


As the clock strikes October, a thrilling chill runs down my spine, and my kitchen transforms into a workshop of delightful spookiness. This Halloween, I’m excited to share my recipe for dazzling Mozzarella Cheese Skulls that add a playful twist to any gathering. These fun appetizers are not only easy to whip up but also bring a creamy indulgence that your guests will crave. Whether you’re hosting a festive bash or just looking for a fun charcuterie addition, these ghoulish treats are the ultimate crowd-pleasers. Plus, they can be made in advance, allowing you more time to enjoy the spooky celebrations. Who could resist those little cheese skulls perfect for dipping? Ready to dive into some deliciously haunted kitchen magic? Let’s get started!

Why are Mozzarella Cheese Skulls a must-try?
Festive Fun: These Mozzarella Cheese Skulls are a delightful way to celebrate Halloween, transforming an ordinary cheese appetizer into a spooky masterpiece that will wow your guests at any gathering.
Easy to Make: With just a few simple steps, you’ll create creamy, soft cheese shapes that look as good as they taste—you won’t need to be a master chef to impress!
Perfect for Dipping: Pair these skulls with your favorite dips like pesto or balsamic glaze for an extra flavor boost that enhances the enjoyment of this unique treat.
Crowd Favorites: Kids and adults alike will love these ghoulish bites, making them the ultimate crowd-pleaser at Halloween parties or themed gatherings.
Make Ahead: Save time on party day—these delectable skulls can be prepared in advance and stored in the fridge, ensuring you’ll have more time for fun.
Versatile Shapes: Not limited to just skulls! Get creative and try using other seasonal molds for a variety of spooky shapes, expanding the fun of your Halloween spread.
Add these cheesy delights to your charcuterie board alongside other favorites like Banana Grilled Cheese or Strawberry Cheesecake Dump for a thoroughly enjoyable feast!
Mozzarella Cheese Skulls Ingredients
• Create delicious spooky bites with these ingredients!
For the Skull Bases
- Mini Mozzarella Balls – Use ciliegine for the perfect skull shape; other small cheese balls can work as substitutes if necessary.
- Silicone Skull Mold – Essential for shaping the mozzarella; make sure it’s heat-resistant for baking.
For Serving
- Balsamic Glaze – Perfect for drizzling over the skulls for added flavor and elegance.
- Pesto – A tasty dip that complements the creamy texture of the mozzarella cheese skulls beautifully.
Step‑by‑Step Instructions for Mozzarella Cheese Skulls
Step 1: Preheat the Oven
Begin by preheating your oven to 350°F (175°C). This temperature is ideal for melting the mozzarella cheese to a perfect gooey consistency. While the oven warms up, gather your mini mozzarella balls and silicone skull mold to ensure everything is ready for a seamless cooking experience.
Step 2: Prepare the Mozzarella Balls
Pat each mini mozzarella ball dry using a paper towel. This step is crucial to remove any excess moisture, which helps the mozzarella melt evenly in the mold without becoming too watery. With each ball prepped, you’ll be ensuring that your Mozzarella Cheese Skulls have the perfect texture when baked.
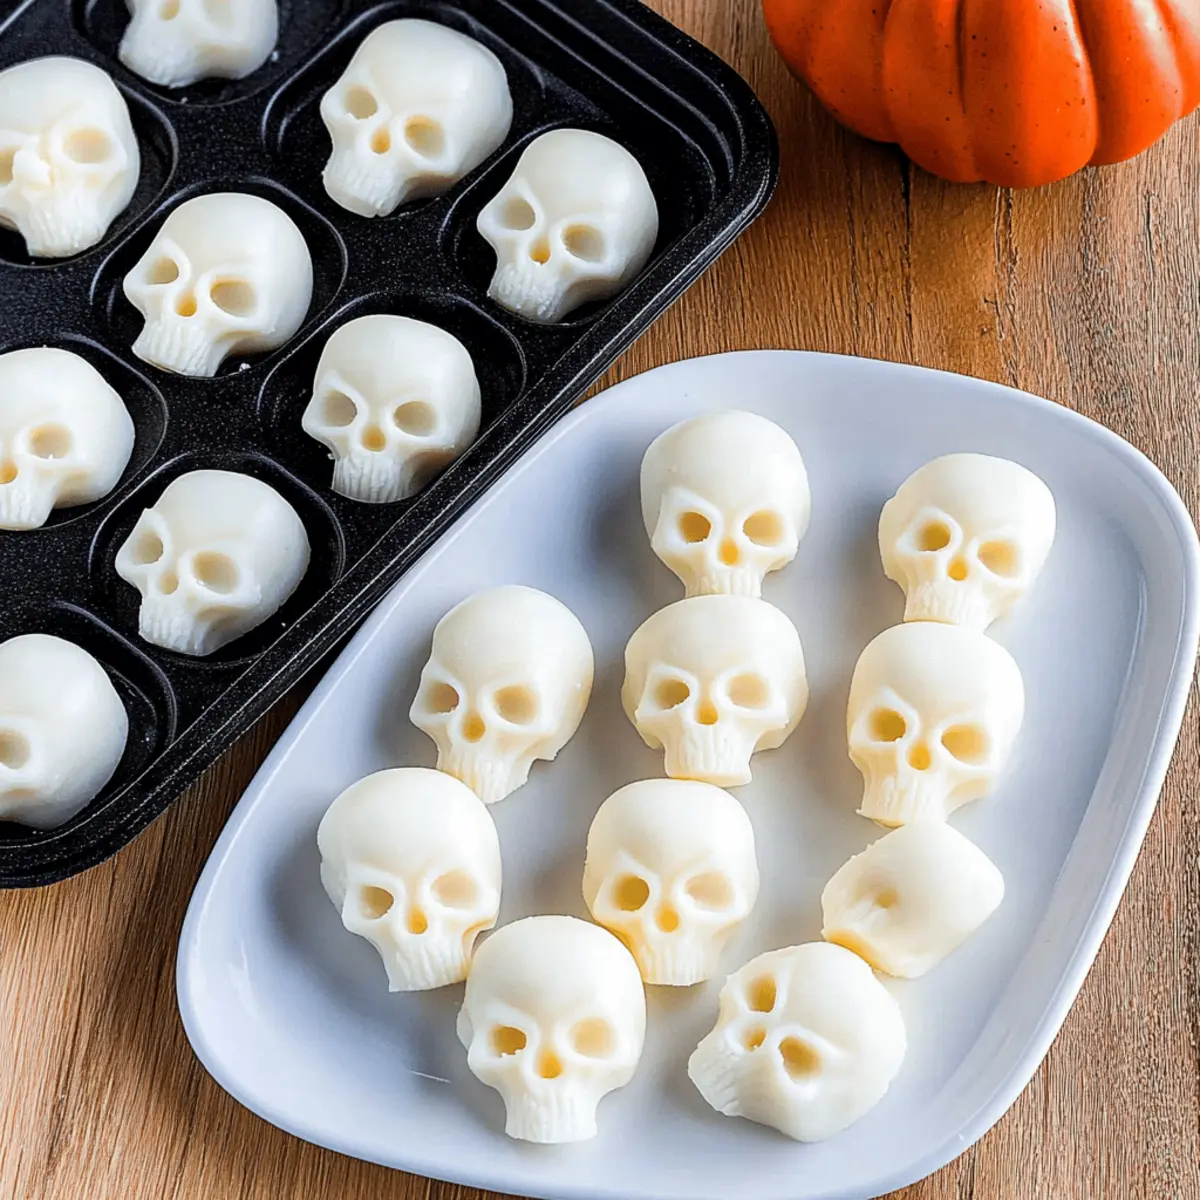
Step 3: Fill the Skull Mold
Carefully place one mozzarella ball into each cavity of the silicone skull mold. Make sure to arrange them so they sit securely and upright, ready to take their spooky form. This fun mold will shape the cheesiness into adorable skulls, perfect for your Halloween spread.
Step 4: Bake the Mozzarella
Slide the filled mold into the preheated oven and bake for 8-10 minutes. Keep an eye on them—you’re looking for the mozzarella to become soft and slightly bubbly, indicating that it’s ready to be molded. This melting phase is key to achieving your delightful Mozzarella Cheese Skulls.
Step 5: Mold the Cheese Shapes
Once the baking time is complete, remove the mold from the oven and use the back of a spoon to gently press the melted mozzarella into the skull shapes. Ensure you fill the cavities completely, eliminating any air bubbles that could cause uneven forms. The mixture should be smooth and cohesive without losing shape.
Step 6: Remove Excess Moisture
After pressing the cheese, check for any excess moisture that may have collected. Use a clean paper towel to blot and absorb this liquid from the surface of the mold. This step helps prevent your Mozzarella Cheese Skulls from becoming soggy, preserving their delightful form and taste.
Step 7: Chill the Mold
Place the silicone mold into the refrigerator for approximately 10 minutes. This cooling period allows the mozzarella to firm up, making it easier to un-mold the ghoulish shapes. As the cheese sets, you can think about all the fun ways to serve your spooky creations!
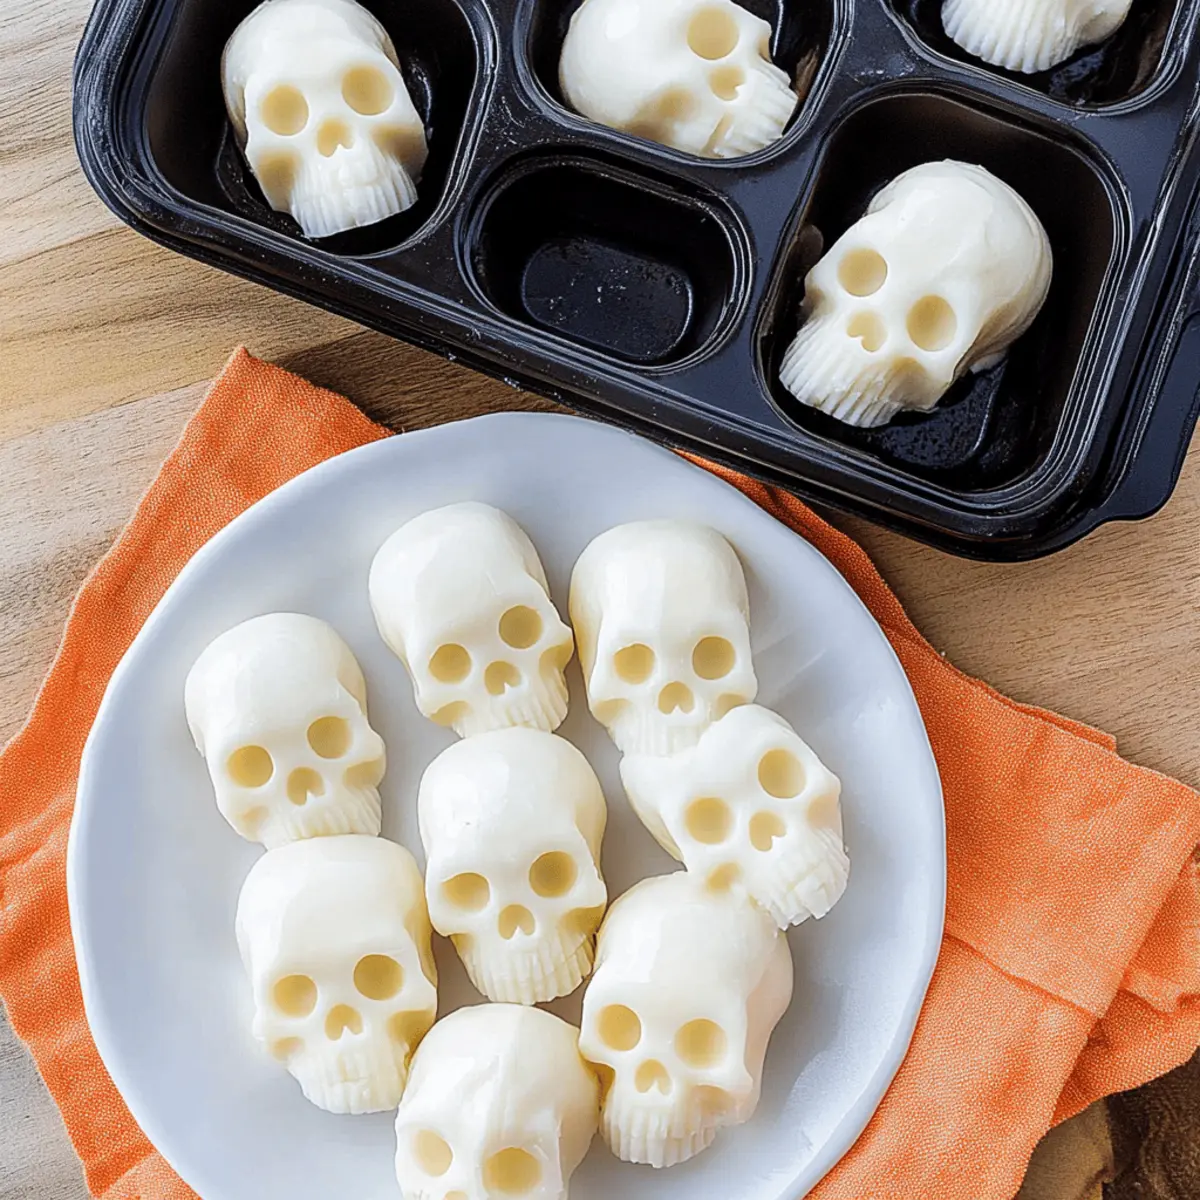
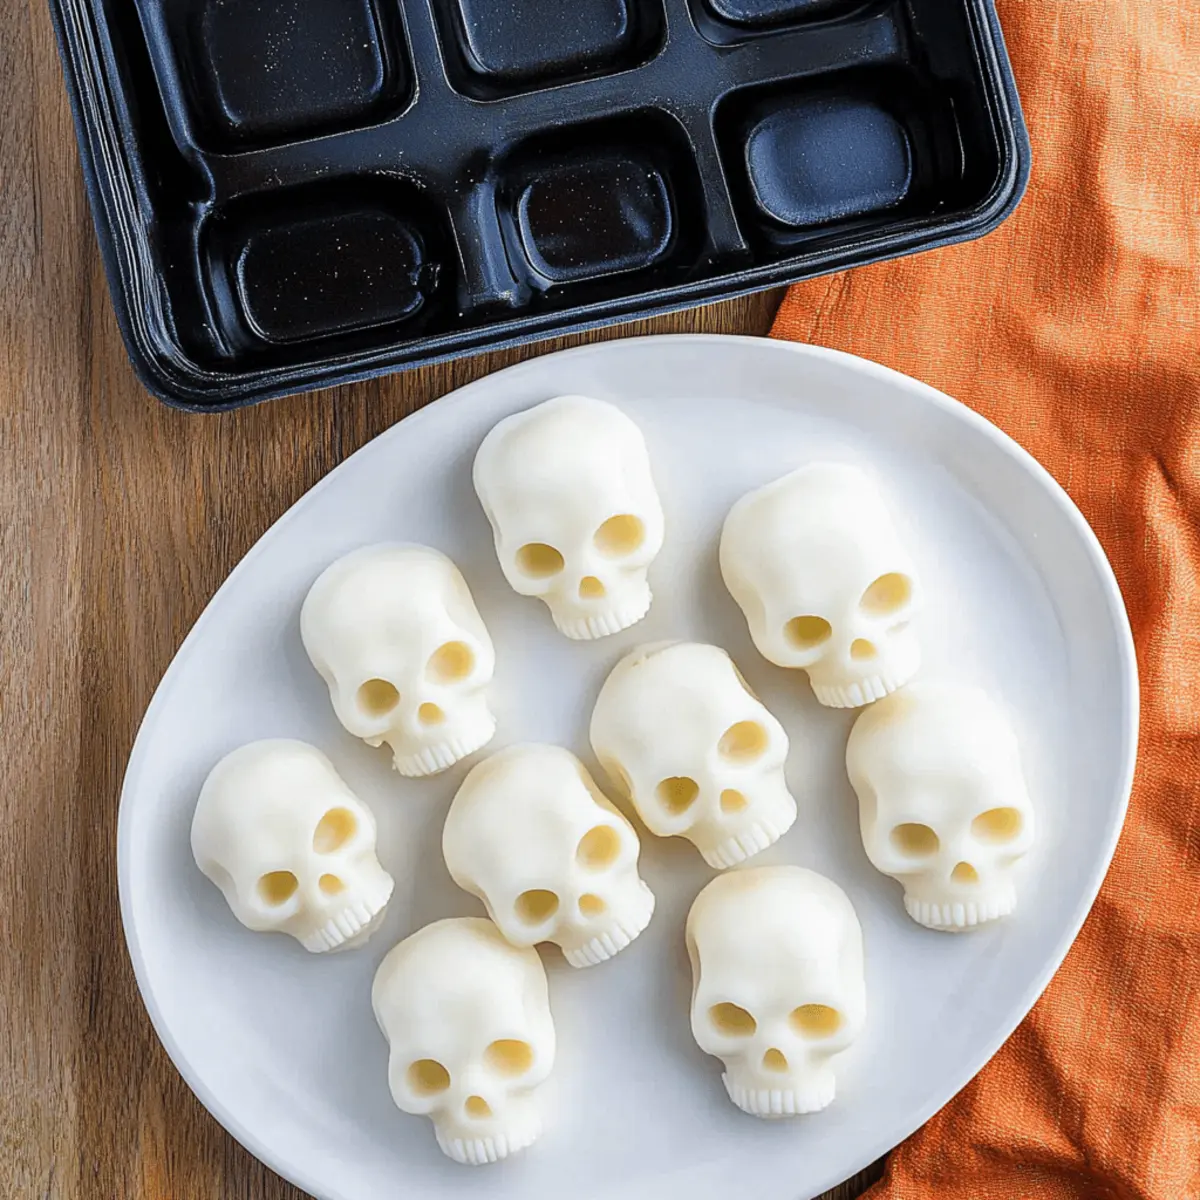
Step 8: Unmold and Serve
Finally, carefully remove each Mozzarella Cheese Skull from the mold, taking your time to avoid any breakage. Place them on a serving platter, and consider drizzling them with balsamic glaze or presenting them alongside pesto for dipping. These whimsical bites are now ready to be enjoyed at your Halloween affair!
Make Ahead Options
These Mozzarella Cheese Skulls are perfect for meal prep, allowing you to prepare them up to 24 hours in advance! Simply follow the initial steps and once the mozzarella cheese has been molded into the skull shapes, allow them to cool completely. Then, place the skulls in an airtight container and refrigerate. This helps retain their softness and prevents any drying out. When you’re ready to serve, drizzling them with balsamic glaze or pairing with pesto can be done right before your guests arrive, ensuring your spooky appetizers are just as delicious as when they were freshly made! This simple make-ahead strategy allows for a stress-free Halloween celebration, letting you focus on the festivities!
Expert Tips for Mozzarella Cheese Skulls
-
Watch the Bake Time: Keep a close eye on the mozzarella while it bakes, as overcooking can lead to hard cheese rather than the desired creamy texture.
-
Use Non-Stick Molds: Opt for a non-stick silicone skull mold to ensure easy release of the melted mozzarella shapes without any damage.
-
Gentle Pressure: When pressing the melted mozzarella into the mold, be gentle. Too much force can cause the shapes to break apart.
-
Pat Dry: Always pat the mozzarella balls dry before shaping. Excess moisture can affect the melting process and lead to sogginess.
-
Chill for Best Shape: Don’t skip the chilling step! Refrigerating the molded cheese helps it firm up and maintain its spooky skull form when unmolding.
Mozzarella Cheese Skulls: Unique Twists
Feel free to let your creativity shine as you customize these delightful mozzarella cheese skulls to suit your taste!
-
Herbed Mozzarella: Use herbed or flavored mozzarella balls for an extra flavor punch. The herbal notes blend perfectly with the richness of the cheese.
-
Vegan Version: Swap mozzarella for vegan cheese alternatives, which can deliver a similar creamy texture while catering to plant-based diets. Delight your vegan friends with these spooky bites!
-
Spicy Kick: Sprinkle crushed red pepper flakes or mix in jalapeños with the cheese for a fiery version that will leave your guests wanting more. These bold flavors bring an exciting twist to the classic skull appetizer.
-
Alternative Shapes: Use molds shaped like pumpkins or ghosts for Halloween-themed diversity. The playful shapes add even more fun to your festive spread and broaden your options for entertaining.
-
Incorporate Nuts: Add chopped walnuts or pecans mixed with the mozzarella for a crunchy texture surprise. The nuttiness pairs beautifully with the creaminess of the cheese.
-
Seasonal Flavors: Try adding a hint of pumpkin spice to the cheese before baking for a festive autumn twist. This unexpected flavor note will bring warm, cozy sensations to your skulls.
-
Cheesy Combinations: Combine mozzarella with other cheeses like cheddar or gouda to create a multi-dimensional flavor profile. The fusion of different cheeses keeps every bite exciting and indulgent.
For more delicious inspirations, consider adding these skulls to an enticing charcuterie board alongside a Chicken Grilled Cheese or a delightful Strawberry Cheesecake!
What to Serve with Spooky Mozzarella Cheese Skulls
Elevate your Halloween gathering with delightful pairings that complement the creamy indulgence of these spooky mozzarella cheese skulls!
-
Creamy Pesto Dip: A vibrant, herbal addition that enhances the mozzarella’s mild flavor, making every bite a burst of freshness.
-
Balsamic Glaze Drizzle: This sweet and tangy accompaniment not only adds a sophisticated touch but also elevates the flavor profile of the skulls.
-
Charcuterie Board Essentials: Combine with an assortment of cured meats, crackers, and olives, creating a stunning spread that invites mingling and sharing.
-
Savory Garlic Breadsticks: Their crunchy exterior and soft, buttery inside perfectly balance the soft texture of the mozzarella skulls, offering a delightful contrast.
-
Crunchy Veggie Sticks: Fresh carrots, celery, and bell peppers provide a refreshing crunch, a colorful contrast, and a healthy element alongside your cheesy delights.
-
Spicy Tomato Salsa: This zesty dip brings a lively kick to the mix, adding tantalizing heat that contrasts beautifully with the creamy mozzarella.
-
Chilled White Wine: A crisp Sauvignon Blanc pairs beautifully, its acidity cutting through the creaminess, refreshing your palate with every sip.
-
Pumpkin Spice Dessert: Keep the fall flavors alive with a slice of pumpkin pie—its sweet warmth harmonizes wonderfully with the savory appetizers.
How to Store and Freeze Mozzarella Cheese Skulls
Fridge: Store your Mozzarella Cheese Skulls in an airtight container in the refrigerator for up to 3 days. This keeps them fresh and ready for your next snack or Halloween gathering.
Freezer: If you want to make these ghoulish treats ahead of time, you can freeze the molded cheese for up to 1 month. Just wrap each skull tightly in plastic wrap, then place them in a freezer-safe bag or container.
Thawing: When you’re ready to enjoy the frozen Mozzarella Cheese Skulls, simply transfer them to the fridge to thaw overnight. Allow them to come to room temperature before serving for the best texture.
Reheating: If you’d like to warm them up, bake the thawed skulls at 350°F for about 5-7 minutes until soft. This will help regain their gooey, creamy consistency, perfect for dipping!
Mozzarella Cheese Skulls Recipe FAQs
How do I choose the best mozzarella for this recipe?
Absolutely! When selecting mozzarella, look for mini mozzarella balls known as ciliegine, which are about the size of a cherry tomato. The fresher, the better. Avoid any that have dark spots or a sour smell. If you’d like a twist, other small cheese balls can also work as substitutes, but the creamy texture of mozzarella is truly the star here!
How should I store leftover mozzarella skulls?
Store your Mozzarella Cheese Skulls in an airtight container in the refrigerator for up to 3 days. Placing a piece of parchment paper between layers can help absorb excess moisture and keep them fresh. This way, you’ll have delicious spooky bites ready for your next snack attack!
Can I freeze mozzarella skulls for future use?
Yes, you can! To freeze, wrap each molded skull tightly in plastic wrap, then place them in a freezer-safe bag or container. They can be frozen for up to 1 month. When you want to enjoy them, simply transfer the skulls to the fridge to thaw overnight, allowing them to reach room temperature before serving.
What if my mozzarella doesn’t melt properly?
No worries! If your mozzarella does not melt adequately, it could be due to excess moisture on the balls before baking or not enough bake time. Ensure you pat the mozzarella balls dry before placing them in the mold and keep a close eye on them—8 to 10 minutes should do the trick for a perfect melt. If it hardens after baking, avoid overcooking next time!
Are mozzarella skulls safe for my pets?
Generally, mozzarella cheese in moderation is safe for dogs; however, remember that too much cheese can upset their stomach. Always consult your vet about including new treats in their diet. For other pets, it’s best to avoid sharing human food altogether. Your ghoulish creations are best left for humans’ spooky celebrations!
Cheesy Mozzarella Cheese Skulls: Fun Halloween Appetizer
Ingredients
Equipment
Method
- Preheat your oven to 350°F (175°C). Gather your mini mozzarella balls and silicone skull mold.
- Pat each mini mozzarella ball dry using a paper towel to remove excess moisture.
- Place one mozzarella ball into each cavity of the silicone skull mold.
- Bake for 8-10 minutes until soft and slightly bubbly.
- Remove the mold and press the melted mozzarella into the skull shapes.
- Check for excess moisture and blot with a clean paper towel.
- Chill the mold in the refrigerator for approximately 10 minutes.
- Carefully unmold each Mozzarella Cheese Skull and serve with balsamic glaze and pesto.