Get my cookbooks

Cream Cheese Babka: Discover This Easy Recipe Today!

Introduction to Cream Cheese Babka

There’s something magical about the aroma of freshly baked bread wafting through the house.

When I first discovered Cream Cheese Babka, it felt like unearthing a hidden treasure.

This delightful treat combines a soft, sweet dough with a rich cream cheese filling, making it perfect for any occasion.

Whether you’re looking to impress guests or simply want a cozy dessert for a quiet evening, this recipe is your go-to.

It’s easy to make, and the results are nothing short of spectacular.

Trust me, your taste buds will thank you!

Why You’ll Love This Cream Cheese Babka

This Cream Cheese Babka is a game-changer for any home cook.

It’s not just about the taste—though, let me tell you, it’s heavenly.

The ease of preparation means you can whip it up even on a busy day.

Plus, the delightful combination of creamy filling and soft dough will have everyone asking for seconds.

It’s a sweet treat that brings joy without the fuss, making it perfect for any occasion!

Ingredients for Cream Cheese Babka

Creating a delicious Cream Cheese Babka starts with gathering the right ingredients.

Here’s what you’ll need:

  • All-purpose flour: The backbone of your dough, providing structure and softness.
  • Granulated sugar: Adds sweetness and helps with browning during baking.
  • Salt: Enhances flavor and balances the sweetness of the dough.
  • Active dry yeast: The magic ingredient that makes your dough rise and become fluffy.
  • Whole milk: Warmed to activate the yeast, it adds richness to the dough.
  • Unsalted butter: For a tender texture and a rich flavor, melted into the dough.
  • Large egg: Binds the ingredients together and adds moisture.
  • Vanilla extract: A splash of this elevates the flavor profile, making it aromatic.
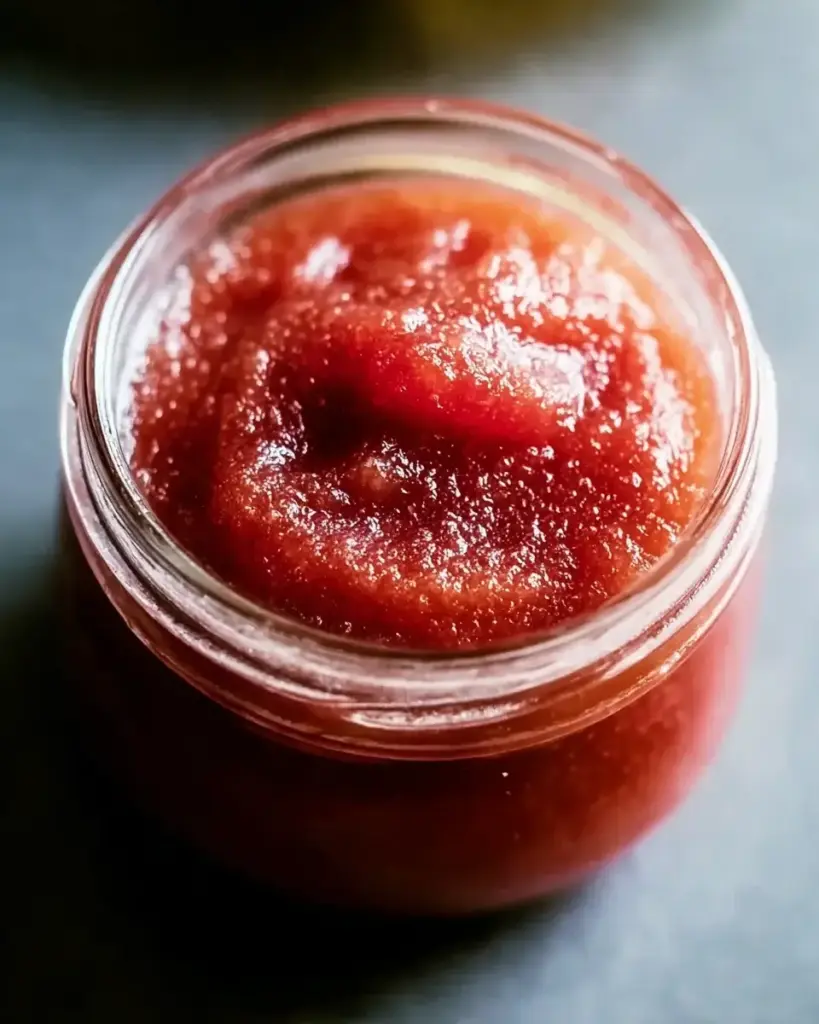
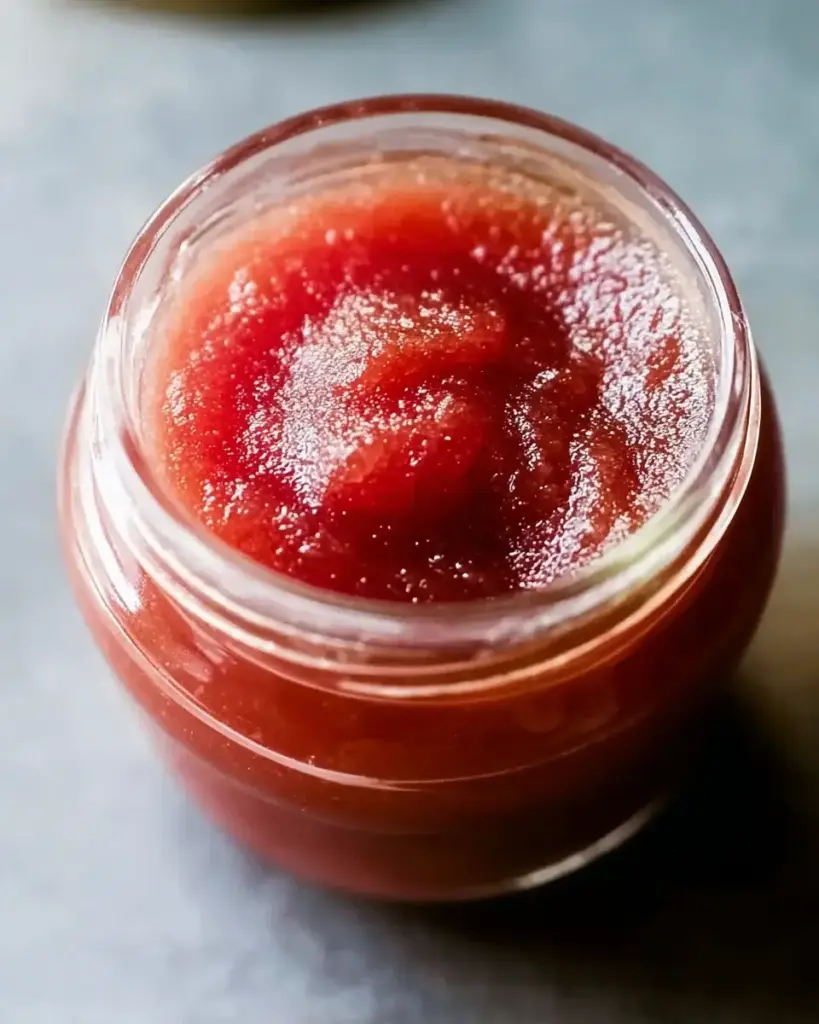
  • Cream cheese: The star of the show! Softened for easy mixing, it creates a luscious filling.
  • Powdered sugar: Sweetens the cream cheese filling and gives it a smooth texture.
  • Chocolate chips (optional): For those who crave a little extra sweetness and richness.
  • Beaten egg (for egg wash): Gives the babka a beautiful golden finish when baked.

Feel free to get creative!

You can substitute chocolate chips with dried fruit or nuts for a different twist.

For exact measurements, check the bottom of the article where you can find everything listed for easy printing.

How to Make Cream Cheese Babka

Making Cream Cheese Babka is a delightful journey that fills your kitchen with warmth and sweet aromas.

Let’s dive into the steps that will lead you to this delicious creation!

Step 1: Prepare the Dough

Start by grabbing a large bowl.

Combine the all-purpose flour, granulated sugar, salt, and active dry yeast.

Mix them well to ensure even distribution.

In a separate bowl, whisk together the warm milk, melted butter, egg, and vanilla extract.

Pour this wet mixture into the dry ingredients.

Stir until a dough begins to form.

It might be a bit sticky, but that’s okay!

Just flour your hands and knead the dough on a floured surface for about 5-7 minutes.

You want it to be smooth and elastic, like a soft pillow.

Step 2: Let the Dough Rise

Once your dough is ready, place it in a greased bowl.

Cover it with a kitchen towel and let it rise in a warm spot for about an hour.

You’re looking for it to double in size.

This is where the magic happens!

If your kitchen is chilly, try placing the bowl near a warm oven or on a sunny windowsill.

Step 3: Make the Cream Cheese Filling

While the dough is rising, it’s time to whip up the filling.

In a bowl, mix the softened cream cheese and powdered sugar until smooth.

If you’re feeling adventurous, fold in some chocolate chips for an extra treat.

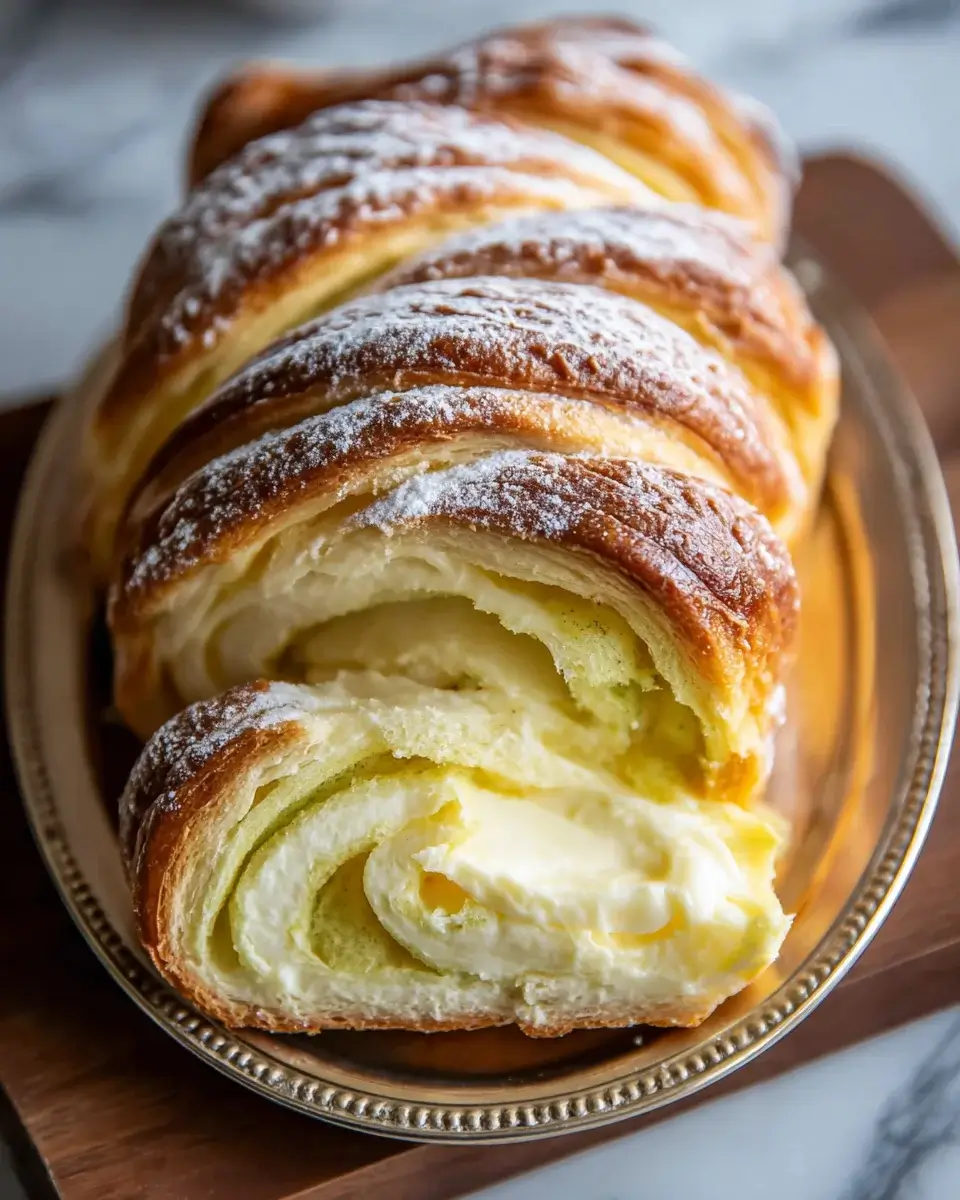
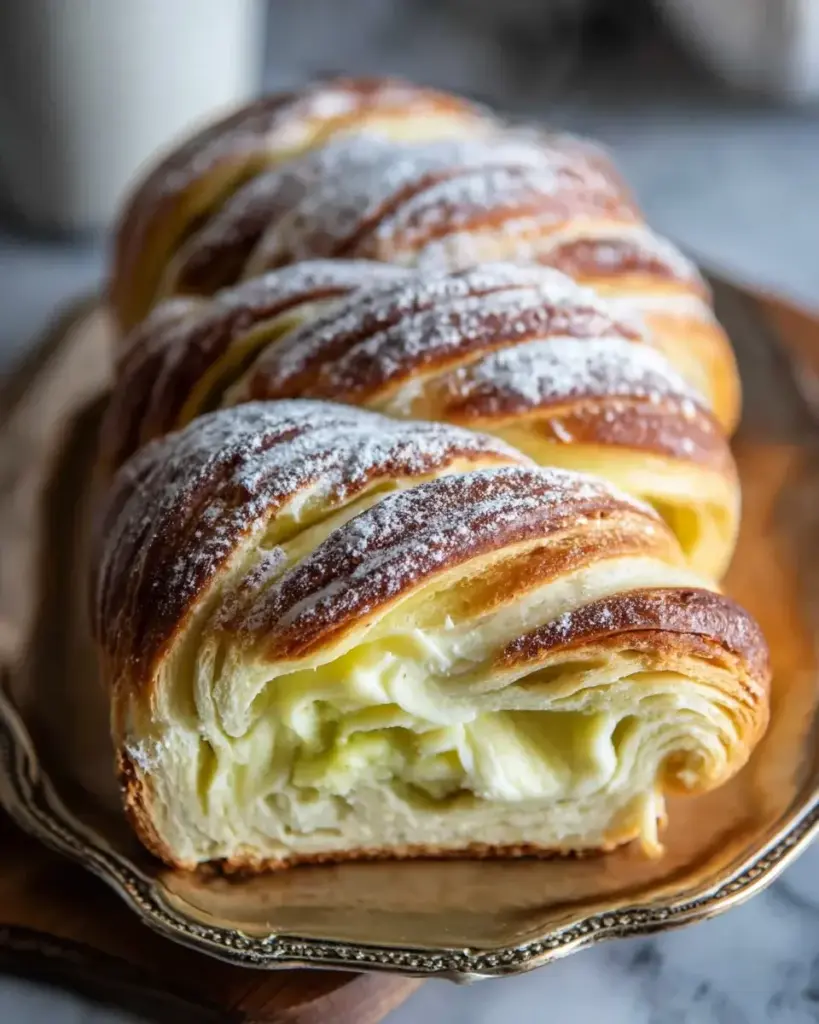
This filling is what makes your Cream Cheese Babka so irresistible!

Step 4: Roll and Shape the Babka

After the dough has risen, punch it down gently to release the air.

Roll it out on a floured surface into a rectangle about 1/4 inch thick.

Spread the cream cheese mixture evenly over the dough, leaving a small border around the edges.

Now, starting from one long edge, roll the dough tightly into a log.

Pinch the seams to seal it well.

Next, cut the rolled dough in half lengthwise to reveal that beautiful filling.

Twist the two halves together and place them in a greased loaf pan.

Step 5: Final Rise and Bake

Cover the twisted dough and let it rise for another 30 minutes.

This second rise helps create that fluffy texture we all love.

While it’s rising, preheat your oven to 350°F.

Once ready, brush the top with the beaten egg for a golden finish.

Bake for 30-35 minutes, or until it’s golden brown and your kitchen smells heavenly.

Let it cool in the pan for about 10 minutes before transferring it to a wire rack.

Now, take a moment to admire your creation before slicing into it!

Tips for Success

  • Ensure your milk is warm, not hot, to activate the yeast without killing it.
  • Don’t skip the second rise; it’s crucial for a light and fluffy texture.
  • Use a sharp knife to cut the dough; this helps maintain the shape.
  • Experiment with fillings—cinnamon or nuts can add a delightful twist.
  • Store leftovers in an airtight container to keep them fresh longer.

Equipment Needed

  • Mixing bowls: A large bowl for the dough and a smaller one for the filling.
  • Measuring cups and spoons: Essential for accuracy; a kitchen scale can work too.
  • Rolling pin: For rolling out the dough; a wine bottle can substitute in a pinch.
  • Loaf pan: A standard 9×5 inch pan works best; any similar-sized pan will do.
  • Kitchen towel: To cover the dough while it rises; plastic wrap is a good alternative.

Variations of Cream Cheese Babka

  • Cinnamon Swirl: Add a teaspoon of cinnamon to the cream cheese filling for a warm, spiced flavor.
  • Fruit-Filled: Substitute chocolate chips with dried fruits like cranberries or apricots for a fruity twist.
  • Nuts Galore: Mix in chopped walnuts or pecans to the filling for added crunch and flavor.
  • Gluten-Free Option: Use a gluten-free all-purpose flour blend to make this recipe suitable for gluten-sensitive friends.
  • Chocolate Babka: Replace half of the cream cheese with melted chocolate for a rich, decadent filling.

Serving Suggestions for Cream Cheese Babka

  • Fresh Fruit: Serve with a side of berries or sliced bananas for a refreshing contrast.
  • Coffee or Tea: Pair with a hot cup of coffee or herbal tea to enhance the flavors.
  • Dusting of Powdered Sugar: A light sprinkle on top adds a touch of elegance.
  • Whipped Cream: A dollop of whipped cream can elevate your babka experience.
  • Ice Cream: Serve warm slices with a scoop of vanilla ice cream for a decadent dessert.

FAQs about Cream Cheese Babka

Can I make Cream Cheese Babka ahead of time?

Absolutely! You can prepare the dough and filling a day in advance. Just store them separately in the fridge. When you’re ready to bake, let the dough come to room temperature before proceeding with the recipe.

What can I substitute for cream cheese?

If you’re looking for alternatives, mascarpone cheese works beautifully. You can also use ricotta for a lighter filling, but it may require a bit more powdered sugar to achieve the desired sweetness.

How do I store leftover Cream Cheese Babka?

To keep your babka fresh, wrap it tightly in plastic wrap or store it in an airtight container. It can last for up to three days at room temperature or up to a week in the fridge.

Can I freeze Cream Cheese Babka?

Yes, you can freeze it! Wrap the cooled babka tightly in plastic wrap and then in aluminum foil. It can be frozen for up to three months. Just thaw it overnight in the fridge before serving.

What’s the best way to reheat Cream Cheese Babka?

The best way to reheat is to slice it and warm it in the oven at 350°F for about 10 minutes. This will help restore its soft texture and bring back that fresh-baked aroma!

Final Thoughts

Baking Cream Cheese Babka is more than just a recipe; it’s an experience that fills your home with warmth and joy.

Each slice reveals a beautiful swirl of creamy goodness, inviting you to savor every bite.

Whether you’re sharing it with family or enjoying it solo with a cup of coffee, this babka brings a sense of comfort and indulgence.

It’s a delightful way to connect with your culinary roots while creating new memories.

So, roll up your sleeves, embrace the process, and let this Cream Cheese Babka become a cherished part of your baking repertoire!

jhessica

Cream Cheese Babka: Discover This Easy Recipe Today!

A delicious and easy-to-make Cream Cheese Babka recipe that combines a rich cream cheese filling with a soft, sweet dough.
Prep Time 20 minutes
Cook Time 35 minutes
Total Time 1 hour 55 minutes
Servings: 8 servings
Course: Dessert
Cuisine: Eastern European
Calories: 220

Ingredients
  

  • 2 cups all-purpose flour
  • 1/4 cup granulated sugar
  • 1/2 teaspoon salt
  • 1 packet 2 1/4 teaspoons active dry yeast
  • 1/2 cup whole milk warmed to about 110°F
  • 1/4 cup unsalted butter melted
  • 1 large egg
  • 1 teaspoon vanilla extract
  • 8 ounces cream cheese softened
  • 1/4 cup powdered sugar
  • 1/4 cup chocolate chips optional
  • 1 egg beaten (for egg wash)

Method
 

  1. In a large bowl, combine the flour, granulated sugar, salt, and yeast.
  2. In a separate bowl, mix the warm milk, melted butter, egg, and vanilla extract.
  3. Pour the wet ingredients into the dry ingredients and stir until a dough forms.
  4. Knead the dough on a floured surface for about 5-7 minutes until smooth and elastic.
  5. Place the dough in a greased bowl, cover with a kitchen towel, and let it rise in a warm place for about 1 hour or until doubled in size.
  6. Prepare the filling by mixing the softened cream cheese and powdered sugar in a bowl until smooth. If desired, fold in the chocolate chips.
  7. Once the dough has risen, punch it down and roll it out on a floured surface into a rectangle about 1/4 inch thick.
  8. Spread the cream cheese mixture evenly over the dough.
  9. Starting from one long edge, roll the dough tightly into a log and pinch the seams to seal.
  10. Preheat the oven to 350°F.
  11. Cut the rolled dough in half lengthwise to expose the filling.
  12. Twist the two halves together and place in a greased loaf pan.
  13. Cover and let rise for another 30 minutes.
  14. Brush the top with the beaten egg.
  15. Bake for 30-35 minutes, or until golden brown.
  16. Let cool in the pan for 10 minutes before transferring to a wire rack to cool completely.

Nutrition

Serving: 1sliceCalories: 220kcalCarbohydrates: 28gProtein: 5gFat: 10gSaturated Fat: 5gPolyunsaturated Fat: 3gCholesterol: 40mgSodium: 150mgFiber: 1gSugar: 8g

Notes

  • For a richer flavor, add a teaspoon of cinnamon to the cream cheese filling.
  • You can substitute the chocolate chips with dried fruit or nuts for a different twist.

Tried this recipe?

Let us know how it was!

Creamy Mushroom Chicken: A Delightful Recipe to Try!

Introduction to Creamy Mushroom Chicken

There’s something magical about a dish that warms your heart and fills your belly. Creamy mushroom chicken does just that. It’s the kind of meal that can turn a hectic weeknight into a cozy dinner experience. Picture this: tender chicken breasts swimming in a rich, velvety mushroom sauce, all ready in under an hour. Whether you’re looking to impress a date or simply treat yourself after a long day, this recipe is your go-to. It’s easy, delicious, and perfect for any occasion. Let’s dive into this culinary adventure together!

Why You’ll Love This Creamy Mushroom Chicken

This creamy mushroom chicken is a game-changer for busy nights. It’s quick to whip up, taking just 40 minutes from start to finish. The rich flavors of the mushroom sauce elevate the dish, making it feel gourmet without the fuss. Plus, it’s a crowd-pleaser! Whether you’re cooking for family or friends, this recipe guarantees smiles all around. Trust me, once you try it, you’ll be hooked!

Ingredients for Creamy Mushroom Chicken

Gathering the right ingredients is the first step to culinary success. For this creamy mushroom chicken, you’ll need a few staples that pack a punch of flavor.

  • Boneless, skinless chicken breasts: The star of the show! Tender and juicy, they soak up the sauce beautifully.
  • Salt and black pepper: Essential for seasoning, these two enhance the natural flavors of the chicken.
  • Olive oil: A healthy fat that helps achieve that golden-brown crust on the chicken.
  • Mushrooms: Sliced mushrooms add earthiness and depth to the dish. I prefer cremini or button mushrooms for their rich flavor.
  • Garlic: Minced garlic brings a fragrant kick that elevates the entire dish.
  • Chicken broth: This adds moisture and a savory base for the sauce. Homemade is great, but store-bought works just fine!
  • Heavy cream: The secret to that luscious, creamy texture. For a lighter option, consider half-and-half.
  • Dried thyme and parsley: These herbs add a touch of freshness and aroma, making the dish feel vibrant.
  • Parmesan cheese: Grated Parmesan melts into the sauce, adding a nutty flavor that ties everything together.
  • Fresh parsley: Optional, but a sprinkle on top adds a pop of color and freshness.

For those looking to mix things up, consider adding spinach or kale for extra nutrition. You can find the exact measurements for each ingredient at the bottom of the article, ready for printing!

How to Make Creamy Mushroom Chicken

Now that you have your ingredients ready, let’s get cooking! This creamy mushroom chicken recipe is straightforward and rewarding. Follow these steps, and you’ll have a delicious meal on the table in no time.

Step 1: Season the Chicken

Start by seasoning the chicken breasts with salt and black pepper on both sides. This simple step enhances the chicken’s natural flavor. Don’t be shy—make sure to coat them evenly. A little seasoning goes a long way!

Step 2: Cook the Chicken

In a large skillet, heat the olive oil over medium-high heat. Once the oil is shimmering, add the seasoned chicken breasts. Cook them for about 6-7 minutes on each side. You want them golden brown and cooked through. Use a meat thermometer if you have one; the internal temperature should reach 165°F. Once done, remove the chicken from the skillet and set it aside.

Step 3: Sauté the Mushrooms

In the same skillet, toss in the sliced mushrooms. Cook them for about 5 minutes, stirring occasionally, until they are browned and tender. The mushrooms will soak up all those delicious chicken flavors left in the pan. Add the minced garlic and cook for an additional minute until fragrant. Your kitchen will smell amazing!

Step 4: Create the Sauce

Pour in the chicken broth, scraping the bottom of the skillet to release any browned bits. This adds depth to your sauce. Bring it to a simmer and let it cook for 3-4 minutes. Then, reduce the heat to low and stir in the heavy cream, dried thyme, and parsley. Allow the sauce to simmer for another 5 minutes until it thickens slightly. You’ll see it transform into a creamy delight!

Step 5: Combine and Heat

Now, stir in the grated Parmesan cheese until it melts and blends into the sauce. Return the chicken to the skillet, spooning the sauce over the top. Cook for an additional 2-3 minutes to heat everything through. This is where the magic happens—your creamy mushroom chicken is almost ready!

Tips for Success

  • Always use a meat thermometer to ensure your chicken is perfectly cooked.
  • Don’t rush the sautéing process; let the mushrooms brown for maximum flavor.
  • For a richer sauce, consider adding a splash of white wine before the chicken broth.
  • Feel free to adjust the herbs based on your taste; fresh herbs can elevate the dish even more.
  • Let the sauce simmer longer for a thicker consistency if desired.

Equipment Needed

  • Large skillet: A non-stick skillet works wonders, but any heavy-bottomed pan will do.
  • Meat thermometer: Essential for checking chicken doneness; a simple knife can also help.
  • Wooden spoon: Perfect for stirring and scraping up those tasty bits.
  • Cutting board: A must for prepping your ingredients.

Variations

  • Herb-Infused: Swap out dried thyme and parsley for fresh herbs like rosemary or basil for a vibrant twist.
  • Vegetarian Option: Replace chicken with hearty portobello mushrooms or tofu for a satisfying meatless meal.
  • Spicy Kick: Add a pinch of red pepper flakes or a dash of hot sauce to the sauce for some heat.
  • Cheesy Delight: Experiment with different cheeses like Gruyère or Gouda for a unique flavor profile.
  • Low-Carb Version: Serve over zucchini noodles or cauliflower rice instead of traditional pasta for a lighter meal.

Serving Suggestions

  • Pair with Rice: Serve creamy mushroom chicken over fluffy white or brown rice to soak up the sauce.
  • Fresh Salad: A crisp green salad with a light vinaigrette complements the richness of the dish.
  • Wine Selection: A chilled Chardonnay or a light Pinot Noir enhances the flavors beautifully.
  • Garnish: Top with fresh parsley for a pop of color and freshness.

FAQs about Creamy Mushroom Chicken

As you embark on your creamy mushroom chicken journey, you might have a few questions. Here are some common queries that can help you along the way.

Can I use different types of mushrooms?

Absolutely! While I love using cremini or button mushrooms, feel free to experiment with shiitake or portobello mushrooms for a unique flavor. Each type brings its own character to the dish.

How can I make this dish lighter?

If you’re looking to lighten things up, consider substituting half-and-half for the heavy cream. You can also add more veggies like spinach or kale to boost nutrition without sacrificing flavor.

What can I serve with creamy mushroom chicken?

This dish pairs wonderfully with rice, pasta, or a fresh salad. The creamy sauce is perfect for soaking into grains or greens, making every bite delightful.

Can I make this recipe ahead of time?

Yes! You can prepare the chicken and sauce in advance. Just reheat gently on the stove before serving. This makes it a great option for meal prep!

How do I store leftovers?

Store any leftovers in an airtight container in the fridge for up to three days. Reheat gently on the stove or in the microwave, adding a splash of broth if needed to loosen the sauce.

Final Thoughts

Cooking creamy mushroom chicken is more than just preparing a meal; it’s about creating a moment. The rich, savory sauce enveloping tender chicken brings comfort and satisfaction, making it a dish to cherish. Whether you’re sharing it with loved ones or enjoying a quiet dinner alone, this recipe has a way of turning an ordinary evening into something special. Plus, the ease of preparation means you can focus on what truly matters—savoring each bite and the joy of cooking. So, roll up your sleeves and dive into this delightful culinary experience!

jhessica

Creamy Mushroom Chicken: A Delightful Recipe to Try!

A delightful recipe for creamy mushroom chicken that combines tender chicken breasts with a rich and flavorful mushroom sauce.
Prep Time 10 minutes
Cook Time 30 minutes
Total Time 40 minutes
Servings: 2 servings
Course: Main Course
Cuisine: American
Calories: 550

Ingredients
  

  • 2 boneless skinless chicken breasts (about 1 pound)
  • 1 teaspoon salt
  • 1/2 teaspoon black pepper
  • 2 tablespoons olive oil
  • 8 ounces mushrooms sliced
  • 3 cloves garlic minced
  • 1 cup chicken broth
  • 1 cup heavy cream
  • 1 teaspoon dried thyme
  • 1 teaspoon dried parsley
  • 1/2 cup grated Parmesan cheese
  • Fresh parsley for garnish optional

Method
 

  1. Season the chicken breasts with salt and black pepper on both sides.
  2. In a large skillet, heat the olive oil over medium-high heat. Add the chicken breasts and cook for about 6-7 minutes on each side, or until golden brown and cooked through. Remove the chicken from the skillet and set aside.
  3. In the same skillet, add the sliced mushrooms and cook for about 5 minutes, or until they are browned and tender. Add the minced garlic and cook for an additional 1 minute until fragrant.
  4. Pour in the chicken broth, scraping the bottom of the skillet to release any browned bits. Bring to a simmer and let it cook for 3-4 minutes.
  5. Reduce the heat to low and stir in the heavy cream, dried thyme, and dried parsley. Allow the sauce to simmer for another 5 minutes until it thickens slightly.
  6. Stir in the grated Parmesan cheese until melted and well combined. Return the chicken to the skillet, spooning the sauce over the top. Cook for an additional 2-3 minutes to heat through.
  7. Serve the creamy mushroom chicken warm, garnished with fresh parsley if desired.

Nutrition

Serving: 1servingCalories: 550kcalCarbohydrates: 6gProtein: 40gFat: 40gSaturated Fat: 20gPolyunsaturated Fat: 15gCholesterol: 150mgSodium: 800mgFiber: 1gSugar: 2g

Notes

  • For a lighter version, substitute half-and-half for the heavy cream.
  • Add spinach or kale to the sauce for extra color and nutrition. Cook it down with the mushrooms.

Tried this recipe?

Let us know how it was!

Potato and Egg Scramble: A Delicious Breakfast Idea!

Introduction to Potato and Egg Scramble

There’s something magical about the aroma of a hearty breakfast wafting through the house. The Potato and Egg Scramble is not just a meal; it’s a warm hug on a plate. Whether you’re rushing to work or enjoying a lazy Sunday, this dish is your go-to solution. It’s quick, satisfying, and packed with flavor, making it perfect for impressing family or friends. Plus, it’s a fantastic way to use up those leftover potatoes sitting in your pantry. Let’s dive into this delicious breakfast idea that will kickstart your day with a smile!

Why You’ll Love This Potato and Egg Scramble

This Potato and Egg Scramble is a breakfast game-changer. It’s incredibly easy to whip up, taking just 30 minutes from start to finish. The combination of fluffy eggs and crispy potatoes creates a satisfying texture that will keep you full and energized. Plus, it’s versatile! You can customize it with your favorite veggies or proteins, making it a dish that never gets old. Trust me, your taste buds will thank you!

Ingredients for Potato and Egg Scramble

Gathering the right ingredients is the first step to creating a delicious Potato and Egg Scramble. Here’s what you’ll need:

  • Russet Potatoes: These starchy beauties are perfect for achieving that crispy texture. They hold up well during cooking and add heartiness to your dish.
  • Olive Oil: A splash of this healthy fat helps to sauté the potatoes and veggies, giving them a lovely golden color and flavor.
  • Onion: Diced onions add a sweet and savory depth to the scramble. They caramelize beautifully, enhancing the overall taste.
  • Bell Pepper: Any color will do! Bell peppers bring a pop of color and a slight crunch, making your scramble visually appealing and tasty.
  • Eggs: The star of the show! Eggs provide protein and creaminess, binding all the ingredients together in a delightful scramble.
  • Salt and Pepper: Essential seasonings that elevate the flavors. Adjust to your taste for the perfect balance.
  • Garlic Powder: A sprinkle of garlic powder adds a subtle kick without overpowering the dish.
  • Paprika: This spice brings warmth and a hint of smokiness, enhancing the overall flavor profile.
  • Shredded Cheddar Cheese (optional): For those who love a cheesy touch, this adds richness and gooeyness to your scramble.
  • Fresh Parsley: A sprinkle of chopped parsley not only adds a fresh flavor but also brightens up the dish visually.

Feel free to get creative! You can swap in sweet potatoes for a healthier twist or toss in some cooked bacon or sausage for added protein. For exact quantities, check the bottom of the article where you can find everything available for printing.

How to Make Potato and Egg Scramble

Creating a delicious Potato and Egg Scramble is easier than you might think. Follow these simple steps, and you’ll have a hearty breakfast ready in no time. Let’s get cooking!

Step 1: Prepare the Potatoes

Start by peeling and dicing your russet potatoes into small cubes. Aim for uniform pieces to ensure even cooking. Rinse them under cold water to remove excess starch, which helps them crisp up nicely. Pat them dry with a towel before moving on to the next step. This little trick makes a big difference!

Step 2: Sauté the Vegetables

In a large skillet, heat a tablespoon of olive oil over medium heat. Once the oil is shimmering, toss in the diced potatoes. Cook them for about 10 minutes, stirring occasionally. You want them to soften and turn golden brown. After that, add the diced onion and bell pepper. Sauté for another 5-7 minutes until the veggies are tender and fragrant. The colors will brighten your morning!

Step 3: Whisk the Eggs

While the potatoes and veggies are cooking, crack four large eggs into a bowl. Add a pinch of salt, pepper, garlic powder, and paprika. Whisk everything together until the mixture is smooth and slightly frothy. This step is crucial for fluffy eggs, so don’t rush it!

Step 4: Combine and Cook

Pour the egg mixture over the sautéed vegetables in the skillet. Gently stir everything together, allowing the eggs to coat the potatoes and veggies. Cook for about 3-4 minutes, stirring occasionally, until the eggs are just set. If you’re feeling cheesy, sprinkle shredded cheddar on top and cover the skillet for 1-2 minutes. The cheese will melt beautifully, adding a rich layer of flavor.

Step 5: Garnish and Serve

Once everything is cooked to perfection, remove the skillet from heat. Garnish your Potato and Egg Scramble with freshly chopped parsley for a pop of color and freshness. Serve it hot, and watch your loved ones dig in with smiles on their faces. This dish is not just a meal; it’s a moment to savor!

Tips for Success

  • Use a non-stick skillet for easy cooking and cleanup.
  • Don’t overcrowd the pan; cook in batches if necessary.
  • For extra flavor, add herbs like thyme or oregano.
  • Experiment with different cheeses for a unique twist.
  • Make it a meal prep option by storing leftovers in the fridge for up to three days.

Equipment Needed

  • Large Skillet: A non-stick skillet works best, but any large frying pan will do.
  • Cutting Board: Essential for chopping your veggies and potatoes.
  • Knife: A sharp chef’s knife makes prep a breeze.
  • Whisk: For beating the eggs; a fork can work in a pinch.
  • Spatula: Perfect for stirring and serving your delicious scramble.

Variations

  • Sweet Potato Swap: Replace russet potatoes with sweet potatoes for a healthier, slightly sweet twist.
  • Protein Boost: Add cooked bacon, sausage, or diced ham for a heartier meal that packs a protein punch.
  • Veggie Delight: Toss in spinach, mushrooms, or zucchini for extra nutrients and flavor.
  • Spicy Kick: Add diced jalapeños or a dash of hot sauce for those who like a little heat in their breakfast.
  • Herb Infusion: Experiment with fresh herbs like cilantro or chives to elevate the dish with fresh flavors.

Serving Suggestions

  • Toast: Serve with crispy whole-grain toast for a satisfying crunch.
  • Fruit Salad: A side of fresh fruit adds a refreshing contrast to the savory scramble.
  • Coffee or Tea: Pair with your favorite morning beverage for a complete breakfast experience.
  • Presentation: Serve in a colorful bowl and garnish with extra parsley for a vibrant touch.

FAQs about Potato and Egg Scramble

Can I make Potato and Egg Scramble ahead of time?

Absolutely! You can prepare the Potato and Egg Scramble in advance. Just store it in an airtight container in the fridge for up to three days. Reheat it in the microwave or on the stovetop for a quick breakfast.

What can I substitute for eggs in this recipe?

If you’re looking for an egg alternative, try using tofu or chickpea flour mixed with water. Both options provide a similar texture and can be seasoned to taste, making them great substitutes in a Potato and Egg Scramble.

How can I make this dish spicier?

For a spicy twist, add diced jalapeños or a few dashes of hot sauce while cooking. You can also sprinkle some red pepper flakes on top before serving for an extra kick!

Is Potato and Egg Scramble suitable for meal prep?

Yes! This dish is perfect for meal prep. You can make a big batch and portion it out for the week. Just reheat when you’re ready to enjoy a hearty breakfast.

Can I use frozen potatoes for this recipe?

Definitely! Frozen diced potatoes can save you time. Just toss them in the skillet and cook until heated through and golden. They work great in a Potato and Egg Scramble!

Final Thoughts

Cooking a Potato and Egg Scramble is more than just preparing breakfast; it’s about creating moments. The sizzle of the skillet, the vibrant colors of the veggies, and the aroma filling your kitchen all come together to form a delightful experience. This dish is versatile, allowing you to customize it to your taste, making it a staple in your morning routine. Whether you’re sharing it with family or enjoying it solo, each bite is a reminder of the simple joys of home cooking. So grab your skillet and let the magic unfold—your perfect breakfast awaits!

jhessica

Potato and Egg Scramble: A Delicious Breakfast Idea!

A delicious and hearty breakfast dish made with scrambled eggs and diced potatoes, perfect for starting your day.
Prep Time 10 minutes
Cook Time 20 minutes
Total Time 30 minutes
Servings: 4 servings
Course: Breakfast
Cuisine: American
Calories: 210

Ingredients
  

  • 2 medium russet potatoes peeled and diced (about 2 cups)
  • 1 tablespoon olive oil
  • 1 small onion diced
  • 1 bell pepper diced (any color)
  • 4 large eggs
  • Salt and pepper to taste
  • 1/2 teaspoon garlic powder
  • 1/2 teaspoon paprika
  • 1/4 cup shredded cheddar cheese optional
  • Fresh parsley chopped (for garnish)

Method
 

  1. In a large skillet, heat the olive oil over medium heat. Add the diced potatoes and cook for about 10 minutes, stirring occasionally, until they start to soften and turn golden brown.
  2. Add the diced onion and bell pepper to the skillet. Cook for an additional 5-7 minutes, stirring frequently, until the vegetables are tender.
  3. In a bowl, whisk together the eggs, salt, pepper, garlic powder, and paprika. Pour the egg mixture over the cooked vegetables in the skillet.
  4. Cook the eggs, gently stirring, until they are just set, about 3-4 minutes. If using, sprinkle the shredded cheddar cheese on top and cover the skillet for 1-2 minutes until the cheese melts.
  5. Remove from heat and garnish with fresh parsley before serving.

Nutrition

Serving: 1servingCalories: 210kcalCarbohydrates: 18gProtein: 10gFat: 10gSaturated Fat: 3gPolyunsaturated Fat: 7gCholesterol: 300mgSodium: 300mgFiber: 2gSugar: 1g

Notes

  • For added flavor, try incorporating cooked bacon or sausage into the scramble.
  • Substitute sweet potatoes for a healthier twist and a touch of sweetness.

Tried this recipe?

Let us know how it was!

Double Chocolate Chip Cookies: Indulge in Rich Flavor!

Introduction to Double Chocolate Chip Cookies

There’s something magical about the aroma of freshly baked cookies wafting through the house. It takes me back to my childhood, where every Sunday was a sweet adventure in the kitchen. Today, I’m excited to share my recipe for double chocolate chip cookies, a treat that’s perfect for chocolate lovers like me. Whether you’re looking for a quick solution to satisfy a sweet tooth or a delightful dessert to impress your loved ones, these cookies are sure to hit the spot. With rich chocolate flavor and gooey chocolate chips, they’re a guaranteed crowd-pleaser!

Why You’ll Love This Double Chocolate Chip Cookies

These double chocolate chip cookies are a dream come true for anyone who craves chocolate. They’re incredibly easy to whip up, making them perfect for busy weeknights or spontaneous gatherings. In just 27 minutes, you can indulge in warm, gooey cookies that melt in your mouth. Plus, the rich flavor and chewy texture will have everyone coming back for seconds. Trust me, these cookies are a sweet escape you won’t want to miss!

Ingredients for Double Chocolate Chip Cookies

Gathering the right ingredients is the first step to cookie perfection. Here’s what you’ll need for these indulgent double chocolate chip cookies:

  • Unsalted butter: This is the base of your cookies, providing richness and flavor. Make sure it’s softened for easy mixing.
  • Granulated sugar: Adds sweetness and helps create that delightful chewy texture.
  • Brown sugar: Packed with moisture, it gives the cookies a deeper flavor and a hint of caramel.
  • Large eggs: They bind the ingredients together and add moisture, making your cookies soft and tender.
  • Vanilla extract: A splash of this classic flavor elevates the overall taste of your cookies.
  • All-purpose flour: The backbone of any cookie, it provides structure and stability.
  • Unsweetened cocoa powder: This is where the double chocolate magic happens, giving your cookies that rich, chocolatey flavor.
  • Baking soda: A leavening agent that helps your cookies rise and become fluffy.
  • Salt: Just a pinch enhances the sweetness and balances the flavors.
  • Semi-sweet chocolate chips: The star of the show! These little morsels melt beautifully and add bursts of chocolate in every bite.

For those looking to mix things up, consider adding a teaspoon of espresso powder for a richer flavor or swapping half of the chocolate chips for mint chocolate chips for a refreshing twist. You can find the exact quantities for each ingredient at the bottom of the article, ready for printing!

How to Make Double Chocolate Chip Cookies

Now that you have your ingredients ready, let’s dive into the fun part—making these delicious double chocolate chip cookies! Follow these simple steps, and you’ll be on your way to cookie bliss in no time.

Step 1: Preheat the Oven

Preheat your oven to 350°F (175°C) to ensure even baking. This step is crucial for achieving that perfect cookie texture. A hot oven means your cookies will rise beautifully!

Step 2: Cream the Butter and Sugars

In a large mixing bowl, cream together the softened butter, granulated sugar, and brown sugar until light and fluffy. This process incorporates air into the mixture, giving your cookies a delightful texture. Don’t rush it—about 3-5 minutes should do the trick!

Step 3: Add Eggs and Vanilla

Add the eggs one at a time, mixing well after each addition. This helps to create a smooth batter. Then, stir in the vanilla extract for that warm, inviting flavor that makes cookies irresistible.

Step 4: Combine Dry Ingredients

In another bowl, whisk together the all-purpose flour, cocoa powder, baking soda, and salt. This step ensures that your dry ingredients are evenly distributed, which is key for consistent flavor and texture in your double chocolate chip cookies.

Step 5: Mix Wet and Dry Ingredients

Gradually add the dry ingredients to the wet mixture, stirring until just combined. Be careful not to overmix; you want your cookies to be tender and soft, not tough!

Step 6: Fold in Chocolate Chips

Gently fold in the chocolate chips to ensure even distribution. This is where the magic happens! Each bite will be packed with gooey chocolate goodness.

Step 7: Shape the Cookies

Drop rounded tablespoons of dough onto ungreased baking sheets, spacing them about 2 inches apart. This gives them room to spread while baking. A cookie scoop can make this step easier and more uniform!

Step 8: Bake the Cookies

Bake for 10-12 minutes, or until the edges are set but the centers are still soft. Keep an eye on them; every oven is a little different. You want that perfect balance of chewy and soft!

Step 9: Cool the Cookies

Allow the cookies to cool on the baking sheets for 5 minutes before transferring them to wire racks to cool completely. This step helps them firm up a bit, making them easier to handle. Plus, the smell will drive everyone wild!

Tips for Success

  • Use room temperature ingredients for better mixing and texture.
  • Don’t skip the cooling time; it helps the cookies set perfectly.
  • For extra flavor, try adding a pinch of sea salt on top before baking.
  • Store cookies in an airtight container to keep them fresh longer.
  • Experiment with different types of chocolate chips for unique flavors!

Equipment Needed

  • Mixing bowls: A large bowl for mixing and a smaller one for dry ingredients. Any size will do!
  • Electric mixer: A hand mixer works great, but a whisk and some elbow grease can do the job too.
  • Baking sheets: Use ungreased sheets or line them with parchment paper for easy cleanup.
  • Cookie scoop: Optional, but it helps create uniform cookie sizes.
  • Wire racks: Perfect for cooling cookies, but a plate will work in a pinch!

Variations

  • Nutty Delight: Add chopped walnuts or pecans for a crunchy texture that complements the chocolate.
  • Gluten-Free Option: Substitute all-purpose flour with a gluten-free flour blend for a delicious gluten-free treat.
  • Spicy Kick: Mix in a pinch of cayenne pepper or cinnamon for a surprising twist that enhances the chocolate flavor.
  • White Chocolate Swirl: Replace half of the semi-sweet chocolate chips with white chocolate chips for a sweet contrast.
  • Vegan Version: Use coconut oil instead of butter and flax eggs as a substitute for regular eggs for a plant-based cookie.

Serving Suggestions

  • Pair your double chocolate chip cookies with a tall glass of cold milk for the ultimate treat.
  • Serve them warm with a scoop of vanilla ice cream on top for a decadent dessert.
  • For a fun presentation, stack cookies on a decorative plate and dust with powdered sugar.
  • Enjoy them alongside a rich cup of coffee or a creamy hot chocolate.

FAQs about Double Chocolate Chip Cookies

As you embark on your double chocolate chip cookie journey, you might have a few questions. Here are some common queries that can help you bake the perfect batch!

Can I use dark chocolate chips instead of semi-sweet?

Absolutely! Dark chocolate chips will give your cookies a richer flavor. Just keep in mind that they may be a bit less sweet, which can be a delightful twist for chocolate lovers.

How do I store leftover cookies?

To keep your cookies fresh, store them in an airtight container at room temperature. They should stay delicious for about a week. If you want to keep them longer, consider freezing them!

Can I make the dough ahead of time?

Yes! You can prepare the dough and refrigerate it for up to 3 days. Just let it sit at room temperature for a few minutes before baking to make scooping easier.

What can I substitute for eggs in this recipe?

If you need an egg substitute, try using 1/4 cup of unsweetened applesauce or a flax egg (1 tablespoon of ground flaxseed mixed with 2.5 tablespoons of water). Both options work well in double chocolate chip cookies!

Why are my cookies flat?

Flat cookies can result from using melted butter or not enough flour. Make sure your butter is softened, not melted, and measure your flour accurately for the best results.

Final Thoughts

Baking double chocolate chip cookies is more than just a recipe; it’s an experience that brings joy to your kitchen. The rich aroma fills the air, creating a warm atmosphere that invites everyone to gather around. Each bite is a delightful explosion of chocolate, evoking memories of childhood treats and family gatherings. Whether you’re sharing them with friends or enjoying them solo, these cookies are a sweet reminder of life’s simple pleasures. So, roll up your sleeves, embrace the mess, and indulge in the happiness that comes from baking these irresistible cookies. You won’t regret it!

jhessica

Double Chocolate Chip Cookies: Indulge in Rich Flavor!

Indulge in rich flavor with these delicious double chocolate chip cookies, perfect for chocolate lovers.
Prep Time 15 minutes
Cook Time 12 minutes
Total Time 27 minutes
Servings: 24 cookies
Course: Dessert
Cuisine: American
Calories: 180

Ingredients
  

  • 1 cup unsalted butter softened
  • 1 cup granulated sugar
  • 1 cup brown sugar packed
  • 2 large eggs
  • 2 teaspoons vanilla extract
  • 3 cups all-purpose flour
  • 1 cup unsweetened cocoa powder
  • 1 teaspoon baking soda
  • 1/2 teaspoon salt
  • 2 cups semi-sweet chocolate chips

Method
 

  1. Preheat your oven to 350°F (175°C).
  2. In a large mixing bowl, cream together the softened butter, granulated sugar, and brown sugar until light and fluffy.
  3. Add the eggs one at a time, mixing well after each addition, then stir in the vanilla extract.
  4. In another bowl, whisk together the all-purpose flour, cocoa powder, baking soda, and salt.
  5. Gradually add the dry ingredients to the wet mixture, stirring until just combined.
  6. Fold in the chocolate chips.
  7. Drop rounded tablespoons of dough onto ungreased baking sheets, spacing them about 2 inches apart.
  8. Bake for 10-12 minutes, or until the edges are set but the centers are still soft.
  9. Allow the cookies to cool on the baking sheets for 5 minutes before transferring them to wire racks to cool completely.

Nutrition

Serving: 1cookieCalories: 180kcalCarbohydrates: 22gProtein: 2gFat: 9gSaturated Fat: 5gPolyunsaturated Fat: 4gCholesterol: 30mgSodium: 100mgFiber: 1gSugar: 10g

Notes

  • For a richer flavor, try adding a teaspoon of espresso powder to the dough.
  • If you prefer a minty twist, substitute half of the chocolate chips with mint chocolate chips.

Tried this recipe?

Let us know how it was!

Discover Crockpot Pierogi Casserole with Kielbasa Now!

Introduction to Crockpot Pierogi Casserole with Kielbasa

There’s something magical about a dish that warms both the heart and the belly. My journey with the Crockpot Pierogi Casserole with Kielbasa began on a chilly evening when I craved comfort food that didn’t require hours in the kitchen. This recipe is a lifesaver for busy weeknights or when you want to impress family and friends without breaking a sweat. With layers of cheesy pierogi, savory kielbasa, and tangy sauerkraut, it’s a delightful blend of flavors that brings everyone together. Trust me, this dish will quickly become a favorite in your home!

Why You’ll Love This Crockpot Pierogi Casserole with Kielbasa

This Crockpot Pierogi Casserole with Kielbasa is a game-changer for anyone who loves hearty meals without the hassle. It’s incredibly easy to prepare—just layer and let the crockpot do the work. The rich flavors meld beautifully as it cooks, creating a dish that’s both comforting and satisfying. Plus, it’s perfect for feeding a crowd or enjoying leftovers the next day. Who doesn’t love a meal that tastes even better the second time around?

Ingredients for Crockpot Pierogi Casserole with Kielbasa

Gathering the right ingredients is the first step to creating a delicious Crockpot Pierogi Casserole with Kielbasa. Here’s what you’ll need:

  • Frozen pierogi: Choose cheese or potato-filled varieties for a creamy texture.
  • Kielbasa: This flavorful sausage adds a savory punch. Feel free to use turkey or chicken kielbasa for a lighter option.
  • Onion: Diced onions bring sweetness and depth to the dish.
  • Sauerkraut: Drained sauerkraut adds a tangy contrast that balances the richness of the cheese and sausage.
  • Shredded cheddar cheese: A must for that gooey, melty goodness. You can swap it for a sharp variety for more flavor.
  • Sour cream: This creamy element enhances the dish’s richness and adds a slight tang.
  • Garlic powder: A sprinkle of garlic powder elevates the flavor profile without overpowering the dish.
  • Onion powder: This complements the fresh onion and adds a layer of flavor.
  • Paprika: A dash of paprika gives a subtle smokiness and a pop of color.
  • Salt and pepper: Essential for seasoning to taste, enhancing all the flavors.
  • Fresh parsley: Chopped parsley is perfect for garnishing, adding a fresh touch to the final dish.

For those looking to mix things up, consider these options:

  • Substitute kielbasa with sautéed mushrooms or a plant-based sausage for a vegetarian twist.
  • Add a layer of spinach or kale for extra greens and nutrition.

Exact quantities for each ingredient can be found at the bottom of the article, ready for printing!

How to Make Crockpot Pierogi Casserole with Kielbasa

Creating this Crockpot Pierogi Casserole with Kielbasa is as easy as pie—well, easier! Just follow these simple steps, and you’ll have a hearty meal ready to enjoy. Let’s dive in!

Step 1: Layer the Pierogi

Start by placing half of the frozen pierogi in the bottom of your crockpot. Make sure they’re spread out evenly. This layer is the foundation of your casserole, so take a moment to arrange them nicely. Trust me, it’ll pay off later when you dig in!

Step 2: Add Kielbasa and Vegetables

Next, it’s time to add the flavor! Layer half of the sliced kielbasa over the pierogi. Then, sprinkle the diced onion and drained sauerkraut on top. The combination of these ingredients creates a savory base that will infuse the dish with deliciousness as it cooks.

Step 3: Cheese It Up

Now, let’s get cheesy! Sprinkle half of the shredded cheddar cheese over the layers you just created. This melty goodness will bind everything together and add that irresistible creaminess we all love. Don’t be shy—more cheese is always a good idea!

Step 4: Mix the Sour Cream Mixture

In a small bowl, combine the sour cream, garlic powder, onion powder, paprika, salt, and pepper. Mix it well until it’s smooth. Spread half of this mixture over the cheese layer. This adds a tangy richness that elevates the entire dish. It’s like a secret weapon for flavor!

Step 5: Repeat the Layers

Now, it’s time to repeat the layering process with the remaining ingredients. Start with the rest of the pierogi, followed by the remaining kielbasa, onion, sauerkraut, and finally, the rest of the cheddar cheese. Top it all off with the remaining sour cream mixture. You’re building a delicious tower of comfort food!

Step 6: Cook to Perfection

Cover your crockpot and set it to cook on low for 6-8 hours or on high for 3-4 hours. The key is to let the flavors meld together beautifully. Check for doneness by ensuring the pierogi are tender and the kielbasa is heated through. When it’s ready, your kitchen will be filled with an aroma that’s simply irresistible!

Tips for Success

  • Use a non-stick spray or a liner for easy cleanup.
  • Don’t skip the garnishing—fresh parsley adds a pop of color and flavor.
  • For extra creaminess, mix in a bit more sour cream before serving.
  • Adjust seasoning to your taste; everyone loves a personal touch!
  • Feel free to experiment with different types of cheese for unique flavors.

Equipment Needed

  • Crockpot: A must-have for this recipe. Any size will do, but a 6-quart is ideal.
  • Measuring cups and spoons: For accurate ingredient portions.
  • Mixing bowl: To combine the sour cream mixture.
  • Spatula: For spreading and layering ingredients.

Variations

  • For a vegetarian option, swap kielbasa with sautéed mushrooms or a plant-based sausage.
  • Add a layer of fresh spinach or kale for a nutritious boost.
  • Try using different types of cheese, like pepper jack or gouda, for a unique flavor twist.
  • Incorporate roasted red peppers or jalapeños for a spicy kick.
  • For a smoky flavor, add a dash of liquid smoke or smoked paprika.

Serving Suggestions

  • Pair with a crisp green salad for a refreshing contrast.
  • Serve with crusty bread or dinner rolls to soak up the delicious flavors.
  • A cold beer or a glass of white wine complements the dish perfectly.
  • Garnish with extra parsley for a vibrant presentation.

FAQs about Crockpot Pierogi Casserole with Kielbasa

Can I use fresh pierogi instead of frozen?

Absolutely! If you have fresh pierogi, they can be used in this Crockpot Pierogi Casserole with Kielbasa. Just adjust the cooking time slightly, as fresh pierogi may cook faster than frozen ones.

How do I store leftovers?

Leftovers can be stored in an airtight container in the fridge for up to 3 days. Reheat in the microwave or on the stovetop, adding a splash of water or broth to keep it moist.

Can I make this dish ahead of time?

Yes! You can prep the layers the night before and store them in the fridge. Just pop it in the crockpot in the morning, and you’ll have a delicious meal waiting for you when you get home.

Is this recipe gluten-free?

Yes, this Crockpot Pierogi Casserole with Kielbasa can be gluten-free if you use gluten-free pierogi. Just check the labels to ensure all ingredients meet your dietary needs.

What can I serve with this casserole?

This dish pairs wonderfully with a simple green salad or some crusty bread. A cold beer or a glass of white wine also makes for a perfect accompaniment!

Final Thoughts

Cooking this Crockpot Pierogi Casserole with Kielbasa is more than just preparing a meal; it’s about creating memories. The aroma wafting through your home as it simmers is like a warm hug, inviting everyone to gather around the table. Each bite is a comforting reminder of family dinners and shared laughter. Whether you’re feeding a crowd or enjoying a cozy night in, this dish brings joy and satisfaction. So, roll up your sleeves, embrace the simplicity, and let this casserole become a cherished part of your culinary repertoire. Trust me, your taste buds will thank you!

jhessica

Discover Crockpot Pierogi Casserole with Kielbasa Now!

A hearty and comforting Crockpot Pierogi Casserole with Kielbasa, perfect for family dinners.
Prep Time 15 minutes
Servings: 6 servings
Course: Main Dish
Cuisine: Polish
Calories: 350

Ingredients
  

  • 2 cups frozen pierogi cheese or potato
  • 1 pound kielbasa sliced
  • 1 medium onion diced
  • 2 cups sauerkraut drained
  • 1 cup shredded cheddar cheese
  • 1 cup sour cream
  • 1 teaspoon garlic powder
  • 1 teaspoon onion powder
  • 1 teaspoon paprika
  • Salt and pepper to taste
  • Fresh parsley chopped (for garnish)

Method
 

  1. In the bottom of the crockpot, layer half of the frozen pierogi.
  2. Add half of the sliced kielbasa on top of the pierogi, followed by half of the diced onion and half of the sauerkraut.
  3. Sprinkle half of the shredded cheddar cheese over the layers.
  4. In a small bowl, mix together the sour cream, garlic powder, onion powder, paprika, salt, and pepper. Spread half of this mixture over the cheese layer.
  5. Repeat the layers with the remaining pierogi, kielbasa, onion, sauerkraut, and cheddar cheese. Top with the remaining sour cream mixture.
  6. Cover and cook on low for 6-8 hours or on high for 3-4 hours, until the pierogi are tender and the kielbasa is heated through.
  7. Before serving, garnish with fresh chopped parsley.

Nutrition

Serving: 1servingCalories: 350kcalCarbohydrates: 25gProtein: 15gFat: 22gSaturated Fat: 10gPolyunsaturated Fat: 8gCholesterol: 60mgSodium: 800mgFiber: 2gSugar: 2g

Notes

  • For a vegetarian option, substitute the kielbasa with sautéed mushrooms or a plant-based sausage.
  • Add a layer of spinach or kale for extra greens and nutrition.

Tried this recipe?

Let us know how it was!

Fiery Chicken Ramen: Discover the Ultimate Spicy Recipe!

Introduction to Fiery Chicken Ramen

There’s something magical about a steaming bowl of ramen, especially when it’s packed with flavor and a kick of heat. Fiery Chicken Ramen is not just a meal; it’s a warm hug on a chilly evening or a quick solution for a busy day. I remember the first time I tried a spicy ramen dish; it was an explosion of flavors that danced on my palate. This recipe is perfect for impressing your loved ones or simply treating yourself after a long day. Let’s dive into this delicious adventure together!

Why You’ll Love This Fiery Chicken Ramen

This Fiery Chicken Ramen is a game-changer for busy weeknights. It’s quick to whip up, taking just 30 minutes from start to finish. The tender chicken and vibrant veggies create a symphony of flavors that will have your taste buds singing. Plus, it’s customizable! You can adjust the spice level to suit your palate, making it a dish everyone can enjoy. What’s not to love?

Ingredients for Fiery Chicken Ramen

Gathering the right ingredients is the first step to creating your Fiery Chicken Ramen masterpiece. Here’s what you’ll need:

  • Vegetable oil: This is your cooking base, perfect for sautéing the chicken and aromatics.
  • Boneless, skinless chicken thighs: Tender and juicy, they soak up all the flavors beautifully.
  • Salt and black pepper: Essential seasonings that enhance the natural flavors of the chicken.
  • Minced garlic: Adds a fragrant kick that elevates the dish.
  • Minced ginger: A zesty touch that complements the garlic and adds warmth.
  • Chicken broth: The heart of your ramen, providing depth and richness to the soup.
  • Soy sauce: A savory element that brings umami to the mix.
  • Sriracha: For that fiery punch! Adjust the amount based on your spice tolerance.
  • Instant ramen noodles: Quick and easy, these noodles are the perfect vehicle for your broth.
  • Baby spinach: Fresh greens that add color and nutrition, wilting perfectly into the hot broth.
  • Green onions: Sliced for garnish, they add a fresh crunch and a pop of color.
  • Soft-boiled eggs (optional): Creamy and rich, they make a delightful addition to your ramen.
  • Sesame seeds (optional): A sprinkle on top adds a nutty flavor and a touch of elegance.

For exact quantities, check the bottom of the article where you can find everything listed for easy printing. Feel free to get creative with your ingredients! You can swap in different vegetables or proteins based on what you have on hand. The beauty of this dish lies in its versatility!

How to Make Fiery Chicken Ramen

Now that you have your ingredients ready, let’s get cooking! This Fiery Chicken Ramen comes together in just a few simple steps. Follow along, and you’ll have a delicious bowl of spicy goodness in no time.

Step 1: Sauté the Chicken

Start by heating the vegetable oil in a large pot over medium-high heat. Once it’s shimmering, toss in the bite-sized chicken pieces. Season them with salt and black pepper. Cook for about 5-7 minutes, stirring occasionally, until the chicken is browned and cooked through. Remove the chicken from the pot and set it aside. This step is crucial; it builds the foundation of flavor for your ramen.

Step 2: Sauté Garlic and Ginger

In the same pot, add the minced garlic and ginger. Sauté for about 1 minute until they become fragrant. The aroma will fill your kitchen, making your mouth water. This is where the magic begins! The garlic and ginger will infuse the oil, creating a flavorful base for your broth.

Step 3: Prepare the Broth

Pour in the chicken broth, soy sauce, and sriracha. Bring the mixture to a boil. The broth is the heart of your Fiery Chicken Ramen, so let it bubble away for a minute or two. Taste it and adjust the sriracha if you want more heat. Remember, you can always add more spice, but it’s tough to take it away!

Step 4: Cook the Ramen Noodles

Add the instant ramen noodles to the boiling broth. Cook according to the package instructions, usually about 3-4 minutes. Stir occasionally to prevent sticking. The noodles will soak up all that delicious broth, becoming the perfect vehicle for your flavors. Keep an eye on them; you want them tender but not mushy!

Step 5: Combine Ingredients

Once the noodles are cooked, return the sautéed chicken to the pot. Stir in the baby spinach and let it cook for an additional 1-2 minutes until the spinach wilts. This step adds a pop of color and nutrition to your dish. Plus, it’s a great way to sneak in some greens!

Step 6: Serve and Garnish

Now it’s time to serve your Fiery Chicken Ramen! Ladle the hot ramen into bowls and top with sliced green onions, soft-boiled eggs, and a sprinkle of sesame seeds if you like. The vibrant colors and textures will make your dish look as good as it tastes. Enjoy every spicy, savory bite!

Tips for Success

  • Prep all your ingredients before starting to cook. It makes the process smoother.
  • Adjust the sriracha to your spice preference; start small and add more if needed.
  • For a richer broth, simmer the chicken longer before adding the noodles.
  • Experiment with toppings like mushrooms or bok choy for added flavor and nutrition.
  • Don’t skip the soft-boiled eggs; they elevate the dish!

Equipment Needed

  • Large pot: Essential for cooking the ramen. A Dutch oven works well too.
  • Wooden spoon: Perfect for stirring without scratching your pot.
  • Measuring spoons: Handy for precise ingredient measurements.
  • Cutting board and knife: For chopping your chicken and veggies.

Variations of Fiery Chicken Ramen

  • Vegetable Ramen: Swap the chicken for tofu or your favorite vegetables like bell peppers, zucchini, and mushrooms for a hearty vegetarian option.
  • Spicy Seafood Ramen: Add shrimp or scallops instead of chicken for a delightful seafood twist that pairs beautifully with the spicy broth.
  • Coconut Curry Ramen: Stir in coconut milk and curry paste for a creamy, aromatic version that adds a whole new layer of flavor.
  • Low-Carb Ramen: Use zucchini noodles or shirataki noodles instead of traditional ramen for a low-carb alternative that still satisfies.
  • Extra Spicy Ramen: For those who crave heat, add fresh sliced jalapeños or a dash of chili oil to amp up the spice level.

Serving Suggestions for Fiery Chicken Ramen

  • Side Salad: A crisp cucumber salad with sesame dressing complements the heat of the ramen.
  • Drink Pairing: Enjoy with a cold Japanese beer or a refreshing iced green tea.
  • Presentation: Serve in deep bowls with chopsticks for an authentic touch.

FAQs about Fiery Chicken Ramen

Can I make Fiery Chicken Ramen ahead of time?

Absolutely! You can prepare the broth and chicken in advance. Just store them separately in the fridge. When you’re ready to eat, reheat the broth, cook the noodles, and combine everything for a quick meal.

How can I adjust the spice level?

To customize the heat, start with a small amount of sriracha and taste as you go. You can always add more! For an extra kick, consider adding chili oil or fresh sliced chilies when serving.

Is this recipe gluten-free?

Yes! This Fiery Chicken Ramen can be made gluten-free by using gluten-free soy sauce and ensuring your ramen noodles are gluten-free. Always check the labels to be sure.

What can I substitute for chicken thighs?

If you prefer, you can use chicken breast for a leaner option. Alternatively, tofu or tempeh works well for a vegetarian version, soaking up all the delicious flavors of the broth.

Can I add more vegetables to the ramen?

Definitely! Feel free to toss in your favorite veggies like bell peppers, mushrooms, or bok choy. They not only enhance the flavor but also add nutrition and color to your dish.

Final Thoughts

Cooking Fiery Chicken Ramen is more than just preparing a meal; it’s about creating an experience that warms the soul. Each spoonful is a delightful blend of spice and comfort, perfect for sharing with friends or savoring solo after a long day. The vibrant colors and rich flavors will transport you to a cozy ramen shop, even if you’re just in your kitchen. Plus, the joy of customizing it to your taste makes it a dish you’ll want to revisit time and again. So grab your chopsticks and dive into this spicy adventure—you won’t regret it!

jhessica

Fiery Chicken Ramen: Discover the Ultimate Spicy Recipe!

A spicy and flavorful ramen dish featuring tender chicken and fresh vegetables, perfect for spice lovers.
Prep Time 10 minutes
Cook Time 20 minutes
Total Time 30 minutes
Servings: 4 servings
Course: Main Course
Cuisine: Japanese
Calories: 450

Ingredients
  

  • 2 tablespoons vegetable oil
  • 1 pound boneless skinless chicken thighs, cut into bite-sized pieces
  • 1 teaspoon salt
  • 1 teaspoon black pepper
  • 1 tablespoon minced garlic
  • 1 tablespoon minced ginger
  • 4 cups chicken broth
  • 2 tablespoons soy sauce
  • 1 tablespoon sriracha adjust to taste
  • 2 packs of instant ramen noodles discard the seasoning packets
  • 2 cups baby spinach
  • 2 green onions sliced
  • 2 soft-boiled eggs optional
  • Sesame seeds for garnish optional

Method
 

  1. In a large pot, heat the vegetable oil over medium-high heat. Add the chicken pieces, season with salt and pepper, and cook until browned and cooked through, about 5-7 minutes. Remove the chicken and set aside.
  2. In the same pot, add the minced garlic and ginger. Sauté for about 1 minute until fragrant.
  3. Pour in the chicken broth, soy sauce, and sriracha. Bring the mixture to a boil.
  4. Add the ramen noodles to the boiling broth and cook according to package instructions, usually about 3-4 minutes.
  5. Once the noodles are cooked, return the chicken to the pot and stir in the baby spinach. Cook for an additional 1-2 minutes until the spinach is wilted.
  6. Serve the ramen hot, topped with sliced green onions, soft-boiled eggs, and a sprinkle of sesame seeds if desired.

Nutrition

Serving: 1bowlCalories: 450kcalCarbohydrates: 45gProtein: 30gFat: 15gSaturated Fat: 3gPolyunsaturated Fat: 10gCholesterol: 150mgSodium: 1200mgFiber: 2gSugar: 2g

Notes

  • For extra heat, add more sriracha or a dash of chili oil when serving.
  • Customize your ramen by adding vegetables like mushrooms, bell peppers, or corn during the cooking process.

Tried this recipe?

Let us know how it was!

Cookies and Cream Cheesecake Cups: A Sweet Delight!

Introduction to Cookies and Cream Cheesecake Cups

There’s something magical about dessert that brings us back to our childhood.

The first time I tasted a cookies and cream cheesecake, I was hooked.

These Cookies and Cream Cheesecake Cups are a delightful way to indulge your sweet tooth without spending hours in the kitchen.

Perfect for busy weeknights or a last-minute gathering, they offer a creamy, dreamy experience that’s sure to impress.

With just a few simple ingredients, you can whip up these no-bake treats that will have everyone asking for seconds.

Trust me, your taste buds will thank you!

Why You’ll Love This Cookies and Cream Cheesecake Cups

These Cookies and Cream Cheesecake Cups are a game-changer for dessert lovers.

They’re incredibly easy to make, requiring no baking at all.

In just 20 minutes, you can create a delicious treat that’s perfect for any occasion.

The rich, creamy filling paired with the crunchy cookie crust is a flavor combination that never disappoints.

Plus, they’re portable, making them ideal for picnics or potlucks.

Who wouldn’t love that?

Ingredients for Cookies and Cream Cheesecake Cups

Creating these Cookies and Cream Cheesecake Cups is a breeze, thanks to a handful of simple ingredients.

Here’s what you’ll need:

  • Crushed chocolate sandwich cookies: These are the star of the show, providing that classic cookies and cream flavor. Think Oreos or any similar brand.
  • Unsalted butter: This helps bind the cookie crumbs together for a sturdy crust. Unsalted is best to control the overall saltiness.
  • Cream cheese: The base of your cheesecake filling, it adds that rich, creamy texture we all love. Make sure it’s softened for easy mixing.
  • Powdered sugar: This sweetens the filling and gives it a smooth consistency. It dissolves easily, making it perfect for no-bake recipes.
  • Vanilla extract: A splash of this adds depth and enhances the overall flavor of the cheesecake. Always opt for pure vanilla for the best taste.
  • Heavy whipping cream: This is what makes your cheesecake light and fluffy. Whipping it to stiff peaks is key for that airy texture.
  • Additional crushed chocolate sandwich cookies: These are for topping, adding a delightful crunch and visual appeal to your cups.

Feel free to get creative!

For a chocolatey twist, consider adding cocoa powder to the cream cheese mixture.

If you want a different flavor profile, graham crackers can be a tasty substitute for the chocolate cookies.

Exact measurements for each ingredient are available at the bottom of the article for your convenience.

How to Make Cookies and Cream Cheesecake Cups

Creating these Cookies and Cream Cheesecake Cups is a fun and straightforward process.

Let’s dive into the steps that will lead you to dessert bliss!

Step 1: Prepare the Cookie Crust

Start by grabbing a medium bowl.

Combine the crushed chocolate sandwich cookies with the melted butter.

Mix them together until the crumbs are evenly coated.

This mixture will form the base of your cheesecake cups.

Now, take your serving cups or small jars and press the cookie mixture firmly into the bottom.

Make sure it’s compact; this will give you a sturdy crust.

Set these aside while you whip up the filling.

Step 2: Make the Cheesecake Filling

In a large mixing bowl, beat the softened cream cheese with an electric mixer.

You want it to be smooth and creamy, so take your time here.

Gradually add in the powdered sugar and vanilla extract.

Mix until everything is well combined and you have a luscious filling.

This is where the magic begins!

Step 3: Whip the Cream

In a separate bowl, pour in the heavy whipping cream.

Using a mixer, whip it until stiff peaks form.

This means when you lift the beaters, the cream holds its shape.

This step is crucial for achieving that light, airy texture in your cheesecake.

Don’t rush it; patience pays off here!

Step 4: Combine and Fill

Now, gently fold the whipped cream into the cream cheese mixture.

Be careful not to deflate the whipped cream; you want to keep that fluffiness.

Once fully incorporated, it’s time to fill your cups.

Spoon or pipe the cheesecake mixture over the cookie crust in each cup.

Make sure to leave a little room at the top for the final touch!

Step 5: Chill and Serve

The last step is to refrigerate your cheesecake cups.

Let them chill for at least 2 hours.

This allows the flavors to meld and the cheesecake to set properly.

Trust me, the wait is worth it!

When you’re ready to serve, top each cup with the additional crushed chocolate sandwich cookies for that extra crunch.

Tips for Success

  • Use room temperature cream cheese for easier mixing and a smoother filling.
  • Don’t overmix the whipped cream; fold gently to maintain its airy texture.
  • Chill the cheesecake cups overnight for the best flavor and texture.
  • Experiment with different toppings like chocolate shavings or fresh berries.
  • For a fun twist, add a splash of coffee or mint extract to the filling.

Equipment Needed

  • Mixing bowls: A medium and a large bowl will do the trick. You can use any bowls you have on hand.
  • Electric mixer: A hand mixer works great, but a whisk can be used if you’re feeling adventurous.
  • Serving cups or jars: Any small containers will work; just ensure they’re sturdy enough to hold the cheesecake.

Variations

  • Chocolate Mint: Add a few drops of peppermint extract to the cheesecake filling for a refreshing twist.
  • Peanut Butter Swirl: Mix in some creamy peanut butter into the cheesecake filling for a nutty flavor that pairs beautifully with chocolate.
  • Fruit Topping: Top your cheesecake cups with fresh strawberries, raspberries, or blueberries for a fruity contrast.
  • Gluten-Free Option: Use gluten-free chocolate sandwich cookies to make this dessert suitable for those with gluten sensitivities.
  • Vegan Version: Substitute cream cheese with a vegan alternative and use coconut cream instead of heavy whipping cream for a plant-based treat.

Serving Suggestions

  • Pair your Cookies and Cream Cheesecake Cups with a scoop of vanilla ice cream for an extra indulgent treat.
  • Serve alongside a rich cup of coffee or a chilled glass of milk to complement the flavors.
  • For a festive touch, garnish with chocolate shavings or a sprig of mint on top.
  • Present them on a colorful platter for a visually appealing dessert display.

FAQs about Cookies and Cream Cheesecake Cups

Can I make these Cookies and Cream Cheesecake Cups ahead of time?

Absolutely! These cheesecake cups are perfect for making ahead. Just prepare them and refrigerate for up to two days before serving. This allows the flavors to develop even more!

How do I store leftover cheesecake cups?

Store any leftovers in an airtight container in the refrigerator. They should stay fresh for about 3-4 days. Just be sure to keep them covered to maintain their creamy texture.

Can I use different cookies for the crust?

Definitely! While chocolate sandwich cookies are traditional, feel free to experiment with graham crackers, vanilla wafers, or even gluten-free options. Each will give a unique twist to your cheesecake cups.

What can I use instead of heavy whipping cream?

If you’re looking for a lighter option, you can substitute heavy whipping cream with whipped topping. For a dairy-free alternative, coconut cream works wonderfully, giving a subtle coconut flavor.

How can I make these cheesecake cups more festive?

To add a festive flair, consider topping your cheesecake cups with seasonal fruits, chocolate shavings, or even a drizzle of caramel sauce. These little touches can elevate your dessert for any occasion!

Final Thoughts

Creating these Cookies and Cream Cheesecake Cups is more than just a cooking experience; it’s a journey back to simpler times.

Each bite is a delightful blend of creamy and crunchy, evoking memories of childhood treats.

Whether you’re sharing them with family or enjoying them solo after a long day, these cups bring joy and satisfaction.

They’re quick to make, yet they feel special enough for any occasion.

So, roll up your sleeves, gather your ingredients, and let the sweet magic unfold.

Trust me, your taste buds will be dancing with delight!

jhessica

Cookies and Cream Cheesecake Cups: A Sweet Delight!

Delicious and creamy Cookies and Cream Cheesecake Cups, perfect for dessert lovers.
Prep Time 20 minutes
Total Time 2 hours 20 minutes
Servings: 6 servings
Course: Dessert
Cuisine: American
Calories: 320

Ingredients
  

  • 1 cup crushed chocolate sandwich cookies like Oreos
  • 2 tablespoons unsalted butter melted
  • 8 ounces cream cheese softened
  • 1/2 cup powdered sugar
  • 1 teaspoon vanilla extract
  • 1 cup heavy whipping cream
  • 1/2 cup crushed chocolate sandwich cookies for topping

Method
 

  1. In a medium bowl, combine the crushed chocolate sandwich cookies and melted butter. Mix until the crumbs are evenly coated.
  2. Press the cookie mixture firmly into the bottom of serving cups or small jars to form the crust. Set aside.
  3. In a large mixing bowl, beat the softened cream cheese with an electric mixer until smooth and creamy.
  4. Gradually add the powdered sugar and vanilla extract, mixing until well combined.
  5. In a separate bowl, whip the heavy cream until stiff peaks form.
  6. Gently fold the whipped cream into the cream cheese mixture until fully incorporated.
  7. Spoon or pipe the cheesecake mixture over the cookie crust in each cup.
  8. Top each cheesecake cup with crushed chocolate sandwich cookies.
  9. Refrigerate for at least 2 hours before serving to allow the flavors to meld and the cheesecake to set.

Nutrition

Serving: 1cupCalories: 320kcalCarbohydrates: 22gProtein: 4gFat: 24gSaturated Fat: 14gPolyunsaturated Fat: 8gCholesterol: 70mgSodium: 200mgFiber: 1gSugar: 16g

Notes

  • For a chocolatey twist, add a tablespoon of cocoa powder to the cream cheese mixture.
  • Substitute the chocolate sandwich cookies with graham crackers for a different flavor profile.

Tried this recipe?

Let us know how it was!

Philly Cheesesteak Meatloaf: A Hearty, Flavorful Twist!

Introduction to Philly Cheesesteak Meatloaf

There’s something undeniably comforting about a hearty meatloaf, especially when it’s infused with the bold flavors of a classic Philly cheesesteak.

This Philly Cheesesteak Meatloaf is not just a meal; it’s a warm hug on a plate.

Whether you’re juggling a busy week or looking to impress your loved ones, this dish is your go-to solution.

With its savory blend of ground beef, veggies, and gooey provolone, it’s a delightful twist on a traditional favorite.

Get ready to savor every bite and create lasting memories around the dinner table!

Why You’ll Love This Philly Cheesesteak Meatloaf

This Philly Cheesesteak Meatloaf is a game-changer for your dinner routine.

It’s quick to prepare, taking just 15 minutes of your time, and then it bakes while you unwind.

The rich flavors of beef, cheese, and veggies meld together beautifully, creating a dish that’s both satisfying and delicious.

Plus, it’s a fantastic way to sneak in some veggies for those picky eaters at the table.

Trust me, everyone will be asking for seconds!

Ingredients for Philly Cheesesteak Meatloaf

Creating this Philly Cheesesteak Meatloaf is all about gathering the right ingredients.

Here’s what you’ll need to whip up this delicious dish:

  • Ground beef: The star of the show, providing a rich and hearty base.
  • Onion: Adds sweetness and depth, enhancing the overall flavor.
  • Green bell pepper: Brings a fresh crunch and a pop of color.
  • Mushrooms: These earthy gems add moisture and umami to the mix.
  • Garlic powder: A must for that aromatic kick without the fuss of fresh garlic.
  • Salt and black pepper: Essential seasonings that elevate all the flavors.
  • Provolone cheese: The gooey, melty goodness that makes this meatloaf sing.
  • Breadcrumbs: These help bind everything together, ensuring a perfect texture.
  • Eggs: Another binding agent that adds moisture and richness.
  • Ketchup: A touch of sweetness and tang that complements the beef beautifully.
  • Worcestershire sauce: Adds a savory depth, reminiscent of classic cheesesteaks.
  • Dijon mustard: A hint of sharpness that balances the flavors.
  • Beef broth: Keeps the meatloaf moist and adds extra flavor during baking.

Feel free to get creative!

For a spicy kick, toss in some diced jalapeños or a splash of hot sauce.

If you’re looking for a lighter option, ground turkey or chicken can be substituted for the beef.

All ingredient quantities are listed at the bottom of the article for easy reference and printing.

How to Make Philly Cheesesteak Meatloaf

Creating this Philly Cheesesteak Meatloaf is a straightforward process that yields delicious results.

Let’s dive into the steps that will transform your kitchen into a flavor-packed haven!

Step 1: Preheat the Oven

Start by preheating your oven to 350°F.

This step is crucial because it ensures even cooking throughout the meatloaf.

A hot oven helps the meatloaf rise and develop that beautiful crust we all love.

Step 2: Prepare the Meat Mixture

In a large mixing bowl, combine the ground beef with the finely chopped onion, green bell pepper, and mushrooms.

Mixing these ingredients together creates a flavorful base.

The veggies not only add taste but also moisture, making your meatloaf tender and juicy.

Don’t be afraid to get your hands in there; it’s the best way to ensure everything is well combined!

Step 3: Add Binding Ingredients

Next, it’s time to add the binding ingredients.

Toss in the breadcrumbs, eggs, ketchup, Worcestershire sauce, and Dijon mustard.

These ingredients work together to hold the meatloaf together while adding flavor.

The breadcrumbs soak up moisture, while the eggs provide richness.

Mix until everything is evenly incorporated, but don’t overdo it; a gentle touch is key!

Step 4: Shape and Transfer

Now, transfer the meat mixture into a loaf pan.

Shape it into a loaf, making sure it’s compact but not too tight.

Pour the beef broth over the top; this will keep your meatloaf moist as it bakes.

The broth seeps in, enhancing the flavor and texture.

Step 5: Bake to Perfection

Place your meatloaf in the preheated oven and bake for about 1 hour.

After 45 minutes, sprinkle the shredded provolone cheese on top.

This step is where the magic happens!

The cheese melts into a gooey layer, giving you that classic cheesesteak flavor.

Keep an eye on it; you want a nice golden-brown finish.

Step 6: Rest and Serve

Once your meatloaf is done baking, let it rest for about 10 minutes before slicing.

This resting period is essential; it allows the juices to redistribute, ensuring each slice is moist and flavorful.

Serve warm, and watch as everyone digs in with delight!

Tips for Success

  • Use lean ground beef for a healthier option without sacrificing flavor.
  • Don’t skip the resting time; it makes a world of difference in juiciness.
  • Experiment with different cheeses like cheddar or mozzarella for a unique twist.
  • For added flavor, sauté the vegetables before mixing them in.
  • Make a double batch and freeze one for a quick meal later!

Equipment Needed

  • Loaf pan: A standard 9×5 inch pan works well; a baking dish can be a substitute.
  • Mixing bowl: Any large bowl will do; a stand mixer can save time.
  • Measuring cups and spoons: Essential for accuracy; a kitchen scale is a great alternative.
  • Spatula: For mixing; a wooden spoon or your hands can also work.

Variations

  • For a spicy kick, add diced jalapeños or a splash of hot sauce to the meat mixture.
  • Swap out ground beef for ground turkey or chicken for a lighter version.
  • Incorporate different vegetables like zucchini or spinach for added nutrition.
  • Try using different cheeses such as cheddar or pepper jack for a unique flavor profile.
  • For a gluten-free option, substitute breadcrumbs with crushed gluten-free crackers or oats.

Serving Suggestions

  • Pair your Philly Cheesesteak Meatloaf with roasted vegetables for a colorful plate.
  • A fresh garden salad adds a crisp contrast to the hearty meatloaf.
  • Serve with a side of creamy mashed potatoes for ultimate comfort.
  • Complement with a cold beer or a glass of red wine.
  • Garnish with fresh parsley for a pop of color and flavor.

FAQs about Philly Cheesesteak Meatloaf

Can I make Philly Cheesesteak Meatloaf ahead of time?

Absolutely! You can prepare the meat mixture a day in advance and store it in the fridge. Just shape it into a loaf and bake when you’re ready to enjoy a hearty meal.

What can I substitute for provolone cheese?

If provolone isn’t your favorite, feel free to swap it out for mozzarella or cheddar. Each cheese brings its own unique flavor, so choose what you love!

How do I store leftovers?

Leftover Philly Cheesesteak Meatloaf can be stored in an airtight container in the fridge for up to 3 days. Reheat in the oven or microwave for a quick meal.

Can I freeze Philly Cheesesteak Meatloaf?

Yes! This meatloaf freezes beautifully. Just wrap it tightly in plastic wrap and then foil. It can be frozen for up to 3 months. Thaw in the fridge before reheating.

What sides pair well with Philly Cheesesteak Meatloaf?

For a complete meal, serve it with roasted vegetables, a fresh salad, or creamy mashed potatoes. These sides complement the rich flavors of the meatloaf perfectly!

Final Thoughts

Cooking this Philly Cheesesteak Meatloaf is more than just preparing a meal; it’s about creating a moment.

The aroma wafting through your kitchen will draw everyone in, sparking conversations and laughter.

Each slice reveals layers of flavor, making it a dish that brings comfort and joy to the table.

Whether it’s a weeknight dinner or a special gathering, this meatloaf is sure to impress.

So roll up your sleeves, gather your loved ones, and enjoy the deliciousness that comes from sharing a hearty meal.

Trust me, this recipe will become a cherished favorite in your home!

jhessica

Philly Cheesesteak Meatloaf: A Hearty, Flavorful Twist!

A hearty and flavorful twist on traditional meatloaf, inspired by the classic Philly cheesesteak.
Prep Time 15 minutes
Cook Time 1 hour
Total Time 1 hour 15 minutes
Servings: 6 servings
Course: Main Dish
Cuisine: American
Calories: 350

Ingredients
  

  • 1 ½ pounds ground beef
  • 1 cup finely chopped onion
  • 1 cup finely chopped green bell pepper
  • 1 cup finely chopped mushrooms
  • 1 teaspoon garlic powder
  • 1 teaspoon salt
  • ½ teaspoon black pepper
  • 1 cup shredded provolone cheese
  • 1 cup breadcrumbs
  • 2 large eggs
  • ¼ cup ketchup
  • 2 tablespoons Worcestershire sauce
  • 1 tablespoon Dijon mustard
  • ½ cup beef broth

Method
 

  1. Preheat the oven to 350°F.
  2. In a large mixing bowl, combine ground beef, onion, bell pepper, mushrooms, garlic powder, salt, and black pepper. Mix until well combined.
  3. Add the breadcrumbs, eggs, ketchup, Worcestershire sauce, and Dijon mustard to the meat mixture. Mix until all ingredients are evenly incorporated.
  4. Transfer the meat mixture to a loaf pan and shape it into a loaf. Pour the beef broth over the top of the meatloaf.
  5. Bake in the preheated oven for 1 hour. After 45 minutes, sprinkle the shredded provolone cheese on top of the meatloaf and return to the oven for the remaining 15 minutes.
  6. Once cooked, let the meatloaf rest for 10 minutes before slicing. Serve warm.

Nutrition

Serving: 1sliceCalories: 350kcalCarbohydrates: 10gProtein: 30gFat: 20gSaturated Fat: 8gPolyunsaturated Fat: 10gCholesterol: 120mgSodium: 600mgFiber: 1gSugar: 4g

Notes

  • For a spicier version, add diced jalapeños or hot sauce to the meat mixture.
  • To make it a complete meal, serve with a side of roasted vegetables or a fresh salad.

Tried this recipe?

Let us know how it was!

Spicy Voodoo Shrimp: Discover This Flavorful Recipe!

Introduction to Spicy Voodoo Shrimp

Cooking has always been my way of connecting with family and friends. When I whip up a dish like Spicy Voodoo Shrimp, it’s not just about the food; it’s about the memories we create around the table. This recipe is a fantastic solution for those busy weeknights when you want something quick yet bursting with flavor. With a blend of spices and fresh ingredients, it’s sure to impress your loved ones. Plus, it’s a dish that brings a little Cajun magic into your kitchen, making every bite a delightful adventure.

Why You’ll Love This Spicy Voodoo Shrimp

This Spicy Voodoo Shrimp recipe is a game-changer for anyone looking to whip up a delicious meal in no time. With just 25 minutes from start to finish, it’s perfect for those hectic evenings. The combination of spices creates a flavor explosion that will have your taste buds dancing. Plus, it’s versatile enough to please everyone at the table, making it a go-to dish for any occasion.

Ingredients for Spicy Voodoo Shrimp

Gathering the right ingredients is the first step to creating a memorable dish. For this Spicy Voodoo Shrimp, you’ll need a mix of fresh and pantry staples that come together beautifully. Here’s what you’ll need:

  • Large shrimp: Peeled and deveined, these are the stars of the dish. Fresh or frozen works, just ensure they’re thawed if frozen.
  • Olive oil: A staple in my kitchen, it adds richness and helps sauté the veggies.
  • Unsalted butter: This adds a creamy depth to the sauce, balancing the spices perfectly.
  • Onion: Diced, it brings sweetness and a savory base to the dish.
  • Garlic: Minced, it infuses the dish with aromatic goodness that’s hard to resist.
  • Bell pepper: Any color will do! It adds crunch and a pop of color to the mix.
  • Smoked paprika: This spice gives a warm, smoky flavor that’s essential for that Cajun vibe.
  • Cayenne pepper: Adjust this to your heat preference; it’s what makes the dish spicy and exciting.
  • Dried thyme: A classic herb that adds an earthy note to the dish.
  • Oregano: This herb complements the other flavors, enhancing the overall taste.
  • Diced tomatoes: Fresh or canned, they provide a juicy base for the sauce.
  • Chicken broth: This adds depth and richness to the sauce, making it more flavorful.
  • Salt and pepper: Essential for seasoning, they help bring all the flavors together.
  • Green onions: Sliced, they make a fresh and colorful garnish.
  • Cooked rice or crusty bread: Perfect for serving, they soak up the delicious sauce.

For those looking to customize, consider adding a splash of lemon juice for brightness or fresh parsley for a pop of color. You can find the exact quantities for each ingredient at the bottom of the article, ready for printing!

How to Make Spicy Voodoo Shrimp

Now that you have all your ingredients ready, let’s dive into the cooking process. Making Spicy Voodoo Shrimp is straightforward and fun. Each step builds on the last, creating a dish that’s bursting with flavor. Follow along, and you’ll have a delicious meal in no time!

Step 1: Sauté the Vegetables

Start by heating the olive oil and butter in a large skillet over medium heat. Once the butter melts and starts to bubble, toss in the diced onion and bell pepper. Sauté these colorful veggies for about five minutes until they soften and become fragrant. This step lays the foundation for the rich flavors to come, so don’t rush it!

Step 2: Add Garlic and Spices

Next, stir in the minced garlic and let it cook for about a minute. You want that aromatic goodness to fill your kitchen! Then, sprinkle in the smoked paprika, cayenne pepper, dried thyme, and oregano. Toasting the spices for another minute enhances their flavors, making your Spicy Voodoo Shrimp even more irresistible. Trust me, your taste buds will thank you!

Step 3: Create the Sauce

Now it’s time to bring it all together. Pour in the diced tomatoes and chicken broth, stirring well to combine. Bring the mixture to a gentle simmer, allowing it to cook for about five minutes. This simmering time thickens the sauce and melds the flavors beautifully. The aroma will be heavenly, and you’ll be eager to move on to the next step!

Step 4: Cook the Shrimp

With the sauce ready, it’s time to add the star of the show: the shrimp! Gently stir them into the skillet, ensuring they’re well-coated in that flavorful sauce. Cook for about three to five minutes, or until the shrimp turn pink and opaque. Be careful not to overcook them; they should be tender and juicy, not rubbery!

Step 5: Garnish and Serve

Once the shrimp are cooked, remove the skillet from heat. Garnish your Spicy Voodoo Shrimp with sliced green onions for a fresh touch. Serve it over a bed of fluffy rice or alongside crusty bread to soak up that delicious sauce. Each bite is a burst of flavor, and I guarantee it will be a hit at your dinner table!

Tips for Success

  • Prep all your ingredients before starting to cook. It makes the process smoother and more enjoyable.
  • Don’t rush the sautéing step; it builds the flavor base for your Spicy Voodoo Shrimp.
  • Adjust the cayenne pepper to suit your heat preference; you can always add more later!
  • For extra flavor, consider marinating the shrimp in spices for 30 minutes before cooking.
  • Serve immediately for the best texture and taste; shrimp are best enjoyed fresh!

Equipment Needed

  • Large skillet: A non-stick skillet works wonders, but any large pan will do.
  • Spatula: A wooden or silicone spatula is perfect for stirring without scratching your pan.
  • Measuring spoons: Essential for accurate spice measurements.
  • Knife and cutting board: For chopping veggies and prepping ingredients.

Variations of Spicy Voodoo Shrimp

  • Vegetarian Option: Swap shrimp for firm tofu or chickpeas for a plant-based twist. Just sauté them until golden before adding to the sauce.
  • Seafood Medley: Mix in other seafood like scallops or crab for a delightful seafood extravaganza.
  • Extra Veggies: Add zucchini, spinach, or mushrooms to boost the nutritional value and add more texture.
  • Spicy Voodoo Pasta: Toss the shrimp and sauce with cooked pasta for a hearty, comforting meal.
  • Low-Carb Version: Serve over cauliflower rice instead of regular rice for a low-carb alternative.

Serving Suggestions for Spicy Voodoo Shrimp

  • Rice: Serve over fluffy white or brown rice to soak up the flavorful sauce.
  • Crusty Bread: A side of crusty bread is perfect for dipping and enjoying every last drop.
  • Salad: Pair with a light green salad for a refreshing contrast.
  • Drink: Enjoy with a cold beer or a zesty lemonade to balance the spice.

FAQs about Spicy Voodoo Shrimp

Can I use frozen shrimp for this recipe?

Absolutely! Just make sure to thaw the shrimp completely before cooking. Frozen shrimp can be a convenient option, and they’ll taste just as delicious in your Spicy Voodoo Shrimp.

How can I adjust the spice level?

If you prefer a milder dish, simply reduce the amount of cayenne pepper or omit it altogether. You can always add a little heat later if you want to spice things up!

What can I serve with Spicy Voodoo Shrimp?

This dish pairs wonderfully with fluffy rice or crusty bread to soak up the sauce. A light salad or some steamed veggies can also complement the meal nicely.

Can I make this dish ahead of time?

While it’s best enjoyed fresh, you can prepare the sauce ahead of time and store it in the fridge. Just add the shrimp when you’re ready to serve for the best texture.

Is Spicy Voodoo Shrimp healthy?

Yes! This dish is low in calories and packed with protein, making it a nutritious option. Plus, the fresh ingredients and spices add plenty of flavor without extra calories.

Final Thoughts

Cooking Spicy Voodoo Shrimp is more than just preparing a meal; it’s about creating an experience that brings people together. The vibrant colors, enticing aromas, and bold flavors make every bite a celebration. Whether you’re sharing it with family on a busy weeknight or impressing friends at a gathering, this dish never fails to deliver joy. Plus, the ease of preparation means you can focus on what truly matters—enjoying the moment. So, roll up your sleeves, embrace the spice, and let this recipe add a little magic to your kitchen adventures!

jhessica

Spicy Voodoo Shrimp: Discover This Flavorful Recipe!

A flavorful and spicy shrimp dish that combines a variety of spices and fresh ingredients for a delicious meal.
Prep Time 10 minutes
Cook Time 15 minutes
Total Time 25 minutes
Servings: 4 servings
Course: Main Course
Cuisine: Cajun
Calories: 320

Ingredients
  

  • 1 pound large shrimp peeled and deveined
  • 2 tablespoons olive oil
  • 1 tablespoon unsalted butter
  • 1 medium onion diced
  • 3 cloves garlic minced
  • 1 bell pepper diced (any color)
  • 1 teaspoon smoked paprika
  • 1 teaspoon cayenne pepper adjust to taste
  • 1 teaspoon dried thyme
  • 1 teaspoon oregano
  • 1 cup diced tomatoes canned or fresh
  • 1 cup chicken broth
  • Salt and pepper to taste
  • 2 green onions sliced (for garnish)
  • Cooked rice or crusty bread for serving

Method
 

  1. In a large skillet, heat the olive oil and butter over medium heat. Add the diced onion and bell pepper, and sauté for about 5 minutes until softened.
  2. Stir in the minced garlic and cook for an additional minute until fragrant.
  3. Add the smoked paprika, cayenne pepper, thyme, and oregano, stirring to combine. Cook for another minute to toast the spices.
  4. Pour in the diced tomatoes and chicken broth, then bring the mixture to a simmer. Let it cook for about 5 minutes to thicken slightly.
  5. Add the shrimp to the skillet, stirring gently to coat them in the sauce. Cook for about 3-5 minutes, or until the shrimp are pink and cooked through. Season with salt and pepper to taste.
  6. Remove from heat and garnish with sliced green onions. Serve over cooked rice or with crusty bread to soak up the sauce.

Nutrition

Serving: 1servingCalories: 320kcalCarbohydrates: 8gProtein: 28gFat: 18gSaturated Fat: 5gPolyunsaturated Fat: 13gCholesterol: 200mgSodium: 600mgFiber: 1gSugar: 3g

Notes

  • For a milder version, reduce the cayenne pepper or omit it altogether.
  • Add a splash of lemon juice or a handful of fresh parsley before serving for a bright flavor boost.

Tried this recipe?

Let us know how it was!

Rhubarb Butter: Discover This Delicious Spread Today!

Introduction to Rhubarb Butter

Rhubarb butter is one of those delightful surprises that can transform your breakfast or dessert into something truly special. I remember the first time I tasted it; the tangy sweetness danced on my tongue, and I was hooked. This creamy spread is not just a quick solution for busy mornings; it’s also a way to impress your loved ones with minimal effort. Whether you slather it on toast, pancakes, or even ice cream, rhubarb butter brings a burst of flavor that’s hard to resist. Let’s dive into this simple yet delicious recipe that will elevate your culinary game!

Why You’ll Love This Rhubarb Butter

This rhubarb butter is a game-changer in the kitchen. It’s incredibly easy to whip up, taking just 25 minutes from start to finish. The vibrant flavor is a delightful mix of sweet and tangy, making it perfect for any meal. Plus, it’s versatile! Use it on toast, pancakes, or even as a topping for desserts. You’ll find yourself reaching for it again and again, and your taste buds will thank you!

Ingredients for Rhubarb Butter

Gathering the right ingredients is the first step to creating this delightful rhubarb butter. Here’s what you’ll need:

  • Rhubarb: Fresh, vibrant rhubarb is the star of this spread. Look for firm stalks with a bright color for the best flavor.
  • Granulated Sugar: This sweetener balances the tartness of the rhubarb, creating a harmonious flavor. You can adjust the amount based on your sweetness preference.
  • Unsalted Butter: Softened butter adds creaminess and richness. Using unsalted allows you to control the saltiness of the final product.
  • Vanilla Extract: A splash of vanilla enhances the overall flavor, adding warmth and depth to the butter.
  • Ground Cinnamon: This spice brings a cozy, aromatic touch. It pairs beautifully with the tangy rhubarb.
  • Salt: Just a pinch helps to elevate the flavors, balancing the sweetness and tartness.

For those looking to experiment, consider adding a pinch of ground ginger or nutmeg for a spicier kick. You can find all the exact measurements at the bottom of the article, ready for printing. Happy cooking!

How to Make Rhubarb Butter

Creating rhubarb butter is a straightforward process that anyone can master. Follow these simple steps, and you’ll have a delicious spread ready in no time!

Step 1: Cook the Rhubarb and Sugar

Start by combining the chopped rhubarb and granulated sugar in a medium saucepan. Place it over medium heat. Stir occasionally as the mixture heats up. You’ll notice the rhubarb breaking down and releasing its juices. This should take about 10-15 minutes. The goal is to achieve a syrupy consistency. Keep an eye on it; you don’t want it to burn!

Step 2: Cool the Mixture

Once the rhubarb has cooked down, remove the saucepan from the heat. Let the mixture cool slightly. This step is crucial because adding hot ingredients to butter can cause it to melt too much. A little patience here will pay off in the final texture of your rhubarb butter.

Step 3: Prepare the Butter Mixture

While the rhubarb mixture cools, grab a mixing bowl. Add the softened unsalted butter, vanilla extract, ground cinnamon, and salt. Using an electric mixer, beat the ingredients together until creamy. This should take about 2-3 minutes. The mixture should be light and fluffy, creating a perfect base for your rhubarb.

Step 4: Combine the Mixtures

Now it’s time to bring it all together! Gradually add the cooled rhubarb mixture to the butter mixture. Keep mixing until everything is well combined and smooth. You want a beautiful, creamy spread that’s bursting with flavor. Don’t rush this step; the blending is where the magic happens!

Step 5: Refrigerate and Serve

Transfer your rhubarb butter to a jar or an airtight container. Pop it in the refrigerator for at least one hour. This chilling time allows the flavors to meld beautifully. Once it’s ready, slather it on toast, pancakes, or even use it as a topping for desserts. Enjoy the burst of flavor with every bite!

Tips for Success

  • Use fresh rhubarb for the best flavor; avoid wilted or discolored stalks.
  • Adjust the sugar to your taste; if you prefer a tangier spread, reduce the sugar slightly.
  • Let the rhubarb mixture cool completely before mixing with butter for a smoother texture.
  • Experiment with spices like ginger or nutmeg for a unique twist.
  • Store in an airtight container to keep it fresh longer.

Equipment Needed

  • Medium saucepan: A regular pot works too, just ensure it’s not too small.
  • Mixing bowl: Any bowl will do, but a large one makes mixing easier.
  • Electric mixer: A hand mixer is perfect; a whisk can work if you’re up for a workout!
  • Jar or airtight container: Use any container to store your rhubarb butter.

Variations of Rhubarb Butter

  • Spicy Rhubarb Butter: Add a pinch of ground ginger or nutmeg for a warm, spicy kick that complements the tangy rhubarb.
  • Maple Rhubarb Butter: Substitute half of the granulated sugar with maple syrup for a rich, earthy sweetness.
  • Berry Blend: Mix in some mashed strawberries or raspberries for a fruity twist that adds color and flavor.
  • Vegan Option: Replace the unsalted butter with coconut oil or a plant-based butter alternative for a dairy-free version.
  • Herbed Rhubarb Butter: Incorporate fresh herbs like mint or basil for a refreshing, unexpected flavor profile.

Serving Suggestions for Rhubarb Butter

  • Spread it on warm, toasted bagels for a delightful breakfast treat.
  • Pair with pancakes or waffles for a sweet twist on brunch.
  • Top vanilla ice cream or yogurt for a refreshing dessert.
  • Serve alongside a cheese platter for a unique flavor contrast.
  • Use as a filling in pastries or croissants for an elegant touch.

FAQs about Rhubarb Butter

Can I use frozen rhubarb for this recipe?

Absolutely! Frozen rhubarb works just as well as fresh. Just make sure to thaw it and drain any excess liquid before cooking. This will help achieve that perfect syrupy consistency.

How long does rhubarb butter last in the fridge?

When stored in an airtight container, rhubarb butter can last up to two weeks in the refrigerator. Just make sure to keep it sealed to maintain its freshness!

Can I freeze rhubarb butter?

Yes, you can freeze rhubarb butter! Just transfer it to a freezer-safe container, leaving some space for expansion. It can last up to three months in the freezer. Thaw it in the fridge before using.

What can I use rhubarb butter on besides toast?

Rhubarb butter is incredibly versatile! Try it on pancakes, waffles, or even as a topping for yogurt and ice cream. It also makes a fantastic filling for pastries or a unique addition to a cheese platter.

Is rhubarb butter suitable for vegans?

Not in its original form, but you can easily make a vegan version by substituting the unsalted butter with coconut oil or a plant-based butter alternative. Enjoy the same delicious flavor without the dairy!

Final Thoughts

Creating rhubarb butter is more than just a cooking task; it’s an experience that brings joy to your kitchen. The vibrant colors and delightful aromas fill the air, making the process feel special. Each bite of this creamy spread is a reminder of the simple pleasures in life. Whether you’re enjoying it on a lazy Sunday morning or sharing it with friends at a gathering, rhubarb butter adds a touch of warmth and nostalgia. So, roll up your sleeves and dive into this recipe. Your taste buds will thank you, and your loved ones will be impressed!

jhessica

Rhubarb Butter: Discover This Delicious Spread Today!

A delicious and creamy spread made from fresh rhubarb, perfect for toast, pancakes, or desserts.
Prep Time 10 minutes
Cook Time 15 minutes
Total Time 25 minutes
Servings: 8 servings
Course: Spread
Cuisine: American
Calories: 120

Ingredients
  

  • 2 cups rhubarb chopped
  • 1 cup granulated sugar
  • 1/2 cup unsalted butter softened
  • 1 teaspoon vanilla extract
  • 1/4 teaspoon ground cinnamon
  • 1/4 teaspoon salt

Method
 

  1. In a medium saucepan, combine the chopped rhubarb and sugar. Cook over medium heat, stirring occasionally, until the rhubarb breaks down and the mixture becomes syrupy, about 10-15 minutes.
  2. Remove the saucepan from heat and let the mixture cool slightly.
  3. In a mixing bowl, combine the softened butter, vanilla extract, ground cinnamon, and salt. Beat with an electric mixer until creamy.
  4. Gradually add the rhubarb mixture to the butter mixture, beating until well combined and smooth.
  5. Transfer the rhubarb butter to a jar or airtight container and refrigerate for at least 1 hour to allow the flavors to meld.

Nutrition

Serving: 1tablespoonCalories: 120kcalCarbohydrates: 10gProtein: 1gFat: 8gSaturated Fat: 5gPolyunsaturated Fat: 3gCholesterol: 30mgSodium: 50mgSugar: 10g

Notes

  • For a spicier flavor, add a pinch of ground ginger or nutmeg to the mixture.
  • This rhubarb butter can be used as a spread on toast, pancakes, or muffins, or as a topping for ice cream or yogurt.

Tried this recipe?

Let us know how it was!

Stay Connected

Get recipes via email: