Get my cookbooks

Baked Oatmeal with Berries: Try This Easy Recipe!

Introduction to Baked Oatmeal with Berries

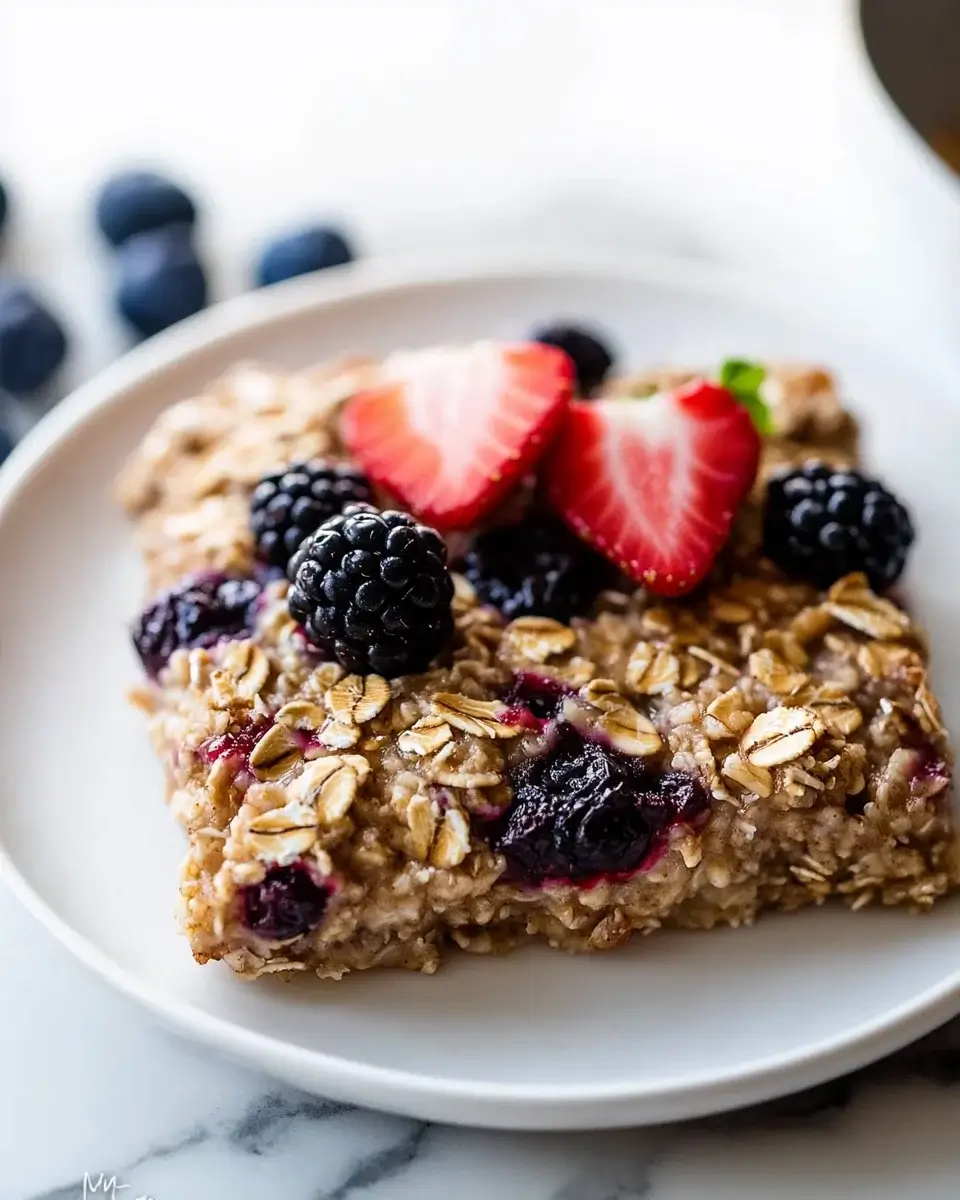
There’s something comforting about waking up to the smell of baked oatmeal with berries wafting through the house.

This dish is not just a breakfast; it’s a warm hug on a chilly morning.

Whether you’re rushing out the door or enjoying a leisurely weekend brunch, this recipe is your go-to solution.

It’s simple, delicious, and packed with nutrients, making it perfect for busy days or when you want to impress your loved ones.

Trust me, once you try it, you’ll wonder how you ever lived without this delightful treat in your life.

Why You’ll Love This Baked Oatmeal with Berries

This baked oatmeal with berries is a game-changer for breakfast lovers.

It’s incredibly easy to whip up, taking just 10 minutes of prep time.

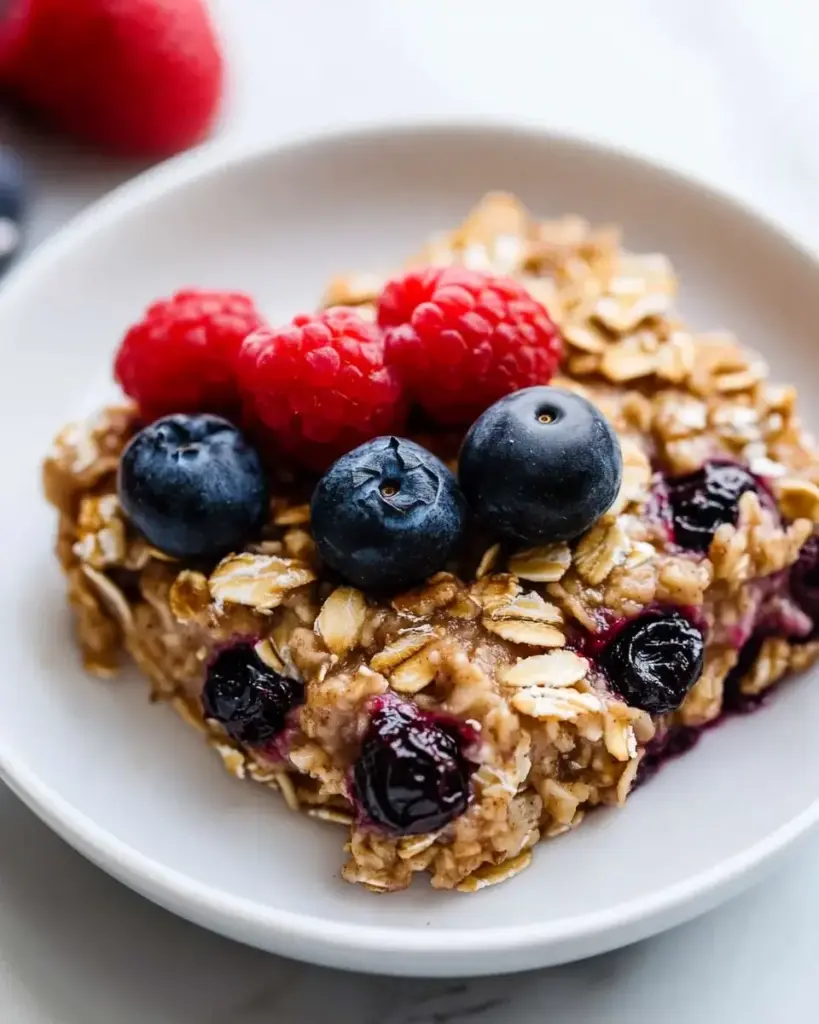
The combination of sweet berries and hearty oats creates a flavor explosion that will make your taste buds dance.

Plus, it’s versatile! You can customize it with your favorite fruits or nuts.

Healthy, satisfying, and downright delicious—what’s not to love?

Ingredients for Baked Oatmeal with Berries

Gathering the right ingredients is the first step to creating your baked oatmeal masterpiece.

Here’s what you’ll need:

  • Rolled oats: The star of the show! They provide a hearty base and a chewy texture.
  • Baking powder: This little leavening agent helps the oatmeal rise, giving it a fluffy consistency.
  • Cinnamon: A warm spice that adds depth and a hint of sweetness to the dish.
  • Salt: Just a pinch enhances all the flavors, balancing the sweetness of the berries.
  • Milk: Whether you choose dairy or a non-dairy alternative, it adds creaminess and moisture.
  • Maple syrup or honey: A natural sweetener that brings a delightful flavor to the mix.
  • Eggs: They bind everything together and contribute to the oatmeal’s rich texture.
  • Vanilla extract: A splash of this adds a lovely aroma and enhances the overall taste.
  • Mixed berries: Fresh or frozen, they provide bursts of flavor and vibrant color. Feel free to mix it up with your favorites!
  • Chopped nuts (optional): For a crunchy texture, add walnuts or almonds. They also boost the nutritional value.

For exact measurements, check the bottom of the article where you can find everything listed for easy printing.

With these ingredients, you’re well on your way to a delicious breakfast that’s sure to impress!

How to Make Baked Oatmeal with Berries

Making baked oatmeal with berries is a breeze!

Follow these simple steps, and you’ll have a delicious breakfast ready in no time.

Let’s dive in!

Step 1: Preheat the Oven

First things first, preheat your oven to 350°F (175°C).

While it warms up, lightly grease an 8×8-inch baking dish.

This ensures your baked oatmeal doesn’t stick, making cleanup a snap!

Step 2: Combine Dry Ingredients

In a large bowl, combine the rolled oats, baking powder, cinnamon, and salt.

Mix well until everything is evenly distributed.

This step is crucial for a balanced flavor in your baked oatmeal with berries.

Step 3: Mix Wet Ingredients

In another bowl, whisk together the milk, maple syrup (or honey), eggs, and vanilla extract.

Make sure everything is fully combined.

This mixture adds moisture and sweetness, making your oatmeal rich and satisfying.

Step 4: Combine Wet and Dry Ingredients

Now, pour the wet ingredients into the dry ingredients.

Stir gently until just combined.

Don’t overmix; a few lumps are perfectly fine!

Step 5: Add Berries and Nuts

Gently fold in the mixed berries and chopped nuts if you’re using them.

This is where the magic happens!

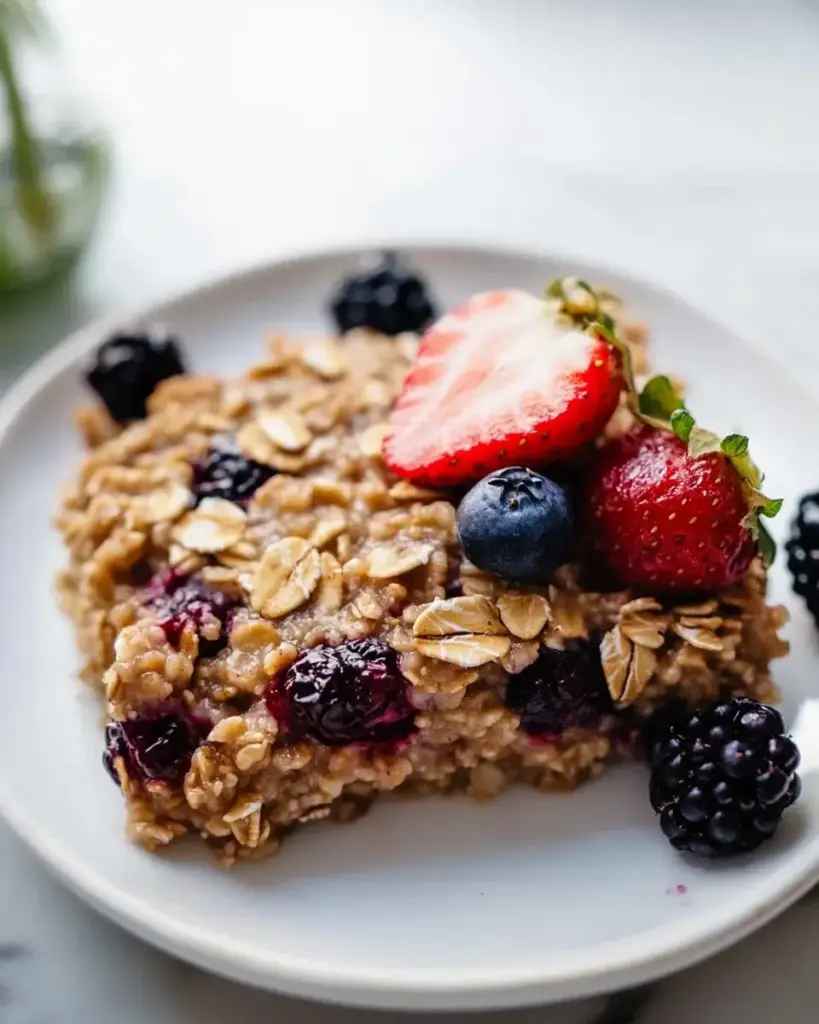
The berries will burst during baking, creating pockets of sweetness throughout.

Step 6: Bake the Mixture

Pour the mixture into your prepared baking dish and spread it evenly.

Bake for 25-30 minutes, or until the top is golden brown and the oatmeal is set.

Your kitchen will smell heavenly during this time!

Step 7: Cool and Serve

Once baked, allow it to cool for a few minutes.

Then, slice into squares and serve warm.

Enjoy your delicious baked oatmeal with berries, and watch it disappear!

Tips for Success

  • For a creamier texture, add an extra splash of milk before baking.
  • Let the baked oatmeal cool slightly before slicing; it holds together better.
  • Experiment with different berries or fruits to find your favorite combination.
  • Store leftovers in an airtight container in the fridge for up to five days.
  • Reheat individual portions in the microwave for a quick breakfast on busy mornings.

Equipment Needed

  • 8×8-inch baking dish: A standard size for this recipe; a similar-sized casserole dish works too.
  • Mixing bowls: Use two bowls—one for dry ingredients and one for wet.
  • Whisk: Perfect for mixing wet ingredients; a fork can work in a pinch.
  • Spatula: Great for folding in berries and nuts; a wooden spoon is a good alternative.

Variations of Baked Oatmeal with Berries

  • Nut Butter Swirl: Add a dollop of almond or peanut butter to the mixture before baking for a rich, nutty flavor.
  • Chocolate Chip Delight: Toss in some dark chocolate chips along with the berries for a decadent twist.
  • Banana Oatmeal: Substitute half of the berries with sliced bananas for a naturally sweet and creamy texture.
  • Vegan Option: Replace eggs with flaxseed meal mixed with water and use plant-based milk for a vegan-friendly version.
  • Spiced Pumpkin: Add pumpkin puree and a pinch of nutmeg for a fall-inspired baked oatmeal.

Serving Suggestions for Baked Oatmeal with Berries

  • Pair your baked oatmeal with a dollop of Greek yogurt for added creaminess and protein.
  • Serve alongside fresh fruit for a colorful and nutritious breakfast plate.
  • A hot cup of coffee or tea complements the flavors beautifully.
  • Drizzle with extra maple syrup for a touch of sweetness.

FAQs about Baked Oatmeal with Berries

Can I use frozen berries in this recipe?

Absolutely! Frozen berries work just as well as fresh ones. They’ll add a burst of flavor and color to your baked oatmeal with berries. Just fold them in while still frozen to prevent them from getting mushy.

How do I store leftovers?

Store any leftover baked oatmeal in an airtight container in the fridge for up to five days. You can reheat individual portions in the microwave for a quick breakfast on busy mornings.

Can I make this recipe ahead of time?

Yes! You can prepare the mixture the night before and store it in the fridge. Just pour it into the baking dish and bake it in the morning for a fresh, warm breakfast.

Is this baked oatmeal suitable for meal prep?

Definitely! This baked oatmeal with berries is perfect for meal prep. You can cut it into squares and grab a piece for breakfast throughout the week. It’s nutritious, filling, and easy to take on the go.

What can I substitute for eggs in this recipe?

If you’re looking for an egg substitute, try using flaxseed meal mixed with water. Combine 1 tablespoon of flaxseed meal with 2.5 tablespoons of water for each egg. This will help bind the ingredients just like eggs do!

Final Thoughts

Baked oatmeal with berries is more than just a breakfast; it’s a delightful experience that brings warmth and comfort to your mornings.

Each bite is a perfect blend of chewy oats and sweet, juicy berries, making it a dish that everyone will love.

Whether you’re enjoying it solo or sharing it with family, this recipe creates moments of joy and satisfaction.

Plus, it’s so easy to make that you’ll find yourself whipping it up again and again.

So, grab your ingredients and let this baked oatmeal become a cherished part of your breakfast routine!

jhessica

Baked Oatmeal with Berries: Try This Easy Recipe!

A delicious and easy recipe for baked oatmeal with berries, perfect for breakfast or a snack.
Prep Time 10 minutes
Cook Time 30 minutes
Total Time 40 minutes
Servings: 6 servings
Course: Breakfast
Cuisine: American
Calories: 180

Ingredients
  

  • 2 cups rolled oats
  • 1 teaspoon baking powder
  • 1 teaspoon cinnamon
  • 1/2 teaspoon salt
  • 2 cups milk dairy or non-dairy
  • 1/4 cup maple syrup or honey
  • 2 large eggs
  • 1 teaspoon vanilla extract
  • 1 cup mixed berries fresh or frozen
  • 1/4 cup chopped nuts optional

Method
 

  1. Preheat your oven to 350°F (175°C) and lightly grease an 8×8-inch baking dish.
  2. In a large bowl, combine the rolled oats, baking powder, cinnamon, and salt. Mix well.
  3. In another bowl, whisk together the milk, maple syrup (or honey), eggs, and vanilla extract until fully combined.
  4. Pour the wet ingredients into the dry ingredients and stir until just combined.
  5. Gently fold in the mixed berries and chopped nuts if using.
  6. Pour the mixture into the prepared baking dish and spread it evenly.
  7. Bake for 25-30 minutes, or until the top is golden brown and the oatmeal is set.
  8. Allow to cool for a few minutes before slicing into squares and serving.

Nutrition

Serving: 1squareCalories: 180kcalCarbohydrates: 28gProtein: 6gFat: 5gSaturated Fat: 1gPolyunsaturated Fat: 4gCholesterol: 70mgSodium: 200mgFiber: 3gSugar: 8g

Notes

  • For a creamier texture, try adding an extra splash of milk before baking.
  • You can also substitute the berries with sliced bananas or apples for a different flavor.
  • For a touch of sweetness, sprinkle some brown sugar on top before baking.

Tried this recipe?

Let us know how it was!

Mediterranean Chicken Pasta Salad: A Quick, Tasty Dish!

Introduction to Mediterranean Chicken Pasta Salad

There’s something about a vibrant Mediterranean Chicken Pasta Salad that just feels like a warm hug on a busy day. This dish is not only a feast for the eyes but also a quick solution for those evenings when time is tight, yet you want to impress your loved ones. With its colorful mix of fresh veggies, tender chicken, and zesty dressing, it’s a delightful way to bring a taste of the Mediterranean to your table. Plus, it’s perfect for meal prep, making it a go-to recipe for any home cook looking to simplify their weeknight dinners.

Why You’ll Love This Mediterranean Chicken Pasta Salad

This Mediterranean Chicken Pasta Salad is a game-changer for busy weeknights. It’s quick to whip up, taking just 25 minutes from start to finish. The combination of flavors is simply irresistible, with juicy chicken, crisp veggies, and tangy feta dancing together in every bite. Plus, it’s versatile enough to serve as a main dish or a side, making it a perfect fit for any occasion. You’ll find yourself reaching for this recipe time and again!

Ingredients for Mediterranean Chicken Pasta Salad

Gathering the right ingredients is key to making a delicious Mediterranean Chicken Pasta Salad. Here’s what you’ll need:

  • Rotini pasta: This spiral-shaped pasta holds onto the dressing and flavors beautifully.
  • Cooked chicken breast: Diced for easy mixing, it adds protein and heartiness to the salad.
  • Cherry tomatoes: Halved for sweetness and color, they bring a burst of freshness.
  • Cucumber: Diced for crunch, it adds a refreshing element to the dish.
  • Red onion: Finely chopped, it provides a sharp bite that balances the flavors.
  • Kalamata olives: Pitted and sliced, they introduce a briny richness that’s quintessentially Mediterranean.
  • Feta cheese: Crumbled for creaminess, it adds a tangy flavor that ties everything together.
  • Fresh parsley: Chopped for a pop of color and a hint of earthiness.
  • Olive oil: A staple in Mediterranean cooking, it serves as the base for the dressing.
  • Red wine vinegar: Adds acidity and brightness to the salad.
  • Dried oregano: A classic herb that enhances the Mediterranean flavor profile.
  • Garlic powder: For a subtle garlic flavor without the fuss of fresh garlic.
  • Salt and pepper: Essential for seasoning, they elevate all the flavors.

For those looking to mix things up, consider substituting the chicken with chickpeas or grilled vegetables for a vegetarian option. A squeeze of fresh lemon juice can also brighten the dish even more. Exact quantities for each ingredient are available at the bottom of the article for easy printing!

How to Make Mediterranean Chicken Pasta Salad

Creating a Mediterranean Chicken Pasta Salad is as easy as pie, or should I say, as easy as pasta? Follow these simple steps, and you’ll have a delicious dish ready in no time. Let’s dive in!

Step 1: Cook the Pasta

Start by boiling a pot of salted water. Once it’s bubbling, add the rotini pasta. Cook it according to the package instructions until it’s al dente. This usually takes about 8-10 minutes. Remember, you want it firm enough to hold up in the salad. After cooking, drain the pasta and rinse it under cold water. This stops the cooking process and cools it down quickly.

Step 2: Combine the Ingredients

In a large mixing bowl, combine the cooled pasta with the diced chicken, cherry tomatoes, cucumber, red onion, Kalamata olives, feta cheese, and parsley. This colorful mix is not just a feast for the eyes; it’s packed with flavor and nutrition. Make sure to toss everything gently to avoid breaking the pasta or feta.

Step 3: Prepare the Dressing

In a small bowl, whisk together the olive oil, red wine vinegar, dried oregano, garlic powder, salt, and pepper. This dressing is the magic that brings all the ingredients together. Taste it and adjust the seasoning if needed. A little extra salt or a splash more vinegar can make a big difference!

Step 4: Toss the Salad

Pour the dressing over the pasta salad. Now, it’s time to toss everything together! Use a spatula or large spoon to mix gently, ensuring every piece is coated in that delicious dressing. This is where the flavors start to meld, creating that irresistible Mediterranean taste.

Step 5: Chill and Serve

Cover the salad and pop it in the fridge for at least 30 minutes. This chilling time allows the flavors to develop and intensify. When you’re ready to serve, you can enjoy it chilled or at room temperature. Either way, it’s a refreshing dish that’s sure to impress!

Tips for Success

  • Always rinse the pasta under cold water to stop cooking and prevent sticking.
  • Use fresh ingredients for the best flavor; they make a noticeable difference.
  • Let the salad chill for at least 30 minutes to enhance the flavors.
  • Adjust the dressing to your taste; a little more vinegar can brighten it up.
  • Feel free to add your favorite veggies for a personal touch!

Equipment Needed

  • Large pot: For boiling pasta; a deep skillet works too.
  • Colander: To drain the pasta; a slotted spoon can be a quick alternative.
  • Mixing bowl: A large bowl for combining ingredients; any big bowl will do.
  • Whisk: For mixing the dressing; a fork can work in a pinch.
  • Spatula or large spoon: For tossing the salad; use tongs for easy mixing.

Variations

  • Vegetarian Delight: Swap the chicken for chickpeas or grilled vegetables for a hearty vegetarian option.
  • Pasta Swap: Try using quinoa or farro instead of rotini for a different texture and added nutrition.
  • Herb Infusion: Experiment with fresh herbs like basil or mint for a unique flavor twist.
  • Spicy Kick: Add sliced jalapeños or a sprinkle of red pepper flakes for some heat.
  • Cheese Variety: Substitute feta with goat cheese or mozzarella for a creamier texture.

Serving Suggestions

  • Pair with a crisp white wine: A chilled Sauvignon Blanc complements the salad beautifully.
  • Serve with crusty bread: A side of warm, crusty baguette is perfect for soaking up the dressing.
  • Garnish with extra parsley: A sprinkle of fresh parsley adds a vibrant touch.
  • Enjoy with grilled meats: This salad makes a great side for grilled chicken or fish.

FAQs about Mediterranean Chicken Pasta Salad

Can I make Mediterranean Chicken Pasta Salad ahead of time?

Absolutely! This salad is perfect for meal prep. You can make it a day in advance and store it in the fridge. The flavors will meld beautifully, making it even tastier the next day.

Is this Mediterranean Chicken Pasta Salad gluten-free?

Yes, if you use gluten-free rotini pasta, this salad can easily fit into a gluten-free diet. Just check the packaging to ensure it meets your dietary needs.

What can I substitute for chicken in this recipe?

If you’re looking for a vegetarian option, chickpeas or grilled vegetables work wonderfully. They add protein and texture while keeping the Mediterranean vibe intact.

How long can I store leftovers?

Leftovers can be stored in an airtight container in the fridge for up to three days. Just give it a good stir before serving again!

Can I add more vegetables to the salad?

Definitely! Feel free to toss in your favorite veggies like bell peppers, artichokes, or spinach. The more, the merrier when it comes to flavor and nutrition!

Final Thoughts

Creating a Mediterranean Chicken Pasta Salad is more than just a cooking task; it’s an experience that brings joy to your kitchen. The vibrant colors and fresh ingredients create a dish that not only tastes amazing but also looks stunning on the table. Whether you’re serving it at a family gathering or enjoying it solo, each bite transports you to sun-soaked shores and bustling markets. Plus, the ease of preparation means you can spend less time cooking and more time savoring the moments that matter. This salad is a celebration of flavor, simplicity, and the joy of sharing good food.

jhessica

Mediterranean Chicken Pasta Salad: A Quick, Tasty Dish!

A refreshing Mediterranean Chicken Pasta Salad that combines rotini pasta, diced chicken, and fresh vegetables, all tossed in a flavorful dressing.
Prep Time 15 minutes
Cook Time 10 minutes
Total Time 25 minutes
Servings: 6 servings
Course: Salad
Cuisine: Mediterranean
Calories: 350

Ingredients
  

  • 8 ounces rotini pasta
  • 1 pound cooked chicken breast diced
  • 1 cup cherry tomatoes halved
  • 1 cup cucumber diced
  • 1/2 cup red onion finely chopped
  • 1/2 cup Kalamata olives pitted and sliced
  • 1/2 cup feta cheese crumbled
  • 1/4 cup fresh parsley chopped
  • 1/4 cup olive oil
  • 2 tablespoons red wine vinegar
  • 1 teaspoon dried oregano
  • 1 teaspoon garlic powder
  • Salt and pepper to taste

Method
 

  1. Cook the rotini pasta according to package instructions until al dente. Drain and rinse under cold water to cool.
  2. In a large bowl, combine the cooked pasta, diced chicken, cherry tomatoes, cucumber, red onion, olives, feta cheese, and parsley.
  3. In a small bowl, whisk together the olive oil, red wine vinegar, oregano, garlic powder, salt, and pepper.
  4. Pour the dressing over the pasta salad and toss gently to combine all ingredients evenly.
  5. Cover the salad and refrigerate for at least 30 minutes to allow the flavors to meld.
  6. Serve chilled or at room temperature.

Nutrition

Serving: 1servingCalories: 350kcalCarbohydrates: 30gProtein: 25gFat: 18gSaturated Fat: 4gPolyunsaturated Fat: 14gCholesterol: 70mgSodium: 600mgFiber: 3gSugar: 3g

Notes

  • For a vegetarian option, substitute the chicken with chickpeas or grilled vegetables.
  • Add a squeeze of fresh lemon juice for extra brightness and flavor.

Tried this recipe?

Let us know how it was!

Cinnamon Roll French Toast Roll-Ups: A Sweet Delight!

Introduction to Cinnamon Roll French Toast Roll-Ups

There’s something magical about breakfast that brings back memories of lazy Sunday mornings. The aroma of cinnamon wafting through the air, mingling with the sound of sizzling butter, is enough to make anyone’s mouth water. That’s where these Cinnamon Roll French Toast Roll-Ups come in. They’re not just a treat; they’re a delightful way to kickstart your day. Perfect for busy mornings or a special brunch, these roll-ups combine the best of both worlds—cinnamon rolls and French toast. Trust me, your loved ones will be begging for seconds!

Why You’ll Love This Cinnamon Roll French Toast Roll-Ups

These Cinnamon Roll French Toast Roll-Ups are a game changer for breakfast lovers. They’re quick to whip up, taking just 30 minutes from start to finish. The combination of warm, gooey cinnamon sugar and fluffy bread is simply irresistible. Plus, they’re fun to make! Whether you’re cooking for family or just treating yourself, these roll-ups are sure to bring smiles and satisfaction to the breakfast table.

Ingredients for Cinnamon Roll French Toast Roll-Ups

Gathering the right ingredients is the first step to creating these delightful Cinnamon Roll French Toast Roll-Ups. Here’s what you’ll need:

  • Granulated sugar: This sweetener is essential for that classic cinnamon roll flavor.
  • Ground cinnamon: The star of the show! It adds warmth and spice to each bite.
  • Large eggs: They provide structure and richness, making the roll-ups fluffy.
  • Milk: Use whole or your favorite alternative to keep the mixture creamy.
  • Vanilla extract: A splash of this adds a lovely depth of flavor.
  • Slices of bread: White or whole wheat works well; just make sure it’s fresh for easy rolling.
  • Butter: For cooking, it gives a golden, crispy exterior that’s hard to resist.
  • Powdered sugar: Dust it on top for a sweet finish that looks as good as it tastes.
  • Maple syrup: Optional, but a drizzle of this liquid gold takes it to the next level!

For those looking to mix things up, consider adding a thin layer of cream cheese before the cinnamon sugar for a rich filling. You can also sneak in some fresh fruit like sliced bananas or strawberries for a fruity twist. The exact quantities for each ingredient are listed at the bottom of the article, ready for printing!

How to Make Cinnamon Roll French Toast Roll-Ups

Now that you have all your ingredients ready, it’s time to dive into the fun part—making these Cinnamon Roll French Toast Roll-Ups. Follow these simple steps, and you’ll have a breakfast that’s not only delicious but also a joy to prepare.

Step 1: Prepare the Cinnamon Sugar Mixture

Start by mixing the granulated sugar and ground cinnamon in a small bowl. This sweet blend will be the magic dust that coats your roll-ups. Set it aside for later; you’ll want it ready when the time comes!

Step 2: Whisk the Egg Mixture

In a medium bowl, crack the large eggs and pour in the milk and vanilla extract. Whisk them together until everything is well blended. This mixture will give your roll-ups that classic French toast flavor and a lovely custardy texture.

Step 3: Flatten the Bread

Grab your rolling pin and flatten each slice of bread. This step is crucial! Flattening makes it easier to roll up the bread without tearing. Aim for a nice, even thickness, about a quarter of an inch. It’s like giving your bread a little spa treatment!

Step 4: Add Cinnamon Sugar

Now, sprinkle a generous amount of your cinnamon sugar mixture over one side of each flattened slice. Don’t be shy! The more, the merrier. This is where the flavor really starts to shine, so make sure every inch is covered.

Step 5: Roll the Bread

Starting from the side with the cinnamon sugar, tightly roll each slice of bread. Keep it snug but not too tight; you want the filling to stay inside. Once rolled, place the seam side down to help it hold its shape.

Step 6: Cook the Roll-Ups

Heat a large skillet over medium heat and add a bit of butter. Once it’s melted and bubbly, dip each roll-up into the egg mixture, ensuring they’re well coated. Then, place them seam-side down in the skillet. Cook for about 2-3 minutes on each side, or until they’re golden brown and crispy.

Step 7: Coat with Cinnamon Sugar

Once cooked, remove the roll-ups from the skillet and immediately roll them in the remaining cinnamon sugar mixture. This step adds that extra sweetness and crunch that makes these roll-ups irresistible!

Step 8: Serve and Enjoy

Serve your warm Cinnamon Roll French Toast Roll-Ups dusted with powdered sugar. For an added treat, drizzle some maple syrup on top. Enjoy every bite of this delightful breakfast that’s sure to impress!

Tips for Success

  • Use day-old bread for better texture; it holds up well when rolling.
  • Don’t skip the flattening step; it makes rolling easier and prevents tearing.
  • Keep the skillet at medium heat to avoid burning the roll-ups.
  • Experiment with different fillings like cream cheese or fruit for variety.
  • Serve immediately for the best taste; they’re best enjoyed warm!

Equipment Needed

  • Rolling pin: A standard one works great, but a wine bottle can do the trick in a pinch.
  • Skillet: A non-stick skillet is ideal, but any frying pan will suffice.
  • Mixing bowls: Use any size you have on hand; just make sure they’re sturdy.
  • Whisk: A fork can also work for mixing the egg mixture.

Variations

  • Cream Cheese Filling: Spread a thin layer of cream cheese on the bread before adding the cinnamon sugar for a rich, creamy twist.
  • Fruit-Filled Roll-Ups: Add sliced bananas, strawberries, or even blueberries inside the roll-ups for a fruity explosion.
  • Nutty Delight: Sprinkle chopped nuts like pecans or walnuts along with the cinnamon sugar for added crunch and flavor.
  • Gluten-Free Option: Use gluten-free bread to make these roll-ups suitable for those with dietary restrictions.
  • Spiced Up: Add a pinch of nutmeg or pumpkin spice to the cinnamon sugar for a seasonal twist.

Serving Suggestions

  • Pair with crispy bacon or sausage for a savory contrast to the sweetness.
  • Serve alongside fresh fruit like berries or sliced apples for a refreshing touch.
  • Complement with a hot cup of coffee or a chilled glass of orange juice.
  • For a festive presentation, arrange roll-ups on a platter and dust with extra powdered sugar.

FAQs about Cinnamon Roll French Toast Roll-Ups

Can I make Cinnamon Roll French Toast Roll-Ups ahead of time?

Absolutely! You can prepare the roll-ups the night before and store them in the fridge. Just cook them in the morning for a quick breakfast treat.

What type of bread works best for this recipe?

While white and whole wheat bread are great options, you can also use brioche or challah for a richer flavor and texture. Just make sure it’s fresh or slightly stale for easier rolling.

Can I freeze the roll-ups?

Yes! After cooking, let them cool completely, then freeze in an airtight container. Reheat in the oven or microwave when you’re ready to enjoy them again.

How can I customize the filling?

Get creative! You can add cream cheese, fresh fruit, or even chocolate chips inside the roll-ups for a delicious twist. The possibilities are endless!

What can I serve with Cinnamon Roll French Toast Roll-Ups?

These roll-ups pair wonderfully with crispy bacon, fresh fruit, or a drizzle of maple syrup. A hot cup of coffee or a refreshing juice makes for a perfect breakfast combo!

Final Thoughts

Creating these Cinnamon Roll French Toast Roll-Ups is more than just making breakfast; it’s about crafting moments of joy. The sweet aroma fills your kitchen, inviting everyone to gather around the table. Each bite is a delightful blend of flavors that brings smiles and satisfaction. Whether it’s a special occasion or a simple weekend treat, these roll-ups are sure to impress. So, roll up your sleeves, gather your loved ones, and enjoy the sweet experience of making and sharing this delicious dish. Trust me, it’s a breakfast adventure you won’t want to miss!

jhessica

Cinnamon Roll French Toast Roll-Ups: A Sweet Delight!

Cinnamon Roll French Toast Roll-Ups are a delightful breakfast treat that combines the flavors of cinnamon rolls and French toast into a fun, rolled-up version.
Prep Time 15 minutes
Cook Time 15 minutes
Total Time 30 minutes
Servings: 4 servings
Course: Breakfast
Cuisine: American
Calories: 320

Ingredients
  

  • 1 cup granulated sugar
  • 1 tablespoon ground cinnamon
  • 4 large eggs
  • 1 cup milk
  • 1 teaspoon vanilla extract
  • 8 slices of bread white or whole wheat
  • 1/4 cup butter for cooking
  • 1 cup powdered sugar for serving
  • Maple syrup optional, for serving

Method
 

  1. In a small bowl, mix together the granulated sugar and cinnamon. Set aside.
  2. In a medium bowl, whisk together the eggs, milk, and vanilla extract until well combined.
  3. Flatten each slice of bread using a rolling pin. This will make it easier to roll up.
  4. Sprinkle a generous amount of the cinnamon sugar mixture over one side of each flattened slice of bread.
  5. Roll each slice of bread tightly from one end to the other, starting from the side with the cinnamon sugar.
  6. Heat a large skillet over medium heat and add the butter. Once melted, dip each roll-up into the egg mixture, ensuring they are well coated.
  7. Place the roll-ups seam-side down in the skillet and cook for about 2-3 minutes on each side, or until golden brown.
  8. Remove from the skillet and immediately roll in the remaining cinnamon sugar mixture.
  9. Serve warm, dusted with powdered sugar and drizzled with maple syrup if desired.

Nutrition

Serving: 1roll-upCalories: 320kcalCarbohydrates: 40gProtein: 8gFat: 15gSaturated Fat: 8gPolyunsaturated Fat: 5gCholesterol: 200mgSodium: 300mgFiber: 1gSugar: 20g

Notes

  • For a cream cheese filling, spread a thin layer of cream cheese on the bread before sprinkling with cinnamon sugar.
  • Add fresh fruit like sliced bananas or strawberries inside the roll-ups for a fruity twist.

Tried this recipe?

Let us know how it was!

Grilled Mango Pineapple Chicken: A Flavorful Delight!

Introduction to Grilled Mango Pineapple Chicken

There’s something magical about the combination of sweet and savory flavors, especially when it comes to grilled dishes. Grilled Mango Pineapple Chicken is a delightful way to bring a taste of the tropics to your backyard. Whether you’re looking to impress friends at a weekend barbecue or simply want a quick solution for a busy weeknight dinner, this recipe has you covered. The juicy chicken, paired with vibrant mango and pineapple, creates a dish that’s not only delicious but also visually stunning. Trust me, your taste buds will thank you!

Why You’ll Love This Grilled Mango Pineapple Chicken

This Grilled Mango Pineapple Chicken is a game-changer for your dinner routine. It’s incredibly easy to whip up, making it perfect for those hectic weeknights. The vibrant flavors of mango and pineapple elevate the dish, turning a simple meal into a tropical escape. Plus, it’s a crowd-pleaser! Your family and friends will be raving about it long after the last bite. Who doesn’t love a dish that’s both quick and delicious?

Ingredients for Grilled Mango Pineapple Chicken

Gathering the right ingredients is the first step to creating a mouthwatering Grilled Mango Pineapple Chicken. Here’s what you’ll need:

  • Chicken Breasts: The star of the show! Choose large, boneless chicken breasts for even cooking and juicy results.
  • Fresh Pineapple: Diced pineapple adds a sweet, tangy flavor that perfectly complements the chicken. Look for ripe, juicy fruit for the best taste.
  • Ripe Mango: This tropical fruit brings a luscious sweetness. Make sure it’s ripe for maximum flavor and a beautiful color.
  • Soy Sauce: A savory base for the marinade, soy sauce enhances the umami flavor of the chicken.
  • Honey: This natural sweetener balances the saltiness of the soy sauce and adds a lovely glaze when grilled.
  • Olive Oil: Helps to keep the chicken moist and adds richness to the marinade.
  • Garlic: Minced garlic infuses the dish with aromatic flavor, making it irresistible.
  • Ground Ginger: A hint of warmth and spice, ginger elevates the tropical vibe of this dish.
  • Black Pepper: A simple seasoning that adds a touch of heat and depth.
  • Red Pepper Flakes (optional): For those who like a little kick, these flakes can spice things up!
  • Fresh Cilantro: A vibrant garnish that adds a pop of color and freshness to your finished dish.

For exact measurements, check the bottom of the article where you can find everything listed for easy printing. Feel free to get creative with your ingredients! You can substitute chicken with shrimp or tofu for a different protein option, or even mix in other tropical fruits like papaya or kiwi for a unique twist.

How to Make Grilled Mango Pineapple Chicken

Creating this Grilled Mango Pineapple Chicken is a breeze! Follow these simple steps, and you’ll have a tropical feast ready in no time. Let’s dive in!

Step 1: Prepare the Marinade

Start by grabbing a medium bowl. Combine the diced pineapple, ripe mango, soy sauce, honey, olive oil, minced garlic, ground ginger, black pepper, and those optional red pepper flakes if you’re feeling adventurous. Mix everything well until it’s a beautiful, fragrant marinade. The sweet and savory aroma will have your mouth watering already!

Step 2: Marinate the Chicken

Next, take your chicken breasts and place them in a resealable plastic bag or a shallow dish. Pour that delicious marinade over the chicken, ensuring it’s well-coated. Seal the bag or cover the dish tightly, then pop it in the fridge. Let it marinate for at least 1 hour, but if you can wait, 4 hours will really amp up the flavor!

Step 3: Preheat the Grill

While the chicken is soaking up all those tropical flavors, it’s time to get your grill ready. Preheat it to medium-high heat. This step is crucial for achieving those beautiful grill marks and juicy chicken. A hot grill means a perfect sear!

Step 4: Grill the Chicken

Once your grill is hot, carefully remove the chicken from the marinade. Discard the marinade—no one wants that on their plate! Place the chicken on the grill and cook for about 6-7 minutes per side. You’re looking for an internal temperature of 165°F. That’s when you know it’s perfectly cooked and safe to eat!

Step 5: Rest and Serve

After grilling, let the chicken rest for about 5 minutes. This allows the juices to redistribute, making each bite tender and juicy. Slice the chicken and serve it topped with the remaining fresh pineapple and mango. Don’t forget to sprinkle some fresh cilantro on top for that extra pop of flavor and color!

Tips for Success

  • Marinate overnight for deeper flavor.
  • Use a meat thermometer to ensure perfect doneness.
  • Let the chicken rest after grilling for juicier results.
  • Experiment with different fruits for a unique twist.
  • Don’t skip the cilantro; it brightens the dish!

Equipment Needed

  • Grill: A gas or charcoal grill works perfectly. If you don’t have one, a grill pan on the stovetop will do.
  • Medium Bowl: For mixing the marinade. Any mixing bowl will suffice.
  • Resealable Plastic Bag or Shallow Dish: For marinating the chicken.
  • Meat Thermometer: To check the chicken’s doneness. A simple knife can also work to cut and check.

Variations of Grilled Mango Pineapple Chicken

  • Shrimp or Tofu: Swap out chicken for shrimp or tofu for a delightful twist. Both options soak up the marinade beautifully!
  • Spicy Kick: Add more red pepper flakes or a dash of sriracha to the marinade for those who crave heat.
  • Herb Infusion: Experiment with fresh herbs like basil or mint in addition to cilantro for a unique flavor profile.
  • Fruit Medley: Mix in other tropical fruits like kiwi, papaya, or even peaches for a colorful and flavorful variation.
  • Gluten-Free Option: Use tamari instead of soy sauce to keep it gluten-free while still enjoying that savory flavor.

Serving Suggestions for Grilled Mango Pineapple Chicken

  • Rice or Quinoa: Serve over coconut rice or fluffy quinoa for a hearty base.
  • Grilled Veggies: Pair with grilled zucchini, bell peppers, or asparagus for a colorful plate.
  • Tropical Drinks: Enjoy with a refreshing mojito or a cold beer to complement the flavors.
  • Presentation: Garnish with extra cilantro and lime wedges for a vibrant touch.

FAQs about Grilled Mango Pineapple Chicken

Can I use frozen fruit for the marinade? Absolutely! While fresh fruit is ideal for flavor and texture, frozen mango and pineapple can work in a pinch. Just make sure to thaw and drain any excess liquid before adding them to the marinade.

How long can I marinate the chicken? For the best flavor, marinate the chicken for at least 1 hour. However, if you have the time, letting it sit overnight will really enhance the taste. Just be cautious not to exceed 24 hours, as the acidity can start to break down the chicken.

What can I serve with Grilled Mango Pineapple Chicken? This dish pairs wonderfully with coconut rice, grilled vegetables, or a fresh salad. You can also serve it with a tropical drink like a mojito or a cold beer to complement the flavors.

Can I make this recipe ahead of time? Yes! You can marinate the chicken a day in advance and grill it when you’re ready to serve. Just remember to let it rest after grilling for the juiciest results.

Is Grilled Mango Pineapple Chicken gluten-free? Yes, this recipe can easily be made gluten-free by substituting soy sauce with tamari. Enjoy the same delicious flavors without the gluten!

Final Thoughts

Grilled Mango Pineapple Chicken is more than just a meal; it’s an experience that transports you to sun-soaked beaches and tropical breezes. The vibrant flavors and juicy textures create a symphony of taste that delights the senses. Whether you’re grilling for family or hosting friends, this dish is sure to impress. It’s quick, easy, and bursting with freshness, making it a perfect addition to your culinary repertoire. So fire up that grill, savor the aromas, and enjoy the joy of sharing this tropical delight with your loved ones. Your taste buds will thank you!

jhessica

Grilled Mango Pineapple Chicken: A Flavorful Delight!

A delicious and tropical grilled chicken recipe featuring mango and pineapple.
Prep Time 10 minutes
Cook Time 15 minutes
Total Time 1 hour 25 minutes
Servings: 4 servings
Course: Main Course
Cuisine: Tropical
Calories: 290

Ingredients
  

  • 2 large chicken breasts about 1 pound
  • 1 cup fresh pineapple diced
  • 1 cup ripe mango diced
  • 1/4 cup soy sauce
  • 2 tablespoons honey
  • 2 tablespoons olive oil
  • 2 cloves garlic minced
  • 1 teaspoon ground ginger
  • 1/2 teaspoon black pepper
  • 1/4 teaspoon red pepper flakes optional
  • Fresh cilantro for garnish

Method
 

  1. In a medium bowl, combine the diced pineapple, mango, soy sauce, honey, olive oil, minced garlic, ground ginger, black pepper, and red pepper flakes. Mix well to create a marinade.
  2. Place the chicken breasts in a resealable plastic bag or shallow dish and pour the marinade over the chicken. Seal the bag or cover the dish and refrigerate for at least 1 hour, or up to 4 hours for more flavor.
  3. Preheat the grill to medium-high heat. Remove the chicken from the marinade and discard the marinade.
  4. Grill the chicken for about 6-7 minutes per side, or until the internal temperature reaches 165°F and the chicken is cooked through.
  5. Remove the chicken from the grill and let it rest for 5 minutes before slicing.
  6. Serve the grilled chicken topped with the remaining fresh pineapple and mango. Garnish with fresh cilantro.

Nutrition

Serving: 1servingCalories: 290kcalCarbohydrates: 10gProtein: 30gFat: 15gSaturated Fat: 2gPolyunsaturated Fat: 13gCholesterol: 70mgSodium: 800mgFiber: 1gSugar: 10g

Notes

  • For added flavor, marinate the chicken overnight.
  • Substitute the chicken with shrimp or tofu for a different protein option.

Tried this recipe?

Let us know how it was!

Sausage and Egg Breakfast Casserole: A Savory Delight!

Introduction to Sausage and Egg Breakfast Casserole

There’s something magical about waking up to the aroma of a warm, hearty breakfast. The Sausage and Egg Breakfast Casserole is a dish that brings comfort and satisfaction, perfect for those busy mornings or lazy weekends alike. It’s not just a meal; it’s a way to gather friends and family around the table, sharing stories and laughter. This casserole is a quick solution for feeding a crowd, and it’s so easy to whip up. Trust me, once you try it, you’ll want to make it a regular part of your breakfast routine!

Why You’ll Love This Sausage and Egg Breakfast Casserole

This Sausage and Egg Breakfast Casserole is a game-changer for your mornings. It’s incredibly easy to prepare, making it perfect for those hectic weekdays or relaxed weekends. The combination of savory sausage, fluffy eggs, and melted cheese creates a flavor explosion that will have everyone coming back for seconds. Plus, it’s a one-dish wonder, so cleanup is a breeze. Who wouldn’t love that?

Ingredients for Sausage and Egg Breakfast Casserole

Gathering the right ingredients is the first step to creating a delicious Sausage and Egg Breakfast Casserole. Here’s what you’ll need:

  • Breakfast sausage: This is the star of the show, bringing savory flavor. You can use pork, turkey, or even plant-based sausage for a lighter option.
  • Large eggs: They provide the base for the casserole, creating a fluffy texture. Fresh eggs are always best!
  • Milk: Adds creaminess and helps bind everything together. You can substitute with almond or oat milk for a dairy-free version.
  • Shredded cheddar cheese: This melty goodness enhances the flavor. Feel free to mix it up with pepper jack or mozzarella for a twist.
  • Diced bell peppers: They add color and a slight sweetness. Any color works, so use your favorites!
  • Diced onion: A must for depth of flavor. Yellow or white onions are great choices.
  • Garlic powder: For that extra kick of flavor without the fuss of fresh garlic.
  • Salt and black pepper: Essential seasonings to enhance all the flavors.
  • Paprika: This adds a subtle smokiness and a pop of color.
  • Cubed day-old bread: Acts as the casserole’s backbone, soaking up all the delicious flavors. Stale bread works best, but fresh can be used in a pinch.

For those looking to spice things up, consider adding diced jalapeños or a dash of hot sauce. If you prefer a vegetarian option, sautéed mushrooms and spinach can easily replace the sausage. You’ll find the exact quantities for each ingredient at the bottom of the article, ready for printing!

How to Make Sausage and Egg Breakfast Casserole

Creating a Sausage and Egg Breakfast Casserole is a straightforward process that yields delicious results. Follow these simple steps, and you’ll have a hearty breakfast ready in no time!

Step 1: Preheat and Prepare

Start by preheating your oven to 350°F. While it warms up, grab a 9×13-inch baking dish and grease it well. This will ensure your casserole doesn’t stick, making cleanup a breeze.

Step 2: Cook the Sausage

In a large skillet over medium heat, add the breakfast sausage. Cook it until it’s browned and crumbled, which should take about 5-7 minutes. Don’t forget to drain any excess fat; we want the focus to be on that savory flavor!

Step 3: Whisk the Egg Mixture

In a large bowl, whisk together the eggs, milk, garlic powder, salt, black pepper, and paprika. Make sure everything is well combined. This mixture is the heart of your casserole, so give it a good whisk!

Step 4: Combine Ingredients

Now, it’s time to bring it all together. Add the cooked sausage, diced bell peppers, diced onion, and half of the shredded cheddar cheese to the egg mixture. Stir everything until it’s nicely combined. The colors and aromas will start to come alive!

Step 5: Fold in the Bread

Gently fold in the cubed day-old bread. Make sure each piece is evenly coated with the egg mixture. This step is crucial, as the bread will soak up all those delicious flavors.

Step 6: Bake the Casserole

Pour the mixture into your prepared baking dish, spreading it out evenly. Top it off with the remaining cheddar cheese for that melty goodness. Bake in the preheated oven for 30-35 minutes. You’ll know it’s done when the center is set and the top is golden brown.

Step 7: Cool and Serve

Once baked, let the casserole cool for about 5-10 minutes. This will make slicing easier. Serve it warm, and watch as everyone digs in with delight!

Tips for Success

  • Use stale bread for the best texture; it absorbs flavors without getting mushy.
  • Feel free to customize with your favorite veggies or cheeses.
  • Let the casserole sit for a few minutes before slicing; it holds together better.
  • For extra flavor, consider adding herbs like parsley or chives on top before serving.
  • Make it ahead of time and refrigerate overnight for an easy morning prep!

Equipment Needed

  • 9×13-inch baking dish: Essential for baking the casserole. A similar-sized dish works too.
  • Large skillet: For cooking the sausage. A non-stick pan makes cleanup easier.
  • Mixing bowl: To whisk the egg mixture. Any large bowl will do.
  • Whisk: For blending ingredients. A fork can work in a pinch.
  • Spatula: To fold in the bread and serve. A wooden spoon is a great alternative.

Variations

  • Spicy Kick: Add diced jalapeños or a splash of hot sauce to the egg mixture for a fiery twist.
  • Vegetarian Delight: Swap the sausage for sautéed mushrooms and spinach for a hearty, meat-free option.
  • Cheesy Goodness: Experiment with different cheeses like pepper jack, feta, or gouda for unique flavors.
  • Herb Infusion: Incorporate fresh herbs like basil, thyme, or cilantro to elevate the taste profile.
  • Breakfast Burrito Style: Serve the casserole in tortillas with avocado and salsa for a fun twist!

Serving Suggestions

  • Fresh Fruit: Serve with a side of mixed berries or sliced melons for a refreshing contrast.
  • Coffee or Tea: Pair with a hot cup of coffee or your favorite tea to kickstart the day.
  • Presentation: Garnish with fresh herbs like parsley or chives for a pop of color.
  • Toast: Add a slice of buttered toast for extra crunch and flavor.

FAQs about Sausage and Egg Breakfast Casserole

Can I make this casserole ahead of time?
Absolutely! You can prepare the Sausage and Egg Breakfast Casserole the night before. Just assemble it, cover it, and refrigerate. In the morning, pop it in the oven, and you’ll have a delicious breakfast ready to go!

How do I store leftovers?
Store any leftovers in an airtight container in the fridge. It should last for about 3-4 days. Reheat individual portions in the microwave or oven for a quick breakfast fix.

Can I freeze the casserole?
Yes, you can freeze the casserole! Just make sure it’s completely cooled before wrapping it tightly in plastic wrap and aluminum foil. It can be frozen for up to 2 months. Thaw it overnight in the fridge before baking.

What can I substitute for the sausage?
If you’re looking for alternatives, ground turkey or chicken sausage works well. For a vegetarian option, sautéed mushrooms and spinach are fantastic substitutes that still provide great flavor.

Can I add other vegetables?
Definitely! Feel free to get creative. Spinach, zucchini, or even diced tomatoes can be great additions to your Sausage and Egg Breakfast Casserole. Just make sure to adjust the cooking time if you add more moisture-rich veggies.

Final Thoughts

The Sausage and Egg Breakfast Casserole is more than just a meal; it’s a celebration of flavors and togetherness. Each bite is a warm hug, reminding us of cozy mornings spent with loved ones. Whether you’re hosting a brunch or simply treating yourself, this dish brings joy and satisfaction to the table. It’s easy to prepare, versatile, and perfect for any occasion. So, roll up your sleeves, gather your ingredients, and let the aroma fill your kitchen. Trust me, once you serve this casserole, it will become a cherished favorite in your breakfast repertoire!

jhessica

Sausage and Egg Breakfast Casserole: A Savory Delight!

A savory and hearty breakfast casserole featuring sausage, eggs, and cheese, perfect for feeding a crowd.
Prep Time 15 minutes
Cook Time 35 minutes
Total Time 50 minutes
Servings: 8 servings
Course: Breakfast
Cuisine: American
Calories: 290

Ingredients
  

  • 8 ounces breakfast sausage casings removed
  • 8 large eggs
  • 1 cup milk
  • 1 cup shredded cheddar cheese
  • 1 cup diced bell peppers any color
  • 1 cup diced onion
  • 1 teaspoon garlic powder
  • 1 teaspoon salt
  • 1/2 teaspoon black pepper
  • 1/2 teaspoon paprika
  • 4 cups cubed day-old bread

Method
 

  1. Preheat the oven to 350°F. Grease a 9×13-inch baking dish.
  2. In a large skillet over medium heat, cook the sausage until browned and crumbled, about 5-7 minutes. Drain excess fat.
  3. In a large bowl, whisk together the eggs, milk, garlic powder, salt, black pepper, and paprika until well combined.
  4. Add the cooked sausage, bell peppers, onion, and half of the cheddar cheese to the egg mixture. Stir to combine.
  5. Fold in the cubed bread until evenly coated with the egg mixture.
  6. Pour the mixture into the prepared baking dish and spread it out evenly. Top with the remaining cheddar cheese.
  7. Bake for 30-35 minutes, or until the casserole is set in the center and the top is golden brown.
  8. Let it cool for 5-10 minutes before slicing and serving.

Nutrition

Serving: 1sliceCalories: 290kcalCarbohydrates: 20gProtein: 18gFat: 18gSaturated Fat: 7gPolyunsaturated Fat: 9gCholesterol: 300mgSodium: 600mgFiber: 1gSugar: 2g

Notes

  • For a spicier version, add diced jalapeños or a dash of hot sauce to the egg mixture.
  • To make it vegetarian, substitute the sausage with sautéed mushrooms and spinach.

Tried this recipe?

Let us know how it was!

Rainbow Orzo Salad: A Colorful Dish to Brighten Your Table

Introduction to Rainbow Orzo Salad

There’s something magical about a dish that bursts with color and flavor, isn’t there? The Rainbow Orzo Salad is just that—a vibrant medley that not only pleases the eyes but also delights the palate. Whether you’re looking for a quick solution for a busy day or a dish to impress your loved ones at a gathering, this salad fits the bill perfectly. It’s refreshing, easy to whip up, and packed with nutritious ingredients. Plus, it’s a fantastic way to sneak in those veggies without anyone noticing. Let’s dive into this culinary adventure together!

Why You’ll Love This Rainbow Orzo Salad

This Rainbow Orzo Salad is a game-changer for anyone who craves flavor without the fuss. It comes together in under an hour, making it perfect for busy weeknights or last-minute gatherings. The combination of fresh veggies and a light dressing creates a refreshing taste that’s hard to resist. Plus, it’s versatile enough to serve as a side or a main dish, ensuring everyone at the table leaves satisfied.

Ingredients for Rainbow Orzo Salad

Gathering the right ingredients is half the fun of cooking! For this Rainbow Orzo Salad, you’ll need a colorful array of fresh vegetables and a few pantry staples. Here’s what you’ll be looking for:

  • Orzo pasta: This tiny pasta shape is the star of the show, providing a delightful base that soaks up all the flavors.
  • Cherry tomatoes: Sweet and juicy, they add a burst of color and freshness to the salad.
  • Cucumber: Crisp and refreshing, cucumbers bring a cool crunch that balances the other ingredients.
  • Bell peppers: Any color will do! They add sweetness and a vibrant pop to the dish.
  • Corn: Whether fresh or frozen, corn adds a touch of sweetness and a lovely texture.
  • Red onion: Finely chopped, it gives a sharp bite that complements the sweetness of the other veggies.
  • Feta cheese: Crumbled feta adds a creamy, tangy element that ties everything together beautifully.
  • Fresh parsley: Chopped parsley brings a hint of earthiness and a splash of green.
  • Olive oil: A good quality olive oil is essential for a rich, flavorful dressing.
  • Red wine vinegar: This adds a tangy kick that brightens the entire salad.
  • Garlic powder: A sprinkle of garlic powder enhances the flavor without overpowering the dish.
  • Salt and pepper: Essential for seasoning, these will elevate all the flavors in your salad.

For those looking to mix things up, consider adding grilled chicken or chickpeas for protein. If you prefer a creamier texture, swap the feta for avocado. You can find the exact quantities for each ingredient at the bottom of the article, ready for printing!

How to Make Rainbow Orzo Salad

Creating this Rainbow Orzo Salad is a breeze! Follow these simple steps, and you’ll have a colorful dish that’s sure to impress. Let’s get started!

Step 1: Cook the Orzo Pasta

Begin by boiling a pot of salted water. Once it’s bubbling, add the orzo pasta. Cook it according to the package instructions until it’s al dente—firm but not hard. This usually takes about 8-10 minutes. Once done, drain the pasta in a colander and rinse it under cold water. This stops the cooking process and cools it down quickly, ensuring it doesn’t become mushy.

Step 2: Combine the Vegetables

In a large mixing bowl, combine the cooled orzo with your colorful vegetables. Toss in the halved cherry tomatoes, diced cucumber, bell peppers, corn, and finely chopped red onion. The vibrant colors will make your salad pop! Gently mix everything together, allowing the flavors to mingle.

Step 3: Prepare the Dressing

In a small bowl, whisk together the olive oil, red wine vinegar, garlic powder, salt, and pepper. This dressing is light yet flavorful, perfectly complementing the fresh ingredients. Taste it and adjust the seasoning if needed. A little extra salt or vinegar can make a big difference!

Step 4: Toss the Salad

Now, pour the dressing over the salad mixture. Using a large spoon, toss everything gently to ensure the dressing coats all the ingredients evenly. Be careful not to mash the veggies; we want them to stay crisp and colorful!

Step 5: Add Feta and Chill

Finally, sprinkle the crumbled feta cheese on top of the salad. Give it a light toss to incorporate the feta without breaking it up too much. Now, cover the bowl and chill the salad in the refrigerator for at least 30 minutes. This allows the flavors to meld beautifully, making each bite even more delicious!

Tips for Success

  • Always rinse the orzo after cooking to prevent it from sticking together.
  • Use fresh, seasonal vegetables for the best flavor and nutrition.
  • Let the salad chill for at least 30 minutes to enhance the flavors.
  • Feel free to customize with your favorite veggies or proteins.
  • Make it ahead of time; it keeps well in the fridge for a couple of days!

Equipment Needed

  • Large pot: For boiling the orzo. A deep skillet can work too.
  • Colander: To drain the pasta. A fine mesh strainer is a good alternative.
  • Mixing bowl: A large bowl for combining ingredients. Any large bowl will do.
  • Whisk: For mixing the dressing. A fork can also get the job done.
  • Serving spoon: To toss and serve the salad. A spatula works well too.

Variations of Rainbow Orzo Salad

  • Protein Boost: Add grilled chicken, shrimp, or chickpeas for a heartier meal.
  • Herb Infusion: Experiment with fresh herbs like basil or mint for a unique twist.
  • Spicy Kick: Toss in some diced jalapeños or a sprinkle of red pepper flakes for heat.
  • Nutty Flavor: Incorporate toasted pine nuts or walnuts for added crunch and richness.
  • Vegan Option: Replace feta with avocado or a vegan cheese alternative for a dairy-free delight.
  • Seasonal Variations: Use seasonal vegetables like asparagus in spring or roasted butternut squash in fall for a seasonal touch.

Serving Suggestions for Rainbow Orzo Salad

  • Pair with Grilled Meats: This salad complements grilled chicken, steak, or fish beautifully.
  • Serve with Bread: A crusty baguette or garlic bread makes for a satisfying meal.
  • Refreshing Drinks: Enjoy with iced tea, lemonade, or a crisp white wine.
  • Presentation: Serve in a large bowl, garnished with extra parsley for a pop of color.

FAQs about Rainbow Orzo Salad

Can I make Rainbow Orzo Salad ahead of time?

Absolutely! This salad is perfect for meal prep. You can make it a day in advance and store it in the fridge. Just remember to add the feta cheese right before serving to keep it fresh.

What can I substitute for orzo pasta?

If you don’t have orzo on hand, you can use other small pasta shapes like ditalini or even quinoa for a gluten-free option. Both will work well with the colorful veggies!

How long does Rainbow Orzo Salad last in the fridge?

This salad can last up to three days in the fridge. Just make sure to keep it in an airtight container to maintain its freshness.

Can I add more vegetables to the salad?

<pDefinitely! Feel free to get creative. Zucchini, carrots, or even roasted vegetables can add more flavor and texture to your Rainbow Orzo Salad.

Is this salad suitable for a vegetarian diet?

<pYes, the Rainbow Orzo Salad is vegetarian-friendly! It’s packed with fresh veggies and can easily be made vegan by omitting the feta or using a dairy-free alternative.

Final Thoughts

Creating this Rainbow Orzo Salad is more than just a cooking task; it’s an experience that brings joy to your table. Each vibrant ingredient tells a story, from the sweet cherry tomatoes to the crunchy cucumbers. This dish is not only a feast for the eyes but also a celebration of flavors that can brighten any meal. Whether you’re sharing it with family or enjoying it solo, this salad is a reminder that cooking can be both simple and satisfying. So, roll up your sleeves and let the colors inspire your culinary creativity!

jhessica

Rainbow Orzo Salad: A Colorful Dish to Brighten Your Table

A vibrant and refreshing Rainbow Orzo Salad that combines colorful vegetables and a light dressing, perfect for any occasion.
Prep Time 15 minutes
Cook Time 10 minutes
Total Time 55 minutes
Servings: 6 servings
Course: Salad
Cuisine: Mediterranean
Calories: 220

Ingredients
  

  • 2 cups orzo pasta
  • 1 cup cherry tomatoes halved
  • 1 cup cucumber diced
  • 1 cup bell peppers any color, diced
  • 1 cup corn fresh or frozen
  • 1/2 cup red onion finely chopped
  • 1/2 cup feta cheese crumbled
  • 1/4 cup fresh parsley chopped
  • 1/4 cup olive oil
  • 2 tablespoons red wine vinegar
  • 1 teaspoon garlic powder
  • Salt and pepper to taste

Method
 

  1. Cook the orzo pasta according to package instructions until al dente. Drain and rinse under cold water to cool.
  2. In a large mixing bowl, combine the cooled orzo, cherry tomatoes, cucumber, bell peppers, corn, red onion, and parsley.
  3. In a small bowl, whisk together the olive oil, red wine vinegar, garlic powder, salt, and pepper.
  4. Pour the dressing over the salad and toss gently to combine all ingredients.
  5. Add the crumbled feta cheese on top and give it a light toss.
  6. Chill the salad in the refrigerator for at least 30 minutes before serving to allow the flavors to meld.

Nutrition

Serving: 1servingCalories: 220kcalCarbohydrates: 30gProtein: 6gFat: 10gSaturated Fat: 2gPolyunsaturated Fat: 8gCholesterol: 10mgSodium: 200mgFiber: 3gSugar: 3g

Notes

  • For added protein, consider mixing in grilled chicken or chickpeas.
  • Substitute the feta cheese with avocado for a creamier texture and a dairy-free option.

Tried this recipe?

Let us know how it was!

Hearty Slow Cooker Beef Stew: A Flavorful Family Favorite

Introduction to Hearty Slow Cooker Beef Stew

There’s something magical about the aroma of a Hearty Slow Cooker Beef Stew wafting through the house. It takes me back to my childhood, where Sunday dinners were a family affair, filled with laughter and stories. This recipe is a lifesaver for busy weeknights or when you want to impress your loved ones without spending hours in the kitchen.

With just a bit of prep, you can set it and forget it, letting the slow cooker work its magic. Trust me, your family will be begging for seconds, and you’ll feel like a culinary hero.

Why You’ll Love This Hearty Slow Cooker Beef Stew

This Hearty Slow Cooker Beef Stew is a game-changer for any home cook.

It’s incredibly easy to prepare, allowing you to spend more time with your family and less time in the kitchen.

The rich flavors develop beautifully as it simmers, creating a comforting dish that warms the soul.

Plus, it’s versatile enough to adapt to your taste, making it a perfect fit for any family dinner.

Ingredients for Hearty Slow Cooker Beef Stew

Creating a delicious Hearty Slow Cooker Beef Stew starts with the right ingredients. Here’s what you’ll need:

  • Beef Chuck: This cut is perfect for stewing, as it becomes tender and flavorful during the slow cooking process.
  • Olive Oil: A splash of this adds richness and helps brown the beef, enhancing its flavor.
  • Onion: Chopped onions bring a sweet, aromatic base to the stew, making it more savory.
  • Garlic: Minced garlic adds a punch of flavor that elevates the entire dish.
  • Carrots: Sliced carrots contribute sweetness and a pop of color, making the stew visually appealing.
  • Potatoes: Diced potatoes provide heartiness and help thicken the stew as they cook.
  • Beef Broth: This is the soul of the stew, infusing it with deep, rich flavors.
  • Frozen Peas: Adding these at the end gives a fresh burst of color and sweetness.
  • Tomato Paste: A spoonful adds depth and a hint of acidity, balancing the flavors.
  • Worcestershire Sauce: This sauce brings umami, enhancing the overall taste of the stew.
  • Dried Thyme and Rosemary: These herbs add aromatic notes that complement the beef beautifully.
  • Salt and Pepper: Essential for seasoning, these enhance all the flavors in the stew.
  • Cornstarch (optional): If you prefer a thicker stew, this can be used to achieve that desired consistency.
  • Water (optional): Used with cornstarch for thickening, it helps create a smooth texture.

For exact measurements, check the bottom of the article where you can find everything available for printing. Each ingredient plays a vital role in crafting a stew that’s not just hearty but also bursting with flavor.

How to Make Hearty Slow Cooker Beef Stew

Making a Hearty Slow Cooker Beef Stew is a straightforward process that rewards you with a comforting meal. Follow these simple steps, and you’ll have a delicious dish ready to impress your family.

Step 1: Brown the Beef

Start by heating a tablespoon of olive oil in a large skillet over medium-high heat.

Once the oil is shimmering, add the beef chuck cubes.

Brown them on all sides for about 5-7 minutes.

This step locks in the flavors and gives the beef a nice crust.

After browning, transfer the beef to your slow cooker.

Step 2: Sauté the Aromatics

In the same skillet, toss in the chopped onion and minced garlic.

Sauté for 2-3 minutes until the onion turns translucent.

This step builds a flavorful base for your stew.

Once done, add the sautéed mixture to the slow cooker with the beef.

Step 3: Combine Ingredients

Now it’s time to bring everything together.

Add the sliced carrots, diced potatoes, and frozen peas to the slow cooker.

Pour in the beef broth, then stir in the tomato paste and Worcestershire sauce.

Sprinkle in the dried thyme, rosemary, salt, and pepper.

Mix everything well to ensure the flavors meld together.

Step 4: Slow Cook

Cover the slow cooker and set it to cook on low for 8 hours or high for 4 hours.

This slow cooking method allows the beef to become tender and the vegetables to soak up all the delicious flavors.

Resist the urge to peek too often; let it do its thing!

Step 5: Thicken the Stew (Optional)

If you prefer a thicker stew, this step is for you.

About 30 minutes before serving, mix 2 tablespoons of cornstarch with 2 tablespoons of water in a small bowl until smooth.

Stir this mixture into the stew and let it cook for the remaining time.

This will give your stew a hearty, satisfying texture.

Step 6: Final Seasoning

Before serving, taste your stew and adjust the seasoning if needed.

A little extra salt or pepper can make a big difference.

Once it’s just right, serve it hot and enjoy the smiles around the table.

This Hearty Slow Cooker Beef Stew is sure to become a family favorite!

Tips for Success

  • Always brown the beef for maximum flavor; it’s worth the extra step.
  • Don’t skip the aromatics; they create a delicious base for your stew.
  • Feel free to customize veggies based on what you have on hand.
  • Let the stew cool before storing leftovers; it helps maintain flavor.
  • Reheat gently on the stove for the best taste the next day.

Equipment Needed

  • Slow Cooker: Essential for this recipe; a 6-quart model works great.
  • Large Skillet: For browning the beef; a non-stick option makes cleanup easier.
  • Cutting Board: A sturdy surface for chopping veggies.
  • Sharp Knife: A good chef’s knife will make prep a breeze.
  • Measuring Cups and Spoons: For accurate ingredient measurements.

Variations

  • Red Wine Addition: For a richer flavor, add a splash of red wine to the broth before cooking.
  • Vegetarian Option: Substitute beef with hearty mushrooms or lentils for a plant-based twist.
  • Spicy Kick: Add a pinch of red pepper flakes or diced jalapeños for some heat.
  • Herb Variations: Experiment with fresh herbs like parsley or cilantro for a fresh finish.
  • Root Veggies: Swap out potatoes for parsnips or sweet potatoes for a different flavor profile.

Serving Suggestions

  • Crusty Bread: Serve with a warm, crusty baguette or homemade bread for dipping.
  • Salad: A fresh green salad with a light vinaigrette complements the stew perfectly.
  • Wine Pairing: A robust red wine, like Cabernet Sauvignon, enhances the meal.
  • Garnish: Top with fresh parsley for a pop of color and flavor.
  • Serving Dish: Present in a rustic bowl for a cozy, inviting look.

FAQs about Hearty Slow Cooker Beef Stew

Can I use other cuts of beef for this stew?

Absolutely! While beef chuck is ideal for its tenderness, you can also use brisket or round. Just remember, tougher cuts may need a bit more cooking time to become tender.

How can I make this stew gluten-free?

This Hearty Slow Cooker Beef Stew is naturally gluten-free! Just ensure that your beef broth and Worcestershire sauce are gluten-free, as some brands may contain gluten.

Can I prepare this stew in advance?

Yes! You can prep all the ingredients the night before and store them in the fridge. Just toss everything into the slow cooker in the morning, and you’ll have a delicious meal waiting for you.

What can I do with leftovers?

Leftovers can be stored in an airtight container in the fridge for up to three days. Reheat gently on the stove or in the microwave. You can also freeze portions for a quick meal later!

Can I add more vegetables to the stew?

Definitely! Feel free to add your favorite vegetables like bell peppers, green beans, or even corn. Just keep in mind that some veggies may cook faster than others, so add them accordingly.

Final Thoughts

Cooking a Hearty Slow Cooker Beef Stew is more than just preparing a meal; it’s about creating memories.

The warmth of the stew fills your home, inviting everyone to gather around the table.

Each spoonful is a reminder of love, comfort, and the joy of sharing good food with family.

Whether it’s a chilly evening or a busy weeknight, this stew is your go-to solution.

With its rich flavors and tender beef, it’s bound to become a cherished family favorite.

So, roll up your sleeves, embrace the process, and enjoy the delicious rewards that await!

jhessica

Hearty Slow Cooker Beef Stew: A Flavorful Family Favorite

A hearty and flavorful beef stew made in a slow cooker, perfect for family dinners.
Prep Time 20 minutes
Servings: 6 servings
Course: Main Course
Cuisine: American
Calories: 320

Ingredients
  

  • 2 pounds beef chuck cut into 1-inch cubes
  • 1 tablespoon olive oil
  • 1 medium onion chopped
  • 3 cloves garlic minced
  • 4 carrots sliced
  • 3 medium potatoes diced
  • 2 cups beef broth
  • 1 cup frozen peas
  • 2 tablespoons tomato paste
  • 1 tablespoon Worcestershire sauce
  • 1 teaspoon dried thyme
  • 1 teaspoon dried rosemary
  • Salt and pepper to taste
  • 2 tablespoons cornstarch optional, for thickening
  • 2 tablespoons water optional, for thickening

Method
 

  1. In a large skillet, heat the olive oil over medium-high heat. Add the beef cubes and brown on all sides, about 5-7 minutes. Transfer the browned beef to the slow cooker.
  2. In the same skillet, add the chopped onion and minced garlic. Sauté for 2-3 minutes until the onion is translucent. Add to the slow cooker.
  3. Add the sliced carrots, diced potatoes, beef broth, frozen peas, tomato paste, Worcestershire sauce, thyme, rosemary, salt, and pepper to the slow cooker. Stir to combine.
  4. Cover and cook on low for 8 hours or on high for 4 hours, until the beef is tender and the vegetables are cooked through.
  5. If you prefer a thicker stew, mix the cornstarch and water in a small bowl until smooth, then stir it into the stew during the last 30 minutes of cooking.
  6. Taste and adjust seasoning if necessary before serving.

Nutrition

Serving: 1servingCalories: 320kcalCarbohydrates: 22gProtein: 30gFat: 12gSaturated Fat: 4gPolyunsaturated Fat: 8gCholesterol: 80mgSodium: 600mgFiber: 3gSugar: 4g

Notes

  • For added flavor, consider adding a splash of red wine to the broth before cooking.
  • You can substitute the beef with chicken or turkey for a lighter version of this stew.

Tried this recipe?

Let us know how it was!

No-Bake Oreo Cheesecake: A Creamy Delight Awaits!

Introduction to No-Bake Oreo Cheesecake

There’s something magical about desserts that require no baking. The No-Bake Oreo Cheesecake is one of those delightful treats that can turn an ordinary day into a special occasion. I remember the first time I made it; my friends were amazed that something so creamy and delicious could come together without ever seeing the inside of an oven. This recipe is perfect for busy days or when you want to impress loved ones without spending hours in the kitchen. With just a few simple ingredients, you’ll create a dessert that’s sure to be a crowd-pleaser!

Why You’ll Love This No-Bake Oreo Cheesecake

This No-Bake Oreo Cheesecake is a game-changer for dessert lovers. It’s incredibly easy to whip up, taking just 20 minutes of your time. No oven? No problem! The creamy texture and rich Oreo flavor will have everyone coming back for seconds. Plus, it’s a versatile dessert that fits any occasion, from casual family dinners to fancy gatherings. You’ll impress your guests without breaking a sweat!

Ingredients for No-Bake Oreo Cheesecake

Gathering the right ingredients is the first step to creating this creamy masterpiece. Here’s what you’ll need:

  • Cream Cheese: The star of the show! Softened cream cheese gives the cheesecake its rich and velvety texture.
  • Powdered Sugar: This sweetener blends seamlessly into the cream cheese, adding just the right amount of sweetness without any graininess.
  • Vanilla Extract: A splash of vanilla enhances the overall flavor, making each bite even more delightful.
  • Heavy Whipping Cream: Whipped to perfection, this ingredient adds lightness and a fluffy texture to the cheesecake.
  • Oreo Cookies: Crushed Oreos provide that iconic chocolatey crunch and flavor. You’ll also need some halved Oreos for garnish.
  • Cocoa Powder: A light dusting of cocoa powder on top adds a touch of elegance and a hint of chocolate flavor.

For those looking to mix things up, consider adding melted chocolate for a richer taste or swapping Oreos for your favorite chocolate sandwich cookies. The exact quantities for each ingredient are listed at the bottom of the article, ready for you to print and take to the kitchen!

How to Make No-Bake Oreo Cheesecake

Creating this No-Bake Oreo Cheesecake is a breeze! Follow these simple steps, and you’ll have a dessert that’s not only delicious but also visually stunning. Let’s dive in!

Step 1: Prepare the Cream Cheese Mixture

Start by placing your softened cream cheese in a large mixing bowl. Using an electric mixer, beat it on medium speed until it’s smooth and creamy. This step is crucial; you want to avoid any lumps. The cream cheese should be as velvety as a cloud, ready to embrace the other ingredients.

Step 2: Add Sugar and Vanilla

Next, gradually add the powdered sugar and vanilla extract to the cream cheese. Mix on low speed to prevent a sugary cloud from forming. Once combined, increase the speed to medium and beat until everything is well blended. The mixture should be sweet and fragrant, making your kitchen smell heavenly!

Step 3: Whip the Cream

In a separate bowl, pour in the heavy whipping cream. Using a clean mixer, whip it on high speed until stiff peaks form. This means when you lift the beaters, the cream holds its shape. It’s like magic! This whipped cream will add that light, airy texture to your cheesecake.

Step 4: Combine Mixtures

Now, gently fold the whipped cream into the cream cheese mixture. Use a spatula and be careful not to deflate the whipped cream. You want to maintain that fluffy texture. It’s like wrapping a delicate gift; you want to keep it intact while blending the flavors.

Step 5: Add Crushed Oreos

Time to bring in the star ingredient! Stir in the crushed Oreo cookies until they’re evenly distributed throughout the mixture. The chocolatey bits will add a delightful crunch and flavor that’s simply irresistible. You’ll want to sneak a taste at this point!

Step 6: Pour and Smooth

Pour the creamy mixture into a 9-inch springform pan. Use a spatula to smooth the top, making it as even as possible. This is where your cheesecake starts to take shape. It should look inviting and ready for the fridge!

Step 7: Refrigerate

Cover the pan with plastic wrap and refrigerate for at least 4 hours, or until set. This step is essential; it allows the flavors to meld and the cheesecake to firm up. Patience is key here, but trust me, it’s worth the wait!

Step 8: Garnish and Serve

Before serving, it’s time to add the finishing touches. Garnish with halved Oreo cookies and a light dusting of cocoa powder on top. This not only looks beautiful but also adds an extra layer of flavor. Slice, serve, and watch your guests’ faces light up with joy!

Tips for Success

  • Make sure your cream cheese is at room temperature for easy mixing.
  • Use a clean bowl and beaters when whipping the cream to achieve the best results.
  • Don’t rush the refrigeration; letting it set properly is key to a perfect texture.
  • For a fun twist, try adding different flavored cookies or toppings.
  • Always taste the mixture before pouring it into the pan; adjust sweetness if needed!

Equipment Needed

  • Mixing Bowls: A large bowl for the cream cheese and a separate one for whipping cream. Any size will do!
  • Electric Mixer: A hand mixer works great, but a stand mixer can save you some elbow grease.
  • Spatula: Essential for folding and smoothing the mixture.
  • 9-inch Springform Pan: If you don’t have one, a regular pie dish can work in a pinch.

Variations

  • Chocolate Lovers: Add ¼ cup of melted chocolate to the cream cheese mixture for an extra rich flavor.
  • Minty Fresh: Incorporate a few drops of peppermint extract for a refreshing mint Oreo cheesecake.
  • Fruit Twist: Fold in some crushed strawberries or raspberries for a fruity contrast to the chocolate.
  • Gluten-Free Option: Substitute regular Oreos with gluten-free chocolate sandwich cookies.
  • Vegan Version: Use vegan cream cheese and coconut cream instead of heavy whipping cream for a plant-based delight.

Serving Suggestions

  • Pair with a scoop of vanilla ice cream for an extra creamy experience.
  • Serve alongside fresh berries for a pop of color and flavor.
  • Drizzle with chocolate or caramel sauce for added indulgence.
  • Present on a decorative platter for a stunning display.
  • Enjoy with a cup of coffee or a glass of milk to balance the sweetness.

FAQs about No-Bake Oreo Cheesecake

Can I make No-Bake Oreo Cheesecake ahead of time?

Absolutely! This cheesecake is perfect for making ahead. Just prepare it a day in advance and let it chill overnight. The flavors will deepen, making it even more delicious!

How long does No-Bake Oreo Cheesecake last in the fridge?

Stored properly in an airtight container, your No-Bake Oreo Cheesecake can last up to 5 days in the fridge. Just be sure to keep it covered to maintain its freshness.

Can I freeze No-Bake Oreo Cheesecake?

Yes, you can freeze it! Wrap the cheesecake tightly in plastic wrap and then in aluminum foil. It can be frozen for up to 2 months. Just thaw it in the fridge before serving.

What can I use instead of cream cheese?

If you’re looking for a substitute, try using mascarpone cheese or a vegan cream cheese alternative. Both will give you a creamy texture, though the flavor may vary slightly.

Can I use different cookies for this cheesecake?

Definitely! While Oreos are classic, feel free to experiment with other chocolate sandwich cookies. You can even try vanilla cookies for a different flavor profile!

Final Thoughts

Creating a No-Bake Oreo Cheesecake is more than just whipping up a dessert; it’s about sharing joy and deliciousness with those you love. Each creamy slice is a reminder that simple ingredients can lead to extraordinary moments. Whether it’s a family gathering or a casual get-together with friends, this cheesecake is bound to steal the show. The smiles and satisfied sighs from your guests will be the sweetest reward. So, roll up your sleeves, gather your ingredients, and let this delightful treat bring a little magic to your kitchen and your life!

jhessica

No-Bake Oreo Cheesecake: A Creamy Delight Awaits!

A creamy and delicious No-Bake Oreo Cheesecake that is easy to make and perfect for any occasion.
Prep Time 20 minutes
Total Time 4 hours 20 minutes
Servings: 8 servings
Course: Dessert
Cuisine: American
Calories: 320

Ingredients
  

  • 8 ounces cream cheese softened
  • 1 cup powdered sugar
  • 1 teaspoon vanilla extract
  • 1 cup heavy whipping cream
  • 12 Oreo cookies crushed
  • 8 Oreo cookies halved (for garnish)
  • 1 tablespoon unsweetened cocoa powder for garnish

Method
 

  1. In a large mixing bowl, beat the softened cream cheese with an electric mixer until smooth and creamy.
  2. Gradually add the powdered sugar and vanilla extract, mixing until well combined.
  3. In a separate bowl, whip the heavy cream until stiff peaks form.
  4. Gently fold the whipped cream into the cream cheese mixture until fully incorporated.
  5. Stir in the crushed Oreo cookies until evenly distributed.
  6. Pour the mixture into a 9-inch springform pan and smooth the top with a spatula.
  7. Refrigerate for at least 4 hours or until set.
  8. Before serving, garnish with halved Oreo cookies and a dusting of cocoa powder.

Nutrition

Serving: 1sliceCalories: 320kcalCarbohydrates: 24gProtein: 4gFat: 24gSaturated Fat: 14gPolyunsaturated Fat: 8gCholesterol: 70mgSodium: 200mgFiber: 1gSugar: 18g

Notes

  • For a chocolate twist, add ¼ cup of melted chocolate to the cream cheese mixture.
  • You can substitute the Oreo cookies with any chocolate sandwich cookies for a different flavor.

Tried this recipe?

Let us know how it was!

Sweet Cream Pancakes: Discover the Fluffy Recipe Today!

Introduction to Sweet Cream Pancakes

There’s something magical about waking up to the smell of pancakes wafting through the house. Sweet cream pancakes are my go-to for those lazy Sunday mornings or when I want to impress friends at brunch. They’re fluffy, delicious, and surprisingly easy to whip up. Whether you’re a busy dad looking for a quick breakfast solution or someone wanting to treat loved ones to a special meal, this recipe has you covered. With just a few simple ingredients, you can create a stack of pancakes that will make everyone smile. Let’s dive into this delightful culinary adventure!

Why You’ll Love This Sweet Cream Pancakes

Sweet cream pancakes are not just a breakfast; they’re an experience. They come together in a flash, making them perfect for busy mornings or spontaneous brunches. The taste? Absolutely divine! Each bite is a fluffy cloud of sweetness that pairs beautifully with syrup or fresh fruit. Plus, they’re versatile enough to please even the pickiest eaters. Trust me, once you try these, they’ll become a staple in your kitchen!

Ingredients for Sweet Cream Pancakes

Gathering the right ingredients is the first step to pancake perfection. Here’s what you’ll need to create these fluffy delights:

  • All-purpose flour: The backbone of your pancakes, providing structure and fluffiness.
  • Granulated sugar: Adds a touch of sweetness, balancing the flavors beautifully.
  • Baking powder: This leavening agent is key for that light, airy texture.
  • Baking soda: Works alongside baking powder to help the pancakes rise even more.
  • Salt: Just a pinch enhances the overall flavor, making the sweetness pop.
  • Large eggs: They bind the ingredients together and add richness.
  • Buttermilk: This tangy ingredient makes the pancakes tender and adds depth to the flavor.
  • Heavy cream: For that luxurious, sweet creaminess that takes these pancakes to the next level.
  • Vanilla extract: A splash of this adds warmth and a lovely aroma.
  • Unsalted butter: Melted and folded in, it enriches the batter and gives a delicious flavor.

Feel free to get creative! You can add chocolate chips or blueberries for a fun twist. If you’re out of buttermilk, regular milk works in a pinch—just add a splash of vinegar to mimic the tang. For exact measurements, check the bottom of the article where you can find everything ready for printing.

How to Make Sweet Cream Pancakes

Now that you have your ingredients ready, it’s time to bring these sweet cream pancakes to life! Follow these simple steps, and you’ll be flipping pancakes like a pro in no time.

Step 1: Prepare the Dry Ingredients

In a large mixing bowl, whisk together the all-purpose flour, granulated sugar, baking powder, baking soda, and salt. This combination is crucial for achieving that fluffy texture we all crave. Make sure there are no lumps; a smooth mix is key!

Step 2: Mix the Wet Ingredients

In another bowl, beat the large eggs until they’re frothy. Then, add the buttermilk, heavy cream, and vanilla extract. Mix everything until well combined. The wet ingredients are what will make your pancakes rich and flavorful, so don’t rush this step!

Step 3: Combine Wet and Dry Ingredients

Now, pour the wet mixture into the bowl with the dry ingredients. Stir gently until just combined. Remember, overmixing can lead to tough pancakes, and nobody wants that! A few lumps are perfectly fine.

Step 4: Add Melted Butter

Next, fold in the melted butter. This step enhances the flavor and adds a lovely richness to your pancakes. Just be gentle; we want to keep that fluffy texture intact!

Step 5: Preheat the Cooking Surface

Preheat a non-stick skillet or griddle over medium heat. Lightly grease it with butter or cooking spray. A well-heated surface is essential for achieving that golden-brown crust on your pancakes.

Step 6: Cook the Pancakes

Pour 1/4 cup of batter onto the skillet for each pancake. Cook until bubbles form on the surface and the edges look set, about 2-3 minutes. Then, flip and cook for an additional 1-2 minutes until golden brown. The aroma will be irresistible!

Step 7: Serve and Enjoy

Serve your sweet cream pancakes warm with your favorite syrup, fresh fruit, or a dollop of whipped cream. Each bite is a fluffy delight that will make your breakfast feel special. Enjoy the smiles around the table!

Tips for Success

  • Let the batter rest for 10-15 minutes for extra fluffiness.
  • Use room temperature ingredients for better mixing.
  • Don’t overcrowd the skillet; cook in batches for even browning.
  • Keep pancakes warm in a low oven while cooking the rest.
  • Experiment with add-ins like chocolate chips or nuts for variety.

Equipment Needed

  • Mixing bowls: A set of two will do—one for dry and one for wet ingredients.
  • Whisk: Essential for blending ingredients smoothly; a fork can work in a pinch.
  • Non-stick skillet or griddle: Ensures easy flipping; a cast-iron skillet is a great alternative.
  • Measuring cups and spoons: For accurate ingredient portions; a kitchen scale can also help.

Variations

  • Chocolate Chip Sweet Cream Pancakes: Fold in a handful of chocolate chips for a decadent twist that will satisfy any sweet tooth.
  • Blueberry Sweet Cream Pancakes: Add fresh or frozen blueberries to the batter for a burst of fruity flavor in every bite.
  • Whole Wheat Sweet Cream Pancakes: Substitute half of the all-purpose flour with whole wheat flour for a healthier option that still tastes great.
  • Vegan Sweet Cream Pancakes: Replace eggs with flaxseed meal and use almond milk instead of buttermilk for a plant-based version.
  • Spiced Sweet Cream Pancakes: Add a pinch of cinnamon or nutmeg to the batter for a warm, cozy flavor that’s perfect for fall.

Serving Suggestions

  • Fresh Fruit: Serve with sliced bananas, strawberries, or blueberries for a refreshing touch.
  • Maple Syrup: Drizzle with pure maple syrup for that classic pancake experience.
  • Whipped Cream: Top with a dollop of whipped cream for extra indulgence.
  • Breakfast Drinks: Pair with freshly brewed coffee or a glass of orange juice.

FAQs about Sweet Cream Pancakes

Can I make Sweet Cream Pancakes ahead of time?

Absolutely! You can prepare the batter the night before and store it in the fridge. Just give it a gentle stir before cooking. For cooked pancakes, keep them warm in a low oven until ready to serve.

What can I substitute for buttermilk?

If you don’t have buttermilk on hand, mix regular milk with a tablespoon of vinegar or lemon juice. Let it sit for about 5 minutes, and you’ll have a perfect buttermilk substitute for your sweet cream pancakes.

How do I store leftover pancakes?

Store any leftover pancakes in an airtight container in the fridge for up to 3 days. You can also freeze them! Just layer them with parchment paper and place them in a freezer bag. Reheat in the toaster or microwave when you’re ready to enjoy.

Can I make these pancakes gluten-free?

Yes! Substitute the all-purpose flour with a gluten-free flour blend. Just make sure it contains xanthan gum for the best texture. Your sweet cream pancakes will still be fluffy and delicious!

What toppings go well with Sweet Cream Pancakes?

These pancakes are versatile! Top them with fresh fruit, maple syrup, or even a sprinkle of powdered sugar. For a decadent treat, add chocolate chips or a dollop of whipped cream. The possibilities are endless!

Final Thoughts

Sweet cream pancakes are more than just a breakfast dish; they’re a celebration of simple pleasures. Each fluffy bite brings back memories of family gatherings and lazy mornings, where laughter and good food go hand in hand. This recipe is a canvas for creativity, allowing you to add your favorite flavors and toppings. Whether you’re cooking for yourself or sharing with loved ones, these pancakes create moments of joy and connection. So, grab your ingredients, fire up that skillet, and let the aroma of sweet cream pancakes fill your home. Trust me, it’s a delicious journey worth taking!

jhessica

Sweet Cream Pancakes: Discover the Fluffy Recipe Today!

Deliciously fluffy sweet cream pancakes perfect for breakfast or brunch.
Prep Time 10 minutes
Cook Time 15 minutes
Total Time 25 minutes
Course: Breakfast
Cuisine: American
Calories: 320

Ingredients
  

  • 2 cups all-purpose flour
  • 2 tablespoons granulated sugar
  • 1 tablespoon baking powder
  • 1/2 teaspoon baking soda
  • 1/2 teaspoon salt
  • 2 large eggs
  • 1 1/2 cups buttermilk
  • 1/2 cup heavy cream
  • 1 teaspoon vanilla extract
  • 4 tablespoons unsalted butter melted

Method
 

  1. In a large mixing bowl, whisk together the flour, sugar, baking powder, baking soda, and salt.
  2. In another bowl, beat the eggs and then add the buttermilk, heavy cream, and vanilla extract. Mix until well combined.
  3. Pour the wet ingredients into the dry ingredients and stir gently until just combined; do not overmix.
  4. Fold in the melted butter.
  5. Preheat a non-stick skillet or griddle over medium heat. Lightly grease with butter or cooking spray.
  6. Pour 1/4 cup of batter onto the skillet for each pancake. Cook until bubbles form on the surface and the edges look set, about 2-3 minutes.
  7. Flip and cook for an additional 1-2 minutes until golden brown. Repeat with remaining batter.
  8. Serve warm with your favorite syrup, fresh fruit, or whipped cream.

Nutrition

Serving: 1pancakeCalories: 320kcalCarbohydrates: 42gProtein: 7gFat: 14gSaturated Fat: 8gPolyunsaturated Fat: 6gCholesterol: 70mgSodium: 400mgFiber: 1gSugar: 6g

Notes

  • For fluffier pancakes, let the batter rest for 10-15 minutes before cooking.
  • Add chocolate chips or blueberries to the batter for a fun twist.

Tried this recipe?

Let us know how it was!

Loaded Salmon Rice Bowl: A Flavorful Recipe to Try!

Introduction to Loaded Salmon Rice Bowl

There’s something magical about a meal that feels both indulgent and healthy at the same time. The Loaded Salmon Rice Bowl is just that—a delightful blend of flavors and textures that can brighten any busy day. Whether you’re looking to impress your family or simply treat yourself after a long week, this dish is a quick solution that doesn’t skimp on taste. With baked salmon, fresh veggies, and hearty brown rice, it’s a nourishing bowl that satisfies both the palate and the soul. Let’s dive into this culinary adventure together!

Why You’ll Love This Loaded Salmon Rice Bowl

This Loaded Salmon Rice Bowl is a game-changer for anyone juggling a busy lifestyle. It’s quick to prepare, taking just 25 minutes from start to finish. The combination of tender salmon, vibrant veggies, and wholesome brown rice creates a flavor explosion that’s hard to resist. Plus, it’s packed with nutrients, making it a guilt-free indulgence. You’ll find yourself reaching for this recipe again and again, and your taste buds will thank you!

Ingredients for Loaded Salmon Rice Bowl

Gathering the right ingredients is the first step to creating your Loaded Salmon Rice Bowl. Each component plays a vital role in building flavor and nutrition. Here’s what you’ll need:

  • Cooked brown rice: This hearty base adds fiber and a nutty flavor, making it a healthier alternative to white rice.
  • Salmon fillets: Rich in omega-3 fatty acids, salmon is the star of this dish, providing a deliciously flaky texture when baked.
  • Olive oil: A drizzle of this healthy fat enhances flavor and helps the spices stick to the salmon.
  • Garlic powder: This adds a savory depth, making the salmon even more irresistible.
  • Onion powder: A subtle sweetness complements the garlic, creating a well-rounded flavor profile.
  • Smoked paprika: This spice brings a hint of smokiness, elevating the dish to new heights.
  • Salt and pepper: Essential for seasoning, these staples enhance all the flavors in your bowl.
  • Cherry tomatoes: Their juicy sweetness adds a burst of freshness and color.
  • Avocado: Creamy and rich, avocado provides healthy fats and a luxurious texture.
  • Corn: Whether fresh, frozen, or canned, corn adds a sweet crunch that balances the dish.
  • Green onions: These bring a mild onion flavor and a pop of color to your bowl.
  • Cilantro: Fresh cilantro adds a bright, herbaceous note that ties everything together.
  • Lime juice: A squeeze of lime brightens the flavors and adds a zesty kick.
  • Feta cheese (optional): Crumbled feta adds a tangy creaminess, perfect for those who enjoy a little extra flavor.

For exact measurements, check the bottom of the article where you can find everything listed for easy printing. Feel free to mix and match ingredients based on your preferences or what you have on hand!

How to Make Loaded Salmon Rice Bowl

Creating your Loaded Salmon Rice Bowl is a straightforward process that’s as enjoyable as it is delicious. Follow these simple steps, and you’ll have a vibrant meal ready in no time!

Step 1: Preheat the Oven

Start by preheating your oven to 400°F. This step is crucial because it ensures even cooking. While the oven heats up, line a baking sheet with parchment paper. This makes cleanup a breeze and prevents the salmon from sticking.

Step 2: Prepare the Salmon

Next, place your salmon fillets on the prepared baking sheet. Drizzle them with olive oil, then sprinkle garlic powder, onion powder, smoked paprika, salt, and pepper over the top. These spices not only enhance the flavor but also create a beautiful crust as the salmon bakes.

Step 3: Bake the Salmon

Slide the baking sheet into the oven and bake the salmon for 12-15 minutes. Keep an eye on it! You’ll know it’s done when it flakes easily with a fork. This is the perfect time to enjoy the mouthwatering aroma filling your kitchen.

Step 4: Prepare the Toppings

While the salmon is baking, it’s time to prep your toppings. In a bowl, combine cherry tomatoes, corn, diced avocado, green onions, cilantro, and a squeeze of lime juice. Mixing these fresh vegetables not only adds color but also boosts the nutritional value of your bowl.

Step 5: Flake the Salmon

Once the salmon is out of the oven and has cooled for a few minutes, use a fork to flake it into bite-sized pieces. This method makes it easy to distribute the salmon evenly across your bowls, ensuring every bite is packed with flavor.

Step 6: Assemble the Bowls

Now comes the fun part! Divide the cooked brown rice among your serving bowls. Top each bowl with a generous portion of flaked salmon and the vibrant vegetable mixture. Layering the ingredients not only looks appealing but also allows for a delightful mix of flavors in every bite.

Step 7: Add Optional Toppings

If you’re feeling adventurous, sprinkle some crumbled feta cheese on top for an extra burst of flavor. For those who like a little heat, consider adding diced jalapeños or a drizzle of sriracha. Customize your Loaded Salmon Rice Bowl to suit your taste!

Tips for Success

  • Use a meat thermometer to check salmon doneness; it should reach 145°F.
  • Let the salmon rest for a few minutes before flaking to retain moisture.
  • Prep your veggies while the salmon bakes to save time.
  • Experiment with different toppings like pickled onions or sesame seeds for added flavor.
  • Store leftovers in an airtight container for up to three days.

Equipment Needed

  • Baking sheet: A standard sheet works, but a cast-iron skillet can add a nice sear.
  • Parchment paper: Use aluminum foil if you don’t have parchment; it’ll still prevent sticking.
  • Mixing bowl: Any bowl will do, but a large one makes mixing easier.
  • Fork: Essential for flaking the salmon; a sturdy spatula can work too.

Variations

  • Quinoa Base: Swap brown rice for quinoa for a protein-packed alternative that’s gluten-free.
  • Cauliflower Rice: For a low-carb option, use cauliflower rice instead of brown rice; it’s light and fluffy!
  • Spicy Twist: Add diced jalapeños or a drizzle of sriracha for a spicy kick that elevates the flavor.
  • Vegetarian Version: Replace salmon with grilled tofu or chickpeas for a hearty vegetarian bowl.
  • Seasonal Veggies: Incorporate seasonal vegetables like bell peppers or zucchini for added freshness and variety.

Serving Suggestions

  • Pair your Loaded Salmon Rice Bowl with a crisp green salad for a refreshing contrast.
  • A chilled glass of white wine, like Sauvignon Blanc, complements the flavors beautifully.
  • For a fun presentation, serve in colorful bowls to highlight the vibrant ingredients.
  • Consider adding a side of garlic bread for a satisfying crunch.

FAQs about Loaded Salmon Rice Bowl

Can I use frozen salmon for this recipe?

Absolutely! Just make sure to thaw it completely before seasoning and baking. Frozen salmon can be just as delicious when cooked properly.

What can I substitute for brown rice?

If brown rice isn’t your thing, quinoa or cauliflower rice are excellent alternatives. They both offer unique flavors and textures while keeping the dish healthy.

How can I make this dish spicier?

For a spicy kick, add diced jalapeños or a drizzle of sriracha on top. You can also mix in some red pepper flakes for an extra punch!

Can I meal prep this Loaded Salmon Rice Bowl?

Definitely! This bowl is perfect for meal prep. Just store the components separately in airtight containers, and assemble when you’re ready to eat.

Is this recipe gluten-free?

Yes! The Loaded Salmon Rice Bowl is naturally gluten-free, making it a great option for those with dietary restrictions.

Final Thoughts

Creating a Loaded Salmon Rice Bowl is more than just cooking; it’s about bringing joy to your table. Each bite is a celebration of flavors, textures, and colors that can brighten even the busiest of days. This dish not only nourishes the body but also warms the heart, making it perfect for family dinners or a solo treat. Plus, the ease of preparation means you can whip it up without stress. So, gather your ingredients, unleash your inner chef, and enjoy the delightful experience of crafting this wholesome meal. Your taste buds will thank you!

jhessica

Loaded Salmon Rice Bowl: A Flavorful Recipe to Try!

A delicious and nutritious Loaded Salmon Rice Bowl featuring baked salmon, fresh vegetables, and brown rice.
Prep Time 10 minutes
Cook Time 15 minutes
Total Time 25 minutes
Servings: 4 servings
Course: Main Dish
Cuisine: American
Calories: 450

Ingredients
  

  • 2 cups cooked brown rice
  • 1 pound salmon fillets
  • 2 tablespoons olive oil
  • 1 teaspoon garlic powder
  • 1 teaspoon onion powder
  • 1 teaspoon smoked paprika
  • Salt and pepper to taste
  • 1 cup cherry tomatoes halved
  • 1 avocado diced
  • 1 cup corn fresh, frozen, or canned
  • 1/4 cup green onions sliced
  • 1/4 cup fresh cilantro chopped
  • Juice of 1 lime
  • 1/4 cup feta cheese optional

Method
 

  1. Preheat the oven to 400°F. Line a baking sheet with parchment paper.
  2. Place the salmon fillets on the prepared baking sheet. Drizzle with olive oil and season with garlic powder, onion powder, smoked paprika, salt, and pepper.
  3. Bake the salmon in the preheated oven for 12-15 minutes, or until it flakes easily with a fork.
  4. While the salmon is baking, prepare the toppings. In a bowl, combine cherry tomatoes, corn, diced avocado, green onions, cilantro, and lime juice. Mix gently to combine.
  5. Once the salmon is done, remove it from the oven and let it cool for a few minutes. Flake the salmon with a fork.
  6. To assemble the bowls, divide the cooked brown rice among serving bowls. Top each bowl with flaked salmon and the vegetable mixture.
  7. If desired, sprinkle feta cheese on top before serving.

Nutrition

Serving: 1bowlCalories: 450kcalCarbohydrates: 40gProtein: 30gFat: 20gSaturated Fat: 3gPolyunsaturated Fat: 15gCholesterol: 70mgSodium: 300mgFiber: 6gSugar: 3g

Notes

  • For a spicy kick, add diced jalapeños or a drizzle of sriracha on top.
  • Substitute quinoa or cauliflower rice for a different base or to make it lower in carbs.

Tried this recipe?

Let us know how it was!

Stay Connected

Get recipes via email: