Get my cookbooks

Garlic Butter Chicken Pasta: A Quick, Creamy Delight!

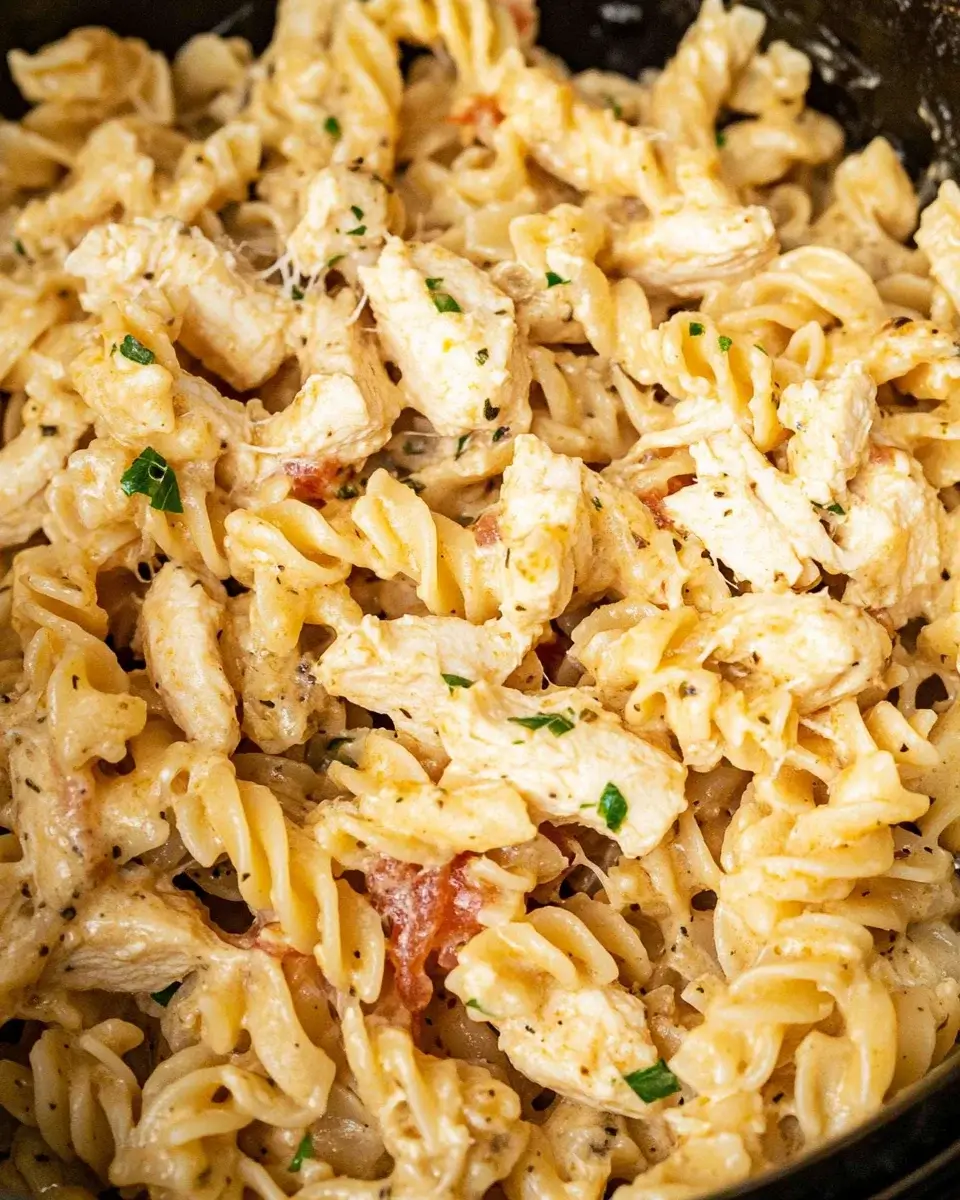
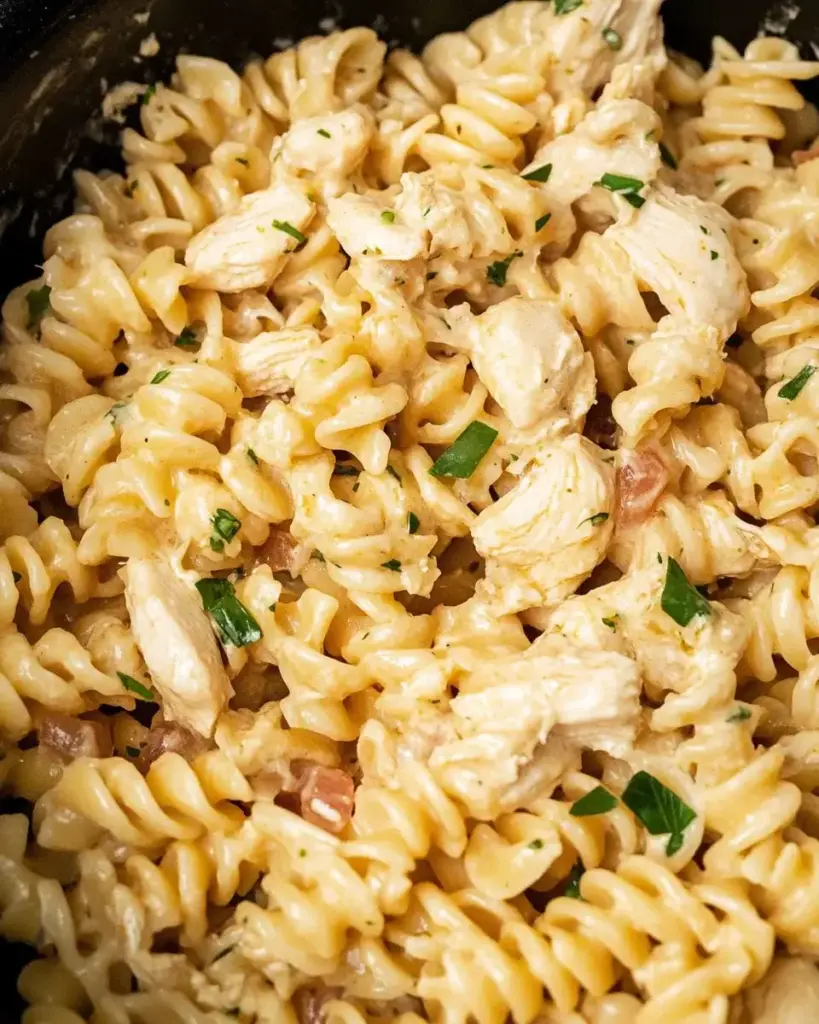
Introduction to Garlic Butter Chicken Pasta

After a long day, the last thing I want is to spend hours in the kitchen. That’s where my go-to recipe, Garlic Butter Chicken Pasta, comes in. It’s a creamy delight that’s not only quick to whip up but also packed with flavor. Imagine the rich aroma of garlic wafting through your home as you prepare this dish. It’s perfect for impressing your loved ones or simply treating yourself to a comforting meal. With just a few ingredients and minimal effort, you can create a satisfying dinner that feels like a warm hug on a plate.

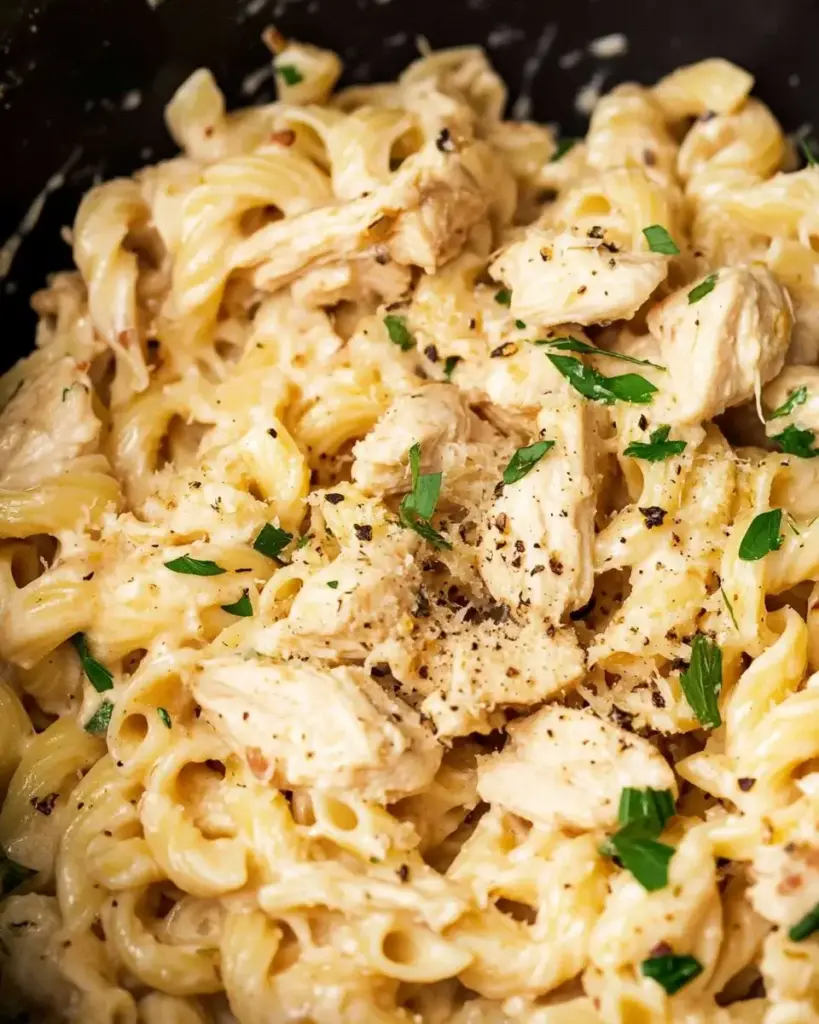
Why You’ll Love This Garlic Butter Chicken Pasta

This Garlic Butter Chicken Pasta is a lifesaver for busy weeknights. It’s quick to prepare, taking just 30 minutes from start to finish. The creamy sauce, infused with garlic and butter, creates a flavor explosion that will have everyone asking for seconds. Plus, it’s versatile enough to adapt to your taste. Whether you’re cooking for family or friends, this dish guarantees smiles all around.

Ingredients for Garlic Butter Chicken Pasta

Gathering the right ingredients is the first step to creating this delicious Garlic Butter Chicken Pasta. Here’s what you’ll need:

  • Penne pasta: This tubular pasta holds onto the creamy sauce beautifully, making every bite satisfying.
  • Boneless, skinless chicken breasts: Tender and easy to cook, they soak up the flavors of the garlic and butter.
  • Unsalted butter: The star of the show, it adds richness and depth to the sauce.
  • Garlic: Freshly minced garlic brings a punch of flavor that elevates the dish.
  • Italian seasoning: A blend of herbs that adds a touch of Mediterranean flair.
  • Red pepper flakes (optional): For those who like a little heat, these flakes add a nice kick.
  • Chicken broth: This liquid gold enhances the sauce, making it savory and comforting.
  • Heavy cream: The secret to that luscious, creamy texture that coats the pasta perfectly.
  • Parmesan cheese: Grated and stirred in, it adds a salty, nutty flavor that ties everything together.
  • Salt and pepper: Essential for seasoning, they help bring out the flavors of the other ingredients.
  • Fresh parsley: A sprinkle of this vibrant herb not only adds color but also a fresh taste.

For those looking to add a bit more nutrition, consider tossing in some spinach or cherry tomatoes during the last few minutes of cooking. If you want a lighter version, you can substitute half-and-half for the heavy cream and reduce the butter. The exact quantities for each ingredient are listed at the bottom of the article for easy printing.

How to Make Garlic Butter Chicken Pasta

Now that you have all your ingredients ready, let’s dive into the steps to create this mouthwatering Garlic Butter Chicken Pasta. Each step is straightforward, ensuring you can whip this up even on the busiest of nights.

Step 1: Cook the Pasta

Start by boiling a large pot of salted water. Add the penne pasta and cook according to the package instructions until it’s al dente. This usually takes about 8-10 minutes. Once done, drain the pasta and set it aside. Remember, a little bit of pasta water can be a lifesaver later, so don’t rinse it!

Step 2: Sauté the Chicken

In a large skillet, melt the unsalted butter over medium heat. Once it’s bubbling, toss in the bite-sized chicken pieces. Season them with salt and pepper. Cook for about 5-7 minutes, stirring occasionally, until the chicken is golden brown and cooked through. This step is crucial for building flavor, so don’t rush it!

Step 3: Add Garlic and Seasonings

Next, add the minced garlic, Italian seasoning, and red pepper flakes to the skillet. Sauté everything for about a minute until the garlic becomes fragrant. This is where the magic happens—the aroma will make your kitchen feel like an Italian bistro!

Step 4: Simmer with Chicken Broth

Pour in the chicken broth and bring the mixture to a gentle simmer. Let it cook for 2-3 minutes. This step helps to deglaze the pan, lifting all those delicious bits stuck to the bottom. It’s all about maximizing flavor!

Step 5: Incorporate Heavy Cream

Now, stir in the heavy cream and bring the mixture back to a simmer. Allow it to cook for another 2-3 minutes until the sauce thickens slightly. This creamy goodness is what makes the dish so indulgent. If you’re looking for a lighter option, remember you can swap the heavy cream for half-and-half.

Step 6: Combine Pasta and Sauce

Time to bring it all together! Add the cooked penne pasta and grated Parmesan cheese to the skillet. Toss everything together until the pasta is well coated in that luscious sauce. If it seems too thick, a splash of reserved pasta water can help loosen it up.

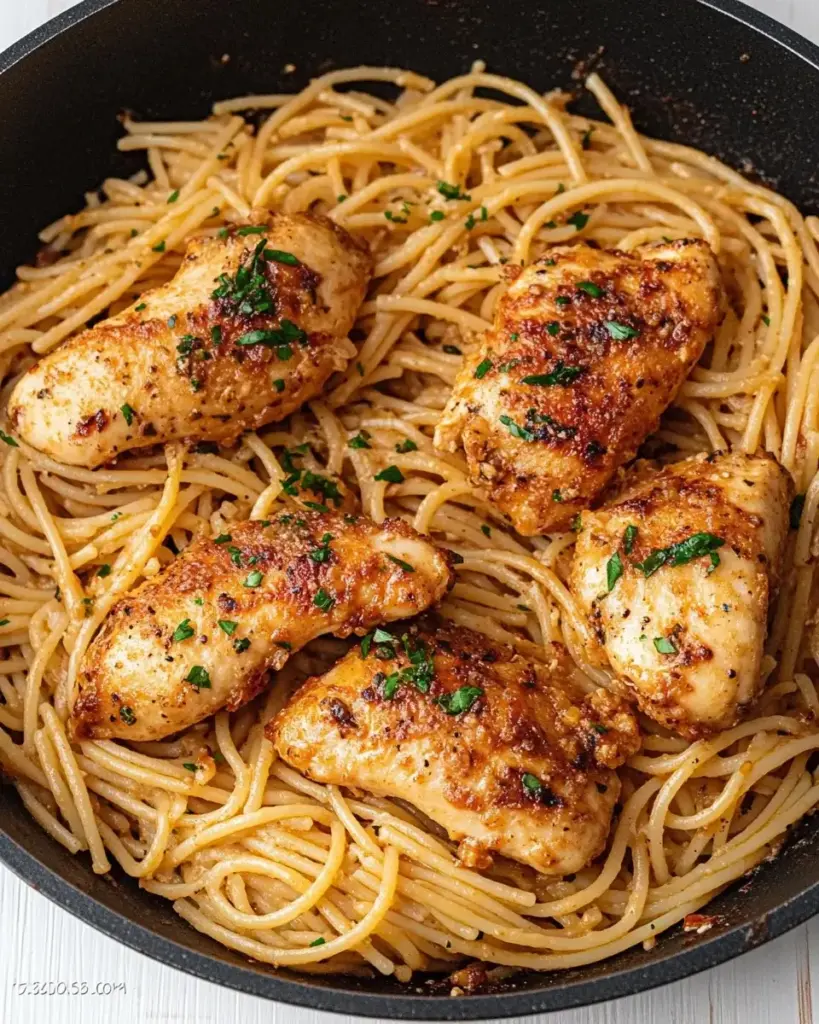
Step 7: Adjust Seasoning and Serve

Finally, taste your creation and adjust the seasoning with more salt and pepper if needed. Serve hot, garnished with fresh parsley for a pop of color and flavor. Enjoy your Garlic Butter Chicken Pasta, and watch as everyone digs in with delight!

Tips for Success

  • Always salt your pasta water; it enhances the flavor of the pasta.
  • Don’t overcook the chicken; it should be juicy and tender.
  • Use fresh garlic for the best flavor; it makes a noticeable difference.
  • Reserve some pasta water to adjust the sauce consistency if needed.
  • Garnish with parsley just before serving for a fresh touch.

Equipment Needed

  • Large pot: For boiling pasta; a Dutch oven works well too.
  • Skillet: A non-stick skillet is ideal for sautéing; cast iron is a great alternative.
  • Colander: For draining pasta; a slotted spoon can work in a pinch.
  • Measuring cups: Essential for accurate ingredient portions.

Variations of Garlic Butter Chicken Pasta

  • Vegetable Boost: Add spinach, cherry tomatoes, or bell peppers for extra nutrition and color.
  • Protein Swap: Substitute chicken with shrimp or tofu for a different protein option.
  • Whole Wheat Pasta: Use whole wheat penne for a healthier, fiber-rich alternative.
  • Gluten-Free Option: Opt for gluten-free pasta to accommodate dietary restrictions.
  • Herb Infusion: Experiment with fresh herbs like basil or thyme for a fragrant twist.
  • Spicy Kick: Increase the red pepper flakes or add a dash of hot sauce for heat lovers.

Serving Suggestions for Garlic Butter Chicken Pasta

  • Garlic Bread: Serve with warm, crusty garlic bread for a classic pairing.
  • Side Salad: A fresh Caesar or mixed greens salad adds a refreshing crunch.
  • Wine Pairing: A chilled white wine, like Pinot Grigio, complements the dish beautifully.
  • Presentation: Serve in shallow bowls, garnished with extra Parmesan and parsley for a restaurant-style look.

FAQs about Garlic Butter Chicken Pasta

Can I make Garlic Butter Chicken Pasta ahead of time?

Absolutely! You can prepare the chicken and sauce in advance. Just cook the pasta fresh when you’re ready to serve. This way, you’ll have a quick dinner ready in no time!

What can I substitute for heavy cream?

If you want a lighter option, half-and-half works well. You can also use coconut milk for a dairy-free alternative, though it will change the flavor slightly.

How do I store leftovers?

Store any leftovers in an airtight container in the fridge for up to three days. Reheat gently on the stovetop, adding a splash of chicken broth or water to loosen the sauce.

Can I use a different type of pasta?

Definitely! While penne is perfect for this dish, feel free to use any pasta shape you love. Fusilli or farfalle would also work beautifully.

Is this dish suitable for meal prep?

Yes! Garlic Butter Chicken Pasta is great for meal prep. Just portion it out into containers for easy lunches or dinners throughout the week.
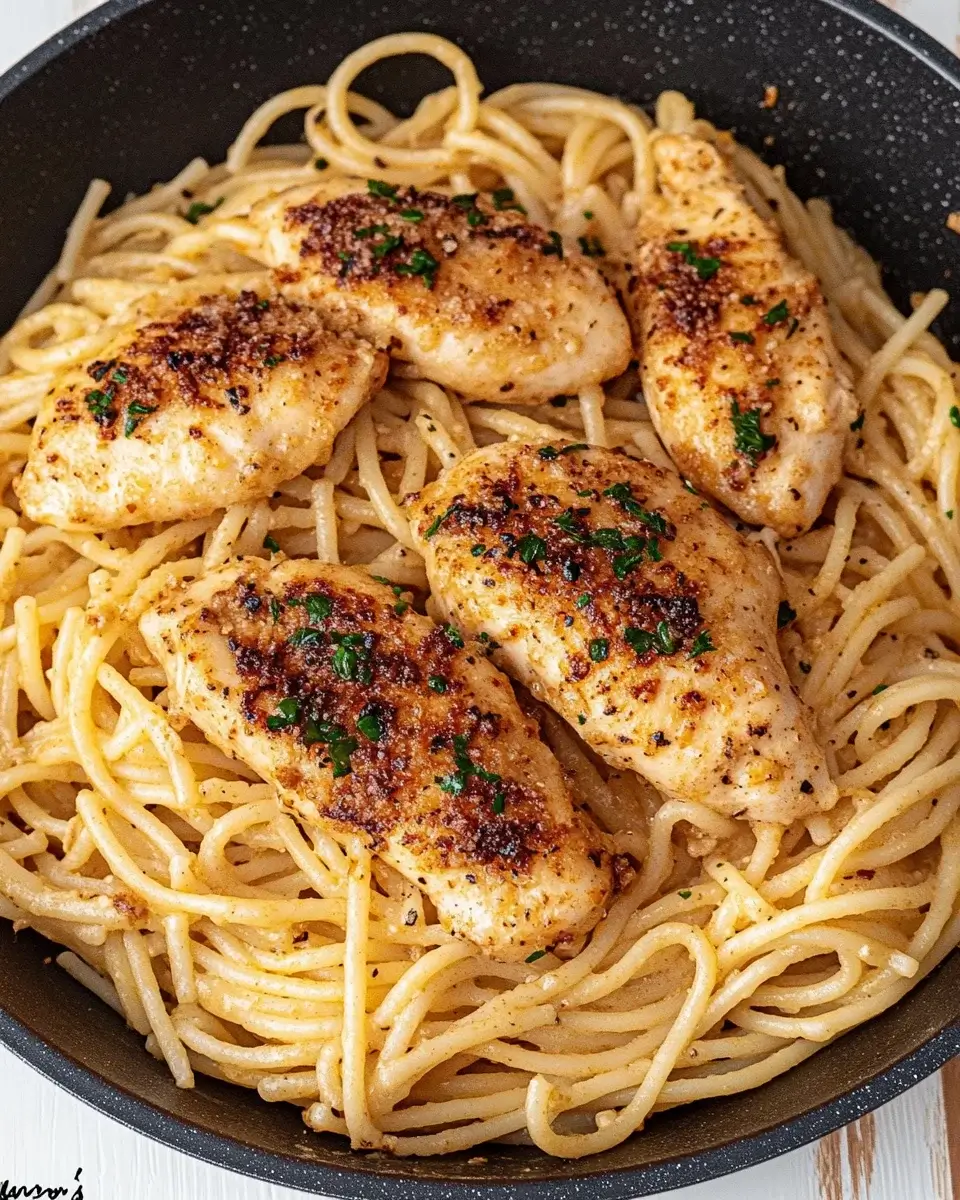
Final Thoughts

Cooking Garlic Butter Chicken Pasta is more than just preparing a meal; it’s about creating moments. The rich, creamy sauce and tender chicken come together to form a dish that warms the heart and satisfies the soul. Whether you’re sharing it with family or enjoying a quiet night in, this recipe brings a sense of comfort and joy. Plus, the ease of preparation means you can focus on what truly matters—enjoying good food and great company. So, roll up your sleeves, embrace the aromas, and let this delightful dish become a staple in your kitchen!

jhessica

Garlic Butter Chicken Pasta: A Quick, Creamy Delight!

A quick and creamy garlic butter chicken pasta dish that’s perfect for a weeknight dinner.
Prep Time 10 minutes
Cook Time 20 minutes
Total Time 30 minutes
Servings: 4 servings
Course: Pasta
Cuisine: Italian
Calories: 620

Ingredients
  

  • 8 ounces penne pasta
  • 1 pound boneless skinless chicken breasts, cut into bite-sized pieces
  • 3 tablespoons unsalted butter
  • 4 cloves garlic minced
  • 1 teaspoon Italian seasoning
  • 1/2 teaspoon red pepper flakes optional
  • 1 cup chicken broth
  • 1 cup heavy cream
  • 1 cup grated Parmesan cheese
  • Salt and pepper to taste
  • Fresh parsley chopped (for garnish)

Method
 

  1. Cook the penne pasta according to package instructions until al dente. Drain and set aside.
  2. In a large skillet over medium heat, melt the butter. Add the chicken pieces and season with salt and pepper. Cook until the chicken is browned and cooked through, about 5-7 minutes.
  3. Add the minced garlic, Italian seasoning, and red pepper flakes to the skillet. Sauté for about 1 minute until fragrant.
  4. Pour in the chicken broth and bring to a simmer. Allow it to cook for 2-3 minutes.
  5. Stir in the heavy cream and bring the mixture back to a gentle simmer. Let it cook for another 2-3 minutes until slightly thickened.
  6. Add the cooked penne pasta and Parmesan cheese to the skillet. Toss everything together until the pasta is well coated in the sauce.
  7. Taste and adjust seasoning with more salt and pepper if needed.
  8. Serve hot, garnished with chopped parsley.

Nutrition

Serving: 1servingCalories: 620kcalCarbohydrates: 40gProtein: 36gFat: 38gSaturated Fat: 23gPolyunsaturated Fat: 10gCholesterol: 150mgSodium: 800mgFiber: 2gSugar: 2g

Notes

  • For added vegetables, consider tossing in some spinach or cherry tomatoes during the last few minutes of cooking.
  • To make it lighter, substitute half-and-half for heavy cream and reduce the amount of butter.

Tried this recipe?

Let us know how it was!

Caribbean Chicken and Rice: A Flavorful Dish to Try!

Introduction to Caribbean Chicken and Rice

There’s something magical about the vibrant flavors of the Caribbean that can transport you to sun-soaked beaches, even if you’re just in your kitchen. Caribbean Chicken and Rice is more than just a meal; it’s a celebration of life, perfect for those busy weeknights or when you want to impress your loved ones. This dish combines tender chicken with aromatic rice, all cooked in creamy coconut milk, creating a symphony of flavors that dance on your palate. Whether you’re a seasoned cook or just starting out, this recipe is a quick solution that brings warmth and joy to your table.

Why You’ll Love This Caribbean Chicken and Rice

This Caribbean Chicken and Rice dish is a game-changer for anyone looking to whip up a delicious meal without spending hours in the kitchen. It’s quick, taking just 40 minutes from start to finish, and the flavors are simply irresistible. The creamy coconut milk adds a rich depth, while the colorful veggies make it visually appealing. Plus, it’s a one-pan wonder, which means less cleanup and more time to enjoy your meal!

Ingredients for Caribbean Chicken and Rice

Gathering the right ingredients is the first step to creating this delightful Caribbean Chicken and Rice dish. Each component plays a vital role in building the flavors that make this meal so special. Here’s what you’ll need:

  • Vegetable oil: This is your cooking base, perfect for sautéing the chicken and veggies.
  • Boneless, skinless chicken thighs: Tender and juicy, they soak up all the delicious flavors.
  • Salt and black pepper: Essential seasonings that enhance the overall taste.
  • Paprika: Adds a subtle smokiness and vibrant color to the dish.
  • Garlic powder and onion powder: These bring depth and a savory aroma without the fuss of fresh ingredients.
  • Dried thyme: A classic herb that complements the chicken beautifully.
  • Cumin: This spice adds a warm, earthy flavor that’s characteristic of Caribbean cuisine.
  • Long-grain white rice: The perfect canvas for soaking up the coconut milk and broth.
  • Coconut milk: This creamy ingredient is the star of the show, lending a rich, tropical flavor.
  • Chicken broth: Enhances the dish’s savory profile and adds moisture.
  • Diced bell peppers: A colorful mix of red, green, and yellow peppers adds sweetness and crunch.
  • Diced onion: Provides a foundational flavor that ties everything together.
  • Frozen peas: These little gems add a pop of color and a touch of sweetness.
  • Fresh lime juice: A splash of acidity brightens the dish and balances the richness.
  • Chopped fresh cilantro: A fragrant garnish that adds freshness and a burst of flavor.

For those looking to spice things up, consider adding diced jalapeños or a pinch of cayenne pepper for heat. If you prefer a gluten-free option, quinoa can be substituted for rice, boosting the protein content while keeping it delicious. Exact measurements for each ingredient can be found at the bottom of the article, ready for printing!

How to Make Caribbean Chicken and Rice

Creating this Caribbean Chicken and Rice dish is a breeze. Follow these simple steps, and you’ll have a flavorful meal that impresses everyone at the table. Let’s dive in!

Step 1: Sauté the Chicken

Start by heating the vegetable oil in a large skillet over medium-high heat. Once hot, add the bite-sized chicken pieces. Season them with salt, black pepper, paprika, garlic powder, onion powder, thyme, and cumin. Cook for about 5-7 minutes until the chicken is browned and cooked through. This step is crucial; it locks in the flavors. Once done, remove the chicken from the skillet and set it aside.

Step 2: Cook the Vegetables

In the same skillet, toss in the diced onion and bell peppers. Sauté these colorful veggies for about 3-4 minutes until they soften. The aroma will fill your kitchen, making it hard to resist. This step adds a fresh crunch and sweetness to the dish.

Step 3: Toast the Rice

Next, stir in the long-grain white rice. Cook it for an additional 1-2 minutes, allowing the rice to toast slightly. This enhances its flavor and gives it a nutty aroma. Trust me, this little step makes a big difference!

Step 4: Combine Liquids and Simmer

Now, pour in the coconut milk and chicken broth, stirring to combine everything. Bring the mixture to a boil. Once boiling, reduce the heat to low, cover the skillet, and let it simmer for about 15 minutes. This is when the rice absorbs all that creamy goodness, so resist the urge to peek too often!

Step 5: Add Chicken and Peas

After the rice is tender, add the cooked chicken back into the skillet along with the frozen peas and fresh lime juice. Stir gently to combine everything. Cook for another 5 minutes until everything is heated through. The peas add a pop of color and sweetness, balancing the dish perfectly.

Step 6: Let it Rest

Finally, remove the skillet from heat and let it sit, covered, for 5 minutes before serving. This resting time allows the flavors to meld beautifully. When you’re ready to serve, garnish with chopped fresh cilantro for that extra burst of flavor. Enjoy your Caribbean Chicken and Rice!

Tips for Success

  • Prep all your ingredients before starting to cook. It makes the process smoother.
  • Don’t skip the resting time; it helps the flavors develop.
  • Adjust the seasoning to your taste. Everyone’s palate is different!
  • For a creamier texture, use full-fat coconut milk.
  • Feel free to add your favorite veggies for extra nutrition and flavor.

Equipment Needed

  • Large skillet: A non-stick skillet works wonders for easy cooking and cleanup.
  • Wooden spoon: Perfect for stirring without scratching your skillet.
  • Measuring cups: Essential for accurate ingredient portions.
  • Cutting board and knife: For chopping veggies and chicken.
  • Lid: To cover the skillet while simmering.

Variations

  • For a spicy kick, add diced jalapeños or a sprinkle of cayenne pepper when cooking the chicken.
  • Swap out the chicken for shrimp or tofu for a seafood or vegetarian twist.
  • Use brown rice instead of white for a nuttier flavor and added fiber.
  • Incorporate tropical fruits like pineapple or mango for a sweet contrast to the savory elements.
  • Try adding black beans for extra protein and a hearty texture.

Serving Suggestions

  • Pair your Caribbean Chicken and Rice with a refreshing side salad for a light touch.
  • Serve with plantain chips for a crunchy contrast.
  • A cold glass of coconut water or a fruity rum punch complements the flavors beautifully.
  • Garnish with lime wedges for an extra zesty kick.

FAQs about Caribbean Chicken and Rice

Can I use brown rice instead of white rice?

Absolutely! Brown rice can be used for a nuttier flavor and added fiber. Just keep in mind that it may require a longer cooking time and more liquid.

Is Caribbean Chicken and Rice gluten-free?

Yes, this dish is naturally gluten-free, especially if you use gluten-free chicken broth. It’s a great option for those with dietary restrictions.

Can I make this dish ahead of time?

Definitely! You can prepare it a day in advance and reheat it when you’re ready to serve. Just add a splash of chicken broth to keep it moist.

What can I substitute for coconut milk?

If you’re not a fan of coconut milk, you can use almond milk or any other non-dairy milk. However, the flavor will differ slightly.

How can I make this dish spicier?

For a spicy kick, add diced jalapeños or a pinch of cayenne pepper when cooking the chicken. Adjust to your heat preference!

Final Thoughts

Cooking Caribbean Chicken and Rice is more than just preparing a meal; it’s about creating an experience filled with warmth and flavor. Each bite transports you to a tropical paradise, where the creamy coconut milk and vibrant spices come together in perfect harmony. This dish is not only easy to make but also brings joy to the table, making it ideal for family dinners or gatherings with friends. I hope you find as much happiness in cooking and sharing this recipe as I do. So grab your skillet, and let the flavors of the Caribbean brighten your day!

jhessica

Caribbean Chicken and Rice: A Flavorful Dish to Try!

A flavorful Caribbean dish featuring tender chicken and aromatic rice cooked in coconut milk.
Prep Time 10 minutes
Cook Time 30 minutes
Total Time 40 minutes
Servings: 4 servings
Course: Main Course
Cuisine: Caribbean
Calories: 480

Ingredients
  

  • 2 tablespoons vegetable oil
  • 1 pound boneless skinless chicken thighs, cut into bite-sized pieces
  • 1 teaspoon salt
  • 1/2 teaspoon black pepper
  • 1 teaspoon paprika
  • 1/2 teaspoon garlic powder
  • 1/2 teaspoon onion powder
  • 1/2 teaspoon dried thyme
  • 1/2 teaspoon cumin
  • 1 cup long-grain white rice
  • 1 can 15 ounces coconut milk
  • 1 cup chicken broth
  • 1 cup diced bell peppers mix of red, green, and yellow
  • 1/2 cup diced onion
  • 1/2 cup frozen peas
  • 1 tablespoon fresh lime juice
  • Chopped fresh cilantro for garnish

Method
 

  1. In a large skillet, heat the vegetable oil over medium-high heat. Add the chicken pieces, season with salt, black pepper, paprika, garlic powder, onion powder, thyme, and cumin. Cook until the chicken is browned and cooked through, about 5-7 minutes. Remove the chicken from the skillet and set aside.
  2. In the same skillet, add the diced onion and bell peppers. Sauté for about 3-4 minutes until the vegetables are softened.
  3. Stir in the rice and cook for an additional 1-2 minutes, allowing the rice to toast slightly.
  4. Pour in the coconut milk and chicken broth, stirring to combine. Bring the mixture to a boil.
  5. Reduce the heat to low, cover the skillet, and let it simmer for about 15 minutes or until the rice is tender and has absorbed most of the liquid.
  6. Add the cooked chicken back into the skillet along with the frozen peas and lime juice. Stir gently to combine and cook for another 5 minutes until everything is heated through.
  7. Remove from heat and let it sit, covered, for 5 minutes before serving. Garnish with chopped cilantro.

Nutrition

Serving: 1servingCalories: 480kcalCarbohydrates: 45gProtein: 28gFat: 22gSaturated Fat: 10gPolyunsaturated Fat: 8gCholesterol: 100mgSodium: 800mgFiber: 3gSugar: 5g

Notes

  • For added heat, include diced jalapeños or a pinch of cayenne pepper when cooking the chicken.
  • Substitute quinoa for rice for a gluten-free option or to boost the protein content.

Tried this recipe?

Let us know how it was!

Patriotic Snack Mix: A Fun Festive Recipe to Try!

Introduction to Patriotic Snack Mix

Every summer, I look forward to those sun-soaked days filled with barbecues, fireworks, and, of course, delicious snacks. This Patriotic Snack Mix is my go-to recipe for celebrating those moments. It’s not just a treat; it’s a fun way to bring friends and family together. Whether you’re hosting a backyard bash or just need a quick snack for movie night, this mix is a breeze to whip up. With its vibrant colors and delightful crunch, it’s sure to impress your loved ones and keep everyone coming back for more!

Why You’ll Love This Patriotic Snack Mix

This Patriotic Snack Mix is a game-changer for any gathering. It’s incredibly easy to make, taking just 20 minutes from start to finish. The combination of sweet and salty flavors will have your taste buds dancing. Plus, it’s versatile! You can customize it to suit your preferences or dietary needs. Whether you’re celebrating a holiday or just snacking on a Tuesday, this mix is sure to bring smiles all around.

Ingredients for Patriotic Snack Mix

Gathering the right ingredients is half the fun! Here’s what you’ll need for this vibrant Patriotic Snack Mix:

  • Rice cereal: This forms the crunchy base of your mix, adding a delightful texture.
  • Popcorn: Light and airy, it brings a satisfying crunch that pairs perfectly with the other ingredients.
  • Pretzel sticks: These add a salty twist, balancing the sweetness of the chocolate and candies.
  • Red and blue M&M’s: Not just for color, these candies provide bursts of chocolatey goodness.
  • White chocolate chips: They melt beautifully, coating the mix in a sweet, creamy layer.
  • Vegetable oil: A little oil helps the chocolate melt smoothly and coat the mix evenly.
  • Sea salt: Just a sprinkle enhances the flavors, making each bite irresistible.
  • Dried cranberries (optional): For a fruity touch, these add a chewy texture and a pop of tartness.

Feel free to get creative! You can swap out the white chocolate for dark chocolate for a richer flavor. If you want to boost the nutrition, toss in some nuts or seeds for extra crunch and protein. For exact measurements, check the bottom of the article where you can find them available for printing.

How to Make Patriotic Snack Mix

Creating this Patriotic Snack Mix is as easy as pie! Follow these simple steps, and you’ll have a festive treat ready in no time. Let’s dive in!

Step 1: Combine the Dry Ingredients

Start by grabbing a large mixing bowl. Toss in the rice cereal, popcorn, pretzel sticks, and red and blue M&M’s. If you’re feeling adventurous, add the dried cranberries too. Gently mix everything together. You want to ensure an even distribution of colors and textures. This is where the fun begins!

Step 2: Melt the White Chocolate

Next, take a microwave-safe bowl and add the white chocolate chips along with the vegetable oil. Microwave in 30-second intervals, stirring in between. Keep an eye on it! You want it smooth and creamy, not burnt. This melted chocolate is the magic that binds your mix together.

Step 3: Drizzle and Mix

Once your white chocolate is melted, it’s time to drizzle! Pour it over the dry ingredients in your mixing bowl. Use a spatula to gently stir everything together. Make sure every piece gets a nice coating. This step is crucial for that sweet, creamy flavor in every bite!

Step 4: Spread and Sprinkle

Now, line a baking sheet with parchment paper. Spread your snack mix evenly across the sheet. This helps it cool down and prevents clumping. Sprinkle a little sea salt over the top. That touch of salt will elevate the flavors, making your Patriotic Snack Mix even more irresistible.

Step 5: Cool and Store

Let the mix cool completely. This will allow it to harden into delightful clusters. Once cooled, break it into pieces and store it in an airtight container. It’s perfect for snacking throughout the week or for sharing at your next gathering!

Tips for Success

  • Use fresh ingredients for the best flavor and texture.
  • Don’t rush the melting process; stir often to avoid burning the chocolate.
  • Feel free to customize with your favorite nuts or seeds for added crunch.
  • Store in an airtight container to keep it fresh and crunchy.
  • Make a double batch for larger gatherings; it disappears fast!

Equipment Needed

  • Large mixing bowl: Any bowl will do, but a big one helps with mixing.
  • Microwave-safe bowl: A glass or ceramic bowl works best for melting chocolate.
  • Spatula: Use a rubber or silicone spatula for easy mixing.
  • Baking sheet: A standard sheet pan is perfect for spreading the mix.
  • Parchment paper: If you don’t have this, aluminum foil can be a good substitute.

Variations of Patriotic Snack Mix

  • Chocolate Lovers: Swap half of the white chocolate for dark chocolate chips for a richer flavor.
  • Nutty Delight: Add a mix of your favorite nuts, like almonds or cashews, for extra crunch and protein.
  • Fruity Twist: Incorporate dried fruits like raisins or apricots for a chewy texture and natural sweetness.
  • Spicy Kick: Toss in some chili powder or cayenne pepper for a surprising heat that contrasts with the sweetness.
  • Gluten-Free Option: Use gluten-free pretzels and ensure your rice cereal is certified gluten-free.

Serving Suggestions for Patriotic Snack Mix

  • Pair with refreshing lemonade or iced tea for a perfect summer vibe.
  • Serve in clear cups or mason jars for a festive presentation.
  • Great alongside grilled burgers or hot dogs at your next barbecue.
  • Use as a topping for ice cream for a fun dessert twist.
  • Perfect for picnics or road trips—just pack and go!

FAQs about Patriotic Snack Mix

Can I make this Patriotic Snack Mix ahead of time?

Absolutely! This mix stores well in an airtight container for up to a week. Making it ahead of time can save you stress on the day of your celebration.

What can I substitute for white chocolate?

If white chocolate isn’t your thing, feel free to use dark chocolate or even milk chocolate. Each option brings a unique flavor to your Patriotic Snack Mix.

Is this snack mix suitable for kids?

<pDefinitely! Kids love the colorful M&M’s and the crunchy textures. Just keep an eye on the salt content if you’re serving it to little ones.

Can I add more ingredients to the mix?

<pFor sure! This festive snack is all about customization. Toss in your favorite nuts, seeds, or even some mini marshmallows for a fun twist.

How do I store leftovers?

Store any leftover Patriotic Snack Mix in an airtight container at room temperature. This keeps it fresh and crunchy for your next snacking session!

Final Thoughts

Creating this Patriotic Snack Mix is more than just a recipe; it’s an experience that brings joy and togetherness. The vibrant colors and delightful crunch make it a perfect addition to any celebration, whether it’s a backyard barbecue or a festive gathering. Each bite is a reminder of summer fun and cherished moments with loved ones. Plus, the ease of preparation means you can focus on what truly matters—enjoying time with family and friends. So, gather your ingredients, unleash your creativity, and let this snack mix be the highlight of your next celebration!

jhessica

Patriotic Snack Mix: A Fun Festive Recipe to Try!

A fun and festive snack mix perfect for patriotic celebrations.
Prep Time 15 minutes
Cook Time 5 minutes
Total Time 20 minutes
Servings: 8 servings
Course: Snack
Cuisine: American
Calories: 210

Ingredients
  

  • 3 cups rice cereal
  • 2 cups popcorn popped
  • 1 cup pretzel sticks
  • 1 cup red and blue M&M’s
  • 1 cup white chocolate chips
  • 1 teaspoon vegetable oil
  • 1/2 teaspoon sea salt
  • 1/2 cup dried cranberries optional

Method
 

  1. In a large mixing bowl, combine the rice cereal, popcorn, pretzel sticks, M&M’s, and dried cranberries if using. Toss gently to mix.
  2. In a microwave-safe bowl, melt the white chocolate chips with the vegetable oil in 30-second intervals, stirring between each until smooth.
  3. Drizzle the melted white chocolate over the snack mix and gently stir to coat the ingredients evenly.
  4. Spread the mixture onto a baking sheet lined with parchment paper and sprinkle with sea salt.
  5. Allow the snack mix to cool completely, then break it into clusters and store in an airtight container.

Nutrition

Serving: 1servingCalories: 210kcalCarbohydrates: 30gProtein: 2gFat: 9gSaturated Fat: 3gPolyunsaturated Fat: 6gSodium: 150mgFiber: 1gSugar: 10g

Notes

  • For a chocolatey twist, substitute half of the white chocolate with dark chocolate chips.
  • Add in some nuts or seeds for extra crunch and protein, such as almonds or sunflower seeds.

Tried this recipe?

Let us know how it was!

Overnight Breakfast Casserole: Easy Recipe for a Delightful Start!

Introduction to Overnight Breakfast Casserole

There’s something magical about waking up to the aroma of a warm breakfast casserole wafting through the house. The Overnight Breakfast Casserole is a game-changer for busy mornings. It’s like a warm hug on a plate, ready to fuel your day without the morning rush.

I remember my mom making a similar dish on lazy Sunday mornings, and it always felt special. This recipe is perfect for impressing family or friends, or simply treating yourself. With minimal prep the night before, you can enjoy a delightful breakfast that’s both satisfying and delicious.

Why You’ll Love This Overnight Breakfast Casserole

This Overnight Breakfast Casserole is a lifesaver for those hectic mornings. It’s incredibly easy to prepare, allowing you to spend more time enjoying your coffee instead of cooking. The combination of fluffy eggs, savory cheese, and fresh veggies creates a flavor explosion that will have everyone asking for seconds. Plus, it’s versatile—perfect for any occasion, whether it’s a family brunch or a cozy weekend treat.

Ingredients for Overnight Breakfast Casserole

Gathering the right ingredients is the first step to creating your Overnight Breakfast Casserole masterpiece. Here’s what you’ll need:

  • Cubed whole grain bread: This forms the base of your casserole, adding texture and heartiness. Whole grain is a healthier choice, but feel free to use your favorite bread.
  • Milk: Whether you choose dairy or a non-dairy alternative, milk adds creaminess to the dish. Almond or oat milk can work wonders if you’re looking for a lighter option.
  • Large eggs: The star of the show! Eggs provide structure and protein, making this casserole filling and satisfying.
  • Shredded cheese: Cheddar is a classic choice, but you can mix it up with mozzarella, pepper jack, or any cheese you love. Cheese brings that gooey goodness we all crave.
  • Diced vegetables: Bell peppers, spinach, or mushrooms add color and nutrition. Feel free to get creative with whatever veggies you have on hand.
  • Garlic powder: A sprinkle of garlic powder enhances the flavor without the fuss of chopping fresh garlic.
  • Onion powder: This adds a subtle sweetness and depth to the dish, complementing the other ingredients beautifully.
  • Salt and black pepper: Essential seasonings that elevate the overall taste. Adjust to your preference for a little kick.
  • Olive oil or cooking spray: Use this to grease your baking dish, ensuring your casserole comes out easily and doesn’t stick.

For those looking to spice things up, consider adding diced jalapeños or a pinch of red pepper flakes to the vegetable mix. If you have leftover croissants, they can be a delicious substitute for the bread, adding a rich flavor.

Exact quantities for each ingredient are available at the bottom of the article for easy printing. Happy cooking!

How to Make Overnight Breakfast Casserole

Step 1: Preheat and Prepare

Start by preheating your oven to 350°F. While it warms up, grab a 9×13-inch baking dish and grease it with olive oil or cooking spray. This step is crucial to ensure your Overnight Breakfast Casserole comes out easily and doesn’t stick. A well-prepared dish makes all the difference!

Step 2: Whisk the Egg Mixture

In a large bowl, whisk together the eggs, milk, garlic powder, onion powder, salt, and black pepper. This mixture is the heart of your casserole, binding everything together. Make sure it’s well combined, as this will ensure every bite is packed with flavor. It’s a simple step that sets the stage for deliciousness!

Step 3: Combine Ingredients

Now, add the cubed bread, diced vegetables, and half of the shredded cheese to the egg mixture. Stir gently until everything is well coated. This is where the magic happens! The bread will soak up all those tasty flavors, making each bite a delightful experience. Don’t rush this step; it’s worth it!

Step 4: Pour and Spread

Transfer the mixture into your prepared baking dish, spreading it evenly. This ensures that every slice of your Overnight Breakfast Casserole bakes uniformly. Use a spatula to press down gently, making sure the bread is submerged in the egg mixture. A little love goes a long way here!

Step 5: Refrigerate

Cover the dish with plastic wrap and pop it in the refrigerator. Let it chill for at least 2 hours or overnight if you can. This step allows the flavors to meld beautifully, making your casserole even tastier. Plus, it’s a great way to save time in the morning!

Step 6: Bake

When you’re ready to bake, remove the plastic wrap and place the dish in the preheated oven. Bake for 30-35 minutes, or until the top is golden brown and the casserole is set. The aroma will fill your kitchen, making it hard to wait. Trust me, it’s worth the anticipation!

Step 7: Cool and Serve

Once baked, let the casserole cool for a few minutes before slicing. This helps it set up nicely, making it easier to serve. Cut into squares and enjoy your delicious Overnight Breakfast Casserole warm. It’s the perfect way to start your day with a smile!

Tips for Success

  • Use day-old bread for better texture; it absorbs the egg mixture without getting too soggy.
  • Experiment with different cheeses for unique flavors; feta or goat cheese can add a nice twist.
  • Chop vegetables into small pieces for even cooking and easier serving.
  • For a heartier dish, add cooked sausage or bacon to the mix.
  • Don’t skip the chilling step; it enhances the flavors and makes for a fluffier casserole.

Equipment Needed

  • 9×13-inch baking dish: Essential for baking your casserole. A similar-sized dish will work if you don’t have one.
  • Mixing bowl: A large bowl for whisking the egg mixture. Any bowl will do, just make sure it’s big enough!
  • Whisk: Perfect for blending ingredients. A fork can also do the trick in a pinch.
  • Spatula: Great for mixing and spreading the casserole evenly. A wooden spoon works too!

Variations

  • Spicy Kick: Add diced jalapeños or a sprinkle of red pepper flakes for a zesty twist that will wake up your taste buds.
  • Meat Lovers: Incorporate cooked sausage, bacon, or ham for a heartier version that’s packed with protein.
  • Veggie Delight: Swap in seasonal vegetables like zucchini, asparagus, or cherry tomatoes for a fresh, colorful dish.
  • Herb Infusion: Mix in fresh herbs like basil, parsley, or chives to elevate the flavor profile and add a burst of freshness.
  • Gluten-Free Option: Use gluten-free bread or even hash browns as a base for a delicious alternative that everyone can enjoy.

Serving Suggestions

  • Fresh Fruit: Serve with a side of mixed berries or sliced oranges for a refreshing contrast.
  • Yogurt: A dollop of Greek yogurt adds creaminess and pairs well with the casserole.
  • Drinks: Complement your meal with freshly brewed coffee or a glass of orange juice.
  • Presentation: Garnish with fresh herbs like parsley or chives for a pop of color and flavor.

FAQs about Overnight Breakfast Casserole

Can I make the Overnight Breakfast Casserole ahead of time?
Absolutely! In fact, that’s the beauty of this recipe. You can prepare it the night before and let it chill in the fridge. This allows the flavors to meld beautifully, making your breakfast even more delicious.

What can I substitute for the bread?
If you’re looking for alternatives, gluten-free bread works great. You can also use leftover croissants for a richer flavor or even hash browns for a fun twist. Get creative with what you have on hand!

How do I store leftovers?
Store any leftovers in an airtight container in the refrigerator. It should last for about 3-4 days. You can reheat individual portions in the microwave or oven for a quick breakfast fix.

Can I freeze the casserole?
Yes, you can freeze the Overnight Breakfast Casserole! Just make sure to wrap it tightly in plastic wrap and then foil. It can be frozen for up to 2 months. Thaw it in the fridge overnight before baking.

What are some good add-ins for extra flavor?
Feel free to mix in cooked sausage, bacon, or even different cheeses for a flavor boost. Fresh herbs like basil or chives can also elevate the dish. The possibilities are endless!

Final Thoughts

Creating this Overnight Breakfast Casserole is more than just cooking; it’s about crafting a joyful experience for yourself and your loved ones. The anticipation of waking up to a warm, cheesy dish is a delight that transforms any morning into a special occasion.

Whether you’re hosting a brunch or simply enjoying a quiet morning, this casserole brings comfort and satisfaction. It’s a recipe that invites creativity, allowing you to personalize it with your favorite ingredients. So, roll up your sleeves, embrace the process, and savor the delicious moments that follow. Happy cooking!

jhessica

Overnight Breakfast Casserole: Easy Recipe for a Delightful Start!

A delicious and easy Overnight Breakfast Casserole that can be prepared ahead of time for a delightful start to your day.
Prep Time 15 minutes
Cook Time 35 minutes
Total Time 50 minutes
Servings: 6 servings
Course: Breakfast
Cuisine: American
Calories: 220

Ingredients
  

  • 2 cups cubed whole grain bread
  • 1 cup milk dairy or non-dairy
  • 4 large eggs
  • 1 cup shredded cheese cheddar or your choice
  • 1 cup diced vegetables bell peppers, spinach, or mushrooms
  • 1 teaspoon garlic powder
  • 1 teaspoon onion powder
  • 1/2 teaspoon salt
  • 1/4 teaspoon black pepper
  • 1 tablespoon olive oil or cooking spray

Method
 

  1. Preheat the oven to 350°F. Grease a 9×13-inch baking dish with olive oil or cooking spray.
  2. In a large bowl, whisk together the eggs, milk, garlic powder, onion powder, salt, and black pepper.
  3. Add the cubed bread, diced vegetables, and half of the cheese to the egg mixture. Stir until well combined.
  4. Pour the mixture into the prepared baking dish and spread it evenly.
  5. Sprinkle the remaining cheese on top.
  6. Cover the dish with plastic wrap and refrigerate for at least 2 hours or overnight.
  7. When ready to bake, remove the plastic wrap and bake for 30-35 minutes, or until the casserole is set and the top is golden brown.
  8. Let it cool for a few minutes before slicing and serving.

Nutrition

Serving: 1sliceCalories: 220kcalCarbohydrates: 18gProtein: 12gFat: 10gSaturated Fat: 4gPolyunsaturated Fat: 6gCholesterol: 180mgSodium: 400mgFiber: 2gSugar: 2g

Notes

  • For a spicier version, add diced jalapeños or a pinch of red pepper flakes to the vegetable mix.
  • You can substitute the bread with a gluten-free option or use leftover croissants for a richer flavor.

Tried this recipe?

Let us know how it was!

Red, White, and Blue Fruit Kabobs: A Festive Delight!

Introduction to Red, White, and Blue Fruit Kabobs

Summer gatherings are all about vibrant flavors and colorful presentations, and nothing captures that spirit quite like Red, White, and Blue Fruit Kabobs. These delightful treats are not only a feast for the eyes but also a quick solution for those busy days when you want to impress your friends and family. I remember the joy of making these with my kids, their laughter echoing as we threaded the fruit onto skewers. With minimal prep and no cooking required, these kabobs are perfect for any occasion, bringing a burst of freshness to your table.

Why You’ll Love This Red, White, and Blue Fruit Kabobs

These Red, White, and Blue Fruit Kabobs are a game-changer for summer snacking. They’re incredibly easy to whip up, taking just 15 minutes from start to finish. The combination of sweet strawberries, juicy blueberries, and creamy bananas creates a flavor explosion that’s hard to resist. Plus, they’re a hit with kids and adults alike, making them the perfect addition to any gathering. Who doesn’t love a treat that’s as fun to make as it is to eat?

Ingredients for Red, White, and Blue Fruit Kabobs

Gathering the right ingredients is half the fun! Here’s what you’ll need to create these festive Red, White, and Blue Fruit Kabobs:

  • Strawberries: Sweet and juicy, these red gems are the star of the show. Hull and halve them for easy threading.
  • Blueberries: These little blue beauties add a burst of flavor and a pop of color. They’re also packed with antioxidants!
  • Bananas: Creamy and soft, banana slices provide a delightful contrast to the firmer fruits. You can swap them out for pineapple chunks if you prefer.
  • Mini Marshmallows: These fluffy treats add a fun, chewy texture. They’re optional, but who can resist a little sweetness?
  • Vanilla Yogurt: Perfect for dipping, this creamy addition enhances the kabobs’ flavor. You can also use Greek yogurt for a protein boost.
  • Wooden Skewers: Essential for assembling your kabobs. Make sure they’re sturdy enough to hold all that delicious fruit!

For exact measurements, check the bottom of the article where you can find everything available for printing. Feel free to get creative with your fruit choices—kiwi, grapes, or even peaches can add a unique twist!

How to Make Red, White, and Blue Fruit Kabobs

Step 1: Prepare Your Fruit

Start by hulling and halving the strawberries. This makes them easier to thread. Next, slice the bananas into thick rounds. Finally, give the blueberries a good rinse under cold water. Having your fruit prepped and ready is key to a smooth kabob-making experience!

Step 2: Thread the Ingredients

Grab a wooden skewer and begin threading your ingredients. Alternate between strawberries, blueberries, banana slices, and mini marshmallows. This colorful pattern not only looks great but also balances the flavors. Keep it fun and playful as you build your kabobs!

Step 3: Fill the Skewers

Continue adding fruit and marshmallows until the skewer is filled. Leave a little space at the end for easy handling. This way, everyone can enjoy the kabobs without the mess. Plus, it makes for a perfect bite every time!

Step 4: Repeat the Process

Now, repeat the process with the remaining skewers and ingredients. It’s a simple assembly line that keeps the fun going. Before you know it, you’ll have a colorful platter ready to impress!

Step 5: Serve with Yogurt

Finally, serve your kabobs with a side of vanilla yogurt for dipping. This creamy addition elevates the flavors and makes for a delightful treat. Enjoy every bite of your festive creation!

Tips for Success

  • Choose ripe, fresh fruit for the best flavor and texture.
  • Soak wooden skewers in water for 30 minutes to prevent splintering.
  • Mix and match fruits to keep things interesting—try adding kiwi or grapes!
  • For a fun twist, drizzle honey or agave syrup over the kabobs before serving.
  • Make these kabobs ahead of time and store them in the fridge for a refreshing snack!

Equipment Needed

  • Wooden Skewers: Essential for threading your fruit. If you’re out, try using sturdy toothpicks for smaller bites.
  • Cutting Board: A must-have for slicing your fruit. Any flat surface will do in a pinch.
  • Knife: A sharp knife makes prep easier. A butter knife can work for soft fruits.
  • Mixing Bowl: Use this for holding your prepped fruit. A large plate can also work.

Variations

  • Fruit Swap: Replace bananas with pineapple chunks for a tropical twist. You can also try peaches or mango for a different flavor profile.
  • Yogurt Flavors: Experiment with flavored yogurts like strawberry or coconut for a fun dip. Greek yogurt adds protein and a tangy taste.
  • Chocolate Drizzle: For a decadent touch, drizzle melted dark chocolate over the kabobs before serving. It adds richness and pairs beautifully with the fruit.
  • Nutty Crunch: Sprinkle chopped nuts or granola on top of the yogurt for added texture and flavor. Almonds or walnuts work great!
  • Herbal Infusion: Add a hint of mint or basil to the yogurt for a refreshing herbal note. It elevates the kabobs to a whole new level!

Serving Suggestions

  • Pair your kabobs with a refreshing lemonade or iced tea for a perfect summer drink.
  • Serve alongside a light salad for a balanced meal that’s both colorful and nutritious.
  • For a festive touch, arrange the kabobs on a vibrant platter with fresh mint leaves.
  • Consider adding a sprinkle of edible glitter for a fun, celebratory look!

FAQs about Red, White, and Blue Fruit Kabobs

Can I make Red, White, and Blue Fruit Kabobs ahead of time?

Absolutely! You can prepare these kabobs a few hours in advance. Just store them in the fridge to keep the fruit fresh. This makes them a great option for parties or picnics!

What other fruits can I use in these kabobs?

The beauty of Red, White, and Blue Fruit Kabobs is their versatility. Feel free to swap in fruits like kiwi, grapes, or even peaches. Get creative with your combinations!

How do I keep the bananas from browning?

To prevent bananas from browning, you can toss the slices in a little lemon juice before threading them onto the skewers. This keeps them looking fresh and appetizing!

Are these kabobs suitable for kids?

<pDefinitely! These kabobs are not only fun to make but also a healthy snack option for kids. They can help with the assembly, making it a great family activity!

Can I use a different dip instead of yogurt?

Of course! While vanilla yogurt is delicious, you can try chocolate sauce, peanut butter, or even a fruit dip. The options are endless, so choose what you love!

Final Thoughts

Creating Red, White, and Blue Fruit Kabobs is more than just a recipe; it’s an experience filled with laughter and creativity. Each colorful skewer tells a story, whether it’s a summer barbecue or a family picnic. The joy of assembling these kabobs with loved ones brings everyone together, making memories that last long after the last bite. Plus, they’re a guilt-free treat that satisfies both kids and adults. So, grab your skewers and let the fun begin! You’ll find that these kabobs are not just delicious but also a delightful way to celebrate summer’s bounty.

jhessica

Red, White, and Blue Fruit Kabobs: A Festive Delight!

A festive and colorful treat perfect for summer gatherings, these Red, White, and Blue Fruit Kabobs are easy to make and delicious to eat.
Prep Time 15 minutes
Total Time 15 minutes
Course: Dessert
Cuisine: American
Calories: 120

Ingredients
  

  • 2 cups strawberries hulled and halved
  • 2 cups blueberries
  • 2 cups banana sliced
  • 1 cup mini marshmallows
  • 1 cup vanilla yogurt for dipping
  • Wooden skewers

Method
 

  1. Start by preparing your fruit: hull and halve the strawberries, slice the bananas, and wash the blueberries.
  2. Take a wooden skewer and begin threading the ingredients. Alternate between strawberries, blueberries, banana slices, and mini marshmallows for a colorful pattern.
  3. Continue adding fruit and marshmallows until the skewer is filled, leaving a little space at the end for easy handling.
  4. Repeat the process with the remaining skewers and ingredients until all the fruit is used.
  5. Serve the kabobs with a side of vanilla yogurt for dipping.

Nutrition

Serving: 1kabobCalories: 120kcalCarbohydrates: 20gProtein: 2gFat: 1gSodium: 5mgFiber: 2gSugar: 10g

Notes

  • For added flavor, drizzle a little honey or agave syrup over the finished kabobs before serving.
  • You can substitute the bananas with pineapple chunks or add other fruits like kiwi or grapes for variety.

Tried this recipe?

Let us know how it was!

Red, White, and Blue Cheesecake Salad: A Festive Delight!

Introduction to Red, White, and Blue Cheesecake Salad

Summer gatherings are all about vibrant flavors and festive presentations, and nothing captures that spirit quite like a Red, White, and Blue Cheesecake Salad. This delightful dish is not just a feast for the eyes; it’s a quick and easy solution for those busy days when you want to impress your friends and family without spending hours in the kitchen. With its creamy cheesecake layers and fresh berries, it’s a crowd-pleaser that brings a touch of celebration to any occasion. Trust me, once you serve this, you’ll be the star of the summer cookouts!

Why You’ll Love This Red, White, and Blue Cheesecake Salad

This Red, White, and Blue Cheesecake Salad is a game-changer for summer desserts. It’s incredibly easy to whip up, taking just 20 minutes of prep time. The combination of creamy cheesecake and fresh berries creates a flavor explosion that’s both refreshing and indulgent. Plus, it’s a no-bake recipe, so you can keep your kitchen cool while impressing your guests. What’s not to love?

Ingredients for Red, White, and Blue Cheesecake Salad

Gathering the right ingredients is the first step to creating this festive delight. Here’s what you’ll need:

  • Strawberries: Fresh, hulled, and sliced, these berries add a sweet and juicy burst of flavor.
  • Blueberries: These little gems bring a pop of color and a slightly tart taste that balances the sweetness.
  • Raspberries: Their vibrant red hue and tangy flavor make them a perfect addition to this patriotic salad.
  • Cream Cheese: Softened for easy mixing, it forms the creamy base of the cheesecake layer.
  • Powdered Sugar: This sweetener gives the cheesecake mixture its delightful sweetness without any graininess.
  • Vanilla Extract: A splash of this adds depth and enhances the overall flavor of the salad.
  • Whipped Topping: Light and airy, it helps create that fluffy texture we all love in a cheesecake.
  • Crushed Graham Crackers: These provide a crunchy topping that mimics the crust of a traditional cheesecake.
  • Mint Leaves (optional): A fresh garnish that adds a pop of color and a hint of freshness.

For those looking to lighten things up, consider substituting Greek yogurt for cream cheese and reducing the powdered sugar. A splash of lemon juice can also add a zesty twist to the mix. If you want to make it extra festive, sprinkle some edible glitter on top before serving!

Exact quantities for each ingredient can be found at the bottom of the article, ready for printing.

How to Make Red, White, and Blue Cheesecake Salad

Creating this Red, White, and Blue Cheesecake Salad is a breeze! Follow these simple steps, and you’ll have a stunning dessert that’s sure to impress. Let’s dive in!

Step 1: Prepare the Cream Cheese Mixture

Start by beating the softened cream cheese in a large mixing bowl. Use an electric mixer for a smooth consistency. Once it’s creamy, gradually add the powdered sugar and vanilla extract. Mix until everything is well combined and you have a luscious base for your cheesecake salad.

Step 2: Fold in the Whipped Topping

Next, gently fold in the whipped topping. This step is crucial for achieving that light and fluffy texture we all love. Use a spatula to carefully incorporate the whipped topping into the cream cheese mixture. Be gentle; you want to keep that airy feel!

Step 3: Layer the Berries

Now, grab a large serving bowl and start layering! Begin with half of the strawberries, blueberries, and raspberries. Spread them evenly across the bottom. This colorful layer sets the stage for the creamy goodness to come.

Step 4: Add the Cheesecake Mixture

Spread half of the cheesecake mixture over the berry layer. Use a spatula to ensure it covers the berries completely. This creamy layer is where the magic happens, blending beautifully with the fresh fruit.

Step 5: Repeat the Layers

It’s time to repeat the layering process! Add the remaining berries on top of the cheesecake mixture, followed by the rest of the cheesecake mixture. This double-layering creates a stunning visual and a delightful mix of flavors.

Step 6: Top with Graham Crackers

Finish off your masterpiece by sprinkling crushed graham crackers on top. This adds a satisfying crunch that mimics the crust of a traditional cheesecake. Plus, it looks fantastic!

Step 7: Chill Before Serving

Finally, chill your Red, White, and Blue Cheesecake Salad in the refrigerator for at least 1 hour. This allows the flavors to meld together beautifully. Trust me, the wait will be worth it when you take that first bite!

Tips for Success

  • Use room temperature cream cheese for easier mixing and a smoother texture.
  • Don’t skip the chilling step; it enhances the flavors and makes serving easier.
  • For a fun twist, try adding a splash of your favorite liqueur to the cheesecake mixture.
  • Keep your berries fresh by washing them just before use.
  • Feel free to customize the fruit based on what’s in season!

Equipment Needed

  • Mixing Bowl: A large bowl for combining ingredients. A glass or stainless steel bowl works well.
  • Electric Mixer: For smooth cream cheese. A whisk can be used, but it requires more effort.
  • Spatula: Essential for folding and spreading the mixture evenly.
  • Serving Bowl: A large, clear bowl showcases the layers beautifully.

Variations

  • Berry Medley: Swap out the berries for your favorites, like blackberries or peaches, for a unique twist.
  • Chocolate Drizzle: Drizzle melted chocolate over the top for a decadent touch that chocolate lovers will adore.
  • Nutty Crunch: Add chopped nuts, like pecans or almonds, for an extra layer of flavor and texture.
  • Vegan Option: Use vegan cream cheese and coconut whipped cream for a dairy-free version that’s just as delicious.
  • Low-Sugar Version: Substitute powdered sugar with a sugar alternative to reduce sweetness without sacrificing flavor.

Serving Suggestions

  • Pair with grilled chicken or fish for a balanced meal that’s perfect for summer.
  • Serve alongside a refreshing lemonade or iced tea to complement the flavors.
  • For a festive touch, garnish with fresh mint leaves and edible flowers.
  • Present in individual cups for a fun, personal serving option.

FAQs about Red, White, and Blue Cheesecake Salad

Can I make this Red, White, and Blue Cheesecake Salad ahead of time?

Absolutely! This salad can be made a day in advance. Just keep it covered in the refrigerator. The flavors will meld beautifully overnight, making it even more delicious!

What can I substitute for cream cheese?

If you’re looking for a lighter option, Greek yogurt works well as a substitute. It gives a tangy flavor while keeping the creamy texture. You can also use vegan cream cheese for a dairy-free version.

How long will leftovers last?

Leftovers can be stored in an airtight container in the refrigerator for up to 3 days. Just be aware that the berries may release some juice over time, but it will still taste great!

Can I use frozen berries instead of fresh?

Yes, you can use frozen berries! Just make sure to thaw and drain them before layering. This will prevent excess moisture from making the salad soggy.

Is this salad suitable for a gluten-free diet?

To make this Red, White, and Blue Cheesecake Salad gluten-free, simply substitute the crushed graham crackers with gluten-free options, like crushed gluten-free cookies or nuts. Enjoy without worry!

Final Thoughts

Creating this Red, White, and Blue Cheesecake Salad is more than just whipping up a dessert; it’s about bringing people together. Each layer tells a story, from the vibrant berries to the creamy cheesecake, evoking memories of summer celebrations and laughter. This dish is a reminder that cooking can be simple yet rewarding. Whether you’re hosting a barbecue or enjoying a quiet evening, this salad adds a festive touch to any occasion. So, roll up your sleeves, gather your loved ones, and dive into this delightful treat that’s sure to spark joy and create lasting memories!

jhessica

Red, White, and Blue Cheesecake Salad: A Festive Delight!

A festive and delicious Red, White, and Blue Cheesecake Salad perfect for summer gatherings and celebrations.
Prep Time 20 minutes
Total Time 1 hour 20 minutes
Servings: 8 servings
Course: Dessert
Cuisine: American
Calories: 210

Ingredients
  

  • 2 cups strawberries hulled and sliced
  • 2 cups blueberries
  • 1 cup raspberries
  • 8 ounces cream cheese softened
  • 1 cup powdered sugar
  • 1 teaspoon vanilla extract
  • 1 cup whipped topping like Cool Whip
  • 1/2 cup crushed graham crackers
  • Mint leaves for garnish optional

Method
 

  1. In a large mixing bowl, beat the softened cream cheese with an electric mixer until smooth.
  2. Gradually add the powdered sugar and vanilla extract, mixing until well combined.
  3. Gently fold in the whipped topping until the mixture is light and fluffy.
  4. In a large serving bowl, layer half of the strawberries, blueberries, and raspberries.
  5. Spread half of the cheesecake mixture over the berries.
  6. Repeat the layers with the remaining berries and cheesecake mixture.
  7. Top with crushed graham crackers for added crunch.
  8. Chill in the refrigerator for at least 1 hour before serving to allow the flavors to meld.

Nutrition

Serving: 1servingCalories: 210kcalCarbohydrates: 18gProtein: 3gFat: 12gSaturated Fat: 7gPolyunsaturated Fat: 3gCholesterol: 30mgSodium: 150mgFiber: 1gSugar: 14g

Notes

  • For a lighter version, substitute the cream cheese with Greek yogurt and reduce the powdered sugar.
  • Add a splash of lemon juice for a zesty twist.
  • Consider adding a sprinkle of edible glitter on top before serving for a festive touch.

Tried this recipe?

Let us know how it was!

Hearty Ground Turkey and Rice Soup: Nourish Your Soul Today!

Introduction to Hearty Ground Turkey and Rice Soup

There’s something magical about a warm bowl of soup on a chilly day. The aroma wafting through the kitchen, the vibrant colors of fresh vegetables, and the promise of comfort in every spoonful. My Hearty Ground Turkey and Rice Soup is just that—a nourishing hug in a bowl. It’s perfect for those busy evenings when you need a quick solution that doesn’t skimp on flavor or nutrition. Packed with lean turkey, wholesome brown rice, and a medley of veggies, this soup is a delightful way to impress your loved ones while keeping things simple. Let’s dive in!

Why You’ll Love This Hearty Ground Turkey and Rice Soup

This Hearty Ground Turkey and Rice Soup is a game-changer for busy weeknights. It’s not just quick to make; it’s also incredibly satisfying. The combination of lean turkey and nutritious brown rice creates a filling meal that won’t weigh you down. Plus, it’s versatile! You can easily customize it with whatever veggies you have on hand. Trust me, this soup will become a staple in your kitchen.

Ingredients for Hearty Ground Turkey and Rice Soup

Gathering the right ingredients is the first step to creating a delicious Hearty Ground Turkey and Rice Soup. Here’s what you’ll need:

  • Olive oil: A healthy fat that adds richness and helps sauté the aromatics.
  • Onion: Chopped onion brings sweetness and depth to the soup.
  • Garlic: Minced garlic adds a fragrant kick that elevates the flavor profile.
  • Ground turkey: Lean and protein-packed, it’s the star of this dish, making it hearty without being heavy.
  • Carrots: Diced carrots add a touch of sweetness and vibrant color.
  • Celery: This crunchy vegetable contributes a refreshing crunch and balances the flavors.
  • Dried thyme: A classic herb that infuses the soup with earthy notes.
  • Dried oregano: Adds a hint of Mediterranean flavor, enhancing the overall taste.
  • Salt and black pepper: Essential seasonings that bring all the flavors together.
  • Chicken broth: The base of the soup, providing warmth and depth; feel free to use low-sodium for a healthier option.
  • Brown rice: A nutritious whole grain that makes the soup filling and adds texture.
  • Diced tomatoes: Canned tomatoes add acidity and a burst of flavor; no need to drain them!
  • Fresh spinach: Chopped spinach adds a pop of color and nutrients, making the soup even healthier.
  • Lemon juice: A splash of lemon juice brightens the flavors and adds a refreshing zing.

For those looking to mix things up, consider these optional ingredients:

  • Soy sauce or Worcestershire sauce: A tablespoon stirred in just before serving can enhance the umami flavor.
  • Quinoa: Swap out brown rice for quinoa for a different texture and added protein.
  • Red pepper flakes: If you like a bit of heat, sprinkle in some red pepper flakes or a dash of hot sauce.

Exact measurements for these ingredients can be found at the bottom of the article, ready for printing!

How to Make Hearty Ground Turkey and Rice Soup

Now that you have all your ingredients ready, let’s get cooking! Making this Hearty Ground Turkey and Rice Soup is straightforward and rewarding. Follow these simple steps, and you’ll have a delicious meal in no time.

Step 1: Sauté the Aromatics

Start by heating a tablespoon of olive oil in a large pot over medium heat. Once the oil shimmers, toss in the chopped onion. Sauté for about 3-4 minutes until it turns translucent. The aroma will fill your kitchen, making it hard to resist. Add the minced garlic and cook for another minute. This step lays the flavorful foundation for your soup.

Step 2: Brown the Turkey

Next, add the pound of ground turkey to the pot. Use a wooden spoon to break it apart as it cooks. Brown the turkey for about 5-7 minutes, stirring occasionally. You want it to be fully cooked and no longer pink. If there’s excess fat, drain it off. This lean protein is what makes this soup hearty without being heavy.

Step 3: Add Vegetables and Seasonings

Now it’s time to bring in the veggies! Stir in the diced carrots and celery, along with the dried thyme, oregano, salt, and black pepper. Cook for another 5 minutes, allowing the vegetables to soften slightly. This step adds color and texture, making your Hearty Ground Turkey and Rice Soup even more inviting.

Step 4: Combine Broth and Rice

Pour in the chicken broth and bring the mixture to a boil. Once it’s bubbling, add the uncooked brown rice and the can of diced tomatoes (don’t drain them!). This is where the magic happens. Reduce the heat to low, cover the pot, and let it simmer. The rice will absorb the flavors, creating a comforting base for your soup.

Step 5: Simmer to Perfection

Let the soup simmer for 30-35 minutes. This is the perfect time to relax and enjoy the delicious smells wafting through your home. Check occasionally to ensure the rice is tender and the soup isn’t sticking to the bottom. If it looks too thick, feel free to add a splash more broth or water.

Step 6: Stir in Spinach and Lemon Juice

In the last few minutes of cooking, stir in the chopped spinach and the juice of one lemon. Cook until the spinach wilts, about 2-3 minutes. This final touch brightens the flavors and adds a burst of nutrients. Your Hearty Ground Turkey and Rice Soup is now ready to be served!

Tips for Success

  • Prep your ingredients ahead of time to streamline the cooking process.
  • Use low-sodium chicken broth for a healthier option without sacrificing flavor.
  • Don’t skip the lemon juice; it brightens the soup beautifully.
  • Feel free to experiment with different vegetables based on what you have.
  • Store leftovers in an airtight container for up to three days for easy meals.

Equipment Needed

  • Large pot: A sturdy stockpot works best, but any large pot will do.
  • Wooden spoon: Perfect for stirring; a spatula can also work.
  • Measuring cups: Essential for accurate ingredient portions.
  • Cutting board and knife: For chopping veggies; a good chef’s knife is ideal.

Variations

  • Vegetarian Option: Replace ground turkey with lentils or chickpeas for a hearty plant-based version.
  • Spicy Kick: Add diced jalapeños or a splash of hot sauce for a fiery twist.
  • Herb Infusion: Experiment with fresh herbs like basil or cilantro for a fresh flavor boost.
  • Different Grains: Swap brown rice for barley or farro for a unique texture and taste.
  • Seasonal Veggies: Incorporate seasonal vegetables like zucchini or bell peppers to keep it fresh and exciting.

Serving Suggestions

  • Crusty Bread: Serve with a warm, crusty baguette or garlic bread for dipping.
  • Salad: Pair with a light green salad dressed in vinaigrette for a refreshing contrast.
  • Wine: A glass of white wine, like Sauvignon Blanc, complements the soup beautifully.
  • Garnish: Top with fresh herbs or a sprinkle of Parmesan for added flavor.

FAQs about Hearty Ground Turkey and Rice Soup

Can I make this soup in advance?
Absolutely! This Hearty Ground Turkey and Rice Soup stores well in the fridge for up to three days. Just reheat it on the stove or in the microwave when you’re ready to enjoy it again.

Can I freeze Hearty Ground Turkey and Rice Soup?
Yes, you can freeze this soup! Allow it to cool completely, then transfer it to an airtight container. It will keep well in the freezer for up to three months. Just thaw and reheat when you’re ready for a comforting meal.

What can I substitute for ground turkey?
If you’re looking for alternatives, ground chicken or lean beef works well. For a vegetarian option, try using lentils or chickpeas to keep it hearty and nutritious.

How can I make this soup spicier?
For a spicy kick, add diced jalapeños, a pinch of red pepper flakes, or a dash of hot sauce while cooking. Adjust the heat to your liking!

What are some good side dishes to serve with this soup?
This soup pairs wonderfully with a light salad, crusty bread, or even a side of roasted vegetables. It’s a complete meal on its own, but these sides can elevate your dining experience!

Final Thoughts

Cooking this Hearty Ground Turkey and Rice Soup is more than just preparing a meal; it’s about creating a moment of warmth and comfort. Each spoonful is a reminder of the simple joys in life—nourishing your body and soul. Whether you’re sharing it with family or enjoying a quiet evening alone, this soup brings a sense of satisfaction that’s hard to beat. Plus, the versatility of this recipe means you can make it your own. So, roll up your sleeves, embrace the process, and let this delightful soup become a cherished part of your culinary repertoire!

jhessica

Hearty Ground Turkey and Rice Soup: Nourish Your Soul Today!

A comforting and nutritious soup made with ground turkey, brown rice, and fresh vegetables, perfect for nourishing your soul.
Prep Time 10 minutes
Cook Time 40 minutes
Total Time 50 minutes
Servings: 6 servings
Course: Soup
Cuisine: American
Calories: 250

Ingredients
  

  • 1 tablespoon olive oil
  • 1 medium onion chopped
  • 2 cloves garlic minced
  • 1 pound ground turkey
  • 1 cup carrots diced
  • 1 cup celery diced
  • 1 teaspoon dried thyme
  • 1 teaspoon dried oregano
  • 1/2 teaspoon salt
  • 1/4 teaspoon black pepper
  • 6 cups chicken broth
  • 1 cup uncooked brown rice
  • 1 can 14.5 ounces diced tomatoes, undrained
  • 2 cups fresh spinach chopped
  • Juice of 1 lemon

Method
 

  1. Heat the olive oil in a large pot over medium heat. Add the chopped onion and sauté for about 3-4 minutes until translucent.
  2. Stir in the minced garlic and cook for an additional minute until fragrant.
  3. Add the ground turkey to the pot, breaking it apart with a spoon. Cook until browned, about 5-7 minutes. Drain any excess fat if necessary.
  4. Stir in the diced carrots, celery, thyme, oregano, salt, and black pepper. Cook for another 5 minutes, allowing the vegetables to soften slightly.
  5. Pour in the chicken broth and bring the mixture to a boil. Once boiling, add the uncooked brown rice and diced tomatoes.
  6. Reduce the heat to low, cover, and simmer for 30-35 minutes, or until the rice is tender.
  7. In the last few minutes of cooking, stir in the chopped spinach and lemon juice. Cook until the spinach is wilted, about 2-3 minutes.
  8. Serve hot, garnished with additional lemon wedges if desired.

Nutrition

Serving: 1bowlCalories: 250kcalCarbohydrates: 30gProtein: 20gFat: 8gSaturated Fat: 1gPolyunsaturated Fat: 7gCholesterol: 70mgSodium: 600mgFiber: 4gSugar: 4g

Notes

  • For added flavor, consider stirring in a tablespoon of soy sauce or Worcestershire sauce just before serving.
  • You can substitute quinoa for brown rice for a different texture and flavor.
  • If you prefer a spicier soup, add a pinch of red pepper flakes or a dash of hot sauce.

Tried this recipe?

Let us know how it was!

Smothered Turkey Wings with Gravy: A Flavorful Delight!

Introduction to Smothered Turkey Wings with Gravy

There’s something undeniably comforting about a plate of Smothered Turkey Wings with Gravy.

Growing up, my family often gathered around the table for hearty meals that warmed both our bellies and hearts.

This dish is a perfect blend of tender turkey wings and rich, creamy gravy, making it an ideal choice for a busy weeknight or a special Sunday dinner.

Whether you’re looking to impress your loved ones or simply craving a taste of home, this recipe is sure to deliver.

Let’s dive into the deliciousness that awaits!

Why You’ll Love This Smothered Turkey Wings with Gravy

This dish is a game-changer for any home cook.

Not only is it easy to prepare, but it also delivers a flavor punch that will have everyone asking for seconds.

The slow-baking process ensures the turkey wings become melt-in-your-mouth tender, while the creamy gravy adds a luxurious touch.

Plus, it’s a one-pan wonder, making cleanup a breeze.

What’s not to love about that?

Ingredients for Smothered Turkey Wings with Gravy

To create the mouthwatering Smothered Turkey Wings with Gravy, you’ll need a handful of simple yet flavorful ingredients.

Here’s what you’ll gather:

  • Turkey Wings: The star of the show! These large wings are meaty and perfect for soaking up that rich gravy.
  • Olive Oil: A splash of this helps to sear the wings, locking in moisture and flavor.
  • Garlic Powder: Adds a savory depth that complements the turkey beautifully.
  • Onion Powder: Enhances the overall flavor profile, making every bite irresistible.
  • Paprika: This spice brings a subtle smokiness and vibrant color to the dish.
  • Dried Thyme: A classic herb that adds an earthy note, elevating the dish.
  • Salt and Black Pepper: Essential for seasoning, these two bring out the natural flavors of the turkey.
  • Cayenne Pepper (optional): For those who like a little heat, this adds a spicy kick to the gravy.
  • Onion: Sliced onions caramelize beautifully, adding sweetness and texture to the dish.
  • Garlic: Freshly minced garlic infuses the gravy with a robust flavor.
  • Chicken Broth: This forms the base of your gravy, providing richness and depth.
  • Heavy Cream: For that creamy, luxurious texture that makes the gravy irresistible.
  • All-Purpose Flour: Used to thicken the gravy, giving it that perfect consistency.
  • Worcestershire Sauce: A splash of this adds a tangy umami flavor that rounds out the dish.
  • Fresh Parsley: Chopped for garnish, it adds a pop of color and freshness to your plate.

Feel free to get creative! You can substitute turkey wings with chicken thighs or drumsticks if you prefer.

For exact measurements, check the bottom of the article where you can find everything available for printing.

How to Make Smothered Turkey Wings with Gravy

Creating Smothered Turkey Wings with Gravy is a straightforward process that yields delicious results.

Follow these simple steps, and you’ll have a comforting meal that’s sure to impress.

Step 1: Preheat the Oven

Start by preheating your oven to 350°F.

This step is crucial for even cooking.

A hot oven ensures that the turkey wings cook through properly, resulting in tender meat and a rich gravy.

Step 2: Prepare the Spice Mixture

In a large bowl, combine garlic powder, onion powder, paprika, dried thyme, salt, black pepper, and cayenne pepper if you’re feeling adventurous.

Mix these spices well.

Seasoning is key to flavor, and this blend will enhance the turkey wings beautifully.

Step 3: Sear the Turkey Wings

Heat olive oil in a large oven-safe skillet or Dutch oven over medium-high heat.

Once hot, add the turkey wings and sear them for about 5-7 minutes on each side until they’re golden brown.

Searing locks in moisture and creates a delicious crust, adding depth to the overall flavor.

Step 4: Sauté Onions and Garlic

Remove the turkey wings and set them aside.

In the same skillet, toss in the sliced onions and minced garlic.

Sauté for about 3-4 minutes until the onions are translucent.

This step builds a flavor base that will elevate your gravy.

Step 5: Create the Gravy Base

Sprinkle the flour over the sautéed onions and garlic, stirring constantly for about a minute.

This helps cook the flour, preventing a raw taste in your gravy.

Gradually whisk in the chicken broth and heavy cream, ensuring there are no lumps.

Add Worcestershire sauce and bring the mixture to a gentle simmer.

Whisking is essential here; it creates a smooth, creamy gravy that clings to the turkey wings.

Step 6: Combine and Bake

Return the turkey wings to the skillet, spooning some of the gravy over them.

Cover the skillet with a lid or aluminum foil to trap moisture.

Transfer it to the preheated oven and bake for 1.5 to 2 hours.

This slow cooking process allows the flavors to meld and the turkey to become tender and juicy.

Tips for Success

  • Always season generously; it makes a world of difference in flavor.
  • Let the turkey wings rest after baking for juicier meat.
  • For a thicker gravy, add a bit more flour during the cooking process.
  • Experiment with spices to find your perfect flavor profile.
  • Don’t skip the searing step; it enhances the overall taste.

Equipment Needed

  • Oven-safe Skillet or Dutch Oven: Essential for searing and baking. A heavy-bottomed pot works too.
  • Mixing Bowl: For combining your spice mixture. Any large bowl will do.
  • Whisk: Perfect for creating a smooth gravy. A fork can work in a pinch.
  • Measuring Cups and Spoons: For accurate ingredient measurements.

Variations

  • Spicy Smothered Turkey Wings: Add chopped jalapeños or a dash of hot sauce to the gravy for an extra kick.
  • Herb-Infused Gravy: Experiment with fresh herbs like rosemary or sage for a fragrant twist.
  • Slow Cooker Version: Use a slow cooker to prepare the wings for a hands-off approach; just sear first and then let it cook on low for 6-8 hours.
  • Gluten-Free Option: Substitute all-purpose flour with cornstarch or a gluten-free flour blend to thicken the gravy.
  • Vegetable Additions: Toss in carrots, celery, or bell peppers during the sautéing step for added flavor and nutrition.

Serving Suggestions

  • Mashed Potatoes: Creamy mashed potatoes are a classic pairing, perfect for soaking up that delicious gravy.
  • Collard Greens: A side of sautéed collard greens adds a nutritious and flavorful touch.
  • Biscuits: Fluffy biscuits are great for mopping up every last bit of gravy.
  • Iced Tea: A refreshing glass of iced tea complements the meal beautifully.

FAQs about Smothered Turkey Wings with Gravy

Can I use chicken instead of turkey wings?

Absolutely! You can substitute turkey wings with chicken thighs or drumsticks. They’ll still soak up that rich gravy beautifully, giving you a delicious meal.

How do I store leftovers?

Store any leftover Smothered Turkey Wings with Gravy in an airtight container in the fridge for up to 3 days. Reheat gently on the stove or in the microwave, adding a splash of broth if needed.

Can I make this dish ahead of time?

Yes! You can prepare the turkey wings and gravy a day in advance. Just reheat in the oven before serving. This allows the flavors to meld even more!

What can I serve with Smothered Turkey Wings?

Pair these wings with creamy mashed potatoes, collard greens, or fluffy biscuits. They all complement the rich gravy perfectly!

Is this recipe gluten-free?

To make it gluten-free, simply substitute the all-purpose flour with cornstarch or a gluten-free flour blend. Your gravy will still be deliciously thick!

Final Thoughts

Cooking Smothered Turkey Wings with Gravy is more than just preparing a meal; it’s about creating memories.

The aroma wafting through your kitchen will transport you back to family gatherings and cozy dinners.

Each bite of tender turkey, drenched in creamy gravy, is a warm hug on a plate.

This dish invites you to slow down, savor the flavors, and share moments with loved ones.

Whether it’s a weeknight dinner or a special occasion, this recipe brings comfort and joy to the table.

So roll up your sleeves and enjoy the delicious journey ahead!

jhessica

Smothered Turkey Wings with Gravy: A Flavorful Delight!

Smothered Turkey Wings with Gravy is a flavorful dish that combines tender turkey wings with a rich and creamy gravy, perfect for a comforting meal.
Prep Time 15 minutes
Cook Time 2 hours
Total Time 2 hours 15 minutes
Course: Main Course
Cuisine: American
Calories: 450

Ingredients
  

  • 4 large turkey wings about 3-4 pounds
  • 1 tablespoon olive oil
  • 1 teaspoon garlic powder
  • 1 teaspoon onion powder
  • 1 teaspoon paprika
  • 1 teaspoon dried thyme
  • 1 teaspoon salt
  • 1/2 teaspoon black pepper
  • 1/2 teaspoon cayenne pepper optional
  • 1 medium onion sliced
  • 3 cloves garlic minced
  • 2 cups chicken broth
  • 1 cup heavy cream
  • 2 tablespoons all-purpose flour
  • 1 tablespoon Worcestershire sauce
  • Fresh parsley chopped (for garnish)

Method
 

  1. Preheat your oven to 350°F.
  2. In a large bowl, combine garlic powder, onion powder, paprika, thyme, salt, black pepper, and cayenne pepper. Rub this spice mixture all over the turkey wings.
  3. In a large oven-safe skillet or Dutch oven, heat olive oil over medium-high heat. Add the turkey wings and sear them for about 5-7 minutes on each side until browned. Remove the wings and set aside.
  4. In the same skillet, add the sliced onion and minced garlic. Sauté for about 3-4 minutes until the onion is translucent.
  5. Sprinkle the flour over the onions and garlic, stirring constantly for about 1 minute to cook the flour.
  6. Gradually whisk in the chicken broth and heavy cream, ensuring there are no lumps. Add Worcestershire sauce and bring the mixture to a gentle simmer.
  7. Return the turkey wings to the skillet, spooning some of the gravy over them. Cover the skillet with a lid or aluminum foil.
  8. Transfer the skillet to the preheated oven and bake for 1.5 to 2 hours, or until the turkey wings are tender and cooked through.
  9. Once done, remove from the oven and let rest for 10 minutes. Garnish with chopped parsley before serving.

Nutrition

Serving: 1turkey wing with gravyCalories: 450kcalCarbohydrates: 6gProtein: 35gFat: 30gSaturated Fat: 15gPolyunsaturated Fat: 10gCholesterol: 120mgSodium: 800mgSugar: 1g

Notes

  • For a spicier kick, add chopped jalapeños or a dash of hot sauce to the gravy.
  • Substitute turkey wings with chicken thighs or drumsticks for a different flavor and texture.

Tried this recipe?

Let us know how it was!

Cheesy Chicken Enchilada Casserole is a must-try dish!

Introduction to Cheesy Chicken Enchilada Casserole

There’s something magical about a dish that brings everyone together, and the Cheesy Chicken Enchilada Casserole does just that.

After a long day, when the clock is ticking and hunger pangs are setting in, this casserole is your go-to solution.

It’s hearty, comforting, and packed with flavor, making it perfect for impressing family or friends.

With layers of tender chicken, zesty enchilada sauce, and gooey cheese, it’s a meal that warms the heart and fills the belly.

Trust me, once you try it, you’ll want to make it a regular on your dinner table.

Why You’ll Love This Cheesy Chicken Enchilada Casserole

This Cheesy Chicken Enchilada Casserole is a game-changer for busy weeknights.

It’s quick to prepare, taking just 15 minutes of your time, and then it bakes to perfection while you unwind.

The layers of flavor are simply irresistible, with each bite delivering a delightful mix of spices and cheesy goodness.

Plus, it’s a crowd-pleaser, making it perfect for family dinners or gatherings with friends.

Ingredients for Cheesy Chicken Enchilada Casserole

Creating a delicious Cheesy Chicken Enchilada Casserole starts with gathering the right ingredients.

Here’s what you’ll need:

  • Cooked, shredded chicken: This is the star of the dish. Use rotisserie chicken for convenience or cook your own for a fresher taste.
  • Red enchilada sauce: This adds a rich, tangy flavor. You can find it canned or make your own if you’re feeling adventurous.
  • Black beans: These provide protein and a nice texture. Rinse them well to remove excess sodium.
  • Corn: Whether frozen or canned, corn adds sweetness and color to the casserole.
  • Diced tomatoes: Fresh or canned, they bring juiciness and a burst of flavor. Opt for fire-roasted for an extra kick.
  • Ground cumin: This spice gives a warm, earthy flavor that complements the other ingredients beautifully.
  • Garlic powder: A must-have for that aromatic punch. It’s convenient and blends well into the mix.
  • Onion powder: This adds depth without the hassle of chopping onions. A little goes a long way.
  • Chili powder: For those who like a bit of heat, this spice enhances the overall flavor profile.
  • Corn tortillas: Cut into strips, they create layers that soak up all the delicious flavors.
  • Shredded cheddar cheese: The gooey goodness that ties everything together. Feel free to mix in other cheeses for variety.
  • Sour cream: This is optional but adds a creamy, tangy finish when served on top.
  • Fresh cilantro: A garnish that brightens the dish. If you’re not a fan, feel free to skip it.

For exact measurements, check the bottom of the article where you can find everything listed for easy printing.

With these ingredients, you’re well on your way to creating a comforting and satisfying meal that everyone will love!

How to Make Cheesy Chicken Enchilada Casserole

Creating this Cheesy Chicken Enchilada Casserole is a breeze.

With just a few simple steps, you’ll have a delicious meal ready to impress.

Let’s dive into the process!

Step 1: Preheat the Oven

First things first, preheat your oven to 350°F (175°C).

This ensures even cooking and helps the cheese melt to perfection.

Step 2: Prepare the Chicken Mixture

In a large mixing bowl, combine the shredded chicken, enchilada sauce, black beans, corn, diced tomatoes, cumin, garlic powder, onion powder, and chili powder.

Mix well until all ingredients are evenly coated.

This mixture is where the magic happens, so make sure it’s well combined!

Step 3: Layer the Tortillas

Grab a greased 9×13-inch baking dish and layer half of the tortilla strips on the bottom.

This creates a solid base for your casserole, soaking up all those delicious flavors.

Step 4: Add the Chicken Mixture

Spread half of the chicken mixture over the tortilla layer.

Then, sprinkle half of the shredded cheese on top.

This layering technique builds flavor and texture, making each bite a delight.

Step 5: Repeat the Layers

Now, repeat the layers with the remaining tortilla strips, chicken mixture, and top with the remaining cheese.

Don’t skimp on the cheese; it’s what makes this casserole so cheesy and delicious!

Step 6: Bake the Casserole

Cover the baking dish with aluminum foil and bake for 25 minutes.

After that, remove the foil and bake for an additional 10-15 minutes, or until the cheese is bubbly and golden.

The aroma will fill your kitchen, making it hard to wait!

Step 7: Cool and Serve

Once it’s out of the oven, let the casserole cool for 5-10 minutes before serving.

Top with sour cream and cilantro if desired.

This final touch adds a creamy contrast to the cheesy goodness, making every bite unforgettable.

Tips for Success

  • Use rotisserie chicken for a quick and easy option.
  • Don’t skip the cooling time; it helps the casserole set up nicely.
  • Feel free to customize the spices to suit your taste.
  • For a creamier texture, mix some sour cream into the chicken mixture.
  • Store leftovers in an airtight container for up to three days.

Equipment Needed

  • 9×13-inch baking dish: A standard size for casseroles; any similar-sized dish works.
  • Mixing bowl: Use a large bowl for combining ingredients; a pot can work in a pinch.
  • Measuring cups and spoons: Essential for accuracy; eyeballing can be risky!
  • Aluminum foil: Helps retain moisture while baking; parchment paper is a good alternative.

Variations

  • Spicy Kick: Add diced jalapeños or a splash of hot sauce to the chicken mixture for an extra layer of heat.
  • Vegetarian Option: Substitute the chicken with sautéed bell peppers, zucchini, and mushrooms for a hearty meatless version.
  • Cheese Lovers: Mix in different cheeses like Monterey Jack or pepper jack for a unique flavor twist.
  • Gluten-Free: Ensure your corn tortillas are labeled gluten-free to keep this dish suitable for gluten-sensitive eaters.
  • Low-Carb: Replace corn tortillas with cauliflower rice or zucchini slices for a lighter, low-carb alternative.

Serving Suggestions

  • Side Salad: Pair with a fresh green salad topped with avocado and lime dressing for a refreshing contrast.
  • Rice: Serve with cilantro-lime rice to soak up the delicious enchilada sauce.
  • Drinks: Enjoy with a cold beer or a fruity margarita for a festive touch.
  • Presentation: Garnish with extra cilantro and lime wedges for a pop of color and flavor.

FAQs about Cheesy Chicken Enchilada Casserole

Can I make Cheesy Chicken Enchilada Casserole ahead of time?

Absolutely! You can prepare the casserole a day in advance. Just assemble it, cover it tightly, and store it in the fridge. When you’re ready to bake, add a few extra minutes to the cooking time.

What can I substitute for chicken in this casserole?

If you’re looking for alternatives, ground turkey or beef works well. For a vegetarian option, try using sautéed vegetables like bell peppers and mushrooms instead of chicken.

How do I store leftovers of Cheesy Chicken Enchilada Casserole?

Store any leftovers in an airtight container in the fridge for up to three days. Reheat in the oven or microwave until warmed through.

Can I freeze Cheesy Chicken Enchilada Casserole?

Yes, this casserole freezes beautifully! Just make sure to wrap it tightly in plastic wrap and then foil. It can be frozen for up to three months. Thaw in the fridge before baking.

What sides pair well with Cheesy Chicken Enchilada Casserole?

For a complete meal, serve it with a fresh salad, cilantro-lime rice, or some crispy tortilla chips. A refreshing drink like a margarita can also elevate the experience!

Final Thoughts

Cooking the Cheesy Chicken Enchilada Casserole is more than just preparing a meal; it’s about creating memories.

The aroma wafting through your kitchen, the laughter around the table, and the satisfied smiles of your loved ones make it all worthwhile.

This dish is a celebration of flavors and comfort, perfect for any occasion.

Whether it’s a busy weeknight or a gathering with friends, this casserole brings everyone together.

So, roll up your sleeves, embrace the joy of cooking, and let this cheesy delight become a staple in your home. You won’t regret it!

jhessica

Cheesy Chicken Enchilada Casserole is a must-try dish!

Cheesy Chicken Enchilada Casserole is a must-try dish that combines layers of shredded chicken, enchilada sauce, and cheese for a delicious and hearty meal.
Prep Time 15 minutes
Cook Time 40 minutes
Total Time 55 minutes
Servings: 6 servings
Course: Main Course
Cuisine: Mexican
Calories: 350

Ingredients
  

  • 2 cups cooked shredded chicken
  • 1 can 10 oz red enchilada sauce
  • 1 can 15 oz black beans, drained and rinsed
  • 1 cup corn frozen or canned
  • 1 cup diced tomatoes fresh or canned
  • 1 teaspoon ground cumin
  • 1 teaspoon garlic powder
  • 1 teaspoon onion powder
  • 1/2 teaspoon chili powder
  • 8 corn tortillas cut into strips
  • 2 cups shredded cheddar cheese
  • 1 cup sour cream
  • 1/4 cup chopped fresh cilantro optional for garnish

Method
 

  1. Preheat your oven to 350°F (175°C).
  2. In a large mixing bowl, combine the shredded chicken, enchilada sauce, black beans, corn, diced tomatoes, cumin, garlic powder, onion powder, and chili powder. Mix well until all ingredients are evenly coated.
  3. In a greased 9×13-inch baking dish, layer half of the tortilla strips on the bottom.
  4. Spread half of the chicken mixture over the tortilla layer, followed by half of the shredded cheese.
  5. Repeat the layers with the remaining tortilla strips, chicken mixture, and top with the remaining cheese.
  6. Cover the baking dish with aluminum foil and bake for 25 minutes.
  7. Remove the foil and bake for an additional 10-15 minutes, or until the cheese is bubbly and golden.
  8. Let the casserole cool for 5-10 minutes before serving. Top with sour cream and cilantro if desired.

Nutrition

Serving: 1/6 of casseroleCalories: 350kcalCarbohydrates: 30gProtein: 25gFat: 15gSaturated Fat: 7gPolyunsaturated Fat: 6gCholesterol: 70mgSodium: 800mgFiber: 8gSugar: 3g

Notes

  • For a spicier kick, add diced jalapeños or a dash of hot sauce to the chicken mixture.
  • Substitute ground turkey or beef for the chicken for a different flavor profile.

Tried this recipe?

Let us know how it was!

Creamy Garlic Parmesan Chicken Pasta: A Delicious Recipe!

Introduction to Creamy Garlic Parmesan Chicken Pasta

There’s something magical about a plate of pasta that brings everyone together. When I think of comfort food, Creamy Garlic Parmesan Chicken Pasta tops the list. It’s rich, creamy, and bursting with flavor, making it the perfect dish for a busy weeknight or a cozy weekend dinner. Whether you’re cooking for yourself or impressing loved ones, this recipe is a surefire hit. Plus, it’s quick to whip up, so you can spend less time in the kitchen and more time enjoying the company around your table.

Why You’ll Love This Creamy Garlic Parmesan Chicken Pasta

This Creamy Garlic Parmesan Chicken Pasta is a game-changer for any home cook. It’s not just delicious; it’s incredibly easy to make. In about 30 minutes, you can serve a restaurant-quality meal that will have everyone asking for seconds. The creamy sauce, combined with tender chicken and perfectly cooked pasta, creates a symphony of flavors that’s hard to resist. Trust me, this dish will quickly become a family favorite!

Ingredients for Creamy Garlic Parmesan Chicken Pasta

Gathering the right ingredients is the first step to creating a delicious Creamy Garlic Parmesan Chicken Pasta. Here’s what you’ll need:

  • Penne pasta: This tubular pasta holds the creamy sauce beautifully, making every bite satisfying.
  • Boneless, skinless chicken breasts: A lean protein that cooks quickly and stays juicy, perfect for this dish.
  • Olive oil: Adds richness and helps to sauté the chicken to golden perfection.
  • Garlic: Freshly minced garlic infuses the dish with a fragrant aroma and robust flavor.
  • Italian seasoning: A blend of herbs that brings a taste of Italy to your kitchen.
  • Salt and black pepper: Essential seasonings that enhance the overall flavor of the dish.
  • Chicken broth: Provides depth and moisture to the sauce, making it rich and savory.
  • Heavy cream: The star of the show, creating that luscious, creamy texture we all love.
  • Grated Parmesan cheese: Adds a salty, nutty flavor that complements the creaminess perfectly.
  • Frozen peas: A pop of color and sweetness, plus they cook quickly right in the sauce.
  • Chopped fresh parsley (optional): A sprinkle of freshness on top, adding a vibrant touch to your dish.

For those looking to lighten things up, consider substituting half-and-half for the heavy cream. You can also add sautéed mushrooms or spinach for extra flavor and nutrition. The exact quantities for each ingredient are available at the bottom of the article for easy printing.

How to Make Creamy Garlic Parmesan Chicken Pasta

Now that you have all your ingredients ready, let’s dive into the cooking process. Making Creamy Garlic Parmesan Chicken Pasta is straightforward and fun. Follow these steps, and you’ll have a delicious meal on the table in no time!

Step 1: Cook the Pasta

Start by boiling a large pot of salted water. Once it’s bubbling, add the penne pasta. Cook it according to the package instructions until it’s al dente. This usually takes about 10-12 minutes. Remember, you want it firm enough to hold up in the sauce. Once done, drain the pasta and set it aside. A little tip: drizzle a bit of olive oil on it to prevent sticking.

Step 2: Prepare the Chicken

While the pasta cooks, heat a large skillet over medium heat and add the olive oil. Season the boneless, skinless chicken breasts with Italian seasoning, salt, and black pepper. Place the chicken in the skillet and cook for about 6-7 minutes on each side. You want it golden brown and cooked through. Once done, remove the chicken from the skillet and let it rest for a few minutes before slicing it into bite-sized pieces.

Step 3: Sauté the Garlic

In the same skillet, add the minced garlic. Sauté it for about a minute until it becomes fragrant. Be careful not to burn it; burnt garlic can turn bitter. This step is crucial as it builds the flavor base for your sauce.

Step 4: Create the Sauce

Pour in the chicken broth and heavy cream, stirring to combine. Bring the mixture to a gentle simmer. As it heats, add the grated Parmesan cheese, stirring until it melts and the sauce becomes smooth. This creamy goodness is what makes this dish so irresistible!

Step 5: Combine Ingredients

Now, it’s time to bring everything together. Add the cooked pasta and frozen peas to the skillet. Toss everything gently until the pasta is well coated in the creamy sauce. The peas will heat through quickly, adding a nice pop of color and sweetness.

Step 6: Serve and Enjoy

Slice the rested chicken and place it on top of the pasta. If you’re feeling fancy, sprinkle some chopped fresh parsley for a touch of color. Serve this Creamy Garlic Parmesan Chicken Pasta warm, and watch everyone dig in with delight. Enjoy the compliments!

Tips for Success

  • Always salt your pasta water; it enhances the flavor of the pasta.
  • Let the chicken rest before slicing to keep it juicy.
  • Use freshly grated Parmesan for the best flavor and texture.
  • Don’t rush the garlic; sauté it just until fragrant for optimal taste.
  • Feel free to customize with your favorite veggies for added nutrition.

Equipment Needed

  • Large pot: For boiling pasta; a deep skillet can work too.
  • Skillet: A non-stick skillet is ideal for easy cooking and cleanup.
  • Colander: For draining pasta; a slotted spoon can be a quick alternative.
  • Measuring cups: Essential for accurate ingredient portions.
  • Knife and cutting board: For slicing chicken and prepping garlic.

Variations

  • Vegetarian Option: Replace chicken with sautéed mushrooms or grilled zucchini for a hearty, meatless dish.
  • Spicy Kick: Add red pepper flakes or diced jalapeños to the sauce for a spicy twist.
  • Whole Wheat Pasta: Use whole wheat penne for a healthier, fiber-rich alternative.
  • Low-Carb Version: Swap pasta for spiralized zucchini or cauliflower rice for a low-carb meal.
  • Herb Infusion: Experiment with fresh herbs like basil or thyme for an aromatic touch.

Serving Suggestions

  • Garlic Bread: Serve with warm, buttery garlic bread for a classic pairing.
  • Side Salad: A fresh green salad with a light vinaigrette complements the richness of the pasta.
  • Wine Pairing: A crisp white wine, like Pinot Grigio, enhances the flavors beautifully.
  • Presentation: Garnish with extra Parmesan and parsley for a restaurant-style finish.

FAQs about Creamy Garlic Parmesan Chicken Pasta

As you embark on your culinary adventure with Creamy Garlic Parmesan Chicken Pasta, you might have a few questions. Here are some common queries and their answers to help you along the way:

Can I use a different type of pasta?

Absolutely! While penne is a great choice, you can use any pasta you prefer, like fettuccine or rotini. Just adjust the cooking time as needed.

How can I make this dish gluten-free?

To make a gluten-free version of Creamy Garlic Parmesan Chicken Pasta, simply use gluten-free pasta. The rest of the ingredients are naturally gluten-free!

Can I prepare this dish in advance?

Yes! You can cook the chicken and sauce ahead of time. Just store them separately in the fridge. When you’re ready to eat, reheat and combine with freshly cooked pasta.

What can I substitute for heavy cream?

If you’re looking for a lighter option, half-and-half or whole milk can work. For a dairy-free alternative, try coconut milk or a cashew cream.

How do I store leftovers?

Store any leftovers in an airtight container in the fridge for up to three days. Reheat gently on the stovetop, adding a splash of chicken broth or cream to loosen the sauce.

Final Thoughts

Cooking Creamy Garlic Parmesan Chicken Pasta is more than just preparing a meal; it’s about creating moments. The rich, creamy sauce envelops the tender chicken and pasta, making every bite a comforting hug. Whether it’s a weeknight dinner or a special occasion, this dish brings warmth to the table and smiles to faces. I love how it transforms an ordinary evening into something memorable. So, roll up your sleeves, gather your loved ones, and dive into this delightful recipe. Trust me, the joy of sharing this meal will linger long after the last bite is gone.

jhessica

Creamy Garlic Parmesan Chicken Pasta: A Delicious Recipe!

A creamy and delicious pasta dish featuring chicken, garlic, and Parmesan cheese.
Prep Time 10 minutes
Cook Time 20 minutes
Total Time 30 minutes
Servings: 4 servings
Course: Main Course
Cuisine: Italian
Calories: 550

Ingredients
  

  • 2 cups uncooked penne pasta
  • 1 pound boneless skinless chicken breasts
  • 1 tablespoon olive oil
  • 4 cloves garlic minced
  • 1 teaspoon Italian seasoning
  • 1/2 teaspoon salt
  • 1/4 teaspoon black pepper
  • 1 cup chicken broth
  • 1 cup heavy cream
  • 1 cup grated Parmesan cheese
  • 1/2 cup frozen peas
  • 1/4 cup chopped fresh parsley optional

Method
 

  1. Cook the penne pasta according to package instructions until al dente. Drain and set aside.
  2. In a large skillet, heat the olive oil over medium heat. Add the chicken breasts and season with Italian seasoning, salt, and black pepper. Cook for about 6-7 minutes on each side, or until the chicken is cooked through. Remove from the skillet and let it rest for a few minutes before slicing.
  3. In the same skillet, add the minced garlic and sauté for about 1 minute until fragrant.
  4. Pour in the chicken broth and heavy cream, stirring to combine. Bring to a simmer.
  5. Stir in the grated Parmesan cheese until melted and smooth. Add the frozen peas and cooked pasta, mixing until well combined.
  6. Slice the cooked chicken and place it on top of the pasta. Garnish with chopped parsley if desired. Serve warm.

Nutrition

Serving: 1servingCalories: 550kcalCarbohydrates: 40gProtein: 36gFat: 30gSaturated Fat: 15gPolyunsaturated Fat: 10gCholesterol: 120mgSodium: 800mgFiber: 2gSugar: 2g

Notes

  • For a lighter version, substitute half-and-half for heavy cream.
  • Add sautéed mushrooms or spinach for extra vegetables and flavor.

Tried this recipe?

Let us know how it was!

Stay Connected

Get recipes via email: