Get my cookbooks

Cheesy Egg Hash Brown Casserole is a must-try dish!

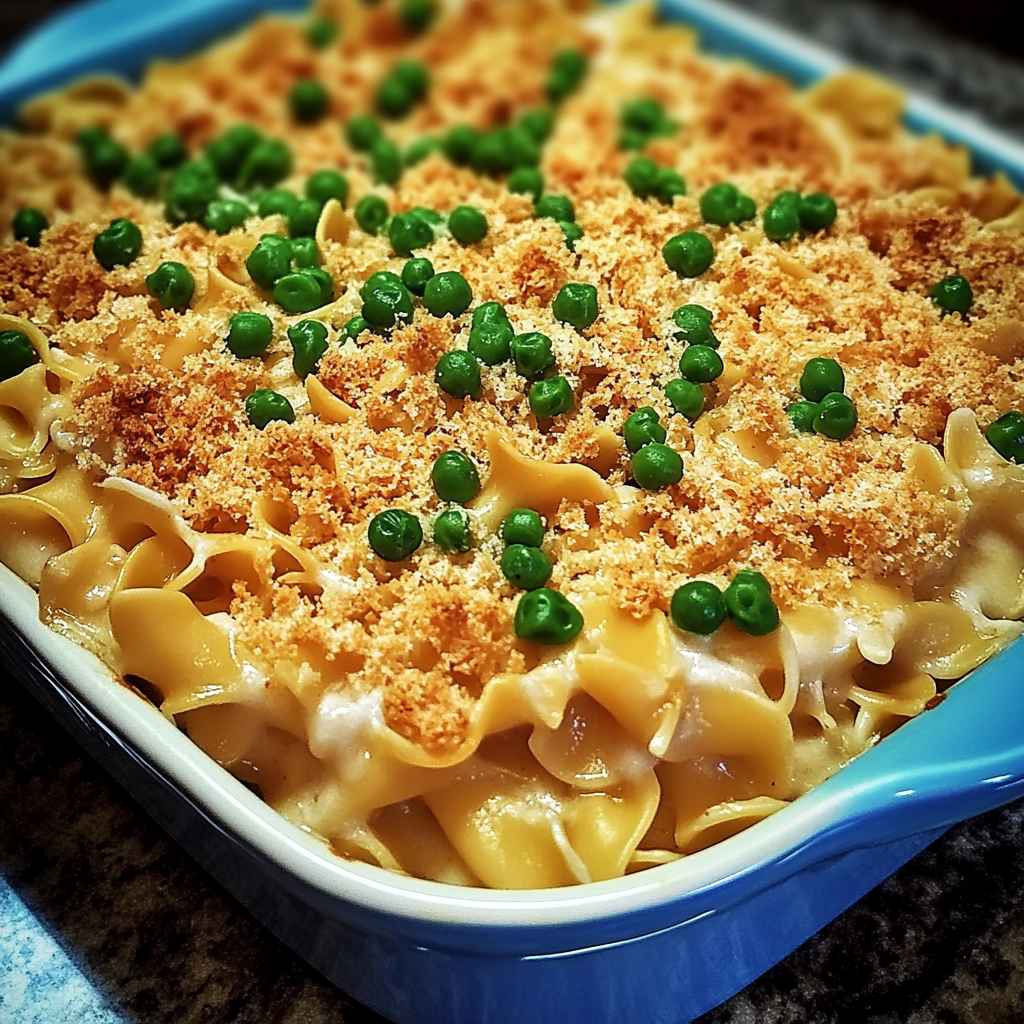
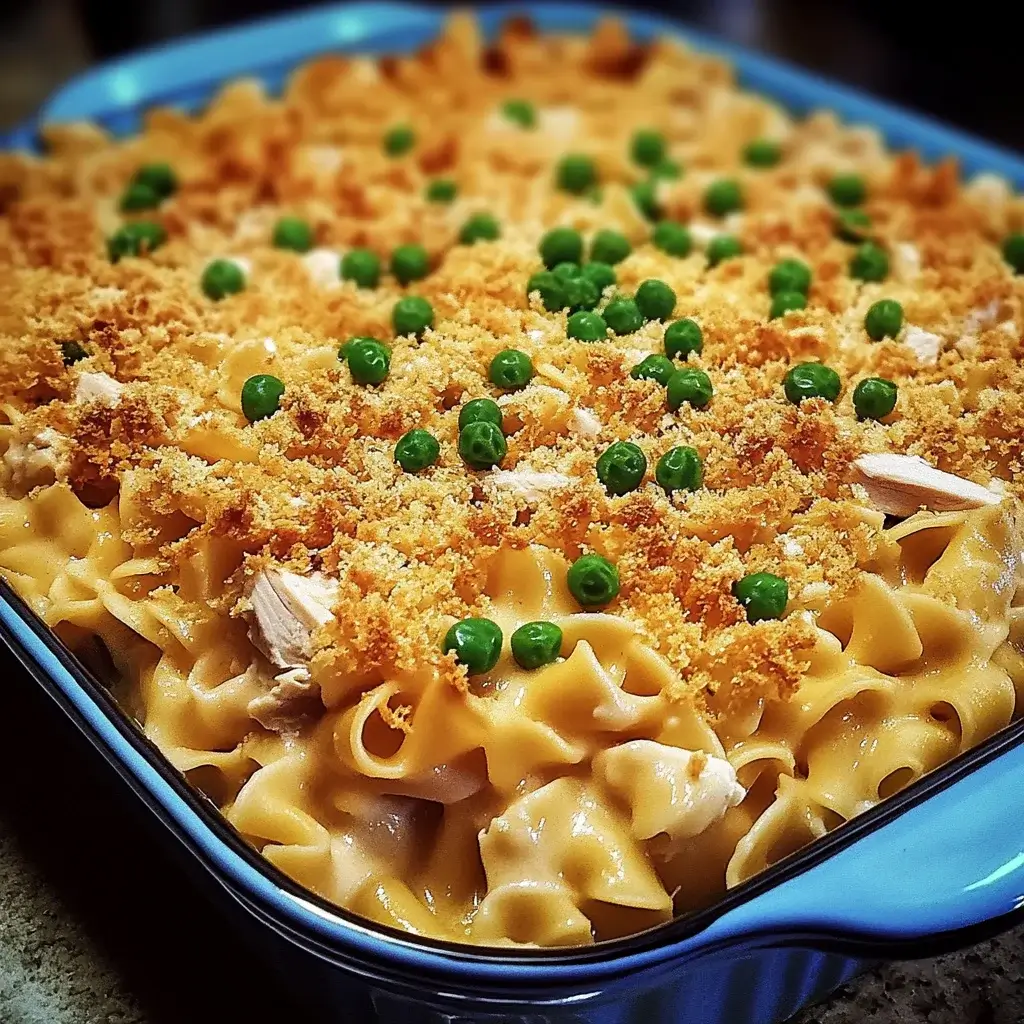
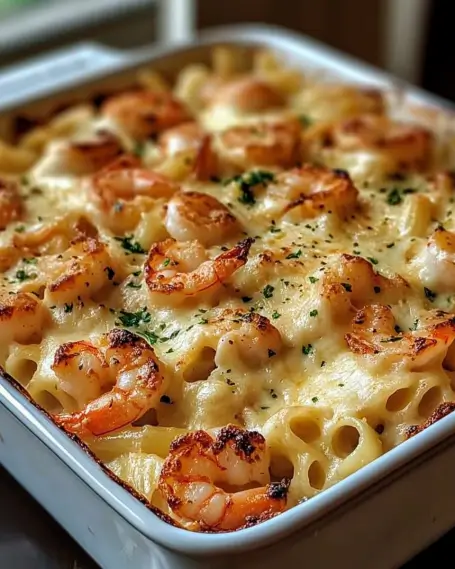
Introduction to Cheesy Egg Hash Brown Casserole

Cheesy Egg Hash Brown Casserole. This delightful dish combines the comforting flavors of crispy hash browns, creamy eggs, and melted cheese, making it a perfect choice for any meal of the day. Whether you’re hosting a brunch, enjoying a family breakfast, or simply craving a cozy dinner, this casserole is sure to please everyone at the table.

What makes this casserole so special? It’s not just the taste; it’s also the ease of preparation. With just a few simple ingredients, you can whip up a dish that feels indulgent yet is surprisingly straightforward. Plus, it’s versatile! You can customize it with your favorite proteins or vegetables, making it a great way to use up leftovers.

Cheesy Egg Hash Brown Casserole recipe!

Ingredients for Cheesy Egg Hash Brown Casserole

Cheesy Egg Hash Brown Casserole, you’ll need a handful of simple ingredients. Each component plays a vital role in delivering that delightful flavor and texture. Here’s what you’ll need:

  • 2 cups frozen hash browns, thawed
  • 1 cup shredded cheddar cheese
  • 1 cup diced cooked ham or cooked bacon
  • 6 large eggs
  • 1 cup milk
  • 1 teaspoon garlic powder
  • 1 teaspoon onion powder
  • Salt and pepper to taste
  • 2 tablespoons chopped fresh parsley (optional for garnish)

These ingredients come together to create a dish that is not only filling but also packed with flavor. The hash browns provide a crispy base, while the eggs and cheese create a creamy, rich topping. You can easily adjust the recipe to suit your taste. For instance, if you prefer a vegetarian option, simply omit the ham or bacon and add your favorite sautéed vegetables.

Cheesy Egg Hash Brown Casserole to life!

Preparation of Cheesy Egg Hash Brown Casserole

Cheesy Egg Hash Brown Casserole. This process is simple and quick, allowing you to enjoy a delicious meal in no time. Follow these easy steps to create a dish that will impress your family and friends!

Step 1: Preheat the Oven

First things first, preheat your oven to 350°F (175°C). This step is crucial as it ensures that your casserole cooks evenly. While the oven heats up, you can focus on preparing the other ingredients. It’s a great way to save time!

Step 2: Prepare the Hash Browns

Next, take your thawed hash browns and place them in a large mixing bowl. If you want a crispier texture, you can pat them dry with a paper towel to remove excess moisture. Then, add half of the shredded cheddar cheese and your choice of diced ham or bacon. Mix everything together until well combined. This mixture will form the base of your casserole, so make sure it’s evenly distributed.

Step 3: Mix the Egg Mixture

In another bowl, crack the six large eggs and pour in the cup of milk. Add the garlic powder, onion powder, salt, and pepper. Whisk everything together until the mixture is smooth and well blended. This egg mixture will bind all the ingredients together, creating a fluffy texture.

Step 4: Combine Ingredients

Now it’s time to bring everything together! Pour the egg mixture over the hash brown mixture in the baking dish. Use a spatula to ensure it’s evenly distributed. This step is important for achieving that perfect consistency throughout the casserole. Finally, sprinkle the remaining cheddar cheese on top for that gooey, cheesy goodness.

Step 5: Bake the Casserole

Place the baking dish in your preheated oven and bake for 45-50 minutes. You’ll know it’s ready when the eggs are set and the top is golden brown. The aroma will fill your kitchen, making it hard to resist! Once done, let the casserole cool for about 5 minutes before slicing. If you like, garnish with chopped fresh parsley for a pop of color and flavor.

Cheesy Egg Hash Brown Casserole is now ready to be served. It’s a delightful dish that’s perfect for any occasion. Let’s explore some variations to make it even more exciting!

Variation of Cheesy Egg Hash Brown Casserole

Cheesy Egg Hash Brown Casserole is its versatility. You can easily customize it to suit your taste or dietary preferences. Let’s explore some exciting variations that can elevate your casserole experience!

Adding Vegetables

For those who love a burst of color and nutrition, adding vegetables is a fantastic option. You can incorporate a variety of sautéed veggies to enhance the flavor and texture of your casserole. Consider adding:

  • Bell Peppers: Diced red, green, or yellow bell peppers add sweetness and crunch.
  • Spinach: Fresh or frozen spinach can provide a healthy boost and vibrant color.
  • Mushrooms: Sautéed mushrooms add an earthy flavor that pairs well with the cheese.
  • Zucchini: Grated zucchini can add moisture and a subtle taste.

Cheesy Egg Hash Brown Casserole even more delicious!

Protein Options

If you want to switch up the protein in your casserole, there are plenty of options to consider. While ham and bacon are classic choices, you can try:

  • Cooked Sausage: Crumbled breakfast sausage adds a savory kick.
  • Chicken: Diced cooked chicken can make the dish heartier.
  • Turkey: Ground turkey is a leaner alternative that still packs a punch.
  • Tofu: For a vegetarian option, crumbled tofu can be seasoned and added for protein.

Cheesy Egg Hash Brown Casserole a delightful surprise every time!

Cooking Note for Cheesy Egg Hash Brown Casserole

Cheesy Egg Hash Brown Casserole, there are a few cooking notes to keep in mind. These tips will help ensure that your casserole turns out perfectly every time, making it a dish you can confidently serve to family and friends.

First, always use thawed hash browns. Frozen hash browns can release excess moisture during cooking, which may lead to a soggy casserole. Thawing them beforehand helps achieve that desired crispy texture. If you’re short on time, you can microwave the hash browns for a few minutes to speed up the thawing process.

Next, consider the size of your baking dish. A 9×13-inch dish is ideal for this recipe, as it allows for even cooking. If you use a smaller dish, the casserole may take longer to cook, and the center might remain undercooked. Conversely, a larger dish may cause the casserole to dry out.

Additionally, keep an eye on the baking time. Ovens can vary, so check your casserole a few minutes before the recommended time. You want the eggs to be set and the top to be golden brown. If the top browns too quickly, you can cover it loosely with aluminum foil to prevent burning while the center finishes cooking.

Lastly, let the casserole cool for a few minutes before slicing. This resting time allows the flavors to meld and makes it easier to cut clean slices. Plus, it helps prevent burns from the hot cheese and egg mixture.

Cheesy Egg Hash Brown Casserole that is not only delicious but also visually appealing. Now, let’s move on to some serving suggestions to make your meal even more enjoyable!

Serving Suggestions for Cheesy Egg Hash Brown Casserole

Cheesy Egg Hash Brown Casserole is baked to perfection, it’s time to serve it up! This dish is not only delicious but also incredibly versatile when it comes to serving options. Here are some delightful ideas to enhance your meal experience:

  • Fresh Fruit: Pair your casserole with a side of fresh fruit. Slices of juicy watermelon, strawberries, or a fruit salad can add a refreshing contrast to the rich flavors of the casserole.
  • Green Salad: A light green salad with mixed greens, cherry tomatoes, and a tangy vinaigrette can balance the heaviness of the casserole. The crispness of the salad complements the creamy texture beautifully.
  • Toast or Biscuits: Serve your casserole with warm, buttery toast or flaky biscuits. This adds a comforting touch and makes for a hearty breakfast or brunch spread.
  • Salsa or Hot Sauce: For those who enjoy a bit of spice, offering salsa or hot sauce on the side can elevate the flavors. A dollop of salsa adds a zesty kick that pairs well with the cheesy goodness.
  • Yogurt or Sour Cream: A spoonful of yogurt or sour cream can add creaminess and a slight tang. This is especially nice if you’ve added spicy ingredients to your casserole.

When serving, consider the occasion. For a casual family breakfast, you might want to keep it simple with just fruit and coffee. However, if you’re hosting a brunch, you can create a beautiful buffet-style spread with all the suggested sides. This way, guests can mix and match according to their preferences.

Cheesy Egg Hash Brown Casserole is a crowd-pleaser, so don’t hesitate to get creative with your serving ideas. Enjoy the delightful flavors and the smiles it brings to your table!

Tips for Perfecting Cheesy Egg Hash Brown Casserole

Cheesy Egg Hash Brown Casserole is all about attention to detail. With a few helpful tips, you can elevate your dish from good to great! Here are some essential tips to ensure your casserole turns out delicious every time:

  • Use Fresh Ingredients: Fresh ingredients can make a big difference in flavor. Opt for high-quality cheese and fresh eggs. If possible, choose organic or farm-fresh eggs for a richer taste.
  • Season Generously: Don’t be shy with the seasonings! Salt and pepper are essential, but you can also experiment with herbs like thyme or rosemary. A pinch of paprika can add a lovely color and flavor.
  • Let It Rest: After baking, allow the casserole to rest for about 5-10 minutes before slicing. This helps the layers set and makes it easier to serve. Plus, it allows the flavors to meld together beautifully.
  • Experiment with Cheese: While cheddar is a classic choice, feel free to mix it up! Try using Monterey Jack, pepper jack, or even a blend of cheeses for a unique twist. Each cheese brings its own flavor profile.
  • Check for Doneness: Ovens can vary, so keep an eye on your casserole as it bakes. The eggs should be fully set, and the top should be golden brown. If you’re unsure, use a toothpick to check the center; it should come out clean.
  • Customize to Your Taste: Don’t hesitate to make the recipe your own! Add your favorite spices, proteins, or vegetables. The Cheesy Egg Hash Brown Casserole is a blank canvas waiting for your creativity!
  • Serve Hot: This casserole is best enjoyed hot out of the oven. The gooey cheese and fluffy eggs are at their peak when served fresh. If you have leftovers, reheat them in the oven for the best results.

Cheesy Egg Hash Brown Casserole. Each bite will be a delightful experience, filled with flavor and comfort. Now, let’s break down the time needed to prepare this delicious dish!

Breakdown of Time for Cheesy Egg Hash Brown Casserole

Cheesy Egg Hash Brown Casserole is essential for planning your meal. Whether you’re preparing it for a special occasion or a cozy family breakfast, knowing the prep and cooking times will help you stay organized. Here’s a breakdown of the time needed:

Prep Time

The prep time for this delicious casserole is approximately 15-20 minutes. This includes gathering your ingredients, thawing the hash browns, and mixing the egg and hash brown mixtures. If you choose to add vegetables or additional proteins, you may need a few extra minutes for chopping and sautéing. However, the overall prep time remains quick and manageable!

Cooking Time

Once your casserole is assembled, it will need to bake in the oven for about 45-50 minutes. During this time, the eggs will set, and the top will turn a beautiful golden brown. Keep an eye on it as it bakes, and remember that oven temperatures can vary. Checking a few minutes early can help ensure it doesn’t overcook.

Total Time

Cheesy Egg Hash Brown Casserole into your busy schedule, making it a perfect choice for any meal!

Nutritional Information for Cheesy Egg Hash Brown Casserole

Cheesy Egg Hash Brown Casserole is important, especially if you’re mindful of your diet. This dish is not only delicious but also provides a good balance of nutrients. Here’s a breakdown of the key nutritional information per serving:

Calories

Cheesy Egg Hash Brown Casserole contains approximately 290 calories. This makes it a satisfying option for breakfast or brunch without being overly heavy. The combination of eggs, cheese, and hash browns provides a hearty meal that can keep you energized throughout the day.

Protein

With about 18 grams of protein per serving, this casserole is a great source of this essential nutrient. The protein comes primarily from the eggs and cheese, making it an excellent choice for those looking to increase their protein intake. Protein is vital for muscle repair and growth, making this dish a smart option for active individuals.

Sodium

The sodium content in each serving is approximately 600 mg. While this is a reasonable amount for a savory dish, it’s always good to be mindful of your sodium intake, especially if you’re watching your salt consumption. You can reduce the sodium by using low-sodium ham or bacon and opting for low-sodium cheese if desired.

Cheesy Egg Hash Brown Casserole offers a balanced mix of calories, protein, and flavor. It’s a dish that can fit into various dietary plans while still being enjoyable. Now that you know the nutritional information, let’s address some frequently asked questions about this delightful casserole!

FAQs about Cheesy Egg Hash Brown Casserole

Can I make Cheesy Egg Hash Brown Casserole ahead of time?

Cheesy Egg Hash Brown Casserole ahead of time. Simply assemble the casserole as directed, but instead of baking it right away, cover it tightly with plastic wrap or aluminum foil. You can store it in the refrigerator for up to 24 hours before baking. When you’re ready to bake, just remove the cover and pop it in the oven. You may need to add a few extra minutes to the baking time since it will be cold from the fridge.

What can I substitute for hash browns in the casserole?

If you don’t have hash browns on hand, there are several tasty substitutes you can use. Consider using:

  • Shredded Potatoes: Freshly grated potatoes can work well. Just be sure to squeeze out excess moisture.
  • Sweet Potatoes: For a healthier twist, shredded sweet potatoes can add a unique flavor.
  • Cauliflower Rice: For a low-carb option, riced cauliflower can be a great alternative. It will give a different texture but still be delicious!

Cheesy Egg Hash Brown Casserole.

How do I store leftovers of Cheesy Egg Hash Brown Casserole?

Storing leftovers is easy! Allow the casserole to cool completely, then cover it tightly with plastic wrap or transfer it to an airtight container. You can keep it in the refrigerator for up to 3-4 days. When you’re ready to enjoy it again, simply reheat individual portions in the microwave or warm it in the oven until heated through. This makes for a quick and satisfying meal!

Can I freeze Cheesy Egg Hash Brown Casserole?

Cheesy Egg Hash Brown Casserole! To do this, prepare the casserole as directed but do not bake it. Instead, cover it tightly with plastic wrap and then aluminum foil to prevent freezer burn. It can be stored in the freezer for up to 2-3 months. When you’re ready to bake it, thaw it in the refrigerator overnight and then bake as usual. This is a great way to have a delicious meal ready to go for busy days!

Conclusion on Cheesy Egg Hash Brown Casserole

Cheesy Egg Hash Brown Casserole is a delightful dish that brings comfort and satisfaction to any meal. Its combination of crispy hash browns, creamy eggs, and melted cheese creates a flavor profile that is hard to resist. Whether you’re serving it for breakfast, brunch, or dinner, this casserole is sure to impress your family and friends.

What makes this dish even more appealing is its versatility. You can easily customize it with your favorite proteins and vegetables, making it a great way to use up leftovers or cater to different dietary preferences. From adding sautéed veggies to experimenting with various cheeses, the possibilities are endless!

Moreover, the preparation is straightforward, allowing you to whip up this delicious casserole in no time. With just a few simple steps, you can create a hearty meal that not only tastes great but also nourishes your body. Plus, the nutritional benefits, including a good amount of protein and essential vitamins, make it a smart choice for any occasion.

Cheesy Egg Hash Brown Casserole. It’s a recipe that promises to bring smiles to the table and warmth to your heart. Gather your ingredients, follow the steps, and enjoy the delightful experience of this cheesy, eggy goodness!

Bacon, Egg, and Hashbrown Casserole is a must-try!

Introduction to Bacon, Egg, and Hashbrown Casserole

Bacon, Egg, and Hashbrown Casserole. This delightful dish combines crispy bacon, fluffy eggs, and golden hashbrowns into one satisfying meal. Perfect for brunch gatherings or a cozy family breakfast, this casserole is not only easy to prepare but also packed with flavor.

The beauty of this casserole lies in its simplicity. With just a handful of ingredients, you can create a dish that feels indulgent yet is straightforward to make. Imagine waking up to the aroma of bacon sizzling in the kitchen, followed by the comforting scent of eggs baking in the oven. It’s a breakfast experience that brings warmth and joy to your morning routine.

Bacon, Egg, and Hashbrown Casserole a go-to recipe for any occasion.

In this article, we will guide you through the ingredients, preparation steps, and even some variations to try. So, roll up your sleeves and get ready to whip up a breakfast that will have everyone asking for seconds!

Ingredients for Bacon, Egg, and Hashbrown Casserole

Bacon, Egg, and Hashbrown Casserole, you’ll need a few simple ingredients. Each component plays a vital role in delivering that delicious flavor and satisfying texture. Here’s what you’ll need:

  • 2 cups frozen hashbrowns, thawed: These provide the base of the casserole, giving it a hearty and filling texture.
  • 8 ounces bacon, chopped: Crispy bacon adds a savory and smoky flavor that elevates the dish.
  • 6 large eggs: Eggs are essential for binding the ingredients together and creating a fluffy texture.
  • 1 cup milk: Milk adds creaminess and helps to make the eggs light and airy.
  • 1 cup shredded cheddar cheese: Cheddar cheese brings a rich, cheesy flavor that complements the other ingredients.
  • 1 teaspoon salt: Salt enhances the overall flavor of the casserole.
  • 1/2 teaspoon black pepper: Black pepper adds a touch of spice and depth to the dish.
  • 1/2 teaspoon garlic powder: Garlic powder gives a subtle, savory taste that pairs well with the bacon.
  • 1/2 teaspoon onion powder: Onion powder adds a hint of sweetness and complexity to the flavor profile.
  • 1/4 cup chopped green onions (optional): Green onions add a fresh, vibrant touch and a bit of crunch.

Bacon, Egg, and Hashbrown Casserole is all about making it your own!

Step-by-Step Preparation of Bacon, Egg, and Hashbrown Casserole

Bacon, Egg, and Hashbrown Casserole. Follow these simple steps to create a delicious breakfast that everyone will love!

Step 1: Preheat the Oven

First things first, preheat your oven to 375°F (190°C). This step is crucial as it ensures that your casserole cooks evenly. While the oven heats up, you can focus on preparing the other ingredients.

Step 2: Prepare the Hashbrowns

Next, take your thawed hashbrowns and spread them evenly in the bottom of a greased 9×13-inch baking dish. Make sure to cover the entire base. This layer will provide a hearty foundation for your casserole, making it filling and satisfying.

Step 3: Cook the Bacon

In a skillet over medium heat, cook the chopped bacon until it becomes crispy. This usually takes about 5-7 minutes. Once done, remove the bacon from the skillet and let it drain on paper towels. This will help absorb any excess grease, keeping your casserole from becoming too oily.

Step 4: Mix the Egg Mixture

In a large bowl, whisk together the eggs, milk, salt, black pepper, garlic powder, and onion powder. Mix until everything is well combined. This egg mixture is what binds all the ingredients together, creating a fluffy texture in your casserole.

Step 5: Combine Ingredients

Now it’s time to layer your casserole! Start by sprinkling the crispy bacon over the hashbrowns. Then, add the shredded cheddar cheese on top of the bacon. Finally, pour the egg mixture evenly over everything. If you’re using green onions, sprinkle them on top for an extra burst of flavor.

Step 6: Bake the Casserole

Place the baking dish in the preheated oven and bake for 30-35 minutes. You’ll know it’s ready when the eggs are set and the top is golden brown. Once baked, allow the casserole to cool for a few minutes before slicing and serving. This will make it easier to cut and serve.

Bacon, Egg, and Hashbrown Casserole that’s perfect for any breakfast occasion. Enjoy the delightful flavors and the smiles on your family’s faces!

Variations of Bacon, Egg, and Hashbrown Casserole

Bacon, Egg, and Hashbrown Casserole is a fantastic base recipe that allows for plenty of creativity. Whether you’re looking to cater to dietary preferences or simply want to try something new, there are many variations you can explore. Let’s dive into some exciting options!

Vegetarian Options

Bacon, Egg, and Hashbrown Casserole, you can easily swap out the bacon for a variety of vegetables. Consider using sautéed bell peppers, mushrooms, or spinach. These veggies not only add flavor but also bring a colorful touch to your dish.

Another great option is to include black beans or diced tomatoes for added texture and nutrition. You can also enhance the flavor by adding spices like cumin or chili powder. This way, you can enjoy a hearty breakfast without the meat, making it perfect for vegetarians or anyone looking to reduce their meat intake.

Cheese Additions

Bacon, Egg, and Hashbrown Casserole. While cheddar cheese is a classic choice, feel free to experiment with other types. For a sharper flavor, try using pepper jack or gouda. If you prefer a milder taste, mozzarella or Monterey Jack can work beautifully.

You can also mix different cheeses for a more complex flavor profile. For instance, combining cheddar with feta or cream cheese can create a creamy, rich texture. Just remember to adjust the amount of salt in your recipe, as some cheeses can be saltier than others. With these cheese additions, your casserole will be even more delicious and satisfying!

Bacon, Egg, and Hashbrown Casserole! The possibilities are endless, and your family will love the new twists you bring to this classic recipe.

Cooking Note for Bacon, Egg, and Hashbrown Casserole

Bacon, Egg, and Hashbrown Casserole, there are a few important cooking notes to keep in mind. These tips will help ensure that your casserole turns out perfectly every time, making your breakfast experience even more enjoyable.

First, make sure to thaw your hashbrowns completely before using them. This step is crucial as it prevents excess moisture from making your casserole soggy. If you’re short on time, you can quickly thaw them in the microwave. Just be sure to drain any excess water before adding them to the dish.

Next, consider the type of bacon you use. Thick-cut bacon will provide a heartier texture and richer flavor, while regular bacon will cook faster and may become crispier. Whichever you choose, ensure it’s cooked until crispy for the best results. This will add a delightful crunch to your casserole.

Another tip is to let the casserole cool for a few minutes after baking. This resting time allows the eggs to set further, making it easier to slice and serve. If you cut into it too soon, the casserole may fall apart, and you won’t get those beautiful, clean slices.

Lastly, feel free to experiment with cooking times. Every oven is different, so keep an eye on your casserole as it bakes. If the top is browning too quickly, you can cover it loosely with aluminum foil to prevent burning while the eggs finish cooking.

Bacon, Egg, and Hashbrown Casserole that your family will love. Enjoy the process and the delightful aroma that fills your kitchen!

Serving Suggestions for Bacon, Egg, and Hashbrown Casserole

Bacon, Egg, and Hashbrown Casserole is baked to perfection, it’s time to serve it up! This dish is not only delicious but also visually appealing, making it a great centerpiece for any breakfast or brunch table. Here are some serving suggestions to enhance your meal experience:

First, consider pairing your casserole with fresh fruit. A colorful fruit salad or sliced seasonal fruits like strawberries, blueberries, or melons can add a refreshing contrast to the rich flavors of the casserole. The sweetness of the fruit balances the savory elements beautifully.

Next, you might want to serve your casserole with a side of toast or warm biscuits. These options provide a nice crunch and can be used to scoop up the casserole. For an extra touch, spread some butter or jam on the toast for added flavor.

For those who enjoy a little kick, consider offering hot sauce or salsa on the side. A drizzle of hot sauce can elevate the flavors and add a spicy twist to each bite. Alternatively, a fresh salsa made with tomatoes, onions, and cilantro can bring a zesty freshness to the dish.

If you’re hosting a brunch, you can also serve the casserole alongside a light salad. A simple green salad with a vinaigrette dressing can provide a refreshing contrast to the hearty casserole. This combination makes for a well-rounded meal that satisfies both savory and fresh cravings.

Lastly, don’t forget about beverages! A hot cup of coffee or tea pairs wonderfully with breakfast dishes. For a more festive touch, consider serving mimosas or fresh-squeezed orange juice. These drinks can add a celebratory feel to your meal, making it even more special.

Bacon, Egg, and Hashbrown Casserole will shine as the star of the breakfast table. Enjoy the delightful flavors and the smiles from your family and friends as they dig into this delicious dish!

Tips for Perfecting Your Bacon, Egg, and Hashbrown Casserole

Bacon, Egg, and Hashbrown Casserole is all about attention to detail. With a few helpful tips, you can elevate your dish from good to great. Here are some tried-and-true suggestions to ensure your casserole turns out delicious every time!

First, always use fresh ingredients. Fresh eggs and high-quality bacon can make a significant difference in flavor. If possible, choose organic or free-range eggs for a richer taste. Similarly, opt for thick-cut bacon for a heartier texture and more robust flavor.

Next, consider the layering of your ingredients. Start with a solid base of hashbrowns, ensuring they are evenly spread. This helps create a sturdy foundation for the casserole. When adding the bacon and cheese, distribute them evenly to ensure every bite is packed with flavor.

Another tip is to let the egg mixture sit for a few minutes before pouring it over the casserole. This allows the flavors to meld together, enhancing the overall taste. Additionally, whisking the eggs thoroughly will help incorporate air, resulting in a fluffier texture.

Don’t forget to season your layers! While you add salt and pepper to the egg mixture, consider sprinkling a little extra seasoning over the hashbrowns and bacon. This extra touch can enhance the flavor profile and make your casserole even more delicious.

For a crispy top, broil the casserole for the last few minutes of baking. Keep a close eye on it to prevent burning. This step adds a delightful crunch that contrasts beautifully with the soft interior of the casserole.

Lastly, let your casserole rest for about 10 minutes after baking. This resting period allows the flavors to settle and makes it easier to slice. You’ll achieve cleaner cuts and a more appealing presentation when serving.

Bacon, Egg, and Hashbrown Casserole. Enjoy the process and the delicious results that come from your efforts!

Breakdown of Time for Bacon, Egg, and Hashbrown Casserole

Bacon, Egg, and Hashbrown Casserole can help you plan your breakfast or brunch more effectively. Here’s a detailed breakdown of the time you’ll need for preparation and cooking.

Prep Time

The prep time for this delicious casserole is approximately 15-20 minutes. During this time, you will gather all your ingredients, thaw the hashbrowns, and prepare the bacon and egg mixture. It’s a straightforward process that doesn’t require much time, making it perfect for busy mornings. If you want to save even more time, you can prepare some ingredients the night before, such as chopping the bacon or mixing the egg mixture.

Cooking Time

Once you’ve prepped everything, the cooking time is about 30-35 minutes. This is when the casserole bakes in the oven at 375°F (190°C). During this time, the eggs will set, and the top will turn a beautiful golden brown. It’s essential to keep an eye on it as it bakes to ensure it doesn’t overcook. You want that perfect balance of fluffy eggs and crispy edges!

Total Time

Bacon, Egg, and Hashbrown Casserole is an excellent choice for a satisfying breakfast that doesn’t take all morning to prepare. Plus, the delicious aroma wafting through your kitchen will make the wait worthwhile!

Nutritional Information for Bacon, Egg, and Hashbrown Casserole

Bacon, Egg, and Hashbrown Casserole can help you make informed choices about your meals. This dish is not only delicious but also provides a good balance of nutrients. Here’s a closer look at the nutritional information for a serving of this hearty casserole.

Calories

Bacon, Egg, and Hashbrown Casserole contains approximately 320 calories. This makes it a satisfying option for breakfast without being overly heavy. The combination of ingredients provides energy to kickstart your day, making it a great choice for busy mornings.

Protein

In terms of protein, this casserole packs a punch with about 18 grams per serving. The protein comes primarily from the eggs and bacon, which are excellent sources of this essential nutrient. Protein is vital for muscle repair and growth, making this dish a great post-workout breakfast option as well.

Sodium

When it comes to sodium, each serving contains around 600 milligrams. While sodium is necessary for bodily functions, it’s important to monitor your intake. If you’re watching your sodium levels, consider using low-sodium bacon or cheese to help reduce the overall sodium content of the casserole.

Bacon, Egg, and Hashbrown Casserole offers a balanced meal that is rich in protein and provides a good source of energy. By being mindful of the ingredients you choose, you can enjoy this delicious dish while keeping your nutritional goals in check. Whether you’re serving it for breakfast or brunch, it’s sure to be a hit with family and friends!

FAQs about Bacon, Egg, and Hashbrown Casserole

Can I make Bacon, Egg, and Hashbrown Casserole ahead of time?

Bacon, Egg, and Hashbrown Casserole ahead of time, making it a convenient option for busy mornings. To do this, assemble the casserole as directed but do not bake it right away. Instead, cover it tightly with plastic wrap or aluminum foil and refrigerate it for up to 24 hours. When you’re ready to bake, simply remove it from the fridge, let it sit at room temperature for about 15 minutes, and then bake as instructed. This way, you can enjoy a delicious breakfast without the morning rush!

What can I substitute for hashbrowns in the casserole?

Bacon, Egg, and Hashbrown Casserole. You can use diced potatoes, either fresh or frozen, as a base. Just make sure to cook them until tender before layering them in the dish. Another option is to use cooked quinoa or rice for a unique twist. These alternatives will still provide a hearty foundation for your casserole while adding their own flavors and textures.

How do I store leftovers of Bacon, Egg, and Hashbrown Casserole?

Bacon, Egg, and Hashbrown Casserole is easy! Allow the casserole to cool completely before transferring it to an airtight container. You can store it in the refrigerator for up to 3-4 days. If you want to keep it longer, consider freezing it. Cut the casserole into individual portions and wrap each piece tightly in plastic wrap, then place them in a freezer-safe bag or container. When you’re ready to enjoy it again, simply reheat in the oven or microwave until warmed through. This way, you can savor the delicious flavors of your casserole even after the initial meal!

Conclusion on Bacon, Egg, and Hashbrown Casserole

Bacon, Egg, and Hashbrown Casserole is a delightful dish that brings comfort and satisfaction to any breakfast table. Its combination of crispy bacon, fluffy eggs, and hearty hashbrowns creates a meal that is not only delicious but also easy to prepare. Whether you’re hosting a brunch or simply enjoying a family breakfast, this casserole is sure to impress.

Bacon, Egg, and Hashbrown Casserole a favorite among many, as it can cater to various tastes and dietary preferences.

Bacon, Egg, and Hashbrown Casserole is bound to become a cherished recipe in your home.

Now that you have all the tips, tricks, and variations at your fingertips, it’s time to get cooking! Enjoy the process, and most importantly, enjoy every delicious bite of your homemade casserole!

Grilled Salmon Skewers with Garlic Butterbean Purée delight!

Introduction to Grilled Salmon Skewers with Garlic Butterbean Purée

Grilled Salmon Skewers with Garlic Butterbean Purée is a delightful dish that brings together the rich flavors of salmon and the creamy texture of butterbeans. This recipe is not just a feast for the taste buds; it also offers a healthy option for those looking to enjoy a nutritious meal. The combination of marinated salmon, grilled to perfection, paired with a smooth and garlicky purée, makes this dish a standout choice for any occasion.

What Makes Grilled Salmon Skewers with Garlic Butterbean Purée Special?

What sets Grilled Salmon Skewers with Garlic Butterbean Purée apart is its unique blend of flavors and textures. The salmon is marinated in a zesty mixture of harissa and miso, which adds a spicy and umami kick. This not only enhances the taste but also helps to keep the fish moist while grilling. The garlic butterbean purée serves as a creamy base that complements the salmon beautifully, creating a harmonious balance on your plate.

Moreover, the addition of charred summer greens, like asparagus and spinach, adds a vibrant color and a fresh crunch. This dish is not only visually appealing but also packed with nutrients. Salmon is rich in omega-3 fatty acids, which are great for heart health, while butterbeans provide a good source of protein and fiber. Together, they create a wholesome meal that is both satisfying and nourishing.

Whether you’re hosting a summer barbecue or simply looking for a quick weeknight dinner, Grilled Salmon Skewers with Garlic Butterbean Purée is sure to impress. It’s easy to prepare, and the grilling process adds a smoky flavor that elevates the dish. Plus, it’s a fun way to enjoy salmon, making it a hit with both kids and adults alike!

Ingredients for Grilled Salmon Skewers with Garlic Butterbean Purée

To create the delicious Grilled Salmon Skewers with Garlic Butterbean Purée, you will need a variety of fresh ingredients. Each component plays a vital role in building the flavors and textures of this dish. Here’s a complete list of what you’ll need:

  • 1 pound salmon fillets: Cut into 1-inch cubes for easy skewering and grilling.
  • 2 tablespoons olive oil: This helps to marinate the salmon and adds a rich flavor.
  • 2 tablespoons harissa paste: A spicy North African chili paste that gives the salmon a kick.
  • 1 tablespoon miso paste: Adds a savory umami flavor to the marinade.
  • 1 teaspoon lemon juice: Freshly squeezed for a zesty touch.
  • 1 can (15 ounces) butterbeans: Drained and rinsed, these provide a creamy base for the purée.
  • 2 tablespoons unsalted butter: Used to sauté the garlic and enrich the purée.
  • 2 cloves garlic: Minced for a fragrant and flavorful purée.
  • 1 cup fresh spinach: Adds color and nutrients to the dish.
  • 1 cup asparagus: Trimmed and cut into 2-inch pieces for grilling.
  • Salt and pepper: To taste, enhancing the overall flavor of the dish.
  • Lemon wedges: For serving, providing a fresh squeeze of citrus over the skewers.

Gathering these ingredients will set you on the right path to creating a delightful meal. Each item contributes to the overall taste and presentation, making your Grilled Salmon Skewers with Garlic Butterbean Purée a dish to remember!

Step-by-Step Preparation of Grilled Salmon Skewers with Garlic Butterbean Purée

Now that you have all your ingredients ready, it’s time to dive into the step-by-step preparation of Grilled Salmon Skewers with Garlic Butterbean Purée. This process is straightforward and will guide you through each stage, ensuring your dish turns out deliciously every time.

Step 1: Preparing the Salmon for Skewers

First, let’s focus on the salmon. Start by cutting the salmon fillets into 1-inch cubes. This size is perfect for skewering and allows for even cooking. Next, in a mixing bowl, combine the olive oil, harissa paste, miso paste, and lemon juice. This marinade is key to infusing the salmon with flavor.

Once your marinade is ready, add the salmon cubes to the bowl. Gently toss the salmon until each piece is well-coated. Cover the bowl with plastic wrap and place it in the refrigerator. Allow the salmon to marinate for at least 30 minutes. This step is crucial as it enhances the flavor and keeps the fish moist during grilling.

Step 2: Making the Garlic Butterbean Purée

While the salmon is marinating, you can prepare the garlic butterbean purée. Start by melting the unsalted butter in a small saucepan over medium heat. Once the butter is melted, add the minced garlic. Sauté the garlic for about a minute, or until it becomes fragrant. Be careful not to burn it, as burnt garlic can taste bitter.

Next, add the drained and rinsed butterbeans to the saucepan. Stir them in and cook for another 2-3 minutes until they are heated through. After that, remove the saucepan from the heat. You can either mash the mixture with a fork for a chunky texture or blend it until smooth using a food processor. Season the purée with salt and pepper to taste. Set it aside while you prepare the skewers.

Step 3: Assembling the Grilled Salmon Skewers

Now it’s time to assemble your skewers! Take the marinated salmon out of the refrigerator. If you’re using wooden skewers, make sure to soak them in water for about 30 minutes to prevent burning on the grill. Thread the salmon cubes onto the skewers, leaving a little space between each piece. This spacing allows for even cooking and helps the salmon develop a nice char.

For added flavor, you can alternate the salmon with pieces of vegetables like bell peppers or zucchini if you like. However, for this recipe, we’ll keep it simple with just the salmon. Once all the salmon is skewered, you’re ready to grill!

Step 4: Grilling the Salmon Skewers

Preheat your grill to medium-high heat. Once it’s hot, place the salmon skewers on the grill. Grill the skewers for about 3-4 minutes on each side. You’ll know they’re done when the salmon is cooked through and has a slight char. Keep an eye on them to avoid overcooking.

In the last few minutes of grilling, add the fresh spinach and asparagus to the grill. Cook them until they are charred and tender, which should take about 2-3 minutes. This will add a lovely crunch and vibrant color to your dish.

Once everything is grilled to perfection, it’s time to serve! The combination of flavors and textures will surely impress your guests or family.

Variations of Grilled Salmon Skewers with Garlic Butterbean Purée

While the classic Grilled Salmon Skewers with Garlic Butterbean Purée is a delightful dish on its own, there are many ways to switch things up! Whether you want to try different ingredients or explore new flavors, these variations will keep your meals exciting and fresh.

Alternative Ingredients for the Skewers

If you’re looking to change the protein in your skewers, consider these alternatives:

  • Shrimp: Shrimp is a fantastic substitute for salmon. It cooks quickly and absorbs flavors well. Just be sure to adjust the grilling time to about 2-3 minutes per side.
  • Chicken: Chicken breast cut into cubes can also work beautifully. Marinate it the same way as the salmon, but grill for about 5-6 minutes on each side until fully cooked.
  • Tofu: For a vegetarian option, use firm tofu. Press it to remove excess moisture, then marinate and grill. It will soak up the flavors nicely!
  • Vegetable Skewers: If you prefer a meatless meal, load your skewers with colorful vegetables like bell peppers, zucchini, and mushrooms. Brush them with olive oil and season before grilling.

These alternatives not only provide variety but also cater to different dietary preferences, making your meal inclusive for everyone!

Different Flavors for the Garlic Butterbean Purée

The garlic butterbean purée is versatile and can be customized to suit your taste. Here are some flavor variations to consider:

  • Herbed Purée: Add fresh herbs like basil, parsley, or dill to the purée for a burst of freshness. Blend them in after mashing the butterbeans for a vibrant green color.
  • Spicy Kick: For those who love heat, mix in some crushed red pepper flakes or a dash of cayenne pepper. This will give the purée a spicy twist that pairs well with the salmon.
  • Lemon Zest: Incorporate lemon zest into the purée for an extra zing. This brightens the flavor and complements the salmon beautifully.
  • Smoky Flavor: Add a touch of smoked paprika to the purée for a smoky depth. This works especially well if you’re grilling the skewers, enhancing the overall grilled flavor.

Experimenting with these variations can elevate your Grilled Salmon Skewers with Garlic Butterbean Purée, making each meal a new experience. Enjoy the process of creating your own unique twist on this delicious dish!

Cooking Note for Grilled Salmon Skewers with Garlic Butterbean Purée

When preparing Grilled Salmon Skewers with Garlic Butterbean Purée, there are a few cooking notes to keep in mind. These tips will help ensure that your dish turns out perfectly every time, enhancing both flavor and presentation.

First, marinating the salmon is essential. The longer you let it sit in the marinade, the more flavorful it will become. However, avoid marinating for more than two hours, as the acid in the lemon juice can start to “cook” the fish, changing its texture.

Next, when grilling, preheat your grill properly. A hot grill is crucial for achieving those beautiful grill marks and a nice char. If your grill isn’t hot enough, the salmon may stick and not cook evenly. To prevent sticking, lightly oil the grill grates before placing the skewers on them.

Also, keep an eye on the cooking time. Salmon cooks quickly, and overcooking can lead to a dry texture. Aim for a slightly opaque center, as the fish will continue to cook even after being removed from the grill. Using a meat thermometer can help; the internal temperature should reach 145°F for perfectly cooked salmon.

Lastly, let the skewers rest for a few minutes after grilling. This allows the juices to redistribute, making the salmon even more tender and flavorful. Serve the skewers with the garlic butterbean purée and charred greens for a complete meal that’s sure to impress!

By following these cooking notes, you’ll create a delicious and visually appealing dish that highlights the wonderful flavors of grilled salmon and garlic butterbean purée. Enjoy your culinary adventure!

Serving Suggestions for Grilled Salmon Skewers with Garlic Butterbean Purée

Once your Grilled Salmon Skewers with Garlic Butterbean Purée are ready, it’s time to think about how to serve them. The right side dishes and beverages can elevate your meal, making it even more enjoyable. Here are some fantastic serving suggestions to complement your dish.

Pairing Side Dishes with Grilled Salmon Skewers

When it comes to side dishes, you want to choose options that enhance the flavors of the salmon and purée without overpowering them. Here are some great ideas:

  • Quinoa Salad: A light quinoa salad with cherry tomatoes, cucumber, and a lemon vinaigrette pairs beautifully with the skewers. The freshness of the salad complements the rich flavors of the salmon.
  • Grilled Vegetables: Continue the grilling theme by serving a medley of grilled vegetables. Bell peppers, zucchini, and eggplant add color and flavor to your plate.
  • Roasted Potatoes: Crispy roasted potatoes seasoned with herbs make a hearty side. Their texture contrasts nicely with the tender salmon and creamy purée.
  • Coleslaw: A tangy coleslaw can provide a refreshing crunch. Use a vinegar-based dressing to keep it light and zesty.

These side dishes not only complement the main dish but also add variety to your meal, making it more satisfying.

Wine Pairings for Grilled Salmon Skewers with Garlic Butterbean Purée

Choosing the right wine can enhance your dining experience. Here are some excellent wine pairings for your Grilled Salmon Skewers with Garlic Butterbean Purée:

  • Sauvignon Blanc: This white wine is crisp and refreshing, with citrus notes that pair well with the salmon and lemon juice in the dish.
  • Chardonnay: A lightly oaked Chardonnay offers a creamy texture that complements the garlic butterbean purée beautifully.
  • Pinot Noir: If you prefer red wine, a light-bodied Pinot Noir works well. Its fruity notes won’t overpower the salmon and will enhance the overall flavor.
  • Rosé: A dry rosé is a versatile option that can bridge the flavors of both the salmon and the sides, making it a great choice for summer meals.

These wine pairings will not only enhance the flavors of your dish but also create a delightful dining experience. Enjoy your meal with family and friends, and savor every bite of your Grilled Salmon Skewers with Garlic Butterbean Purée!

Tips for Perfect Grilled Salmon Skewers with Garlic Butterbean Purée

Creating the perfect Grilled Salmon Skewers with Garlic Butterbean Purée is all about attention to detail. With a few helpful tips, you can elevate your dish and impress your guests. Here are some essential tips to ensure your skewers turn out delicious every time:

  • Choose Fresh Salmon: Always opt for the freshest salmon available. Look for bright, vibrant color and a clean smell. Fresh salmon will enhance the flavor and texture of your skewers.
  • Marinate Wisely: While marinating is crucial, don’t overdo it. Marinate the salmon for at least 30 minutes but no more than 2 hours. This allows the flavors to penetrate without compromising the fish’s texture.
  • Soak Wooden Skewers: If using wooden skewers, soak them in water for at least 30 minutes before grilling. This prevents them from burning and helps them hold the salmon securely.
  • Preheat the Grill: Always preheat your grill to medium-high heat. A hot grill ensures that the salmon cooks evenly and develops those beautiful grill marks.
  • Don’t Overcrowd the Skewers: When threading the salmon onto skewers, leave a little space between each piece. This allows for even cooking and helps the salmon get that nice char.
  • Use a Meat Thermometer: To ensure your salmon is perfectly cooked, use a meat thermometer. The internal temperature should reach 145°F. This guarantees a moist and flaky texture.
  • Let It Rest: After grilling, let the skewers rest for a few minutes. This allows the juices to redistribute, making the salmon even more tender and flavorful.
  • Garnish for Presentation: Don’t forget to garnish your dish! A sprinkle of fresh herbs or a drizzle of olive oil can add a beautiful finishing touch to your plated skewers.

By following these tips, you’ll create Grilled Salmon Skewers with Garlic Butterbean Purée that are not only delicious but also visually appealing. Enjoy the process and the delightful flavors that come together in this wonderful dish!

Breakdown of Time for Grilled Salmon Skewers with Garlic Butterbean Purée

Understanding the time required for each step in preparing Grilled Salmon Skewers with Garlic Butterbean Purée can help you plan your cooking efficiently. Here’s a detailed breakdown of the time needed for preparation and cooking, ensuring you can enjoy this delicious dish without any stress.

Prep Time

The prep time for this dish is approximately 40 minutes. This includes:

  • Marinating the Salmon: 30 minutes is ideal for allowing the flavors to infuse into the fish.
  • Preparing the Garlic Butterbean Purée: About 10 minutes to sauté the garlic and mash the butterbeans.

During the marinating time, you can also gather your other ingredients and prepare the grill, making the most of this waiting period.

Cooking Time

The cooking time for Grilled Salmon Skewers with Garlic Butterbean Purée is around 10 minutes. This includes:

  • Grilling the Salmon Skewers: Approximately 6-8 minutes, grilling for 3-4 minutes on each side until cooked through.
  • Grilling the Vegetables: About 2-3 minutes for the spinach and asparagus, added in the last few minutes of grilling.

Keep an eye on the salmon to ensure it doesn’t overcook, as it can dry out quickly.

Total Time

In total, you can expect to spend about 50 minutes from start to finish. This includes:

  • Prep Time: 40 minutes
  • Cooking Time: 10 minutes

This total time makes Grilled Salmon Skewers with Garlic Butterbean Purée a quick and easy meal option, perfect for busy weeknights or casual gatherings. With just under an hour, you can serve a delicious and nutritious dish that everyone will love!

Nutritional Information for Grilled Salmon Skewers with Garlic Butterbean Purée

Understanding the nutritional content of your meals is essential for maintaining a balanced diet. Grilled Salmon Skewers with Garlic Butterbean Purée not only taste great but also provide a variety of nutrients. Here’s a breakdown of the key nutritional information for this delicious dish.

Calories

Each serving of Grilled Salmon Skewers with Garlic Butterbean Purée contains approximately 350 calories. This makes it a satisfying yet light meal option. The combination of salmon and butterbeans provides a good balance of energy without being overly heavy. Enjoying this dish can fit well into a healthy eating plan, especially when paired with fresh vegetables.

Protein Content

One of the standout features of this dish is its high protein content. Each serving offers about 30 grams of protein. Salmon is an excellent source of high-quality protein, which is essential for muscle repair and growth. Additionally, butterbeans contribute to the protein content, making this dish a great choice for those looking to increase their protein intake.

Sodium Levels

When it comes to sodium, each serving of Grilled Salmon Skewers with Garlic Butterbean Purée contains around 600 milligrams. While this is a moderate amount, it’s important to consider your overall daily sodium intake. To keep sodium levels in check, you can adjust the amount of salt used in the recipe or choose low-sodium butterbeans. This way, you can enjoy the flavors without worrying about excess sodium.

Overall, Grilled Salmon Skewers with Garlic Butterbean Purée is a nutritious meal that provides a good balance of calories, protein, and sodium. It’s a fantastic option for anyone looking to enjoy a healthy and delicious dish that supports their dietary goals!

FAQs about Grilled Salmon Skewers with Garlic Butterbean Purée

Can I use frozen salmon for grilled salmon skewers?

Yes, you can use frozen salmon for your grilled salmon skewers! However, it’s important to thaw the salmon completely before marinating. You can do this by placing it in the refrigerator overnight or using the defrost setting on your microwave. Once thawed, follow the same marinating process as you would with fresh salmon. Just keep in mind that frozen salmon may have a slightly different texture, but it will still taste delicious when grilled!

What can I substitute for butterbeans in the purée?

If you don’t have butterbeans on hand, there are several great substitutes you can use for the purée. Cannellini beans or navy beans are excellent alternatives, as they have a similar creamy texture. You could also use chickpeas for a different flavor profile. Just make sure to drain and rinse them before adding to the saucepan. Each of these options will create a tasty purée that pairs well with the grilled salmon!

How long should I marinate the salmon before grilling?

For the best flavor, marinate the salmon for at least 30 minutes. This allows the marinade to penetrate the fish, enhancing its taste. However, you can marinate it for up to 2 hours if you want a more intense flavor. Just be cautious not to exceed this time, as the acid in the marinade can start to change the texture of the salmon, making it mushy. So, 30 minutes to 2 hours is the sweet spot!

Can I make the garlic butterbean purée ahead of time?

Absolutely! You can prepare the garlic butterbean purée ahead of time. Simply make the purée as directed, then store it in an airtight container in the refrigerator. It will keep well for up to 3 days. When you’re ready to serve, just reheat it gently on the stove or in the microwave. This makes meal prep easier and allows you to enjoy your Grilled Salmon Skewers with Garlic Butterbean Purée with minimal fuss!

Conclusion on Grilled Salmon Skewers with Garlic Butterbean Purée

In conclusion, Grilled Salmon Skewers with Garlic Butterbean Purée is a delightful dish that combines flavor, nutrition, and ease of preparation. This recipe showcases the wonderful taste of salmon, enhanced by a zesty marinade and complemented by a creamy purée. The addition of charred summer greens not only adds color but also boosts the nutritional value of the meal.

Whether you’re cooking for a special occasion or a casual weeknight dinner, this dish is sure to impress. The grilling process infuses the salmon with a smoky flavor, while the garlic butterbean purée provides a rich and satisfying base. Plus, with the flexibility to customize the skewers and purée, you can make this dish your own.

As you gather around the table with family and friends, the vibrant presentation and delicious aromas will create a memorable dining experience. So, fire up the grill, gather your ingredients, and enjoy the process of creating this wonderful meal. With its health benefits and delightful flavors, Grilled Salmon Skewers with Garlic Butterbean Purée is a recipe you’ll want to return to time and again!

Crab Stuffed Salmon is a Delicious Dinner Delight

Introduction to Crab Stuffed Salmon

Crab stuffed salmon is a delightful dish that combines the rich flavors of fresh salmon with the sweet, tender taste of crab meat. This recipe is not only delicious but also easy to prepare, making it perfect for both special occasions and weeknight dinners. Imagine the aroma of baked salmon wafting through your kitchen, enticing everyone to gather around the table.

Salmon is known for its health benefits, packed with omega-3 fatty acids, which are great for heart health. When you add crab meat to the mix, you elevate the dish with a touch of luxury. The creamy stuffing complements the flaky salmon, creating a mouthwatering experience that is sure to impress your family and friends.

Whether you are a seafood lover or just looking to try something new, crab stuffed salmon is a fantastic choice. It’s versatile, allowing for various fillings and cooking methods, which means you can customize it to suit your taste. Plus, it’s a great way to introduce more seafood into your diet without sacrificing flavor.

In this article, we will guide you through the ingredients, preparation steps, and tips for making the perfect crab stuffed salmon. Get ready to dive into a culinary adventure that will leave your taste buds dancing!

Ingredients for Crab Stuffed Salmon

To create a delicious crab stuffed salmon, you’ll need a few key ingredients that come together to make this dish truly special. Here’s what you’ll need:

  • 4 salmon fillets (6 ounces each) – Choose fresh, high-quality salmon for the best flavor.
  • 1 cup lump crab meat – Make sure it’s drained and picked over for any shells.
  • 1/2 cup cream cheese – Softened to make mixing easier and to create a creamy texture.
  • 1/4 cup shredded mozzarella cheese – This adds a nice stretch and flavor to the stuffing.
  • 2 tablespoons mayonnaise – Helps bind the ingredients together and adds moisture.
  • 1 tablespoon Dijon mustard – Provides a tangy kick that enhances the overall taste.
  • 1 tablespoon fresh lemon juice – Brightens the flavors and adds freshness.
  • 2 teaspoons Old Bay seasoning – A classic seafood seasoning that brings out the best in crab.
  • 1/4 teaspoon garlic powder – Adds depth and a hint of savory flavor.
  • 1/4 teaspoon black pepper – For a touch of heat and seasoning.
  • 2 tablespoons fresh parsley – Chopped, for a pop of color and freshness in the stuffing.
  • Lemon wedges – For serving, to squeeze over the salmon for added zest.

These ingredients come together to create a rich and flavorful stuffing that pairs perfectly with the tender salmon. Each bite will be a delightful combination of textures and tastes, making your crab stuffed salmon a standout dish at any meal.

Preparation of Crab Stuffed Salmon

Now that you have gathered all the ingredients, it’s time to prepare your crab stuffed salmon. This section will guide you through each step, ensuring that your dish turns out perfectly. Let’s dive into the preparation process!

Step 1: Preparing the Salmon Fillets

First, you need to prepare the salmon fillets. Start by rinsing them under cold water to remove any residue. Pat them dry with paper towels. This step is important as it helps the salmon cook evenly.

Next, place the fillets skin-side down on a cutting board. Using a sharp knife, carefully make a pocket in each fillet. Cut horizontally, but be cautious not to slice all the way through. You want to create a nice space to hold the delicious crab stuffing. This pocket will help keep the filling secure while baking.

Step 2: Making the Crab Stuffing

Now, let’s move on to making the crab stuffing. In a medium bowl, combine the lump crab meat, softened cream cheese, shredded mozzarella cheese, mayonnaise, Dijon mustard, fresh lemon juice, Old Bay seasoning, garlic powder, black pepper, and chopped parsley.

Using a spatula or a fork, mix all the ingredients together until they are well combined. The mixture should be creamy and slightly chunky, allowing the crab meat to shine through. Taste the mixture and adjust the seasoning if needed. This stuffing is what makes your crab stuffed salmon so special!

Step 3: Stuffing the Salmon

With your salmon fillets and crab stuffing ready, it’s time to stuff the salmon. Take a generous amount of the crab mixture and carefully fill each pocket in the salmon fillets. Press gently to secure the filling, but be careful not to overstuff. You want the stuffing to stay inside while it bakes.

Once all the fillets are stuffed, you can place them in the prepared baking dish. Make sure they are arranged in a single layer for even cooking.

Step 4: Cooking the Crab Stuffed Salmon

Now, it’s time to cook your crab stuffed salmon! Preheat your oven to 375°F (190°C) if you haven’t done so already. Bake the stuffed salmon in the preheated oven for 20-25 minutes. You’ll know it’s done when the salmon flakes easily with a fork and is opaque in the center.

Once cooked, remove the dish from the oven and let the salmon rest for about 5 minutes. This resting time allows the juices to redistribute, making the salmon even more tender. Garnish with additional parsley and serve with lemon wedges for a fresh touch.

And there you have it! Your crab stuffed salmon is ready to be enjoyed. The combination of flavors and textures will surely impress anyone at your table.

Variation of Crab Stuffed Salmon

While the classic crab stuffed salmon recipe is a hit, there are many ways to switch things up. You can explore alternative fillings and different cooking methods to create your own unique version of this delightful dish. Let’s take a closer look at these variations!

Alternative Fillings for Crab Stuffed Salmon

If you want to try something different, consider these alternative fillings for your crab stuffed salmon:

  • Shrimp: Chopped shrimp can replace crab meat for a different seafood flavor. Just make sure to cook the shrimp beforehand for the best texture.
  • Spinach and Feta: For a Mediterranean twist, mix fresh spinach with crumbled feta cheese. This combination adds a savory and tangy flavor.
  • Mushroom and Cream Cheese: Sautéed mushrooms mixed with cream cheese create a rich and earthy filling. This option is perfect for mushroom lovers!
  • Vegetable Medley: For a lighter option, use a mix of finely chopped vegetables like bell peppers, zucchini, and onions. Sauté them first to enhance their flavors.
  • Cheese Blend: Experiment with different cheeses like goat cheese or cheddar for a creamy and flavorful stuffing.

These alternative fillings can add a new dimension to your crab stuffed salmon, making it a versatile dish that can cater to various tastes and preferences.

Different Cooking Methods for Crab Stuffed Salmon

In addition to the traditional baking method, there are several other ways to cook your crab stuffed salmon. Here are some popular options:

  • Grilling: For a smoky flavor, grill the stuffed salmon fillets. Preheat your grill and cook the salmon on medium heat for about 6-8 minutes per side, depending on thickness.
  • Pan-Seering: Heat a bit of oil in a skillet over medium heat. Cook the stuffed salmon for about 4-5 minutes on each side until golden brown and cooked through.
  • Air Frying: If you have an air fryer, this method is quick and easy. Cook the stuffed salmon at 375°F (190°C) for about 10-12 minutes for a crispy exterior.
  • Broiling: For a crispy top, broil the stuffed salmon for the last few minutes of cooking. Keep a close eye to prevent burning!

These cooking methods can enhance the flavors and textures of your crab stuffed salmon, allowing you to enjoy this dish in various ways. Feel free to experiment and find your favorite method!

Cooking Note for Crab Stuffed Salmon

When preparing crab stuffed salmon, there are a few important cooking notes to keep in mind. These tips will help ensure that your dish turns out perfectly every time, allowing you to enjoy the delightful flavors and textures of this seafood masterpiece.

First, always choose fresh salmon fillets. Freshness is key to achieving the best taste and texture. If possible, buy your salmon from a trusted fishmonger or grocery store that specializes in seafood. Look for fillets that are bright in color and have a clean, ocean-like smell.

Next, be mindful of the cooking time. Salmon can easily overcook, leading to a dry texture. To avoid this, keep an eye on the fillets as they bake. The general rule is to cook salmon for about 4-6 minutes per half-inch of thickness. If your fillets are thicker, adjust the cooking time accordingly.

Using a meat thermometer can be a great way to check for doneness. The internal temperature of the salmon should reach 145°F (63°C) for safe consumption. This ensures that the fish is cooked through while still remaining moist and flaky.

Additionally, let the stuffed salmon rest after cooking. This resting period allows the juices to redistribute throughout the fish, enhancing its flavor and tenderness. A few minutes of resting can make a significant difference in the final dish.

Lastly, don’t forget to experiment with seasonings and garnishes. While the recipe provides a delicious base, feel free to add your personal touch. A sprinkle of fresh herbs or a drizzle of a flavorful sauce can elevate your crab stuffed salmon to new heights.

By following these cooking notes, you’ll be well on your way to creating a stunning crab stuffed salmon that will impress your guests and satisfy your taste buds. Enjoy the process and happy cooking!

Serving Suggestions for Crab Stuffed Salmon

Once your crab stuffed salmon is beautifully cooked and ready to serve, it’s time to think about how to present this delightful dish. The right serving suggestions can enhance the overall dining experience, making your meal even more enjoyable. Here are some ideas to consider:

  • Pair with Fresh Vegetables: Serve your crab stuffed salmon alongside a medley of steamed or roasted vegetables. Asparagus, green beans, or broccoli are excellent choices that add color and nutrition to your plate.
  • Complement with a Salad: A light salad can balance the richness of the salmon. Consider a simple mixed greens salad with a lemon vinaigrette or a refreshing cucumber and tomato salad.
  • Serve with Rice or Quinoa: For a heartier meal, serve the salmon over a bed of fluffy rice or quinoa. These grains absorb the flavors of the dish and provide a satisfying base.
  • Accompany with a Creamy Sauce: Drizzle a light cream sauce or a lemon butter sauce over the salmon for added richness. This can elevate the dish and add an extra layer of flavor.
  • Garnish with Fresh Herbs: A sprinkle of fresh parsley or dill on top of the salmon not only adds a pop of color but also enhances the dish’s freshness.
  • Include Lemon Wedges: Always serve lemon wedges on the side. A squeeze of fresh lemon juice right before eating brightens the flavors and adds a zesty kick.

These serving suggestions can help you create a well-rounded meal that highlights the deliciousness of your crab stuffed salmon. Whether it’s a casual family dinner or a special occasion, these ideas will impress your guests and make your dining experience memorable.

Tips for Perfect Crab Stuffed Salmon

Creating the perfect crab stuffed salmon is all about attention to detail and a few helpful tips. With these suggestions, you can ensure that your dish turns out delicious every time. Let’s explore some essential tips for making your crab stuffed salmon truly exceptional!

  • Choose Quality Ingredients: Start with fresh, high-quality salmon and crab meat. Fresh ingredients make a significant difference in flavor and texture. If possible, buy your salmon from a reputable fish market.
  • Don’t Overmix the Filling: When preparing the crab stuffing, mix just until combined. Overmixing can break down the crab meat, making it less tender. You want to maintain some chunks for a delightful texture.
  • Season Generously: Don’t be shy with the seasonings! The crab meat and salmon both benefit from a good amount of seasoning. Taste the stuffing before filling the salmon to ensure it’s flavorful.
  • Use a Meat Thermometer: To avoid overcooking, use a meat thermometer to check the internal temperature. Salmon should reach 145°F (63°C) for perfect doneness. This ensures it remains moist and flaky.
  • Let It Rest: After baking, allow the stuffed salmon to rest for about 5 minutes. This resting period helps the juices redistribute, resulting in a more tender and flavorful dish.
  • Experiment with Flavors: Feel free to add your twist to the recipe! Consider adding herbs like dill or tarragon to the stuffing for a fresh flavor. You can also try different cheeses or spices to suit your taste.
  • Presentation Matters: Take a moment to plate your crab stuffed salmon beautifully. A sprinkle of fresh herbs and a wedge of lemon can elevate the dish visually and enhance the dining experience.

By following these tips, you’ll be well on your way to mastering the art of crab stuffed salmon. Each bite will be a delightful combination of flavors and textures, making your meal a memorable one!

Breakdown of Time for Crab Stuffed Salmon

Understanding the time required for each step in preparing crab stuffed salmon can help you plan your cooking efficiently. Here’s a detailed breakdown of the time you’ll need for preparation and cooking.

Prep Time

The prep time for crab stuffed salmon is approximately 20-25 minutes. This includes:

  • Gathering and measuring all your ingredients.
  • Rinsing and drying the salmon fillets.
  • Making the crab stuffing mixture.
  • Stuffing the salmon fillets.

Taking your time during the prep phase ensures that everything is ready for cooking, making the process smoother and more enjoyable.

Cooking Time

The cooking time for crab stuffed salmon is about 20-25 minutes. This involves:

  • Baking the stuffed salmon in the preheated oven until it is cooked through and flakes easily with a fork.

Keep an eye on the salmon as it cooks to avoid overcooking, which can lead to a dry texture.

Total Time

In total, you can expect to spend around 45-50 minutes from start to finish. This includes both prep and cooking time. Here’s a quick summary:

  • Prep Time: 20-25 minutes
  • Cooking Time: 20-25 minutes
  • Total Time: 45-50 minutes

This total time makes crab stuffed salmon a great option for a weeknight dinner or a special occasion. With a little planning, you can have a delicious meal ready in no time!

Nutritional Information for Crab Stuffed Salmon

Understanding the nutritional content of your meals is essential for maintaining a balanced diet. Crab stuffed salmon is not only delicious but also packed with nutrients that can benefit your health. Let’s break down the key nutritional components of this delightful dish.

Calories

380 calories. This calorie count makes it a satisfying option for dinner without being overly heavy. The combination of salmon and crab meat provides a rich source of energy, making it a great choice for a fulfilling meal.

Protein

32 grams of protein. Protein is essential for building and repairing tissues, making it crucial for overall health. The salmon and crab meat work together to provide a hearty dose of this important nutrient, helping you feel full and satisfied.

Sodium

600 milligrams per serving. While this is a moderate amount, it’s important to be mindful of your sodium intake, especially if you are watching your salt consumption. The Old Bay seasoning and other ingredients contribute to the sodium content, so consider adjusting the seasoning to suit your dietary needs.

Overall, crab stuffed salmon is a nutritious meal option that offers a good balance of calories, protein, and flavor. By enjoying this dish, you can indulge in a delicious seafood experience while also nourishing your body. Whether you’re looking for a healthy dinner or a special occasion meal, crab stuffed salmon is a fantastic choice!

FAQs about Crab Stuffed Salmon

Can I use frozen salmon for Crab Stuffed Salmon?

Yes, you can use frozen salmon for crab stuffed salmon! However, it’s important to thaw the salmon properly before cooking. To do this, place the frozen fillets in the refrigerator overnight or submerge them in cold water for about an hour. Once thawed, follow the same preparation and cooking steps as you would with fresh salmon. Just keep in mind that frozen salmon may have a slightly different texture, but it will still be delicious when stuffed and baked!

What type of crab meat is best for Crab Stuffed Salmon?

When it comes to crab meat for your crab stuffed salmon, lump crab meat is the best choice. It has large, tender pieces that provide a sweet flavor and a lovely texture. You can also use backfin crab meat, which is a mix of lump and smaller pieces, if you prefer a more budget-friendly option. Avoid using imitation crab meat, as it lacks the rich taste and quality of real crab. Always look for fresh or canned crab meat that is labeled as “wild-caught” for the best flavor.

How do I know when the Crab Stuffed Salmon is done?

To determine if your crab stuffed salmon is done, look for a few key signs. First, the salmon should be opaque and flake easily with a fork. You can also use a meat thermometer to check the internal temperature. The salmon should reach 145°F (63°C) for safe consumption. If you don’t have a thermometer, you can gently press the thickest part of the fillet with a fork; if it flakes apart easily, it’s ready to serve!

Can I make Crab Stuffed Salmon ahead of time?

Absolutely! You can prepare crab stuffed salmon ahead of time, making it a convenient option for busy days. To do this, follow the recipe up to the point of stuffing the salmon. Once stuffed, cover the dish with plastic wrap and refrigerate for up to 24 hours. When you’re ready to cook, simply bake it as directed, adding a few extra minutes to the cooking time if it’s still cold from the fridge. This way, you can enjoy a delicious meal without the last-minute rush!

Conclusion on Crab Stuffed Salmon

In conclusion, crab stuffed salmon is a delightful dish that brings together the best of both worlds: the rich, buttery flavor of salmon and the sweet, tender taste of crab meat. This recipe is not only easy to prepare but also versatile, allowing you to customize it with various fillings and cooking methods. Whether you’re hosting a dinner party or enjoying a cozy meal at home, crab stuffed salmon is sure to impress.

By following the steps outlined in this article, you can create a dish that is both visually appealing and delicious. The combination of creamy crab stuffing and flaky salmon creates a mouthwatering experience that will leave your guests asking for seconds. Plus, with its high protein content and healthy fats, this dish is a nutritious option that supports a balanced diet.

Remember to experiment with different flavors and ingredients to make the recipe your own. Whether you choose to grill, bake, or air fry your salmon, the possibilities are endless. Don’t forget to pair your crab stuffed salmon with fresh vegetables, a light salad, or a flavorful sauce to elevate your meal even further.

So, gather your ingredients, roll up your sleeves, and get ready to enjoy a culinary adventure with crab stuffed salmon. With its delightful flavors and impressive presentation, this dish is bound to become a favorite in your household. Happy cooking!

Leftover Turkey Noodle Casserole: A Delicious Way to Repurpose!

Leftover Turkey Noodle Casserole

Introduction to Leftover Turkey Noodle Casserole

After a big holiday feast, the fridge is often bursting with leftover turkey. Instead of letting it languish in the back, why not transform it into a comforting dish? This Leftover Turkey Noodle Casserole is not just a quick solution for a busy day; it’s a warm hug in a baking dish. With its creamy texture and cheesy topping, it’s sure to impress your loved ones. Plus, it’s an easy way to bring everyone together around the dinner table, making it a perfect weeknight meal that feels special without the fuss.

Why You’ll Love This Leftover Turkey Noodle Casserole

This Leftover Turkey Noodle Casserole is a lifesaver for busy weeknights. It’s incredibly easy to whip up, taking just 45 minutes from start to finish. The combination of tender turkey, creamy sauce, and cheesy goodness creates a dish that’s not only satisfying but also packed with flavor. Plus, it’s a fantastic way to reduce food waste while treating your family to a delicious meal they’ll love.

Ingredients for Leftover Turkey Noodle Casserole

Gathering the right ingredients is the first step to creating this delightful casserole. Here’s what you’ll need:

  • Cooked turkey: Shredded or diced, this is the star of the dish. It’s a great way to use up those holiday leftovers.
  • Egg noodles: These provide a comforting base. They soak up the flavors beautifully and add a satisfying texture.
  • Frozen mixed vegetables: A blend of peas, carrots, and corn adds color and nutrition. Feel free to use fresh veggies if you have them on hand!
  • Cream of mushroom soup: This creamy element binds everything together. You can swap it for cream of chicken soup for a different flavor.
  • Milk: It helps create a luscious sauce. Use whole milk for richness or a lower-fat option if you prefer.
  • Shredded cheddar cheese: This adds a melty, cheesy topping that everyone loves. You can mix in other cheeses for a unique twist.
  • Garlic powder: A sprinkle of this adds depth and flavor. Fresh garlic works too, just adjust the amount.
  • Onion powder: This enhances the savory notes of the casserole. Fresh onions can be sautéed and added for a stronger taste.
  • Salt and pepper: Essential for seasoning. Adjust to your taste for the perfect balance.
  • Breadcrumbs: These create a crunchy topping. You can use panko for extra crispiness or even crushed crackers.
  • Butter: Melted and mixed with breadcrumbs, it adds richness and helps them brown beautifully.

For exact measurements, check the bottom of the article where you can find everything available for printing!

How to Make Leftover Turkey Noodle Casserole

Creating this Leftover Turkey Noodle Casserole is a breeze! Follow these simple steps, and you’ll have a delicious meal ready in no time. Let’s dive in!

Step 1: Preheat the Oven

First things first, preheat your oven to 350°F (175°C). This ensures that your casserole bakes evenly and comes out perfectly golden brown.

Step 2: Cook the Egg Noodles

Next, cook the egg noodles according to the package instructions until they’re al dente. This usually takes about 7-9 minutes. Once done, drain them and set aside. You want them firm enough to hold up in the casserole.

Step 3: Combine Ingredients

In a large mixing bowl, combine the cooked turkey, egg noodles, frozen mixed vegetables, cream of mushroom soup, milk, garlic powder, onion powder, salt, and pepper. Mix everything until well combined. This is where the magic begins, as all those flavors meld together!

Step 4: Transfer to Baking Dish

Now, transfer the mixture into a greased 9×13-inch baking dish. Make sure to spread it out evenly. This will help it cook uniformly and ensure every bite is delicious.

Step 5: Prepare the Topping

In a small bowl, mix the breadcrumbs with the melted butter until they’re evenly coated. This will give your casserole a delightful crunch. Sprinkle the breadcrumb mixture generously over the top of the casserole.

Step 6: Bake

Place your casserole in the preheated oven and bake for 25-30 minutes. You’ll know it’s ready when it’s bubbly and the top is a beautiful golden brown. The aroma will fill your kitchen, making it hard to wait!

Step 7: Cool and Serve

Finally, let the casserole cool for about 5 minutes before serving. This allows the flavors to settle and makes it easier to scoop out. Enjoy your comforting dish with family and friends!

Tips for Success

  • For a creamier casserole, add an extra half cup of cheese to the mixture before baking.
  • Don’t skip the resting time after baking; it helps the casserole set up nicely.
  • Feel free to customize with your favorite veggies or leftover ingredients.
  • Use a mix of cheeses for a flavor boost—think mozzarella or pepper jack!
  • Store leftovers in an airtight container for up to three days.

Equipment Needed

  • Baking dish: A 9×13-inch dish is ideal, but any oven-safe dish will work.
  • Mixing bowl: A large bowl for combining ingredients; a pot can also do the trick.
  • Measuring cups and spoons: Essential for accuracy; you can use standard kitchen cups if needed.
  • Colander: For draining the noodles; a slotted spoon can be a handy alternative.

Variations

  • Vegetarian Option: Substitute the turkey with cooked lentils or chickpeas for a hearty, meat-free version.
  • Spicy Kick: Add diced jalapeños or a dash of hot sauce to the mixture for a zesty twist.
  • Herb Infusion: Mix in fresh herbs like thyme or rosemary for an aromatic flavor boost.
  • Gluten-Free: Use gluten-free egg noodles and ensure your cream of mushroom soup is gluten-free.
  • Cheesy Delight: Experiment with different cheeses like gouda or feta for a unique taste.

Serving Suggestions

  • Side Salad: Pair with a fresh green salad for a light, crunchy contrast.
  • Garlic Bread: Serve with warm garlic bread for a comforting touch.
  • Wine Pairing: A crisp white wine complements the casserole beautifully.
  • Presentation: Garnish with fresh parsley for a pop of color.

FAQs about Leftover Turkey Noodle Casserole

Can I use other types of meat in this casserole?
Absolutely! While this recipe shines with leftover turkey, you can easily substitute it with chicken or even ham. Just make sure the meat is cooked and shredded or diced for the best texture.

How do I store leftovers?
Store any leftover turkey noodle casserole in an airtight container in the fridge. It will keep well for up to three days. Just reheat in the oven or microwave until warmed through.

Can I freeze this casserole?
Yes, you can freeze it! Assemble the casserole but don’t bake it. Cover it tightly with foil and freeze for up to three months. When you’re ready to enjoy it, thaw in the fridge overnight and bake as directed.

What can I serve with this casserole?
This dish pairs wonderfully with a simple side salad or some warm garlic bread. A light, crisp white wine also complements the flavors beautifully.

Can I make this casserole ahead of time?
Definitely! You can prepare the casserole a day in advance. Just cover it and store it in the fridge until you’re ready to bake. This makes it a perfect option for busy weeknights!

Final Thoughts

There’s something truly special about transforming leftover turkey into a dish that warms the heart and fills the belly. This Leftover Turkey Noodle Casserole is more than just a meal; it’s a way to create memories around the dinner table. The creamy, cheesy goodness brings comfort on busy nights, while the simple preparation allows you to spend more time with loved ones. Whether it’s a family gathering or a cozy night in, this casserole is sure to become a cherished recipe in your home. Embrace the joy of cooking and enjoy every delicious bite!

Leftover Turkey Noodle Casserole
jhessica

Leftover Turkey Noodle Casserole: A Delicious Way to Repurpose!

A delicious way to repurpose leftover turkey into a comforting casserole.
Prep Time 15 minutes
Cook Time 30 minutes
Total Time 45 minutes
Servings: 6 servings
Course: Main Dish
Cuisine: American
Calories: 320

Ingredients
  

  • 2 cups cooked turkey shredded or diced
  • 8 ounces egg noodles
  • 1 cup frozen mixed vegetables peas, carrots, corn
  • 1 can 10.5 ounces cream of mushroom soup
  • 1 cup milk
  • 1 cup shredded cheddar cheese
  • 1 teaspoon garlic powder
  • 1 teaspoon onion powder
  • Salt and pepper to taste
  • 1 cup breadcrumbs
  • 2 tablespoons butter melted

Method
 

  1. Preheat your oven to 350°F (175°C).
  2. Cook the egg noodles according to package instructions until al dente, then drain and set aside.
  3. In a large mixing bowl, combine the cooked turkey, cooked egg noodles, frozen mixed vegetables, cream of mushroom soup, milk, garlic powder, onion powder, salt, and pepper. Mix until well combined.
  4. Transfer the mixture into a greased 9×13-inch baking dish.
  5. In a small bowl, mix the breadcrumbs with the melted butter until evenly coated. Sprinkle the breadcrumb mixture over the casserole.
  6. Bake in the preheated oven for 25-30 minutes, or until the casserole is bubbly and the top is golden brown.
  7. Let it cool for 5 minutes before serving.

Nutrition

Serving: 1servingCalories: 320kcalCarbohydrates: 30gProtein: 25gFat: 12gSaturated Fat: 6gPolyunsaturated Fat: 4gCholesterol: 70mgSodium: 600mgFiber: 2gSugar: 3g

Notes

  • For a creamier texture, add an additional half cup of cheese to the mixture before baking.
  • Substitute the cream of mushroom soup with cream of chicken soup for a different flavor profile.

Tried this recipe?

Let us know how it was!

Savory Red Wine Braised Short Ribs are a must-try dish!

Introduction to Savory Red Wine Braised Short Ribs

When it comes to comfort food, few dishes can compete with the rich, hearty flavors of Savory Red Wine Braised Short Ribs. This dish is not just a meal; it’s an experience that warms the soul. The tender beef, infused with the deep notes of red wine, creates a symphony of flavors that dance on your palate. Whether you’re hosting a dinner party or enjoying a cozy night in, this recipe is sure to impress.

What Makes Savory Red Wine Braised Short Ribs Special?

What sets Savory Red Wine Braised Short Ribs apart is the unique combination of ingredients and cooking techniques. First, the short ribs are seared to perfection, creating a beautiful crust that locks in the juices. Then, they are slowly braised in a mixture of red wine and beef broth, allowing the flavors to meld together beautifully. The result? Meat that is so tender it practically falls off the bone!

Moreover, the addition of aromatic vegetables like onions, carrots, and celery enhances the dish’s depth. The herbs, such as thyme and rosemary, add a fragrant touch that elevates the overall taste. Each bite is a delightful blend of savory and slightly sweet flavors, making it a dish that everyone will love.

In addition to its incredible taste, this recipe is also versatile. You can easily adapt it to suit your preferences or dietary needs. Whether you choose to serve it over creamy mashed potatoes or a bed of polenta, the possibilities are endless. Plus, it’s a fantastic way to impress your guests without spending all day in the kitchen.

So, if you’re ready to dive into a world of flavor and comfort, let’s explore the ingredients and preparation steps for these Savory Red Wine Braised Short Ribs!

Ingredients for Savory Red Wine Braised Short Ribs

To create the mouthwatering Savory Red Wine Braised Short Ribs, you’ll need a selection of fresh ingredients that come together to form a delicious dish. Here’s what you’ll need:

  • 3 pounds beef short ribs: Look for well-marbled ribs for the best flavor and tenderness.
  • 2 tablespoons olive oil: This will help in searing the meat and adding richness.
  • 1 large onion, chopped: Onions add sweetness and depth to the dish.
  • 2 carrots, chopped: Carrots bring a subtle sweetness and color.
  • 2 celery stalks, chopped: Celery adds a nice crunch and flavor base.
  • 4 cloves garlic, minced: Garlic enhances the overall aroma and taste.
  • 2 cups red wine: A good quality wine, like Cabernet Sauvignon, is essential for flavor.
  • 2 cups beef broth: This adds moisture and richness to the braising liquid.
  • 1 tablespoon tomato paste: Tomato paste contributes a rich, savory note.
  • 1 teaspoon dried thyme: Thyme adds an earthy flavor that complements the beef.
  • 1 teaspoon dried rosemary: Rosemary brings a fragrant, pine-like aroma.
  • 2 bay leaves: Bay leaves infuse the dish with a subtle depth of flavor.
  • Salt and pepper to taste: Essential for seasoning the dish perfectly.
  • Fresh parsley, chopped (for garnish): Parsley adds a pop of color and freshness when serving.

Gathering these ingredients will set you on the right path to creating a delightful meal. Each component plays a vital role in building the rich flavors that make Savory Red Wine Braised Short Ribs so special. Now that you have everything you need, let’s move on to the preparation steps!

Preparation of Savory Red Wine Braised Short Ribs

Now that you have gathered all the ingredients, it’s time to dive into the preparation of your Savory Red Wine Braised Short Ribs. This process involves several steps, each crucial for achieving that melt-in-your-mouth tenderness and rich flavor. Let’s break it down step by step!

Step 1: Preparing the Short Ribs

Start by taking the beef short ribs out of the refrigerator. Pat them dry with paper towels. This step is important because it helps achieve a nice sear. Next, season the ribs generously with salt and pepper. This simple seasoning enhances the natural flavors of the beef.

Step 2: Searing the Short Ribs

In a large Dutch oven, heat the olive oil over medium-high heat. Once the oil is hot, add the short ribs in batches. Be careful not to overcrowd the pot, as this can prevent proper browning. Sear the ribs for about 3-4 minutes on each side until they develop a beautiful brown crust. This step locks in the juices and adds depth to the flavor. After browning, remove the ribs from the pot and set them aside on a plate.

Step 3: Sautéing the Aromatics

With the short ribs resting, it’s time to add the chopped onion, carrots, and celery to the same pot. Sauté these aromatic vegetables for about 5 minutes, stirring occasionally. You want them to soften and become fragrant. After that, add the minced garlic and cook for an additional minute. The garlic will add a wonderful aroma to your dish!

Step 4: Deglazing the Pan

Now comes the fun part! Pour in the red wine, scraping the bottom of the pot with a wooden spoon. This process, known as deglazing, helps lift all those flavorful browned bits stuck to the bottom. Bring the mixture to a simmer and let it reduce for about 5 minutes. This step intensifies the wine’s flavor, making your dish even more delicious.

Step 5: Braising the Short Ribs

Once the wine has reduced, stir in the beef broth, tomato paste, thyme, rosemary, and bay leaves. Return the short ribs to the pot, ensuring they are submerged in the liquid. Cover the pot with a lid and transfer it to your preheated oven. Braise the short ribs for 2.5 to 3 hours. The low and slow cooking method allows the meat to become tender and flavorful.

Step 6: Finishing Touches

After the braising time is up, carefully remove the pot from the oven. Discard the bay leaves and skim off any excess fat from the surface. This will help create a cleaner sauce. Serve the short ribs with the rich sauce spooned over the top. Don’t forget to garnish with fresh parsley for a pop of color and freshness!

And there you have it! Your Savory Red Wine Braised Short Ribs are ready to be enjoyed. The preparation may take some time, but the end result is well worth the effort. Now, let’s explore some variations you can try to make this dish even more exciting!

Variation of Savory Red Wine Braised Short Ribs

While the classic recipe for Savory Red Wine Braised Short Ribs is undeniably delicious, there are many ways to switch things up! By experimenting with alternative ingredients and cooking methods, you can create a unique twist on this comforting dish. Let’s explore some exciting variations!

Alternative Ingredients for Different Flavors

One of the best parts about cooking is the ability to customize recipes to suit your taste. Here are some alternative ingredients you can use to create different flavor profiles:

  • Different Cuts of Meat: If you can’t find short ribs, try using chuck roast or brisket. These cuts also become tender when braised.
  • Wine Options: While Cabernet Sauvignon is a popular choice, you can experiment with other red wines like Merlot or Pinot Noir. Each wine will impart its unique flavor to the dish.
  • Vegetable Variations: Feel free to add other vegetables like mushrooms, parsnips, or even potatoes. These will add extra texture and flavor to your dish.
  • Herbs and Spices: Instead of thyme and rosemary, try using oregano or sage for a different aromatic experience. You can also add a pinch of red pepper flakes for a bit of heat!
  • Sweeteners: For a touch of sweetness, consider adding a tablespoon of brown sugar or honey to the braising liquid. This can balance the acidity of the wine.

These alternative ingredients can help you create a dish that’s uniquely yours while still maintaining the essence of Savory Red Wine Braised Short Ribs.

Cooking Methods: Slow Cooker vs. Oven

Another way to vary your cooking experience is by choosing different methods. Both the slow cooker and oven can yield delicious results, but they each have their benefits:

  • Slow Cooker: If you prefer a hands-off approach, the slow cooker is your best friend. Simply follow the same steps for browning the meat and sautéing the vegetables. Then, transfer everything to the slow cooker and cook on low for 6-8 hours. This method allows the flavors to meld beautifully while you go about your day.
  • Oven: The traditional oven method, as described earlier, gives you that lovely crust on the meat. It also allows for a more controlled cooking environment, which can be beneficial for achieving the perfect tenderness.

Both methods will result in tender, flavorful short ribs, so choose the one that best fits your schedule and cooking style. No matter how you prepare them, your Savory Red Wine Braised Short Ribs will surely impress!

Cooking Note for Savory Red Wine Braised Short Ribs

Cooking Savory Red Wine Braised Short Ribs is a delightful journey that requires patience and attention to detail. Here are some essential notes to keep in mind to ensure your dish turns out perfectly every time.

First, always choose high-quality beef short ribs. The marbling in the meat is crucial for flavor and tenderness. Look for ribs that have a good amount of fat running through them, as this will melt during cooking and keep the meat juicy.

Next, don’t rush the searing process. Searing the short ribs creates a rich, brown crust that adds depth to the dish. Make sure your oil is hot enough before adding the meat. If the oil isn’t hot, the ribs will steam instead of sear, which can affect the flavor.

When it comes to the braising liquid, using a good quality red wine is key. The wine should be something you enjoy drinking, as its flavor will concentrate during cooking. Avoid cooking wines, as they often contain added salt and preservatives that can alter the taste of your dish.

Additionally, be mindful of the cooking time. Braising is a slow process, and the longer you cook the short ribs, the more tender they will become. However, keep an eye on them to ensure they don’t overcook. The meat should be fork-tender and easily pull away from the bone.

Lastly, let the dish rest after cooking. Allowing the short ribs to sit for about 10-15 minutes before serving helps the juices redistribute throughout the meat. This simple step can make a significant difference in the overall texture and flavor of your dish.

By following these cooking notes, you’ll be well on your way to creating a delicious batch of Savory Red Wine Braised Short Ribs that will impress your family and friends. Enjoy the process, and savor every bite!

Serving Suggestions for Savory Red Wine Braised Short Ribs

Once your Savory Red Wine Braised Short Ribs are ready, it’s time to think about how to serve them. The right side dishes and wine pairings can elevate your meal to a whole new level. Let’s explore some ideal options that complement the rich flavors of the short ribs!

Ideal Side Dishes

When it comes to side dishes, you want to choose options that balance the richness of the short ribs. Here are some delicious ideas:

  • Creamy Mashed Potatoes: The buttery, smooth texture of mashed potatoes pairs perfectly with the savory sauce of the short ribs. They soak up the delicious juices, making each bite heavenly.
  • Polenta: Creamy polenta is another fantastic option. Its mild flavor and smooth consistency complement the bold taste of the beef.
  • Roasted Vegetables: A medley of roasted vegetables, such as carrots, Brussels sprouts, and potatoes, adds color and nutrition to your plate. The caramelization from roasting enhances their natural sweetness.
  • Garlic Bread: A side of warm garlic bread is perfect for sopping up the rich sauce. It adds a delightful crunch and flavor to the meal.
  • Green Salad: A fresh green salad with a light vinaigrette can provide a refreshing contrast to the hearty short ribs. Consider adding ingredients like arugula, cherry tomatoes, and feta cheese for extra flavor.

These side dishes not only enhance the overall dining experience but also create a well-rounded meal that everyone will enjoy!

Wine Pairing Recommendations

Pairing the right wine with your Savory Red Wine Braised Short Ribs can elevate the meal even further. Here are some excellent wine options to consider:

  • Cabernet Sauvignon: This is a classic choice, as it mirrors the wine used in the recipe. Its bold flavors and tannins complement the richness of the beef.
  • Merlot: A softer, fruitier option, Merlot offers a smooth finish that balances the savory notes of the dish.
  • Syrah/Shiraz: With its spicy and fruity profile, Syrah or Shiraz can add an exciting twist to your meal. It pairs well with the herbs and spices in the dish.
  • Malbec: Known for its dark fruit flavors and velvety texture, Malbec is another great match. It enhances the overall richness of the short ribs.
  • Pinot Noir: If you prefer a lighter wine, Pinot Noir is a fantastic choice. Its acidity can cut through the richness of the meat, providing a refreshing contrast.

Choosing the right wine can enhance the flavors of your Savory Red Wine Braised Short Ribs, making your meal even more enjoyable. So, pour a glass, sit back, and savor every moment of this delightful dining experience!

Tips for Perfecting Savory Red Wine Braised Short Ribs

Creating the perfect Savory Red Wine Braised Short Ribs is an art that combines technique, quality ingredients, and a little love. Here are some valuable tips to help you achieve the best results every time you make this delicious dish.

First, always start with high-quality beef short ribs. Look for ribs that are well-marbled. The fat content is essential for flavor and tenderness. The more marbling, the juicier your short ribs will be!

Next, don’t skip the seasoning. Generously season the short ribs with salt and pepper before cooking. This step enhances the natural flavors of the meat and ensures a delicious crust when seared.

When searing the ribs, make sure your oil is hot enough. A hot pan creates a beautiful brown crust, which adds depth to the flavor. If the oil isn’t hot, the meat will steam instead of sear, leading to a less flavorful dish.

During the deglazing step, take your time. Scraping the bottom of the pot to lift those browned bits is crucial. These bits are packed with flavor and will enrich your braising liquid.

For the braising liquid, choose a wine you enjoy drinking. The quality of the wine directly affects the flavor of the dish. Avoid cooking wines, as they often contain additives that can alter the taste.

Be patient with the cooking time. Braising is all about low and slow cooking. The longer you cook the short ribs, the more tender they will become. Aim for fork-tender meat that easily pulls away from the bone.

Lastly, let the dish rest after cooking. Allowing the short ribs to sit for about 10-15 minutes before serving helps the juices redistribute throughout the meat. This simple step can make a significant difference in the overall texture and flavor of your dish.

By following these tips, you’ll be well on your way to mastering Savory Red Wine Braised Short Ribs. Each bite will be a delightful experience, and your family and friends will surely be impressed!

Breakdown of Time for Savory Red Wine Braised Short Ribs

Understanding the time commitment for making Savory Red Wine Braised Short Ribs is essential for planning your meal. This dish requires both preparation and cooking time, but the results are well worth the wait. Here’s a detailed breakdown of the time involved in creating this delicious recipe.

Prep Time

The prep time for Savory Red Wine Braised Short Ribs is approximately 30 minutes. During this time, you will gather all your ingredients, chop the vegetables, and season the short ribs. Taking your time during this step ensures that everything is ready for a smooth cooking process. Remember, a well-prepared kitchen makes for a more enjoyable cooking experience!

Cooking Time

The cooking time for this dish is about 2.5 to 3 hours. This includes the time spent braising the short ribs in the oven. The low and slow cooking method allows the meat to become incredibly tender and flavorful. While it may seem like a long time, this is what transforms the short ribs into a melt-in-your-mouth delight. Patience is key here!

Total Time

In total, you can expect to spend around 3 to 3.5 hours from start to finish. This includes both the prep and cooking times. While the cooking time may seem lengthy, most of it is hands-off, allowing you to relax or prepare side dishes while the short ribs are braising. The end result will be a comforting and satisfying meal that is sure to impress!

Nutritional Information for Savory Red Wine Braised Short Ribs

Understanding the nutritional content of your meals is essential for maintaining a balanced diet. Savory Red Wine Braised Short Ribs not only offer a delightful taste but also provide valuable nutrients. Here’s a closer look at the nutritional information for this delicious dish.

Calories

Each serving of Savory Red Wine Braised Short Ribs contains approximately 450 calories. This calorie count makes it a hearty meal, perfect for a special occasion or a comforting dinner. While it’s a bit higher in calories, the rich flavors and satisfying nature of the dish make it worth every bite!

Protein Content

One of the standout features of this dish is its protein content. Each serving provides about 35 grams of protein. This high protein level is beneficial for muscle repair and growth, making it an excellent choice for those looking to maintain a healthy diet. The beef short ribs are a fantastic source of protein, ensuring you feel full and satisfied after your meal.

Sodium Levels

When it comes to sodium, Savory Red Wine Braised Short Ribs contain approximately 800 milligrams per serving. While this is a moderate amount, it’s essential to be mindful of your overall sodium intake, especially if you are watching your salt consumption. To reduce sodium levels, consider using low-sodium beef broth and adjusting the salt added during cooking.

In summary, Savory Red Wine Braised Short Ribs offer a delicious and nutritious meal option. With a good balance of calories, protein, and flavor, this dish is sure to be a hit at your dinner table. Enjoy every bite while being mindful of your nutritional needs!

FAQs about Savory Red Wine Braised Short Ribs

Can I use a different type of wine for braising?

Absolutely! While Cabernet Sauvignon is a popular choice for Savory Red Wine Braised Short Ribs, you can experiment with other red wines. Merlot, Pinot Noir, or even Zinfandel can work well. Each wine will bring its unique flavor profile to the dish, so feel free to choose one that you enjoy drinking. Just remember, the better the wine, the better the dish!

How long should I braise the short ribs?

The ideal braising time for short ribs is between 2.5 to 3 hours. This slow cooking process allows the meat to become incredibly tender and flavorful. You want the meat to be fork-tender and easily pull away from the bone. If you find that the ribs are not tender enough after 3 hours, you can continue braising them for an additional 30 minutes. Just keep an eye on them to ensure they don’t overcook!

What can I serve with Savory Red Wine Braised Short Ribs?

There are many delicious options to serve alongside Savory Red Wine Braised Short Ribs. Creamy mashed potatoes or polenta are classic choices that pair beautifully with the rich sauce. Roasted vegetables, garlic bread, or a fresh green salad can also complement the dish nicely. These sides not only enhance the meal but also provide a well-rounded dining experience!

Can I make Savory Red Wine Braised Short Ribs ahead of time?

Yes, you can definitely make Savory Red Wine Braised Short Ribs ahead of time! In fact, the flavors often improve after sitting for a day. To do this, simply prepare the dish as directed, then let it cool before refrigerating. When you’re ready to serve, reheat the short ribs gently on the stove or in the oven. Just be sure to add a splash of beef broth or water to keep the sauce from drying out. This makes for a convenient and delicious meal option!

Conclusion on Savory Red Wine Braised Short Ribs

In conclusion, Savory Red Wine Braised Short Ribs are more than just a meal; they are a celebration of flavors and comfort. This dish brings together tender beef, aromatic vegetables, and a rich sauce that tantalizes the taste buds. Whether you’re cooking for a special occasion or simply treating yourself to a comforting dinner, this recipe is sure to impress.

The beauty of Savory Red Wine Braised Short Ribs lies in their versatility. You can easily adapt the recipe to suit your preferences, whether by experimenting with different cuts of meat, wines, or cooking methods. Each variation offers a unique twist while maintaining the essence of this classic dish.

Moreover, the preparation process, though it requires some time, is straightforward and rewarding. The slow braising method allows the flavors to meld beautifully, resulting in a dish that is both satisfying and delicious. With the right side dishes and wine pairings, you can create a memorable dining experience that will leave your guests raving.

So, gather your ingredients, roll up your sleeves, and embark on this culinary adventure. With each bite of Savory Red Wine Braised Short Ribs, you’ll savor the rich flavors and the love that goes into making this dish. Enjoy the process, and most importantly, enjoy the delicious results!

Sweet Potato Casserole with Marshmallows Recipe is delicious!

Introduction to Sweet Potato Casserole with Marshmallows Recipe

The History of Sweet Potato Casserole

Sweet potato casserole has a rich history in American cuisine. It first gained popularity in the Southern United States during the 19th century. Sweet potatoes were a staple food, and their natural sweetness made them perfect for desserts. Over time, families began to create casseroles, combining sweet potatoes with sugar and spices. The addition of marshmallows came later, around the 1950s, when the Campfire Marshmallow Company promoted their product in recipes. This delightful combination quickly became a holiday favorite, especially during Thanksgiving. Today, sweet potato casserole with marshmallows is a beloved dish that brings warmth and joy to many gatherings.

Why You Should Try This Sweet Potato Casserole with Marshmallows Recipe

If you’re looking for a dish that’s both comforting and delicious, this sweet potato casserole with marshmallows recipe is a must-try! It’s easy to make and perfect for any occasion. The creamy sweet potato base pairs wonderfully with the fluffy marshmallow topping, creating a delightful contrast in textures. Plus, it’s a great way to sneak in some nutritious sweet potatoes into your meal. This casserole is not only tasty but also visually appealing, making it a showstopper on your dinner table. Whether you’re hosting a holiday feast or just want a cozy family dinner, this recipe will surely impress everyone!

Ingredients for Sweet Potato Casserole with Marshmallows Recipe

Gathering the right ingredients is key to making a delicious sweet potato casserole with marshmallows. Here’s what you’ll need:

  • 2 pounds sweet potatoes, peeled and cubed
  • 1/2 cup brown sugar
  • 1/4 cup milk
  • 1/4 cup unsalted butter, softened
  • 1 teaspoon vanilla extract
  • 1/2 teaspoon ground cinnamon
  • 1/4 teaspoon ground nutmeg
  • 1/4 teaspoon salt
  • 1 cup mini marshmallows

1/2 cup of chopped pecans or walnuts to the sweet potato mixture before baking. This addition not only enhances the taste but also adds a delightful crunch.

maple syrup or honey. This swap will still give you that sweet flavor while reducing refined sugar content. Now that you have your ingredients ready, let’s move on to the preparation steps!

Step-by-Step Preparation of Sweet Potato Casserole with Marshmallows Recipe

Step 1: Preparing the Sweet Potatoes

To start, you need to prepare the sweet potatoes. First, peel and cube the sweet potatoes into small pieces. This helps them cook evenly. Next, fill a large pot with water and bring it to a boil. Once the water is boiling, carefully add the cubed sweet potatoes. Cook them for about 15 to 20 minutes, or until they are tender. You can check their tenderness by poking them with a fork. When they are soft, drain the water and let the sweet potatoes cool slightly. This step is crucial as it sets the foundation for your casserole.

Step 2: Mixing the Sweet Potato Base

Now that your sweet potatoes are ready, it’s time to mix the base. In a large mixing bowl, mash the sweet potatoes until they are smooth. You can use a potato masher or a fork for this. Once mashed, add in the brown sugar, milk, softened butter, vanilla extract, ground cinnamon, ground nutmeg, and salt. Mix everything together until well combined. The mixture should be creamy and sweet, with a lovely aroma from the spices. This sweet potato base is what makes your casserole so delicious!

Step 3: Preparing the Marshmallow Topping

While the sweet potato base is coming together, it’s time to prepare the marshmallow topping. Grab your mini marshmallows and set them aside. These little treats will add a delightful sweetness and a fluffy texture to your casserole. You can also consider adding chopped nuts at this stage if you want a crunchy contrast. Just remember to mix them in gently so they don’t break apart.

Step 4: Assembling the Casserole

With your sweet potato mixture and marshmallows ready, it’s time to assemble the casserole. Take a greased 9×13 inch baking dish and transfer the sweet potato mixture into it. Spread it out evenly across the dish. This ensures that every bite is filled with that creamy goodness. After that, sprinkle the mini marshmallows on top. Make sure to spread them out evenly so that every part of the casserole gets that sweet, gooey topping.

Step 5: Baking the Casserole

Now comes the exciting part—baking! Preheat your oven to 350°F. Once it’s ready, place your assembled casserole in the oven. Bake it for about 25 to 30 minutes. You’ll know it’s done when the marshmallows are golden brown and the casserole is heated through. The smell will fill your kitchen, making it hard to wait! After baking, remove the casserole from the oven and let it cool for a few minutes before serving. This step allows the flavors to settle and makes it easier to serve.

Variations of Sweet Potato Casserole with Marshmallows Recipe

Alternative Toppings for Sweet Potato Casserole

While the classic marshmallow topping is a favorite, there are many alternative toppings you can try to give your sweet potato casserole a unique twist. Here are some delicious options:

  • Pecan Crumble: Combine 1 cup of chopped pecans with 1/2 cup of brown sugar and 1/4 cup of melted butter. Sprinkle this mixture over the sweet potato base before baking. The crunchy texture adds a delightful contrast.
  • Coconut Flakes: For a tropical flair, top your casserole with sweetened coconut flakes. They will toast beautifully in the oven, adding a chewy texture and a hint of coconut flavor.
  • Chocolate Chips: If you love chocolate, sprinkle mini chocolate chips over the marshmallows. They will melt slightly, creating a rich and sweet topping that kids will adore.
  • Graham Cracker Crust: Crush graham crackers and mix them with melted butter. Spread this mixture over the sweet potato layer for a s’mores-inspired casserole.

These alternative toppings can elevate your sweet potato casserole, making it even more enjoyable for your guests. Feel free to mix and match to find your favorite combination!

Healthier Versions of Sweet Potato Casserole with Marshmallows Recipe

If you’re looking to make your sweet potato casserole a bit healthier, there are several easy substitutions you can make. Here are some ideas:

  • Reduce Sugar: Instead of using 1/2 cup of brown sugar, try using 1/4 cup of honey or maple syrup. This will lower the refined sugar content while still providing sweetness.
  • Use Greek Yogurt: Replace half of the butter with plain Greek yogurt. This swap adds creaminess while reducing fat and calories.
  • Incorporate Whole Grains: For added fiber, consider mixing in some rolled oats or whole grain breadcrumbs into the sweet potato mixture or as a topping.
  • Swap Milk for Almond Milk: If you want a dairy-free option, use unsweetened almond milk instead of regular milk. It’s lower in calories and still creamy.

These healthier variations allow you to enjoy the deliciousness of sweet potato casserole without compromising on nutrition. You can indulge guilt-free while still savoring every bite!

Cooking Note for Sweet Potato Casserole with Marshmallows Recipe

When preparing your sweet potato casserole with marshmallows, there are a few cooking notes to keep in mind. These tips will help ensure that your dish turns out perfectly every time.

First, make sure to choose sweet potatoes that are firm and free from blemishes. Fresh sweet potatoes will provide the best flavor and texture. If you can, opt for medium-sized sweet potatoes, as they tend to be sweeter and creamier.

Next, when boiling the sweet potatoes, avoid overcooking them. If they become too soft, they may turn watery, which can affect the consistency of your casserole. Aim for tender sweet potatoes that can be easily mashed but still hold their shape.

Additionally, when mixing the sweet potato base, be careful not to overmix. Overmixing can lead to a gummy texture. Just mix until all ingredients are combined and the mixture is smooth.

For the marshmallow topping, consider using mini marshmallows for even distribution. They melt beautifully and create that delightful gooey layer on top. If you prefer a toasted flavor, you can broil the casserole for a minute or two at the end of baking. Just keep a close eye on it to prevent burning!

Lastly, let the casserole cool for a few minutes after baking. This cooling time allows the flavors to meld together and makes it easier to serve. Enjoy your sweet potato casserole with marshmallows as a comforting side dish or a sweet treat!

Serving Suggestions for Sweet Potato Casserole with Marshmallows Recipe

Serving your sweet potato casserole with marshmallows is just as important as preparing it. The way you present this dish can enhance the overall dining experience. Here are some delightful serving suggestions to consider:

  • Pair with Savory Dishes: This casserole makes a fantastic side dish for savory meals. It pairs beautifully with roasted turkey, ham, or grilled chicken. The sweetness of the casserole complements the savory flavors of the main course, creating a balanced meal.
  • Garnish with Fresh Herbs: For a pop of color and freshness, consider garnishing your casserole with chopped fresh herbs like parsley or chives. This adds a lovely contrast to the sweet flavors and makes the dish visually appealing.
  • Serve with a Side Salad: To balance the richness of the casserole, serve it alongside a light salad. A simple green salad with a tangy vinaigrette can provide a refreshing contrast to the creamy sweet potatoes.
  • Offer a Variety of Sauces: Consider offering sauces on the side, such as cranberry sauce or a light drizzle of maple syrup. These can enhance the flavors and allow guests to customize their servings.
  • Make it a Breakfast Treat: Sweet potato casserole can also be enjoyed for breakfast! Serve it warm with a dollop of Greek yogurt or a sprinkle of nuts for added protein. It’s a delicious way to start the day!

These serving suggestions will not only elevate your sweet potato casserole with marshmallows but also create a memorable dining experience for you and your guests. Enjoy the delightful flavors and the joy of sharing this comforting dish!

Tips for Perfecting Your Sweet Potato Casserole with Marshmallows Recipe

Creating the perfect sweet potato casserole with marshmallows is all about attention to detail. Here are some helpful tips to ensure your dish turns out delicious every time:

  • Choose the Right Sweet Potatoes: Select sweet potatoes that are firm and smooth. Avoid any with soft spots or blemishes. The fresher the sweet potatoes, the better the flavor!
  • Cook Evenly: When boiling the sweet potatoes, cut them into uniform cubes. This ensures they cook evenly and become tender at the same time. Aim for pieces that are about 1-inch in size.
  • Don’t Overmix: When combining the sweet potato mixture, mix just until everything is combined. Overmixing can lead to a gummy texture, which is not what you want in a creamy casserole.
  • Experiment with Spices: Feel free to adjust the spices to your taste. If you love cinnamon, add a bit more! You can also try adding a pinch of ginger or allspice for a unique flavor twist.
  • Use Quality Marshmallows: For the best results, use mini marshmallows. They melt evenly and create that perfect gooey topping. If you want a toasted flavor, consider broiling the casserole for a minute or two at the end of baking.
  • Let It Rest: After baking, allow the casserole to cool for about 10 minutes before serving. This helps the flavors meld together and makes it easier to serve without falling apart.
  • Make Ahead: If you’re short on time, you can prepare the sweet potato mixture a day in advance. Just store it in the fridge and add the marshmallows right before baking.
  • Serve Warm: Sweet potato casserole is best enjoyed warm. The marshmallows will be soft and gooey, making each bite delightful!

By following these tips, you’ll be well on your way to mastering the art of sweet potato casserole with marshmallows. Each bite will be a comforting reminder of home and family gatherings, making it a dish everyone will love!

Breakdown of Time for Sweet Potato Casserole with Marshmallows Recipe

Prep Time

15-20 minutes. This includes peeling and cubing the sweet potatoes, boiling them until tender, and mixing the sweet potato base with all the delicious ingredients. Make sure to have everything ready before you start cooking to streamline the process!

Cooking Time

25-30 minutes. During this time, the marshmallows will melt and turn golden brown, creating that irresistible topping. Keep an eye on the casserole as it bakes to ensure the marshmallows don’t burn. The delightful aroma will fill your kitchen, making it hard to wait!

Total Time

40-50 minutes from start to finish. This includes both prep and cooking time. It’s a quick and easy recipe that allows you to enjoy a comforting dish without spending all day in the kitchen. Perfect for busy weeknights or festive gatherings!

Nutritional Information for Sweet Potato Casserole with Marshmallows Recipe

Calories

220 calories. This makes it a satisfying addition to your meal without overwhelming your daily calorie intake. The combination of sweet potatoes and marshmallows provides a sweet treat that can be enjoyed guilt-free, especially during festive occasions.

Protein

2 grams of protein. While this may not seem like a lot, it contributes to your overall daily protein intake. Sweet potatoes are a good source of vitamins and minerals, making this dish a wholesome choice for your table. Pairing it with a protein-rich main dish can help create a balanced meal.

Sodium

150 milligrams of sodium per serving. This level is relatively low, especially when compared to many other side dishes. By using unsalted butter and controlling the amount of added salt, you can enjoy this casserole without worrying too much about sodium levels. It’s a great option for those looking to keep their meals heart-healthy!

FAQs about Sweet Potato Casserole with Marshmallows Recipe

Can I make Sweet Potato Casserole with Marshmallows Recipe ahead of time?

Absolutely! You can prepare the sweet potato mixture a day in advance. Just follow the steps up to mixing the sweet potatoes and store the mixture in the refrigerator. When you’re ready to bake, simply spread the mixture in your greased baking dish, add the marshmallows, and bake as directed. This makes it super convenient for holiday gatherings or busy weeknights!

What can I substitute for marshmallows in Sweet Potato Casserole?

toasted coconut flakes for a chewy texture and a hint of sweetness. Another option is to sprinkle chocolate chips on top for a rich flavor. If you prefer a nutty topping, consider using a pecan crumble made from chopped pecans, brown sugar, and butter. These substitutes can add a unique twist to your casserole!

Is Sweet Potato Casserole with Marshmallows Recipe gluten-free?

Yes, this sweet potato casserole with marshmallows recipe is naturally gluten-free! The main ingredients, sweet potatoes, and marshmallows, do not contain gluten. However, if you decide to add any toppings, like graham cracker crust, make sure to use gluten-free options. Always check the labels of your ingredients to ensure they meet your dietary needs.

How do I store leftovers of Sweet Potato Casserole with Marshmallows Recipe?

3-4 days. When you’re ready to enjoy it again, simply reheat in the oven at 350°F until warmed through. You can also microwave individual portions for a quick treat!

Conclusion on Sweet Potato Casserole with Marshmallows Recipe

In conclusion, the sweet potato casserole with marshmallows recipe is a delightful dish that brings warmth and joy to any table. Its rich history and comforting flavors make it a staple during holidays and family gatherings. With its creamy sweet potato base and fluffy marshmallow topping, this casserole is not only delicious but also visually appealing.

Whether you choose to stick with the classic recipe or explore the various variations and healthier options, this dish is sure to impress your guests. The ease of preparation and the ability to make it ahead of time make it a perfect choice for busy cooks. Plus, the nutritional benefits of sweet potatoes add a wholesome touch to your meal.

As you gather around the table with loved ones, this sweet potato casserole will surely be a highlight of your feast. So, don’t hesitate to whip up this comforting dish and create lasting memories. Enjoy every bite of this sweet potato casserole with marshmallows, and let it bring a smile to your face and warmth to your heart!

Buttery Garlic Shrimp Pasta is a must-try recipe!

Introduction to Buttery Garlic Shrimp Pasta Recipe

Welcome to the delightful world of Buttery Garlic Shrimp Pasta! This dish is not just a meal; it’s an experience that brings together the rich flavors of garlic, the sweetness of shrimp, and the comforting texture of pasta. Whether you’re cooking for a special occasion or just a cozy dinner at home, this recipe is sure to impress. Let’s dive into what makes this dish so special and explore its fascinating history.

What Makes This Dish Special?

What sets Buttery Garlic Shrimp Pasta apart is its simplicity and flavor. The combination of fresh ingredients creates a dish that is both satisfying and elegant. The buttery sauce, infused with garlic and a hint of lemon, perfectly complements the tender shrimp. Plus, it’s quick to prepare, making it ideal for busy weeknights or last-minute gatherings. The vibrant colors and aromas will fill your kitchen, inviting everyone to the table.

Another reason this dish shines is its versatility. You can easily customize it by adding vegetables or adjusting the spice level. Whether you prefer a mild flavor or a spicy kick, this recipe can cater to your taste. It’s a fantastic way to enjoy seafood while also indulging in a comforting pasta dish.

A Brief History of Shrimp Pasta Dishes

Shrimp pasta dishes have a rich history that dates back centuries. Originating from coastal regions, seafood has always been a staple in many cultures. In Italy, pasta and seafood are often combined, creating delicious meals that highlight the freshness of the ocean. The classic pairing of shrimp with pasta can be traced to the Mediterranean, where ingredients like garlic, olive oil, and fresh herbs are commonly used.

As culinary traditions evolved, shrimp pasta dishes gained popularity worldwide. Today, you can find various interpretations, from creamy Alfredo to spicy arrabbiata. The Buttery Garlic Shrimp Pasta Recipe is a modern take that honors these traditions while adding a unique twist. It’s a dish that celebrates the love of good food and brings people together, making it a timeless favorite.

Ingredients for Buttery Garlic Shrimp Pasta Recipe

Essential Ingredients

To create the perfect Buttery Garlic Shrimp Pasta, you’ll need a few essential ingredients. These components work together to deliver a delightful flavor and texture. Here’s what you’ll need:

  • 8 ounces spaghetti or linguine: Choose your favorite pasta type. Spaghetti and linguine are both excellent choices that hold the sauce well.
  • 1 pound large shrimp: Fresh or frozen shrimp works great. Just make sure they are peeled and deveined for easy cooking.
  • 4 tablespoons unsalted butter: This is the base of your sauce, adding richness and flavor.
  • 4 cloves garlic: Minced garlic brings a wonderful aroma and taste to the dish.
  • 1 teaspoon red pepper flakes: Adjust this to your spice preference. It adds a nice kick!
  • 1/2 cup chicken broth: This adds depth to the sauce, making it savory and delicious.
  • 1/4 cup fresh lemon juice: Freshly squeezed lemon juice brightens the dish and balances the flavors.
  • 1/4 cup chopped fresh parsley: This adds a pop of color and freshness to your pasta.
  • Salt and pepper: Essential for seasoning to taste.
  • Grated Parmesan cheese (optional): For those who love cheese, this is a delightful finishing touch.

Optional Ingredients for Extra Flavor

If you want to elevate your Buttery Garlic Shrimp Pasta even further, consider adding some optional ingredients. These can enhance the dish and cater to your personal taste:

  • 1/4 cup heavy cream: For a creamier sauce, stir in heavy cream after adding the chicken broth.
  • Vegetables: Add spinach, cherry tomatoes, or bell peppers for a colorful and nutritious twist.
  • White wine: A splash of white wine can add a sophisticated flavor to the sauce.
  • Fresh herbs: Basil or thyme can be used in addition to parsley for a more aromatic experience.

With these ingredients, you’re well on your way to creating a delicious Buttery Garlic Shrimp Pasta that will impress your family and friends. Let’s move on to the preparation steps!

Step-by-Step Preparation of Buttery Garlic Shrimp Pasta Recipe

Step 1: Preparing the Pasta

First things first, let’s get that pasta cooking! Bring a large pot of salted water to a boil. Once it’s bubbling, add your 8 ounces of spaghetti or linguine. Cook according to the package instructions until it’s al dente, which usually takes about 8 to 10 minutes. Remember, you want it firm to the bite. After cooking, drain the pasta in a colander, but don’t forget to reserve 1/2 cup of that starchy pasta water. This will help you achieve the perfect sauce consistency later!

Step 2: Sautéing the Garlic

Now, let’s move on to the flavor base! In a large skillet, melt 4 tablespoons of unsalted butter over medium heat. As the butter melts, it will start to bubble. This is your cue to add the minced garlic. Toss in 4 cloves of garlic and 1 teaspoon of red pepper flakes. Sauté this mixture for about 1 minute. You want the garlic to become fragrant but be careful not to burn it. Burnt garlic can turn bitter, and we want a delicious buttery flavor!

Step 3: Cooking the Shrimp

Next up, it’s time for the star of the show: the shrimp! Add 1 pound of peeled and deveined large shrimp to the skillet. Season them with salt and pepper to taste. Cook the shrimp for about 2-3 minutes on each side. You’ll know they’re done when they turn pink and opaque. This step is crucial, as perfectly cooked shrimp are tender and juicy, making your dish even more delightful!

Step 4: Combining Ingredients

Once your shrimp are cooked, it’s time to bring everything together. Pour in 1/2 cup of chicken broth and 1/4 cup of fresh lemon juice into the skillet. Stir well to combine all the flavors. Let this mixture simmer for about 2-3 minutes. This will allow the sauce to reduce slightly, intensifying the flavors. After that, add the cooked pasta to the skillet. Toss everything together, ensuring the pasta is well coated in the buttery sauce. If it seems a bit dry, don’t hesitate to add some of that reserved pasta water until you reach your desired consistency!

Step 5: Finishing Touches

Finally, it’s time for the finishing touches! Stir in 1/4 cup of chopped fresh parsley for a burst of color and freshness. Taste your dish and adjust the seasoning with more salt and pepper if needed. Serve your Buttery Garlic Shrimp Pasta immediately, and if you like, sprinkle some grated Parmesan cheese on top for an extra layer of flavor. Enjoy your delicious creation!

Variation of Buttery Garlic Shrimp Pasta Recipe

Adding Vegetables for a Healthier Twist

Looking to make your Buttery Garlic Shrimp Pasta even more nutritious? Adding vegetables is a fantastic way to boost the health factor while enhancing the flavor. You can incorporate a variety of colorful veggies that complement the dish beautifully. Here are some great options:

  • Spinach: Fresh spinach wilts down nicely and adds a vibrant green color. Toss it in during the last minute of cooking to keep it tender yet bright.
  • Cherry Tomatoes: Halved cherry tomatoes add a sweet burst of flavor. Add them to the skillet just after the shrimp are cooked for a juicy addition.
  • Bell Peppers: Sliced bell peppers bring a crunchy texture and sweetness. Sauté them with the garlic for a delicious flavor combination.
  • Zucchini: Thinly sliced zucchini can be added for a light and refreshing touch. Cook it until just tender to maintain its crunch.

By adding these vegetables, you not only enhance the dish’s nutritional value but also create a more colorful and appealing plate. Plus, it’s a great way to sneak in some extra vitamins and minerals!

Spicy Version of Buttery Garlic Shrimp Pasta

If you love a bit of heat, why not spice things up? Transform your Buttery Garlic Shrimp Pasta into a fiery delight with just a few tweaks. Here’s how to turn up the heat:

  • Increase Red Pepper Flakes: Start by adding more red pepper flakes than the original recipe calls for. Adjust according to your spice tolerance.
  • Fresh Jalapeños: For an extra kick, slice fresh jalapeños and sauté them with the garlic. This will add both heat and flavor.
  • Hot Sauce: A splash of your favorite hot sauce can elevate the dish. Add it to the sauce mixture for a zesty finish.
  • Spicy Sausage: Consider adding slices of spicy Italian sausage. Cook them alongside the shrimp for a hearty and flavorful addition.

This spicy variation is perfect for those who enjoy bold flavors. It’s a great way to make your Buttery Garlic Shrimp Pasta stand out and cater to your taste buds!

Cooking Note for Buttery Garlic Shrimp Pasta Recipe

Tips for Perfectly Cooked Shrimp

Cooking shrimp perfectly is key to a delicious Buttery Garlic Shrimp Pasta. Here are some helpful tips to ensure your shrimp turn out just right:

  • Use Fresh Shrimp: Fresh shrimp will have a better texture and flavor. If using frozen, make sure to thaw them completely before cooking.
  • Don’t Overcook: Shrimp cook quickly. They only need about 2-3 minutes on each side. Overcooking can make them tough and rubbery.
  • Look for Color Change: Shrimp are done when they turn pink and opaque. Keep an eye on them to avoid overcooking.
  • Season Well: Seasoning the shrimp with salt and pepper before cooking enhances their natural flavor.

Importance of Pasta Water

Pasta water is a secret ingredient that can elevate your Buttery Garlic Shrimp Pasta. Here’s why it’s so important:

  • Starchiness: The reserved pasta water contains starch, which helps thicken the sauce and bind it to the pasta.
  • Adjust Consistency: If your sauce seems too thick, adding a splash of pasta water can help achieve the perfect consistency.
  • Flavor Boost: The salty flavor of the pasta water can enhance the overall taste of your dish.

By following these tips, you’ll ensure that your Buttery Garlic Shrimp Pasta is not only delicious but also visually appealing. Now, let’s explore some serving suggestions to make your meal even more delightful!

Cooking Note for Buttery Garlic Shrimp Pasta Recipe

Tips for Perfectly Cooked Shrimp

Cooking shrimp perfectly is essential for a delightful Buttery Garlic Shrimp Pasta. Here are some helpful tips to ensure your shrimp turn out just right:

  • Use Fresh Shrimp: Fresh shrimp will have a better texture and flavor. If using frozen, make sure to thaw them completely before cooking.
  • Don’t Overcook: Shrimp cook quickly. They only need about 2-3 minutes on each side. Overcooking can make them tough and rubbery.
  • Look for Color Change: Shrimp are done when they turn pink and opaque. Keep an eye on them to avoid overcooking.
  • Season Well: Seasoning the shrimp with salt and pepper before cooking enhances their natural flavor.

Importance of Pasta Water

Pasta water is a secret ingredient that can elevate your Buttery Garlic Shrimp Pasta. Here’s why it’s so important:

  • Starchiness: The reserved pasta water contains starch, which helps thicken the sauce and bind it to the pasta.
  • Adjust Consistency: If your sauce seems too thick, adding a splash of pasta water can help achieve the perfect consistency.
  • Flavor Boost: The salty flavor of the pasta water can enhance the overall taste of your dish.

By following these tips, you’ll ensure that your Buttery Garlic Shrimp Pasta is not only delicious but also visually appealing. Now, let’s explore some serving suggestions to make your meal even more delightful!

Serving Suggestions for Buttery Garlic Shrimp Pasta Recipe

Ideal Pairings with Sides and Drinks

When it comes to serving Buttery Garlic Shrimp Pasta, the right pairings can elevate your meal to new heights. Here are some delightful side dishes and drink options that complement this dish beautifully:

  • Garlic Bread: A classic choice! The buttery, garlicky flavor of garlic bread pairs perfectly with the pasta, allowing you to soak up every bit of that delicious sauce.
  • Caesar Salad: A fresh Caesar salad adds a crisp contrast to the rich pasta. The crunchy romaine and creamy dressing balance the meal nicely.
  • Steamed Vegetables: Lightly steamed broccoli or asparagus can add a healthy touch. Their vibrant colors and textures enhance the overall presentation.
  • White Wine: A chilled glass of white wine, like Sauvignon Blanc or Pinot Grigio, complements the shrimp and garlic flavors beautifully.
  • Lemonade or Sparkling Water: For a non-alcoholic option, refreshing lemonade or sparkling water with a slice of lemon can cleanse the palate.

These pairings not only enhance the dining experience but also create a well-rounded meal that everyone will enjoy. Now, let’s talk about how to present your Buttery Garlic Shrimp Pasta for that extra wow factor!

Presentation Tips for Serving

Presentation is key when serving Buttery Garlic Shrimp Pasta. A beautifully plated dish can make your meal feel special. Here are some tips to make your pasta shine:

  • Use a Large Serving Bowl: Serve the pasta in a large, shallow bowl. This allows the vibrant colors of the shrimp and parsley to stand out.
  • Garnish Generously: Sprinkle extra chopped parsley on top for a fresh touch. A few lemon wedges on the side can add a pop of color and freshness.
  • Parmesan Cheese: If using, add a generous sprinkle of grated Parmesan cheese right before serving. It adds flavor and a nice visual appeal.
  • Drizzle Olive Oil: A light drizzle of high-quality olive oil over the top can enhance the dish’s richness and shine.
  • Serve Immediately: Serve the pasta right after cooking to ensure it’s warm and inviting. This will also keep the shrimp tender and juicy.

With these serving suggestions and presentation tips, your Buttery Garlic Shrimp Pasta will not only taste amazing but also look stunning on the table. Now, let’s move on to some helpful tips for making the best version of this delightful dish!

Tips for Making the Best Buttery Garlic Shrimp Pasta Recipe

Common Mistakes to Avoid

When preparing Buttery Garlic Shrimp Pasta, avoiding common mistakes can make a big difference in the final dish. Here are some pitfalls to watch out for:

  • Overcooking the Shrimp: Shrimp cook quickly. If you leave them in the skillet too long, they can become tough and rubbery. Aim for that perfect pink color!
  • Not Reserving Pasta Water: Forgetting to save some pasta water can lead to a dry sauce. This starchy water is key to achieving the right consistency.
  • Burning the Garlic: Garlic can go from fragrant to burnt in seconds. Keep an eye on it while sautéing to avoid a bitter taste.
  • Skipping Seasoning: Don’t forget to season your shrimp and pasta. A little salt and pepper can enhance the flavors significantly.
  • Using Cold Ingredients: If you use cold shrimp straight from the fridge, they may not cook evenly. Let them sit at room temperature for a few minutes before cooking.

By being mindful of these common mistakes, you can ensure that your Buttery Garlic Shrimp Pasta turns out delicious every time!

Storage Tips for Leftovers

If you find yourself with leftover Buttery Garlic Shrimp Pasta, don’t worry! Here are some tips to store and reheat it properly:

  • Cool Down: Allow the pasta to cool to room temperature before storing. This helps prevent condensation and sogginess.
  • Use Airtight Containers: Store leftovers in airtight containers to keep them fresh. This will help maintain the flavors and prevent drying out.
  • Refrigerate: Leftover pasta can be stored in the refrigerator for up to 2 days. Make sure to consume it within this time frame for the best taste.
  • Reheat Gently: When reheating, do so gently on the stove or in the microwave. Add a splash of chicken broth or reserved pasta water to keep it moist.
  • Avoid Freezing: While you can freeze pasta, the texture of shrimp may suffer. It’s best to enjoy this dish fresh!

With these storage tips, you can enjoy your Buttery Garlic Shrimp Pasta even after the initial meal. Now, let’s move on to the breakdown of time for this delightful recipe!

Breakdown of Time for Buttery Garlic Shrimp Pasta Recipe

Prep Time

Getting everything ready for your Buttery Garlic Shrimp Pasta is a breeze! The prep time usually takes about 10 to 15 minutes. During this time, you’ll gather all your ingredients, peel and devein the shrimp if needed, and chop the garlic and parsley. Having everything prepped in advance makes the cooking process smooth and enjoyable. Plus, it helps you stay organized in the kitchen!

Cooking Time

The cooking time for this delicious dish is relatively quick, taking around 15 to 20 minutes. First, you’ll boil the pasta, which takes about 8 to 10 minutes. While the pasta cooks, you can sauté the garlic and shrimp simultaneously. This multitasking not only saves time but also ensures that everything is hot and ready to serve together. The final steps of combining the ingredients and letting the sauce simmer will take an additional 5 to 7 minutes.

Total Time

In total, you can expect to spend about 25 to 35 minutes from start to finish. This includes both prep and cooking time. It’s a fantastic option for a weeknight dinner or a last-minute gathering with friends. With such a quick turnaround, you can enjoy a flavorful and satisfying meal without spending hours in the kitchen. So, gather your ingredients and get ready to whip up this delightful Buttery Garlic Shrimp Pasta!

Nutritional Information for Buttery Garlic Shrimp Pasta Recipe

Calories and Macronutrients

Understanding the nutritional content of your meals is essential for maintaining a balanced diet. The Buttery Garlic Shrimp Pasta is not only delicious but also provides a good mix of macronutrients. Here’s a breakdown of the nutritional information per serving:

  • Calories: 450
  • Net Carbs: 45g
  • Protein: 30g
  • Fat: 15g

This dish offers a satisfying amount of protein from the shrimp, making it a great option for those looking to build muscle or maintain energy levels. The carbohydrates from the pasta provide a quick source of energy, while the healthy fats from the butter contribute to a rich flavor and help keep you feeling full.

Health Benefits of Shrimp and Pasta

Both shrimp and pasta come with their own set of health benefits, making this dish a nutritious choice. Here are some key benefits:

  • Shrimp: Shrimp is low in calories and high in protein, making it an excellent choice for weight management. It’s also rich in essential nutrients like selenium, vitamin B12, and iodine, which support overall health.
  • Pasta: Whole grain or whole wheat pasta options provide dietary fiber, which aids digestion and helps maintain a healthy gut. Fiber also keeps you feeling full longer, which can help with weight control.
  • Garlic: Garlic is known for its health benefits, including boosting the immune system and reducing blood pressure. It also has anti-inflammatory properties that can contribute to overall wellness.
  • Lemon Juice: The addition of fresh lemon juice not only enhances flavor but also provides vitamin C, which is vital for a healthy immune system and skin.

By enjoying Buttery Garlic Shrimp Pasta, you’re not just treating your taste buds; you’re also nourishing your body with wholesome ingredients. This dish is a perfect example of how delicious food can also be good for you!

FAQs about Buttery Garlic Shrimp Pasta Recipe

Can I use frozen shrimp for this recipe?

Absolutely! You can use frozen shrimp for your Buttery Garlic Shrimp Pasta. Just make sure to thaw them completely before cooking. The best way to do this is to place them in the refrigerator overnight or run them under cold water for a quick thaw. Once thawed, they will cook just as well as fresh shrimp, providing you with a delicious meal.

What type of pasta works best for this dish?

For Buttery Garlic Shrimp Pasta, both spaghetti and linguine are excellent choices. These pasta types hold the sauce well and complement the shrimp beautifully. However, you can also experiment with other pasta shapes like fettuccine or penne if you prefer. Just remember to adjust the cooking time according to the pasta type you choose!

How can I make this recipe gluten-free?

If you want to make Buttery Garlic Shrimp Pasta gluten-free, simply substitute regular pasta with gluten-free pasta. There are many options available, such as rice pasta or quinoa pasta, that work well in this recipe. Just follow the cooking instructions on the package to ensure the pasta is cooked perfectly. Enjoy your gluten-free version without missing out on flavor!

Can I prepare the sauce in advance?

Yes, you can prepare the sauce in advance! To do this, follow the steps for sautéing the garlic and cooking the shrimp, then add the chicken broth and lemon juice. Allow the sauce to cool, then store it in an airtight container in the refrigerator for up to 2 days. When you’re ready to serve, simply reheat the sauce in a skillet, add the cooked pasta, and toss everything together. This makes for a quick and easy meal on busy nights!

Conclusion on Buttery Garlic Shrimp Pasta Recipe

Recap of Key Points

In summary, Buttery Garlic Shrimp Pasta is a delightful dish that combines the rich flavors of garlic and butter with tender shrimp and perfectly cooked pasta. We explored the essential ingredients needed to create this dish, including shrimp, garlic, and fresh parsley. The step-by-step preparation guide ensures that even novice cooks can whip up this meal with ease.

We also discussed variations to enhance the dish, such as adding vegetables for a healthier twist or spicing it up for those who enjoy a kick. Additionally, we highlighted the importance of cooking shrimp perfectly and the role of pasta water in achieving the ideal sauce consistency. With serving suggestions and tips for making the best version of this dish, you’re well-equipped to impress your family and friends.

Encouragement to Try the Recipe

Now that you have all the information, it’s time to put on your apron and give this Buttery Garlic Shrimp Pasta a try! Whether it’s a weeknight dinner or a special occasion, this recipe is sure to please. The combination of flavors and textures will leave everyone at the table wanting more.

Don’t hesitate to experiment with the ingredients and make it your own. Cooking is all about creativity and enjoying the process. So gather your ingredients, follow the steps, and savor the deliciousness of your homemade Buttery Garlic Shrimp Pasta. Happy cooking!

Apple Pie Cheesecake Bars Recipe is a must-try dessert!

Introduction to Apple Pie Cheesecake Bars Recipe

What Makes Apple Pie Cheesecake Bars Unique?

Apple Pie Cheesecake Bars are a delightful twist on two classic desserts. They combine the creamy richness of cheesecake with the warm, spiced flavors of apple pie. This unique blend creates a dessert that is both comforting and indulgent. The graham cracker crust adds a crunchy texture, while the creamy filling and sweet apple topping make each bite a heavenly experience. Plus, they are easy to cut into bars, making them perfect for sharing at gatherings or enjoying at home.

The Perfect Dessert for Any Occasion

Whether it’s a holiday celebration, a family gathering, or just a cozy night in, Apple Pie Cheesecake Bars are the perfect dessert. They are versatile enough to suit any occasion. You can serve them warm with a scoop of vanilla ice cream or chilled with a drizzle of caramel sauce. Their beautiful layers and inviting aroma will impress your guests and make any event feel special. Plus, they are simple to make, so you can whip them up without much fuss. Everyone will love these bars, and they are sure to become a favorite in your dessert repertoire!

Ingredients for Apple Pie Cheesecake Bars Recipe

Essential Ingredients

To create the delicious Apple Pie Cheesecake Bars, you’ll need a few essential ingredients. These ingredients work together to form the crust, filling, and apple topping. Here’s what you’ll need:

  • 2 cups graham cracker crumbs: This forms the base of your bars, giving them a crunchy texture.
  • 1/2 cup unsalted butter, melted: This helps bind the crumbs together for a sturdy crust.
  • 1/4 cup granulated sugar: Adds sweetness to the crust.
  • 2 (8-ounce) packages cream cheese, softened: The star of the cheesecake filling, providing a creamy texture.
  • 1 cup granulated sugar: Sweetens the cheesecake filling.
  • 1 teaspoon vanilla extract: Enhances the flavor of the cheesecake.
  • 2 large eggs: These help set the filling as it bakes.
  • 1 teaspoon ground cinnamon: Adds warmth and spice to the filling.
  • 2 cups apples, peeled, cored, and diced: Fresh apples are essential for that classic apple pie flavor.
  • 1 tablespoon lemon juice: Prevents the apples from browning and adds a hint of tartness.
  • 1/4 cup brown sugar: Provides a deeper sweetness to the apple mixture.
  • 1/4 teaspoon nutmeg: Complements the cinnamon and enhances the apple flavor.

Optional Ingredients for Extra Flavor

While the essential ingredients create a fantastic dessert, you can elevate your Apple Pie Cheesecake Bars with a few optional ingredients. Here are some ideas:

  • 1/4 cup caramel sauce: Drizzle this on top for a sweet finish.
  • Chopped nuts (like pecans or walnuts): Add these to the apple mixture for a delightful crunch.
  • A pinch of ginger or allspice: These spices can add a warm, spicy kick to the apple filling.
  • Gluten-free graham crackers: Substitute these for a gluten-free crust option.

These optional ingredients allow you to customize your bars to suit your taste. Feel free to experiment and make this recipe your own!

Step-by-Step Preparation of Apple Pie Cheesecake Bars Recipe

Step 1: Preparing the Crust

To start, gather your ingredients for the crust. In a medium bowl, combine the graham cracker crumbs, melted butter, and 1/4 cup of granulated sugar. Mix these ingredients well until they form a crumbly texture. Next, press this mixture evenly into the bottom of a greased 9×13-inch baking dish. Make sure to pack it down firmly to create a solid base. Bake the crust in a preheated oven at 325°F for about 10 minutes. Once done, remove it from the oven and let it cool slightly while you prepare the filling.

Step 2: Making the Cheesecake Filling

Now, let’s move on to the cheesecake filling. In a large mixing bowl, beat the softened cream cheese with 1 cup of granulated sugar and the vanilla extract. Use an electric mixer for a smooth and creamy consistency. Add the eggs one at a time, mixing well after each addition. This step is crucial for a fluffy filling. Once everything is well combined, pour the cream cheese mixture over the cooled crust. Spread it evenly to ensure every bite is delicious!

Step 3: Preparing the Apple Filling

Next, it’s time to prepare the apple filling. In another bowl, toss the diced apples with lemon juice, brown sugar, 1 teaspoon of cinnamon, and nutmeg. Make sure the apples are well coated with the mixture. This will enhance their flavor and keep them from browning. Once mixed, set the apple filling aside for a moment while you get ready to assemble the bars.

Step 4: Assembling the Bars

With the crust and fillings ready, it’s time to assemble your Apple Pie Cheesecake Bars. Start by spooning the apple mixture over the cream cheese layer. Spread it evenly across the top, ensuring that every piece of cheesecake is covered with those delicious apples. This layering is what makes these bars so special, combining the creamy and fruity elements beautifully.

Step 5: Baking the Apple Pie Cheesecake Bars

Finally, it’s time to bake your masterpiece! Place the assembled bars in the oven and bake for 35-40 minutes. You’ll know they’re done when the center is set and the edges are lightly golden. Once baked, remove the dish from the oven and let it cool completely at room temperature. After cooling, refrigerate the bars for at least 2 hours before cutting them into squares. This chilling time helps the flavors meld together and makes cutting easier. Enjoy your delicious Apple Pie Cheesecake Bars!

Variation of Apple Pie Cheesecake Bars Recipe

Gluten-Free Options

If you or your guests are following a gluten-free diet, you can still enjoy these delicious Apple Pie Cheesecake Bars. Simply substitute the regular graham cracker crumbs with gluten-free graham crackers. Many brands offer gluten-free options that taste just as good as the original. Additionally, ensure that all other ingredients, like the cream cheese and sugar, are gluten-free. This way, you can create a dessert that everyone can enjoy without compromising on flavor or texture!

Vegan Alternatives

For those who prefer a vegan version of the Apple Pie Cheesecake Bars, there are several substitutions you can make. Start by replacing the cream cheese with a vegan cream cheese alternative. You can also use flax eggs instead of regular eggs; simply mix 1 tablespoon of ground flaxseed with 2.5 tablespoons of water for each egg. For the crust, use vegan butter instead of regular butter. Lastly, ensure that your sugar is vegan-friendly, as some sugars are processed with bone char. With these adjustments, you can create a delightful vegan dessert that everyone will love!

Cooking Note for Apple Pie Cheesecake Bars Recipe

Tips for Perfect Baking

To ensure your Apple Pie Cheesecake Bars turn out perfectly, follow these helpful tips. First, always preheat your oven to the correct temperature. This step is crucial for even baking. Next, make sure your cream cheese is softened before mixing. This will help achieve a smooth and creamy filling. If you forget to take it out in advance, you can microwave it for about 15 seconds to soften it quickly.

When preparing the crust, pack the graham cracker mixture firmly into the baking dish. This will create a sturdy base that holds the bars together. Additionally, keep an eye on the baking time. Ovens can vary, so check your bars a few minutes before the suggested time. They should be set in the center and lightly golden around the edges.

Lastly, allow the bars to cool completely at room temperature before refrigerating. This helps the flavors meld together beautifully. Once chilled, they will be easier to cut into neat squares. Enjoy the process, and remember that practice makes perfect!

Common Mistakes to Avoid

While making Apple Pie Cheesecake Bars is straightforward, there are a few common mistakes to watch out for. One mistake is not measuring ingredients accurately. Baking is a science, so precise measurements are essential for the best results. Use measuring cups and spoons for accuracy.

Another common error is overmixing the cheesecake filling. Mixing too much can incorporate too much air, leading to cracks in the surface as it bakes. Mix just until combined for a smooth texture. Also, avoid skipping the chilling step after baking. This time allows the bars to set properly, making them easier to cut and enhancing the flavors.

Lastly, don’t forget to adjust your baking time if you’re using a different size baking dish. A larger dish may require less time, while a smaller one may need more. By avoiding these mistakes, you’ll create delicious Apple Pie Cheesecake Bars that everyone will love!

Serving Suggestions for Apple Pie Cheesecake Bars Recipe

Ideal Pairings with Beverages

When it comes to serving your Apple Pie Cheesecake Bars, choosing the right beverage can enhance the experience. Here are some delightful pairings:

  • Hot Apple Cider: This warm drink complements the apple flavors beautifully. The spices in the cider will echo the cinnamon and nutmeg in the bars.
  • Vanilla Ice Cream: A scoop of creamy vanilla ice cream adds a rich contrast to the bars. The cold ice cream melts slightly on the warm bars, creating a delicious combination.
  • Chai Tea: The spiced notes of chai tea pair wonderfully with the flavors of the cheesecake bars. It’s a cozy option for a chilly day.
  • Coffee: A cup of freshly brewed coffee balances the sweetness of the bars. The bitterness of the coffee enhances the dessert’s flavors.

These beverages not only complement the dessert but also create a warm and inviting atmosphere for your guests.

Presentation Ideas

Presentation is key when serving your Apple Pie Cheesecake Bars. Here are some creative ideas to make your dessert stand out:

  • Drizzle with Caramel: Before serving, drizzle caramel sauce over the bars for an elegant touch. This adds a beautiful visual element and extra sweetness.
  • Garnish with Whipped Cream: A dollop of whipped cream on top of each bar adds a light and airy texture. You can also sprinkle a bit of cinnamon on the cream for added flair.
  • Use a Decorative Platter: Arrange the bars on a decorative platter or cake stand. This elevates the presentation and makes it more inviting.
  • Add Fresh Apple Slices: Place a few thin apple slices around the bars for a fresh touch. This not only looks appealing but also ties in the apple theme.

With these serving suggestions, your Apple Pie Cheesecake Bars will not only taste amazing but also look stunning on any table. Enjoy sharing this delightful dessert with family and friends!

Tips for Making the Best Apple Pie Cheesecake Bars Recipe

Ingredient Substitutions

Making the perfect Apple Pie Cheesecake Bars can be even easier with a few ingredient substitutions. If you find yourself missing an item, don’t worry! Here are some great alternatives:

  • For Cream Cheese: If you want a lighter option, consider using Greek yogurt. It will give a similar creamy texture with less fat.
  • For Sugar: You can use coconut sugar or honey as a natural sweetener. Just remember that honey is sweeter, so you may need less.
  • For Eggs: If you’re looking for an egg substitute, use unsweetened applesauce. One-fourth cup of applesauce replaces one egg and adds moisture.
  • For Butter: If you want a dairy-free option, use coconut oil or a vegan butter substitute. Both will work well in the crust.
  • For Apples: If you don’t have fresh apples, canned apple pie filling can be a quick alternative. Just make sure to drain it well before using.

These substitutions can help you adapt the recipe to your dietary needs or what you have on hand. Feel free to experiment and find what works best for you!

Storage Tips for Leftovers

After enjoying your delicious Apple Pie Cheesecake Bars, you might have some leftovers. Here’s how to store them properly:

  • Refrigeration: Store the bars in an airtight container in the refrigerator. They will stay fresh for up to five days. Make sure to separate layers with parchment paper to prevent sticking.
  • Freezing: If you want to keep them longer, you can freeze the bars. Wrap each piece tightly in plastic wrap and then place them in a freezer-safe container. They can last up to three months in the freezer.
  • Thawing: When you’re ready to enjoy the frozen bars, simply transfer them to the refrigerator for a few hours or overnight to thaw. You can also let them sit at room temperature for about 30 minutes before serving.

By following these storage tips, you can enjoy your Apple Pie Cheesecake Bars even after the initial baking day. They make for a delightful treat anytime!

Breakdown of Time for Apple Pie Cheesecake Bars Recipe

Prep Time

Preparing your Apple Pie Cheesecake Bars is a breeze! The prep time for this recipe is approximately 20-25 minutes. This includes gathering your ingredients, mixing the crust, making the cheesecake filling, and preparing the apple topping. With a little organization, you can have everything ready to go in no time!

Cooking Time

Once your bars are assembled, the cooking time is about 35-40 minutes. During this time, the cheesecake filling will set, and the edges will turn a lovely golden brown. Keep an eye on them as they bake to ensure they don’t overcook. You want that perfect balance of creamy and firm!

Total Time

In total, you can expect to spend around 1 hour to 1 hour and 5 minutes from start to finish. This includes both prep and cooking time. However, remember to factor in the chilling time after baking. It’s best to let your bars cool completely and then refrigerate them for at least 2 hours before serving. This extra time allows the flavors to meld beautifully and makes cutting the bars easier. So, while the active time is short, the wait will be well worth it!

Nutritional Information for Apple Pie Cheesecake Bars Recipe

Calories and Macronutrients

Understanding the nutritional content of your Apple Pie Cheesecake Bars can help you enjoy them mindfully. Each serving, which is one bar, contains approximately 290 calories. Here’s a breakdown of the macronutrients:

  • Net Carbs: 30g
  • Protein: 4g
  • Fat: 16g

This combination of macronutrients makes these bars a satisfying treat. The balance of carbohydrates from the crust and apples, protein from the cream cheese, and healthy fats from the butter creates a well-rounded dessert. Enjoying these bars in moderation can fit nicely into a balanced diet!

Health Benefits of Ingredients

While Apple Pie Cheesecake Bars are a delicious indulgence, they also offer some health benefits thanks to their wholesome ingredients. Here are a few highlights:

  • Apples: Rich in fiber and vitamin C, apples support digestive health and boost the immune system. They also contain antioxidants that can help reduce inflammation.
  • Cinnamon: This spice is known for its anti-inflammatory properties and can help regulate blood sugar levels. It adds a warm flavor that enhances the overall taste of the bars.
  • Cream Cheese: While it’s a source of fat, cream cheese also provides calcium, which is essential for strong bones and teeth. Opting for lower-fat cream cheese can reduce calorie intake while still enjoying the creamy texture.
  • Graham Crackers: Made from whole grains, graham crackers can provide some fiber and essential nutrients. Choosing whole-grain options can enhance the nutritional value of the crust.

By incorporating these ingredients, your Apple Pie Cheesecake Bars not only satisfy your sweet tooth but also offer some nutritional benefits. Enjoy them as part of a balanced diet, and feel good about treating yourself!

FAQs about Apple Pie Cheesecake Bars Recipe

Can I make Apple Pie Cheesecake Bars ahead of time?

Absolutely! Making Apple Pie Cheesecake Bars ahead of time is a great idea. You can prepare them a day or two in advance. Just follow the recipe as usual, and once they are baked and cooled, store them in the refrigerator. This allows the flavors to meld beautifully. When you’re ready to serve, simply cut them into bars and enjoy. They’ll taste just as delicious, if not better, after a little time in the fridge!

How do I store leftover Apple Pie Cheesecake Bars?

Storing leftover Apple Pie Cheesecake Bars is easy! Place the bars in an airtight container and keep them in the refrigerator. They will stay fresh for up to five days. If you want to keep them longer, you can freeze them. Just wrap each bar tightly in plastic wrap and then place them in a freezer-safe container. This way, you can enjoy them later without losing their delicious flavor and texture!

Can I freeze Apple Pie Cheesecake Bars?

Yes, you can freeze Apple Pie Cheesecake Bars! Freezing is a great option if you want to save some for later. After baking and cooling, wrap each bar in plastic wrap and place them in a freezer-safe container. They can last up to three months in the freezer. When you’re ready to enjoy them, simply thaw them in the refrigerator overnight or let them sit at room temperature for about 30 minutes. They’ll taste just as good as when they were freshly made!

Conclusion on Apple Pie Cheesecake Bars Recipe

Final Thoughts and Encouragement to Try the Recipe

In conclusion, the Apple Pie Cheesecake Bars recipe is a delightful fusion of flavors that brings together the best of both worlds. With its creamy cheesecake filling, spiced apple topping, and crunchy graham cracker crust, this dessert is sure to impress anyone who takes a bite. Whether you’re hosting a gathering or simply treating yourself, these bars are a fantastic choice.

We encourage you to give this recipe a try! The step-by-step instructions make it easy for bakers of all skill levels. Plus, the optional ingredients allow you to customize the bars to your liking. Don’t hesitate to experiment with flavors and toppings to make this dessert truly your own.

Remember, baking is not just about following a recipe; it’s about enjoying the process and sharing delicious treats with loved ones. So gather your ingredients, preheat that oven, and get ready to create something wonderful. Your Apple Pie Cheesecake Bars will not only satisfy your sweet tooth but also create lasting memories with every bite. Happy baking!

No-Bake Nutella Cheesecake Recipe is a must-try!

Introduction to No-Bake Nutella Cheesecake Recipe

If you’re looking for a dessert that’s both indulgent and easy to make, then the No-Bake Nutella Cheesecake Recipe is just for you! This delightful treat combines the rich, creamy texture of cheesecake with the irresistible flavor of Nutella. Plus, it requires no baking, making it a perfect choice for those warm days when you want something sweet without heating up the kitchen.

Imagine a smooth, velvety cheesecake filling resting on a crunchy biscuit crust, all topped with a sprinkle of hazelnuts or cocoa powder. It’s a dessert that not only looks stunning but also tastes heavenly. Whether you’re hosting a party, celebrating a special occasion, or simply treating yourself, this cheesecake is sure to impress.

What Makes No-Bake Nutella Cheesecake Special?

What sets this cheesecake apart is its simplicity and the use of Nutella, which adds a unique twist. Unlike traditional cheesecakes that require baking, this no-bake version is quick to prepare. You can whip it up in no time and let it chill while you relax. The combination of cream cheese and Nutella creates a luscious filling that melts in your mouth.

Moreover, the versatility of this recipe allows for various adaptations. You can easily customize it with different flavors or toppings to suit your taste. Whether you prefer a nutty crunch or a fruity layer, the possibilities are endless. This makes the No-Bake Nutella Cheesecake not just a dessert, but a canvas for your creativity!

So, gather your ingredients and get ready to create a dessert that will leave everyone asking for seconds. Let’s dive into the ingredients you’ll need for this delightful treat!

Ingredients for No-Bake Nutella Cheesecake Recipe

To create this scrumptious No-Bake Nutella Cheesecake, you’ll need a few simple ingredients. Each one plays a vital role in achieving that creamy texture and rich flavor. Here’s what you’ll need:

  • 1 ½ cups crushed digestive biscuits: These form the base of your cheesecake, providing a crunchy texture.
  • ½ cup melted coconut oil: This helps bind the biscuit crumbs together, creating a solid crust.
  • 1 (8 oz) block of cream cheese, softened: Cream cheese gives the cheesecake its creamy and rich consistency.
  • 1 cup Nutella: The star ingredient! Nutella adds a delicious chocolate-hazelnut flavor.
  • 1 cup icing sugar: This sweetens the cheesecake and balances the flavors.
  • 1 teaspoon almond extract: A hint of almond enhances the overall taste.
  • 1 cup chilled heavy cream: Whipped cream adds lightness and fluffiness to the filling.
  • Chopped hazelnuts or cocoa powder for decoration (optional): These toppings add a lovely finishing touch and extra flavor.

With these ingredients on hand, you’re all set to create a delightful dessert that everyone will love. The combination of flavors and textures will surely make this cheesecake a favorite at any gathering. Now, let’s move on to the step-by-step preparation of this delicious No-Bake Nutella Cheesecake!

Step-by-Step Preparation of No-Bake Nutella Cheesecake Recipe

Now that you have all your ingredients ready, it’s time to dive into the fun part: preparing your No-Bake Nutella Cheesecake! Follow these simple steps to create a dessert that will wow your friends and family.

Step 1: Prepare the Crust

Start by making the crust, which is the foundation of your cheesecake. In a mixing bowl, combine the crushed digestive biscuits with the melted coconut oil. Stir the mixture until it resembles damp sand. This texture is important for a sturdy crust.

Next, take a 9-inch springform pan and firmly press the biscuit mixture into the bottom. Make sure it’s even and compact. This will help the crust hold together when you slice the cheesecake. Once you’ve pressed it down, place the pan in the refrigerator for about 15 minutes. This will allow the crust to firm up nicely.

Step 2: Make the Cheesecake Filling

While the crust is chilling, it’s time to prepare the cheesecake filling. In a separate bowl, use an electric mixer to blend the softened cream cheese until it’s creamy and smooth. This step is crucial for achieving that velvety texture.

Once the cream cheese is smooth, add in the Nutella, icing sugar, and almond extract. Mix everything together until it’s well combined and silky. The Nutella will give the filling its rich chocolate-hazelnut flavor, while the icing sugar adds the perfect sweetness.

Step 3: Combine and Layer

Now, let’s add some lightness to the filling! In another bowl, whip the chilled heavy cream until it forms stiff peaks. This means that when you lift the whisk, the cream should hold its shape. Carefully fold the whipped cream into the Nutella mixture. Be gentle to avoid deflating the whipped cream. You want to keep that airy texture!

Once combined, pour the luscious Nutella cheesecake filling over the prepared crust. Use a spatula to spread it out evenly. This will create a beautiful layer of creamy goodness on top of your crust.

Step 4: Chill the Cheesecake

To let the flavors meld and the cheesecake set, cover the pan with plastic wrap. Place it in the refrigerator for a minimum of 4 hours. For the best results, let it chill overnight. This will ensure that your cheesecake is firm and ready to slice when you’re ready to serve.

After chilling, your No-Bake Nutella Cheesecake will be ready to impress! Just remember to sprinkle some chopped hazelnuts or a dusting of cocoa powder on top for that extra touch of elegance before serving.

Variation of No-Bake Nutella Cheesecake Recipe

While the classic No-Bake Nutella Cheesecake is a delightful treat on its own, there are many ways to switch things up! You can easily customize this recipe to suit your taste or to impress your guests with unique flavors. Here are some alternative flavors and add-ins to consider:

Alternative Flavors and Add-Ins

  • Peanut Butter Swirl: For a nutty twist, add ½ cup of creamy peanut butter to the cheesecake filling. Swirl it in before chilling for a beautiful marbled effect.
  • Fruit Infusion: Incorporate fresh fruit like strawberries or raspberries into the filling. You can blend them into the cheesecake or layer them on top for a fruity burst.
  • Mint Chocolate: Add a few drops of peppermint extract to the filling for a refreshing minty flavor. This pairs wonderfully with the chocolate-hazelnut taste of Nutella.
  • Cookie Crumble: Mix in crushed cookies, like Oreos or chocolate wafers, into the cheesecake filling for added texture and flavor. You can also sprinkle them on top for decoration.
  • Caramel Drizzle: Drizzle caramel sauce over the top of the cheesecake before serving. This adds a sweet and gooey layer that complements the Nutella perfectly.
  • Chocolate Hazelnut Layer: For an extra chocolatey experience, layer some melted chocolate hazelnut spread between the crust and the cheesecake filling.

These variations not only enhance the flavor but also make your No-Bake Nutella Cheesecake a versatile dessert. Feel free to mix and match these ideas to create your own signature version. The possibilities are endless, and your creativity will surely shine through!

Cooking Note for No-Bake Nutella Cheesecake Recipe

When preparing your No-Bake Nutella Cheesecake, there are a few important cooking notes to keep in mind. These tips will help ensure that your cheesecake turns out perfectly every time, making it a delightful treat for any occasion.

First, make sure your cream cheese is at room temperature. This will make it easier to blend smoothly with the other ingredients. If it’s too cold, you may end up with lumps in your filling, which can affect the texture of your cheesecake.

Next, when whipping the heavy cream, be careful not to over-whip it. You want to achieve stiff peaks, but if you whip it too much, it can turn grainy and separate. Keep an eye on it, and stop whipping as soon as you see those peaks forming.

Additionally, chilling the cheesecake is crucial. The longer you let it chill, the better the flavors will meld together. If you can, aim for an overnight chill. This will give your cheesecake a firmer texture, making it easier to slice and serve.

Lastly, when it comes to serving, use a hot knife to cut through the cheesecake. Simply dip your knife in hot water, wipe it dry, and then slice. This will help you achieve clean, beautiful slices without disturbing the layers.

By following these cooking notes, you’ll be well on your way to creating a stunning No-Bake Nutella Cheesecake that will impress your family and friends. Enjoy the process, and don’t forget to have fun while making this delicious dessert!

Serving Suggestions for No-Bake Nutella Cheesecake Recipe

Once your No-Bake Nutella Cheesecake is perfectly chilled and ready to serve, it’s time to think about how to present this delightful dessert. A beautiful presentation can elevate the experience and make your cheesecake even more appealing. Here are some ideal pairings and presentation tips to consider:

Ideal Pairings and Presentation Tips

  • Fresh Berries: Serve your cheesecake with a side of fresh berries, like strawberries, raspberries, or blueberries. Their tartness complements the sweetness of the cheesecake beautifully.
  • Whipped Cream: A dollop of freshly whipped cream on top adds a light and airy touch. You can even flavor the whipped cream with a hint of vanilla or cocoa powder for extra flair.
  • Chocolate Shavings: For a touch of elegance, sprinkle some chocolate shavings over the top. This adds a decorative element and enhances the chocolate flavor.
  • Caramel Sauce: Drizzle caramel sauce over the cheesecake just before serving. The sweet, gooey caramel pairs wonderfully with the Nutella and adds a rich layer of flavor.
  • Hazelnut Garnish: If you love hazelnuts, consider topping your cheesecake with chopped hazelnuts. This adds a delightful crunch and enhances the nutty flavor of Nutella.
  • Mint Leaves: For a pop of color, garnish with fresh mint leaves. They not only look beautiful but also add a refreshing taste that balances the richness of the cheesecake.

When it comes to presentation, consider using a cake stand or a decorative platter to showcase your cheesecake. You can also slice it into individual portions and place them on dessert plates for a more formal setting. Don’t forget to serve with forks and napkins for a complete dessert experience!

With these serving suggestions, your No-Bake Nutella Cheesecake will not only taste amazing but also look stunning on the table. Enjoy sharing this delightful treat with your loved ones, and watch as they savor every bite!

Tips for Perfecting Your No-Bake Nutella Cheesecake Recipe

Creating the perfect No-Bake Nutella Cheesecake is all about attention to detail. With a few helpful tips, you can ensure that your cheesecake turns out delicious and visually appealing every time. Here are some essential tips to keep in mind:

  • Use Quality Ingredients: The flavor of your cheesecake largely depends on the quality of the ingredients. Opt for high-quality Nutella and fresh cream cheese for the best taste.
  • Room Temperature Ingredients: Make sure your cream cheese is at room temperature before mixing. This helps achieve a smooth and creamy filling without lumps.
  • Don’t Rush the Chilling Process: Allow your cheesecake to chill for at least 4 hours, but overnight is best. This ensures it sets properly and enhances the flavors.
  • Whip Cream Carefully: When whipping the heavy cream, stop as soon as you see stiff peaks. Over-whipping can lead to a grainy texture, which you want to avoid.
  • Layering Techniques: If you’re adding layers or toppings, do so gently. This keeps the cheesecake light and airy while maintaining its beautiful appearance.
  • Hot Knife for Slicing: To achieve clean slices, use a hot knife. Dip it in hot water, wipe it dry, and then cut through the cheesecake. This prevents the layers from mixing.
  • Experiment with Flavors: Don’t hesitate to try different flavors or add-ins. Whether it’s a fruit layer or a nutty swirl, experimenting can lead to delightful surprises!
  • Presentation Matters: Take time to present your cheesecake beautifully. Use garnishes like fresh berries, whipped cream, or chocolate shavings to make it visually appealing.

By following these tips, you’ll be well on your way to mastering the art of making a No-Bake Nutella Cheesecake. Each step contributes to the overall success of your dessert, ensuring that it’s not only delicious but also a feast for the eyes. Enjoy the process and the delightful results!

Breakdown of Time for No-Bake Nutella Cheesecake Recipe

Understanding the time required for each step of the No-Bake Nutella Cheesecake Recipe is essential for planning your dessert preparation. Here’s a detailed breakdown of the time you’ll need to create this delicious treat.

Prep Time

The prep time for this No-Bake Nutella Cheesecake is approximately 30 minutes. This includes gathering your ingredients, preparing the crust, and mixing the cheesecake filling. It’s a straightforward process, and you’ll find that it goes quickly, especially with everything ready to go!

Cooking Time

Since this is a no-bake recipe, there’s no actual cooking time involved. However, you will need to allow time for the cheesecake to chill in the refrigerator. This chilling time is crucial for the cheesecake to set properly and develop its flavors.

Total Time

In total, you should plan for at least 4 hours for the cheesecake to chill. Ideally, letting it sit overnight will yield the best results. So, while the active preparation takes only about 30 minutes, the total time from start to finish can be around 4 to 12 hours, depending on how long you choose to chill it.

By keeping this time breakdown in mind, you can easily fit the preparation of your No-Bake Nutella Cheesecake into your schedule. Whether you’re making it for a special occasion or just a sweet treat for yourself, knowing the timing will help you enjoy the process even more!

Nutritional Information for No-Bake Nutella Cheesecake Recipe

Understanding the nutritional information of your No-Bake Nutella Cheesecake is essential, especially if you’re mindful of your dietary choices. This delicious dessert is not only a treat for your taste buds but also provides some nutritional value. Here’s a breakdown of the key nutritional components per serving:

Calories

Each slice of this delightful cheesecake contains approximately 350 calories. While this may seem high for a dessert, it’s important to remember that it’s made with quality ingredients like cream cheese and Nutella, which contribute to its rich flavor and creamy texture. Enjoying a slice in moderation can be a satisfying way to indulge your sweet tooth!

Protein

In terms of protein, each serving offers about 5 grams. The cream cheese and heavy cream provide a good source of protein, which is essential for muscle repair and overall health. While this dessert isn’t a primary source of protein, it does contribute to your daily intake when enjoyed as part of a balanced diet.

Sodium

When it comes to sodium, the No-Bake Nutella Cheesecake contains approximately 200 mg per slice. This amount is relatively moderate, especially for a dessert. However, if you’re watching your sodium intake, it’s always a good idea to be mindful of portion sizes and enjoy this cheesecake as an occasional treat.

Overall, the No-Bake Nutella Cheesecake is a delicious dessert that can fit into a balanced diet. By being aware of its nutritional content, you can enjoy this sweet indulgence while still making informed choices about your health. Now that you know the nutritional information, let’s move on to some frequently asked questions about this delightful recipe!

FAQs about No-Bake Nutella Cheesecake Recipe

Can I use a different type of chocolate spread?

Absolutely! While Nutella is a favorite for its unique chocolate-hazelnut flavor, you can experiment with other chocolate spreads. Brands like Hershey’s or any generic chocolate spread can work well. Just keep in mind that the taste and texture may vary slightly. If you choose a spread that’s less sweet, you might want to adjust the icing sugar accordingly to maintain the right balance of flavors.

How long can I store the cheesecake?

Your No-Bake Nutella Cheesecake can be stored in the refrigerator for up to 5 days. Make sure to cover it tightly with plastic wrap or place it in an airtight container. This will help keep it fresh and prevent it from absorbing any odors from the fridge. If you notice any changes in texture or smell, it’s best to discard it.

Can I freeze No-Bake Nutella Cheesecake?

Yes, you can freeze your No-Bake Nutella Cheesecake! To do this, wrap it tightly in plastic wrap and then in aluminum foil to prevent freezer burn. It can be stored in the freezer for up to 2 months. When you’re ready to enjoy it, simply transfer it to the refrigerator to thaw overnight. This way, you can have a delicious dessert ready whenever you need it!

What can I substitute for cream cheese?

If you’re looking for a substitute for cream cheese, Greek yogurt is a great option! It provides a similar creamy texture and adds a bit of tanginess. You can replace half of the cream cheese with Greek yogurt for a lighter version. Other alternatives include mascarpone cheese or silken tofu for a dairy-free option. Just remember that these substitutes may slightly alter the flavor and texture of your cheesecake.

Conclusion on No-Bake Nutella Cheesecake Recipe

In conclusion, the No-Bake Nutella Cheesecake is a delightful dessert that combines simplicity with indulgence. Its creamy texture and rich flavor make it a favorite among dessert lovers. Whether you’re preparing it for a special occasion or just to satisfy your sweet tooth, this cheesecake is sure to impress.

With easy-to-follow steps and a variety of customization options, you can make this cheesecake your own. From adding different flavors to experimenting with toppings, the possibilities are endless. Plus, the no-bake aspect means you can enjoy this treat without the hassle of turning on the oven, making it perfect for warm days or busy schedules.

Remember to take your time during the preparation and chilling process. Allowing the cheesecake to set properly will enhance its flavor and texture. And don’t forget to present it beautifully! A well-decorated cheesecake not only tastes great but also looks stunning on any table.

So, gather your ingredients, follow the steps, and get ready to create a dessert that will leave everyone asking for more. The No-Bake Nutella Cheesecake is not just a recipe; it’s an experience filled with joy and deliciousness. Enjoy every bite and share the love with family and friends!

Stay Connected

Get recipes via email: