Get my cookbooks

Creamy Lemon Salmon Piccata Recipe is a must-try!

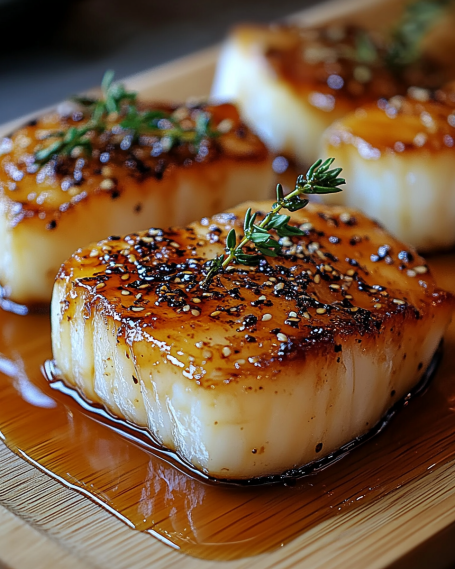
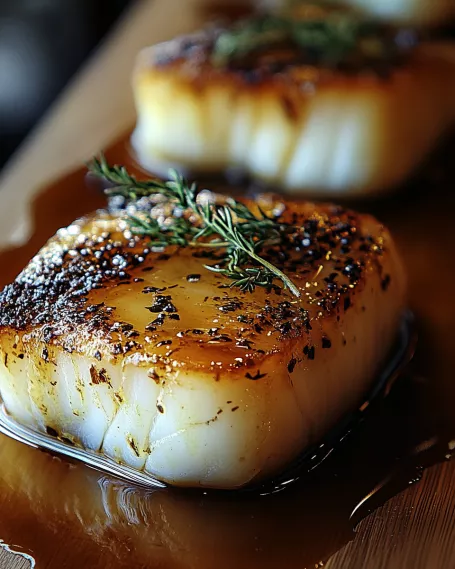
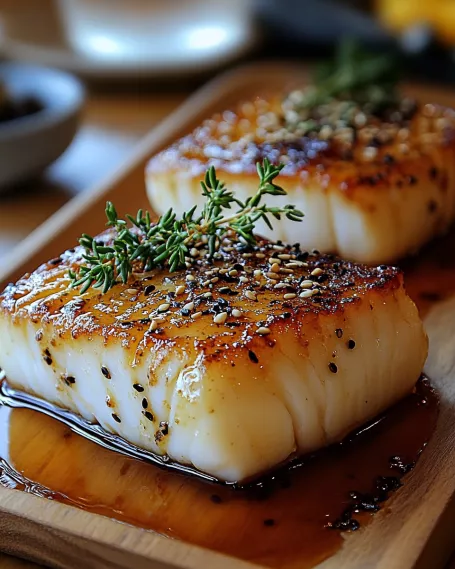
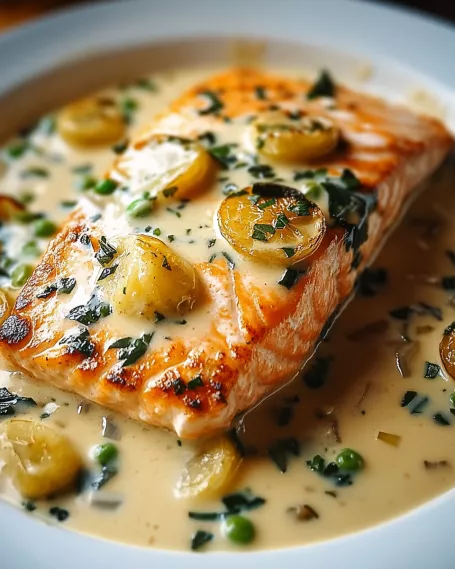
Introduction to Creamy Lemon Salmon Piccata Recipe

Creamy Lemon Salmon Piccata Recipe. This dish is not just a meal; it’s an experience that brings together the rich flavors of salmon, the zest of lemon, and the creaminess of a well-crafted sauce. Whether you’re cooking for a special occasion or just a cozy dinner at home, this recipe is sure to impress.

What Makes Creamy Lemon Salmon Piccata Unique?

What sets this recipe apart is its perfect balance of flavors. The salmon fillets are seasoned to perfection, providing a savory base. The creamy lemon sauce adds a refreshing twist, making each bite a burst of flavor. The addition of capers introduces a delightful brininess that complements the richness of the cream. Together, these elements create a dish that is both comforting and sophisticated.

Moreover, this recipe is versatile. You can easily adjust the ingredients to suit your taste. For instance, if you prefer a lighter version, simply swap out some of the heavy cream for Greek yogurt. This flexibility makes it a fantastic choice for various dietary preferences.

In just a few simple steps, you can create a restaurant-quality meal right in your kitchen. So, let’s dive into the ingredients and get started on this culinary adventure!

Ingredients for Creamy Lemon Salmon Piccata Recipe

Creamy Lemon Salmon Piccata Recipe, you will need a selection of fresh and flavorful ingredients. Each component plays a vital role in achieving the perfect balance of taste and texture. Here’s what you’ll need:

  • 1 pound salmon fillets (skinless) – Choose fresh salmon for the best flavor.
  • 1 teaspoon salt – Enhances the natural taste of the salmon.
  • 1/2 teaspoon black pepper – Adds a subtle kick to the dish.
  • 2 tablespoons olive oil – Used for cooking the salmon, providing healthy fats.
  • 3 tablespoons unsalted butter – Adds richness to the sauce.
  • 3 cloves garlic (minced) – Infuses the dish with aromatic flavor.
  • 1 cup chicken broth – Forms the base of the creamy sauce.
  • 1/4 cup fresh lemon juice (about 2 lemons) – Brings brightness and acidity to the dish.
  • 1/4 cup heavy cream – Creates the creamy texture of the sauce.
  • 1/4 cup capers (rinsed and drained) – Adds a tangy, briny flavor.
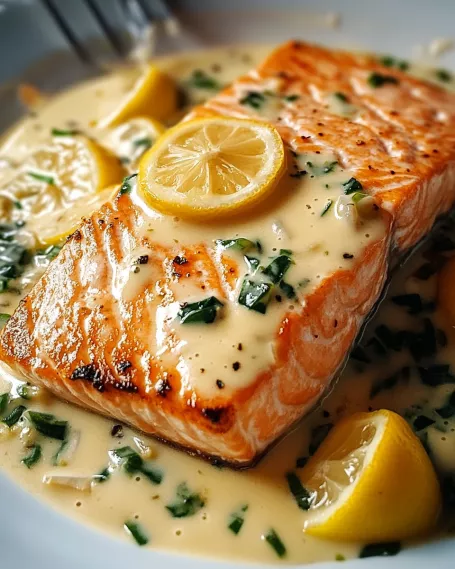
  • 1/4 cup fresh parsley (chopped) – For garnish and a pop of color.
  • Lemon slices – For garnish, enhancing the visual appeal.

These ingredients come together to create a dish that is not only delicious but also visually appealing. The combination of flavors will surely tantalize your taste buds. Now that you have your ingredients ready, let’s move on to the step-by-step preparation of this delightful recipe!

Step-by-Step Preparation of Creamy Lemon Salmon Piccata Recipe

Creamy Lemon Salmon Piccata Recipe. Each step is designed to ensure that your dish turns out perfectly every time. Let’s get started!

Step 1: Preparing the Salmon

First, take your skinless salmon fillets and place them on a clean cutting board. Season both sides generously with salt and black pepper. This simple seasoning enhances the natural flavors of the salmon. Make sure to cover the entire surface for an even taste. Once seasoned, set the salmon aside while you prepare the skillet.

Step 2: Making the Creamy Lemon Sauce

Next, grab a large skillet and heat 2 tablespoons of olive oil over medium-high heat. Once the oil is hot, it’s time to add the salmon fillets. But before that, let’s create the creamy lemon sauce. In the same skillet, after cooking the salmon, melt 3 tablespoons of unsalted butter over medium heat. Add 3 cloves of minced garlic and sauté for about 1 minute. The garlic should become fragrant but not browned.

Now, pour in 1 cup of chicken broth and 1/4 cup of fresh lemon juice. As you do this, use a wooden spoon to scrape the bottom of the skillet. This action helps release any delicious browned bits left from cooking the salmon. Bring the mixture to a gentle simmer and let it cook for 2-3 minutes. This simmering process allows the flavors to meld beautifully.

Step 3: Cooking the Salmon

After preparing the sauce, it’s time to cook the salmon. Carefully add the seasoned salmon fillets to the skillet. Cook them for about 4-5 minutes on each side. You’ll know they are done when they turn golden brown and flake easily with a fork. Once cooked, remove the salmon from the skillet and set it aside on a plate. This step ensures that the salmon remains tender and juicy.

Step 4: Combining Salmon with the Sauce

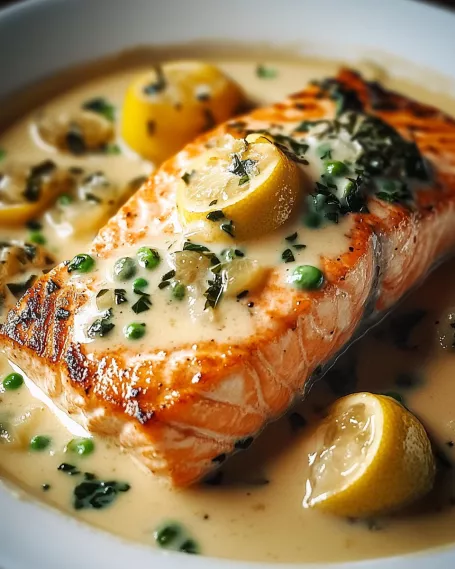
Now, let’s finish the creamy lemon sauce. Stir in 1/4 cup of heavy cream and 1/4 cup of rinsed and drained capers. Allow the sauce to simmer for another 2-3 minutes until it thickens slightly. This creamy mixture will envelop the salmon in a rich, flavorful sauce.

Creamy Lemon Salmon Piccata Recipe is ready to be garnished and served!

Variations of Creamy Lemon Salmon Piccata Recipe

Creamy Lemon Salmon Piccata Recipe is delightful as it is, there are many ways to customize it to suit your taste or dietary needs. Let’s explore some alternative ingredients and different cooking methods that can elevate this dish even further.

Alternative Ingredients to Consider

Switching up ingredients can bring new life to your salmon piccata. Here are some ideas:

  • Fish Options: If you’re not a fan of salmon, try using other fish like tilapia or cod. These options will still provide a delicious base for the creamy sauce.
  • Herbs: Fresh herbs can enhance the flavor. Consider adding dill or thyme for a different aromatic touch.
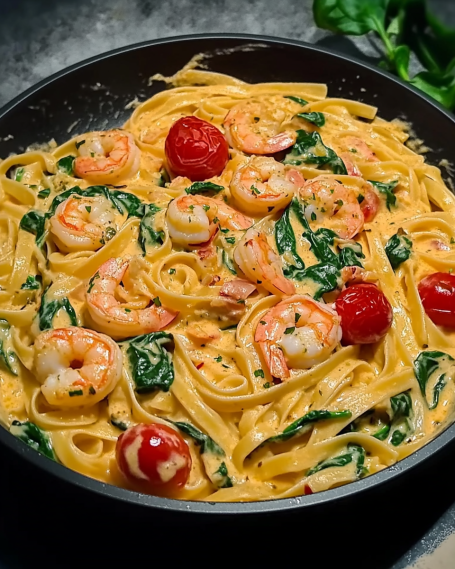
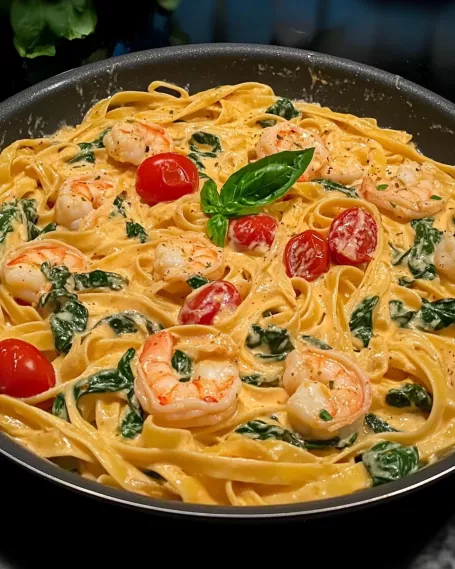
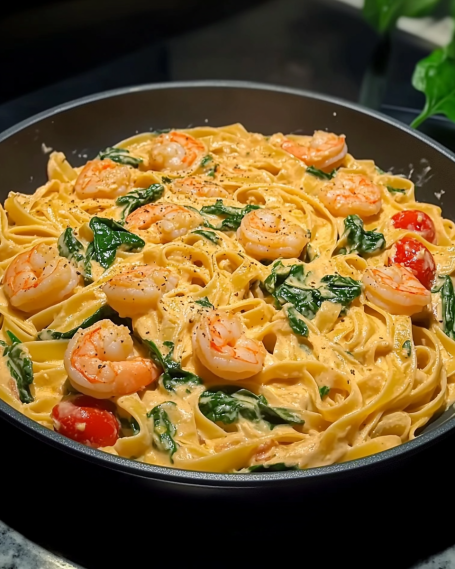
  • Vegetables: For added nutrition, toss in some spinach or cherry tomatoes while making the sauce. They will add color and flavor.
  • Broth Variations: Instead of chicken broth, use vegetable broth for a vegetarian-friendly option. This will still keep the dish flavorful.
  • Capers Alternatives: If capers aren’t your thing, try using olives for a similar briny taste.

These alternatives can help you create a unique version of the classic recipe while still keeping the essence of the dish intact.

Different Cooking Methods

Creamy Lemon Salmon Piccata Recipe. Here are a few methods to consider:

  • Grilling: For a smoky flavor, grill the salmon fillets instead of pan-searing them. Just be sure to keep an eye on them to prevent overcooking.
  • Baking: You can also bake the salmon in the oven. Preheat your oven to 375°F (190°C) and bake for about 15-20 minutes. Pour the sauce over the salmon before serving.
  • Air Frying: If you have an air fryer, this method can yield crispy salmon with less oil. Cook at 400°F (200°C) for about 10-12 minutes.

Each cooking method offers a different texture and flavor profile, allowing you to enjoy this dish in various ways. Feel free to experiment and find your favorite version!

Cooking Note for Creamy Lemon Salmon Piccata Recipe

Creamy Lemon Salmon Piccata Recipe, there are a few important cooking notes to keep in mind. These tips will help ensure that your dish turns out perfectly every time.

First, always choose fresh salmon fillets. Fresh fish not only tastes better but also has a firmer texture, which is essential for this recipe. If you can, buy your salmon from a reputable fishmonger or grocery store that specializes in seafood.

Next, be mindful of the cooking temperature. Cooking the salmon over medium-high heat allows it to sear nicely, creating a golden crust. However, if the heat is too high, the salmon may cook too quickly on the outside while remaining raw inside. Aim for a balance to achieve that perfect doneness.

Additionally, when making the creamy lemon sauce, don’t rush the simmering process. Allowing the sauce to simmer for a few minutes helps the flavors meld together beautifully. This step is crucial for achieving that rich, creamy texture that makes this dish so delightful.

Lastly, remember to taste the sauce before serving. You can adjust the seasoning by adding more salt, pepper, or lemon juice according to your preference. This final touch can elevate the dish and make it truly your own.

Creamy Lemon Salmon Piccata Recipe that will impress your family and friends!

Serving Suggestions for Creamy Lemon Salmon Piccata Recipe

Creamy Lemon Salmon Piccata Recipe, it’s time to think about how to serve it. The right side dishes and beverages can enhance the meal, making it even more enjoyable. Here are some ideal side dishes and wine pairing recommendations to complement your delicious salmon dish.

Ideal Side Dishes

Choosing the right side dishes can elevate your meal. Here are some fantastic options to consider:

  • Garlic Mashed Potatoes: Creamy mashed potatoes with a hint of garlic pair beautifully with the rich salmon. They soak up the delicious sauce, making every bite delightful.
  • Steamed Asparagus: Lightly steamed asparagus adds a fresh, crunchy element to your plate. The bright green color also enhances the visual appeal.
  • Quinoa Salad: A light quinoa salad with cherry tomatoes, cucumber, and a lemon vinaigrette offers a refreshing contrast to the creamy sauce.
  • Roasted Vegetables: A medley of roasted vegetables, such as bell peppers, zucchini, and carrots, adds color and nutrition to your meal.
  • Pasta: Serve the salmon over a bed of pasta, such as fettuccine or angel hair, to create a heartier dish. The pasta will absorb the creamy sauce, making it even more satisfying.

These side dishes not only complement the flavors of the salmon but also create a well-rounded meal that is sure to impress your guests.

Wine Pairing Recommendations

Creamy Lemon Salmon Piccata Recipe can enhance the dining experience. Here are some excellent wine options:

  • Sauvignon Blanc: This white wine is crisp and refreshing, with citrus notes that complement the lemon in the dish.
  • Chardonnay: A lightly oaked Chardonnay offers a creamy texture that matches the richness of the sauce.
  • Pinot Grigio: This wine is light and zesty, making it a great match for the salmon and its creamy sauce.
  • Rosé: A dry rosé provides a fruity flavor that pairs well with the salmon while adding a touch of elegance to your meal.

Creamy Lemon Salmon Piccata Recipe even more memorable. Enjoy your meal with these delightful pairings!

Tips for Perfecting Your Creamy Lemon Salmon Piccata Recipe

Creamy Lemon Salmon Piccata Recipe, a few tips can make all the difference. These suggestions will help you achieve a dish that is not only delicious but also visually stunning. Let’s explore some essential tips for perfecting your salmon piccata!

First, always use fresh ingredients. Fresh salmon, herbs, and lemons will enhance the flavor of your dish significantly. When shopping, look for salmon that has a bright color and a fresh smell. This ensures you’re starting with the best quality fish.

Next, pay attention to the cooking time. Salmon cooks quickly, so keep an eye on it to avoid overcooking. A perfectly cooked salmon should be flaky yet moist. If you’re unsure, use a fork to check for doneness; it should flake easily but still be slightly translucent in the center.

Another tip is to let the salmon rest after cooking. Allowing it to sit for a few minutes before serving helps the juices redistribute, making it even more tender. This small step can elevate the overall texture of your dish.

When making the creamy lemon sauce, don’t rush the simmering process. Allowing the sauce to simmer for a few minutes helps the flavors meld together beautifully. This step is crucial for achieving that rich, creamy texture that makes this dish so delightful.

Lastly, don’t forget to taste and adjust the seasoning. Before serving, give the sauce a quick taste. You might want to add a pinch more salt, a squeeze of lemon, or even a dash of pepper. This final touch can elevate the dish and make it truly your own.

Creamy Lemon Salmon Piccata Recipe that will impress your family and friends!

Breakdown of Time for Creamy Lemon Salmon Piccata Recipe

Creamy Lemon Salmon Piccata Recipe can help you plan your cooking efficiently. Here’s a detailed breakdown of the time you’ll need for preparation and cooking.

Prep Time

The prep time for this delicious dish is quite manageable. You’ll need about 10-15 minutes to gather and prepare your ingredients. This includes:

  • Seasoning the salmon fillets with salt and pepper.
  • Minced garlic and chopped parsley.
  • Juicing the lemons and measuring out the other ingredients.

Having everything ready before you start cooking will make the process smoother and more enjoyable.

Cooking Time

Creamy Lemon Salmon Piccata Recipe is approximately 15-20 minutes. Here’s how it breaks down:

  • Cooking the salmon fillets: 8-10 minutes (4-5 minutes on each side).
  • Making the creamy lemon sauce: 5-7 minutes.
  • Combining the salmon with the sauce: 2 minutes.

This quick cooking time makes it a perfect option for a weeknight dinner or a last-minute meal.

Total Time

In total, you can expect to spend about 25-35 minutes from start to finish. This includes both prep and cooking time. Here’s a quick summary:

  • Prep Time: 10-15 minutes
  • Cooking Time: 15-20 minutes
  • Total Time: 25-35 minutes

Creamy Lemon Salmon Piccata Recipe into your busy schedule. Enjoy the process and the delicious results!

Nutritional Information for Creamy Lemon Salmon Piccata Recipe

Creamy Lemon Salmon Piccata Recipe not only delights your taste buds but also provides valuable nutrients. Here’s a breakdown of the nutritional information per serving:

Calories

350 calories. This calorie count makes it a satisfying yet light option for dinner. The combination of salmon and creamy sauce provides a fulfilling meal without excessive calories.

Protein Content

Creamy Lemon Salmon Piccata Recipe is its high protein content. Each serving offers around 30 grams of protein. Salmon is an excellent source of protein, which is essential for muscle repair and overall health. This makes it a great choice for those looking to increase their protein intake.

Sodium Levels

600 milligrams per serving. While sodium is necessary for bodily functions, it’s important to monitor your intake. If you’re watching your sodium levels, consider using low-sodium chicken broth and rinsing the capers thoroughly to reduce the overall sodium content.

Creamy Lemon Salmon Piccata Recipe is not only a flavorful dish but also a nutritious one. With a good balance of calories, protein, and sodium, it can fit well into a healthy eating plan. Enjoy this delightful meal knowing it’s good for you too!

FAQs about Creamy Lemon Salmon Piccata Recipe

Can I use frozen salmon for this recipe?

Creamy Lemon Salmon Piccata Recipe. However, it’s important to thaw the salmon properly before cooking. The best way to do this is to place the frozen salmon in the refrigerator overnight. If you’re short on time, you can also thaw it under cold running water for about 30 minutes. Once thawed, season and cook it just like fresh salmon. Keep in mind that cooking times may vary slightly, so check for doneness to ensure it’s cooked through.

What can I substitute for heavy cream?

If you’re looking for a lighter option, there are several substitutes for heavy cream in this recipe. One popular choice is Greek yogurt, which adds creaminess while reducing calories. You can use half Greek yogurt and half chicken broth for a delicious alternative. Another option is to use coconut cream for a dairy-free version. Just remember that these substitutes may slightly alter the flavor and texture of the sauce, but they will still be tasty!

How can I make this recipe gluten-free?

Creamy Lemon Salmon Piccata Recipe gluten-free is quite simple! The main ingredients in this recipe are naturally gluten-free. However, ensure that the chicken broth you use is labeled gluten-free, as some brands may contain gluten. Additionally, if you choose to serve the salmon with pasta, opt for gluten-free pasta made from rice, quinoa, or other gluten-free grains. This way, you can enjoy the dish without any gluten concerns!

Can I add vegetables to the Creamy Lemon Salmon Piccata?

Creamy Lemon Salmon Piccata Recipe is a great way to boost nutrition and flavor. Consider adding spinach, cherry tomatoes, or asparagus while making the sauce. These vegetables not only add color but also enhance the overall taste of the dish. Just be sure to adjust the cooking time slightly to ensure the vegetables are tender but still vibrant. This addition will make your meal even more delightful!

Conclusion on Creamy Lemon Salmon Piccata Recipe

Creamy Lemon Salmon Piccata Recipe is a delightful dish that combines rich flavors and a creamy texture, making it a perfect choice for any occasion. Whether you’re hosting a dinner party or enjoying a quiet meal at home, this recipe is sure to impress your guests and family alike.

With its simple yet elegant preparation, you can easily whip up this dish in under 40 minutes. The balance of savory salmon, zesty lemon, and the unique brininess of capers creates a symphony of flavors that dance on your palate. Plus, the nutritional benefits of salmon, including high protein and healthy fats, make this meal not only delicious but also good for you.

Creamy Lemon Salmon Piccata Recipe will always shine as the star of the meal.

So, gather your ingredients, follow the steps, and enjoy the process of creating this culinary masterpiece. Your taste buds will thank you, and your loved ones will be asking for seconds. Happy cooking!

Ginger Soy Glazed Cod is a delicious and healthy dish.

Introduction to Ginger Soy Glazed Cod Recipe

Welcome to the delightful world of the Ginger Soy Glazed Cod Recipe! This dish is not only a feast for the eyes but also a treat for your taste buds. With its perfect balance of sweet and savory flavors, it’s sure to become a favorite in your home. The combination of fresh ginger and soy sauce creates a unique glaze that enhances the natural taste of the cod. Plus, it’s easy to prepare, making it ideal for both busy weeknights and special occasions.

What Makes Ginger Soy Glazed Cod Special?

What sets this Ginger Soy Glazed Cod apart is its vibrant flavor profile. The marinade, made from soy sauce, honey, and ginger, infuses the fish with a rich taste that is both comforting and exciting. The ginger adds a warm, spicy note, while the honey brings a touch of sweetness. Together, they create a glaze that caramelizes beautifully in the oven, giving the cod a lovely golden color. This dish is not just about taste; it’s also about the experience of enjoying a meal that feels both gourmet and homemade.

Health Benefits of Cod and Ginger

Not only is this dish delicious, but it also offers numerous health benefits. Cod is a lean source of protein, making it an excellent choice for those looking to maintain a healthy diet. It is low in calories and packed with essential nutrients like omega-3 fatty acids, which are known to support heart health. On the other hand, ginger is celebrated for its anti-inflammatory properties and digestive benefits. It can help soothe an upset stomach and may even boost your immune system. Together, cod and ginger create a nutritious meal that nourishes your body while tantalizing your taste buds.

Ingredients for Ginger Soy Glazed Cod Recipe

To create the mouthwatering Ginger Soy Glazed Cod, you’ll need a few simple yet flavorful ingredients. Each component plays a vital role in building the dish’s unique taste. Here’s what you’ll need:

  • 1 pound cod fillets: Fresh or thawed, these will be the star of your dish.
  • 1/4 cup soy sauce: This adds a savory depth to the marinade.
  • 2 tablespoons fresh ginger, grated: Fresh ginger brings a zesty kick and warmth.
  • 2 tablespoons honey: This natural sweetener balances the saltiness of the soy sauce.
  • 1 tablespoon rice vinegar: It adds a subtle tang that brightens the flavors.
  • 1 tablespoon sesame oil: This oil contributes a nutty aroma and richness.
  • 2 cloves garlic, minced: Garlic enhances the overall flavor with its aromatic qualities.
  • 1/2 teaspoon black pepper: A pinch of pepper adds a mild heat.
  • 2 green onions, sliced (for garnish): These add a fresh crunch and color.
  • Sesame seeds (for garnish): A sprinkle of sesame seeds gives a delightful crunch.

Gathering these ingredients will set you on the path to creating a delicious meal. Each item contributes to the overall flavor, making this Ginger Soy Glazed Cod a dish that’s both satisfying and healthy. Now that you have your ingredients ready, let’s move on to the preparation steps!

Step-by-Step Preparation of Ginger Soy Glazed Cod Recipe

Now that you have gathered all your ingredients, it’s time to dive into the preparation of your Ginger Soy Glazed Cod. This step-by-step guide will help you create a delicious meal that’s sure to impress. Let’s get started!

Step 1: Preparing the Marinade

First, you’ll want to prepare the marinade. In a small bowl, combine the soy sauce, grated ginger, honey, rice vinegar, sesame oil, minced garlic, and black pepper. Use a whisk to mix everything together until it’s well combined. This marinade is the heart of the dish, so make sure all the ingredients are blended nicely. The aroma of ginger and garlic will fill your kitchen, making it hard to resist!

Step 2: Marinating the Cod

Next, take your cod fillets and place them in a shallow dish. Pour the freshly made marinade over the cod, ensuring each piece is well coated. This step is crucial as it allows the flavors to penetrate the fish. Cover the dish with plastic wrap and refrigerate for at least 30 minutes. If you have more time, marinating for up to 2 hours will enhance the flavor even more. Just remember, the longer it marinates, the tastier it gets!

Step 3: Cooking the Cod

Once your cod has marinated, it’s time to cook! Preheat your oven to 400°F (200°C). While the oven heats up, line a baking sheet with parchment paper. This will prevent the fish from sticking and make cleanup easier. Place the marinated cod fillets on the baking sheet, making sure they are spaced out. Bake the cod for 12-15 minutes. You’ll know it’s done when the fish flakes easily with a fork. The glaze will caramelize beautifully, giving the cod a lovely golden hue.

Step 4: Serving the Dish

After removing the cod from the oven, let it rest for a few minutes. This allows the juices to redistribute, making the fish even more tender. When you’re ready to serve, garnish the cod with sliced green onions and a sprinkle of sesame seeds. This adds a pop of color and a delightful crunch. Your Ginger Soy Glazed Cod is now ready to be enjoyed!

Variation of Ginger Soy Glazed Cod Recipe

While the Ginger Soy Glazed Cod Recipe is delicious as is, there are plenty of ways to switch things up! Whether you want to try different flavors or cooking methods, these variations will keep your meals exciting. Let’s explore some alternative ingredients and cooking methods that can enhance your dish.

Alternative Ingredients

Experimenting with different ingredients can lead to delightful new flavors. Here are some alternatives you might consider:

  • Fish Options: If cod isn’t your favorite, you can easily substitute it with salmon or tilapia. Both options will absorb the marinade well and offer their unique tastes.
  • Sweeteners: Instead of honey, try maple syrup or agave nectar for a different sweetness. Each will add its own character to the glaze.
  • Vinegar Choices: If you don’t have rice vinegar, apple cider vinegar or white wine vinegar can work just as well. They will still provide that necessary tang.
  • Herbs and Spices: Feel free to add fresh herbs like cilantro or basil for a fresh twist. You can also include a teaspoon of sriracha or red pepper flakes for a spicy kick!

Cooking Methods

While baking is a fantastic way to prepare your Ginger Soy Glazed Cod, there are other methods you can try:

  • Grilling: For a smoky flavor, grill the marinated cod on medium heat. This method adds a lovely char and enhances the overall taste.
  • Pan-Seering: Heat a little sesame oil in a skillet over medium-high heat. Cook the cod for about 4-5 minutes on each side until golden brown and cooked through.
  • Broiling: If you want a crispy top, broil the cod for the last few minutes of cooking. Just keep an eye on it to prevent burning!

These variations allow you to customize your Ginger Soy Glazed Cod Recipe to suit your taste preferences. Whether you’re trying new ingredients or cooking methods, the possibilities are endless!

Cooking Note for Ginger Soy Glazed Cod Recipe

Cooking the perfect Ginger Soy Glazed Cod requires attention to detail and a few helpful tips. Here are some essential notes to ensure your dish turns out delicious every time.

First, always choose fresh cod fillets when possible. Fresh fish has a better texture and flavor compared to frozen. If you must use frozen cod, make sure to thaw it completely in the refrigerator before marinating. This helps the marinade penetrate the fish more effectively.

Next, marinating time is crucial. While 30 minutes is the minimum, allowing the cod to marinate for up to 2 hours will enhance the flavor significantly. However, avoid marinating for too long, as the fish can become mushy due to the acidity in the marinade.

When baking, keep an eye on the cod as it cooks. Ovens can vary in temperature, so check for doneness a couple of minutes before the suggested cooking time. The fish should flake easily with a fork and have a slightly opaque appearance when done.

Lastly, let the cod rest for a few minutes after baking. This step allows the juices to redistribute, making the fish more tender and flavorful. Following these cooking notes will help you achieve a perfectly glazed cod that’s sure to impress your family and friends!

Serving Suggestions for Ginger Soy Glazed Cod Recipe

Now that you’ve prepared your delicious Ginger Soy Glazed Cod, it’s time to think about how to serve it! The right side dishes and beverages can elevate your meal, making it even more enjoyable. Here are some ideal pairings to complement your dish.

Ideal Side Dishes

Choosing the right side dishes can enhance the flavors of your Ginger Soy Glazed Cod. Here are some tasty options:

  • Steamed Rice: A classic choice, steamed jasmine or basmati rice absorbs the delicious glaze and balances the flavors.
  • Stir-Fried Vegetables: Colorful veggies like bell peppers, broccoli, and snap peas stir-fried in sesame oil add crunch and nutrition.
  • Quinoa Salad: A light quinoa salad with cucumbers, carrots, and a splash of lime juice offers a refreshing contrast to the rich cod.
  • Asian Noodle Salad: Cold noodles tossed with soy sauce, sesame oil, and fresh vegetables make a delightful side that pairs well with the fish.
  • Roasted Asparagus: Tender roasted asparagus drizzled with a bit of soy sauce and sesame seeds complements the dish beautifully.

These side dishes not only taste great but also add color and variety to your plate. Feel free to mix and match based on your preferences and what you have on hand!

Pairing with Beverages

To complete your meal, consider what beverages will pair well with your Ginger Soy Glazed Cod. Here are some suggestions:

  • White Wine: A chilled glass of Sauvignon Blanc or Pinot Grigio enhances the flavors of the fish and adds a refreshing touch.
  • Green Tea: A warm cup of green tea offers a soothing contrast and complements the ginger in the dish.
  • Sparkling Water: For a non-alcoholic option, sparkling water with a slice of lemon or lime is refreshing and light.
  • Asian Beer: A light lager or rice beer can also be a great choice, as it pairs well with the savory notes of the cod.

Choosing the right beverages can enhance your dining experience, making your Ginger Soy Glazed Cod meal even more enjoyable. With these serving suggestions, you’re all set to impress your family and friends!

Tips for Perfecting Your Ginger Soy Glazed Cod Recipe

To ensure your Ginger Soy Glazed Cod turns out perfectly every time, consider these helpful tips. Each suggestion will help you enhance the flavors and presentation of your dish, making it a standout meal.

Use Fresh Ingredients

Fresh ingredients make a significant difference in flavor. Always opt for fresh cod fillets when possible. Fresh fish has a firmer texture and a more vibrant taste compared to frozen. If you must use frozen cod, ensure it is completely thawed before marinating. This allows the marinade to penetrate the fish better, enhancing its flavor.

Marinate Wisely

Marinating is key to infusing flavor into your cod. While 30 minutes is the minimum, marinating for up to 2 hours will yield a more flavorful result. However, avoid marinating for too long, as the acidity in the marinade can break down the fish, making it mushy. A good rule of thumb is to check the texture after the recommended time.

Monitor Cooking Time

Cooking times can vary based on your oven and the thickness of the cod fillets. Keep an eye on the fish as it bakes. Check for doneness a couple of minutes before the suggested cooking time. The cod should flake easily with a fork and appear slightly opaque when fully cooked. This ensures you don’t overcook the fish, which can lead to dryness.

Let It Rest

After baking, allow the cod to rest for a few minutes before serving. This step is crucial as it lets the juices redistribute throughout the fish, making it more tender and flavorful. A little patience here will pay off in taste!

Garnish for Presentation

Don’t forget to garnish your Ginger Soy Glazed Cod! Sliced green onions and a sprinkle of sesame seeds not only add visual appeal but also enhance the dish’s flavor and texture. A beautiful presentation can elevate your meal, making it feel more special.

By following these tips, you’ll be well on your way to mastering the art of cooking Ginger Soy Glazed Cod. Each step contributes to a delicious and visually appealing dish that your family and friends will love!

Breakdown of Time for Ginger Soy Glazed Cod Recipe

Understanding the time needed for each step in the Ginger Soy Glazed Cod Recipe can help you plan your meal better. Here’s a simple breakdown of the time required for preparation, cooking, and the total time needed to enjoy this delicious dish.

Prep Time

The prep time for this recipe is quite manageable. You’ll need about 10-15 minutes to gather your ingredients and prepare the marinade. This includes grating the ginger, mincing the garlic, and mixing everything together. It’s a quick and easy process that sets the stage for a flavorful meal!

Cooking Time

Once your cod is marinated, the cooking time is approximately 12-15 minutes. Preheating the oven takes a few minutes, but once it’s ready, the cod cooks quickly. Just keep an eye on it to ensure it doesn’t overcook. The fish should flake easily when done, which is a good indicator of perfect cooking.

Total Time

In total, you can expect to spend about 45 minutes to 2 hours on this recipe, depending on how long you choose to marinate the cod. If you opt for the minimum marinating time of 30 minutes, the total time will be around 45 minutes. However, if you let it marinate for 2 hours, the total time will be closer to 2 hours and 15 minutes. Either way, the wait is worth it for the delicious flavors you’ll enjoy!

By understanding the time breakdown, you can easily fit this Ginger Soy Glazed Cod Recipe into your schedule, making it a perfect choice for both busy weeknights and leisurely weekends.

Nutritional Information for Ginger Soy Glazed Cod Recipe

Understanding the nutritional content of your meals is essential for maintaining a balanced diet. The Ginger Soy Glazed Cod is not only delicious but also packed with nutrients. Here’s a breakdown of the key nutritional information per serving, which serves as a great guide for health-conscious eaters.

Calories

Each serving of Ginger Soy Glazed Cod contains approximately 210 calories. This makes it a light yet satisfying option for dinner. The combination of lean protein from the cod and the flavorful marinade ensures you get a fulfilling meal without excessive calories. It’s perfect for those looking to enjoy a tasty dish while keeping their calorie intake in check.

Protein

Protein is vital for building and repairing tissues, and this recipe delivers! Each serving provides about 24 grams of protein. Cod is an excellent source of high-quality protein, making it a great choice for anyone looking to increase their protein intake. Whether you’re an athlete or just someone who wants to maintain muscle mass, this dish supports your dietary needs.

Sodium

When it comes to sodium, each serving contains around 800 milligrams. While soy sauce is a primary source of sodium in this recipe, you can easily adjust the amount to suit your dietary preferences. Opting for low-sodium soy sauce can help reduce the sodium content while still providing that delicious umami flavor. Being mindful of sodium intake is important for heart health, so feel free to customize the recipe to fit your needs.

In summary, the Ginger Soy Glazed Cod is a nutritious meal option that offers a good balance of calories, protein, and sodium. It’s a dish that not only satisfies your taste buds but also supports your health goals. Enjoy this delightful recipe knowing you’re making a wholesome choice!

FAQs about Ginger Soy Glazed Cod Recipe

Can I use frozen cod for this recipe?

Yes, you can use frozen cod for the Ginger Soy Glazed Cod recipe! However, it’s important to thaw the fish completely before marinating. Thawing in the refrigerator overnight is the best method. This ensures that the marinade can penetrate the fish properly, enhancing its flavor. Just remember, fresh cod will give you a firmer texture and a more vibrant taste, but frozen cod can still be delicious when prepared correctly!

What can I substitute for soy sauce?

If you’re looking for a soy sauce substitute, there are several options available. You can use tamari, which is a gluten-free alternative that has a similar flavor. Coconut aminos is another great choice, offering a slightly sweeter taste with less sodium. If you prefer a homemade option, mix equal parts of beef or vegetable broth with a splash of vinegar and a pinch of salt. Each of these substitutes will still provide that savory depth to your Ginger Soy Glazed Cod!

How long should I marinate the cod?

For the best flavor, marinate the cod for at least 30 minutes. However, if you have the time, marinating for up to 2 hours is ideal. This allows the flavors from the marinade to fully infuse into the fish. Just be cautious not to marinate for too long, as the acidity in the marinade can break down the fish, making it mushy. A good rule of thumb is to check the texture after the recommended time!

Can I make this recipe in advance?

Absolutely! You can prepare the Ginger Soy Glazed Cod in advance. Marinate the cod and store it in the refrigerator for up to 2 hours before cooking. If you want to prepare it even earlier, you can marinate the cod and freeze it. Just make sure to thaw it in the refrigerator before cooking. This makes it a convenient option for busy weeknights or meal prep. Just remember to cook it fresh for the best taste and texture!

Conclusion on Ginger Soy Glazed Cod Recipe

In conclusion, the Ginger Soy Glazed Cod Recipe is a delightful dish that combines simplicity with rich flavors. This recipe not only showcases the tender, flaky texture of cod but also highlights the vibrant taste of ginger and the savory notes of soy sauce. Whether you’re cooking for a special occasion or a casual family dinner, this dish is sure to impress.

By following the steps outlined in this article, you can create a meal that is both nutritious and satisfying. The health benefits of cod and ginger make this dish a smart choice for anyone looking to eat well. Plus, with the various tips and variations provided, you can easily customize the recipe to suit your taste preferences.

As you serve your Ginger Soy Glazed Cod, remember to enjoy the process of cooking and sharing this meal with loved ones. The joy of preparing a delicious dish is just as important as the meal itself. So, gather your ingredients, follow the steps, and savor the delightful flavors of this wonderful recipe. Happy cooking!

Coconut Crusted Fish with Mango Salsa Recipe delights!

Introduction to Coconut Crusted Fish with Mango Salsa Recipe

Are you looking for a delightful dish that combines the flavors of the tropics with a satisfying crunch? Look no further! The Coconut Crusted Fish with Mango Salsa recipe is a perfect choice for any meal. This dish not only tantalizes your taste buds but also brings a burst of color to your plate. With its crispy coconut coating and refreshing mango salsa, it’s sure to impress family and friends alike.

What Makes Coconut Crusted Fish with Mango Salsa Special?

What sets this recipe apart is its unique blend of textures and flavors. The fish, coated in a crunchy layer of coconut and panko breadcrumbs, offers a delightful contrast to the tender, flaky meat inside. Meanwhile, the mango salsa adds a sweet and zesty kick, balancing the richness of the coconut. This combination creates a dish that is not only delicious but also visually appealing.

Moreover, this recipe is versatile. You can easily swap out the fish for your favorite type or adjust the salsa ingredients to suit your taste. Whether you’re hosting a dinner party or simply enjoying a weeknight meal, this dish is sure to be a hit. Plus, it’s packed with nutrients, making it a healthy option for any occasion.

In the following sections, we will guide you through the ingredients, preparation steps, and tips to make your Coconut Crusted Fish with Mango Salsa a success. Get ready to dive into a culinary adventure that will transport you to a sunny beach with every bite!

Ingredients for Coconut Crusted Fish with Mango Salsa Recipe

To create the delicious Coconut Crusted Fish with Mango Salsa, you’ll need a few key ingredients. Each component plays a vital role in delivering the delightful flavors and textures that make this dish so special. Here’s what you’ll need:

For the Coconut Crusted Fish:

  • 1 pound white fish fillets (such as tilapia or cod)
  • 1 cup shredded unsweetened coconut
  • 1 cup panko breadcrumbs
  • 1 teaspoon garlic powder
  • 1 teaspoon salt
  • 1/2 teaspoon black pepper
  • 2 large eggs
  • 2 tablespoons coconut oil (for frying)

For the Mango Salsa:

  • 1 ripe mango, diced
  • 1/2 red onion, finely chopped
  • 1 jalapeño, seeded and minced
  • 1/4 cup fresh cilantro, chopped
  • Juice of 1 lime
  • Salt to taste

These ingredients come together to create a dish that is not only flavorful but also visually stunning. The combination of the crispy coconut crust and the vibrant mango salsa makes for a perfect pairing. As you gather these ingredients, you’ll be one step closer to enjoying a tropical feast right in your kitchen!

Preparation of Coconut Crusted Fish with Mango Salsa Recipe

Now that you have gathered all the ingredients, it’s time to dive into the preparation of your Coconut Crusted Fish with Mango Salsa. This process is straightforward and fun, allowing you to create a delicious meal in no time. Let’s break it down step by step.

Step 1: Preparing the Fish

First, start by rinsing the fish fillets under cold water. This helps to remove any excess moisture and ensures a better crust. Pat the fillets dry with paper towels. This step is crucial as it prevents the coating from becoming soggy. Once dried, set the fish aside on a clean plate while you prepare the crust.

Step 2: Making the Coconut Crust

In a shallow dish, combine the shredded coconut, panko breadcrumbs, garlic powder, salt, and black pepper. Mix these ingredients well to ensure an even distribution of flavors. The combination of coconut and panko creates a delightful crunch that will enhance the fish. This mixture is what gives the fish its signature crispy texture.

Step 3: Preparing the Mango Salsa

While the fish is resting, it’s a great time to prepare the mango salsa. In a medium bowl, combine the diced mango, finely chopped red onion, minced jalapeño, chopped cilantro, and lime juice. Add a pinch of salt to taste. Mix everything together gently. Allow the salsa to sit for a few minutes. This resting time helps the flavors meld beautifully, making the salsa even more delicious.

Step 4: Coating the Fish

Now, it’s time to coat the fish. In another shallow dish, beat the eggs until they are well combined. Take each fish fillet and dip it into the egg mixture, ensuring it is fully coated. Allow any excess egg to drip off before moving to the next step. Then, place the fillet into the coconut and panko mixture. Press gently to ensure the coating adheres well. Repeat this process for all the fillets, making sure they are evenly coated.

Step 5: Cooking the Fish

Heat the coconut oil in a large skillet over medium heat. Once the oil is hot, carefully add the coated fish fillets to the skillet. Cook for about 4-5 minutes on each side. You want them to be golden brown and cooked through. Keep an eye on them to avoid burning. Once cooked, remove the fish from the skillet and let it rest on a paper towel-lined plate. This will help absorb any excess oil, keeping your dish light and crispy.

With these steps completed, you are now ready to serve your Coconut Crusted Fish with Mango Salsa. The preparation is simple, and the results are absolutely rewarding!

Variation of Coconut Crusted Fish with Mango Salsa Recipe

One of the best things about the Coconut Crusted Fish with Mango Salsa recipe is its versatility. You can easily customize it to suit your taste or to use what you have on hand. Let’s explore some alternative fish options and different salsa combinations that can elevate your dish even further.

Alternative Fish Options

While tilapia and cod are popular choices, there are many other fish that work wonderfully in this recipe. Here are a few alternatives:

  • Salmon: This fatty fish adds a rich flavor and pairs beautifully with the coconut crust.
  • Snapper: Known for its mild taste, snapper is another great option that holds up well during cooking.
  • Catfish: With its firm texture, catfish can be a delightful choice for frying.
  • Halibut: This fish is thick and meaty, making it perfect for a hearty meal.

Feel free to experiment with these options. Each type of fish will bring its unique flavor and texture to the dish, allowing you to enjoy a new experience every time you make it!

Different Salsa Combinations

The mango salsa is a refreshing complement to the coconut crusted fish, but you can switch things up with different salsa combinations. Here are some ideas:

  • Pineapple Salsa: Swap mango for diced pineapple for a sweeter, tropical twist.
  • Avocado Salsa: Combine diced avocado, tomatoes, red onion, and lime juice for a creamy texture.
  • Peach Salsa: Use diced peaches instead of mango for a sweet and tangy flavor.
  • Tomato Salsa: A classic option with diced tomatoes, onions, cilantro, and jalapeños for a zesty kick.

These variations not only enhance the flavor but also add a colorful touch to your plate. Feel free to mix and match ingredients based on what you enjoy or have available. The possibilities are endless!

Cooking Note for Coconut Crusted Fish with Mango Salsa Recipe

When preparing the Coconut Crusted Fish with Mango Salsa, there are a few cooking notes to keep in mind. These tips will help ensure that your dish turns out perfectly every time. Let’s dive into some essential points to consider while cooking.

First, the choice of oil is crucial. Coconut oil is recommended for frying due to its high smoke point and tropical flavor. However, if you prefer a different taste, you can use vegetable oil or canola oil. Just remember that the oil should be hot enough before adding the fish. This helps achieve that golden, crispy crust.

Next, avoid overcrowding the skillet. If you add too many fish fillets at once, the temperature of the oil will drop. This can lead to soggy fish instead of a crispy coating. It’s better to cook in batches if necessary. This way, each fillet gets the attention it deserves!

Additionally, keep an eye on the cooking time. Fish cooks quickly, and overcooking can lead to a dry texture. Aim for a golden brown color on both sides, and use a fork to check for flakiness. If the fish flakes easily, it’s done!

Lastly, let the fish rest on a paper towel-lined plate after frying. This step is important as it absorbs any excess oil, keeping your dish light and enjoyable. Pairing the fish with the fresh mango salsa right before serving will enhance the flavors and make for a delightful meal.

By following these cooking notes, you’ll be well on your way to mastering the Coconut Crusted Fish with Mango Salsa recipe. Enjoy the process and the delicious results!

Serving Suggestions for Coconut Crusted Fish with Mango Salsa Recipe

Once your Coconut Crusted Fish with Mango Salsa is ready, it’s time to think about how to serve it. Presentation can elevate your dish, making it even more appealing. Here are some delightful serving suggestions to enhance your dining experience:

Plating the Dish

Start by placing a generous portion of the coconut crusted fish on a clean plate. You can arrange the fillets in a fan shape for a beautiful presentation. Next, spoon a generous amount of mango salsa over the top of the fish. This not only adds color but also highlights the fresh ingredients in the salsa.

Accompaniments

To complement the flavors of the fish and salsa, consider serving it with:

  • Coconut Rice: The subtle sweetness of coconut rice pairs perfectly with the fish and salsa.
  • Steamed Vegetables: Bright, colorful vegetables like broccoli, carrots, or snap peas add nutrition and vibrancy to your plate.
  • Quinoa Salad: A light quinoa salad with lime dressing can provide a refreshing contrast to the rich coconut crust.
  • Mixed Greens: A simple salad with mixed greens, avocado, and a light vinaigrette can balance the meal.

Garnishing

Don’t forget to garnish your dish! A sprinkle of fresh cilantro or a wedge of lime on the side can add a pop of color and flavor. You might also consider adding thin slices of jalapeño for an extra kick, or even some toasted coconut flakes for added texture.

Drink Pairings

To complete your meal, think about what to drink. Here are some refreshing options:

  • Coconut Water: This hydrating drink complements the tropical flavors of the dish.
  • White Wine: A chilled Sauvignon Blanc or Pinot Grigio can enhance the meal beautifully.
  • Mango Smoothie: For a non-alcoholic option, a mango smoothie can be a delightful pairing.

By considering these serving suggestions, you can create a memorable dining experience with your Coconut Crusted Fish with Mango Salsa. Enjoy the vibrant flavors and the joy of sharing this delicious dish with family and friends!

Tips for Perfecting Coconut Crusted Fish with Mango Salsa Recipe

To truly master the Coconut Crusted Fish with Mango Salsa, a few tips can make all the difference. These simple yet effective suggestions will help you achieve the perfect balance of flavors and textures. Let’s explore some key tips to elevate your dish!

Choose the Right Fish

While tilapia and cod are excellent choices, selecting the freshest fish available is crucial. Fresh fish not only tastes better but also holds up well during cooking. If possible, visit a local fish market to find the best options. Always look for fish with a clean smell and firm texture.

Prep Ahead of Time

To streamline your cooking process, consider prepping your ingredients ahead of time. Chop the mango, onion, and jalapeño for the salsa earlier in the day. You can also mix the coconut crust ingredients and store them in an airtight container. This way, when it’s time to cook, everything is ready to go!

Experiment with Seasonings

Don’t hesitate to get creative with your seasonings! While garlic powder, salt, and pepper are great, you can add other spices to the coconut crust. Consider paprika for a smoky flavor or even a pinch of cayenne for some heat. Adjusting the seasoning can give your dish a unique twist.

Monitor Cooking Temperature

Maintaining the right cooking temperature is essential for achieving that golden crust. If the oil is too hot, the coating may burn before the fish is cooked through. Conversely, if it’s too cool, the fish will absorb excess oil and become greasy. A medium heat is usually ideal for frying.

Let It Rest

After frying, allow the fish to rest on a paper towel-lined plate. This step is important as it helps absorb any excess oil, keeping your dish light and crispy. It also allows the flavors to settle, enhancing the overall taste.

Serve Immediately

For the best experience, serve your Coconut Crusted Fish with Mango Salsa immediately after cooking. The contrast between the warm, crispy fish and the cool, fresh salsa is delightful. If you need to prepare in advance, keep the components separate until just before serving.

By following these tips, you’ll be well on your way to perfecting the Coconut Crusted Fish with Mango Salsa recipe. Enjoy the process, and don’t forget to share your delicious creation with family and friends!

Breakdown of Time for Coconut Crusted Fish with Mango Salsa Recipe

Understanding the time required for each step of the Coconut Crusted Fish with Mango Salsa recipe can help you plan your cooking efficiently. Here’s a breakdown of the time you’ll need for preparation and cooking.

Prep Time

The prep time for this delightful dish is approximately 20 minutes. This includes gathering your ingredients, rinsing and drying the fish, chopping the mango, onion, and jalapeño for the salsa, and mixing the coconut crust ingredients. Taking your time during this step ensures that everything is ready for a smooth cooking process.

Cooking Time

Once you’ve prepped your ingredients, the cooking time is about 10-12 minutes. This includes frying the fish fillets for about 4-5 minutes on each side until they are golden brown and cooked through. The quick cooking time allows you to enjoy a fresh and crispy meal in no time!

Total Time

In total, you can expect the entire process to take around 30-32 minutes from start to finish. This makes the Coconut Crusted Fish with Mango Salsa a fantastic option for a weeknight dinner or a special occasion. With just a little bit of time, you can create a delicious and impressive meal that everyone will love!

Nutritional Information for Coconut Crusted Fish with Mango Salsa Recipe

Understanding the nutritional content of your meals is essential for maintaining a balanced diet. The Coconut Crusted Fish with Mango Salsa is not only delicious but also offers a variety of nutrients. Here’s a closer look at the nutritional information for this delightful dish.

Calories

Each serving of Coconut Crusted Fish with Mango Salsa contains approximately 350 calories. This makes it a satisfying yet light option for lunch or dinner. The combination of fish and fresh salsa provides a nutritious meal without excessive calories, allowing you to enjoy a flavorful dish while keeping your calorie intake in check.

Protein

Protein is an important part of any meal, and this recipe delivers! Each serving provides about 25 grams of protein. The white fish fillets are an excellent source of lean protein, which is essential for muscle repair and overall health. Pairing the fish with the mango salsa adds even more nutritional value, making this dish a great choice for those looking to boost their protein intake.

Sodium

When it comes to sodium, each serving contains around 500 milligrams. This amount is reasonable for a meal, especially considering the flavors from the garlic powder and salt used in the recipe. If you are watching your sodium intake, you can easily adjust the salt in the coconut crust and salsa to suit your dietary needs. Remember, fresh ingredients like mango and cilantro also contribute to the overall flavor without adding extra sodium.

In summary, the Coconut Crusted Fish with Mango Salsa is a nutritious option that provides a good balance of calories, protein, and sodium. Enjoy this dish knowing that you are treating yourself to a meal that is both tasty and beneficial for your health!

FAQs about Coconut Crusted Fish with Mango Salsa Recipe

Can I use frozen fish for this recipe?

Yes, you can use frozen fish for the Coconut Crusted Fish with Mango Salsa recipe! Just make sure to thaw the fish completely before cooking. You can do this by placing the fish in the refrigerator overnight or using the defrost setting on your microwave. Once thawed, rinse and pat the fish dry as you would with fresh fish. This ensures that the coating adheres well and the fish cooks evenly. Keep in mind that cooking times may vary slightly, so check for doneness as you cook.

What can I substitute for mango in the salsa?

If you don’t have mango on hand or prefer a different flavor, there are several delicious substitutes for the salsa. Pineapple is a fantastic option, offering a similar sweetness and tropical flair. You can also use diced peaches or nectarines for a fruity twist. For a creamier texture, consider avocado, which pairs well with the other salsa ingredients. Each of these alternatives will bring a unique taste to your dish while still complementing the coconut crusted fish beautifully.

How do I store leftovers of Coconut Crusted Fish with Mango Salsa?

To store leftovers of Coconut Crusted Fish with Mango Salsa, first, let the fish cool to room temperature. Then, place the fish in an airtight container. It’s best to keep the mango salsa in a separate container to maintain its freshness. Stored properly, the fish can last in the refrigerator for up to 2 days, while the salsa is best consumed within 1-2 days for optimal flavor. When reheating the fish, do so gently in the oven or on the stovetop to preserve its crispy texture. Enjoy your leftovers as a quick and tasty meal!

Conclusion on Coconut Crusted Fish with Mango Salsa Recipe

In conclusion, the Coconut Crusted Fish with Mango Salsa recipe is a delightful dish that brings the flavors of the tropics right to your kitchen. With its crispy coconut coating and refreshing mango salsa, this meal is not only visually appealing but also packed with nutrients. Whether you’re cooking for a special occasion or a casual weeknight dinner, this recipe is sure to impress.

By following the steps outlined in this article, you can create a dish that is both delicious and satisfying. The versatility of the recipe allows you to experiment with different types of fish and salsa combinations, making it a fun culinary adventure. Plus, the tips and variations provided will help you perfect your cooking technique and tailor the dish to your taste.

As you enjoy your Coconut Crusted Fish with Mango Salsa, remember that cooking is about creativity and joy. Don’t hesitate to make it your own by adding personal touches or trying new ingredients. Share this dish with family and friends, and watch as they savor every bite. With its tropical flavors and crispy texture, this recipe is bound to become a favorite in your household.

So, gather your ingredients, roll up your sleeves, and get ready to embark on a delicious journey. Happy cooking!

Pepperoni Pizza Lasagna Roll-Ups Recipe is a must-try!

Introduction to Pepperoni Pizza Lasagna Roll-Ups Recipe

Pepperoni Pizza Lasagna Roll-Ups Recipe combines the best of both worlds: the comforting layers of lasagna and the classic flavors of pizza. This dish is not only easy to make but also a hit with both kids and adults alike.

Imagine rolling up tender lasagna noodles filled with creamy ricotta, savory pepperoni, and gooey mozzarella, all smothered in rich pizza sauce. It’s a meal that brings everyone together, perfect for family dinners or casual gatherings with friends. Plus, it’s a great way to sneak in some extra veggies if you choose to add them!

In this recipe, we’ll guide you through each step, ensuring that your roll-ups turn out perfectly every time. Whether you’re a seasoned chef or a beginner in the kitchen, you’ll find this recipe straightforward and rewarding. So, grab your apron and let’s dive into the world of Pepperoni Pizza Lasagna Roll-Ups!

Ingredients for Pepperoni Pizza Lasagna Roll-Ups Recipe

Pepperoni Pizza Lasagna Roll-Ups Recipe, you’ll need a few simple ingredients. These items are easy to find at your local grocery store. Here’s what you’ll need:

  • 8 lasagna noodles
  • 1 cup ricotta cheese
  • 1 cup shredded mozzarella cheese
  • 1/2 cup grated Parmesan cheese
  • 1 cup pizza sauce
  • 1 cup sliced pepperoni
  • 1 teaspoon Italian seasoning
  • 1/2 teaspoon garlic powder
  • Salt and pepper to taste
  • Fresh basil leaves for garnish (optional)

These ingredients come together to create a delightful dish that’s bursting with flavor. The combination of cheeses provides a creamy texture, while the pepperoni adds a savory kick. The pizza sauce ties everything together, making each bite a delicious experience.

Feel free to customize your roll-ups by adding your favorite toppings or ingredients. For instance, you can include vegetables like bell peppers or mushrooms for added nutrition. The possibilities are endless, and that’s what makes this recipe so versatile!

Now that you have your ingredients ready, let’s move on to the preparation steps to bring your Pepperoni Pizza Lasagna Roll-Ups to life!

Preparation of Pepperoni Pizza Lasagna Roll-Ups Recipe

Pepperoni Pizza Lasagna Roll-Ups Recipe. This process is simple and fun! Follow these steps to create a delicious meal that everyone will love.

Step 1: Preheat the Oven

First things first, preheat your oven to 375°F (190°C). This step is crucial as it ensures that your roll-ups bake evenly and come out perfectly golden. While the oven heats up, you can move on to the next step.

Step 2: Cook the Lasagna Noodles

Next, cook the lasagna noodles according to the package instructions. Aim for al dente, which means they should be firm to the bite. Once cooked, drain the noodles and lay them flat on a clean kitchen towel. This prevents them from sticking together and makes them easier to roll.

Step 3: Prepare the Filling

In a mixing bowl, combine the ricotta cheese, 1/2 cup of shredded mozzarella cheese, grated Parmesan cheese, Italian seasoning, garlic powder, salt, and pepper. Mix everything together until well combined. This cheesy filling is what makes your roll-ups so delicious!

Step 4: Assemble the Roll-Ups

Now it’s time to assemble your roll-ups! Spread a thin layer of pizza sauce on each lasagna noodle, leaving a small border around the edges. Then, spoon about 2 tablespoons of the cheese mixture onto each noodle. Top it off with a few slices of pepperoni. Carefully roll each noodle up, starting from one end, and place them seam-side down in a greased 9×13 inch baking dish.

Step 5: Add Sauce and Cheese

Once all the roll-ups are in the baking dish, pour the remaining pizza sauce over them. Don’t be shy—make sure each roll-up is well covered! Finally, sprinkle the remaining mozzarella cheese on top. This will create a bubbly, cheesy crust as it bakes.

Step 6: Bake the Roll-Ups

Cover the dish with aluminum foil and bake for 25 minutes. After that, remove the foil and bake for an additional 10 minutes. This will allow the cheese to become bubbly and golden. Once done, let the roll-ups cool for a few minutes before serving. If you like, garnish with fresh basil leaves for a pop of color and flavor!

Pepperoni Pizza Lasagna Roll-Ups Recipe is ready to be enjoyed. The combination of flavors and textures will surely impress your family and friends.

Variation of Pepperoni Pizza Lasagna Roll-Ups Recipe

Pepperoni Pizza Lasagna Roll-Ups Recipe is a crowd-pleaser, there are plenty of ways to switch things up! Whether you’re looking for a vegetarian option or a gluten-free alternative, these variations will keep your meal exciting and inclusive for everyone.

Vegetarian Option

If you want to make a vegetarian version of the roll-ups, simply replace the pepperoni with your favorite vegetables. You can use ingredients like spinach, zucchini, or bell peppers. These veggies not only add flavor but also boost the nutritional value of your dish.

To prepare the filling, mix in some sautéed mushrooms or diced tomatoes along with the cheese mixture. This will create a hearty and satisfying meal without any meat. You can also sprinkle some crushed red pepper flakes for a little kick! Your vegetarian roll-ups will be just as delicious and satisfying as the original.

Gluten-Free Alternative

Pepperoni Pizza Lasagna Roll-Ups Recipe by using gluten-free lasagna noodles. Many brands offer great alternatives that taste just as good as traditional noodles.

Make sure to check the packaging for cooking instructions, as gluten-free noodles may require different cooking times. Once you have your gluten-free noodles ready, follow the same steps as the original recipe. You’ll end up with a delightful dish that everyone can enjoy, regardless of dietary restrictions!

These variations not only cater to different dietary needs but also allow you to explore new flavors. So, feel free to get creative and make the recipe your own!

Cooking Note for Pepperoni Pizza Lasagna Roll-Ups Recipe

Pepperoni Pizza Lasagna Roll-Ups Recipe, there are a few cooking notes to keep in mind to ensure your dish turns out perfectly every time. These tips will help you avoid common pitfalls and enhance the overall flavor and texture of your roll-ups.

First, make sure to cook the lasagna noodles just until they are al dente. Overcooking them can lead to mushy roll-ups that fall apart. Remember, they will continue to cook in the oven, so a firm noodle is key!

Next, when spreading the pizza sauce on the noodles, be careful not to overdo it. A thin layer is sufficient to keep the roll-ups from becoming soggy. You want just enough sauce to add flavor without compromising the structure of the noodles.

Additionally, if you’re using a baking dish that’s not non-stick, be sure to grease it well. This will prevent the roll-ups from sticking and make serving much easier. You can use cooking spray or a light coating of olive oil for this purpose.

Lastly, let the roll-ups cool for a few minutes after baking. This resting time allows the cheese to set slightly, making it easier to serve without the filling spilling out. Trust us, a little patience goes a long way!

Pepperoni Pizza Lasagna Roll-Ups Recipe!

Serving Suggestions for Pepperoni Pizza Lasagna Roll-Ups Recipe

Pepperoni Pizza Lasagna Roll-Ups Recipe is baked to perfection, it’s time to serve them up! This dish is not only delicious but also visually appealing, making it a great centerpiece for any meal. Here are some serving suggestions to elevate your dining experience:

  • Pair with a Fresh Salad: A crisp green salad is a perfect complement to the rich flavors of the roll-ups. Consider a simple mixed greens salad with cherry tomatoes, cucumbers, and a light vinaigrette. The freshness of the salad balances the hearty lasagna.
  • Serve with Garlic Bread: Nothing says comfort food like garlic bread! Serve warm, buttery garlic bread on the side. It’s great for dipping into the extra pizza sauce.
  • Top with Extra Sauce: For those who love sauce, drizzle some additional pizza sauce over the roll-ups before serving. This adds extra flavor and moisture, making each bite even more enjoyable.
  • Garnish with Fresh Herbs: Fresh basil or parsley can brighten up the dish. Sprinkle some chopped herbs on top for a pop of color and a burst of flavor.
  • Offer a Variety of Toppings: Set up a toppings bar with options like crushed red pepper flakes, grated Parmesan cheese, or even sliced olives. This allows everyone to customize their roll-ups to their liking.

Pepperoni Pizza Lasagna Roll-Ups will surely be a hit!

Tips for Perfect Pepperoni Pizza Lasagna Roll-Ups Recipe

Pepperoni Pizza Lasagna Roll-Ups Recipe is all about attention to detail. With a few helpful tips, you can ensure that your roll-ups turn out delicious every time. Here are some expert suggestions to elevate your cooking game:

  • Use Fresh Ingredients: Fresh ingredients make a big difference in flavor. Opt for fresh ricotta and mozzarella cheese if possible. Fresh herbs, like basil, can also enhance the taste of your roll-ups.
  • Don’t Overfill: When adding the cheese mixture and pepperoni, be careful not to overfill the noodles. A little goes a long way! Overfilling can cause the roll-ups to burst during baking.
  • Experiment with Cheese: While the classic recipe calls for ricotta and mozzarella, feel free to experiment! Try adding provolone or fontina cheese for a different flavor profile. Mixing cheeses can create a delightful taste experience.
  • Let the Sauce Simmer: If you’re using store-bought pizza sauce, consider simmering it on the stove for a few minutes. This can deepen the flavors and make it even more delicious. You can add herbs or spices to customize it to your liking.
  • Cool the Noodles: After cooking the lasagna noodles, let them cool slightly before assembling. This makes them easier to handle and reduces the risk of burns when rolling them up.
  • Cover While Baking: Covering the baking dish with aluminum foil during the first part of baking helps to keep moisture in. This prevents the roll-ups from drying out and ensures a tender texture.
  • Let Them Rest: After baking, allow the roll-ups to rest for about 5-10 minutes before serving. This helps the cheese set and makes it easier to cut and serve without falling apart.
  • Pair with Dipping Sauces: Consider serving your roll-ups with extra pizza sauce or a creamy ranch dressing for dipping. This adds an extra layer of flavor and fun to the meal.

Pepperoni Pizza Lasagna Roll-Ups Recipe. Each bite will be packed with flavor, and your family and friends will be asking for seconds!

Breakdown of Time for Pepperoni Pizza Lasagna Roll-Ups Recipe

Pepperoni Pizza Lasagna Roll-Ups Recipe can help you plan your meal better. Here’s a simple breakdown of the time required for each step, so you can enjoy a stress-free cooking experience.

Prep Time

The prep time for this delicious recipe is approximately 20 minutes. This includes gathering your ingredients, cooking the lasagna noodles, and preparing the cheese filling. Taking your time during this stage ensures that everything is ready for assembly, making the process smoother.

Cooking Time

Once your roll-ups are assembled, the cooking time is about 35 minutes. This includes 25 minutes of covered baking and an additional 10 minutes uncovered to achieve that golden, bubbly cheese on top. It’s the perfect amount of time to let the flavors meld together while ensuring the noodles are cooked to perfection.

Total Time

In total, you can expect to spend around 55 minutes from start to finish. This includes both prep and cooking time. With such a quick turnaround, you can have a delightful meal ready to serve in less than an hour!

Pepperoni Pizza Lasagna Roll-Ups Recipe into your busy schedule. Enjoy the process and the delicious results!

Nutritional Information for Pepperoni Pizza Lasagna Roll-Ups Recipe

Pepperoni Pizza Lasagna Roll-Ups Recipe not only satisfies your taste buds but also provides valuable nutrients. Here’s a breakdown of the nutritional information per serving, so you can enjoy this dish while keeping your health in mind.

Calories

Pepperoni Pizza Lasagna Roll-Ups Recipe contains approximately 450 calories. This calorie count makes it a hearty meal that can keep you full and satisfied. It’s a great option for dinner, especially after a long day!

Protein

In terms of protein, each serving offers about 25 grams. This protein content comes from the ricotta, mozzarella, and pepperoni, making it a good source of this essential nutrient. Protein is vital for muscle repair and growth, so you can feel good about enjoying this dish.

Sodium

When it comes to sodium, the roll-ups contain around 800 milligrams per serving. While this is a reasonable amount for a flavorful dish, it’s always wise to be mindful of your sodium intake, especially if you’re watching your salt consumption. You can reduce sodium by using low-sodium pizza sauce or cheese if desired.

Pepperoni Pizza Lasagna Roll-Ups Recipe provides a balanced mix of calories, protein, and flavor. It’s a delightful meal that can fit into a healthy eating plan when enjoyed in moderation. So, dig in and savor every bite!

FAQs about Pepperoni Pizza Lasagna Roll-Ups Recipe

Can I make Pepperoni Pizza Lasagna Roll-Ups ahead of time?

Pepperoni Pizza Lasagna Roll-Ups Recipe ahead of time. Simply assemble the roll-ups and place them in the baking dish. Cover the dish with plastic wrap or aluminum foil and store it in the refrigerator for up to 24 hours. When you’re ready to bake, just remove the cover and bake as directed. This makes it a great option for busy weeknights or when hosting guests!

What can I substitute for pepperoni in the recipe?

Pepperoni Pizza Lasagna Roll-Ups Recipe is versatile, so feel free to get creative with your fillings!

How do I store leftovers of Pepperoni Pizza Lasagna Roll-Ups?

Storing leftovers is easy! Allow the roll-ups to cool completely, then transfer them to an airtight container. You can keep them in the refrigerator for up to 3-4 days. When you’re ready to enjoy them again, simply reheat in the oven at 350°F (175°C) until warmed through. You can also microwave them for a quicker option, but the oven will help maintain the texture.

Can I freeze Pepperoni Pizza Lasagna Roll-Ups?

Pepperoni Pizza Lasagna Roll-Ups Recipe! To do this, assemble the roll-ups and place them in a freezer-safe dish. Cover tightly with plastic wrap and then aluminum foil to prevent freezer burn. They can be frozen for up to 2-3 months. When you’re ready to eat, thaw them in the refrigerator overnight and bake as usual. This makes for a convenient meal option on busy days!

Conclusion on Pepperoni Pizza Lasagna Roll-Ups Recipe

Pepperoni Pizza Lasagna Roll-Ups Recipe is a delightful dish that brings together the best flavors of lasagna and pizza in a fun and easy-to-make format. Whether you’re cooking for a family dinner or a casual gathering with friends, these roll-ups are sure to impress everyone at the table. The combination of creamy cheeses, savory pepperoni, and rich pizza sauce creates a mouthwatering experience that is hard to resist.

Not only is this recipe delicious, but it also offers versatility. You can easily customize it to suit your dietary preferences, whether you choose to go vegetarian or gluten-free. The tips and variations provided ensure that you can make this dish your own, allowing for creativity in the kitchen.

Pepperoni Pizza Lasagna Roll-Ups, remember to enjoy the process. Cooking is not just about the end result; it’s about the joy of creating something special. So, gather your loved ones, share the experience, and savor each bite of this delightful meal.

We hope you find this recipe as enjoyable to make as it is to eat. Happy cooking, and may your kitchen be filled with the wonderful aroma of Pepperoni Pizza Lasagna Roll-Ups!

Mediterranean Roasted Eggplant: A Flavorful Delight!

Introduction to Mediterranean Roasted Eggplant

Mediterranean Roasted Eggplant is a true celebration of bold flavors and simple ingredients. With its tender texture, smoky edges, and a vibrant blend of herbs, garlic, and olive oil, this dish captures the essence of Mediterranean cooking. Whether served as a side, appetizer, or part of a mezze platter, it’s a flavorful delight that brings warmth and sunshine to every bite.

Why You’ll Love This Mediterranean Roasted Eggplant

This Mediterranean Roasted Eggplant is a true gem in the kitchen. It’s quick to prepare, taking just 40 minutes from start to finish. The flavors are vibrant, with a delightful mix of spices that dance on your palate. Plus, it’s a healthy option that fits perfectly into a vegetarian diet. Whether you’re serving it as a side or a main dish, it’s sure to impress everyone at the table!

Ingredients for Mediterranean Roasted Eggplant

Gathering the right ingredients is the first step to creating a delicious Mediterranean Roasted Eggplant. Here’s what you’ll need:

  • Eggplants: Choose medium-sized eggplants for the best texture. They should be firm and shiny, indicating freshness.
  • Olive Oil: A good quality olive oil enhances the flavor and helps achieve that perfect golden-brown finish.
  • Salt: Essential for bringing out the natural flavors of the eggplant. It also helps draw out excess moisture.
  • Black Pepper: Freshly ground black pepper adds a subtle kick to the dish.
  • Garlic Powder: This adds a warm, savory depth without the hassle of chopping fresh garlic.
  • Dried Oregano: A staple in Mediterranean cuisine, it brings a fragrant, earthy flavor.
  • Smoked Paprika: This spice adds a hint of smokiness, elevating the dish to new heights.
  • Cherry Tomatoes: Sweet and juicy, they burst with flavor when roasted, complementing the eggplant beautifully.
  • Feta Cheese: Crumbled feta adds a creamy, tangy finish that perfectly balances the dish.
  • Fresh Parsley: A sprinkle of chopped parsley not only adds color but also a fresh, herbal note.

For those looking to spice things up, consider adding a pinch of red pepper flakes to the seasoning mix. If you’re in a pinch, you can substitute the eggplant with zucchini or bell peppers for a different twist. Exact measurements for these ingredients can be found at the bottom of the article, ready for printing!

How to Make Mediterranean Roasted Eggplant

Creating Mediterranean Roasted Eggplant is a straightforward process that yields delicious results. Follow these simple steps, and you’ll have a dish that’s bursting with flavor and perfect for any occasion.

Step 1: Preheat the Oven

Start by preheating your oven to 400°F (200°C). This step is crucial for achieving that perfect roasted texture. A hot oven ensures the eggplant slices cook evenly, becoming tender and golden brown. Trust me, you want that caramelization!

Step 2: Prepare the Eggplant

Next, slice your eggplants into 1-inch rounds. This thickness allows for even cooking. In a large bowl, combine the eggplant slices with olive oil, salt, black pepper, garlic powder, oregano, and smoked paprika. Toss everything together until the eggplant is evenly coated. This seasoning mix is what brings the Mediterranean flavors to life!

Step 3: Arrange on Baking Sheet

Now, it’s time to arrange the eggplant slices on a baking sheet lined with parchment paper. Make sure to space them out in a single layer. This is key! Crowding the pan can lead to steaming instead of roasting, which means you’ll miss out on that delightful crispiness.

Step 4: Roast the Eggplant

Roast the eggplant in your preheated oven for 25-30 minutes. Flip the slices halfway through to ensure they cook evenly. You’re looking for a tender texture and a beautiful golden color. The aroma will be irresistible, and your kitchen will feel like a Mediterranean bistro!

Step 5: Add Cherry Tomatoes

In the last 5 minutes of roasting, add the halved cherry tomatoes to the baking sheet. They’ll soften and release their juices, creating a burst of flavor that complements the eggplant perfectly. It’s like a little flavor explosion waiting to happen!

Step 6: Garnish and Serve

Once everything is roasted to perfection, remove the baking sheet from the oven. Sprinkle crumbled feta cheese and chopped parsley over the top. This final touch not only adds a pop of color but also a creamy, tangy flavor that ties the dish together beautifully. Serve warm, and watch your loved ones dig in!

Tips for Success

  • Choose eggplants that are firm and shiny for the best texture.
  • Don’t skip the preheating step; it’s essential for even roasting.
  • For extra flavor, let the eggplant sit with salt for 15 minutes before rinsing to draw out moisture.
  • Experiment with different herbs like thyme or basil for a unique twist.
  • Serve immediately for the best taste and texture.

Equipment Needed

  • Baking Sheet: A standard baking sheet works well, but a cast-iron skillet can add extra flavor.
  • Parchment Paper: This helps prevent sticking; aluminum foil is a good alternative.
  • Large Bowl: Any mixing bowl will do, even a large pot if that’s what you have.
  • Sharp Knife: A good chef’s knife makes slicing the eggplant a breeze.

Variations

  • Spicy Kick: Add a pinch of red pepper flakes to the seasoning mix for a spicy twist.
  • Herb Infusion: Swap out oregano for fresh basil or thyme to change up the flavor profile.
  • Cheese Alternatives: Try goat cheese or a dairy-free feta for a different creamy finish.
  • Roasted Veggie Medley: Mix in other vegetables like zucchini, bell peppers, or mushrooms for a colorful dish.
  • Grain Bowl: Serve the roasted eggplant over a bed of quinoa or couscous for a hearty meal.

Serving Suggestions

  • Pair with a refreshing Greek salad for a complete Mediterranean experience.
  • Serve alongside grilled chicken or fish for a protein boost.
  • Drizzle with balsamic glaze for an elegant touch.
  • Enjoy with a glass of crisp white wine, like Sauvignon Blanc.
  • Garnish with extra parsley for a vibrant presentation.

FAQs about Mediterranean Roasted Eggplant

Can I use other vegetables instead of eggplant?

Absolutely! While eggplant is the star of this dish, zucchini, bell peppers, or even mushrooms can work beautifully. Just keep in mind that cooking times may vary slightly.

How do I store leftovers?

Store any leftover Mediterranean Roasted Eggplant in an airtight container in the fridge for up to three days. Reheat in the oven for the best texture, or enjoy it cold in salads!

Can I make this dish ahead of time?

Yes! You can prepare the eggplant and season it a few hours in advance. Just roast it right before serving for that fresh, warm flavor.

What can I serve with Mediterranean Roasted Eggplant?

This dish pairs wonderfully with a Greek salad, grilled meats, or even as a topping for quinoa or couscous. The possibilities are endless!

Is this recipe suitable for meal prep?

Definitely! Mediterranean Roasted Eggplant is perfect for meal prep. It holds up well in the fridge and can be easily incorporated into various meals throughout the week.

Final Thoughts

Cooking Mediterranean Roasted Eggplant is more than just preparing a meal; it’s about creating a moment of joy in your kitchen. The vibrant colors and enticing aromas fill your home with warmth, inviting everyone to gather around the table. Each bite is a celebration of flavors, from the smoky paprika to the creamy feta. This dish not only nourishes the body but also the soul, reminding us of the beauty of simple, wholesome ingredients. Whether it’s a weeknight dinner or a special occasion, Mediterranean Roasted Eggplant is sure to bring smiles and satisfaction to all who share it.

Mediterranean Roasted Eggplant
jhessica

Mediterranean Roasted Eggplant: A Flavorful Delight!

Mediterranean Roasted Eggplant is a flavorful and healthy dish featuring roasted eggplant slices seasoned with olive oil, spices, and topped with cherry tomatoes and feta cheese.
Prep Time 10 minutes
Cook Time 30 minutes
Total Time 40 minutes
Servings: 4 servings
Course: Side Dish
Cuisine: Mediterranean
Calories: 180

Ingredients
  

  • 2 medium eggplants sliced into 1-inch rounds
  • 1/4 cup olive oil
  • 1 teaspoon salt
  • 1/2 teaspoon black pepper
  • 1 teaspoon garlic powder
  • 1 teaspoon dried oregano
  • 1 teaspoon smoked paprika
  • 1/2 cup cherry tomatoes halved
  • 1/4 cup crumbled feta cheese
  • Fresh parsley chopped (for garnish)

Method
 

  1. Preheat your oven to 400°F (200°C).
  2. In a large bowl, combine the sliced eggplants, olive oil, salt, black pepper, garlic powder, oregano, and smoked paprika. Toss until the eggplant slices are evenly coated.
  3. Arrange the eggplant slices in a single layer on a baking sheet lined with parchment paper.
  4. Roast in the preheated oven for 25-30 minutes, flipping halfway through, until the eggplants are tender and golden brown.
  5. In the last 5 minutes of roasting, add the halved cherry tomatoes to the baking sheet.
  6. Remove from the oven and sprinkle with crumbled feta cheese and chopped parsley before serving.

Nutrition

Serving: 1servingCalories: 180kcalCarbohydrates: 8gProtein: 4gFat: 15gSaturated Fat: 2gPolyunsaturated Fat: 13gCholesterol: 5mgSodium: 300mgFiber: 3gSugar: 3g

Notes

  • For a spicier version, add a pinch of red pepper flakes to the seasoning mix.
  • Serve with a side of quinoa or couscous for a complete meal.

Tried this recipe?

Let us know how it was!

Sweet Hawaiian Chicken in a Crockpot is easy to make!

Introduction to Sweet Hawaiian Chicken in a Crockpot

Are you looking for a delicious and easy meal that will impress your family and friends? Look no further than Sweet Hawaiian Chicken in a Crockpot! This dish combines tender chicken thighs with a sweet and tangy sauce, creating a delightful flavor that everyone will love. The best part? You can set it and forget it! Just toss the ingredients into your crockpot, and let it do the work for you.

This recipe is perfect for busy weeknights or lazy weekends. With minimal prep time, you can enjoy a hearty meal without spending hours in the kitchen. Plus, the combination of pineapple, soy sauce, and brown sugar gives this dish a tropical twist that will transport your taste buds to a sunny paradise.

Whether you’re hosting a gathering or simply cooking for your family, Sweet Hawaiian Chicken is sure to be a hit. Serve it over fluffy rice, and watch as everyone goes back for seconds. So, grab your crockpot and get ready to create a meal that’s not only tasty but also easy to make!

Ingredients for Sweet Hawaiian Chicken in a Crockpot

To create the mouthwatering Sweet Hawaiian Chicken in a Crockpot, you’ll need a few simple ingredients. Each one plays a vital role in building the dish’s unique flavor profile. Here’s what you’ll need:

  • 2 pounds boneless, skinless chicken thighs: These are perfect for slow cooking, as they become tender and juicy.
  • 1 cup pineapple chunks: Fresh or canned, these add a sweet and tropical flavor. Make sure to drain canned pineapple to avoid excess liquid.
  • 1/2 cup soy sauce: This provides a savory depth to the dish. You can use low-sodium soy sauce if you prefer.
  • 1/2 cup brown sugar: The sweetness balances the saltiness of the soy sauce, creating a delightful contrast.
  • 1/4 cup ketchup: This adds a hint of tanginess and helps thicken the sauce.
  • 1 tablespoon minced garlic: Fresh garlic enhances the overall flavor with its aromatic qualities.
  • 1 tablespoon minced ginger: Ginger adds a warm, spicy note that complements the sweetness.
  • 1 teaspoon sesame oil: This oil brings a nutty flavor that elevates the dish.
  • 1/2 teaspoon black pepper: A little spice to round out the flavors.
  • 1/4 cup chopped green onions: These are for garnish, adding a fresh crunch and a pop of color.
  • Cooked rice: Serve the chicken over rice to soak up all the delicious sauce.

Gathering these ingredients is the first step toward making a delightful meal. Each component contributes to the overall taste, making this dish a favorite for many. Now that you have everything ready, let’s move on to the preparation!

Step-by-Step Preparation of Sweet Hawaiian Chicken in a Crockpot

Now that you have all your ingredients ready, it’s time to dive into the step-by-step preparation of Sweet Hawaiian Chicken in a Crockpot. This process is simple and straightforward, making it easy for anyone to follow. Let’s get started!

Step 1: Preparing the Chicken

First, take your 2 pounds of boneless, skinless chicken thighs. Rinse them under cold water and pat them dry with paper towels. This helps remove any excess moisture. Next, place the chicken thighs in the bottom of your crockpot. Make sure they are spread out evenly. This ensures that they cook uniformly and soak up all the delicious flavors from the sauce.

Step 2: Mixing the Sauce

In a medium bowl, it’s time to mix the sauce. Combine the pineapple chunks, soy sauce, brown sugar, ketchup, minced garlic, minced ginger, sesame oil, and black pepper. Use a whisk or a fork to blend everything together until it’s well combined. The mixture should be smooth and slightly thick. This sauce is what gives the chicken its sweet and tangy flavor, so make sure it’s mixed well!

Step 3: Combining Ingredients in the Crockpot

Now, pour the sauce mixture over the chicken in the crockpot. Ensure that the chicken is well coated with the sauce. You can use a spoon to gently stir the chicken and sauce together, but be careful not to break the chicken apart. The goal is to have every piece of chicken covered in that tasty sauce.

Step 4: Cooking the Chicken

Cover the crockpot with its lid. You can choose to cook the chicken on low for 6-7 hours or on high for 3-4 hours. Cooking on low allows the flavors to meld beautifully, while cooking on high is perfect for a quicker meal. Either way, the chicken will become tender and easy to shred. When it’s done, you’ll know it’s ready when the chicken easily pulls apart with a fork.

Step 5: Serving the Dish

Once the chicken is cooked, take two forks and shred the chicken right in the crockpot. Stir it back into the sauce to ensure every bite is flavorful. Now, it’s time to serve! Spoon the sweet Hawaiian chicken over a bed of cooked rice. For a finishing touch, sprinkle chopped green onions on top for a fresh crunch. Enjoy your delicious meal!

Variation of Sweet Hawaiian Chicken in a Crockpot

While the classic Sweet Hawaiian Chicken in a Crockpot is a crowd-pleaser, there are many ways to switch things up! Whether you want to try different ingredients or explore various cooking methods, these variations can add a new twist to your meal. Let’s dive into some alternative ingredients and cooking methods that can enhance your dish.

Alternative Ingredients

Experimenting with different ingredients can lead to exciting new flavors. Here are some alternatives you might consider:

  • Chicken Breasts: For a leaner option, swap out chicken thighs for boneless, skinless chicken breasts. They will still be tender and delicious!
  • Different Fruits: Instead of pineapple, try using mango or peaches for a different fruity flavor. These fruits will add their own sweetness and tropical flair.
  • Teriyaki Sauce: Replace soy sauce with teriyaki sauce for a sweeter, more complex flavor. This can enhance the dish’s overall taste.
  • Vegetables: Add bell peppers, carrots, or snap peas to the crockpot for extra nutrition and color. They will cook down and absorb the sauce’s flavors.
  • Honey or Maple Syrup: If you want a different sweetener, consider using honey or maple syrup instead of brown sugar. This can add a unique twist to the sauce.

Different Cooking Methods

While the crockpot is a fantastic way to prepare this dish, you can also try other cooking methods for a quicker meal. Here are a couple of options:

  • Instant Pot: If you’re short on time, use an Instant Pot. Cook the chicken on high pressure for about 10-12 minutes, then shred and mix with the sauce. This method is fast and still yields tender chicken.
  • Stovetop: You can also make this dish on the stovetop. Sauté the chicken in a large skillet until browned, then add the sauce and simmer for about 20-30 minutes until the chicken is cooked through and tender.

These variations can help you customize your Sweet Hawaiian Chicken in a Crockpot to suit your taste preferences. Whether you stick to the classic recipe or try something new, you’re sure to enjoy a delicious meal!

Cooking Note for Sweet Hawaiian Chicken in a Crockpot

When preparing Sweet Hawaiian Chicken in a Crockpot, there are a few important cooking notes to keep in mind. These tips will help ensure that your dish turns out perfectly every time. Let’s explore some key points to consider while cooking.

First, always ensure that your crockpot is set to the correct temperature. Cooking on low for 6-7 hours allows the flavors to meld beautifully, while cooking on high for 3-4 hours is great for a quicker meal. However, if you choose to cook on high, keep an eye on the chicken to prevent it from drying out.

Next, it’s essential to avoid overloading your crockpot. If you’re making a larger batch, consider using a bigger crockpot or cooking in two separate batches. Overcrowding can lead to uneven cooking, which may result in some pieces being undercooked while others are overdone.

Additionally, if you prefer a thicker sauce, you can remove the lid during the last 30 minutes of cooking. This allows some of the liquid to evaporate, concentrating the flavors and thickening the sauce. Just be sure to stir occasionally to prevent sticking.

Lastly, remember to let the chicken rest for a few minutes after cooking. This helps the juices redistribute, making the chicken even more tender and flavorful. Once rested, shred the chicken and mix it back into the sauce for a delicious finish.

By following these cooking notes, you can create a delightful Sweet Hawaiian Chicken in a Crockpot that is sure to impress. Enjoy the process and savor the wonderful flavors that come together in this easy and tasty dish!

Serving Suggestions for Sweet Hawaiian Chicken in a Crockpot

Once your Sweet Hawaiian Chicken in a Crockpot is ready, it’s time to think about how to serve it! This dish is versatile and pairs well with various sides and garnishes. Here are some delightful serving suggestions to elevate your meal:

  • Fluffy Rice: The classic choice! Serve the chicken over a bed of fluffy white or brown rice. The rice will soak up the delicious sauce, making every bite flavorful.
  • Quinoa: For a healthier option, consider serving the chicken over quinoa. This protein-packed grain adds a nutty flavor and complements the dish beautifully.
  • Cauliflower Rice: If you’re looking for a low-carb alternative, cauliflower rice is a great choice. It’s light and allows the sweet Hawaiian flavors to shine through.
  • Steamed Vegetables: Add a side of steamed broccoli, green beans, or snap peas for a nutritious boost. The crunch of the veggies contrasts nicely with the tender chicken.
  • Salad: A fresh salad can balance the richness of the chicken. Try a simple green salad with a light vinaigrette or a tropical fruit salad with mango and avocado.
  • Wraps: For a fun twist, use the chicken to make wraps. Fill tortillas with the shredded chicken, some fresh veggies, and a drizzle of extra sauce for a tasty meal on the go.
  • Garnishes: Don’t forget to sprinkle chopped green onions or sesame seeds on top before serving. These add a pop of color and a burst of flavor that enhances the dish.

These serving suggestions can help you create a well-rounded meal that everyone will enjoy. Whether you stick to the classic rice or try something new, your Sweet Hawaiian Chicken in a Crockpot will surely be a hit at the dinner table!

Tips for Perfecting Sweet Hawaiian Chicken in a Crockpot

To make your Sweet Hawaiian Chicken in a Crockpot truly shine, consider these helpful tips. They will guide you in achieving the best flavor and texture, ensuring that every bite is delicious. Let’s explore some key tips for perfecting this dish!

  • Use Quality Ingredients: Start with fresh, high-quality chicken thighs. The better the ingredients, the better the final dish will taste. Fresh pineapple can elevate the flavor, but canned works well too.
  • Marinate for Extra Flavor: If you have time, marinate the chicken in the sauce for a few hours or overnight. This allows the flavors to penetrate the meat, making it even more delicious.
  • Adjust Sweetness: Taste the sauce before pouring it over the chicken. If you prefer a sweeter dish, add a bit more brown sugar or honey. For a tangier flavor, increase the ketchup or soy sauce.
  • Don’t Skip the Garlic and Ginger: These ingredients are essential for adding depth to the flavor. Freshly minced garlic and ginger will provide a more vibrant taste than powdered versions.
  • Monitor Cooking Time: Keep an eye on the cooking time. If you’re using chicken breasts, they may cook faster than thighs. Check for doneness to avoid overcooking.
  • Let It Rest: After cooking, let the chicken rest for a few minutes before shredding. This helps retain moisture and makes the chicken more tender.
  • Save Leftover Sauce: If you have extra sauce, save it! It can be used as a marinade for other meats or drizzled over vegetables for added flavor.
  • Experiment with Spices: Feel free to add spices like paprika or cayenne pepper for a little heat. This can balance the sweetness and add complexity to the dish.

By following these tips, you can elevate your Sweet Hawaiian Chicken in a Crockpot to new heights. Each suggestion is designed to enhance the flavors and ensure a delightful dining experience. Enjoy the process and the delicious results!

Breakdown of Time for Sweet Hawaiian Chicken in a Crockpot

Understanding the time needed for each step in preparing Sweet Hawaiian Chicken in a Crockpot can help you plan your meal better. Here’s a simple breakdown of the time involved, from preparation to cooking.

Prep Time

The prep time for this delicious dish is quite minimal. You’ll spend about 15-20 minutes gathering and preparing the ingredients. This includes rinsing and drying the chicken, chopping the green onions, and mixing the sauce. With everything ready, you can move on to the next steps without any hassle!

Cooking Time

Once you’ve combined all the ingredients in the crockpot, the cooking time will vary based on your choice. If you cook on low, it will take about 6-7 hours. On the other hand, cooking on high will take around 3-4 hours. Both methods will yield tender, flavorful chicken, so choose the one that fits your schedule best.

Total Time

In total, you can expect to spend about 6 hours and 15 minutes to 7 hours and 20 minutes from start to finish. This includes both prep and cooking time. The beauty of this recipe is that while the chicken cooks, you can go about your day, making it a perfect option for busy families or anyone looking for a convenient meal solution.

With this time breakdown, you can easily plan your day around making Sweet Hawaiian Chicken in a Crockpot. Enjoy the process and the delightful meal that awaits you!

Nutritional Information for Sweet Hawaiian Chicken in a Crockpot

When it comes to enjoying a delicious meal, knowing the nutritional information can help you make informed choices. Sweet Hawaiian Chicken in a Crockpot is not only tasty but also provides a good balance of nutrients. Let’s break down the key nutritional components of this dish.

Calories

Each serving of Sweet Hawaiian Chicken in a Crockpot contains approximately 320 calories. This makes it a satisfying meal option without being overly heavy. The combination of chicken, pineapple, and sauce contributes to the calorie count, providing energy for your day. If you’re watching your calorie intake, serving it with a side of vegetables or a smaller portion of rice can help keep your meal balanced.

Protein

One of the standout features of this dish is its protein content. Each serving offers about 28 grams of protein. Chicken thighs are an excellent source of protein, which is essential for muscle repair and overall health. Including protein in your meals can help you feel fuller for longer, making this dish a great choice for lunch or dinner.

Sodium

When it comes to sodium, each serving contains around 800 milligrams. This is primarily due to the soy sauce used in the recipe. If you’re concerned about sodium intake, consider using low-sodium soy sauce. This simple swap can significantly reduce the sodium content while still maintaining the dish’s delicious flavor. Balancing your meal with fresh vegetables can also help offset sodium levels.

Overall, Sweet Hawaiian Chicken in a Crockpot is a nutritious option that provides a good mix of calories, protein, and flavor. By being mindful of the ingredients and portion sizes, you can enjoy this delightful dish while keeping your dietary goals in check!

FAQs about Sweet Hawaiian Chicken in a Crockpot

Can I use frozen chicken for Sweet Hawaiian Chicken in a Crockpot?

Yes, you can use frozen chicken for Sweet Hawaiian Chicken in a Crockpot! However, it’s important to note that cooking times will vary. If you start with frozen chicken, you should cook it on high for about 4-5 hours or on low for 8-9 hours. Always ensure the chicken reaches an internal temperature of 165°F (75°C) for safety. Using frozen chicken can be a convenient option, especially if you forgot to thaw it ahead of time!

How long can I store leftovers of Sweet Hawaiian Chicken in a Crockpot?

Leftovers of Sweet Hawaiian Chicken can be stored in the refrigerator for up to 3-4 days. Make sure to place the chicken in an airtight container to keep it fresh. If you want to store it for a longer period, consider freezing it. In the freezer, it can last for about 2-3 months. When you’re ready to enjoy it again, simply thaw it in the refrigerator overnight and reheat it on the stovetop or in the microwave.

What can I serve with Sweet Hawaiian Chicken in a Crockpot?

Sweet Hawaiian Chicken pairs wonderfully with a variety of sides! Here are some great options:

  • Fluffy Rice: White or brown rice is a classic choice that absorbs the delicious sauce.
  • Quinoa: A healthy alternative that adds a nutty flavor.
  • Steamed Vegetables: Broccoli, green beans, or snap peas add color and nutrition.
  • Salad: A fresh green salad can balance the richness of the chicken.
  • Wraps: Use the chicken in tortillas with fresh veggies for a fun meal.

These sides can enhance your meal and make it even more enjoyable!

Can I make Sweet Hawaiian Chicken in a Crockpot without soy sauce?

Absolutely! If you want to make Sweet Hawaiian Chicken without soy sauce, you can use alternatives like coconut aminos or teriyaki sauce. Coconut aminos is a great soy sauce substitute that is lower in sodium and has a slightly sweeter taste. You can also try using a homemade sauce with ingredients like apple cider vinegar, honey, and spices to mimic the flavor profile. Just keep in mind that the taste may vary slightly, but it will still be delicious!

Conclusion on Sweet Hawaiian Chicken in a Crockpot

In conclusion, Sweet Hawaiian Chicken in a Crockpot is a fantastic dish that brings together the perfect blend of flavors and convenience. With its tender chicken thighs, sweet pineapple, and savory sauce, this recipe is sure to become a family favorite. The ease of preparation makes it ideal for busy weeknights or special gatherings, allowing you to enjoy a delicious meal without spending hours in the kitchen.

By following the simple steps outlined in this article, you can create a delightful dish that not only satisfies your taste buds but also nourishes your body. The nutritional benefits, including a good amount of protein and essential vitamins, make this meal a wholesome choice for everyone. Plus, with the various tips and variations provided, you can easily customize the recipe to suit your preferences.

Whether you serve it over fluffy rice, quinoa, or even in wraps, Sweet Hawaiian Chicken is versatile and adaptable. The garnishes of green onions and the option to add vegetables enhance both the presentation and the nutritional value of the dish. So, gather your ingredients, set your crockpot, and get ready to enjoy a meal that’s bursting with flavor and goodness!

Don’t forget to share this recipe with friends and family. They’ll appreciate the ease and deliciousness of Sweet Hawaiian Chicken in a Crockpot just as much as you do. Happy cooking!

Lime Chili Coconut Chicken Recipe is a must-try dish!

Introduction to Lime Chili Coconut Chicken Recipe

Are you ready to embark on a culinary adventure? The Lime Chili Coconut Chicken Recipe is a delightful dish that brings together vibrant flavors and a touch of tropical flair. This recipe is not just about cooking; it’s about creating a memorable meal that will impress your family and friends. With its unique combination of ingredients, this dish is sure to become a favorite in your household.

What Makes Lime Chili Coconut Chicken Unique?

What sets this Lime Chili Coconut Chicken apart from other chicken recipes? It’s all about the marinade! The blend of coconut milk, fresh lime juice, and soy sauce creates a rich and creamy base that infuses the chicken with incredible flavor. The addition of garlic, ginger, and red chili flakes adds depth and a hint of spice, making each bite a burst of deliciousness. This dish is not only easy to prepare but also offers a unique twist on traditional chicken recipes, making it a standout choice for any occasion.

The Flavor Profile of Lime Chili Coconut Chicken

The flavor profile of Lime Chili Coconut Chicken is a harmonious blend of sweet, tangy, and spicy notes. The coconut milk provides a creamy sweetness that balances the tartness of the lime juice. Meanwhile, the soy sauce adds a savory umami kick, enhancing the overall taste. The garlic and ginger contribute warmth and depth, while the red chili flakes introduce a delightful heat that can be adjusted to your preference. Together, these flavors create a dish that is both comforting and exciting, perfect for any palate.

Ingredients for Lime Chili Coconut Chicken Recipe

To create the mouthwatering Lime Chili Coconut Chicken, you’ll need a selection of fresh and flavorful ingredients. Each component plays a vital role in building the dish’s unique taste. Here’s what you’ll need:

  • 2 pounds boneless, skinless chicken thighs: These are juicy and tender, perfect for soaking up the marinade.
  • 1 can (13.5 ounces) coconut milk: This creamy base adds richness and a tropical flavor.
  • 1/4 cup fresh lime juice: About 2 limes, this ingredient brings a zesty brightness to the dish.
  • 2 tablespoons soy sauce: This adds a savory depth and enhances the overall flavor.
  • 1 tablespoon honey: A touch of sweetness balances the tangy lime and spicy chili.
  • 2 cloves garlic, minced: Garlic adds aromatic flavor and warmth.
  • 1 tablespoon fresh ginger, grated: Ginger provides a fresh, spicy kick that complements the other flavors.
  • 1 teaspoon red chili flakes: Adjust this to your taste for the desired level of heat.
  • 1 tablespoon vegetable oil: This is used for cooking the chicken, ensuring it doesn’t stick.
  • Salt and pepper to taste: Essential for seasoning the chicken perfectly.
  • Fresh cilantro, for garnish: This adds a pop of color and freshness when serving.
  • Lime wedges, for serving: These are perfect for squeezing over the chicken for extra zing.

Gathering these ingredients will set you on the right path to creating a delicious Lime Chili Coconut Chicken that your family will love. Each ingredient contributes to the overall flavor, making this dish a delightful experience for your taste buds.

Step-by-Step Preparation of Lime Chili Coconut Chicken Recipe

Now that you have all your ingredients ready, it’s time to dive into the preparation of your Lime Chili Coconut Chicken. This step-by-step guide will help you create a dish that is bursting with flavor and sure to impress. Let’s get started!

Step 1: Marinating the Chicken

The first step in this delicious journey is marinating the chicken. In a large bowl, whisk together the coconut milk, fresh lime juice, soy sauce, honey, minced garlic, grated ginger, and red chili flakes. This marinade is the heart of the dish, so make sure it’s well combined. Once mixed, add the boneless, skinless chicken thighs to the bowl. Ensure each piece is fully coated in the marinade. Cover the bowl with plastic wrap and refrigerate for at least one hour. For even more flavor, let it marinate overnight. This allows the chicken to absorb all those wonderful flavors!

Step 2: Preparing the Coconut Sauce

While the chicken is marinating, you can prepare the coconut sauce. This sauce is what makes the dish so creamy and rich. Simply set aside the remaining marinade after removing the chicken. You can use this marinade to create a sauce later. If you want to enhance the sauce, consider adding a bit more coconut milk or a splash of lime juice. This will give it an extra zing! Just remember to cook it thoroughly if you plan to use it as a sauce.

Step 3: Cooking the Chicken

Once the chicken has marinated, it’s time to cook! Preheat your grill or a large skillet over medium-high heat. If you’re using a skillet, add the vegetable oil to prevent sticking. Remove the chicken from the marinade, allowing any excess to drip off. Season the chicken with salt and pepper to taste. Grill or cook the chicken for about 6-7 minutes on each side. You want the internal temperature to reach 165°F, ensuring it’s cooked through. The chicken should have a beautiful golden-brown color when done.

Step 4: Combining Flavors

After cooking, remove the chicken from the grill or skillet and let it rest for about 5 minutes. This resting period allows the juices to redistribute, keeping the chicken moist and tender. While the chicken rests, you can warm up the reserved marinade in a small saucepan. Bring it to a gentle simmer, stirring occasionally. This will create a delicious sauce to drizzle over your chicken when serving.

Step 5: Final Touches

Now it’s time for the final touches! Slice the rested chicken into bite-sized pieces. Arrange the chicken on a serving platter and drizzle the warmed coconut sauce over the top. Garnish with fresh cilantro for a pop of color and flavor. Serve with lime wedges on the side for an extra burst of freshness. Your Lime Chili Coconut Chicken is now ready to be enjoyed!

Variations of Lime Chili Coconut Chicken Recipe

While the Lime Chili Coconut Chicken Recipe is already a delightful dish, there are many ways to customize it to suit your taste or dietary preferences. Here are some variations that you can try, ensuring that every meal feels fresh and exciting!

Alternative Proteins

If you want to switch things up, consider using alternative proteins. Chicken thighs are juicy and flavorful, but you can also use chicken breasts for a leaner option. Just remember to adjust the cooking time, as breasts may cook faster. For a different twist, try using shrimp or fish. Both seafood options will absorb the marinade beautifully and cook quickly, making them perfect for a quick weeknight dinner. Just grill or sauté them for about 3-4 minutes on each side until they are opaque and cooked through.

Vegetarian Options

For those who prefer a vegetarian meal, you can easily adapt this recipe. Tofu is an excellent substitute for chicken. Use firm or extra-firm tofu, and press it to remove excess moisture. Cut it into cubes and marinate just like the chicken. You can also use vegetables such as bell peppers, zucchini, or eggplant. Grill or sauté the marinated veggies until they are tender and slightly charred. This will create a vibrant and colorful dish that everyone will enjoy!

Different Spice Levels

Spice lovers can easily adjust the heat level of the Lime Chili Coconut Chicken. If you enjoy a fiery kick, add more red chili flakes or even a diced jalapeño to the marinade. For a milder version, reduce the amount of chili flakes or omit them altogether. You can also experiment with different spices, such as curry powder or smoked paprika, to create a unique flavor profile. The beauty of this recipe is its versatility, allowing you to tailor it to your taste preferences!

Cooking Note for Lime Chili Coconut Chicken Recipe

When preparing the Lime Chili Coconut Chicken, there are a few important cooking notes to keep in mind. These tips will help ensure that your dish turns out perfectly every time, making your cooking experience enjoyable and stress-free.

First, always ensure that your chicken is at room temperature before cooking. This helps the chicken cook evenly and prevents it from becoming tough. If you take the chicken out of the refrigerator about 20-30 minutes before cooking, it will reach the right temperature.

Next, when grilling or cooking the chicken, avoid overcrowding the pan or grill. If you place too many pieces at once, the temperature will drop, and the chicken may steam instead of sear. This can lead to a less flavorful and less appealing texture. Cook in batches if necessary, allowing each piece enough space to develop a nice golden-brown crust.

Additionally, using a meat thermometer is a great way to ensure your chicken is cooked to perfection. The internal temperature should reach 165°F for safe consumption. This tool takes the guesswork out of cooking and helps you avoid overcooking, which can dry out the chicken.

Lastly, don’t forget to let the chicken rest after cooking. This step is crucial as it allows the juices to redistribute throughout the meat, resulting in a juicier and more flavorful dish. A resting time of about 5 minutes is ideal before slicing and serving.

By following these cooking notes, you’ll be well on your way to creating a delicious Lime Chili Coconut Chicken that is sure to impress everyone at the table!

Serving Suggestions for Lime Chili Coconut Chicken Recipe

Once your Lime Chili Coconut Chicken is ready, it’s time to think about how to serve it. The right side dishes and beverages can elevate your meal, making it even more enjoyable. Here are some fantastic serving suggestions that will complement the flavors of your dish perfectly.

Ideal Side Dishes

When it comes to side dishes, you want to choose options that balance the rich and zesty flavors of the Lime Chili Coconut Chicken. Here are some great ideas:

  • Coconut Rice: This is a natural pairing! The creamy coconut rice will echo the flavors in the chicken, creating a harmonious meal.
  • Grilled Vegetables: Colorful grilled veggies like bell peppers, zucchini, and asparagus add freshness and crunch. They also bring a nice charred flavor that complements the chicken.
  • Quinoa Salad: A light quinoa salad with diced cucumbers, tomatoes, and a squeeze of lime can provide a refreshing contrast to the rich chicken.
  • Asian Slaw: A crunchy slaw made with cabbage, carrots, and a tangy dressing can add a delightful crunch and brightness to your plate.
  • Steamed Broccoli: Simple and nutritious, steamed broccoli is a great way to add some greens to your meal without overpowering the main dish.

These side dishes not only enhance the meal but also add a variety of textures and flavors that everyone will love!

Pairing with Beverages

Choosing the right beverage can elevate your dining experience. Here are some beverage options that pair wonderfully with Lime Chili Coconut Chicken:

  • Coconut Water: For a refreshing non-alcoholic option, coconut water is a perfect match. It complements the tropical flavors of the dish.
  • White Wine: A chilled Sauvignon Blanc or a light Pinot Grigio can enhance the flavors of the chicken while providing a crisp contrast.
  • Beer: A light lager or a wheat beer can be a great choice. The carbonation and lightness will balance the richness of the chicken.
  • Iced Tea: Unsweetened iced tea with a slice of lime can be a refreshing accompaniment, offering a nice balance to the meal.
  • Mango Lassi: For a unique twist, a mango lassi can add a creamy and fruity element that pairs beautifully with the spices in the chicken.

With these serving suggestions, your Lime Chili Coconut Chicken will not only be a feast for the taste buds but also a delightful dining experience for everyone at the table!

Tips for Perfecting Lime Chili Coconut Chicken Recipe

To truly master the Lime Chili Coconut Chicken Recipe, a few tips can make all the difference. These suggestions will help you elevate your dish, ensuring it’s bursting with flavor and cooked to perfection. Let’s explore how to choose the right chicken and enhance the flavors with fresh ingredients.

Choosing the Right Chicken

When it comes to chicken, the choice of cut can significantly impact the final dish. For this recipe, boneless, skinless chicken thighs are recommended. They are juicy and tender, making them perfect for marinating. However, if you prefer a leaner option, chicken breasts can be used. Just remember to adjust the cooking time, as breasts may cook faster than thighs.

Additionally, consider the quality of the chicken. Opt for organic or free-range chicken if possible. These options often have better flavor and texture compared to conventional chicken. Fresh chicken is always preferable, but if you must use frozen, ensure it’s fully thawed before marinating. This will help the marinade penetrate the meat more effectively, resulting in a more flavorful dish.

Enhancing Flavor with Fresh Ingredients

Using fresh ingredients is key to achieving the best flavor in your Lime Chili Coconut Chicken. Fresh lime juice is essential; it provides a bright and zesty flavor that bottled juice simply can’t match. Similarly, fresh garlic and ginger will add a depth of flavor that dried versions lack. Always opt for fresh herbs, like cilantro, for garnishing. They not only enhance the dish visually but also add a burst of freshness.

When it comes to spices, consider using whole spices and grinding them yourself for maximum flavor. For example, using fresh red chili peppers instead of dried flakes can add a vibrant heat and freshness to the dish. You can also experiment with adding fresh herbs like basil or mint to the marinade for a unique twist.

By choosing the right chicken and enhancing your dish with fresh ingredients, you’ll create a Lime Chili Coconut Chicken that is not only delicious but also memorable. These tips will help you impress your family and friends with your culinary skills!

Breakdown of Time for Lime Chili Coconut Chicken Recipe

Understanding the time commitment for the Lime Chili Coconut Chicken Recipe is essential for planning your meal. Here’s a breakdown of the time needed for preparation and cooking, ensuring you can enjoy this delicious dish without any surprises!

Prep Time

The prep time for this recipe is approximately 15-20 minutes. This includes gathering your ingredients, marinating the chicken, and preparing the coconut sauce. If you choose to marinate the chicken overnight, you can save time on the day of cooking. Just remember to plan ahead!

Cooking Time

Cooking the chicken will take about 12-15 minutes. This includes grilling or sautéing the chicken for 6-7 minutes on each side. The key is to ensure the chicken reaches an internal temperature of 165°F. This guarantees that it is cooked through and safe to eat.

Total Time

In total, you can expect the Lime Chili Coconut Chicken Recipe to take around 1 hour and 35 minutes if you include marinating time. If you opt for a shorter marinating period of just 1 hour, the total time will be about 1 hour and 15 minutes. This makes it a great option for a weeknight dinner or a weekend gathering!

By keeping track of the prep and cooking times, you can easily fit this flavorful dish into your schedule, ensuring a delightful meal for you and your loved ones.

Nutritional Information for Lime Chili Coconut Chicken Recipe

Understanding the nutritional content of your meals is essential for maintaining a balanced diet. The Lime Chili Coconut Chicken Recipe not only delights your taste buds but also provides valuable nutrients. Here’s a breakdown of the nutritional information per serving, helping you make informed choices while enjoying this delicious dish.

Calories

Each serving of Lime Chili Coconut Chicken contains approximately 320 calories. This makes it a satisfying option for dinner without being overly heavy. The combination of chicken and coconut milk provides a good source of energy, making it perfect for a busy day.

Protein

Protein is an essential nutrient for building and repairing tissues, and this recipe delivers! With about 24 grams of protein per serving, the Lime Chili Coconut Chicken is an excellent choice for those looking to increase their protein intake. The chicken thighs are particularly rich in protein, making this dish a great option for active individuals or anyone looking to maintain muscle mass.

Sodium

When it comes to sodium, this recipe contains approximately 600 milligrams per serving. While sodium is necessary for bodily functions, it’s important to monitor your intake. If you’re watching your sodium levels, consider using low-sodium soy sauce or adjusting the amount of added salt to suit your dietary needs. This way, you can enjoy the flavors without compromising your health goals.

By keeping track of the nutritional information, you can enjoy the Lime Chili Coconut Chicken Recipe while being mindful of your dietary preferences. This dish not only satisfies your cravings but also supports your nutritional needs, making it a fantastic addition to your meal rotation!

FAQs about Lime Chili Coconut Chicken Recipe

Can I use frozen chicken for this recipe?

Yes, you can use frozen chicken for the Lime Chili Coconut Chicken Recipe. However, it’s important to fully thaw the chicken before marinating. This ensures that the marinade penetrates the meat effectively, enhancing the flavor. To thaw, simply place the chicken in the refrigerator overnight or use the defrost setting on your microwave. Once thawed, follow the marinating and cooking instructions as usual for delicious results!

What can I substitute for coconut milk?

If you don’t have coconut milk on hand, there are several substitutes you can use. One option is to use almond milk or soy milk mixed with a bit of coconut extract to mimic the flavor. Another alternative is to use heavy cream or half-and-half, which will provide a creamy texture, though it will lack the coconut flavor. If you prefer a lighter option, you can use low-fat milk, but keep in mind that it may not be as rich as coconut milk. Choose the substitute that best fits your taste and dietary needs!

How spicy is the Lime Chili Coconut Chicken Recipe?

The spiciness of the Lime Chili Coconut Chicken Recipe can be adjusted to your preference. The recipe calls for 1 teaspoon of red chili flakes, which adds a mild to moderate heat. If you enjoy a spicier dish, feel free to increase the amount of chili flakes or add a diced jalapeño to the marinade. Conversely, if you prefer a milder flavor, you can reduce the chili flakes or omit them altogether. This flexibility allows you to customize the heat level to suit your taste!

Can I make this recipe ahead of time?

Absolutely! The Lime Chili Coconut Chicken Recipe is perfect for meal prep. You can marinate the chicken up to 24 hours in advance, allowing the flavors to develop even more. After cooking, the chicken can be stored in an airtight container in the refrigerator for up to 3 days. When you’re ready to serve, simply reheat the chicken in a skillet or microwave until warmed through. This makes it a convenient option for busy weeknights or gatherings!

Conclusion on Lime Chili Coconut Chicken Recipe

In conclusion, the Lime Chili Coconut Chicken Recipe is a delightful dish that combines vibrant flavors and easy preparation. With its unique blend of coconut milk, fresh lime juice, and spices, this recipe offers a tropical twist that is sure to impress. Whether you’re cooking for a family dinner or hosting friends, this dish is versatile enough to suit any occasion.

Not only is it delicious, but it also provides a good balance of protein and healthy fats, making it a nutritious choice. The ability to customize the spice level and substitute ingredients allows you to tailor the dish to your preferences, ensuring that everyone at the table can enjoy it. Plus, with the option to prepare it ahead of time, you can save valuable moments in the kitchen while still serving a fantastic meal.

So, gather your ingredients, follow the steps, and get ready to savor the delightful flavors of Lime Chili Coconut Chicken. This recipe is not just a meal; it’s an experience that brings joy and satisfaction to your dining table. Enjoy every bite, and don’t forget to share your culinary creations with family and friends!

Creamy Shrimp Fettuccine with Spinach and Tomatoes Recipe is delicious!

Introduction to Creamy Shrimp Fettuccine with Spinach and Tomatoes Recipe

What Makes This Recipe Special?

Creamy Shrimp Fettuccine with Spinach and Tomatoes Recipe is a delightful meal that brings together succulent shrimp, fresh spinach, and juicy tomatoes, all enveloped in a creamy sauce. This recipe is not just about taste; it’s also about the vibrant colors and textures that make it visually appealing. Whether you’re cooking for a special occasion or just a cozy dinner at home, this dish is sure to impress.

A Brief Overview of Ingredients and Preparation

To create this delicious fettuccine, you’ll need a handful of simple yet flavorful ingredients. The star of the show is, of course, the shrimp, which adds a wonderful seafood flavor. Fresh spinach and cherry tomatoes provide a burst of color and nutrients, while heavy cream creates a luscious sauce that ties everything together. The preparation is straightforward, making it perfect for both novice and experienced cooks. In just a few steps, you’ll have a restaurant-quality meal ready to serve!

Ingredients for Creamy Shrimp Fettuccine with Spinach and Tomatoes Recipe

Essential Ingredients

Creamy Shrimp Fettuccine with Spinach and Tomatoes Recipe, you’ll need some key ingredients that come together to create a delightful dish. Here’s what you’ll need:

  • Fettuccine Pasta: 8 ounces of fettuccine pasta forms the base of this dish. It’s perfect for holding onto the creamy sauce.
  • Shrimp: 1 pound of large shrimp, peeled and deveined, adds a delicious seafood flavor.
  • Olive Oil: 1 tablespoon of olive oil is used for sautéing the shrimp, giving it a nice golden color.
  • Garlic: 2 cloves of minced garlic provide a fragrant aroma and depth of flavor.
  • Cherry Tomatoes: 1 cup of halved cherry tomatoes adds sweetness and a pop of color.
  • Fresh Spinach: 2 cups of fresh spinach not only enhances the dish’s nutrition but also its visual appeal.
  • Heavy Cream: 1 cup of heavy cream creates a rich and creamy sauce that binds all the ingredients together.
  • Italian Seasoning: 1 teaspoon of Italian seasoning brings a blend of herbs that complements the dish beautifully.
  • Parmesan Cheese: 1/2 cup of grated Parmesan cheese adds a salty, nutty flavor that elevates the dish.
  • Salt and Pepper: To taste, these seasonings enhance the overall flavor.

Optional Ingredients for Extra Flavor

While the essential ingredients create a fantastic dish, you can also consider adding some optional ingredients for an extra flavor boost:

  • Red Pepper Flakes: A pinch of red pepper flakes can add a spicy kick to the dish.
  • Fresh Basil: Garnishing with fresh basil not only looks beautiful but also adds a fresh, aromatic touch.
  • Half-and-Half: For a lighter version, you can substitute half-and-half for heavy cream.
  • Other Vegetables: Feel free to add bell peppers, zucchini, or mushrooms for added texture and flavor.

With these ingredients, you’re well on your way to creating a delicious meal that’s sure to impress your family and friends!

Step-by-Step Preparation of Creamy Shrimp Fettuccine with Spinach and Tomatoes Recipe

Step 1: Preparing the Fettuccine

First things first, let’s get that fettuccine ready! Start by bringing a large pot of salted water to a boil. Once boiling, add the 8 ounces of fettuccine pasta. Cook it according to the package instructions until it’s al dente, which usually takes about 8-10 minutes. Remember to stir occasionally to prevent sticking. Once cooked, drain the pasta in a colander, but don’t forget to reserve 1/2 cup of the pasta water. This starchy water will help adjust the sauce later. Set the fettuccine aside while you prepare the rest of the dish.

Step 2: Sautéing the Shrimp

Now, let’s move on to the shrimp! In a large skillet, heat 1 tablespoon of olive oil over medium heat. Once the oil is hot, add the 1 pound of peeled and deveined shrimp. Cook the shrimp for about 2-3 minutes on each side, or until they turn pink and opaque. This quick cooking time ensures they stay juicy and tender. Once done, remove the shrimp from the skillet and set them aside on a plate. This step is crucial as it prevents overcooking the shrimp.

Step 3: Cooking the Spinach and Tomatoes

In the same skillet, add the minced garlic and halved cherry tomatoes. Sauté them for about 2-3 minutes until the tomatoes start to soften and release their juices. The aroma will be delightful! Next, add the 2 cups of fresh spinach to the skillet. Cook the spinach for about 1-2 minutes, stirring occasionally, until it wilts down. This step not only adds flavor but also boosts the nutritional value of your dish.

Step 4: Making the Creamy Sauce

Now it’s time to create that luscious creamy sauce! Pour in 1 cup of heavy cream into the skillet with the spinach and tomatoes. Stir in 1 teaspoon of Italian seasoning, which adds a wonderful blend of herbs. Bring the mixture to a gentle simmer and let it cook for about 2-3 minutes. This allows the flavors to meld together and the sauce to thicken slightly. Keep an eye on it, stirring occasionally to prevent sticking.

Step 5: Combining All Ingredients

Creamy Shrimp Fettuccine with Spinach and Tomatoes Recipe is now ready to be served!

Variations of Creamy Shrimp Fettuccine with Spinach and Tomatoes Recipe

Substituting Shrimp with Other Proteins

Creamy Shrimp Fettuccine with Spinach and Tomatoes Recipe just as delicious!

Adding Different Vegetables

Vegetables can elevate your dish and add more nutrition! While spinach and tomatoes are delightful, feel free to get creative. Bell peppers, zucchini, or mushrooms can add great texture and flavor. Simply chop them up and sauté them along with the garlic and tomatoes. You can also add peas or asparagus for a pop of color and crunch. The beauty of this recipe is its versatility, allowing you to customize it to your taste. So, don’t hesitate to mix and match your favorite veggies!

Cooking Note for Creamy Shrimp Fettuccine with Spinach and Tomatoes Recipe

Tips for Perfectly Cooked Fettuccine

Cooking fettuccine to perfection is key to a delightful meal. Here are some tips to ensure your pasta turns out just right:

  • Use Plenty of Water: Always use a large pot filled with water. This helps the pasta cook evenly and prevents sticking.
  • Salt the Water: Adding salt to the boiling water enhances the flavor of the pasta. Aim for about 1-2 tablespoons of salt per gallon of water.
  • Stir Occasionally: Stir the pasta during cooking to keep it from clumping together. This is especially important in the first few minutes.
  • Check for Al Dente: Follow the package instructions but start checking a minute or two early. Al dente pasta should be firm to the bite but not hard.
  • Reserve Pasta Water: Always save some pasta water before draining. This starchy water can help adjust the sauce’s consistency later.

Creamy Shrimp Fettuccine with Spinach and Tomatoes Recipe beautifully!

Ensuring the Sauce is Creamy

A creamy sauce is the heart of this dish. Here are some tips to ensure your sauce is rich and velvety:

  • Use Heavy Cream: For the best results, stick with heavy cream. It has a higher fat content, which creates a luscious texture.
  • Simmer Gently: When adding the cream, bring it to a gentle simmer. This allows it to thicken without curdling.
  • Stir Constantly: Keep stirring the sauce as it simmers. This helps prevent it from sticking to the bottom of the skillet and ensures even cooking.
  • Adjust Consistency: If the sauce is too thick, add a splash of the reserved pasta water. This will help loosen it up while keeping it creamy.
  • Incorporate Cheese Gradually: When adding Parmesan cheese, do it gradually. This allows it to melt smoothly into the sauce, enhancing the creaminess.

Creamy Shrimp Fettuccine with Spinach and Tomatoes Recipe a true delight!

Serving Suggestions for Creamy Shrimp Fettuccine with Spinach and Tomatoes Recipe

Ideal Pairings with Sides and Drinks

Creamy Shrimp Fettuccine with Spinach and Tomatoes Recipe, the right sides and drinks can elevate the meal even further. Here are some delightful pairings to consider:

  • Garlic Bread: A warm, crusty garlic bread is perfect for soaking up the creamy sauce. It adds a comforting touch to your meal.
  • Caesar Salad: A fresh Caesar salad with crisp romaine, crunchy croutons, and a tangy dressing complements the richness of the fettuccine.
  • Steamed Vegetables: Lightly steamed vegetables, such as broccoli or asparagus, add color and nutrition to your plate without overpowering the main dish.
  • White Wine: A chilled glass of white wine, like Sauvignon Blanc or Pinot Grigio, pairs beautifully with shrimp and creamy sauces, enhancing the overall dining experience.
  • Lemonade or Iced Tea: For a non-alcoholic option, refreshing lemonade or iced tea can cleanse the palate and balance the richness of the dish.

These pairings not only complement the flavors of your fettuccine but also create a well-rounded meal that your guests will love!

Presentation Tips for Serving

Creamy Shrimp Fettuccine with Spinach and Tomatoes Recipe look as good as it tastes. Here are some simple tips to enhance the visual appeal:

  • Use a Large Serving Bowl: Serve the fettuccine in a large, shallow bowl. This allows the vibrant colors of the shrimp, spinach, and tomatoes to shine.
  • Garnish with Fresh Basil: A sprinkle of fresh basil on top adds a pop of color and a fragrant aroma, making the dish look inviting.
  • Grate Extra Parmesan: Consider adding a little extra grated Parmesan cheese on top just before serving. It adds a touch of elegance and enhances the flavor.
  • Serve with Lemon Wedges: Placing lemon wedges on the side not only looks appealing but also allows guests to add a splash of citrus for extra brightness.
  • Use Colorful Plates: Opt for colorful or patterned plates to make the dish stand out. The contrast will make your meal more visually appealing.

Creamy Shrimp Fettuccine with Spinach and Tomatoes Recipe will be a feast for the eyes as well as the palate!

Tips for Making the Best Creamy Shrimp Fettuccine with Spinach and Tomatoes Recipe

Common Mistakes to Avoid

Creamy Shrimp Fettuccine with Spinach and Tomatoes Recipe, avoiding common pitfalls can make a big difference. Here are some mistakes to steer clear of:

  • Overcooking the Shrimp: Shrimp cooks quickly. If you leave it in the skillet too long, it can become rubbery. Aim for just 2-3 minutes per side until pink and opaque.
  • Not Salting the Pasta Water: Failing to salt the boiling water can lead to bland pasta. Remember, the water should taste like the sea!
  • Skipping the Pasta Water: The reserved pasta water is a game-changer. It helps adjust the sauce’s consistency and adds flavor. Don’t forget to save it!
  • Using Low-Quality Ingredients: Since this dish relies on a few key ingredients, using high-quality shrimp, fresh spinach, and real Parmesan cheese will elevate the flavors.
  • Rushing the Sauce: Allow the sauce to simmer gently. Rushing this step can lead to a thin sauce that lacks depth. Give it time to thicken and develop flavor.

By avoiding these common mistakes, you’ll be on your way to creating a delicious and satisfying meal that everyone will love!

Enhancing Flavor Profiles

Creamy Shrimp Fettuccine with Spinach and Tomatoes Recipe to the next level, consider these tips for enhancing flavor:

  • Fresh Herbs: Adding fresh herbs like parsley or dill can brighten the dish. Sprinkle them on just before serving for a fresh burst of flavor.
  • Acid Balance: A squeeze of fresh lemon juice can cut through the richness of the cream. It adds a refreshing zing that balances the dish beautifully.
  • Cheese Variety: While Parmesan is classic, try mixing in some Pecorino Romano or a bit of goat cheese for a unique twist.
  • Infused Oils: Drizzling a bit of garlic-infused olive oil over the finished dish can add an extra layer of flavor. It’s a simple way to elevate your meal.
  • Season Gradually: Taste as you go! Adjust the seasoning gradually to ensure the perfect balance of flavors. This way, you can avoid over-salting or overpowering the dish.

Creamy Shrimp Fettuccine with Spinach and Tomatoes Recipe will be bursting with flavor, making it a memorable meal for any occasion!

Breakdown of Time for Creamy Shrimp Fettuccine with Spinach and Tomatoes Recipe

Prep Time

Creamy Shrimp Fettuccine with Spinach and Tomatoes Recipe, you’ll need about 15 minutes for prep. This includes gathering your ingredients, peeling and deveining the shrimp, and chopping the garlic and tomatoes. Having everything prepped in advance makes the cooking process smoother and more enjoyable!

Cooking Time

The actual cooking time for this dish is approximately 20 minutes. This includes boiling the fettuccine, sautéing the shrimp, and preparing the creamy sauce with spinach and tomatoes. Each step is quick, allowing you to create a delicious meal in no time. The key is to keep an eye on the shrimp to ensure they don’t overcook!

Total Time

Creamy Shrimp Fettuccine with Spinach and Tomatoes Recipe a perfect option for a weeknight dinner or a last-minute gathering. With just a little time and effort, you’ll have a delightful dish that’s sure to impress!

Nutritional Information for Creamy Shrimp Fettuccine with Spinach and Tomatoes Recipe

Calories and Macronutrients

Creamy Shrimp Fettuccine with Spinach and Tomatoes Recipe offers a satisfying combination of flavors while providing a decent nutritional profile. Here’s a breakdown of the calories and macronutrients per serving:

  • Calories: 550
  • Net Carbohydrates: 45g
  • Protein: 30g
  • Fat: 30g

This dish is rich in protein, thanks to the shrimp and cheese, making it a great option for those looking to increase their protein intake. The carbohydrates primarily come from the fettuccine, providing energy for your day. The healthy fats from olive oil and heavy cream contribute to the creamy texture and flavor.

Health Benefits of Key Ingredients

Creamy Shrimp Fettuccine with Spinach and Tomatoes Recipe brings its own set of health benefits:

  • Shrimp: A lean source of protein, shrimp is low in calories and high in essential nutrients like selenium and vitamin B12. These nutrients support immune function and energy production.
  • Spinach: Packed with vitamins A, C, and K, spinach is a powerhouse of nutrients. It’s also rich in antioxidants, which help combat oxidative stress in the body.
  • Cherry Tomatoes: These little gems are high in vitamins C and K, as well as lycopene, an antioxidant linked to heart health. They add a burst of flavor and color to your dish.
  • Olive Oil: Known for its heart-healthy fats, olive oil is a staple in Mediterranean diets. It contains monounsaturated fats that can help reduce inflammation and lower cholesterol levels.
  • Parmesan Cheese: While it adds flavor, Parmesan also provides calcium and protein. Just be mindful of the portion size, as it can be high in sodium.

Creamy Shrimp Fettuccine with Spinach and Tomatoes Recipe not only satisfies your taste buds but also contributes to your overall health!

FAQs about Creamy Shrimp Fettuccine with Spinach and Tomatoes Recipe

Can I use frozen shrimp for this recipe?

Creamy Shrimp Fettuccine with Spinach and Tomatoes Recipe. Just make sure to thaw them properly before cooking. You can do this by placing them in the refrigerator overnight or running them under cold water for a quick thaw. Once thawed, peel and devein them if necessary, and then follow the recipe as usual. Using frozen shrimp is a convenient option and can save you time!

What can I substitute for fettuccine?

Creamy Shrimp Fettuccine with Spinach and Tomatoes Recipe.

How can I make this recipe healthier?

Creamy Shrimp Fettuccine with Spinach and Tomatoes Recipe healthier is easy! Here are a few tips:

  • Use Whole Wheat Pasta: Swap regular fettuccine for whole wheat pasta to increase fiber content.
  • Reduce Cream: Substitute half-and-half or Greek yogurt for heavy cream to cut down on calories and fat.
  • Add More Vegetables: Incorporate additional vegetables like bell peppers, broccoli, or peas to boost nutrition.
  • Limit Cheese: Use less Parmesan cheese or opt for a lower-fat cheese option.

These simple changes can help you enjoy a lighter version of this delicious dish without sacrificing flavor!

Can I prepare this dish in advance?

Creamy Shrimp Fettuccine with Spinach and Tomatoes Recipe in advance! You can cook the fettuccine and store it in the refrigerator for up to 2 days. Additionally, you can sauté the shrimp and vegetables ahead of time. Just reheat them gently before combining with the sauce and pasta. However, it’s best to prepare the creamy sauce fresh, as it can thicken when stored. This way, you’ll have a quick and easy meal ready to go!

Conclusion on Creamy Shrimp Fettuccine with Spinach and Tomatoes Recipe

Recap of Key Points

Creamy Shrimp Fettuccine with Spinach and Tomatoes Recipe is a delightful dish that combines fresh ingredients and rich flavors. From the tender shrimp to the vibrant spinach and juicy tomatoes, every bite is a celebration of taste. The creamy sauce, made with heavy cream and Parmesan cheese, ties everything together beautifully. With simple steps and easily accessible ingredients, this recipe is perfect for both novice cooks and seasoned chefs alike. Remember to consider variations, such as substituting proteins or adding extra vegetables, to make it your own!

Encouragement to Try the Recipe

Creamy Shrimp Fettuccine with Spinach and Tomatoes Recipe is sure to impress. Don’t be afraid to experiment with flavors and ingredients to make it uniquely yours. Enjoy the process, and savor the delicious results. Happy cooking!

Autumn Roasted Chicken and Vegetables is a must-try!

Introduction to Autumn Roasted Chicken and Vegetables

As the leaves change color and the air turns crisp, there’s nothing quite like the warmth of a home-cooked meal. Autumn Roasted Chicken and Vegetables is a delightful dish that captures the essence of the season. This recipe not only fills your kitchen with inviting aromas but also brings a comforting, hearty meal to your table.

Imagine tender chicken thighs, perfectly seasoned, nestled among vibrant vegetables. The combination of sweet potatoes, carrots, and Brussels sprouts creates a colorful medley that is as pleasing to the eye as it is to the palate. This dish is not just about flavor; it’s also about nutrition. Packed with protein and essential vitamins, it’s a wholesome choice for family dinners or gatherings with friends.

Moreover, the simplicity of this recipe makes it accessible for cooks of all skill levels. With just a few ingredients and straightforward steps, you can create a meal that feels special without spending hours in the kitchen. Whether you’re an experienced chef or a beginner, this Autumn Roasted Chicken and Vegetables recipe is sure to impress.

So, gather your ingredients and get ready to enjoy a dish that celebrates the flavors of fall. Let’s dive into the ingredients you’ll need to make this delicious meal!

Ingredients for Autumn Roasted Chicken and Vegetables

To create a mouthwatering Autumn Roasted Chicken and Vegetables dish, you’ll need a selection of fresh ingredients. Each component plays a vital role in delivering flavor and nutrition. Here’s what you’ll need:

  • 3 pounds bone-in, skin-on chicken thighs: This cut of chicken is juicy and flavorful, perfect for roasting.
  • 2 tablespoons olive oil: Olive oil adds richness and helps the seasonings stick to the chicken and vegetables.
  • 1 teaspoon salt: Salt enhances the overall flavor of the dish.
  • 1/2 teaspoon black pepper: A touch of black pepper adds a mild heat.
  • 1 teaspoon garlic powder: Garlic powder brings a savory depth to the dish.
  • 1 teaspoon dried thyme: Thyme offers a warm, earthy flavor that complements the chicken.
  • 1 teaspoon paprika: Paprika adds a subtle smokiness and vibrant color.
  • 4 medium carrots: Peeled and cut into 1-inch pieces, carrots add sweetness and crunch.
  • 2 medium sweet potatoes: Peeled and cubed, sweet potatoes provide a creamy texture and natural sweetness.
  • 1 red onion: Cut into wedges, red onion adds a slight tang and sweetness when roasted.
  • 1 cup Brussels sprouts: Trimmed and halved, these mini cabbages add a delightful bitterness that balances the dish.
  • 1 tablespoon fresh rosemary (optional): Fresh rosemary can be sprinkled on top for an aromatic finish.

These ingredients come together to create a hearty meal that is not only delicious but also visually appealing. Feel free to adjust the quantities based on your preferences or the number of servings you need. Now that you have your ingredients ready, let’s move on to the preparation steps!

Step-by-Step Preparation of Autumn Roasted Chicken and Vegetables

Now that you have gathered all your ingredients, it’s time to dive into the preparation of your Autumn Roasted Chicken and Vegetables. This step-by-step guide will help you create a delicious meal that your family will love. Let’s get started!

Step 1: Prepping the Chicken

First, you need to prepare the chicken thighs. Start by rinsing them under cold water. This helps to remove any excess blood or impurities. After rinsing, pat the chicken dry with paper towels. Drying the chicken is important because it helps the skin get crispy when roasted.

Next, place the chicken thighs in a large bowl. This is where you will add your seasonings. Make sure to remove any visible fat for a cleaner taste. Once prepped, the chicken is ready for seasoning!

Step 2: Preparing the Vegetables

While the chicken is drying, it’s time to prepare the vegetables. Begin by peeling the carrots and sweet potatoes. Cut the carrots into 1-inch pieces and the sweet potatoes into 1-inch cubes. This size ensures even cooking.

Next, take the red onion and cut it into wedges. For the Brussels sprouts, trim the ends and slice them in half. This will help them cook evenly and absorb the flavors of the dish. Once all the vegetables are prepped, they are ready to be seasoned!

Step 3: Seasoning the Dish

In a large bowl, combine the olive oil, salt, black pepper, garlic powder, dried thyme, and paprika. Stir the mixture well to combine all the flavors. Then, add the chicken thighs to the bowl and toss them until they are fully coated with the seasoning mix.

After seasoning the chicken, add the prepared vegetables to the same bowl. Toss them gently with any remaining oil mixture. This ensures that every piece of vegetable is coated with the delicious seasonings, enhancing their flavor during roasting.

Step 4: Roasting the Chicken and Vegetables

Now it’s time to roast! Preheat your oven to 425°F. Arrange the seasoned chicken thighs skin-side up on a large baking sheet. Spread the seasoned vegetables around the chicken, making sure they are in a single layer for even cooking.

Place the baking sheet in the preheated oven and roast for 35-40 minutes. You’ll know it’s done when the chicken reaches an internal temperature of 165°F and the vegetables are tender. For an extra crispy skin, you can broil the chicken for an additional 2-3 minutes at the end of cooking.

Once cooked, let the dish rest for about 5 minutes before serving. This allows the juices to redistribute, making the chicken even more flavorful. Now, you’re ready to enjoy your Autumn Roasted Chicken and Vegetables!

Variation of Autumn Roasted Chicken and Vegetables

While the classic Autumn Roasted Chicken and Vegetables recipe is delicious as is, there’s always room for creativity in the kitchen! You can easily switch things up by using different vegetables or experimenting with various seasonings. Let’s explore some exciting alternatives that can elevate your dish.

Alternative Vegetables to Use

One of the best things about roasting is the flexibility it offers. You can substitute the vegetables in this recipe with seasonal options that suit your taste. Here are some great alternatives:

  • Butternut Squash: This sweet and nutty squash adds a creamy texture and pairs beautifully with chicken.
  • Parsnips: With their sweet, earthy flavor, parsnips can add a unique twist to your dish.
  • Cauliflower: Roasted cauliflower florets become tender and caramelized, adding a delightful crunch.
  • Potatoes: You can use regular potatoes or even fingerling potatoes for a different texture.
  • Green Beans: Fresh green beans can add a pop of color and a crisp bite to your meal.

Feel free to mix and match these vegetables based on what you have on hand or what’s in season. The key is to ensure that all vegetables are cut to a similar size for even cooking.

Different Seasoning Options

Seasoning is where you can really let your creativity shine! While the original recipe uses garlic powder, thyme, and paprika, you can try various combinations to suit your palate. Here are some ideas:

  • Italian Herbs: Use a blend of oregano, basil, and rosemary for a Mediterranean flair.
  • Curry Powder: For a warm, spicy kick, sprinkle some curry powder over the chicken and veggies.
  • Lemon Zest: Adding lemon zest can brighten the flavors and give a refreshing twist.
  • Chili Powder: If you like heat, a dash of chili powder can spice things up!
  • Honey or Maple Syrup: A drizzle of honey or maple syrup can add a touch of sweetness that complements the savory elements.

Experimenting with different vegetables and seasonings can lead to delightful new versions of your Autumn Roasted Chicken and Vegetables. Don’t hesitate to try out your favorite flavors and make this dish your own!

Cooking Note for Autumn Roasted Chicken and Vegetables

When preparing your Autumn Roasted Chicken and Vegetables, there are a few important cooking notes to keep in mind. These tips will help ensure that your dish turns out perfectly every time, making it a favorite for family dinners or gatherings.

First, always preheat your oven. This step is crucial for achieving that golden-brown, crispy skin on the chicken. If the oven isn’t hot enough, the chicken may not cook evenly, and you might miss out on that delightful texture.

Next, consider the size of your chicken thighs and vegetables. Uniformity is key! Cutting your vegetables into similar sizes ensures they cook at the same rate. This way, you won’t end up with some pieces overcooked while others are still crunchy.

Another important note is to avoid overcrowding the baking sheet. If the chicken and vegetables are too close together, they will steam instead of roast. This can lead to soggy skin and undercooked veggies. Make sure there’s enough space for air to circulate around each piece.

Lastly, let the dish rest after cooking. Allowing the chicken to rest for about 5 minutes before serving helps the juices redistribute. This results in a juicier, more flavorful chicken. Trust us, this small step makes a big difference!

By following these cooking notes, you’ll be well on your way to mastering the art of Autumn Roasted Chicken and Vegetables. Enjoy the process and the delicious results!

Serving Suggestions for Autumn Roasted Chicken and Vegetables

Once your Autumn Roasted Chicken and Vegetables are perfectly cooked, it’s time to think about how to serve this delightful dish. Presentation can elevate your meal, making it even more enjoyable for you and your guests. Here are some serving suggestions to consider:

  • Garnish with Fresh Herbs: A sprinkle of fresh herbs, like parsley or rosemary, can add a pop of color and freshness. This simple touch enhances the visual appeal and adds a burst of flavor.
  • Serve with a Side Salad: Pair your roasted chicken and vegetables with a light side salad. A simple mix of greens, cherry tomatoes, and a vinaigrette can balance the richness of the dish.
  • Accompany with Grains: Consider serving the chicken and vegetables over a bed of grains like quinoa, rice, or farro. This adds texture and makes the meal more filling.
  • Offer Dipping Sauces: A tangy dipping sauce, such as a honey mustard or a yogurt-based sauce, can complement the flavors of the roasted chicken. It adds an interactive element to the meal.
  • Pair with Seasonal Bread: Serve warm, crusty bread or dinner rolls on the side. This is perfect for soaking up any delicious juices from the chicken and vegetables.

When serving, consider using a large platter to display the chicken and vegetables together. This creates a beautiful centerpiece for your dining table. You can also serve individual portions on plates for a more formal setting.

Remember, the key to a great meal is not just the food but also the experience. Enjoy the process of serving and sharing your Autumn Roasted Chicken and Vegetables with family and friends. Bon appétit!

Tips for Perfecting Autumn Roasted Chicken and Vegetables

To truly master the art of Autumn Roasted Chicken and Vegetables, a few tips can make all the difference. These simple yet effective strategies will help you achieve a dish that is not only delicious but also visually stunning. Let’s explore some expert tips to elevate your cooking game!

First, always choose high-quality chicken. Opt for organic or free-range chicken thighs if possible. This choice not only enhances the flavor but also ensures a more humane farming practice. The quality of your main ingredient sets the tone for the entire dish.

Next, don’t skip marinating! If you have time, let the chicken marinate in the seasoning mixture for at least 30 minutes, or even overnight in the refrigerator. This allows the flavors to penetrate the meat, resulting in a more flavorful and juicy chicken.

Another important tip is to use a meat thermometer. This handy tool takes the guesswork out of cooking. Insert the thermometer into the thickest part of the chicken thigh, avoiding the bone. When it reads 165°F, your chicken is perfectly cooked and safe to eat.

For the vegetables, consider roasting them in stages. Since different vegetables have varying cooking times, you can add denser vegetables like sweet potatoes first, followed by quicker-cooking ones like Brussels sprouts. This ensures everything is cooked to perfection.

Additionally, don’t forget to toss the vegetables halfway through cooking. This simple step promotes even roasting and prevents any pieces from burning. It also allows the vegetables to caramelize beautifully, enhancing their natural sweetness.

Lastly, serve your dish immediately after resting. Roasted chicken and vegetables are best enjoyed fresh out of the oven. The flavors are at their peak, and the textures are delightful. If you let it sit too long, the chicken may lose its crispiness, and the vegetables can become soggy.

By following these tips, you’ll be well on your way to creating the perfect Autumn Roasted Chicken and Vegetables. Enjoy the process, and don’t hesitate to share your delicious results with family and friends!

Breakdown of Time for Autumn Roasted Chicken and Vegetables

Understanding the time required for each step in preparing your Autumn Roasted Chicken and Vegetables is essential for a smooth cooking experience. Here’s a detailed breakdown of the time you’ll need for preparation and cooking.

Prep Time

The prep time for this delicious dish is relatively short. You can expect to spend about 15-20 minutes getting everything ready. This includes:

  • Rinsing and drying the chicken thighs.
  • Peeling and cutting the vegetables into the appropriate sizes.
  • Mixing the seasoning and coating the chicken and vegetables.

With a little organization, you can have everything prepped and ready to go in no time!

Cooking Time

Once everything is prepped, the cooking time is straightforward. You will roast the chicken and vegetables in the oven for about 35-40 minutes. During this time, the chicken will cook through, and the vegetables will become tender and caramelized. If you choose to broil the chicken for an extra crispy skin, add an additional 2-3 minutes to this time.

Total Time

In total, you can expect the entire process, from prep to serving, to take around 55-60 minutes. Here’s a quick summary:

  • Prep Time: 15-20 minutes
  • Cooking Time: 35-40 minutes
  • Total Time: 55-60 minutes

This makes Autumn Roasted Chicken and Vegetables a perfect option for a weeknight dinner or a cozy weekend meal. With just under an hour, you can create a wholesome, flavorful dish that everyone will love!

Nutritional Information for Autumn Roasted Chicken and Vegetables

Understanding the nutritional content of your meals is essential for maintaining a balanced diet. The Autumn Roasted Chicken and Vegetables dish not only delights the taste buds but also provides a variety of nutrients. Here’s a closer look at the nutritional information for this hearty meal.

Calories

Each serving of Autumn Roasted Chicken and Vegetables contains approximately 410 calories. This makes it a satisfying option for dinner without overwhelming your daily caloric intake. The combination of chicken and vegetables ensures that you’re getting a good mix of macronutrients while enjoying a flavorful meal.

Protein

Protein is a vital component of any meal, and this dish delivers! With about 28 grams of protein per serving, the chicken thighs provide a substantial amount of this essential nutrient. Protein is important for muscle repair, immune function, and overall health. Including this dish in your diet can help you meet your protein needs while enjoying a delicious meal.

Sodium

When it comes to sodium, this recipe contains around 600 milligrams per serving. While sodium is necessary for bodily functions, it’s important to monitor your intake. If you’re watching your sodium levels, consider using less salt or opting for low-sodium alternatives in your seasoning mix. This way, you can still enjoy the flavors without exceeding your daily sodium limit.

Overall, Autumn Roasted Chicken and Vegetables is a nutritious choice that balances calories, protein, and sodium. It’s a great option for those looking to enjoy a wholesome meal that supports their health goals. Plus, with its vibrant colors and delicious flavors, it’s sure to be a hit at your dinner table!

FAQs about Autumn Roasted Chicken and Vegetables

What vegetables pair well with roasted chicken?

When it comes to pairing vegetables with roasted chicken, the options are plentiful! Some popular choices include:

  • Carrots: Their natural sweetness complements the savory chicken.
  • Potatoes: Both sweet and regular potatoes add heartiness to the dish.
  • Brussels Sprouts: These mini cabbages provide a delightful crunch and slight bitterness.
  • Onions: Roasted onions become sweet and caramelized, enhancing the overall flavor.
  • Cauliflower: This versatile vegetable absorbs flavors well and adds a nice texture.

Feel free to mix and match based on your preferences or what’s in season. The key is to choose vegetables that roast well and complement the chicken’s flavors!

Can I use frozen vegetables for roasting?

Yes, you can use frozen vegetables for roasting! However, there are a few things to keep in mind. First, frozen vegetables often contain more moisture, which can lead to steaming rather than roasting. To avoid this, make sure to thaw and drain them before seasoning and roasting. Additionally, you may need to adjust the cooking time, as frozen vegetables can take longer to cook through. Keep an eye on them to ensure they become tender and caramelized.

How do I know when the chicken is fully cooked?

The best way to check if your chicken is fully cooked is by using a meat thermometer. Insert the thermometer into the thickest part of the chicken thigh, avoiding the bone. The chicken is safe to eat when it reaches an internal temperature of 165°F. If you don’t have a thermometer, you can also check for doneness by cutting into the chicken. The juices should run clear, and the meat should no longer be pink. Always prioritize food safety when cooking poultry!

What is the best way to store leftovers?

To store leftovers of your Autumn Roasted Chicken and Vegetables, allow the dish to cool to room temperature. Then, transfer it to an airtight container. You can store it in the refrigerator for up to 3-4 days. If you want to keep it longer, consider freezing the leftovers. Place them in a freezer-safe container or bag, and they can last for up to 3 months. When ready to eat, simply thaw in the refrigerator overnight and reheat in the oven or microwave until heated through.

Conclusion on Autumn Roasted Chicken and Vegetables

In conclusion, Autumn Roasted Chicken and Vegetables is more than just a meal; it’s a celebration of the flavors and warmth of the fall season. This dish brings together tender chicken thighs and a colorful array of vegetables, creating a wholesome and satisfying experience for everyone at the table. With its simple preparation and delightful taste, it’s perfect for family dinners, gatherings, or even a cozy night in.

As you explore the variations and tips shared throughout this article, remember that cooking is an art. Feel free to experiment with different vegetables and seasonings to make this dish your own. Whether you stick to the classic recipe or add your personal touch, the result will always be a comforting and delicious meal.

Moreover, the nutritional benefits of this dish make it a smart choice for those looking to maintain a balanced diet. With a good amount of protein, vitamins, and minerals, Autumn Roasted Chicken and Vegetables supports your health while satisfying your taste buds.

So, gather your ingredients, invite your loved ones, and enjoy the process of creating this delightful dish. As the aroma fills your kitchen, you’ll be reminded of the joy that comes from sharing a home-cooked meal. Happy cooking, and bon appétit!

Cilantro Lime Chicken Bowls with Peach Salsa Recipe delight!

Introduction to Cilantro Lime Chicken Bowls with Peach Salsa Recipe

Cilantro Lime Chicken Bowls with Peach Salsa Recipe is a delightful dish that combines fresh flavors and wholesome ingredients. This recipe is perfect for busy weeknights or casual gatherings with friends and family. With its colorful presentation and zesty taste, it’s sure to impress everyone at the table.

What Makes Cilantro Lime Chicken Bowls Special?

Cilantro Lime Chicken Bowls stand out for several reasons. First, the combination of juicy chicken, zesty lime, and fresh cilantro creates a flavor explosion in every bite. The addition of peach salsa adds a sweet and tangy twist that complements the savory chicken perfectly. Moreover, this dish is not only tasty but also visually appealing, making it a feast for the eyes as well as the palate.

Another reason these bowls are special is their versatility. You can easily customize them to suit your taste preferences. Whether you prefer a little extra heat from jalapeños or want to swap out the chicken for a vegetarian option, the possibilities are endless. This adaptability makes it a go-to recipe for any occasion.

The Benefits of Using Fresh Ingredients

Using fresh ingredients is key to making the best Cilantro Lime Chicken Bowls. Fresh produce, like ripe peaches and vibrant cilantro, not only enhances the flavor but also boosts the nutritional value of your meal. Fresh ingredients are packed with vitamins, minerals, and antioxidants that are essential for a healthy diet.

Additionally, cooking with fresh ingredients allows you to control what goes into your food. You can avoid preservatives and artificial flavors, ensuring that your meal is wholesome and nourishing. Plus, the aroma of fresh herbs and spices while cooking is simply irresistible!

Cilantro Lime Chicken Bowls with Peach Salsa Recipe is a delightful dish that brings together fresh flavors and healthy ingredients. It’s a meal that’s not only satisfying but also good for you. So, let’s dive into the ingredients and get started on this culinary adventure!

Ingredients for Cilantro Lime Chicken Bowls with Peach Salsa Recipe

Essential Ingredients for the Chicken

To create the perfect Cilantro Lime Chicken Bowls, you need a few essential ingredients for the chicken. Start with two large boneless, skinless chicken breasts, weighing about one pound in total. These will be the star of your dish! Next, gather the spices: one teaspoon each of garlic powder, onion powder, cumin, and chili powder. Don’t forget to add salt and pepper to taste. These spices will give your chicken a flavorful kick.

For cooking, you’ll need two tablespoons of olive oil. This not only helps in cooking the chicken but also adds a rich flavor. Finally, the juice of two limes will bring a zesty brightness to the dish, enhancing the overall taste. With these ingredients, you’re well on your way to a delicious meal!

Ingredients for the Peach Salsa

The peach salsa is what makes this dish truly special. For the salsa, you’ll need two ripe peaches, diced into small pieces. Their sweetness pairs beautifully with the savory chicken. You’ll also need a quarter of a red onion, finely chopped, to add a bit of crunch and flavor. If you like a little heat, include one jalapeño, seeded and minced. This is optional, but it can elevate the salsa to a whole new level!

To finish off the salsa, squeeze the juice of one lime and add a pinch of salt. This combination of ingredients creates a refreshing and vibrant topping that complements the chicken perfectly. The peach salsa is not just a topping; it’s a burst of flavor that brings the whole dish together!

Optional Add-Ins for Extra Flavor

If you want to take your Cilantro Lime Chicken Bowls to the next level, consider adding some optional ingredients. For instance, you can include one cup of cooked rice, either white or brown, as a hearty base for your bowl. Black beans, drained and rinsed, add protein and fiber, making the meal more filling.

Don’t forget about corn! You can use fresh, frozen, or canned corn—about one cup will do. It adds a sweet crunch that balances the flavors. For a creamy touch, dice one avocado and sprinkle it on top. Cherry tomatoes, halved, add a pop of color and freshness. Finally, a quarter cup of fresh cilantro, chopped, will enhance the dish with its aromatic flavor.

These optional add-ins not only enhance the taste but also make your bowls more colorful and nutritious. Feel free to mix and match based on your preferences!

Step-by-Step Preparation of Cilantro Lime Chicken Bowls with Peach Salsa Recipe

Step 1: Marinating the Chicken

To kick off your cooking adventure, start by marinating the chicken. In a small bowl, mix together the garlic powder, onion powder, cumin, chili powder, salt, and pepper. This spice blend is the secret to flavorful chicken! Rub this mixture evenly over both sides of the chicken breasts. Make sure every inch is covered for maximum flavor. Once seasoned, let the chicken sit for about 15 minutes. This allows the spices to soak in, making the chicken even tastier.

Step 2: Preparing the Peach Salsa

While the chicken is marinating, it’s time to prepare the peach salsa. Grab a medium bowl and combine the diced peaches, finely chopped red onion, and minced jalapeño if you’re feeling adventurous. Squeeze the juice of one lime over the mixture and sprinkle in a pinch of salt. Gently mix everything together. The sweetness of the peaches combined with the tangy lime juice creates a refreshing salsa that will brighten your bowls. Set the salsa aside to let the flavors meld while you cook the chicken.

Step 3: Cooking the Chicken

Now, let’s cook the chicken! Heat two tablespoons of olive oil in a large skillet over medium-high heat. Once the oil is hot, carefully add the marinated chicken breasts. Cook them for about 6-7 minutes on each side. You want the chicken to be golden brown and cooked through. To check if it’s done, use a meat thermometer; the internal temperature should reach 165°F (75°C). Once cooked, remove the chicken from the skillet and let it rest for a few minutes. This resting period helps keep the chicken juicy.

Step 4: Assembling the Bowls

Finally, it’s time to assemble your beautiful bowls! Start with a base of cooked rice—white or brown, whichever you prefer. Next, slice the rested chicken and place it on top of the rice. Add a generous scoop of black beans and corn for extra texture and flavor. Then, sprinkle diced avocado and halved cherry tomatoes over the top. Don’t forget the star of the show—the peach salsa! Add a big spoonful right in the center. Finish off with a sprinkle of fresh cilantro and an extra squeeze of lime juice if you like. Your Cilantro Lime Chicken Bowls with Peach Salsa are now ready to be enjoyed!

Variations of Cilantro Lime Chicken Bowls with Peach Salsa Recipe

Vegetarian Alternatives

If you’re looking for a vegetarian option, you can easily swap out the chicken for plant-based proteins. One great alternative is grilled or roasted tofu. Tofu absorbs flavors well and can be marinated just like the chicken. Simply cut it into cubes, marinate with the same spices, and cook until golden brown.

Another option is to use chickpeas. They are packed with protein and add a nice texture to your bowls. Just drain and rinse a can of chickpeas, then sauté them with the same spice mix for a few minutes. This will give them a delicious flavor that pairs perfectly with the other ingredients.

For a heartier option, consider using quinoa instead of rice. Quinoa is a complete protein and adds a nutty flavor to your dish. You can also add roasted vegetables like bell peppers, zucchini, or sweet potatoes for extra nutrition and color. These variations make the dish just as satisfying and delicious!

Different Protein Options

If you’re not in the mood for chicken, there are plenty of other protein options to consider. Shrimp is a fantastic choice! Simply season the shrimp with the same spices and sauté them in olive oil until they turn pink and opaque. This will add a delightful seafood twist to your bowls.

Another option is to use steak. Grilled flank steak or chicken thighs can bring a rich flavor to your meal. Just make sure to adjust the cooking time based on the protein you choose. Each protein will bring its unique taste and texture, making your bowls exciting and varied.

For a lighter option, consider using fish like tilapia or salmon. Season and cook the fish in a similar way to the chicken. The flaky texture of fish pairs beautifully with the peach salsa, creating a refreshing and satisfying meal.

Customizing the Salsa

The peach salsa is a highlight of this recipe, but you can customize it to suit your taste! If peaches aren’t in season, try using mango or pineapple for a tropical twist. Both fruits add sweetness and a unique flavor that complements the chicken.

You can also experiment with different herbs. Instead of cilantro, try using fresh mint or basil for a different aromatic experience. If you love heat, add more jalapeños or even a dash of hot sauce to the salsa for an extra kick.

For a crunchier texture, consider adding diced bell peppers or cucumbers. These ingredients will add freshness and a satisfying crunch to your salsa. Feel free to mix and match based on what you have on hand or what you enjoy most!

Cooking Note for Cilantro Lime Chicken Bowls with Peach Salsa Recipe

Tips for Perfectly Cooked Chicken

Cooking chicken can be tricky, but with a few simple tips, you can achieve perfectly cooked chicken every time! First, always start with chicken that is at room temperature. This helps it cook evenly. Before cooking, make sure to pat the chicken dry with paper towels. This will help it sear nicely and develop a beautiful golden crust.

When cooking, avoid overcrowding the skillet. If you add too many pieces at once, the temperature of the pan will drop, and the chicken will steam instead of sear. If you have more chicken than fits comfortably, cook it in batches.

Using a meat thermometer is a game-changer! Insert it into the thickest part of the chicken. The internal temperature should reach 165°F (75°C) for safe consumption. Once cooked, let the chicken rest for a few minutes before slicing. This allows the juices to redistribute, keeping the chicken moist and flavorful.

Storing Leftovers Safely

If you have leftovers from your Cilantro Lime Chicken Bowls, storing them properly is essential for maintaining freshness. Start by letting the chicken and other ingredients cool down to room temperature. Then, place them in airtight containers. This will help prevent moisture loss and keep your food safe.

Store the chicken and the peach salsa separately. The salsa can become watery if stored with the chicken. Leftover chicken can be kept in the refrigerator for up to three days. If you want to keep it longer, consider freezing it. Just make sure to wrap it tightly in plastic wrap or aluminum foil before placing it in a freezer-safe bag.

When reheating, do so gently in the microwave or on the stovetop. This will help retain the chicken’s moisture. Enjoy your delicious leftovers in salads, wraps, or even as a topping for nachos!

Serving Suggestions for Cilantro Lime Chicken Bowls with Peach Salsa Recipe

Ideal Side Dishes

Cilantro Lime Chicken Bowls with Peach Salsa Recipe, choosing the right side dishes can elevate your meal even further. Here are some ideal options to consider:

  • Grilled Vegetables: A medley of grilled vegetables like zucchini, bell peppers, and asparagus adds a smoky flavor and vibrant colors to your plate.
  • Mexican Street Corn: This dish, known as elote, features corn on the cob slathered in creamy sauce, cheese, and spices. It pairs wonderfully with the flavors of your chicken bowls.
  • Simple Green Salad: A fresh salad with mixed greens, cucumber, and a light vinaigrette can provide a refreshing contrast to the hearty chicken bowls.
  • Quinoa Salad: A quinoa salad with black beans, corn, and lime dressing can complement the flavors of your main dish while adding extra protein and fiber.

These side dishes not only enhance the meal but also add variety and nutrition. Feel free to mix and match based on your preferences and what you have on hand!

Pairing with Beverages

To complete your dining experience, consider pairing your Cilantro Lime Chicken Bowls with the right beverages. Here are some delightful options:

  • Refreshing Lemonade: A glass of homemade lemonade, sweetened to your liking, can provide a zesty and refreshing contrast to the savory flavors of the chicken.
  • Iced Tea: Unsweetened iced tea, either black or herbal, is a great choice. You can add a slice of lime for an extra zing!
  • Margaritas: If you’re in the mood for something a bit more festive, a classic margarita pairs beautifully with the flavors of the dish. The lime and tequila complement the zesty notes of the chicken and salsa.
  • Light Beer: A light lager or pilsner can be a great accompaniment, as it won’t overpower the flavors of your meal.

Choosing the right beverage can enhance your meal and make it even more enjoyable. So, whether you prefer something refreshing or a bit more spirited, there’s a perfect drink to accompany your Cilantro Lime Chicken Bowls!

Tips for Making the Best Cilantro Lime Chicken Bowls with Peach Salsa Recipe

Choosing the Right Ingredients

Cilantro Lime Chicken Bowls with Peach Salsa Recipe, selecting high-quality ingredients is crucial. Start with fresh, ripe peaches for the salsa. The sweetness of ripe peaches will elevate the flavor of your dish. If peaches are out of season, opt for mangoes or pineapples, which can also add a delightful sweetness.

For the chicken, choose organic, free-range chicken breasts if possible. They tend to be more flavorful and juicy. When selecting spices, go for fresh, high-quality options. Fresh spices can make a significant difference in taste. Always check the expiration date on your spices to ensure they are potent.

Don’t forget about the herbs! Fresh cilantro is essential for that vibrant flavor. If you’re not a fan of cilantro, consider using fresh parsley or mint as alternatives. These herbs can provide a different yet refreshing taste to your bowls.

Enhancing Flavor Profiles

Cilantro Lime Chicken Bowls with Peach Salsa Recipe to the next level, consider enhancing the flavor profiles with a few simple tricks. First, marinate the chicken for longer than 15 minutes if you have the time. Allowing it to soak in the spices for a few hours or even overnight will deepen the flavors.

Another way to enhance flavor is by adding a splash of vinegar or a dash of hot sauce to the peach salsa. This can add a tangy kick that balances the sweetness of the peaches. Additionally, try roasting the corn before adding it to the bowls. Roasting brings out the natural sweetness and adds a smoky flavor that complements the chicken beautifully.

Lastly, don’t shy away from experimenting with different toppings. Crumbled feta or cotija cheese can add a creamy, salty element that pairs well with the sweetness of the salsa. A sprinkle of chili powder or smoked paprika on top can also add an extra layer of flavor. With these tips, your Cilantro Lime Chicken Bowls will be bursting with deliciousness!

Breakdown of Time for Cilantro Lime Chicken Bowls with Peach Salsa Recipe

Prep Time

Cilantro Lime Chicken Bowls with Peach Salsa Recipe is a breeze! The prep time is approximately 20 minutes. This includes gathering all your ingredients, marinating the chicken, and preparing the peach salsa. Having everything organized will make the cooking process smooth and enjoyable. So, take a moment to chop, mix, and measure before you start cooking!

Cooking Time

Once you’re prepped and ready, the cooking time is about 15-20 minutes. This includes cooking the chicken in the skillet until it’s perfectly golden and juicy. While the chicken is resting, you can assemble your bowls with the rice, beans, corn, and all the delicious toppings. The quick cooking time makes this recipe perfect for busy weeknights when you want a tasty meal without spending hours in the kitchen.

Total Time

In total, you can expect to spend around 35-40 minutes from start to finish. This includes both prep and cooking time. With such a short time commitment, you can enjoy a flavorful and nutritious meal that’s sure to please everyone at the table. So, gather your ingredients and get ready to whip up these delightful bowls!

Nutritional Information for Cilantro Lime Chicken Bowls with Peach Salsa Recipe

Calories and Macronutrients

Cilantro Lime Chicken Bowls with Peach Salsa Recipe contains approximately 450 calories. This makes it a satisfying yet healthy option for lunch or dinner.

Here’s a breakdown of the macronutrients per serving:

  • Protein: 30g – The chicken and black beans provide a hearty dose of protein, essential for muscle repair and growth.
  • Fat: 15g – Healthy fats from olive oil and avocado contribute to satiety and support overall health.
  • Net Carbohydrates: 45g – The rice, corn, and beans offer a good source of energy, making this meal filling and nutritious.

This balanced macronutrient profile makes the dish suitable for various dietary needs, whether you’re looking to maintain your weight or fuel an active lifestyle. Plus, the combination of ingredients ensures you’re getting a variety of nutrients in one delicious bowl!

Health Benefits of Key Ingredients

Cilantro Lime Chicken Bowls with Peach Salsa Recipe is not just tasty; it’s also packed with health benefits thanks to its fresh ingredients. Here are some key components and their health advantages:

  • Chicken: A great source of lean protein, chicken helps build and repair tissues. It’s also rich in B vitamins, which are vital for energy production.
  • Peaches: These juicy fruits are high in vitamins A and C, which support skin health and boost the immune system. They also contain antioxidants that help fight inflammation.
  • Cilantro: This herb is known for its detoxifying properties. It may help remove heavy metals from the body and is rich in vitamins K and C.
  • Avocado: Packed with healthy monounsaturated fats, avocados promote heart health. They also provide fiber, which aids digestion and keeps you feeling full.
  • Black Beans: A fantastic source of plant-based protein and fiber, black beans help regulate blood sugar levels and support digestive health.

Incorporating these ingredients into your meals not only enhances flavor but also contributes to your overall well-being. Enjoying a bowl of Cilantro Lime Chicken with Peach Salsa is a delicious way to nourish your body while savoring every bite!

FAQs about Cilantro Lime Chicken Bowls with Peach Salsa Recipe

Can I make the peach salsa ahead of time?

Absolutely! Making the peach salsa ahead of time is a great idea. You can prepare it a few hours or even a day in advance. Just store it in an airtight container in the refrigerator. This allows the flavors to meld together, making the salsa even tastier. Just remember to give it a good stir before serving, as some juices may settle at the bottom.

What can I substitute for cilantro?

If you’re not a fan of cilantro, don’t worry! There are several alternatives you can use. Fresh parsley is a popular substitute that offers a mild flavor. You can also try fresh mint for a refreshing twist. If you want a slightly different taste, basil can work well too. Each of these herbs will add a unique flavor to your bowls, so feel free to experiment!

How can I make this recipe spicier?

Cilantro Lime Chicken Bowls with Peach Salsa Recipe. First, you can add more jalapeños to the peach salsa. If you want even more heat, consider using a hotter pepper, like serrano or habanero. Another option is to sprinkle some red pepper flakes or cayenne pepper on the chicken before cooking. This will give your dish a nice kick without overpowering the other flavors.

Is this recipe suitable for meal prep?

Yes, this recipe is perfect for meal prep! You can cook the chicken and prepare the peach salsa in advance. Store the components separately in airtight containers. This way, you can easily assemble your bowls throughout the week. Just keep in mind that the avocado should be added fresh to prevent browning. Meal prepping this dish makes it a convenient and healthy option for busy days!

Conclusion on Cilantro Lime Chicken Bowls with Peach Salsa Recipe

Recap of Key Points

Cilantro Lime Chicken Bowls with Peach Salsa Recipe is a delightful and nutritious meal that brings together fresh ingredients and vibrant flavors. From the marinated chicken to the refreshing peach salsa, every component adds to the overall experience. We’ve explored the essential ingredients, step-by-step preparation, and various ways to customize this dish to suit your taste. Whether you prefer it vegetarian or with different proteins, the possibilities are endless!

Additionally, we discussed the importance of using fresh ingredients, tips for cooking chicken perfectly, and how to store leftovers safely. With a balanced nutritional profile, this recipe is not only satisfying but also supports a healthy lifestyle. The ideal side dishes and beverage pairings further enhance your dining experience, making it a versatile option for any occasion.

Encouragement to Try the Recipe

Cilantro Lime Chicken Bowls with Peach Salsa Recipe is perfect for family dinners, meal prep, or even impressing guests at a gathering. With its colorful presentation and mouthwatering flavors, it’s sure to become a favorite in your household.

So, gather your ingredients, follow the steps, and enjoy the process of creating this delightful dish. Don’t forget to share your experience and any variations you try! Happy cooking!

Stay Connected

Get recipes via email: