Get my cookbooks

Creamy Roasted Red Pepper Pasta Sauce is simply delicious!

Introduction to Creamy Roasted Red Pepper Pasta Sauce

Are you looking for a delicious and easy pasta sauce that will impress your family and friends? Look no further! Creamy Roasted Red Pepper Pasta Sauce is a delightful blend of flavors that brings a touch of gourmet to your dinner table. This sauce is not only creamy and rich but also packed with the sweet, smoky taste of roasted red peppers. It’s perfect for any occasion, whether it’s a cozy family dinner or a gathering with friends.

What Makes Creamy Roasted Red Pepper Pasta Sauce Special?

What sets this sauce apart is its unique combination of ingredients. The roasted red peppers provide a natural sweetness and depth of flavor that you simply can’t achieve with store-bought sauces. When blended with heavy cream and Parmesan cheese, it creates a velvety texture that clings beautifully to pasta. Plus, the addition of garlic and onion adds a savory note that balances the sweetness of the peppers.

Another fantastic aspect of this sauce is its versatility. You can easily customize it to suit your taste. Want a little heat? Just add some red pepper flakes! Prefer a lighter version? Substitute the heavy cream with coconut milk. The possibilities are endless, making it a go-to recipe for any home cook.

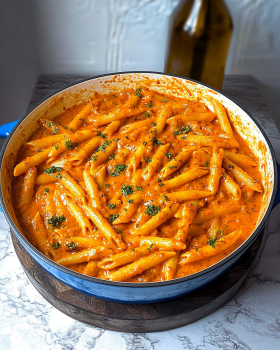
In addition to its wonderful flavor, Creamy Roasted Red Pepper Pasta Sauce is also visually appealing. The vibrant red color of the sauce makes any plate look inviting and appetizing. It’s a dish that not only tastes great but also looks beautiful, making it perfect for entertaining.

So, whether you’re a seasoned chef or a beginner in the kitchen, this sauce is sure to become a favorite. Let’s dive into the ingredients and preparation steps to create this mouthwatering dish!

Ingredients for Creamy Roasted Red Pepper Pasta Sauce

To create the delightful Creamy Roasted Red Pepper Pasta Sauce, you’ll need a few simple ingredients. Each one plays a vital role in building the rich flavor and creamy texture of the sauce. Here’s what you’ll need:

  • 2 large red bell peppers: These are the star of the sauce, providing sweetness and a beautiful color.
  • 1 tablespoon olive oil: This adds richness and helps sauté the onions and garlic.
  • 1 small onion, chopped: Onions bring a savory depth to the sauce.
  • 2 cloves garlic, minced: Garlic adds a wonderful aroma and flavor.
  • 1 cup heavy cream: This gives the sauce its creamy texture.
  • 1 teaspoon Italian seasoning: A blend of herbs that enhances the overall flavor.
  • Salt and pepper to taste: Essential for seasoning and balancing flavors.
  • 1/2 cup grated Parmesan cheese: This adds a nutty flavor and creaminess to the sauce.
  • 1 pound pasta of your choice: Spaghetti, penne, or any pasta you love will work perfectly.
  • Fresh basil for garnish (optional): A touch of fresh basil adds a pop of color and flavor.

These ingredients are easy to find and can be adjusted based on your preferences. For instance, if you want a dairy-free option, you can swap the heavy cream for coconut milk and use nutritional yeast instead of Parmesan. This flexibility makes the Creamy Roasted Red Pepper Pasta Sauce a fantastic choice for everyone!

Step-by-Step Preparation of Creamy Roasted Red Pepper Pasta Sauce

Now that you have gathered all the ingredients, it’s time to bring them together to create your delicious Creamy Roasted Red Pepper Pasta Sauce. Follow these simple steps to ensure a smooth and flavorful sauce that will elevate your pasta dish.

Step 1: Roasting the Red Peppers

Start by preheating your oven to 425°F (220°C). This high temperature is perfect for roasting. Cut the red bell peppers in half and remove the seeds. Place them cut-side down on a baking sheet. Roast the peppers in the oven for about 25-30 minutes. You’ll know they’re ready when the skins are charred and blistered. Once done, remove them from the oven and let them cool slightly. This cooling period makes it easier to peel off the skins.

Step 2: Blending the Ingredients

While the peppers are roasting, you can prepare the other ingredients. In a large skillet, heat 1 tablespoon of olive oil over medium heat. Add the chopped onion and sauté for about 5 minutes until it becomes translucent. Then, add the minced garlic and cook for an additional minute. The aroma will be delightful!

Once the peppers have cooled, peel off the charred skins and add the roasted peppers to the skillet with the onions and garlic. Stir in 1 cup of heavy cream and 1 teaspoon of Italian seasoning. Now, it’s time to blend everything together. If you have an immersion blender, use it to puree the mixture until smooth. If not, transfer the mixture to a regular blender, blend until smooth, and then return it to the skillet.

Step 3: Cooking the Sauce

After blending, add 1/2 cup of grated Parmesan cheese to the sauce. Stir until the cheese melts and combines well with the sauce. If you find the sauce too thick, don’t worry! Just add some reserved pasta water to reach your desired consistency. Season with salt and pepper to taste. This step is crucial as it enhances the overall flavor of your sauce.

Step 4: Combining with Pasta

Now that your sauce is ready, it’s time to bring it all together. Toss the cooked pasta in the sauce until it’s well coated. Make sure every strand or piece of pasta is enveloped in that creamy goodness. Serve immediately, and if you like, garnish with fresh basil for an extra touch of flavor and color. Enjoy your homemade Creamy Roasted Red Pepper Pasta Sauce!

Variations of Creamy Roasted Red Pepper Pasta Sauce

One of the best things about Creamy Roasted Red Pepper Pasta Sauce is its versatility. You can easily modify it to suit your taste or dietary needs. Here are some exciting variations to consider:

Adding Protein to Your Sauce

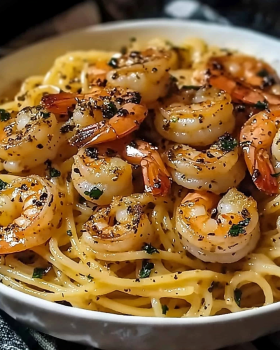
If you want to make your meal heartier, consider adding protein to your sauce. Grilled chicken, shrimp, or even sautéed mushrooms can enhance the dish. Simply cook your chosen protein separately and mix it into the sauce before tossing it with the pasta. This addition not only boosts the flavor but also makes the dish more filling.

Vegetarian and Vegan Options

For those following a vegetarian or vegan diet, there are simple swaps you can make. Instead of heavy cream, use coconut milk for a creamy texture without dairy. Nutritional yeast can replace Parmesan cheese, giving a cheesy flavor without animal products. You can also add vegetables like spinach or zucchini for extra nutrition and color. These adjustments ensure everyone can enjoy this delicious sauce!

With these variations, you can create a unique version of Creamy Roasted Red Pepper Pasta Sauce that fits your preferences. Whether you’re looking for a protein-packed meal or a lighter, plant-based option, the possibilities are endless!

Cooking Note for Creamy Roasted Red Pepper Pasta Sauce

When preparing your Creamy Roasted Red Pepper Pasta Sauce, there are a few cooking notes to keep in mind. These tips will help you achieve the best flavor and texture for your sauce.

First, always choose ripe, fresh red bell peppers. The quality of your peppers directly affects the sauce’s taste. Look for peppers that are firm and have a vibrant color. Avoid any that have soft spots or wrinkles.

Next, don’t rush the roasting process. Allowing the peppers to char properly enhances their sweetness and adds a smoky flavor. If you find that the skins are not blistering, you may need to increase the roasting time slightly.

When blending the sauce, ensure that the mixture is completely smooth. This step is crucial for achieving that creamy texture. If you prefer a chunkier sauce, you can blend it less, but keep in mind that a smooth sauce will coat the pasta better.

Lastly, taste your sauce before serving. Adjust the seasoning as needed. Sometimes, a little extra salt or a dash of lemon juice can elevate the flavors even more. Enjoy the process, and don’t hesitate to experiment with different ingredients!

Serving Suggestions for Creamy Roasted Red Pepper Pasta Sauce

Now that you have your delicious Creamy Roasted Red Pepper Pasta Sauce ready, it’s time to think about how to serve it. Here are some great serving suggestions to make your meal even more enjoyable.

Pairing with Different Types of Pasta

This sauce pairs wonderfully with various types of pasta. Spaghetti is a classic choice, but you can also use penne, fettuccine, or even gluten-free pasta. The key is to choose a pasta shape that will hold onto the sauce well. For instance, penne’s tubular shape captures the sauce inside, making every bite flavorful.

Additionally, consider serving the sauce over whole wheat or chickpea pasta for a healthier twist. These options add extra fiber and protein, making your meal more nutritious.

Garnishing Ideas

Garnishing your dish can elevate its presentation and flavor. Fresh basil is a fantastic choice, adding a pop of color and a hint of freshness. You can also sprinkle some extra grated Parmesan cheese on top for added richness.

For a bit of crunch, consider adding toasted pine nuts or walnuts. They provide a delightful texture contrast to the creamy sauce. A drizzle of high-quality olive oil can also enhance the dish’s flavor.

Lastly, serve your pasta with a side salad or garlic bread for a complete meal. This combination will impress your guests and make for a satisfying dining experience!

Cooking Note for Creamy Roasted Red Pepper Pasta Sauce

When preparing your Creamy Roasted Red Pepper Pasta Sauce, there are a few cooking notes to keep in mind. These tips will help you achieve the best flavor and texture for your sauce.

First, always choose ripe, fresh red bell peppers. The quality of your peppers directly affects the sauce’s taste. Look for peppers that are firm and have a vibrant color. Avoid any that have soft spots or wrinkles.

Next, don’t rush the roasting process. Allowing the peppers to char properly enhances their sweetness and adds a smoky flavor. If you find that the skins are not blistering, you may need to increase the roasting time slightly.

When blending the sauce, ensure that the mixture is completely smooth. This step is crucial for achieving that creamy texture. If you prefer a chunkier sauce, you can blend it less, but keep in mind that a smooth sauce will coat the pasta better.

Lastly, taste your sauce before serving. Adjust the seasoning as needed. Sometimes, a little extra salt or a dash of lemon juice can elevate the flavors even more. Enjoy the process, and don’t hesitate to experiment with different ingredients!

Serving Suggestions for Creamy Roasted Red Pepper Pasta Sauce

Now that you have your delicious Creamy Roasted Red Pepper Pasta Sauce ready, it’s time to think about how to serve it. Here are some great serving suggestions to make your meal even more enjoyable.

Pairing with Different Types of Pasta

This sauce pairs wonderfully with various types of pasta. Spaghetti is a classic choice, but you can also use penne, fettuccine, or even gluten-free pasta. The key is to choose a pasta shape that will hold onto the sauce well. For instance, penne’s tubular shape captures the sauce inside, making every bite flavorful.

Additionally, consider serving the sauce over whole wheat or chickpea pasta for a healthier twist. These options add extra fiber and protein, making your meal more nutritious. If you’re feeling adventurous, try using spiralized vegetables like zucchini or sweet potatoes as a low-carb alternative. They not only taste great but also add a colorful touch to your plate!

Garnishing Ideas

Garnishing your dish can elevate its presentation and flavor. Fresh basil is a fantastic choice, adding a pop of color and a hint of freshness. You can also sprinkle some extra grated Parmesan cheese on top for added richness. This simple touch can make your dish look restaurant-quality!

For a bit of crunch, consider adding toasted pine nuts or walnuts. They provide a delightful texture contrast to the creamy sauce. A drizzle of high-quality olive oil can also enhance the dish’s flavor, giving it a luxurious finish.

Lastly, serve your pasta with a side salad or garlic bread for a complete meal. A light arugula salad with lemon vinaigrette complements the richness of the sauce beautifully. This combination will impress your guests and make for a satisfying dining experience!

Tips for Perfecting Creamy Roasted Red Pepper Pasta Sauce

Creating the perfect Creamy Roasted Red Pepper Pasta Sauce is all about attention to detail. Here are some helpful tips to ensure your sauce turns out delicious every time.

First, always use fresh ingredients. Fresh red bell peppers will give your sauce the best flavor. Look for peppers that are firm and vibrant in color. The fresher the ingredients, the tastier your sauce will be!

Next, don’t skip the roasting step. Roasting the peppers enhances their natural sweetness and adds a smoky flavor. Make sure to let them cool before peeling. This makes it easier to remove the skins and ensures a smoother sauce.

When blending the sauce, aim for a silky texture. If you prefer a chunkier sauce, blend it less, but remember that a smooth sauce clings better to pasta. If you find the sauce too thick, gradually add reserved pasta water until you reach your desired consistency.

Seasoning is key! Taste your sauce as you go. Adjust the salt and pepper to your liking. A squeeze of fresh lemon juice can brighten the flavors, making the sauce even more delicious.

Lastly, don’t be afraid to experiment! Try adding different herbs or spices to customize the flavor. Fresh thyme or oregano can add a lovely aroma. You can also mix in some sautéed vegetables for added nutrition and texture.

By following these tips, you’ll be well on your way to mastering the art of making Creamy Roasted Red Pepper Pasta Sauce. Enjoy the process and have fun in the kitchen!

Breakdown of Time for Creamy Roasted Red Pepper Pasta Sauce

Understanding the time needed to prepare your Creamy Roasted Red Pepper Pasta Sauce can help you plan your meal better. Here’s a simple breakdown of the time involved in each step of the process.

Prep Time

The prep time for this delicious sauce is quite minimal. You’ll need about 10-15 minutes to gather your ingredients and prepare them. This includes washing and cutting the red bell peppers, chopping the onion, and mincing the garlic. Having everything ready before you start cooking will make the process smoother and more enjoyable.

Cooking Time

Once you start cooking, the total cooking time is approximately 30-40 minutes. This includes:

  • Roasting the red peppers: 25-30 minutes in the oven.
  • Sautéing the onions and garlic: About 6 minutes.
  • Blending and cooking the sauce: 5-10 minutes.

These steps come together quickly, allowing you to create a flavorful sauce without spending hours in the kitchen.

Total Time

In total, you can expect to spend around 40-55 minutes from start to finish. This includes both prep and cooking time. It’s a perfect option for a weeknight dinner or a special occasion when you want to impress your guests without too much hassle.

With this time breakdown, you can easily fit the preparation of Creamy Roasted Red Pepper Pasta Sauce into your schedule. Enjoy the process and the delicious results!

Nutritional Information for Creamy Roasted Red Pepper Pasta Sauce

Understanding the nutritional content of your Creamy Roasted Red Pepper Pasta Sauce is essential for making informed choices about your meals. This sauce is not only delicious but also provides a good balance of nutrients. Here’s a closer look at the nutritional information per serving:

Calories

Each serving of Creamy Roasted Red Pepper Pasta Sauce contains approximately 450 calories. This makes it a satisfying option for a main dish, especially when paired with your favorite pasta. The calorie count can vary slightly based on the type of pasta you choose and any additional ingredients you may add.

Protein Content

In terms of protein, this sauce offers about 12 grams per serving. The protein primarily comes from the heavy cream and Parmesan cheese. If you decide to add protein sources like grilled chicken or shrimp, you can significantly increase the protein content of your meal, making it even more filling and nutritious.

Sodium Levels

The sodium levels in Creamy Roasted Red Pepper Pasta Sauce are around 600 milligrams per serving. This amount can vary based on how much salt you add during cooking and the type of pasta used. To keep sodium levels in check, consider using low-sodium broth or cheese alternatives. Always taste your sauce before serving to adjust the seasoning to your preference.

By being aware of the nutritional information, you can enjoy your Creamy Roasted Red Pepper Pasta Sauce while keeping your dietary goals in mind. Whether you’re looking for a comforting meal or a healthy option, this sauce fits the bill!

FAQs about Creamy Roasted Red Pepper Pasta Sauce

Can I use jarred roasted red peppers instead of fresh?

Yes, you can definitely use jarred roasted red peppers! They are a convenient option and can save you time. Just make sure to drain them well before adding them to your sauce. Jarred peppers may have a slightly different flavor compared to fresh ones, but they will still create a delicious sauce. This is a great shortcut if you’re in a hurry!

How can I make the sauce spicier?

If you want to add some heat to your Creamy Roasted Red Pepper Pasta Sauce, there are a few easy ways to do it. One simple method is to add a pinch of red pepper flakes while cooking the sauce. You can also include diced jalapeños or a dash of hot sauce for an extra kick. Just remember to start with a small amount and adjust to your taste. Enjoy the spicy twist!

What pasta pairs best with creamy roasted red pepper pasta sauce?

This creamy sauce pairs well with many types of pasta. Spaghetti and penne are popular choices, as they hold the sauce nicely. Fettuccine is another great option, offering a wider surface area for the sauce to cling to. If you prefer a gluten-free option, try using rice or chickpea pasta. Ultimately, choose your favorite pasta shape to enjoy this delicious sauce!

Can I freeze creamy roasted red pepper pasta sauce?

Yes, you can freeze Creamy Roasted Red Pepper Pasta Sauce! To do this, let the sauce cool completely before transferring it to an airtight container. It can be stored in the freezer for up to three months. When you’re ready to use it, simply thaw it in the refrigerator overnight and reheat on the stove. You may need to add a splash of cream or pasta water to restore its creamy texture. Enjoy your homemade sauce anytime!

Conclusion on Creamy Roasted Red Pepper Pasta Sauce

In conclusion, Creamy Roasted Red Pepper Pasta Sauce is a delightful addition to any meal. Its rich, creamy texture and vibrant flavor make it a favorite among pasta lovers. Whether you’re cooking for a special occasion or a simple weeknight dinner, this sauce is sure to impress.

By following the steps outlined in this article, you can easily create a homemade sauce that rivals any restaurant dish. The versatility of this recipe allows you to customize it to your liking, whether you prefer it spicy, vegetarian, or packed with protein. Plus, the nutritional benefits make it a wholesome choice for you and your family.

Don’t forget to experiment with different pasta types and garnishes to elevate your dish even further. Fresh basil, toasted nuts, or a sprinkle of cheese can transform your meal into a gourmet experience. With just a few simple ingredients and steps, you can enjoy a delicious, comforting dish that brings joy to your table.

So, gather your ingredients, fire up your oven, and get ready to savor the delightful flavors of Creamy Roasted Red Pepper Pasta Sauce. Happy cooking!

Pan-Seared Flank Steak with Garlic Herb Butter delights all!

Introduction to Pan-Seared Flank Steak with Garlic Herb Butter

Are you ready to elevate your dinner game? Pan-Seared Flank Steak with Garlic Herb Butter is a dish that brings together rich flavors and a delightful texture. This recipe is not just about cooking meat; it’s about creating a memorable meal that will impress your family and friends. Flank steak is known for its robust flavor and tenderness when cooked correctly. When paired with a luscious garlic herb butter, it transforms into a culinary masterpiece.

What Makes Pan-Seared Flank Steak with Garlic Herb Butter Special?

What sets this dish apart? First, the flank steak itself is a lean cut of beef that absorbs flavors beautifully. Its natural taste shines through when seared to perfection. The cooking method—pan-searing—locks in juices, creating a crispy exterior while keeping the inside tender and juicy.

Next, let’s talk about the garlic herb butter. This simple yet flavorful addition takes the steak to another level. The combination of garlic, fresh herbs, and a hint of lemon creates a vibrant topping that enhances the meat’s flavor. It’s a perfect balance of richness and freshness.

Moreover, this dish is versatile. You can serve it with various sides, making it suitable for any occasion, from casual family dinners to elegant gatherings. Plus, it’s quick to prepare, making it an excellent choice for busy weeknights.

In summary, Pan-Seared Flank Steak with Garlic Herb Butter is not just a meal; it’s an experience. With its mouthwatering flavors and easy preparation, it’s sure to become a favorite in your household. So, let’s dive into the ingredients and get cooking!

Ingredients for Pan-Seared Flank Steak with Garlic Herb Butter

To create the delicious Pan-Seared Flank Steak with Garlic Herb Butter, you’ll need a few simple yet high-quality ingredients. Each component plays a vital role in achieving the perfect flavor and texture. Here’s what you’ll need:

  • 2 pounds flank steak: This is the star of the dish. Look for a fresh cut with good marbling for the best flavor.
  • 2 tablespoons olive oil: This helps to sear the steak and adds a rich flavor.
  • 1 teaspoon salt: Essential for enhancing the natural taste of the meat.
  • 1 teaspoon black pepper: Adds a bit of heat and depth to the seasoning.
  • 4 cloves garlic, minced: Fresh garlic brings a robust flavor to the herb butter.
  • 4 tablespoons unsalted butter, softened: This is the base for your garlic herb butter, providing creaminess.
  • 2 tablespoons fresh parsley, chopped: Adds a fresh, vibrant flavor.
  • 1 tablespoon fresh thyme, chopped: This herb complements the steak beautifully.
  • 1 tablespoon fresh rosemary, chopped: Rosemary adds a fragrant touch to the butter.
  • 1 teaspoon lemon juice: A splash of acidity brightens the flavors.

Gathering these ingredients is the first step toward creating a mouthwatering meal. Make sure to use fresh herbs for the best taste. Now that you have everything ready, let’s move on to the preparation steps!

Step-by-Step Preparation of Pan-Seared Flank Steak with Garlic Herb Butter

Now that you have all your ingredients ready, it’s time to dive into the step-by-step preparation of your Pan-Seared Flank Steak with Garlic Herb Butter. Following these steps will ensure that your steak is cooked to perfection and bursting with flavor. Let’s get started!

Step 1: Preparing the Flank Steak

First, take the flank steak out of the refrigerator. Allow it to sit at room temperature for about 30 minutes. This step is crucial as it helps the meat cook evenly. While the steak is resting, pat it dry with paper towels. This will help achieve a nice sear.

Next, season both sides of the steak generously with salt and black pepper. This simple seasoning enhances the natural flavors of the meat. Make sure to rub the seasoning in well for an even distribution.

Step 2: Making the Garlic Herb Butter

While the steak is resting, let’s prepare the garlic herb butter. In a small bowl, combine the softened unsalted butter, minced garlic, chopped parsley, thyme, rosemary, and lemon juice. Mix everything together until well combined. This butter will add a rich, flavorful topping to your steak.

For an extra kick, consider adding a pinch of red pepper flakes to the mixture. This will give your dish a delightful spicy twist. Once mixed, set the garlic herb butter aside. It will be ready to use once the steak is cooked.

Step 3: Cooking the Flank Steak

Now, it’s time to cook the steak! Heat a large skillet over medium-high heat and add the olive oil. Wait until the oil is shimmering, indicating it’s hot enough. Carefully place the flank steak in the skillet. Sear it for about 4-5 minutes on each side for medium-rare. If you prefer your steak more done, adjust the cooking time accordingly.

To ensure accuracy, use a meat thermometer. The internal temperature should reach 130°F for medium-rare. This method locks in the juices, giving you a tender and juicy steak.

Step 4: Resting and Slicing the Steak

Once the steak is cooked to your liking, remove it from the skillet and place it on a cutting board. Let it rest for about 10 minutes. This resting period allows the juices to redistribute throughout the meat, ensuring every bite is flavorful.

After resting, slice the steak against the grain into thin strips. This technique helps to break down the muscle fibers, making the steak more tender. Finally, top the sliced steak with the prepared garlic herb butter and serve immediately. Enjoy your delicious creation!

Variations of Pan-Seared Flank Steak with Garlic Herb Butter

While the classic Pan-Seared Flank Steak with Garlic Herb Butter is a delightful dish on its own, there are many ways to customize it. By experimenting with different herbs and cooking methods, you can create a unique flavor profile that suits your taste. Let’s explore some exciting variations!

Different Herbs to Use

Herbs are a fantastic way to enhance the flavor of your garlic herb butter. While parsley, thyme, and rosemary are traditional choices, feel free to get creative! Here are some alternative herbs you might consider:

  • Basil: This sweet herb adds a fresh, aromatic flavor that pairs well with steak.
  • Oregano: Known for its robust taste, oregano can give your butter a Mediterranean twist.
  • Cilantro: If you enjoy a bit of zest, cilantro can add a bright, citrusy note.
  • Sage: This herb has a warm, earthy flavor that complements the richness of the steak.

Mix and match these herbs to find your perfect combination. Each herb brings its own unique flavor, allowing you to tailor the dish to your liking.

Alternative Cooking Methods

While pan-searing is a fantastic way to cook flank steak, there are other methods you can try for different results. Here are a couple of alternative cooking methods:

  • Grilling: For a smoky flavor, grill the flank steak over medium-high heat. This method adds a delicious char and is perfect for outdoor gatherings.
  • Broiling: If you don’t have a grill, broiling in the oven is a great option. Place the steak on a broiler pan and cook it under high heat for a few minutes on each side.
  • Slow Cooking: For a tender, melt-in-your-mouth experience, consider slow cooking the flank steak. Season it well and cook it on low for several hours until it’s fork-tender.

Each cooking method offers a unique texture and flavor, so don’t hesitate to experiment. Whether you choose to grill, broil, or slow cook, your Pan-Seared Flank Steak with Garlic Herb Butter will still shine!

Cooking Note for Pan-Seared Flank Steak with Garlic Herb Butter

Cooking the perfect Pan-Seared Flank Steak with Garlic Herb Butter requires attention to detail. Here are some essential notes to keep in mind to ensure your steak turns out delicious every time.

First, always start with a high-quality flank steak. Look for a cut that has a good amount of marbling. This fat will melt during cooking, adding flavor and moisture to the meat. Freshness is key, so try to buy your steak from a trusted butcher or grocery store.

Next, remember that temperature matters. Allowing the steak to come to room temperature before cooking is crucial. This step helps the meat cook evenly, preventing the outside from overcooking while the inside remains underdone. A quick tip: if you’re short on time, you can also use a meat thermometer to check the internal temperature as it cooks.

When it comes to searing, don’t overcrowd the skillet. If you’re cooking more than one steak, do it in batches. Overcrowding can lower the skillet’s temperature, leading to steaming instead of searing. A good sear creates a flavorful crust that enhances the overall taste of the dish.

Lastly, don’t skip the resting period after cooking. This step is vital for juicy steak. Resting allows the juices to redistribute throughout the meat, ensuring that every slice is tender and flavorful. If you cut into the steak too soon, those delicious juices will run out, leaving you with a drier piece of meat.

By following these cooking notes, you’ll be well on your way to mastering the art of Pan-Seared Flank Steak with Garlic Herb Butter. Enjoy the process and savor the delightful results!

Serving Suggestions for Pan-Seared Flank Steak with Garlic Herb Butter

Once you’ve prepared your delicious Pan-Seared Flank Steak with Garlic Herb Butter, it’s time to think about how to serve it. The right side dishes and beverages can elevate your meal, making it even more enjoyable. Let’s explore some ideal side dishes and wine pairings that complement this flavorful steak.

Ideal Side Dishes

When it comes to side dishes, you want to choose options that balance the richness of the steak. Here are some fantastic ideas:

  • Roasted Vegetables: A mix of seasonal vegetables like carrots, bell peppers, and zucchini, roasted until tender, adds color and nutrition to your plate.
  • Garlic Mashed Potatoes: Creamy mashed potatoes infused with garlic provide a comforting and hearty side that pairs perfectly with the steak.
  • Fresh Salad: A light salad with mixed greens, cherry tomatoes, and a tangy vinaigrette can refresh your palate and add a crisp texture.
  • Grilled Asparagus: The slight char from grilling asparagus enhances its natural flavor, making it a great accompaniment to the steak.
  • Quinoa Pilaf: A nutty quinoa pilaf with herbs and nuts offers a healthy, protein-packed side that complements the meal beautifully.

These side dishes not only enhance the flavors of the steak but also create a well-rounded meal that everyone will love.

Wine Pairings

Choosing the right wine can elevate your dining experience. Here are some excellent wine pairings for your Pan-Seared Flank Steak with Garlic Herb Butter:

  • Cabernet Sauvignon: This full-bodied red wine has bold flavors that match the richness of the steak, making it a classic choice.
  • Malbec: Known for its dark fruit flavors and smooth finish, Malbec complements the savory notes of the flank steak.
  • Syrah/Shiraz: With its spicy undertones, this wine enhances the garlic and herb flavors in the dish.
  • Pinot Noir: If you prefer a lighter option, Pinot Noir offers a fruity profile that balances the richness of the steak without overpowering it.
  • Chardonnay: For white wine lovers, a lightly oaked Chardonnay can provide a creamy texture that pairs well with the garlic herb butter.

These wine options will not only complement the flavors of your Pan-Seared Flank Steak with Garlic Herb Butter but also enhance the overall dining experience. Cheers to a delicious meal!

Tips for Perfecting Pan-Seared Flank Steak with Garlic Herb Butter

To truly master the art of cooking Pan-Seared Flank Steak with Garlic Herb Butter, a few tips can make all the difference. These simple yet effective strategies will help you achieve a perfectly cooked steak every time. Let’s dive into some essential tips!

First, always use a meat thermometer. This handy tool takes the guesswork out of cooking. For medium-rare, aim for an internal temperature of 130°F. If you prefer your steak more done, adjust the temperature accordingly. This ensures that your steak is cooked to perfection, juicy and tender.

Next, don’t forget to let your steak rest after cooking. This step is crucial for juicy meat. Resting allows the juices to redistribute throughout the steak, making every bite flavorful. Aim for about 10 minutes of resting time before slicing.

Another important tip is to slice against the grain. This technique helps break down the muscle fibers, resulting in a more tender bite. Look for the direction of the grain in the meat and cut perpendicular to it. This small step can significantly enhance the eating experience.

Additionally, consider marinating your flank steak before cooking. A simple marinade of olive oil, vinegar, and your favorite herbs can add extra flavor and tenderness. Just remember to marinate for at least 30 minutes, or up to overnight for the best results.

Lastly, don’t rush the searing process. Allow your skillet to get hot enough before adding the steak. A good sear creates a delicious crust that locks in moisture and flavor. If the skillet isn’t hot enough, the steak may steam instead of sear, leading to a less desirable texture.

By following these tips, you’ll be well on your way to perfecting your Pan-Seared Flank Steak with Garlic Herb Butter. Enjoy the process and savor the delicious results!

Breakdown of Time for Pan-Seared Flank Steak with Garlic Herb Butter

Understanding the time required for each step in preparing Pan-Seared Flank Steak with Garlic Herb Butter is essential for a smooth cooking experience. Here’s a detailed breakdown of the time you’ll need for preparation and cooking.

Prep Time

The prep time for this delicious dish is approximately 15-20 minutes. This includes:

  • Allowing the flank steak to sit at room temperature for about 30 minutes.
  • Patting the steak dry and seasoning it with salt and black pepper.
  • Preparing the garlic herb butter by mixing the softened butter with minced garlic and fresh herbs.

By organizing your ingredients and steps, you can streamline the process and make the most of your time in the kitchen.

Cooking Time

The cooking time for the flank steak is around 10-12 minutes. This includes:

  • Searing the steak for 4-5 minutes on each side for medium-rare doneness.
  • Allowing the steak to rest for about 10 minutes after cooking.

Using a meat thermometer will help you achieve the perfect doneness, ensuring your steak is juicy and flavorful.

Total Time

In total, you can expect the entire process to take about 55-60 minutes. This includes:

  • 30 minutes for the steak to come to room temperature.
  • 15-20 minutes for prep work.
  • 10-12 minutes for cooking and resting the steak.

With this time breakdown, you can plan your meal effectively, ensuring that your Pan-Seared Flank Steak with Garlic Herb Butter is ready to impress your guests or family!

Nutritional Information for Pan-Seared Flank Steak with Garlic Herb Butter

Understanding the nutritional content of your meals is essential for maintaining a balanced diet. Pan-Seared Flank Steak with Garlic Herb Butter is not only delicious but also packed with nutrients. Here’s a breakdown of the key nutritional information per serving:

Calories

Each serving of Pan-Seared Flank Steak with Garlic Herb Butter contains approximately 400 calories. This makes it a satisfying option for dinner without being overly heavy. The calorie content primarily comes from the protein in the steak and the healthy fats in the butter and olive oil.

Protein

One of the standout features of this dish is its high protein content. Each serving provides about 40 grams of protein. Protein is essential for muscle repair and growth, making this meal a great choice for those looking to maintain or build muscle mass. It also helps keep you feeling full and satisfied.

Sodium

The sodium content in this dish is approximately 600 milligrams per serving. This amount is reasonable for a flavorful steak dish, especially considering that the seasoning is kept simple with just salt and pepper. If you are watching your sodium intake, you can adjust the amount of salt used in the recipe to suit your dietary needs.

In summary, Pan-Seared Flank Steak with Garlic Herb Butter is a nutritious meal option that provides a good balance of calories, protein, and sodium. It’s a delicious way to enjoy a hearty dinner while still being mindful of your nutritional goals. Enjoy this flavorful dish knowing it’s not just tasty but also beneficial for your health!

FAQs about Pan-Seared Flank Steak with Garlic Herb Butter

How do I know when flank steak is done?

Knowing when your flank steak is done is crucial for achieving the perfect doneness. The best way to check is by using a meat thermometer. For medium-rare, aim for an internal temperature of 130°F. If you prefer medium, look for 140°F. Remember, the steak will continue to cook slightly while resting, so it’s okay to take it off the heat just before it reaches your desired temperature. If you don’t have a thermometer, you can also use the touch test. Gently press the steak; a soft feel indicates rare, while a firmer touch suggests medium or well-done.

Can I use a different cut of meat for this recipe?

Absolutely! While flank steak is a fantastic choice for this recipe, you can use other cuts of beef as well. Skirt steak, sirloin, or even ribeye can work beautifully. Just keep in mind that cooking times may vary depending on the thickness and fat content of the cut you choose. Always adjust your cooking time accordingly to ensure the meat is cooked to your liking.

What can I substitute for garlic in the herb butter?

If you’re not a fan of garlic or need a substitute, there are several options. You can use shallots for a milder onion flavor. Alternatively, try using garlic powder or roasted garlic for a different taste. If you want to skip the garlic altogether, consider adding a bit of Dijon mustard or horseradish for a zesty kick. Each option will give your herb butter a unique flavor profile!

How should I store leftovers of Pan-Seared Flank Steak with Garlic Herb Butter?

Storing leftovers properly is key to enjoying your Pan-Seared Flank Steak with Garlic Herb Butter later. Allow the steak to cool to room temperature, then wrap it tightly in plastic wrap or aluminum foil. You can also place it in an airtight container. Store it in the refrigerator for up to 3-4 days. If you want to keep it longer, consider freezing it. Just make sure to wrap it well to prevent freezer burn. When ready to eat, thaw it in the refrigerator overnight and reheat gently in a skillet or microwave.

Conclusion on Pan-Seared Flank Steak with Garlic Herb Butter

In conclusion, Pan-Seared Flank Steak with Garlic Herb Butter is a delightful dish that combines simplicity with rich flavors. This recipe is perfect for both novice cooks and seasoned chefs alike. With just a few quality ingredients and straightforward steps, you can create a meal that impresses everyone at your table.

The beauty of this dish lies in its versatility. You can easily customize the garlic herb butter with different herbs or spices to suit your taste. Whether you prefer a classic flavor or a spicy twist, the options are endless. Additionally, the cooking methods allow for creativity, whether you choose to grill, broil, or pan-sear your steak.

Moreover, serving this steak with the right sides and wine can elevate your dining experience. From roasted vegetables to creamy mashed potatoes, the right accompaniments can enhance the meal’s overall appeal. Pairing it with a bold red wine can also complement the rich flavors of the steak beautifully.

As you embark on your culinary journey with Pan-Seared Flank Steak with Garlic Herb Butter, remember the tips shared throughout this article. They will help you achieve the perfect steak every time. So, gather your ingredients, follow the steps, and enjoy the process of creating a delicious meal that will surely become a favorite in your household.

Happy cooking, and may your kitchen be filled with the delightful aroma of this mouthwatering dish!

Honey Garlic Butter Chicken Mac and Cheese Recipe delights!

Introduction to Honey Garlic Butter Chicken Mac and Cheese Recipe

What Makes This Recipe Special?

Honey Garlic Butter Chicken Mac and Cheese is not just another pasta dish; it’s a delightful blend of flavors that will make your taste buds dance. The sweetness of honey, combined with the savory notes of garlic and butter, creates a sauce that perfectly coats tender chicken and creamy macaroni. This recipe stands out because it brings comfort food to a whole new level. It’s easy to prepare, making it perfect for busy weeknights or special family gatherings. Plus, it’s a crowd-pleaser that kids and adults alike will love!

A Brief Overview of Honey Garlic Butter Chicken Mac and Cheese

This recipe combines classic mac and cheese with a twist. First, you cook elbow macaroni until it’s just right. Then, you sauté bite-sized chicken pieces seasoned with salt, pepper, and garlic powder. The magic happens when you mix in a rich honey garlic butter sauce that adds a sweet and savory flavor. Finally, you stir in sharp cheddar cheese and milk, creating a creamy, cheesy delight. Topped with fresh green onions, this dish is not only delicious but also visually appealing. It serves four, making it a great option for family dinners or gatherings with friends.

Ingredients for Honey Garlic Butter Chicken Mac and Cheese Recipe

Essential Ingredients

To create the delicious Honey Garlic Butter Chicken Mac and Cheese, you’ll need a few essential ingredients. These are the building blocks of this delightful dish:

  • 2 cups elbow macaroni: This classic pasta shape holds the creamy sauce perfectly.
  • 1 pound boneless, skinless chicken breasts: Cut into bite-sized pieces for easy cooking and eating.
  • 1 tablespoon olive oil: Used for sautéing the chicken, adding a touch of healthy fat.
  • 1 teaspoon salt: Enhances the flavors of the dish.
  • 1/2 teaspoon black pepper: Adds a mild kick to the chicken.
  • 1/2 teaspoon garlic powder: Boosts the garlic flavor in the dish.
  • 1/4 cup honey: Provides sweetness that balances the savory elements.
  • 1/4 cup unsalted butter: Creates a rich, creamy sauce.
  • 1/4 cup soy sauce: Adds depth and umami flavor.
  • 1 cup shredded sharp cheddar cheese: The star ingredient that makes the dish cheesy and delicious.
  • 1/2 cup milk: Helps to create a creamy texture.
  • 1/4 cup chopped green onions: For garnish, adding a fresh touch.

Optional Ingredients for Extra Flavor

If you want to elevate your Honey Garlic Butter Chicken Mac and Cheese, consider adding some optional ingredients. These can enhance the flavor and make the dish even more exciting:

  • Red pepper flakes: A teaspoon can add a spicy kick to the honey garlic sauce.
  • Cooked shrimp or tofu: These can be used as alternative proteins for a different twist.
  • Breadcrumbs: Sprinkling some on top before baking can add a crunchy texture.
  • Parmesan cheese: Mixing in some grated Parmesan can deepen the cheesy flavor.
  • Vegetables: Adding peas, spinach, or bell peppers can boost the nutrition and color.

Preparation of Honey Garlic Butter Chicken Mac and Cheese Recipe

Step 1: Cooking the Chicken

To start, heat a large skillet over medium heat. Add the tablespoon of olive oil and let it warm up. Once the oil is hot, add the bite-sized chicken pieces. Sprinkle in the salt, black pepper, and garlic powder. Cook the chicken for about 5 to 7 minutes. You want it to be golden brown and fully cooked. Stir occasionally to ensure even cooking. Once done, remove the skillet from heat and set it aside. This step is crucial as it lays the foundation for the dish’s flavor.

Step 2: Preparing the Pasta

While the chicken is cooking, you can prepare the elbow macaroni. Bring a large pot of salted water to a boil. Add the macaroni and cook according to the package instructions until it’s al dente. This usually takes around 7 to 9 minutes. Once cooked, drain the pasta in a colander and set it aside. Make sure not to overcook the pasta, as it will continue to cook when mixed with the other ingredients.

Step 3: Making the Honey Garlic Butter Sauce

Next, it’s time to create the delicious honey garlic butter sauce. In a small saucepan, combine the honey, unsalted butter, and soy sauce. Heat the mixture over low heat. Stir gently until the butter melts and everything is well combined. This sauce is what makes the dish special, adding a sweet and savory flavor that perfectly complements the chicken. Once ready, remove it from the heat and set it aside.

Step 4: Combining Ingredients

Now comes the fun part! In a large mixing bowl, combine the cooked macaroni, the sautéed chicken, and the honey garlic sauce. Stir everything together until the chicken is evenly coated with the sauce. Then, add the shredded sharp cheddar cheese and milk. Mix well until the cheese melts and creates a creamy texture. This step is essential for achieving that gooey, cheesy goodness that everyone loves in mac and cheese.

Step 5: Baking the Dish

For an extra touch, you can bake the dish. Preheat your oven to 350°F (175°C). Transfer the combined mixture into a greased baking dish. If you like, sprinkle some breadcrumbs on top for a crunchy finish. Bake for about 20 minutes, or until the top is golden and bubbly. This final step enhances the flavors and gives the dish a delightful texture. Once done, remove it from the oven and let it cool for a few minutes before serving.

Variation of Honey Garlic Butter Chicken Mac and Cheese Recipe

Alternative Proteins

If you’re looking to switch things up, there are several alternative proteins you can use in this Honey Garlic Butter Chicken Mac and Cheese recipe. For a seafood twist, consider using cooked shrimp. Simply sauté the shrimp until they turn pink and then mix them in with the sauce. Another great option is tofu. Firm tofu can be cubed and sautéed until golden brown, providing a delicious vegetarian alternative. Both options will absorb the honey garlic sauce beautifully, ensuring a tasty meal for everyone.

Vegetarian Options

For those who prefer a meat-free dish, there are plenty of vegetarian options to explore. You can replace the chicken with a variety of vegetables. For instance, sautéed mushrooms, zucchini, or bell peppers can add great flavor and texture. Additionally, you can use plant-based protein crumbles, which mimic the texture of chicken. These alternatives will still allow you to enjoy the creamy, cheesy goodness of the mac and cheese while keeping it vegetarian-friendly.

Flavor Variations

To make your Honey Garlic Butter Chicken Mac and Cheese even more exciting, consider experimenting with different flavor variations. Adding spices like smoked paprika or cumin can give the dish a unique twist. You might also try incorporating different types of cheese, such as mozzarella or pepper jack, for a different taste profile. For a fresh touch, mix in some spinach or kale before baking. These variations not only enhance the flavor but also add nutritional value to your meal.

Cooking Note for Honey Garlic Butter Chicken Mac and Cheese Recipe

Tips for Perfectly Cooked Pasta

Cooking pasta might seem simple, but there are a few tips to ensure your elbow macaroni turns out perfectly. First, always use a large pot filled with plenty of water. This helps the pasta cook evenly. Add a generous amount of salt to the boiling water; it enhances the flavor of the pasta. Stir the macaroni occasionally while it cooks to prevent it from sticking together. Remember to check the package instructions for the recommended cooking time, but taste a piece a minute or two before the time is up. You want it to be al dente, which means it should be firm to the bite. Once cooked, drain the pasta immediately to stop the cooking process. Rinsing it briefly under cold water can also help if you’re not mixing it right away.

Ensuring the Chicken is Juicy

Juicy chicken is key to a delicious Honey Garlic Butter Chicken Mac and Cheese. To achieve this, start with high-quality, fresh chicken breasts. Cut them into even, bite-sized pieces to ensure they cook uniformly. When cooking, avoid overcrowding the skillet; this can cause the chicken to steam instead of brown. If necessary, cook in batches. Use medium heat to allow the chicken to brown nicely without burning. Once cooked, let the chicken rest for a few minutes before mixing it with the sauce. This resting period helps the juices redistribute, keeping the chicken moist and flavorful. Following these tips will ensure your chicken is tender and juicy, making your mac and cheese even more delightful!

Serving Suggestions for Honey Garlic Butter Chicken Mac and Cheese Recipe

Ideal Side Dishes

When serving Honey Garlic Butter Chicken Mac and Cheese, pairing it with the right side dishes can elevate your meal. Here are some ideal options:

  • Steamed Vegetables: Broccoli, green beans, or carrots add a fresh crunch and balance the richness of the mac and cheese.
  • Garden Salad: A light salad with mixed greens, cherry tomatoes, and a vinaigrette dressing can provide a refreshing contrast.
  • Garlic Bread: Crispy garlic bread is a classic choice that complements the creamy pasta perfectly.
  • Coleslaw: A tangy coleslaw can add a nice crunch and a bit of acidity to cut through the richness of the dish.
  • Fruit Salad: A sweet fruit salad can serve as a light and refreshing side, balancing the savory flavors of the main dish.

Pairing with Beverages

Choosing the right beverages can enhance your dining experience. Here are some great options to consider:

  • Iced Tea: A refreshing glass of iced tea, sweetened or unsweetened, pairs well with the sweet and savory flavors of the dish.
  • Lemonade: The tartness of lemonade can provide a delightful contrast to the richness of the mac and cheese.
  • White Wine: A chilled glass of white wine, like Sauvignon Blanc, complements the flavors beautifully.
  • Sparkling Water: For a non-alcoholic option, sparkling water with a slice of lemon or lime adds a refreshing touch.
  • Craft Beer: A light lager or pale ale can enhance the meal, providing a nice balance to the creamy dish.

Tips for Making the Best Honey Garlic Butter Chicken Mac and Cheese Recipe

Ingredient Substitutions

Making the Honey Garlic Butter Chicken Mac and Cheese recipe can be flexible with ingredient substitutions. If you’re out of a specific item or want to cater to dietary needs, here are some great alternatives:

  • Chicken: If you don’t have chicken breasts, you can use rotisserie chicken for a quicker option. Alternatively, cooked turkey or even canned chicken can work in a pinch.
  • Cheese: While sharp cheddar is delicious, feel free to mix it up! Monterey Jack, Gouda, or even a blend of cheeses can add unique flavors.
  • Milk: If you prefer a creamier texture, substitute whole milk with heavy cream or half-and-half. For a lighter option, use almond milk or oat milk.
  • Honey: Maple syrup can be a great substitute if you want a different sweetness. Agave nectar is another option that works well.
  • Butter: For a dairy-free version, use vegan butter or olive oil instead of unsalted butter.

Storage and Reheating Tips

Storing and reheating your Honey Garlic Butter Chicken Mac and Cheese properly can help maintain its deliciousness. Here are some tips:

  • Storage: Allow the mac and cheese to cool completely before transferring it to an airtight container. It can be stored in the refrigerator for up to 3-4 days.
  • Freezing: If you want to keep it longer, you can freeze the dish. Place it in a freezer-safe container, and it will last for about 2-3 months. Just make sure to label it with the date!
  • Reheating: To reheat, you can use the microwave or oven. If using the microwave, heat in short intervals, stirring in between to ensure even warming. For the oven, preheat to 350°F (175°C) and bake until heated through, about 20 minutes. Adding a splash of milk can help restore creaminess.
  • Freshening Up: When reheating, consider adding a little extra cheese or a sprinkle of breadcrumbs on top for a fresh, crispy layer.

Breakdown of Time for Honey Garlic Butter Chicken Mac and Cheese Recipe

Prep Time

Getting everything ready for your Honey Garlic Butter Chicken Mac and Cheese is quick and easy. The prep time for this recipe is about 15 minutes. During this time, you’ll gather all your ingredients, chop the chicken, and measure out the honey, butter, and other essentials. Having everything prepped will make the cooking process smooth and enjoyable.

Cooking Time

The cooking time for this delicious dish is approximately 25 to 30 minutes. This includes cooking the chicken, boiling the macaroni, and making the honey garlic butter sauce. Once everything is combined, if you choose to bake it, add another 20 minutes for that golden, bubbly finish. Overall, the cooking time is efficient, allowing you to serve a hearty meal in no time.

Total Time

In total, you can expect to spend around 40 to 45 minutes from start to finish. This includes both prep and cooking time. It’s a fantastic option for a weeknight dinner or a cozy weekend meal. With such a quick turnaround, you can enjoy a comforting and flavorful dish without spending hours in the kitchen!

Nutritional Information for Honey Garlic Butter Chicken Mac and Cheese Recipe

Calories and Macronutrients

When it comes to enjoying a delicious meal, knowing the nutritional content can help you make informed choices. Each serving of Honey Garlic Butter Chicken Mac and Cheese contains approximately 550 calories. This hearty dish provides a balanced mix of macronutrients:

  • Protein: 30g – The chicken and cheese contribute to a good protein source, essential for muscle repair and growth.
  • Fat: 25g – The butter and cheese add richness, while healthy fats from olive oil support overall health.
  • Net Carbohydrates: 45g – The elbow macaroni provides carbohydrates, which are a primary energy source for your body.

This combination of macronutrients makes the dish satisfying and filling, perfect for a family meal or a cozy dinner with friends.

Sodium and Other Nutritional Facts

In addition to calories and macronutrients, it’s important to consider sodium and other nutritional facts. Each serving of this Honey Garlic Butter Chicken Mac and Cheese contains:

  • Sodium: Approximately 800mg – This comes from the soy sauce and added salt. If you’re watching your sodium intake, consider using low-sodium soy sauce.
  • Fiber: 2g – While this dish is not high in fiber, adding vegetables can increase the fiber content.
  • Vitamins and Minerals: The dish provides essential vitamins and minerals, especially if you add vegetables like spinach or broccoli. These additions can enhance the nutritional profile significantly.

Overall, this recipe offers a delightful balance of flavors and nutrients, making it a great choice for a comforting meal. Enjoying it in moderation, along with a variety of other foods, can contribute to a well-rounded diet.

FAQs about Honey Garlic Butter Chicken Mac and Cheese Recipe

Can I make this recipe ahead of time?

Absolutely! You can prepare the Honey Garlic Butter Chicken Mac and Cheese ahead of time. Simply follow the recipe up to the point of combining all the ingredients. After mixing, transfer the dish to a greased baking dish, cover it tightly with plastic wrap or aluminum foil, and refrigerate. When you’re ready to serve, just bake it in a preheated oven at 350°F (175°C) for about 25-30 minutes, or until heated through. This makes it a great option for meal prep or for hosting gatherings!

What can I substitute for the butter?

If you’re looking for a substitute for butter, there are several options available. You can use olive oil or coconut oil for a healthier alternative. Both will provide a nice flavor and help create a creamy texture. For a dairy-free option, consider using vegan butter or margarine. These substitutes will work well in the honey garlic sauce, ensuring your dish remains rich and delicious without the dairy.

Is it possible to make this dish gluten-free?

Yes, you can easily make Honey Garlic Butter Chicken Mac and Cheese gluten-free! To do this, simply use gluten-free elbow macaroni instead of regular pasta. Additionally, make sure to choose a gluten-free soy sauce or tamari for the sauce. These small changes will allow you to enjoy this comforting dish without gluten, making it suitable for those with gluten sensitivities or celiac disease.

How can I make it spicier?

If you love a bit of heat, there are several ways to spice up your Honey Garlic Butter Chicken Mac and Cheese. One simple method is to add a teaspoon of red pepper flakes to the honey garlic sauce while it’s cooking. You can also mix in some diced jalapeños or hot sauce to the chicken for an extra kick. If you prefer a smoky flavor, consider adding a dash of cayenne pepper or smoked paprika. These additions will enhance the dish’s flavor profile and give it that spicy edge you crave!

Conclusion on Honey Garlic Butter Chicken Mac and Cheese Recipe

Recap of the Recipe Benefits

In summary, the Honey Garlic Butter Chicken Mac and Cheese recipe is a delightful fusion of flavors that brings comfort food to a whole new level. This dish is not only easy to prepare but also offers a perfect balance of sweetness and savory goodness. With its creamy texture and cheesy richness, it’s sure to satisfy even the pickiest eaters. Plus, the nutritional benefits, including a good source of protein and essential vitamins, make it a wholesome choice for family meals. Whether you’re cooking for a busy weeknight or a special occasion, this recipe is versatile and adaptable, allowing you to customize it to your taste.

Encouragement to Try the Recipe

So why not give this Honey Garlic Butter Chicken Mac and Cheese recipe a try? Gather your ingredients, follow the simple steps, and enjoy the delightful flavors that come together in this dish. It’s a fantastic way to impress your family and friends while providing them with a comforting meal. Don’t forget to experiment with the optional ingredients and variations to make it your own! Happy cooking, and enjoy every cheesy, delicious bite!

Creamy Garlic Carbonara Recipe is a must-try dish!

Introduction to Creamy Garlic Carbonara Recipe

Welcome to the delightful world of pasta! Today, we’re diving into a dish that combines rich flavors and creamy textures: the Creamy Garlic Carbonara Recipe. This dish is not just a meal; it’s an experience that brings comfort and joy to your dining table. With its luscious sauce and savory ingredients, it’s sure to impress family and friends alike.

What Makes Creamy Garlic Carbonara Unique?

What sets this Creamy Garlic Carbonara apart from traditional carbonara? The answer lies in the roasted garlic. Roasting garlic transforms its sharpness into a sweet, mellow flavor that enhances the dish beautifully. This unique twist adds depth and richness, making every bite a delightful surprise.

Moreover, the creamy sauce is made without heavy cream. Instead, it relies on the natural creaminess of eggs and cheese, creating a velvety texture that clings to the spaghetti perfectly. This method not only keeps the dish lighter but also allows the flavors to shine through.

Another standout feature is the versatility of this recipe. You can easily customize it to suit your taste. Whether you prefer crispy pancetta, sautéed mushrooms, or fresh spinach, the options are endless. This adaptability makes it a fantastic choice for any occasion, from a cozy family dinner to a festive gathering.

In summary, the Creamy Garlic Carbonara Recipe is a delightful blend of flavors and textures. Its unique use of roasted garlic, creamy sauce, and customizable ingredients make it a must-try for pasta lovers. So, let’s get started on this culinary adventure!

Ingredients for Creamy Garlic Carbonara Recipe

To create the perfect Creamy Garlic Carbonara, you’ll need a selection of fresh and flavorful ingredients. Each component plays a vital role in achieving that rich, creamy texture and delightful taste. Here’s what you’ll need:

  • 8 ounces spaghetti: This classic pasta is the base of your dish. You can also use fettuccine or linguine for a different twist.
  • 1 head of garlic: Roasting garlic brings out its sweet flavor, making it a key ingredient in this recipe.
  • 2 tablespoons olive oil: This oil is used to roast the garlic and adds a lovely richness to the dish.
  • 4 large eggs: Eggs create the creamy sauce without the need for heavy cream.
  • 1 cup grated Parmesan cheese: This cheese adds a salty, nutty flavor that enhances the overall taste.
  • 1 teaspoon black pepper: Freshly cracked black pepper adds a hint of spice and depth.
  • 1 teaspoon salt: Salt is essential for seasoning the pasta and enhancing the flavors.
  • 1 cup cooked pancetta or bacon, chopped: This adds a savory, crispy element to the dish. You can substitute it with vegetarian options if desired.
  • Fresh parsley, chopped (for garnish): A sprinkle of parsley adds a pop of color and freshness to your plate.

Gathering these ingredients will set you on the path to creating a delicious Creamy Garlic Carbonara. Each item contributes to the dish’s unique flavor profile, ensuring a delightful dining experience. Now that you have everything ready, let’s move on to the preparation steps!

Step-by-Step Preparation of Creamy Garlic Carbonara Recipe

Now that you have all your ingredients ready, it’s time to dive into the cooking process! Follow these simple steps to create a delicious Creamy Garlic Carbonara that will leave everyone asking for seconds. Let’s get started!

Step 1: Preparing the Pasta

First, bring a large pot of salted water to a boil. This is crucial for flavoring the spaghetti. Once the water is boiling, add the 8 ounces of spaghetti. Cook it according to the package instructions until it’s al dente, which usually takes about 8-10 minutes. Remember, you want it firm to the bite!

While the pasta cooks, keep an eye on it. Stir occasionally to prevent sticking. When the spaghetti is ready, reserve 1 cup of the pasta water. This starchy water will help adjust the sauce later. After reserving the water, drain the spaghetti in a colander and set it aside. This step is essential for ensuring your pasta is perfectly cooked and ready for the creamy sauce.

Step 2: Making the Creamy Garlic Sauce

While the pasta is cooking, it’s time to prepare the creamy garlic sauce. Start by taking the roasted garlic you prepared earlier. Squeeze the soft cloves into a bowl and mash them with a fork until smooth. This will create a sweet and flavorful base for your sauce.

In a large mixing bowl, whisk together the 4 large eggs, 1 cup of grated Parmesan cheese, 1 teaspoon of black pepper, and 1 teaspoon of salt. Make sure the mixture is smooth and well combined. Then, stir in the mashed roasted garlic. This combination will create a rich and creamy sauce that clings beautifully to the spaghetti.

Step 3: Combining Pasta and Sauce

Now comes the exciting part! Quickly add the hot, drained spaghetti to the bowl with the creamy garlic sauce. Toss everything together gently but thoroughly. The heat from the pasta will cook the eggs just enough to create a silky sauce. If you find the sauce is too thick, don’t worry! Just add a little of the reserved pasta water, a bit at a time, until you reach your desired consistency.

Next, fold in the 1 cup of chopped pancetta or bacon. This adds a savory crunch that complements the creamy sauce perfectly. Make sure everything is evenly mixed, so every bite is packed with flavor.

Step 4: Final Touches and Serving

It’s time to serve your delicious Creamy Garlic Carbonara! Transfer the pasta to serving plates or a large bowl. For a beautiful presentation, garnish with freshly chopped parsley and additional grated Parmesan cheese if desired. This not only adds color but also enhances the flavor.

Serve immediately while it’s hot and creamy. Enjoy the delightful combination of flavors and textures in every bite. Your Creamy Garlic Carbonara is now ready to impress your family and friends!

Variations of Creamy Garlic Carbonara Recipe

While the traditional Creamy Garlic Carbonara is a delightful dish on its own, there are many ways to customize it. Whether you’re looking for vegetarian options or want to add more protein, these variations will keep your meals exciting and flavorful. Let’s explore some delicious alternatives!

Vegetarian Options

If you’re looking to make a vegetarian version of the Creamy Garlic Carbonara, you have some tasty choices. One popular option is to replace the pancetta or bacon with sautéed mushrooms. Mushrooms add a rich, umami flavor that complements the creamy sauce beautifully. Simply sauté sliced mushrooms in olive oil until they are golden brown and tender, then mix them into the pasta.

Another great alternative is to use fresh spinach. Adding spinach not only boosts the nutritional value but also adds a lovely color to the dish. You can sauté the spinach briefly until wilted, then fold it into the pasta along with the creamy sauce. This way, you’ll enjoy a delicious and vibrant meal that everyone will love!

Protein Additions

If you want to amp up the protein in your Creamy Garlic Carbonara, consider adding grilled chicken or shrimp. Grilled chicken breast, sliced into strips, can be tossed in with the pasta for a hearty meal. The mild flavor of chicken pairs well with the creamy sauce, making it a satisfying option.

Shrimp is another fantastic addition. Simply sauté shrimp in a bit of olive oil until they turn pink and opaque. Then, mix them into the pasta just before serving. The seafood adds a delightful twist to the dish, making it feel special and indulgent.

For those who enjoy a bit of spice, try adding cooked chorizo or spicy sausage. The bold flavors of these meats will elevate your Creamy Garlic Carbonara, giving it a kick that many will appreciate. Just remember to adjust the seasoning accordingly, as these meats can be quite flavorful on their own.

With these variations, you can easily adapt the Creamy Garlic Carbonara to suit your dietary preferences or simply to keep things interesting. Enjoy experimenting with different ingredients to find your perfect combination!

Cooking Note for Creamy Garlic Carbonara Recipe

When preparing the Creamy Garlic Carbonara, there are a few important cooking notes to keep in mind. These tips will help ensure that your dish turns out perfectly every time, allowing you to enjoy a creamy, flavorful pasta that impresses everyone at the table.

First, timing is crucial. Make sure to have all your ingredients prepped and ready before you start cooking. This includes roasting the garlic, cooking the pasta, and preparing the sauce. Having everything organized will make the cooking process smoother and more enjoyable.

Next, pay attention to the heat. When you combine the hot spaghetti with the egg mixture, the heat should be just right. If the pasta is too cool, the eggs won’t cook properly, and you’ll end up with a runny sauce. Conversely, if the pasta is too hot, it can scramble the eggs. Aim for a balance to achieve that creamy texture.

Additionally, remember to reserve that cup of pasta water! This starchy water is a game-changer. It helps adjust the sauce’s consistency, making it creamier without adding extra ingredients. Just add a little at a time until you reach your desired thickness.

Lastly, serve the Creamy Garlic Carbonara immediately. This dish is best enjoyed fresh and hot. If it sits too long, the sauce may thicken and lose its creamy quality. So, gather your family or friends around the table and dig in while it’s still warm!

By keeping these cooking notes in mind, you’ll be well on your way to mastering the Creamy Garlic Carbonara Recipe. Enjoy the process and the delicious results!

Serving Suggestions for Creamy Garlic Carbonara Recipe

Now that you’ve prepared your delicious Creamy Garlic Carbonara, it’s time to think about how to serve it. Presentation can elevate your dish, making it even more enjoyable for you and your guests. Here are some delightful serving suggestions to enhance your dining experience:

  • Pair with a Fresh Salad: A light, crisp salad is a perfect complement to the rich flavors of the carbonara. Consider a simple arugula salad with lemon vinaigrette. The acidity of the dressing will balance the creaminess of the pasta.
  • Serve with Garlic Bread: For garlic lovers, serving your carbonara with warm garlic bread is a must. The crunchy texture and buttery flavor of the bread will pair beautifully with the creamy sauce.
  • Top with Extra Parmesan: Don’t be shy about adding more grated Parmesan cheese on top of your carbonara. This extra layer of cheese adds a delightful salty flavor and enhances the overall richness of the dish.
  • Garnish with Fresh Herbs: Fresh herbs like basil or chives can add a pop of color and freshness. Sprinkle them on top just before serving for an appealing presentation.
  • Accompany with a Glass of Wine: A glass of white wine, such as Pinot Grigio or Chardonnay, pairs wonderfully with creamy pasta dishes. The wine’s acidity will cut through the richness, making each bite even more enjoyable.
  • Offer a Side of Roasted Vegetables: Roasted vegetables, such as asparagus or zucchini, can add a healthy touch to your meal. Their natural sweetness and slight char will complement the savory flavors of the carbonara.

These serving suggestions will not only enhance the flavor of your Creamy Garlic Carbonara but also create a delightful dining experience. Whether it’s a casual family dinner or a special occasion, these ideas will impress your guests and make your meal memorable. Enjoy every bite!

Tips for Perfecting Your Creamy Garlic Carbonara Recipe

Creating the perfect Creamy Garlic Carbonara is all about attention to detail. With a few helpful tips, you can elevate your dish to restaurant-quality status. Here are some essential tips to ensure your carbonara turns out creamy, flavorful, and utterly delicious every time.

  • Use Fresh Ingredients: Fresh ingredients make a significant difference in flavor. Opt for high-quality eggs, fresh garlic, and freshly grated Parmesan cheese. These elements will enhance the overall taste of your dish.
  • Don’t Overcook the Pasta: Cooking the spaghetti to al dente is crucial. Overcooked pasta can become mushy and won’t hold the sauce well. Keep an eye on the cooking time and taste the pasta a minute or two before the package suggests.
  • Mix Quickly: When combining the hot pasta with the egg mixture, do it quickly. This ensures the heat from the pasta gently cooks the eggs, creating a creamy sauce without scrambling them. Tossing vigorously helps achieve that silky texture.
  • Adjust the Sauce Consistency: If your sauce seems too thick, don’t hesitate to add more reserved pasta water. This starchy water is your secret weapon for achieving the perfect creamy consistency. Add it gradually until you reach your desired thickness.
  • Season Wisely: Taste your dish as you go. The pancetta or bacon adds saltiness, so be cautious with additional salt. Adjust the seasoning to your preference, ensuring a balanced flavor throughout.
  • Experiment with Flavors: Feel free to add your twist! Consider incorporating ingredients like crushed red pepper flakes for heat or a splash of white wine for depth. These small additions can transform your carbonara into something unique.
  • Serve Immediately: Carbonara is best enjoyed fresh. Serve it right after mixing to maintain that creamy texture. If it sits too long, the sauce may thicken, losing its delightful creaminess.

By following these tips, you’ll be well on your way to mastering the Creamy Garlic Carbonara Recipe. Each step contributes to a dish that’s not only delicious but also a joy to prepare. Happy cooking!

Breakdown of Time for Creamy Garlic Carbonara Recipe

Understanding the time needed for each step in the Creamy Garlic Carbonara Recipe can help you plan your cooking efficiently. Here’s a breakdown of the time required for preparation and cooking, ensuring you can enjoy this delicious dish without any rush.

Prep Time

The prep time for this Creamy Garlic Carbonara is approximately 15-20 minutes. This includes gathering your ingredients, roasting the garlic, and preparing the sauce. Make sure to have everything ready before you start cooking. This will make the process smoother and more enjoyable!

Cooking Time

The cooking time for the pasta and sauce is about 20-25 minutes. This includes boiling the spaghetti until al dente and mixing it with the creamy garlic sauce. Keep an eye on the pasta to ensure it doesn’t overcook. Timing is key to achieving that perfect creamy texture!

Total Time

In total, you can expect to spend around 35-45 minutes from start to finish. This includes both prep and cooking time. With this quick and easy timeline, you can have a delicious Creamy Garlic Carbonara ready to serve in no time!

Nutritional Information for Creamy Garlic Carbonara Recipe

Understanding the nutritional content of your meals is essential for maintaining a balanced diet. The Creamy Garlic Carbonara Recipe not only delights your taste buds but also provides valuable nutrients. Here’s a breakdown of the nutritional information per serving, so you can enjoy this dish while being mindful of your dietary needs.

Calories

Each serving of Creamy Garlic Carbonara contains approximately 550 calories. This calorie count includes the rich flavors from the pasta, eggs, cheese, and pancetta. While it’s a hearty meal, it’s important to enjoy it in moderation, especially if you’re watching your calorie intake.

Protein

In terms of protein, this dish offers about 25 grams per serving. The protein comes primarily from the eggs and pancetta or bacon. Protein is essential for muscle repair and growth, making this dish a satisfying option for those looking to fuel their bodies after a workout or a long day.

Sodium

The sodium content in each serving is around 800 milligrams. This amount is mainly due to the pancetta or bacon and the added salt. If you’re watching your sodium intake, consider using low-sodium bacon or omitting extra salt during preparation. Balancing your meals with fresh vegetables can also help manage sodium levels.

In summary, the Creamy Garlic Carbonara Recipe is a delicious and nutritious option that provides a good balance of calories, protein, and flavor. By being mindful of portion sizes and ingredient choices, you can enjoy this delightful dish while maintaining a healthy lifestyle. Happy cooking and eating!

FAQs about Creamy Garlic Carbonara Recipe

Can I use a different type of pasta for this recipe?

Absolutely! While spaghetti is the classic choice for carbonara, you can use other types of pasta as well. Fettuccine, linguine, or even penne work wonderfully. Just keep in mind that cooking times may vary slightly, so always check the package instructions. The key is to choose a pasta that can hold onto the creamy sauce, ensuring every bite is delicious!

How can I make the sauce thicker?

If you find your sauce is too thin, there are a few simple tricks to thicken it up. First, make sure to reserve some pasta water. This starchy water can help adjust the sauce’s consistency. If the sauce is still too thin, you can whisk in an extra egg yolk or a bit more grated Parmesan cheese. Both options will add creaminess and richness to your sauce, making it thicker and more satisfying.

Is it possible to make a dairy-free version of Creamy Garlic Carbonara?

Yes, you can create a dairy-free version of Creamy Garlic Carbonara! Instead of using Parmesan cheese, try nutritional yeast for a cheesy flavor without dairy. For the creamy texture, consider using a plant-based cream or cashew cream. Simply blend soaked cashews with water until smooth, and mix it into your sauce. This way, you can enjoy a delicious carbonara that fits your dietary needs!

What can I serve with Creamy Garlic Carbonara?

There are many delightful options to serve alongside your Creamy Garlic Carbonara. A fresh salad, like a simple arugula salad with lemon vinaigrette, pairs beautifully. You can also serve garlic bread for a comforting touch. For a healthy side, consider roasted vegetables such as asparagus or zucchini. These options will complement the rich flavors of the carbonara and create a well-rounded meal!

Conclusion on Creamy Garlic Carbonara Recipe

In conclusion, the Creamy Garlic Carbonara Recipe is a delightful dish that brings together rich flavors and comforting textures. With its unique twist of roasted garlic, this recipe elevates the traditional carbonara to new heights. The creamy sauce, made without heavy cream, relies on the natural goodness of eggs and cheese, creating a velvety texture that clings beautifully to the pasta.

Whether you’re cooking for a special occasion or simply enjoying a cozy night in, this dish is sure to impress. Its versatility allows you to customize it with various ingredients, making it suitable for everyone, from meat lovers to vegetarians. Plus, the simple preparation steps make it accessible for cooks of all skill levels.

As you gather around the table to enjoy your Creamy Garlic Carbonara, take a moment to appreciate the flavors and the joy of sharing a meal with loved ones. This recipe not only nourishes the body but also warms the heart. So, roll up your sleeves, gather your ingredients, and embark on this culinary adventure. Happy cooking!

Sour Cream Beef Noodle Casserole Recipe is delicious!

Introduction to Sour Cream Beef Noodle Casserole Recipe

Sour Cream Beef Noodle Casserole Recipe is a classic dish that brings warmth and satisfaction to any dinner table. This hearty casserole combines tender ground beef, creamy sauces, and egg noodles, creating a dish that is both filling and flavorful. Perfect for family gatherings or a cozy weeknight meal, this recipe is sure to become a favorite.

What makes this casserole truly special is its rich blend of ingredients. The sour cream and cottage cheese add a creamy texture, while the Worcestershire sauce gives it a savory kick. Plus, the melted cheddar cheese on top creates a deliciously gooey finish that everyone will love. Not only is it tasty, but it’s also easy to prepare, making it a go-to recipe for busy cooks.

Sour Cream Beef Noodle Casserole Recipe. Whether you’re a seasoned chef or a beginner in the kitchen, you’ll find this recipe simple and enjoyable. So, let’s dive in and discover how to create this comforting dish that’s perfect for any occasion!

Ingredients for Sour Cream Beef Noodle Casserole Recipe

Sour Cream Beef Noodle Casserole Recipe, you will need a variety of ingredients that come together to form a hearty meal. Here’s a complete list of what you’ll need:

  • 1 pound ground beef: This is the main protein source, providing flavor and richness.
  • 1 medium onion, chopped: Adds sweetness and depth to the dish.
  • 2 cloves garlic, minced: Enhances the overall flavor with its aromatic qualities.
  • 1 (10.5-ounce) can cream of mushroom soup: This creamy base binds the ingredients together.
  • 1 cup sour cream: Contributes a tangy flavor and creamy texture.
  • 1 cup cottage cheese: Adds creaminess and protein to the casserole.
  • 1 teaspoon Worcestershire sauce: Provides a savory umami flavor.
  • 1 teaspoon salt: Enhances the overall taste of the dish.
  • 1/2 teaspoon black pepper: Adds a hint of spice.
  • 8 ounces egg noodles: The perfect pasta to soak up all the delicious flavors.
  • 1 cup shredded cheddar cheese: Melts beautifully on top for a cheesy finish.
  • 1/2 cup breadcrumbs: Creates a crunchy topping that contrasts with the creamy filling.
  • 2 tablespoons olive oil: Used to coat the breadcrumbs for added flavor and crispiness.

Gathering these ingredients will set you on the right path to making a delightful casserole that your family will love. Each component plays a vital role in creating the comforting and satisfying flavors of this dish. Now that you have everything you need, let’s move on to the preparation steps!

Step-by-Step Preparation of Sour Cream Beef Noodle Casserole Recipe

Sour Cream Beef Noodle Casserole Recipe. This process is straightforward and enjoyable, making it perfect for cooks of all skill levels. Let’s get started!

Step 1: Prepping the Ingredients

First things first, gather all your ingredients on the counter. This makes the cooking process smoother. Chop the onion and mince the garlic. Having everything prepped will save you time later. It’s like setting the stage for a great performance!

Step 2: Cooking the Beef

Next, heat a large skillet over medium heat. Add the ground beef and cook it until it’s browned. This usually takes about 5-7 minutes. Remember to drain any excess fat to keep your casserole from being greasy. Once the beef is cooked, toss in the chopped onion and minced garlic. Sauté them together until the onion turns translucent, which should take about 3-4 minutes. The aroma will be delightful!

Step 3: Boiling the Noodles

While the beef mixture is cooking, bring a pot of salted water to a boil. Add the egg noodles and cook them according to the package instructions until they are al dente. This usually takes around 7-9 minutes. Once done, drain the noodles and set them aside. They will soak up all the delicious flavors in the casserole!

Step 4: Mixing the Casserole Ingredients

Now it’s time to combine everything! In the skillet with the beef mixture, stir in the cream of mushroom soup, sour cream, cottage cheese, Worcestershire sauce, salt, and black pepper. Mix everything well until it’s creamy and smooth. This mixture is the heart of your casserole!

Step 5: Assembling the Casserole

Take a greased 9×13-inch baking dish and transfer the beef and sauce mixture into it. Then, add the cooked egg noodles and gently stir to combine everything. Make sure the noodles are well coated with the creamy mixture. This step is crucial for ensuring every bite is flavorful!

Step 6: Baking the Casserole

Finally, it’s time to add the finishing touches. In a small bowl, mix the breadcrumbs with olive oil until they are evenly coated. Sprinkle this mixture over the casserole. Then, top it off with shredded cheddar cheese. Now, place the baking dish in the preheated oven at 350°F and bake for 25-30 minutes. You’ll know it’s ready when the cheese is melted and bubbly. Let it cool for 5-10 minutes before serving, and enjoy!

Variation of Sour Cream Beef Noodle Casserole Recipe

Sour Cream Beef Noodle Casserole Recipe is versatile and can be easily adapted to suit different tastes and dietary needs. Whether you want to switch up the flavors or make it healthier, there are plenty of options to explore. Let’s take a look at some alternative ingredients and dietary modifications you can consider!

Alternative Ingredients to Consider

When it comes to making this casserole your own, the possibilities are endless! Here are some alternative ingredients you might want to try:

  • Ground Turkey or Chicken: For a leaner option, swap out the ground beef for ground turkey or chicken. This change will reduce the fat content while still providing a delicious flavor.
  • Vegetables: Add some color and nutrition by including vegetables like spinach, bell peppers, or mushrooms. These can be sautéed with the onion and garlic for extra flavor.
  • Different Cheeses: Instead of cheddar cheese, experiment with other types like mozzarella or pepper jack for a unique twist.
  • Gluten-Free Noodles: If you’re avoiding gluten, use gluten-free egg noodles or pasta. This way, everyone can enjoy the casserole without worry.
  • Herbs and Spices: Enhance the flavor by adding herbs like thyme, oregano, or parsley. A pinch of red pepper flakes can also add a nice kick!

These alternatives can help you create a dish that fits your preferences while still being delicious. Feel free to mix and match to find your perfect combination!

Dietary Modifications for Sour Cream Beef Noodle Casserole Recipe

Sour Cream Beef Noodle Casserole Recipe is simple and can cater to various dietary needs. Here are some suggestions:

  • Low-Fat Options: Use low-fat sour cream and cottage cheese to cut down on calories and fat without sacrificing creaminess.
  • Vegetarian Version: Replace the ground beef with a plant-based protein like lentils or black beans. You can also add more vegetables to make it hearty.
  • Dairy-Free Version: For a dairy-free option, use dairy-free sour cream and cheese alternatives. There are many great products available that mimic the taste and texture of dairy.
  • Low-Carb Version: If you’re following a low-carb diet, consider using zucchini noodles or cauliflower rice instead of egg noodles. This will keep the dish low in carbs while still being satisfying.

These modifications allow you to enjoy the comforting flavors of the casserole while meeting your dietary needs. With a little creativity, you can make this dish work for everyone at your table!

Cooking Note for Sour Cream Beef Noodle Casserole Recipe

Sour Cream Beef Noodle Casserole Recipe, there are a few important cooking notes to keep in mind. These tips will help ensure that your casserole turns out perfectly every time, making it a delightful dish for you and your family.

First, always preheat your oven to 350°F before baking. This step is crucial as it allows the casserole to cook evenly. If the oven isn’t hot enough, the cheese may not melt properly, and the casserole could end up soggy.

Next, when cooking the ground beef, make sure to drain any excess fat. This will prevent the casserole from becoming greasy. A leaner beef option, like 90% lean ground beef, can also help reduce fat content while still providing great flavor.

Additionally, be mindful of the cooking time for the egg noodles. Cooking them until they are al dente is key. If they are overcooked, they may become mushy when baked in the casserole. Remember, they will continue to cook in the oven, so slightly undercooking them is a good strategy.

When mixing the casserole ingredients, ensure that everything is well combined. This will help distribute the flavors evenly throughout the dish. A good mix will ensure that every bite is just as delicious as the last!

Lastly, let the casserole cool for about 5-10 minutes after baking. This resting time allows the layers to set, making it easier to serve. Cutting into a hot casserole can cause it to fall apart, so patience is key!

Sour Cream Beef Noodle Casserole Recipe that everyone will enjoy. Happy cooking!

Serving Suggestions for Sour Cream Beef Noodle Casserole Recipe

Sour Cream Beef Noodle Casserole Recipe is baked to perfection, it’s time to serve it up! This dish is not only delicious but also versatile, making it easy to pair with various sides and accompaniments. Here are some serving suggestions to elevate your meal:

  • Fresh Salad: A crisp green salad is a perfect complement to the rich flavors of the casserole. Consider a simple garden salad with mixed greens, cherry tomatoes, and a light vinaigrette. The freshness of the salad balances the creaminess of the casserole.
  • Garlic Bread: Serve warm garlic bread on the side for a delightful crunch. The buttery, garlicky flavor pairs wonderfully with the creamy casserole, making each bite even more enjoyable.
  • Steamed Vegetables: Add some color and nutrition to your plate with steamed vegetables. Broccoli, green beans, or carrots are great options. They provide a nice contrast to the hearty casserole.
  • Pickles or Relish: For a tangy twist, consider serving pickles or relish alongside the casserole. The acidity cuts through the richness, adding a refreshing element to the meal.
  • Fruit Salad: A light fruit salad can be a sweet ending to your meal. Fresh fruits like berries, melons, or citrus can cleanse the palate and provide a refreshing finish.

Sour Cream Beef Noodle Casserole Recipe, consider garnishing it with fresh herbs like parsley or chives for a pop of color and added flavor. This simple touch can make your dish look even more appealing!

With these serving suggestions, you can create a well-rounded meal that everyone will love. Enjoy your delicious casserole with these delightful sides, and watch as your family gathers around the table for a comforting dining experience!

Tips for Perfecting Your Sour Cream Beef Noodle Casserole Recipe

Sour Cream Beef Noodle Casserole Recipe truly shine, consider these helpful tips. They will guide you in achieving the best flavor and texture, ensuring that your casserole is a hit every time you serve it!

  • Use Quality Ingredients: The better the ingredients, the better the dish! Opt for fresh vegetables and high-quality ground beef. This will enhance the overall taste of your casserole.
  • Don’t Overcook the Noodles: Remember to cook the egg noodles just until al dente. They will continue to cook in the oven, so slightly undercooking them will prevent a mushy texture.
  • Mix Thoroughly: When combining the beef mixture with the noodles, make sure everything is well mixed. This ensures that every bite is packed with flavor and creaminess.
  • Experiment with Seasonings: Feel free to add your favorite herbs and spices. A dash of paprika or Italian seasoning can elevate the flavor profile of your casserole.
  • Let It Rest: After baking, allow the casserole to cool for about 5-10 minutes before serving. This resting time helps the layers set, making it easier to cut and serve.
  • Garnish for Presentation: A sprinkle of fresh herbs like parsley or chives on top before serving adds a pop of color and freshness. It makes the dish look even more appetizing!
  • Make It Ahead: If you’re short on time, consider preparing the casserole ahead of time. You can assemble it and store it in the fridge for up to 24 hours before baking. Just add a few extra minutes to the baking time if it’s cold from the fridge.

Sour Cream Beef Noodle Casserole Recipe that your family and friends will rave about. Enjoy the process and happy cooking!

Breakdown of Time for Sour Cream Beef Noodle Casserole Recipe

Sour Cream Beef Noodle Casserole Recipe can help you plan your cooking efficiently. Here’s a detailed breakdown of the time you’ll need for preparation, cooking, and the total time to enjoy this delicious dish!

Prep Time

The prep time for this casserole is approximately 15-20 minutes. During this time, you will gather all your ingredients, chop the onion, mince the garlic, and cook the ground beef. Having everything ready before you start cooking will make the process smoother and more enjoyable.

Cooking Time

Once you’ve prepped your ingredients, the cooking time will take about 25-30 minutes. This includes boiling the egg noodles, mixing the casserole ingredients, and baking it in the oven. The baking time is crucial for achieving that perfect bubbly cheese topping!

Total Time

Sour Cream Beef Noodle Casserole Recipe ready to serve in no time!

Nutritional Information for Sour Cream Beef Noodle Casserole Recipe

Sour Cream Beef Noodle Casserole Recipe is essential for those who are mindful of their diet. This casserole is not only delicious but also provides a good balance of nutrients. Here’s a breakdown of the key nutritional information per serving:

Calories

Sour Cream Beef Noodle Casserole Recipe contains approximately 350 calories. This makes it a satisfying meal option without being overly heavy. The combination of ground beef, noodles, and creamy ingredients contributes to the calorie count, providing energy for your day.

Protein

With about 20 grams of protein per serving, this casserole is a great source of this essential nutrient. The ground beef, cottage cheese, and sour cream all contribute to the protein content, making it a filling dish that helps support muscle health and keeps you feeling full longer.

Sodium

The sodium content in each serving is around 800 milligrams. While this is a reasonable amount for a hearty casserole, it’s important to be mindful of sodium intake, especially for those on a low-sodium diet. You can reduce the sodium by using low-sodium versions of the cream of mushroom soup and Worcestershire sauce.

Sour Cream Beef Noodle Casserole Recipe offers a balanced meal with a good mix of calories, protein, and flavor. By being aware of the nutritional information, you can enjoy this comforting dish while keeping your dietary goals in mind!

FAQs about Sour Cream Beef Noodle Casserole Recipe

Can I make Sour Cream Beef Noodle Casserole Recipe ahead of time?

Sour Cream Beef Noodle Casserole Recipe ahead of time. Simply assemble the casserole as directed, but do not bake it right away. Cover it tightly with plastic wrap or aluminum foil and store it in the refrigerator for up to 24 hours. When you’re ready to bake, just pop it in the oven. You may need to add a few extra minutes to the baking time since it will be cold from the fridge. This makes it a great option for busy weeknights or when hosting guests!

What can I substitute for sour cream in the Sour Cream Beef Noodle Casserole Recipe?

Sour Cream Beef Noodle Casserole Recipe without compromising on taste!

How do I store leftovers of Sour Cream Beef Noodle Casserole Recipe?

Sour Cream Beef Noodle Casserole Recipe is easy! Allow the casserole to cool completely before transferring it to an airtight container. You can store it in the refrigerator for up to 3-4 days. When you’re ready to enjoy it again, simply reheat individual portions in the microwave or warm it in the oven at 350°F until heated through. This makes for a quick and satisfying meal on busy days!

Can I freeze Sour Cream Beef Noodle Casserole Recipe?

Sour Cream Beef Noodle Casserole Recipe for later enjoyment! To do this, prepare the casserole as directed but do not bake it. Instead, cover it tightly with plastic wrap and then with aluminum foil to prevent freezer burn. It can be frozen for up to 2-3 months. When you’re ready to bake it, thaw it in the refrigerator overnight and then bake as usual. This is a fantastic way to have a comforting meal ready to go whenever you need it!

Conclusion on Sour Cream Beef Noodle Casserole Recipe

Sour Cream Beef Noodle Casserole Recipe is a delightful dish that combines comfort and flavor in every bite. This recipe is not only easy to prepare but also offers a variety of options to suit different tastes and dietary needs. Whether you’re cooking for a family dinner or a gathering with friends, this casserole is sure to impress.

With its creamy texture, savory beef, and cheesy topping, it’s a meal that brings everyone together. Plus, the ability to customize the ingredients allows you to make it your own. From adding vegetables to swapping out proteins, the possibilities are endless!

As you embark on your cooking journey, remember the tips and variations shared in this article. They will help you create a perfect casserole every time. Don’t hesitate to experiment and find what works best for you and your loved ones.

Sour Cream Beef Noodle Casserole Recipe is more than just a dish; it’s a way to create memories around the dinner table. Happy cooking!

Cheesy Meatloaf Casserole is a family favorite dish.

Introduction to Cheesy Meatloaf Casserole

Cheesy Meatloaf Casserole. This delightful recipe combines the classic flavors of meatloaf with the gooey goodness of melted cheese, creating a meal that is both hearty and satisfying. Perfect for busy weeknights or cozy weekends, this casserole is sure to become a family favorite.

Cheesy Meatloaf Casserole is not only delicious but also easy to prepare. With simple ingredients and straightforward steps, you can whip up this dish in no time. Plus, it serves six, making it ideal for family dinners or gatherings with friends.

In this article, we will guide you through the ingredients, preparation, and variations of this scrumptious casserole. Whether you’re a seasoned cook or a beginner in the kitchen, you’ll find this recipe approachable and rewarding. So, roll up your sleeves and get ready to enjoy a meal that’s packed with flavor and comfort!

Ingredients for Cheesy Meatloaf Casserole

Cheesy Meatloaf Casserole, you’ll need a variety of ingredients that come together to form a delicious dish. Here’s what you’ll need:

  • 1 pound ground beef: This is the main protein source, providing flavor and texture.
  • 1 cup breadcrumbs: These help bind the meatloaf together and add a nice texture.
  • 1/2 cup grated Parmesan cheese: This adds a rich, cheesy flavor that enhances the overall taste.
  • 1/2 cup shredded cheddar cheese: Cheddar brings a sharpness that complements the other cheeses.
  • 1/2 cup milk: This keeps the meatloaf moist and tender.
  • 1/4 cup ketchup: Ketchup adds sweetness and a hint of tanginess.
  • 1/4 cup finely chopped onion: Onions provide a savory base flavor.
  • 2 cloves garlic, minced: Garlic adds a wonderful aroma and depth of flavor.
  • 1 large egg: The egg acts as a binder, helping to hold everything together.
  • 1 teaspoon Worcestershire sauce: This sauce adds a unique umami flavor.
  • 1 teaspoon salt: Salt enhances all the flavors in the dish.
  • 1/2 teaspoon black pepper: Pepper adds a bit of heat and depth.
  • 1/2 teaspoon dried oregano: Oregano brings a hint of earthiness.
  • 1/2 teaspoon dried thyme: Thyme adds a subtle herbal note.
  • 1 cup mixed vegetables: You can use frozen or fresh peas and carrots for added nutrition and color.
  • 1 cup shredded mozzarella cheese: This cheese melts beautifully, creating a gooey topping.

Cheesy Meatloaf Casserole. Each component plays a vital role in creating a dish that is not only tasty but also comforting. Gather your ingredients, and let’s move on to the preparation!

Preparation of Cheesy Meatloaf Casserole

Cheesy Meatloaf Casserole. This process is simple and straightforward, making it easy for anyone to follow. Let’s break it down into five easy steps!

Step 1: Preheat the Oven

First things first, preheat your oven to 350°F (175°C). This step is crucial as it ensures that your casserole cooks evenly. While the oven heats up, you can move on to the next step.

Step 2: Prepare the Meat Mixture

In a large mixing bowl, combine the ground beef, breadcrumbs, grated Parmesan cheese, and shredded cheddar cheese. Next, add the milk, ketchup, finely chopped onion, minced garlic, egg, Worcestershire sauce, salt, black pepper, oregano, and thyme. Use your hands or a spoon to mix everything together until well combined. Make sure not to overmix, as this can make the meatloaf tough.

Step 3: Assemble the Casserole

Once your meat mixture is ready, transfer it to a greased 9×13-inch baking dish. Shape the mixture into a loaf, making sure it’s even. Then, spread the mixed vegetables evenly over the top of the meatloaf. This adds color and nutrition to your dish!

Step 4: Bake the Casserole

Cover the baking dish with aluminum foil and place it in the preheated oven. Bake for 45 minutes. This allows the meatloaf to cook through and the flavors to meld together. After 45 minutes, carefully remove the foil and sprinkle the shredded mozzarella cheese on top. Return the dish to the oven and bake for an additional 15 minutes, or until the cheese is melted and bubbly.

Step 5: Let it Rest Before Serving

Cheesy Meatloaf Casserole is out of the oven, let it cool for about 10 minutes. This resting time helps the casserole set, making it easier to slice. After it has cooled, you can slice it into portions and serve. Enjoy the delicious flavors and cheesy goodness!

Variation of Cheesy Meatloaf Casserole

Cheesy Meatloaf Casserole is a versatile dish that can be customized to suit your taste preferences or dietary needs. Whether you want to switch up the flavors or try a different cooking method, there are plenty of options to explore. Let’s take a look at some alternative ingredients and cooking methods that can elevate your casserole experience!

Alternative Ingredients

Cheesy Meatloaf Casserole is its adaptability. Here are some alternative ingredients you can use:

  • Ground Turkey or Chicken: For a leaner option, substitute ground beef with ground turkey or chicken. This will reduce the fat content while still providing a delicious flavor.
  • Lentils or Meat Substitutes: If you’re looking for a vegetarian alternative, consider using cooked lentils or a meat substitute. These options are packed with protein and can create a hearty dish.
  • Different Cheeses: Feel free to experiment with different types of cheese. Gouda, pepper jack, or even feta can add unique flavors to your casserole.
  • Seasonal Vegetables: Swap out the mixed vegetables for seasonal options like bell peppers, zucchini, or spinach. This not only adds variety but also boosts the nutritional value.
  • Spices and Herbs: Customize the flavor by adding spices like cumin, paprika, or fresh herbs like parsley or basil. This can give your casserole a whole new twist!

Different Cooking Methods

Cheesy Meatloaf Casserole:

  • Slow Cooker: For a hands-off approach, use a slow cooker. Simply combine all the ingredients in the slow cooker and cook on low for 6-8 hours. This method allows the flavors to meld beautifully.
  • Instant Pot: If you’re short on time, the Instant Pot is a great option. Cook the meat mixture using the sauté function, then add the vegetables and cheese. Seal the lid and cook on high pressure for about 25 minutes.
  • Grilling: For a smoky flavor, consider grilling the meatloaf. Shape the mixture into a loaf and place it on a grill-safe pan. Cook over medium heat, turning occasionally, until fully cooked.

Cheesy Meatloaf Casserole that suits your taste and lifestyle. Don’t hesitate to get creative and make this dish your own!

Cooking Note for Cheesy Meatloaf Casserole

Cheesy Meatloaf Casserole, there are a few important cooking notes to keep in mind. These tips will help ensure that your casserole turns out perfectly every time, making it a delightful dish for you and your family.

First, always use fresh ingredients. Fresh vegetables and high-quality meat can significantly enhance the flavor of your casserole. If you opt for frozen vegetables, make sure to thaw and drain them before adding them to the dish. This prevents excess moisture, which can make the casserole soggy.

Next, consider the size of your baking dish. A 9×13-inch dish is ideal for this recipe, as it allows the meatloaf to cook evenly. If you use a smaller dish, the meatloaf may take longer to cook through. Always check the internal temperature of the meatloaf with a meat thermometer. It should reach at least 160°F (71°C) to ensure it’s safe to eat.

Another tip is to let the casserole rest after baking. This resting period allows the juices to redistribute, making the meatloaf more flavorful and easier to slice. If you cut into it too soon, the juices may run out, resulting in a drier dish.

Lastly, feel free to adjust the seasoning to your taste. Everyone has different preferences, so don’t hesitate to add more salt, pepper, or herbs. A little taste test before baking can help you find the perfect balance of flavors.

Cheesy Meatloaf Casserole that your family will love. Happy cooking!

Serving Suggestions for Cheesy Meatloaf Casserole

Cheesy Meatloaf Casserole is ready, it’s time to think about how to serve it. This dish is not only delicious but also versatile, making it easy to pair with various sides and accompaniments. Here are some delightful serving suggestions to enhance your meal:

  • Fresh Salad: A crisp green salad is a perfect complement to the rich flavors of the casserole. Consider a simple mixed greens salad with a light vinaigrette. This adds freshness and balances the hearty meatloaf.
  • Garlic Bread: Serve slices of warm garlic bread on the side. The buttery, garlicky flavor pairs wonderfully with the cheesy meatloaf, making every bite even more enjoyable.
  • Mashed Potatoes: Creamy mashed potatoes are a classic side that goes hand-in-hand with meatloaf. The smooth texture and buttery flavor create a comforting combination.
  • Steamed Vegetables: For a healthy touch, serve steamed vegetables like broccoli, green beans, or asparagus. These add color and nutrition to your plate.
  • Coleslaw: A tangy coleslaw can provide a crunchy contrast to the soft texture of the casserole. The acidity from the dressing can brighten up the meal.
  • Pickles or Relish: Adding pickles or a side of relish can introduce a zesty flavor that cuts through the richness of the cheese and meat.

Cheesy Meatloaf Casserole, consider garnishing it with fresh herbs like parsley or chives. This not only adds a pop of color but also enhances the overall presentation. You can also serve it with a dollop of sour cream or a drizzle of barbecue sauce for an extra layer of flavor.

Cheesy Meatloaf Casserole will be a hit at the dinner table. Enjoy the delightful combination of flavors and textures, and watch as your family savors every bite!

Tips for Perfecting Cheesy Meatloaf Casserole

Cheesy Meatloaf Casserole is all about attention to detail and a few helpful tips. With these suggestions, you can elevate your dish and impress your family and friends. Let’s explore some key tips to ensure your casserole turns out delicious every time!

First, always measure your ingredients accurately. This is especially important for the breadcrumbs and cheeses, as too much can make the casserole dry or overly cheesy. Use a measuring cup for precision, and level off the ingredients for the best results.

Next, don’t skip the resting time after baking. Allowing the casserole to rest for about 10 minutes helps it set. This makes it easier to slice and serve, ensuring that each piece holds its shape. If you cut it too soon, it may fall apart and lose its appealing look.

Another tip is to mix the ingredients gently. Overmixing can lead to a tough meatloaf. Combine the ingredients just until they are blended. This will keep your casserole tender and juicy.

Consider adding a layer of flavor by using fresh herbs. Chopped parsley, basil, or cilantro can brighten up the dish. Sprinkle some on top before serving for a fresh touch. Fresh herbs not only enhance the flavor but also add a beautiful pop of color.

For an extra cheesy experience, feel free to mix different types of cheese. Combining mozzarella with pepper jack or gouda can create a delightful flavor profile. Just remember to adjust the amount to maintain the right texture.

Lastly, keep an eye on the baking time. Ovens can vary, so check the casserole a few minutes before the suggested time. You want the cheese to be melted and bubbly, but not overcooked. A meat thermometer can help ensure the internal temperature reaches 160°F (71°C).

Cheesy Meatloaf Casserole. Each bite will be packed with flavor, and your family will be asking for seconds!

Breakdown of Time for Cheesy Meatloaf Casserole

Cheesy Meatloaf Casserole can help you plan your cooking efficiently. Here’s a detailed breakdown of the time you’ll need for preparation and cooking.

Prep Time

Cheesy Meatloaf Casserole is approximately 20-25 minutes. During this time, you will gather all your ingredients, chop the vegetables, and mix the meatloaf mixture. It’s a good idea to have everything ready before you start cooking. This way, you can move smoothly from one step to the next without any interruptions.

Cooking Time

The cooking time for the casserole is about 60 minutes. This includes 45 minutes of baking covered with aluminum foil and an additional 15 minutes uncovered to melt the mozzarella cheese. It’s important to keep an eye on the casserole during the last few minutes to ensure the cheese doesn’t overcook. The goal is to have it bubbly and golden brown.

Total Time

Cheesy Meatloaf Casserole to take around 80-90 minutes. This includes both prep and cooking time. With this timeline in mind, you can easily fit this delicious dish into your busy schedule, making it a perfect option for family dinners or gatherings.

Cheesy Meatloaf Casserole that everyone will love!

Nutritional Information for Cheesy Meatloaf Casserole

Cheesy Meatloaf Casserole is essential for those who are mindful of their diet. This dish not only satisfies your taste buds but also provides a balanced meal. Let’s break down the key nutritional components per serving to help you make informed choices.

Calories

Cheesy Meatloaf Casserole contains approximately 350 calories. This makes it a hearty option for dinner without being overly heavy. The combination of protein, fats, and carbohydrates in this dish provides a satisfying meal that can keep you full for hours.

Protein

Cheesy Meatloaf Casserole is an excellent source of this essential nutrient. Protein is vital for muscle repair and growth, making this casserole a great choice for active individuals or anyone looking to maintain a healthy diet. The ground beef and cheese contribute significantly to the protein content, ensuring you get a nutritious meal.

Sodium

Each serving contains around 600 milligrams of sodium. While sodium is necessary for bodily functions, it’s important to monitor your intake. If you’re watching your sodium levels, consider using low-sodium ketchup and Worcestershire sauce. This small adjustment can help reduce the overall sodium content while still keeping the flavors intact.

Cheesy Meatloaf Casserole offers a balanced meal with a good amount of calories, protein, and sodium. By being aware of these nutritional aspects, you can enjoy this delicious dish while keeping your dietary goals in mind. Whether you’re serving it for a family dinner or a gathering with friends, this casserole is sure to please everyone at the table!

FAQs about Cheesy Meatloaf Casserole

Can I make Cheesy Meatloaf Casserole ahead of time?

Cheesy Meatloaf Casserole ahead of time. Simply follow the recipe up to the point of baking. Cover the assembled casserole tightly with plastic wrap or aluminum foil and store it in the refrigerator for up to 24 hours. When you’re ready to bake, just remove the cover and bake it as directed. You may need to add a few extra minutes to the cooking time if it’s cold from the fridge.

What can I serve with Cheesy Meatloaf Casserole?

Cheesy Meatloaf Casserole. Consider serving it with a fresh green salad, creamy mashed potatoes, or warm garlic bread. Steamed vegetables like broccoli or green beans also make a great addition. For a crunchy contrast, coleslaw or pickles can enhance the meal. Feel free to mix and match based on your family’s preferences!

How do I store leftovers of Cheesy Meatloaf Casserole?

Cheesy Meatloaf Casserole is easy! Allow the casserole to cool completely, then cover it tightly with plastic wrap or aluminum foil. You can also transfer it to an airtight container. Store it in the refrigerator for up to 3-4 days. When you’re ready to enjoy it again, simply reheat individual portions in the microwave or warm it in the oven until heated through.

Can I freeze Cheesy Meatloaf Casserole?

Cheesy Meatloaf Casserole for later enjoyment! To do this, prepare the casserole as directed but do not bake it. Instead, cover it tightly with plastic wrap and then aluminum foil to prevent freezer burn. It can be frozen for up to 3 months. When you’re ready to eat it, thaw it in the refrigerator overnight and then bake it according to the original instructions. This way, you can have a comforting meal ready whenever you need it!

Conclusion on Cheesy Meatloaf Casserole

Cheesy Meatloaf Casserole is a delightful dish that combines comfort and flavor in every bite. With its rich blend of cheeses, savory ground beef, and colorful vegetables, this casserole is not only satisfying but also visually appealing. It’s a perfect meal for families, gatherings, or even a cozy night in.

Cheesy Meatloaf Casserole can easily adapt to your taste preferences and dietary needs. Plus, with the option to prepare it ahead of time or freeze it for later, this casserole fits seamlessly into any busy schedule.

Cheesy Meatloaf Casserole is sure to spark joy and conversation, making it a cherished addition to your family’s recipe collection.

So, why not give it a try? Gather your ingredients, follow the steps, and savor the deliciousness of this cheesy, hearty casserole. Your family will thank you for it, and you might just find yourself making it again and again!

Garlic Shrimp Pasta is a quick and tasty meal.

Introduction to Garlic Shrimp Pasta Recipe

Garlic shrimp pasta is a delightful dish that brings together the rich flavors of garlic, succulent shrimp, and perfectly cooked pasta. This recipe is not just a meal; it’s an experience that tantalizes your taste buds and warms your heart. Whether you’re cooking for a special occasion or a simple weeknight dinner, this dish is sure to impress.

What Makes Garlic Shrimp Pasta Special?

What sets garlic shrimp pasta apart is its simplicity and versatility. The combination of fresh ingredients creates a dish that is both flavorful and satisfying. The garlic infuses the oil with a robust aroma, while the shrimp adds a touch of elegance. Plus, the cherry tomatoes provide a burst of sweetness, balancing the savory elements beautifully.

Another reason this dish shines is its quick preparation time. In just about 30 minutes, you can whip up a restaurant-quality meal right in your kitchen. This makes it perfect for busy families or anyone looking to enjoy a delicious dinner without spending hours in the kitchen.

Moreover, garlic shrimp pasta is easily customizable. You can adjust the spice level, add your favorite vegetables, or even switch up the type of pasta. This flexibility allows you to make it your own, ensuring that every bite is just how you like it.

In summary, garlic shrimp pasta is not only a feast for the senses but also a practical choice for any home cook. With its delightful flavors and quick preparation, it’s no wonder this dish has become a favorite in many households. So, let’s dive into the ingredients and get started on this mouthwatering journey!

Ingredients for Garlic Shrimp Pasta Recipe

To create a delicious garlic shrimp pasta, you’ll need a few simple yet flavorful ingredients. Each component plays a vital role in bringing the dish to life. Here’s what you’ll need:

  • 8 ounces spaghetti or linguine
  • 1 pound large shrimp, peeled and deveined
  • 3 tablespoons olive oil
  • 4 cloves garlic, minced
  • 1 teaspoon red pepper flakes (optional)
  • 1 cup cherry tomatoes, halved
  • 1/2 cup chicken broth
  • 1/4 cup fresh parsley, chopped
  • Salt and pepper to taste
  • Juice of 1 lemon
  • Grated Parmesan cheese for serving

These ingredients come together to create a dish that is not only tasty but also visually appealing. The vibrant colors of the cherry tomatoes and parsley contrast beautifully with the shrimp and pasta. Plus, the fresh garlic and lemon juice add a zesty kick that elevates the entire meal.

When selecting your shrimp, opt for large, fresh shrimp for the best texture and flavor. If you prefer, you can also use frozen shrimp; just be sure to thaw them properly before cooking. As for the pasta, spaghetti and linguine are both excellent choices, but feel free to experiment with your favorite type!

Now that you have your ingredients ready, let’s move on to the next step: preparing the pasta!

Step-by-Step Preparation of Garlic Shrimp Pasta Recipe

Now that you have gathered all your ingredients, it’s time to dive into the step-by-step preparation of this delicious garlic shrimp pasta recipe. Each step is simple and straightforward, ensuring that you can create a delightful meal with ease. Let’s get started!

Step 1: Preparing the Ingredients

Before you start cooking, it’s essential to prepare all your ingredients. Begin by peeling and deveining the shrimp if you haven’t done so already. Rinse them under cold water and pat them dry with a paper towel. This helps to remove any excess moisture, ensuring they cook perfectly.

Next, mince the garlic cloves finely. This will allow the garlic to release its flavor quickly when sautéed. Then, halve the cherry tomatoes and chop the fresh parsley. Having everything ready will make the cooking process smooth and enjoyable.

Step 2: Cooking the Pasta

Bring a large pot of salted water to a boil. Once boiling, add the spaghetti or linguine. Cook according to the package instructions until the pasta is al dente, which usually takes about 8-10 minutes. Stir occasionally to prevent sticking.

Once cooked, drain the pasta in a colander, but remember to reserve about 1/2 cup of the pasta water. This starchy water will help to create a silky sauce later on. Set the drained pasta aside while you prepare the shrimp.

Step 3: Sautéing the Shrimp

In a large skillet, heat the olive oil over medium heat. Once the oil is hot, add the minced garlic and red pepper flakes if you’re using them. Sauté for about 1 minute until the garlic becomes fragrant, but be careful not to burn it.

Now, add the shrimp to the skillet. Season them with salt and pepper. Cook the shrimp for about 2-3 minutes on each side. You’ll know they’re done when they turn pink and opaque. This step is crucial, as perfectly cooked shrimp are tender and juicy.

Step 4: Combining Pasta and Shrimp

Once the shrimp are cooked, it’s time to bring everything together. Stir in the halved cherry tomatoes and chicken broth into the skillet. Cook for an additional 2-3 minutes until the tomatoes soften and release their juices.

Now, add the cooked pasta to the skillet. Toss everything together gently, ensuring the pasta is well coated with the garlic and shrimp mixture. If the dish seems a bit dry, add some of the reserved pasta water until you reach your desired consistency.

Step 5: Adding the Finishing Touches

Remove the skillet from heat and stir in the chopped parsley and lemon juice. These fresh ingredients will brighten the dish and add a burst of flavor. Taste and adjust the seasoning with more salt and pepper if needed.

Your garlic shrimp pasta is now ready to be served! Plate it up and sprinkle with grated Parmesan cheese for an extra touch of richness. Enjoy your delicious creation!

Variations of Garlic Shrimp Pasta Recipe

While the classic garlic shrimp pasta is a delightful dish on its own, there are many ways to switch things up! Here are two popular variations that can add a new twist to your meal. Each variation maintains the essence of the original recipe while introducing exciting flavors and textures.

Spicy Garlic Shrimp Pasta Variation

If you love a bit of heat, the spicy garlic shrimp pasta variation is perfect for you! To make this version, simply increase the amount of red pepper flakes to suit your taste. You can also add sliced jalapeños or a dash of hot sauce for an extra kick. The heat from the spices pairs beautifully with the sweetness of the shrimp and the acidity of the tomatoes.

For an added layer of flavor, consider incorporating a splash of white wine after sautéing the garlic. Let it simmer for a minute to reduce before adding the shrimp. This will create a rich, aromatic sauce that enhances the overall dish. Serve it with a sprinkle of fresh cilantro or basil for a refreshing finish!

Creamy Garlic Shrimp Pasta Variation

If you prefer a richer, creamier dish, the creamy garlic shrimp pasta variation is a fantastic choice. To achieve this, add 1/2 cup of heavy cream or half-and-half to the skillet after cooking the shrimp. Stir it in along with the cherry tomatoes and chicken broth. This will create a luscious sauce that clings to the pasta beautifully.

For added flavor, you can mix in some grated Parmesan cheese while the cream is heating. This will give the sauce a cheesy, savory depth. You might also want to include some spinach or peas for a pop of color and nutrition. This creamy version is perfect for those cozy nights when you want something comforting and indulgent!

Both variations of garlic shrimp pasta are easy to prepare and will surely impress your family and friends. Feel free to experiment with different ingredients to make these recipes your own. Now, let’s move on to some important cooking notes to ensure your dish turns out perfectly every time!

Cooking Note for Garlic Shrimp Pasta Recipe

When preparing garlic shrimp pasta, a few cooking notes can help you achieve the best results. These tips will ensure that your dish is not only delicious but also visually appealing and satisfying. Let’s explore some essential points to keep in mind while cooking.

First, always use fresh ingredients whenever possible. Fresh shrimp will provide a better texture and flavor compared to frozen ones. If you do use frozen shrimp, make sure to thaw them completely and pat them dry before cooking. This step is crucial, as excess moisture can lead to a watery dish.

Next, be mindful of the garlic. Garlic can burn quickly, which can result in a bitter taste. Sauté it over medium heat and keep an eye on it. As soon as it becomes fragrant, it’s time to add the shrimp. This will ensure that the garlic flavor is prominent without being overpowering.

Another important note is to avoid overcooking the shrimp. They should be cooked just until they turn pink and opaque. Overcooked shrimp can become rubbery and tough, which is not what you want in your pasta dish. Remember, shrimp cook quickly, so keep an eye on them!

Additionally, when combining the pasta and shrimp, be sure to toss everything gently. This will help to coat the pasta evenly with the sauce and prevent it from breaking apart. If you find the dish too dry, don’t hesitate to add more reserved pasta water. This starchy water is a great way to achieve the perfect sauce consistency.

Lastly, don’t forget to taste your dish before serving. Adjust the seasoning with salt, pepper, or even a bit more lemon juice if needed. This final touch can elevate the flavors and make your garlic shrimp pasta truly shine.

By following these cooking notes, you’ll be well on your way to creating a mouthwatering garlic shrimp pasta that will impress everyone at the table. Now that you’re equipped with these tips, let’s move on to some serving suggestions to enhance your dining experience!

Serving Suggestions for Garlic Shrimp Pasta Recipe

Once your garlic shrimp pasta is ready, it’s time to think about how to serve it. Presentation can elevate your dish from simple to spectacular. Here are some delightful serving suggestions that will impress your family and friends.

First, consider using a large, shallow bowl for serving. This allows the pasta to spread out, showcasing the vibrant colors of the shrimp, tomatoes, and parsley. A sprinkle of freshly grated Parmesan cheese on top adds a touch of elegance and flavor.

For a pop of color, garnish your dish with additional chopped parsley or even a few slices of lemon. This not only enhances the visual appeal but also adds a fresh aroma that complements the garlic and shrimp beautifully.

Pair your garlic shrimp pasta with a side salad for a complete meal. A simple green salad with mixed greens, cherry tomatoes, and a light vinaigrette works wonderfully. The crispness of the salad balances the richness of the pasta.

Another great option is to serve garlic bread alongside your pasta. The buttery, garlicky bread is perfect for soaking up any leftover sauce. It’s a classic combination that everyone loves!

If you want to add a bit of sophistication, consider serving your garlic shrimp pasta with a glass of white wine. A crisp Sauvignon Blanc or a light Pinot Grigio pairs nicely with the flavors of the dish, enhancing the overall dining experience.

Lastly, don’t forget to enjoy your meal with loved ones! Sharing a delicious dish like garlic shrimp pasta creates wonderful memories and brings everyone together. So, gather around the table, dig in, and savor every bite!

Tips for Perfect Garlic Shrimp Pasta Recipe

Creating the perfect garlic shrimp pasta is all about attention to detail and a few helpful tips. These suggestions will ensure that your dish turns out delicious every time, making it a favorite in your household. Let’s explore some essential tips to elevate your cooking experience!

First, always start with high-quality ingredients. Fresh shrimp will provide the best flavor and texture. If you’re using frozen shrimp, make sure to thaw them properly and pat them dry. This helps to avoid excess moisture, which can make your dish watery.

Next, pay close attention to the garlic. Garlic can burn quickly, leading to a bitter taste. Sauté it over medium heat and watch it closely. As soon as it becomes fragrant, it’s time to add the shrimp. This will ensure that the garlic flavor shines through without being overpowering.

When cooking the shrimp, remember not to overcook them. They should turn pink and opaque, which usually takes just a few minutes on each side. Overcooked shrimp can become rubbery, so keep an eye on them!

As you combine the pasta and shrimp, toss everything gently. This helps to coat the pasta evenly with the sauce and prevents it from breaking apart. If the dish seems dry, don’t hesitate to add some reserved pasta water. This starchy water is perfect for achieving the right sauce consistency.

Finally, always taste your dish before serving. Adjust the seasoning with salt, pepper, or a splash of lemon juice if needed. This final touch can elevate the flavors and make your garlic shrimp pasta truly shine.

By following these tips, you’ll be well on your way to creating a mouthwatering garlic shrimp pasta that will impress everyone at the table. Now that you’re equipped with these insights, let’s move on to the breakdown of time for this delightful recipe!

Breakdown of Time for Garlic Shrimp Pasta Recipe

Understanding the time it takes to prepare garlic shrimp pasta can help you plan your meal better. This dish is quick and easy, making it perfect for busy weeknights or last-minute gatherings. Here’s a breakdown of the time you’ll need for each step of the process:

Prep Time

10-15 minutes on this part. Having everything ready will make cooking much smoother!

Cooking Time

8-10 minutes. While the pasta cooks, you can sauté the shrimp, which will take about 5-7 minutes. In total, the cooking time will be approximately 15-20 minutes.

Total Time

25-35 minutes. This quick turnaround makes it an excellent choice for a delicious meal without spending hours in the kitchen.

With this time breakdown, you can easily fit garlic shrimp pasta into your busy schedule. Now that you know how to manage your time, let’s take a look at the nutritional information for this delightful dish!

Nutritional Information for Garlic Shrimp Pasta Recipe

Understanding the nutritional information of garlic shrimp pasta can help you make informed choices about your meals. This dish is not only delicious but also provides a good balance of nutrients. Here’s a closer look at the nutritional breakdown per serving:

Calories

450 calories. This makes it a satisfying meal that can fit into a balanced diet. The combination of shrimp, pasta, and fresh ingredients contributes to its overall caloric content.

Protein

30 grams of protein per serving, garlic shrimp pasta is a great option for those looking to increase their protein intake. The shrimp is a lean source of protein, making it a healthy choice for any meal.

Sodium

600 milligrams per serving. This amount can vary based on the chicken broth and added salt. If you’re watching your sodium intake, consider using low-sodium broth and adjusting the salt to taste.

Overall, garlic shrimp pasta is a nutritious meal that offers a good balance of calories, protein, and flavor. It’s perfect for a quick weeknight dinner or a special occasion. Now that you know the nutritional benefits, let’s move on to some frequently asked questions about this delightful dish!

Nutritional Information for Garlic Shrimp Pasta Recipe

Understanding the nutritional information of garlic shrimp pasta can help you make informed choices about your meals. This dish is not only delicious but also provides a good balance of nutrients. Here’s a closer look at the nutritional breakdown per serving:

Calories

450 calories. This makes it a satisfying meal that can fit into a balanced diet. The combination of shrimp, pasta, and fresh ingredients contributes to its overall caloric content. With this calorie count, you can enjoy a hearty dish without feeling guilty.

Protein

30 grams of protein per serving, garlic shrimp pasta is a great option for those looking to increase their protein intake. The shrimp is a lean source of protein, making it a healthy choice for any meal. This protein boost is especially beneficial for active individuals or those looking to maintain muscle mass.

Sodium

600 milligrams per serving. This amount can vary based on the chicken broth and added salt. If you’re watching your sodium intake, consider using low-sodium broth and adjusting the salt to taste. This way, you can enjoy the flavors without compromising your health goals.

Overall, garlic shrimp pasta is a nutritious meal that offers a good balance of calories, protein, and flavor. It’s perfect for a quick weeknight dinner or a special occasion. Now that you know the nutritional benefits, let’s move on to some frequently asked questions about this delightful dish!

FAQs about Garlic Shrimp Pasta Recipe

Can I use frozen shrimp for this recipe?

Yes, you can use frozen shrimp for garlic shrimp pasta! Just make sure to thaw them properly before cooking. To do this, place the shrimp in the refrigerator overnight or run them under cold water for a quick thaw. Once thawed, pat them dry with a paper towel to remove excess moisture. This will help ensure that your dish remains flavorful and not watery.

What type of pasta works best for garlic shrimp pasta?

Both spaghetti and linguine are excellent choices for garlic shrimp pasta. They hold the sauce well and complement the shrimp beautifully. However, you can also experiment with other types of pasta, such as fettuccine or penne. The key is to choose a pasta that you enjoy and that will pair nicely with the garlic and shrimp flavors.

How can I make garlic shrimp pasta gluten-free?

To make garlic shrimp pasta gluten-free, simply substitute regular pasta with gluten-free pasta. There are many options available, such as rice pasta, quinoa pasta, or even chickpea pasta. Just be sure to follow the cooking instructions on the package, as gluten-free pasta may have different cooking times. This way, you can enjoy a delicious meal without worrying about gluten!

Can I add vegetables to garlic shrimp pasta?

Absolutely! Adding vegetables to garlic shrimp pasta is a great way to boost its nutritional value and flavor. You can include vegetables like spinach, zucchini, bell peppers, or asparagus. Simply sauté them along with the garlic or add them in during the last few minutes of cooking. This will create a colorful and healthy dish that everyone will love!

Conclusion on Garlic Shrimp Pasta Recipe

In conclusion, garlic shrimp pasta is a delightful dish that combines simplicity with rich flavors. It’s perfect for any occasion, whether you’re hosting a dinner party or enjoying a cozy meal at home. The blend of succulent shrimp, aromatic garlic, and fresh ingredients creates a satisfying experience that is sure to please everyone at the table.

This recipe is not only quick to prepare but also highly customizable. You can easily adjust the spice level, add your favorite vegetables, or even switch to a creamy version for a different taste. With just a few simple ingredients, you can create a restaurant-quality meal in the comfort of your own kitchen.

Moreover, the nutritional benefits of garlic shrimp pasta make it a smart choice for those looking to maintain a balanced diet. With a good amount of protein and essential nutrients, this dish can fit seamlessly into your meal planning.

So, gather your ingredients, follow the steps, and enjoy the process of cooking this delicious garlic shrimp pasta. Whether you’re a seasoned chef or a beginner, this recipe is sure to become a staple in your culinary repertoire. Bon appétit!

Balsamic Chicken Skillet with Veggies is a must-try!

Introduction to Balsamic Chicken Skillet with Veggies

Balsamic Chicken Skillet with Veggies is a fantastic choice. This dish combines tender chicken thighs with vibrant vegetables, all coated in a rich balsamic marinade. It’s not just tasty; it’s also packed with nutrients!

This recipe is perfect for busy weeknights or a cozy weekend dinner. The best part? You can have it ready in under an hour! The combination of flavors from the balsamic vinegar, garlic, and fresh herbs creates a mouthwatering experience that will impress your family and friends.

Moreover, this skillet meal is versatile. You can easily swap out vegetables based on what you have on hand. Whether you prefer zucchini, bell peppers, or even broccoli, the options are endless. Plus, it’s a one-pan dish, which means less cleanup for you!

Balsamic Chicken Skillet with Veggies a hit. So, let’s dive in and discover how to create this delightful meal that’s sure to become a family favorite!

Ingredients for Balsamic Chicken Skillet with Veggies

Balsamic Chicken Skillet with Veggies, you’ll need a few simple ingredients. Each component plays a vital role in building flavor and nutrition. Here’s what you’ll need:

  • 2 pounds boneless, skinless chicken thighs: These are juicy and tender, making them perfect for this dish.
  • 1 cup cherry tomatoes, halved: Their sweetness adds a burst of flavor.
  • 1 medium zucchini, sliced: This veggie brings a nice crunch and is low in carbs.
  • 1 medium bell pepper, chopped: Choose any color you like for a pop of color and taste.
  • 1 medium red onion, sliced: This adds a savory depth to the dish.
  • 1/4 cup balsamic vinegar: The star of the show! It gives the dish its tangy flavor.
  • 1/4 cup olive oil: This helps to keep the chicken moist and adds healthy fats.
  • 3 cloves garlic, minced: Garlic enhances the overall flavor profile.
  • 1 teaspoon dried oregano: A classic herb that pairs well with chicken.
  • 1 teaspoon dried basil: This adds a lovely aroma and taste.
  • Salt and pepper to taste: Essential for seasoning your dish.
  • Fresh basil leaves for garnish (optional): These add a fresh touch when serving.

Balsamic Chicken Skillet with Veggies. Each item contributes to a balanced meal that’s both satisfying and nutritious. Now that you have your ingredients ready, let’s move on to the preparation steps!

Preparation of Balsamic Chicken Skillet with Veggies

Balsamic Chicken Skillet with Veggies. This process is straightforward and fun! Follow these steps to create a delicious meal that everyone will love.

Step 1: Preparing the Chicken

Start by rinsing the boneless, skinless chicken thighs under cold water. Pat them dry with paper towels. This helps the marinade stick better. Next, trim any excess fat from the chicken. This step ensures a leaner dish. Once done, cut the chicken into bite-sized pieces. This will help them cook evenly and quickly.

Step 2: Chopping the Vegetables

While the chicken is drying, it’s time to chop the vegetables. Begin with the zucchini. Slice it into rounds, about half an inch thick. Then, take the bell pepper and remove the seeds. Chop it into bite-sized pieces. For the red onion, slice it thinly. The goal is to have all the veggies roughly the same size for even cooking. Finally, halve the cherry tomatoes. Set all the chopped vegetables aside for later.

Step 3: Marinating the Chicken

In a large bowl, combine the balsamic vinegar, olive oil, minced garlic, oregano, basil, salt, and pepper. Whisk these ingredients together until they are well blended. Now, add the chicken pieces to the marinade. Make sure each piece is fully coated. Cover the bowl with plastic wrap and let it marinate for at least 30 minutes. If you have more time, marinating for up to 2 hours in the refrigerator will enhance the flavor even more!

Step 4: Cooking the Chicken

After marinating, heat a large skillet over medium-high heat. Once hot, add the marinated chicken thighs to the skillet. Cook them for about 5-7 minutes on each side. You want the chicken to be browned and cooked through. Use a meat thermometer to check that the internal temperature reaches 165°F. This ensures the chicken is safe to eat and perfectly juicy!

Step 5: Adding the Veggies

Once the chicken is cooked, remove it from the skillet and set it aside on a plate. In the same skillet, add the chopped cherry tomatoes, zucchini, bell pepper, and red onion. Sauté the vegetables for about 5-7 minutes. You want them to be tender but still crisp. Stir occasionally to prevent sticking. This step allows the veggies to soak up the delicious flavors left in the skillet.

Step 6: Finishing Touches

Balsamic Chicken Skillet with Veggies is ready to serve!

Garnish with fresh basil leaves if desired, and enjoy your delightful meal!

Variation of Balsamic Chicken Skillet with Veggies

Balsamic Chicken Skillet with Veggies lies in its versatility. You can easily customize this dish to suit your taste or use what you have on hand. Let’s explore some alternative vegetables and different marinade options that can elevate your meal!

Alternative Vegetables to Use

While the original recipe calls for zucchini, bell peppers, and red onions, feel free to mix it up! Here are some tasty alternatives:

  • Broccoli: This green veggie adds a nice crunch and is packed with vitamins.
  • Asparagus: Tender asparagus spears can bring a unique flavor and texture.
  • Carrots: Sliced or julienned carrots add sweetness and color to the dish.
  • Mushrooms: Sautéed mushrooms can add a rich, earthy flavor that complements the chicken.
  • Spinach: Toss in some fresh spinach at the end for a boost of nutrients and a pop of color.

Balsamic Chicken Skillet with Veggies. Plus, it’s a great way to use up leftover veggies in your fridge!

Different Marinade Options

While the balsamic marinade is delicious, you can experiment with other flavors too! Here are some ideas:

  • Lemon Herb Marinade: Replace balsamic vinegar with lemon juice and add fresh herbs like thyme and rosemary for a bright flavor.
  • Honey Mustard Marinade: Mix honey, Dijon mustard, and olive oil for a sweet and tangy twist.
  • Teriyaki Marinade: Use teriyaki sauce instead of balsamic vinegar for an Asian-inspired dish.
  • Spicy Chipotle Marinade: Add chipotle peppers in adobo sauce for a smoky, spicy kick.

Balsamic Chicken Skillet with Veggies into a whole new dish. Don’t hesitate to get creative and find the flavor combinations that you love!

Cooking Note for Balsamic Chicken Skillet with Veggies

Balsamic Chicken Skillet with Veggies, there are a few cooking notes to keep in mind. These tips will help ensure that your dish turns out perfectly every time!

First, always use a large skillet. A spacious skillet allows the chicken and vegetables to cook evenly. If your skillet is too crowded, the ingredients may steam instead of sauté, which can affect the texture and flavor.

Next, pay attention to the heat. Cooking over medium-high heat is essential for achieving that beautiful golden-brown color on the chicken. However, if you notice that the chicken is browning too quickly, reduce the heat slightly. You want to cook the chicken thoroughly without burning it.

Additionally, let the chicken rest after cooking. Once you remove it from the skillet, allow it to sit for a few minutes. This resting period helps the juices redistribute, making the chicken even juicier and more flavorful.

When adding the vegetables, remember to stir occasionally. This ensures that they cook evenly and don’t stick to the skillet. You want them to be tender yet still crisp, so keep an eye on them!

Balsamic Chicken Skillet with Veggies to a whole new level.

By following these cooking notes, you’ll create a delicious and visually appealing meal that everyone will enjoy. Happy cooking!

Serving Suggestions for Balsamic Chicken Skillet with Veggies

Balsamic Chicken Skillet with Veggies is ready, it’s time to think about how to serve it! This dish is not only delicious but also visually appealing, making it perfect for any occasion. Here are some serving suggestions to enhance your meal experience:

  • Over Rice or Quinoa: Serve the chicken and veggies over a bed of fluffy rice or quinoa. This adds a nice texture and helps soak up the flavorful balsamic sauce.
  • With a Side Salad: Pair your skillet dish with a fresh green salad. A simple mix of greens, cucumbers, and a light vinaigrette complements the rich flavors of the chicken.
  • With Crusty Bread: Serve with slices of crusty bread or garlic bread. This is perfect for dipping into the delicious sauce left in the skillet.
  • As a Wrap: For a fun twist, use the chicken and veggies as a filling for wraps. Use whole wheat or spinach tortillas for a healthy option.
  • With Pasta: Toss the chicken and veggies with your favorite pasta for a hearty meal. A sprinkle of Parmesan cheese on top can add a delightful touch.

Balsamic Chicken Skillet with Veggies and make it even more enjoyable. Whether it’s a family dinner or a gathering with friends, these serving suggestions will surely impress your guests!

Tips for Perfecting Balsamic Chicken Skillet with Veggies

Balsamic Chicken Skillet with Veggies truly shine, consider these helpful tips. They will ensure that your dish is not only delicious but also visually appealing and satisfying!

First, always choose high-quality ingredients. Fresh vegetables and good-quality chicken can make a big difference in flavor. Look for vibrant, firm veggies and chicken that is free from any blemishes. This attention to detail will enhance the overall taste of your meal.

Next, don’t rush the marinating process. Allowing the chicken to marinate for at least 30 minutes, or even longer, will infuse it with flavor. If you can, prepare the marinade the night before and let the chicken soak overnight. This extra time will make your dish even more delicious!

When cooking the chicken, avoid overcrowding the skillet. If you have too many pieces in the pan, they will steam instead of sear. This can lead to a less appealing texture. If necessary, cook the chicken in batches to ensure even cooking and browning.

Also, consider adding a splash of chicken broth or water to the skillet while cooking the vegetables. This can help deglaze the pan, lifting any flavorful bits stuck to the bottom. It adds extra moisture and flavor to your veggies, making them even tastier!

Lastly, taste as you go! Adjust the seasoning to your liking. If you prefer a tangier flavor, add a bit more balsamic vinegar. If you like it spicier, consider adding red pepper flakes. Personalizing the dish to your taste will make it even more enjoyable.

Balsamic Chicken Skillet with Veggies that is bursting with flavor and sure to impress everyone at the table. Happy cooking!

Breakdown of Time for Balsamic Chicken Skillet with Veggies

Balsamic Chicken Skillet with Veggies can help you plan your cooking efficiently. Here’s a simple breakdown of the time involved in this delicious recipe:

Prep Time

The prep time for this dish is approximately 15-20 minutes. This includes:

  • Rinsing and drying the chicken thighs.
  • Chopping the vegetables, including zucchini, bell pepper, red onion, and cherry tomatoes.
  • Preparing the marinade by mixing balsamic vinegar, olive oil, garlic, and herbs.

Taking your time during prep ensures that everything is ready for cooking, making the process smoother and more enjoyable.

Cooking Time

Balsamic Chicken Skillet with Veggies is about 15-20 minutes. This includes:

  • Cooking the marinated chicken thighs for 10-14 minutes until they are browned and cooked through.
  • Sautéing the vegetables for about 5-7 minutes until they are tender yet crisp.
  • Combining the chicken and veggies for an additional 2-3 minutes to meld the flavors.

Keeping an eye on the cooking process will help you achieve the perfect texture and flavor.

Total Time

In total, you can expect the entire process to take around 45-60 minutes. This includes:

  • 15-20 minutes for prep.
  • 15-20 minutes for cooking.
  • 30 minutes to 2 hours for marinating (optional but recommended for enhanced flavor).

Balsamic Chicken Skillet with Veggies without feeling rushed. This meal is perfect for a weeknight dinner or a special occasion!

Nutritional Information for Balsamic Chicken Skillet with Veggies

Balsamic Chicken Skillet with Veggies is not only delicious but also packed with nutrients. Here’s a breakdown of the key nutritional information per serving:

Calories

Balsamic Chicken Skillet with Veggies contains approximately 350 calories. This makes it a satisfying yet light meal option. The combination of chicken and vegetables provides a good balance of energy without being overly heavy. It’s perfect for those looking to enjoy a flavorful dish while keeping their calorie intake in check.

Protein

One of the standout features of this dish is its protein content. Each serving offers about 30 grams of protein. Chicken thighs are an excellent source of lean protein, which is essential for muscle repair and growth. Including protein in your meals can help you feel fuller for longer, making it easier to manage hunger throughout the day.

Sodium

Balsamic Chicken Skillet with Veggies is approximately 600 milligrams per serving. This amount is reasonable for a flavorful dish, especially considering the use of balsamic vinegar and seasonings. However, if you are watching your sodium intake, you can adjust the amount of salt added to the marinade and the dish. Using low-sodium chicken broth or soy sauce can also help reduce sodium levels while still enhancing flavor.

Balsamic Chicken Skillet with Veggies is a nutritious meal option that provides a good balance of calories, protein, and sodium. It’s a great choice for anyone looking to enjoy a healthy and satisfying dish without compromising on taste!

FAQs about Balsamic Chicken Skillet with Veggies

Can I use frozen chicken for Balsamic Chicken Skillet with Veggies?

Balsamic Chicken Skillet with Veggies. However, it’s important to thaw the chicken first. You can do this by placing it in the refrigerator overnight or using the defrost setting on your microwave. Once thawed, follow the marinating and cooking steps as usual. Just remember that cooking times may vary slightly, so ensure the chicken reaches an internal temperature of 165°F for safety.

What can I serve with Balsamic Chicken Skillet with Veggies?

Balsamic Chicken Skillet with Veggies. Here are a few ideas:

  • Rice or Quinoa: These grains make a great base for soaking up the flavorful sauce.
  • Crusty Bread: Perfect for dipping into the sauce and adding a satisfying crunch.
  • Side Salad: A fresh green salad can balance the richness of the dish.
  • Pasta: Toss the chicken and veggies with your favorite pasta for a hearty meal.

Feel free to mix and match based on your preferences and what you have on hand!

How long does Balsamic Chicken Skillet with Veggies last in the fridge?

Balsamic Chicken Skillet with Veggies can last in the fridge for about 3-4 days when stored in an airtight container. Make sure to let it cool down before placing it in the fridge. When you’re ready to enjoy leftovers, simply reheat in the microwave or on the stovetop until heated through. This makes it a great option for meal prep!

Can I make Balsamic Chicken Skillet with Veggies ahead of time?

Balsamic Chicken Skillet with Veggies ahead of time. You can marinate the chicken the night before and store it in the refrigerator. This allows the flavors to develop even more. Additionally, you can cook the dish in advance and store it in the fridge for later. Just remember to reheat it thoroughly before serving. This makes it a convenient option for busy weeknights!

Conclusion on Balsamic Chicken Skillet with Veggies

Balsamic Chicken Skillet with Veggies is a delightful dish that combines flavor, nutrition, and convenience. With its tender chicken thighs and vibrant vegetables, this meal is not only satisfying but also easy to prepare. Whether you’re cooking for your family or hosting friends, this recipe is sure to impress.

By following the steps outlined in this article, you can create a delicious meal that is both healthy and full of flavor. The versatility of this dish allows you to customize it to your liking, whether by swapping out vegetables or trying different marinades. This adaptability makes it a perfect choice for any occasion.

Balsamic Chicken Skillet with Veggies make it a smart option for those looking to maintain a balanced diet. With a good amount of protein and low net carbs, it fits well into various dietary preferences. Plus, the quick cooking time means you can enjoy a homemade meal even on the busiest of nights.

Balsamic Chicken Skillet with Veggies become a beloved staple in your kitchen!

Spring Vegan Biryani is a delicious one-pot meal.

Introduction to Spring Vegan Biryani

What is Spring Vegan Biryani?

Spring Vegan Biryani is a delightful and colorful dish that celebrates the fresh flavors of spring. This vegan version of the traditional biryani is packed with vibrant vegetables and aromatic spices. It’s a one-pot meal that combines basmati rice with chickpeas, peas, and a medley of seasonal veggies. The result is a hearty, nutritious dish that is both satisfying and easy to prepare. Perfect for family dinners or gatherings, this biryani is sure to impress everyone at the table.

The Origins of Biryani

Biryani has a rich history that dates back centuries. It is believed to have originated in Persia and was brought to India by the Mughals. Traditionally, biryani is made with meat, rice, and a variety of spices, cooked together to create a flavorful dish. Over time, many regional variations emerged, each with its unique twist. Today, biryani is enjoyed worldwide, and the vegan version allows everyone to savor its deliciousness without compromising dietary choices. The Spring Vegan Biryani pays homage to this classic dish while embracing the fresh, seasonal ingredients that spring offers.

Ingredients for Spring Vegan Biryani

Essential Ingredients

To create a delicious Spring Vegan Biryani, you’ll need a variety of essential ingredients. These components not only provide flavor but also contribute to the dish’s vibrant colors and textures. Here’s what you’ll need:

  • Basmati Rice: 2 cups of this fragrant rice is the base of your biryani.
  • Chickpeas: One can (15 ounces) of chickpeas adds protein and heartiness.
  • Onion: A medium onion, thinly sliced, brings sweetness and depth.
  • Garlic and Ginger: Two cloves of garlic and one tablespoon of fresh ginger enhance the aroma.
  • Green Peas: One cup of peas, either fresh or frozen, adds a pop of color.
  • Carrot and Bell Pepper: A large diced carrot and a diced red bell pepper provide crunch and sweetness.
  • Vegetable Broth: One cup of broth infuses the rice with flavor.
  • Diced Tomatoes: One can (14.5 ounces) of diced tomatoes adds moisture and tang.
  • Olive Oil: Two tablespoons for sautéing the vegetables.
  • Spices: Curry powder, cumin, and turmeric are essential for that authentic biryani flavor.
  • Salt and Pepper: To taste, enhancing all the flavors.
  • Cilantro: Fresh cilantro for garnish adds a refreshing touch.

Optional Ingredients for Customization

One of the best things about Spring Vegan Biryani is its versatility. You can easily customize it based on your preferences or what you have on hand. Here are some optional ingredients to consider:

  • Saffron: A pinch of saffron soaked in warm water can elevate the dish with its unique flavor and color.
  • Seasonal Vegetables: Feel free to add zucchini, cauliflower, or spinach for extra nutrition and variety.
  • Nuts and Dried Fruits: Cashews or raisins can add a delightful crunch and sweetness.
  • Spicy Peppers: For those who enjoy heat, adding chopped green chilies can spice things up.

With these essential and optional ingredients, you can create a Spring Vegan Biryani that is not only delicious but also tailored to your taste. Enjoy the process of making this dish, and don’t hesitate to experiment with different flavors!

Preparation of Spring Vegan Biryani

Step 1: Preparing the Vegetables

To start your Spring Vegan Biryani, the first step is to prepare the vegetables. Begin by washing and peeling the carrot. Then, dice it into small pieces. Next, take the red bell pepper, remove the seeds, and chop it into bite-sized cubes. For the onion, slice it thinly to ensure it cooks evenly. Lastly, if you’re using fresh peas, shell them and set them aside. Having all your vegetables prepped will make the cooking process smoother and more enjoyable.

Step 2: Cooking the Rice

Cooking the basmati rice is crucial for achieving the perfect texture in your biryani. Rinse the rice under cold water until the water runs clear. This step removes excess starch, preventing the rice from becoming sticky. After rinsing, soak the rice in water for about 30 minutes. This soaking time allows the grains to absorb water, ensuring they cook evenly. Once soaked, drain the rice and set it aside for later use.

Step 3: Sautéing the Spices

Now it’s time to bring out the flavors! In a large pot, heat two tablespoons of olive oil over medium heat. Once the oil is hot, add the sliced onion. Sauté the onion for about five minutes until it becomes translucent. Then, stir in the minced garlic and grated ginger. Cook these ingredients for an additional minute, allowing their aromas to fill your kitchen. This step is essential as it forms the flavor base for your biryani.

Step 4: Combining Ingredients

After sautéing the onions, garlic, and ginger, it’s time to add the diced carrot and bell pepper. Cook these vegetables for about three to four minutes until they start to soften. Next, sprinkle in the curry powder, cumin, and turmeric. Stir the spices for one minute to release their flavors. Then, add the drained chickpeas, green peas, diced tomatoes (with their juice), and vegetable broth. Season the mixture with salt and pepper to taste. Bring everything to a gentle simmer, allowing the flavors to meld together.

Step 5: Final Cooking Process

Now comes the exciting part! Gently fold in the soaked and drained basmati rice, ensuring it is evenly distributed throughout the pot. Cover the pot with a lid and reduce the heat to low. Let the biryani cook for 20 minutes without lifting the lid. This step is crucial as it allows the rice to absorb all the delicious flavors. After 20 minutes, remove the pot from heat and let it sit, covered, for an additional 10 minutes. This resting time helps the rice steam perfectly. Finally, fluff the biryani with a fork and garnish with fresh cilantro before serving. Enjoy your vibrant and flavorful Spring Vegan Biryani!

Variations of Spring Vegan Biryani

Different Vegetable Combinations

One of the most delightful aspects of Spring Vegan Biryani is its adaptability. You can easily switch up the vegetables based on what’s in season or what you have in your kitchen. For instance, if you want to add more greens, consider including spinach or kale. These leafy vegetables not only boost the nutritional value but also add a lovely color to your dish.

Another great option is to incorporate zucchini or cauliflower. These vegetables absorb flavors beautifully and provide a satisfying texture. If you enjoy a bit of crunch, try adding some diced bell peppers or even snap peas. The key is to mix and match according to your taste preferences. This flexibility allows you to create a unique biryani every time you make it!

Alternative Grains for Biryani

While basmati rice is the traditional choice for biryani, you can experiment with other grains to suit your dietary needs or preferences. Quinoa is a fantastic alternative, offering a nutty flavor and extra protein. It cooks quickly and can be a great gluten-free option. Another choice is farro, which has a chewy texture and adds a hearty element to your dish.

If you’re looking for something different, try using brown rice. It has a slightly earthy taste and is more nutritious than white rice. Just keep in mind that brown rice may require a longer cooking time. By exploring these alternative grains, you can enjoy a delicious Spring Vegan Biryani that fits your lifestyle while still being full of flavor!

Cooking Note for Spring Vegan Biryani

Tips for Perfectly Cooked Rice

Cooking rice perfectly is essential for a delicious Spring Vegan Biryani. Here are some tips to ensure your rice turns out fluffy and flavorful:

  • Rinse Thoroughly: Always rinse the basmati rice under cold water until the water runs clear. This step removes excess starch, preventing the rice from becoming gummy.
  • Soak the Rice: Soaking the rice for at least 30 minutes helps the grains absorb water. This ensures even cooking and a better texture.
  • Water Ratio: Use the right water-to-rice ratio. For basmati rice, a common ratio is 1 cup of rice to 1.5 cups of liquid. Adjust based on the type of rice you use.
  • Don’t Lift the Lid: Once you cover the pot, resist the urge to lift the lid while cooking. This keeps the steam trapped, allowing the rice to cook evenly.
  • Let it Rest: After cooking, let the biryani sit covered for an additional 10 minutes. This resting period allows the rice to steam and become fluffy.

By following these tips, you can achieve perfectly cooked rice that enhances the overall taste and texture of your Spring Vegan Biryani.

Adjusting Spice Levels

Spice levels can make or break a dish, especially in a flavorful recipe like Spring Vegan Biryani. Here are some ways to adjust the spice levels to suit your taste:

  • Start Mild: If you’re unsure about spice levels, start with a smaller amount of curry powder and cumin. You can always add more later if needed.
  • Fresh Peppers: For those who enjoy heat, consider adding fresh green chilies. Slice them and add them during the sautéing process for a spicy kick.
  • Chili Powder: If you want to increase the heat, sprinkle in some chili powder or cayenne pepper. Start with a pinch and adjust according to your preference.
  • Cooling Ingredients: If your biryani turns out too spicy, add a dollop of coconut yogurt or serve it with a side of raita. These cooling ingredients can balance the heat.
  • Herbs and Citrus: Fresh herbs like cilantro or a squeeze of lemon juice can also help tone down the spice while adding freshness.

By adjusting the spice levels, you can create a Spring Vegan Biryani that is just right for you and your guests. Enjoy experimenting with flavors!

Serving Suggestions for Spring Vegan Biryani

Accompaniments to Enhance Flavor

To elevate your Spring Vegan Biryani experience, consider serving it with a variety of delicious accompaniments. These side dishes not only enhance the flavors but also add a delightful contrast to the biryani. Here are some popular options:

  • Raita: A cooling yogurt-based side dish, raita is perfect for balancing the spices in biryani. You can make a simple cucumber raita by mixing diced cucumber, yogurt, and a sprinkle of cumin.
  • Pickles: Indian pickles, or “achar,” add a tangy kick to your meal. They come in various flavors, from spicy to sweet, and can complement the biryani beautifully.
  • Salad: A fresh salad made with cucumbers, tomatoes, and onions can provide a refreshing crunch. Drizzle with lemon juice for added zest.
  • Chutney: Serve your biryani with a side of mint or coriander chutney. These vibrant sauces add a burst of flavor and freshness.
  • Papadums: Crispy papadums are a great addition. They add texture and can be enjoyed as a crunchy side or topping.

These accompaniments will not only enhance the flavor of your Spring Vegan Biryani but also create a well-rounded meal that everyone will enjoy.

Presentation Ideas

Presentation plays a key role in making your Spring Vegan Biryani visually appealing. Here are some creative ideas to serve your dish:

  • Layered Serving: For a stunning presentation, layer the biryani in a large serving dish. Start with a base of rice, then add a layer of vegetables and chickpeas, followed by another layer of rice. Top with fresh cilantro and a sprinkle of spices.
  • Individual Bowls: Serve the biryani in individual bowls for a personal touch. Garnish each bowl with cilantro and a slice of lemon for a pop of color.
  • Garnish: Use fresh herbs like cilantro or mint to garnish the biryani. You can also add toasted nuts or seeds for an extra crunch.
  • Colorful Plates: Choose vibrant plates that contrast with the colors of the biryani. This will make the dish stand out even more.
  • Accompaniment Arrangement: Arrange your accompaniments in small bowls around the biryani. This not only looks appealing but also invites guests to mix and match flavors.

With these serving suggestions and presentation ideas, your Spring Vegan Biryani will not only taste amazing but also look stunning on the table. Enjoy sharing this delightful dish with family and friends!

Tips for Making the Best Spring Vegan Biryani

Common Mistakes to Avoid

Making the perfect Spring Vegan Biryani can be a delightful experience, but there are some common mistakes to watch out for. Here are a few tips to help you avoid pitfalls:

  • Overcooking the Rice: One of the biggest mistakes is overcooking the rice. This can lead to mushy biryani. Always follow the cooking times and let the rice rest after cooking.
  • Skipping the Soaking Step: Rinsing and soaking the basmati rice is crucial. Skipping this step can result in sticky rice. Always rinse until the water runs clear and soak for at least 30 minutes.
  • Not Seasoning Enough: Under-seasoning can make your biryani bland. Taste as you go and adjust the salt and spices to enhance the flavors.
  • Using Cold Ingredients: Adding cold vegetables or broth can lower the cooking temperature. Make sure your ingredients are at room temperature for even cooking.
  • Neglecting to Fluff: After cooking, don’t forget to fluff the rice gently with a fork. This helps separate the grains and improves the texture.

By avoiding these common mistakes, you can ensure that your Spring Vegan Biryani turns out delicious and satisfying every time!

Storage Tips for Leftovers

If you have leftovers from your Spring Vegan Biryani, storing them properly is essential to maintain freshness. Here are some helpful storage tips:

  • Cool Before Storing: Allow the biryani to cool to room temperature before placing it in the refrigerator. This helps prevent condensation and sogginess.
  • Use Airtight Containers: Store the biryani in airtight containers to keep it fresh. This prevents moisture from getting in and helps retain flavor.
  • Refrigerate Promptly: Make sure to refrigerate leftovers within two hours of cooking. This helps prevent bacterial growth.
  • Reheat Gently: When reheating, add a splash of water or broth to keep the rice moist. Heat it on low in a pot or microwave, stirring occasionally.
  • Consume Within a Few Days: For the best taste and quality, try to eat the leftovers within 3-4 days. If you want to keep them longer, consider freezing portions.

By following these storage tips, you can enjoy your Spring Vegan Biryani even after the initial meal, ensuring it remains delicious and satisfying!

Breakdown of Time for Spring Vegan Biryani

Prep Time

Preparing your ingredients is an important step in making Spring Vegan Biryani. The prep time typically takes about 15 to 20 minutes. During this time, you will wash and chop the vegetables, rinse and soak the basmati rice, and gather all your spices and other ingredients. Having everything ready before you start cooking will make the process smoother and more enjoyable.

Cooking Time

The cooking time for Spring Vegan Biryani is approximately 30 minutes. This includes sautéing the vegetables and spices, simmering the chickpeas and tomatoes, and finally cooking the rice. It’s essential to keep the pot covered during the cooking process to trap the steam, which helps the rice cook evenly. Remember, patience is key here!

Total Time

In total, you can expect to spend about 50 to 60 minutes from start to finish when making Spring Vegan Biryani. This includes both the prep and cooking times. It’s a relatively quick meal to prepare, especially considering how flavorful and satisfying it is. Whether you’re cooking for a family dinner or meal prepping for the week, this time investment is well worth it!

Nutritional Information for Spring Vegan Biryani

Calories and Macronutrients

Understanding the nutritional content of your meals is essential for maintaining a balanced diet. Each serving of Spring Vegan Biryani offers a delightful combination of flavors and nutrients. Here’s a breakdown of the calories and macronutrients per serving:

  • Calories: 320
  • Net Carbohydrates: 50g
  • Protein: 10g
  • Fat: 8g

This nutritional profile makes Spring Vegan Biryani a wholesome option for lunch or dinner. The combination of basmati rice and chickpeas provides a good source of carbohydrates and protein, while the vegetables contribute essential vitamins and minerals. Enjoying this dish can help you feel satisfied and energized throughout the day!

Health Benefits of Ingredients

Spring Vegan Biryani is not only delicious but also packed with health benefits thanks to its wholesome ingredients. Here are some of the key health benefits:

  • Basmati Rice: This fragrant rice is low in fat and has a low glycemic index, making it a great choice for maintaining stable blood sugar levels.
  • Chickpeas: Rich in protein and fiber, chickpeas help keep you full longer and support digestive health. They are also a good source of iron and folate.
  • Vegetables: The colorful mix of carrots, bell peppers, and peas provides a variety of vitamins, such as vitamin A, C, and K. These nutrients are essential for immune function and skin health.
  • Spices: Turmeric, cumin, and curry powder not only add flavor but also have anti-inflammatory properties. Turmeric, in particular, contains curcumin, which is known for its health benefits.
  • Olive Oil: A healthy fat, olive oil is rich in monounsaturated fats and antioxidants. It supports heart health and can help reduce inflammation.

By incorporating these nutritious ingredients, Spring Vegan Biryani becomes a meal that nourishes your body while delighting your taste buds. Enjoy this vibrant dish knowing that it contributes to your overall health!

FAQs about Spring Vegan Biryani

Can I make Spring Vegan Biryani ahead of time?

Absolutely! Spring Vegan Biryani is a great dish to prepare ahead of time. You can make it a day in advance and store it in the refrigerator. Just make sure to let it cool completely before transferring it to an airtight container. When you’re ready to serve, simply reheat it on the stove or in the microwave. Adding a splash of vegetable broth or water while reheating can help keep the rice moist and fluffy. This makes it a perfect option for meal prep or for hosting gatherings!

What can I substitute for rice in Spring Vegan Biryani?

If you’re looking for alternatives to rice in your Spring Vegan Biryani, there are several options to consider. Quinoa is a popular choice, as it cooks quickly and adds a nutty flavor. Another great substitute is cauliflower rice, which is low in carbs and adds a unique texture. You can also use farro or barley for a heartier option. Just keep in mind that cooking times may vary, so adjust accordingly. These alternatives can provide a delightful twist to your biryani while still being delicious!

Is Spring Vegan Biryani gluten-free?

Yes, Spring Vegan Biryani is naturally gluten-free! The main ingredients, such as basmati rice, chickpeas, and vegetables, do not contain gluten. However, if you choose to use alternative grains, like farro or barley, be sure to check their labels for gluten content. Additionally, always ensure that any spices or packaged ingredients you use are certified gluten-free to avoid cross-contamination. This makes it a wonderful option for those with gluten sensitivities or celiac disease!

How can I make Spring Vegan Biryani spicier?

If you love a bit of heat in your dishes, there are several ways to spice up your Spring Vegan Biryani. Start by adding fresh green chilies during the sautéing process. You can also increase the amount of curry powder or add a pinch of cayenne pepper for an extra kick. Another option is to include spicy pickles or serve the biryani with a spicy chutney on the side. Just remember to taste as you go, so you can adjust the spice levels to your liking. Enjoy experimenting with flavors!

Conclusion on Spring Vegan Biryani

Recap of the Recipe

In summary, Spring Vegan Biryani is a vibrant and nutritious dish that brings together the best of seasonal vegetables and aromatic spices. With its base of fluffy basmati rice and hearty chickpeas, this one-pot meal is not only satisfying but also easy to prepare. The recipe guides you through each step, from preparing the vegetables to cooking the rice and combining all the flavors. With a cooking time of just about 30 minutes, you can enjoy a delicious meal that is perfect for family dinners or gatherings with friends. Plus, the nutritional benefits make it a wholesome choice for any occasion.

Encouragement to Experiment with Ingredients

As you embark on your culinary journey with Spring Vegan Biryani, don’t hesitate to experiment with different ingredients. The beauty of this dish lies in its versatility. You can swap out vegetables based on what’s in season or add your favorite spices to create a unique flavor profile. Whether you choose to include saffron for a touch of luxury or add extra greens for a nutritional boost, the possibilities are endless. Enjoy the process of making this dish, and let your creativity shine in the kitchen. Happy cooking!

Mediterranean Baked Fish Recipe is a must-try dish!

Introduction to Mediterranean Baked Fish Recipe

Are you looking for a delicious and healthy meal that transports your taste buds to the sunny shores of the Mediterranean? Look no further! The Mediterranean Baked Fish Recipe is a delightful dish that combines fresh ingredients, vibrant flavors, and simple preparation. This recipe is not only easy to make but also packed with nutrients, making it a perfect choice for a weeknight dinner or a special occasion.

Imagine tender white fish fillets, marinated in a zesty blend of olive oil, lemon, and aromatic herbs. As the fish bakes, it absorbs all the wonderful flavors from the cherry tomatoes and Kalamata olives, creating a dish that is both satisfying and refreshing. Plus, it’s a great way to incorporate more seafood into your diet, which is known for its health benefits.

Whether you’re a seasoned cook or a beginner in the kitchen, this Mediterranean Baked Fish Recipe is sure to impress. With just a few simple steps, you can create a meal that not only looks beautiful on the plate but also tastes incredible. So, roll up your sleeves and get ready to dive into this culinary adventure!

In the following sections, we will guide you through the ingredients, preparation steps, and tips to make your Mediterranean Baked Fish a success. Let’s get started!

Ingredients for Mediterranean Baked Fish Recipe

To create the perfect Mediterranean Baked Fish, you’ll need a selection of fresh and flavorful ingredients. Each component plays a vital role in enhancing the dish’s taste and nutritional value. Here’s what you’ll need:

  • 2 pounds white fish fillets: Choose from cod, tilapia, or snapper for a flaky texture.
  • 1/4 cup olive oil: This healthy fat adds richness and helps to keep the fish moist.
  • 2 lemons: You’ll need both the juice and zest for a bright, zesty flavor.
  • 4 cloves garlic: Minced garlic brings a wonderful aroma and depth to the dish.
  • 1 teaspoon dried oregano: This herb is a staple in Mediterranean cooking, adding a warm, earthy flavor.
  • 1 teaspoon dried thyme: Thyme complements the other herbs and enhances the overall taste.
  • 1/2 teaspoon red pepper flakes: Optional, but it adds a nice kick if you enjoy a bit of heat.
  • 1 cup cherry tomatoes: Halved, these sweet tomatoes provide freshness and color.
  • 1/2 cup Kalamata olives: Pitted and halved, they add a briny flavor that pairs beautifully with the fish.
  • 1/4 cup fresh parsley: Chopped parsley adds a pop of color and freshness when sprinkled on top.
  • Salt and pepper: To taste, these basic seasonings enhance all the flavors in the dish.

Gathering these ingredients will set you on the right path to creating a delightful Mediterranean meal. Each item contributes to the overall flavor profile, making this dish a true celebration of Mediterranean cuisine. Now that you have everything you need, let’s move on to the next step: preparing the fish!

Step-by-Step Preparation of Mediterranean Baked Fish Recipe

Now that you have all your ingredients ready, it’s time to dive into the preparation of your Mediterranean Baked Fish. This section will guide you through each step, ensuring that your dish turns out perfectly every time. Let’s get started!

Step 1: Prepping the Fish

First things first, you need to prepare the fish fillets. Start by rinsing the fish under cold water. This helps to remove any residual scales or impurities. After rinsing, gently pat the fish dry with paper towels. This step is crucial as it helps the marinade stick better to the fish.

Next, check for any bones in the fillets. If you find any, use a pair of tweezers to remove them carefully. Once your fish is clean and bone-free, place it in a large baking dish. Make sure the dish is big enough to hold all the fillets without crowding them. This allows for even cooking.

Step 2: Preparing the Marinade

Now, let’s whip up that delicious marinade! In a small bowl, combine the olive oil, lemon juice, and lemon zest. Then, add the minced garlic, dried oregano, dried thyme, red pepper flakes, salt, and pepper. Whisk everything together until well blended. The aroma of the garlic and herbs will make your mouth water!

Once the marinade is ready, pour it over the fish fillets in the baking dish. Use a brush or your hands to ensure that each piece is well coated. This marinade not only adds flavor but also helps keep the fish moist while it bakes.

Step 3: Assembling the Dish

With the fish marinated, it’s time to add the colorful toppings. Scatter the halved cherry tomatoes and Kalamata olives around the fish in the baking dish. These ingredients not only enhance the flavor but also add a beautiful pop of color to your dish.

For an extra touch, you can sprinkle a little more salt and pepper over the tomatoes and olives. This will help to bring out their natural flavors as they cook. Now, your dish is almost ready to go into the oven!

Step 4: Baking the Fish

Preheat your oven to 400°F (200°C) if you haven’t done so already. Once the oven is hot, place the baking dish inside. Bake the fish for about 20-25 minutes. You’ll know it’s done when the fish flakes easily with a fork and is opaque throughout.

As the fish bakes, the wonderful aromas will fill your kitchen, making it hard to wait! Once it’s ready, carefully remove the dish from the oven. Don’t forget to sprinkle the fresh parsley on top before serving. This adds a lovely freshness and makes your dish look even more appetizing.

And there you have it! Your Mediterranean Baked Fish is now ready to be enjoyed. In the next section, we’ll explore some variations you can try to make this dish even more exciting.

Variation of Mediterranean Baked Fish Recipe

While the classic Mediterranean Baked Fish Recipe is delicious on its own, there are many ways to switch things up! By experimenting with alternative ingredients and different cooking methods, you can create a unique dish that suits your taste. Let’s explore some exciting variations!

Alternative Ingredients to Consider

One of the best things about this recipe is its versatility. You can easily swap out ingredients to suit your preferences or what you have on hand. Here are some alternative ingredients to consider:

  • Fish Options: Instead of cod, tilapia, or snapper, try using salmon or halibut. These fish have a rich flavor and pair well with Mediterranean ingredients.
  • Herbs: Fresh herbs like basil or dill can replace dried oregano and thyme. Fresh herbs add a vibrant taste and aroma.
  • Vegetables: Feel free to add bell peppers, zucchini, or artichoke hearts. These veggies not only enhance the flavor but also add more nutrition.
  • Cheese: Crumbled feta cheese can be sprinkled on top before baking for a creamy, tangy twist.
  • Spices: Experiment with spices like cumin or paprika for a different flavor profile. These spices can add warmth and depth to the dish.

By mixing and matching these ingredients, you can create a Mediterranean Baked Fish that’s uniquely yours!

Different Cooking Methods

While baking is a fantastic way to prepare this dish, there are other cooking methods you can try for different textures and flavors. Here are a few options:

  • Grilling: For a smoky flavor, grill the fish on an outdoor grill or a grill pan. Just be sure to oil the grill grates to prevent sticking.
  • Broiling: Broil the fish for a few minutes at the end of cooking to achieve a crispy top. This method adds a delightful crunch!
  • Pan-Seering: Sear the fish in a hot skillet with olive oil for a golden crust. Then, finish cooking it in the oven.
  • Steaming: For a lighter option, steam the fish with the marinade in a covered pot. This method keeps the fish moist and tender.

Each cooking method brings out different flavors and textures, allowing you to enjoy your Mediterranean Baked Fish in new ways. Now that you have some variations in mind, let’s move on to cooking notes to ensure your dish turns out perfectly every time!

Cooking Note for Mediterranean Baked Fish Recipe

Cooking is an art, and every dish has its nuances. When it comes to the Mediterranean Baked Fish Recipe, a few key notes can help you achieve the best results. Here are some important tips to keep in mind while preparing this delightful dish:

First, always choose fresh fish. Freshness is crucial for flavor and texture. If possible, buy your fish from a reputable fishmonger or a trusted grocery store. Look for fillets that are firm, moist, and have a mild scent. Avoid fish that smells overly fishy or has a dull appearance.

Next, marinating the fish is essential. Allow the fish to soak in the marinade for at least 15-30 minutes before baking. This step enhances the flavor and ensures that the fish absorbs all the delicious ingredients. If you have more time, marinating it for a few hours in the refrigerator can yield even better results.

When baking, make sure to check the fish for doneness. The cooking time may vary depending on the thickness of the fillets. A general rule of thumb is to bake the fish for about 10 minutes per inch of thickness. Use a fork to gently flake the fish; it should be opaque and easily break apart when done.

Lastly, don’t forget to let the fish rest for a few minutes after removing it from the oven. This allows the juices to redistribute, making the fish even more tender and flavorful. Serve it warm, and enjoy the delightful combination of flavors!

By following these cooking notes, you’ll be well on your way to mastering the Mediterranean Baked Fish Recipe. In the next section, we’ll discuss some serving suggestions to complement this delicious dish.

Serving Suggestions for Mediterranean Baked Fish Recipe

Now that your Mediterranean Baked Fish is ready, it’s time to think about how to serve it! Pairing your dish with the right sides and beverages can elevate your meal to a whole new level. Here are some ideal side dishes and wine pairing recommendations to complement your delicious fish.

Ideal Side Dishes

When it comes to side dishes, you want to choose options that enhance the flavors of the Mediterranean Baked Fish without overpowering it. Here are some great ideas:

  • Quinoa or Couscous: These grains are light and fluffy, making them perfect for soaking up the flavorful juices from the fish.
  • Roasted Vegetables: A mix of seasonal vegetables like zucchini, bell peppers, and asparagus roasted with olive oil and herbs adds color and nutrition.
  • Greek Salad: A refreshing salad with cucumbers, tomatoes, red onion, and feta cheese drizzled with olive oil and lemon juice pairs beautifully with the fish.
  • Garlic Bread: Crispy garlic bread is a delightful addition, perfect for mopping up any leftover sauce on your plate.
  • Rice Pilaf: Fluffy rice pilaf with herbs and spices can be a wonderful base for the fish, adding a comforting element to the meal.

These side dishes not only complement the Mediterranean flavors but also provide a balanced meal that is satisfying and nutritious.

Wine Pairing Recommendations

Choosing the right wine can enhance your dining experience. Here are some wine pairing recommendations that go well with Mediterranean Baked Fish:

  • Sauvignon Blanc: This white wine is crisp and refreshing, with citrus notes that match the lemony flavors of the fish.
  • Pinot Grigio: A light and fruity option, Pinot Grigio has a clean finish that complements the dish without overwhelming it.
  • Chardonnay: If you prefer a fuller-bodied wine, opt for an unoaked Chardonnay. Its buttery texture pairs nicely with the richness of the fish.
  • Rosé: A dry rosé offers a lovely balance of fruitiness and acidity, making it a versatile choice for seafood dishes.
  • Prosecco: For a sparkling option, Prosecco adds a fun and festive touch, with its light bubbles enhancing the meal’s overall experience.

With these side dishes and wine pairings, your Mediterranean Baked Fish will shine at the dinner table. In the next section, we’ll share some tips for perfecting your recipe, ensuring that every bite is as delicious as the last!

Tips for Perfecting Your Mediterranean Baked Fish Recipe

To truly master the Mediterranean Baked Fish Recipe, a few extra tips can make all the difference. These simple yet effective suggestions will help you elevate your dish, ensuring it’s not only delicious but also visually appealing. Let’s dive into some expert tips!

First, always use high-quality ingredients. Fresh fish is key, but don’t overlook the importance of fresh herbs and ripe tomatoes. The better the ingredients, the better the final dish will taste. If you can, visit a local farmer’s market for the freshest produce.

Next, consider the thickness of your fish fillets. Thicker fillets may require a bit more cooking time, while thinner ones will cook faster. To ensure even cooking, try to select fillets of similar thickness. This way, everything will be perfectly cooked at the same time.

Another great tip is to let the fish marinate longer if you have the time. While 15-30 minutes is sufficient, marinating for a few hours or even overnight in the refrigerator can intensify the flavors. Just remember to cover the dish to prevent any contamination.

When it comes to baking, use a baking dish that allows for even heat distribution. A glass or ceramic dish works well, as it retains heat and helps cook the fish evenly. Avoid overcrowding the dish; if necessary, use two separate dishes to ensure proper cooking.

Lastly, don’t skip the resting time after baking. Allowing the fish to rest for a few minutes before serving helps the juices redistribute, making each bite tender and flavorful. This small step can significantly enhance the overall eating experience.

By following these tips, you’ll be well on your way to perfecting your Mediterranean Baked Fish Recipe. In the next section, we’ll break down the time needed for preparation and cooking, so you can plan your meal with ease!

Breakdown of Time for Mediterranean Baked Fish Recipe

Understanding the time required for each step of the Mediterranean Baked Fish Recipe can help you plan your cooking efficiently. Whether you’re preparing this dish for a weeknight dinner or a special occasion, knowing the time breakdown will make the process smoother. Let’s take a closer look at the prep time, cooking time, and total time needed for this delightful meal.

Prep Time

The prep time for the Mediterranean Baked Fish Recipe is approximately 15-20 minutes. This includes:

  • Gathering all your ingredients.
  • Rinsing and drying the fish fillets.
  • Preparing the marinade by mixing the olive oil, lemon juice, garlic, and herbs.
  • Assembling the dish by placing the fish in the baking dish and adding the tomatoes and olives.

With a little organization, you can have everything ready to go in no time!

Cooking Time

The cooking time for the Mediterranean Baked Fish is about 20-25 minutes. During this time, the fish will bake in the preheated oven at 400°F (200°C). Keep an eye on the fish as it cooks, checking for doneness. The fish should flake easily with a fork and be opaque throughout.

Total Time

In total, you can expect the Mediterranean Baked Fish Recipe to take around 35-45 minutes from start to finish. This includes both the prep and cooking times. It’s a quick and easy meal that doesn’t compromise on flavor or nutrition, making it perfect for busy weeknights or leisurely weekends.

Now that you have a clear understanding of the time involved, you can confidently prepare this delicious Mediterranean Baked Fish. In the next section, we’ll dive into the nutritional information, so you can see just how healthy this dish is!

Nutritional Information for Mediterranean Baked Fish Recipe

Understanding the nutritional value of your meals is essential for maintaining a balanced diet. The Mediterranean Baked Fish Recipe not only delights your taste buds but also offers a wealth of nutrients. Let’s break down the key nutritional components of this delicious dish.

Calories

Each serving of the Mediterranean Baked Fish contains approximately 350 calories. This makes it a great option for those looking to enjoy a satisfying meal without overindulging. The combination of healthy fats from olive oil and protein from the fish contributes to a well-rounded meal that keeps you feeling full and energized.

Protein Content

One of the standout features of this recipe is its high protein content. Each serving provides about 30 grams of protein. Protein is essential for building and repairing tissues, making it a crucial part of any healthy diet. The white fish used in this recipe is an excellent source of lean protein, making it a smart choice for those looking to increase their protein intake without excess calories.

Sodium Levels

When it comes to sodium, each serving of the Mediterranean Baked Fish contains around 600 milligrams. While this is a moderate amount, it’s important to be mindful of your overall sodium intake, especially if you are watching your salt consumption. To reduce sodium levels, consider using low-sodium olives or adjusting the amount of salt you add to the marinade.

Overall, the Mediterranean Baked Fish Recipe is a nutritious option that provides a good balance of calories, protein, and flavor. It’s a fantastic way to enjoy a healthy meal that supports your dietary goals. In the next section, we’ll answer some frequently asked questions about this delightful dish!

FAQs about Mediterranean Baked Fish Recipe

What type of fish is best for this recipe?

When it comes to the Mediterranean Baked Fish Recipe, the best choices are white fish fillets. Cod, tilapia, and snapper are popular options due to their mild flavor and flaky texture. However, you can also use salmon or halibut for a richer taste. Each type of fish brings its unique flavor, so feel free to experiment and find your favorite!

Can I make this recipe ahead of time?

Absolutely! You can prepare the Mediterranean Baked Fish ahead of time. To do this, marinate the fish in the olive oil mixture and place it in the baking dish. Cover it with plastic wrap and store it in the refrigerator for up to 24 hours. When you’re ready to cook, simply remove it from the fridge and bake as directed. This makes it a great option for meal prep or entertaining guests!

How do I know when the fish is done cooking?

Knowing when your fish is done is key to achieving the perfect texture. The fish should flake easily with a fork and appear opaque throughout. A good rule of thumb is to bake the fish for about 10 minutes per inch of thickness. If you have a food thermometer, the internal temperature should reach 145°F (63°C). This ensures that your fish is safe to eat and perfectly cooked!

What are some common mistakes to avoid?

To ensure your Mediterranean Baked Fish turns out perfectly, here are some common mistakes to avoid:

  • Using frozen fish: Fresh fish yields the best flavor and texture. If you must use frozen fish, make sure to thaw it completely before cooking.
  • Overcrowding the baking dish: Give each fillet enough space to cook evenly. If necessary, use two dishes to avoid crowding.
  • Skipping the marinating step: Marinating enhances the flavor. Don’t rush this step; let the fish soak in the marinade for at least 15 minutes.
  • Not checking for doneness: Always check the fish for doneness to avoid overcooking. Use a fork or thermometer to ensure it’s perfectly cooked.

By avoiding these common pitfalls, you’ll be well on your way to mastering the Mediterranean Baked Fish Recipe. In the next section, we’ll wrap up with a conclusion that highlights the joys of this delightful dish!

Conclusion on Mediterranean Baked Fish Recipe

In conclusion, the Mediterranean Baked Fish Recipe is a wonderful way to enjoy a healthy and flavorful meal. With its simple preparation and fresh ingredients, this dish captures the essence of Mediterranean cuisine. The combination of tender fish, zesty lemon, aromatic herbs, and vibrant vegetables creates a delightful experience for your taste buds.

Not only is this recipe easy to follow, but it also offers plenty of room for creativity. You can experiment with different types of fish, herbs, and vegetables to make it your own. Whether you’re cooking for a family dinner or hosting friends, this dish is sure to impress everyone at the table.

Moreover, the nutritional benefits of this recipe are significant. With high protein content and healthy fats, it supports a balanced diet while keeping you satisfied. Plus, the vibrant colors and fresh flavors make it a feast for the eyes as well as the palate.

So, why not give the Mediterranean Baked Fish Recipe a try? Gather your ingredients, follow the steps, and enjoy a meal that not only nourishes your body but also brings a taste of the Mediterranean to your home. Happy cooking!

Stay Connected

Get recipes via email: