Get my cookbooks

Creamy Orzo with Butternut Squash and Spinach delights all!

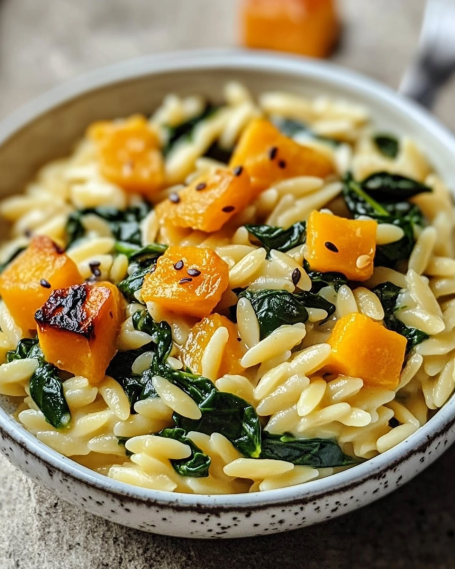
Introduction to Creamy Orzo with Butternut Squash and Spinach

Creamy Orzo with Butternut Squash and Spinach. This dish is not just a meal; it’s a warm hug on a plate. With its creamy texture and vibrant colors, it’s perfect for any occasion. Whether you’re cooking for family or hosting friends, this recipe will surely impress. Let’s dive into what makes this dish so special and explore the health benefits of its key ingredients.

What Makes Creamy Orzo with Butternut Squash and Spinach Special?

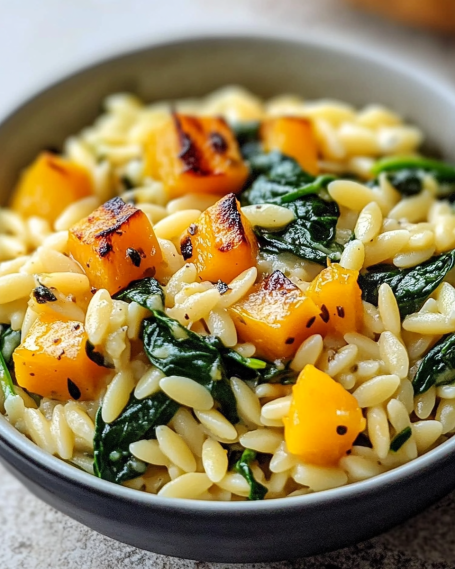
Creamy Orzo with Butternut Squash and Spinach apart is its unique combination of flavors and textures. The orzo pasta provides a delightful chewiness, while the roasted butternut squash adds a sweet, nutty flavor. Spinach brings a fresh, earthy taste that balances the creaminess of the dish. Together, they create a symphony of taste that is both comforting and satisfying.

Moreover, the creamy sauce made with heavy cream and Parmesan cheese elevates this dish to a whole new level. It’s rich and indulgent, yet the addition of vegetables keeps it light. This balance makes it a favorite among both kids and adults. Plus, it’s easy to prepare, making it a go-to recipe for busy weeknights or special gatherings.

The Health Benefits of Butternut Squash and Spinach

Creamy Orzo with Butternut Squash and Spinach delicious, but it’s also packed with health benefits. Butternut squash is a powerhouse of nutrients. It’s rich in vitamins A and C, which are essential for maintaining healthy skin and vision. Additionally, it contains fiber, which aids digestion and keeps you feeling full longer.

Spinach, on the other hand, is known for its high iron content, which is vital for energy production. It’s also loaded with antioxidants that help fight inflammation and support overall health. Together, these ingredients make this dish not only tasty but also a nutritious choice for your meals.

Creamy Orzo with Butternut Squash and Spinach is a delightful dish that combines flavor, comfort, and health benefits. It’s a perfect addition to your recipe collection, promising to satisfy your taste buds while nourishing your body.

Ingredients for Creamy Orzo with Butternut Squash and Spinach

Creamy Orzo with Butternut Squash and Spinach, you’ll need a few simple ingredients. Each one plays a vital role in building the flavors and textures of this dish. Here’s what you’ll need:

  • 2 cups butternut squash: Peeled and diced into 1-inch cubes. This adds sweetness and a creamy texture.
  • 1 tablespoon olive oil: For roasting the squash, giving it a lovely golden color and flavor.
  • Salt and pepper: To taste, enhancing the overall flavor of the dish.
  • 1 cup orzo pasta: This small pasta shape is perfect for absorbing the creamy sauce.
  • 2 cups vegetable broth: A flavorful base for cooking the orzo, adding depth to the dish.
  • 1 cup fresh spinach: Chopped, providing a fresh and vibrant element.
  • 1/2 cup heavy cream: For that rich, creamy texture that makes this dish so comforting.
  • 1/2 cup grated Parmesan cheese: Adds a savory, cheesy flavor that ties everything together.
  • 1 teaspoon garlic powder: For a hint of garlic flavor without the fuss of fresh garlic.
  • 1/2 teaspoon onion powder: Enhances the overall taste with a subtle onion flavor.
  • 1/4 teaspoon nutmeg: A pinch of nutmeg adds warmth and depth to the creamy sauce.
  • Fresh parsley: Chopped, for garnish and a pop of color.

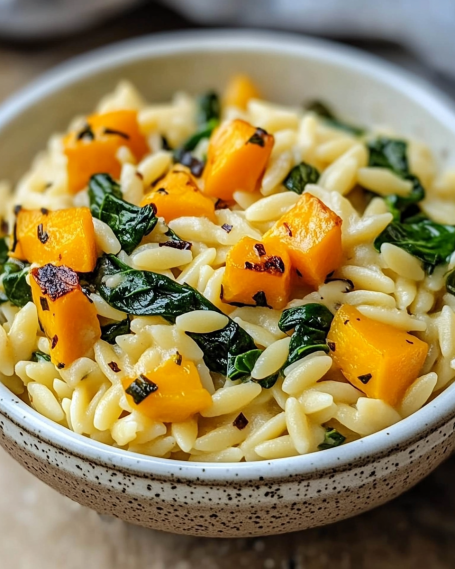
These ingredients come together to create a dish that is not only delicious but also visually appealing. The vibrant colors of the butternut squash and spinach make it a feast for the eyes. Plus, the creamy sauce enveloping the orzo makes every bite a delight. Gather these ingredients, and you’re ready to start cooking!

Step-by-Step Preparation of Creamy Orzo with Butternut Squash and Spinach

Creamy Orzo with Butternut Squash and Spinach. Each step is designed to ensure that your dish turns out perfectly creamy and flavorful.

Step 1: Preparing the Butternut Squash

First, preheat your oven to 400°F (200°C). This temperature is perfect for roasting. Next, take your peeled and diced butternut squash and place it on a baking sheet. Drizzle the olive oil over the squash, then sprinkle with salt and pepper. Toss everything together until the squash is well coated. This step is crucial as it enhances the flavor and helps achieve that lovely caramelization.

Roast the squash in the oven for about 25-30 minutes. Make sure to stir it halfway through to ensure even cooking. You’ll know it’s done when the squash is tender and has a beautiful golden color. The aroma will fill your kitchen, making it hard to resist!

Step 2: Cooking the Orzo

While the butternut squash is roasting, it’s time to cook the orzo. In a medium saucepan, bring 2 cups of vegetable broth to a boil. Once boiling, add the orzo pasta. Cook according to the package instructions, usually about 8-10 minutes, until it’s al dente. Stir occasionally to prevent sticking.

Once cooked, drain the orzo and set it aside. This pasta will soak up the creamy sauce beautifully, making each bite delicious.

Step 3: Sautéing the Spinach

In the same saucepan, reduce the heat to medium. Add the heavy cream, garlic powder, onion powder, and nutmeg. Stir everything together and let it simmer for about 2-3 minutes. This step allows the flavors to meld together, creating a rich and creamy base.

Next, add the chopped spinach to the saucepan. Stir until the spinach wilts, which should take just a minute or two. The vibrant green color will brighten up your dish and add a fresh taste.

Step 4: Combining Ingredients for Creamy Orzo with Butternut Squash and Spinach

Now it’s time to bring everything together! Add the cooked orzo and the roasted butternut squash to the saucepan. Gently stir to combine all the ingredients. Make sure the orzo is well coated with the creamy sauce, and the squash is evenly distributed throughout.

This is where the magic happens! The creamy sauce envelops the orzo and vegetables, creating a comforting and satisfying dish.

Step 5: Final Touches and Serving

Remove the saucepan from heat and stir in the grated Parmesan cheese. This will melt into the dish, adding a savory flavor that ties everything together. Taste your creamy orzo and adjust the seasoning with salt and pepper if needed.

Creamy Orzo with Butternut Squash and Spinach warm, and watch as everyone savors each delicious bite!

Variations of Creamy Orzo with Butternut Squash and Spinach

Creamy Orzo with Butternut Squash and Spinach is delightful on its own, there are many ways to customize this dish. Whether you want to add protein or make it vegan, these variations will keep your meals exciting and delicious. Let’s explore some tasty options!

Adding Protein: Chicken or Tofu

Creamy Orzo with Butternut Squash and Spinach, consider adding chicken or tofu. For chicken, simply cook diced chicken breast in a skillet until golden brown and cooked through. You can season it with salt, pepper, and a pinch of garlic powder for extra flavor. Once cooked, mix the chicken into the creamy orzo just before serving.

For a vegetarian option, tofu is a fantastic choice. Use firm tofu, and cut it into cubes. Sauté the tofu in a bit of olive oil until it’s crispy on the outside. This adds a nice texture to the dish. Just like with chicken, stir the cooked tofu into the orzo before serving. Both options will make your meal heartier and more satisfying!

Vegan Alternatives for Creamy Orzo with Butternut Squash and Spinach

Creamy Orzo with Butternut Squash and Spinach, it’s easy to make a few simple swaps. Start by replacing the heavy cream with a plant-based cream, such as coconut cream or cashew cream. These alternatives provide a rich texture without any dairy.

Additionally, you can substitute the Parmesan cheese with nutritional yeast. This ingredient adds a cheesy flavor while keeping the dish completely vegan. Just sprinkle it in when you would normally add the cheese, and stir until well combined.

Creamy Orzo with Butternut Squash and Spinach in different ways, catering to your dietary preferences while still savoring the delicious flavors of this comforting dish.

Cooking Note for Creamy Orzo with Butternut Squash and Spinach

Creamy Orzo with Butternut Squash and Spinach, there are a few cooking notes to keep in mind. These tips will help ensure that your dish turns out perfectly every time, enhancing both flavor and texture.

First, always choose fresh ingredients. Fresh butternut squash and spinach will provide the best flavor and nutrition. If you can, buy whole butternut squash and peel and dice it yourself. This way, you can enjoy the freshest taste possible.

Next, pay attention to the cooking time for the orzo. Overcooking can lead to mushy pasta, which isn’t ideal for this creamy dish. Aim for al dente, which means the pasta should still have a slight bite to it. This texture will hold up better when mixed with the creamy sauce.

Another important note is to adjust the creaminess to your liking. If you prefer a lighter dish, feel free to reduce the amount of heavy cream or substitute it with half-and-half or a plant-based alternative. This flexibility allows you to customize the dish to suit your taste and dietary needs.

Lastly, don’t forget to taste as you go! Adjusting the seasoning with salt, pepper, or even a splash of lemon juice can elevate the flavors. A little acidity can brighten the dish and balance the creaminess, making it even more enjoyable.

Creamy Orzo with Butternut Squash and Spinach that everyone will love. Happy cooking!

Serving Suggestions for Creamy Orzo with Butternut Squash and Spinach

Creamy Orzo with Butternut Squash and Spinach, presentation and pairing can elevate your dining experience. Here are some delightful serving suggestions to make your meal even more enjoyable.

First, consider serving the creamy orzo in individual bowls. This not only looks appealing but also makes it easy for guests to enjoy. A sprinkle of fresh parsley on top adds a pop of color and freshness, making the dish visually inviting.

For a complete meal, pair the orzo with a simple side salad. A mixed greens salad with a light vinaigrette complements the richness of the creamy orzo. You can include ingredients like cherry tomatoes, cucumbers, and red onions for added crunch and flavor.

Another great option is to serve the orzo alongside grilled or roasted proteins. Chicken, fish, or even a hearty vegetable skewer can enhance the meal. The flavors of the grilled items will contrast beautifully with the creamy texture of the orzo.

If you want to add a touch of elegance, consider serving the dish with a glass of white wine. A crisp Sauvignon Blanc or a light Pinot Grigio pairs wonderfully with the flavors of butternut squash and spinach. This combination can make your meal feel more special.

Lastly, don’t forget about bread! A warm, crusty baguette or garlic bread can be a perfect accompaniment. It’s great for scooping up the creamy orzo, making every bite even more satisfying.

Creamy Orzo with Butternut Squash and Spinach will not only taste amazing but also look and feel like a gourmet meal. Enjoy sharing this delightful dish with family and friends!

Tips for Perfecting Creamy Orzo with Butternut Squash and Spinach

Creamy Orzo with Butternut Squash and Spinach truly shine, consider these helpful tips. They will guide you in achieving the best flavor and texture, ensuring that every bite is a delight.

First, always taste your ingredients before cooking. Fresh butternut squash should be sweet and firm, while spinach should be vibrant and crisp. This ensures that you start with the best quality produce, which will enhance the overall dish.

Next, when roasting the butternut squash, make sure to spread the cubes out evenly on the baking sheet. This allows for proper caramelization. If the pieces are too crowded, they may steam instead of roast, resulting in a less flavorful outcome.

For the orzo, remember to stir it occasionally while cooking. This prevents it from sticking together and ensures even cooking. Also, reserve a bit of the vegetable broth before draining the orzo. This starchy liquid can be added back to the dish if you find it too thick.

When combining the ingredients, be gentle. Stirring too vigorously can break the orzo and squash, leading to a less appealing texture. Instead, fold the ingredients together to maintain their shape.

Lastly, don’t hesitate to experiment with seasonings. While the recipe calls for garlic powder and nutmeg, feel free to add a pinch of red pepper flakes for heat or a dash of lemon juice for brightness. These small adjustments can elevate the dish and make it uniquely yours.

Creamy Orzo with Butternut Squash and Spinach that is not only delicious but also visually stunning. Enjoy the process and happy cooking!

Breakdown of Time for Creamy Orzo with Butternut Squash and Spinach

Creamy Orzo with Butternut Squash and Spinach can help you plan your cooking efficiently. Here’s a simple breakdown of the time required for each step, ensuring you can enjoy this delicious dish without any rush.

Prep Time

The prep time for this dish is approximately 15-20 minutes. This includes peeling and dicing the butternut squash, chopping the spinach, and measuring out all the ingredients. Having everything ready before you start cooking makes the process smoother and more enjoyable.

Cooking Time

Creamy Orzo with Butternut Squash and Spinach takes about 30-35 minutes. This includes roasting the butternut squash for 25-30 minutes and cooking the orzo for 8-10 minutes. While the squash roasts, you can prepare the creamy sauce and sauté the spinach, making the most of your time in the kitchen.

Total Time

In total, you can expect to spend around 45-55 minutes from start to finish. This includes both prep and cooking time. With this timeline, you can easily fit this delightful dish into your busy schedule, making it perfect for weeknight dinners or special occasions.

Creamy Orzo with Butternut Squash and Spinach and impress your family and friends with your culinary skills!

Nutritional Information for Creamy Orzo with Butternut Squash and Spinach

Creamy Orzo with Butternut Squash and Spinach not only delights your taste buds but also provides valuable nutrients. Here’s a closer look at the nutritional information for this comforting dish.

Calories

Creamy Orzo with Butternut Squash and Spinach contains approximately 360 calories. This makes it a satisfying meal without being overly heavy. The combination of ingredients ensures that you get a good mix of energy and nutrients, making it a great choice for lunch or dinner.

Protein

This dish offers about 10 grams of protein per serving. The protein comes from the orzo pasta, heavy cream, and Parmesan cheese. If you choose to add chicken or tofu, the protein content will increase, making it an even more filling option. This balance of protein helps keep you full and satisfied throughout the day.

Sodium

Creamy Orzo with Butternut Squash and Spinach is around 600 milligrams per serving. This amount can vary based on the vegetable broth and cheese used. If you’re watching your sodium intake, consider using low-sodium broth and adjusting the amount of added salt. This way, you can enjoy the dish while keeping your dietary needs in check.

Creamy Orzo with Butternut Squash and Spinach is a nutritious meal that provides a good balance of calories, protein, and sodium. It’s a delicious way to enjoy wholesome ingredients while nourishing your body. Enjoy this delightful dish knowing it’s not only tasty but also good for you!

FAQs about Creamy Orzo with Butternut Squash and Spinach

Can I make Creamy Orzo with Butternut Squash and Spinach ahead of time?

Creamy Orzo with Butternut Squash and Spinach ahead of time! To do this, cook the dish as directed, then let it cool completely. Store it in an airtight container in the refrigerator for up to 3 days. When you’re ready to enjoy it, simply reheat it on the stove over low heat. You may need to add a splash of vegetable broth or cream to loosen it up, as it may thicken when stored. This makes it a great option for meal prep or busy weeknights!

What can I substitute for orzo in this recipe?

Creamy Orzo with Butternut Squash and Spinach. Small pasta shapes like ditalini, acini di pepe, or even couscous work well. For a gluten-free option, consider using quinoa or rice. Just keep in mind that cooking times may vary, so adjust accordingly. Each substitute will bring its own unique texture and flavor to the dish, making it a fun way to switch things up!

Is Creamy Orzo with Butternut Squash and Spinach gluten-free?

Creamy Orzo with Butternut Squash and Spinach gluten-free by using gluten-free orzo or any other gluten-free pasta. Many brands offer gluten-free pasta options that mimic the shape and texture of orzo. Just be sure to check the packaging to ensure it meets your dietary needs. This way, everyone can enjoy this delicious dish!

How can I make Creamy Orzo with Butternut Squash and Spinach spicier?

Creamy Orzo with Butternut Squash and Spinach. One simple method is to add red pepper flakes to the creamy sauce while it simmers. Start with a pinch and adjust to your taste. You can also incorporate diced jalapeños or a splash of hot sauce for an extra kick. For a smoky flavor, consider adding smoked paprika. These additions will enhance the dish and give it a delightful spicy twist!

Conclusion on Creamy Orzo with Butternut Squash and Spinach

Creamy Orzo with Butternut Squash and Spinach is a delightful dish that brings together comfort, flavor, and nutrition. Its creamy texture and vibrant colors make it a feast for both the eyes and the palate. Whether you’re enjoying it on a cozy weeknight or serving it at a gathering, this recipe is sure to impress.

The combination of roasted butternut squash and fresh spinach not only enhances the taste but also provides essential vitamins and minerals. With the option to customize the dish by adding proteins or making it vegan, it caters to various dietary preferences. This versatility makes it a fantastic choice for any meal.

As you prepare this dish, remember to savor the process. Cooking is not just about the end result; it’s about enjoying the journey of creating something delicious. With each step, you’ll find joy in the aromas and flavors that fill your kitchen.

Creamy Orzo with Butternut Squash and Spinach. Share it with family and friends, and watch as they delight in every creamy, comforting bite. Happy cooking!

Mushroom Lasagna Delight is a must-try recipe today!

Introduction to Mushroom Lasagna Recipe

Mushroom lasagna is a delightful twist on the classic Italian dish. It combines layers of rich flavors and textures, making it a favorite for many. This recipe is not only delicious but also easy to prepare, making it perfect for family dinners or gatherings with friends. The combination of creamy ricotta, savory mushrooms, and gooey mozzarella creates a mouthwatering experience that will leave everyone asking for seconds.

What Makes Mushroom Lasagna Special?

What sets mushroom lasagna apart is its unique flavor profile. The earthy taste of mushrooms adds depth to the dish, enhancing the overall experience. Unlike traditional meat lasagna, this version is vegetarian-friendly, allowing everyone to enjoy it. The layers of noodles, cheese, and sauce create a comforting meal that warms the heart. Plus, it’s a great way to sneak in some vegetables without sacrificing taste!

The Benefits of Cooking with Mushrooms

Mushrooms are not just tasty; they also offer numerous health benefits. They are low in calories and packed with nutrients. Rich in antioxidants, mushrooms help boost the immune system. They also contain vitamins like B and D, which are essential for energy and bone health. Additionally, mushrooms are a great source of fiber, promoting digestive health. By incorporating mushrooms into your lasagna, you’re not only enhancing the flavor but also adding a nutritious element to your meal.

Ingredients for Mushroom Lasagna Recipe

Essential Ingredients

To create a delicious mushroom lasagna, you’ll need a few key ingredients. These essentials form the foundation of the dish, ensuring that every bite is packed with flavor. Here’s what you’ll need:

  • Lasagna noodles: 12 ounces of lasagna noodles are the base of your layers.
  • Olive oil: 2 tablespoons for sautéing the vegetables.
  • Onion: 1 medium onion, chopped, adds sweetness and depth.
  • Garlic: 3 cloves, minced, for that aromatic kick.
  • Mushrooms: 16 ounces of sliced mushrooms, such as cremini or button, for a hearty texture.
  • Dried oregano: 1 teaspoon to enhance the Italian flavor.
  • Dried basil: 1 teaspoon for a fresh, herbal note.
  • Salt: 1/2 teaspoon to bring out the flavors.
  • Black pepper: 1/4 teaspoon for a hint of spice.
  • Ricotta cheese: 15 ounces for creaminess and richness.
  • Egg: 1 large egg to bind the cheese mixture.
  • Shredded mozzarella cheese: 2 cups for that gooey, melty goodness.
  • Grated Parmesan cheese: 1 cup for a savory finish.
  • Marinara sauce: 3 cups to layer between the noodles.

Optional Ingredients for Extra Flavor

While the essential ingredients create a fantastic mushroom lasagna, you can elevate the dish with a few optional ingredients. These additions can enhance the flavor and add variety:

  • Spinach: Adding fresh or frozen spinach can boost the nutritional value and add a pop of color.
  • Zucchini: Thinly sliced zucchini can provide extra texture and flavor.
  • Homemade tomato sauce: For a fresher taste, consider making your own sauce instead of using store-bought marinara.
  • Fresh herbs: Chopped fresh basil or parsley can be sprinkled on top before serving for a burst of freshness.
  • Red pepper flakes: If you like a bit of heat, sprinkle some red pepper flakes into the mushroom mixture.

With these ingredients, you’re well on your way to creating a mouthwatering mushroom lasagna that everyone will love!

Preparation of Mushroom Lasagna Recipe

Step 1: Preparing the Mushroom Filling

To start, you’ll want to prepare the mushroom filling. First, heat 2 tablespoons of olive oil in a large skillet over medium heat. Once the oil is hot, add the chopped onion. Sauté the onion for about 3-4 minutes until it becomes soft and translucent. Next, add the minced garlic and sliced mushrooms to the skillet. Cook this mixture for an additional 5-7 minutes. Stir occasionally to ensure even cooking. The mushrooms should become tender and release their moisture, creating a flavorful base for your lasagna. Finally, stir in the dried oregano, dried basil, salt, and black pepper. Remove the skillet from heat and let the filling cool slightly.

Step 2: Making the Cheese Mixture

While the mushroom filling cools, it’s time to prepare the cheese mixture. In a mixing bowl, combine 15 ounces of ricotta cheese, 1 large egg, and half of the grated Parmesan cheese. Mix these ingredients until smooth and creamy. This cheese mixture will add richness to your lasagna, balancing the savory mushroom filling. Make sure to blend well, so every bite is deliciously cheesy!

Step 3: Assembling the Lasagna

Now comes the fun part—assembling your mushroom lasagna! Start by spreading a thin layer of marinara sauce on the bottom of a 9×13 inch baking dish. This will prevent the noodles from sticking. Next, layer 3 lasagna noodles over the sauce. Spread half of the ricotta cheese mixture over the noodles, followed by half of the mushroom filling. Then, sprinkle a third of the shredded mozzarella cheese on top. Pour a layer of marinara sauce over everything to keep it moist. Repeat this layering process: add another 3 noodles, the remaining ricotta mixture, the rest of the mushroom filling, another third of the mozzarella, and more marinara sauce. Finally, top with the last 3 noodles, the remaining marinara sauce, the rest of the mozzarella cheese, and the remaining Parmesan cheese.

Step 4: Baking the Mushroom Lasagna

Once your lasagna is fully assembled, it’s time to bake! Cover the baking dish with aluminum foil to keep the moisture in. Bake in a preheated oven at 375°F (190°C) for 25 minutes. After that, carefully remove the foil and bake for an additional 15-20 minutes. This will allow the cheese to become bubbly and golden brown. Once done, let the lasagna cool for 10-15 minutes before slicing. This cooling time helps the layers set, making it easier to serve. If desired, garnish with fresh basil leaves for a touch of color and flavor!

Variation of Mushroom Lasagna Recipe

Vegetarian Variations

Mushroom lasagna is already a vegetarian delight, but you can enhance it further with additional vegetables. Consider adding layers of fresh spinach or sautéed zucchini for extra nutrition and flavor. You can also include roasted bell peppers or artichoke hearts to give your lasagna a unique twist. These vegetables not only add color but also provide a variety of textures that make each bite exciting. If you want a creamier texture, try adding a layer of béchamel sauce or a blend of cream cheese and herbs. This will create a rich, velvety layer that complements the mushrooms beautifully.

Gluten-Free Options

If you or your guests are gluten-sensitive, you can still enjoy this delicious mushroom lasagna! Simply substitute traditional lasagna noodles with gluten-free alternatives. Many brands offer gluten-free lasagna noodles made from rice, corn, or quinoa. Be sure to check the cooking instructions, as gluten-free noodles may require different cooking times. Additionally, you can make your own lasagna sheets using thinly sliced vegetables like zucchini or eggplant. This not only makes the dish gluten-free but also adds more nutrients. Just remember to salt the vegetable slices and let them sit for a bit to draw out excess moisture before layering them in your lasagna.

Cooking Note for Mushroom Lasagna Recipe

Tips for Perfectly Layered Lasagna

Creating a perfectly layered mushroom lasagna is an art that can elevate your dish from good to great. Here are some helpful tips to ensure your lasagna turns out beautifully every time:

  • Use Enough Sauce: Make sure to use enough marinara sauce between the layers. This keeps the noodles moist and prevents them from drying out during baking. A good rule of thumb is to have a layer of sauce between every layer of noodles.
  • Don’t Overcook the Noodles: When boiling the lasagna noodles, cook them just until al dente. They will continue to cook in the oven, so you want them slightly firm to hold up under the layers.
  • Layering Order Matters: Start with sauce on the bottom, followed by noodles, cheese mixture, mushroom filling, and more sauce. This order helps to create a balanced flavor throughout the dish.
  • Press Down Gently: After adding each layer, gently press down to compact the ingredients. This helps the layers stick together and makes for easier slicing later.
  • Let It Rest: After baking, allow the lasagna to rest for 10-15 minutes before slicing. This resting period helps the layers set, making it easier to serve without falling apart.
  • Experiment with Cheese: While mozzarella and Parmesan are classic choices, feel free to mix in other cheeses like provolone or fontina for added flavor. Just remember to keep the cheese layers balanced.

By following these tips, you’ll create a mushroom lasagna that is not only delicious but also visually appealing. Each slice will showcase the beautiful layers, making it a perfect centerpiece for any meal!

Serving Suggestions for Mushroom Lasagna Recipe

Ideal Side Dishes

When serving your delicious mushroom lasagna, pairing it with the right side dishes can enhance the overall dining experience. Here are some ideal side dishes that complement the rich flavors of the lasagna:

  • Garlic Bread: A classic choice, garlic bread is perfect for soaking up any extra marinara sauce. Its crispy texture and buttery flavor pair wonderfully with the creamy lasagna.
  • Caesar Salad: A fresh Caesar salad adds a crunchy contrast to the soft layers of lasagna. The crisp romaine, creamy dressing, and crunchy croutons create a delightful balance.
  • Steamed Vegetables: Lightly steamed vegetables, such as broccoli or green beans, provide a healthy and colorful addition to your meal. They add a nice crunch and freshness that complements the richness of the lasagna.
  • Caprese Salad: This simple salad of fresh mozzarella, tomatoes, and basil drizzled with balsamic glaze offers a refreshing taste that pairs beautifully with the hearty lasagna.
  • Roasted Asparagus: Roasted asparagus with a sprinkle of lemon juice and Parmesan cheese adds a touch of elegance to your meal. Its earthy flavor complements the mushrooms in the lasagna.

Wine Pairings

Choosing the right wine can elevate your mushroom lasagna experience. Here are some excellent wine pairings to consider:

  • Chianti: This classic Italian red wine has bright acidity and fruity notes that complement the tomato sauce and mushrooms beautifully.
  • Pinot Noir: A light-bodied red wine like Pinot Noir offers earthy flavors that harmonize well with the mushrooms, enhancing the overall taste of the dish.
  • Sangiovese: Another Italian favorite, Sangiovese has a nice balance of acidity and fruitiness, making it a great match for the savory layers of lasagna.
  • Chardonnay: If you prefer white wine, a lightly oaked Chardonnay can work well. Its creamy texture and hints of butter complement the richness of the cheese.
  • Prosecco: For a sparkling option, Prosecco adds a refreshing touch. Its bubbles and fruity notes can cleanse the palate between bites of the rich lasagna.

With these side dishes and wine pairings, your mushroom lasagna will be a hit at any gathering. Enjoy the delightful combination of flavors and textures that make this meal truly special!

Tips for Making the Best Mushroom Lasagna Recipe

Common Mistakes to Avoid

Making mushroom lasagna can be a fun and rewarding experience. However, there are some common mistakes that can affect the final result. Here are a few pitfalls to watch out for:

  • Overcooking the Noodles: One of the biggest mistakes is cooking the lasagna noodles too long. They should be al dente, as they will continue to cook in the oven. If they are too soft, they may fall apart when layered.
  • Skipping the Cooling Time: After baking, it’s tempting to slice into the lasagna right away. However, skipping the cooling time can lead to messy slices. Letting it rest for 10-15 minutes allows the layers to set.
  • Not Using Enough Sauce: A common error is not adding enough marinara sauce between the layers. This can result in dry noodles. Make sure each layer has a good amount of sauce to keep everything moist.
  • Ignoring Seasoning: Don’t forget to season your mushroom filling! Adding salt, pepper, and herbs enhances the flavor. Taste as you go to ensure a well-seasoned dish.
  • Overloading on Cheese: While cheese is delicious, too much can make the lasagna greasy. Stick to the recommended amounts for a balanced flavor and texture.

By avoiding these common mistakes, you’ll be on your way to creating a delicious mushroom lasagna that everyone will love!

Storage Tips for Leftovers

If you have leftover mushroom lasagna, storing it properly is key to maintaining its flavor and texture. Here are some helpful storage tips:

  • Cool Before Storing: Allow the lasagna to cool completely before storing it. This prevents condensation from forming, which can make the lasagna soggy.
  • Use Airtight Containers: Store leftovers in airtight containers or wrap them tightly with plastic wrap. This helps keep the lasagna fresh and prevents it from absorbing other odors in the fridge.
  • Refrigerate Promptly: Place the lasagna in the refrigerator within two hours of cooking. It can be stored in the fridge for up to 3-4 days.
  • Freezing for Longer Storage: If you want to keep it longer, consider freezing the lasagna. Wrap it tightly in plastic wrap and then in aluminum foil. It can be frozen for up to 3 months.
  • Reheating Tips: When reheating, cover the lasagna with foil to prevent it from drying out. Heat in the oven at 350°F (175°C) until warmed through, about 20-30 minutes.

By following these storage tips, you can enjoy your mushroom lasagna even after the first serving!

Breakdown of Time for Mushroom Lasagna Recipe

Prep Time

Preparing your mushroom lasagna is a delightful process that doesn’t take too long. The prep time for this recipe is approximately 30 minutes. This includes gathering your ingredients, chopping the vegetables, and mixing the cheese filling. Taking your time during this stage ensures that everything is ready for assembly, making the cooking process smoother and more enjoyable.

Cooking Time

Once your lasagna is assembled, the cooking time is about 40-45 minutes. First, you’ll bake it covered with aluminum foil for 25 minutes. This helps the layers cook evenly and keeps the moisture in. After that, you’ll remove the foil and bake for an additional 15-20 minutes. This final step allows the cheese to become bubbly and golden, creating that perfect lasagna finish.

Total Time

In total, you can expect to spend about 1 hour and 15 minutes from start to finish. This includes both the prep and cooking times. With a little patience and care, you’ll have a delicious mushroom lasagna ready to serve. It’s a wonderful dish that’s worth every minute spent in the kitchen!

Nutritional Information for Mushroom Lasagna Recipe

Calories and Macronutrients

Understanding the nutritional content of your mushroom lasagna can help you make informed choices about your meals. Each serving of this delightful dish contains approximately 350 calories. Here’s a breakdown of the macronutrients per serving:

  • Calories: 350
  • Net Carbohydrates: 30g
  • Protein: 20g
  • Fat: 15g

This balance of macronutrients makes mushroom lasagna a satisfying meal. The protein from the ricotta and mozzarella helps keep you full, while the carbohydrates from the noodles provide energy. The healthy fats from olive oil and cheese contribute to the creamy texture and rich flavor of the dish.

Health Benefits of Ingredients

Not only is mushroom lasagna delicious, but it also offers several health benefits thanks to its wholesome ingredients. Here are some of the key benefits:

  • Mushrooms: These fungi are low in calories and high in nutrients. They are a great source of antioxidants, which help protect your body from damage. Additionally, mushrooms provide essential vitamins like B and D, supporting energy levels and bone health.
  • Ricotta Cheese: This creamy cheese is lower in fat compared to other cheeses, making it a healthier option. It’s also rich in calcium, which is vital for strong bones and teeth.
  • Olive Oil: A staple in Mediterranean diets, olive oil is known for its heart-healthy fats. It contains monounsaturated fats that can help reduce bad cholesterol levels.
  • Herbs and Spices: The oregano and basil used in this recipe not only enhance flavor but also offer health benefits. Oregano is known for its antibacterial properties, while basil is rich in antioxidants.
  • Whole Grains (if using whole wheat noodles): If you choose whole wheat lasagna noodles, you’ll benefit from added fiber, which aids digestion and helps maintain a healthy weight.

By enjoying mushroom lasagna, you’re not just treating your taste buds; you’re also nourishing your body with wholesome ingredients. This makes it a fantastic choice for a balanced meal that everyone can enjoy!

FAQs about Mushroom Lasagna Recipe

Can I use different types of mushrooms?

Absolutely! You can use a variety of mushrooms to create your mushroom lasagna. While cremini and button mushrooms are popular choices, you can also experiment with shiitake, portobello, or even oyster mushrooms. Each type brings its unique flavor and texture, enhancing the overall dish. Mixing different mushrooms can add depth and complexity to your lasagna, making it even more delightful!

How can I make this recipe ahead of time?

Making mushroom lasagna ahead of time is a great idea! You can prepare the entire dish up to the baking step. Simply assemble the lasagna, cover it tightly with plastic wrap or aluminum foil, and refrigerate it for up to 24 hours. When you’re ready to bake, remove it from the fridge and let it sit at room temperature for about 30 minutes before placing it in the oven. This helps ensure even cooking. If you prefer, you can also freeze the assembled lasagna for up to three months. Just remember to thaw it in the fridge overnight before baking.

What can I substitute for ricotta cheese?

If you need a substitute for ricotta cheese, there are several options available. You can use cottage cheese blended until smooth for a similar texture. Cream cheese mixed with a bit of milk can also work well, providing a rich and creamy layer. For a dairy-free option, consider using tofu blended with nutritional yeast and a splash of lemon juice. This will give you a creamy consistency while adding a cheesy flavor. Choose the substitute that best fits your dietary needs and preferences!

Is mushroom lasagna suitable for freezing?

Yes, mushroom lasagna is perfect for freezing! To freeze, assemble the lasagna as directed, but do not bake it. Wrap it tightly in plastic wrap and then in aluminum foil to prevent freezer burn. It can be stored in the freezer for up to three months. When you’re ready to enjoy it, thaw the lasagna in the refrigerator overnight. Then, bake it as directed, adding a few extra minutes to the cooking time if needed. This way, you can have a delicious homemade meal ready whenever you want!

Conclusion on Mushroom Lasagna Recipe

Recap of Key Points

In summary, mushroom lasagna is a delightful and nutritious dish that brings together layers of flavor and texture. With its rich combination of mushrooms, creamy ricotta, and gooey mozzarella, this recipe is sure to please everyone at the table. We explored the essential ingredients needed to create this masterpiece, along with optional additions to enhance its flavor. The preparation steps are straightforward, making it accessible for cooks of all skill levels. Plus, we discussed variations for vegetarians and gluten-free options, ensuring that everyone can enjoy this delicious meal.

We also highlighted the importance of proper layering and cooking techniques to achieve the perfect lasagna. From serving suggestions to wine pairings, you now have all the tools to create a memorable dining experience. Lastly, we covered storage tips and common mistakes to avoid, so you can enjoy your mushroom lasagna even after the first serving.

Encouragement to Try the Recipe

Now that you have all the information, it’s time to roll up your sleeves and try making this mushroom lasagna delight! Whether you’re cooking for family, friends, or just for yourself, this dish is sure to impress. The comforting layers of cheese and mushrooms will warm your heart and satisfy your taste buds. So gather your ingredients, follow the steps, and enjoy the process of creating something truly special. Happy cooking!

Tuna Pasta Recipe: A Quick and Delicious Meal!

Introduction to Tuna Pasta Recipe

Tuna pasta is a delightful dish that combines the goodness of pasta with the rich flavor of tuna. This recipe is not only easy to make but also packed with nutrients. Whether you’re a busy parent, a student, or just someone who loves good food, this dish is perfect for you. It’s quick, satisfying, and can be enjoyed at any time of the day.

Why Tuna Pasta is a Great Choice

First and foremost, tuna pasta is incredibly versatile. You can customize it to suit your taste. Want a little kick? Add some chili flakes! Prefer a creamier texture? Swap out the mayonnaise for Greek yogurt. The options are endless!

Moreover, this dish is a fantastic source of protein. Tuna is rich in protein, which helps build and repair tissues in our bodies. Plus, it’s low in calories, making it a great choice for those watching their weight. With just 350 calories per serving, you can enjoy a hearty meal without the guilt.

Another reason to love tuna pasta is its convenience. With just a few ingredients, you can whip up a delicious meal in no time. It’s perfect for weeknight dinners or even for meal prep. Just make a big batch, and you’ll have lunch ready for the week!

Lastly, tuna pasta is a crowd-pleaser. Whether you’re serving it to family or friends, it’s sure to impress. The combination of flavors and textures makes it a delightful dish that everyone will enjoy. So, let’s dive into the ingredients and get cooking!

Ingredients for Tuna Pasta Recipe

To create this delicious tuna pasta, you’ll need a few simple ingredients. Most of them are pantry staples, making it easy to whip up this meal anytime. Here’s what you’ll need:

  • 8 ounces pasta: You can choose any shape you like, such as penne, fusilli, or spaghetti.
  • 1 can (5 ounces) tuna in water: Make sure to drain it well to avoid excess moisture.
  • 1 cup cherry tomatoes: Halved for a burst of freshness and flavor.
  • 1/2 cup frozen peas: These add a pop of color and sweetness.
  • 1/4 cup mayonnaise: This gives the dish a creamy texture. You can use Greek yogurt for a healthier option.
  • 2 tablespoons olive oil: A drizzle of olive oil enhances the flavor and adds healthy fats.
  • 1 tablespoon lemon juice: Fresh lemon juice brightens the dish and balances the flavors.
  • 1 teaspoon garlic powder: For a hint of garlic flavor without the fuss of fresh garlic.
  • Salt and pepper: To taste, ensuring the dish is well-seasoned.
  • Fresh parsley: Chopped, for garnish and a touch of color.

These ingredients come together to create a delightful tuna pasta that is not only tasty but also nutritious. Feel free to get creative and add your favorite veggies or spices to make it your own!

Step-by-Step Preparation of Tuna Pasta Recipe

Now that you have all your ingredients ready, it’s time to dive into the cooking process. This tuna pasta recipe is straightforward and quick, making it perfect for any skill level. Let’s break it down step by step!

Step 1: Preparing the Pasta

Start by boiling a large pot of salted water. Once the water is bubbling, add your 8 ounces of pasta. Cook it according to the package instructions until it’s al dente, which means it should be firm to the bite. This usually takes about 8 to 10 minutes, depending on the type of pasta you choose.

After the pasta is cooked, carefully drain it in a colander. Make sure to shake off any excess water. It’s important to do this so your tuna pasta doesn’t become too watery. Set the drained pasta aside to cool slightly while you prepare the sauce.

Step 2: Making the Tuna Sauce

In a large mixing bowl, combine the drained tuna, halved cherry tomatoes, and frozen peas. These ingredients will create a colorful and flavorful base for your dish. Next, add the 1/4 cup of mayonnaise, 2 tablespoons of olive oil, and 1 tablespoon of lemon juice. The mayonnaise adds creaminess, while the olive oil and lemon juice provide a fresh taste.

Now, sprinkle in the 1 teaspoon of garlic powder, along with salt and pepper to taste. Mix everything together gently until all the ingredients are well combined. This step is crucial as it ensures that every bite of your tuna pasta is packed with flavor!

Step 3: Combining Ingredients

Once your tuna sauce is ready, it’s time to bring everything together. Add the cooked pasta to the mixing bowl with the tuna mixture. Gently toss the pasta with the sauce, making sure every piece is coated evenly. If you find the mixture is too thick, don’t hesitate to add a splash of the reserved pasta water. This will help loosen it up and create a lovely creamy texture.

Step 4: Final Touches

Now that your tuna pasta is combined, it’s time for the final touches. Taste the dish and adjust the seasoning if needed. You might want to add a little more salt, pepper, or even a dash of lemon juice for extra zing. Once you’re satisfied with the flavor, it’s ready to serve!

Transfer the tuna pasta to a serving dish or individual bowls. For a beautiful presentation, garnish with freshly chopped parsley. This adds a pop of color and freshness to your meal. Enjoy your delicious tuna pasta delight!

Variations of Tuna Pasta Recipe

While the classic tuna pasta recipe is delicious on its own, there are many ways to switch things up! Whether you want to make it healthier or explore different flavor profiles, these variations will keep your meals exciting. Let’s take a look at some tasty options!

Healthy Alternatives

If you’re looking to make your tuna pasta even healthier, there are several easy swaps you can make. For instance, consider using whole grain or legume-based pasta. These options are higher in fiber and protein, making your meal more filling and nutritious.

Another great alternative is to replace mayonnaise with Greek yogurt. This swap not only cuts down on calories but also adds a creamy texture and a boost of protein. You can also add more vegetables to your dish. Diced bell peppers, spinach, or even zucchini can enhance the nutritional value while adding color and crunch.

Lastly, try incorporating fresh herbs like basil or dill. These herbs not only add flavor but also provide additional health benefits. With these healthy alternatives, you can enjoy your tuna pasta guilt-free!

Different Flavor Profiles

Want to take your tuna pasta on a flavor adventure? There are countless ways to change the taste of this dish. For a Mediterranean twist, add olives, feta cheese, and a sprinkle of oregano. This combination will transport your taste buds to sunny shores!

If you prefer a spicy kick, mix in some diced jalapeños or a dash of hot sauce. This will give your tuna pasta a zesty flavor that’s sure to wake up your palate. Alternatively, for a creamy and rich experience, try adding a splash of cream or a handful of grated Parmesan cheese.

Don’t forget about the power of citrus! A bit of lime juice or zest can brighten up the dish, making it refreshing and vibrant. With these different flavor profiles, you can easily customize your tuna pasta to suit your mood and taste preferences!

Cooking Note for Tuna Pasta Recipe

Cooking tuna pasta is a simple yet rewarding experience. However, there are a few important notes to keep in mind to ensure your dish turns out perfectly every time. First, always choose high-quality tuna. Canned tuna comes in various types, such as chunk light or solid white. Solid white tuna tends to have a firmer texture and richer flavor, making it a great choice for this recipe.

Next, pay attention to the pasta cooking time. Overcooking pasta can lead to a mushy texture, which is not ideal for this dish. Aim for al dente, which means the pasta should still have a slight bite to it. This will help it hold up better when mixed with the sauce.

When mixing the ingredients, be gentle. You want to combine everything without breaking up the tuna too much. A light hand will keep the tuna chunks intact, adding to the overall texture of the dish.

Lastly, feel free to experiment with the ingredients. If you have leftover vegetables in your fridge, toss them in! This recipe is very forgiving, and adding your favorite ingredients can make it even more delicious. Just remember to adjust the seasoning accordingly, as extra ingredients may require a little more salt or pepper.

By keeping these cooking notes in mind, you’ll be well on your way to creating a delightful tuna pasta that everyone will love!

Serving Suggestions for Tuna Pasta Recipe

Once your tuna pasta is ready, it’s time to think about how to serve it. This dish is not only delicious but also versatile. You can pair it with various sides or present it in a way that makes it even more appealing. Let’s explore some great serving suggestions!

Pairing with Sides

To create a well-rounded meal, consider serving your tuna pasta with some tasty sides. Here are a few ideas:

  • Garlic Bread: A warm slice of garlic bread complements the flavors of tuna pasta beautifully. The buttery, garlicky goodness is a perfect match!
  • Green Salad: A fresh green salad adds a crunchy texture and balances the richness of the pasta. Toss together some mixed greens, cucumbers, and a light vinaigrette for a refreshing side.
  • Steamed Vegetables: Steamed broccoli, carrots, or green beans are nutritious options that pair well with tuna pasta. They add color and extra vitamins to your meal.
  • Fruit Salad: For a sweet touch, serve a fruit salad on the side. The natural sweetness of fruits like berries or melons can brighten up the meal.

These sides not only enhance the meal but also provide a variety of flavors and textures. Feel free to mix and match based on your preferences!

Presentation Tips

Presentation can make a big difference in how your dish is perceived. Here are some simple tips to make your tuna pasta look as good as it tastes:

  • Use Colorful Bowls: Serve your tuna pasta in vibrant bowls to make the dish pop. Bright colors can make the meal more inviting.
  • Garnish Generously: Don’t skimp on the fresh parsley! A sprinkle of chopped parsley not only adds color but also a fresh aroma.
  • Layer Ingredients: When serving, consider layering the pasta and tuna mixture. This creates a visually appealing dish that showcases the ingredients.
  • Serve with Lemon Wedges: Adding lemon wedges on the side allows guests to squeeze fresh juice over their pasta, enhancing the flavor and presentation.

By following these presentation tips, you can elevate your tuna pasta dish, making it a feast for the eyes as well as the palate. Enjoy your meal!

Tips for Perfecting Your Tuna Pasta Recipe

Perfecting your tuna pasta recipe is all about attention to detail and a few handy tips. With these suggestions, you can elevate your dish and impress your family and friends. Let’s explore some essential tips to ensure your tuna pasta turns out delicious every time!

Choose Quality Ingredients

Start with high-quality ingredients. Opt for good canned tuna, preferably packed in water or olive oil. This choice enhances the flavor and texture of your dish. Fresh vegetables, like ripe cherry tomatoes, will also make a big difference. Fresh ingredients lead to a fresher taste!

Cook Pasta Al Dente

Cooking your pasta to al dente is crucial. This means it should be firm to the bite. Overcooked pasta can become mushy and lose its appeal. To achieve this, follow the package instructions closely and taste the pasta a minute or two before the suggested cooking time ends.

Don’t Skip the Seasoning

Seasoning is key to a flavorful dish. Don’t be shy with salt and pepper! Taste your tuna pasta before serving and adjust the seasoning as needed. A little extra lemon juice can also brighten the flavors, making the dish more vibrant.

Mix Gently

When combining the pasta with the tuna mixture, mix gently. This helps keep the tuna chunks intact, adding texture to your dish. A light hand ensures that every bite is a delightful mix of flavors without breaking up the tuna too much.

Experiment with Add-Ins

Feel free to get creative! Add-ins like olives, capers, or even a sprinkle of cheese can enhance the flavor profile. You can also try different herbs, such as basil or dill, to give your dish a unique twist. The more you experiment, the more you’ll discover your favorite combinations!

Serve Fresh

Tuna pasta is best enjoyed fresh. If you need to store leftovers, keep them in an airtight container in the fridge. However, the flavors may change slightly after a day. If you plan to make it ahead of time, consider adding fresh ingredients just before serving to maintain that vibrant taste.

By following these tips, you’ll be well on your way to creating a tuna pasta recipe that’s not only delicious but also a hit at any gathering. Enjoy the process and happy cooking!

Breakdown of Time for Tuna Pasta Recipe

Understanding the time it takes to prepare and cook your tuna pasta is essential for planning your meal. This dish is quick and easy, making it perfect for busy weeknights or last-minute gatherings. Here’s a breakdown of the time you’ll need for each step of the process.

Prep Time

The prep time for this tuna pasta recipe is quite short. You’ll need about 10 minutes to gather your ingredients and prepare them. This includes:

  • Measuring out the pasta and other ingredients.
  • Draining the tuna and halving the cherry tomatoes.
  • Chopping fresh parsley for garnish.

With everything ready, you’ll be set to start cooking in no time!

Cooking Time

The cooking time for this dish is approximately 15 minutes. Here’s how it breaks down:

  • Boiling the pasta takes about 8 to 10 minutes, depending on the type you choose.
  • While the pasta cooks, you can prepare the tuna sauce, which takes about 5 minutes.

By multitasking, you can have everything ready to combine as soon as the pasta is done!

Total Time

In total, you’ll need about 25 minutes from start to finish. This includes both prep and cooking time. Here’s a quick recap:

  • Prep Time: 10 minutes
  • Cooking Time: 15 minutes

With just 25 minutes, you can enjoy a delicious and nutritious tuna pasta dish that’s sure to satisfy your hunger. It’s a fantastic option for those who want a quick meal without sacrificing flavor!

Nutritional Information for Tuna Pasta Recipe

Understanding the nutritional content of your meals is essential for maintaining a balanced diet. This tuna pasta recipe not only satisfies your taste buds but also provides a good mix of nutrients. Let’s break down the nutritional information for this delightful dish!

Calories

Each serving of this tuna pasta recipe contains approximately 350 calories. This makes it a great option for those looking for a filling meal without going overboard on calories. The balance of ingredients ensures that you get a satisfying dish that won’t weigh you down. Plus, with the right portion size, you can enjoy this meal guilt-free!

Protein Content

One of the standout features of this tuna pasta recipe is its protein content. Each serving provides about 20 grams of protein. Tuna is an excellent source of lean protein, which is essential for building and repairing tissues in your body. This makes the dish not only delicious but also a great choice for those looking to increase their protein intake, especially after workouts or during busy days.

Sodium Levels

When it comes to sodium, this tuna pasta recipe contains around 600 milligrams per serving. While this is a reasonable amount, it’s important to be mindful of your overall sodium intake throughout the day. If you’re watching your sodium levels, consider using low-sodium tuna or adjusting the amount of added salt in the recipe. This way, you can enjoy your meal while keeping your health goals in check!

Overall, this tuna pasta recipe is a nutritious option that provides a good balance of calories, protein, and sodium. It’s perfect for a quick meal that doesn’t compromise on flavor or health benefits. Enjoy your delicious and wholesome tuna pasta delight!

FAQs about Tuna Pasta Recipe

Can I use fresh tuna instead of canned?

Absolutely! You can use fresh tuna instead of canned. Just make sure to cook the fresh tuna first. You can grill, sear, or bake it until it’s cooked through. Once it’s ready, flake it into pieces and mix it with the other ingredients. Fresh tuna will give your dish a different texture and flavor, making it a delightful twist on the classic recipe!

What can I substitute for pasta?

If you’re looking for alternatives to traditional pasta, there are plenty of options! You can use whole grain pasta for added fiber. If you want a gluten-free option, try zucchini noodles or spaghetti squash. These veggie-based alternatives are low in carbs and calories, making them a great choice for a lighter meal. You can also use chickpea or lentil pasta for a protein boost!

How long does Tuna Pasta last in the fridge?

Tuna pasta can last in the fridge for about 3 to 4 days when stored in an airtight container. To keep it fresh, make sure it’s cooled down before placing it in the fridge. When you’re ready to eat, you can enjoy it cold or reheat it in the microwave. Just be cautious not to overheat, as this can make the pasta mushy.

Can I make Tuna Pasta ahead of time?

Yes, you can make tuna pasta ahead of time! It’s a great dish for meal prep. Just prepare the recipe as usual, and store it in the fridge. If you plan to make it a day or two in advance, consider adding fresh ingredients like parsley or tomatoes just before serving. This will keep the flavors vibrant and the dish looking fresh. Enjoy your make-ahead meal!

Conclusion on Tuna Pasta Recipe

In conclusion, the tuna pasta recipe is a fantastic dish that combines simplicity with deliciousness. It’s perfect for anyone looking for a quick meal that doesn’t skimp on flavor or nutrition. With just a handful of ingredients, you can create a satisfying dish that appeals to both the taste buds and the eyes.

This recipe is not only versatile but also allows for creativity. Whether you choose to stick to the classic version or explore various healthy alternatives and flavor profiles, the possibilities are endless. You can easily adapt it to suit your dietary needs or personal preferences, making it a go-to meal for any occasion.

Moreover, the nutritional benefits of this dish are noteworthy. With a good balance of protein, healthy fats, and carbohydrates, tuna pasta is a well-rounded meal that can fuel your day. It’s a great option for busy weeknights, meal prep, or even casual gatherings with friends and family.

So, why not give this delightful tuna pasta recipe a try? Gather your ingredients, follow the steps, and enjoy a delicious meal that’s sure to impress. Remember, cooking is all about having fun and experimenting, so feel free to make it your own. Happy cooking!

Garlic Butter Steak with Brussels Sprouts and Butternut Squash Recipe is delicious!

Introduction to Garlic Butter Steak with Brussels Sprouts and Butternut Squash Recipe

Garlic Butter Steak with Brussels Sprouts and Butternut Squash Recipe is a fantastic choice for any occasion. This dish combines the rich flavors of flank steak with the earthy taste of Brussels sprouts and the sweetness of butternut squash. It’s not just a meal; it’s an experience that will delight your taste buds.

Why This Recipe is a Must-Try

First and foremost, this recipe is packed with flavor. The garlic butter sauce adds a rich, savory touch to the steak, making it incredibly mouthwatering. Plus, the roasted Brussels sprouts and butternut squash provide a perfect balance of textures and tastes. You get the crunchiness of the sprouts and the creamy softness of the squash in every bite.

Moreover, this dish is nutritious! With a good amount of protein from the steak and plenty of vitamins from the vegetables, it’s a well-rounded meal. It’s also easy to customize. Whether you want to switch up the vegetables or try a different cut of steak, this recipe is flexible enough to accommodate your preferences.

Garlic Butter Steak with Brussels Sprouts and Butternut Squash Recipe is perfect for both weeknight dinners and special occasions. It’s simple enough for a quick family meal but impressive enough to serve guests. So, roll up your sleeves and get ready to create a dish that everyone will love!

Ingredients for Garlic Butter Steak with Brussels Sprouts and Butternut Squash Recipe

Garlic Butter Steak with Brussels Sprouts and Butternut Squash Recipe, you’ll need a few simple yet flavorful ingredients. Here’s what you’ll need:

  • 1 pound flank steak: This cut is tender and flavorful, perfect for searing.
  • 2 tablespoons olive oil: Used for roasting the vegetables and adding healthy fats.
  • 1 teaspoon salt: Enhances the flavors of the steak and vegetables.
  • 1/2 teaspoon black pepper: Adds a bit of spice to the dish.
  • 1 tablespoon minced garlic: Infuses the steak with a rich, aromatic flavor.
  • 1/4 cup unsalted butter: Creates a luscious garlic butter sauce for the steak.
  • 1 pound Brussels sprouts: Trimmed and halved for roasting, they add a delightful crunch.
  • 2 cups butternut squash: Peeled and diced, this adds sweetness and creaminess.
  • 1 teaspoon dried thyme: A fragrant herb that complements the dish beautifully.
  • 1 teaspoon paprika: Adds a subtle smokiness and vibrant color.
  • 1 tablespoon fresh parsley: Chopped for garnish, it adds a fresh touch.

Gathering these ingredients will set you on the right path to making a delicious meal. Each component plays a vital role in creating the perfect balance of flavors and textures. Now that you have everything ready, let’s move on to the preparation steps!

Step-by-Step Preparation of Garlic Butter Steak with Brussels Sprouts and Butternut Squash Recipe

Garlic Butter Steak with Brussels Sprouts and Butternut Squash Recipe. Following these steps will ensure that your meal turns out perfectly every time. Let’s get started!

Step 1: Preparing the Ingredients

First, wash and prepare your vegetables. Trim the Brussels sprouts by cutting off the ends and halving them. Next, peel the butternut squash and dice it into small cubes. This will help them cook evenly. Also, take the flank steak out of the fridge and let it sit at room temperature for about 15 minutes. This helps the steak cook more evenly.

Step 2: Cooking the Brussels Sprouts

In a large bowl, toss the halved Brussels sprouts with 1 tablespoon of olive oil, salt, and black pepper. Make sure they are well coated. This seasoning will enhance their natural flavor. Spread the Brussels sprouts on a baking sheet in a single layer. This allows them to roast evenly and get that nice caramelization.

Step 3: Roasting the Butternut Squash

In the same bowl, add the diced butternut squash. Drizzle with the remaining olive oil, thyme, and paprika. Toss everything together until the squash is evenly coated. Spread the butternut squash on another baking sheet. Place both baking sheets in the preheated oven at 400°F (200°C). Roast for about 25-30 minutes, stirring halfway through. You want them to be tender and slightly caramelized.

Step 4: Cooking the Steak

While the vegetables are roasting, heat a large skillet over medium-high heat. Season the flank steak with salt and black pepper on both sides. Once the skillet is hot, add the steak. Sear it for about 4-5 minutes on each side for medium-rare. Adjust the cooking time if you prefer your steak more or less done. The goal is to achieve a nice brown crust on the outside.

Step 5: Making the Garlic Butter Sauce

In the last minute of cooking the steak, add the minced garlic and butter to the skillet. As the butter melts, spoon it over the steak. This will infuse the meat with a rich garlic flavor. Once cooked to your liking, remove the steak from the skillet and let it rest for about 5 minutes. This resting period allows the juices to redistribute, making the steak more tender.

Step 6: Combining Everything Together

Garlic Butter Steak with Brussels Sprouts and Butternut Squash Recipe is now ready to be enjoyed!

Variations of Garlic Butter Steak with Brussels Sprouts and Butternut Squash Recipe

Garlic Butter Steak with Brussels Sprouts and Butternut Squash Recipe is delicious as is, there are many ways to switch things up! Whether you want to try different vegetables or experiment with various cuts of steak, these variations will keep your meals exciting and flavorful. Let’s explore some options!

Alternative Vegetables to Use

If you’re looking to change the vegetables in this recipe, you have plenty of options. Here are some tasty alternatives:

  • Green Beans: Crisp and vibrant, green beans can add a fresh crunch to your dish. Simply trim the ends and toss them with olive oil and seasonings before roasting.
  • Asparagus: This tender vegetable pairs beautifully with steak. Just snap off the woody ends and roast them until they are slightly charred.
  • Carrots: Sweet and colorful, carrots can be sliced into sticks or rounds. They roast well and add a lovely sweetness to the meal.
  • Cauliflower: For a low-carb option, cauliflower florets can be roasted until golden. They absorb flavors well and provide a nice texture.

Feel free to mix and match these vegetables based on your preferences or what you have on hand. Each option brings its unique flavor and texture to the dish!

Different Cuts of Steak

While flank steak is a great choice for this recipe, you can also try other cuts of steak for different flavors and textures. Here are some popular alternatives:

  • Sirloin Steak: This cut is lean and flavorful, making it a great option for grilling or pan-searing.
  • Ribeye Steak: Known for its marbling, ribeye is juicy and rich in flavor. It’s perfect for those who enjoy a more decadent steak experience.
  • Filet Mignon: This tender cut is buttery and melts in your mouth. It’s a bit pricier but perfect for special occasions.
  • Skirt Steak: Similar to flank steak, skirt steak is flavorful and great for quick cooking. It’s perfect for fajitas or stir-fries.

Garlic Butter Steak with Brussels Sprouts and Butternut Squash Recipe, making it a versatile dish!

Cooking Note for Garlic Butter Steak with Brussels Sprouts and Butternut Squash Recipe

Garlic Butter Steak with Brussels Sprouts and Butternut Squash Recipe is a delightful experience, but there are a few important notes to keep in mind. These tips will help you achieve the best results and ensure your meal is both delicious and visually appealing.

First, always start with high-quality ingredients. Fresh vegetables and a good cut of steak can make a significant difference in flavor. When selecting your flank steak, look for one that has a nice marbling of fat. This will enhance the juiciness and tenderness of the meat.

Next, pay attention to the cooking times. Each oven and stovetop can vary in temperature, so keep an eye on your vegetables and steak. For the Brussels sprouts and butternut squash, you want them to be tender and slightly caramelized. If they start to brown too quickly, you can lower the oven temperature slightly.

When cooking the steak, remember that resting is crucial. After you remove the steak from the skillet, let it rest for about 5 minutes. This allows the juices to redistribute throughout the meat, making it more flavorful and tender. If you cut into it too soon, you may lose those delicious juices.

Lastly, don’t be afraid to adjust the seasonings to your taste. If you love garlic, add a bit more minced garlic to the butter sauce. If you prefer a spicier kick, consider adding a pinch of red pepper flakes. Cooking is all about personal preference, so feel free to make this recipe your own!

Garlic Butter Steak with Brussels Sprouts and Butternut Squash Recipe that will impress your family and friends. Enjoy the process and savor every bite!

Serving Suggestions for Garlic Butter Steak with Brussels Sprouts and Butternut Squash Recipe

Garlic Butter Steak with Brussels Sprouts and Butternut Squash Recipe, it’s time to think about how to serve it. Presentation can elevate your meal, making it even more enjoyable. Here are some serving suggestions to enhance your dining experience:

  • Plate Arrangement: Start by placing a generous portion of the roasted Brussels sprouts and butternut squash on one side of the plate. Then, arrange the sliced steak on the other side. This creates a colorful and inviting presentation.
  • Garnish: Don’t forget to sprinkle fresh parsley over the dish. This adds a pop of color and freshness. You can also add a few lemon wedges on the side for a zesty touch.
  • Accompaniments: Consider serving the steak with a side of creamy mashed potatoes or a light salad. A simple arugula salad with a lemon vinaigrette pairs beautifully with the rich flavors of the steak.
  • Wine Pairing: A glass of red wine, such as Cabernet Sauvignon or Merlot, complements the savory flavors of the steak. If you prefer white wine, a Chardonnay can also work well with the roasted vegetables.
  • Leftover Ideas: If you have leftovers, consider making a steak salad the next day. Slice the remaining steak and toss it with mixed greens, cherry tomatoes, and a balsamic vinaigrette for a refreshing lunch.

Garlic Butter Steak with Brussels Sprouts and Butternut Squash Recipe. Enjoy the flavors and the company of those you share it with!

Tips for Perfect Garlic Butter Steak with Brussels Sprouts and Butternut Squash Recipe

Garlic Butter Steak with Brussels Sprouts and Butternut Squash Recipe turns out perfectly every time, here are some helpful tips. These suggestions will enhance the flavors and textures of your dish, making it a hit at the dinner table.

  • Choose the Right Steak: Opt for a flank steak that has good marbling. This fat will melt during cooking, keeping the meat juicy and flavorful. If you prefer a different cut, remember to adjust the cooking time accordingly.
  • Let the Steak Rest: After cooking, always let your steak rest for about 5 minutes. This allows the juices to redistribute, resulting in a more tender and juicy steak.
  • Season Generously: Don’t be shy with the salt and pepper. Seasoning the steak and vegetables well will enhance their natural flavors. You can also experiment with additional herbs and spices to suit your taste.
  • Use Fresh Ingredients: Fresh Brussels sprouts and butternut squash will provide the best flavor and texture. Avoid using wilted or old vegetables, as they can affect the overall taste of the dish.
  • Monitor Cooking Times: Keep an eye on your vegetables while they roast. Stir them halfway through to ensure even cooking. If they start to brown too quickly, lower the oven temperature slightly.
  • Adjust Garlic to Taste: If you love garlic, feel free to add more minced garlic to the butter sauce. This will intensify the flavor and make the dish even more aromatic.
  • Experiment with Accompaniments: While this recipe is delicious on its own, consider serving it with a side of creamy mashed potatoes or a fresh salad. These sides can complement the rich flavors of the steak and vegetables.
  • Store Leftovers Properly: If you have any leftovers, store them in an airtight container in the fridge. They can be enjoyed the next day in a salad or reheated for a quick meal.

Garlic Butter Steak with Brussels Sprouts and Butternut Squash Recipe. Enjoy the cooking process and the delicious results!

Breakdown of Time for Garlic Butter Steak with Brussels Sprouts and Butternut Squash Recipe

Prep Time

Garlic Butter Steak with Brussels Sprouts and Butternut Squash Recipe is quick and easy. You’ll need about 15-20 minutes to gather and prepare all your ingredients. This includes washing and cutting the vegetables, seasoning the steak, and getting everything ready for cooking. Taking this time ensures that your cooking process goes smoothly and efficiently.

Cooking Time

The cooking time for this recipe is approximately 30-35 minutes. This includes:

  • Roasting the Vegetables: About 25-30 minutes in the oven. Stir halfway through to ensure even cooking.
  • Cooking the Steak: Around 8-10 minutes on the stovetop, depending on your desired doneness.

While the vegetables roast, you can cook the steak, making the most of your time in the kitchen.

Total Time

In total, you can expect to spend about 45-55 minutes from start to finish. This includes both prep and cooking time. With this efficient timeline, you can have a delicious and satisfying meal ready in no time. Perfect for busy weeknights or a special weekend dinner!

Nutritional Information for Garlic Butter Steak with Brussels Sprouts and Butternut Squash Recipe

Garlic Butter Steak with Brussels Sprouts and Butternut Squash Recipe not only delights your taste buds but also provides valuable nutrients. Here’s a breakdown of the nutritional information per serving:

Calories

450 calories. This makes it a satisfying option for dinner without being overly heavy. The combination of steak and vegetables ensures you get a hearty meal that keeps you full and energized.

Protein

35 grams of protein per serving. The flank steak is the primary source of protein, making it an excellent choice for those looking to increase their protein intake. This is especially beneficial for active individuals or those looking to maintain muscle mass.

Sodium

600 milligrams per serving. While sodium is necessary for various bodily functions, it’s important to monitor your intake. If you’re watching your sodium levels, consider using less salt or opting for low-sodium butter. This way, you can still enjoy the flavors without exceeding your daily sodium limit.

Garlic Butter Steak with Brussels Sprouts and Butternut Squash Recipe is a nutritious meal that provides a good balance of calories, protein, and essential nutrients. Enjoy this dish knowing that you’re nourishing your body while indulging in a delicious meal!

FAQs about Garlic Butter Steak with Brussels Sprouts and Butternut Squash Recipe

Can I use frozen Brussels sprouts for this recipe?

Yes, you can use frozen Brussels sprouts! However, keep in mind that they may release more moisture during cooking. To ensure they roast properly, it’s best to thaw them first and pat them dry with a paper towel. This will help achieve that nice caramelization you want. Just remember to adjust the cooking time slightly, as frozen vegetables may take a bit longer to cook through.

What can I substitute for butternut squash?

Garlic Butter Steak with Brussels Sprouts and Butternut Squash Recipe.

How do I know when the steak is cooked to my liking?

To determine if your steak is cooked to your liking, you can use a meat thermometer. For medium-rare, aim for an internal temperature of about 130°F (54°C). For medium, look for around 140°F (60°C). If you don’t have a thermometer, you can also use the touch test. Press the center of the steak with your finger; a soft feel indicates rare, while a firmer touch suggests medium or well-done. Remember, the steak will continue to cook slightly while resting, so it’s okay to remove it from the heat just before it reaches your desired temperature.

Can I make this recipe ahead of time?

Garlic Butter Steak with Brussels Sprouts and Butternut Squash Recipe ahead of time. You can marinate the steak and chop the vegetables a day in advance. Store them separately in the refrigerator. When you’re ready to cook, simply roast the vegetables and cook the steak as directed. If you have leftovers, they can be stored in an airtight container in the fridge for up to three days. Reheat gently in the oven or on the stovetop to enjoy a quick and delicious meal later!

Conclusion on Garlic Butter Steak with Brussels Sprouts and Butternut Squash Recipe

Garlic Butter Steak with Brussels Sprouts and Butternut Squash Recipe is a delightful dish that brings together rich flavors and nutritious ingredients. This recipe is not only easy to prepare but also offers a wonderful balance of taste and texture. The savory garlic butter sauce enhances the juicy steak, while the roasted Brussels sprouts and butternut squash provide a satisfying crunch and sweetness.

Whether you’re cooking for a family dinner or hosting friends, this meal is sure to impress. It’s versatile, allowing you to customize the vegetables and steak cuts to suit your preferences. Plus, with its nutritious profile, you can enjoy a hearty meal without compromising on health.

As you embark on your cooking journey, remember to have fun and experiment with flavors. Don’t hesitate to adjust seasonings or try different vegetable combinations. The beauty of cooking lies in creativity, and this recipe serves as a fantastic base for your culinary adventures.

Garlic Butter Steak with Brussels Sprouts and Butternut Squash Recipe is more than just a meal; it’s an experience that brings joy to your table. Enjoy every bite and share the love of good food with those around you!

Creamy Seafood Stuffed Shells for a Decadent Dinner!

Introduction to Creamy Seafood Stuffed Shells

Creamy Seafood Stuffed Shells are just a delightful blend of flavors that feels like a hug on a plate. Whether you’re hosting a dinner party or simply looking to impress your family on a weeknight, this recipe is your secret weapon. It’s quick to prepare, yet it feels indulgent enough for a special occasion. Plus, who can resist the allure of cheesy, seafood-filled pasta? Let’s dive into this culinary adventure that’s sure to become a favorite in your home!

Ingredients for Creamy Seafood Stuffed Shells

Gathering the right ingredients is the first step to creating your Creamy Seafood Stuffed Shells masterpiece. Here’s what you’ll need:

  • Jumbo pasta shells: These large shells are perfect for holding all that creamy goodness.
  • Olive oil: A splash of this liquid gold adds flavor and helps sauté the veggies.
  • Onion: Finely chopped, it brings a sweet, aromatic base to the filling.
  • Garlic: Minced garlic adds a punch of flavor that elevates the dish.
  • Fresh spinach: Chopped spinach not only adds color but also a nutritious boost.
  • Ricotta cheese: This creamy cheese gives the filling its rich texture.
  • Cream cheese: Softened cream cheese adds an extra layer of creaminess.
  • Cooked shrimp: Chopped shrimp brings a delightful seafood flavor to the mix.
  • Cooked crab meat: Sweet and tender, crab meat enhances the seafood experience.
  • Shredded mozzarella cheese: This melty cheese is essential for that gooey topping.
  • Salt: A pinch of salt enhances all the flavors in the dish.
  • Black pepper: Freshly ground pepper adds a subtle kick.
  • Red pepper flakes (optional): For those who like a bit of heat, these flakes are a great addition.
  • Marinara sauce: A rich tomato sauce that ties everything together beautifully.
  • Grated Parmesan cheese: This adds a savory finish and a touch of elegance.

For exact measurements, check the bottom of the article where you can find everything listed for easy printing. Feel free to get creative! You can substitute the seafood with cooked chicken or even load up on veggies for a different twist. Happy cooking!

How to Make Creamy Seafood Stuffed Shells

Creating these Creamy Seafood Stuffed Shells is a delightful journey that fills your kitchen with mouthwatering aromas. Follow these simple steps, and you’ll have a dish that’s sure to impress!

Step 1: Preheat the Oven

Start by preheating your oven to 375°F. This ensures even cooking and helps the cheese melt beautifully.

Step 2: Cook the Pasta Shells

Next, cook the jumbo pasta shells according to the package instructions until they’re al dente. Drain them and set aside. This step is crucial; you want the shells firm enough to hold all that creamy filling!

Step 3: Sauté the Vegetables

In a large skillet, heat the olive oil over medium heat. Add the chopped onion and minced garlic, sautéing until the onion turns translucent, about 3-4 minutes. This aromatic base will elevate the flavor of your filling.

Step 4: Add Spinach

Now, stir in the chopped spinach and cook until it wilts, which should take about 2 minutes. Remove the skillet from heat and let it cool slightly. The vibrant green spinach adds both color and nutrition!

Step 5: Prepare the Filling

In a mixing bowl, combine the ricotta cheese, cream cheese, cooked shrimp, cooked crab meat, half of the mozzarella cheese, salt, black pepper, and red pepper flakes (if you’re feeling spicy). Add the cooled spinach mixture and mix until everything is well combined. This filling is where the magic happens!

Step 6: Assemble the Dish

Spread half of the marinara sauce in the bottom of a 9×13-inch baking dish. Stuff each cooked pasta shell with the seafood mixture and place them snugly in the baking dish. It’s like tucking in little pillows of deliciousness!

Step 7: Add Sauce and Cheese

Pour the remaining marinara sauce over the stuffed shells. Then, sprinkle the remaining mozzarella and Parmesan cheese on top. This cheesy layer will create a golden crust as it bakes.

Step 8: Bake

Cover the dish with aluminum foil and bake for 25 minutes. After that, remove the foil and bake for an additional 10 minutes, or until the cheese is bubbly and golden. Your kitchen will smell heavenly!

Step 9: Cool and Serve

Finally, let the dish cool for a few minutes before serving. This brief wait allows the flavors to settle and makes it easier to serve. Enjoy your Creamy Seafood Stuffed Shells with a smile!

Tips for Success

  • Make sure to cook the pasta shells al dente; they’ll continue to cook in the oven.
  • Don’t skip the cooling step for the spinach; it helps maintain the filling’s texture.
  • Feel free to experiment with different seafood or add fresh herbs for extra flavor.
  • For a crispy topping, sprinkle breadcrumbs before the final bake.
  • Let the dish cool slightly before serving to enhance the flavors.

Equipment Needed

  • Large skillet: A non-stick skillet works wonders for sautéing.
  • 9×13-inch baking dish: Any oven-safe dish will do if you don’t have this size.
  • Mixing bowl: A large bowl for combining your filling ingredients.
  • Cooking pot: For boiling the pasta shells.
  • Aluminum foil: Essential for covering the dish while baking.

Variations

  • Vegetarian Option: Swap the seafood for sautéed mushrooms, zucchini, or a medley of your favorite vegetables for a hearty vegetarian dish.
  • Spicy Twist: Add diced jalapeños or a splash of hot sauce to the filling for a kick that will awaken your taste buds.
  • Herb-Infused: Incorporate fresh herbs like basil, dill, or parsley into the filling for a burst of freshness and flavor.
  • Cheesy Delight: Mix in some feta or goat cheese with the ricotta for a tangy twist that complements the seafood beautifully.
  • Gluten-Free Option: Use gluten-free pasta shells to make this dish suitable for those with gluten sensitivities.

Serving Suggestions

  • Side Salad: Pair your Creamy Seafood Stuffed Shells with a crisp Caesar or mixed greens salad for a refreshing contrast.
  • Garlic Bread: Serve with warm, buttery garlic bread to soak up the delicious marinara sauce.
  • Wine Pairing: A chilled white wine, like Pinot Grigio, complements the seafood beautifully.
  • Presentation: Garnish with fresh parsley or basil for a pop of color and added flavor.

FAQs about Creamy Seafood Stuffed Shells

Can I use frozen seafood for the filling?

Absolutely! Frozen seafood works well in this recipe. Just make sure to thaw and drain it before adding it to the filling. This way, you’ll avoid excess moisture that could make the dish watery.

How can I make these Creamy Seafood Stuffed Shells ahead of time?

You can prepare the stuffed shells in advance and store them in the refrigerator for up to 24 hours before baking. Just cover the dish tightly with plastic wrap or aluminum foil. When you’re ready to bake, add a few extra minutes to the cooking time.

What can I substitute for ricotta cheese?

If you’re not a fan of ricotta, you can use cottage cheese or even mascarpone for a different flavor profile. Both options will still give you that creamy texture you crave in these stuffed shells.

Can I make this dish vegetarian?

Certainly! Simply replace the seafood with sautéed vegetables like mushrooms, zucchini, or spinach. You can also add some beans for protein, making it a hearty vegetarian meal.

What’s the best way to store leftovers?

Store any leftovers in an airtight container in the refrigerator for up to three days. Reheat in the oven or microwave until warmed through. Enjoy your delicious Creamy Seafood Stuffed Shells again!

Final Thoughts

Creating Creamy Seafood Stuffed Shells is more than just cooking; it’s about crafting a memorable experience for you and your loved ones. The rich flavors and creamy textures come together to create a dish that feels indulgent yet comforting. Each bite is a celebration of seafood goodness, wrapped in tender pasta. Whether it’s a cozy family dinner or a gathering with friends, this recipe brings joy to the table. I hope you find as much happiness in making and sharing this dish as I do. Here’s to delicious moments and cherished memories around your dinner table!

Creamy Seafood Stuffed Shells
jhessica

Creamy Seafood Stuffed Shells for a Decadent Dinner!

A rich and creamy seafood stuffed pasta dish perfect for a decadent dinner.
Prep Time 20 minutes
Cook Time 35 minutes
Total Time 55 minutes
Servings: 4 servings
Course: Dinner
Cuisine: Italian
Calories: 480

Ingredients
  

  • 12 jumbo pasta shells
  • 1 tablespoon olive oil
  • 1 small onion finely chopped
  • 2 cloves garlic minced
  • 8 ounces fresh spinach chopped
  • 8 ounces ricotta cheese
  • 8 ounces cream cheese softened
  • 1 cup cooked shrimp chopped
  • 1 cup cooked crab meat
  • 1 cup shredded mozzarella cheese divided
  • 1/2 teaspoon salt
  • 1/4 teaspoon black pepper
  • 1/4 teaspoon red pepper flakes optional
  • 1 cup marinara sauce
  • 1/4 cup grated Parmesan cheese

Method
 

  1. Preheat your oven to 375°F.
  2. Cook the jumbo pasta shells according to package instructions until al dente. Drain and set aside.
  3. In a large skillet, heat the olive oil over medium heat. Add the chopped onion and garlic, sautéing until the onion is translucent, about 3-4 minutes.
  4. Stir in the chopped spinach and cook until wilted, about 2 minutes. Remove from heat and let cool slightly.
  5. In a mixing bowl, combine the ricotta cheese, cream cheese, cooked shrimp, cooked crab meat, half of the mozzarella cheese, salt, black pepper, and red pepper flakes (if using). Add the cooled spinach mixture and mix until well combined.
  6. Spread half of the marinara sauce in the bottom of a 9×13-inch baking dish.
  7. Stuff each cooked pasta shell with the seafood mixture and place them in the baking dish.
  8. Pour the remaining marinara sauce over the stuffed shells and sprinkle with the remaining mozzarella and Parmesan cheese.
  9. Cover the dish with aluminum foil and bake for 25 minutes.
  10. Remove the foil and bake for an additional 10 minutes, or until the cheese is bubbly and golden.
  11. Let the dish cool for a few minutes before serving.

Nutrition

Serving: 1servingCalories: 480kcalCarbohydrates: 35gProtein: 30gFat: 25gSaturated Fat: 12gPolyunsaturated Fat: 8gCholesterol: 150mgSodium: 800mgFiber: 2gSugar: 3g

Notes

  • For extra flavor, try adding fresh herbs like parsley or dill to the seafood mixture.
  • You can substitute the seafood with cooked chicken or vegetables for a different twist.
  • If you prefer a little crunch, top the dish with breadcrumbs before the final baking step.

Tried this recipe?

Let us know how it was!

Crazy Chicken Mexican Style Rice Queso is a must-try!

Introduction to Crazy Chicken Mexican Style Rice Queso

Are you ready to spice up your dinner routine? Look no further than Crazy Chicken Mexican Style Rice Queso! This delightful dish combines tender chicken, flavorful spices, and creamy queso, all served over a bed of fluffy rice. It’s a meal that brings the vibrant flavors of Mexico right to your kitchen.

Imagine a plate filled with juicy chicken, perfectly seasoned with chili powder and cumin, paired with colorful veggies like tomatoes, corn, and black beans. The best part? It’s topped with a generous helping of melted cheese and rich queso dip, making it a true crowd-pleaser. Whether you’re cooking for family or hosting friends, this dish is sure to impress.

Not only is Crazy Chicken Mexican Style Rice Queso delicious, but it’s also easy to prepare. With just a few simple ingredients and steps, you can create a hearty meal that everyone will love. Plus, it’s versatile! You can customize it to suit your taste, whether you prefer it mild or spicy.

So, roll up your sleeves and get ready to dive into this mouthwatering recipe. Let’s explore the ingredients and preparation steps that will make your Crazy Chicken Mexican Style Rice Queso a hit at the dinner table!

Ingredients for Crazy Chicken Mexican Style Rice Queso

To create your very own Crazy Chicken Mexican Style Rice Queso, you’ll need a selection of fresh and flavorful ingredients. Here’s what you’ll need:

  • 2 cups cooked white rice
  • 1 pound boneless, skinless chicken breasts
  • 1 tablespoon olive oil
  • 1 teaspoon chili powder
  • 1 teaspoon cumin
  • 1 teaspoon garlic powder
  • 1 teaspoon onion powder
  • Salt and pepper to taste
  • 1 cup diced tomatoes (canned or fresh)
  • 1 cup corn (canned or frozen)
  • 1 cup black beans (canned, drained, and rinsed)
  • 1 cup shredded cheddar cheese
  • 1 cup queso dip (store-bought or homemade)
  • Fresh cilantro for garnish (optional)
  • Lime wedges for serving (optional)

These ingredients come together to create a dish that is not only satisfying but also packed with nutrients. The chicken provides a great source of protein, while the beans and corn add fiber and vitamins. The combination of spices gives the dish its signature flavor, making it a delightful experience for your taste buds.

Feel free to adjust the ingredients based on your preferences. For instance, if you love a bit of heat, consider adding diced jalapeños or a splash of hot sauce. You can also swap out the rice for quinoa or cauliflower rice for a healthier twist. The possibilities are endless!

Preparation of Crazy Chicken Mexican Style Rice Queso

Now that you have all your ingredients ready, it’s time to dive into the preparation of Crazy Chicken Mexican Style Rice Queso. This process is straightforward and fun! Follow these steps to create a delicious meal that will have everyone asking for seconds.

Step 1: Preparing the Chicken

First, let’s focus on the chicken. Start by heating a large skillet over medium heat. Add the tablespoon of olive oil and let it warm up. While the oil heats, season the boneless, skinless chicken breasts with chili powder, cumin, garlic powder, onion powder, salt, and pepper. Make sure to coat the chicken evenly with the spices for maximum flavor.

Once the oil is hot, carefully place the seasoned chicken in the skillet. Cook the chicken for about 6-7 minutes on each side. You want it to be golden brown and fully cooked, with no pink in the center. After cooking, remove the chicken from the skillet and let it rest for a few minutes. This resting time helps keep the chicken juicy. Once rested, slice the chicken into strips.

Step 2: Cooking the Rice

If you haven’t cooked your rice yet, now is the time! You can use any method you prefer, whether it’s on the stovetop, in a rice cooker, or even in the microwave. Just make sure to follow the package instructions for the best results. Once your rice is fluffy and ready, set it aside. This will be the base for your Crazy Chicken Mexican Style Rice Queso.

Step 3: Making the Queso Sauce

Next, let’s prepare the queso sauce. If you’re using store-bought queso dip, you can skip this step. However, if you want to make it from scratch, combine your favorite cheese with a splash of milk in a small saucepan. Heat it over low heat, stirring constantly until the cheese melts and becomes creamy. This homemade queso will add a special touch to your dish!

Step 4: Combining Ingredients

Now, it’s time to bring everything together! In the same skillet where you cooked the chicken, add the diced tomatoes, corn, and black beans. Stir these ingredients together and cook for about 3-4 minutes until they are heated through. Then, add the cooked rice to the skillet and mix everything well. This step allows the flavors to meld beautifully.

Step 5: Final Cooking Steps

Finally, it’s time to layer on the goodness! Place the sliced chicken on top of the rice mixture in the skillet. Pour the creamy queso dip over the chicken and rice, ensuring it covers everything nicely. Then, sprinkle the shredded cheddar cheese on top. Cover the skillet with a lid and let it cook on low heat for about 5 minutes. This will melt the cheese and create a bubbly, cheesy topping that everyone will love!

Once the cheese is melted and bubbly, remove the skillet from heat. You’re now ready to serve your Crazy Chicken Mexican Style Rice Queso!

Variation of Crazy Chicken Mexican Style Rice Queso

While the original Crazy Chicken Mexican Style Rice Queso is a delightful dish, there are many ways to switch things up! Whether you want to try different proteins or explore vegetarian options, these variations will keep your meals exciting and flavorful.

Alternative Proteins

If you’re looking to change the protein in your Crazy Chicken Mexican Style Rice Queso, you have plenty of tasty options. Here are a few ideas:

  • Turkey: Ground turkey is a lean alternative that works well in this recipe. Season it just like the chicken for a delicious twist.
  • Pork: Shredded pork, such as carnitas, adds a rich flavor. Just warm it up with the veggies for a hearty meal.
  • Beef: Ground beef or steak strips can be seasoned similarly. They will add a robust taste to your dish.
  • Fish: Grilled or baked fish, like tilapia or salmon, can be a lighter option. Flake it and mix it in with the rice and veggies.

These alternative proteins can bring new flavors and textures to your Crazy Chicken Mexican Style Rice Queso, making it a versatile dish for any occasion!

Vegetarian Options

For those who prefer a meatless meal, there are plenty of vegetarian options to enjoy Crazy Chicken Mexican Style Rice Queso. Here are some ideas:

  • Tofu: Firm tofu can be cubed and sautéed with the same spices as the chicken. It absorbs flavors well and adds protein.
  • Tempeh: This fermented soy product has a nutty flavor. Crumble it and cook it with the spices for a hearty addition.
  • Chickpeas: Canned chickpeas are a great source of protein. Rinse and add them to the veggie mix for a filling option.
  • Vegetable Medley: Use a mix of your favorite vegetables, like bell peppers, zucchini, and mushrooms. Sauté them until tender and flavorful.

These vegetarian variations not only make the dish suitable for everyone but also add a colorful and nutritious twist to your Crazy Chicken Mexican Style Rice Queso!

Cooking Note for Crazy Chicken Mexican Style Rice Queso

When preparing Crazy Chicken Mexican Style Rice Queso, a few cooking notes can help ensure your dish turns out perfectly every time. These tips will enhance the flavors and textures, making your meal even more enjoyable.

First, always use fresh ingredients when possible. Fresh vegetables, like tomatoes and corn, can elevate the taste of your dish. If you opt for canned items, choose low-sodium options to keep the dish healthier.

Next, pay attention to the cooking times. Overcooking the chicken can lead to dryness. Make sure to check that the chicken is cooked through but still juicy. Using a meat thermometer can help; the internal temperature should reach 165°F (75°C).

Additionally, when combining the ingredients, don’t rush the mixing process. Allow the rice and vegetable mixture to heat through properly. This step is crucial for blending the flavors, ensuring every bite is delicious.

For the queso dip, if you’re making it from scratch, keep the heat low. Stir continuously to prevent the cheese from burning or clumping. A smooth, creamy queso will make your dish irresistible!

Lastly, don’t forget about garnishing! Fresh cilantro and lime wedges add a burst of freshness and flavor. They can brighten up the dish and make it visually appealing.

By following these cooking notes, you’ll create a Crazy Chicken Mexican Style Rice Queso that’s not only tasty but also a feast for the eyes. Enjoy the process and the delightful results!

Serving Suggestions for Crazy Chicken Mexican Style Rice Queso

Once your Crazy Chicken Mexican Style Rice Queso is ready, it’s time to think about how to serve it! Presentation can elevate your meal, making it even more enjoyable. Here are some delightful serving suggestions to consider:

  • Family Style: Serve the dish directly from the skillet at the table. This creates a warm, inviting atmosphere where everyone can help themselves. Provide serving spoons and let guests scoop out their portions.
  • Individual Bowls: For a more polished look, serve the Crazy Chicken Mexican Style Rice Queso in individual bowls. This way, each person gets their own serving, and you can add a personal touch with garnishes.
  • With Tortilla Chips: Pair your dish with crispy tortilla chips. They make a great side for scooping up the cheesy goodness. You can even sprinkle some chips on top for added crunch!
  • Fresh Sides: Complement your meal with fresh sides like a simple green salad or guacamole. These sides add freshness and balance to the rich flavors of the queso.
  • Garnishes: Don’t forget to garnish your dish! Fresh cilantro, diced avocados, or sliced jalapeños can enhance the presentation and flavor. Lime wedges on the side allow guests to add a zesty kick.

These serving suggestions not only enhance the dining experience but also allow for creativity. Whether you choose a casual or elegant presentation, your Crazy Chicken Mexican Style Rice Queso will surely impress everyone at the table!

Tips for Perfecting Crazy Chicken Mexican Style Rice Queso

To make your Crazy Chicken Mexican Style Rice Queso truly unforgettable, consider these helpful tips. They will guide you in achieving the best flavors and textures, ensuring that every bite is a delight!

First, marinate the chicken for extra flavor. If you have time, let the chicken sit in the spice mixture for at least 30 minutes before cooking. This allows the spices to penetrate the meat, making it even tastier.

Next, don’t skip the resting time for the chicken. After cooking, let it rest for a few minutes before slicing. This step helps the juices redistribute, keeping the chicken moist and tender.

When cooking the rice, consider using broth instead of water. Chicken or vegetable broth adds depth to the rice, enhancing the overall flavor of your dish. You can also add a pinch of salt to the water for extra seasoning.

For the queso dip, experiment with different cheeses. While cheddar is a classic choice, mixing in Monterey Jack or pepper jack can add a unique twist. These cheeses melt beautifully and provide a creamy texture.

Additionally, feel free to customize the spice level. If you enjoy heat, add more chili powder or diced jalapeños to the chicken seasoning. You can also sprinkle some cayenne pepper into the queso for an extra kick.

Lastly, serve your Crazy Chicken Mexican Style Rice Queso immediately after cooking. The cheese is best when it’s hot and gooey. If you need to keep it warm, cover the skillet with a lid and set it on low heat until ready to serve.

By following these tips, you’ll elevate your Crazy Chicken Mexican Style Rice Queso to new heights. Enjoy the process of cooking and the delicious results that come from it!

Breakdown of Time for Crazy Chicken Mexican Style Rice Queso

Understanding the time needed to prepare Crazy Chicken Mexican Style Rice Queso can help you plan your cooking session better. Here’s a simple breakdown of the time involved in each step of the process.

Prep Time

The prep time for this delicious dish is approximately 15-20 minutes. During this time, you will gather all your ingredients, season the chicken, and chop any vegetables you plan to use. If you choose to make your queso dip from scratch, you might need an extra few minutes to prepare that as well. Having everything ready before you start cooking will make the process smoother and more enjoyable!

Cooking Time

The cooking time for Crazy Chicken Mexican Style Rice Queso is about 25-30 minutes. This includes cooking the chicken, heating the vegetables, and combining everything in the skillet. The chicken takes around 12-14 minutes to cook through, while the vegetable mixture and rice need about 5-7 minutes to heat up and meld together. Finally, the cheese needs about 5 minutes to melt and become bubbly.

Total Time

In total, you can expect to spend around 40-50 minutes from start to finish. This includes both prep and cooking time. With this timeline, you can easily fit Crazy Chicken Mexican Style Rice Queso into your weeknight dinner plans or even serve it at a gathering with friends and family. The delicious flavors and satisfying textures will make it worth every minute spent in the kitchen!

Nutritional Information for Crazy Chicken Mexican Style Rice Queso

Understanding the nutritional content of your meals is essential for maintaining a balanced diet. Crazy Chicken Mexican Style Rice Queso is not only delicious but also provides a good mix of nutrients. Here’s a breakdown of the key nutritional information for this hearty dish.

Calories

Each serving of Crazy Chicken Mexican Style Rice Queso contains approximately 550 calories. This calorie count includes the chicken, rice, vegetables, and cheese, making it a filling option for dinner. The combination of protein, carbs, and fats ensures that you feel satisfied after your meal.

Protein

Protein is a vital nutrient for building and repairing tissues in the body. In Crazy Chicken Mexican Style Rice Queso, you’ll find about 35 grams of protein per serving. The chicken and black beans contribute significantly to this protein content, making it a great choice for those looking to increase their protein intake.

Sodium

Sodium is another important factor to consider in your diet. Each serving of Crazy Chicken Mexican Style Rice Queso contains around 800 mg of sodium. This amount can vary based on the ingredients you use, especially if you opt for canned items. To keep sodium levels in check, consider using low-sodium canned beans and tomatoes, or make your own queso dip from scratch.

By being aware of the nutritional information, you can enjoy Crazy Chicken Mexican Style Rice Queso while making informed choices about your diet. This dish not only satisfies your taste buds but also provides essential nutrients to fuel your day!

FAQs about Crazy Chicken Mexican Style Rice Queso

What can I substitute for chicken in Crazy Chicken Mexican Style Rice Queso?

If you’re looking to switch up the protein in your Crazy Chicken Mexican Style Rice Queso, there are plenty of tasty alternatives! Ground turkey is a lean option that works well. You can also use shredded pork, like carnitas, for a rich flavor. Ground beef or steak strips can add a robust taste, while grilled fish, such as tilapia or salmon, offers a lighter choice. Each of these proteins can be seasoned similarly to the chicken, ensuring your dish remains flavorful and satisfying.

Can I make Crazy Chicken Mexican Style Rice Queso ahead of time?

Absolutely! Crazy Chicken Mexican Style Rice Queso can be prepared ahead of time, making it a great option for meal prep. You can cook the chicken, rice, and vegetables in advance, then combine them with the queso dip and cheese just before serving. Store the components separately in airtight containers in the refrigerator for up to three days. When you’re ready to enjoy it, simply reheat everything in a skillet until warmed through, then add the cheese and let it melt for a delicious meal!

How do I store leftovers of Crazy Chicken Mexican Style Rice Queso?

Storing leftovers of Crazy Chicken Mexican Style Rice Queso is easy! Allow the dish to cool completely before transferring it to an airtight container. You can keep it in the refrigerator for up to three days. If you want to store it for a longer period, consider freezing it. Place the cooled dish in a freezer-safe container, and it can last for up to three months. When you’re ready to eat, thaw it in the refrigerator overnight and reheat it on the stove or in the microwave until hot.

Is Crazy Chicken Mexican Style Rice Queso spicy?

The spice level of Crazy Chicken Mexican Style Rice Queso can be adjusted to your liking! The base recipe is mildly seasoned, but you can easily add more heat. If you enjoy spicy food, consider adding diced jalapeños or a dash of hot sauce to the chicken seasoning. You can also sprinkle some cayenne pepper into the queso for an extra kick. Feel free to customize the spice level to suit your taste buds, ensuring everyone at the table can enjoy this delicious dish!

Conclusion on Crazy Chicken Mexican Style Rice Queso

In conclusion, Crazy Chicken Mexican Style Rice Queso is a delightful dish that brings the vibrant flavors of Mexico right to your dinner table. With its combination of tender chicken, colorful vegetables, and creamy queso, this meal is not only satisfying but also easy to prepare. Whether you’re cooking for family or hosting friends, this recipe is sure to impress everyone.

As we’ve explored, the versatility of Crazy Chicken Mexican Style Rice Queso allows you to customize it to your taste. You can switch up the proteins, try vegetarian options, or adjust the spice level to suit your preferences. The cooking notes and tips provided will help you achieve the best results, ensuring that every bite is bursting with flavor.

Moreover, the nutritional benefits of this dish make it a great choice for a balanced meal. With a good mix of protein, carbohydrates, and essential nutrients, Crazy Chicken Mexican Style Rice Queso can fuel your day while satisfying your cravings.

So, why not give this recipe a try? Gather your ingredients, follow the preparation steps, and enjoy the delicious results. Your taste buds will thank you, and your loved ones will be asking for seconds. Happy cooking!

Slow Cooker Meat Stuffed Shells are a family favorite!

Introduction to Slow Cooker Meat Stuffed Shells

Slow Cooker Meat Stuffed Shells. This comforting dish combines jumbo pasta shells filled with a savory meat and cheese mixture, all simmered in rich marinara sauce. It’s perfect for busy weeknights or cozy weekends when you want to enjoy a hearty meal without spending hours in the kitchen.

The beauty of this recipe lies in its simplicity. With just a few ingredients and a slow cooker, you can create a dish that’s not only satisfying but also packed with flavor. Imagine coming home to the delightful aroma of melted cheese and seasoned meat wafting through your home. It’s a meal that warms the heart and fills the belly!

Whether you’re a seasoned cook or a beginner, this recipe is straightforward and forgiving. Plus, it’s versatile! You can easily customize it to suit your taste preferences or dietary needs. From adding extra veggies to trying different types of meat, the possibilities are endless.

Slow Cooker Meat Stuffed Shells. Let’s explore the ingredients and preparation steps that will lead you to a delightful dinner experience!

Ingredients for Slow Cooker Meat Stuffed Shells

Slow Cooker Meat Stuffed Shells, you’ll need a handful of simple ingredients. Each component plays a vital role in building flavor and texture. Here’s what you’ll need:

  • 16 ounces jumbo pasta shells: These large shells are perfect for stuffing and hold the filling beautifully.
  • 1 pound ground beef or Italian sausage: Choose your favorite meat for a rich and hearty filling.
  • 1 small onion, diced: Adds sweetness and depth to the meat mixture.
  • 2 cloves garlic, minced: Garlic brings a wonderful aroma and flavor to the dish.
  • 24 ounces marinara sauce: This sauce is the base that ties everything together, providing moisture and flavor.
  • 15 ounces ricotta cheese: Creamy ricotta adds richness and helps bind the filling.
  • 1 cup shredded mozzarella cheese: Mozzarella melts beautifully, creating a gooey topping.
  • 1/2 cup grated Parmesan cheese: Parmesan adds a salty, nutty flavor that enhances the dish.
  • 1 teaspoon Italian seasoning: A blend of herbs that brings an authentic Italian taste.
  • 1/2 teaspoon salt: Enhances the overall flavor of the dish.
  • 1/4 teaspoon black pepper: Adds a hint of spice.
  • 1/4 cup fresh parsley, chopped (optional for garnish): Fresh parsley adds a pop of color and freshness when serving.

Slow Cooker Meat Stuffed Shells. Now that you have everything ready, let’s move on to the preparation steps!

Preparation of Slow Cooker Meat Stuffed Shells

Slow Cooker Meat Stuffed Shells. This process is simple and enjoyable, allowing you to create a delicious meal with minimal effort. Let’s break it down step by step!

Step 1: Prepare the Meat Filling

Start by heating a skillet over medium heat. Add the ground beef or Italian sausage along with the diced onion. Cook until the meat is browned and the onion becomes translucent. This usually takes about 5 to 7 minutes. Next, stir in the minced garlic and cook for an additional minute. The garlic will release its wonderful aroma, making your kitchen smell fantastic! If there’s any excess fat, drain it off to keep your filling nice and lean.

Step 2: Cook the Shells

While the meat mixture is cooking, bring a large pot of salted water to a boil. Add the jumbo pasta shells and cook them according to the package instructions until they are al dente. This means they should be firm to the bite but not hard. Once cooked, drain the shells and let them cool slightly. This will make them easier to handle when it’s time to stuff them.

Step 3: Assemble the Stuffed Shells

In a large mixing bowl, combine the cooked meat mixture with the ricotta cheese, Italian seasoning, salt, pepper, and half of the shredded mozzarella cheese. Mix everything together until it’s well combined. Now, take each pasta shell and carefully stuff it with the meat and cheese mixture. Don’t be shy; fill them generously for a hearty bite!

Step 4: Layer in the Slow Cooker

To start layering, spread a thin layer of marinara sauce on the bottom of your slow cooker. This will prevent the shells from sticking. Next, place the stuffed shells in a single layer on top of the sauce. Once they are arranged, pour the remaining marinara sauce over the shells, ensuring they are well covered. This will keep them moist and flavorful during cooking.

Step 5: Cook in the Slow Cooker

Finally, sprinkle the remaining mozzarella cheese and grated Parmesan cheese on top of the stuffed shells. Cover the slow cooker with its lid and set it to cook on low for 4 to 5 hours. The cheese will melt and become bubbly, creating a deliciously cheesy topping. Once the cooking time is up, let the dish sit for about 10 minutes before serving. This resting time allows the flavors to meld beautifully.

Slow Cooker Meat Stuffed Shells are ready to be enjoyed. The preparation is straightforward, and the result is a comforting meal that everyone will love.

Variation of Slow Cooker Meat Stuffed Shells

Slow Cooker Meat Stuffed Shells is their versatility. You can easily adapt the recipe to suit different tastes and dietary preferences. Let’s explore some exciting variations that will keep your meals fresh and interesting!

Vegetarian Option

Slow Cooker Meat Stuffed Shells. Instead of ground beef or sausage, you can use sautéed mushrooms, spinach, and zucchini. These vegetables add a wonderful texture and flavor to the filling. Simply cook them in a skillet until they are tender, then mix them with ricotta cheese, Italian seasoning, and your favorite herbs. This option is not only delicious but also packed with nutrients!

Different Meat Choices

For those who enjoy experimenting with flavors, there are plenty of meat options to choose from. You can swap the ground beef for ground turkey or chicken for a lighter dish. Alternatively, try using Italian sausage for a spicier kick. Mixing different meats can also create a unique flavor profile. For example, combining beef and sausage can give you a rich and hearty filling that everyone will love. The choice is yours!

Cheese Variations

Slow Cooker Meat Stuffed Shells. While ricotta, mozzarella, and Parmesan are classic choices, you can also experiment with other cheeses. For a creamier texture, try adding cream cheese to the filling. If you enjoy a sharper flavor, consider using aged cheddar or provolone. Mixing in some feta cheese can also add a delightful tang. The possibilities are endless!

Slow Cooker Meat Stuffed Shells that suits your taste and dietary needs. Whether you go vegetarian, switch up the meats, or play with different cheeses, each version will bring its own unique charm to the table!

Cooking Note for Slow Cooker Meat Stuffed Shells

Slow Cooker Meat Stuffed Shells, there are a few important cooking notes to keep in mind. These tips will help ensure that your dish turns out perfectly every time, making your cooking experience enjoyable and stress-free.

First, it’s essential to choose the right slow cooker size. A 6-quart slow cooker is ideal for this recipe, as it provides enough space for the stuffed shells to cook evenly. If your slow cooker is smaller, you may need to cook in batches or reduce the number of shells you prepare.

Next, consider the cooking time. While the recipe suggests cooking on low for 4 to 5 hours, every slow cooker is different. It’s a good idea to check the shells after about 4 hours. The cheese should be melted and bubbly, and the sauce should be hot. If you find that it needs more time, you can always extend the cooking duration by 30 minutes to an hour.

Another tip is to avoid overstuffing the shells. While it’s tempting to pack them full of the delicious meat and cheese mixture, overstuffing can lead to a mess. Leave a little space at the top of each shell to allow for expansion during cooking. This will help keep your dish looking neat and appetizing.

Lastly, don’t forget to let the dish rest for about 10 minutes after cooking. This resting period allows the flavors to meld and makes it easier to serve. The shells will hold their shape better, and the sauce will thicken slightly, enhancing the overall texture of the dish.

Slow Cooker Meat Stuffed Shells. Enjoy the process, and savor the delicious results!

Serving Suggestions for Slow Cooker Meat Stuffed Shells

Slow Cooker Meat Stuffed Shells are ready, it’s time to think about how to serve them. This dish is not only delicious but also visually appealing, making it perfect for family dinners or gatherings. Here are some serving suggestions to elevate your meal experience:

First, consider pairing your stuffed shells with a fresh salad. A simple green salad with mixed greens, cherry tomatoes, and a light vinaigrette can provide a refreshing contrast to the rich flavors of the stuffed shells. The crispness of the salad complements the creamy texture of the cheese and meat, creating a balanced meal.

Another great option is to serve garlic bread on the side. The warm, buttery bread is perfect for soaking up any extra marinara sauce left on your plate. You can easily make garlic bread by spreading butter and minced garlic on slices of baguette or Italian bread, then toasting them in the oven until golden brown.

Slow Cooker Meat Stuffed Shells with fresh basil or additional parsley. This not only enhances the presentation but also adds a burst of fresh flavor. A sprinkle of red pepper flakes can also provide a nice kick for those who enjoy a bit of heat.

For a heartier meal, you might want to serve the stuffed shells with a side of roasted vegetables. Roasted zucchini, bell peppers, or asparagus can add color and nutrition to your plate. Simply toss your favorite vegetables with olive oil, salt, and pepper, then roast them in the oven until tender.

Lastly, don’t forget about beverages! A glass of red wine, such as Chianti or Merlot, pairs beautifully with the flavors of the stuffed shells. If you prefer non-alcoholic options, sparkling water with a slice of lemon or a refreshing iced tea can also complement the meal nicely.

Slow Cooker Meat Stuffed Shells will not only be a hit at the dinner table but also create a delightful dining experience for you and your loved ones. Enjoy every bite!

Tips for Perfect Slow Cooker Meat Stuffed Shells

Slow Cooker Meat Stuffed Shells is all about attention to detail and a few helpful tips. With these suggestions, you can ensure that your dish turns out delicious every time. Let’s dive into some essential tips that will elevate your cooking experience!

First, always taste your filling before stuffing the shells. This is a crucial step! Adjust the seasoning as needed. If you prefer a bit more flavor, feel free to add extra Italian seasoning, salt, or pepper. Remember, the filling should be well-seasoned since it’s the heart of the dish.

Next, consider using a mix of cheeses in your filling. While ricotta is a classic choice, blending it with cream cheese or cottage cheese can add a delightful creaminess. Mixing in some shredded cheese, like mozzarella or cheddar, can also enhance the flavor and texture.

When cooking the pasta shells, be careful not to overcook them. You want them to be al dente, which means they should still have a slight bite. Overcooked shells can become mushy during the slow cooking process, leading to a less-than-ideal texture.

Another tip is to layer the marinara sauce generously. A good amount of sauce not only keeps the shells moist but also infuses them with flavor. Make sure to cover the shells completely with sauce to prevent them from drying out while cooking.

Slow Cooker Meat Stuffed Shells even more delicious!

Lastly, don’t rush the resting time after cooking. Allowing the dish to sit for about 10 minutes before serving helps the flavors meld together. It also makes it easier to serve, as the shells will hold their shape better.

Slow Cooker Meat Stuffed Shells. Enjoy the process, and savor the delightful results!

Breakdown of Time for Slow Cooker Meat Stuffed Shells

Slow Cooker Meat Stuffed Shells can help you plan your meal better. Here’s a simple breakdown of the time involved in preparing and cooking this delicious dish.

Prep Time

Slow Cooker Meat Stuffed Shells is approximately 30 minutes. This includes gathering your ingredients, cooking the meat filling, and stuffing the pasta shells. Taking your time during this stage ensures that everything is well-prepared and ready for the slow cooker.

Cooking Time

Once you have everything prepped, the cooking time in the slow cooker is about 4 to 5 hours on low heat. This slow cooking allows the flavors to meld beautifully, resulting in a rich and satisfying meal. If you’re in a hurry, you can cook on high for about 2 to 3 hours, but the low setting is recommended for the best results.

Total Time

Slow Cooker Meat Stuffed Shells. This includes both the prep and cooking times. It’s a great option for busy days when you want to set it and forget it, allowing you to enjoy a hearty meal with minimal effort!

Nutritional Information for Slow Cooker Meat Stuffed Shells

Slow Cooker Meat Stuffed Shells, it’s important to consider the nutritional aspects. Understanding the calories, protein, and sodium content can help you make informed choices about your diet. Here’s a breakdown of the nutritional information for this hearty dish:

Calories

Slow Cooker Meat Stuffed Shells contains approximately 450 calories. This makes it a satisfying meal that can keep you full and energized. The combination of pasta, meat, and cheese provides a good balance of carbohydrates and protein, making it a great option for dinner.

Protein

In terms of protein, each serving offers about 25 grams. This is beneficial for muscle repair and growth, especially if you lead an active lifestyle. The protein comes primarily from the ground beef or sausage and the ricotta cheese, making it a protein-packed meal that supports your dietary needs.

Sodium

When it comes to sodium, each serving contains around 800 milligrams. While this is a reasonable amount for a hearty dish, it’s always a good idea to monitor your sodium intake, especially if you are watching your salt consumption. You can reduce the sodium content by using low-sodium marinara sauce or opting for fresh herbs instead of salt for seasoning.

Slow Cooker Meat Stuffed Shells while being aware of your dietary choices. This dish not only satisfies your taste buds but also provides essential nutrients to fuel your day!

FAQs about Slow Cooker Meat Stuffed Shells

Can I use different types of pasta for stuffed shells?

Absolutely! While jumbo pasta shells are traditional for this recipe, you can experiment with other types of pasta. Manicotti, for example, is a great alternative. It has a similar shape and works well for stuffing. You could also use large conchiglie (shells) or even cannelloni. Just keep in mind that cooking times may vary slightly, so always check the package instructions for the best results.

How long can I store leftovers of Slow Cooker Meat Stuffed Shells?

Slow Cooker Meat Stuffed Shells can be stored in the refrigerator for up to 3 to 4 days. Make sure to place them in an airtight container to keep them fresh. When you’re ready to enjoy them again, simply reheat in the microwave or oven until heated through. This makes for a quick and satisfying meal on busy days!

Can I freeze Slow Cooker Meat Stuffed Shells?

Slow Cooker Meat Stuffed Shells! To do this, allow the dish to cool completely before transferring it to a freezer-safe container. It’s best to freeze them without the sauce to prevent sogginess. When you’re ready to eat, thaw in the refrigerator overnight and reheat in the oven or microwave. This way, you can enjoy a delicious homemade meal anytime!

What can I serve with Slow Cooker Meat Stuffed Shells?

Slow Cooker Meat Stuffed Shells. A fresh garden salad with mixed greens, cucumbers, and a light vinaigrette pairs wonderfully. Garlic bread is another favorite, perfect for soaking up the marinara sauce. You might also consider roasted vegetables, like zucchini or bell peppers, for a nutritious side. These options will complement the rich flavors of the stuffed shells and create a well-rounded meal!

Conclusion on Slow Cooker Meat Stuffed Shells

Slow Cooker Meat Stuffed Shells is a delightful dish that brings comfort and satisfaction to any meal. With its rich flavors and hearty ingredients, it’s a perfect choice for family dinners or gatherings with friends. The beauty of this recipe lies in its simplicity and versatility, allowing you to customize it to suit your taste preferences.

From the savory meat filling to the gooey cheese and marinara sauce, every bite is a burst of flavor. Plus, the slow cooker does all the hard work for you, making it an ideal option for busy days. Just prepare the ingredients, set the timer, and let the magic happen!

Whether you choose to stick with the classic recipe or explore the various variations, you’re sure to impress your loved ones with this comforting meal. Don’t forget to pair it with a fresh salad or garlic bread for a complete dining experience. And if you have leftovers, they make for a quick and delicious meal the next day!

Slow Cooker Meat Stuffed Shells. Enjoy the process, savor the flavors, and create wonderful memories around the dinner table. Happy cooking!

Shrimp and Spinach Stuffed Pasta Rolls are easy to make!

Introduction to Shrimp and Spinach Stuffed Pasta Rolls

Shrimp and Spinach Stuffed Pasta Rolls. This delightful dish combines the rich flavors of shrimp and fresh spinach, all wrapped in tender lasagna noodles. Topped with a creamy roasted red pepper sauce, it’s a feast for both the eyes and the taste buds.

These stuffed pasta rolls are not only tasty but also versatile. You can serve them for a family dinner, a special occasion, or even a cozy night in. The combination of shrimp and spinach provides a healthy dose of protein and nutrients, making this dish a great choice for anyone looking to eat well.

What makes this recipe even better is its simplicity. With just a few ingredients and straightforward steps, you can create a meal that feels gourmet without spending hours in the kitchen. Plus, the vibrant colors and flavors will impress your guests, making it a perfect dish for entertaining.

Shrimp and Spinach Stuffed Pasta Rolls a success. Whether you’re a seasoned cook or a beginner, you’ll find this recipe easy to follow and enjoyable to make. So, let’s dive into the world of stuffed pasta rolls and discover how to create this delightful dish!

Ingredients for Shrimp and Spinach Stuffed Pasta Rolls

Shrimp and Spinach Stuffed Pasta Rolls, you’ll need a selection of fresh and flavorful ingredients. Each component plays a vital role in bringing this dish to life. Here’s what you’ll need:

  • 8 large lasagna noodles
  • 1 cup cooked shrimp, chopped
  • 1 cup fresh spinach, chopped
  • 1 cup ricotta cheese
  • 1 cup shredded mozzarella cheese, divided
  • 1/4 cup grated Parmesan cheese
  • 1/2 teaspoon garlic powder
  • 1/2 teaspoon onion powder
  • 1/4 teaspoon red pepper flakes (optional)
  • Salt and pepper to taste
  • 1 cup roasted red peppers, drained and chopped
  • 1/2 cup heavy cream
  • 1 tablespoon olive oil
  • 1 tablespoon fresh basil, chopped (for garnish)

These ingredients come together to create a delightful balance of flavors. The shrimp adds a savory touch, while the spinach brings freshness. The creamy cheeses bind everything, making each bite rich and satisfying. The roasted red pepper cream sauce elevates the dish, adding a hint of sweetness and depth.

Feel free to customize the ingredients based on your preferences. For instance, you can use low-fat cheese for a healthier option or add extra vegetables for more nutrition. The beauty of this recipe lies in its flexibility, allowing you to make it your own!

Preparation of Shrimp and Spinach Stuffed Pasta Rolls

Shrimp and Spinach Stuffed Pasta Rolls. This section will guide you through each step, ensuring that your dish turns out perfectly. Let’s get started!

Step 1: Cook the Pasta

First, bring a large pot of salted water to a boil. Carefully add the lasagna noodles and cook them according to the package instructions until they are al dente. This usually takes about 8 to 10 minutes. Once cooked, drain the noodles and lay them flat on a clean kitchen towel. This prevents them from sticking together and makes them easier to handle later.

Step 2: Prepare the Filling

While the pasta is cooking, you can prepare the filling. In a mixing bowl, combine the chopped shrimp, fresh spinach, ricotta cheese, 1/2 cup of shredded mozzarella cheese, and grated Parmesan cheese. Add the garlic powder, onion powder, red pepper flakes (if using), and season with salt and pepper. Mix everything together until well combined. This filling is packed with flavor and nutrients!

Step 3: Assemble the Shrimp and Spinach Stuffed Pasta Rolls

Now comes the fun part—assembling the rolls! Take one lasagna noodle and spoon about 2-3 tablespoons of the shrimp and spinach mixture onto one end of the noodle. Carefully roll the noodle tightly, making sure the filling stays inside. Place the rolled noodle seam-side down in a 9×13 inch baking dish. Repeat this process with the remaining noodles and filling until everything is used up. Your dish is starting to take shape!

Step 4: Prepare the Sauce

Shrimp and Spinach Stuffed Pasta Rolls. Pour the sauce evenly over the assembled pasta rolls, ensuring they are well covered. Then, sprinkle the remaining mozzarella cheese on top for that delicious cheesy finish.

Step 5: Bake the Pasta Rolls

Preheat your oven to 375°F (190°C). Cover the baking dish with aluminum foil and bake for 25 minutes. After that, remove the foil and bake for an additional 10-15 minutes, or until the cheese is bubbly and golden brown. The aroma will fill your kitchen, making it hard to wait! Once done, let the dish cool for about 5 minutes before serving. This allows the flavors to settle and makes it easier to serve.

Shrimp and Spinach Stuffed Pasta Rolls are ready to be enjoyed. The combination of flavors and textures will surely impress anyone who tries them.

Variation of Shrimp and Spinach Stuffed Pasta Rolls

Shrimp and Spinach Stuffed Pasta Rolls recipe is delicious on its own, there are many ways to switch things up! You can easily customize the filling and sauce to suit your taste or dietary needs. Let’s explore some alternative fillings and different sauces that can elevate your dish even further.

Alternative Fillings

One of the best things about stuffed pasta rolls is their versatility. You can experiment with various fillings to create new flavors. Here are some ideas:

  • Crab and Cream Cheese: Substitute shrimp with lump crab meat and add cream cheese for a rich, decadent filling.
  • Mushroom and Ricotta: Sauté mushrooms with garlic and mix them with ricotta cheese for a vegetarian option.
  • Chicken and Broccoli: Use shredded cooked chicken and steamed broccoli for a hearty and nutritious filling.
  • Spinach and Feta: Replace ricotta with feta cheese and add sun-dried tomatoes for a Mediterranean twist.

Feel free to mix and match ingredients based on what you have on hand. The key is to maintain a balance of flavors and textures, ensuring each bite is satisfying.

Different Sauces to Pair

Shrimp and Spinach Stuffed Pasta Rolls. While the roasted red pepper cream sauce is fantastic, you can try these alternatives:

  • Alfredo Sauce: A creamy Alfredo sauce made with butter, cream, and Parmesan cheese adds a rich flavor that pairs beautifully with the pasta rolls.
  • Marinara Sauce: For a classic Italian touch, serve your rolls with a homemade or store-bought marinara sauce. The acidity of the tomatoes complements the richness of the filling.
  • Pesto Sauce: Drizzle some basil pesto over the rolls for a fresh and vibrant flavor. This is especially great if you’re using spinach and feta as a filling.
  • White Wine Sauce: A light white wine sauce with garlic and herbs can add a sophisticated touch to your dish.

Shrimp and Spinach Stuffed Pasta Rolls will always be a hit!

Cooking Note for Shrimp and Spinach Stuffed Pasta Rolls

Shrimp and Spinach Stuffed Pasta Rolls, there are a few cooking notes to keep in mind. These tips will help ensure that your dish turns out perfectly every time. Let’s dive into some essential points to consider!

First, always check the freshness of your shrimp. If you’re using frozen shrimp, make sure to thaw them completely before cooking. This helps maintain the right texture and flavor. Fresh shrimp will give your dish a delightful taste, enhancing the overall experience.

Next, when cooking the lasagna noodles, be careful not to overcook them. You want them to be al dente, which means they should still have a slight bite. Overcooked noodles can become mushy and may break apart when you roll them. So, keep an eye on the cooking time!

Additionally, when mixing the filling, don’t be afraid to adjust the seasonings. Taste the mixture before stuffing the noodles. If you prefer a stronger flavor, add more garlic powder or red pepper flakes. This is your chance to customize the dish to your liking!

While assembling the rolls, ensure that you don’t overfill them. If you add too much filling, it may spill out during baking. A good rule of thumb is to use about 2-3 tablespoons of filling per noodle. This will help keep everything neatly contained.

Lastly, let the dish cool for a few minutes after baking. This resting time allows the flavors to meld together and makes it easier to serve. Plus, it prevents anyone from burning their mouth on the hot cheese!

Shrimp and Spinach Stuffed Pasta Rolls that everyone will love. Enjoy the process and happy cooking!

Serving Suggestions for Shrimp and Spinach Stuffed Pasta Rolls

Shrimp and Spinach Stuffed Pasta Rolls are baked to perfection, it’s time to think about how to serve them. Presentation can elevate your dish, making it even more appealing. Here are some delightful serving suggestions to enhance your meal:

  • Garnish with Fresh Herbs: A sprinkle of fresh basil or parsley on top adds a pop of color and freshness. It also complements the flavors beautifully.
  • Pair with a Side Salad: Serve your pasta rolls with a light side salad. A simple mix of greens, cherry tomatoes, and a vinaigrette dressing balances the richness of the dish.
  • Accompany with Garlic Bread: A slice of warm garlic bread is perfect for soaking up any extra sauce. It adds a comforting touch to your meal.
  • Offer Extra Sauce: Consider serving additional roasted red pepper cream or marinara sauce on the side. This allows guests to add more sauce to their liking.
  • Wine Pairing: A glass of white wine, such as Pinot Grigio or Sauvignon Blanc, pairs wonderfully with shrimp. The crispness of the wine complements the flavors of the dish.

Shrimp and Spinach Stuffed Pasta Rolls look even more appetizing. Whether it’s a family dinner or a gathering with friends, these ideas will surely impress your guests!

Tips for Perfect Shrimp and Spinach Stuffed Pasta Rolls

Shrimp and Spinach Stuffed Pasta Rolls is all about attention to detail. With a few helpful tips, you can elevate your dish and ensure it turns out delicious every time. Here are some essential tips to keep in mind:

First, always use high-quality ingredients. Fresh shrimp and vibrant spinach will enhance the flavor of your rolls. If possible, buy shrimp from a trusted source. Fresh ingredients make a noticeable difference in taste.

Next, don’t skip the seasoning! The filling should be flavorful, so taste it before stuffing the noodles. Adjust the seasonings to your liking. A little extra garlic or a pinch of salt can go a long way in enhancing the overall flavor.

When rolling the lasagna noodles, be gentle but firm. If you roll too tightly, the filling may burst out during baking. Conversely, if you roll too loosely, the filling may fall out. Aim for a snug fit that keeps everything together.

Another tip is to let the assembled rolls rest for a few minutes before baking. This allows the filling to settle and helps the flavors meld together. It also makes it easier to handle the rolls when transferring them to the baking dish.

For a beautiful presentation, consider broiling the pasta rolls for a minute or two at the end of baking. This will give the cheese a lovely golden color and a slightly crispy texture. Just keep a close eye on them to prevent burning!

Lastly, don’t forget to let the dish cool for a few minutes after baking. This resting time allows the sauce to thicken slightly and makes serving easier. Plus, it prevents anyone from burning their mouth on hot cheese!

Shrimp and Spinach Stuffed Pasta Rolls that are sure to impress your family and friends. Enjoy the cooking process and savor every delicious bite!

Breakdown of Time for Shrimp and Spinach Stuffed Pasta Rolls

Shrimp and Spinach Stuffed Pasta Rolls can help you plan your meal better. Here’s a simple breakdown of the time required for each step, so you can enjoy a smooth cooking experience.

Prep Time

The prep time for this delightful dish is approximately 30 minutes. This includes:

  • Gathering all your ingredients.
  • Cooking the lasagna noodles until al dente.
  • Chopping the shrimp and spinach.
  • Mixing the filling ingredients together.
  • Preparing the roasted red pepper sauce in the blender.

Taking your time during prep ensures that everything is ready for assembly, making the cooking process more enjoyable.

Cooking Time

Shrimp and Spinach Stuffed Pasta Rolls is about 35 to 40 minutes. This includes:

  • Baking the rolls covered with foil for 25 minutes.
  • Baking uncovered for an additional 10-15 minutes until the cheese is bubbly and golden.

This cooking time allows the flavors to meld beautifully while ensuring the pasta is cooked perfectly.

Total Time

In total, you can expect to spend about 1 hour and 10 minutes from start to finish. This includes both prep and cooking time. Here’s a quick summary:

  • Prep Time: 30 minutes
  • Cooking Time: 35-40 minutes
  • Total Time: 1 hour and 10 minutes

Shrimp and Spinach Stuffed Pasta Rolls into your schedule, whether it’s a weeknight dinner or a weekend gathering. Enjoy the process and the delicious results!

Nutritional Information for Shrimp and Spinach Stuffed Pasta Rolls

Shrimp and Spinach Stuffed Pasta Rolls not only taste great but also provide a good mix of nutrients. Here’s a closer look at the nutritional information for this delightful dish.

Calories

Shrimp and Spinach Stuffed Pasta Rolls contains approximately 450 calories. This makes it a satisfying meal that can fit into various dietary plans. The combination of shrimp, cheese, and pasta provides a hearty dish without being overly heavy.

Protein

Protein is an essential nutrient for building and repairing tissues. Each serving of these pasta rolls offers about 28 grams of protein. The shrimp and ricotta cheese contribute significantly to this protein content, making it a great option for those looking to increase their protein intake.

Sodium

When it comes to sodium, each serving contains around 800 milligrams. While this is a reasonable amount for a meal, it’s always good to be mindful of your overall sodium intake throughout the day. You can reduce sodium by using low-sodium cheese or by adjusting the amount of salt added during preparation.

Shrimp and Spinach Stuffed Pasta Rolls provide a balanced meal with a good mix of calories, protein, and sodium. This makes it a delicious option for lunch or dinner, especially when paired with a fresh salad or some garlic bread. Enjoy this nutritious dish while savoring every bite!

FAQs about Shrimp and Spinach Stuffed Pasta Rolls

Can I use frozen shrimp for Shrimp and Spinach Stuffed Pasta Rolls?

Shrimp and Spinach Stuffed Pasta Rolls. Just make sure to thaw them completely before cooking. To do this, place the shrimp in the refrigerator overnight or run them under cold water for a quick thaw. Once thawed, chop them into small pieces and proceed with the recipe as usual. Using frozen shrimp can be a convenient option, and they will still taste delicious in your dish!

What can I substitute for spinach in Shrimp and Spinach Stuffed Pasta Rolls?

If you’re not a fan of spinach or simply want to try something different, there are several great substitutes! You can use kale, Swiss chard, or even arugula. These greens will provide a similar texture and flavor. If you prefer a different taste, consider using cooked broccoli or sautéed mushrooms. Just make sure to chop them finely so they mix well with the other filling ingredients. Feel free to get creative with your choices!

How do I store leftover Shrimp and Spinach Stuffed Pasta Rolls?

Shrimp and Spinach Stuffed Pasta Rolls to cool completely before transferring them to an airtight container. You can keep them in the refrigerator for up to 3 days. If you want to store them for a longer period, consider freezing them. Wrap the rolls tightly in plastic wrap and then place them in a freezer-safe container. They can last up to 2 months in the freezer. When you’re ready to enjoy them again, simply thaw in the refrigerator and reheat in the oven until warmed through.

Can I make Shrimp and Spinach Stuffed Pasta Rolls ahead of time?

Shrimp and Spinach Stuffed Pasta Rolls ahead of time! This is a great option for busy days or special occasions. You can assemble the rolls and place them in the baking dish, then cover with foil and refrigerate for up to 24 hours before baking. When you’re ready to cook, just add a few extra minutes to the baking time since they will be cold from the fridge. This makes it super convenient to have a delicious meal ready to go!

Conclusion on Shrimp and Spinach Stuffed Pasta Rolls

Shrimp and Spinach Stuffed Pasta Rolls are a delightful dish that combines flavor, nutrition, and ease of preparation. This recipe showcases the wonderful pairing of tender shrimp and fresh spinach, all enveloped in comforting lasagna noodles. The creamy roasted red pepper sauce adds a rich touch, making each bite a true delight.

Whether you’re cooking for a family dinner, hosting friends, or simply treating yourself, these pasta rolls are sure to impress. The versatility of the recipe allows you to customize the filling and sauce to suit your taste preferences. From alternative fillings like crab and cream cheese to different sauces like marinara or pesto, the possibilities are endless!

Shrimp and Spinach Stuffed Pasta Rolls can fit into various dietary plans without sacrificing flavor.

As you embark on your cooking journey, remember the tips and variations shared in this article. They will help you create a dish that not only tastes great but also looks beautiful on the plate. So, gather your ingredients, roll up your sleeves, and enjoy the process of making this delicious meal!

Shrimp and Spinach Stuffed Pasta Rolls with your loved ones. Happy cooking!

Sun-Dried Tomato Pasta Recipe is a must-try dish!

Introduction to Sun-Dried Tomato Pasta Recipe

Welcome to the delightful world of Sun-Dried Tomato Pasta! This dish is not just a meal; it’s an experience that brings together rich flavors and comforting textures. With its creamy sauce and the tangy sweetness of sun-dried tomatoes, this pasta recipe is sure to become a favorite in your kitchen.

What Makes Sun-Dried Tomato Pasta Special?

Sun-Dried Tomato Pasta stands out for several reasons. First, the sun-dried tomatoes add a unique depth of flavor that fresh tomatoes simply can’t match. Their concentrated sweetness and slight chewiness create a wonderful contrast to the creamy sauce. Moreover, the combination of garlic and Parmesan cheese enhances the overall taste, making each bite a burst of deliciousness.

Another reason this dish is special is its versatility. You can easily customize it to suit your dietary preferences. Whether you want to add protein, go vegetarian, or even make it vegan, the options are endless. Plus, it’s quick to prepare, making it perfect for busy weeknights or a cozy weekend dinner.

In addition, the creamy texture of the sauce clings beautifully to the penne pasta, ensuring that every forkful is satisfying. The use of heavy cream gives it a rich mouthfeel, while the Italian seasoning ties all the flavors together. This recipe is not just about filling your stomach; it’s about enjoying a delightful culinary experience.

So, gather your ingredients and get ready to whip up a dish that’s not only easy to make but also packed with flavor. Let’s dive into the ingredients you’ll need for this scrumptious Sun-Dried Tomato Pasta Recipe!

Ingredients for Sun-Dried Tomato Pasta Recipe

To create a mouthwatering Sun-Dried Tomato Pasta, you’ll need a few simple yet flavorful ingredients. Each component plays a vital role in bringing this dish to life. Here’s what you’ll need:

  • 8 ounces penne pasta: This pasta shape is perfect for holding onto the creamy sauce.
  • 1 cup sun-dried tomatoes in oil: Make sure to drain and chop them for easy mixing.
  • 3 cloves garlic: Minced garlic adds a fragrant kick to the dish.
  • 1 cup heavy cream: This ingredient gives the sauce its rich and creamy texture.
  • 1 cup grated Parmesan cheese: Freshly grated cheese melts beautifully and enhances the flavor.
  • 1 teaspoon Italian seasoning: A blend of herbs that brings an authentic Italian taste.
  • Salt and pepper to taste: Essential for seasoning and balancing flavors.
  • 2 tablespoons olive oil: Used for sautéing the garlic and sun-dried tomatoes.
  • Fresh basil leaves (optional): These make a lovely garnish and add freshness.

With these ingredients on hand, you’re well on your way to creating a delicious Sun-Dried Tomato Pasta. Each item contributes to the overall flavor and texture, making this dish a delightful experience. Now that you have everything ready, let’s move on to the step-by-step preparation of this fantastic recipe!

Step-by-Step Preparation of Sun-Dried Tomato Pasta Recipe

Now that you have gathered all your ingredients, it’s time to dive into the step-by-step preparation of your Sun-Dried Tomato Pasta. This process is straightforward and enjoyable, allowing you to create a delicious meal in no time. Let’s get started!

Step 1: Preparing the Ingredients

Before you start cooking, it’s essential to prepare all your ingredients. Begin by measuring out the penne pasta, sun-dried tomatoes, and heavy cream. Mince the garlic cloves finely to release their flavor. Grate the Parmesan cheese if you haven’t done so already. Having everything ready will make the cooking process smooth and efficient.

Step 2: Cooking the Pasta

Next, bring a large pot of salted water to a boil. Once boiling, add the penne pasta. Cook it according to the package instructions until it reaches an al dente texture. This usually takes about 8 to 10 minutes. Remember to stir occasionally to prevent sticking. Once cooked, drain the pasta in a colander, but don’t forget to reserve about ½ cup of the pasta water. This starchy water will help adjust the sauce later if needed.

Step 3: Making the Sauce

In a large skillet, heat the olive oil over medium heat. Once hot, add the minced garlic and sauté for about 1 minute. You want it fragrant but not burnt. Then, stir in the chopped sun-dried tomatoes and cook for another 2 minutes. This step allows the flavors to meld beautifully. Lower the heat and pour in the heavy cream, stirring to combine. Bring the mixture to a gentle simmer.

Now, add the grated Parmesan cheese and Italian seasoning. Stir continuously until the cheese melts and the sauce becomes smooth. If the sauce seems too thick, gradually add some reserved pasta water until you achieve your desired consistency. This creamy sauce is the heart of your Sun-Dried Tomato Pasta!

Step 4: Combining Pasta and Sauce

Once your sauce is ready, it’s time to bring everything together. Add the drained penne pasta to the skillet with the sauce. Toss the pasta gently to ensure it’s evenly coated with the creamy mixture. This step is crucial as it allows the pasta to absorb the flavors of the sauce, making each bite delicious.

Step 5: Final Touches

Finally, season your dish with salt and pepper to taste. Give it one last toss to mix everything well. If you like, garnish your Sun-Dried Tomato Pasta with fresh basil leaves for a pop of color and added freshness. Serve immediately while it’s hot and enjoy the delightful flavors!

With these simple steps, you’ve created a fantastic Sun-Dried Tomato Pasta that’s sure to impress. Now, let’s explore some variations to make this dish even more exciting!

Variations of Sun-Dried Tomato Pasta Recipe

While the classic Sun-Dried Tomato Pasta is delicious on its own, there are many ways to customize it to suit your taste. Whether you want to add protein or explore vegetarian and vegan options, these variations will keep your meals exciting and flavorful. Let’s take a closer look!

Adding Protein Options

If you’re looking to boost the protein content of your Sun-Dried Tomato Pasta, consider adding grilled chicken or shrimp. Both options pair wonderfully with the creamy sauce and sun-dried tomatoes. Simply grill or sauté the protein of your choice, then toss it in with the pasta and sauce during the final mixing step.

For a heartier meal, you can also use Italian sausage. Cook the sausage in the skillet before adding the garlic and sun-dried tomatoes. This will infuse the dish with even more flavor. If you prefer a lighter option, try adding cooked chickpeas or white beans. They not only add protein but also a nice texture to the dish.

Vegetarian and Vegan Alternatives

For those following a vegetarian diet, you can easily make this dish meat-free. Simply skip the protein additions and focus on enhancing the flavors with extra vegetables. Spinach, zucchini, or bell peppers can be sautéed along with the garlic and sun-dried tomatoes for added nutrition and color.

If you want to make a vegan version of Sun-Dried Tomato Pasta, substitute the heavy cream with coconut cream or cashew cream. These alternatives provide a creamy texture without any dairy. Additionally, use nutritional yeast instead of Parmesan cheese for a cheesy flavor that’s completely plant-based. You can also add some sautéed mushrooms for an earthy taste that complements the sun-dried tomatoes beautifully.

With these variations, you can enjoy Sun-Dried Tomato Pasta in many different ways. Whether you’re adding protein or exploring vegetarian and vegan options, each twist brings something new to the table. Now, let’s move on to some cooking notes to ensure your dish turns out perfectly!

Cooking Note for Sun-Dried Tomato Pasta Recipe

Cooking is an art, and every great dish requires attention to detail. When making your Sun-Dried Tomato Pasta, keep these important notes in mind to ensure a delicious outcome.

First, choose high-quality sun-dried tomatoes. The flavor of your dish greatly depends on the quality of the tomatoes you use. Opt for sun-dried tomatoes packed in oil, as they tend to be more flavorful and tender. If you can find them, look for those that are labeled as “packed in olive oil” for an extra layer of taste.

Next, be mindful of the garlic. Garlic can burn quickly, which can lead to a bitter taste in your sauce. Sauté it just until fragrant, about one minute, and then add the sun-dried tomatoes. This will help preserve its flavor and aroma.

When it comes to the heavy cream, consider using a full-fat version for the richest flavor. However, if you’re looking for a lighter option, you can substitute half of the cream with low-fat milk or Greek yogurt. Just remember that this may alter the creaminess of the sauce slightly.

Don’t forget to reserve that pasta water! The starchy water is a secret weapon in pasta dishes. It helps to adjust the sauce’s consistency and allows it to cling better to the pasta. Add it gradually until you reach your desired thickness.

Lastly, serve your Sun-Dried Tomato Pasta immediately after mixing. The creamy sauce is best enjoyed fresh, as it can thicken as it cools. If you need to reheat leftovers, add a splash of milk or cream to loosen the sauce before warming it up.

By following these cooking notes, you’ll elevate your Sun-Dried Tomato Pasta to new heights. Now that you’re equipped with these tips, let’s explore some serving suggestions to complement your delicious dish!

Serving Suggestions for Sun-Dried Tomato Pasta Recipe

Now that you’ve created a delicious Sun-Dried Tomato Pasta, it’s time to think about how to serve it. The right side dishes and beverages can enhance your meal, making it even more enjoyable. Here are some fantastic serving suggestions to consider!

Pairing with Side Dishes

When it comes to side dishes, you want to complement the rich flavors of your Sun-Dried Tomato Pasta. Here are a few ideas:

  • Garlic Bread: A classic choice! The crispy, buttery garlic bread pairs perfectly with the creamy pasta, allowing you to soak up every last bit of sauce.
  • Caesar Salad: A fresh Caesar salad adds a nice crunch and balances the richness of the pasta. The crisp romaine lettuce and tangy dressing are a delightful contrast.
  • Roasted Vegetables: Consider serving a medley of roasted vegetables, such as zucchini, bell peppers, and asparagus. Their natural sweetness and slight char will enhance the overall meal.
  • Steamed Broccoli: For a simple and healthy option, steamed broccoli adds color and nutrition. Plus, it’s easy to prepare!

These side dishes not only complement the Sun-Dried Tomato Pasta but also create a well-rounded meal that’s satisfying and delicious.

Wine Pairing Recommendations

To elevate your dining experience, consider pairing your Sun-Dried Tomato Pasta with the right wine. Here are some excellent options:

  • Chardonnay: A full-bodied Chardonnay, especially one that’s oaked, complements the creamy sauce beautifully. Its buttery notes enhance the richness of the dish.
  • Sauvignon Blanc: If you prefer a crisper wine, a Sauvignon Blanc offers bright acidity that cuts through the creaminess, refreshing your palate.
  • Pinot Grigio: This light and fruity white wine is another great choice. Its citrus notes pair well with the sun-dried tomatoes, enhancing their flavor.
  • Chianti: For red wine lovers, a Chianti provides a nice balance. Its acidity and cherry flavors complement the savory elements of the pasta.

Choosing the right wine can elevate your meal, making it a memorable dining experience. So, pour yourself a glass and enjoy your Sun-Dried Tomato Pasta with these delightful pairings!

Tips for Perfecting Your Sun-Dried Tomato Pasta Recipe

Creating the perfect Sun-Dried Tomato Pasta is all about attention to detail and a few helpful tips. With these suggestions, you can elevate your dish and impress your family and friends. Let’s explore some essential tips for perfecting your Sun-Dried Tomato Pasta Recipe!

First, always taste as you go. This is crucial for achieving the right balance of flavors. After adding the salt and pepper, take a moment to taste the sauce. Adjust the seasoning if needed. A little extra salt or a pinch of red pepper flakes can make a big difference!

Next, consider the timing of your ingredients. To keep the sun-dried tomatoes vibrant, add them to the skillet just after the garlic has sautéed. This ensures they retain their texture and flavor without becoming too soft.

Another tip is to use freshly grated Parmesan cheese. Pre-grated cheese often contains anti-caking agents that can affect the melting process. Freshly grated cheese melts smoothly, creating a luscious sauce that clings beautifully to the pasta.

For a burst of freshness, add a squeeze of lemon juice just before serving. This brightens the dish and enhances the flavors of the sun-dried tomatoes and cream. It’s a simple addition that can elevate your pasta to new heights!

Lastly, don’t be afraid to experiment with herbs. While Italian seasoning is a great base, adding fresh herbs like thyme or oregano can bring a new dimension to your dish. Just sprinkle them in during the final mixing for a fresh, aromatic touch.

By following these tips, you’ll be well on your way to creating a Sun-Dried Tomato Pasta that’s not only delicious but also memorable. Now that you have the tools to perfect your dish, let’s break down the time needed for this delightful recipe!

Breakdown of Time for Sun-Dried Tomato Pasta Recipe

Understanding the time required for each step of your Sun-Dried Tomato Pasta Recipe can help you plan your cooking efficiently. Here’s a breakdown of the time you’ll need for preparation and cooking, ensuring you can enjoy this delicious dish without any rush.

Prep Time

The prep time for this Sun-Dried Tomato Pasta is quite minimal. You’ll need about 10 to 15 minutes to gather and prepare your ingredients. This includes measuring the pasta, chopping the sun-dried tomatoes, mincing the garlic, and grating the Parmesan cheese. Having everything ready will make the cooking process smooth and enjoyable.

Cooking Time

Once you start cooking, the actual cooking time will take around 15 to 20 minutes. This includes boiling the pasta, sautéing the garlic and sun-dried tomatoes, and making the creamy sauce. The quick cooking time makes this recipe perfect for busy weeknights when you want a delicious meal without spending hours in the kitchen.

Total Time

In total, you can expect to spend about 30 to 35 minutes from start to finish. This includes both prep and cooking time. With such a quick turnaround, you can easily whip up this delightful Sun-Dried Tomato Pasta and enjoy a satisfying meal in no time!

Nutritional Information for Sun-Dried Tomato Pasta Recipe

Understanding the nutritional content of your meals is essential for maintaining a balanced diet. The Sun-Dried Tomato Pasta is not only delicious but also provides a good mix of nutrients. Here’s a breakdown of the nutritional information per serving, so you can enjoy this dish while being mindful of your dietary needs.

Calories

Each serving of Sun-Dried Tomato Pasta contains approximately 550 calories. This calorie count includes the rich ingredients like heavy cream and Parmesan cheese, which contribute to the overall energy content of the dish. While it’s a hearty meal, it’s important to enjoy it in moderation, especially if you’re watching your calorie intake.

Protein Content

This pasta dish offers about 18 grams of protein per serving. The protein primarily comes from the Parmesan cheese and the penne pasta. If you choose to add grilled chicken, shrimp, or beans, you can significantly increase the protein content, making it a more filling option for those who need extra energy.

Sodium Levels

The sodium content in each serving is around 800 milligrams. This level is mainly due to the added salt and the Parmesan cheese. If you’re watching your sodium intake, consider using low-sodium cheese or reducing the amount of salt you add during cooking. Balancing flavors with herbs and spices can also help reduce the need for extra salt.

By being aware of the nutritional information, you can enjoy your Sun-Dried Tomato Pasta while making informed choices about your diet. Whether you’re indulging in a comforting meal or looking for a quick weeknight dinner, this dish can fit into a healthy lifestyle with the right adjustments.

FAQs about Sun-Dried Tomato Pasta Recipe

Can I use fresh tomatoes instead of sun-dried tomatoes?

Yes, you can use fresh tomatoes in your Sun-Dried Tomato Pasta, but the flavor will be different. Fresh tomatoes have a higher water content and a milder taste compared to sun-dried tomatoes. To mimic the concentrated flavor, consider roasting the fresh tomatoes first. This will enhance their sweetness and create a richer taste. However, keep in mind that the texture will also change, as fresh tomatoes will not provide the same chewiness as sun-dried ones.

How can I store leftover Sun-Dried Tomato Pasta?

Storing leftover Sun-Dried Tomato Pasta is easy! Allow the pasta to cool completely before transferring it to an airtight container. You can keep it in the refrigerator for up to 3 days. When you’re ready to enjoy it again, simply reheat it in a skillet over low heat. If the sauce has thickened, add a splash of milk or cream to loosen it up. This will help restore its creamy texture and flavor.

What can I substitute for pasta in this recipe?

If you’re looking for a pasta substitute, there are several options available. For a gluten-free alternative, consider using zucchini noodles (zoodles) or spaghetti squash. Both options provide a light and healthy base for the creamy sauce. If you prefer a low-carb option, cauliflower rice can also work well. Just remember that cooking times may vary, so adjust accordingly to ensure everything is cooked perfectly!

Is Sun-Dried Tomato Pasta Recipe suitable for meal prep?

Absolutely! Sun-Dried Tomato Pasta is a fantastic option for meal prep. You can prepare the entire dish ahead of time and store it in individual portions. This makes it easy to grab a quick meal during busy days. Just remember to store the pasta and sauce separately if you want to maintain the best texture. When reheating, add a little extra cream or pasta water to keep the sauce creamy and delicious!

Conclusion on Sun-Dried Tomato Pasta Recipe

In conclusion, the Sun-Dried Tomato Pasta Recipe is a delightful dish that combines rich flavors and creamy textures, making it a perfect choice for any occasion. Whether you’re cooking for a family dinner or a cozy night in, this recipe is sure to impress. The unique taste of sun-dried tomatoes, paired with the savory garlic and Parmesan cheese, creates a meal that is both satisfying and comforting.

Moreover, the versatility of this dish allows you to customize it to your liking. You can easily add proteins, explore vegetarian options, or even make it vegan. This adaptability ensures that everyone at the table can enjoy a delicious meal tailored to their preferences.

As you prepare your Sun-Dried Tomato Pasta, remember the tips and variations shared throughout this article. They will help you create a dish that not only tastes great but also looks appealing. From choosing high-quality ingredients to experimenting with flavors, each step contributes to a memorable dining experience.

So, gather your ingredients, follow the steps, and enjoy the process of making this delightful pasta. With its creamy sauce and vibrant flavors, your Sun-Dried Tomato Pasta will surely become a beloved recipe in your kitchen. Happy cooking!

Sweet and Savory Orange Chicken Stir-Fry is delicious!

Introduction to Sweet and Savory Orange Chicken Stir-Fry

Sweet and Savory Orange Chicken Stir-Fry is a delightful dish that combines tender chicken thighs with vibrant vegetables, all coated in a luscious orange sauce. This recipe is not only quick to prepare but also packed with nutrients, making it a perfect choice for busy weeknights.

Imagine the aroma of garlic and ginger wafting through your kitchen as you whip up this colorful stir-fry. The sweetness of the orange juice pairs beautifully with the savory soy sauce, creating a balance that will tantalize your taste buds. Plus, the bright colors of the broccoli, bell peppers, and snap peas make this dish as pleasing to the eyes as it is to the palate.

Whether you’re cooking for your family or hosting friends, this stir-fry is sure to impress. It’s versatile too! You can easily swap out the chicken for shrimp or tofu, making it suitable for various dietary preferences. Serve it over fluffy rice or quinoa, and you have a complete meal that everyone will love.

Sweet and Savory Orange Chicken Stir-Fry a hit. Let’s dive into the world of flavors and colors that this dish has to offer!

Ingredients for Sweet and Savory Orange Chicken Stir-Fry

Sweet and Savory Orange Chicken Stir-Fry, you’ll need a variety of fresh ingredients that come together to create a delightful meal. Here’s what you’ll need:

  • 2 tablespoons vegetable oil
  • 1 pound boneless, skinless chicken thighs, cut into bite-sized pieces
  • 1 teaspoon salt
  • 1/2 teaspoon black pepper
  • 1 cup broccoli florets
  • 1 bell pepper, sliced (any color)
  • 1 cup snap peas
  • 1/2 cup carrots, thinly sliced
  • 1/4 cup green onions, chopped
  • 1/2 cup orange juice
  • 1/4 cup soy sauce
  • 2 tablespoons honey
  • 1 tablespoon cornstarch
  • 1 tablespoon water
  • 1 teaspoon minced garlic
  • 1 teaspoon minced ginger
  • Cooked rice or quinoa, for serving

These ingredients are not only easy to find but also contribute to the vibrant flavors of the dish. The chicken thighs provide a juicy base, while the vegetables add crunch and color. The combination of orange juice and soy sauce creates a sweet and savory sauce that ties everything together beautifully.

Feel free to get creative! You can adjust the vegetables based on what you have on hand or your personal preferences. The key is to keep the balance of flavors and textures that make this stir-fry so enjoyable. Now that you have your ingredients ready, let’s move on to the preparation steps!

Step-by-Step Preparation of Sweet and Savory Orange Chicken Stir-Fry

Sweet and Savory Orange Chicken Stir-Fry to life! Follow these simple steps to create a delicious meal that will impress everyone at your table.

Step 1: Preparing the Chicken

Start by heating 2 tablespoons of vegetable oil in a large skillet or wok over medium-high heat. Once the oil is hot, add 1 pound of boneless, skinless chicken thighs that you’ve cut into bite-sized pieces. Season the chicken with 1 teaspoon of salt and 1/2 teaspoon of black pepper. Cook the chicken for about 5-7 minutes, stirring occasionally, until it’s browned and cooked through. Once done, remove the chicken from the skillet and set it aside on a plate.

Step 2: Making the Orange Sauce

While the chicken is cooking, you can prepare the orange sauce. In a small bowl, whisk together 1/2 cup of orange juice, 1/4 cup of soy sauce, 2 tablespoons of honey, 1 tablespoon of cornstarch, 1 tablespoon of water, 1 teaspoon of minced garlic, and 1 teaspoon of minced ginger. Mix until smooth and set it aside. This sauce will add a sweet and savory flavor to your stir-fry.

Step 3: Stir-Frying the Vegetables

In the same skillet where you cooked the chicken, add the vegetables. Start with 1 cup of broccoli florets, 1 sliced bell pepper (any color), 1 cup of snap peas, and 1/2 cup of thinly sliced carrots. Stir-fry the vegetables for about 3-4 minutes. You want them to be tender-crisp, which means they should still have a bit of crunch. This will keep your stir-fry vibrant and fresh!

Step 4: Combining Ingredients

Once the vegetables are ready, it’s time to bring everything together. Return the cooked chicken to the skillet with the stir-fried vegetables. Pour the orange sauce over the chicken and vegetables, stirring well to combine. Make sure everything is coated in that delicious sauce!

Step 5: Final Cooking Steps

Sweet and Savory Orange Chicken Stir-Fry is now ready to be served!

Variation of Sweet and Savory Orange Chicken Stir-Fry

Sweet and Savory Orange Chicken Stir-Fry lies in its versatility. You can easily customize this dish to suit your taste preferences or dietary needs. Let’s explore some alternative proteins and vegetable substitutions that can elevate your stir-fry experience!

Alternative Proteins

If you’re looking to switch things up, consider using different proteins in your stir-fry. Here are a few options:

  • Shrimp: Shrimp cooks quickly and adds a delightful seafood flavor. Just sauté them for 2-3 minutes until they turn pink.
  • Tofu: For a vegetarian option, use firm tofu. Press it to remove excess moisture, then cut it into cubes and sauté until golden brown.
  • Beef: Thinly sliced beef can also work well. Use flank steak or sirloin for a tender bite. Cook it for about 3-4 minutes until browned.
  • Pork: Pork tenderloin, sliced into thin strips, is another tasty alternative. It cooks quickly and absorbs flavors beautifully.

Sweet and Savory Orange Chicken Stir-Fry a delightful surprise every time!

Vegetable Substitutions

Feel free to get creative with the vegetables in your stir-fry. Here are some tasty substitutions:

  • Zucchini: Sliced zucchini adds a mild flavor and cooks quickly, making it a great addition.
  • Mushrooms: Sliced mushrooms bring an earthy taste and a nice chewy texture.
  • Cauliflower: Cauliflower florets can replace broccoli for a different crunch and flavor.
  • Baby corn: This adds a sweet crunch and is a fun addition to any stir-fry.
  • Asparagus: Cut into bite-sized pieces, asparagus adds a fresh and slightly nutty flavor.

Sweet and Savory Orange Chicken Stir-Fry remains as vibrant as it is delicious!

Cooking Note for Sweet and Savory Orange Chicken Stir-Fry

Sweet and Savory Orange Chicken Stir-Fry, there are a few important cooking notes to keep in mind. These tips will help you achieve the best flavor and texture, ensuring your dish turns out perfectly every time.

First, make sure to cut your chicken thighs into uniform, bite-sized pieces. This ensures even cooking, allowing each piece to brown nicely. If the pieces are too large, they may not cook through properly, leading to an uneven texture.

Next, when stir-frying, it’s crucial to keep the heat at medium-high. This high heat helps to sear the chicken and vegetables quickly, locking in their flavors and juices. If the heat is too low, the ingredients may steam instead of stir-fry, resulting in a soggy dish.

Also, avoid overcrowding the skillet. If you add too many ingredients at once, the temperature of the pan will drop. This can lead to steaming rather than frying. If necessary, cook the chicken and vegetables in batches to maintain that perfect stir-fry texture.

Sweet and Savory Orange Chicken Stir-Fry.

By following these cooking notes, you’ll create a delicious and satisfying stir-fry that everyone will love. Happy cooking!

Serving Suggestions for Sweet and Savory Orange Chicken Stir-Fry

Sweet and Savory Orange Chicken Stir-Fry is ready, it’s time to think about how to serve it! This dish is not only delicious but also visually appealing, making it perfect for any occasion. Here are some serving suggestions to enhance your meal experience:

  • Over Rice or Quinoa: Serve your stir-fry over a bed of fluffy white rice, brown rice, or quinoa. The grains will soak up the flavorful orange sauce, making each bite delightful.
  • With Noodles: For a different twist, try serving the stir-fry over cooked noodles. Rice noodles or soba noodles work wonderfully, adding a unique texture to the dish.
  • Garnish with Fresh Herbs: Add a sprinkle of fresh cilantro or basil on top for an aromatic touch. This will elevate the flavors and add a pop of color.
  • Pair with a Side Salad: A light side salad with mixed greens, cucumbers, and a citrus vinaigrette complements the stir-fry beautifully. It adds freshness and balances the meal.
  • Serve with Spring Rolls: For a fun appetizer, consider serving your stir-fry with crispy spring rolls. They make a great finger food and pair well with the sweet and savory flavors of the dish.

Sweet and Savory Orange Chicken Stir-Fry is versatile enough to adapt to any meal setting, whether it’s a casual family dinner or a festive gathering with friends. Enjoy your delicious creation!

Tips for Perfecting Sweet and Savory Orange Chicken Stir-Fry

Sweet and Savory Orange Chicken Stir-Fry truly shine, consider these helpful tips. They will guide you in achieving the best flavor and texture, ensuring your dish is a hit every time!

  • Prep Ahead: To save time, chop your vegetables and chicken ahead of time. This way, you can quickly toss everything together when you’re ready to cook.
  • Use Fresh Ingredients: Fresh vegetables and high-quality chicken will enhance the flavor of your stir-fry. Look for vibrant, crisp veggies at the market.
  • Marinate the Chicken: For extra flavor, consider marinating the chicken in a bit of soy sauce and orange juice for 30 minutes before cooking. This adds depth to the dish.
  • Adjust the Sauce: Taste your sauce before adding it to the stir-fry. If you prefer a sweeter sauce, add more honey. For a saltier kick, increase the soy sauce.
  • Don’t Overcook the Vegetables: Keep your vegetables tender-crisp by not overcooking them. They should be bright and colorful, adding both flavor and nutrition to your dish.
  • Garnish for Flavor: A sprinkle of sesame seeds or chopped nuts can add a delightful crunch and extra flavor. Consider adding these just before serving.
  • Serve Immediately: Stir-fries are best enjoyed fresh. Serve your Sweet and Savory Orange Chicken Stir-Fry right after cooking for the best taste and texture.

Sweet and Savory Orange Chicken Stir-Fry that’s bursting with flavor. Enjoy the process and the delicious results!

Breakdown of Time for Sweet and Savory Orange Chicken Stir-Fry

Sweet and Savory Orange Chicken Stir-Fry can help you plan your cooking efficiently. Here’s a simple breakdown of the time required for preparation and cooking.

Prep Time

The prep time for this delicious stir-fry is approximately 15-20 minutes. During this time, you will:

  • Gather all your ingredients.
  • Cut the chicken thighs into bite-sized pieces.
  • Chop the vegetables, including broccoli, bell pepper, snap peas, carrots, and green onions.
  • Measure out the ingredients for the orange sauce.

Having everything ready before you start cooking will make the process smoother and more enjoyable!

Cooking Time

Sweet and Savory Orange Chicken Stir-Fry is about 15-20 minutes. This includes:

  • Cooking the chicken thighs until browned and cooked through (5-7 minutes).
  • Stir-frying the vegetables until tender-crisp (3-4 minutes).
  • Combining the chicken, vegetables, and sauce, then cooking until the sauce thickens (2-3 minutes).

With everything cooked at medium-high heat, your stir-fry will come together quickly!

Total Time

In total, you can expect to spend about 30-40 minutes from start to finish. This includes both prep and cooking time. It’s a quick and satisfying meal that’s perfect for busy weeknights or when you want to impress guests without spending hours in the kitchen.

Sweet and Savory Orange Chicken Stir-Fry into your schedule. Enjoy the cooking process and the delightful flavors that await you!

Nutritional Information for Sweet and Savory Orange Chicken Stir-Fry

Sweet and Savory Orange Chicken Stir-Fry not only delights your taste buds but also provides a good mix of nutrients. Here’s a closer look at the nutritional information per serving:

Calories

Sweet and Savory Orange Chicken Stir-Fry contains approximately 320 calories. This makes it a satisfying yet light option for dinner. The combination of chicken, vegetables, and sauce ensures you get a fulfilling meal without excessive calories.

Protein

Protein is vital for muscle repair and overall health. This stir-fry packs in about 25 grams of protein per serving, primarily from the chicken thighs. This high protein content helps keep you feeling full and energized, making it an excellent choice for active individuals or those looking to maintain a healthy lifestyle.

Sodium

When it comes to sodium, each serving contains around 800 milligrams. While this is a reasonable amount for a flavorful dish, it’s essential to be mindful of your overall sodium intake throughout the day. If you’re watching your sodium levels, consider using low-sodium soy sauce or adjusting the amount of soy sauce in the recipe to suit your dietary needs.

Sweet and Savory Orange Chicken Stir-Fry is not only delicious but also offers a balanced nutritional profile. With its moderate calorie count, high protein content, and flavorful ingredients, it’s a fantastic option for a healthy meal. Enjoy this delightful dish while nourishing your body!

FAQs about Sweet and Savory Orange Chicken Stir-Fry

Can I make Sweet and Savory Orange Chicken Stir-Fry ahead of time?

Sweet and Savory Orange Chicken Stir-Fry ahead of time! To do this, cook the chicken and vegetables as directed, but do not add the sauce until you are ready to serve. Store the cooked chicken and vegetables in an airtight container in the refrigerator for up to 2 days. When you’re ready to eat, simply reheat the mixture in a skillet, add the sauce, and cook until heated through. This makes it a great option for meal prep!

What can I serve with Sweet and Savory Orange Chicken Stir-Fry?

Sweet and Savory Orange Chicken Stir-Fry. Here are a few ideas:

  • Rice: Fluffy white rice, brown rice, or jasmine rice pairs perfectly with the stir-fry.
  • Quinoa: For a healthier grain option, serve it over quinoa, which adds extra protein.
  • Noodles: Try serving it with rice noodles or soba noodles for a different texture.
  • Salad: A light side salad with mixed greens and a citrus dressing complements the flavors beautifully.

Feel free to mix and match based on your preferences and what you have on hand!

Is Sweet and Savory Orange Chicken Stir-Fry healthy?

Sweet and Savory Orange Chicken Stir-Fry is a healthy meal option. It features lean protein from chicken thighs, a variety of colorful vegetables, and a flavorful sauce made with orange juice and honey. This dish is low in calories and high in protein, making it a nutritious choice for dinner. Just be mindful of the sodium content from the soy sauce, and consider using low-sodium options if needed.

Can I use frozen vegetables in Sweet and Savory Orange Chicken Stir-Fry?

Sweet and Savory Orange Chicken Stir-Fry. Frozen vegetables are convenient and can save you time. Just be sure to thaw them before adding them to the skillet. You may need to adjust the cooking time slightly, as frozen vegetables can release extra moisture. Stir-fry them until they are heated through and tender-crisp for the best results!

Conclusion on Sweet and Savory Orange Chicken Stir-Fry

Sweet and Savory Orange Chicken Stir-Fry is a delightful dish that brings together vibrant flavors and colorful ingredients. It’s not just a meal; it’s an experience that can brighten up any dinner table. With its easy preparation and quick cooking time, this stir-fry is perfect for busy weeknights or when you want to impress guests without spending hours in the kitchen.

This recipe allows for creativity, whether you choose to stick with chicken thighs or explore alternative proteins like shrimp or tofu. The variety of vegetables adds not only nutrition but also a beautiful presentation that makes the dish visually appealing. Plus, the sweet and tangy orange sauce ties everything together, creating a harmonious blend of flavors that will leave everyone wanting more.

Sweet and Savory Orange Chicken Stir-Fry, remember to enjoy the process. Cooking is an art, and each step is an opportunity to express your creativity. Don’t hesitate to adjust the ingredients to suit your taste or dietary needs. With the tips and variations provided, you can make this dish your own.

So, gather your ingredients, fire up that skillet, and get ready to savor a meal that’s not only delicious but also healthy. Your family and friends will appreciate the effort, and you’ll feel great knowing you’ve created something special. Happy cooking!

Stay Connected

Get recipes via email: