Get my cookbooks

Teriyaki Chicken Casserole Recipe is a family favorite.

Introduction to Teriyaki Chicken Casserole Recipe

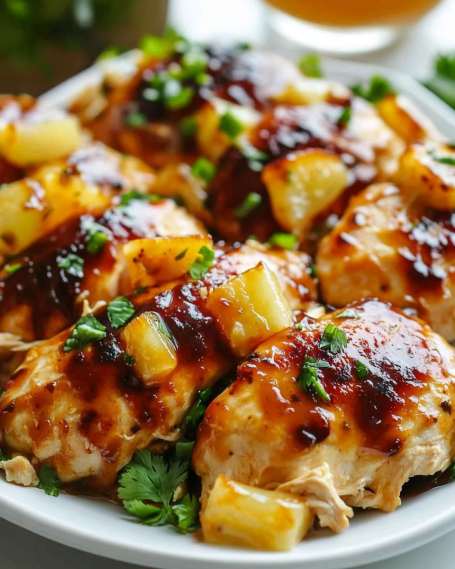
Are you looking for a delicious and easy meal that the whole family will love? Look no further than the Teriyaki Chicken Casserole Recipe! This dish combines tender chicken, colorful vegetables, and fluffy rice, all smothered in a savory teriyaki sauce. It’s a delightful blend of flavors that will surely satisfy your taste buds.

Not only is this casserole tasty, but it’s also a breeze to prepare. With just a few simple ingredients, you can whip up a hearty meal in no time. Plus, it’s perfect for busy weeknights or when you have guests over. The best part? You can customize it to suit your preferences!

In this article, we’ll guide you through the ingredients, preparation steps, and even some variations to make this dish your own. Whether you’re a seasoned cook or a beginner in the kitchen, you’ll find this Teriyaki Chicken Casserole Recipe easy to follow and enjoyable to make.

So, roll up your sleeves and get ready to create a comforting and flavorful casserole that will have everyone asking for seconds!

Ingredients for Teriyaki Chicken Casserole Recipe

To create a mouthwatering Teriyaki Chicken Casserole, you’ll need a variety of fresh ingredients. Each component plays a vital role in delivering that delicious flavor and satisfying texture. Here’s what you’ll need:

  • 2 cups cooked rice: You can use either white or brown rice, depending on your preference.
  • 1 pound boneless, skinless chicken breasts: Diced into bite-sized pieces for easy cooking and eating.
  • 1 cup broccoli florets: Fresh or frozen, they add a nice crunch and vibrant color.
  • 1 cup sliced bell peppers: Any color will do! They bring sweetness and a pop of color to the dish.
  • 1 cup shredded carrots: These add a touch of sweetness and a lovely texture.
  • 1 cup teriyaki sauce: This is the star of the show, providing that rich, savory flavor.
  • 1 cup shredded mozzarella cheese: For a gooey, cheesy topping that everyone loves.
  • 2 tablespoons olive oil: Used for cooking the chicken and vegetables.
  • 1 teaspoon garlic powder: Adds a wonderful aroma and flavor.
  • 1 teaspoon ginger powder: Complements the teriyaki sauce beautifully.
  • Salt and pepper to taste: Essential for enhancing the overall flavor.
  • 2 green onions: Sliced for garnish, adding a fresh touch to the finished dish.

Gathering these ingredients will set you on the right path to making a delightful Teriyaki Chicken Casserole. Each item contributes to the overall taste and texture, making this dish a family favorite. Now that you have everything you need, let’s move on to the preparation steps!

Preparation of Teriyaki Chicken Casserole Recipe

Now that you have all your ingredients ready, it’s time to dive into the preparation of your Teriyaki Chicken Casserole. This process is straightforward and fun! Follow these steps to create a delicious meal that everyone will enjoy.

Step 1: Prepping the Chicken

First, let’s focus on the chicken. Start by washing your hands and ensuring your workspace is clean. Take the boneless, skinless chicken breasts and dice them into bite-sized pieces. This helps them cook evenly and makes it easier to serve later. Next, heat 2 tablespoons of olive oil in a large skillet over medium heat. Once the oil is hot, add the diced chicken to the skillet.

Season the chicken with 1 teaspoon of garlic powder, 1 teaspoon of ginger powder, and a pinch of salt and pepper. Cook the chicken for about 5-7 minutes, stirring occasionally. You want the chicken to be golden brown and no longer pink in the center. This step is crucial as it ensures your chicken is flavorful and safe to eat.

Step 2: Preparing the Vegetables

While the chicken is cooking, it’s time to prepare the vegetables. If you’re using fresh broccoli, wash and cut it into small florets. For the bell peppers, slice them into thin strips. You can choose any color you like—red, yellow, or green will all work beautifully. Lastly, shred the carrots if you haven’t done so already.

Once the chicken is cooked, add the broccoli, bell peppers, and shredded carrots to the skillet. Stir everything together and cook for an additional 3-4 minutes. This will soften the vegetables while keeping them vibrant and crunchy. The aroma will be delightful!

Step 3: Making the Teriyaki Sauce

Now, let’s bring it all together with the teriyaki sauce. In a large bowl, combine the cooked rice with the chicken and vegetable mixture. Pour in 1 cup of teriyaki sauce and mix everything well. Make sure every piece of chicken and vegetable is coated in that delicious sauce. This is where the magic happens, as the flavors meld together beautifully.

Step 4: Assembling the Casserole

Next, it’s time to assemble your casserole. Take a greased 9×13-inch baking dish and pour the rice, chicken, and vegetable mixture into it. Spread it out evenly across the dish. This ensures that every bite will have a perfect balance of flavors. Finally, sprinkle 1 cup of shredded mozzarella cheese on top. The cheese will melt and create a gooey, delicious layer.

Step 5: Baking the Casserole

Now, preheat your oven to 350°F (175°C). Once it’s ready, place your assembled casserole in the oven. Bake it for 25-30 minutes, or until the cheese is melted and bubbly. The smell will fill your kitchen, making it hard to wait! After baking, remove the casserole from the oven and let it cool for a few minutes. This will make it easier to serve.

And there you have it! Your Teriyaki Chicken Casserole is now ready to be enjoyed. The combination of tender chicken, colorful veggies, and cheesy goodness is sure to be a hit at your dinner table.

Variation of Teriyaki Chicken Casserole Recipe

One of the best things about the Teriyaki Chicken Casserole Recipe is its versatility. You can easily switch up the ingredients to suit your dietary needs or preferences. Whether you want to try different proteins or make it vegetarian, there are plenty of options to explore. Let’s take a closer look at some alternative protein options and vegetarian adaptations.

Alternative Protein Options

If you’re not in the mood for chicken, there are several alternative proteins you can use in your casserole. Here are a few ideas:

  • Turkey: Ground turkey is a lean option that works well in this dish. Just cook it the same way as the chicken, seasoning it with garlic and ginger.
  • Pork: Diced pork tenderloin or ground pork can add a different flavor profile. Cook it until browned and fully cooked through.
  • Beef: For a heartier dish, try using ground beef or diced steak. Season it well and cook until it reaches your desired doneness.
  • Seafood: Shrimp or diced salmon can be a delightful twist. Just be sure to adjust the cooking time, as seafood cooks faster than chicken.

These alternative proteins can bring new flavors to your Teriyaki Chicken Casserole, making it exciting every time you prepare it!

Vegetarian Adaptations

If you’re looking for a vegetarian option, you can easily adapt the Teriyaki Chicken Casserole Recipe. Here are some tasty substitutions:

  • Tofu: Firm tofu is a great protein source. Press it to remove excess moisture, then dice and sauté it in olive oil. Season it just like the chicken for added flavor.
  • Chickpeas: Canned chickpeas are a fantastic choice. Rinse and drain them, then mix them into the casserole for a protein boost.
  • Tempeh: This fermented soy product has a nutty flavor and a firm texture. Crumble or cube it and sauté before adding it to the casserole.
  • Vegetables: You can also increase the amount of vegetables in the dish. Add mushrooms, zucchini, or snap peas for extra nutrition and flavor.

These vegetarian adaptations will ensure that everyone can enjoy a delicious Teriyaki Casserole, regardless of their dietary choices. With these variations, you can make this dish your own while still keeping it simple and satisfying!

Cooking Note for Teriyaki Chicken Casserole Recipe

When preparing your Teriyaki Chicken Casserole, there are a few important cooking notes to keep in mind. These tips will help you achieve the best results and ensure that your dish turns out perfectly every time.

First, always use fresh ingredients when possible. Fresh vegetables not only enhance the flavor but also add vibrant colors to your casserole. If you opt for frozen vegetables, make sure to thaw and drain them before adding them to the dish. This prevents excess moisture, which can make your casserole soggy.

Next, be mindful of the cooking time. Every oven is different, so keep an eye on your casserole as it bakes. You want the cheese to be melted and bubbly, but not overcooked. If you notice the cheese browning too quickly, you can cover the dish with aluminum foil to prevent burning.

Additionally, feel free to adjust the amount of teriyaki sauce to suit your taste. If you prefer a saucier casserole, add a bit more sauce. On the other hand, if you like it less saucy, you can reduce the amount. Just remember that the sauce is key to the dish’s flavor, so don’t skip it!

Lastly, let your casserole cool for a few minutes before serving. This allows the flavors to settle and makes it easier to cut into portions. Garnishing with sliced green onions right before serving adds a fresh touch and enhances the overall presentation.

By following these cooking notes, you’ll ensure that your Teriyaki Chicken Casserole is not only delicious but also visually appealing. Enjoy the process and the delightful meal that awaits you!

Serving Suggestions for Teriyaki Chicken Casserole Recipe

Once your Teriyaki Chicken Casserole is baked to perfection, it’s time to serve it up! This dish is not only delicious but also visually appealing, making it a great centerpiece for any meal. Here are some serving suggestions to enhance your dining experience:

  • Pair with a Fresh Salad: A light, crisp salad can balance the richness of the casserole. Consider a simple green salad with mixed greens, cherry tomatoes, and a light vinaigrette. This adds freshness and crunch to your meal.
  • Serve with Steamed Rice: If you want to make the meal even heartier, serve the casserole alongside a small bowl of steamed rice. This is especially great if you have a family that loves rice!
  • Add a Side of Fruit: Fresh fruit can provide a sweet contrast to the savory flavors of the casserole. Slices of pineapple, mango, or a fruit salad can be a refreshing addition.
  • Top with Extra Garnishes: Before serving, sprinkle additional sliced green onions or sesame seeds on top of the casserole. This not only enhances the flavor but also adds a beautiful touch to the presentation.
  • Offer Extra Teriyaki Sauce: Some guests may enjoy a little extra sauce on their servings. Consider placing a small bowl of teriyaki sauce on the table for those who want to drizzle more on their plates.

These serving suggestions will elevate your Teriyaki Chicken Casserole experience. Whether it’s a family dinner or a gathering with friends, these ideas will help create a delightful meal that everyone will enjoy. So, gather around the table and dig in!

Tips for Perfecting Your Teriyaki Chicken Casserole Recipe

To make your Teriyaki Chicken Casserole truly shine, consider these helpful tips. They will guide you in achieving the best flavor and texture, ensuring that your dish is a hit every time you serve it.

  • Use Quality Ingredients: Always opt for fresh, high-quality ingredients. Fresh vegetables and good-quality chicken will enhance the overall taste of your casserole. If possible, choose organic options for a healthier meal.
  • Marinate the Chicken: For an extra burst of flavor, marinate the diced chicken in teriyaki sauce for at least 30 minutes before cooking. This allows the chicken to absorb the flavors, making it even more delicious.
  • Experiment with Vegetables: Don’t hesitate to mix in your favorite vegetables. Snap peas, zucchini, or even corn can add unique flavors and textures. The more colorful your casserole, the more appealing it will look!
  • Adjust the Cheese: While mozzarella is a great choice, feel free to experiment with other cheeses. Cheddar or Monterey Jack can add a different flavor profile. Mixing cheeses can also create a delightful cheesy topping.
  • Check for Doneness: Always check that the chicken is fully cooked before mixing it with the rice and vegetables. The internal temperature should reach 165°F (75°C) for safety. This ensures that your casserole is both delicious and safe to eat.
  • Let It Rest: After baking, allow the casserole to rest for about 5-10 minutes before serving. This helps the flavors meld together and makes it easier to cut into portions.
  • Store Properly: If you have leftovers, store them in an airtight container in the refrigerator. This will keep your casserole fresh for up to 3 days. Reheat in the oven or microwave, adding a splash of water to keep it moist.

By following these tips, you’ll be well on your way to creating a Teriyaki Chicken Casserole that’s not only delicious but also memorable. Enjoy the cooking process and the delightful meal that awaits you!

Breakdown of Time for Teriyaki Chicken Casserole Recipe

Understanding the time needed for each step of the Teriyaki Chicken Casserole Recipe can help you plan your cooking efficiently. Here’s a simple breakdown of the time required for preparation and cooking, so you can enjoy your meal without any rush.

Prep Time

The prep time for this delicious casserole is approximately 15-20 minutes. During this time, you will gather all your ingredients, wash and chop the vegetables, and dice the chicken. This step is essential as it sets the foundation for a smooth cooking process. Having everything ready will make the cooking experience enjoyable and stress-free!

Cooking Time

Once your ingredients are prepped, the cooking time will take about 30-35 minutes. This includes cooking the chicken and vegetables in the skillet for about 10-12 minutes, followed by baking the casserole in the oven for 25-30 minutes. The baking time allows the flavors to meld together and the cheese to melt beautifully, creating that irresistible topping.

Total Time

In total, you can expect the entire process to take around 45-55 minutes from start to finish. This includes both prep and cooking time. With this quick turnaround, you can have a hearty and flavorful Teriyaki Chicken Casserole ready to serve in less than an hour. It’s perfect for busy weeknights or when you want to impress guests without spending all day in the kitchen!

Nutritional Information for Teriyaki Chicken Casserole Recipe

Understanding the nutritional content of your meals is essential for maintaining a balanced diet. The Teriyaki Chicken Casserole Recipe not only delights your taste buds but also provides a good mix of nutrients. Here’s a breakdown of the nutritional information per serving, so you can enjoy this dish while keeping your health in mind.

Calories

Each serving of the Teriyaki Chicken Casserole contains approximately 350 calories. This makes it a satisfying meal option without being overly heavy. The combination of chicken, rice, and vegetables provides a hearty dish that can keep you full and energized throughout the day.

Protein

Protein is an essential nutrient for building and repairing tissues. In this casserole, you’ll find about 25 grams of protein per serving. The diced chicken is the primary source of protein, making this dish a great choice for those looking to increase their protein intake. It’s perfect for active individuals or anyone needing a nutritious meal.

Sodium

When it comes to sodium, each serving contains around 800 milligrams. While this is a reasonable amount for a flavorful dish, it’s important to be mindful of your overall sodium intake throughout the day. If you’re watching your sodium levels, consider using low-sodium teriyaki sauce or adjusting the amount of sauce you add to the casserole. This way, you can enjoy the delicious flavors without exceeding your daily sodium limit.

By keeping these nutritional facts in mind, you can enjoy your Teriyaki Chicken Casserole while making informed choices about your diet. This dish is not only tasty but also provides a good balance of calories, protein, and sodium, making it a great addition to your meal rotation!

FAQs about Teriyaki Chicken Casserole Recipe

Can I make Teriyaki Chicken Casserole Recipe ahead of time?

Absolutely! You can prepare the Teriyaki Chicken Casserole ahead of time. Simply follow the preparation steps up to the baking stage. Once you’ve assembled the casserole, cover it tightly with plastic wrap or aluminum foil and store it in the refrigerator. It can be made a day in advance, making it a convenient option for busy weeknights or gatherings. When you’re ready to bake, just remove it from the fridge and let it sit at room temperature for about 15-20 minutes before placing it in the oven. This helps ensure even cooking.

What can I substitute for chicken in the Teriyaki Chicken Casserole Recipe?

If you’re looking for alternatives to chicken, there are plenty of options! You can use turkey, pork, or beef as alternative proteins. For a vegetarian option, consider using tofu, chickpeas, or tempeh. Each of these substitutes will bring its unique flavor and texture to the casserole. Just remember to adjust the cooking times accordingly, especially for proteins like seafood, which cook faster than chicken.

How do I store leftovers of Teriyaki Chicken Casserole Recipe?

Storing leftovers is easy! Allow the Teriyaki Chicken Casserole to cool completely before transferring it to an airtight container. It can be stored in the refrigerator for up to 3 days. When you’re ready to enjoy the leftovers, simply reheat them in the microwave or oven. If using the oven, cover the dish with foil to prevent it from drying out. You can add a splash of water to keep it moist while reheating.

Can I freeze Teriyaki Chicken Casserole Recipe?

Yes, you can freeze the Teriyaki Chicken Casserole! To do this, prepare the casserole as directed but do not bake it. Instead, cover it tightly with plastic wrap and then with aluminum foil to prevent freezer burn. It can be frozen for up to 3 months. When you’re ready to bake it, thaw it in the refrigerator overnight and then bake as directed. This makes for a quick and easy meal option when you need something delicious in a hurry!

Conclusion on Teriyaki Chicken Casserole Recipe

In conclusion, the Teriyaki Chicken Casserole Recipe is a fantastic dish that brings together a delightful mix of flavors and textures. With its tender chicken, vibrant vegetables, and cheesy topping, it’s sure to become a family favorite. Not only is it easy to prepare, but it also allows for plenty of customization, making it suitable for various dietary preferences.

This casserole is perfect for busy weeknights or when you want to impress guests with minimal effort. The combination of cooked rice and teriyaki sauce creates a comforting base, while the colorful veggies add nutrition and visual appeal. Plus, the option to substitute proteins or make it vegetarian means that everyone can enjoy this delicious meal.

As you explore the preparation steps, variations, and serving suggestions, you’ll find that this dish is not only satisfying but also versatile. Whether you choose to stick to the classic recipe or experiment with different ingredients, the Teriyaki Chicken Casserole is bound to deliver a delightful dining experience.

So, gather your ingredients, roll up your sleeves, and get ready to create a comforting meal that will have everyone asking for seconds. Enjoy the process, and most importantly, enjoy the delicious results of your hard work!

Hawaiian Chicken Salad Recipe is a tropical delight!

Introduction to Hawaiian Chicken Salad Recipe

Welcome to the delightful world of Hawaiian Chicken Salad! This vibrant dish brings a taste of the tropics right to your table. With its colorful ingredients and refreshing flavors, it’s perfect for any occasion. Whether you’re hosting a summer barbecue, enjoying a picnic, or simply looking for a quick and healthy meal, this salad is sure to impress.

The Hawaiian Chicken Salad Recipe combines tender shredded chicken with sweet pineapple, crunchy vegetables, and a creamy dressing. Each bite is a burst of flavor that transports you to a sunny beach. Plus, it’s easy to make and can be customized to suit your taste. You can add nuts for crunch or swap out ingredients to create your own twist.

Not only is this salad delicious, but it’s also packed with nutrients. The combination of protein from the chicken and vitamins from the veggies makes it a wholesome choice. So, if you’re ready to dive into a tropical delight, let’s gather our ingredients and get started on this Hawaiian Chicken Salad Recipe!

Ingredients for Hawaiian Chicken Salad Recipe

To create a delicious Hawaiian Chicken Salad, you’ll need a variety of fresh and flavorful ingredients. Here’s what you’ll need to gather:

  • 2 cups cooked chicken, shredded
  • 1 cup pineapple chunks, drained
  • 1/2 cup red bell pepper, diced
  • 1/2 cup celery, diced
  • 1/4 cup red onion, finely chopped
  • 1/2 cup mayonnaise
  • 1 tablespoon Dijon mustard
  • 1 tablespoon honey
  • 1 tablespoon lime juice
  • Salt and pepper to taste
  • 1/4 cup chopped fresh cilantro (optional)
  • Lettuce leaves for serving

These ingredients come together to create a delightful mix of flavors and textures. The shredded chicken provides a hearty base, while the pineapple adds a sweet and juicy contrast. The red bell pepper and celery contribute a satisfying crunch, and the red onion gives a hint of sharpness. The creamy dressing, made with mayonnaise, Dijon mustard, honey, and lime juice, ties everything together beautifully.

Feel free to adjust the quantities based on your preferences or dietary needs. For instance, if you love a bit more sweetness, add extra pineapple. If you prefer a tangy kick, a splash more lime juice can do the trick. The beauty of this Hawaiian Chicken Salad Recipe lies in its versatility!

Preparation of Hawaiian Chicken Salad Recipe

Now that you have all your ingredients ready, it’s time to prepare your Hawaiian Chicken Salad. This process is simple and quick, making it a perfect dish for any busy day. Let’s break it down step by step!

Step 1: Preparing the Chicken

First, you need to prepare the chicken. If you haven’t cooked it yet, you can boil, grill, or roast it. Once cooked, let it cool down a bit. Then, shred the chicken into bite-sized pieces. This will help it mix well with the other ingredients. If you have leftover chicken from a previous meal, that works great too!

Step 2: Chopping the Vegetables

Next, it’s time to chop the vegetables. Start with the red bell pepper, celery, and red onion. Make sure to dice them into small, even pieces. This ensures that every bite of your Hawaiian Chicken Salad is packed with flavor. If you’re using cilantro, chop it finely as well. The fresh herbs will add a lovely aroma to your salad.

Step 3: Mixing the Dressing

Now, let’s whip up the dressing! In a small bowl, combine the mayonnaise, Dijon mustard, honey, lime juice, salt, and pepper. Use a whisk to mix everything together until it’s smooth and creamy. This dressing is what brings all the flavors together, so make sure it’s well blended!

Step 4: Combining Ingredients

Once your chicken and vegetables are ready, it’s time to combine everything. In a large mixing bowl, add the shredded chicken, chopped vegetables, and the dressing. Stir gently until all the ingredients are well coated with the dressing. This step is crucial, as it ensures that every bite is delicious!

Step 5: Chilling the Salad

Finally, cover the bowl with plastic wrap or a lid and place it in the refrigerator. Let the salad chill for at least 30 minutes. This allows the flavors to meld together beautifully. The longer it sits, the tastier it becomes! When you’re ready to serve, just scoop it onto a bed of lettuce leaves or use it as a filling for sandwiches.

And there you have it! Your Hawaiian Chicken Salad is now ready to be enjoyed. It’s a delightful dish that’s sure to please everyone at the table.

Variation of Hawaiian Chicken Salad Recipe

While the classic Hawaiian Chicken Salad is delicious on its own, there are many ways to switch things up! You can easily customize this recipe to suit your taste or to use what you have on hand. Let’s explore some alternative ingredients and different serving styles that can make your Hawaiian Chicken Salad even more exciting.

Alternative Ingredients to Consider

One of the best things about the Hawaiian Chicken Salad Recipe is its versatility. Here are some alternative ingredients you might want to try:

  • Fruits: Swap out pineapple for mango or diced apples for a different fruity flavor. Both options add a sweet touch!
  • Nuts: For added crunch, consider mixing in chopped walnuts, pecans, or even slivered almonds. They provide a delightful texture contrast.
  • Vegetables: You can add diced cucumbers or shredded carrots for extra crunch and color. These veggies also boost the nutritional value.
  • Protein: If you want to switch up the protein, try using cooked shrimp or diced ham instead of chicken. Both options pair well with the tropical flavors.
  • Dressings: Experiment with different dressings! A yogurt-based dressing or a light vinaigrette can give your salad a fresh twist.

Feel free to mix and match these ingredients based on your preferences. The goal is to create a salad that you love!

Different Serving Styles

How you serve your Hawaiian Chicken Salad can also change the experience. Here are some fun serving styles to consider:

  • On a Bed of Greens: Serve the salad on a bed of fresh lettuce or spinach. This adds a nice crunch and makes for a beautiful presentation.
  • In a Wrap: Use a tortilla or lettuce leaves to create a wrap. This is a great option for a portable lunch or picnic.
  • As a Sandwich: Spread the salad between slices of bread or in a bun for a tasty sandwich. It’s perfect for a quick meal!
  • In a Bowl: Serve it in a bowl with some extra toppings like avocado slices or crispy tortilla strips for added flavor and texture.
  • As a Dip: Use the salad as a dip with crackers or veggie sticks. This makes for a fun appetizer at gatherings!

These serving styles not only enhance the presentation but also make the meal more enjoyable. So, get creative and have fun with your Hawaiian Chicken Salad!

Cooking Note for Hawaiian Chicken Salad Recipe

When preparing your Hawaiian Chicken Salad, there are a few cooking notes to keep in mind. These tips will help ensure that your salad turns out perfectly every time. Let’s dive into some important points to consider!

First, always use cooked chicken for this recipe. You can use rotisserie chicken for convenience, or cook your own chicken breasts. If you choose to cook your chicken, make sure it’s fully cooked and tender. This will make shredding easier and ensure a juicy salad.

Next, the freshness of your ingredients matters. Use fresh vegetables and ripe pineapple for the best flavor. If you can, opt for fresh cilantro instead of dried. Fresh herbs add a burst of flavor that dried herbs simply can’t match.

When it comes to the dressing, feel free to adjust the ingredients to suit your taste. If you prefer a creamier salad, add a bit more mayonnaise. For a tangier flavor, increase the lime juice. Taste as you go to find the perfect balance!

Additionally, if you’re making this salad for a gathering, consider preparing the ingredients ahead of time. You can chop the vegetables and cook the chicken a day in advance. Just mix everything together right before serving to keep it fresh.

Lastly, remember that chilling the salad is key. Allowing it to sit in the refrigerator for at least 30 minutes helps the flavors meld together beautifully. The longer it chills, the more delicious it becomes!

By keeping these cooking notes in mind, you’ll create a Hawaiian Chicken Salad that’s not only tasty but also visually appealing. Enjoy the process and savor the delightful flavors of this tropical dish!

Serving Suggestions for Hawaiian Chicken Salad Recipe

Now that your Hawaiian Chicken Salad is ready, it’s time to think about how to serve it! This dish is not only delicious but also versatile, making it perfect for various occasions. Here are some serving suggestions that will elevate your meal and impress your guests.

On a Bed of Greens

One of the simplest and most elegant ways to serve your Hawaiian Chicken Salad is on a bed of fresh greens. Use crisp lettuce, spinach, or mixed greens as a base. This adds a refreshing crunch and makes the dish visually appealing. Plus, it’s a great way to incorporate more veggies into your meal!

In a Wrap

For a fun and portable option, consider serving the salad in a wrap. Use a large tortilla or lettuce leaves to create a healthy wrap. Just spoon the salad onto the wrap, roll it up, and enjoy! This is perfect for picnics, lunches, or on-the-go meals.

As a Sandwich

Transform your Hawaiian Chicken Salad into a delicious sandwich! Spread the salad between slices of whole-grain bread, a bun, or even a croissant for a tasty twist. Add some extra toppings like avocado or sliced tomatoes for added flavor and nutrition.

In a Bowl

Serving the salad in a bowl allows for creativity! Top it with additional ingredients like sliced almonds, crispy tortilla strips, or even avocado slices. This not only enhances the flavor but also adds a delightful crunch to each bite.

As a Dip

For a fun appetizer, use your Hawaiian Chicken Salad as a dip! Serve it with an assortment of crackers, pita chips, or fresh vegetable sticks. This is a great way to share the salad at gatherings or parties, allowing guests to enjoy it in a unique way.

These serving suggestions will not only make your Hawaiian Chicken Salad more enjoyable but also cater to different preferences. Whether you choose to serve it on greens, in a wrap, or as a dip, your guests are sure to love this tropical delight!

Tips for Perfecting Your Hawaiian Chicken Salad Recipe

To make your Hawaiian Chicken Salad truly shine, consider these helpful tips. They will enhance the flavors and textures, ensuring that every bite is delightful. Let’s explore some easy ways to perfect your salad!

Use Quality Ingredients

Start with fresh, high-quality ingredients. Fresh chicken, ripe pineapple, and crisp vegetables make a big difference in taste. If possible, choose organic produce for the best flavor and nutrition.

Balance the Flavors

Achieving a balance of sweet, savory, and tangy flavors is key. Taste your dressing before adding it to the salad. If it’s too sweet, add a bit more lime juice. If it’s too tangy, a touch more honey can help. Adjusting the flavors to your liking will make the salad more enjoyable.

Chill for Maximum Flavor

As mentioned earlier, chilling the salad is essential. Allow it to sit in the refrigerator for at least 30 minutes. This resting time lets the flavors meld together beautifully, creating a more cohesive dish.

Experiment with Textures

For added crunch, consider mixing in some nuts or seeds. Chopped walnuts, pecans, or sunflower seeds can elevate the texture of your salad. They add a delightful crunch that contrasts nicely with the creamy dressing.

Garnish for Presentation

Don’t forget about presentation! A sprinkle of fresh cilantro or a few slices of lime on top can make your salad look even more appealing. A beautiful presentation can enhance the dining experience and impress your guests.

Serve Immediately for Freshness

If you’re serving the salad at a gathering, mix the ingredients just before serving. This keeps the salad fresh and prevents the vegetables from becoming soggy. If you need to prepare it ahead of time, store the dressing separately and mix it in right before serving.

By following these tips, you’ll create a Hawaiian Chicken Salad that’s not only delicious but also visually stunning. Enjoy the process of making this tropical delight, and don’t hesitate to get creative with your ingredients!

Breakdown of Time for Hawaiian Chicken Salad Recipe

Understanding the time needed to prepare your Hawaiian Chicken Salad is essential for planning your meal. This dish is quick to make, allowing you to enjoy a delicious and healthy option without spending hours in the kitchen. Here’s a breakdown of the time involved in making this delightful salad.

Prep Time

The prep time for the Hawaiian Chicken Salad is approximately 15 to 20 minutes. This includes gathering your ingredients, shredding the chicken, and chopping the vegetables. If you have pre-cooked chicken, this step will be even quicker! Just make sure to have everything ready before you start mixing.

Cooking Time

If you need to cook the chicken, this will take an additional 20 to 30 minutes, depending on your cooking method. Boiling or grilling chicken breasts is a quick option. However, if you’re using rotisserie chicken, you can skip this step entirely, saving you time!

Total Time

In total, if you’re using pre-cooked chicken, the Hawaiian Chicken Salad can be ready in about 30 to 40 minutes. This includes prep time and chilling time. If you need to cook the chicken, expect the total time to be around 50 to 60 minutes. Regardless of the time, the result is a refreshing and tasty salad that’s worth every minute spent!

Nutritional Information for Hawaiian Chicken Salad Recipe

Understanding the nutritional content of your Hawaiian Chicken Salad is important for maintaining a balanced diet. This salad not only tastes great but also provides essential nutrients. Let’s break down the key nutritional components of this delightful dish.

Calories

Each serving of Hawaiian Chicken Salad contains approximately 320 calories. This makes it a satisfying meal option without being overly heavy. The combination of chicken, vegetables, and dressing provides a good balance of energy and nutrients.

Protein

Protein is a vital part of any meal, and this salad delivers! With about 28 grams of protein per serving, the shredded chicken is the star player. Protein helps build and repair tissues, making this salad a great choice for active individuals or anyone looking to maintain muscle health.

Sodium

When it comes to sodium, each serving contains around 600 milligrams. While this is a reasonable amount, it’s always good to be mindful of your sodium intake. If you’re watching your salt consumption, consider using low-sodium mayonnaise or adjusting the amount of added salt in the dressing.

Overall, the Hawaiian Chicken Salad Recipe is a nutritious option that combines protein, healthy fats, and vitamins from fresh ingredients. Enjoying this salad can be a delicious way to support your health while indulging in tropical flavors!

FAQs about Hawaiian Chicken Salad Recipe

What can I substitute for chicken in the Hawaiian Chicken Salad Recipe?

If you’re looking for a substitute for chicken in the Hawaiian Chicken Salad Recipe, there are several tasty options! You can use cooked shrimp for a seafood twist. Diced ham or turkey also works well, providing a different flavor profile. For a vegetarian option, consider using chickpeas or tofu. Both options will add protein while keeping the salad hearty and satisfying. Just remember to adjust the seasoning to match your chosen protein!

Can I make Hawaiian Chicken Salad Recipe ahead of time?

Absolutely! The Hawaiian Chicken Salad Recipe is perfect for making ahead of time. You can prepare the salad a day in advance and store it in the refrigerator. Just keep the dressing separate until you’re ready to serve. This helps maintain the freshness of the ingredients. When you’re ready to enjoy, simply mix in the dressing and serve. It’s a great option for meal prep or gatherings!

How long does Hawaiian Chicken Salad last in the fridge?

Your Hawaiian Chicken Salad can last in the fridge for about 3 to 4 days when stored properly in an airtight container. However, for the best taste and texture, it’s recommended to consume it within the first couple of days. If you notice any changes in smell or appearance, it’s best to discard it. Always trust your senses when it comes to food safety!

Is Hawaiian Chicken Salad Recipe healthy?

Yes, the Hawaiian Chicken Salad Recipe is a healthy choice! It’s packed with protein from the chicken, vitamins from the fresh vegetables, and healthy fats from the mayonnaise. The addition of pineapple adds natural sweetness and fiber. If you want to make it even healthier, consider using Greek yogurt instead of mayonnaise or adding more veggies. Overall, it’s a nutritious option that can fit well into a balanced diet!

Conclusion on Hawaiian Chicken Salad Recipe

In conclusion, the Hawaiian Chicken Salad Recipe is a delightful dish that brings together a medley of flavors and textures. With its combination of tender chicken, sweet pineapple, and crunchy vegetables, this salad is not only delicious but also nutritious. It’s perfect for any occasion, whether you’re hosting a summer gathering or simply looking for a quick and healthy meal.

As you’ve seen, this recipe is incredibly versatile. You can easily customize it to suit your taste by adding different fruits, nuts, or proteins. The various serving styles also allow you to enjoy this salad in multiple ways, making it a fun and exciting dish to share with family and friends.

Remember to use fresh ingredients and take the time to chill the salad for the best flavor. With just a little preparation, you can create a tropical delight that everyone will love. So, gather your ingredients, follow the steps, and enjoy the vibrant flavors of Hawaiian Chicken Salad!

We hope you find joy in making this recipe and that it becomes a favorite in your household. Happy cooking!

Spicy Honey Lime Chicken Recipe is a must-try dish!

Introduction to Spicy Honey Lime Chicken Recipe

Spicy Honey Lime Chicken Recipe is here to bring excitement to your table! This dish combines the sweetness of honey with the zesty kick of lime and a hint of spice. It’s not just a meal; it’s an experience that tantalizes your taste buds and leaves you craving more.

What Makes the Spicy Honey Lime Chicken Recipe Unique?

What sets this recipe apart is its perfect balance of flavors. The honey adds a delightful sweetness, while the lime juice provides a refreshing tang. The addition of chili powder and cayenne pepper gives it a spicy twist that can be adjusted to your liking. Whether you prefer a mild kick or a fiery heat, this recipe allows you to customize the spice level.

Moreover, the marinating process infuses the chicken with flavor, making each bite juicy and tender. This dish is not only easy to prepare but also versatile. You can serve it in various ways, from tacos to rice bowls, making it suitable for any occasion. Plus, it’s a crowd-pleaser, perfect for family dinners or gatherings with friends.

Spicy Honey Lime Chicken Recipe a hit. Get ready to impress your loved ones with this delicious and vibrant dish!

Ingredients for Spicy Honey Lime Chicken Recipe

Spicy Honey Lime Chicken Recipe, you’ll need a few simple ingredients. Each one plays a vital role in building the dish’s unique flavor profile. Here’s what you’ll need:

  • 2 pounds boneless, skinless chicken thighs: These are juicy and tender, perfect for absorbing the marinade.
  • 1/4 cup honey: This adds sweetness and helps caramelize the chicken when cooked.
  • 1/4 cup lime juice: Freshly squeezed from about 2-3 limes, it provides a zesty kick.
  • 2 tablespoons soy sauce: This adds depth and umami flavor to the marinade.
  • 2 tablespoons olive oil: Helps to keep the chicken moist and adds richness.
  • 2 cloves garlic, minced: Garlic enhances the overall flavor with its aromatic qualities.
  • 1 teaspoon chili powder: This gives the chicken a warm, spicy flavor.
  • 1/2 teaspoon cayenne pepper: Adjust this to your taste for extra heat.
  • 1/2 teaspoon salt: Essential for enhancing all the flavors.
  • 1/4 teaspoon black pepper: Adds a subtle kick to the dish.
  • Fresh cilantro, chopped: For garnish, it adds a fresh touch and vibrant color.

Spicy Honey Lime Chicken Recipe a delightful experience. Now that you have everything ready, let’s move on to the preparation steps!

Step-by-Step Preparation of Spicy Honey Lime Chicken Recipe

Spicy Honey Lime Chicken Recipe. This step-by-step guide will help you create a flavorful dish that’s sure to impress. Let’s get started!

Step 1: Marinating the Chicken

The first step is marinating the chicken. This is crucial for infusing the meat with flavor. In a large bowl, combine the honey, lime juice, soy sauce, olive oil, minced garlic, chili powder, cayenne pepper, salt, and black pepper. Whisk these ingredients together until they are well blended.

Next, add the boneless, skinless chicken thighs to the marinade. Make sure each piece is fully coated. This ensures that every bite will be packed with flavor. Once coated, cover the bowl with plastic wrap or a lid and place it in the refrigerator. Allow the chicken to marinate for at least 30 minutes. For even better results, let it sit for up to 4 hours. The longer it marinates, the more flavorful it becomes!

Step 2: Preparing the Honey Lime Sauce

While the chicken is marinating, you can prepare the honey lime sauce. This sauce is what makes the dish so special. If you want to enhance the flavor, consider adding a teaspoon of smoked paprika to the marinade. This will give your chicken a delightful smoky taste.

Once the chicken is done marinating, you can set aside a small amount of the marinade to use as a sauce later. Just remember to keep it separate from the raw chicken to avoid any contamination. This sauce can be drizzled over the chicken when serving, adding an extra layer of flavor.

Step 3: Cooking the Chicken

Now it’s time to cook the chicken! Preheat your grill or grill pan over medium-high heat. Once hot, remove the chicken from the marinade, allowing any excess to drip off. Discard the remaining marinade to ensure food safety.

Place the chicken thighs on the grill. Cook them for about 6-7 minutes on each side. You want the internal temperature to reach 165°F. This ensures the chicken is fully cooked and safe to eat. Look for a nice char on the outside, which adds to the flavor.

Step 4: Serving the Dish

After cooking, remove the chicken from the grill and let it rest for about 5 minutes. This resting period allows the juices to redistribute, making the chicken even juicier. Once rested, slice the chicken into strips or serve it whole, depending on your preference.

Spicy Honey Lime Chicken Recipe with your favorite sides!

Variations of Spicy Honey Lime Chicken Recipe

Spicy Honey Lime Chicken Recipe is incredibly versatile. While chicken thighs are the star of this dish, there are many ways to switch things up. Let’s explore some alternative proteins and vegetarian options that can bring new flavors to your table!

Alternative Proteins to Use

Spicy Honey Lime Chicken Recipe, consider these alternatives:

  • Chicken Breasts: For a leaner option, use boneless, skinless chicken breasts. They will still absorb the marinade well and cook quickly.
  • Pork Chops: Thin pork chops can be marinated and grilled just like chicken. They will add a different flavor profile while still being delicious.
  • Tofu: For a plant-based option, firm tofu is a great choice. Press it to remove excess moisture, then marinate and grill for a tasty vegetarian dish.
  • Fish: Salmon or tilapia can also work well. The marinade will complement the fish beautifully, giving it a sweet and spicy flavor.

Each of these proteins can be marinated and cooked using the same method as the chicken. Just be mindful of cooking times, as they may vary.

Vegetarian Options for Spicy Honey Lime Chicken Recipe

If you want to keep things vegetarian, there are plenty of delicious options to consider:

  • Cauliflower Steaks: Slice cauliflower into thick steaks, marinate, and grill. They will absorb the flavors and provide a hearty texture.
  • Portobello Mushrooms: These meaty mushrooms are perfect for grilling. Marinate them and cook until tender for a satisfying dish.
  • Chickpeas: For a protein-packed option, toss canned chickpeas in the marinade and roast them in the oven. They will become crispy and flavorful.
  • Vegetable Skewers: Use a mix of your favorite vegetables like bell peppers, zucchini, and onions. Marinate and grill them on skewers for a colorful and tasty side.

Spicy Honey Lime Chicken Recipe, regardless of their dietary preferences. Feel free to get creative and mix and match!

Cooking Note for Spicy Honey Lime Chicken Recipe

Spicy Honey Lime Chicken Recipe, there are a few important cooking notes to keep in mind. These tips will help ensure that your chicken turns out perfectly every time, making your meal a delightful experience.

First, always use a meat thermometer to check the internal temperature of the chicken. This is crucial for food safety. The chicken should reach an internal temperature of 165°F. This ensures that it is fully cooked and safe to eat, while also remaining juicy and tender.

Next, consider the cooking method. Grilling is a fantastic way to achieve that smoky flavor and beautiful char. However, if you don’t have a grill, you can also use a grill pan or bake the chicken in the oven. If baking, preheat your oven to 400°F and cook the chicken for about 25-30 minutes, flipping halfway through.

Additionally, marinating the chicken for longer than 4 hours can lead to a mushy texture. The acidity from the lime juice can break down the meat too much. So, stick to the recommended marinating time for the best results.

Lastly, let the chicken rest after cooking. This step is often overlooked but is essential. Resting allows the juices to redistribute throughout the meat, making it more flavorful and moist. A 5-minute rest is usually sufficient.

Spicy Honey Lime Chicken Recipe to new heights. Enjoy the process and the delicious results!

Serving Suggestions for Spicy Honey Lime Chicken Recipe

Spicy Honey Lime Chicken Recipe, it’s time to think about how to serve it. The right side dishes and drinks can elevate your meal, making it even more enjoyable. Here are some fantastic serving suggestions to complement your chicken dish!

Ideal Side Dishes

Spicy Honey Lime Chicken Recipe. Here are some great options:

  • Rice: A fluffy bed of white or brown rice is perfect for soaking up the delicious honey lime sauce. You can also try coconut rice for a tropical twist.
  • Quinoa: This protein-packed grain is a healthy alternative. It adds a nutty flavor that pairs well with the chicken.
  • Grilled Vegetables: Seasonal veggies like zucchini, bell peppers, and asparagus can be grilled alongside the chicken. They add color and nutrition to your plate.
  • Coleslaw: A refreshing coleslaw with a tangy dressing can balance the spiciness of the chicken. It adds crunch and a cool contrast.
  • Tortillas: Serve the chicken in warm tortillas for a fun taco night! Add toppings like avocado, salsa, and cheese for extra flavor.

Spicy Honey Lime Chicken Recipe but also create a well-rounded meal that everyone will love.

Pairing Drinks with Spicy Honey Lime Chicken Recipe

Spicy Honey Lime Chicken Recipe. Here are some refreshing options:

  • Lemonade: A classic choice, lemonade’s sweetness and acidity balance the spiciness of the chicken perfectly.
  • Iced Tea: Unsweetened iced tea with a splash of lime is a refreshing option that won’t overpower the flavors of the dish.
  • Beer: A light lager or a citrusy pale ale can complement the dish nicely. The carbonation helps cleanse the palate.
  • Margaritas: For a festive touch, serve margaritas. The lime flavor will echo the chicken’s marinade, creating a harmonious pairing.
  • Sparkling Water: For a non-alcoholic option, sparkling water with a slice of lime is refreshing and keeps the meal light.

Spicy Honey Lime Chicken Recipe even more enjoyable. Cheers to a delicious meal!

Tips for Perfecting Your Spicy Honey Lime Chicken Recipe

Spicy Honey Lime Chicken Recipe truly shine, consider these helpful tips. They will guide you in achieving the best flavor and texture, ensuring that every bite is delicious!

First, always use fresh ingredients. Fresh limes will provide a brighter flavor compared to bottled lime juice. The same goes for garlic; fresh minced garlic adds a robust taste that enhances the marinade.

Next, don’t skip the marinating step. Marinating the chicken is essential for infusing it with flavor. If you have time, let it marinate longer than 30 minutes. Just remember not to exceed 4 hours to avoid a mushy texture.

When grilling, preheat your grill or grill pan properly. A hot grill helps to sear the chicken, creating a nice char and locking in juices. If you’re using a grill pan, make sure it’s well-oiled to prevent sticking.

For added flavor, consider basting the chicken with the reserved marinade during the last few minutes of cooking. This will enhance the taste and keep the chicken moist. Just ensure that the marinade has not come into contact with raw chicken to maintain food safety.

Lastly, let the chicken rest after cooking. This step is crucial for juicy chicken. Resting allows the juices to redistribute, making each bite tender and flavorful. A 5-minute rest is usually enough.

Spicy Honey Lime Chicken Recipe to perfection. Enjoy the process and the delightful results!

Breakdown of Time for Spicy Honey Lime Chicken Recipe

Spicy Honey Lime Chicken Recipe is essential for planning your meal. Here’s a detailed breakdown of the time required for preparation and cooking, so you can enjoy a delicious dinner without any stress!

Prep Time

The prep time for this recipe is quite manageable. You’ll need about 10-15 minutes to gather your ingredients and prepare the marinade. This includes:

  • Measuring out the honey, lime juice, soy sauce, and other ingredients.
  • Minced garlic and chopping cilantro for garnish.
  • Coating the chicken thighs in the marinade.

After this initial prep, remember to allow at least 30 minutes for marinating. If you have more time, marinating for up to 4 hours will enhance the flavor even more!

Cooking Time

Once the chicken has marinated, the cooking time is relatively quick. Here’s what to expect:

  • Preheating the grill or grill pan: about 5 minutes.
  • Grilling the chicken: approximately 12-14 minutes total (6-7 minutes on each side).
  • Resting the chicken after grilling: 5 minutes.

In total, the cooking time will take around 20-25 minutes, making it a quick and easy meal option!

Total Time

Spicy Honey Lime Chicken Recipe is approximately:

  • Prep Time: 10-15 minutes
  • Marinating Time: 30 minutes to 4 hours (optional)
  • Cooking Time: 20-25 minutes

So, if you marinate for 30 minutes, the total time will be around 1 hour. If you choose to marinate for 4 hours, the total time will be about 4 hours and 15 minutes. This flexibility allows you to plan your meal according to your schedule!

Spicy Honey Lime Chicken Recipe that’s sure to impress!

Nutritional Information for Spicy Honey Lime Chicken Recipe

Spicy Honey Lime Chicken Recipe not only delights your taste buds but also provides valuable nutrients. Here’s a breakdown of the nutritional information per serving, so you can enjoy this dish while keeping track of your dietary needs.

Calories

Spicy Honey Lime Chicken Recipe contains approximately 290 calories. This makes it a satisfying option for dinner without being overly heavy. The combination of protein and healthy fats helps keep you full and energized.

Protein Content

Protein is vital for muscle repair and overall health. This recipe packs a punch with about 25 grams of protein per serving. The boneless, skinless chicken thighs are an excellent source of lean protein, making this dish a great choice for those looking to increase their protein intake.

Sodium Levels

When it comes to sodium, each serving contains around 600 milligrams. This level is reasonable for a flavorful dish, especially considering the use of soy sauce in the marinade. If you’re watching your sodium intake, you can opt for low-sodium soy sauce to reduce the overall sodium content without sacrificing flavor.

Spicy Honey Lime Chicken Recipe while being mindful of your dietary goals. This dish is not only delicious but also a nutritious addition to your meal rotation!

FAQs about Spicy Honey Lime Chicken Recipe

Can I make the Spicy Honey Lime Chicken Recipe ahead of time?

Spicy Honey Lime Chicken Recipe ahead of time. Marinate the chicken in the sauce and store it in the refrigerator for up to 4 hours. If you want to prepare it even earlier, you can marinate the chicken the night before. Just remember to cook it fresh when you’re ready to serve. This way, the flavors will be even more intense, and your meal will be quick to finish!

What can I substitute for honey in the Spicy Honey Lime Chicken Recipe?

If you need a substitute for honey, there are several options you can use. Maple syrup is a great alternative, providing a similar sweetness. Agave nectar is another option that works well in marinades. For a lower-calorie choice, consider using a sugar substitute like stevia or monk fruit sweetener. Just keep in mind that these substitutes may alter the flavor slightly, so adjust to your taste!

How spicy is the Spicy Honey Lime Chicken Recipe?

Spicy Honey Lime Chicken Recipe can be adjusted to your preference. The recipe includes chili powder and cayenne pepper, which give it a nice kick. If you prefer a milder flavor, you can reduce the amount of cayenne pepper or omit it altogether. On the other hand, if you love heat, feel free to add more cayenne or even some chopped jalapeños to the marinade for an extra spicy twist!

Can I grill the chicken instead of cooking it on the stove?

Spicy Honey Lime Chicken Recipe! In fact, grilling enhances the flavor with a smoky char that complements the marinade beautifully. Just preheat your grill to medium-high heat and follow the cooking instructions as outlined. If you don’t have a grill, a grill pan or baking in the oven are also great alternatives. Each method will yield delicious results!

Conclusion on Spicy Honey Lime Chicken Recipe

Spicy Honey Lime Chicken Recipe is a delightful dish that brings together sweet, tangy, and spicy flavors in a way that is sure to please everyone at your table. With its simple ingredients and easy preparation, this recipe is perfect for both busy weeknights and special occasions. The versatility of the dish allows you to customize it to your taste, whether you prefer it mild or with an extra kick.

By following the steps outlined in this article, you can create a meal that is not only delicious but also nutritious. The combination of protein from the chicken and the vibrant flavors from the marinade makes it a well-rounded option for any dinner. Plus, with the various serving suggestions and side dishes, you can easily create a complete meal that satisfies all appetites.

Spicy Honey Lime Chicken Recipe is sure to become a favorite in your household. So gather your ingredients, fire up the grill, and enjoy a flavorful dining experience that will leave everyone asking for seconds!

Happy cooking, and may your meals be filled with joy and flavor!

Lemon Garlic Chicken Recipe is easy and delicious!

Introduction to Lemon Garlic Chicken Recipe

Lemon Garlic Chicken Recipe. This dish is not just a meal; it’s an experience that brings together the zesty brightness of lemon and the aromatic essence of garlic. Perfect for family dinners or special occasions, this recipe is sure to impress your guests and satisfy your taste buds.

Chicken thighs are the star of this dish, known for their juicy texture and rich flavor. When combined with a simple yet flavorful marinade, they transform into a mouthwatering delight. The best part? This recipe is easy to follow, making it suitable for both novice cooks and seasoned chefs alike.

As you prepare this dish, you’ll discover how the ingredients work together to create a harmonious blend of flavors. The lemon juice adds a refreshing tang, while the garlic infuses a warm, savory note. With just a few simple steps, you can create a meal that feels gourmet without spending hours in the kitchen.

Lemon Garlic Chicken Recipe. Whether you’re serving it with a side of roasted vegetables or a fresh salad, this dish is bound to become a favorite in your household. Let’s get started on this culinary adventure!

Ingredients for Lemon Garlic Chicken Recipe

Lemon Garlic Chicken Recipe, you’ll need a handful of fresh and flavorful ingredients. Each component plays a vital role in enhancing the overall taste of the dish. Here’s what you’ll need:

  • 2 pounds bone-in, skin-on chicken thighs: These provide rich flavor and juicy texture.
  • 3 tablespoons olive oil: This helps to keep the chicken moist and adds a lovely richness.
  • 4 cloves garlic, minced: Garlic is the star ingredient, giving the dish its aromatic flavor.
  • 1 lemon, juiced and zested: The lemon adds a bright, zesty flavor that complements the chicken beautifully.
  • 1 teaspoon dried oregano: This herb adds a warm, earthy note to the marinade.
  • 1 teaspoon salt: Essential for enhancing the flavors of the chicken.
  • ½ teaspoon black pepper: Adds a subtle kick to the dish.
  • ½ teaspoon red pepper flakes (optional): For those who enjoy a bit of heat, this is a great addition.
  • Fresh parsley, chopped (for garnish): This adds a pop of color and freshness when serving.

Feel free to customize the ingredients to suit your taste. For instance, you can add sliced olives or capers to the marinade for an extra burst of flavor. With these ingredients on hand, you’re well on your way to creating a delicious meal that everyone will love!

Step-by-Step Preparation of Lemon Garlic Chicken Recipe

Lemon Garlic Chicken Recipe. Each step is designed to ensure that your chicken turns out flavorful and juicy. Let’s get started!

Step 1: Marinating the Chicken

Marinating is a crucial step that enhances the flavor of the chicken. Begin by placing the chicken thighs in a large bowl. Next, pour the marinade mixture over the chicken. Make sure each piece is well-coated. This is where the magic happens! The longer you marinate, the more flavorful your chicken will be. Aim for at least 30 minutes, but if you have time, let it sit in the refrigerator for up to 2 hours. This allows the lemon and garlic to penetrate the meat, making it tender and delicious.

Step 2: Preparing the Lemon Garlic Sauce

While the chicken is marinating, you can prepare the lemon garlic sauce. In a small bowl, combine the remaining olive oil, minced garlic, lemon juice, and lemon zest. Whisk these ingredients together until they are well blended. This sauce will not only flavor the chicken but can also be drizzled over your side dishes. It’s a simple yet effective way to elevate your meal!

Step 3: Cooking the Chicken

Once the chicken has marinated, it’s time to cook! Preheat your oven to 425°F. Line a baking sheet with parchment paper for easy cleanup. Place the marinated chicken thighs skin-side up on the baking sheet. This allows the skin to get crispy while the chicken cooks. Roast the chicken in the oven for 35-40 minutes. You’ll know it’s done when the internal temperature reaches 165°F, and the skin is golden brown and crispy. The aroma will fill your kitchen, making it hard to wait!

Step 4: Finishing Touches

Lemon Garlic Chicken Recipe is ready to be enjoyed!

Variations of Lemon Garlic Chicken Recipe

Lemon Garlic Chicken Recipe is delicious on its own, there are many ways to switch things up! By adding different herbs or vegetables, you can create unique flavors that will keep your meals exciting. Here are two delightful variations to try:

Lemon Garlic Chicken Recipe with Herbs

Lemon Garlic Chicken Recipe to new heights. Consider adding fresh herbs like rosemary, thyme, or basil to your marinade. These herbs complement the lemon and garlic beautifully. For this variation, simply chop a handful of your chosen herbs and mix them into the marinade along with the other ingredients. The fresh herbs will infuse the chicken with a fragrant aroma and a burst of flavor. You can also sprinkle some herbs on top of the chicken before serving for an extra touch of freshness.

Lemon Garlic Chicken Recipe with Vegetables

Lemon Garlic Chicken Recipe is by incorporating vegetables. Roasting vegetables alongside the chicken not only adds color but also enhances the meal’s nutrition. You can use vegetables like bell peppers, zucchini, or carrots. Simply chop them into bite-sized pieces and toss them in the same marinade as the chicken. Spread the vegetables around the chicken on the baking sheet. As they roast, they will absorb the delicious flavors of the marinade, creating a complete meal in one pan. This method saves time and makes cleanup a breeze!

Lemon Garlic Chicken Recipe to suit your taste preferences. Whether you choose to add herbs or vegetables, you’ll create a dish that’s not only tasty but also visually appealing. Enjoy experimenting with these ideas!

Cooking Note for Lemon Garlic Chicken Recipe

Lemon Garlic Chicken Recipe, there are a few important cooking notes to keep in mind. These tips will help ensure that your chicken turns out perfectly every time, making your cooking experience enjoyable and stress-free.

First, always start with high-quality chicken. Fresh, organic chicken thighs will yield the best flavor and texture. If possible, choose chicken that is free from antibiotics and hormones. This not only benefits your health but also enhances the overall taste of your dish.

Next, marinating is key! As mentioned earlier, allowing the chicken to marinate for at least 30 minutes is essential. However, if you can plan ahead, marinating overnight in the refrigerator will deepen the flavors even more. Just remember to cover the bowl with plastic wrap or a lid to prevent any contamination.

When it comes to cooking, using a meat thermometer is a great way to ensure your chicken is cooked perfectly. Insert the thermometer into the thickest part of the thigh, avoiding the bone. The chicken is safe to eat when it reaches an internal temperature of 165°F. This guarantees that your chicken is juicy and tender, not dry or overcooked.

Lastly, let the chicken rest after cooking. This step is often overlooked but is crucial for juicy results. Resting allows the juices to redistribute throughout the meat, making each bite flavorful and moist. Cover the chicken loosely with foil while it rests to keep it warm.

Lemon Garlic Chicken Recipe. Enjoy the process and the delicious results!

Serving Suggestions for Lemon Garlic Chicken Recipe

Lemon Garlic Chicken Recipe, it’s time to think about how to serve it! The right sides can elevate your meal and create a well-rounded dining experience. Here are some delightful serving suggestions that pair beautifully with your chicken:

  • Roasted Vegetables: A colorful medley of roasted vegetables, such as bell peppers, zucchini, and carrots, complements the flavors of the chicken. Toss them in olive oil, salt, and pepper, and roast them alongside the chicken for a simple yet nutritious side.
  • Fresh Salad: A crisp salad with mixed greens, cherry tomatoes, and cucumbers adds a refreshing contrast to the savory chicken. Drizzle with a light vinaigrette to enhance the flavors.
  • Garlic Mashed Potatoes: Creamy garlic mashed potatoes are a comforting side that pairs perfectly with the zesty chicken. The richness of the potatoes balances the bright flavors of the lemon and garlic.
  • Quinoa or Rice: Serve your chicken over a bed of fluffy quinoa or rice. These grains soak up the delicious juices from the chicken, making each bite flavorful.
  • Crusty Bread: A warm, crusty loaf of bread is perfect for soaking up any leftover sauce. It adds a delightful texture and is great for dipping!

Lemon Garlic Chicken Recipe with a combination of these sides. This not only enhances the dining experience but also provides a variety of flavors and textures. Whether it’s a family dinner or a special occasion, these serving suggestions will make your meal memorable!

Tips for Perfecting Your Lemon Garlic Chicken Recipe

Lemon Garlic Chicken Recipe, a few tips can make all the difference. These simple yet effective suggestions will help you achieve the best flavor and texture every time you cook this dish. Let’s dive into some expert advice!

First, always use fresh ingredients. Fresh garlic and lemons will enhance the flavor of your marinade significantly. When possible, opt for organic produce. This not only tastes better but is also healthier for you and your family.

Next, don’t skip the marinating step! The longer you let the chicken soak in the marinade, the more flavorful it will be. If you can, marinate overnight. This allows the lemon and garlic to penetrate deeply into the meat, resulting in a juicier chicken.

Another tip is to ensure your chicken is at room temperature before cooking. Take it out of the refrigerator about 30 minutes before you plan to roast it. This helps the chicken cook evenly and prevents it from becoming tough.

When roasting, keep an eye on the chicken. Ovens can vary in temperature, so check for doneness a few minutes before the suggested cooking time. Use a meat thermometer to ensure the internal temperature reaches 165°F. This guarantees that your chicken is safe to eat and perfectly cooked.

Lastly, don’t forget to let the chicken rest after cooking. This crucial step allows the juices to redistribute throughout the meat, making it tender and juicy. Cover it loosely with foil and let it sit for about 5 minutes before serving.

Lemon Garlic Chicken Recipe to new heights. Enjoy the process and the delicious results that come with it!

Breakdown of Time for Lemon Garlic Chicken Recipe

Lemon Garlic Chicken Recipe can help you plan your cooking efficiently. Here’s a simple breakdown of the time you’ll need for preparation and cooking:

Prep Time

Lemon Garlic Chicken Recipe is approximately 10-15 minutes. This includes gathering your ingredients, marinating the chicken, and preparing the lemon garlic sauce. If you choose to marinate the chicken for longer, you can set aside additional time for that. Remember, the longer the chicken marinates, the more flavorful it will be!

Cooking Time

Once your chicken is marinated, the cooking time is about 35-40 minutes. Preheating the oven to 425°F takes a few minutes, but once it’s ready, you’ll roast the chicken until it reaches an internal temperature of 165°F. Keep an eye on it to ensure the skin gets crispy and golden brown.

Total Time

Lemon Garlic Chicken Recipe to take around 45-55 minutes, including both prep and cooking time. If you opt for the longer marinating period of up to 2 hours, the total time will increase accordingly. However, the hands-on time remains minimal, making this recipe a great option for a busy weeknight dinner or a weekend gathering!

Nutritional Information for Lemon Garlic Chicken Recipe

Lemon Garlic Chicken Recipe not only delights your taste buds but also provides valuable nutrients. Here’s a breakdown of the key nutritional information for this delicious dish:

Calories

Lemon Garlic Chicken Recipe contains approximately 380 calories. This makes it a satisfying option for dinner without being overly heavy. The combination of chicken, olive oil, and seasonings contributes to the calorie count, providing a well-rounded meal that can fit into various dietary plans.

Protein

Protein is a vital nutrient for building and repairing tissues, and this recipe delivers! Each serving offers about 28 grams of protein. Chicken thighs are an excellent source of high-quality protein, making this dish a great choice for those looking to increase their protein intake. Whether you’re an athlete or just aiming to maintain a healthy lifestyle, this recipe supports your nutritional needs.

Sodium

Lemon Garlic Chicken Recipe is approximately 800 milligrams per serving. While sodium is necessary for bodily functions, it’s important to monitor your intake. If you’re watching your sodium levels, consider using low-sodium salt or reducing the amount of added salt in the marinade. This way, you can enjoy the flavors without compromising your health goals.

Lemon Garlic Chicken Recipe is a nutritious option that provides a good balance of calories, protein, and sodium. By being mindful of your portion sizes and ingredient choices, you can enjoy this dish as part of a healthy and delicious meal plan!

FAQs about Lemon Garlic Chicken Recipe

What can I serve with Lemon Garlic Chicken?

Lemon Garlic Chicken Recipe, the options are endless! You can pair it with a variety of sides to create a well-rounded meal. Some popular choices include:

  • Roasted Vegetables: A mix of seasonal vegetables like carrots, zucchini, and bell peppers adds color and nutrition.
  • Fresh Salad: A light salad with greens, tomatoes, and cucumbers provides a refreshing contrast to the savory chicken.
  • Garlic Mashed Potatoes: Creamy mashed potatoes are a comforting side that complements the zesty flavors of the chicken.
  • Quinoa or Rice: These grains soak up the delicious juices from the chicken, making each bite flavorful.
  • Crusty Bread: A warm loaf of bread is perfect for dipping into any leftover sauce.

Feel free to mix and match these sides to suit your taste and create a delightful dining experience!

Can I use boneless chicken for this Lemon Garlic Chicken Recipe?

Lemon Garlic Chicken Recipe. Boneless chicken cooks faster, so be sure to adjust the cooking time accordingly. Aim for an internal temperature of 165°F to ensure it’s fully cooked. The marinade will still infuse the chicken with delicious flavors, making it a great alternative!

How long can I marinate the chicken for the Lemon Garlic Chicken Recipe?

For the best flavor, marinate your chicken for at least 30 minutes. However, if you have more time, letting it sit in the refrigerator for up to 2 hours is ideal. This allows the lemon and garlic to penetrate the meat, resulting in a more flavorful dish. Just remember to cover the bowl to prevent contamination!

Is the Lemon Garlic Chicken Recipe suitable for meal prep?

Lemon Garlic Chicken Recipe is perfect for meal prep! You can marinate the chicken ahead of time and store it in the refrigerator for up to 2 days. Cooked chicken can also be stored in airtight containers in the fridge for up to 4 days. This makes it easy to enjoy delicious, homemade meals throughout the week. Just reheat and serve with your favorite sides!

Conclusion on Lemon Garlic Chicken Recipe

Lemon Garlic Chicken Recipe is a delightful dish that combines simplicity with bold flavors. It’s perfect for any occasion, whether you’re hosting a dinner party or enjoying a cozy family meal. The juicy chicken thighs, infused with the zesty brightness of lemon and the aromatic essence of garlic, create a mouthwatering experience that is hard to resist.

Throughout this article, we’ve explored the essential ingredients, step-by-step preparation, and various serving suggestions that make this recipe a standout. The versatility of the dish allows you to customize it with different herbs and vegetables, ensuring that it never gets boring. Plus, the nutritional benefits make it a smart choice for those looking to maintain a balanced diet.

Lemon Garlic Chicken Recipe, remember to embrace the process. Cooking is not just about the end result; it’s about enjoying the experience and sharing delicious meals with loved ones. So, gather your ingredients, follow the steps, and savor the delightful flavors that await you.

We hope this recipe becomes a staple in your kitchen, bringing joy and satisfaction to your dining table. Happy cooking!

Creamy Garlic Herb Chicken Recipe is a must-try dish!

Introduction to Creamy Garlic Herb Chicken Recipe

Creamy Garlic Herb Chicken Recipe. This dish is not just a meal; it’s an experience that brings comfort and joy to your dining table. With its rich flavors and creamy texture, it’s sure to impress family and friends alike. Whether you’re a seasoned chef or a beginner in the kitchen, this recipe is easy to follow and guarantees a delicious outcome.

What Makes This Recipe Special?

Creamy Garlic Herb Chicken Recipe apart is its unique blend of flavors. The combination of garlic, fresh herbs, and creamy sauce creates a mouthwatering dish that tantalizes your taste buds. Each bite is packed with savory goodness, making it a favorite for many. Plus, the use of simple ingredients means you can whip it up without a hassle. It’s a dish that feels fancy but is incredibly approachable.

The Perfect Dish for Any Occasion

This recipe is versatile enough to suit any occasion. Whether you’re hosting a dinner party, celebrating a special event, or simply enjoying a cozy night in, creamy garlic herb chicken fits the bill. It pairs beautifully with a variety of sides, making it easy to customize for your guests. Plus, the comforting aroma that fills your kitchen while cooking is simply irresistible. So, gather your ingredients and get ready to create a dish that will leave everyone asking for seconds!

Ingredients for Creamy Garlic Herb Chicken Recipe

Creamy Garlic Herb Chicken Recipe, you’ll need a selection of fresh and flavorful ingredients. Each component plays a vital role in achieving that rich, creamy sauce and tender chicken. Here’s what you’ll need:

  • 4 boneless, skinless chicken breasts
  • 2 tablespoons olive oil
  • 4 cloves garlic, minced
  • 1 cup heavy cream
  • 1 cup chicken broth
  • 1 teaspoon dried thyme
  • 1 teaspoon dried oregano
  • 1 teaspoon dried basil
  • Salt and pepper to taste
  • Fresh parsley, chopped (for garnish)

These ingredients come together to create a dish that is not only delicious but also visually appealing. The chicken breasts provide a hearty base, while the garlic and herbs infuse the sauce with aromatic flavors. The heavy cream adds a luscious texture, making every bite a delight. Feel free to adjust the herbs according to your taste preferences, as this recipe is quite forgiving and allows for personal touches.

Now that you have your ingredients ready, let’s move on to the next step of preparing this delightful dish!

Step-by-Step Preparation of Creamy Garlic Herb Chicken Recipe

Creamy Garlic Herb Chicken Recipe. This step-by-step guide will help you create a dish that is both delicious and satisfying. Let’s get started!

Step 1: Preparing the Chicken

First, you need to prepare the chicken breasts. Start by rinsing them under cold water. Pat them dry with paper towels. This step is important as it helps the chicken sear nicely. Next, season both sides of the chicken breasts with salt and pepper. This simple seasoning enhances the flavor of the chicken and sets the stage for the creamy sauce to shine.

Step 2: Making the Creamy Garlic Herb Sauce

Now, let’s move on to the sauce. In a medium saucepan, heat the olive oil over medium heat. Once hot, add the minced garlic. Sauté the garlic for about 1-2 minutes until it becomes fragrant. Be careful not to burn it, as burnt garlic can taste bitter. After that, pour in the heavy cream and chicken broth. Stir well to combine. Then, add the dried thyme, oregano, and basil. Allow the sauce to simmer for about 5 minutes, letting the flavors meld together. This creamy garlic herb sauce is what makes this dish so special!

Step 3: Cooking the Chicken

In a large skillet, heat a little more olive oil over medium-high heat. Once the oil is hot, carefully add the seasoned chicken breasts. Cook them for about 6-7 minutes on each side, or until they are golden brown and cooked through. You can check for doneness by cutting into the thickest part of the chicken; it should be no longer pink. Once cooked, remove the chicken from the skillet and set it aside on a plate.

Step 4: Combining Chicken and Sauce

Creamy Garlic Herb Chicken Recipe is now ready to be served!

With these simple steps, you’ve created a dish that is sure to impress. The creamy sauce paired with tender chicken is a match made in culinary heaven. Next, let’s explore some variations to make this dish even more exciting!

Variations of Creamy Garlic Herb Chicken Recipe

Creamy Garlic Herb Chicken Recipe is delicious as is, there are many ways to customize it. Adding different ingredients can enhance the flavors and make the dish even more exciting. Let’s explore some tasty variations!

Adding Vegetables for Extra Flavor

Incorporating vegetables into your creamy garlic herb chicken can elevate the dish. Not only do they add color, but they also provide extra nutrients. Here are some great options:

  • Spinach: Add fresh spinach to the sauce just before serving. It wilts quickly and adds a lovely green color.
  • Mushrooms: Sauté sliced mushrooms with the garlic for a rich, earthy flavor that complements the creaminess.
  • Broccoli: Steam or sauté broccoli florets and mix them into the sauce for a crunchy texture.
  • Bell Peppers: Diced bell peppers can add sweetness and a pop of color. Sauté them along with the garlic.

These vegetables not only enhance the flavor but also make the dish more filling. Feel free to mix and match based on your preferences!

Alternative Protein Options

If you want to switch things up, consider using different proteins. Here are some alternatives that work well with the creamy garlic herb sauce:

  • Turkey: Turkey cutlets can be a leaner option. They cook quickly and absorb the sauce beautifully.
  • Pork Chops: Boneless pork chops are another great choice. They have a nice flavor that pairs well with the creamy sauce.
  • Tofu: For a vegetarian option, use firm tofu. Press it to remove excess moisture, then sauté until golden before adding the sauce.
  • Seafood: Shrimp or scallops can be delightful in this recipe. Cook them briefly in the sauce for a quick and elegant meal.

Creamy Garlic Herb Chicken Recipe. Experimenting with different ingredients can lead to exciting discoveries in your cooking journey!

Cooking Note for Creamy Garlic Herb Chicken Recipe

Creamy Garlic Herb Chicken Recipe, there are a few important cooking notes to keep in mind. These tips will help ensure that your dish turns out perfectly every time. Let’s dive into some key points to consider!

First, always use fresh ingredients when possible. Fresh garlic and herbs will enhance the flavor of your sauce significantly. Dried herbs can work in a pinch, but fresh ones bring a vibrant taste that is hard to beat. If you have access to fresh thyme, oregano, or basil, don’t hesitate to use them!

Next, be mindful of the cooking temperature. Cooking the chicken over medium-high heat allows it to sear nicely, creating a golden crust. However, if the heat is too high, the outside may cook too quickly while the inside remains undercooked. Always check the internal temperature of the chicken. It should reach 165°F (75°C) for safe consumption.

Additionally, when making the creamy sauce, stir it gently to prevent it from sticking to the bottom of the pan. This will help maintain a smooth texture. If the sauce becomes too thick, you can add a splash of chicken broth or water to reach your desired consistency.

Lastly, let the dish rest for a few minutes after cooking. This allows the flavors to meld together and makes serving easier. The creamy garlic herb chicken will be even more delicious when allowed to sit for a bit!

Creamy Garlic Herb Chicken Recipe to new heights. Now, let’s explore some serving suggestions to complement this delightful dish!

Serving Suggestions for Creamy Garlic Herb Chicken Recipe

Creamy Garlic Herb Chicken Recipe, it’s time to think about how to serve it. The right side dishes and beverages can enhance the overall dining experience. Let’s explore some ideal pairings that will complement your dish beautifully!

Ideal Side Dishes

Choosing the right side dishes can elevate your creamy garlic herb chicken to a whole new level. Here are some fantastic options:

  • Mashed Potatoes: Creamy mashed potatoes are a classic choice. They soak up the delicious sauce, making every bite heavenly.
  • Rice: Fluffy white or brown rice is perfect for balancing the richness of the chicken. You can also try garlic or herb-infused rice for added flavor.
  • Steamed Vegetables: Lightly steamed green beans or asparagus add a fresh crunch. Their bright colors also make the plate visually appealing.
  • Salad: A crisp garden salad with a light vinaigrette can provide a refreshing contrast to the creamy chicken. Consider adding cherry tomatoes and cucumbers for extra crunch.
  • Garlic Bread: For a comforting touch, serve warm garlic bread. It’s perfect for dipping into the creamy sauce!

These side dishes not only complement the flavors of the creamy garlic herb chicken but also create a well-rounded meal that everyone will enjoy.

Wine Pairing Recommendations

Creamy Garlic Herb Chicken Recipe:

  • Chardonnay: A buttery Chardonnay complements the creaminess of the sauce beautifully. Look for one with a hint of oak for added depth.
  • Sauvignon Blanc: This wine’s crisp acidity balances the richness of the dish. It also brings out the herbal notes in the sauce.
  • Pinot Grigio: A light and refreshing Pinot Grigio can be a great choice. Its fruity flavors will enhance the overall taste of the meal.
  • Rosé: A dry rosé offers a lovely balance of fruitiness and acidity, making it a versatile option for this dish.

Choosing the right wine can elevate your meal, making it feel even more special. So, pour a glass and enjoy your creamy garlic herb chicken with these delightful pairings!

Tips for Perfecting Your Creamy Garlic Herb Chicken Recipe

Creamy Garlic Herb Chicken Recipe turns out perfectly every time, consider these helpful tips. From ingredient substitutions to storage and reheating advice, these pointers will help you create a dish that’s not only delicious but also convenient for your lifestyle.

Ingredient Substitutions

Sometimes, you may not have all the ingredients on hand. No worries! Here are some easy substitutions that won’t compromise the flavor of your dish:

  • Heavy Cream: If you want a lighter option, use half-and-half or whole milk. Just be aware that the sauce may be less thick and creamy.
  • Chicken Broth: Vegetable broth can be a great substitute for a vegetarian version. It adds flavor without the meat.
  • Fresh Herbs: If you don’t have fresh herbs, dried herbs work well too. Use about one-third of the amount since dried herbs are more concentrated.
  • Olive Oil: You can replace olive oil with butter for a richer flavor. Just melt it in the pan before adding the garlic.
  • Chicken Breasts: Feel free to use chicken thighs for a juicier option. They add a different texture and flavor to the dish.

Creamy Garlic Herb Chicken Recipe to what you have available, making it easier to whip up this delicious meal anytime!

Storage and Reheating Tips

After enjoying your creamy garlic herb chicken, you may have leftovers. Here’s how to store and reheat them properly:

  • Storage: Allow the chicken to cool completely before transferring it to an airtight container. It can be stored in the refrigerator for up to 3 days.
  • Freezing: If you want to keep it longer, you can freeze the chicken. Just make sure to use a freezer-safe container. It can last for up to 2 months.
  • Reheating: To reheat, place the chicken in a skillet over low heat. Add a splash of chicken broth or cream to keep it moist. Stir occasionally until heated through.
  • Microwave: If you’re in a hurry, you can use the microwave. Place the chicken in a microwave-safe dish, cover it, and heat in short intervals, stirring in between.

Creamy Garlic Herb Chicken Recipe even after the initial meal. It’s a great way to save time and reduce food waste!

Breakdown of Time for Creamy Garlic Herb Chicken Recipe

Creamy Garlic Herb Chicken Recipe is essential for planning your meal. Here’s a simple breakdown of the time required for each step, so you can manage your cooking efficiently.

Prep Time

The prep time for this delicious dish is quite manageable. You’ll need about 15 minutes to gather and prepare your ingredients. This includes rinsing and drying the chicken, chopping garlic, and measuring out your herbs and cream. Having everything ready will make the cooking process smoother and more enjoyable!

Cooking Time

Once you start cooking, the total cooking time is approximately 20-25 minutes. This includes:

  • Cooking the chicken: 12-14 minutes
  • Making the creamy garlic herb sauce: 5-7 minutes
  • Combining the chicken and sauce: 2-3 minutes

With this efficient cooking time, you can have a delicious meal ready in no time!

Total Time

Creamy Garlic Herb Chicken Recipe a perfect option for a weeknight dinner or a special occasion. With just a little time and effort, you’ll create a dish that’s sure to impress!

Nutritional Information for Creamy Garlic Herb Chicken Recipe

Creamy Garlic Herb Chicken Recipe not only delights your taste buds but also provides essential nutrients. Here’s a breakdown of the key nutritional information for this dish:

Calories

Creamy Garlic Herb Chicken Recipe contains approximately 450-500 calories. This calorie count can vary based on the specific ingredients used and portion sizes. The creamy sauce and chicken provide a satisfying meal that can keep you full and energized.

Protein

Protein is a vital nutrient for building and repairing tissues. This recipe is a great source of protein, with each serving containing around 40-45 grams. The chicken breasts are lean and packed with protein, making this dish an excellent choice for those looking to increase their protein intake.

Sodium

Creamy Garlic Herb Chicken Recipe has about 800-900 milligrams per serving. This amount can vary depending on the chicken broth and added salt. If you’re watching your sodium intake, consider using low-sodium broth and adjusting the salt to taste. This way, you can enjoy the flavors without exceeding your daily sodium limit.

Creamy Garlic Herb Chicken Recipe while being mindful of your dietary needs. It’s a delicious way to nourish your body and satisfy your cravings!

FAQs about Creamy Garlic Herb Chicken Recipe

Can I make this recipe ahead of time?

Creamy Garlic Herb Chicken Recipe can be made ahead of time, making it a great option for meal prep. You can cook the chicken and prepare the sauce, then store them separately in airtight containers. Keep them in the refrigerator for up to 3 days. When you’re ready to serve, simply reheat the chicken and sauce together in a skillet over low heat. This way, you’ll have a delicious meal ready in no time!

What can I serve with creamy garlic herb chicken?

Creamy Garlic Herb Chicken Recipe. Some popular choices include:

  • Mashed potatoes for a comforting side.
  • Steamed vegetables like green beans or broccoli for a healthy touch.
  • Fluffy rice to soak up the creamy sauce.
  • A fresh garden salad for a refreshing contrast.
  • Garlic bread for a delicious dipping option.

These sides not only complement the flavors of the chicken but also create a well-rounded meal that everyone will enjoy!

Is it possible to make this recipe dairy-free?

Creamy Garlic Herb Chicken Recipe dairy-free! To do this, substitute the heavy cream with a dairy-free alternative, such as coconut cream or cashew cream. You can also use a dairy-free chicken broth. This way, you can enjoy the creamy texture and rich flavors without any dairy products. Just be sure to check the labels of your substitutes to ensure they fit your dietary needs!

How can I adjust the spice level in this recipe?

Creamy Garlic Herb Chicken Recipe, there are a few simple ways to do so. For a milder flavor, reduce the amount of garlic or omit any spicy herbs. If you prefer a bit of heat, consider adding a pinch of red pepper flakes or a dash of hot sauce to the creamy sauce. You can also experiment with different herbs, like adding a bit of fresh chili or using spicy mustard. Adjusting the spice level allows you to customize the dish to your taste!

Conclusion on Creamy Garlic Herb Chicken Recipe

Creamy Garlic Herb Chicken Recipe is a delightful dish that brings together rich flavors and comforting textures. It’s perfect for any occasion, whether you’re hosting a dinner party or enjoying a quiet meal at home. The combination of tender chicken and a creamy, herb-infused sauce creates a satisfying experience that is sure to please everyone at the table.

With its simple ingredients and straightforward preparation, this recipe is accessible for cooks of all skill levels. You can easily customize it with various vegetables or alternative proteins, making it a versatile option for your culinary repertoire. Plus, the tips and variations provided ensure that you can adapt the dish to suit your preferences and dietary needs.

Creamy Garlic Herb Chicken Recipe and share it with family and friends. You might just find it becomes a new favorite in your household!

Happy cooking, and enjoy every creamy, garlicky bite!

Creamy Lemon Garlic Salmon Pasta Recipe is a must-try!

Introduction to Creamy Lemon Garlic Salmon Pasta Recipe

Creamy Lemon Garlic Salmon Pasta Recipe is a dish that brings together the rich flavors of salmon, the zest of lemon, and the creaminess of coconut. This recipe is not just a meal; it’s a celebration of taste and nutrition. Perfect for a family dinner or a special occasion, this dish is sure to impress everyone at the table.

Why You’ll Love This Creamy Lemon Garlic Salmon Pasta Recipe

There are countless reasons to fall in love with this recipe. First, it’s incredibly easy to prepare, making it suitable for both novice cooks and seasoned chefs. The combination of salmon and pasta creates a satisfying meal that is both hearty and healthy. Plus, the creamy sauce, infused with garlic and lime, adds a refreshing twist that elevates the dish.

Another reason to adore this recipe is its versatility. You can easily customize it by adding your favorite vegetables or substituting the salmon with other proteins. This means you can enjoy a different version of this dish every time you make it!

Moreover, the nutritional benefits of salmon are hard to ignore. Rich in omega-3 fatty acids, it supports heart health and boosts brain function. When paired with whole grain pasta and fresh vegetables, you have a balanced meal that nourishes your body.

Finally, the vibrant colors and enticing aromas of this dish will make your kitchen feel like a gourmet restaurant. So, gather your ingredients and get ready to create a meal that is not only delicious but also a feast for the eyes!

Ingredients for Creamy Lemon Garlic Salmon Pasta Recipe

Creamy Lemon Garlic Salmon Pasta Recipe, you will need a selection of fresh and flavorful ingredients. Each component plays a vital role in bringing this dish to life. Here’s what you’ll need:

  • 8 ounces spaghetti or tagliatelle
  • 1 tablespoon avocado oil
  • 2 salmon steaks (approximately 6 ounces each)
  • Sea salt and black pepper, to taste
  • 3 cloves garlic, finely chopped
  • 1 cup coconut cream
  • 1 cup vegetable broth
  • 1 cup grape tomatoes, halved
  • 1 cup baby kale
  • Juice of 1 lime
  • Zest of 1 lime
  • ¼ cup shredded Pecorino cheese
  • Chopped basil leaves (for garnish)

These ingredients combine to create a dish that is not only delicious but also packed with nutrients. The salmon provides healthy fats, while the vegetables add vitamins and minerals. The coconut cream gives the sauce a rich, creamy texture, making every bite a delight. So, gather these ingredients and prepare to embark on a culinary adventure!

Step-by-Step Preparation of Creamy Lemon Garlic Salmon Pasta Recipe

Creamy Lemon Garlic Salmon Pasta Recipe. Each step is designed to ensure that your dish turns out perfectly delicious.

Step 1: Preparing the Salmon

Start by preparing the salmon. First, rinse the salmon steaks under cold water and pat them dry with a paper towel. This helps remove any excess moisture. Next, season both sides of the salmon with sea salt and black pepper. This simple seasoning enhances the natural flavors of the fish. Heat a large frying pan over medium heat and add the avocado oil. Once the oil is hot, carefully place the salmon steaks in the pan. Cook for about 4-5 minutes on each side until they are golden brown and flaky. Once cooked, remove the salmon from the pan and set it aside on a plate.

Step 2: Cooking the Pasta

While the salmon is cooking, you can prepare the pasta. In a large pot, bring salted water to a boil. Add the spaghetti or tagliatelle and cook according to the package instructions until just tender. This usually takes around 8-10 minutes. Once the pasta is cooked, drain it in a colander, but remember to reserve half a cup of the cooking liquid. This starchy water will help adjust the sauce’s consistency later on.

Step 3: Making the Creamy Lemon Garlic Sauce

Now, let’s make the creamy sauce! In the same frying pan used for the salmon, add the finely chopped garlic. Sauté the garlic for about a minute until it becomes fragrant. Be careful not to burn it! Next, pour in the coconut cream and vegetable broth, stirring well to combine. Allow the mixture to come to a gentle simmer. Cook for 3-4 minutes until the sauce thickens slightly. This creamy base will be the heart of your dish.

Step 4: Combining Ingredients

Once your sauce is ready, it’s time to add the vegetables. Stir in the halved grape tomatoes and baby kale. Cook for another 2-3 minutes until the kale wilts and the tomatoes soften. Then, break the cooked salmon into smaller pieces and return it to the pan. Add the drained pasta along with the shredded Pecorino cheese. Toss everything together gently, ensuring that the pasta is well coated with the creamy sauce. If the sauce seems too thick, gradually mix in the reserved pasta water until you reach your desired creaminess.

Step 5: Final Touches and Serving

Creamy Lemon Garlic Salmon Pasta Recipe is now ready to be enjoyed!

Variations of Creamy Lemon Garlic Salmon Pasta Recipe

Creamy Lemon Garlic Salmon Pasta Recipe is delicious as is, there are many ways to switch things up! Whether you want to try different proteins or add more vegetables, these variations will keep your meals exciting and flavorful.

Substituting Salmon with Other Proteins

If salmon isn’t your favorite, don’t worry! You can easily substitute it with other proteins. For instance, chicken breast is a great alternative. Simply cook the chicken in the same way as the salmon, seasoning it with salt and pepper. You can also use shrimp, which cooks quickly and adds a delightful taste. Just sauté the shrimp until they turn pink, and then follow the rest of the recipe as usual.

Another option is to use tofu for a vegetarian twist. Firm tofu can be cubed and sautéed until golden. It absorbs the flavors of the sauce beautifully, making it a satisfying choice for plant-based eaters. No matter which protein you choose, the creamy sauce will complement it perfectly!

Adding Vegetables for Extra Flavor

Enhancing your dish with more vegetables is a fantastic way to boost nutrition and flavor. Consider adding bell peppers, zucchini, or spinach. These veggies can be sautéed along with the garlic for a colorful and nutritious addition. You can also toss in some peas or asparagus for a pop of freshness.

For a heartier meal, try adding broccoli or cauliflower. Simply steam or sauté them before mixing them into the pasta. Not only do these vegetables add texture, but they also provide essential vitamins and minerals. Feel free to get creative and use whatever vegetables you have on hand. The more, the merrier!

Creamy Lemon Garlic Salmon Pasta Recipe can be a new dish every time you make it. Enjoy experimenting and discovering your favorite combinations!

Cooking Note for Creamy Lemon Garlic Salmon Pasta Recipe

Creamy Lemon Garlic Salmon Pasta Recipe, a few cooking notes can help ensure your dish turns out perfectly every time. First, always use fresh ingredients whenever possible. Fresh salmon, ripe tomatoes, and vibrant greens will enhance the flavors and textures of your meal.

Next, pay attention to the cooking times. Overcooking the salmon can lead to a dry texture, while undercooking it may leave it too raw. Aim for that perfect golden-brown crust on the outside while keeping the inside flaky and tender. A good rule of thumb is to cook salmon for about 4-5 minutes on each side, depending on the thickness of the steaks.

Additionally, when cooking the pasta, make sure to follow the package instructions closely. Different types of pasta may require varying cooking times. Always taste the pasta a minute or two before the suggested time to ensure it’s al dente, which means it should be firm to the bite.

As you prepare the creamy sauce, remember that the coconut cream can vary in thickness. If you find the sauce too thick, gradually add the reserved pasta water until you achieve your desired consistency. This starchy water not only helps with the texture but also adds flavor to the sauce.

Lastly, don’t hesitate to adjust the seasoning to your liking. The balance of flavors is key to a delicious dish. A little extra lime juice can brighten the flavors, while more salt and pepper can enhance the overall taste. Trust your palate and make it your own!

Creamy Lemon Garlic Salmon Pasta Recipe. Enjoy the process and the delightful meal that follows!

Serving Suggestions for Creamy Lemon Garlic Salmon Pasta Recipe

Creamy Lemon Garlic Salmon Pasta Recipe, it’s time to think about how to serve it. Presentation can elevate your dish, making it even more enjoyable. Here are some delightful serving suggestions to enhance your dining experience:

  • Garnish with Fresh Herbs: A sprinkle of chopped basil leaves not only adds a pop of color but also enhances the flavor. Fresh herbs can brighten the dish and make it look more appealing.
  • Pair with a Side Salad: A light side salad can complement the richness of the pasta. Consider a simple mixed greens salad with a lemon vinaigrette. The acidity will balance the creaminess of the dish.
  • Serve with Crusty Bread: A slice of crusty bread or garlic bread is perfect for soaking up the creamy sauce. It adds a satisfying crunch and makes the meal feel more complete.
  • Offer Extra Lime Wedges: Serving lime wedges on the side allows guests to add a splash of fresh lime juice to their pasta. This extra zing can enhance the flavors and make each bite even more refreshing.
  • Wine Pairing: If you enjoy wine, consider pairing your meal with a crisp white wine, such as Sauvignon Blanc or Pinot Grigio. These wines complement the flavors of the salmon and the creamy sauce beautifully.

Creamy Lemon Garlic Salmon Pasta Recipe will surely impress your family and friends, making any meal feel like a special occasion!

Tips for Perfecting Your Creamy Lemon Garlic Salmon Pasta Recipe

Creamy Lemon Garlic Salmon Pasta Recipe, a few tips can make all the difference. These simple yet effective suggestions will help you elevate your dish and impress everyone at the table.

  • Choose Quality Salmon: Opt for fresh, high-quality salmon. Wild-caught salmon often has a richer flavor compared to farmed varieties. Look for bright, vibrant color and a fresh smell when selecting your fish.
  • Don’t Overcook the Salmon: Keep an eye on the cooking time for the salmon. Overcooking can lead to a dry texture. Aim for a golden crust on the outside while keeping the inside moist and flaky.
  • Use Fresh Garlic: Fresh garlic adds a robust flavor to your sauce. Avoid pre-minced garlic, as it can lose its potency. The aroma of freshly chopped garlic will enhance the overall taste of your dish.
  • Adjust the Creaminess: If you prefer a lighter sauce, feel free to reduce the amount of coconut cream. You can also substitute part of it with low-fat yogurt for a tangy twist without sacrificing creaminess.
  • Experiment with Herbs: While basil is a great garnish, don’t hesitate to try other herbs. Fresh parsley, dill, or even cilantro can add unique flavors that complement the dish beautifully.
  • Incorporate Citrus Zest: Besides lime juice, consider adding lemon or orange zest for an extra layer of flavor. The zest enhances the citrus notes and brightens the dish.
  • Let the Pasta Rest: After mixing the pasta with the sauce, let it sit for a minute before serving. This allows the flavors to meld together, creating a more cohesive dish.
  • Serve Immediately: For the best experience, serve the pasta right after cooking. The creamy sauce is at its peak when fresh, ensuring a delightful texture and flavor.

Creamy Lemon Garlic Salmon Pasta Recipe. Each bite will be a delicious reminder of your culinary skills and creativity!

Breakdown of Time for Creamy Lemon Garlic Salmon Pasta Recipe

Creamy Lemon Garlic Salmon Pasta Recipe can help you plan your cooking efficiently. Here’s a simple breakdown of the time required for preparation and cooking:

Prep Time

The prep time for this delightful dish is approximately 15 minutes. During this time, you will gather all your ingredients, wash and chop the vegetables, and season the salmon. Having everything ready before you start cooking makes the process smoother and more enjoyable.

Cooking Time

Creamy Lemon Garlic Salmon Pasta Recipe is about 20 minutes. This includes cooking the pasta, sautéing the salmon, and preparing the creamy sauce. Each step is quick, allowing you to create a delicious meal in no time!

Total Time

In total, you can expect to spend around 35 minutes from start to finish. This makes it a perfect option for a weeknight dinner or a last-minute gathering. With just a little time and effort, you can serve a restaurant-quality meal right at home!

Nutritional Information for Creamy Lemon Garlic Salmon Pasta Recipe

Creamy Lemon Garlic Salmon Pasta Recipe not only delights your taste buds but also provides valuable nutrients. Here’s a breakdown of the key nutritional information for this dish:

Calories

Creamy Lemon Garlic Salmon Pasta Recipe contains approximately 450 calories. This calorie count includes the healthy fats from the salmon and avocado oil, as well as the carbohydrates from the pasta. It’s a satisfying meal that provides energy without being overly heavy.

Protein

Protein is a vital nutrient for building and repairing tissues. This recipe offers about 30 grams of protein per serving, primarily from the salmon and Pecorino cheese. Including protein in your meals helps keep you full and supports muscle health, making this dish a great choice for active individuals.

Sodium

Creamy Lemon Garlic Salmon Pasta Recipe is around 600 milligrams per serving. This amount can vary based on the type of broth used and how much salt you add during cooking. To keep sodium levels in check, consider using low-sodium vegetable broth and adjusting the salt to your taste.

Creamy Lemon Garlic Salmon Pasta Recipe!

FAQs about Creamy Lemon Garlic Salmon Pasta Recipe

Can I use frozen salmon for this recipe?

Creamy Lemon Garlic Salmon Pasta Recipe. However, it’s best to thaw the salmon first. You can do this by placing it in the refrigerator overnight or using the defrost setting on your microwave. Once thawed, follow the same cooking instructions as you would for fresh salmon. Just keep an eye on the cooking time, as frozen salmon may take a minute or two longer to cook through.

What can I substitute for heavy cream in the sauce?

If you’re looking for a substitute for heavy cream, coconut cream is a fantastic option, as used in this recipe. It provides a rich, creamy texture without dairy. Alternatively, you can use Greek yogurt for a lighter option. Just mix it in at the end of cooking to avoid curdling. Another option is to use a blend of milk and cornstarch to thicken the sauce, giving you a creamy consistency without the heaviness.

How can I make this recipe gluten-free?

Creamy Lemon Garlic Salmon Pasta Recipe gluten-free, simply substitute regular pasta with gluten-free pasta. There are many options available, such as rice pasta or chickpea pasta. Just be sure to follow the cooking instructions on the package, as gluten-free pasta may have different cooking times. The rest of the ingredients in the recipe are naturally gluten-free, so you can enjoy this dish without worry!

Can I prepare the sauce in advance?

Yes, you can prepare the sauce in advance! Simply make the creamy lemon garlic sauce and store it in an airtight container in the refrigerator for up to three days. When you’re ready to serve, reheat the sauce gently on the stove. You may need to add a splash of vegetable broth or reserved pasta water to loosen it up. Then, combine it with freshly cooked pasta and salmon for a quick and delicious meal!

Conclusion on Creamy Lemon Garlic Salmon Pasta Recipe

Creamy Lemon Garlic Salmon Pasta Recipe is a delightful dish that combines rich flavors, vibrant colors, and essential nutrients. This recipe is not only easy to prepare but also offers a wonderful way to enjoy the health benefits of salmon and fresh vegetables. Whether you’re cooking for a family dinner or a special occasion, this dish is sure to impress.

As you’ve seen, the versatility of this recipe allows for endless variations. You can easily substitute proteins, add more vegetables, or adjust the flavors to suit your taste. This adaptability makes it a fantastic choice for any meal, ensuring that you can enjoy it time and time again without getting bored.

Moreover, the nutritional benefits of this dish are significant. With a good balance of protein, healthy fats, and carbohydrates, it provides a satisfying meal that fuels your body. The use of coconut cream adds a unique twist, making the sauce creamy and delicious without the need for heavy dairy products.

Creamy Lemon Garlic Salmon Pasta Recipe a try. You’ll be amazed at how quickly you can whip up a restaurant-quality meal in your own kitchen. Enjoy the process, savor each bite, and share this delightful dish with your loved ones. Happy cooking!

Bang Bang Salmon Recipe: A Quick and Tasty Delight

Introduction to Bang Bang Salmon Recipe

Bang Bang Salmon Recipe is here to bring excitement to your table! This dish combines the rich flavors of salmon with a zesty, spicy glaze that will tantalize your taste buds. Not only is it delicious, but it’s also quick and easy to prepare, making it perfect for busy weeknights or special occasions.

Salmon is a fantastic source of protein and omega-3 fatty acids, which are great for heart health. When paired with a sweet and spicy sauce, it transforms into a meal that everyone will love. The creamy Greek yogurt in the glaze adds a delightful texture, while the chili sauces provide just the right amount of heat. Plus, the fresh lemon juice brightens up the flavors, making each bite refreshing.

Bang Bang Salmon Recipe!

Ingredients for Bang Bang Salmon Recipe

Bang Bang Salmon Recipe, you’ll need a few simple ingredients. Each component plays a vital role in building the flavors that make this dish so special. Here’s what you’ll need:

  • 4 salmon fillets (6 ounces each)
  • 1/2 cup Greek yogurt
  • 3 tablespoons sweet chili sauce
  • 1 tablespoon chili garlic sauce (adjust for heat level)
  • 1 tablespoon fresh lemon juice
  • 1 teaspoon onion powder
  • Salt and pepper to taste
  • 2 tablespoons sesame oil
  • 2 tablespoons chopped cilantro (for garnish)
  • Lemon wedges (for serving)

These ingredients are not only easy to find but also come together to create a delightful balance of flavors. The salmon fillets are the star of the show, providing a rich and buttery taste. The Greek yogurt adds creaminess, while the sweet chili and chili garlic sauces bring the heat and sweetness that define the “Bang Bang” style. Fresh lemon juice brightens the dish, making it refreshing and vibrant.

Bang Bang Salmon Recipe. Now that you have everything ready, let’s move on to the next step: preparing the salmon!

Step-by-Step Preparation of Bang Bang Salmon Recipe

Bang Bang Salmon Recipe. This process is straightforward and will have your kitchen smelling amazing in no time. Let’s get started!

Step 1: Preparing the Salmon

First, you need to prepare the salmon fillets. Start by preheating your oven to 425°F (220°C). This high temperature will help achieve that perfect crispy skin. While the oven heats up, take a paper towel and gently pat the salmon fillets dry. This step is crucial as it helps the skin get crispy when cooked.

Next, season both sides of the salmon with salt and pepper. This simple seasoning enhances the natural flavors of the fish. Make sure to cover all areas evenly for the best taste. Once seasoned, set the salmon aside while you prepare the glaze.

Step 2: Making the Bang Bang Sauce

Bang Bang Salmon Recipe so special. Adjust the chili garlic sauce according to your heat preference. If you like it spicy, feel free to add a bit more!

Step 3: Cooking the Salmon

With your salmon prepared and the sauce ready, it’s time to cook! In a large oven-safe skillet, heat the sesame oil over medium-high heat. Once the oil is shimmering, carefully place the salmon fillets in the skillet, skin-side down. Cook for about 4-5 minutes. You want the skin to turn golden and crispy, which adds a delightful texture to the dish.

After the skin is crispy, gently flip the salmon fillets over. This is where the magic happens! Generously brush the spicy glaze over the top of each piece. Make sure to cover them well, as this will infuse the salmon with flavor while it bakes.

Step 4: Combining Salmon and Sauce

Now, it’s time to finish cooking the salmon. Carefully move the skillet to your preheated oven. Bake for 10-12 minutes, or until the salmon is opaque and flakes easily when tested with a fork. The combination of the crispy skin and the spicy glaze will create a mouthwatering dish that you won’t be able to resist!

Bang Bang Salmon Recipe is ready to serve!

Variation of Bang Bang Salmon Recipe

Bang Bang Salmon Recipe is delicious as is, there are many ways to switch things up! Variations can enhance flavors or cater to dietary preferences. Let’s explore some alternative ingredients and different cooking methods that can make this dish even more exciting.

Alternative Ingredients for Bang Bang Salmon Recipe

Sometimes, you might not have all the ingredients on hand. No worries! Here are some alternative ingredients you can use:

  • Fish Options: If salmon isn’t your favorite, try using trout or tilapia. Both have a mild flavor and cook similarly.
  • Yogurt Substitutes: For a dairy-free option, use coconut yogurt or cashew cream. These alternatives will still provide creaminess.
  • Sweet Chili Sauce Alternatives: If you can’t find sweet chili sauce, mix honey with a bit of sriracha for a similar sweet and spicy flavor.
  • Herbs: Instead of cilantro, try fresh parsley or green onions for a different herbal note.
  • Spice Level: Adjust the heat by using different chili sauces. For a milder version, use a sweet chili sauce without added heat.

Bang Bang Salmon Recipe to suit your taste or dietary needs. Feel free to experiment and find your perfect combination!

Different Cooking Methods for Bang Bang Salmon Recipe

Bang Bang Salmon Recipe:

  • Grilling: For a smoky flavor, grill the salmon fillets instead of baking. Preheat your grill and cook the salmon for about 4-5 minutes on each side, brushing with the glaze as you go.
  • Broiling: If you want a crispy top, try broiling the salmon. After applying the glaze, place the skillet under the broiler for 3-5 minutes until the glaze bubbles and caramelizes.
  • Pan-Seering: For a quick meal, pan-sear the salmon in a skillet over high heat. Cook for 3-4 minutes on each side, then add the glaze and cover to steam for a few minutes.
  • Air Frying: If you have an air fryer, this method is fantastic for achieving a crispy texture. Cook the salmon at 400°F (200°C) for about 8-10 minutes, brushing with glaze halfway through.

Bang Bang Salmon Recipe and keep your meals exciting. Choose the one that fits your schedule and taste preferences!

Cooking Note for Bang Bang Salmon Recipe

Bang Bang Salmon Recipe, there are a few cooking notes to keep in mind to ensure your dish turns out perfectly every time. These tips will help you achieve the best flavor and texture, making your meal even more enjoyable.

First, always start with fresh salmon. Fresh fish not only tastes better but also has a firmer texture, which is essential for achieving that crispy skin. If you can, buy wild-caught salmon for the best flavor and health benefits.

Next, pay attention to the cooking time. Salmon can easily go from perfectly cooked to overdone in just a minute. Keep an eye on it while it bakes. The fish should be opaque and flake easily with a fork when done. If you have a meat thermometer, aim for an internal temperature of 145°F (63°C) for perfectly cooked salmon.

Additionally, let the salmon rest after cooking. This resting period allows the juices to redistribute throughout the fish, making it more tender and flavorful. A few minutes is all you need before serving.

Bang Bang Salmon Recipe lies in its versatility, so feel free to make it your own!

Bang Bang Salmon Recipe to new heights, impressing your family and friends with every bite. Happy cooking!

Serving Suggestions for Bang Bang Salmon Recipe

Bang Bang Salmon Recipe is ready, it’s time to think about how to serve it! Presentation can elevate your meal, making it even more enjoyable. Here are some delightful serving suggestions that will complement the flavors of your salmon and create a well-rounded dining experience.

  • Roasted Vegetables: Pair your salmon with a side of roasted vegetables. Carrots, bell peppers, and zucchini drizzled with olive oil and seasoned with salt and pepper make a colorful and nutritious addition.
  • Fresh Salad: A light salad with mixed greens, cherry tomatoes, and a lemon vinaigrette can balance the richness of the salmon. The freshness of the salad will enhance the overall meal.
  • Rice or Quinoa: Serve the salmon over a bed of fluffy rice or quinoa. Both options absorb the delicious glaze and provide a hearty base for the dish. Consider using jasmine rice for a fragrant touch.
  • Grilled Corn: Grilled corn on the cob adds a sweet and smoky flavor that pairs beautifully with the spicy salmon. Brush the corn with a bit of butter and sprinkle with salt for extra flavor.
  • Garlic Bread: For a comforting side, serve with warm garlic bread. The buttery, garlicky goodness complements the spicy glaze of the salmon perfectly.

Don’t forget to garnish your salmon with fresh cilantro and serve lemon wedges on the side. The lemon adds a zesty kick that brightens the dish. You can also drizzle a little extra sweet chili sauce over the top for those who love a bit more sweetness.

Bang Bang Salmon Recipe but also create a beautiful and satisfying meal. Enjoy your culinary creation with family and friends, and watch them rave about your cooking skills!

Tips for Perfecting Your Bang Bang Salmon Recipe

Bang Bang Salmon Recipe, a few tips can make all the difference. These simple yet effective suggestions will help you achieve the best flavor and texture, ensuring your dish is a hit every time. Let’s dive into some expert tips!

First, always choose high-quality salmon. Fresh, wild-caught salmon is ideal for this recipe. It has a richer flavor and firmer texture compared to farmed salmon. If you can, buy your salmon from a trusted fishmonger or local market.

Next, don’t skip the drying step! Patting the salmon fillets dry with a paper towel is crucial. This step helps the skin crisp up beautifully when cooked. A dry surface allows for better searing and prevents steaming.

When seasoning, be generous but not overwhelming. A light sprinkle of salt and pepper enhances the natural flavors of the salmon without overpowering it. Remember, the glaze will add more flavor, so balance is key.

For the glaze, feel free to adjust the ingredients to suit your taste. If you prefer a sweeter sauce, add more sweet chili sauce. For those who love heat, increase the chili garlic sauce. Taste the glaze before applying it to the salmon to ensure it meets your preferences.

Cooking time is essential for perfect salmon. Keep an eye on it while baking. Salmon cooks quickly, and overcooking can lead to a dry texture. Aim for an internal temperature of 145°F (63°C) for perfectly flaky salmon.

Lastly, let the salmon rest after cooking. This resting period allows the juices to redistribute, making each bite tender and juicy. Just a few minutes will enhance the overall eating experience.

Bang Bang Salmon Recipe to new heights. Your family and friends will be impressed with your culinary skills, and you’ll enjoy a delicious meal every time!

Breakdown of Time for Bang Bang Salmon Recipe

Bang Bang Salmon Recipe can help you plan your cooking efficiently. Here’s a simple breakdown of the time required for preparation and cooking, ensuring you can enjoy this delicious meal without any rush.

Prep Time

Bang Bang Salmon Recipe is approximately 15 minutes. This includes gathering your ingredients, patting the salmon dry, seasoning it, and mixing the flavorful glaze. Taking your time during this step ensures that everything is ready for cooking, making the process smoother.

Cooking Time

Once you’ve prepped, the cooking time is about 15-17 minutes. This includes 4-5 minutes of searing the salmon in the skillet and 10-12 minutes of baking in the oven. The combination of these cooking methods helps achieve that perfect crispy skin and tender, flaky fish.

Total Time

Bang Bang Salmon Recipe to take around 30-32 minutes from start to finish. This quick cooking time makes it an excellent choice for busy weeknights or when you want to impress guests without spending hours in the kitchen. With just a little time and effort, you’ll have a delicious meal ready to serve!

Nutritional Information for Bang Bang Salmon Recipe

Bang Bang Salmon Recipe not only delights your taste buds but also provides valuable nutrients. Let’s break down the nutritional information to see what makes this dish a healthy choice.

Calories in Bang Bang Salmon Recipe

Bang Bang Salmon Recipe contains approximately 390 calories. This calorie count is reasonable for a main dish, especially considering the rich flavors and satisfying ingredients. The combination of salmon and the creamy glaze makes it a filling option without being overly heavy.

Protein Content in Bang Bang Salmon Recipe

One of the standout features of this recipe is its high protein content. Each serving provides about 31 grams of protein. Salmon is an excellent source of protein, which is essential for muscle repair and overall health. Including this dish in your diet can help you meet your daily protein needs while enjoying a delicious meal.

Sodium Levels in Bang Bang Salmon Recipe

Bang Bang Salmon Recipe contains approximately 600 milligrams per serving. While this is a moderate amount, it’s important to be mindful of your overall sodium intake, especially if you are watching your salt consumption. You can reduce sodium levels by using low-sodium soy sauce or adjusting the amount of salt added during cooking.

Bang Bang Salmon Recipe is a nutritious option that provides a good balance of calories, protein, and flavor. It’s a great choice for anyone looking to enjoy a healthy meal without sacrificing taste. So, gather your ingredients and get ready to indulge in this delightful dish!

FAQs about Bang Bang Salmon Recipe

What is the origin of the Bang Bang Salmon Recipe?

Bang Bang Salmon Recipe draws inspiration from the popular “Bang Bang” style of cooking, which is known for its sweet and spicy flavors. The term “Bang Bang” is often associated with dishes that feature a creamy sauce combined with a kick of heat. While the exact origin is unclear, it is believed to have roots in Asian cuisine, particularly Thai and Chinese influences. The combination of sweet chili sauce and chili garlic sauce creates a unique flavor profile that has gained popularity in various culinary circles. This recipe takes that concept and applies it to salmon, making it a delightful and modern twist on traditional flavors.

Can I make Bang Bang Salmon Recipe ahead of time?

Bang Bang Salmon Recipe ahead of time! You can mix the glaze and store it in the refrigerator for up to 2 days. This allows the flavors to meld together, enhancing the taste. However, it’s best to cook the salmon fresh for the best texture and flavor. If you have leftovers, you can store them in an airtight container in the fridge for up to 2 days. Reheat gently in the oven or microwave, but be cautious not to overcook the salmon during reheating.

What can I serve with Bang Bang Salmon Recipe?

Bang Bang Salmon Recipe. Consider pairing it with:

  • Roasted Vegetables: Colorful veggies like bell peppers, zucchini, and carrots add nutrition and flavor.
  • Fresh Salad: A light salad with mixed greens and a lemon vinaigrette balances the richness of the salmon.
  • Rice or Quinoa: Both options absorb the flavorful glaze and provide a hearty base for the dish.
  • Grilled Corn: Sweet corn on the cob complements the spicy salmon beautifully.
  • Garlic Bread: Warm garlic bread adds a comforting touch to your meal.

These sides will enhance your dining experience and create a well-rounded meal that everyone will enjoy!

Is Bang Bang Salmon Recipe healthy?

Bang Bang Salmon Recipe is a healthy choice for several reasons. Salmon is rich in omega-3 fatty acids, which are beneficial for heart health. It also provides a good amount of protein, making it a filling option. The use of Greek yogurt in the glaze adds creaminess without excessive calories or fat. Additionally, the recipe includes fresh ingredients like lemon juice and cilantro, which contribute vitamins and minerals. While the sweet chili sauce does add some sugar, the overall nutritional profile remains balanced. Enjoying this dish as part of a varied diet can be a delicious way to maintain a healthy lifestyle!

Conclusion on Bang Bang Salmon Recipe

Bang Bang Salmon Recipe is a delightful dish that brings together vibrant flavors and healthy ingredients. With its perfect balance of sweetness and spice, this recipe is sure to become a favorite in your household. The combination of crispy salmon, creamy glaze, and fresh herbs creates a meal that is not only satisfying but also visually appealing.

Whether you’re cooking for a special occasion or a simple weeknight dinner, this recipe is quick and easy to prepare. The step-by-step instructions make it accessible for cooks of all skill levels. Plus, the versatility of the dish allows you to customize it to your taste, whether by adjusting the spice level or trying different cooking methods.

Bang Bang Salmon Recipe, don’t forget to pair it with delicious sides like roasted vegetables or a fresh salad. These accompaniments will enhance the overall dining experience and make your meal even more enjoyable.

Bang Bang Salmon Recipe is not just a meal; it’s an experience that brings joy to the table. Happy cooking!

Char Siu Chicken is a must-try recipe for everyone!

Introduction to Char Siu Chicken Recipe

What is Char Siu Chicken?

Char Siu Chicken is a delicious dish that features tender chicken marinated in a sweet and savory sauce. This dish is known for its vibrant red color and mouthwatering flavor. The marinade typically includes soy sauce, honey, and a blend of spices, giving the chicken a unique taste that is both sweet and slightly smoky. Char Siu is often grilled or roasted, resulting in a juicy texture that makes it a favorite among many.

The Origins of Char Siu Chicken

Char Siu, which translates to “fork roasted,” has its roots in Cantonese cuisine. This traditional method of cooking dates back to the Song Dynasty, where it was originally made with pork. Over time, the recipe evolved, and chicken became a popular alternative. Today, Char Siu Chicken is enjoyed worldwide, often served in Chinese restaurants and at home. Its rich history and delightful flavor make it a beloved dish for many families.

Ingredients for Char Siu Chicken Recipe

To create a mouthwatering Char Siu Chicken, you’ll need a selection of fresh ingredients that come together to form a delicious marinade. Here’s what you’ll need:

  • 2 pounds boneless, skinless chicken thighs
  • 1/4 cup soy sauce
  • 1/4 cup hoisin sauce
  • 1/4 cup honey
  • 2 tablespoons rice vinegar
  • 1 tablespoon sesame oil
  • 2 teaspoons Chinese five-spice powder
  • 4 cloves garlic, finely chopped
  • 1 inch piece of fresh ginger, grated
  • 1 tablespoon vegetable oil
  • 1/2 teaspoon ground black pepper

These ingredients work together to create a rich and flavorful marinade that infuses the chicken with a delightful taste. The combination of soy sauce and hoisin sauce provides a savory base, while honey adds a touch of sweetness. The rice vinegar and sesame oil contribute a hint of tanginess and nuttiness, respectively. Finally, the garlic, ginger, and five-spice powder elevate the flavor profile, making this dish truly special.

Feel free to adjust the quantities based on your taste preferences. For instance, if you enjoy a spicier kick, consider adding a teaspoon of sriracha or chili paste to the marinade. This flexibility allows you to customize your Char Siu Chicken to suit your palate perfectly.

Step-by-Step Preparation of Char Siu Chicken Recipe

Step 1: Marinating the Chicken

To start, you need to marinate the chicken. First, take a large mixing bowl and combine all the marinade ingredients. This includes soy sauce, hoisin sauce, honey, rice vinegar, sesame oil, Chinese five-spice powder, garlic, ginger, vegetable oil, and black pepper. Stir the mixture well until it’s smooth and all ingredients are blended together.

Next, add the boneless, skinless chicken thighs to the bowl. Make sure each piece is thoroughly coated in the marinade. This step is crucial as it allows the chicken to absorb all those wonderful flavors. Once coated, cover the bowl with plastic wrap and place it in the refrigerator. For the best results, let it marinate for at least 2 hours, but overnight is even better!

Step 2: Preparing the Char Siu Sauce

While the chicken is marinating, you can prepare the Char Siu sauce. This sauce is what gives the chicken its signature flavor. In a small saucepan, take a portion of the marinade you set aside before adding the chicken. Bring it to a gentle boil over medium heat. Allow it to simmer for about 5-10 minutes until it thickens slightly. This step not only enhances the flavor but also ensures the sauce is safe to use for glazing later.

Once thickened, remove the saucepan from heat and let it cool. This sauce will be used to glaze the chicken during cooking, adding a beautiful shine and extra flavor.

Step 3: Cooking the Chicken

Now it’s time to cook the chicken! Preheat your grill or oven to 400°F. If you’re using an oven, line a baking sheet with aluminum foil for easy cleanup. Take the marinated chicken out of the refrigerator and let any excess marinade drip off. Place the chicken on the grill or the prepared baking sheet.

If grilling, cook the chicken for about 6-7 minutes on each side. You want the internal temperature to reach 165°F for safe consumption. If baking, arrange the chicken on the baking sheet and bake for 25-30 minutes. Remember to baste the chicken with the reserved Char Siu sauce halfway through cooking for added flavor.

Step 4: Glazing the Chicken

As the chicken cooks, it’s important to glaze it with the prepared Char Siu sauce. This step adds a beautiful, sticky finish to the chicken. If grilling, brush the sauce on the chicken during the last few minutes of cooking. If baking, apply the glaze during the last 10 minutes. This will create a lovely caramelized layer that enhances the overall taste.

Once cooked, remove the chicken from the grill or oven and let it rest for about 5 minutes. This resting period allows the juices to redistribute, ensuring each bite is juicy and flavorful.

Variations of Char Siu Chicken Recipe

Alternative Ingredients

While the classic Char Siu Chicken recipe is delicious, you can easily switch things up with alternative ingredients. For instance, if you want a different flavor profile, consider using maple syrup instead of honey. This will give your chicken a unique sweetness that pairs well with the savory elements.

Additionally, you can experiment with different types of soy sauce. Light soy sauce offers a milder taste, while dark soy sauce adds a richer color and deeper flavor. If you’re looking for a gluten-free option, tamari sauce is a great substitute.

For those who enjoy a bit of heat, adding chili flakes or fresh chopped chilies to the marinade can elevate the dish. You might also try using different herbs and spices, such as cilantro or scallions, to enhance the flavor even further. These variations allow you to customize your Char Siu Chicken to suit your taste preferences.

Cooking Methods

Char Siu Chicken can be prepared using various cooking methods, each offering a unique taste and texture. While grilling is the traditional method, baking is a fantastic alternative that requires less hands-on time. If you prefer a smoky flavor, consider using a smoker. This method infuses the chicken with a rich, deep flavor that is hard to resist.

Another option is to use a slow cooker. Simply place the marinated chicken in the slow cooker and cook on low for 6-8 hours. This method results in incredibly tender chicken that falls apart easily. You can also finish it off under the broiler for a few minutes to achieve that beautiful glaze.

Whichever method you choose, the key is to ensure the chicken is cooked to the right temperature. This way, you’ll enjoy a delicious Char Siu Chicken that’s bursting with flavor, no matter how you prepare it!

Cooking Note for Char Siu Chicken Recipe

When preparing your Char Siu Chicken, there are a few important cooking notes to keep in mind. These tips will help ensure that your chicken turns out perfectly every time, delivering that sweet and savory flavor you crave.

First, always check the internal temperature of the chicken. Using a meat thermometer is the best way to ensure it reaches 165°F. This temperature guarantees that the chicken is safe to eat while remaining juicy and tender. Undercooking can lead to foodborne illnesses, while overcooking can dry out the meat.

Next, consider the thickness of your chicken thighs. If they are particularly thick, you may need to adjust your cooking time. Thinner pieces will cook faster, so keep an eye on them to avoid drying out. If you find that your chicken is browning too quickly, you can lower the heat or move it to a cooler part of the grill or oven.

Additionally, marinating the chicken for a longer period can enhance the flavor. While two hours is the minimum, marinating overnight allows the chicken to absorb more of the marinade’s delicious flavors. This extra time can make a significant difference in taste.

Lastly, don’t forget to let the chicken rest after cooking. This step is crucial as it allows the juices to redistribute throughout the meat. If you slice the chicken too soon, you may lose those flavorful juices, resulting in a drier dish. A resting time of about 5 minutes is ideal.

By following these cooking notes, you’ll be well on your way to creating a mouthwatering Char Siu Chicken that will impress your family and friends!

Serving Suggestions for Char Siu Chicken Recipe

Pairing with Sides

When it comes to serving your Char Siu Chicken, the right sides can elevate the meal to new heights. A classic pairing is steamed jasmine rice. The fluffy rice absorbs the delicious sauce, making each bite even more enjoyable. You can also serve it with fried rice for a heartier option, adding vegetables and scrambled eggs for extra flavor.

Fresh vegetables are another great choice. Consider a side of stir-fried bok choy or broccoli, which adds a nice crunch and vibrant color to your plate. You might also enjoy a simple cucumber salad dressed with rice vinegar and sesame oil. This refreshing side balances the sweetness of the chicken beautifully.

If you’re looking for something a bit different, try serving the chicken with Asian-style noodles. Tossed in a light soy sauce or sesame dressing, these noodles complement the Char Siu Chicken perfectly. You can also add some sliced bell peppers and carrots for added texture and nutrition.

Presentation Tips

Presentation plays a key role in making your Char Siu Chicken dish visually appealing. Start by slicing the chicken into thin pieces, showcasing the beautiful glaze and juicy interior. Arrange the slices neatly on a serving platter or individual plates.

For a pop of color, garnish the chicken with chopped green onions or sesame seeds. These toppings not only enhance the visual appeal but also add a delightful crunch. You can also add a few sprigs of fresh cilantro for a touch of freshness.

Consider serving the chicken on a bed of steamed rice or alongside your chosen vegetables. This creates a beautiful contrast and makes the dish look more inviting. If you’re feeling creative, you can use a ring mold to shape the rice, giving it a professional touch.

Finally, don’t forget to drizzle some of the reserved Char Siu sauce over the chicken before serving. This adds an extra layer of flavor and makes the dish shine. With these serving suggestions and presentation tips, your Char Siu Chicken will not only taste amazing but also look stunning on the table!

Tips for Perfecting Your Char Siu Chicken Recipe

Common Mistakes to Avoid

When making Char Siu Chicken, avoiding common mistakes can make a big difference in the final dish. One frequent error is not marinating the chicken long enough. While two hours is the minimum, marinating overnight allows the flavors to penetrate deeply. This extra time enhances the taste significantly.

Another mistake is not checking the chicken’s internal temperature. Always use a meat thermometer to ensure it reaches 165°F. Undercooking can lead to foodborne illnesses, while overcooking can dry out the chicken. Keep an eye on the cooking time, especially if your chicken pieces are uneven in thickness.

Additionally, some cooks forget to reserve a portion of the marinade before adding the chicken. This reserved marinade is essential for glazing the chicken during cooking. Skipping this step can result in a less flavorful dish. Lastly, don’t rush the resting period after cooking. Allowing the chicken to rest for about 5 minutes helps retain its juices, ensuring each bite is tender and juicy.

Enhancing Flavor

To take your Char Siu Chicken to the next level, consider a few flavor-enhancing tips. First, try adding fresh herbs like cilantro or basil to the marinade. These herbs can add a fresh twist to the traditional flavor profile. You might also experiment with citrus zest, such as orange or lime, for a bright, zesty note.

For those who enjoy a bit of heat, incorporating chili paste or fresh chilies into the marinade can elevate the dish. This addition will give your chicken a spicy kick that balances the sweetness beautifully. Another option is to add a splash of rice wine or sherry to the marinade for a deeper flavor.

Finally, consider finishing your Char Siu Chicken with a sprinkle of toasted sesame seeds or chopped green onions. These toppings not only add flavor but also provide a delightful crunch and visual appeal. With these tips, you can create a Char Siu Chicken that is bursting with flavor and sure to impress your family and friends!

Breakdown of Time for Char Siu Chicken Recipe

Prep Time

Preparing your Char Siu Chicken is a straightforward process. The prep time mainly involves gathering your ingredients and marinating the chicken. Expect to spend about 15-20 minutes on this step. This includes measuring out the ingredients, mixing the marinade, and coating the chicken thoroughly. Remember, the longer you marinate, the better the flavor, so plan accordingly!

Cooking Time

Once your chicken is marinated, the cooking time will vary based on your chosen method. If you decide to grill the chicken, it will take approximately 12-14 minutes, cooking for about 6-7 minutes on each side. If you opt for baking, the chicken will need around 25-30 minutes in the oven. Regardless of the method, always ensure the internal temperature reaches 165°F for safe consumption.

Total Time

In total, you should plan for about 2 hours and 45 minutes to make your Char Siu Chicken. This includes the 2 hours of marinating time and the 15-30 minutes of cooking time, depending on your method. If you choose to marinate overnight, the total time will be longer, but the hands-on time remains minimal. This makes it a perfect dish for meal prep or a weekend family dinner!

Nutritional Information for Char Siu Chicken Recipe

Calories

When it comes to enjoying Char Siu Chicken, being mindful of its nutritional content is essential. Each serving of this delightful dish contains approximately 320 calories. This makes it a satisfying option for a main course without overwhelming your daily caloric intake. The balance of flavors and textures in this dish ensures that you won’t feel deprived while enjoying a delicious meal.

Protein

Protein is a vital nutrient for our bodies, and Char Siu Chicken delivers on this front. Each serving provides about 25 grams of protein. This high protein content is primarily due to the chicken thighs, which are an excellent source of lean protein. Including protein in your meals helps with muscle repair and keeps you feeling full longer, making this dish a great choice for a healthy diet.

Sodium

While enjoying Char Siu Chicken, it’s important to be aware of its sodium content. Each serving contains around 800 milligrams of sodium. This level is primarily influenced by the soy sauce and hoisin sauce used in the marinade. If you’re watching your sodium intake, consider using low-sodium soy sauce or adjusting the amount of sauce in the recipe. This way, you can still enjoy the rich flavors of Char Siu Chicken while keeping your health in check.

FAQs about Char Siu Chicken Recipe

Can I use other meats for Char Siu?

Absolutely! While Char Siu is traditionally made with pork, you can use other meats like beef or duck. Chicken is a popular alternative, as we’ve discussed in this recipe. Each meat will bring its unique flavor and texture to the dish. Just remember to adjust the cooking times based on the type of meat you choose. For instance, beef may require a longer cooking time to become tender, while chicken cooks relatively quickly.

How do I store leftover Char Siu Chicken?

Storing leftover Char Siu Chicken is easy! First, let the chicken cool down to room temperature. Then, place it in an airtight container. You can store it in the refrigerator for up to 3-4 days. If you want to keep it longer, consider freezing it. Wrap the chicken tightly in plastic wrap or aluminum foil, then place it in a freezer-safe bag. Frozen Char Siu Chicken can last for up to 3 months. When you’re ready to enjoy it again, simply thaw it in the refrigerator overnight and reheat it in the oven or microwave.

What can I serve with Char Siu Chicken?

Char Siu Chicken pairs wonderfully with a variety of sides. Steamed jasmine rice is a classic choice, as it absorbs the delicious sauce. You can also serve it with fried rice, stir-fried vegetables, or a fresh cucumber salad. For a heartier meal, consider adding Asian-style noodles tossed in a light soy sauce. These sides complement the sweet and savory flavors of the chicken beautifully, creating a well-rounded meal.

Is Char Siu Chicken spicy?

Char Siu Chicken is not inherently spicy. The traditional marinade focuses on sweet and savory flavors, thanks to ingredients like honey and soy sauce. However, if you enjoy a bit of heat, you can easily customize the recipe. Adding chili paste, sriracha, or fresh chilies to the marinade will give your chicken a spicy kick. This way, you can adjust the heat level to suit your taste preferences!

Conclusion on Char Siu Chicken Recipe

In conclusion, Char Siu Chicken is a delightful dish that brings together sweet and savory flavors in a way that is both satisfying and memorable. With its roots in Cantonese cuisine, this recipe has evolved to become a favorite for many around the world. The combination of tender chicken thighs marinated in a rich sauce creates a meal that is not only delicious but also versatile.

Whether you choose to grill, bake, or even slow cook your chicken, the result is always a juicy and flavorful dish that can be enjoyed in various ways. Pair it with steamed rice, fresh vegetables, or Asian-style noodles for a complete meal that will impress your family and friends.

Moreover, the flexibility of the recipe allows you to customize it to your liking. From adjusting the sweetness to adding a spicy kick, the possibilities are endless. By following the tips and variations provided, you can create a Char Siu Chicken that is uniquely yours.

So, gather your ingredients, set aside some time for marinating, and get ready to enjoy a delicious meal that is sure to become a staple in your kitchen. With its rich flavors and easy preparation, Char Siu Chicken is not just a recipe; it’s an experience that brings joy to the table. Happy cooking!

Sriracha Honey Salmon Bowl: A Quick, Delicious Meal!

Introduction to Sriracha Honey Salmon Bowl

Sriracha Honey Salmon Bowl is just what you need! This dish combines the rich flavors of salmon with a sweet and spicy glaze, making it a delightful option for lunch or dinner. Not only is it packed with protein, but it also offers a variety of colorful vegetables and wholesome grains.

Imagine biting into tender salmon, perfectly glazed with a mix of honey and sriracha. The heat from the sriracha balances beautifully with the sweetness of honey, creating a flavor explosion in every bite. Plus, the addition of steamed broccoli and grated carrots adds a nice crunch and vibrant color to your bowl.

This recipe is not only tasty but also versatile. You can easily swap out the salmon for chicken or tofu, depending on your preference. Whether you’re a busy professional or a parent looking for a quick meal, this bowl can be ready in under 30 minutes!

Sriracha Honey Salmon Bowl uniquely yours. Let’s dive into the world of flavors and textures that this dish has to offer!

Ingredients for Sriracha Honey Salmon Bowl

Sriracha Honey Salmon Bowl, you’ll need a few simple ingredients. Each component plays a vital role in building the flavors and textures of this dish. Here’s what you’ll need:

  • 2 (6-ounce) salmon fillets
  • 2 tablespoons honey
  • 2 tablespoons sriracha sauce
  • 1 tablespoon soy sauce
  • 1 tablespoon olive oil
  • 1 teaspoon garlic powder
  • 1 teaspoon ground ginger
  • 1 cup cooked brown rice
  • 1 cup broccoli florets, steamed
  • ½ cup grated carrots
  • ¼ cup chopped green onions
  • 1 tablespoon toasted sesame seeds

These ingredients come together to create a balanced meal that is not only delicious but also nutritious. The salmon provides a rich source of protein and omega-3 fatty acids, while the brown rice offers fiber and energy. The vegetables add essential vitamins and minerals, making this bowl a wholesome choice.

Sriracha Honey Salmon Bowl lies in its flexibility!

Step-by-Step Preparation of Sriracha Honey Salmon Bowl

Sriracha Honey Salmon Bowl. Follow these simple steps to create a delicious meal that’s sure to impress!

Step 1: Preparing the Salmon

First, take your salmon fillets out of the refrigerator. Rinse them gently under cold water and pat them dry with paper towels. This helps remove any excess moisture, allowing the glaze to stick better. Next, place the salmon fillets on a baking sheet lined with parchment paper. This makes for easy cleanup later!

Step 2: Making the Sriracha Honey Sauce

In a mixing bowl, combine the honey, sriracha sauce, soy sauce, olive oil, garlic powder, and ground ginger. Use a whisk to mix everything together until it’s smooth and well-blended. The sweet and spicy aroma will fill your kitchen, making your mouth water in anticipation!

Step 3: Cooking the Salmon

Now, it’s time to coat the salmon. Generously brush the spicy honey glaze over each fillet, ensuring they are well-covered. This will give the salmon a beautiful caramelized finish. Preheat your oven to 400°F (200°C) and bake the salmon for about 12-15 minutes. You’ll know it’s done when the salmon flakes easily with a fork. The glaze will create a shiny, sticky layer that enhances the flavor.

Step 4: Assembling the Bowl

Sriracha Honey Salmon Bowl is now ready to be enjoyed!

Variations of Sriracha Honey Salmon Bowl

Sriracha Honey Salmon Bowl is a fantastic dish that can be easily customized to suit your taste. Whether you want to switch up the protein, change the grain base, or add more veggies, there are plenty of variations to explore. Let’s take a look at some delicious options!

Alternative Proteins

Sriracha Honey Salmon Bowl.

Different Grain Bases

While brown rice is a nutritious base for your bowl, you can easily switch it up! Quinoa is a fantastic alternative, packed with protein and fiber. It has a slightly nutty flavor that complements the spicy honey glaze beautifully. If you’re looking for a lighter option, try cauliflower rice. It’s low in carbs and adds a nice texture to the dish. For a heartier choice, consider using farro or barley. These grains are chewy and add a wonderful depth to your bowl. Feel free to experiment with different grains to find your favorite combination!

Vegetable Additions

Sriracha Honey Salmon Bowl, and you can mix and match to your heart’s content. In addition to broccoli and carrots, consider adding bell peppers for a sweet crunch or snap peas for a fresh bite. Spinach or kale can be tossed in for added nutrients and color. You could also include roasted sweet potatoes for a touch of sweetness that balances the spice. The possibilities are endless, so don’t hesitate to get creative with your veggie choices!

Sriracha Honey Salmon Bowl your own. Each change brings a new twist to the dish, keeping it exciting and delicious every time you prepare it!

Cooking Note for Sriracha Honey Salmon Bowl

Sriracha Honey Salmon Bowl, there are a few cooking tips to keep in mind to ensure your dish turns out perfectly every time. These notes will help you achieve the best flavor and texture, making your meal even more enjoyable.

First, always choose fresh salmon fillets. Fresh fish not only tastes better but also has a firmer texture, which is essential for this recipe. If you can, buy wild-caught salmon for a richer flavor and better nutritional profile.

Next, pay attention to the cooking time. Salmon can easily overcook, leading to a dry texture. Keep an eye on it while it bakes. The general rule is to cook salmon for about 4-6 minutes per half-inch of thickness. If your fillets are thicker, adjust the time accordingly. You want the salmon to be just cooked through and still moist.

Additionally, let the salmon rest for a few minutes after baking. This allows the juices to redistribute, making the fish even more tender and flavorful. While it rests, you can finish assembling your bowls, ensuring everything is ready to go.

Sriracha Honey Salmon Bowl lies in its adaptability, so feel free to experiment until you find your perfect balance!

Sriracha Honey Salmon Bowl that’s sure to impress your family and friends. Enjoy the process and savor every bite!

Serving Suggestions for Sriracha Honey Salmon Bowl

Sriracha Honey Salmon Bowl, it’s time to think about how to serve it. Presentation can elevate your meal, making it even more enjoyable. Here are some serving suggestions to enhance your dining experience:

First, consider using vibrant bowls that contrast with the colors of your ingredients. A bright white or deep blue bowl can make the colorful salmon, vegetables, and rice pop visually. This not only makes the dish more appealing but also adds to the overall dining experience.

For an extra touch, garnish your bowls with fresh herbs. Chopped cilantro or parsley can add a refreshing flavor that complements the spicy honey glaze. You can also add a wedge of lime or lemon on the side. A squeeze of citrus just before eating can brighten the flavors and add a zesty kick.

If you’re serving guests, consider offering additional toppings on the side. Extra sriracha, sesame seeds, or even crushed peanuts can allow everyone to customize their bowl to their liking. This interactive element can make the meal more fun and engaging.

Sriracha Honey Salmon Bowl with a light beverage. A chilled green tea or sparkling water with a slice of lemon can be refreshing and cleanse the palate between bites. If you prefer something warmer, a cup of miso soup can complement the flavors beautifully.

Lastly, don’t forget about the ambiance! Setting the table with nice utensils and perhaps some candles can create a cozy atmosphere. Enjoying your meal in a pleasant environment can make the experience even more delightful.

Sriracha Honey Salmon Bowl will not only taste amazing but also look stunning on the table. Enjoy every bite and the company of those you share it with!

Tips for Perfecting Your Sriracha Honey Salmon Bowl

Sriracha Honey Salmon Bowl truly exceptional, consider these helpful tips. They will guide you in achieving the best flavors and textures, ensuring that every bite is a delight!

First, marinate the salmon for extra flavor. If you have time, let the salmon sit in the spicy honey glaze for about 30 minutes before baking. This allows the flavors to penetrate the fish, making it even tastier.

Next, don’t skip the resting period after baking. Allow the salmon to rest for a few minutes before serving. This helps the juices redistribute, keeping the fish moist and tender.

For a crispy texture, broil the salmon for the last 2-3 minutes of cooking. This will give the top a nice caramelized finish, enhancing the overall flavor. Just keep a close eye on it to prevent burning!

When it comes to vegetables, try to use a mix of textures. For instance, add some crunchy radishes or snap peas for a delightful contrast to the tender salmon and rice. This variety will make your bowl more interesting.

Also, consider adding a splash of rice vinegar to the vegetables. This will brighten their flavors and add a tangy note that complements the sweetness of the honey glaze.

Lastly, don’t be afraid to experiment with spices. A sprinkle of chili flakes or a dash of sesame oil can elevate the dish even further. These small additions can make a big difference in flavor.

Sriracha Honey Salmon Bowl that’s not only delicious but also visually appealing. Enjoy the process of cooking and savor the delightful results!

Breakdown of Time for Sriracha Honey Salmon Bowl

Sriracha Honey Salmon Bowl can help you plan your meal better. Here’s a simple breakdown of the time required for each step, ensuring you can enjoy this delicious dish without any rush!

Prep Time

Sriracha Honey Salmon Bowl is approximately 10-15 minutes. This includes gathering your ingredients, rinsing and drying the salmon, and mixing the spicy honey glaze. If you’re chopping vegetables or cooking rice, you might need a few extra minutes. However, with everything organized, you can easily keep it within this time frame!

Cooking Time

Once you’ve prepped your ingredients, the cooking time is about 12-15 minutes. This is the time it takes to bake the salmon in the oven. While the salmon is cooking, you can steam your broccoli and prepare the rice if it’s not already cooked. This multitasking can help you maximize your efficiency in the kitchen!

Total Time

Sriracha Honey Salmon Bowl to take around 25-30 minutes. This makes it a perfect option for a quick weeknight dinner or a satisfying lunch. With just a little bit of time, you can create a flavorful and nutritious meal that everyone will love!

Nutritional Information for Sriracha Honey Salmon Bowl

Sriracha Honey Salmon Bowl not only delights your taste buds but also provides a variety of nutrients. Here’s a breakdown of the key nutritional information for this delicious dish:

Calories

Sriracha Honey Salmon Bowl contains approximately 550 calories. This calorie count includes the salmon, brown rice, and vegetables, making it a satisfying meal that can keep you energized throughout the day. The combination of protein, healthy fats, and carbohydrates ensures that you feel full and satisfied after eating.

Protein

Sriracha Honey Salmon Bowl is its high protein content. Each serving provides about 34 grams of protein. Salmon is an excellent source of protein, which is essential for muscle repair and growth. Including protein in your meals can also help you feel fuller for longer, making it easier to manage your appetite.

Sodium

Sriracha Honey Salmon Bowl is approximately 800 milligrams per serving. While sodium is necessary for various bodily functions, it’s important to monitor your intake. If you’re watching your sodium levels, consider using low-sodium soy sauce or reducing the amount of sriracha in the glaze. This way, you can still enjoy the flavors without exceeding your daily sodium limit.

Sriracha Honey Salmon Bowl is a nutritious option that provides a good balance of calories, protein, and essential nutrients. By enjoying this meal, you’re not only treating your taste buds but also nourishing your body!

FAQs about Sriracha Honey Salmon Bowl

Can I use frozen salmon for the Sriracha Honey Salmon Bowl?

Sriracha Honey Salmon Bowl. However, it’s important to thaw the salmon properly before cooking. The best way to do this is to place the frozen fillets in the refrigerator overnight. If you’re short on time, you can also submerge the sealed salmon in cold water for about an hour. Once thawed, follow the same preparation and cooking steps as you would with fresh salmon. Just keep in mind that cooking times may vary slightly, so check for doneness to ensure it flakes easily with a fork.

What can I substitute for Sriracha in the Sriracha Honey Salmon Bowl?

Sriracha Honey Salmon Bowl. Hot sauce varieties like sambal oelek or chili garlic sauce can work well. If you want a milder option, consider using a sweet chili sauce. For a homemade alternative, mix some red pepper flakes with a bit of honey and vinegar to create a spicy glaze. Just remember to adjust the amount based on your heat preference!

How can I make the Sriracha Honey Salmon Bowl spicier?

Sriracha Honey Salmon Bowl, there are a few easy ways to do so. First, you can increase the amount of sriracha in the glaze. For an extra spicy kick, add a pinch of cayenne pepper or red pepper flakes to the sauce. Another option is to top your finished bowl with additional sriracha or a sprinkle of chili oil. You could also include spicy vegetables, like jalapeños or radishes, to enhance the heat. Just be sure to balance the spice with the sweetness of the honey for a well-rounded flavor!

Is the Sriracha Honey Salmon Bowl healthy?

Sriracha Honey Salmon Bowl is a healthy meal option. It features salmon, which is rich in omega-3 fatty acids and high-quality protein. The brown rice provides fiber and complex carbohydrates, while the vegetables add essential vitamins and minerals. This dish is well-balanced, offering a mix of nutrients that support overall health. Just be mindful of the sodium content if you’re watching your intake, and feel free to adjust the ingredients to suit your dietary needs. Overall, it’s a nutritious choice that can fit into a healthy eating plan!

Conclusion on Sriracha Honey Salmon Bowl

Sriracha Honey Salmon Bowl is a delightful dish that brings together a perfect blend of flavors and textures. With its sweet and spicy glaze, tender salmon, and vibrant vegetables, this meal is not only satisfying but also visually appealing. It’s a fantastic option for anyone looking to enjoy a nutritious and delicious meal without spending hours in the kitchen.

This recipe is incredibly versatile, allowing you to customize it to your taste preferences. Whether you choose to swap the salmon for chicken or tofu, or experiment with different grains and vegetables, the possibilities are endless. Each variation can bring a new twist to your bowl, keeping your meals exciting and fresh.

Sriracha Honey Salmon Bowl is packed with essential nutrients, making it a healthy choice for any day of the week. With a good balance of protein, healthy fats, and carbohydrates, it can fuel your body and keep you energized. Plus, it’s quick to prepare, making it ideal for busy weeknights or meal prep for the week ahead.

Sriracha Honey Salmon Bowl is bound to become a favorite in your household. Happy cooking!

Beef Enchiladas with Cheese are a must-try dish!

Introduction to Beef Enchiladas with Cheese

Beef enchiladas with cheese are a delightful dish that brings the flavors of Mexico right to your kitchen. This hearty meal is perfect for family dinners or gatherings with friends. The combination of seasoned ground beef, melted cheese, and rich enchilada sauce creates a mouthwatering experience that everyone will love.

What makes beef enchiladas so special? It’s all about the layers of flavor. The savory beef filling, combined with the gooey cheese, creates a satisfying bite. Plus, the enchilada sauce adds a zesty kick that ties everything together. Whether you’re a seasoned cook or a beginner, this recipe is easy to follow and guarantees delicious results.

In this article, we will guide you through the ingredients, preparation steps, and variations of beef enchiladas with cheese. You’ll learn how to make this classic dish from scratch, ensuring that every bite is packed with flavor. So, roll up your sleeves and get ready to impress your family and friends with this tasty treat!

Ingredients for Beef Enchiladas with Cheese

To create delicious beef enchiladas with cheese, you’ll need a few simple ingredients. Each component plays a vital role in building the rich flavors that make this dish so enjoyable. Here’s what you’ll need:

  • 1 pound ground beef: This is the star of the dish, providing a hearty base.
  • 1 teaspoon garlic powder: Adds a savory depth to the beef.
  • 1 teaspoon onion powder: Enhances the flavor profile with a hint of sweetness.
  • 1 can (10 ounces) red enchilada sauce: This sauce brings the classic enchilada taste.
  • 8 flour tortillas (8-inch): These will wrap around the filling, holding everything together.
  • 2 cups shredded cheddar cheese: Melts beautifully, adding creaminess and flavor.
  • 1 cup salsa: A fresh topping that adds a zesty kick.
  • 1 tablespoon chopped fresh cilantro (optional): For garnish, adding a pop of color and freshness.

These ingredients are easy to find at your local grocery store. Feel free to adjust the quantities based on your preferences or the number of servings you need. With these components, you’re well on your way to making mouthwatering beef enchiladas with cheese!

Preparation of Beef Enchiladas with Cheese

Now that you have gathered all the ingredients, it’s time to dive into the preparation of your beef enchiladas with cheese. This process is straightforward and fun! Follow these steps to create a delicious meal that will impress everyone at the table.

Step 1: Preparing the Beef Filling

First, let’s focus on the beef filling. Start by heating a large skillet over medium heat. Once hot, add the ground beef. Cook it for about 5-7 minutes, breaking it apart with a spatula as it cooks. You want it to brown evenly. After the beef is browned, drain any excess fat to keep your enchiladas from being greasy.

Next, sprinkle in the garlic powder and onion powder. Stir well to combine these seasonings with the beef. This step is crucial as it adds flavor to your filling. Once mixed, remove the skillet from the heat and set it aside. Your beef filling is now ready!

Step 2: Assembling the Beef Enchiladas with Cheese

Now comes the fun part—assembling your enchiladas! Start by spreading 1/2 cup of the red enchilada sauce in the bottom of a 9×13-inch baking dish. This will prevent the tortillas from sticking and add flavor.

Take a flour tortilla and place about 1/4 cup of the beef mixture in the center. Then, add 2 tablespoons of shredded cheddar cheese on top of the beef. Carefully roll up the tortilla, tucking in the sides as you go. Place the rolled tortilla seam-side down in the baking dish. Repeat this process for all the tortillas until the dish is filled.

Step 3: Baking the Beef Enchiladas with Cheese

Once all the enchiladas are in the baking dish, pour the remaining enchilada sauce over the top. Make sure to cover all the tortillas evenly. Then, sprinkle the remaining shredded cheddar cheese on top. This will create a delicious, cheesy crust as it bakes.

Preheat your oven to 350°F (175°C) if you haven’t done so already. Place the baking dish in the oven and bake for 20-25 minutes. You’ll know they’re ready when the cheese is melted and bubbly. Once done, remove the dish from the oven and let it cool for a few minutes. Your beef enchiladas with cheese are now ready to be served!

Variation of Beef Enchiladas with Cheese

While the classic beef enchiladas with cheese are a hit, there are many ways to switch things up! You can easily adapt this recipe to suit different tastes and dietary preferences. Here are two popular variations that you might enjoy.

Vegetarian Options for Beef Enchiladas with Cheese

If you’re looking for a meat-free option, vegetarian enchiladas are a fantastic choice. You can replace the ground beef with a variety of delicious ingredients. Here are some ideas:

  • Black Beans: Use canned black beans for a protein-packed filling. Rinse and drain them before mixing with spices.
  • Vegetables: Sauté bell peppers, zucchini, and corn for a colorful and nutritious filling. Season them with garlic and onion powder for extra flavor.
  • Tofu: Crumbled tofu can be a great substitute. Season it well to mimic the taste of beef.

Assemble the vegetarian enchiladas just like the beef version. The cheese and enchilada sauce will still provide that comforting, cheesy goodness. Your family and friends will love this tasty twist!

Spicy Beef Enchiladas with Cheese

If you enjoy a little heat, consider making spicy beef enchiladas with cheese. Here are some ways to add a kick:

  • Jalapeños: Dice fresh jalapeños and mix them into the beef filling. This will give your enchiladas a nice spicy flavor.
  • Spicy Enchilada Sauce: Use a spicy enchilada sauce instead of the regular one. This will elevate the heat level significantly.
  • Hot Sauce: Drizzle your favorite hot sauce over the assembled enchiladas before baking for an extra layer of spice.

These spicy variations will surely satisfy those who love bold flavors. No matter which option you choose, your enchiladas will be a hit!

Cooking Note for Beef Enchiladas with Cheese

When preparing beef enchiladas with cheese, a few cooking notes can help ensure your dish turns out perfectly every time. These tips will enhance your cooking experience and the final result, making your enchiladas even more enjoyable.

First, always use fresh ingredients. Fresh ground beef, quality cheese, and homemade or high-quality enchilada sauce can significantly impact the flavor. If you have the time, consider making your own enchilada sauce. It’s simple and allows you to control the spice level and ingredients.

Next, don’t rush the browning of the beef. Take your time to cook it evenly. This step is crucial for developing flavor. If the beef is not browned properly, your enchiladas may lack depth in taste.

Additionally, when assembling the enchiladas, be careful not to overfill the tortillas. If you add too much filling, they may burst while baking. A good rule of thumb is to stick to the recommended amounts in the recipe.

Lastly, let the enchiladas cool for a few minutes after baking. This allows the cheese to set slightly, making it easier to serve. If you cut into them too soon, they may fall apart, and you want those beautiful layers to shine!

By keeping these cooking notes in mind, you’ll create beef enchiladas with cheese that are not only delicious but also visually appealing. Enjoy the process, and happy cooking!

Serving Suggestions for Beef Enchiladas with Cheese

Once your beef enchiladas with cheese are baked to perfection, it’s time to serve them up! Presentation can elevate your dish and make it even more enjoyable. Here are some delightful serving suggestions to enhance your meal:

  • Garnish with Fresh Ingredients: Top your enchiladas with chopped fresh cilantro for a burst of color and flavor. You can also add sliced green onions or diced tomatoes for extra freshness.
  • Serve with Salsa: A generous scoop of salsa on top or on the side adds a zesty kick. Choose your favorite salsa—mild, medium, or spicy—to match your taste preferences.
  • Pair with Sour Cream: A dollop of sour cream can balance the flavors and add creaminess. It’s a classic accompaniment that many people love.
  • Accompany with Rice and Beans: Serve your enchiladas alongside Mexican rice and refried beans for a complete meal. This combination is filling and satisfying.
  • Include a Side Salad: A light salad with lettuce, avocado, and a tangy dressing can complement the richness of the enchiladas. It adds a refreshing contrast to the dish.

For a fun twist, consider serving your enchiladas in a taco bar style. Set out various toppings like jalapeños, olives, and different types of cheese. This way, everyone can customize their plate to their liking!

With these serving suggestions, your beef enchiladas with cheese will not only taste amazing but also look appealing on the table. Enjoy sharing this delicious meal with family and friends!

Tips for Perfect Beef Enchiladas with Cheese

Creating the perfect beef enchiladas with cheese is all about attention to detail. With a few helpful tips, you can elevate your dish and impress everyone at the dinner table. Here are some essential tips to ensure your enchiladas turn out delicious every time:

  • Choose the Right Tortillas: Opt for fresh flour tortillas for a soft and pliable wrap. If you prefer a bit of crunch, corn tortillas can also work well. Just remember to warm them slightly before filling to prevent tearing.
  • Season Generously: Don’t be shy with your seasonings! Adding spices like cumin, chili powder, or paprika to the beef can enhance the flavor. Taste as you go to find the perfect balance.
  • Layer the Cheese: For an extra cheesy experience, consider layering cheese between the beef filling and on top of the enchiladas. This creates a gooey, melty texture that everyone loves.
  • Use Quality Enchilada Sauce: The sauce is key to great enchiladas. If you can, make your own or choose a high-quality store-bought option. A good sauce can make all the difference in flavor.
  • Don’t Overbake: Keep an eye on your enchiladas while they bake. Overbaking can lead to dry tortillas and tough cheese. Remove them from the oven as soon as the cheese is bubbly and golden.
  • Let Them Rest: After baking, let your enchiladas sit for a few minutes before serving. This helps the flavors meld together and makes them easier to cut and serve.
  • Experiment with Toppings: Get creative with your toppings! Besides salsa and sour cream, try avocado slices, pickled jalapeños, or even a sprinkle of lime juice for a fresh twist.

By following these tips, you’ll be well on your way to making perfect beef enchiladas with cheese that are sure to impress. Enjoy the cooking process and the delicious results!

Breakdown of Time for Beef Enchiladas with Cheese

Understanding the time needed to prepare beef enchiladas with cheese can help you plan your cooking better. Here’s a simple breakdown of the time involved in each step of the process. This way, you can enjoy a delicious meal without feeling rushed!

Prep Time

The prep time for beef enchiladas with cheese is approximately 15-20 minutes. During this time, you will gather all your ingredients, chop any vegetables if you’re adding them, and prepare the beef filling. This step is essential as it sets the stage for a smooth cooking experience. Make sure to have everything ready before you start cooking!

Cooking Time

Once you’ve prepped your ingredients, the cooking time will take about 25-30 minutes. This includes browning the beef, assembling the enchiladas, and baking them in the oven. The baking time is crucial for melting the cheese and allowing the flavors to meld together. Keep an eye on them to ensure they don’t overbake!

Total Time

In total, you can expect to spend around 40-50 minutes from start to finish. This includes both prep and cooking time. With this timeline, you can easily fit beef enchiladas with cheese into your busy schedule. Plus, the delicious aroma wafting through your kitchen will make the wait worthwhile!

Nutritional Information for Beef Enchiladas with Cheese

Understanding the nutritional information for beef enchiladas with cheese is essential for those who are health-conscious or following specific dietary guidelines. This dish is not only delicious but also provides a good balance of nutrients. Here’s a closer look at the nutritional breakdown per serving:

Calories

Each serving of beef enchiladas with cheese contains approximately 450 calories. This makes it a hearty meal that can satisfy your hunger without going overboard. The combination of ground beef, cheese, and tortillas contributes to the calorie count, providing energy for your day.

Protein

One of the standout features of this dish is its protein content. Each serving offers about 30 grams of protein. This is primarily due to the ground beef and cheese, making it a great option for those looking to increase their protein intake. Protein is essential for muscle repair and overall health, making these enchiladas a smart choice for active individuals.

Sodium

When it comes to sodium, each serving contains around 800 milligrams. While this is a reasonable amount for a flavorful dish, it’s important to be mindful of your overall sodium intake throughout the day. If you’re watching your sodium levels, consider using low-sodium enchilada sauce or reducing the amount of cheese to help lower the sodium content.

In summary, beef enchiladas with cheese provide a balanced meal with a good amount of calories, protein, and sodium. By being aware of these nutritional aspects, you can enjoy this delicious dish while keeping your dietary goals in mind. Whether you’re serving it for a family dinner or a special occasion, these enchiladas are sure to please!

FAQs about Beef Enchiladas with Cheese

What can I substitute for beef in Beef Enchiladas with Cheese?

If you’re looking for alternatives to beef in your enchiladas, you have several tasty options! Ground turkey or chicken can be used for a leaner protein choice. They cook similarly to beef and absorb flavors well. For a vegetarian option, consider using black beans, lentils, or crumbled tofu. These ingredients provide protein and texture while keeping the dish hearty and satisfying. You can also mix in sautéed vegetables like bell peppers, zucchini, or corn for added flavor and nutrition. The key is to season your substitutes well to ensure they are just as delicious as the original recipe!

Can I make Beef Enchiladas with Cheese ahead of time?

Absolutely! Making beef enchiladas with cheese ahead of time is a great way to save time on busy days. You can prepare the enchiladas and assemble them in the baking dish, then cover and refrigerate them for up to 24 hours before baking. When you’re ready to cook, simply preheat your oven and bake as directed. If you’re making them further in advance, consider freezing them. Just be sure to wrap them tightly in plastic wrap and aluminum foil. When you’re ready to enjoy, thaw them in the fridge overnight and bake as usual. This makes for a convenient and delicious meal any day of the week!

How do I store leftover Beef Enchiladas with Cheese?

Storing leftover beef enchiladas with cheese is easy! Allow the enchiladas to cool completely before transferring them to an airtight container. You can keep them in the refrigerator for up to 3-4 days. If you want to store them for a longer period, consider freezing them. Wrap the enchiladas tightly in plastic wrap and then in aluminum foil to prevent freezer burn. They can be frozen for up to 3 months. When you’re ready to eat, thaw them in the fridge overnight and reheat in the oven or microwave until heated through. This way, you can enjoy your delicious enchiladas even after the initial meal!

Conclusion on Beef Enchiladas with Cheese

In conclusion, beef enchiladas with cheese are a delightful dish that brings warmth and flavor to any table. This recipe is not only easy to follow but also allows for creativity in the kitchen. Whether you stick to the classic version or explore variations like vegetarian or spicy enchiladas, the possibilities are endless.

By using fresh ingredients and following the preparation steps, you can create a meal that is both satisfying and nutritious. The combination of seasoned ground beef, melted cheese, and zesty enchilada sauce makes for a comforting dish that everyone will love. Plus, with the tips and serving suggestions provided, you can elevate your enchiladas to a whole new level.

So, gather your ingredients, roll up your sleeves, and get ready to enjoy a delicious homemade meal. Beef enchiladas with cheese are perfect for family dinners, gatherings with friends, or even a cozy night in. No matter the occasion, this dish is sure to impress and satisfy. Happy cooking!

Stay Connected

Get recipes via email: