Get my cookbooks

Baked Cod in Coconut Lemon Cream Sauce is a must-try!

Introduction to Baked Cod with Coconut Lemon Cream Sauce

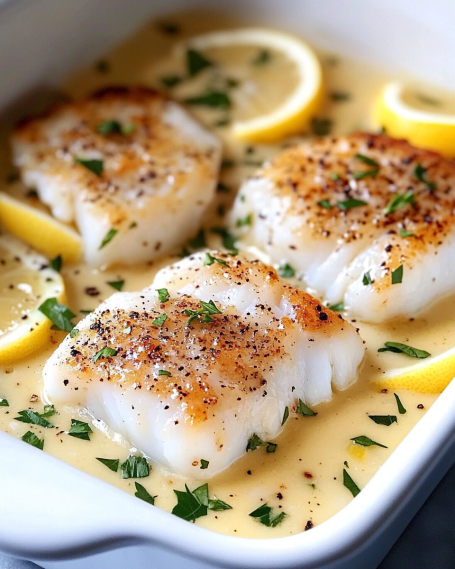
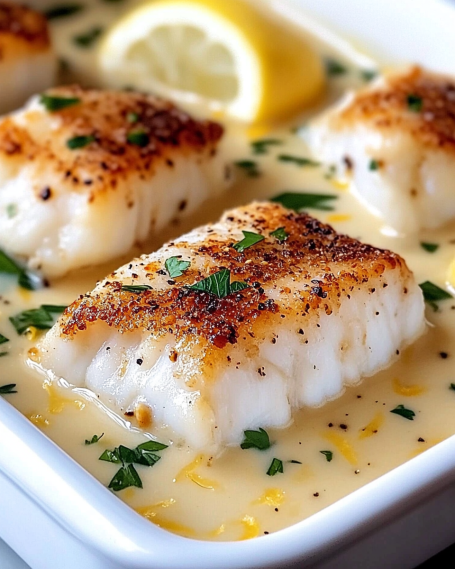
Are you looking for a delightful seafood dish that’s both easy to prepare and bursting with flavor? Look no further! Baked Cod with Coconut Lemon Cream Sauce is a fantastic choice for any occasion. This dish combines the mild, flaky texture of cod with a rich and creamy sauce that’s infused with zesty lemon and aromatic spices. It’s a perfect meal for family dinners, special gatherings, or even a cozy night in.

What makes this recipe stand out is its simplicity. With just a handful of ingredients, you can create a restaurant-quality dish right in your own kitchen. The coconut milk adds a tropical twist, while the lemon juice and zest brighten up the flavors, making each bite refreshing and satisfying. Plus, it’s a healthy option that’s packed with protein and low in carbs, making it suitable for various dietary preferences.

Whether you’re a seasoned cook or a beginner, this recipe is straightforward and forgiving. You can easily adjust the ingredients to suit your taste, and it pairs wonderfully with a variety of side dishes. So, roll up your sleeves and get ready to impress your loved ones with this delicious Baked Cod with Coconut Lemon Cream Sauce!

Ingredients for Baked Cod with Coconut Lemon Cream Sauce

To create the delightful Baked Cod with Coconut Lemon Cream Sauce, you’ll need a few simple ingredients. Each component plays a vital role in building the dish’s unique flavor profile. Here’s what you’ll need:

  • 1 pound cod fillets: Fresh or thawed, cod is the star of this dish. Its mild flavor pairs perfectly with the creamy sauce.
  • 1 can (13.5 ounces) coconut milk: This rich ingredient adds creaminess and a hint of tropical flavor.
  • 1 tablespoon lemon juice: Freshly squeezed lemon juice brightens the dish and balances the richness of the coconut milk.
  • 1 teaspoon lemon zest: The zest enhances the lemon flavor, giving the sauce a refreshing kick.
  • 2 cloves garlic, minced: Garlic adds depth and aroma, making the dish even more appetizing.
  • 1 teaspoon fresh ginger, grated: Ginger brings warmth and a slight spiciness to the sauce.
  • 1 tablespoon olive oil: This helps to prevent the cod from sticking to the baking dish and adds a touch of richness.
  • Salt and pepper to taste: Essential for seasoning, these will enhance all the flavors in the dish.
  • 1 tablespoon fresh parsley, chopped (for garnish): A sprinkle of parsley adds a pop of color and freshness when serving.

Feel free to get creative! You can add a pinch of red pepper flakes for a bit of heat or substitute the cod with another white fish like tilapia or haddock. The beauty of this recipe lies in its versatility, allowing you to tailor it to your preferences.

Preparation of Baked Cod with Coconut Lemon Cream Sauce

Now that you have gathered all the ingredients, it’s time to dive into the preparation of your Baked Cod with Coconut Lemon Cream Sauce. This section will guide you through each step, ensuring that your dish turns out perfectly every time. Let’s get started!

Step 1: Preheat the Oven

400°F (200°C). Preheating is essential as it ensures that your cod cooks evenly and thoroughly. While the oven heats up, you can move on to the next steps.

Step 2: Prepare the Cod Fillets

Next, take your cod fillets and rinse them under cold water. Pat them dry with paper towels. This helps remove any excess moisture, allowing the fish to bake nicely. Once dried, place the fillets in a baking dish in a single layer. This ensures that each piece cooks evenly and absorbs the delicious sauce.

Step 3: Make the Coconut Lemon Cream Sauce

coconut milk, lemon juice, lemon zest, minced garlic, grated ginger, salt, and pepper. Use a whisk to mix everything together until it’s well combined. The aroma of the garlic and ginger will fill your kitchen, making it hard to resist!

Step 4: Combine and Bake

20-25 minutes. You’ll know it’s done when the cod flakes easily with a fork. After baking, let it rest for a few minutes before serving. This allows the flavors to settle and makes for a more enjoyable meal.

With these simple steps, you’re well on your way to enjoying a delicious Baked Cod with Coconut Lemon Cream Sauce. The preparation is quick and straightforward, making it a perfect choice for busy weeknights or special occasions!

Variation of Baked Cod with Coconut Lemon Cream Sauce

While the classic Baked Cod with Coconut Lemon Cream Sauce is a delightful dish on its own, there are many ways to switch things up! Variations can enhance the flavors and make the meal even more exciting. Let’s explore some alternative ingredients and cooking methods that can elevate your dish.

Alternative Ingredients for Different Flavors

One of the best things about this recipe is its versatility. You can easily swap out ingredients to create new flavor profiles. Here are some ideas:

  • Different Fish: If you’re not a fan of cod, try using tilapia, haddock, or even salmon. Each fish has its unique taste and texture, which can change the overall experience.
  • Herbs and Spices: Experiment with fresh herbs like cilantro or basil instead of parsley. You can also add spices like cumin or paprika for a different twist.
  • Vegetables: Add sliced bell peppers, spinach, or cherry tomatoes to the baking dish. These veggies will not only add color but also enhance the nutritional value of your meal.
  • Coconut Cream: For a richer sauce, substitute coconut milk with coconut cream. This will give your dish a thicker and creamier texture.
  • Acidic Elements: Instead of lemon juice, try lime juice or even a splash of white wine for a different zing.

These alternatives can help you create a unique version of the dish that suits your taste buds perfectly!

Cooking Methods: Grilling vs. Baking

While baking is a fantastic way to prepare your cod, grilling is another excellent option that can add a smoky flavor to the dish. Here’s how the two methods compare:

  • Baking: This method is straightforward and allows the cod to cook evenly in the creamy sauce. It’s perfect for a cozy indoor meal.
  • Grilling: Grilling the cod can give it a delicious char and enhance the flavors. To grill, simply marinate the cod in the coconut lemon sauce for about 30 minutes, then place it on a preheated grill. Cook for about 4-5 minutes on each side, or until it flakes easily.

Both methods yield delicious results, so feel free to choose the one that fits your cooking style or occasion!

Cooking Note for Baked Cod with Coconut Lemon Cream Sauce

When preparing Baked Cod with Coconut Lemon Cream Sauce, there are a few important cooking notes to keep in mind. These tips will help ensure that your dish turns out perfectly every time, allowing you to enjoy the delightful flavors without any hiccups.

First, always choose fresh cod fillets when possible. Fresh fish not only tastes better but also has a firmer texture, which holds up well during cooking. If you must use frozen cod, make sure to thaw it completely before cooking. This will help the fish cook evenly and prevent it from becoming rubbery.

Next, pay attention to the thickness of your cod fillets. Thicker fillets may require a bit more cooking time, while thinner ones will cook faster. To check for doneness, use a fork to gently flake the fish. If it flakes easily and is opaque throughout, it’s ready to serve.

Additionally, consider the baking dish you use. A glass or ceramic dish is ideal for this recipe, as it distributes heat evenly. If you use a metal dish, keep an eye on the cooking time, as it may cook faster than glass or ceramic.

Lastly, don’t skip the resting time after baking. Allowing the cod to rest for a few minutes before serving helps the flavors meld together and makes for a more enjoyable meal. This small step can make a big difference in the overall taste and presentation of your dish.

By following these cooking notes, you’ll be well on your way to mastering the art of Baked Cod with Coconut Lemon Cream Sauce. Enjoy the process and savor the delicious results!

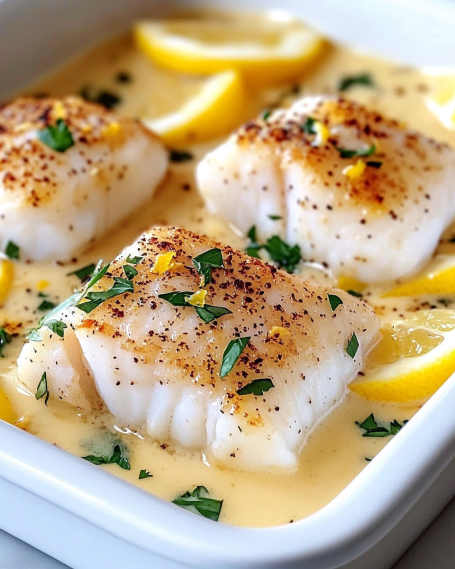
Serving Suggestions for Baked Cod with Coconut Lemon Cream Sauce

Once your Baked Cod with Coconut Lemon Cream Sauce is ready, it’s time to think about how to serve it. The right side dishes and beverages can elevate your meal, making it even more enjoyable. Here are some fantastic serving suggestions to complement your delicious cod dish.

Ideal Side Dishes

When it comes to side dishes, you want to choose options that balance the rich flavors of the coconut lemon cream sauce. Here are some great ideas:

  • Steamed Rice: A classic choice, steamed white or brown rice absorbs the creamy sauce beautifully. It’s a simple yet satisfying option.
  • Quinoa: For a healthier alternative, serve your cod with fluffy quinoa. It adds a nutty flavor and is packed with protein.
  • Roasted Vegetables: Colorful roasted veggies like zucchini, bell peppers, and carrots add a delightful crunch and nutrition to your plate.
  • Garlic Mashed Potatoes: Creamy mashed potatoes with a hint of garlic can be a comforting side that pairs well with the fish.
  • Green Salad: A fresh salad with mixed greens, cherry tomatoes, and a light vinaigrette can provide a refreshing contrast to the rich sauce.

These side dishes not only complement the flavors of the cod but also add variety to your meal, making it more appealing and satisfying.

Pairing with Wine or Beverages

To enhance your dining experience, consider pairing your Baked Cod with Coconut Lemon Cream Sauce with the right beverages. Here are some excellent options:

  • White Wine: A crisp white wine, such as Sauvignon Blanc or Pinot Grigio, pairs beautifully with the lightness of the cod and the creaminess of the sauce.
  • Sparkling Water: For a non-alcoholic option, sparkling water with a slice of lemon can be refreshing and cleanse the palate.
  • Coconut Water: To keep with the tropical theme, serve coconut water. It’s hydrating and complements the coconut flavor in the dish.
  • Herbal Tea: A light herbal tea, like chamomile or mint, can be a soothing choice to enjoy alongside your meal.

Choosing the right side dishes and beverages can truly elevate your Baked Cod with Coconut Lemon Cream Sauce. Enjoy the delightful combination of flavors and make your meal a memorable one!

Tips for Perfect Baked Cod with Coconut Lemon Cream Sauce

To ensure your Baked Cod with Coconut Lemon Cream Sauce turns out perfectly every time, consider these helpful tips. From selecting the right cod to adjusting the sauce consistency, these suggestions will enhance your cooking experience and the final dish.

Choosing the Right Cod

When it comes to selecting cod, freshness is key. Here are some tips to help you choose the best cod fillets:

  • Look for Freshness: Fresh cod should have a mild scent, not a strong fishy odor. The flesh should be firm and moist, with a translucent appearance.
  • Check for Color: Fresh cod fillets are usually white or off-white. Avoid any fillets that appear discolored or have brown spots.
  • Ask Questions: If you’re buying from a fish market, don’t hesitate to ask the fishmonger about the catch date. Freshly caught fish will always yield the best flavor.
  • Consider Sustainability: Look for sustainably sourced cod. This not only supports responsible fishing practices but also ensures you’re getting a quality product.

By choosing the right cod, you set the foundation for a delicious meal that everyone will love!

Adjusting the Sauce Consistency

The coconut lemon cream sauce is a highlight of this dish, and you may want to adjust its consistency to suit your preference. Here are some tips:

  • Thicker Sauce: If you prefer a thicker sauce, consider adding a tablespoon of cornstarch mixed with a little water. Stir this mixture into the sauce before pouring it over the cod. This will create a creamier texture.
  • Thinner Sauce: For a lighter sauce, you can add a splash of vegetable broth or water. This will help thin out the sauce without losing flavor.
  • Balancing Flavors: If you find the sauce too rich, a little extra lemon juice can brighten it up. Taste as you go to find the perfect balance!

Adjusting the sauce consistency allows you to customize the dish to your liking. Whether you prefer it thick and creamy or light and zesty, these tips will help you achieve the perfect sauce for your Baked Cod with Coconut Lemon Cream Sauce.

Breakdown of Time for Baked Cod with Coconut Lemon Cream Sauce

Understanding the time required for each step in preparing Baked Cod with Coconut Lemon Cream Sauce can help you plan your meal better. Here’s a detailed breakdown of the time you’ll need for preparation and cooking.

Prep Time

10-15 minutes to gather your ingredients and prepare the cod and sauce. This includes rinsing and drying the cod fillets, chopping garlic and ginger, and whisking together the coconut lemon cream sauce. With everything ready, you’ll be set to move on to the cooking phase!

Cooking Time

20-25 minutes. During this time, the fish will absorb the flavors of the coconut lemon cream sauce, resulting in a tender and flavorful dish. Keep an eye on the cod, and check for doneness by flaking it with a fork. It should flake easily when fully cooked.

Total Time

30-40 minutes from start to finish. This includes both prep and cooking time. With such a quick turnaround, Baked Cod with Coconut Lemon Cream Sauce is an excellent option for a delicious meal without spending hours in the kitchen. Enjoy the process and the delightful flavors that await you!

Nutritional Information for Baked Cod with Coconut Lemon Cream Sauce

Understanding the nutritional content of your meals is essential for maintaining a balanced diet. Baked Cod with Coconut Lemon Cream Sauce is not only delicious but also offers a variety of nutrients. Here’s a breakdown of the nutritional information per serving, which serves four people.

Calories

320 calories. This makes it a satisfying yet light option for dinner. The combination of cod and coconut milk provides a good balance of energy without being overly heavy.

Protein

24 grams of protein. Cod is an excellent source of lean protein, making it a great choice for those looking to increase their protein intake while keeping calories in check.

Sodium

500 milligrams. This amount is reasonable for a flavorful dish, but if you’re watching your sodium intake, consider using low-sodium coconut milk and adjusting the salt in the recipe. This way, you can enjoy the dish while keeping your health goals in mind.

Overall, Baked Cod with Coconut Lemon Cream Sauce is a nutritious meal that fits well into a healthy eating plan. With its balance of calories, protein, and sodium, it’s a dish you can feel good about serving to your family and friends!

FAQs about Baked Cod with Coconut Lemon Cream Sauce

Can I use frozen cod for this recipe?

Yes, you can use frozen cod for Baked Cod with Coconut Lemon Cream Sauce! Just make sure to thaw it completely before cooking. Thawing helps the fish cook evenly and prevents it from becoming rubbery. You can thaw the cod overnight in the refrigerator or use the quick-thaw method by placing it in a sealed bag and submerging it in cold water for about an hour. Once thawed, follow the recipe as usual for a delicious meal!

What can I substitute for coconut cream?

If you don’t have coconut cream on hand, you can easily substitute it with coconut milk. While coconut cream is thicker and richer, coconut milk will still provide a lovely flavor. If you prefer a creamier texture, you can mix equal parts of coconut milk and a little cornstarch to thicken it up. Alternatively, heavy cream can be used for a non-coconut option, but it will change the flavor profile slightly.

How do I know when the cod is done cooking?

To check if your cod is done cooking, use a fork to gently flake the fish. It should flake easily and appear opaque throughout. The internal temperature should reach 145°F (63°C) for safe consumption. If you see that the fish is still translucent or resists flaking, give it a few more minutes in the oven. Remember, overcooking can make the fish dry, so keep an eye on it!

Can I make the sauce ahead of time?

Absolutely! You can prepare the coconut lemon cream sauce ahead of time. Simply mix all the ingredients together and store the sauce in an airtight container in the refrigerator for up to 2 days. When you’re ready to cook, just give it a good stir and pour it over the cod before baking. This can save you time on busy days and still deliver a delicious meal!

Conclusion on Baked Cod with Coconut Lemon Cream Sauce

In conclusion, Baked Cod with Coconut Lemon Cream Sauce is a delightful dish that brings together the best of both flavor and nutrition. With its creamy coconut sauce and zesty lemon notes, this recipe is sure to impress your family and friends. The simplicity of the preparation makes it accessible for cooks of all skill levels, allowing anyone to create a restaurant-quality meal at home.

This dish not only highlights the mild flavor of cod but also offers versatility. You can easily customize it with different fish, herbs, or vegetables to suit your taste. Whether you choose to bake or grill, the result will be a tender, flaky fish that pairs beautifully with a variety of side dishes.

Moreover, the nutritional benefits of this meal make it a smart choice for those looking to maintain a healthy diet. With a good balance of protein, healthy fats, and low carbs, it fits well into many dietary plans. Plus, the vibrant flavors will keep you coming back for more!

So, why not give this recipe a try? Gather your ingredients, follow the steps, and enjoy the deliciousness of Baked Cod with Coconut Lemon Cream Sauce. It’s a meal that promises satisfaction and joy, making every bite a celebration of flavors. Happy cooking!

Garlic Butter Steak Noodles are a must-try dish today!

Introduction to Garlic Butter Steak Noodles

Garlic Butter Steak Noodles are a delightful dish that combines the rich flavors of tender steak with the comforting texture of noodles. This recipe is not just a meal; it’s an experience that brings together the best of both worlds. Imagine savoring perfectly cooked noodles coated in a luscious garlic butter sauce, paired with juicy slices of flank steak. It’s a dish that’s sure to impress family and friends alike!

What Makes Garlic Butter Steak Noodles Special?

What sets Garlic Butter Steak Noodles apart is the harmony of flavors and textures. The garlic butter sauce is the star of the show, infusing the dish with a savory aroma that makes your mouth water. The flank steak, when cooked just right, adds a satisfying chewiness that complements the softness of the noodles. Plus, the addition of soy sauce and Worcestershire sauce brings a depth of umami that elevates the entire dish.

Another special aspect is its versatility. You can easily customize this recipe to suit your taste. Whether you prefer a spicy kick or a milder flavor, Garlic Butter Steak Noodles can adapt to your preferences. Additionally, it’s a quick meal that can be prepared in under 30 minutes, making it perfect for busy weeknights or a cozy weekend dinner.

In summary, Garlic Butter Steak Noodles are not just a meal; they are a celebration of flavors that can be enjoyed by everyone. With simple ingredients and easy preparation, this dish is bound to become a favorite in your household!

Ingredients for Garlic Butter Steak Noodles

To create the mouthwatering Garlic Butter Steak Noodles, you’ll need a few simple yet flavorful ingredients. Each component plays a vital role in bringing this dish to life. Here’s what you’ll need:

  • 8 ounces of spaghetti or linguine: Choose your favorite type of pasta for a delightful base.
  • 1 pound of flank steak: Thinly sliced for quick cooking and maximum tenderness.
  • 4 tablespoons of unsalted butter: This adds richness and flavor to the dish.
  • 4 cloves of garlic: Minced for that aromatic kick.
  • 1 tablespoon of soy sauce: Provides a savory depth to the sauce.
  • 1 tablespoon of Worcestershire sauce: Enhances the umami flavor.
  • 1 teaspoon of red pepper flakes (optional): For those who enjoy a bit of heat.
  • Salt and pepper to taste: Essential for seasoning the steak and noodles.
  • 2 green onions: Sliced for garnish, adding a fresh crunch.
  • Fresh parsley: Chopped for a pop of color and freshness.

These ingredients come together to create a dish that is not only delicious but also visually appealing. The combination of garlic, butter, and steak creates a rich flavor profile that is hard to resist. Plus, the noodles soak up all the savory goodness, making every bite a delight!

Step-by-Step Preparation of Garlic Butter Steak Noodles

Now that you have all your ingredients ready, it’s time to dive into the step-by-step preparation of Garlic Butter Steak Noodles. This process is straightforward and will have you enjoying a delicious meal in no time. Let’s get started!

Step 1: Preparing the Steak

First, you need to prepare the flank steak. Start by slicing the steak thinly against the grain. This technique ensures that the meat remains tender and easy to chew. Once sliced, season the steak with salt and pepper. This simple seasoning enhances the natural flavors of the meat. Set the seasoned steak aside while you heat up your skillet.

Step 2: Cooking the Noodles

Next, it’s time to cook the noodles. Bring a large pot of salted water to a boil. Add the spaghetti or linguine and cook according to the package instructions until al dente. This usually takes about 8-10 minutes. Once cooked, drain the noodles in a colander and set them aside. Remember, you want them firm enough to hold up against the rich garlic butter sauce!

Step 3: Making the Garlic Butter Sauce

Now, let’s make the garlic butter sauce. In a large skillet, melt 2 tablespoons of unsalted butter over medium-high heat. Once the butter is melted and bubbling, add the thinly sliced flank steak. Cook the steak for about 3-4 minutes until it’s nicely browned. After that, remove the steak from the skillet and set it aside. In the same skillet, add the remaining 2 tablespoons of butter and the minced garlic. Sauté the garlic for about 1 minute until it becomes fragrant. This step is crucial as it infuses the butter with a delicious garlic flavor.

Step 4: Combining Ingredients

Finally, it’s time to bring everything together! Return the cooked steak to the skillet with the garlic butter. Add the soy sauce, Worcestershire sauce, and red pepper flakes if you’re using them. Stir everything together and let it cook for an additional 2 minutes. This allows the flavors to meld beautifully. Now, add the cooked noodles to the skillet and toss everything together until the noodles are well coated in the garlic butter sauce. The aroma will be irresistible!

Once everything is combined, remove the skillet from heat. Garnish your Garlic Butter Steak Noodles with sliced green onions and chopped parsley for a fresh touch. Your meal is now ready to be served!

Variations of Garlic Butter Steak Noodles

Garlic Butter Steak Noodles are delicious as they are, but there’s always room for creativity in the kitchen! You can easily switch things up by using different proteins or even making a vegetarian version. Let’s explore some tasty variations that will keep your meals exciting!

Alternative Proteins to Use

If you’re looking to change the protein in your Garlic Butter Steak Noodles, you have plenty of options. Here are a few alternatives:

  • Chicken Breast: Thinly sliced chicken breast is a great substitute. Cook it the same way as the steak, ensuring it reaches an internal temperature of 165°F.
  • Shrimp: For a seafood twist, use shrimp! They cook quickly, so add them to the skillet after sautéing the garlic. Cook until they turn pink and opaque.
  • Pork Tenderloin: Thinly sliced pork tenderloin can also work well. Season it similarly to the steak and follow the same cooking steps.
  • Tofu: For a plant-based option, use firm tofu. Press it to remove excess moisture, then slice and sauté until golden brown.

These alternative proteins not only change the flavor but also add variety to your meals. Feel free to experiment with different marinades or seasonings to enhance the taste!

Vegetarian Options for Garlic Butter Steak Noodles

If you’re looking for a vegetarian version of Garlic Butter Steak Noodles, you can easily make it without meat. Here’s how:

  • Vegetable Medley: Use a mix of your favorite vegetables like bell peppers, broccoli, and snap peas. Sauté them in the garlic butter until tender.
  • Mushrooms: Sliced mushrooms add a meaty texture. They absorb the garlic butter flavor beautifully, making them a perfect addition.
  • Chickpeas: For added protein, toss in canned chickpeas. They’re hearty and will soak up the delicious sauce.
  • Eggplant: Diced eggplant can be sautéed until soft and flavorful. It’s a great way to add depth to your dish.

By using these vegetarian options, you can enjoy the same rich flavors of Garlic Butter Steak Noodles while keeping it meat-free. The key is to ensure that the vegetables are cooked just right, so they maintain their texture and flavor.

In conclusion, whether you choose to stick with steak or explore alternative proteins and vegetarian options, Garlic Butter Steak Noodles can be tailored to suit your taste. Enjoy the process of experimenting and discovering new favorites!

Cooking Note for Garlic Butter Steak Noodles

When preparing Garlic Butter Steak Noodles, a few cooking notes can help you achieve the best results. These tips will ensure that your dish is not only delicious but also visually appealing and satisfying. Let’s dive into some essential cooking notes to keep in mind!

First, the quality of your ingredients matters. Choose fresh flank steak and high-quality butter for the best flavor. Fresh garlic will provide a more robust aroma and taste compared to pre-minced options. Additionally, using fresh herbs like parsley and green onions will enhance the dish’s overall freshness.

Next, pay attention to the cooking times. Flank steak cooks quickly, so avoid overcooking it. Aim for a nice sear on the outside while keeping it tender on the inside. If you’re using alternative proteins, adjust the cooking times accordingly. For instance, shrimp cooks in just a few minutes, while chicken may take a bit longer.

Another important note is to keep the heat at medium-high when cooking the garlic butter sauce. This temperature allows the garlic to sauté without burning, which can create a bitter taste. Stir frequently to ensure even cooking and to prevent the garlic from sticking to the skillet.

Lastly, don’t forget to taste as you go! Adjust the seasoning with salt, pepper, or additional soy sauce to suit your preferences. This step is crucial for achieving a balanced flavor profile that everyone will enjoy.

By following these cooking notes, you’ll be well on your way to creating a plate of Garlic Butter Steak Noodles that is bursting with flavor and sure to impress. Happy cooking!

Serving Suggestions for Garlic Butter Steak Noodles

Once your Garlic Butter Steak Noodles are ready, it’s time to think about how to serve them. Presentation can elevate your dish, making it even more enjoyable. Here are some delightful serving suggestions to enhance your meal:

  • Plate it Up: Serve the noodles in a large, shallow bowl. This allows the garlic butter sauce to pool at the bottom, making each bite flavorful.
  • Garnish Generously: Don’t skimp on the garnishes! Sprinkle extra sliced green onions and chopped parsley on top for a fresh and vibrant look.
  • Pair with a Side Salad: A light side salad with mixed greens, cherry tomatoes, and a simple vinaigrette complements the richness of the noodles. It adds a refreshing crunch!
  • Serve with Crusty Bread: A slice of crusty bread or garlic bread is perfect for soaking up any leftover garlic butter sauce. It’s a delicious way to enjoy every last bit!
  • Offer Extra Spice: If you have guests who enjoy a bit of heat, serve sliced jalapeños or a small dish of sriracha on the side. This allows everyone to customize their meal to their liking.
  • Wine Pairing: Consider serving a glass of red wine, like a Cabernet Sauvignon or Merlot. The rich flavors of the wine will complement the savory steak and garlic butter beautifully.

These serving suggestions not only enhance the visual appeal of your Garlic Butter Steak Noodles but also create a more enjoyable dining experience. Whether it’s a casual family dinner or a special occasion, these tips will help you impress your guests and make the meal memorable!

Tips for Perfect Garlic Butter Steak Noodles

Creating the perfect Garlic Butter Steak Noodles is all about attention to detail. With a few helpful tips, you can elevate your dish to restaurant-quality right in your kitchen. Here are some essential tips to ensure your meal turns out delicious every time!

  • Use Fresh Ingredients: Fresh garlic, herbs, and high-quality steak make a significant difference in flavor. Fresh ingredients enhance the overall taste and aroma of your dish.
  • Don’t Overcook the Steak: Flank steak cooks quickly. Aim for a nice sear on the outside while keeping it tender inside. Overcooking can lead to a tough texture.
  • Cook Noodles Al Dente: Follow the package instructions for cooking time, but check a minute early. Al dente noodles hold up better in the sauce and provide a delightful bite.
  • Adjust Seasoning: Taste your dish as you cook. Adjust the salt, pepper, and sauces to suit your preferences. This step is crucial for achieving a balanced flavor.
  • Let the Sauce Shine: The garlic butter sauce is the star of the dish. Make sure to coat the noodles evenly, allowing them to soak up all the delicious flavors.
  • Garnish Generously: Fresh herbs like parsley and green onions not only add color but also enhance the flavor. Don’t skip this step for a vibrant presentation!
  • Serve Immediately: Garlic Butter Steak Noodles are best enjoyed fresh. Serve them right after cooking for the best texture and flavor.
  • Experiment with Flavors: Feel free to add your favorite vegetables or spices. Bell peppers, snap peas, or even a splash of lime juice can add a unique twist to the dish.

By following these tips, you’ll be well on your way to mastering Garlic Butter Steak Noodles. Each bite will be bursting with flavor, making it a dish everyone will love!

Breakdown of Time for Garlic Butter Steak Noodles

Understanding the time needed for each step in preparing Garlic Butter Steak Noodles can help you plan your cooking efficiently. Here’s a simple breakdown of the time required for preparation and cooking:

Prep Time

The prep time for Garlic Butter Steak Noodles is approximately 15 minutes. This includes:

  • Gathering all your ingredients.
  • Slicing the flank steak against the grain.
  • Minced garlic and chopping green onions and parsley for garnish.
  • Measuring out sauces and spices.

Having everything ready before you start cooking makes the process smoother and more enjoyable!

Cooking Time

The cooking time for this dish is about 15 minutes. Here’s how it breaks down:

  • Cooking the noodles: 8-10 minutes.
  • Cooking the steak: 3-4 minutes.
  • Making the garlic butter sauce and combining everything: 2-3 minutes.

With everything cooked quickly, you’ll have a delicious meal ready in no time!

Total Time

In total, you can expect to spend around 30 minutes from start to finish. This makes Garlic Butter Steak Noodles a fantastic option for a quick weeknight dinner or a last-minute meal for guests. With just a little bit of time, you can create a flavorful dish that everyone will love!

Nutritional Information for Garlic Butter Steak Noodles

Understanding the nutritional content of Garlic Butter Steak Noodles can help you make informed choices about your meals. This dish is not only delicious but also provides a good balance of macronutrients. Here’s a closer look at the nutritional information per serving:

Calories

Each serving of Garlic Butter Steak Noodles contains approximately 450 calories. This calorie count makes it a satisfying meal that can fit into a balanced diet. The combination of steak and noodles provides energy, making it a great option for lunch or dinner.

Protein Content

Garlic Butter Steak Noodles are a good source of protein, with about 30 grams per serving. The flank steak contributes significantly to this protein content, which is essential for muscle repair and overall health. Including protein in your meals can help keep you feeling full and satisfied.

Sodium Levels

The sodium content in Garlic Butter Steak Noodles is around 800 milligrams per serving. This level is primarily due to the soy sauce and Worcestershire sauce used in the recipe. While sodium is necessary for bodily functions, it’s important to monitor your intake, especially if you are watching your salt consumption. You can reduce the sodium levels by using low-sodium soy sauce or adjusting the amount of sauce you add.

In summary, Garlic Butter Steak Noodles offer a balanced meal with a good mix of calories, protein, and sodium. By being mindful of portion sizes and ingredient choices, you can enjoy this flavorful dish while maintaining a healthy diet!

FAQs about Garlic Butter Steak Noodles

Can I use different types of noodles for Garlic Butter Steak Noodles?

Absolutely! While spaghetti and linguine are popular choices, you can use various types of noodles for Garlic Butter Steak Noodles. Options like fettuccine, udon, or even rice noodles can work well. Just make sure to adjust the cooking time according to the type of noodle you choose. Each noodle type will bring its unique texture and flavor to the dish, allowing you to customize it to your liking!

How can I make Garlic Butter Steak Noodles spicier?

If you love a bit of heat, there are several ways to spice up your Garlic Butter Steak Noodles. You can add sliced jalapeños or a dash of sriracha to the garlic butter sauce. Another option is to increase the amount of red pepper flakes in the recipe. For an extra kick, consider adding a few dashes of hot sauce when serving. These additions will enhance the flavor while giving your dish a delightful spiciness!

What sides pair well with Garlic Butter Steak Noodles?

Garlic Butter Steak Noodles are delicious on their own, but pairing them with the right sides can elevate your meal. A light side salad with mixed greens, cherry tomatoes, and a simple vinaigrette complements the richness of the noodles. You can also serve steamed vegetables like broccoli or green beans for a healthy touch. For a heartier option, garlic bread or crusty rolls are perfect for soaking up any leftover sauce. These sides will create a well-rounded dining experience!

Can I prepare Garlic Butter Steak Noodles in advance?

While Garlic Butter Steak Noodles are best enjoyed fresh, you can prepare some components in advance. You can slice the steak and chop the garlic and herbs ahead of time. However, it’s best to cook the noodles and combine everything just before serving to maintain the best texture and flavor. If you have leftovers, store them in an airtight container in the fridge for up to two days. Reheat gently on the stove, adding a splash of water or broth to revive the sauce!

Conclusion on Garlic Butter Steak Noodles

In conclusion, Garlic Butter Steak Noodles are a delightful dish that brings together the rich flavors of steak and the comforting texture of noodles. This recipe is not only easy to prepare but also offers a wonderful balance of taste and nutrition. With its savory garlic butter sauce, tender flank steak, and perfectly cooked noodles, it’s a meal that can satisfy any appetite.

Whether you’re cooking for a busy weeknight dinner or a special occasion, Garlic Butter Steak Noodles are sure to impress. The versatility of this dish allows you to customize it to your liking, whether you prefer different proteins or want to explore vegetarian options. Plus, with the tips and variations provided, you can make this dish your own!

As you gather your ingredients and follow the simple steps, remember to enjoy the process. Cooking is not just about the final product; it’s about the joy of creating something delicious. So, roll up your sleeves, get into the kitchen, and whip up a batch of Garlic Butter Steak Noodles. Your taste buds will thank you!

Finally, don’t forget to share your culinary creations with family and friends. This dish is perfect for gatherings, and everyone will love the rich flavors and satisfying textures. So, go ahead and make Garlic Butter Steak Noodles a staple in your recipe collection. Happy cooking!

Beef and Cheese Chimichangas Recipe is a must-try!

Introduction to Beef and Cheese Chimichangas Recipe

What Are Chimichangas?

Chimichangas are a delicious Mexican dish that many people love. They are essentially deep-fried burritos, filled with a variety of tasty ingredients. The name “chimichanga” comes from the Spanish word for “thingamajig,” which perfectly describes this delightful treat. Traditionally, chimichangas are made with flour tortillas that are filled with meat, cheese, and sometimes beans or vegetables. After being rolled up, they are fried until golden brown and crispy. This cooking method gives them a crunchy exterior while keeping the inside warm and flavorful.

Why You Should Try This Beef and Cheese Chimichangas Recipe

If you’re looking for a meal that’s both satisfying and easy to make, this Beef and Cheese Chimichangas Recipe is perfect for you! Not only is it packed with flavor, but it also offers a wonderful combination of textures. The crispy outside contrasts beautifully with the cheesy, savory filling. Plus, this recipe is simple enough for anyone to follow, whether you’re a seasoned cook or just starting out in the kitchen.

Moreover, chimichangas are versatile. You can customize them to suit your taste. Want to add some spice? Go for it! Prefer a vegetarian option? You can easily swap out the beef for beans or veggies. This recipe is not just a meal; it’s an experience that brings joy to the table. So gather your ingredients and get ready to enjoy a delightful dish that will impress your family and friends!

Ingredients for Beef and Cheese Chimichangas Recipe

To create the perfect Beef and Cheese Chimichangas, you’ll need a few simple ingredients. Each one plays a vital role in delivering that delicious flavor and satisfying texture. Here’s what you’ll need:

  • 1 pound ground beef: This is the main protein source, providing a hearty base for your chimichangas.
  • 1 teaspoon chili powder: Adds a warm, spicy kick to the beef mixture.
  • 1 teaspoon cumin: This spice brings a rich, earthy flavor that complements the beef.
  • 1 teaspoon garlic powder: Enhances the overall taste with its aromatic qualities.
  • 1 teaspoon onion powder: Adds sweetness and depth to the filling.
  • Salt and pepper to taste: Essential for seasoning and balancing flavors.
  • 1 cup shredded cheddar cheese: Melts beautifully, creating a creamy texture in the filling.
  • 4 large flour tortillas: These are the wrappers that hold all the delicious ingredients together.
  • 1 cup vegetable oil: Used for frying, giving the chimichangas their crispy exterior.
  • Sour cream: A cool, creamy topping that pairs perfectly with the hot chimichangas.
  • Salsa: Adds a fresh, zesty flavor that complements the dish.

With these ingredients on hand, you’re ready to embark on a culinary adventure. Each component contributes to the overall taste, making your Beef and Cheese Chimichangas a delightful meal. So, gather your ingredients and let’s move on to the next step!

Step-by-Step Preparation of Beef and Cheese Chimichangas Recipe

Step 1: Preparing the Beef Filling

To kick off your Beef and Cheese Chimichangas, start by preparing the beef filling. First, grab a large skillet and place it over medium heat. Add the pound of ground beef to the skillet. As the beef cooks, use a spatula to break it apart. Cook it for about 6-8 minutes, or until it’s fully browned. Make sure to drain any excess fat to keep your chimichangas from being greasy.

Next, it’s time to add flavor! Sprinkle in the chili powder, cumin, garlic powder, onion powder, salt, and pepper. Stir everything together and let it cook for another 2-3 minutes. This step is crucial as it allows the spices to release their wonderful aromas. Once the spices are fragrant, remove the skillet from the heat. Now, mix in the shredded cheddar cheese. Stir until the cheese melts and combines well with the beef. Your filling is now ready!

Step 2: Assembling the Chimichangas

Now that your beef filling is prepared, it’s time to assemble the chimichangas. Start by laying a large flour tortilla flat on a clean surface. Spoon about 1/4 of the beef and cheese mixture onto the center of the tortilla. Be careful not to overfill, as this can make rolling difficult.

Next, fold the sides of the tortilla over the filling. Then, roll it up tightly from the bottom to the top. Make sure to seal the edges well to prevent any filling from escaping during cooking. Repeat this process with the remaining tortillas and filling. You should have four deliciously stuffed chimichangas ready to fry!

Step 3: Cooking the Chimichangas

It’s time to cook your chimichangas! In a large skillet, heat the vegetable oil over medium-high heat. You want the oil to be hot but not smoking. Carefully add the chimichangas to the skillet, seam side down. Fry them for about 3-4 minutes on each side, or until they turn golden brown and crispy.

Once they are cooked, use tongs to remove the chimichangas from the oil. Place them on a plate lined with paper towels to drain any excess oil. This step helps keep them crispy. Now, your Beef and Cheese Chimichangas are ready to be served! Enjoy them hot with a side of sour cream and salsa for dipping.

Variation of Beef and Cheese Chimichangas Recipe

Vegetarian Option

If you’re looking for a meat-free alternative, try this delicious vegetarian option! Instead of ground beef, you can use black beans or refried beans as the base. These beans are packed with protein and flavor, making them a great substitute. To prepare, simply mash the beans in a bowl and mix in some spices like cumin, chili powder, and garlic powder for added taste.

You can also add diced vegetables such as bell peppers, zucchini, or corn to the mixture. Sauté them lightly before mixing with the beans to enhance their flavor. Once your filling is ready, follow the same steps for assembling and cooking the chimichangas. This vegetarian version is just as satisfying and will please everyone at the table!

Spicy Beef and Cheese Chimichangas

If you love a little heat, consider making spicy Beef and Cheese Chimichangas! To kick up the spice level, add diced jalapeños or serrano peppers to the beef filling. You can mix them in while cooking the ground beef, allowing their flavors to meld together.

Another option is to use pepper jack cheese instead of cheddar. This cheese has a nice kick and melts beautifully. For an extra layer of flavor, drizzle some hot sauce over the filling before rolling up the chimichangas. This spicy twist will surely satisfy those who enjoy a fiery meal!

Cooking Note for Beef and Cheese Chimichangas Recipe

When preparing your Beef and Cheese Chimichangas, there are a few important cooking notes to keep in mind. These tips will help ensure that your chimichangas turn out perfectly crispy and delicious every time.

First, make sure your oil is at the right temperature before frying. If the oil is too cool, the chimichangas will absorb more oil and become greasy. On the other hand, if the oil is too hot, they may burn on the outside while remaining uncooked on the inside. A good rule of thumb is to test the oil by dropping a small piece of tortilla into it. If it sizzles and bubbles, the oil is ready!

Next, avoid overcrowding the skillet. Frying too many chimichangas at once can lower the oil temperature, leading to soggy results. Instead, cook them in batches. This way, each chimichanga gets the space it needs to fry evenly and achieve that golden-brown color.

Additionally, consider using a slotted spoon or tongs to turn the chimichangas gently. This helps maintain their shape and prevents the filling from spilling out. Once they are done frying, let them drain on paper towels to remove any excess oil. This step is crucial for keeping them crispy and light.

Lastly, if you prefer a healthier option, you can bake the chimichangas instead of frying them. Preheat your oven to 400°F and place the assembled chimichangas on a baking sheet. Brush them lightly with oil and bake for 20-25 minutes, or until they are golden brown. This method still delivers a satisfying crunch while reducing the amount of oil used.

By following these cooking notes, you’ll be well on your way to creating the perfect Beef and Cheese Chimichangas. Enjoy the process and savor the delicious results!

Serving Suggestions for Beef and Cheese Chimichangas Recipe

Once your Beef and Cheese Chimichangas are cooked to perfection, it’s time to serve them up! This dish is not only delicious but also visually appealing, making it a great centerpiece for any meal. Here are some serving suggestions to elevate your dining experience:

  • Garnish with Fresh Herbs: Sprinkle chopped cilantro or parsley on top of the chimichangas for a pop of color and freshness. This adds a lovely aroma and enhances the overall flavor.
  • Pair with Dipping Sauces: Serve your chimichangas with a variety of dipping sauces. Sour cream and salsa are classic choices, but you can also include guacamole or a zesty ranch dressing for added flavor.
  • Accompany with Rice and Beans: For a complete meal, serve the chimichangas alongside a side of Mexican rice and refried beans. This combination not only fills you up but also complements the flavors of the chimichangas.
  • Add a Side Salad: A light salad with fresh greens, tomatoes, and avocado can balance the richness of the chimichangas. Drizzle with a lime vinaigrette for a refreshing touch.
  • Offer a Variety of Salsas: Consider providing different types of salsa, such as mango salsa or corn salsa. This allows guests to choose their favorite flavor profile and adds an exciting twist to the meal.

These serving suggestions will not only enhance the presentation of your Beef and Cheese Chimichangas but also create a delightful dining experience. Enjoy sharing this tasty dish with family and friends!

Tips for Perfect Beef and Cheese Chimichangas Recipe

Creating the perfect Beef and Cheese Chimichangas is all about attention to detail. With a few helpful tips, you can ensure that your chimichangas turn out crispy, flavorful, and absolutely delicious. Here are some essential tips to keep in mind:

  • Choose the Right Tortillas: Opt for large flour tortillas that are soft and pliable. This makes rolling easier and helps prevent tearing. If you can, warm the tortillas slightly before filling them. This will make them more flexible and easier to work with.
  • Don’t Overfill: While it’s tempting to pack in a lot of filling, overfilling can lead to messy chimichangas. Stick to about 1/4 of the filling per tortilla. This ensures they roll up nicely and stay sealed during cooking.
  • Seal the Edges Well: After rolling the chimichangas, make sure to seal the edges tightly. You can use a little water or egg wash to help them stick. This prevents the filling from leaking out while frying.
  • Maintain Oil Temperature: As mentioned earlier, keeping the oil at the right temperature is crucial. Use a thermometer if you have one. Ideally, the oil should be around 350°F. This ensures a crispy exterior without absorbing too much oil.
  • Fry in Batches: To achieve the best results, fry the chimichangas in small batches. This prevents overcrowding and allows each one to cook evenly. It also helps maintain the oil temperature.
  • Let Them Drain: After frying, place the chimichangas on paper towels to drain excess oil. This step is important for keeping them crispy and light.
  • Experiment with Fillings: Don’t hesitate to get creative! Try different cheeses, meats, or even add some veggies to the filling. This allows you to customize the flavor to your liking.
  • Serve Immediately: Chimichangas are best enjoyed fresh and hot. Serve them right after frying for the ultimate crispy experience. If you need to keep them warm, place them in a low oven until ready to serve.

By following these tips, you’ll be well on your way to making perfect Beef and Cheese Chimichangas every time. Enjoy the cooking process and the delicious results!

Breakdown of Time for Beef and Cheese Chimichangas Recipe

Prep Time

Getting everything ready for your Beef and Cheese Chimichangas is a breeze! The prep time for this recipe is about 15-20 minutes. During this time, you’ll gather all your ingredients, chop any vegetables if you’re adding them, and prepare the beef filling. This step is essential as it sets the stage for a smooth cooking process. So, take your time to ensure everything is organized and within reach!

Cooking Time

Once your ingredients are prepped, the cooking time is relatively quick. Frying the chimichangas takes about 10-12 minutes. This includes cooking each side for 3-4 minutes until they are golden brown and crispy. If you choose to bake them instead, it will take around 20-25 minutes in the oven. Regardless of your cooking method, you’ll be enjoying your delicious chimichangas in no time!

Total Time

In total, you can expect to spend about 30-40 minutes from start to finish. This includes both the prep and cooking times. With such a short time commitment, you can whip up a delightful meal that’s sure to impress your family and friends. So, roll up your sleeves and get ready to enjoy some tasty Beef and Cheese Chimichangas!

Nutritional Information for Beef and Cheese Chimichangas Recipe

Calories

When it comes to enjoying a delicious meal, knowing the calorie content can help you make informed choices. Each serving of Beef and Cheese Chimichangas contains approximately 450 calories. This makes it a satisfying option for lunch or dinner without going overboard on calories. Enjoying this dish in moderation can fit well into a balanced diet.

Protein

Protein is an essential nutrient that helps build and repair tissues in our bodies. Each serving of these chimichangas provides about 25 grams of protein. The ground beef and cheddar cheese contribute significantly to this protein content, making it a great choice for those looking to increase their protein intake. This hearty filling will keep you feeling full and energized throughout the day!

Sodium

Sodium is another important factor to consider in your meals. Each serving of Beef and Cheese Chimichangas contains around 800 milligrams of sodium. While sodium is necessary for bodily functions, it’s essential to monitor your intake, especially if you’re watching your salt consumption. To reduce sodium levels, consider using low-sodium seasoning or cheese options. This way, you can enjoy your chimichangas while keeping your health in check!

FAQs about Beef and Cheese Chimichangas Recipe

Can I make Beef and Cheese Chimichangas ahead of time?

Absolutely! You can prepare the Beef and Cheese Chimichangas ahead of time. To do this, follow the recipe up to the point of assembling the chimichangas. Once they are rolled up, you can store them in the refrigerator for up to 24 hours before frying. Just make sure to cover them tightly with plastic wrap or place them in an airtight container to prevent them from drying out. When you’re ready to cook, simply fry or bake them as directed. This makes it easy to enjoy a delicious meal without the last-minute rush!

What can I serve with Beef and Cheese Chimichangas?

Beef and Cheese Chimichangas are versatile and pair well with various sides. Here are some great options to consider:

  • Mexican Rice: A flavorful side of Mexican rice complements the chimichangas perfectly.
  • Refried Beans: Creamy refried beans add a nice texture and flavor contrast.
  • Fresh Salad: A light salad with greens, tomatoes, and avocado can balance the richness of the chimichangas.
  • Dipping Sauces: Serve with sour cream, salsa, guacamole, or even a spicy ranch dressing for added flavor.

These sides not only enhance the meal but also create a colorful and inviting presentation on your table!

How do I store leftover Beef and Cheese Chimichangas?

If you have any leftover Beef and Cheese Chimichangas, storing them is easy! Allow them to cool completely before placing them in an airtight container. You can keep them in the refrigerator for up to 3 days. To reheat, you can either bake them in the oven at 350°F for about 10-15 minutes or microwave them for a quick option. However, baking will help maintain their crispiness better than microwaving. Enjoy your leftovers as a tasty snack or meal!

Conclusion on Beef and Cheese Chimichangas Recipe

In conclusion, the Beef and Cheese Chimichangas Recipe is a delightful dish that brings together rich flavors and satisfying textures. Whether you’re cooking for a family dinner or hosting friends, this recipe is sure to impress. The combination of seasoned ground beef and melted cheddar cheese, all wrapped in a crispy tortilla, creates a meal that is both comforting and delicious.

Not only is this recipe easy to follow, but it also allows for plenty of customization. You can adjust the spice levels, add vegetables, or even try a vegetarian version. This versatility makes it a fantastic choice for any occasion. Plus, with the option to fry or bake, you can choose the cooking method that best suits your preferences.

As you gather around the table to enjoy your Beef and Cheese Chimichangas, remember that food is more than just sustenance; it’s about sharing moments and creating memories. So, don’t hesitate to experiment with different fillings and toppings, and make this dish your own. With each bite, you’ll savor the love and effort that went into making this delightful meal.

So, roll up your sleeves, gather your ingredients, and get ready to enjoy a plate of delicious Beef and Cheese Chimichangas. Happy cooking!

Steak Burritos with Chipotle Sauce Recipe is delicious!

Introduction to Steak Burritos with Chipotle Sauce Recipe

Steak Burritos with Chipotle Sauce Recipe is not just a meal; it’s an experience! This dish combines the rich flavors of marinated flank steak with the smoky kick of chipotle sauce, all wrapped in a warm tortilla. Whether you’re hosting a gathering or simply treating yourself, these burritos are sure to impress.

What Makes Steak Burritos with Chipotle Sauce Special?

What sets these steak burritos apart? First, it’s the marinated flank steak. The marinade infuses the meat with a burst of flavor, making each bite juicy and satisfying. Next, the chipotle sauce adds a delightful smokiness that elevates the entire dish. It’s a perfect balance of heat and creaminess, making it irresistible.

Moreover, the combination of fresh ingredients like lettuce, tomatoes, and cheese adds a refreshing crunch. Each burrito is customizable, allowing you to add your favorite toppings. This versatility makes it a hit for everyone, from meat lovers to vegetarians. Plus, they’re easy to prepare, making them a great option for busy weeknights or casual get-togethers.

In this article, we’ll guide you through the ingredients, preparation steps, and tips to make your steak burritos truly special. So, roll up your sleeves and get ready to create a delicious meal that will have everyone asking for seconds!

Ingredients for Steak Burritos with Chipotle Sauce Recipe

Steak Burritos with Chipotle Sauce Recipe, you’ll need a selection of fresh and flavorful ingredients. Each component plays a vital role in building the taste and texture of your burritos. Here’s what you’ll need:

  • 1 pound flank steak: Thinly sliced for easy cooking and maximum flavor absorption.
  • 1 tablespoon olive oil: For sautéing the steak and adding richness.
  • 1 teaspoon chili powder: To give your steak a warm, spicy kick.
  • 1 teaspoon cumin: Adds an earthy flavor that complements the other spices.
  • 1 teaspoon garlic powder: For a savory depth that enhances the overall taste.
  • 1 teaspoon onion powder: To bring a subtle sweetness and aroma.
  • Salt and pepper: To taste, ensuring all flavors are balanced.
  • 4 large flour tortillas: The perfect wrap for all your delicious fillings.
  • 1 cup cooked rice: Choose either white or brown for added texture.
  • 1 cup black beans: Drained and rinsed, they add protein and fiber.
  • 1 cup shredded cheddar cheese: For a creamy, melty finish.
  • 1 cup lettuce: Shredded for a fresh crunch.
  • 1 medium tomato: Diced to add juiciness and color.
  • 1/2 cup sour cream: For a cool, creamy contrast to the spicy flavors.
  • 1/4 cup chipotle sauce: Store-bought or homemade, this is the star of the show!

These ingredients come together to create a mouthwatering experience. Feel free to adjust the quantities based on your preferences or dietary needs. Now that you have everything ready, let’s move on to the preparation steps!

Preparation of Steak Burritos with Chipotle Sauce Recipe

Steak Burritos with Chipotle Sauce Recipe. This process is straightforward and fun! Follow these steps to create a delicious meal that will delight your taste buds.

Step 1: Marinating the Steak

To kick things off, marinating the steak is essential. This step enhances the flavor and tenderness of the meat. Start by placing the thinly sliced flank steak in a bowl. Add lime juice, chili powder, cumin, garlic powder, onion powder, salt, and pepper. Mix everything well, ensuring the steak is evenly coated. Cover the bowl and let it marinate in the refrigerator for at least 30 minutes. If you have more time, marinating for a few hours will deepen the flavors even more!

Step 2: Cooking the Steak

Once your steak has marinated, it’s time to cook it. Heat 1 tablespoon of olive oil in a large skillet over medium-high heat. When the oil is hot, add the marinated steak. Cook for about 5-7 minutes, stirring occasionally. You want the steak to be browned and cooked through. The aroma will be mouthwatering, and your kitchen will smell amazing!

Step 3: Preparing the Chipotle Sauce

If you’re using store-bought chipotle sauce, you can skip this step. However, if you want to make your own, it’s simple! In a small bowl, mix together sour cream and chipotle sauce until well combined. Adjust the amount of chipotle sauce based on your spice preference. This creamy sauce will add a delightful kick to your burritos!

Step 4: Assembling the Burritos

Now comes the fun part—assembling your burritos! Start by warming the flour tortillas in a separate skillet or microwave until they are pliable. Lay one tortilla flat on a clean surface. In the center, add a portion of cooked rice, black beans, the sautéed steak, shredded cheese, lettuce, and diced tomatoes. Drizzle with the chipotle sauce and add a dollop of sour cream. Be careful not to overfill, as it can make rolling difficult!

Step 5: Grilling the Burritos

To finish, fold in the sides of the tortilla and roll it up tightly from the bottom. If you like a crispy exterior, grill the burritos in the same skillet for about 2-3 minutes on each side until golden brown. This step adds a nice crunch and helps seal the burrito. Serve immediately, or wrap them in foil to keep warm until you’re ready to enjoy!

With these steps, you’re well on your way to creating delicious steak burritos that everyone will love. Let’s move on to some variations you can try!

Variation of Steak Burritos with Chipotle Sauce Recipe

Steak Burritos with Chipotle Sauce Recipe is a crowd-pleaser, there are many ways to switch things up! Whether you want to try different proteins or explore vegetarian options, these variations will keep your meals exciting and delicious.

Alternative Proteins for Steak Burritos

If you’re looking to change the protein in your burritos, there are plenty of tasty alternatives. Here are a few options:

  • Grilled Chicken: Tender grilled chicken breast is a fantastic substitute. Marinate it in the same spices as the steak for a similar flavor profile.
  • Pork Carnitas: Slow-cooked pork adds a rich, savory taste. Shred the pork and season it with lime juice and spices for a delightful twist.
  • Ground Beef: For a classic burrito experience, use seasoned ground beef. Cook it with taco seasoning for added flavor.
  • Tofu: For a plant-based option, try marinated and sautéed tofu. It absorbs flavors well and provides a satisfying texture.

These alternatives allow you to customize your burritos based on your preferences or dietary needs. Each protein brings its unique flavor, making every meal a new experience!

Vegetarian Options for Chipotle Sauce Recipe

If you’re catering to vegetarians or simply want to enjoy a meat-free meal, there are plenty of delicious options to consider:

  • Grilled Vegetables: A mix of bell peppers, zucchini, and onions grilled to perfection can add a smoky flavor to your burritos.
  • Black Bean and Quinoa: Combine black beans with cooked quinoa for a protein-packed filling. Season with spices for extra flavor.
  • Chickpeas: Sautéed chickpeas seasoned with cumin and chili powder make for a hearty and nutritious filling.
  • Cauliflower Rice: For a low-carb option, use cauliflower rice mixed with spices. It’s light yet filling!

These vegetarian options not only taste great but also provide a variety of textures and flavors. You can still enjoy the creamy chipotle sauce with any of these fillings, making your burritos just as satisfying!

Cooking Note for Steak Burritos with Chipotle Sauce Recipe

Steak Burritos with Chipotle Sauce Recipe, a few cooking notes can help ensure your dish turns out perfectly every time. These tips will enhance the flavors and textures, making your burritos even more enjoyable.

First, always choose high-quality flank steak. Fresh meat not only tastes better but also cooks more evenly. If you can, look for grass-fed beef, which tends to have a richer flavor. Additionally, slicing the steak against the grain is crucial. This technique helps to break down the muscle fibers, resulting in a more tender bite.

Next, don’t rush the marinating process. Allowing the steak to marinate for at least 30 minutes, or even a few hours, will deepen the flavors. If you have time, consider marinating overnight for the best results. The longer the steak sits in the marinade, the more flavorful it becomes.

When cooking the steak, ensure your skillet is hot before adding the meat. A hot skillet will sear the steak, locking in juices and creating a delicious crust. Avoid overcrowding the pan, as this can cause the meat to steam instead of sear. If you have a lot of steak, cook it in batches.

Lastly, when assembling your burritos, be mindful of the amount of filling you use. Overfilling can lead to messy burritos that are hard to roll. Aim for a balanced amount of each ingredient, ensuring every bite is packed with flavor without spilling out. Wrapping the burritos tightly will also help keep everything together.

By following these cooking notes, you’ll create steak burritos that are not only delicious but also visually appealing. Enjoy the process, and don’t hesitate to experiment with flavors and ingredients to make this recipe your own!

Serving Suggestions for Steak Burritos with Chipotle Sauce Recipe

Steak Burritos with Chipotle Sauce Recipe, it’s time to think about how to serve them. Pairing your burritos with the right side dishes and beverages can elevate your meal to a whole new level. Here are some fantastic suggestions to complement your burritos!

Side Dishes to Pair with Steak Burritos

Choosing the right side dishes can enhance the flavors of your steak burritos. Here are some tasty options:

  • Mexican Rice: A side of seasoned Mexican rice adds a flavorful touch. The spices in the rice will complement the burritos beautifully.
  • Refried Beans: Creamy refried beans are a classic pairing. They add richness and a comforting texture to your meal.
  • Guacamole: Fresh guacamole brings a creamy, cool element. The avocado’s richness balances the spiciness of the chipotle sauce.
  • Chips and Salsa: Crunchy tortilla chips served with fresh salsa make for a fun appetizer. The bright flavors of the salsa will awaken your taste buds!
  • Grilled Corn: Sweet, grilled corn on the cob is a delightful side. It adds a touch of sweetness that pairs well with the savory burritos.

These side dishes not only complement your steak burritos but also create a festive atmosphere. Feel free to mix and match based on your preferences!

Beverage Pairings for a Complete Meal

To wash down your delicious steak burritos, consider these refreshing beverage options:

  • Margaritas: A classic margarita, whether frozen or on the rocks, is a perfect match. The citrusy flavors enhance the meal and add a festive touch.
  • Mexican Beer: Light Mexican beers, like Corona or Pacifico, are great choices. They provide a refreshing contrast to the spicy flavors of the burritos.
  • Iced Tea: Unsweetened iced tea with a slice of lemon offers a refreshing balance. It’s a great non-alcoholic option that cleanses the palate.
  • Horchata: This sweet, creamy rice drink is a traditional Mexican beverage. Its sweetness pairs wonderfully with spicy dishes.
  • Fruit-Infused Water: For a light and healthy option, try fruit-infused water. Add slices of lime, lemon, or berries for a refreshing twist.

These beverages will not only quench your thirst but also enhance the overall dining experience. Enjoy your meal with family and friends, and savor every bite of your steak burritos!

Tips for Perfecting Your Steak Burritos with Chipotle Sauce Recipe

Steak Burritos with Chipotle Sauce Recipe truly unforgettable, consider these helpful tips. They will guide you in selecting the best ingredients and adjusting flavors to suit your taste. With a few simple adjustments, you can elevate your burritos to a whole new level!

Choosing the Right Cut of Steak

The cut of steak you choose can significantly impact the flavor and texture of your burritos. Flank steak is a popular choice due to its rich flavor and tenderness when cooked properly. However, there are other cuts you might consider:

  • Skirt Steak: This cut is similar to flank steak but has a more intense beefy flavor. It’s great for marinating and grilling.
  • Sirloin Steak: A leaner option, sirloin is tender and flavorful. It’s a bit more expensive but worth it for special occasions.
  • Ribeye Steak: Known for its marbling, ribeye is juicy and flavorful. It adds a rich taste to your burritos but can be higher in fat.

When selecting your steak, look for cuts with good marbling. This fat will melt during cooking, keeping the meat juicy and flavorful. Always ask your butcher for recommendations if you’re unsure!

Customizing the Spice Level of Chipotle Sauce

The chipotle sauce is the star of your burritos, and customizing its spice level can make a big difference. Here are some tips to adjust the heat:

  • Start Mild: If you’re unsure about spice levels, start with a small amount of chipotle sauce. You can always add more later!
  • Add Creaminess: Mixing sour cream with the chipotle sauce can help tone down the heat. The creaminess balances the spice, making it more enjoyable.
  • Incorporate Sweetness: A touch of honey or sugar can counteract the heat. Just a teaspoon can make a big difference!
  • Use Fresh Ingredients: Adding fresh lime juice or diced tomatoes can help brighten the flavors and reduce the perception of heat.

Experiment with these adjustments to find the perfect balance for your taste buds. Remember, cooking is all about personal preference, so don’t hesitate to make it your own!

Breakdown of Time for Steak Burritos with Chipotle Sauce Recipe

Steak Burritos with Chipotle Sauce Recipe can help you plan your cooking efficiently. Here’s a breakdown of the time required for preparation and cooking, so you can enjoy your meal without any rush!

Prep Time

The prep time for this recipe is approximately 40 minutes. This includes:

  • Marinating the Steak: 30 minutes (or longer if you prefer)
  • Chopping Vegetables: 10 minutes (dicing tomatoes and shredding lettuce)

While the steak marinates, you can use this time to prepare the other ingredients, making the process smoother!

Cooking Time

The cooking time for the steak and assembling the burritos is about 15 minutes. This includes:

  • Cooking the Steak: 5-7 minutes
  • Warming the Tortillas: 2-3 minutes
  • Assembling the Burritos: 5 minutes

Cooking the steak quickly ensures it remains juicy and tender, while warming the tortillas makes them easier to roll.

Total Time

Steak Burritos with Chipotle Sauce Recipe. This includes both prep and cooking times. If you choose to marinate the steak for longer, just factor in that additional time. Overall, it’s a quick and rewarding meal that’s perfect for any occasion!

Nutritional Information for Steak Burritos with Chipotle Sauce Recipe

Steak Burritos with Chipotle Sauce Recipe is essential for making informed choices about your meals. This dish is not only delicious but also provides a good balance of nutrients. Here’s a breakdown of the key nutritional information per serving:

Calories

Each serving of these flavorful steak burritos contains approximately 550 calories. This calorie count includes all the delicious ingredients, from the marinated flank steak to the creamy chipotle sauce. It’s a satisfying meal that can keep you energized throughout the day!

Protein Content

One of the standout features of this recipe is its protein content. Each burrito packs about 30 grams of protein. The flank steak and black beans contribute significantly to this number, making it a great option for those looking to increase their protein intake. Protein is essential for muscle repair and overall health, so you can feel good about enjoying this meal!

Sodium Levels

When it comes to sodium, each serving contains around 800 milligrams. This level is typical for a dish that includes seasoned meat and sauces. If you’re watching your sodium intake, consider using low-sodium black beans and adjusting the amount of added salt in the recipe. Balancing flavors while keeping sodium in check is always a smart approach!

Steak Burritos with Chipotle Sauce Recipe offers a delicious and nutritious meal option. With a good balance of calories, protein, and flavor, it’s perfect for any occasion. Enjoy your cooking and savor every bite!

FAQs about Steak Burritos with Chipotle Sauce Recipe

Can I use chicken instead of steak in this recipe?

Steak Burritos with Chipotle Sauce Recipe. Grilled chicken breast works wonderfully. Just marinate it in the same spices for a similar flavor. Cook it until it’s tender and juicy, then follow the same assembly steps. Your burritos will still be packed with flavor!

How can I make the chipotle sauce milder?

If you prefer a milder chipotle sauce, there are a few easy ways to tone down the heat. First, start with a smaller amount of chipotle sauce and gradually add more until you reach your desired spice level. Mixing in extra sour cream can also help balance the heat, making it creamier and less spicy. Additionally, adding a bit of honey or sugar can counteract the heat, creating a more balanced flavor.

What toppings can I add to my steak burritos?

There are so many tasty toppings you can add to your steak burritos! Here are some popular options:

  • Avocado or Guacamole: Adds creaminess and a fresh flavor.
  • Jalapeños: For those who love extra heat!
  • Fresh Cilantro: A sprinkle of cilantro adds a burst of freshness.
  • Hot Sauce: Drizzle your favorite hot sauce for an extra kick.
  • Chopped Green Onions: For a mild onion flavor and crunch.

Feel free to mix and match toppings based on your preferences. The possibilities are endless!

Can I prepare the burritos in advance?

Yes, you can prepare the burritos in advance! To do this, assemble the burritos as directed, but do not grill them yet. Wrap each burrito tightly in foil or plastic wrap and store them in the refrigerator for up to 24 hours. When you’re ready to eat, simply grill them in a skillet or bake them in the oven until heated through. This makes for a convenient meal option on busy days!

Conclusion on Steak Burritos with Chipotle Sauce Recipe

Steak Burritos with Chipotle Sauce Recipe is a delightful dish that brings together bold flavors and fresh ingredients. Whether you’re cooking for family, friends, or just for yourself, these burritos are sure to satisfy. The combination of marinated flank steak, creamy chipotle sauce, and vibrant toppings creates a meal that is both hearty and delicious.

As you’ve seen, this recipe is versatile. You can easily swap out proteins or add your favorite vegetables to suit your taste. The cooking process is straightforward, making it accessible for cooks of all skill levels. Plus, with the tips and variations provided, you can customize your burritos to make them uniquely yours.

So, why not give this recipe a try? Gather your ingredients, roll up your sleeves, and enjoy the process of creating something special. Your taste buds will thank you for it! Whether you serve them at a gathering or enjoy them on a cozy night in, these steak burritos are bound to become a favorite in your household.

Happy cooking, and don’t forget to share your delicious creations with friends and family. Enjoy every bite of your flavorful steak burritos with chipotle sauce!

One-Pan Italian Sausage Orzo: Quick & Delicious Recipe!

One-Pan Italian Sausage Orzo

Introduction to One-Pan Italian Sausage Orzo

After a long day, the last thing I want is to spend hours in the kitchen. That’s where my One-Pan Italian Sausage Orzo comes to the rescue! This dish is a delightful blend of savory Italian sausage, tender orzo, and vibrant vegetables, all cooked in one pan. It’s not just quick; it’s bursting with flavor and comfort. Whether you’re feeding a hungry family or impressing friends, this recipe is your go-to solution. Trust me, it’s a meal that brings everyone together, making busy evenings feel a little more special.

Why You’ll Love This One-Pan Italian Sausage Orzo

This One-Pan Italian Sausage Orzo is a game-changer for busy weeknights. It’s incredibly easy to whip up, taking just 30 minutes from start to finish. The best part? You only need one pan, which means less cleanup and more time to relax. With its rich flavors and hearty ingredients, this dish is sure to satisfy even the pickiest eaters. It’s comfort food at its finest, ready to warm your heart and home.

Ingredients for One-Pan Italian Sausage Orzo

Gathering the right ingredients is the first step to creating your One-Pan Italian Sausage Orzo. Here’s what you’ll need:

  • Olive oil: A staple in Italian cooking, it adds richness and helps sauté the ingredients.
  • Italian sausage: Choose between sweet or spicy for a flavor kick. It’s the heart of this dish!
  • Onion: Diced onion brings sweetness and depth to the overall flavor.
  • Garlic: Minced garlic adds a fragrant aroma that elevates the dish.
  • Red bell pepper: This adds a pop of color and sweetness, balancing the savory sausage.
  • Zucchini: A versatile veggie that adds texture and nutrition.
  • Cherry tomatoes: Halved for bursts of juicy flavor, they brighten up the dish.
  • Dried oregano: A classic herb that brings an earthy, aromatic note.
  • Dried basil: Adds a hint of sweetness and complements the other flavors beautifully.
  • Red pepper flakes: Optional, but they give a nice kick if you like some heat.
  • Orzo pasta: This tiny pasta cooks quickly and absorbs all the delicious flavors.
  • Chicken broth: Use low-sodium for a healthier option; it’s the cooking liquid that infuses flavor.
  • Salt and pepper: Essential for seasoning; adjust to your taste.
  • Parmesan cheese: Grated for a creamy finish that ties everything together.
  • Fresh basil leaves: For garnish, they add a fresh touch and vibrant color.

For those looking for alternatives, you can swap the Italian sausage with plant-based sausage for a vegetarian option. Adding more veggies like spinach or mushrooms can also enhance the dish. If you want a zesty twist, a splash of lemon juice or a sprinkle of lemon zest before serving works wonders!

Exact quantities for each ingredient are available at the bottom of the article for easy printing.

How to Make One-Pan Italian Sausage Orzo

Creating your One-Pan Italian Sausage Orzo is a breeze! Follow these simple steps, and you’ll have a delicious meal ready in no time. Let’s dive in!

Step 1: Brown the Italian Sausage

Start by heating the olive oil in a large skillet over medium heat. Once it’s shimmering, add the Italian sausage. Use a wooden spoon to break it up as it cooks. You want it browned and cooked through, which should take about 5-7 minutes. The aroma will be irresistible!

Step 2: Sauté the Vegetables

Next, toss in the diced onion. Sauté it for about 3-4 minutes until it softens. Then, add the minced garlic and stir for another minute. The garlic will release a fragrant scent that fills your kitchen. Now, add the red bell pepper, zucchini, and cherry tomatoes. Cook for about 5 minutes, stirring occasionally, until the veggies are tender and vibrant.

Step 3: Add Seasonings

Time to bring in the flavor! Sprinkle in the dried oregano, dried basil, and red pepper flakes if you’re feeling spicy. Season with salt and pepper to taste. Stir everything together, letting those herbs mingle with the sausage and veggies. This step is where the magic happens!

Step 4: Cook the Orzo

Now, it’s time for the orzo! Pour it into the pan along with the chicken broth. Bring the mixture to a boil, then reduce the heat to low. Cover the pan and let it simmer for about 10-12 minutes. Stir occasionally to prevent sticking. You’ll know it’s done when the orzo is tender and has absorbed most of the liquid.

Step 5: Stir in Cheese and Serve

Once the orzo is cooked, remove the pan from heat. Stir in the grated Parmesan cheese until it melts into the dish, creating a creamy texture. Taste and adjust the seasoning if needed. Finally, garnish with fresh basil leaves for a pop of color and freshness. Serve it warm, and watch everyone dig in!

Tips for Success

  • Prep your ingredients ahead of time to streamline the cooking process.
  • Don’t skip the stirring while the orzo cooks; it prevents sticking and ensures even cooking.
  • Feel free to customize the veggies based on what you have on hand.
  • For extra creaminess, add more Parmesan cheese or a splash of cream.
  • Leftovers can be stored in the fridge for up to three days—just reheat gently!

Equipment Needed

  • Large skillet or pan: A non-stick skillet works best, but any large pan will do.
  • Wooden spoon: Perfect for stirring and breaking up the sausage.
  • Measuring cups: For accurate ingredient measurements, especially the orzo and broth.
  • Cutting board and knife: Essential for chopping veggies.

Variations

  • Vegetarian Delight: Swap the Italian sausage for plant-based sausage or add more vegetables like spinach, mushrooms, or bell peppers for a hearty vegetarian option.
  • Spicy Kick: If you love heat, increase the amount of red pepper flakes or add sliced jalapeños for an extra spicy twist.
  • Herb Infusion: Experiment with fresh herbs like thyme or parsley instead of dried herbs for a vibrant flavor boost.
  • Cheesy Goodness: Mix in different cheeses like mozzarella or feta for a unique cheesy experience.
  • One-Pan Mediterranean: Add olives and artichoke hearts for a Mediterranean flair that complements the Italian flavors beautifully.

Serving Suggestions

  • Fresh Salad: Pair your One-Pan Italian Sausage Orzo with a crisp arugula or mixed greens salad drizzled with balsamic vinaigrette.
  • Garlic Bread: Serve with warm, buttery garlic bread for a comforting touch.
  • Wine Pairing: A glass of Chianti or Pinot Grigio complements the flavors beautifully.
  • Presentation: Garnish with extra Parmesan and fresh basil for a vibrant finish.

FAQs about One-Pan Italian Sausage Orzo

Can I use a different type of pasta instead of orzo?

Absolutely! While orzo is perfect for this dish, you can substitute it with other small pasta shapes like ditalini or even rice. Just adjust the cooking time according to the pasta you choose.

Is this One-Pan Italian Sausage Orzo gluten-free?

Yes, if you use gluten-free orzo, this dish can easily be made gluten-free. Just check the packaging to ensure it meets your dietary needs.

How can I make this dish spicier?

If you love heat, increase the amount of red pepper flakes or add sliced jalapeños. You can also use spicy Italian sausage for an extra kick!

Can I prepare this dish in advance?

Yes! You can prep the ingredients ahead of time and store them in the fridge. Just follow the cooking instructions when you’re ready to enjoy your meal.

What can I serve with One-Pan Italian Sausage Orzo?

This dish pairs wonderfully with a fresh salad, garlic bread, or a glass of wine. The options are endless, so feel free to get creative!

Final Thoughts

Cooking should be a joyful experience, and my One-Pan Italian Sausage Orzo embodies that spirit. It’s not just a meal; it’s a celebration of flavors and togetherness. The ease of preparation means you can spend more time with loved ones and less time scrubbing pots and pans. Each bite is a warm hug, filled with the comforting essence of Italian cuisine. Whether it’s a weeknight dinner or a gathering with friends, this dish brings smiles and satisfaction. I hope it becomes a cherished recipe in your home, just as it has in mine!

One-Pan Italian Sausage Orzo
jhessica

One-Pan Italian Sausage Orzo: Quick & Delicious Recipe!

A quick and delicious one-pan meal featuring Italian sausage and orzo pasta, packed with vegetables and flavors.
Prep Time 10 minutes
Cook Time 20 minutes
Total Time 30 minutes
Servings: 4 servings
Course: Main Course
Cuisine: Italian
Calories: 450

Ingredients
  

  • 2 tablespoons olive oil
  • 1 pound Italian sausage sweet or spicy, casings removed
  • 1 medium onion diced
  • 3 cloves garlic minced
  • 1 red bell pepper diced
  • 1 zucchini diced
  • 1 cup cherry tomatoes halved
  • 1 teaspoon dried oregano
  • 1 teaspoon dried basil
  • 1/2 teaspoon red pepper flakes optional
  • 1 1/2 cups orzo pasta
  • 4 cups chicken broth
  • Salt and pepper to taste
  • 1/2 cup grated Parmesan cheese
  • Fresh basil leaves for garnish

Method
 

  1. In a large skillet or pan, heat the olive oil over medium heat. Add the Italian sausage and cook until browned, breaking it up with a spoon, about 5-7 minutes.
  2. Add the diced onion and cook until softened, about 3-4 minutes. Stir in the minced garlic and cook for an additional 1 minute until fragrant.
  3. Add the red bell pepper, zucchini, and cherry tomatoes to the pan. Cook for about 5 minutes, stirring occasionally, until the vegetables are tender.
  4. Stir in the dried oregano, dried basil, red pepper flakes (if using), and season with salt and pepper.
  5. Add the orzo pasta and chicken broth to the pan. Bring to a boil, then reduce the heat to low. Cover and simmer for about 10-12 minutes, or until the orzo is cooked and has absorbed most of the liquid. Stir occasionally to prevent sticking.
  6. Once the orzo is cooked, remove the pan from heat and stir in the grated Parmesan cheese. Adjust seasoning if necessary.
  7. Garnish with fresh basil leaves before serving.

Nutrition

Serving: 1servingCalories: 450kcalCarbohydrates: 40gProtein: 25gFat: 20gSaturated Fat: 7gPolyunsaturated Fat: 10gCholesterol: 70mgSodium: 800mgFiber: 3gSugar: 5g

Notes

  • For a vegetarian option, substitute the Italian sausage with plant-based sausage or add more vegetables like spinach or mushrooms.
  • You can add a splash of lemon juice or a sprinkle of lemon zest before serving for a fresh flavor boost.

Tried this recipe?

Let us know how it was!

Crispy Baked Chicken Tenders: Discover the Secret Crunch!

Introduction to Crispy Baked Chicken Tenders

A plate of crispy baked chicken tenders reminds me of family gatherings, where laughter mingled with the aroma of golden-brown goodness wafting from the kitchen. This recipe is a delightful solution for busy weeknights or a fun weekend treat. With just a handful of ingredients, you can whip up a dish that’s not only healthier than fried options but also packed with flavor. Whether you’re feeding picky eaters or impressing guests, these tenders are sure to be a hit. Let’s dive into the secret crunch that makes them irresistible!

Why You’ll Love This Crispy Baked Chicken Tenders

These crispy baked chicken tenders are a game-changer for any home cook. They come together in just 30 minutes, making them perfect for those hectic evenings. The best part? You get all the crunch without the guilt of frying. Each bite is tender and flavorful, satisfying even the pickiest eaters. Plus, they’re versatile enough to pair with your favorite dipping sauces, making every meal a delightful experience!

Ingredients for Crispy Baked Chicken Tenders

Gathering the right ingredients is the first step to creating these mouthwatering crispy baked chicken tenders. Here’s what you’ll need:

  • Chicken tenderloins: These are the stars of the dish, offering a tender and juicy bite. You can also use chicken breasts cut into strips for a different texture.
  • All-purpose flour: This helps create a base coating that sticks to the chicken, ensuring the breadcrumbs adhere well.
  • Large eggs: Beaten eggs act as a binding agent, helping the breadcrumbs cling to the chicken for that perfect crunch.
  • Breadcrumbs: I recommend panko for an extra crispy finish, but regular breadcrumbs work too. They add that delightful crunch we all love.
  • Garlic powder: A sprinkle of this adds a savory depth of flavor that elevates the dish.
  • Onion powder: This complements the garlic and enhances the overall taste profile.
  • Paprika: Not only does it add a beautiful color, but it also brings a subtle smokiness to the tenders.
  • Salt and black pepper: Essential for seasoning, these two ingredients bring out the natural flavors of the chicken.
  • Cooking spray or olive oil: A light spray or drizzle helps achieve that golden-brown finish while keeping the dish healthier.

For those looking to add a twist, consider mixing in some grated Parmesan cheese with the breadcrumbs for an extra layer of flavor. You can find the exact quantities for each ingredient at the bottom of the article, ready for printing!

How to Make Crispy Baked Chicken Tenders

Creating these crispy baked chicken tenders is a straightforward process that anyone can master. Follow these simple steps, and you’ll have a delicious meal ready in no time!

Step 1: Preheat and Prepare

Start by preheating your oven to 425°F (220°C). This temperature is key for achieving that perfect crunch. While the oven warms up, line a baking sheet with parchment paper. This not only prevents sticking but also makes cleanup a breeze.

Step 2: Set Up Your Breading Station

Next, it’s time to create your breading station. Grab three shallow bowls. In the first bowl, add the flour. In the second, beat the eggs until they’re smooth. In the third bowl, mix the breadcrumbs with garlic powder, onion powder, paprika, salt, and pepper. This setup keeps everything organized and makes the coating process a cinch!

Step 3: Coat the Chicken

Now, let’s get to the fun part—coating the chicken! Take a chicken tenderloin and dip it into the flour, shaking off any excess. Then, dunk it into the beaten eggs, ensuring it’s fully coated. Finally, roll it in the breadcrumb mixture, pressing gently to make sure it sticks. This layering is what gives the tenders that irresistible crunch!

Step 4: Arrange and Spray

Once all your chicken tenders are coated, arrange them on the prepared baking sheet. Make sure they’re spaced out to allow for even cooking. For that golden finish, lightly spray or drizzle them with cooking spray or olive oil. This little step makes a big difference in achieving that crispy exterior.

Step 5: Bake to Perfection

It’s time to bake! Place the baking sheet in the preheated oven and let the tenders cook for 15-20 minutes. Flip them halfway through to ensure they’re evenly cooked and crispy all around. You’ll know they’re done when they’re golden brown and the chicken is cooked through. The aroma will be simply irresistible!

Tips for Success

  • Use panko breadcrumbs for an extra crunch that elevates your tenders.
  • Don’t overcrowd the baking sheet; give each tender space to crisp up.
  • For added flavor, marinate the chicken in buttermilk for a few hours before coating.
  • Experiment with spices in the breadcrumb mixture to customize the flavor.
  • Serve immediately for the best texture; they’re best enjoyed fresh out of the oven!

Equipment Needed

  • Baking sheet: A standard baking sheet works well, but a wire rack can help with airflow for extra crispiness.
  • Parchment paper: This makes cleanup easy; aluminum foil is a good alternative.
  • Three shallow bowls: Any shallow dishes will do for the breading station.
  • Whisk: Use a fork if you don’t have a whisk for beating the eggs.

Variations

  • Spicy Kick: Add cayenne pepper or hot sauce to the breadcrumb mixture for a fiery twist.
  • Herb-Infused: Mix in dried herbs like oregano, thyme, or Italian seasoning for a fresh flavor boost.
  • Gluten-Free Option: Substitute all-purpose flour and breadcrumbs with gluten-free alternatives like almond flour and gluten-free breadcrumbs.
  • Parmesan Crust: Incorporate grated Parmesan cheese into the breadcrumb mixture for a cheesy, savory crunch.
  • Asian-Inspired: Use sesame seeds in the breadcrumb mix and serve with a soy sauce-based dipping sauce for a unique flavor.

Serving Suggestions

  • Classic Dipping Sauces: Serve with honey mustard, barbecue sauce, or ranch dressing for a crowd-pleasing combo.
  • Fresh Sides: Pair with a crisp salad or steamed veggies for a balanced meal.
  • Fun Presentation: Arrange tenders on a platter with colorful garnishes like parsley or lemon wedges for a pop of color.

FAQs about Crispy Baked Chicken Tenders

Can I make these chicken tenders ahead of time?

Absolutely! You can prepare the chicken tenders and coat them in advance. Just cover them and refrigerate until you’re ready to bake. This makes weeknight dinners a breeze!

What dipping sauces pair well with crispy baked chicken tenders?

These tenders are incredibly versatile! Try serving them with honey mustard, ranch dressing, or a zesty barbecue sauce. Each dip adds a unique flavor that complements the crunch.

Can I freeze leftover chicken tenders?

Yes, you can freeze them! Just let the cooked tenders cool completely, then place them in an airtight container. They can be reheated in the oven for a quick meal later.

How do I ensure my chicken tenders stay crispy?

To keep your crispy baked chicken tenders crunchy, avoid stacking them after baking. Serve them immediately, and if you need to store them, place them on a wire rack to maintain airflow.

What can I substitute for breadcrumbs?

If you’re out of breadcrumbs, crushed cornflakes or crushed crackers can work as great alternatives. They’ll still give you that satisfying crunch!

Final Thoughts

Making crispy baked chicken tenders is more than just a cooking task; it’s an experience filled with joy and satisfaction. The aroma that fills your kitchen as they bake is simply irresistible, evoking memories of family dinners and laughter. Each tender bite offers a delightful crunch, making it hard to resist going back for seconds. Whether you’re serving them for a casual weeknight meal or a gathering with friends, these tenders are sure to impress. I hope this recipe brings as much happiness to your table as it has to mine. Enjoy every crispy, flavorful moment!

Crispy Baked Chicken Tenders
jhessica

Crispy Baked Chicken Tenders: Discover the Secret Crunch!

Crispy Baked Chicken Tenders are a delicious and healthier alternative to fried chicken, featuring a crunchy coating and tender meat.
Prep Time 10 minutes
Cook Time 20 minutes
Total Time 30 minutes
Servings: 4 servings
Course: Main Course
Cuisine: American
Calories: 280

Ingredients
  

  • 1 pound chicken tenderloins
  • 1 cup all-purpose flour
  • 2 large eggs
  • 1 cup breadcrumbs preferably panko for extra crunch
  • 1 teaspoon garlic powder
  • 1 teaspoon onion powder
  • 1 teaspoon paprika
  • 1 teaspoon salt
  • 1/2 teaspoon black pepper
  • Cooking spray or olive oil for drizzling

Method
 

  1. Preheat your oven to 425°F (220°C) and line a baking sheet with parchment paper.
  2. In a shallow bowl, place the flour. In another bowl, beat the eggs. In a third bowl, combine the breadcrumbs, garlic powder, onion powder, paprika, salt, and pepper.
  3. Coat each chicken tenderloin in flour, shaking off the excess. Dip it into the beaten eggs, then roll it in the breadcrumb mixture, pressing gently to adhere.
  4. Arrange the coated chicken tenders on the prepared baking sheet. Lightly spray or drizzle with cooking spray or olive oil for added crispiness.
  5. Bake for 15-20 minutes, flipping halfway through, until the chicken is cooked through and golden brown.
  6. Serve hot with your favorite dipping sauce.

Nutrition

Serving: 1servingCalories: 280kcalCarbohydrates: 20gProtein: 28gFat: 10gSaturated Fat: 2gPolyunsaturated Fat: 8gCholesterol: 150mgSodium: 600mgFiber: 1gSugar: 1g

Notes

  • For extra flavor, try adding grated Parmesan cheese to the breadcrumb mixture.
  • You can also substitute the chicken tenderloins with chicken breasts cut into strips for a different texture.

Tried this recipe?

Let us know how it was!

Garlic Butter Chicken Bites with Parmesan Pasta delight!

Introduction to Garlic Butter Chicken Bites with Parmesan Pasta

Welcome to a delightful culinary experience! Garlic Butter Chicken Bites with Parmesan Pasta is a dish that brings comfort and flavor to your dining table. This recipe combines tender chicken pieces infused with garlic and butter, served over creamy pasta that’s rich in Parmesan cheese. It’s a meal that’s not only easy to prepare but also perfect for family dinners or special occasions.

What Makes Garlic Butter Chicken Bites with Parmesan Pasta Special?

What sets this dish apart is its harmonious blend of flavors and textures. The garlic butter sauce adds a savory depth that elevates the chicken bites, making them irresistible. Meanwhile, the creamy Parmesan pasta serves as a perfect base, soaking up all the delicious sauce. Each bite is a delightful mix of tender chicken and rich pasta, creating a satisfying meal that pleases everyone.

Moreover, this recipe is versatile. You can easily customize it by adding your favorite vegetables or swapping out the pasta type. Whether you’re a busy parent or a novice cook, this dish is straightforward and quick to make. It’s a fantastic way to impress your guests or simply enjoy a cozy night in.

So, roll up your sleeves and get ready to create a dish that’s sure to become a family favorite. With just a few simple ingredients, you’ll be on your way to serving up a plate of Garlic Butter Chicken Bites with Parmesan Pasta that’s bursting with flavor!

Ingredients for Garlic Butter Chicken Bites with Parmesan Pasta

To create the mouthwatering Garlic Butter Chicken Bites with Parmesan Pasta, you’ll need a selection of fresh and flavorful ingredients. Here’s what you’ll need:

  • 2 cups pasta: Choose your favorite type, such as penne or fettuccine, for a delightful texture.
  • 1 pound chicken breast: Diced into small chunks for even cooking and easy eating.
  • 4 tablespoons unsalted butter: This will add richness to the dish.
  • 4 cloves garlic: Finely chopped to infuse the chicken and sauce with a robust flavor.
  • 1 teaspoon dried Italian herbs: A blend of herbs like oregano and basil enhances the taste.
  • Salt and freshly ground black pepper: To season the chicken and pasta to perfection.
  • 1 cup heavy cream: This creates a luscious, creamy sauce that coats the pasta.
  • 1 cup freshly grated Parmesan cheese: Adds a savory, cheesy flavor that ties the dish together.
  • 2 tablespoons fresh parsley: Chopped for garnish, adding a pop of color and freshness.

Gathering these ingredients will set you on the right path to making a delicious meal. Each component plays a vital role in creating the rich flavors and creamy textures that make Garlic Butter Chicken Bites with Parmesan Pasta so special. Now that you have everything ready, let’s move on to the preparation steps!

Preparation of Garlic Butter Chicken Bites with Parmesan Pasta

Now that you have all your ingredients ready, it’s time to dive into the preparation of Garlic Butter Chicken Bites with Parmesan Pasta. This section will guide you through each step, ensuring that your dish turns out perfectly delicious. Let’s get started!

Step 1: Preparing the Chicken Bites

First, take your pound of chicken breast and cut it into small, bite-sized chunks. This helps the chicken cook evenly and makes it easy to enjoy in every bite. Once cut, season the chicken pieces with salt, freshly ground black pepper, and dried Italian herbs. This seasoning will enhance the flavor of the chicken, making it even more delightful when cooked.

Step 2: Making the Garlic Butter Sauce

Next, it’s time to create the garlic butter sauce. In a spacious skillet, melt 2 tablespoons of unsalted butter over medium heat. Once the butter is melted, add the finely chopped garlic. Sauté the garlic for about a minute, just until it becomes fragrant. Be careful not to burn it, as burnt garlic can taste bitter. This step is crucial, as the garlic will infuse the butter with its rich flavor.

Step 3: Cooking the Chicken Bites

After the garlic is ready, it’s time to cook the chicken. Add the seasoned chicken bites to the skillet with the garlic butter. Sauté the chicken for about 5-7 minutes, stirring occasionally. You want the chicken to turn a lovely golden brown and be fully cooked through. Once done, transfer the chicken to a plate and keep it warm while you prepare the pasta.

Step 4: Preparing the Parmesan Pasta

While the chicken is cooking, you can prepare the pasta. In a large pot, bring water to a boil and add a pinch of salt. Cook the pasta according to the package instructions until it reaches an al dente texture. Once cooked, drain the pasta and set it aside. This step ensures that your pasta is perfectly cooked and ready to soak up the creamy sauce.

Step 5: Combining the Dish

Now comes the exciting part! In the same skillet where you cooked the chicken, pour in 1 cup of heavy cream. Bring it to a gentle simmer over low heat. Gradually stir in 1 cup of freshly grated Parmesan cheese, mixing until the sauce is creamy and well-combined. Then, return the cooked pasta and sautéed chicken to the skillet. Toss everything together, ensuring that the pasta and chicken are generously coated in the luscious sauce. Allow it to heat through for an additional 2-3 minutes.

Your Garlic Butter Chicken Bites with Parmesan Pasta is now ready to be served! Garnish with fresh parsley for a pop of color and flavor. Enjoy this delightful dish with family and friends!

Variation of Garlic Butter Chicken Bites with Parmesan Pasta

While the classic Garlic Butter Chicken Bites with Parmesan Pasta is a hit, there are many ways to switch things up! You can easily customize this dish to suit your taste or dietary needs. Let’s explore some alternative ingredients and different pasta options that can make your meal even more exciting.

Alternative Ingredients for Garlic Butter Chicken Bites

One of the best things about this recipe is its flexibility. Here are some alternative ingredients you can use:

  • Protein Options: Instead of chicken, try shrimp, turkey, or even tofu for a vegetarian option. Each protein brings its unique flavor and texture.
  • Vegetables: Add colorful veggies like bell peppers, spinach, or broccoli. Sauté them with the garlic for added nutrition and flavor.
  • Herbs and Spices: Experiment with fresh herbs like basil or thyme. You can also add a pinch of red pepper flakes for a spicy kick!
  • Cheese Alternatives: If you’re looking for a lighter option, consider using low-fat cream cheese or a dairy-free cheese substitute.

These alternatives can help you create a dish that fits your preferences while still being delicious!

Different Pasta Options for Parmesan Pasta

The type of pasta you choose can change the entire dish. Here are some great options to consider:

  • Penne: This tubular pasta holds onto the sauce beautifully, making every bite flavorful.
  • Fettuccine: A flat pasta that pairs wonderfully with creamy sauces, giving a rich texture.
  • Spaghetti: A classic choice that works well with the garlic butter sauce, making it a family favorite.
  • Whole Wheat Pasta: For a healthier twist, whole wheat pasta adds fiber and nutrients without sacrificing taste.
  • Gluten-Free Pasta: If you have dietary restrictions, gluten-free pasta is widely available and works just as well!

Choosing different pasta types can add variety to your meals and keep things interesting. Feel free to mix and match ingredients to create your perfect Garlic Butter Chicken Bites with Parmesan Pasta!

Cooking Note for Garlic Butter Chicken Bites with Parmesan Pasta

When preparing Garlic Butter Chicken Bites with Parmesan Pasta, a few cooking notes can help ensure your dish turns out perfectly every time. These tips will enhance your cooking experience and the final flavor of your meal.

First, always use fresh ingredients whenever possible. Fresh garlic, herbs, and high-quality Parmesan cheese can significantly elevate the taste of your dish. Fresh ingredients not only provide better flavor but also add nutritional value.

Next, pay attention to the cooking times. Overcooking the chicken can lead to dry bites, while undercooking can be unsafe. Aim for a golden brown color on the chicken, which indicates it’s cooked through. Use a meat thermometer if you’re unsure; the internal temperature should reach 165°F (75°C).

When making the garlic butter sauce, keep the heat low once you add the cream. High heat can cause the cream to curdle, ruining the smooth texture of your sauce. Stir gently and consistently to create a creamy consistency without lumps.

Additionally, don’t forget to reserve a bit of pasta water before draining. This starchy water can be added to the sauce if it becomes too thick, helping to achieve the desired creamy texture. Just a splash can make a big difference!

Lastly, remember that this dish is best enjoyed fresh. While leftovers can be stored in the fridge, the pasta may absorb the sauce, making it less creamy. If you do have leftovers, reheat gently on the stove with a splash of cream or broth to revive the sauce.

By following these cooking notes, you’ll create a delicious and satisfying Garlic Butter Chicken Bites with Parmesan Pasta that everyone will love. Happy cooking!

Serving Suggestions for Garlic Butter Chicken Bites with Parmesan Pasta

Once your Garlic Butter Chicken Bites with Parmesan Pasta is ready, it’s time to think about how to serve it for maximum enjoyment. Presentation can elevate your meal, making it even more appealing. Here are some delightful serving suggestions to consider:

  • Garnish with Fresh Herbs: A sprinkle of freshly chopped parsley or basil on top adds a vibrant touch. It not only enhances the visual appeal but also adds a burst of fresh flavor.
  • Pair with a Side Salad: Serve your dish alongside a crisp green salad. A simple mix of lettuce, cherry tomatoes, and a light vinaigrette complements the richness of the pasta.
  • Include Garlic Bread: For a true garlic lover’s feast, serve with warm garlic bread. The crunchy texture and buttery flavor pair perfectly with the creamy pasta.
  • Offer Grated Cheese: Set out extra grated Parmesan cheese at the table. Guests can sprinkle more cheese on their servings, enhancing the cheesy goodness.
  • Wine Pairing: Consider serving a glass of white wine, such as Chardonnay or Pinot Grigio. These wines complement the creamy sauce and enhance the overall dining experience.

These serving suggestions will not only make your Garlic Butter Chicken Bites with Parmesan Pasta look inviting but also create a well-rounded meal. Enjoy sharing this delicious dish with family and friends, and watch as they savor every bite!

Tips for Perfecting Garlic Butter Chicken Bites with Parmesan Pasta

To make your Garlic Butter Chicken Bites with Parmesan Pasta truly unforgettable, consider these helpful tips. They will guide you in achieving the best flavor and texture, ensuring that every bite is a delight!

  • Choose Quality Ingredients: Always opt for fresh, high-quality ingredients. Fresh chicken, real Parmesan cheese, and organic garlic can significantly enhance the taste of your dish.
  • Don’t Rush the Cooking: Take your time when cooking the chicken. Sauté it over medium heat until it’s golden brown. This step is crucial for developing flavor.
  • Adjust the Creaminess: If you prefer a creamier sauce, feel free to add a bit more heavy cream. Just remember to adjust the seasoning accordingly to maintain balance.
  • Experiment with Flavors: Don’t hesitate to add your favorite spices or herbs. A pinch of red pepper flakes can add a nice kick, while fresh basil can bring a refreshing taste.
  • Reserve Pasta Water: Before draining your pasta, save a cup of the cooking water. This starchy water can help loosen the sauce if it becomes too thick.
  • Let It Rest: After combining the pasta and chicken with the sauce, let it sit for a couple of minutes. This allows the flavors to meld together beautifully.
  • Serve Immediately: Garlic Butter Chicken Bites with Parmesan Pasta is best enjoyed fresh. Serve it right after cooking for the creamiest texture and the best flavor.
  • Store Properly: If you have leftovers, store them in an airtight container in the fridge. Reheat gently on the stove, adding a splash of cream or broth to revive the sauce.

By following these tips, you’ll elevate your Garlic Butter Chicken Bites with Parmesan Pasta to new heights. Each step you take will contribute to a delicious and satisfying meal that everyone will love. Happy cooking!

Breakdown of Time for Garlic Butter Chicken Bites with Parmesan Pasta

Understanding the time needed for each step in preparing Garlic Butter Chicken Bites with Parmesan Pasta can help you plan your cooking efficiently. Here’s a simple breakdown of the time required for preparation and cooking.

Prep Time

Getting everything ready is the first step. The prep time for this dish is approximately 15 minutes. During this time, you will:

  • Gather all your ingredients.
  • Dice the chicken breast into small chunks.
  • Chop the garlic and parsley.
  • Measure out the pasta and other ingredients.

This quick prep will set you up for a smooth cooking process!

Cooking Time

The cooking time for Garlic Butter Chicken Bites with Parmesan Pasta is about 20 minutes. Here’s how it breaks down:

  • Cooking the pasta: 10 minutes (or according to package instructions).
  • Sautéing the chicken: 5-7 minutes until golden brown.
  • Making the garlic butter sauce and combining everything: 5-7 minutes.

With these steps, you’ll have a delicious meal ready in no time!

Total Time

When you add the prep time and cooking time together, the total time to make Garlic Butter Chicken Bites with Parmesan Pasta is approximately 35 minutes. This makes it a perfect option for a quick weeknight dinner or a delightful weekend meal.

With this time breakdown, you can easily plan your cooking and enjoy a delicious dish without feeling rushed. Happy cooking!

Nutritional Information for Garlic Butter Chicken Bites with Parmesan Pasta

Understanding the nutritional content of your meals is essential for maintaining a balanced diet. Garlic Butter Chicken Bites with Parmesan Pasta is not only delicious but also provides a good mix of nutrients. Here’s a breakdown of the key nutritional information for this delightful dish.

Calories

One serving of Garlic Butter Chicken Bites with Parmesan Pasta contains approximately 600-700 calories. This calorie count can vary based on the specific ingredients used and portion sizes. The combination of chicken, pasta, and creamy sauce contributes to the overall calorie content, making it a hearty meal that can satisfy your hunger.

Protein

This dish is a great source of protein, primarily from the chicken and Parmesan cheese. Each serving provides about 35-40 grams of protein. Protein is essential for muscle repair and growth, making this meal a good choice for active individuals or anyone looking to maintain a healthy diet.

Sodium

The sodium content in Garlic Butter Chicken Bites with Parmesan Pasta is approximately 800-900 milligrams per serving. This amount can vary depending on how much salt you add during cooking and the type of Parmesan cheese used. If you’re watching your sodium intake, consider using low-sodium chicken broth or cheese alternatives to help reduce the overall sodium content.

By being aware of the nutritional information, you can enjoy Garlic Butter Chicken Bites with Parmesan Pasta while keeping your dietary goals in mind. This dish offers a satisfying balance of flavors and nutrients, making it a wonderful addition to your meal rotation!

FAQs about Garlic Butter Chicken Bites with Parmesan Pasta

Can I use frozen chicken for Garlic Butter Chicken Bites?

Yes, you can use frozen chicken for Garlic Butter Chicken Bites! However, it’s important to thaw the chicken completely before cooking. You can do this by placing it in the refrigerator overnight or using the defrost setting on your microwave. Once thawed, follow the same steps in the recipe. Just remember that cooking time may vary slightly, so ensure the chicken reaches an internal temperature of 165°F (75°C) for safety.

What can I substitute for Parmesan in the pasta?

If you don’t have Parmesan cheese or prefer a different flavor, there are several substitutes you can use. Pecorino Romano is a great alternative, offering a similar salty and nutty taste. For a dairy-free option, try nutritional yeast, which provides a cheesy flavor without the dairy. You can also use a blend of cream cheese and a bit of garlic powder for a creamy texture. Just keep in mind that the flavor profile may change slightly with these substitutes.

How can I make Garlic Butter Chicken Bites with Parmesan Pasta healthier?

Making Garlic Butter Chicken Bites with Parmesan Pasta healthier is easy! Start by using whole wheat or gluten-free pasta for added fiber. You can also reduce the amount of butter and cream in the recipe. Consider using low-fat milk or a plant-based cream alternative. Adding more vegetables, like spinach or zucchini, can boost the nutritional value while keeping the dish colorful and delicious. Lastly, using lean chicken breast or even turkey can help lower the calorie count.

Can I prepare Garlic Butter Chicken Bites with Parmesan Pasta in advance?

Yes, you can prepare Garlic Butter Chicken Bites with Parmesan Pasta in advance! You can cook the chicken and pasta separately, then combine them with the sauce just before serving. This way, the pasta won’t absorb too much sauce and become mushy. Store the components in airtight containers in the refrigerator for up to 2 days. When you’re ready to eat, simply reheat everything gently on the stove, adding a splash of cream or broth to revive the sauce.

Conclusion on Garlic Butter Chicken Bites with Parmesan Pasta

In conclusion, Garlic Butter Chicken Bites with Parmesan Pasta is a delightful dish that combines rich flavors and comforting textures. This recipe is not only easy to prepare but also offers a wonderful way to bring family and friends together around the dinner table. With its creamy sauce, tender chicken, and perfectly cooked pasta, it’s a meal that everyone will love.

Whether you’re cooking for a special occasion or a cozy weeknight dinner, this dish is sure to impress. The versatility of the recipe allows you to customize it to your taste, making it a fantastic option for any palate. From adding your favorite vegetables to experimenting with different pasta types, the possibilities are endless!

As you embark on your culinary journey with Garlic Butter Chicken Bites with Parmesan Pasta, remember to enjoy the process. Cooking is not just about the final dish; it’s about the joy of creating something delicious. So, gather your ingredients, follow the steps, and savor every moment in the kitchen.

We hope this recipe becomes a staple in your home, bringing warmth and happiness to your meals. Happy cooking, and enjoy your Garlic Butter Chicken Bites with Parmesan Pasta!

Egg Roll Stir-Fry is a quick and tasty meal option.

Introduction to Egg Roll Stir-Fry Recipe

What is an Egg Roll Stir-Fry?

An Egg Roll Stir-Fry is a delightful dish that captures the essence of traditional egg rolls but in a quick and easy bowl format. Instead of wrapping ingredients in a crispy shell, this recipe combines all the flavors and textures in a savory stir-fry. You get the same delicious taste of egg rolls, but without the fuss of frying. This dish typically includes protein, fresh vegetables, and a flavorful sauce, making it a wholesome meal option for any day of the week.

Why You Should Try This Egg Roll Stir-Fry Recipe

There are many reasons to give this Egg Roll Stir-Fry Recipe a try! First, it’s incredibly versatile. You can easily customize it to suit your taste preferences or dietary needs. Whether you prefer chicken, beef, or a plant-based protein, this recipe has you covered. Plus, it’s packed with nutritious ingredients like mixed greens and zucchini, ensuring you get a healthy dose of vitamins and minerals.

Another great reason to try this dish is its simplicity. With just a few steps and minimal prep time, you can whip up a delicious meal in under 30 minutes. This makes it perfect for busy weeknights or when you want to impress guests without spending hours in the kitchen. Finally, the Egg Roll Stir-Fry is a crowd-pleaser. Its bold flavors and colorful presentation make it a hit with both kids and adults alike!

Ingredients for Egg Roll Stir-Fry Recipe

To create a delicious Egg Roll Stir-Fry, you’ll need a variety of fresh ingredients that come together to make a flavorful dish. Here’s what you’ll need:

  • 1 pound ground chicken or beef: This serves as the protein base for your stir-fry. You can choose either for a hearty meal.
  • 1 tablespoon canola oil: This oil is perfect for cooking at high temperatures and helps to brown the meat.
  • 1 medium shallot, finely chopped: Shallots add a mild onion flavor that enhances the overall taste.
  • 3 cloves garlic, minced: Garlic brings a wonderful aroma and depth of flavor to the dish.
  • 1 cup grated zucchini: Zucchini adds moisture and a subtle sweetness, making the dish more nutritious.
  • 4 cups mixed greens: A combination of cabbage, carrots, and radishes provides crunch and color.
  • 1/4 cup tamari or soy sauce: This sauce is essential for seasoning and gives the stir-fry its savory flavor.
  • 1 tablespoon peanut oil: Peanut oil adds a nutty taste and enhances the overall richness of the dish.
  • 1 teaspoon fresh ginger, grated: Ginger adds a zesty kick and is known for its health benefits.
  • 1/2 teaspoon cayenne pepper: This spice gives the dish a bit of heat, which you can adjust to your liking.
  • 2 tablespoons chopped cilantro: Cilantro adds freshness and a burst of flavor when sprinkled on top.
  • 1 tablespoon crushed peanuts (optional): For those who enjoy a crunchy texture, crushed peanuts make a great topping.

These ingredients come together to create a satisfying meal that’s not only tasty but also packed with nutrients. Feel free to adjust the quantities based on your preferences or dietary needs!

Step-by-Step Preparation of Egg Roll Stir-Fry Recipe

Step 1: Prepare Your Ingredients

Before you start cooking, it’s important to prepare all your ingredients. Begin by gathering everything you need. Chop the shallot, mince the garlic, and grate the zucchini. If you’re using fresh ginger, grate that as well. Having everything ready will make the cooking process smoother and quicker. This step is crucial for a successful Egg Roll Stir-Fry Recipe, as it allows you to focus on cooking without interruptions.

Step 2: Cook the Protein

Next, heat the canola oil in a large skillet over medium-high heat. Once the oil is hot, add the ground chicken or beef. Cook it for about 6-8 minutes, breaking it apart with a spatula. You want the meat to be thoroughly browned. If there’s any excess fat, be sure to drain it off. This step is essential for achieving a flavorful base for your stir-fry.

Step 3: Sauté the Vegetables

After the protein is cooked, it’s time to add the vegetables. Toss in the chopped shallot and minced garlic. Stir them for about 2-3 minutes until the shallot becomes soft and fragrant. Then, add the grated zucchini and mixed greens to the skillet. Sauté everything together for an additional 4-5 minutes. You want the greens to wilt and the zucchini to become tender. This step adds a wonderful texture and flavor to your Egg Roll Stir-Fry Recipe.

Step 4: Combine Ingredients

Once the vegetables are cooked, it’s time to combine everything. Drizzle in the tamari or soy sauce, along with the peanut oil, grated ginger, and cayenne pepper. Stir everything together well. This is where the magic happens! The flavors meld together, creating a delicious and savory dish. Let it cook for another 2 minutes to ensure everything is heated through.

Step 5: Add Seasonings

Now that your stir-fry is almost ready, it’s time to add the finishing touches. Remove the skillet from the heat and sprinkle the chopped cilantro on top. If you like a bit of crunch, feel free to add crushed peanuts as well. These toppings not only enhance the flavor but also add a lovely presentation to your Egg Roll Stir-Fry Recipe.

Step 6: Serve and Enjoy

Your Egg Roll Stir-Fry is now ready to be served! Spoon the mixture into bowls and enjoy it warm. This dish is perfect on its own or served with rice or noodles. The combination of flavors and textures will surely delight your taste buds. Enjoy your meal and the compliments that come with it!

Variations of Egg Roll Stir-Fry Recipe

Vegetarian Options

If you’re looking for a vegetarian twist on the Egg Roll Stir-Fry Recipe, you’re in luck! There are plenty of delicious options to choose from. One popular choice is to replace the meat with lentils or chickpeas. These legumes are not only packed with protein but also add a hearty texture to the dish. You can also use tofu, which absorbs flavors beautifully and provides a satisfying bite.

Another great option is to incorporate a variety of vegetables. Consider adding bell peppers, snap peas, or mushrooms for extra flavor and crunch. You can even toss in some edamame for a protein boost. The key is to mix and match your favorite veggies to create a colorful and nutritious stir-fry. This way, you can enjoy the same great taste while keeping it plant-based!

Protein Substitutes

For those who want to switch up the protein in the Egg Roll Stir-Fry Recipe, there are several tasty substitutes available. If you prefer poultry, turkey is a leaner option that works well. Ground turkey cooks similarly to chicken and offers a lighter flavor.

If you’re a fan of seafood, shrimp or scallops can be excellent choices. They cook quickly and add a delightful seafood twist to your stir-fry. Just be sure to adjust the cooking time accordingly, as seafood typically cooks faster than ground meat.

For a more exotic flavor, consider using ground lamb or pork. These meats bring a unique taste that can elevate your dish. No matter which protein you choose, the Egg Roll Stir-Fry Recipe remains versatile and delicious, allowing you to enjoy a meal that suits your preferences!

Cooking Note for Egg Roll Stir-Fry Recipe

When preparing your Egg Roll Stir-Fry Recipe, there are a few cooking notes to keep in mind to ensure the best results. First, always use a large skillet or wok. This allows for even cooking and prevents overcrowding, which can lead to steaming instead of sautéing. A well-heated pan is essential for achieving that perfect sear on your protein and vegetables.

Next, consider the freshness of your ingredients. Fresh vegetables not only enhance the flavor but also add vibrant colors to your dish. If possible, choose organic produce for a healthier option. Additionally, when it comes to the protein, opt for high-quality ground meat or plant-based alternatives. This will significantly impact the overall taste and texture of your stir-fry.

Another important tip is to prep your ingredients ahead of time. As mentioned earlier, having everything chopped and ready to go will make the cooking process smoother. Stir-frying is a quick method, so you want to avoid any delays once you start cooking.

Lastly, feel free to adjust the seasonings to your liking. If you prefer a sweeter taste, add a splash of honey or a sprinkle of sugar. For more heat, increase the cayenne pepper or add some chili flakes. The beauty of this Egg Roll Stir-Fry Recipe lies in its flexibility, allowing you to create a dish that perfectly suits your palate.

Serving Suggestions for Egg Roll Stir-Fry Recipe

When it comes to serving your Egg Roll Stir-Fry Recipe, the options are endless! This dish is not only delicious on its own but can also be paired with various sides to create a complete meal. Here are some serving suggestions to elevate your dining experience:

  • Over Rice: Serve your stir-fry over a bed of steamed white or brown rice. The rice absorbs the savory sauce, making each bite even more flavorful.
  • With Noodles: For a heartier option, try serving the stir-fry with cooked rice noodles or soba noodles. This adds a delightful texture and makes the dish more filling.
  • In Lettuce Wraps: For a fun twist, spoon the stir-fry mixture into crisp lettuce leaves. This creates a fresh and crunchy wrap that’s perfect for a light meal or appetizer.
  • With a Side Salad: Pair your stir-fry with a simple side salad. A mix of greens, cucumbers, and a light vinaigrette complements the flavors of the stir-fry beautifully.
  • Garnished with Fresh Herbs: Enhance the presentation by garnishing your dish with additional chopped cilantro or green onions. This adds a pop of color and freshness.
  • With Dipping Sauces: Consider serving your stir-fry with a side of dipping sauces like sweet chili sauce or hoisin sauce. These can add an extra layer of flavor and excitement to your meal.

Feel free to mix and match these serving suggestions based on your preferences. The Egg Roll Stir-Fry Recipe is versatile enough to adapt to any occasion, whether it’s a casual family dinner or a gathering with friends. Enjoy your meal and the delightful flavors it brings!

Tips for Perfecting Your Egg Roll Stir-Fry Recipe

To make your Egg Roll Stir-Fry Recipe truly shine, consider these helpful tips. They will enhance the flavors and textures, ensuring a delightful meal every time you prepare it.

  • Use Fresh Ingredients: Fresh vegetables and high-quality protein make a significant difference in taste. Opt for seasonal produce whenever possible. Fresh ingredients not only taste better but also provide more nutrients.
  • Don’t Overcrowd the Pan: When cooking, avoid adding too many ingredients at once. Overcrowding can lead to steaming instead of sautéing. Cook in batches if necessary to achieve that perfect sear.
  • Adjust the Heat: Keep an eye on the heat while cooking. If the pan gets too hot, the ingredients may burn. Conversely, if it’s too low, they may not cook properly. Medium-high heat is usually ideal for stir-frying.
  • Experiment with Sauces: While tamari or soy sauce is a staple, don’t hesitate to experiment with other sauces. Adding a splash of sesame oil or a drizzle of oyster sauce can elevate the flavor profile.
  • Incorporate Different Textures: For added crunch, consider including nuts or seeds. Crushed peanuts or sesame seeds can provide a delightful contrast to the tender vegetables and protein.
  • Let It Rest: After cooking, allow the stir-fry to sit for a minute before serving. This resting time helps the flavors meld together, resulting in a more cohesive dish.
  • Garnish Generously: Don’t skip the garnishes! Fresh herbs like cilantro or green onions add brightness and enhance the overall presentation. A sprinkle of sesame seeds can also add visual appeal.
  • Serve Immediately: Stir-fries are best enjoyed fresh and hot. Serve your Egg Roll Stir-Fry right after cooking to maintain the vibrant colors and crisp textures.

By following these tips, you’ll be well on your way to mastering the Egg Roll Stir-Fry Recipe. Each time you make it, you’ll discover new ways to enhance the dish, making it a favorite in your household!

Breakdown of Time for Egg Roll Stir-Fry Recipe

Prep Time

Preparing your ingredients is a crucial step in making the Egg Roll Stir-Fry Recipe. This includes chopping, mincing, and grating your vegetables and protein. On average, you should set aside about 10-15 minutes for this prep work. Having everything ready will make the cooking process much smoother and quicker.

Cooking Time

The actual cooking time for the Egg Roll Stir-Fry Recipe is relatively short. Once you start cooking, it typically takes around 15-20 minutes to complete the dish. This includes browning the protein, sautéing the vegetables, and combining all the ingredients with the seasonings. The quick cooking time is one of the reasons this recipe is perfect for busy weeknights!

Total Time

When you combine both the prep time and cooking time, the total time to make the Egg Roll Stir-Fry Recipe is approximately 25-35 minutes. This makes it an excellent option for a delicious and nutritious meal that can be prepared in under half an hour. Whether you’re cooking for yourself or for a family, this time-efficient recipe is sure to impress!

Nutritional Information for Egg Roll Stir-Fry Recipe

Calories

When it comes to enjoying a delicious meal, knowing the calorie content can help you make informed choices. Each serving of the Egg Roll Stir-Fry Recipe contains approximately 350 calories. This makes it a satisfying option that won’t weigh you down. With a balanced mix of protein, vegetables, and healthy fats, you can enjoy this dish without feeling guilty.

Protein

Protein is essential for building and repairing tissues in our bodies. In this Egg Roll Stir-Fry Recipe, you’ll find about 26 grams of protein per serving. This high protein content comes from the ground chicken or beef, making it a great choice for those looking to increase their protein intake. Whether you’re an athlete or just someone who wants to maintain a healthy diet, this dish can help you meet your protein needs.

Sodium

Sodium is an important mineral, but it’s essential to consume it in moderation. The Egg Roll Stir-Fry Recipe contains around 800 milligrams of sodium per serving, primarily from the tamari or soy sauce. If you’re watching your sodium intake, consider using low-sodium soy sauce or tamari. This small adjustment can help you enjoy the flavors of the dish while keeping your sodium levels in check.

FAQs about Egg Roll Stir-Fry Recipe

Can I make Egg Roll Stir-Fry Recipe ahead of time?

Yes, you can prepare the Egg Roll Stir-Fry Recipe ahead of time! To do this, cook the dish as directed, then let it cool completely. Store it in an airtight container in the refrigerator for up to three days. When you’re ready to enjoy it, simply reheat it in a skillet over medium heat until warmed through. This makes it a great option for meal prep or busy weeknights!

What can I substitute for cabbage in Egg Roll Stir-Fry Recipe?

If you’re not a fan of cabbage or simply want to try something different, there are plenty of substitutes! You can use kale, bok choy, or even spinach for a different flavor and texture. Each of these greens will add a unique taste to your Egg Roll Stir-Fry Recipe while still providing that satisfying crunch. Feel free to experiment with your favorite leafy greens!

Is Egg Roll Stir-Fry Recipe gluten-free?

The Egg Roll Stir-Fry Recipe can easily be made gluten-free! Simply substitute regular soy sauce with gluten-free tamari. This small change allows you to enjoy the same delicious flavors without the gluten. Always check the labels of your ingredients to ensure they are gluten-free, especially if you have dietary restrictions.

How can I make Egg Roll Stir-Fry Recipe spicier?

If you love a bit of heat, there are several ways to spice up your Egg Roll Stir-Fry Recipe! You can increase the amount of cayenne pepper or add some red pepper flakes for an extra kick. Another option is to include sliced fresh chili peppers, such as jalapeños or serranos, during the cooking process. For a different flavor, try adding a dash of sriracha or chili garlic sauce at the end. Adjust the spice level to suit your taste!

Conclusion on Egg Roll Stir-Fry Recipe

In conclusion, the Egg Roll Stir-Fry Recipe is a fantastic way to enjoy the beloved flavors of traditional egg rolls in a quick and healthy format. This dish is not only easy to prepare but also allows for endless customization, making it suitable for various dietary preferences. Whether you choose to stick with the classic ground chicken or beef, or opt for a vegetarian or seafood alternative, the possibilities are truly limitless.

Moreover, the vibrant mix of fresh vegetables and savory seasonings ensures that each bite is packed with flavor and nutrition. With a cooking time of just 15-20 minutes, this recipe is perfect for busy weeknights or when you want to impress guests without spending hours in the kitchen. Plus, the nutritional benefits, including a good amount of protein and low net carbs, make it a guilt-free option for any meal.

As you explore this Egg Roll Stir-Fry Recipe, remember to have fun with it! Experiment with different vegetables, proteins, and sauces to find your perfect combination. Don’t hesitate to share your creations with family and friends, as this dish is sure to be a hit at any table. So gather your ingredients, fire up the skillet, and enjoy a delicious meal that brings the taste of egg rolls to your home in a delightful stir-fry bowl!

Spicy Ginger Chicken Recipe is a must-try dish!

Introduction to Spicy Ginger Chicken Recipe

Spicy Ginger Chicken Recipe is here to bring excitement to your table! This dish combines tender chicken thighs with a zesty ginger sauce, creating a delightful explosion of flavors. Whether you’re cooking for family or friends, this recipe is sure to impress.

What Makes the Spicy Ginger Chicken Recipe Unique?

Spicy Ginger Chicken Recipe not just a meal, but an experience!

Moreover, the marinating process allows the chicken to soak up all those delicious flavors, ensuring every bite is packed with taste. Plus, it’s quick to prepare, making it an ideal choice for busy weeknights. With just a few simple ingredients, you can create a dish that feels gourmet without spending hours in the kitchen.

Spicy Ginger Chicken Recipe is your answer. Let’s dive into the ingredients and get cooking!

Ingredients for Spicy Ginger Chicken Recipe

Spicy Ginger Chicken Recipe, you’ll need a selection of fresh and flavorful ingredients. Each component plays a vital role in building the dish’s unique taste. Here’s what you’ll need:

  • 2 pounds boneless, skinless chicken thighs, diced
  • 2 tablespoons canola oil
  • 1 medium onion, chopped
  • 4 cloves garlic, minced
  • 1 tablespoon freshly grated ginger
  • 2 tablespoons tamari or soy sauce
  • 1 tablespoon apple cider vinegar
  • 1 tablespoon maple syrup
  • 1 teaspoon chili flakes (adjust to preference)
  • 1/2 teaspoon freshly ground black pepper
  • 1/4 cup low-sodium chicken broth
  • 2 green onions, chopped (for topping)
  • Toasted sesame seeds (for topping)

Spicy Ginger Chicken Recipe a well-rounded meal that everyone will love!

Now that you have your ingredients ready, let’s move on to the step-by-step preparation of this delightful dish!

Step-by-Step Preparation of Spicy Ginger Chicken Recipe

Spicy Ginger Chicken Recipe to life! Follow these simple steps to create a dish that is bursting with flavor and sure to impress.

Step 1: Marinating the Chicken

Start by marinating the diced chicken. In a large bowl, combine the tamari or soy sauce, apple cider vinegar, maple syrup, chili flakes, and black pepper. Mix well to create a flavorful marinade. Add the diced chicken to the bowl, ensuring each piece is well-coated. Cover the bowl with plastic wrap and let it sit for at least 30 minutes. For even better flavor, refrigerate it for up to 2 hours. This marinating step is crucial as it allows the chicken to absorb all those delicious flavors!

Step 2: Preparing the Ginger Sauce

Spicy Ginger Chicken Recipe truly special.

Step 3: Cooking the Chicken

Once the chicken has marinated, it’s time to cook! Heat the canola oil in a large skillet or wok over medium-high heat. Add the chopped onion and sauté for about 3-4 minutes until it becomes translucent. Next, stir in the minced garlic and freshly grated ginger, cooking for another minute until fragrant. This step fills your kitchen with an amazing aroma!

Now, raise the heat to high and add the marinated chicken to the pan. Sauté the chicken for approximately 5-7 minutes, stirring often. You want the chicken to be golden brown and fully cooked. The high heat helps to sear the chicken, locking in the juices and flavors.

Step 4: Combining Ingredients

After the chicken is cooked, pour in the low-sodium chicken broth. Let the mixture simmer for a few minutes, allowing the sauce to reduce and thicken. This step is essential as it creates a rich, flavorful sauce that clings to the chicken. Once the sauce has reached your desired consistency, take the skillet off the heat. Finish by sprinkling the dish with chopped green onions and toasted sesame seeds for a beautiful presentation.

Spicy Ginger Chicken Recipe is ready to be served. This dish is not only easy to make but also packed with flavor. Let’s explore some variations to keep things exciting!

Variation of Spicy Ginger Chicken Recipe

Spicy Ginger Chicken Recipe is its versatility. You can easily switch up ingredients to create different flavors. Let’s explore some alternative ingredients and ways to adjust the spice levels to suit your taste!

Alternative Ingredients for Different Flavors

If you want to mix things up, consider these alternative ingredients:

  • Protein Options: Instead of chicken thighs, try using chicken breasts, shrimp, or even tofu for a vegetarian option. Each protein will absorb the flavors differently, giving you a unique dish.
  • Vegetables: Add colorful vegetables like bell peppers, broccoli, or snap peas. These not only enhance the dish’s appearance but also add crunch and nutrition.
  • Herbs and Spices: Experiment with fresh herbs like cilantro or basil. You can also add spices like cumin or coriander for an extra layer of flavor.
  • Sweeteners: If you prefer a different sweetness, try honey or agave syrup instead of maple syrup. Each sweetener brings its own unique taste.

Spicy Ginger Chicken Recipe while keeping the essence of the dish intact. Feel free to get creative!

Adjusting Spice Levels in Spicy Ginger Chicken Recipe

Spicy Ginger Chicken Recipe is easy!

  • Reduce Chili Flakes: If you prefer a milder dish, simply decrease the amount of chili flakes. Start with half a teaspoon and taste as you go.
  • Remove Chili Flakes: For those who want no heat at all, you can skip the chili flakes entirely. The dish will still be flavorful thanks to the ginger and garlic.
  • Add Fresh Peppers: If you enjoy fresh heat, consider adding sliced jalapeños or serrano peppers. This will give your dish a fresh kick without overpowering it.
  • Serve with a Cooling Side: Pair your spicy chicken with a cooling side like yogurt or a cucumber salad. This can help balance the heat while still enjoying the flavors.

Spicy Ginger Chicken Recipe suitable for everyone at your table. Now that you have some variations in mind, let’s move on to cooking notes to ensure your dish turns out perfectly!

Cooking Note for Spicy Ginger Chicken Recipe

Spicy Ginger Chicken Recipe is a delightful experience, but a few tips can help you achieve the best results. Here are some essential cooking notes to keep in mind:

  • Use Fresh Ingredients: Fresh ginger and garlic make a significant difference in flavor. They add a vibrant taste that dried versions simply can’t match. Always opt for fresh when possible!
  • Marination Time: While 30 minutes is the minimum marination time, allowing the chicken to marinate for up to 2 hours will enhance the flavor even more. The longer it sits, the more the chicken absorbs the marinade.
  • High Heat Cooking: Cooking on high heat helps to sear the chicken quickly, locking in moisture and flavor. Just be sure to stir frequently to prevent burning.
  • Check Chicken Doneness: Ensure the chicken is fully cooked by checking that it reaches an internal temperature of 165°F (75°C). This guarantees that it’s safe to eat and perfectly tender.
  • Adjust Sauce Consistency: If the sauce is too thick, add a splash more chicken broth. If it’s too thin, let it simmer a bit longer to reduce. Finding the right consistency will enhance the overall dish.
  • Garnishing: Don’t skip the garnishing step! Chopped green onions and toasted sesame seeds not only add flavor but also make the dish visually appealing.

Spicy Ginger Chicken Recipe turns out delicious every time. Now that you’re equipped with these tips, let’s explore some serving suggestions to complement your dish!

Serving Suggestions for Spicy Ginger Chicken Recipe

Spicy Ginger Chicken Recipe is ready, it’s time to think about how to serve it! The right side dishes can elevate your meal and create a well-rounded dining experience. Here are some fantastic options to pair with your spicy chicken:

Best Side Dishes to Pair with Spicy Ginger Chicken

  • Fluffy Rice: A classic choice, fluffy white or brown rice absorbs the delicious sauce from the chicken. It balances the spice and adds a comforting element to your meal.
  • Quinoa: For a healthier option, serve your chicken over quinoa. This protein-packed grain adds a nutty flavor and complements the dish beautifully.
  • Steamed Vegetables: Bright, colorful vegetables like broccoli, carrots, and snap peas not only add nutrition but also a lovely crunch. Steaming them keeps their vibrant colors and nutrients intact.
  • Asian Noodles: Toss some cooked noodles in a light soy sauce or sesame oil for a delightful side. The noodles will soak up the flavors and make for a satisfying addition.
  • Cucumber Salad: A refreshing cucumber salad with a light vinaigrette can help cool down the heat from the chicken. The crispness of the cucumbers adds a nice contrast to the dish.
  • Spring Rolls: Serve some fresh spring rolls on the side for a fun, crunchy texture. They can be filled with veggies and served with a dipping sauce for extra flavor.

Spicy Ginger Chicken Recipe but also enhance the overall dining experience. Feel free to mix and match based on your preferences and what you have on hand. Now that you have some great serving suggestions, let’s move on to tips for perfecting your dish!

Tips for Perfecting Your Spicy Ginger Chicken Recipe

Spicy Ginger Chicken Recipe truly shine, it’s essential to avoid common pitfalls. Here are some tips to help you perfect this delicious dish:

Common Mistakes to Avoid

  • Skipping the Marination: One of the biggest mistakes is not marinating the chicken long enough. Marination is key to infusing flavor. Aim for at least 30 minutes, but if you can, let it sit for up to 2 hours.
  • Overcrowding the Pan: When cooking, avoid adding too much chicken at once. Overcrowding can lead to steaming instead of searing. Cook in batches if necessary to achieve that perfect golden-brown color.
  • Using Dried Ginger: Fresh ginger is a must for this recipe. Dried ginger lacks the vibrant flavor and aroma that fresh ginger provides. Always opt for fresh to elevate your dish.
  • Not Tasting as You Go: Don’t forget to taste your dish while cooking! This allows you to adjust flavors, especially the spice levels. You can add more chili flakes or sweetness as needed.
  • Ignoring Sauce Consistency: Pay attention to the sauce’s thickness. If it’s too thin, let it simmer longer. If it’s too thick, add a splash of chicken broth. The right consistency enhances the overall dish.
  • Forgetting the Garnish: Garnishing is not just for looks! Chopped green onions and toasted sesame seeds add flavor and texture. Don’t skip this final touch!

Spicy Ginger Chicken Recipe turns out perfectly every time. With these tips in mind, you’re well on your way to creating a dish that will impress everyone at your table. Now, let’s break down the time needed for this recipe!

Breakdown of Time for Spicy Ginger Chicken Recipe

Spicy Ginger Chicken Recipe can help you plan your meal better. Here’s a simple breakdown of the time needed for preparation and cooking:

Prep Time

The prep time for this delicious dish is approximately 10-15 minutes. This includes gathering your ingredients, chopping the chicken, onions, and garlic, as well as grating the ginger. If you choose to marinate the chicken for a longer period, you can set it aside while you prepare the rest of your meal.

Cooking Time

Once you’re ready to cook, the cooking time will take about 15-20 minutes. This includes sautéing the onions, garlic, and ginger, cooking the marinated chicken, and allowing the sauce to simmer. The quick cooking time makes this recipe perfect for busy weeknights!

Total Time

Spicy Ginger Chicken Recipe if you marinate the chicken for 30 minutes. If you opt for the maximum marination time of 2 hours, the total time will be about 2 hours and 35 minutes, including the marination. This flexibility allows you to fit this flavorful dish into your schedule easily.

With this time breakdown, you can confidently plan your cooking session. Now that you know how long it takes, let’s dive into the nutritional information for this delightful recipe!

Nutritional Information for Spicy Ginger Chicken Recipe

Spicy Ginger Chicken Recipe is essential for making informed choices about your meals. This dish not only satisfies your taste buds but also provides a good balance of nutrients. Let’s break down the key nutritional components of this delicious recipe.

Calories

Spicy Ginger Chicken Recipe contains approximately 320 calories. This makes it a great option for those looking to enjoy a flavorful meal without consuming excessive calories. The combination of chicken and flavorful ingredients ensures that you feel satisfied without overindulging.

Protein Content

Protein is an essential nutrient for maintaining muscle mass and overall health. In this recipe, you’ll find about 28 grams of protein per serving. The boneless, skinless chicken thighs are a fantastic source of lean protein, making this dish a great choice for anyone looking to boost their protein intake while enjoying a tasty meal.

Sodium Levels

Spicy Ginger Chicken Recipe is relatively low in sodium, with approximately 600 milligrams per serving. Using low-sodium chicken broth and tamari or soy sauce helps keep the sodium levels in check. This makes it a heart-healthy option for those who are mindful of their sodium intake.

Spicy Ginger Chicken Recipe is not only delicious but also nutritious. With a good balance of calories, protein, and low sodium, it’s a meal you can feel good about serving to your family and friends. Now that you have a clear understanding of the nutritional information, let’s address some frequently asked questions about this delightful dish!

FAQs about Spicy Ginger Chicken Recipe

Can I make the Spicy Ginger Chicken Recipe ahead of time?

Spicy Ginger Chicken Recipe can be made ahead of time, making it a great option for meal planning. You can marinate the chicken and store it in the refrigerator for up to 2 hours before cooking. If you want to prepare it even earlier, you can cook the chicken and store it in an airtight container in the fridge for up to 3 days. Just reheat it on the stove or in the microwave when you’re ready to serve. This makes it perfect for busy weeknights or meal prep for the week!

What can I substitute for ginger in the Spicy Ginger Chicken Recipe?

Spicy Ginger Chicken Recipe is all about that zesty ginger kick!

Is the Spicy Ginger Chicken Recipe suitable for meal prep?

Spicy Ginger Chicken Recipe is perfect for meal prep! It stores well in the refrigerator and can be easily reheated. To meal prep, simply cook a larger batch and divide it into individual portions. Pair it with your choice of rice, quinoa, or vegetables, and store them in meal prep containers. This way, you’ll have delicious, ready-to-eat meals throughout the week. Just remember to keep the toppings, like green onions and sesame seeds, separate until you’re ready to eat for the best flavor and presentation!

Conclusion on Spicy Ginger Chicken Recipe

Spicy Ginger Chicken Recipe is a fantastic addition to your culinary repertoire. This dish not only offers a delightful blend of flavors but also provides a nutritious meal option that is easy to prepare. With its tender chicken thighs, zesty ginger, and a perfect balance of heat and sweetness, it’s sure to become a family favorite.

Whether you’re cooking for a special occasion or just a weeknight dinner, this recipe is versatile enough to suit any occasion. The ability to customize the spice levels and swap out ingredients allows you to make it your own. Plus, with the tips and variations provided, you can keep this dish fresh and exciting every time you make it.

Spicy Ginger Chicken Recipe with delicious sides like fluffy rice or steamed vegetables for a complete meal.

Spicy Ginger Chicken Recipe.

Scallion Chicken Stir-Fry Recipe is a must-try dish!

Introduction to Scallion Chicken Stir-Fry Recipe

Scallion Chicken Stir-Fry Recipe. This dish is not just a meal; it’s a celebration of flavors and textures that come together in a quick and easy way. Perfect for busy weeknights or a cozy weekend dinner, this recipe brings the taste of Asian cuisine right to your kitchen.

What Makes Scallion Chicken Stir-Fry Special?

What sets this dish apart? First, it’s all about the ingredients. The tender chicken thighs soak up the savory soy sauce, creating a rich flavor that’s hard to resist. The scallions add a fresh crunch, while garlic and ginger provide a warm, aromatic base. Together, they create a symphony of taste that dances on your palate.

Moreover, this stir-fry is incredibly versatile. You can easily customize it by adding your favorite vegetables or swapping out the chicken for another protein. This flexibility makes it a go-to recipe for families and friends alike. Plus, it’s quick to prepare, taking less than 30 minutes from start to finish!

Scallion Chicken Stir-Fry Recipe is sure to impress.

Ready to dive into the cooking process? Let’s gather our ingredients and get started!

Ingredients for Scallion Chicken Stir-Fry Recipe

Scallion Chicken Stir-Fry Recipe, you’ll need a selection of fresh and flavorful ingredients. Each component plays a vital role in building the dish’s unique taste. Here’s what you’ll need:

  • 2 pounds boneless, skinless chicken thighs, diced: This cut of chicken is juicy and tender, making it perfect for stir-frying.
  • 1/4 cup soy sauce: This adds a savory depth to the dish, enhancing the overall flavor.
  • 2 tablespoons cornstarch: This helps to create a nice coating on the chicken, giving it a crispy texture.
  • 2 tablespoons canola oil: A neutral oil that’s great for high-heat cooking.
  • 1 bunch scallions, sliced (approximately 1 cup): These provide a fresh crunch and a mild onion flavor.
  • 4 cloves garlic, finely chopped: Garlic adds a wonderful aroma and depth to the dish.
  • 1 tablespoon fresh ginger, grated: Ginger brings a warm, spicy note that complements the other flavors.
  • 1 tablespoon toasted sesame oil: This oil adds a nutty richness that elevates the dish.
  • 1 tablespoon rice vinegar: A splash of acidity that balances the flavors beautifully.
  • 1 teaspoon granulated sugar: This helps to round out the savory notes and adds a hint of sweetness.
  • Salt and freshly ground black pepper to taste: Essential for seasoning and enhancing the flavors.

Scallion Chicken Stir-Fry Recipe. Each item contributes to the dish’s overall appeal, making it a delightful meal for any occasion. Now that you have everything ready, let’s move on to the preparation steps!

Step-by-Step Preparation of Scallion Chicken Stir-Fry Recipe

Scallion Chicken Stir-Fry Recipe that will impress your family and friends.

Step 1: Preparing the Chicken

Start by taking your diced chicken thighs. Make sure they are cut into even pieces. This helps them cook uniformly. If you prefer, you can also use chicken breasts, but thighs tend to be juicier. Place the chicken in a large bowl, ready for marinating.

Step 2: Chopping the Scallions

Next, grab your bunch of scallions. Rinse them under cold water to remove any dirt. Then, slice them thinly. You can use both the white and green parts. The white part has a stronger flavor, while the green adds a fresh touch. Set the chopped scallions aside for later.

Step 3: Marinating the Chicken

Now, it’s time to marinate the chicken. In the bowl with the diced chicken, add the soy sauce and cornstarch. Toss everything together until the chicken is well-coated. Let it sit for about 15 minutes. This step is crucial as it allows the chicken to absorb all those wonderful flavors.

Step 4: Stir-Frying the Ingredients

Heat your large skillet or wok over medium-high heat. Add the canola oil and let it get hot. Once shimmering, carefully add the marinated chicken in a single layer. Cook for about 5-7 minutes, stirring occasionally. You want the chicken to turn golden brown and be fully cooked. Then, add the chopped garlic and grated ginger. Stir for about a minute until they become fragrant.

Step 5: Combining Everything Together

Scallion Chicken Stir-Fry Recipe is now ready to be served!

With these steps, you’ll create a flavorful dish that’s sure to please. Let’s move on to some variations you can try to make this recipe even more exciting!

Variations of Scallion Chicken Stir-Fry Recipe

Scallion Chicken Stir-Fry Recipe is a fantastic base that allows for plenty of creativity. You can easily modify it to suit your taste or dietary needs. Here are some exciting variations to consider!

Adding Vegetables for Extra Nutrition

One of the best ways to enhance your stir-fry is by adding a variety of vegetables. Not only do they boost the nutritional value, but they also add color and texture. Here are some great options:

  • Bell Peppers: Slice them into thin strips for a sweet crunch.
  • Broccoli: Cut into small florets; it adds a nice bite and is rich in vitamins.
  • Carrots: Julienne or slice them thinly for a pop of color and sweetness.
  • Snow Peas: These add a delightful crispness and are quick to cook.
  • Mushrooms: Sliced mushrooms bring an earthy flavor that complements the chicken.

When adding vegetables, toss them in after the chicken is cooked but before adding the scallions. This way, they’ll have enough time to soften while still keeping their vibrant colors. Feel free to mix and match based on what you have on hand!

Alternative Proteins to Use

If you’re looking to switch things up, consider using different proteins. Here are some tasty alternatives:

  • Tofu: A great plant-based option, tofu absorbs flavors well. Use firm or extra-firm tofu for the best texture.
  • Beef: Thinly sliced flank steak or sirloin can add a rich flavor. Just adjust the cooking time as beef cooks faster than chicken.
  • Pork: Diced pork tenderloin or shoulder can also work beautifully in this stir-fry.
  • Shrimp: Quick-cooking shrimp can be added for a seafood twist. Just be careful not to overcook them!

Scallion Chicken Stir-Fry Recipe unique and exciting. Experiment with different combinations to find your favorite! Now, let’s explore some cooking notes to ensure your dish turns out perfectly every time.

Cooking Note for Scallion Chicken Stir-Fry Recipe

Scallion Chicken Stir-Fry Recipe, a few cooking notes can help you achieve the best results. These tips will ensure that your dish is not only delicious but also visually appealing and satisfying.

First, always use a large skillet or wok. This allows for even cooking and prevents overcrowding. If the pan is too crowded, the chicken will steam instead of sear, resulting in a less desirable texture. A well-heated pan is essential for achieving that golden-brown color on the chicken.

Next, consider the order of adding ingredients. Start with the chicken, as it takes the longest to cook. Once it’s nearly done, add the garlic and ginger. These ingredients cook quickly and can burn if added too early. Finally, add the scallions and other ingredients towards the end to keep their vibrant color and crunch.

Another important note is to keep an eye on the cooking time. Chicken thighs typically take about 5-7 minutes to cook through, but this can vary based on the size of the pieces. Always check that the chicken is no longer pink in the center and reaches an internal temperature of 165°F (75°C).

Scallion Chicken Stir-Fry Recipe is just right.

By following these cooking notes, you’ll be well on your way to creating a stir-fry that’s bursting with flavor and sure to impress. Now, let’s move on to some serving suggestions to elevate your meal even further!

Serving Suggestions for Scallion Chicken Stir-Fry Recipe

Scallion Chicken Stir-Fry Recipe is ready, it’s time to think about how to serve it. The right side dishes and serving temperature can enhance the overall dining experience. Here are some suggestions to make your meal even more enjoyable!

Best Side Dishes to Pair

Pairing your stir-fry with the right side dishes can elevate the meal. Here are some delicious options:

  • Steamed Rice: A classic choice, white or brown rice absorbs the savory sauce beautifully.
  • Fried Rice: For a twist, serve your stir-fry over fried rice, adding extra flavor and texture.
  • Noodles: Lo mein or rice noodles can be a delightful base for your stir-fry, making it even heartier.
  • Asian Slaw: A fresh slaw made with cabbage, carrots, and a light dressing adds a crunchy contrast.
  • Spring Rolls: These crispy rolls can be a fun appetizer or side, complementing the stir-fry perfectly.

Scallion Chicken Stir-Fry Recipe but also add variety to your meal. Feel free to mix and match based on your preferences!

Ideal Serving Temperature

For the best taste and texture, serve your stir-fry hot. The ideal serving temperature is around 165°F (75°C). This ensures that the chicken is juicy and the scallions retain their crunch. If you’re preparing the dish ahead of time, keep it warm in a low oven or on the stovetop over low heat until you’re ready to serve.

When plating, consider garnishing with extra sliced scallions or sesame seeds for a pop of color and added flavor. This simple touch can make your dish look restaurant-quality!

Scallion Chicken Stir-Fry Recipe will be a hit at the dinner table. Now, let’s explore some tips for perfecting your stir-fry!

Tips for Perfecting Your Scallion Chicken Stir-Fry Recipe

Scallion Chicken Stir-Fry Recipe truly shine, a few tips can help you achieve the best results. These insights will ensure that your dish is not only delicious but also visually appealing and satisfying.

Choosing the Right Pan

The choice of pan can significantly impact your stir-fry. A large skillet or wok is ideal for this recipe. These pans allow for even heat distribution and provide enough space for the ingredients to cook properly. If the pan is too crowded, the chicken will steam instead of sear, leading to a less desirable texture.

When selecting your pan, consider using a non-stick surface. This will help prevent the chicken from sticking and make cleanup easier. If you prefer a traditional approach, a well-seasoned cast-iron skillet can also work wonders, giving your stir-fry a lovely sear.

Additionally, make sure your pan is preheated before adding the oil. A hot pan helps to lock in the juices of the chicken, creating that golden-brown crust we all love. So, don’t rush this step; let your pan heat up properly!

Timing Your Cooking Process

Timing is crucial in stir-frying. Each ingredient has its own cooking time, and knowing when to add them can make all the difference. Start with the chicken, as it takes the longest to cook. Once it’s nearly done, introduce the garlic and ginger. These aromatic ingredients cook quickly and can burn if added too early.

After the chicken is golden brown and cooked through, it’s time to add the scallions and any other vegetables. Stir-fry them just until they are tender but still crisp. This will keep the vibrant colors and fresh flavors intact.

Scallion Chicken Stir-Fry Recipe is just right.

Scallion Chicken Stir-Fry Recipe.

Breakdown of Time for Scallion Chicken Stir-Fry Recipe

Scallion Chicken Stir-Fry Recipe can help you plan your cooking efficiently. Here’s a simple breakdown of the time required for preparation and cooking.

Prep Time

The prep time for this delicious stir-fry is approximately 20 minutes. This includes:

  • Gathering and measuring all your ingredients.
  • Dicing the chicken thighs into even pieces.
  • Slicing the scallions and chopping the garlic and ginger.
  • Marinating the chicken for 15 minutes to enhance its flavor.

Taking your time during prep ensures that everything is ready when you start cooking. This makes the cooking process smoother and more enjoyable!

Cooking Time

Scallion Chicken Stir-Fry Recipe is about 10-15 minutes. This includes:

  • Cooking the marinated chicken until golden brown (5-7 minutes).
  • Stir-frying the garlic and ginger (1 minute).
  • Adding the scallions and other ingredients, then cooking until everything is well combined (2-3 minutes).

Keeping an eye on the cooking time is essential to ensure that the chicken is cooked through and the vegetables remain crisp.

Total Time

Scallion Chicken Stir-Fry Recipe to take about 35 minutes. This includes both prep and cooking time. It’s a quick and satisfying meal that’s perfect for busy weeknights!

With this time breakdown, you can easily fit this recipe into your schedule. Now that you know how to manage your time, let’s take a look at the nutritional information for this delightful dish!

Nutritional Information for Scallion Chicken Stir-Fry Recipe

Scallion Chicken Stir-Fry Recipe not only delights your taste buds but also provides valuable nutrients. Here’s a breakdown of the key nutritional components of this dish.

Calories

Scallion Chicken Stir-Fry Recipe contains approximately 350-400 calories. This calorie count can vary based on the specific ingredients used and portion sizes. The chicken thighs contribute a significant portion of the calories, providing a hearty and satisfying meal without being overly heavy.

Protein Content

This stir-fry is an excellent source of protein, with about 30-35 grams per serving. Chicken thighs are particularly rich in protein, making this dish a great option for those looking to increase their protein intake. Protein is essential for muscle repair and growth, making this recipe a perfect post-workout meal.

Sodium Levels

Scallion Chicken Stir-Fry Recipe is around 800-900 milligrams per serving. Most of this sodium comes from the soy sauce. If you’re watching your sodium intake, consider using low-sodium soy sauce or adjusting the amount used in the recipe. This way, you can enjoy the flavors without exceeding your daily sodium limit.

Scallion Chicken Stir-Fry Recipe is a nutritious option that balances protein, calories, and sodium. It’s a delicious way to nourish your body while enjoying a flavorful meal. Now that you have a good understanding of the nutritional information, let’s move on to some frequently asked questions about this recipe!

FAQs about Scallion Chicken Stir-Fry Recipe

Can I use frozen chicken for this recipe?

Scallion Chicken Stir-Fry Recipe. However, it’s best to thaw the chicken first. Thawing allows for even cooking and better flavor absorption. You can thaw the chicken overnight in the refrigerator or use the defrost setting on your microwave. Once thawed, follow the marinating and cooking steps as usual. Just remember, cooking time may vary slightly, so ensure the chicken reaches an internal temperature of 165°F (75°C).

What can I substitute for scallions?

If you don’t have scallions on hand, there are several great substitutes. Chives are a fantastic option, offering a similar mild onion flavor. You can also use shallots, which provide a sweeter taste. If you prefer a stronger flavor, diced yellow or white onions can work, but use them sparingly as they are more potent. Fresh herbs like parsley or cilantro can add a fresh touch, though they will change the flavor profile slightly. Feel free to experiment with what you have available!

How do I store leftovers?

Scallion Chicken Stir-Fry Recipe is easy! Allow the dish to cool to room temperature, then transfer it to an airtight container. You can store it in the refrigerator for up to 3-4 days. If you want to keep it longer, consider freezing it. Place the stir-fry in a freezer-safe container or bag, and it can last for up to 3 months. When ready to eat, simply thaw in the refrigerator overnight and reheat in a skillet or microwave until heated through.

Can I make this recipe gluten-free?

Scallion Chicken Stir-Fry Recipe gluten-free is simple. The main ingredient to replace is soy sauce. Look for gluten-free soy sauce or tamari, which is a great alternative. Additionally, ensure that any other sauces or condiments you use are gluten-free. With these adjustments, you can enjoy a delicious and gluten-free stir-fry that everyone will love!

Scallion Chicken Stir-Fry Recipe. Now that you’re well-informed, let’s wrap up with a conclusion on this delightful dish!

Conclusion on Scallion Chicken Stir-Fry Recipe

Scallion Chicken Stir-Fry Recipe is a delightful dish that brings together vibrant flavors and wholesome ingredients. It’s not just a meal; it’s an experience that can be enjoyed by everyone at the table. With its quick preparation time and versatility, this recipe is perfect for busy weeknights or special occasions.

By following the steps outlined in this article, you can create a dish that is not only delicious but also packed with nutrition. The combination of tender chicken, fresh scallions, and aromatic garlic and ginger creates a symphony of flavors that will leave your taste buds dancing. Plus, the ability to customize the recipe with various vegetables or proteins makes it a fantastic option for any dietary preference.

Scallion Chicken Stir-Fry Recipe is sure to become a favorite in your kitchen.

So, gather your ingredients, fire up that skillet, and enjoy the process of creating this wonderful dish. Your family and friends will appreciate the effort, and you’ll feel great knowing you’ve prepared a meal that’s both satisfying and nourishing. Happy cooking!

Stay Connected

Get recipes via email: