Introduction to Garlic Chicken Gnocchi Recipe
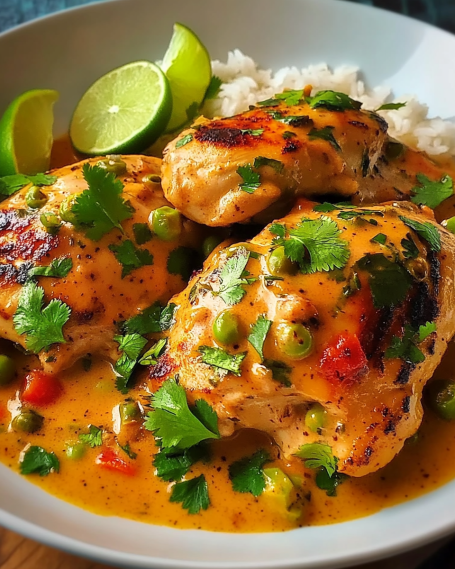
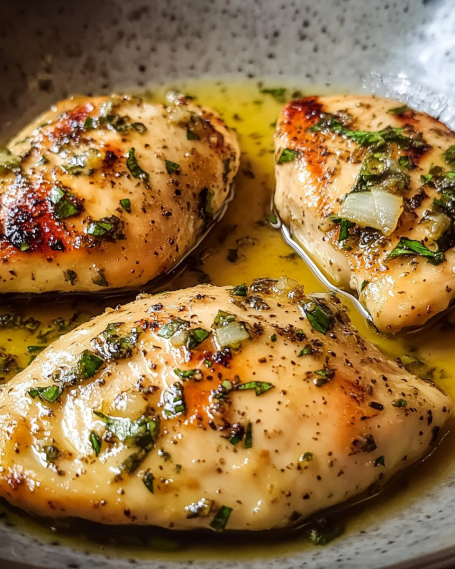
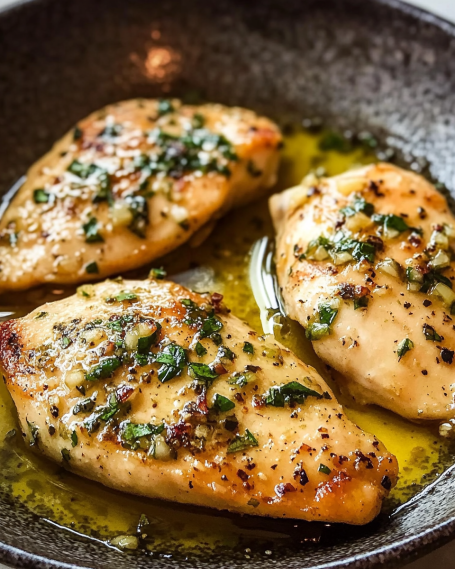
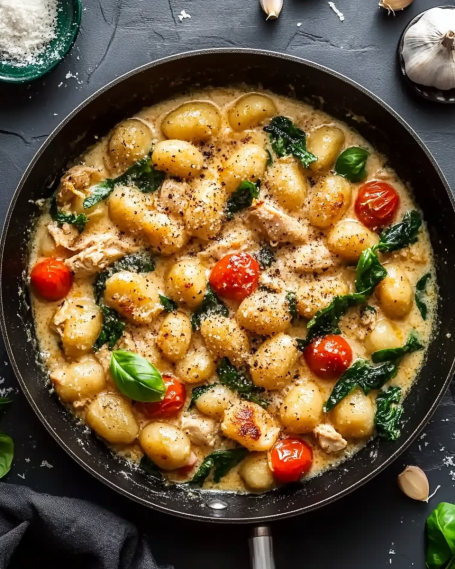
Are you looking for a delicious and comforting meal that’s easy to prepare? Look no further than the Garlic Chicken Gnocchi Recipe! This dish combines tender chicken, pillowy gnocchi, and vibrant vegetables, all enveloped in a creamy garlic sauce. It’s a perfect choice for a weeknight dinner or a cozy gathering with friends and family.
What Makes Garlic Chicken Gnocchi Special?
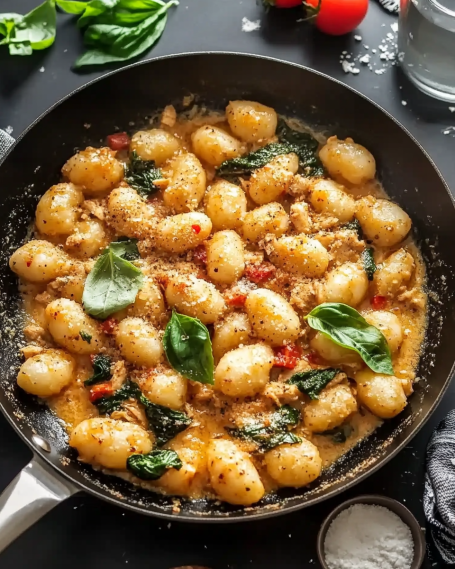
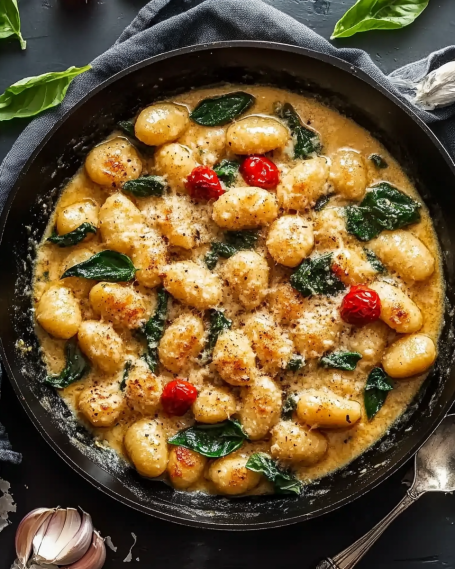
What sets this Garlic Chicken Gnocchi apart is its delightful blend of flavors and textures. The gnocchi, made from potatoes, offers a unique softness that pairs beautifully with the juicy chicken. The garlic adds a fragrant aroma, while the cherry tomatoes and spinach bring freshness to the dish. Plus, the creamy sauce ties everything together, making each bite a burst of flavor. It’s not just a meal; it’s an experience!
The Origins of Gnocchi
Gnocchi has a rich history that dates back to ancient Italy. Originally, these little dumplings were made from flour and water. Over time, potatoes became the main ingredient, creating the soft, pillowy texture we love today. Gnocchi is often served with various sauces, from simple butter and sage to hearty meat sauces. This versatility makes it a beloved staple in Italian cuisine. By incorporating gnocchi into the Garlic Chicken Gnocchi Recipe, you’re not only enjoying a delicious meal but also a taste of culinary tradition.
Ingredients for Garlic Chicken Gnocchi Recipe
To create the delightful Garlic Chicken Gnocchi, you’ll need a few simple yet flavorful ingredients. Each component plays a vital role in building the dish’s rich taste and satisfying texture. Here’s what you’ll need:
- 2 tablespoons olive oil: This adds a rich flavor and helps cook the chicken.
- 1 pound boneless, skinless chicken breasts: Cut into bite-sized pieces for easy cooking and eating.
- 1 teaspoon salt: Enhances the overall flavor of the dish.
- 1/2 teaspoon black pepper: Adds a subtle kick to the chicken.
- 4 cloves garlic, minced: The star ingredient that brings a wonderful aroma and taste.
- 1 cup cherry tomatoes, halved: These add sweetness and a pop of color.
- 1 cup spinach leaves: Provides freshness and a nutritious boost.
- 1 pound potato gnocchi: The main carbohydrate that makes this dish hearty.
- 1/2 cup heavy cream: Creates a rich and creamy sauce.
- 1/2 cup grated Parmesan cheese: Adds a savory depth and creaminess.
- 1 teaspoon Italian seasoning: A blend of herbs that enhances the flavor profile.
- Fresh basil leaves for garnish (optional): Adds a fresh touch and beautiful presentation.
Gathering these ingredients will set you on the path to creating a delicious Garlic Chicken Gnocchi that everyone will love. Each item contributes to the dish’s overall flavor, making it a delightful meal for any occasion.
Step-by-Step Preparation of Garlic Chicken Gnocchi Recipe
Now that you have all your ingredients ready, it’s time to dive into the cooking process! This Garlic Chicken Gnocchi Recipe is straightforward and fun to make. Follow these steps to create a delicious meal that will impress your family and friends.
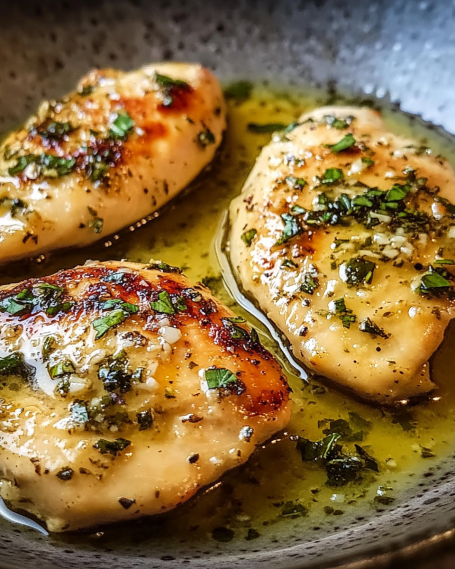
Step 1: Preparing the Chicken
Start by heating 2 tablespoons of olive oil in a large skillet over medium heat. Once the oil is hot, add 1 pound of bite-sized chicken pieces. Season the chicken with 1 teaspoon of salt and 1/2 teaspoon of black pepper. Cook the chicken for about 5-7 minutes, stirring occasionally, until it’s browned and cooked through. Once done, remove the chicken from the skillet and set it aside. This step ensures your chicken is juicy and flavorful.
Step 2: Cooking the Gnocchi
While the chicken is cooking, you can prepare the gnocchi. Follow the package instructions for cooking 1 pound of potato gnocchi. Usually, this involves boiling them in salted water until they float to the surface, which takes just a few minutes. Once cooked, drain the gnocchi and set them aside. This step is crucial as it gives the gnocchi the perfect texture for your dish.
Step 3: Making the Garlic Sauce
In the same skillet where you cooked the chicken, add the minced garlic (4 cloves) and sauté for about 1 minute. You want to cook it just until it becomes fragrant, but be careful not to burn it. Next, add 1 cup of halved cherry tomatoes and 1 cup of spinach leaves. Cook these for about 2-3 minutes, stirring occasionally, until the spinach wilts and the tomatoes soften. This step adds a burst of color and flavor to your sauce.
Step 4: Combining Ingredients
Now it’s time to bring everything together! Return the cooked chicken to the skillet. Then, pour in 1/2 cup of heavy cream, add 1/2 cup of grated Parmesan cheese, and sprinkle in 1 teaspoon of Italian seasoning. Stir everything together and let it simmer for 2-3 minutes. This allows the sauce to thicken slightly and the flavors to meld beautifully.
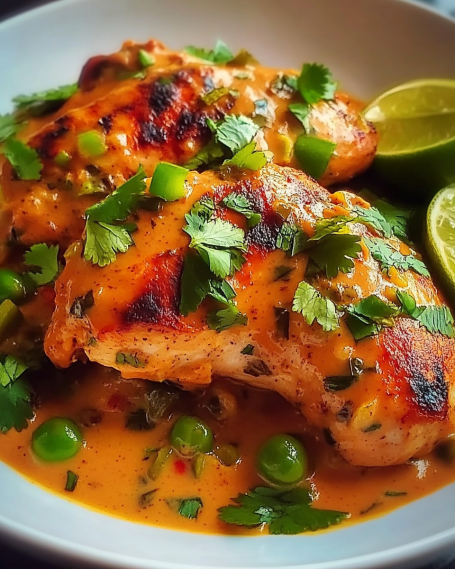
Step 5: Final Touches
Finally, add the cooked gnocchi to the skillet. Toss everything together gently until the gnocchi is well coated with the creamy sauce. This step is where the magic happens! Serve your Garlic Chicken Gnocchi hot, garnished with fresh basil leaves if desired. Enjoy your delicious creation!
Variations of Garlic Chicken Gnocchi Recipe
While the classic Garlic Chicken Gnocchi Recipe is a hit on its own, there are plenty of ways to switch things up! Whether you’re looking for a vegetarian option or want to add some heat, these variations will keep your meals exciting and delicious.
Vegetarian Option
If you want to enjoy a meat-free version, simply replace the chicken with hearty vegetables. You can use ingredients like mushrooms, zucchini, or bell peppers. Start by sautéing these vegetables in olive oil until they are tender. Follow the same steps as the original recipe, adding the garlic, tomatoes, and spinach. This vegetarian Garlic Gnocchi will still be creamy and flavorful, making it a satisfying meal for everyone!
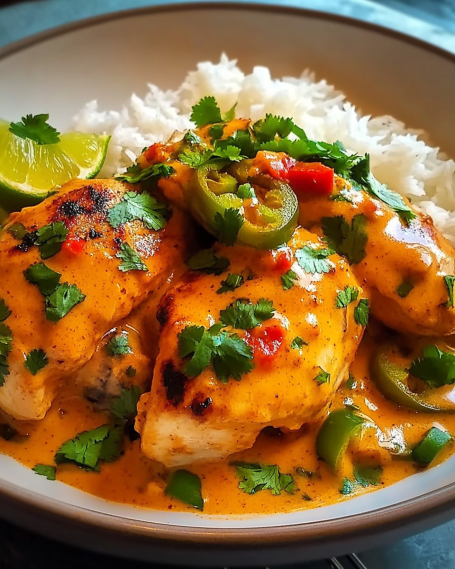
Spicy Garlic Chicken Gnocchi
For those who love a little kick, try making Spicy Garlic Chicken Gnocchi! To add heat, include red pepper flakes or diced jalapeños when cooking the garlic. You can also use spicy Italian sausage instead of chicken for an extra flavor boost. Just remember to adjust the amount of salt, as sausage can be saltier than chicken. This variation will surely spice up your dinner table!
Cooking Note for Garlic Chicken Gnocchi Recipe
When preparing the Garlic Chicken Gnocchi Recipe, a few cooking notes can help ensure your dish turns out perfectly every time. These tips will enhance your cooking experience and the final flavor of your meal.
First, always use fresh ingredients when possible. Fresh garlic, ripe cherry tomatoes, and vibrant spinach will elevate the taste of your dish. Fresh ingredients not only add flavor but also provide essential nutrients, making your meal healthier.
Next, pay attention to the cooking time for the chicken. Overcooking can lead to dry chicken, while undercooking can be unsafe. Aim for a golden-brown color and ensure the internal temperature reaches 165°F (75°C). Using a meat thermometer can help you achieve this accuracy.
Additionally, when cooking the gnocchi, avoid overcrowding the pot. If you’re making a large batch, consider cooking them in two separate pots. This ensures they cook evenly and don’t stick together. Remember, gnocchi is done when it floats to the surface, which usually takes just a few minutes.
Lastly, don’t rush the simmering process after adding the cream and cheese. Allowing the sauce to simmer for a few minutes helps it thicken and develop a rich flavor. Stir occasionally to prevent sticking and ensure even cooking.
By following these cooking notes, you’ll create a Garlic Chicken Gnocchi that’s not only delicious but also a joy to prepare. Happy cooking!
Serving Suggestions for Garlic Chicken Gnocchi Recipe
Once you’ve prepared your delightful Garlic Chicken Gnocchi, it’s time to think about how to serve it! The right sides and drinks can elevate your meal, making it even more enjoyable. Here are some fantastic serving suggestions to complement your dish.
Pairing with Sides
To create a well-rounded meal, consider serving your Garlic Chicken Gnocchi with some tasty sides. Here are a few ideas:
- Garlic Bread: A classic choice! The buttery, garlicky flavor pairs perfectly with the creamy gnocchi.
- Mixed Green Salad: A fresh salad with a light vinaigrette can balance the richness of the dish. Add ingredients like cucumbers, radishes, and cherry tomatoes for extra crunch.
- Roasted Vegetables: Seasonal veggies like zucchini, bell peppers, or asparagus can add color and nutrition to your meal. Simply toss them in olive oil, season, and roast until tender.
These sides not only enhance the meal but also provide a variety of textures and flavors that everyone will love.
Ideal Wine Pairings
When it comes to drinks, a good wine can elevate your dining experience. Here are some wine options that pair beautifully with Garlic Chicken Gnocchi:
- Chardonnay: A buttery Chardonnay complements the creamy sauce and enhances the flavors of the dish.
- Sauvignon Blanc: This wine’s crisp acidity can cut through the richness, making it a refreshing choice.
- Pinot Grigio: A light and fruity Pinot Grigio pairs well with the garlic and vegetables, adding a nice balance.
Choosing the right wine can make your meal feel special and sophisticated. Enjoy your Garlic Chicken Gnocchi with these delightful pairings for a complete dining experience!
Tips for Perfecting Garlic Chicken Gnocchi Recipe
To ensure your Garlic Chicken Gnocchi turns out perfectly every time, consider these helpful tips. They will enhance the flavor and texture of your dish, making it a favorite for family and friends.
Choosing the Right Gnocchi
When selecting gnocchi, you have a few options. Fresh gnocchi is often softer and more flavorful than dried varieties. If you can find it, go for fresh potato gnocchi from the refrigerated section of your grocery store. However, if you prefer convenience, high-quality dried gnocchi works well too. Just remember to follow the cooking instructions carefully to achieve the best texture.
Additionally, consider trying different types of gnocchi, such as spinach or whole wheat. These variations can add unique flavors and nutritional benefits to your dish. Experimenting with different gnocchi types can make your Garlic Chicken Gnocchi even more exciting!
Enhancing Flavor with Herbs
Herbs can elevate the flavor of your Garlic Chicken Gnocchi significantly. While the recipe calls for Italian seasoning, feel free to add fresh herbs like thyme, oregano, or parsley. These herbs can bring a fresh and aromatic quality to your dish.
For an extra burst of flavor, consider adding a squeeze of lemon juice just before serving. The acidity will brighten the dish and balance the creaminess of the sauce. You can also sprinkle some red pepper flakes for a hint of heat, making your meal even more delightful.
By following these tips, you’ll create a Garlic Chicken Gnocchi that’s not only delicious but also tailored to your taste preferences. Enjoy the process of cooking and the wonderful flavors that come together in this comforting dish!
Breakdown of Time for Garlic Chicken Gnocchi Recipe
Understanding the time needed for each step in the Garlic Chicken Gnocchi Recipe can help you plan your cooking efficiently. Here’s a simple breakdown of the time required for preparation and cooking:
Prep Time
Preparing the ingredients is the first step. This includes cutting the chicken, mincing the garlic, and halving the cherry tomatoes. Overall, you should set aside about 15 minutes for prep work. Having everything ready will make the cooking process smoother and more enjoyable.
Cooking Time
The actual cooking time for the Garlic Chicken Gnocchi is approximately 20-25 minutes. This includes cooking the chicken, sautéing the garlic and vegetables, and simmering the sauce. Each step is quick, allowing you to create a delicious meal in no time!
Total Time
In total, you can expect to spend around 35-40 minutes from start to finish. This makes the Garlic Chicken Gnocchi Recipe a fantastic option for a weeknight dinner when you want something tasty without spending hours in the kitchen.
By keeping track of your time, you can enjoy a delicious meal without feeling rushed. Plus, the quick preparation and cooking time make this recipe perfect for busy days!
Nutritional Information for Garlic Chicken Gnocchi Recipe
Understanding the nutritional content of your meals is essential for maintaining a balanced diet. The Garlic Chicken Gnocchi Recipe not only delights your taste buds but also provides valuable nutrients. Here’s a breakdown of the nutritional information per serving:
Calories
Each serving of Garlic Chicken Gnocchi contains approximately 450 calories. This calorie count makes it a satisfying meal that can fit into a variety of dietary plans. The combination of chicken, gnocchi, and creamy sauce provides a hearty dish that keeps you full and energized.
Protein
With about 30 grams of protein per serving, this recipe is an excellent source of this essential nutrient. Protein is crucial for muscle repair and growth, making this dish a great option for those who lead an active lifestyle. The chicken and Parmesan cheese contribute significantly to the protein content, ensuring you get a nutritious meal.
Sodium
The sodium content in each serving is approximately 800 milligrams. While sodium is necessary for bodily functions, it’s important to monitor your intake. If you’re watching your sodium levels, consider using low-sodium chicken broth or reducing the amount of added salt in the recipe. This way, you can enjoy the flavors without compromising your health goals.
By being aware of the nutritional information, you can make informed choices about your meals. The Garlic Chicken Gnocchi Recipe offers a delicious balance of calories, protein, and sodium, making it a delightful addition to your dinner rotation.
FAQs about Garlic Chicken Gnocchi Recipe
Can I use store-bought gnocchi for this recipe?
Absolutely! Using store-bought gnocchi is a great option for this Garlic Chicken Gnocchi Recipe. Many grocery stores offer fresh or frozen gnocchi, which can save you time in the kitchen. Just be sure to follow the cooking instructions on the package for the best results. Store-bought gnocchi can be just as delicious as homemade, making it a convenient choice for busy weeknights.
How can I store leftovers of Garlic Chicken Gnocchi?
If you have leftovers, storing them is easy! Allow the Garlic Chicken Gnocchi to cool completely before transferring it to an airtight container. You can keep it in the refrigerator for up to 3 days. When you’re ready to enjoy it again, simply reheat it on the stove over low heat, adding a splash of cream or broth to loosen the sauce. This will help maintain the creamy texture and flavor of the dish.
What can I substitute for chicken in this recipe?
If you’re looking for a substitute for chicken, there are several delicious options! You can use cooked shrimp, diced tofu, or even chickpeas for a plant-based alternative. Each of these options will provide a different flavor and texture, but they will still work well with the creamy garlic sauce. Feel free to experiment and find the substitute that you enjoy the most!
Is this recipe suitable for meal prep?
Yes, the Garlic Chicken Gnocchi Recipe is perfect for meal prep! You can prepare the entire dish ahead of time and store it in individual portions. Just remember to store the gnocchi and sauce together to keep everything flavorful. When you’re ready to eat, simply reheat it in the microwave or on the stove. This makes it a convenient and tasty option for busy days when you want a homemade meal without the fuss!
Conclusion on Garlic Chicken Gnocchi Recipe
In conclusion, the Garlic Chicken Gnocchi Recipe is a delightful dish that brings together comforting flavors and satisfying textures. With its creamy garlic sauce, tender chicken, and pillowy gnocchi, this meal is sure to please everyone at your table. Whether you’re cooking for a family dinner or a cozy night in, this recipe is both easy to prepare and incredibly delicious.
Not only does this dish offer a wonderful taste experience, but it also allows for creativity in the kitchen. You can easily adapt the recipe to suit your dietary preferences, whether you choose to go vegetarian or add a spicy twist. The versatility of the ingredients means you can make it your own, ensuring that every meal feels special.
Moreover, the nutritional benefits of this recipe make it a smart choice for those looking to maintain a balanced diet. With a good amount of protein and essential nutrients, Garlic Chicken Gnocchi is not just a treat for your taste buds but also a nourishing option for your body.
So, gather your ingredients, follow the steps, and enjoy the process of creating this delightful dish. Your family and friends will surely appreciate the effort, and you’ll love the satisfaction of serving a homemade meal that’s both comforting and flavorful. Happy cooking!