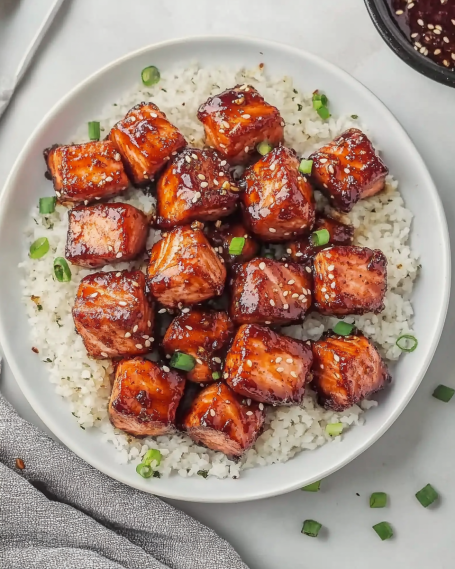
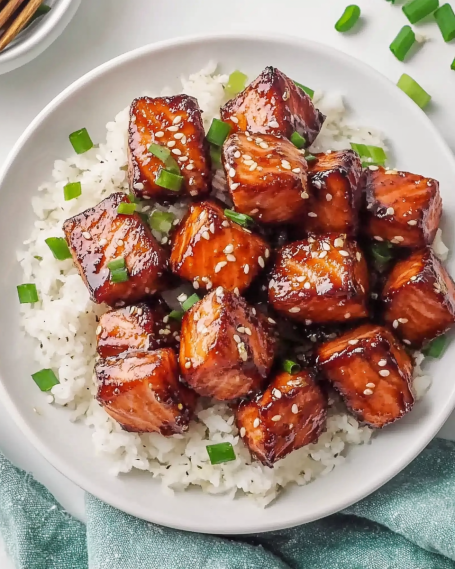
Introduction to Mediterranean Herb-Crusted Salmon Recipe
Are you looking for a delicious and healthy meal that’s easy to prepare? Look no further than the Mediterranean Herb-Crusted Salmon Recipe! This dish combines the rich flavors of the Mediterranean with the health benefits of salmon. It’s not just a meal; it’s an experience that brings the taste of the sun-soaked coasts right to your kitchen.
What Makes Mediterranean Herb-Crusted Salmon Unique?
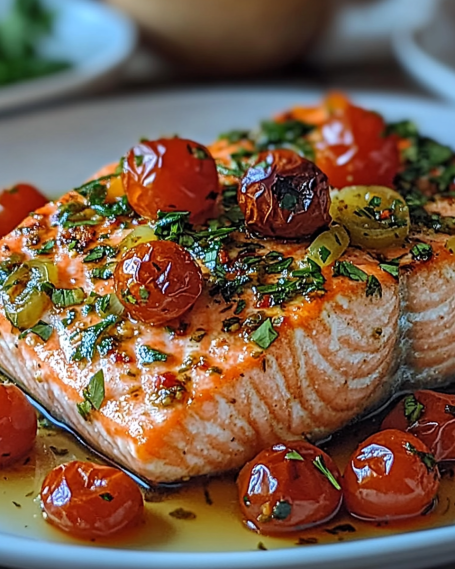
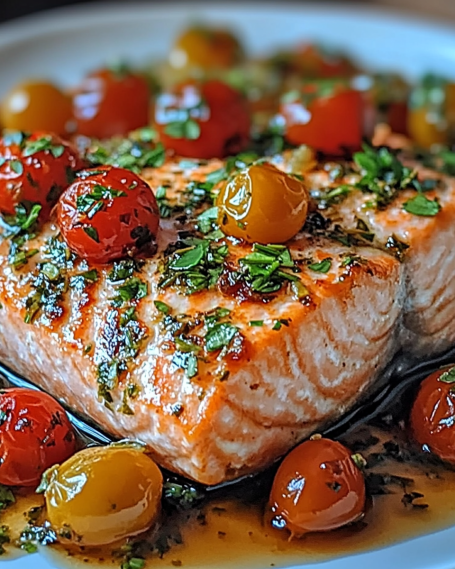
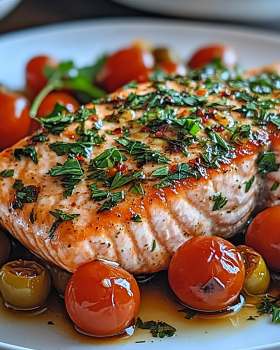
What sets this recipe apart is its vibrant blend of herbs and fresh ingredients. The combination of dried oregano, thyme, and garlic powder creates a flavorful crust that enhances the natural taste of the salmon. Plus, the addition of cherry tomatoes and Kalamata olives adds a burst of color and flavor, making the dish visually appealing and nutritious.
Another unique aspect is the use of feta cheese. When sprinkled on top, it melts slightly, adding a creamy texture that complements the flaky salmon perfectly. This recipe is not only packed with protein but also low in carbs, making it a great choice for those watching their diet.
Moreover, the Mediterranean Herb-Crusted Salmon Recipe is versatile. You can easily swap out the salmon for other fish like trout or tilapia, allowing you to customize it to your taste. Whether you’re cooking for a family dinner or a special occasion, this dish is sure to impress.
In the following sections, we will dive deeper into the ingredients, preparation steps, and tips to make your Mediterranean Herb-Crusted Salmon a hit at your table. Get ready to enjoy a meal that’s as healthy as it is delicious!
Ingredients for Mediterranean Herb-Crusted Salmon Recipe
To create the delightful Mediterranean Herb-Crusted Salmon, you’ll need a selection of fresh and flavorful ingredients. Each component plays a vital role in bringing out the best in this dish. Here’s what you’ll need:
- 4 salmon fillets (6 ounces each) – Choose fresh, high-quality salmon for the best flavor.
- 1/4 cup olive oil – This healthy fat adds richness and helps the herbs stick to the salmon.
- 2 tablespoons lemon juice – Fresh lemon juice brightens the dish and balances the flavors.
- 2 teaspoons dried oregano – A classic Mediterranean herb that adds a warm, earthy flavor.
- 2 teaspoons dried thyme – This herb complements the salmon beautifully with its subtle sweetness.
- 2 teaspoons garlic powder – For a hint of garlic flavor without the fuss of fresh garlic.
- 1 teaspoon salt – Enhances all the flavors in the dish.
- 1/2 teaspoon black pepper – Adds a touch of heat and depth.
- 1/4 cup cherry tomatoes, halved – These juicy tomatoes add freshness and color.
- 1/4 cup Kalamata olives, pitted and sliced – Their briny flavor brings a Mediterranean touch.
- 1/4 cup feta cheese, crumbled – This creamy cheese adds richness and tang.
- 1 tablespoon fresh parsley, chopped (for garnish) – A sprinkle of parsley adds a pop of color and freshness.
Gathering these ingredients will set you on the path to creating a mouthwatering Mediterranean Herb-Crusted Salmon. Each item contributes to the overall taste and presentation, making this dish not only delicious but also visually appealing. Now that you have your ingredients ready, let’s move on to the preparation steps!
Step-by-Step Preparation of Mediterranean Herb-Crusted Salmon Recipe
Now that you have gathered all your ingredients, it’s time to dive into the preparation of your Mediterranean Herb-Crusted Salmon. This step-by-step guide will help you create a dish that’s not only delicious but also visually stunning. Let’s get started!
Step 1: Preparing the Salmon Fillets
First, you need to prepare the salmon fillets. Start by rinsing them under cold water. This helps remove any residual scales or impurities. After rinsing, gently pat the fillets dry with paper towels. This step is crucial as it ensures the herb mixture adheres well to the salmon.
Next, place the salmon fillets on a clean cutting board or a plate, skin side down. If you prefer, you can remove the skin, but leaving it on helps keep the fish moist during cooking. Make sure the fillets are evenly sized for consistent cooking.
Step 2: Creating the Herb Crust
In a small bowl, whisk together the olive oil, lemon juice, dried oregano, dried thyme, garlic powder, salt, and black pepper. This mixture will serve as the flavorful herb crust for your salmon. Whisking well ensures that all the ingredients are combined evenly.
Once mixed, take a brush or a spoon and generously apply the herb mixture over the top of each salmon fillet. Make sure to cover the entire surface for maximum flavor. The olive oil will help the herbs stick and create a beautiful crust when baked.
Step 3: Assembling the Dish
Now it’s time to assemble your dish. Take the prepared baking sheet and arrange the salmon fillets on it, skin side down. Make sure to leave some space between each fillet for even cooking.
Next, scatter the halved cherry tomatoes and sliced Kalamata olives around the salmon. These ingredients not only add flavor but also create a colorful presentation. The tomatoes will roast beautifully, enhancing their sweetness, while the olives provide a briny contrast.
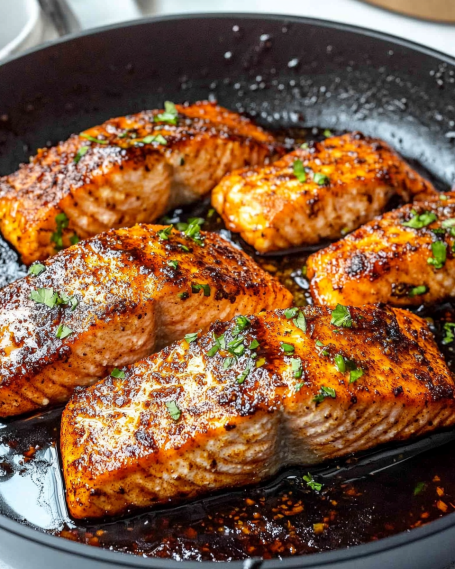
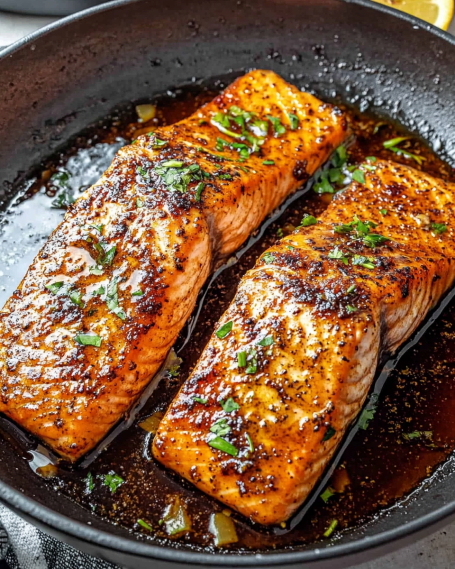
Step 4: Cooking the Salmon
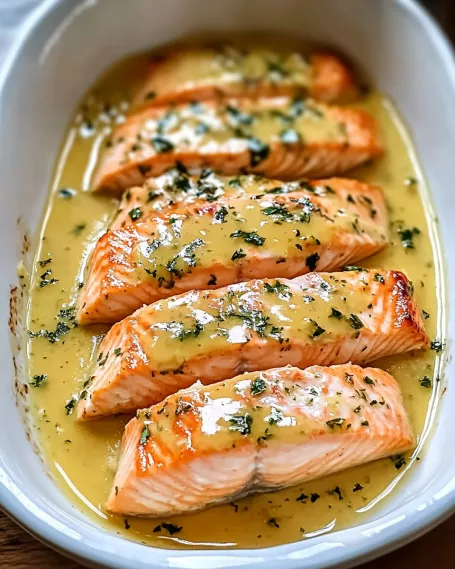
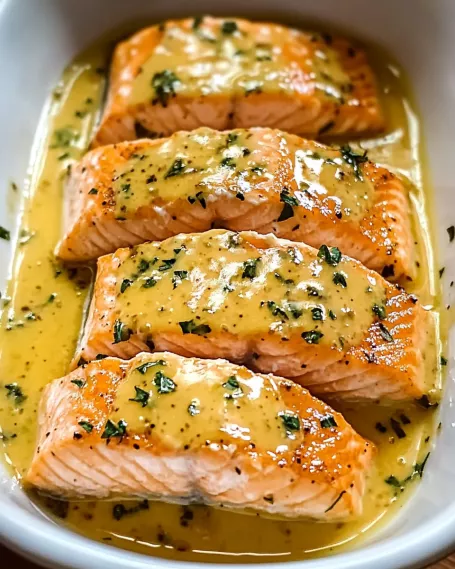
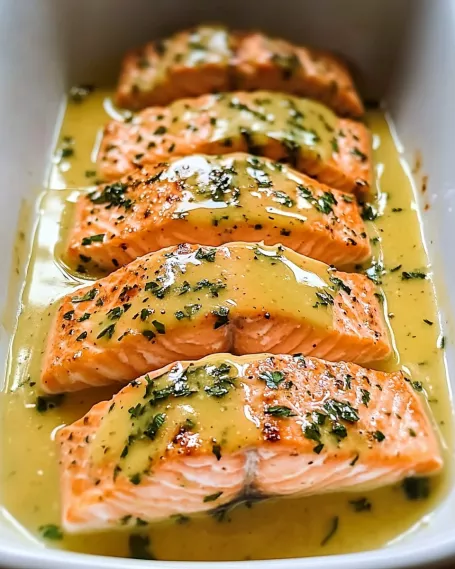
Preheat your oven to 400°F (200°C) if you haven’t done so already. Once the oven is ready, place the baking sheet with the salmon in the oven. Bake for 12-15 minutes. The salmon is done when it flakes easily with a fork and reaches an internal temperature of 145°F (63°C).
After the initial baking time, remove the salmon from the oven. Sprinkle the crumbled feta cheese over the top of each fillet. Return the baking sheet to the oven for an additional 2-3 minutes. This will warm the feta and allow it to melt slightly, adding a creamy texture to the dish.
Once done, take the salmon out of the oven and garnish with fresh parsley. Your Mediterranean Herb-Crusted Salmon is now ready to be served!
Variations of Mediterranean Herb-Crusted Salmon Recipe
While the Mediterranean Herb-Crusted Salmon Recipe is delicious as is, there are many ways to switch things up! Whether you want to experiment with different flavors or try new cooking methods, these variations will keep your meals exciting. Let’s explore some alternative herbs and spices, as well as different cooking methods you can use.
Alternative Herbs and Spices
One of the best things about this recipe is its versatility. You can easily customize the herb crust to suit your taste. Here are some alternative herbs and spices you might consider:
- Basil: Fresh or dried basil adds a sweet, aromatic flavor that pairs well with salmon.
- Dill: This herb has a light, fresh taste that complements fish beautifully. Use fresh dill for the best flavor.
- Rosemary: A strong, fragrant herb that can add a robust flavor to your salmon. Use it sparingly, as it can be quite potent.
- Smoked Paprika: For a hint of smokiness, add smoked paprika to the herb mixture. It gives a unique twist to the dish.
- Chili Flakes: If you like a bit of heat, sprinkle some chili flakes into the herb mixture for a spicy kick.
Feel free to mix and match these herbs and spices to create your own signature flavor profile. The key is to balance the flavors so that they enhance the salmon without overpowering it.
Different Cooking Methods
In addition to baking, there are several other cooking methods you can use to prepare your Mediterranean Herb-Crusted Salmon. Each method brings out different flavors and textures:
- Grilling: For a smoky flavor, grill the salmon fillets. Preheat your grill and cook the salmon for about 5-7 minutes on each side, depending on thickness.
- Pan-Seering: Heat a skillet over medium-high heat and add a little olive oil. Cook the salmon fillets for about 4-5 minutes on each side until golden brown and cooked through.
- Broiling: Place the salmon under the broiler for a quick cook. This method gives a nice char on top. Broil for about 6-8 minutes, keeping a close eye to prevent burning.
- Air Frying: If you have an air fryer, this is a great option! Cook the salmon at 375°F (190°C) for about 10-12 minutes for a crispy exterior.
Each cooking method offers a unique taste and texture, so don’t hesitate to try them all! With these variations, your Mediterranean Herb-Crusted Salmon will never get boring. Enjoy experimenting and finding your favorite way to prepare this delightful dish!
Cooking Note for Mediterranean Herb-Crusted Salmon Recipe
Cooking salmon can be a delightful experience, but there are a few important notes to keep in mind to ensure your Mediterranean Herb-Crusted Salmon turns out perfectly every time. Here are some tips to help you achieve the best results:
First, always choose fresh salmon fillets. Fresh fish not only tastes better but also has a firmer texture. If you can, buy wild-caught salmon for its superior flavor and health benefits. When selecting your salmon, look for bright, moist fillets with a vibrant color. Avoid any that appear dull or have a strong fishy smell.
Next, pay attention to the thickness of your salmon fillets. Thicker fillets may require a longer cooking time, while thinner ones will cook faster. To ensure even cooking, try to select fillets that are similar in size. This way, they will all finish cooking at the same time.
Another important note is to avoid overcooking the salmon. Salmon is best when it’s cooked just until it flakes easily with a fork. Overcooking can lead to dry, tough fish. Using a meat thermometer can help you check the internal temperature. Aim for 145°F (63°C) for perfectly cooked salmon.
Lastly, let the salmon rest for a few minutes after removing it from the oven. This allows the juices to redistribute, making the fish even more tender and flavorful. Serve it warm, and don’t forget to garnish with fresh parsley for that extra touch of color and flavor!
By following these cooking notes, you’ll be well on your way to creating a delicious Mediterranean Herb-Crusted Salmon that will impress your family and friends. Enjoy the process and savor every bite of this delightful dish!
Serving Suggestions for Mediterranean Herb-Crusted Salmon Recipe
Once your Mediterranean Herb-Crusted Salmon is ready, it’s time to think about how to serve it. Pairing this flavorful dish with the right sides and drinks can elevate your meal to a whole new level. Here are some ideal side dishes and wine pairings that complement the rich flavors of the salmon.
Ideal Side Dishes
Choosing the right side dishes can enhance the overall dining experience. Here are some delicious options that pair wonderfully with Mediterranean Herb-Crusted Salmon:
- Roasted Vegetables: A mix of seasonal vegetables like zucchini, bell peppers, and asparagus roasted with olive oil and herbs makes a colorful and nutritious side.
- Quinoa Salad: A light quinoa salad with cucumbers, tomatoes, and a lemon vinaigrette adds a refreshing touch to your meal.
- Garlic Mashed Potatoes: Creamy mashed potatoes with a hint of garlic provide a comforting contrast to the flaky salmon.
- Greek Salad: A classic Greek salad with feta, olives, and fresh veggies brings a Mediterranean flair that complements the salmon beautifully.
- Steamed Green Beans: Lightly steamed green beans tossed with a bit of olive oil and lemon zest offer a crisp and vibrant side.
These side dishes not only enhance the flavors of the salmon but also add a variety of textures and colors to your plate. Feel free to mix and match based on your preferences and what you have on hand!
Wine Pairings
To complete your meal, consider pairing your Mediterranean Herb-Crusted Salmon with the right wine. Here are some excellent options:
- Sauvignon Blanc: This white wine is crisp and refreshing, with citrus notes that complement the lemon and herbs in the dish.
- Chardonnay: A lightly oaked Chardonnay offers a creamy texture that pairs well with the richness of the salmon and feta cheese.
- Pinot Grigio: This light and zesty wine enhances the flavors of the Mediterranean ingredients, making it a perfect match.
- Rosé: A dry rosé provides a fruity and floral note that balances the savory elements of the dish.
- Red Blend: If you prefer red wine, a light red blend can work well, especially if it has fruity undertones.
Choosing the right wine can elevate your dining experience, making it even more enjoyable. Remember to serve your wine chilled for white and rosé options, while light reds can be served slightly cooler than room temperature.
With these serving suggestions, your Mediterranean Herb-Crusted Salmon will not only taste amazing but also look and feel like a gourmet meal. Enjoy every bite and sip!
Tips for Perfecting Mediterranean Herb-Crusted Salmon Recipe
To ensure your Mediterranean Herb-Crusted Salmon turns out perfectly every time, consider these helpful tips. These suggestions will enhance the flavor, texture, and overall presentation of your dish. Let’s dive into some expert advice!
First, marinating the salmon can significantly boost its flavor. If you have time, let the salmon sit in the herb mixture for about 30 minutes before baking. This allows the flavors to penetrate the fish, making it even more delicious.
Next, pay attention to the cooking time. Salmon fillets can vary in thickness, so it’s essential to check for doneness. Use a fork to see if the fish flakes easily. If it does, it’s ready! If not, give it a few more minutes in the oven.
Another tip is to use a meat thermometer. This tool can help you achieve the perfect internal temperature of 145°F (63°C). This ensures your salmon is cooked through but still moist and tender.
For added texture, consider broiling the salmon for the last few minutes of cooking. This will create a crispy top while keeping the inside juicy. Just keep a close eye on it to prevent burning!
Lastly, presentation matters! When serving, arrange the salmon on a platter with the roasted cherry tomatoes and olives. A sprinkle of fresh parsley not only adds color but also a burst of freshness. This simple touch can elevate your dish from ordinary to extraordinary.
By following these tips, you’ll be well on your way to mastering the Mediterranean Herb-Crusted Salmon Recipe. Enjoy the process and the delightful flavors that come with it!
Breakdown of Time for Mediterranean Herb-Crusted Salmon Recipe
Understanding the time needed for each step of the Mediterranean Herb-Crusted Salmon Recipe can help you plan your meal better. Here’s a detailed breakdown of the time required for preparation and cooking.
Prep Time
The prep time for this delicious dish is quite manageable. You’ll need about 15-20 minutes to gather your ingredients and prepare the salmon. This includes rinsing the fillets, mixing the herb crust, and assembling everything on the baking sheet. If you choose to marinate the salmon, add an extra 30 minutes to this time. Marinating enhances the flavor and makes the dish even more delightful!
Cooking Time
Once your salmon is prepped, the cooking time is relatively quick. Preheat your oven to 400°F (200°C) and bake the salmon for 12-15 minutes. The exact time will depend on the thickness of your fillets. After the initial baking, you’ll add the feta cheese and return it to the oven for an additional 2-3 minutes. In total, expect about 15-18 minutes of cooking time.
Total Time
When you combine the prep and cooking times, the total time for the Mediterranean Herb-Crusted Salmon Recipe is approximately 30-38 minutes. If you include marinating time, the total can extend to about 1 hour. This makes it a perfect option for a weeknight dinner or a special occasion when you want to impress your guests without spending all day in the kitchen!
With this time breakdown, you can easily fit this flavorful dish into your schedule. Enjoy the process and the wonderful aromas that will fill your kitchen as you prepare this Mediterranean delight!
Nutritional Information for Mediterranean Herb-Crusted Salmon Recipe
Understanding the nutritional content of your meals is essential for maintaining a balanced diet. The Mediterranean Herb-Crusted Salmon Recipe not only delights your taste buds but also offers a range of health benefits. Let’s break down the key nutritional components of this dish.
Calories
Each serving of the Mediterranean Herb-Crusted Salmon contains approximately 350 calories. This makes it a satisfying yet light option for dinner. The calorie count comes from the healthy fats in the salmon and olive oil, along with the nutritious ingredients like tomatoes and olives. This dish is perfect for those looking to enjoy a flavorful meal without overindulging.
Protein Content
One of the standout features of this recipe is its high protein content. Each serving provides about 34 grams of protein. Salmon is an excellent source of protein, which is essential for muscle repair and growth. Including this dish in your diet can help you meet your daily protein needs while enjoying a delicious meal.
Sodium Levels
When it comes to sodium, each serving of the Mediterranean Herb-Crusted Salmon contains around 600 milligrams. While this is a moderate amount, it’s important to be mindful of your overall sodium intake, especially if you are watching your salt consumption. The sodium primarily comes from the added salt and the Kalamata olives. If you prefer a lower sodium option, consider reducing the amount of salt used or opting for low-sodium olives.
In summary, the Mediterranean Herb-Crusted Salmon Recipe is not only a treat for your taste buds but also a nutritious choice. With a good balance of calories, high protein, and moderate sodium levels, it fits well into a healthy eating plan. Enjoy this delightful dish knowing it’s good for you too!
FAQs about Mediterranean Herb-Crusted Salmon Recipe
Can I use frozen salmon for this recipe?
Yes, you can use frozen salmon for the Mediterranean Herb-Crusted Salmon Recipe! However, it’s important to thaw the salmon properly before cooking. The best way to do this is to place the frozen fillets in the refrigerator overnight. If you’re short on time, you can also thaw them under cold running water for about an hour. Once thawed, follow the recipe as usual. Just keep in mind that cooking times may vary slightly, so check for doneness to ensure your salmon is perfectly cooked.
What herbs work best for the crust?
The Mediterranean Herb-Crusted Salmon Recipe is versatile when it comes to herbs. The original recipe uses dried oregano and thyme, which are classic choices. However, you can also experiment with other herbs like basil, dill, or rosemary. Fresh herbs can add a vibrant flavor, while dried herbs provide a concentrated taste. Feel free to mix and match based on your preferences. The key is to choose herbs that complement the salmon without overpowering it.
How can I store leftovers?
If you have any leftovers from your Mediterranean Herb-Crusted Salmon, storing them is easy! Allow the salmon to cool completely, then place it in an airtight container. You can store it in the refrigerator for up to 3 days. When you’re ready to enjoy it again, gently reheat the salmon in the oven at a low temperature to maintain its moisture. Avoid using the microwave, as it can make the salmon dry. Enjoy your leftovers as a quick lunch or dinner option!
Is this recipe suitable for meal prep?
Absolutely! The Mediterranean Herb-Crusted Salmon Recipe is perfect for meal prep. You can prepare the salmon and the herb mixture ahead of time. Simply marinate the salmon in the herb mixture and store it in the refrigerator for up to 24 hours before cooking. This allows the flavors to develop even more. When you’re ready to eat, just bake the salmon as directed. Pair it with your favorite sides, and you’ll have a delicious, healthy meal ready to go!
Conclusion on Mediterranean Herb-Crusted Salmon Recipe
In conclusion, the Mediterranean Herb-Crusted Salmon Recipe is a delightful dish that combines health and flavor in a simple yet elegant way. With its vibrant herbs, fresh ingredients, and the rich taste of salmon, this recipe is sure to become a favorite in your kitchen. Not only is it easy to prepare, but it also offers a variety of options for customization, making it suitable for any occasion.
Whether you’re cooking for a family dinner or hosting friends, this dish impresses with its beautiful presentation and delicious taste. The combination of cherry tomatoes, Kalamata olives, and feta cheese adds a Mediterranean flair that transports your taste buds to sun-soaked shores. Plus, with its high protein content and low carb count, it fits perfectly into a balanced diet.
As you explore the variations and tips provided, you’ll find that this recipe is versatile enough to keep your meals exciting. From experimenting with different herbs to trying out various cooking methods, the possibilities are endless. So, don’t hesitate to make this dish your own!
We hope you enjoy making and sharing the Mediterranean Herb-Crusted Salmon with your loved ones. It’s not just a meal; it’s a celebration of flavors and a step towards healthier eating. Happy cooking!