Get my cookbooks

Vietnamese Caramel Ginger Chicken Recipe is delightful!

Introduction to Vietnamese Caramel Ginger Chicken Recipe

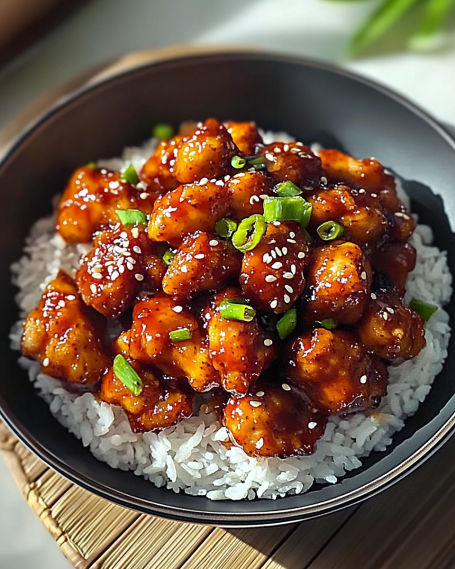
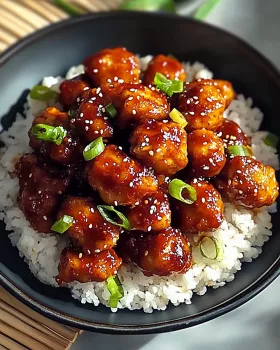
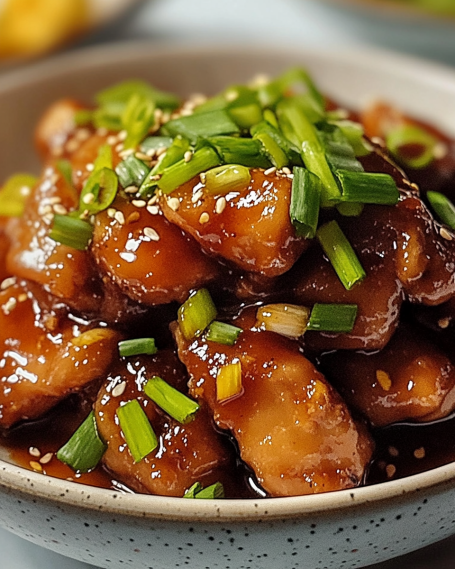
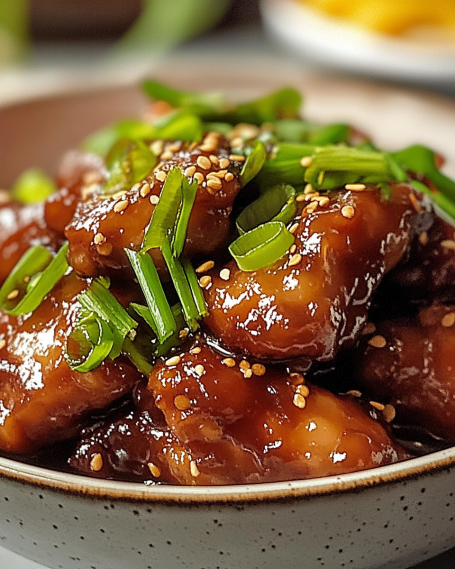
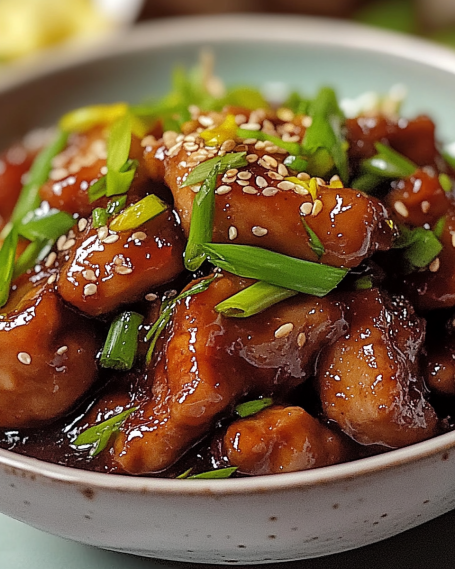
Vietnamese Caramel Ginger Chicken Recipe. This dish is not just a meal; it’s an experience filled with rich flavors and aromas. The combination of tender chicken, sweet caramel, and zesty ginger creates a symphony of taste that will leave your taste buds dancing.

What Makes Vietnamese Caramel Ginger Chicken Unique?

What sets this dish apart? First, it’s the balance of flavors. The sweetness from the caramelized sugar perfectly complements the savory notes of soy sauce and fish sauce. Ginger adds a refreshing kick, making each bite exciting. Moreover, the cooking method enhances the chicken’s natural juiciness, resulting in a tender and flavorful dish.

Another unique aspect is the cultural significance. In Vietnam, caramelized dishes are often enjoyed during family gatherings and celebrations. This recipe brings a taste of home to your table, allowing you to share a piece of Vietnamese culture with your loved ones.

Additionally, the versatility of this recipe is remarkable. You can easily adjust the spice level or swap proteins to suit your preferences. Whether you’re a seasoned chef or a beginner, this dish is approachable and rewarding. So, let’s dive into the ingredients and preparation steps to create your very own Vietnamese Caramel Ginger Chicken!

Ingredients for Vietnamese Caramel Ginger Chicken Recipe

Vietnamese Caramel Ginger Chicken Recipe, you’ll need a selection of fresh and flavorful ingredients. Each component plays a vital role in building the dish’s unique taste. Here’s what you’ll need:

  • 1 pound boneless, skinless chicken thighs, diced: Chicken thighs are juicy and tender, making them perfect for this recipe.
  • 1/4 cup soy sauce: This adds a savory depth to the dish, enhancing the overall flavor.
  • 1/4 cup brown sugar: The brown sugar caramelizes beautifully, giving the chicken a sweet glaze.
  • 2 tablespoons fish sauce: This ingredient brings a rich umami flavor, essential in Vietnamese cooking.
  • 1 tablespoon canola oil: Used for sautéing the chicken, it has a neutral flavor that won’t overpower the dish.
  • 4 cloves garlic, finely chopped: Garlic adds a fragrant aroma and a savory kick.
  • 1 tablespoon fresh ginger, grated: Ginger provides a zesty and refreshing flavor that brightens the dish.
  • 1/2 teaspoon ground black pepper: This adds a subtle heat and enhances the overall taste.
  • 1/4 teaspoon chili flakes (optional): For those who enjoy a bit of spice, chili flakes can be added for an extra kick.
  • 1/4 cup chicken broth: This helps to create a rich sauce that coats the chicken perfectly.
  • 2 green onions, sliced (for garnish): Green onions add a fresh crunch and a pop of color to the dish.
  • Steamed jasmine rice (for serving): This fragrant rice is the perfect base for the caramelized chicken.

Vietnamese Caramel Ginger Chicken Recipe, ensuring a delicious meal that everyone will love!

Step-by-Step Preparation of Vietnamese Caramel Ginger Chicken Recipe

Vietnamese Caramel Ginger Chicken Recipe. This step-by-step guide will help you create a delicious dish that’s sure to impress. Let’s get started!

Step 1: Marinating the Chicken

Begin by marinating the chicken. In a mixing bowl, combine the diced chicken thighs with the soy sauce, brown sugar, fish sauce, garlic, ginger, black pepper, and chili flakes. Mix everything well, ensuring the chicken is fully coated. Cover the bowl and let it marinate for at least 30 minutes. This step allows the flavors to penetrate the chicken, making it more delicious.

Step 2: Preparing the Caramel Sauce

While the chicken marinates, you can prepare the caramel sauce. In a small saucepan, combine the remaining brown sugar with a splash of water. Heat it over medium heat, stirring gently until the sugar dissolves. Allow it to simmer without stirring until it turns a golden brown color. Be careful not to burn it! Once ready, remove it from the heat and set it aside.

Step 3: Cooking the Chicken

After marinating, it’s time to cook the chicken. Heat the canola oil in a large frying pan over medium-high heat. Add the marinated chicken, cooking for about 5-7 minutes. You want the chicken to be golden brown and cooked through. Stir occasionally to ensure even cooking.

Step 4: Combining Ingredients

Once the chicken is cooked, pour the prepared caramel sauce over it. Then, add the chicken broth to the pan. Stir everything together, making sure the chicken is well coated in the sauce. This combination will create a rich and flavorful glaze that enhances the dish.

Step 5: Final Touches

Allow the mixture to come to a gentle boil. Then, reduce the heat to medium-low and cover the pan. Let it simmer for 15-20 minutes, stirring occasionally. This will help the sauce thicken and the chicken become tender. After cooking, remove the pan from the heat and let it rest for a few minutes. Serve the caramelized chicken over steamed jasmine rice and garnish with sliced green onions for a fresh finish.

Vietnamese Caramel Ginger Chicken Recipe. Enjoy the process and the delicious results!

Variations of Vietnamese Caramel Ginger Chicken Recipe

Vietnamese Caramel Ginger Chicken Recipe is a crowd-pleaser, there are many ways to customize it. Whether you want to try different proteins or explore vegetarian options, these variations will keep your meals exciting and flavorful. Let’s take a look at some alternatives!

Alternative Proteins to Use

If you’re looking to switch things up, consider using different proteins. Here are some tasty alternatives:

  • Chicken Breasts: For a leaner option, chicken breasts can be used instead of thighs. Just be sure to adjust the cooking time, as breasts may cook faster.
  • Pork: Pork tenderloin or pork chops can be a delicious substitute. The sweetness of the caramel sauce pairs wonderfully with pork.
  • Beef: Thinly sliced beef can also work well. Marinate it just like the chicken for a rich flavor.
  • Tofu: For a vegetarian twist, firm tofu is a great choice. It absorbs flavors beautifully and adds a nice texture to the dish.

Vietnamese Caramel Ginger Chicken Recipe, making it a versatile dish for any occasion.

Vegetarian Options

If you prefer a meat-free meal, there are plenty of vegetarian options to explore. Here are some ideas:

  • Tempeh: This fermented soy product has a nutty flavor and firm texture. It can be marinated and cooked just like chicken for a satisfying meal.
  • Mushrooms: Varieties like shiitake or portobello can add a rich, umami flavor. Sauté them until golden brown before adding the sauce.
  • Seitan: Known as wheat meat, seitan has a chewy texture that mimics meat. It’s perfect for absorbing the delicious caramel sauce.
  • Mixed Vegetables: A colorful mix of bell peppers, broccoli, and snap peas can create a vibrant dish. Stir-fry the veggies before adding the sauce for a delightful crunch.

Vietnamese Caramel Ginger Chicken Recipe while catering to different dietary preferences. Feel free to experiment and find your favorite combination!

Cooking Note for Vietnamese Caramel Ginger Chicken Recipe

Vietnamese Caramel Ginger Chicken Recipe, there are a few important cooking notes to keep in mind. These tips will help ensure that your dish turns out perfectly every time, enhancing both flavor and texture.

First, marinating the chicken is crucial. Allowing the chicken to soak in the marinade for at least 30 minutes, or even longer if possible, will deepen the flavors. If you have time, marinating overnight in the refrigerator can yield even better results.

Next, pay attention to the heat when cooking the chicken. Medium-high heat is ideal for achieving a nice golden brown color. However, be careful not to overcrowd the pan. Cooking in batches can help maintain the right temperature and ensure even cooking.

When preparing the caramel sauce, watch it closely. Sugar can burn quickly, so stir gently and keep an eye on the color. Once it reaches a golden hue, remove it from the heat immediately to prevent bitterness.

Lastly, don’t rush the simmering process. Allowing the chicken to simmer in the sauce for 15-20 minutes helps the flavors meld together beautifully. This step also ensures that the chicken becomes tender and absorbs the rich sauce.

Vietnamese Caramel Ginger Chicken Recipe that’s sure to impress your family and friends. Enjoy the cooking journey!

Serving Suggestions for Vietnamese Caramel Ginger Chicken Recipe

Vietnamese Caramel Ginger Chicken Recipe, it’s time to think about how to serve it. The right side dishes can elevate your meal, making it even more enjoyable. Here are some fantastic serving suggestions to complement your dish!

Ideal Side Dishes

When it comes to side dishes, you want to choose options that balance the rich flavors of the caramel ginger chicken. Here are some ideal choices:

  • Fresh Spring Rolls: These light and refreshing rolls filled with vegetables and herbs provide a nice contrast to the savory chicken.
  • Vietnamese Pickled Vegetables: A tangy side of pickled carrots and daikon radish can add a delightful crunch and acidity to your meal.
  • Stir-Fried Greens: Sautéed bok choy or spinach with garlic can add a nutritious and vibrant touch to your plate.
  • Egg Rolls: Crispy egg rolls filled with vegetables or meat can be a fun and tasty addition to your meal.

These side dishes not only enhance the overall dining experience but also bring a variety of textures and flavors to the table.

Pairing with Rice or Noodles

Vietnamese Caramel Ginger Chicken Recipe shines when served over a bed of steamed jasmine rice. The fluffy rice absorbs the rich sauce, making each bite a delight. However, if you’re in the mood for something different, consider these alternatives:

  • Rice Noodles: Soft rice noodles can be a great base for the chicken. They soak up the sauce beautifully and add a unique texture.
  • Egg Noodles: For a heartier option, egg noodles can provide a satisfying chewiness that pairs well with the chicken.
  • Quinoa: For a healthier twist, serve the chicken over quinoa. This protein-packed grain adds a nutty flavor and complements the dish nicely.

Vietnamese Caramel Ginger Chicken Recipe!

Tips for Perfecting Vietnamese Caramel Ginger Chicken Recipe

Vietnamese Caramel Ginger Chicken Recipe, a few tips can make all the difference. These suggestions will help you enhance the flavors and ensure a delightful dining experience. Let’s explore some essential tips for perfecting this dish!

First, always use fresh ingredients. Fresh ginger and garlic will provide a vibrant flavor that dried or older ingredients simply can’t match. The freshness of these components is key to achieving that authentic taste.

Next, consider the marinating time. While 30 minutes is the minimum, marinating the chicken for a few hours or even overnight will deepen the flavors significantly. This extra time allows the chicken to absorb the marinade fully, resulting in a more flavorful dish.

When cooking the chicken, avoid overcrowding the pan. If you add too much chicken at once, it can lower the pan’s temperature, causing the chicken to steam instead of sear. Cook in batches if necessary to achieve that perfect golden-brown color.

Another important tip is to adjust the sweetness to your liking. If you prefer a sweeter sauce, feel free to add an extra tablespoon of brown sugar. This small adjustment can make a big difference in flavor, allowing you to customize the dish to your taste.

Vietnamese Caramel Ginger Chicken Recipe.

By following these tips, you’ll elevate your cooking and create a deliciously authentic Vietnamese dish that your family and friends will love. Enjoy the process and the wonderful flavors that come with it!

Breakdown of Time for Vietnamese Caramel Ginger Chicken Recipe

Vietnamese Caramel Ginger Chicken Recipe can help you plan your cooking efficiently. Here’s a detailed breakdown of the time you’ll need for preparation and cooking.

Prep Time

The prep time for this delicious dish is approximately 40 minutes. This includes:

  • Marinating the Chicken: Allow at least 30 minutes for the chicken to soak in the flavorful marinade. If you have more time, marinating overnight is even better!
  • Preparing Ingredients: Spend about 10 minutes chopping garlic, grating ginger, and slicing green onions. Having everything ready will make the cooking process smoother.

Cooking Time

Vietnamese Caramel Ginger Chicken Recipe is around 25-30 minutes. This includes:

  • Sautéing the Chicken: Cook the marinated chicken for about 5-7 minutes until golden brown.
  • Simmering: After adding the caramel sauce and chicken broth, let the mixture simmer for 15-20 minutes. This step is crucial for thickening the sauce and tenderizing the chicken.

Total Time

In total, you can expect to spend about 1 hour and 10 minutes from start to finish. This includes both prep and cooking time. Here’s a quick summary:

  • Prep Time: 40 minutes
  • Cooking Time: 25-30 minutes
  • Total Time: 1 hour and 10 minutes

Vietnamese Caramel Ginger Chicken Recipe. Enjoy the process and the delicious results!

Nutritional Information for Vietnamese Caramel Ginger Chicken Recipe

Vietnamese Caramel Ginger Chicken Recipe is essential for those who are health-conscious or following specific dietary guidelines. This dish not only delights the palate but also provides a balanced meal. Let’s break down the key nutritional components.

Calories

Vietnamese Caramel Ginger Chicken Recipe contains approximately 320 calories. This makes it a satisfying yet moderate option for lunch or dinner. The calorie count comes from the combination of chicken, sauces, and the added ingredients, ensuring a flavorful meal without excessive calories.

Protein Content

Protein is a vital nutrient, and this recipe delivers! Each serving provides about 24 grams of protein. The chicken thighs are an excellent source of lean protein, which is essential for muscle repair and overall health. Including this dish in your diet can help meet your daily protein needs while enjoying a delicious meal.

Sodium Levels

When it comes to sodium, each serving contains approximately 800 milligrams. This level is primarily due to the soy sauce and fish sauce used in the recipe. While sodium is necessary for bodily functions, it’s important to monitor your intake. If you’re watching your sodium levels, consider using low-sodium soy sauce or reducing the amount of fish sauce to make this dish more heart-healthy.

Vietnamese Caramel Ginger Chicken Recipe offers a balanced meal with a good amount of protein and moderate calories. By being mindful of the sodium content, you can enjoy this delightful dish while maintaining a healthy diet.

FAQs about Vietnamese Caramel Ginger Chicken Recipe

Can I make Vietnamese Caramel Ginger Chicken in advance?

Vietnamese Caramel Ginger Chicken Recipe in advance. In fact, making it ahead of time can enhance the flavors as they have more time to meld together. Simply follow the recipe, let the dish cool, and store it in an airtight container in the refrigerator. It can be kept for up to three days. When you’re ready to serve, just reheat it on the stove or in the microwave until warmed through. This makes it a great option for meal prep or busy weeknights!

What can I substitute for ginger in this recipe?

If you don’t have fresh ginger on hand, there are a few substitutes you can use. Ground ginger is a common alternative; use about 1/4 teaspoon of ground ginger for every tablespoon of fresh ginger. However, keep in mind that the flavor will be slightly different. Another option is to use a small amount of galangal, which has a similar taste profile. If you prefer to skip ginger altogether, you can simply omit it, but the dish will lose some of its signature flavor.

Is Vietnamese Caramel Ginger Chicken spicy?

Vietnamese Caramel Ginger Chicken Recipe is not inherently spicy. However, if you choose to add chili flakes, it can introduce a mild heat. The level of spiciness can be easily adjusted based on your preference. If you enjoy a bit of heat, feel free to add more chili flakes or even fresh chili peppers. Conversely, if you prefer a milder dish, you can omit the chili flakes entirely. This flexibility makes it suitable for everyone!

How can I store leftovers of Vietnamese Caramel Ginger Chicken?

Vietnamese Caramel Ginger Chicken Recipe is simple! Allow the dish to cool completely before transferring it to an airtight container. Store it in the refrigerator for up to three days. If you want to keep it longer, you can freeze it for up to three months. To reheat, thaw it in the refrigerator overnight if frozen, then warm it on the stove or in the microwave. Just be sure to stir occasionally to ensure even heating. Enjoy your delicious leftovers!

Conclusion on Vietnamese Caramel Ginger Chicken Recipe

Vietnamese Caramel Ginger Chicken Recipe is a delightful dish that brings together a wonderful blend of flavors and textures. From the tender chicken to the sweet and savory caramel sauce, every bite is a celebration of Vietnamese culinary traditions. This recipe not only showcases the beauty of Vietnamese cuisine but also offers a versatile meal that can be adapted to suit various tastes and dietary preferences.

Whether you’re cooking for family, friends, or just for yourself, this dish is sure to impress. The step-by-step preparation makes it accessible for cooks of all skill levels, while the rich flavors will leave everyone asking for seconds. Plus, with the option to customize the protein or make it vegetarian, it’s a recipe that can be enjoyed by all.

Vietnamese Caramel Ginger Chicken Recipe.

We hope you find this recipe as delightful as we do. Share it with your loved ones, and let the flavors of Vietnam brighten your dining table. Happy cooking!

Cajun Sausage Pasta Recipe is a must-try dish!

Introduction to Cajun Sausage Pasta Recipe

If you’re looking for a dish that combines bold flavors with creamy goodness, then the Cajun Sausage Pasta Recipe is just what you need. This delightful meal brings together the rich taste of smoked sausage, the warmth of Cajun spices, and the comforting texture of creamy pasta. It’s perfect for a family dinner or a gathering with friends. Plus, it’s easy to make, which means you can spend less time in the kitchen and more time enjoying your meal!

What Makes Cajun Sausage Pasta Unique?

The uniqueness of Cajun Sausage Pasta lies in its vibrant flavors and hearty ingredients. Cajun cuisine is known for its bold spices and rich, savory profiles. In this recipe, the smoked sausage adds a deep, smoky flavor that pairs beautifully with the creamy sauce. The addition of Cajun seasoning gives the dish a kick, making it exciting for your taste buds.

Moreover, the colorful vegetables like red bell peppers and onions not only enhance the flavor but also add a pop of color to your plate. This dish is not just a meal; it’s an experience that brings the essence of Louisiana cooking right to your kitchen. Whether you’re a fan of spicy food or just looking to try something new, this Cajun Sausage Pasta Recipe is sure to impress!

Ingredients for Cajun Sausage Pasta Recipe

To create this delicious Cajun Sausage Pasta, you’ll need a variety of fresh ingredients that come together to form a mouthwatering dish. Here’s a complete list of what you’ll need:

  • 12 ounces penne pasta
  • 1 tablespoon olive oil
  • 1 pound smoked sausage, sliced
  • 1 medium onion, chopped
  • 1 red bell pepper, chopped
  • 3 cloves garlic, minced
  • 1 teaspoon Cajun seasoning
  • 1/2 teaspoon black pepper
  • 1/4 teaspoon salt
  • 1 can (14.5 ounces) diced tomatoes, undrained
  • 1 cup heavy cream
  • 1 cup shredded cheddar cheese
  • 2 green onions, chopped (for garnish)

These ingredients are not only easy to find but also work together to create a dish that is both hearty and satisfying. The penne pasta serves as the perfect base, while the smoked sausage adds a rich flavor. The vegetables bring freshness, and the creamy sauce ties everything together beautifully. Don’t forget the green onions for a lovely garnish that adds a touch of color and flavor!

Now that you have your ingredients ready, you’re one step closer to making this delightful Cajun Sausage Pasta. Let’s move on to the preparation steps!

Step-by-Step Preparation of Cajun Sausage Pasta Recipe

Now that you have all your ingredients ready, it’s time to dive into the cooking process! This step-by-step guide will help you create a delicious Cajun Sausage Pasta that’s sure to impress. Let’s get started!

Step 1: Gather Your Ingredients

Before you start cooking, make sure you have everything you need within reach. Gather your penne pasta, smoked sausage, vegetables, and spices. Having everything organized will make the cooking process smoother and more enjoyable. Plus, it’s always nice to have a clean workspace!

Step 2: Cook the Sausage

Begin by heating a large skillet over medium heat. Add the tablespoon of olive oil and let it warm up. Once the oil is hot, add the sliced smoked sausage. Cook the sausage for about 5 minutes, stirring occasionally. You want it to brown nicely, which will enhance its flavor. The aroma will fill your kitchen, making it hard to resist!

Step 3: Sauté the Vegetables

Next, it’s time to add some color and flavor! Toss in the chopped onion and red bell pepper into the skillet with the sausage. Sauté these vegetables for about 3-4 minutes until they soften. The onions will become translucent, and the bell peppers will brighten up. This step is crucial as it builds the base of flavors for your dish.

Step 4: Combine Ingredients

Now, it’s time to add the minced garlic, Cajun seasoning, black pepper, and salt. Stir everything together and let it cook for another minute. This will allow the garlic to release its wonderful aroma and the spices to blend perfectly. You’ll notice the flavors coming together beautifully!

Step 5: Add the Pasta

After the mixture has simmered, it’s time to add the undrained diced tomatoes. Stir them in and let the mixture simmer for about 5 minutes. This will help meld all the flavors together. Then, lower the heat and gently mix in the heavy cream. Allow it to warm through for 2-3 minutes. Finally, fold in the cooked penne pasta, ensuring it’s well-coated with the creamy sauce.

Step 6: Simmer and Serve

To finish off your Cajun Sausage Pasta, sprinkle in the shredded cheddar cheese. Stir until the cheese melts and the dish becomes creamy and delicious. Serve your pasta immediately, garnished with chopped green onions for a fresh touch. Enjoy the delightful flavors and the smiles on your family’s faces!

Variations of Cajun Sausage Pasta Recipe

While the classic Cajun Sausage Pasta is a hit, there are many ways to customize this dish to suit different tastes and dietary preferences. Here are some exciting variations you can try!

Vegetarian Options

If you’re looking for a meat-free version, you can easily make this dish vegetarian. Instead of smoked sausage, consider using plant-based sausage or sautéed mushrooms for a hearty texture. You can also add more vegetables like zucchini, spinach, or even artichokes to enhance the flavor and nutrition. The creamy sauce can be made with vegetable broth and a splash of almond or soy milk instead of heavy cream. This way, you still get that rich, creamy goodness without the meat!

Different Types of Sausage

Another fun way to switch things up is by experimenting with different types of sausage. You can use Italian sausage for a milder flavor or spicy chorizo for an extra kick. Chicken or turkey sausage is a great option if you’re looking for a leaner choice. Each type of sausage brings its unique taste, allowing you to create a new experience with every variation. Just remember to adjust the seasoning based on the sausage you choose, as some may be spicier or more flavorful than others!

These variations not only keep the dish exciting but also cater to different dietary needs. Whether you’re cooking for vegetarians or simply want to try something new, these options will surely delight your taste buds!

Cooking Note for Cajun Sausage Pasta Recipe

When preparing the Cajun Sausage Pasta, there are a few important cooking notes to keep in mind. These tips will help ensure that your dish turns out perfectly every time. Let’s dive into some key points to consider!

First, always remember to cook the pasta al dente. This means it should be firm to the bite. Overcooked pasta can become mushy and lose its texture, which is not ideal for this creamy dish. To achieve the perfect al dente pasta, follow the package instructions closely and taste it a minute or two before the suggested cooking time ends.

Next, when sautéing the sausage and vegetables, make sure your skillet is hot enough. A hot skillet helps to brown the sausage nicely, enhancing its flavor. If the skillet is too cool, the sausage may steam instead of brown, which can affect the overall taste of your dish.

Additionally, feel free to adjust the Cajun seasoning to your taste. If you prefer a milder flavor, start with less seasoning and add more as needed. On the other hand, if you love a spicy kick, don’t hesitate to amp it up! Just remember that the flavors will intensify as the dish simmers.

Lastly, for a creamier sauce, you can add a bit more heavy cream or even a splash of pasta water when mixing in the cooked penne. This will help create a luscious, velvety texture that clings beautifully to the pasta. Just be cautious not to add too much liquid, as you want to maintain the balance of flavors.

By keeping these cooking notes in mind, you’ll be well on your way to creating a delicious Cajun Sausage Pasta that everyone will love. Happy cooking!

Serving Suggestions for Cajun Sausage Pasta Recipe

Once your Cajun Sausage Pasta is ready, it’s time to think about how to serve it! This dish is not only delicious but also versatile, making it a great centerpiece for any meal. Here are some serving suggestions to elevate your dining experience:

  • Pair with a Fresh Salad: A crisp green salad is a perfect complement to the creamy pasta. Consider a simple mixed greens salad with a light vinaigrette. The freshness of the salad balances the richness of the dish.
  • Garlic Bread: Serve your Cajun Sausage Pasta with warm garlic bread. The crunchy texture and buttery flavor of garlic bread make it a delightful side that everyone will enjoy.
  • Roasted Vegetables: For a healthy touch, add a side of roasted vegetables. Carrots, zucchini, and asparagus drizzled with olive oil and herbs can enhance the meal’s flavor and nutrition.
  • Wine Pairing: If you enjoy wine, consider pairing your pasta with a glass of white wine, like Sauvignon Blanc or Chardonnay. These wines complement the creamy sauce and enhance the overall dining experience.
  • Garnish with Fresh Herbs: For an extra pop of flavor, sprinkle some fresh parsley or basil on top of your pasta before serving. This not only adds color but also a fresh taste that brightens the dish.

These serving suggestions will help you create a well-rounded meal that’s sure to impress your family and friends. Whether it’s a casual weeknight dinner or a special occasion, your Cajun Sausage Pasta will shine on the table!

Tips for Perfecting Your Cajun Sausage Pasta Recipe

To make your Cajun Sausage Pasta truly unforgettable, consider these helpful tips. They will guide you in achieving the best flavor and texture, ensuring that every bite is a delight!

First, always taste as you go. This is key in cooking. After adding the Cajun seasoning, take a moment to taste the sauce. Adjust the spices according to your preference. If you like it spicier, add more seasoning. If you prefer a milder flavor, dial it back. This way, you can create a dish that suits your taste perfectly.

Next, don’t rush the sautéing process. Allow the sausage and vegetables to brown properly. This caramelization adds depth to the flavors. A well-browned sausage will enhance the overall taste of your pasta. So, be patient and let those ingredients develop their rich flavors!

Another tip is to reserve some pasta water. Before draining your penne, scoop out a cup of the starchy cooking water. This water can be added to the sauce if it becomes too thick. It helps to create a silky texture that clings beautifully to the pasta.

Also, consider letting the dish sit for a few minutes after cooking. This allows the flavors to meld together even more. The pasta will absorb some of the sauce, making it even more delicious. Plus, it gives you a moment to set the table or prepare any sides!

Lastly, don’t forget about presentation. A well-presented dish is always more appetizing. Use a large serving bowl and top your pasta with freshly chopped green onions or herbs. A sprinkle of cheese on top can also make it look extra inviting. Remember, we eat with our eyes first!

By following these tips, you’ll elevate your Cajun Sausage Pasta to new heights. Enjoy the cooking process and the delicious results!

Breakdown of Time for Cajun Sausage Pasta Recipe

Understanding the time needed for each step in the Cajun Sausage Pasta Recipe can help you plan your cooking efficiently. Here’s a simple breakdown of the time required for preparation and cooking. This way, you can enjoy your meal without feeling rushed!

Prep Time

The prep time for this delicious Cajun Sausage Pasta is approximately 15 minutes. During this time, you will gather all your ingredients, chop the vegetables, and slice the sausage. Having everything ready before you start cooking makes the process smoother and more enjoyable. Plus, it helps you stay organized in the kitchen!

Cooking Time

The cooking time for the Cajun Sausage Pasta is about 25 minutes. This includes browning the sausage, sautéing the vegetables, and simmering the sauce. Each step is essential for building flavor, so take your time to ensure everything is cooked perfectly. The aroma that fills your kitchen will be worth the wait!

Total Time

In total, you can expect to spend around 40 minutes from start to finish. This includes both prep and cooking time. With just a little over half an hour, you can create a hearty and flavorful meal that serves six people. It’s a fantastic option for busy weeknights or when you want to impress guests without spending all day in the kitchen!

Now that you know the time breakdown, you can easily fit this Cajun Sausage Pasta into your schedule. Enjoy the cooking process and the delicious results!

Nutritional Information for Cajun Sausage Pasta Recipe

Understanding the nutritional content of your meals is essential for maintaining a balanced diet. The Cajun Sausage Pasta Recipe is not only delicious but also provides a good mix of nutrients. Here’s a breakdown of the nutritional information per serving, which serves six people.

Calories

Each serving of Cajun Sausage Pasta contains approximately 550 calories. This calorie count includes the creamy sauce, sausage, and pasta, making it a hearty meal. While it’s a satisfying dish, it’s important to enjoy it in moderation, especially if you’re watching your calorie intake.

Protein

This recipe is a great source of protein, with about 25 grams of protein per serving. The smoked sausage and cheddar cheese contribute significantly to this protein content. Protein is essential for muscle repair and growth, making this dish a good option for those who lead an active lifestyle.

Sodium

Each serving contains around 800 milligrams of sodium. The sodium content comes from the smoked sausage, cheese, and added seasonings. If you’re monitoring your sodium intake, consider using low-sodium sausage or cheese to help reduce the overall sodium level in the dish.

By being aware of the nutritional information, you can make informed choices about your meals. The Cajun Sausage Pasta Recipe offers a delightful balance of flavors and nutrients, making it a fantastic option for family dinners or gatherings with friends!

FAQs about Cajun Sausage Pasta Recipe

Can I use different types of pasta for this recipe?

Absolutely! While penne pasta is a great choice for this Cajun Sausage Pasta Recipe, you can easily swap it for other types of pasta. Options like fusilli, rigatoni, or even spaghetti work well. Just keep in mind that different pasta shapes may alter the cooking time slightly. Always check the package instructions for the best results. The key is to choose a pasta that can hold onto the creamy sauce, ensuring every bite is flavorful!

How spicy is Cajun sausage pasta?

The spiciness of Cajun Sausage Pasta can vary based on the Cajun seasoning you use and the type of sausage. Traditional Cajun seasoning has a nice kick, but it’s not overwhelmingly spicy. If you prefer a milder dish, you can reduce the amount of seasoning. Conversely, if you love heat, feel free to add more! The smoked sausage also contributes to the overall flavor, so choose one that matches your spice preference. Remember, you can always adjust the heat to suit your taste!

Can I make Cajun sausage pasta ahead of time?

Yes, you can prepare Cajun Sausage Pasta ahead of time! To do this, cook the pasta and sauce separately, then combine them just before serving. This helps prevent the pasta from becoming mushy. You can store the sauce in the refrigerator for up to three days. When you’re ready to eat, simply reheat the sauce, add the cooked pasta, and stir until warmed through. This makes it a convenient option for meal prep or busy weeknights!

What can I serve with Cajun sausage pasta?

Cajun Sausage Pasta is a hearty dish that pairs well with various sides. Consider serving it with a fresh green salad to balance the richness of the pasta. Garlic bread is another popular choice, perfect for soaking up the creamy sauce. For a healthier option, roasted vegetables like zucchini or asparagus can complement the meal beautifully. If you enjoy wine, a glass of white wine can enhance the dining experience. These sides will elevate your meal and make it even more enjoyable!

Conclusion on Cajun Sausage Pasta Recipe

In conclusion, the Cajun Sausage Pasta Recipe is a delightful dish that brings together bold flavors and creamy textures. It’s not just a meal; it’s an experience that captures the essence of Cajun cuisine. With its rich ingredients and easy preparation, this recipe is perfect for both busy weeknights and special gatherings.

Whether you choose to stick to the classic version or explore the various adaptations, this dish is sure to please everyone at the table. The combination of smoked sausage, vibrant vegetables, and a luscious creamy sauce creates a satisfying meal that is both hearty and comforting. Plus, with the tips and variations provided, you can easily customize it to suit your taste and dietary needs.

So, gather your ingredients, follow the steps, and enjoy the process of cooking. Your family and friends will appreciate the effort, and you’ll love the delicious results. Don’t forget to share your culinary creations and enjoy the smiles that come with every bite of this Cajun Sausage Pasta. Happy cooking!

Dragon Noodles Recipe: A Colorful Culinary Adventure

Introduction to Dragon Noodles Recipe

What Are Dragon Noodles?

Dragon noodles are a delightful and colorful dish that brings together the best of Asian flavors. This recipe features a medley of vibrant vegetables, perfectly cooked noodles, and a spicy sauce that tantalizes your taste buds. The name “dragon noodles” evokes images of fiery flavors and a burst of colors, making it a feast for both the eyes and the palate. With a combination of spaghetti or linguine, fresh veggies, and a savory sauce, this dish is not only delicious but also easy to prepare. Whether you’re a seasoned chef or a beginner, you’ll find joy in creating this flavorful meal.

The Origin of Dragon Noodles

The origins of dragon noodles are somewhat mysterious, as they blend various culinary traditions. Many believe that this dish draws inspiration from Asian stir-fry techniques, where quick cooking preserves the freshness of ingredients. The vibrant colors of the vegetables symbolize good fortune and happiness in many cultures. Over time, dragon noodles have evolved, incorporating different ingredients and flavors to suit various tastes. Today, they are enjoyed worldwide, making them a popular choice for family dinners, gatherings, or even meal prep. With each bite, you can experience a taste of tradition and creativity, all wrapped up in one delicious dish.

Ingredients for Dragon Noodles Recipe

To create the perfect dragon noodles, you’ll need a variety of fresh ingredients that come together to form a colorful and flavorful dish. Here’s what you’ll need:

  • 8 ounces of spaghetti or linguine: Choose your favorite pasta for a delightful base.
  • 2 tablespoons of canola oil: This oil helps to stir-fry the ingredients without overpowering their flavors.
  • 3 cloves of garlic, finely chopped: Garlic adds a wonderful aroma and depth to the dish.
  • 1 teaspoon of freshly grated ginger: Ginger brings a zesty kick that complements the other flavors.
  • 1 cup of assorted bell peppers, sliced thinly: Use vibrant colors like red, yellow, and green for a beautiful presentation.
  • 1 cup of carrots, cut into matchsticks: Carrots add sweetness and crunch to the dish.
  • 1 cup of sugar snap peas, ends trimmed: These peas provide a fresh, crisp texture.
  • 1/4 cup of tamari or soy sauce: This sauce is essential for that savory umami flavor.
  • 2 tablespoons of sweet soy sauce: Sweet soy sauce balances the dish with a hint of sweetness.
  • 1 tablespoon of chili paste: Adjust this ingredient based on your spice preference.
  • 2 green onions, chopped: Green onions add a fresh, mild onion flavor.
  • Sesame seeds for topping: These seeds provide a delightful crunch and nutty flavor.

Gathering these ingredients will set you on the right path to making a delicious dragon noodles recipe. Each component plays a vital role in creating a dish that is not only tasty but also visually appealing. So, let’s get ready to cook!

Step-by-Step Preparation of Dragon Noodles Recipe

Step 1: Preparing the Noodles

To start your dragon noodles recipe, bring a large pot of salted water to a boil. Once boiling, add the spaghetti or linguine. Cook the pasta according to the package instructions until it is just firm, or “al dente.” This usually takes about 8-10 minutes. After cooking, drain the noodles in a colander and set them aside to cool slightly. This step is crucial, as it prevents the noodles from becoming mushy when mixed with the other ingredients.

Step 2: Making the Sauce

While the noodles are cooking, you can prepare the sauce. In a small bowl, combine the tamari or soy sauce, sweet soy sauce, and chili paste. Stir these ingredients together until well mixed. This sauce will be the heart of your dragon noodles, providing that delicious umami flavor with a hint of sweetness and spice. Adjust the amount of chili paste based on how spicy you want your dish to be. Set the sauce aside for later use.

Step 3: Stir-Frying the Vegetables

Next, it’s time to stir-fry the vegetables. In a large frying pan or wok, heat the canola oil over medium-high heat. Once the oil is hot, add the finely chopped garlic and freshly grated ginger. Stir them for about 30 seconds until they become fragrant. Then, add the sliced bell peppers, matchstick carrots, and sugar snap peas to the pan. Stir-fry these colorful vegetables for about 3-4 minutes. You want them to be bright and slightly tender but still crisp. This step enhances their flavors and keeps the dish vibrant.

Step 4: Combining Ingredients

Now, lower the heat to medium and add the drained noodles to the pan with the vegetables. Pour the prepared sauce over the noodles and vegetables. Toss everything together vigorously for about 2-3 minutes. Make sure the noodles are evenly coated with the sauce and warmed through. This is where the magic happens, as all the flavors meld together, creating a deliciously fiery dish.

Step 5: Final Touches

Once everything is well combined, take the pan off the heat. Gently fold in the chopped green onions for a fresh burst of flavor. To serve, plate the dragon noodles hot and sprinkle sesame seeds generously on top. These seeds add a delightful crunch and nutty flavor, making your dish even more enjoyable. Now, your dragon noodles are ready to be devoured!

Variations of Dragon Noodles Recipe

Vegetarian Dragon Noodles Recipe

If you’re looking for a meat-free option, the vegetarian dragon noodles recipe is perfect for you. This variation maintains all the vibrant flavors while being completely plant-based. To make it, simply follow the original recipe but swap out any animal-based ingredients. You can add more vegetables like broccoli, zucchini, or mushrooms to enhance the dish. For added protein, consider including tofu or tempeh. Just sauté the tofu until golden before adding it to the stir-fry. This way, you’ll have a hearty meal that’s both nutritious and satisfying. The colorful veggies and savory sauce will still shine through, making it a delightful dish for everyone!

Spicy Dragon Noodles Recipe

For those who crave an extra kick, the spicy dragon noodles recipe is the way to go! To amp up the heat, increase the amount of chili paste in the sauce. You can also add sliced fresh chilies or a sprinkle of red pepper flakes during the stir-fry. Another great addition is a dash of sriracha or hot sauce when serving. This fiery version will tantalize your taste buds and leave you wanting more. Pair it with a refreshing cucumber salad or a cool drink to balance the heat. With these adjustments, your dragon noodles will be a spicy sensation that’s sure to impress!

Cooking Note for Dragon Noodles Recipe

When preparing your dragon noodles recipe, there are a few important cooking notes to keep in mind. These tips will help ensure that your dish turns out perfectly every time.

First, always use fresh ingredients. Fresh vegetables not only enhance the flavor but also add vibrant colors to your dish. Look for crisp bell peppers, bright green snap peas, and firm carrots. The fresher the ingredients, the better your dragon noodles will taste!

Next, be mindful of the cooking times. Overcooking the vegetables can lead to a mushy texture, which is not what you want. Aim for a stir-fry that keeps the veggies slightly crisp. This way, they maintain their nutrients and add a satisfying crunch to your meal.

Additionally, when cooking the noodles, make sure to follow the package instructions closely. Cooking them just until “al dente” is key. This means they should be firm to the bite. If you overcook the noodles, they may become sticky and lose their appealing texture.

Lastly, feel free to adjust the sauce to your taste. If you prefer a sweeter flavor, add a bit more sweet soy sauce. For those who love heat, increase the chili paste. The beauty of this dragon noodles recipe lies in its versatility, allowing you to customize it to your liking.

By keeping these cooking notes in mind, you’ll create a delicious and visually stunning dragon noodles dish that everyone will love!

Serving Suggestions for Dragon Noodles Recipe

When it comes to serving your dragon noodles recipe, presentation and pairing can elevate the dining experience. Here are some delightful serving suggestions to consider:

  • Garnish with Fresh Herbs: Adding fresh herbs like cilantro or basil can enhance the flavor and add a pop of color. Simply sprinkle them on top just before serving.
  • Pair with a Side Salad: A light cucumber or Asian slaw salad complements the noodles perfectly. The crunchiness of the salad balances the softness of the noodles.
  • Serve with a Protein: For a heartier meal, consider serving your dragon noodles alongside grilled chicken, shrimp, or tofu. This adds protein and makes the dish more filling.
  • Offer Extra Sauce: Some guests may enjoy a little extra sauce on the side. Prepare a small bowl of the tamari or sweet soy sauce mixture for dipping or drizzling.
  • Use Fun Serving Dishes: Present your dragon noodles in colorful bowls or on a large platter. This not only looks appealing but also encourages sharing among family and friends.
  • Include a Refreshing Drink: Pair your meal with a refreshing drink like iced green tea or lemonade. These beverages can help cleanse the palate and enhance the overall dining experience.

By incorporating these serving suggestions, you can create a memorable meal that not only tastes great but also looks stunning on the table. Enjoy your dragon noodles with family and friends, and watch as they delight in every flavorful bite!

Tips for Perfecting Your Dragon Noodles Recipe

To truly master the art of making dragon noodles, a few tips can help you elevate your dish to new heights. These suggestions will ensure that your dragon noodles are not only delicious but also visually appealing and satisfying.

  • Prep Ingredients Ahead: Before you start cooking, take the time to prep all your ingredients. Chop the vegetables, measure out the sauces, and have everything ready to go. This will make the cooking process smoother and more enjoyable.
  • Use High Heat: When stir-frying, use high heat to quickly cook the vegetables. This helps retain their color and crunch. Just be sure to keep stirring to prevent burning.
  • Don’t Overcrowd the Pan: If you’re making a large batch, consider cooking in batches. Overcrowding the pan can lead to steaming instead of stir-frying, which can make your vegetables soggy.
  • Experiment with Flavors: Feel free to experiment with different sauces and spices. Adding a splash of rice vinegar or a sprinkle of sesame oil can enhance the flavor profile of your dragon noodles.
  • Adjust Spice Levels: If you’re unsure about the spice level, start with less chili paste and add more as needed. You can always increase the heat, but it’s hard to tone it down once it’s in!
  • Let Noodles Cool: After cooking, let the noodles cool slightly before adding them to the stir-fry. This prevents them from becoming mushy and helps them hold their shape better.
  • Finish with Fresh Ingredients: Adding fresh ingredients like chopped herbs or a squeeze of lime just before serving can brighten the dish and add a fresh flavor.

By following these tips, you’ll be well on your way to creating the perfect dragon noodles recipe. Each bite will be a delightful explosion of flavors and textures, making your meal a hit with family and friends!

Breakdown of Time for Dragon Noodles Recipe

Prep Time

Preparing your dragon noodles recipe is quick and easy. The prep time typically takes about 15 minutes. During this time, you’ll gather all your ingredients, chop the vegetables, and measure out the sauces. Having everything ready before you start cooking will make the process smoother and more enjoyable. So, take a moment to set up your workspace and get organized!

Cooking Time

The cooking time for your dragon noodles is approximately 10-15 minutes. This includes boiling the pasta, stir-frying the vegetables, and combining everything together. The key is to keep an eye on the vegetables while they cook. You want them to be bright and slightly tender, not mushy. Stir-frying should be done quickly over high heat to lock in those vibrant colors and flavors.

Total Time

In total, you can expect to spend around 25-30 minutes from start to finish. This makes the dragon noodles recipe a fantastic option for a quick weeknight dinner or a delightful meal for guests. With just a little bit of time, you can create a colorful and flavorful dish that everyone will love. So, roll up your sleeves and get ready to enjoy your delicious dragon noodles!

Nutritional Information for Dragon Noodles Recipe

Calories

When it comes to enjoying a delicious meal, knowing the calorie content can help you make informed choices. Each serving of the dragon noodles recipe contains approximately 350 calories. This makes it a satisfying option for lunch or dinner without being overly heavy. The balance of carbohydrates, proteins, and fats in this dish ensures that you feel full and energized after your meal.

Protein

Protein is an essential nutrient that helps build and repair tissues in our bodies. In this dragon noodles recipe, you can expect to find around 10 grams of protein per serving. This protein content comes primarily from the noodles and any added ingredients like tofu, chicken, or shrimp. If you want to boost the protein even further, consider adding more protein-rich ingredients to your dish. This way, you can enjoy a hearty meal that supports your dietary needs.

Sodium

Sodium is an important mineral, but it’s essential to keep an eye on your intake. The dragon noodles recipe contains approximately 800 milligrams of sodium per serving. This sodium level comes from the tamari or soy sauce used in the dish. If you’re watching your sodium intake, you can opt for low-sodium soy sauce or adjust the amount of sauce you use. This way, you can still enjoy the flavors of the dish while keeping your sodium levels in check.

FAQs About Dragon Noodles Recipe

Can I make Dragon Noodles Recipe ahead of time?

Absolutely! You can prepare dragon noodles ahead of time, making them a great option for meal prep. To do this, cook the noodles and stir-fry the vegetables as directed. However, it’s best to store the noodles and vegetables separately to maintain their texture. When you’re ready to eat, simply reheat them in a pan with a splash of water or sauce to bring them back to life. This way, you can enjoy a delicious meal without the fuss of cooking from scratch every time!

What can I substitute for the noodles in Dragon Noodles Recipe?

If you’re looking for alternatives to traditional noodles, there are plenty of options! You can use rice noodles, zucchini noodles, or even whole grain pasta for a healthier twist. For a gluten-free option, try using rice noodles or gluten-free pasta. Each substitute will bring its unique flavor and texture, so feel free to experiment and find the one that suits your taste best. The key is to ensure that the noodles you choose can hold up to the stir-frying process.

How spicy is the Dragon Noodles Recipe?

The spice level of the dragon noodles recipe can be easily adjusted to your preference. The base recipe includes one tablespoon of chili paste, which gives it a nice kick. If you enjoy a milder flavor, you can reduce the amount of chili paste or omit it altogether. On the other hand, if you love heat, feel free to add more chili paste, fresh chilies, or even a dash of hot sauce. This flexibility allows you to customize the dish to suit your taste buds perfectly!

Can I add protein to the Dragon Noodles Recipe?

Yes, adding protein to your dragon noodles is a fantastic idea! You can mix in cooked chicken, shrimp, or tofu during the stir-fry for a heartier meal. Simply sauté the protein of your choice until cooked through, then add the vegetables and noodles as directed. This not only enhances the nutritional value of the dish but also makes it more filling. Feel free to get creative with your protein choices to make the dish your own!

Conclusion on Dragon Noodles Recipe

In conclusion, the dragon noodles recipe is a vibrant and flavorful dish that brings a delightful mix of textures and tastes to your table. With its colorful vegetables, perfectly cooked noodles, and a spicy sauce, this meal is sure to impress family and friends alike. Whether you choose to stick to the classic recipe or explore the various variations, the possibilities are endless.

Not only is this dish easy to prepare, but it also allows for creativity in the kitchen. You can customize it to suit your dietary preferences, whether you’re vegetarian, looking for a protein boost, or craving extra spice. The dragon noodles recipe is perfect for any occasion, from a quick weeknight dinner to a festive gathering.

As you embark on your culinary adventure with dragon noodles, remember to enjoy the process. Cooking is not just about the final dish; it’s about the joy of creating something delicious. So gather your ingredients, follow the steps, and savor every bite of your fiery dragon noodles. Happy cooking!

Creamy Crack Chicken Penne Recipe is a must-try dish!

Introduction to Creamy Crack Chicken Penne Recipe

Welcome to the delightful world of the Creamy Crack Chicken Penne Recipe! This dish is not just a meal; it’s an experience that brings comfort and joy to your dining table. With its creamy texture and rich flavors, it’s a perfect choice for family dinners or gatherings with friends. The combination of tender chicken, cheesy goodness, and zesty ranch seasoning creates a dish that is both satisfying and easy to prepare.

What Makes Creamy Crack Chicken Penne Special?

What sets the Creamy Crack Chicken Penne apart from other pasta dishes? First, it’s all about the flavors. The ranch seasoning adds a unique twist that elevates the dish. Plus, the creamy sauce made from cream cheese and chicken broth envelops the penne pasta, making every bite a burst of deliciousness. The addition of crumbled bacon and green onions not only enhances the taste but also adds a delightful crunch and freshness.

Moreover, this recipe is incredibly versatile. You can easily customize it to suit your taste preferences. Whether you want to add more veggies or switch up the cheese, the possibilities are endless. This dish is not just a meal; it’s a canvas for your culinary creativity!

A Brief History of Crack Chicken Dishes

Crack Chicken has become a popular term in the culinary world, and its origins are quite interesting. The name “Crack Chicken” refers to the addictive nature of the dish, which is often made with chicken, cream cheese, and ranch seasoning. It first gained popularity in the United States, especially among busy families looking for quick and tasty meals.

Over the years, variations of Crack Chicken have emerged, with many home cooks adding their own twists. From slow cooker versions to pasta adaptations, the concept has evolved while maintaining its core appeal. The Creamy Crack Chicken Penne Recipe is a perfect example of how this beloved dish can be transformed into a pasta delight that everyone will love.

So, whether you’re a seasoned chef or a beginner in the kitchen, this recipe is sure to impress. Let’s dive into the ingredients and get started on creating this creamy, cheesy masterpiece!

Ingredients for Creamy Crack Chicken Penne Recipe

Gathering the right ingredients is the first step to creating a delicious Creamy Crack Chicken Penne. This recipe is simple yet packed with flavor. Here’s what you’ll need:

  • 2 cups penne pasta
  • 1 pound boneless, skinless chicken breasts
  • 1 packet ranch seasoning mix (1 ounce)
  • 8 ounces cream cheese, softened
  • 1 cup shredded cheddar cheese
  • 1 cup chicken broth
  • 1/2 cup cooked bacon, crumbled
  • 1/4 cup green onions, sliced
  • Salt and pepper to taste

These ingredients come together to create a creamy, cheesy dish that is sure to please everyone at the table. The ranch seasoning adds a zesty kick, while the cream cheese and cheddar cheese provide a rich, velvety texture. Plus, the crumbled bacon and green onions add a delightful crunch and freshness.

Feel free to customize the ingredients based on your preferences. For instance, you can use whole wheat penne for a healthier option or add your favorite vegetables for extra nutrition. The beauty of this recipe lies in its flexibility, allowing you to make it your own!

Step-by-Step Preparation of Creamy Crack Chicken Penne Recipe

Now that you have all your ingredients ready, it’s time to dive into the cooking process! Follow these simple steps to create your Creamy Crack Chicken Penne. Each step is designed to ensure that your dish turns out perfectly creamy and delicious.

Step 1: Preparing the Chicken

Start by seasoning the boneless, skinless chicken breasts. Sprinkle salt, pepper, and half of the ranch seasoning mix over the chicken. This will infuse the meat with flavor. Next, heat a large skillet over medium heat. Once hot, add the seasoned chicken breasts. Cook them for about 6-7 minutes on each side, or until they are fully cooked and no longer pink in the center. Once done, remove the chicken from the skillet and let it rest for a few minutes. Then, shred the chicken using two forks. This shredded chicken will soak up all the creamy goodness later!

Step 2: Cooking the Penne Pasta

While the chicken is cooking, you can prepare the penne pasta. In a large pot, bring salted water to a boil. Once boiling, add the penne pasta and cook according to the package instructions until it reaches an al dente texture. This usually takes about 8-10 minutes. After cooking, drain the pasta and set it aside. Make sure not to rinse it, as you want the starch to help the sauce stick later on.

Step 3: Making the Creamy Sauce

In the same skillet where you cooked the chicken, pour in the chicken broth. This will help deglaze the pan, picking up all those tasty bits left behind. Next, add the softened cream cheese and the remaining ranch seasoning mix. Stir the mixture continuously until the cream cheese melts and combines with the broth, creating a smooth and creamy sauce. This step is crucial, as it forms the base of your delicious dish!

Step 4: Combining Ingredients

Once your creamy sauce is ready, it’s time to bring everything together. Return the shredded chicken to the skillet, ensuring it gets coated in the sauce. Then, gently fold in the cooked penne pasta. Mix everything together until the pasta is evenly coated with the creamy sauce. This is where the magic happens! The pasta absorbs the flavors, making each bite delightful.

Step 5: Final Touches and Serving

After combining all the ingredients, take the skillet off the heat. Now, it’s time for the finishing touches! Sprinkle half of the shredded cheddar cheese over the pasta and mix it in. Then, top the dish with the remaining cheddar cheese, crumbled bacon, and sliced green onions. This adds a beautiful presentation and extra flavor. Serve your Creamy Crack Chicken Penne hot, and watch everyone enjoy this cheesy delight!

Variations of Creamy Crack Chicken Penne Recipe

While the Creamy Crack Chicken Penne Recipe is already a crowd-pleaser, there are many ways to customize it to suit different dietary needs and preferences. Here are some delicious variations to consider!

Vegetarian Options

If you’re looking to make a vegetarian version of this dish, you can easily swap out the chicken for plant-based proteins. Here are a few ideas:

  • Chickpeas: Use canned chickpeas for a protein boost. Simply rinse and drain them, then add them to the creamy sauce.
  • Tofu: Firm tofu can be cubed and sautéed until golden brown. It absorbs flavors well and adds a nice texture.
  • Mushrooms: Sauté sliced mushrooms in the skillet before adding the sauce. They add a rich, umami flavor that complements the dish.

Feel free to add your favorite vegetables, like spinach or bell peppers, to enhance the nutrition and flavor. This way, you can enjoy a creamy, cheesy pasta dish without any meat!

Gluten-Free Alternatives

For those who need a gluten-free option, you can easily adapt the Creamy Crack Chicken Penne Recipe. Here’s how:

  • Gluten-Free Pasta: Substitute regular penne pasta with gluten-free penne. Many brands offer delicious alternatives made from rice, quinoa, or lentils.
  • Thickening Agents: If you want a thicker sauce, consider using cornstarch or arrowroot powder mixed with water to achieve the desired consistency.
  • Check Seasoning Mix: Ensure that the ranch seasoning mix you use is gluten-free. Many brands offer gluten-free options, so read the labels carefully.

With these simple swaps, you can enjoy a creamy and satisfying dish that fits your dietary needs without sacrificing flavor!

Cooking Note for Creamy Crack Chicken Penne Recipe

When preparing the Creamy Crack Chicken Penne Recipe, a few cooking notes can help ensure your dish turns out perfectly every time. These tips will enhance your cooking experience and the final result.

First, always use fresh ingredients. Fresh chicken and high-quality cheese will significantly improve the flavor of your dish. If possible, opt for organic or locally sourced products. This not only supports local farmers but also ensures you’re using the best ingredients available.

Next, pay attention to the cooking times. Overcooking the chicken can lead to dry meat, while undercooking can be unsafe. Use a meat thermometer to check that the internal temperature of the chicken reaches 165°F (75°C). This guarantees that your chicken is both safe to eat and juicy.

When making the creamy sauce, stir continuously to prevent the cream cheese from sticking to the bottom of the skillet. This will help create a smooth and velvety sauce that coats the pasta beautifully. If the sauce seems too thick, you can add a little more chicken broth to reach your desired consistency.

Lastly, don’t rush the final touches. Allow the dish to sit for a few minutes after cooking. This resting time helps the flavors meld together, making each bite even more delicious. Plus, it gives you a moment to set the table and prepare for a delightful meal!

By following these cooking notes, you’ll be well on your way to mastering the Creamy Crack Chicken Penne Recipe. Enjoy the process and the delicious results!

Serving Suggestions for Creamy Crack Chicken Penne Recipe

Once you’ve prepared your Creamy Crack Chicken Penne, it’s time to think about how to serve it. The right side dishes and beverages can elevate your meal, making it even more enjoyable. Here are some fantastic serving suggestions to complement your delicious pasta dish!

Ideal Side Dishes

Pairing your Creamy Crack Chicken Penne with the right side dishes can enhance the overall dining experience. Here are a few ideas:

  • Garlic Bread: A classic choice, garlic bread is perfect for soaking up the creamy sauce. You can make it easily by spreading butter and minced garlic on slices of baguette, then toasting them in the oven.
  • Caesar Salad: A fresh Caesar salad adds a crunchy texture and a zesty flavor that balances the richness of the pasta. Toss romaine lettuce with Caesar dressing, croutons, and parmesan cheese for a delightful side.
  • Steamed Vegetables: Lightly steamed broccoli, green beans, or carrots provide a healthy contrast to the creamy pasta. They add color and nutrition to your meal.
  • Coleslaw: A tangy coleslaw can offer a refreshing crunch. The acidity from the dressing cuts through the richness of the dish, making it a great pairing.

These side dishes not only complement the flavors of the Creamy Crack Chicken Penne but also add variety to your meal. Choose one or two to create a well-rounded dining experience!

Perfect Pairings with Beverages

Choosing the right beverages can enhance the flavors of your meal. Here are some beverage pairings that work wonderfully with Creamy Crack Chicken Penne:

  • White Wine: A chilled glass of white wine, such as Chardonnay or Sauvignon Blanc, pairs beautifully with the creamy sauce. The acidity in the wine balances the richness of the dish.
  • Iced Tea: For a non-alcoholic option, refreshing iced tea is a great choice. You can sweeten it lightly or add lemon for a zesty twist.
  • Sparkling Water: A bubbly sparkling water with a slice of lemon or lime can cleanse the palate between bites, making each mouthful of pasta even more enjoyable.
  • Craft Beer: If you prefer beer, a light lager or a pale ale can complement the flavors of the dish without overpowering them.

With these beverage options, you can create a delightful dining experience that pairs perfectly with your Creamy Crack Chicken Penne. Enjoy your meal with family and friends, and savor every bite!

Tips for Perfecting Your Creamy Crack Chicken Penne Recipe

To ensure your Creamy Crack Chicken Penne turns out perfectly every time, consider these helpful tips. They will guide you through common pitfalls and help you enjoy your dish to the fullest!

Common Mistakes to Avoid

Even the best cooks can make mistakes. Here are some common ones to watch out for:

  • Overcooking the Chicken: Cooking chicken for too long can make it dry. Always check for doneness with a meat thermometer. The internal temperature should reach 165°F (75°C).
  • Not Salting the Pasta Water: Salting the water is crucial for flavor. It helps season the pasta as it cooks, enhancing the overall taste of your dish.
  • Skipping the Deglazing Step: After cooking the chicken, don’t skip deglazing the pan with chicken broth. This step adds depth to your sauce by incorporating all the flavorful bits stuck to the skillet.
  • Using Cold Cream Cheese: Make sure your cream cheese is softened before adding it to the sauce. Cold cream cheese can clump and won’t blend smoothly.
  • Not Letting the Dish Rest: Allowing the dish to sit for a few minutes after cooking helps the flavors meld together. This resting time makes each bite even more delicious!

Storage Tips for Leftovers

If you have leftovers, you can store them properly to enjoy later. Here are some tips:

  • Cool Before Storing: Allow the Creamy Crack Chicken Penne to cool to room temperature before placing it in the fridge. This helps prevent condensation and keeps it fresh.
  • Use Airtight Containers: Store leftovers in airtight containers to maintain freshness. This will also help prevent any odors from affecting the dish.
  • Refrigerate Promptly: Make sure to refrigerate leftovers within two hours of cooking to ensure food safety.
  • Reheat Gently: When reheating, do so gently on the stove or in the microwave. Add a splash of chicken broth to help restore the creamy texture.
  • Consume Within 3-4 Days: For the best taste and quality, enjoy your leftovers within 3-4 days. If you can’t finish them, consider freezing for later use.

By following these tips, you’ll be well on your way to mastering the Creamy Crack Chicken Penne Recipe. Enjoy the cooking process and the delicious results!

Breakdown of Time for Creamy Crack Chicken Penne Recipe

Understanding the time needed for each step of the Creamy Crack Chicken Penne Recipe can help you plan your cooking efficiently. Here’s a breakdown of the prep time, cooking time, and total time required to create this delicious dish.

Prep Time

The prep time for this recipe is quite manageable. You’ll need about 15-20 minutes to gather and prepare your ingredients. This includes:

  • Measuring out the penne pasta, chicken, and other ingredients.
  • Seasoning the chicken with salt, pepper, and ranch seasoning.
  • Chopping green onions and crumbling the bacon if not pre-cooked.

Having everything ready before you start cooking will make the process smoother and more enjoyable!

Cooking Time

The cooking time for the Creamy Crack Chicken Penne is approximately 30-35 minutes. This includes:

  • Cooking the chicken in the skillet (about 12-14 minutes).
  • Boiling the penne pasta (8-10 minutes).
  • Making the creamy sauce and combining all ingredients (10-12 minutes).

By keeping an eye on the cooking times, you’ll ensure that everything is cooked perfectly and ready to serve!

Total Time

In total, you can expect to spend about 45-55 minutes from start to finish. This includes both prep and cooking times. Here’s a quick summary:

  • Prep Time: 15-20 minutes
  • Cooking Time: 30-35 minutes
  • Total Time: 45-55 minutes

This makes the Creamy Crack Chicken Penne Recipe a great option for a weeknight dinner or a gathering with friends. You’ll have a delicious meal ready in no time!

Nutritional Information for Creamy Crack Chicken Penne Recipe

Understanding the nutritional content of your meals is essential for maintaining a balanced diet. The Creamy Crack Chicken Penne Recipe is not only delicious but also provides a good mix of macronutrients. Here’s a closer look at the calories and macronutrients in each serving.

Calories and Macronutrients

Each serving of the Creamy Crack Chicken Penne contains approximately 450 calories. This makes it a satisfying meal that can fit into various dietary plans. Here’s a breakdown of the macronutrients:

  • Calories: 450
  • Protein: 30g
  • Fat: 25g
  • Net Carbohydrates: 25g

The protein content comes primarily from the chicken and cheese, making it a great option for those looking to increase their protein intake. The fats mainly come from the cream cheese and cheddar cheese, contributing to the creamy texture of the dish. The carbohydrates are primarily from the penne pasta, providing energy for your day.

Sodium Content

When it comes to sodium, it’s important to be mindful, especially if you’re watching your salt intake. The sodium content in each serving of the Creamy Crack Chicken Penne is approximately 800mg. This is largely due to the ranch seasoning mix and chicken broth used in the recipe.

To reduce sodium levels, consider using low-sodium chicken broth and a homemade ranch seasoning mix. This way, you can enjoy the flavors without the extra salt. Always remember to balance your meals with fresh fruits and vegetables to maintain a healthy diet.

By being aware of the nutritional information, you can enjoy the Creamy Crack Chicken Penne Recipe while keeping your dietary goals in mind. It’s a delicious and satisfying meal that can be part of a balanced lifestyle!

FAQs about Creamy Crack Chicken Penne Recipe

Can I use a different type of pasta?

Absolutely! While penne pasta is a great choice for the Creamy Crack Chicken Penne Recipe, you can easily swap it for other types of pasta. Options like rotini, fusilli, or even spaghetti work well. Just keep in mind that cooking times may vary slightly, so be sure to check the package instructions. The key is to choose a pasta shape that can hold onto the creamy sauce, ensuring every bite is delicious!

How can I make this dish spicier?

If you love a bit of heat, there are several ways to spice up your Creamy Crack Chicken Penne. You can add crushed red pepper flakes or diced jalapeños to the creamy sauce for an extra kick. Another option is to use a spicy ranch seasoning mix if you can find one. Additionally, serving the dish with hot sauce on the side allows everyone to adjust the spice level to their liking. Enjoy experimenting with flavors!

Can I prepare Creamy Crack Chicken Penne in advance?

Yes, you can prepare the Creamy Crack Chicken Penne in advance! To do this, follow the recipe up to the point of combining the ingredients. After mixing everything together, let it cool completely before storing it in an airtight container in the refrigerator. You can reheat it on the stove or in the microwave when you’re ready to serve. Just add a splash of chicken broth to help restore the creamy texture. This makes it a convenient option for meal prep!

What are some good substitutes for cream cheese?

If you’re looking for alternatives to cream cheese, there are several options you can try. Greek yogurt is a popular substitute that adds creaminess while being lower in fat. You can also use cottage cheese blended until smooth for a similar texture. For a dairy-free option, consider using cashew cream or a plant-based cream cheese. Each substitute will bring its own unique flavor, so feel free to experiment and find what you like best!

Conclusion on Creamy Crack Chicken Penne Recipe

In conclusion, the Creamy Crack Chicken Penne Recipe is a delightful dish that combines rich flavors and creamy textures, making it a favorite for many. Whether you’re cooking for family or hosting friends, this recipe is sure to impress. Its simplicity and versatility allow you to customize it to your liking, ensuring that everyone at the table will enjoy it.

From the tender chicken to the cheesy sauce, every bite is a comforting experience. Plus, with the option to add vegetables or swap ingredients, you can make this dish fit various dietary needs. The Creamy Crack Chicken Penne is not just a meal; it’s a celebration of flavors that brings people together.

As you prepare this dish, remember to enjoy the process. Cooking can be a joyful experience, and sharing your creations with loved ones makes it even more special. So, gather your ingredients, follow the steps, and savor the delicious results. Your Creamy Crack Chicken Penne will surely become a go-to recipe in your kitchen!

We hope you find this recipe as delightful as we do. Happy cooking, and enjoy every creamy, cheesy bite!

Sweet Chili Chicken: A Deliciously Simple Recipe

Sweet Chili Chicken

Introduction to Sweet Chili Chicken

If you’re looking for a quick dinner that doesn’t skimp on flavor, this Sweet Chili Chicken is the answer. With its perfect balance of sweetness, heat, and savory depth, this dish brings excitement to the table without adding stress to your evening. Tender pieces of chicken are cooked until golden and coated in a sticky, vibrant sweet chili sauce that clings to every bite. It’s a crowd-pleaser that pairs beautifully with rice, noodles, or fresh veggies—making it a versatile staple you’ll want to come back to again and again.

Why You’ll Love This Sweet Chili Chicken

This Sweet Chili Chicken recipe is a lifesaver for busy evenings. It’s quick to prepare, taking just 30 minutes of marinating and 14 minutes of cooking. The flavors are a delightful balance of sweet and savory, making it a hit with both kids and adults. Plus, it’s versatile enough to pair with rice, quinoa, or even a fresh salad. You’ll love how effortlessly it brings everyone to the table!

Ingredients for Sweet Chili Chicken

Gathering the right ingredients is key to making this Sweet Chili Chicken shine. Here’s what you’ll need:

  • Boneless, skinless chicken thighs: These are juicy and tender, perfect for soaking up the marinade.
  • Sweet chili sauce: This is the star of the show, providing that signature sweet and spicy flavor.
  • Soy sauce: Adds depth and umami, enhancing the overall taste of the dish.
  • Rice vinegar: A splash of acidity that balances the sweetness and brightens the flavors.
  • Vegetable oil: Helps to keep the chicken moist while cooking and prevents sticking.
  • Garlic: Freshly minced garlic brings a wonderful aroma and savory kick.
  • Fresh ginger: Grated ginger adds warmth and a hint of spice, elevating the dish.
  • Black pepper: A simple seasoning that enhances the overall flavor profile.
  • Red pepper flakes (optional): For those who like a little heat, these can be added to the marinade.
  • Green onions: Sliced for garnish, they add a fresh crunch and a pop of color.
  • Sesame seeds: These are optional but add a lovely nutty flavor and visual appeal.

For exact measurements, check the bottom of the article where you can find everything listed for easy printing. Feel free to get creative with substitutions; for instance, chicken breasts can work in a pinch, and you can swap out the soy sauce for a gluten-free alternative if needed!

How to Make Sweet Chili Chicken

Now that you have your ingredients ready, let’s dive into the steps to create this mouthwatering Sweet Chili Chicken. Each step is simple, and I promise the end result will be worth it!

Step 1: Prepare the Marinade

Start by grabbing a large bowl. Combine the sweet chili sauce, soy sauce, rice vinegar, vegetable oil, minced garlic, grated ginger, black pepper, and red pepper flakes if you’re feeling adventurous. As you mix, take a moment to inhale the delightful aromas. The sweet and savory notes will have your taste buds dancing in anticipation!

Step 2: Marinate the Chicken

Next, add the chicken thighs to the marinade. Make sure each piece is well coated; this is where the magic happens! Cover the bowl with plastic wrap and let it sit in the fridge for at least 30 minutes. If you have time, marinating for up to 2 hours will deepen the flavors even more. Trust me, your chicken will thank you!

Step 3: Preheat Your Cooking Surface

While the chicken is soaking up all that flavor, it’s time to preheat your grill or skillet. If you’re using a grill, get it nice and hot over medium-high heat. For a skillet, add a splash of oil to prevent sticking. Preheating is crucial; it ensures that the chicken cooks evenly and gets that beautiful sear!

Step 4: Cook the Chicken

Once your cooking surface is ready, remove the chicken from the marinade, letting any excess drip off. Discard the leftover marinade—no double-dipping here! Grill or cook the chicken for about 6-7 minutes on each side. You’re looking for a lovely golden-brown color and an internal temperature of 165°F. A meat thermometer is your best friend here!

Step 5: Rest and Serve

After cooking, let the chicken rest for about 5 minutes. This step is essential; it allows the juices to redistribute, keeping your chicken moist and tender. Slice the chicken and serve it up, garnished with sliced green onions and a sprinkle of sesame seeds. Your Sweet Chili Chicken is now ready to impress!

Tips for Success

  • Always marinate the chicken for at least 30 minutes to enhance flavor.
  • Use a meat thermometer to ensure the chicken reaches 165°F for safety.
  • For extra flavor, try adding a splash of lime juice to the marinade.
  • Let the chicken rest after cooking to keep it juicy.
  • Experiment with different garnishes like cilantro or lime wedges for a fresh twist.

Equipment Needed

  • Large bowl: For mixing the marinade. A zip-top bag works too!
  • Grill or skillet: Either will do for cooking. A grill pan is a great alternative.
  • Meat thermometer: To check the chicken’s doneness. A simple knife can also help.
  • Plastic wrap: To cover the bowl while marinating. A lid works just as well.

Variations

  • Spicy Sweet Chili Chicken: Add more red pepper flakes or a splash of sriracha to the marinade for an extra kick.
  • Honey Garlic Chicken: Substitute half of the sweet chili sauce with honey for a sweeter, garlicky flavor.
  • Vegetarian Option: Replace chicken with tofu or tempeh, marinating and cooking them the same way.
  • Low-Carb Version: Serve the chicken over cauliflower rice instead of traditional rice for a healthier option.
  • Herb-Infused Chicken: Add fresh herbs like basil or cilantro to the marinade for a fresh twist.

Serving Suggestions

  • Serve your Sweet Chili Chicken over a bed of fluffy jasmine rice or quinoa for a hearty meal.
  • Pair it with steamed broccoli or sautéed green beans for a colorful, nutritious side.
  • A chilled cucumber salad adds a refreshing crunch.
  • For drinks, try a light white wine or iced green tea.

FAQs about Sweet Chili Chicken

As you embark on your culinary adventure with Sweet Chili Chicken, you might have a few questions. Here are some common queries I’ve encountered, along with helpful answers!

Can I use chicken breasts instead of thighs?

Absolutely! While I love the juiciness of chicken thighs, boneless, skinless chicken breasts can work just as well. Just keep an eye on the cooking time, as breasts may cook a bit faster.

How can I make this dish gluten-free?

To make your Sweet Chili Chicken gluten-free, simply swap out the soy sauce for a gluten-free alternative. There are many delicious options available that won’t compromise on flavor!

Can I prepare the marinade in advance?

Yes! You can prepare the marinade a day ahead and store it in the fridge. Just add the chicken when you’re ready to cook. This can save you time on busy days!

What sides pair well with Sweet Chili Chicken?

This dish is versatile! It pairs beautifully with steamed rice, quinoa, or a fresh salad. You can also serve it with roasted vegetables for a complete meal.

Can I freeze the marinated chicken?


Definitely! Marinate the chicken, then place it in a freezer-safe bag. It can be frozen for up to three months. Just thaw it in the fridge before cooking for the best results.

Final Thoughts

Cooking should be a joyful experience, and my Sweet Chili Chicken recipe embodies that spirit. It’s not just about the delicious flavors; it’s about gathering around the table with loved ones, sharing stories, and creating memories. This dish is a reminder that even on the busiest days, a simple, flavorful meal can bring everyone together. Whether you’re a seasoned chef or a kitchen novice, I hope this recipe inspires you to embrace your culinary adventures. So, roll up your sleeves, savor the process, and enjoy every bite of this delightful dish!

“`

Sweet Chili Chicken
admin

Sweet Chili Chicken: A Deliciously Simple Recipe

Sweet Chili Chicken is a deliciously simple recipe featuring tender chicken thighs marinated in a flavorful sweet chili sauce.
Prep Time 30 minutes
Cook Time 14 minutes
Total Time 44 minutes
Servings: 4 servings
Course: Main Dish
Cuisine: Asian
Calories: 350

Ingredients
  

  • 2 pounds boneless skinless chicken thighs
  • 1/2 cup sweet chili sauce
  • 1 tablespoon soy sauce
  • 1 tablespoon rice vinegar
  • 1 tablespoon vegetable oil
  • 3 cloves garlic minced
  • 1 teaspoon fresh ginger grated
  • 1/2 teaspoon black pepper
  • 1/4 teaspoon red pepper flakes optional
  • 2 green onions sliced (for garnish)
  • Sesame seeds for garnish

Method
 

  1. In a large bowl, combine the sweet chili sauce, soy sauce, rice vinegar, vegetable oil, minced garlic, grated ginger, black pepper, and red pepper flakes (if using). Mix well to create the marinade.
  2. Add the chicken thighs to the marinade, ensuring they are well coated. Cover the bowl with plastic wrap and refrigerate for at least 30 minutes, or up to 2 hours for more flavor.
  3. Preheat your grill or a large skillet over medium-high heat. If using a skillet, add a little oil to prevent sticking.
  4. Remove the chicken from the marinade, allowing excess marinade to drip off. Discard the remaining marinade.
  5. Grill or cook the chicken for about 6-7 minutes per side, or until the internal temperature reaches 165°F and the chicken is nicely browned.
  6. Once cooked, remove the chicken from the heat and let it rest for 5 minutes.
  7. Slice the chicken and serve it garnished with sliced green onions and sesame seeds.

Nutrition

Serving: 1servingCalories: 350kcalCarbohydrates: 10gProtein: 30gFat: 20gSaturated Fat: 3gPolyunsaturated Fat: 15gCholesterol: 100mgSodium: 600mgSugar: 8g

Notes

  • For a spicier kick, add more red pepper flakes or a splash of sriracha to the marinade.
  • Serve the chicken over a bed of steamed rice or quinoa for a complete meal.
  • You can also add steamed vegetables for extra nutrition.

Tried this recipe?

Let us know how it was!

Creamy Marry Me Shrimp Pasta: A Delicious Dinner Choice!

Creamy Marry Me Shrimp Pasta

Introduction to Creamy Marry Me Shrimp Pasta

Welcome to my kitchen, where I believe every meal can be a love letter to those we cherish! Today, I’m excited to share my recipe for Creamy Marry Me Shrimp Pasta. This dish is not just a meal; it’s a delightful experience that can turn an ordinary evening into something special. Whether you’re a busy mom juggling work and family or a professional looking for a quick yet impressive dinner, this creamy pasta is your answer. It’s simple, delicious, and guaranteed to make hearts flutter at the dinner table!

Why You’ll Love This Creamy Marry Me Shrimp Pasta

This Creamy Marry Me Shrimp Pasta is a lifesaver for busy nights. It comes together in just 30 minutes, making it perfect for those evenings when time is tight. The rich, creamy sauce envelops the shrimp and pasta in a warm embrace, creating a dish that’s both comforting and elegant. Plus, it’s a crowd-pleaser, ensuring smiles all around the table. Trust me, this recipe will quickly become a favorite in your home!

Ingredients for Creamy Marry Me Shrimp Pasta

Gathering the right ingredients is the first step to creating this delightful dish. Here’s what you’ll need:

  • Fettuccine pasta: This wide, flat pasta is perfect for holding onto the creamy sauce. You can also use linguine or spaghetti if you prefer.
  • Large shrimp: Fresh or frozen, shrimp adds a sweet, briny flavor. Make sure they’re peeled and deveined for convenience.
  • Olive oil: A staple in Italian cooking, it adds richness and helps sauté the garlic to perfection.
  • Garlic: Freshly minced garlic brings a fragrant aroma and depth of flavor to the dish.
  • Heavy cream: This is what makes the sauce luxuriously creamy. For a lighter option, consider half-and-half.
  • Chicken broth: It adds a savory base to the sauce. You can use vegetable broth for a vegetarian twist.
  • Parmesan cheese: Grated Parmesan melts beautifully into the sauce, giving it a rich, cheesy flavor. Freshly grated is best!
  • Red pepper flakes: These add a hint of heat. Adjust the amount to suit your taste.
  • Salt and pepper: Essential for seasoning, they enhance all the flavors in the dish.
  • Fresh spinach: This adds a pop of color and nutrition. You can substitute with kale or arugula if you like.
  • Lemon juice: A splash of lemon brightens the dish and balances the creaminess.
  • Fresh parsley: Chopped parsley is perfect for garnishing, adding a fresh touch to your plate.

For exact measurements, check the bottom of the article where you can find everything listed for easy printing. Happy cooking!

How to Make Creamy Marry Me Shrimp Pasta

Now that we have our ingredients ready, let’s dive into the cooking process! This Creamy Marry Me Shrimp Pasta is straightforward and fun to make. Follow these steps, and you’ll have a delicious meal in no time!

Step 1: Cook the Fettuccine Pasta

Start by boiling a large pot of salted water. Once it’s bubbling, add the fettuccine pasta. Cook it according to the package instructions until it’s al dente, which means it should still have a slight bite to it. This is crucial because the pasta will continue to cook when mixed with the sauce.

Don’t forget to reserve about half a cup of that starchy pasta water before draining! This water is a secret weapon for adjusting the sauce’s consistency later on.

Step 2: Sauté the Garlic

While the pasta cooks, grab a large skillet and heat up the olive oil over medium heat. Once the oil is shimmering, toss in the minced garlic. Sauté it for about a minute until it becomes fragrant. Be careful not to let it burn; burnt garlic can turn bitter and ruin the dish!

Step 3: Cook the Shrimp

Next, add the peeled and deveined shrimp to the skillet. Season them with salt, pepper, and a sprinkle of red pepper flakes for a little kick. Cook the shrimp for about 2-3 minutes on each side until they turn pink and opaque. This is when they’re perfectly cooked!

Once done, remove the shrimp from the skillet and set them aside. This step is important because we’ll be using the same skillet for the sauce, which will soak up all those delicious flavors.

Step 4: Prepare the Sauce

In the same skillet, pour in the chicken broth and bring it to a gentle simmer. This will help deglaze the pan, lifting all those tasty bits stuck to the bottom. After a minute, stir in the heavy cream and let it cook for 2-3 minutes until it thickens slightly.

If you find the sauce too thick, don’t worry! Just add a splash of the reserved pasta water until you reach your desired consistency.

Step 5: Add Cheese and Spinach

Now it’s time to make the sauce even more delicious! Gradually whisk in the grated Parmesan cheese until it melts and creates a creamy texture. Then, toss in the fresh spinach and a splash of lemon juice. Stir until the spinach wilts and brightens the sauce.

Step 6: Combine Everything

Finally, return the cooked shrimp and fettuccine to the skillet. Toss everything together gently, ensuring the pasta is well-coated in that luscious sauce. Taste and adjust the seasoning with more salt and pepper if needed.

And just like that, your Creamy Marry Me Shrimp Pasta is ready to be served! Enjoy this delightful dish with a sprinkle of fresh parsley on top for that extra touch.

Tips for Success

  • Always reserve pasta water; it’s a game-changer for sauce consistency.
  • Don’t overcook the shrimp; they should be just pink and opaque.
  • Use freshly grated Parmesan for the best flavor and texture.
  • Feel free to add your favorite veggies for extra nutrition.
  • Adjust the red pepper flakes to suit your spice preference.

Equipment Needed

  • Large pot: For boiling pasta. A Dutch oven works well too.
  • Skillet: A non-stick skillet is ideal for sautéing and making the sauce.
  • Colander: For draining the pasta. A slotted spoon can be a handy alternative.
  • Whisk: To mix the sauce smoothly. A fork can work in a pinch!

Variations

  • Vegetable Delight: Add cherry tomatoes, bell peppers, or zucchini for a colorful and nutritious twist.
  • Spicy Kick: For those who love heat, toss in some diced jalapeños or increase the red pepper flakes.
  • Herb Infusion: Experiment with fresh herbs like basil or thyme to elevate the flavor profile.
  • Gluten-Free Option: Substitute fettuccine with gluten-free pasta for a delicious alternative.
  • Seafood Medley: Mix in scallops or crab meat for a luxurious seafood experience.

Serving Suggestions

  • Side Salad: Pair your pasta with a light arugula or mixed greens salad dressed with lemon vinaigrette.
  • Garlic Bread: Serve warm, crusty garlic bread on the side for a delightful crunch.
  • Wine Pairing: A chilled Sauvignon Blanc complements the creamy sauce beautifully.
  • Presentation: Garnish with extra parsley and a sprinkle of Parmesan for a restaurant-worthy look.

FAQs about Creamy Marry Me Shrimp Pasta

Can I use frozen shrimp for this recipe?

Absolutely! Frozen shrimp work perfectly. Just make sure to thaw them completely before cooking. This will ensure they cook evenly and maintain their juicy texture.

How can I make this dish lighter?

For a lighter version of *Creamy Marry Me Shrimp Pasta*, substitute half-and-half for heavy cream and use zucchini noodles instead of traditional pasta. You can also add more vegetables for added nutrition!

What can I serve with this pasta?

This dish pairs wonderfully with garlic bread or a fresh salad. A crisp white wine, like Sauvignon Blanc, also complements the flavors beautifully.

Can I make this dish ahead of time?

While it’s best enjoyed fresh, you can prepare the sauce ahead of time and store it in the fridge. Just reheat it gently before adding the shrimp and pasta.

What if I don’t have Italian seasoning?

No worries! You can create your own blend using dried basil, oregano, and thyme. This will still give your *Creamy Marry Me Shrimp Pasta* that delightful Italian flavor.

Final Thoughts

Cooking is a beautiful way to express love, and my Creamy Marry Me Shrimp Pasta is no exception. This dish brings joy not just through its rich flavors but also by creating moments around the dinner table. Whether it’s a cozy family night or a romantic dinner, this pasta is sure to impress. I hope you find as much happiness in making it as I do. Remember, it’s not just about the food; it’s about the memories you create while sharing it. So, gather your loved ones and enjoy every creamy, delicious bite together!

Creamy Marry Me Shrimp Pasta
jhessica

Creamy Marry Me Shrimp Pasta: A Delicious Dinner Choice!

A creamy and delicious shrimp pasta dish that is perfect for a romantic dinner or a special occasion.
Prep Time 10 minutes
Cook Time 20 minutes
Total Time 30 minutes
Servings: 4 servings
Course: Dinner
Cuisine: Italian
Calories: 550

Ingredients
  

  • 8 ounces fettuccine or linguine
  • 1 pound large shrimp peeled and deveined
  • 2 tablespoons olive oil
  • 4 cloves garlic minced
  • 1 cup heavy cream
  • 1 cup chicken broth
  • 1 teaspoon Italian seasoning
  • 1/2 teaspoon red pepper flakes optional
  • 1 cup grated Parmesan cheese
  • Salt and pepper to taste
  • Fresh parsley chopped (for garnish)

Method
 

  1. Cook the fettuccine or linguine according to package instructions until al dente. Drain and set aside.
  2. In a large skillet, heat the olive oil over medium heat. Add the minced garlic and sauté for about 1 minute until fragrant.
  3. Add the shrimp to the skillet and cook for 2-3 minutes on each side until they turn pink and opaque. Remove the shrimp from the skillet and set aside.
  4. In the same skillet, pour in the heavy cream and chicken broth. Stir in the Italian seasoning and red pepper flakes, if using. Bring the mixture to a simmer.
  5. Gradually whisk in the grated Parmesan cheese until the sauce is smooth and creamy. Season with salt and pepper to taste.
  6. Return the cooked shrimp to the skillet and add the drained pasta. Toss everything together until the pasta is well coated in the sauce.
  7. Serve immediately, garnished with fresh parsley.

Nutrition

Serving: 1servingCalories: 550kcalCarbohydrates: 45gProtein: 30gFat: 30gSaturated Fat: 15gPolyunsaturated Fat: 10gCholesterol: 200mgSodium: 800mgFiber: 2gSugar: 2g

Notes

  • For a lighter version, substitute half-and-half for heavy cream and use zucchini noodles instead of pasta.
  • Add vegetables like spinach, sun-dried tomatoes, or asparagus for extra flavor and nutrition.

Tried this recipe?

Let us know how it was!

Chicken Shawarma Bowl: Easily Spice Up Dinner Tonight!

Chicken Shawarma Bowl

Introduction to Chicken Shawarma Bowl

After a long day, the last thing I want is to spend hours in the kitchen. That’s where my Chicken Shawarma Bowl comes to the rescue! This dish is not just a meal; it’s a celebration of flavors that can brighten up any evening. With marinated chicken thighs, fresh veggies, and a creamy yogurt-tahini sauce, it’s a quick solution for busy nights or a delightful way to impress loved ones. Plus, it’s healthy and gluten-free, making it a win-win for everyone at the table. Let’s dive into this delicious adventure together!

Why You’ll Love This Chicken Shawarma Bowl

This Chicken Shawarma Bowl is a game-changer for weeknight dinners. It’s incredibly easy to whip up, taking just 45 minutes from start to finish. The combination of spices creates a mouthwatering flavor that dances on your palate. Plus, it’s customizable! You can add your favorite veggies or adjust the spice level. Healthy, satisfying, and bursting with taste, this bowl is sure to become a family favorite!

Ingredients for Chicken Shawarma Bowl

Gathering the right ingredients is the first step to creating your Chicken Shawarma Bowl masterpiece. Here’s what you’ll need:

  • Cooked brown rice: This serves as a hearty base, providing fiber and nutrients.
  • Boneless, skinless chicken thighs: Juicy and flavorful, they soak up the marinade beautifully.
  • Olive oil: A healthy fat that helps the spices adhere to the chicken.
  • Ground cumin: Adds a warm, earthy flavor that’s essential in Middle Eastern cuisine.
  • Ground paprika: This brings a subtle sweetness and vibrant color to the dish.
  • Ground turmeric: Not only does it add a lovely golden hue, but it also packs a health punch.
  • Garlic powder: A must-have for that aromatic kick.
  • Onion powder: Enhances the savory depth of flavor.
  • Cayenne pepper (optional): For those who like a little heat, this spice can elevate the dish.
  • Salt and pepper: Essential for seasoning and bringing out the flavors.
  • Cherry tomatoes: Their sweetness and juiciness add a refreshing contrast.
  • Cucumber: Crisp and cool, it balances the warm spices perfectly.
  • Red onion: Adds a sharp bite and beautiful color.
  • Fresh parsley: A sprinkle of this herb brightens up the bowl.
  • Plain Greek yogurt: Creamy and tangy, it forms the base of the sauce.
  • Tahini: This sesame paste adds a nutty richness to the yogurt sauce.
  • Juice of 1 lemon: A splash of acidity that ties all the flavors together.

For exact measurements, check the bottom of the article where you can find everything listed for easy printing. Feel free to get creative with your ingredients! You can swap brown rice for quinoa or add your favorite veggies to make this bowl truly your own.

How to Make Chicken Shawarma Bowl

Creating your Chicken Shawarma Bowl is a delightful journey that’s easier than you might think. Follow these simple steps, and you’ll have a delicious meal ready in no time!

Step 1: Marinate the Chicken

Start by grabbing a large bowl. Combine olive oil, cumin, paprika, turmeric, garlic powder, onion powder, cayenne pepper, salt, and pepper. This blend of spices is the heart of your Chicken Shawarma Bowl, infusing the chicken with incredible flavor.

Next, add the boneless, skinless chicken thighs to the bowl. Make sure each piece is well-coated with the marinade. Cover the bowl and let it sit in the fridge for at least 30 minutes. If you have time, marinating for up to 2 hours will deepen the flavors even more. Trust me, it’s worth the wait!

Step 2: Cook the Chicken

Once your chicken has marinated, it’s time to cook! Preheat your grill or skillet over medium-high heat. Place the chicken thighs on the grill or in the skillet, cooking for about 5-7 minutes on each side. You want that beautiful golden-brown color!

To ensure the chicken is fully cooked, check that the internal temperature reaches 165°F. Once done, remove the chicken from heat and let it rest for about 5 minutes. This resting time allows the juices to redistribute, making each bite tender and juicy.

Step 3: Prepare the Vegetables

While the chicken is resting, it’s time to prepare the fresh vegetables. In a large bowl, combine the halved cherry tomatoes, diced cucumber, thinly sliced red onion, and chopped parsley. Toss them gently to mix. This colorful medley adds freshness and crunch to your Chicken Shawarma Bowl.

Step 4: Make the Yogurt-Tahini Sauce

Now, let’s whip up the creamy yogurt-tahini sauce! In a small bowl, whisk together the plain Greek yogurt, tahini, and lemon juice until smooth. This sauce is the perfect finishing touch, adding a tangy richness that complements the spices beautifully.

Step 5: Assemble the Bowls

It’s time for the fun part—assembling your Chicken Shawarma Bowls! Start by dividing the cooked brown rice among four bowls. Top each bowl with sliced chicken, the vibrant vegetable mixture, and a generous drizzle of the yogurt-tahini sauce. Feel free to get creative with the presentation; a sprinkle of extra parsley on top adds a lovely touch!

Tips for Success

  • Marinate the chicken longer for deeper flavor—up to 2 hours is ideal.
  • Use a meat thermometer to ensure the chicken is perfectly cooked at 165°F.
  • Feel free to customize the veggies based on what you have on hand.
  • For a creamier sauce, add a splash of water to the yogurt-tahini mix.
  • Serve with warm pita bread for a delightful touch!

Equipment Needed

  • Grill or Skillet: Either works well for cooking the chicken. A grill adds a smoky flavor, while a skillet is perfect for indoor cooking.
  • Large Bowl: For marinating the chicken and mixing the vegetables.
  • Small Bowl: Ideal for whisking the yogurt-tahini sauce.
  • Meat Thermometer: Ensures your chicken is cooked to perfection.
  • Cutting Board and Knife: Essential for slicing the chicken and chopping veggies.

Variations

  • Spicy Shawarma Bowl: Add sliced jalapeños or a dash of hot sauce to the vegetable mix for an extra kick.
  • Vegetarian Option: Substitute the chicken with grilled halloumi or chickpeas for a delicious plant-based version.
  • Grain Swap: Try quinoa or cauliflower rice instead of brown rice for a different texture and flavor.
  • Herb Infusion: Experiment with fresh herbs like mint or cilantro to elevate the freshness of the bowl.
  • Nutty Twist: Add toasted pine nuts or slivered almonds for a delightful crunch and nutty flavor.

Serving Suggestions

  • Pair your Chicken Shawarma Bowl with warm pita bread for a delightful side.
  • A crisp green salad with a lemon vinaigrette complements the flavors beautifully.
  • Serve with a refreshing mint lemonade or a chilled yogurt drink.
  • For presentation, garnish with extra parsley and lemon wedges for a pop of color.

FAQs about Chicken Shawarma Bowl

Can I make Chicken Shawarma Bowl ahead of time?

Absolutely! You can marinate the chicken and prepare the vegetables a day in advance. Just store everything in the fridge. When you’re ready to eat, cook the chicken and assemble the bowls. It’s a great way to save time on busy nights!

What can I substitute for chicken in this recipe?

If you’re looking for a vegetarian option, grilled halloumi or chickpeas work wonderfully. They absorb flavors beautifully and provide a satisfying texture. You can also use tofu for a plant-based protein alternative.

How can I adjust the spice level in the Chicken Shawarma Bowl?

To control the heat, simply adjust the cayenne pepper in the marinade. If you prefer a milder flavor, you can omit it entirely. For those who love spice, add sliced jalapeños or a dash of hot sauce to the vegetable mix!

Is this Chicken Shawarma Bowl gluten-free?

Yes! This recipe is naturally gluten-free, especially when you use brown rice as the base. Just be sure to check the labels on your tahini and yogurt to ensure they are gluten-free as well.

Can I freeze leftovers?

Yes, you can freeze the cooked chicken and sauce separately. Just make sure to store them in airtight containers. When you’re ready to enjoy, thaw in the fridge overnight and reheat before serving. The flavors will still be delicious!

Final Thoughts

Creating a Chicken Shawarma Bowl is more than just cooking; it’s about bringing joy to the table. The vibrant colors, aromatic spices, and creamy sauce come together to create a dish that feels both comforting and exciting. Each bite is a reminder of the flavors of Middle Eastern cuisine, making it a delightful escape from the everyday routine. Whether you’re sharing it with family or enjoying a quiet dinner alone, this bowl is sure to bring a smile to your face. So, roll up your sleeves and dive into this culinary adventure—you won’t regret it!

Chicken Shawarma Bowl
jhessica

Chicken Shawarma Bowl: Easily Spice Up Dinner Tonight!

A delicious and healthy Chicken Shawarma Bowl that combines marinated chicken thighs with fresh vegetables and a creamy yogurt-tahini sauce, served over brown rice.
Prep Time 30 minutes
Cook Time 15 minutes
Total Time 45 minutes
Servings: 4 servings
Course: Dinner
Cuisine: Middle Eastern
Calories: 450

Ingredients
  

  • 2 cups cooked brown rice
  • 1 pound boneless skinless chicken thighs
  • 2 tablespoons olive oil
  • 2 teaspoons ground cumin
  • 2 teaspoons ground paprika
  • 1 teaspoon ground turmeric
  • 1 teaspoon garlic powder
  • 1 teaspoon onion powder
  • 1/2 teaspoon cayenne pepper optional
  • Salt and pepper to taste
  • 1 cup cherry tomatoes halved
  • 1 cucumber diced
  • 1/2 red onion thinly sliced
  • 1/4 cup fresh parsley chopped
  • 1/2 cup plain Greek yogurt
  • 2 tablespoons tahini
  • Juice of 1 lemon

Method
 

  1. In a large bowl, combine olive oil, cumin, paprika, turmeric, garlic powder, onion powder, cayenne pepper, salt, and pepper. Add the chicken thighs and coat them well with the marinade. Cover and refrigerate for at least 30 minutes, or up to 2 hours for more flavor.
  2. Preheat your grill or a skillet over medium-high heat. Cook the marinated chicken thighs for about 5-7 minutes on each side, or until fully cooked and the internal temperature reaches 165°F. Remove from heat and let rest for 5 minutes before slicing.
  3. While the chicken is resting, prepare the vegetables. In a large bowl, combine cherry tomatoes, cucumber, red onion, and parsley. Toss gently to mix.
  4. In a small bowl, whisk together Greek yogurt, tahini, and lemon juice until smooth.
  5. To assemble the bowls, divide the cooked brown rice among four bowls. Top each with sliced chicken, the vegetable mixture, and a drizzle of the yogurt-tahini sauce.

Nutrition

Serving: 1bowlCalories: 450kcalCarbohydrates: 40gProtein: 30gFat: 20gSaturated Fat: 3gPolyunsaturated Fat: 15gCholesterol: 100mgSodium: 600mgFiber: 5gSugar: 5g

Notes

  • For a spicier kick, add sliced jalapeños or a dash of hot sauce to the vegetable mixture.
  • You can also substitute quinoa for brown rice for a different grain option.

Tried this recipe?

Let us know how it was!

Cajun Steak Alfredo: A Creamy Delight You Must Try!

Introduction to Cajun Steak Alfredo

A rich, velvety pasta has a way of comforting the soul and satisfying hunger like nothing else. Cajun Steak Alfredo is just that—a delightful blend of tender steak and rich, velvety sauce that dances on your taste buds. Whether you’re looking for a quick solution for a busy weeknight or a dish to impress your loved ones, this recipe has you covered. With just a handful of ingredients and a skillet, you can whip up a restaurant-quality meal in no time. Trust me, once you try this, it will become a staple in your kitchen!

Why You’ll Love This Cajun Steak Alfredo

This Cajun Steak Alfredo is a game-changer for busy nights. It’s quick to prepare, taking just 30 minutes from start to finish. The creamy sauce envelops the fettuccine and steak, creating a comforting dish that’s bursting with flavor. Plus, it’s versatile enough to please even the pickiest eaters at your table. You’ll find yourself making this dish again and again, and your family will thank you for it!

Ingredients for Cajun Steak Alfredo

Gathering the right ingredients is the first step to creating a delicious Cajun Steak Alfredo. Here’s what you’ll need:

  • Fettuccine pasta: This wide, flat pasta is perfect for holding onto the creamy sauce. You can also use linguine or even whole wheat pasta for a healthier twist.
  • Sirloin steak: Tender and flavorful, sirloin is ideal for this dish. If you prefer, flank steak or chicken can be great substitutes.
  • Olive oil: A staple in many kitchens, olive oil adds richness and helps to sear the steak beautifully.
  • Cajun seasoning: This spice blend brings the heat and flavor. You can buy it pre-made or mix your own with paprika, cayenne, garlic powder, and oregano.
  • Heavy cream: The star of the sauce, heavy cream gives that luscious, creamy texture. For a lighter option, half-and-half works well too.
  • Parmesan cheese: Freshly grated Parmesan adds a nutty flavor and helps thicken the sauce. Feel free to substitute with Pecorino Romano for a sharper taste.
  • Garlic: Minced garlic infuses the dish with aromatic goodness. Fresh is best, but garlic powder can be used in a pinch.
  • Salt and pepper: Essential for seasoning, these simple ingredients enhance all the flavors in the dish.
  • Chopped parsley: A sprinkle of fresh parsley not only adds color but also a fresh taste to finish off your dish.

For those who want to get creative, consider adding sautéed mushrooms or spinach for extra flavor and nutrition. You can find the exact quantities for each ingredient at the bottom of the article, ready for printing!

How to Make Cajun Steak Alfredo

Now that you have all your ingredients ready, let’s dive into the cooking process. This is where the magic happens! Follow these simple steps to create a creamy, flavorful Cajun Steak Alfredo that will have everyone asking for seconds.

Step 1: Cook the Fettuccine

Start by boiling a large pot of salted water. Once it’s bubbling, add the fettuccine pasta. Cook it according to the package instructions until it’s al dente. This usually takes about 8-10 minutes. Remember, you want it firm enough to hold up in the sauce. Once done, drain the pasta and set it aside. A little drizzle of olive oil can keep it from sticking together.

Step 2: Prepare the Steak

While the pasta cooks, it’s time to focus on the steak. Heat a large skillet over medium-high heat and add the olive oil. Season the sliced sirloin steak with Cajun seasoning, salt, and pepper. When the oil is hot, add the steak to the skillet. Sear it for about 3-4 minutes, stirring occasionally, until it’s browned and cooked to your liking. Don’t overcrowd the pan; you want that beautiful sear! Once cooked, remove the steak from the skillet and set it aside.

Step 3: Sauté the Garlic

In the same skillet, add the minced garlic. Sauté it for about 30 seconds until it becomes fragrant. Be careful not to burn it; burnt garlic can turn bitter and ruin your dish. The aroma will fill your kitchen, making it hard to resist the deliciousness that’s about to unfold!

Step 4: Create the Alfredo Sauce

Now, pour in the heavy cream and bring it to a gentle simmer. Stir in the grated Parmesan cheese, allowing it to melt and create a smooth, creamy sauce. This is where the magic of Cajun Steak Alfredo truly shines! If the sauce seems too thick, you can add a splash of pasta water to loosen it up. Taste and adjust the seasoning with salt and pepper as needed.

Step 5: Combine Ingredients

Once your sauce is ready, it’s time to bring everything together. Add the cooked fettuccine and the sautéed steak back into the skillet. Toss everything together gently until the pasta and steak are well coated in that luscious Alfredo sauce. This step is crucial; you want every strand of pasta to be enveloped in creamy goodness!

Step 6: Serve and Garnish

Finally, it’s time to serve your Cajun Steak Alfredo! Plate it up and sprinkle with chopped parsley for a pop of color and freshness. This dish is best enjoyed immediately while it’s warm and creamy. Trust me, the first bite will be a flavor explosion that you won’t forget!

Tips for Success

  • Always salt your pasta water; it enhances the flavor of the fettuccine.
  • Let the steak rest for a few minutes after cooking to keep it juicy.
  • Use freshly grated Parmesan for the best flavor and texture in your sauce.
  • Don’t rush the sauce; let it simmer gently for a creamy consistency.
  • Feel free to adjust the Cajun seasoning to suit your spice preference.

Equipment Needed

  • Large pot: For boiling the fettuccine. A Dutch oven works well too.
  • Skillet: A non-stick or cast-iron skillet is perfect for searing the steak and making the sauce.
  • Colander: To drain the pasta after cooking.
  • Wooden spoon: Great for stirring and combining ingredients.
  • Measuring cups: For accurate ingredient measurements, though you can eyeball it if you’re feeling adventurous!

Variations

  • Vegetarian Option: Swap the steak for sautéed mushrooms or grilled zucchini for a delicious meatless version.
  • Spicy Kick: Add diced jalapeños or a dash of hot sauce to the Alfredo sauce for an extra layer of heat.
  • Low-Carb Alternative: Use zucchini noodles or spaghetti squash instead of fettuccine for a lighter, low-carb meal.
  • Herb Infusion: Incorporate fresh herbs like basil or thyme into the sauce for a burst of freshness.
  • Seafood Twist: Replace the steak with shrimp or scallops for a delightful seafood Cajun Alfredo.

Serving Suggestions

  • Garlic Bread: Serve with warm, buttery garlic bread for a perfect pairing.
  • Salad: A crisp Caesar or mixed greens salad adds freshness to the meal.
  • Wine: A chilled glass of Chardonnay complements the creamy sauce beautifully.
  • Presentation: Serve in shallow bowls and garnish with extra parsley and Parmesan for a restaurant-style look.

FAQs about Cajun Steak Alfredo

Can I use a different type of pasta for Cajun Steak Alfredo?

Absolutely! While fettuccine is traditional, you can use linguine, penne, or even gluten-free pasta. Just keep an eye on the cooking time, as different shapes may require adjustments.

How can I make Cajun Steak Alfredo spicier?

If you love heat, consider adding more Cajun seasoning or a pinch of cayenne pepper. You can also toss in some diced jalapeños or a splash of hot sauce to kick things up a notch!

Can I prepare Cajun Steak Alfredo ahead of time?

While this dish is best enjoyed fresh, you can prepare the components ahead. Cook the pasta and steak, then store them separately. When ready to serve, just reheat and combine with the sauce.

What can I substitute for heavy cream?

If you’re looking for a lighter option, half-and-half works well. You can also use coconut milk for a dairy-free version, though it will alter the flavor slightly.

How do I store leftovers of Cajun Steak Alfredo?

Store any leftovers in an airtight container in the fridge for up to three days. Reheat gently on the stove, adding a splash of milk or cream to revive the sauce’s creaminess.

Final Thoughts

Cooking Cajun Steak Alfredo is more than just preparing a meal; it’s about creating a moment of joy and connection. The rich, creamy sauce and tender steak come together to form a dish that feels indulgent yet comforting. Each bite is a celebration of flavors that can turn an ordinary weeknight into something special. Whether you’re sharing it with family or enjoying a quiet dinner alone, this recipe brings warmth and satisfaction. I hope it finds a cherished place in your kitchen, just as it has in mine. Happy cooking, and enjoy every delicious moment!

Cajun Steak Alfredo
jhessica

Cajun Steak Alfredo: A Creamy Delight You Must Try!

A creamy and flavorful Cajun Steak Alfredo that combines tender steak with fettuccine pasta in a rich sauce.
Prep Time 10 minutes
Cook Time 20 minutes
Total Time 30 minutes
Servings: 4 servings
Course: Main Course
Cuisine: Cajun
Calories: 650

Ingredients
  

  • 1 pound fettuccine pasta
  • 1 pound sirloin steak sliced into thin strips
  • 2 tablespoons olive oil
  • 2 teaspoons Cajun seasoning
  • 1 cup heavy cream
  • 1 cup grated Parmesan cheese
  • 2 cloves garlic minced
  • Salt and pepper to taste
  • Chopped parsley for garnish

Method
 

  1. Cook the fettuccine according to package instructions until al dente. Drain and set aside.
  2. In a large skillet, heat the olive oil over medium-high heat. Season the sliced steak with Cajun seasoning, salt, and pepper.
  3. Add the steak to the skillet and cook for about 3-4 minutes, or until browned and cooked to your liking. Remove the steak from the skillet and set aside.
  4. In the same skillet, add the minced garlic and sauté for about 30 seconds until fragrant.
  5. Pour in the heavy cream and bring to a simmer. Stir in the grated Parmesan cheese until melted and smooth.
  6. Add the cooked fettuccine and the cooked steak back into the skillet. Toss everything together until well combined and heated through.
  7. Serve immediately, garnished with chopped parsley.

Nutrition

Serving: 1servingCalories: 650kcalCarbohydrates: 45gProtein: 36gFat: 40gSaturated Fat: 20gPolyunsaturated Fat: 15gCholesterol: 100mgSodium: 600mgFiber: 2gSugar: 2g

Notes

  • For a lighter version, substitute half-and-half for heavy cream.
  • For added flavor, consider adding sautéed mushrooms or spinach to the dish.

Tried this recipe?

Let us know how it was!

Steak and Shrimp Kabobs Recipe for a Delicious Meal!

Introduction to Steak and Shrimp Kabobs Recipe

Steak and Shrimp Kabobs Recipe is a fantastic choice. This dish combines tender sirloin steak and juicy shrimp, all grilled to perfection. With colorful vegetables and a flavorful marinade, these kabobs are not only tasty but also visually appealing.

Why You Should Try This Steak and Shrimp Kabobs Recipe

First and foremost, this recipe is incredibly versatile. You can easily customize it to suit your taste. Whether you prefer chicken, tofu, or even different vegetables, the options are endless. Plus, the marinade adds a burst of flavor that makes every bite delightful.

Another reason to try this recipe is its simplicity. With just a few ingredients and straightforward steps, you can whip up a meal that feels gourmet. It’s perfect for busy weeknights or weekend gatherings. The air fryer method ensures that your kabobs cook evenly and quickly, saving you time in the kitchen.

Moreover, this dish is healthy! Packed with protein from the steak and shrimp, along with vitamins from the vegetables, it’s a balanced meal. Each serving is low in carbs, making it suitable for various dietary preferences.

Steak and Shrimp Kabobs Recipe is a fun way to enjoy cooking. Skewering the ingredients can be a great activity for kids and adults alike. So gather your loved ones, and let’s get started on this delicious culinary adventure!

Ingredients for Steak and Shrimp Kabobs Recipe

Steak and Shrimp Kabobs Recipe, you’ll need a selection of fresh ingredients. Here’s what you’ll require:

  • 1 pound sirloin steak, cut into 1-inch cubes
  • 1 pound large shrimp, peeled and deveined
  • 1 red bell pepper, cut into 1-inch pieces
  • 1 green bell pepper, cut into 1-inch pieces
  • 1 medium onion, cut into wedges
  • 1/4 cup olive oil
  • 2 tablespoons soy sauce
  • 2 tablespoons lemon juice
  • 2 teaspoons garlic powder
  • 1 teaspoon smoked paprika
  • 1 teaspoon black pepper
  • 1 teaspoon salt
  • Wood or metal skewers

These ingredients come together to create a delightful flavor profile. The sirloin steak provides a rich, meaty taste, while the shrimp adds a sweet and tender contrast. The colorful bell peppers and onion not only enhance the visual appeal but also contribute essential vitamins and minerals.

When selecting your ingredients, opt for fresh produce and high-quality steak and shrimp. This will ensure that your kabobs are not only delicious but also nutritious. If you want to add a little heat, consider including some red pepper flakes in the marinade. This simple addition can elevate the flavor and make your kabobs even more exciting!

Step-by-Step Preparation of Steak and Shrimp Kabobs Recipe

Steak and Shrimp Kabobs Recipe. Follow these simple steps to create a delicious meal that everyone will love!

Step 1: Marinating the Steak and Shrimp

Start by marinating the steak and shrimp. In a large bowl, place the 1 pound of sirloin steak cubes. Then, add the 1 pound of peeled and deveined shrimp. This combination will soak up all the flavors from the marinade.

In a separate small bowl, whisk together the olive oil, soy sauce, lemon juice, garlic powder, smoked paprika, black pepper, and salt. This mixture will be the magic that brings your kabobs to life! Pour the marinade over the steak and shrimp, making sure to coat everything evenly. Cover the bowl with plastic wrap and refrigerate for at least 30 minutes. If you have time, letting it marinate for up to 2 hours will enhance the flavor even more.

Step 2: Preparing the Vegetables

While the steak and shrimp are marinating, it’s time to prepare the vegetables. Take your red and green bell peppers and cut them into 1-inch pieces. Next, cut the medium onion into wedges. These colorful veggies will not only add flavor but also make your kabobs visually appealing.

Once cut, you can set the vegetables aside. They will be ready to join the steak and shrimp on the skewers. If you want to add more variety, consider including zucchini or cherry tomatoes for an extra burst of flavor!

Step 3: Assembling the Kabobs

After marinating, it’s time to assemble your kabobs! If you’re using wooden skewers, make sure to soak them in water for about 30 minutes. This prevents them from burning during cooking. If you’re using metal skewers, you can skip this step.

Now, take a skewer and start threading the marinated steak, shrimp, and prepared vegetables onto it. Alternate between the steak, shrimp, and veggies for a colorful and tasty kabob. Aim for about 3-4 pieces of each ingredient per skewer. This not only looks great but also ensures that every bite is packed with flavor!

Step 4: Grilling the Kabobs

With your kabobs assembled, it’s time to cook them! Preheat your air fryer to 400°F. Place the skewers in the air fryer basket in a single layer. Make sure they are not overcrowded, as this will help them cook evenly.

Cook the kabobs for 10-12 minutes, turning them halfway through. This will ensure that the steak is cooked to your desired doneness and the shrimp turns opaque and pink. Once done, remove the kabobs from the air fryer and let them rest for a few minutes before serving. This resting time allows the juices to redistribute, making every bite juicy and flavorful!

Variation of Steak and Shrimp Kabobs Recipe

Steak and Shrimp Kabobs Recipe is delicious as is, there are many ways to switch things up! Whether you want to try different ingredients or explore various cooking methods, these variations will keep your kabob experience exciting and fresh.

Alternative Ingredients for Steak and Shrimp Kabobs

One of the best things about kabobs is their versatility. You can easily substitute ingredients to suit your taste or dietary needs. Here are some alternative ingredients you might consider:

  • Protein Options: Instead of sirloin steak, try chicken breast, pork tenderloin, or even tofu for a vegetarian option. Each protein brings its unique flavor and texture.
  • Vegetable Choices: Feel free to mix in other vegetables like zucchini, cherry tomatoes, mushrooms, or asparagus. These can add different flavors and colors to your kabobs.
  • Marinade Variations: Experiment with different marinades! You can use teriyaki sauce, barbecue sauce, or even a spicy sriracha blend for a kick.
  • Herbs and Spices: Add fresh herbs like rosemary or thyme for an aromatic touch. You can also sprinkle in some cumin or coriander for a unique flavor profile.

These alternatives can help you create a kabob that suits your preferences or dietary restrictions while still being delicious!

Different Cooking Methods for Steak and Shrimp Kabobs

While the air fryer is a fantastic way to cook your kabobs, there are other methods you can try. Each method offers a different taste and texture:

  • Grilling: If you have access to a grill, this is a classic way to cook kabobs. The smoky flavor from the grill enhances the taste of the steak and shrimp beautifully.
  • Oven Baking: Preheat your oven to 400°F and place the skewers on a baking sheet. Bake for about 15-20 minutes, turning halfway through. This method is great for those who don’t have an air fryer or grill.
  • Broiling: Set your oven to broil and place the kabobs on a broiler pan. Broil for about 10 minutes, turning once. This method gives a nice char similar to grilling.
  • Stovetop Searing: Heat a skillet over medium-high heat and add a little oil. Sear the kabobs for about 3-4 minutes on each side until cooked through. This method is quick and easy!

Steak and Shrimp Kabobs Recipe. Enjoy experimenting!

Cooking Note for Steak and Shrimp Kabobs Recipe

Steak and Shrimp Kabobs Recipe, there are a few important cooking notes to keep in mind. These tips will help ensure that your kabobs turn out perfectly every time!

First, always check the freshness of your ingredients. Fresh steak and shrimp will enhance the overall flavor of your kabobs. If possible, buy your seafood from a reputable source to ensure quality.

Next, marinating is key! Allowing the steak and shrimp to soak in the marinade for at least 30 minutes will infuse them with flavor. However, if you have time, marinating for up to 2 hours is even better. Just remember not to exceed this time, especially with shrimp, as they can become mushy.

When it comes to cooking, make sure your air fryer is preheated. This step is crucial for achieving that perfect sear on the steak and ensuring the shrimp cooks evenly. If you’re using a grill, preheat it as well to get those beautiful grill marks.

Another important note is to avoid overcrowding the skewers. If they are packed too tightly, the heat won’t circulate properly, leading to uneven cooking. Instead, give each kabob some space in the air fryer or on the grill.

Lastly, always let your kabobs rest for a few minutes after cooking. This resting period allows the juices to redistribute, making each bite juicy and flavorful. Trust us, this small step makes a big difference!

Steak and Shrimp Kabobs that will impress everyone at your table!

Serving Suggestions for Steak and Shrimp Kabobs Recipe

Steak and Shrimp Kabobs Recipe is ready, it’s time to think about how to serve them! Presentation can elevate your meal, making it even more enjoyable. Here are some delightful serving suggestions to consider:

  • Serve with Rice or Quinoa: A bed of fluffy rice or quinoa makes a perfect base for your kabobs. The grains will soak up the delicious juices, adding extra flavor to each bite.
  • Pair with a Fresh Salad: A crisp salad with mixed greens, cherry tomatoes, and a light vinaigrette complements the kabobs beautifully. The freshness of the salad balances the richness of the steak and shrimp.
  • Offer Dipping Sauces: Enhance the flavor experience by serving your kabobs with a variety of dipping sauces. Consider options like garlic aioli, tzatziki, or a spicy sriracha sauce for an extra kick.
  • Garnish with Fresh Herbs: A sprinkle of fresh herbs like parsley or cilantro adds a pop of color and freshness. This simple touch can make your dish look even more appealing.
  • Include Grilled Bread: Serve your kabobs with warm, grilled pita or naan bread. This is perfect for scooping up any leftover marinade or sauce.
  • Make it a Feast: Create a kabob platter by serving a variety of skewers. Include different proteins and vegetables to cater to everyone’s tastes. This is great for gatherings and parties!

Steak and Shrimp Kabobs Recipe but also create a well-rounded meal. Enjoy your delicious creation with family and friends!

Tips for Perfect Steak and Shrimp Kabobs Recipe

Steak and Shrimp Kabobs Recipe is all about attention to detail. With a few helpful tips, you can elevate your kabob game and impress your guests. Here are some essential tips to ensure your kabobs turn out delicious every time!

  • Choose Quality Ingredients: Start with fresh, high-quality steak and shrimp. Look for bright, firm shrimp and well-marbled steak. Fresh ingredients make a noticeable difference in flavor.
  • Marinate Wisely: Don’t rush the marinating process. Allow the steak and shrimp to soak in the marinade for at least 30 minutes. For even better flavor, aim for 2 hours. Just remember, don’t marinate shrimp for too long, as they can become mushy.
  • Cut Uniformly: Ensure that all your ingredients are cut into similar sizes. This helps them cook evenly. Aim for 1-inch pieces for the steak, shrimp, and vegetables.
  • Soak Wooden Skewers: If you’re using wooden skewers, soak them in water for 30 minutes before grilling. This prevents them from burning and helps keep your kabobs intact.
  • Don’t Overcrowd the Skewers: When assembling your kabobs, give each ingredient some space. Overcrowding can lead to uneven cooking. Aim for 3-4 pieces of each ingredient per skewer.
  • Preheat Your Cooking Device: Whether you’re using an air fryer, grill, or oven, always preheat it. This step ensures that your kabobs get a nice sear and cook evenly.
  • Check for Doneness: Use a meat thermometer to check the doneness of the steak. For medium-rare, aim for 135°F, and for medium, 145°F. The shrimp should be opaque and pink when fully cooked.
  • Let Them Rest: After cooking, let your kabobs rest for a few minutes. This allows the juices to redistribute, making each bite juicy and flavorful.
  • Experiment with Flavors: Don’t hesitate to try different marinades, spices, and vegetables. This will keep your kabobs exciting and tailored to your taste preferences.

Steak and Shrimp Kabobs Recipe. Enjoy the process and have fun creating delicious meals!

Breakdown of Time for Steak and Shrimp Kabobs Recipe

Steak and Shrimp Kabobs Recipe can help you plan your meal better. Here’s a simple breakdown of the time required for preparation and cooking.

Prep Time

The prep time for this delicious recipe is approximately 15-20 minutes. This includes:

  • Cutting the sirloin steak into 1-inch cubes.
  • Peeled and deveined shrimp (if not pre-prepared).
  • Chopping the red and green bell peppers and onion.
  • Whisking together the marinade ingredients.
  • Assembling the kabobs on skewers.

Taking your time during prep ensures that everything is ready for cooking. It’s a great opportunity to involve family members, making it a fun activity!

Cooking Time

Steak and Shrimp Kabobs Recipe is about 10-12 minutes. This includes:

  • Preheating the air fryer to 400°F (about 5 minutes).
  • Cooking the kabobs in the air fryer for 10-12 minutes, turning halfway through.

Make sure to keep an eye on the kabobs as they cook. This will help you achieve your desired level of doneness for the steak and ensure the shrimp is perfectly cooked.

Total Time

In total, you can expect the entire process to take around 45-60 minutes. This includes:

  • Prep Time: 15-20 minutes
  • Marinating Time: 30 minutes (or up to 2 hours for more flavor)
  • Cooking Time: 10-12 minutes

Steak and Shrimp Kabobs Recipe is a quick and rewarding meal that fits perfectly into your busy schedule!

Nutritional Information for Steak and Shrimp Kabobs Recipe

Steak and Shrimp Kabobs Recipe not only offers delicious flavors but also provides valuable nutrients. Here’s a breakdown of the nutritional information per serving:

Calories

Steak and Shrimp Kabobs Recipe contains approximately 350 calories. This makes it a satisfying yet light meal option. The combination of protein from the steak and shrimp, along with the healthy fats from olive oil, contributes to a well-rounded dish that keeps you energized.

Protein

Protein is a vital nutrient for building and repairing tissues. In this recipe, you’ll find about 30 grams of protein per serving. The sirloin steak and shrimp are excellent sources of high-quality protein, making this dish perfect for those looking to increase their protein intake. Whether you’re an athlete or just someone who wants to maintain muscle mass, this kabob recipe is a great choice!

Sodium

Each serving contains around 800 milligrams of sodium. While this is a moderate amount, it’s important to be mindful of your overall sodium intake, especially if you’re watching your salt consumption. The soy sauce in the marinade contributes to the sodium content, so consider using low-sodium soy sauce if you prefer a healthier option.

Steak and Shrimp Kabobs Recipe is a nutritious meal that provides a good balance of calories, protein, and essential nutrients. Enjoy this delicious dish while knowing you’re making a healthy choice for yourself and your loved ones!

FAQs about Steak and Shrimp Kabobs Recipe

Can I use frozen shrimp for the Steak and Shrimp Kabobs Recipe?

Steak and Shrimp Kabobs Recipe. However, it’s important to thaw them properly before marinating. To do this, place the frozen shrimp in a bowl of cold water for about 15-20 minutes. Once thawed, peel and devein them if necessary. Using thawed shrimp will ensure they absorb the marinade flavors better and cook evenly on the skewers.

What vegetables pair well with Steak and Shrimp Kabobs Recipe?

Steak and Shrimp Kabobs Recipe. Some great options include:

  • Zucchini: Adds a mild flavor and tender texture.
  • Cherry Tomatoes: Provide a burst of sweetness and color.
  • Mushrooms: Offer an earthy taste that pairs well with steak.
  • Asparagus: Adds a crunchy texture and vibrant color.
  • Yellow Bell Peppers: For a sweeter flavor and beautiful presentation.

Feel free to mix and match your favorite vegetables to create a colorful and nutritious kabob!

How do I know when the steak is done on the Steak and Shrimp Kabobs Recipe?

To check if the steak is done, use a meat thermometer. For medium-rare steak, aim for an internal temperature of 135°F. If you prefer medium, look for 145°F. The shrimp should be opaque and pink when fully cooked. If you don’t have a thermometer, you can also cut into the steak to check its color. It should be slightly pink in the center for medium-rare and fully brown for medium.

Can I make the Steak and Shrimp Kabobs Recipe ahead of time?

Steak and Shrimp Kabobs Recipe ahead of time. Marinate the steak and shrimp in advance and store them in the refrigerator for up to 2 hours. If you want to prepare them even earlier, you can assemble the kabobs and keep them covered in the fridge until you’re ready to cook. Just remember to cook them within 24 hours for the best flavor and freshness!

Conclusion on Steak and Shrimp Kabobs Recipe

Steak and Shrimp Kabobs Recipe is a delightful dish that brings together the best of both worlds: tender steak and succulent shrimp. This recipe is not only easy to prepare but also offers a wonderful opportunity to customize flavors and ingredients to suit your preferences. Whether you’re hosting a summer barbecue or enjoying a cozy dinner at home, these kabobs are sure to impress.

With a simple marinade that enhances the natural flavors of the ingredients, each bite is a burst of deliciousness. Plus, the vibrant colors of the vegetables make the dish visually appealing, adding to the overall dining experience. The versatility of this recipe allows you to experiment with different proteins and vegetables, ensuring that you can enjoy it time and time again without getting bored.

As you gather around the table with family and friends, these kabobs can spark joy and conversation. They are perfect for sharing and can be served with a variety of sides, making them a great addition to any meal. Remember to follow the tips and cooking notes provided to achieve the best results, and don’t hesitate to get creative with your ingredients.

Steak and Shrimp Kabobs Recipe is waiting to be the star of your next meal. Enjoy the process, savor the flavors, and most importantly, have fun cooking!

Crispy Southern Fried Chicken is a must-try recipe!

Introduction to Crispy Southern Fried Chicken

The Allure of Crispy Southern Fried Chicken

Crispy Southern Fried Chicken is more than just a meal; it’s a celebration of flavor and tradition. The golden, crunchy exterior gives way to juicy, tender meat that delights the senses. This dish has a way of bringing people together, whether at family gatherings, picnics, or Sunday dinners. The aroma of frying chicken fills the air, creating an inviting atmosphere that makes everyone feel at home.

What makes this dish so special? It’s the perfect blend of spices and the technique of frying that creates that irresistible crunch. Each bite is a delightful experience, making it hard to resist going back for seconds. Plus, it pairs beautifully with a variety of sides, from creamy coleslaw to fluffy biscuits. The allure of Crispy Southern Fried Chicken lies not only in its taste but also in the memories it creates.

A Brief History of Southern Fried Chicken

The roots of Southern Fried Chicken trace back to the 18th century. It is believed that Scottish immigrants brought the tradition of frying chicken to America. However, it was the African American community in the South that perfected the dish, adding their unique spices and techniques. Over the years, Southern Fried Chicken has evolved, becoming a staple in Southern cuisine.

In the early 20th century, fried chicken gained popularity across the United States. It became a symbol of comfort food, often served during special occasions and family gatherings. Today, it remains a beloved dish, celebrated for its rich history and delicious flavor. Whether enjoyed at a local diner or made at home, Crispy Southern Fried Chicken continues to hold a special place in the hearts of many.

Ingredients for Crispy Southern Fried Chicken

To create the perfect Crispy Southern Fried Chicken, you need to gather a few essential ingredients. Each component plays a vital role in achieving that mouthwatering flavor and texture. Here’s what you’ll need:

  • 2 pounds bone-in, skin-on chicken pieces: Choose legs, thighs, or breasts for the best results. The skin helps lock in moisture and adds to the crispiness.
  • 1 cup buttermilk: This ingredient is key for marinating the chicken. It tenderizes the meat and adds a rich flavor.
  • 1 teaspoon hot sauce (optional): For those who enjoy a little heat, this adds a nice kick to the marinade.
  • 1 teaspoon garlic powder: Garlic powder enhances the overall flavor, giving the chicken a savory depth.
  • 1 teaspoon onion powder: Similar to garlic powder, onion powder adds a subtle sweetness and complexity.
  • 1 teaspoon paprika: This spice not only adds color but also a mild, smoky flavor that complements the chicken.
  • 1 teaspoon salt: Essential for seasoning, salt brings out the natural flavors of the chicken.
  • 1/2 teaspoon black pepper: A pinch of black pepper adds a slight bite to the dish.
  • 1 1/2 cups all-purpose flour: This is the main coating for the chicken, creating that crispy exterior.
  • 1 teaspoon baking powder: Adding baking powder to the flour helps achieve an extra crispy texture.
  • Vegetable oil: For frying, use enough oil to cover the chicken pieces. This ensures even cooking and a golden finish.

With these ingredients on hand, you’re well on your way to making delicious Crispy Southern Fried Chicken. Each item contributes to the overall taste and texture, making this dish a true delight. So, gather your ingredients and get ready to fry up some comfort food!

Preparation of Crispy Southern Fried Chicken

Step 1: Marinating the Chicken

Marinating the chicken is a crucial step in making Crispy Southern Fried Chicken. Start by taking a large bowl and combining the buttermilk, hot sauce (if you’re using it), garlic powder, onion powder, paprika, salt, and black pepper. This mixture not only adds flavor but also tenderizes the chicken.

Next, add the chicken pieces to the bowl. Make sure they are fully submerged in the marinade. Cover the bowl with plastic wrap and place it in the refrigerator. For the best flavor, let the chicken marinate for at least 2 hours, or even overnight. This allows the spices to penetrate the meat, ensuring every bite is packed with flavor.

Step 2: Preparing the Coating

While the chicken is marinating, it’s time to prepare the coating. In a separate bowl, mix together the all-purpose flour and baking powder. The baking powder is key to achieving that extra crispy texture. Stir the mixture well to ensure the baking powder is evenly distributed throughout the flour.

Once mixed, set the bowl aside. This will be the coating that gives your chicken that signature crunch. Having everything ready will make the dredging process smoother and quicker.

Step 3: Dredging the Chicken

After marinating, it’s time to dredge the chicken. Remove each piece from the buttermilk mixture, allowing any excess marinade to drip off. Then, take each piece and coat it in the flour mixture. Press lightly to ensure the flour adheres well to the chicken. This step is essential for that crispy exterior.

Once coated, place the chicken pieces on a wire rack. Let them rest for about 15 minutes. This resting period helps the coating stick better during frying, resulting in a crunchier finish.

Step 4: Frying the Chicken

Now comes the exciting part—frying the chicken! In a large skillet or deep fryer, heat about 1 inch of vegetable oil over medium-high heat. Use a thermometer to check the oil temperature; it should reach 350°F for optimal frying. Carefully add the chicken pieces, skin side down, in batches. Avoid overcrowding the pan, as this can lower the oil temperature and lead to soggy chicken.

Fry the chicken for about 12-15 minutes on each side. You want it to be golden brown and cooked through. To ensure safety, the internal temperature should reach 165°F. Adjust the heat as needed to maintain the oil temperature throughout the frying process.

Step 5: Draining and Resting

Once the chicken is cooked, it’s time to drain it. Carefully transfer the fried chicken to a paper towel-lined plate. This will help absorb any excess oil, keeping your chicken crispy. Allow the chicken to rest for a few minutes before serving. This resting time helps the juices redistribute, making each bite even more delicious.

Now that your Crispy Southern Fried Chicken is ready, you can enjoy it hot with your favorite sides. The preparation process may take some time, but the end result is well worth the effort!

Variation of Crispy Southern Fried Chicken

Spicy Crispy Southern Fried Chicken

If you love a little heat, then Spicy Crispy Southern Fried Chicken is the perfect variation for you! To add a fiery kick, simply incorporate cayenne pepper into your flour mixture. Start with 1 teaspoon, but feel free to adjust based on your spice preference. This addition not only enhances the flavor but also gives your chicken a beautiful reddish hue.

Another way to spice things up is by increasing the amount of hot sauce in the marinade. This will infuse the chicken with a zesty flavor that pairs wonderfully with the crispy coating. For an extra layer of heat, consider adding sliced jalapeños to the buttermilk marinade. The result? A mouthwatering dish that will have your taste buds dancing!

Herb-Infused Crispy Southern Fried Chicken

If you prefer a more aromatic flavor, try making Herb-Infused Crispy Southern Fried Chicken. This variation is all about fresh herbs! Start by adding chopped fresh herbs like rosemary, thyme, or parsley to your buttermilk marinade. These herbs will impart a delightful fragrance and taste to the chicken.

Additionally, you can mix dried herbs such as Italian seasoning or herbes de Provence into the flour mixture. This will create a flavorful crust that complements the juicy chicken perfectly. The combination of herbs will elevate your fried chicken experience, making it a unique twist on the classic recipe.

Both variations offer exciting ways to enjoy Crispy Southern Fried Chicken. Whether you choose the spicy route or the herb-infused option, you’re sure to impress your family and friends with these delicious adaptations!

Cooking Note for Crispy Southern Fried Chicken

When it comes to making Crispy Southern Fried Chicken, a few cooking notes can make all the difference. These tips will help ensure that your chicken turns out perfectly crispy and delicious every time.

First, always use a thermometer to check the oil temperature. Maintaining the right temperature is crucial for achieving that golden-brown crust. If the oil is too hot, the outside may burn while the inside remains undercooked. Conversely, if the oil is too cool, the chicken will absorb more oil, resulting in a greasy texture.

Next, consider the size of your chicken pieces. Uniform sizes will help them cook evenly. If you’re using larger pieces, they may require a longer cooking time. Always check the internal temperature with a meat thermometer; it should reach 165°F for safe consumption.

Another important note is to avoid overcrowding the pan. Frying in batches allows the oil to maintain its temperature, ensuring that each piece gets that desired crispiness. If you add too many pieces at once, the temperature will drop, leading to soggy chicken.

Lastly, let the chicken rest after frying. This step is essential for allowing the juices to redistribute throughout the meat. It also helps the coating stay crispy. Placing the chicken on a wire rack instead of a plate can help air circulate around it, preventing steam from making the crust soggy.

By following these cooking notes, you’ll be well on your way to mastering the art of Crispy Southern Fried Chicken. Enjoy the process and savor the delicious results!

Serving Suggestions for Crispy Southern Fried Chicken

Classic Sides to Pair with Crispy Southern Fried Chicken

When it comes to serving Crispy Southern Fried Chicken, the right sides can elevate your meal to new heights. Here are some classic sides that perfectly complement the rich flavors of the chicken:

  • Coleslaw: A crunchy, tangy coleslaw adds a refreshing contrast to the crispy chicken. The coolness of the slaw balances the warmth of the fried chicken, making each bite delightful.
  • Mashed Potatoes: Creamy mashed potatoes are a Southern staple. They soak up the juices from the chicken, creating a comforting and satisfying combination.
  • Biscuits: Fluffy, buttery biscuits are perfect for sopping up any leftover gravy or juices. They add a touch of Southern charm to your meal.
  • Green Beans: Steamed or sautéed green beans provide a healthy, vibrant side. Their crispness adds a nice texture to the plate.
  • Macaroni and Cheese: This cheesy, creamy dish is a favorite among many. Its richness pairs wonderfully with the crispy chicken, making for a hearty meal.

These classic sides not only enhance the flavors of your Crispy Southern Fried Chicken but also create a well-rounded meal that everyone will love. Feel free to mix and match to find your perfect combination!

Creative Serving Ideas for Crispy Southern Fried Chicken

If you’re looking to add a twist to your Crispy Southern Fried Chicken, consider these creative serving ideas:

  • Chicken Sandwich: Transform your fried chicken into a delicious sandwich. Place a crispy piece between two slices of bread, add some pickles, and drizzle with your favorite sauce for a tasty treat.
  • Chicken and Waffles: This sweet and savory combination is a Southern classic. Serve your fried chicken on top of fluffy waffles, drizzled with maple syrup for a delightful brunch option.
  • Fried Chicken Tacos: For a fun twist, shred the fried chicken and serve it in soft tortillas. Top with slaw, avocado, and a squeeze of lime for a fresh, flavorful meal.
  • Fried Chicken Salad: Chop the crispy chicken and toss it on a bed of mixed greens. Add cherry tomatoes, cucumbers, and a tangy dressing for a lighter option that still satisfies.
  • Buffalo Chicken Bites: Toss the fried chicken in buffalo sauce for a spicy appetizer. Serve with celery sticks and blue cheese dressing for dipping.

These creative serving ideas not only showcase the versatility of Crispy Southern Fried Chicken but also allow you to impress your guests with unique presentations. Whether you stick to classic sides or venture into creative territory, your meal is sure to be a hit!

Tips for Perfecting Crispy Southern Fried Chicken

Choosing the Right Chicken Parts

When it comes to making Crispy Southern Fried Chicken, the choice of chicken parts is essential. Bone-in, skin-on pieces are the best for achieving that juicy, flavorful result. Chicken thighs and drumsticks are particularly popular because they remain moist during cooking. The skin is crucial, as it crisps up beautifully and adds flavor.

If you prefer white meat, chicken breasts can also work well. However, they may dry out more quickly, so be sure to monitor the cooking time closely. Regardless of the parts you choose, always opt for high-quality chicken. Fresh, organic chicken will yield the best flavor and texture, making your fried chicken truly irresistible.

The Importance of Temperature Control

Temperature control is vital for frying chicken to perfection. The oil should be heated to around 350°F before adding the chicken. This temperature allows the coating to crisp up quickly while keeping the meat juicy inside. If the oil is too hot, the outside may burn before the inside cooks through. Conversely, if the oil is too cool, the chicken will absorb excess oil, resulting in a greasy texture.

Using a thermometer is the best way to ensure the oil is at the right temperature. If you don’t have one, you can test the oil by dropping a small piece of bread into it. If it sizzles and turns golden brown in about 60 seconds, the oil is ready. Adjust the heat as needed while frying to maintain a consistent temperature for the best results.

Secrets to Extra Crispy Coating

To achieve that coveted extra crispy coating on your Crispy Southern Fried Chicken, there are a few secrets to keep in mind. First, the marinating process is key. Soaking the chicken in buttermilk not only adds flavor but also helps the flour coating adhere better.

Another tip is to double-dredge the chicken. After the first coating of flour, dip the chicken back into the buttermilk and then coat it again in the flour mixture. This extra layer creates a thicker, crunchier crust.

Additionally, consider adding cornstarch to your flour mixture. A 1:1 ratio of flour to cornstarch can enhance the crispiness. Finally, allow the coated chicken to rest on a wire rack for about 15 minutes before frying. This helps the coating set and stick better during cooking, resulting in a crunchier finish.

By following these tips, you’ll be well on your way to perfecting your Crispy Southern Fried Chicken. Each step contributes to that delightful crunch and juicy flavor that makes this dish a true Southern classic!

Breakdown of Time for Crispy Southern Fried Chicken

Prep Time

Preparing Crispy Southern Fried Chicken involves a few steps that require some time. The marinating process is essential for flavor and tenderness. You should plan for at least 2 hours of marinating time, but for the best results, marinate overnight. This means your total prep time can range from 2 hours to 24 hours, depending on how much time you have. In addition to marinating, you’ll need about 15 minutes to prepare the coating and dredge the chicken. Overall, expect to spend around 2 hours and 15 minutes to 24 hours on prep, including marinating time.

Cooking Time

When it comes to cooking, the frying process is relatively quick. Once your oil is heated to the right temperature of 350°F, frying each batch of chicken will take about 12-15 minutes per side. If you’re frying in batches, you may need to account for additional time. For example, if you have two batches of chicken, the total cooking time will be around 30-40 minutes. So, plan for approximately 30-40 minutes of cooking time, depending on how many pieces you are frying at once.

Total Time

In total, the time required to make Crispy Southern Fried Chicken can vary significantly based on your marinating choice. If you opt for a quick 2-hour marinade, the total time will be around 2 hours and 45 minutes, including prep and cooking. However, if you choose to marinate overnight, the total time can extend to about 24 hours and 45 minutes. Regardless of the time, the delicious results will be well worth the wait!

Nutritional Information for Crispy Southern Fried Chicken

Calories

When indulging in Crispy Southern Fried Chicken, it’s essential to be aware of its caloric content. Each serving contains approximately 450 calories. This number can vary slightly based on the specific chicken parts used and the cooking method. While it’s a delicious treat, moderation is key to enjoying this comfort food without overdoing it.

Protein

One of the great benefits of Crispy Southern Fried Chicken is its protein content. Each serving provides around 30 grams of protein. This makes it a satisfying option for those looking to boost their protein intake. Protein is vital for muscle repair and growth, making this dish not only tasty but also beneficial for your body.

Sodium

While Crispy Southern Fried Chicken is a flavorful dish, it’s important to consider its sodium content. Each serving contains approximately 800 milligrams of sodium. This amount can vary based on the seasoning and any additional sauces used. If you’re watching your sodium intake, consider adjusting the salt in the marinade and coating to suit your dietary needs.

Overall, Crispy Southern Fried Chicken can be enjoyed as part of a balanced diet. By being mindful of portion sizes and pairing it with healthy sides, you can savor this Southern classic while maintaining a nutritious meal plan.

FAQs about Crispy Southern Fried Chicken

What is the best oil for frying Crispy Southern Fried Chicken?

When it comes to frying Crispy Southern Fried Chicken, the choice of oil is crucial. The best oils for frying are those with a high smoke point. Vegetable oil, canola oil, and peanut oil are excellent options. These oils can withstand high temperatures without burning, ensuring your chicken cooks evenly and crisps up beautifully. Avoid using olive oil, as it has a lower smoke point and may impart a strong flavor to the chicken.

How can I make Crispy Southern Fried Chicken without frying?

If you prefer a healthier option, you can make Crispy Southern Fried Chicken in the oven or air fryer. For oven-baked chicken, preheat your oven to 425°F. After dredging the chicken, place it on a wire rack set over a baking sheet. This allows air to circulate around the chicken, helping it crisp up. Bake for about 35-45 minutes, or until the chicken reaches an internal temperature of 165°F. For an air fryer, preheat it to 375°F and cook the chicken for about 25-30 minutes, flipping halfway through. Both methods yield delicious results with less oil!

Can I prepare Crispy Southern Fried Chicken in advance?

Yes, you can prepare Crispy Southern Fried Chicken in advance! To do this, follow the marinating and dredging steps as usual. After coating the chicken, you can place it on a baking sheet and cover it with plastic wrap. Store it in the refrigerator for up to 24 hours before frying. This allows the flavors to meld even more. If you have leftover fried chicken, store it in an airtight container in the refrigerator for up to 3 days. Reheat in the oven to maintain its crispiness.

What are the best sides to serve with Crispy Southern Fried Chicken?

When serving Crispy Southern Fried Chicken, classic sides can enhance your meal. Some of the best sides include:

  • Coleslaw: Its crunch and tanginess balance the richness of the chicken.
  • Mashed Potatoes: Creamy and comforting, they soak up the delicious juices.
  • Biscuits: Fluffy biscuits are perfect for sopping up gravy.
  • Green Beans: A healthy, vibrant side that adds color to your plate.
  • Macaroni and Cheese: This cheesy dish is a favorite that pairs well with fried chicken.

These sides not only complement the flavors of the chicken but also create a well-rounded meal that everyone will enjoy!

Conclusion on Crispy Southern Fried Chicken

Crispy Southern Fried Chicken is more than just a dish; it’s a culinary tradition that brings joy and comfort to many. With its crunchy exterior and juicy interior, this beloved recipe has a way of making any meal feel special. Whether you’re preparing it for a family gathering, a picnic, or a cozy dinner at home, the process of making this dish is as rewarding as the final result.

By following the steps outlined in this article, you can create your own Crispy Southern Fried Chicken that rivals any restaurant. From marinating the chicken to achieving that perfect golden crust, each step is essential in crafting a dish that is both delicious and satisfying. Plus, with the variations and tips provided, you can customize your fried chicken to suit your taste preferences.

As you serve your Crispy Southern Fried Chicken alongside classic sides or creative twists, you’ll not only delight your taste buds but also create lasting memories with family and friends. So, gather your ingredients, roll up your sleeves, and get ready to fry up a Southern classic that will surely impress everyone at the table.

In the end, Crispy Southern Fried Chicken is a celebration of flavor, tradition, and togetherness. Enjoy every bite, and remember that the best meals are those shared with loved ones. Happy frying!

Stay Connected

Get recipes via email: