Lemon Blueberry Delight Recipe | Summery Dessert

On those sun-drenched summer afternoons, nothing beats the joy of indulging in a dessert that matches the brightness of the season. Imagine a family gathered in the backyard, laughter echoing as kids chase each other. The enticing aroma of grilled meals wafts in the air.

Suddenly, someone brings out a stunning Lemon Blueberry Delight. Its vibrant layers of creamy lemon filling are topped with generous amounts of juicy blueberries. These glisten in the sunlight. As the first slice is cut, everyone leans forward eagerly.

They are eager to enjoy this refreshing treat. With its harmonious blend of tangy and sweet, this easy dessert recipe quickly becomes the highlight of the day. It leaves satisfied smiles all around. Let’s dive into the details of how you can recreate this delightful summer dessert to bring that same joy to your gatherings.

Key Takeaways

  • Lemon Blueberry Delight is a refreshing, summery dessert perfect for gatherings.
  • This recipe combines sweet blueberries and zesty lemon for a delightful flavor.
  • It’s an easy dessert recipe anyone can make at home.
  • The visually appealing layers add a touch of elegance to any table.
  • Perfect for warm days when you crave something light yet satisfying.

What is Lemon Blueberry Delight?

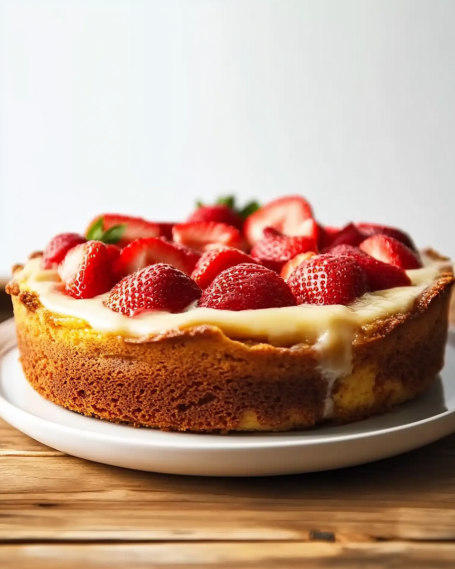
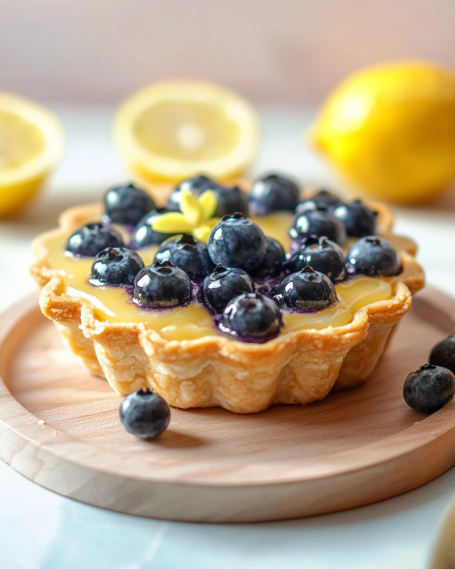
The Lemon Blueberry Delight dessert is a refreshing treat that captures the essence of summer. It combines the tartness of lemons with the sweetness of fresh blueberries. This creates a layered masterpiece that is both visually appealing and delicious.

Description of the Dessert

This dessert features a creamy lemon filling between juicy blueberries. It offers a beautiful contrast of flavors and textures. The light and airy consistency makes it perfect for warm weather gatherings.

Each bite is a burst of zesty lemon and the natural sweetness of blueberries. It delivers a symphony of tastes that dance on the palate.

Origins and History

The lemon dessert origins date back to early American cooking. Simple ingredients were often turned into delightful treats. Fruits like blueberries have a rich history in desserts.

As berries and citrus became more popular, the Lemon Blueberry Delight emerged. It became a favorite at picnics and family gatherings. Its presence in American cuisine shows the appeal of combining fresh, seasonal ingredients.

Key Ingredients for the Recipe

To make the perfect Lemon Blueberry Delight, you need the right ingredients. They mix together to create a summer dessert that’s both tasty and beautiful. Each part is important for the dessert’s flavor and texture.

Fresh Blueberries

Fresh blueberries are the main attraction in this dessert. Their sweetness and deep color add a nice contrast. Choose plump, firm berries for the best taste and texture.

Zesty Lemons

Zesty lemons bring a refreshing tang to the mix. The juice and zest of the lemons add a vibrant twist. Make sure to pick ripe lemons for the best flavor.

Other Essential Ingredients

Other ingredients are key to getting the perfect balance. Granulated sugar adds sweetness, while heavy cream makes it rich. A graham cracker crust adds a nice crunch. Using quality ingredients is important for flavor and looks.

Step-by-Step Preparation Instructions

Making the Lemon Blueberry Delight is a fun process. It involves several steps that make the dessert taste great and look amazing.

Preparing the Lemon Filling

Start by mixing the lemon filling. Use fresh lemon juice, zest, sugar, and cream. Whisk until it’s smooth. This filling is the base for the dessert’s layers.

Making the Blueberry Layer

Next, make the blueberry layer. Cook fresh blueberries with sugar until they burst. Add cornstarch to thicken it. This step is key for the dessert’s rich taste.

Assembling the Dessert

Now, it’s time to put it all together. Start with a graham cracker crust. Then, layer the lemon filling and blueberry mixture. This makes the dessert look stunning. Let it chill in the fridge for at least six hours. For more details, see this guide to Lemon Blueberry Delight preparation.

Tips for Perfecting Your Lemon Blueberry Delight

Making a great Lemon Blueberry Delight takes a few key steps. Using the right ingredients and techniques is key. Here are some tips to help you make the best dessert.

Choosing the Right Blueberries

Choosing the right blueberries is important for flavor and texture. Look for berries that are:

  • Firm and plump.
  • Deep blue in color.
  • Covered with a slight sheen.

These signs mean the berries are fresh. Freshness is key to a great dessert.

Tips for Squeezing Lemons

Using a lemon squeezer can really help with squeezing lemons. It gets more juice and keeps seeds out. Make sure to:

  • Select ripe lemons for more juice.
  • Roll the lemon on a flat surface before cutting to release more juice.

These steps help get the most flavor from your lemons. This makes your dish tangier.

Timing and Temperature

Letting your Lemon Blueberry Delight chill in the fridge is important. It makes the flavors better and the texture smoother. Try to:

  • Chill it for at least two hours after making it.
  • Serve it cool for the best taste.

Serving Suggestions

When serving Lemon Blueberry Delight, the right *serving suggestions* can make a big difference. This dessert goes well with many things that bring out its taste and look.

Ideal Pairings with the Dessert

For the best taste, try these options:

  • Dollops of whipped cream for added richness
  • Scoops of vanilla ice cream to introduce a creamy texture
  • Fresh berries for a burst of color and flavor
  • A drizzle of blueberry sauce to complement the blueberry layer

These pairings turn serving Lemon Blueberry Delight into a special treat.

Garnishing Ideas

How you present the dessert is key. Here are some ideas to make your Lemon Blueberry Delight look great:

  • Fresh mint leaves for a pop of vibrant green
  • Sprinkles of lemon zest to enhance aroma and brightness
  • Powdered sugar dusting for an elegant finish

Try serving it in individual glasses for a fancy look. It will impress your guests and show off the dessert’s beauty.

Storage Tips for Leftovers

Keeping your Lemon Blueberry Delight fresh is key. Simple storage tips can help. This way, you can enjoy it for days.

How to Store Properly

Store leftovers in an airtight container to keep flavors and textures right. Don’t leave it out; refrigeration is a must. Freezing is also an option, but it might change the texture a bit.

Shelf Life Expectations

Leftovers can last 3 to 5 days in the fridge. This ensures you enjoy the lemon and blueberry mix without losing quality. Freezing extends this to 2 months. Always check for spoilage before eating.

Variations on the Classic Recipe

Exploring variations of Lemon Blueberry Delight lets everyone enjoy this dessert. It’s great for those with special dietary needs. You can make a vegan dessert or a gluten-free dessert. Both keep the taste amazing and make sure everyone can enjoy it.

Vegan Lemon Blueberry Delight

To make a vegan version, use coconut cream instead of dairy. Choose a plant-based sweetener too. This way, the dessert stays creamy and zesty. It’s perfect for vegans who love this treat.

Gluten-Free Alternatives

For gluten-free options, try a crust made from nuts like almonds. Or use gluten-free cookies. This keeps the dessert tasty while being safe for those with gluten issues. For more ideas, visit this link.

Variation TypeMain IngredientsDietary Information
Classic Lemon Blueberry DelightGraham cracker crust, cream cheese, blueberriesNot vegan, not gluten-free
Vegan Lemon Blueberry DelightCoconut cream, plant-based sweetener, blueberriesVegan
Gluten-Free Lemon Blueberry DelightNut-based crust or gluten-free cookies, cream cheese, blueberriesGluten-free

Health Benefits of Key Ingredients

The Lemon Blueberry Delight is not just tasty. It’s also packed with health benefits. Each ingredient adds to your well-being, making every bite a treat.

Benefits of Blueberries

Blueberries are known for their health perks. They’re full of antioxidants that fight stress and inflammation. They’re also rich in vitamins C and K, and fiber, which helps with digestion.

Studies show that blueberries can improve heart health and brain function. They’re a great choice for a healthy diet.

Advantages of Lemon

Lemons are more than just a burst of flavor. They’re also good for you. They’re full of vitamin C, which boosts your immune system and skin health.

Lemons can also help with digestion and keep you hydrated. Adding lemons to your diet can boost your overall health. They’re a key ingredient in any healthy dessert.

Lemon Blueberry Delight for Special Occasions

Lemon Blueberry Delight is perfect for special occasions, like summer gatherings. It’s light and refreshing, with a zesty flavor that’s great for warm weather. Its vibrant colors and creamy texture make it a hit with guests.

Summer Picnics and Gatherings

For summer picnics, Lemon Blueberry Delight is a great choice. It’s a sweet and tangy contrast to savory dishes. Plus, it’s easy to make, perfect for hosts who want to impress without stress.

The mix of juicy blueberries and lemon is irresistible. It makes any outdoor event feel more welcoming.

Holidays and Celebrations

Holidays are a great time to serve Lemon Blueberry Delight. It’s a hit at events like the Fourth of July, with its bright colors and flavors. It’s perfect for family gatherings or casual get-togethers with friends.

Looking for a memorable holiday recipe? This layered delight is a standout choice.

Common Mistakes to Avoid

Making the perfect Lemon Blueberry Delight needs careful attention. Knowing common dessert mistakes can make your dessert better. Avoiding overcooking and picking the right blueberries will make your dessert more enjoyable.

Overcooking the Filling

One big mistake is overcooking the lemon filling. This can make it curdled, ruining the dessert. It’s key to watch the cooking time and temperature closely. This helps keep the filling creamy, as desired.

Using Ripe or Overripe Blueberries

Choosing the right blueberries is also important. Using too ripe berries can make the dessert mushy. Pick fresh, vibrant blueberries to keep the dessert’s flavor balanced. This ensures your Lemon Blueberry Delight is as refreshing as it should be.

Conclusion

The Lemon Blueberry Delight is a refreshing dessert that captures the essence of summer. It’s easy to make and loved by both new and experienced bakers. This dessert perfectly balances the tartness of lemons and the sweetness of blueberries.

It’s also versatile, making it great for any celebration. This makes it a perfect treat for any occasion.

Recap of the Recipe’s Appeal

The Lemon Blueberry Delight is loved for its mix of textures and flavors. It’s perfect for a sunny afternoon or a festive event. Its taste and refreshing qualities make it a hit with guests.

It’s a must-try for anyone wanting to improve their baking skills. This dessert is sure to impress and delight.

Encouragement to Try It Out

We encourage you to make your own Lemon Blueberry Delight. Try different variations and add your own twist. Enjoy the vibrant flavors it brings to any event.

Preparing this dessert is a fun challenge. Share it with your loved ones. It will become a favorite in your dessert collection.


FAQ

What is Lemon Blueberry Delight?

Lemon Blueberry Delight is a layered dessert. It mixes creamy lemon filling with fresh blueberries. This creates a perfect balance of tart and sweet, great for summer.

What are the key ingredients in this recipe?

The main ingredients are fresh blueberries, zesty lemons, sugar, cream, and a graham cracker crust. Together, they make a delicious and beautiful dessert.

How do I prepare the lemon filling?

To make the lemon filling, mix lemon juice and zest with sugar and cream until smooth. Make sure to mix well for a creamy texture.

What are some tips for making a perfect Lemon Blueberry Delight?

Pick firm, ripe blueberries and use a lemon squeezer for juice. Always chill the dessert in the fridge before serving to bring out the flavors.

Can I make Lemon Blueberry Delight vegan?

Yes, you can make a vegan version. Use coconut cream and a plant-based sweetener instead of dairy. It keeps the same great taste.

How should I store leftovers?

Keep leftovers in an airtight container in the fridge for 3-5 days. Don’t leave it at room temperature to keep the crust fresh.

What health benefits do the main ingredients provide?

Blueberries are full of antioxidants and vitamins, good for the heart and immune system. Lemons have lots of vitamin C, which helps with digestion and skin.

Is Lemon Blueberry Delight suitable for special occasions?

Absolutely! It’s perfect for summer picnics, family gatherings, and holidays. It’s a great choice for any festive event.

What common mistakes should I avoid when making this dessert?

Don’t overcook the lemon filling, as it can curdle. Also, pick fresh, firm blueberries for the best taste and texture.

Strawberry Cheesecake Dump Cake Recipe

Summer gatherings have a special magic that brings people together. I remember a family picnic where my aunt brought a warm Strawberry Cheesecake Dump Cake. The sun was out, and everyone laughed as we enjoyed this sweet treat.

This Strawberry Cheesecake Dump Cake is easy to make with just five ingredients. It shows how simple desserts can be full of flavor. It’s perfect for any event, from casual meetups to big celebrations.

Key Takeaways

  • The Strawberry Cheesecake Dump Cake is an easy dessert recipe that anyone can make.
  • It combines creamy cheesecake flavors with sweet strawberries, making it irresistible.
  • With just five simple ingredients, it qualifies as a quick and convenient option for busy bakers.
  • This dessert can be served warm or cold, allowing for versatile enjoyment.
  • It’s an excellent choice for family gatherings, parties, or casual get-togethers.

What is a Strawberry Cheesecake Dump Cake?

A Strawberry Cheesecake Dump Cake is a delightful dessert. It combines creamy cheesecake with fresh strawberries. This dessert is more than a simple cake. It has a rich cheesecake layer with juicy strawberries, making it stunning and inviting.

A Delicious Dessert Overview

This easy cake design is great for gatherings or family dinners. It’s perfect when you want something sweet. The mix of sweetness and creaminess is beautiful. Plus, it’s easy to make and clean up.

The result is a dessert that impresses everyone. It’s delicious and looks amazing, all without needing to be a pro at baking.

The Unique Concept of a Dump Cake

The dump cake concept makes baking easy. You don’t need to mix ingredients for a long time. Just ‘dump’ everything into a dish. This is perfect for beginners or those short on time.

With a few simple steps, you can make a cheesecake dessert. It’s both tasty and beautiful to look at.

Ingredients You’ll Need

To make a delicious strawberry cheesecake dump cake, you need certain ingredients. These ingredients mix together to create a tasty and textured dessert. You can choose from a variety of options to make it your own.

Fresh Strawberries

Fresh strawberries are the heart of this dessert. They add natural sweetness and a burst of flavor. Choose ripe, juicy strawberries for the best taste and look.

Cream Cheese

Cream cheese is key for the cheesecake’s creamy texture. Softened cream cheese blends well with other ingredients. It gives the cake a rich, cheesecake flavor.

Cake Mix Options

There are many cake mix choices. You can use vanilla, yellow, or strawberry mixes. This lets you tailor the flavor to your liking, making it more enjoyable.

Toppings and Variations

Get creative with toppings. Try whipped cream, chocolate syrup, or more strawberries. You can also swap out strawberries for blueberries or raspberries. This makes the dessert even more versatile.

Step-by-Step Instructions

Making a tasty strawberry cheesecake dump cake needs careful steps. Follow these to layer and assemble it right, for a yummy result.

Preparing the Strawberries

Start by washing and hulling the strawberries. Cut them into pieces for even distribution. This step makes the cake look good and taste great.

Mixing the Cream Cheese Layer

Mix softened cream cheese, sugar, and vanilla in a bowl. Use an electric mixer or whisk until it’s smooth. Make sure it’s creamy and lump-free for a velvety texture.

Assembling the Cake

Spread fresh strawberries at the bottom of a baking dish. Then, pour the cream cheese mix over them. Sprinkle cake mix on top and drizzle with melted butter. This ensures everything bakes well together.

Baking Your Strawberry Cheesecake Dump Cake

Getting the baking process right is key for a perfect Strawberry Cheesecake Dump Cake. Follow the baking instructions to ensure a delicious result. Start by preheating your oven to 350°F (175°C). Then, put your cake in the oven and remember the right cake bake time.

Recommended Bake Time

The typical baking time is about 40-45 minutes. This is when the flavors blend together beautifully. Use a timer to avoid overcooking or underbaking.

Checking for Doneness

When your cake is almost done, check if it’s ready. Look for a golden-brown top and bubbling edges. Use a toothpick to check the center; if it’s clean or has a few crumbs, it’s done. These tips will help you make a dessert everyone will love.

For more detailed baking instructions and tips, explore further. Happy baking!

Serving Suggestions

Enjoying your Strawberry Cheesecake Dump Cake is even better with the right pairings. A few simple suggestions can make it shine. Try it with whipped cream or a scoop of vanilla ice cream for extra sweetness and texture.

Fresh mint leaves add a refreshing touch. A drizzle of strawberry syrup can also add a burst of flavor. Each bite becomes even more delightful.

Perfect Complementary Pairings

  • Whipped cream
  • Vanilla ice cream
  • Fresh mint leaves
  • Drizzle of strawberry syrup

Ideal Occasions for Serving

This dessert is perfect for any special occasion. It’s great for summer gatherings, birthday parties, or holiday celebrations. Its deliciousness works for both casual and formal events.

Storage Tips

Storing your strawberry cheesecake dump cake right lets you enjoy it even after it’s been baked. A few simple steps can keep your cake tasting great for longer. The right storage keeps your dessert’s texture and flavor just right.

How to Store Leftovers

To keep your dump cake fresh, put leftovers in an airtight container. Store it in the fridge for up to four days. Cool the cake completely before sealing to avoid it getting soggy.

Reheating Recommendations

Ready to enjoy your dessert again? Use the right reheating tips. For a quick warm-up, microwave a portion for 20-30 seconds. For a crispier texture, reheat in a 350°F oven for 10-15 minutes. This keeps the cake moist and delicious.

Customization Ideas

A Strawberry Cheesecake Dump Cake is super versatile. You can try different fruits and flavors. Think about using peaches, blueberries, or apples for a fruity twist. You can also add almond or coconut to the cream cheese layer for a unique touch.

These ideas let you make a special dessert while keeping the classic recipe’s essence. It’s a fun way to experiment and find new flavors.

Flavor Combinations

Trying new flavors keeps your dessert exciting and caters to different tastes. Use a mix of fresh fruits and flavored extracts for a great look. Here are some flavor options to try:

  • Peach and Almond
  • Blueberry and Coconut
  • Apple Cinnamon
  • Raspberry Lemonade

Dietary Modifications

For those with dietary needs, there are easy swaps. If you’re gluten-free, use a gluten-free cake mix. For a vegan option, use dairy-free cream cheese. These changes make sure everyone can enjoy a slice:

Standard IngredientDietary Swap
Cake MixGluten-Free Cake Mix
Cream CheeseDairy-Free Cream Cheese
SugarNatural Sweeteners (like Stevia or Maple Syrup)

Common Mistakes to Avoid

Making a tasty strawberry cheesecake dump cake is easy. But, some mistakes can mess up your results. Avoid overmixing and get the right ingredient ratios for the best texture and taste.

Overmixing the Ingredients

Overmixing is a big mistake in baking. It makes the cream cheese layer too dense. This ruins the cake’s light and fluffy texture. Mix ingredients just until they’re combined for the perfect cake.

Not Using Enough Strawberries

Not enough strawberries can make your cake taste bland. Use at least two cups of fresh strawberries for the best flavor. This amount works well with the cake mix and cream cheese, making the cake more appealing. For more tips on avoiding common pitfalls, check out this helpful resource that covers typical mistakes in dump cake preparation.

Healthier Alternatives

Making a delicious strawberry cheesecake dump cake doesn’t mean you have to sacrifice health for flavor. You can turn your favorite indulgence into a lighter recipe. The key is using alternative ingredients that keep the dish’s essence but cut calories and boost nutrition.

Lightening Up Your Dump Cake

To make a healthier dump cake, start with lower-fat cream cheese and a sugar substitute. This keeps sweetness without extra calories. Choosing a whole-grain cake mix instead of traditional one boosts nutrition, adding fiber and essential nutrients.

Substitutions for a Guilt-Free Treat

Consider using applesauce to replace oil or Greek yogurt for a creamy texture without fat. These swaps help achieve that luscious taste while being healthier. Making these changes lets you enjoy every bite without guilt.

Why You’ll Love This Recipe

The Strawberry Cheesecake Dump Cake is perfect for quick dessert lovers. It’s easy to make and tastes amazing. You don’t need to spend a lot of time in the kitchen to enjoy it.

Simple and Quick to Make

This dessert is easy to make with just a few steps. It combines fresh strawberries and creamy cheesecake. Even beginners can make it, and it’s ready fast.

Perfect for Any Dessert Lover

This treat will impress anyone who loves sweets. It’s great for cheesecake fans, those who love fruity desserts, or anyone looking for a tasty option. You can find the full recipe here. It’s perfect for any occasion.


FAQ

What is a Strawberry Cheesecake Dump Cake?

A Strawberry Cheesecake Dump Cake is a tasty dessert. It mixes creamy cheesecake with fresh strawberries. This cake is easy to make because you just layer the ingredients without mixing a lot.

How long does it take to prepare the cake?

It takes about 20-30 minutes to prepare the Strawberry Cheesecake Dump Cake. This makes it a quick choice for dessert.

Can I use frozen strawberries instead of fresh ones?

Yes, you can use frozen strawberries. Just thaw and drain them first. This prevents too much moisture that could change the cake’s texture.

What type of cake mix should I use?

You can pick from vanilla, yellow, or strawberry cake mix. Choose what you like best to match the flavors of your dump cake.

How should I store leftovers?

Keep leftovers in an airtight container in the fridge. They stay good for up to four days. Always let the cake cool down before refrigerating.

Can this recipe be made gluten-free?

Yes! Use a gluten-free cake mix to make a gluten-free Strawberry Cheesecake Dump Cake. This way, everyone can enjoy it.

What are some great serving options for this dessert?

Serve it with whipped cream, vanilla ice cream, or strawberry syrup. Adding fresh mint leaves is also a nice touch.

How do I reheat leftover dump cake?

Reheat in the microwave for 20-30 seconds. Or, warm it in the oven at 350°F for 10-15 minutes.

How can I customize this recipe?

Try using blueberries, raspberries, or peaches for a different flavor. You can also add almond or coconut to the cream cheese for a unique taste.

What are some common mistakes to avoid?

Avoid overmixing, which can make the cake dense. Also, use at least two cups of strawberries for enough flavor. Too few strawberries can make the cake taste bland.

Honeybun Carrot Cake with Cheesecake Filling Recipe

Dessert recipes have a special power to bring people together. Imagine a sunny afternoon, the kitchen filled with the scent of spices. Friends gather around, waiting for a slice of Honeybun Carrot Cake with Cheesecake Filling. This treat combines the best of carrot cake with a creamy cheesecake filling.

It’s a perfect dish for any gathering. In this article, we’ll show you how to make this amazing dessert. You’ll learn about its unique qualities and the secrets to its success. Get ready to amaze your taste buds and impress your loved ones with this unforgettable recipe.

Key Takeaways

  • Discover the blend of moist carrot cake and rich cheesecake filling.
  • Learn about essential ingredients that enhance flavor and texture.
  • Find out the must-have kitchen tools for successful baking.
  • Follow step-by-step instructions to create the perfect cake.
  • Explore serving suggestions and presentation tips for a stunning display.
  • Get insights on storing and reheating the cake without losing its freshness.

Introduction to Honeybun Carrot Cake with Cheesecake Filling

The Honeybun Carrot Cake with Cheesecake Filling is a sweet mix of flavors. It’s a twist on traditional carrot cake, bringing joy to all who try it. Exploring its origins and the inspiration behind carrot cake makes it even more special.

The Inspiration Behind the Recipe

This cake comes from classic dessert traditions. It’s inspired by the carrot cake found at family gatherings. Comfort food meets creativity in this recipe, with each baker adding their own twist.

The honeybun version takes these traditions to new heights. It adds a rich cheesecake filling, making it even more special.

What Makes This Cake Unique?

This cake is truly unique among desserts. It has moist cake layers with a cinnamon sugar swirl. The honey glaze brings everything together, creating a perfect blend of flavors.

Each bite is a mix of spices and sweetness. It’s a memorable dessert for any occasion. You can enjoy it warm or at room temperature, making it versatile for breakfast or dessert.

If you want to try this recipe, check out this link. Baking it is a joyful experience that creates lasting memories.

Key Ingredients for the Cake

Making the perfect Honeybun Carrot Cake with Cheesecake Filling is all about the right mix of ingredients. These simple yet key components come together to create a cake that’s not just tasty but also moist and rich.

Fresh Carrots: The Heart of the Cake

Fresh carrots are the star of this dessert. They add natural sweetness and moisture, making the cake tender. Grating them fresh boosts the flavor and adds a beautiful color.

Spices like cinnamon and nutmeg also play a big role. They add a warm, inviting aroma and depth of flavor. This makes each bite truly unforgettable.

Understanding the Cream Cheese Filling

The Cream Cheese Filling is what makes this cake special. Its smooth texture contrasts beautifully with the fluffy carrot layers. This creates a perfect balance of flavors.

A well-made filling balances the cake’s sweetness with a tangy richness. Quality cream cheese and vanilla extract make every slice indulgent.

Essential Baking Tools You’ll Need

To make the perfect Honeybun Carrot Cake, you need the right ingredients and tools. Knowing which kitchen equipment is best for cake baking can make the process easier. Here’s a guide to the essential tools and tips for a smooth baking experience.

Must-Have Kitchen Equipment

Start by gathering the necessary kitchen tools for cake making. Key items include:

  • Mixing Bowls: A set of various sizes helps mix different ingredients.
  • Measuring Cups and Spoons: Accurate measurements are key for recipe success.
  • Stand Mixer: This tool makes mixing batter and cream cheese filling easy.
  • Baking Pans: Choose the right size for even baking, whether round or square.
  • Spatula: Great for folding ingredients without deflating the batter.
  • Cooling Rack: Essential for cooling the cake after baking.

Helpful Tips for Successful Baking

Using the right baking tools is key to success. Follow these baking tips to improve your kitchen skills:

  • Keep your workspace organized and clean.
  • Read the recipe fully before starting to understand all steps.
  • Use room temperature ingredients for better mixing.
  • Don’t rush mixing; blend until just combined to avoid overmixing.
  • Watch baking times closely to prevent overbaking and a dry cake.

Step-by-Step Preparation Instructions

Making the perfect Honeybun Carrot Cake with Cheesecake Filling is a fun process. This guide will help you through each step. You’ll learn how to mix the CAKE batter and put the cake together. Follow these Recipe Instructions for tasty results.

Preparing the Cake Batter

First, heat your oven to 350°F (175°C). Get your ingredients ready: flour, baking powder, baking soda, cinnamon, and sugar. Mix the dry ingredients in a big bowl.

Then, add the wet ingredients: eggs, vanilla extract, and vegetable oil. Don’t forget to add grated carrots for flavor. Make sure the batter is smooth but not too thick.

Making the Cheesecake Filling

To make the cheesecake filling, you need cream cheese, sugar, and an egg. Beat the cream cheese until it’s smooth. Then, add sugar slowly and mix well.

After that, add the egg for extra richness. Make sure everything is well mixed to avoid lumps. This filling will add a creamy touch to your cake.

Assembling the Cake Layers

Now, it’s time to put the cake together. Pour half of the CAKE batter into a greased pan. Spread the cheesecake filling evenly over it.

Then, add the rest of the CAKE batter on top. Bake for 35-40 minutes, or until a toothpick comes out clean. Let the cake cool completely before serving or frosting.

Baking Tips for Perfect Results

Baking a Honeybun Carrot Cake with Cheesecake Filling is a fun experience. It’s even better when you follow key Baking Tips. One important thing is to get the Oven Temperature right. This ensures your cake is moist and tender.

Choosing the Right Oven Temperature

First, preheat your oven to the temperature your recipe suggests. If you’re not sure, 350°F is a good starting point. An oven thermometer can help you check the actual temperature. This is because many ovens don’t show the true temperature.

Too high a temperature can dry out or burn the cake. It might also not cook the inside properly.

Testing for Doneness

Knowing when your cake is done is key. The toothpick test is a simple way to check. Stick a toothpick into the cake’s center. If it comes out clean or with a few moist crumbs, it’s ready.

If it’s covered in wet batter, bake for a bit longer and check again. These methods help you get perfectly baked layers. Whether it’s for a big celebration or a simple treat, they work great. For more baking tips, check out this recipe.

Common Mistakes to Avoid

Baking is a fun activity, but it has its challenges. Home bakers often make Baking Mistakes that can ruin their creations. Knowing what to avoid is key to making the Honeybun Carrot Cake with Cheesecake Filling a success.

Overmixing the Batter

Many bakers struggle with Avoid Overmixing the batter. Mixing is needed to blend ingredients, but too much mixing makes the cake dense and chewy. Instead, mix until just combined, so there are no dry spots. Knowing when to stop mixing is important for a light and fluffy cake.

Not Using Fresh Ingredients

The Fresh Ingredients Importance is huge in baking. Using fresh carrots and quality dairy in the Honeybun Carrot Cake makes it taste better and feel softer. Old or bad ingredients can make the cake taste bad. Choosing the best ingredients makes the cake more enjoyable.

For more info on the cake and tips, visit the Honeybun Carrot Cake with Cheesecake Filling. These tips will help you bake with confidence and success.

Serving Suggestions and Presentation

Presenting your Honeybun Carrot Cake in a special way can really make a difference. Choosing the right platter and adding garnishes can impress your guests. It turns serving cake into a fun experience.

Creative Ways to Serve

Use tiered cake stands for a stunning display. They add height and elegance to your dessert table. Serving in mason jars or small glass dishes adds a personal touch.

Each serving can be paired with vanilla ice cream or whipped cream. This boosts the flavor and looks great.

Garnishing Tips for a Beautiful Display

Adding garnishes can turn your Honeybun Carrot Cake into a feast for the eyes. Try using candied nuts for a crunchy texture. Or scatter fresh fruit preserves for a burst of color.

Edible flowers can add a touch of sophistication. Dusting the cake with powdered sugar before serving is a classic choice. These garnishes not only look good but also make the cake taste better.

Storing and Reheating the Cake

Creating a delicious Honeybun Carrot Cake with Cheesecake Filling is a big deal. Knowing how to store it right is key. It keeps the cake fresh and makes every slice a joy. Here are some top tips for storing your cake.

Best Practices for Keeping It Fresh

To keep your Honeybun Carrot Cake fresh, follow these steps:

  • Refrigeration: Store it in the fridge if you’ll eat it in a few days. Use plastic wrap or an airtight container to keep moisture in.
  • Room Temperature Storage: For one to two days, keep it at room temperature. Make sure it’s covered.
  • Freezing for Longer Storage: Slice the cake before freezing. Wrap each piece in plastic and put them in freezer bags. This stops freezer burn and keeps the flavor.

How to Reheat Without Drying Out

Reheating cake right is important to keep it moist. Here’s how to reheat slices perfectly:

  1. Microwave Method: Put a slice on a microwave-safe plate. Cover with a damp paper towel. Heat in 10-15 seconds until warm.
  2. Oven Method: Preheat the oven to 350°F. Wrap your slice in foil and heat for about 10 minutes. This method keeps moisture in and brings out the flavors.

Conclusion: Enjoying Your Honeybun Carrot Cake

Your Honeybun Carrot Cake with Cheesecake Filling is more than a dessert. It’s a chance to connect and enjoy. It’s perfect for family gatherings or celebrations with friends. The cake’s moist layers and creamy filling make it unforgettable.

Sharing with Family and Friends

Sharing carrot cake with loved ones is a joy. Each slice brings people together, sparking stories and memories. It’s not just a treat; it’s a symbol of togetherness, fostering laughter and deep connections.

Celebrating Special Occasions

This cake is ideal for any celebration. Its flavors and look make any event special. It’s perfect for casual gatherings or big milestones, making every moment memorable and meaningful.


FAQ

What ingredients do I need for the Honeybun Carrot Cake with Cheesecake Filling?

You’ll need fresh carrots, flour, eggs, and sugar. Also, baking soda, cinnamon, nutmeg, and cream cheese for the cheesecake. Don’t forget vanilla extract and butter for extra flavor.

How long does it take to bake the Honeybun Carrot Cake?

Baking takes about 25 to 30 minutes. Check with a toothpick. It should come out clean when inserted into the center.

Can I substitute any ingredients in the recipe?

Yes! Use whole wheat flour for a healthier choice. Replace sugar with honey or maple syrup. Just adjust the amount.

What are some tips for frosting the cake?

Make sure the cream cheese is at room temperature. Use a spatula for even frosting. Chilling the cake helps with frosting.

How can I enhance the flavor of the cheesecake filling?

Add lemon juice or vanilla extract. It will make the filling taste better and match the carrot cake’s sweetness.

Can I make this cake ahead of time?

Absolutely! Make it a day in advance. Store it in an airtight container in the fridge to stay moist.

What is the best way to present the Honeybun Carrot Cake?

Serve on a decorative cake stand. Add candied nuts or caramel sauce for elegance. Fresh fruit or edible flowers also look great.

How do I store any leftover cake?

Store in an airtight container in the fridge. Freeze large portions for later. This keeps the cake fresh.

Is it necessary to use fresh carrots for this recipe?

Yes! Fresh carrots are key for moisture and flavor. Avoid pre-packaged carrots, as they’re drier and less tasty.

Can I freeze the Honeybun Carrot Cake with Cheesecake Filling?

Yes, you can freeze it. Wrap tightly in plastic or foil to avoid freezer burn. Thaw in the fridge for the best taste and texture.

Savory Croissant Breakfast Sandwich Delights

Imagine waking up to the warm aroma of freshly baked croissants. It fills your kitchen, inviting you to start your day with something special. The croissant breakfast sandwich is more than just a meal; it’s a delightful way to begin your day.

Picture a flaky, buttery croissant holding farm-fresh eggs, savory cheese, and your favorite protein. The joy of biting into a well-made croissant breakfast sandwich is unmatched. It’s a favorite in brunch spots and cafes around the world.

It’s a delicious croissant breakfast sandwich that energizes your day. Whether you’re rushing to work or enjoying a weekend brunch, it’s perfect. Let’s dive into making the best croissant breakfast sandwich, where every bite is a joy.

Key Takeaways

  • The croissant breakfast sandwich is a perfect blend of buttery pastry and wholesome ingredients.
  • This gourmet treat is loved globally for its versatility and delicious flavor combinations.
  • Crafting the best croissant breakfast sandwich starts with high-quality ingredients.
  • With various cooking methods, you can enjoy your sandwich crisp, crunchy, or quick and easy.
  • Pair your croissant breakfast sandwich with coffee or fresh juice for a delightful meal.

The Allure of the Croissant Breakfast Sandwich

The croissant breakfast sandwich is a hit because of its mix of flavors and textures. It’s a favorite for breakfast lovers. This sandwich is more than just food; it’s a story of taste with every bite.

A Perfect Blend of Flavors

The flavors in a gourmet croissant breakfast sandwich are amazing. Ingredients like rich cheeses, meats, and crisp veggies make it delicious. A bit of sweetness from jam or honey can make savory options even better.

From classic ham and cheese to avocado and feta, the flavors are rich and exciting. They really make your taste buds happy.

Why Croissants Make the Best Base

Croissants have flaky, buttery layers that make a great sandwich base. Their texture adds to the experience and looks good too. They hold fillings well without falling apart.

This makes croissants perfect for brunch and breakfast. They offer endless possibilities for delicious sandwiches.

Ingredients That Elevate Your Sandwich

Making a tasty homemade croissant breakfast sandwich starts with top-notch ingredients. Each part adds to the flavor. This section will talk about the best cheeses, fresh veggies, and proteins for your sandwich. They make your sandwich a hit.

Cheeses That Melt into Deliciousness

Cheese makes your sandwich taste better and adds a creamy feel. Here are some cheeses that melt well:

  • Cheddar: A classic choice that provides a sharp taste.
  • Swiss: Melts nicely and adds a mild flavor.
  • Provolone: Offers a smooth consistency with a zesty touch.
  • Fontina: Perfect for a rich and creamy outcome.

Fresh Vegetables for Crunch and Color

Fresh veggies make your dish look better and add nutrients. Try these:

  • Spinach: Tender leaves add a pop of color and are packed with vitamins.
  • Tomatoes: Juicy slices can enhance taste and moisture.
  • Avocado: Creamy texture that complements other flavors.
  • Peppers: Crunchy bell peppers provide vibrant color and sweetness.

Proteins That Pack a Punch

Proteins make your meal filling. Choose from these tasty options:

  • Bacon: Crispy and salty, a beloved addition to any breakfast sandwich.
  • Eggs: Scrambled, fried, or poached, eggs are versatile and filling.
  • Smoked Salmon: Adds a luxurious taste with Omega-3 benefits.
  • Turkey or Chicken Sausage: A leaner alternative that delivers hearty flavor.

Crafting the Perfect Croissant

Making the best croissant breakfast sandwich begins with picking the right croissant. Quality is key for flavor and texture. This makes your sandwich better and more enjoyable.

Choosing the Right Croissant

Freshness is essential when choosing a croissant. Look for ones that are golden-brown and shiny. They should feel light and have layers when you squeeze them.

Here are some tips for picking the perfect croissant:

  • Check for a crispy outer layer, which signifies a well-baked pastry.
  • Opt for croissants that are made with real butter for rich flavor.
  • Smell the croissant; a delightful aroma indicates quality ingredients.
  • Avoid croissants that feel dense or heavy, as this suggests underbaking.

Techniques for Perfecting Flakiness

Getting the flaky texture of a croissant right is an art. Here are key techniques to achieve that flaky quality:

  1. Proper Folding: When making croissants from scratch, folding the dough correctly creates the layers necessary for flakiness.
  2. Cooling Time: After baking, allow croissants to cool on a wire rack to maintain their crisp outer layer.
  3. Temperature Control: Ensure your oven is preheated thoroughly before baking to achieve an even rise and golden color.

By focusing on the right croissant and its flakiness, your breakfast sandwich will be top-notch. A well-made croissant is the perfect base for a healthy and tasty breakfast sandwich.

Fun Flavor Combinations to Try

Exploring croissant breakfast sandwich ideas can open up a world of delightful flavors. Each combination creates unique culinary experiences, making breakfast an exciting meal of the day. Here are some enticing flavor profiles to enhance your gourmet croissant breakfast sandwich journey.

Classic Ham and Cheese Delight

A timeless choice for any breakfast, the classic ham and cheese combination in a croissant sandwich is truly irresistible. This delicious croissant breakfast sandwich pairs thinly sliced ham with your favorite cheese, such as Swiss or cheddar. The richness of the cheese melts perfectly into the layers of the croissant, delivering a satisfying bite.

Veggie Lover’s Paradise

For those who love fresh and wholesome ingredients, the veggie lover’s croissant sandwich is a top contender. Load your gourmet croissant breakfast sandwich with vibrant vegetables like spinach, tomatoes, and avocados. Add a spread of hummus or a light cream cheese for extra flavor, creating a nutritious and delicious option that can energize your day.

Sweet and Savory Pairings

Don’t forget the sweet side! Sweet and savory combinations like cream cheese with fruit preserves or Nutella with bananas transform your croissant breakfast sandwich into a dessert-like treat. These delicious croissant breakfast sandwich ideas not only satisfy your cravings but also surprise your palate with unexpected flavors.

Flavor CombinationMain IngredientsBest Pairings
Classic Ham and CheeseHam, Swiss CheeseFruit Juice, Coffee
Veggie Lover’s ParadiseSpinach, Tomatoes, AvocadosHerbal Tea, Smoothie
Sweet and SavoryCream Cheese, Fruit PreservesMilk, Hot Chocolate

With these flavor combinations, you can create a wide range of gourmet croissant breakfast sandwiches that will impress anyone at the breakfast table.

Cooking Methods for Your Sandwich

Choosing the right cooking method is key for a great croissant breakfast sandwich. Each method can make your sandwich more enjoyable. Here are some top ways to cook your easy croissant breakfast sandwich recipe.

Baking for a Crisp Finish

Baking is perfect for a golden-brown crust and a soft inside. Heat your oven to 350°F (175°C). Put your sandwich on a baking sheet. Bake for 10-12 minutes until it’s crispy and warm.

This method brings out the croissant’s buttery taste. It’s great for those who love a crunchy bite.

Grilling for an Extra Crunch

Grilling adds a smoky flavor and a nice char. Heat your grill or grill pan to medium. Butter the sandwich lightly before grilling.

Grill each side for 3-4 minutes until it’s warm and golden. The cheese will melt beautifully, making your sandwich extra tasty.

Microwave: Quick and Easy Option

The microwave is quick for busy mornings. Wrap your sandwich in a damp paper towel on a microwave-safe plate. Heat for 30 seconds to a minute.

This method might not be as crunchy, but it’s fast and works well for a quick breakfast.

Whether you bake, grill, or microwave, these methods make a delicious croissant breakfast sandwich. Try different cooking techniques to find your favorite. For more tips, check out this sandwich recipe.

Pairing Drinks with Your Breakfast Sandwich

The right drink can make a delicious croissant breakfast sandwich even better. It pairs well with many drinks, improving the taste and texture. Coffee and juices are great choices, each adding something special to your meal.

Coffee: The Perfect Companion

Coffee is a classic match for a croissant breakfast sandwich. Its bold flavors go well with the croissant’s buttery layers. Try a medium roast to let the sandwich’s taste stand out.

Juices for a Refreshing Contrast

For a lighter option, try fresh juice. Orange or apple juice adds a bright note to your meal. Their sweetness balances the savory flavors of the sandwich.

Check out this resource for more pairing ideas. Different drinks can make your meal even better and satisfy your morning hunger.

BeverageFlavor ProfileBest Paired With
CoffeeBold and richGourmet croissant breakfast sandwich
Fresh Orange JuiceSweet and tangyDelicious croissant breakfast sandwich
Apple JuiceSweet and refreshingVegetarian croissant options

Healthier Options for Your Croissant Sandwich

Making healthier choices for your croissant breakfast sandwich is tasty and rewarding. Choose whole wheat croissants and add nutritious fillings. This way, you get more flavor and health benefits. A healthy croissant breakfast sandwich can be just as tasty as the traditional one, showing that you can enjoy good food and stay healthy.

Whole Wheat Croissant Choices

Whole wheat croissants are a great choice instead of regular ones. They keep the flaky texture but add important nutrients. Choosing these croissants boosts your fiber intake, helping with digestion and overall health. Adding whole wheat to your homemade croissant breakfast sandwich makes it more filling and keeps you energized.

Adding Nutritious Fillings

Adding nutritious fillings makes your sandwich taste better and is healthier. Here are some good ingredients for a healthy croissant breakfast sandwich:

  • Avocado: Full of healthy fats and vitamins.
  • Spinach: Rich in iron and antioxidants.
  • Lean Proteins: Chicken or turkey breast add protein without too much fat.
  • Tomatoes: Full of vitamins and add flavor.
  • Feta or Goat Cheese: Provides a tangy taste with fewer calories than other cheeses.

Creating your own croissant breakfast sandwich lets you be creative and choose ingredients that fit your health goals. Enjoy experimenting with different ingredients to find your favorite mix!

Croissant Breakfast Sandwiches Around the World

The croissant breakfast sandwich has become a favorite around the globe. It’s loved for its ability to mix flavors in exciting ways. Exploring these international takes can spark new ideas for your breakfast.

From the traditional French way to creative global twists, there’s a world of flavors to discover. Each version celebrates the rich culinary traditions of its place.

French Influence on Breakfast

The French started the trend of enjoying croissants for breakfast. They pair them with butter and jam or fill them with Gruyère cheese and ham. This shows their love for quality and simplicity.

The result is a breakfast that’s both rich and light. It’s a perfect way to start your day.

International Twists Worth Trying

Countries worldwide have put their own spin on the croissant breakfast sandwich. In Canada, they fill it with smoked salmon, cream cheese, and capers. It’s a savory treat.

In Mexico, the sandwich might have eggs, chorizo, and avocado. It adds a spicy twist. These examples show how versatile the croissant can be. They inspire you to try your own local flavors.

Tips for Serving Your Croissant Sandwich

Enhancing your gourmet croissant breakfast sandwich’s presentation can make it stylish. Whether you’re hosting a brunch or enjoying a quiet morning, a few touches can make a big difference. Use rustic wooden boards or vibrant plates to make your sandwich look appealing. Adding fresh herbs or colorful fruit can make it even more inviting.

Presentation Ideas to Impress

To wow your guests, layer your croissant sandwiches beautifully. Stack them with different fillings to show off their flaky layers. Use small toothpicks to hold them together for a fun, shareable bite.

Pair each sandwich with dips or sauces like aioli or salsa for extra taste. Try garnishing with edible flowers for a beautiful breakfast spread.

Serving Sizes for Different Occasions

The size of your gourmet croissant breakfast sandwich depends on the event. For small gatherings, one croissant per person might be enough. But for big events, offer half sandwiches or a mix platter for everyone to try.

At a brunch buffet, have various fillings to let guests try different flavors. Remember to adjust the sizes based on your guests’ hunger. A big breakfast needs bigger servings, while a light snack is fine with smaller bites.


FAQ

What is the best way to make a croissant breakfast sandwich at home?

To make a great croissant breakfast sandwich, start with fresh croissants. Choose your favorite fillings like eggs, cheese, and veggies. For extra taste, try smoked salmon or herbed cream cheese.

Bake it in the oven for a crispy finish. Enjoy your homemade treat!

Can I make a healthy croissant breakfast sandwich?

Yes, you can! Use whole wheat croissants and add fresh veggies like spinach and tomatoes. Add lean protein like turkey or egg whites for more nutrition.

What are some popular croissant breakfast sandwich ideas?

Popular ideas include ham and cheese, or avocado and sprouts for veggies. You can also mix sweet and savory with Nutella and bananas. These ideas let you get creative with croissants!

How can I ensure my croissant remains flaky when making a breakfast sandwich?

To keep your croissant flaky, don’t overstuff it. Use a light butter or cream cheese spread for flavor. Briefly baking your sandwich before serving helps keep it flaky and warm.

What drinks pair well with a croissant breakfast sandwich?

Coffee is a classic choice for a croissant breakfast sandwich. For a refreshing twist, try orange juice or a berry smoothie. These drinks brighten up your meal.

Can I grill my croissant breakfast sandwich?

Yes! Grilling adds crunch and charred flavor. Use medium heat to prevent burning and melt the cheese perfectly.

What types of cheese are best for croissant breakfast sandwiches?

Cheddar, Swiss, and Gruyère are great for melting. They add rich flavors and a gooey texture that goes well with the croissant.

What are some easy croissant breakfast sandwich recipes I can try?

Try scrambled eggs with cheddar, spinach, and hot sauce in a croissant. Or, go for turkey, avocado, and garlic aioli for a tasty twist!

Where can I find the best croissant breakfast sandwich in the city?

Local cafes or bakeries often have the best sandwiches. Check online reviews or food blogs for tips. Ask locals for their top picks too!

Potato and Bacon Soup: Creamy Comfort in Every Bite

Imagine a kitchen filled with warmth as Potato and Bacon Soup simmers on the stove. It’s a chilly evening, and the air is filled with the smell of crispy bacon and fresh potatoes. As the family gathers, bowls in hand, it’s clear why this soup is a comfort classic.

This homemade soup is not just delicious; it also brings back memories of sharing meals with loved ones. Every spoonful is a joy. Whether it’s a cold winter night or a crisp autumn evening, Potato and Bacon Soup reminds us that simplicity can be the key to comfort.

Key Takeaways

  • Potato and Bacon Soup is a creamy comfort dish perfect for all seasons.
  • Its hearty flavors make it a favorite for families and gatherings.
  • Homemade soup brings nostalgia and warmth to the table.
  • This soup recipe is an easy comfort food option for busy lifestyles.
  • Enjoying Potato and Bacon Soup can create cherished memories.

Overview of Potato and Bacon Soup

Potato and Bacon Soup is a hearty soup that warms your soul. It’s a mix of rich, savory elements. This soup is perfect for cold weather because of its unique flavors and textures.

It uses fresh potatoes and crispy bacon for a delightful taste. This makes it a favorite comfort food.

What Makes This Soup Special?

The secret to this soup is its ingredients. Baking potatoes make it creamy, while thick-cut bacon adds a crunchy texture. Onions and garlic sautéed in the broth add comforting flavors.

Heavy cream makes the soup luxurious and creamy. If you want to try this recipe, you can find the steps here.

The Comfort Factor

Potato and Bacon Soup is more than just food; it’s a classic comfort dish. It’s often shared with loved ones, reminding us of happy times. The warm, rich soup satisfies not just your taste buds but also your heart.

It’s perfect for cold weather, bringing a sense of warmth and belonging.

Essential Ingredients for the Perfect Soup

Making a memorable potato and bacon soup needs careful ingredient choice. Each part is key to the soup’s comforting taste. Here are the must-haves for a delicious homemade soup that everyone will enjoy.

Fresh Potatoes

The right potatoes are the base of any great soup. Russet and Yukon Gold potatoes are perfect. Russets make the soup fluffy, while Yukon Golds add creaminess. This mix makes the soup feel like a treat.

Choosing the Right Bacon

The bacon you pick greatly affects the soup’s flavor. Thick-cut, smoked bacon is best. It adds a rich, savory taste that goes well with the potatoes. This makes every spoonful a joy.

Additional Flavor Enhancers

Onions and garlic add depth to your soup. They bring an aromatic quality that enhances the soup. A quality stock also boosts the flavor, making it a go-to dish. Together, these elements make the soup stand out.

Cooking Methods: Stovetop vs. Slow Cooker

Choosing the right cooking method for Potato and Bacon Soup is key. You can use the stovetop or a slow cooker. Each method has its own benefits, depending on what you prefer and how much time you have.

Stovetop Preparation

The stovetop is great for quick meals. Start by cooking onions and bacon until they’re golden. Then, add diced potatoes and broth. This method lets you taste and adjust the flavors as you go.

In no time, you’ll have a warm, comforting bowl of soup ready to enjoy.

Slow Cooker Benefits

The slow cooker offers a different experience. Just put all your ingredients in the pot and let it cook for hours. This way, the flavors blend perfectly, making a delicious soup.

If you’re busy, the slow cooker is perfect. It cooks your soup while you do other things, so you don’t have to watch it all the time.

Step-by-Step Guide to Making Potato and Bacon Soup

Making Potato and Bacon Soup is all about preparation and detail. Follow these steps for a comforting homemade soup. This guide will help you make a dish that’s both satisfying and flavorful.

Preparing Ingredients

Start by washing and peeling your potatoes. Cut them into even cubes for even cooking. Dice your bacon into small pieces for crispiness. Also, gather onions, garlic, and broth for the soup’s taste.

Cooking Instructions

First, cook the diced bacon in a large pot until crispy. Remove the bacon and keep some fat in the pot. Then, sauté diced onions and minced garlic until they smell good.

Add the cubed potatoes and stir for a few minutes. Pour in chicken or vegetable broth to cover the potatoes. Bring to a boil and then simmer until the potatoes are tender.

For creaminess, blend some of the potato mixture until smooth. Stir in the reserved bacon pieces. Add heavy cream or milk for extra richness. Serve warm with your favorite bread or toppings.

IngredientPreparation
PotatoesWash, peel, and cube
BaconDice into small pieces
OnionsDiced
GarlicMinced
BrothChoose chicken or vegetable

Tips for Achieving the Creamiest Texture

Creating the perfect creamy texture for your Potato and Bacon Soup makes it a top Easy comfort food. It’s important to know the difference between cream and milk. Also, the right blending techniques are key to getting the *Creamy Comfort* you want. Let’s explore these essential tips.

Cream vs. Milk

Cream and milk both add creaminess to your soup, but in different ways. Cream makes the soup velvety and indulgent. Milk, on the other hand, lightens the soup without losing flavor. It gives a subtle texture while keeping it comforting. Your choice depends on your taste and nutritional needs.

Blending Techniques

The way you blend your soup affects its final texture. An immersion blender is convenient, blending right in the pot. It’s great for keeping a rustic feel with small potato chunks. A traditional blender, though more work, makes the soup smoother and more refined. Either way, blending turns the ingredients into a rich, cohesive soup.

Trying out these tips will help you make a Potato and Bacon Soup full of *Creamy Comfort*. It will satisfy your cravings for Easy comfort food.

How to Enhance Flavor with Spices

Seasoning is key to making Potato and Bacon Soup truly special. The right spices can elevate the comforting flavors, making every spoonful a delight. Learning how spices and herbs work together helps you customize the recipe to your liking.

Popular Seasonings for Potato Soup

Choosing the right seasonings can really boost the flavors. Here are some top picks:

  • Black Pepper: This classic adds warmth and a bit of kick, balancing the creamy texture.
  • Paprika: With its smoky flavor, paprika adds depth, making the soup hard to resist.
  • Thyme: This herb brings an earthy taste that pairs well with potatoes and bacon, adding freshness.

Adding Fresh Herbs

Fresh herbs not only improve the taste but also make the soup look great. Try adding:

  • Parsley: Its bright, fresh taste enhances the soup’s comforting flavors and adds color.
  • Chives: These add a mild onion flavor, complementing the dish’s richness.

Don’t be afraid to try different spices to find your favorite flavor. Cooking is all about making dishes your own.

Serving Suggestions for Potato and Bacon Soup

Potato and bacon soup is perfect for any meal. It’s easy to make and always a hit. You can make it even better by choosing the right sides and how you present it. Here are some ideas to make your soup stand out.

Perfect Pairings

Choose sides that balance out the soup’s richness. Here are some great options:

  • Crusty Bread: A warm slice of sourdough or baguette is perfect with the creamy soup.
  • Fresh Salad: A crisp garden salad adds a refreshing touch to the warm soup.
  • Cheese Toasts: These are great for dipping into the soup, topped with melty cheese.

Creative Presentation Ideas

Make your potato and bacon soup look as good as it tastes. Here are some ways to do it:

  • Garnishing: Add crispy bacon bits and fresh herbs like parsley or chives for color and flavor.
  • Unique Bowls: Try serving it in rustic bowls or hollowed-out bread loaves for a fun twist.
  • Drizzle of Olive Oil: A light drizzle of high-quality olive oil adds richness and a fancy touch.

These ideas show how versatile potato and bacon soup can be. It’s great as a main dish or part of a bigger meal. This classic dish always brings joy to the table.

Storing and Reheating Leftovers

Leftover Potato and Bacon Soup is perfect for meal prep or cozy meals. It keeps its flavors and creamy texture well. This ensures every bite is as delightful as the first.

Best Storage Practices

Let the soup cool down before putting it in airtight containers. Store them in the fridge for a few days. For longer storage, freezing is best. Don’t forget to label the containers with the date.

Reheating Tips

To reheat, gently warm the soup in a saucepan over medium heat. Stir it often. Adding a bit of broth or cream can make it creamier. This way, it tastes like it’s just been made.

Dietary Adjustments and Alternatives

Recipes can be made to fit everyone’s needs. The Potato and Bacon Soup can be changed to suit different diets. This way, everyone can enjoy this easy comfort food.

Making it Gluten-Free

To make a gluten-free version, use a gluten-free broth. Make sure all extra ingredients, like seasonings and toppings, are gluten-free. This lets you enjoy a hearty bowl without worry.

Vegan Alternatives

For vegans, there are tasty swaps. Use plant-based bacon for a smoky taste. Coconut cream can replace dairy for creaminess. Nutritional yeast adds a cheesy flavor, making it a classic comfort dish for all.

These changes let everyone enjoy a warm, creamy bowl. For more tips on making this easy comfort food, check out the full recipe here.

Conclusion: Why You Should Try Potato and Bacon Soup

Every great meal has a recipe that brings comfort and joy. Potato and Bacon Soup is a perfect example. It turns simple ingredients into a warm bowl of happiness. The mix of potatoes and bacon creates a cozy feeling, reminding us of family gatherings and cold winter nights.

This soup is easy to make and perfect for sharing with loved ones. It can start conversations and laughter, making it great for dinners with friends and family. It’s a way to make lasting memories and connect with others over a delicious meal.

Make Potato and Bacon Soup a staple in your home. It’s creamy and comforting, sure to impress anyone. For a tasty recipe and to learn how to make it, check out this Potato and Bacon Soup. Enjoy a bowl of comfort with your loved ones today!


FAQ

What is Potato and Bacon Soup?

Potato and Bacon Soup is a creamy dish. It’s made with fresh potatoes, crispy bacon, and seasonings. It’s a classic comfort food that warms the soul.

How do I make the soup creamier?

For creamier soup, use heavy cream instead of milk. Also, blend some of the soup. This makes it smooth.

Can I make this soup vegan?

Yes! Make a vegan version by using plant-based bacon. Use coconut cream for richness. Make sure the broth is vegan-friendly. Add nutritional yeast for a cheesy taste.

What types of potatoes are best for this soup?

Starchy potatoes like russets or Yukon Golds are best. They make the soup smooth.

How do I store leftovers?

Cool the soup and store it in airtight containers. Keep it in the fridge for 4 days or freeze for 3 months. Reheat gently, adding broth or cream to keep it creamy.

What can I pair with this soup?

Pair it with crusty bread, a fresh salad, or grilled cheese. These add to the dining experience.

Is it possible to prepare this soup in a slow cooker?

Yes! The slow cooker is perfect for Potato and Bacon Soup. Just add all the ingredients and cook on low for hours.

What seasonings should I use?

Use black pepper, paprika, and thyme. Fresh herbs like parsley or chives also enhance the flavor.

Decadent Easy Turtle Bars Recipe | Quick & Tasty!

The holidays bring magic to the kitchen, with smells and laughter everywhere. Last winter, I was in a busy kitchen with family, all looking for a sweet treat. We found a turtle bars recipe that had everything: buttery shortbread, caramel, and chocolate.

Kids were laughing as they unwrapped caramels and poured chocolate. Adults were arguing over nuts or no nuts. These Easy Turtle Bars became our favorite dessert for fun gatherings and cozy nights.

They’re quick to make, with only 20 minutes of prep time. They turn simple ingredients into a rich, delicious treat. If you want a chocolate dessert that will wow everyone, let’s make these bars together! For the full recipe and tips, visit this link.

Key Takeaways

  • Easy Turtle Bars are a delectable mix of shortbread, caramel, and chocolate.
  • Perfect for holiday gatherings or any quick dessert need.
  • Preparation takes just 20 minutes, making them a simple treat to whip up.
  • Customizable with or without nuts for personal preference.
  • A delightful dessert option that’s great for involving children in the kitchen.

What Are Easy Turtle Bars?

Easy Turtle Bars are a tasty treat that combines flavors of favorite candies into a bar. They have a rich, layered dessert that looks and tastes great. With sweet chocolate, caramel, and a crunchy texture, they’re perfect for any event.

A Delicious Dessert Overview

This dessert overview shows why turtle bars are loved by many. They mix textures in a way that’s both pleasing and comforting. Each bite is a melt-in-your-mouth experience, making them great for any gathering.

Main Ingredients to Note

The main ingredients in these turtle bars are simple and easy to find. The key parts are:

  • Shortbread cookie base: This gives a rich, buttery taste.
  • Creamy caramel sauce: Adds a sweet, creamy layer.
  • Semi-sweet chocolate: Provides a rich contrast on top.
  • Chopped pecans: Add a nice crunch and nutty flavor.

Knowing these ingredients is key for making this turtle bars recipe just right. Each part affects the taste and texture, making for a delicious dessert.

Why You’ll Love This Recipe

Easy Turtle Bars are perfect for many occasions. They’re great for birthday parties or cozy family gatherings. Their look and taste are sure to impress everyone, making them a hit at any event.

Whether you’re serving them at a holiday feast or a potluck, these bars are always a crowd-pleaser.

Perfect for Any Occasion

There are countless occasions for turtle bars, including:

  • Birthday celebrations
  • Holiday festivities
  • Family movie nights
  • Bake sales
  • Potlucks

These bars are a treat for all gatherings. They impress friends and family with their appealing presentation and indulgent taste.

Quick and Simple Preparation

This recipe is a breeze to make. Even novice bakers can whip up these treats in no time. It’s a quick dessert that saves time and lets you enjoy the moment.

The minimal effort needed makes Easy Turtle Bars ideal for busy lives. They ensure more time for making memories and enjoying delicious desserts.

Essential Ingredients for Easy Turtle Bars

Making the perfect easy turtle bars starts with the right ingredients. Each part is key to the delicious layers of flavor and texture. Here’s what you need for this turtle bars recipe.

Shortbread Cookie Base

The shortbread base is the foundation of easy turtle bars. It’s made with flour, sugar, butter, and a bit of salt. Softened butter is important for a tender crust. Mixing it well gives a nice crunch and flavor.

Rich Caramel Sauce

The caramel sauce is what makes these bars special. You can make it from scratch or buy it. It should be smooth and a bit thick. This layer adds flavor to every bite.

Chocolate Topping

The final touch is a layer of melted chocolate. Use semi-sweet chocolate chips or bars. Melting it right is key to avoid a grainy texture. This chocolate layer adds to the sweet caramel and crunchy pecans, making it a treat for your taste buds.

Step-by-Step Preparation Guide

Making turtle bars is a fun journey through flavors. This guide will help you make the shortbread, caramel, and chocolate topping.

Making the Shortbread Base

First, preheat your oven to 350°F and grease a baking dish. Mix the shortbread ingredients until crumbly. Press it into the dish.

Bake until it’s lightly golden. Let it cool. This helps the caramel stick better.

Preparing the Caramel Layer

To make caramel, melt it on the stovetop or in the microwave. Pour it over the cooled shortbread. Spread it out.

Let it set for a few minutes. Or, chill it in the fridge. This keeps each layer unique.

Melting the Chocolate Topping

To make the chocolate topping, melt it in a double boiler or microwave. Stir every 30 seconds. Pour it over the caramel.

Spread it evenly. Sprinkle chopped pecans on top while it’s warm. This makes the bars look great.

Tips for the Best Turtle Bars

Creating the perfect Easy Turtle Bars requires attention to detail. Choosing the right ingredients and preparation methods is key. This ensures your dessert is a hit.

Choosing Quality Ingredients

For the best taste and texture, use top-notch ingredients. Real butter makes the shortbread base rich. Choose semi-sweet chocolate you love for better flavor. Fresh pecans add a nice crunch.

Time-Saving Techniques

Save time by using smart tips. Make the shortbread base a day early to rest. Store-bought caramel saves time without losing flavor. Pre-measuring ingredients makes the process faster.

Customizing Your Bars

Customizing Easy Turtle Bars is fun. Try different chocolates, like milk or dark, for your taste. Add sea salt or toppings like shredded coconut or nuts for a unique twist.

Serving Suggestions for Turtle Bars

Enjoying easy turtle bars can be even better with the right serving suggestions. These treats are tasty alone but also great with other flavors. Here are some ways to make your dessert time special.

Pairing with Ice Cream

Turtle bars and ice cream are a match made in dessert heaven. Try them with creamy vanilla or rich caramel ice cream. The ice cream’s creaminess balances the chocolate and pecans perfectly.

For an extra treat, drizzle caramel or chocolate sauce over the ice cream. It adds a rich, indulgent flavor.

Ideal Beverages to Complement

Drinks can make your turtle bars even more enjoyable. Hot drinks like coffee or hot cocoa bring out the chocolate flavors. It makes each bite more delightful.

For a unique twist, try a glass of dessert wine. It pairs well with the bars’ sweetness. It lets guests explore different flavors that enhance their meal.

Serving SuggestionsPairing Options
Ice CreamVanilla, Caramel
Hot BeveragesCoffee, Hot Cocoa
Dessert WineSweet White, Port

Variations on Easy Turtle Bars

Exploring different versions of easy turtle bars can make your dessert experience even better. If you want a nut-free option, it’s easy to make. Just remove the pecans and add sunflower seeds or a crunchy biscuit topping. This way, you keep the great taste that makes these bars so loved.

Nut-Free Alternative

Nuts add texture and flavor to desserts, but you can also enjoy nut-free turtle bars. Using sunflower seeds gives a similar crunch without the nuts. You can also try other crunchy toppings that fit your diet.

Adding a Peanut Butter Layer

Adding a peanut butter layer is a tasty twist. Heat the peanut butter until it’s smooth, then spread it over the caramel layer. Finish with chocolate for a unique treat that peanut butter fans will love.

These variations open up new possibilities beyond the classic recipe. Be creative and make your turtle bars special at parties. Enjoy the fun flavors and textures of each unique version.

For more ideas, check out the Easy Turtle Bars recipe for inspiration.

Perfecting Your Turtle Bars

Making turtle bars can be a fun challenge. To get it right, watch out for common mistakes. Each layer must be made with care for a treat everyone will enjoy.

Avoiding Common Mistakes

Many bakers overcook the shortbread or caramel. It’s important to find the right balance. The shortbread should be lightly golden, and the caramel smooth and grain-free.

Achieving the Right Texture

The texture of turtle bars is key. Let each layer cool before adding the next. This keeps each layer distinct and adds to the dessert’s appeal.

Celebrating Special Occasions with Turtle Bars

Easy Turtle Bars are perfect for any festive gathering. They can be made to fit any theme, making them great for all-year celebrations. Turtle bars are loved for both casual and formal events.

Ideal for Holidays

Turtle bars are a hit for holiday desserts with their rich flavors. Add seasonal decorations to make them even more special. Try drizzling melted chocolate in holiday colors or topping them with seasonal candies.

They taste amazing and look great, making them a standout choice for winter, birthdays, and more.

Perfect for Parties and Gatherings

Turtle bars are a crowd-pleaser for parties, potlucks, or casual meetups. They can be made ahead of time, served chilled or at room temperature. This makes them easy to serve.

Impress your guests with their rich flavor and textures. Turtle bars are sure to make a lasting impression, perfect for any gathering.

Conclusion: Your Next Dessert Adventure Awaits!

Easy Turtle Bars are the perfect treat for anyone looking for something quick yet impressive. They mix sweet, crunchy, and creamy textures in a way that pleases every sweet tooth. This makes them a hit for any event or just for a special treat.

Are you ready to try your hand at baking? This article gives you all the tips and steps to make these delicious Turtle Bars. Each bite is a mix of flavors that will make everyone want more.

So, put on your apron and start this fun dessert journey. The joy of baking and the happiness of enjoying a homemade treat are just around the corner with every batch of Easy Turtle Bars!


FAQ

What are Easy Turtle Bars made of?

Easy Turtle Bars have layers of buttery shortbread, rich caramel sauce, smooth chocolate, and crunchy pecans. They are a decadent treat.

How long does it take to make Easy Turtle Bars?

It takes about 30 minutes to prepare Easy Turtle Bars. Then, they need 2 hours to cool. So, you can enjoy them in about 2.5 hours.

Can I make Easy Turtle Bars ahead of time?

Yes! You can make Easy Turtle Bars ahead of time. Store them in the fridge for up to a week. Or, freeze them for even longer, just wrap them well.

What can I use instead of pecans in the recipe?

If you want a nut-free option, try sunflower seeds or omit them. You can also use crushed cookies for extra texture.

How should I store leftover Turtle Bars?

Keep leftover Turtle Bars in an airtight container at room temperature for a few days. Or, refrigerate them for up to a week. For freezing, wrap them in plastic wrap and foil, then in a container.

Can I make these bars with a different type of chocolate?

Absolutely! You can use milk, dark, or white chocolate. Just remember, the taste will change with different chocolates.

What is the best way to melt chocolate for the topping?

To melt chocolate, use a double boiler or microwave it in short bursts (30 seconds at a time). Stir between each interval to avoid burning.

Are there any vegan alternatives for this recipe?

Yes! For a vegan version, use vegan butter, dairy-free caramel, and non-dairy chocolate. They will be just as delicious!

Can I customize the toppings for my Turtle Bars?

Definitely! Try adding different toppings like shredded coconut, sea salt, or extra chocolate. It’s a great way to make them your own.

Easter Dirt Cups: Sweet Treat for Springtime Fun

As the days get warmer and flowers bloom, families plan their Easter celebrations. Imagine a sunny afternoon filled with laughter and kids searching for colorful eggs. Later, a delightful dessert, Easter Dirt Cups, becomes the highlight.

These treats have layers of creamy chocolate pudding, crushed Oreo cookies, and bright candies. They’re perfect for both kids and adults, bringing joy with every bite. With a dirt cups recipe that’s easy to follow, these desserts add fun to your Easter party. They also let kids help in the kitchen, making memories.

Key Takeaways

  • Easter Dirt Cups are a fun dessert for kids, ideal for Easter celebrations.
  • They are made with chocolate pudding and crushed cookies, creating a delightful layer of flavors.
  • These treats can be customized with various candies for a creative twist.
  • Perfect for spring gatherings, they add a festive and playful element to any occasion.
  • Making Easter Dirt Cups is a simple process that can be enjoyed as a family activity.

What Are Easter Dirt Cups?

Easter Dirt Cups are a mix of fun and creativity, perfect for spring. They delight both kids and adults with their unique twist on desserts. Let’s explore what makes them special, from their definition to the joy they bring at Easter.

Definition and Concept

Easter Dirt Cups are desserts that look like a garden. They’re made with chocolate pudding and crushed Oreos, looking like soil. You can add fun touches like gummy worms or chocolate eggs to make them even more appealing.

History of Dirt Cups

Dirt Cups started in the 1980s as a fun dessert for kids’ parties. Their fun design and easy ingredients made them a hit. Now, families love making them again, often at Easter.

Why They’re Fun for Easter

Dirt Cups add excitement to Easter desserts. Their fun look grabs everyone’s attention. Decorating them together is a fun activity that brings families closer. Adding seasonal themes makes Easter even more joyful.

Ingredients for Easter Dirt Cups

Easter Dirt Cups are a fun treat that combines fun and flavor. They are perfect for celebrating the season. Knowing the ingredients makes it easy to make this delightful dessert.

Essential Ingredients

The key ingredients are chocolate pudding mix, milk, crushed Oreo cookies, and gummy candies. These mix together to make a tasty base that everyone loves. Look for brands like JELL-O for pudding and Nabisco Oreos for cookies to get the best taste.

Optional Add-Ins

Adding optional toppings can make your dirt cups even better. Whipped cream adds creaminess, and sprinkles or edible grass make them look great. These extras let you be creative and make each cup special.

Tips for Choosing Ingredients

Always choose high-quality ingredients for the best taste and look. Using different candies can make your dessert festive and fun for all. For more ideas, check out this guide on Easter Dirt Cups.

How to Make Easter Dirt Cups

Making dirt cups is a fun mix of layers and textures. It’s perfect for a festive treat. Follow these steps to create a delightful dessert that everyone will love. Remember, avoid common mistakes in dessert preparation to make sure your dirt cups turn out right.

Step-by-Step Instructions

  1. Prepare chocolate pudding according to the package instructions and let it cool completely.
  2. In clear cups, start by adding a layer of the cooled chocolate pudding.
  3. Next, sprinkle crushed Oreos on top of the pudding layer.
  4. Repeat these layers until the cups are filled, finishing with Oreos on top.
  5. Decorate with gummy candies like worms or other themed treats to enhance the garden effect.
  6. To add flair, sprinkle additional crushed cookies on top for an authentic dirt look.

Common Mistakes to Avoid

While preparing your dirt cups, be aware of several common mistakes in dessert preparation:

  • Not letting the pudding cool completely can result in a messy mixture that doesn’t hold its layers well.
  • Using too much liquid in the pudding mix can lead to a runny consistency.
  • Neglecting to layer effectively can create a less visually appealing dessert.

Tips for Presentation

Presentation is key to making your Easter dirt cups stand out. Consider these tips:

  • Use clear cups to showcase the beautiful layers of pudding and cookie crumbles.
  • Add themed decorations like mini plastic shovels or colorful wrappers for a festive touch.
  • Serve them on a decorative tray to enhance overall appeal.

Decorating Your Easter Dirt Cups

Make your Easter dirt cups more exciting with creative decorating. You can use many colorful and fun options to make each cup special. Add playful touches and seasonal themes to make it even more festive.

Fun Topping Ideas

Choosing the right toppings can really make your dirt cups stand out. Here are some great Easter dessert toppings to add color and texture:

  • Edible flowers for a springtime touch
  • Crushed cookies to mimic dirt
  • Pastel-colored candy sprinkles for a festive flair
  • Mini chocolate bunnies or eggs for added fun
  • Coconut flakes dyed green to represent grass

Creative Serving Suggestions

Unique serving ideas can make your Easter treats even more special. Here are some ideas to impress your guests:

  • Terracotta pots lined with festive napkins
  • Biodegradable containers for an eco-friendly presentation
  • Small decorative baskets for a charming display
  • Clear cups to showcase the layers of delicious ingredients
  • Personalized tags with guests’ names for a unique touch

By mixing fun toppings with creative serving ideas, you can turn simple dirt cups into amazing Easter treats. Everyone will love them.

Variations of Easter Dirt Cups

Adding new flavors to traditional Easter Dirt Cups is fun for everyone. These changes let you mix flavors and meet different dietary needs. So, everyone can join in the fun.

Seasonal Flavor Twists

Try adding seasonal flavors to your Easter desserts. For example, mix vanilla pudding with lemon zest for a zesty twist. Pumpkin spice can make your gathering feel cozy and warm.

Whether you prefer something fruity or comforting, trying new flavors makes Easter celebrations more exciting.

Gluten-Free and Dairy-Free Options

Many families look for gluten-free desserts. For Easter Dirt Cups, use gluten-free cookies instead of regular Oreos. For dairy-free pudding, try almond or coconut milk.

These changes let everyone enjoy the treats without worrying about their diet. For a simple recipe, check out this link.

Fun Additions to Your Easter Celebrations

Easter celebrations become more fun with the right additions. Adding Easter dessert pairings brings joy to all ages. Try pairing carrot cake, chocolate bunnies, and pastel macarons with Easter dirt cups. These pairings make your themed dessert tables stand out and delight your guests.

Pairing with Other Desserts

Choosing the right desserts to pair with Easter dirt cups makes the experience better. Look for a mix of flavors and textures that complement the dirt cups. Here are some pairing ideas:

  • Carrot cake topped with cream cheese frosting
  • Chocolate bunnies for an iconic Easter touch
  • Pastel macarons that bring color to the table
  • Fruit tarts featuring seasonal berries for freshness

These pairings not only satisfy sweet cravings but also let guests try different flavors.

Themed Party Ideas

Creating memorable experiences through party ideas for Easter is key. Hosting an Easter egg hunt followed by a dessert gathering is a hit. After the hunt, guests can enjoy themed dessert tables with your Easter dirt cups and other treats.

Adding activities like cookie decorating or crafting Easter cards brings out the holiday’s creativity. This approach makes the celebration fun and engaging for everyone, filled with joy and laughter.

Healthier Alternatives to Traditional Dirt Cups

Making healthier dirt cups is fun and rewarding. You can make lighter desserts without losing flavor. These swaps help you make desserts that are good for you and taste great.

Ingredients Swap for a Lighter Option

Start by swapping out ingredients. Use sugar-free pudding or Greek yogurt for a creamier base. These changes add protein and cut down on sugar.

Replace Oreo cookies with homemade granola. This adds texture and lets you control the sweetness. Your dirt cups will be healthier but just as tasty.

Nutritional Considerations

When making desserts, watch your portion sizes and choose quality ingredients. Add fresh fruits and nuts to boost nutrition. These choices make your dirt cups healthier and perfect for Easter.

How to Involve Kids in Making Dirt Cups

Getting kids to help with Easter Dirt Cups makes dessert time fun. It turns a simple task into a special family moment. Kids learn and have fun together, making it a great Easter activity.

Age-Appropriate Tasks

  • Preschoolers can pour layers into cups with a little help, making them feel important.
  • School-age children can measure and mix, showing off their growing skills.
  • Older kids can crush cookies or decorate, letting their creativity shine.

Making It a Fun Family Activity

Make dessert time a fun challenge. Have a contest to see who can decorate their cup the best. It’s a great way to get everyone excited and creative, making it a highlight of Easter.

Every step in making these treats is a chance for laughter and bonding. It’s not just about the yummy dessert. It’s about creating memories that make your Easter even more special.

Storing and Serving Easter Dirt Cups

To keep your Easter Dirt Cups fresh, follow the best storage practices. Store them in the fridge for up to 2-3 days. Use airtight containers or plastic wrap to keep them fresh and prevent odors.

When serving, presentation matters a lot. Use clear dessert cups on festive trays. This makes it easy for guests to serve themselves. Add cute flags or tags to each cup for a fun touch.


FAQ

What are the main ingredients in Easter Dirt Cups?

Easter Dirt Cups need chocolate pudding mix, milk, crushed Oreo cookies, and gummy candies. You can add whipped cream or fun toppings for extra flavor.

How can I make my Easter Dirt Cups healthier?

Use sugar-free pudding or Greek yogurt for protein. Swap Oreo cookies for homemade granola to control sugar.

What are some fun decoration ideas for Easter Dirt Cups?

Decorate with edible flowers, pastel sprinkles, or themed toppings like mini chocolate eggs. Terracotta pots make great serving dishes!

How long can I store leftover Easter Dirt Cups?

Store them in the fridge for 2-3 days. Use airtight containers or plastic wrap to keep them fresh.

Can I involve my kids in making Easter Dirt Cups?

Yes! It’s a fun family activity. Let kids help with measuring, mixing, and decorating.

Are there gluten-free options for Easter Dirt Cups?

Yes! Use gluten-free cookies and dairy-free pudding mixes for a treat everyone can enjoy.

What should I avoid when making Easter Dirt Cups?

Don’t mix the pudding when it’s too warm. Cool it fully for a smooth layering process.

How can I make Easter Dirt Cups more visually appealing?

Use clear cups to show off the layers. Decorate with themed items or colorful edible grass for a festive look.

What are some themed party ideas to pair with Easter Dirt Cups?

Host an Easter egg hunt and then a dessert party. Add activities like cookie decorating or crafting Easter cards for fun.

Apple Crisp Cinnamon Roll Casserole Recipe

It was a chilly Sunday morning when the kitchen filled with the scent of warm cinnamon rolls. Everyone gathered around the table, excited for a treat. I presented my latest creation: the Apple Crisp Cinnamon Roll Casserole.

This dish mixed fluffy cinnamon rolls with fresh apples, creating a unique breakfast option. With each bite, we enjoyed the comforting flavors and the time together. It proved to be perfect for any occasion. Let’s explore the recipe that will become a family favorite, making breakfast special with this delicious dessert.

Key Takeaways

  • The Apple Crisp Cinnamon Roll Casserole offers a unique blend of flavors, making it a must-try sweet breakfast casserole.
  • Combining cinnamon rolls and apples results in a delicious dessert recipe that appeals to all age groups.
  • This dish is perfect for gatherings and special occasions, bringing joy to the breakfast table.
  • Easy to prepare, it is a delightful way to start any day with loved ones.
  • The warm, inviting aroma it produces makes it a favorite among family and friends.

What is an Apple Crisp Cinnamon Roll Casserole?

The Apple Crisp Cinnamon Roll Casserole is a mix of breakfast and dessert. It combines cinnamon rolls with a homemade apple filling. This dish is loved for its cozy flavors, making it perfect for fall.

Overview of Ingredients

The dish has two main parts: cinnamon rolls and fresh apples. Honey Crisp apples add a sweet and tart taste. The cinnamon rolls are mixed with a creamy egg mixture for a rich texture.

A crunchy crumble tops the casserole, adding flavor and texture. For an easy apple casserole recipe, this dish is a great choice. It combines flavors that everyone loves.

History of the Dish

The cinnamon roll casserole started at family gatherings and holidays. It’s a mix of two favorite treats. This dish shows how American kitchens can be creative.

Nutritional Benefits

Apples in the casserole add flavor and health benefits. They are full of dietary fiber, vitamins, and antioxidants. This makes the dessert both tasty and healthy.

Enjoying this dessert means you’re treating yourself while staying healthy. It’s a great choice for anyone with a sweet tooth.

Key Ingredients for the Casserole

Making a tasty apple crisp cinnamon roll casserole begins with picking top-notch ingredients. Each part is key to bringing out the flavors and textures that make this dish a hit. Let’s look at the main ingredients that make this apple casserole recipe a treat.

Cinnamon Rolls

The base of this cinnamon roll dessert is the cinnamon rolls. You can choose from store-bought or homemade, depending on what you like. Homemade rolls offer a fresh taste, while store-bought ones are convenient. Make sure the rolls are soft and tasty, as they add sweetness to the apple layers.

Apples

Picking the right apples is vital for the perfect flavor in your apple crisp recipe. Granny Smith or Honeycrisp apples are great because they’re tart and firm. Peel and slice the apples to make them taste better and blend well with the casserole. Their sweetness and juiciness make the dish even more delicious.

Crisp Topping

The crisp topping is the final touch, adding a nice crunch. It’s made of oats, flour, brown sugar, and butter. Adding nuts or spices like cinnamon can make it even better. The right texture of the topping contrasts well with the apples and cinnamon rolls, making the dish unforgettable.

Essential Tools and Equipment

Creating the perfect cinnamon roll casserole needs the right tools. Having essential baking tools makes the process smooth and fun. Each tool, from the baking dish to measuring cups, is key to success.

Baking Dish

Choosing the right baking dish is key. A glass or ceramic dish helps with even baking and browning. It also affects the texture of your casserole.

The size of the dish matters too. A bigger dish means more food, perfect for parties.

Mixing Bowls

Having different sizes of mixing bowls is a must. They help organize your kitchen and make prep easier. The right bowls make cooking this casserole a breeze.

Measuring Cups and Spoons

Getting the measurements right is critical. Good measuring tools ensure each ingredient is just right. This boosts the casserole’s flavor and consistency.

Using quality measuring tools adds to your satisfaction. For a tasty recipe, check out this cinnamon roll casserole to spark your creativity.

Step-by-Step Preparation Instructions

Making a tasty apple crisp cinnamon roll casserole is easy. Start with the apple prep, which is key to this yummy dessert.

Preparing the Apples

First, wash six Honeycrisp apples well. Peel and slice them evenly for even cooking. This ensures the casserole’s texture is perfect.

For extra flavor, sprinkle cinnamon and nutmeg on the apple slices. This simple step makes the apple crisp recipe even better.

Assembling the Casserole

Now, it’s time to put the casserole together. Start with half the cinnamon rolls at the bottom of a baking dish. Then, add half the spiced apple slices.

Top with half the crisp topping, made from oats and brown sugar. Repeat this layering to mix apples and cinnamon rolls well. This ensures every bite is full of flavor.

Baking Tips

For a great casserole, follow some baking tips. Preheat your oven to 350°F. Wait until it’s hot before baking.

Bake for 30 to 35 minutes. Check with a toothpick to see if it’s done. The top should be crispy. These tips help get the perfect gooey and crispy texture.

Serving Suggestions for Apple Crisp Cinnamon Roll Casserole

Make your breakfast special with creative ways to serve the apple crisp cinnamon roll casserole. This sweet dish is not just tasty but also goes well with other breakfast foods and drinks. It’s perfect for any gathering or special event.

Pairing with Breakfast Items

Choose breakfast items that match the casserole’s rich flavors. You can serve it with:

  • Sausage links for a savory contrast
  • Scrambled eggs for a fluffy addition
  • Fresh fruit to add a refreshing element

These options mix well with the casserole’s sweetness, making a great breakfast spread.

Perfect Beverages

Drinks can make your meal even better. Here are some great choices:

  • Coffee, providing a robust flavor that balances sweetness
  • Apple cider for a thematic touch
  • Mimosas, bringing a festive flair to brunch drinks

Each drink pairs well with the casserole, making your breakfast even more enjoyable.

Garnishing Ideas

Make your dish stand out with presentation ideas. Try these garnishing suggestions:

  • Drizzle caramel sauce or icing on top for extra sweetness
  • Add fresh mint leaves for a pop of color
  • Sprinkle cinnamon sugar for an appealing touch

These garnishes not only look good but also taste great. They make the dish hard to resist.

How to Store and Reheat Leftovers

Storing leftovers right keeps your apple crisp cinnamon roll casserole fresh and tasty. Good storage methods keep the flavor and texture just right. Here are some tips to help you store leftovers well.

Proper Storage Methods

Use airtight containers to store leftovers. This keeps moisture and air out, preventing sogginess. Store it in the fridge for 3-4 days. Place it on a middle shelf for the best temperature.

Best Reheating Techniques

There are ways to reheat leftovers. Microwaving is quick, while oven reheating makes it crispy. For microwaving, cover the dish to trap steam. Heat in short intervals, stirring between each.

If you choose the oven, preheat to 350°F. Cover the dish with foil for 15-20 minutes. Then, uncover it for the last few minutes to crisp the top. These methods keep your casserole delicious, perfect for seconds.

Substitutions and Variations

Making substitutions and trying new things can make the Apple Crisp Cinnamon Roll Casserole even better. You can change it to fit different diets and tastes. Find out how to make it gluten-free, vegan, and add different fruits.

Gluten-Free Alternatives

To make a gluten-free version, use gluten-free flour or rolls. Brands like Bob’s Red Mill have great options. These alternatives let everyone enjoy the dish without gluten worries.

Vegan Options

For a vegan casserole, swap eggs and dairy with plant-based stuff. Almond milk or coconut yogurt are good for cream or milk. Flaxseed meal can replace eggs. This way, vegans can enjoy it too.

Different Fruit Additions

Try adding different fruits to change the taste. Berries like blueberries or raspberries add a nice tartness. Pears add a soft texture and a sweet twist. Using seasonal fruits makes each casserole unique and fresh.

Troubleshooting Common Issues

Baking can sometimes be tricky, leading to common mistakes. It’s important to know how to fix these issues to make the perfect apple crisp cinnamon roll casserole. This guide offers practical solutions for common problems like overcooking, sticking, and flavor imbalances.

Overcooked vs. Undercooked

Telling if your casserole is overcooked or undercooked can be hard. An overcooked casserole is dry and falls apart. An undercooked one is gooey in the middle. To avoid these problems, check if a toothpick inserted in the center comes out clean. Watch the baking time closely, as a few extra minutes can ruin it.

Sticking to the Baking Dish

Sticking is a common issue for bakers. To prevent it, grease your dish well with cooking spray or butter. You can also line it with parchment paper for extra protection. These tips will help you serve your casserole without any hassle.

Flavor Imbalances

Flavor imbalances can make a casserole disappointing. It’s key to fix these to improve your dish. Taste your mixture before baking. If it’s too sweet, a bit of salt or citrus juice can help. Adding spices like cinnamon or nutmeg can also enhance the flavor, making it balanced and enjoyable for all.

Creative Ways to Enjoy Leftovers

Turning leftover apple crisp cinnamon roll casserole into new dishes is exciting. It boosts breakfast and dessert ideas and makes quick snacks. These strategies make mealtime more fun and creative.

Breakfast Ideas

Leftover casseroles are great for breakfast. Try making breakfast sandwiches with casserole and toasted bread. Or, mix it with yogurt, fruits, and granola for a tasty parfait.

This way, you start your day with a delicious, balanced meal.

Desserts

Make leftover casserole into a special dessert. Top vanilla ice cream with crumbled casserole for a cozy treat. Or, blend it into a milkshake for a rich dessert.

These ideas make your desserts a reason to celebrate. They ensure no food is wasted.

Snacks for Later

Leftover casseroles are perfect for quick snacks. Cut them into squares for easy snacks. Pair with dips like cream cheese or fruit spread for extra taste.

These snacks are great for busy days. They’re quick, tasty, and easy to make.

UseDescriptionBenefits
Breakfast SandwichesCrumble the casserole between toasted breadFilling start to the day
Yogurt ParfaitsLayer casserole with yogurt and fruitsHealthy and balanced
Ice Cream ToppingCrumble on top of ice creamWarm and cool contrast
MilkshakesBlend casserole into milkshakesDelicious dessert option
Snack BitesCut into squaresEasy to transport and eat

Seasonal Occasions for Apple Crisp Cinnamon Roll Casserole

The Apple Crisp Cinnamon Roll Casserole is perfect for many occasions. It’s great for fall desserts and festive breakfasts. It’s a hit at family gatherings, holiday celebrations, or cozy brunches, spreading warmth and joy.

Fall Gatherings

Fall gatherings need dishes that capture the season’s spirit. The Apple Crisp Casserole’s warm, spiced flavors are a perfect fit. It fills the air with cinnamon and apple aromas, making everyone feel welcome.

Holiday Breakfasts

Holiday breakfasts are special times to come together. This casserole is a great addition, blending well with autumn recipes. It’s loved for its rich taste and satisfying texture, perfect for festive meals.

Weekend Brunches

Weekend brunches are for enjoying quality time with loved ones. This casserole is a favorite, making meals more enjoyable. It’s easy to make ahead, so hosts can focus on their guests.

User Testimonials and Feedback

Home cooks across the country love the Apple Crisp Cinnamon Roll Casserole. They say it brings warmth and joy to family gatherings. The sweet cinnamon rolls and tart apples create a unique flavor that impresses everyone.

Many have made this casserole a favorite for special occasions. It’s perfect for cozy dinners or festive gatherings. People love the compliments they get when they serve it, making it a treasured recipe.

There’s also a lot of creativity in the community. Cooks have tried adding berries or peaches and shared tips for better flavors. These ideas make the recipe even more special for everyone who tries it.


FAQ

What is an Apple Crisp Cinnamon Roll Casserole?

This dessert combines soft cinnamon rolls with fresh apples. It’s topped with a crunchy crisp. It’s perfect for cozy gatherings, whether as a dessert or a sweet breakfast.

Can I use store-bought cinnamon rolls for this recipe?

Absolutely! Store-bought cinnamon rolls make this recipe quick and easy. Just pick a high-quality brand for the best taste.

What types of apples work best in this casserole?

Granny Smith and Honeycrisp apples are great choices. They add a nice balance of sweet and tart, perfect for the casserole’s rich flavors.

How do I store leftovers from the casserole?

Store leftovers in an airtight container in the fridge. It stays fresh for about 3-4 days.

How can I reheat the leftovers without losing flavor?

Reheat in the oven at 350°F for 15-20 minutes. This keeps the texture and flavor just right.

Can I make this casserole gluten-free?

Yes! Use gluten-free cinnamon rolls and a gluten-free flour substitute for the crisp topping.

What drinks pair well with this dish?

Try warm apple cider, coffee, or mimosas. It’s perfect for autumn gatherings and holiday breakfasts.

How do I make a vegan version of this casserole?

Use plant-based alternatives like almond milk and apple sauce instead of eggs and dairy.

Can I add other fruits to the casserole?

Yes! Add berries or pears to mix up the flavors and add variety to your apple dessert.

Key Lime Pie Rice Treats: Zesty Snack Delight

On a warm summer day, nothing feels as refreshing as a slice of key lime pie. The sweet-tart notes make your taste buds dance. Now, imagine that flavor in a crunchy, easy-to-make treat: Key Lime Pie Rice Treats.

This twist on the traditional rice crispy snack captures the essence of your favorite lime dessert. It brings a zesty kick that’s perfect for gatherings or casual snacking. These crispy rice snacks are a mix of nostalgia and vibrant taste. They’re perfect for summer celebrations!

Key Takeaways

  • Key Lime Pie Rice Treats combine the tangy flavor of key limes with a chewy, crispy texture.
  • These zesty snacks are a fun and innovative twist on the classic rice treat.
  • Perfect for summer gatherings, they add a bright element to any snack table.
  • Making your own treats allows for customization and control over ingredients.
  • These crispy rice snacks are simple to prepare and a delightful way to impress guests.

What Are Key Lime Pie Rice Treats?

Key Lime Rice Treats are a dessert twist on classic rice treats. They mix the flavors of key lime pie with the traditional recipe. This creates a new and exciting dessert option.

They are easy to make and perfect for gatherings, great for the warmer months.

A Delicious Twist on a Classic Dessert

These treats add a zesty citrus flavor to the classic rice treats. Crunchy Rice Krispies, fluffy marshmallows, and graham cracker crumbs make up the mix. Fresh lime juice and zest take the flavor to the next level.

This daring dessert twist makes your snack table stand out. It offers something unique among the usual options.

Key Ingredients That Make It Special

The magic of Key Lime Rice Treats comes from their unique ingredients. Marshmallows and butter are the base, but key lime juice adds a tartness. It’s like a traditional key lime pie in every bite.

Graham cracker crumbs add a summer baking favorite touch. Find the full recipe and more details here.

The History of Rice Treats

Rice treats have a long history that started in the 1930s. The Kellogg Company first made them, and they quickly became a favorite among kids in America. The mix of crispy rice and marshmallows created a classic that many love today.

Origin and Evolution

Over the years, rice treats have changed a lot. At first, they were just a simple mix that people loved. But as tastes changed, so did the treats. Chefs and home cooks started adding things like chocolate and fruits to them.

This made rice treats even more popular. They became trendy snacks that people enjoy today.

Popular Variations Over the Years

There have been many different kinds of rice treats over the years. Some are shaped like pumpkins for Halloween, while others are like s’mores with chocolate and graham crackers. Now, you can even find treats with zesty key lime flavor.

Key Lime Flavor Profile

Key limes have a unique flavor that makes them stand out. They are very tart and have a floral scent. This makes them perfect for desserts like Key Lime Pie Rice Treats.

The Distinctive Taste of Key Limes

Key limes are smaller and more tart than regular limes. Their flavor is intense and adds a zesty kick to dishes. In desserts, their tartness balances out the sweetness of ingredients like marshmallows and butter.

How It Compares to Regular Limes

Key limes and regular limes are different. Regular limes are juicier but lack the flavor of key limes. Key limes are better for recipes that need a strong citrus taste. They make desserts unforgettable and leave a lasting impression.

Benefits of Making Your Own Treats

Making your own treats, like Key Lime Pie Rice Treats, has many advantages. It’s fun and good for your health. You get to pick the ingredients, making your dessert special and satisfying.

Control Over Ingredients

One big plus of making your snacks is controlling the ingredients. Store-bought snacks often have preservatives and additives you might not want. By making your treats, you can use fresh, natural ingredients. This makes your Key Lime Pie Rice Treats healthier and more enjoyable.

Healthier Alternatives to Store-Bought Options

More people are looking for healthier dessert options. Homemade snacks are a great way to get them. Store-bought snacks can have hidden sugars and fats. Making your own treats means you can avoid these and choose healthier ingredients.

Essential Ingredients for Key Lime Pie Rice Treats

To make the perfect Key Lime Pie Rice Treats, you need to know the key ingredients. Each part is important for the taste and texture. You can also add fun mix-ins for extra flavor.

Marshmallows and Butter

The base of these treats is marshmallows and butter. Marshmallows add sweetness and chewiness. Butter makes them richer and creamier. Together, they create a delicious bite that goes well with lime.

Key Lime Juice and Zest

Key lime juice and zest make these treats special. The juice adds a tangy taste that balances the marshmallows. The zest adds a fresh aroma that boosts the flavor. This mix makes the treats stand out.

Optional Mix-Ins for Extra Flavor

You can make your treats even better with mix-ins. Try adding graham cracker crumbs for a pie-like crust or white chocolate chips for sweetness. Coconut flakes add a nice texture. These extras make each batch unique.

IngredientFunction
MarshmallowsProvide sweetness and chewy texture
ButterAdds richness and creaminess
Key Lime JuiceDelivers acidity and brightness
Key Lime ZestEnhances aroma and flavor
Optional Mix-Ins (Graham Cracker Crumbs, White Chocolate, Coconut)Adds unique flavor and texture

Step-by-Step Recipe for Making These Treats

Making your own Key Lime Pie Rice Treats is a fun twist on a classic. Follow these steps to learn how to make rice treats that taste like key lime pie. Each step is important for getting the right mix of flavors and textures.

Preparing the Base

Begin by melting butter in a big saucepan over low heat. Once it’s melted, add marshmallows and stir until they’re smooth. Then, mix in crispy rice cereal and crushed graham crackers. Make sure everything is well mixed for a solid base. This is the start of your Key Lime Pie Rice Treats.

Adding the Zesty Flavoring

Now, add the key ingredient: key lime juice and zest. Mix these into your mix for a zesty kick. Use fresh lime zest for the best flavor. Mix well to spread the zest evenly. This makes the rice treats truly special.

Setting and Serving Instructions

Put the mix into a greased pan and press it down to make an even layer. Let it sit at room temperature for about 30 minutes to set. For a nice touch, drizzle melted white chocolate with lime zest on top. Once it’s set, cut into squares and serve. These treats are perfect for any occasion and bring back childhood memories. For more ideas, check out this Key Lime Pie Rice Treats recipe.

Tips for Perfect Key Lime Pie Rice Treats

Making Key Lime Pie Rice Treats requires the right texture and flavor balance. Here are some tips to help you achieve perfection. Focus on heating methods, ingredient ratios, and flavor adjustments for the best zesty snack.

Achieving the Right Texture

The texture of your Key Lime treats is key. Start by melting marshmallows carefully; too long and they become sticky. Heat slowly and stir constantly for a smooth mix.

When mixing with Rice Krispies, make sure it’s even. Let the mix cool a bit before shaping. This helps it hold its shape better.

Balancing Sweetness and Tartness

Getting the sweetness and tartness just right is important. Key lime juice adds zing, while marshmallows add sweetness. Start with a little key lime juice and add more as needed.

This way, you can control the flavor. Adding lime zest is a great idea too. It boosts the flavor and adds a nice aroma.

For a detailed guide on making these treats, check out this recipe. By following these tips, you’ll get a snack that’s both delicious and refreshing, perfect for any time.

Decorating Your Key Lime Pie Rice Treats

Turning your Key Lime Pie Rice Treats into stunning desserts is all about decorating. This part will show you how to make your treats look amazing. You’ll learn about garnishing and presentation to make them the star of any event.

Garnishing Ideas

Start with garnishing ideas that boost both taste and looks. Here are some suggestions:

  • Drizzle with melted white chocolate for a rich contrast.
  • Top with fluffy whipped cream to add a creamy element.
  • Sprinkle lime zest over each square for a fresh burst of color.
  • Add slices of key lime or fresh mint leaves for a touch of elegance.

Creative Presentation Tips

Impress your guests with creative presentation. Place your treats on a colorful platter or stack them with twine for a rustic vibe. Use fancy cupcake liners or mini dessert cups for a cute display. Dessert styling can turn simple treats into beautiful culinary works of art.

Storage and Shelf Life

Storing your Key Lime Pie Rice Treats right is key to enjoying them fully. Knowing how to store them keeps them fresh and extends their life. By following some simple food storage tips, your treats will stay tasty and fresh for longer.

How to Store Your Treats

To store rice treats well, put them in an airtight container. This stops air from drying them out or making them stale. If you have a big batch, slice them into single portions. This makes it easy to grab one when you want it.

Store the container in a cool, dry place like a pantry. But, if it’s hot outside, refrigeration helps keep them fresh longer.

Best Practices for Maximum Freshness

To keep your Key Lime Pie Rice Treats tasting great and feeling right, follow these tips:

  • Always use airtight containers for storing rice treats.
  • Keep treats away from direct sunlight and heat sources.
  • For added freshness, consider placing a piece of bread inside the container; it helps absorb excess moisture.
  • Consume stored treats within a week for the best taste and texture.

Perfect Occasions for Key Lime Pie Rice Treats

Key Lime Pie Rice Treats are perfect for many joyful celebrations. Their zesty flavor adds a fresh twist to any occasion. They’re great for both casual gatherings and grand events, making the dessert table pop.

Summer Parties and Picnics

Light and refreshing snacks are a must in the summer. Key Lime Pie Rice Treats are perfect for outdoor events. Their zesty flavor is a hit on sunny days, impressing guests at the beach, park, or backyard.

Celebratory Events and Gatherings

These treats are also great for birthdays, anniversaries, or reunions. The key lime zest adds a bright touch, fitting right into the festive vibe. Kids and adults love them, making them a hit at family gatherings. Their look and taste create lasting memories.

OccasionSuitability of Key Lime Pie Rice TreatsComplementary Foods
Summer PicnicsRefreshing snack for warm weatherFresh fruits, lemonade
Birthday PartiesAdds a unique dessert optionCake, ice cream
Family ReunionsPopular among all age groupsCharcuterie boards, finger foods
Outdoor GatheringsEasy to transport and serveSandwiches, chips

Key Lime Pie Rice Treats are a crowd-pleaser at any event. Their versatility and refreshing taste make any gathering memorable, leaving everyone happy and full.

Pairing Suggestions

Choosing the right drinks and snacks can make Key Lime Pie Rice Treats even better. These tips will help make your snack time unforgettable.

Beverages That Complement the Treats

For a perfect match, try refreshing drinks. Sweet tea balances the sweetness, while iced lemonade adds a tangy touch. For something bubbly, a mojito with mint is a great choice. These drinks will enhance your treat experience.

Other Snacks That Go Well Together

Adding more snacks to your Key Lime Pie Rice Treats can make it even better. Try pairing with cucumber sandwiches or crunchy tortilla chips with zesty salsa. Guacamole adds a creamy touch that’s perfect with the treats. These snacks will add variety and flavor to your snack time.

BeverageTaste ProfileSnack Combo
Sweet TeaSweet with a hint of bitternessCucumber Sandwiches
Iced LemonadeTart and refreshingTortilla Chips with Zesty Salsa
MojitoMinty and refreshingGuacamole

For more tasty ideas, visit this Key Lime Pie Rice Treats recipe.

Conclusion: Why You’ll Love Key Lime Pie Rice Treats

Key Lime Pie Rice Treats are more than just a dessert. They’re a refreshing addition to any snack table. Their zesty flavor and unique texture make them stand out. The bright taste of key limes adds a twist that’s both satisfying and irresistible.

These treats are easy to make, making them perfect for anyone. You can enjoy them at gatherings, picnics, or just a cozy night at home. Their simplicity means you can indulge without hassle.

These snacks offer a perfect mix of sweetness and tang. They leave a lasting impression, whether shared with others or enjoyed alone. Try this recipe and see why they’re a favorite in many homes!


FAQ

What makes Key Lime Pie Rice Treats different from regular rice treats?

Key Lime Pie Rice Treats are special because they have key lime juice and zest. This gives them a tangy taste. It makes the treats a zesty delight for those who love a bit of tartness.

Can I use regular limes instead of key limes?

You can use regular limes, but key limes add a deeper tartness. They make the treats more flavorful. If using regular limes, adjust the juice to get the right tanginess.

How do I ensure the right texture for my rice treats?

For the perfect texture, melt the marshmallows slowly and stir well. Use enough butter to keep them chewy. Make sure the mixture is well-combined before setting it in the pan.

What mix-ins can I add to my Key Lime Pie Rice Treats?

You can add mix-ins like graham cracker crumbs for a pie crust taste. Coconut flakes or white chocolate chips also work well. These add a unique twist to your treats.

How do I store Key Lime Pie Rice Treats to maintain freshness?

Keep them in an airtight container at room temperature. Refrigeration also works for longer freshness. This keeps them chewy and zesty.

What events are best for serving Key Lime Pie Rice Treats?

They’re great for summer parties, picnics, and celebrations. Their refreshing taste is perfect for outdoor events and family gatherings. They add a zestful touch to any snack table.

Can I make these treats ahead of time?

Yes, you can make them a day or two in advance. Just store them properly to keep them fresh until serving.

What’s a good drink pairing for Key Lime Pie Rice Treats?

Pair them with sweet tea, iced lemonade, or a mojito for fun. These drinks enhance the treats’ zesty flavor, making for a great snacking experience.

Potato and Bacon Soup – The Ultimate Creamy and Smoky Comfort Food

As the leaves change and the air cools, we often crave comfort food. Imagine a cozy kitchen filled with the smell of sizzling bacon. It brings back memories of family dinners. This is what Potato and Bacon Soup is all about.

It’s not just a meal; it’s an experience. The creamy and smoky flavors mix with fresh potatoes, making a comforting bowl. It’s perfect for chilly evenings. Whether you’re an experienced cook or new to the kitchen, this recipe is easy to follow. For a delicious dish, try this savory recipe that will become a favorite.

Key Takeaways

  • Potato and Bacon Soup combines creamy and smoky flavors for a comforting experience.
  • This dish is quick and easy to prepare, making it perfect for any skill level.
  • It’s ideal for cool fall and winter evenings, creating warmth and joy.
  • The recipe can easily be customized for various dietary preferences.
  • Pair it with crusty bread for a hearty meal that enhances its flavors.

What Makes Potato and Bacon Soup So Special?

The Potato and Bacon Soup is loved by many for its unique qualities. It has a great flavor mix, a creamy texture, and is very versatile. This soup is a favorite comfort dish for many people.

The Perfect Flavor Combination

The dish’s core is a perfect flavor mix. Bacon’s salty, smoky taste goes well with potatoes’ sweetness. This mix creates a taste that stays with you, making each bite a joy. It’s a favorite among many.

Creamy Texture That Comforts

The creamy texture adds to the soup’s comfort. It’s made smooth by blending, feeling rich on your tongue. This makes it a warm, satisfying meal for cold nights.

Versatile and Easily Customizable

This soup is great because it can be changed to fit anyone’s taste. You can add herbs, spices, or veggies as you like. It’s easy to make it your own, whether for a family dinner or a special meal.

Essential Ingredients for Your Soup

To make the perfect Potato and Bacon Soup, focus on key ingredients. These enhance flavor and texture. The right mix turns this dish into a cozy meal that pleases everyone.

Fresh Potatoes You Should Use

For your soup, choose Russet or Yukon Gold potatoes. They’re high in starch, making the soup creamy and tasty. Cut the potatoes evenly so they cook well and blend smoothly.

Choosing the Right Type of Bacon

The type of bacon you pick is key to flavor. Go for thick-cut applewood smoked bacon for a smoky taste. This bacon adds a nice crunch and depth to the soup. Cook it until crispy for the best flavor.

Additional Flavor Boosters

Adding certain ingredients can make your soup even better. Try garlic, onions, vegetable broth, and fresh herbs like thyme or parsley. They add depth and brightness, making the soup even more enjoyable.

Step-by-Step Guide to Making Potato and Bacon Soup

Making a delicious potato and bacon soup needs careful steps. Follow this guide to make a comforting bowl that warms your heart.

Preparing the Ingredients

Start with fresh ingredients for the best taste. Wash and dice your potatoes into even cubes. Chop the bacon and your aromatic base, including onions and garlic. This prep is key for a smooth cooking process and better flavor.

Cooking Techniques for Maximum Flavor

The right cooking techniques make this dish special. Start by sautéing the chopped bacon in a large pot. This step makes the fat flavorful, creating a tasty base for the soup. When the bacon is crispy, add the onions and garlic, stirring until they’re soft and fragrant.

Then, add the diced potatoes and broth. Let it simmer gently. This helps all the flavors mix well together.

Blending for Creaminess

To get that creamy texture, blending is key. Once the potatoes are tender, use an immersion blender to purée the soup until smooth. This turns the ingredients into a rich, hearty comfort food that’s hard to resist.

IngredientPreparation Method
PotatoesDiced into cubes
BaconChopped and sautéed
OnionsChopped
GarlicMincing
BrothAdded for simmering

Tips for Perfecting Your Potato and Bacon Soup

Making a great Potato and Bacon Soup takes a few important steps. First, get the right consistency. Then, make sure the flavors mix well. Lastly, know how to store leftovers.

Achieving the Right Consistency

The soup’s texture is key. For a thicker soup, simmer it longer or use less liquid. This method lets the flavors blend and creates a creamy base that everyone will love.

Balancing Flavors and Seasoning

Getting the flavors right is an art. Start with a little salt and pepper, tasting as you go. Adding a bit of lemon juice at the end can really enhance the taste. It makes the smoky bacon and potatoes shine.

Storing Leftovers Effectively

Properly storing leftovers is vital. Cool the soup down before putting it in airtight containers. It will stay good in the fridge for up to three days. For longer storage, freeze it. This way, you can enjoy a warm meal whenever you want.

Healthier Alternatives to Classic Ingredients

Enjoying potato and bacon soup can be a challenge. It’s about finding a balance between taste and health. There are many Healthier Alternatives that can make your soup better without losing flavor. These changes are great for those who care about their health and want to try something new.

Lightening Up the Cream Base

Switching to a Light Cream Base can cut down calories while keeping it creamy. Try using half-and-half or low-fat cream instead of heavy cream. This way, you get a rich taste without feeling guilty.

Using Turkey Bacon for a Leaner Dish

Turkey Bacon is a great swap for regular bacon. It has the smoky taste you love but with less fat. This change reduces calories and keeps the dish satisfying, proving healthy food can be tasty too.

Incorporating More Vegetables

Adding Extra Vegetables like spinach, carrots, or celery makes the soup healthier. These veggies add important vitamins and minerals. They also make the soup look and feel more substantial, keeping it comforting and nutritious.

Pairing Suggestions for Your Soup

Enjoying potato and bacon soup is even better with the right sides. Choosing the right pairings can make each bite more flavorful. You can pick from a variety of options, like bread for dipping, salads, and wine.

Bread Choices for Dipping

Choosing the right bread is key for dipping into potato and bacon soup. Crusty baguettes, fluffy ciabatta, or warm biscuits are great choices. They soak up the soup’s flavors and add a nice texture.

Enjoy dipping and savoring each bite. It makes the soup even more satisfying.

Salads That Complement the Dish

Adding a fresh salad can make your meal complete. A simple green salad with light vinaigrette adds zest. A Caesar salad brings a creamy element that matches the soup’s texture.

These salads make your meal well-rounded. They enhance your dining experience.

Wine and Beverage Pairings

Pairing wine with potato and bacon soup can elevate the flavors. A light Chardonnay or a delicate Pinot Noir works well. They balance the soup’s richness and bring out the bacon’s smoky flavors.

For a non-alcoholic option, try sparkling water with lemon. It adds a refreshing touch to your meal.

Creative Twists on Traditional Recipes

Innovation in the kitchen can breathe new life into classic dishes. The Potato and Bacon Soup is a great example. By trying new ingredients, you can make this comforting soup even better.

Adding Different Cheeses for Flavor

Adding various cheeses can really boost your soup’s flavor. Cheddar, gouda, and pepper jack each add something special. They make the soup richer and creamier. Don’t forget to add cheeses to your recipe.

Incorporating Spices for Extra Heat

Seasoning can totally change a dish. Spices like cayenne pepper or smoked paprika add warmth and depth. A little of these spices can make each spoonful exciting. Explore your spice cabinet for new flavors.

Seasonal Variations to Try

Using seasonal produce keeps your recipe fresh. In fall, butternut squash adds sweetness and color. Spring brings fresh herbs that brighten the soup. Adding seasonal variations makes cooking fun all year.

Cheese TypeFlavor ProfileIdeal for
CheddarSharp and CreamyClassic Comfort
GoudaSmoky and SweetRichness Boost
Pepper JackSpicy and CreamyHeat Lover’s Delight

Serving Suggestions for Special Occasions

Make Potato and Bacon Soup the main event at your gathering. It turns into a highlight at Dinner Parties with the right Serving Suggestions. Creative presentation and garnishes will impress your guests.

Making It a Star at Dinner Parties

Use elegant bowls to serve this soup. Add fresh chives or truffle oil for flavor and style. Finely chopped herbs can make it even more special.

Creative Toppings to Impress Guests

Try Creative Toppings like crispy onions or shredded cheese. They add crunch and flavor. Let guests choose their toppings for a personalized bowl.

Kid-Friendly Modifications

Make it fun for kids by adding crunchy tortilla chips. For a smooth soup, blend it well. These changes make mealtime fun for everyone.

For more ideas, visit this Potato and Bacon Soup resource. Create memorable moments with this customizable soup!

Conclusion: Embracing Comfort with Every Bowl

As we wrap up our journey with Potato and Bacon Soup, it’s clear this dish is all about sharing warmth. Each bowl is more than just food; it’s a way to connect with those we love. It invites us to come together, enjoy the taste of comfort, and celebrate life’s little joys.

Family recipes, like this soup, are a treasure trove of tradition and memories. They tell stories of generations, with each cook adding their own twist. It’s in these moments that we truly find comfort, enjoying flavors and togetherness.

This soup is also incredibly versatile. You can stick to the classic recipe or get creative. Every time you make it, you might discover something new. So, grab your ingredients and make this recipe your own. Turn a beloved dish into a personal masterpiece that keeps family traditions alive.


FAQ

What type of potatoes are best for Potato and Bacon Soup?

Starchier potatoes like Russet or Yukon Gold are best. They make the soup creamy and hold their shape well.

Can I make Potato and Bacon Soup ahead of time?

Yes, you can make it ahead. Store it in the fridge for up to three days or freeze it for longer. Cool it first before putting it in containers.

How can I make my soup healthier without losing flavor?

Use turkey bacon for a leaner soup. Swap heavy cream for half-and-half or light cream. Adding more veggies also boosts nutrition without losing flavor.

What are some creative toppings I can use for Potato and Bacon Soup?

Try crispy fried onions, fresh chives, shredded cheese, or truffle oil. They add flavor and make it look great.

What types of bread pair well with Potato and Bacon Soup?

Crusty baguettes, buttery biscuits, or soft dinner rolls are perfect. They soak up the soup’s creamy and smoky flavors well.

Can I add extra ingredients to the soup for more flavor?

Yes! Adding cheddar or gouda cheese and spices like cayenne pepper or smoked paprika can add depth. Seasonal veggies also add variety.

Is Potato and Bacon Soup suitable for freezing?

Yes, it freezes well. Cool it completely before freezing in airtight containers. It stays good for months.

What’s the best way to achieve a creamy texture?

Blend the soup after cooking for a creamy texture. Use an immersion blender or a regular blender in batches for smoothness.

How can I balance the flavors in my soup?

Taste and adjust as you go. Add salt, pepper, and lemon juice at the end. This ensures a balanced flavor.