Creamy Slow Cooker Chicken Mushroom Wild Rice Soup

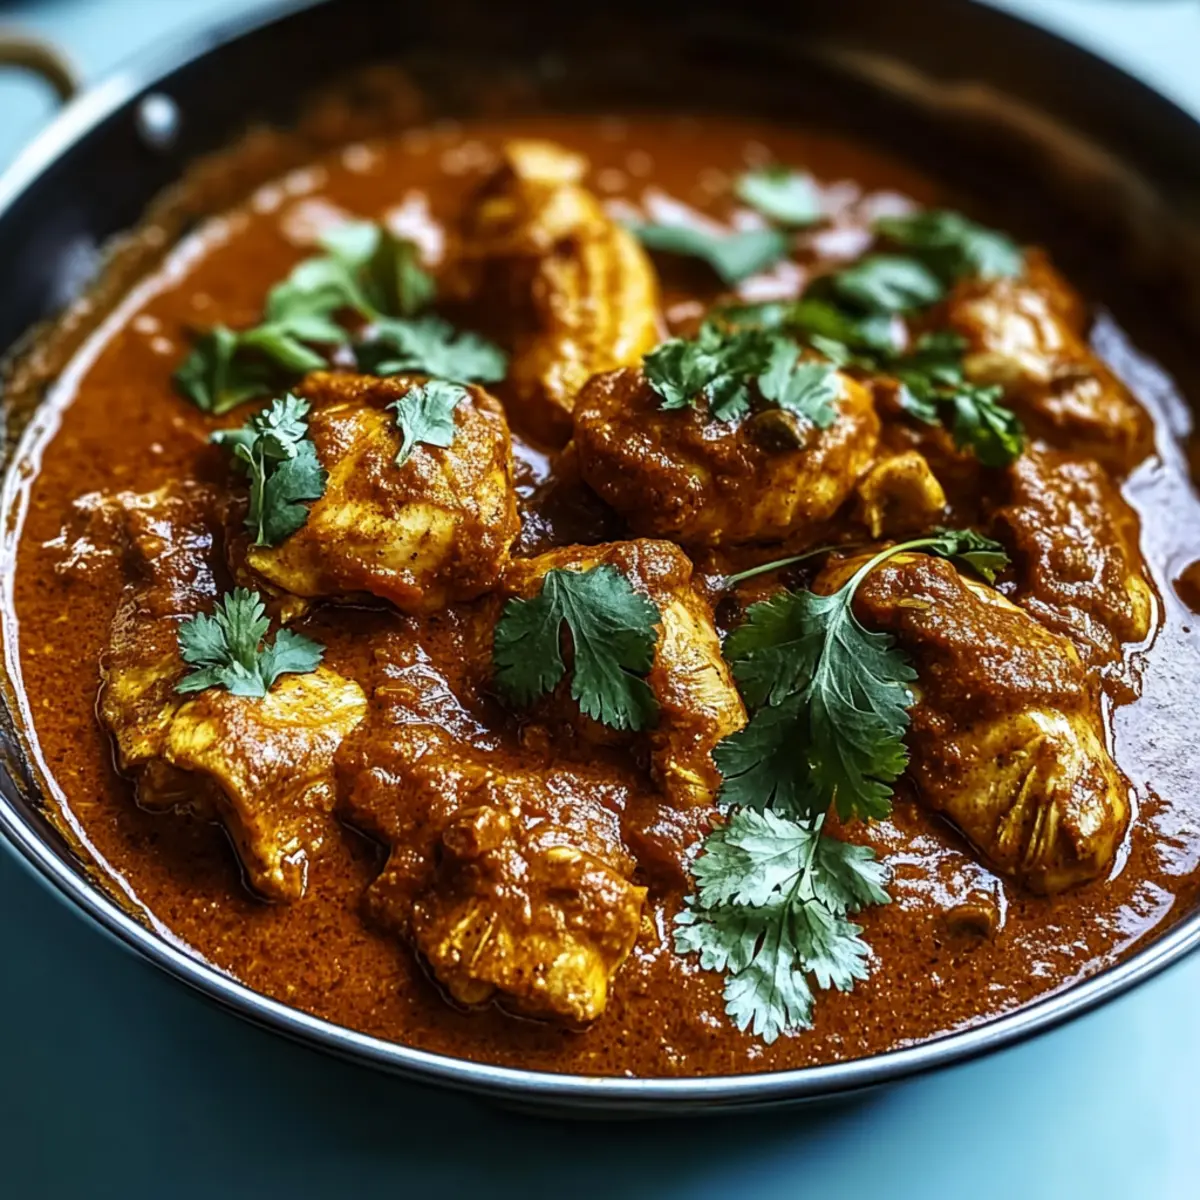
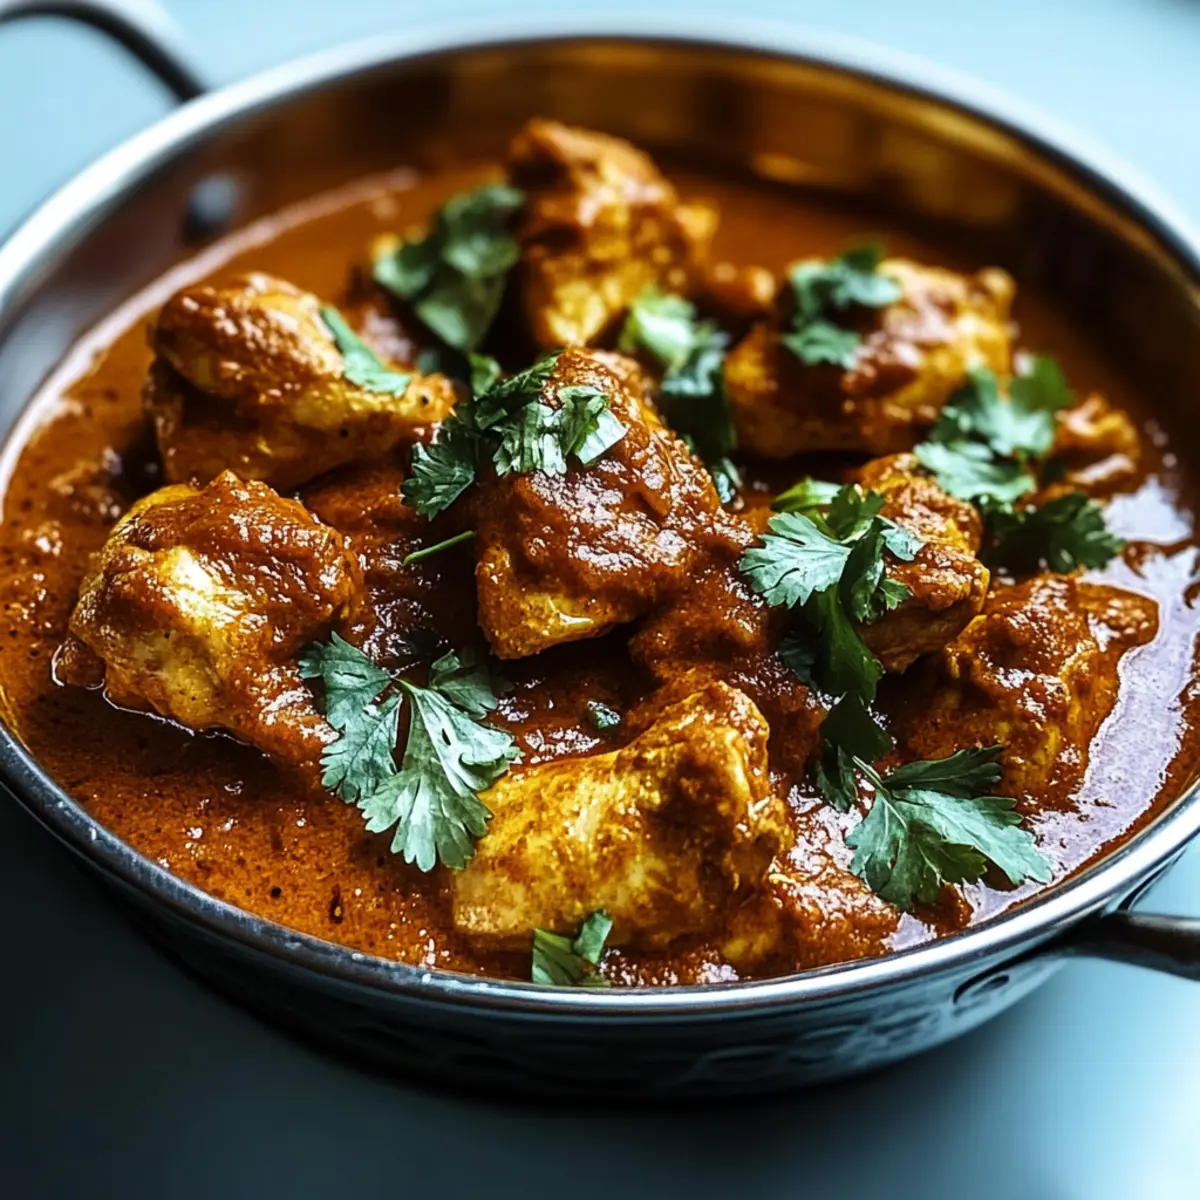
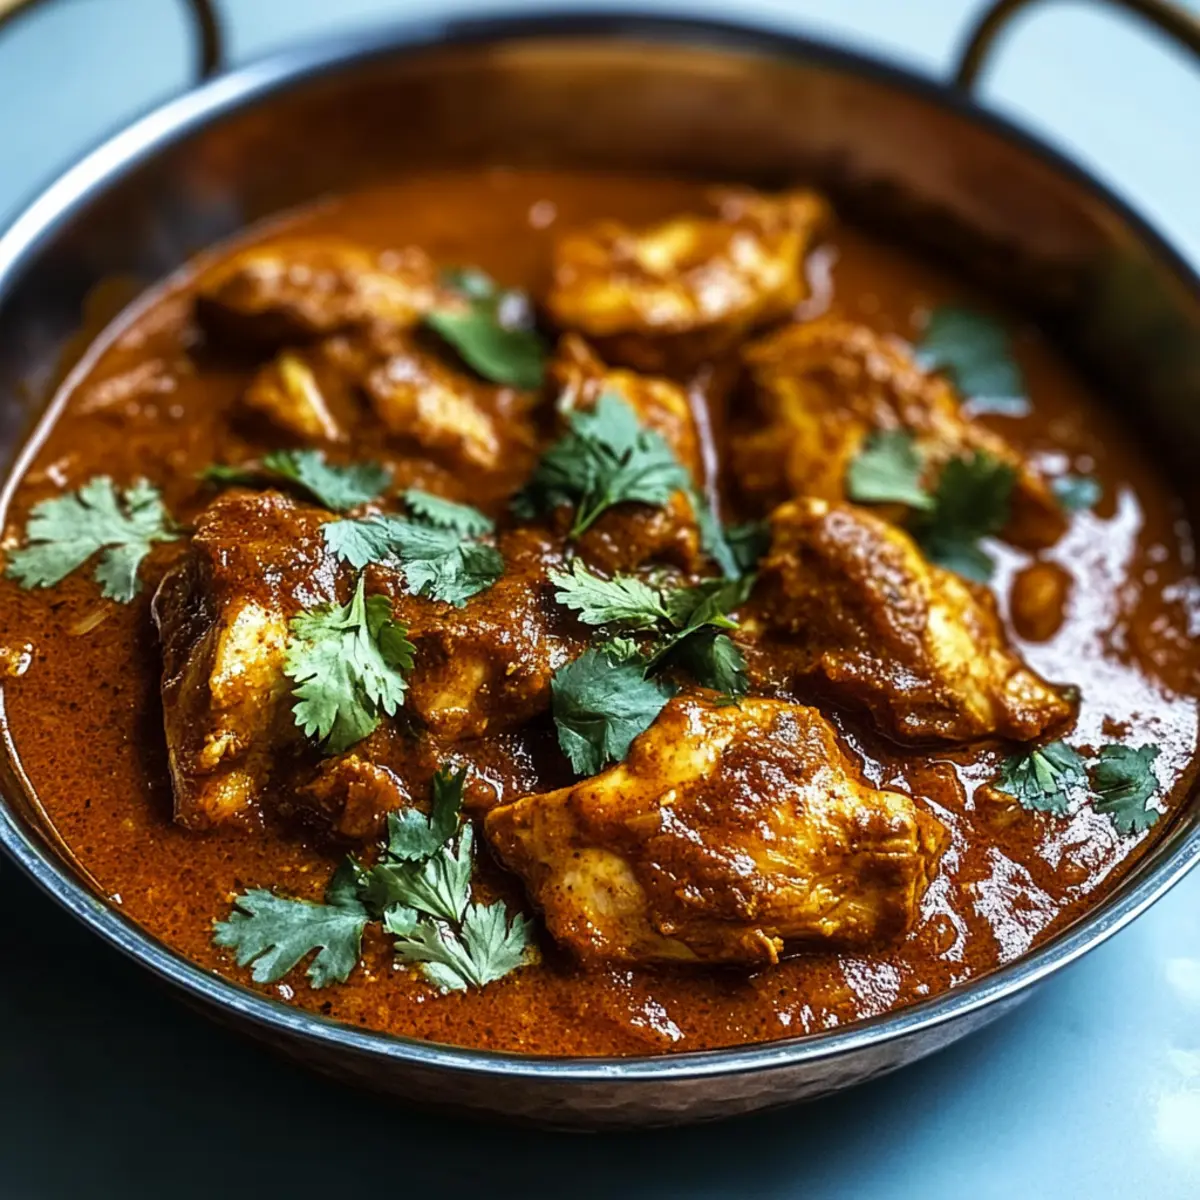
In the midst of a busy week, I uncovered a time-saving gem that transformed our dinner routine: the Creamy Crockpot Chicken Mushroom Wild Rice Soup. This comforting dish is a heartfelt reminder of cozy nights spent with family, enveloped in warmth and rich flavors. With just a handful of ingredients and a slow cooker doing all the work, I couldn’t believe how simply it melds the tender chicken, earthy mushrooms, and wholesome wild rice into a delightful symphony of flavor. Not only does it require minimal prep, but it also warms you from the inside out, making it perfect for chilly evenings or stress-free gatherings. As the aromas fill your kitchen, I can’t help but wonder—how will you customize this recipe to make it your own?

Why is this soup a must-try?

Simplicity: With just a few ingredients, this recipe allows anyone to whip up a delightful meal effortlessly.
Comforting Warmth: Each bowl offers heartwarming flavors that remind you of cozy family dinners.
Versatile Customization: Add your favorite vegetables or spices to make this soup uniquely yours!
Effortless Prep: Just toss everything in the slow cooker, and let it work its magic while you go about your day.
Crowd-Pleasing Appeal: Ideal for gatherings, this creamy soup will leave your guests asking for seconds—pair it with some warm crusty bread for a complete experience.

Creamy Slow Cooker Chicken Mushroom Wild Rice Soup Ingredients

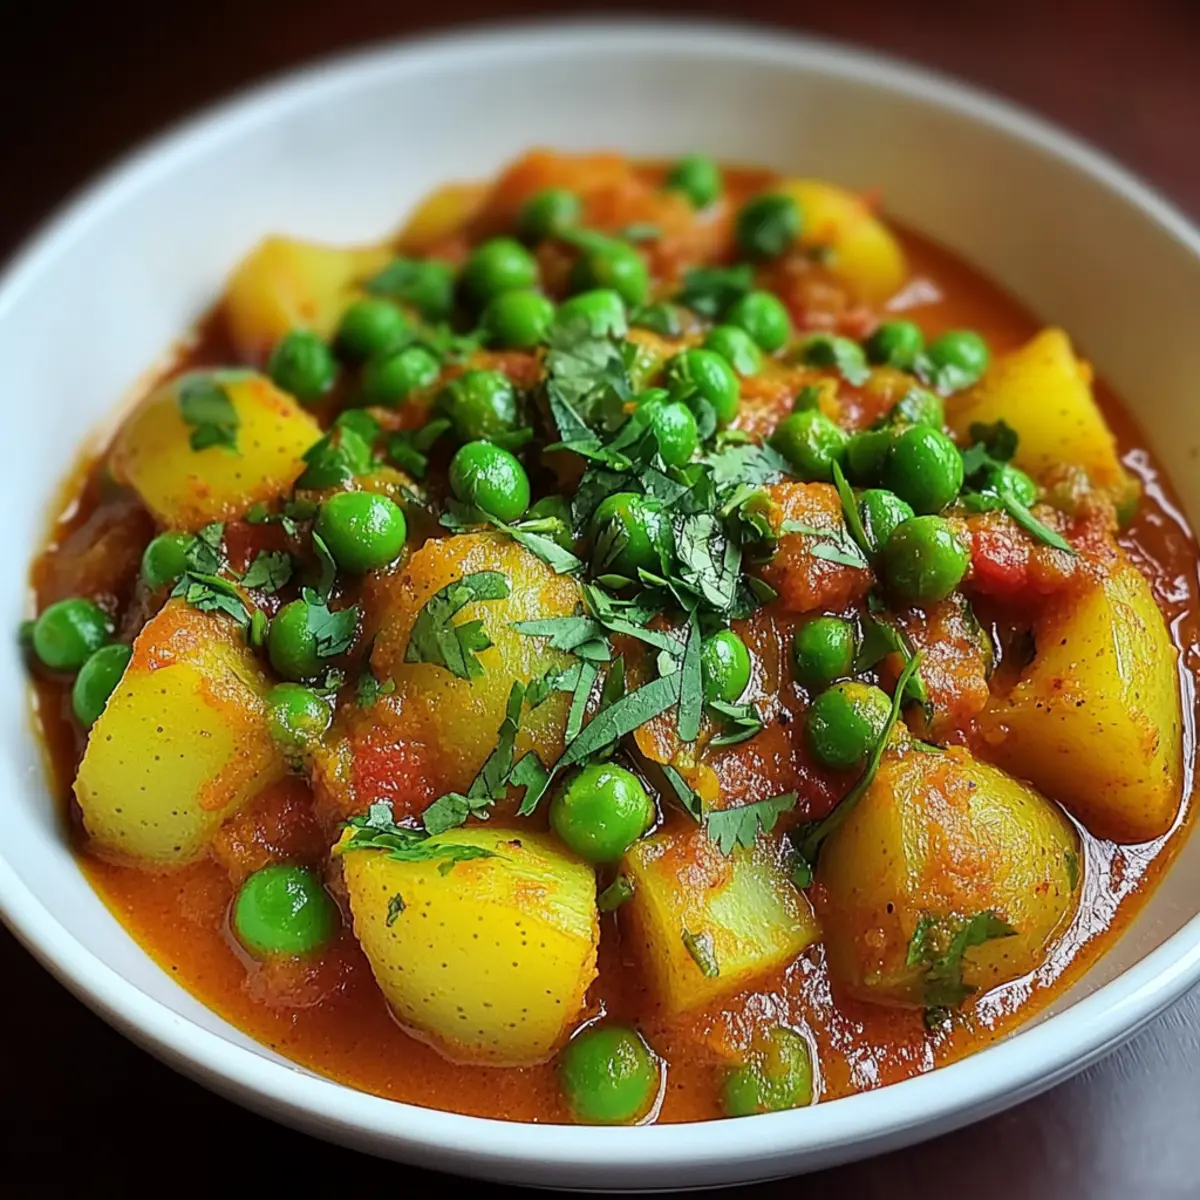
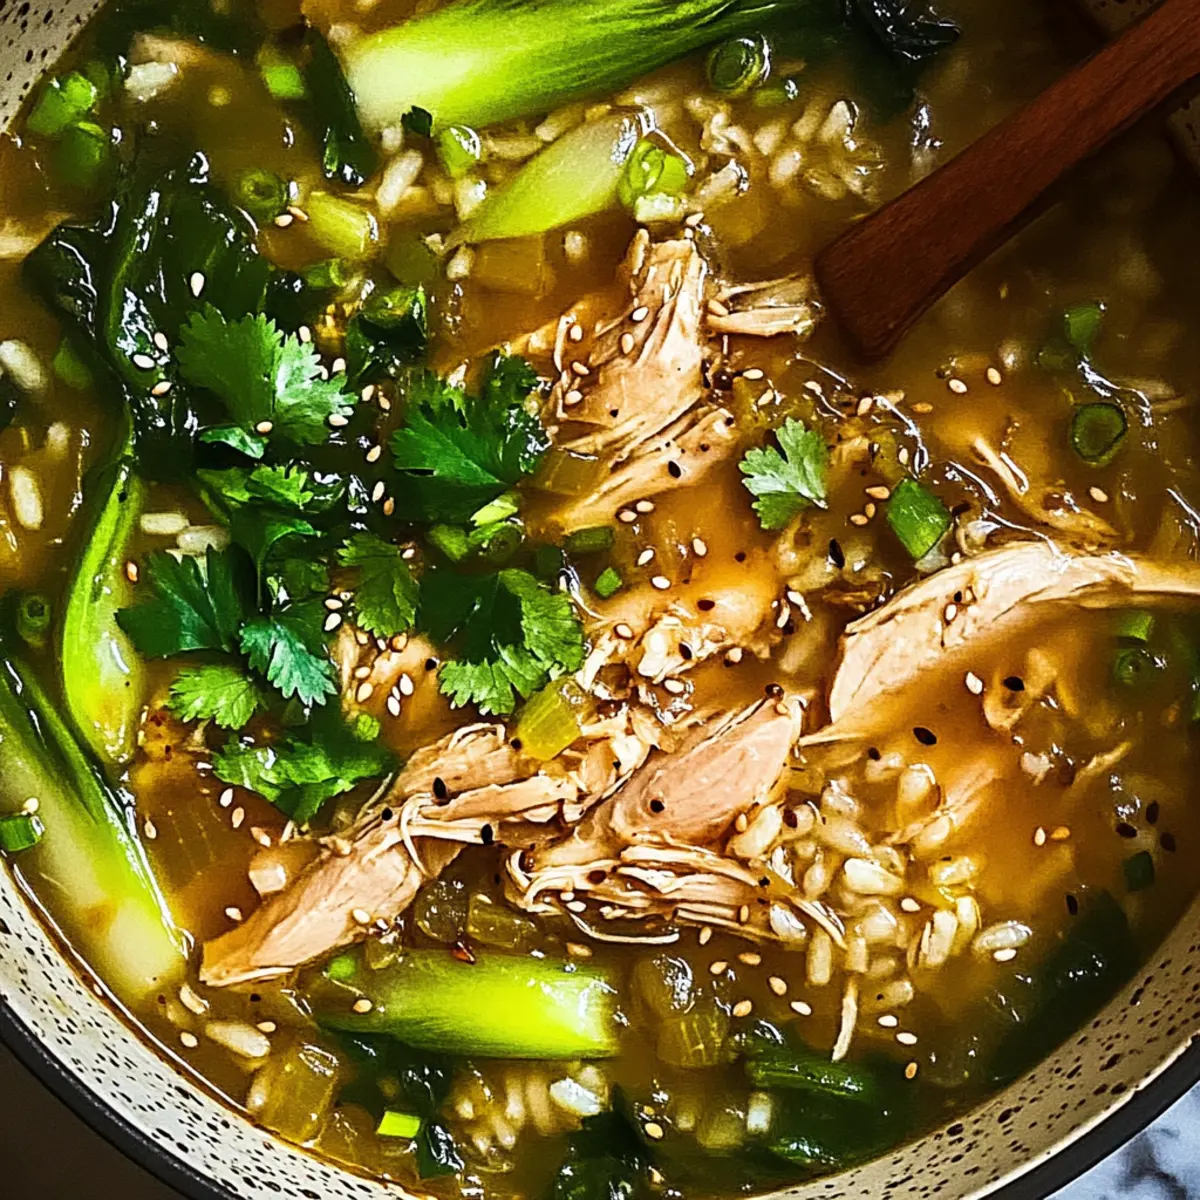
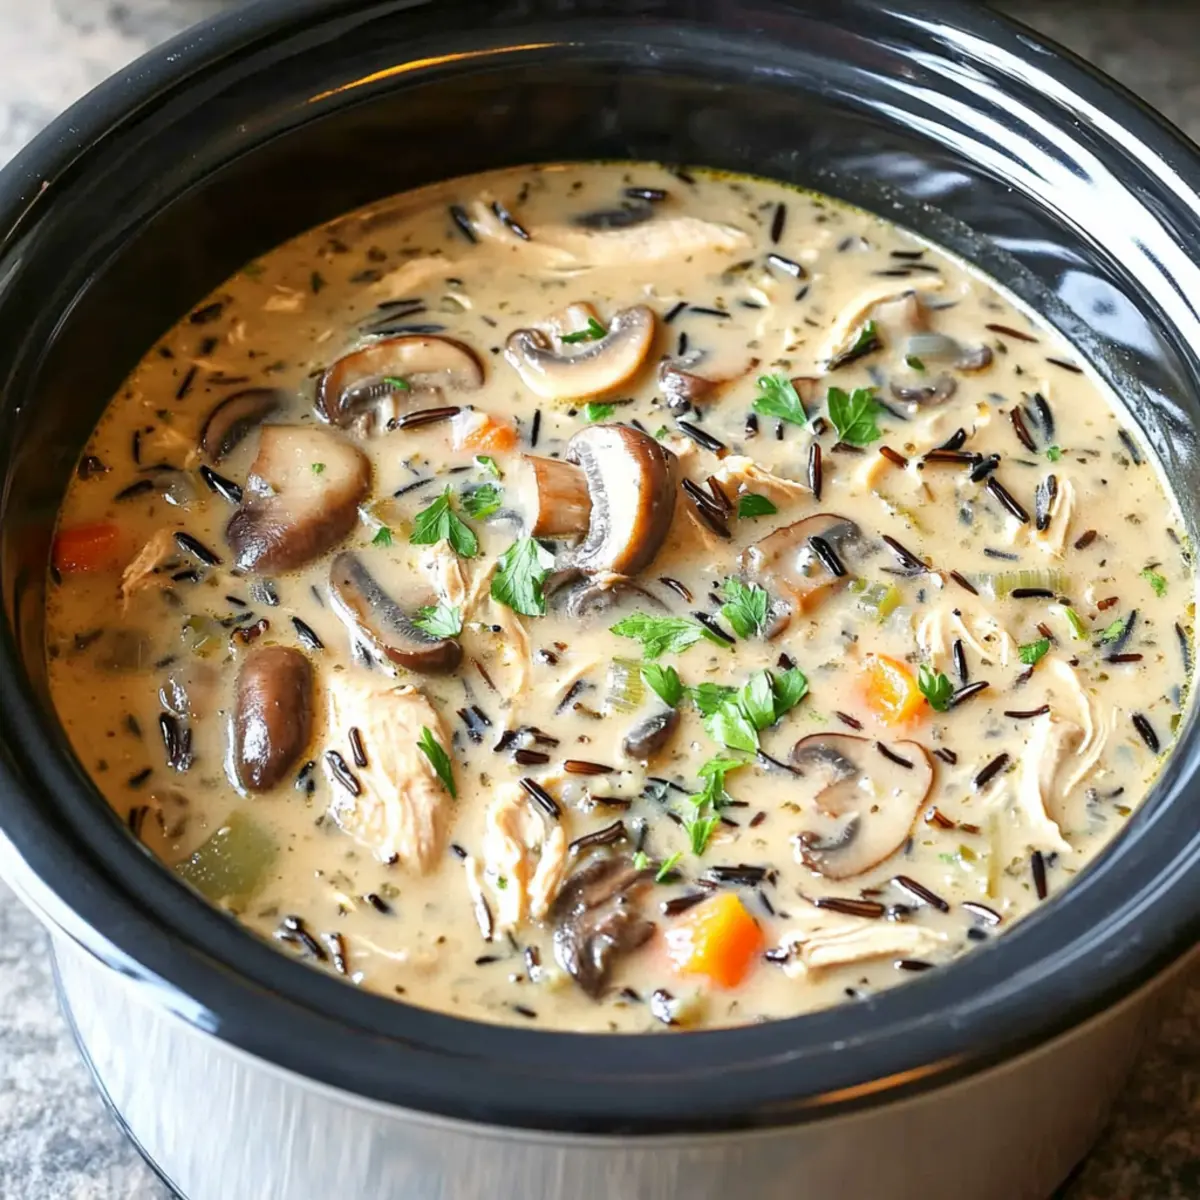
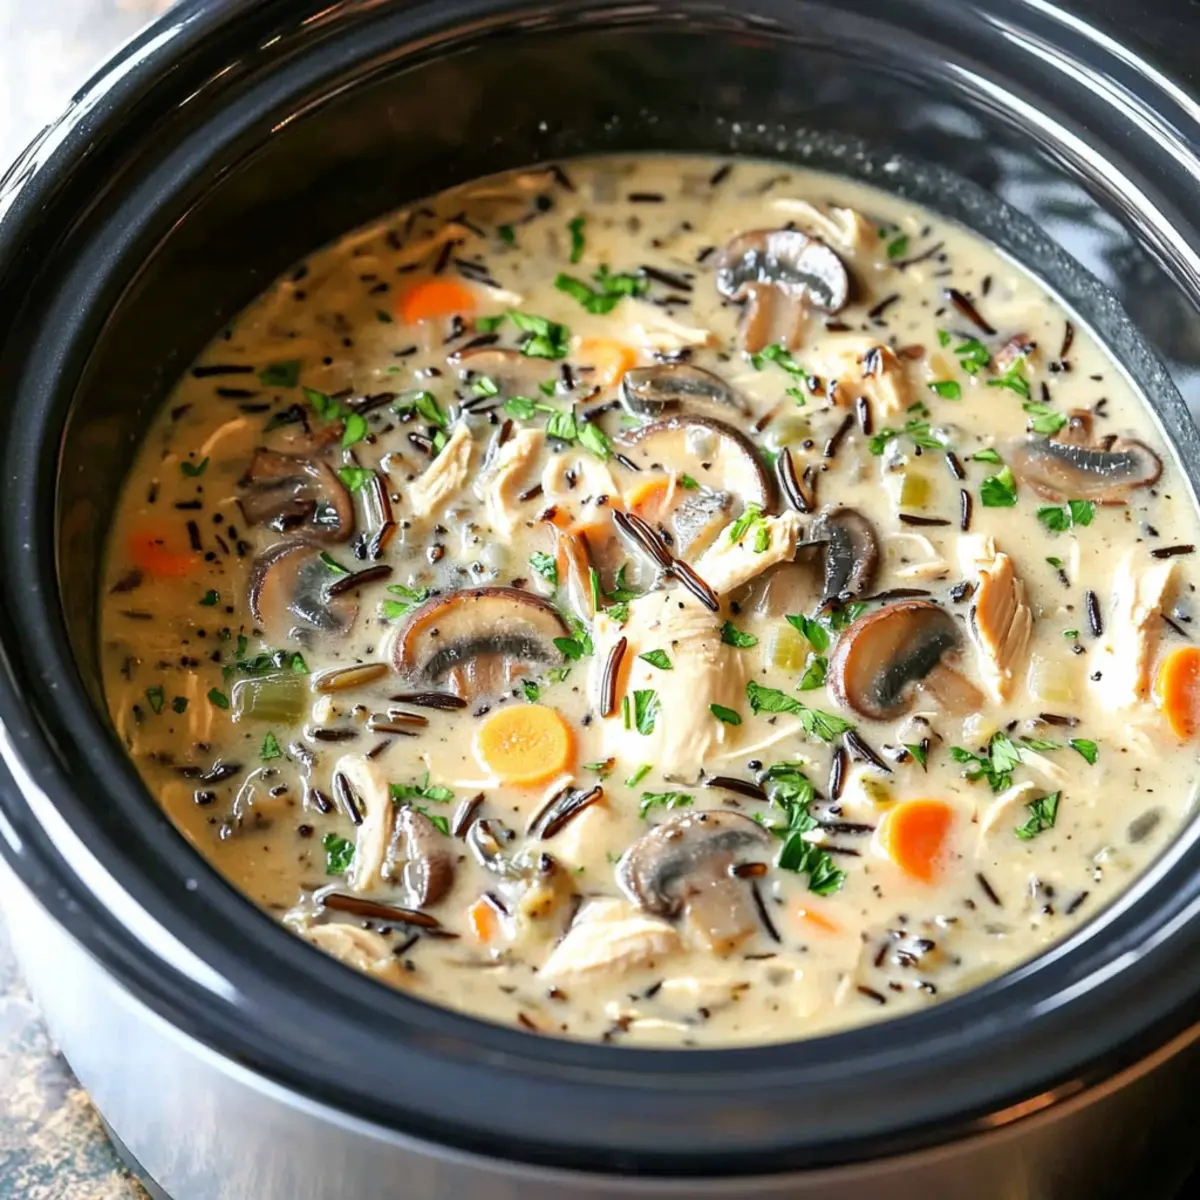
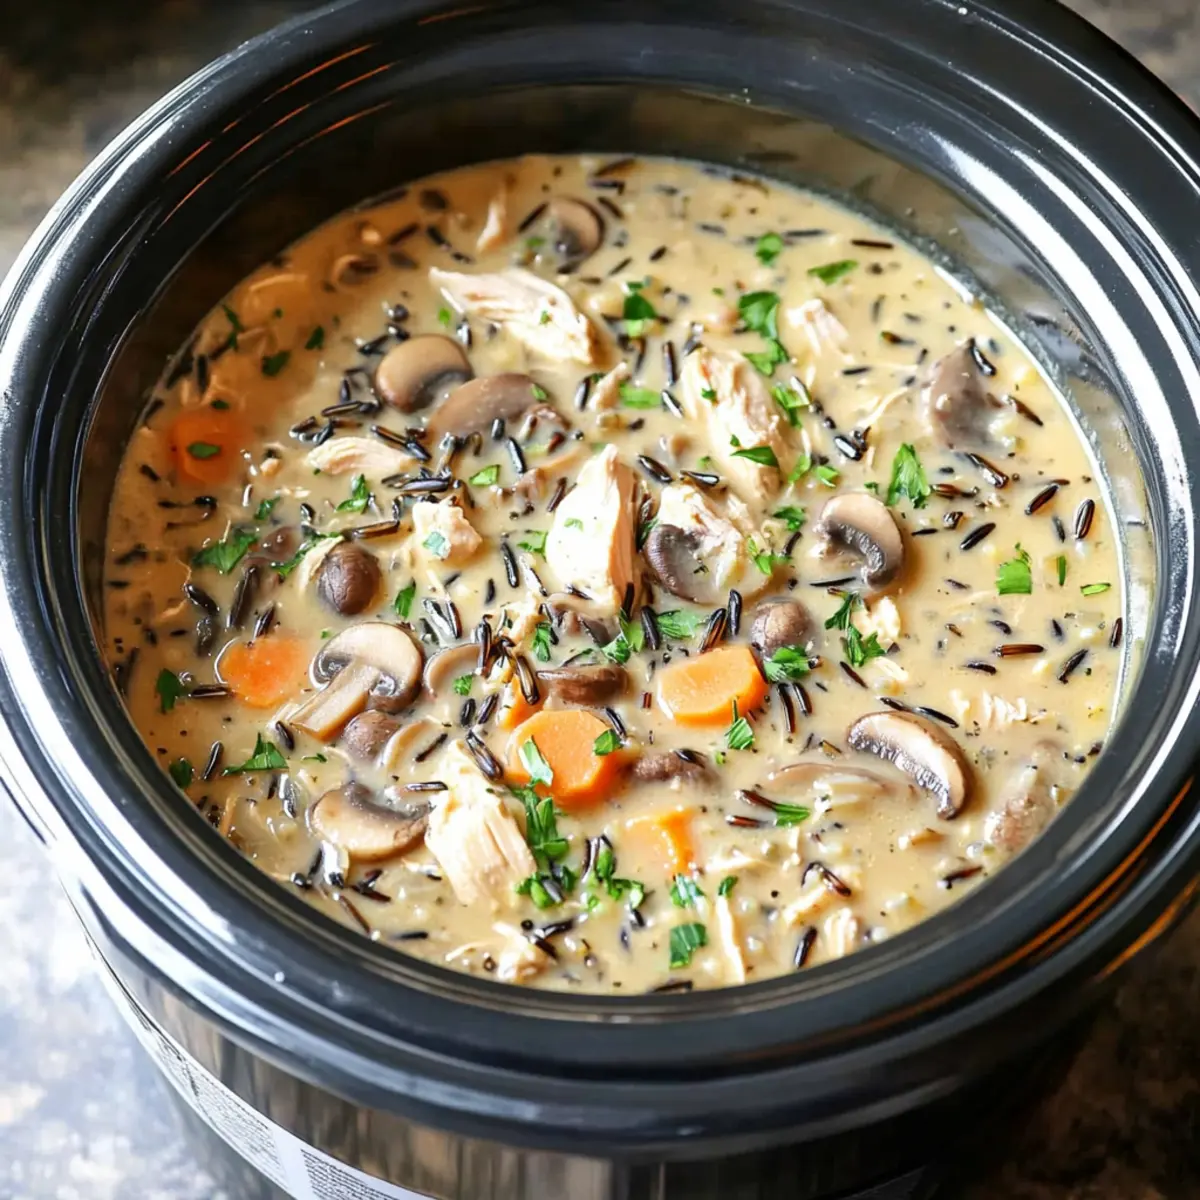
• This soup is not only a hug in a bowl but also a delightfully simple recipe that you can make in your slow cooker!

  • For the Soup Base

  • Boneless Skinless Chicken Breasts – The heartiness of the soup comes from this main protein. Substitutions: Shredded rotisserie chicken works well for quicker prep.

  • Chicken Stock – This rich liquid serves as the flavorful base. Vegetable stock is a great gluten-friendly option if you prefer.

  • Wild Rice – It brings a nutty flavor and hearty texture. Use white rice as a substitution, adding it later to prevent mushiness.

  • Kosher Salt and Freshly Ground Black Pepper – Essential seasonings that elevate the dish. Adjust according to your taste preference.

  • For the Aromatics & Vegetables

  • Garlic – Infuses the soup with depth and flavor. Minced garlic releases more flavor into the broth.

  • Onion – Adds a subtle sweetness. Diced finely for even cooking throughout.

  • Carrots – Contribute sweetness and vibrant color. Peeled and diced for uniform texture.

  • Celery – Provides freshness and crunch. Diced to blend perfectly with other flavors.

  • Dried Thyme and Dried Rosemary – These herbs enhance the aroma and taste. Fresh herbs can elevate the profile even more if available.

  • Bay Leaves – Adds a layer of complexity to the flavor profile. Remember to remove them before serving.

  • For the Creamy Finish

  • Cremini Mushrooms – Adds earthiness and contrasts the textures. Slice them thinly for even cooking.

  • Unsalted Butter – The base for a silky roux that enriches the soup.

  • All-Purpose Flour – Works as a thickener to create that creamy consistency.

  • Milk and Half and Half – Bring luxurious creaminess to every spoonful. For a lighter version, use low-fat alternatives.

  • Chopped Fresh Parsley – A fresh garnish that adds a pop of color. While optional, it’s recommended for that finishing touch.

Now that you have all the ingredients ready, let’s move on to creating this creamy slow cooker chicken mushroom wild rice soup that you and your loved ones will adore!

Step‑by‑Step Instructions for Creamy Slow Cooker Chicken Mushroom Wild Rice Soup

Step 1: Season the Chicken
Start by seasoning the boneless, skinless chicken breasts generously with kosher salt and freshly ground black pepper. Place the seasoned chicken directly into your 6-quart slow cooker, ensuring they are arranged in a single layer to allow for even cooking and maximum flavor infusion.

Step 2: Add the Base Ingredients
Pour in the chicken stock, followed by the wild rice, minced garlic, diced onion, peeled and diced carrots, and diced celery. Sprinkle in the dried thyme and rosemary, then add the bay leaves. Gently stir these ingredients together, combining them well to ensure the flavors meld in this creamy slow cooker chicken mushroom wild rice soup.

Step 3: Begin the Slow Cooking Process
Cover the slow cooker with its lid and cook on the low setting for 6 to 8 hours. During this time, the chicken will become tender, and the wild rice will soften. Check intermittently, and enjoy the wonderful aroma filling your kitchen as the soup slowly simmers and the flavors deepen.

Step 4: Incorporate the Mushrooms
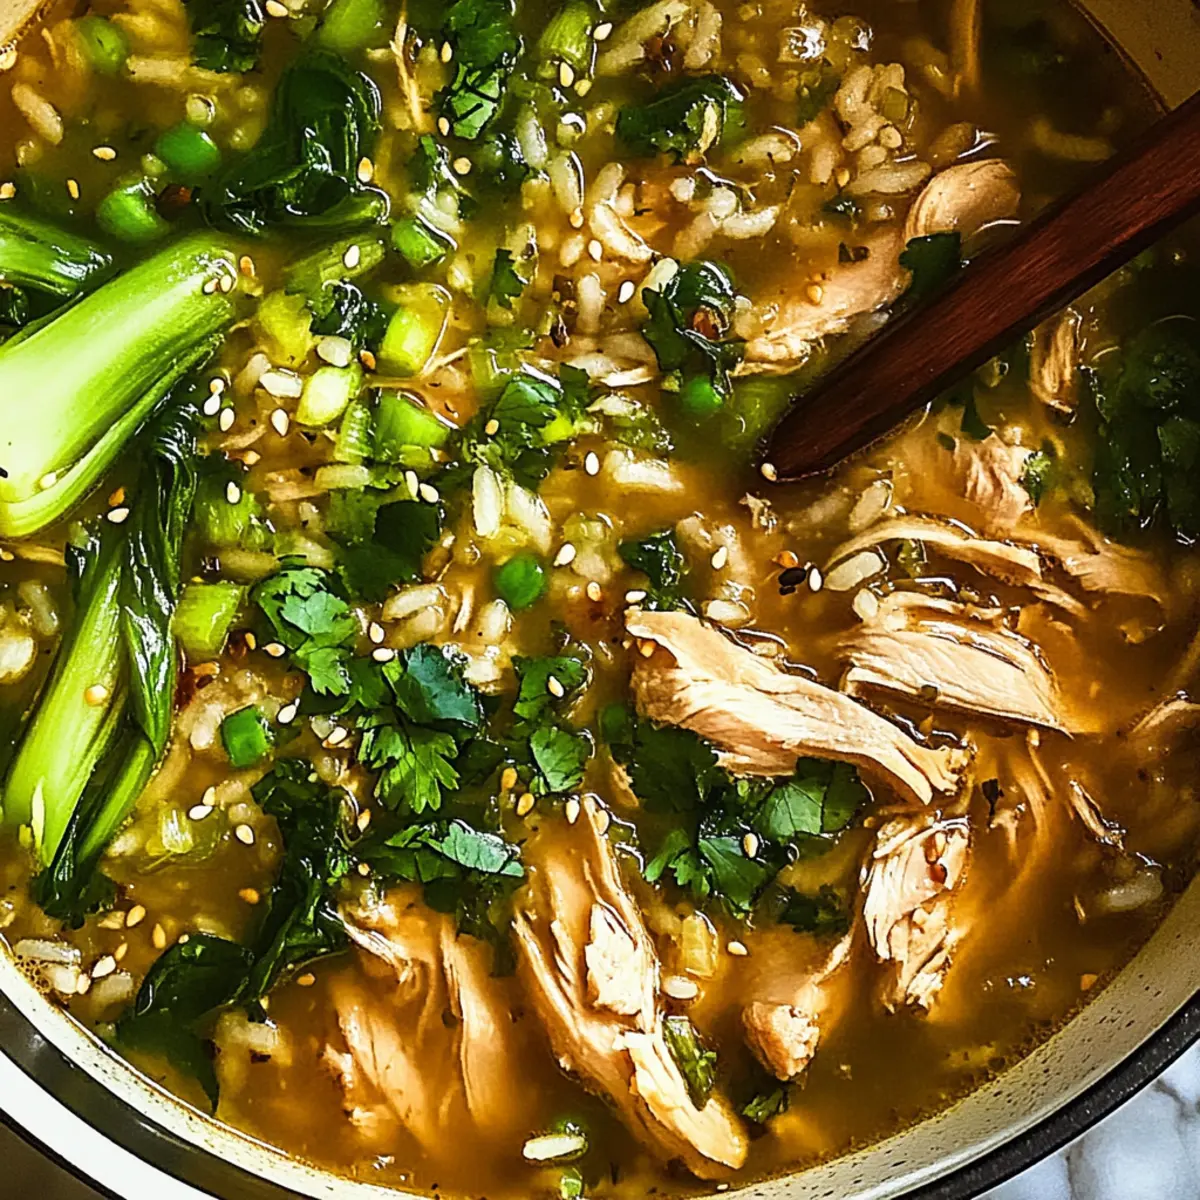
About 30 minutes before serving, add the thinly sliced cremini mushrooms to the slow cooker. Stir them gently into the bubbling mixture, allowing them to soften and release their earthy flavors without overcooking. This final touch ensures your soup has a beautiful contrast of textures.

Step 5: Shred the Chicken
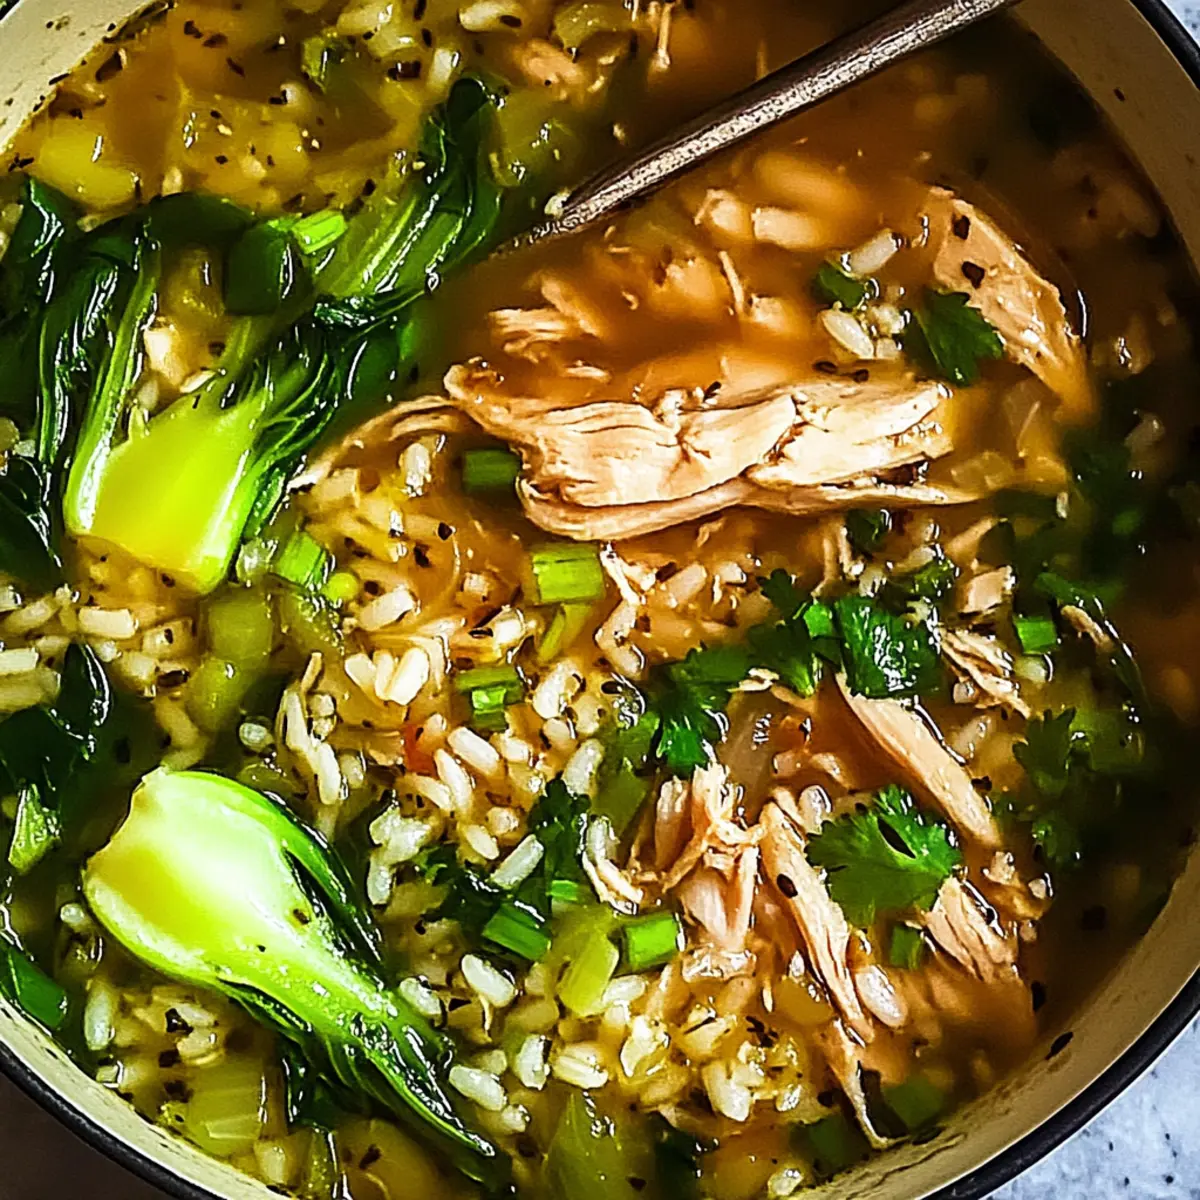
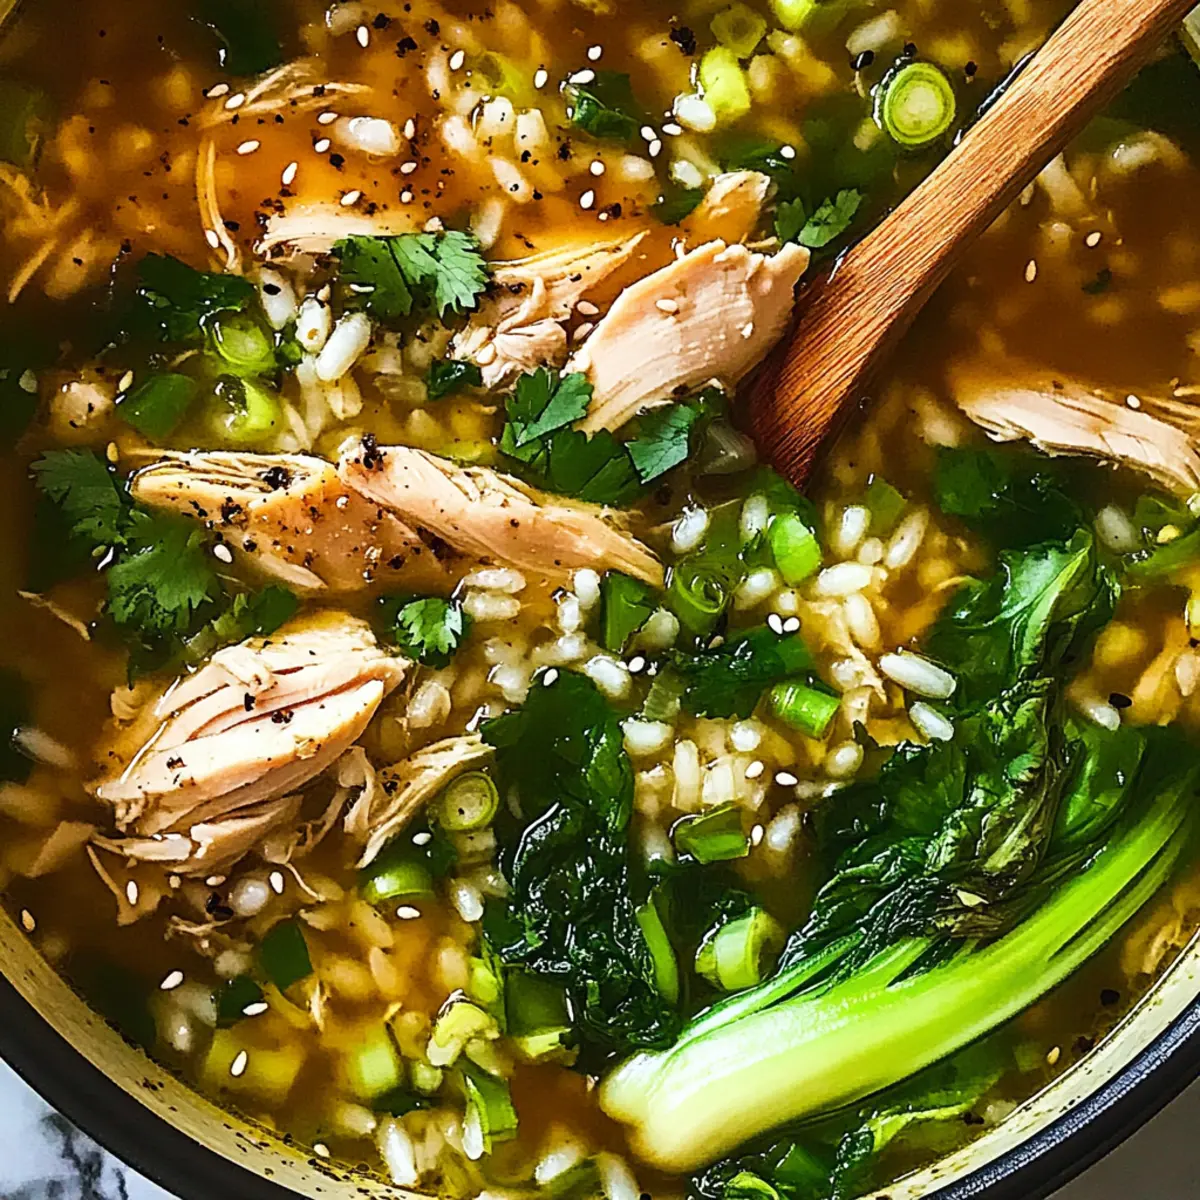
Once the cooking time is complete, carefully lift the chicken breasts from the slow cooker using tongs. Let them cool slightly before shredding with two forks into bite-sized pieces. Return the shredded chicken back into the slow cooker, stirring it through the creamy mixture to distribute evenly.

Step 6: Create the Creamy Roux
In a separate saucepan, melt unsalted butter over medium heat. Once melted, whisk in the all-purpose flour, cooking it until lightly browned, about 1 minute. This roux will add the lovely creaminess to your soup, ensuring it’s rich and satisfying.

Step 7: Whisk in Dairy
Gradually whisk in milk and half and half into the roux, cooking for an additional 4 to 5 minutes until the mixture thickens slightly. Observe for a creamy consistency that will beautifully enrich your soup. Remove from heat and prepare to mix this into the slow cooker for that velvety finish.

Step 8: Combine and Adjust
Stir the creamy roux mixture back into the slow cooker with the soup, ensuring it’s well incorporated. Feel free to adjust the soup’s consistency by adding more half and half if necessary. This is your chance to tailor the richness to your liking in this comforting chicken mushroom wild rice soup.

Step 9: Serve with Flair
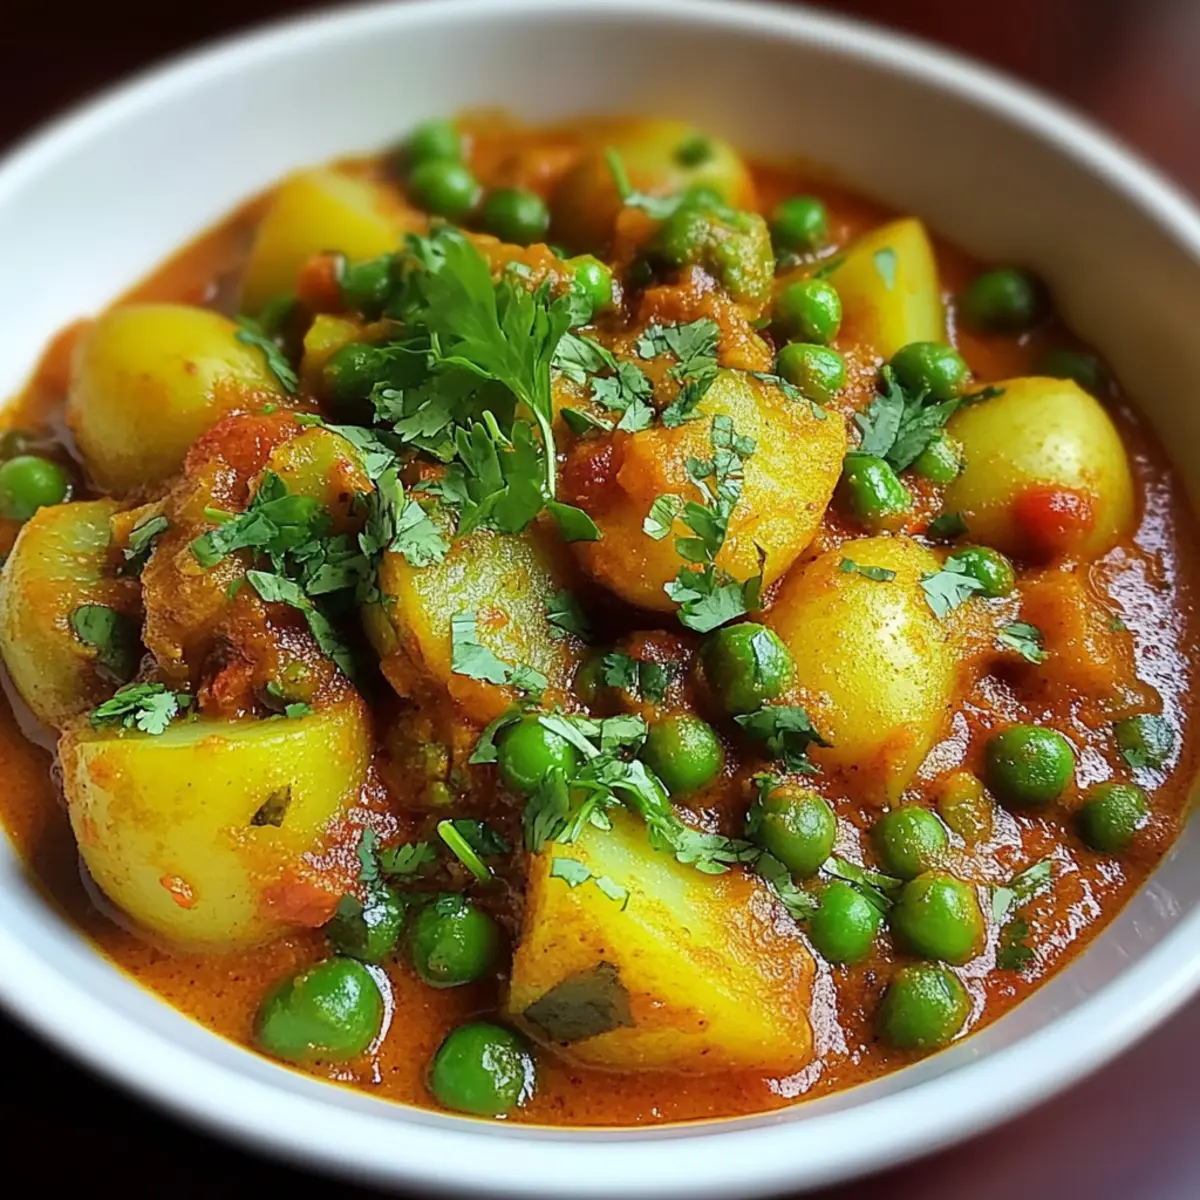
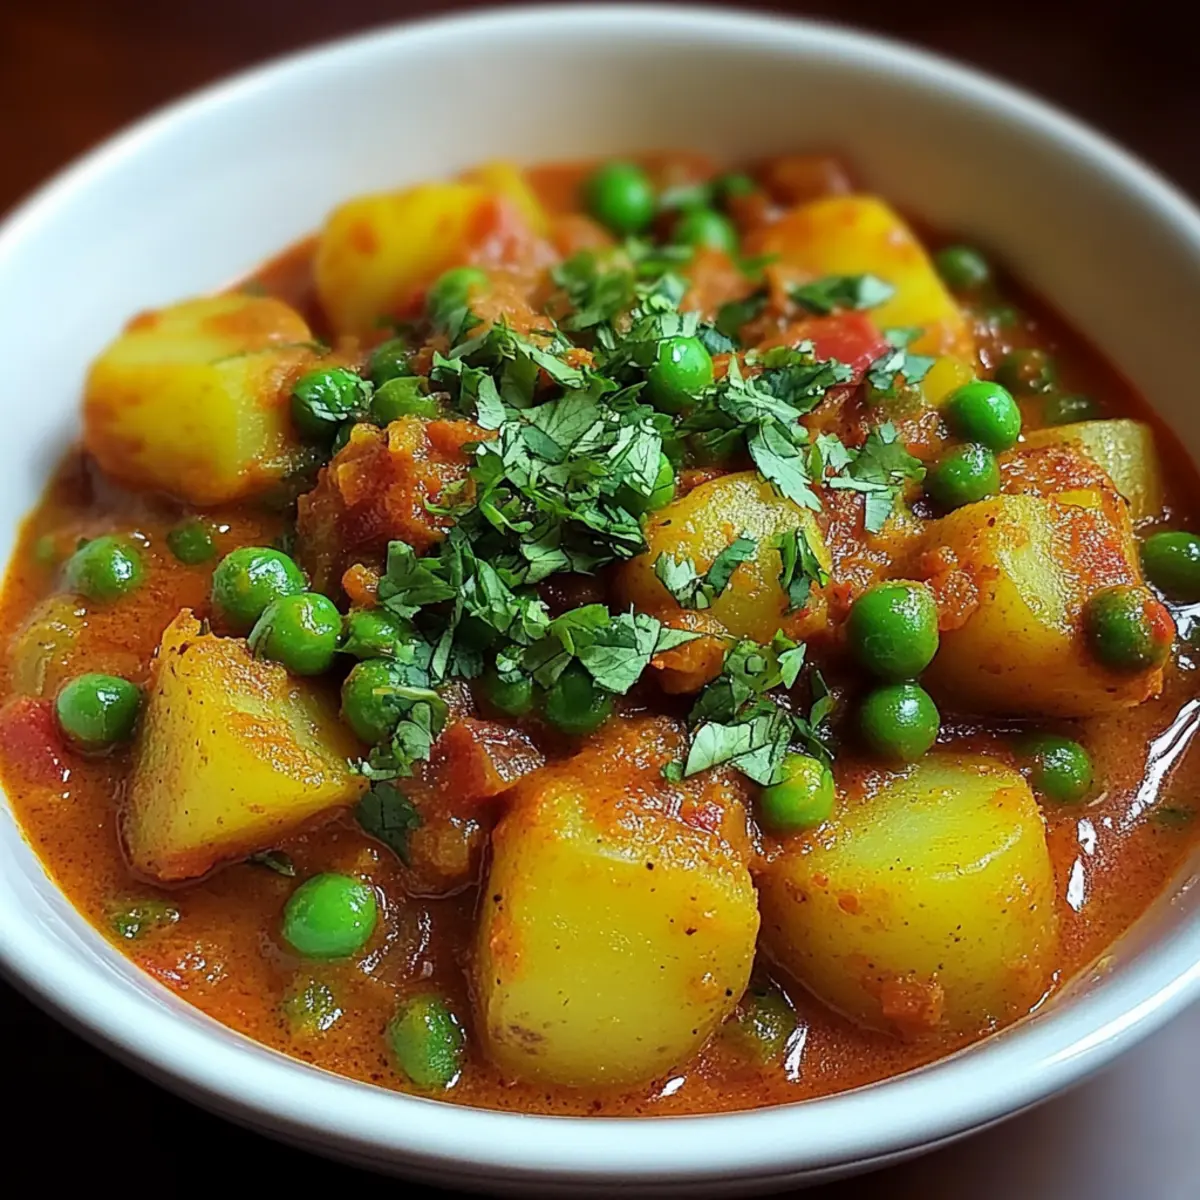
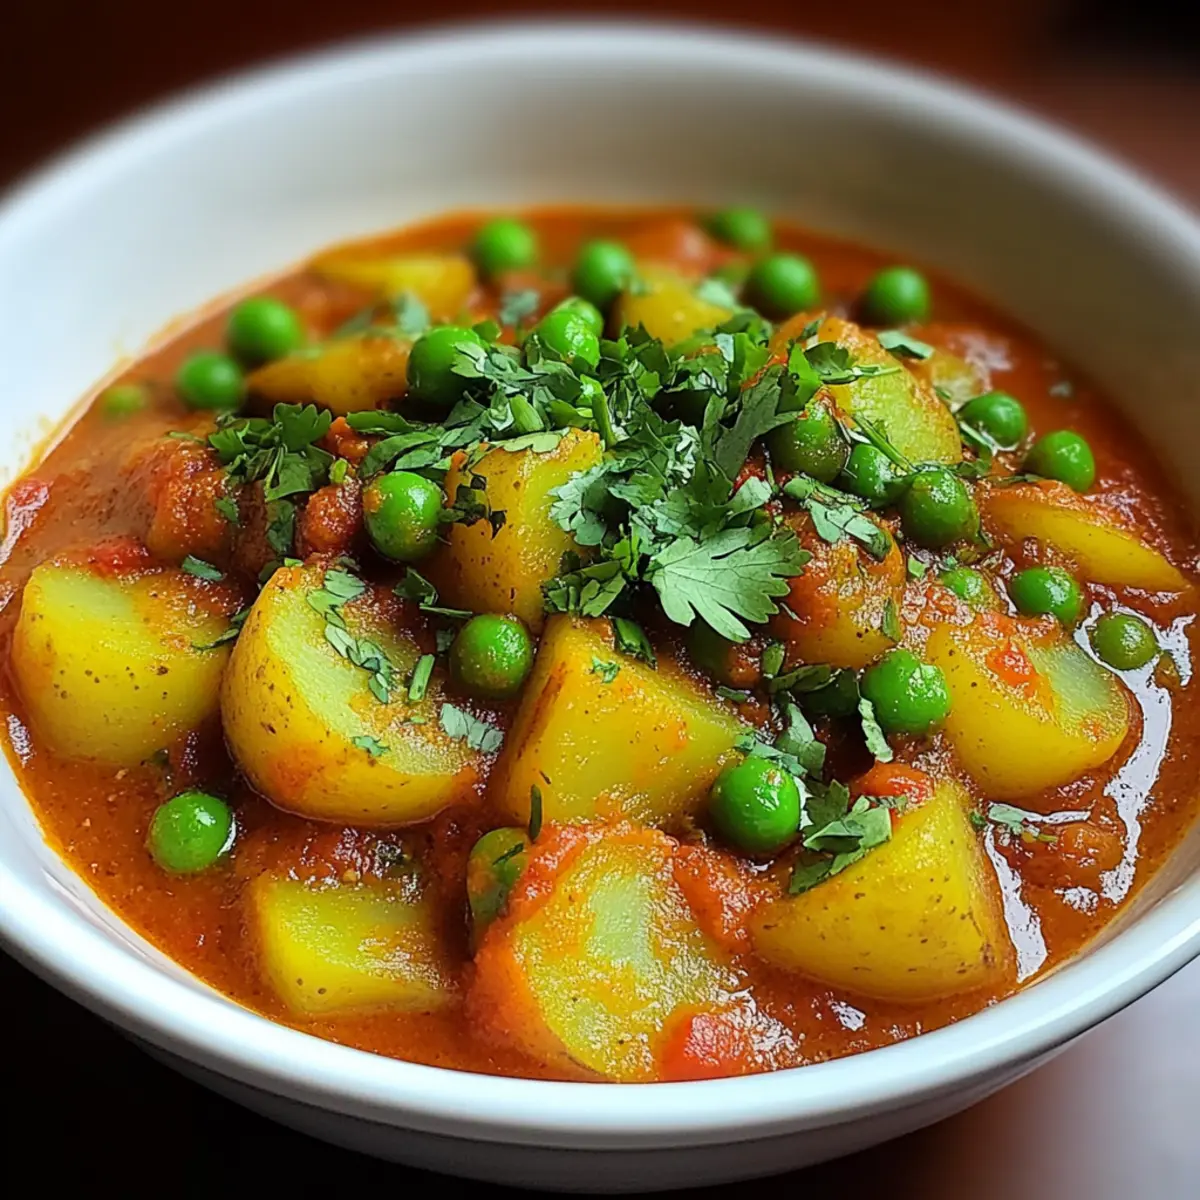
Ladle the soup into bowls, garnishing with freshly chopped parsley for a pop of color and freshness. This step enhances presentation and flavor, making your creamy slow cooker chicken mushroom wild rice soup inviting and delicious. Enjoy the warmth and comfort as you share it with family and friends!

Make Ahead Options

These Creamy Slow Cooker Chicken Mushroom Wild Rice Soup preparations are perfect for busy weeknights! You can chop all the vegetables, season the chicken, and combine the broth and rice up to 24 hours in advance, storing them in an airtight container in the refrigerator. To keep everything fresh and maintain quality, avoid adding the mushrooms until just before cooking; they can be sliced up to 3 days ahead too. When you’re ready to enjoy, simply transfer everything to your slow cooker, add the mushrooms, and follow the cooking instructions for 6-8 hours. This way, you’ll have an effortlessly delicious meal waiting for you, just as comforting as if made fresh!

Expert Tips for Creamy Chicken Mushroom Soup

  • Cooking Time: Ensure the chicken cooks thoroughly; check for an internal temperature of 165°F for safe consumption.
  • Rice Substitution: If using white rice, add it halfway through cooking to prevent it from becoming mushy in this creamy slow cooker chicken mushroom wild rice soup.
  • Thickening Guidance: Watch the thickness; if the soup becomes too thick, simply add more half and half to achieve your desired consistency.
  • Prep Ahead: This soup is perfect for meal prep; refrigerate leftovers in an airtight container for up to 3 days without losing flavor.
  • Customization Options: Don’t hesitate to experiment! Add your favorite veggies or spices to make this creamy chicken mushroom wild rice soup uniquely yours.

How to Store and Freeze Creamy Chicken Mushroom Wild Rice Soup

Fridge: Store leftover soup in an airtight container for up to 3 days. Make sure to cool it down before sealing.

Freezer: Freeze the soup for up to 3 months in a freezer-safe container. Leave some space for expansion, as liquids can expand when frozen.

Reheating: When ready to enjoy, thaw overnight in the fridge, then reheat on the stove over medium heat, stirring occasionally. If the soup is too thick, add a splash of broth or water.

Texture Note: Be aware that the creaminess may change slightly after freezing, but it will still be delicious! Enjoy this comforting chicken mushroom wild rice soup at home.

What to Serve with Creamy Crockpot Chicken Mushroom Wild Rice Soup

Warm, filling, and bursting with rich flavor, you’ll want to create the perfect accompaniment to this cozy masterpiece while enjoying moments with loved ones.

  • Crusty Bread: A slice of homemade or store-bought crusty bread is perfect for soaking up every creamy drop. The crispy exterior gives a delightful contrast to the smooth soup, enhancing every bite.

  • Side Salad: A fresh green salad with a tangy vinaigrette offers a crisp, refreshing balance. The bright flavors help cleanse your palate, making each spoonful of soup even more satisfying.

  • Garlic Breadsticks: Soft, buttery garlic breadsticks not only bring a comforting essence but are also fantastic for dipping into the soup. Their delightful aroma and flavor are an irresistible pairing.

  • Roasted Vegetables: Adding roasted seasonal vegetables introduces a burst of color and nutrition to your meal. The caramelized flavors and slight sweetness beautifully contrast the soup’s creamy richness.

  • Cheesy Quiche: A warm cheesy quiche serves as an exquisite way to elevate your meal. Its flaky crust and savory filling complement the soup while making your dining experience a little more special.

  • White Wine: Pour a glass of chilled white wine, such as Sauvignon Blanc or Chardonnay, for a refreshing sip. The crisp acidity cuts through the richness, enhancing the comforting warmth of the soup.

  • Apple Crisp: End the meal on a sweet note with a warm apple crisp. The warm cinnamon apples topped with a crumbly oat mixture provide a delightful finish alongside the savory soup.

  • Herbed Rice: A simple side of herbed rice can add lightness and another layer of flavor. The subtle herbs align beautifully with the earthy notes present in the soup, bringing harmony to your meal.

Variations & Substitutions for Creamy Crockpot Chicken Mushroom Wild Rice Soup

Exploring different twists on this recipe can elevate your dish and cater to your family’s preferences. Let your creativity shine in the kitchen!

  • Mushroom Swap: Replace cremini with button mushrooms for a milder taste, or try shiitake for a more robust flavor. Each variety offers its unique quality.

  • Spicy Kick: Add a pinch of red pepper flakes during the cooking process for a zesty warmth. This simple addition can really transform the dish!

  • Dairy-Free Delight: Use almond milk or coconut cream instead of milk and half and half to make this soup dairy-free. It will still be delectably creamy while being more accommodating to dietary restrictions.

  • Extra Veggies: Toss in some spinach or kale during the last 30 minutes of cooking for added nutrition and vibrant color. This is a great way to sneak in more greens!

  • Wild Rice Alternative: If wild rice is hard to find, try using quinoa for a gluten-free and protein-packed twist. Just adjust the cooking time accordingly!

  • Citrus Zing: A squeeze of lemon juice at the end can brighten the flavors and add a refreshing finish to the creamy broth. Who doesn’t love that zesty touch?

  • Hearty Beans: For an extra boost of fiber, add a can of drained white beans, like cannellini or great northern, mixing them in during the last hour of cooking. They’ll add heartiness without overshadowing the other flavors.

  • Herb Variations: Swap dried thyme and rosemary for fresh herbs (like dill or parsley) for an aromatic lift that freshens up the soup’s flavor profile. Fresh is always best for a more vibrant outcome!

There’s no limit to how you can make this soup reflect your flavor preferences or dietary needs. Enjoy experimenting, and don’t hesitate to share your culinary discoveries!

Creamy Crockpot Chicken Mushroom Wild Rice Soup Recipe FAQs

What type of chicken should I use for the soup?
Absolutely! Boneless skinless chicken breasts work best for this recipe as they provide a hearty, tender texture. If you’re looking for a quicker option, shredded rotisserie chicken can be a fantastic time-saver—just add it during the last hour of cooking to warm through.

How should I store leftovers of this soup?
I recommend placing any leftover soup in an airtight container and refrigerating it. It should stay fresh for up to 3 days. Just remember to let it cool before sealing to maintain its rich flavor profile.

Can I freeze the creamy chicken mushroom wild rice soup?
Yes, you can! This soup freezes beautifully for up to 3 months. I suggest storing it in a freezer-safe container, leaving a little room at the top for expansion. When you’re ready to enjoy it, simply thaw overnight in the fridge and reheat slowly on the stove, stirring occasionally.

How can I adjust the soup for dietary restrictions?
Very! For a gluten-friendly option, be sure to use gluten-free all-purpose flour and low-sodium chicken stock. If you’re looking to make this soup dairy-free, you can substitute the milk and half and half with almond milk or coconut cream, which will still yield a creamy texture!

What should I do if the soup is too thick after cooking?
If you find that your soup has thickened more than you’d like, don’t worry! Just add a splash of chicken stock or water while reheating to reach your desired consistency. Stir well until it’s all mixed, and you’ll have a perfect bowl of comfort again.

How do I know when the chicken is fully cooked?
This is important! Ensure the internal temperature of the chicken reaches 165°F for safe consumption. I recommend using a meat thermometer to check, and once it’s done, the chicken will shred easily. Enjoy the deliciously tender chicken in your soup!

undefined

Creamy Slow Cooker Chicken Mushroom Wild Rice Soup

This comforting Creamy Slow Cooker Chicken Mushroom Wild Rice Soup is a heartwarming gem perfect for chilly evenings.
Prep Time 15 minutes
Cook Time 8 hours
Total Time 8 hours 15 minutes
Servings: 6 cups
Course: Dinner
Cuisine: American
Calories: 350

Ingredients
  

For the Soup Base
  • 2 pounds Boneless Skinless Chicken Breasts Shredded rotisserie chicken works as a quick substitute.
  • 6 cups Chicken Stock Vegetable stock is a great gluten-friendly option.
  • 1 cup Wild Rice Use white rice as a substitution, add it later.
  • 1 tablespoon Kosher Salt Adjust according to your taste preference.
  • 1 teaspoon Freshly Ground Black Pepper Adjust according to your taste preference.
For the Aromatics & Vegetables
  • 4 cloves Garlic Minced for better flavor infusion.
  • 1 medium Onion Diced finely for even cooking.
  • 2 medium Carrots Peeled and diced.
  • 2 stalks Celery Diced.
  • 1 teaspoon Dried Thyme Fresh herbs can enhance flavor further.
  • 1 teaspoon Dried Rosemary Fresh herbs can enhance flavor further.
  • 2 leaves Bay Leaves Remove before serving.
For the Creamy Finish
  • 8 ounces Cremini Mushrooms Thinly sliced.
  • 4 tablespoons Unsalted Butter
  • 1/4 cup All-Purpose Flour
  • 1 cup Milk Use low-fat alternatives for a lighter version.
  • 1 cup Half and Half Use low-fat alternatives for a lighter version.
  • 1/4 cup Chopped Fresh Parsley Optional, but recommended for garnish.

Equipment

  • Slow Cooker

Method
 

Step-by-Step Instructions
  1. Season the boneless, skinless chicken breasts with kosher salt and pepper, place in the slow cooker in a single layer.
  2. Add chicken stock, wild rice, garlic, onion, carrots, celery, thyme, rosemary, and bay leaves. Stir gently.
  3. Cover and cook on low for 6 to 8 hours.
  4. Add sliced mushrooms about 30 minutes before serving.
  5. Remove chicken, shred, and return to the slow cooker.
  6. In a saucepan, melt butter, whisk in flour, and cook for 1 minute. Gradually add milk and half and half, cooking until thickened.
  7. Stir the creamy roux into the slow cooker to combine.
  8. Serve garnished with parsley.

Nutrition

Serving: 1cupCalories: 350kcalCarbohydrates: 30gProtein: 25gFat: 18gSaturated Fat: 8gPolyunsaturated Fat: 2gMonounsaturated Fat: 9gCholesterol: 70mgSodium: 800mgPotassium: 600mgFiber: 3gSugar: 3gVitamin A: 500IUVitamin C: 10mgCalcium: 200mgIron: 2mg

Notes

This soup can be prepared ahead of time and stored in the fridge for up to 3 days or frozen for up to 3 months.

Tried this recipe?

Let us know how it was!

Hearty Slow Cooker Korean Chicken Stew for Cozy Nights

Amid the hustle of everyday life, there’s a special kind of joy in coming home to a comforting bowl of stew. This Healthy Slow Cooker Korean Chicken Stew not only warms the soul but is also incredibly simple to craft. Tender chicken thighs blend seamlessly with earthy mushrooms and vibrant carrots, simmering in a spicy gochujang sauce that awakens the taste buds. With minimal prep time and a busy schedule in mind, this dish is your go-to for those long workdays or cozy weekends. Plus, it’s gluten-free, low-calorie, and freezer-friendly, making it a versatile addition to your meal plan. Are you ready to bring a taste of Korea to your kitchen while keeping it healthy and hassle-free? Let’s dive into the delightful details!

Why is This Stew a Must-Try?

Convenience: With its slow cooker method, this stew requires minimal effort and allows you to set it and forget it—perfect for busy evenings.

Flavors: The bold, spicy gochujang creates a depth of flavor that elevates your ordinary stew to something extraordinary.

Versatility: Feel free to adapt it! Try a vegetarian version with tofu or mix in your favorite seasonal veggies for a unique twist.

Healthy Comfort: Packed with protein and nutrients, it’s a guilt-free comfort food that will leave you satisfied without weighing you down.

Crowd-Pleaser: Whether you’re serving family or hosting friends, this dish promises to be a hit, creating moments of shared delight at the dinner table.

For extra inspiration, don’t forget to check out the options for serving suggestions that complement this flavorful stew!

Slow Cooker Korean Chicken Stew Ingredients

For the Stew
Chicken Thighs – A juicy protein source; boneless skinless thighs provide the best flavor.
Onion – Adds natural sweetness; shallots can be used for a subtler touch.
Carrot – Brings sweetness and texture; parsnips make a great alternative.
Mushrooms – Provides umami depth; cremini or shiitake offer the most flavor.
Garlic – Elevates the overall taste; fresh cloves are best for authenticity.
Gochujang – The key spice that delivers a flavorful kick; opt for authentic Korean paste.
Soy Sauce – Adds a savory note; use low-sodium for a healthier option.
Brown Sugar – Balances spicy notes; honey or maple syrup can also work well.
Sesame Oil – Infuses a distinctive nutty aroma; avocado oil can substitute but lacks its depth.
Chicken Stock – The flavorful base for your stew; homemade or low-sodium is preferred.
Spring Onions – Adds a fresh, crunchy garnish; chives can be used instead if desired.
Cornstarch – Thickens the stew beautifully; arrowroot or tapioca starch are worthy substitutes.
Salt and Black Pepper – Essential for seasoning; adjust to your taste for the perfect finish.

Try making this Slow Cooker Korean Chicken Stew with these quality ingredients and experience the comfort and nutrition it brings to your table!

Step‑by‑Step Instructions for Healthy Slow Cooker Korean Chicken Stew

Step 1: Prepare the Ingredients
Begin by gathering all your ingredients for the Healthy Slow Cooker Korean Chicken Stew. Dice the onion and chop the carrots into bite-sized pieces, ensuring they’re uniform for even cooking. Clean the mushrooms and slice them, then mince the garlic. This prep will make combining everything in the slow cooker smoother and quicker.

Step 2: Load the Slow Cooker
In your slow cooker, add the chicken thighs, diced onion, sliced mushrooms, chopped carrots, and minced garlic. Pour in the chicken stock, soy sauce, gochujang, brown sugar, and sesame oil, ensuring all the ingredients are well distributed. This flavorful base is crucial for developing depth in your stew as it cooks.

Step 3: Mix and Set to Cook
Using a large spoon, stir the mixture thoroughly to combine all the ingredients for your Healthy Slow Cooker Korean Chicken Stew. Cover the slow cooker securely with its lid and set it to cook on high for 2 to 3 hours or on low for 4 to 5 hours. The chicken should be tender enough to shred easily when finished.

Step 4: Thicken the Stew
During the last hour of cooking on high or the last two hours on low, prepare a cornstarch slurry by mixing cornstarch with water in a small bowl until smooth. Gently stir this slurry into the stew, which will help to thicken the broth and enhance the overall texture.

Step 5: Adjust Seasoning
Once the cooking time is complete, carefully taste the stew to adjust seasoning. Add salt and black pepper as needed, ensuring the flavors are balanced. If there’s an overwhelming spice level, a bit more brown sugar can help to mellow it out.

Step 6: Garnish and Serve
After seasoning, ladle the Healthy Slow Cooker Korean Chicken Stew into bowls. Finish each serving with a sprinkle of chopped spring onions for a vibrant touch. This final garnish will not only add flavor but bring a fresh aesthetic to your comforting dish.

Step 7: Pair and Enjoy
Serve your stew warm, and consider pairing it with steamed rice or quinoa to soak up the delicious sauce. This cozy meal is perfect for sharing, so gather your loved ones around the table and enjoy the delightful flavors of this comforting Korean-inspired dish.

How to Store and Freeze Slow Cooker Korean Chicken Stew

Fridge: Store leftovers in an airtight container for up to 3 days, ensuring the stew is completely cooled before sealing to maintain freshness.

Freezer: For longer storage, freeze the stew in airtight containers or freezer bags for up to 3 months. Label with the date for easy tracking.

Reheating: Thaw in the refrigerator overnight, then reheat on the stovetop over low heat until warmed through. You can also use the microwave, stirring occasionally for even heating.

Make-Ahead Tips: Prepare the Slow Cooker Korean Chicken Stew in advance, and store it in the fridge for a quick meal option on busy nights. It also tastes even better the next day!

Make Ahead Options

These Healthy Slow Cooker Korean Chicken Stew components are perfect for busy home cooks looking to simplify meal planning! You can chop the vegetables and store them in an airtight container in the refrigerator up to 3 days in advance, which cuts down on prep time when you’re ready to cook. Additionally, you can mix the chicken and marinade ingredients together, marinating for up to 24 hours, which enhances flavor. When ready to serve, simply combine all prepped ingredients in the slow cooker and set it to cook. Trust me, this stew will be just as delicious after prepping ahead, providing you with a warm and comforting meal with minimal last-minute effort!

What to Serve with Healthy Slow Cooker Korean Chicken Stew

Pair your delightful stew with these complementary dishes to create a memorable meal experience.

  • Steamed Jasmine Rice: The fluffy texture balances the savory broth, providing a perfect base to absorb those rich flavors.

  • Quinoa Salad: Light and nutty, quinoa adds a nutritious twist and an extra crunch, enhancing the overall meal’s healthfulness.

  • Kimchi: This traditional Korean side dish brings tang and spice, elevating your stew with its unique flavor profile.

  • Braised Bok Choy: Lightly sautéed bok choy adds a fresh crunch and contrasting texture, making it a refreshing addition to your plate.

  • Cucumber Salad: Crisp cucumber slices dressed in rice vinegar offer a cool, refreshing contrast that balances the stew’s heat.

  • Sweet Potato Mash: Creamy and slightly sweet, this mash provides a heartwarming contrast to the stew’s savory notes, creating a delightful harmony on your plate.

  • Hot Green Tea: A warm cup of tea enhances the meal experience, soothing the palate and adding a touch of serenity to your dining.

  • Chocolate Mousse: For dessert, indulge in a light chocolate mousse that complements the meal with its rich yet airy texture, leaving a sweet final note.

Slow Cooker Korean Chicken Stew Variations

Embrace your culinary creativity and tailor this comforting stew to suit your taste or dietary needs!

  • Vegetarian Version: Substitute the chicken with beans or tofu and use vegetable stock; add seasonal veggies for extra goodness. Perfect for those looking to enjoy the flavors without meat!

  • Spicy Twist: Add sliced jalapeños or a splash of sriracha for an extra kick. The fiery heat will elevate the dish and awaken your senses!

  • Oven Method: If a slow cooker isn’t available, use a Dutch oven. Follow similar steps but check frequently to avoid burning and ensure the chicken remains juicy.

  • Sweet Alternative: Swap brown sugar for honey or maple syrup for a sweeter touch. This small change will add a lovely caramelized flavor to the stew.

  • Nut-Free Option: Omit sesame oil and use olive or avocado oil instead; your stew will still be delicious without the nutty undertone.

  • Mushroom Medley: Experiment with different mushrooms, such as shiitake, portobello, or oyster mushrooms, to enhance the umami flavor and texture of your stew.

  • Creamy Base: Stir in a splash of coconut milk during the last 30 minutes of cooking for a creamy twist that complements the spices beautifully.

  • Add Greens: Toss in fresh spinach or kale near the end of cooking for a nutrient boost and vibrant color in your comforting dish.

Feel free to explore these variations and create your unique comfort food! After all, the joy of cooking lies in experimenting. And don’t forget to check out some delightful serving suggestions to elevate your meal even further!

Expert Tips for Slow Cooker Korean Chicken Stew

Choose Chicken Thighs: Opt for boneless skinless thighs which are juicier and retain more flavor during the slow cooking process than chicken breasts.

Prep Your Ingredients: Chop vegetables uniformly and ensure all ingredients are prepped beforehand to make combining them in the slow cooker a breeze.

Timing Matters: Be mindful of when to add the cornstarch slurry; adding it too early can result in a thin sauce that lacks that hearty thickness you’re after.

Adjust Spice Levels: Feel free to modify the amount of gochujang based on your heat preference; a little goes a long way!

Garnish for Freshness: Always finish your stew with a sprinkle of fresh spring onions for a burst of flavor and color that enhances the overall presentation.

Freezer-Friendly: This Slow Cooker Korean Chicken Stew makes excellent leftovers; store in airtight containers for up to three months for a quick meal later!

Healthy Slow Cooker Korean Chicken Stew Recipe FAQs

How do I choose the right chicken for this recipe?
Absolutely! I recommend using boneless skinless chicken thighs for the best flavor and moisture retention. They hold up well during slow cooking compared to chicken breasts, which can dry out.

How should I store leftover stew?
Store any leftovers in an airtight container in the fridge for up to 3 days. Make sure the stew cools down completely before sealing to help maintain its freshness.

Can I freeze this stew?
Yes! For longer storage, freeze the Healthy Slow Cooker Korean Chicken Stew in airtight containers or freezer bags for up to 3 months. Be sure to label them with the date, and when you’re ready to enjoy it, simply thaw overnight in the fridge before reheating.

What can I do if my stew is too thin?
Not a problem! If you find the stew is thinner than you’d like, mix a cornstarch slurry—1 tablespoon of cornstarch mixed with 2 tablespoons of cold water—then stir it into the stew during the last hour of cooking. This will help thicken the sauce beautifully.

Are there any dietary considerations for this recipe?
Very! This Healthy Slow Cooker Korean Chicken Stew is gluten-free, especially if you use tamari instead of soy sauce. For those with dietary restrictions or preferences, consider substituting chicken with beans or tofu for a vegetarian version, and always check your ingredient labels for allergens.

How long can I keep this stew in the freezer?
You can keep it frozen for up to 3 months. When storing, try to use airtight containers or freezer bags to prevent freezer burn, and it’s always a good idea to label them with the date for easy tracking!

undefined

Hearty Slow Cooker Korean Chicken Stew for Cozy Nights

A comforting and healthy Korean chicken stew, perfect for busy nights.
Prep Time 15 minutes
Cook Time 5 hours
Thickening Time 30 minutes
Total Time 5 hours 45 minutes
Servings: 6 servings
Course: Dinner
Cuisine: Korean
Calories: 350

Ingredients
  

For the Stew
  • 2 pounds Chicken Thighs boneless, skinless
  • 1 medium Onion diced
  • 2 medium Carrot chopped
  • 8 ounces Mushrooms sliced
  • 4 cloves Garlic minced
  • 3 tablespoons Gochujang Korean chili paste
  • 3 tablespoons Soy Sauce low-sodium
  • 1 tablespoon Brown Sugar
  • 2 tablespoons Sesame Oil
  • 4 cups Chicken Stock homemade or low-sodium
  • 3 tablespoons Spring Onions chopped, for garnish
  • 2 tablespoons Cornstarch for thickening
  • to taste Salt
  • to taste Black Pepper

Equipment

  • Slow Cooker

Method
 

Preparation
  1. Gather and dice the onion, chop the carrots, slice the mushrooms, and mince the garlic.
  2. Load the chicken thighs, diced onion, sliced mushrooms, chopped carrots, and minced garlic into the slow cooker.
  3. Add chicken stock, soy sauce, gochujang, brown sugar, and sesame oil to the slow cooker.
  4. Stir thoroughly to combine all ingredients.
  5. Cover and cook on high for 2 to 3 hours or low for 4 to 5 hours.
  6. Prepare a cornstarch slurry during the last cooking hour on high or last two hours on low.
  7. Stir the cornstarch slurry into the stew to thicken.
  8. Adjust seasoning with salt and pepper after cooking.
  9. Ladle into bowls, garnish with chopped spring onions, and serve.
  10. Pair with steamed rice or quinoa, if desired.

Nutrition

Serving: 1bowlCalories: 350kcalCarbohydrates: 30gProtein: 30gFat: 10gSaturated Fat: 2gPolyunsaturated Fat: 0.5gMonounsaturated Fat: 2gCholesterol: 90mgSodium: 700mgPotassium: 700mgFiber: 3gSugar: 5gVitamin A: 2000IUVitamin C: 15mgCalcium: 30mgIron: 2mg

Notes

This stew is freezer-friendly; store in airtight containers for up to 3 months.

Tried this recipe?

Let us know how it was!

Savory Chicken Bhuna: Cozy Comfort in Every Bite

The moment the garlic sizzles in the pan, I’m transported to the bustling streets of India, where the aroma of vibrant spices fills the air. Today, I’m excited to share my beloved recipe for Cozy Chicken Bhuna—a comforting Indian delight that transforms simple ingredients into an unforgettable meal. This delightful dish showcases tender chicken thighs immersed in a spiced tomato sauce, packing a delicious punch while remaining high in protein. What I love most about Chicken Bhuna is its delightful flexibility; it can be tailored to suit your preferred spice level, making it a crowd-pleaser for everyone at the table. Plus, the prep is a breeze, perfect for busy weeknights! Curious to discover how to create this mouthwatering masterpiece? Let’s dive in!

Why is Chicken Bhuna a must-try?

Comforting, cozy flavors: The blend of spices in Chicken Bhuna creates a warm, inviting atmosphere that is perfect for sharing.
Customizable spice levels: Whether you prefer mild or fiery heat, you can easily adjust the heat to cater to your family’s taste.
High-protein goodness: Packed with protein-rich chicken thighs, this dish not only satisfies hunger but also supports your nutritional goals.
Quick and easy prep: With minimal cooking time and straightforward steps, chicken bhuna can fit seamlessly into your busy weeknight routine.
Versatile pairing options: Serve with fluffy basmati rice or warm naan for a complete meal that everyone will love. If you’re looking for more easy recipes, check out my simple Indian-inspired dishes.

Savory Chicken Bhuna Ingredients

Ready to whip up a comforting bowl of Savory Chicken Bhuna? Here’s everything you need!

For the Chicken

  • Chicken Thighs – These tender pieces absorb all the rich flavors beautifully!
  • Salt – Enhances all the flavors; adjust according to your taste preference.

For the Aromatics

  • Garlic – Adds a lovely aromatic base; you can skip it if you’re sensitive.
  • Fresh Ginger – Essential for an authentic taste; be sure to chop it finely.
  • Green Chili – Deseed and chop; adjust the quantity to control the heat level!
  • Onions – Diced; sweetens the sauce as they cook down and add depth.

For the Spices

  • Turmeric Powder – Gives the dish a vibrant color and subtle, earthy flavor.
  • Chili Powder – Adds necessary heat, for those who crave a kick!
  • Ground Cumin – Bringing warmth and earthiness to this cozy dish.
  • Ground Coriander – Complements cumin and enhances the whole flavor profile.
  • Garam Masala – A spice blend that brings complexity; don’t skip this one!

For the Sauce

  • Tomatoes – Chopped; the base of the sauce that adds essential richness.
  • Water – Adjust to your desired sauce consistency; we recommend starting with a little and adding more as needed.

For the Finish

  • Lemon Juice – A splash brightens up flavors with a delightful tang!
  • Fresh Coriander – Chopped; a fresh garnish that adds color and a hint of brightness.
  • Vegetable Oil – Necessary for sautéing your aromatics and spices.

With these ingredients in hand, you’re ready to create a delightful Savory Chicken Bhuna that will bring warmth to your kitchen!

Step‑by‑Step Instructions for Cozy Chicken Bhuna

Step 1: Heat the Oil
In a large pan, pour in 2 tablespoons of vegetable oil and heat it over medium heat. You’ll know it’s ready when the oil shimmers slightly. This step is essential for starting your Cozy Chicken Bhuna, so make sure the oil is hot enough to sauté the aromatics effectively.

Step 2: Sauté Aromatics
Add 4 minced garlic cloves, 1 chopped green chili (deseeded for milder heat), and 1 tablespoon of finely chopped fresh ginger to the hot oil. Sauté these for about 1 minute until they become fragrant, enhancing the base flavor of your dish. Stir occasionally to prevent sticking while the magical aromas fill your kitchen.

Step 3: Add Onions
Toss in 1 medium diced onion and cook until they’re golden brown, which should take about 3-4 minutes. Stir frequently to encourage even cooking. This step will bring out the natural sweetness of the onions, deepening the flavors in your Cozy Chicken Bhuna’s sauce.

Step 4: Bloom the Spices
Stir in ½ teaspoon of turmeric powder, 1 teaspoon of chili powder, 1 teaspoon of ground cumin, 1 teaspoon of ground coriander, and 1 teaspoon of garam masala. Cook these spices for an additional minute, stirring constantly to bloom their flavors and mix them well with the sautéed onions, creating an aromatic foundation for the sauce.

Step 5: Incorporate Tomatoes and Water
Now, add 2 cups of chopped tomatoes and about 1 cup of water to the pan. Season with salt to taste. Bring this mixture to a boil, watching for the tomatoes to soften and release their juices, which should take around 5 minutes, creating a flavorful base for your Cozy Chicken Bhuna.

Step 6: Simmer the Sauce
Reduce the heat to low, allowing the sauce to simmer uncovered for 10-15 minutes. Stir occasionally as it thickens; you’re looking for a rich, concentrated sauce that coats the back of a spoon. This step is crucial for developing the comforting flavors of your dish.

Step 7: Add Chicken Thighs
Carefully place 1.5 pounds of chicken thighs into the thickened sauce, ensuring they are well-coated. Cover the pan and let them cook for about 20 minutes, turning occasionally, until the chicken is fully cooked and tender, with an internal temperature reaching 165°F (75°C).

Step 8: Final Touches
Once the chicken is cooked, squeeze the juice of half a lemon over the dish and stir well. Finish by garnishing your Cozy Chicken Bhuna with freshly chopped coriander. The lemon juice brightens the flavors, balancing the richness of the sauce perfectly, ready to be served warm.

Storage Tips for Savory Chicken Bhuna

  • Fridge: Store leftover Savory Chicken Bhuna in an airtight container for up to 3 days. Ensure it cools completely before sealing to maintain freshness.
  • Freezer: Chicken Bhuna can be frozen for up to 3 months. Portion into containers or bags and thaw overnight in the refrigerator before reheating.
  • Reheating: Gently reheat on the stovetop over low heat, adding a splash of water if needed to keep the sauce from drying out.
  • Serving Reminder: Always taste and adjust seasoning after reheating, as flavors can mellow during storage. Enjoy your comforting meal!

Savory Chicken Bhuna Variations

Feel free to put your own spin on this cozy Chicken Bhuna to suit your taste and dietary needs!

  • Vegetarian Option: Replace chicken thighs with paneer or chickpeas for a delicious vegetarian twist that still packs a protein punch. This makes the dish just as satisfying.

  • Lower-Carb: Swap out tomatoes for diced zucchini to decrease carbs while maintaining a delightful texture. The zucchini will soak up those wonderful spices too!

  • Heat Level Adjustment: Increase or decrease the amount of green chili and chili powder according to your family’s spice preference. Every bit of heat can create a different experience, allowing each meal to be unique.

  • Creamy Texture: Add a dollop of yogurt or heavy cream towards the end of cooking for an indulgent, creamy finish. This elevates the dish, making it even more comforting.

  • Extra Veggies: Toss in some grated carrots, peas, or bell peppers during the onion stage for a nutrition boost and added color. Your kids (and adults) will never know they’re eating more veggies!

  • Herb Infusion: Try adding fresh mint or basil along with the coriander at the end for a refreshing twist. This not only adds flavor but a lovely aroma that will beckon everyone to the table.

  • Rich Flavor Boost: Brown the chicken thighs before adding them to the sauce for an extra depth of flavor. Letting them caramelize creates a delightful crust that enhances every bite.

  • Coconut Cream: Use coconut milk in place of water for a tropical flavor and creaminess that pairs beautifully with the spices. It’s a delightful way to switch things up!

Remember, cooking should reflect your personal taste, so don’t hesitate to explore these variations! For more inspiration, hop over to my collection of simple Indian-inspired dishes that will spark your creativity in the kitchen.

Expert Tips for Savory Chicken Bhuna

  • Choose Chicken Thighs: Ensure you use bone-in, skinless chicken thighs for the best flavor and tenderness; breasts can dry out.
  • Spice Freshness Matters: Always check the freshness of your spices. Stale spices can dull the rich flavor of your Chicken Bhuna.
  • Sauce Thickness: If your sauce turns out too watery, simply simmer uncovered for 10-15 minutes, allowing it to thicken beautifully.
  • Control the Heat: Tailor the spice levels by adjusting the amount of green chili and chili powder; remember, you can always add more, but it’s hard to take it out!
  • Storage Savvy: For leftovers, refrigerate in an airtight container for up to 3 days or freeze for up to 3 months to enjoy the comforting meal anytime.

Make Ahead Options

These Cozy Chicken Bhuna meal prep options are perfect for busy weeknights! You can chop the vegetables and marinate the chicken thighs up to 24 hours in advance, keeping them refrigerated to absorb the flavors. The spice mixture can also be prepped and stored in an airtight container for up to 3 days, ensuring depth in flavor. When it’s time to serve, simply sauté the aromatics as outlined, add the tomatoes and water, then incorporate your marinated chicken, finishing with fresh lemon juice and coriander for that vibrant touch. By preparing in advance, you’ll have a delicious, homemade Chicken Bhuna ready with minimal fuss, just as delightful as if made fresh!

What to Serve with Cozy Chicken Bhuna?

Pair your delightful dish with complementary sides that elevate its comforting flavors and textures.

  • Fluffy Basmati Rice: The light and fragrant rice absorbs the spices, making each bite perfectly balanced and satisfying.
  • Warm Naan Bread: Ideal for scooping up the rich sauce, naan adds a wonderful, chewy texture that enhances every mouthful.
  • Cucumber Raita: This cooling yogurt dip offers a refreshing contrast to the heat of the chicken, beautifully balancing the meal.
  • Spiced Roasted Vegetables: Roasting brings out the natural sweetness and pairs wonderfully with the bold spices in Chicken Bhuna.
  • Chickpea Salad: A bright, protein-packed salad with fresh herbs and lemon makes for a light and zesty counterpart.
  • Mango Chutney: This sweet and tangy condiment adds a delightful contrast to the savory chicken bhuna, enhancing the overall flavor experience.
  • Masala Chai: A fragrant spiced tea makes for an inviting drink, perfect for warming up your evening.
  • Gulab Jamun: Finish the meal with these syrupy, sweet treats for a traditional Indian dessert that offers a delightful endnote.
  • Lemon and Mint Infused Water: Keep it refreshing, cleansing, and light, accentuating the richness of your savory chicken.

Savory Chicken Bhuna Recipe FAQs

How do I choose ripe tomatoes for the sauce?
Absolutely! Look for tomatoes that are firm yet slightly soft to the touch, with a vibrant red color. Avoid those that have dark spots all over or feel overly mushy. Ideal tomatoes should smell sweet and fresh!

What is the best way to store leftover Chicken Bhuna?
After cooking, allow your Savory Chicken Bhuna to cool completely, then transfer it to an airtight container. It can safely be stored in the fridge for up to 3 days. Just be sure to seal it well to maintain its delicious flavors.

Can I freeze Chicken Bhuna for later?
Yes, you can! Simply allow the dish to cool completely and then portion it into freezer-safe containers or zip-top bags. Chicken Bhuna can be frozen for up to 3 months. To reheat, thaw it in the refrigerator overnight, then gently warm on the stovetop.

What if my Chicken Bhuna sauce is too watery?
If your sauce ends up too thin, don’t worry! Simply simmer it uncovered over medium heat for 10-15 minutes. This will help cook off excess liquid, thickening the sauce to a lovely consistency. Stir occasionally to prevent sticking, and enjoy the rich flavors!

Is Chicken Bhuna suitable for my gluten-free diet?
Very! This recipe is naturally gluten-free since it doesn’t include any wheat-based ingredients. Just double-check that any spice blends you use, like garam masala, don’t contain gluten. It’s a delightful option for gluten-sensitive diners!

Can my pets enjoy Chicken Bhuna?
It’s best not to share your Savory Chicken Bhuna with pets. While chicken is a great protein source for them, the spices and seasonings can be harmful. Always stick to pet-friendly foods when treating your furry friends!

undefined

Savory Chicken Bhuna: Cozy Comfort in Every Bite

Savory Chicken Bhuna is a comforting dish with rich flavors, customizable spice levels, and high-protein goodness.
Prep Time 15 minutes
Cook Time 45 minutes
Total Time 1 hour
Servings: 4 servings
Course: Dinner
Cuisine: Indian
Calories: 380

Ingredients
  

For the Chicken
  • 1.5 pounds chicken thighs bone-in, skinless is best
  • salt to taste
For the Aromatics
  • 4 cloves garlic minced
  • 1 tablespoon fresh ginger finely chopped
  • 1 unit green chili deseeded and chopped
  • 1 medium onion diced
For the Spices
  • ½ teaspoon turmeric powder
  • 1 teaspoon chili powder
  • 1 teaspoon ground cumin
  • 1 teaspoon ground coriander
  • 1 teaspoon garam masala
For the Sauce
  • 2 cups chopped tomatoes
  • 1 cup water adjust for desired consistency
For the Finish
  • ½ unit lemon juice freshly squeezed
  • fresh coriander chopped, for garnish
  • 2 tablespoons vegetable oil for sautéing

Equipment

  • large pan

Method
 

Step‑by‑Step Instructions
  1. Heat the oil in a large pan over medium heat until shimmering.
  2. Sauté the minced garlic, chopped green chili, and chopped ginger in the hot oil for about 1 minute until fragrant.
  3. Add the diced onion and cook until golden brown, about 3-4 minutes.
  4. Stir in the spices: turmeric, chili powder, ground cumin, ground coriander, and garam masala. Cook for another minute.
  5. Add chopped tomatoes and water, season with salt, and bring to a boil for about 5 minutes.
  6. Reduce heat to low and simmer uncovered for about 10-15 minutes until the sauce thickens.
  7. Add chicken thighs to the sauce, cover, and cook for about 20 minutes until tender.
  8. Squeeze lemon juice over the dish and garnish with chopped coriander before serving warm.

Nutrition

Serving: 1servingCalories: 380kcalCarbohydrates: 12gProtein: 32gFat: 22gSaturated Fat: 5gPolyunsaturated Fat: 2gMonounsaturated Fat: 15gCholesterol: 150mgSodium: 600mgPotassium: 850mgFiber: 3gSugar: 5gVitamin A: 500IUVitamin C: 15mgCalcium: 25mgIron: 3mg

Notes

Store leftovers in an airtight container. For a complete meal, serve with basmati rice or naan.

Tried this recipe?

Let us know how it was!

Irresistible Homemade Chocolate Chip Cookies to Savor

The aroma of freshly baked cookies wafts through the kitchen, stirring memories of laughter and warm hugs. Nothing compares to the joy of biting into a warm chocolate chip cookie that strikes the perfect balance between crisp edges and chewy centers. Today, I’m thrilled to share my cherished recipe for Classic Chocolate Chip Cookies, a delightful blend of simplicity and indulgence. This recipe is not only a crowd-pleaser that transcends ages but also requires minimal time and effort, making it perfect for a quick fix any day of the week. Imagine the smiles you’ll see as you serve these golden-brown delights to family and friends! Are you ready to discover the secret to making these irresistible treats? Let’s dive in together!

Why Are These Cookies a Must-Bake?

Deliciousness Guaranteed: Each bite offers a heavenly combination of crispy edges and chewy centers, a hallmark of perfect chocolate chip cookies.

Quick and Easy: With just a few simple ingredients and straightforward steps, you’ll whip up these lovely treats in no time.

Versatile Treats: Customize them to your liking by adding nuts, oats, or even experimenting with different chocolates, ensuring everyone gets their favorite version.

Nostalgia in Every Bite: These cookies are a timeless classic that evokes warmth and joy, making them ideal for any occasion or simply for satisfying your cravings.

Perfect for Sharing: They disappear fast at gatherings, bringing smiles and compliments from friends and family alike! Don’t forget to check out my tips on Serving Suggestions for an unforgettable experience.

Chocolate Chip Cookie Ingredients

  • For the Dough
  • All-Purpose FlourProvides structure to the cookies; using a gluten-free blend can cater to dietary needs.
  • Unsalted ButterAdds richness and flavor; ensure it’s softened for easy mixing.
  • Light Brown SugarContributes a hint of caramel flavor; you can substitute with coconut sugar for a healthier option.
  • Granulated SugarSweetens and enhances browning; adjust measurements to your preferred sweetness level.
  • Large EggsBind the ingredients together and provide moisture; for a vegan option, a flaxseed mixture can work well.
  • Semi-Sweet Chocolate ChipsBring delightful sweetness and texture; dark chocolate can be used for less sweetness or milk chocolate for a creamier bite.
  • Baking SodaAct as a leavening agent to help the cookies rise; be cautious not to use expired baking soda for optimal results.
  • SaltEnhances all the flavors in the cookies; using coarse sea salt offers a gourmet touch that balances sweetness.

With these Chocolate Chip Cookie ingredients, you’re well on your way to creating a batch of irresistible treats that will leave everyone asking for more!

Step‑by‑Step Instructions for Irresistible Homemade Chocolate Chip Cookies to Savor

Step 1: Preheat the Oven
Start by preheating your oven to 350°F (175°C). This temperature is key for achieving that perfect balance of crisp edges and chewy centers in your classic chocolate chip cookies. While the oven is heating, line a baking sheet with parchment paper to prevent sticking and ensure an easy cleanup later.

Step 2: Cream the Butter and Sugars
In a large mixing bowl, combine softened unsalted butter, light brown sugar, and granulated sugar. Use an electric mixer on medium speed to cream the mixture until it’s light and fluffy, which should take about 3 minutes. The mixture should appear pale and airy, indicating that it’s ready for the next step in your chocolate chip cookie adventure.

Step 3: Incorporate Eggs and Vanilla
Next, add in the large eggs and a splash of pure vanilla extract to the creamed mixture. Beat them together on medium speed until the eggs are fully incorporated and the mixture is smooth. This step enriches the flavor of your irresistible homemade chocolate chip cookies while ensuring they stay moist and tender.

Step 4: Mix the Dry Ingredients
In a separate bowl, whisk together the all-purpose flour, baking soda, and salt. This step helps to evenly distribute the leavening agent and enhance the flavors. Once combined, gradually add the dry mixture to the wet ingredients, stirring gently with a spatula until just combined—this is crucial to keeping your cookies tender and chewy.

Step 5: Fold in the Chocolate Chips
With your dough well-mixed, it’s time to add the semi-sweet chocolate chips. Gently fold them into the cookie dough using a spatula or wooden spoon, ensuring an even distribution without overmixing. Your dough should now be beautifully thick and filled with delicious chocolate chunks, ready to be scooped onto your baking sheet.

Step 6: Scoop the Dough
Using a cookie scoop or tablespoon, drop heaping spoonfuls of dough onto the prepared baking sheet. Leave about 2 inches of space between each scoop to allow room for spreading. Aim for uniform sizes to ensure even baking, which will result in those beautifully golden-brown chocolate chip cookies everyone loves.

Step 7: Bake the Cookies
Pop the baking sheet into your preheated oven and bake for 10-12 minutes. Look for the edges to be lightly golden while the centers still appear soft. This is where the magic happens, transforming your cookie dough into irresistible homemade chocolate chip cookies that will fill your kitchen with a delightful aroma.

Step 8: Cool on the Sheet
Once baked to perfection, remove the cookies from the oven and let them cool on the baking sheet for 5 minutes. This cooling time allows the cookies to set properly before transferring them. After a brief wait, transfer the cookies to a wire rack to cool completely, ensuring they retain their chewy texture.

Step 9: Serve and Enjoy
Your irresistible homemade chocolate chip cookies are now ready to be savored! Serve them warm with a glass of milk or let them cool slightly for a cozier treat. No matter how you enjoy them, these cookies are guaranteed to bring smiles and a sense of nostalgia with every bite.

Expert Tips for Perfect Chocolate Chip Cookies

Chill the Dough: Chilling the dough for at least 30 minutes helps prevent spreading, ensuring your cookies maintain that perfect chewy texture.

Don’t Overmix: Once you add the dry ingredients, mix just until combined. Overmixing can lead to tough cookies, while gentle folds keep them tender.

Even Cookie Sizes: Use a cookie scoop for uniform dough balls, ensuring even baking and consistent results in your chocolate chip cookies.

Watch the Bake Time: Keep an eye on your cookies during the last few minutes. They should be golden at the edges but slightly soft in the middle for that ideal texture.

Storage Secrets: Store your cookies in an airtight container at room temperature for up to one week. For longer freshness, consider freezing the baked cookies!

Make Ahead Options

These Classic Chocolate Chip Cookies are perfect for meal prep enthusiasts! You can prepare the dough up to 24 hours in advance. Simply mix the ingredients as per the recipe, then wrap the dough tightly in plastic wrap and refrigerate. This not only saves time but also enhances the flavors, making your cookies even more delicious! When you’re ready to bake, scoop the chilled dough onto a baking sheet and follow the regular baking instructions. If you prefer, you can also freeze the dough in individual balls for up to 3 months; just pop them straight into the oven from the freezer and add an extra minute to the baking time. Enjoy warm cookies with minimal effort on busy weeknights!

Chocolate Chip Cookies Variations & Substitutions

Feel free to let your creativity shine as you adapt and personalize these delightful cookies to suit your taste buds!

  • Nutty: Add chopped walnuts or pecans for an extra crunch and deep flavor. This twist adds a satisfying texture alongside the chocolatey goodness.

  • Oatmeal Delight: Incorporate 1 cup of rolled oats into the dough for a heartier cookie. Oats add a chewy texture that makes every bite feel more substantial.

  • Double Chocolate: Swap half of the flour with cocoa powder for a rich, chocolatey version. Each cookie will be a dark chocolate lover’s dream—decadent and irresistible!

  • Spicy Kick: Add 1 teaspoon of cinnamon or a pinch of cayenne pepper to bring warmth and depth to the flavor. The subtle spice really enhances the sweetness, creating a delightful contrast.

  • Vegan-Friendly: Use coconut oil instead of butter and flaxseed meal mixed with water instead of eggs. You’ll still achieve a fabulous texture and enjoy chocolate chip delights without any animal products!

  • Gluten-Free: Substitute all-purpose flour with a gluten-free flour blend. Just ensure that your blend includes a binding agent for the best results.

  • Fruit Fusion: Toss in 1/2 cup of dried cranberries or cherries to the dough for a fruity twist. The sweet-tart addition complements the chocolate beautifully and adds a pop of color!

  • Chunky Monkey: Mix in slices of ripe banana or use banana chips for a tropical, banana-infused cookie that brings a sweet balance of flavors.

With these ideas, you can transform your classic chocolate chip cookies into unique variations that reflect your personal taste. Happy baking!

What to Serve with Irresistible Homemade Chocolate Chip Cookies

There’s nothing quite like enjoying the warmth and sweetness of fresh cookies, and pairing them with the right accompaniments can elevate your experience even more.

  • Ice Cold Milk: A classic pairing that complements the sweet, rich flavors of cookies. Dunking them in milk creates a delightful contrast between creamy and crunchy.

  • Vanilla Ice Cream: The perfect partner for warm cookies, creating a dreamy ice cream sandwich. The contrast in temperature and texture is simply irresistible!

  • Fresh Berries: Juicy strawberries or tart raspberries provide a refreshing burst of flavor that cuts through the sweetness, enhancing the cookie experience.

  • Coffee or Espresso: The rich, robust flavors in coffee pair wonderfully with chocolate. Enjoy a warm cookie with your favorite brew for a comforting afternoon treat!

  • Peanut Butter Spread: A nutty dollop on your cookie adds an extra layer of flavor and creaminess, transforming an ordinary snack into a gourmet indulgence.

  • Coconut Macaroons: These chewy and sweet treats provide a delightful textural contrast, offering a more exotic addition to the classic chocolate chip cookie experience.

  • Fruit Smoothie: A blend of bananas, yogurt, and a touch of honey creates a healthy, creamy drink that balances out the cookies’ sweetness while keeping your snack time balanced.

Each pairing adds its own unique twist, ensuring that your irresistible homemade chocolate chip cookies not only satisfy cravings but also create lasting memories at every bite.

How to Store and Freeze Chocolate Chip Cookies

Room Temperature: Store your cookies in an airtight container at room temperature for up to one week. This helps maintain their delightful chewy texture and flavor.

Fridge: If you prefer, you can refrigerate the cookies for up to two weeks. Just make sure they’re well-wrapped to prevent them from absorbing odors from the fridge.

Freezer: For longer storage, you can freeze the baked cookies for up to three months. Place them in an airtight freezer-safe bag or container, separating layers with parchment paper.

Reheating: To enjoy warm cookies, reheat them in the microwave for about 10-15 seconds or in the oven at 350°F (175°C) for 5 minutes to revive their fresh-from-the-oven goodness!

Chocolate Chip Cookies Recipe FAQs

What type of flour works best for Chocolate Chip Cookies?
All-purpose flour is the gold standard for these cookies, providing the perfect structure. If you’re looking for a gluten-free option, a gluten-free flour blend can substitute effectively, ensuring everyone can enjoy these delightful treats!

How should I store leftover Chocolate Chip Cookies?
Absolutely store your cookies in an airtight container at room temperature for up to one week. This helps maintain their delightful chewy texture. If you want them to last longer, popping them in the fridge can extend their freshness for up to two weeks, just ensure they’re wrapped well!

Can I freeze Chocolate Chip Cookies?
Definitely! To freeze your cookies, let them cool completely, then place them in an airtight freezer-safe container or bag, layering them with parchment paper. They can stay frozen for up to three months. When you’re ready to enjoy, just reheat them in the microwave for 10-15 seconds or at 350°F (175°C) for 5 minutes for that fresh-baked warmth!

What if my cookie dough is too sticky?
If you find your cookie dough is too sticky to scoop, it’s likely due to the butter being too warm or too much liquid. You can refrigerate the dough for 30 minutes to firm it up before scooping. Also, ensuring your butter is softened—not melted—will help avoid this issue in future batches.

Are there any dietary considerations with Chocolate Chip Cookies?
For those with allergies, always check the ingredient labels, especially for the chocolate chips, as they may contain allergens. If you’re looking to make them vegan, try substituting the eggs with a flaxseed mixture (1 tablespoon ground flaxseed + 2.5 tablespoons water = 1 egg) and ensure your chocolate chips are dairy-free.

undefined

Irresistible Homemade Chocolate Chip Cookies to Savor

Classic Chocolate Chip Cookies that offer a delightful blend of crispy edges and chewy centers, perfect for any occasion.
Prep Time 15 minutes
Cook Time 12 minutes
Cooling Time 5 minutes
Total Time 32 minutes
Servings: 24 cookies
Course: Dessert
Cuisine: American
Calories: 150

Ingredients
  

For the Dough
  • 2 cups All-Purpose Flour Provides structure to the cookies; using a gluten-free blend can cater to dietary needs.
  • 1 cup Unsalted Butter Adds richness and flavor; ensure it's softened for easy mixing.
  • 3/4 cup Light Brown Sugar Contributes a hint of caramel flavor; you can substitute with coconut sugar for a healthier option.
  • 3/4 cup Granulated Sugar Sweetens and enhances browning; adjust measurements to your preferred sweetness level.
  • 2 large Large Eggs Bind the ingredients together and provide moisture; for a vegan option, a flaxseed mixture can work well.
  • 2 cups Semi-Sweet Chocolate Chips Bring delightful sweetness and texture; dark chocolate can be used for less sweetness or milk chocolate for a creamier bite.
  • 1 teaspoon Baking Soda Act as a leavening agent to help the cookies rise; be cautious not to use expired baking soda for optimal results.
  • 1/2 teaspoon Salt Enhances all the flavors in the cookies; using coarse sea salt offers a gourmet touch that balances sweetness.

Equipment

  • Mixing Bowl
  • Electric mixer
  • Baking Sheet
  • Parchment Paper
  • Cookie Scoop

Method
 

Step-by-Step Instructions
  1. Start by preheating your oven to 350°F (175°C) and line a baking sheet with parchment paper.
  2. In a large mixing bowl, combine softened unsalted butter, light brown sugar, and granulated sugar. Use an electric mixer to cream until light and fluffy, about 3 minutes.
  3. Add in the large eggs and a splash of pure vanilla extract to the creamed mixture. Beat until fully incorporated and smooth.
  4. In a separate bowl, whisk together the all-purpose flour, baking soda, and salt. Gradually add to the wet ingredients, stirring gently until just combined.
  5. Fold in the semi-sweet chocolate chips evenly into the dough without overmixing.
  6. Drop heaping spoonfuls of dough onto the prepared baking sheet, leaving about 2 inches space between each scoop.
  7. Bake for 10-12 minutes until edges are lightly golden and centers appear soft.
  8. Let cookies cool on the baking sheet for 5 minutes, then transfer to a wire rack to cool completely.
  9. Serve warm with a glass of milk or let cool slightly for a cozy treat.

Nutrition

Serving: 1cookieCalories: 150kcalCarbohydrates: 20gProtein: 2gFat: 7gSaturated Fat: 4gPolyunsaturated Fat: 1gMonounsaturated Fat: 2gCholesterol: 30mgSodium: 100mgPotassium: 50mgSugar: 10gVitamin A: 300IUCalcium: 20mgIron: 0.5mg

Notes

Chilling the dough for at least 30 minutes can enhance the texture and flavor of the cookies. Store them in an airtight container to maintain freshness.

Tried this recipe?

Let us know how it was!

Grilled Shrimp Bowl with Avocado & Corn Salsa Delight

As I stood in my kitchen with the enticing aroma of grilled shrimp wafting through the air, I felt a rush of excitement. Today, I’m sharing a recipe that has become my go-to: a 25-Minute Grilled Shrimp Bowl with Avocado & Corn Salsa. This dish not only bursts with color but also brings together healthy ingredients that make it a true crowd-pleaser. It’s perfect for those busy weeknights when you crave something light yet satisfying, and the creamy garlic sauce adds a delightful twist that elevates each bite. Plus, it’s fully customizable, allowing you to switch out proteins or add your favorite toppings. Who knew healthy eating could be so delicious? Ready to dive into this flavorful bowl? Keep scrolling to uncover the secret to making this dish shine!

Why is this shrimp bowl a must-try?

Quick and Easy: In just 25 minutes, you can whip up a restaurant-quality meal that’s perfect for busy weeknights.
Nutritious and Delicious: Packed with lean protein, healthy fats, and vibrant veggies, it’s a heart-smart choice that doesn’t skimp on flavor.
Customizable: Feel free to swap proteins or experiment with different toppings to fit your taste perfectly.
Crowd-Pleaser: Whether it’s a family dinner or a gathering with friends, this dish is sure to impress and satisfy everyone’s cravings.
Fresh and Flavorful: With the zesty corn salsa and rich creamy garlic sauce, each bite is a delightful explosion of flavors that feels gourmet at home.

Ready to elevate your dinner tonight? Dive into this Grilled Shrimp Bowl with Avocado & Corn Salsa recipe and enjoy a dish that’s as fun to make as it is to savor!

Grilled Shrimp Bowl Ingredients

• Dive into the essentials for this delightful dish!

For the Shrimp

  • Large Shrimp (1 lb) – The main protein source, rich in nutrients; swap with grilled chicken or tofu for a different twist.
  • Olive Oil (1 tablespoon) – Enhances flavor and helps spices cling beautifully to the shrimp.
  • Paprika (1 teaspoon) – Brings smoky notes and a pop of color to the dish.
  • Garlic Powder (½ teaspoon) – Elevates the garlic flavor, making it more robust.
  • Salt (¼ teaspoon) – A must for enhancing the overall taste of the shrimp.
  • Black Pepper (¼ teaspoon) – Adds a mild touch of heat for depth.
  • Cayenne Pepper (¼ teaspoon, optional) – For those who like an extra fiery kick.

For the Corn Salsa

  • Frozen Corn (1 cup, thawed) – Sweet and crisp texture; feel free to use fresh corn if available!
  • Red Onion (½ cup, diced) – Provides a crunchy bite and sharpness to balance the bowl.
  • Jalapeño (1, optional) – Introduces heat; omit if you prefer a milder salsa.
  • Cilantro (¼ cup, chopped) – Freshness that brightens up the entire dish.
  • Lime Juice (from 1 lime) – Adds zesty acidity that perks up the flavors.

For the Creamy Garlic Sauce

  • Mayonnaise (½ cup) – The creamy base of your flavorful sauce.
  • Sour Cream (¼ cup) – Infuses a tangy kick into the mix.
  • Lemon Juice (from 1 lemon) – Enhances the creaminess with delightful citrus notes.
  • Garlic (1 clove, minced) – A boost to the sauce’s flavor profile.

For Garnish

  • Sesame Seeds – Sprinkle for added texture and visual appeal.
  • Green Onions – Adds a fresh element and vibrant color to your dish.

With these ingredients, you’re just a few simple steps away from enjoying your Grilled Shrimp Bowl that’s not only wholesome but bursting with flavor!

Step-by-Step Instructions for Grilled Shrimp Bowl with Avocado & Corn Salsa

Step 1: Marinate the Shrimp
In a large mixing bowl, combine 1 pound of large shrimp with 1 tablespoon of olive oil, 1 teaspoon paprika, ½ teaspoon garlic powder, ¼ teaspoon salt, ¼ teaspoon black pepper, and optional ¼ teaspoon cayenne pepper. Toss the shrimp until they are well-coated in the marinade, ensuring each piece is covered. Let the shrimp marinate for about 10 minutes to absorb the flavors while you prepare the corn salsa.

Step 2: Prepare the Corn Salsa
In another bowl, mix together 1 cup of thawed frozen corn, ½ cup diced red onion, optional diced jalapeño, ¼ cup chopped cilantro, juice from 1 lime, and a pinch of salt. Stir well until everything is evenly combined. Set aside to let the flavors marry while you preheat the grill, creating a zesty salsa that will complement the shrimp beautifully.

Step 3: Preheat the Grill
Preheat your grill or grill pan over medium heat for about 5 minutes. You want the grill hot enough to give the shrimp a nice sear, ensuring they cook evenly. As it heats up, you can take a moment to prepare the garlic sauce for a delightful finishing touch.

Step 4: Grill the Shrimp
Once the grill is hot, place the marinated shrimp on it. Grill for 2-3 minutes per side until they turn opaque and slightly charred, ensuring they don’t overcook to avoid toughness. You’ll know they’re ready when they have a beautiful pinkish color. Remove the grilled shrimp from the grill and let them rest briefly while you assemble the bowl.

Step 5: Make the Creamy Garlic Sauce
In a small bowl, whisk together ½ cup mayonnaise, ¼ cup sour cream, juice from 1 lemon, 1 minced garlic clove, and a pinch of salt and pepper until the mixture is smooth and creamy. This sauce will add a delightful richness and tanginess to your Grilled Shrimp Bowl, enhancing all the flavors.

Step 6: Assemble the Bowl
To assemble your Grilled Shrimp Bowl, start by dividing the corn salsa among the serving bowls. Top each bowl generously with the grilled shrimp and either sliced or mashed avocado for creaminess. Drizzle the creamy garlic sauce over your shrimp and salsa, giving it a luscious finish.

Step 7: Garnish and Serve
Finally, garnish each bowl with a sprinkle of sesame seeds and chopped green onions for added texture and freshness. This bright and colorful presentation will make your Grilled Shrimp Bowl with Avocado & Corn Salsa not only delicious but also inviting. Serve immediately and enjoy the burst of flavors!

How to Store and Freeze Grilled Shrimp Bowl

Fridge: Store leftovers in an airtight container for up to 2-3 days. This keeps your Grilled Shrimp Bowl fresh and allows you to enjoy the delicious flavors again.

Freezer: For longer storage, you can freeze grilled shrimp and corn salsa separately. Wrap them tightly in plastic wrap and then place them in a freezer-safe bag. They can last up to 3 months.

Reheating: When ready to enjoy, thaw overnight in the fridge and reheat grilled shrimp on a skillet over medium heat for a few minutes until warmed through. Add fresh ingredients to the salsa to revive flavors!

What to Serve with Grilled Shrimp Bowl with Avocado, Corn Salsa & Creamy Garlic Sauce

A vibrant meal deserves vibrant accompaniments, enhancing flavors and textures to create a memorable dining experience.

  • Crispy Garlic Bread: Perfectly toasted with fragrant garlic and butter, it’s wonderful for soaking up the creamy sauce and adds a comforting crunch.

  • Light Green Salad: Tossed with fresh greens and a zesty vinaigrette, the salad provides a refreshing contrast that complements the rich shrimp bowl.

  • Quinoa Pilaf: A nutty base that is hearty and healthy, quinoa adds a delightful texture, making your meal more filling yet light.

  • Grilled Asparagus: Smoky and tender, this seasonal veggie pairs beautifully with the shrimp, echoing the grill’s taste and adding a pop of color.

  • Mango Salsa: Sweet and tangy, it’s a delightful layering of flavors that elevates your dish, providing brightness to the savory notes of the shrimp.

  • Coconut Rice: Infused with creamy coconut, it offers a subtly sweet base that beautifully balances the savory components of your bowl, creating a tropical vibe.

  • Chilled White Wine: A crisp Sauvignon Blanc or refreshing Pinot Grigio enhances the flavors of the shrimp without overshadowing the dish’s freshness.

  • Lemon Sorbet: To finish, a light lemon sorbet cleanses the palate, providing a refreshing and tangy end to your meal that pairs wonderfully with garlic-rich dishes.

Grilled Shrimp Bowl Variations & Substitutions

Explore creative twists to personalize your Grilled Shrimp Bowl, ensuring every bite is perfect for your palate!

  • Protein Swap: Substitute grilled chicken or tofu for a tasty twist that accommodates various dietary preferences.
  • Fresh Corn: Use sweet, fresh corn instead of frozen for a crisp, seasonal flavor that enhances the salsa.
  • Bean Boost: Incorporate black beans into the corn salsa for added protein and a hearty texture.
  • Veggie Add-Ins: Toss in diced tomatoes or a mix of colorful bell peppers to bring vibrant colors and flavors into your bowl.
  • Spicy Kick: For those who love heat, add sliced jalapeños or chili flakes to the shrimp marinade to make it sizzle!
  • Herb Variations: Experiment with chopped parsley or basil instead of cilantro for a different herbaceous note that reflects your taste.
  • Creamy Alternatives: Swap mayonnaise for Greek yogurt for a tangy substitute that maintains creaminess while lightening up the sauce.
  • Zesty Citrus: Switch lime juice for orange juice in the salsa for a sweet citrus twist that complements the shrimp beautifully.

By mixing and matching these variations, your Grilled Shrimp Bowl will become a delightful canvas for your culinary creativity! Don’t forget to check out our tips on customizing toppings; just imagine how a simple salsa upgrade could elevate your dish!

Expert Tips for Grilled Shrimp Bowl

  • Thaw Shrimp Properly: Ensure your shrimp are completely thawed before marinating; this allows them to absorb all the delicious flavors for your bowl.
  • Avoid Overcooking: Keep a close watch while grilling; shrimp should be cooked just until opaque to maintain their tender texture and avoid toughness.
  • Personalize Your Bowl: Don’t hesitate to customize your toppings; adding bell peppers or different herbs can really make your grilled shrimp bowl pop with flavor.
  • Prep Ahead: Consider preparing the corn salsa and garlic sauce in advance; this makes dinner a breeze on busy nights while keeping flavors fresh.
  • Seating Arrangement: Use shallow, wide bowls for the presentation; it allows everyone to scoop up all the vibrant ingredients, making it a shared experience.

Make Ahead Options

These Grilled Shrimp Bowls with Avocado & Corn Salsa are perfect for meal prep enthusiasts! You can marinate the shrimp up to 24 hours in advance and keep them in the refrigerator to lock in all the flavorful spices. The corn salsa can also be prepared ahead and stored in an airtight container for up to 3 days, allowing the flavors to meld beautifully. When you’re ready to serve, simply grill the marinated shrimp (about 2-3 minutes per side) and assemble the bowls with the prepared salsa and sliced avocado. This way, you’ll enjoy a quick, satisfying meal with minimal effort, just as delightful as if you made it fresh!

Grilled Shrimp Bowl with Avocado, Corn Salsa & Creamy Garlic Sauce Recipe FAQs

How do I choose the right shrimp for my dish?
Absolutely! When selecting shrimp, look for ones that are firm, translucent, and have a mild ocean smell. Avoid shrimp with dark spots or strong ammonia odors, as these are signs of spoilage. Fresh shrimp should have a slight sheen. If frozen, make sure they are completely thawed before marinating for the best flavor absorption.

What is the best way to store leftovers from the Grilled Shrimp Bowl?
To keep your Grilled Shrimp Bowl fresh, store any leftovers in an airtight container in the refrigerator for up to 2-3 days. Make sure to place your creamy garlic sauce in a separate container to prevent sogginess. When you’re ready to eat, simply reheat the shrimp and serve over fresh corn salsa and avocado.

Can I freeze the components of the dish?
Yes, you can! For longer storage, freeze the grilled shrimp and corn salsa separately. Wrap the shrimp tightly in plastic wrap, then place them in a freezer-safe bag or container. The corn salsa can be stored in a separate airtight container. They can last up to 3 months in the freezer. When you’re ready to enjoy, thaw them overnight in the fridge and reheat the shrimp on a skillet until warmed through.

What should I do if the shrimp are overcooked?
Oh no! If your shrimp turn out rubbery from overcooking, there’s not much you can do to fix them. However, you can still salvage the meal by adding more of your creamy garlic sauce or incorporating them into a soup or salad where moisture can help mask the texture. Next time, cook the shrimp just until they’re opaque, which usually takes about 2-3 minutes per side.

Is this dish suitable for people with allergies?
Definitely! This Grilled Shrimp Bowl can be tailored for those with allergies by swapping out ingredients. For instance, you can replace shrimp with grilled chicken or tofu if there are shellfish allergies. Always check with your guests about their dietary restrictions beforehand, and feel free to customize the toppings or sauces to ensure everyone can enjoy this delicious bowl!

undefined

Grilled Shrimp Bowl with Avocado & Corn Salsa Delight

A delicious and nutritious 25-minute Grilled Shrimp Bowl, featuring grilled shrimp, avocado, and corn salsa - perfect for busy weeknights.
Prep Time 10 minutes
Cook Time 15 minutes
Marinating Time 10 minutes
Total Time 25 minutes
Servings: 4 bowls
Course: Dinner
Cuisine: American
Calories: 450

Ingredients
  

For the Shrimp
  • 1 lb Large Shrimp Rich in nutrients; can substitute with chicken or tofu
  • 1 tablespoon Olive Oil Enhances flavor
  • 1 teaspoon Paprika Adds smoky notes
  • 0.5 teaspoon Garlic Powder Elevates garlic flavor
  • 0.25 teaspoon Salt Enhances overall taste
  • 0.25 teaspoon Black Pepper Adds mild heat
  • 0.25 teaspoon Cayenne Pepper Optional for extra heat
For the Corn Salsa
  • 1 cup Frozen Corn Thawed; fresh corn can be used
  • 0.5 cup Red Onion Diced
  • 1 unit Jalapeño Optional; introduces heat
  • 0.25 cup Cilantro Chopped
  • 1 unit Lime Juice Juice from 1 lime
For the Creamy Garlic Sauce
  • 0.5 cup Mayonnaise Creamy base
  • 0.25 cup Sour Cream Infuses tanginess
  • 1 unit Lemon Juice Juice from 1 lemon
  • 1 clove Garlic Minced
For Garnish
  • Sesame Seeds For added texture
  • Green Onions Chopped, for freshness

Equipment

  • Grill
  • Mixing Bowl
  • whisk

Method
 

Step-by-Step Instructions
  1. In a large mixing bowl, combine shrimp with olive oil, paprika, garlic powder, salt, black pepper, and optional cayenne pepper. Toss well and marinate for about 10 minutes.
  2. In another bowl, mix together corn, red onion, optional jalapeño, cilantro, lime juice, and a pinch of salt. Stir well and set aside.
  3. Preheat your grill over medium heat for about 5 minutes.
  4. Grill the marinated shrimp for 2-3 minutes per side until opaque and slightly charred.
  5. In a small bowl, whisk together mayonnaise, sour cream, lemon juice, minced garlic, and a pinch of salt and pepper until smooth.
  6. To assemble, divide the corn salsa among bowls, top with grilled shrimp and avocado, and drizzle with garlic sauce.
  7. Garnish with sesame seeds and green onions before serving.

Nutrition

Serving: 1bowlCalories: 450kcalCarbohydrates: 30gProtein: 25gFat: 25gSaturated Fat: 4gPolyunsaturated Fat: 2gMonounsaturated Fat: 15gCholesterol: 150mgSodium: 600mgPotassium: 500mgFiber: 5gSugar: 3gVitamin A: 15IUVitamin C: 15mgCalcium: 4mgIron: 10mg

Notes

Customizable toppings can enhance flavors; consider using fresh ingredients and avoiding overcooking shrimp for best results.

Tried this recipe?

Let us know how it was!

Creamy Potato Curry with Peas for Cozy Comfort Nights

As I stirred the pot, the rich aroma of spices swept through my kitchen, instantly transporting me to the bustling streets of India. Today, we’re diving into the warm and comforting realm of Creamy Potato Curry with Peas—a dish that encapsulates the essence of home-cooked goodness. This vegetarian delight not only comes together in just 15 minutes of prep and 30 minutes of cooking, but it also shines as a gluten-free option when served with rice. Imagine gathering your loved ones around the table, sharing not just a meal but an experience that warms the soul. Plus, you can easily customize this dish to add your favorite veggies or even make it a heartier meal with protein. Curious about how to create this flavorful feast? Let’s get cooking!

Why is this potato curry special?

Simplicity at Its Best: This Creamy Potato Curry with Peas is incredibly easy to make, perfect for weeknight dinners or when you’re short on time.

Flavor Explosion: With a blend of spices like cumin and garam masala, each bite bursts with rich, satisfying flavors that captivate the senses.

Incredible Versatility: Feel free to customize with your favorite veggies or proteins, turning it into a unique creation every time you make it.

Crowd-Pleasing Comfort Food: Ideal for family gatherings or casual get-togethers, this dish is sure to please picky eaters and curry lovers alike.

Quick Cooking Time: In just 45 minutes, you’ll have a hearty meal ready, and it’s gluten-free when served with rice—making it a fantastic option for inclusive dining.

Make-Ahead Marvel: Leftovers taste even better the next day, making it a great dish for meal prep or storing in the fridge for a quick lunch.

Potato Curry with Peas Ingredients

Essential for this Comfort Dish:

For the Curry Base

  • Potatoes – The heart of the dish, choose Yukon Gold or red potatoes for the best texture.
  • Onion – Sauté until golden to create a sweet flavor base.
  • Tomatoes – Use ripe tomatoes for a tangy punch.

For the Flavor Profile

  • Ginger-Garlic Paste – Adds aromatic depth; fresh minced garlic and grated ginger work as substitutions.
  • Cumin Seeds – Essential for an aromatic richness.
  • Mustard Seeds – Optional for an extra kick; skip if you prefer milder flavors.
  • Turmeric Powder – Provides striking color and health benefits.
  • Red Chili Powder – Adjust the heat level to your taste for the perfect spice.
  • Garam Masala – Adds a finishing touch of warmth and complexity.
  • Coriander Powder – Deepens the flavors, essential for a well-rounded dish.
  • Salt – Always adjust to your own taste preferences.

For the Vegetables

  • Green Peas – Fresh or frozen, these add sweetness and vibrant color.

For the Cooking

  • Vegetable Oil – Any neutral oil will do, allowing the spices to shine.
  • Water – Used for cooking to achieve the desired curry consistency.

For the Garnish

  • Cilantro Leaves – A fresh, colorful garnish that elevates the dish.

Now that you have all the ingredients lined up for this delightful potato curry with peas, let’s dive into the cooking process and create something truly special!

Step‑by‑Step Instructions for Creamy Potato Curry with Peas

Step 1: Heat the Oil
In a large pan, heat 2 tablespoons of vegetable oil over medium heat. Once hot, add 1 teaspoon of cumin seeds and a sprinkle of mustard seeds. Listen for the delightful sound of them spluttering, signaling they’re ready to release their flavors. This should take about 2 minutes—keep an eye out for any seeds that might jump!

Step 2: Sauté the Onions
Next, add 1 finely chopped onion to the pan, stirring frequently until the onions turn a beautiful golden brown, which will take roughly 5-7 minutes. The sweetness from the caramelized onions creates a fragrant base for your Creamy Potato Curry. Keep the heat steady to ensure they don’t burn and stir to help them cook evenly.

Step 3: Add Aromatics
Stir in 1 tablespoon of ginger-garlic paste and cook for about 1 minute until the mixture becomes fragrant. As the paste hydrates, its aromatic qualities will further enhance your Creamy Potato Curry. Stir this into the onions thoroughly to ensure that every bit is coated and fragrant.

Step 4: Incorporate Tomatoes
Add 2 chopped ripe tomatoes to the pan and cook them down for about 5 minutes. You’ll want to see them soften and break down, allowing the oil to separate from the mixture. This process thickens the base of your curry and infuses it with tanginess—a key flavor in your dish.

Step 5: Spice it Up
Mix in ½ teaspoon turmeric powder, 1 teaspoon red chili powder, 1 teaspoon garam masala, 1 teaspoon coriander powder, and salt to taste. Stir well for 1 minute to evenly distribute the spices throughout the mixture. The colors should be vibrant, and the heat from the spices will start to envelop the kitchen!

Step 6: Add the Potatoes
Introduce 4 medium-sized cubed Yukon Gold or red potatoes to the pan, stirring to coat them thoroughly in the spices and onion mixture. Let them cook for about 2-3 minutes, enhancing their flavors as the spices cling to their surfaces—this step adds depth to your Creamy Potato Curry.

Step 7: Simmer with Water
Pour in 2 cups of water, bringing the mixture to a gentle boil. Once boiling, reduce the heat to low and cover the pan. Allow it to simmer for 10-15 minutes, checking occasionally. The potatoes should become tender; a fork should easily pierce them without breaking apart, indicating they’re perfectly cooked.

Step 8: Stir in the Peas
Add 1 cup of green peas—fresh or frozen—into the curry and cook uncovered for an additional 5 minutes. The peas will warm through, maintaining their vibrant color and sweetness. Give everything a gentle stir to combine the peas with the rich potato mixture, ensuring even distribution.

Step 9: Garnish and Serve
Remove the pan from heat, then garnish your Creamy Potato Curry with freshly chopped cilantro leaves. Serve it warm, and pair it with fluffy basmati rice or naan for an incredible meal. Embrace the aromatic allure as you gather around the table, ready to enjoy a comforting culinary experience!

Make Ahead Options

These Creamy Potato Curry with Peas are perfect for meal prep, saving you time and effort during busy weeknights! You can chop the potatoes and onions up to 24 hours in advance and store them in a sealed container in the refrigerator to prevent browning. Additionally, you can prepare the ginger-garlic paste and mix together the spices (turmeric, red chili powder, garam masala, and coriander powder) a few days ahead for easy access. When you’re ready to cook, simply sauté the prepped ingredients and follow the remaining steps for a comforting dish that’s just as delicious. This convenience lets you enjoy homemade goodness without the last-minute rush!

Expert Tips for Creamy Potato Curry

  • Choose the Right Potatoes: Opt for Yukon Gold or red potatoes which hold their shape well. Avoid starchy varieties like Russets to prevent mushiness in your creamy potato curry.

  • Golden Onions Are Key: Sauté onions until they achieve a rich golden color. This caramelization adds sweetness and depth, enhancing the overall flavor of the curry.

  • Don’t Overcook Peas: Add green peas towards the end of cooking to keep their vibrant color and sweet flavor intact. Overcooking can lead to a dull taste and color.

  • Adjust Spice Levels: Start with the suggested amounts of red chili powder and taste as you go. You can always add more if you prefer a spicy kick in your creamy potato curry.

  • Simmer Gently: Maintain a gentle simmer while cooking the potatoes. This ensures they become tender without breaking apart, preserving the dish’s textured appeal.

How to Store and Freeze Potato Curry

Fridge: Transfer cooled potato curry to an airtight container. It can be refrigerated for up to 4 days, so you can enjoy the comforting flavors again later.

Freezer: For longer storage, freeze the curry in portioned bags or containers for up to 3 months. Ensure to label them for easy identification later!

Reheating: To maintain texture and flavor, simmer the frozen curry on low heat or microwave it gently until warmed through. You may need to add a splash of water to regain creaminess.

Serving Tip: Remember that the flavors of potato curry deepen and improve after a day in the fridge, making it perfect for meal prep or left-overs!

Variations & Substitutions for Potato Curry

Feel free to tailor the flavors and ingredients in your creamy potato curry to suit your taste and dietary needs!

  • Sweet Potato: Substitute regular potatoes with sweet potatoes for a delightful sweetness that complements the spices beautifully.

  • Mixed Vegetables: Add carrots, bell peppers, or green beans for extra nutrition and texture. This not only enhances the dish but also adds a burst of color!

  • Chickpeas: For a protein boost, throw in canned chickpeas. They absorb flavors well and create a heartier meal without any meat.

  • Coconut Milk: Swap in coconut milk for half the water to bring a lovely creaminess and tropical flavor to your curry, perfect for those who adore rich textures.

  • Spicy Kick: Increase red chili powder or add sliced green chilies for a more significant heat level. Adjust according to your spice tolerance for that extra thrill!

  • Herb Variations: Experiment with different herbs like mint or basil instead of cilantro for a refreshing twist. Each herb brings a unique character to your dish.

  • Lentils: Add cooked lentils for an even more nutrient-dense meal. They blend seamlessly into the sauce while upping the protein content.

  • Serving Ideas: Pair your creamy potato curry with fragrant basmati rice, warm naan, or even quinoa for a healthy alternative. A side of cooling yogurt or chutney adds a refreshing contrast.

Whichever path you choose, these simple variations will elevate your dish and keep every meal exciting. Happy cooking!

What to Serve with Creamy Potato Curry with Peas

The perfect companion to your delicious curry elevates your meal from just good to unforgettable, ensuring a delightful dining experience.

  • Fluffy Basmati Rice: This fragrant rice absorbs the rich sauce beautifully, creating a comforting balance of flavors and textures. Its delicate, slightly nutty flavor enhances the curry without overpowering it.

  • Warm Naan Bread: Soft, pillowy naan is ideal for scooping up the creamy curry. Its charred, smoky notes add depth to the meal while inviting you to savor every last bite.

  • Cooling Yogurt Raita: A refreshing raita of yogurt with mint or cucumber provides a creamy tang that soothes the spice of the curry. This pairing offers a delightful contrast, making every mouthful a pleasure.

  • Crisp Cucumber Salad: A simple salad with sliced cucumbers and tomatoes dressed in lemon juice adds a crunchy freshness. It balances the warm, creamy curry with bright, zesty flavors.

  • Sautéed Spinach: Lightly sautéed spinach with garlic brings a vibrant green element to your plate. The earthy taste complements the spices in the curry while adding essential nutrients.

  • Mango Chutney: Sweet and tangy mango chutney acts as a flavorful counterpoint to the spices. Its sweetness perfectly contrasts the heat of the curry, creating a well-rounded meal experience.

  • Lemonade or Iced Tea: Refreshing drinks like homemade lemonade or iced tea cleanse the palate between bites. Their sweet and tart notes provide a lovely balance to your cozy meal.

Indulge in these delightful pairings, and enjoy the warmth and love that comes with a homemade feast!

Creamy Potato Curry with Peas Recipe FAQs

What kind of potatoes should I use for the curry?
Absolutely! For the best texture, opt for medium-sized potatoes like Yukon Gold or red potatoes. These varieties hold their shape well during cooking, creating a delightful bite. Avoid starchy types like Russets as they can turn mushy in the curry.

How long can I store the creamy potato curry in the refrigerator?
You can refrigerate the creamy potato curry for up to 4 days in an airtight container. Just let it cool completely before transfer to keep it fresh and flavorful. It’s perfect for meal prep, ensuring you have a comforting dish ready to enjoy throughout the week!

Can I freeze potato curry? If so, how?
Very! To freeze the potato curry, allow it to cool, then portion it into airtight bags or containers. It’s best to freeze it for up to 3 months. Be sure to label the bags with the date for easy tracking! When ready to eat, simply thaw in the refrigerator overnight, then reheat gently on the stove until warmed through.

How can I avoid overcooking the peas in the curry?
To maintain their vibrant color and sweet flavor, add green peas during the final 5 minutes of cooking. This ensures they warm through without becoming mushy. If you’re using frozen peas, they only need a quick cooking time to retain their fresh taste.

Are there any allergy considerations I should be aware of?
The creamy potato curry is vegetarian and gluten-free (when served with rice), making it suitable for many diets. However, if you have allergies, make sure to check the labels on any pre-packaged ingredients like ginger-garlic paste or spices, as they may contain allergens. Always feel free to substitute with homemade versions where possible!

What if my curry is too thick?
If you find your creamy potato curry is too thick, don’t worry! Simply stir in a bit more water while it simmers, adding it gradually until you reach the desired consistency. It’s all about finding that perfect balance!

undefined

Creamy Potato Curry with Peas for Cozy Comfort Nights

Savor the comforting flavors of creamy potato curry with peas, a gluten-free delight perfect for family dinners.
Prep Time 15 minutes
Cook Time 30 minutes
Total Time 45 minutes
Servings: 4 servings
Course: Dinner
Cuisine: Indian
Calories: 250

Ingredients
  

Curry Base
  • 4 medium Yukon Gold or red potatoes cubed
  • 1 piece Onion finely chopped
  • 2 pieces Ripe tomatoes chopped
Flavor Profile
  • 1 tablespoon Ginger-garlic paste
  • 1 teaspoon Cumin seeds
  • 1 teaspoon Mustard seeds optional
  • ½ teaspoon Turmeric powder
  • 1 teaspoon Red chili powder to taste
  • 1 teaspoon Garam masala
  • 1 teaspoon Coriander powder
  • Salt to taste
Vegetables
  • 1 cup Green peas fresh or frozen
Cooking
  • 2 tablespoons Vegetable oil any neutral oil
  • 2 cups Water
Garnish
  • Cilantro leaves freshly chopped

Equipment

  • large pan

Method
 

Cooking Steps
  1. In a large pan, heat the vegetable oil over medium heat. Add cumin seeds and mustard seeds, listening for the spluttering sound, about 2 minutes.
  2. Add the finely chopped onion and sauté until golden brown, about 5-7 minutes.
  3. Stir in the ginger-garlic paste and cook for 1 minute until fragrant.
  4. Incorporate the chopped tomatoes and cook for 5 minutes until softened.
  5. Mix in turmeric powder, red chili powder, garam masala, coriander powder, and salt. Stir well for 1 minute.
  6. Add the cubed potatoes, stirring to coat them thoroughly in the spice mixture. Cook for 2-3 minutes.
  7. Pour in water, bring to a gentle boil, reduce heat to low, cover, and simmer for 10-15 minutes.
  8. Add the green peas and cook uncovered for an additional 5 minutes.
  9. Garnish with freshly chopped cilantro leaves and serve warm.

Nutrition

Serving: 1servingCalories: 250kcalCarbohydrates: 40gProtein: 6gFat: 8gSaturated Fat: 1gPolyunsaturated Fat: 3gMonounsaturated Fat: 3gSodium: 500mgPotassium: 700mgFiber: 6gSugar: 3gVitamin A: 500IUVitamin C: 25mgCalcium: 30mgIron: 2mg

Notes

This curry can be easily customized with additional vegetables or proteins. Serve it with basmati rice or naan for a complete meal.

Tried this recipe?

Let us know how it was!

Creamy Crab and Shrimp Bisque Perfect for Cozy Nights

The soothing aroma of seafood wafting through the kitchen instantly transports me to a quaint coastal town where the ocean meets the sky. Today, I’m thrilled to share a recipe for Quick Crab and Shrimp Seafood Bisque that captures that enchanting essence in just 30 minutes. Perfect for those chilly evenings when you crave comfort without breaking a sweat, this bisque is an easy, beginner-friendly delight that combines sweet shrimp and briny crab in a rich, creamy sauce. Plus, it beautifully elevates any weeknight dinner into a special occasion! Are you ready to treat yourself to this luxurious, restaurant-style seafood soup? Let’s dive in!

Why Choose This Seafood Bisque?

Simplicity at Its Best: This recipe is perfect for beginners, requiring minimal cooking skills while delivering maximum flavor.

Rich, Creamy Texture: With a delightful blend of heavy cream and whole milk, each spoonful offers comforting warmth and indulgence.

Quick to Prepare: Whip up this bisque in just 30 minutes, making it an ideal choice for busy weeknights or spontaneous gatherings.

Seafood Lover’s Dream: Featuring both sweet shrimp and briny crab, this bisque celebrates the best of the ocean in one hearty bowl.

Versatile Pairings: Serve it with crusty sourdough bread for dipping or alongside a fresh salad for a complete meal experience. To complement this dish, try my classic sourdough bread recipe that pairs beautifully!

Crowd-Pleasing Flavor: Impress family and friends with a dining experience that rivals upscale restaurants, all from the comfort of your home.

Crab and Shrimp Seafood Bisque Ingredients

Here’s everything you need to create this delectable bisque at home!

For the Base

  • Butter – Adds richness and flavor; use olive oil for a lighter option.
  • Celery – Builds a savory flavor base; fresh or frozen cubes work perfectly.
  • Green Onions – Provide a mild onion flavor; leeks can be a great alternative.
  • Flour – Thickens the bisque; consider gluten-free flour for a gluten-free option.

For the Creaminess

  • Heavy Whipping Cream – Offers creaminess and depth; substitute with whole milk for a lighter texture.
  • Whole Milk – Lightens the bisque; can be swapped with low-fat milk to lower calories.

For the Flavor

  • Tomato Paste – Adds umami and vibrant color; canned crushed tomatoes can be used in a pinch.
  • Old Bay Seasoning – A classic seafood seasoning blend; Cajun or seafood boil seasoning are excellent alternatives.
  • Salt and Pepper – Essential for seasoning to taste.

For the Seafood

  • Cooked Shrimp – The main protein; fresh shrimp is ideal, but cooked frozen shrimp works well too.
  • Crab Meat – Essential for that seafood flavor; imitation crab is a budget-friendly substitute.

This Crab and Shrimp Seafood Bisque will have your taste buds dancing with joy! Enjoy creating your luxurious bowl of ocean goodness.

Step-by-Step Instructions for Quick Crab and Shrimp Seafood Bisque

Step 1: Melt the Butter
In a heavy-bottomed pot, melt 4 tablespoons of butter over medium heat. As it melts, pay attention to the gentle sizzling sound and the rich aroma filling your kitchen. This will be the foundation for your flavorful Crab and Shrimp Seafood Bisque, creating a comforting base for the vegetables.

Step 2: Sauté the Vegetables
Add 1 cup of chopped celery and 1 cup of sliced green onions to the pot. Sauté for about 3-4 minutes until they become tender and fragrant. Stir occasionally with a wooden spoon, and look for the softened veggies to take on a slightly translucent appearance, indicating they’re ready for the next step.

Step 3: Incorporate Flour
Sprinkle in 1/4 cup of flour and stir continuously for 1 minute to eliminate the raw taste. The mixture should thicken slightly while still being creamy. This step is crucial for achieving that perfect bisque consistency, so ensure you mix thoroughly for an even blend.

Step 4: Add Warm Milk
Microwave 2 cups of whole milk until warm, then gradually whisk it into the pot. Stir until the mixture is smooth and free of lumps, and you should notice a creamy texture beginning to form. This will elevate your bisque, giving it a rich mouthfeel that’s essential for a delicious Crab and Shrimp Seafood Bisque.

Step 5: Mix in Cream and Seasonings
Stir in 1 cup of heavy whipping cream, 2 tablespoons of tomato paste, and 1 tablespoon of Old Bay seasoning. Add salt and pepper to taste as you whisk everything together. The bisque should be a beautiful blend of colors and aromas, signaling that it’s time to let it develop more flavor.

Step 6: Simmer the Bisque
Bring the mixture to a gentle simmer over medium-low heat, stirring often for about 5-7 minutes. You’ll see the bisque start to thicken—as it does, it will release an enticing, warm aroma. Keep an eye on the pot to prevent sticking while encouraging the flavors to meld beautifully.

Step 7: Add the Seafood
Fold in 1 cup of cooked shrimp and 1 cup of crab meat into the pot. Cook for an additional 2-3 minutes, until the shrimp turn pink and opaque. The seafood should integrate seamlessly into the bisque, adding an inviting coastal charm to your hearty dish.

Step 8: Serve and Garnish
Ladle the bisque into bowls and garnish with fresh parsley and chives for a pop of color. Serve immediately while hot, allowing the fragrant aroma of your Crab and Shrimp Seafood Bisque to captivate your guests and make them feel cozy on a chilly night.

How to Store and Freeze Crab and Shrimp Seafood Bisque

Fridge: Keep your bisque in an airtight container and refrigerate for up to 4-5 days. Let it cool to room temperature before sealing to maintain freshness.

Freezer: For longer storage, pour the bisque into a freezer-safe container, allowing space for expansion. It can be frozen for up to 3 months.

Thawing: To enjoy your frozen bisque, transfer it to the fridge and thaw overnight. Quickly reheat on the stovetop over medium heat, stirring occasionally until warmed through.

Reheating Tips: If the bisque appears thicker after freezing, add a splash of milk or broth while reheating to restore its creamy texture. Enjoy your crab and shrimp seafood bisque in cozy comfort!

Expert Tips for Quick Crab and Shrimp Seafood Bisque

Warm Milk First: Ensure the milk is heated before adding it to the pot to prevent clumping with the flour for a smoother consistency.

Stir Constantly: Once your bisque starts to thicken, stir constantly to avoid sticking or burning, ensuring every bite is rich and creamy.

Avoid Overcooking Shrimp: Cook the shrimp just until they turn pink and opaque to maintain their tender texture; overcooking can lead to toughness.

Ingredient Quality Matters: Use fresh seafood whenever possible for the best flavor. If using frozen shrimp, make sure it’s properly thawed before cooking.

Customize Your Seasoning: Feel free to adjust the Old Bay seasoning to suit your taste preferences, making this seafood bisque truly your own!

What to Serve with Quick Crab and Shrimp Seafood Bisque

This creamy seafood bisque is the perfect centerpiece for a lovely meal, ready to be enhanced by delightful side dishes.

  • Crusty Sourdough Bread: This warm, chewy bread is perfect for dipping, soaking up every delicious drop of bisque and adding a satisfying crunch.

  • Simple Green Salad: A fresh salad with crisp greens and a light vinaigrette adds a refreshing contrast to the rich flavors of the bisque. The crunchy textures balance the creaminess beautifully.

  • Roasted Asparagus: The earthy flavors of tender roasted asparagus provide a healthy and colorful side, enhancing the overall dining experience.

  • Garlic Butter Breadsticks: Soft and buttery, these breadsticks serve as a delightful vehicle for the bisque. Their savory warmth rounds out the meal perfectly.

  • Chardonnay or Sauvignon Blanc: A chilled glass of white wine enhances the seafood’s flavors, creating a sophisticated pairing that feels indulgent.

  • Lemon Sorbet: For dessert, a scoop of lemon sorbet offers a refreshing finish to your meal, cleansing the palate after the rich bisque. It adds a sweet-tart flavor that echoes the bisque’s brightness.

Variations & Substitutions for Crab and Shrimp Bisque

Explore delightful twists on this crab and shrimp bisque to suit your tastes and dietary preferences!

  • Lobster Love: Add chunks of fresh lobster for a luxurious seafood experience that’s sure to impress. Think of the rich flavor and sweet meat complementing your bisque beautifully.

  • Vegetable Boost: Stir in diced carrots or sweet corn for added texture and sweetness. This sweet crunch will enhance the overall flavor profile of your dish.

  • Spicy Kick: Add diced jalapeños or a pinch of red pepper flakes for a little heat. Elevate your bisque with this fiery twist that will warm your soul!

  • Dairy-Free Delight: Use coconut milk instead of heavy cream for a lighter, dairy-free option. This will give your bisque a unique tropical twist while keeping it creamy.

  • Gluten-Free Version: Substitute regular flour with gluten-free flour or cornstarch to thicken your bisque without compromising on flavor. Each spoonful will still be just as satisfying!

  • Imitation Crab: For a budget-friendly option, try using imitation crab meat. You’ll still enjoy that delicious seafood flavor without breaking the bank.

  • Creamy Texture: Replace heavy cream with sour cream or Greek yogurt for a tangy and lighter version of your bisque. It adds depth and a hint of zing!

  • Herb Infusion: Introduce fresh herbs like dill or tarragon as a fragrant finishing touch. These aromatic herbs will elevate the bisque, taking it to culinary heights.

By experimenting with these variations, you’ll transform your crab and shrimp bisque into a customized bowl of comfort that’s perfect for any occasion! For more ideas on what to pair with this dish, check out my suggestions on perfect side dishes.

Make Ahead Options

This Quick Crab and Shrimp Seafood Bisque is an excellent option for meal prep, allowing you to enjoy its comforting flavors without the last-minute rush. You can prepare the bisque base (without the seafood) up to 24 hours in advance. Simply sauté the vegetables and create the creamy mixture, then let it cool before storing in an airtight container in the refrigerator. To maintain quality, it’s best to refrigerate the bisque base without the shrimp and crab. When you’re ready to enjoy, simply reheat the base over low heat, add the cooked shrimp and crab, and warm until just heated through (2-3 minutes). This time-saving method will have you savoring restaurant-quality results with minimal effort!

Crab and Shrimp Seafood Bisque Recipe FAQs

How do I choose the best shrimp and crab for this recipe?
Absolutely! For optimal freshness, I recommend using raw shrimp if you’re able to find it, as it offers the sweetest flavor and best texture when cooked. Look for shrimp that are firm to the touch, with a slight ocean scent—avoid those with a strong fishy odor. As for crab, fresh lump crab meat is the gold standard, but if it’s outside your budget, high-quality imitation crab can be a great substitute in this bisque.

How should I store leftover bisque?
Very! To store your leftover crab and shrimp seafood bisque, let it cool to room temperature first. Then transfer it into an airtight container, and store it in the refrigerator for up to 4-5 days. Make sure to stir before serving again, as some settling might occur.

Can I freeze crab and shrimp seafood bisque?
Absolutely! If you want to freeze the bisque, use a freezer-safe container and pour in the bisque while leaving some space for expansion—this can be about 1 inch from the top. It will keep well in the freezer for up to 3 months. When ready to enjoy, thaw it in the fridge overnight and reheat on the stovetop, stirring occasionally.

What should I do if my bisque is too thick?
No worries! If you find your bisque is thicker than you’d like, simply add a splash of warm milk or seafood broth while reheating. Stir in gradually until you reach your desired consistency. This not only helps with texture but also revives that delightful creaminess.

Are there any dietary considerations for this bisque?
Definitely! This seafood bisque contains seafood, so it’s not suitable for those with shellfish allergies. To make it gluten-free, substitute standard flour with a gluten-free flour blend. Additionally, you can opt for a lower-calorie version by using whole milk instead of heavy cream while still enjoying a deliciously creamy result.

How long will the shrimp take to cook in the bisque?
Excellent question! When you add the shrimp to the bisque, they should only need about 2-3 minutes of cooking time until they turn pink and opaque. Be careful not to overcook them, as shrimp can become tough when left in the heat too long. Keep an eye on them, and you’ll achieve a perfectly tender bite!

undefined

Creamy Crab and Shrimp Bisque Perfect for Cozy Nights

A quick and easy seafood bisque featuring crab and shrimp, perfect for cozy dinner nights.
Prep Time 10 minutes
Cook Time 20 minutes
Total Time 30 minutes
Servings: 4 bowls
Course: Dinner
Cuisine: Seafood
Calories: 350

Ingredients
  

For the Base
  • 4 tablespoons Butter Use olive oil for a lighter option.
  • 1 cup Celery Chopped; fresh or frozen cubes work.
  • 1 cup Green Onions Sliced; leeks are a great alternative.
  • 1/4 cup Flour Consider gluten-free flour for gluten-free option.
For the Creaminess
  • 1 cup Heavy Whipping Cream Substitute with whole milk for lighter texture.
  • 2 cups Whole Milk Can be swapped with low-fat milk.
For the Flavor
  • 2 tablespoons Tomato Paste Canned crushed tomatoes can be used.
  • 1 tablespoon Old Bay Seasoning Cajun or seafood boil seasoning are alternatives.
  • to taste Salt
  • to taste Pepper
For the Seafood
  • 1 cup Cooked Shrimp Fresh is ideal; cooked frozen works.
  • 1 cup Crab Meat Imitation crab is budget-friendly substitute.

Equipment

  • heavy-bottomed pot

Method
 

Step-by-Step Instructions
  1. Melt the Butter: In a heavy-bottomed pot, melt 4 tablespoons of butter over medium heat.
  2. Sauté the Vegetables: Add 1 cup of chopped celery and 1 cup of sliced green onions to the pot. Sauté for about 3-4 minutes until they become tender.
  3. Incorporate Flour: Sprinkle in 1/4 cup of flour and stir continuously for 1 minute.
  4. Add Warm Milk: Microwave 2 cups of whole milk until warm, then gradually whisk it into the pot.
  5. Mix in Cream and Seasonings: Stir in 1 cup of heavy whipping cream, 2 tablespoons of tomato paste, and 1 tablespoon of Old Bay seasoning.
  6. Simmer the Bisque: Bring the mixture to a gentle simmer over medium-low heat, stirring often for about 5-7 minutes.
  7. Add the Seafood: Fold in 1 cup of cooked shrimp and 1 cup of crab meat into the pot.
  8. Serve and Garnish: Ladle the bisque into bowls and garnish with fresh parsley and chives.

Nutrition

Serving: 1bowlCalories: 350kcalCarbohydrates: 20gProtein: 15gFat: 27gSaturated Fat: 15gPolyunsaturated Fat: 2gMonounsaturated Fat: 8gCholesterol: 80mgSodium: 500mgPotassium: 600mgFiber: 1gSugar: 4gVitamin A: 500IUVitamin C: 10mgCalcium: 200mgIron: 1mg

Notes

For the best flavor, use fresh seafood whenever possible. Adjust the seasoning to your preference.

Tried this recipe?

Let us know how it was!

Ginger Chicken and Rice Soup: Your Cozy One-Pot Delight

As I stood by the stove, the nostalgic scent of ginger filled the air, instantly transporting me back to my grandmother’s kitchen where every bowl of soup was a warm embrace. This ginger chicken and rice soup is my homage to those cherished moments, offering a perfect blend of tender chicken, jasmine rice, and a fragrant broth that not only nourishes the body but soothes the soul. Ready in just 45 minutes, this one-pot meal is not only quick and easy to whip up but also light yet satisfying—ideal for those nights when fast food just won’t cut it. Packed with healthy ingredients, it’s the perfect dish for anyone looking to indulge in comforting flavors without the guilt. Curious about how this cozy recipe can transform your mealtime routine? Let’s dive into the details!

Why is this soup a must-try?

Cozy Comfort: This ginger chicken and rice soup wraps you in warmth with every spoonful, making it the perfect remedy for chilly evenings.

Quick and Easy: In just 45 minutes, you can enjoy this delightful one-pot meal, letting you savor homemade goodness without the fuss.

Nourishing Ingredients: Packed with healthy elements like fresh ginger and bok choy, each bowl promotes wellness while delivering on flavor.

Crowd-Pleasing Flavor: With its rich, fragrant broth infused with ginger and garlic, this soup is sure to impress family and friends.

Endless Versatility: Feel free to customize this recipe by adding your favorite veggies or swapping rice for quinoa, ensuring there’s something for everyone.

Experience this healthy dish and discover how it makes mealtime both enjoyable and nourishing. For more comforting ideas, check out our one-pot meals.

Ginger Chicken and Rice Soup Ingredients

For the Soup

  • Boneless, Skinless Chicken Thighs – Provides protein and richness to the soup; chicken breasts can be used for a leaner option.
  • Chicken Broth – The flavorful base; opt for homemade or low-sodium for a healthier soup.
  • Avocado Oil – Ideal for sautéing due to its high smoke point; you can substitute with olive oil, but it will add a different flavor.
  • Toasted Sesame Oil – Essential for that nutty aroma; don’t skip this as it adds a unique depth.
  • Yellow Onion – Brings sweetness to the dish; shallots are a great mild substitute.
  • Garlic – Adds aromatic flavor; fresh garlic is preferred for the best results.
  • Fresh Ginger – A key flavor that provides a warming effect; while ground ginger can be a substitute, fresh is ideal for authenticity.
  • Green Onions – Imparts freshness and crunch; save some for garnishing to elevate presentation.
  • Uncooked Jasmine Rice – Absorbs the soup’s flavors and adds texture; feel free to substitute with basmati rice, adjusting cooking time as needed.
  • Baby Bok Choy – Offers crispness; spinach or Swiss chard can provide an alternative texture.
  • Tamari or Soy Sauce – Delivers umami richness; ensure you use gluten-free tamari for dietary needs.
  • Rice Vinegar – Brightens the soup’s flavors; apple cider vinegar can work in a pinch if you’re out of rice vinegar.
  • Turmeric – Gives the broth a vibrant color and additional warmth; don’t skip it as it adds health benefits.
  • Ground Coriander – Infuses subtle earthiness; can be omitted but enhances the overall taste.
  • Salt & Black Pepper – Essential for seasoning to taste.
  • Lime Juice – Lifts all flavors and adds freshness; lemon juice can work but lime pairs wonderfully with the soup.
  • Toasted Sesame Seeds & Fresh Cilantro – Used for garnishing, adding both flavor and visual appeal.
  • Chili Oil – Drizzle for optional heat; adjust the amount according to your preference for spice.
  • Lime Wedges – Serve alongside for an extra pop of citrus.

Immerse yourself in the delightful flavors of this ginger chicken and rice soup. Each ingredient plays a vital role in creating this cozy one-pot meal!

Step‑by‑Step Instructions for Ginger Chicken and Rice Soup

Step 1: Sauté Aromatics
Begin by heating 2 tablespoons of avocado oil and 1 teaspoon of toasted sesame oil in a large pot over medium heat. Once the oil is shimmering, add 1 sliced yellow onion, 3 minced garlic cloves, and 1 tablespoon of freshly grated ginger. Season the mixture with salt and pepper, and sauté for about 6 minutes until the onion turns soft and translucent, filling your kitchen with delightful aromas.

Step 2: Build the Broth
Pour in 6 cups of chicken broth, along with 2 tablespoons of tamari, 1 tablespoon of rice vinegar, 1 teaspoon of turmeric, and 1 teaspoon of ground coriander. Stir well to combine, then bring the mixture to a gentle boil over medium-high heat. Watch for small bubbles forming, which indicates that the broth is ready for the next step in this comforting ginger chicken and rice soup.

Step 3: Add Chicken and Rice
Once the broth is boiling, introduce 1 ½ pounds of boneless, skinless chicken thighs and 1 cup of uncooked jasmine rice to the pot. Lower the heat to a simmer, cover the pot, and let it cook for 20 minutes. You’ll know it’s ready when the chicken is thoroughly cooked and the rice has absorbed the fragrant broth, creating a warm, inviting soup.

Step 4: Shred the Chicken
After the chicken has cooked through, carefully remove it from the pot using tongs. Allow it to rest for a few minutes, then shred it into bite-sized pieces using two forks. Return the shredded chicken to the pot, stirring gently to incorporate it back into the ginger chicken and rice soup, ensuring every bite is full of flavor.

Step 5: Incorporate Vegetables
Next, stir in 2 cups of chopped baby bok choy and the green parts of 2 sliced green onions. Simmer the soup uncovered for an additional 3-4 minutes, until the bok choy has wilted but still maintains a vibrant green color. This adds not only nutrition but also a lovely crunch to your nourishing soup.

Step 6: Season and Serve
Finish off your ginger chicken and rice soup by adding the juice of 1 lime and adjusting the seasoning with salt and pepper to taste. Turn off the heat and ladle the soup into bowls. Garnish with toasted sesame seeds, fresh cilantro, and a delightful drizzle of chili oil for an added kick.

Step 7: Enjoy with Lime Wedges
Serve steaming hot alongside lime wedges for that perfect burst of citrus. Each spoonful is a comforting embrace, showcasing the rich flavors of ginger, tender chicken, and wholesome vegetables in your homemade soup, perfect for any night of the week.

How to Store and Freeze Ginger Chicken and Rice Soup

Fridge: Store leftover ginger chicken and rice soup in an airtight container for up to 3 days. To maintain fresh flavors, avoid adding bok choy until reheating.

Freezer: For long-term storage, freeze the soup (without bok choy) in freezer-safe containers for up to 3 months. Allow it to cool completely before sealing.

Reheating: When ready to enjoy, thaw in the fridge overnight, then reheat on the stovetop over low heat. Add fresh bok choy and any remaining seasonings just before serving.

Avoid Mushiness: If possible, store bok choy separately to prevent it from becoming mushy upon reheating this delightful ginger chicken and rice soup.

Expert Tips for Ginger Chicken and Rice Soup

  • Use Fresh Ingredients: Fresh ginger and garlic elevate the soup’s flavor; dried alternatives won’t provide the same aromatic impact.

  • Adjust for Thickness: For a brothier soup, increase the amount of chicken broth you add. A richer broth makes for a more comforting ginger chicken and rice soup.

  • Watch Cooking Times: If using chicken breasts instead of thighs, reduce simmering time to prevent overcooking and maintain tenderness.

  • Customize Veggies: Feel free to toss in your favorite vegetables like carrots or mushrooms, but remember to adjust cooking times accordingly to keep them crisp.

  • Store Wisely: To avoid mushy bok choy in leftovers, store it separately and add fresh before serving again.

  • Enhance Flavors: Toast rice in the pot for 1-2 minutes before adding broth; this adds a deeper flavor profile to the soup.

Make Ahead Options

This ginger chicken and rice soup is a meal prep dream come true, allowing you to enjoy homemade comfort in a fraction of the time! You can chop the veggies and measure out your spices up to 3 days in advance, keeping them in airtight containers in the refrigerator to maintain freshness. The chicken can be cooked ahead as well; simply prepare the soup base and store it in the fridge for up to 24 hours before adding the bok choy and reheating. To finish, just simmer everything together and add lime juice right before serving for a bright, fresh flavor. This makes it easy to whip up a delicious, nourishing meal on even the busiest nights!

What to Serve with Ginger Chicken and Rice Soup

As you nurture your craving for warmth and comfort, consider these delightful pairings that will elevate your meal experience.

  • Crispy Spring Rolls: Their crunchy exterior and savory filling provide a delicious contrast to the warm soup, making each bite a delightful experience.

  • Steamed Edamame: These tender soybeans are a nutritious and satisfying choice, offering a fresh, light flavor that complements the rich broth beautifully.

  • Garlic Breadsticks: Soft, buttery, and garlic-infused, these breadsticks are perfect for dipping into the soup while adding a satisfying texture to your meal.

  • Mango Salad: A refreshing salad with juicy mango and crisp greens adds a burst of sweetness that balances the savory soup perfectly. Toss in some chopped cilantro for a hint of aroma.

  • Green Tea: This soothing beverage enhances the soup’s comforting flavors and adds a touch of lightness, making it an excellent choice to sip alongside.

  • Coconut Rice: This fragrant, slightly sweet rice dish brings an extra layer of flavor that melds beautifully with the ginger chicken and rice soup.

  • Fruit Sorbet: Serve a light, fruity sorbet as a refreshing dessert to cleanse the palate after enjoying the comforting warmth of the soup.

  • Chili Oil Drizzle: For those who crave a little heat, a drizzle of chili oil right over the soup heightens its flavors and adds an exciting kick.

With these delectable options, you can create a harmonious dining experience that envelops you in heartwarming goodness. Dive in, and let these pairings shine alongside your ginger chicken and rice soup!

Ginger Chicken and Rice Soup Variations

Feel free to put a personal spin on this cozy soup for a delightful twist on comfort.

  • Vegetable Boost: Add diced carrots or mushrooms for a colorful nutrition boost. These veggies will enhance the soup’s heartiness while bringing a fresh texture to every spoonful.

  • Quinoa Base: Swap out jasmine rice for quinoa or a gluten-free rice blend. Quinoa adds a wonderful nutty flavor and extra protein, making it a perfect alternative for health-conscious eaters.

  • Eggcellent Addition: Incorporate soft-boiled eggs as a nutritious protein boost. Top each bowl with a perfectly runny egg for added creaminess; it takes this comforting soup to a whole new level.

  • Creamy Coconut: Stir in a splash of coconut milk just before serving for a silky-smooth texture. The creaminess complements the ginger beautifully, creating a wonderfully rich contrast.

  • Spice it Up: Add a pinch of cayenne or red pepper flakes for a spicy kick. This will elevate the flavors and give the soup an exciting heat that warms you from the inside out.

  • Herb Infusion: Toss in a handful of fresh herbs like basil or cilantro for a gardening touch. The brightness of fresh herbs elevates the flavors, taking your soup experience to the next level.

  • Noodle Love: Replace rice with your favorite noodles, like udon or soba, for a delightful twist on a classic. This will give the soup a comforting, noodle-bowl vibe that’s satisfying and satiating.

  • Chunky Veggie Delight: For a heartier texture, add chunks of sweet potato or butternut squash. These will add sweetness and contrasting texture, making each bite a mix of flavors.

Feel inspired to mix and match these ideas as you make this recipe your own! If you’re looking for more comforting meal ideas, check out our collection of one-pot recipes.

Ginger Chicken and Rice Soup Recipe FAQs

How do I choose ripe ingredients for this soup?
Absolutely! For the best flavor, select fresh, firm ingredients. Look for boneless, skinless chicken thighs with a pink color and no dark spots. The ginger should be smooth, with a strong aroma, and the bok choy should have crisp leaves and a vibrant green color.

What is the best way to store ginger chicken and rice soup?
Very! Store leftover ginger chicken and rice soup in an airtight container for up to 3 days in the refrigerator. For the best quality, avoid adding bok choy until you’re ready to reheat it. This will keep the bok choy from getting mushy.

Can I freeze ginger chicken and rice soup?
Certainly! To freeze ginger chicken and rice soup, let it cool completely before transferring it to freezer-safe containers without bok choy. It can be stored for up to 3 months. Make sure to label your containers with the date for easy reference.

What should I do if my soup is too thick?
If your soup turns out too thick, simply add more chicken broth or water until it reaches your desired consistency. Stir well and let it heat through. You can also adjust the seasoning to ensure it remains flavorful.

Are there any dietary considerations I should be aware of?
Definitely! For gluten-free options, use tamari instead of soy sauce. Also, if you have allergies to specific vegetables like bok choy or garlic, feel free to swap them out for other vegetables like spinach or omit them entirely. Always check ingredient labels to ensure they meet your dietary needs.

How long can I keep leftover soup in the fridge?
You’ll want to use the leftover soup within approximately 3 days for the best quality. Always store it in an airtight container to maintain its flavor and prevent contamination.

undefined

Ginger Chicken and Rice Soup: Your Cozy One-Pot Delight

This ginger chicken and rice soup offers a warm embrace with tender chicken, jasmine rice, and a fragrant broth for a comforting meal.
Prep Time 15 minutes
Cook Time 30 minutes
Total Time 45 minutes
Servings: 4 bowls
Course: Dinner
Cuisine: Asian
Calories: 340

Ingredients
  

For the Soup
  • 1.5 pounds Boneless, Skinless Chicken Thighs Chicken breasts can be used for a leaner option.
  • 6 cups Chicken Broth Homemade or low-sodium preferred.
  • 2 tablespoons Avocado Oil Can substitute with olive oil.
  • 1 teaspoon Toasted Sesame Oil Essential for nutty aroma.
  • 1 large Yellow Onion Shallots are a great substitute.
  • 3 cloves Garlic Fresh garlic is preferred.
  • 1 tablespoon Fresh Ginger Preferably freshly grated.
  • 2 whole Green Onions Save some for garnishing.
  • 1 cup Uncooked Jasmine Rice Can substitute with basmati rice.
  • 2 cups Baby Bok Choy Spinach or Swiss chard can be used.
  • 2 tablespoons Tamari or Soy Sauce Use gluten-free tamari for dietary needs.
  • 1 tablespoon Rice Vinegar Apple cider vinegar can work in a pinch.
  • 1 teaspoon Turmeric Adds health benefits.
  • 1 teaspoon Ground Coriander Can be omitted.
  • to taste Salt & Black Pepper Essential for seasoning.
  • 1 tablespoon Lime Juice Lemon juice can be substituted.
  • to taste Toasted Sesame Seeds & Fresh Cilantro Used for garnishing.
  • to taste Chili Oil Adjust amount for spice preference.
  • 1 whole Lime Wedges Serve alongside for extra citrus.

Equipment

  • Large pot

Method
 

Step-by-Step Instructions
  1. Heat 2 tablespoons of avocado oil and 1 teaspoon of toasted sesame oil in a large pot over medium heat. Add 1 sliced yellow onion, 3 minced garlic cloves, and 1 tablespoon of freshly grated ginger. Season with salt and pepper, and sauté for about 6 minutes until the onion is soft and translucent.
  2. Pour in 6 cups of chicken broth, 2 tablespoons of tamari, 1 tablespoon of rice vinegar, 1 teaspoon of turmeric, and 1 teaspoon of ground coriander. Stir well and bring to a gentle boil.
  3. Introduce 1 ½ pounds of boneless, skinless chicken thighs and 1 cup of uncooked jasmine rice to the pot. Lower the heat to a simmer, cover, and cook for 20 minutes.
  4. Remove the chicken from the pot, allow it to rest, then shred into bite-sized pieces. Return the shredded chicken to the pot.
  5. Stir in 2 cups of chopped baby bok choy and the green parts of 2 sliced green onions. Simmer uncovered for an additional 3-4 minutes.
  6. Add the juice of 1 lime and adjust the seasoning with salt and pepper. Ladle the soup into bowls and garnish with toasted sesame seeds, fresh cilantro, and chili oil.
  7. Serve hot alongside lime wedges.

Nutrition

Serving: 1bowlCalories: 340kcalCarbohydrates: 35gProtein: 25gFat: 12gSaturated Fat: 2gPolyunsaturated Fat: 3gMonounsaturated Fat: 6gCholesterol: 70mgSodium: 800mgPotassium: 750mgFiber: 2gSugar: 2gVitamin A: 150IUVitamin C: 20mgCalcium: 50mgIron: 2mg

Notes

To avoid mushy bok choy in leftovers, store it separately and add fresh before serving.

Tried this recipe?

Let us know how it was!

Sushi Wonton Cones: Fun, Flavorful Handheld Appetizer

As I stood in my kitchen, the enticing aroma of frying wontons filled the air, pulling me away from thoughts of bland fast food options. This was a significant culinary moment, as I was about to create something truly special—Sushi Wonton Cones. These delightfully portable treats combine the fresh, vibrant flavors of sushi with the fun and crunch of crispy wonton wrappers, making them perfect for parties or a cozy night in. They’re not just easy to assemble; these sushi-inspired handheld appetizers are also protein-rich and highly customizable, allowing you to cater to every guest’s palate. Imagine filling them with creamy avocado, savory sushi-grade tuna, or whatever else tickles your taste buds. Trust me, your friends and family will be reaching for seconds! Ready to roll up your sleeves and dive into this unique treat? Let’s get started!

Why Are Sushi Wonton Cones Irresistible?

Unique Flavor Fusion: The delightful combination of sushi and wontons creates a taste explosion that’s hard to resist.

Fun Presentation: These colorful handheld cones take center stage at any gathering, sparking joy and conversation.

Customizable Options: Tailor the fillings to suit your dietary preferences—swap tuna for tofu or add crunchy veggies for extra texture!

Quick Prep Time: In just a few simple steps, you can whip up these stellar appetizers without spending hours in the kitchen.

Crowd-Pleasing Appeal: You’ll find they’re not just delicious; they also impress guests, making them a hit at parties or casual dinners.

These cones truly elevate the dining experience while making it accessible and fun. Whether you’re looking for something new to spice up your menu or hosting a gathering, these Sushi Wonton Cones are sure to be a favorite!

Sushi Wonton Cones Ingredients

For the Cones
Wonton wrappers – The crisp foundation for your sushi-inspired handheld appetizer. Substitution: Spring roll wrappers can be used for a different texture.
Coconut oil (for frying) – Creates a golden, crispy exterior. Note: Can substitute with vegetable oil if preferred.

For the Sushi Rice
Sushi rice (short-grain, sticky) – The essential base for that authentic sushi flavor. Prep: Season with rice vinegar, sugar, and salt.
Rice vinegar – Enhances the overall flavor of the sushi rice.
Sugar – Balances the acidity, making the rice wonderfully tasty.
Salt – Essential for seasoning and enhancing flavor.

For the Filling
Avocado – Adds a creamy texture and healthy fats to your cones. Substitution: Cucumber can be used for a lighter option.
Tuna steak (sushi-grade) – The core protein component bringing freshness and flavor. Note: Cooked shrimp or salmon can create a delightful variation.
Kewpie mayonnaise – Infuses richness and a touch of umami flavor. Regular mayonnaise can work as a substitute.
Tomato ketchup or sauce – Adds a sweet and tangy note to your filling.
Sriracha (optional) – A kick of heat for those who like it spicy.
Lime zest – Brightens the flavor profile with a refreshing zing.
Furikake or black sesame seeds – Enhances both flavor and visual appeal of your cones.

Dive into this deliciousness, and enjoy the crafting of your own customized Sushi Wonton Cones!

Step‑by‑Step Instructions for Sushi Wonton Cones

Step 1: Prepare Wonton Cones
Start by preheating your oil in a deep pot to 175 °C (350 °F). While the oil heats, wrap each wonton wrapper around a cream horn or cone mold, ensuring you press gently to seal the edges. Keep them standing upright in a muffin tin to maintain their shape while you prepare to fry them, letting the excitement build!

Step 2: Fry
Carefully place the wrapped wontons into the hot coconut oil, frying them in batches to avoid overcrowding. Fry for about 2-3 minutes or until they turn a beautiful golden brown, then remove them using a slotted spoon. Let the crispy wonton cones drain on paper towels, cooling them off while you move on to the next step.

Step 3: Prepare Sushi Rice
While the wonton cones cool, prepare the sushi rice. Rinse about 1 cup of sushi rice under cold water until the water runs clear, then cook it according to package instructions. Once cooked, gently mix it with rice vinegar, sugar, and salt. Allow the mixture to cool to room temperature, where it gets all the tangy goodness needed for your Sushi Wonton Cones.

Step 4: Make Tuna Mixture
Next, take your sushi-grade tuna steak and either dice it into small cubes or flake it using a fork. In a medium bowl, combine the tuna with Kewpie mayonnaise, a dollop of tomato ketchup, sriracha, and freshly grated lime zest. Mix these ingredients gently until they’re well combined, adjusting seasonings to your taste for that perfect tuna filling.

Step 5: Assemble Cones
Now that everything is prepped, it’s time to assemble your delightful Sushi Wonton Cones. Start by filling each cooled cone with a spoonful of seasoned sushi rice as the base. Next, layer in creamy avocado slices, followed by a generous scoop of the tuna mixture on top. Make sure not to overfill, allowing the flavors to shine without spilling out.

Step 6: Garnish
To finish off your flavorful creations, sprinkle the assembled cones with furikake or black sesame seeds for an extra crunch and a pop of color. Arrange the Sushi Wonton Cones upright in a serving dish or mini muffin tins for a stunning presentation. Now, they’re ready to impress at your next gathering!

Expert Tips for Sushi Wonton Cones

Perfect Frying Temperature: Avoid soggy cones by ensuring the oil temperature is consistent at 175 °C (350 °F) for that perfect crispiness.

Seasoning Absorption: Prepare sushi rice while warm; it absorbs the seasoning better, enhancing the flavor of your Sushi Wonton Cones.

Keep Ingredients Cool: Maintain tuna in the fridge until you’re ready to assemble to preserve its texture and freshness.

Don’t Overfill: Fill cones generously but avoid overstuffing to keep them neat and easy to handle.

Garnish Wisely: A sprinkle of furikake or black sesame seeds isn’t just for looks; it adds flavor and crunch to your delicious creations!

Sushi Wonton Cones Variations & Substitutions

Feel free to get creative with your Sushi Wonton Cones by incorporating your favorite ingredients and flavors!

  • Dairy-Free: Swap Kewpie mayonnaise for a vegan mayo or avocado cream for a creamy and delicious option.
  • Vegetarian: Replace tuna with marinated tofu, adding depth with flavors like sesame or teriyaki for a delightful twist.
  • Spicy Kick: Mix in sriracha or your favorite hot sauce into the tuna mixture for an extra flavor punch.
  • Crunchy Veggies: Add sliced bell peppers, radishes, or even julienned carrots for a refreshing crunch that brightens each bite.
  • Alternative Proteins: Try using smoked salmon or cooked crab for a gourmet take, creating an exciting array of flavors.
  • Zesty Options: Incorporate lime juice into the sushi rice or filling for an added burst of tanginess that elevates the taste.
  • Dipping Sauces: Serve with a side of soy-wasabi or garlic ponzu sauce for a unique flavor pairing that enhances each bite.
  • Different Wrappers: Get adventurous by using rice paper or even phyllo pastry for a unique texture experience.

These variations not only cater to different dietary needs but also encourage creativity in the kitchen, making your sushi-inspired snacks enjoyable every time! Looking for more tips on customizing your dishes? Check out our Storage Tips or explore the delightful world of Flavor Combinations to keep those culinary juices flowing!

What to Serve with Sushi Wonton Cones

Elevate your culinary experience by pairing these delightful handheld snacks with complementary sides and drinks.

  • Sushi Ginger Salad: A refreshing mix of pickled ginger and crisp vegetables provides a tangy contrast to the savory cones.

  • Miso Soup: Rich and comforting, this warm broth enhances the flavors of sushi while soothing the senses. It’s the perfect cozy companion.

  • Cucumber-Mint Salad: This light, zesty salad adds a refreshing crunch, balancing the rich flavors of the cones beautifully and keeping your palate excited.

  • Edamame Beans: Steamed and lightly salted, these protein-packed pods are a fun, interactive side dish that complements the sushi theme.

  • Japanese Sapporo Beer: Crisp and cold, this beer’s flavors harmonize with the savory elements of the cones, enhancing your overall dining experience.

  • Matcha Green Tea: The earthy notes of this traditional tea cleanse the palate, making it the ideal drink to complement the fresh ingredients of your handheld treat.

  • Wasabi Peas: Adding a crunchy, spicy bite, these peas offer a delightful contrast to the creamy fillings inside the cones and keep things interesting.

  • Apple Slice Dessert: Light and crisp, these sweet slices mingle well after savory bites, leaving you feeling satisfied without the heaviness.

These pairings will not only enhance the flavors of your Sushi Wonton Cones but also create a wonderfully satisfying meal that delights the senses!

How to Store and Freeze Sushi Wonton Cones

Room Temperature: Leftover assembled cones are best enjoyed fresh; if stored, keep at room temperature for up to 1 hour before they lose crispness.

Fridge: Unfilled wonton cones can be stored in an airtight container in the fridge for up to 2 days, while prepared sushi rice and tuna mixture can last up to 3 days separately.

Freezer: To freeze, store unfilled wonton cones in a freezer bag for up to 1 month. Thaw in the fridge before frying for best results.

Reheating: If you’ve made ahead and need to reheat, bake the baked cones at 175 °C (350 °F) for about 10 minutes to restore crispness before assembling with the filling.

Make Ahead Options

These Sushi Wonton Cones are a fantastic solution for busy home cooks looking to save time during hectic weekdays or special gatherings! You can prepare the sushi rice and the tuna mixture up to 24 hours in advance; simply store them separately in airtight containers in the refrigerator to maintain their freshness. To prevent the wonton cones from getting soggy, fry them just before serving. Keep the assembled cones chilled until shortly before your guests arrive, then fill them with sushi rice, avocado, and tuna mixture for a delightful, ready-to-enjoy appetizer. This way, you’ll ensure your Sushi Wonton Cones remain crispy and delicious, making entertaining effortless and enjoyable!

Sushi Wonton Cones Recipe FAQs

What type of wonton wrappers should I use?
Absolutely! I recommend using regular wonton wrappers for that perfect crunchy texture. If you’re looking for a slight variation in texture, spring roll wrappers can also work well as a substitute, giving your cones an interesting twist!

How can I store leftover Sushi Wonton Cones?
You can keep any assembled cones at room temperature for up to 1 hour, but they’re best enjoyed fresh to maintain their crispness. If you have unfilled wonton cones, place them in an airtight container in the fridge for up to 2 days. Just remember, it’s the freshness that makes these cones shine!

Can I freeze the unfilled wonton cones?
Yes! To freeze, store your unfilled wonton cones in a zip-top freezer bag for up to 1 month. When you’re ready to enjoy them, thaw in the fridge overnight, and then fry them for that delightful crunch! Frying them from frozen is not recommended as they may not cook evenly.

How can I avoid soggy cones after frying?
Keeping the oil temperature consistent at 175 °C (350 °F) is key! Fry the cones in small batches to avoid temperature drops. After frying, let them drain on paper towels immediately to remove excess oil and maintain that lovely crispiness!

What are some alternative proteins for the sushi filling?
Very! If you’d like to mix things up, you can easily swap out the sushi-grade tuna for cooked shrimp, salmon or even tofu for a vegetarian option. For variety, try adding crunchy veggies like cucumber or bell peppers for extra texture and flavor!

Are there any dietary considerations for allergies?
Definitely! If you’re hosting guests with dietary restrictions, be mindful about ingredients such as soy (in the Kewpie mayonnaise) and gluten (in wonton wrappers). You might also consider using gluten-free wonton wrappers and swapping Kewpie mayonnaise for a dairy-free alternative to cater to those who are vegan or lactose intolerant.

undefined

Sushi Wonton Cones: Fun, Flavorful Handheld Appetizer

Delightful Sushi Wonton Cones combine sushi flavors with crispy wonton wrappers, perfect for any gathering.
Prep Time 30 minutes
Cook Time 10 minutes
Cooling Time 10 minutes
Total Time 50 minutes
Servings: 10 cones
Course: Appetizers
Cuisine: Japanese
Calories: 250

Ingredients
  

For the Cones
  • 30 pieces Wonton wrappers Substitution: Spring roll wrappers can be used for a different texture.
  • 1 cup Coconut oil (for frying) Can substitute with vegetable oil if preferred.
For the Sushi Rice
  • 1 cup Sushi rice (short-grain, sticky) Prep: Season with rice vinegar, sugar, and salt.
  • 3 tablespoons Rice vinegar
  • 1 tablespoon Sugar
  • 1 teaspoon Salt
For the Filling
  • 1 medium Avocado Substitution: Cucumber can be used for a lighter option.
  • 8 ounces Tuna steak (sushi-grade) Note: Cooked shrimp or salmon can create a delightful variation.
  • 2 tablespoons Kewpie mayonnaise Regular mayonnaise can work as a substitute.
  • 1 tablespoon Tomato ketchup or sauce
  • 1 teaspoon Sriracha Optional.
  • 1 teaspoon Lime zest
  • 2 tablespoons Furikake or black sesame seeds

Equipment

  • Deep pot
  • Muffin Tin
  • Cream horn or cone mold

Method
 

Step-by-Step Instructions for Sushi Wonton Cones
  1. Step 1: Prepare Wonton Cones: Start by preheating your oil in a deep pot to 175 °C (350 °F). Wrap each wonton wrapper around a cream horn or cone mold, pressing gently to seal the edges. Keep them standing upright in a muffin tin.
  2. Step 2: Fry: Carefully place the wrapped wontons into the hot coconut oil, frying them in batches for about 2-3 minutes until golden brown. Let them drain on paper towels.
  3. Step 3: Prepare Sushi Rice: Rinse sushi rice under cold water until clear, then cook as instructed. Mix with rice vinegar, sugar, and salt, and let cool.
  4. Step 4: Make Tuna Mixture: Dice the sushi-grade tuna steak and combine with Kewpie mayonnaise, tomato ketchup, sriracha, and lime zest in a bowl.
  5. Step 5: Assemble Cones: Fill each cooled cone with sushi rice, then add avocado slices, followed by the tuna mixture.
  6. Step 6: Garnish: Sprinkle with furikake or black sesame seeds and arrange in a serving dish.

Nutrition

Serving: 1coneCalories: 250kcalCarbohydrates: 30gProtein: 10gFat: 12gSaturated Fat: 2gPolyunsaturated Fat: 3gMonounsaturated Fat: 7gCholesterol: 30mgSodium: 450mgPotassium: 300mgFiber: 2gSugar: 1gVitamin A: 200IUVitamin C: 3mgCalcium: 20mgIron: 1mg

Notes

Enjoy the versatility of fillings, catering to various dietary preferences with ease.

Tried this recipe?

Let us know how it was!

Spicy Miso Carrot Soup: Quick Vegan Comfort in a Bowl

As the chilly air settles in, my kitchen transforms into a haven of warmth and delight with a vibrant pot of Spicy Miso Carrot Soup bubbling away. This dish is more than just a meal; it’s a celebration of cozy flavors that dance between sweetly roasted carrots and the subtle kick of miso. Perfectly vegan and gluten-free, this quick recipe is a lifesaver on busy weeknights, allowing you to nourish your body in just 30 minutes. You’ll find joy in the creamy texture, crafted from the rich embrace of coconut milk, making it a comforting bowl you’ll want to return to again and again. Ready to turn your dinner into a heartwarming affair? Let’s dive into the magic of this soup together!

Why is this soup a game-changer?

Quick & Easy: With just 30 minutes of prep, this soup is a fantastic option for those hectic evenings.

Comfort in Every Spoon: Each bowl captures the essence of cozy nights, blending sweet carrots and spicy miso for an unmatched taste experience.

Healthy & Wholesome: Packed with vitamins and nutrients, it’s a great way to enjoy a healthy dinner without compromising on flavor.

Versatile Base: Feel free to experiment! Whether you swap in sweet potatoes or add a protein boost, the possibilities are endless.

Vegan Delight: This recipe is perfect for plant-based eaters, ensuring everyone can enjoy a heartwarming bowl of goodness.

Freezer-Friendly: Make a big batch and freeze extras; you’ll always have a meal ready to warm your soul!

Spicy Miso Carrot Soup Ingredients

For the Soup

  • Carrots – Sweetness and body; substitute with sweet potatoes for a richer flavor.
  • Olive Oil – Essential for sautéing; coconut oil can be used for a sweeter profile.
  • Onion – Adds aromatic depth; any onion variety will work, although yellow onion is commonly preferred.
  • Garlic – Provides fragrance and zest; fresh minced garlic is recommended for the best flavor.
  • Ginger – Adds warmth and spice; freshly grated ginger enhances the soup’s aromatic profile.
  • Vegetable Broth – Acts as the soup’s liquid base; low-sodium broth is ideal to control salt levels.
  • Miso Paste – Brings umami flavor; choose red or white miso and avoid boiling to preserve benefits.
  • Soy Sauce – Enhances savory flavor; use tamari for a gluten-free option.
  • Sriracha – Adds heat and complexity; adjust the quantity to match your personal spice preference.
  • Coconut Milk – Ensures creaminess and richness; full-fat coconut milk creates a luxurious texture.
  • Salt and Pepper – Important seasonings for flavor enhancement; adjust to taste.

For the Garnish

  • Green Onions – Fresh garnishes that add brightness; finely chop for a crunchy topping.
  • Cilantro – A fresh finishing touch; substitute cilantro with fresh basil for a different flavor twist.

This delightful Spicy Miso Carrot Soup is not just a comforting meal; it’s the essence of cozy evenings together, delivering warmth and satisfaction in every bite!

Step-by-Step Instructions for Spicy Miso Carrot Soup

Step 1: Heat the Oil
In a large pot, heat 2 tablespoons of olive oil over medium heat. Allow the oil to shimmer, signaling it’s hot enough to sauté. This will create a flavorful base for your Spicy Miso Carrot Soup.

Step 2: Sauté the Onion
Add 1 chopped onion to the pot and sauté for 5-7 minutes until it becomes translucent and slightly golden. Stir occasionally to ensure even cooking and to prevent sticking. The aroma will entice you!

Step 3: Incorporate Garlic and Ginger
Stir in 3 minced garlic cloves and 1 tablespoon of freshly grated ginger. Cook for an additional minute, allowing the garlic to become fragrant but not burned. This step enhances the soup’s warm, spicy flavor profile.

Step 4: Add Carrots
Introduce 4 cups of chopped carrots to the pot and sauté for another 5 minutes. You want them to soften slightly while still maintaining their crunch, which will boost the texture of your Spicy Miso Carrot Soup.

Step 5: Pour in the Broth
Add 4 cups of vegetable broth to the pot, stirring gently to combine. Bring the mixture to a gentle simmer, then cover and let it cook for 15-20 minutes. The carrots should become tender enough to blend smoothly.

Step 6: Blend the Soup
Once the carrots are tender, carefully use an immersion blender to puree the soup until smooth and creamy. If you prefer, transfer the soup in batches to a countertop blender. This will create the velvety texture characteristic of a well-made Spicy Miso Carrot Soup.

Step 7: Mix in Miso
In a small bowl, combine 3 tablespoons of miso paste with a ladle of hot soup until dissolved. Then, stir the miso mixture back into the pot. This method ensures that the beneficial properties of the miso are preserved without boiling.

Step 8: Add Coconut Milk and Seasoning
Pour in 1 can of full-fat coconut milk and 2 tablespoons of soy sauce, stirring well to incorporate. Taste and adjust with salt and pepper as needed. This combination brings richness and a balanced flavor to your comforting soup.

Step 9: Serve and Garnish
Ladle the hot soup into bowls, and garnish with chopped green onions and fresh cilantro. The vibrant colors will make this Spicy Miso Carrot Soup not only delicious but visually appealing. Enjoy the warmth and the rich flavors of your creation!

Make Ahead Options

These Spicy Miso Carrot Soup preparations are perfect for busy home cooks looking to save time! You can chop the carrots, onions, and garlic up to 24 hours in advance and store them in an airtight container in the refrigerator to keep them fresh. Additionally, the soup can be fully cooked and then refrigerated for up to 3 days; just be sure to let it cool completely before sealing it in a container. When you’re ready to enjoy this comforting bowl, reheat the soup gently on the stove and mix in the miso paste (dissolved in a ladle of hot soup) along with the coconut milk to preserve its creamy texture. This way, you’ll savor delicious flavors in no time!

Spicy Miso Variations & Substitutions

Feel free to put your personal touch on this comforting soup with these inviting variations that will delight your taste buds!

  • Sweet Potato Swap: Replace carrots with sweet potatoes for a richer, sweeter taste that complements the miso beautifully.

  • Pumpkin Power: Use pumpkin puree instead of carrots for a fall-themed twist. The creamy texture will be just as comforting!

  • Mixed Veggies: Incorporate bell peppers, snap peas, or spinach for a colorful boost of nutrition. Each addition creates a delightful crunch!

  • Protein Boost: Stir in cooked lentils or chickpeas for a heartier meal. Not only will it enhance flavors, but it will also keep you satiated longer.

  • Herb Infusion: Substitute cilantro with fresh basil or parsley for a refreshing twist. These herbs will uplift the soup with a garden-fresh taste.

  • Zesty Lime: Add a squeeze of lime before serving for a bright, tangy finish. A little zing can elevate the comforting sweetness of the soup!

  • Coconut Cream Dream: Swap regular coconut milk for coconut cream for an ultra-rich texture, making the soup even more indulgent.

  • Spicy Kick: Increase the amount of Sriracha or add red pepper flakes for an extra kick! This twist offers a lovely contrast to the soup’s natural sweetness.

Embrace your creativity in the kitchen and make this soup a reflection of your unique tastes! If you’re interested in exploring more comforting flavors, check out our savory homemade breads or discover fun ways to use leftover ingredients in delightful dishes like our creamy potato gratin.

Storage Tips for Spicy Miso Carrot Soup

Fridge: Store the soup in an airtight container for up to 5 days. This keeps the flavors fresh while making it easy to reheat.

Freezer: For longer storage, freeze the soup in portion-sized containers for up to 3 months. Make sure to leave some space in each container for expansion.

Reheating: When ready to enjoy, thaw overnight in the fridge if frozen. Reheat gently on the stove over low heat, stirring occasionally, until heated through.

Additional Tip: Always taste and adjust the seasoning after reheating; this helps bring the vibrant flavors of your Spicy Miso Carrot Soup back to life!

Expert Tips for Spicy Miso Carrot Soup

  • Miso Mastery: Always dissolve miso in a ladle of hot soup before adding it back to keep its beneficial probiotics intact and to avoid boiling it.
  • Adjust Thickness: If your soup turns out too thick, gradually stir in more vegetable broth to reach your desired consistency without losing flavor.
  • Taste to Perfection: Before serving, taste the soup and make adjustments. Adding more salt or soy sauce can elevate the overall umami of your Spicy Miso Carrot Soup.
  • Carrot Prep: For a quicker preparation, use baby carrots; if using larger ones, chop them into small, even pieces to ensure they cook at the same rate.
  • Garnish Variety: Don’t hesitate to explore garnishing options. Fresh herbs like basil can brighten up the dish if cilantro isn’t your favorite!

What to Serve with Spicy Miso Carrot Soup

Enhance your dining experience with delectable sides that perfectly complement the richness of this vibrant soup.

  • Crusty Bread: The perfect vehicle for sopping up the creamy soup; its crispy exterior and soft interior provide a delightful contrast.
  • Simple Green Salad: Freshness adds brightness; think mixed greens topped with a light vinaigrette to cleanse the palate between bites.
  • Steamed Edamame: These protein-packed pods offer a satisfying crunch and can be lightly salted for that perfect touch of savory flavor.
  • Pickled Vegetables: A tangy side kick; their sharpness balances the soup’s warmth, providing a delightful explosion of taste.
  • Roasted Sweet Potatoes: Sweetness and warmth accompany the soup’s spices beautifully, creating a harmonious blend of flavors and textures.
  • Coconut Rice: Creamy and subtly sweet, it pairs wonderfully with the spicy miso backdrop, enhancing the culinary experience in every bite.

These delightful pairings not only elevate your meal but also create a comforting atmosphere that brings everyone together around the table.

Spicy Miso Carrot Soup Recipe FAQs

What type of carrots should I use for this soup?
Absolutely! Use fresh, firm carrots for the best results. Look for carrots that are bright orange without dark spots, as they indicate freshness. If you’re looking for a twist, sweet potatoes make an excellent substitute, providing a richer flavor.

How should I store leftover Spicy Miso Carrot Soup?
Store your soup in an airtight container in the fridge for up to 5 days. Allow it to cool to room temperature before sealing it to maintain freshness. To reheat, just warm it gently on the stove over low heat, stirring occasionally for even warmth.

Can I freeze Spicy Miso Carrot Soup?
Yes, you can! Portion the soup into freezer-safe containers or bags, leaving some space for expansion. It will keep well in the freezer for up to 3 months. When ready to enjoy, simply thaw overnight in the fridge and reheat gently on the stove.

What if the soup is too thick?
If your Spicy Miso Carrot Soup turns out thicker than you like, don’t worry! Gradually add more vegetable broth—about ½ cup at a time—while stirring until you achieve your desired consistency. Simply warm it on the stove, adjusting until it flows nicely.

Is this soup safe for those with allergies?
Many diets can enjoy this delicious bowl! It’s vegan and gluten-free if you use gluten-free soy sauce, like tamari. Always check labels to ensure there are no allergens, particularly with the miso paste, as some brands might include traces of soy or other ingredients.

Can I use a different milk if I don’t have coconut milk?
Very! While coconut milk gives the soup its creamy richness, you can use other plant-based milks like almond or oat milk for a lighter version. Be mindful that using non-creamy options might alter the overall texture slightly, so adjust seasonings as needed for the best flavor!

undefined

Spicy Miso Carrot Soup: Quick Vegan Comfort in a Bowl

This Spicy Miso Carrot Soup is a quick vegan delight, perfect for cold nights, combining sweet roasted carrots and spicy miso in a comforting bowl.
Prep Time 10 minutes
Cook Time 20 minutes
Total Time 30 minutes
Servings: 4 cups
Course: Soup
Cuisine: Vegan
Calories: 350

Ingredients
  

For the Soup
  • 4 cups Chopped Carrots Sweetness and body; substitute with sweet potatoes for a richer flavor.
  • 2 tablespoons Olive Oil Essential for sautéing; coconut oil can be used for a sweeter profile.
  • 1 large Onion Adds aromatic depth; any onion variety will work.
  • 3 cloves Garlic Fresh minced garlic is recommended for the best flavor.
  • 1 tablespoon Freshly Grated Ginger Adds warmth and spice.
  • 4 cups Vegetable Broth Low-sodium broth is ideal to control salt levels.
  • 3 tablespoons Miso Paste Brings umami flavor; avoid boiling to preserve benefits.
  • 2 tablespoons Soy Sauce Enhances savory flavor; use tamari for a gluten-free option.
  • 1 tablespoon Sriracha Adds heat; adjust to match your spice preference.
  • 1 can Full-Fat Coconut Milk Ensures creaminess and rich texture.
  • to taste Salt Important seasoning for flavor enhancement.
  • to taste Pepper Important seasoning for flavor enhancement.
For the Garnish
  • 2 stalks Green Onions Finely chopped for a crunchy topping.
  • to taste Cilantro A fresh finishing touch; substitute with basil if preferred.

Equipment

  • Large pot
  • Immersion blender

Method
 

Step-by-Step Instructions
  1. In a large pot, heat 2 tablespoons of olive oil over medium heat until shimmering.
  2. Add 1 chopped onion and sauté for 5-7 minutes until translucent and slightly golden.
  3. Stir in 3 minced garlic cloves and 1 tablespoon of freshly grated ginger, cooking for an additional minute.
  4. Introduce 4 cups of chopped carrots and sauté for another 5 minutes.
  5. Add 4 cups of vegetable broth, stirring gently, then cover and simmer for 15-20 minutes.
  6. Once tender, use an immersion blender to puree the soup until smooth.
  7. In a small bowl, combine 3 tablespoons of miso paste with a ladle of hot soup until dissolved, then stir back into the pot.
  8. Pour in 1 can of coconut milk and 2 tablespoons of soy sauce, adjusting with salt and pepper as needed.
  9. Ladle into bowls and garnish with chopped green onions and fresh cilantro.

Nutrition

Serving: 1cupCalories: 350kcalCarbohydrates: 40gProtein: 6gFat: 18gSaturated Fat: 14gPolyunsaturated Fat: 2gMonounsaturated Fat: 12gSodium: 800mgPotassium: 600mgFiber: 8gSugar: 6gVitamin A: 200IUVitamin C: 25mgCalcium: 4mgIron: 15mg

Notes

Make a big batch and freeze extras; you’ll always have a meal ready to warm your soul.

Tried this recipe?

Let us know how it was!