Get my cookbooks

Delicious Pumpkin Cottage Cheese Muffins for a Healthy Treat

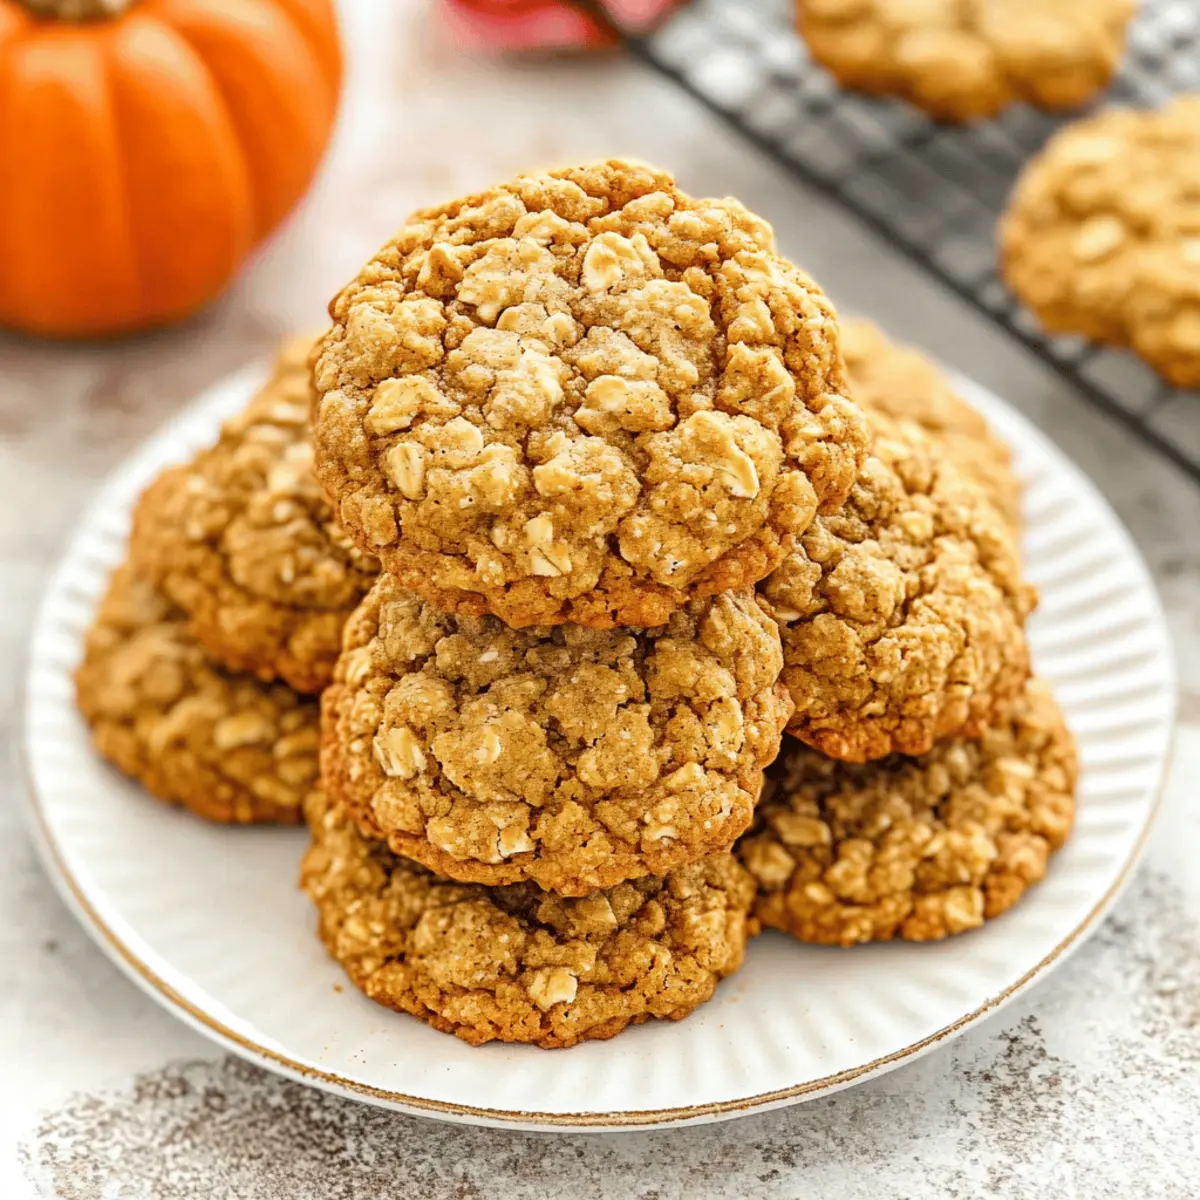
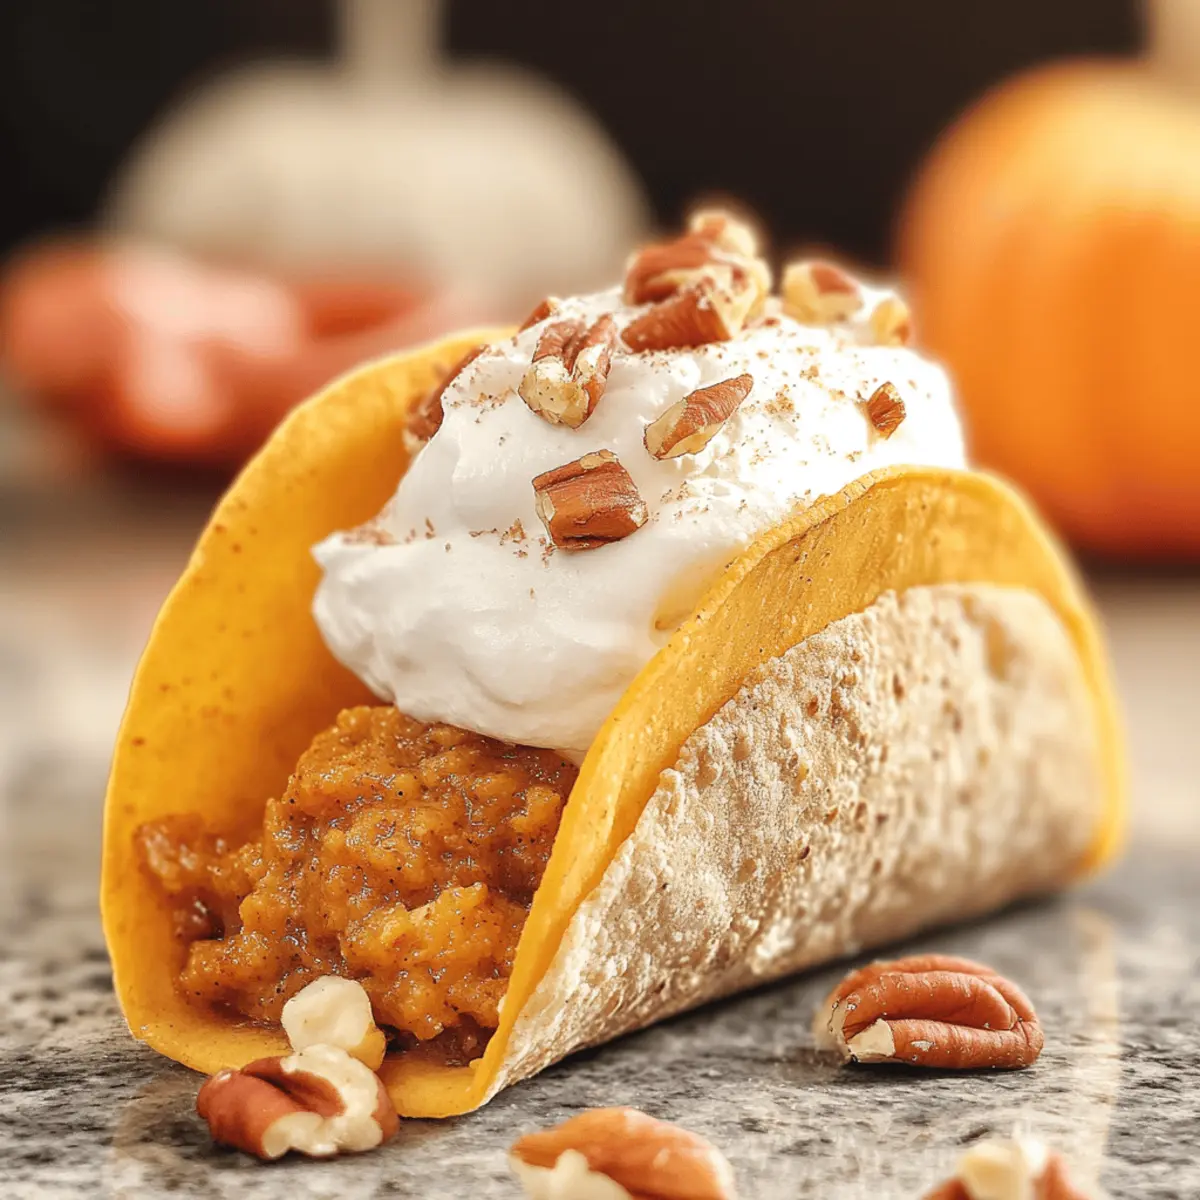
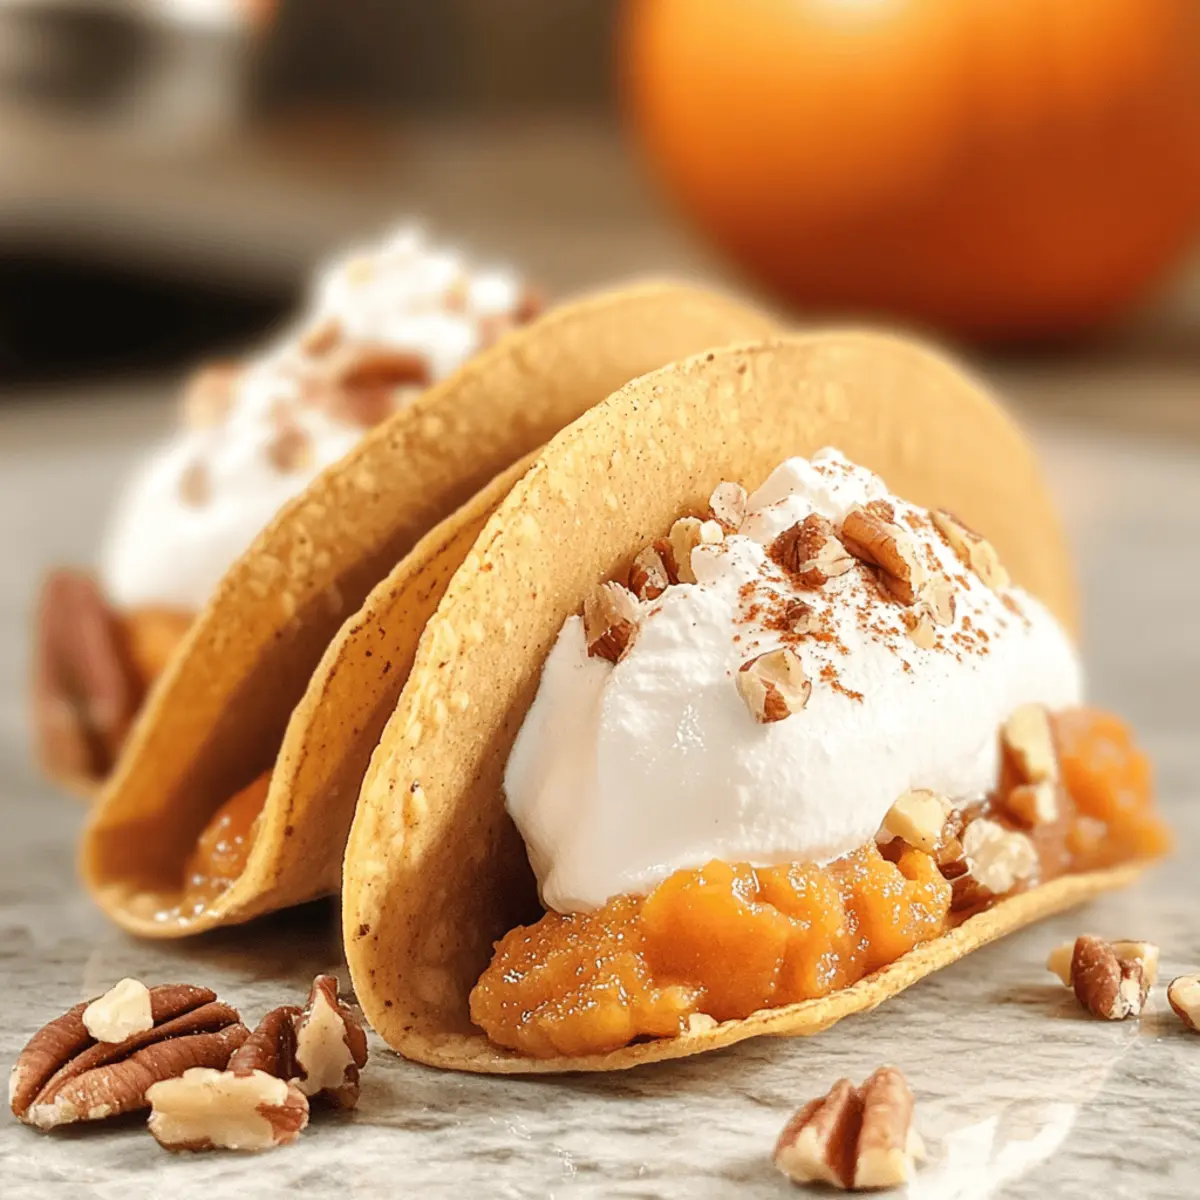
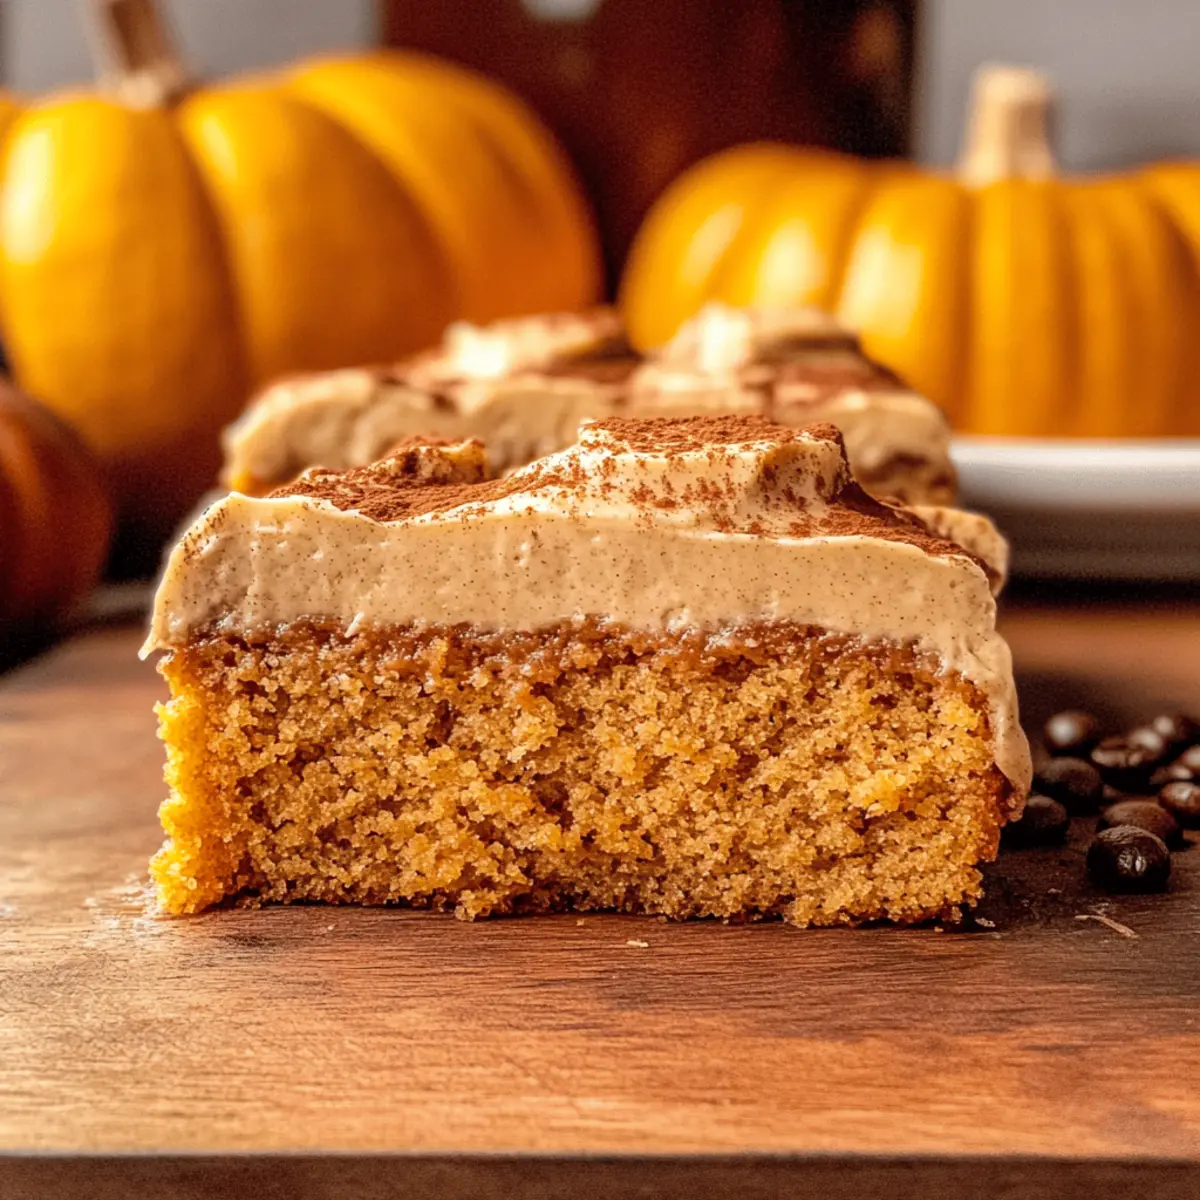
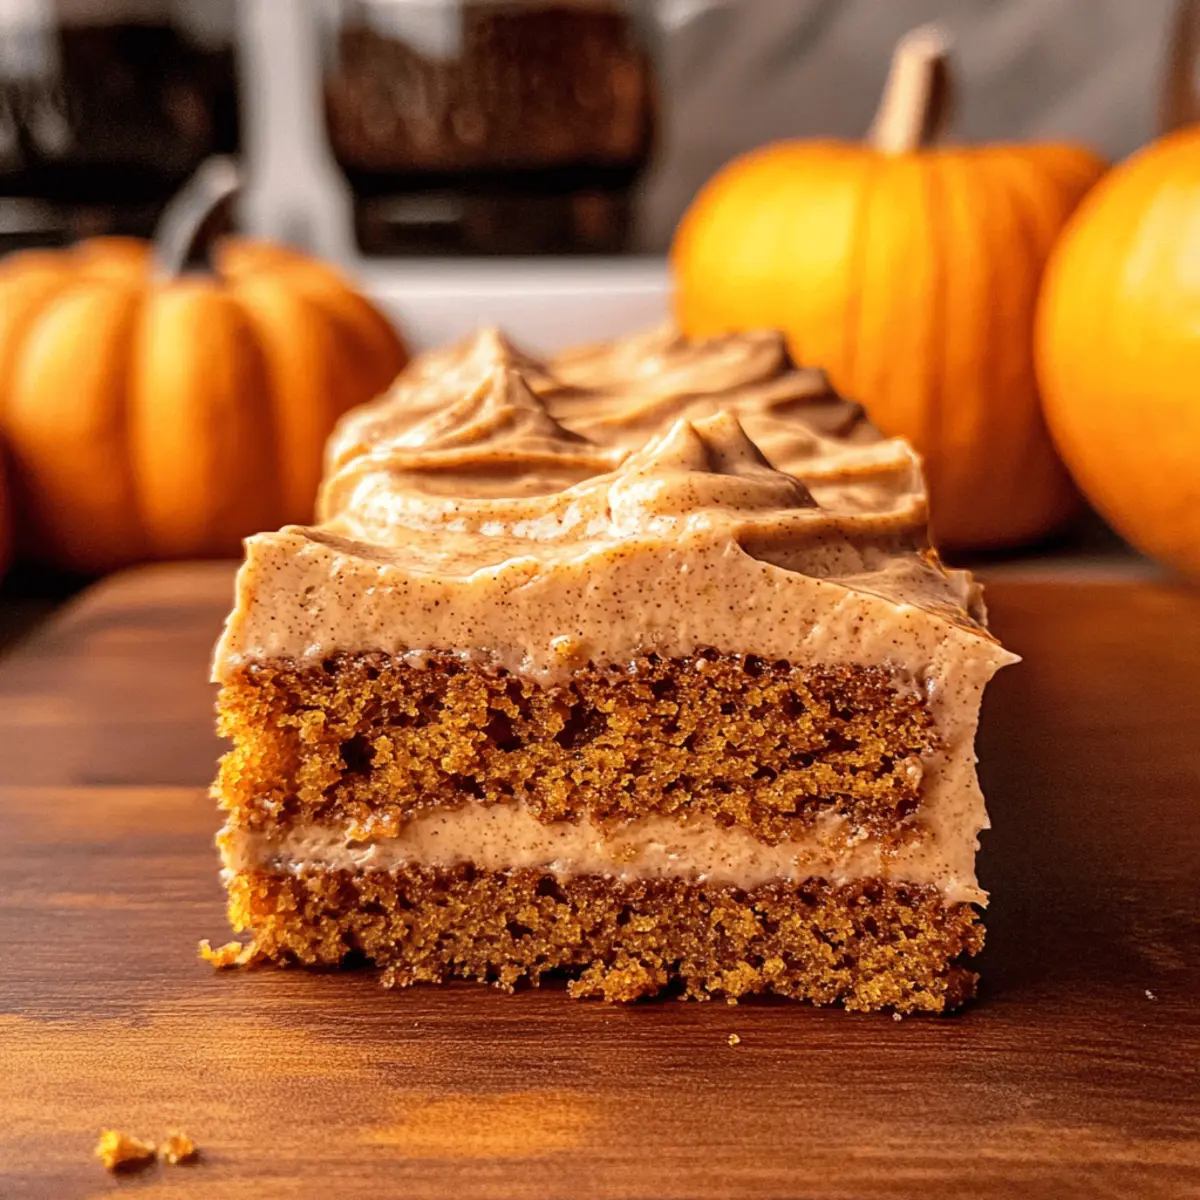
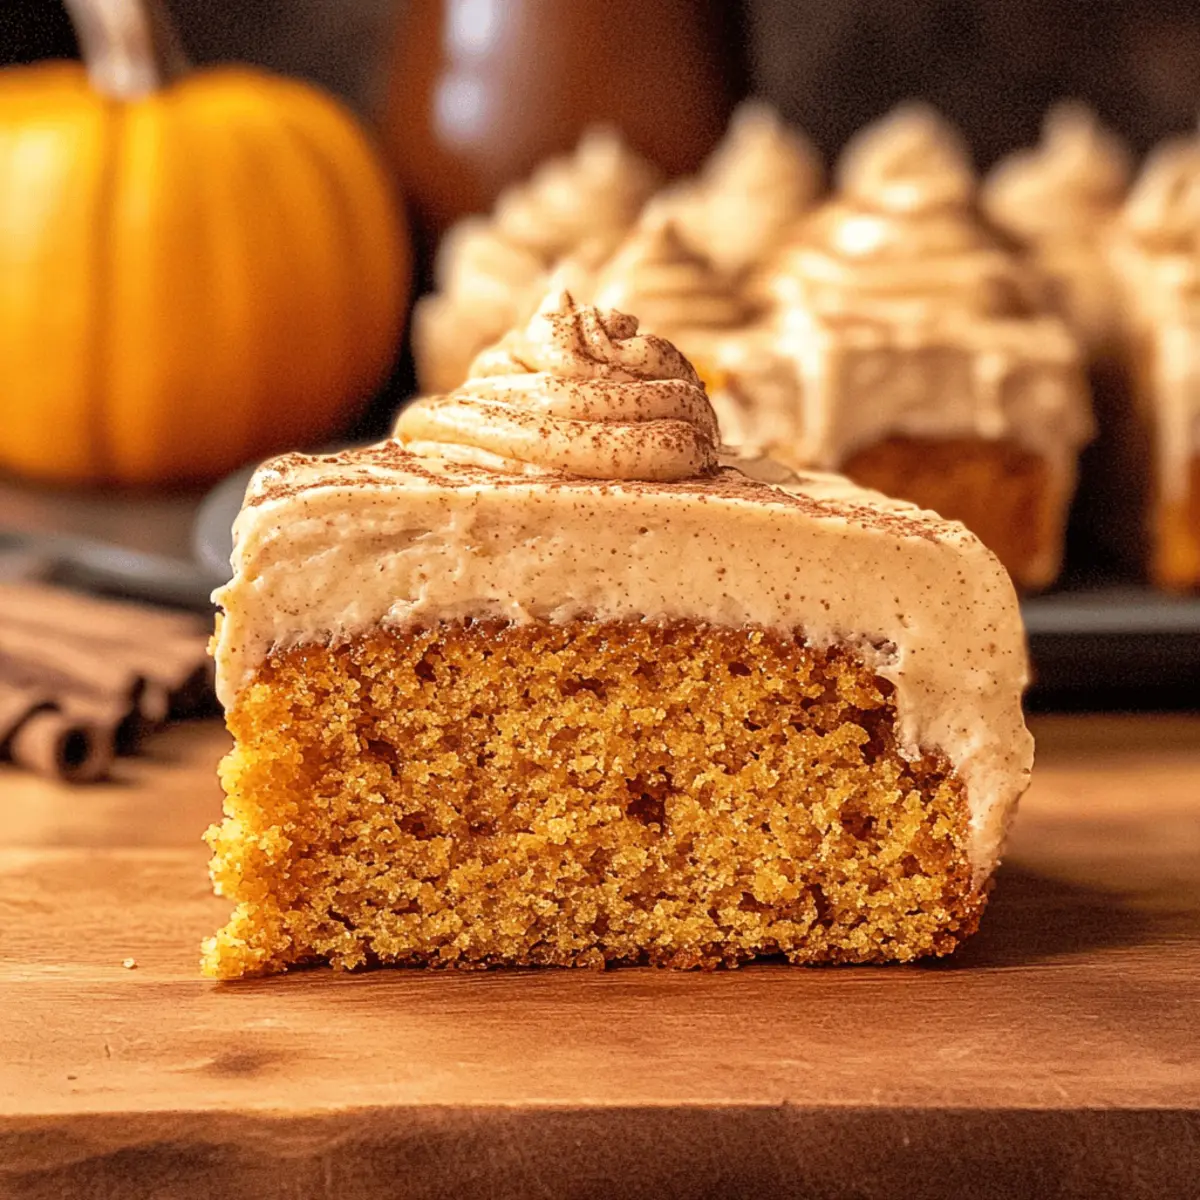
As the first leaves turn golden and the air carries a crispness that whispers of autumn, I find myself drawn to the kitchen—a sanctuary of warmth and comfort. There’s a special thrill in baking these Pumpkin Cottage Cheese Muffins, where cozy spices and nutritious ingredients unite. Packed with protein from the cottage cheese, these muffins are not only a delicious treat but also a wholesome choice that embraces the season. Their soft, tender crumb, highlighted by hints of cinnamon and nutmeg, makes them a perfect addition to your breakfast table or a delightful snack anytime. And the best part? They’re quick to whip up, allowing you to savor that inviting fall aroma without spending hours in the kitchen. Ready to indulge in a batch of these delightful muffins that promise both taste and nourishment?

Why You’ll Adore These Muffins?

Deliciously Nutritious: Each bite is packed with high-quality protein from cottage cheese, making these muffins guilt-free and perfect for health-conscious minds.

Irresistibly Fluffy: With a tender crumb, these muffins have a delightful moist texture that bursts with fall flavors, sure to please everyone at your breakfast table.

Effortless Baking: Perfect for busy mornings, they are quick to prepare—whip up a batch in under an hour, giving you more time to enjoy the season.

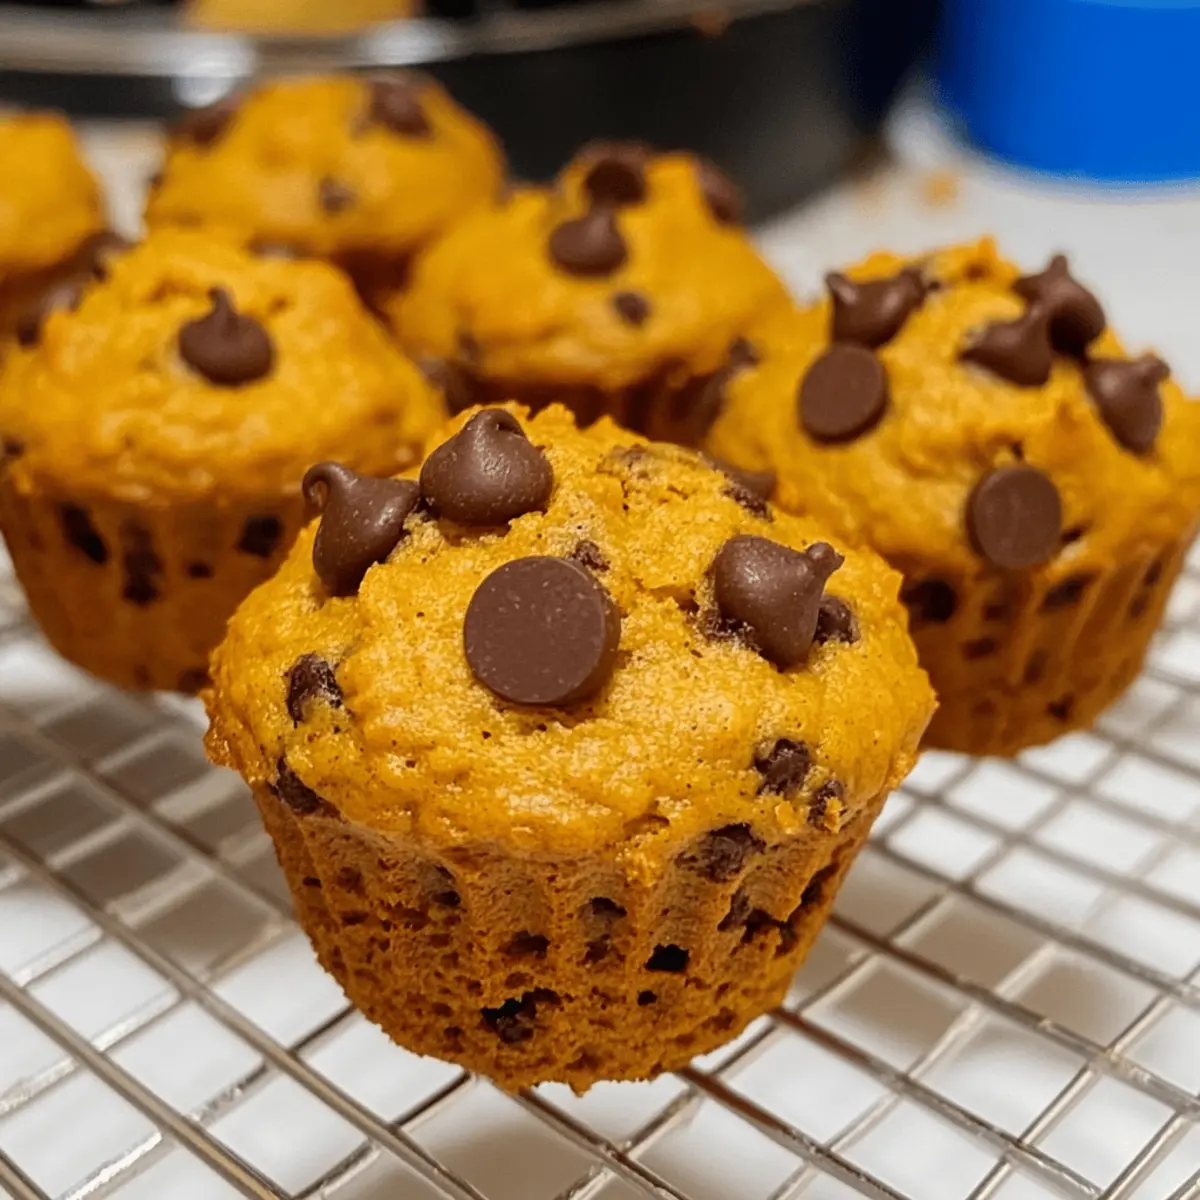
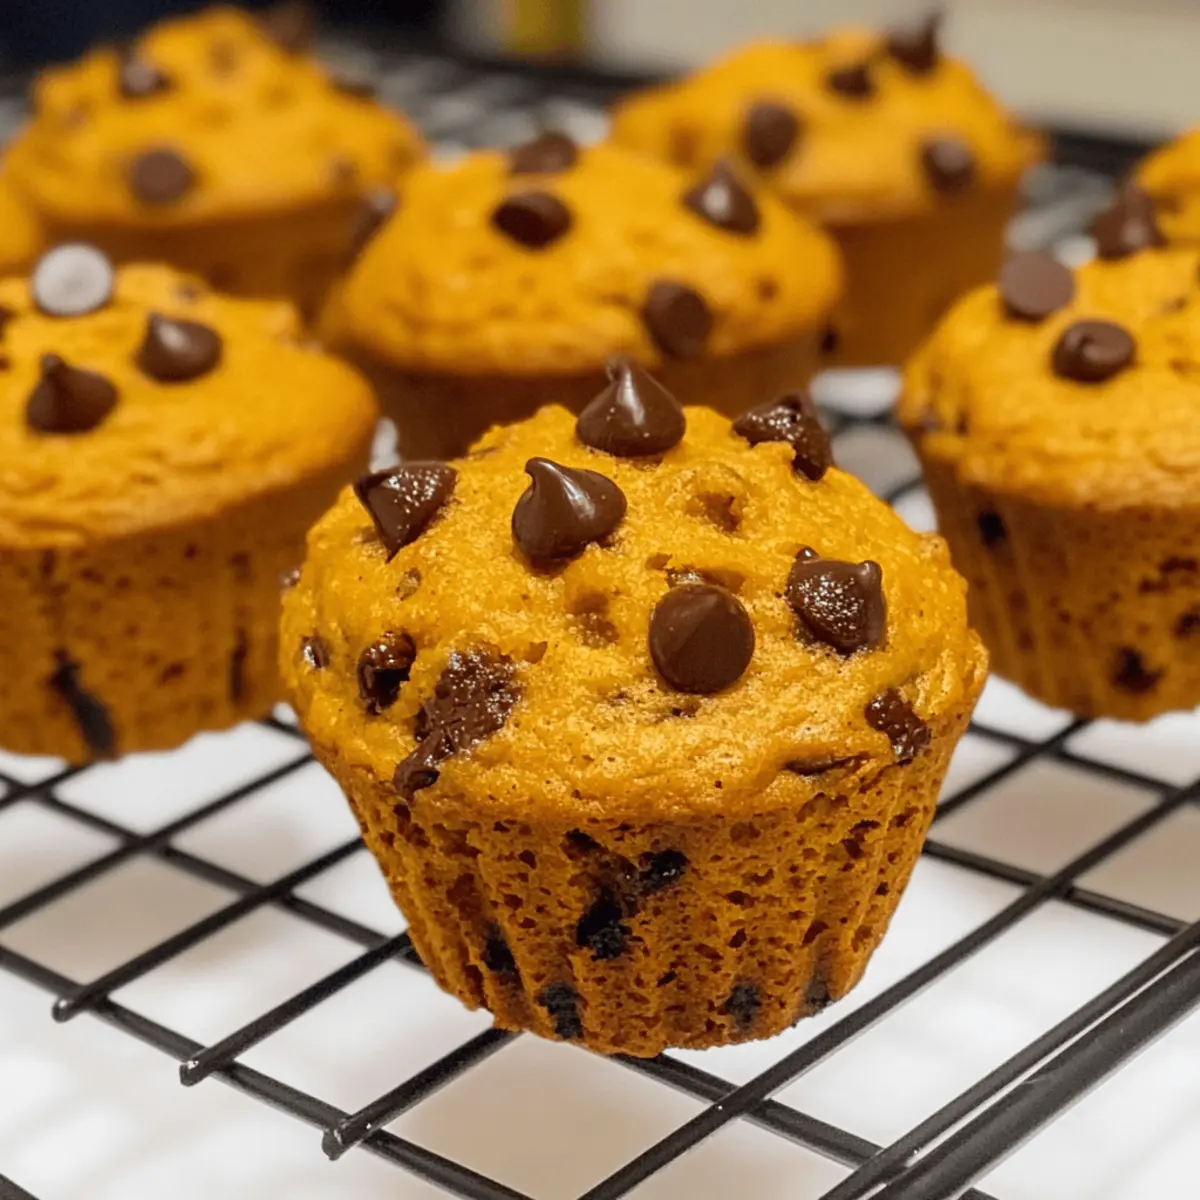
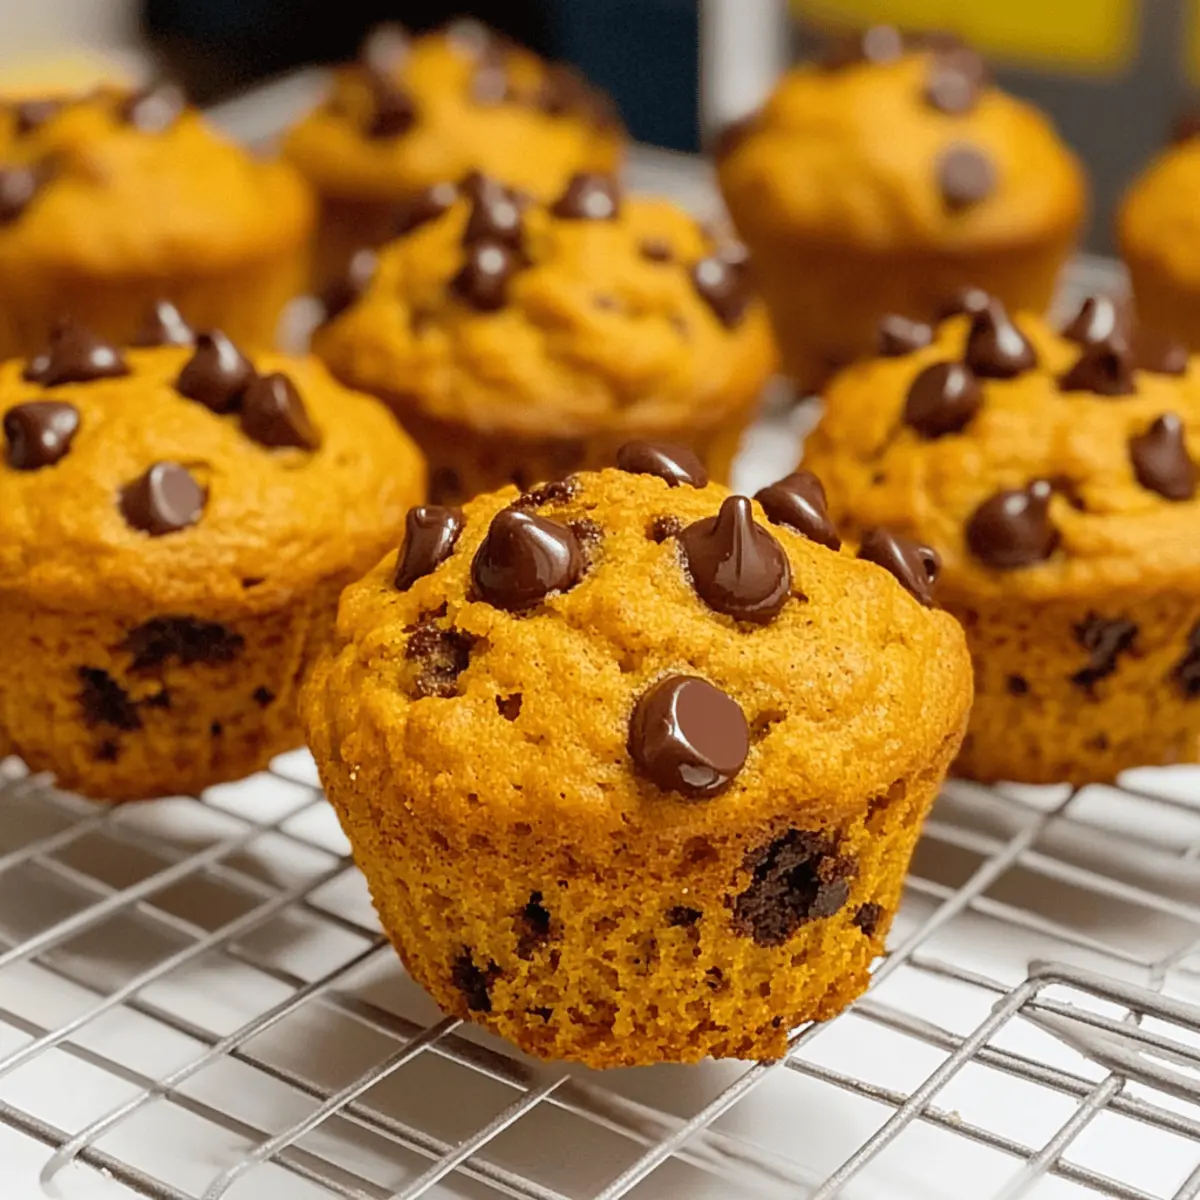
Versatile Treats: Whether you prefer them plain or with mini chocolate chips, feel free to customize your muffins by adding nuts or dried fruits for extra crunch and flavor.

These Pumpkin Cottage Cheese Muffins not only elevate your baking game but also easily pair with morning coffee or tea, similar to my Banana Grilled Cheese or Joumou Haitian Pumpkin. Get ready to be amazed by these delightful and wholesome treats!

Pumpkin Cottage Cheese Muffin Ingredients

For the Muffin Batter

  • Full Fat Cottage Cheese – Blending until smooth ensures a creamy texture without lumps.
  • Maple Syrup – A natural sweetener that perfectly complements the pumpkin flavor; honey is a great substitute if you prefer.
  • Vanilla Extract – Brightens the overall flavor and adds warmth to the muffins.
  • Pumpkin Puree – Use pure pumpkin puree for authentic flavor and moisture; steer clear of pumpkin pie filling.
  • Eggs – Bind the ingredients together while adding richness to each muffin.
  • All-Purpose Flour – The foundational ingredient; whole wheat flour can be used for a healthier twist.
  • Baking Powder – Essential for giving the muffins that lovely rise.
  • Cinnamon – Infuses warm, aromatic notes that harmonize beautifully with the pumpkin.
  • Nutmeg – Adds a cozy, spiced depth, making the muffins perfect for fall.
  • Salt – Elevates sweetness and enhances the muffins’ overall flavor.
  • Mini Chocolate Chips – Incorporate a touch of sweetness and fun; they can be swapped for nuts for a healthier option.

These Pumpkin Cottage Cheese Muffins are a wholesome treat, combining delightful flavors and nutritious ingredients for a perfect autumn indulgence!

Step‑by‑Step Instructions for Pumpkin Cottage Cheese Muffins

Step 1: Preheat the Oven
Begin by preheating your oven to 360°F (182°C). This step is crucial for ensuring your Pumpkin Cottage Cheese Muffins rise perfectly and develop a golden-brown crust. While the oven heats up, gather your muffin tins and grease them lightly with cooking spray or line them with paper liners to prevent sticking.

Step 2: Mix the Wet Ingredients
In a large mixing bowl, combine the blended cottage cheese, maple syrup, vanilla extract, pumpkin puree, and eggs. Use a whisk or electric mixer to blend the ingredients until you achieve a smooth, creamy mixture, which should take about 2–3 minutes. This combination forms the moist base of your muffins and infuses them with delightful fall flavors.

Step 3: Combine Dry Ingredients
Next, add the all-purpose flour, baking powder, cinnamon, nutmeg, and salt to your wet mixture. Gently fold the ingredients together with a spatula, mixing just until combined. Be careful not to over-mix; you want to maintain an airy texture in your Pumpkin Cottage Cheese Muffins. This step should take about 1–2 minutes.

Step 4: Add Chocolate Chips
Fold in mini chocolate chips if desired, incorporating them into the batter evenly. This delightful addition brings a touch of sweetness and fun to your muffins. Ensure that the chips are well distributed throughout the batter for that chocolatey surprise in every bite.

Step 5: Fill the Muffin Tins
Using an ice cream scoop, carefully fill each muffin cup about three-quarters full with the batter. This will help the muffins rise beautifully without overflowing. If you prefer larger muffins, feel free to use two scoops per cup. Aim for a neat and even distribution for consistent baking.

Step 6: Bake for Perfection
Place the filled muffin tins in the preheated oven and bake for 26 to 30 minutes. Keep an eye on them—your delicious Pumpkin Cottage Cheese Muffins are ready when they are set in the middle and a toothpick inserted in the center comes out clean. The lovely aroma will fill your kitchen!

Step 7: Cool and Serve
Once baked, remove the muffins from the oven and let them cool in the pan for about 5–10 minutes. This allows them to firm up slightly, making them easier to transfer. After cooling, gently take the muffins out of the tins and place them on a wire rack to cool completely, ready for you to enjoy!

How to Store and Freeze Pumpkin Cottage Cheese Muffins

Fridge: Store your muffins in an airtight container in the refrigerator for up to five days to keep them fresh and moist, making them a convenient on-the-go treat.

Freezer: To freeze, place muffins in a single layer on a baking sheet until solid, then transfer them to a freezer bag. They’ll last for up to two months, perfect for defrosting and enjoying later.

Reheating: When ready to enjoy, reheat muffins in the microwave for about 20-30 seconds or warm them in a preheated oven at 350°F (175°C) for 10 minutes for that freshly baked taste.

Wrapping: For long-term storage, wrap each muffin in plastic wrap before placing them in the freezer; this prevents freezer burn and keeps the muffins deliciously intact until you’re ready to savor them!

Expert Tips for Pumpkin Cottage Cheese Muffins

  • Smooth Cottage Cheese: Blend the cottage cheese until completely smooth to avoid any lumps in your muffins, which can disrupt the texture and experience.

  • Don’t Over Mix: Only mix your batter until just combined; over-mixing can lead to dense muffins instead of the light and fluffy texture you want for your Pumpkin Cottage Cheese Muffins.

  • Silicone Muffin Tins: Using silicone muffin tins can make removal a breeze and minimize sticking, ensuring your muffins maintain their perfect shape when coming out of the oven.

  • Room Temperature Ingredients: Allow your eggs and cottage cheese to reach room temperature before mixing for even blending, which contributes to consistent baking results.

  • Extra Flavor Boost: Enhance the flavor by adding a pinch of ginger or cloves alongside the cinnamon and nutmeg for a more robust spice profile, capturing all the warmth of fall.

  • Storage Wisdom: Store any leftovers in an airtight container in the fridge for up to five days, or freeze for up to two months to enjoy these muffins whenever the fall mood strikes!

What to Serve with Cottage Cheese Pumpkin Muffins

As the aroma of these warm, spice-infused muffins fills your kitchen, imagine complementing them with delightful sides for a cozy, full meal experience.

  • Fresh Fruit Salad: A mix of seasonal fruits adds a refreshing, bright contrast, enhancing the muffins’ comforting flavors.
  • Yogurt Parfait: Layer creamy yogurt with granola and berries for a wholesome breakfast that’s perfect alongside the muffins.
  • Maple Glazed Bacon: The sweet and savory notes intertwine beautifully, creating a perfect pairing for that cozy fall breakfast vibe.
  • Warm Apple Cider: Sipping on spiced apple cider brings out the seasonal essence, making it a delightful drink choice with every muffin.
  • Nutty Granola: Sprinkling granola on top of your muffins adds texture and an additional crunch, enhancing the overall experience.
  • Pumpkin Spice Latte: Nothing screams fall quite like this classic drink—its creamy spice perfectly complements the muffins.
  • Creamy Oatmeal: Serve a side of oatmeal topped with cinnamon and nuts to enjoy a warm, hearty meal alongside your muffins.
  • Chocolate-Hazelnut Spread: A drizzle on top of your muffin adds a luxurious touch of sweetness that will excite your taste buds.

Make Ahead Options

These Pumpkin Cottage Cheese Muffins are a fantastic choice for meal prep, allowing you to enjoy their delightful flavors without the last-minute rush. You can mix the batter and store it in the refrigerator up to 24 hours before baking, which helps deepen the flavors. Alternatively, you can bake the muffins ahead of time and freeze them for up to 2 months; simply wrap each muffin tightly in plastic wrap and place them in an airtight container. When you’re ready to indulge, just reheat them in the microwave for a few seconds or bake them from frozen at 350°F (175°C) for about 10-15 minutes. With these make-ahead tips, you’ll savor the comfort of homemade pumpkin muffins effortlessly, even on the busiest mornings!

Pumpkin Cottage Cheese Muffin Variations

Feel free to let your creativity shine as you explore these delightful variations!

  • Nutty Crunch: Add chopped walnuts or pecans for a satisfying crunch that complements the soft muffin texture. The warm nuttiness pairs beautifully with the spices!
  • Chocolate Indulgence: Swap mini chocolate chips for dark chocolate chunks to elevate the richness of your muffins. This twist is perfect for chocolate lovers craving that extra depth!
  • Fruity Surprise: Mix in dried cranberries or raisins for a fruity burst that offsets the pumpkin flavor, perfectly enhancing the overall flavor profile. You’ll love the sweet juiciness in each bite!
  • Gluten-Free Option: Use gluten-free all-purpose flour to make your muffins suitable for gluten-sensitive friends without sacrificing flavor or texture. It’s a thoughtful swap that everyone can enjoy!
  • Zesty Citrus: Add the zest of an orange or lemon to the batter for a refreshing brightness that cuts through the richness. This little twist adds a beautiful contrast!
  • Spiced Up: For a kick of heat, add a pinch of cayenne pepper or ginger to your spice mix. The warming sensation is lovely during chilly autumn days!
  • Coconut Bliss: Incorporate shredded coconut into the batter for a tropical vibe that adds sweetness and texture. Pair these with a warm drink for sheer comfort!

These versatile muffin variations can easily transform your game in the kitchen. Consider whipping up a batch of Pumpkin Cottage Cheese Muffins for breakfast alongside a slice of Strawberry Cheesecake as a sweet treat or serving them with a steaming bowl of Comforting Charm Baked ham and cheese for dinner!

Pumpkin Cottage Cheese Muffins Recipe FAQs

What type of pumpkin puree should I use?
Absolutely! Make sure to use pure pumpkin puree for the best flavor and moisture in your muffins. Avoid pumpkin pie filling, as it contains added sugars and spices that can throw off the balance of your recipe.

How should I store the muffins?
Store your Pumpkin Cottage Cheese Muffins in an airtight container in the refrigerator, where they will stay fresh for up to 5 days. If you’d like to keep them longer, freezing them is an excellent option!

Can I freeze these muffins?
Very! To freeze, lay the muffins out in a single layer on a baking sheet and freeze until solid, which usually takes about 1-2 hours. Once they are firm, transfer them to a freezer bag, press out any excess air, and store for up to 3 months. When you’re ready to enjoy one, simply reheat it in the microwave or oven.

Why did my muffins come out dense?
Typically, a dense muffin can occur if you over-mix the batter. Remember to mix just until combined! Also, ensure your ingredients are at room temperature before blending, as this helps achieve that light and fluffy result everyone loves.

Are there any dietary considerations for making these muffins?
Absolutely! These muffins can be made gluten-free by substituting all-purpose flour with a suitable gluten-free blend. Always check for allergies, especially with ingredients like maple syrup and chocolate. For a nut-free option, omit any added nuts or chocolate chips.

Can I use other sweeteners instead of maple syrup?
Yes! If you prefer a different sweetness profile, feel free to swap maple syrup with honey or agave syrup. Just keep in mind that the flavor will slightly change, so choose a sweetener that aligns well with the wholesome essence of your Pumpkin Cottage Cheese Muffins.

Pumpkin Cottage Cheese Muffins

Delicious Pumpkin Cottage Cheese Muffins for a Healthy Treat

These Pumpkin Cottage Cheese Muffins are a nutritious and delightful treat packed with protein and cozy spices, perfect for breakfast or a snack.
Prep Time 10 minutes
Cook Time 30 minutes
Cooling Time 10 minutes
Total Time 50 minutes
Servings: 12 muffins
Course: Breakfast
Cuisine: American
Calories: 150

Ingredients
  

For the Muffin Batter
  • 1 cup Full Fat Cottage Cheese Blend until smooth.
  • 1/2 cup Maple Syrup Honey can be substituted.
  • 1 teaspoon Vanilla Extract
  • 1 cup Pumpkin Puree Use pure pumpkin puree, not pie filling.
  • 2 large Eggs
  • 1 1/2 cups All-Purpose Flour Whole wheat flour can be used.
  • 2 teaspoons Baking Powder
  • 1 teaspoon Cinnamon
  • 1/4 teaspoon Nutmeg
  • 1/2 teaspoon Salt
  • 1/2 cup Mini Chocolate Chips Optional, can swap for nuts.

Equipment

  • Mixing Bowl
  • whisk
  • muffin tins
  • spatula
  • Ice cream scoop
  • Oven

Method
 

Step‑by‑Step Instructions for Pumpkin Cottage Cheese Muffins
  1. Preheat your oven to 360°F (182°C) and prepare muffin tins.
  2. In a large mixing bowl, whisk together cottage cheese, maple syrup, vanilla extract, pumpkin puree, and eggs until smooth.
  3. Add flour, baking powder, cinnamon, nutmeg, and salt to the wet mixture and fold until combined.
  4. Fold in the mini chocolate chips, ensuring even distribution.
  5. Fill muffin cups three-quarters full with batter and bake for 26 to 30 minutes.
  6. Let muffins cool in the pan for about 5-10 minutes before transferring to a wire rack.

Nutrition

Serving: 1muffinCalories: 150kcalCarbohydrates: 22gProtein: 4gFat: 5gSaturated Fat: 2gCholesterol: 40mgSodium: 170mgPotassium: 120mgFiber: 1gSugar: 8gVitamin A: 500IUVitamin C: 1mgCalcium: 50mgIron: 1mg

Notes

Blend the cottage cheese until completely smooth for the best texture. Only mix the batter until just combined to maintain fluffiness.

Tried this recipe?

Let us know how it was!

Soft Pumpkin Oatmeal Cookies That Bring Fall to Your Kitchen

As the leaves begin to turn, the aroma of spice and pumpkin fills the air, reminding me that fall is here. There’s something truly special about baking Soft and Chewy Pumpkin Oatmeal Cookies that captures the essence of the season. These cookies are not only incredibly soft and thick, but each bite is a comforting embrace of pumpkin flavor, perfect for those cozy evenings. Plus, they’re incredibly versatile—you can easily customize them with chocolate chips or nuts to suit your cravings. Whether you’re hosting a gathering or simply indulging yourself, these cookies promise to bring warmth and joy to your kitchen. Are you ready to dive into this delightful fall treat?

Why Are These Cookies So Irresistible?

Irresistible Softness: Each cookie boasts a delightful texture that melts in your mouth, perfectly embodying the cozy vibes of fall.
Versatile Customization: Easily add chocolate chips or nuts for a personal touch, making these cookies adaptable to any palate.
Aromatic Spice Blend: The warming notes of pumpkin pie spice and cinnamon fill your kitchen with comforting scents that invite everyone in.
Quick to Make: With minimal prep time, you can whip up a batch of these cookies in no time, perfect for unexpected guests or sweet cravings.
Crowd-Pleasing Treat: Whether for a party or cozy night in, these cookies are guaranteed to impress family and friends, making them a perfect addition to your dessert table. For another comforting recipe, check out my delicious Blueberry Breakfast Cookies that are ideal for any time of the day!

Pumpkin Oatmeal Cookie Ingredients

• Get ready to bake these delightful Pumpkin Oatmeal Cookies with the perfect blend of flavors!

For the Batter

  • All-Purpose Flour – Provides structure; make sure to spoon and level for accuracy.
  • Pumpkin Pie Spice – Adds seasonal warmth and flavor; can be substituted with homemade spice blends if needed.
  • Ground Cinnamon – Enhances flavor, bringing out the best in pumpkin.
  • Baking Soda – Acts as a leavening agent; always check for freshness for optimal results.
  • Salt – Balances sweetness and elevates the cookie flavors.
  • Unsalted Butter – Adds richness and moisture; ensure it’s softened to room temperature for easy mixing.
  • Brown Sugar – Contributes moisture and a hint of caramel flavor; lightly packed for accurate measurement.
  • Granulated Sugar – Offers sweetness and helps achieve that perfect crisp edge.
  • Egg Yolk – Provides fat and richness, enhancing chewiness.
  • Pure Vanilla Extract – Adds depth of flavor to each cookie.
  • Pumpkin Puree – Brings moisture and a burst of pumpkin flavor; important to squeeze out excess moisture for denser, chewy cookies.
  • Old-Fashioned Rolled Oats – Contributes texture and chew; don’t substitute with quick oats, as they will lead to a different texture.

Optional Mix-Ins

  • Chocolate Chips – Add for a sweet touch and extra decadence.
  • Chopped Nuts – Pecans or walnuts will give a crunchy contrast to the chewy cookies.

These Pumpkin Oatmeal Cookies are not just a treat; they encapsulate the warmth and flavors of fall in every bite!

Step‑by‑Step Instructions for Pumpkin Oatmeal Cookies

Step 1: Preheat the Oven
Begin by preheating your oven to 350°F (180°C). While that warms up, line two baking sheets with parchment paper to ensure the cookies don’t stick during baking. This initial step sets the stage for baking your delicious Pumpkin Oatmeal Cookies evenly and perfectly.

Step 2: Mix the Dry Ingredients
In a medium bowl, whisk together the all-purpose flour, pumpkin pie spice, ground cinnamon, baking soda, and salt. Make sure to mix thoroughly to guarantee an even distribution of the spices and leavening agents. This combination creates the flavorful base that will enhance your Pumpkin Oatmeal Cookies.

Step 3: Cream the Wet Ingredients
In your mixer, combine the softened unsalted butter, brown sugar, and granulated sugar. Beat on medium speed for 1 to 2 minutes until the mixture is smooth and creamy. Then, add in the egg yolk and pure vanilla extract, mixing until fully incorporated. This step introduces richness and flavor to your cookie dough.

Step 4: Incorporate the Pumpkin Puree
Next, add the prepared pumpkin puree to the wet mixture, blending until the texture is creamy and uniform. Make sure to squeeze out any excess moisture from the pumpkin beforehand, as this will help achieve the desired chewy consistency in your Pumpkin Oatmeal Cookies.

Step 5: Combine the Mixtures
Gradually add the dry ingredient mixture to the wet mixture. Stir gently until just combined—overmixing can lead to tough cookies. Finally, fold in the old-fashioned rolled oats, which will provide that wonderful chewy texture characteristic of your Pumpkin Oatmeal Cookies.

Step 6: Chill the Cookie Dough
Cover the dough tightly with plastic wrap and refrigerate for at least 30 minutes. Chilling the dough is crucial as it helps the cookies maintain their shape while baking, contributing to their thick and chewy texture. This waiting time builds anticipation for these delightful cookies!

Step 7: Scoop and Bake
Once chilled, use a scoop to portion out the dough onto the prepared baking sheets. Flatten each dough ball slightly and be sure to leave enough space between them to allow for spreading. Bake in the oven for 9 to 12 minutes or until the edges are lightly browned, signaling they are ready to come out.

Step 8: Cool the Cookies
After removing from the oven, let the cookies rest on the baking sheet for about 5 minutes. This cooling period allows them to set perfectly. Once they are slightly firm, gently transfer the Pumpkin Oatmeal Cookies to a wire rack to cool completely, ensuring they stay chewy and tender.

What to Serve with Soft and Chewy Pumpkin Oatmeal Cookies

As the scent of warm spices fills your kitchen, it’s time to consider delightful pairings that will elevate your cozy cookie experience.

  • Hot Coffee: The robust flavors of coffee beautifully contrast with the sweetness of the cookies, creating a classic pairing.
  • Chai Tea: With its aromatic spices, chai tea complements the warm pumpkin flavor seamlessly, perfect for a relaxing afternoon.
  • Spiced Apple Cider: A warm cup of spiced apple cider brings a bit of autumn into your home and enhances the cookie’s fall vibes.
  • Creamy Vanilla Ice Cream: A scoop of vanilla ice cream adds a refreshing creaminess, balancing the cookie’s chewy texture beautifully.
  • Caramel Sauce: Drizzling warm caramel over cookies introduces a decadent sweetness that will leave everyone in bliss.
  • Roasted Pecans: These nuts add a delightful crunch and a touch of nuttiness that pairs wonderfully with pumpkin flavors.
  • Maple Syrup Dipping Sauce: A light maple syrup dip provides added sweetness while complementing the fall-spiced cookies perfectly.
  • Fresh Fruit Salad: A side of vibrant fruit salad adds a refreshing contrast, brightening up the rich flavors of the cookies.
  • Coconut Milk Latte: The creaminess of coconut milk plays well with the pumpkin spices, offering a tropical twist to your cozy treat.
  • Pumpkin Spice Hot Chocolate: Double down on the pumpkin flavor by pairing these cookies with a rich pumpkin spice hot chocolate for ultimate indulgence.

Expert Tips for Pumpkin Oatmeal Cookies

Squeeze That Pumpkin: Make sure to squeeze out excess moisture from pumpkin puree before measuring. This prevents overly soft cookies.

Chill Time Matters: Allow the cookie dough to chill for at least 30 minutes; it helps maintain the cookie shape and enhances chewiness.

Oat Choice Essential: Stick to old-fashioned rolled oats for a perfect chewy texture. Quick oats lead to mushy cookies, so avoid them!

Avoid Overmixing: When combining wet and dry ingredients, mix gently. Overmixing can make the cookies tough, which we want to avoid.

Check Freshness: Ensure your baking soda is fresh for the best rise. An expired leavening agent can ruin the texture of your Pumpkin Oatmeal Cookies.

Pumpkin Oatmeal Cookies Variations & Substitutions

Feel free to unleash your creativity and adapt these cookies to match your taste buds!

  • Chocolate Chip Delight: Add a generous cup of chocolate chips for a rich, sweet twist that complements the pumpkin flavor beautifully.
  • Nutty Goodness: Stir in chopped pecans or walnuts for a delightful crunch that adds texture and flavor to each bite.
  • Gluten-Free Option: Swap all-purpose flour with a gluten-free flour blend to make these cookies suitable for those with gluten sensitivities.
  • Spice it Up: Experiment with extra spices such as nutmeg or ginger for a personalized warmth that elevates the fall flavor profile.
  • Oatmeal Crunch: Use quick oats instead of rolled oats for a slightly different texture; they’ll give your cookies a softer chew.
  • Dairy-Free Version: Substitute unsalted butter with coconut oil or vegan butter for a dairy-free adaptation that still delivers on taste.
  • Sweetener Swap: Replace brown and granulated sugar with maple syrup or honey; just adjust the flour amount slightly to balance the moisture.
  • Cranberry Burst: Add dried cranberries for a fruity zing that pairs beautifully with the pumpkin and spices, perfect for autumn gatherings.

And for more scrumptious ideas, don’t miss my Joumou Haitian Pumpkin, perfect for warming up chilly nights, or try some enticing Blueberry Breakfast Cookies to start your day right!

Storage Tips for Pumpkin Oatmeal Cookies

Room Temperature: Store cookies in an airtight container at room temperature for up to 5 days. This keeps them soft and chewy, ready for a quick snack or delightful treat anytime.

Fridge: If you prefer longer lasting, you can store them in the refrigerator for up to 7 days. Just remember to let them come to room temperature for the best flavor.

Freezer: Freeze cookies in an airtight container or freezer bag for up to 3 months. For easier access, layer parchment paper between cookies to prevent sticking.

Reheating: To enjoy your frozen Pumpkin Oatmeal Cookies, simply thaw at room temperature or pop them in the microwave for about 10-15 seconds to restore their delightful softness.

Make Ahead Options

These Soft and Chewy Pumpkin Oatmeal Cookies are a fantastic choice for meal prep, saving you valuable time during busy fall days! You can prepare the cookie dough up to 24 hours in advance; simply cover it tightly and refrigerate to maintain freshness. If you prefer, you can also scoop the dough into balls and freeze them for up to 3 months—just place them on a baking sheet and freeze until solid before transferring to a freezer bag. When you’re ready to bake, you can bake them directly from frozen, adding a couple of extra minutes to the baking time. This way, you’ll enjoy warm, freshly baked cookies just like they came out of the oven!

Pumpkin Oatmeal Cookies Recipe FAQs

What type of pumpkin puree should I use?
You should use canned pumpkin puree or homemade puree that has been well-strained to remove excess moisture. Avoid products labeled as “pumpkin pie filling,” as they contain added sugars and spices that can alter your cookie’s intended flavor and texture.

How should I store my Pumpkin Oatmeal Cookies?
Once baked, store your cookies in an airtight container at room temperature for up to 5 days. This keeps them soft and chewy. If you prefer them to last longer, they can be refrigerated for up to 7 days, but let them sit at room temperature before enjoying to regain their warmth and flavor.

Can I freeze Pumpkin Oatmeal Cookies?
Absolutely! To freeze, place the cookies in an airtight container or a freezer-safe bag, with layers of parchment paper in between to prevent sticking. They can be frozen for up to 3 months. When you’re ready to indulge, thaw them at room temperature or microwave for 10-15 seconds, and they’ll be just as delicious!

What can I do if my cookies come out too soft?
If your cookies turn out too soft, it might be due to excess moisture in the pumpkin puree or not chilling the dough long enough. Ensure you squeeze out excess moisture from the pumpkin before measuring. If it happens again, you can also try adding a tablespoon of flour to the dough in your next batch to achieve the right consistency.

Are these cookies safe for pets?
It’s best to avoid sharing these Pumpkin Oatmeal Cookies with pets. Ingredients like chocolate chips (if added) and excessive sugar can be harmful to animals. Always stick to pet-specific treats for your furry friends!

Can I customize the recipe with different mix-ins?
The more the merrier! You can definitely mix in chocolate chips, pecans, or walnuts to add different flavors and textures. You could also substitute the spices for other favorites, such as nutmeg or allspice, for a unique twist!

Pumpkin Oatmeal Cookies

Soft Pumpkin Oatmeal Cookies That Bring Fall to Your Kitchen

These Pumpkin Oatmeal Cookies capture the essence of fall with their soft, chewy texture and comforting pumpkin flavor.
Prep Time 30 minutes
Cook Time 12 minutes
Chill Time 30 minutes
Total Time 1 hour 12 minutes
Servings: 24 cookies
Course: Dessert
Cuisine: American
Calories: 110

Ingredients
  

For the Batter
  • 2 cups All-Purpose Flour Spoon and level for accuracy.
  • 2 teaspoons Pumpkin Pie Spice Can be substituted with homemade spice blends.
  • 1 teaspoon Ground Cinnamon
  • 1 teaspoon Baking Soda Check for freshness.
  • 1 teaspoon Salt Balances sweetness.
  • 1/2 cup Unsalted Butter Softened to room temperature.
  • 1 cup Brown Sugar Lightly packed.
  • 1/2 cup Granulated Sugar
  • 1 large Egg Yolk
  • 1 teaspoon Pure Vanilla Extract
  • 1 cup Pumpkin Puree Squeeze out excess moisture.
  • 3 cups Old-Fashioned Rolled Oats Don’t substitute with quick oats.
Optional Mix-Ins
  • 1 cup Chocolate Chips
  • 1 cup Chopped Nuts Pecans or walnuts.

Equipment

  • Oven
  • Mixing bowls
  • mixer
  • Baking Sheets
  • Parchment Paper
  • Scoop

Method
 

Step-by-Step Instructions
  1. Preheat your oven to 350°F (180°C) and line two baking sheets with parchment paper.
  2. In a medium bowl, whisk together the all-purpose flour, pumpkin pie spice, ground cinnamon, baking soda, and salt.
  3. In your mixer, combine the softened unsalted butter, brown sugar, and granulated sugar. Beat for 1 to 2 minutes until smooth, then add the egg yolk and vanilla extract.
  4. Add the pumpkin puree to the wet mixture, blending until creamy. Squeeze out any excess moisture beforehand.
  5. Gradually add the dry ingredient mixture to the wet mixture, stirring gently. Fold in the old-fashioned rolled oats.
  6. Cover dough tightly with plastic wrap and refrigerate for at least 30 minutes.
  7. Scoop the dough onto the prepared baking sheets. Flatten each dough ball slightly and bake for 9 to 12 minutes until edges are lightly browned.
  8. Let cookies rest on the baking sheet for about 5 minutes, then transfer to a wire rack to cool completely.

Nutrition

Serving: 1cookieCalories: 110kcalCarbohydrates: 15gProtein: 1gFat: 5gSaturated Fat: 3gPolyunsaturated Fat: 0.5gMonounsaturated Fat: 1.5gCholesterol: 20mgSodium: 100mgPotassium: 50mgFiber: 1gSugar: 6gVitamin A: 500IUCalcium: 10mgIron: 0.5mg

Notes

Squeeze out excess moisture from pumpkin puree before measuring. Chill dough for at least 30 minutes for better texture.

Tried this recipe?

Let us know how it was!

Pumpkin Pie Tacos – A Fun Twist on Fall’s Favorite Dessert

As the leaves turn gold and the air develops that crisp autumn bite, I can’t help but dive headfirst into the kitchen to whip up something truly special. That’s when these delightful Pumpkin Pie Tacos come into play—a surprising blend of fall’s favorite flavors wrapped in a fun, crispy taco shell. In just 30 minutes, you can serve up this crowd-pleasing dessert that’s perfect for both Thanksgiving gatherings and festive Halloween parties. Not only are these unique tacos a quick treat to make, but they also pack the comforting essence of pumpkin pie in every delicious bite. Ready to give your fall dessert game a playful twist? Let’s get cooking!

Why Pumpkin Pie Tacos Are a Must-Try?

Unique Flavor Fusion: These Pumpkin Pie Tacos combine the warm spices of pumpkin pie with a fun taco format that surprises and delights!

Quick to Prepare: With only 30 minutes from start to finish, this dessert is perfect for busy autumn days.

Crowd Pleaser: Whether for Thanksgiving or Halloween, these tacos will impress friends and family, leaving them asking for the recipe!

Easy to Customize: Feel free to experiment by swapping in flavored cream cheese or using sweet potato puree for a twist.

Perfectly Textured: Enjoy the crispy taco shell paired with rich pumpkin filling and airy whipped cream—an irresistible combination!

If you’re exploring more unique recipes this fall, consider checking out Joumou Haitian Pumpkin and Key Lime Pie for inspiration!

Pumpkin Pie Tacos Ingredients

  • For the Taco Shells
    Tortillas – Essential for creating the taco shell; can substitute with gluten-free tortillas for a gluten-free option.
    Granulated Sugar – Adds sweetness to the taco shells.
    Ground Cinnamon – Provides warming spice flavor.
    Butter – Coats tortillas for flavor and crispness; can substitute with coconut oil for a dairy-free choice.

  • For the Pumpkin Filling
    Cream Cheese – Adds creaminess to the pumpkin filling; can replace with dairy-free cream cheese if needed.
    Canned Pumpkin Puree – The main flavor component of the filling; make sure not to use pumpkin pie filling that contains added spices.
    Pure Vanilla Extract – Enhances flavor.
    Pumpkin Pie Spice – Blends essential spices such as cinnamon, nutmeg, and ginger for warmth and comfort.

  • For the Whipped Cream Topping
    Heavy Whipping Cream – Used to make the light and airy whipped cream topping; whip until stiff peaks form for the best texture.
    Powdered Sugar – Sweetens the whipped cream.
    Chopped Pecans – Optional garnish for added texture, perfectly complementing the Pumpkin Pie Tacos.

Step‑by‑Step Instructions for Pumpkin Pie Tacos

Step 1: Preheat the Oven
Start by preheating your oven to 400°F (200°C). This ensures a perfect environment for making your crunchy taco shells. While the oven heats, gather your ingredients and equipment, including a muffin pan, baking sheet, and a mixing bowl, to streamline the cooking process.

Step 2: Prepare the Tortillas
Using a cookie cutter, cut your tortillas into 3-4 rounds, ideally around 4 to 4.5 inches in diameter. This will help form the taco shape. Once cut, lay the rounds out on a clean surface while you prepare the cinnamon sugar mixture—this will add a delightful sweetness to your Pumpkin Pie Tacos.

Step 3: Mix Cinnamon and Sugar
On a plate, mix granulated sugar with ground cinnamon until well combined. This sweet blend will coat your taco shells beautifully. Set this mixture aside while you buttery up the tortillas, ensuring that the warm, inviting flavor of cinnamon plays a starring role in your Pumpkin Pie Tacos.

Step 4: Coat the Tortillas
Prick each tortilla round with a fork to prevent air bubbles during baking. Next, brush both sides of each round with melted butter, allowing it to coat thoroughly. Then, dip each buttered tortilla into the cinnamon sugar mixture, ensuring they are fully coated to create that irresistible, sweet crunch.

Step 5: Form the Taco Shells
To create the taco shape, flip your muffin pan upside down and drape the cinnamon-sugar-coated tortilla rounds between the cups. This clever trick will mold your tortillas into the classic taco shape. Be gentle to avoid tearing while ensuring they sit securely for baking.

Step 6: Bake the Taco Shells
Place the muffin pan in the preheated oven and bake for about 10 minutes or until the taco shells are golden brown and crisp. Keep a close eye on them as they bake, as the visual cue of golden edges signals they are ready to come out and cool.

Step 7: Cool the Taco Shells
Once removed from the oven, let the taco shells cool for a few minutes before transferring them to a wire rack. This cooling step is crucial for achieving the perfect crisp texture in your Pumpkin Pie Tacos, preventing any sogginess that can occur if filled too early.

Step 8: Make the Whipped Cream
While your taco shells are cooling, prepare the whipped cream topping. In a mixing bowl, beat heavy whipping cream, powdered sugar, and pure vanilla extract together until stiff peaks form. This light and airy whipped cream is the perfect complement to the creamy pumpkin filling.

Step 9: Prepare the Pumpkin Filling
In a separate mixing bowl, combine softened cream cheese with powdered sugar, mixing until silky smooth. Add canned pumpkin puree, pure vanilla extract, and pumpkin pie spice, stirring well to create a creamy, flavorful filling that perfectly embodies the essence of Pumpkin Pie Tacos.

Step 10: Fill the Taco Shells
Once the taco shells have fully cooled, it’s time to fill them with the delightful pumpkin filling. Use a spoon or piping bag for ease and precision, generously adding the creamy mixture to each shell. Make sure to fill them just before serving to maintain their crispness.

Step 11: Top with Whipped Cream
Finally, generously dollop or pipe the prepared whipped cream on top of each filled taco for a light and airy finish. If desired, sprinkle chopped pecans or a dash of cinnamon on top for added texture and festive flair, making your Pumpkin Pie Tacos not just delicious but also visually appealing.

Step 12: Serve and Enjoy
Serve your Pumpkin Pie Tacos immediately for the best texture and flavor. These unique dessert tacos are perfect for impressing your guests at Thanksgiving or Halloween gatherings, bringing a playful twist to traditional pumpkin pie that everyone will love!

Pumpkin Pie Tacos Variations & Substitutions

Get ready to customize your Pumpkin Pie Tacos with these delightful twists—it’s all about making them your own!

  • Gluten-Free Option: Use gluten-free tortillas for a delicious alternative that everyone can enjoy without compromise.

  • Dairy-Free Delight: Swap cream cheese for dairy-free cream cheese and coconut oil instead of butter for a totally dairy-free dessert.

  • Sweet Potato Twist: Replace canned pumpkin puree with sweet potato puree for a unique, sweeter flavor profile that still embodies fall vibes.

  • Flavorful Cream Cheese: Opt for flavored cream cheese like cinnamon or maple to add unexpected depth and richness to your filling.

  • Spice It Up: Add a pinch of cayenne pepper to the pumpkin filling for a gentle kick that pairs fantastically with the sweet elements.

  • Nutty Crunch: Try using crushed hazelnuts instead of pecans for a different texture and delightful flavor contrast in your whipped topping.

  • Maple Syrup Drizzle: Dust your finished tacos with a drizzle of maple syrup for a sweet alternative to powdered sugar that enhances the autumnal flavor.

  • Chocolate Lovers: Add chocolate chips into the pumpkin filling for a decadent surprise in each taco, perfect for chocoholics!

And if you’re still in the mood for fall flavors, don’t forget to check out Joumou Haitian Pumpkin or Key Lime Pie for more scrumptious recipe inspiration!

What to Serve with Pumpkin Pie Tacos

Serving these charming Pumpkin Pie Tacos alongside the perfect accompaniments can elevate your fall dessert experience!

  • Vanilla Ice Cream: A scoop of creamy vanilla ice cream provides a delightful contrast to the spiced pumpkin filling and crunchy shell.
  • Apple Cider: This warm, spiced drink pairs beautifully with the flavors in the tacos, enhancing the autumnal vibes of your meal.
  • Candied Pecans: Adding a sweet nutty crunch, candied pecans elevate your tacos’ texture while complementing their flavors.

For a more adventurous touch, consider serving these tacos with warm caramel sauce drizzled over the top; it creates a sweet and gooey texture that transforms each bite into a decadent treat. Enjoy these combinations, and watch your guests savor each delightful mouthful!

Expert Tips for Pumpkin Pie Tacos

  • Cool Completely: Allow taco shells to cool fully before filling to prevent sogginess; warm shells can become mushy when filled too soon.

  • Whip It Right: Whip heavy cream until stiff peaks form for the best whipped cream texture—too little beating will result in a runny topping.

  • Measure Spices Carefully: Pumpkin pie spice is potent; measure accurately to maintain a balanced flavor in your filling and ensure your Pumpkin Pie Tacos shine.

  • Experiment with Fillings: Feel free to try flavored cream cheese or even sweet potato puree for a new twist on the classic pumpkin taste.

  • Garnish Wisely: A sprinkle of cinnamon or chopped pecans not only adds flavor but also enhances the visual appeal of your dessert tacos!

Make Ahead Options

These Pumpkin Pie Tacos are perfect for meal prep enthusiasts! You can make the taco shells up to 2 days in advance; simply store them in an airtight container to maintain their crispiness. The pumpkin filling can also be prepared up to 24 hours ahead of time—just keep it refrigerated in a sealed container to prevent any browning. When you’re ready to serve, fill the cooled taco shells with the pumpkin filling and top them with freshly whipped cream, which is best made just before serving to ensure the perfect, airy texture. This way, you can enjoy a delightful dessert with minimal effort, making your busy fall days a little sweeter!

How to Store and Freeze Pumpkin Pie Tacos

Room Temperature: Store the taco shells in an airtight container for up to 2 days to maintain their crispiness. Fill them just before serving for the best texture.

Fridge: If you have leftover filled Pumpkin Pie Tacos, store them in an airtight container in the refrigerator for up to 1 day. The filling will keep, but the shells may soften.

Freezer: Freeze the unfilled taco shells in a single layer, then transfer to a freezer bag for up to 1 month. Thaw and re-crisp in the oven before filling.

Reheating: For best results, reheat the taco shells in the oven at 350°F (175°C) for about 5 minutes to regain their crispness before assembly.

Pumpkin Pie Tacos Recipe FAQs

What type of tortillas should I use for Pumpkin Pie Tacos?
I recommend using regular flour tortillas for the best texture and flavor, but you can easily substitute with gluten-free tortillas if needed. Ensure they are fresh and pliable to prevent tearing when cutting and shaping into taco shells.

How should I store leftover Pumpkin Pie Tacos?
Store any leftover filled Pumpkin Pie Tacos in an airtight container in the refrigerator for up to 1 day. Keep in mind that the taco shells may soften after being filled, so it’s best to fill them just before serving to maintain their delicious crunch!

Can I freeze Pumpkin Pie Taco shells?
Absolutely! To freeze your taco shells, place them in a single layer on a baking sheet, then transfer them to a freezer bag after they are fully frozen. They can last for up to 1 month in the freezer. When ready to use, thaw them in the fridge overnight and re-crisp them in the oven at 350°F (175°C) for about 5 minutes before filling.

What should I do if my taco shells get soggy?
To avoid sogginess with your Pumpkin Pie Tacos, make sure your taco shells are completely cooled before filling. If you’ve accidentally filled warm shells, simply bake them in a 350°F (175°C) oven for about 5-7 minutes to restore some crunch.

Are there any dietary considerations for Pumpkin Pie Tacos?
Yes, definitely! For a dairy-free option, use coconut oil instead of butter and substitute cream cheese with dairy-free cream cheese. If you’re concerned about allergens, check the labels on your tortillas and cream cheese, as these can sometimes contain allergens like soy or gluten.

Can I make Pumpkin Pie Tacos ahead of time?
Certainly! You can prepare the taco shells and pumpkin filling in advance. Store the taco shells in an airtight container for up to 2 days at room temperature. Fill the taco shells just before you plan to serve them to keep them nice and crispy.

Pumpkin Pie Tacos

Pumpkin Pie Tacos - A Fun Twist on Fall's Favorite Dessert

Delight in these Pumpkin Pie Tacos, a playful blend of classic pumpkin pie flavors wrapped in crispy taco shells, perfect for any autumn celebration.
Prep Time 15 minutes
Cook Time 10 minutes
Cooling Time 5 minutes
Total Time 30 minutes
Servings: 12 tacos
Course: Dessert
Cuisine: American
Calories: 190

Ingredients
  

For the Taco Shells
  • 12 tortillas Tortillas Can substitute with gluten-free tortillas
  • 1 cup Granulated Sugar
  • 2 teaspoons Ground Cinnamon
  • 1/2 cup Butter Can substitute with coconut oil
For the Pumpkin Filling
  • 8 oz Cream Cheese Can replace with dairy-free cream cheese
  • 1 cup Canned Pumpkin Puree Do not use pumpkin pie filling
  • 1 teaspoon Pure Vanilla Extract
  • 2 teaspoons Pumpkin Pie Spice
For the Whipped Cream Topping
  • 1 cup Heavy Whipping Cream Whip until stiff peaks form
  • 1/4 cup Powdered Sugar
  • 1/4 cup Chopped Pecans Optional garnish

Equipment

  • Oven
  • muffin pan
  • Baking Sheet
  • Mixing Bowl
  • Cookie cutter

Method
 

Step-by-Step Instructions for Pumpkin Pie Tacos
  1. Preheat your oven to 400°F (200°C) and gather ingredients and equipment.
  2. Cut tortillas into 3-4 rounds, ideally around 4 to 4.5 inches in diameter.
  3. Mix granulated sugar with ground cinnamon on a plate and set aside.
  4. Prick each tortilla round with a fork, brush with melted butter, and dip in cinnamon sugar.
  5. Drape cinnamon-sugar-coated tortillas over an upside-down muffin pan to form taco shapes.
  6. Bake for about 10 minutes until golden brown and crisp.
  7. Let taco shells cool for a few minutes before transferring to a wire rack.
  8. In a mixing bowl, beat heavy whipping cream, powdered sugar, and vanilla until stiff peaks form.
  9. Combine softened cream cheese with powdered sugar, then add pumpkin puree, vanilla, and spice.
  10. Fill cooled taco shells with the pumpkin filling just before serving.
  11. Top with whipped cream and garnish with chopped pecans or cinnamon if desired.
  12. Serve immediately for the best texture and flavor.

Nutrition

Serving: 1tacoCalories: 190kcalCarbohydrates: 20gProtein: 2gFat: 11gSaturated Fat: 6gPolyunsaturated Fat: 0.5gMonounsaturated Fat: 3.5gCholesterol: 30mgSodium: 150mgPotassium: 100mgFiber: 1gSugar: 10gVitamin A: 500IUVitamin C: 1mgCalcium: 40mgIron: 0.5mg

Notes

Allow taco shells to cool fully before filling to prevent sogginess. Whip cream until stiff peaks form for ideal texture.

Tried this recipe?

Let us know how it was!

Homemade Chicken Taquitos Recipe That’s Sure to Impress!

The aroma of sizzling tortillas fills the kitchen, transforming a simple evening into a celebration. As I start assembling my Chicken Taquitos, I can’t help but smile at the thought of these crispy delights being the highlight of our next gathering. This Chicken Taquitos Recipe is not only quick to whip up but also packs a punch of flavor, thanks to tender, rotisserie chicken and melty cheese wrapped in soft tortillas. Whether you’re gearing up for a cozy family dinner or a lively game day, these homemade taquitos are a surefire crowd-pleaser that can easily rival any takeout. Best of all, they come with an irresistible crunchy exterior and a chance to customize with your favorite dipping sauces. Ready to dive into this delicious adventure? Let’s get rolling!

Why Are Chicken Taquitos So Irresistible?

Crispy Texture: Each bite delivers an addictive crunch that keeps you coming back for more.
Flavor Explosion: The combination of rotisserie chicken, spices, and cheese creates a mouthwatering medley that tantalizes the taste buds.
Quick & Easy: Perfect for busy weeknights, these taquitos can be on the table in no time, especially if you prep ahead!
Versatile Dipping: Pair them with sour cream, guacamole, or homemade salsa for a delightful kick. If you love easy appetizers, check out my Chilli Chicken Takeout recipe for another flavorful option!
Family Favorite: Instantly elevates any gathering, making them a hit with kids and adults alike. With all these features, you’ll wonder how you ever lived without this Chicken Taquitos recipe!

Chicken Taquitos Recipe Ingredients

Here’s everything you need to make scrumptious Chicken Taquitos from scratch!

For the Filling

  • Shredded Rotisserie Chicken – A tender and flavorful base; any cooked chicken works great.
  • Shredded Monterey Jack Cheese – Melts beautifully and adds creaminess; substitute with cheddar for a different flavor.
  • Chopped Green Chiles – Brings a mild heat; canned jalapeños can spice things up more.
  • Chili Powder – Adds warmth and rich flavor; using taco seasoning is a convenient alternative.
  • Ground Cumin – Provides an earthy note that’s essential for authentic taste.
  • Garlic Powder – Introduces savory depth; fresh minced garlic enhances the flavor even more.
  • Onion Powder – Offers sweetness and complexity; diced fresh onions can add texture.
  • Ground Black Pepper – A touch of mild heat; freshly ground is the best option.
  • Kosher Salt – Enhances all the flavors; adjust according to your taste preference.

For the Wrap

  • Soft Flour Tortillas – Perfect for easy rolling; corn tortillas can be used but require extra care.

For Frying

  • Canola Oil – Essential for frying to achieve that crispy goodness; vegetable oil is a suitable substitute.

For Dipping

  • Sour Cream, Guacamole, and Salsa – Perfect accompaniments; choose your favorites to add more flavor!

Now that you have everything, it’s time to cook up a storm with this delightful Chicken Taquitos recipe!

Step‑by‑Step Instructions for Chicken Taquitos Recipe

Step 1: Prep the Filling
In a large mixing bowl, combine 2 cups of shredded rotisserie chicken with 1 cup of shredded Monterey Jack cheese, 1/2 cup of chopped green chiles, and all the spices: 1 teaspoon of chili powder, 1 teaspoon of ground cumin, 1 teaspoon of garlic powder, 1 teaspoon of onion powder, 1/2 teaspoon of ground black pepper, and 1/2 teaspoon of kosher salt. Mix until well combined, ensuring the filling is flavorful and ready for your Chicken Taquitos.

Step 2: Assemble the Taquitos
Lay a soft flour tortilla flat on a clean surface. Spoon about 3 tablespoons of the chicken filling into the center of the tortilla. Carefully roll the tortilla tightly around the filling, folding in the sides as you go to prevent any of the delicious filling from escaping. Secure the rolled taquito with a toothpick to keep it together during frying. Repeat this process until all your filling is used up.

Step 3: Heat the Oil
In a cast-iron skillet, pour enough canola oil to cover the bottom, about 1/2 inch deep. Heat the oil over medium-high heat for about 5 minutes, or until it shimmers and gently sizzles when you test it with a small piece of tortilla. This temperature is crucial for achieving that desired crispy texture on your Chicken Taquitos while ensuring the filling heats through.

Step 4: Fry the Taquitos
Carefully place a few taquitos in the hot oil seam-side down, being cautious not to overcrowd the skillet. Fry them for about 3-4 minutes on one side or until they turn a golden brown color. Using tongs, carefully turn the taquitos to fry the other side for an additional 3-4 minutes, ensuring they are evenly crispy on all sides.

Step 5: Drain and Serve
Once golden brown and crispy, remove the taquitos from the skillet using a slotted spoon, allowing excess oil to drain off. Place them on a plate lined with paper towels to absorb any remaining oil. Serve your Chicken Taquitos hot, accompanied by sour cream, guacamole, or salsa for dipping. Enjoy the satisfaction of homemade crispy delights!

Chicken Taquitos Recipe Variations

Feel free to customize your taquitos and make them uniquely yours with these delightful twists!

  • Spice it Up: Add jalapeños or diced bell peppers to the filling for a burst of flavor and extra crunch. Imagine biting into a taquito and feeling that delightful heat!

  • Different Cheeses: Try cheddar or blend in a bit of cream cheese for a creamier texture. This not only enhances the flavor but also brings that gooey melty goodness to each bite.

  • Baked Alternative: For a healthier spin, brush the taquitos with oil and bake at 425°F until crispy, about 20 minutes. You’ll still get that delightful crunch without the frying!

  • Herb Infusion: Add fresh cilantro or a squeeze of lime juice to the filling for a zesty kick. It adds a fresh layer of flavor that brightens each bite.

  • Slow Cooker Chicken: Use your slow cooker to cook the chicken with spices and shredded later for even more tender meat. This can save you time and make the dish even easier!

  • Sweet Heat: Mix in a tablespoon of honey or hot sauce into the chicken filling for a sweet and spicy contrast. It’s a unique twist that could become your new favorite!

  • Crunchy Coating: After rolling, dip the taquitos in breadcrumbs before frying for an extra crispy coating. Elevate your texture game with a satisfying crunch that pairs wonderfully with the filling.

  • Veggie Option: Swap shredded chicken for black beans or a mix of sautéed vegetables for a hearty, vegetarian option. These veggie taquitos still pack a punch in flavor and texture!

Pair these ideas with delicious dips, and if you’re looking for more inspiration, don’t miss my Sweet Chili Chicken for a bold twist on flavor!

Make Ahead Options

These Chicken Taquitos are perfect for meal prep enthusiasts looking to save time! You can assemble the taquitos up to 24 hours in advance. Simply prepare the filling and roll the taquitos, then cover them with a damp paper towel to keep them moist and prevent them from drying out. Store them in an airtight container in the refrigerator until you’re ready to fry. When it’s time to serve, heat the oil and fry the taquitos just before guests arrive for that fresh, crispy experience. This way, you can enjoy flavorful, homemade Chicken Taquitos with minimal effort, all while impressing your family and friends!

Expert Tips for Chicken Taquitos

  • Filling Balance: Ensure balanced filling: Don’t overstuff your taquitos, as this can cause them to burst while frying. A couple of tablespoons per tortilla works perfectly!
  • Oil Temperature: Monitor oil heat closely: If it’s too cool, your taquitos will become greasy; too hot, and they’ll burn. Aim for around 350°F for crispy chicken taquitos.
  • Flavor Boost: Spice it up: Adding fresh herbs like cilantro or lime juice to the filling enhances flavor without compromising the texture.
  • Secure Rolls: Tight rolling is key: This prevents filling from leaking during frying and helps maintain the crispy exterior. Don’t skip the toothpick!
  • Make-Ahead: Consider prepping ahead: Assemble taquitos in advance and refrigerate them covered with a damp paper towel. Fry fresh just before serving for best results.

What to Serve with Crispy Chicken Taquitos?

Imagine the delightful crunch of freshly fried taquitos paired with your favorite sides and dips, creating a feast that’s hard to resist.

  • Zesty Guacamole: Creamy and rich, it adds a fresh kick that perfectly balances the savory flavors of taquitos. The coolness of the avocado complements the warmth of the taquitos beautifully.
  • Fresh Salsa: Chunky tomato salsa introduces a vibrant medley of flavors and a burst of freshness, enhancing the overall taste experience. Don’t be shy—add some diced onions and cilantro for extra zing!
  • Tangy Sour Cream: A classic accompaniment, its tanginess provides a cool contrast to the hot, crispy taquitos. It’s a must-have for dipping!
  • Mexican Street Corn Salad: Creamy, sweet, and spicy, this salad is a delightful side that offers a variety of textures and flavors, adding a festive touch to your meal.
  • Refried Beans: Silky smooth and comforting, these beans offer a hearty, protein-packed side that pairs well with the crispy texture of the taquitos.
  • Crispy Nachos: For an extra crunch, serve with a side of warm, cheesy nachos topped with jalapeños and melted cheese—perfect for sharing!
  • Mexican Rice: Fluffy, seasoned rice provides a simple base that complements every bite of your delicious taquitos. It’s a satisfying addition to round out your meal.
  • Pineapple Agua Fresca: This refreshing drink enhances the meal with a sweet and slightly tangy flavor that cleanses your palate beautifully between bites.
  • Chocolate Flan: End the meal on a sweet note with this luscious dessert that will leave your guests wanting more, perfectly rounding out your homemade feast!

Storage Tips for Chicken Taquitos

Fridge: Store leftover chicken taquitos in an airtight container for up to 3 days. Reheat in the oven at 350°F for about 10 minutes for a crispy finish.

Freezer: These delicious chicken taquitos can be frozen before frying. Wrap each taquito tightly in plastic wrap and place them in a freezer-safe bag for up to 2 months.

Reheating: To reheat frozen taquitos, bake directly from frozen at 400°F for around 20-25 minutes. This will ensure they’re crispy and heated through!

Serving Fresh: For the best taste, prepare chicken taquitos fresh whenever possible. They maintain their irresistible crunch and flavor when enjoyed right after frying.

Chicken Taquitos Recipe FAQs

How do I choose the best tortillas for making taquitos?
Absolutely! For the best results, soft flour tortillas are recommended as they are pliable and easy to roll. If you’re feeling adventurous, you can use corn tortillas for a more traditional approach, but keep in mind they may crack if not heated before use. It often helps to warm them slightly in the microwave for about 15 seconds before filling, making them easier to roll.

How long can I store leftover chicken taquitos?
These scrumptious chicken taquitos can be stored in an airtight container in the refrigerator for up to 3 days. To keep them crispy when reheating, pop them in the oven at 350°F for about 10 minutes. This method works wonders to restore their delightful crunch!

Can I freeze chicken taquitos before frying?
Certainly! To freeze your un-fried chicken taquitos, wrap each one tightly in plastic wrap and place them in a freezer-safe bag—this way, they can be stored for up to 2 months. When you’re ready to enjoy them, you can bake them directly from frozen at 400°F for about 20-25 minutes until they are thoroughly heated and crispy!

What should I do if my taquitos are bursting while frying?
Very often, the issue is related to how tightly the taquitos are rolled. Ensure you’ve secured them tightly, using toothpicks if necessary. Also, avoid overfilling them. A couple of tablespoons of filling per tortilla usually does the trick. If you do the rolling right, that crunchy goodness will stay intact!

Any dietary considerations if I want to serve these taquitos to my kids?
Perfection! This chicken taquitos recipe can be adjusted to cater to your kids’ tastes. To make it milder, opt for non-spicy diced green chiles or even omit them altogether. If there’s a dairy allergy, substitute the cheese with a dairy-free alternative or simply forgo it to focus on the flavorful chicken. Tailoring this recipe is part of the fun!

How can I customize the dipping sauces for my chicken taquitos?
The more the merrier! You can create a variety of dipping sauces to keep things exciting. For a zesty twist, mix sour cream with lime juice and chopped cilantro. If you prefer a spicy kick, combine mayonaisse with sriracha for a delightful creamy hot sauce! The options are endless—get creative and find the flavors that your family enjoys most!

Chicken Taquitos Recipe

Homemade Chicken Taquitos Recipe That's Sure to Impress!

This Chicken Taquitos Recipe is a flavorful, quick, and easy appetizer sure to impress at any gathering.
Prep Time 20 minutes
Cook Time 15 minutes
Total Time 35 minutes
Servings: 4 taquitos
Course: Appetizers
Cuisine: Mexican
Calories: 180

Ingredients
  

For the Filling
  • 2 cups shredded rotisserie chicken any cooked chicken works great
  • 1 cup shredded Monterey Jack cheese substitute with cheddar for a different flavor
  • 1/2 cup chopped green chiles canned jalapeños can spice things up
  • 1 teaspoon chili powder using taco seasoning is a convenient alternative
  • 1 teaspoon ground cumin provides an earthy note
  • 1 teaspoon garlic powder fresh minced garlic enhances flavor
  • 1 teaspoon onion powder diced fresh onions can add texture
  • 1/2 teaspoon ground black pepper freshly ground is best
  • 1/2 teaspoon kosher salt adjust according to taste
For the Wrap
  • 8 pieces soft flour tortillas corn tortillas can be used but require extra care
For Frying
  • 1/2 cup canola oil vegetable oil is a suitable substitute
For Dipping
  • sour cream choose your favorites
  • guacamole choose your favorites
  • salsa choose your favorites

Equipment

  • large mixing bowl
  • cast-iron skillet
  • slotted spoon
  • toothpicks

Method
 

Step‑by‑Step Instructions
  1. In a large mixing bowl, combine shredded rotisserie chicken, shredded Monterey Jack cheese, chopped green chiles, chili powder, ground cumin, garlic powder, onion powder, ground black pepper, and kosher salt. Mix until well combined.
  2. Lay a soft flour tortilla flat on a clean surface. Spoon about 3 tablespoons of the chicken filling into the center of the tortilla. Carefully roll the tortilla tightly around the filling, folding in the sides. Secure with a toothpick.
  3. In a cast-iron skillet, pour enough canola oil to cover the bottom, about 1/2 inch deep. Heat the oil over medium-high heat until it shimmers.
  4. Carefully place taquitos seam-side down in the hot oil, frying for about 3-4 minutes on each side until golden brown.
  5. Remove taquitos using a slotted spoon and drain on paper towels. Serve hot with sour cream, guacamole, or salsa.

Nutrition

Serving: 1taquitoCalories: 180kcalCarbohydrates: 15gProtein: 10gFat: 10gSaturated Fat: 3gPolyunsaturated Fat: 1gMonounsaturated Fat: 5gCholesterol: 45mgSodium: 250mgPotassium: 150mgFiber: 1gSugar: 1gVitamin A: 300IUVitamin C: 2mgCalcium: 150mgIron: 1mg

Notes

For best results, make sure to tightly roll the taquitos and monitor the oil temperature closely during frying.

Tried this recipe?

Let us know how it was!

Irresistibly Easy Chicken Kiev Recipe You’ll Love

As I stood in my kitchen, the tantalizing scent of garlic buttery goodness wafted through the air, taking me back to cherished family dinners filled with laughter. Today, I’m excited to share my easy Chicken Kiev recipe—a heartwarming dish that makes homemade comfort food effortlessly elegant. Imagine juicy chicken breasts enveloping a fragrant garlic-herb butter, ready to burst with every slice. What I love most about this recipe is how it simplifies the traditional method, allowing you to whip up this classic in no time without compromising on taste! Plus, it’s a definite crowd-pleaser, perfect for impressing guests or treating your family to something special. Are you ready to elevate your dinner game with this delightful dish? Let’s dive in!

Why You’ll Adore This Chicken Kiev Recipe

Simplicity, this easy Chicken Kiev recipe streamlines traditional methods, making it accessible even for novice cooks. Flavorful, the rich garlic-herb butter infuses the chicken, creating a dish that bursts with taste. Crowd-friendly, it’s perfect for impressing guests or serving a family dinner. Versatile, try different herbs or spices to suit your palate! Best of all, it pairs wonderfully with dishes like our Sheet Pan Chicken or a fresh salad. Get ready for an irresistible meal that will make you the star of your kitchen!

Chicken Kiev Ingredients

• A delightful mix of flavors awaits!

  • For the Garlic Butter

  • Unsalted Butter – Allows you to control the saltiness and ensures a rich filling.

  • Garlic Clove – Use fresh garlic for a robust, aromatic kick that elevates your Chicken Kiev.

  • Lemon Juice – Adds a bright acidity, enhancing the overall flavor profile.

  • Chopped Fresh Parsley – Incorporates a fresh, vibrant touch; dried parsley can be used if fresh isn’t on hand.

  • Salt – Enhances taste; opt for sea salt for the best results.

  • Black Pepper – Freshly ground pepper contributes a warm, nuanced flavor.

  • For the Chicken

  • Large Chicken Breasts – The star of the dish, tender and juicy when cooked right.

  • For Breading

  • Eggs – Serves as a binder to help the breadcrumbs adhere.

  • All-Purpose Flour – A crucial step in creating a crispy coating by helping the egg stick.

  • Panko Bread Crumbs – These are essential for achieving that light, crunchy texture—avoid regular breadcrumbs for this recipe!

  • For Frying

  • Extra Light Olive Oil – Ideal for frying, adding a subtle flavor; canola oil is another suitable alternative.

This Chicken Kiev recipe is not just about comfort but also adventure in the kitchen—get ready to impress!

Step‑by‑Step Instructions for Easy Garlic Butter Chicken Kiev Recipe

Step 1: Prepare Garlic Butter
In a mixing bowl, mash room-temperature unsalted butter with minced garlic, fresh lemon juice, chopped parsley, salt, and black pepper until thoroughly combined. You want a smooth, blended mixture that’s aromatic and vibrant. Set this garlic butter aside to allow the flavors to meld together while preparing the chicken for your Chicken Kiev.

Step 2: Prepare Chicken
Take large chicken breasts and carefully cut them in half horizontally, creating a pocket without slicing all the way through. Stuff each pocket generously with the prepared garlic butter, then seal the opening by pressing the edges together firmly. Season the outside of the chicken with a sprinkle of salt and pepper to enhance its flavor during cooking.

Step 3: Set Up Breading Station
Create a breading station by placing all-purpose flour on one plate, beaten eggs in a second, and panko breadcrumbs on a third. This arrangement will ensure easy and efficient coating of the stuffed chicken. Make sure to have these ingredients ready close at hand as you will quickly move through the breading process.

Step 4: Bread the Chicken
Dredge each stuffed chicken breast in the flour, ensuring it’s fully coated. Next, dip it into the beaten eggs, allowing any excess to drip off, before finally rolling it in panko breadcrumbs to achieve a crunchy texture. Press the breadcrumbs onto the surface firmly for better adherence, and place the breaded chicken on a clean plate to rest before frying.

Step 5: Fry Chicken
In a large skillet, heat extra light olive oil over medium-high heat until it reaches about 350°F. Gently place the breaded chicken into the hot oil, frying for about 4 minutes on each side or until the chicken is golden brown and crispy. Use a meat thermometer to verify that the internal temperature has reached 165°F for safe consumption.

Step 6: Serve
Once fried to perfection, remove the Chicken Kiev from the skillet and let it drain on a paper towel-lined plate. Serve hot, garnished with additional chopped parsley and lemon wedges. Cutting into the chicken will reveal the melted garlic butter, adding an irresistible touch to your delightful meal that everyone will love!

Chicken Kiev Recipe Variations

You can easily tailor this Chicken Kiev recipe to match your taste buds and dietary preferences. Let your creativity shine!

  • Herb Swap: Try using tarragon or oregano instead of parsley for a unique herb twist that transforms the flavor.

  • Spicy Kick: Add a pinch of red pepper flakes to the garlic butter for those who enjoy a bit of heat—it’s a flavor explosion!

  • Thigh Upgrade: Swap chicken breasts for thighs for a juicier and more flavorful experience; you’ll never look back!

  • Cheesy Delight: Incorporate shredded cheese like mozzarella or cheddar into the garlic butter—melty goodness awaits!

  • Whole Wheat Panko: For a healthier crunch, use whole wheat panko breadcrumbs to give an added nutritional boost without sacrificing taste.

  • Gluten-Free Version: Swap all-purpose flour and panko crumbs with almond flour and gluten-free breadcrumbs for a deliciously crispy alternative.

  • Garlic Lover’s Dream: Increase the number of garlic cloves for an even more intense garlicky goodness; it’s a sure win for those who can’t get enough!

  • Air-Fried Option: For a lighter take, consider air-frying the chicken at 400°F for 8-10 minutes for a crispy texture without the excess oil. This way, you can enjoy your Chicken Kiev guilt-free!

Get ready to dive into gourmet home cooking, and don’t forget to check out our scrumptious Sweet Chili Chicken for more culinary inspiration! Your kitchen adventure is just getting started!

Storage Tips for Chicken Kiev Recipe

  • Fridge: Store leftover Chicken Kiev in an airtight container for up to 5 days. Always allow it to cool before refrigerating to maintain its flavor and texture.
  • Freezer: Uncooked, breaded Chicken Kiev can be frozen for up to 3 months. Wrap each piece individually to prevent freezer burn, and thaw overnight in the fridge before cooking.
  • Reheating: For best results, reheat fried Chicken Kiev in a preheated oven at 350°F for about 10-15 minutes. This helps restore its crispy coating while warming the filling thoroughly.
  • Make-Ahead: You can prepare and bread the Chicken Kiev a day in advance, storing it in the fridge until you’re ready to fry. This makes it an ideal option for stress-free meal prepping!

Make Ahead Options

These Chicken Kievs are perfect for busy weeknights and meal prep enthusiasts! You can prepare the garlic butter filling and stuff the chicken breasts up to 24 hours in advance, sealing them tightly to prevent drying out. Just store them in an airtight container in the refrigerator. The breading can also be done a day ahead; simply bread the chicken and refrigerate until you’re ready to fry. When you’re ready to serve, heat the oil and fry as instructed until golden and crispy. This way, you can enjoy all the delicious flavors of Chicken Kiev without the last-minute rush, allowing your family to savor a comforting, homemade meal effortlessly!

What to Serve with Easy Garlic Butter Chicken Kiev

Imagine spreading warmth and joy around the dinner table with exciting flavors and vibrant colors as you create a delightful meal.

  • Creamy Mashed Potatoes: The buttery, smooth texture makes a perfect canvas for soaking up the rich garlic butter from your Chicken Kiev.
  • Fresh Garden Salad: A crisp salad with seasonal greens and a tangy vinaigrette adds a refreshing contrast to the savory chicken, balancing the meal beautifully.
  • Roasted Vegetables: Caramelized root vegetables or asparagus bring out earthy, sweet notes that complement the garlic flavor, adding both color and nutrition.
  • Garlic Bread: For the true garlic lover, crispy garlic bread served alongside your Chicken Kiev can enhance the buttery goodness and provide a delightful crunch.
  • Steamed Broccoli: Tender broccoli adds a pop of green color that brightens the plate and provides a nutritious touch that contrasts with the richness of the chicken.
  • Lemon Wedges: Serving lemon wedges on the side allows guests to add a splash of citrus brightness that elevates the flavors in every bite, making the dish even more inviting.
  • Chardonnay: A chilled glass of Chardonnay, with its buttery notes and crisp acidity, pairs beautifully with your Chicken Kiev and enriches the dining experience.
  • Chocolate Mousse: For dessert, a light and airy chocolate mousse rounds off the meal perfectly, satisfying sweet cravings without overpowering the rich main course.
  • Baking Soda Bread: This rustic bread gives a comforting feel while being perfect for dipping into any leftover garlic butter.
  • Cucumber Gazpacho: A chilled cucumber gazpacho provides a refreshing start to the meal, offering a light, zesty flavor that invigorates the palate.

Expert Tips for Chicken Kiev Recipe

  • Oil Temperature: Ensure your oil reaches 350°F before adding chicken to prevent soggy breading; a cooking thermometer can help you get it just right.
  • Cutting Technique: When creating a pocket in the chicken, be careful not to slice through completely; if you do, patch it by pressing the flap back together.
  • Flavor Boost: For a twist on this Chicken Kiev recipe, feel free to experiment with herbs; tarragon or oregano can give a unique flavor to your garlic butter.
  • Crisp Factor: Make sure to press the panko breadcrumbs firmly onto the chicken to ensure they adhere well, achieving that delightful crunch we all adore.
  • Reheating Leftovers: If you have leftovers, reheat in the oven instead of the microwave to maintain the crispy texture without making it soggy.
  • Healthier Cooking: For a lighter version, air-fry the chicken at 400°F for 6-8 minutes, flipping halfway for even cooking; this version is both delicious and health-conscious.

Easy Garlic Butter Chicken Kiev Recipe FAQs

What type of chicken should I use for Chicken Kiev?
I recommend using large chicken breasts as they offer a tender and juicy result. If you prefer more flavor, you can also swap them for chicken thighs, which will be just as delightful!

How can I tell if my garlic is fresh for the Chicken Kiev?
Absolutely! Fresh garlic should be firm, with no dark spots or sprouting. If it has any soft spots or starts to smell off, it’s best to choose a new head for that vibrant flavor in your Garlic Butter.

What’s the best way to store leftover Chicken Kiev?
Leftover Chicken Kiev should be stored in an airtight container in the refrigerator for up to 5 days. To prevent losing its delicious crunch, allow it to cool completely before sealing it up—trust me, it makes all the difference in maintaining flavor and texture!

Can I freeze Chicken Kiev?
Yes, you can freeze uncooked, breaded Chicken Kiev for up to 3 months. To freeze, wrap each piece tightly in plastic wrap and then place them in a freezer bag to prevent freezer burn. When you’re ready to cook, thaw them overnight in the refrigerator before frying for the best results.

How can I reheat Chicken Kiev without losing the crispiness?
For reheating, I suggest placing your fried Chicken Kiev in a preheated oven at 350°F for about 10-15 minutes. This method ensures the coating stays crunchy while the filling warms through beautifully—definitely a game-changer!

Can my dog eat Chicken Kiev?
While it’s tempting to share, I’d recommend against giving your dog Chicken Kiev. The garlic and butter can be harmful to pets in large quantities. It’s best to stick to plain, unseasoned chicken if you’re looking to treat your furry friend!

Chicken Kiev Recipe

Irresistibly Easy Chicken Kiev Recipe You’ll Love

This easy Chicken Kiev recipe offers a flavorful and elegant dish, perfect for dinner, featuring juicy chicken breasts and garlic butter.
Prep Time 15 minutes
Cook Time 8 minutes
Total Time 23 minutes
Servings: 4 pieces
Course: Dinner
Cuisine: European
Calories: 450

Ingredients
  

For the Garlic Butter
  • 1 cup Unsalted Butter room temperature
  • 3 cloves Garlic minced
  • 2 tablespoons Lemon Juice
  • 1 tablespoon Chopped Fresh Parsley or dried if fresh isn't available
  • 1 teaspoon Salt sea salt preferred
  • 1/2 teaspoon Black Pepper freshly ground
For the Chicken
  • 4 large Chicken Breasts
For Breading
  • 2 large Eggs beaten
  • 1 cup All-Purpose Flour
  • 1 cup Panko Bread Crumbs for crunchy texture
For Frying
  • 1/2 cup Extra Light Olive Oil or canola oil

Equipment

  • Mixing Bowl
  • Skillet
  • meat thermometer

Method
 

Step-by-Step Instructions
  1. Prepare Garlic Butter: In a mixing bowl, mash room-temperature unsalted butter with minced garlic, fresh lemon juice, chopped parsley, salt, and black pepper until combined. Set aside.
  2. Prepare Chicken: Cut large chicken breasts in half horizontally to create a pocket. Stuff with garlic butter and seal edges. Season with salt and pepper.
  3. Set Up Breading Station: Place flour, beaten eggs, and panko breadcrumbs on separate plates for easy breading.
  4. Bread the Chicken: Dredge stuffed chicken in flour, dip in eggs, then coat with panko breadcrumbs. Let sit on a plate.
  5. Fry Chicken: Heat olive oil in a skillet over medium-high heat. Fry chicken for about 4 minutes on each side until golden brown and crispy.
  6. Serve: Drain on paper towels and serve hot, garnished with parsley and lemon wedges.

Nutrition

Serving: 1pieceCalories: 450kcalCarbohydrates: 30gProtein: 35gFat: 25gSaturated Fat: 10gPolyunsaturated Fat: 5gMonounsaturated Fat: 8gCholesterol: 120mgSodium: 600mgPotassium: 600mgFiber: 2gSugar: 1gVitamin A: 300IUVitamin C: 5mgCalcium: 30mgIron: 2mg

Notes

For best flavor, use fresh ingredients and serve hot for the richest taste experience.

Tried this recipe?

Let us know how it was!

Savory Chicken Enchiladas for a Cozy Family Dinner

Standing in my kitchen, the warmth of the oven mingled with the mouthwatering aroma of green chile sauce, instantly whisked me away to gatherings filled with laughter and comfort. These Chicken Enchiladas are more than just a simple meal; they embody comfort food at its finest, making each bite a taste of home. With just the right balance of tender chicken, warm corn tortillas, and a drizzle of zesty sauce, this recipe is as family-friendly as it is customizable. Whether you’re preparing a weeknight dinner or looking to impress overnight guests, these enchiladas can do it all—quick to prepare yet satisfying enough to make everyone feel cherished. Curious about how to bring this favorite dish to your table? Let’s dive into the deliciously cheesy world of Chicken Enchiladas!

Why are these Chicken Enchiladas irresistible?

Comforting, Cozy Meal: These Chicken Enchiladas deliver a warm hug on your plate, wrapping tender chicken in golden tortillas and drenched in savory green chile sauce.

Customizable Delight: Enjoy endless variations—from swapping chicken for beans to exploring different cheese blends—this dish adapts to every taste!

Quick and Easy: Ideal for a busy weeknight, this recipe comes together quickly, but it’s impressive enough for special occasions, perfect for gatherings or a cozy family dinner.

Crowd-Pleaser: Who doesn’t love cheesy, flavorful enchiladas? Serve them alongside a fresh salad or cornbread for a complete meal that everyone can appreciate.

Make-Ahead Magic: Prepare them a day in advance for those busy nights. Just bake when you’re ready and savor the delightful aroma filling your home.

Craving more fiesta flavors? Try pairing them with our Sizzling Chicken Pepper or enjoy them as a side dish with Bbq Chicken Grilled for an unforgettable meal!

Chicken Enchiladas Ingredients

• Let’s gather what you need for these mouthwatering Chicken Enchiladas!

For the Enchiladas
Whole Corn Tortillas – Provides the base for the enchiladas; traditional and adds a lovely flavor.
Boneless, Skinless Chicken Breasts – The main protein offering a juicy texture; grill or roast for extra flavor.
Cumin – Adds warmth and depth to the filling; use ground cumin for a more intense flavor.
Chili Powder – Enhances the overall flavor with mild heat; substitute with paprika for a gentler spice.
Vegetable Oil – Used for cooking the chicken and onions; can be swapped with olive oil for a healthier option.
Large Onion, Diced – Contributes sweetness to the filling; caramelizing boosts its flavor even more.
Green Enchilada Sauce (3 cans, 15 oz.) – Binds the dish together with its savory goodness; red enchilada sauce can be substituted for a different twist.
Grated Cheddar/Jack Cheese (3 cups) – Adds creaminess and richness; combine with mozzarella for a stretchier cheese pull.

For Serving
Sour Cream – Provides a tangy contrast to the warm enchiladas; Greek yogurt is a healthy alternative.
Diced Tomato – Adds freshness and pops of color; consider using avocado for a creamy texture.
Chopped Cilantro – Enhances the dish with fresh herby notes; feel free to omit if you’re not a fan.

Step‑by‑Step Instructions for Chicken Enchiladas

Step 1: Prep Chicken
Season the boneless, skinless chicken breasts with cumin and chili powder evenly on both sides. In a large skillet, heat vegetable oil over medium heat, adding the chicken. Cook for about 8 minutes, or until the chicken reaches an internal temperature of 165°F and is no longer pink. Remove from the skillet, let it rest for a few minutes, and then shred the chicken using two forks.

Step 2: Caramelize Onions
In the same skillet, add the diced onions to the leftover chicken fat and sauté over medium heat. Cook for 5-7 minutes, stirring occasionally, until the onions become golden and caramelized, bringing out their sweetness. Set the caramelized onions aside on a plate, allowing them to cool slightly while you prepare the enchilada sauce.

Step 3: Warm Sauce
Lower the heat and pour the green enchilada sauce into the skillet, scraping up any delicious bits left from the chicken and onions. Gently heat the sauce on low for about 5 minutes, allowing it to warm through and blend the flavors. It should simmer softly while you move on to preparing the tortillas.

Step 4: Prepare Tortillas
In a separate dry skillet over medium-high heat, warm the corn tortillas one at a time for about 30 seconds on each side. This helps soften them and adds flavor; they should be slightly pliable but not crispy. Once warmed, stack them in a clean towel to keep them warm while you assemble your Chicken Enchiladas.

Step 5: Assemble Enchiladas
Take a warm tortilla, dip it in the enchilada sauce, coating both sides lightly. Place the tortilla on a clean surface and fill it with shredded chicken, a spoonful of caramelized onions, and some grated cheese. Roll the tortilla tightly and place it seam-side down in a greased casserole dish. Repeat this process for each tortilla until all ingredients are used.

Step 6: Top and Bake
Once all enchiladas are assembled in the casserole dish, pour any remaining enchilada sauce over them, ensuring they are well covered. Sprinkle the top with the remaining cheese and a dash of chili powder for garnish. Preheat your oven to 350°F and bake for 30 minutes, or until the cheese is bubbly and slightly golden.

Step 7: Rest and Serve
After baking, remove the Chicken Enchiladas from the oven and let sit for 15-20 minutes. This resting period allows the flavors to meld and makes serving easier. Garnish them with diced tomatoes, a dollop of sour cream, and chopped cilantro for a fresh finish before serving warm to your family.

What to Serve with Delicious Chicken Enchiladas

Looking to create a memorable meal that brings joy to your dinner table? The right accompaniments can elevate your Chicken Enchiladas into a festive feast.

  • Fresh Garden Salad:
    A crisp salad with mixed greens and a zesty vinaigrette balances the cheesy richness of the enchiladas beautifully. The freshness acts as a palate cleanser.

  • Spanish Rice:
    Fluffy rice with spices echoes the flavors of the enchiladas, making each bite harmonious. It’s a filling side that complements the hearty dish.

  • Grilled Corn on the Cob:
    Sweet, smoky grilled corn enhances the comfort food vibe with its summer flavor. Slather it with a bit of lime and spice for that extra kick.

  • Refried Beans:
    Creamy refried beans add a deliciously satisfying dimension, offering a lovely textural contrast. Their savory goodness pairs perfectly with the enchiladas’ flavors.

  • Creamy Guacamole:
    A side of smooth, fresh guacamole provides a cool and creamy contrast, enhancing the overall taste experience. Serve it with crunchy tortilla chips for added delight.

  • Chips and Salsa:
    Crispy chips paired with a fresh salsa bring a delightful crunch and vibrant flavor to the table. It’s the perfect appetizer or snack while waiting for the main course.

  • Margaritas:
    Consider serving a chilled margarita to enhance the fiesta atmosphere. Its tartness balances the richness of the enchiladas, making each sip refreshing.

  • Churros for Dessert:
    End the meal on a sweet note with warm churros sprinkled with cinnamon sugar. Their crispy exterior and soft interior are a delightful way to conclude your feast.

Chicken Enchiladas Variations & Substitutions

Embrace your culinary creativity by personalizing this Chicken Enchiladas recipe to suit your tastes and dietary needs!

  • Vegetarian Delight: Swap out the chicken for black beans or sautéed mushrooms to create a hearty vegetarian version that’s just as satisfying.
  • Spicy Kick: Add diced jalapeños or chopped green chiles into the filling for an extra layer of heat that enchilada lovers will appreciate.
  • Cheese Options: Experiment with different cheese blends like pepper jack for a bit of spice or mozzarella for a melty texture that kids adore.
  • Flavor Boost: Incorporate roasted garlic into the filling for a delightful depth of flavor that elevates the overall taste.
  • Sauce Exchange: Swap green enchilada sauce for a homemade roja or tomatillo sauce for a fresher take that supports your flavor adventure.
  • Tortilla Swap: If you prefer a gluten-free option, use gluten-free tortillas that can hold the same savory fillings, preserving that familiar texture.
  • Nut-Free: For a nut-sensitive diet, ensure that your sauce ingredients, if making homemade, contain no nut contamination to keep it safe for all.
  • Dairy-Free: Opt for vegan cheese and skip the sour cream, replacing it with avocado or a homemade cashew cream for a rich, creamy kick without dairy.

Whether you’re jumping into a comforting weeknight dinner or hosting a gathering, these variations will ensure your Chicken Enchiladas remain a cherished recipe. Want to explore more vibrant meals? Check out our Garlic Chicken Gnocchi or treat yourself to our flavorful BLT Chicken Salad alongside these delightful enchiladas!

Make Ahead Options

These Chicken Enchiladas are a fantastic option for meal prep, saving you valuable time during busy weeknights! You can assemble the enchiladas up to 24 hours in advance: simply complete the filling and rolling process, then cover and refrigerate them before baking. To maintain their quality, ensure each layer is well-sauced to prevent the tortillas from drying out. When you’re ready to bake, add the remaining cheese on top and pop them in a preheated oven at 350°F for about 30 minutes. You’ll enjoy delicious, restaurant-quality Chicken Enchiladas without the evening stress, all prepared ahead of time!

Storage Tips for Chicken Enchiladas

  • Fridge: Store leftover Chicken Enchiladas in an airtight container for up to 3 days. Make sure they are completely cooled before sealing to avoid moisture buildup.

  • Freezer: You can freeze assembled Chicken Enchiladas wrapped tightly in plastic wrap and then in foil for up to 3 months. This keeps them fresh for future quick meals!

  • Reheating: To enjoy leftovers, reheat in the oven at 350°F for about 20-25 minutes until heated through. Cover with foil for the first half to prevent drying out.

  • Make-Ahead Option: Feel free to prepare the enchiladas a day in advance and refrigerate them unbaked. Just add cheese right before baking to keep them delicious!

Helpful Tricks for Chicken Enchiladas

Tortilla Tenderness: Ensure tortillas are soft enough to roll without breaking; warming them in a skillet adds flavor and flexibility.

Resting is Key: Allow the assembled Chicken Enchiladas to rest for 15-20 minutes post-baking to set up for easier serving and maximum flavor.

Homemade Sauce Boost: Consider making your own enchilada sauce for a fresh twist that can elevate the dish. Store-bought is convenient, but homemade can add richer flavors.

Customize with Confidence: Feel free to substitute proteins like shredded pork or black beans for variety, or mix different cheese blends for unique taste experiences.

Perfect Baking Time: Keep an eye on your enchiladas while baking; if the cheese starts browning too quickly, cover with foil for the last few minutes.

Chicken Enchiladas Recipe FAQs

What type of tortillas should I use for Chicken Enchiladas?
Whole corn tortillas are traditional for Chicken Enchiladas, providing a lovely flavor and texture. If you prefer, you can substitute them with flour tortillas; however, corn tortillas enhance the authenticity of the dish.

How long can I store leftover Chicken Enchiladas?
Leftover Chicken Enchiladas can be stored in an airtight container in the fridge for up to 3 days. Make sure they are completely cooled before sealing to avoid excess moisture that could affect their texture.

Can I freeze Chicken Enchiladas?
Absolutely! You can freeze assembled Chicken Enchiladas wrapped tightly in plastic wrap and aluminum foil for up to 3 months. To reheat, simply thaw overnight in the refrigerator and bake at 350°F for about 25-30 minutes until heated through.

What’s the best way to reheat Chicken Enchiladas?
To reheat, place the leftovers in an oven-safe dish and cover with foil to maintain moisture. Bake at 350°F for 20-25 minutes. Uncover for the last few minutes to crisp up the cheese, and watch them closely to avoid drying out.

Can I use different proteins or make it vegetarian?
Very! You can substitute the chicken with shredded pork, beef, or even black beans for a delicious vegetarian option. Feel free to mix it up with different cheese blends to cater to your taste!

Is this Chicken Enchiladas recipe suitable for those with food allergies?
This recipe contains dairy and gluten due to the corn tortillas. If you’re concerned about gluten, look for gluten-free corn tortillas. Always check all ingredient labels if anyone in your household has allergies, especially regarding dairy or specific seasonings.

Chicken Enchiladas

Savory Chicken Enchiladas for a Cozy Family Dinner

These Chicken Enchiladas are a hearty, flavorful dish perfect for a cozy family dinner.
Prep Time 15 minutes
Cook Time 40 minutes
Resting Time 20 minutes
Total Time 1 hour 15 minutes
Servings: 4 enchiladas
Course: Dinner
Cuisine: Mexican
Calories: 350

Ingredients
  

For the Enchiladas
  • 12 pieces Whole Corn Tortillas Provides the base for the enchiladas; traditional and adds a lovely flavor.
  • 2 pounds Boneless, Skinless Chicken Breasts The main protein offering a juicy texture; grill or roast for extra flavor.
  • 1 tablespoon Cumin Adds warmth and depth to the filling; use ground cumin for a more intense flavor.
  • 1 tablespoon Chili Powder Enhances the overall flavor with mild heat; substitute with paprika for a gentler spice.
  • 2 tablespoons Vegetable Oil Used for cooking the chicken and onions; can be swapped with olive oil for a healthier option.
  • 1 large Large Onion, Diced Contributes sweetness to the filling; caramelizing boosts its flavor even more.
  • 3 cans (15 oz.) Green Enchilada Sauce Binds the dish together with its savory goodness; red enchilada sauce can be substituted for a different twist.
  • 3 cups Grated Cheddar/Jack Cheese Adds creaminess and richness; combine with mozzarella for a stretchier cheese pull.
For Serving
  • 1 cup Sour Cream Provides a tangy contrast to the warm enchiladas; Greek yogurt is a healthy alternative.
  • 1 medium Diced Tomato Adds freshness and pops of color; consider using avocado for a creamy texture.
  • 1/4 cup Chopped Cilantro Enhances the dish with fresh herby notes; feel free to omit if you're not a fan.

Equipment

  • Skillet
  • casserole dish
  • Stacking Towels

Method
 

Step-by-Step Instructions for Chicken Enchiladas
  1. Season the boneless, skinless chicken breasts with cumin and chili powder evenly on both sides. In a large skillet, heat vegetable oil over medium heat, adding the chicken. Cook for about 8 minutes, or until the chicken reaches an internal temperature of 165°F and is no longer pink. Remove from the skillet, let it rest for a few minutes, and then shred the chicken using two forks.
  2. In the same skillet, add the diced onions to the leftover chicken fat and sauté over medium heat. Cook for 5-7 minutes, stirring occasionally, until the onions become golden and caramelized, bringing out their sweetness. Set the caramelized onions aside on a plate, allowing them to cool slightly while you prepare the enchilada sauce.
  3. Lower the heat and pour the green enchilada sauce into the skillet, scraping up any delicious bits left from the chicken and onions. Gently heat the sauce on low for about 5 minutes, allowing it to warm through and blend the flavors. It should simmer softly while you move on to preparing the tortillas.
  4. In a separate dry skillet over medium-high heat, warm the corn tortillas one at a time for about 30 seconds on each side. This helps soften them and adds flavor; they should be slightly pliable but not crispy. Once warmed, stack them in a clean towel to keep them warm while you assemble your Chicken Enchiladas.
  5. Take a warm tortilla, dip it in the enchilada sauce, coating both sides lightly. Place the tortilla on a clean surface and fill it with shredded chicken, a spoonful of caramelized onions, and some grated cheese. Roll the tortilla tightly and place it seam-side down in a greased casserole dish. Repeat this process for each tortilla until all ingredients are used.
  6. Once all enchiladas are assembled in the casserole dish, pour any remaining enchilada sauce over them, ensuring they are well covered. Sprinkle the top with the remaining cheese and a dash of chili powder for garnish. Preheat your oven to 350°F and bake for 30 minutes, or until the cheese is bubbly and slightly golden.
  7. After baking, remove the Chicken Enchiladas from the oven and let sit for 15-20 minutes. This resting period allows the flavors to meld and makes serving easier. Garnish them with diced tomatoes, a dollop of sour cream, and chopped cilantro for a fresh finish before serving warm to your family.

Nutrition

Serving: 1enchiladaCalories: 350kcalCarbohydrates: 30gProtein: 25gFat: 15gSaturated Fat: 8gPolyunsaturated Fat: 2gMonounsaturated Fat: 3gCholesterol: 70mgSodium: 600mgPotassium: 400mgFiber: 4gSugar: 2gVitamin A: 500IUVitamin C: 10mgCalcium: 200mgIron: 2mg

Notes

Feel free to customize with different proteins or cheese blends to suit your tastes.

Tried this recipe?

Let us know how it was!

Creamy Chicken Pasta Bake for Cozy Family Dinners

As I stood in my kitchen one bustling weeknight, the familiar aroma of sautéed onions and garlic wafted through the air, instantly sparking memories of family dinners gathered around the table. This is the magic of my Cheesy Chicken Pasta Bake—a dish that effortlessly transforms leftover rotisserie chicken into a warm embrace for the senses. With its creamy homemade tomato sauce and perfectly cooked pasta, this meal is not just comfort food; it’s a quick and easy answer to the challenge of hungry mouths on busy evenings. Plus, its customizable nature means you can throw in extra veggies or a mix of your favorite cheeses, making it your own. Curious to see just how simple this crowd-pleaser can be? Let’s dive into the recipe!

Why is Chicken Pasta Bake a must-try?

Comforting Flavor: This dish wraps tender chicken in a creamy sauce that’s bursting with flavor, bringing everyone together at the dinner table.

Time-Saving: Perfect for busy weeknights, it utilizes rotisserie chicken for a quicker meal.

Customizable: Add your favorite veggies or cheeses to make it uniquely yours.

Crowd-Pleaser: It’s guaranteed to impress family and friends, making it a go-to for gatherings.

Effortless Preparation: With straightforward steps, you’ll be serving this delicious dish in no time.

Pair it with a refreshing salad or some garlic bread for the perfect meal! If you’re looking for more easy recipes, check out my Sizzling Chicken Pepper or Tuscan Chicken Soup.

Chicken Pasta Bake Ingredients

For the Dish

  • Chopped Cooked Chicken Breast – Main protein source; using rotisserie chicken simplifies prep and enhances flavor.
  • Short Pasta (12 ounces) – Provides structure; options like farfalle or penne work well, and gluten-free pasta is available.
  • Salted Butter (¼ cup) – Adds richness to the sauce; unsalted can be used for less sodium.
  • Diced Yellow Onion (1) – Offers depth and sweetness; shallots are a fine substitute if desired.
  • Garlic (2 cloves, minced) – Enhances flavor with its aromatic kick; fresh is best but garlic powder can work in a pinch.
  • All-purpose Flour (2 tablespoons) – Thickens the sauce; gluten-free flour is a suitable alternative.
  • Tomato Paste (2 tablespoons) – Contributes concentrated tomato flavor; pureed tomatoes can be a quick substitute.
  • Canned Diced Tomatoes (14.5 oz) – Acts as the sauce base; consider fresh tomatoes when in season for a fresher taste.
  • Whole Milk (2 cups) – Provides creaminess to the sauce; switch to half-and-half for an extra rich texture.
  • Italian Seasoning (2-3 teaspoons) – A flavorful enhancer; feel free to use fresh herbs like basil or oregano instead.
  • Red Pepper Flakes (¼ to ½ teaspoon) – Adds heat; adjust according to your taste preferences, or omit for a milder version.
  • Salt and Ground Black Pepper – Essential for flavor enhancement; adjust to your liking.

For the Topping

  • Shredded Mozzarella Cheese (2 cups, divided) – Melts beautifully and adds creaminess; a cheddar-mozzarella blend offers more flavor.
  • Shredded Parmesan Cheese (¾ cup, divided) – Imparts a nutty, salty depth; consider Pecorino for a stronger profile.
  • Fresh Chopped Parsley (¼ cup, plus more for garnish) – Brightens up the dish visually and flavor-wise; fresh basil is a great alternative.

Embrace the joy of homemade meals with this delightful Chicken Pasta Bake that’s perfect for cozy family dinners!

Step‑by‑Step Instructions for Chicken Pasta Bake

Step 1: Preheat the Oven
Begin by preheating your oven to 400°F (200°C), ensuring it’s ready to create a perfectly baked Chicken Pasta Bake. While the oven heats up, grease a 9×13-inch baking dish with cooking spray or a little olive oil to prevent sticking, creating a smooth surface for your delicious creation.

Step 2: Cook the Pasta
In a large pot, bring salted water to a boil. Add your choice of short pasta, such as penne or farfalle, and cook according to package instructions until al dente, typically about 8-10 minutes. Drain the pasta, reserving about ½ cup of the starchy pasta water for later use, then set aside to cool slightly.

Step 3: Sauté the Aromatics
In a large skillet over medium heat, melt ¼ cup of salted butter until bubbling. Add diced yellow onion and sauté for about 3-5 minutes, or until translucent and aromatic. Next, stir in minced garlic and cook for an additional 30 seconds, allowing the fragrant aroma to fill your kitchen as you prepare the sauce base.

Step 4: Create the Sauce
Sprinkle 2 tablespoons of all-purpose flour over the onion and garlic mixture, stirring continuously to incorporate. Then add 2 tablespoons of tomato paste and cook for 1-2 minutes to deepen the flavor. This forms a roux, which will help thicken your delicious Chicken Pasta Bake sauce.

Step 5: Build the Tomato Sauce
Slowly pour in the drained canned diced tomatoes, mixing well to combine. Gradually whisk in 2 cups of whole milk, ensuring a creamy consistency. Sprinkle in 2-3 teaspoons of Italian seasoning, along with red pepper flakes, salt, and pepper, then allow the mixture to simmer for about 5-7 minutes, stirring occasionally until it thickens.

Step 6: Add Cheese and Chicken
As the sauce thickens, stir in fresh chopped parsley, 1 cup of shredded mozzarella cheese, and ½ cup of parmesan cheese. Keep stirring until the cheeses melt into the sauce. Finally, fold in the cooked chopped rotisserie chicken until every piece is coated in the creamy sauce, making this Chicken Pasta Bake rich and hearty.

Step 7: Mix and Combine in Baking Dish
In your greased baking dish, combine the cooked pasta with the creamy sauce mixture. Gently fold everything together until the pasta is well coated and the chicken is evenly distributed throughout. Make sure the ingredients are mixed thoroughly to ensure each bite is a comforting blend.

Step 8: Top with Cheese and Bake
Sprinkle the remaining 1 cup of mozzarella and ¼ cup of parmesan cheese over the top of the pasta mixture. Place the baking dish in the preheated oven and bake uncovered for about 20 minutes, or until the cheese is golden and bubbly, creating a mouthwatering crust on your Chicken Pasta Bake.

Step 9: Serve and Enjoy
Once baked to perfection, remove the Chicken Pasta Bake from the oven and let it cool for a few minutes. Garnish with additional fresh parsley for a pop of color before serving hot. This comforting dish is best enjoyed immediately alongside your favorite side salad or some garlic bread.

Expert Tips for Chicken Pasta Bake

  • Pasta Perfection: Always cook pasta just until al dente; it will continue to cook during baking, ensuring a perfect texture.

  • Sauce Consistency: Remember to reserve pasta water; adding a bit helps adjust the sauce’s consistency and keeps the bake from drying out.

  • Layer It Right: When mixing, fold gently to avoid breaking the pasta, ensuring a nice balance of flavors and textures throughout your Chicken Pasta Bake.

  • Cheese Choices: Consider using a blend of cheeses for added depth; mozzarella for creaminess and sharp cheddar for flavor can be delightful.

  • Extra Veggie Boost: Don’t hesitate to throw in some frozen spinach or steamed broccoli; it enhances nutrition and color without complicating your recipe.

Chicken Pasta Bake Variations & Substitutions

Feel free to mix things up as you enjoy this delightful Chicken Pasta Bake, adding your personal touch to each serving!

  • Veggie Boost: Stir in chopped spinach or steamed broccoli for an extra dose of nutrition and vibrant color. It’s a great way to sneak in some greens!

  • Cheese Variety: Experiment with cheeses like Gouda or Cheddar to create different flavor profiles. Mixing cheeses adds depth and can transform the dish completely.

  • Alternative Proteins: Swap in ground turkey or beef for a different protein base. This adjustment not only changes the taste but gives it a unique twist as well.

  • Gluten-Free Option: Use gluten-free pasta to make this dish suitable for those with dietary restrictions. It’s just as delicious and allows everyone to enjoy it.

  • Creamy Dream: For an extra luxurious sauce, consider adding a splash of cream or cream cheese. This will enhance creaminess and make every bite even richer.

  • Herbs & Spices: Fresh herbs like basil or oregano can elevate the flavor significantly. Alternatively, add smoked paprika for a subtle smokiness.

  • Layered Flavors: Include artichokes or sun-dried tomatoes for a Mediterranean flair. These ingredients can add a delightful flavor twist that complements the chicken beautifully.

  • Spicy Kick: Amp up the heat with chopped jalapeños or a dash of hot sauce in the sauce. Adjust to your liking for a dish that satisfies your spicy cravings!

Feel free to make this Chicken Pasta Bake your own, and if you’re in the mood for more flavorful options, don’t forget to check out my Cheesy Spinach Artichoke Chicken Bake or Butter Baked Chicken!

Make Ahead Options

These Chicken Pasta Bake is perfect for meal prep enthusiasts looking to streamline their dinner routine! You can prepare the entire dish up to 24 hours in advance by assembling it in your baking dish without baking. Simply cover it tightly with plastic wrap and refrigerate until you’re ready to cook. For the best quality, consider keeping the cheese topping separate and adding it just before baking to maintain its perfect meltiness. When it’s time to serve, preheat your oven and bake the Chicken Pasta Bake directly from the fridge—just add a few extra minutes to ensure it’s heated through to 165°F. This way, you’ll enjoy the same comforting flavors with minimal evening effort!

What to Serve with Cheesy Chicken Pasta Bake

Transform your comforting Chicken Pasta Bake into a full meal with delightful pairings that elevate every bite.

  • Garlic Bread: The warm, buttery crunch of garlic bread pairs perfectly, allowing you to soak up any extra creamy sauce.

  • Caesar Salad: Crisp romaine, creamy dressing, and crunchy croutons add a refreshing crunch that balances the richness of your bake.

  • Roasted Broccoli: Tender, caramelized broccoli brings a touch of vibrant green and a delightful contrast in texture to every mouthful.

  • Grilled Vegetables: Zucchini, bell peppers, and eggplant drizzled with olive oil give a smoky, charred flavor, adding depth to your meal.

  • Red Wine: A medium-bodied red, like Merlot or Chianti, enhances the dish’s flavors while making your dining experience feel more special.

  • Fruit Sorbet: Light and refreshing, a scoop of fruit sorbet offers a sweet, icy contrast to the cheesy decadence of the Chicken Pasta Bake—perfect for cleansing the palate.

How to Store and Freeze Chicken Pasta Bake

Fridge: Store any leftovers in an airtight container for up to 3-4 days. Be sure to cool them completely before sealing to maintain freshness.

Freezer: To freeze, wrap the Chicken Pasta Bake tightly in foil or plastic wrap, then place it in a freezer-safe container. It can be stored for up to 2-3 months.

Reheating: For best results, reheat in the oven at 350°F (175°C) until hot throughout. If using a microwave, ensure the internal temperature reaches 165°F for safety.

Make-Ahead Tips: You can prepare the Chicken Pasta Bake a day in advance and refrigerate it unbaked. Just pop it in the oven when you’re ready to serve!

Chicken Pasta Bake Recipe FAQs

How do I select the best rotisserie chicken for my Chicken Pasta Bake?
When choosing a rotisserie chicken, look for one with a golden-brown skin and minimal dark spots. Make sure it’s hot and the packaging is intact. These cues ensure you’re getting a freshly made bird that will enhance your dish’s flavor. If available, opt for a chicken that’s labeled as “all-natural” or “organic” for the best taste and quality.

How should I store leftover Chicken Pasta Bake?
Absolutely! Allow the Chicken Pasta Bake to cool completely before placing it in an airtight container. It will stay fresh in the fridge for up to 3-4 days. If you’re looking to enjoy it later, this dish is perfect for meal prep, and I often make extra so I have delicious leftovers ready to go!

Can I freeze Chicken Pasta Bake? If so, how?
Yes, you can freeze your Chicken Pasta Bake! First, let the dish cool to room temperature. Then, wrap it tightly in plastic wrap or aluminum foil to minimize freezer burn. Place it in a freezer-safe container or bag, and label it with the date. It will keep well for up to 2-3 months. When you’re ready to eat, simply thaw it in the fridge overnight before reheating.

What should I do if my Chicken Pasta Bake turns out too dry?
If your Chicken Pasta Bake turns out dry, don’t worry—it’s an easy fix! Next time, be sure to reserve that starchy pasta water as it can make a significant difference. Simply add a few tablespoons into your dish before baking or during reheating to give it a creamy texture. Also, consider adding more sauce or adjusting cheese levels, which can help retain moisture.

Are there any dietary considerations I should keep in mind?
Definitely! If you’re serving this dish to guests with dietary restrictions, check for potential allergens in your ingredients like dairy or gluten. For a gluten-free option, I suggest using gluten-free pasta and flour. Additionally, if you know of anyone with a dairy allergy, consider dairy-free cheese alternatives that melt well—there are some great options available that can still give you a delicious chicken pasta bake.

How long can I keep my Chicken Pasta Bake in the freezer and still maintain its quality?
For optimal flavor and texture, I recommend consuming your frozen Chicken Pasta Bake within 2-3 months. Beyond this timeframe, while it may still be safe to eat, the quality might diminish, leading to a less satisfying meal when you finally reheat it.

Chicken Pasta Bake

Creamy Chicken Pasta Bake for Cozy Family Dinners

Transform leftover rotisserie chicken into a comforting Chicken Pasta Bake that's easy and delicious.
Prep Time 15 minutes
Cook Time 30 minutes
Total Time 45 minutes
Servings: 6 servings
Course: Casserole
Cuisine: American
Calories: 550

Ingredients
  

For the Dish
  • 12 ounces Short Pasta e.g., penne or farfalle
  • ¼ cup Salted Butter unsalted can be used for less sodium
  • 1 Diced Yellow Onion or shallots
  • 2 cloves Garlic minced
  • 2 tablespoons All-purpose Flour gluten-free flour is an alternative
  • 2 tablespoons Tomato Paste or pureed tomatoes
  • 14.5 oz Canned Diced Tomatoes consider fresh tomatoes in season
  • 2 cups Whole Milk or half-and-half for richness
  • 2-3 teaspoons Italian Seasoning fresh herbs can be used
  • ¼ to ½ teaspoon Red Pepper Flakes adjust to taste
  • 2 cups Shredded Mozzarella Cheese divided
  • ¾ cup Shredded Parmesan Cheese divided
  • ¼ cup Fresh Chopped Parsley plus more for garnish
  • 2 cups Chopped Cooked Chicken Breast using rotisserie chicken simplifies prep

Equipment

  • Large pot
  • Skillet
  • 9x13 inch baking dish
  • Measuring cups
  • Measuring spoons
  • spatula

Method
 

Step‑by‑Step Instructions for Chicken Pasta Bake
  1. Preheat your oven to 400°F (200°C) and grease a 9x13-inch baking dish.
  2. Bring salted water to a boil, add pasta, and cook until al dente (about 8-10 minutes). Drain and reserve ½ cup of water.
  3. Melt butter in a skillet over medium heat, add onion and sauté until translucent, then add garlic.
  4. Sprinkle flour over the mixture, stir, add tomato paste, and cook for 1-2 minutes.
  5. Gradually add diced tomatoes and whisk in milk. Add seasoning, simmer for 5-7 minutes until thickened.
  6. Stir in parsley and cheeses, then fold in the cooked chicken.
  7. Mix the pasta with the sauce, ensuring even distribution.
  8. Top with remaining cheese and bake for about 20 minutes until golden and bubbly.
  9. Let it cool for a few minutes, garnish with parsley, and serve hot.

Nutrition

Serving: 1servingCalories: 550kcalCarbohydrates: 45gProtein: 30gFat: 25gSaturated Fat: 15gCholesterol: 90mgSodium: 800mgPotassium: 500mgFiber: 3gSugar: 6gVitamin A: 800IUVitamin C: 5mgCalcium: 400mgIron: 2mg

Notes

This dish is customizable with added veggies or different cheeses.

Tried this recipe?

Let us know how it was!

Savory Pumpkin Pizza That Will Warm Your Fall Nights

As autumn rolls in, the air is filled with the warm, inviting aroma of pumpkin-based dishes, and that’s exactly how my Savory Pumpkin Pizza came to life. This delightful combination of creamy provolone and crispy bacon creates a comforting dish that’s perfect for cozy family dinners or entertaining friends. With quick prep and the ability to cater to both meat lovers and vegetarians alike, this pizza is versatile enough to be a staple in your fall recipe repertoire. Plus, it’s a fun twist on traditional pizza, showcasing the luscious flavors of seasonal ingredients in every bite. Are you ready to turn your kitchen into a fall haven with this unique creation? Let’s dive in!

Why is this pizza a must-try?

Unique Flavor Medley: With creamy provolone and smoky bacon, each bite bursts with rich flavors that scream autumn.
Versatile Options: Whether you’re entertaining or enjoying a cozy family dinner, it easily caters to both meat lovers and vegetarians.
Quick Prep Time: This recipe is designed for busy nights, so you can whip it up in no time!
Crowd-Pleasing Appeal: Friends and family will rave about this delightful twist on traditional pizza.
Seasonal Ingredients: Celebrate fall harvests and enjoy the flavors of pumpkin in a new and delicious way! For more delicious pumpkin recipes, check out Joumou Haitian Pumpkin or discover how to incorporate savory notes in other dishes with Beef Noodles Savory.

Savory Pumpkin Pizza Ingredients

For the Pizza Crust
Pizza Crust – Opt for a thin, European-style crust for the best crispy texture.

For the Sauce
Red Pesto with Sundried Tomatoes – This forms the base sauce, providing a unique umami flavor; traditional tomato sauce can be substituted if preferred.

For the Toppings
Pumpkin – Two cups, peeled and chopped; using pie pumpkins enhances the dish’s natural sweetness and moisture.
Red Onion – ¼ cup, sliced thin; this adds a sharp contrast to the sweetness of the pumpkin but can be swapped with shallots for a milder taste.
Roasted Red Pepper – 1 large, chopped; this ingredient contributes sweetness and texture, although bell peppers work as a milder alternative.
Provolone Cheese – 8 ounces, delivering creamy, melty goodness—shredded cheese can be a convenient substitute.
Bacon – 5 strips, cooked and chopped; it introduces a savory crunch, or you can replace it with sautéed mushrooms for a vegetarian-friendly option.

For Drizzling
Olive Oil – 1 tablespoon; using extra virgin enhances the roasting flavor profile of the toppings.

Remember, this Savory Pumpkin Pizza is not just any ordinary pie; it’s a delicious blend of autumnal flavors that will warm your heart and home!

Step‑by‑Step Instructions for Savory Pumpkin Pizza

Step 1: Preheat the Oven
Begin by preheating your oven to 400°F (200°C) to ensure optimal cooking conditions. This initial heat will help create a perfectly crisp pizza crust later on. While the oven warms, gather your baking dish and preparation area to set the stage for assembling your Savory Pumpkin Pizza.

Step 2: Roast the Pumpkin and Onion
In your baking dish, combine the peeled and chopped pumpkin, sliced red onion, and olive oil. Toss everything together until each piece is well-coated and equally seasoned. Pop the dish in the oven for about 20 minutes, allowing the mixture to roast and soften until it’s fork-tender and richly caramelized.

Step 3: Increase Oven Temperature
Once the pumpkin and onion mixture is tender, quickly increase your oven temperature to 450°F (232°C). This boost in heat is crucial for achieving a perfectly crispy crust as you finalize your Savory Pumpkin Pizza. It’s time to prepare the pizza base while waiting for the oven to reach the new temperature.

Step 4: Spread the Sauce
Take your prepped pizza crust and spread a generous layer of red pesto with sundried tomatoes evenly across the base. This savory sauce will act as a flavorful foundation for the pizza. Remember to leave a small border around the edge to create that delightful crispy crust you crave.

Step 5: Add the First Layer of Cheese
Now it’s time to layer on the cheese. Sprinkle half of the provolone cheese evenly over the pesto-covered pizza crust. This will create a creamy, melty base that enhances the flavors of your Savory Pumpkin Pizza, setting the stage for the next toppings.

Step 6: Layer the Roasted Veggies
Distribute half of the roasted pumpkin and onion mixture evenly over the cheese layer. This not only adds a wonderful texture but also infuses the pizza with a delectable autumnal flavor. Make sure to spread the mixture around to ensure every bite delivers that delicious combination.

Step 7: Finish with Toppings
Next, sprinkle the remaining provolone cheese over the pizza, followed by the rest of the roasted pumpkin and onion mixture. Finally, add the chopped bacon or sautéed mushrooms if you’re opting for a vegetarian twist. Each topping should be evenly distributed to ensure a tasty surprise in every slice.

Step 8: Bake to Perfection
Carefully place your pizza in the oven and bake for 15 minutes or until the crust is golden and crispy, and the cheese is bubbly and tantalizing. Keep an eye on it towards the end to achieve that perfect golden-brown finish, allowing the flavors of your Savory Pumpkin Pizza to meld beautifully.

Step 9: Cool and Serve
Once baked, remove the pizza from the oven and allow it to cool for a few minutes. This gives the cheese time to set slightly, making slicing easier. Serve it hot, and watch your family and friends enjoy this delightful autumn treat as you savor the comfort of your homemade Savory Pumpkin Pizza!

Expert Tips for Savory Pumpkin Pizza

  • Use Fresh Pumpkins: For the best flavor, always choose pie pumpkins over carving pumpkins; they provide richer sweetness and texture.

  • Perfect Crust Technique: Avoid letting the pizza crust hang over the edge of the baking sheet; this can lead to burning and uneven cooking.

  • Cooling Time: Allow the roasted pumpkin and onion mixture to cool slightly before layering; this prevents the crust from becoming soggy.

  • Cheese Selection: Opt for high-quality provolone cheese to ensure a creamy, melty finish; consider shredding for easier melting and distribution.

  • Variation Adjustments: Feel free to swap bacon for sautéed mushrooms for a delicious vegetarian version of your Savory Pumpkin Pizza.

How to Store and Freeze Savory Pumpkin Pizza

Fridge: Store leftover Savory Pumpkin Pizza in an airtight container for up to 3 days to maintain freshness and prevent sogginess.

Freezer: For long-term storage, wrap the pizza tightly in plastic wrap and then foil, freezing for up to 2 months. Thaw in the fridge before reheating.

Reheating: To regain that crispy crust, reheat the pizza in a 375°F (190°C) oven for about 10-15 minutes until heated through. Avoid using a microwave, as it can make the crust chewy.

Tip: For best flavor preservation, ensure the pizza is cooled completely before storing it in the fridge or freezer.

Make Ahead Options

These Savory Pumpkin Pizza delights are perfect for meal prep enthusiasts! You can prepare the roasted pumpkin and onion mixture up to 24 hours in advance—just combine them with olive oil as instructed, then refrigerate in an airtight container. Additionally, you can spread the red pesto sauce onto the pizza crust and layer half of the provolone cheese up to 3 days ahead. To maintain quality, keep the components separate until ready to assemble and bake; this will prevent any sogginess. When it’s time to serve, simply add the remaining ingredients—roasted veggies, bacon or mushrooms, and the last of the cheese—then bake for 15 minutes. You’ll have a warm, comforting pizza ready with minimal effort, making busy weeknights a breeze!

Savory Pumpkin Pizza Variations

Feel free to get creative and customize your Savory Pumpkin Pizza to suit your cravings and dietary needs!

  • Cheese Swap: Swap provolone for mozzarella for a milder, gooey cheese experience. It melts beautifully and balances perfectly with the pumpkin’s sweetness.
  • Vegetarian Delight: Replace bacon with sautéed mushrooms for a savory twist that adds an earthy depth, making it a satisfying option for vegetarians.
  • Spice it Up: For added warmth, sprinkle red pepper flakes on top before serving. A little heat can elevate the dish and tantalize your taste buds!
  • Herb Infusion: Incorporate fresh herbs like thyme or rosemary into the roasted pumpkin mix. These herbs bring out the autumn flavors and add a fragrant aroma.
  • Garlic Touch: Add minced garlic to the red pesto sauce for an extra kick. It complements the sweetness of the pumpkin and enhances the overall flavor profile.
  • Nutty Crunch: Top your pizza with toasted pine nuts for an unexpected crunchy texture and nutty flavor. This twist adds a gourmet touch that your guests will love!
  • Sweet Surprise: Drizzle honey or balsamic glaze over the finished pizza for a touch of sweetness that pairs beautifully with the savory elements. It’s a delightful contrast!
  • Gluten-Free Option: Use a gluten-free pizza crust for a friendly alternative, ensuring everyone can enjoy this delightful dish without worry.

Each of these variations allows you to explore new flavors and textures while keeping the heart of this cozy pizza alive. Enjoy your culinary adventure, and don’t forget to check out more comforting flavors with Sweet Savory Brown for a delightful meal, or dive into the warm richness of Beef Noodles Savory to savor every moment of fall!

What to Serve with Savory Pumpkin Pizza

Imagine a warm, inviting table filled with comforting flavors that enhance your cozy autumn evenings.

  • Arugula Salad: A light arugula salad with lemon vinaigrette adds a crunchy and fresh contrast to the rich pizza, balancing out its creaminess.
  • Butternut Squash Soup: Creamy and subtly sweet, this soup harmonizes with the pumpkin pizza, creating a delightful and warming combination.
  • Garlic Bread: The buttery, garlicky flavors of crispy garlic bread provide a perfect textural contrast and are great for soaking up any sauce.

Pair it with a refreshing drink to complete your meal!

  • Crisp White Wine: A chilled Sauvignon Blanc or Pinot Grigio enhances the pizza’s savory notes while providing a refreshing palate cleanser.
  • Pumpkin Spice Latte: For a festive touch, enjoy this seasonal favorite that complements the pizza’s flavors while offering a cozy beverage experience.
  • Spicy Apple Cider: The sweet and spicy notes of apple cider elevate the autumnal experience, creating a symphony of fall flavors alongside the pizza.

For dessert, end on a sweet note!

  • Maple Pecan Tart: The rich, nutty flavors of this tart enhance the seasonal spirit while pairing well with the earthy pumpkin tones.
  • Cinnamon Sugar Donuts: These warm, sugary treats are a delightful finale that echoes the flavors of the fall, making every bite perfectly nostalgic.

Savory Pumpkin Pizza Recipe FAQs

What type of pumpkin should I use for this recipe?
Absolutely! For the best flavor, I recommend using pie pumpkins, as they are sweeter and have a better texture compared to regular carving pumpkins. Look for pumpkins that feel firm and heavy for their size without any soft spots or blemishes.

How should I store leftover Savory Pumpkin Pizza?
Very! Store any leftover Savory Pumpkin Pizza in an airtight container in the fridge for up to 3 days. Make sure it’s fully cooled before sealing to prevent sogginess. When you’re ready to enjoy it again, reheat in the oven for that delightful crispiness!

Can I freeze Savory Pumpkin Pizza, and if so, how?
Definitely! To freeze, wrap the pizza tightly in plastic wrap and then in aluminum foil, ensuring all edges are sealed to prevent freezer burn. You can store it for up to 2 months. When you’re craving it again, simply thaw it in the fridge overnight before reheating.

What can I do if my pizza crust turns out soggy?
Oh no! If your crust ends up soggy, it may be due to too much moisture from the toppings. Always allow the roasted pumpkin and onion mixture to cool slightly before layering. You could also try pre-baking the crust for a few minutes before adding toppings, which helps create a crispy base.

Is there a vegetarian alternative to bacon for this pizza?
Absolutely! You can easily swap out the bacon for sautéed mushrooms or even roasted chickpeas for a savory crunch. Both options bring a delightful flavor that complements the pumpkin beautifully, making it a heartwarming vegetarian-friendly meal.

Can pets eat pumpkin pizza leftovers?
Very! Plain, cooked pumpkin is safe for dogs; however, ensure there are no added ingredients like onion or garlic, which can be harmful to pets. It’s best to share small amounts without the toppings to keep your furry friend safe while enjoying pumpkin goodness!

Savory Pumpkin Pizza

Savory Pumpkin Pizza That Will Warm Your Fall Nights

This Savory Pumpkin Pizza features a unique flavor blend of creamy provolone and crispy bacon, perfect for autumn meals.
Prep Time 10 minutes
Cook Time 35 minutes
Cooling Time 5 minutes
Total Time 50 minutes
Servings: 4 slices
Course: Dinner
Cuisine: American
Calories: 320

Ingredients
  

For the Pizza Crust
  • 1 piece Pizza Crust Opt for a thin, European-style crust for the best crispy texture.
For the Sauce
  • 1 cup Red Pesto with Sundried Tomatoes Can substitute with traditional tomato sauce if preferred.
For the Toppings
  • 2 cups Pumpkin Peeled and chopped; pie pumpkins enhance sweetness.
  • 0.25 cups Red Onion Sliced thin; can be swapped with shallots.
  • 1 large Roasted Red Pepper Chopped; contributes sweetness and texture.
  • 8 ounces Provolone Cheese Delivers creamy goodness; shredded cheese is a convenient substitute.
  • 5 strips Bacon Cooked and chopped; can be replaced with sautéed mushrooms.
For Drizzling
  • 1 tablespoon Olive Oil Extra virgin enhances the roasting flavor.

Equipment

  • Oven
  • baking dish
  • Pizza stone

Method
 

Preparation Steps
  1. Preheat your oven to 400°F (200°C) to create a perfectly crisp pizza crust.
  2. Combine the peeled and chopped pumpkin, sliced red onion, and olive oil in a baking dish. Toss until well-coated. Roast for about 20 minutes until tender and caramelized.
  3. After roasting, increase the oven temperature to 450°F (232°C).
  4. Spread red pesto with sundried tomatoes evenly across the pizza crust, leaving a small border around the edge.
  5. Layer half of the provolone cheese evenly over the sauce.
  6. Distribute half of the roasted pumpkin and onion mixture over the cheese layer.
  7. Finish by adding the remaining provolone cheese and the rest of the roasted pumpkin and onion mixture. Top with chopped bacon or sautéed mushrooms for a vegetarian option.
  8. Bake for 15 minutes or until the crust is golden brown and the cheese is bubbly.
  9. Allow to cool for a few minutes before slicing and serving.

Nutrition

Serving: 1sliceCalories: 320kcalCarbohydrates: 34gProtein: 14gFat: 15gSaturated Fat: 6gPolyunsaturated Fat: 1gMonounsaturated Fat: 7gCholesterol: 30mgSodium: 540mgPotassium: 450mgFiber: 3gSugar: 4gVitamin A: 2000IUVitamin C: 6mgCalcium: 250mgIron: 2mg

Notes

For the best flavor, choose pie pumpkins over carving pumpkins. Allow the roasted mixture to cool slightly before layering to prevent a soggy crust.

Tried this recipe?

Let us know how it was!

Delightfully Moist Pumpkin Spice Latte Cake You’ll Love

As the leaves begin to turn and the air gets that crisp edge, there’s nothing quite like the warm embrace of autumn flavors. In my quest for comfort this season, I stumbled upon a gem: the Pumpkin Spice Latte Cake. Imagine a dessert that embodies the magic of your favorite café drink, boasting a rich, spiced pumpkin flavor swirled with an inviting espresso cream cheese frosting. This delightful cake is not just a treat for your taste buds; it’s also incredibly easy to whip up, making it a perfect choice for gatherings or cozy evenings at home. Plus, with a gluten-free option, everyone can indulge! Are you ready to discover how to bring a slice of fall into your kitchen?

Why is Pumpkin Spice Latte Cake a Must-Try?

Unforgettable Flavor: This cake combines the classic flavors of pumpkin spice and coffee for a mouthwatering experience.

Easy to Make: With simple steps and basic ingredients, anyone can become a baking star, especially when hosting friends.

Perfectly Moist: Each bite is soft and tender, reminiscent of your favorite café lattes, thanks to the espresso soak.

Versatile Treat: Serve it as a show-stopping dessert at fall gatherings or simple afternoon coffee breaks with friends.

Gluten-Free Friendly: Use gluten-free flour for a deliciously inclusive option that everyone can enjoy, just like my Strawberry Cheesecake Dump.

Crowd-Pleaser: Its delightful presentation and comforting flavors mean it’s sure to impress family and guests alike, becoming a staple in your dessert repertoire!

Pumpkin Spice Latte Cake Ingredients

• Discover the essential ingredients for this delightful fall dessert.

For the Cake

  • All-Purpose Flour – Provides structure; accurately measuring is crucial for the best texture.
  • Pumpkin Pie Spice – Infuses the cake with warm autumn flavors; use a mix of cinnamon, nutmeg, and ginger if unavailable.
  • Baking Powder – Acts as a leavening agent for a fluffy cake.
  • Baking Soda – Helps the cake rise while enhancing color.
  • Salt – Balances sweetness and elevates flavor.
  • Unsalted Butter – Ensures rich moisture; remember to soften before creaming.
  • Granulated Sugar – Sweetens and promotes cake browning.
  • Eggs – Binds ingredients together; using them at room temperature ensures even mixing.
  • Vanilla Extract – Enhances the cake’s flavor depth.
  • Buttermilk – Adds tenderness and a tangy flavor; you can substitute with milk and lemon juice if needed.
  • Canned Pumpkin Puree – Key for flavor and moisture; ensure it’s at room temperature for easy mixing.

For the Soak

  • Espresso or Strong Coffee – Infuses that beloved coffee taste; brewed decaf can be used for a milder effect.
  • Whole Milk – Adds creaminess to the soak.
  • Sweetened Condensed Milk – Provides richness and sweetness to the mixture.

For the Frosting

  • Instant Espresso Powder – Intensifies the coffee flavor in the frosting; a little goes a long way!
  • Cream Cheese – Base of the frosting, offering a rich tang; keep it cold for easy blending.
  • Powdered Sugar – Sweetens and thickens the frosting for the perfect finish.

With these carefully chosen ingredients, your Pumpkin Spice Latte Cake is bound to be a hit this fall season!

Step‑by‑Step Instructions for Pumpkin Spice Latte Cake

Step 1: Preheat and Prepare the Pan
Begin by preheating your oven to 350°F (175°C). While it’s heating, take a 9×9 inch metal baking pan and generously butter it, then line the bottom with parchment paper for easy removal later. This will ensure that your Pumpkin Spice Latte Cake bakes evenly and releases effortlessly when it’s time to serve.

Step 2: Whisk the Dry Ingredients
In a medium bowl, whisk together 2 cups of all-purpose flour, 1 teaspoon of baking powder, 1 teaspoon of baking soda, ½ teaspoon of salt, and 2 teaspoons of pumpkin pie spice. Combine these dry ingredients thoroughly, ensuring no lumps remain. This blend will add rich flavor and provide the necessary rise for your cake, resulting in a fluffy texture that is absolutely perfect for autumn.

Step 3: Cream Butter and Sugar
In a large mixing bowl, cream together ½ cup of softened unsalted butter and 1 cup of granulated sugar. Use a hand mixer on medium speed for about 2 minutes until the mixture is light and fluffy. This important step incorporates air into the batter, making your Pumpkin Spice Latte Cake delightfully moist and airy once baked.

Step 4: Add Eggs and Wet Ingredients
Add 2 large eggs, one at a time, along with 1 teaspoon of vanilla extract to the creamed mixture. Beat until fully combined and smooth. Then, pour in 1 cup of buttermilk and 1 cup of canned pumpkin puree, mixing just until everything is incorporated. The wet ingredients will create a luscious batter that embodies the rich flavors of fall.

Step 5: Combine Wet and Dry Ingredients
Gradually add the dry ingredients to the wet mixture, stirring gently with a spatula to combine. Be careful not to overmix; stop as soon as there are no visible dry spots. This will help your Pumpkin Spice Latte Cake maintain its soft texture. Scrape down the sides of the bowl to ensure everything is blended well.

Step 6: Bake the Cake
Pour the batter into your prepared baking pan, smoothing it out with a spatula. Bake in the preheated oven for 35-38 minutes or until a toothpick inserted into the center comes out clean. Once done, the edges should be a lovely golden brown, and the center will spring back when gently pressed.

Step 7: Cool the Cake
Remove the baking pan from the oven and let it cool in the pan for 30 minutes. After that, carefully transfer the cake to a wire rack to cool completely. This ensures that your Pumpkin Spice Latte Cake stays moist and doesn’t become soggy while it’s cooling.

Step 8: Prepare the Latte Soak
In a separate bowl, mix ½ cup of strong brewed espresso, ½ cup of whole milk, and ½ cup of sweetened condensed milk with a splash of vanilla extract. Whisk until combined. This delicious soak will enhance the depth of flavor in your cake, making every bite as indulgent as your favorite coffee shop drink.

Step 9: Make the Cream Cheese Frosting
In a large bowl, whip ½ cup of softened unsalted butter until fluffy. Then add 8 ounces of cold cream cheese and mix until smooth and fully combined. Gradually incorporate 2 cups of powdered sugar and 2 tablespoons of instant espresso powder, blending until your frosting is creamy and rich, perfect for topping your Pumpkin Spice Latte Cake.

Step 10: Soak the Cake
Once the cake is fully cooled, level the top with a serrated knife if needed. Use a skewer to poke holes all over the top, allowing the soak to penetrate. Slowly pour the latte soak over the surface, letting it soak in as you go. This step is vital, as it infuses the cake with the luxurious coffee essence reminiscent of a true pumpkin spice latte.

Step 11: Frost the Cake
Once the soak has fully absorbed, generously frost the top of the cake with your creamy espresso frosting. Use an offset spatula for an even layer, creating a delightful finish. For that extra touch, sprinkle gentle layers of pumpkin pie spice on top, inviting everyone to indulge in a slice of your Pumpkin Spice Latte Cake.

Step 12: Slice and Serve
Cut the frosted cake into 16 equal servings and arrange them on a beautiful platter. This delectable Pumpkin Spice Latte Cake is now ready to be enjoyed! Serve it alongside a warm cup of coffee or tea for a delightful fall experience, perfect for gatherings or cozy evenings at home.

How to Store and Freeze Pumpkin Spice Latte Cake

Fridge: Store leftover Pumpkin Spice Latte Cake in an airtight container for up to 3 days. This keeps it fresh and moist, but allow it to come to room temperature before serving for the best flavor.

Freezer: For longer storage, wrap slices in plastic wrap and place in a freezer-safe container. The cake can be frozen for up to 2 months. Thaw overnight in the fridge before enjoying.

Reheating: If you’d like a warm slice, gently reheat in the microwave for 10-15 seconds. This will refresh the cake without drying it out!

Frosting: If you have extra espresso cream cheese frosting, store it separately in the fridge for up to a week or freeze for later use.

Variations & Substitutions for Pumpkin Spice Latte Cake

Feel free to make this delicious Pumpkin Spice Latte Cake truly your own with these creative twists and substitutions!

  • Gluten-Free Flour: Use Bob’s Red Mill 1:1 gluten-free flour to make this cake suitable for gluten-sensitive friends. It’ll maintain the delightful texture without compromising flavor!

  • Sugar Reduction: For a lighter version, reduce the sugar in both the cake and frosting by about one-third. This will let the natural sweetness of the pumpkin shine through beautifully.

  • Cupcake Transformation: Convert this recipe into cupcakes by adjusting the baking time to 17-19 minutes. Each bite will carry that same beloved pumpkin spice essence but in a fun, handheld form.

  • Non-Dairy Option: Substitute buttermilk with coconut milk and use vegan butter for a dairy-free delight. You can still enjoy that rich, moist cake without any dairy!

  • Spice Boost: Add 1/4 teaspoon of ground allspice or cloves for an extra layer of warmth that complements the pumpkin perfectly.

  • Nutty Texture: Fold in 1/2 cup of chopped pecans or walnuts into the batter for an added crunch and nutty flavor that mirrors autumn’s bounty.

  • Frosting Twist: Swirl in some maple syrup into the cream cheese frosting for a sweet and earthy hint that pairs wonderfully with the pumpkin spice theme.

  • Pumpkin Spice Swirl: Before baking, spoon some additional pumpkin puree mixed with a sprinkle of pumpkin pie spice into the batter and gently swirl it for a beautiful marbled effect.

Each variation offers a unique twist to this seasonal favorite, making it even more special. Speaking of special, if you’re looking for another delightful treat, why not try my Strawberry Cheesecake as a refreshing contrast? Happy baking!

What to Serve with Pumpkin Spice Latte Cake

As the aroma of the Pumpkin Spice Latte Cake fills your kitchen, think about the perfect pairings that will enhance this dreamy dessert experience.

  • Creamy Mashed Potatoes: Their buttery richness complements the cake’s sweetness beautifully, creating a lovely contrast on your palate.
  • Spiced Apple Cider: This warm drink echoes the cake’s nutmeg and cinnamon flavors while providing a cozy beverage option to sip alongside.
  • Whipped Cream: A dollop of fresh, lightly sweetened whipped cream adds a lightness that balances the cake’s dense texture, making each bite divine.
  • Maple Glazed Carrots: Sweet and earthy, these carrots bring an essential freshness that enhances the richness of the cake while keeping your meal balanced.
  • Cheddar Cheese Scones: Their flaky texture and savory notes create an exciting contrast to the cake’s sweetness, perfect for tea time or a brunch spread.
  • Pecan Pie: This classic dessert adds a rich, nutty element that pairs with the pumpkin tones wonderfully for a comforting meal finale.
  • Vanilla Ice Cream: A scoop of creamy vanilla ice cream melts slightly on warm cake, creating a deliciously indulgent experience.
  • Caramel Sauce: Drizzling warm caramel over a slice intensifies the dessert’s sweetness and adds a delightful chewy texture.
  • Nutty Coffee: A cup of nut-infused coffee enhances the espresso notes in the cake while providing an energizing boost perfect for afternoon breaks.

Expert Tips for Pumpkin Spice Latte Cake

  • Measure Accurately: Use a digital scale to ensure precise measurements, especially for the flour, which is crucial for cake texture.

  • Room Temperature Ingredients: Make sure your eggs, butter, and buttermilk are at room temperature to avoid a gummy texture and ensure even mixing.

  • Avoid Overmixing: Gently fold the dry ingredients into the wet mixture. Overmixing can lead to a dense cake instead of a light, airy Pumpkin Spice Latte Cake.

  • Proper Pan Choice: Use a light-colored metal pan to promote even baking. Dark or glass pans can cause uneven browning.

  • Check Doneness: Insert a toothpick into the center of the cake; it should come out clean. If it’s wet, give it a few more minutes in the oven.

  • Cooling Matters: Allow the cake to cool fully on a wire rack before adding the soak and frosting to maintain moisture and avoid sogginess.

Make Ahead Options

These Pumpkin Spice Latte Cake preparations are perfect for busy home cooks who want to save time without sacrificing flavor! You can bake the cake up to 24 hours in advance; simply cool it completely before wrapping it tightly in plastic wrap and refrigerating. For the frosting, make it up to 3 days ahead; just store it in an airtight container in the fridge to maintain its creamy texture. When you’re ready to serve, let both the cake and frosting come to room temperature, frost the cake, and soak it right before slicing. This way, each slice of your Pumpkin Spice Latte Cake stays just as delicious and moist as the day it was made!

Pumpkin Spice Latte Cake Recipe FAQs

What type of pumpkin should I use for the cake?
Absolutely! For the best results, always use canned pumpkin puree, as it offers a consistent texture and flavor. Just make sure it’s at room temperature before mixing it into your batter for easier incorporation. If you prefer fresh pumpkin, you can roast and puree it; just choose the sugar pumpkin variety for the sweetest flavor!

How should I store leftover Pumpkin Spice Latte Cake?
To maintain its delightful moisture, store any leftover Pumpkin Spice Latte Cake in an airtight container in the refrigerator. It will stay fresh for up to 3 days. Before serving, let it come to room temperature to bring back its soft texture!

Can I freeze the Pumpkin Spice Latte Cake?
Very! Wrap slices of the cake in plastic wrap and place them in a freezer-safe container. You can freeze the cake for up to 2 months. When you’re ready to enjoy, simply thaw it overnight in the fridge. This will help retain its sweet, spiced flavor while keeping it soft and moist.

What if my cake doesn’t rise properly?
If your Pumpkin Spice Latte Cake doesn’t rise well, the issue might stem from expired baking powder or baking soda. Always check the freshness of your leavening agents before use. Additionally, remember not to overmix the batter after adding the dry ingredients; this can lead to a dense cake instead of a light, fluffy one.

Is this recipe suitable for people with gluten allergies?
Absolutely! For a gluten-free version of the Pumpkin Spice Latte Cake, simply substitute Bob’s Red Mill 1:1 gluten-free flour for the all-purpose flour. This will allow you to enjoy all the cozy flavors of autumn without compromising on texture or taste!

How long can I keep the cream cheese frosting?
You can store any leftover espresso cream cheese frosting in the fridge for up to a week. If you plan to make it ahead of time, feel free to freeze it as well; just ensure it’s kept in a freezer-safe container. To use, thaw overnight in the fridge and give it a good stir before frosting your cake!

Pumpkin Spice Latte Cake

Delightfully Moist Pumpkin Spice Latte Cake You’ll Love

Experience the warmth of autumn with this delightful Pumpkin Spice Latte Cake featuring rich pumpkin flavor and espresso cream cheese frosting.
Prep Time 25 minutes
Cook Time 38 minutes
Cooling Time 30 minutes
Total Time 1 hour 33 minutes
Servings: 16 slices
Course: Dessert
Cuisine: American
Calories: 290

Ingredients
  

For the Cake
  • 2 cups all-purpose flour Accurate measuring is crucial for the best texture.
  • 1 teaspoon baking powder Acts as a leavening agent for a fluffy cake.
  • 1 teaspoon baking soda Helps the cake rise while enhancing color.
  • ½ teaspoon salt Balances sweetness and elevates flavor.
  • 2 teaspoons pumpkin pie spice Infuses the cake with warm autumn flavors.
  • ½ cup unsalted butter Ensure it's softened before creaming.
  • 1 cup granulated sugar Sweetens and promotes cake browning.
  • 2 large eggs Bind ingredients together; use at room temperature.
  • 1 teaspoon vanilla extract Enhances flavor depth.
  • 1 cup buttermilk Adds tenderness; can substitute with milk and lemon juice.
  • 1 cup canned pumpkin puree Key for flavor and moisture.
For the Soak
  • ½ cup espresso or strong coffee Infuses coffee taste; brewed decaf can be used.
  • ½ cup whole milk Adds creaminess to the soak.
  • ½ cup sweetened condensed milk Provides richness and sweetness.
For the Frosting
  • 2 tablespoons instant espresso powder Intensifies the coffee flavor.
  • 8 ounces cream cheese Rich tang; keep cold for blending.
  • 2 cups powdered sugar Sweetens and thickens the frosting.

Equipment

  • 9x9 inch metal baking pan
  • medium bowl
  • large mixing bowl
  • Hand mixer
  • spatula
  • Wire rack

Method
 

Preparation
  1. Preheat your oven to 350°F (175°C) and butter a 9x9 inch baking pan, lining the bottom with parchment paper.
  2. In a medium bowl, whisk together the dry ingredients: flour, baking powder, baking soda, salt, and pumpkin pie spice.
  3. In a large mixing bowl, cream together the softened butter and granulated sugar until light and fluffy.
  4. Add eggs one at a time and vanilla extract to the creamed mixture, beating until smooth, then mix in buttermilk and pumpkin puree.
  5. Gradually add the dry mixture to the wet mixture, stirring gently until just combined.
  6. Pour the batter into the prepared pan and bake for 35-38 minutes or until a toothpick comes out clean.
Cooling and Soaking
  1. Let the cake cool in the pan for 30 minutes before transferring it to a wire rack to cool completely.
  2. In a bowl, whisk together espresso, whole milk, sweetened condensed milk, and a splash of vanilla.
  3. Once the cake has cooled, poke holes in the top using a skewer and drizzle the soak over the surface.
Frosting
  1. Whip softened butter until fluffy, then add cream cheese and beat until smooth.
  2. Gradually mix in powdered sugar and instant espresso powder until creamy.
  3. Frost the soaked cake generously and sprinkle pumpkin pie spice on top.
Serving
  1. Slice the cake into 16 pieces and serve with coffee or tea.

Nutrition

Serving: 1sliceCalories: 290kcalCarbohydrates: 45gProtein: 4gFat: 12gSaturated Fat: 7gPolyunsaturated Fat: 0.5gMonounsaturated Fat: 4gCholesterol: 40mgSodium: 250mgPotassium: 140mgFiber: 1gSugar: 20gVitamin A: 240IUVitamin C: 1mgCalcium: 80mgIron: 1mg

Notes

Ensure ingredients are at room temperature for the best texture and flavor. Avoid overmixing to preserve the cake's lightness.

Tried this recipe?

Let us know how it was!

Cheesy Chicken Enchiladas: The Ultimate Comfort Food Treat

In a kitchen filled with the rich aroma of garlic and spices, I found myself on a mission to create a dish that brings warmth and comfort. Enter my Easy Chicken and Cheese Enchiladas with Red Sauce—a delightful combination of tender chicken, melty cheese, and soft tortillas that creates a symphony of flavors and textures. This recipe isn’t just about taste; it’s a make-ahead wonder, perfect for busy weeknights or gathering loved ones around the table. Best of all, it’s versatile—whether you prefer flour or corn tortillas or want to switch up the protein, these cheesy chicken enchiladas can effortlessly adapt to your cravings. So, what toppings will you choose to elevate this comforting classic? Let’s dive into the recipe!

Why are Cheesy Chicken Enchiladas a must-try?

Comforting, Familiar Flavors: Easy Chicken and Cheese Enchiladas combine beloved ingredients for a dish everyone will adore.
Make-Ahead Magic: Perfect for busy nights, assemble them a day ahead and pop them in the oven when you’re ready to dive into comfort.
Customizable Choices: Switch out proteins like beef or turkey, and play with cheese blends to craft your perfect bite!
Delightful Crunch: Enjoy a slightly crispy top that contrasts beautifully with the tender, cheesy interior—no soggy tortillas here!
Crowd-Pleasing Appeal: Whether for a family dinner or a gathering of friends, these enchiladas are bound to impress. Pair with a refreshing side salad or some delicious Mexican rice for a full meal; your guests will be going back for seconds!

Cheesy Chicken Enchiladas Ingredients

For the Filling
2 boneless skinless chicken breasts – Main protein; adds heartiness and can be swapped for rotisserie chicken for quick preparation.
2 cups shredded cheddar jack cheese – Provides creaminess and flavor; try a Mexican cheese blend for a different taste.
8 flour tortillas – Encase the filling; use corn tortillas for a gluten-free option, though the texture may differ.

For the Sauce
3 cups enchilada sauce – Adds moisture and zest; using a homemade sauce enhances flavor, but store-bought works well too.
2 cloves garlic, minced – Amplifies flavor; garlic powder can be a quick substitute if you’re in a rush.
Salt and ground black pepper – Adjust to your taste for perfect seasoning.

For Baking
Cooking spray – Prevents sticking; oil or melted butter also work nicely as alternatives.

For Garnishing (Optional)
½ cup fresh cilantro, chopped – Adds a pop of freshness; can be replaced with green onions for a different flavor twist.

These Cheesy Chicken Enchiladas are not just a recipe; they’re a chance to bring comfort and joy to your dining table. Let’s get cooking!

Step‑by‑Step Instructions for Cheesy Chicken Enchiladas

Step 1: Preheat the Oven
Begin by preheating your oven to 425°F (220°C). This temperature is crucial for achieving that delightful, slightly crispy top on your Cheesy Chicken Enchiladas. As the oven heats, take a moment to gather your ingredients and prepare your workspace, ensuring everything is within reach.

Step 2: Cook the Chicken in Sauce
In a deep skillet, combine 3 cups of enchilada sauce with 2 minced garlic cloves and bring it to a gentle boil over medium heat. Season your 2 boneless skinless chicken breasts with salt and pepper, then submerge them in the bubbling sauce. Reduce the heat to low, cover, and let them simmer for 15-20 minutes until the chicken is fully cooked and tender.

Step 3: Shred the Cooked Chicken
Once the chicken is cooked through, carefully remove it from the skillet and allow it to cool for a few minutes. Using two forks, shred the chicken into bite-sized pieces, letting its juices mingle with the remaining enchilada sauce in the skillet. This step infuses the chicken with the robust flavors of the sauce, ensuring every bite of your Cheesy Chicken Enchiladas is packed with deliciousness.

Step 4: Make the Filling
In a large bowl, combine the shredded chicken with ¾ cup of the enchilada sauce and 1 cup of the shredded cheddar jack cheese. Stir until everything is well mixed, creating a flavorful filling for your enchiladas. The cheese will melt beautifully as they bake, adding that gooey goodness that everyone loves.

Step 5: Warm the Tortillas
To prevent your tortillas from tearing, wrap them in a damp cloth and microwave them for about 30 seconds until warm and flexible. This will make it easier to roll them without breaking, ensuring your Cheesy Chicken Enchiladas are perfectly assembled. Set them aside and get ready to fill.

Step 6: Assemble the Enchiladas
Take a warm tortilla and spoon in a heaping ⅓ cup of the chicken filling, then roll it tightly, placing the seam-side down in a greased baking dish. Repeat this process until all the filling is used. This step creates your comforting base of Cheesy Chicken Enchiladas, ready to soak up the sauce and cheese.

Step 7: Bake for Crunch
Brush the tops of your assembled enchiladas lightly with olive oil to enhance crispness, then bake them uncovered in the preheated oven for 8-10 minutes, or until lightly golden. This step ensures you capture the delightful crunch that contrasts beautifully with the tender filling of your Cheesy Chicken Enchiladas.

Step 8: Add Sauce and Cheese
After the initial baking, reduce the oven temperature to 400°F (200°C). Pour the remaining enchilada sauce over the top of the baked enchiladas and sprinkle with the remaining cheese. Cover the dish with foil and bake for an additional 20 minutes, allowing the flavors to meld beautifully.

Step 9: Final Bake
Remove the foil and return the dish to the oven for another 5-10 minutes, allowing the cheese to become bubbly and golden. Keep an eye on it; you want to achieve that perfect melted-cheese texture that makes these Cheesy Chicken Enchiladas irresistible!

Step 10: Rest Before Serving
After baking, let your enchiladas rest for 5-10 minutes. This step allows the flavors to settle and makes them easier to serve. Garnish with chopped cilantro or your favorite toppings, and get ready to enjoy the warm, comforting embrace of these Cheesy Chicken Enchiladas!

Make Ahead Options

These Easy Chicken and Cheese Enchiladas are perfect for meal prep enthusiasts! You can assemble the enchiladas up to 24 hours in advance and refrigerate them before baking. Simply prepare the filling and roll the tortillas as directed, then cover the baking dish tightly with foil to maintain freshness and prevent dryness. When you’re ready to serve, bake them straight from the fridge, adding an extra 5-10 minutes to the cooking time to ensure they heat through completely. This way, you can enjoy delicious, homemade cheesy chicken enchiladas on busy weeknights with minimal fuss, just as flavorful as if freshly made!

Expert Tips for Cheesy Chicken Enchiladas

Avoid Overstuffing: Keep the filling modest in each tortilla to prevent tearing while rolling. A heaping ⅓ cup should be just right!

Perfect Baking Technique: Bake the enchiladas uncovered initially to achieve that delightful crunch. This method helps to avoid soggy tortillas.

Layer Sauce for Moisture: For even more flavor, layer a bit of enchilada sauce at the bottom of the baking dish before placing the rolled tortillas.

Simplify with Rotisserie Chicken: Using pre-cooked rotisserie chicken can save time and add fantastic flavor, making your Cheesy Chicken Enchiladas even easier!

Leftover Love: Store any uneaten enchiladas in an airtight container; they can be reheated by adding more cheese and covering with foil to keep them moist.

What to Serve with Easy Chicken and Cheese Enchiladas

To complete your meal and create a culinary fiesta, let’s explore some delicious side dishes that will elevate your Cheesy Chicken Enchiladas!

  • Mexican Rice: Complements the enchiladas with its tender grains and subtle spices, adding a hearty element to your meal.

  • Black Beans: Rich in protein and fiber, they provide a creamy contrast that balances the flavors of your enchiladas.

  • Fresh Side Salad: A crisp salad with avocado, tomatoes, and lime dressing adds brightness and freshness, enhancing every bite.

  • Guacamole: Creamy, zesty, and delicious, it’s the perfect accompaniment for dipping or drizzling over your cheesy enchiladas.

For something sweet to finish off your meal, consider homemade flan or churros to bring a delightful touch of tradition. Enjoy a chilled glass of horchata or a refreshing margarita to round out the flavors of this delightful dinner! Each pairing works harmoniously, ensuring every bite is a celebration of comfort food!

Cheesy Chicken Enchiladas Variations & Substitutions

Feel free to get creative with these enchiladas and tailor them to your family’s tastes, ensuring a dish that warms both the heart and the belly.

  • Protein Swap: Replace chicken with ground beef, turkey, or even black beans for a vegetarian delight.

    If you’re feeling adventurous, try mixing proteins! Combining shredded chicken with black beans can add a delightful texture and earthy flavor you won’t want to miss.

  • Cheese Choices: Experiment with different cheeses like Monterey Jack, pepper jack, or a zesty Mexican blend for a flavor twist.

    Choose cheese based on your mood; adding pepper jack infuses a warm kick, while a blend can provide complex flavors that elevate your enchiladas.

  • Tortilla Type: Use corn tortillas for a gluten-free option, or try whole wheat for a healthier variant.

    Keep in mind that corn tortillas tend to be more delicate but offer a delightful authenticity that pairs beautifully with the flavors in these enchiladas.

  • Veggie Additions: Mix in spinach, diced tomatoes, or roasted peppers into your filling for added nutrients and flavor depth.

    Adding fresh veggies not only boosts nutrition but also brings vibrant colors to your casserole, creating an appealing presentation.

  • Saucy Boost: Stir in diced green chilies, corn, or black olives into the enchilada sauce for an extra kick.

    These additions can transform the sauce from simple to sensational, providing unexpected bursts of flavor in every bite.

  • Garnish Creativity: Top with sliced avocado, diced onions, or crispy tortilla strips to add texture and freshness to your enchiladas.

    The contrasting temperatures of warm enchiladas and cool toppings make each mouthful a delightful experience, worthy of your family’s admiration.

  • Spice Level: Add spices such as cumin, chili powder, or jalapeños to your filling for a fiery kick.

    A little heat can take your dish from comforting to unforgettable, igniting your taste buds in a way that only a good enchilada can.

For more delicious dinner ideas where you can experiment with flavors, don’t miss out on my Cheesy Garlic Chicken or BLT Chicken Salad. Happy cooking!

How to Store and Freeze Cheesy Chicken Enchiladas

Fridge: Store leftovers in an airtight container for up to 3-4 days. Reheat in the oven or microwave, adding a sprinkle of cheese for extra melty goodness.

Freezer: If you want to freeze your enchiladas, wrap them tightly in plastic wrap and then foil. They can be frozen for up to 3 months. Thaw overnight in the fridge before reheating.

Reheating: For best results, reheat frozen enchiladas in a 350°F oven, covered with foil, for about 30 minutes or until heated through to maintain that delightful texture.

Make-Ahead Tips: You can assemble your Cheesy Chicken Enchiladas and refrigerate them a day before baking—perfect for busy weeknights or gatherings!

Cheesy Chicken Enchiladas Recipe FAQs

How can I choose the best chicken for my enchiladas?
Absolutely! For the best result, select boneless, skinless chicken breasts that are fresh and not discolored. Look for those that are plump and firm, avoiding any with dark spots. If you’re in a hurry, rotisserie chicken is a fantastic alternative that provides wonderful flavor with less prep time.

What is the best way to store leftover enchiladas?
Very good question! Store your leftover Cheesy Chicken Enchiladas in an airtight container in the fridge, where they’ll stay fresh for about 3-4 days. When you’re ready to enjoy them again, simply reheat them in the oven or microwave. I often add a sprinkle of cheese on top before reheating to enhance the melty goodness!

Can I freeze my enchiladas, and how do I do it?
Of course! To freeze your Cheesy Chicken Enchiladas, wrap them tightly in plastic wrap and then cover them with foil to prevent freezer burn. They can be frozen for up to 3 months. When you’re ready to enjoy them, simply thaw them overnight in the fridge and reheat in a 350°F oven covered with foil for approximately 30 minutes until heated through.

What should I do if my tortillas tear during assembly?
No worries! If your tortillas are tearing, it could be due to being too cold or thick. To avoid this, warm them in a damp cloth for about 30 seconds in the microwave before assembling. This will make them more pliable and easier to roll without tearing. If you’re still having trouble, consider switching to corn tortillas, which tend to be sturdier.

Are there any dietary considerations I should keep in mind?
Certainly! If you have allergies, it’s essential to check the labels of your enchilada sauce and cheese for gluten or dairy content. For gluten-free options, replace flour tortillas with gluten-free corn tortillas. For those with dairy allergies, you could swap out the cheese with a dairy-free alternative; just ensure it melts well!

Can I prepare these enchiladas in advance?
Absolutely! You can assemble your Cheesy Chicken Enchiladas and refrigerate them a day prior to baking. Just cover them tightly with foil to keep them fresh. This make-ahead magic is perfect for busy weeknights or family gatherings, allowing you to pop them in the oven when it’s time to enjoy a comforting meal!

Cheesy Chicken Enchiladas

Cheesy Chicken Enchiladas: The Ultimate Comfort Food Treat

Cheesy Chicken Enchiladas are the perfect comfort food, featuring tender chicken, melty cheese, and soft tortillas—customizable for your taste!
Prep Time 20 minutes
Cook Time 30 minutes
Resting Time 10 minutes
Total Time 1 hour
Servings: 4 enchiladas
Course: Dinner
Cuisine: Mexican
Calories: 400

Ingredients
  

For the Filling
  • 2 breasts boneless skinless chicken Main protein; can be swapped for rotisserie chicken.
  • 2 cups shredded cheddar jack cheese Try a Mexican cheese blend for a different taste.
  • 8 tortillas flour Use corn tortillas for a gluten-free option.
For the Sauce
  • 3 cups enchilada sauce Using homemade enhances flavor.
  • 2 cloves garlic Minced; garlic powder can be a substitute.
  • Salt Adjust to taste.
  • Ground black pepper Adjust to taste.
For Baking
  • Cooking spray Prevent sticking; oil or melted butter also work.
For Garnishing (Optional)
  • ½ cup fresh cilantro Chopped; can be replaced with green onions.

Equipment

  • deep skillet
  • baking dish
  • Microwave
  • Oven
  • Large bowl

Method
 

Step-by-Step Instructions
  1. Preheat your oven to 425°F (220°C). Gather your ingredients and prepare your workspace.
  2. In a deep skillet, combine 3 cups of enchilada sauce with 2 minced garlic cloves and bring to a gentle boil. Season chicken with salt and pepper, submerge in sauce, then simmer for 15-20 minutes.
  3. Remove chicken from skillet, let cool, then shred into bite-sized pieces and mix with remaining enchilada sauce.
  4. Combine shredded chicken with ¾ cup of enchilada sauce and 1 cup of cheddar jack cheese in a large bowl.
  5. Wrap tortillas in a damp cloth and microwave for 30 seconds until warm and flexible.
  6. Take a warm tortilla, spoon in ⅓ cup of filling, roll tightly, and place seam-side down in a greased baking dish. Repeat until all filling is used.
  7. Brush tops with olive oil and bake uncovered for 8-10 minutes until lightly golden.
  8. Reduce oven temperature to 400°F (200°C), pour remaining enchilada sauce over, and sprinkle with remaining cheese. Cover with foil and bake for 20 minutes.
  9. Remove foil and bake for another 5-10 minutes until the cheese is bubbly and golden.
  10. Let enchiladas rest for 5-10 minutes before serving. Garnish with chopped cilantro or your favorite toppings.

Nutrition

Serving: 1enchiladaCalories: 400kcalCarbohydrates: 35gProtein: 25gFat: 20gSaturated Fat: 10gPolyunsaturated Fat: 2gMonounsaturated Fat: 2gCholesterol: 80mgSodium: 600mgPotassium: 450mgFiber: 4gSugar: 2gVitamin A: 15IUVitamin C: 4mgCalcium: 20mgIron: 10mg

Notes

These Cheesy Chicken Enchiladas are an adaptable recipe perfect for busy weeknights or family gatherings. Consider adding your favorite toppings for an extra flavor boost.

Tried this recipe?

Let us know how it was!

Stay Connected

Get recipes via email: