Get my cookbooks

Creamy Chicken and Stuffing Casserole for Cozy Nights

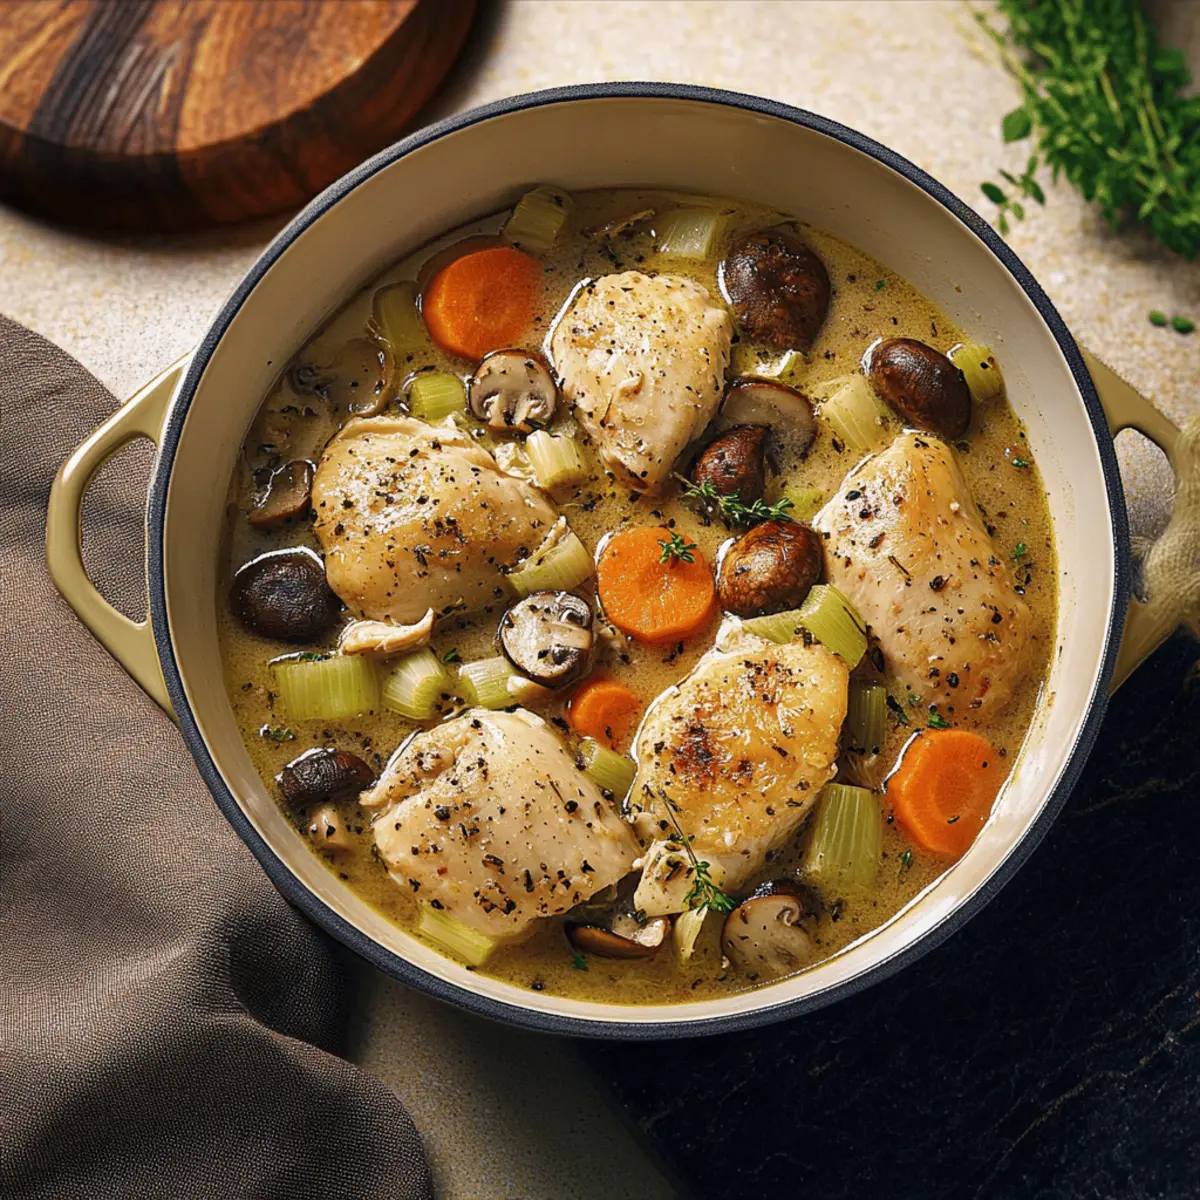
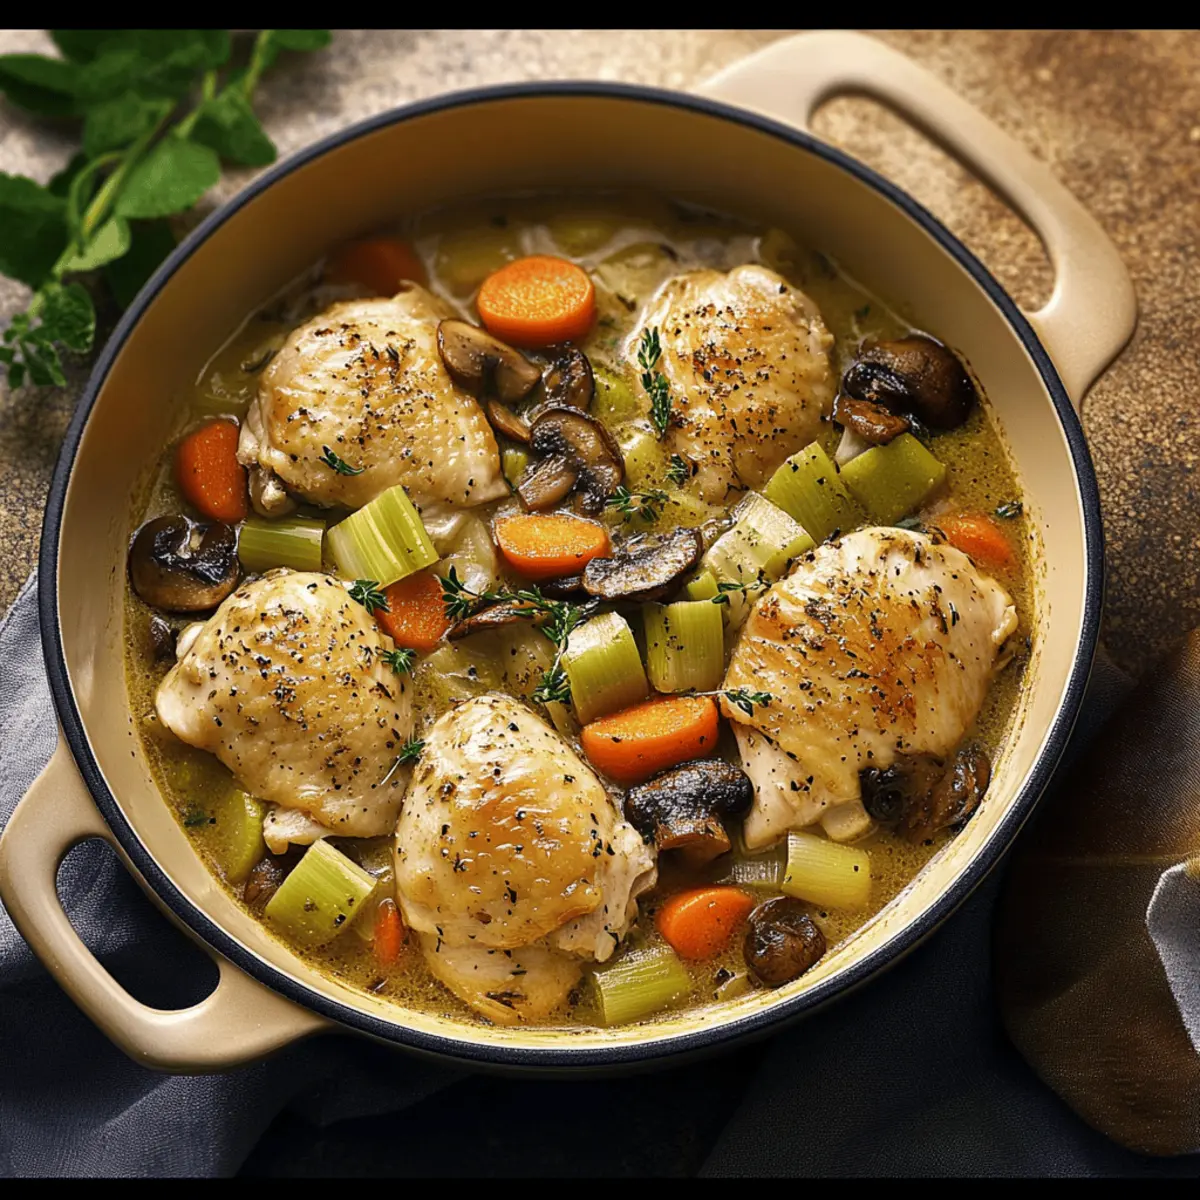
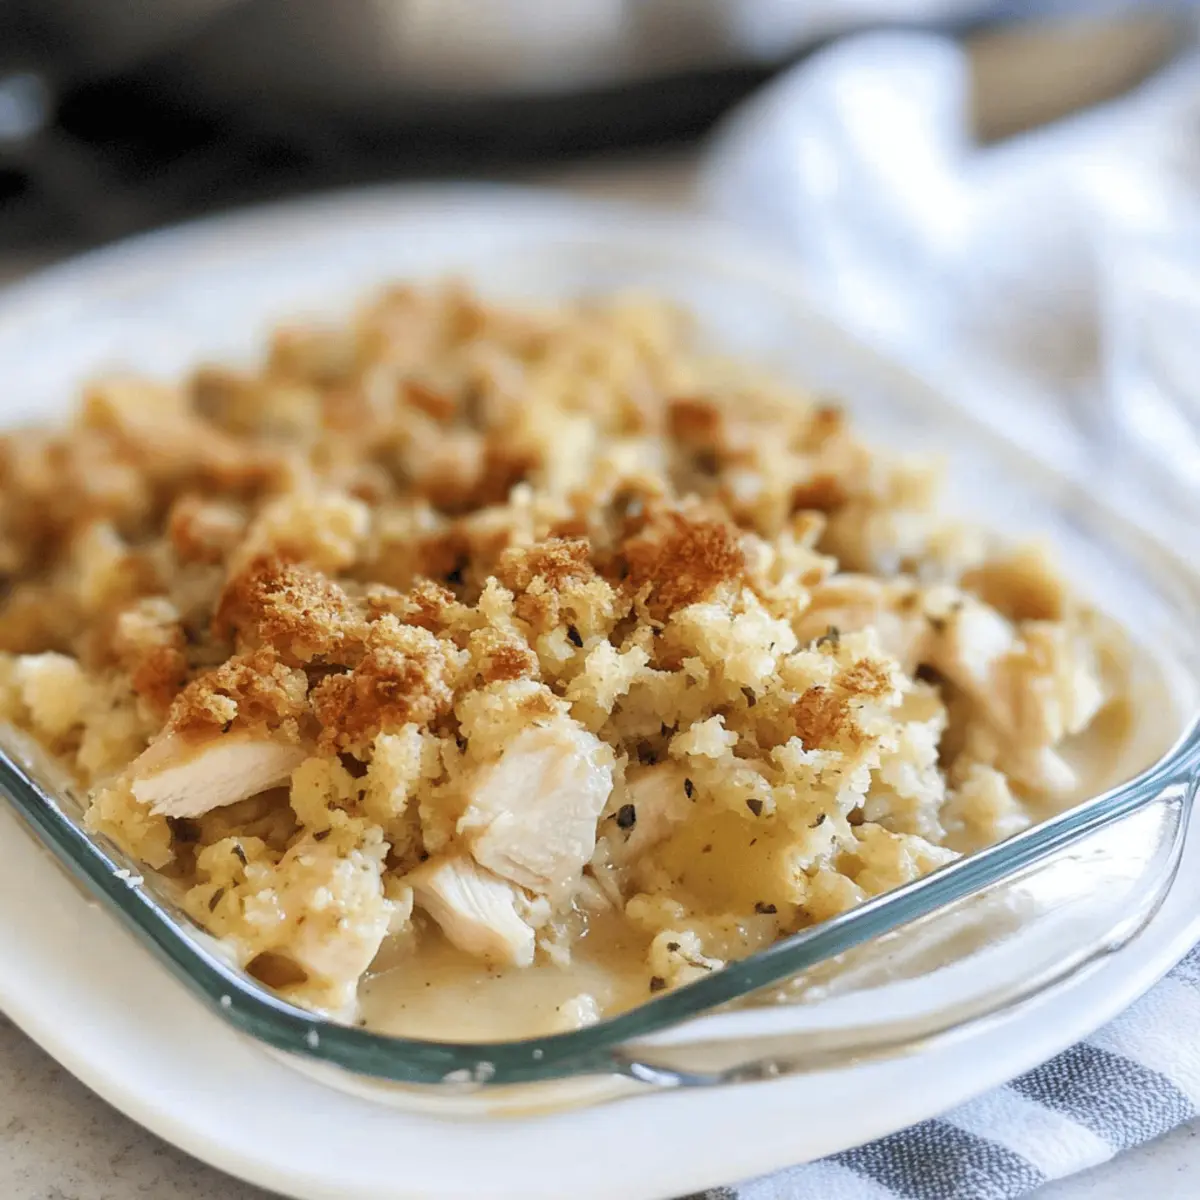
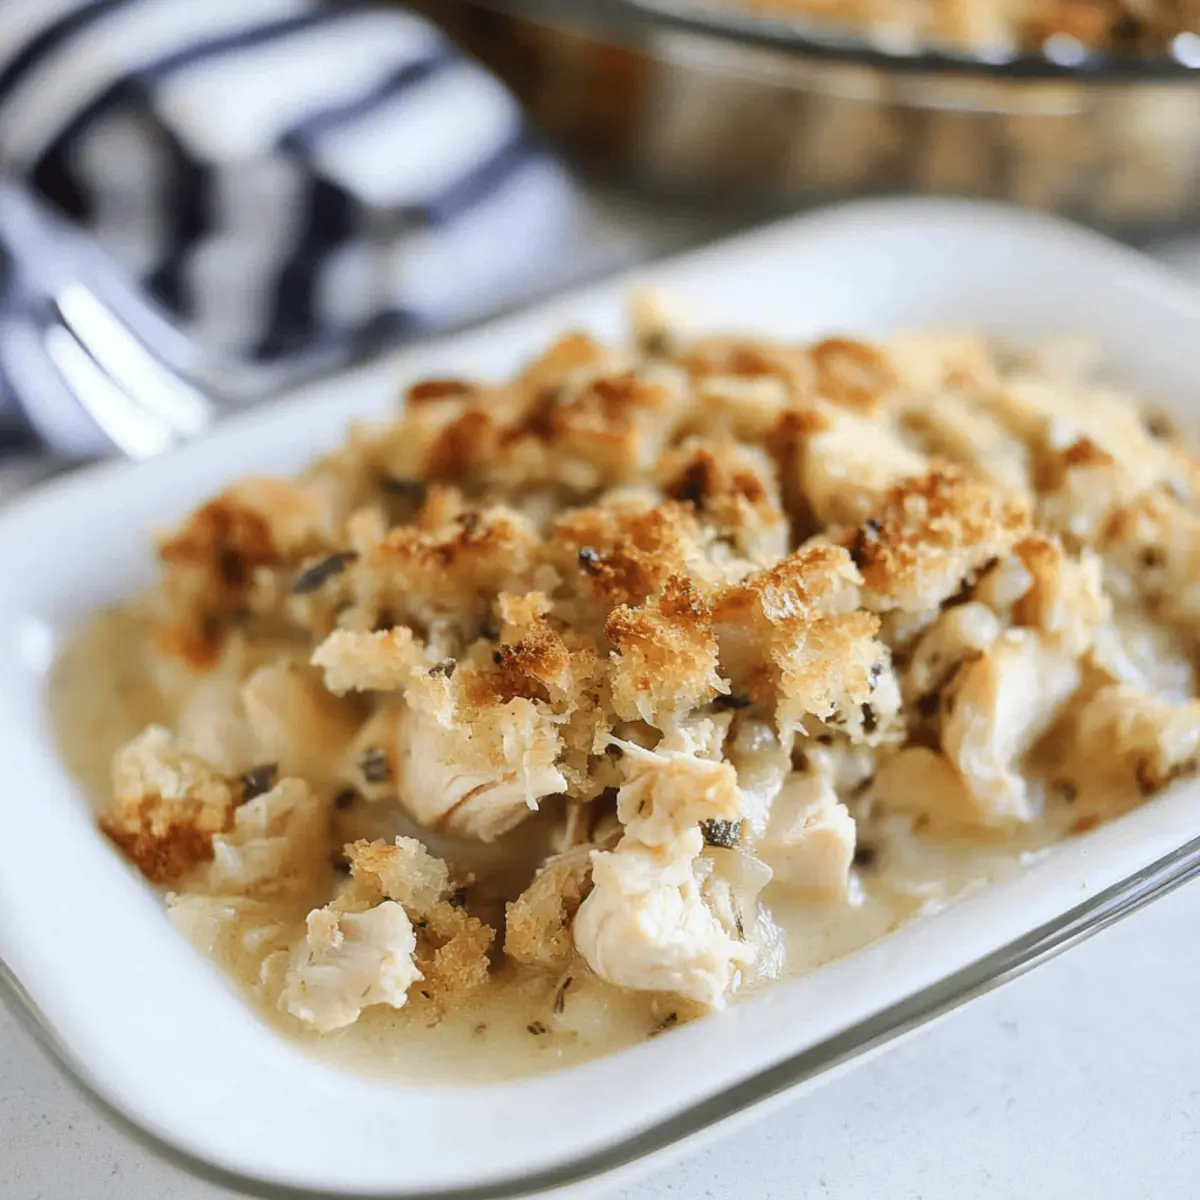
As I stirred the bubbling pot of cream of chicken soup, the familiar aroma flooded my kitchen, instantly transporting me back to cozy family dinners. This Easy 5-Ingredient Chicken and Stuffing Casserole brings all the warmth and nostalgia of a home-cooked meal without the hassle. It’s the perfect recipe for those busy nights when you crave comfort food but don’t have hours to spare. With just five simple ingredients, you’ll whip up this creamy delight that’s not only quick to prepare but also doubles as a crowd-pleaser. Trust me, your family will be asking for seconds! Curious about how to make this delectable dish come together? Let’s dive into the details!

Why is this casserole your new favorite?

Simplicity at its finest: With only five ingredients, preparing this Chicken and Stuffing Casserole is a breeze, perfect for even the busiest weeknights.

Nostalgic flavors transport you back home: The warm, comforting aromas will remind you of family gatherings, making every bite feel special.

Versatile for any occasion: Feel free to customize with vegetables or protein options, like turkey or plant-based alternatives, ensuring everyone at the table is happy.

Quick and satisfying: Ready in under an hour, it’s a hearty meal that saves you time without compromising on taste. You can also serve it alongside a refreshing salad for a balanced dinner experience!

Crowd-pleasing appeal: This casserole’s creamy texture and crunchy topping will have everyone coming back for seconds—just like those cherished family dinners. For more delicious ideas, don’t forget to check out my recipe for Oven Chicken Rice for another easy meal option!

Chicken and Stuffing Casserole Ingredients

Here’s what you’ll need to create this comforting dish!

For the Casserole

  • Shredded Cooked Chicken – This is the main protein; feel free to use rotisserie chicken for a quicker option.
  • Cream of Chicken Soup – Adds creaminess and helps bind everything together; can be swapped with cream of mushroom soup for a different twist.
  • Boxed Stuffing Mix – Provides a crunchy topping; select any variety like herbed or cornbread based on your preference.
  • Chicken Broth – Keeps the stuffing moist; using low-sodium broth helps control the overall saltiness.
  • Seasonings (e.g., salt, pepper) – Elevate the flavors; adjust these according to your taste preferences.

Enjoy making your Chicken and Stuffing Casserole!

Step‑by‑Step Instructions for Chicken and Stuffing Casserole

Step 1: Preheat the Oven
Start by preheating your oven to 350°F (175°C). This crucial step ensures that your Chicken and Stuffing Casserole bakes evenly and reaches a delicious golden brown on top. As the oven warms, gather your ingredients and prepare your baking dish for a seamless cooking experience.

Step 2: Combine Chicken and Soup
In a large mixing bowl, combine the shredded cooked chicken with the cream of chicken soup. Stir thoroughly until the chicken is fully coated in the creamy mixture—a key element for ensuring moisture throughout the casserole. This combination should be thick and rich, providing a flavorful base for the casserole.

Step 3: Spread the Chicken Mixture
Take your greased baking dish and carefully spread the chicken mixture evenly across the bottom. Make sure to reach the edges of the dish for a thorough bake. This layer sets the foundation for your Chicken and Stuffing Casserole, creating a luscious and comforting texture beneath the crunchy topping.

Step 4: Prepare the Stuffing
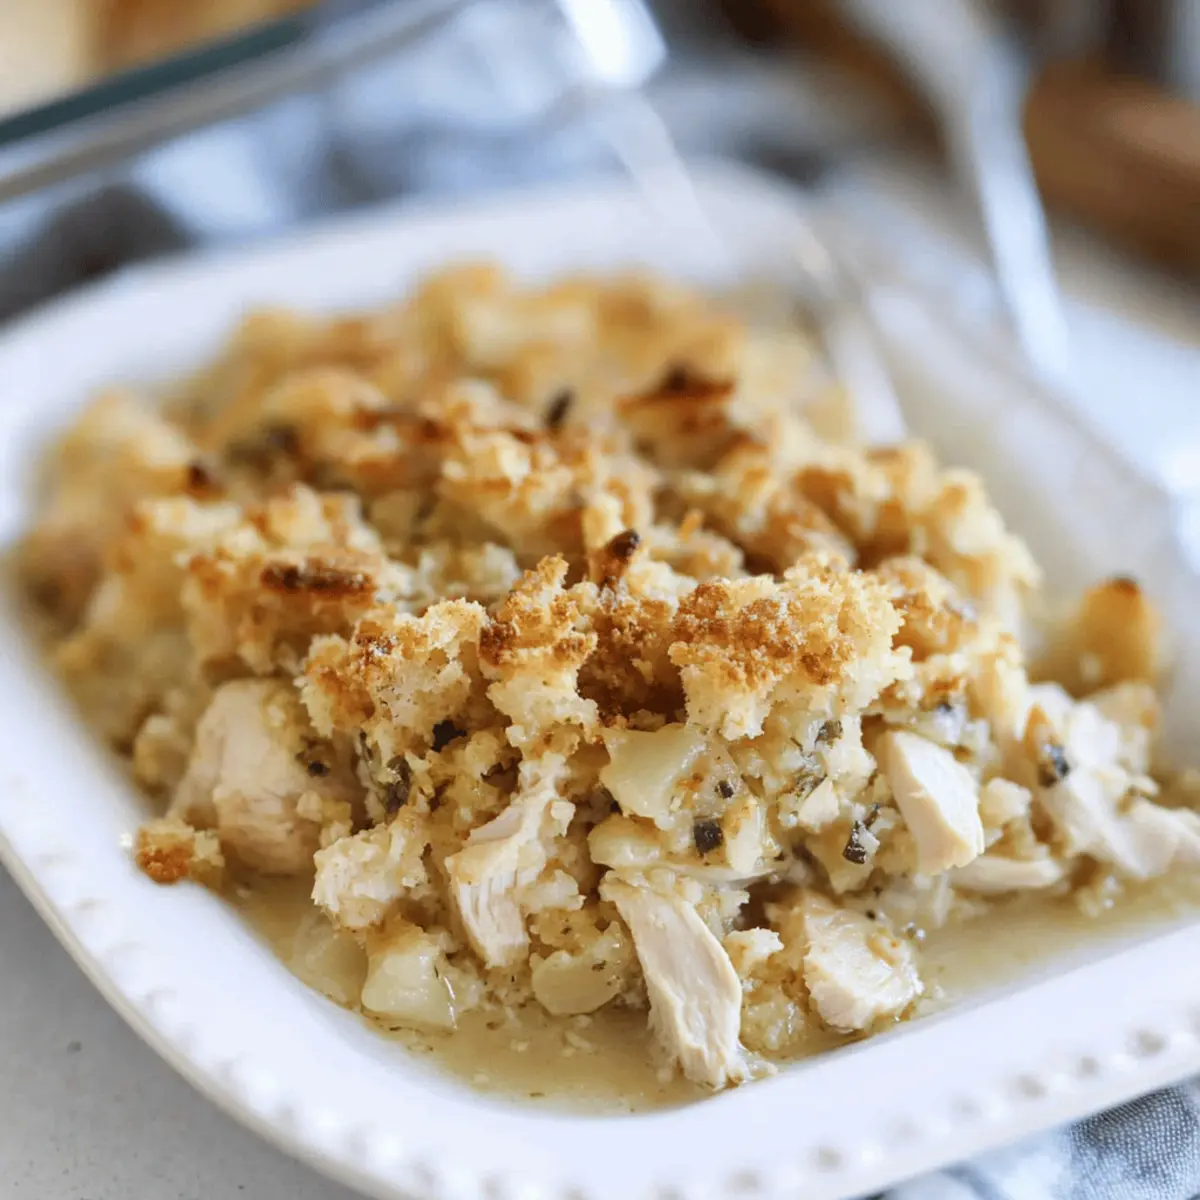
Next, prepare the boxed stuffing mix according to the package instructions. Typically, this involves adding boiling water and allowing it to sit until it’s fluffy. Once ready, gently spread the stuffing over the chicken layer, ensuring every bit is covered, as this will form the delightful topping that provides texture to your casserole.

Step 5: Add Broth for Moisture
Drizzle the chicken broth evenly over the stuffing layer. This step is crucial as it keeps the stuffing moist during baking, enhancing the flavors in your Chicken and Stuffing Casserole. You should see the liquid penetrate the stuffing; this helps create a beautifully cooked top while the layers below remain creamy.

Step 6: Bake to Perfection
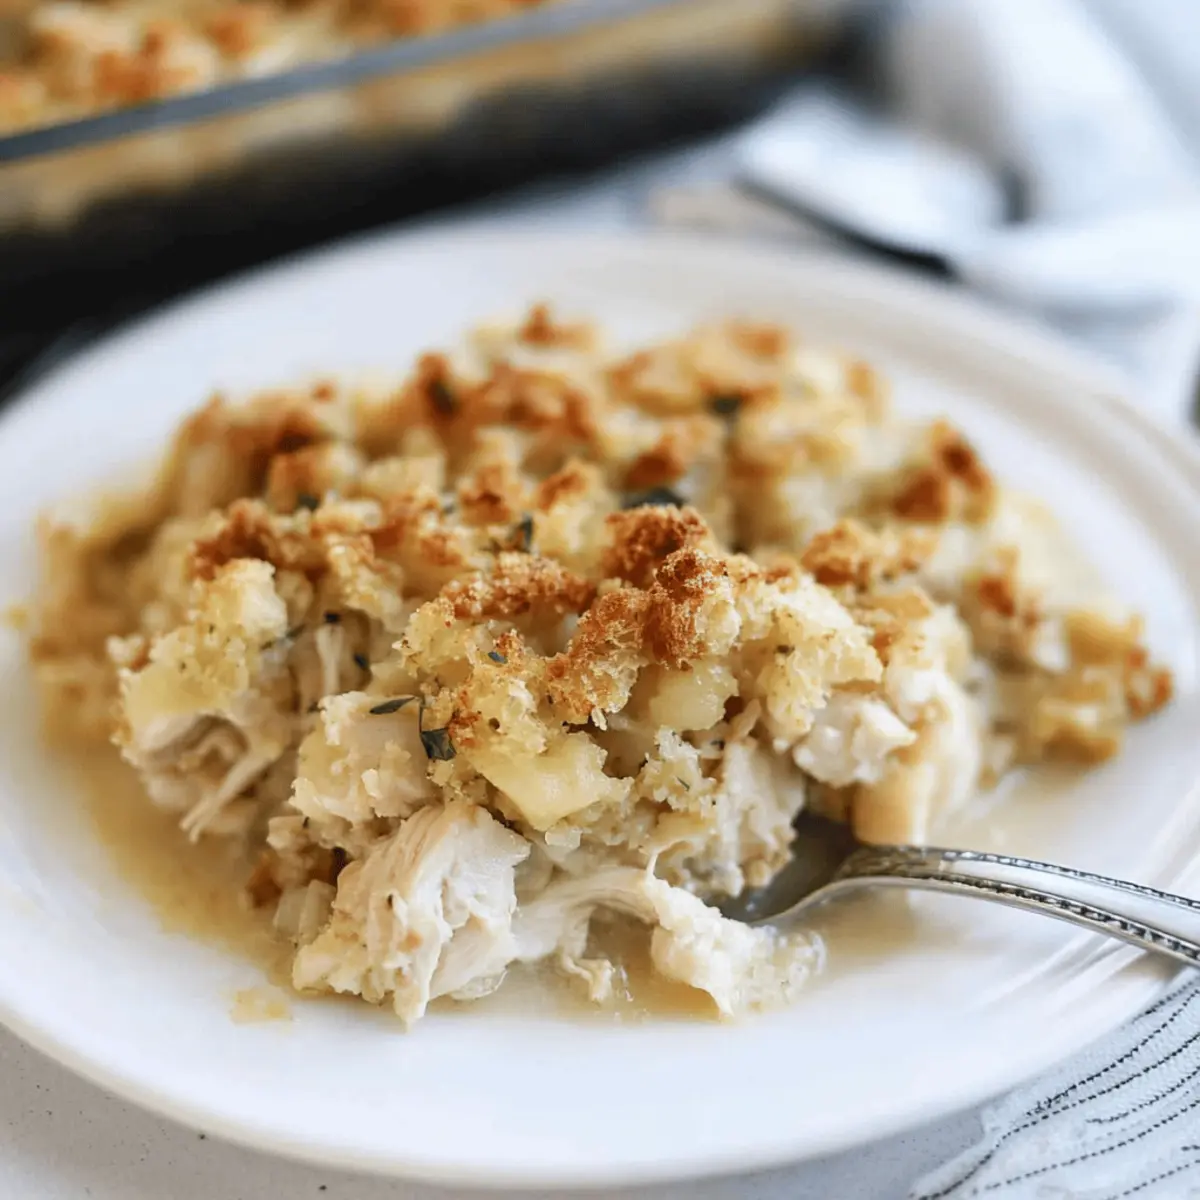
Place the casserole in the preheated oven and bake for about 45 minutes. Keep an eye on it to ensure it becomes bubbling and the top is beautifully golden brown. When ready, the center should feel hot to the touch, indicating that all the layers have melded together into a comforting meal that is sure to please everyone.

What to Serve with Easy 5-Ingredient Chicken and Stuffing Casserole

Transform your comfort food delight into a full meal experience with these delicious pairings.

  • Crisp Caesar Salad: Adds a refreshing crunch that balances the creaminess of the casserole, enhancing your dining experience. The zesty dressing brightens up the meal beautifully.

  • Garlic Roasted Vegetables: Pair with a colorful medley of broccoli, carrots, and bell peppers, providing a tasty and nutritious contrast to the creamy dish. Roasting brings out their natural sweetness, making them irresistible.

  • Honey-Glazed Carrots: The sweet glaze creates a harmonious contrast to the savory casserole, enticing even the pickiest eaters. Their tender texture offers a lovely complement to every bite.

  • Creamy Mashed Potatoes: For those who can’t get enough comfort, these mashed potatoes add richness and can soak up the delicious casserole juices for a satisfying finish.

  • Buttery Cornbread: Its slightly sweet flavor and fluffy texture pair wonderfully with the casserole, bringing a southern twist to your table. Serve warm for that cozy, homemade feel.

  • Steamed Green Beans: Lightly steamed with a sprinkle of lemon zest, these deliver fresh crunch and a pop of color, creating a vibrant plate. They’re a simple yet elegant addition to any family meal.

  • Apple Crisp: This warm dessert’s sweetness and comforting spices will perfectly round out your meal, reminiscent of family gatherings. The crunch of the topping mirrors the stuffing’s texture in your casserole, creating a delightful culinary echo.

  • Sparkling Apple Cider: As a fun beverage, it brings a touch of celebration to the table, pairing nicely with both the savory casserole and sweet desserts. The bubbles add an element of festivity to your cozy dinner.

  • Classic Coleslaw: A creamy, tangy coleslaw offers a refreshing crunch that beautifully contrasts textures with your molded casserole, while infusing the meal with bright flavors.

Storage Tips for Chicken and Stuffing Casserole

Fridge: Store leftovers in an airtight container for up to 3 days. Make sure it’s sealed tightly to maintain moisture and flavor.

Freezer: For longer storage, freeze the casserole in a disposable pan, tightly wrapped in plastic wrap and then aluminum foil. It can last up to 3 months in the freezer.

Reheating: When ready to enjoy, thaw overnight in the fridge. Reheat in the oven at 350°F (175°C) until heated through, about 25-30 minutes, or use the microwave for a quicker option.

Make-Ahead Tip: You can assemble your Chicken and Stuffing Casserole a day in advance. Just avoid adding the stuffing until you’re ready to bake for the best texture!

Make Ahead Options

These Chicken and Stuffing Casserole preparations are perfect for busy cooks looking to save time during the week! You can assemble the casserole up to 24 hours in advance, combining the shredded chicken and cream of chicken soup, then spreading this mixture in your greased baking dish. To maintain the best texture, keep the stuffing separate and only prepare it right before baking. Cover the dish tightly with plastic wrap in the refrigerator to lock in moisture. When you’re ready to enjoy a comforting meal, simply prepare the stuffing, drizzle on the chicken broth, and bake the casserole at 350°F (175°C) for about 45 minutes. This way, you’ll have a delicious, home-cooked Chicken and Stuffing Casserole with minimal effort!

Expert Tips for Chicken and Stuffing Casserole

  • Chicken Choice: Use fully cooked or rotisserie chicken for a speedy prep. This ensures even cooking and a moist result for your casserole.
  • Even Layering: Make sure to spread the chicken mixture evenly in the baking dish. Uneven layering can cause some areas to bake longer than others, affecting texture.
  • Broth Balance: Don’t skimp on the chicken broth! It’s essential for keeping the stuffing moist. If too dry, the casserole might become crumbly.
  • Timing Check: Use a meat thermometer to ensure the center of the casserole reaches 165°F to guarantee it’s piping hot for serving.
  • Mix It Up: Customize your Chicken and Stuffing Casserole by adding sautéed veggies or herbs for added flavor and nutrition. Feel free to experiment!

Chicken and Stuffing Casserole Variations

Feel empowered to make this Chicken and Stuffing Casserole truly your own with these delightful variations!

  • Veggie Boost: Add sautéed onions, bell peppers, or celery for a flavor punch and nutrition boost. The extra crunch and color will brighten up the dish!

  • Frozen Veggies: Toss in frozen peas or mixed vegetables for an easy way to include more greens. They’ll melt perfectly into the casserole while adding a vibrant touch.

  • Turkey Twist: Substitute shredded chicken for turkey for a Thanksgiving-inspired take on this comfort food classic. It’ll keep the flavors familiar yet wonderfully unique.

  • Plant-Based Delight: Use shredded jackfruit or a favorite plant-based protein instead of chicken for a vegetarian version. This swap still retains the comforting heartiness you crave.

  • Cheesy Layer: Sprinkle shredded cheddar or mozzarella cheese over the stuffing layer before baking. This addition will melt into gooey goodness, elevating the casserole experience!

  • Spicy Kick: Add diced jalapeños or a dash of hot sauce to give your casserole a little heat. This twist will excite your taste buds while keeping the dish cozy.

  • Herbed Goodness: Incorporate fresh herbs like thyme or rosemary into the chicken mixture. Their aromatic qualities will enhance the comforting essence of your casserole.

  • Cream of Mushroom: Swap the cream of chicken soup for cream of mushroom to create an earthier flavor profile. This small change makes a significant impact on taste!

Feel free to explore these variations or mix and match ideas for a personalized touch. If you’re looking for more comforting chicken recipes, don’t forget to check out my Parmesan Crusted Chicken or even a savory Low Carb Chicken casserole! Happy cooking!

Chicken and Stuffing Casserole Recipe FAQs

How do I know if my chicken is the right texture and doneness?
Absolutely! The chicken should be cooked through, with no pinkness in the center. If you’re using rotisserie chicken, ensure it’s warm before mixing. A meat thermometer should read 165°F for safety.

What should I look for when choosing ingredients, especially the stuffing mix?
Very! Look for a stuffing mix that appeals to your taste—herbed varieties add great flavor while cornbread mixes contribute a slight sweetness. Check for freshness on the package to ensure the best results.

How long can I store leftovers in the fridge and what’s the best way to do it?
Make sure to store leftovers in an airtight container in the fridge for up to 3 days. I highly recommend labeling the container with the date to keep track of freshness. This way, you can savor every last bite without worry!

Can I freeze this casserole, and if so, how do I do it properly?
Absolutely! I suggest freezing the assembled casserole in a disposable pan. Wrap it tightly in plastic wrap followed by aluminum foil. It will last for up to 3 months. When you’re ready, thaw it in the fridge overnight before baking.

Are there dietary considerations for allergies or pets?
Yes! If you’re accommodating allergies, always check labels on canned soups and stuffing mix for allergens like gluten or dairy. If preparing for pets, I advise keeping their meals separate, as ingredients like onions or excessive seasoning can be harmful.

What if my casserole isn’t heating through evenly?
Very! If you notice uneven heating, check that the layers are evenly spread. You can also tent the casserole with foil during baking, which helps promote even cooking. Ensure the center reaches 165°F—if not, return it to the oven until hot.

Chicken and Stuffing Casserole

Creamy Chicken and Stuffing Casserole for Cozy Nights

This Chicken and Stuffing Casserole is a comforting dish that brings warmth and nostalgia to busy nights with just five simple ingredients.
Prep Time 15 minutes
Cook Time 45 minutes
Total Time 1 hour
Servings: 6 servings
Course: Casserole
Cuisine: American
Calories: 350

Ingredients
  

For the Casserole
  • 3 cups Shredded Cooked Chicken Rotisserie chicken can be used for a quicker option.
  • 1 can Cream of Chicken Soup Can substitute with cream of mushroom soup.
  • 1 box Boxed Stuffing Mix Any variety like herbed or cornbread.
  • 1 cup Chicken Broth Low-sodium broth recommended.
  • to taste Seasonings (e.g., salt, pepper) Adjust according to your taste.

Equipment

  • baking dish
  • Mixing Bowl
  • Oven

Method
 

Step-by-Step Instructions
  1. Preheat the oven to 350°F (175°C).
  2. In a large mixing bowl, combine shredded cooked chicken with cream of chicken soup.
  3. Spread the chicken mixture evenly in a greased baking dish.
  4. Prepare the boxed stuffing mix according to the package instructions and spread over the chicken layer.
  5. Drizzle the chicken broth evenly over the stuffing layer.
  6. Bake for about 45 minutes until bubbling and golden brown.

Nutrition

Serving: 1servingCalories: 350kcalCarbohydrates: 35gProtein: 30gFat: 12gSaturated Fat: 3gPolyunsaturated Fat: 2gMonounsaturated Fat: 5gCholesterol: 70mgSodium: 800mgPotassium: 500mgFiber: 2gSugar: 1gVitamin A: 300IUVitamin C: 2mgCalcium: 20mgIron: 1mg

Notes

Customize by adding sautéed veggies or herbs for added flavor and nutrition. Store leftovers in an airtight container for up to 3 days.

Tried this recipe?

Let us know how it was!

Pumpkin Shaped Cheese Ball: A Creamy Fall Delight for Parties

As the leaves turn golden and the air fills with the crisp scent of autumn, I find myself dreaming of cozy gatherings and festive feasts. Nothing captures the warmth of fall quite like a delightful Pumpkin-Shaped Cheese Ball. This rich and creamy appetizer is not only a no-bake wonder but also a show-stopping centerpiece for Halloween, Thanksgiving, or any autumn celebration. With just a handful of easy-to-find ingredients, you’ll wow your guests with both its whimsical presentation and its savory flavor. Plus, it’s vegetarian-friendly, making it a perfect choice for any crowd. Are you ready to impress your friends and family with a seasonal twist on a classic favorite? Let’s dive into this fun and delicious recipe!

Why is this cheese ball a must-try?

Unique Shape: The whimsical pumpkin design is not only perfect for fall but also makes a stunning centerpiece at any gathering.

No-Bake Convenience: This recipe is entirely no-bake, allowing you to spend more time enjoying the festivities rather than slaving in the kitchen.

Flavorful Combination: The blend of cream cheese, cheddar, and spices creates a rich and savory taste that will keep your guests coming back for more.

Easy Customization: Feel free to swap cheeses or add spices to suit your preferences, making this cheese ball versatile for all palates.

Perfect for Sharing: Serve it with assorted dippers like veggies or crackers; it’s a crowd-pleasing appetizer that brings everyone together—a delightful addition alongside a comforting classic like Joumou Haitian Pumpkin soup!

Pumpkin Shaped Cheese Ball Ingredients

For the Cheese Mixture

  • Cream Cheese – provides a creamy base; use full-fat for a rich texture.
  • Cheddar Cheese – adds flavor; freshly shredded is preferred for better mixing.
  • Garlic Powder – enhances savory notes and depth of flavor.
  • Onion Powder – complements garlic and adds a sweet, aromatic touch.
  • Salt & Pepper – essential for balancing and seasoning to taste.

For the Vegetables

  • Red Bell Pepper – adds vibrant color and crunch; green bell pepper is a suitable substitute.
  • Green Onions (Scallions) – contributes freshness; can be replaced with chives if desired.

For Serving

  • Crackers, Chips, Pretzels, or Fresh Veggies – the perfect dippers for your delightful Pumpkin Shaped Cheese Ball!

Step‑by‑Step Instructions for Pumpkin Shaped Cheese Ball

Step 1: Prepare Ingredients
Begin your festive journey by allowing the cream cheese to soften at room temperature for about 30 minutes until it’s easy to blend. Shred the cheddar cheese if you haven’t already, opting for fresh over pre-shredded to enhance flavor and texture. Gather your garlic powder, onion powder, salt, pepper, red bell pepper, and green onions for a quick and smooth assembly of your Pumpkin Shaped Cheese Ball.

Step 2: Mix Cheese Base
In a large mixing bowl, combine the softened cream cheese and shredded cheddar. Add in the garlic powder, onion powder, salt, and pepper, and use a spatula to mix everything together until you have a smooth and creamy texture. This savory base will be the delicious foundation of your Pumpkin Shaped Cheese Ball, bringing warmth and richness to your fall gatherings.

Step 3: Add Vegetables
Finely chop the red bell pepper and green onions, then gently fold them into the cheese mixture. Stir until the vegetables are evenly distributed, adding vibrant color and a delightful crunch that will elevate your Pumpkin Shaped Cheese Ball. The fresh elements complement the creamy base beautifully, creating a balanced and flavorful mixture that will delight your guests.

Step 4: Shape Cheese Ball
To create your pumpkin shape, lay out a large piece of plastic wrap on a clean surface. Spoon the cheese mixture onto the center of the wrap, then gather the edges together and mold it into a pumpkin shape, securing it tightly. Use rubber bands around the shaped cheese ball to maintain its form while refrigerating. This step is crucial for achieving the whimsical look of the Pumpkin Shaped Cheese Ball.

Step 5: Chill
Place the wrapped cheese ball in the refrigerator and let it chill for at least 90 minutes. This not only firms up the shape but allows the flavors to meld beautifully. You’ll know it’s ready when the cheese ball feels solid to the touch and has a delightful aroma. This chill time is essential for a delicious and cohesive Pumpkin Shaped Cheese Ball.

Step 6: Serve
Once chilled, carefully unwrap the Pumpkin Shaped Cheese Ball and transfer it to a serving platter. Get creative by garnishing with additional toppings like crushed chips, shredded cheese, or even a small herb sprig for a pumpkin stem effect. Surround it with an array of dippers like crackers, chips, and fresh veggies to enhance your autumn presentation and provide delightful options for guests to enjoy.

What to Serve with Pumpkin Shaped Cheese Ball

Elevate your fall gathering with a variety of delectable pairings that compliment this creamy pumpkin delight.

  • Crunchy Veggie Sticks: Fresh carrots, celery, and bell peppers offer a refreshing crunch that contrasts beautifully with the smooth cheese ball. Their crispness adds a lovely balance, making every bite delightful.

  • Savory Crackers: Choose an assortment of whole-grain or herb-flavored crackers to add a nutty base and extra texture. The light saltiness enhances the cheesy flavors and is perfect for dipping.

  • Pretzel Crisps: The sturdy and crisp nature of pretzel chips provides a satisfying crunch that pairs wonderfully with the creamy filling. Plus, their hint of salt elevates each bite.

  • Toasted Baguette Slices: Thinly sliced, toasted baguettes offer a wonderful chewy texture that melds perfectly with the cheese ball’s creaminess. Spread it on for an elegant touch at your gathering.

  • Apple Slices: Sweet and tart apple slices introduce a refreshing fruity note that cuts through the richness of the cheese. The combination of flavors is simply heavenly and ideal for fall.

  • Red Wine: A glass of red wine, such as Merlot or Pinot Noir, pairs beautifully with the savory cheese ball, enhancing its flavors with fruity undertones.

  • Pumpkin Spice Hot Cider: Keep that fall spirit alive with warm pumpkin spice cider. Its cozy spices create a comforting atmosphere, wrapping your gathering in seasonal bliss.

  • Chocolaty Brownies: For dessert, rich chocolaty brownies add a decadent element to the table, providing a sweet finish after savoring the savory cheese ball.

Explore these variety of accompaniments to create an unforgettable spread that guests will talk about long after the last bite!

How to Store and Freeze Pumpkin Shaped Cheese Ball

Fridge: Wrap the cheese ball tightly in plastic wrap or store in an airtight container; it can be refrigerated for up to 5-6 days without losing its flavor.

Freezer: While freezing is not recommended for this cheese ball, if you must, wrap it tightly and consume within 1 month for the best quality.

Thawing: If frozen, thaw in the refrigerator overnight before serving to preserve the creamy texture.

Serving After Storage: Serve chilled with fresh dippers to bring back the vibrant flavors of your Pumpkin Shaped Cheese Ball!

Pumpkin Shaped Cheese Ball: Fun Variations

Get ready to unleash your creativity in the kitchen and transform this delightful cheese ball into your personal masterpiece!

  • Spicy Twist: Add a pinch of cayenne pepper or red pepper flakes for a delightful kick in every bite. It’s a fun surprise that will dazzle your spice-loving guests!

  • Nutty Crunch: Roll the outer layer in finely chopped pecans or walnuts instead of using chips. This adds an unexpected crunch and rich flavor, elevating your cheese ball to the next level of deliciousness.

  • Garnish Upgrade: Top the cheese ball with a small sprig of rosemary or a green herb, like parsley, to mimic a pumpkin stem. It’s a simple touch that enhances its festive fall charm.

  • Herbed Variation: Swap out garlic and onion powder for fresh herbs like dill or thyme for a fresh flavor twist. The aromatic notes will complement the cheese perfectly, making each bite even more delightful!

  • Veggie Delight: Fold in chopped olives or sun-dried tomatoes along with the bell peppers for an exciting burst of flavor and color. It’s a great way to introduce some extra zest into your pumpkin cheese ball.

  • Dairy-Free Version: Use a vegan cream cheese alternative and plant-based cheese options for a dairy-free take. This makes it friendly for those avoiding dairy while keeping the creamy texture intact.

  • Bite-Sized Balls: Instead of one large cheese ball, form several small bite-sized balls and serve them on skewers. These festive mini versions make for fun finger food at parties!

  • Cheese Swap: Try using smoked gouda or feta cheese instead of cheddar for a different flavor profile. Each cheese swap brings its unique character to the dish, creating a surprise for your taste buds.

With these creative variations, you can easily adapt the Pumpkin Shaped Cheese Ball to suit your taste preferences and impress your guests, making it an unforgettable centerpiece at your autumn celebrations! Looking for more delicious offerings? Try it alongside a comforting classic like Joumou Haitian Pumpkin soup or a sweet treat like Strawberry Cheesecake Dump for a well-rounded feast!

Make Ahead Options

Preparing your Pumpkin-Shaped Cheese Ball ahead of time is a fantastic way to save yourself time on busy days! You can mix the cheese base and shape it up to 24 hours in advance; just be sure to wrap it tightly in plastic wrap to maintain its form and prevent drying out. Additionally, the cheese ball can be refrigerated for up to 3 days before serving. When you’re ready to impress your guests, simply remove it from the fridge, garnish it with your favorite toppings, and serve it with an assortment of dippers. This way, you can enjoy all the flavors of your delightful cheese ball with minimal last-minute effort!

Expert Tips for Pumpkin Shaped Cheese Ball

  • Softened Cream Cheese: Ensure your cream cheese is at room temperature; this allows for easier mixing and results in a smoother texture for your cheese ball.

  • Freshly Shredded Cheese: Use freshly shredded cheddar instead of pre-shredded. It blends better and enhances the creamy consistency of your Pumpkin Shaped Cheese Ball.

  • Avoid Over-Mixing: When folding in vegetables, mix just until incorporated. Over-mixing can lead to a more uniform texture, losing the delightful crunch you’re aiming for.

  • Chill Time Matters: Don’t rush the chilling process; allowing at least 90 minutes helps the flavors meld and the cheese ball to firm up for easier serving.

  • Creative Garnishes: Get playful with garnishes like crushed tortilla chips or fresh herbs for a stem. These add visual appeal, making your Pumpkin Shaped Cheese Ball even more festive!

  • Adjust to Taste: Feel free to tweak spices or add extra veggies based on your family’s preferences for a cheese ball that perfectly suits your gathering.

Pumpkin-Shaped Cheese Ball Recipe FAQs

Can I use low-fat cream cheese instead of regular?
Absolutely! Low-fat cream cheese can be used as a substitute in this Pumpkin-Shaped Cheese Ball. While it may alter the creamy texture slightly, it’s a great way to reduce calories if that’s a concern for you. Just make sure it’s softened properly before mixing for the best results!

How should I store leftovers of the cheese ball?
Wrap the Pumpkin-Shaped Cheese Ball tightly in plastic wrap or place it in an airtight container, and store it in the refrigerator. It will stay fresh for up to 5-6 days. Just be sure to keep it well-sealed to maintain that delicious flavor!

Can I freeze the Pumpkin-Shaped Cheese Ball?
Freezing is not recommended for this cheese ball due to its creamy texture. However, if you must freeze it, ensure it’s wrapped tightly in plastic wrap and consume it within 1 month. When you’re ready to enjoy it again, thaw it in the refrigerator overnight before serving, to help regain its original creamy consistency.

What if my cheese ball isn’t holding its shape?
If the Pumpkin-Shaped Cheese Ball is not holding its shape, it may be because the mixture wasn’t chilled long enough or the rubber bands weren’t tight enough during shaping. For the best results, make sure to chill for the full 90 minutes and use strong rubber bands to maintain its pumpkin form while it sets.

Are there any allergy considerations for this recipe?
Yes, as this cheese ball contains dairy, it’s not suitable for those with lactose intolerance or dairy allergies. If you’d like to make a dairy-free version, consider using vegan cream cheese and cheese alternatives. Always check for labels to ensure all ingredients align with dietary needs.

What vegetables can I substitute in this cheese ball?
For the veggies, feel free to mix it up! If you’re not a fan of bell peppers, finely chopped carrots or cucumbers can add a nice crunch and flavor. You can also consider incorporating spices like cayenne pepper for a kick, depending on your taste preferences!

Pumpkin Shaped Cheese Ball

Pumpkin Shaped Cheese Ball: A Creamy Fall Delight for Parties

This Pumpkin Shaped Cheese Ball is a creamy, no-bake appetizer that's perfect for fall gatherings and a show-stopping centerpiece.
Prep Time 30 minutes
Chill Time 1 hour 30 minutes
Total Time 2 hours
Servings: 8 servings
Course: Appetizers
Cuisine: American
Calories: 150

Ingredients
  

For the Cheese Mixture
  • 8 oz Cream Cheese use full-fat for a rich texture
  • 1 cup Cheddar Cheese freshly shredded is preferred
  • 1 tsp Garlic Powder
  • 1 tsp Onion Powder
  • to taste Salt
  • to taste Pepper
For the Vegetables
  • 1 medium Red Bell Pepper chopped
  • 2 stalks Green Onions (Scallions) chopped
For Serving
  • as needed Crackers, Chips, Pretzels, or Fresh Veggies for dipping

Equipment

  • Mixing Bowl
  • Plastic Wrap
  • spatula
  • Refrigerator

Method
 

Step-by-Step Instructions
  1. Allow the cream cheese to soften at room temperature for about 30 minutes. Shred the cheddar cheese if necessary. Gather the other ingredients.
  2. Combine the softened cream cheese and shredded cheddar in a mixing bowl. Add garlic powder, onion powder, salt, and pepper. Mix until smooth.
  3. Finely chop the red bell pepper and green onions, then gently fold them into the cheese mixture.
  4. Lay out a large piece of plastic wrap and spoon the cheese mixture onto the center. Gather the edges and mold into a pumpkin shape. Use rubber bands to secure it while refrigerating.
  5. Chill the wrapped cheese ball in the refrigerator for at least 90 minutes until solid.
  6. Unwrap the cheese ball and transfer it to a serving platter. Garnish as desired and serve with assorted dippers.

Nutrition

Serving: 1servingCalories: 150kcalCarbohydrates: 5gProtein: 6gFat: 13gSaturated Fat: 8gPolyunsaturated Fat: 1gMonounsaturated Fat: 4gCholesterol: 30mgSodium: 250mgPotassium: 100mgSugar: 1gVitamin A: 500IUVitamin C: 10mgCalcium: 150mgIron: 1mg

Notes

Ensure the cream cheese is softened for easier mixing. Use fresh cheese for best results. Chill time is crucial for flavor melding.

Tried this recipe?

Let us know how it was!

Indulge in Dreamy Pumpkin Cheesecake Bars Your Fall Favorite

As the leaves turn golden and the air fills with a hint of cinnamon, there’s something magical about the arrival of fall. One of my absolute favorite ways to embrace this season is with these Swirled Pumpkin Cheesecake Bars. This delightful dessert blends a creamy cheesecake filling with luscious pumpkin puree, all resting on a buttery graham cracker crust. What’s great about this recipe is not just the killer flavor combo, but also how quick it is to prepare—you’ll have these bars ready to impress your family in no time. Plus, with a simple option for a low-carb almond flour crust, it’s a versatile treat that everyone can enjoy. Curious how to make these mouthwatering bars perfect for your next gathering? Let’s dive in!

Why are these Pumpkin Cheesecake Bars irresistible?

Decadent Flavor: Each bite of these bars combines creamy cheesecake with the warmth of pumpkin and spices, making them a true fall favorite.
Quick Prep: With simple ingredients and straightforward steps, you’ll have these delicious treats ready in no time—ideal for busy schedules!
Versatility: Whether you choose the classic graham cracker crust or the low-carb almond flour alternative, everyone can savor the joy of these bars.
Crowd-Pleasing: Perfect for family gatherings, holiday celebrations, or even just a cozy night in; these bars are sure to impress your guests.
Make-Ahead Option: Prepare them a day in advance and pop them in the fridge to chill, allowing the flavors to meld perfectly. You can also check out Strawberry Cheesecake for another delightful dessert option!

Pumpkin Cheesecake Bars Ingredients

• Here’s everything you’ll need to create these delightful Pumpkin Cheesecake Bars!

For the Crust

  • Graham Crackers – The perfect base that provides a crunchy texture; consider gluten-free crackers for a suitable alternative.
  • Unsalted Butter – Adds richness and binds the crust’s ingredients; coconut oil can be used for a dairy-free option.
  • Sugar – Sweetens the crust beautifully; swap in a low-carb sweetener for a healthier alternative.

For the Filling

  • Cream Cheese – This creamy base gives the cheesecake its rich flavor; make sure it’s softened at room temperature for easy mixing.
  • All-Purpose Flour – Stabilizes the cheesecake; almond flour works well for a gluten-free twist.
  • Salt – Enhances flavor; using sea salt can elevate the taste even more.
  • Vanilla Extract – Adds depth and warmth to the filling; pure vanilla extract is a great option for a richer aroma.
  • Eggs – Essential for setting the cheesecake; ensure they are at room temperature for better incorporation.
  • Pumpkin Puree – The star of the show! Ensures moisture and abundant pumpkin flavor; opt for solid-pack to avoid excess water.
  • Ground Cinnamon – Infuses warmth and spice into the filling; you can use pumpkin spice mix for an extra seasonal touch.
  • Grated Nutmeg – Offers a unique flavor; fresh nutmeg will have a more pronounced taste.
  • Ground Ginger – Adds a delightful zing; this ingredient is optional for those who prefer a milder spice profile.

Step‑by‑Step Instructions for Swirled Pumpkin Cheesecake Bars

Step 1: Prep the Crust
Begin by preheating your oven to 350°F (175°C). In a mixing bowl, combine crushed graham crackers, melted unsalted butter, and sugar. Mix until the crumbs are well-coated and resemble wet sand. Transfer this mixture into an 11×7 inch baking dish, pressing it firmly into an even layer using a flat-bottomed measuring cup. Bake the crust for about 10 minutes until lightly golden and fragrant, then remove and set aside to cool.

Step 2: Make the Filling
In a large mixing bowl, beat the softened cream cheese until smooth and creamy, using a hand mixer on medium speed for about 2-3 minutes. Gradually add in the sugar, all-purpose flour, and salt, mixing until everything is well combined. Ensure there are no lumps; then incorporate the eggs one at a time, mixing just enough to combine and scraping the sides of the bowl as necessary for a silky texture in your Pumpkin Cheesecake Bars.

Step 3: Create the Pumpkin Mixture
In a separate bowl, whisk together the pumpkin puree, ground cinnamon, grated nutmeg, ground ginger, and vanilla extract. Blend until smooth and well-combined. Gently fold half of the cheesecake mixture into the pumpkin mixture until just combined. This creates a rich and flavorful pumpkin filling that will swirl beautifully with the creamy cheesecake layer for your delightful Pumpkin Cheesecake Bars.

Step 4: Layer and Swirl
Spoon alternating dollops of the cheesecake and pumpkin mixtures over the baked crust, creating a checkerboard pattern. To achieve a beautiful swirl, take a skewer or knife and gently drag it through the mixtures in a back-and-forth motion. Be careful not to overmix; you want clear swirls to create an eye-catching presentation for your Swirled Pumpkin Cheesecake Bars.

Step 5: Bake
Place the baking dish in your preheated oven and bake for 55-60 minutes. You’ll know it’s done when the edges appear set, but the center retains a slight jiggle—this will firm up while cooling. Keep an eye on it to avoid overcooking, which can cause cracks in your creamy dessert.

Step 6: Cool and Chill
After baking, allow your Pumpkin Cheesecake Bars to cool in the pan at room temperature for about 30 minutes. Then, cover and refrigerate for at least 4 hours or overnight for the best flavor. This resting period helps the bars firm up, making them easier to cut into neat squares when you’re ready to serve.

Pumpkin Cheesecake Bars Variations & Substitutions

Feel free to get creative and make these bars uniquely yours with a few simple twists and swaps!

  • Low-Carb Crust: Replace graham crackers with almond flour for a gluten-free, low-carb treat.
  • Chocolate Heaven: Mix in semi-sweet chocolate chips to the cheesecake layer for added richness and decadent flavor.
  • Maple Infusion: Add a touch of maple syrup to the pumpkin layer for a sweet enhancement that complements the spices beautifully.
  • Spice it Up: Increase the ground ginger or add a pinch of cayenne pepper for a delightful kick that warms the palate.
  • Nutty Crunch: Top with chopped pecans or walnuts before baking to add a delightful crunch and an earthy flavor.
  • Coconut Twist: Use shredded coconut in the crust for a tropical flavor that pairs well with pumpkin.
  • Dairy-Free Delight: Substitute cream cheese with a dairy-free equivalent for a vegan-friendly version; coconut cream works wonderfully!
  • Fruit Swirl: Incorporate a layer of cranberry sauce or apple butter for a seasonal twist that brings a fruity brightness to your dessert.

With these ideas, you can effortlessly adapt your Pumpkin Cheesecake Bars to cater to varied preferences. Don’t forget to serve them alongside a warm cup of coffee or tea, and if you’re in the mood for more sweet delights, consider trying Turtle Bars Decadent for a divine chocolate treat or Strawberry Cheesecake Dump for a fruity dessert!

How to Store and Freeze Pumpkin Cheesecake Bars

Fridge: Store your Pumpkin Cheesecake Bars in an airtight container for up to 1 week. Refrigerating them enhances the creamy texture and flavors.

Freezer: For long-term storage, freeze the bars wrapped tightly in plastic wrap and aluminum foil for up to 2 months. Thaw in the refrigerator before serving.

Cutting: For best results, cut the bars into squares before freezing. This way, you can grab a piece anytime without having to thaw the entire batch.

Reheating: If desired, enjoy the bars chilled straight from the fridge, or warm them slightly in the microwave for 10-15 seconds to enhance the creamy filling.

Make Ahead Options

These Swirled Pumpkin Cheesecake Bars are a fantastic option for meal prep, saving you time during busy fall days! You can prepare the crust and filling components up to 24 hours in advance. Simply make the crust and allow it to cool, then store it covered in the refrigerator. The filling can be mixed and kept separately for optimal freshness. When you’re ready to bake, simply layer and swirl the fillings over the chilled crust and proceed with the baking instructions. By prepping ahead, you ensure that your bars will still retain their rich flavors and creamy texture, making for a delightful dessert that tastes just as delicious as if made fresh in a hurry!

What to Serve with Swirled Pumpkin Cheesecake Bars?

As you prepare to indulge in autumn’s most delightful dessert, consider these perfect pairings that elevate your experience.

  • Whipped Cream: A dollop on top gives your bars an airiness, balancing the rich cheesecake with a light, creamy finish.
  • Cinnamon Sugar Cookies: These soft, spice-kissed cookies add a charming crunch and a nod to the classic fall flavors.
  • Caramel Sauce: Drizzle over your bars for a sweet touch that enhances the pumpkin notes—perfect for caramel lovers!
  • Apple Cider: Serve warm or cold, this drink complements the spices beautifully, evoking cozy moments by the fire.
  • Pecan Pie: Introduce this classic dessert to your spread; its nutty richness pairs wonderfully with pumpkin’s smooth texture.
  • Coffee or Latte: The cozy flavors of brewed coffee or a spiced latte amplify your dessert experience, creating a warm, inviting atmosphere.
  • Chocolate Chunks: Tuck some chocolate into the filling for a decadent surprise that enhances every bite of the cheesecake bars.
  • Ginger Snap Crust: For those who love a bit of zing, swapping in ginger snaps for your crust can add an unexpected twist.
  • Pumpkin Spice Latte: This seasonal favorite pairs perfectly, echoing the flavors of your pumpkin cheesecake bars and adding an extra touch of warmth.

Expert Tips for Perfect Pumpkin Cheesecake Bars

Avoid Over-Swirling: Limit your swirling to just 3-4 gentle strokes. Too much mixing can blend the layers, losing that beautiful marbled effect you want in your Pumpkin Cheesecake Bars.

Use Room Temperature Ingredients: Ensure cream cheese and eggs are at room temperature. This makes them easier to mix, leading to a smoother cheesecake filling.

Watch the Bake Time: Keep an eye on your bars in the oven. They should be set around the edges with a slight jiggle in the center to prevent cracking as they cool.

Refrigerate Properly: After baking, let your bars cool at room temperature for 30 minutes before refrigerating. Chilling them for at least 4 hours helps the flavors meld beautifully.

Adjust for Baking Dish Size: If using a 9×13 inch dish, increase all ingredients by 50%. Keep the baking time similar for consistent results in your Pumpkin Cheesecake Bars.

Swirled Pumpkin Cheesecake Bars Recipe FAQs

How do I choose the best pumpkin puree?
Absolutely! Look for solid-pack pumpkin puree, which has a thicker consistency and less moisture. Avoid pumpkin pie filling, as it contains added sugars and spices that alter the flavor of your bars. If you’re feeling adventurous, I often recommend roasting your own pumpkin for a fresh, vibrant taste.

What is the best way to store leftover cheesecake bars?
These Pumpkin Cheesecake Bars can be stored in an airtight container in the fridge for up to a week. To keep them fresh, make sure they are covered well to avoid any drying out. Enjoy them chilled for the best creamy texture!

Can I freeze Pumpkin Cheesecake Bars?
Yes! For freezing, wrap each bar tightly in plastic wrap, then place them inside a freezer-safe container or a zip-top bag. They can be frozen for up to 2 months. To thaw, simply move them to the fridge the night before you plan to enjoy them.

What if my cheesecake bars crack while baking?
To avoid cracks in your Pumpkin Cheesecake Bars, ensure you don’t overmix after adding the eggs, and monitor your baking time closely. They should be set at the edges with a slight jiggle in the center. If cracks do appear, don’t worry! A dollop of whipped cream on top can cover any imperfections.

Are these bars safe for those with specific dietary needs?
For gluten-free diets, simply swap the graham cracker crust for a gluten-free option, like almond flour crust. If you have dairy allergies, using coconut oil instead of butter and dairy-free cream cheese can work well too. Enjoying dessert shouldn’t be a hassle, and I believe everyone should indulge!

Pumpkin Cheesecake Bars

Indulge in Dreamy Pumpkin Cheesecake Bars Your Fall Favorite

These Pumpkin Cheesecake Bars blend creamy cheesecake with pumpkin puree for a delicious fall treat.
Prep Time 30 minutes
Cook Time 1 hour
Cooling Time 30 minutes
Total Time 2 hours
Servings: 12 bars
Course: Dessert
Cuisine: American
Calories: 250

Ingredients
  

For the Crust
  • 2 cups Graham Crackers, crushed Gluten-free alternatives can be used.
  • 1/2 cup Unsalted Butter, melted Coconut oil can be used for a dairy-free option.
  • 1/4 cup Sugar Low-carb sweetener can be swapped in.
For the Filling
  • 8 oz Cream Cheese, softened Ensure it's at room temperature for easy mixing.
  • 1/4 cup All-Purpose Flour Almond flour works well for a gluten-free option.
  • 1/2 tsp Salt Sea salt can enhance flavor.
  • 1 tsp Vanilla Extract Pure extract is recommended for richer aroma.
  • 2 large Eggs Ensure they are at room temperature.
  • 1 cup Pumpkin Puree Use solid-pack to avoid excess water.
  • 1 tsp Ground Cinnamon Pumpkin spice mix can be used for extra flavor.
  • 1/4 tsp Grated Nutmeg Fresh nutmeg has a more pronounced flavor.
  • 1/2 tsp Ground Ginger Optional for those who prefer milder spice.

Equipment

  • Mixing Bowl
  • baking dish
  • Hand mixer
  • Measuring cup
  • whisk

Method
 

Step-by-Step Instructions
  1. Preheat the oven to 350°F (175°C). Mix crushed graham crackers, melted unsalted butter, and sugar until coated. Press into a 11x7 inch baking dish and bake for 10 minutes. Cool.
  2. Beat the softened cream cheese until smooth. Gradually add sugar, flour, and salt. Mix until combined. Add eggs one at a time, mixing just enough to incorporate.
  3. In a separate bowl, whisk together pumpkin puree, ground cinnamon, grated nutmeg, ground ginger, and vanilla extract until smooth. Fold half of cheesecake mixture into pumpkin mixture.
  4. Spoon alternating dollops of cheesecake and pumpkin mixtures onto the baked crust. Swirl gently with a skewer or knife.
  5. Bake for 55-60 minutes until edges are set but center jiggles. Cool at room temperature for 30 minutes before refrigerating for at least 4 hours.

Nutrition

Serving: 1barCalories: 250kcalCarbohydrates: 30gProtein: 4gFat: 12gSaturated Fat: 7gMonounsaturated Fat: 4gCholesterol: 50mgSodium: 200mgPotassium: 175mgFiber: 1gSugar: 15gVitamin A: 1800IUVitamin C: 1mgCalcium: 40mgIron: 1mg

Notes

For best results, use room temperature ingredients and watch the bake time closely to avoid cracks.

Tried this recipe?

Let us know how it was!

Comforting Chicken Casserole Recipe for Cozy Family Dinners

As the aroma of chicken sizzling in a pan fills my kitchen, I’m reminded of the comfort food of my childhood—warm, hearty casseroles bubbling away on the stovetop. Today, I’m excited to share my Easy Chicken Casserole Recipe, a dish that’s not just a feast for the senses but also a breeze to whip up. Perfect for hectic weeknights or cozy family get-togethers, this casserole combines juicy chicken, vibrant vegetables, and a creamy sauce that warms the soul. What makes it even better? It’s dairy-free and can be tailored to fit various dietary needs. Whether you’re feeding a crowd or savoring a quiet evening at home, this dish is a guaranteed crowd-pleaser. Are you ready to turn your kitchen into a cozy haven with this delightful casserole?

Why is this Chicken Casserole unforgettable?

Irresistible Flavor: This Chicken Casserole bursts with savory goodness, combining tender, juicy chicken thighs with earthy vegetables in a rich sauce.

Dairy-Free Delight: Perfect for those with dietary restrictions, this recipe offers all the comfort without dairy.

Simple Preparation: With straightforward steps, this dish is easy enough for even novice cooks.

Versatile Options: Customize easily by swapping in seasonal veggies or boneless chicken thighs for quicker cooking—ideal for any weeknight!

Perfect for Gatherings: Whether it’s a family dinner or a potluck, it’s sure to impress a crowd. Why not serve it with some crusty bread or alongside a Tater Tot Casserole to complete the meal?

Chicken Casserole Recipe Ingredients

For the Casserole

  • Bone-in, skin-on chicken thighs – Provides rich flavor and juicy texture; boneless thighs can be used for quicker cooking.
  • Olive or sunflower oil – Essential for sautéing, ensuring the chicken and vegetables have a nice sear; any neutral oil can work.
  • Onion – Adds sweetness and depth; thinly slice for even cooking.
  • Smoked back bacon – Introduces a smoky flavor and additional fat for a richer sauce; can be omitted for a lighter dish.
  • Small mushrooms – Contributes umami and texture; any variety of mushrooms can be used or omitted if preferred.
  • Carrots – Adds sweetness and vibrant color; cut into 1.5 cm slices for even cooking.
  • Plain flour – Thickens the sauce beautifully as it cooks; gluten-free flour can be used for a gluten-free option.
  • Dried thyme or fresh thyme leaves – Enhances flavor with earthy notes; substitute with other herbs like rosemary if desired.
  • Hot chicken stock – Provides moisture and a richer flavor base for the casserole; vegetable stock works for a vegetarian option.
  • Leeks – Adds sweetness and texture at the end of cooking; cut into 1 cm slices.

Optional Toppings

  • Fresh parsley – Adds a pop of color and freshness; chop finely and sprinkle just before serving.
  • Lemon zest – Brightens the dish; a light sprinkle can elevate the flavors.

This Chicken Casserole Recipe is a delicious and comforting choice for cozy family dinners!

Step‑by‑Step Instructions for Chicken Casserole Recipe

Step 1: Preheat the Oven
Begin by preheating your oven to 190°C (170°C fan/Gas 5). This ensures the temperature is just right when your Chicken Casserole is ready to bake. A hot oven helps to create that golden, bubbly finish we all love. While the oven heats up, gather all your ingredients to streamline the cooking process.

Step 2: Season the Chicken
While the oven is warming, take your bone-in, skin-on chicken thighs and season them generously with salt and pepper. This simple step enhances the flavor of the chicken, bringing out its natural juices. Make sure to coat both sides of the thighs for a well-seasoned dish that will delight your family.

Step 3: Sear the Chicken
In a large non-stick casserole pan, heat a splash of olive or sunflower oil over medium-high heat. Once hot, carefully add the seasoned chicken thighs skin-side down and sear for 7-8 minutes until the skin is beautifully golden brown. Afterward, turn them over and cook for an additional 3 minutes before removing them from the pan to set aside.

Step 4: Sauté the Vegetables
In the same pan, add the sliced onion, chopped bacon, and mushrooms. Sauté for 4-5 minutes until the onion is soft and everything is lightly browned. This will infuse your Chicken Casserole with a rich, smoky flavor, creating a perfect base for the dish ahead. Stir occasionally to ensure even cooking and to scrape up any browned bits from the bottom.

Step 5: Add Carrots and Flour
Next, toss in the sliced carrots and sprinkle over the plain flour. Stir everything together well to coat the vegetables with flour, which will help thicken the sauce later. Cook this mixture for about 2-3 minutes until everything is well mixed and starting to soften, creating a flavorful foundation for your casserole.

Step 6: Incorporate the Stock and Thyme
Sprinkle dried thyme over the mixture, then gradually pour in the hot chicken stock while continuously stirring. This will help you avoid lumps and ensure a smooth sauce for your Chicken Casserole. Bring this to a simmer, allowing the mixture to thicken slightly as the flavors meld together, creating a heavenly aroma in your kitchen.

Step 7: Return Chicken to the Pan
Now, return the seared chicken thighs to the pan, nestling them into the bubbling sauce. Bring the entire mixture back to a simmer, then cover the pan with a lid. This will trap the moisture, helping the chicken to cook evenly and retain its juiciness. Once simmering well, transfer the casserole gently into the preheated oven.

Step 8: Bake the Casserole
Let your Chicken Casserole bake in the oven for 45 minutes. You’ll know it’s ready when the chicken is cooked through and tender. The aroma should be irresistible! After 45 minutes, carefully remove the casserole; be cautious of the hot steam when lifting the lid.

Step 9: Add Leeks and Finish Baking
Finally, stir in the sliced leeks, which will add a lovely sweetness and texture to the dish. Cover it again and return the casserole to the oven for an additional 15 minutes. This allows the leeks to soften beautifully. When the timer goes off, the Chicken Casserole should be bubbly and inviting, perfect for serving to your loved ones.

Expert Tips for Chicken Casserole Recipe

  • Chicken Selection: Choose bone-in, skin-on chicken thighs for rich flavor, but boneless thighs can work for quicker cooking. Just adjust the time accordingly!

  • Vegetable Variations: Feel free to swap in seasonal vegetables like green beans or peas. They add color and nutrition without compromising the deliciousness of your chicken casserole.

  • Thickening Sauce: If your casserole turns out too watery, simply simmer it on the stovetop to reduce, or add a cornflour slurry for a thicker consistency.

  • Freezing Advice: Cool the casserole completely before freezing in an airtight container. This helps retain freshness for up to 3 months—perfect for last-minute meals!

  • Herb Substitution: Experiment with herbs! While thyme is standard, rosemary or Italian seasoning can also complement your chicken casserole beautifully.

What to Serve with Easy Chicken Casserole

Complement your comforting casserole with these delightful sides that enhance the family meal experience.

  • Creamy Mashed Potatoes: They soak up the delicious sauce beautifully, making each bite a savory delight. A rich addition to a cozy dinner.

  • Crusty Bread: Perfect for sopping up the rich sauce, this warm bread adds a satisfying crunch and enhances the comfort feel of your meal.

  • Fresh Green Salad: A vibrant salad with crisp greens and a light vinaigrette provides a refreshing contrast to the hearty casserole. It’s the perfect balance!

  • Steamed Broccoli: Offering a vibrant color and essential nutrients, steamed broccoli brightens your plate and pairs perfectly with the savory flavors.

  • Coleslaw: The crispness and tang of coleslaw bring a delightful crunch and freshness, making it a fun, cool counterpoint to the warm casserole.

  • Herbed Rice: Fluffy rice infused with herbs complements the casserole’s flavors while enhancing the overall dining experience. Simple yet satisfying!

  • Fruit Dessert: A light fruit salad or a tart fruit pie can provide a sweet ending that leaves everyone feeling refreshed after the hearty meal.

  • Wine Pairing: A glass of lightly chilled white wine, such as Chardonnay, can elevate the flavors of your Chicken Casserole, making it a truly elegant dining occasion.

Storage Tips for Chicken Casserole Recipe

Fridge: Store leftover chicken casserole in an airtight container for up to 3 days. Make sure it cools completely before sealing to retain freshness and prevent moisture buildup.

Freezer: For longer storage, freeze the casserole in a suitable container for up to 3 months. Remember to leave space for expansion and ensure it’s well sealed to avoid freezer burn.

Reheating: Reheat thawed casserole gently on the stovetop over low heat, adding a splash of chicken stock if needed to reinvigorate the sauce. Aim for an internal temperature of 75°C (165°F) before serving.

Portioning: Consider freezing in individual portions for those busy nights when you crave a hearty meal without the fuss. Simply thaw and reheat for a quick, satisfying dinner!

Chicken Casserole Recipe Variations

Feel free to make adjustments and personalize this delightful recipe according to your taste and dietary needs!

  • Dairy-Free Option: Use coconut milk or almond milk instead of regular cream for a creamy, dairy-free sauce that’s equally delicious.

  • Vegan Version: Replace chicken with lentils or chickpeas and use vegetable stock for an entirely plant-based dish.

  • Cooking Time Adjustment: For boneless chicken thighs, reduce baking time to 35 minutes before adding leeks for perfectly tender meat.

  • Herb Swaps: Substitute thyme with fresh rosemary or oregano to infuse different earthy flavors into your casserole.

  • Spicy Kick: Sprinkle in red pepper flakes or diced jalapeños for that extra heat, making your casserole a zesty sensation.

  • Veggie Boost: Toss in seasonal vegetables like peas or bell peppers during the last 15 minutes to enhance nutrition and color.

  • Nut-Free Creaminess: Blend cooked cauliflower with the stock for a creamy texture that’s nut-free, soothing, and flavorful without using dairy.

  • Flavor Fusion: Add a splash of soy sauce or Worcestershire sauce to deepen the rich flavor profile and create umami goodness.

Whichever way you choose to customize it, each variation will undoubtedly bring its unique charm to this wonderful Chicken Casserole Recipe! And for more comforting meals, don’t miss out on our delicious Crack Chicken Noodle or Sheet Pan Chicken recipes. Happy cooking!

Make Ahead Options

This Easy Chicken Casserole is a fantastic choice for busy cooks looking to save time on hectic weeknights! You can prepare the entire casserole up to 24 hours in advance by following the first six steps—up to the point where you add the chicken back into the pan. After assembling, allow it to cool before covering and refrigerating. When you’re ready to enjoy, simply pop it in the oven for the final bake, extending the cooking time to 50-60 minutes to account for the cold. Additionally, for longer storage, this casserole can be frozen for up to 3 months. To maintain quality, ensure it’s well-wrapped or in an airtight container to prevent freezer burn. You’ll have a deliciously effortless meal ready to go, just as comforting as when first made!

Chicken Casserole Recipe FAQs

How do I choose the right chicken for my casserole?
Absolutely! For a flavorful and juicy Chicken Casserole, I recommend starting with bone-in, skin-on chicken thighs—they truly elevate the dish. However, if you’re short on time, boneless thighs work wonderfully and will reduce your cooking time; just remember to adjust accordingly, letting them cook for about 35 minutes before adding leeks.

How should I store the leftover chicken casserole?
Very good question! Store leftover Chicken Casserole in an airtight container in the fridge for up to 3 days. Ensure it has cooled completely before sealing to preserve the flavors. For longer storage, freeze it in a suitable container for up to 3 months. This helps keep it fresh and ready for a cozy meal anytime!

Can I freeze my chicken casserole?
Absolutely, freezing is a great option! Once the casserole has cooled completely, transfer it to an airtight container, leaving some space for expansion. You can store it for up to 3 months. To reheat, allow it to thaw overnight in the fridge, then gently warm on the stovetop, adding a splash of chicken stock to keep it moist.

What if my casserole turns out too watery?
Very common! If you find your casserole is too watery, don’t worry—just simmer it on the stovetop over low heat to reduce the liquid. Alternatively, you can create a cornflour slurry by mixing 1 tablespoon of cornflour with 2 tablespoons of cold water, then stir it into the casserole while simmering until it thickens to your desired consistency.

Is this chicken casserole recipe okay for those with dietary restrictions?
Absolutely! This Chicken Casserole is not only delicious but also friendly for various dietary needs. It’s dairy-free, egg-free, and nut-free, making it a fantastic choice for those avoiding allergens. If you’re cooking for someone who is pregnant, it’s a comforting, hearty meal that can support their nutritional needs while being delightful to eat. Just be sure to check stock ingredients for any hidden allergens!

How can I adjust the flavor or ingredients in my casserole?
The more the merrier when it comes to customization! Feel free to swap in any seasonal vegetables like peas or green beans for added color and nutrition. You can also spice it up a bit with paprika or chili flakes if your family enjoys a touch of heat. Playing with herbs like rosemary or even Italian seasoning can also give your Chicken Casserole a unique twist!

Chicken Casserole Recipe

Comforting Chicken Casserole Recipe for Cozy Family Dinners

This Chicken Casserole Recipe combines juicy chicken, vibrant vegetables, and a creamy sauce, perfect for cozy family dinners.
Prep Time 15 minutes
Cook Time 1 hour
Total Time 1 hour 15 minutes
Servings: 6 servings
Course: Casserole
Cuisine: American
Calories: 420

Ingredients
  

For the Casserole
  • 4 pieces bone-in, skin-on chicken thighs or boneless thighs for quicker cooking
  • 2 tablespoons olive or sunflower oil any neutral oil can work
  • 1 medium onion thinly sliced
  • 100 grams smoked back bacon can be omitted
  • 200 grams small mushrooms any variety of mushrooms can be used or omitted
  • 2 medium carrots cut into 1.5 cm slices
  • 3 tablespoons plain flour gluten-free flour can be used
  • 1 teaspoon dried thyme or fresh thyme leaves
  • 500 milliliters hot chicken stock or vegetable stock for vegetarian option
  • 2 pieces leeks cut into 1 cm slices
Optional Toppings
  • 2 tablespoons fresh parsley chopped
  • 1 teaspoon lemon zest light sprinkle

Equipment

  • large non-stick casserole pan

Method
 

Cooking Steps
  1. Preheat your oven to 190°C (170°C fan/Gas 5).
  2. Season the chicken thighs generously with salt and pepper.
  3. Sear the chicken thighs skin-side down for 7-8 minutes until golden brown, then turn and cook for an additional 3 minutes.
  4. Sauté the onion, bacon, and mushrooms for 4-5 minutes until soft and lightly browned.
  5. Add carrots and sprinkle with flour, stirring for 2-3 minutes.
  6. Sprinkle thyme over the mixture and gradually pour in chicken stock, stirring to avoid lumps.
  7. Return seared chicken thighs to the pan and simmer, then transfer to the oven.
  8. Bake the casserole for 45 minutes.
  9. Stir in sliced leeks and bake for an additional 15 minutes.

Nutrition

Serving: 1servingCalories: 420kcalCarbohydrates: 30gProtein: 35gFat: 20gSaturated Fat: 6gPolyunsaturated Fat: 4gMonounsaturated Fat: 10gCholesterol: 100mgSodium: 800mgPotassium: 600mgFiber: 4gSugar: 5gVitamin A: 180IUVitamin C: 15mgCalcium: 30mgIron: 2mg

Notes

Cool leftovers completely before storing. Can freeze for up to 3 months. Try adding seasonal vegetables for variety.

Tried this recipe?

Let us know how it was!

Mouthwatering Meatball Sub Recipe for Cozy Nights In

As I stood by the stove, the seductive aroma of simmering marinara and sizzling meatballs enveloped my kitchen, instantly transporting me to an Italian street market. This Quick and Easy Italian Meatball Sub Recipe is perfect for those busy weeknights when you crave hearty comfort without the fuss. With its blend of homemade meatballs swimming in rich marinara sauce and gooey mozzarella nestled in crispy sub rolls, it promises to be a family-friendly crowd-pleaser that even the pickiest eaters can’t resist. Plus, it takes almost no time to whip up, making it an ideal solution for spontaneous gatherings or cozy movie nights. Are you ready to elevate your dinner game with these delicious subs? Let’s dive into the recipe!

Why Choose This Meatball Sub Recipe?

Quick Preparation: This recipe is designed for busy schedules, allowing you to serve a warm, comforting meal in under 30 minutes.

Customizable Toppings: Feel free to personalize your subs with your favorite toppings, like pickled jalapeños or crispy onion straws, to create your perfect bite.

Crowd-Pleasing Flavor: The combination of savory meatballs, tangy marinara, and gooey mozzarella is irresistible—ideal for family dinners or entertaining friends!

Easy Cooking: With minimal steps and ingredients, it’s perfect for home cooks of all levels. If you love quick meals, check out my Mexican Taco Soup for another effortless option!

Rich Comfort Food: Each bite delivers a delightful mix of textures and flavors, truly embodying the comfort of classic Italian-American cuisine.

Meatball Sub Recipe Ingredients

Elevate your dinner with these essentials!

For the Meatballs

  • Ground Beef – A staple for flavorful meatballs; choose lean for a healthier option.
  • Italian Bread Crumbs – Binds the meatballs and adds texture; swap with gluten-free crumbs if needed.
  • Grated Parmesan Cheese – Adds moisture and enhances taste; use nutritional yeast for a dairy-free alternative.
  • Egg – Binds everything together; consider a flax egg for a vegan option.
  • Dried Oregano & Dried Basil – Infuses classic Italian flavors; fresh herbs can elevate the taste.
  • Onion Powder & Garlic Powder – Enhances flavor depth; fresh minced versions can deliver a brighter profile.
  • Kosher Salt & Black Pepper – Vital for balancing flavors; season to your liking.

For the Sauce & Assembly

  • Marinara Sauce – Coats the meatballs with rich, tangy goodness; use homemade or store-bought for convenience.
  • Sub Rolls – Choose hoagie or French rolls for the perfect vessel; whole grain options lend a healthy twist.
  • Finely Shredded Mozzarella Cheese – Melts beautifully for that gooey finish; substitute with dairy-free cheese if desired.
  • Chopped Fresh Italian Parsley/Basil – Optional for a fresh, aromatic garnish; adds color and flavor to your subs.

With these Meatball Sub Recipe ingredients in hand, you’re one step closer to creating a mouthwatering dinner that brings the family together! Enjoy crafting these comforting bites!

Step‑by‑Step Instructions for Quick and Easy Italian Meatball Subs

Step 1: Prepare Meatballs
In a large mixing bowl, combine ground beef, Italian bread crumbs, grated Parmesan cheese, egg, dried oregano, dried basil, onion powder, garlic powder, kosher salt, and black pepper. Using your hands, mix until just combined, then form the mixture into 1-inch meatballs. You should have about 20 meatballs, all uniformly shaped for even cooking.

Step 2: Cook Meatballs
Heat a large skillet over medium heat and add the meatballs in a single layer, making sure not to crowd the pan. Cook for 8–10 minutes, turning occasionally until browned on all sides. Once browned, drain any excess grease, then pour in the marinara sauce. Simmer for 15 minutes, allowing the flavors to meld and the meatballs to Cook through.

Step 3: Toast Sub Rolls
While the meatballs are simmering in the sauce, preheat your broiler. Take your sub rolls, spread a thin layer of butter on the cut sides, and place them on a baking sheet. Broil for 2–3 minutes until they turn golden and slightly crispy, watching closely to prevent burning. This adds a delightful crunch to your Meatball Sub recipe.

Step 4: Assemble Subs
Once the meatballs are cooked, remove the rolls from the oven. Place a handful of shredded mozzarella cheese on the bottom of each toasted sub roll. Add five meatballs from the skillet to each roll, ensuring they are nicely nestled. Top with the remaining mozzarella, allowing the warm meatballs to melt the cheese perfectly.

Step 5: Broil
Return your assembled Meatball Subs to the broiler for 2–3 minutes, or until the cheese is bubbly and lightly browned. Keep a close eye, as the cheese can melt quickly. Once ready, remove from the oven, and for an extra touch, sprinkle with additional grated Parmesan and chopped fresh parsley or basil.

Step 6: Serve and Enjoy
Let the Meatball Subs sit for a minute before serving to allow the cheese to set. Cut them in half if desired, and serve hot alongside a fresh salad or crispy fries. With every bite, you’ll embrace the hearty flavors of Italian comfort food from your own kitchen!

Meatball Sub Recipe Variations

Feel free to let your creativity run wild as you customize this delightful recipe to fit your taste buds!

  • Lean Meat Option: Swap in ground turkey or chicken for a lighter version. These alternatives can keep the meatballs juicy while adding a different flavor profile.

  • Cheesy Twist: Experiment with various cheeses like provolone or fontina for a creamy melt that adds a unique twist to your subs. A blend of cheeses can transform your meal into a gourmet delight!

  • Spicy Kick: Integrate crushed red pepper flakes into the meatball mixture for a fiery flavor boost. Or add pickled jalapeños as a topping for that extra kick if you prefer!

  • Gourmet Add-Ins: Toss in roasted red peppers or sautéed mushrooms for a richer flavor. These ingredients not only enhance taste but also add lovely textures, making each bite an adventure.

  • Gluten-Free: Use gluten-free bread crumbs in the meatballs and opt for gluten-free sub rolls to cater to gluten-sensitive family members. Everyone deserves a taste of happiness!

  • Vegan Delight: Try substituting the beef with lentils or a plant-based ground meat. Paired with dairy-free cheese, you can easily whip up a satisfying plant-based version that’s just as hearty!

  • Savory Toppings: Don’t hesitate to adorn your subs with crispy onion straws or fresh basil for an irresistible crunch and burst of flavor. A sprinkle of fresh herbs can elevate the entire dish!

For more hearty options, check out my cozy Broccoli Cheddar Soup or learn how to make a comforting Fat Burning Soup as sides! Enjoy crafting unique variations that make this amazing meatball sub recipe your own!

Make Ahead Options

These Italian Meatball Subs are perfect for meal prep enthusiasts! You can prepare the meatballs and simmer them in marinara sauce up to 24 hours in advance. Simply let the meatballs cool completely, then store them in an airtight container in the refrigerator. The sub rolls can be buttered and toasted just before serving to maintain their crispiness, ensuring they won’t become soggy. When you’re ready to enjoy, simply reheat the meatballs in the sauce on the stove until warmed through, then assemble the subs with shredded mozzarella and broil them until the cheese is bubbly. This makes weekday dinners a breeze, allowing you to savor hearty, comforting flavors with minimal effort!

Storage Tips for Meatball Sub Recipe

Fridge: Store leftovers in an airtight container for up to 3 days. If possible, keep the meatballs and rolls separate to maintain the sub’s texture.

Freezer: Freeze assembled meatball subs, wrapped tightly, for up to 2 months. For best results, thaw overnight in the fridge before reheating.

Reheating: Reheat in the microwave for 1–2 minutes, or bake in a preheated oven at 350°F for about 10–15 minutes until heated through and cheese is bubbly.

Assembly Tip: If you’re storing unassembled ingredients separately, the cooked meatballs and sauce can be refrigerated and combined with fresh rolls when ready to serve.

What to Serve with Quick and Easy Italian Meatball Subs

Transform your meal into a complete feast by exploring the delightful side dishes and treats that harmonize perfectly with these hearty meatball subs.

  • Crispy French Fries: Crisp, golden fries add a delightful crunch and are perfect for dipping into marinara sauce. The contrast between the hot, cheesy sub and the cool, crispy fries enhances the meal experience.

  • Garlic Bread: With its buttery, herb-infused flavor, garlic bread complements the savory taste of meatball subs. Plus, it’s great for mopping up any leftover marinara sauce!

  • Classic Caesar Salad: Crisp romaine lettuce, creamy dressing, and crunchy croutons provide a refreshing balance to the rich, hearty subs. This salad adds a bright, zesty contrast that’s hard to resist.

  • Roasted Vegetables: Seasonal veggies like zucchini, bell peppers, or asparagus drizzled with olive oil create a colorful, nutritious side. Their natural sweetness aligns beautifully with the savory meatballs.

  • Pickled Vegetables: A tangy, crunchy assortment of pickled veggies brings a refreshing bite, cutting through the richness of the subs. It introduces a delightful burst of flavor!

  • Sweet Potato Wedges: Baked sweet potato wedges offer a sweet-savory mix that complements the meatball subs beautifully. Their softness and natural sweetness create a cozy, comforting vibe.

  • Homemade Coleslaw: This crunchy, creamy side adds texture and a hint of sweetness that perfectly balances the savory flavors of the subs. Consider using a tangy vinaigrette for an extra zing!

  • Sparkling Lemonade: A glass of refreshing sparkling lemonade serves as a bright, bubbly drink that cleanses the palate and adds a touch of zest to every bite of your meatball sub.

  • Chocolate Chip Cookies: End your meal on a sweet note with warm, gooey cookies. Their comforting, nostalgic flavor pairs delightfully with the overall comforting experience of your dinner.

Expert Tips for the Best Meatball Sub Recipe

  • Choose Quality Meat: Use lean ground beef for meatballs to keep them flavorful yet healthier. Avoid overmixing the meat to maintain tenderness.

  • Watch the Browning: Monitor meatballs closely while browning to prevent burning. A nice golden color adds depth to the flavor!

  • Perfectly Toasted Rolls: Toast sub rolls under the broiler until just golden. Keep an eye on them, as they can burn quickly—no one wants sad, burnt bread!

  • Customize Your Sauce: Feel free to use homemade marinara for richer flavors or select a low-sugar store-bought variety; either way, a good sauce is key to your meatball sub experience.

  • Don’t Skip the Garnish: Chopped fresh parsley or basil isn’t just for looks; it adds a vibrant flavor that elevates your meatball sub recipe.

  • Serve Hot: Allow the subs to sit for a minute after broiling to help prevent cheese overflow but serve them hot for the best taste and gooeyness!

Meatball Sub Recipe FAQs

How do I choose the best ground beef for my meatball sub?
Absolutely! I recommend selecting lean ground beef to reduce excess fat while still keeping the meatballs flavorful. Look for ground beef with 80–85% lean content for the perfect balance of taste and tenderness.

How should I store my leftover meatball subs?
Very! Store any uneaten meatball subs in an airtight container in the fridge for up to 3 days. If you want to retain the rolls’ texture, keep the meatballs and rolls separate when storing.

Can I freeze meatball subs for later?
Certainly! To freeze your assembled meatball subs, wrap each one tightly in plastic wrap or aluminum foil and place them in a freezer-safe bag. They can last for up to 2 months in the freezer. Thaw overnight in the refrigerator before reheating.

What if my meatballs are falling apart while cooking?
No worries! This can happen if the mixture is too wet or overmixed. Ensure you’re using enough bread crumbs as a binder. If you notice falling meatballs, consider adding a bit more breadcrumbs or chilling them for about 15 minutes before cooking to help them firm up.

Are there any dietary considerations for my meatball sub recipe?
Absolutely! If you have gluten sensitivities, substitute traditional breadcrumbs with gluten-free versions. For dairy-free options, use nutritional yeast instead of Parmesan and opt for dairy-free cheese. Always check ingredient labels for allergens to accommodate all dietary needs.

How do I make my meatball subs even more delicious?
Great question! For a more gourmet touch, you can mix in roasted garlic or sautéed onions into the meatball mixture. Additionally, feel free to experiment with toppings like fresh arugula or spicy pickled jalapeños to elevate the flavor profile of your meatball sub recipe.

Meatball Sub Recipe

Mouthwatering Meatball Sub Recipe for Cozy Nights In

Enjoy this Meatball Sub Recipe that's quick, easy, and perfect for cozy nights in, featuring savory meatballs and rich marinara.
Prep Time 15 minutes
Cook Time 30 minutes
Total Time 45 minutes
Servings: 4 subs
Course: Lunch
Cuisine: Italian
Calories: 550

Ingredients
  

For the Meatballs
  • 1 lb Ground Beef Use lean for a healthier option.
  • 1 cup Italian Bread Crumbs Gluten-free crumbs can be used.
  • 1/2 cup Grated Parmesan Cheese Nutritional yeast for dairy-free.
  • 1 large Egg Consider a flax egg for vegan option.
  • 1 tsp Dried Oregano
  • 1 tsp Dried Basil
  • 1 tsp Onion Powder
  • 1 tsp Garlic Powder
  • 1 tsp Kosher Salt Adjust to taste.
  • 1/2 tsp Black Pepper Adjust to taste.
For the Sauce & Assembly
  • 2 cups Marinara Sauce Homemade or store-bought.
  • 4 slices Sub Rolls Hoagie or French rolls recommended.
  • 2 cups Finely Shredded Mozzarella Cheese Dairy-free cheese can be used.
  • 1/4 cup Chopped Fresh Italian Parsley/Basil Optional garnish.

Equipment

  • Skillet
  • Mixing Bowl
  • Baking Sheet

Method
 

Meatball Preparation
  1. In a large mixing bowl, combine ground beef, Italian bread crumbs, grated Parmesan cheese, egg, dried oregano, dried basil, onion powder, garlic powder, kosher salt, and black pepper. Mix until just combined, then form into 1-inch meatballs.
  2. Heat a large skillet over medium heat. Add meatballs and cook for 8–10 minutes, turning occasionally until browned. Drain excess grease and pour in marinara sauce. Simmer for 15 minutes.
  3. Preheat broiler. Spread butter on cut sides of sub rolls and place on a baking sheet. Broil for 2–3 minutes until golden.
  4. Remove rolls from the oven. Place a handful of mozzarella cheese on the bottom of each roll. Add five meatballs to each roll and top with remaining mozzarella.
  5. Return assembled subs to broiler for 2–3 minutes until cheese is bubbly.
  6. Let subs sit for a minute, then serve hot.

Nutrition

Serving: 1subCalories: 550kcalCarbohydrates: 50gProtein: 30gFat: 25gSaturated Fat: 10gPolyunsaturated Fat: 5gMonounsaturated Fat: 10gCholesterol: 80mgSodium: 900mgPotassium: 500mgFiber: 2gSugar: 5gVitamin A: 10IUVitamin C: 5mgCalcium: 20mgIron: 15mg

Notes

For best flavor and texture, monitor cooking time and serve immediately after broiling.

Tried this recipe?

Let us know how it was!

Zesty Contessa Chicken Piccata You’ll Love Making at Home

As I stood in my kitchen one sunny afternoon, the zesty aroma of lemons and the sizzle of chicken filled the air, instantly transporting me to a bustling Italian piazza. This Lemon-Infused Chicken Piccata with Shallots takes the traditional Contessa Chicken Piccata and elevates it with an extra splash of citrus and a touch of sweetness from shallots. It’s a dish that not only impresses but is also a breeze to whip up on a busy weeknight. With its quick cooking time, you can easily serve a delightful meal that your whole family will love. Plus, it’s versatile enough to elevate any side, from pasta to sautéed vegetables. Are you ready to dive into a taste of Italy right from your home kitchen?

Why is Chicken Piccata So Loved?

Bright Citrus Flavor: The extra lemon in this recipe adds a refreshing zing that lifts the dish to new heights.

Quick and Easy: This recipe can be made in just 30 minutes, making it perfect for busy weeknights when you want something delightful without the fuss.

Family-Friendly: Even picky eaters will love this creamy, buttery rendition—it’s bound to please everyone at the dinner table!

Versatile Pairing Options: Serve it over a bed of al dente pasta or alongside sautéed vegetables for a complete meal. For a different twist, check out my Sizzling Chicken Pepper recipe for inspiration.

Crowd-Pleasing Gourmet Dish: Impress your guests with this restaurant-quality meal—ideal for dinner parties or casual gatherings. Your friends will be asking for seconds!

Contessa Chicken Piccata Ingredients

For the Chicken
Boneless, Skinless Chicken Breast Cutlets – Your primary protein; ensure they are dried well for a perfect sear.
Salt and Ground Black Pepper – Essential for flavor enhancement; feel free to adjust to your taste.
All-Purpose Flour – Helps create a light crust; substitute with gluten-free flour if needed.

For the Sauce
Large Lemon – Adds the bright, citrusy kick that’s a hallmark of Contessa Chicken Piccata; always use fresh for optimal zest.
Olive Oil – Adds flavor and prevents sticking during cooking; can be swapped for butter if you prefer richness.
Shallot – Adds a subtle sweetness; can be replaced with a bit of onion if that’s all you have.
Garlic – Brings in that delicious umami flavor; fresh minced garlic is highly recommended.
Chicken Stock or Broth – Infuses depth into the sauce; low-sodium options work best for health-conscious cooks.
Small Capers – Provides briny, tangy notes; omit if you’re not a fan, but it will change the flavor profile.
Unsalted Butter – Adds a luxurious mouthfeel to the sauce; ensure it’s softened for easy incorporation.
Fresh Parsley – For garnish, adding a pop of color and freshness; substitute with other herbs like basil or thyme if preferred.

This delightful combination of ingredients will take your homemade meal to a whole new level, ensuring that your Contessa Chicken Piccata is not just good, but truly unforgettable. Enjoy cooking!

Step‑by‑Step Instructions for Lemon-Infused Chicken Piccata with Shallots

Step 1: Prepare Chicken
Begin by rinsing your boneless, skinless chicken breast cutlets under cold water and patting them dry with paper towels. Season both sides generously with salt and ground black pepper to enhance the flavors. Then, dredge each piece in all-purpose flour, shaking off any excess, to create a light crust that crisps beautifully during cooking.

Step 2: Sear Chicken
In a large skillet, heat 2 tablespoons of olive oil over medium-high heat until shimmering. Carefully add the floured chicken cutlets to the hot skillet, making sure not to overcrowd them. Sauté for 2 to 2½ minutes on each side until they develop a golden-brown crust. Remove the chicken from the skillet and set aside on a plate while you prepare the sauce.

Step 3: Make Sauce
In the same skillet, using the leftover oil and tasty bits, lower the heat to medium and add 1 minced shallot and 2 cloves of minced garlic. Sauté for about 1 minute until fragrant, stirring frequently. The shallots should become translucent without browning too much, as their delicate sweetness is key to the flavor of your Lemon-Infused Chicken Piccata.

Step 4: Deglaze Pan
Pour in 1 cup of chicken stock or broth, along with the zest and slices of half a large lemon, scraping the bottom of the skillet with a wooden spoon to release those flavorful browned bits. Allow the mixture to simmer and reduce for about 4 minutes, letting the flavors meld and intensify while thickening slightly.

Step 5: Finish Sauce
Once the sauce has reduced, stir in the juice of the remaining lemon half and a tablespoon of small capers, allowing it to simmer for an additional minute. Remove the skillet from heat, then add 2 tablespoons of unsalted butter, swirling until melted and combined. Finally, mix in freshly chopped parsley for a burst of color and freshness.

Step 6: Serve
To serve your splendid Lemon-Infused Chicken Piccata, place the sautéed chicken back into the pan, spooning the luscious sauce generously over each cutlet. This dish is best enjoyed immediately, perhaps alongside a bed of al dente pasta or sautéed vegetables to round out your family-friendly meal.

Expert Tips for the Best Contessa Chicken Piccata

  • Get the Skillet Hot: Always preheat your skillet to ensure a perfect sear on the chicken. A hot pan locks in moisture and creates that signature crispy exterior.
  • Avoid Overcrowding: Cook chicken cutlets in batches if necessary to prevent steaming. Sufficient space in the pan will keep them browning beautifully.
  • Use Fresh Ingredients: For the most vibrant flavor, opt for fresh lemon juice instead of bottled. The real zest will elevate your Contessa Chicken Piccata remarkably.
  • Mind the Shallots: Sauté shallots until translucent but not browned; this maintains their sweetness, ensuring a balanced taste in your sauce.
  • Don’t Skip the Butter: For a rich mouthfeel, incorporate the butter at the end. This step transforms your sauce into a silky finish, making every bite irresistible.

Make Ahead Options

These Lemon-Infused Chicken Piccata cutlets are perfect for meal prep! You can season and dredge the chicken up to 24 hours in advance, storing it in the refrigerator to maintain moisture and flavor. Additionally, the sauce can be prepared a day ahead; simply sauté the shallots and garlic, deglaze with chicken stock, and keep it sealed in an airtight container. When you’re ready to serve, heat the sauce gently and finish by adding the lemon juice, capers, butter, and parsley. This will ensure your dish remains just as delicious while saving you precious time on busy weeknights!

Storage Tips for Contessa Chicken Piccata

Fridge: Store leftovers in an airtight container in the refrigerator for up to 3 days. This keeps the chicken moist and the flavors intact.

Freezer: You can freeze Chicken Piccata for up to 2 months. Ensure it’s in a well-sealed container or freezer bag to prevent freezer burn, and reheat slowly after thawing.

Reheating: To reheat, warm gently in a skillet over low heat, adding a splash of chicken broth or water to maintain moisture. This will help revive the creamy texture of the sauce.

Room Temperature: It’s best to avoid leaving out Chicken Piccata at room temperature for more than 2 hours to ensure food safety.

What to Serve with Lemon-Infused Chicken Piccata with Shallots

Elevate your dinner table with delightful sides that complement the zesty flavors and creamy richness of this Italian classic.

  • Creamy Mashed Potatoes: Their smooth texture and buttery taste perfectly balance the vibrant sauce, making each bite a comforting experience.
  • Garlic Bread: Crunchy and buttery, it’s the ideal vehicle for soaking up the delicious sauce left on your plate. The garlicky aroma adds to the inviting atmosphere.
  • Sautéed Green Beans: Bright and crisp, these beans add a refreshing crunch that contrasts beautifully with the tender chicken, brightening the meal.
  • Arugula Salad: The peppery notes of fresh arugula tossed with a lemon vinaigrette harmonize with your Chicken Piccata’s citrusy flair while adding a refreshing bite.
  • Lemon Risotto: Creamy and loaded with the freshness of lemon, this side enhances the dish’s existing flavors while offering a luxurious texture.
  • Chardonnay or Pinot Grigio: A crisp, chilled glass complements the citrus notes of your Contessa Chicken Piccata, making your mealtime experience even more special.
  • Tiramisu: Conclude your meal on a sweet note with this classic Italian dessert. The coffee flavors offer a lovely contrast after the bright main dish.

Contessa Chicken Piccata Variations

Feel free to customize this beloved recipe with delightful twists that suit your taste buds and dietary needs!

  • Gluten-Free: Substitute all-purpose flour with a gluten-free blend to keep this dish friendly for all diets.

  • More Citrus: Add extra lemon juice or zest for an even bolder flavor that shines through in each bite. You’ll love the delightful brightness!

  • Creamy Twist: Incorporate a splash of heavy cream at the end to transform your sauce into a rich, velvety masterpiece. This adds an irresistible richness that pairs beautifully with the tartness.

  • Spicy Kick: Mix in some red pepper flakes during the sauté for a fiery touch that will take your Chicken Piccata to another level of flavor excitement. It’s a fun way to ignite the taste buds!

  • Vegetable Boost: Toss in some sautéed spinach or cherry tomatoes with the shallots for added nutrition and beautiful color. This delicious variation keeps your dish vibrant and healthy.

  • Herb Swap: Use fresh basil or thyme instead of parsley to change the herbaceous note of the dish, bringing a unique twist to the classic flavors. Experiment and discover new favorites!

  • Wine Infusion: Add a splash of white wine during the deglazing step for an enriched, sophisticated flavor profile that elevates your meal dramatically. This adds depth that is simply delightful.

Wondering what else to whip up for dinner? Check out my Garlic Chicken Gnocchi or serve this alongside a warm bowl of Tuscan Chicken Soup for a satisfying feast!

Contessa Chicken Piccata Recipe FAQs

How do I choose the best lemon for this recipe?
Absolutely! Look for a large, plump lemon that feels heavy for its size. The skin should be bright yellow without any dark spots, as this indicates freshness. A juicy lemon will yield the most zest and juice, enhancing the overall flavor of your Contessa Chicken Piccata.

How should I store leftover Chicken Piccata?
To keep your delicious dish fresh, store any leftovers in an airtight container in the refrigerator for up to 3 days. If you notice the sauce thickening, simply add a splash of chicken broth when reheating to maintain that lovely creamy texture.

Can I freeze Chicken Piccata?
Yes, you can freeze this dish! Allow it to cool completely before transferring it to a well-sealed freezer-safe container or freezer bag. Chicken Piccata can be frozen for up to 2 months. When you’re ready to enjoy it again, thaw overnight in the fridge and reheat gently in a skillet over low heat, adding a splash of broth or water to help revive the sauce.

What should I do if my chicken isn’t browning properly?
Don’t worry, this can happen! Make sure your skillet is hot enough before adding the chicken; a good rule of thumb is to let it heat for about 2 minutes. Also, avoid overcrowding the pan because this can cause steaming instead of browning. If needed, cook the chicken in batches to allow for that beautiful golden crust.

Is this recipe safe for my pet?
While Chicken Piccata is delicious, it’s best not to share with pets due to the garlic and onion (shallots) which can be toxic to dogs and cats. If you want to treat your furry friend, consider setting aside a small, plain piece of cooked chicken before adding the sauce.

What if I have allergies to certain ingredients?
No problem at all! This recipe is quite adaptable. For gluten-free needs, swap the all-purpose flour for a gluten-free alternative. If you’re sensitive to dairy, you can omit the butter; just finish the sauce with a little olive oil or non-dairy butter instead. Always feel free to make it your own!

Contessa Chicken Piccata

Zesty Contessa Chicken Piccata You’ll Love Making at Home

Experience the delightful flavors of Contessa Chicken Piccata with this zesty recipe, perfect for any occasion.
Prep Time 10 minutes
Cook Time 20 minutes
Total Time 30 minutes
Servings: 4 servings
Course: Dinner
Cuisine: Italian
Calories: 400

Ingredients
  

For the Chicken
  • 4 pieces Boneless, Skinless Chicken Breast Cutlets Ensure they are dried well for a perfect sear.
  • 1 teaspoon Salt Adjust to taste.
  • 1 teaspoon Ground Black Pepper Adjust to taste.
  • 1/2 cup All-Purpose Flour Substitute with gluten-free flour if needed.
For the Sauce
  • 1 large Lemon Use fresh for optimal zest.
  • 2 tablespoons Olive Oil Can be swapped for butter if preferred.
  • 1 large Shallot Can be replaced with onion if necessary.
  • 2 cloves Garlic Fresh minced garlic is highly recommended.
  • 1 cup Chicken Stock or Broth Low-sodium options work best.
  • 2 tablespoons Small Capers Omit if not a fan.
  • 2 tablespoons Unsalted Butter Ensure it's softened for easy incorporation.
  • 1/4 cup Fresh Parsley For garnish.

Equipment

  • Large skillet

Method
 

Step-by-Step Instructions
  1. Prepare Chicken: Rinse and pat dry chicken cutlets. Season with salt and pepper, then dredge in flour.
  2. Sear Chicken: Heat olive oil in skillet. Sauté chicken cutlets for 2-2½ minutes on each side until golden-brown.
  3. Make Sauce: In the same skillet, sauté minced shallot and garlic until fragrant.
  4. Deglaze Pan: Add chicken stock and lemon zest, scraping the skillet to release browned bits. Simmer for 4 minutes.
  5. Finish Sauce: Stir in lemon juice and capers, simmer for 1 additional minute. Add butter and parsley.
  6. Serve: Return chicken to the skillet, spoon sauce over. Enjoy with pasta or vegetables.

Nutrition

Serving: 1servingCalories: 400kcalCarbohydrates: 20gProtein: 30gFat: 25gSaturated Fat: 8gPolyunsaturated Fat: 2gMonounsaturated Fat: 15gCholesterol: 120mgSodium: 600mgPotassium: 600mgFiber: 1gSugar: 2gVitamin A: 5IUVitamin C: 30mgCalcium: 2mgIron: 5mg

Notes

Store leftovers in an airtight container in the fridge for up to 3 days, or freeze for up to 2 months.

Tried this recipe?

Let us know how it was!

Dill Pickle Parmesan Chicken: A Flavorful Twist on Dinner

In my quest for kitchen creativity, I stumbled upon an unexpected treasure: Dill Pickle Chicken! This wonder dish uses the tangy brine of everyday pickles to marinate juicy chicken thighs, transforming them into a flavor-packed culinary delight. With its quick prep time and simple ingredients, this recipe is a lifesaver for those hectic weeknights when fast food seems tempting but isn’t quite what you want. Not only is this dish gluten-free and low-carb, but it’s also a protein-rich meal that’ll satisfy the whole family. Trust me, your dinner table is about to experience a delightful twist! Curious to dive into the recipe? Let’s get started!

Why is Dill Pickle Chicken a Must-Try?

Unique Flavor Duo: The delightful blend of dill pickle brine and chicken creates an unexpectedly delicious taste that elevates a regular dinner into something extraordinary.

Quick and Easy: Perfect for busy weeknights, this recipe takes just minutes to prepare and less than half an hour to cook, freeing you from the fast-food trap!

High-Protein Goodness: With 47.5g of protein per serving, it’s a fantastic option for anyone looking to boost their protein intake without the carbs, making it a hit for the health-conscious.

Versatile Variations: Feel free to mix it up! Substitute chicken thighs with breasts for a leaner option or experiment with various pickle flavors for a personalized touch.

Crowd-Pleaser: Whether for family dinners or entertaining friends, this dish will impress everyone at the table – it’s like comfort food with a zesty twist! If you enjoy this recipe, you might also love my Garlic Parmesan Chicken for another crowd favorite!

Dill Pickle Chicken Ingredients

For the Marinade
Boneless, Skinless Chicken Thighs – Choose thighs for their juiciness; breasts are a leaner alternative but may dry out.
Pickle Brine – This is the star ingredient that tenderizes and infuses flavor; use any jarred pickle brine, and feel free to experiment!
Kosher Salt – Enhances flavor; omit if the brine is salty enough.
Freshly Ground Black Pepper – Adds seasoning; swap with your favorite seasoning blend if preferred.

For Optional Garnishes
Diced Pickles – These provide an extra crunch; they’re optional but highly recommended for texture.
Chopped Fresh Dill – Adds a burst of freshness; dried dill works as a substitute, or you can skip it if you wish.

Let this delicious Dill Pickle Chicken marinate your taste buds and elevate your dinner game!

Step‑by‑Step Instructions for Dill Pickle Chicken

Step 1: Marinate the Chicken
Begin by placing your boneless, skinless chicken thighs in a shallow dish. Pour the pickle brine over the chicken, ensuring it is fully submerged. Cover the dish tightly with plastic wrap and refrigerate for 2 to 8 hours. The longer you marinate, the more flavorful the Dill Pickle Chicken will be, so let the brine work its magic!

Step 2: Preheat the Oven
Once the marinating time is up, preheat your oven to 425°F (220°C). Position an oven rack in the center of the oven to ensure even heat distribution. While the oven heats, this is a great time to prepare the next steps for your Dill Pickle Chicken.

Step 3: Prepare Chicken for Baking
After marinating, drain the chicken and gently pat it dry with paper towels. This helps achieve a nice, crispy texture when baking. Season both sides of the chicken thighs with kosher salt and freshly ground black pepper to enhance the flavors without overpowering the dill pickle essence.

Step 4: Bake the Chicken
Transfer the seasoned chicken thighs to a baking dish in a single layer. Bake in the preheated oven for approximately 20 minutes, or until the internal temperature reaches 165°F (74°C), and the chicken is golden brown. You’ll notice a delightful aroma wafting through your kitchen as the chicken cooks.

Step 5: Rest & Garnish
Once baked, remove the chicken from the oven and cover it loosely with aluminum foil. Let it rest for about 10 minutes, which allows the juices to redistribute, making the Dill Pickle Chicken incredibly juicy. After resting, you can garnish with diced pickles and chopped fresh dill for an added burst of flavor before serving.

Storage Tips for Dill Pickle Chicken

Fridge: Store leftover Dill Pickle Chicken in an airtight container for up to 4 days to keep it fresh and flavorful.

Freezer: If you want to save it for later, freeze the cooked chicken in a vacuum-sealed bag or airtight container for up to 3 months.

Reheating: To reheat, simply thaw overnight in the refrigerator, then warm it in the oven at 350°F (175°C) until heated through, ensuring it remains juicy.

Room Temperature: Avoid leaving your Dill Pickle Chicken out at room temperature for more than 2 hours to maintain safety and quality.

Dill Pickle Chicken Variations

Feel free to explore exciting new flavors and dietary preferences while making this delicious dish!

  • Chicken Breasts: Swap the thighs for breasts for a leaner cut—just watch out for dryness!

  • Spicy Kick: Add a splash of hot sauce to the pickle brine for an extra zesty flavor adventure. Spice lovers will relish this fiery twist!

  • Sweet & Tangy: Use sweet pickle brine instead of dill for a refreshing contrast, perfect for those with a sweeter palate.

  • Herbaceous Boost: Mix in fresh chopped herbs like parsley or thyme with the brine for an aromatic upgrade that elevates the charm of the dish.

  • Gluten-Free Crunch: Instead of regular breadcrumbs for coating, use gluten-free alternatives to keep it healthy and suitable for everyone!

  • Oven Free Option: Grill the marinated chicken on a BBQ for a smoky flavor that enhances the tanginess, ideal for a summer gathering.

  • Low-Carb Delight: Serve the chicken over a bed of sautéed spinach or zucchini noodles for a delicious low-carb meal. Pairing with roasted vegetables also works wonders!

  • Garnish Variations: Experiment with crunchy toppings like fried onions or crushed nuts to add a different texture and surprise element. Now that’s a fun way to enhance your Dill Pickle Chicken!

If you enjoyed this recipe, you might also love my Chili Chicken Takeout for another sensational meal option!

Make Ahead Options

Dill Pickle Chicken is a fantastic meal prep option that saves you time on busy weeknights! You can marinate the chicken in the pickle brine up to 24 hours in advance, ensuring every bite is bursting with flavor. Simply place the chicken thighs in a shallow dish, cover them with the brine, and refrigerate until you’re ready to cook. For the best quality, make sure the chicken is fully submerged to prevent drying out. When it’s time to serve, just drain, season, and bake as instructed for restaurant-quality results with minimal effort. You’ll have a delicious, quick meal that feels like a warm hug on your dinner table!

Expert Tips for Dill Pickle Chicken

Submerge for Success: Ensure the chicken is fully submerged in the dill pickle brine during marination to achieve maximum flavor and tenderness.

Avoid Overcrowding: When baking, arrange the chicken thighs in a single layer without crowding the dish; this promotes even cooking and crisping.

Resting is Key: Don’t skip the resting step after baking; allowing the chicken to rest for 10 minutes ensures juicy, tender results that everyone will love.

Watch the Salt: If you’re sensitive to sodium, taste the pickle brine before adding kosher salt; it may already be salty enough for a great flavor.

Experiment Freely: Feel free to add your own twist! Try different types of pickles in the brine or seasonings to personalize your Dill Pickle Chicken experience.

What to Serve with Dill Pickle Chicken

Looking to create a deliciously complete meal that tantalizes your taste buds and complements the vibrant flavors of your Dill Pickle Chicken?

  • Creamy Mashed Potatoes: These fluffy, buttery potatoes add a comforting creaminess that balances the tanginess of the chicken. A dollop of gravy would make it even more irresistible!

  • Fresh Garden Salad: A crisp salad with mixed greens, cucumbers, and a zesty vinaigrette brings a refreshing crunch that contrasts wonderfully with the tender chicken. Toss in some sliced radishes for a peppery kick!

  • Garlic Roasted Vegetables: Colorful medleys of roasted seasonal veggies, such as carrots and zucchini, provide sweetness and a caramelized texture that pairs perfectly with the savory tones of the dish.

  • Coleslaw: This creamy side dish offers a cool and crunchy texture, bringing an extra bite that lifts the overall flavor experience. Plus, it’s a fun nod to summer barbecues!

  • Herbed Quinoa: Fluffy quinoa seasoned with fresh herbs not only adds a nutty flavor but also ups the nutritional profile of your meal, making everything feel both wholesome and satisfying.

  • Pickle Brine Potato Wedges: Why not embrace the theme? Crispy, seasoned potato wedges, baked or air-fried, complement the Dill Pickle Chicken beautifully, echoing those delightful pickle flavors in a new form.

  • Lemonade or Iced Tea: Refreshing drinks like homemade lemonade or lightly sweetened iced tea harmonize with the zesty chicken, providing a lively contrast against the savory notes.

With these delightful pairings, your dinner is sure to be a standout experience that your loved ones will cherish!

Dill Pickle Chicken Recipe FAQs

How do I select the best dill pickle brine for marinating?
Absolutely! The best pickle brine is one that has a good balance of vinegar, spices, and salt. For a zestier flavor, choose a brine that includes garlic or dill in addition to standard spices. Always pay attention to the overall color and smell of the brine; avoid any that seems cloudy or has an off smell.

What is the best way to store leftover Dill Pickle Chicken?
Leftover Dill Pickle Chicken can be stored in an airtight container in the refrigerator for up to 4 days. To preserve its flavor and moisture, make sure the container is sealed tightly. For longer storage, freeze the cooked chicken in a vacuum-sealed bag or airtight container for up to 3 months.

Can I freeze Dill Pickle Chicken, and how should I do it?
Certainly! To freeze Dill Pickle Chicken, allow it to cool completely after cooking, then slice or keep the pieces whole as desired. Place the chicken in a vacuum-sealed bag or an airtight container, making sure to remove as much air as possible. Label the container with the date, and freeze for up to 3 months. When you’re ready to enjoy it again, simply thaw overnight in the refrigerator before reheating.

What should I do if my chicken turns out dry?
Very! If your chicken ends up dry, it may have been overcooked or not marinated long enough. To prevent this in the future, always use a meat thermometer to check for an internal temperature of 165°F (74°C) and avoid cooking beyond that. Additionally, marinating for a longer duration can greatly enhance moisture retention, so feel free to soak in the brine for the full recommended time!

Is Dill Pickle Chicken suitable for my dietary needs, such as gluten intolerance?
Absolutely! This Dill Pickle Chicken recipe is naturally gluten-free, as long as you verify that the pickle brine isn’t made with any gluten-containing additives. It’s also a great option for low-carb diets, making it perfect for anyone watching their carbohydrate intake. However, always check labels if you’re sensitive to allergens!

Can I use other chicken cuts, such as breast or tenderloin?
Very much! While this recipe works best with boneless, skinless chicken thighs due to their juiciness, you can substitute chicken breasts or tenders if you prefer. Keep in mind that breasts can dry out more quickly, so monitoring the cooking time will be key—around 15-20 minutes at 425°F (220°C) should suffice while ensuring they remain juicy.

Dill Pickle Parmesan Chicken

Dill Pickle Parmesan Chicken: A Flavorful Twist on Dinner

Dill Pickle Parmesan Chicken combines tangy pickle brine with juicy chicken for a quick, gluten-free, and protein-rich dinner that's sure to please the family.
Prep Time 10 minutes
Cook Time 20 minutes
Resting Time 10 minutes
Total Time 40 minutes
Servings: 4 pieces
Course: Dinner
Cuisine: American
Calories: 350

Ingredients
  

For the Marinade
  • 1 pound Boneless, Skinless Chicken Thighs Choose thighs for their juiciness; breasts are a leaner alternative but may dry out.
  • 1 cup Pickle Brine Use any jarred pickle brine, and feel free to experiment!
  • 1 teaspoon Kosher Salt Enhances flavor; omit if the brine is salty enough.
  • 1/2 teaspoon Freshly Ground Black Pepper Adds seasoning; swap with your favorite seasoning blend if preferred.
For Optional Garnishes
  • 1/2 cup Diced Pickles Optional but highly recommended for texture.
  • 2 tablespoons Chopped Fresh Dill Adds freshness; dried dill works as a substitute.

Equipment

  • Oven
  • baking dish
  • Plastic Wrap
  • paper towels

Method
 

Step-by-Step Instructions for Dill Pickle Chicken
  1. Begin by placing your boneless, skinless chicken thighs in a shallow dish. Pour the pickle brine over the chicken, ensuring it is fully submerged. Cover the dish tightly with plastic wrap and refrigerate for 2 to 8 hours.
  2. Once the marinating time is up, preheat your oven to 425°F (220°C). Position an oven rack in the center of the oven.
  3. After marinating, drain the chicken and gently pat it dry with paper towels. Season both sides of the chicken thighs with kosher salt and freshly ground black pepper.
  4. Transfer the seasoned chicken thighs to a baking dish in a single layer. Bake in the preheated oven for approximately 20 minutes, or until the internal temperature reaches 165°F (74°C).
  5. Once baked, remove the chicken from the oven and cover it loosely with aluminum foil. Let it rest for about 10 minutes.
  6. Garnish with diced pickles and chopped fresh dill for an added burst of flavor before serving.

Nutrition

Serving: 1pieceCalories: 350kcalCarbohydrates: 4gProtein: 47.5gFat: 15gSaturated Fat: 3gPolyunsaturated Fat: 2gMonounsaturated Fat: 4gCholesterol: 120mgSodium: 800mgPotassium: 600mgSugar: 1gVitamin A: 2IUVitamin C: 1mgCalcium: 2mgIron: 4mg

Notes

Ensure the chicken is fully submerged in the dill pickle brine during marination and avoid overcrowding the baking dish for even cooking.

Tried this recipe?

Let us know how it was!

Creamy Butter Chicken Linguine for a Cozy Night In

As I stood in my kitchen, the rich aroma of garlic and spices wafted through the air, pulling me into a culinary daydream about hearty, soulful dishes. Today, I’m excited to share my take on Cowboy Butter Chicken Linguine, a delightful recipe that combines tender chicken and linguine in a creamy, herbaceous sauce that’s as satisfying as it is indulgent. Not only is this dish budget-friendly and easy to whip up in under 30 minutes, but it’s also completely customizable with your favorite spices and add-ins. Whether you want to spice things up with a pinch of red pepper flakes or throw in some vibrant veggies, this Creamy Cowboy Butter Chicken Linguine delivers comfort and flavor with every bite! Ready to dive into this unforgettable meal?

Why is Cowboy Butter Chicken Linguine a Must-Try?

Comforting Simplicity: This recipe makes cozy evenings effortless with its straightforward steps, allowing you to whip up a delightful meal in just 30 minutes.

Savory Flavor Explosion: The rich cowboy butter sauce, combined with garlic and spices, creates a tantalizing taste that will have everyone at the table asking for seconds.

Customizable Goodness: You have the flexibility to personalize this dish with your choice of herbs, proteins, or even vegetables like spinach or cherry tomatoes, ensuring every bite is tailored to your palate.

Budget-Friendly Meal: With affordable ingredients, this dish proves you don’t have to break the bank to indulge in a restaurant-quality experience at home.

Crowd-Pleasing Appeal: Ideal for family dinners or a casual gathering with friends, this Creamy Cowboy Butter Chicken Linguine is sure to impress and satisfy even the pickiest of eaters.

Try serving it alongside a crisp garden salad or freshly baked garlic bread for an unforgettable meal that brings everyone together! For more delicious ideas, don’t miss out on my Butter Chicken Linguine recipe.

Butter Chicken Linguine Ingredients

For the Chicken
Boneless, skinless chicken breasts – Cut into bite-sized pieces for quick cooking and easy bites.
Salt and pepper – Essential for seasoning the chicken, enhancing overall flavor.

For the Pasta
Linguine – Eight ounces create the perfect base, soaking up the creamy butter sauce.
Olive oil – One tablespoon for cooking the chicken, adding depth of flavor.

For the Sauce
Butter – One tablespoon enriches the sauce, lending a luxurious texture.
Garlic – Four cloves, minced; fresh garlic brings essential aroma and flavor.
Dijon mustard – One teaspoon for a tangy kick that complements the richness of the butter.
Paprika – Half a teaspoon adds warmth and color; choose sweet or smoked based on your flavor preference.
Red pepper flakes – Half a teaspoon (optional); adds gentle heat for those who enjoy a bit of spice.
Lemon – Juice and zest of half a lemon to brighten the dish with acidity.
Chicken broth or pasta water – Half a cup helps to create a smooth sauce consistency.
Heavy cream – Half a cup for that creamy texture that binds all the flavors together.
Grated Parmesan cheese – A quarter cup enhances the umami factor, making the sauce irresistible.
Fresh parsley – A quarter cup, chopped for freshness and a vibrant touch.

For Serving
Garlic bread – Perfectly complements the dish, offering a delightful crunch.
Crisp garden salad – A light side to balance the richness of the linguine.

This Butter Chicken Linguine is a delightful way to bring comfort and flavor to your dinner table!

Step‑by‑Step Instructions for Creamy Cowboy Butter Chicken Linguine

Step 1: Cook Pasta
Begin by boiling a large pot of salted water over high heat. Add the linguine and cook according to package instructions, usually 8-10 minutes, until al dente. Once done, reserve ½ cup of the pasta water for later, then drain the linguine and set it aside, allowing the hot steam to soften the noodles further.

Step 2: Cook Chicken
In a large skillet, heat one tablespoon of olive oil over medium-high heat. Add the bite-sized pieces of chicken, seasoned with salt and pepper. Sauté the chicken for about 5-7 minutes, stirring occasionally, until it’s browned and cooked through. Once done, remove the chicken from the skillet and set it aside on a plate, keeping it warm.

Step 3: Prepare Sauce
In the same skillet, reduce the heat to medium and add one tablespoon of butter, allowing it to melt. As the butter foams, introduce the minced garlic, paprika, and optional red pepper flakes. Sauté the mixture for about 1 minute, stirring constantly to prevent the garlic from browning, until the garlic becomes fragrant and golden.

Step 4: Combine Ingredients
Stir in one teaspoon of Dijon mustard, the juice and zest of half a lemon, and half a cup of chicken broth or reserved pasta water. Simmer the mixture for around 2 minutes, scraping any brown bits from the bottom of the skillet to incorporate all the flavors. Following this, add half a cup of heavy cream and half of the chopped parsley, cooking until the sauce thickens slightly.

Step 5: Finish Dish
Add the cooked chicken back into the skillet, tossing it gently with the creamy sauce. Then, introduce the linguine and a quarter cup of grated Parmesan cheese, stirring everything together until the noodles are well-coated. If the sauce appears too thick, pour in the reserved pasta water gradually to achieve your desired consistency.

Step 6: Garnish and Serve
Taste your Creamy Cowboy Butter Chicken Linguine and adjust the seasoning with salt and pepper as needed. Serve the dish in bowls, garnished with the remaining parsley and a sprinkle of extra Parmesan cheese. Enjoy this delightful meal with a side of garlic bread and a crisp garden salad for a truly satisfying feast.

Expert Tips for Cowboy Butter Chicken Linguine

  • Use Fresh Ingredients: Fresh garlic and herbs make a significant difference in flavor. Avoid garlic powder to truly capture the essence of Cowboy Butter Chicken Linguine.

  • Perfect Pasta Texture: Cook the linguine just until al dente; it will soak up the sauce without becoming mushy. Reserve pasta water for a creamier finish.

  • Customize Your Heat: Adjust red pepper flakes according to your spicy preference. Start with a small pinch and add more if you enjoy a kick in your Cowboy Butter Chicken Linguine!

  • Timing is Key: Avoid overcooking the garlic in the butter; it should be fragrant but not browned to keep the sauce bright and flavorful.

  • Consistent Sauce: Gradually add reserved pasta water to reach your ideal sauce consistency. This will help ensure each bite is perfectly creamy without losing flavor.

  • Storage Savvy: Store leftovers in an airtight container and reheat with a splash of broth or cream to maintain the deliciousness of your Cowboy Butter Chicken Linguine.

Make Ahead Options

These Creamy Cowboy Butter Chicken Linguine are perfect for meal prep enthusiasts! You can cook the chicken up to 24 hours in advance and store it in the refrigerator. Simply season and sauté, then allow it to cool before transferring it to an airtight container. The pasta can also be cooked ahead of time; just toss it with a splash of olive oil to prevent sticking and refrigerate. When ready to serve, reheat the chicken and pasta together, then finish the dish by preparing the rich sauce as instructed. Rest assured, this meal remains just as delicious, allowing busy cooks to enjoy a hearty, flavorful dinner with minimal effort!

How to Store and Freeze Cowboy Butter Chicken Linguine

Fridge: Store leftovers in an airtight container for up to 3 days. This keeps your Cowboy Butter Chicken Linguine fresh and flavorful for quick meals.

Freezer: For longer storage, freeze in a freezer-safe container for up to 2 months. Make sure to leave some space at the top as the sauce may expand.

Reheating: When you’re ready to enjoy, gently reheat in a skillet over low heat. Add a splash of chicken broth or cream to restore creaminess while warming.

Thawing: If frozen, transfer to the fridge to thaw overnight, or use the microwave in short intervals for a quick reheat option.

What to Serve with Cowboy Butter Chicken Linguine

Create a complete dining experience that delights the senses and warms the heart.

  • Crisp Garden Salad: A fresh, crunchy salad with mixed greens and a tangy vinaigrette offers a bright contrast to the rich linguine.
  • Garlic Bread: Crispy, buttery garlic bread pairs wonderfully, perfect for soaking up the creamy sauce.
  • Roasted Vegetables: Seasonal roasted veggies like zucchini and bell peppers add texture and vibrant colors, enhancing the meal’s nutrition.
  • White Wine: A chilled glass of Sauvignon Blanc complements the flavors of the dish, elevating your dinner experience to new heights.
  • Lemon Sorbet: For dessert, a light lemon sorbet cleanses the palate and provides a refreshing finish after the savory pasta.

Elevate your dining table by thoughtfully choosing sides and drinks that play off the Cowboy Butter Chicken Linguine’s flavors!

Butter Chicken Linguine Variations

Feel free to get creative and make this delicious dish your own with these fun twists!

  • Vegetable Boost: Add fresh spinach, cherry tomatoes, or steamed broccoli to pack in nutrition and vibrant colors.

  • Gluten-Free Option: Simply swap linguine for gluten-free pasta while maintaining the creamy sauce you’ll love.

  • Vegetarian Delight: Replace chicken with sautéed mushrooms or extra-firm tofu for a hearty plant-based version.

  • Spice it Up: Add more red pepper flakes, or throw in diced jalapeños if you’re craving extra heat!

  • Creamy Alternatives: For a lighter twist, use half-and-half instead of heavy cream while still keeping that creamy texture.

  • Flavor Switch: Experiment with different herbs like basil or cilantro to change the flavor profile and add freshness.

  • Citrus Twist: Substitute lime juice instead of lemon for a zingy flavor that pairs wonderfully with the butter sauce.

  • Savory Seeds: Sprinkle some toasted sesame seeds on top before serving for an interesting texture and nutty taste.

These delicious variations will keep your Cowboy Butter Chicken Linguine exciting and ensure it fits your family’s preferences. If you’re looking for more comforting recipes, check out my Butter Baked Chicken or try the flavorful Chilli Chicken Takeout. Happy cooking!

Cowboy Butter Chicken Linguine Recipe FAQs

How do I select the right chicken for this recipe?
Absolutely! When choosing chicken for your Cowboy Butter Chicken Linguine, opt for boneless, skinless chicken breasts for lean protein. Look for pieces that are firm and pale pink, avoiding any that have a discolored appearance or an off smell. Fresh chicken is always best, but you can also use frozen chicken; just remember to thaw it properly before cooking.

How should I store leftovers of Cowboy Butter Chicken Linguine?
Very! Store your leftovers in an airtight container in the fridge for up to 3 days. This helps maintain the creaminess and flavor of the sauce. When reheating, add a splash of chicken broth or cream to ensure it doesn’t dry out and retains its delicious texture. It’s a fantastic way to enjoy your meal again!

Can I freeze Cowboy Butter Chicken Linguine?
Absolutely! You can freeze this dish for up to 2 months. To do so, allow it to cool completely, then transfer it to a freezer-safe container, leaving some space at the top for expansion. To reheat from frozen, thaw it in the refrigerator overnight, or for a quick option, microwave it in short intervals.

What should I do if the sauce is too thick?
Don’t worry! If your sauce ends up too thick, simply add a little reserved pasta water—start with a tablespoon or two. Stir it in gradually until you reach your desired consistency. This not only helps creaminess but also enhances the flavor of the sauce.

Are there any dietary considerations I should be aware of?
The more the merrier! This Cowboy Butter Chicken Linguine can easily accommodate various dietary needs. For those avoiding dairy, swap out the butter and cream for plant-based alternatives. If you have allergies, be cautious with Dijon mustard (which often contains vinegar) and ensure that your broth is free from allergens. You can even go vegetarian by replacing chicken with sautéed mushrooms or tofu!

How long does the garlic need to cook to avoid burning?
Great question! When sautéing garlic in your skillet, cook it just until it’s fragrant—which usually takes about 1 minute—keeping an eye to avoid browning. This step is crucial as burnt garlic can impart a bitter taste to your Cowboy Butter Chicken Linguine, diminishing the overall flavor of the dish. Enjoy making it!

Butter Chicken Linguine

Creamy Butter Chicken Linguine for a Cozy Night In

Indulge in this creamy Butter Chicken Linguine, a comforting dish that combines tender chicken and linguine in a rich sauce.
Prep Time 10 minutes
Cook Time 20 minutes
Total Time 30 minutes
Servings: 4 servings
Course: Pasta
Cuisine: American, Indian
Calories: 500

Ingredients
  

For the Chicken
  • 1 pound Boneless, skinless chicken breasts Cut into bite-sized pieces
  • to taste Salt
  • to taste Pepper
For the Pasta
  • 8 ounces Linguine For the base of the dish
  • 1 tablespoon Olive oil For cooking the chicken
For the Sauce
  • 1 tablespoon Butter For enriching the sauce
  • 4 cloves Garlic Minced
  • 1 teaspoon Dijon mustard For a tangy flavor
  • 0.5 teaspoon Paprika Sweet or smoked based on preference
  • 0.5 teaspoon Red pepper flakes Optional for a spicy kick
  • 0.5 Lemon Juice and zest of half a lemon
  • 0.5 cup Chicken broth or pasta water For sauce consistency
  • 0.5 cup Heavy cream For a creamy texture
  • 0.25 cup Grated Parmesan cheese Enhances umami
  • 0.25 cup Fresh parsley Chopped for garnish
For Serving
  • 1 Garlic bread For a delightful crunch
  • 1 Crisp garden salad A light side

Equipment

  • Large pot
  • Skillet
  • Measuring cups
  • Measuring spoons
  • spatula

Method
 

Step-by-Step Instructions
  1. Cook pasta according to package instructions (8-10 minutes), reserve ½ cup pasta water, then drain.
  2. In a skillet, heat olive oil, add chicken seasoned with salt and pepper, and sauté for 5-7 minutes until browned.
  3. In the same skillet, melt butter, then add garlic, paprika, and red pepper flakes, sauté for 1 minute.
  4. Stir in Dijon mustard, lemon juice and zest, and chicken broth/pasta water. Simmer for 2 minutes.
  5. Add heavy cream and half of the parsley to thicken the sauce slightly.
  6. Combine cooked chicken and linguine with sauce, adding Parmesan cheese until well-coated.
  7. Garnish with remaining parsley and serve with garlic bread and salad.

Nutrition

Serving: 1servingCalories: 500kcalCarbohydrates: 35gProtein: 30gFat: 25gSaturated Fat: 12gPolyunsaturated Fat: 2gMonounsaturated Fat: 6gCholesterol: 100mgSodium: 600mgPotassium: 700mgFiber: 2gSugar: 3gVitamin A: 500IUVitamin C: 10mgCalcium: 150mgIron: 2mg

Notes

Use fresh ingredients for best flavor and adjust red pepper flakes to your spice preference.

Tried this recipe?

Let us know how it was!

Creamy Pumpkin Chicken Curry: Your New Autumn Favorite

As the crisp air of autumn settles in, I find myself reaching for cozy and aromatic dishes that warm the soul. That’s when I whip up my Savory Pumpkin Chicken Curry, a delightful twist on traditional comfort food. This dish marries tender chunks of chicken with a creamy pumpkin sauce infused with warm spices. Perfect for those busy weeknights, it comes together in just 30-40 minutes, proving that healthy meals don’t have to be time-consuming. Plus, it’s both gluten and dairy-free, so everyone can enjoy this hearty meal. With the irresistible aroma filling your kitchen and the promise of comfort in every bite, I can’t wait for you to dive in. What’s your favorite way to enjoy pumpkin in savory dishes?

Why is Pumpkin Chicken Curry a Must-Try?

Comforting Warmth: This savory pumpkin chicken curry is the perfect dish to warm your soul during chilly evenings. Quick to Prepare: With just 30-40 minutes of active cooking time, it’s a healthy option for busy weeknights. Dairy-Free Delight: Enjoy a creamy texture without any dairy, making it suitable for various diets. Flavorful Fusion: The combination of pumpkin and spices creates a uniquely delicious profile that’s reminiscent of fall. Serve it over your favorite grain or check out ideas like Sizzling Chicken Pepper for more comforting meals!

Pumpkin Chicken Curry Ingredients

For the Chicken
Chicken Breasts – The main protein source; feel free to swap in boneless, skinless chicken thighs for a richer flavor.

For the Curry Base
Extra Virgin Olive Oil – Ideal for sautéing; substitute with avocado or grapeseed oil if preferred.
Yellow Onion – Adds a sweet depth; white onion works as a suitable alternative.
Diced Tomatoes – Bring acidity and moisture; using canned with juices is best.
Tomato Paste – Thickens and enhances flavor; just 2 tablespoons are needed.
Pumpkin Puree – The star of the dish, providing creamy texture and signature flavor; canned is most convenient.
Coconut Milk – Delivers a luscious creaminess; opt for canned for a richer result.
Lemon Juice – Brightens the dish beautifully; fresh juice is recommended for optimal flavor.
Brown Sugar – Balances the spicy notes; light or dark brown works well based on what you have.

For Seasoning
Curry Powder – The savory backbone of this pumpkin chicken curry; use mild for a gentle flavor.
Mild Chili Powder – Adds heat without overpowering; swap for medium or hot if you crave spiciness.
Salt & Pepper – Essential for seasoning; always adjust to taste.
Ground Cumin – Adds warmth and earthiness to the blend.
Ground Mustard Seed – Provides a slight zing; a little goes a long way.
Ground Coriander Seed – Adds a touch of citrusy flavor for balance.
Ground Cinnamon – Infuses wintery warmth to enhance the dish’s comfort level.

For Serving
Grain/Legume for Serving – Serve over rice, quinoa, lentils, or couscous; each option adds a unique flair.
Optional Toppings – Fresh cilantro, red pepper flakes, and a drizzle of coconut milk can elevate flavor and presentation.

This savory pumpkin chicken curry is ultimately a delightful blend of flavors, ready to transform your fall evenings into a cozy haven. Dive into this delicious concoction and savor the heartwarming experience it brings to your table!

Step‑by‑Step Instructions for Savory Pumpkin Chicken Curry

Step 1: Prepare the Chicken
Begin by cutting the chicken breasts into small cubes, ensuring even sizes for proper cooking. In a medium skillet, heat 2 tablespoons of extra virgin olive oil over medium heat. Once hot, add the chicken cubes seasoned with salt and pepper. Sauté in batches for about 5-7 minutes until golden brown and cooked through, then set aside on a plate to rest.

Step 2: Sauté the Onion
In the same skillet, add diced yellow onion, allowing the residual oil and flavor to enhance the dish. Sauté the onion over medium heat for about 2-3 minutes, stirring frequently, until it becomes translucent and fragrant. Scrape the bottom of the skillet with a wooden spoon to deglaze, capturing all those delicious bits stuck on the pan.

Step 3: Combine Sauces
Add 1 can of diced tomatoes (with their juices), 2 tablespoons of tomato paste, and 1 cup of pumpkin puree to the skillet with the sautéed onions. Pour in 1 can of coconut milk and 1 tablespoon of fresh lemon juice. Stir the mixture well, creating a creamy blend that forms the base of your savory pumpkin chicken curry.

Step 4: Season the Curry
Incorporate 1 tablespoon of brown sugar along with your spices: 1 tablespoon of curry powder, 1 teaspoon of mild chili powder, and a dash of ground cumin, mustard seed, coriander seed, and cinnamon. Mix thoroughly until all the flavors become vibrant and well combined, ensuring the beautiful aroma envelops your kitchen.

Step 5: Simmer the Curry
Return the browned chicken to the skillet, and gently stir it into the creamy sauce. Cover the skillet and reduce the heat to low, allowing the savory pumpkin chicken curry to simmer for 10-15 minutes. This step helps the chicken absorb the rich flavors, while the sauce thickens to the perfect consistency.

Step 6: Serve and Garnish
Once the chicken is tender and the sauce has thickened, scoop the savory pumpkin chicken curry over your choice of grain, like rice or quinoa. For an extra touch, garnish with fresh cilantro and a sprinkle of red pepper flakes to introduce a pop of color and additional flavor, perfect for enjoying this comforting dish.

Expert Tips for Pumpkin Chicken Curry

  • Sauté in Batches: Avoid overcrowding the skillet when cooking chicken. This prevents steaming and allows the meat to brown properly, enhancing flavor.

  • Balance Consistency: If your pumpkin chicken curry becomes too thick after sitting, simply thin it out with a splash of water or chicken broth while reheating.

  • Season to Taste: Always taste your curry before serving. Adjust the seasoning by adding more salt, sugar, or spices to match your personal preferences and enhance the flavor.

  • Use Fresh Ingredients: Fresh lemon juice significantly improves the dish’s brightness compared to bottled. Make sure your spices are fresh for optimal aroma and taste.

  • Versatile Serving Options: This pumpkin chicken curry pairs beautifully with various grains or legumes. Experiment with rice, quinoa, or lentils for a personalized touch that elevates your dish.

What to Serve with Savory Pumpkin Chicken Curry

This delightful dish isn’t just a meal; it’s an invitation to explore a feast of flavors that will complete your dining experience.

  • Fragrant Coconut Rice: The creaminess of coconut rice enhances the curry’s rich sauce while adding a fragrant touch to every bite.

  • Fresh Garden Salad: Crisp greens and a zesty vinaigrette offer a refreshing contrast, balancing the warmth of the curry beautifully.

  • Garlic Naan: Soak up the savory pumpkin chicken curry with warm, pillowy naan, creating the ultimate comfort food experience.

  • Roasted Vegetables: Adding roasted seasonal vegetables not only boosts nutrition but also brings earthy flavors that complement the dish perfectly.

  • Mango Chutney: A dollop of sweet and spicy mango chutney adds an exciting burst of flavor, elevating the entire meal.

  • Chilled Cucumber Raita: This cooling yogurt-based dip provides a refreshing contrast to the spiced curry, enhancing your palate with each bite.

  • Crispy Papadam: The crunchy texture of papadam brings a delightful contrast to the creamy sauce, making it perfect for dipping or snacking.

  • Spiced Apple Cider: Pair your meal with warm spiced apple cider, as its fruity notes harmonize wonderfully with the spices in the curry.

  • Pumpkin Spice Dessert: Keep the pumpkin theme alive with a light pumpkin spiced dessert to finish your meal on a delightful note.

Dive into this enticing combination, and let your taste buds revel in the harmonious flavors of your meal!

How to Store and Freeze Pumpkin Chicken Curry

Fridge: Store in an airtight container for up to 3-4 days. Allow the pumpkin chicken curry to cool down before refrigerating to maintain freshness.

Freezer: For longer storage, freeze in portioned airtight containers for up to 4-6 months. Make sure to label each container with the date for easy tracking.

Reheating: Thaw in the refrigerator overnight. Reheat gently on the stovetop over medium heat, adding a splash of water or broth to achieve your desired consistency.

Leftover Tips: Consider using frozen pumpkin chicken curry in recipes like soups or casseroles to create a quick and delicious meal on busy nights!

Pumpkin Chicken Curry Variations

Feel free to take this comforting recipe and make it your own with these delightful twists!

  • Chickpea Swap: Replace chicken with canned chickpeas for a hearty vegetarian version, perfect for plant-based diners.
    This swap brings a delicious texture and protein boost, offering a warm dish for everyone.

  • Vegetable Delight: Add fresh spinach or broccoli to the curry for an extra burst of nutrients.
    These veggies bring vibrant color and a pleasant crunch, enhancing the overall flavor profile.

  • Spice It Up: For a bolder flavor, mix in Garam Masala or add fresh ginger to your spice blend.
    Both options elevate your dish and introduce layers of warmth that will entice your taste buds.

  • Creamy Coconut Variation: Swap half of the coconut milk with cashew cream for an extra creamy texture.
    This twist accentuates the richness, making every bite feel indulgent while still keeping it dairy-free.

  • Heat Level Adjustment: If you crave spice, substitute mild chili powder with hot chili powder or add sliced jalapeños.
    This brings a delightful kick that contrasts beautifully with the creamy pumpkin sauce.

  • Grain Options: Serve over farro or quinoa instead of rice for a unique twist and added nutty flavor.
    Exploring different grains can transform your curry experience while keeping it wholesome.

  • Herb Infusion: Experiment with different fresh herbs like basil or mint for garnishing instead of cilantro.
    Fresh herbs can completely change the flavor experience, adding brightness to the warm dish.

  • Savory Pairings: For a twist on serving, accompany with naan bread or a refreshing cucumber salad for texture contrast.
    This adds a delightful crunch and makes it an even more satisfying meal, perfect for family gatherings.

There’s no wrong way to enjoy your pumpkin chicken curry! For more comforting recipes, such as the vibrant Tuscan Chicken Soup or a delightful BBQ Chicken Grilled Cheese, don’t hesitate to explore and make dinnertime exciting!

Make Ahead Options

These Savory Pumpkin Chicken Curry preparations are perfect for busy home cooks looking to streamline their meal planning! You can chop the chicken and vegetables and store them in an airtight container for up to 24 hours in the refrigerator. Additionally, the curry sauce can be made in advance and kept for up to 3 days, making it easy to combine it with the chicken right before serving. When you’re ready to enjoy this delightful dish, simply reheat the sauce, add the chicken, and allow it to simmer for about 10-15 minutes, ensuring it’s just as delicious and comforting as fresh. By prepping ahead, you can save valuable time while still serving a warm and flavorful meal!

Savory Pumpkin Chicken Curry Recipe FAQs

What type of pumpkin puree should I use?
Absolutely! Canned pumpkin puree is the easiest option and gives a consistent texture and flavor. It’s best to avoid pumpkin pie filling, as it contains added sugars and spices that might alter the taste of your Savory Pumpkin Chicken Curry.

How long can I store leftovers in the fridge?
You can store your pumpkin chicken curry in an airtight container for up to 3-4 days. Make sure it’s cooled down a bit before sealing to preserve freshness and flavor.

Can I freeze pumpkin chicken curry?
Yes! To freeze your curry, allow it to cool to room temperature, then portion it into airtight containers. It keeps well for up to 4-6 months. Don’t forget to label each container with the date so you can enjoy it later without any guesswork!

What should I do if the curry is too thick after cooking?
If your curry thickens too much, no need to worry! Simply add a splash of water or chicken broth while reheating. Stir well until you reach the desired consistency. This little trick will bring back its creamy texture.

Is this dish suitable for people with dietary restrictions?
Very! This Savory Pumpkin Chicken Curry is both gluten-free and dairy-free, making it suitable for a variety of diets. However, if you’re cooking for someone with allergies, always check the labels on your canned goods and spices to ensure there are no hidden allergens.

Can I make this dish vegetarian or vegan?
Absolutely! For a vegetarian option, you can substitute chicken with chickpeas or tofu. If you want it to be vegan, just make sure to use vegetable broth and keep all other ingredients dairy-free. Adding extra veggies like spinach or bell peppers not only enhances the flavor but also boosts the nutrients.

Enjoy your cooking journey with this delightful recipe!

Pumpkin Chicken Curry

Creamy Pumpkin Chicken Curry: Your New Autumn Favorite

Savor the comforting flavors of Pumpkin Chicken Curry, a creamy, dairy-free dish perfect for autumn.
Prep Time 10 minutes
Cook Time 30 minutes
Total Time 40 minutes
Servings: 4 servings
Course: Dinner
Cuisine: American
Calories: 400

Ingredients
  

For the Chicken
  • 2 pieces Chicken Breasts Boneless, skinless
For the Curry Base
  • 2 tablespoons Extra Virgin Olive Oil Can substitute with avocado or grapeseed oil
  • 1 medium Yellow Onion Can substitute with white onion
  • 1 can Diced Tomatoes Use canned with juices
  • 2 tablespoons Tomato Paste
  • 1 cup Pumpkin Puree Canned is most convenient
  • 1 can Coconut Milk Opt for canned for a richer result
  • 1 tablespoon Lemon Juice Fresh juice is recommended
  • 1 tablespoon Brown Sugar Light or dark brown
For Seasoning
  • 1 tablespoon Curry Powder Use mild for a gentle flavor
  • 1 teaspoon Mild Chili Powder Can substitute for medium or hot
  • Salt & Pepper Adjust to taste
  • 1 teaspoon Ground Cumin
  • 1 teaspoon Ground Mustard Seed A little goes a long way
  • 1 teaspoon Ground Coriander Seed
  • 1 teaspoon Ground Cinnamon
For Serving
  • 2 cups Grain/Legume for Serving Like rice, quinoa, lentils, or couscous
  • Optional Toppings Fresh cilantro, red pepper flakes, and coconut milk

Equipment

  • Skillet

Method
 

Step-by-Step Instructions for Savory Pumpkin Chicken Curry
  1. Begin by cutting the chicken breasts into small cubes, ensuring even sizes for proper cooking. In a medium skillet, heat 2 tablespoons of extra virgin olive oil over medium heat. Once hot, add the chicken cubes seasoned with salt and pepper. Sauté in batches for about 5-7 minutes until golden brown and cooked through, then set aside on a plate to rest.
  2. In the same skillet, add diced yellow onion, allowing the residual oil and flavor to enhance the dish. Sauté the onion over medium heat for about 2-3 minutes, stirring frequently, until it becomes translucent and fragrant. Scrape the bottom of the skillet with a wooden spoon to deglaze, capturing all those delicious bits stuck on the pan.
  3. Add 1 can of diced tomatoes (with their juices), 2 tablespoons of tomato paste, and 1 cup of pumpkin puree to the skillet with the sautéed onions. Pour in 1 can of coconut milk and 1 tablespoon of fresh lemon juice. Stir the mixture well, creating a creamy blend that forms the base of your savory pumpkin chicken curry.
  4. Incorporate 1 tablespoon of brown sugar along with your spices: 1 tablespoon of curry powder, 1 teaspoon of mild chili powder, and a dash of ground cumin, mustard seed, coriander seed, and cinnamon. Mix thoroughly until all the flavors become vibrant and well combined, ensuring the beautiful aroma envelops your kitchen.
  5. Return the browned chicken to the skillet, and gently stir it into the creamy sauce. Cover the skillet and reduce the heat to low, allowing the savory pumpkin chicken curry to simmer for 10-15 minutes. This step helps the chicken absorb the rich flavors, while the sauce thickens to the perfect consistency.
  6. Once the chicken is tender and the sauce has thickened, scoop the savory pumpkin chicken curry over your choice of grain, like rice or quinoa. For an extra touch, garnish with fresh cilantro and a sprinkle of red pepper flakes to introduce a pop of color and additional flavor, perfect for enjoying this comforting dish.

Nutrition

Serving: 1bowlCalories: 400kcalCarbohydrates: 30gProtein: 25gFat: 20gSaturated Fat: 8gPolyunsaturated Fat: 5gMonounsaturated Fat: 7gCholesterol: 80mgSodium: 600mgPotassium: 800mgFiber: 6gSugar: 5gVitamin A: 3000IUVitamin C: 30mgCalcium: 50mgIron: 2mg

Notes

For optimal flavor, always taste your curry before serving and adjust the seasoning by adding more salt, sugar, or spices as preferred.

Tried this recipe?

Let us know how it was!

Ground Beef Taco Soup: A Cozy Bowl of Flavorful Comfort

In the midst of a bustling week, discovering that your pantry is stocked but uninspired can feel like a miniature crisis. However, I’ve got just the remedy: my Ground Beef Taco Soup. This hearty dish transforms simple ingredients into a comforting, flavorful masterpiece that warms both the heart and the kitchen. With just 20 minutes of prep time and an hour of simmering, it’s an easy dinner solution that easily adapts to suit your tastes. Plus, it’s perfect for cozy gatherings or a satisfying weeknight bite when you’re tired of takeout. Can you smell the spices already? Let’s dive into this deliciously customizable bowl of joy!

Why is this Taco Soup a Must-try?

Heartwarming Comfort: With its rich and savory flavors, this Ground Beef Taco Soup brings a delightful warmth to your dinner table, ideal for chilly evenings.

Quick & Easy: Prep only takes 20 minutes, making this recipe a perfect solution for busy weeknights when you crave something homemade yet satisfying.

Customizable Goodness: Whether you want to substitute ground beef with turkey or add your favorite beans, this soup encourages personal tweaks to suit your tastes.

Crowd Favorite: Serve it at gatherings, and watch as it quickly becomes the star of the show. Pair with some crunchy tortilla chips or a fresh green salad for a complete meal!

Healthy and Filling: Packed with protein and fiber, this soup satisfies your hunger without the guilt—making it a great alternative to fast food. Plus, don’t forget to check out our Mexican Taco Soup for even more taco-inspired goodness!

Ground Beef Taco Soup Ingredients

• Here’s everything you need to whip up a cozy batch.

For the Soup Base

  • Ground Beef – The main protein source; swap for turkey or chicken for a lighter alternative.
  • Bone Broth Powder – Enhances the richness; you can use chicken or vegetable broth for a lighter flavor.
  • Diced Tomatoes with Green Chiles – Adds acidity and mild heat; fresh tomatoes can work if you chop and peel them.
  • Garlic (minced) – Delivers aromatic depth; using fresh garlic makes the soup more flavorful.
  • Spices (Taco Seasoning) – This blend brings that classic taco taste; feel free to use your homemade mix for a personal touch.
  • Black Beans – Adds fiber and texture; you can substitute them with pinto beans or skip for fewer carbs.
  • Corn (optional) – Sweetens the soup and adds color; omit for a lower-carb option or to avoid grains.

For Serving

  • Tortilla Chips – Perfect for a crunchy topping or side for dipping, these bring a little crunch to your delicious Ground Beef Taco Soup!

Step‑by‑Step Instructions for Ground Beef Taco Soup

Step 1: Brown the Beef
In a large pot, heat a drizzle of oil over medium heat and add the ground beef. Cook for about 6–8 minutes, stirring occasionally until the beef is nicely browned and fully cooked through. Don’t forget to break it apart with a spatula for an even texture. Once browned, drain any excess fat to keep the soup light and flavorful.

Step 2: Add Flavors
Add minced garlic to the pot and sauté for about 1 minute, stirring until fragrant. The aroma will fill your kitchen! This is an essential step for enhancing the flavor of your Ground Beef Taco Soup. Be careful not to burn the garlic; it should be golden and aromatic before moving on to the next step.

Step 3: Combine Ingredients
Pour in the bone broth, followed by the diced tomatoes with green chiles. Stir in your taco seasoning and mix well. Then, add the black beans and corn if you’re using them. Give everything a good stir to ensure that the ingredients meld together beautifully, creating a rich base for your soup.

Step 4: Simmer
Increase the heat and bring the mixture to a boil, then reduce it to low and let the soup simmer uncovered for about 30–40 minutes. This simmering time is crucial for allowing the flavors of your Ground Beef Taco Soup to blend. You’ll notice the soup thickening and bubbling gently, which means it’s reaching its delicious peak.

Step 5: Serve
Once the soup has simmered to perfection, ladle it into bowls, and don’t forget the fun toppings! Garnish with sour cream, shredded cheese, and fresh cilantro for a burst of color and flavor. Serve alongside crunchy tortilla chips for dipping, enhancing the comforting experience of your hearty Ground Beef Taco Soup.

Make Ahead Options

These Ground Beef Taco Soup preparations are a lifesaver for busy weeknights! You can brown the ground beef and sauté the garlic up to 24 hours in advance, then refrigerate in an airtight container. Additionally, you can chop your vegetables and measure out spices ahead of time, saving precious minutes when you’re ready to cook. When it’s time to serve, combine your prepped ingredients with the broth, diced tomatoes, beans, and corn (if using), then simmer as directed. This approach ensures your soup retains its rich flavors while providing a quick, delicious meal that feels homemade without the hassle!

Expert Tips for Ground Beef Taco Soup

  • Brown the Beef Well: Ensure you brown the ground beef thoroughly; undercooking can lead to a less flavorful soup. This step is essential for a robust taste.

  • Taste and Adjust: Always taste the soup before serving; you can enhance the flavor by adding more spices or even a splash of lime juice for brightness.

  • Mind the Simmer: Don’t rush the simmering process; letting the soup cook for 30–40 minutes helps the flavors meld beautifully, giving you a hearty Ground Beef Taco Soup.

  • Save Time on Prep: Chop your vegetables and gather spices ahead of time, making the cooking process even quicker on busy weeknights.

  • Mixing Beans: If using different types of beans, consider rinsing them well to remove excess sodium and enhance flavor, keeping your soup fresh and tasty.

Ground Beef Taco Soup Variations

Get ready to make your Ground Beef Taco Soup as unique as your taste buds!

  • Lean Twist: Swap ground beef for ground turkey or shredded chicken to cut down on fat without sacrificing flavor. Both options maintain that hearty essence, making them fantastic substitutions.

  • Vegetarian Delight: Replace the beef with lentils or a mix of mushrooms for a rich, plant-based option that’s just as filling and satisfying.

  • Spice It Up: Add jalapeños or a dash of your favorite hot sauce to bring some heat to the dish. That spicy kick will elevate the comforting flavors in delightful ways.

  • Herb Infusion: Incorporate fresh herbs like cilantro or oregano towards the end of cooking for a burst of freshness and vibrant aroma. It’ll brighten the soup and enhance the overall flavor experience.

  • Veggie Boost: Mix in diced bell peppers, zucchini, or sweet potatoes for an added nutritional punch and an enjoyable textural contrast. These veggies blend beautifully with the soup’s thick broth.

  • Dairy-Free: Use coconut cream instead of sour cream for a creamy topping that’s rich and dairy-free! Plus, it adds a subtle sweetness that balances the spices nicely.

  • Texture Magic: For a twist, swap in quinoa or farro instead of beans for an interesting texture and added nutrition. These grains will give your soup more chew and heartiness.

  • Citrus Zing: Squeeze some lime juice right before serving to add a refreshing tartness to the warm soup. This bright flavor can elevate your meal to new heights!

Enjoy experimenting with these variations, and don’t forget to check out our Mongolian Ground Beef Noodle Recipe for another family-favorite!

How to Store and Freeze Ground Beef Taco Soup

Fridge: Store leftovers in an airtight container for up to 4 days. Let the soup cool before refrigerating to maintain its flavor and texture.

Freezer: Pour the cooled soup into freezer-safe bags or containers. It will keep well for up to 3 months. Be sure to leave some space for expansion.

Reheating: Thaw frozen soup in the fridge overnight. Reheat gently on the stove or in the microwave, stirring occasionally to ensure even heating throughout.

Separation Tip: If the soup thickens too much after freezing, add a splash of broth or water while reheating to restore the desired consistency.

What to Serve with Ground Beef Taco Soup

Cozying up with a warm bowl of taco soup opens the door to endless delicious pairing options that elevate your meal experience.

  • Crusty Bread: A hearty, warm loaf is perfect for dipping, soaking up every last bite of the savory soup.
  • Fresh Green Salad: Crisp greens tossed in a light vinaigrette provide a refreshing contrast to the rich flavors of the soup.
  • Savory Cornbread: The mild sweetness pairs beautifully with the spiciness of the soup, and its tender texture complements each spoonful wonderfully.
  • Guacamole: Creamy, cool avocado dip is the ultimate addition, adding both flavor and richness that enhances the taco-inspired meal.
  • Sour Cream: A dollop on top cools the spice while adding creaminess, creating a delightful balance with each bite.
  • Cheddar Cheese: Sprinkle generous amounts over your taco soup; melting cheese adds warmth and a savory punch, taking comfort to the next level.
  • Tortilla Chips: For crunch, serve a side of crispy chips. They’re perfect for scooping and add a satisfying texture contrast.
  • Pico de Gallo: Fresh, zesty salad brighten up the soup, offering a pop of flavor that harmonizes with the rich broth.

Ground Beef Taco Soup Recipe FAQs

How do I choose the best ground beef?
When selecting ground beef, look for meat that is bright red with minimal dark spots, which indicates freshness. Aim for an 80/20 blend (80% lean meat and 20% fat) for a balance of flavor and juiciness. If you prefer a leaner option, ground turkey or chicken can be wonderful substitutes!

How do I store leftover Ground Beef Taco Soup?
Store any leftover soup in an airtight container in the refrigerator for up to 4 days. Make sure the soup has cooled to room temperature before sealing it to help maintain its flavor. Label the container with the date so you can enjoy your soup at its best!

Can I freeze Ground Beef Taco Soup?
Absolutely! To freeze your soup, let it cool completely before transferring it into freezer-safe bags or airtight containers. It can be stored in the freezer for up to 3 months. When reheating from frozen, thaw it overnight in the fridge and then reheat gently on the stove, stirring occasionally for even heating.

What should I do if my soup is too thick?
If you find your soup has thickened too much, no worries! Simply add a splash of broth or water while reheating, stirring well until you reach your desired consistency. Always taste and adjust seasoning as needed after adding additional liquid.

Is this recipe suitable for people with dietary restrictions?
Yes! This Ground Beef Taco Soup can easily be adjusted for various dietary preferences. To make it gluten-free, ensure your taco seasoning is certified gluten-free. Additionally, for vegetarian or vegan diets, you can substitute the ground beef with lentils or additional beans, and use vegetable broth instead of bone broth.

Can I use fresh tomatoes instead of canned diced tomatoes?
Of course! If you’d prefer to use fresh tomatoes, I recommend using about 2-3 large ripe tomatoes. Be sure to remove the skins by blanching them in boiling water for a minute, then chopping them finely before adding to the soup. This will enhance the freshness and brightness of your Ground Beef Taco Soup!

Ground Beef Taco Soup

Ground Beef Taco Soup: A Cozy Bowl of Flavorful Comfort

Enjoy a comforting and hearty Ground Beef Taco Soup that warms both the heart and the kitchen.
Prep Time 20 minutes
Cook Time 1 hour
Total Time 1 hour 20 minutes
Servings: 4 bowls
Course: Dinner
Cuisine: Mexican
Calories: 350

Ingredients
  

For the Soup Base
  • 1 lb Ground Beef Can substitute with turkey or chicken
  • 2 tbsp Bone Broth Powder Or use chicken/vegetable broth
  • 1 can Diced Tomatoes with Green Chiles Fresh tomatoes can be used if chopped and peeled
  • 3 cloves Garlic (minced) Fresh garlic preferred for flavor
  • 2 tbsp Spices (Taco Seasoning) Homemade mix can be used
  • 1 can Black Beans Can substitute with pinto beans or omit
  • 1 cup Corn (optional) Omit for lower-carb option
For Serving
  • 1 bag Tortilla Chips For topping or dipping

Equipment

  • Large pot

Method
 

Step-by-Step Instructions
  1. In a large pot, heat a drizzle of oil over medium heat and add the ground beef. Cook for about 6–8 minutes, stirring occasionally until browned. Drain excess fat.
  2. Add minced garlic to the pot and sauté for about 1 minute until fragrant, then proceed to the next step.
  3. Pour in the bone broth and diced tomatoes with green chiles. Stir in taco seasoning, black beans, and corn. Mix well.
  4. Increase heat to bring to a boil, then reduce to low and let simmer uncovered for about 30–40 minutes.
  5. Ladle soup into bowls and garnish with toppings like sour cream, shredded cheese, and fresh cilantro. Serve with tortilla chips.

Nutrition

Serving: 1bowlCalories: 350kcalCarbohydrates: 30gProtein: 25gFat: 15gSaturated Fat: 6gPolyunsaturated Fat: 1gMonounsaturated Fat: 7gCholesterol: 70mgSodium: 800mgPotassium: 600mgFiber: 10gSugar: 5gVitamin A: 500IUVitamin C: 10mgCalcium: 50mgIron: 3mg

Notes

Taste and adjust seasoning as needed. Prepping ingredients ahead can save time during cooking.

Tried this recipe?

Let us know how it was!

Stay Connected

Get recipes via email: