Get my cookbooks

Creamy Chicken Corn Chowder: 5 Simple Cooking Steps

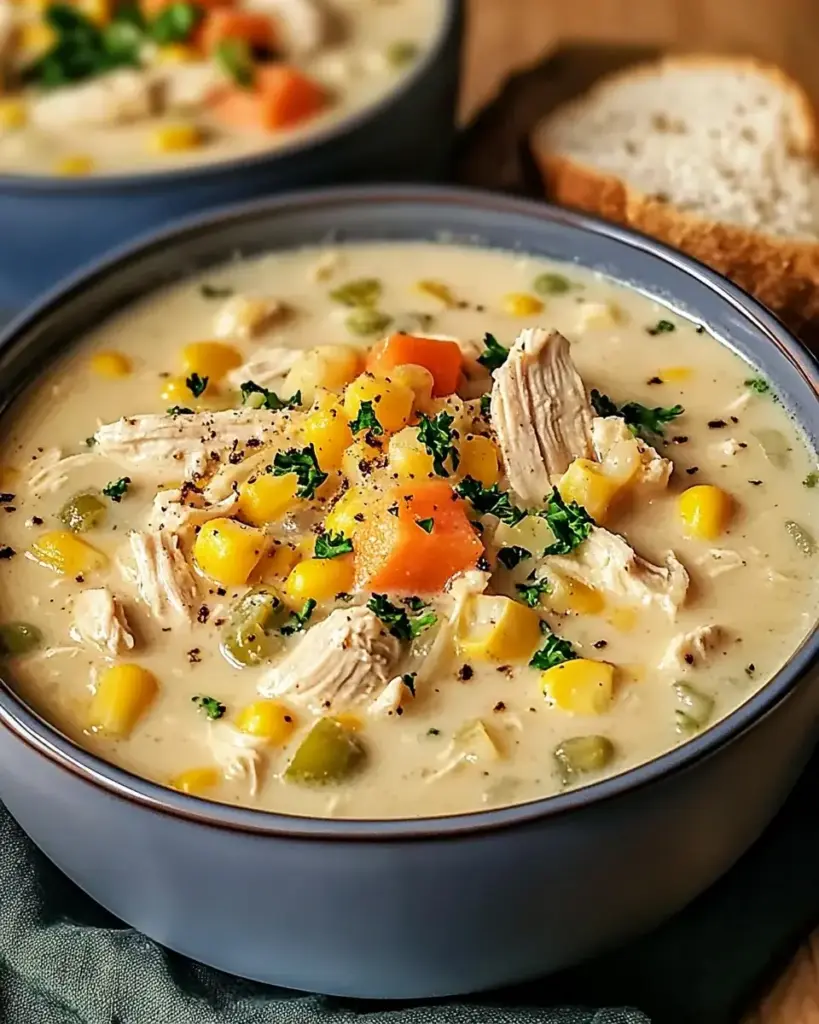
Introduction to Creamy Chicken Corn Chowder

There’s something magical about a warm bowl of soup on a chilly evening. Creamy Chicken Corn Chowder is that comforting hug in a bowl, perfect for those busy days when you need a quick solution. I remember my mom making this dish when I was a kid, filling the house with its rich aroma. It’s a recipe that brings back memories and warms the soul. Whether you’re looking to impress your loved ones or simply want to treat yourself, this chowder is a delightful choice. Let’s dive into this easy, satisfying recipe that’s sure to become a family favorite!

Why You’ll Love This Creamy Chicken Corn Chowder

This Creamy Chicken Corn Chowder is a game-changer for busy weeknights. It’s not just easy to make; it’s also incredibly satisfying. In about 40 minutes, you can whip up a hearty meal that warms the heart and fills the belly. The combination of tender chicken, sweet corn, and creamy goodness creates a flavor explosion that will have everyone asking for seconds. Trust me, this chowder is comfort food at its finest!

Ingredients for Creamy Chicken Corn Chowder

Gathering the right ingredients is the first step to creating this delicious Creamy Chicken Corn Chowder. Here’s what you’ll need:

  • Olive oil: This is your base for sautéing, adding a rich flavor to the veggies.
  • Onion: Diced onion brings sweetness and depth to the chowder.
  • Garlic: Minced garlic adds a fragrant kick that elevates the dish.
  • Red bell pepper: This adds a pop of color and a hint of sweetness.
  • Carrots: Diced carrots contribute a subtle sweetness and texture.
  • Celery: Chopped celery gives a nice crunch and fresh flavor.
  • Chicken broth: The heart of the chowder, providing a savory base.
  • Cooked chicken: Shredded chicken adds protein and heartiness.
  • Frozen corn: Sweet corn kernels bring a burst of flavor and color.
  • Diced potatoes: These add creaminess and help thicken the chowder.
  • Dried thyme: A classic herb that enhances the overall flavor.
  • Paprika: This adds a subtle smokiness and warmth.
  • Salt and pepper: Essential for seasoning to taste.
  • Heavy cream: This is what makes the chowder rich and creamy.
  • Fresh parsley: Chopped parsley is perfect for garnishing and adds freshness.

For those looking to spice things up, consider adding a diced jalapeño or a pinch of cayenne pepper. If you prefer a dairy-free option, coconut milk works beautifully as a substitute for heavy cream. You can find the exact quantities for each ingredient at the bottom of the article, ready for printing!

How to Make Creamy Chicken Corn Chowder

Now that you have all your ingredients ready, let’s get cooking! Making this Creamy Chicken Corn Chowder is straightforward and fun. Follow these simple steps, and you’ll have a delicious meal in no time.

Step 1: Sauté the Vegetables

Start by heating the olive oil in a large pot or Dutch oven over medium heat. Once the oil is shimmering, toss in the diced onion. Sauté it for about 3-4 minutes until it becomes soft and translucent. This step is crucial; it builds the foundation of flavor for your chowder.

Step 2: Add More Veggies

Next, stir in the minced garlic, red bell pepper, diced carrots, and chopped celery. Cook these vibrant veggies for an additional 5 minutes. You want them tender but still with a bit of crunch. The colors alone will brighten your kitchen!

Step 3: Combine Ingredients

Now it’s time to bring everything together. Pour in the chicken broth, and add the shredded chicken, frozen corn, diced potatoes, dried thyme, paprika, salt, and pepper. Stir well to combine. Bring the mixture to a boil, then reduce the heat and let it simmer for 20-25 minutes. This allows the potatoes to soften and the flavors to meld beautifully.

Step 4: Stir in Cream

After the simmering time, it’s time for the magic touch! Stir in the heavy cream and let the chowder simmer for another 5 minutes. This is where it transforms into that rich, creamy goodness we all love. Don’t forget to taste and adjust the seasoning if needed!

Step 5: Serve and Garnish

Finally, ladle the chowder into bowls and garnish with fresh parsley. Serve it hot, and watch as everyone digs in with smiles on their faces. This Creamy Chicken Corn Chowder is not just a meal; it’s a warm embrace on a chilly day!

Tips for Success

  • Prep your ingredients ahead of time to streamline the cooking process.
  • Use rotisserie chicken for a quicker option without sacrificing flavor.
  • Don’t skip the simmering time; it enhances the chowder’s depth.
  • Adjust the thickness by adding more or less cream based on your preference.
  • For extra flavor, try adding a splash of hot sauce before serving.

Equipment Needed

  • Large pot or Dutch oven: Essential for simmering the chowder. A deep skillet can work too.
  • Cutting board and knife: For chopping veggies. A good chef’s knife makes all the difference.
  • Wooden spoon: Perfect for stirring and combining ingredients.
  • Measuring cups and spoons: Handy for precise ingredient amounts.

Variations of Creamy Chicken Corn Chowder

  • Spicy Chicken Corn Chowder: Add diced jalapeños or a pinch of cayenne pepper for a kick that’ll warm you up!
  • Southwestern Twist: Incorporate black beans, corn, and a sprinkle of cumin for a zesty flavor profile.
  • Vegetarian Version: Replace chicken with chickpeas and use vegetable broth for a hearty, plant-based option.
  • Herb-Infused Chowder: Experiment with fresh herbs like basil or cilantro to elevate the flavor.
  • Cheesy Corn Chowder: Stir in shredded cheddar cheese for an extra creamy and cheesy delight.

Serving Suggestions for Creamy Chicken Corn Chowder

  • Crusty Bread: Serve with a warm, crusty baguette or sourdough for dipping.
  • Salad: Pair with a fresh garden salad for a light, refreshing contrast.
  • Wine: A chilled white wine, like Chardonnay, complements the chowder beautifully.
  • Presentation: Serve in rustic bowls and sprinkle extra parsley for a pop of color.

FAQs about Creamy Chicken Corn Chowder

Can I make Creamy Chicken Corn Chowder ahead of time?

Absolutely! This chowder actually tastes even better the next day as the flavors meld together. Just store it in an airtight container in the fridge. When you’re ready to enjoy it, reheat gently on the stovetop.

Can I freeze Creamy Chicken Corn Chowder?

Yes, you can freeze it! Just make sure to leave out the heavy cream before freezing. Add it in when you reheat the chowder for that creamy texture. It can last up to three months in the freezer.

What can I substitute for chicken in this chowder?

If you’re looking for a meatless option, chickpeas or white beans work great! They add protein and texture while keeping the chowder hearty and satisfying.

How can I make this chowder spicier?

For a spicy kick, add diced jalapeños or a dash of cayenne pepper during cooking. You can also serve it with hot sauce on the side for those who like it extra fiery!

Is this chowder gluten-free?

Yes, this Creamy Chicken Corn Chowder is naturally gluten-free! Just ensure that your chicken broth is labeled gluten-free, and you’re all set for a delicious meal.

Final Thoughts

Cooking this Creamy Chicken Corn Chowder is more than just preparing a meal; it’s about creating memories and sharing warmth with those you love. Each spoonful is a reminder of cozy evenings spent with family, laughter echoing through the kitchen. The rich flavors and creamy texture make it a dish that comforts the soul, perfect for any occasion. Whether you’re enjoying it on a chilly night or serving it at a gathering, this chowder is sure to bring smiles and satisfaction. So grab your ingredients, and let’s make some delicious memories together!

jhessica

Creamy Chicken Corn Chowder: 5 Simple Cooking Steps

A rich and creamy chicken corn chowder that is easy to make and perfect for a comforting meal.
Prep Time 10 minutes
Cook Time 30 minutes
Total Time 40 minutes
Servings: 6 servings
Course: Soup
Cuisine: American
Calories: 320

Ingredients
  

  • 2 tablespoons olive oil
  • 1 medium onion diced
  • 2 cloves garlic minced
  • 1 medium red bell pepper diced
  • 2 medium carrots diced
  • 2 stalks celery diced
  • 4 cups chicken broth
  • 2 cups cooked chicken shredded
  • 2 cups frozen corn
  • 1 cup diced potatoes about 1 medium potato
  • 1 teaspoon dried thyme
  • 1 teaspoon paprika
  • Salt and pepper to taste
  • 1 cup heavy cream
  • 2 tablespoons fresh parsley chopped (for garnish)

Method
 

  1. In a large pot or Dutch oven, heat the olive oil over medium heat. Add the diced onion and sauté for about 3-4 minutes until softened.
  2. Stir in the minced garlic, red bell pepper, carrots, and celery. Cook for an additional 5 minutes until the vegetables are tender.
  3. Pour in the chicken broth and add the shredded chicken, frozen corn, diced potatoes, thyme, paprika, salt, and pepper. Bring to a boil, then reduce heat and let simmer for 20-25 minutes until the potatoes are tender.
  4. Stir in the heavy cream and let the chowder simmer for another 5 minutes. Adjust seasoning if necessary.
  5. Serve hot, garnished with fresh parsley.

Nutrition

Serving: 1cupCalories: 320kcalCarbohydrates: 22gProtein: 24gFat: 18gSaturated Fat: 10gPolyunsaturated Fat: 8gCholesterol: 70mgSodium: 800mgFiber: 3gSugar: 5g

Notes

  • For a spicier kick, add a diced jalapeño or a pinch of cayenne pepper.
  • You can substitute the heavy cream with coconut milk for a dairy-free version.

Tried this recipe?

Let us know how it was!

Bailey’s Irish Cream Cake: A Decadent Dessert Recipe!

Introduction to Bailey’s Irish Cream Cake

There’s something magical about a cake that brings people together, and this Bailey’s Irish Cream Cake does just that. I remember the first time I baked it; the aroma filled my kitchen, drawing my family in like moths to a flame. This cake is not just a dessert; it’s a celebration in every slice. Whether you’re hosting a gathering or simply treating yourself after a long day, this rich and decadent cake is the perfect solution. With its delightful flavor and creamy frosting, it’s bound to impress your loved ones and leave them asking for seconds!

Why You’ll Love This Bailey’s Irish Cream Cake

This Bailey’s Irish Cream Cake is a dream come true for any home cook. It’s incredibly easy to whip up, making it perfect for those busy weeknights or last-minute celebrations. The rich, velvety flavor of Bailey’s elevates this cake to a whole new level, ensuring every bite is a delight. Plus, the creamy frosting adds a touch of indulgence that will have your friends and family raving about it long after the last slice is gone!

Ingredients for Bailey’s Irish Cream Cake

Gathering the right ingredients is the first step to creating this delightful Bailey’s Irish Cream Cake. Here’s what you’ll need:

  • All-purpose flour: The backbone of your cake, providing structure and texture.
  • Granulated sugar: Sweetens the cake and helps create a moist crumb.
  • Unsweetened cocoa powder: Adds a rich chocolate flavor that pairs beautifully with Bailey’s.
  • Baking powder: A leavening agent that helps the cake rise to perfection.
  • Baking soda: Works alongside baking powder for a light and fluffy texture.
  • Salt: Enhances the flavors and balances the sweetness.
  • Buttermilk: Adds moisture and a slight tang, making the cake tender.
  • Vegetable oil: Keeps the cake moist and adds richness.
  • Large eggs: Bind the ingredients together and provide structure.
  • Vanilla extract: A classic flavor enhancer that complements the Bailey’s.
  • Bailey’s Irish Cream: The star of the show, infusing the cake with its signature creamy flavor.
  • Hot water: Helps to dissolve the cocoa and create a smooth batter.
  • For the frosting:
  • Unsalted butter: Provides a creamy base for the frosting.
  • Powdered sugar: Sweetens and thickens the frosting for a perfect spread.
  • Bailey’s Irish Cream: Adds that delicious flavor to the frosting as well.
  • Vanilla extract: Enhances the overall taste of the frosting.
  • Cocoa powder (optional): For those who want a chocolate frosting twist.

For exact measurements, check the bottom of the article where you can find everything listed for easy printing. Happy baking!

How to Make Bailey’s Irish Cream Cake

Step 1: Preheat and Prepare

Start by preheating your oven to 350°F (175°C). While it warms up, grease and flour two 9-inch round cake pans. This step is crucial; it ensures your cake releases easily after baking. Trust me, there’s nothing worse than a cake that sticks!

Step 2: Mix Dry Ingredients

In a large mixing bowl, combine the all-purpose flour, granulated sugar, cocoa powder, baking powder, baking soda, and salt. Whisk them together until they’re well blended. This dry mix is the foundation of your Bailey’s Irish Cream Cake, so make sure it’s lump-free and uniform.

Step 3: Combine Wet Ingredients

In another bowl, mix the buttermilk, vegetable oil, eggs, and vanilla extract until smooth. This mixture adds moisture and richness to your cake. Don’t rush this step; a well-combined wet mix will lead to a tender cake that melts in your mouth.

Step 4: Combine Wet and Dry Mixtures

Gradually add the wet ingredients to the dry ingredients, mixing gently until just combined. Avoid overmixing; you want a smooth batter without lumps, but a few small flour streaks are okay. This balance is key to achieving that perfect texture!

Step 5: Add Bailey’s and Water

Now, stir in the Bailey’s Irish Cream and hot water until the batter is smooth. The hot water helps dissolve the cocoa powder, enhancing the chocolate flavor. This is where the magic happens, as the Bailey’s infuses the batter with its creamy goodness.

Step 6: Bake the Cake

Divide the batter evenly between the prepared cake pans. Bake for 30-35 minutes, or until a toothpick inserted into the center comes out clean. Keep an eye on them; every oven is different, and you want that perfect rise!

Step 7: Cool the Cakes

Once baked, allow the cakes to cool in the pans for about 10 minutes. Then, transfer them to a wire rack to cool completely. This step is essential; frosting a warm cake can lead to a melty mess, and we want a beautiful finish!

Step 8: Make the Frosting

In a large bowl, beat the softened butter until creamy. Gradually add the powdered sugar, mixing until combined. Then, add the Bailey’s Irish Cream and vanilla extract, mixing until smooth. If you’re feeling adventurous, toss in some cocoa powder for a chocolate twist!

Step 9: Frost the Cake

Once the cakes are completely cool, place one layer on a serving plate. Spread a generous layer of frosting on top, then add the second layer. Frost the top and sides of the cake, making it as pretty as it is delicious. You’ve earned this moment!

Tips for Success

  • Use room temperature ingredients for a smoother batter.
  • Don’t skip the cooling step; it prevents frosting from melting.
  • For a richer flavor, let the cake sit overnight before serving.
  • Experiment with different frostings, like cream cheese or whipped cream.
  • Keep an eye on baking time; ovens can vary.

Equipment Needed

  • Mixing bowls: A set of various sizes is ideal; you can also use any large bowl you have on hand.
  • Whisk: Essential for mixing; a fork can work in a pinch.
  • Measuring cups and spoons: Accurate measurements are key; use any standard measuring tools.
  • 9-inch round cake pans: If you don’t have these, square pans will do just fine.
  • Cooling rack: Helps cakes cool evenly; a plate can substitute if needed.

Variations

  • Chocolate Chip Delight: Add a cup of chocolate chips to the batter for an extra chocolatey experience.
  • Gluten-Free Option: Substitute all-purpose flour with a gluten-free blend to accommodate dietary needs.
  • Nutty Twist: Incorporate chopped walnuts or pecans into the batter for added texture and flavor.
  • Bailey’s Irish Cream Cheesecake: Transform this cake into a cheesecake by using a cheesecake filling instead of cake batter.
  • Vegan Version: Replace eggs with flax eggs and use a plant-based milk alternative for a vegan-friendly treat.

Serving Suggestions

  • Pair with a scoop of vanilla ice cream for a delightful contrast.
  • Serve alongside fresh berries to add a pop of color and freshness.
  • Drizzle with chocolate sauce for an extra indulgent touch.
  • Enjoy with a cup of coffee or a glass of dessert wine.
  • Garnish with chocolate shavings or whipped cream for a beautiful presentation.

FAQs about Bailey’s Irish Cream Cake

Can I make Bailey’s Irish Cream Cake ahead of time?

Absolutely! This cake actually tastes better the next day as the flavors meld together. Just store it in an airtight container in the fridge, and it will stay fresh for up to three days.

Can I use a different type of alcohol in this cake?

While Bailey’s Irish Cream is the star of this recipe, you can experiment with other liqueurs like Kahlúa or Amaretto for a unique twist. Just keep in mind that it will change the flavor profile!

Is this cake suitable for kids?

Since Bailey’s contains alcohol, it’s best to reserve this cake for adults. However, you can make a non-alcoholic version by substituting the Bailey’s with a mix of cream and vanilla extract for a similar flavor.

How can I store leftover Bailey’s Irish Cream Cake?

Store any leftovers in the refrigerator, covered with plastic wrap or in an airtight container. This will keep the cake moist and delicious for a few days.

Can I freeze Bailey’s Irish Cream Cake?

Yes! You can freeze the cake for up to three months. Just wrap it tightly in plastic wrap and then in aluminum foil. Thaw it in the fridge overnight before serving for the best texture.

Final Thoughts

Baking this Bailey’s Irish Cream Cake is more than just following a recipe; it’s about creating memories. The joy of watching friends and family savor each slice, their faces lighting up with delight, is truly priceless. This cake brings a touch of celebration to any occasion, whether it’s a birthday, holiday, or just a Tuesday that needs a little sweetness. With its rich flavors and creamy frosting, it’s bound to become a favorite in your home. So, roll up your sleeves, embrace the process, and let this cake be the centerpiece of your next gathering!

jhessica

Bailey’s Irish Cream Cake: A Decadent Dessert Recipe!

A rich and decadent cake infused with the delightful flavor of Bailey’s Irish Cream, perfect for any celebration.
Prep Time 20 minutes
Cook Time 35 minutes
Total Time 55 minutes
Servings: 12 servings
Course: Dessert
Cuisine: Irish
Calories: 350

Ingredients
  

  • 2 cups all-purpose flour
  • 1 ½ cups granulated sugar
  • ½ cup unsweetened cocoa powder
  • 1 ½ teaspoons baking powder
  • 1 teaspoon baking soda
  • ½ teaspoon salt
  • 1 cup buttermilk
  • ½ cup vegetable oil
  • 2 large eggs
  • 1 teaspoon vanilla extract
  • 1 cup Bailey’s Irish Cream
  • 1 cup hot water
For the frosting:
  • 1 cup unsalted butter softened
  • 4 cups powdered sugar
  • ½ cup Bailey’s Irish Cream
  • 1 teaspoon vanilla extract
  • 2 tablespoons cocoa powder optional, for chocolate frosting

Method
 

  1. Preheat your oven to 350°F (175°C). Grease and flour two 9-inch round cake pans.
  2. In a large mixing bowl, combine the flour, sugar, cocoa powder, baking powder, baking soda, and salt. Whisk together until well blended.
  3. In another bowl, mix the buttermilk, vegetable oil, eggs, and vanilla extract until smooth. Gradually add the wet ingredients to the dry ingredients, mixing until just combined.
  4. Stir in the Bailey’s Irish Cream and hot water until the batter is smooth.
  5. Divide the batter evenly between the prepared cake pans. Bake for 30-35 minutes, or until a toothpick inserted into the center comes out clean.
  6. Allow the cakes to cool in the pans for 10 minutes, then transfer them to a wire rack to cool completely.
  7. For the frosting, beat the softened butter in a large bowl until creamy. Gradually add the powdered sugar, mixing until combined. Add the Bailey’s Irish Cream and vanilla extract, mixing until smooth. If desired, add cocoa powder for a chocolate frosting.
  8. Once the cakes are completely cool, place one layer on a serving plate and spread a layer of frosting on top. Place the second layer on top and frost the top and sides of the cake.
  9. Serve immediately or refrigerate for up to 3 days.

Nutrition

Serving: 1sliceCalories: 350kcalCarbohydrates: 45gProtein: 4gFat: 15gSaturated Fat: 8gPolyunsaturated Fat: 5gCholesterol: 50mgSodium: 200mgFiber: 1gSugar: 30g

Notes

  • For a lighter version, substitute half of the butter in the frosting with Greek yogurt.
  • For a fun twist, add chocolate chips to the batter for extra texture and flavor.

Tried this recipe?

Let us know how it was!

Spicy Bayou Deviled Eggs: Elevate Your Appetizer Game!

Introduction to Spicy Bayou Deviled Eggs

Deviled eggs have always held a special place in my heart. They remind me of family gatherings, where laughter and good food filled the air. Now, let’s take that classic dish and give it a zesty twist with Spicy Bayou Deviled Eggs! This recipe is perfect for those busy days when you need a quick yet impressive appetizer. With just a handful of ingredients, you can whip up a batch that will have your friends and family raving. Trust me, these spicy bites will elevate your appetizer game and leave everyone wanting more!

Why You’ll Love This Spicy Bayou Deviled Eggs

These Spicy Bayou Deviled Eggs are a game-changer for any gathering. They’re quick to prepare, taking just under an hour from start to finish. The flavor? Absolutely unforgettable! The creamy filling, combined with a spicy kick, will tantalize your taste buds. Plus, they’re a low-calorie option that doesn’t skimp on taste. Whether it’s a party or a casual get-together, these eggs will steal the show!

Ingredients for Spicy Bayou Deviled Eggs

Gathering the right ingredients is key to making these Spicy Bayou Deviled Eggs shine. Here’s what you’ll need:

  • Large eggs: The star of the show! Fresh eggs yield the best flavor and texture.
  • Mayonnaise: This creamy base adds richness. You can use light mayo for a healthier twist.
  • Dijon mustard: A touch of tanginess that elevates the flavor profile. Feel free to swap it with yellow mustard if that’s what you have.
  • Hot sauce: The secret to that spicy kick! Adjust the amount based on your heat tolerance. Sriracha is a great alternative for a different flavor.
  • Smoked paprika: This adds a smoky depth. Regular paprika works too, but you’ll miss that unique flavor.
  • Garlic powder: A sprinkle of this brings a savory note. Fresh garlic can be used, but it’s more potent.
  • Salt and pepper: Essential for seasoning. Don’t skip these; they enhance all the flavors.
  • Green onions: These add a fresh crunch and a pop of color. Chives can be a nice substitute.
  • Fresh parsley: A sprinkle of this herb brightens up the dish. You can also use cilantro for a different twist.

For exact measurements, check the bottom of the article where you can find everything listed for easy printing. Happy cooking!

How to Make Spicy Bayou Deviled Eggs

Creating Spicy Bayou Deviled Eggs is a straightforward process that anyone can master. Follow these simple steps, and you’ll have a delicious appetizer ready in no time!

Step 1: Boil the Eggs

Start by placing the large eggs in a saucepan. Cover them with cold water, ensuring the water is about an inch above the eggs. Bring the water to a boil over medium-high heat. Once it reaches a rolling boil, cover the pot and remove it from the heat. Let the eggs sit for 12 minutes. This method ensures perfectly cooked yolks without that greenish ring around them.

Step 2: Cool the Eggs

After the timer goes off, it’s time to cool those eggs. Transfer them to a bowl filled with ice water. This step is crucial! Cooling the eggs for about 5 minutes makes peeling them a breeze. Trust me, there’s nothing worse than tearing the egg white while trying to peel it!

Step 3: Prepare the Filling

Once the eggs are cool, peel them gently and slice them in half lengthwise. Carefully remove the yolks and place them in a mixing bowl. Mash the yolks with a fork until they’re crumbly. Then, add the mayonnaise, Dijon mustard, hot sauce, smoked paprika, garlic powder, salt, and pepper. Mix everything until it’s smooth and creamy. This filling is where the magic happens, so taste and adjust the seasoning as needed!

Step 4: Fill the Egg Whites

Now comes the fun part—filling the egg whites! You can either spoon the yolk mixture back into the egg halves or use a piping bag for a more polished look. If you’re using a bag, cut a small hole in one corner and pipe the filling in. This method gives a nice, professional touch to your Spicy Bayou Deviled Eggs.

Step 5: Garnish and Chill

To finish, sprinkle the filled eggs with chopped green onions and fresh parsley for a pop of color and flavor. Then, place them in the refrigerator for at least 30 minutes before serving. Chilling allows the flavors to meld beautifully, making each bite even more delightful. Your guests will be impressed!

Tips for Success

  • Use fresh eggs for the best flavor and easier peeling.
  • Adjust the hot sauce to your preferred spice level; taste as you go!
  • For a creamier filling, let the mayonnaise sit at room temperature before mixing.
  • Experiment with garnishes like paprika or crispy bacon bits for added flair.
  • Make these ahead of time; they taste even better after chilling!

Equipment Needed

  • Medium saucepan: Essential for boiling the eggs. A large pot works too.
  • Mixing bowl: For combining the yolk mixture. Any bowl will do!
  • Fork: To mash the yolks. A potato masher can work in a pinch.
  • Piping bag (optional): For a neat filling. A zip-top bag with a corner cut works great.
  • Ice water bowl: To cool the eggs. A large bowl or even the sink will suffice.

Variations of Spicy Bayou Deviled Eggs

  • Bacon Lovers: Add crumbled bacon to the yolk mixture for a smoky, savory twist that elevates the flavor.
  • Herb Infusion: Mix in fresh herbs like dill or cilantro for a refreshing taste that brightens the dish.
  • Avocado Delight: Substitute half of the mayonnaise with mashed avocado for a creamy, healthier option.
  • Spicy Sriracha: Swap the hot sauce for sriracha to give your deviled eggs a different heat profile and flavor.
  • Cheesy Goodness: Stir in some shredded cheddar or crumbled feta cheese for an extra layer of richness.

Serving Suggestions for Spicy Bayou Deviled Eggs

  • Pair with crispy tortilla chips for a delightful crunch.
  • Serve alongside a refreshing cucumber salad to balance the spice.
  • Complement with a chilled glass of iced tea or a light beer.
  • Arrange on a colorful platter for an eye-catching presentation.
  • Garnish with extra herbs for a fresh touch.

FAQs about Spicy Bayou Deviled Eggs

Can I make Spicy Bayou Deviled Eggs ahead of time?

Absolutely! These deviled eggs can be made a day in advance. Just keep them covered in the refrigerator. The flavors will meld beautifully overnight, making them even tastier!

What can I substitute for mayonnaise in this recipe?

If you’re looking for a healthier option, Greek yogurt works wonderfully as a mayonnaise substitute. It adds creaminess while cutting down on calories.

How can I adjust the spice level?

To control the heat, start with a small amount of hot sauce and taste as you mix. You can always add more if you like it spicier. Sriracha is also a great alternative for a different flavor profile.

Can I use different herbs for garnishing?

Definitely! While green onions and parsley are fantastic, feel free to experiment with chives, dill, or even cilantro for a unique twist on your Spicy Bayou Deviled Eggs.

What’s the best way to store leftover deviled eggs?

Store any leftovers in an airtight container in the refrigerator. They should stay fresh for up to two days. Just be sure to keep them chilled until you’re ready to enjoy!

Final Thoughts

Making Spicy Bayou Deviled Eggs is more than just cooking; it’s about creating memories. Each bite bursts with flavor, bringing a little excitement to your gatherings. Whether you’re hosting a party or just enjoying a quiet evening at home, these deviled eggs are sure to impress. They’re easy to prepare, and the spicy kick adds a delightful twist to a classic favorite. So, roll up your sleeves, gather your ingredients, and let the joy of cooking fill your kitchen. Trust me, your taste buds will thank you, and your friends will be asking for the recipe!

jhessica

Spicy Bayou Deviled Eggs: Elevate Your Appetizer Game!

A flavorful twist on classic deviled eggs with a spicy kick, perfect for elevating your appetizer game.
Prep Time 15 minutes
Cook Time 12 minutes
Total Time 57 minutes
Servings: 6 servings
Course: Appetizer
Cuisine: American
Calories: 120

Ingredients
  

  • 6 large eggs
  • 3 tablespoons mayonnaise
  • 1 teaspoon Dijon mustard
  • 1 teaspoon hot sauce adjust to taste
  • 1/2 teaspoon smoked paprika
  • 1/4 teaspoon garlic powder
  • Salt and pepper to taste
  • 2 tablespoons finely chopped green onions
  • 1 tablespoon finely chopped fresh parsley

Method
 

  1. Place the eggs in a saucepan and cover them with cold water. Bring to a boil over medium-high heat. Once boiling, cover the pot, remove it from heat, and let it sit for 12 minutes.
  2. After 12 minutes, transfer the eggs to a bowl of ice water to cool for about 5 minutes. This will make peeling easier.
  3. Peel the cooled eggs and slice them in half lengthwise. Remove the yolks and place them in a mixing bowl.
  4. Mash the yolks with a fork and add the mayonnaise, Dijon mustard, hot sauce, smoked paprika, garlic powder, salt, and pepper. Mix until smooth and creamy.
  5. Spoon or pipe the yolk mixture back into the egg whites.
  6. Garnish each deviled egg with chopped green onions and parsley.
  7. Chill in the refrigerator for at least 30 minutes before serving for the best flavor.

Nutrition

Serving: 1egg halfCalories: 120kcalCarbohydrates: 1gProtein: 6gFat: 10gSaturated Fat: 2gPolyunsaturated Fat: 8gCholesterol: 186mgSodium: 150mg

Notes

  • For a twist, try adding crumbled bacon to the yolk mixture for a smoky flavor.
  • You can also substitute the hot sauce with sriracha for a different heat profile.

Tried this recipe?

Let us know how it was!

Peanut Butter Banana Bread: A Simple, Delicious Recipe!

Introduction to Peanut Butter Banana Bread

There’s something magical about the aroma of freshly baked bread wafting through the kitchen. It takes me back to my childhood, where my mom would whip up her famous banana bread, filling our home with warmth and comfort. This Peanut Butter Banana Bread combines that nostalgic flavor with the rich, creamy goodness of peanut butter. It’s a quick solution for busy mornings or a delightful treat to impress your loved ones. Whether you’re looking for a snack or a breakfast option, this recipe is sure to become a favorite in your home.

Why You’ll Love This Peanut Butter Banana Bread

This Peanut Butter Banana Bread is a game-changer in the kitchen. It’s incredibly easy to whip up, making it perfect for those hectic mornings or lazy weekends. The combination of sweet bananas and rich peanut butter creates a flavor explosion that’s hard to resist. Plus, it’s versatile! You can enjoy it plain, with a spread of butter, or even toasted. Trust me, once you try it, you’ll be hooked!

Ingredients for Peanut Butter Banana Bread

Gathering the right ingredients is the first step to creating this delightful Peanut Butter Banana Bread. Here’s what you’ll need:

  • Ripe Bananas: The star of the show! Look for bananas that are brown and spotty for maximum sweetness.
  • Creamy Peanut Butter: This adds richness and a nutty flavor. Choose your favorite brand, or go for natural peanut butter for a healthier twist.
  • Melted Coconut Oil: A great alternative to butter, it keeps the bread moist. You can also use vegetable oil if that’s what you have on hand.
  • Brown Sugar: This gives the bread a deep, caramel-like sweetness. If you prefer, honey or maple syrup can be used instead.
  • Large Egg: Acts as a binder, helping to hold everything together. If you’re vegan, a flax egg works well too!
  • Vanilla Extract: A splash of this adds warmth and enhances the flavors.
  • Baking Soda: This is your leavening agent, helping the bread rise and become fluffy.
  • Salt: Just a pinch to balance the sweetness and enhance the flavors.
  • All-Purpose Flour: The base of your bread. You can substitute with whole wheat flour for a healthier option.
  • Chocolate Chips (optional): For those who want a little extra sweetness and indulgence, chocolate chips are a fantastic addition!

Exact measurements for these ingredients can be found at the bottom of the article, ready for you to print and take to the kitchen!

How to Make Peanut Butter Banana Bread

Now that you have your ingredients ready, let’s dive into the fun part—making this delicious Peanut Butter Banana Bread! Follow these simple steps, and you’ll have a warm loaf ready to enjoy in no time.

Step 1: Preheat the Oven

First things first, preheat your oven to 350°F (175°C). This ensures that your bread bakes evenly. While the oven heats up, grease a 9×5-inch loaf pan or line it with parchment paper. This will make it easier to remove the bread later.

Step 2: Mix Bananas and Peanut Butter

In a large mixing bowl, combine the mashed bananas and creamy peanut butter. Use a fork or a potato masher to mix them until smooth. The bananas should be well incorporated with the peanut butter, creating a luscious base for your bread.

Step 3: Add Wet Ingredients

Next, stir in the melted coconut oil, brown sugar, egg, and vanilla extract. Mix until everything is well combined. The mixture should be creamy and slightly thick. This is where the magic begins, as the flavors meld together beautifully.

Step 4: Incorporate Dry Ingredients

Now, add the baking soda and salt to the bowl. Mix until they are fully incorporated. This step is crucial for achieving that perfect rise in your Peanut Butter Banana Bread. The baking soda will work its magic as it reacts with the wet ingredients.

Step 5: Fold in Flour

Gradually fold in the all-purpose flour until just combined. Be careful not to overmix; a few lumps are perfectly fine. If you’re feeling adventurous, gently fold in the chocolate chips at this stage for an extra touch of sweetness!

Step 6: Pour and Bake

Pour the batter into your prepared loaf pan and smooth the top with a spatula. Bake for 50-60 minutes, or until a toothpick inserted into the center comes out clean. The aroma will fill your kitchen, making it hard to wait!

Step 7: Cool and Serve

Once baked, allow the bread to cool in the pan for about 10 minutes. Then, transfer it to a wire rack to cool completely. This step is essential for achieving the perfect texture. Slice it up and enjoy your homemade Peanut Butter Banana Bread!

Tips for Success

  • Use overripe bananas for maximum sweetness and flavor.
  • Don’t overmix the batter; it should be slightly lumpy for the best texture.
  • Let the bread cool completely before slicing to avoid a gummy texture.
  • Store leftovers in an airtight container to keep it fresh longer.
  • Feel free to experiment with add-ins like nuts or dried fruit for extra flavor!

Equipment Needed

  • 9×5-inch Loaf Pan: Essential for baking. If you don’t have one, a round cake pan works too.
  • Mixing Bowls: A large bowl for mixing ingredients. Any size will do, just make sure it’s sturdy.
  • Fork or Potato Masher: For mashing bananas. A blender can also work if you prefer a smoother texture.
  • Spatula: Great for folding in ingredients and smoothing the batter.
  • Oven Mitts: Safety first! Protect your hands when handling hot pans.

Variations

  • Nutty Delight: Add chopped walnuts or pecans for a crunchy texture that complements the creamy peanut butter.
  • Chocolate Lovers: Mix in dark chocolate chips or chunks for a rich, indulgent twist.
  • Spiced Up: Incorporate a teaspoon of cinnamon or nutmeg for a warm, aromatic flavor that elevates the bread.
  • Gluten-Free Option: Substitute all-purpose flour with a gluten-free blend to make this recipe suitable for gluten-sensitive friends.
  • Fruit Fusion: Toss in some blueberries or chopped strawberries for a fruity burst that pairs beautifully with the bananas.

Serving Suggestions

  • Spread it: Enjoy a slice with a smear of butter or additional peanut butter for extra richness.
  • Pair with Coffee: A warm cup of coffee or tea complements the flavors perfectly.
  • Top it Off: Add sliced bananas or a drizzle of honey for a beautiful presentation.
  • Breakfast Treat: Serve it alongside yogurt and fresh fruit for a balanced breakfast.

FAQs about Peanut Butter Banana Bread

As you embark on your Peanut Butter Banana Bread journey, you might have a few questions. Here are some common queries that can help you along the way:

Can I use crunchy peanut butter instead of creamy?

Absolutely! Crunchy peanut butter will add a delightful texture to your bread. Just keep in mind that it may alter the smoothness of the final product.

How do I store leftover Peanut Butter Banana Bread?

To keep your bread fresh, store it in an airtight container at room temperature for up to three days. For longer storage, wrap it tightly in plastic wrap and freeze it for up to three months.

Can I make this recipe vegan?

Yes! Simply replace the egg with a flax egg (1 tablespoon of ground flaxseed mixed with 2.5 tablespoons of water) and use a plant-based oil. Your Peanut Butter Banana Bread will still be delicious!

What can I add to enhance the flavor?

Consider adding spices like cinnamon or nutmeg for warmth. You can also mix in chocolate chips, nuts, or dried fruits for extra flavor and texture.

Is this Peanut Butter Banana Bread healthy?

While it’s a treat, it does contain nutritious ingredients like bananas and peanut butter. You can make it healthier by using whole wheat flour or reducing the sugar. Enjoy it in moderation!

Final Thoughts

There’s a certain joy that comes from baking, especially when it involves a recipe as comforting as Peanut Butter Banana Bread. The blend of sweet bananas and creamy peanut butter creates a delightful harmony that warms the heart. Each slice is not just a treat; it’s a reminder of home, family, and the simple pleasures in life. Whether you enjoy it fresh out of the oven or toasted with a bit of butter, this bread is sure to bring smiles to your table. So, roll up your sleeves and let the baking adventure begin—your taste buds will thank you!

jhessica

Peanut Butter Banana Bread: A Simple, Delicious Recipe!

A simple and delicious recipe for Peanut Butter Banana Bread that combines the rich flavors of peanut butter and ripe bananas.
Prep Time 15 minutes
Cook Time 1 hour
Total Time 1 hour 15 minutes
Servings: 8 servings
Course: Dessert
Cuisine: American
Calories: 180

Ingredients
  

  • 3 ripe bananas mashed
  • 1/2 cup creamy peanut butter
  • 1/3 cup melted coconut oil or vegetable oil
  • 1/2 cup brown sugar packed
  • 1 large egg
  • 1 teaspoon vanilla extract
  • 1 teaspoon baking soda
  • 1/4 teaspoon salt
  • 1 1/2 cups all-purpose flour
  • 1/2 cup chocolate chips optional

Method
 

  1. Preheat your oven to 350°F (175°C). Grease a 9×5-inch loaf pan or line it with parchment paper.
  2. In a large mixing bowl, combine the mashed bananas and peanut butter until smooth.
  3. Stir in the melted coconut oil, brown sugar, egg, and vanilla extract until well combined.
  4. Add the baking soda and salt, mixing until incorporated.
  5. Gradually fold in the flour until just combined. Be careful not to overmix. If using, gently fold in the chocolate chips.
  6. Pour the batter into the prepared loaf pan and smooth the top.
  7. Bake for 50-60 minutes, or until a toothpick inserted into the center comes out clean.
  8. Allow the bread to cool in the pan for about 10 minutes before transferring it to a wire rack to cool completely.

Nutrition

Serving: 1sliceCalories: 180kcalCarbohydrates: 24gProtein: 4gFat: 7gSaturated Fat: 2gPolyunsaturated Fat: 5gCholesterol: 30mgSodium: 150mgFiber: 2gSugar: 10g

Notes

  • For added texture, consider mixing in chopped nuts like walnuts or pecans.
  • Substitute honey or maple syrup for brown sugar for a different sweetness profile.

Tried this recipe?

Let us know how it was!

Grilled Salmon Balls with Creamy Avocado Sauce Delight!

Introduction to Grilled Salmon Balls with Creamy Avocado Sauce

Cooking has always been a way for me to connect with family and friends. When I discovered these Grilled Salmon Balls with Creamy Avocado Sauce, it felt like finding a hidden gem in my recipe box. They’re not just delicious; they’re a quick solution for busy weeknights or a fun appetizer for gatherings. Imagine the joy on your loved ones’ faces as they savor these flavorful bites. Plus, they’re healthy, making them perfect for anyone looking to eat better without sacrificing taste. Let’s dive into this delightful recipe that’s sure to impress!

Why You’ll Love This Grilled Salmon Balls with Creamy Avocado Sauce

These Grilled Salmon Balls with Creamy Avocado Sauce are a game-changer in the kitchen. They come together in just 25 minutes, making them perfect for those hectic evenings. The taste? Absolutely mouthwatering! The combination of fresh salmon and creamy avocado creates a flavor explosion that’s hard to resist. Plus, they’re versatile enough to serve as an appetizer or a main dish, ensuring you’ll impress your guests or family every time.

Ingredients for Grilled Salmon Balls with Creamy Avocado Sauce

Gathering the right ingredients is the first step to culinary success. For these Grilled Salmon Balls with Creamy Avocado Sauce, you’ll need a few fresh staples that pack a punch in flavor.

  • Fresh salmon fillet: The star of the show! Look for bright, firm fillets without any fishy smell.
  • Breadcrumbs: These add texture and help bind the salmon balls together. You can use regular or panko for extra crunch.
  • Green onions: They bring a mild onion flavor that complements the salmon beautifully.
  • Fresh parsley: This herb adds a pop of color and freshness to the dish.
  • Egg: A crucial binding agent that helps hold everything together.
  • Dijon mustard: Just a teaspoon adds a tangy depth of flavor that elevates the dish.
  • Garlic powder: For that savory kick without the hassle of fresh garlic.
  • Salt and black pepper: Essential seasonings to enhance all the flavors.
  • Olive oil: A light brush on the grill grates prevents sticking and adds a hint of richness.

For the creamy avocado sauce, you’ll need:

  • Ripe avocado: The creaminess of the avocado is what makes this sauce so irresistible.
  • Greek yogurt: This adds a tangy creaminess that balances the richness of the avocado.
  • Lime juice: A splash of acidity brightens the sauce and enhances the flavors.
  • Minced garlic: Fresh garlic gives the sauce a robust flavor.
  • Salt and pepper: To taste, ensuring the sauce is perfectly seasoned.

For those looking to spice things up, consider adding chopped jalapeños or red pepper flakes to the salmon mixture. If you’re in a pinch, you can also bake the salmon balls instead of grilling them. Just check the exact quantities at the bottom of the article for your convenience!

How to Make Grilled Salmon Balls with Creamy Avocado Sauce

Creating these Grilled Salmon Balls with Creamy Avocado Sauce is a straightforward process that anyone can master. Follow these simple steps, and you’ll be on your way to a delicious meal that’s sure to impress.

Step 1: Preheat the Grill

Start by preheating your grill to medium heat. This step is crucial because it ensures even cooking and helps achieve that perfect golden-brown crust on your salmon balls. A hot grill also prevents sticking, making it easier to flip them without falling apart.

Step 2: Prepare the Salmon

Next, take your fresh salmon fillet and cut it into smaller pieces. Using a food processor, pulse the salmon until it’s finely chopped but not pureed. You want a chunky texture that holds together well. Over-pulsing can lead to a mushy mixture, which won’t give you the delightful bite you’re aiming for.

Step 3: Mix Ingredients

In a large bowl, combine the chopped salmon with breadcrumbs, green onions, parsley, egg, Dijon mustard, garlic powder, salt, and black pepper. Each ingredient plays a role: the breadcrumbs bind everything, while the egg adds moisture. The mustard and garlic powder enhance the flavor, making each bite a taste sensation. Mix until everything is well combined, but don’t overwork it!

Step 4: Form the Balls

Now it’s time to shape your mixture into balls. Aim for about 1 to 1.5 inches in diameter. This size ensures they cook evenly on the grill. If you find the mixture is too sticky, wet your hands slightly to make shaping easier. Keep them uniform for consistent cooking.

Step 5: Grill the Salmon Balls

Lightly brush the grill grates with olive oil to prevent sticking. Place the salmon balls on the grill and cook for about 4-5 minutes on each side. To check for doneness, look for a golden-brown exterior and ensure they’re cooked through. You can use a meat thermometer; they should reach an internal temperature of 145°F.

Step 6: Make the Creamy Avocado Sauce

While the salmon balls are grilling, prepare your creamy avocado sauce. In a bowl, mash the ripe avocado until smooth. Then, mix in Greek yogurt, lime juice, minced garlic, salt, and pepper. Stir until you achieve a creamy texture. This sauce is the perfect complement to the savory salmon balls, adding a refreshing twist.

Step 7: Serve and Enjoy

Once your salmon balls are grilled to perfection, it’s time to serve! Arrange them on a platter and place the creamy avocado sauce in a small bowl for dipping. Garnish with extra parsley or lime wedges for a pop of color. Your guests will love the presentation, and the flavors will keep them coming back for more!

Tips for Success

  • Use fresh salmon for the best flavor and texture.
  • Don’t over-pulse the salmon; you want a chunky consistency.
  • Wet your hands when forming the balls to prevent sticking.
  • Keep the grill at medium heat for even cooking.
  • Experiment with spices like jalapeños for a kick!

Equipment Needed

  • Grill: A gas or charcoal grill works well. If you don’t have one, a grill pan on the stovetop is a great alternative.
  • Food Processor: Essential for chopping the salmon. A sharp knife and cutting board can work in a pinch.
  • Mixing Bowl: Any large bowl will do for combining ingredients.
  • Meat Thermometer: Useful for checking doneness, but you can also rely on visual cues.

Variations

  • Spicy Salmon Balls: Add chopped jalapeños or a dash of hot sauce to the mixture for a fiery kick.
  • Herb-Infused: Experiment with different herbs like dill or cilantro for a unique flavor profile.
  • Gluten-Free Option: Substitute breadcrumbs with crushed gluten-free crackers or almond flour.
  • Oven-Baked: If grilling isn’t an option, bake the salmon balls at 400°F for 15-20 minutes, flipping halfway through.
  • Vegetarian Twist: Replace salmon with canned chickpeas or black beans for a plant-based version.

Serving Suggestions

  • Fresh Salad: Pair with a crisp green salad for a refreshing contrast.
  • Chilled White Wine: A glass of Sauvignon Blanc complements the flavors beautifully.
  • Colorful Platter: Serve on a vibrant platter with lime wedges and extra parsley for a pop of color.
  • Crunchy Veggies: Offer sliced cucumbers or bell peppers for dipping in the creamy avocado sauce.

FAQs about Grilled Salmon Balls with Creamy Avocado Sauce

Can I use canned salmon instead of fresh? Absolutely! Canned salmon is a convenient option. Just make sure to drain it well and flake it before mixing with the other ingredients. This will save you time while still delivering delicious Grilled Salmon Balls.

How do I store leftovers? If you have any leftovers, store them in an airtight container in the fridge for up to three days. Reheat them in the oven or on the grill to maintain their texture. They’re great for a quick snack or lunch!

Can I make the creamy avocado sauce ahead of time? Yes, you can prepare the sauce a few hours in advance. Just keep it covered in the fridge to prevent browning. Give it a good stir before serving to bring back that creamy consistency.

What can I serve with these salmon balls? These Grilled Salmon Balls with Creamy Avocado Sauce pair wonderfully with a fresh salad, roasted vegetables, or even a side of quinoa. They’re versatile enough to complement many dishes!

Are these salmon balls suitable for freezing? Yes! You can freeze the uncooked salmon balls. Just place them on a baking sheet to freeze individually, then transfer them to a freezer bag. When you’re ready to cook, grill them straight from the freezer, adding a few extra minutes to the cooking time.

Final Thoughts

Creating Grilled Salmon Balls with Creamy Avocado Sauce is more than just cooking; it’s about bringing people together. The joy of watching friends and family savor each bite is truly rewarding. This recipe is a celebration of fresh ingredients and simple techniques, making it accessible for any home cook. Whether you’re hosting a gathering or enjoying a quiet dinner, these salmon balls deliver flavor and satisfaction. Plus, the creamy avocado sauce adds a delightful twist that elevates the dish. Dive into this culinary adventure, and let the flavors spark joy in your kitchen!

jhessica

Grilled Salmon Balls with Creamy Avocado Sauce Delight!

Delicious grilled salmon balls served with a creamy avocado sauce, perfect for a healthy appetizer or main dish.
Prep Time 15 minutes
Cook Time 10 minutes
Total Time 25 minutes
Servings: 4 servings
Course: Appetizer/Main Dish
Cuisine: American
Calories: 290

Ingredients
  

  • 1 pound fresh salmon fillet skin removed
  • 1/2 cup breadcrumbs
  • 1/4 cup finely chopped green onions
  • 1/4 cup fresh parsley chopped
  • 1 large egg
  • 1 teaspoon Dijon mustard
  • 1 teaspoon garlic powder
  • 1/2 teaspoon salt
  • 1/4 teaspoon black pepper
  • 1 tablespoon olive oil for grilling
  • 1 ripe avocado
  • 1/4 cup Greek yogurt
  • 1 tablespoon lime juice
  • 1 clove garlic minced
  • Salt and pepper to taste

Method
 

  1. Preheat your grill to medium heat.
  2. In a food processor, pulse the salmon until finely chopped but not pureed. Transfer to a large bowl.
  3. Add breadcrumbs, green onions, parsley, egg, Dijon mustard, garlic powder, salt, and black pepper to the bowl with the salmon. Mix until well combined.
  4. Form the mixture into small balls, about 1 to 1.5 inches in diameter.
  5. Lightly brush the grill grates with olive oil to prevent sticking. Place the salmon balls on the grill and cook for about 4-5 minutes on each side, or until cooked through and golden brown.
  6. While the salmon balls are grilling, prepare the creamy avocado sauce. In a bowl, mash the avocado and mix in Greek yogurt, lime juice, minced garlic, salt, and pepper until smooth and creamy.
  7. Serve the grilled salmon balls warm with the creamy avocado sauce on the side for dipping.

Nutrition

Serving: 1servingCalories: 290kcalCarbohydrates: 10gProtein: 22gFat: 18gSaturated Fat: 3gPolyunsaturated Fat: 15gCholesterol: 70mgSodium: 400mgFiber: 3gSugar: 1g

Notes

  • For added flavor, consider mixing in some chopped jalapeños or red pepper flakes to the salmon mixture for a spicy kick.
  • If you prefer baking, place the salmon balls on a lined baking sheet and bake at 400°F for 15-20 minutes, flipping halfway through.

Tried this recipe?

Let us know how it was!

Red Velvet Strawberry Cheesecake: A Delicious Recipe!

Introduction to Red Velvet Strawberry Cheesecake

When I think of desserts that bring a smile, the Red Velvet Strawberry Cheesecake tops the list.

This delightful treat combines the rich, velvety texture of red velvet with the freshness of strawberries, creating a dessert that’s as stunning as it is delicious.

Whether you’re looking to impress guests at a dinner party or simply want to indulge after a long day, this cheesecake is the perfect solution.

It’s easy to make, and the vibrant colors will brighten any table.

Let’s dive into this recipe that’s sure to become a favorite in your home!

Why You’ll Love This Red Velvet Strawberry Cheesecake

This Red Velvet Strawberry Cheesecake is a game-changer for dessert lovers.

It’s not just about the taste; it’s about the experience.

With minimal prep time and a straightforward process, you’ll have a show-stopping dessert ready in no time.

The creamy filling, combined with the tartness of fresh strawberries, creates a flavor explosion that’s hard to resist.

Trust me, this cheesecake will have everyone asking for seconds!

Ingredients for Red Velvet Strawberry Cheesecake

Creating a Red Velvet Strawberry Cheesecake is all about using quality ingredients that work together to create a symphony of flavors.

Here’s what you’ll need:

  • Graham cracker crumbs: These form the base of your cheesecake crust, providing a sweet and crunchy texture.
  • Unsalted butter: Melted butter binds the crumbs together, adding richness to the crust.
  • Granulated sugar: A touch of sweetness enhances the crust and balances the flavors.
  • Cream cheese: The star of the show! Softened cream cheese gives the cheesecake its creamy, luscious texture.
  • Powdered sugar: This fine sugar dissolves easily, sweetening the cream cheese without grittiness.
  • Vanilla extract: A splash of vanilla adds depth and warmth to the cheesecake filling.
  • Heavy whipping cream: Whipped to stiff peaks, it lightens the filling and adds a cloud-like texture.
  • Fresh strawberries: These juicy gems not only top the cheesecake but also bring a refreshing tartness.
  • Cocoa powder: This gives the cheesecake its signature red velvet flavor, adding a hint of chocolate.
  • Red food coloring: A few drops transform the cheesecake into a vibrant red, making it visually stunning.
  • Lemon juice: Just a bit of acidity brightens the flavors and balances the sweetness.

For exact measurements, check the bottom of the article where you can find everything listed for easy printing.

Feel free to get creative! You can swap out the graham cracker crust for a chocolate cookie crust or add mini chocolate chips to the filling for an extra treat.

How to Make Red Velvet Strawberry Cheesecake

Creating a Red Velvet Strawberry Cheesecake is a delightful journey.

Follow these steps, and you’ll be rewarded with a dessert that’s as beautiful as it is delicious.

Step 1: Preheat the Oven

Start by preheating your oven to 325°F.

This step is crucial because it ensures even baking.

A properly preheated oven helps the crust set perfectly, giving you that ideal base for your cheesecake.

Step 2: Prepare the Crust

In a medium bowl, combine graham cracker crumbs, melted butter, and granulated sugar.

Mix until everything is well combined.

Now, press this mixture firmly into the bottom of a 9-inch springform pan.

This step is vital; a well-pressed crust holds everything together and provides a satisfying crunch.

Step 3: Bake the Crust

Bake the crust for about 10 minutes.

This short baking time helps to set the crust, making it sturdy enough to hold the creamy filling.

Once done, remove it from the oven and let it cool completely.

Step 4: Make the Cream Cheese Mixture

In a large mixing bowl, beat the softened cream cheese with an electric mixer until smooth.

Gradually add the powdered sugar and vanilla extract, mixing until fully incorporated.

This mixture should be creamy and free of lumps, creating a luscious base for your cheesecake.

Step 5: Whip the Cream

In a separate bowl, whip the heavy cream until stiff peaks form.

This step is crucial for achieving that light, airy texture in your cheesecake.

Stiff peaks mean the cream holds its shape, adding volume to the filling.

Step 6: Combine Mixtures

Gently fold the whipped cream into the cream cheese mixture.

Use a spatula and a gentle motion to maintain the airiness.

This technique ensures your cheesecake remains light and fluffy, rather than dense.

Step 7: Add Color and Flavor

In a small bowl, mix the cocoa powder, red food coloring, and lemon juice to create a smooth paste.

Fold this mixture into the cream cheese mixture until evenly distributed.

You’ll achieve a beautiful marbled effect that’s visually stunning and delicious.

Step 8: Pour and Decorate

Pour the cheesecake filling over the cooled crust in the springform pan.

Smooth the top with a spatula for an even finish.

Now, arrange the sliced strawberries on top, creating a vibrant and inviting presentation.

Step 9: Chill the Cheesecake

Cover the cheesecake and refrigerate for at least 4 hours, or overnight for the best results.

Chilling allows the flavors to meld and the texture to set perfectly.

Trust me, patience pays off here!

Step 10: Serve and Enjoy

When you’re ready to serve, carefully remove the sides of the springform pan.

Slice the cheesecake with a sharp knife for clean edges.

Enjoy every bite of this delightful Red Velvet Strawberry Cheesecake!

Tips for Success

  • Use room temperature cream cheese for a smoother filling.
  • Don’t skip the chilling time; it’s essential for the best texture.
  • For a cleaner slice, dip your knife in hot water before cutting.
  • Experiment with different toppings like whipped cream or chocolate shavings.
  • Store leftovers in an airtight container in the fridge for up to 3 days.

Equipment Needed

  • 9-inch springform pan: Essential for easy removal; a regular cake pan works too, but slicing will be trickier.
  • Mixing bowls: Use a large bowl for the cream cheese and a medium one for the crust.
  • Electric mixer: A hand mixer is perfect; a whisk can work, but it’ll take longer.
  • Spatula: Great for folding and smoothing the cheesecake filling.
  • Measuring cups and spoons: Accurate measurements ensure the best results.

Variations

  • Chocolate Lovers: Add mini chocolate chips to the cheesecake filling for an extra chocolatey twist.
  • Fruit Medley: Swap strawberries for other fruits like raspberries or blueberries for a different flavor profile.
  • Gluten-Free Option: Use gluten-free graham crackers or almond flour for the crust to make it suitable for gluten-sensitive diets.
  • Vegan Version: Substitute cream cheese with a vegan alternative and use coconut cream instead of heavy whipping cream.
  • Nutty Delight: Incorporate crushed nuts like pecans or walnuts into the crust for added texture and flavor.

Serving Suggestions

  • Pair with a dollop of whipped cream for extra creaminess.
  • Serve alongside a scoop of vanilla ice cream for a delightful contrast.
  • Drizzle with chocolate or caramel sauce for added sweetness.
  • Garnish with fresh mint leaves for a pop of color.
  • Enjoy with a cup of coffee or a glass of dessert wine.

FAQs about Red Velvet Strawberry Cheesecake

Can I make this cheesecake ahead of time?

Absolutely! This Red Velvet Strawberry Cheesecake is perfect for making a day in advance. Just ensure you chill it overnight for the best flavor and texture.

How do I store leftovers?

Store any leftover cheesecake in an airtight container in the fridge. It should stay fresh for up to three days, but trust me, it’s hard to resist finishing it sooner!

Can I use frozen strawberries instead of fresh?

Yes, you can! Just make sure to thaw and drain them well before using. Fresh strawberries do add a nice texture, but frozen ones work in a pinch.

What can I substitute for cream cheese?

If you’re looking for a lighter option, you can use Greek yogurt or a vegan cream cheese alternative. Just keep in mind that the flavor and texture may vary slightly.

Is this cheesecake suitable for special diets?

Definitely! With a few tweaks, like using gluten-free graham crackers or a vegan cream cheese substitute, you can easily adapt this recipe to fit various dietary needs.

Final Thoughts

Baking this Red Velvet Strawberry Cheesecake is more than just a culinary task; it’s an experience filled with joy and creativity.

Each step, from mixing the vibrant red batter to arranging the fresh strawberries, brings a sense of accomplishment.

When you finally slice into this beauty, the smiles around the table are worth every minute spent in the kitchen.

This cheesecake isn’t just a dessert; it’s a celebration of flavors and memories.

So, gather your loved ones, share a slice, and let the delightful taste of this cheesecake create lasting moments together!

jhessica

Red Velvet Strawberry Cheesecake: A Delicious Recipe!

A delicious and visually stunning Red Velvet Strawberry Cheesecake that combines the rich flavors of red velvet with fresh strawberries.
Prep Time 30 minutes
Cook Time 10 minutes
Total Time 4 hours 40 minutes
Servings: 10 servings
Course: Dessert
Cuisine: American
Calories: 320

Ingredients
  

  • 1 ½ cups graham cracker crumbs
  • ½ cup unsalted butter melted
  • 2 tablespoons granulated sugar
  • 1 ½ cups cream cheese softened
  • 1 cup powdered sugar
  • 1 teaspoon vanilla extract
  • 1 cup heavy whipping cream
  • 1 cup fresh strawberries hulled and sliced
  • 2 tablespoons cocoa powder
  • 1 tablespoon red food coloring
  • 1 teaspoon lemon juice

Method
 

  1. Preheat the oven to 325°F.
  2. In a medium bowl, combine graham cracker crumbs, melted butter, and granulated sugar. Mix until well combined.
  3. Press the mixture firmly into the bottom of a 9-inch springform pan to form the crust.
  4. Bake for 10 minutes, then remove from the oven and let cool.
  5. In a large mixing bowl, beat the softened cream cheese with an electric mixer until smooth.
  6. Gradually add the powdered sugar and vanilla extract, mixing until fully incorporated.
  7. In a separate bowl, whip the heavy cream until stiff peaks form.
  8. Gently fold the whipped cream into the cream cheese mixture until combined.
  9. In a small bowl, mix the cocoa powder, red food coloring, and lemon juice to create a smooth paste.
  10. Fold this mixture into the cream cheese mixture until evenly distributed, creating a marbled effect.
  11. Pour the cheesecake filling over the cooled crust in the springform pan. Smooth the top with a spatula.
  12. Arrange the sliced strawberries on top of the cheesecake.
  13. Cover and refrigerate for at least 4 hours, or overnight for best results.
  14. To serve, carefully remove the sides of the springform pan. Slice the cheesecake and enjoy!

Nutrition

Serving: 1sliceCalories: 320kcalCarbohydrates: 25gProtein: 5gFat: 22gSaturated Fat: 12gPolyunsaturated Fat: 8gCholesterol: 70mgSodium: 200mgFiber: 1gSugar: 15g

Notes

  • For a chocolate twist, add mini chocolate chips to the cheesecake filling before pouring it into the crust.
  • To make it a no-bake cheesecake, substitute the baked crust with a store-bought graham cracker crust and skip the baking step.

Tried this recipe?

Let us know how it was!

Crispy Baked Zucchini Chips: A Delicious Healthy Snack!

Introduction to Crispy Baked Zucchini Chips

There’s something magical about transforming a simple vegetable into a crunchy delight. Crispy Baked Zucchini Chips are not just a snack; they’re a game-changer for those busy days when you crave something satisfying yet healthy. I remember the first time I made these chips; my kids devoured them like they were candy! This recipe is perfect for impressing your loved ones or simply enjoying a guilt-free treat while binge-watching your favorite show. With just a few ingredients and minimal effort, you’ll have a delicious snack that’s sure to please everyone.

Why You’ll Love This Crispy Baked Zucchini Chips

These Crispy Baked Zucchini Chips are a breeze to whip up, making them perfect for any occasion. They’re not only quick to prepare but also packed with flavor, satisfying those snack cravings without the guilt. Plus, they’re a fantastic way to sneak in some veggies, even for the pickiest eaters. Trust me, once you try them, you’ll wonder how you ever lived without this crunchy goodness in your life!

Ingredients for Crispy Baked Zucchini Chips

Gathering the right ingredients is the first step to creating these delightful Crispy Baked Zucchini Chips. Here’s what you’ll need:

  • Zucchinis: Fresh, medium-sized zucchinis are the star of the show. They provide a mild flavor and a satisfying crunch.
  • Salt: A sprinkle of salt helps draw out moisture from the zucchini, ensuring they crisp up beautifully.
  • Black Pepper: This adds a subtle kick, enhancing the overall flavor of the chips.
  • Garlic Powder: A must for that savory depth, garlic powder brings a warm, aromatic quality to the mix.
  • Onion Powder: This complements the garlic, adding a hint of sweetness and complexity.
  • Parmesan Cheese: Grated Parmesan gives a rich, cheesy flavor and helps the coating stick to the zucchini.
  • Breadcrumbs: Panko or regular breadcrumbs create that irresistible crunch. Panko is lighter and flakier, while regular breadcrumbs are more traditional.
  • Olive Oil: A drizzle of olive oil ensures the zucchini chips bake evenly and adds a touch of richness.

For those looking to mix things up, consider adding Italian seasoning or smoked paprika for extra flavor. If you’re feeling adventurous, try different cheeses like cheddar or even nutritional yeast for a vegan twist. Want a bit of heat? A sprinkle of cayenne pepper in the breadcrumb mix will do the trick!

Exact quantities for each ingredient can be found at the bottom of the article, ready for printing. Happy cooking!

How to Make Crispy Baked Zucchini Chips

Creating these Crispy Baked Zucchini Chips is a straightforward process that anyone can master. Follow these simple steps, and you’ll be on your way to enjoying a crunchy, healthy snack in no time!

Step 1: Preheat the Oven

Start by preheating your oven to 225°F. This low temperature is key for achieving that perfect crispiness. While the oven warms up, line a baking sheet with parchment paper. This will prevent the chips from sticking and make cleanup a breeze.

Step 2: Prepare the Zucchini

Next, slice your zucchinis into 1/4-inch rounds. Toss these slices with salt and let them sit for about 10 minutes. This step is crucial as it draws out excess moisture, ensuring your chips turn out crispy. Afterward, pat the slices dry with paper towels to remove any lingering moisture.

Step 3: Mix the Coating

In a separate bowl, combine black pepper, garlic powder, onion powder, grated Parmesan cheese, and breadcrumbs. This flavorful mixture will give your chips that irresistible crunch and savory taste. Feel free to get creative here; adding herbs or spices can elevate the flavor even more!

Step 4: Coat the Zucchini

Drizzle olive oil over the zucchini slices and toss them gently to coat evenly. This helps the breadcrumb mixture stick. Now, dredge each slice in the breadcrumb mixture, pressing gently to ensure it adheres well. Place the coated slices in a single layer on your prepared baking sheet.

Step 5: Bake the Chips

It’s time to bake! Place the baking sheet in the preheated oven and let the chips bake for 1 to 1.5 hours. Flip them halfway through to ensure even cooking. Keep an eye on them; you want them golden brown and crispy, not burnt!

Step 6: Cool and Serve

Once they’re done baking, remove the chips from the oven and let them cool for a few minutes. This cooling time allows them to crisp up even more. Serve them warm, and watch them disappear!

Tips for Success

  • Make sure to slice the zucchini evenly for consistent cooking.
  • Don’t skip the salting step; it’s essential for crispiness.
  • Experiment with different seasonings to find your favorite flavor profile.
  • Store any leftovers in an airtight container to maintain crunchiness.
  • For extra crunch, try using a wire rack on the baking sheet.

Equipment Needed

  • Baking Sheet: A standard baking sheet works well, but a wire rack can enhance airflow for extra crispiness.
  • Parchment Paper: This keeps the chips from sticking; aluminum foil is a good alternative.
  • Mixing Bowls: Use any size; just ensure they’re large enough for tossing ingredients.
  • Knife and Cutting Board: Essential for slicing the zucchini evenly.

Variations

  • Spicy Zucchini Chips: Add cayenne pepper or chili powder to the breadcrumb mixture for a fiery kick.
  • Herbed Zucchini Chips: Mix in dried herbs like oregano, thyme, or basil for an aromatic twist.
  • Cheesy Garlic Zucchini Chips: Use a blend of mozzarella and Parmesan for a gooey, cheesy experience.
  • Vegan Option: Substitute nutritional yeast for Parmesan and use a plant-based oil for coating.
  • Sweet Zucchini Chips: Sprinkle with cinnamon and a touch of sugar for a unique sweet snack.

Serving Suggestions

  • Pair your Crispy Baked Zucchini Chips with a zesty dip like ranch or tzatziki for added flavor.
  • Serve them alongside a fresh salad for a light lunch or dinner.
  • Enjoy with a cold beverage, like iced tea or a light beer, for a perfect snack combo.
  • For a fun presentation, stack them in a cone-shaped paper holder for a casual party vibe.

FAQs about Crispy Baked Zucchini Chips

Can I use other vegetables for this recipe? Absolutely! While zucchini is the star, you can experiment with other veggies like sweet potatoes, carrots, or even eggplant. Just adjust the cooking time as needed.

How do I store leftover zucchini chips? To keep them crispy, store any leftovers in an airtight container at room temperature. Avoid refrigerating them, as moisture can make them soggy.

Can I make these chips in an air fryer? Yes! If you have an air fryer, you can achieve a similar crispy texture. Just set it to 350°F and cook for about 15-20 minutes, flipping halfway through.

What can I dip these chips in? These Crispy Baked Zucchini Chips pair wonderfully with dips like hummus, guacamole, or a tangy yogurt-based dip. Get creative!

Are these chips suitable for a gluten-free diet? Yes! Simply use gluten-free breadcrumbs, and you’ll have a delicious snack that fits your dietary needs.

Final Thoughts

Making Crispy Baked Zucchini Chips is more than just a cooking task; it’s an adventure in flavor and texture. Each bite is a delightful crunch that brings joy to snack time, whether you’re enjoying them solo or sharing with friends and family. The satisfaction of creating a healthy treat that everyone loves is unmatched. Plus, the versatility of this recipe means you can customize it to suit your taste. So, roll up your sleeves, grab those zucchinis, and let the kitchen magic begin. You’ll be amazed at how something so simple can bring so much happiness!

jhessica

Crispy Baked Zucchini Chips: A Delicious Healthy Snack!

Crispy Baked Zucchini Chips are a delicious and healthy snack that are easy to make and perfect for satisfying your cravings.
Prep Time 15 minutes
Servings: 4 servings
Course: Snack
Cuisine: American
Calories: 150

Ingredients
  

  • 2 medium zucchinis sliced into 1/4-inch rounds
  • 1 teaspoon salt
  • 1/2 teaspoon black pepper
  • 1 teaspoon garlic powder
  • 1 teaspoon onion powder
  • 1/2 cup grated Parmesan cheese
  • 1 cup breadcrumbs panko or regular
  • 2 tablespoons olive oil

Method
 

  1. Preheat your oven to 225°F. Line a baking sheet with parchment paper.
  2. In a large bowl, toss the zucchini slices with salt and let them sit for about 10 minutes to draw out moisture. Pat the slices dry with paper towels.
  3. In a separate bowl, mix together the black pepper, garlic powder, onion powder, Parmesan cheese, and breadcrumbs.
  4. Drizzle the olive oil over the zucchini slices and toss to coat evenly.
  5. Dredge each zucchini slice in the breadcrumb mixture, pressing gently to adhere. Place the coated slices in a single layer on the prepared baking sheet.
  6. Bake in the preheated oven for 1 to 1.5 hours, flipping the chips halfway through, until they are golden brown and crispy.
  7. Remove from the oven and let cool for a few minutes before serving.

Nutrition

Serving: 1servingCalories: 150kcalCarbohydrates: 8gProtein: 7gFat: 10gSaturated Fat: 3gPolyunsaturated Fat: 7gCholesterol: 10mgSodium: 300mgFiber: 2gSugar: 2g

Notes

  • For extra flavor, try adding Italian seasoning or smoked paprika to the breadcrumb mixture.
  • You can also experiment with different cheeses, such as cheddar or nutritional yeast for a vegan option.
  • For a spicier kick, sprinkle some cayenne pepper into the breadcrumb mix.

Tried this recipe?

Let us know how it was!

Sausage and Egg Breakfast Pies: A Delicious Breakfast Idea!

Introduction to Sausage and Egg Breakfast Pies

There’s something magical about waking up to the smell of a warm, hearty breakfast. Sausage and Egg Breakfast Pies are not just a meal; they’re a comforting hug on a plate. Whether you’re rushing out the door or enjoying a leisurely weekend brunch, these pies are the perfect solution. They’re easy to make, packed with flavor, and can even impress your loved ones. Imagine slicing into a golden crust, revealing a savory filling that warms your soul. Trust me, once you try these, they’ll become a staple in your breakfast rotation!

Why You’ll Love This Sausage and Egg Breakfast Pie

Let’s be honest: mornings can be chaotic. That’s where these Sausage and Egg Breakfast Pies shine. They’re quick to whip up, taking just about 50 minutes from start to finish. The combination of savory sausage and creamy eggs wrapped in a flaky crust is simply irresistible. Plus, they’re versatile! You can customize them to suit your taste, making breakfast a delightful adventure every time.

Ingredients for Sausage and Egg Breakfast Pies

Gathering the right ingredients is the first step to creating these delicious Sausage and Egg Breakfast Pies. Here’s what you’ll need:

  • Breakfast sausage: This is the star of the show! Choose your favorite brand or even a spicy variety for an extra kick.
  • Shredded cheddar cheese: Adds a creamy, melty texture. Feel free to swap it for pepper jack or mozzarella if you’re feeling adventurous.
  • Large eggs: The foundation of the filling, providing protein and richness. Fresh eggs make a noticeable difference!
  • Milk: A splash of milk makes the egg mixture fluffy and light. You can use whole, skim, or even a non-dairy alternative.
  • Salt and black pepper: Essential seasonings that enhance the flavors. Adjust to your taste preferences.
  • Refrigerated pie crusts: For convenience, these save time. You can also make your own if you’re up for a little baking challenge!
  • Chopped fresh chives (optional): A lovely garnish that adds a pop of color and a mild onion flavor. Perfect for those who enjoy a fresh touch.

For exact measurements, check the bottom of the article where you can find everything listed for easy printing. Happy cooking!

How to Make Sausage and Egg Breakfast Pies

Step 1: Preheat the Oven

Preheating your oven is a crucial first step. It ensures that your Sausage and Egg Breakfast Pies bake evenly and develop that golden, flaky crust we all love. Set your oven to 375°F. This temperature is just right for cooking the filling through while giving the crust a beautiful color.

Step 2: Cook the Sausage

In a large skillet over medium heat, add your breakfast sausage. Use a spatula to break it apart as it cooks. You want it browned and fully cooked, which usually takes about 5-7 minutes. Keep an eye on it; stirring occasionally helps it brown evenly. Once it’s done, drain any excess grease. This step is essential to avoid a soggy pie. Let the sausage cool slightly while you prepare the egg mixture.

Step 3: Prepare the Egg Mixture

In a mixing bowl, crack open the large eggs and add the milk, salt, and black pepper. Whisk them together until well combined. The goal is to create a fluffy mixture that will hold all those delicious flavors. Next, stir in the cooked sausage and shredded cheddar cheese. This combination is where the magic happens! Make sure everything is evenly mixed so every bite is packed with flavor.

Step 4: Assemble the Pie

Roll out one of the refrigerated pie crusts and fit it into a 9-inch pie pan. This crust will be the base for your filling. Pour the sausage and egg mixture into the crust, spreading it evenly. Now, roll out the second pie crust and place it over the filling. Crimp the edges to seal it well, ensuring no filling escapes during baking. Don’t forget to cut a few slits in the top crust. This allows steam to escape and helps the crust bake perfectly.

Step 5: Bake the Pie

Place your assembled pie in the preheated oven and bake for 30-35 minutes. Keep an eye on it as it bakes. You want the crust to turn a lovely golden brown and the filling to be set. To check for doneness, gently shake the pie; if the filling jiggles slightly but is mostly firm, it’s ready. The aroma wafting through your kitchen will be irresistible!

Step 6: Cool and Slice

Once your pie is out of the oven, let it cool for about 10 minutes. This cooling time is essential; it allows the filling to set further, making slicing easier. After cooling, grab a sharp knife and slice into those golden layers. Serve warm and enjoy every bite!

Tips for Success

  • Use fresh ingredients for the best flavor. Fresh eggs and quality sausage make a noticeable difference.
  • Don’t rush the cooling process. It helps the filling set, making slicing easier.
  • Experiment with spices! A pinch of red pepper flakes can add a delightful kick.
  • For a flaky crust, avoid overworking the dough when crimping the edges.
  • Store leftovers in the fridge for a quick breakfast option later in the week.

Equipment Needed

  • 9-inch pie pan: Essential for baking your pie. A tart pan can work too!
  • Large skillet: For cooking the sausage. A non-stick pan makes cleanup easier.
  • Mixing bowl: Needed for whisking the egg mixture. Any bowl will do!
  • Spatula: Perfect for breaking up the sausage and mixing ingredients.
  • Sharp knife: For slicing the pie once it’s cooled.

Variations of Sausage and Egg Breakfast Pies

  • Vegetarian Option: Swap the sausage for sautéed mushrooms, spinach, and bell peppers for a hearty, meat-free version.
  • Spicy Kick: Add diced jalapeños or a sprinkle of cayenne pepper to the egg mixture for a fiery twist.
  • Herbed Delight: Incorporate fresh herbs like basil or parsley into the filling for a burst of freshness.
  • Cheese Lovers: Mix in different cheeses such as feta or goat cheese for a unique flavor profile.
  • Gluten-Free Crust: Use a gluten-free pie crust to accommodate dietary restrictions without sacrificing taste.

Serving Suggestions for Sausage and Egg Breakfast Pies

  • Fresh Fruit: Serve with a side of mixed berries or sliced oranges for a refreshing contrast.
  • Coffee or Tea: Pair with a hot cup of coffee or your favorite tea to kickstart your morning.
  • Presentation: Garnish with fresh chives or parsley for a pop of color and flavor.
  • Hot Sauce: Offer a selection of hot sauces for those who enjoy a spicy kick.

FAQs about Sausage and Egg Breakfast Pies

Can I make Sausage and Egg Breakfast Pies ahead of time?

Absolutely! You can prepare the filling and assemble the pies a day in advance. Just cover them and store them in the fridge. When you’re ready to bake, pop them in the oven straight from the fridge, adding a few extra minutes to the baking time.

What can I substitute for breakfast sausage?

If you’re looking for alternatives, turkey sausage or chicken sausage work well. For a vegetarian option, try using sautéed vegetables or a meat substitute like tempeh or tofu, seasoned to your liking.

How do I store leftovers?

Leftover Sausage and Egg Breakfast Pies can be stored in an airtight container in the fridge for up to 3 days. Reheat slices in the microwave or oven until warmed through. They make for a quick breakfast option!

Can I freeze these breakfast pies?

Yes, you can freeze them! After baking, let the pies cool completely, then wrap them tightly in plastic wrap and foil. They can be frozen for up to 2 months. Thaw in the fridge overnight before reheating.

What sides pair well with Sausage and Egg Breakfast Pies?

These pies are delicious on their own, but you can enhance your breakfast with sides like fresh fruit, a light salad, or crispy hash browns. A hot cup of coffee or tea also complements the meal perfectly!

Final Thoughts

Creating Sausage and Egg Breakfast Pies is more than just cooking; it’s about crafting a moment of joy to share with family or friends. The aroma that fills your kitchen as they bake is simply irresistible, drawing everyone in. Each slice offers a delightful combination of flavors and textures, making breakfast feel special. Whether you enjoy them on a busy weekday or a relaxed weekend, these pies are sure to become a cherished part of your morning routine. So roll up your sleeves, gather your ingredients, and let the deliciousness unfold. Happy cooking!

jhessica

Sausage and Egg Breakfast Pies: A Delicious Breakfast Idea!

Sausage and Egg Breakfast Pies are a delicious and hearty breakfast option, perfect for any morning.
Prep Time 15 minutes
Cook Time 35 minutes
Total Time 50 minutes
Servings: 6 servings
Course: Breakfast
Cuisine: American
Calories: 320

Ingredients
  

  • 1 pound breakfast sausage
  • 1 cup shredded cheddar cheese
  • 6 large eggs
  • 1/2 cup milk
  • 1/2 teaspoon salt
  • 1/4 teaspoon black pepper
  • 1 package 1 lb refrigerated pie crusts (2 crusts)
  • 1 tablespoon chopped fresh chives optional

Method
 

  1. Preheat the oven to 375°F.
  2. In a large skillet over medium heat, cook the breakfast sausage until browned and fully cooked, breaking it apart with a spatula. Drain any excess grease and set aside to cool slightly.
  3. In a mixing bowl, whisk together the eggs, milk, salt, and pepper until well combined. Stir in the cooked sausage and shredded cheddar cheese.
  4. Roll out one pie crust and fit it into a 9-inch pie pan. Pour the sausage and egg mixture into the crust.
  5. Roll out the second pie crust and place it over the filling. Crimp the edges to seal and cut a few slits in the top crust to allow steam to escape.
  6. Bake in the preheated oven for 30-35 minutes, or until the crust is golden brown and the filling is set.
  7. Let cool for 10 minutes before slicing.

Nutrition

Serving: 1pie sliceCalories: 320kcalCarbohydrates: 18gProtein: 15gFat: 22gSaturated Fat: 8gPolyunsaturated Fat: 14gCholesterol: 210mgSodium: 600mgFiber: 1gSugar: 1g

Notes

  • For a spicier kick, add 1/2 teaspoon of red pepper flakes to the egg mixture.
  • You can also substitute the cheddar cheese with pepper jack or mozzarella for a different flavor profile.

Tried this recipe?

Let us know how it was!

Persian Chicken Thighs with Apricots and Spiced Almonds delight!

Introduction to Persian Chicken Thighs with Apricots and Spiced Almonds

There’s something magical about the aroma of spices wafting through the kitchen, isn’t there?

When I first discovered Persian Chicken Thighs with Apricots and Spiced Almonds, it felt like a culinary adventure right at home.

This dish is not just a meal; it’s a warm embrace on a busy weeknight or a showstopper for your next gathering.

With tender chicken thighs, sweet apricots, and crunchy spiced almonds, it’s a delightful blend of flavors that will impress your loved ones without keeping you chained to the stove.

Let’s dive into this flavorful journey together!

Why You’ll Love This Persian Chicken Thighs with Apricots and Spiced Almonds

This dish is a game-changer for busy nights.

It’s quick to prepare, taking just about 15 minutes of hands-on time, and the oven does the rest.

The combination of sweet apricots and spiced almonds elevates the chicken to a whole new level of deliciousness.

Plus, it’s gluten-free, making it a fantastic option for everyone at the table.

Trust me, your taste buds will thank you!

Ingredients for Persian Chicken Thighs with Apricots and Spiced Almonds

Creating this delightful dish starts with gathering the right ingredients.

Here’s what you’ll need:

  • Bone-in, skin-on chicken thighs: These are juicy and flavorful, perfect for absorbing all the spices.
  • Salt and black pepper: Essential for seasoning, enhancing the natural flavors of the chicken.
  • Olive oil: This adds richness and helps achieve that beautiful golden sear.
  • Onion: A finely chopped onion brings sweetness and depth to the dish.
  • Garlic: Minced garlic adds a punch of flavor that complements the spices.
  • Ground cinnamon: This warm spice adds a hint of sweetness and a touch of exotic flair.
  • Ground cumin: Earthy and aromatic, cumin is a staple in Persian cuisine.
  • Ground turmeric: Not only does it add color, but it also brings a subtle earthiness.
  • Cayenne pepper: For those who like a little heat, adjust this to your taste.
  • Chicken broth: This forms the base of the sauce, infusing the dish with savory goodness.
  • Dried apricots: Their natural sweetness balances the spices beautifully.
  • Slivered almonds: Toasted for crunch, they add a delightful texture contrast.
  • Honey: A drizzle of honey enhances the sweetness and adds a glossy finish.
  • Fresh parsley: Chopped for garnish, it adds a pop of color and freshness.

For exact measurements, check the bottom of the article where you can find everything available for printing.

Feel free to experiment with ingredients!

For instance, if you’re out of apricots, dried figs or prunes can work just as well.

And if you prefer boneless chicken, go ahead! Just adjust the cooking time accordingly.

How to Make Persian Chicken Thighs with Apricots and Spiced Almonds

Cooking this delightful dish is a breeze, and I’m here to guide you through each step.

Let’s get started!

Step 1: Preheat and Season

First things first, preheat your oven to 375°F (190°C).

While that’s warming up, season your bone-in, skin-on chicken thighs generously with salt and black pepper on both sides.

This simple step enhances the chicken’s natural flavors and sets the stage for a delicious meal.

Step 2: Sear the Chicken

Next, grab a large oven-safe skillet and heat 2 tablespoons of olive oil over medium-high heat.

Once the oil is shimmering, carefully place the chicken thighs skin-side down in the skillet.

Sear them for about 5-7 minutes until they turn a beautiful golden brown.

Flip the chicken and cook for another 3-4 minutes.

This step locks in the juices and adds a lovely crust.

Remove the chicken from the skillet and set it aside for now.

Step 3: Sauté Onions and Garlic

In the same skillet, toss in your finely chopped onion.

Sauté for about 5 minutes until it becomes translucent and fragrant.

Then, add 3 cloves of minced garlic and cook for an additional minute.

The aroma will be irresistible, and it’s just the beginning!

Step 4: Add Spices and Broth

Now, it’s time to bring in the spices!

Stir in 1 teaspoon of ground cinnamon, 1 teaspoon of ground cumin, 1/2 teaspoon of ground turmeric, and a pinch of cayenne pepper.

Cook this mixture for about a minute until the spices release their fragrant oils.

Then, pour in 1 cup of chicken broth and add 1 cup of halved dried apricots.

Bring everything to a gentle simmer, allowing those flavors to meld beautifully.

Step 5: Bake the Chicken

Return the seared chicken thighs to the skillet, skin-side up.

Drizzle 2 tablespoons of honey over the top for that sweet touch.

Transfer the skillet to your preheated oven and bake for 30-35 minutes.

You’ll know it’s done when the chicken reaches an internal temperature of 165°F (74°C).

The skin will be crispy, and the meat tender and juicy.

Step 6: Toast the Almonds

While the chicken is baking, let’s toast the slivered almonds.

In a dry skillet over medium heat, add 1/2 cup of slivered almonds.

Stir them frequently for about 3-5 minutes until they turn golden brown.

This adds a delightful crunch to your dish!

Step 7: Garnish and Serve

Once the chicken is done, remove it from the oven and let it rest for 5 minutes.

This helps the juices redistribute, making every bite succulent.

Garnish with the toasted almonds and a sprinkle of fresh chopped parsley for a pop of color.

Serve it up and enjoy the delightful flavors of your Persian Chicken Thighs with Apricots and Spiced Almonds!

Tips for Success

  • Always let the chicken rest after baking; it keeps the meat juicy.
  • Adjust the cayenne pepper to suit your heat preference.
  • For extra flavor, marinate the chicken thighs in spices for a few hours before cooking.
  • Use a meat thermometer to ensure perfect doneness.
  • Pair with couscous or rice to soak up the delicious sauce.

Equipment Needed

  • Oven-safe skillet: A cast-iron or stainless-steel skillet works great.
  • Meat thermometer: Essential for checking chicken doneness; a simple instant-read thermometer will do.
  • Cutting board: A sturdy board for chopping onions and garlic.
  • Sharp knife: For easy and precise cutting.

Variations

  • Herb-Infused: Add fresh herbs like thyme or rosemary for an aromatic twist.
  • Fruit Swap: Substitute dried apricots with dried figs or prunes for a different flavor profile.
  • Spicy Kick: Incorporate a diced jalapeño or a splash of sriracha for an extra heat boost.
  • Nut Alternatives: Use pistachios or walnuts instead of almonds for a unique crunch.
  • Vegetarian Option: Replace chicken with hearty vegetables like eggplant or cauliflower, adjusting cooking times accordingly.

Serving Suggestions

  • Couscous or Rice: Serve the chicken over fluffy couscous or fragrant basmati rice to soak up the delicious sauce.
  • Fresh Salad: Pair with a light cucumber and tomato salad for a refreshing contrast.
  • Wine Pairing: A chilled white wine, like Sauvignon Blanc, complements the dish beautifully.
  • Presentation: Serve in a large platter, garnished with extra parsley and almonds for a stunning display.

FAQs about Persian Chicken Thighs with Apricots and Spiced Almonds

Can I use boneless chicken thighs for this recipe?

Absolutely! Boneless chicken thighs can be used, but remember to adjust the cooking time. They may cook faster, so keep an eye on them to avoid drying out.

What can I substitute for dried apricots?

If you don’t have dried apricots on hand, dried figs or prunes work wonderfully as substitutes. They’ll add a similar sweetness and texture to the dish.

How can I make this dish spicier?

For a spicier kick, increase the amount of cayenne pepper or add a pinch of red pepper flakes. You can also toss in some diced jalapeños for an extra heat boost!

Can I prepare this dish in advance?

Yes! You can marinate the chicken thighs in the spices and honey a few hours ahead of time. Just store them in the fridge until you’re ready to cook.

What sides pair well with Persian Chicken Thighs?

This dish is fantastic served over fluffy couscous or rice. A light salad or roasted vegetables also make great accompaniments, balancing the rich flavors beautifully.

Final Thoughts

Cooking Persian Chicken Thighs with Apricots and Spiced Almonds is more than just preparing a meal; it’s about creating a moment of joy.

The sweet and savory flavors dance together, making each bite a delightful experience.

Whether you’re sharing it with family or enjoying a quiet dinner, this dish brings warmth and comfort to the table.

Plus, the ease of preparation means you can focus on what truly matters—connecting with those you love.

So, roll up your sleeves, embrace the aromas, and let this recipe transport you to a world of culinary delight!

jhessica

Persian Chicken Thighs with Apricots and Spiced Almonds delight!

A delightful Persian dish featuring chicken thighs cooked with apricots and spiced almonds, perfect for a flavorful meal.
Prep Time 15 minutes
Cook Time 40 minutes
Total Time 55 minutes
Servings: 4 servings
Course: Main Course
Cuisine: Persian
Calories: 450

Ingredients
  

  • 2 pounds bone-in skin-on chicken thighs
  • 1 teaspoon salt
  • 1 teaspoon black pepper
  • 2 tablespoons olive oil
  • 1 large onion finely chopped
  • 3 cloves garlic minced
  • 1 teaspoon ground cinnamon
  • 1 teaspoon ground cumin
  • 1/2 teaspoon ground turmeric
  • 1/4 teaspoon cayenne pepper adjust to taste
  • 1 cup chicken broth
  • 1 cup dried apricots halved
  • 1/2 cup slivered almonds
  • 2 tablespoons honey
  • 1/4 cup fresh parsley chopped (for garnish)

Method
 

  1. Preheat your oven to 375°F (190°C). Season the chicken thighs with salt and black pepper on both sides.
  2. In a large oven-safe skillet, heat the olive oil over medium-high heat. Add the chicken thighs, skin-side down, and sear for about 5-7 minutes until golden brown. Flip the chicken and cook for another 3-4 minutes. Remove the chicken from the skillet and set aside.
  3. In the same skillet, add the chopped onion and sauté for about 5 minutes until translucent. Add the minced garlic and cook for an additional minute.
  4. Stir in the cinnamon, cumin, turmeric, and cayenne pepper, cooking for another minute until fragrant.
  5. Pour in the chicken broth and add the dried apricots. Bring the mixture to a simmer.
  6. Return the chicken thighs to the skillet, skin-side up, and drizzle with honey.
  7. Transfer the skillet to the preheated oven and bake for 30-35 minutes, or until the chicken is cooked through and reaches an internal temperature of 165°F (74°C).
  8. While the chicken is baking, toast the slivered almonds in a dry skillet over medium heat for about 3-5 minutes, stirring frequently, until golden brown.
  9. Once the chicken is done, remove it from the oven and let it rest for 5 minutes. Garnish with toasted almonds and fresh parsley before serving.

Nutrition

Serving: 1servingCalories: 450kcalCarbohydrates: 18gProtein: 30gFat: 30gSaturated Fat: 6gPolyunsaturated Fat: 24gCholesterol: 120mgSodium: 600mgFiber: 2gSugar: 18g

Notes

  • For a spicier kick, increase the cayenne pepper or add a pinch of red pepper flakes.
  • Serve the chicken over a bed of fluffy couscous or rice to soak up the delicious sauce.

Tried this recipe?

Let us know how it was!

Ground Beef Tostadas: Discover This Quick Recipe!

Introduction to Ground Beef Tostadas

After a long day, the last thing I want is to spend hours in the kitchen. That’s where Ground Beef Tostadas come to the rescue! This quick recipe is not just a meal; it’s a way to bring the family together without the fuss. Picture crispy tostada shells piled high with seasoned beef, fresh veggies, and creamy toppings. It’s a dish that impresses without the stress. Whether you’re feeding a crowd or just looking for a satisfying weeknight dinner, these tostadas are your go-to solution. Trust me, they’ll become a favorite in no time!

Why You’ll Love This Ground Beef Tostadas

Ground Beef Tostadas are a game-changer for busy weeknights. They come together in just 25 minutes, making them perfect for those evenings when time is tight. The combination of crispy shells and savory beef creates a flavor explosion that’s hard to resist. Plus, everyone can customize their toppings, making it a fun, interactive meal. It’s quick, delicious, and sure to please even the pickiest eaters!

Ingredients for Ground Beef Tostadas

Gathering the right ingredients is key to making delicious Ground Beef Tostadas. Here’s what you’ll need:

  • Ground beef: The star of the show! Choose lean ground beef for a healthier option.
  • Chili powder: Adds a warm, spicy kick that elevates the flavor.
  • Cumin: This earthy spice brings depth and a hint of smokiness.
  • Garlic powder: A must-have for that savory aroma and taste.
  • Onion powder: Enhances the overall flavor profile without the hassle of chopping onions.
  • Salt and pepper: Essential for seasoning and balancing flavors.
  • Tostada shells: The crispy base for your toppings. You can buy them pre-made or make your own!
  • Refried beans: A creamy layer that adds richness and protein.
  • Shredded lettuce: For a fresh crunch that lightens up the dish.
  • Diced tomatoes: Juicy and vibrant, they add color and freshness.
  • Shredded cheddar cheese: Melty and delicious, it’s the perfect finishing touch.
  • Sour cream: Adds creaminess and balances the spices.
  • Sliced jalapeños (optional): For those who like a spicy kick!
  • Fresh cilantro (optional): A sprinkle of this herb brightens up the flavors.

For exact quantities, check the bottom of the article where you can find everything listed for easy printing. Feel free to mix and match ingredients based on your preferences or what you have on hand!

How to Make Ground Beef Tostadas

Creating Ground Beef Tostadas is a breeze! Follow these simple steps, and you’ll have a delicious meal ready in no time. Let’s dive in!

Step 1: Cook the Ground Beef

Start by heating a large skillet over medium heat. Add the ground beef and cook it until it’s browned, about 5-7 minutes. Make sure to break it apart with a spatula as it cooks. If there’s excess fat, drain it off. This step is crucial for a leaner, healthier tostada!

Step 2: Season the Beef

Once the beef is cooked, it’s time to add flavor. Stir in the chili powder, cumin, garlic powder, onion powder, salt, and pepper. Cook for an additional 2-3 minutes. The spices will release their aromas, making your kitchen smell amazing. Trust me, this is where the magic happens!

Step 3: Prepare the Tostada Shells

While the beef is cooking, prepare your tostada shells. Follow the package instructions, usually involving baking or frying until they’re crispy. If you’re feeling adventurous, you can even make your own from corn tortillas. Just fry them in a bit of oil until golden brown!

Step 4: Assemble the Tostadas

Now comes the fun part! Spread a layer of refried beans on each tostada shell. This creamy base adds richness and helps hold everything together. Then, top each shell with a generous portion of the seasoned ground beef. Don’t be shy—load them up!

Step 5: Add Toppings

It’s time to get creative with toppings! Add shredded lettuce, diced tomatoes, and shredded cheddar cheese on top of the beef. These fresh ingredients not only add color but also a delightful crunch. Feel free to mix and match based on your taste!

Step 6: Garnish and Serve

Finish off your Ground Beef Tostadas with a dollop of sour cream and jalapeño slices if you like a bit of heat. A sprinkle of fresh cilantro adds a pop of color and flavor. Serve immediately and watch everyone dig in with smiles on their faces!

Tips for Success

  • Use lean ground beef to keep your tostadas healthier without sacrificing flavor.
  • Don’t skip draining excess fat; it makes a big difference in taste and texture.
  • Experiment with toppings! Avocado or guacamole can add a creamy twist.
  • For extra crunch, toast your tostada shells in the oven for a few minutes.
  • Make a double batch of beef and freeze leftovers for a quick meal later.

Equipment Needed

  • Large skillet: A non-stick skillet works wonders for easy cooking and cleanup.
  • Spatula: Essential for breaking up the beef and flipping tostada shells.
  • Measuring spoons: Handy for precise seasoning.
  • Baking sheet: If you’re baking your tostada shells, this is a must!

Variations

  • Ground Turkey or Chicken: Swap out the beef for ground turkey or chicken for a leaner option that still packs a punch.
  • Vegetarian Tostadas: Use black beans or lentils instead of meat for a hearty, plant-based version.
  • Spicy Kick: Add diced green chilies or a splash of hot sauce to the beef mixture for an extra layer of heat.
  • Cheesy Delight: Mix in some cream cheese with the refried beans for a creamy, cheesy base.
  • Grilled Veggies: Top your tostadas with grilled bell peppers and zucchini for a fresh, smoky flavor.

Serving Suggestions

  • Side Salad: Pair your tostadas with a light, zesty salad for a refreshing contrast.
  • Mexican Rice: Serve with a side of fluffy Mexican rice to soak up all the flavors.
  • Cold Beverages: Enjoy with a chilled cerveza or a refreshing limeade.
  • Presentation: Arrange tostadas on a colorful platter for a vibrant table display.

FAQs about Ground Beef Tostadas

Can I make Ground Beef Tostadas ahead of time?

Absolutely! You can prepare the seasoned beef and refried beans in advance. Just store them in the fridge and assemble the tostadas when you’re ready to eat. This makes for a quick meal on busy nights!

What can I substitute for ground beef?

If you’re looking for a leaner option, ground turkey or chicken works great. For a vegetarian twist, try using black beans or lentils. Both alternatives will still deliver delicious flavor!

How do I store leftovers?

Store any leftover beef and toppings separately in airtight containers in the fridge. The tostada shells can get soggy, so it’s best to keep them separate until you’re ready to enjoy them again.

Can I freeze Ground Beef Tostadas?

Yes, you can freeze the seasoned beef! Just let it cool, then transfer it to a freezer-safe container. When you’re ready to eat, thaw it in the fridge and reheat before assembling your tostadas.

What toppings can I add to my Ground Beef Tostadas?

The sky’s the limit! Besides the classic toppings like lettuce, tomatoes, and cheese, consider adding avocado, guacamole, or even pickled onions for an extra flavor boost. Get creative!

Final Thoughts

Ground Beef Tostadas are more than just a meal; they’re a celebration of flavors and family. The joy of gathering around the table, customizing each tostada, and sharing laughter is what makes this dish special. It’s quick enough for a busy weeknight yet impressive enough for a casual get-together. Each bite is a delightful crunch, bursting with savory goodness. I hope this recipe brings as much joy to your kitchen as it has to mine. So, roll up your sleeves, gather your loved ones, and dive into a plate of these delicious tostadas!

jhessica

Ground Beef Tostadas: Discover This Quick Recipe!

A quick and delicious recipe for Ground Beef Tostadas, perfect for a weeknight meal.
Prep Time 10 minutes
Cook Time 15 minutes
Total Time 25 minutes
Servings: 4 servings
Course: Main Dish
Cuisine: Mexican
Calories: 450

Ingredients
  

  • 1 pound ground beef
  • 1 teaspoon chili powder
  • 1 teaspoon cumin
  • 1 teaspoon garlic powder
  • 1 teaspoon onion powder
  • Salt and pepper to taste
  • 8 tostada shells
  • 1 cup refried beans
  • 1 cup shredded lettuce
  • 1 cup diced tomatoes
  • 1 cup shredded cheddar cheese
  • 1/2 cup sour cream
  • 1/4 cup sliced jalapeños optional
  • Fresh cilantro for garnish optional

Method
 

  1. In a large skillet over medium heat, cook the ground beef until browned, about 5-7 minutes. Drain excess fat if necessary.
  2. Stir in chili powder, cumin, garlic powder, onion powder, salt, and pepper. Cook for an additional 2-3 minutes until the spices are fragrant.
  3. While the beef is cooking, prepare the tostada shells according to package instructions, usually by baking or frying until crispy.
  4. Spread a layer of refried beans on each tostada shell.
  5. Top each tostada with a generous portion of the seasoned ground beef.
  6. Add shredded lettuce, diced tomatoes, and shredded cheddar cheese on top of the beef.
  7. Finish with a dollop of sour cream and jalapeño slices if desired.
  8. Garnish with fresh cilantro before serving.

Nutrition

Serving: 1tostadaCalories: 450kcalCarbohydrates: 30gProtein: 25gFat: 30gSaturated Fat: 12gPolyunsaturated Fat: 18gCholesterol: 80mgSodium: 800mgFiber: 5gSugar: 3g

Notes

  • For a spicier kick, add diced green chilies to the beef mixture.
  • You can also substitute ground turkey or chicken for a leaner option.
  • Consider adding avocado slices or guacamole for extra creaminess.

Tried this recipe?

Let us know how it was!

Stay Connected

Get recipes via email: