Get my cookbooks

Shrimp Scampi with Garlic Butter: A Quick, Delicious Recipe!

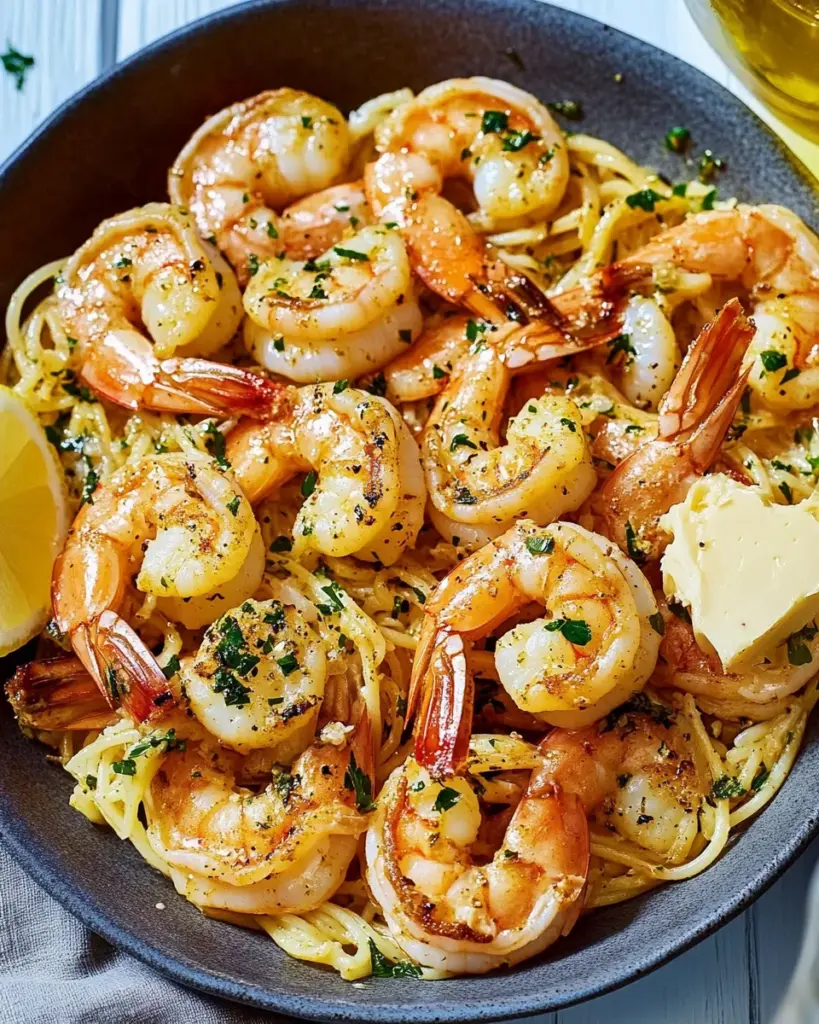
Introduction to Shrimp Scampi with Garlic Butter

There’s something magical about a dish that can transport you to a cozy Italian bistro in just 25 minutes. Shrimp Scampi with Garlic Butter is that dish. It’s a quick solution for those busy weeknights when you want to impress your loved ones without spending hours in the kitchen. The rich aroma of garlic and butter fills the air, making your home feel warm and inviting. Plus, it’s a crowd-pleaser, perfect for family dinners or a casual gathering with friends. Trust me, once you try this recipe, it’ll become a staple in your culinary repertoire.

Why You’ll Love This Shrimp Scampi with Garlic Butter

This Shrimp Scampi with Garlic Butter is a game-changer for your weeknight dinners. It’s incredibly easy to whip up, taking just 25 minutes from start to finish. The combination of succulent shrimp, rich garlic butter, and a splash of white wine creates a flavor explosion that’s hard to resist. Plus, it’s versatile enough to impress guests or satisfy a hungry family. You’ll find yourself making this dish again and again!

Ingredients for Shrimp Scampi with Garlic Butter

Gathering the right ingredients is the first step to creating a delicious Shrimp Scampi with Garlic Butter. Here’s what you’ll need:

  • Large shrimp: Fresh or frozen, peeled and deveined. They’re the star of the dish, bringing a sweet, briny flavor.
  • Linguine or spaghetti: Choose your favorite pasta. It’s the perfect vehicle for soaking up that luscious garlic butter sauce.
  • Unsalted butter: This adds richness and depth. Using unsalted allows you to control the seasoning.
  • Olive oil: A splash of this adds a fruity note and helps prevent the butter from burning.
  • Garlic: Minced garlic is essential for that aromatic base. It’s what makes the dish sing!
  • Red pepper flakes: Optional, but they add a nice kick. Adjust to your heat preference.
  • Dry white wine: A splash enhances the sauce’s flavor. Sauvignon Blanc works beautifully here.
  • Lemon: Both juice and zest brighten the dish, balancing the richness of the butter.
  • Fresh parsley: Chopped parsley adds a pop of color and freshness, making the dish visually appealing.
  • Salt and pepper: Essential for seasoning. Adjust to taste for the perfect flavor.

For those looking to mix things up, consider substituting shrimp with scallops or chicken. If you’re aiming for a lighter version, zucchini noodles can be a fantastic alternative. You’ll find the exact quantities for each ingredient at the bottom of the article, ready for printing!

How to Make Shrimp Scampi with Garlic Butter

Now that you have your ingredients ready, let’s dive into the cooking process. Making Shrimp Scampi with Garlic Butter is straightforward and fun. Follow these steps, and you’ll have a delicious meal on the table in no time!

Step 1: Cook the Pasta

Start by boiling a large pot of salted water. Once it’s bubbling, add your linguine or spaghetti. Cook according to the package instructions until it’s al dente. This usually takes about 8-10 minutes. Remember to reserve half a cup of that pasta water before draining. It’ll help bring everything together later!

Step 2: Prepare the Skillet

While the pasta cooks, grab a large skillet and place it over medium heat. Add the unsalted butter and olive oil. Let them melt together, creating a rich base for your sauce. The combination of butter and oil prevents burning while adding depth to the flavor.

Step 3: Sauté the Garlic

Once the butter is melted, toss in the minced garlic and red pepper flakes if you’re using them. Sauté for about a minute, stirring constantly. You want the garlic to become fragrant but not browned. Burnt garlic can turn bitter, and we don’t want that!

Step 4: Cook the Shrimp

Now it’s time to add the star of the show—your shrimp! Season them with salt and pepper, then add them to the skillet. Cook for 2-3 minutes, flipping them halfway through. They’re done when they turn pink and opaque. Keep an eye on them; overcooked shrimp can become rubbery!

Step 5: Add Wine and Lemon

Pour in the dry white wine and squeeze in the lemon juice. Let it simmer for 2-3 minutes. This step is crucial as it reduces the wine and intensifies the flavors. The acidity from the lemon balances the richness of the butter, creating a harmonious sauce.

Step 6: Combine with Pasta

Now, add the drained pasta to the skillet along with the reserved pasta water and lemon zest. Toss everything together until the pasta is well coated in that luscious garlic butter sauce. If it seems a bit dry, add more pasta water until you reach your desired consistency.

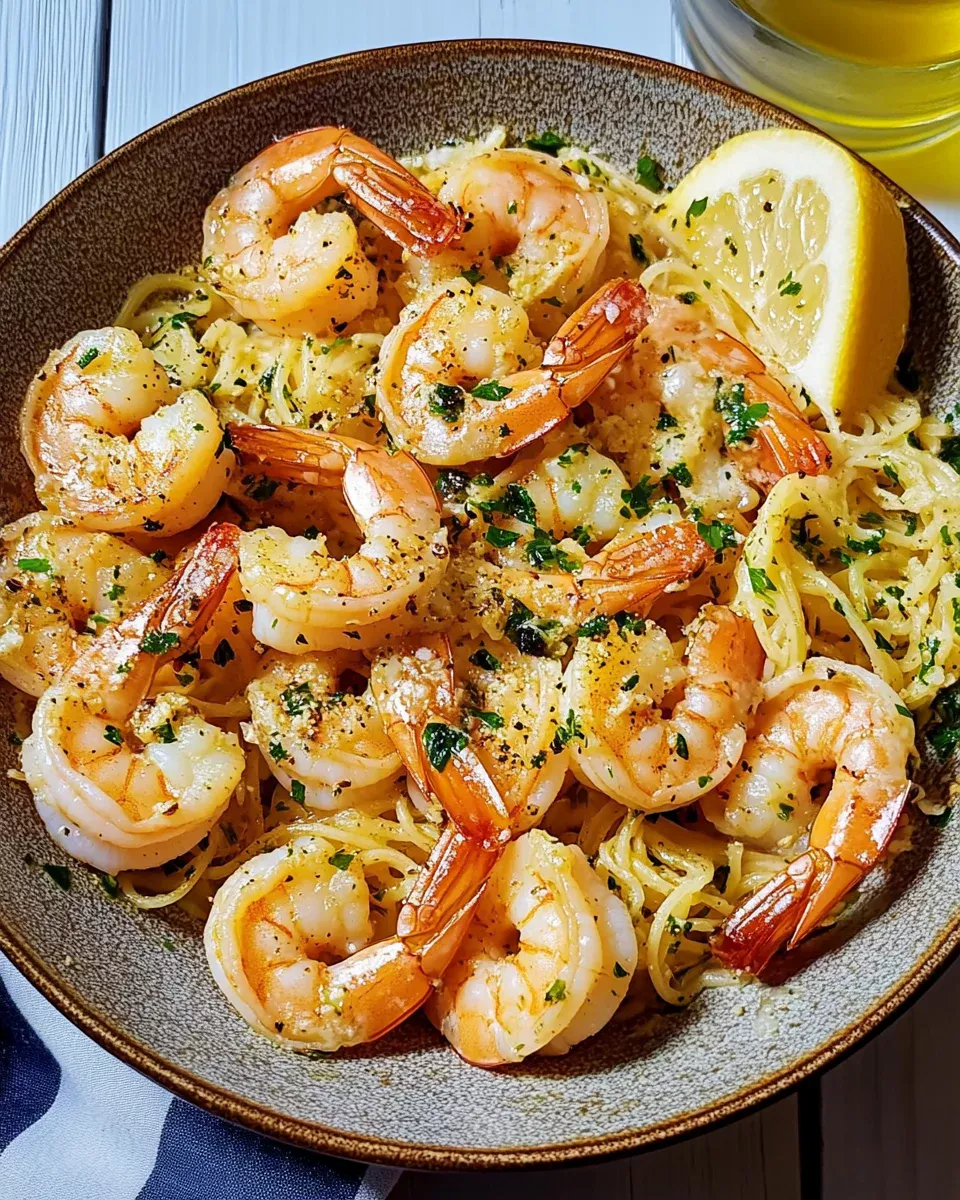
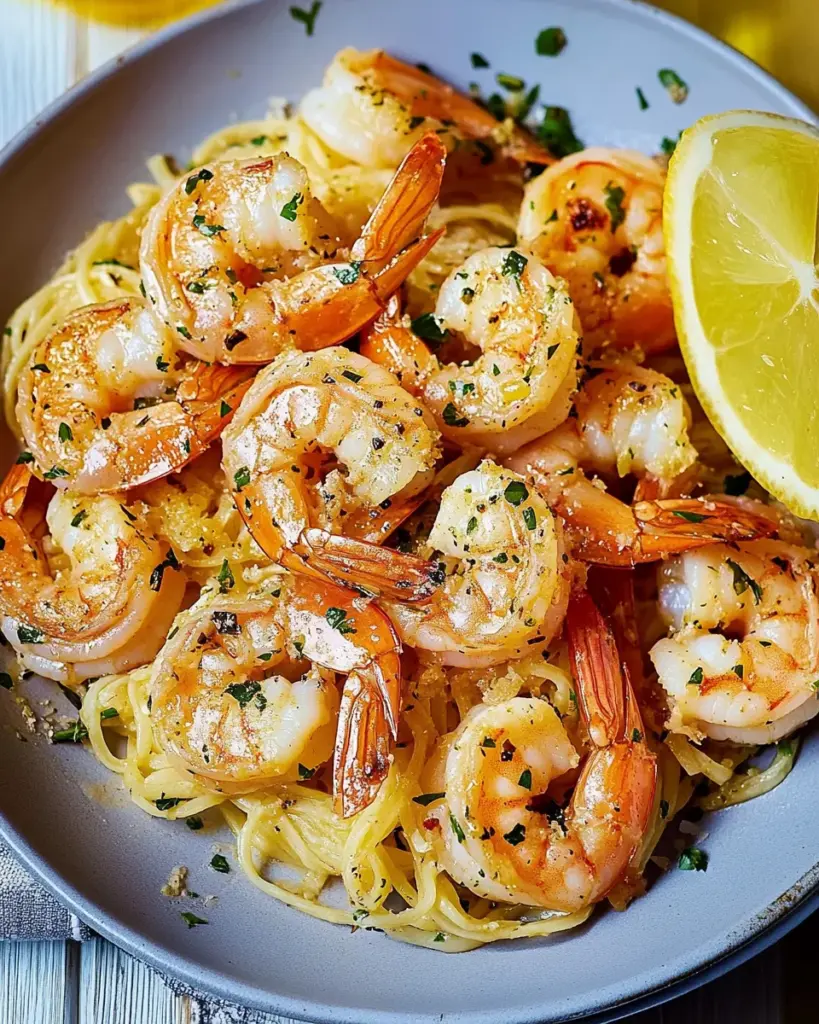
Step 7: Garnish and Serve

Remove the skillet from heat and sprinkle with fresh parsley. This adds a burst of color and freshness. Serve your Shrimp Scampi with Garlic Butter immediately, and watch everyone dig in with delight. Enjoy the compliments!

Tips for Success

  • Always use fresh shrimp for the best flavor. If using frozen, thaw them completely before cooking.
  • Don’t skip the reserved pasta water; it helps create a silky sauce.
  • Adjust the red pepper flakes to your heat preference—start small and add more if desired.
  • For a richer flavor, consider adding a pinch of grated Parmesan cheese before serving.
  • Keep an eye on the garlic; it can burn quickly!

Equipment Needed

  • Large pot: For boiling pasta. A deep skillet can work in a pinch.
  • Large skillet: Essential for sautéing. A non-stick skillet makes cleanup easier.
  • Colander: For draining pasta. A slotted spoon can also do the job.
  • Measuring cups and spoons: For accuracy in ingredients. Use your eyes if you’re feeling adventurous!

Variations

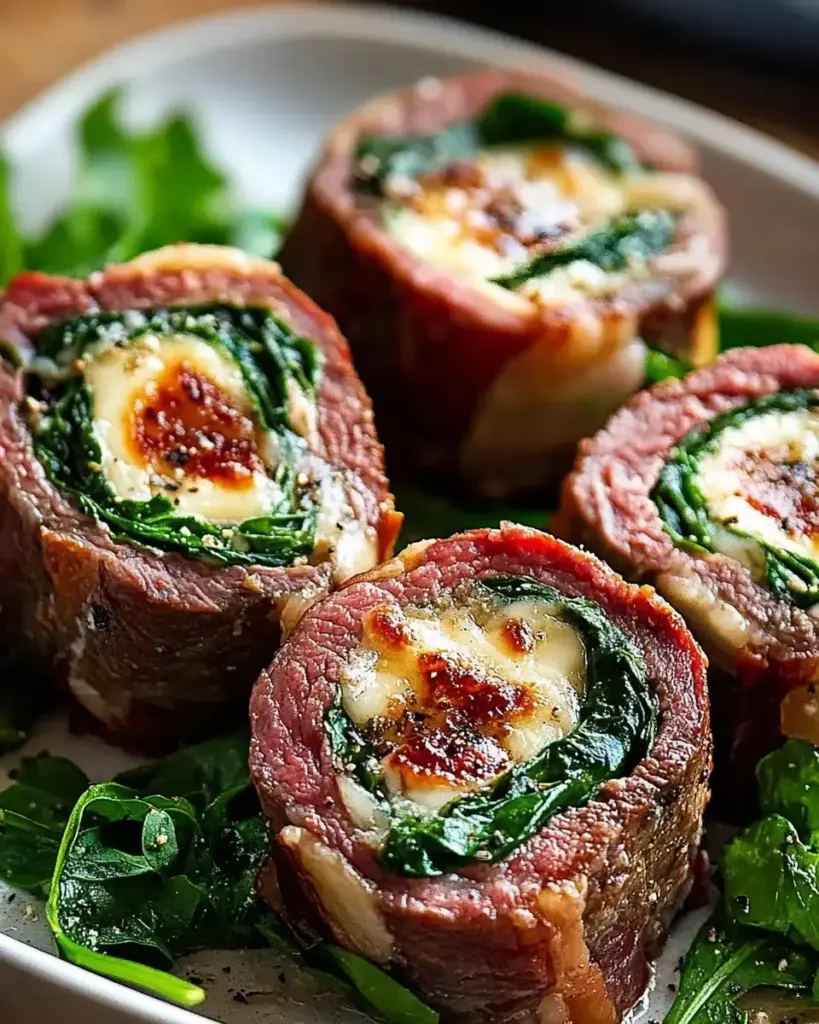
  • Scallops or Chicken: Swap shrimp for scallops or chicken for a different protein twist.
  • Vegetarian Option: Replace shrimp with sautéed mushrooms or a medley of seasonal vegetables.
  • Gluten-Free: Use gluten-free pasta or zucchini noodles for a lighter, gluten-free version.
  • Herb Infusion: Experiment with fresh herbs like basil or thyme for added flavor.
  • Spicy Kick: Add diced jalapeños or a splash of hot sauce for an extra kick.

Serving Suggestions

  • Garlic Bread: Serve with warm, crusty garlic bread to soak up the delicious sauce.
  • Salad: A light arugula or Caesar salad pairs perfectly for a refreshing contrast.
  • Wine: Enjoy with a chilled Sauvignon Blanc to complement the flavors.
  • Presentation: Garnish with lemon wedges and extra parsley for a vibrant touch.

FAQs about Shrimp Scampi with Garlic Butter

Can I use frozen shrimp for this recipe?

Absolutely! Just make sure to thaw them completely before cooking. Frozen shrimp can be just as delicious as fresh when prepared correctly.

What can I substitute for white wine?

If you prefer not to use wine, you can substitute it with chicken broth or a splash of lemon juice mixed with water. This will still give you a flavorful sauce.

How do I know when the shrimp are cooked?

Cook the shrimp until they turn pink and opaque, which usually takes about 2-3 minutes. Overcooked shrimp can become rubbery, so keep an eye on them!

Can I make this dish ahead of time?

While Shrimp Scampi is best enjoyed fresh, you can prepare the sauce ahead of time and store it in the fridge. Just reheat and add the shrimp and pasta when you’re ready to serve.

What sides pair well with Shrimp Scampi?

Garlic bread, a light salad, or steamed vegetables make excellent sides. They complement the rich flavors of the dish beautifully!

Final Thoughts

Cooking Shrimp Scampi with Garlic Butter is more than just preparing a meal; it’s about creating a moment. The aroma of garlic and butter wafting through your kitchen can turn an ordinary evening into something special. This dish is a celebration of flavors, simplicity, and the joy of sharing good food with great company. Whether it’s a weeknight dinner or a gathering with friends, this recipe brings smiles and satisfaction. So, roll up your sleeves, embrace the process, and enjoy every bite. Trust me, this dish will become a cherished favorite in your home!

jhessica

Shrimp Scampi with Garlic Butter: A Quick, Delicious Recipe!

A quick and delicious recipe for Shrimp Scampi with Garlic Butter, perfect for a weeknight dinner.
Prep Time 10 minutes
Cook Time 15 minutes
Total Time 25 minutes
Servings: 4 servings
Course: Main Course
Cuisine: Italian
Calories: 400

Ingredients
  

  • 1 pound large shrimp peeled and deveined
  • 8 ounces linguine or spaghetti
  • 4 tablespoons unsalted butter
  • 2 tablespoons olive oil
  • 4 cloves garlic minced
  • 1/4 teaspoon red pepper flakes optional
  • 1/2 cup dry white wine such as Sauvignon Blanc
  • 1 lemon juiced and zested
  • 1/4 cup fresh parsley chopped
  • Salt and pepper to taste

Method
 

  1. Cook the linguine or spaghetti according to package instructions until al dente. Drain and set aside, reserving 1/2 cup of the pasta cooking water.
  2. In a large skillet, melt the butter and olive oil over medium heat.
  3. Add the minced garlic and red pepper flakes (if using) to the skillet. Sauté for about 1 minute until fragrant, being careful not to burn the garlic.
  4. Add the shrimp to the skillet, season with salt and pepper, and cook for 2-3 minutes until they turn pink and opaque.
  5. Pour in the white wine and lemon juice, and let it simmer for 2-3 minutes to reduce slightly.
  6. Stir in the cooked pasta, lemon zest, and reserved pasta water. Toss everything together until well combined.
  7. Remove from heat and sprinkle with fresh parsley before serving.

Nutrition

Serving: 1servingCalories: 400kcalCarbohydrates: 45gProtein: 25gFat: 15gSaturated Fat: 6gPolyunsaturated Fat: 9gCholesterol: 200mgSodium: 600mgFiber: 2gSugar: 1g

Notes

  • For added flavor, consider adding a pinch of grated Parmesan cheese on top before serving.
  • You can substitute the shrimp with scallops or chicken for a different protein option.
  • For a lighter version, use zucchini noodles instead of pasta.

Tried this recipe?

Let us know how it was!

Sweet and Spicy Dragon Chicken: A Flavorful Recipe Unveiled!

Introduction to Sweet and Spicy Dragon Chicken

Cooking can sometimes feel like a chore, especially on those busy weeknights when you just want something quick and delicious. That’s where my Sweet and Spicy Dragon Chicken comes in! This dish is not only a feast for the eyes with its vibrant colors, but it also packs a punch of flavor that will impress your loved ones. Imagine tender chicken thighs coated in a sweet and spicy sauce, mingling with colorful veggies. It’s the perfect solution for a hectic day or a cozy dinner at home. Let’s dive into this culinary adventure together!

Why You’ll Love This Sweet and Spicy Dragon Chicken

This Sweet and Spicy Dragon Chicken is a game-changer for your dinner routine. It’s quick to whip up, taking just 30 minutes from start to finish. The combination of sweet honey and spicy sriracha creates a flavor explosion that will have everyone asking for seconds. Plus, it’s a one-pan wonder, making cleanup a breeze. Trust me, this dish will become a staple in your kitchen!

Ingredients for Sweet and Spicy Dragon Chicken

Gathering the right ingredients is the first step to creating this mouthwatering dish. Here’s what you’ll need:

  • Boneless, skinless chicken thighs: These are juicy and tender, perfect for soaking up the sweet and spicy sauce.
  • Cornstarch: This helps create a crispy coating on the chicken, giving it that delightful crunch.
  • Vegetable oil: A neutral oil that’s great for frying, ensuring your chicken gets that golden-brown finish.
  • Red and green bell peppers: These add vibrant color and a sweet crunch to the dish.
  • Onion: A classic flavor base that brings depth to the stir-fry.
  • Garlic: Freshly minced garlic adds a fragrant kick that elevates the overall taste.
  • Fresh ginger: This adds a warm, spicy note that complements the sweetness perfectly.
  • Soy sauce: A savory staple that enhances the umami flavor of the dish.
  • Honey: This brings the sweetness that balances the heat from the sriracha.
  • Rice vinegar: A splash of acidity that brightens the flavors and adds a tangy twist.
  • Sriracha: Adjust this to your heat preference; it’s the secret to that spicy kick!
  • Green onions: Sliced for garnish, they add a fresh, crisp finish to the dish.
  • Sesame seeds: These are optional but add a nice crunch and nutty flavor when sprinkled on top.

For those looking to mix things up, consider adding broccoli or snap peas for extra veggies. If you want a healthier twist, swap half the honey for maple syrup or agave nectar. You can find the exact quantities for each ingredient at the bottom of the article, ready for printing!

How to Make Sweet and Spicy Dragon Chicken

Now that you have all your ingredients ready, let’s get cooking! This Sweet and Spicy Dragon Chicken is straightforward and fun to make. Follow these steps, and you’ll have a delicious meal on the table in no time.

Step 1: Prepare the Chicken

Start by cutting your boneless, skinless chicken thighs into bite-sized pieces. This helps them cook evenly and soak up that amazing sauce. Toss the chicken pieces in cornstarch until they’re well coated. This step is crucial for achieving that crispy texture. Set the chicken aside while you heat up the skillet.

Step 2: Cook the Chicken

Heat vegetable oil in a large skillet or wok over medium-high heat. Once the oil is shimmering, add the chicken. Cook it for about 5-7 minutes, stirring occasionally, until it’s golden brown and cooked through. The cornstarch will give it a lovely crunch. Once done, remove the chicken from the skillet and set it aside. This keeps it juicy while you prepare the veggies.

Step 3: Stir-Fry the Vegetables

In the same skillet, toss in the diced red and green bell peppers, onion, minced garlic, and ginger. Stir-fry these colorful veggies for about 3-4 minutes. You want them tender but still crisp. The aroma will be fantastic! This step adds a fresh crunch and vibrant color to your dish.

Step 4: Make the Sauce

In a small bowl, whisk together soy sauce, honey, rice vinegar, and sriracha. This sauce is the heart of your Sweet and Spicy Dragon Chicken. Pour it over the sautéed vegetables in the skillet. The combination of sweet and spicy will make your taste buds dance!

Step 5: Combine and Serve

Return the cooked chicken to the skillet and toss everything together. Make sure the chicken is well coated with that delicious sauce. Cook for an additional 2-3 minutes to heat everything through. Serve hot, garnished with sliced green onions and a sprinkle of sesame seeds for that extra flair. Enjoy your culinary masterpiece!

Tips for Success

  • Prep all your ingredients before starting to cook. It makes the process smoother.
  • Don’t overcrowd the skillet; cook the chicken in batches if necessary for that perfect crisp.
  • Adjust the sriracha to your heat preference; start with less if you’re unsure.
  • For extra flavor, marinate the chicken in soy sauce and ginger for 30 minutes before cooking.
  • Serve immediately for the best texture and taste!

Equipment Needed

  • Large skillet or wok: Essential for stir-frying; a non-stick pan works too.
  • Cutting board: A must for prepping your chicken and veggies.
  • Sharp knife: For cutting chicken and chopping vegetables efficiently.
  • Mixing bowls: Useful for tossing chicken in cornstarch and mixing the sauce.
  • Whisk: Handy for combining the sauce ingredients smoothly.

Variations

  • Spicy Garlic Dragon Chicken: Add more minced garlic and a dash of chili flakes for an extra kick.
  • Vegetarian Option: Substitute chicken with tofu or tempeh for a plant-based twist.
  • Low-Carb Version: Serve over cauliflower rice instead of regular rice for a healthier alternative.
  • Sweet and Tangy: Mix in pineapple chunks for a tropical flavor that complements the sauce.
  • Extra Veggies: Toss in snap peas, broccoli, or carrots for added nutrition and color.

Serving Suggestions

  • Steamed Jasmine Rice: A fluffy bed of jasmine rice perfectly complements the sweet and spicy flavors.
  • Chilled Beer: A light lager or pale ale pairs well, balancing the heat of the dish.
  • Fresh Salad: A crisp cucumber and carrot salad adds a refreshing crunch.
  • Presentation: Serve in a colorful bowl, garnished with extra green onions and sesame seeds for visual appeal.

FAQs about Sweet and Spicy Dragon Chicken

Can I use chicken breasts instead of thighs?

Absolutely! While I love the juiciness of chicken thighs, boneless, skinless chicken breasts work just as well. Just be mindful that they may cook a bit faster, so keep an eye on them.

How can I make this dish spicier?

If you’re a heat lover, feel free to add more sriracha or even some crushed red pepper flakes. You can also toss in some sliced jalapeños for an extra kick!

Can I prepare this dish ahead of time?

Yes! You can marinate the chicken in the sauce for a few hours or even overnight. Just cook it fresh when you’re ready to serve for the best flavor and texture.

What can I serve with Sweet and Spicy Dragon Chicken?

This dish pairs wonderfully with steamed jasmine rice, but you can also serve it with noodles or a fresh salad for a lighter option. The possibilities are endless!

Is this recipe gluten-free?

Yes! As long as you use gluten-free soy sauce, this Sweet and Spicy Dragon Chicken is a delicious gluten-free option. Enjoy without worry!

Final Thoughts

Cooking Sweet and Spicy Dragon Chicken is more than just preparing a meal; it’s about creating a moment of joy in your kitchen. The vibrant colors and enticing aromas fill your home, making it feel warm and inviting. Each bite is a delightful dance of sweet and spicy flavors that brings smiles to the table. Whether you’re impressing guests or enjoying a cozy night in, this dish is sure to become a favorite. So roll up your sleeves, embrace the process, and savor the satisfaction of a homemade meal that’s bursting with flavor and love!

jhessica

Sweet and Spicy Dragon Chicken: A Flavorful Recipe Unveiled!

A delicious and flavorful recipe for Sweet and Spicy Dragon Chicken, featuring tender chicken thighs coated in a sweet and spicy sauce with colorful vegetables.
Prep Time 15 minutes
Cook Time 15 minutes
Total Time 30 minutes
Servings: 4 servings
Course: Main Dish
Cuisine: Asian
Calories: 350

Ingredients
  

  • 1 pound boneless skinless chicken thighs, cut into bite-sized pieces
  • 1/4 cup cornstarch
  • 1/4 cup vegetable oil
  • 1/2 cup red bell pepper diced
  • 1/2 cup green bell pepper diced
  • 1/2 cup onion diced
  • 3 cloves garlic minced
  • 1 tablespoon fresh ginger minced
  • 1/4 cup soy sauce
  • 1/4 cup honey
  • 1 tablespoon rice vinegar
  • 1 tablespoon sriracha adjust to taste
  • 2 green onions sliced (for garnish)
  • Sesame seeds for garnish

Method
 

  1. In a bowl, toss the chicken pieces with cornstarch until well coated.
  2. Heat the vegetable oil in a large skillet or wok over medium-high heat. Add the chicken and cook until golden brown and cooked through, about 5-7 minutes. Remove the chicken from the skillet and set aside.
  3. In the same skillet, add the red and green bell peppers, onion, garlic, and ginger. Stir-fry for about 3-4 minutes until the vegetables are tender.
  4. In a small bowl, whisk together the soy sauce, honey, rice vinegar, and sriracha. Pour this sauce over the vegetables in the skillet.
  5. Return the cooked chicken to the skillet and toss everything together until the chicken is well coated with the sauce. Cook for an additional 2-3 minutes to heat through.
  6. Serve hot, garnished with sliced green onions and sesame seeds.

Nutrition

Serving: 1servingCalories: 350kcalCarbohydrates: 20gProtein: 25gFat: 18gSaturated Fat: 3gPolyunsaturated Fat: 15gCholesterol: 100mgSodium: 800mgFiber: 1gSugar: 15g

Notes

  • For a healthier option, substitute half of the honey with maple syrup or agave nectar.
  • Add a cup of broccoli or snap peas for extra veggies and color.

Tried this recipe?

Let us know how it was!

Dragon Noodles: A Quick and Flavorful Stir-Fry Recipe

Introduction to Dragon Noodles

There’s something magical about a dish that can whisk you away from a hectic day to a cozy kitchen filled with tantalizing aromas. Dragon Noodles are just that—a quick and flavorful stir-fry that brings together vibrant vegetables and a spicy kick. Whether you’re racing against the clock or looking to impress your loved ones, this recipe is your go-to solution. With just a handful of ingredients and minimal prep time, you can create a meal that’s not only satisfying but also bursting with flavor. Trust me, once you try these noodles, they’ll become a staple in your kitchen!

Why You’ll Love This Dragon Noodles

Dragon Noodles are the ultimate weeknight hero. They come together in just 25 minutes, making them perfect for those busy evenings when you want something delicious without the fuss. The combination of fresh veggies and a spicy sauce creates a flavor explosion that will have your taste buds dancing. Plus, this dish is easily customizable, so you can adapt it to suit your cravings or dietary needs. What’s not to love?

Ingredients for Dragon Noodles

Gathering the right ingredients is half the fun of cooking Dragon Noodles. Here’s what you’ll need:

  • Noodles: Spaghetti or ramen work beautifully. They soak up the sauce and add that satisfying chew.
  • Vegetable Oil: This is your base for sautéing. It helps to bring out the flavors of the garlic and ginger.
  • Garlic: Minced garlic adds a punch of flavor. It’s aromatic and essential for that savory depth.
  • Ginger: Fresh ginger brings a zesty warmth. It complements the garlic and adds a nice kick.
  • Bell Peppers: Any color will do! They add sweetness and crunch, making the dish visually appealing.
  • Carrots: Julienned carrots provide a lovely texture and a hint of sweetness.
  • Snap Peas: These add a fresh, crisp bite. You can swap them for zucchini or broccoli if you prefer.
  • Green Onions: Sliced green onions give a fresh finish and a pop of color.
  • Soy Sauce: This is the backbone of your sauce, adding umami and saltiness.
  • Sriracha: Adjust this to your spice level. It brings heat and flavor to the dish.
  • Sesame Oil: A drizzle of sesame oil adds a nutty richness that elevates the dish.
  • Honey or Maple Syrup: A touch of sweetness balances the heat and saltiness.
  • Rice Vinegar: This adds a tangy brightness that rounds out the flavors.
  • Sesame Seeds: For garnish, they add a nice crunch and a touch of elegance.

For exact measurements, check the bottom of the article where you can find everything listed for easy printing. Feel free to get creative with your ingredients based on what you have on hand!

How to Make Dragon Noodles

Now that you have all your ingredients ready, let’s dive into the fun part—making Dragon Noodles! This process is straightforward and quick, perfect for a busy weeknight. Follow these steps, and you’ll have a delicious meal on the table in no time.

Step 1: Cook the Noodles

Start by boiling a pot of water. Once it’s bubbling, add your spaghetti or ramen noodles. Cook them according to the package instructions until they’re al dente. This usually takes about 8-10 minutes. Drain the noodles and set them aside. A little tip: toss them with a splash of oil to prevent sticking while you prepare the rest of the dish.

Step 2: Sauté Garlic and Ginger

In a large skillet or wok, heat up the vegetable oil over medium heat. Once it’s shimmering, add the minced garlic and ginger. Sauté for about a minute until they’re fragrant. Be careful not to burn them; burnt garlic can turn bitter and ruin the dish. This step is where the magic begins!

Step 3: Stir-Fry the Vegetables

Next, toss in the sliced bell peppers, julienned carrots, and snap peas. Stir-fry these vibrant veggies for about 3-4 minutes. You want them tender but still crisp. The colors will brighten your kitchen and your mood! If you’re using zucchini or broccoli, add them here instead.

Step 4: Prepare the Sauce

While the veggies are cooking, grab a small bowl. Whisk together the soy sauce, sriracha, sesame oil, honey, and rice vinegar. This sauce is the heart of your Dragon Noodles, so make sure it’s well mixed. Adjust the sriracha to your taste—more for heat, less for a milder flavor.

Step 5: Combine Noodles and Sauce

Now, it’s time to bring everything together! Pour the sauce over the sautéed vegetables and stir to combine. Then, add the cooked noodles to the skillet. Toss everything together until the noodles are well coated in that delicious sauce. Heat through for about 2-3 minutes. Your kitchen will smell incredible!

Step 6: Garnish and Serve

Remove the skillet from heat and stir in the sliced green onions. They add a fresh crunch that complements the dish perfectly. Serve your Dragon Noodles hot, garnished with a sprinkle of sesame seeds. Enjoy the vibrant colors and flavors that make this dish a true delight!

Tips for Success

  • Prep all your ingredients before you start cooking. It makes the process smoother and faster.
  • Don’t overcook the vegetables; they should be tender yet crisp for the best texture.
  • Feel free to adjust the sauce ingredients to suit your taste. More honey for sweetness or extra sriracha for heat!
  • For a protein boost, toss in cooked chicken, shrimp, or tofu.
  • Serve immediately for the best flavor and texture.

Equipment Needed

  • Large Skillet or Wok: Essential for stir-frying. A non-stick skillet works well too.
  • Pot: For boiling the noodles. Any large pot will do.
  • Colander: To drain the noodles after cooking.
  • Whisk: For mixing the sauce. A fork can work in a pinch.

Variations

  • Protein Additions: Boost your Dragon Noodles by adding cooked chicken, shrimp, or tofu for a heartier meal.
  • Vegetable Swaps: Experiment with different veggies like zucchini, broccoli, or bok choy for varied textures and flavors.
  • Gluten-Free Option: Use gluten-free noodles such as rice noodles or quinoa noodles to make this dish suitable for gluten-sensitive diets.
  • Spice Level: Adjust the heat by adding more or less sriracha, or try a different hot sauce for a unique twist.
  • Herb Infusion: Add fresh herbs like cilantro or basil at the end for a burst of freshness and flavor.

Serving Suggestions

  • Side Dishes: Pair your Dragon Noodles with a light cucumber salad or steamed edamame for a refreshing contrast.
  • Drinks: Enjoy with a cold beer or a refreshing iced green tea to complement the flavors.
  • Presentation: Serve in a large bowl, garnished with extra sesame seeds and green onions for a vibrant look.

FAQs about Dragon Noodles

Curious about Dragon Noodles? You’re not alone! Here are some common questions I often hear, along with answers to help you navigate this delicious dish.

Can I make Dragon Noodles ahead of time?

Absolutely! You can prepare the noodles and sauce in advance. Just store them separately in the fridge. When you’re ready to eat, simply stir-fry the veggies and combine everything. It’s a great way to save time on busy nights!

What can I substitute for sriracha?

If sriracha isn’t your thing, try using chili garlic sauce or even a dash of red pepper flakes. Both options will add that spicy kick without compromising flavor. Adjust the amount to suit your heat preference!

Are Dragon Noodles suitable for meal prep?

Yes! Dragon Noodles are perfect for meal prep. They store well in airtight containers and can be reheated easily. Just be sure to keep the sauce separate until you’re ready to eat to maintain the best texture.

Can I add protein to my Dragon Noodles?

Definitely! Adding cooked chicken, shrimp, or tofu is a fantastic way to make this dish more filling. Just toss in your protein of choice during the last few minutes of cooking to heat it through.

What’s the best way to store leftovers?

Store any leftovers in an airtight container in the fridge for up to three days. When reheating, add a splash of water or extra soy sauce to keep the noodles from drying out. Enjoy your delicious Dragon Noodles again!

Final Thoughts

Dragon Noodles are more than just a meal; they’re a celebration of flavors and colors that can brighten any day. The joy of whipping up this quick stir-fry lies in its simplicity and versatility. Whether you’re cooking for yourself or sharing with family, each bite is a reminder that delicious food doesn’t have to be complicated. Plus, the satisfaction of creating something so vibrant and tasty in just 25 minutes is unbeatable. So, roll up your sleeves, embrace the heat, and let these Dragon Noodles take you on a culinary adventure that’s sure to impress!

jhessica

Dragon Noodles: A Quick and Flavorful Stir-Fry Recipe

Dragon Noodles are a quick and flavorful stir-fry dish that combines noodles with vibrant vegetables and a spicy sauce.
Prep Time 10 minutes
Cook Time 15 minutes
Total Time 25 minutes
Servings: 4 servings
Course: Main Course
Cuisine: Asian
Calories: 350

Ingredients
  

  • 8 ounces of spaghetti or ramen noodles
  • 2 tablespoons of vegetable oil
  • 3 cloves of garlic minced
  • 1 tablespoon of ginger minced
  • 1 cup of bell peppers sliced (any color)
  • 1 cup of carrots julienned
  • 1 cup of snap peas
  • 3 green onions sliced
  • 1/4 cup of soy sauce
  • 2 tablespoons of sriracha adjust to taste
  • 1 tablespoon of sesame oil
  • 1 tablespoon of honey or maple syrup
  • 1 tablespoon of rice vinegar
  • Sesame seeds for garnish

Method
 

  1. Cook the noodles according to package instructions. Drain and set aside.
  2. In a large skillet or wok, heat the vegetable oil over medium heat. Add the minced garlic and ginger, sautéing for about 1 minute until fragrant.
  3. Add the sliced bell peppers, carrots, and snap peas to the skillet. Stir-fry for about 3-4 minutes until the vegetables are tender but still crisp.
  4. In a small bowl, whisk together the soy sauce, sriracha, sesame oil, honey, and rice vinegar. Pour this sauce over the sautéed vegetables and stir to combine.
  5. Add the cooked noodles to the skillet, tossing everything together until the noodles are well coated in the sauce and heated through, about 2-3 minutes.
  6. Remove from heat and stir in the sliced green onions. Serve hot, garnished with sesame seeds.

Nutrition

Serving: 1servingCalories: 350kcalCarbohydrates: 45gProtein: 10gFat: 12gSaturated Fat: 1.5gPolyunsaturated Fat: 10gSodium: 800mgFiber: 3gSugar: 6g

Notes

  • For a protein boost, add cooked chicken, shrimp, or tofu to the stir-fry.
  • You can also use zucchini or broccoli instead of snap peas for a different flavor and texture.
  • Adjust the level of sriracha to make the dish milder or spicier according to your preference.

Tried this recipe?

Let us know how it was!

Savory Morel Mushroom Hand Pies that Delight Your Palate

Introduction to Savory Morel Mushroom Hand Pies

There’s something magical about hand pies, isn’t there? They remind me of cozy family gatherings, where everyone eagerly awaits the first bite. Savory Morel Mushroom Hand Pies are not just a treat; they’re a delightful way to bring warmth and comfort to your table. Perfect for a quick snack or an impressive appetizer, these little pockets of goodness are filled with rich morel mushrooms, creamy cheeses, and fragrant herbs. Whether you’re hosting friends or just treating yourself, this recipe is a simple yet satisfying solution for any occasion. Let’s dive into this culinary adventure!

Why You’ll Love This Savory Morel Mushroom Hand Pies

These Savory Morel Mushroom Hand Pies are a game-changer for busy weeknights or casual get-togethers. They come together quickly, making them perfect for those moments when you need a delicious snack without the fuss. The combination of earthy morel mushrooms and creamy cheeses creates a flavor explosion that will impress your taste buds. Plus, they’re portable, so you can enjoy them anywhere—no plates required!

Ingredients for Savory Morel Mushroom Hand Pies

Gathering the right ingredients is the first step to creating these delightful Savory Morel Mushroom Hand Pies. Here’s what you’ll need:

  • Fresh morel mushrooms: These unique mushrooms bring an earthy flavor. If you can’t find them, consider using shiitake or cremini as substitutes.
  • Olive oil: A staple in many kitchens, it adds richness and helps sauté the aromatics.
  • Onion: Finely chopped, it provides a sweet base flavor when sautéed.
  • Garlic: Minced garlic adds a punch of flavor that elevates the filling.
  • Fresh thyme: This herb enhances the earthy notes of the mushrooms. Dried thyme works too if fresh isn’t available.
  • Ricotta cheese: Creamy and mild, it adds a luscious texture to the filling.
  • Shredded mozzarella cheese: This cheese melts beautifully, creating a gooey, satisfying bite.
  • Salt and black pepper: Essential seasonings that enhance all the flavors in the filling.
  • Refrigerated pie crusts: Convenient and easy to work with, they save time. You can also make your own if you’re feeling adventurous!
  • Egg: Beaten for an egg wash, it gives the hand pies a beautiful golden finish.
  • Flour: For dusting the surface, ensuring the dough doesn’t stick while you roll it out.

For those looking to customize, consider adding a pinch of red pepper flakes for heat or mixing in sautéed spinach for extra nutrition. You can find the exact quantities for each ingredient at the bottom of the article, ready for printing!

How to Make Savory Morel Mushroom Hand Pies

Step 1: Preheat and Prepare

Start by preheating your oven to 400°F (200°C). This ensures your Savory Morel Mushroom Hand Pies bake evenly. While the oven heats, line a baking sheet with parchment paper. This simple step prevents sticking and makes cleanup a breeze. Trust me, your future self will thank you!

Step 2: Sauté the Aromatics

In a large skillet, heat the olive oil over medium heat. Add the finely chopped onion and sauté until it turns translucent, about 4-5 minutes. Then, toss in the minced garlic and fresh thyme. Cook for an additional minute until the kitchen fills with that irresistible aroma. It’s the perfect start!

Step 3: Cook the Morel Mushrooms

Now, stir in the chopped morel mushrooms. Cook them until they’re tender and any moisture has evaporated, which should take about 5-7 minutes. Season with salt and black pepper to taste. This step is crucial; it intensifies the flavors and makes your filling truly delicious!

Step 4: Mix the Filling

In a mixing bowl, combine the ricotta and shredded mozzarella cheeses. Add the cooled mushroom mixture and mix until everything is well combined. This creamy filling is what makes these hand pies so special. It’s rich, flavorful, and oh-so-satisfying!

Step 5: Roll and Cut the Dough

On a lightly floured surface, roll out one pie crust. Use a round cutter or a bowl to cut out circles about 5 inches in diameter. This is where the fun begins! Don’t worry if they’re not perfect; rustic is charming. Just make sure they’re big enough to hold your filling.

Step 6: Fill and Seal the Hand Pies

Place a generous tablespoon of the mushroom filling in the center of each circle. Fold the dough over to create a half-moon shape. Press the edges to seal, then use a fork to crimp the edges for a decorative touch. This step adds a personal flair to your hand pies!

Step 7: Bake to Perfection

Transfer the filled hand pies to your prepared baking sheet. Brush the tops with the beaten egg for that golden finish. Bake in the preheated oven for 20-25 minutes, or until they’re beautifully golden brown. The aroma wafting through your kitchen will be irresistible!

Tips for Success

  • Make sure to clean the morel mushrooms thoroughly, as they can hide dirt in their crevices.
  • Don’t rush the sautéing process; letting the onions and garlic develop flavor is key.
  • For a flaky crust, avoid overworking the dough when rolling it out.
  • Experiment with different cheeses for unique flavor profiles.
  • Let the hand pies cool slightly before serving to avoid burning your mouth!

Equipment Needed

  • Large skillet: Essential for sautéing. A non-stick pan works well too.
  • Baking sheet: A standard one will do, but a rimmed sheet can catch any drips.
  • Parchment paper: For easy cleanup; aluminum foil is a good alternative.
  • Rolling pin: If you don’t have one, a wine bottle can work in a pinch!
  • Round cutter or bowl: To cut dough circles; any round object will suffice.

Variations

  • Vegan Option: Substitute ricotta and mozzarella with your favorite vegan cheese alternatives for a plant-based delight.
  • Spicy Kick: Add a pinch of red pepper flakes to the filling for a zesty twist that will wake up your taste buds.
  • Herb Infusion: Experiment with different herbs like rosemary or basil to create unique flavor profiles.
  • Vegetable Boost: Mix in sautéed spinach or kale for added nutrition and color.
  • Meat Lover’s Delight: Incorporate cooked sausage or bacon bits into the filling for a heartier version.

Serving Suggestions

  • Pair your Savory Morel Mushroom Hand Pies with a crisp green salad for a refreshing contrast.
  • Serve with a side of tangy dipping sauce, like a garlic aioli or spicy mustard.
  • A chilled glass of white wine complements the earthy flavors beautifully.
  • For a casual vibe, arrange them on a rustic wooden board for a charming presentation.

FAQs about Savory Morel Mushroom Hand Pies

Can I use dried morel mushrooms instead of fresh?
Absolutely! If you can’t find fresh morel mushrooms, dried ones work too. Just rehydrate them in warm water for about 30 minutes before using. This will help bring back their rich flavor.

How do I store leftover hand pies?
Store any leftover Savory Morel Mushroom Hand Pies in an airtight container in the refrigerator. They’ll stay fresh for up to three days. You can also freeze them for longer storage; just make sure to wrap them tightly!

Can I make the filling ahead of time?
Yes! You can prepare the mushroom filling a day in advance. Just store it in the fridge until you’re ready to assemble the hand pies. This can save you time on busy days!

What can I serve with these hand pies?
These hand pies pair wonderfully with a fresh salad or a zesty dipping sauce. Try serving them with garlic aioli or a tangy mustard for an extra flavor boost!

Are Savory Morel Mushroom Hand Pies suitable for vegetarians?
Yes! This recipe is vegetarian-friendly, making it a great option for meatless meals. Just ensure you use vegetarian cheese alternatives if needed.

Final Thoughts

Creating Savory Morel Mushroom Hand Pies is more than just cooking; it’s about crafting moments of joy. Each bite transports you to a cozy gathering, where laughter and delicious flavors mingle. The earthy richness of morel mushrooms combined with creamy cheeses makes for a truly satisfying experience. Whether you’re sharing them with friends or savoring them solo, these hand pies are sure to delight. They’re a reminder that good food can bring us together, even on the busiest of days. So roll up your sleeves, embrace the process, and enjoy every delicious moment!

jhessica

Savory Morel Mushroom Hand Pies that Delight Your Palate

Savory Morel Mushroom Hand Pies are delicious pastries filled with a rich mixture of morel mushrooms, cheeses, and herbs, perfect for a delightful snack or appetizer.
Prep Time 20 minutes
Cook Time 25 minutes
Total Time 45 minutes
Servings: 6 servings
Course: Appetizer
Cuisine: American
Calories: 250

Ingredients
  

  • 2 cups fresh morel mushrooms cleaned and chopped
  • 1 tablespoon olive oil
  • 1 small onion finely chopped
  • 2 cloves garlic minced
  • 1 teaspoon fresh thyme leaves or ½ teaspoon dried thyme
  • 1 cup ricotta cheese
  • 1 cup shredded mozzarella cheese
  • 1 teaspoon salt
  • ½ teaspoon black pepper
  • 1 package 1 pound refrigerated pie crusts (2 crusts)
  • 1 egg beaten (for egg wash)
  • Flour for dusting

Method
 

  1. Preheat the oven to 400°F (200°C). Line a baking sheet with parchment paper.
  2. In a large skillet, heat the olive oil over medium heat. Add the chopped onion and sauté until translucent, about 4-5 minutes. Add the minced garlic and thyme, cooking for an additional minute until fragrant.
  3. Stir in the chopped morel mushrooms and cook until they are tender and any moisture has evaporated, about 5-7 minutes. Season with salt and pepper. Remove from heat and let cool slightly.
  4. In a mixing bowl, combine the ricotta cheese and shredded mozzarella. Add the cooled mushroom mixture and mix until well combined.
  5. Roll out one pie crust on a lightly floured surface. Use a round cutter or a bowl to cut out circles about 5 inches in diameter.
  6. Place a generous tablespoon of the mushroom filling in the center of each circle. Fold the dough over to create a half-moon shape and press the edges to seal. Use a fork to crimp the edges for a decorative touch.
  7. Transfer the hand pies to the prepared baking sheet. Brush the tops with the beaten egg for a golden finish.
  8. Bake in the preheated oven for 20-25 minutes, or until golden brown. Allow to cool for a few minutes before serving.

Nutrition

Serving: 1hand pieCalories: 250kcalCarbohydrates: 20gProtein: 10gFat: 15gSaturated Fat: 8gPolyunsaturated Fat: 7gCholesterol: 50mgSodium: 400mgFiber: 1gSugar: 2g

Notes

  • For a vegetarian option, substitute the ricotta and mozzarella with a vegan cheese alternative.
  • Add a pinch of red pepper flakes to the filling for a spicy kick, or mix in some sautéed spinach for added flavor and nutrition.

Tried this recipe?

Let us know how it was!

Creamy Morel Mushroom Pasta: A Delectable Recipe Delight

Introduction to Creamy Morel Mushroom Pasta

There’s something magical about a plate of pasta that warms the soul, and this Creamy Morel Mushroom Pasta is no exception.

I remember the first time I tasted morel mushrooms; their earthy flavor danced on my palate, leaving me craving more.

This dish is perfect for those busy weeknights when you want to impress your loved ones without spending hours in the kitchen.

With just a handful of ingredients and a mere 30 minutes, you can whip up a comforting meal that feels gourmet.

Let’s dive into this delightful recipe that’s sure to become a family favorite!

Why You’ll Love This Creamy Morel Mushroom Pasta

This Creamy Morel Mushroom Pasta is a game-changer for any home cook.

It’s quick, taking just 30 minutes from start to finish, making it perfect for those hectic evenings.

The rich, creamy sauce envelops the pasta, while the morel mushrooms add a unique, earthy flavor that elevates the dish.

Whether you’re cooking for family or friends, this recipe guarantees smiles and satisfied appetites.

Trust me, it’s a dish you’ll want to make again and again!

Ingredients for Creamy Morel Mushroom Pasta

To create this delightful Creamy Morel Mushroom Pasta, you’ll need a few key ingredients that come together to make magic on your plate.

– **Fettuccine or your favorite pasta**: This serves as the base of the dish. Fettuccine holds the creamy sauce beautifully, but feel free to use any pasta you love.

– **Olive oil**: A staple in Italian cooking, it adds richness and depth to the sautéed mushrooms.

– **Unsalted butter**: This enhances the flavor and gives the sauce a silky texture.

– **Fresh morel mushrooms**: The star of the show! Their unique, earthy flavor is what makes this dish special. If you can’t find them, consider using a mix of cremini or shiitake mushrooms for a different twist.

– **Garlic**: Minced garlic adds a fragrant kick that complements the mushrooms perfectly.

– **Heavy cream**: This is what makes the sauce creamy and luscious. It’s essential for that indulgent feel.

– **Grated Parmesan cheese**: This adds a salty, nutty flavor that rounds out the dish beautifully.

– **Salt and pepper**: Simple seasonings that elevate the overall taste. Adjust to your preference.

– **Fresh parsley**: A sprinkle of chopped parsley not only adds color but also a fresh note to the dish.

For exact measurements, check the bottom of the article where you can find everything listed for easy printing. Enjoy gathering these ingredients, and let’s get cooking!

How to Make Creamy Morel Mushroom Pasta

Making this Creamy Morel Mushroom Pasta is a breeze.

Follow these simple steps, and you’ll have a delicious meal ready in no time.

Let’s get started!

Step 1: Cook the Pasta

Begin by boiling a large pot of salted water.

Add your fettuccine or favorite pasta and cook according to the package instructions until al dente.

This usually takes about 8-10 minutes.

Once done, drain the pasta, but don’t forget to reserve half a cup of that starchy pasta water.

It’ll come in handy later!

Step 2: Sauté the Morel Mushrooms

In a large skillet, heat the olive oil and unsalted butter over medium heat.

Once the butter melts and starts to bubble, toss in the sliced morel mushrooms.

Sauté them for about 5 minutes until they’re tender and lightly browned.

The aroma will be heavenly, trust me!

Step 3: Add Garlic

Next, add the minced garlic to the skillet.

Stir it in and let it cook for 1-2 minutes.

Keep an eye on it; you don’t want the garlic to burn.

This step adds a fragrant kick that pairs perfectly with the morels.

Step 4: Create the Cream Sauce

Pour in the heavy cream and bring the mixture to a gentle simmer.

Let it cook for about 3-4 minutes until it thickens slightly.

Now, stir in the grated Parmesan cheese until it melts and creates a smooth sauce.

If it feels too thick, add a splash of that reserved pasta water to reach your desired consistency.

Step 5: Combine Pasta and Sauce

Once your sauce is ready, it’s time to bring everything together.

Add the cooked pasta to the skillet and toss it gently to coat every strand with that creamy goodness.

Season with salt and pepper to taste.

This is where the magic happens!

Step 6: Serve and Garnish

Your Creamy Morel Mushroom Pasta is almost ready to shine!

Plate it up and garnish with freshly chopped parsley for a pop of color.

Serve immediately, and watch as your family or friends dig in with delight.

Enjoy every creamy, mushroom-filled bite!

Tips for Success

  • Always reserve some pasta water; it’s a secret weapon for adjusting sauce consistency.
  • Don’t rush the sautéing process; let the morels develop their flavor.
  • Use fresh ingredients for the best taste, especially the mushrooms and parsley.
  • Experiment with different pasta shapes; they all work well with this creamy sauce.
  • For extra flavor, consider adding a splash of white wine to the sauce.

Equipment Needed

  • Large pot: For boiling pasta; a deep skillet works too.
  • Skillet: A non-stick skillet is ideal for sautéing mushrooms.
  • Colander: To drain the pasta; a slotted spoon can work in a pinch.
  • Measuring cups: For accurate ingredient portions.
  • Wooden spoon: Perfect for stirring and combining flavors.

Variations

  • For a vegetarian twist, swap out morel mushrooms for a mix of cremini, shiitake, or portobello mushrooms.
  • Add cooked chicken or shrimp for a protein boost and extra flavor.
  • For a lighter version, use half-and-half instead of heavy cream.
  • Incorporate spinach or kale for added nutrition and a pop of color.
  • Try adding sun-dried tomatoes for a tangy contrast to the creamy sauce.

Serving Suggestions

  • Pair your Creamy Morel Mushroom Pasta with a crisp green salad dressed in a light vinaigrette.
  • A glass of chilled white wine, like Pinot Grigio, complements the dish beautifully.
  • For presentation, serve in warm bowls and sprinkle extra Parmesan on top.
  • Consider garlic bread on the side for a delightful crunch.

FAQs about Creamy Morel Mushroom Pasta

Can I use dried morel mushrooms instead of fresh?

Absolutely! Dried morel mushrooms can be a great alternative. Just remember to rehydrate them in warm water for about 30 minutes before using. This will help bring back their unique flavor and texture.

What can I substitute for heavy cream?

If you’re looking for a lighter option, you can use half-and-half or even a plant-based cream. Just keep in mind that the sauce may not be as rich and creamy, but it will still be delicious!

How do I store leftovers of Creamy Morel Mushroom Pasta?

Store any leftovers in an airtight container in the fridge for up to 3 days. When reheating, add a splash of water or cream to loosen the sauce, as it may thicken in the fridge.

Can I make this dish ahead of time?

While it’s best enjoyed fresh, you can prepare the sauce ahead of time and store it in the fridge. Just cook the pasta right before serving to keep everything perfectly al dente.

What other mushrooms can I use in this recipe?

If morels are hard to find, don’t fret! You can use a mix of cremini, shiitake, or even button mushrooms. Each will bring its own flavor, making the dish uniquely yours.

Final Thoughts

Cooking this Creamy Morel Mushroom Pasta is more than just preparing a meal; it’s about creating a moment.

The rich, creamy sauce and the earthy morels come together to form a dish that feels both comforting and elegant.

Every bite is a reminder of the joy that simple ingredients can bring.

Whether you’re sharing it with family or enjoying a quiet dinner alone, this pasta is sure to warm your heart.

So, roll up your sleeves, gather your ingredients, and let the magic of cooking transform your kitchen into a haven of deliciousness!

jhessica

Creamy Morel Mushroom Pasta: A Delectable Recipe Delight

A creamy and delicious pasta dish featuring fresh morel mushrooms, perfect for a comforting meal.
Prep Time 10 minutes
Cook Time 20 minutes
Total Time 30 minutes
Servings: 4 servings
Course: Main Course
Cuisine: Italian
Calories: 450

Ingredients
  

  • 8 ounces fettuccine or your favorite pasta
  • 1 tablespoon olive oil
  • 1 tablespoon unsalted butter
  • 1 cup fresh morel mushrooms cleaned and sliced
  • 2 cloves garlic minced
  • 1 cup heavy cream
  • 1/2 cup grated Parmesan cheese
  • Salt and pepper to taste
  • 2 tablespoons fresh parsley chopped (for garnish)

Method
 

  1. Cook the pasta according to package instructions until al dente. Drain and set aside, reserving 1/2 cup of pasta water.
  2. In a large skillet, heat the olive oil and butter over medium heat. Add the sliced morel mushrooms and sauté for about 5 minutes, or until they are tender and lightly browned.
  3. Add the minced garlic to the skillet and cook for an additional 1-2 minutes, stirring frequently to prevent burning.
  4. Pour in the heavy cream and bring to a gentle simmer. Allow it to cook for about 3-4 minutes until it thickens slightly.
  5. Stir in the grated Parmesan cheese until melted and smooth. If the sauce is too thick, add a little reserved pasta water to reach your desired consistency.
  6. Season the sauce with salt and pepper to taste. Add the cooked pasta to the skillet and toss to coat evenly with the sauce.
  7. Serve immediately, garnished with fresh parsley.

Nutrition

Serving: 1servingCalories: 450kcalCarbohydrates: 30gProtein: 12gFat: 30gSaturated Fat: 18gPolyunsaturated Fat: 8gCholesterol: 80mgSodium: 300mgFiber: 2gSugar: 2g

Notes

  • For a vegetarian option, substitute the morel mushrooms with a mix of your favorite mushrooms like cremini or shiitake.
  • Add cooked chicken or shrimp for extra protein and flavor.

Tried this recipe?

Let us know how it was!

Hearty German Bean Soup: Discover the Perfect Recipe!

Introduction to Hearty German Bean Soup

There’s something magical about a warm bowl of soup on a chilly evening. Hearty German Bean Soup is not just a meal; it’s a hug in a bowl. This recipe is perfect for those busy days when you crave comfort without spending hours in the kitchen. With its rich flavors and nutritious ingredients, it’s a dish that will impress your loved ones and nourish your soul. Plus, it’s easy to make, so you can whip it up even after a long day. Let’s dive into this delightful recipe that’s sure to become a family favorite!

Why You’ll Love This Hearty German Bean Soup

This Hearty German Bean Soup is a game-changer for your weeknight dinners. It’s not only simple to prepare but also packed with flavor and nutrition. In just over an hour, you can create a satisfying meal that warms the heart and fills the belly. Plus, it’s versatile! You can easily customize it to suit your taste or dietary needs. Trust me, once you try it, you’ll be hooked!

Ingredients for Hearty German Bean Soup

Gathering the right ingredients is the first step to creating a delicious Hearty German Bean Soup. Here’s what you’ll need:

  • Dried navy beans: These small, white beans are the star of the show, providing a creamy texture and a hearty base.
  • Olive oil: A splash of this liquid gold adds richness and helps sauté the vegetables to perfection.
  • Onion: Diced onions bring a sweet and savory depth to the soup, enhancing the overall flavor.
  • Garlic: Minced garlic adds a punch of flavor that elevates the dish to new heights.
  • Carrots: Diced carrots contribute a touch of sweetness and vibrant color, making the soup visually appealing.
  • Celery: This crunchy vegetable adds a refreshing crunch and a subtle earthiness to the mix.
  • Dried thyme: A classic herb that infuses the soup with a warm, aromatic flavor.
  • Smoked paprika: This spice brings a smoky depth, reminiscent of cozy campfires and hearty meals.
  • Vegetable broth: The liquid base that ties everything together, providing moisture and flavor.
  • Bay leaf: A single leaf adds a layer of complexity, enhancing the overall taste of the soup.
  • Salt and black pepper: Essential seasonings that help balance and enhance the flavors.
  • Diced potatoes: These starchy gems make the soup even heartier and more filling.
  • Kale or spinach: Adding greens not only boosts nutrition but also adds a pop of color.
  • Apple cider vinegar: A splash at the end brightens the flavors, giving the soup a delightful tang.

For those looking to add a twist, consider incorporating diced smoked sausage or bacon during the sautéing step for a smoky flavor. If you prefer a creamier texture, blending a portion of the soup with an immersion blender can create a luscious consistency. You can find the exact quantities for each ingredient at the bottom of the article, ready for printing!

How to Make Hearty German Bean Soup

Creating a bowl of Hearty German Bean Soup is a straightforward process that anyone can master. Follow these simple steps, and you’ll have a delicious meal ready in no time!

Step 1: Prepare the Beans

Start by rinsing the dried navy beans under cold water. This removes any dust or debris. Then, soak them in water overnight. This step is crucial as it softens the beans, making them easier to cook. If you forget to soak them, you can use the quick soak method: boil them for 2 minutes, then let them sit for an hour.

Step 2: Sauté the Vegetables

In a large pot, heat the olive oil over medium heat. Add the diced onion and sauté for about 5 minutes until it becomes translucent. The aroma will fill your kitchen, making it hard to resist. Next, stir in the minced garlic, carrots, and celery. Cook for another 5 minutes, stirring occasionally. This step builds a flavorful base for your soup.

Step 3: Combine Ingredients

Now it’s time to bring everything together. Add the soaked navy beans, dried thyme, smoked paprika, vegetable broth, bay leaf, salt, and black pepper to the pot. Stir well to combine. Bring the mixture to a boil, then reduce the heat to low. Cover the pot and let it simmer. This is where the magic happens, as the flavors meld beautifully.

Step 4: Simmer the Soup

Let the soup simmer for about 1 hour. During this time, the beans will become tender and absorb all those delicious flavors. Keep an eye on it, stirring occasionally to prevent sticking. If it looks too thick, feel free to add a bit more vegetable broth.

Step 5: Add Potatoes

After an hour, it’s time to add the diced potatoes. These will make the soup even heartier. Continue to simmer for another 15 minutes until the potatoes are cooked through. You’ll know they’re ready when you can easily pierce them with a fork.

Step 6: Incorporate Greens

Next, stir in the chopped kale or spinach. This not only boosts the nutrition but also adds a vibrant pop of color. Cook for an additional 5 minutes until the greens are wilted. The soup is now looking and smelling fantastic!

Step 7: Final Touches

Just before serving, stir in the apple cider vinegar. This adds a delightful brightness to the soup. Taste and adjust the seasoning if needed. Remove the bay leaf, and your Hearty German Bean Soup is ready to be enjoyed!

Tips for Success

  • Soak the beans overnight for the best texture; it saves cooking time too!
  • Don’t skip the sautéing step; it builds a rich flavor base.
  • Adjust the seasoning to your taste; every palate is different.
  • For a thicker soup, blend a portion and stir it back in.
  • Store leftovers in the fridge for up to 3 days; it tastes even better the next day!

Equipment Needed

  • Large pot: A sturdy stockpot works best, but any large pot will do.
  • Cutting board: Essential for chopping vegetables; a plastic or wooden board is fine.
  • Knife: A sharp chef’s knife makes prep easier and safer.
  • Measuring cups: Handy for precise ingredient amounts, though you can eyeball it if needed.
  • Wooden spoon: Perfect for stirring and mixing your soup.

Variations

  • Meat Lover’s Delight: Add diced smoked sausage or bacon during the sautéing step for a smoky, meaty flavor.
  • Spicy Kick: Toss in a pinch of red pepper flakes or diced jalapeños for a spicy twist that warms you up.
  • Herb Infusion: Experiment with fresh herbs like parsley or dill for a fresh, vibrant taste.
  • Vegan Option: Ensure all ingredients are plant-based, and consider using coconut milk for a creamy texture.
  • Seasonal Veggies: Swap in seasonal vegetables like zucchini or bell peppers to keep it fresh and exciting.

Serving Suggestions

  • Pair your Hearty German Bean Soup with crusty bread or a warm baguette for dipping.
  • A side salad with a tangy vinaigrette complements the soup beautifully.
  • For drinks, consider a light German lager or a crisp apple cider.
  • Garnish with fresh herbs like parsley for a pop of color.

FAQs about Hearty German Bean Soup

Can I use canned beans instead of dried beans?

Absolutely! If you’re short on time, canned beans can be a great shortcut. Just rinse and drain them, and add them to the soup during the last 30 minutes of cooking. This way, they’ll heat through without getting mushy.

How can I make this soup gluten-free?

This Hearty German Bean Soup is naturally gluten-free! Just ensure that your vegetable broth is labeled gluten-free, and you’re good to go. Enjoy a comforting bowl without any worries!

Can I freeze the soup for later?

Yes, this soup freezes beautifully! Allow it to cool completely, then transfer it to airtight containers. It can be stored in the freezer for up to three months. Just reheat on the stovetop when you’re ready to enjoy it again.

What can I serve with Hearty German Bean Soup?

Pair it with crusty bread or a fresh salad for a complete meal. A light German lager or a refreshing apple cider also complements the flavors perfectly. It’s a cozy combo that will warm you up!

How can I adjust the spice level?

If you like a bit of heat, add red pepper flakes or diced jalapeños during the sautéing step. Start with a small amount and adjust to your taste. You can always add more, but it’s hard to take it out!

Final Thoughts

Cooking Hearty German Bean Soup is more than just preparing a meal; it’s about creating a warm, inviting experience. The rich aromas wafting through your kitchen will draw everyone in, making it a perfect dish for family gatherings or cozy nights in. Each spoonful is a reminder of the comfort that good food brings, nourishing both body and soul. Whether you’re enjoying it on a chilly evening or sharing it with friends, this soup is sure to become a cherished recipe in your home. Dive in, savor the flavors, and let the warmth wrap around you like a favorite blanket!

jhessica

Hearty German Bean Soup: Discover the Perfect Recipe!

A hearty and nutritious German bean soup made with navy beans, vegetables, and spices, perfect for a comforting meal.
Prep Time 10 minutes
Cook Time 1 hour 20 minutes
Total Time 1 hour 30 minutes
Servings: 6 servings
Course: Soup
Cuisine: German
Calories: 220

Ingredients
  

  • 1 cup dried navy beans
  • 1 tablespoon olive oil
  • 1 medium onion diced
  • 2 cloves garlic minced
  • 2 medium carrots diced
  • 2 celery stalks diced
  • 1 teaspoon dried thyme
  • 1 teaspoon smoked paprika
  • 6 cups vegetable broth
  • 1 bay leaf
  • 1 teaspoon salt adjust to taste
  • 1/2 teaspoon black pepper
  • 1 cup diced potatoes
  • 1 cup chopped kale or spinach
  • 1 tablespoon apple cider vinegar

Method
 

  1. Rinse the dried navy beans under cold water and soak them in water overnight. Drain and set aside.
  2. In a large pot, heat the olive oil over medium heat. Add the diced onion and sauté for about 5 minutes until translucent.
  3. Stir in the minced garlic, carrots, and celery. Cook for an additional 5 minutes, stirring occasionally.
  4. Add the soaked beans, thyme, smoked paprika, vegetable broth, bay leaf, salt, and black pepper. Bring to a boil, then reduce the heat to low and cover. Simmer for about 1 hour or until the beans are tender.
  5. Add the diced potatoes and continue to simmer for another 15 minutes until the potatoes are cooked through.
  6. Stir in the chopped kale or spinach and cook for an additional 5 minutes until wilted. Remove the bay leaf.
  7. Just before serving, stir in the apple cider vinegar for a touch of brightness. Adjust seasoning as needed.

Nutrition

Serving: 1bowlCalories: 220kcalCarbohydrates: 30gProtein: 10gFat: 5gSaturated Fat: 1gPolyunsaturated Fat: 4gSodium: 500mgFiber: 8gSugar: 2g

Notes

  • For a smoky flavor, add diced smoked sausage or bacon during the sautéing step.
  • To make it a creamy soup, blend a portion of the soup with an immersion blender and return it to the pot before serving.

Tried this recipe?

Let us know how it was!

Cowboy Cookies: Discover the Ultimate Recipe Delight!

Introduction to Cowboy Cookies

There’s something magical about the aroma of freshly baked cookies wafting through the house. Cowboy Cookies are a delightful blend of hearty oats, rich chocolate, and crunchy nuts that can turn any ordinary day into a special occasion. Whether you’re looking for a quick solution to satisfy a sweet tooth or a treat to impress your loved ones, these cookies have got you covered. They’re easy to whip up, making them perfect for busy weeknights or lazy weekends. Trust me, once you take a bite, you’ll understand why they’re a favorite in my kitchen!

Why You’ll Love This Cowboy Cookies

Cowboy Cookies are the ultimate crowd-pleaser. They’re not just delicious; they’re incredibly easy to make. In about 30 minutes, you can have a batch of warm, gooey cookies ready to share—or keep all to yourself! The combination of oats, chocolate, and nuts creates a satisfying texture that’s hard to resist. Plus, they’re versatile enough to adapt to your taste, making them a go-to recipe for any occasion.

Ingredients for Cowboy Cookies

Gathering the right ingredients is the first step to creating these delightful Cowboy Cookies. Here’s what you’ll need:

  • All-purpose flour: The backbone of your cookies, providing structure and chewiness.
  • Baking soda: This little leavening agent helps the cookies rise and become fluffy.
  • Salt: A pinch enhances the flavors, balancing the sweetness beautifully.
  • Unsalted butter: Softened butter adds richness and moisture, making the cookies tender.
  • Brown sugar: Packed with molasses, it gives a deep, caramel-like flavor.
  • Granulated sugar: For sweetness and a slight crispness on the edges.
  • Large eggs: They bind the ingredients together and add moisture.
  • Vanilla extract: A splash of this adds warmth and depth to the flavor profile.
  • Old-fashioned rolled oats: These provide a hearty texture and a wholesome feel.
  • Semi-sweet chocolate chips: The star of the show, adding gooey chocolate goodness.
  • Chopped pecans or walnuts: For a delightful crunch and nutty flavor.
  • Shredded coconut (optional): Adds a tropical twist and chewy texture if you’re feeling adventurous.

For exact measurements, check the bottom of the article where you can find everything listed for easy printing. Happy baking!

How to Make Cowboy Cookies

Now that you have all your ingredients ready, it’s time to dive into the fun part—making these delicious Cowboy Cookies! Follow these simple steps, and you’ll be on your way to cookie bliss in no time.

Step 1: Preheat and Prepare

First things first, preheat your oven to 350°F (175°C). This ensures your cookies bake evenly. While the oven warms up, line two baking sheets with parchment paper. This little trick prevents sticking and makes cleanup a breeze.

Step 2: Mix Dry Ingredients

In a medium bowl, whisk together the all-purpose flour, baking soda, and salt. This step is crucial as it evenly distributes the leavening agent and salt throughout the flour. Set this mixture aside for now; it’ll come into play shortly.

Step 3: Cream Butter and Sugars

In a large mixing bowl, cream together the softened unsalted butter, brown sugar, and granulated sugar. Use an electric mixer for about 2-3 minutes until the mixture is light and fluffy. This step adds air to the dough, making your cookies tender and delightful.

Step 4: Add Eggs and Vanilla

Next, add the eggs one at a time, mixing well after each addition. This helps incorporate them fully into the batter. Then, stir in the vanilla extract. The aroma of vanilla will start to fill your kitchen, and trust me, it’s heavenly!

Step 5: Combine Wet and Dry Ingredients

Gradually add the dry ingredients to the wet mixture. Mix until just combined; overmixing can lead to tough cookies. You want a soft dough that’s ready for all those tasty add-ins!

Step 6: Fold in Add-Ins

Now comes the fun part! Gently fold in the old-fashioned rolled oats, semi-sweet chocolate chips, chopped nuts, and shredded coconut if you’re using it. Make sure everything is evenly distributed, so every bite is packed with flavor.

Step 7: Shape and Bake

Using a tablespoon, drop rounded scoops of dough onto the prepared baking sheets, spacing them about 2 inches apart. This gives them room to spread. Bake in the preheated oven for 10-12 minutes, or until the edges are golden brown. The centers may look slightly underbaked, but they’ll firm up as they cool.

Step 8: Cool and Enjoy

Once baked, allow the cookies to cool on the baking sheets for about 5 minutes. This helps them set. Then, transfer them to wire racks to cool completely. Now, grab a glass of milk and enjoy your homemade Cowboy Cookies!

Tips for Success

  • Chill the dough for at least 30 minutes for chewier cookies.
  • Use a cookie scoop for uniform sizes and even baking.
  • Don’t overmix the dough; it should be just combined.
  • Experiment with different add-ins like dried fruit or different nuts.
  • Store cookies in an airtight container to keep them fresh longer.

Equipment Needed

  • Mixing bowls: A set of various sizes is ideal; you can use any large bowl if needed.
  • Electric mixer: A hand mixer works great, but a whisk and some elbow grease will do!
  • Baking sheets: Use any flat, oven-safe tray; just line it with parchment paper.
  • Cookie scoop: A tablespoon works perfectly if you don’t have one.
  • Wire racks: If you don’t have these, a plate will suffice for cooling.

Variations

  • Gluten-Free: Substitute all-purpose flour with a gluten-free flour blend for a delicious gluten-free version.
  • Nut-Free: Omit the nuts or replace them with sunflower seeds for a nut-free alternative.
  • Vegan: Use coconut oil instead of butter, flax eggs in place of regular eggs, and dairy-free chocolate chips.
  • Spicy Kick: Add a teaspoon of cinnamon or a pinch of cayenne pepper for a warm, spicy twist.
  • Fruit-Infused: Mix in dried fruits like cranberries or raisins for a chewy, fruity addition.

Serving Suggestions

  • Pair your Cowboy Cookies with a tall glass of cold milk for the classic experience.
  • Serve them warm with a scoop of vanilla ice cream for an indulgent dessert.
  • For a fun twist, drizzle melted chocolate over the cookies before serving.
  • Present them on a rustic wooden platter for a charming touch.

FAQs about Cowboy Cookies

Got questions about these delightful Cowboy Cookies? You’re not alone! Here are some common queries that might help you on your baking journey.

Can I freeze Cowboy Cookies?

Absolutely! Once baked, let them cool completely, then store them in an airtight container or freezer bag. They can last up to three months in the freezer. Just thaw them at room temperature when you’re ready to enjoy!

What can I substitute for eggs in this recipe?

If you’re looking for an egg substitute, try using a flax egg. Mix one tablespoon of ground flaxseed with three tablespoons of water and let it sit for about 5 minutes until it thickens. This works great in Cowboy Cookies!

How do I make my cookies chewier?

For chewier Cowboy Cookies, chill the dough for at least 30 minutes before baking. This helps the cookies maintain their shape and results in a softer texture. You can also add a bit more brown sugar for extra moisture.

Can I use quick oats instead of rolled oats?

While you can use quick oats, I recommend sticking with old-fashioned rolled oats for the best texture. Rolled oats provide a heartier bite that complements the other ingredients beautifully.

What’s the best way to store leftover cookies?

To keep your Cowboy Cookies fresh, store them in an airtight container at room temperature. They’ll stay soft and delicious for about a week. If you want to keep them longer, consider freezing them!

Final Thoughts

Baking Cowboy Cookies is more than just a recipe; it’s an experience that fills your home with warmth and joy. Each bite is a delightful combination of flavors and textures, making them perfect for sharing with family and friends. Whether you’re enjoying them fresh out of the oven or savoring them later, these cookies bring a sense of comfort and nostalgia. They remind us of simpler times, where a homemade treat could brighten any day. So, roll up your sleeves, gather your ingredients, and let the magic of Cowboy Cookies create sweet memories in your kitchen!

jhessica

Cowboy Cookies: Discover the Ultimate Recipe Delight!

Delicious and hearty Cowboy Cookies packed with oats, chocolate chips, and nuts.
Prep Time 15 minutes
Cook Time 12 minutes
Total Time 27 minutes
Servings: 24 cookies
Course: Dessert
Cuisine: American
Calories: 200

Ingredients
  

  • 2 cups all-purpose flour
  • 1 teaspoon baking soda
  • 1 teaspoon salt
  • 1 cup unsalted butter softened
  • 1 cup brown sugar packed
  • 1/2 cup granulated sugar
  • 2 large eggs
  • 2 teaspoons vanilla extract
  • 2 cups old-fashioned rolled oats
  • 1 cup semi-sweet chocolate chips
  • 1 cup chopped pecans or walnuts
  • 1 cup shredded coconut optional

Method
 

  1. Preheat your oven to 350°F (175°C) and line two baking sheets with parchment paper.
  2. In a medium bowl, whisk together the flour, baking soda, and salt. Set aside.
  3. In a large mixing bowl, cream together the softened butter, brown sugar, and granulated sugar until light and fluffy, about 2-3 minutes.
  4. Add the eggs one at a time, mixing well after each addition, then stir in the vanilla extract.
  5. Gradually add the flour mixture to the wet ingredients, mixing until just combined.
  6. Fold in the oats, chocolate chips, nuts, and coconut (if using) until evenly distributed.
  7. Drop rounded tablespoons of dough onto the prepared baking sheets, spacing them about 2 inches apart.
  8. Bake for 10-12 minutes, or until the edges are golden brown. The centers may look slightly underbaked; they will continue to cook on the baking sheet.
  9. Allow the cookies to cool on the baking sheets for 5 minutes before transferring them to wire racks to cool completely.

Nutrition

Serving: 1cookieCalories: 200kcalCarbohydrates: 24gProtein: 3gFat: 10gSaturated Fat: 6gPolyunsaturated Fat: 4gCholesterol: 30mgSodium: 150mgFiber: 1gSugar: 12g

Notes

  • For a chewier cookie, chill the dough for at least 30 minutes before baking.
  • You can substitute the chocolate chips with butterscotch or peanut butter chips for a different flavor.

Tried this recipe?

Let us know how it was!

Cowboy Pasta Salad: A Flavor-Packed Recipe to Try!

Introduction to Cowboy Pasta Salad

There’s something about a vibrant, hearty dish that brings people together. Cowboy Pasta Salad is just that—a colorful medley of flavors that’s perfect for any gathering. Whether you’re hosting a backyard barbecue or simply looking for a quick solution for a busy weeknight dinner, this salad has got your back. It’s easy to whip up, and the best part? It tastes even better after a little time in the fridge, allowing those flavors to mingle. Trust me, your loved ones will be asking for seconds!

Why You’ll Love This Cowboy Pasta Salad

This Cowboy Pasta Salad is a game-changer for busy days. It comes together in under an hour, making it a breeze for any home cook. The combination of fresh ingredients and zesty dressing creates a flavor explosion that will impress your family and friends. Plus, it’s versatile! You can serve it as a side or a main dish, and it’s perfect for meal prep. Who doesn’t love a dish that’s both delicious and easy?

Ingredients for Cowboy Pasta Salad

Gathering the right ingredients is half the fun of cooking! For this Cowboy Pasta Salad, you’ll need a colorful array of fresh and pantry staples that come together beautifully. Here’s what you’ll need:

  • Rotini pasta: This spiral-shaped pasta holds onto the dressing and other ingredients perfectly, making every bite flavorful.
  • Cherry tomatoes: Sweet and juicy, they add a burst of color and freshness to the salad.
  • Corn: Whether canned or frozen, corn brings a delightful crunch and a hint of sweetness.
  • Black beans: Packed with protein and fiber, they add a hearty texture. You can swap them for chickpeas or kidney beans if you prefer.
  • Red bell pepper: This adds a sweet crunch and vibrant color, making the salad visually appealing.
  • Red onion: Finely chopped, it gives a sharp bite that balances the sweetness of the other ingredients.
  • Shredded cheddar cheese: Creamy and rich, it adds a savory depth to the dish.
  • Fresh cilantro: This herb brings a refreshing note that brightens up the entire salad.
  • Olive oil: A key ingredient for the dressing, it adds richness and helps to meld the flavors.
  • Lime juice: This adds a zesty kick that enhances the overall taste.
  • Chili powder: A sprinkle of this spice gives the salad a warm, smoky flavor.
  • Garlic powder: For a hint of savory goodness without the fuss of fresh garlic.
  • Salt and pepper: Essential for seasoning, they help to elevate all the flavors.

For those who like a little heat, consider adding diced jalapeños or a dash of hot sauce to the dressing. And if you’re looking for a different flavor profile, feel free to substitute the black beans with chickpeas or kidney beans. The exact quantities for each ingredient are listed at the bottom of the article, ready for you to print out and take to the store!

How to Make Cowboy Pasta Salad

Creating this Cowboy Pasta Salad is as easy as pie. Follow these simple steps, and you’ll have a delicious dish ready in no time. Let’s dive in!

Step 1: Cook the Pasta

Start by boiling a pot of water. Add a pinch of salt to enhance the flavor of the rotini pasta. Cook the pasta according to the package instructions until it’s al dente. This usually takes about 8-10 minutes. Once done, drain the pasta and rinse it under cold water. This stops the cooking process and cools it down quickly, making it perfect for your salad.

Step 2: Combine the Ingredients

In a large mixing bowl, toss together the cooled rotini, cherry tomatoes, corn, black beans, red bell pepper, red onion, cheddar cheese, and cilantro. The colors should pop, making it look as good as it tastes. Stir gently to ensure everything is evenly distributed. This is where the magic begins!

Step 3: Prepare the Dressing

In a small bowl, whisk together the olive oil, lime juice, chili powder, garlic powder, salt, and pepper. This dressing is the secret sauce that ties all the flavors together. Taste it and adjust the seasoning if needed. If you like a bit of heat, now’s the time to add those diced jalapeños or a splash of hot sauce!

Step 4: Mix and Chill

Pour the dressing over the pasta salad. Toss everything together gently until the pasta and veggies are well coated. Cover the bowl with plastic wrap or a lid and refrigerate for at least 30 minutes. This chilling time allows the flavors to meld beautifully, making each bite even more delicious.

Step 5: Serve

When you’re ready to serve, give the salad a quick stir. You can enjoy it chilled or at room temperature. It’s perfect for picnics, barbecues, or just a cozy dinner at home. Your Cowboy Pasta Salad is now ready to impress!

Tips for Success

  • Always rinse the pasta after cooking to stop the cooking process and keep it from getting mushy.
  • Let the salad chill for at least 30 minutes to enhance the flavors.
  • Feel free to customize with your favorite veggies or proteins for a personal touch.
  • Use fresh lime juice for the best flavor in your dressing.
  • Make it ahead of time; it tastes even better the next day!

Equipment Needed

  • Large pot: For boiling the pasta. A deep skillet can work in a pinch.
  • Colander: To drain the pasta. A fine mesh strainer is a great alternative.
  • Mixing bowl: A large bowl for combining ingredients. Any big bowl will do!
  • Whisk: For mixing the dressing. A fork can also get the job done.
  • Plastic wrap or lid: To cover the salad while it chills. A plate can work too!

Variations

  • Spicy Cowboy Pasta Salad: Add diced jalapeños or a few dashes of your favorite hot sauce for a fiery kick.
  • Protein-Packed Version: Toss in grilled chicken, shrimp, or tofu for an extra boost of protein.
  • Gluten-Free Option: Substitute rotini pasta with gluten-free pasta to accommodate dietary needs.
  • Vegan Twist: Omit the cheddar cheese or use a dairy-free alternative to make it vegan-friendly.
  • Seasonal Veggies: Swap in seasonal vegetables like zucchini or bell peppers for a fresh twist.

Serving Suggestions

  • Pair your Cowboy Pasta Salad with grilled chicken or steak for a hearty meal.
  • Serve it alongside crusty garlic bread for a satisfying dinner.
  • For drinks, try a refreshing iced tea or a light beer.
  • Garnish with extra cilantro or lime wedges for a pop of color.

FAQs about Cowboy Pasta Salad

Got questions about this delicious Cowboy Pasta Salad? You’re not alone! Here are some common queries that might help you out:

Can I make Cowboy Pasta Salad ahead of time?

Absolutely! In fact, making it a day in advance allows the flavors to meld beautifully. Just store it in the fridge, and it’ll taste even better the next day.

What can I substitute for black beans?

If black beans aren’t your thing, feel free to swap them for chickpeas or kidney beans. Both options add a different flavor and texture while keeping it hearty.

Is Cowboy Pasta Salad gluten-free?

To make it gluten-free, simply use gluten-free rotini pasta. The rest of the ingredients are naturally gluten-free, so you’re good to go!

How long can I store leftovers?

Leftover Cowboy Pasta Salad can be stored in an airtight container in the fridge for up to 3 days. Just give it a good stir before serving again!

Can I add more vegetables to the salad?

Definitely! Feel free to get creative. Adding seasonal veggies like zucchini, cucumbers, or even avocado can enhance the flavor and nutrition of your Cowboy Pasta Salad.

Final Thoughts

Cooking is more than just a task; it’s a way to connect with those we love. This Cowboy Pasta Salad embodies that spirit, bringing together vibrant flavors and fresh ingredients in a dish that’s as fun to make as it is to eat. Whether you’re sharing it at a family gathering or enjoying it solo, each bite is a reminder of the joy that good food can bring. So roll up your sleeves, gather your ingredients, and let this salad become a staple in your kitchen. Trust me, it’ll quickly become a favorite for everyone around your table!

jhessica

Cowboy Pasta Salad: A Flavor-Packed Recipe to Try!

A delicious and colorful Cowboy Pasta Salad packed with flavors and perfect for any gathering.
Prep Time 15 minutes
Cook Time 10 minutes
Total Time 55 minutes
Servings: 6 servings
Course: Salad
Cuisine: American
Calories: 250

Ingredients
  

  • 8 ounces rotini pasta
  • 1 cup cherry tomatoes halved
  • 1 cup corn canned or frozen
  • 1 cup black beans rinsed and drained
  • 1/2 cup red bell pepper diced
  • 1/2 cup red onion finely chopped
  • 1/2 cup shredded cheddar cheese
  • 1/4 cup fresh cilantro chopped
  • 1/4 cup olive oil
  • 2 tablespoons lime juice
  • 1 teaspoon chili powder
  • 1 teaspoon garlic powder
  • Salt and pepper to taste

Method
 

  1. Cook the rotini pasta according to package instructions until al dente. Drain and rinse under cold water to cool.
  2. In a large bowl, combine the cooled pasta, cherry tomatoes, corn, black beans, red bell pepper, red onion, cheddar cheese, and cilantro.
  3. In a small bowl, whisk together the olive oil, lime juice, chili powder, garlic powder, salt, and pepper.
  4. Pour the dressing over the pasta salad and toss gently to combine.
  5. Cover the salad and refrigerate for at least 30 minutes to allow the flavors to meld.
  6. Serve chilled or at room temperature.

Nutrition

Serving: 1servingCalories: 250kcalCarbohydrates: 30gProtein: 10gFat: 10gSaturated Fat: 3gPolyunsaturated Fat: 7gCholesterol: 15mgSodium: 200mgFiber: 5gSugar: 3g

Notes

  • For a spicier kick, add diced jalapeños or a dash of hot sauce to the dressing.
  • Substitute the black beans with chickpeas or kidney beans for a different flavor and texture.

Tried this recipe?

Let us know how it was!

Strawberry Matcha Sago Pudding: A Delightful Recipe!

Introduction to Strawberry Matcha Sago Pudding

There’s something magical about desserts that combine unexpected flavors, and that’s exactly what you’ll find in this Strawberry Matcha Sago Pudding. As a passionate home cook, I know how important it is to have a go-to recipe that impresses without taking hours in the kitchen. This delightful treat is not only refreshing but also a quick solution for those busy days when you want to whip up something special. The chewy sago pearls paired with the vibrant taste of strawberries and the earthy notes of matcha create a dessert that’s sure to win hearts and satisfy cravings.

Why You’ll Love This Strawberry Matcha Sago Pudding

This Strawberry Matcha Sago Pudding is a dessert that checks all the boxes. It’s incredibly easy to make, requiring just a handful of ingredients and minimal prep time. The delightful combination of flavors is not only refreshing but also visually stunning, making it perfect for impressing guests or treating yourself. Plus, it’s vegan-friendly, so everyone can enjoy a scoop of this creamy, dreamy delight without any guilt!

Ingredients for Strawberry Matcha Sago Pudding

Gathering the right ingredients is the first step to creating this delightful Strawberry Matcha Sago Pudding. Here’s what you’ll need:

  • Small tapioca pearls: These chewy gems are the star of the show, providing that unique texture that makes sago pudding so enjoyable.
  • Coconut milk: This creamy base adds richness and a hint of tropical flavor. For a creamier texture, opt for full-fat coconut milk.
  • Water: Used to balance the coconut milk and help cook the tapioca pearls to perfection.
  • Granulated sugar: A touch of sweetness to enhance the flavors. You can adjust this based on your taste preferences.
  • Salt: Just a pinch to elevate the overall flavor profile of the pudding.
  • Matcha powder: This vibrant green powder brings an earthy flavor and a beautiful color to the dessert. It’s packed with antioxidants too!
  • Fresh strawberries: Sweet and juicy, these berries add a burst of freshness and a pop of color. Feel free to swap them for other fruits like mango or kiwi for a twist.
  • Honey (optional): A drizzle of honey can enhance the sweetness, but it’s entirely optional if you prefer a lighter dessert.
  • Mint leaves for garnish (optional): These add a refreshing touch and a lovely visual appeal when serving.

For exact measurements, check the bottom of the article where you can find everything listed for easy printing. Happy cooking!

How to Make Strawberry Matcha Sago Pudding

Creating this Strawberry Matcha Sago Pudding is a delightful journey that’s as enjoyable as the final product. Follow these simple steps, and you’ll have a stunning dessert that’s sure to impress.

Step 1: Rinse the Tapioca Pearls

Start by rinsing the small tapioca pearls under cold water in a fine mesh strainer. This step is crucial! Rinsing removes excess starch, which can make the pudding gummy. You want those pearls to be perfectly chewy, not clumpy. Once the water runs clear, set them aside.

Step 2: Prepare the Coconut Mixture

In a medium saucepan, combine the coconut milk, water, sugar, and salt. Stir it all together and bring the mixture to a gentle simmer over medium heat. This simmering process is key; it helps dissolve the sugar and meld the flavors beautifully. Keep an eye on it, stirring occasionally to prevent sticking.

Step 3: Cook the Tapioca Pearls

Once your coconut mixture is simmering, add the rinsed tapioca pearls. Reduce the heat to low and cook for about 15-20 minutes. Stir frequently! You’ll know the pearls are ready when they turn translucent and have a delightful chewy texture. It’s like watching magic happen in your pot!

Step 4: Mix in Matcha

In a small bowl, mix the matcha powder with a few tablespoons of hot water to create a smooth paste. This step ensures that the matcha blends seamlessly into the pudding. Stir this vibrant green mixture into the cooked tapioca pudding until everything is well combined. The color transformation is simply stunning!

Step 5: Cool and Chill

Remove the saucepan from heat and let the pudding cool to room temperature. This cooling phase is essential; it allows the flavors to develop. Once cooled, transfer the pudding to the refrigerator and chill for at least 1 hour. Chilling gives the pudding its final texture, making it creamy and refreshing.

Step 6: Serve and Garnish

To serve, spoon the chilled sago pudding into bowls or glasses. Layer it with fresh strawberries for that burst of flavor and color. If you like, drizzle a bit of honey on top for extra sweetness. Don’t forget to garnish with mint leaves for a refreshing touch. Your Strawberry Matcha Sago Pudding is now ready to be enjoyed!

Tips for Success

  • Always rinse the tapioca pearls thoroughly to avoid a gummy texture.
  • Use full-fat coconut milk for a creamier pudding.
  • Stir frequently while cooking the pearls to prevent sticking.
  • Let the pudding cool completely before chilling for the best texture.
  • Experiment with different fruits for unique flavor combinations.

Equipment Needed

  • Medium saucepan: A sturdy pot for simmering the coconut mixture. A large skillet can work too.
  • Fine mesh strainer: Essential for rinsing the tapioca pearls. A regular colander can be a substitute.
  • Mixing bowl: For combining the matcha paste. Any bowl will do!
  • Spoon or spatula: For stirring. A wooden spoon adds a nice touch.

Variations

  • Mango Matcha Sago: Swap out strawberries for ripe mango chunks for a tropical twist.
  • Chocolate Matcha Sago: Add cocoa powder to the matcha paste for a rich chocolate flavor.
  • Chia Seed Boost: Mix in chia seeds for added texture and nutritional benefits.
  • Nutty Delight: Top with toasted coconut flakes or crushed nuts for a crunchy contrast.
  • Flavored Coconut Milk: Use flavored coconut milk, like pandan or vanilla, for an extra layer of taste.

Serving Suggestions

  • Pair with a refreshing green tea or iced matcha latte for a delightful afternoon treat.
  • Serve alongside a light fruit salad for a colorful and healthy dessert spread.
  • Present in clear glasses to showcase the beautiful layers of strawberries and pudding.
  • Top with a sprinkle of toasted coconut for added texture and flavor.

FAQs about Strawberry Matcha Sago Pudding

Can I make Strawberry Matcha Sago Pudding ahead of time?

Absolutely! This dessert is perfect for making ahead. Just prepare it a day in advance and store it in the refrigerator. The flavors will meld beautifully, and it will be ready to impress when you are!

Is Strawberry Matcha Sago Pudding gluten-free?

Yes, this delightful pudding is naturally gluten-free! The main ingredients, tapioca pearls and coconut milk, are safe for those avoiding gluten. Enjoy without worry!

Can I use frozen strawberries instead of fresh?

Definitely! Frozen strawberries work well in this recipe. Just thaw them before using, and they’ll add a lovely sweetness to your pudding.

How long can I store the pudding?

You can store Strawberry Matcha Sago Pudding in an airtight container in the refrigerator for up to 3 days. Just give it a gentle stir before serving!

What can I substitute for matcha powder?

If you don’t have matcha powder, you can use green tea powder as an alternative. While the flavor will differ slightly, it will still provide a lovely green hue and a hint of earthiness.

Final Thoughts

Creating Strawberry Matcha Sago Pudding is more than just following a recipe; it’s about crafting a delightful experience that brings joy to your table. The vibrant colors and unique flavors make it a feast for the eyes and the palate. Each spoonful offers a refreshing burst of strawberries, the comforting creaminess of coconut, and the earthy notes of matcha. Whether you’re impressing guests or treating yourself, this dessert is sure to become a favorite. So, roll up your sleeves, gather your ingredients, and let the magic of this pudding brighten your day!

jhessica

Strawberry Matcha Sago Pudding: A Delightful Recipe!

A delightful and refreshing dessert combining the flavors of strawberry and matcha with chewy sago pearls.
Prep Time 15 minutes
Cook Time 20 minutes
Total Time 1 hour 35 minutes
Servings: 4 servings
Course: Dessert
Cuisine: Asian
Calories: 280

Ingredients
  

  • 1 cup small tapioca pearls
  • 2 cups coconut milk
  • 1 cup water
  • 1/2 cup granulated sugar
  • 1/2 teaspoon salt
  • 1 tablespoon matcha powder
  • 1 cup fresh strawberries hulled and sliced
  • 1 tablespoon honey optional
  • Mint leaves for garnish optional

Method
 

  1. Rinse the tapioca pearls under cold water in a fine mesh strainer until the water runs clear.
  2. In a medium saucepan, combine the coconut milk, water, sugar, and salt. Bring to a gentle simmer over medium heat, stirring occasionally.
  3. Once the mixture is simmering, add the rinsed tapioca pearls. Reduce the heat to low and cook for about 15-20 minutes, stirring frequently until the pearls become translucent and chewy.
  4. In a small bowl, mix the matcha powder with a few tablespoons of hot water to create a smooth paste. Stir this mixture into the cooked tapioca pudding until well combined.
  5. Remove the saucepan from heat and let the pudding cool to room temperature. Once cooled, transfer it to the refrigerator and chill for at least 1 hour.
  6. To serve, spoon the chilled sago pudding into bowls or glasses, layer with fresh strawberries, and drizzle with honey if desired. Garnish with mint leaves.

Nutrition

Serving: 1servingCalories: 280kcalCarbohydrates: 38gProtein: 3gFat: 12gSaturated Fat: 10gPolyunsaturated Fat: 2gSodium: 200mgFiber: 1gSugar: 12g

Notes

  • For a creamier texture, use full-fat coconut milk.
  • You can substitute the strawberries with other fruits like mango or kiwi for a different flavor.

Tried this recipe?

Let us know how it was!

Steak Pinwheels with Spinach and Cheese are Delicious!

Introduction to Steak Pinwheels with Spinach and Cheese

Steak Pinwheels with Spinach and Cheese are not just a meal; they’re a culinary hug on a plate. I remember the first time I made these delightful rolls. The aroma of searing steak filled my kitchen, and my family gathered around, curious and hungry. This dish is perfect for those busy weeknights when you want something impressive yet easy to whip up. With tender flank steak wrapped around a creamy spinach and cheese filling, it’s a guaranteed crowd-pleaser. Trust me, your loved ones will be asking for seconds!

Why You’ll Love This Steak Pinwheels with Spinach and Cheese

These Steak Pinwheels with Spinach and Cheese are a game-changer for any home cook. They’re quick to prepare, taking just 40 minutes from start to finish. The combination of savory steak and creamy filling is simply irresistible. Plus, they’re versatile enough for a casual dinner or a special occasion. You’ll impress your family and friends without spending hours in the kitchen. Who doesn’t love a dish that’s both delicious and easy?

Ingredients for Steak Pinwheels with Spinach and Cheese

Gathering the right ingredients is the first step to creating these mouthwatering Steak Pinwheels with Spinach and Cheese. Here’s what you’ll need:

  • Flank steak: This cut is perfect for rolling. It’s tender and flavorful, making it the star of the dish.
  • Fresh spinach: Adds a vibrant color and a nutritious boost. You can also use kale or arugula for a twist.
  • Cream cheese: This creamy base binds the filling together, giving it a rich texture.
  • Shredded mozzarella cheese: Melts beautifully and adds a gooey, cheesy goodness to each bite.
  • Garlic: Freshly minced garlic brings a punch of flavor that elevates the dish.
  • Salt and black pepper: Essential seasonings that enhance the overall taste of the pinwheels.
  • Olive oil: Used for searing the pinwheels, it adds a lovely richness and helps achieve that golden crust.
  • Italian seasoning: A blend of herbs that complements the flavors of the steak and cheese.
  • Toothpicks or kitchen twine: These are crucial for securing the pinwheels, ensuring they hold their shape while cooking.

For those looking to spice things up, consider adding red pepper flakes to the cheese mixture. If you’re feeling adventurous, swap out the spinach for other greens to create your own unique flavor profile. Exact quantities for each ingredient can be found at the bottom of the article, ready for printing!

How to Make Steak Pinwheels with Spinach and Cheese

Creating these Steak Pinwheels with Spinach and Cheese is a straightforward process that will have your kitchen smelling divine. Follow these simple steps, and you’ll be on your way to a delicious meal that’s sure to impress.

Step 1: Preheat the Oven

First things first, preheat your oven to 375°F (190°C). This ensures it’s hot and ready to bake those pinwheels to perfection.

Step 2: Prepare the Cheese Mixture

In a mixing bowl, combine the cream cheese, shredded mozzarella, chopped spinach, minced garlic, salt, pepper, and Italian seasoning. Mix everything until it’s well combined. This creamy filling is the heart of your pinwheels, so make sure it’s evenly blended.

Step 3: Prepare the Flank Steak

Next, lay the flank steak slices flat on a clean surface. If they seem a bit thick, gently pound them with a meat mallet until they’re about 1/4 inch thick. This step is crucial for rolling them up easily and ensuring they cook evenly.

Step 4: Assemble the Pinwheels

Now, spread a generous layer of the cheese and spinach mixture over each slice of steak. Starting from one end, carefully roll each steak slice tightly into a pinwheel shape. Secure the ends with toothpicks or tie them with kitchen twine. This will keep everything together while cooking.

Step 5: Sear the Pinwheels

Heat olive oil in a large oven-safe skillet over medium-high heat. Once hot, sear the pinwheels for about 2-3 minutes on each side until they’re nicely browned. This step adds a beautiful crust and enhances the flavor.

Step 6: Bake the Pinwheels

Transfer the skillet to your preheated oven and bake for 15-20 minutes. Keep an eye on them, and cook until the steak reaches your desired doneness. The aroma will be irresistible!

Step 7: Rest and Serve

Once done, remove the skillet from the oven and let the pinwheels rest for about 5 minutes. This allows the juices to redistribute. Then, slice them into pinwheels and serve warm. Enjoy the delightful combination of flavors!

Tips for Success

  • Use a sharp knife to slice the pinwheels for clean edges.
  • Let the cream cheese soften at room temperature for easier mixing.
  • Don’t overcrowd the skillet when searing; give each pinwheel space to brown.
  • Experiment with different cheeses for unique flavors.
  • Allow the pinwheels to rest before slicing to keep them juicy.

Equipment Needed

  • Oven-safe skillet: A cast-iron skillet works great, but any oven-safe pan will do.
  • Meat mallet: If you don’t have one, a rolling pin or heavy pan can help flatten the steak.
  • Mixing bowl: Any large bowl will suffice for combining the filling.
  • Toothpicks or kitchen twine: Both are essential for securing the pinwheels.

Variations

  • Spicy Kick: Add red pepper flakes or diced jalapeños to the cheese mixture for a fiery twist.
  • Herb Infusion: Mix in fresh herbs like basil or parsley to enhance the flavor profile.
  • Cheese Swap: Try using feta or goat cheese instead of cream cheese for a tangy flavor.
  • Vegetable Boost: Incorporate roasted red peppers or sun-dried tomatoes into the filling for added depth.
  • Low-Carb Option: Use zucchini slices instead of flank steak for a lighter, veggie-packed version.

Serving Suggestions

  • Side Salad: Pair with a fresh arugula salad drizzled with balsamic vinaigrette for a light contrast.
  • Roasted Vegetables: Serve alongside roasted asparagus or Brussels sprouts for a colorful plate.
  • Wine Pairing: A bold red wine, like Cabernet Sauvignon, complements the steak beautifully.
  • Presentation: Arrange pinwheels on a platter, garnished with fresh herbs for an elegant touch.

FAQs about Steak Pinwheels with Spinach and Cheese

Can I make Steak Pinwheels with Spinach and Cheese ahead of time?

Absolutely! You can prepare the pinwheels and store them in the fridge for up to 24 hours before cooking. Just make sure to cover them tightly to keep them fresh.

What can I serve with Steak Pinwheels?

These pinwheels pair wonderfully with a side salad, roasted vegetables, or even mashed potatoes. A bold red wine also complements the flavors beautifully.

Can I use a different cut of meat?

While flank steak is ideal, you can use other cuts like sirloin or skirt steak. Just ensure they are thinly sliced for easy rolling.

How do I store leftovers?

Store any leftover pinwheels in an airtight container in the fridge for up to three days. Reheat them in the oven for the best texture.

Can I freeze Steak Pinwheels with Spinach and Cheese?

Yes, you can freeze them! Just wrap each pinwheel tightly in plastic wrap and place them in a freezer-safe bag. They’ll keep for up to three months. Thaw in the fridge before cooking.

Final Thoughts

Steak Pinwheels with Spinach and Cheese are more than just a meal; they’re a celebration of flavors and memories. Each bite is a delightful combination of tender steak and creamy filling that warms the heart. Whether you’re cooking for family or friends, this dish brings everyone together around the table. The joy of sharing a homemade meal is unmatched, and these pinwheels make it easy to impress without the stress. So roll up your sleeves, get cooking, and enjoy the smiles that come with every delicious slice. Trust me, this recipe will become a cherished favorite!

jhessica

Steak Pinwheels with Spinach and Cheese are Delicious!

Steak Pinwheels with Spinach and Cheese are a delicious and savory dish that combines tender flank steak with a creamy spinach and cheese filling.
Prep Time 15 minutes
Cook Time 25 minutes
Total Time 40 minutes
Servings: 4 servings
Course: Main Course
Cuisine: American
Calories: 350

Ingredients
  

  • 1 pound flank steak thinly sliced
  • 1 cup fresh spinach chopped
  • 1 cup cream cheese softened
  • 1 cup shredded mozzarella cheese
  • 2 cloves garlic minced
  • 1 teaspoon salt
  • 1/2 teaspoon black pepper
  • 1 tablespoon olive oil
  • 1 teaspoon Italian seasoning
  • Toothpicks or kitchen twine for securing

Method
 

  1. Preheat your oven to 375°F (190°C).
  2. In a mixing bowl, combine the cream cheese, mozzarella cheese, chopped spinach, minced garlic, salt, pepper, and Italian seasoning. Mix until well combined.
  3. Lay the flank steak slices flat on a clean surface. If the slices are too thick, gently pound them with a meat mallet to about 1/4 inch thickness.
  4. Spread a generous layer of the cheese and spinach mixture over each slice of steak.
  5. Starting from one end, carefully roll each steak slice tightly into a pinwheel shape. Secure the ends with toothpicks or tie with kitchen twine.
  6. Heat olive oil in a large oven-safe skillet over medium-high heat. Sear the pinwheels for about 2-3 minutes on each side until browned.
  7. Transfer the skillet to the preheated oven and bake for 15-20 minutes, or until the steak is cooked to your desired doneness.
  8. Remove from the oven and let rest for 5 minutes before slicing into pinwheels. Serve warm.

Nutrition

Serving: 1pinwheelCalories: 350kcalCarbohydrates: 3gProtein: 30gFat: 24gSaturated Fat: 12gPolyunsaturated Fat: 8gCholesterol: 80mgSodium: 600mgFiber: 1gSugar: 2g

Notes

  • For a spicy kick, add red pepper flakes to the cheese mixture.
  • Substitute the spinach with other greens like kale or arugula for a different flavor profile.

Tried this recipe?

Let us know how it was!

Stay Connected

Get recipes via email: