Get my cookbooks

Pineapple Crunch Delight: A Simple, Tasty Recipe!

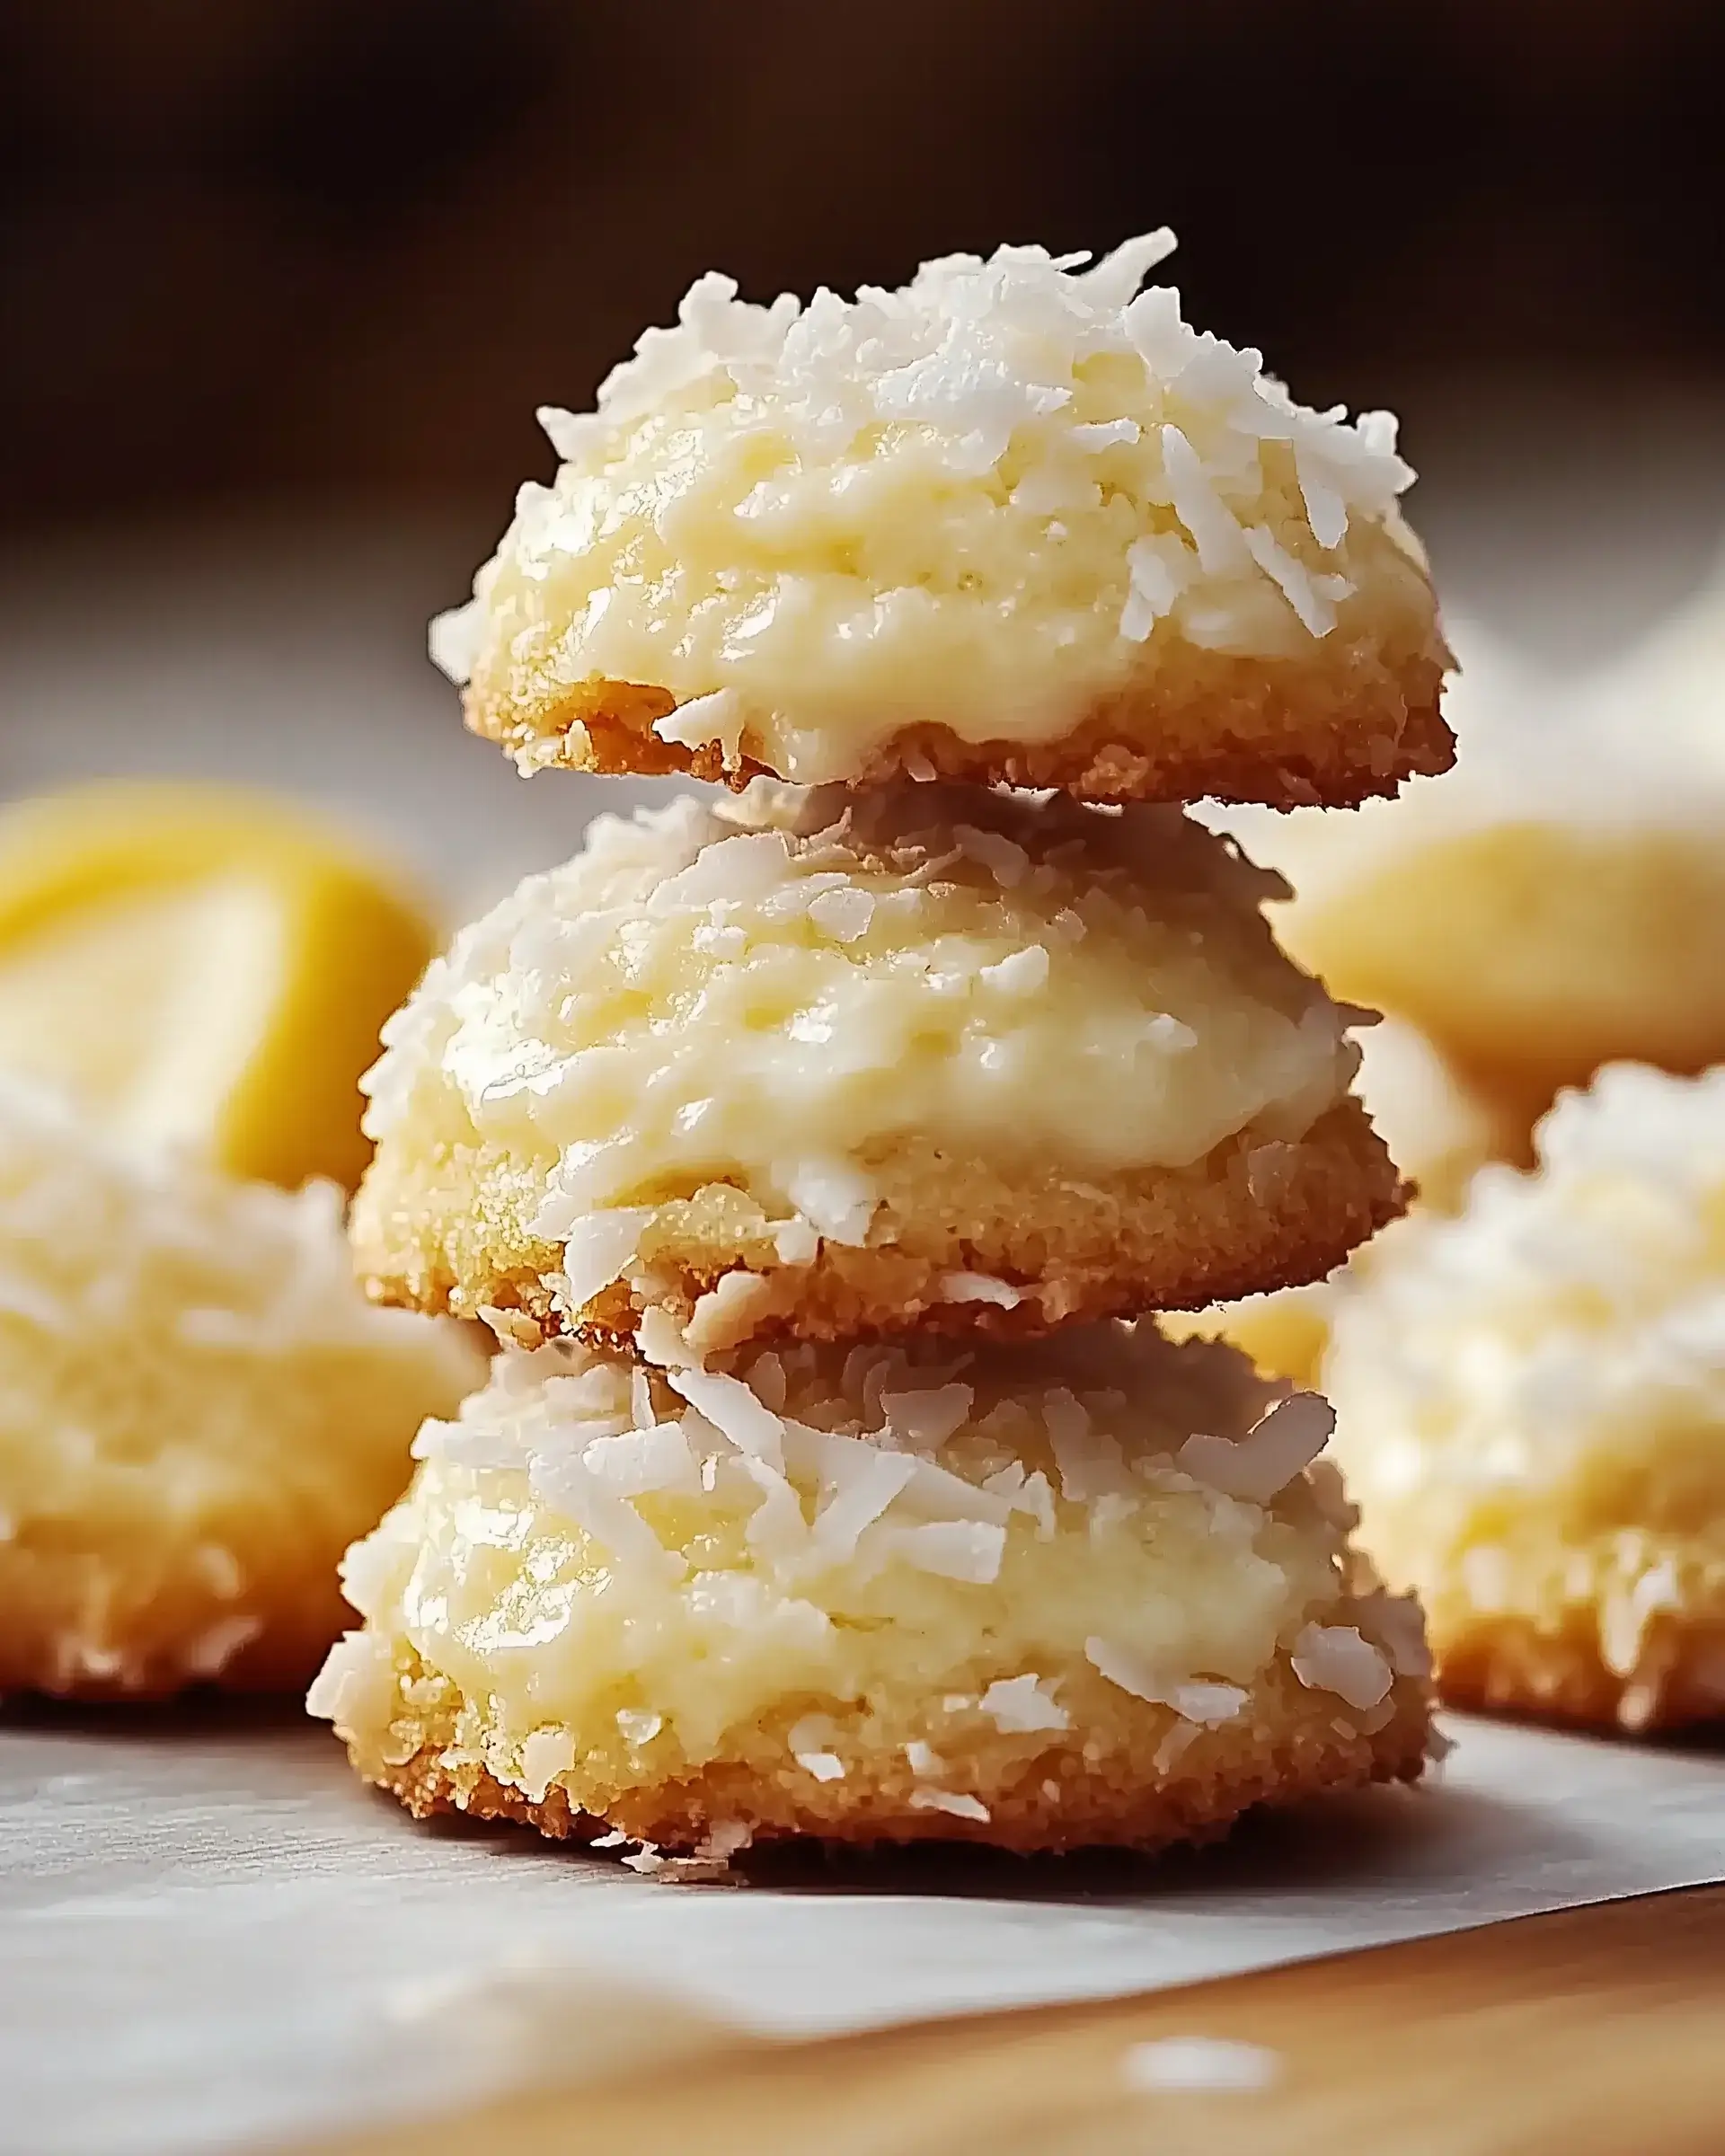
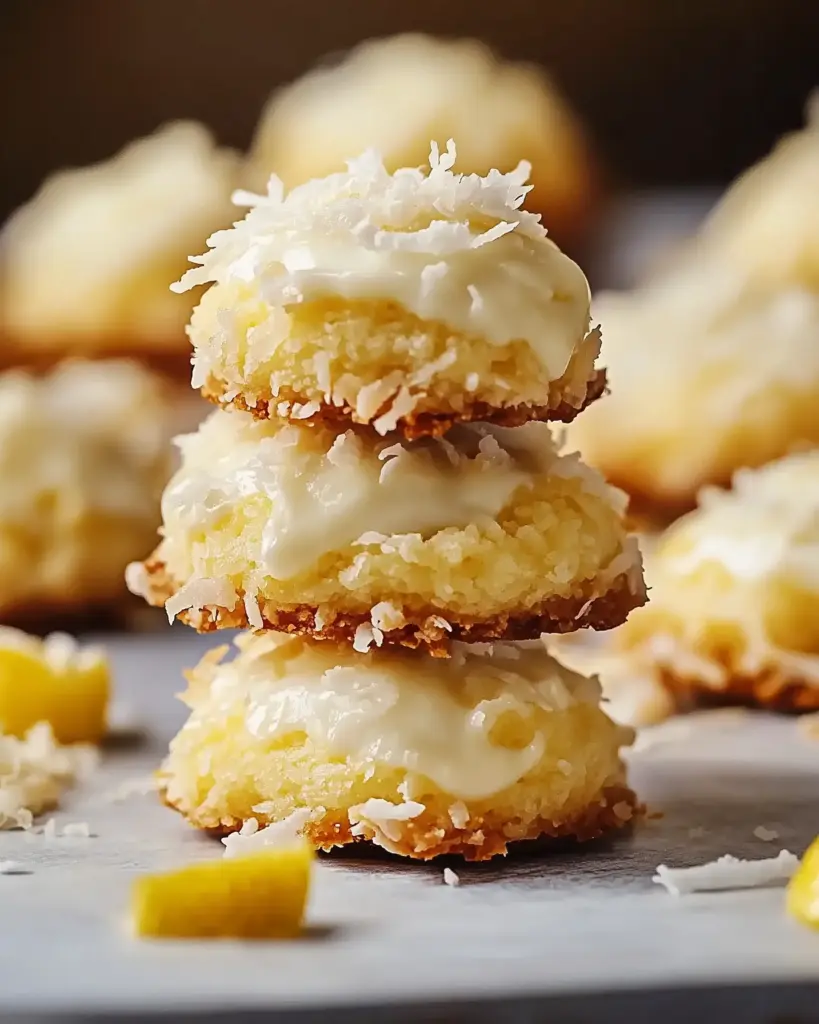
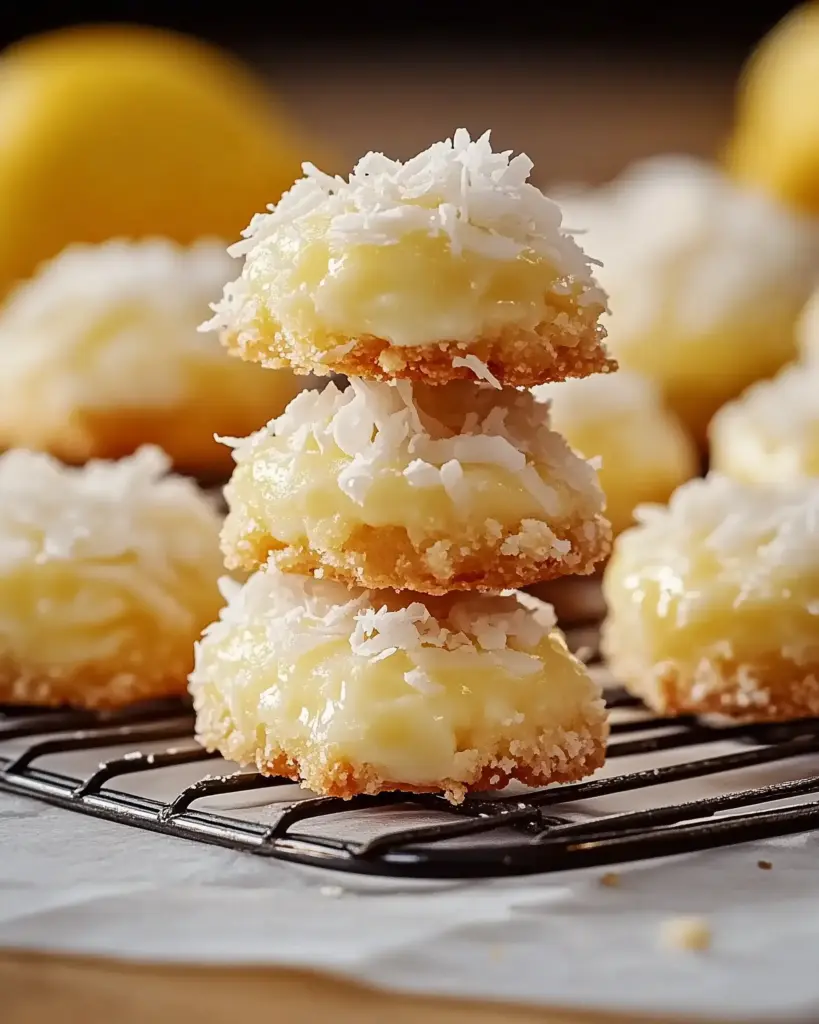
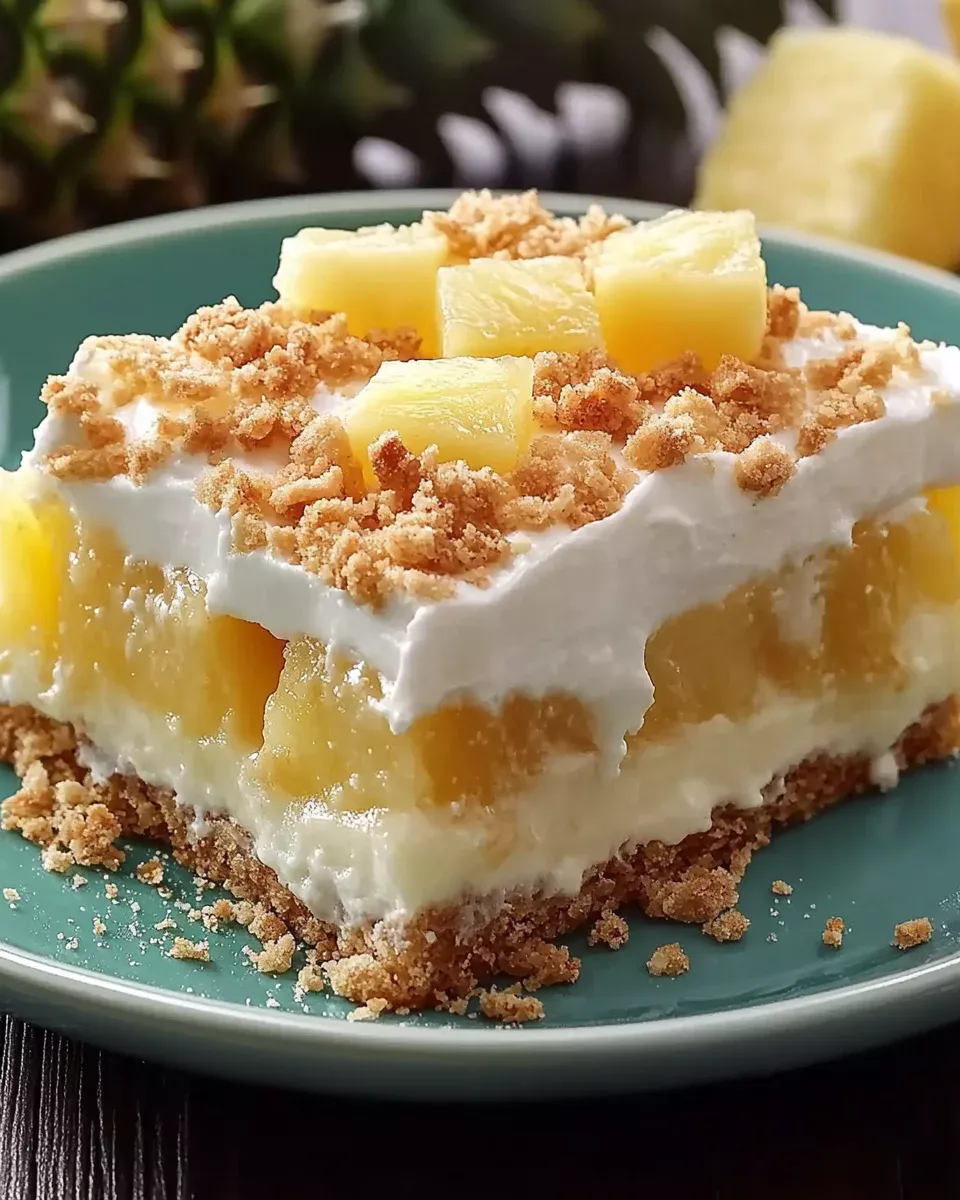
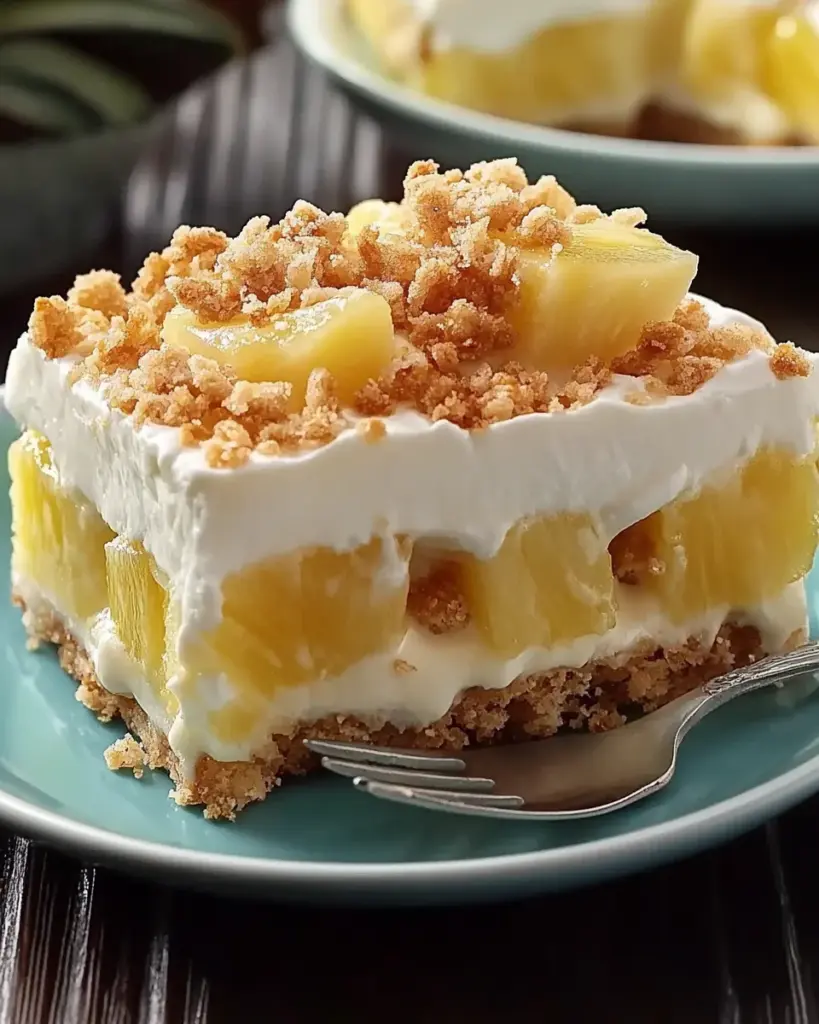
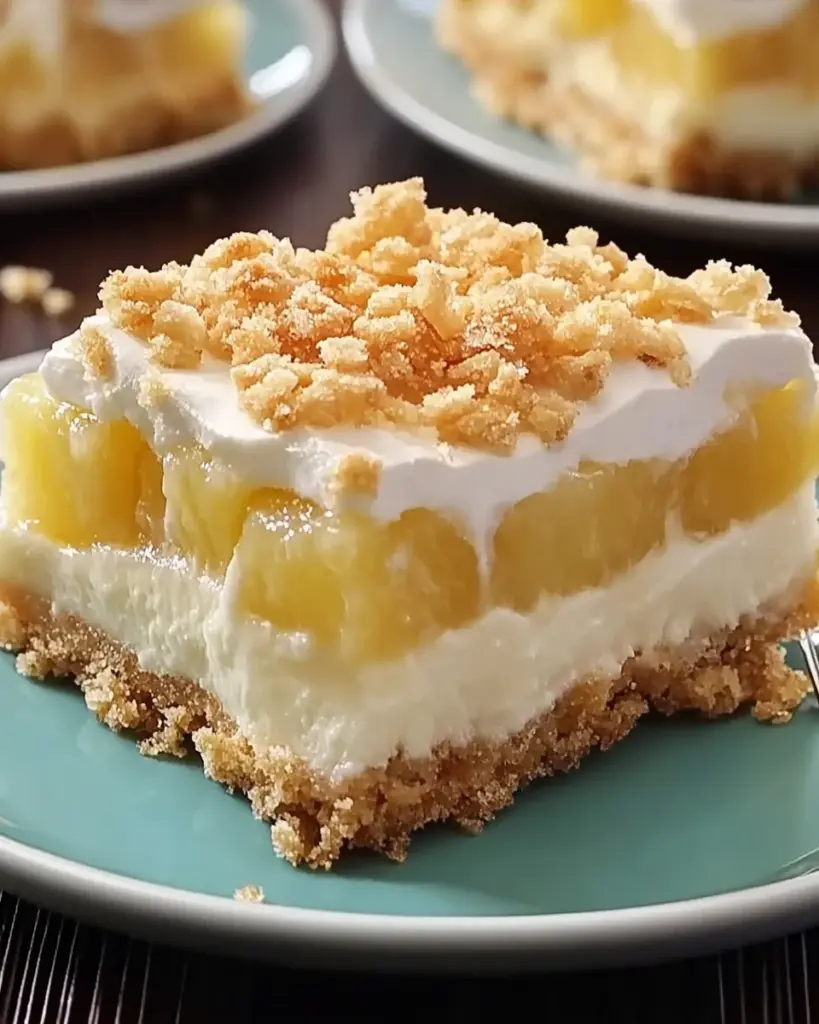
Introduction to Pineapple Crunch Delight

There’s something magical about desserts that bring back memories of simpler times. Pineapple Crunch Delight is one of those recipes that instantly transports me to my childhood kitchen, where the sweet aroma of baking filled the air. This delightful treat is not just easy to whip up; it’s a quick solution for busy days when you want to impress your loved ones without spending hours in the kitchen. With its perfect balance of sweetness and crunch, this dessert is sure to become a favorite in your home, just like it is in mine.

Why You’ll Love This Pineapple Crunch Delight

This Pineapple Crunch Delight is a game-changer for anyone who loves dessert but hates complicated recipes. It comes together in just 10 minutes, making it perfect for those last-minute gatherings or a cozy night in. The combination of sweet pineapple and crunchy topping creates a flavor explosion that will have everyone asking for seconds. Plus, it’s a crowd-pleaser, so you can impress your friends and family without breaking a sweat!

Ingredients for Pineapple Crunch Delight

Gathering the right ingredients is the first step to creating this delicious Pineapple Crunch Delight. Here’s what you’ll need:

  • Crushed Pineapple: A can of drained crushed pineapple serves as the sweet base of this dessert, bringing a tropical flair.
  • Granulated Sugar: This adds sweetness and balances the tartness of the pineapple, making every bite delightful.
  • All-Purpose Flour: Essential for binding the ingredients together, it gives the dessert its structure.
  • Rolled Oats: These provide a hearty crunch and a chewy texture that complements the softness of the pineapple.
  • Unsalted Butter: Melted butter enhances the richness and flavor, making the topping irresistible.
  • Baking Powder: This leavening agent helps the dessert rise, creating a light and airy texture.
  • Salt: Just a pinch enhances the overall flavor, balancing the sweetness.
  • Vanilla Extract: A splash of vanilla adds warmth and depth to the flavor profile.
  • Chopped Pecans (optional): For those who enjoy a nutty crunch, pecans are a fantastic addition, but feel free to skip them if you prefer.

For those looking to get creative, consider adding shredded coconut for a tropical twist. You can find the exact quantities for each ingredient at the bottom of the article, ready for printing!

How to Make Pineapple Crunch Delight

Creating this Pineapple Crunch Delight is as easy as pie—well, easier! Follow these simple steps, and you’ll have a delicious dessert ready to impress.

Step 1: Preheat the Oven

Start by preheating your oven to 350°F (175°C). This ensures it’s hot and ready to bake your delightful creation. A well-preheated oven is key to achieving that perfect golden crust!

Step 2: Mix the Pineapple and Sugar

In a mixing bowl, combine the drained crushed pineapple and sugar. Stir them together until they’re well blended. This sweet base is what makes the dessert so irresistible!

Step 3: Combine Dry Ingredients

Next, stir in the flour, oats, baking powder, salt, and vanilla extract. Mix until everything is well combined. This step is crucial for achieving a balanced texture that’s both chewy and crunchy.

Step 4: Add Pecans

If you’re feeling adventurous, fold in the chopped pecans. They add a delightful crunch and nutty flavor that elevates the dish. If nuts aren’t your thing, feel free to skip this step!

Step 5: Prepare the Baking Dish

Pour the mixture into a greased 9×13-inch baking dish. Spread it evenly to ensure uniform baking. This helps every bite be just as delicious as the last!

Step 6: Drizzle with Butter

Now, drizzle the melted butter over the top. This step enhances the richness of the dessert, making it even more decadent. Who can resist a buttery topping?

Step 7: Bake

Bake for 30-35 minutes or until the top is golden brown and the edges are bubbly. The aroma wafting through your kitchen will be hard to resist!

Step 8: Cool and Serve

Finally, allow the dessert to cool for at least 10 minutes before serving. This lets the flavors settle and makes it easier to cut into squares. Trust me, the wait will be worth it!

Tips for Success

  • Make sure to drain the crushed pineapple well to avoid a soggy dessert.
  • For a deeper flavor, let the mixture sit for a few minutes before baking.
  • Use a toothpick to check for doneness; it should come out clean.
  • Store leftovers in an airtight container for up to three days.
  • Reheat individual servings in the microwave for a warm treat!

Equipment Needed

  • Mixing Bowl: A large bowl for combining ingredients. A sturdy pot can work in a pinch.
  • Measuring Cups: Essential for accuracy. Use a kitchen scale if you prefer weight measurements.
  • 9×13-inch Baking Dish: Perfect for this recipe. Any similar-sized dish will do.
  • Spatula: Great for mixing and spreading. A wooden spoon is a good alternative.
  • Oven Mitts: Safety first! Use thick towels if you don’t have mitts.

Variations

  • Tropical Twist: Add shredded coconut to the mixture for an extra layer of flavor and texture.
  • Gluten-Free Option: Substitute all-purpose flour with a gluten-free flour blend to make this dessert suitable for gluten-sensitive friends.
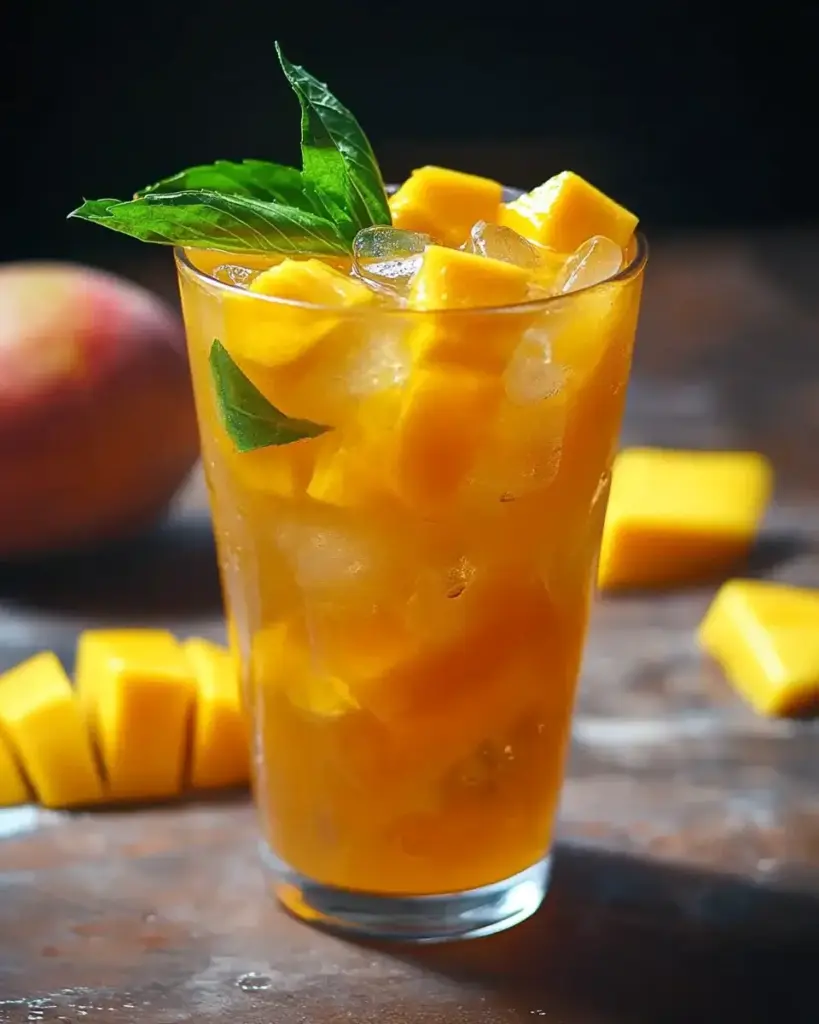
  • Fruit Medley: Mix in other fruits like diced mango or banana for a fruity explosion.
  • Vegan Version: Replace the butter with coconut oil and use a plant-based sugar to make it vegan-friendly.
  • Spiced Up: Add a teaspoon of cinnamon or nutmeg for a warm, spiced flavor that complements the pineapple beautifully.

Serving Suggestions

  • Ice Cream: Serve warm with a scoop of vanilla ice cream for a delightful contrast.
  • Whipped Cream: Top with freshly whipped cream for added richness.
  • Fresh Fruit: Pair with sliced strawberries or blueberries for a refreshing touch.
  • Presentation: Serve in individual ramekins for a charming dessert display.
  • Drink Pairing: Enjoy with a chilled glass of sweet tea or a tropical fruit punch.

FAQs about Pineapple Crunch Delight

As you dive into making this Pineapple Crunch Delight, you might have a few questions. Here are some common queries that can help you along the way:

Can I use fresh pineapple instead of canned?

Absolutely! Fresh pineapple can add a vibrant flavor. Just make sure to crush it well and drain any excess juice to keep the texture right.

How do I store leftovers?

Store any leftover Pineapple Crunch Delight in an airtight container in the fridge. It should stay fresh for up to three days. Just reheat individual servings in the microwave for a warm treat!

Can I make this dessert ahead of time?

Yes! You can prepare the mixture a day in advance and store it in the fridge. Just bake it when you’re ready to serve for a fresh, warm dessert.

Is Pineapple Crunch Delight suitable for vegetarians?

Yes, this recipe is vegetarian-friendly! It contains no meat or animal-derived ingredients, making it a great option for those following a vegetarian diet.

What can I substitute for granulated sugar?

If you’re looking for a healthier option, consider using coconut sugar or a sugar substitute like stevia. Just keep in mind that it may alter the flavor slightly.

Final Thoughts

Creating Pineapple Crunch Delight is more than just baking; it’s about sharing joy and deliciousness with those you love. The sweet, tropical flavors combined with that satisfying crunch make every bite a little celebration. Whether it’s a family gathering or a quiet evening at home, this dessert brings smiles and warmth to the table. Plus, it’s so easy to make that you’ll find yourself whipping it up time and again. So, grab your ingredients and let the aroma of this delightful treat fill your kitchen. Trust me, it’s a recipe that will create lasting memories!

jhessica

Pineapple Crunch Delight: A Simple, Tasty Recipe!

Pineapple Crunch Delight is a simple and tasty dessert that combines the sweetness of crushed pineapple with a crunchy topping.
Prep Time 10 minutes
Servings: 9 servings
Course: Dessert
Cuisine: American
Calories: 250

Ingredients
  

  • 1 can 20 ounces crushed pineapple, drained
  • 1 cup granulated sugar
  • 1 cup all-purpose flour
  • 1 cup rolled oats
  • 1/2 cup unsalted butter melted
  • 1 teaspoon baking powder
  • 1/2 teaspoon salt
  • 1 teaspoon vanilla extract
  • 1/2 cup chopped pecans optional

Method
 

  1. Preheat your oven to 350°F (175°C).
  2. In a mixing bowl, combine the drained crushed pineapple and sugar.
  3. Stir in the flour, oats, baking powder, salt, and vanilla extract until well mixed.
  4. If using, fold in the chopped pecans.
  5. Pour the mixture into a greased 9×13-inch baking dish, spreading it evenly.
  6. Drizzle the melted butter over the top.
  7. Bake for 30-35 minutes or until the top is golden brown and the edges are bubbly.
  8. Allow to cool for at least 10 minutes before serving.

Nutrition

Serving: 1pieceCalories: 250kcalCarbohydrates: 30gProtein: 3gFat: 12gSaturated Fat: 7gPolyunsaturated Fat: 5gCholesterol: 30mgSodium: 150mgFiber: 2gSugar: 20g

Notes

  • For a tropical twist, add shredded coconut to the mixture.
  • Serve warm with a scoop of vanilla ice cream for an indulgent dessert.

Tried this recipe?

Let us know how it was!

Savory Ground Beef Lettuce Wraps: A Quick Delight!

Introduction to Savory Ground Beef Lettuce Wraps

When life gets hectic, finding a meal that’s both quick and satisfying can feel like a challenge. That’s where Savory Ground Beef Lettuce Wraps come in, offering a delightful escape from the ordinary.

These wraps are not just a meal; they’re a celebration of flavors and textures, all wrapped up in crisp lettuce leaves.

Perfect for a busy weeknight or a casual gathering, they’re easy to whip up and even easier to enjoy.

Trust me, once you try these, they’ll become a go-to recipe in your kitchen arsenal!

Why You’ll Love This Savory Ground Beef Lettuce Wraps

Savory Ground Beef Lettuce Wraps are a game-changer for anyone craving a quick, delicious meal.

They come together in just 25 minutes, making them perfect for busy evenings.

The combination of juicy beef and fresh veggies wrapped in crisp lettuce is not only satisfying but also guilt-free.

Plus, you can customize them to suit your taste, ensuring everyone at the table leaves happy!

Ingredients for Savory Ground Beef Lettuce Wraps

Creating Savory Ground Beef Lettuce Wraps is a breeze, especially with the right ingredients on hand. Here’s what you’ll need to bring this delicious dish to life:

  • Ground Beef: The star of the show! Choose lean ground beef for a healthier option, or go for a fattier blend for extra flavor.
  • Olive Oil: A splash of this liquid gold helps sauté the aromatics, adding richness to the dish.
  • Onion: Diced small, it brings sweetness and depth to the beef mixture. Yellow or white onions work best.
  • Garlic: Minced garlic adds a punch of flavor that elevates the entire dish. Fresh is always best!
  • Bell Pepper: Any color will do! Diced bell pepper adds crunch and a hint of sweetness.
  • Soy Sauce: This salty, umami-rich sauce is essential for flavoring the beef. Low-sodium options are available for a healthier choice.
  • Hoisin Sauce: A sweet and tangy sauce that adds a unique depth to the filling. It’s a must-have for that Asian flair!
  • Sesame Oil: Just a teaspoon brings a nutty aroma and flavor that ties everything together.
  • Ground Ginger: This spice adds warmth and a hint of spice. Fresh ginger can be used if you have it on hand.
  • Black Pepper: A dash of this common seasoning enhances the overall flavor profile.
  • Lettuce: Butter or romaine lettuce leaves serve as the perfect wrap, providing a crisp and refreshing bite.
  • Carrot: Shredded for a pop of color and crunch, it adds a nice contrast to the savory beef.
  • Green Onions: Chopped green onions add freshness and a mild onion flavor as a topping.
  • Sesame Seeds: Optional, but they make for a lovely garnish, adding a bit of crunch and visual appeal.

For exact measurements, check the bottom of the article where you can find everything listed for easy printing. Enjoy the process of gathering these ingredients, as each one plays a vital role in creating a dish that’s not only tasty but also a joy to prepare!

How to Make Savory Ground Beef Lettuce Wraps

Making Savory Ground Beef Lettuce Wraps is a straightforward process that’s as enjoyable as it is delicious.

Follow these simple steps, and you’ll have a mouthwatering meal ready in no time!

Step 1: Sauté the Aromatics

Start by heating a tablespoon of olive oil in a large skillet over medium heat.

Once the oil shimmers, toss in the diced onion.

Sauté for about 3 minutes until the onion turns translucent and fragrant.

This step lays the foundation for a flavorful filling!

Step 2: Add Garlic and Bell Pepper

Next, add the minced garlic and diced bell pepper to the skillet.

Cook them together for 2-3 minutes, stirring occasionally.

You want the bell pepper to soften and the garlic to release its aromatic goodness.

This combination will make your kitchen smell heavenly!

Step 3: Brown the Ground Beef

Now, it’s time to increase the heat to medium-high.

Add the ground beef to the skillet, breaking it apart with a spatula.

Cook for about 5-7 minutes until the beef is browned and no longer pink.

If there’s excess fat, drain it off to keep your wraps light and healthy.

Step 4: Mix in the Sauces and Spices

Stir in the soy sauce, hoisin sauce, sesame oil, ground ginger, and black pepper.

Cook for another 2-3 minutes, allowing the flavors to meld beautifully.

This is where the magic happens, transforming your beef into a savory delight!

Step 5: Assemble the Wraps

To serve, spoon the beef mixture into the lettuce leaves.

Top with shredded carrot and chopped green onions for added crunch and freshness.

If you like, sprinkle some sesame seeds on top for a finishing touch.

Enjoy these wraps immediately while the filling is warm and the lettuce is crisp!

Tips for Success

  • Prep all your ingredients before starting to cook. It makes the process smoother and more enjoyable.
  • Don’t rush the sautéing! Allow the onions and garlic to develop their flavors fully.
  • Feel free to customize the filling with your favorite veggies or proteins for a personal touch.
  • Serve the wraps immediately for the best texture; warm filling and crisp lettuce are a winning combo!
  • Experiment with sauces! A splash of sriracha can add a delightful kick.

Equipment Needed

  • Large Skillet: A non-stick skillet works wonders, but any large pan will do.
  • Spatula: A sturdy spatula is essential for breaking up the beef and stirring.
  • Knife and Cutting Board: For chopping veggies, a sharp knife and a reliable cutting board are must-haves.
  • Measuring Spoons: Handy for measuring sauces and spices accurately.

Variations of Savory Ground Beef Lettuce Wraps

  • Spicy Kick: Add a teaspoon of sriracha or red pepper flakes to the beef mixture for a fiery twist.
  • Lean Protein: Substitute ground turkey or chicken for a lighter option without sacrificing flavor.
  • Vegetarian Delight: Use crumbled tofu or tempeh instead of beef for a plant-based version that’s just as satisfying.
  • Extra Veggies: Toss in shredded zucchini, mushrooms, or water chestnuts for added texture and nutrition.
  • Asian Fusion: Incorporate chopped cilantro and lime juice for a fresh, zesty flavor profile.

Serving Suggestions for Savory Ground Beef Lettuce Wraps

  • Side Salad: Pair with a light cucumber and tomato salad for a refreshing contrast.
  • Rice or Quinoa: Serve over a bed of jasmine rice or quinoa for a heartier meal.
  • Drink Pairing: Enjoy with a cold beer or iced green tea to complement the flavors.
  • Presentation: Arrange wraps on a platter with colorful veggies for a vibrant display.

FAQs about Savory Ground Beef Lettuce Wraps

Can I make Savory Ground Beef Lettuce Wraps ahead of time?

Absolutely! You can prepare the beef mixture in advance and store it in the fridge. Just reheat it when you’re ready to serve. Assemble the wraps just before eating to keep the lettuce crisp.

What can I use instead of ground beef?

If you’re looking for alternatives, ground turkey or chicken works well. For a vegetarian option, crumbled tofu or tempeh can be used, providing a satisfying texture and flavor.

How do I store leftovers?

Store any leftover beef mixture in an airtight container in the fridge for up to three days. The lettuce leaves can be kept separately to maintain their crunch.

Can I freeze the beef mixture?

Yes! The beef mixture freezes beautifully. Just let it cool completely, then transfer it to a freezer-safe container. It can be stored for up to three months. Thaw in the fridge before reheating.

What are some good dipping sauces for these wraps?

For an extra flavor boost, try serving your wraps with soy sauce, hoisin sauce, or a spicy peanut sauce. These add a delightful kick and enhance the overall experience!

Final Thoughts

Savory Ground Beef Lettuce Wraps are more than just a meal; they’re an experience that brings joy to the table.

The combination of warm, flavorful beef nestled in crisp lettuce creates a delightful contrast that’s hard to resist.

Whether you’re cooking for yourself or sharing with loved ones, these wraps are sure to impress.

They’re quick, customizable, and packed with flavor, making them a perfect choice for any occasion.

So, roll up your sleeves, gather your ingredients, and dive into this culinary adventure.

You’ll find that every bite is a celebration of taste and creativity!

jhessica

Savory Ground Beef Lettuce Wraps: A Quick Delight!

Savory Ground Beef Lettuce Wraps are a quick and delicious meal option, perfect for a healthy lunch or dinner.
Prep Time 10 minutes
Cook Time 15 minutes
Total Time 25 minutes
Servings: 4 servings
Course: Main Dish
Cuisine: Asian
Calories: 320

Ingredients
  

  • 1 pound ground beef
  • 1 tablespoon olive oil
  • 1 small onion diced
  • 2 cloves garlic minced
  • 1 bell pepper diced (any color)
  • 1 tablespoon soy sauce
  • 1 tablespoon hoisin sauce
  • 1 teaspoon sesame oil
  • 1 teaspoon ground ginger
  • 1/2 teaspoon black pepper
  • 1 head of butter or romaine lettuce leaves separated
  • 1 carrot shredded
  • 1/4 cup chopped green onions
  • Sesame seeds for garnish optional

Method
 

  1. In a large skillet, heat the olive oil over medium heat. Add the diced onion and sauté for about 3 minutes until it becomes translucent.
  2. Add the minced garlic and diced bell pepper to the skillet. Cook for an additional 2-3 minutes until the bell pepper softens.
  3. Increase the heat to medium-high and add the ground beef. Cook until browned, breaking it apart with a spatula, about 5-7 minutes. Drain excess fat if necessary.
  4. Stir in the soy sauce, hoisin sauce, sesame oil, ground ginger, and black pepper. Cook for another 2-3 minutes until everything is well combined and heated through.
  5. To serve, spoon the beef mixture into the lettuce leaves. Top with shredded carrot and chopped green onions. Sprinkle with sesame seeds if desired.
  6. Enjoy immediately while the filling is warm and the lettuce is crisp.

Nutrition

Serving: 1wrapCalories: 320kcalCarbohydrates: 5gProtein: 24gFat: 22gSaturated Fat: 8gPolyunsaturated Fat: 14gCholesterol: 80mgSodium: 600mgFiber: 1gSugar: 3g

Notes

  • For a spicier kick, add a teaspoon of sriracha or red pepper flakes to the beef mixture.
  • Substitute ground turkey or chicken for a leaner option, or use tofu for a vegetarian version.

Tried this recipe?

Let us know how it was!

Garlic Butter Baked Salmon: Delightful Recipe You’ll Love!

Introduction to Garlic Butter Baked Salmon

When I think of weeknight dinners, Garlic Butter Baked Salmon always comes to mind. It’s one of those dishes that feels fancy but is incredibly easy to whip up.

After a long day, the last thing I want is to spend hours in the kitchen. This recipe is a quick solution for busy evenings, yet it impresses everyone at the table.

The rich, buttery garlic flavor seeps into the salmon, creating a delightful experience with every bite. Trust me, your loved ones will be asking for seconds, and you’ll feel like a culinary rockstar!

Why You’ll Love This Garlic Butter Baked Salmon

This Garlic Butter Baked Salmon is a game-changer for anyone who craves deliciousness without the fuss.

In just 30 minutes, you can serve up a meal that’s not only healthy but bursting with flavor.

The combination of garlic and butter elevates the salmon, making it a dish that feels special.

Plus, it’s perfect for impressing guests or simply treating yourself after a long day.

Ingredients for Garlic Butter Baked Salmon

Creating the perfect Garlic Butter Baked Salmon starts with the right ingredients. Here’s what you’ll need:

  • Salmon fillets: Fresh, high-quality salmon is key. Look for vibrant color and firm texture. You can use wild-caught or farmed, depending on your preference.
  • Unsalted butter: This adds richness and depth. Unsalted allows you to control the saltiness of the dish.
  • Garlic: Freshly minced garlic brings a punch of flavor. If you’re in a pinch, garlic powder can work, but fresh is always best.
  • Lemon juice: A splash of acidity brightens the dish. Freshly squeezed lemon juice is ideal, but bottled can suffice in a hurry.
  • Dried parsley: This adds a hint of earthiness. Feel free to swap it for fresh parsley if you have it on hand.
  • Salt and black pepper: Essential for seasoning. Adjust to your taste, but don’t skip these; they enhance all the flavors.
  • Lemon wedges: For serving, these add a refreshing touch. Squeeze them over the salmon just before eating for an extra zing.

For exact measurements, check the bottom of the article where you can find everything listed for easy printing. Enjoy the process of gathering these ingredients; each one plays a vital role in making this dish a standout!

How to Make Garlic Butter Baked Salmon

Making Garlic Butter Baked Salmon is a straightforward process that anyone can master. Follow these simple steps, and you’ll have a delicious meal ready in no time.

Step 1: Preheat the Oven

Start by preheating your oven to 375°F (190°C).

This step is crucial because it ensures even cooking.

While the oven heats up, line a baking sheet with parchment paper.

This makes cleanup a breeze and prevents the salmon from sticking.

Step 2: Prepare the Garlic Butter Mixture

In a small bowl, combine the melted butter, minced garlic, lemon juice, dried parsley, salt, and black pepper.

Mix everything well until it’s nicely blended.

This garlic butter sauce is the star of the show, so don’t rush it!

The aroma will have your mouth watering before you even start cooking.

Step 3: Arrange the Salmon Fillets

Place the salmon fillets skin-side down on the prepared baking sheet.

Make sure they have some space between them for even cooking.

If you’re using skin-on fillets, this will help keep the fish moist while baking.

Step 4: Coat the Salmon

Pour the garlic butter mixture evenly over the salmon fillets.

Use a brush or the back of a spoon to ensure they are well coated.

This step is essential; the more garlic butter, the better the flavor!

Don’t be shy—make sure every inch is covered.

Step 5: Bake the Salmon

Slide the baking sheet into the preheated oven and bake for 15-20 minutes.

Keep an eye on it; the salmon is done when it flakes easily with a fork and reaches an internal temperature of 145°F (63°C).

If you prefer a crispy skin, consider broiling it for the last 2-3 minutes.

Step 6: Serve and Enjoy

Once baked, remove the salmon from the oven and let it rest for a few minutes.

This resting time allows the juices to redistribute, making each bite tender and juicy.

Serve with lemon wedges on the side for an extra burst of flavor.

Your Garlic Butter Baked Salmon is now ready to impress!

Tips for Success

  • Always use fresh ingredients for the best flavor, especially the garlic and salmon.
  • Don’t skip the resting time after baking; it makes a big difference in texture.
  • Experiment with herbs like dill or thyme for a unique twist.
  • For a more intense garlic flavor, let the garlic sit in the butter for a few minutes before mixing.
  • Keep an eye on the salmon while baking to avoid overcooking.

Equipment Needed

  • Baking sheet: A standard baking sheet works perfectly. If you don’t have one, a shallow dish can do the trick.
  • Parchment paper: This makes cleanup easy. Aluminum foil is a good alternative if you’re out of parchment.
  • Mixing bowl: Any bowl will do for combining the garlic butter mixture.
  • Spoon or brush: Use either to coat the salmon evenly with the garlic butter.

Variations

  • Herb-Infused: Add fresh herbs like dill, thyme, or rosemary to the garlic butter for an aromatic twist.
  • Spicy Kick: Mix in a pinch of red pepper flakes or a dash of hot sauce to the garlic butter for some heat.
  • Honey Glaze: Drizzle a bit of honey over the salmon before baking for a sweet and savory flavor combination.
  • Asian Flair: Substitute the lemon juice with soy sauce and add sesame oil for an Asian-inspired version.
  • Vegetable Medley: Bake some asparagus or broccoli alongside the salmon for a complete meal in one pan.

Serving Suggestions

  • Pair with a fresh salad: A light arugula or spinach salad complements the richness of the salmon.
  • Serve with roasted vegetables: Carrots, zucchini, or Brussels sprouts add color and nutrition.
  • Enjoy with a crisp white wine: A Sauvignon Blanc or Chardonnay enhances the meal.
  • Garnish with fresh herbs: A sprinkle of parsley or dill elevates the presentation.

FAQs about Garlic Butter Baked Salmon

Can I use frozen salmon for this recipe?

Absolutely! Just make sure to thaw the salmon completely before cooking. Frozen salmon can still be delicious when prepared properly.

What can I substitute for butter in this recipe?

If you’re looking for a healthier option, you can use olive oil or avocado oil. They’ll still provide a nice flavor, though the richness will be slightly different.

How do I know when the salmon is done baking?

The salmon is perfectly cooked when it flakes easily with a fork and reaches an internal temperature of 145°F (63°C). A meat thermometer is a handy tool for this!

Can I make this dish ahead of time?

While it’s best enjoyed fresh, you can prepare the garlic butter mixture in advance. Just store it in the fridge and coat the salmon right before baking.

What sides pair well with Garlic Butter Baked Salmon?

This dish goes wonderfully with a fresh salad, roasted vegetables, or even a light pasta. The options are endless!

Final Thoughts

Cooking Garlic Butter Baked Salmon is more than just preparing a meal; it’s about creating a moment.

The aroma of garlic and butter wafting through your kitchen can transport you back to family dinners or cozy gatherings.

Each bite is a reminder of how simple ingredients can come together to create something extraordinary.

Whether you’re impressing guests or enjoying a quiet night in, this dish brings joy and satisfaction.

So, roll up your sleeves, embrace the process, and let this delightful recipe become a staple in your culinary repertoire.

You won’t regret it!

jhessica

Garlic Butter Baked Salmon: Delightful Recipe You’ll Love!

A delightful and easy recipe for Garlic Butter Baked Salmon that is flavorful and healthy.
Prep Time 10 minutes
Cook Time 20 minutes
Total Time 30 minutes
Servings: 2 servings
Course: Main Course
Cuisine: American
Calories: 350

Ingredients
  

  • 2 6-ounce salmon fillets
  • 4 tablespoons unsalted butter melted
  • 4 cloves garlic minced
  • 1 tablespoon fresh lemon juice
  • 1 teaspoon dried parsley
  • 1 teaspoon salt
  • ½ teaspoon black pepper
  • Lemon wedges for serving

Method
 

  1. Preheat your oven to 375°F (190°C) and line a baking sheet with parchment paper.
  2. In a small bowl, combine the melted butter, minced garlic, lemon juice, parsley, salt, and black pepper. Mix well.
  3. Place the salmon fillets skin-side down on the prepared baking sheet.
  4. Pour the garlic butter mixture evenly over the salmon fillets, ensuring they are well coated.
  5. Bake in the preheated oven for 15-20 minutes, or until the salmon flakes easily with a fork and reaches an internal temperature of 145°F (63°C).
  6. Remove from the oven and let it rest for a few minutes before serving. Serve with lemon wedges on the side.

Nutrition

Serving: 1filletCalories: 350kcalCarbohydrates: 1gProtein: 34gFat: 22gSaturated Fat: 10gPolyunsaturated Fat: 12gCholesterol: 100mgSodium: 500mg

Notes

  • For added flavor, sprinkle some fresh herbs like dill or thyme on top before baking.
  • If you prefer a crispy skin, broil the salmon for the last 2-3 minutes of cooking.

Tried this recipe?

Let us know how it was!

Broccoli Cheddar Pasta Salad: A Creamy Delight Awaits!

Introduction to Broccoli Cheddar Pasta Salad

There’s something magical about a dish that brings together comfort and nutrition, and that’s exactly what you get with Broccoli Cheddar Pasta Salad. This creamy delight is not just a meal; it’s a quick solution for those busy days when you want something satisfying yet easy to whip up. I remember making this salad for family gatherings, and it always disappeared faster than I could serve it. With fresh broccoli, sharp cheddar, and a tangy dressing, it’s a dish that impresses without the fuss. Let’s dive into this delicious recipe that’s sure to become a favorite!

Why You’ll Love This Broccoli Cheddar Pasta Salad

This Broccoli Cheddar Pasta Salad is a game-changer for anyone looking for a quick, delicious meal. It comes together in just 25 minutes, making it perfect for busy weeknights or last-minute gatherings. The creamy dressing pairs beautifully with the crunch of fresh broccoli and the sharpness of cheddar. Plus, it’s versatile enough to serve as a side dish or a main course, ensuring everyone leaves the table satisfied.

Ingredients for Broccoli Cheddar Pasta Salad

Gathering the right ingredients is the first step to creating this delightful Broccoli Cheddar Pasta Salad. Here’s what you’ll need:

  • Elbow macaroni: The classic pasta choice, it holds the creamy dressing beautifully.
  • Fresh broccoli florets: These add a vibrant crunch and a boost of nutrients.
  • Sharp cheddar cheese: This is the star of the show, providing a rich, tangy flavor.
  • Mayonnaise: It forms the base of the creamy dressing, adding richness.
  • Sour cream: This adds a tangy twist and enhances the creaminess.
  • Apple cider vinegar: A splash of acidity to balance the flavors.
  • Dijon mustard: This brings a subtle kick and depth to the dressing.
  • Garlic powder: A hint of garlic flavor without the fuss of fresh cloves.
  • Onion powder: Adds a savory note that complements the other ingredients.
  • Salt and pepper: Essential for seasoning and enhancing all the flavors.
  • Chopped green onions (optional): For a fresh, mild onion flavor and a pop of color.
  • Diced red bell pepper (optional): Adds sweetness and crunch, making the salad even more colorful.

For those looking to lighten things up, consider substituting Greek yogurt for the mayonnaise and sour cream. You can also add cooked chicken or chickpeas for extra protein. If you want a bit of crunch, sunflower seeds or chopped nuts can be a delightful addition. Exact quantities for each ingredient are available at the bottom of the article for easy printing.

How to Make Broccoli Cheddar Pasta Salad

Creating this Broccoli Cheddar Pasta Salad is a breeze. Follow these simple steps, and you’ll have a creamy, delicious dish ready in no time. Let’s get started!

Step 1: Cook the Elbow Macaroni

Begin by boiling a pot of salted water. Once it’s bubbling, add the elbow macaroni. Cook it according to the package instructions until it’s al dente. This usually takes about 8-10 minutes. Remember, you want it firm enough to hold up in the salad. After cooking, drain the pasta and rinse it under cold water to stop the cooking process. This helps keep it from getting mushy.

Step 2: Blanch the Broccoli

While the pasta is cooking, bring another pot of water to a boil. Add the fresh broccoli florets and blanch them for just 2 minutes. This quick cooking method brightens the color and keeps the broccoli crisp. After 2 minutes, drain the broccoli and rinse it under cold water. This step is crucial to maintain that vibrant green color and crunch.

Step 3: Combine Pasta and Broccoli

In a large mixing bowl, combine the cooled elbow macaroni and the blanched broccoli. Toss them gently to mix. At this point, you can also add the shredded sharp cheddar cheese. The cheese will melt slightly from the warmth of the pasta, creating a deliciously creamy texture.

Step 4: Prepare the Dressing

In a separate bowl, whisk together the mayonnaise, sour cream, apple cider vinegar, and Dijon mustard. Add the garlic powder, onion powder, salt, and pepper. Whisk until the dressing is smooth and creamy. This dressing is what brings everything together, so don’t skip this step!

Step 5: Mix Everything Together

Pour the dressing over the pasta and broccoli mixture. Toss everything together until all the ingredients are well coated. If you’re using optional ingredients like chopped green onions or diced red bell pepper, fold them in gently. These add extra flavor and a pop of color to your salad.

Step 6: Chill Before Serving

Cover the bowl with plastic wrap or a lid and refrigerate the pasta salad for at least 30 minutes. This chilling time allows the flavors to meld beautifully. Trust me, it’s worth the wait! When you’re ready to serve, give it a quick stir and enjoy your creamy Broccoli Cheddar Pasta Salad.

Tips for Success

  • Always rinse the pasta under cold water to prevent it from sticking together.
  • For extra flavor, let the salad chill longer than 30 minutes; overnight is even better!
  • Adjust the dressing ingredients to suit your taste; add more vinegar for tang or mustard for a kick.
  • Experiment with different cheeses like pepper jack for a spicy twist.
  • Don’t skip the optional ingredients; they add great texture and flavor!

Equipment Needed

  • Large pot: For boiling pasta and blanching broccoli. A stockpot works well too.
  • Colander: To drain the pasta and broccoli. A fine mesh strainer can be a good substitute.
  • Mixing bowls: One large for the salad and a smaller one for the dressing.
  • Whisk: For mixing the dressing. A fork can do the job in a pinch.
  • Spatula or spoon: For tossing everything together.

Variations of Broccoli Cheddar Pasta Salad

  • Protein Boost: Add cooked chicken, chickpeas, or diced ham for a heartier meal.
  • Cheese Swap: Try different cheeses like feta for a tangy twist or mozzarella for a milder flavor.
  • Veggie Medley: Incorporate other vegetables like cherry tomatoes, carrots, or peas for added color and nutrition.
  • Gluten-Free Option: Use gluten-free pasta to make this dish suitable for those with dietary restrictions.
  • Spicy Kick: Mix in some diced jalapeños or a dash of hot sauce for a spicy version.
  • Herb Infusion: Add fresh herbs like dill or parsley to enhance the flavor profile.

Serving Suggestions for Broccoli Cheddar Pasta Salad

  • Pair with grilled chicken or steak for a hearty meal.
  • Serve alongside crusty bread or garlic knots for a satisfying side.
  • Complement with a light vinaigrette salad for freshness.
  • Enjoy with a chilled glass of lemonade or iced tea.
  • Garnish with extra cheddar and green onions for a pop of color.

FAQs about Broccoli Cheddar Pasta Salad

Can I make Broccoli Cheddar Pasta Salad ahead of time?

Absolutely! This salad tastes even better after it sits for a while. You can prepare it a day in advance and let the flavors meld in the fridge. Just give it a quick stir before serving.

How long does Broccoli Cheddar Pasta Salad last in the fridge?

When stored in an airtight container, this pasta salad can last up to 3-5 days in the fridge. Just keep an eye on the freshness of the broccoli and cheese.

Can I use frozen broccoli instead of fresh?

Yes, you can! Just make sure to thaw and drain the frozen broccoli before adding it to the salad. It’s a convenient option if you’re short on time.

Is Broccoli Cheddar Pasta Salad suitable for vegetarians?

Definitely! This dish is vegetarian-friendly, making it a great option for meatless meals. You can also add protein like chickpeas for a heartier version.

What can I serve with Broccoli Cheddar Pasta Salad?

This salad pairs wonderfully with grilled meats, sandwiches, or even as a standalone dish. It’s versatile enough to complement any meal!

Final Thoughts

Creating this Broccoli Cheddar Pasta Salad is more than just cooking; it’s about bringing joy to the table. Each bite is a delightful blend of creamy, crunchy, and tangy flavors that can brighten any meal. Whether you’re serving it at a family gathering or enjoying it as a quick lunch, this dish is sure to impress. Plus, it’s a fantastic way to sneak in some veggies without anyone noticing! So, roll up your sleeves, gather your ingredients, and let this creamy delight become a staple in your kitchen. Trust me, your taste buds will thank you!

jhessica

Broccoli Cheddar Pasta Salad: A Creamy Delight Awaits!

A creamy and delicious Broccoli Cheddar Pasta Salad that combines elbow macaroni, fresh broccoli, and sharp cheddar cheese, all tossed in a tangy dressing.
Prep Time 15 minutes
Cook Time 10 minutes
Total Time 25 minutes
Servings: 6 servings
Course: Salad
Cuisine: American
Calories: 320

Ingredients
  

  • 8 ounces elbow macaroni
  • 2 cups broccoli florets
  • 1 cup shredded sharp cheddar cheese
  • 1/2 cup mayonnaise
  • 1/4 cup sour cream
  • 2 tablespoons apple cider vinegar
  • 1 tablespoon Dijon mustard
  • 1/2 teaspoon garlic powder
  • 1/2 teaspoon onion powder
  • Salt and pepper to taste
  • 1/4 cup chopped green onions optional
  • 1/4 cup diced red bell pepper optional

Method
 

  1. Cook the elbow macaroni according to package instructions until al dente. Drain and rinse under cold water to cool.
  2. In a large pot of boiling water, blanch the broccoli florets for 2 minutes, then drain and rinse under cold water to stop the cooking process.
  3. In a large mixing bowl, combine the cooled macaroni, blanched broccoli, and shredded cheddar cheese.
  4. In a separate bowl, whisk together the mayonnaise, sour cream, apple cider vinegar, Dijon mustard, garlic powder, onion powder, salt, and pepper until smooth.
  5. Pour the dressing over the pasta mixture and toss until everything is well coated.
  6. If using, fold in the chopped green onions and diced red bell pepper for added flavor and crunch.
  7. Cover and refrigerate the pasta salad for at least 30 minutes before serving to allow the flavors to meld.

Nutrition

Serving: 1servingCalories: 320kcalCarbohydrates: 30gProtein: 10gFat: 18gSaturated Fat: 6gPolyunsaturated Fat: 10gCholesterol: 30mgSodium: 500mgFiber: 2gSugar: 3g

Notes

  • For a lighter version, substitute Greek yogurt for the mayonnaise and sour cream.
  • You can also add cooked chicken or chickpeas for extra protein.
  • For a bit of crunch, consider adding sunflower seeds or chopped nuts.

Tried this recipe?

Let us know how it was!

Baked French Eggs with Spinach and Cheese: Try This!

Introduction to Baked French Eggs with Spinach and Cheese

There’s something magical about a dish that feels both comforting and sophisticated. Baked French Eggs with Spinach and Cheese is just that—a delightful blend of flavors that can elevate your breakfast or brunch game. Whether you’re rushing to get out the door or looking to impress friends on a lazy Sunday, this recipe is your go-to. It’s quick, nutritious, and bursting with cheesy goodness. Plus, it’s a fantastic way to sneak in some greens without anyone noticing. Trust me, your taste buds will thank you for this culinary adventure!

Why You’ll Love This Baked French Eggs with Spinach and Cheese

This dish is a game-changer for busy mornings. It’s incredibly easy to whip up, taking just 10 minutes of prep time. The combination of creamy cheese and fresh spinach creates a flavor explosion that’s hard to resist. Plus, it’s versatile—perfect for breakfast, brunch, or even a light dinner. You’ll love how it satisfies your cravings while keeping things healthy. Who knew a baked egg dish could be this delightful?

Ingredients for Baked French Eggs with Spinach and Cheese

Gathering the right ingredients is the first step to creating your masterpiece. Here’s what you’ll need for Baked French Eggs with Spinach and Cheese:

  • Large eggs: The star of the show! Eggs provide protein and a rich, creamy texture.
  • Fresh spinach: This leafy green adds a pop of color and a nutritious boost. Feel free to swap it out for other veggies like bell peppers or mushrooms.
  • Shredded cheese: Gruyère or cheddar works wonders here, melting beautifully and adding a savory depth. Experiment with your favorite cheese for a unique twist!
  • Milk: A splash of milk makes the eggs fluffier and creamier. You can use whole, skim, or even a plant-based alternative.
  • Olive oil: This healthy fat greases your baking dish and adds a hint of flavor. You can also use butter if you prefer.
  • Salt and black pepper: Essential seasonings that enhance the overall taste. Adjust to your liking!
  • Garlic powder and onion powder: These spices bring a savory aroma and depth to the dish. Fresh garlic and onions can be used too, just sauté them first.
  • Fresh herbs: Parsley or chives make for a lovely garnish, adding freshness and a touch of elegance.

For exact measurements, check the bottom of the article where you can find everything listed for easy printing. Happy cooking!

How to Make Baked French Eggs with Spinach and Cheese

Now that you have your ingredients ready, let’s dive into the fun part—making Baked French Eggs with Spinach and Cheese! This process is straightforward and rewarding. Follow these steps, and you’ll have a delicious dish in no time.

Step 1: Preheat the Oven

First things first, preheat your oven to 375°F (190°C). This ensures your dish cooks evenly. While the oven warms up, grab a small baking dish and grease it with a splash of olive oil. This will help prevent sticking and add a hint of flavor.

Step 2: Prepare the Egg Mixture

In a mixing bowl, crack open those large eggs. Add in the milk, salt, black pepper, garlic powder, and onion powder. Whisk everything together until it’s well combined. You want a smooth, creamy mixture that’s full of flavor. This is where the magic begins!

Step 3: Add Spinach and Cheese

Next, stir in the chopped spinach and half of the shredded cheese into your egg mixture. The spinach will wilt beautifully as it bakes, adding both nutrition and color. Mixing in the cheese now allows it to melt into the eggs, creating a delightful cheesy texture.

Step 4: Pour into Baking Dish

Carefully pour the egg mixture into your prepared baking dish. Make sure it’s evenly distributed. This will help it cook uniformly, ensuring every bite is just as delicious as the last.

Step 5: Top with Cheese

Now, sprinkle the remaining cheese evenly over the top. This will create a lovely, golden crust as it bakes. Who doesn’t love a cheesy topping? It’s the cherry on top of this savory dish!

Step 6: Bake

Place your baking dish in the preheated oven and bake for 20-25 minutes. Keep an eye on it! You’ll know it’s done when the eggs are set and the top is lightly golden. The aroma wafting through your kitchen will be irresistible!

Step 7: Garnish and Serve

Once baked, remove the dish from the oven and let it cool for a few minutes. This helps the eggs firm up a bit. Finally, garnish with fresh herbs like parsley or chives before serving. This adds a pop of color and freshness that makes the dish even more inviting.

Tips for Success

  • Use fresh ingredients for the best flavor—especially the spinach and cheese.
  • Don’t overmix the egg mixture; a few lumps are okay!
  • Experiment with different cheeses for unique flavors.
  • Let the dish cool slightly before serving to enhance texture.
  • For a crispy top, broil for the last minute of baking.

Equipment Needed

  • Baking dish: A small, oven-safe dish works best. A cast-iron skillet is a great alternative.
  • Mixing bowl: Any medium-sized bowl will do for whisking the ingredients.
  • Whisk: A standard whisk is perfect, but a fork can work in a pinch.
  • Measuring cups: Handy for precise ingredient amounts, though you can eyeball it if you’re confident!

Variations

  • Meat Lover’s Delight: Add cooked bacon or sausage for a hearty twist. The savory meat pairs perfectly with the eggs and cheese.
  • Veggie Medley: Swap spinach for other vegetables like bell peppers, mushrooms, or zucchini. Each brings its own unique flavor and texture.
  • Herb Infusion: Experiment with different fresh herbs like basil or dill for a fresh, aromatic touch.
  • Spicy Kick: Add a pinch of red pepper flakes or diced jalapeños for a spicy version that wakes up your taste buds.
  • Cheese Variety: Try different cheeses like feta, goat cheese, or pepper jack for a new flavor profile each time.

Serving Suggestions

  • Fresh Salad: Pair your Baked French Eggs with a light mixed greens salad for a refreshing contrast.
  • Toast: Serve with crusty bread or buttery croissants to soak up the delicious egg mixture.
  • Drink: A glass of freshly squeezed orange juice or a robust coffee complements the dish perfectly.
  • Presentation: Serve in individual ramekins for a charming brunch display.

FAQs about Baked French Eggs with Spinach and Cheese

Can I make Baked French Eggs with Spinach and Cheese ahead of time?

Absolutely! You can prepare the egg mixture the night before and store it in the fridge. Just pour it into the baking dish and bake it in the morning for a quick breakfast.

What can I substitute for spinach in this recipe?

If spinach isn’t your thing, feel free to swap it out for other veggies like kale, bell peppers, or even mushrooms. Each option brings its own unique flavor to the dish!

How do I store leftovers?

Store any leftovers in an airtight container in the fridge for up to three days. Reheat in the oven or microwave before serving again. It’s just as delicious the next day!

Can I use egg substitutes for this recipe?

Yes! If you’re looking for a lighter option, you can use egg substitutes or even silken tofu blended until smooth. Just keep in mind that the texture may vary slightly.

What’s the best cheese to use for Baked French Eggs?

While Gruyère and cheddar are fantastic choices, feel free to experiment with your favorites! Feta, goat cheese, or pepper jack can add a delightful twist to your baked eggs.

Final Thoughts

Baked French Eggs with Spinach and Cheese is more than just a recipe; it’s an experience that brings warmth and joy to your kitchen. The delightful aroma wafting through the air as it bakes is enough to make anyone’s mouth water. Each bite is a comforting blend of creamy eggs, savory cheese, and vibrant spinach, making it a dish that feels both indulgent and wholesome. Whether you’re sharing it with family or enjoying a quiet moment alone, this dish is sure to brighten your day. So, roll up your sleeves and dive into this delicious adventure—you won’t regret it!

jhessica

Baked French Eggs with Spinach and Cheese: Try This!

A delicious and nutritious baked dish featuring eggs, fresh spinach, and cheese, perfect for breakfast or brunch.
Prep Time 10 minutes
Cook Time 25 minutes
Total Time 35 minutes
Servings: 2 servings
Course: Breakfast
Cuisine: French
Calories: 280

Ingredients
  

  • 4 large eggs
  • 1 cup fresh spinach chopped
  • 1/2 cup shredded cheese such as Gruyère or cheddar
  • 1/4 cup milk
  • 1 tablespoon olive oil
  • 1/2 teaspoon salt
  • 1/4 teaspoon black pepper
  • 1/4 teaspoon garlic powder
  • 1/4 teaspoon onion powder
  • Fresh herbs such as parsley or chives for garnish

Method
 

  1. Preheat your oven to 375°F (190°C). Grease a small baking dish with olive oil.
  2. In a mixing bowl, whisk together the eggs, milk, salt, pepper, garlic powder, and onion powder until well combined.
  3. Stir in the chopped spinach and half of the shredded cheese into the egg mixture.
  4. Pour the egg mixture into the prepared baking dish.
  5. Sprinkle the remaining cheese evenly over the top.
  6. Bake in the preheated oven for 20-25 minutes, or until the eggs are set and the top is lightly golden.
  7. Remove from the oven and let it cool for a few minutes. Garnish with fresh herbs before serving.

Nutrition

Serving: 1servingCalories: 280kcalCarbohydrates: 3gProtein: 20gFat: 20gSaturated Fat: 8gPolyunsaturated Fat: 12gCholesterol: 400mgSodium: 500mgFiber: 1gSugar: 1g

Notes

  • For added flavor, mix in cooked bacon or sausage before baking.
  • Substitute the spinach with other vegetables like bell peppers or mushrooms for a different twist.

Tried this recipe?

Let us know how it was!

Lemon Coconut Cheesecake Cookies: A Tropical Delight Awaits!

Introduction to Lemon Coconut Cheesecake Cookies

There’s something magical about the combination of lemon and coconut that instantly transports me to sun-soaked beaches. These Lemon Coconut Cheesecake Cookies are not just a treat; they’re a mini-vacation for your taste buds. Perfect for a quick dessert after a long day or a delightful surprise for guests, these cookies blend tangy lemon with creamy cheesecake and a hint of tropical coconut. Whether you’re a seasoned baker or just starting out, this recipe is simple enough to whip up on a whim, yet impressive enough to make you the star of any gathering.

Why You’ll Love This Lemon Coconut Cheesecake Cookies

These Lemon Coconut Cheesecake Cookies are a dream come true for anyone craving a burst of flavor without spending hours in the kitchen. They come together in just 27 minutes, making them a perfect last-minute dessert. The delightful balance of tangy lemon and creamy cheesecake, paired with the tropical twist of coconut, creates a taste sensation that will have everyone asking for seconds. Trust me, these cookies are a guaranteed crowd-pleaser!

Ingredients for Lemon Coconut Cheesecake Cookies

Gathering the right ingredients is the first step to creating these delightful Lemon Coconut Cheesecake Cookies. Here’s what you’ll need:

  • All-purpose flour: The backbone of your cookies, providing structure and a soft texture.
  • Baking powder: This little leavening agent helps your cookies rise, giving them that perfect fluffy bite.
  • Salt: Just a pinch enhances the flavors, balancing the sweetness beautifully.
  • Unsalted butter: Softened to room temperature, it adds richness and helps create a tender cookie.
  • Granulated sugar: This sweetener gives your cookies a delightful sweetness and a nice crunch.
  • Brown sugar: Packed for moisture and a hint of caramel flavor, it complements the other sugars perfectly.
  • Large egg: Acts as a binder, helping to hold everything together while adding moisture.
  • Vanilla extract: A classic flavor enhancer that rounds out the taste of your cookies.
  • Lemon juice: Freshly squeezed is best, providing that zesty tang that makes these cookies shine.
  • Lemon zest: The aromatic outer peel of the lemon adds a burst of citrus flavor.
  • Cream cheese: Softened, it brings a rich, creamy texture that mimics cheesecake in every bite.
  • Shredded coconut: Adds a tropical flair and chewy texture, making each cookie feel like a mini vacation.
  • White chocolate chips: For a touch of sweetness and creaminess, these are the perfect finishing touch.

For those looking to mix things up, consider adding crushed pineapple for an extra tropical twist. If you prefer a richer flavor, dark chocolate chips can be swapped in for the white chocolate. And if gluten is a concern, a 1:1 gluten-free flour blend works wonders in this recipe. Exact measurements for each ingredient can be found at the bottom of the article, ready for printing!

How to Make Lemon Coconut Cheesecake Cookies

Now that you have all your ingredients ready, let’s dive into the fun part—making these Lemon Coconut Cheesecake Cookies! Follow these simple steps, and you’ll have a batch of cookies that will make your kitchen smell like a tropical paradise.

Step 1: Preheat and Prepare

First things first, preheat your oven to 350°F (175°C). This ensures your cookies bake evenly. While that’s heating up, line a baking sheet with parchment paper. This little trick prevents sticking and makes cleanup a breeze.

Step 2: Mix Dry Ingredients

In a medium bowl, whisk together the all-purpose flour, baking powder, and salt. This step is crucial as it helps to evenly distribute the leavening agent. Set this mixture aside for now; it’ll be joining the party soon!

Step 3: Cream Butter and Sugars

In a large mixing bowl, cream together the softened unsalted butter, granulated sugar, and brown sugar. Use an electric mixer if you have one; it makes this step easier. Beat until the mixture is light and fluffy, which usually takes about 2-3 minutes. This is where the magic begins!

Step 4: Add Wet Ingredients

Next, add in the large egg, vanilla extract, lemon juice, and lemon zest to the butter mixture. Mix until everything is well combined. The aroma of lemon will start to fill your kitchen, and trust me, it’s heavenly!

Step 5: Combine Mixtures

Now, gradually add the dry ingredients to the wet ingredients. Mix until just combined. Be careful not to overmix; we want those cookies to be tender and soft, not tough!

Step 6: Fold in Extras

Here comes the fun part! Gently fold in the softened cream cheese, shredded coconut, and white chocolate chips. Make sure everything is evenly distributed. Each bite should be a delightful surprise of flavors and textures.

Step 7: Bake the Cookies

Using a tablespoon, drop portions of dough onto the prepared baking sheet, spacing them about 2 inches apart. This gives them room to spread. Bake for 10-12 minutes, or until the edges are lightly golden. Once they’re out of the oven, let them cool on the baking sheet for about 5 minutes before transferring them to a wire rack to cool completely. Enjoy the sweet anticipation!

Tips for Success

  • Use room temperature ingredients for better mixing and texture.
  • Don’t skip the parchment paper; it makes for easy removal and cleanup.
  • For extra flavor, toast the shredded coconut before adding it to the dough.
  • Keep an eye on the cookies while baking; ovens can vary.
  • Let the cookies cool completely for the best texture and flavor.

Equipment Needed

  • Baking sheet: A standard cookie sheet works well, but a stoneware pan can give a nice even bake.
  • Parchment paper: If you don’t have this, a silicone baking mat is a great alternative.
  • Mixing bowls: Use any size, but a large bowl is ideal for mixing the dough.
  • Electric mixer: A hand mixer is perfect, but a whisk and some elbow grease will do!

Variations

  • Crushed Pineapple: Add crushed pineapple to the dough for an extra tropical twist that enhances the flavor.
  • Dark Chocolate Chips: Swap white chocolate chips for dark chocolate chips for a richer, more decadent cookie.
  • Gluten-Free Option: Use a 1:1 gluten-free flour blend in place of all-purpose flour to make these cookies gluten-free.
  • Nutty Addition: Fold in chopped macadamia nuts or almonds for a delightful crunch and added flavor.
  • Vegan Version: Substitute the egg with a flax egg and use vegan cream cheese for a plant-based treat.

Serving Suggestions

  • Pair these cookies with a refreshing glass of iced tea or lemonade for a perfect summer treat.
  • Serve alongside a scoop of coconut ice cream for an indulgent dessert experience.
  • For a beautiful presentation, dust the cookies with powdered sugar before serving.
  • Arrange on a colorful platter with tropical fruits like pineapple and mango for a festive touch.

FAQs about Lemon Coconut Cheesecake Cookies

Curious about these delightful Lemon Coconut Cheesecake Cookies? Here are some common questions I often hear, along with answers to help you bake with confidence!

Can I make these cookies ahead of time?

Absolutely! You can prepare the dough in advance and refrigerate it for up to 3 days. Just scoop and bake when you’re ready for fresh cookies!

How should I store leftover cookies?

Store your cookies in an airtight container at room temperature for up to a week. If you want to keep them longer, freeze them for up to 3 months.

Can I use other types of cheese instead of cream cheese?

While cream cheese gives the best texture and flavor, you can experiment with mascarpone for a richer taste. Just keep in mind it may alter the cookie’s consistency slightly.

What can I substitute for lemon juice?

If you don’t have lemon juice, lime juice works well too! It will give a slightly different flavor but still keep that refreshing citrus zing.

Are these cookies suitable for a gluten-free diet?

Yes! Simply swap the all-purpose flour for a 1:1 gluten-free flour blend, and you’ll have delicious gluten-free Lemon Coconut Cheesecake Cookies!

Final Thoughts

Creating these Lemon Coconut Cheesecake Cookies is more than just baking; it’s about crafting a little piece of joy. Each bite bursts with the vibrant flavors of lemon and coconut, transporting you to a sunny paradise. Whether you’re sharing them with friends or enjoying them solo, these cookies bring a sense of warmth and happiness. They’re perfect for any occasion, from casual gatherings to special celebrations. So, roll up your sleeves, embrace the process, and let the delightful aroma fill your kitchen. Trust me, the smiles you’ll receive will be worth every moment spent baking!

jhessica

Lemon Coconut Cheesecake Cookies: A Tropical Delight Awaits!

Lemon Coconut Cheesecake Cookies are a delightful treat that combines the tangy flavor of lemon with the richness of cream cheese and the tropical taste of coconut.
Prep Time 15 minutes
Cook Time 12 minutes
Total Time 27 minutes
Servings: 24 cookies
Course: Dessert
Cuisine: American
Calories: 150

Ingredients
  

  • 1 cup all-purpose flour
  • 1/2 teaspoon baking powder
  • 1/4 teaspoon salt
  • 1/2 cup unsalted butter softened
  • 1/2 cup granulated sugar
  • 1/4 cup brown sugar packed
  • 1 large egg
  • 1 teaspoon vanilla extract
  • 1 tablespoon lemon juice
  • 1 tablespoon lemon zest
  • 1/2 cup cream cheese softened
  • 1/2 cup shredded coconut
  • 1/2 cup white chocolate chips

Method
 

  1. Preheat your oven to 350°F (175°C) and line a baking sheet with parchment paper.
  2. In a medium bowl, whisk together the flour, baking powder, and salt. Set aside.
  3. In a large mixing bowl, cream together the softened butter, granulated sugar, and brown sugar until light and fluffy.
  4. Add the egg, vanilla extract, lemon juice, and lemon zest to the butter mixture and mix until well combined.
  5. Gradually add the dry ingredients to the wet ingredients, mixing until just combined.
  6. Fold in the cream cheese, shredded coconut, and white chocolate chips until evenly distributed.
  7. Drop tablespoon-sized portions of dough onto the prepared baking sheet, spacing them about 2 inches apart.
  8. Bake for 10-12 minutes, or until the edges are lightly golden. Remove from the oven and let cool on the baking sheet for 5 minutes before transferring to a wire rack to cool completely.

Nutrition

Serving: 1cookieCalories: 150kcalCarbohydrates: 18gProtein: 2gFat: 7gSaturated Fat: 4gPolyunsaturated Fat: 2gCholesterol: 20mgSodium: 50mgSugar: 10g

Notes

  • This recipe makes about 24 cookies.
  • For a tropical twist, try adding crushed pineapple to the dough.
  • You can substitute the white chocolate chips with dark chocolate chips for a richer flavor.
  • For a gluten-free option, use a 1:1 gluten-free flour blend in place of all-purpose flour.

Tried this recipe?

Let us know how it was!

Mango Iced Tea: Refreshing Recipe for a Summer Treat

Introduction to Mango Iced Tea

Summer days can be sweltering, and nothing beats the heat quite like a refreshing glass of mango iced tea. This delightful drink is not just a thirst-quencher; it’s a burst of sunshine in a glass. I remember sipping on sweet iced teas during family picnics, the laughter mingling with the clinking of ice cubes. This mango iced tea recipe is perfect for those busy afternoons when you need a quick solution to cool down or impress your friends at a backyard barbecue. With just a few simple ingredients, you can create a tropical escape right in your kitchen.

Why You’ll Love This Mango Iced Tea

This mango iced tea is a game-changer for summer gatherings. It’s incredibly easy to whip up, taking just 10 minutes from start to finish. The vibrant flavors of mango and lime dance together, creating a refreshing taste that’s hard to resist. Plus, it’s a versatile drink that can be enjoyed by everyone, making it the perfect companion for any occasion. Trust me, your taste buds will thank you!

Ingredients for Mango Iced Tea

Gathering the right ingredients is the first step to crafting your mango iced tea masterpiece. Here’s what you’ll need:

  • Brewed black tea: This forms the base of your drink, providing a robust flavor that pairs beautifully with mango.
  • Mango juice: Look for 100% juice for the best flavor. It adds sweetness and a tropical vibe.
  • Fresh mango: Diced mango pieces bring texture and a burst of fresh fruitiness to each sip.
  • Honey: A natural sweetener that you can adjust to your taste. Feel free to swap it with agave syrup or sugar if you prefer.
  • Fresh lime juice: This adds a zesty kick, balancing the sweetness of the mango.
  • Ice cubes: Essential for that refreshing chill. The more, the merrier!
  • Fresh mint leaves: Optional, but they make for a lovely garnish and add a hint of freshness.

For those who want to get creative, consider these tips:

  • For a sparkling twist, replace half of the brewed tea with sparkling water.
  • Add a splash of coconut milk for a creamier texture and a tropical flair.

Exact quantities for each ingredient can be found at the bottom of the article, ready for printing!

How to Make Mango Iced Tea

Creating your own mango iced tea is a breeze! Follow these simple steps, and you’ll have a refreshing drink ready in no time. Let’s dive in!

Step 1: Brew the Black Tea

Start by brewing your black tea. Boil water and steep the tea bags according to the package instructions. I usually let it steep for about 5 minutes for a robust flavor. Once it’s brewed, remove the tea bags and let the tea cool completely. You can speed up the cooling process by placing it in the fridge for a bit.

Step 2: Combine Ingredients

In a large pitcher, combine the cooled black tea with the mango juice. Next, toss in the diced fresh mango. The vibrant colors are already a feast for the eyes! Add the honey and fresh lime juice, then stir everything together until the honey dissolves completely. This mixture is where the magic happens, blending all those tropical flavors.

Step 3: Adjust Sweetness

Now comes the fun part—tasting! Take a sip of your mango iced tea and see if it’s sweet enough for your liking. If you want it sweeter, add more honey, a little at a time, until it’s just right. Remember, you can always add more, but you can’t take it out!

Step 4: Serve Over Ice

Grab your favorite glasses and fill them with ice cubes. Pour the mango iced tea over the ice, watching it cascade beautifully. The ice will chill the drink instantly, making it even more refreshing. It’s like summer in a glass!

Step 5: Garnish and Enjoy

For that extra touch, garnish your drink with fresh mint leaves. They not only look great but also add a refreshing aroma. Serve immediately and enjoy the compliments from your friends and family. Trust me, they’ll be asking for seconds!

Tips for Success

  • Use freshly brewed tea for the best flavor; avoid bottled tea.
  • Chill your tea in the fridge to speed up cooling.
  • Experiment with different sweeteners like agave or maple syrup.
  • For a stronger mango flavor, add more diced mango.
  • Make a larger batch and store it in the fridge for up to three days.

Equipment Needed

  • Large pitcher: Essential for mixing your ingredients. A bowl works too!
  • Measuring cups: For accurate ingredient portions. You can use any cup if you’re in a pinch.
  • Tea kettle: To brew your tea. A pot on the stove will do just fine.
  • Stirring spoon: A long spoon helps mix everything well. A whisk can add some fun!

Variations of Mango Iced Tea

  • Herbal Twist: Swap black tea for herbal tea like hibiscus or chamomile for a caffeine-free option.
  • Spicy Kick: Add a pinch of cayenne pepper or a slice of jalapeño for a surprising heat that complements the sweetness.
  • Berry Blend: Mix in some fresh berries like strawberries or raspberries for an extra fruity flavor.
  • Green Tea Version: Use green tea instead of black tea for a lighter, more refreshing drink.
  • Frozen Delight: Blend the ingredients with ice for a slushy version that’s perfect for hot days.

Serving Suggestions for Mango Iced Tea

  • Pair with light snacks like cucumber sandwiches or shrimp cocktails for a refreshing combo.
  • Serve alongside grilled chicken or fish for a tropical twist to your meal.
  • For a festive touch, use mason jars and colorful straws for serving.
  • Enjoy with a slice of key lime pie for a delightful dessert pairing.

FAQs about Mango Iced Tea

Can I use green tea instead of black tea for mango iced tea?

Absolutely! Green tea offers a lighter flavor and pairs well with mango. Just brew it the same way, and you’ll have a refreshing twist on the classic recipe.

How can I make mango iced tea less sweet?

If you prefer a less sweet drink, simply reduce the amount of honey or use unsweetened mango juice. You can also add more lime juice for a zesty kick that balances the sweetness.

Can I make mango iced tea ahead of time?

Yes! You can prepare it a day in advance. Just store it in the fridge, and give it a good stir before serving. It’s a great way to have a refreshing drink ready for unexpected guests!

Is mango iced tea vegan-friendly?

Yes, this mango iced tea recipe is vegan! The ingredients are all plant-based, making it a perfect choice for anyone following a vegan diet.

What can I add to enhance the flavor of my mango iced tea?

Consider adding fresh herbs like basil or mint for an aromatic touch. A splash of coconut milk can also give it a creamy, tropical vibe that’s simply irresistible!

Final Thoughts

There’s something magical about sipping a glass of mango iced tea on a hot summer day. It’s not just a drink; it’s a moment of joy, a refreshing escape from the everyday hustle. Each sip transports you to a sun-soaked beach, where the worries of the world fade away. This recipe is a simple way to bring a taste of summer into your home, whether you’re hosting friends or enjoying a quiet afternoon. So, gather your ingredients, embrace the vibrant flavors, and let this mango iced tea become your go-to summer treat. Cheers to sunny days ahead!

jhessica

Mango Iced Tea: Refreshing Recipe for a Summer Treat

A refreshing mango iced tea recipe perfect for summer.
Prep Time 10 minutes
Total Time 10 minutes
Servings: 4 servings
Course: Beverage
Cuisine: American
Calories: 120

Ingredients
  

  • 2 cups brewed black tea cooled
  • 1 cup mango juice
  • 1 cup fresh mango diced
  • 1/4 cup honey or to taste
  • 1 tablespoon fresh lime juice
  • Ice cubes
  • Fresh mint leaves for garnish optional

Method
 

  1. Brew the black tea according to package instructions and allow it to cool completely.
  2. In a large pitcher, combine the cooled tea, mango juice, diced mango, honey, and lime juice. Stir well until the honey is fully dissolved.
  3. Taste the mixture and adjust sweetness by adding more honey if desired.
  4. Fill glasses with ice cubes and pour the mango iced tea over the ice.
  5. Garnish with fresh mint leaves if desired and serve immediately.

Nutrition

Serving: 1glassCalories: 120kcalCarbohydrates: 28gProtein: 1gSugar: 28g

Notes

  • For a sparkling version, replace half of the brewed tea with sparkling water.
  • Add a splash of coconut milk for a creamier texture and tropical flavor.

Tried this recipe?

Let us know how it was!

Shrimp Scampi with Garlic Butter: A Simple Delightful Recipe

Introduction to Shrimp Scampi with Garlic Butter

There’s something magical about the aroma of garlic sizzling in butter. It takes me back to family dinners where laughter filled the air, and the table was a canvas of deliciousness. Shrimp Scampi with Garlic Butter is not just a meal; it’s a quick solution for those busy weeknights or a dish to impress your loved ones on special occasions.

With just a handful of ingredients, you can whip up a delightful dinner that feels fancy but is incredibly simple. Trust me, this recipe will become a staple in your kitchen, bringing joy to your table.

Why You’ll Love This Shrimp Scampi with Garlic Butter

This Shrimp Scampi with Garlic Butter is a culinary gem that shines for its simplicity.

In just 25 minutes, you can serve a restaurant-quality dish that dazzles the taste buds.

The combination of succulent shrimp, rich garlic butter, and a splash of white wine creates a flavor explosion.

Plus, it’s versatile enough to adapt to your pantry staples, making it a go-to recipe for any occasion.

Ingredients for Shrimp Scampi with Garlic Butter

To create this mouthwatering Shrimp Scampi with Garlic Butter, you’ll need a few key ingredients that come together in perfect harmony. Here’s what you’ll gather:

  • Large shrimp: Fresh or frozen, peeled and deveined shrimp are the stars of this dish. They cook quickly and soak up all that delicious garlic butter.
  • Linguine or spaghetti: These pasta types are perfect for holding onto the sauce. Choose your favorite, or whatever you have on hand.
  • Unsalted butter: This adds richness and depth to the sauce. Unsalted allows you to control the saltiness of the dish.
  • Olive oil: A splash of olive oil enhances the flavor and helps prevent the butter from burning.
  • Garlic: Freshly minced garlic is essential for that aromatic kick. It’s the heart of the dish!
  • Red pepper flakes: Optional, but they add a delightful heat that balances the richness of the butter.
  • Dry white wine: A splash of wine, like Sauvignon Blanc, elevates the dish with acidity and depth. You can also use chicken broth if you prefer.
  • Lemon juice: Freshly squeezed lemon juice brightens the flavors and adds a zesty finish.
  • Salt and pepper: Essential for seasoning, these simple ingredients enhance all the flavors.
  • Fresh parsley: Chopped parsley adds a pop of color and freshness, making the dish visually appealing.
  • Lemon wedges: For serving, these add an extra burst of citrus when squeezed over the finished dish.

For exact measurements, check the bottom of the article where you can find everything listed for easy printing. Enjoy gathering these ingredients; they’re the building blocks of a delightful meal!

How to Make Shrimp Scampi with Garlic Butter

Making Shrimp Scampi with Garlic Butter is a breeze.

Follow these simple steps, and you’ll have a delicious meal ready in no time.

Let’s dive into the cooking process!

Step 1: Cook the Pasta

Start by boiling a large pot of salted water.

Add your linguine or spaghetti and cook according to the package instructions until al dente.

This usually takes about 8-10 minutes.

Once done, drain the pasta, but don’t forget to reserve half a cup of that starchy pasta water.

It’ll help bring everything together later!

Step 2: Prepare the Garlic Butter

In a large skillet, melt 4 tablespoons of unsalted butter with 3 tablespoons of olive oil over medium heat.

The combination of these two fats creates a rich base for your sauce.

Once melted, toss in 4 cloves of minced garlic and, if you like a kick, add 1/4 teaspoon of red pepper flakes.

Sauté for about a minute until the garlic is fragrant but not browned.

Burnt garlic can turn bitter, so keep an eye on it!

Step 3: Sauté the Shrimp

Now, it’s time to add the star of the show—1 pound of large shrimp.

Increase the heat to medium-high and cook the shrimp for 2-3 minutes.

Stir occasionally until they turn pink and opaque.

This is where the magic happens!

The shrimp will soak up all that garlicky goodness.

Step 4: Combine Ingredients

Pour in 1/2 cup of dry white wine and the juice of 1 lemon.

Let it simmer for 2-3 minutes to reduce slightly.

Season with salt and pepper to taste.

Now, add the cooked pasta to the skillet, tossing everything together.

If it seems a bit dry, add a splash of that reserved pasta water until you reach your desired consistency.

This step ensures every strand of pasta is coated in that luscious garlic butter sauce.

Step 5: Serve and Enjoy

Finally, stir in 1/4 cup of chopped fresh parsley for a burst of color and freshness.

Remove the skillet from heat and serve immediately.

Don’t forget to add lemon wedges on the side for an extra zing!

This Shrimp Scampi with Garlic Butter is best enjoyed fresh, so gather your loved ones and dig in!

Tips for Success

  • Use fresh shrimp for the best flavor; frozen works too, just thaw them properly.
  • Don’t overcook the shrimp; they should be just pink and opaque.
  • Reserve that pasta water! It’s a game-changer for sauce consistency.
  • Feel free to adjust the garlic and red pepper flakes to suit your taste.
  • For a creamier sauce, add a splash of heavy cream after the wine.

Equipment Needed

  • Large pot: For boiling pasta. A deep skillet can work in a pinch.
  • Skillet: A large skillet is essential for sautéing. A wok can also do the job.
  • Colander: For draining pasta. A slotted spoon can be a handy alternative.
  • Measuring cups: For precise ingredient measurements. A kitchen scale is useful too.

Variations of Shrimp Scampi with Garlic Butter

  • Scallop Scampi: Swap shrimp for scallops for a luxurious twist. They cook similarly and absorb the garlic butter beautifully.
  • Chicken Scampi: Use diced chicken breast instead of shrimp for a heartier option. Just ensure it’s cooked through before adding the pasta.
  • Vegetarian Version: Replace shrimp with sautéed mushrooms or zucchini for a delightful meatless meal. Add extra garlic for flavor!
  • Spicy Scampi: Increase the red pepper flakes or add a dash of hot sauce for those who crave a fiery kick.
  • Creamy Scampi: Stir in heavy cream after the wine for a rich, creamy sauce that coats the pasta perfectly.

Serving Suggestions for Shrimp Scampi with Garlic Butter

  • Garlic Bread: Serve with warm, crusty garlic bread to soak up that delicious sauce.
  • Salad: A light arugula or Caesar salad pairs perfectly for a refreshing contrast.
  • Wine: Enjoy with a chilled glass of Sauvignon Blanc to complement the flavors.
  • Presentation: Garnish with extra parsley and lemon wedges for a vibrant touch.

FAQs about Shrimp Scampi with Garlic Butter

Can I use frozen shrimp for this recipe?

Absolutely! Frozen shrimp work just fine. Just make sure to thaw them properly before cooking. This will help them cook evenly and absorb all that delicious garlic butter flavor.

What can I substitute for white wine?

If you prefer not to use wine, chicken broth is a great alternative. It adds depth to the sauce without the alcohol. Just make sure to choose a low-sodium option to control the saltiness.

How do I store leftovers?

Store any leftovers in an airtight container in the fridge for up to 2 days. Reheat gently on the stovetop, adding a splash of water or broth to keep it moist.

Can I make this dish ahead of time?

While it’s best enjoyed fresh, you can prep the ingredients ahead. Cook the pasta and shrimp separately, then combine them just before serving to maintain the best texture.

What sides pair well with Shrimp Scampi with Garlic Butter?

Garlic bread and a light salad are perfect companions. They balance the richness of the dish and make for a complete meal that’s sure to impress!

Final Thoughts

Cooking Shrimp Scampi with Garlic Butter is more than just preparing a meal; it’s about creating moments.

The rich aroma of garlic and butter wafting through your kitchen can transform an ordinary evening into something special.

This dish is a reminder that great food doesn’t have to be complicated.

With its vibrant flavors and quick preparation, it’s perfect for busy nights or intimate gatherings.

So, gather your loved ones, share a laugh, and enjoy this delightful recipe.

Every bite is a celebration of simple pleasures, and I hope it brings as much joy to your table as it does to mine!

jhessica

Shrimp Scampi with Garlic Butter: A Simple Delightful Recipe

A simple and delightful recipe for Shrimp Scampi with Garlic Butter, perfect for a quick dinner.
Prep Time 10 minutes
Cook Time 15 minutes
Total Time 25 minutes
Servings: 4 servings
Course: Main Course
Cuisine: Italian
Calories: 400

Ingredients
  

  • 1 pound large shrimp peeled and deveined
  • 8 ounces linguine or spaghetti
  • 4 tablespoons unsalted butter
  • 3 tablespoons olive oil
  • 4 cloves garlic minced
  • 1/4 teaspoon red pepper flakes optional
  • 1/2 cup dry white wine such as Sauvignon Blanc
  • Juice of 1 lemon
  • Salt and pepper to taste
  • 1/4 cup fresh parsley chopped
  • Lemon wedges for serving

Method
 

  1. Cook the linguine or spaghetti according to package instructions until al dente. Drain and set aside, reserving 1/2 cup of the pasta cooking water.
  2. In a large skillet over medium heat, melt the butter and olive oil together.
  3. Add the minced garlic and red pepper flakes (if using) to the skillet and sauté for about 1 minute, until fragrant.
  4. Increase the heat to medium-high and add the shrimp to the skillet. Cook for 2-3 minutes, stirring occasionally, until the shrimp turn pink and opaque.
  5. Pour in the white wine and lemon juice, and let it simmer for 2-3 minutes to reduce slightly. Season with salt and pepper to taste.
  6. Add the cooked pasta to the skillet, tossing to combine. If the mixture seems dry, add a little of the reserved pasta water until the desired consistency is reached.
  7. Stir in the chopped parsley and remove from heat. Serve immediately with lemon wedges on the side.

Nutrition

Serving: 1servingCalories: 400kcalCarbohydrates: 45gProtein: 25gFat: 15gSaturated Fat: 5gPolyunsaturated Fat: 10gCholesterol: 200mgSodium: 600mgFiber: 2gSugar: 1g

Notes

  • For a creamier sauce, add 1/4 cup of heavy cream after adding the white wine.
  • Substitute shrimp with scallops or chicken for a different protein option.

Tried this recipe?

Let us know how it was!

Hungarian Mushroom Soup: A Hearty Comfort Recipe Awaiting You!

Introduction to Hungarian Mushroom Soup

There’s something magical about a warm bowl of soup, especially when it’s a hearty Hungarian Mushroom Soup. This dish wraps you in comfort like a favorite old sweater. Whether you’re coming in from a chilly day or just need a quick solution for dinner, this recipe is your go-to. It’s simple, satisfying, and packed with flavor, making it perfect for impressing loved ones or enjoying a cozy night in. Trust me, once you try this, it’ll become a staple in your kitchen, bringing warmth and joy to your table every time.

Why You’ll Love This Hungarian Mushroom Soup

This Hungarian Mushroom Soup is a delightful blend of flavors that comes together in no time. With just a handful of ingredients, you can whip up a comforting meal that warms the soul. It’s vegetarian-friendly, making it a great option for everyone at the table. Plus, the earthy mushrooms and aromatic spices create a taste that’s both rich and satisfying. You’ll find yourself reaching for seconds, and maybe even thirds!

Ingredients for Hungarian Mushroom Soup

Gathering the right ingredients is the first step to creating a delicious Hungarian Mushroom Soup. Here’s what you’ll need:

  • Fresh mushrooms: The star of the show! Use any variety you like, such as cremini or button mushrooms, for that earthy flavor.
  • Onion: A medium onion adds sweetness and depth to the soup. Chop it finely for even cooking.
  • Butter: This is your base for sautéing. It adds richness and a lovely aroma to the dish.
  • Garlic: Minced garlic brings a punch of flavor. It’s a must for that aromatic kick.
  • Dried thyme: This herb complements the mushrooms beautifully, adding a hint of earthiness.
  • Paprika: A staple in Hungarian cuisine, paprika gives the soup its signature color and a mild, smoky flavor.
  • Soy sauce: Just a splash enhances the umami taste, making the soup even more savory.
  • Vegetable broth: The liquid base of your soup. Choose a good-quality broth for the best flavor.
  • Milk: This adds creaminess. You can use whole milk or a plant-based alternative for a lighter version.
  • All-purpose flour: A thickener that helps create a nice, velvety texture.
  • Salt and pepper: Essential for seasoning. Adjust to your taste for the perfect balance.
  • Fresh parsley: Chopped parsley is for garnish, adding a pop of color and freshness to your bowl.

For those looking to mix things up, consider adding a splash of lemon juice for brightness or blending a portion of the soup for a creamier texture. You can find the exact quantities for each ingredient at the bottom of the article, ready for printing!

How to Make Hungarian Mushroom Soup

Now that you have all your ingredients ready, let’s dive into making this comforting Hungarian Mushroom Soup. Follow these simple steps, and you’ll have a delicious bowl of warmth in no time!

Step 1: Sauté the Onions

Start by melting the butter in a large pot over medium heat. As it begins to bubble, toss in the chopped onion. Sauté it for about 5 minutes, stirring occasionally, until the onions turn translucent. This step is crucial; it builds the foundation of flavor for your soup.

Step 2: Add Garlic and Mushrooms

Next, stir in the minced garlic and sliced mushrooms. The aroma will be heavenly! Add the dried thyme, paprika, soy sauce, salt, and pepper. Cook everything together for another 5 to 7 minutes. You want the mushrooms to become tender and release their juices, creating a rich base for your soup.

Step 3: Incorporate Flour

Once the mushrooms are tender, sprinkle the flour over the mixture. Stir well to combine, cooking for about 1 to 2 minutes. This helps eliminate the raw flour taste and thickens the soup. It’s a small step, but it makes a big difference in texture!

Step 4: Add Broth and Simmer

Now, it’s time to add the vegetable broth. Pour it in gradually while stirring continuously to prevent any lumps. Bring the mixture to a boil, then reduce the heat and let it simmer for 15 minutes. This allows all those flavors to meld beautifully.

Step 5: Stir in Milk

Finally, stir in the milk and let the soup simmer for an additional 5 minutes. This is where the creaminess comes into play! Taste and adjust the seasoning with salt and pepper as needed. Your Hungarian Mushroom Soup is now ready to be served!

Tips for Success

  • Use a mix of mushrooms for a deeper flavor profile.
  • Don’t rush the sautéing process; it builds essential flavor.
  • For a creamier soup, blend a portion before adding milk.
  • Adjust seasoning gradually; taste as you go!
  • Garnish with fresh parsley just before serving for a vibrant touch.

Equipment Needed

  • Large pot: A sturdy pot is essential for simmering your soup. A Dutch oven works great too.
  • Wooden spoon: Perfect for stirring and scraping the bottom of the pot.
  • Measuring cups and spoons: For accurate ingredient measurements.
  • Cutting board and knife: Essential for chopping your veggies.

Variations

  • Protein Boost: Add cooked chicken or turkey for a heartier soup that packs a protein punch.
  • Spicy Kick: Toss in some red pepper flakes or a dash of hot sauce for a spicy twist.
  • Herb Infusion: Experiment with fresh herbs like dill or basil for a unique flavor profile.
  • Vegan Option: Substitute milk with coconut milk or almond milk and use vegetable broth for a completely plant-based version.
  • Cheesy Delight: Stir in some grated cheese, like Parmesan or cheddar, just before serving for added richness.

Serving Suggestions

  • Crusty Bread: Serve with a slice of warm, crusty bread for dipping.
  • Salad: Pair with a fresh green salad for a light, balanced meal.
  • Wine: Enjoy with a glass of white wine, like Sauvignon Blanc, to complement the flavors.
  • Presentation: Garnish with extra parsley and a drizzle of olive oil for a beautiful finish.

FAQs about Hungarian Mushroom Soup

Can I make Hungarian Mushroom Soup ahead of time?

Absolutely! This soup actually tastes even better the next day as the flavors meld together. Just store it in an airtight container in the fridge. When you’re ready to enjoy it, simply reheat on the stovetop.

Is Hungarian Mushroom Soup gluten-free?

To make this soup gluten-free, substitute the all-purpose flour with a gluten-free flour blend or cornstarch. Just remember to adjust the amount accordingly for the best texture.

Can I freeze Hungarian Mushroom Soup?

Yes, you can freeze it! Allow the soup to cool completely, then transfer it to freezer-safe containers. It can be stored for up to three months. Just thaw and reheat when you’re ready for a comforting meal.

What can I serve with Hungarian Mushroom Soup?

This soup pairs wonderfully with crusty bread, a fresh salad, or even a side of roasted vegetables. It’s versatile enough to complement many dishes!

How can I make this soup spicier?

If you like a bit of heat, add red pepper flakes or a dash of hot sauce while cooking. You can also toss in some diced jalapeños for an extra kick!

Final Thoughts

Cooking this Hungarian Mushroom Soup is more than just preparing a meal; it’s about creating a moment of warmth and comfort. Each spoonful is a reminder of cozy nights spent with family, laughter echoing in the kitchen, and the simple joy of sharing good food. The rich flavors and creamy texture invite you to slow down and savor every bite. Whether you’re enjoying it solo or with loved ones, this soup has a way of bringing people together. So, grab your ingredients and let the magic unfold in your kitchen. You won’t regret it!

jhessica

Hungarian Mushroom Soup: A Hearty Comfort Recipe Awaiting You!

A hearty and comforting Hungarian Mushroom Soup that is perfect for any occasion.
Prep Time 10 minutes
Cook Time 30 minutes
Total Time 40 minutes
Servings: 4 servings
Course: Soup
Cuisine: Hungarian
Calories: 180

Ingredients
  

  • 8 ounces fresh mushrooms sliced
  • 1 medium onion chopped
  • 2 tablespoons butter
  • 2 cloves garlic minced
  • 1 teaspoon dried thyme
  • 1 teaspoon paprika
  • 1 tablespoon soy sauce
  • 4 cups vegetable broth
  • 1 cup milk
  • 2 tablespoons all-purpose flour
  • Salt and pepper to taste
  • 2 tablespoons fresh parsley chopped (for garnish)

Method
 

  1. In a large pot, melt the butter over medium heat. Add the chopped onion and sauté until translucent, about 5 minutes.
  2. Stir in the minced garlic, sliced mushrooms, thyme, paprika, soy sauce, salt, and pepper. Cook for another 5-7 minutes until the mushrooms are tender.
  3. Sprinkle the flour over the mushroom mixture and stir well to combine. Cook for 1-2 minutes to eliminate the raw flour taste.
  4. Gradually add the vegetable broth, stirring continuously to prevent lumps. Bring the mixture to a boil, then reduce the heat and let it simmer for 15 minutes.
  5. Stir in the milk and let the soup simmer for an additional 5 minutes. Adjust seasoning with salt and pepper as needed.
  6. Serve hot, garnished with fresh parsley.

Nutrition

Serving: 1cupCalories: 180kcalCarbohydrates: 15gProtein: 6gFat: 8gSaturated Fat: 4gPolyunsaturated Fat: 4gCholesterol: 20mgSodium: 500mgFiber: 2gSugar: 3g

Notes

  • For a creamier texture, blend a portion of the soup before adding the milk.
  • Add a splash of lemon juice for a bright flavor or top with croutons for added crunch.

Tried this recipe?

Let us know how it was!

Tacos al Pastor: Discover the Ultimate Flavorful Recipe!

Introduction to Tacos al Pastor

There’s something magical about the aroma of Tacos al Pastor wafting through the kitchen. It takes me back to family gatherings, where laughter mingled with the sizzle of marinated pork on the grill. This dish is not just a meal; it’s an experience. Perfect for a quick weeknight dinner or a weekend feast with friends, Tacos al Pastor brings vibrant flavors and a touch of festivity to any table. With just a few simple ingredients and a bit of love, you can create a dish that impresses your loved ones and satisfies your cravings. Let’s dive in!

Why You’ll Love This Tacos al Pastor

Tacos al Pastor is a game-changer for any home cook. They’re quick to prepare, making them perfect for busy weeknights or spontaneous gatherings. The combination of marinated pork and grilled pineapple creates a flavor explosion that’s hard to resist. Plus, you can customize your toppings to suit everyone’s taste. Whether you’re a seasoned chef or a kitchen novice, this recipe guarantees a delicious meal that will leave everyone asking for seconds!

Ingredients for Tacos al Pastor

Gathering the right ingredients is the first step to creating mouthwatering Tacos al Pastor. Here’s what you’ll need:

  • Pork shoulder: The star of the show! This cut is tender and flavorful, perfect for marinating and grilling.
  • Pineapple juice: Adds a sweet tang that balances the savory pork. Fresh juice is best, but canned works too.
  • White vinegar: A splash of acidity to enhance the flavors and tenderize the meat.
  • Orange juice: Brings a citrusy brightness that complements the marinade beautifully.
  • Adobo sauce: This smoky sauce from canned chipotle peppers adds depth and a hint of heat.
  • Chili powder: A must for that classic taco flavor. It brings warmth without overwhelming spice.
  • Ground cumin: Earthy and aromatic, cumin is essential for that authentic Mexican taste.
  • Dried oregano: Adds a herbal note that rounds out the flavor profile.
  • Garlic powder: For a savory kick that enhances the overall taste.
  • Onion powder: A subtle sweetness that complements the garlic and spices.
  • Salt and black pepper: Essential for seasoning and bringing all the flavors together.
  • Cayenne pepper: Optional, but if you like a little heat, this is your go-to!
  • Pineapple: Fresh rings for grilling. They caramelize beautifully and add a sweet contrast to the pork.
  • Corn tortillas: The perfect vessel for your tacos. Look for small, soft ones for the best experience.
  • Fresh cilantro: A must-have topping that adds freshness and color.
  • Diced onion: Adds crunch and a bit of sharpness to balance the richness of the pork.
  • Lime wedges: For that zesty finish that brightens every bite.

For exact measurements, check the bottom of the article where you can find everything listed for easy printing. Happy cooking!

How to Make Tacos al Pastor

Creating Tacos al Pastor is a straightforward process that rewards you with incredible flavors. Follow these simple steps, and you’ll be on your way to taco perfection!

Step 1: Marinate the Pork

Start by combining the pork shoulder slices with all the marinade ingredients in a large bowl. This includes pineapple juice, white vinegar, orange juice, adobo sauce, chili powder, cumin, oregano, garlic powder, onion powder, salt, black pepper, and cayenne pepper if you’re feeling adventurous. Mix everything well to ensure the pork is evenly coated. Cover the bowl and let it marinate in the fridge for at least two hours, or overnight for the best flavor. Trust me, the longer, the better!

Step 2: Preheat the Grill

While the pork is soaking up all those delicious flavors, it’s time to get your grill ready. Preheat your grill or stovetop grill pan over medium-high heat. A hot grill is essential for achieving that perfect char on the pork. If you’re using a grill pan, a little oil can help prevent sticking.

Step 3: Grill the Pork

Once your grill is hot, take the marinated pork out of the fridge. Let it sit at room temperature for about 15 minutes. This helps it cook evenly. Grill the pork slices for about 4-5 minutes on each side. You want them nicely charred and cooked through. Don’t forget to add the pineapple rings to the grill during the last few minutes. They’ll caramelize beautifully, adding a sweet touch to your tacos!

Step 4: Prepare the Tortillas

While the pork and pineapple are grilling, warm your corn tortillas. Place them on the grill for about 30 seconds on each side until they’re soft and pliable. This step is crucial; warm tortillas make all the difference in your taco experience!

Step 5: Assemble the Tacos

Now comes the fun part! Remove the grilled pork and pineapple from the grill. Let the pork rest for a few minutes before slicing it into small pieces. To assemble your tacos, place a generous portion of the grilled pork on each tortilla. Top with diced onion, chopped cilantro, and a slice of grilled pineapple if you like. Serve with lime wedges on the side for that zesty finish. Enjoy every bite of your homemade Tacos al Pastor!

Tips for Success

  • Marinate the pork overnight for maximum flavor; it’s worth the wait!
  • Use a meat thermometer to ensure the pork reaches 145°F for perfect doneness.
  • Don’t skip warming the tortillas; it enhances the overall taco experience.
  • Experiment with toppings like avocado or jalapeños for a personal twist.
  • Keep a close eye on the grill to avoid overcooking the pork and pineapple.

Equipment Needed

  • Grill or Grill Pan: A traditional grill works best, but a stovetop grill pan is a great alternative.
  • Mixing Bowl: Any large bowl will do for marinating the pork.
  • Meat Thermometer: Optional, but helpful for checking doneness.
  • Tongs: Essential for flipping the pork and pineapple on the grill.
  • Spatula: Useful for warming tortillas and serving tacos.

Variations

  • Chicken Tacos al Pastor: Swap the pork for chicken thighs or breasts for a lighter option. The marinade works beautifully with chicken too!
  • Vegetarian Version: Use grilled portobello mushrooms or marinated tofu instead of pork. Add extra pineapple for sweetness and flavor.
  • Spicy Kick: For those who love heat, add diced jalapeños or a splash of hot sauce to the marinade.
  • Gluten-Free Option: Ensure your corn tortillas are certified gluten-free, and you’re good to go!
  • Fruit Variations: Experiment with other fruits like mango or peach for a unique twist on the classic flavor profile.

Serving Suggestions

  • Side Dishes: Serve with Mexican street corn or a fresh avocado salad for a refreshing contrast.
  • Drinks: Pair with a cold cerveza or a zesty margarita to elevate the meal.
  • Presentation: Arrange tacos on a colorful platter, garnished with lime wedges and extra cilantro for a vibrant touch.

FAQs about Tacos al Pastor

What is Tacos al Pastor?

Tacos al Pastor is a traditional Mexican dish featuring marinated pork, grilled to perfection, and served in soft corn tortillas. The marinade typically includes pineapple juice, spices, and adobo sauce, giving it a unique flavor profile that’s both savory and slightly sweet.

Can I make Tacos al Pastor ahead of time?

Absolutely! You can marinate the pork a day in advance, allowing the flavors to deepen. Just grill the pork and assemble the tacos when you’re ready to serve. This makes it a fantastic option for meal prep or entertaining.

What can I serve with Tacos al Pastor?

These tacos pair wonderfully with sides like Mexican street corn, guacamole, or a fresh salad. A cold beer or a refreshing margarita also complements the flavors beautifully.

Can I use a different meat for Tacos al Pastor?

Yes! While pork is traditional, you can substitute chicken or even go vegetarian with grilled mushrooms or tofu. The marinade works well with various proteins, so feel free to get creative!

How do I store leftovers?

Store any leftover pork and toppings in airtight containers in the fridge. The pork can be reheated in a skillet or microwave. Just be sure to warm the tortillas again for the best taco experience!

Final Thoughts

Making Tacos al Pastor is more than just cooking; it’s about creating memories and sharing joy with those you love. The vibrant flavors and the sizzle of the grill bring a sense of celebration to any meal. Whether it’s a casual weeknight dinner or a lively gathering with friends, these tacos are sure to impress. The best part? You can customize them to fit everyone’s taste, making each bite a delightful experience. So, roll up your sleeves, gather your ingredients, and let the magic of Tacos al Pastor transform your kitchen into a fiesta!

jhessica

Tacos al Pastor: Discover the Ultimate Flavorful Recipe!

Tacos al Pastor is a delicious Mexican dish made with marinated pork, grilled to perfection and served in corn tortillas with fresh toppings.
Prep Time 2 hours
Cook Time 15 minutes
Total Time 2 hours 15 minutes
Servings: 6 servings
Course: Main Dish
Cuisine: Mexican
Calories: 320

Ingredients
  

  • 2 pounds pork shoulder thinly sliced
  • 1/4 cup pineapple juice
  • 1/4 cup white vinegar
  • 1/4 cup orange juice
  • 3 tablespoons adobo sauce from canned chipotle peppers
  • 2 tablespoons chili powder
  • 1 tablespoon ground cumin
  • 1 tablespoon dried oregano
  • 1 teaspoon garlic powder
  • 1 teaspoon onion powder
  • 1/2 teaspoon salt
  • 1/4 teaspoon black pepper
  • 1/4 teaspoon cayenne pepper optional, for heat
  • 1 medium pineapple peeled, cored, and sliced into rings
  • 12 small corn tortillas
  • 1/2 cup chopped fresh cilantro
  • 1/2 cup diced onion
  • Lime wedges for serving

Method
 

  1. In a large bowl, combine the pork shoulder slices, pineapple juice, white vinegar, orange juice, adobo sauce, chili powder, cumin, oregano, garlic powder, onion powder, salt, black pepper, and cayenne pepper (if using). Mix well to coat the pork evenly. Cover and refrigerate for at least 2 hours, preferably overnight for maximum flavor.
  2. Preheat your grill or stovetop grill pan over medium-high heat.
  3. Remove the marinated pork from the refrigerator and let it sit at room temperature for about 15 minutes.
  4. Grill the pork slices for about 4-5 minutes on each side, or until they are nicely charred and cooked through. Add the pineapple rings to the grill during the last few minutes of cooking, turning until caramelized.
  5. Once cooked, remove the pork and pineapple from the grill. Let the pork rest for a few minutes before slicing it into small pieces.
  6. Warm the corn tortillas on the grill for about 30 seconds on each side until soft and pliable.
  7. To assemble the tacos, place a generous portion of the grilled pork on each tortilla, top with diced onion and chopped cilantro, and add a slice of grilled pineapple if desired. Serve with lime wedges on the side.

Nutrition

Serving: 1tacoCalories: 320kcalCarbohydrates: 15gProtein: 24gFat: 18gSaturated Fat: 6gPolyunsaturated Fat: 10gCholesterol: 70mgSodium: 600mgFiber: 2gSugar: 5g

Notes

  • For a smoky flavor, add a few drops of liquid smoke to the marinade.
  • Try adding sliced avocado or jalapeños for extra toppings to customize your tacos.

Tried this recipe?

Let us know how it was!

Stay Connected

Get recipes via email: