Get my cookbooks

Creamy Street Corn Pasta Salad: A Flavorful Delight!

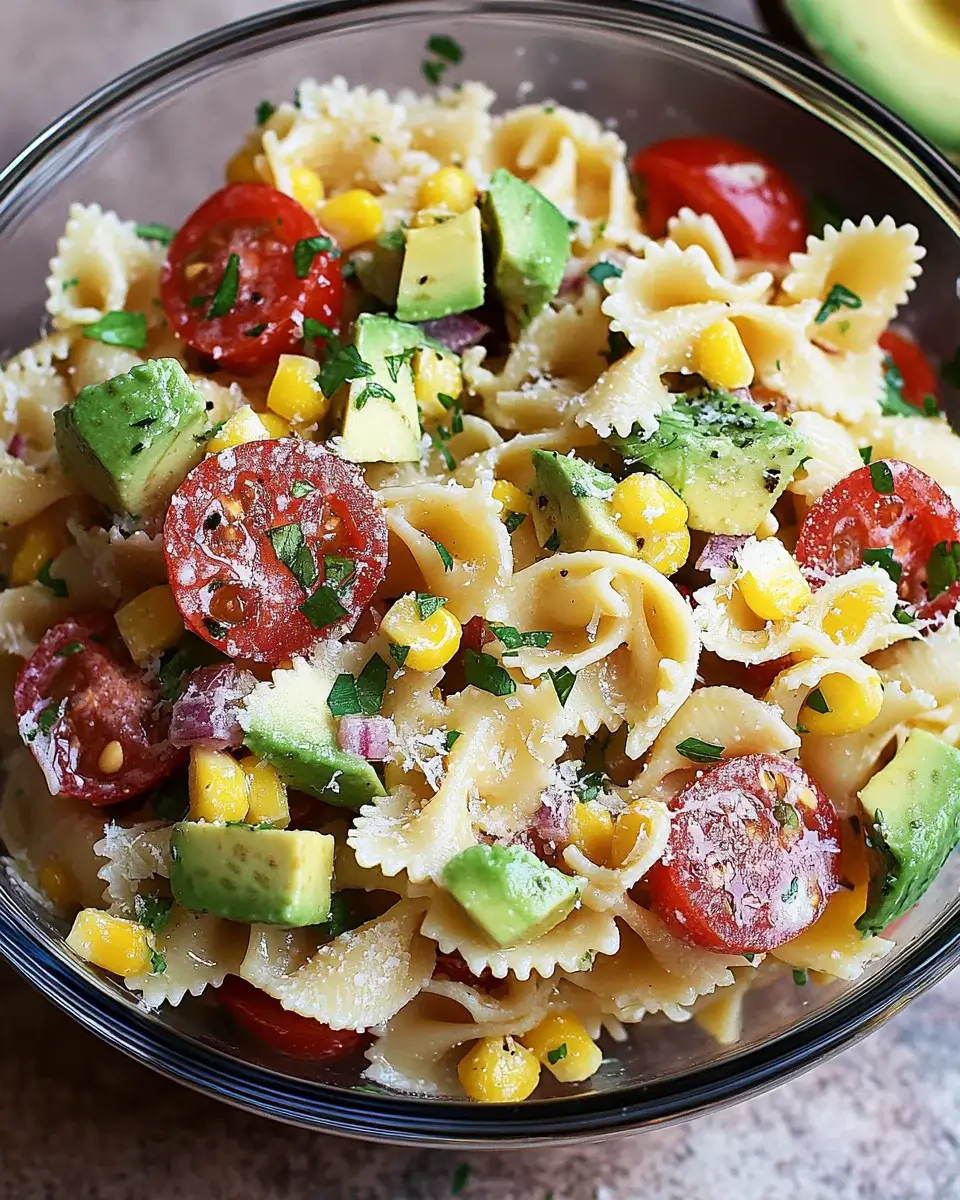
Introduction to Creamy Street Corn Pasta Salad

There’s something magical about summer gatherings, isn’t there? The laughter, the sunshine, and of course, the food. One dish that always steals the show is my Creamy Street Corn Pasta Salad. It’s a vibrant, flavorful delight that brings a taste of the streets right to your backyard.

This recipe is not just quick and easy; it’s a crowd-pleaser that impresses without the fuss. Whether you’re hosting a barbecue or just looking for a refreshing side, this pasta salad is your go-to. Trust me, your taste buds will thank you!

Why You’ll Love This Creamy Street Corn Pasta Salad

This Creamy Street Corn Pasta Salad is a game-changer for busy days.

It comes together in under an hour, making it perfect for last-minute gatherings.

The combination of sweet corn, tangy lime, and creamy dressing creates a flavor explosion that dances on your palate.

Plus, it’s versatile enough to serve as a side or a main dish.

Trust me, once you try it, you’ll be hooked!

Ingredients for Creamy Street Corn Pasta Salad

Creating this Creamy Street Corn Pasta Salad is a breeze, especially with the right ingredients. Here’s what you’ll need:

  • Elbow macaroni: The classic pasta choice that holds the creamy dressing beautifully.
  • Corn kernels: Fresh, frozen, or canned—each option brings a sweet crunch to the dish.
  • Cherry tomatoes: Their juicy sweetness adds a pop of color and flavor.
  • Red onion: Finely chopped for a mild bite that complements the other ingredients.
  • Mayonnaise: This creamy base gives the salad its rich texture.
  • Sour cream: Adds tanginess and creaminess, balancing the flavors perfectly.
  • Lime juice: A splash of citrus that brightens up the entire dish.
  • Chili powder: For a hint of spice that elevates the flavor profile.
  • Garlic powder: A subtle kick that enhances the overall taste.
  • Salt and pepper: Essential seasonings to bring all the flavors together.
  • Cotija cheese: Crumbled on top for a salty, creamy finish. You can swap it with feta for a different twist.
  • Fresh cilantro: Chopped for a burst of freshness and color.

Feel free to get creative! For a spicier kick, consider adding diced jalapeños.

All ingredient quantities are listed at the bottom of the article for easy reference and printing.

How to Make Creamy Street Corn Pasta Salad

Making this Creamy Street Corn Pasta Salad is as easy as pie.

Follow these simple steps, and you’ll have a delicious dish ready in no time.

Let’s dive in!

Step 1: Cook the Pasta

Start by boiling a pot of salted water.

Add the elbow macaroni and cook according to the package instructions until al dente.

This usually takes about 8-10 minutes.

Once done, drain the pasta and rinse it under cold water.

This step cools it down and prevents it from getting mushy.

Set it aside to let the excess water drain.

Step 2: Combine the Vegetables

In a large mixing bowl, toss together the cooled pasta, corn kernels, halved cherry tomatoes, and finely chopped red onion.

The colors will pop, making your salad visually appealing.

Mixing these fresh ingredients creates a vibrant base for your creamy dressing.

Step 3: Prepare the Dressing

In a separate bowl, whisk together the mayonnaise, sour cream, lime juice, chili powder, garlic powder, salt, and pepper.

This creamy dressing is the heart of your salad.

Make sure it’s smooth and well combined.

Taste it! Adjust the seasoning if needed.

A little extra lime juice can brighten it up even more.

Step 4: Mix Everything Together

Pour the dressing over the pasta and vegetable mixture.

Gently toss everything together until every piece is coated in that creamy goodness.

Be careful not to break the pasta or tomatoes.

Once mixed, fold in the crumbled cotija cheese and chopped cilantro for that extra flavor kick.

Step 5: Chill and Serve

Cover the bowl with plastic wrap or a lid and refrigerate for at least 30 minutes.

This chilling time allows the flavors to meld beautifully.

When you’re ready to serve, give it a quick stir.

You can garnish with additional cilantro if you like.

Enjoy your Creamy Street Corn Pasta Salad chilled or at room temperature!

Tips for Success

  • Always rinse the pasta after cooking to stop the cooking process and keep it firm.
  • Use fresh corn when in season for the best flavor; frozen works well too!
  • Let the salad chill longer than 30 minutes if possible; it enhances the flavors.
  • Adjust the spice level by adding more or less chili powder to suit your taste.
  • For a creamier texture, add a bit more mayonnaise or sour cream.

Equipment Needed

  • Large pot: For boiling the pasta. A deep skillet can work too.
  • Colander: To drain the pasta. A fine mesh strainer is a good alternative.
  • Mixing bowls: One large for the salad and a smaller one for the dressing.
  • Whisk: For mixing the dressing. A fork can do the job in a pinch.
  • Spatula or spoon: To gently mix everything together without breaking the pasta.

Variations

  • Spicy Street Corn Pasta Salad: Add diced jalapeños or a splash of hot sauce for an extra kick.
  • Protein-Packed Version: Toss in cooked chicken, shrimp, or black beans for added protein.
  • Vegan Option: Substitute mayonnaise and sour cream with vegan alternatives and use nutritional yeast instead of cheese.
  • Grilled Veggie Twist: Incorporate grilled zucchini, bell peppers, or asparagus for a smoky flavor.
  • Herb-Infused Salad: Experiment with different herbs like dill or parsley for a fresh twist.

Serving Suggestions

  • Pair your Creamy Street Corn Pasta Salad with grilled chicken or steak for a hearty meal.
  • Serve alongside crispy tortilla chips and salsa for a fun, casual vibe.
  • Complement with a refreshing iced tea or a light beer.
  • For presentation, garnish with extra cilantro and lime wedges for a pop of color.

FAQs about Creamy Street Corn Pasta Salad

Can I make this Creamy Street Corn Pasta Salad ahead of time?

Absolutely! This salad tastes even better after sitting in the fridge for a few hours or overnight. Just give it a good stir before serving.

What can I substitute for cotija cheese?

If you can’t find cotija cheese, feta is a great alternative. It offers a similar creamy texture and salty flavor that complements the salad beautifully.

Is this pasta salad gluten-free?

To make a gluten-free version, simply swap the elbow macaroni for gluten-free pasta. The rest of the ingredients are naturally gluten-free!

How long will leftovers last in the fridge?

Your Creamy Street Corn Pasta Salad will stay fresh for about 3-4 days in the fridge. Just make sure to store it in an airtight container.

Can I add more vegetables to this salad?

Definitely! Feel free to toss in diced bell peppers, cucumbers, or even avocado for added crunch and flavor. The more, the merrier!

Final Thoughts

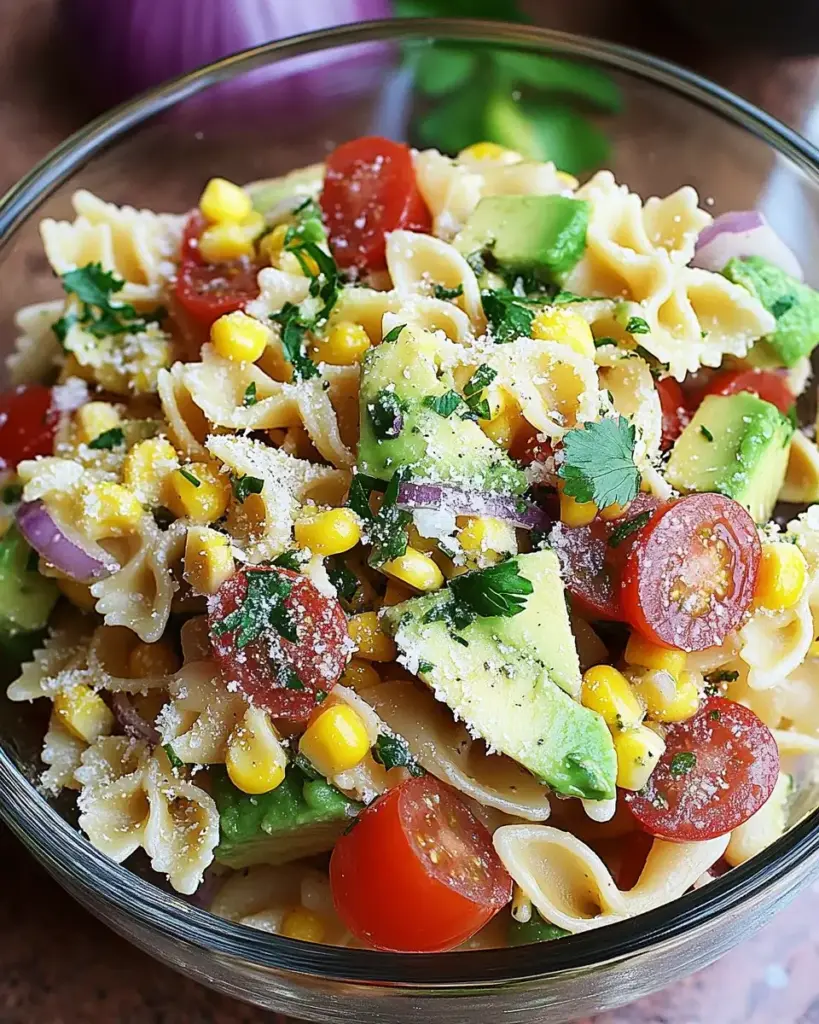
Creating this Creamy Street Corn Pasta Salad is more than just whipping up a dish; it’s about bringing people together.

The vibrant colors and flavors evoke memories of summer barbecues and laughter shared with friends.

Each bite is a reminder of the joy that simple ingredients can bring.

Whether you’re serving it at a picnic or enjoying it on a quiet evening, this salad is sure to impress.

So, roll up your sleeves, gather your loved ones, and dive into this delightful recipe.

Trust me, it’ll become a staple in your summer repertoire!

jhessica

Creamy Street Corn Pasta Salad: A Flavorful Delight!

A creamy and flavorful pasta salad featuring street corn, perfect for summer gatherings.
Prep Time 15 minutes
Cook Time 10 minutes
Total Time 55 minutes
Servings: 6 servings
Course: Salad
Cuisine: Mexican-American
Calories: 290

Ingredients
  

  • 8 ounces elbow macaroni
  • 1 cup corn kernels fresh, frozen, or canned
  • 1/2 cup cherry tomatoes halved
  • 1/4 cup red onion finely chopped
  • 1/4 cup mayonnaise
  • 1/4 cup sour cream
  • 1 tablespoon lime juice
  • 1 teaspoon chili powder
  • 1/2 teaspoon garlic powder
  • Salt and pepper to taste
  • 1/4 cup crumbled cotija cheese
  • 2 tablespoons fresh cilantro chopped

Method
 

  1. Cook the elbow macaroni according to package instructions until al dente. Drain and rinse under cold water to cool.
  2. In a large mixing bowl, combine the cooled pasta, corn, cherry tomatoes, and red onion.
  3. In a separate bowl, whisk together the mayonnaise, sour cream, lime juice, chili powder, garlic powder, salt, and pepper until smooth.
  4. Pour the dressing over the pasta mixture and toss until everything is evenly coated.
  5. Gently fold in the cotija cheese and cilantro.
  6. Cover and refrigerate for at least 30 minutes to allow the flavors to meld.
  7. Serve chilled or at room temperature, garnished with additional cilantro if desired.

Nutrition

Serving: 1servingCalories: 290kcalCarbohydrates: 35gProtein: 9gFat: 12gSaturated Fat: 3gPolyunsaturated Fat: 9gCholesterol: 15mgSodium: 300mgFiber: 2gSugar: 3g

Notes

  • For a spicier kick, add diced jalapeños to the salad.
  • You can also substitute the cotija cheese with feta cheese for a different flavor profile.

Tried this recipe?

Let us know how it was!

Irish Potato Farls: A Delicious Recipe to Try Today!

Introduction to Irish Potato Farls

Growing up, my kitchen was always filled with the comforting aroma of home-cooked meals. One dish that stood out was Irish Potato Farls. These delightful potato cakes are not just easy to make; they’re a warm hug on a plate. Perfect for a quick breakfast or a side dish that impresses at dinner, they bring a taste of Ireland right to your table. Whether you’re a seasoned cook or just starting out, this recipe is a fantastic way to enjoy a delicious, hearty meal without spending hours in the kitchen.

Why You’ll Love This Irish Potato Farls

Irish Potato Farls are a game-changer for busy weeknights. They come together in just 30 minutes, making them a quick solution for satisfying meals. The crispy exterior and fluffy interior create a delightful contrast that’s hard to resist. Plus, they’re incredibly versatile—enjoy them with butter, cheese, or even a dollop of sour cream. Trust me, once you try these farls, they’ll become a staple in your kitchen!

Ingredients for Irish Potato Farls

To whip up these delightful Irish Potato Farls, you’ll need a handful of simple ingredients that you might already have in your pantry. Here’s what you’ll gather:

  • Mashed Potatoes: The star of the show! Use leftover mashed potatoes for convenience, or make a fresh batch. They should be cooled before mixing.
  • All-Purpose Flour: This helps bind the dough together, giving the farls their structure. You can substitute with whole wheat flour for a nuttier flavor.
  • Baking Powder: A leavening agent that adds a bit of fluffiness to the farls. It’s essential for that perfect texture.
  • Salt: Just a pinch enhances the flavors of the potatoes and balances the dish.
  • Butter: Melted butter adds richness to the dough. You’ll also need extra for frying, which gives the farls that golden, crispy finish.

For those looking to jazz things up, consider these optional ingredients:

  • Cheddar Cheese: Adding shredded cheese to the dough gives a deliciously cheesy twist.
  • Herbs: Fresh chives or parsley can be mixed in for an extra burst of flavor.

Exact measurements for these ingredients are available at the bottom of the article for easy printing. Happy cooking!

How to Make Irish Potato Farls

Making Irish Potato Farls is a straightforward process that anyone can master. Follow these simple steps, and you’ll have a delicious dish ready in no time. Let’s dive into the fun of cooking!

Step 1: Prepare the Dough

Start by grabbing a large bowl. Combine your cooled mashed potatoes, all-purpose flour, baking powder, and salt. Mix everything together until a dough forms. It should be soft but not sticky. If it feels too wet, sprinkle in a bit more flour. This dough is the foundation of your Irish Potato Farls, so make sure it’s just right!

Step 2: Knead the Dough

Next, turn the dough out onto a floured surface. Gently knead it for about a minute. You want it to be smooth and pliable, not tough. This step is crucial for achieving that perfect texture. Remember, a little love goes a long way in the kitchen!

Step 3: Shape the Farls

Now it’s time to shape your farls. Divide the dough into four equal pieces. Roll each piece into a circle about ½ inch thick. Don’t stress about perfection; rustic is charming! Cut each circle into quarters to form wedges. These will be your delightful potato cakes, ready for frying.

Step 4: Fry the Farls

Heat a skillet over medium heat and add a little butter. Once it’s melted and bubbling, carefully place the potato farls in the skillet. Fry them for about 4-5 minutes on each side. You’re looking for a golden brown color and a crispy texture. The aroma will be irresistible!

Step 5: Serve Warm

Once they’re cooked, remove the farls from the skillet and keep them warm while you fry the remaining pieces. Serve them warm with a generous pat of butter or your favorite toppings. Trust me, these Irish Potato Farls will be a hit at your table!

Tips for Success

  • Use leftover mashed potatoes for a quicker prep time.
  • Don’t over-knead the dough; a minute is all you need.
  • Adjust the flour based on the moisture of your potatoes.
  • Keep the skillet at medium heat to avoid burning.
  • Experiment with toppings like sour cream or smoked salmon for a twist.

Equipment Needed

  • Large Bowl: For mixing the dough. A mixing bowl works just as well.
  • Floured Surface: A clean countertop or cutting board for kneading.
  • Skillet: A non-stick skillet is ideal, but any frying pan will do.
  • Spatula: For flipping the farls without breaking them.

Variations

  • Cheesy Farls: Mix in ½ cup of shredded cheddar cheese for a rich, cheesy flavor that melts beautifully.
  • Herb-Infused: Add fresh herbs like chives, parsley, or dill to the dough for a burst of freshness.
  • Spicy Kick: Incorporate a pinch of cayenne pepper or chopped jalapeños for a spicy twist.
  • Sweet Potato Farls: Substitute regular potatoes with sweet potatoes for a sweeter, healthier option.
  • Gluten-Free Option: Use a gluten-free flour blend to make these farls suitable for gluten-sensitive diets.

Serving Suggestions

  • Pair Irish Potato Farls with a side of crispy bacon or sausage for a hearty breakfast.
  • Serve alongside a fresh green salad for a light lunch option.
  • Top with smoked salmon and cream cheese for an elegant appetizer.
  • Enjoy with a pint of stout or a refreshing Irish cider.

FAQs about Irish Potato Farls

Can I use instant mashed potatoes for Irish Potato Farls?

While fresh mashed potatoes yield the best texture, you can use instant mashed potatoes in a pinch. Just follow the package instructions and let them cool before mixing.

How do I store leftover Irish Potato Farls?

Store any leftovers in an airtight container in the fridge for up to three days. Reheat them in a skillet for that crispy texture.

Can I freeze Irish Potato Farls?

Absolutely! Freeze the uncooked farls on a baking sheet, then transfer them to a freezer bag. They can be cooked straight from frozen; just add a couple of extra minutes to the frying time.

What toppings go well with Irish Potato Farls?

These farls are incredibly versatile! Try them with butter, sour cream, or even a sprinkle of cheese. For a twist, top with smoked salmon or sautéed mushrooms.

Are Irish Potato Farls suitable for a vegetarian diet?

Yes, Irish Potato Farls are vegetarian-friendly! They’re made with simple ingredients that fit perfectly into a vegetarian lifestyle.

Final Thoughts

Making Irish Potato Farls is more than just cooking; it’s about creating memories and sharing joy. Each bite transports you to a cozy Irish kitchen, filled with laughter and warmth. The simplicity of the ingredients allows for creativity, whether you stick to tradition or add your own twist. These farls are perfect for any occasion, from a casual breakfast to a festive gathering. I hope you find as much happiness in making and sharing this dish as I do. So roll up your sleeves, gather your loved ones, and enjoy the delightful experience of Irish Potato Farls!

jhessica

Irish Potato Farls: A Delicious Recipe to Try Today!

Irish Potato Farls are a delicious and easy-to-make potato dish that can be enjoyed warm with butter or your favorite toppings.
Prep Time 10 minutes
Cook Time 20 minutes
Total Time 30 minutes
Servings: 4 servings
Course: Side Dish
Cuisine: Irish
Calories: 180

Ingredients
  

  • 2 cups mashed potatoes prepared and cooled
  • 1 cup all-purpose flour
  • 1 teaspoon baking powder
  • ½ teaspoon salt
  • 2 tablespoons butter melted
  • Extra butter for frying

Method
 

  1. In a large bowl, combine the cooled mashed potatoes, flour, baking powder, and salt. Mix until a dough forms.
  2. On a floured surface, turn out the dough and knead gently for about 1 minute until smooth.
  3. Divide the dough into four equal pieces. Roll each piece into a circle about ½ inch thick. Cut each circle into quarters to form wedges.
  4. Heat a skillet over medium heat and add a little butter. Fry the potato farls for about 4-5 minutes on each side, or until golden brown and crispy.
  5. Remove from the skillet and keep warm while you cook the remaining farls.
  6. Serve warm with butter, or enjoy with your favorite toppings.

Nutrition

Serving: 1farlCalories: 180kcalCarbohydrates: 30gProtein: 4gFat: 6gSaturated Fat: 3gPolyunsaturated Fat: 2gCholesterol: 15mgSodium: 200mgFiber: 2gSugar: 1g

Notes

  • For a cheesy twist, add ½ cup shredded cheddar cheese to the dough before mixing.
  • Try adding herbs like chives or parsley for extra flavor.

Tried this recipe?

Let us know how it was!

Lemon Tiramisu: A Refreshing Twist on Classic Dessert

Introduction to Lemon Tiramisu

There’s something magical about desserts that can transport you back to simpler times. Lemon Tiramisu does just that, offering a refreshing twist on the classic Italian favorite. This delightful dessert is perfect for those busy evenings when you want to impress your loved ones without spending hours in the kitchen. With its zesty flavor and creamy texture, it’s a crowd-pleaser that feels both indulgent and light. Whether you’re hosting a dinner party or just treating yourself, this Lemon Tiramisu is a quick solution that brings a burst of sunshine to any occasion.

Why You’ll Love This Lemon Tiramisu

This Lemon Tiramisu is a game-changer for dessert lovers. It’s incredibly easy to whip up, taking just 20 minutes of your time. The no-bake method means you can skip the oven and still impress your guests. Plus, the bright lemon flavor cuts through the richness, making it a refreshing treat. Perfect for warm evenings or special occasions, this dessert is sure to become a favorite in your kitchen.

Ingredients for Lemon Tiramisu

Gathering the right ingredients is the first step to creating your Lemon Tiramisu masterpiece. Here’s what you’ll need:

  • Heavy cream: This is the base for your whipped topping, giving the dessert its luscious texture.
  • Mascarpone cheese: A rich Italian cheese that adds creaminess and depth to the filling.
  • Powdered sugar: This sweetens the mascarpone mixture and helps achieve that smooth consistency.
  • Vanilla extract: A splash of vanilla enhances the overall flavor, making it even more delightful.
  • Brewed espresso or strong coffee: This adds a classic tiramisu touch, balancing the lemon’s brightness.
  • Lemon juice: Freshly squeezed is best, providing that zesty kick that makes this dessert unique.
  • Lemon zest: The zest adds an aromatic burst of lemon flavor, elevating the dish.
  • Ladyfinger cookies: These sponge-like cookies soak up the espresso and form the layers of your tiramisu.
  • Cocoa powder: A light dusting on top adds a touch of elegance and a hint of chocolate flavor.

For those looking to lighten things up, consider substituting half of the heavy cream with Greek yogurt. If you want to kick it up a notch, a splash of limoncello in the espresso can add a delightful twist. Exact measurements for these ingredients can be found at the bottom of the article, ready for printing!

How to Make Lemon Tiramisu

Creating this Lemon Tiramisu is a breeze, and I promise it will be worth every minute. Follow these simple steps, and you’ll have a stunning dessert that will wow your family and friends.

Step 1: Whip the Cream

Start by pouring the heavy cream into a large mixing bowl. Using an electric mixer, whip the cream until soft peaks form. This is where the magic begins! Gradually add the powdered sugar and vanilla extract, continuing to whip until you reach stiff peaks. The cream should be thick and fluffy, like a cloud of deliciousness.

Step 2: Prepare the Mascarpone Mixture

In another bowl, combine the mascarpone cheese, lemon juice, and lemon zest. Mix gently until everything is well blended. The lemon zest will add a fragrant aroma that will make your kitchen smell heavenly. Now, carefully fold the whipped cream into the mascarpone mixture. This step is crucial; you want to keep that airy texture intact.

Step 3: Soak the Ladyfingers

Next, grab your brewed espresso or strong coffee. Dip each ladyfinger into the coffee for about 2 seconds. You want them soaked but not soggy. If you soak them too long, they’ll fall apart. The coffee adds a rich depth that balances the lemon’s brightness beautifully.

Step 4: Layer the Ingredients

Now it’s time to assemble your Lemon Tiramisu! In a 9×9-inch dish, layer half of the soaked ladyfingers on the bottom. Spread half of the lemon mascarpone mixture over the ladyfingers. Repeat this process with the remaining ladyfingers and mascarpone mixture. Each layer should be smooth and even, creating a beautiful contrast of colors.

Step 5: Chill and Serve

Cover the dish with plastic wrap and refrigerate for at least 4 hours, or overnight if you can wait. This chilling time allows the flavors to meld together, creating a harmonious dessert. Before serving, dust the top with cocoa powder for that classic tiramisu finish. Slice, serve, and watch your guests’ faces light up with delight!

Tips for Success

  • Use fresh lemon juice and zest for the best flavor.
  • Don’t over-soak the ladyfingers; a quick dip is all you need.
  • For a creamier texture, let the mascarpone sit at room temperature before mixing.
  • Chill the dessert overnight for enhanced flavor.
  • Experiment with different coffee types for unique flavor profiles.

Equipment Needed

  • Mixing bowls: A set of various sizes will help you combine ingredients easily.
  • Electric mixer: A hand mixer works well, but a stand mixer can save time.
  • 9×9-inch dish: Any similar-sized dish will do for layering your tiramisu.
  • Spatula: A rubber spatula is perfect for folding and spreading.
  • Plastic wrap: Essential for covering your dessert while it chills.

Variations

  • Berry Bliss: Add layers of fresh berries like strawberries or blueberries for a fruity twist.
  • Chocolate Lovers: Incorporate cocoa powder into the mascarpone mixture for a chocolatey flavor.
  • Nutty Delight: Sprinkle crushed nuts, like pistachios or almonds, between the layers for added crunch.
  • Gluten-Free Option: Use gluten-free ladyfingers to make this dessert suitable for those with dietary restrictions.
  • Vegan Version: Substitute heavy cream with coconut cream and use a plant-based mascarpone alternative.

Serving Suggestions

  • Pair your Lemon Tiramisu with a light, fruity dessert wine like Moscato for a delightful contrast.
  • Serve alongside fresh berries for a pop of color and added freshness.
  • Garnish with mint leaves for an elegant touch.
  • Consider a scoop of lemon sorbet for a refreshing palate cleanser.

FAQs about Lemon Tiramisu

Can I make Lemon Tiramisu ahead of time?

Absolutely! In fact, making it a day in advance enhances the flavors. Just cover it well and refrigerate until you’re ready to serve.

What can I substitute for mascarpone cheese?

If you can’t find mascarpone, a blend of cream cheese and heavy cream can work in a pinch. Just mix equal parts for a similar texture.

Is Lemon Tiramisu suitable for kids?

Yes! This dessert is kid-friendly, but you might want to skip the coffee or use decaf to keep it caffeine-free.

How long does Lemon Tiramisu last in the fridge?

It can last up to 3 days in the fridge. Just make sure it’s covered to keep it fresh and delicious.

Can I use flavored coffee for a twist?

Definitely! Flavored coffee can add an exciting dimension to your Lemon Tiramisu. Try vanilla or hazelnut for a unique taste!

Final Thoughts

Creating this Lemon Tiramisu is more than just making a dessert; it’s about crafting a moment of joy. Each layer tells a story, from the zesty lemon that dances on your palate to the creamy mascarpone that wraps you in comfort. This dessert is perfect for sharing, sparking laughter and conversation around the table. Whether it’s a special occasion or a simple weeknight treat, this Lemon Tiramisu brings a refreshing twist that brightens any gathering. So, roll up your sleeves, embrace the process, and let this delightful dessert become a cherished part of your culinary adventures.

jhessica

Lemon Tiramisu: A Refreshing Twist on Classic Dessert

A refreshing twist on the classic tiramisu, infused with lemon for a zesty flavor.
Prep Time 20 minutes
Total Time 4 hours 20 minutes
Servings: 8 servings
Course: Dessert
Cuisine: Italian
Calories: 320

Ingredients
  

  • 2 cups heavy cream
  • 1 cup mascarpone cheese
  • 3/4 cup powdered sugar
  • 1 teaspoon vanilla extract
  • 1 cup brewed espresso or strong coffee cooled
  • 1/4 cup lemon juice
  • 1 tablespoon lemon zest
  • 24 ladyfinger cookies
  • Cocoa powder for dusting

Method
 

  1. In a large mixing bowl, whip the heavy cream until soft peaks form. Gradually add the powdered sugar and vanilla extract, continuing to whip until stiff peaks form.
  2. In another bowl, combine the mascarpone cheese, lemon juice, and lemon zest. Gently fold the whipped cream into the mascarpone mixture until fully combined and smooth.
  3. Dip each ladyfinger into the cooled espresso for about 2 seconds, ensuring they are soaked but not soggy.
  4. In a 9×9-inch dish, layer half of the soaked ladyfingers on the bottom. Spread half of the lemon mascarpone mixture over the ladyfingers.
  5. Repeat the layers with the remaining ladyfingers and the rest of the mascarpone mixture.
  6. Cover the dish with plastic wrap and refrigerate for at least 4 hours, or overnight for best results.
  7. Before serving, dust the top with cocoa powder for garnish.

Nutrition

Serving: 1sliceCalories: 320kcalCarbohydrates: 25gProtein: 4gFat: 24gSaturated Fat: 15gPolyunsaturated Fat: 9gCholesterol: 80mgSodium: 50mgFiber: 1gSugar: 25g

Notes

  • For a lighter version, substitute half of the heavy cream with Greek yogurt.
  • For added flavor, consider incorporating a splash of limoncello into the espresso before dipping the ladyfingers.

Tried this recipe?

Let us know how it was!

Jello Fruit Roll-Ups: A Fun and Easy Homemade Treat!

Introduction to Jello Fruit Roll-Ups

Growing up, I remember the thrill of unrolling a colorful fruit snack, the sweet aroma wafting through the air. Jello Fruit Roll-Ups bring back those nostalgic moments, and they’re just as fun to make as they are to eat! This recipe is perfect for busy days when you need a quick, delightful treat that can impress your loved ones. With just a few simple ingredients, you can whip up these homemade snacks that are not only tasty but also customizable. Let’s dive into the world of Jello Fruit Roll-Ups and create some delicious memories together!

Why You’ll Love This Jello Fruit Roll-Ups

These Jello Fruit Roll-Ups are a game changer for anyone looking for a quick and easy snack. They come together in just minutes, making them perfect for busy weeknights or last-minute gatherings. Plus, the vibrant colors and fruity flavors are sure to please both kids and adults alike. You can customize them to fit your taste, ensuring every bite is a delightful surprise. Who wouldn’t love that?

Ingredients for Jello Fruit Roll-Ups

Creating your own Jello Fruit Roll-Ups is a breeze with just a handful of ingredients. Here’s what you’ll need:

  • Boiling water: This helps dissolve the gelatin, creating that perfect chewy texture.
  • Cold water: Balances the temperature and helps set the mixture.
  • Flavored gelatin: Choose your favorite flavor for a burst of fruity goodness. Think strawberry, grape, or even blue raspberry!
  • Unflavored gelatin: This adds structure, ensuring your roll-ups hold together nicely.
  • Lemon juice: A splash of acidity brightens the flavors and adds a refreshing zing.
  • Honey or agave syrup (optional): Sweeten to your liking! This is great if you prefer a touch of natural sweetness.

Feel free to get creative! You can blend in pureed fruits like strawberries or mango for an extra fruity twist. For exact measurements, check the bottom of the article where you can find everything available for printing.

How to Make Jello Fruit Roll-Ups

Making Jello Fruit Roll-Ups is as easy as pie! Follow these simple steps, and you’ll have a colorful treat ready to enjoy. Let’s get started!

Step 1: Combine Gelatin Mixtures

In a mixing bowl, pour in the boiling water. Add both the flavored and unflavored gelatin. Stir it all together until everything is completely dissolved. This is where the magic begins! The vibrant colors will start to come alive.

Step 2: Add Cold Ingredients

Next, it’s time to cool things down. Add the cold water and lemon juice to the gelatin mixture. If you’re using honey or agave syrup, toss that in too. Stir well to combine everything. This step ensures your roll-ups have a balanced flavor and the right consistency.

Step 3: Pour into Dish

Now, grab a 9×13-inch baking dish or a silicone mold. Pour the gelatin mixture into the dish, spreading it evenly. If you’re using a silicone mold, it’ll make removing the roll-ups a breeze later on. Just imagine the fun shapes you can create!

Step 4: Refrigerate

Pop the dish into the refrigerator. Let it chill for about 2 to 4 hours, or until the gelatin is fully set. This is the hardest part—waiting! But trust me, it’s worth it. You’ll be rewarded with a delightful treat.

Step 5: Cut and Store

Once set, take the dish out of the fridge. Cut the gelatin into strips or your desired shapes. For easy storage and serving, roll the strips in parchment paper or plastic wrap. Now, you have your homemade Jello Fruit Roll-Ups ready to enjoy!

Tips for Success

  • Make sure the boiling water is truly boiling for the best gelatin dissolve.
  • Experiment with different flavored gelatins to create unique combinations.
  • For a fun twist, add a pinch of salt to enhance the flavors.
  • Use a sharp knife or kitchen scissors for clean cuts.
  • Store in an airtight container to keep them fresh longer.

Equipment Needed

  • Mixing bowl: A standard bowl works, but a large measuring cup can also do the trick.
  • Whisk or spoon: Use either to stir the gelatin mixture until fully dissolved.
  • Baking dish or silicone mold: A 9×13-inch dish is perfect, but any shallow container will suffice.
  • Knife or kitchen scissors: For cutting the roll-ups into fun shapes.

Variations of Jello Fruit Roll-Ups

  • Fruit Purees: Blend in pureed fruits like strawberries, mangoes, or peaches for a natural flavor boost.
  • Natural Sweeteners: Swap honey or agave syrup for maple syrup or stevia for a different sweetness profile.
  • Herbal Infusions: Add a hint of fresh mint or basil to the mixture for a refreshing twist.
  • Colorful Layers: Create layered roll-ups by pouring different flavored mixtures one after the other, allowing each layer to set before adding the next.
  • Vegan Option: Use agar-agar instead of gelatin for a plant-based alternative that still delivers that chewy texture.

Serving Suggestions for Jello Fruit Roll-Ups

  • Pair with fresh fruit like strawberries or blueberries for a colorful snack platter.
  • Serve alongside yogurt or whipped cream for a delightful dip.
  • For a fun presentation, stack roll-ups in a clear glass jar.
  • Enjoy with a refreshing lemonade or iced tea for a perfect summer treat.

FAQs about Jello Fruit Roll-Ups

Can I use sugar-free gelatin for Jello Fruit Roll-Ups?

Absolutely! Sugar-free gelatin works just as well. You’ll still get that delightful chewy texture without the extra sugar. Just keep in mind that the flavor might be a bit different, but it’s a great option for those watching their sugar intake.

How long do homemade Jello Fruit Roll-Ups last?

When stored in an airtight container, your Jello Fruit Roll-Ups can last up to a week in the refrigerator. Just make sure they’re well-wrapped to keep them fresh and tasty!

Can I make these roll-ups in advance for a party?

Definitely! These roll-ups are perfect for prepping ahead of time. Make them a day or two before your event, and they’ll be ready to impress your guests with their vibrant colors and flavors.

What’s the best way to cut the roll-ups?

Using a sharp knife or kitchen scissors is key for clean cuts. If you want fun shapes, consider using cookie cutters! Just make sure to cut them after they’ve fully set for the best results.

Can I add other flavors or ingredients to the mix?

For sure! Feel free to get creative. You can mix in pureed fruits, herbs, or even a splash of juice for added flavor. The possibilities are endless, making these roll-ups a fun canvas for your culinary creativity!

Final Thoughts

Creating Jello Fruit Roll-Ups is more than just a fun kitchen project; it’s a chance to relive childhood memories while making new ones. The vibrant colors and fruity flavors bring joy to snack time, whether you’re sharing them with family or enjoying them solo. Plus, the customization options mean you can tailor each batch to your taste. With just a few simple ingredients and steps, you can whip up a delightful treat that’s sure to impress. So, roll up your sleeves and dive into this colorful adventure—your taste buds will thank you!

jhessica

Jello Fruit Roll-Ups: A Fun and Easy Homemade Treat!

A fun and easy homemade treat, Jello Fruit Roll-Ups are a colorful and delicious snack that can be customized with various flavors.
Prep Time 10 minutes
Servings: 10 servings
Course: Snack
Cuisine: American
Calories: 30

Ingredients
  

  • 1 cup boiling water
  • 1 cup cold water
  • 1 package 3 oz flavored gelatin (any color)
  • 1 package 3 oz unflavored gelatin
  • 1 tablespoon lemon juice
  • 1 tablespoon honey or agave syrup optional

Method
 

  1. In a mixing bowl, combine the boiling water and both the flavored and unflavored gelatin. Stir until completely dissolved.
  2. Add the cold water, lemon juice, and honey or agave syrup (if using) to the mixture. Stir well to combine.
  3. Pour the mixture into a 9×13-inch baking dish or a silicone mold for easier removal.
  4. Refrigerate for about 2-4 hours, or until the gelatin is fully set.
  5. Once set, remove from the refrigerator and cut into strips or desired shapes.
  6. Roll the strips in parchment paper or plastic wrap for easy storage and serving.

Nutrition

Serving: 1roll-upCalories: 30kcalCarbohydrates: 7g

Notes

  • For a fruity twist, blend in pureed fruit like strawberries or mango before pouring the mixture into the dish.
  • Experiment with different flavored gelatins to create a rainbow of colors and flavors for special occasions.

Tried this recipe?

Let us know how it was!

Breakfast Quesadillas: A Delicious Morning Treat!

Introduction to Breakfast Quesadillas

There’s something magical about the morning ritual of cooking. As the sun peeks through the kitchen window, I often find myself craving a hearty breakfast. That’s where breakfast quesadillas come in. They’re not just a meal; they’re a warm hug on a plate. Perfect for busy mornings or lazy weekends, these delicious creations are quick to whip up and can be customized to suit any taste. Whether you’re feeding a crowd or just yourself, breakfast quesadillas are a delightful way to start the day. Trust me, once you try them, you’ll wonder how you ever lived without them!

Why You’ll Love This Breakfast Quesadillas

Breakfast quesadillas are the ultimate solution for anyone juggling a busy morning. They come together in just 25 minutes, making them a quick and satisfying option. The combination of fluffy eggs, melted cheese, and your choice of savory fillings creates a flavor explosion that’s hard to resist. Plus, they’re versatile! You can easily swap ingredients based on what you have on hand, ensuring every bite is fresh and exciting.

Ingredients for Breakfast Quesadillas

Gathering the right ingredients is key to making delicious breakfast quesadillas. Here’s what you’ll need:

  • Flour tortillas: These are the foundation of your quesadilla. They provide a soft, chewy base that holds everything together.
  • Shredded cheddar cheese: This melty goodness adds richness and flavor. Feel free to experiment with other cheeses like pepper jack for a spicy twist.
  • Scrambled eggs: The star of the show! Eggs bring protein and fluffiness, making your quesadilla hearty and satisfying.
  • Breakfast sausage or bacon: For those who love a meaty kick, these options add savory depth. You can also use diced ham or turkey for a lighter choice.
  • Bell peppers: These colorful veggies add crunch and sweetness. Choose any color you like—red, green, or yellow all work beautifully.
  • Diced onions: Onions bring a savory flavor that complements the other ingredients. Sauté them until they’re soft for the best taste.
  • Olive oil: A splash of this oil helps sauté the veggies and adds a touch of healthy fat.
  • Salt and pepper: Simple seasonings that enhance the flavors of your ingredients. Don’t skip these!
  • Sour cream and salsa: Optional, but they make great dipping sauces that add creaminess and zest.

For those looking to mix things up, consider adding diced jalapeños for heat or black beans for a vegetarian option. You can find the exact quantities for each ingredient at the bottom of the article, ready for printing!

How to Make Breakfast Quesadillas

Creating breakfast quesadillas is a straightforward process that anyone can master. Follow these simple steps, and you’ll have a delicious meal ready in no time!

Step 1: Sauté the Vegetables

Start by heating a skillet over medium heat and adding a tablespoon of olive oil. Once the oil shimmers, toss in the diced onions and bell peppers. Sauté them for about 3-4 minutes until they soften and become fragrant. You want them tender but still with a bit of crunch. Season with salt and pepper to enhance their natural flavors. This step sets the stage for a flavorful filling!

Step 2: Scramble the Eggs

In a bowl, crack open your eggs and whisk them together until they’re well combined. Season with a pinch of salt and pepper. Pour the eggs into the skillet with the sautéed veggies. Stir gently, allowing the eggs to cook evenly. Keep an eye on them; you want fluffy, soft curds. Once they’re fully cooked, remove the skillet from heat. This fluffy egg mixture is the heart of your breakfast quesadillas!

Step 3: Assemble the Quesadilla

Lay one tortilla flat on a clean surface. Sprinkle half of the shredded cheddar cheese evenly over the tortilla. Next, spread the scrambled egg mixture over the cheese, followed by your choice of crumbled sausage or bacon. Top it off with the remaining cheese, which will help everything stick together. Place the second tortilla on top and press down gently. This layering creates a delicious melty center!

Step 4: Cook the Quesadilla

Wipe the skillet clean and return it to medium heat. Carefully place the assembled quesadilla in the skillet. Cook for about 3-4 minutes until the bottom is golden brown and the cheese starts to melt. Use a spatula to flip the quesadilla gently, cooking the other side for another 3-4 minutes. You’re aiming for a crispy exterior and gooey cheese inside. The aroma will be irresistible!

Step 5: Serve and Enjoy

Once cooked, remove the quesadilla from the skillet and let it cool for a minute. This cooling time helps the cheese set a bit, making it easier to slice. Cut it into wedges and serve with sour cream and salsa for dipping. Enjoy the delightful crunch and the burst of flavors in every bite!

Tips for Success

  • Use fresh ingredients for the best flavor. Fresh veggies and quality cheese make a difference.
  • Don’t overcrowd the skillet when sautéing. This ensures even cooking and prevents steaming.
  • Experiment with different cheeses for unique flavors. Try mozzarella or feta for a twist!
  • Let the quesadilla cool slightly before slicing. This helps keep the filling intact.
  • Make extra and freeze for quick breakfasts later. Just reheat in a skillet or microwave!

Equipment Needed

  • Skillet: A non-stick skillet works best, but any frying pan will do.
  • Spatula: A sturdy spatula is essential for flipping your quesadilla.
  • Mixing bowl: Use any bowl for whisking your eggs.
  • Knife and cutting board: For chopping veggies and slicing the quesadilla.

Variations

  • Spicy Kick: Add diced jalapeños or a splash of hot sauce to the egg mixture for an extra kick.
  • Vegetarian Delight: Swap the meat for black beans, spinach, or mushrooms for a hearty vegetarian option.
  • Cheesy Goodness: Mix different cheeses like pepper jack, gouda, or even cream cheese for a creamy texture.
  • Breakfast Burrito: Use larger tortillas and wrap the filling tightly for a breakfast burrito instead of a quesadilla.
  • Herb Infusion: Add fresh herbs like cilantro or chives to the egg mixture for a burst of freshness.

Serving Suggestions

  • Fresh Fruit: Serve with a side of sliced avocado, berries, or citrus for a refreshing contrast.
  • Drinks: Pair with a hot cup of coffee or a refreshing glass of orange juice.
  • Presentation: Garnish with fresh herbs or a sprinkle of paprika for a pop of color.

FAQs about Breakfast Quesadillas

Can I make breakfast quesadillas ahead of time?

Absolutely! You can prepare the filling in advance and store it in the fridge. When you’re ready to eat, just assemble and cook the quesadillas. This makes for a quick breakfast option on busy mornings!

What can I use instead of flour tortillas?

If you’re looking for alternatives, corn tortillas work well for a gluten-free option. You can also try whole wheat tortillas for a healthier twist. Just keep in mind that the texture may vary slightly.

How do I store leftovers?

Leftover breakfast quesadillas can be stored in an airtight container in the fridge for up to three days. Reheat them in a skillet or microwave for a quick meal. They taste just as good the next day!

Can I freeze breakfast quesadillas?

Yes! To freeze, assemble the quesadillas but don’t cook them. Wrap each one tightly in plastic wrap and place them in a freezer bag. When you’re ready to enjoy, just cook them straight from the freezer!

What are some good dipping sauces for breakfast quesadillas?

Sour cream and salsa are classic choices, but you can also try guacamole, hot sauce, or even a zesty yogurt dip. These add an extra layer of flavor to your breakfast quesadillas!

Final Thoughts

Breakfast quesadillas are more than just a meal; they’re a canvas for creativity and comfort. Each bite is a delightful blend of flavors and textures, making mornings feel special. Whether you’re enjoying them solo or sharing with family, these quesadillas bring joy to the breakfast table. They’re quick to prepare, easy to customize, and perfect for any occasion. So, the next time you find yourself in a breakfast rut, remember this recipe. It’s a simple way to elevate your mornings and start the day with a smile. Trust me, your taste buds will thank you!

jhessica

Breakfast Quesadillas: A Delicious Morning Treat!

A delicious and hearty breakfast option featuring scrambled eggs, cheese, and your choice of meat or vegetables, all wrapped in a crispy tortilla.
Prep Time 10 minutes
Cook Time 15 minutes
Total Time 25 minutes
Servings: 2 servings
Course: Breakfast
Cuisine: Mexican
Calories: 450

Ingredients
  

  • 2 large flour tortillas
  • 1 cup shredded cheddar cheese
  • 1 cup scrambled eggs about 4 large eggs
  • 1/2 cup cooked and crumbled breakfast sausage or diced cooked bacon
  • 1/4 cup diced bell peppers any color
  • 1/4 cup diced onions
  • 1 tablespoon olive oil
  • Salt and pepper to taste
  • Sour cream and salsa for serving optional

Method
 

  1. In a skillet over medium heat, add olive oil. Once hot, add diced onions and bell peppers. Sauté for about 3-4 minutes until softened. Season with salt and pepper.
  2. In a bowl, whisk the eggs and season with salt and pepper. Pour the eggs into the skillet with the vegetables and scramble until fully cooked. Remove from heat.
  3. Lay one tortilla flat on a clean surface. Sprinkle half of the cheddar cheese evenly over the tortilla.
  4. Spread the scrambled egg mixture over the cheese, then add the crumbled sausage or bacon on top. Sprinkle the remaining cheese over the filling.
  5. Place the second tortilla on top and press down gently.
  6. Wipe the skillet clean and return it to medium heat. Carefully place the quesadilla in the skillet. Cook for about 3-4 minutes until the bottom is golden brown and the cheese begins to melt.
  7. Carefully flip the quesadilla using a spatula and cook for another 3-4 minutes on the other side until golden brown and the cheese is fully melted.
  8. Remove from the skillet and let it cool for a minute before slicing into wedges. Serve with sour cream and salsa if desired.

Nutrition

Serving: 1quesadillaCalories: 450kcalCarbohydrates: 30gProtein: 25gFat: 30gSaturated Fat: 10gPolyunsaturated Fat: 15gCholesterol: 200mgSodium: 800mgFiber: 2gSugar: 2g

Notes

  • For a spicier kick, add diced jalapeños to the filling.
  • You can substitute the cheddar cheese with pepper jack for extra flavor.
  • For a vegetarian option, replace the sausage or bacon with black beans or additional vegetables.

Tried this recipe?

Let us know how it was!

Crack Breakfast Sliders with Bacon, Egg, and Cheese Delight!

Introduction to Crack Breakfast Sliders with Bacon, Egg, and Cheese

There’s something magical about breakfast sliders, especially when they’re packed with bacon, egg, and cheese. These Crack Breakfast Sliders with Bacon, Egg, and Cheese are not just a meal; they’re a warm hug on a plate. Whether you’re rushing out the door or hosting a weekend brunch, these sliders are the perfect solution. They’re quick to whip up, satisfying, and sure to impress your loved ones. Trust me, once you take a bite, you’ll understand why they’re called “crack” – they’re simply addictive!

Why You’ll Love This Crack Breakfast Sliders with Bacon, Egg, and Cheese

These Crack Breakfast Sliders with Bacon, Egg, and Cheese are a game-changer for busy mornings. They come together in just 30 minutes, making them a breeze to prepare. The combination of crispy bacon, fluffy eggs, and gooey cheese creates a flavor explosion that will have everyone coming back for seconds. Plus, they’re perfect for meal prep, so you can enjoy a delicious breakfast all week long!

Ingredients for Crack Breakfast Sliders with Bacon, Egg, and Cheese

Gathering the right ingredients is the first step to creating these delightful Crack Breakfast Sliders with Bacon, Egg, and Cheese. Here’s what you’ll need:

  • Slider rolls: These are the foundation of your sliders. Choose soft, fluffy rolls for the best texture.
  • Bacon: Crispy bacon adds a savory crunch. Feel free to swap in turkey bacon for a lighter option.
  • Large eggs: The star of the show! Eggs provide protein and creaminess, making the sliders satisfying.
  • Shredded cheddar cheese: This melty goodness brings everything together. You can also experiment with pepper jack for a spicy kick.
  • Milk: A splash of milk in the eggs makes them fluffy. Any milk will do, but whole milk gives the richest flavor.
  • Salt and black pepper: Essential seasonings that enhance the flavors of the eggs and bacon.
  • Butter: Used for cooking the eggs, it adds richness and prevents sticking.
  • Chopped fresh chives (optional): A sprinkle of chives adds a pop of color and a mild onion flavor, elevating your sliders.

For exact measurements, check the bottom of the article where you can find everything listed for easy printing. Happy cooking!

How to Make Crack Breakfast Sliders with Bacon, Egg, and Cheese

Creating these Crack Breakfast Sliders with Bacon, Egg, and Cheese is a straightforward process that anyone can master. Follow these simple steps, and you’ll have a delicious breakfast ready in no time!

Step 1: Preheat the Oven

Start by preheating your oven to 350°F. Preheating is crucial because it ensures even cooking. You want those sliders to bake perfectly, with the cheese melting just right and the tops turning golden brown.

Step 2: Prepare the Egg Mixture

In a large bowl, whisk together the eggs, milk, salt, and pepper. Make sure everything is well combined. This mixture is the heart of your sliders, so don’t rush it! The milk will help make the eggs fluffy, giving you that perfect texture.

Step 3: Cook the Eggs

Next, melt the butter in a skillet over medium heat. Pour in your egg mixture and gently stir. Cook until the eggs are just set but still slightly soft, about 3-4 minutes. You want them creamy, not dry. Remember, they’ll continue to cook in the oven!

Step 4: Assemble the Sliders

Now it’s time to layer your sliders. Slice the slider rolls in half horizontally and place the bottom halves in a greased 9×13-inch baking dish. Layer the crispy bacon evenly over the rolls, followed by the scrambled eggs. Finally, sprinkle the shredded cheddar cheese on top before placing the top halves of the rolls over everything.

Step 5: Bake the Sliders

Cover the baking dish with aluminum foil and pop it in the oven for 15 minutes. This helps steam the sliders, keeping them moist. After that, remove the foil and bake for an additional 5-10 minutes. Keep an eye on them until the cheese is melted and the tops are golden brown.

Step 6: Serve and Enjoy

Once they’re out of the oven, let the sliders cool for a few minutes. This helps the cheese set a bit. If you like, sprinkle some chopped chives on top for a fresh touch. Now, dig in and enjoy your delicious Crack Breakfast Sliders with Bacon, Egg, and Cheese!

Tips for Success

  • Use fresh ingredients for the best flavor. Fresh eggs and quality bacon make a difference.
  • Don’t overcook the eggs in the skillet; they’ll finish cooking in the oven.
  • Experiment with different cheeses like gouda or mozzarella for a unique twist.
  • For extra crunch, add a layer of crispy hash browns before the eggs.
  • Make a double batch and freeze leftovers for quick breakfasts later!

Equipment Needed

  • Baking dish: A 9×13-inch dish works best, but any oven-safe dish will do.
  • Skillet: A non-stick skillet makes cooking the eggs easier.
  • Whisk: Essential for mixing the egg mixture; a fork can work in a pinch.
  • Spatula: Great for stirring the eggs and serving the sliders.

Variations of Crack Breakfast Sliders with Bacon, Egg, and Cheese

  • Veggie Delight: Swap out the bacon for sautéed spinach, mushrooms, and bell peppers for a hearty vegetarian option.
  • Spicy Kick: Add jalapeños or a dash of hot sauce to the egg mixture for a fiery twist.
  • Herbed Up: Mix in fresh herbs like basil or parsley with the eggs for a burst of flavor.
  • Cheese Lovers: Combine different cheeses like feta, gouda, or pepper jack for a cheesy extravaganza.
  • Gluten-Free: Use gluten-free slider rolls to make this dish suitable for those with gluten sensitivities.

Serving Suggestions for Crack Breakfast Sliders with Bacon, Egg, and Cheese

  • Fresh Fruit: Serve with a side of mixed berries or sliced melons for a refreshing contrast.
  • Coffee or Tea: Pair with a strong cup of coffee or herbal tea to kickstart your morning.
  • Presentation: Arrange sliders on a platter and garnish with fresh herbs for a pop of color.

FAQs about Crack Breakfast Sliders with Bacon, Egg, and Cheese

Can I make Crack Breakfast Sliders with Bacon, Egg, and Cheese ahead of time?

Absolutely! You can prepare the sliders the night before and store them in the fridge. Just cover the baking dish tightly with foil. In the morning, pop them in the oven to warm up. They’ll still taste fresh and delicious!

What can I substitute for bacon in this recipe?

If bacon isn’t your thing, turkey bacon or sausage works great. You can even go meatless by using sautéed veggies like mushrooms and spinach for a hearty alternative.

How do I store leftovers?

Leftover sliders can be stored in an airtight container in the fridge for up to three days. Reheat them in the oven or microwave before serving. They make for a quick breakfast or snack!

Can I freeze these sliders?

Yes! These Crack Breakfast Sliders freeze well. Just wrap them individually in plastic wrap and place them in a freezer bag. When you’re ready to eat, thaw them overnight in the fridge and reheat in the oven.

What’s the best way to serve these sliders?

These sliders shine at brunch or as a game-day snack. Serve them with fresh fruit, a side of crispy hash browns, or a zesty salsa for dipping. They’re sure to be a hit!

Final Thoughts

Making Crack Breakfast Sliders with Bacon, Egg, and Cheese is more than just cooking; it’s about creating moments. The aroma of sizzling bacon and melting cheese fills the kitchen, inviting everyone to gather around. These sliders are perfect for busy mornings or leisurely brunches, bringing joy to the table. Each bite is a delightful combination of flavors and textures that can brighten anyone’s day. Whether you’re sharing them with family or enjoying them solo, these sliders are sure to become a cherished recipe in your home. So, roll up your sleeves and dive into this delicious adventure!

jhessica

Crack Breakfast Sliders with Bacon, Egg, and Cheese Delight!

Delicious breakfast sliders filled with bacon, egg, and cheese, perfect for a quick and satisfying meal.
Prep Time 10 minutes
Cook Time 20 minutes
Total Time 30 minutes
Servings: 8 servings
Course: Breakfast
Cuisine: American
Calories: 290

Ingredients
  

  • 8 slider rolls
  • 8 slices of cooked bacon
  • 8 large eggs
  • 1 cup shredded cheddar cheese
  • 1/4 cup milk
  • 1/2 teaspoon salt
  • 1/4 teaspoon black pepper
  • 1 tablespoon butter
  • 1 tablespoon chopped fresh chives optional

Method
 

  1. Preheat the oven to 350°F.
  2. In a large bowl, whisk together the eggs, milk, salt, and pepper until well combined.
  3. In a skillet, melt the butter over medium heat. Pour in the egg mixture and cook, stirring gently, until the eggs are just set but still slightly soft, about 3-4 minutes. Remove from heat.
  4. Slice the slider rolls in half horizontally. Place the bottom halves in a greased 9×13-inch baking dish.
  5. Layer the cooked bacon evenly over the rolls, followed by the scrambled eggs.
  6. Sprinkle the shredded cheddar cheese on top, then place the top halves of the rolls over the cheese.
  7. Cover the baking dish with aluminum foil and bake for 15 minutes.
  8. Remove the foil and bake for an additional 5-10 minutes, or until the cheese is melted and the tops are golden brown.
  9. Remove from the oven and let cool for a few minutes. If desired, sprinkle with chopped chives before serving.

Nutrition

Serving: 1sliderCalories: 290kcalCarbohydrates: 20gProtein: 14gFat: 18gSaturated Fat: 7gPolyunsaturated Fat: 9gCholesterol: 210mgSodium: 600mgFiber: 1gSugar: 1g

Notes

  • For extra flavor, try adding sautéed bell peppers or onions to the scrambled eggs.
  • You can also substitute turkey bacon or sausage for a different protein option.

Tried this recipe?

Let us know how it was!

Creamy Summer Corn Soup: A Delicious Recipe to Try!

Introduction to Creamy Summer Corn Soup

Summer days bring a bounty of fresh corn, and what better way to celebrate than with a bowl of creamy summer corn soup? This dish is like a warm hug on a sunny afternoon, perfect for those busy days when you want something quick yet satisfying. I remember my first taste of corn soup at a family picnic, and it instantly became a favorite. With just a handful of ingredients, you can whip up a delightful meal that impresses your loved ones and nourishes your soul. Let’s dive into this delicious recipe that captures the essence of summer!

Why You’ll Love This Creamy Summer Corn Soup

This creamy summer corn soup is a game-changer for your warm-weather meals. It’s incredibly easy to make, taking just 40 minutes from start to finish. The taste? Pure bliss! Each spoonful bursts with the sweetness of fresh corn, making it a delightful treat. Plus, it’s versatile enough to serve as a light lunch or a starter for dinner. You’ll find yourself reaching for this recipe again and again!

Ingredients for Creamy Summer Corn Soup

Gathering the right ingredients is the first step to creating a delicious creamy summer corn soup. Here’s what you’ll need:

  • Fresh corn kernels: The star of the show! Sweet, juicy corn brings a burst of flavor. Aim for about 6-8 ears of corn for the best taste.
  • Medium onion: Diced onion adds depth and sweetness. It’s the aromatic base that enhances the overall flavor.
  • Garlic: Minced garlic infuses the soup with a warm, savory aroma. Just a couple of cloves will do the trick.
  • Vegetable broth: This forms the soup’s foundation. Choose a good-quality broth for a rich flavor, or make your own for an extra touch.
  • Heavy cream: For that luscious, creamy texture. It makes the soup indulgent and satisfying. You can substitute half with coconut milk for a lighter version.
  • Olive oil: Used for sautéing the onions and garlic. It adds a lovely richness and helps to bring out the flavors.
  • Salt and black pepper: Essential seasonings that enhance the natural sweetness of the corn. Adjust to your taste.
  • Cayenne pepper (optional): A pinch adds a subtle kick. If you like a bit of heat, this is your secret weapon!
  • Fresh basil or chives: These herbs make for a beautiful garnish, adding a pop of color and fresh flavor.

For exact measurements, check the bottom of the article where you can find everything listed for easy printing. Happy cooking!

How to Make Creamy Summer Corn Soup

Now that you have your ingredients ready, let’s get cooking! This creamy summer corn soup comes together in just a few simple steps. Follow along, and you’ll have a delicious bowl of soup in no time.

Step 1: Sauté the Aromatics

Start by heating the olive oil in a large pot over medium heat. Once it’s shimmering, toss in the diced onion. Sauté for about 5 minutes until the onion turns translucent. The aroma will fill your kitchen, making your mouth water. Add the minced garlic and cook for another minute. This step builds a flavorful base for your soup.

Step 2: Add the Corn

Next, it’s time to add the fresh corn kernels. Stir them into the pot and sauté for another 5 minutes. This allows the corn to soften slightly and release its natural sweetness. You’ll want to keep stirring occasionally to prevent sticking. The vibrant yellow of the corn is a feast for the eyes!

Step 3: Pour in the Broth

Now, pour in the vegetable broth. Bring the mixture to a boil, then reduce the heat to let it simmer for about 15 minutes. This simmering time allows the flavors to meld beautifully. You’ll notice the soup thickening slightly, which is just what you want.

Step 4: Blend the Soup

Once the soup has simmered, remove it from the heat. Here comes the fun part! Use an immersion blender to puree the soup until it’s smooth and creamy. If you don’t have one, carefully transfer the soup in batches to a countertop blender. Just be cautious with the hot liquid! This step transforms your soup into a velvety delight.

Step 5: Stir in the Cream

Return the pureed soup to the pot and stir in the heavy cream. This is where the magic happens! The cream adds richness and depth. Season with salt, black pepper, and cayenne pepper if you’re feeling adventurous. Heat the soup over low heat for about 5 minutes until warmed through. Your kitchen will smell heavenly!

Step 6: Serve and Garnish

Finally, it’s time to serve! Ladle the soup into bowls and garnish with fresh basil or chives. This adds a pop of color and a fresh flavor that complements the soup perfectly. Enjoy your creamy summer corn soup hot, and watch it disappear in no time!

Tips for Success

  • Use fresh corn for the best flavor; frozen corn works in a pinch.
  • Don’t rush the sautéing process; it builds a rich base for your soup.
  • Adjust seasoning to your taste; a little extra salt can enhance sweetness.
  • For a chunkier texture, reserve some corn before blending and stir it back in.
  • Make it ahead! This soup tastes even better the next day.

Equipment Needed

  • Large pot: Essential for cooking the soup. A Dutch oven works great too.
  • Immersion blender: Perfect for pureeing the soup. A countertop blender is a good alternative.
  • Cutting board and knife: For chopping the onion and garlic.
  • Measuring cups: Handy for accurate ingredient portions.

Variations of Creamy Summer Corn Soup

  • Spicy Corn Soup: Add diced jalapeños or a splash of hot sauce for a fiery kick that elevates the flavor.
  • Herbed Corn Soup: Incorporate fresh herbs like thyme or cilantro for an aromatic twist that brightens the dish.
  • Cheesy Corn Soup: Stir in shredded cheddar or crumbled feta cheese for a rich, savory depth that cheese lovers will adore.
  • Vegan Corn Soup: Substitute heavy cream with coconut milk and use vegetable broth to keep it plant-based and creamy.
  • Chunky Corn Soup: Add diced potatoes, carrots, or bell peppers for extra texture and nutrition, cooking them alongside the onions.

Serving Suggestions for Creamy Summer Corn Soup

  • Crusty Bread: Serve with a warm, crusty baguette or sourdough for dipping.
  • Salad: Pair with a light arugula salad dressed in lemon vinaigrette for a refreshing contrast.
  • Wine: A chilled Sauvignon Blanc complements the soup’s sweetness beautifully.
  • Presentation: Drizzle a bit of olive oil on top and sprinkle with extra herbs for a gourmet touch.

FAQs about Creamy Summer Corn Soup

Can I use frozen corn instead of fresh?

Absolutely! While fresh corn offers the best flavor, frozen corn is a convenient alternative. Just make sure to thaw it before adding it to the soup for even cooking.

How can I make this soup dairy-free?

To create a dairy-free version of creamy summer corn soup, simply substitute the heavy cream with coconut milk or a plant-based cream. This keeps the soup rich and creamy without the dairy.

Can I prepare this soup in advance?

Yes! This soup actually tastes better the next day as the flavors meld together. Just store it in an airtight container in the fridge and reheat when you’re ready to enjoy.

What can I serve with creamy summer corn soup?

This soup pairs wonderfully with crusty bread, a fresh salad, or even grilled cheese sandwiches. It’s a versatile dish that complements many sides!

How long does creamy summer corn soup last in the fridge?

Stored properly in an airtight container, this soup can last up to 3-4 days in the fridge. Just give it a good stir before reheating!

Final Thoughts

Creating this creamy summer corn soup is more than just cooking; it’s about savoring the flavors of summer and sharing joy with those you love. Each bowl is a celebration of fresh ingredients and simple techniques, making it accessible for any home cook. Whether you’re enjoying it on a warm evening or serving it at a gathering, this soup brings smiles and warmth to the table. I hope you find as much happiness in making it as I do. So grab your corn, and let’s make some delicious memories together!

jhessica

Creamy Summer Corn Soup: A Delicious Recipe to Try!

A creamy and delicious summer corn soup that is perfect for warm weather.
Prep Time 10 minutes
Cook Time 30 minutes
Total Time 40 minutes
Servings: 6 servings
Course: Soup
Cuisine: American
Calories: 250

Ingredients
  

  • 4 cups fresh corn kernels about 6-8 ears of corn
  • 1 medium onion diced
  • 2 cloves garlic minced
  • 4 cups vegetable broth
  • 1 cup heavy cream
  • 2 tablespoons olive oil
  • 1 teaspoon salt
  • 1/2 teaspoon black pepper
  • 1/4 teaspoon cayenne pepper optional
  • Fresh basil or chives for garnish

Method
 

  1. In a large pot, heat the olive oil over medium heat. Add the diced onion and sauté for about 5 minutes, or until translucent. Stir in the minced garlic and cook for an additional minute until fragrant.
  2. Add the corn kernels to the pot and sauté for another 5 minutes, stirring occasionally.
  3. Pour in the vegetable broth and bring the mixture to a boil. Reduce the heat and let it simmer for 15 minutes.
  4. Remove the pot from heat and use an immersion blender to puree the soup until smooth. If you don’t have an immersion blender, carefully transfer the soup in batches to a countertop blender.
  5. Return the pureed soup to the pot and stir in the heavy cream. Season with salt, black pepper, and cayenne pepper if using. Heat the soup over low heat until warmed through, about 5 minutes.
  6. Serve hot, garnished with fresh basil or chives.

Nutrition

Serving: 1cupCalories: 250kcalCarbohydrates: 20gProtein: 5gFat: 18gSaturated Fat: 10gPolyunsaturated Fat: 8gCholesterol: 50mgSodium: 800mgFiber: 2gSugar: 5g

Notes

  • For a lighter version, substitute half of the heavy cream with coconut milk or use low-fat milk.
  • Add diced potatoes or carrots for extra texture and nutrition; cook them along with the onions.

Tried this recipe?

Let us know how it was!

Creamy Garlic Salmon with Spinach: A Delightful Recipe!

Introduction to Creamy Garlic Salmon with Spinach

When I think of a meal that feels like a warm hug, creamy garlic salmon with spinach comes to mind.

This dish is not just a feast for the eyes; it’s a quick solution for those busy weeknights when you want something delicious without spending hours in the kitchen.

The rich, creamy sauce paired with tender salmon and vibrant spinach creates a symphony of flavors that will impress your loved ones.

Whether you’re cooking for yourself or hosting a small gathering, this recipe is sure to become a favorite in your culinary repertoire.

Why You’ll Love This Creamy Garlic Salmon with Spinach

This creamy garlic salmon with spinach is a game-changer for your dinner routine.

It’s incredibly easy to whip up, taking just 25 minutes from start to finish.

The combination of rich flavors and nutritious ingredients makes it a guilt-free indulgence.

Plus, it’s versatile enough to impress guests or satisfy a weeknight craving.

Once you try it, you’ll wonder how you ever lived without this delightful dish!

Ingredients for Creamy Garlic Salmon with Spinach

Creating creamy garlic salmon with spinach is a breeze, especially when you have the right ingredients on hand.

Here’s what you’ll need to bring this dish to life:

  • Salmon fillets: Fresh salmon is the star of the show, providing a rich flavor and buttery texture.
  • Olive oil: A splash of olive oil helps to sear the salmon, adding a hint of healthy fat.
  • Garlic: Minced garlic infuses the dish with a fragrant aroma and a punch of flavor.
  • Heavy cream: This is what makes the sauce creamy and indulgent, creating a luscious coating for the salmon.
  • Fresh spinach: Chopped spinach adds a pop of color and a nutritious boost, balancing the richness of the cream.
  • Lemon juice: A squeeze of lemon brightens the dish, cutting through the creaminess with a refreshing zing.
  • Salt and pepper: Essential for seasoning, these staples enhance the flavors of the dish.
  • Fresh parsley: Chopped parsley is a lovely garnish that adds a touch of freshness and color.

Feel free to get creative!

You can substitute half of the heavy cream with low-fat milk or chicken broth for a lighter version.

Adding cherry tomatoes or mushrooms can also elevate the dish, providing extra flavor and nutrition.

For exact quantities, check the bottom of the article where you can find everything available for printing.

How to Make Creamy Garlic Salmon with Spinach

Cooking creamy garlic salmon with spinach is a straightforward process that anyone can master.

With just a few simple steps, you’ll have a delicious meal ready to impress.

Let’s dive into the details!

Step 1: Prepare the Salmon

Start by heating a tablespoon of olive oil in a large skillet over medium heat.

While the oil warms, season your salmon fillets with salt and pepper.

Once the oil is shimmering, place the salmon skin-side down in the skillet.

Cook for about 4-5 minutes until the skin is crispy.

Then, flip the fillets and cook for another 3-4 minutes until they’re cooked through.

Remove the salmon from the skillet and set it aside.

This step ensures your salmon is perfectly seared and full of flavor.

Step 2: Sauté the Garlic

In the same skillet, add the minced garlic.

Sauté it for about 30 seconds until it becomes fragrant.

Be careful not to burn it; burnt garlic can ruin the dish.

This step adds a wonderful aroma and depth to your creamy garlic sauce.

Step 3: Create the Creamy Sauce

Pour in the heavy cream, stirring well to combine.

Scrape up any tasty bits stuck to the bottom of the skillet.

This adds extra flavor to your sauce.

Bring the mixture to a gentle simmer, allowing it to thicken slightly.

The creaminess is what makes this dish so indulgent!

Step 4: Add Spinach and Season

Now, it’s time to add the chopped spinach and a splash of lemon juice.

Stir until the spinach wilts and the sauce is well combined.

Taste and season with additional salt and pepper as needed.

This step not only enhances the flavor but also adds a nutritious boost to your meal.

Step 5: Combine and Heat

Return the salmon to the skillet, spooning some of that creamy sauce over the top.

Let it simmer for an additional 1-2 minutes to heat through.

This allows the salmon to soak up the flavors of the sauce.

Your kitchen will smell heavenly at this point!

Step 6: Serve and Garnish

Finally, serve the salmon hot, garnished with fresh parsley.

This adds a pop of color and freshness to your dish.

Pair it with your favorite sides, and you’re ready to enjoy a delightful meal.

This creamy garlic salmon with spinach is not just a dish; it’s an experience that brings joy to the table.

Tips for Success

  • Always use fresh salmon for the best flavor and texture.
  • Don’t rush the garlic; sauté it just until fragrant to avoid bitterness.
  • Adjust the creaminess by mixing in low-fat milk or broth if desired.
  • Experiment with additional veggies like cherry tomatoes or mushrooms for extra flavor.
  • Serve immediately for the best taste and presentation.

Equipment Needed

  • Large skillet: A non-stick skillet works best for easy cooking and cleanup.
  • Spatula: Use a sturdy spatula to flip the salmon without breaking it.
  • Measuring cups: Handy for measuring cream and other ingredients.
  • Knife and cutting board: Essential for chopping garlic and spinach.

Variations

  • Herb-Infused: Add fresh herbs like dill or thyme for an aromatic twist.
  • Spicy Kick: Incorporate red pepper flakes or a dash of hot sauce for some heat.
  • Low-Carb Option: Serve over zucchini noodles or cauliflower rice instead of traditional sides.
  • Vegetarian Version: Substitute salmon with grilled tofu or chickpeas for a plant-based meal.
  • Cheesy Delight: Stir in some grated Parmesan or mozzarella for an extra creamy and cheesy sauce.

Serving Suggestions

  • Pair with Rice: Serve over fluffy white or brown rice to soak up the creamy sauce.
  • Fresh Salad: A crisp green salad with a light vinaigrette complements the richness of the salmon.
  • Wine Selection: A chilled Sauvignon Blanc enhances the flavors beautifully.
  • Presentation: Serve on a warm plate, garnished with lemon wedges for a pop of color.

FAQs about Creamy Garlic Salmon with Spinach

Can I use frozen salmon for this recipe?

Absolutely! Just make sure to thaw the salmon completely before cooking. Frozen salmon can still be delicious, but fresh is always best for flavor and texture.

What can I substitute for heavy cream?

If you’re looking for a lighter option, you can mix half of the heavy cream with low-fat milk or chicken broth. This will still give you a creamy sauce without all the calories.

How do I know when the salmon is cooked through?

The salmon is done when it flakes easily with a fork and has an internal temperature of 145°F. It should be opaque and no longer translucent in the center.

Can I make this dish ahead of time?

While it’s best enjoyed fresh, you can prepare the sauce ahead of time and store it in the fridge. Just reheat it gently before adding the salmon.

What sides pair well with creamy garlic salmon?

This dish goes wonderfully with rice, quinoa, or a fresh salad. The creamy sauce complements the flavors of a light, crisp side perfectly!

Final Thoughts

Cooking creamy garlic salmon with spinach is more than just preparing a meal; it’s about creating a moment of joy.

The rich flavors and creamy texture come together to make every bite a delightful experience.

Whether you’re enjoying it solo or sharing it with family, this dish brings warmth to the table.

It’s quick, easy, and satisfying, making it perfect for any occasion.

So, roll up your sleeves, embrace the process, and let this recipe become a cherished part of your culinary journey.

You’ll find that it’s not just a meal; it’s a memory in the making.

jhessica

Creamy Garlic Salmon with Spinach: A Delightful Recipe!

A delightful recipe for creamy garlic salmon with spinach, perfect for a quick and delicious meal.
Prep Time 10 minutes
Cook Time 15 minutes
Total Time 25 minutes
Servings: 2 servings
Course: Main Course
Cuisine: American
Calories: 520

Ingredients
  

  • 2 6-ounce salmon fillets
  • 1 tablespoon olive oil
  • 3 cloves garlic minced
  • 1 cup heavy cream
  • 1 cup fresh spinach chopped
  • 1 teaspoon lemon juice
  • Salt and pepper to taste
  • 1 tablespoon fresh parsley chopped (for garnish)

Method
 

  1. Heat olive oil in a large skillet over medium heat. Season the salmon fillets with salt and pepper, then place them skin-side down in the skillet. Cook for about 4-5 minutes until the skin is crispy, then flip and cook for another 3-4 minutes until the salmon is cooked through. Remove the salmon from the skillet and set aside.
  2. In the same skillet, add minced garlic and sauté for about 30 seconds until fragrant. Be careful not to burn it.
  3. Pour in the heavy cream and stir well, scraping up any bits from the bottom of the skillet. Bring the mixture to a gentle simmer.
  4. Add the chopped spinach and lemon juice to the skillet. Stir until the spinach is wilted and the sauce is well combined. Season with additional salt and pepper to taste.
  5. Return the salmon to the skillet, spooning some of the creamy sauce over the top. Let it simmer for an additional 1-2 minutes to heat through.
  6. Serve the salmon hot, garnished with fresh parsley.

Nutrition

Serving: 1fillet with sauceCalories: 520kcalCarbohydrates: 5gProtein: 36gFat: 40gSaturated Fat: 20gPolyunsaturated Fat: 15gCholesterol: 100mgSodium: 300mgFiber: 1gSugar: 1g

Notes

  • For a lighter version, substitute half of the heavy cream with low-fat milk or chicken broth.
  • Add some cherry tomatoes or mushrooms to the sauce for extra flavor and nutrition.

Tried this recipe?

Let us know how it was!

Sausage and Cheese Butter Swim Biscuits: Bake with Ease!

Introduction to Sausage and Cheese Butter Swim Biscuits

There’s something magical about the aroma of freshly baked biscuits wafting through the kitchen. Sausage and Cheese Butter Swim Biscuits are not just a treat; they’re a warm hug on a plate. Perfect for busy mornings or a cozy brunch with friends, these biscuits are incredibly easy to whip up. With just a handful of ingredients, you can create a dish that impresses without the fuss. Whether you’re a seasoned cook or just starting out, this recipe is your ticket to a delicious breakfast that everyone will love.

Why You’ll Love This Sausage and Cheese Butter Swim Biscuits

These Sausage and Cheese Butter Swim Biscuits are a game-changer for any meal. They come together in just 40 minutes, making them perfect for those hectic mornings. The combination of savory sausage and sharp cheddar creates a flavor explosion that will have everyone coming back for seconds. Plus, they’re versatile enough to serve as a snack or a side dish, ensuring you’ll always have a reason to bake them!

Ingredients for Sausage and Cheese Butter Swim Biscuits

Gathering the right ingredients is the first step to biscuit bliss. Here’s what you’ll need:

  • All-purpose flour: The backbone of your biscuits, providing structure and fluffiness.
  • Baking powder: This leavening agent helps your biscuits rise, giving them that light, airy texture.
  • Salt: A pinch enhances all the flavors, making each bite more delicious.
  • Black pepper: Adds a subtle kick that complements the sausage beautifully.
  • Garlic powder: A hint of garlic elevates the flavor profile, making these biscuits irresistible.
  • Shredded sharp cheddar cheese: The star ingredient! It melts into gooey goodness, adding richness and flavor.
  • Breakfast sausage: Cooked and crumbled, it brings savory depth to the biscuits. Feel free to use turkey sausage for a lighter option.
  • Buttermilk: This tangy liquid keeps the biscuits moist and tender. If you don’t have buttermilk, a mix of milk and vinegar works in a pinch.
  • Unsalted butter: Melted butter not only adds flavor but also creates that delightful “swim” effect, making the biscuits extra rich.

For those looking to spice things up, consider adding cayenne pepper for heat or swapping cheddar for pepper jack cheese. The exact measurements for these ingredients can be found at the bottom of the article, ready for printing!

How to Make Sausage and Cheese Butter Swim Biscuits

Now that you have your ingredients ready, let’s dive into the fun part—making these delicious Sausage and Cheese Butter Swim Biscuits! Follow these simple steps, and you’ll have a warm, cheesy treat in no time.

Step 1: Preheat the Oven

First things first, preheat your oven to 450°F. This high temperature is key to achieving that golden-brown crust we all love. While the oven heats up, you can get everything else ready.

Step 2: Mix Dry Ingredients

In a large mixing bowl, whisk together the all-purpose flour, baking powder, salt, black pepper, and garlic powder. Make sure everything is well combined. This step is crucial for even flavor distribution in your biscuits.

Step 3: Add Cheese and Sausage

Next, stir in the shredded sharp cheddar cheese and the crumbled breakfast sausage. Mix gently until the cheese and sausage are evenly distributed throughout the dry ingredients. This is where the magic begins—each bite will be packed with flavor!

Step 4: Combine Wet Ingredients

Now, make a well in the center of your dry mixture. Pour in the buttermilk and melted unsalted butter. The buttermilk adds moisture, while the butter gives that rich, buttery flavor. Don’t skip this step!

Step 5: Mix the Dough

Gently mix the ingredients until just combined. Be careful not to overmix; a slightly sticky dough is what you want. Overmixing can lead to tough biscuits, and we definitely want them light and fluffy!

Step 6: Pour into Baking Dish

Pour the dough into a greased 9×13-inch baking dish. Spread it evenly, but don’t worry about making it perfect. The dough will spread as it bakes, creating those lovely, buttery swim biscuits.

Step 7: Bake to Perfection

Place the baking dish in your preheated oven and bake for 20-25 minutes. Keep an eye on them! You’re looking for a golden-brown top and a toothpick inserted in the center to come out clean. The aroma will be irresistible!

Step 8: Cool and Serve

Once baked, let the biscuits cool for a few minutes. For an extra touch of flavor, brush the tops with a bit more melted butter before serving. These biscuits are best enjoyed warm, so gather your friends and family and dig in!

Tips for Success

  • Use cold buttermilk for a fluffier texture.
  • Don’t overmix the dough; it should be slightly sticky.
  • For extra flavor, add fresh herbs like chives or parsley.
  • Let the biscuits cool slightly before serving to enhance the flavors.
  • Experiment with different cheeses for unique twists on the classic recipe.

Equipment Needed

  • Mixing bowl: A large bowl for combining ingredients. A sturdy pot can work in a pinch.
  • Whisk: Essential for mixing dry ingredients. A fork can also do the job.
  • Baking dish: A 9×13-inch dish is ideal. Any oven-safe dish will suffice.
  • Measuring cups and spoons: For accuracy. Use a kitchen scale if you prefer weight measurements.

Variations

  • Spicy Kick: Add 1/4 teaspoon of cayenne pepper to the dry ingredients for a fiery twist.
  • Cheese Swap: Substitute sharp cheddar with pepper jack or gouda for a different flavor profile.
  • Herb Infusion: Mix in fresh herbs like rosemary or thyme for an aromatic touch.
  • Vegetarian Option: Replace sausage with sautéed mushrooms or spinach for a meatless version.
  • Gluten-Free: Use a gluten-free all-purpose flour blend to make these biscuits suitable for gluten-sensitive diets.

Serving Suggestions

  • Pair these biscuits with scrambled eggs for a hearty breakfast.
  • Serve alongside a fresh fruit salad for a refreshing contrast.
  • Drizzle with honey or maple syrup for a sweet twist.
  • Enjoy with a hot cup of coffee or a chilled glass of orange juice.
  • For a fun presentation, stack them on a rustic wooden board.

FAQs about Sausage and Cheese Butter Swim Biscuits

Can I make these biscuits ahead of time?

Absolutely! You can prepare the dough in advance and store it in the fridge for up to 24 hours. Just remember to let it come to room temperature before baking. This way, you can enjoy fresh Sausage and Cheese Butter Swim Biscuits without the morning rush!

What can I substitute for buttermilk?

If you don’t have buttermilk on hand, a simple mix of milk and vinegar works wonders. Just add one tablespoon of vinegar to a cup of milk and let it sit for about 5 minutes. Voila! You’ve got a perfect buttermilk substitute for your biscuits.

How do I store leftover biscuits?

Leftover biscuits can be stored in an airtight container at room temperature for up to two days. For longer storage, wrap them tightly and freeze for up to a month. Just reheat in the oven for a few minutes to bring back that fresh-baked taste!

Can I use a different type of sausage?

Definitely! Feel free to experiment with different types of sausage, like turkey or chicken sausage, for a lighter option. You can even try spicy sausage for an extra kick. The beauty of this recipe is its versatility!

Are these biscuits suitable for freezing?

Yes, these Sausage and Cheese Butter Swim Biscuits freeze beautifully! Just bake them, let them cool completely, and then store them in a freezer-safe bag. When you’re ready to enjoy, simply reheat them in the oven for a quick and delicious snack.

Final Thoughts

Creating Sausage and Cheese Butter Swim Biscuits is more than just baking; it’s about sharing warmth and joy with those you love. The delightful aroma that fills your kitchen is a prelude to the deliciousness that awaits. Each bite offers a comforting blend of flavors, making them perfect for any occasion. Whether you’re enjoying them at breakfast or as a snack, these biscuits are sure to bring smiles to the table. So, roll up your sleeves, gather your ingredients, and let the magic of these biscuits transform your day into something special!

jhessica

Sausage and Cheese Butter Swim Biscuits: Bake with Ease!

Sausage and Cheese Butter Swim Biscuits are a delicious and easy-to-make treat, perfect for breakfast or a snack.
Prep Time 15 minutes
Cook Time 25 minutes
Total Time 40 minutes
Servings: 8 servings
Course: Breakfast
Cuisine: American
Calories: 290

Ingredients
  

  • 2 cups all-purpose flour
  • 1 tablespoon baking powder
  • 1 teaspoon salt
  • 1/2 teaspoon black pepper
  • 1/2 teaspoon garlic powder
  • 1/2 cup shredded sharp cheddar cheese
  • 1/2 pound breakfast sausage cooked and crumbled
  • 1 cup buttermilk
  • 1/2 cup unsalted butter melted

Method
 

  1. Preheat your oven to 450°F.
  2. In a large mixing bowl, whisk together the flour, baking powder, salt, black pepper, and garlic powder until well combined.
  3. Stir in the shredded cheddar cheese and cooked sausage until evenly distributed.
  4. Make a well in the center of the dry ingredients and pour in the buttermilk and melted butter.
  5. Gently mix until just combined; be careful not to overmix. The dough will be slightly sticky.
  6. Pour the dough into a greased 9×13-inch baking dish, spreading it evenly.
  7. Bake in the preheated oven for 20-25 minutes, or until the top is golden brown and a toothpick inserted in the center comes out clean.
  8. Let the biscuits cool for a few minutes before serving. For extra flavor, brush the tops with additional melted butter before serving.

Nutrition

Serving: 1biscuitCalories: 290kcalCarbohydrates: 28gProtein: 8gFat: 17gSaturated Fat: 7gPolyunsaturated Fat: 10gCholesterol: 40mgSodium: 600mgFiber: 1gSugar: 1g

Notes

  • For a spicier version, add 1/4 teaspoon of cayenne pepper to the dry ingredients.
  • You can substitute the cheddar cheese with pepper jack for a kick of heat.
  • For a lighter option, use turkey sausage instead of pork sausage.

Tried this recipe?

Let us know how it was!

Corn and Avocado Pasta Salad: A Refreshing Delight!

Introduction to Corn and Avocado Pasta Salad

Summer days call for light, refreshing meals that don’t weigh you down. That’s where my Corn and Avocado Pasta Salad comes in. It’s vibrant, delicious, and perfect for those sunny afternoons when you want something quick yet impressive. Whether you’re hosting a barbecue or just need a quick solution for a busy day, this salad is your go-to. With creamy avocado and sweet corn, it’s a delightful dish that brings smiles to the table. Trust me, once you try it, you’ll be making it all season long!

Why You’ll Love This Corn and Avocado Pasta Salad

This Corn and Avocado Pasta Salad is a game-changer for your summer meals. It’s incredibly easy to whip up, taking just about 25 minutes from start to finish. The combination of creamy avocado and sweet corn creates a flavor explosion that’s hard to resist. Plus, it’s versatile enough to serve as a side dish or a light main course. You’ll love how it brightens up any gathering!

Ingredients for Corn and Avocado Pasta Salad

Gathering the right ingredients is the first step to creating this delightful Corn and Avocado Pasta Salad. Here’s what you’ll need:

  • Rotini pasta: This spiral-shaped pasta holds onto the dressing beautifully, making every bite flavorful.
  • Corn kernels: Fresh, frozen, or canned—each option brings a sweet crunch that complements the creamy avocado.
  • Ripe avocado: The star of the show! Its creamy texture adds richness and balances the salad perfectly.
  • Cherry tomatoes: These juicy gems add a burst of color and sweetness, enhancing the overall flavor.
  • Red onion: Finely chopped, it provides a mild bite that elevates the dish without overpowering it.
  • Fresh cilantro: This herb adds a refreshing note, brightening up the salad with its unique flavor.
  • Olive oil: A drizzle of good-quality olive oil brings everything together, adding richness and depth.
  • Lime juice: Freshly squeezed lime juice adds a zesty kick, enhancing the flavors of the other ingredients.
  • Garlic powder: A sprinkle of garlic powder gives a subtle warmth and depth to the dressing.
  • Salt and pepper: Essential for seasoning, these staples help to bring out the flavors of the salad.

For those looking to customize, consider adding cooked chicken, shrimp, or chickpeas for extra protein. If you prefer a different citrus flavor, lemon juice works beautifully too. Feeling adventurous? Toss in some diced jalapeño for a spicy kick!

Exact quantities for each ingredient can be found at the bottom of the article, ready for printing. Happy cooking!

How to Make Corn and Avocado Pasta Salad

Creating this Corn and Avocado Pasta Salad is a breeze. Follow these simple steps, and you’ll have a vibrant dish ready in no time. Let’s dive in!

Step 1: Cook the Pasta

Start by boiling a pot of salted water. Once it’s bubbling, add the rotini pasta. Cook it according to the package instructions until it’s al dente. This usually takes about 8 to 10 minutes. Remember, you want it firm enough to hold up in the salad.

Once cooked, drain the pasta and rinse it under cold water. This stops the cooking process and cools it down quickly. No one wants a warm pasta salad, right?

Step 2: Combine the Ingredients

In a large mixing bowl, combine the cooled pasta with the corn, diced avocado, halved cherry tomatoes, finely chopped red onion, and fresh cilantro. Each ingredient adds its own unique flavor and texture, making this salad a delightful medley.

Gently toss everything together. Be careful with the avocado; you don’t want to mash it. The goal is to keep those creamy chunks intact!

Step 3: Prepare the Dressing

In a small bowl, whisk together the olive oil, lime juice, garlic powder, salt, and pepper. This dressing is simple yet packed with flavor. The lime juice adds a refreshing zing that complements the other ingredients beautifully.

Feel free to taste the dressing and adjust the seasoning. A little more lime juice or salt can make a big difference!

Step 4: Mix and Chill

Pour the dressing over the pasta salad. Gently toss everything together until the pasta and veggies are well coated. This is where the magic happens!

Now, cover the bowl and chill the salad in the refrigerator for at least 30 minutes. This allows the flavors to meld together, creating a deliciously refreshing dish. Trust me, the wait is worth it!

Tips for Success

  • Use ripe avocados for the best creaminess; they should yield slightly when pressed.
  • Don’t skip the chilling step; it enhances the flavors and makes the salad even more refreshing.
  • For a colorful twist, add diced bell peppers or cucumbers.
  • Make it ahead of time; this salad keeps well in the fridge for a day.
  • Adjust the lime juice to your taste; a little extra can brighten the dish!

Equipment Needed

  • Large pot: For boiling the pasta. A deep skillet can work too.
  • Colander: To drain the pasta. A fine mesh strainer is a good alternative.
  • Mixing bowl: A large bowl for combining ingredients. Any big bowl will do!
  • Whisk: For mixing the dressing. A fork can also get the job done.

Variations of Corn and Avocado Pasta Salad

  • Protein Boost: Add grilled chicken, shrimp, or chickpeas for a heartier meal.
  • Spicy Kick: Toss in diced jalapeños or a splash of hot sauce for some heat.
  • Cheesy Delight: Sprinkle crumbled feta or shredded cheese for added creaminess and flavor.
  • Herb Infusion: Experiment with fresh herbs like basil or parsley for a different twist.
  • Whole Grain Option: Swap rotini for whole wheat or gluten-free pasta to suit dietary needs.
  • Seasonal Veggies: Incorporate seasonal vegetables like zucchini or bell peppers for extra crunch and color.

Serving Suggestions for Corn and Avocado Pasta Salad

  • Pair with grilled chicken or fish for a complete meal.
  • Serve alongside crusty bread or garlic knots for a satisfying crunch.
  • Complement with a light white wine or sparkling water for a refreshing drink.
  • Garnish with extra cilantro or lime wedges for a vibrant presentation.

FAQs about Corn and Avocado Pasta Salad

Can I make Corn and Avocado Pasta Salad ahead of time?

Absolutely! This salad is perfect for meal prep. You can make it a day in advance and store it in the fridge. Just remember to give it a gentle toss before serving to redistribute the dressing.

How long does Corn and Avocado Pasta Salad last in the fridge?

This salad is best enjoyed within 1 to 2 days. The avocado may brown slightly, but it will still taste delicious. If you want to keep it fresh, consider adding the avocado just before serving.

Can I use different types of pasta?

Definitely! While rotini is my favorite for this recipe, you can use any pasta shape you like. Penne, fusilli, or even whole wheat pasta work well. Just adjust the cooking time as needed.

Is this salad suitable for a vegetarian diet?

<pYes, this Corn and Avocado Pasta Salad is vegetarian-friendly! It’s packed with fresh ingredients and can easily be made vegan by omitting any cheese or adding plant-based protein.

What can I serve with Corn and Avocado Pasta Salad?

This salad pairs wonderfully with grilled meats, seafood, or even as a standalone dish. It’s also great alongside a light soup or as part of a picnic spread. Enjoy the versatility!

Final Thoughts

Every bite of this Corn and Avocado Pasta Salad is like a mini celebration of summer. The vibrant colors and fresh flavors bring joy to any gathering, making it a dish that’s not just about nourishment but also about connection. Whether you’re sharing it with friends at a barbecue or enjoying it solo on a quiet evening, this salad is sure to brighten your day. Plus, its simplicity means you can whip it up without stress. So, grab those ingredients and let the flavors meld together—your taste buds will thank you!

jhessica

Corn and Avocado Pasta Salad: A Refreshing Delight!

A refreshing and vibrant Corn and Avocado Pasta Salad perfect for summer gatherings.
Prep Time 15 minutes
Cook Time 10 minutes
Total Time 55 minutes
Servings: 4 servings
Course: Salad
Cuisine: American
Calories: 320

Ingredients
  

  • 8 ounces rotini pasta
  • 1 cup corn kernels fresh, frozen, or canned
  • 1 ripe avocado diced
  • 1 cup cherry tomatoes halved
  • 1/4 cup red onion finely chopped
  • 1/4 cup fresh cilantro chopped
  • 1/4 cup olive oil
  • 2 tablespoons lime juice
  • 1 teaspoon garlic powder
  • Salt and pepper to taste

Method
 

  1. Cook the rotini pasta according to package instructions until al dente. Drain and rinse under cold water to cool.
  2. In a large bowl, combine the cooked pasta, corn, diced avocado, cherry tomatoes, red onion, and cilantro.
  3. In a small bowl, whisk together the olive oil, lime juice, garlic powder, salt, and pepper.
  4. Pour the dressing over the pasta salad and gently toss to combine, being careful not to mash the avocado.
  5. Chill the salad in the refrigerator for at least 30 minutes before serving to allow the flavors to meld.

Nutrition

Serving: 1servingCalories: 320kcalCarbohydrates: 40gProtein: 6gFat: 15gSaturated Fat: 2gPolyunsaturated Fat: 13gSodium: 200mgFiber: 6gSugar: 2g

Notes

  • For added protein, consider mixing in cooked chicken, shrimp, or chickpeas.
  • Substitute lime juice with lemon juice for a different citrus flavor, or add diced jalapeño for a spicy kick.

Tried this recipe?

Let us know how it was!

Stay Connected

Get recipes via email: