Get my cookbooks

Patriotic Popcorn: Celebrate with a Festive Recipe!

Introduction to Patriotic Popcorn

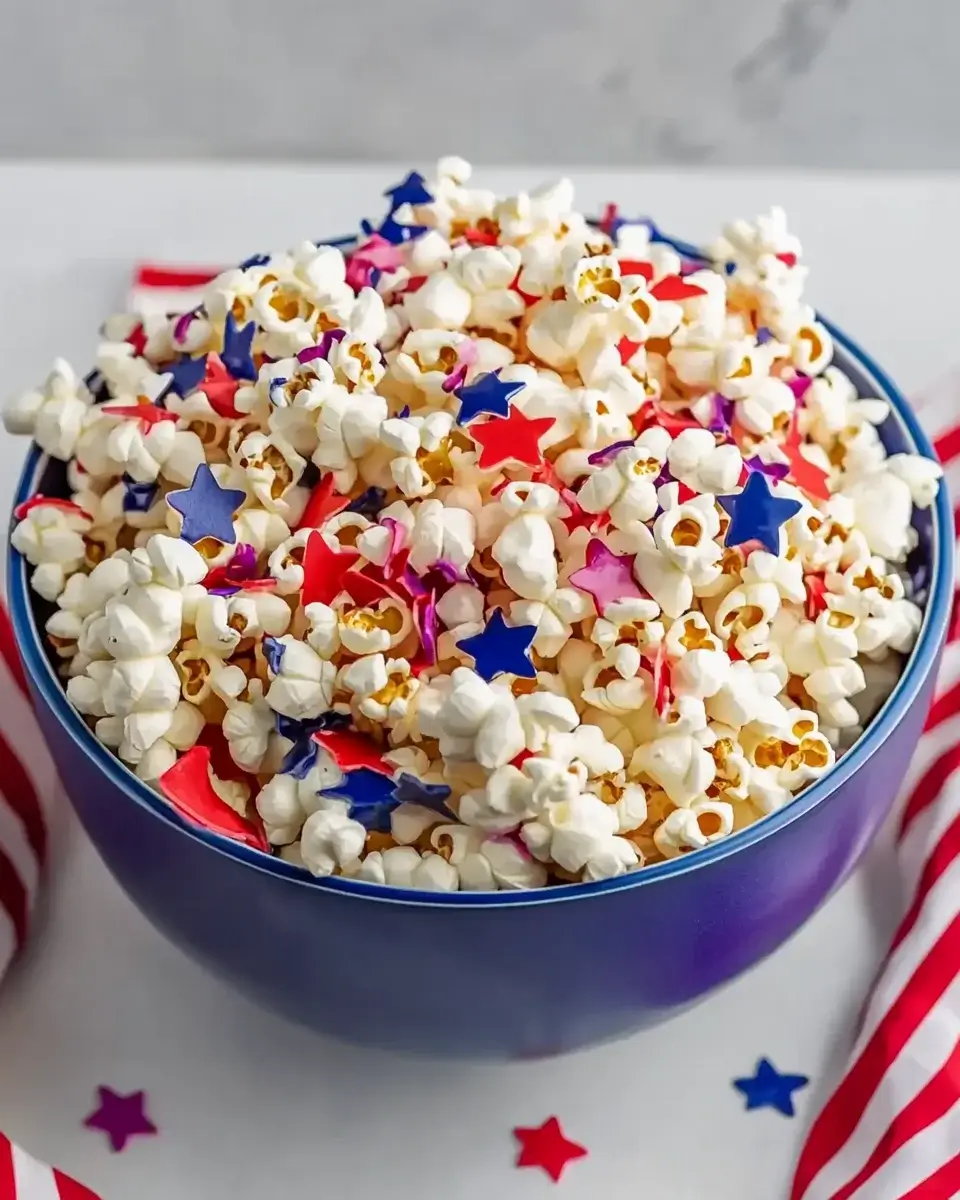
There’s something magical about gathering with friends and family during a holiday, isn’t there? The laughter, the stories, and of course, the food! This Patriotic Popcorn is a delightful treat that brings a splash of color and flavor to any celebration. Whether you’re hosting a backyard barbecue or watching fireworks, this festive snack is a quick and easy solution to impress your loved ones. With its vibrant red, white, and blue hues, it’s not just a treat; it’s a celebration in a bowl. Let’s dive into this fun recipe that’s sure to be a hit!

Why You’ll Love This Patriotic Popcorn

This Patriotic Popcorn is not just a snack; it’s a celebration of flavors and colors that’s incredibly easy to whip up. In just 45 minutes, you can create a festive treat that’s perfect for any gathering. The combination of sweet white chocolate and vibrant candy melts makes it irresistible. Plus, it’s a fun project to involve the kids, turning snack time into a creative adventure!

Ingredients for Patriotic Popcorn

Gathering the right ingredients is the first step to creating your Patriotic Popcorn. Here’s what you’ll need:

  • Popped popcorn: Start with about 8 cups of fluffy popcorn. You can use an air popper or stovetop method. Just make sure to remove any unpopped kernels for a smooth snacking experience.
  • White chocolate chips: These add a creamy sweetness that perfectly complements the candy melts. They’re the base for your coating, making the popcorn extra delicious.
  • Blue candy melts: These vibrant melts bring a pop of color and a sweet flavor. They’re essential for that festive look!
  • Red candy melts: Just like the blue, these add a burst of color and sweetness. Together with the blue, they create a patriotic masterpiece.
  • Sprinkles: A mix of red, white, and blue sprinkles adds a fun crunch and extra flair. They’re the finishing touch that makes your popcorn truly festive.
  • Sea salt: Just a pinch enhances the sweetness and balances the flavors. It’s a small but mighty ingredient!

For those looking to mix it up, consider using dark chocolate instead of white chocolate for a richer flavor. You can also add nuts or dried fruit for extra texture and flavor. All ingredient quantities are listed at the bottom of the article for easy printing!

How to Make Patriotic Popcorn

Step 1: Pop the Popcorn

Start by popping your popcorn. You can use an air popper or the stovetop method. If you’re using the stovetop, heat a bit of oil in a large pot, add the kernels, and cover. Shake the pot occasionally until the popping slows. Once done, pour the popcorn into a large mixing bowl. Don’t forget to sift through and remove any unpopped kernels. This fluffy base is the canvas for your Patriotic Popcorn.

Step 2: Melt the White Chocolate

Next, grab a microwave-safe bowl and add your white chocolate chips. Microwave them in 30-second intervals, stirring in between until smooth. This method prevents burning. Once melted, drizzle the white chocolate over the popcorn. Use a spatula to gently toss the popcorn, ensuring every piece gets a sweet coating. This step is crucial for that delicious flavor and helps the candy melts stick later!

Step 3: Prepare the Baking Sheet

Now, line a large baking sheet with parchment paper. This will prevent the popcorn from sticking and make cleanup a breeze. Spread the coated popcorn evenly across the sheet. This allows for even cooling and makes it easier to drizzle the candy melts later.

Step 4: Melt the Candy Melts

In separate bowls, melt your blue and red candy melts. Just like with the white chocolate, use the microwave in 30-second intervals, stirring until smooth. Be patient; this step is key to achieving that vibrant color. Once melted, you’ll have two bowls of colorful goodness ready to transform your popcorn into a festive treat. The colors will pop against the white chocolate base!

Step 5: Drizzle and Mix

Now comes the fun part! Drizzle the melted blue candy over one half of the popcorn and the red candy over the other half. Use a spatula to gently mix the popcorn, creating a marbled effect. This is where the magic happens! The colors will swirl together, making your Patriotic Popcorn look as festive as it tastes. Don’t worry about perfection; the more random, the better!

Step 6: Add Sprinkles and Salt

While the candy melts are still wet, sprinkle the red, white, and blue sprinkles over the popcorn. This adds a delightful crunch and a burst of color. Don’t forget to sprinkle a touch of sea salt on top. It enhances the sweetness and balances the flavors beautifully.

Step 7: Cool and Serve

Let your popcorn cool completely at room temperature for about 30 minutes. This allows the candy coating to harden. Once set, break the popcorn into clusters. Serve it in festive bowls or bags for a fun presentation. Your Patriotic Popcorn is now ready to be enjoyed!

Tips for Success

  • Use fresh popcorn kernels for the best popping results.
  • Don’t rush the melting process; stir frequently to avoid burning.
  • Feel free to customize with your favorite nuts or dried fruits.
  • For a fun twist, try adding flavored popcorn seasonings after cooling.
  • Store any leftovers in an airtight container to keep them fresh.

Equipment Needed

  • Large pot or air popper: Use either for popping your popcorn. An air popper is quick and easy, while a pot gives you that classic stovetop flavor.
  • Microwave-safe bowls: Essential for melting chocolate and candy melts. Any heat-safe bowl will do!
  • Parchment paper: This makes cleanup a breeze and prevents sticking. Wax paper can be a substitute, but parchment is best.
  • Spatula: A silicone spatula works wonders for mixing and drizzling without damaging the popcorn.

Variations

  • Dark Chocolate Delight: Swap white chocolate for dark chocolate for a richer flavor. It pairs beautifully with the sweetness of the candy melts.
  • Nutty Crunch: Add a mix of your favorite nuts, like almonds or pecans, for an extra crunch and a boost of protein.
  • Fruit Fusion: Toss in some dried cranberries or blueberries for a fruity twist that complements the patriotic theme.
  • Spicy Kick: For those who enjoy a bit of heat, sprinkle some chili powder or cayenne pepper over the popcorn before it cools.
  • Gluten-Free Option: Ensure all ingredients, especially candy melts, are labeled gluten-free for a safe treat for everyone.

Serving Suggestions

  • Pair your Patriotic Popcorn with refreshing lemonade or iced tea for a perfect summer treat.
  • Serve it alongside a fruit platter for a colorful and healthy contrast.
  • Use clear bags tied with red, white, and blue ribbons for a festive presentation at parties.
  • Consider adding a scoop of vanilla ice cream on the side for an indulgent dessert.

FAQs about Patriotic Popcorn

Can I make Patriotic Popcorn ahead of time?

Absolutely! You can prepare your Patriotic Popcorn a day in advance. Just store it in an airtight container to keep it fresh. The candy coating will stay crunchy, making it a perfect snack for your holiday gatherings.

What can I substitute for candy melts?

If you can’t find candy melts, you can use colored chocolate or even colored frosting. Just melt them down and drizzle as you would with the candy melts. It’s a great way to customize your popcorn!

Is this recipe suitable for kids?

<pDefinitely! This festive snack is a fun project for kids. They can help with drizzling the chocolate and adding sprinkles. Just keep an eye on the melting process to ensure safety.

How long does Patriotic Popcorn last?

When stored properly in an airtight container, your popcorn can last up to a week. However, it’s so delicious, it might not last that long!

Can I make this recipe vegan?

<pYes! To make your Patriotic Popcorn vegan, simply use dairy-free chocolate chips and vegan candy melts. This way, everyone can enjoy this colorful treat!

Final Thoughts

Creating this Patriotic Popcorn is more than just making a snack; it’s about bringing people together. The vibrant colors and sweet flavors evoke a sense of celebration, making it perfect for any festive occasion. Whether you’re sharing it at a barbecue or enjoying it during a movie night, each bite is a reminder of the joy of togetherness. Plus, it’s a fun way to get the kids involved in the kitchen! So, gather your loved ones, whip up this delightful treat, and let the festivities begin. You’ll create memories that are just as sweet as the popcorn itself!

jhessica

Patriotic Popcorn: Celebrate with a Festive Recipe!

A festive and colorful popcorn treat perfect for celebrating patriotic holidays.
Prep Time 15 minutes
Cook Time 10 minutes
Total Time 45 minutes
Servings: 8 servings
Course: Snack
Cuisine: American
Calories: 180

Ingredients
  

  • 8 cups popped popcorn about 1/2 cup unpopped kernels
  • 1 cup white chocolate chips
  • 1/2 cup blue candy melts
  • 1/2 cup red candy melts
  • 1/4 cup sprinkles red, white, and blue
  • 1/4 teaspoon sea salt

Method
 

  1. Pop the popcorn using an air popper or stovetop method, then place it in a large mixing bowl. Make sure to remove any unpopped kernels.
  2. In a microwave-safe bowl, melt the white chocolate chips in 30-second intervals, stirring in between until smooth. Drizzle the melted white chocolate over the popcorn and gently toss to coat.
  3. Spread the popcorn evenly onto a large baking sheet lined with parchment paper.
  4. In separate bowls, melt the blue and red candy melts in the microwave, also in 30-second intervals, stirring until smooth.
  5. Drizzle the melted blue candy melts over half of the popcorn and the red candy melts over the other half. Use a spatula to gently mix the popcorn to create a marbled effect.
  6. Sprinkle the sea salt and the red, white, and blue sprinkles over the popcorn while the candy melts are still wet.
  7. Allow the popcorn to cool completely at room temperature, about 30 minutes, until the candy coating hardens.
  8. Once set, break the popcorn into clusters and serve in festive bowls or bags.

Nutrition

Serving: 1servingCalories: 180kcalCarbohydrates: 24gProtein: 2gFat: 7gSaturated Fat: 4gPolyunsaturated Fat: 2gSodium: 100mgFiber: 1gSugar: 15g

Notes

  • For a healthier version, use dark chocolate instead of white chocolate and reduce the amount of candy melts.
  • Add nuts or dried fruit for extra texture and flavor.

Tried this recipe?

Let us know how it was!

Baked Garlic Butter Shrimp Scampi: Irresistible Recipe Delight!

Introduction to Baked Garlic Butter Shrimp Scampi

There’s something magical about the aroma of garlic wafting through the kitchen, isn’t there?

When I think of comfort food, Baked Garlic Butter Shrimp Scampi always comes to mind.

This dish is not just a meal; it’s an experience.

Perfect for a busy weeknight or a special gathering, it brings a touch of elegance without the fuss.

With just a handful of ingredients and minimal prep, you can impress your loved ones or treat yourself to a delightful seafood feast.

Let’s dive into this easy recipe that’s sure to become a favorite!

Why You’ll Love This Baked Garlic Butter Shrimp Scampi

This Baked Garlic Butter Shrimp Scampi is a game-changer for any home cook.

It’s incredibly easy to whip up, taking just 25 minutes from start to finish.

The rich, buttery flavor combined with the zing of garlic and lemon creates a taste explosion that’s hard to resist.

Whether you’re cooking for yourself or entertaining guests, this dish guarantees smiles all around.

Trust me, it’s a seafood lover’s dream come true!

Ingredients for Baked Garlic Butter Shrimp Scampi

To create this mouthwatering Baked Garlic Butter Shrimp Scampi, you’ll need a few key ingredients that come together beautifully.

Here’s what you’ll gather:

  • Large shrimp: Fresh or frozen, peeled and deveined shrimp are the stars of this dish. They soak up all that delicious garlic butter flavor.
  • Unsalted butter: This adds richness. Melted, it becomes the base for your garlic butter sauce.
  • Garlic: Minced garlic is essential for that aromatic kick. Fresh is best, but jarred can work in a pinch.
  • Red pepper flakes: A sprinkle adds a touch of heat. Adjust to your taste for a milder or spicier dish.
  • Lemon zest: This brightens the dish, giving it a fresh, zesty flavor that complements the shrimp.
  • Fresh lemon juice: Adds acidity and balances the richness of the butter.
  • Fresh parsley: Chopped parsley not only adds color but also a fresh herbaceous note.
  • Salt and black pepper: Essential seasonings to enhance all the flavors.
  • Breadcrumbs: Panko breadcrumbs create a crispy topping. They’re lighter and crunchier than regular breadcrumbs.
  • Parmesan cheese: Grated Parmesan adds a savory depth and a touch of nuttiness to the topping.

Feel free to get creative!

For a low-carb version, swap out the breadcrumbs for crushed pork rinds or almond flour.

You can also toss in sliced cherry tomatoes or asparagus for extra flavor and nutrition.

Exact quantities for each ingredient are available at the bottom of the article for easy printing.

How to Make Baked Garlic Butter Shrimp Scampi

Creating this Baked Garlic Butter Shrimp Scampi is a breeze.

With just a few simple steps, you’ll have a dish that’s bursting with flavor.

Let’s get started!

Step 1: Preheat the Oven

First things first, preheat your oven to 400°F.

This ensures that your shrimp scampi cooks evenly and gets that perfect golden crust.

Step 2: Prepare the Garlic Butter Mixture

In a large mixing bowl, combine the melted butter, minced garlic, red pepper flakes, lemon zest, lemon juice, chopped parsley, salt, and black pepper.

Stir well until everything is nicely blended.

The aroma will already start to make your mouth water!

Step 3: Coat the Shrimp

Now, add the peeled and deveined shrimp to the bowl.

Toss them gently in the garlic butter mixture until they’re fully coated.

This step is crucial; you want every shrimp to soak up that delicious flavor.

Step 4: Transfer to Baking Dish

Next, transfer the shrimp mixture to a baking dish.

Spread it out evenly, ensuring the shrimp are in a single layer.

This helps them cook uniformly and allows the flavors to meld beautifully.

Step 5: Add Breadcrumb Topping

In a separate bowl, mix the panko breadcrumbs and grated Parmesan cheese together.

Sprinkle this mixture evenly over the shrimp.

This topping will create a delightful crunch that contrasts perfectly with the tender shrimp.

Step 6: Bake the Dish

Place the baking dish in your preheated oven.

Bake for 12-15 minutes, or until the shrimp turn pink and opaque.

Keep an eye on the breadcrumbs; they should be golden brown and inviting.

Step 7: Broil for Extra Crispiness

For that extra crispy topping, switch your oven to broil for 1-2 minutes.

Watch closely to prevent burning.

This step adds a delightful crunch that takes the dish to the next level.

Step 8: Serve and Garnish

Once done, remove the dish from the oven and let it cool for a few minutes.

Garnish with additional parsley and lemon wedges for a fresh touch.

Serve it warm, and watch everyone dig in with delight!

Tips for Success

  • Use fresh shrimp for the best flavor; frozen works too, just thaw them properly.
  • Don’t skip the broiling step; it adds that irresistible crunch to the topping.
  • Adjust the red pepper flakes to suit your spice preference.
  • Let the dish cool slightly before serving to enhance the flavors.
  • Experiment with herbs like basil or thyme for a unique twist.

Equipment Needed

  • Baking dish: A glass or ceramic dish works well. A cast-iron skillet is a great alternative.
  • Mixing bowls: Use any size you have on hand; just make sure they’re sturdy.
  • Measuring cups and spoons: Essential for accuracy, but eyeballing can work too!
  • Spatula: A rubber or silicone spatula is perfect for mixing and serving.

Variations

  • Spicy Garlic Butter Shrimp: Add more red pepper flakes or a dash of hot sauce for an extra kick.
  • Herb-Infused: Mix in fresh herbs like basil, dill, or thyme for a fragrant twist.
  • Vegetable Medley: Toss in sliced bell peppers, zucchini, or asparagus for added nutrition and color.
  • Cheesy Delight: Top with additional cheese like mozzarella or feta for a creamy finish.
  • Low-Carb Option: Replace breadcrumbs with crushed pork rinds or almond flour for a keto-friendly version.

Serving Suggestions

  • Pair with a crisp salad: A light arugula or mixed greens salad complements the richness of the shrimp.
  • Serve with crusty bread: Perfect for soaking up that delicious garlic butter sauce.
  • Wine pairing: A chilled Sauvignon Blanc or a light Pinot Grigio enhances the seafood flavors.
  • Garnish with lemon wedges: Adds a fresh touch and a pop of color to your presentation.

FAQs about Baked Garlic Butter Shrimp Scampi

Can I use frozen shrimp for this recipe?

Absolutely! Frozen shrimp work just fine. Just make sure to thaw them completely before cooking. This ensures they absorb all that delicious garlic butter flavor.

How can I make this dish spicier?

If you love heat, feel free to add more red pepper flakes or even a splash of hot sauce. Adjust it to your taste for the perfect kick!

What can I serve with Baked Garlic Butter Shrimp Scampi?

This dish pairs wonderfully with a crisp salad, crusty bread, or even over a bed of pasta. The options are endless!

Can I make this recipe ahead of time?

You can prep the shrimp and garlic butter mixture in advance. Just store it in the fridge and bake it when you’re ready to serve. It’s a great time-saver!

Is this dish suitable for a low-carb diet?

Yes! Simply swap the breadcrumbs for crushed pork rinds or almond flour to keep it low-carb while still enjoying that amazing flavor.

Final Thoughts

Baked Garlic Butter Shrimp Scampi is more than just a meal; it’s a celebration of flavors and memories.

Each bite transports you to a cozy seaside restaurant, where the ocean breeze mingles with the scent of garlic and butter.

This dish is perfect for any occasion, whether it’s a casual weeknight dinner or a special gathering with friends.

The joy of sharing this delightful recipe with loved ones is truly unmatched.

So, roll up your sleeves, embrace the process, and let the magic of Baked Garlic Butter Shrimp Scampi bring warmth and happiness to your table!

jhessica

Baked Garlic Butter Shrimp Scampi: Irresistible Recipe Delight!

A delicious and easy recipe for Baked Garlic Butter Shrimp Scampi, perfect for seafood lovers.
Prep Time 10 minutes
Cook Time 15 minutes
Total Time 25 minutes
Course: Main Dish
Cuisine: Italian
Calories: 320

Ingredients
  

  • 1 pound large shrimp peeled and deveined
  • 4 tablespoons unsalted butter melted
  • 4 cloves garlic minced
  • 1 teaspoon red pepper flakes adjust to taste
  • 1 teaspoon lemon zest
  • 2 tablespoons fresh lemon juice
  • 1/4 cup fresh parsley chopped
  • 1/2 teaspoon salt
  • 1/4 teaspoon black pepper
  • 1 cup breadcrumbs preferably panko
  • 1/4 cup grated Parmesan cheese

Method
 

  1. Preheat your oven to 400°F.
  2. In a large mixing bowl, combine the melted butter, minced garlic, red pepper flakes, lemon zest, lemon juice, parsley, salt, and black pepper. Stir well to combine.
  3. Add the shrimp to the bowl and toss until they are evenly coated in the garlic butter mixture.
  4. Transfer the shrimp mixture to a baking dish, spreading it out in an even layer.
  5. In a separate bowl, mix the breadcrumbs and Parmesan cheese together. Sprinkle the breadcrumb mixture evenly over the shrimp.
  6. Bake in the preheated oven for 12-15 minutes, or until the shrimp are pink and opaque, and the breadcrumbs are golden brown.
  7. For an extra crispy topping, broil for an additional 1-2 minutes, keeping a close eye to prevent burning.
  8. Remove from the oven and let it cool for a few minutes before serving. Garnish with additional parsley and lemon wedges if desired.

Nutrition

Serving: 1servingCalories: 320kcalCarbohydrates: 15gProtein: 25gFat: 18gSaturated Fat: 7gPolyunsaturated Fat: 8gCholesterol: 200mgSodium: 600mgFiber: 1gSugar: 1g

Notes

  • For a low-carb version, substitute breadcrumbs with crushed pork rinds or almond flour.
  • Add sliced cherry tomatoes or asparagus to the baking dish for extra flavor and nutrition.

Tried this recipe?

Let us know how it was!

Pesto Pasta Salad that Will Wow Your Taste Buds!

Introduction to Pesto Pasta Salad

There’s something magical about a bowl of Pesto Pasta Salad that instantly transports me back to summer picnics with family. The vibrant colors of fresh ingredients and the aromatic scent of basil always bring a smile to my face. This dish is not just a quick solution for a busy day; it’s a delightful way to impress your loved ones. With its refreshing flavors and easy preparation, this Pesto Pasta Salad is perfect for any occasion, whether it’s a backyard barbecue or a cozy dinner at home. Let’s dive into this culinary adventure together!

Why You’ll Love This Pesto Pasta Salad

This Pesto Pasta Salad is a game-changer for anyone looking to whip up something delicious without spending hours in the kitchen. It’s quick, taking just about 15 minutes to prep, and the flavors are simply out of this world. The combination of fresh ingredients and that rich, herby pesto dressing makes every bite a burst of joy. Plus, it’s versatile enough to suit any gathering, making it a must-try!

Ingredients for Pesto Pasta Salad

Gathering the right ingredients is the first step to creating a mouthwatering Pesto Pasta Salad. Here’s what you’ll need:

  • Rotini Pasta: This spiral-shaped pasta holds onto the pesto beautifully, making every bite flavorful.
  • Cherry Tomatoes: Their sweetness adds a pop of color and freshness to the dish.
  • Fresh Mozzarella Balls: Creamy and mild, they provide a delightful contrast to the tangy pesto.
  • Fresh Basil Leaves: The star of the show! Their aromatic flavor elevates the entire salad.
  • Pesto Sauce: A vibrant blend of basil, garlic, and nuts that brings everything together.
  • Olive Oil: Adds richness and helps the dressing coat the pasta evenly.
  • Balsamic Vinegar: A splash of acidity that brightens the flavors and balances the richness.
  • Salt and Pepper: Essential for enhancing the flavors of all the ingredients.
  • Parmesan Cheese: Optional, but a sprinkle on top adds a savory finish.

For those looking to mix things up, consider adding cooked chicken or chickpeas for extra protein. You can also swap the rotini for whole wheat or gluten-free pasta to suit your dietary needs. Exact quantities for each ingredient are available at the bottom of the article for easy printing!

How to Make Pesto Pasta Salad

Creating a delicious Pesto Pasta Salad is easier than you might think. Follow these simple steps, and you’ll have a vibrant dish ready to impress in no time!

Step 1: Cook the Pasta

Start by boiling a pot of salted water. Once it’s bubbling, add the rotini pasta. Cook it according to the package instructions until it’s al dente. This usually takes about 8 to 10 minutes. Remember, you want it firm enough to hold up in the salad. After cooking, drain the pasta and rinse it under cold water. This stops the cooking process and cools it down quickly.

Step 2: Combine the Ingredients

In a large mixing bowl, combine the cooled rotini pasta, halved cherry tomatoes, mozzarella balls, and chopped basil. The colors will start to pop, and the aroma will be heavenly. Gently toss everything together to ensure an even distribution of ingredients. This is where the magic begins!

Step 3: Prepare the Dressing

In a separate small bowl, whisk together the pesto sauce, olive oil, balsamic vinegar, salt, and pepper. This dressing is the heart of your Pesto Pasta Salad. It’s rich and flavorful, so don’t skimp on the whisking! Make sure everything is well combined and smooth.

Step 4: Toss and Chill

Pour the dressing over the pasta mixture. Toss gently to coat every piece of pasta and ingredient with that luscious pesto goodness. Taste it! Adjust the seasoning if needed. Once you’re satisfied, cover the bowl and chill the salad in the refrigerator for at least 30 minutes. This allows the flavors to meld beautifully.

Step 5: Serve and Enjoy

When you’re ready to serve, give the salad a quick toss. If you like, sprinkle some grated Parmesan cheese on top for an extra touch of flavor. Serve it chilled, and watch as your friends and family dive in. This Pesto Pasta Salad is sure to be a hit!

Tips for Success

  • Always salt your pasta water; it enhances the flavor of the pasta.
  • Rinse the pasta thoroughly to prevent it from sticking together.
  • Use fresh ingredients for the best flavor; quality matters!
  • Let the salad chill for at least 30 minutes to allow flavors to develop.
  • Feel free to customize with your favorite veggies or proteins.

Equipment Needed

  • Large Pot: For boiling the pasta. A deep skillet can work in a pinch.
  • Colander: To drain the pasta. A slotted spoon can also do the job.
  • Mixing Bowl: For combining ingredients. Any large bowl will suffice.
  • Whisk: To mix the dressing. A fork can be a handy alternative.

Variations

  • Protein Boost: Add grilled chicken, shrimp, or chickpeas for a heartier salad.
  • Veggie Delight: Toss in diced bell peppers, cucumbers, or spinach for extra crunch and nutrition.
  • Cheese Lovers: Experiment with feta or goat cheese for a tangy twist.
  • Nutty Flavor: Sprinkle in toasted pine nuts or walnuts for added texture and richness.
  • Gluten-Free Option: Substitute rotini with gluten-free pasta for a delicious alternative.
  • Herb Infusion: Mix in arugula or parsley for a fresh herbaceous kick.

Serving Suggestions

  • Pair with Grilled Chicken: A perfect protein addition that complements the salad’s flavors.
  • Serve with Garlic Bread: Crunchy, buttery garlic bread makes for a delightful side.
  • Refreshing Drinks: Enjoy with iced tea or a crisp white wine for a refreshing touch.
  • Presentation: Serve in a large bowl garnished with extra basil and Parmesan for a stunning look.

FAQs about Pesto Pasta Salad

Can I make Pesto Pasta Salad ahead of time?

Absolutely! This salad actually tastes better after sitting for a while. You can prepare it a day in advance and store it in the fridge. Just give it a quick toss before serving to refresh the flavors.

What can I substitute for pesto sauce?

If you don’t have pesto on hand, you can use a homemade version with basil, garlic, nuts, and olive oil. Alternatively, store-bought sun-dried tomato or spinach pesto can add a unique twist to your Pesto Pasta Salad.

Is Pesto Pasta Salad suitable for vegetarians?

<pYes, this Pesto Pasta Salad is vegetarian-friendly! With fresh veggies, cheese, and pasta, it’s a satisfying meal. Just ensure your pesto is made without cheese if you want it to be completely dairy-free.

How can I make this salad gluten-free?

Simply swap the rotini pasta for gluten-free pasta. There are many great options available that taste just as good, ensuring everyone can enjoy this delicious dish!

What are some good add-ins for Pesto Pasta Salad?

Feel free to get creative! You can add grilled chicken, chickpeas, or even roasted vegetables. Nuts like pine nuts or walnuts can also enhance the texture and flavor of your salad.

Final Thoughts

Creating this Pesto Pasta Salad is more than just a cooking task; it’s an experience that brings joy to the table. The vibrant colors and fresh flavors remind me of sunny days spent with family and friends. Each bite is a celebration of simplicity and taste, making it a go-to dish for any occasion. Whether you’re hosting a gathering or enjoying a quiet dinner, this salad is sure to impress. So, roll up your sleeves, gather your ingredients, and let the magic of this Pesto Pasta Salad transform your meal into something truly special!

jhessica

Pesto Pasta Salad that Will Wow Your Taste Buds!

A delicious and refreshing Pesto Pasta Salad that combines rotini pasta, cherry tomatoes, mozzarella, and fresh basil, all tossed in a flavorful pesto dressing.
Prep Time 15 minutes
Cook Time 10 minutes
Total Time 55 minutes
Servings: 6 servings
Course: Salad
Cuisine: Italian
Calories: 320

Ingredients
  

  • 8 ounces rotini pasta
  • 1 cup cherry tomatoes halved
  • 1 cup fresh mozzarella balls halved
  • 1 cup fresh basil leaves chopped
  • 1/2 cup pesto sauce
  • 1/4 cup olive oil
  • 1 tablespoon balsamic vinegar
  • Salt and pepper to taste
  • Parmesan cheese for garnish optional

Method
 

  1. Cook the rotini pasta according to package instructions until al dente. Drain and rinse under cold water to cool.
  2. In a large mixing bowl, combine the cooled pasta, cherry tomatoes, mozzarella balls, and chopped basil.
  3. In a separate small bowl, whisk together the pesto sauce, olive oil, balsamic vinegar, salt, and pepper.
  4. Pour the dressing over the pasta salad and toss gently to combine until everything is evenly coated.
  5. Taste and adjust seasoning if necessary.
  6. Chill the pasta salad in the refrigerator for at least 30 minutes before serving to allow the flavors to meld.
  7. Serve chilled, garnished with grated Parmesan cheese if desired.

Nutrition

Serving: 1servingCalories: 320kcalCarbohydrates: 30gProtein: 10gFat: 18gSaturated Fat: 4gPolyunsaturated Fat: 14gCholesterol: 10mgSodium: 200mgFiber: 2gSugar: 3g

Notes

  • For added protein, consider mixing in cooked chicken or chickpeas.
  • Substitute the rotini pasta with whole wheat or gluten-free pasta for a healthier option.

Tried this recipe?

Let us know how it was!

Creamy Pesto Chicken is the Ultimate Weeknight Delight!

Introduction to Creamy Pesto Chicken

After a long day, the last thing I want is to spend hours in the kitchen. That’s where my go-to recipe, Creamy Pesto Chicken, comes in. It’s a delightful dish that combines tender chicken breasts with a rich, flavorful pesto cream sauce. This meal is not just quick to whip up; it’s also a surefire way to impress your loved ones. Whether you’re cooking for family or just treating yourself, this recipe is a comforting hug on a plate. Let’s dive into this weeknight delight that’s bound to become a staple in your kitchen!

Why You’ll Love This Creamy Pesto Chicken

This Creamy Pesto Chicken is a game-changer for busy weeknights. It’s incredibly easy to make, taking just 30 minutes from start to finish. The rich, creamy sauce elevates the simple chicken to a whole new level of flavor. Plus, it’s versatile enough to pair with your favorite sides or even pasta. Trust me, once you try it, you’ll be adding it to your regular rotation!

Ingredients for Creamy Pesto Chicken

Gathering the right ingredients is the first step to creating this mouthwatering Creamy Pesto Chicken. Here’s what you’ll need:

  • Boneless, skinless chicken breasts: The star of the dish, providing lean protein and tenderness.
  • Olive oil: For sautéing the chicken, adding a touch of healthy fat and flavor.
  • Salt and black pepper: Essential seasonings that enhance the chicken’s natural taste.
  • Heavy cream: This is what makes the sauce rich and creamy, giving it that luxurious texture.
  • Basil pesto: A vibrant blend of basil, garlic, and nuts that infuses the dish with fresh, herby goodness.
  • Grated Parmesan cheese: Adds a salty, nutty flavor that complements the cream and pesto beautifully.
  • Cherry tomatoes: These little bursts of sweetness add color and a juicy contrast to the creamy sauce.
  • Fresh spinach: A nutritious addition that wilts down nicely, adding a pop of green.
  • Garlic powder: For an extra layer of flavor without the fuss of fresh garlic.
  • Red pepper flakes (optional): A pinch of heat for those who like a little kick in their meal.
  • Fresh basil leaves: Perfect for garnishing, adding a fresh aroma and visual appeal.

For those looking to lighten things up, consider substituting half-and-half for the heavy cream. You can also toss in some cooked pasta or quinoa to make it a complete meal. Exact quantities for each ingredient can be found at the bottom of the article, ready for printing!

How to Make Creamy Pesto Chicken

Now that you have your ingredients ready, let’s get cooking! This Creamy Pesto Chicken is straightforward and fun to make. Follow these simple steps, and you’ll have a delicious meal on the table in no time.

Step 1: Season the Chicken

Start by seasoning the chicken breasts. Sprinkle salt, black pepper, and garlic powder generously on both sides. This simple step enhances the chicken’s flavor, making every bite delicious. Don’t be shy with the seasoning; it’s what brings the dish to life!

Step 2: Cook the Chicken

Heat a tablespoon of olive oil in a large skillet over medium-high heat. Once the oil is shimmering, carefully add the seasoned chicken breasts. Cook them for about 6-7 minutes on each side. You want them golden brown and cooked through. The sizzling sound is music to your ears, signaling that dinner is on its way!

Step 3: Prepare the Sauce

After the chicken is cooked, remove it from the skillet and set it aside. In the same skillet, reduce the heat to medium. Pour in the heavy cream, followed by the basil pesto and grated Parmesan cheese. Stir everything together, letting it simmer for about 3-4 minutes. The sauce will thicken slightly, creating a creamy, dreamy texture that’s hard to resist.

Step 4: Add Vegetables

Now it’s time to add some color and nutrition! Toss in the halved cherry tomatoes and fresh spinach. Stir them into the sauce, cooking for about 2-3 minutes. You’ll see the spinach wilt and the tomatoes soften, adding a burst of flavor and freshness to the dish.

Step 5: Combine and Heat

Return the cooked chicken to the skillet, placing it right in the creamy sauce. Spoon the sauce over the chicken, ensuring it’s well-coated. Let it cook for an additional 2 minutes to heat through. The aroma wafting through your kitchen will have everyone eagerly waiting for dinner!

Tips for Success

  • Always let the chicken rest for a few minutes after cooking to keep it juicy.
  • Use fresh basil pesto for the best flavor; homemade is even better!
  • Don’t rush the sauce; let it simmer to develop a rich taste.
  • Feel free to add more veggies like bell peppers or zucchini for extra nutrition.
  • Serve immediately for the creamiest experience; leftovers can be reheated but may thicken.

Equipment Needed

  • Large skillet: A non-stick skillet works wonders, but any heavy-bottomed pan will do.
  • Spatula: A wooden or silicone spatula is perfect for stirring and serving.
  • Meat thermometer: Optional, but great for ensuring chicken is cooked to perfection.
  • Cutting board: Essential for prepping your ingredients.

Variations

  • Herb-Infused: Add fresh herbs like thyme or oregano to the sauce for an aromatic twist.
  • Protein Swap: Substitute chicken with shrimp or tofu for a different protein option.
  • Low-Carb Delight: Serve over zucchini noodles or cauliflower rice for a low-carb meal.
  • Spicy Kick: Mix in some diced jalapeños or a splash of hot sauce for extra heat.
  • Cheesy Goodness: Experiment with different cheeses like mozzarella or feta for varied flavors.

Serving Suggestions

  • Pair with pasta: Serve over fettuccine or penne to soak up the creamy sauce.
  • Fresh salad: A crisp Caesar or mixed greens salad complements the richness.
  • Wine pairing: A chilled Sauvignon Blanc enhances the flavors beautifully.
  • Garnish: Top with extra Parmesan and fresh basil for a stunning presentation.

FAQs about Creamy Pesto Chicken

As you embark on your culinary adventure with Creamy Pesto Chicken, you might have a few questions. Here are some common queries that can help you navigate this delicious dish:

Can I use store-bought pesto?

Absolutely! Store-bought basil pesto is a great time-saver and still delivers fantastic flavor. Just make sure to choose a high-quality brand for the best results.

How can I make this dish healthier?

For a lighter version, swap the heavy cream for half-and-half or Greek yogurt. You can also add more vegetables or serve it over a bed of greens instead of pasta.

What can I serve with Creamy Pesto Chicken?

This dish pairs wonderfully with pasta, rice, or a fresh salad. You can also serve it with crusty bread to soak up that delicious sauce!

Can I make this ahead of time?

While it’s best enjoyed fresh, you can prepare the sauce in advance and store it in the fridge. Just reheat it gently before adding the chicken.

How do I store leftovers?

Store any leftovers in an airtight container in the fridge for up to three days. Reheat gently on the stove or in the microwave, adding a splash of cream if it thickens too much.

Final Thoughts

Creamy Pesto Chicken is more than just a meal; it’s a celebration of flavors that brings joy to the dinner table. The rich, creamy sauce envelops the tender chicken, creating a dish that feels indulgent yet is surprisingly easy to prepare. Whether you’re cooking for family or enjoying a quiet night in, this recipe is sure to impress. It’s a reminder that delicious food doesn’t have to be complicated. So, roll up your sleeves, gather your ingredients, and let this delightful dish transform your weeknight dinners into something special. Happy cooking!

jhessica

Creamy Pesto Chicken is the Ultimate Weeknight Delight!

Creamy Pesto Chicken is a delicious and easy weeknight meal featuring tender chicken breasts in a rich and flavorful pesto cream sauce.
Prep Time 10 minutes
Cook Time 20 minutes
Total Time 30 minutes
Servings: 2 servings
Course: Main Dish
Cuisine: Italian
Calories: 600

Ingredients
  

  • 2 boneless skinless chicken breasts (about 1 pound total)
  • 1 tablespoon olive oil
  • 1 teaspoon salt
  • 1/2 teaspoon black pepper
  • 1 cup heavy cream
  • 1/2 cup basil pesto
  • 1/2 cup grated Parmesan cheese
  • 1 cup cherry tomatoes halved
  • 1 cup fresh spinach
  • 1 teaspoon garlic powder
  • 1/2 teaspoon red pepper flakes optional
  • Fresh basil leaves for garnish

Method
 

  1. Start by seasoning the chicken breasts with salt, pepper, and garlic powder on both sides.
  2. In a large skillet, heat the olive oil over medium-high heat. Add the chicken breasts and cook for about 6-7 minutes on each side, or until golden brown and cooked through. Remove the chicken from the skillet and set aside.
  3. In the same skillet, reduce the heat to medium and add the heavy cream, basil pesto, and Parmesan cheese. Stir well to combine and let it simmer for about 3-4 minutes until the sauce thickens slightly.
  4. Add the cherry tomatoes and spinach to the sauce, stirring until the spinach wilts and the tomatoes soften, about 2-3 minutes.
  5. Return the cooked chicken to the skillet, spooning the creamy sauce over the top. Let it cook for an additional 2 minutes to heat through.
  6. Serve the creamy pesto chicken garnished with fresh basil leaves.

Nutrition

Serving: 1servingCalories: 600kcalCarbohydrates: 8gProtein: 45gFat: 45gSaturated Fat: 20gPolyunsaturated Fat: 15gCholesterol: 150mgSodium: 800mgFiber: 1gSugar: 3g

Notes

  • For a lighter version, substitute half-and-half for heavy cream.
  • Add cooked pasta or quinoa to the skillet for a complete meal.

Tried this recipe?

Let us know how it was!

Creamy Garlic Cheesy Chicken and Potatoes is Delightful!

Introduction to Creamy Garlic Cheesy Chicken and Potatoes

There’s something magical about a dish that brings comfort and satisfaction in every bite.

Creamy Garlic Cheesy Chicken and Potatoes is just that—a delightful blend of tender chicken and baby potatoes enveloped in a rich, creamy garlic sauce.

Whether you’re racing against the clock after a long day or looking to impress your loved ones with minimal effort, this recipe is your go-to solution.

It’s quick, easy, and packed with flavor, making it perfect for any occasion.

Let’s dive into this culinary adventure that will surely become a family favorite!

Why You’ll Love This Creamy Garlic Cheesy Chicken and Potatoes

This dish is a game-changer for busy weeknights.

With just a handful of ingredients and minimal prep time, you can whip up a meal that feels indulgent yet effortless.

The creamy garlic sauce clings to the chicken and potatoes, creating a flavor explosion that will have everyone asking for seconds.

Plus, it’s a one-pan wonder, making cleanup a breeze.

What’s not to love?

Ingredients for Creamy Garlic Cheesy Chicken and Potatoes

Gathering the right ingredients is the first step to culinary success.

For this Creamy Garlic Cheesy Chicken and Potatoes, you’ll need:

  • Baby Potatoes: These little gems are tender and cook quickly, making them perfect for this dish.
  • Boneless, Skinless Chicken Breasts: Cut into bite-sized pieces, they absorb the creamy sauce beautifully.
  • Olive Oil: A staple in any kitchen, it adds flavor and helps sauté the potatoes to perfection.
  • Garlic: Freshly minced garlic brings a robust flavor that elevates the entire dish.
  • Heavy Cream: This is the secret to that luscious, creamy sauce. For a lighter option, consider half-and-half.
  • Shredded Cheddar Cheese: Melty and gooey, it adds a cheesy richness that’s hard to resist.
  • Dried Thyme: A pinch of this herb adds an earthy note that complements the garlic.
  • Paprika: This spice not only adds color but also a subtle warmth to the dish.
  • Salt and Pepper: Essential for seasoning, they enhance all the flavors in the dish.
  • Fresh Parsley: A sprinkle of this vibrant herb adds a pop of color and freshness when serving.

Feel free to get creative!

You can toss in your favorite vegetables, like spinach or broccoli, for added nutrition and flavor.

For exact quantities, check the bottom of the article where you can find everything available for printing.

How to Make Creamy Garlic Cheesy Chicken and Potatoes

Creating this Creamy Garlic Cheesy Chicken and Potatoes is a straightforward process that will have your kitchen smelling divine.

Let’s break it down step by step, ensuring you have all the tips you need for a successful dish.

Step 1: Preheat the Oven

First things first, preheat your oven to 400°F (200°C).

This ensures it’s hot and ready for baking when the time comes.

Step 2: Sauté the Potatoes

In a large oven-safe skillet, heat the olive oil over medium heat.

Add the halved baby potatoes and cook for about 5-7 minutes, stirring occasionally.

You want them to start softening but not fully cooked yet.

This step is crucial for achieving that perfect texture later.

Step 3: Add Garlic

Next, toss in the minced garlic.

Cook for an additional 1-2 minutes until it becomes fragrant.

The aroma will fill your kitchen, making it hard to resist sneaking a taste!

Step 4: Cook the Chicken

Now, push the potatoes to the side of the skillet and add the chicken pieces.

Season everything with salt, pepper, thyme, and paprika.

Cook until the chicken is browned on all sides, about 5-6 minutes.

This step locks in flavor and ensures your chicken is juicy.

Step 5: Combine Ingredients

Pour in the heavy cream and stir to combine everything.

Bring the mixture to a simmer, then reduce the heat to low.

This creamy sauce is what makes this dish so indulgent!

Step 6: Add Cheese and Bake

Sprinkle the shredded cheddar cheese evenly over the top.

Transfer the skillet to the preheated oven and bake for 15-20 minutes.

You’ll know it’s ready when the chicken is cooked through and the sauce is bubbly.

That golden cheese on top is a sight to behold!

Step 7: Garnish and Serve

Once out of the oven, let it cool for a few minutes.

Garnish with fresh parsley before serving.

This final touch adds a burst of color and freshness to your dish.

Now, dig in and enjoy every creamy, cheesy bite!\

Tips for Success

  • Always taste as you go! Adjust seasoning to your preference for the best flavor.
  • For extra creaminess, let the dish sit for a few minutes after baking before serving.
  • Use a cast-iron skillet for even cooking and a beautiful presentation.
  • Don’t rush the sautéing process; it enhances the flavors of the garlic and potatoes.
  • Experiment with different cheeses like mozzarella or pepper jack for a twist!

Equipment Needed

  • Oven-Safe Skillet: A cast-iron skillet works wonders, but any oven-safe pan will do.
  • Cutting Board: Essential for chopping your chicken and garlic.
  • Sharp Knife: A good knife makes prep quick and easy.
  • Measuring Cups: Handy for portioning out your ingredients.
  • Spatula: Perfect for stirring and serving your delicious creation.

Variations of Creamy Garlic Cheesy Chicken and Potatoes

  • Vegetable Medley: Add colorful veggies like bell peppers, zucchini, or carrots for a nutritious boost.
  • Spicy Kick: Incorporate diced jalapeños or a sprinkle of red pepper flakes for a fiery twist.
  • Herb Infusion: Experiment with fresh herbs like rosemary or basil to elevate the flavor profile.
  • Low-Carb Option: Substitute baby potatoes with cauliflower florets for a lighter, keto-friendly version.
  • Cheese Variety: Swap cheddar for gouda or feta for a unique cheesy experience.

Serving Suggestions for Creamy Garlic Cheesy Chicken and Potatoes

  • Fresh Salad: Pair with a crisp green salad for a refreshing contrast.
  • Garlic Bread: Serve with warm garlic bread to soak up that creamy sauce.
  • Wine Pairing: A chilled Chardonnay complements the richness beautifully.
  • Presentation: Serve in the skillet for a rustic, family-style meal.

FAQs about Creamy Garlic Cheesy Chicken and Potatoes

Can I use frozen chicken for this recipe?

Absolutely! Just make sure to thaw it completely before cooking. Frozen chicken may require a bit more time to cook through, so keep an eye on it.

What can I substitute for heavy cream?

If you’re looking for a lighter option, half-and-half or a low-fat cream alternative works well. You can also use coconut milk for a dairy-free version.

How do I store leftovers?

Store any leftovers in an airtight container in the fridge for up to three days. Reheat in the oven or microwave until warmed through.

Can I add more vegetables to this dish?

Definitely! Feel free to toss in your favorite veggies like spinach, broccoli, or even peas for added nutrition and flavor.

Is this dish gluten-free?

Yes! Creamy Garlic Cheesy Chicken and Potatoes is naturally gluten-free, making it a great option for those with dietary restrictions.

Final Thoughts

Cooking is more than just a task; it’s an experience that brings people together.

This Creamy Garlic Cheesy Chicken and Potatoes dish embodies that spirit, transforming a simple meal into a heartwarming gathering.

The rich flavors and creamy texture create a comforting embrace that warms the soul.

Whether you’re sharing it with family or enjoying a quiet night in, each bite is a reminder of the joy that home-cooked meals can bring.

So, roll up your sleeves, gather your loved ones, and let this delightful recipe become a cherished part of your culinary repertoire!

jhessica

Creamy Garlic Cheesy Chicken and Potatoes is Delightful!

Creamy Garlic Cheesy Chicken and Potatoes is a delightful dish that combines tender chicken and baby potatoes in a rich, creamy garlic sauce topped with melted cheddar cheese.
Prep Time 10 minutes
Cook Time 30 minutes
Total Time 40 minutes
Servings: 4 servings
Course: Main Course
Cuisine: American
Calories: 450

Ingredients
  

  • 2 cups baby potatoes halved
  • 1 pound boneless skinless chicken breasts, cut into bite-sized pieces
  • 2 tablespoons olive oil
  • 4 cloves garlic minced
  • 1 cup heavy cream
  • 1 cup shredded cheddar cheese
  • 1 teaspoon dried thyme
  • 1 teaspoon paprika
  • Salt and pepper to taste
  • Fresh parsley chopped (for garnish)

Method
 

  1. Preheat your oven to 400°F (200°C).
  2. In a large oven-safe skillet, heat the olive oil over medium heat. Add the halved baby potatoes and cook for about 5-7 minutes, stirring occasionally, until they start to soften.
  3. Add the minced garlic to the skillet and cook for an additional 1-2 minutes until fragrant.
  4. Push the potatoes to the side of the skillet and add the chicken pieces. Season with salt, pepper, thyme, and paprika. Cook until the chicken is browned on all sides, about 5-6 minutes.
  5. Pour in the heavy cream and stir to combine everything. Bring to a simmer, then reduce heat to low.
  6. Sprinkle the shredded cheddar cheese evenly over the top. Transfer the skillet to the preheated oven and bake for 15-20 minutes, or until the chicken is cooked through and the sauce is bubbly.
  7. Remove from the oven and let it cool for a few minutes. Garnish with fresh parsley before serving.

Nutrition

Serving: 1servingCalories: 450kcalCarbohydrates: 15gProtein: 35gFat: 30gSaturated Fat: 15gPolyunsaturated Fat: 10gCholesterol: 120mgSodium: 600mgFiber: 2gSugar: 2g

Notes

  • For a lighter version, substitute heavy cream with half-and-half or a low-fat cream alternative.
  • Add your favorite vegetables, such as spinach or broccoli, for added nutrition and flavor.

Tried this recipe?

Let us know how it was!

Taco Lasagna: A Delicious Twist on Classic Baking!

Introduction to Taco Lasagna

There’s something magical about combining two beloved dishes into one, and that’s exactly what Taco Lasagna does. Growing up, I always looked forward to family dinners where flavors collided in the most delightful ways. This recipe is a fantastic solution for those busy weeknights when you want to impress your loved ones without spending hours in the kitchen. With layers of seasoned meat, gooey cheese, and vibrant toppings, Taco Lasagna is comfort food at its finest. It’s not just a meal; it’s a celebration of flavors that brings everyone together around the table.

Why You’ll Love This Taco Lasagna

Taco Lasagna is the ultimate crowd-pleaser, combining the best of both worlds: the heartiness of lasagna and the zesty kick of tacos. It’s quick to prepare, making it perfect for those hectic evenings when time is short. Plus, the layers of flavor create a satisfying dish that even picky eaters will love. With minimal cleanup and maximum taste, this recipe is sure to become a staple in your kitchen.

Ingredients for Taco Lasagna

Gathering the right ingredients is key to making a delicious Taco Lasagna. Here’s what you’ll need:

  • Ground beef or turkey: This is the base of your filling, providing protein and flavor. You can also use shredded chicken or a plant-based alternative for a different twist.
  • Onion: Diced onion adds sweetness and depth to the dish. It caramelizes beautifully when cooked, enhancing the overall flavor.
  • Garlic: Minced garlic brings a fragrant aroma and a punch of flavor that pairs perfectly with the spices.
  • Taco seasoning: This blend of spices is what gives Taco Lasagna its signature kick. Feel free to use store-bought or make your own for a personal touch.
  • Black beans: These add a hearty texture and boost the fiber content, making the dish more filling.
  • Corn: Sweet corn adds a pop of color and sweetness, balancing the savory flavors.
  • Salsa: A jar of salsa brings moisture and a zesty flavor to the mix. Choose your favorite variety for a personal touch.
  • Lasagna noodles: Regular or no-boil noodles work well. They create the layers that make this dish so comforting.
  • Shredded cheddar cheese: This melty goodness is essential for that gooey, cheesy layer that everyone loves.
  • Sour cream: A dollop of sour cream adds creaminess and a tangy flavor that complements the spices.
  • Shredded lettuce: Fresh lettuce is perfect for topping, adding a crisp texture and freshness.
  • Tomato: Diced tomatoes provide a burst of freshness and color on top of your lasagna.
  • Black olives (optional): If you enjoy their briny flavor, sliced black olives make a great addition to the topping.
  • Cilantro (optional): Fresh cilantro adds a burst of herbal flavor, perfect for garnishing your dish.

For exact measurements, check the bottom of the article where you can find everything available for printing. Happy cooking!

How to Make Taco Lasagna

Creating Taco Lasagna is a straightforward process that brings together all those delicious flavors in a fun and satisfying way. Follow these simple steps, and you’ll have a mouthwatering dish ready to impress!

Step 1: Preheat the Oven

Start by preheating your oven to 350°F (175°C). Preheating is crucial for even cooking. It ensures that your Taco Lasagna bakes perfectly, with all the layers heated through and the cheese bubbling beautifully.

Step 2: Cook the Meat

In a large skillet over medium heat, add your ground beef or turkey. Cook it until browned, breaking it apart with a spatula. This step is essential for flavor. Once browned, drain any excess fat to keep your dish from becoming greasy.

Step 3: Add Vegetables and Seasoning

Next, toss in the diced onion and minced garlic. Sauté them until the onion turns translucent, about 3-4 minutes. Then, stir in the taco seasoning. This blend of spices is what gives Taco Lasagna its signature flavor, so don’t skip this step!

Step 4: Combine Ingredients

Now, it’s time to mix in the black beans, corn, and salsa. Stir everything together and let it cook for an additional 5 minutes. This hearty filling is what makes Taco Lasagna so satisfying, combining textures and flavors that will have everyone coming back for seconds.

Step 5: Layer the Lasagna

In a 9×13-inch baking dish, start by spreading a thin layer of the meat mixture on the bottom. Then, place a layer of lasagna noodles over it. Repeat the layering process: add half of the remaining meat mixture, followed by half of the sour cream and a generous layer of cheese. Repeat until all ingredients are used, finishing with cheese on top.

Step 6: Bake the Lasagna

Cover the dish with aluminum foil and bake for 25 minutes. This helps the lasagna cook evenly. After that, remove the foil and bake for an additional 10-15 minutes. You want the cheese to be bubbly and golden, creating that irresistible crust.

Step 7: Cool and Serve

Once baked, let the lasagna cool for about 10 minutes. This cooling time allows the layers to set, making it easier to slice. Top with shredded lettuce, diced tomatoes, and black olives if you like. A sprinkle of fresh cilantro adds a lovely touch!

Tips for Success

  • Use no-boil lasagna noodles for a quicker prep time.
  • Don’t skip the cooling time; it helps the layers hold together when slicing.
  • Feel free to customize the toppings based on your family’s preferences.
  • For extra flavor, consider adding diced jalapeños to the meat mixture.
  • Make it ahead of time and refrigerate; it tastes even better the next day!

Equipment Needed

  • Large skillet: Essential for browning the meat. A non-stick pan works well too.
  • 9×13-inch baking dish: Perfect for layering your Taco Lasagna. Any similar-sized dish will do.
  • Spatula: Great for mixing and serving. A wooden spoon is a good alternative.
  • Aluminum foil: Necessary for covering the dish while baking. Parchment paper can be used in a pinch.

Variations

  • Vegetarian Taco Lasagna: Swap the meat for a mix of sautéed mushrooms, zucchini, and bell peppers for a hearty vegetarian option.
  • Spicy Taco Lasagna: Add diced jalapeños or a splash of hot sauce to the meat mixture for an extra kick.
  • Gluten-Free Option: Use gluten-free lasagna noodles to make this dish suitable for those with gluten sensitivities.
  • Cheesy Taco Lasagna: Mix in different types of cheese, like pepper jack or Monterey Jack, for a unique flavor twist.
  • Low-Carb Taco Lasagna: Replace lasagna noodles with thinly sliced zucchini or eggplant for a low-carb alternative.

Serving Suggestions

  • Pair Taco Lasagna with a fresh side salad for a light and crunchy contrast.
  • Serve with tortilla chips and guacamole for a fun, shareable appetizer.
  • A cold beer or a refreshing margarita complements the flavors beautifully.
  • Garnish with extra cilantro and lime wedges for a vibrant presentation.

FAQs about Taco Lasagna

As you dive into the world of Taco Lasagna, you might have a few questions. Here are some common queries that can help you navigate this delicious dish:

Can I make Taco Lasagna ahead of time?

Absolutely! You can prepare Taco Lasagna a day in advance. Just assemble it, cover it tightly, and refrigerate. When you’re ready to bake, add a few extra minutes to the cooking time.

What can I substitute for ground beef?

If you’re looking for alternatives, ground turkey, shredded chicken, or even a plant-based meat substitute work wonderfully. Each option brings its own unique flavor to the dish.

How do I store leftovers?

Leftover Taco Lasagna can be stored in an airtight container in the fridge for up to 3-4 days. Reheat in the oven or microwave until warmed through.

Can I freeze Taco Lasagna?

Yes! Taco Lasagna freezes well. Just make sure to wrap it tightly in plastic wrap and aluminum foil. It can be frozen for up to 3 months. Thaw in the fridge before baking.

What toppings can I add to Taco Lasagna?

The sky’s the limit! Consider adding sliced jalapeños, avocado, or even a drizzle of hot sauce for an extra kick. Fresh toppings like cilantro and lime juice brighten up the dish beautifully.

Final Thoughts

Taco Lasagna is more than just a meal; it’s an experience that brings joy to the table. The layers of flavor and texture create a comforting dish that warms the heart and satisfies the soul. Whether you’re sharing it with family on a busy weeknight or serving it at a gathering with friends, this recipe is sure to impress. The best part? It’s versatile and easy to customize, making it a go-to for any occasion. So roll up your sleeves, gather your ingredients, and let the deliciousness unfold. Your taste buds will thank you!

jhessica

Taco Lasagna: A Delicious Twist on Classic Baking!

Taco Lasagna is a delicious twist on classic baking, combining the flavors of tacos with the comforting layers of lasagna.
Prep Time 20 minutes
Cook Time 40 minutes
Total Time 1 hour
Servings: 6 servings
Course: Main Dish
Cuisine: Mexican
Calories: 450

Ingredients
  

  • 1 pound ground beef or turkey
  • 1 small onion diced
  • 2 cloves garlic minced
  • 1 packet taco seasoning
  • 1 15-ounce can black beans, drained and rinsed
  • 1 15-ounce can corn, drained
  • 1 16-ounce jar salsa
  • 9-12 lasagna noodles regular or no-boil
  • 2 cups shredded cheddar cheese
  • 1 cup sour cream
  • 1 cup shredded lettuce for topping
  • 1 medium tomato diced (for topping)
  • 1/4 cup sliced black olives optional, for topping
  • 1/4 cup chopped fresh cilantro optional, for garnish

Method
 

  1. Preheat the oven to 350°F (175°C).
  2. In a large skillet over medium heat, cook the ground beef or turkey until browned. Drain excess fat if necessary.
  3. Add the diced onion and minced garlic to the skillet, cooking until the onion is translucent, about 3-4 minutes.
  4. Stir in the taco seasoning, black beans, corn, and salsa. Cook for an additional 5 minutes, allowing the flavors to meld.
  5. In a 9×13-inch baking dish, spread a thin layer of the meat mixture on the bottom. Place a layer of lasagna noodles over the meat mixture.
  6. Spread half of the remaining meat mixture over the noodles, followed by half of the sour cream and a layer of cheese.
  7. Repeat the layering process with another layer of noodles, the remaining meat mixture, sour cream, and top with the remaining cheese.
  8. Cover the dish with aluminum foil and bake for 25 minutes. Remove the foil and bake for an additional 10-15 minutes, or until the cheese is bubbly and golden.
  9. Let the lasagna cool for 10 minutes before slicing. Top with shredded lettuce, diced tomato, black olives, and cilantro if desired.

Nutrition

Serving: 1sliceCalories: 450kcalCarbohydrates: 30gProtein: 30gFat: 25gSaturated Fat: 10gPolyunsaturated Fat: 15gCholesterol: 80mgSodium: 800mgFiber: 5gSugar: 3g

Notes

  • For a spicier kick, add diced jalapeños to the meat mixture.
  • You can substitute ground beef with shredded chicken or a plant-based meat alternative for a different flavor profile.

Tried this recipe?

Let us know how it was!

Cashew Chicken Sheet Pan Dinner: A Simple Recipe Delight!

Introduction to Cashew Chicken Sheet Pan Dinner

After a long day, the last thing I want is to spend hours in the kitchen. That’s where my Cashew Chicken Sheet Pan Dinner comes in, a delightful dish that’s as easy as it is delicious. Picture tender chicken, vibrant veggies, and crunchy cashews all roasted together, creating a symphony of flavors. This recipe is perfect for busy weeknights or when you want to impress your loved ones without breaking a sweat. With minimal prep and cleanup, you can savor a home-cooked meal that feels special, yet is simple enough for any night of the week.

Why You’ll Love This Cashew Chicken Sheet Pan Dinner

This Cashew Chicken Sheet Pan Dinner is a game-changer for anyone juggling a busy schedule. It’s quick to prepare, taking just 15 minutes of your time, and the oven does the rest. The combination of tender chicken, colorful veggies, and crunchy cashews creates a mouthwatering dish that’s bursting with flavor. Plus, cleanup is a breeze—just one pan to wash! It’s a win-win for your taste buds and your time.

Ingredients for Cashew Chicken Sheet Pan Dinner

Gathering the right ingredients is the first step to culinary success. For this Cashew Chicken Sheet Pan Dinner, you’ll need a mix of fresh produce, protein, and flavorful seasonings. Here’s what you’ll need:

  • Boneless, skinless chicken thighs: Tender and juicy, they soak up flavors beautifully.
  • Raw cashews: These add a delightful crunch and nutty flavor that elevates the dish.
  • Red and yellow bell peppers: Their sweetness and vibrant colors make the meal visually appealing.
  • Broccoli florets: Packed with nutrients, they add a nice texture and a pop of green.
  • Snap peas: Crisp and sweet, they bring a fresh crunch to every bite.
  • Soy sauce: This salty, umami-rich sauce is the backbone of the flavor profile.
  • Honey: A touch of sweetness balances the savory elements perfectly.
  • Sesame oil: This oil adds a rich, nutty aroma that enhances the Asian-inspired flavors.
  • Garlic: Minced garlic brings a punch of flavor that’s hard to resist.
  • Ground ginger: A warm spice that adds depth and a hint of warmth.
  • Cornstarch: This helps thicken the sauce and gives it a nice glaze.
  • Salt and pepper: Essential for seasoning, they enhance all the flavors.
  • Cooked rice or quinoa: Serve this dish over your choice of grain for a complete meal.

For those looking to mix things up, consider substituting chicken with tofu or shrimp for a different protein option. If you want a spicy kick, feel free to add red pepper flakes or sriracha to the sauce. You can find the exact quantities for each ingredient at the bottom of the article, ready for printing!

How to Make Cashew Chicken Sheet Pan Dinner

Now that you have your ingredients ready, let’s dive into the fun part—making this Cashew Chicken Sheet Pan Dinner! Follow these simple steps, and you’ll have a delicious meal on the table in no time.

Step 1: Preheat the Oven

First things first, preheat your oven to 400°F (200°C). This ensures everything cooks evenly and gets that lovely roasted flavor. While the oven heats up, line a large baking sheet with parchment paper. This little trick makes cleanup a breeze!

Step 2: Prepare the Chicken and Vegetables

In a large bowl, combine the bite-sized pieces of chicken, diced red and yellow bell peppers, broccoli florets, and snap peas. The colors alone will make you smile! Toss them together gently, so they’re ready to soak up all those amazing flavors.

Step 3: Make the Sauce

In a separate bowl, whisk together the soy sauce, honey, sesame oil, minced garlic, ground ginger, cornstarch, salt, and pepper. This sauce is the heart of your dish, bringing everything together. Once mixed, pour it over the chicken and vegetables, tossing to coat them evenly. You want every piece to be deliciously dressed!

Step 4: Arrange on Baking Sheet

Spread the chicken and vegetable mixture in a single layer on your prepared baking sheet. This step is crucial for even cooking. If they’re too crowded, they’ll steam instead of roast, and we want that beautiful caramelization!

Step 5: Add Cashews

Now, sprinkle the raw cashews over the top of the chicken and vegetables. They’ll toast up nicely in the oven, adding that delightful crunch we all love. Trust me, this is where the magic happens!

Step 6: Bake

Pop the baking sheet into the preheated oven and bake for 25-30 minutes. Halfway through, give everything a good stir to ensure even roasting. You’ll know it’s done when the chicken is cooked through and the veggies are tender. The aroma will be irresistible!

Step 7: Serve

Once out of the oven, serve your Cashew Chicken over cooked rice or quinoa. This dish is not just a meal; it’s a celebration of flavors and textures. Enjoy every bite!

Tips for Success

  • Prep your ingredients ahead of time to save on cooking time.
  • Don’t overcrowd the baking sheet; give everything room to roast.
  • For extra flavor, marinate the chicken in the sauce for 30 minutes before cooking.
  • Use fresh vegetables for the best taste and texture.
  • Feel free to experiment with different veggies based on what you have on hand.

Equipment Needed

  • Baking sheet: A large, rimmed baking sheet is ideal. If you don’t have one, a roasting pan works too.
  • Parchment paper: This makes cleanup easy. Aluminum foil can be a substitute.
  • Mixing bowls: Use any size you have on hand for mixing ingredients.
  • Whisk: A fork can work in a pinch for mixing the sauce.

Variations

  • Protein Swap: Substitute chicken with tofu for a vegetarian option or shrimp for a seafood twist.
  • Veggie Medley: Add or replace vegetables like carrots, zucchini, or asparagus for a different flavor profile.
  • Spicy Kick: Incorporate red pepper flakes or sriracha into the sauce for a fiery version.
  • Nut Alternatives: Use almonds or peanuts instead of cashews for a different crunch and taste.
  • Gluten-Free Option: Ensure your soy sauce is gluten-free or use tamari for a similar flavor.

Serving Suggestions

  • Grain Base: Serve your Cashew Chicken over fluffy rice or quinoa for a hearty meal.
  • Fresh Salad: Pair with a light cucumber or mixed greens salad for a refreshing contrast.
  • Drink Pairing: Enjoy with a crisp white wine or iced green tea to complement the flavors.
  • Garnish: Top with sliced green onions or sesame seeds for an extra touch of flair.

FAQs about Cashew Chicken Sheet Pan Dinner

Can I use chicken breasts instead of thighs?
Absolutely! Chicken breasts can be used, but they may dry out faster. Just keep an eye on the cooking time to ensure they stay juicy.

How can I make this dish spicier?
For a spicy kick, add red pepper flakes or a splash of sriracha to the sauce. You can also toss in some sliced jalapeños for an extra heat boost!

Can I prepare this meal in advance?
Yes! You can marinate the chicken and chop the vegetables a day ahead. Just store them in the fridge until you’re ready to bake.

What can I substitute for cashews?
If you’re not a fan of cashews, almonds or peanuts work great too. They’ll still provide that satisfying crunch and nutty flavor.

Is this recipe gluten-free?
Yes, as long as you use gluten-free soy sauce or tamari, this Cashew Chicken Sheet Pan Dinner is a delicious gluten-free option!

Final Thoughts

Cooking should be a joyful experience, and my Cashew Chicken Sheet Pan Dinner embodies that spirit. It’s not just about the delicious flavors or the ease of preparation; it’s about gathering around the table with family or friends, sharing stories, and creating memories. The vibrant colors and enticing aromas fill your kitchen, making it feel warm and inviting. Plus, with minimal cleanup, you can focus on what truly matters—enjoying the moment. So, whether it’s a busy weeknight or a special occasion, this dish is sure to bring smiles and satisfaction to your table. Dive in and savor every bite!

jhessica

Cashew Chicken Sheet Pan Dinner: A Simple Recipe Delight!

A delicious and easy-to-make Cashew Chicken Sheet Pan Dinner that combines tender chicken, colorful vegetables, and crunchy cashews, all baked to perfection.
Prep Time 15 minutes
Cook Time 30 minutes
Total Time 45 minutes
Servings: 4 servings
Course: Dinner
Cuisine: Asian
Calories: 400

Ingredients
  

  • 2 cups boneless skinless chicken thighs, cut into bite-sized pieces
  • 1 cup raw cashews
  • 1 red bell pepper diced
  • 1 yellow bell pepper diced
  • 1 cup broccoli florets
  • 1 cup snap peas
  • 3 tablespoons soy sauce
  • 2 tablespoons honey
  • 1 tablespoon sesame oil
  • 2 cloves garlic minced
  • 1 teaspoon ground ginger
  • 1 tablespoon cornstarch
  • Salt and pepper to taste
  • Cooked rice or quinoa for serving

Method
 

  1. Preheat your oven to 400°F (200°C) and line a large baking sheet with parchment paper.
  2. In a large bowl, combine the chicken, bell peppers, broccoli, and snap peas.
  3. In a separate bowl, whisk together the soy sauce, honey, sesame oil, garlic, ginger, cornstarch, salt, and pepper. Pour this mixture over the chicken and vegetables, tossing to coat evenly.
  4. Spread the chicken and vegetable mixture in a single layer on the prepared baking sheet.
  5. Sprinkle the cashews over the top of the chicken and vegetables.
  6. Bake in the preheated oven for 25-30 minutes, or until the chicken is cooked through and the vegetables are tender. Stir halfway through cooking for even roasting.
  7. Serve over cooked rice or quinoa, and enjoy!

Nutrition

Serving: 1servingCalories: 400kcalCarbohydrates: 30gProtein: 30gFat: 20gSaturated Fat: 3gPolyunsaturated Fat: 15gCholesterol: 100mgSodium: 800mgFiber: 4gSugar: 10g

Notes

  • For a spicier kick, add red pepper flakes or sriracha to the sauce.
  • Substitute the chicken with tofu or shrimp for a different protein option.

Tried this recipe?

Let us know how it was!

Korean Cucumber Salad: Quick, Crunchy Delight Awaits!

Introduction to Korean Cucumber Salad

There’s something magical about a dish that combines simplicity with vibrant flavors. Korean cucumber salad is just that—a refreshing, crunchy delight that can brighten up any meal. Whether you’re racing against the clock on a busy weeknight or looking to impress friends at a weekend gathering, this salad is your go-to. It’s quick to whip up, and the best part? It’s packed with flavor and nutrition. Trust me, once you try this Korean cucumber salad, it’ll become a staple in your kitchen, ready to elevate your dining experience with minimal effort.

Why You’ll Love This Korean Cucumber Salad

This Korean cucumber salad is a game-changer for anyone who craves a quick, refreshing side dish. It takes just 15 minutes to prepare, making it perfect for those hectic evenings. The balance of sweet, tangy, and savory flavors will tantalize your taste buds. Plus, it’s a guilt-free addition to any meal, bringing a burst of color and crunch that everyone will love. You’ll find yourself making it again and again!

Ingredients for Korean Cucumber Salad

Gathering the right ingredients is key to making a delicious Korean cucumber salad. Here’s what you’ll need:

  • Cucumbers: Fresh, medium cucumbers are the star of this dish. Their crispness adds that satisfying crunch.
  • Salt: A little salt helps draw out moisture from the cucumbers, enhancing their flavor.
  • Sugar: This balances the tanginess of the vinegar, creating a harmonious taste.
  • Rice Vinegar: A staple in Korean cuisine, it adds a mild acidity that brightens the salad.
  • Soy Sauce: This brings a savory depth, complementing the other flavors beautifully.
  • Sesame Oil: A drizzle of this nutty oil adds richness and a hint of warmth.
  • Minced Garlic: Fresh garlic gives a punch of flavor that elevates the dish.
  • Sesame Seeds: These tiny seeds add a delightful crunch and a nutty finish.
  • Green Onion: Finely chopped, they provide a fresh, mild onion flavor.
  • Red Pepper Flakes: Optional, but if you like a bit of heat, sprinkle some in for a spicy kick.

For those looking to mix things up, consider adding thinly sliced carrots or bell peppers for extra crunch. If you’re out of rice vinegar, apple cider vinegar works as a great substitute. You can find the exact measurements for these ingredients at the bottom of the article, ready for printing!

How to Make Korean Cucumber Salad

Creating this Korean cucumber salad is a breeze. Follow these simple steps, and you’ll have a delicious side dish ready in no time. Let’s dive in!

Step 1: Prepare the Cucumbers

Start by washing your cucumbers thoroughly. Slice them thinly; this helps them soak up the flavors. In a large bowl, toss the sliced cucumbers with salt. This step is crucial as it draws out excess moisture, making your salad crispier. Let them sit for about 15 minutes. You’ll notice some water collecting at the bottom of the bowl—that’s exactly what you want!

Step 2: Make the Dressing

While the cucumbers are resting, it’s time to whip up the dressing. In a separate bowl, combine sugar, rice vinegar, soy sauce, sesame oil, and minced garlic. Whisk everything together until the sugar dissolves. If you’re feeling adventurous, add red pepper flakes for a spicy kick. This dressing is the heart of your Korean cucumber salad, so make sure it’s well mixed!

Step 3: Combine and Toss

Once the cucumbers have released their moisture, rinse them under cold water and drain well. Pat them dry with a paper towel to remove excess water. Now, add the drained cucumbers to the dressing. Toss everything together until the cucumbers are well coated. This is where the magic happens—the flavors meld beautifully, creating a refreshing taste.

Step 4: Let it Rest

For the best flavor, let your salad sit for at least 10 minutes before serving. This resting time allows the cucumbers to absorb the dressing fully. You can serve it chilled or at room temperature, depending on your preference. Trust me, the wait is worth it!

Tips for Success

  • Use fresh, firm cucumbers for the best crunch.
  • Adjust the sugar and vinegar to suit your taste; balance is key!
  • For extra flavor, let the salad sit longer—up to an hour is great.
  • Experiment with different vinegars for unique twists.
  • Store leftovers in an airtight container for up to two days.

Equipment Needed

  • Cutting Board: A sturdy surface for slicing cucumbers. A plate can work in a pinch.
  • Sharp Knife: Essential for thinly slicing cucumbers. A vegetable peeler can help with prep.
  • Mixing Bowls: Use two bowls—one for cucumbers and one for the dressing. Any large bowl will do.
  • Whisk or Fork: For mixing the dressing. A spoon can also get the job done.

Variations

  • Spicy Twist: Add more red pepper flakes or a splash of sriracha for an extra kick.
  • Herb Infusion: Toss in fresh herbs like cilantro or mint for a refreshing twist.
  • Protein Boost: Mix in cooked shrimp or tofu for a heartier salad.
  • Asian Fusion: Incorporate thinly sliced radishes or jicama for added crunch and flavor.
  • Low-Sodium Option: Use low-sodium soy sauce to reduce salt intake without sacrificing taste.

Serving Suggestions

  • Pair with grilled meats like bulgogi or chicken for a delightful contrast.
  • Serve alongside steamed rice or noodles to create a balanced meal.
  • For drinks, try a light beer or a refreshing iced tea.
  • Garnish with extra sesame seeds for a beautiful presentation.

FAQs about Korean Cucumber Salad

As you dive into the world of Korean cucumber salad, you might have a few questions. Here are some common queries that can help you make the most of this refreshing dish.

Can I make Korean cucumber salad ahead of time?

Absolutely! This salad actually tastes better after sitting for a while. You can prepare it a few hours in advance and store it in the fridge. Just give it a good toss before serving to redistribute the flavors.

What type of cucumbers should I use?

For the best results, use English cucumbers or Persian cucumbers. They have fewer seeds and a thinner skin, making them perfect for this salad. Regular cucumbers work too, but you might want to peel them for a better texture.

Is Korean cucumber salad spicy?

It can be! The heat level depends on whether you add red pepper flakes. If you prefer a milder flavor, feel free to skip them. The salad will still be delicious without the spice.

How long does Korean cucumber salad last in the fridge?

This salad is best enjoyed fresh, but it can last up to two days in the fridge. Just keep it in an airtight container to maintain its crunchiness.

Can I customize the dressing?

Definitely! Feel free to experiment with the dressing ingredients. You can add a splash of lime juice for extra tang or swap out the soy sauce for tamari to make it gluten-free. The possibilities are endless!

Final Thoughts

Making Korean cucumber salad is more than just preparing a dish; it’s about creating a moment of joy in your kitchen. The vibrant colors and refreshing crunch bring a burst of life to any meal. Each bite is a delightful dance of flavors that can transport you to a bustling Korean market. Whether you’re enjoying it solo or sharing it with loved ones, this salad is a reminder that simple ingredients can create something extraordinary. So, roll up your sleeves, embrace the process, and let this Korean cucumber salad become a cherished part of your culinary repertoire!

jhessica

Korean Cucumber Salad: Quick, Crunchy Delight Awaits!

A refreshing and crunchy Korean cucumber salad that is quick to prepare and perfect as a side dish.
Prep Time 15 minutes
Total Time 25 minutes
Servings: 4 servings
Course: Salad
Cuisine: Korean
Calories: 50

Ingredients
  

  • 2 medium cucumbers thinly sliced
  • 1 teaspoon salt
  • 1 tablespoon sugar
  • 2 tablespoons rice vinegar
  • 1 tablespoon soy sauce
  • 1 teaspoon sesame oil
  • 1 teaspoon minced garlic
  • 1 teaspoon sesame seeds
  • 1 green onion finely chopped
  • 1 teaspoon red pepper flakes optional for heat

Method
 

  1. In a large bowl, combine the sliced cucumbers and salt. Toss to coat and let sit for 15 minutes to draw out excess moisture.
  2. After 15 minutes, rinse the cucumbers under cold water and drain well. Pat dry with a paper towel.
  3. In a separate bowl, whisk together the sugar, rice vinegar, soy sauce, sesame oil, minced garlic, and red pepper flakes (if using).
  4. Add the drained cucumbers to the dressing and toss until well coated.
  5. Stir in the sesame seeds and chopped green onion.
  6. Let the salad sit for at least 10 minutes before serving to allow the flavors to meld. Serve chilled or at room temperature.

Nutrition

Serving: 1servingCalories: 50kcalCarbohydrates: 5gProtein: 1gFat: 3gSodium: 200mgFiber: 1gSugar: 5g

Notes

  • For a crunchier texture, try adding thinly sliced carrots or bell peppers.
  • Substitute apple cider vinegar for rice vinegar for a different flavor profile.

Tried this recipe?

Let us know how it was!

Patriotic Italian Cream Sodas: A Festive & Refreshing Treat

Introduction to Patriotic Italian Cream Sodas

There’s something magical about a drink that captures the spirit of celebration.

Patriotic Italian Cream Sodas do just that, bringing vibrant colors and refreshing flavors to your table.

Whether it’s a backyard barbecue, a holiday gathering, or just a sunny afternoon, these drinks are a quick solution for impressing friends and family.

With just a few simple ingredients, you can create a festive treat that’s as delightful to look at as it is to sip.

Let’s dive into this easy recipe that’s sure to become a favorite in your home!

Why You’ll Love This Patriotic Italian Cream Sodas

These Patriotic Italian Cream Sodas are not just visually stunning; they’re incredibly easy to whip up.

In just 10 minutes, you can create a refreshing beverage that dazzles the senses.

The combination of creamy texture and fruity flavors makes each sip a celebration.

Plus, they’re perfect for any occasion, whether you’re hosting a party or just treating yourself.

Trust me, your taste buds will thank you!

Ingredients for Patriotic Italian Cream Sodas

Creating these delightful Patriotic Italian Cream Sodas is a breeze with just a handful of ingredients.

Here’s what you’ll need:

  • Club soda: This fizzy base adds a refreshing sparkle to your drink.
  • Heavy cream: For that rich, creamy texture that makes each sip indulgent.
  • Raspberry syrup: A sweet and tangy layer that brings a burst of flavor and color.
  • Blue raspberry syrup: This vibrant syrup adds a fun twist and a pop of blue to your drink.
  • Vanilla extract: A hint of vanilla enhances the overall flavor profile beautifully.
  • Ice cubes: Essential for keeping your drink chilled and refreshing.
  • Whipped cream: The perfect topping for a touch of sweetness and a creamy finish.
  • Fresh raspberries and blueberries: These not only make for a gorgeous garnish but also add a fresh burst of flavor.

Feel free to get creative!

For a lighter version, you can swap heavy cream with coconut milk or a non-dairy cream alternative.

And if you’re feeling adventurous, try experimenting with different flavored syrups like strawberry or mango for a unique twist on this festive drink.

Exact quantities for each ingredient are available at the bottom of the article for easy printing.

How to Make Patriotic Italian Cream Sodas

Making these Patriotic Italian Cream Sodas is as fun as it is easy.

Follow these simple steps, and you’ll have a colorful, refreshing drink ready in no time!

Step 1: Mix the Base

Start by pouring the club soda into a large pitcher.

Add the heavy cream and stir gently.

You want to mix it without losing that delightful fizz.

Then, add a teaspoon of vanilla extract for a hint of sweetness.

Give it another gentle stir, and your base is ready!

Step 2: Prepare the Glasses

Grab four tall glasses and fill each one halfway with ice cubes.

This will keep your drinks nice and cold.

Make sure the glasses are clear so everyone can admire the beautiful layers you’re about to create!

Step 3: Layer the Flavors

Now comes the fun part!

Pour ¼ cup of raspberry syrup into each glass first.

This vibrant red layer sets the stage for the rest.

Next, slowly pour ¼ cup of the club soda mixture over the syrup.

Take your time; you want to keep those layers distinct.

Finally, add ¼ cup of blue raspberry syrup.

Pour it gently down the side of the glass, letting it settle at the bottom.

You’ll see a stunning red, white, and blue effect!

Step 4: Add the Finishing Touches

Top each drink with a generous dollop of whipped cream.

This adds a creamy finish that complements the fruity flavors perfectly.

For a pop of color, garnish with fresh raspberries and blueberries on top.

They not only look great but also add a fresh burst of flavor!

Step 5: Serve and Enjoy

Your Patriotic Italian Cream Sodas are ready to shine!

Serve them immediately to enjoy the refreshing flavors at their best.

Watch as your friends and family marvel at the colorful layers.

Trust me, they’ll be asking for seconds!

Tips for Success

  • Use chilled club soda for extra fizz and freshness.
  • Stir gently to maintain the carbonation in your drink.
  • Layer the syrups slowly to achieve that stunning visual effect.
  • Feel free to adjust the sweetness by adding more or less syrup.
  • For a fun twist, try adding a splash of lemon or lime juice!

Equipment Needed

  • Large pitcher: For mixing your base. A bowl works too!
  • Tall glasses: To showcase those beautiful layers. Any clear glass will do.
  • Measuring cups: For precise syrup and cream measurements. A simple pour will suffice if you’re feeling adventurous!
  • Spoon: For stirring. A whisk can add a fun twist!

Variations

  • Fruit-Infused: Add fresh fruit purees like strawberry or mango for a fruity twist.
  • Non-Dairy Option: Substitute heavy cream with coconut milk or almond milk for a lighter, dairy-free version.
  • Herbal Touch: Infuse your cream with a hint of mint or basil for a refreshing herbal note.
  • Alcoholic Version: Add a splash of vodka or rum for a festive adult beverage.
  • Colorful Layers: Use different flavored syrups like peach or green apple to create a rainbow effect.

Serving Suggestions

  • Pair your Patriotic Italian Cream Sodas with light appetizers like bruschetta or caprese skewers.
  • Serve alongside grilled burgers or hot dogs for a festive barbecue vibe.
  • For a complete experience, offer a selection of colorful straws and napkins.
  • Present drinks on a tray with fresh fruit for a vibrant display.

FAQs about Patriotic Italian Cream Sodas

Can I make Patriotic Italian Cream Sodas ahead of time?

While these drinks are best served fresh, you can prepare the base mixture in advance. Just keep it chilled and layer the syrups right before serving to maintain that stunning visual effect.

What can I substitute for heavy cream?

If you’re looking for a lighter option, coconut milk or almond milk works beautifully. They’ll still give you that creamy texture without the extra calories.

Can I use different flavored syrups?

Absolutely! Feel free to experiment with flavors like strawberry, mango, or even peach. Each syrup will add its unique twist to your Patriotic Italian Cream Sodas.

How do I store leftovers?

Leftover drinks can be tricky since carbonation fades. If you have any, store them in the fridge and consume within a few hours for the best taste.

Are these drinks suitable for kids?

Yes! Patriotic Italian Cream Sodas are a fun, festive treat for all ages. Just keep an eye on the sugar content if you’re serving them to little ones.

Final Thoughts

Creating Patriotic Italian Cream Sodas is more than just mixing ingredients; it’s about crafting a moment of joy.

Each vibrant layer tells a story, inviting laughter and celebration.

Whether you’re toasting to a holiday or simply enjoying a sunny day, these drinks bring a refreshing twist to any occasion.

The combination of creamy and fruity flavors dances on your palate, making every sip a delightful experience.

So, gather your loved ones, raise your glasses, and let these festive treats spark joy and connection.

Trust me, they’ll become a cherished part of your celebrations!

jhessica

Patriotic Italian Cream Sodas: A Festive & Refreshing Treat

A festive and refreshing treat perfect for celebrations, these Patriotic Italian Cream Sodas are layered with vibrant colors and delicious flavors.
Prep Time 10 minutes
Total Time 10 minutes
Servings: 4 servings
Course: Beverage
Cuisine: Italian-American
Calories: 350

Ingredients
  

  • 2 cups club soda
  • 1 cup heavy cream
  • 1 cup raspberry syrup
  • 1 cup blue raspberry syrup
  • 1 teaspoon vanilla extract
  • Ice cubes
  • Whipped cream for topping
  • Fresh raspberries and blueberries for garnish

Method
 

  1. In a large pitcher, combine the club soda and heavy cream. Stir gently to mix without losing too much carbonation.
  2. Add the vanilla extract and mix again.
  3. In four tall glasses, add ice cubes to fill each glass halfway.
  4. Pour ¼ cup of raspberry syrup into each glass, followed by ¼ cup of the club soda mixture.
  5. Slowly pour ¼ cup of blue raspberry syrup into each glass, allowing it to settle at the bottom for a layered effect.
  6. Top each drink with whipped cream and garnish with fresh raspberries and blueberries.
  7. Serve immediately and enjoy the refreshing flavors!

Nutrition

Serving: 1drinkCalories: 350kcalCarbohydrates: 30gProtein: 3gFat: 30gSaturated Fat: 18gCholesterol: 100mgSodium: 50mgSugar: 30g

Notes

  • For a lighter version, substitute heavy cream with coconut milk or a non-dairy cream alternative.
  • Experiment with different flavored syrups, such as strawberry or mango, for a unique twist on this festive drink.

Tried this recipe?

Let us know how it was!

Red, White, and Blue Fruit Pizza: A Festive Delight!

Introduction to Red, White, and Blue Fruit Pizza

There’s something magical about a dessert that not only tastes great but also looks like a celebration on a plate. The Red, White, and Blue Fruit Pizza is just that—a vibrant, festive treat that’s perfect for any gathering. Whether it’s a backyard barbecue or a family picnic, this dessert is sure to impress your loved ones. Plus, it’s a quick solution for those busy days when you want to whip up something special without spending hours in the kitchen. Trust me, this colorful delight will have everyone reaching for seconds!

Why You’ll Love This Red, White, and Blue Fruit Pizza

This Red, White, and Blue Fruit Pizza is a game-changer for dessert lovers. It’s incredibly easy to make, requiring just a handful of ingredients and minimal prep time. The combination of sweet fruits and creamy cheese creates a delightful balance of flavors that will have your taste buds dancing. Plus, it’s visually stunning, making it a showstopper at any gathering. Who wouldn’t love a dessert that’s as fun to make as it is to eat?

Ingredients for Red, White, and Blue Fruit Pizza

Gathering the right ingredients is the first step to creating your Red, White, and Blue Fruit Pizza. Here’s what you’ll need:

  • All-purpose flour: The base for your crust, providing structure and a light texture.
  • Granulated sugar: Sweetens the dough, balancing the flavors of the fruits.
  • Baking powder: Helps the crust rise, giving it a fluffy texture.
  • Salt: Enhances the overall flavor of the crust.
  • Unsalted butter: Adds richness and moisture to the dough.
  • Large egg: Binds the ingredients together and adds a bit of richness.
  • Vanilla extract: Infuses the dough with a warm, sweet aroma.
  • Cream cheese: The star of the show, creating a creamy layer that complements the fruits.
  • Powdered sugar: Sweetens the cream cheese layer, making it smooth and delightful.
  • Strawberries: Bright red and juicy, they add a pop of color and sweetness.
  • Blueberries: Their deep blue hue and tangy flavor create a beautiful contrast.
  • Banana: Adds a creamy texture and natural sweetness.
  • Shredded coconut (optional): A fun topping that adds a tropical twist and texture.

For those looking for alternatives, you can easily swap the all-purpose flour with a gluten-free blend. Feel free to get creative with your fruit toppings—peaches or kiwi can also make delightful additions! Exact measurements for each ingredient can be found at the bottom of the article, ready for printing.

How to Make Red, White, and Blue Fruit Pizza

Step 1: Preheat and Prepare

Start by preheating your oven to 350°F. This ensures your crust bakes evenly and comes out perfectly golden. While the oven heats up, grab a 12-inch pizza pan. You can grease it lightly with butter or line it with parchment paper for easy removal later. This little step makes a big difference when it’s time to serve your delicious Red, White, and Blue Fruit Pizza!

Step 2: Make the Dough

In a large mixing bowl, combine the all-purpose flour, granulated sugar, baking powder, and salt. Whisk them together to blend the dry ingredients well. Next, add the softened butter, egg, and vanilla extract. Mix everything until a dough forms. It should be soft and slightly sticky. If it feels too dry, a splash of milk can help. This dough is the foundation of your fruit pizza, so make sure it’s well combined!

Step 3: Bake the Crust

Now it’s time to shape your crust! Press the dough evenly into the prepared pizza pan, making sure it reaches the edges. Bake it in the preheated oven for about 12-15 minutes, or until it turns a light golden brown. Keep an eye on it; you want a nice, firm base for your toppings. Once baked, remove it from the oven and let it cool completely before adding the cream cheese layer.

Step 4: Prepare the Cream Cheese Layer

While your crust cools, let’s whip up the cream cheese layer. In a separate bowl, beat together the softened cream cheese, powdered sugar, and vanilla extract. Use an electric mixer for a smooth and creamy texture. This layer is what makes your Red, White, and Blue Fruit Pizza so indulgent. Once it’s fluffy and well combined, set it aside until the crust is ready.

Step 5: Assemble the Pizza

With the crust cooled and the cream cheese layer ready, it’s time to assemble! Spread the cream cheese mixture evenly over the cooled crust. Make sure to cover every inch for that creamy goodness. Now, it’s time for the fun part—arranging the fruits! Decoratively place the sliced strawberries, blueberries, and banana on top. If you’re feeling adventurous, sprinkle some shredded coconut for an extra touch!

Step 6: Chill and Serve

To let all those flavors meld together, chill your assembled fruit pizza in the refrigerator for at least 30 minutes. This step enhances the taste and makes it refreshing. When you’re ready to serve, slice it up like a pizza and watch everyone’s eyes light up. This Red, White, and Blue Fruit Pizza is not just a treat; it’s a celebration on a plate!

Tips for Success

  • Make sure your butter is softened for easy mixing.
  • Don’t skip chilling the pizza; it enhances the flavors.
  • Use fresh, ripe fruits for the best taste and texture.
  • Feel free to experiment with different fruits based on the season.
  • For a crispier crust, bake a few extra minutes, but watch closely!

Equipment Needed

  • 12-inch pizza pan: A round baking sheet works too.
  • Mixing bowls: Any size will do, just ensure they’re sturdy.
  • Electric mixer: A whisk can work if you’re feeling adventurous.
  • Measuring cups and spoons: Essential for accuracy.
  • Spatula: Great for spreading the cream cheese layer evenly.

Variations

  • For a gluten-free option, use a gluten-free flour blend in place of all-purpose flour.
  • Swap out the cream cheese for Greek yogurt for a lighter, tangy twist.
  • Add a layer of lemon curd beneath the cream cheese for a zesty flavor boost.
  • Incorporate seasonal fruits like peaches, raspberries, or kiwi for a unique touch.
  • Drizzle honey or maple syrup over the fruit for added sweetness and flavor.

Serving Suggestions

  • Pair with a scoop of vanilla ice cream for a delightful contrast.
  • Serve alongside a refreshing lemonade or iced tea to balance the sweetness.
  • Garnish with fresh mint leaves for a pop of color and flavor.
  • Present on a colorful platter to enhance its festive appeal.

FAQs about Red, White, and Blue Fruit Pizza

Can I make Red, White, and Blue Fruit Pizza ahead of time?

Absolutely! You can prepare the crust and cream cheese layer a day in advance. Just assemble the pizza the day you plan to serve it for the freshest taste. Chilling it for a few hours before serving enhances the flavors.

What fruits can I use for this fruit pizza?

The beauty of this dessert is its versatility! While strawberries, blueberries, and bananas are classic choices, feel free to mix in seasonal fruits like peaches, kiwi, or raspberries. Just make sure they’re ripe for the best flavor.

Is this dessert suitable for a gluten-free diet?

Yes! Simply substitute the all-purpose flour with a gluten-free flour blend. This way, everyone can enjoy this festive treat without worry.

How should I store leftovers?

Store any leftovers in an airtight container in the refrigerator. It’s best enjoyed within a couple of days, as the crust may become soggy over time.

Can I use a different type of cheese instead of cream cheese?

Sure! Greek yogurt is a great alternative for a lighter option. It adds a tangy flavor that pairs well with the fruits. Just make sure to sweeten it slightly with powdered sugar for that creamy texture.

Final Thoughts

Creating this Red, White, and Blue Fruit Pizza is more than just baking; it’s about bringing joy to your table. The vibrant colors and fresh flavors make it a delightful centerpiece for any gathering. Each slice is a reminder of summer celebrations, family picnics, and the simple pleasures of life. Plus, it’s a fantastic way to get everyone involved in the kitchen, whether they’re slicing fruit or arranging it on the pizza. So, roll up your sleeves, gather your loved ones, and enjoy the sweet satisfaction of sharing this festive treat together!

jhessica

Red, White, and Blue Fruit Pizza: A Festive Delight!

A festive and delicious Red, White, and Blue Fruit Pizza perfect for celebrations.
Prep Time 20 minutes
Cook Time 15 minutes
Total Time 1 hour 5 minutes
Servings: 8 servings
Course: Dessert
Cuisine: American
Calories: 210

Ingredients
  

  • 2 cups all-purpose flour
  • 1/2 cup granulated sugar
  • 1/2 teaspoon baking powder
  • 1/4 teaspoon salt
  • 1/2 cup unsalted butter softened
  • 1 large egg
  • 1 teaspoon vanilla extract
  • 1 8 oz package cream cheese, softened
  • 1/2 cup powdered sugar
  • 1 teaspoon vanilla extract
  • 1 cup strawberries sliced
  • 1 cup blueberries
  • 1 banana sliced
  • 1/4 cup shredded coconut optional

Method
 

  1. Preheat your oven to 350°F. Grease a 12-inch pizza pan or line it with parchment paper.
  2. In a large mixing bowl, combine the flour, granulated sugar, baking powder, and salt. Add the softened butter, egg, and vanilla extract. Mix until a dough forms.
  3. Press the dough evenly into the prepared pizza pan. Bake for 12-15 minutes or until lightly golden. Remove from the oven and let it cool completely.
  4. In another bowl, beat together the softened cream cheese, powdered sugar, and vanilla extract until smooth and creamy.
  5. Once the crust is cool, spread the cream cheese mixture evenly over the top.
  6. Arrange the sliced strawberries, blueberries, and banana on top of the cream cheese layer in a decorative pattern. If desired, sprinkle shredded coconut over the fruit.
  7. Chill the fruit pizza in the refrigerator for at least 30 minutes before serving to allow the flavors to meld.

Nutrition

Serving: 1sliceCalories: 210kcalCarbohydrates: 25gProtein: 3gFat: 10gSaturated Fat: 6gPolyunsaturated Fat: 4gCholesterol: 30mgSodium: 150mgFiber: 1gSugar: 10g

Notes

  • This recipe serves 8.
  • For a gluten-free option, substitute the all-purpose flour with a gluten-free flour blend.
  • You can customize the topping with any seasonal fruits you prefer, such as peaches or kiwi.

Tried this recipe?

Let us know how it was!

Stay Connected

Get recipes via email: