Get my cookbooks

Red, White, and Blue Muddy Buddies Recipe for Celebration!

Introduction to Red, White, and Blue Muddy Buddies

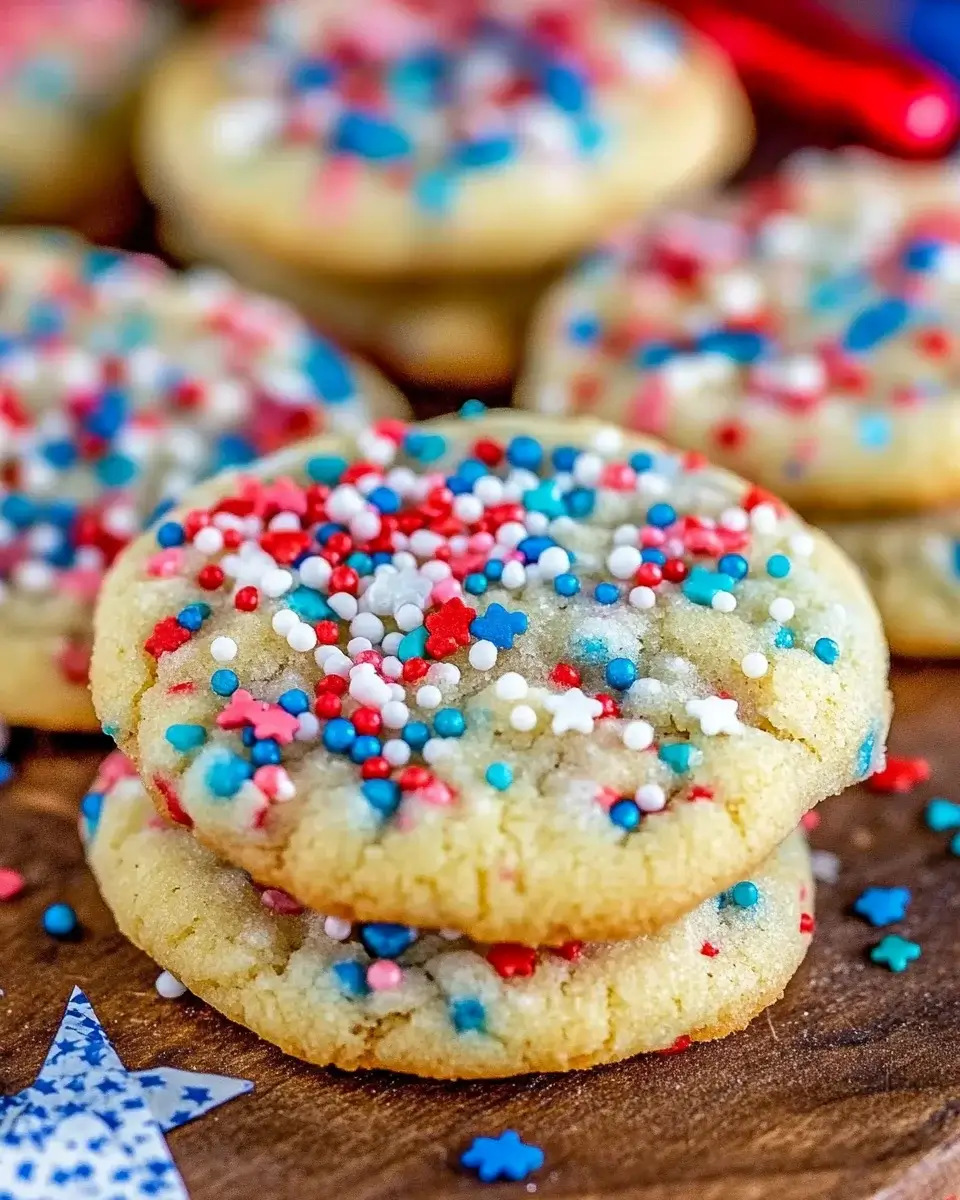
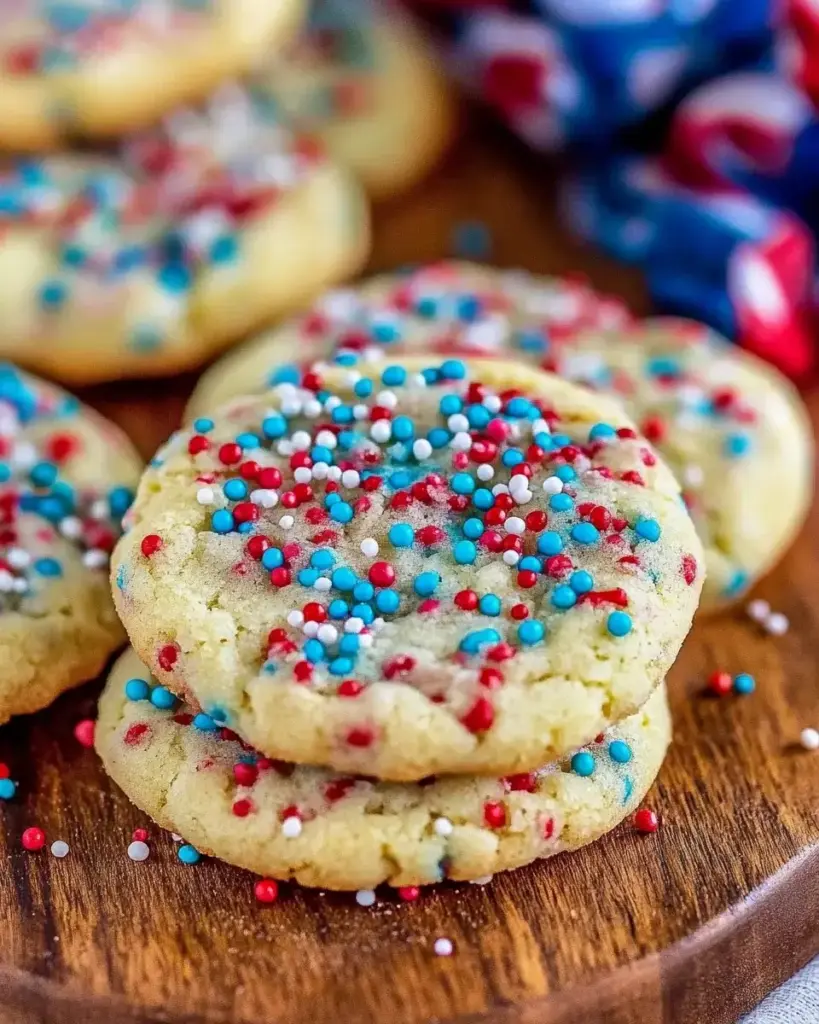
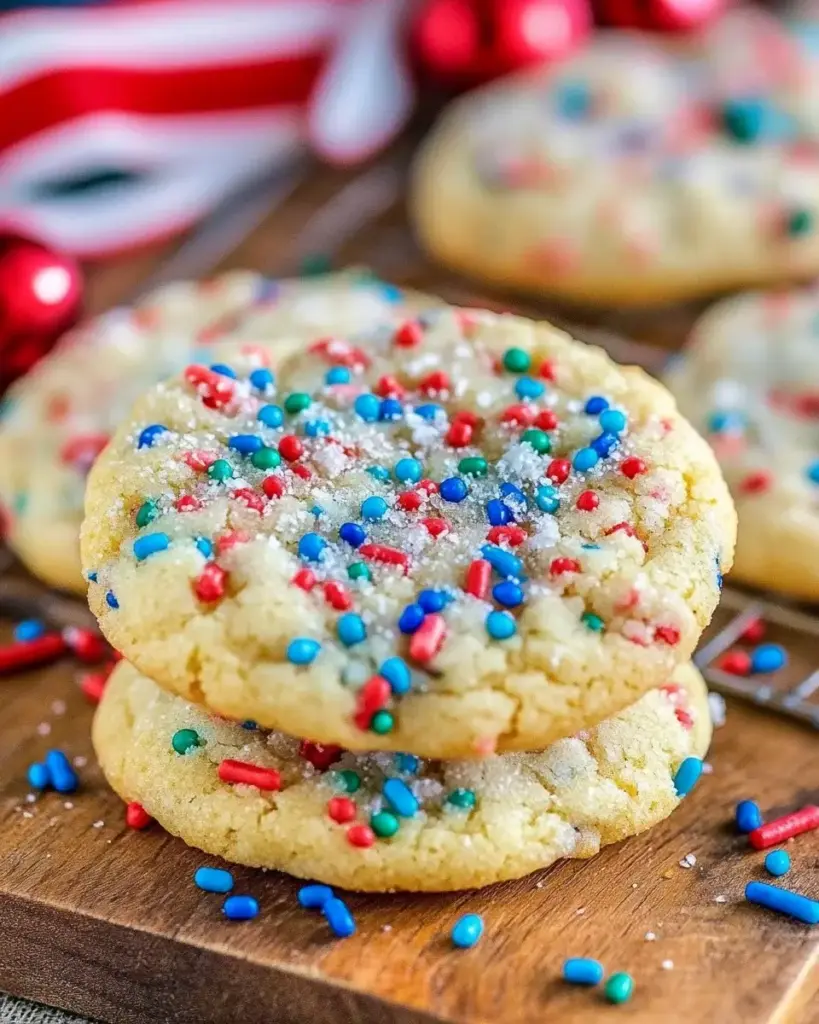
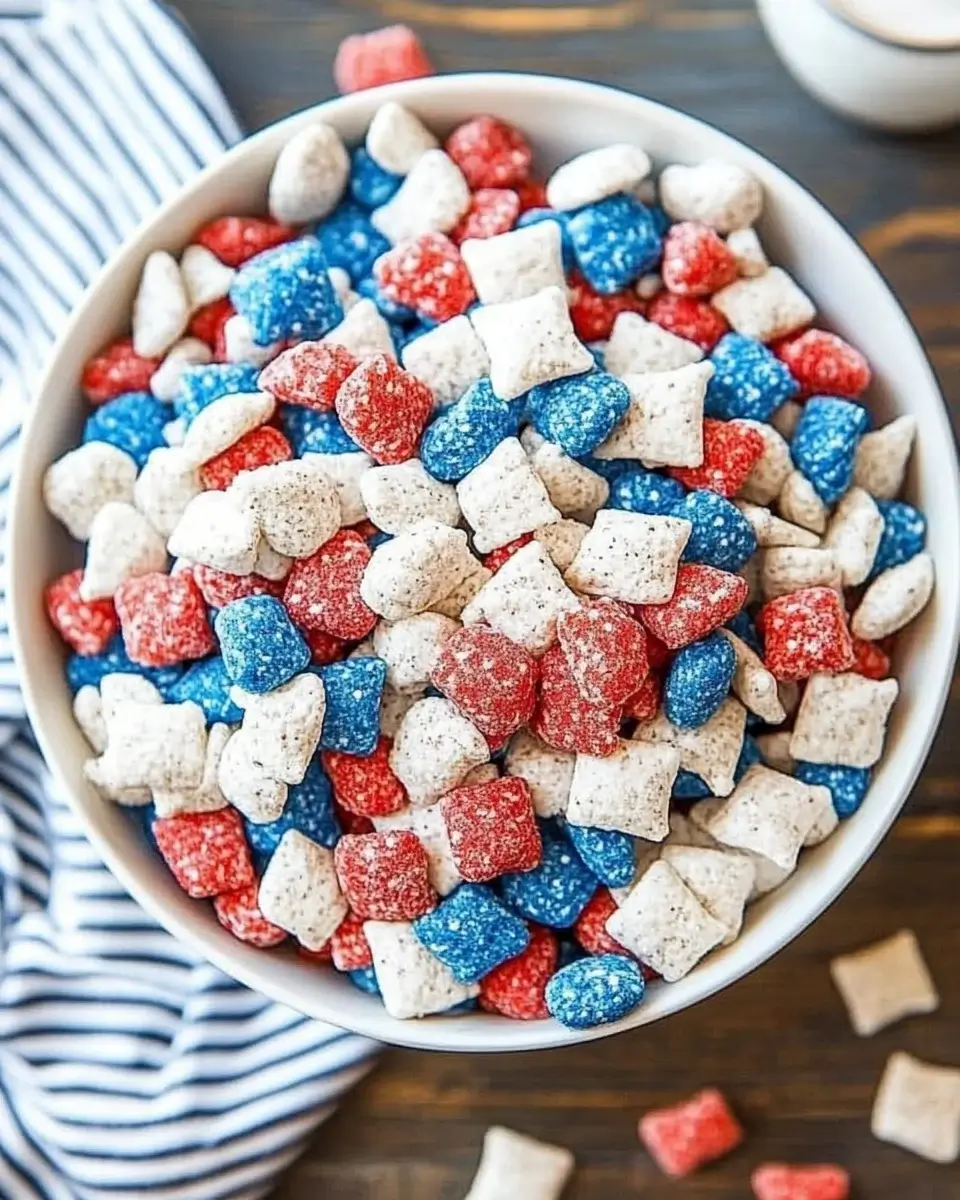
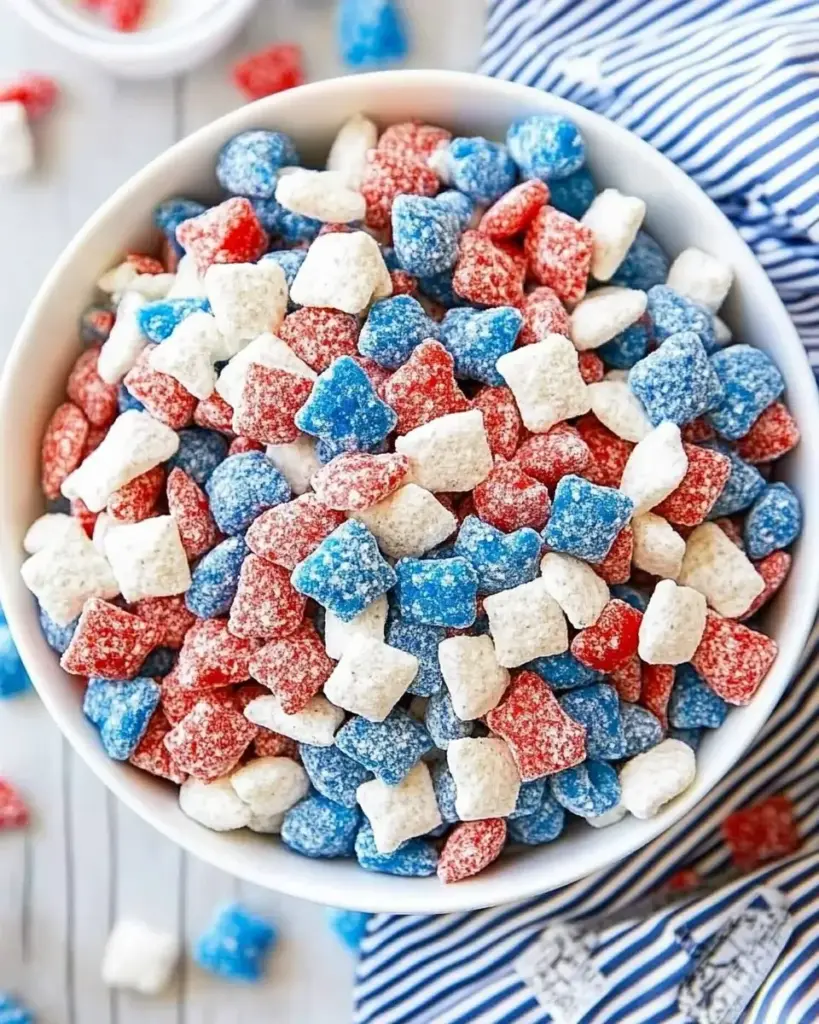
Celebrations call for something special, and what better way to add a splash of color and flavor than with Red, White, and Blue Muddy Buddies? These delightful treats are not just a feast for the eyes; they’re a quick and easy solution for busy days or festive gatherings. I remember making these with my kids, their laughter filling the kitchen as we drizzled colorful candy melts. It’s a recipe that brings joy and togetherness, perfect for impressing friends or simply indulging yourself. Let’s dive into this fun and delicious adventure!

Why You’ll Love This Red, White, and Blue Muddy Buddies

These Red, White, and Blue Muddy Buddies are a game-changer for any celebration. They come together in just 15 minutes, making them perfect for last-minute gatherings. The combination of crunchy Rice Chex, creamy peanut butter, and sweet chocolate creates a flavor explosion that’s hard to resist. Plus, they’re a hit with both kids and adults, ensuring everyone leaves with a smile. What’s not to love?

Ingredients for Red, White, and Blue Muddy Buddies

Gathering the right ingredients is the first step to creating these festive treats. Here’s what you’ll need:

  • Rice Chex cereal: The crunchy base that gives these muddy buddies their delightful texture.
  • White chocolate chips: These melt into a creamy coating, adding sweetness and richness.
  • Creamy peanut butter: This brings a nutty flavor and helps bind everything together.
  • Unsweetened cocoa powder: A touch of chocolatey goodness that balances the sweetness.
  • Powdered sugar: This adds a sweet dusting that makes the muddy buddies irresistible.
  • Red candy melts: These provide a vibrant color and a sweet, candy-like finish.
  • Blue candy melts: Just like the red, they add a pop of color and sweetness.
  • Sprinkles (red, white, and blue): These are the finishing touch, making your treats festive and fun.

For those with dietary restrictions, you can substitute creamy peanut butter with sunflower seed butter for a nut-free version. Feel free to add mini marshmallows or chocolate chips for extra texture and flavor. The exact quantities for each ingredient are listed at the bottom of the article for easy printing!

How to Make Red, White, and Blue Muddy Buddies

Creating these Red, White, and Blue Muddy Buddies is a breeze! Follow these simple steps, and you’ll have a delicious treat ready in no time. Let’s get started!

Step 1: Prepare the Cereal

Begin by measuring out 3 cups of Rice Chex cereal. Pour it into a large mixing bowl. This crunchy base is essential for that delightful texture. Set it aside while you work on the chocolate mixture.

Step 2: Melt the Chocolate and Peanut Butter

In a microwave-safe bowl, combine 1 cup of white chocolate chips and ½ cup of creamy peanut butter. Microwave in 30-second intervals, stirring in between until it’s melted and smooth. This creamy blend is what makes the muddy buddies so irresistible!

Step 3: Coat the Cereal

Once your chocolate and peanut butter mixture is ready, pour it over the Rice Chex cereal. Gently stir until every piece is coated. Take your time here; you want that delicious mixture to hug each piece of cereal.

Step 4: Mix in Cocoa and Sugar

In a separate bowl, mix together ¼ cup of unsweetened cocoa powder and ½ cup of powdered sugar. Add this mixture to your coated cereal. Stir well until everything is evenly combined. This step adds a rich chocolate flavor that balances the sweetness perfectly.

Step 5: Cool the Mixture

Spread the muddy buddies onto a large baking sheet lined with parchment paper. This helps them cool and prevents sticking. Let them sit for about 10 minutes while you prepare the candy melts.

Step 6: Melt the Candy Coatings

In two separate microwave-safe bowls, melt ½ cup of red candy melts and ½ cup of blue candy melts. Again, use 30-second intervals, stirring until smooth. These vibrant colors will make your treats pop!

Step 7: Drizzle and Decorate

Now comes the fun part! Drizzle the melted red and blue candy over the cooled muddy buddies. Get creative with your design! Then, sprinkle with red, white, and blue sprinkles for that festive touch.

Step 8: Set and Serve

Allow the muddy buddies to set for about 30 minutes at room temperature. This will let the candy coating harden. Once set, break them into pieces and serve. Enjoy the smiles as everyone digs in!

Tips for Success

  • Use a large bowl for mixing to prevent spills.
  • Stir gently to avoid breaking the Rice Chex.
  • Let the chocolate mixture cool slightly before pouring it over the cereal.
  • Experiment with different candy melt colors for various occasions.
  • Store leftovers in an airtight container to keep them fresh.

Equipment Needed

  • Large mixing bowl: A big bowl helps keep everything contained. A pot can work in a pinch.
  • Microwave-safe bowls: For melting chocolate and candy melts. Any heatproof bowl will do.
  • Parchment paper: Essential for easy cleanup. Aluminum foil can be a substitute.
  • Spatula: Perfect for mixing and drizzling. A wooden spoon works too!

Variations

  • Nut-Free Version: Swap creamy peanut butter for sunflower seed butter to make it safe for those with nut allergies.
  • Chocolate Lovers: Add mini chocolate chips or chunks for an extra chocolatey kick.
  • Fruit Twist: Incorporate dried fruits like cranberries or blueberries for a chewy texture and added flavor.
  • Spicy Kick: Mix in a pinch of cayenne pepper or chili powder to the cocoa mixture for a surprising heat.
  • Vegan Option: Use dairy-free chocolate chips and candy melts to make this treat vegan-friendly.

Serving Suggestions

  • Pair these Red, White, and Blue Muddy Buddies with a refreshing lemonade or iced tea for a perfect summer treat.
  • Serve them in festive bowls or mason jars for a fun presentation at parties.
  • Consider adding fresh fruit skewers on the side for a colorful and healthy contrast.

FAQs about Red, White, and Blue Muddy Buddies

Can I make Red, White, and Blue Muddy Buddies ahead of time?

Absolutely! You can prepare these treats a day in advance. Just store them in an airtight container to keep them fresh. They’ll be ready to impress your guests when the celebration begins!

What can I substitute for Rice Chex cereal?

If you’re looking for alternatives, you can use Corn Chex or even Crispix. Both options will give you that satisfying crunch. Just make sure they’re gluten-free if that’s a concern!

How do I store leftovers?

Leftover Red, White, and Blue Muddy Buddies can be stored in an airtight container at room temperature. They’ll stay fresh for about a week, but I doubt they’ll last that long!

Can I use different colors of candy melts?

Definitely! Feel free to mix it up with any colors you like. This is a fun way to customize your muddy buddies for different holidays or events.

Are Red, White, and Blue Muddy Buddies gluten-free?

Yes, as long as you use gluten-free Rice Chex cereal, these treats can be enjoyed by those with gluten sensitivities. Just double-check the labels on your ingredients to be safe!

Final Thoughts

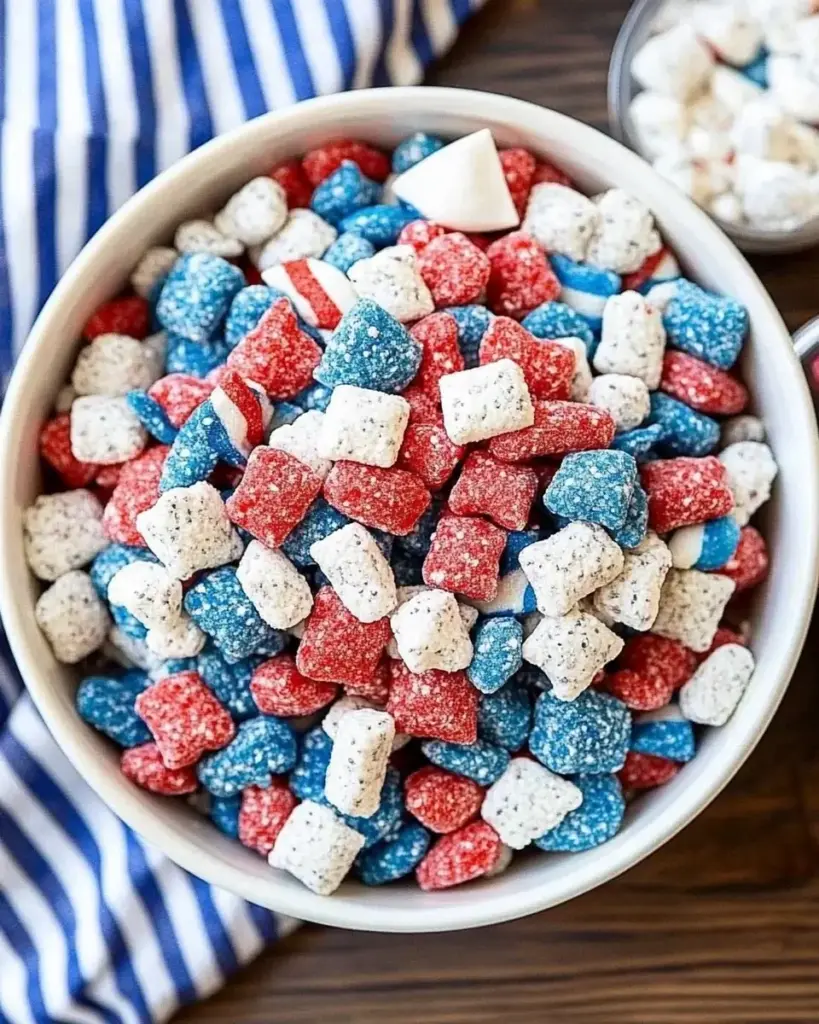
Creating Red, White, and Blue Muddy Buddies is more than just whipping up a treat; it’s about making memories. The joy of mixing, drizzling, and decorating with vibrant colors brings a sense of celebration to any occasion. Whether it’s a backyard barbecue, a holiday gathering, or just a fun afternoon with the kids, these delightful snacks are sure to spark smiles. Plus, they’re so easy to make that you’ll find yourself reaching for this recipe time and again. So gather your loved ones, roll up your sleeves, and enjoy the sweet moments together!

jhessica

Red, White, and Blue Muddy Buddies Recipe for Celebration!

A festive and delicious treat perfect for celebrations, combining Rice Chex cereal with white chocolate, peanut butter, and colorful candy melts.
Prep Time 15 minutes
Cook Time 5 minutes
Total Time 50 minutes
Servings: 8 servings
Course: Dessert
Cuisine: American
Calories: 210

Ingredients
  

  • 3 cups Rice Chex cereal
  • 1 cup white chocolate chips
  • 1/2 cup creamy peanut butter
  • 1/4 cup unsweetened cocoa powder
  • 1/2 cup powdered sugar
  • 1/2 cup red candy melts
  • 1/2 cup blue candy melts
  • 1/4 cup sprinkles red, white, and blue

Method
 

  1. In a large bowl, measure out the Rice Chex cereal and set aside.
  2. In a microwave-safe bowl, combine the white chocolate chips and peanut butter. Microwave in 30-second intervals, stirring in between, until melted and smooth.
  3. Pour the melted mixture over the Rice Chex cereal and gently stir until all the cereal is evenly coated.
  4. In a separate bowl, combine the cocoa powder and powdered sugar. Add this mixture to the coated cereal and stir until well combined.
  5. Spread the muddy buddies onto a large baking sheet lined with parchment paper to cool.
  6. In two separate microwave-safe bowls, melt the red and blue candy melts in 30-second intervals, stirring until smooth.
  7. Drizzle the melted red and blue candy over the muddy buddies, then sprinkle with red, white, and blue sprinkles.
  8. Allow the muddy buddies to set for about 30 minutes at room temperature or until the candy coating hardens.
  9. Once set, break into pieces and serve.

Nutrition

Serving: 1servingCalories: 210kcalCarbohydrates: 25gProtein: 3gFat: 9gSaturated Fat: 3gPolyunsaturated Fat: 6gSodium: 50mgFiber: 1gSugar: 10g

Notes

  • For a nut-free version, substitute the creamy peanut butter with sunflower seed butter.
  • Add mini marshmallows or chocolate chips for extra texture and flavor.

Tried this recipe?

Let us know how it was!

Cheesy Ground Beef and Zucchini Casserole Awaits You!

Introduction to Cheesy Ground Beef and Zucchini Casserole

There’s something incredibly comforting about a warm, cheesy dish that brings everyone together. The Cheesy Ground Beef and Zucchini Casserole is just that—a hearty meal that’s perfect for busy weeknights or a cozy family gathering.

I remember my mom whipping up casseroles like this when I was a kid, filling the house with mouthwatering aromas. This recipe combines savory ground beef, fresh zucchini, and a melty blend of cheeses, making it a crowd-pleaser. It’s not just easy to make; it’s also a delicious way to sneak in some veggies. Trust me, your loved ones will be asking for seconds!

Why You’ll Love This Cheesy Ground Beef and Zucchini Casserole

This Cheesy Ground Beef and Zucchini Casserole is a game-changer for your dinner routine.

It’s quick to prepare, taking just about 15 minutes of hands-on time.

The combination of flavors is simply irresistible, with gooey cheese and tender zucchini complementing the savory beef.

Plus, it’s a one-dish wonder, making cleanup a breeze.

You’ll love how it satisfies your hunger while keeping things simple and delicious!

Ingredients for Cheesy Ground Beef and Zucchini Casserole

Gathering the right ingredients is the first step to creating this delightful dish. Here’s what you’ll need:

  • Ground Beef: The star of the show! It adds richness and protein to the casserole.
  • Zucchini: Fresh and tender, zucchini brings a subtle sweetness and a healthy twist.
  • Onion: Diced onion adds depth and flavor, making every bite more savory.
  • Garlic: Minced garlic infuses the dish with a fragrant aroma that’s hard to resist.
  • Diced Tomatoes: A can of these adds moisture and a burst of flavor, enhancing the overall taste.
  • Dried Oregano and Basil: These herbs bring a classic Italian flair, elevating the dish’s flavor profile.
  • Salt and Black Pepper: Essential seasonings that enhance all the other flavors in the casserole.
  • Shredded Mozzarella Cheese: This gooey cheese melts beautifully, creating that irresistible cheesy layer.
  • Ricotta Cheese: Adds creaminess and a slight tang, making the casserole rich and satisfying.
  • Egg: Helps bind the ricotta mixture, ensuring a perfect texture.
  • Grated Parmesan Cheese: A sprinkle on top adds a delightful crunch and extra flavor.
  • Olive Oil: Used for sautéing, it adds healthy fats and enhances the dish’s overall taste.

Feel free to get creative! For a spicier kick, toss in some red pepper flakes. If you’re looking for a vegetarian option, swap the ground beef for black beans or lentils.

Exact quantities for each ingredient can be found at the bottom of the article, ready for printing. Happy cooking!

How to Make Cheesy Ground Beef and Zucchini Casserole

Creating this Cheesy Ground Beef and Zucchini Casserole is a straightforward process that yields delicious results. Follow these simple steps, and you’ll have a comforting meal ready in no time!

Step 1: Preheat the Oven

Start by preheating your oven to 375°F.

This step is crucial for even cooking.

A hot oven ensures that your casserole bakes perfectly, allowing the cheese to melt and the flavors to meld beautifully.

Step 2: Sauté the Aromatics

In a large skillet, heat the olive oil over medium heat.

Add the diced onion and minced garlic, sautéing them until the onion turns translucent, about 3-4 minutes.

This step is where the magic begins!

The aroma of sautéing onion and garlic fills your kitchen, setting the stage for a flavorful casserole.

Step 3: Brown the Ground Beef

Next, add the ground beef to the skillet.

Cook it until browned and fully cooked, breaking it apart with a spoon, which should take about 5-7 minutes.

Don’t forget to drain any excess fat!

This keeps your casserole from becoming greasy and allows the flavors to shine through.

Step 4: Add Zucchini and Tomatoes

Now, stir in the sliced zucchini and the can of diced tomatoes, along with the oregano, basil, salt, and pepper.

Cook this mixture for an additional 5 minutes.

You want the zucchini to soften slightly while soaking up all those delicious flavors.

Step 5: Prepare the Ricotta Mixture

In a separate mixing bowl, combine the ricotta cheese, egg, and half of the mozzarella cheese.

Mix until everything is well combined.

This creamy mixture adds a rich texture to your casserole, making every bite a delight.

Step 6: Layer the Casserole

In a greased 9×13 inch baking dish, start layering.

Begin with half of the beef and zucchini mixture, followed by the ricotta mixture, and then the remaining beef and zucchini mixture.

This layering is key!

It ensures that every forkful is packed with flavor and creaminess.

Step 7: Bake the Casserole

Top your casserole with the remaining mozzarella cheese and sprinkle the Parmesan cheese on top.

Cover the dish with aluminum foil and bake for 25 minutes.

After that, remove the foil and bake for an additional 15 minutes.

This method allows the cheese to become bubbly and golden brown, creating that irresistible crust.

Step 8: Cool and Serve

Once baked, let the casserole cool for 5-10 minutes before serving.

This cooling time is important!

It helps the casserole set, making it easier to slice and serve while enhancing the overall texture.

Tips for Success

  • Use fresh zucchini for the best flavor and texture.
  • Don’t skip the cooling time; it helps the casserole hold its shape.
  • Feel free to mix in other veggies like bell peppers or mushrooms.
  • For a creamier texture, add more ricotta cheese.
  • Experiment with different cheeses for a unique twist!

Equipment Needed

  • Large skillet: A non-stick pan works well for easy cooking and cleanup.
  • Mixing bowl: Any bowl will do, but a large one makes mixing easier.
  • 9×13 inch baking dish: A glass or ceramic dish is perfect for even baking.
  • Aluminum foil: Essential for covering the casserole while it bakes.
  • Spatula: A sturdy spatula helps with layering and serving.

Variations

  • Spicy Kick: Add ½ teaspoon of red pepper flakes to the beef mixture for a zesty twist.
  • Vegetarian Delight: Substitute ground beef with 1 can of drained black beans or lentils for a hearty vegetarian option.
  • Cheesy Overload: Mix in additional cheeses like cheddar or pepper jack for a flavor explosion.
  • Herb Infusion: Experiment with fresh herbs like thyme or parsley for a fresh, aromatic touch.
  • Low-Carb Option: Replace zucchini with cauliflower rice for a low-carb alternative that still satisfies.

Serving Suggestions

  • Pair with a crisp green salad for a refreshing contrast.
  • Serve with garlic bread to soak up the cheesy goodness.
  • A glass of red wine complements the flavors beautifully.
  • Garnish with fresh basil or parsley for a pop of color.
  • Offer a side of steamed vegetables for added nutrition.

FAQs about Cheesy Ground Beef and Zucchini Casserole

Can I make this casserole ahead of time?

Absolutely! You can prepare the Cheesy Ground Beef and Zucchini Casserole a day in advance. Just assemble it, cover it tightly, and store it in the fridge. When you’re ready to bake, simply pop it in the oven. You may need to add a few extra minutes to the cooking time if it’s cold from the fridge.

Can I freeze leftovers?

Yes, this casserole freezes well! After baking, let it cool completely, then wrap it tightly in plastic wrap and aluminum foil. It can be stored in the freezer for up to three months. To reheat, thaw it in the fridge overnight and bake until heated through.

What can I substitute for ground beef?

If you’re looking for alternatives, ground turkey or chicken works great. For a vegetarian option, use black beans or lentils. Both options will still provide a hearty texture and flavor in your Cheesy Ground Beef and Zucchini Casserole.

How do I store leftovers?

Store any leftovers in an airtight container in the fridge for up to three days. Reheat in the microwave or oven until warmed through. This casserole is just as delicious the next day!

Can I add more vegetables?

Definitely! Feel free to mix in other veggies like bell peppers, mushrooms, or spinach. Just remember to adjust the cooking time slightly to ensure everything is tender and flavorful in your Cheesy Ground Beef and Zucchini Casserole.

Final Thoughts

Cooking the Cheesy Ground Beef and Zucchini Casserole is more than just preparing a meal; it’s about creating memories.

The aroma wafting through your kitchen will draw everyone in, sparking conversations and laughter around the dinner table.

Each bite is a comforting reminder of home, filled with cheesy goodness and hearty flavors.

Whether you’re feeding a hungry family or impressing friends, this dish is sure to be a hit.

So roll up your sleeves, embrace the joy of cooking, and let this casserole become a staple in your home.

You won’t regret it!

jhessica

Cheesy Ground Beef and Zucchini Casserole Awaits You!

A delicious and hearty Cheesy Ground Beef and Zucchini Casserole that combines ground beef, zucchini, and a blend of cheeses for a comforting meal.
Prep Time 15 minutes
Cook Time 40 minutes
Total Time 55 minutes
Servings: 6 servings
Course: Casserole
Cuisine: American
Calories: 350

Ingredients
  

  • 1 pound ground beef
  • 2 medium zucchinis sliced
  • 1 medium onion diced
  • 2 cloves garlic minced
  • 1 can 14.5 ounces diced tomatoes, undrained
  • 1 teaspoon dried oregano
  • 1 teaspoon dried basil
  • 1 teaspoon salt
  • ½ teaspoon black pepper
  • 2 cups shredded mozzarella cheese
  • 1 cup ricotta cheese
  • 1 large egg
  • ½ cup grated Parmesan cheese
  • 1 tablespoon olive oil

Method
 

  1. Preheat the oven to 375°F.
  2. In a large skillet, heat the olive oil over medium heat. Add the diced onion and minced garlic, sautéing until the onion is translucent, about 3-4 minutes.
  3. Add the ground beef, cooking until browned and fully cooked, breaking it apart with a spoon, about 5-7 minutes. Drain excess fat if necessary.
  4. Stir in the sliced zucchini, diced tomatoes, oregano, basil, salt, and pepper. Cook for an additional 5 minutes, allowing the zucchini to soften slightly. Remove from heat.
  5. In a mixing bowl, combine the ricotta cheese, egg, and half of the mozzarella cheese. Mix until well combined.
  6. In a greased 9×13 inch baking dish, layer half of the beef and zucchini mixture, followed by the ricotta mixture, and then the remaining beef and zucchini mixture.
  7. Top with the remaining mozzarella cheese and sprinkle with Parmesan cheese.
  8. Cover the dish with aluminum foil and bake for 25 minutes.
  9. Remove the foil and bake for an additional 15 minutes, or until the cheese is bubbly and golden brown.
  10. Let it cool for 5-10 minutes before serving.

Nutrition

Serving: 1servingCalories: 350kcalCarbohydrates: 6gProtein: 28gFat: 22gSaturated Fat: 10gPolyunsaturated Fat: 8gCholesterol: 90mgSodium: 600mgFiber: 1gSugar: 4g

Notes

  • For a spicier version, add ½ teaspoon of red pepper flakes to the beef mixture.
  • To make it vegetarian, substitute the ground beef with 1 can (15 ounces) of drained black beans or lentils.

Tried this recipe?

Let us know how it was!

Italian Meatballs: Discover the Secret Recipe Today!

Introduction to Italian Meatballs

There’s something undeniably comforting about Italian meatballs. They remind me of family gatherings, where laughter and the aroma of simmering sauce filled the air. This recipe is not just about food; it’s about creating memories. Whether you’re looking for a quick solution for a busy weeknight or a dish to impress your loved ones, these meatballs are your answer. With a blend of ground beef and pork, seasoned to perfection, they’re baked for a healthier twist. Trust me, once you try them, you’ll want to make them a regular on your dinner table.

Why You’ll Love This Italian Meatballs

These Italian meatballs are a game-changer for any home cook. They’re quick to prepare, taking just 15 minutes of your time, and they bake to perfection in under 30 minutes. The flavor? Absolutely mouthwatering! With a delightful blend of beef and pork, every bite is a taste of Italy. Plus, they’re versatile enough to serve with pasta, in a sub, or even on their own. You’ll love how easy they are to make and how they bring everyone together at the table.

Ingredients for Italian Meatballs

Gathering the right ingredients is the first step to creating these delicious Italian meatballs. Here’s what you’ll need:

  • Ground Beef: The star of the show! It provides a rich flavor and juicy texture.
  • Ground Pork: This adds a touch of sweetness and moisture, balancing the beef perfectly.
  • Breadcrumbs: They help bind the meat together while keeping the meatballs tender.
  • Parmesan Cheese: A sprinkle of this adds a savory depth that elevates the flavor.
  • Fresh Parsley: This herb brings a burst of freshness and color to the mix.
  • Garlic: Minced garlic infuses the meatballs with a warm, aromatic essence.
  • Egg: Acts as a binder, helping to hold everything together.
  • Salt and Black Pepper: Essential seasonings that enhance the overall taste.
  • Dried Oregano: A classic Italian herb that adds a hint of earthiness.
  • Red Pepper Flakes (optional): For those who like a little heat, these add a spicy kick.
  • Marinara Sauce: The perfect companion for your meatballs, adding moisture and flavor.
  • Olive Oil: A drizzle before baking helps achieve a golden, crispy exterior.

For those looking to mix things up, consider substituting ground turkey for a leaner option. You can also toss in chopped bell peppers or onions for added flavor and nutrition. The exact quantities for each ingredient are listed at the bottom of the article, ready for you to print and take to the kitchen!

How to Make Italian Meatballs

Making Italian meatballs is a straightforward process that anyone can master. Follow these simple steps, and you’ll have a plate of deliciousness ready in no time!

Step 1: Preheat the Oven

Start by preheating your oven to 400°F. This step is crucial because it ensures that your meatballs cook evenly. A hot oven helps to seal in the juices, giving you that perfect, tender bite. Trust me, you don’t want to skip this part!

Step 2: Mix the Ingredients

In a large bowl, combine the ground beef, ground pork, breadcrumbs, Parmesan cheese, parsley, garlic, egg, salt, black pepper, oregano, and red pepper flakes. Use your hands or a spoon to mix everything together. But here’s the key: don’t overmix! Just combine until everything is evenly distributed. Overmixing can lead to tough meatballs, and nobody wants that.

Step 3: Form the Meatballs

Now it’s time to shape your meatballs. Grab a handful of the mixture and roll it into a ball about 1 to 1.5 inches in diameter. This size is perfect for even cooking. If you make them too big, they might not cook through properly. Place them on a baking sheet lined with parchment paper, leaving a little space between each one.

Step 4: Prepare for Baking

Drizzle a bit of olive oil over the meatballs. This helps them achieve a nice, crispy exterior while baking. The parchment paper is your best friend here; it prevents sticking and makes cleanup a breeze. You’ll thank yourself later!

Step 5: Bake the Meatballs

Slide the baking sheet into your preheated oven and let the meatballs bake for 20-25 minutes. To check for doneness, use a meat thermometer; they should reach an internal temperature of 160°F. If you don’t have a thermometer, just cut one open to ensure it’s no longer pink inside.

Step 6: Heat the Marinara Sauce

While your meatballs are baking, it’s the perfect time to heat up the marinara sauce. Pour it into a saucepan and warm it over medium heat. Stir occasionally to prevent it from sticking. This sauce will be the delicious bath for your meatballs, adding moisture and flavor.

Step 7: Combine and Serve

Once the meatballs are done, gently add them to the warm marinara sauce. Let them simmer together for about 5 minutes. This step allows the flavors to meld beautifully. Serve your Italian meatballs with spaghetti, on a sub roll, or even on their own with extra sauce. Enjoy every bite!

Tips for Success

  • Use fresh ingredients for the best flavor; fresh herbs make a noticeable difference.
  • Don’t skip the olive oil; it’s key for that crispy texture.
  • Let the meatballs rest for a few minutes after baking for juiciness.
  • Experiment with spices; add your favorites to customize the flavor.
  • Make a double batch and freeze extras for quick meals later.

Equipment Needed

  • Baking Sheet: A standard sheet works, but a rimmed one prevents spills.
  • Parchment Paper: Use it for easy cleanup; aluminum foil is a good alternative.
  • Mixing Bowl: Any large bowl will do; a stand mixer can save time.
  • Meat Thermometer: Essential for checking doneness; a knife can work in a pinch.

Variations

  • Turkey Meatballs: Swap out the beef and pork for ground turkey for a leaner option.
  • Vegetarian Meatballs: Use lentils or chickpeas as a base, adding breadcrumbs and spices for flavor.
  • Cheesy Meatballs: Incorporate mozzarella cheese into the meat mixture for a gooey surprise.
  • Spicy Meatballs: Increase the red pepper flakes or add diced jalapeños for an extra kick.
  • Herb-Infused Meatballs: Experiment with different herbs like basil or thyme for a unique twist.

Serving Suggestions

  • Classic Spaghetti: Serve your meatballs over a bed of spaghetti for a traditional Italian meal.
  • Garlic Bread: Pair with warm, buttery garlic bread to soak up the delicious sauce.
  • Salad: A fresh green salad adds a crisp contrast to the hearty meatballs.
  • Wine: Enjoy with a glass of red wine, like Chianti, to enhance the flavors.
  • Presentation: Garnish with extra parsley or Parmesan for a beautiful finish.

FAQs about Italian Meatballs

Can I use only ground beef for Italian meatballs?

Absolutely! While the blend of ground beef and pork gives a unique flavor, you can use just ground beef. It will still be delicious, though the texture might be slightly different.

How do I store leftover Italian meatballs?

Store any leftovers in an airtight container in the fridge for up to three days. You can also freeze them for up to three months. Just reheat in the oven or microwave when you’re ready to enjoy them again!

What can I serve with Italian meatballs?

Italian meatballs are versatile! Serve them over spaghetti, in a sub roll, or alongside a fresh salad. They also pair wonderfully with garlic bread or a side of roasted vegetables.

Can I make Italian meatballs ahead of time?

Yes! You can prepare the meatball mixture a day in advance and store it in the fridge. Just form and bake them when you’re ready to serve. This makes meal prep a breeze!

What’s the best way to check if my meatballs are done?

The best way is to use a meat thermometer. They should reach an internal temperature of 160°F. If you don’t have one, cut one open to ensure it’s no longer pink inside.

Final Thoughts

Cooking these Italian meatballs is more than just preparing a meal; it’s about creating a moment of joy. The aroma wafting through your kitchen will transport you to a bustling Italian trattoria, where every bite tells a story. Whether you’re sharing them with family or enjoying a quiet dinner alone, these meatballs bring warmth and comfort to the table. Plus, the satisfaction of crafting something delicious from scratch is unmatched. So roll up your sleeves, embrace the process, and let these Italian meatballs become a cherished part of your culinary repertoire. You won’t regret it!

jhessica

Italian Meatballs: Discover the Secret Recipe Today!

Delicious Italian meatballs made with a blend of ground beef and pork, seasoned to perfection and baked for a healthier twist.
Prep Time 15 minutes
Cook Time 25 minutes
Total Time 40 minutes
Servings: 4 servings
Course: Main Dish
Cuisine: Italian
Calories: 350

Ingredients
  

  • 1 pound ground beef
  • 1/2 pound ground pork
  • 1 cup breadcrumbs
  • 1/4 cup grated Parmesan cheese
  • 1/4 cup chopped fresh parsley
  • 2 cloves garlic minced
  • 1 large egg
  • 1 teaspoon salt
  • 1/2 teaspoon black pepper
  • 1 teaspoon dried oregano
  • 1/2 teaspoon red pepper flakes optional
  • 1 cup marinara sauce
  • 1 tablespoon olive oil

Method
 

  1. Preheat your oven to 400°F.
  2. In a large bowl, combine the ground beef, ground pork, breadcrumbs, Parmesan cheese, parsley, garlic, egg, salt, black pepper, oregano, and red pepper flakes. Mix until just combined; do not overmix.
  3. Form the mixture into meatballs, about 1 to 1.5 inches in diameter.
  4. Place the meatballs on a baking sheet lined with parchment paper. Drizzle with olive oil.
  5. Bake in the preheated oven for 20-25 minutes, or until cooked through and browned.
  6. While the meatballs are baking, heat the marinara sauce in a saucepan over medium heat.
  7. Once the meatballs are done, add them to the sauce and simmer for an additional 5 minutes.
  8. Serve the meatballs with spaghetti, on a sub roll, or on their own with extra sauce.

Nutrition

Serving: 1meatballCalories: 350kcalCarbohydrates: 15gProtein: 25gFat: 20gSaturated Fat: 7gPolyunsaturated Fat: 10gCholesterol: 80mgSodium: 600mgFiber: 1gSugar: 2g

Notes

  • For a healthier option, substitute ground turkey for the beef and pork.
  • Add chopped bell peppers or onions to the meat mixture for extra flavor and nutrition.

Tried this recipe?

Let us know how it was!

Beef and Cabbage Stir-Fry: Discover This Easy Recipe!

Introduction to Beef and Cabbage Stir-Fry

There’s something comforting about a sizzling stir-fry that brings back memories of family dinners. My Beef and Cabbage Stir-Fry is not just a meal; it’s a quick solution for those busy weeknights when you want something delicious without spending hours in the kitchen. Packed with flavor and nutrition, this dish is perfect for impressing your loved ones or simply treating yourself after a long day. With just a handful of ingredients, you can whip up a satisfying dinner that’s both hearty and healthy. Let’s dive into this easy recipe that’s sure to become a favorite!

Why You’ll Love This Beef and Cabbage Stir-Fry

This Beef and Cabbage Stir-Fry is a game-changer for anyone juggling a busy schedule. It’s quick to prepare, taking just 30 minutes from start to finish. The flavors meld beautifully, creating a dish that’s both savory and satisfying. Plus, it’s a one-pan wonder, making cleanup a breeze. Whether you’re cooking for yourself or a crowd, this recipe delivers on taste and convenience every time.

Ingredients for Beef and Cabbage Stir-Fry

Gathering the right ingredients is the first step to creating a delicious Beef and Cabbage Stir-Fry. Here’s what you’ll need:

  • Ground Beef: The star of the dish, providing rich flavor and protein. You can use lean ground beef for a healthier option.
  • Green Cabbage: This adds crunch and nutrition. It cooks down beautifully, soaking up all the flavors.
  • Onion: Sliced onions bring sweetness and depth. They caramelize nicely, enhancing the overall taste.
  • Garlic: Minced garlic adds a punch of flavor. It’s a must for that aromatic base.
  • Fresh Ginger: A little ginger goes a long way, giving a warm, spicy kick that complements the beef.
  • Soy Sauce: This salty, umami-rich sauce ties everything together. It’s the secret to that savory goodness.
  • Sesame Oil: A drizzle of sesame oil adds a nutty flavor, elevating the dish to new heights.
  • Vegetable Oil: Used for cooking, it has a high smoke point, perfect for stir-frying.
  • Sugar: Just a touch balances the savory flavors, enhancing the overall taste.
  • Black Pepper: Freshly cracked black pepper adds a hint of heat and depth.
  • Green Onions: Chopped for garnish, they add a fresh, vibrant touch to the finished dish.

For those looking to spice things up, consider adding red pepper flakes or a splash of sriracha. If you prefer a leaner option, ground turkey or chicken works well too. Feel free to toss in extra veggies like bell peppers or carrots for added color and nutrition.

Exact quantities for each ingredient can be found at the bottom of the article, ready for printing!

How to Make Beef and Cabbage Stir-Fry

Now that you have all your ingredients ready, let’s get cooking! This Beef and Cabbage Stir-Fry is straightforward and quick, making it perfect for any night of the week. Follow these simple steps, and you’ll have a delicious meal in no time.

Step 1: Brown the Ground Beef

Start by heating the vegetable oil in a large skillet or wok over medium-high heat. Once the oil is shimmering, add the ground beef. Use a spatula to break it up as it cooks. You want it browned and crumbly, which should take about 5-7 minutes. If there’s excess fat, drain it off to keep the dish lighter.

Step 2: Sauté the Aromatics

Next, toss in the sliced onion, minced garlic, and fresh ginger. Sauté these aromatics for 2-3 minutes until the onion turns translucent and fragrant. This step is crucial; it builds the flavor base for your stir-fry. The aroma will fill your kitchen, making it hard to resist!

Step 3: Cook the Cabbage

Now, it’s time to add the star of the show: the cabbage! Stir in the thinly sliced cabbage and cook for another 5-7 minutes. Stir occasionally to ensure even cooking. You want the cabbage to be tender but still have a bit of crunch. This texture contrast is what makes the dish so enjoyable.

Step 4: Combine with Sauce

In a small bowl, mix together the soy sauce, sesame oil, sugar, and black pepper. Pour this flavorful sauce over the beef and cabbage mixture. Stir well to combine everything, allowing the sauce to coat the ingredients evenly. Cook for an additional 2-3 minutes to heat through and let those flavors meld together.

Step 5: Garnish and Serve

Once everything is cooked to perfection, remove the skillet from heat. Garnish your Beef and Cabbage Stir-Fry with chopped green onions for a fresh touch. Serve it hot, and enjoy the delightful flavors you’ve created. This dish pairs wonderfully with rice or noodles, but it’s just as satisfying on its own!

Tips for Success

  • Prep all ingredients before cooking to streamline the process.
  • Use a high-quality soy sauce for the best flavor.
  • Don’t overcrowd the pan; cook in batches if necessary.
  • Adjust the cooking time based on your preferred cabbage texture.
  • Experiment with different proteins or veggies to keep it exciting.

Equipment Needed

  • Large Skillet or Wok: Essential for stir-frying. A non-stick skillet works well too.
  • Spatula: For breaking up the beef and stirring ingredients.
  • Cutting Board: A sturdy surface for chopping veggies.
  • Knife: A sharp knife makes prep easier and safer.

Variations

  • Spicy Kick: Add a teaspoon of red pepper flakes or a splash of sriracha to the sauce for a fiery twist.
  • Lean Protein: Substitute ground turkey or chicken for a lighter option without sacrificing flavor.
  • Extra Veggies: Toss in bell peppers, carrots, or snap peas for added color and nutrition.
  • Gluten-Free: Use tamari instead of soy sauce to make this dish gluten-free.
  • Vegetarian Option: Replace the beef with tofu or tempeh for a plant-based version that’s just as satisfying.

Serving Suggestions

  • Rice: Serve your Beef and Cabbage Stir-Fry over steamed jasmine or brown rice for a filling meal.
  • Noodles: Toss it with cooked noodles for a delightful twist.
  • Drinks: Pair with a light beer or iced green tea to complement the flavors.
  • Presentation: Garnish with sesame seeds for an appealing finish.

FAQs about Beef and Cabbage Stir-Fry

Can I use a different type of meat in this stir-fry?
Absolutely! While ground beef is the star here, you can easily swap it for ground turkey, chicken, or even pork. Each option brings its own unique flavor to the dish.

How can I make this Beef and Cabbage Stir-Fry spicier?
If you’re looking for a kick, add a teaspoon of red pepper flakes or a splash of sriracha to the sauce. This will elevate the heat and add an exciting twist to the flavors.

Can I prepare this dish ahead of time?
Yes! You can chop the vegetables and even cook the beef in advance. Just store everything in the fridge and stir-fry it when you’re ready to eat. It’s a great way to save time on busy nights.

What can I serve with Beef and Cabbage Stir-Fry?
This dish pairs wonderfully with steamed rice or noodles. You can also serve it alongside a light salad or some pickled vegetables for a refreshing contrast.

Is this stir-fry healthy?
Definitely! This Beef and Cabbage Stir-Fry is packed with protein and fiber, making it a nutritious choice. Plus, it’s low in calories, so you can enjoy a hearty meal without the guilt.

Final Thoughts

Cooking this Beef and Cabbage Stir-Fry is more than just preparing a meal; it’s about creating a moment of joy in your kitchen. The vibrant colors, enticing aromas, and satisfying crunch of the cabbage make every bite a delight. Whether you’re sharing it with family or enjoying a quiet dinner alone, this dish brings warmth and comfort. Plus, the ease of preparation means you can focus on what really matters—savoring the flavors and enjoying the experience. So grab your skillet, and let this recipe become a staple in your culinary repertoire!

jhessica

Beef and Cabbage Stir-Fry: Discover This Easy Recipe!

A quick and easy Beef and Cabbage Stir-Fry recipe that is packed with flavor and nutrition.
Prep Time 10 minutes
Cook Time 20 minutes
Total Time 30 minutes
Servings: 4 servings
Course: Main Dish
Cuisine: Asian
Calories: 320

Ingredients
  

  • 1 pound ground beef
  • 4 cups green cabbage thinly sliced
  • 1 medium onion sliced
  • 2 cloves garlic minced
  • 1 tablespoon fresh ginger minced
  • 1/4 cup soy sauce
  • 1 tablespoon sesame oil
  • 1 tablespoon vegetable oil
  • 1 teaspoon sugar
  • 1/2 teaspoon black pepper
  • 2 green onions chopped (for garnish)

Method
 

  1. In a large skillet or wok, heat the vegetable oil over medium-high heat. Add the ground beef and cook until browned, breaking it up with a spatula, about 5-7 minutes. Drain excess fat if necessary.
  2. Add the sliced onion, garlic, and ginger to the skillet. Sauté for 2-3 minutes until the onion is translucent and fragrant.
  3. Stir in the sliced cabbage and cook for another 5-7 minutes, stirring occasionally, until the cabbage is tender.
  4. In a small bowl, mix the soy sauce, sesame oil, sugar, and black pepper. Pour this mixture over the beef and cabbage, stirring to combine. Cook for an additional 2-3 minutes to heat through.
  5. Remove from heat and garnish with chopped green onions before serving.

Nutrition

Serving: 1servingCalories: 320kcalCarbohydrates: 6gProtein: 24gFat: 24gSaturated Fat: 10gPolyunsaturated Fat: 14gCholesterol: 80mgSodium: 800mgFiber: 2gSugar: 1g

Notes

  • For a spicier version, add a teaspoon of red pepper flakes or a splash of sriracha to the sauce.
  • Substitute ground turkey or chicken for a leaner option, or add extra vegetables like bell peppers or carrots for more color and nutrition.

Tried this recipe?

Let us know how it was!

Slow Cooker Sausage and Cheese Tortellini: A Delightful Dinner!

Introduction to Slow Cooker Sausage and Cheese Tortellini

There’s something magical about a slow cooker, isn’t there? It transforms simple ingredients into a warm, comforting meal that feels like a hug on a plate. My go-to for busy weeknights is the Slow Cooker Sausage and Cheese Tortellini.

This dish is not just easy; it’s a crowd-pleaser that brings everyone to the table. With Italian sausage, creamy cheese tortellini, and a rich tomato sauce, it’s a delightful dinner that requires minimal effort. Whether you’re feeding a family or impressing friends, this recipe is your secret weapon for a satisfying meal without the fuss.

Why You’ll Love This Slow Cooker Sausage and Cheese Tortellini

This Slow Cooker Sausage and Cheese Tortellini is a game-changer for anyone juggling a busy schedule.

It’s incredibly easy to prepare, allowing you to toss everything in and let the magic happen.

The rich flavors meld together beautifully, creating a dish that tastes like you spent hours in the kitchen.

Plus, it’s perfect for leftovers, making it a win-win for both taste and convenience.

Ingredients for Slow Cooker Sausage and Cheese Tortellini

Gathering the right ingredients is half the fun of cooking! For this Slow Cooker Sausage and Cheese Tortellini, you’ll need a mix of hearty and flavorful components. Here’s what you’ll need:

  • Italian sausage: Choose between mild or spicy, depending on your taste. This is the star of the dish, adding depth and richness.
  • Onion: A medium onion, diced, brings sweetness and aroma to the sauce.
  • Garlic: Three cloves, minced, for that irresistible savory kick.
  • Crushed tomatoes: A 28-ounce can forms the base of your sauce, providing a rich, tangy flavor.
  • Tomato sauce: A 15-ounce can adds smoothness and enhances the tomato flavor.
  • Diced tomatoes: A 14.5-ounce can, undrained, gives texture and freshness to the dish.
  • Chicken broth: Two cups help to create a luscious sauce that ties everything together.
  • Italian seasoning: One teaspoon for that classic Italian flavor profile.
  • Salt and black pepper: Essential for seasoning, bringing out the flavors of the other ingredients.
  • Cheese tortellini: A 9-ounce package of refrigerated tortellini adds creaminess and heartiness.
  • Heavy cream: One cup for a rich, velvety finish that makes the dish indulgent.
  • Shredded mozzarella cheese: One cup, stirred in at the end for gooey goodness.
  • Grated Parmesan cheese: A quarter cup adds a nutty flavor that complements the dish perfectly.
  • Fresh basil: Optional, but a sprinkle on top adds a pop of color and freshness.

Feel free to get creative! You can find the exact measurements at the bottom of the article, ready for printing.

How to Make Slow Cooker Sausage and Cheese Tortellini

Cooking this Slow Cooker Sausage and Cheese Tortellini is as easy as pie.

With just a few steps, you’ll have a hearty meal that’s sure to impress.

Let’s dive into the process!

Step 1: Brown the Sausage

Start by heating a large skillet over medium heat.

Add the Italian sausage and cook until it’s browned and fully cooked.

This step is crucial; it locks in the flavors.

Once done, drain any excess fat and transfer the sausage to your slow cooker.

The aroma will already have your mouth watering!

Step 2: Combine Ingredients in the Slow Cooker

Now, it’s time to bring everything together.

In the slow cooker, add the diced onion and minced garlic to the sausage.

Next, stir in the crushed tomatoes, tomato sauce, and diced tomatoes.

Pour in the chicken broth, then sprinkle in the Italian seasoning, salt, and black pepper.

Mix everything well; this is where the magic begins!

Step 3: Cook the Mixture

Cover the slow cooker and set it to cook.

You can choose low for 4 hours or high for 2 hours.

During this time, the flavors will meld beautifully.

It’s like a cozy Italian hug in your kitchen!

Step 4: Add Tortellini and Cream

About 30 minutes before you’re ready to eat, it’s tortellini time!

Stir in the cheese tortellini and heavy cream.

Cover again and let it cook on low for 30 minutes or high for 15 minutes.

You want the tortellini to be tender and soak up all that delicious sauce.

Step 5: Stir in Cheeses

Finally, it’s time for the grand finale!

Before serving, stir in the shredded mozzarella and grated Parmesan cheese.

Watch as they melt into the dish, creating a creamy, cheesy delight.

If you like, garnish with fresh basil for a pop of color and flavor.

Now, you’re ready to serve up a bowl of comfort!

Tips for Success

  • Don’t skip browning the sausage; it enhances the flavor.
  • Use fresh ingredients for the best taste, especially the garlic and herbs.
  • Adjust the seasoning to your preference; taste as you go!
  • For a thicker sauce, let it cook a bit longer without the lid.
  • Store leftovers in an airtight container for up to three days.

Equipment Needed

  • Slow Cooker: A 6-quart model works best, but any size will do.
  • Large Skillet: For browning the sausage; a non-stick pan is ideal.
  • Wooden Spoon: Perfect for stirring ingredients without scratching your cookware.
  • Measuring Cups and Spoons: Essential for accurate ingredient portions.

Variations

  • Vegetable Boost: Add spinach, bell peppers, or zucchini for extra nutrition and flavor. Stir them in during the last 30 minutes of cooking.
  • Spicy Kick: Use hot Italian sausage or add red pepper flakes for a fiery twist.
  • Gluten-Free Option: Swap regular tortellini for gluten-free varieties to accommodate dietary needs.
  • Herb Infusion: Experiment with fresh herbs like thyme or oregano for a fragrant touch.
  • Cheese Lovers: Mix in different cheeses like gouda or fontina for a unique flavor profile.

Serving Suggestions

  • Garlic Bread: Serve with warm, buttery garlic bread for a perfect pairing.
  • Side Salad: A fresh green salad with a light vinaigrette complements the richness of the dish.
  • Wine Pairing: Enjoy with a glass of Chianti or a crisp Pinot Grigio.
  • Presentation: Garnish with fresh basil and a sprinkle of Parmesan for a restaurant-style finish.

FAQs about Slow Cooker Sausage and Cheese Tortellini

Can I use frozen tortellini in this recipe?

Absolutely! Frozen tortellini works just as well. Just add it during the last 30 minutes of cooking, and it will be perfectly tender.

How can I make this dish healthier?

For a lighter version, swap the Italian sausage for turkey sausage and use half-and-half instead of heavy cream. You can also add more vegetables for extra nutrition.

Can I prepare this dish ahead of time?

Yes! You can brown the sausage and combine all the ingredients in the slow cooker the night before. Just refrigerate it and cook it the next day.

What can I serve with Slow Cooker Sausage and Cheese Tortellini?

This dish pairs wonderfully with garlic bread, a fresh salad, or even a glass of red wine. It’s all about comfort!

How do I store leftovers?

Store any leftovers in an airtight container in the fridge for up to three days. Reheat gently on the stove or in the microwave.

Final Thoughts

Cooking the Slow Cooker Sausage and Cheese Tortellini is more than just preparing a meal; it’s about creating moments.

The aroma wafting through your home, the laughter around the table, and the satisfied smiles of your loved ones make it all worthwhile.

This dish is a reminder that comfort food doesn’t have to be complicated.

With just a few ingredients and a little patience, you can serve up a hearty, delicious dinner that warms the heart.

So, roll up your sleeves, embrace the process, and enjoy every bite of this delightful creation!

jhessica

Slow Cooker Sausage and Cheese Tortellini: A Delightful Dinner!

A hearty and delicious slow cooker recipe featuring Italian sausage, cheese tortellini, and a rich tomato sauce.
Prep Time 15 minutes
Cook Time 4 hours
Total Time 4 hours 15 minutes
Servings: 6 servings
Course: Dinner
Cuisine: Italian
Calories: 450

Ingredients
  

  • 1 pound Italian sausage mild or spicy, your choice
  • 1 medium onion diced
  • 3 cloves garlic minced
  • 1 28-ounce can crushed tomatoes
  • 1 15-ounce can tomato sauce
  • 1 14.5-ounce can diced tomatoes, undrained
  • 2 cups chicken broth
  • 1 teaspoon Italian seasoning
  • 1 teaspoon salt
  • ½ teaspoon black pepper
  • 1 9-ounce package refrigerated cheese tortellini
  • 1 cup heavy cream
  • 1 cup shredded mozzarella cheese
  • ¼ cup grated Parmesan cheese
  • Fresh basil for garnish (optional)

Method
 

  1. In a large skillet over medium heat, brown the Italian sausage until fully cooked. Drain excess fat and transfer the sausage to the slow cooker.
  2. Add the diced onion and minced garlic to the slow cooker with the sausage. Stir in the crushed tomatoes, tomato sauce, diced tomatoes, chicken broth, Italian seasoning, salt, and black pepper. Mix well.
  3. Cover and cook on low for 4 hours or high for 2 hours.
  4. About 30 minutes before serving, stir in the cheese tortellini and heavy cream. Cover and continue to cook on low for 30 minutes or high for 15 minutes, until the tortellini is tender.
  5. Before serving, stir in the shredded mozzarella and grated Parmesan cheese until melted and well combined. Garnish with fresh basil if desired.

Nutrition

Serving: 1servingCalories: 450kcalCarbohydrates: 20gProtein: 22gFat: 30gSaturated Fat: 15gPolyunsaturated Fat: 10gCholesterol: 90mgSodium: 1200mgFiber: 2gSugar: 6g

Notes

  • For a lighter version, use turkey sausage and half-and-half instead of heavy cream.
  • Add vegetables like spinach or bell peppers for extra nutrition and flavor. Stir them in during the last 30 minutes of cooking.

Tried this recipe?

Let us know how it was!

Creamy Chocolate Protein Pudding: A Delicious Recipe!

Introduction to Creamy Chocolate Protein Pudding

There’s something magical about dessert that feels indulgent yet guilt-free.

When I first stumbled upon the idea of a creamy chocolate protein pudding, I was skeptical.

Could something so rich and delicious also be healthy?

As it turns out, yes!

This creamy chocolate protein pudding is not just a quick solution for a busy day; it’s a delightful treat that satisfies your sweet tooth while packing a protein punch.

Perfect for a post-workout snack or a late-night craving, this recipe is a game-changer.

Let’s dive into this deliciously simple creation that will impress your loved ones and keep you feeling great!

Why You’ll Love This Creamy Chocolate Protein Pudding

This creamy chocolate protein pudding is a dream come true for anyone juggling a busy lifestyle.

It’s incredibly easy to whip up, taking just 10 minutes of your time.

The taste? Rich, velvety, and utterly satisfying.

With a healthy dose of protein, it’s perfect for fueling your day or curbing those late-night cravings.

You’ll find yourself reaching for this recipe again and again, and your taste buds will thank you!

Ingredients for Creamy Chocolate Protein Pudding

Creating this creamy chocolate protein pudding is a breeze, and the ingredients are simple yet effective.

Here’s what you’ll need:

  • Unsweetened almond milk: A dairy-free base that keeps the pudding light and creamy.
  • Chocolate protein powder: The star of the show, adding both flavor and a protein boost.
  • Unsweetened cocoa powder: For that rich chocolatey taste without the extra sugar.
  • Chia seeds: Tiny powerhouses that thicken the pudding and add fiber.
  • Maple syrup (or honey): A natural sweetener that enhances the flavor without being overpowering.
  • Vanilla extract: A splash of this adds depth and warmth to the pudding.
  • Pinch of salt: Just a touch to balance the sweetness and enhance the chocolate flavor.

Feel free to get creative!

For a richer flavor, consider adding a tablespoon of nut butter, like almond or peanut butter, before refrigerating.

You can also top your pudding with fresh berries, sliced bananas, or a sprinkle of granola for added texture and flavor.

Exact quantities for each ingredient are available at the bottom of the article for easy printing.

How to Make Creamy Chocolate Protein Pudding

Making this creamy chocolate protein pudding is as easy as pie—well, maybe easier!

Let’s break it down step by step, so you can enjoy this delicious treat in no time.

Step 1: Whisk the Ingredients Together

Start by grabbing a medium mixing bowl.

Pour in the unsweetened almond milk, followed by the chocolate protein powder and unsweetened cocoa powder.

Add the chia seeds, maple syrup, vanilla extract, and a pinch of salt.

Now, whisk everything together until it’s smooth and well combined.

You want a silky texture that promises a rich chocolate experience!

Step 2: Let It Thicken

Once your mixture is smooth, let it sit for about 5 minutes.

This is where the magic happens!

The chia seeds will absorb some of the liquid, thickening the pudding.

Don’t rush this step; it’s crucial for that perfect creamy consistency.

Step 3: Final Whisk

After the 5 minutes are up, give the mixture another good whisk.

This ensures there are no clumps and that everything is evenly distributed.

You want a velvety pudding that’s ready to chill!

Step 4: Prepare for Refrigeration

Now it’s time to get your pudding ready for the fridge.

You can either cover the bowl with plastic wrap or transfer the pudding into individual serving cups.

Both options work well, but I love the idea of portioning it out for easy snacking later.

Step 5: Chill the Pudding

Pop your pudding into the refrigerator for at least 1 hour.

This chilling time allows the pudding to thicken further, giving it that luscious texture.

If you can wait longer, it only gets better!

Step 6: Serve and Enjoy

Once chilled, it’s time to dig in!

Serve your creamy chocolate protein pudding cold, and enjoy that rich, satisfying flavor.

Feel free to add your favorite toppings like fresh berries or a sprinkle of granola for an extra crunch.

Trust me, you’ll be coming back for seconds!

Tips for Success

  • Use a whisk for a smoother texture; it helps combine everything evenly.
  • Let the pudding chill overnight for an even thicker consistency.
  • Experiment with different protein powders for unique flavors.
  • Adjust the sweetness to your taste; add more maple syrup if desired.
  • Store leftovers in an airtight container for up to three days.

Equipment Needed

  • Mixing bowl: A medium-sized bowl works best; a large one can also do the trick.
  • Whisk: A standard whisk is ideal, but a fork can work in a pinch.
  • Measuring cups: Essential for accuracy; you can use any standard measuring tools.
  • Plastic wrap or serving cups: For covering or portioning the pudding.

Variations

  • Nutty Delight: Stir in a tablespoon of almond or peanut butter for a creamy, nutty flavor.
  • Mint Chocolate: Add a few drops of peppermint extract for a refreshing twist.
  • Fruit Fusion: Mix in mashed bananas or pureed strawberries for a fruity version.
  • Spicy Kick: Sprinkle in a pinch of cayenne pepper or cinnamon for a surprising heat.
  • Protein Boost: Use a plant-based protein powder for a vegan-friendly option.

Serving Suggestions

  • Pair your creamy chocolate protein pudding with a cup of herbal tea for a soothing treat.
  • Top with fresh berries or sliced bananas for a burst of flavor and color.
  • Serve in elegant glass cups for a fancy presentation at gatherings.
  • Drizzle with a bit of extra maple syrup for added sweetness.

FAQs about Creamy Chocolate Protein Pudding

Can I use a different type of milk?

Absolutely! While unsweetened almond milk is my go-to, you can use any milk you prefer. Coconut milk, soy milk, or even oat milk work wonderfully in this creamy chocolate protein pudding.

How long does the pudding last in the fridge?

This pudding can be stored in an airtight container for up to three days. Just make sure to give it a good stir before serving, as it may thicken further in the fridge.

Can I make this pudding without protein powder?

Yes, you can! If you prefer a protein-free version, simply omit the protein powder. You might want to adjust the sweetness and cocoa powder to maintain the flavor balance.

Is this pudding suitable for kids?

Definitely! This creamy chocolate protein pudding is a healthy treat that kids will love. It’s a great way to sneak in some protein and fiber while satisfying their sweet tooth.

Can I freeze the pudding?

While you can freeze it, the texture may change once thawed. If you plan to freeze it, consider portioning it out and enjoying it as a frozen treat on hot days!

Final Thoughts

Creating this creamy chocolate protein pudding is more than just whipping up a quick snack; it’s about indulging in a moment of joy.

Each spoonful is a delightful blend of rich chocolate and creamy texture, making it a perfect treat for any time of day.

Whether you’re fueling up after a workout or satisfying a late-night craving, this pudding delivers on taste and nutrition.

Plus, it’s versatile enough to adapt to your preferences.

So, gather your ingredients, and let this recipe bring a little sweetness and satisfaction into your life!

jhessica

Creamy Chocolate Protein Pudding: A Delicious Recipe!

A delicious and healthy creamy chocolate protein pudding recipe that is easy to make and perfect for a quick snack or dessert.
Prep Time 10 minutes
Total Time 1 hour 10 minutes
Servings: 2 servings
Course: Dessert
Cuisine: American
Calories: 180

Ingredients
  

  • 1 cup unsweetened almond milk
  • 1 scoop chocolate protein powder
  • 2 tablespoons unsweetened cocoa powder
  • 2 tablespoons chia seeds
  • 2 tablespoons maple syrup or honey
  • 1 teaspoon vanilla extract
  • Pinch of salt

Method
 

  1. In a medium mixing bowl, whisk together the almond milk, chocolate protein powder, cocoa powder, chia seeds, maple syrup, vanilla extract, and salt until well combined and smooth.
  2. Let the mixture sit for about 5 minutes to allow the chia seeds to absorb some liquid and thicken the pudding.
  3. After 5 minutes, whisk the mixture again to ensure there are no clumps.
  4. Cover the bowl with plastic wrap or transfer the pudding to individual serving cups.
  5. Refrigerate for at least 1 hour, or until the pudding has thickened to your desired consistency.
  6. Serve chilled, and enjoy your creamy chocolate protein pudding!

Nutrition

Serving: 1servingCalories: 180kcalCarbohydrates: 10gProtein: 20gFat: 6gSaturated Fat: 0.5gPolyunsaturated Fat: 5.5gSodium: 150mgFiber: 4gSugar: 5g

Notes

  • For a richer flavor, add a tablespoon of nut butter (like almond or peanut butter) to the mixture before refrigerating.
  • Top with fresh berries, sliced bananas, or a sprinkle of granola for added texture and flavor before serving.

Tried this recipe?

Let us know how it was!

Creamy Chicken Sausage Orzo: A Deliciously Simple Recipe!

Introduction to Creamy Chicken Sausage Orzo

There’s something magical about a dish that feels like a warm hug on a plate. Creamy chicken sausage orzo is just that—a comforting meal that’s both simple and satisfying. Whether you’re coming home after a long day or looking to impress your family with minimal effort, this recipe is your go-to. It’s quick to whip up, and the creamy goodness will have everyone asking for seconds. Plus, it’s a one-pan wonder, making cleanup a breeze. Trust me, this dish will become a staple in your kitchen!

Why You’ll Love This Creamy Chicken Sausage Orzo

This creamy chicken sausage orzo is a game-changer for busy weeknights. It’s not just about the rich flavors; it’s about the ease of preparation. In just 35 minutes, you can serve a delicious meal that feels gourmet. The combination of savory chicken sausage and creamy orzo creates a dish that’s both hearty and comforting. Plus, it’s versatile enough to adapt to your family’s tastes, making it a winner every time!

Ingredients for Creamy Chicken Sausage Orzo

Gathering the right ingredients is the first step to creating your creamy chicken sausage orzo masterpiece. Here’s what you’ll need:

  • Olive oil: This adds a rich flavor and helps sauté the sausage and veggies.
  • Chicken sausage: A leaner option that packs a punch of flavor. Feel free to choose spicy or mild based on your preference.
  • Onion: Diced onions bring sweetness and depth to the dish.
  • Garlic: Minced garlic adds an aromatic kick that elevates the overall taste.
  • Orzo pasta: This tiny pasta cooks quickly and absorbs the creamy sauce beautifully.
  • Chicken broth: A flavorful base that enhances the dish’s savory notes.
  • Heavy cream: This is what makes the dish creamy and indulgent. For a lighter option, consider half-and-half.
  • Spinach: Fresh spinach adds color and nutrition, plus it wilts down nicely.
  • Italian seasoning: A blend of herbs that brings a taste of Italy to your kitchen.
  • Salt and pepper: Essential for seasoning and enhancing all the flavors.
  • Parmesan cheese: Grated cheese adds a salty, nutty finish that ties everything together.
  • Fresh parsley: Chopped parsley is perfect for garnishing, adding a pop of color and freshness.

For those looking to mix things up, consider adding bell peppers or zucchini for extra flavor and nutrition. You can find the exact quantities for each ingredient at the bottom of the article, ready for printing!

How to Make Creamy Chicken Sausage Orzo

Now that you have your ingredients ready, let’s dive into the cooking process. Making creamy chicken sausage orzo is straightforward and fun. Follow these steps, and you’ll have a delicious meal on the table in no time!

Step 1: Sauté the Chicken Sausage

Start by heating two tablespoons of olive oil in a large skillet over medium heat. Once the oil is shimmering, add the sliced chicken sausage. Cook it for about 5-7 minutes until it’s nicely browned. This step adds a depth of flavor that’s hard to resist. Once done, remove the sausage from the skillet and set it aside. You’ll add it back later.

Step 2: Cook the Onions and Garlic

In the same skillet, toss in the diced onion. Sauté it for about 3-4 minutes until it turns translucent. The aroma will start to fill your kitchen, and trust me, it’s heavenly! Next, stir in the minced garlic and cook for an additional minute. This will make your dish even more fragrant.

Step 3: Toast the Orzo Pasta

Now, it’s time to add the orzo pasta to the skillet. Toast it for about 2 minutes, stirring frequently. This step enhances the nutty flavor of the orzo, making it even more delicious. You’ll notice a slight change in color, which is a good sign!

Step 4: Add Chicken Broth and Simmer

Pour in the chicken broth and bring the mixture to a boil. Once boiling, reduce the heat to a simmer. Let it cook for about 10 minutes, or until the orzo is tender and most of the liquid is absorbed. Keep an eye on it, stirring occasionally to prevent sticking.

Step 5: Incorporate Cream and Spinach

After the orzo is cooked, stir in the heavy cream and chopped spinach. The cream will make everything rich and velvety, while the spinach adds a pop of color and nutrition. Season with salt and pepper to taste. Cook for another 3-5 minutes until the spinach wilts and everything is heated through.

Step 6: Finish with Parmesan Cheese

Finally, remove the skillet from heat and stir in the grated Parmesan cheese. This is where the magic happens! The cheese melts into the dish, creating that creamy texture we all love. Give it a good mix, and you’re ready to serve!

Tips for Success

  • Prep your ingredients before starting to save time and keep things organized.
  • Don’t skip toasting the orzo; it adds a wonderful depth of flavor.
  • Adjust the cream to your taste; half-and-half works well for a lighter dish.
  • Feel free to experiment with different vegetables for added nutrition.
  • Always taste and adjust seasoning before serving for the best flavor.

Equipment Needed

  • Large skillet: A non-stick skillet works best, but any large pan will do.
  • Wooden spoon: Perfect for stirring without scratching your skillet.
  • Measuring cups: Essential for accurate ingredient portions.
  • Knife and cutting board: For chopping your veggies and sausage.

Variations of Creamy Chicken Sausage Orzo

  • Spicy Kick: Add crushed red pepper flakes or diced jalapeños for a fiery twist.
  • Vegetarian Delight: Swap chicken sausage for plant-based sausage or mushrooms for a hearty, meatless option.
  • Herb Infusion: Experiment with fresh herbs like basil or thyme to elevate the flavor profile.
  • Cheesy Goodness: Mix in different cheeses like mozzarella or goat cheese for a unique taste.
  • Seasonal Veggies: Incorporate seasonal vegetables like asparagus or cherry tomatoes for freshness and color.

Serving Suggestions for Creamy Chicken Sausage Orzo

  • Garlic Bread: Serve with warm, crusty garlic bread for a delightful pairing.
  • Side Salad: A fresh green salad with a light vinaigrette complements the richness of the orzo.
  • Wine Pairing: Enjoy with a glass of Chardonnay or a light red wine.
  • Presentation: Garnish with extra parsley and a sprinkle of Parmesan for a beautiful finish.

FAQs about Creamy Chicken Sausage Orzo

Can I use regular pasta instead of orzo? Absolutely! While orzo gives a unique texture, you can substitute it with any small pasta like ditalini or even rice. Just adjust the cooking time accordingly.

Is this creamy chicken sausage orzo gluten-free? Yes, if you use gluten-free orzo, this dish can easily fit into a gluten-free diet. Just check the packaging to ensure it meets your needs.

How can I make this dish dairy-free? To create a dairy-free version, swap the heavy cream for coconut milk or a dairy-free cream alternative. You can also use nutritional yeast instead of Parmesan for a cheesy flavor.

Can I prepare this dish in advance? Yes! You can make creamy chicken sausage orzo ahead of time. Just store it in an airtight container in the fridge. Reheat gently on the stove, adding a splash of broth or cream to loosen it up.

What can I serve with creamy chicken sausage orzo? This dish pairs wonderfully with garlic bread, a fresh salad, or even roasted vegetables. The creamy texture complements a variety of sides beautifully!

Final Thoughts

Cooking creamy chicken sausage orzo is more than just preparing a meal; it’s about creating moments. The rich, creamy texture and savory flavors come together to form a dish that warms the heart and satisfies the soul. Whether you’re sharing it with family or enjoying a quiet night in, this recipe brings comfort and joy to the table. Plus, its simplicity means you can whip it up any night of the week. So, roll up your sleeves, embrace the process, and let this creamy chicken sausage orzo become a cherished part of your culinary repertoire!

jhessica

Creamy Chicken Sausage Orzo: A Deliciously Simple Recipe!

A deliciously simple recipe for creamy chicken sausage orzo, perfect for a comforting meal.
Prep Time 10 minutes
Cook Time 25 minutes
Total Time 35 minutes
Servings: 4 servings
Course: Main Course
Cuisine: Italian
Calories: 550

Ingredients
  

  • 2 tablespoons olive oil
  • 1 pound chicken sausage sliced
  • 1 medium onion diced
  • 3 cloves garlic minced
  • 1 cup orzo pasta
  • 4 cups chicken broth
  • 1 cup heavy cream
  • 1 cup spinach chopped
  • 1 teaspoon Italian seasoning
  • Salt and pepper to taste
  • 1/2 cup grated Parmesan cheese
  • Fresh parsley chopped (for garnish)

Method
 

  1. In a large skillet, heat the olive oil over medium heat. Add the sliced chicken sausage and cook until browned, about 5-7 minutes. Remove the sausage from the skillet and set aside.
  2. In the same skillet, add the diced onion and sauté until translucent, about 3-4 minutes. Stir in the minced garlic and cook for an additional 1 minute until fragrant.
  3. Add the orzo pasta to the skillet and toast for 2 minutes, stirring frequently.
  4. Pour in the chicken broth and bring to a boil. Reduce the heat to a simmer and cook for about 10 minutes, or until the orzo is tender and most of the liquid is absorbed.
  5. Stir in the heavy cream, chopped spinach, Italian seasoning, and the cooked chicken sausage. Season with salt and pepper to taste. Cook for another 3-5 minutes until the spinach is wilted and everything is heated through.
  6. Remove from heat and stir in the grated Parmesan cheese until melted and creamy.
  7. Serve hot, garnished with fresh parsley.

Nutrition

Serving: 1servingCalories: 550kcalCarbohydrates: 40gProtein: 25gFat: 30gSaturated Fat: 15gPolyunsaturated Fat: 10gCholesterol: 100mgSodium: 800mgFiber: 2gSugar: 2g

Notes

  • For a lighter version, substitute half-and-half for the heavy cream.
  • Add your favorite vegetables, such as bell peppers or zucchini, for extra flavor and nutrition.

Tried this recipe?

Let us know how it was!

Chili Lime Chicken and Sweet Potato Skillet Recipe Revealed!

Introduction to Chili Lime Chicken and Sweet Potato Skillet

After a long day, the last thing I want is to spend hours in the kitchen. That’s where my Chili Lime Chicken and Sweet Potato Skillet comes in. This dish is a vibrant explosion of flavors, combining tender chicken with sweet potatoes and bell peppers, all drizzled in a zesty lime dressing. It’s not just quick to whip up; it’s also a healthy option that will impress your loved ones. Whether you’re cooking for family or just treating yourself, this skillet meal is a perfect solution for busy evenings.

Why You’ll Love This Chili Lime Chicken and Sweet Potato Skillet

This Chili Lime Chicken and Sweet Potato Skillet is a game-changer for anyone who craves flavor without the fuss. It’s quick to prepare, taking just 40 minutes from start to finish. The combination of spices and fresh lime juice creates a taste that dances on your palate. Plus, it’s packed with nutrients, making it a guilt-free indulgence. You’ll love how easy it is to clean up, too—one skillet, one delicious meal!

Ingredients for Chili Lime Chicken and Sweet Potato Skillet

Gathering the right ingredients is the first step to creating this delicious Chili Lime Chicken and Sweet Potato Skillet. Here’s what you’ll need:

  • Olive oil: A healthy fat that adds richness and helps cook the chicken to perfection.
  • Boneless, skinless chicken breasts: The star of the dish, providing lean protein and a tender texture.
  • Chili powder: This spice brings a warm, smoky flavor that elevates the dish.
  • Cumin: Adds an earthy depth, complementing the chili powder beautifully.
  • Garlic powder: A convenient way to infuse that beloved garlic flavor without the chopping.
  • Onion powder: Enhances the savory notes, making the dish more aromatic.
  • Salt and pepper: Essential seasonings that bring all the flavors together.
  • Sweet potatoes: These provide a natural sweetness and a hearty texture, making the dish filling.
  • Red and green bell peppers: They add color, crunch, and a fresh taste that balances the sweetness of the potatoes.
  • Fresh lime juice: The zesty kick that brightens the entire dish, making it refreshing.
  • Fresh cilantro: A fragrant herb that adds a burst of freshness when sprinkled on top before serving.

For those who like a little heat, consider adding diced jalapeños or a pinch of cayenne pepper to the chicken seasoning. If you want to switch things up, you can substitute sweet potatoes with butternut squash or zucchini for a different flavor and texture. You’ll find the exact quantities for each ingredient at the bottom of the article, ready for printing!

How to Make Chili Lime Chicken and Sweet Potato Skillet

Now that you have all your ingredients ready, let’s dive into making this delicious Chili Lime Chicken and Sweet Potato Skillet. Follow these simple steps, and you’ll have a mouthwatering meal in no time!

Step 1: Prepare the Chicken

Start by heating 2 tablespoons of olive oil in a large skillet over medium-high heat. Once the oil is shimmering, add 1 pound of bite-sized chicken pieces. Season them with 1 teaspoon of chili powder, 1 teaspoon of cumin, ½ teaspoon of garlic powder, ½ teaspoon of onion powder, and a sprinkle of salt and pepper. Cook for about 5-7 minutes, stirring occasionally, until the chicken is browned and cooked through. Remove the chicken from the skillet and set it aside. This step is crucial; you want that chicken to be juicy and flavorful!

Step 2: Cook the Sweet Potatoes

In the same skillet, toss in the diced sweet potatoes. Cook them for about 10 minutes, stirring occasionally. You want them to start softening but not mushy. The sweet potatoes are the heart of this dish, providing a sweet contrast to the spices. If they start to stick, don’t hesitate to add a splash more olive oil!

Step 3: Add the Bell Peppers

Next, it’s time to add some color! Toss in the diced red and green bell peppers. Cook for an additional 5 minutes, or until the peppers are tender and the sweet potatoes are fully cooked. The vibrant colors not only make the dish visually appealing but also add a fresh crunch that complements the sweet potatoes beautifully.

Step 4: Combine and Heat

Return the cooked chicken to the skillet. Pour in ¼ cup of fresh lime juice, stirring everything together. Let it cook for another 2-3 minutes to heat through. The lime juice is the magic ingredient here, bringing all those flavors together in a zesty embrace. Trust me, your kitchen will smell incredible!

Step 5: Garnish and Serve

Finally, remove the skillet from heat and sprinkle with ¼ cup of chopped fresh cilantro. This adds a burst of freshness that elevates the dish. Serve it warm, and watch as everyone digs in with delight. You’ve just created a beautiful, healthy meal that’s sure to impress!

Tips for Success

  • Prep your ingredients ahead of time to streamline the cooking process.
  • Don’t overcrowd the skillet; cook in batches if necessary for even browning.
  • Adjust the spice levels to your taste; add more chili powder for extra heat.
  • Let the sweet potatoes cook until fork-tender for the best texture.
  • Fresh lime juice is key—don’t skip it for that zesty kick!

Equipment Needed

  • Large skillet: A non-stick skillet works best, but any large pan will do.
  • Cutting board: Essential for chopping your veggies and chicken safely.
  • Sharp knife: A good knife makes prep work quick and easy.
  • Measuring spoons: For accurate seasoning, though you can eyeball it if you’re confident!

Variations

  • Spicy Kick: Add diced jalapeños or a pinch of cayenne pepper to the chicken seasoning for an extra layer of heat.
  • Vegetarian Option: Substitute the chicken with chickpeas or tofu for a plant-based twist that’s just as satisfying.
  • Different Veggies: Experiment with seasonal vegetables like zucchini, asparagus, or even corn for a unique flavor profile.
  • Herb Swap: Try using fresh parsley or basil instead of cilantro for a different herbaceous note.
  • Sweet Potato Alternatives: Butternut squash or carrots can be used in place of sweet potatoes for a different texture and taste.

Serving Suggestions

  • Side Salad: Pair with a fresh green salad topped with avocado and a light vinaigrette.
  • Rice or Quinoa: Serve over a bed of fluffy rice or quinoa for added texture.
  • Drink Pairing: Enjoy with a cold beer or a refreshing lime-infused sparkling water.
  • Presentation: Garnish with extra lime wedges and cilantro for a vibrant look.

FAQs about Chili Lime Chicken and Sweet Potato Skillet

Can I make this Chili Lime Chicken and Sweet Potato Skillet ahead of time?

Absolutely! You can prepare the chicken and sweet potatoes in advance. Just store them separately in the fridge. When you’re ready to eat, reheat everything in the skillet and add the lime juice and cilantro just before serving for the best flavor.

What can I substitute for sweet potatoes?

If sweet potatoes aren’t your thing, you can easily swap them for butternut squash or zucchini. Both options will bring a different texture and flavor while still keeping the dish delicious and healthy.

How can I make this dish spicier?

For those who love a kick, consider adding diced jalapeños or a pinch of cayenne pepper to the chicken seasoning. You can also serve it with a side of hot sauce for an extra layer of heat!

Is this recipe gluten-free?

Yes! This Chili Lime Chicken and Sweet Potato Skillet is naturally gluten-free, making it a great option for anyone with gluten sensitivities. Just be sure to check any additional ingredients you might add.

How do I store leftovers?

Store any leftovers in an airtight container in the fridge for up to three days. Reheat in the skillet or microwave, and enjoy your delicious meal again!

Final Thoughts

Cooking this Chili Lime Chicken and Sweet Potato Skillet is more than just preparing a meal; it’s about creating a moment of joy in your kitchen. The vibrant colors and zesty flavors come together to make a dish that’s not only healthy but also incredibly satisfying. Each bite is a reminder that cooking can be simple yet rewarding. Whether you’re sharing it with family or enjoying it solo, this recipe brings a sense of accomplishment and warmth. So grab your skillet, unleash your inner chef, and savor the delightful experience that awaits you!

jhessica

Chili Lime Chicken and Sweet Potato Skillet Recipe Revealed!

A delicious and healthy Chili Lime Chicken and Sweet Potato Skillet recipe that combines tender chicken with sweet potatoes and bell peppers, all tossed in a zesty lime dressing.
Prep Time 15 minutes
Cook Time 25 minutes
Total Time 40 minutes
Servings: 4 servings
Course: Main Dish
Cuisine: Mexican
Calories: 350

Ingredients
  

  • 2 tablespoons olive oil
  • 1 pound boneless skinless chicken breasts, cut into bite-sized pieces
  • 1 teaspoon chili powder
  • 1 teaspoon cumin
  • 1/2 teaspoon garlic powder
  • 1/2 teaspoon onion powder
  • Salt and pepper to taste
  • 2 medium sweet potatoes peeled and diced (about 3 cups)
  • 1 red bell pepper diced
  • 1 green bell pepper diced
  • 1/4 cup fresh lime juice
  • 1/4 cup fresh cilantro chopped

Method
 

  1. In a large skillet, heat the olive oil over medium-high heat. Add the chicken pieces and season with chili powder, cumin, garlic powder, onion powder, salt, and pepper. Cook for about 5-7 minutes, stirring occasionally, until the chicken is browned and cooked through. Remove the chicken from the skillet and set aside.
  2. In the same skillet, add the diced sweet potatoes. Cook for about 10 minutes, stirring occasionally, until they begin to soften.
  3. Add the diced red and green bell peppers to the skillet with the sweet potatoes. Cook for an additional 5 minutes, or until the peppers are tender and the sweet potatoes are fully cooked.
  4. Return the cooked chicken to the skillet and pour in the lime juice. Stir to combine and cook for another 2-3 minutes to heat everything through.
  5. Remove from heat and sprinkle with fresh cilantro before serving.

Nutrition

Serving: 1servingCalories: 350kcalCarbohydrates: 30gProtein: 28gFat: 14gSaturated Fat: 2gPolyunsaturated Fat: 10gCholesterol: 70mgSodium: 300mgFiber: 5gSugar: 5g

Notes

  • For added heat, consider adding diced jalapeños or a pinch of cayenne pepper to the chicken seasoning.
  • Substitute the sweet potatoes with butternut squash or zucchini for a different flavor and texture.

Tried this recipe?

Let us know how it was!

Festive Sprinkle Cookies: Your Perfect Holiday Treat!

Introduction to Festive Sprinkle Cookies

There’s something magical about the holidays that makes us crave sweet treats, and these Festive Sprinkle Cookies are just the ticket! I remember baking cookies with my mom, the kitchen filled with laughter and the sweet aroma of vanilla. This recipe is perfect for anyone looking to whip up a quick and colorful dessert that will impress family and friends. Whether you’re hosting a holiday gathering or just want to brighten up a regular day, these cookies are a delightful way to spread joy. Trust me, they’ll disappear faster than you can say “more sprinkles!”

Why You’ll Love This Festive Sprinkle Cookies

These Festive Sprinkle Cookies are a breeze to make, perfect for busy schedules. With just a handful of ingredients and minimal prep time, you can have a batch ready in under 30 minutes. The taste? Absolutely delightful! Each bite is a burst of sweetness, complemented by colorful sprinkles that bring a smile to anyone’s face. Plus, they’re versatile enough for any occasion, making them a go-to treat for the holidays and beyond!

Ingredients for Festive Sprinkle Cookies

Gathering the right ingredients is the first step to creating these delightful Festive Sprinkle Cookies. Here’s what you’ll need:

  • All-purpose flour: The backbone of your cookies, providing structure and texture.
  • Baking soda: This little leavening agent helps your cookies rise and become fluffy.
  • Salt: A pinch enhances the sweetness and balances flavors.
  • Unsalted butter: Softened butter adds richness and a creamy texture to the dough.
  • Granulated sugar: This sweetener gives your cookies that classic sweetness and crisp edges.
  • Brown sugar: Packed with moisture, it adds a lovely chewiness and depth of flavor.
  • Eggs: They bind the ingredients together and contribute to the cookies’ structure.
  • Vanilla extract: A splash of this aromatic essence elevates the overall flavor.
  • Rainbow sprinkles: The star of the show! They add color and fun to your cookies.

For those looking to mix things up, consider using themed sprinkles for different holidays or occasions. You can also swap out half of the all-purpose flour with almond flour for a nutty twist. If you’re curious about exact measurements, they’re available at the bottom of the article for easy printing!

How to Make Festive Sprinkle Cookies

Now that you have your ingredients ready, let’s dive into the fun part: making these Festive Sprinkle Cookies! Follow these simple steps, and you’ll have a batch of colorful cookies in no time.

Step 1: Preheat the Oven

Start by preheating your oven to 350°F. This ensures it’s nice and hot when your cookies go in, helping them bake evenly and perfectly.

Step 2: Prepare the Dry Ingredients

In a medium bowl, whisk together the all-purpose flour, baking soda, and salt. This step is crucial as it combines the dry ingredients and helps distribute the baking soda evenly throughout the flour.

Step 3: Cream the Butter and Sugars

In a large bowl, beat the softened butter, granulated sugar, and brown sugar together until light and fluffy, about 2-3 minutes. This process incorporates air into the mixture, giving your cookies a delightful texture.

Step 4: Add Eggs and Vanilla

Add the eggs one at a time, mixing well after each addition. Then, stir in the vanilla extract. This step adds moisture and flavor, making your cookies irresistible!

Step 5: Combine Wet and Dry Ingredients

Gradually add the dry ingredients to the wet ingredients, mixing until just combined. Be careful not to overmix; you want your cookies to be tender and soft.

Step 6: Fold in the Sprinkles

Gently fold in the rainbow sprinkles. This is where the magic happens! The sprinkles add color and a festive touch to your cookies.

Step 7: Shape the Cookies

Drop rounded tablespoons of dough onto ungreased baking sheets, spacing them about 2 inches apart. This gives them room to spread while baking.

Step 8: Bake the Cookies

Bake for 10-12 minutes, or until the edges are lightly golden. Keep an eye on them; you want that perfect balance of chewy and crispy!

Step 9: Cool and Enjoy

Remove from the oven and let the cookies cool on the baking sheets for 5 minutes. Then, transfer them to wire racks to cool completely. Enjoy the delightful aroma filling your kitchen!

Tips for Success

  • Make sure your butter is softened, not melted, for the best texture.
  • Chill the dough for 30 minutes if it feels too sticky; this helps with shaping.
  • Use a cookie scoop for uniform sizes and even baking.
  • Experiment with different sprinkles to match the season or occasion.
  • Store cookies in an airtight container to keep them fresh longer.

Equipment Needed

  • Mixing bowls: A set of various sizes is handy; you can use any large bowl if needed.
  • Whisk: Essential for mixing dry ingredients; a fork works in a pinch.
  • Electric mixer: For creaming butter and sugars; a sturdy wooden spoon can do the job too.
  • Baking sheets: Use any flat, oven-safe tray; parchment paper is optional but helps with cleanup.
  • Cookie scoop: Great for uniform cookies; a tablespoon works just as well.

Variations

  • Chocolate Chip Festive Sprinkle Cookies: Add a cup of chocolate chips for a delicious twist on the classic recipe.
  • Gluten-Free Option: Substitute all-purpose flour with a gluten-free blend to make these cookies suitable for gluten-sensitive friends.
  • Nutty Delight: Incorporate chopped nuts like walnuts or pecans for added crunch and flavor.
  • Spiced Version: Add a teaspoon of cinnamon or nutmeg to the dry ingredients for a warm, spiced flavor.
  • Vegan Adaptation: Replace eggs with flaxseed meal mixed with water and use vegan butter for a plant-based treat.

Serving Suggestions

  • Pair these Festive Sprinkle Cookies with a glass of cold milk for a classic treat.
  • Serve alongside a warm cup of hot cocoa or coffee for a cozy afternoon snack.
  • For a festive touch, arrange cookies on a colorful platter with seasonal decorations.
  • Consider gifting a box of cookies to friends or family for a sweet surprise!

FAQs about Festive Sprinkle Cookies

Got questions about these delightful Festive Sprinkle Cookies? You’re not alone! Here are some common queries that might help you out:

Can I use different types of sprinkles?

Absolutely! Feel free to experiment with themed sprinkles for various holidays or occasions. The colorful options can really elevate your cookie game!

How should I store the cookies?

To keep your cookies fresh, store them in an airtight container at room temperature. They’ll stay delicious for up to a week—if they last that long!

Can I freeze the cookie dough?

Yes! You can freeze the dough for up to three months. Just scoop the dough onto a baking sheet, freeze until solid, then transfer to a freezer bag. Bake straight from the freezer, adding a couple of extra minutes to the baking time.

What can I substitute for eggs?

If you’re looking for an egg substitute, try using flaxseed meal mixed with water or unsweetened applesauce. Both options work well in this recipe!

Are these cookies suitable for a gluten-free diet?

Yes! Simply swap the all-purpose flour with a gluten-free flour blend, and you’ll have a tasty treat that everyone can enjoy.

Final Thoughts

Creating these Festive Sprinkle Cookies is more than just baking; it’s about making memories. The joy of mixing, the anticipation of the aroma wafting through your kitchen, and the smiles on your loved ones’ faces as they take that first bite are priceless. These cookies are a celebration of color and flavor, perfect for any occasion. Whether you’re sharing them at a holiday gathering or enjoying them with a cup of coffee, they bring warmth and happiness. So roll up your sleeves, get those sprinkles ready, and let the holiday spirit shine through your baking!

jhessica

Festive Sprinkle Cookies: Your Perfect Holiday Treat!

Delicious and colorful cookies perfect for any holiday celebration.
Prep Time 15 minutes
Cook Time 12 minutes
Total Time 27 minutes
Servings: 24 cookies
Course: Dessert
Cuisine: American
Calories: 150

Ingredients
  

  • 2 ¾ cups all-purpose flour
  • 1 teaspoon baking soda
  • ½ teaspoon salt
  • 1 cup unsalted butter softened
  • 1 cup granulated sugar
  • ½ cup packed brown sugar
  • 2 large eggs
  • 2 teaspoons vanilla extract
  • 1 cup rainbow sprinkles

Method
 

  1. Preheat your oven to 350°F.
  2. In a medium bowl, whisk together the flour, baking soda, and salt.
  3. In a large bowl, beat the softened butter, granulated sugar, and brown sugar together until light and fluffy, about 2-3 minutes.
  4. Add the eggs one at a time, mixing well after each addition, then stir in the vanilla extract.
  5. Gradually add the dry ingredients to the wet ingredients, mixing until just combined.
  6. Fold in the rainbow sprinkles.
  7. Drop rounded tablespoons of dough onto ungreased baking sheets, spacing them about 2 inches apart.
  8. Bake for 10-12 minutes, or until the edges are lightly golden.
  9. Remove from the oven and let the cookies cool on the baking sheets for 5 minutes before transferring them to wire racks to cool completely.

Nutrition

Serving: 1cookieCalories: 150kcalCarbohydrates: 20gProtein: 1gFat: 7gSaturated Fat: 4gPolyunsaturated Fat: 2gCholesterol: 30mgSodium: 100mgSugar: 10g

Notes

  • For a fun twist, try using themed sprinkles for different holidays or occasions.
  • You can substitute half of the all-purpose flour with almond flour for a nutty flavor and slightly different texture.

Tried this recipe?

Let us know how it was!

Very Berry Dessert Lasagna: A Delightful Treat Awaits!

Introduction to Very Berry Dessert Lasagna

There’s something magical about dessert that brings people together, isn’t there? The Very Berry Dessert Lasagna is a delightful treat that does just that. It’s not just a dessert; it’s a celebration of flavors and textures layered in a way that makes every bite a joy. Perfect for those busy days when you want to impress your loved ones without spending hours in the kitchen, this no-bake wonder is as easy to make as it is to devour. Trust me, once you serve this, you’ll be the star of the gathering!

Why You’ll Love This Very Berry Dessert Lasagna

This Very Berry Dessert Lasagna is a game-changer for anyone who loves delicious desserts without the fuss. It’s quick to whip up, requiring no baking, which means less time in the kitchen and more time enjoying life. The combination of creamy layers and fresh berries creates a refreshing taste that’s perfect for any occasion. Plus, it’s a crowd-pleaser, making it an ideal choice for gatherings or family dinners!

Ingredients for Very Berry Dessert Lasagna

Gathering the right ingredients is the first step to creating your Very Berry Dessert Lasagna. Here’s what you’ll need:

  • Graham cracker crumbs: These form the base of your dessert, providing a sweet and crunchy crust.
  • Unsalted butter: Melted butter binds the crumbs together, ensuring a firm crust that holds up beautifully.
  • Powdered sugar: This sweetener adds a touch of sweetness to the cream cheese layer, making it irresistibly creamy.
  • Cream cheese: Softened cream cheese gives the dessert its rich and velvety texture, balancing the sweetness perfectly.
  • Whipped topping: A light and airy addition that makes the dessert feel indulgent without being heavy.
  • Vanilla extract: Just a teaspoon enhances the flavors, adding a warm, aromatic note to the cream cheese layer.
  • Mixed berries: A colorful medley of strawberries, blueberries, and raspberries brings freshness and a burst of flavor.
  • Berry pie filling: This adds a luscious layer of sweetness and fruitiness, complementing the fresh berries.
  • Sliced almonds (optional): For those who enjoy a bit of crunch, almonds add a delightful texture contrast on top.

For those looking for alternatives, consider using gluten-free graham crackers for a gluten-free option. You can also swap the mixed berries for your favorite fruits, like peaches or mangoes, for a tropical twist. Exact measurements for these ingredients can be found at the bottom of the article, ready for printing!

How to Make Very Berry Dessert Lasagna

Creating your Very Berry Dessert Lasagna is a breeze! Follow these simple steps, and you’ll have a stunning dessert that’s sure to impress. Let’s dive into the deliciousness!

Step 1: Prepare the Crust

Start by combining the graham cracker crumbs and melted butter in a medium bowl. Mix them until the crumbs are fully coated and resemble wet sand. Next, press this mixture firmly into the bottom of a 9×13-inch baking dish. This will form a sturdy crust for your dessert. Once it’s evenly spread, pop it in the refrigerator for about 10 minutes to set. This step is crucial for a perfect base!

Step 2: Make the Cream Cheese Layer

In a large bowl, beat the softened cream cheese and powdered sugar together until smooth and creamy. This is where the magic begins! Once combined, add in the vanilla extract for that extra flavor kick. Gently fold in one cup of whipped topping until it’s fully incorporated. This will create a light and fluffy cream cheese layer that balances the sweetness of the dessert beautifully.

Step 3: Layer the Ingredients

Now it’s time to build your masterpiece! Spread the cream cheese mixture evenly over the chilled graham cracker crust. Next, layer the mixed berries on top, distributing them evenly for a burst of color and flavor. Finally, spoon the berry pie filling over the berries, spreading it gently to cover. This adds a luscious sweetness that complements the fresh fruit perfectly.

Step 4: Top and Chill

To finish, spread the remaining whipped topping over the berry pie filling, creating a smooth and creamy layer. If you’re feeling adventurous, sprinkle sliced almonds on top for a delightful crunch. Cover the dish with plastic wrap and refrigerate for at least four hours, or overnight for the best results. This chilling time allows all the flavors to meld together beautifully!

Tips for Success

  • Make sure your cream cheese is softened for easy mixing; it should be at room temperature.
  • For a firmer crust, press the graham cracker mixture down firmly.
  • Use fresh berries for the best flavor, but frozen can work in a pinch—just thaw and drain them first.
  • Let the dessert chill overnight for maximum flavor and texture.
  • Feel free to customize with your favorite fruits or toppings!

Equipment Needed

  • 9×13-inch baking dish: Essential for layering your dessert; a glass or metal dish works well.
  • Mixing bowls: Use medium and large bowls for mixing ingredients; any size will do.
  • Electric mixer: A hand mixer or stand mixer makes beating the cream cheese easier.
  • Spatula: Perfect for spreading layers evenly; a silicone spatula is ideal.

Variations

  • Tropical Twist: Swap the mixed berries for diced peaches, mangoes, or pineapple for a refreshing tropical flavor.
  • Chocolate Lovers: Add a layer of chocolate pudding between the cream cheese and berry layers for a decadent touch.
  • Nut-Free Option: Omit the sliced almonds and use crushed graham crackers or coconut flakes for a different texture.
  • Vegan Version: Substitute cream cheese with a vegan alternative and use coconut whipped cream instead of regular whipped topping.
  • Berry Blast: Use a mix of different berries like blackberries and cranberries for a unique flavor profile.

Serving Suggestions

  • Pair with a scoop of vanilla ice cream for an extra indulgent treat.
  • Serve alongside a refreshing fruit salad to enhance the berry flavors.
  • Drizzle with chocolate or caramel sauce for a decadent touch.
  • Garnish with fresh mint leaves for a pop of color and freshness.

FAQs about Very Berry Dessert Lasagna

Curious about the Very Berry Dessert Lasagna? Here are some common questions I often hear, along with their answers to help you out!

Can I make this dessert ahead of time?

Absolutely! In fact, making it a day in advance allows the flavors to meld beautifully. Just keep it covered in the fridge until you’re ready to serve.

What can I substitute for the cream cheese?

If you’re looking for a lighter option, consider using Greek yogurt or a vegan cream cheese alternative. Both will give you a creamy texture without compromising flavor.

Can I use frozen berries?

Yes, frozen berries work well! Just make sure to thaw and drain them before layering to avoid excess moisture in your dessert.

How long will leftovers last?

Your berry dessert will stay fresh in the fridge for about 3-4 days. Just be sure to cover it well to maintain its deliciousness!

Is this dessert gluten-free?

To make it gluten-free, simply swap the graham crackers for gluten-free versions. The rest of the ingredients are naturally gluten-free, so you’re good to go!

Final Thoughts

Creating the Very Berry Dessert Lasagna is more than just whipping up a sweet treat; it’s about crafting memories. Each layer tells a story, from the crunchy graham cracker base to the vibrant berries that burst with flavor. This dessert is perfect for gatherings, family dinners, or simply a quiet night in. The joy of sharing it with loved ones, watching their faces light up with each bite, is truly priceless. So, roll up your sleeves, gather your ingredients, and let this delightful dessert bring a little sweetness into your life!

jhessica

Very Berry Dessert Lasagna: A Delightful Treat Awaits!

A delightful and refreshing dessert lasagna layered with cream cheese, whipped topping, and mixed berries.
Prep Time 20 minutes
Total Time 4 hours 20 minutes
Servings: 12 servings
Course: Dessert
Cuisine: American
Calories: 220

Ingredients
  

  • 2 cups graham cracker crumbs
  • 1/2 cup unsalted butter melted
  • 1 cup powdered sugar
  • 8 ounces cream cheese softened
  • 2 cups whipped topping like Cool Whip
  • 1 teaspoon vanilla extract
  • 2 cups mixed berries strawberries, blueberries, raspberries
  • 1 cup berry pie filling
  • 1/2 cup sliced almonds optional

Method
 

  1. In a medium bowl, combine the graham cracker crumbs and melted butter. Mix until the crumbs are well coated. Press the mixture into the bottom of a 9×13-inch baking dish to form a crust. Refrigerate for 10 minutes to set.
  2. In a large bowl, beat together the softened cream cheese and powdered sugar until smooth. Add the vanilla extract and mix until well combined.
  3. Gently fold in 1 cup of the whipped topping into the cream cheese mixture until fully incorporated. Spread this mixture evenly over the chilled graham cracker crust.
  4. Layer the mixed berries over the cream cheese layer, spreading them out evenly.
  5. Spoon the berry pie filling over the berries, spreading it gently to cover.
  6. Top with the remaining whipped topping, spreading it evenly over the pie filling.
  7. If using, sprinkle sliced almonds on top for added crunch.
  8. Cover the dish with plastic wrap and refrigerate for at least 4 hours, or overnight for best results.
  9. Before serving, slice into squares and enjoy!

Nutrition

Serving: 1squareCalories: 220kcalCarbohydrates: 25gProtein: 3gFat: 10gSaturated Fat: 5gPolyunsaturated Fat: 3gCholesterol: 30mgSodium: 150mgFiber: 1gSugar: 15g

Notes

  • For a gluten-free option, use gluten-free graham crackers.
  • Substitute the mixed berries with your favorite fruits, such as peaches or mangoes, for a tropical twist.

Tried this recipe?

Let us know how it was!

Stay Connected

Get recipes via email: