Get my cookbooks

Coconut Lime Refresher Mocktail is a must-try drink!

Introduction to Coconut Lime Refresher Mocktail

What is a Coconut Lime Refresher Mocktail?

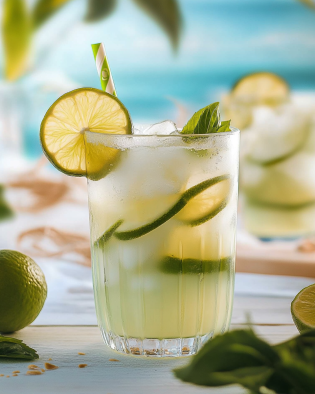
The Coconut Lime Refresher Mocktail is a delightful drink that combines the tropical flavors of coconut and lime. This refreshing beverage is perfect for warm days or any occasion where you want to feel a bit of sunshine. Made with coconut water, fresh lime juice, and a hint of pineapple, it’s a drink that not only tastes great but also hydrates you. The addition of fresh mint leaves adds a burst of freshness, making each sip a mini-vacation for your taste buds. Plus, it’s a non-alcoholic option, so everyone can enjoy it!

Why Choose a Mocktail?

Mocktails are a fantastic choice for many reasons. First, they provide a fun and flavorful alternative to traditional cocktails without the alcohol. This makes them suitable for all ages and occasions. Whether you’re hosting a family gathering, a summer barbecue, or just enjoying a quiet evening at home, mocktails can elevate your experience. They are also a healthier option, as they often contain fewer calories and sugar than their alcoholic counterparts. Plus, with the Coconut Lime Refresher Mocktail, you get the added benefits of coconut water, which is rich in electrolytes and great for hydration. So, why not sip on something delicious and refreshing that everyone can enjoy?

Ingredients for Coconut Lime Refresher Mocktail

To create the perfect Coconut Lime Refresher Mocktail, you’ll need a few simple ingredients. Each component plays a vital role in delivering that refreshing tropical taste. Here’s what you’ll need:

  • 1 cup coconut water: This is the base of your mocktail, providing hydration and a subtle sweetness.
  • 1/2 cup fresh lime juice: About 4-5 limes will give you the zesty kick that balances the sweetness of the coconut water.
  • 1/2 cup pineapple juice: This adds a fruity flavor that complements the coconut and lime beautifully.
  • 1 tablespoon agave syrup (optional): Adjust this to taste if you prefer a sweeter drink.
  • 1/4 cup fresh mint leaves: These will infuse your mocktail with a refreshing aroma and taste.
  • Ice cubes: Essential for keeping your drink cool and refreshing.
  • Lime slices and mint sprigs for garnish: These not only enhance the presentation but also add a touch of extra flavor.

Gathering these ingredients will set you on the path to creating a delightful Coconut Lime Refresher Mocktail. Each ingredient contributes to the overall flavor, making it a perfect drink for any occasion. So, let’s get ready to mix up something special!

Step-by-Step Preparation of Coconut Lime Refresher Mocktail

Step 1: Gather Your Ingredients

Before you start mixing, it’s important to have everything ready. Gather all your ingredients in one place. This includes coconut water, fresh lime juice, pineapple juice, agave syrup, fresh mint leaves, ice cubes, and garnishes like lime slices and mint sprigs. Having everything at hand makes the process smoother and more enjoyable. Plus, it helps you avoid any last-minute scrambles!

Step 2: Prepare the Coconut Base

Now that you have your ingredients, it’s time to create the base of your mocktail. In a large pitcher, pour in 1 cup of coconut water. This will be the heart of your drink, providing hydration and a subtle sweetness. Next, add 1/2 cup of fresh lime juice. Squeeze about 4-5 limes to get the right amount. Stir the mixture well to combine the flavors. If you like a sweeter drink, add 1 tablespoon of agave syrup and stir until it dissolves completely.

Step 3: Mix in the Lime Juice

After preparing the coconut base, it’s time to enhance the flavor. Add the 1/2 cup of pineapple juice to the pitcher. This fruity addition will complement the coconut and lime beautifully. Stir the mixture again to ensure all the flavors blend together. The combination of coconut, lime, and pineapple creates a tropical taste that’s simply irresistible!

Step 4: Combine with Sparkling Water

If you want to add a fizzy twist to your Coconut Lime Refresher Mocktail, this step is for you! Just before serving, pour in some club soda or sparkling water. This will give your drink a refreshing effervescence. Gently stir the mixture to combine, but be careful not to lose the bubbles. The fizz adds a fun element to your mocktail, making it even more enjoyable!

Step 5: Garnish and Serve

Finally, it’s time to serve your delicious mocktail! Fill glasses with ice cubes to keep the drink cool. Pour the coconut-lime mixture over the ice, filling each glass to the brim. For a beautiful presentation, garnish each drink with a slice of lime and a sprig of fresh mint. This not only looks appealing but also enhances the flavor. Serve immediately and enjoy your refreshing Coconut Lime Refresher Mocktail!

Variations of Coconut Lime Refresher Mocktail

Adding Fresh Fruits

One of the best things about the Coconut Lime Refresher Mocktail is its versatility. You can easily customize it by adding fresh fruits. For instance, consider tossing in some diced strawberries, mango, or kiwi. These fruits not only add vibrant colors but also enhance the flavor profile. Simply chop the fruits into small pieces and add them to the pitcher before serving. This will give your mocktail a fruity twist that’s both refreshing and visually appealing. You can also blend the fruits with the coconut water for a smoother texture. The result? A delightful drink that’s bursting with tropical goodness!

Infusing with Herbs

If you want to elevate your Coconut Lime Refresher Mocktail even further, try infusing it with different herbs. While fresh mint is a classic choice, you can also experiment with basil or rosemary. To do this, simply muddle the herbs in the pitcher along with the mint leaves. This will release their essential oils and add a unique flavor to your drink. For a more aromatic experience, consider adding a few sprigs of lavender. The combination of coconut, lime, and fragrant herbs creates a refreshing mocktail that’s perfect for summer gatherings or relaxing evenings. Don’t be afraid to get creative and find the herb combination that you love the most!

Cooking Note for Coconut Lime Refresher Mocktail

When preparing the Coconut Lime Refresher Mocktail, there are a few cooking notes to keep in mind to ensure your drink turns out perfectly every time. First, always use fresh ingredients. Fresh lime juice is essential for that zesty flavor, while fresh mint leaves will provide the best aroma and taste. Avoid bottled lime juice, as it often contains preservatives that can alter the flavor of your mocktail.

Next, consider the temperature of your ingredients. For the best experience, chill your coconut water and pineapple juice beforehand. This will help keep your mocktail refreshingly cool without needing too much ice, which can dilute the flavors. If you prefer a stronger mint flavor, you can steep the mint leaves in the coconut water for a few hours before mixing. This will infuse the drink with a delightful minty essence.

Lastly, don’t hesitate to adjust the sweetness to your liking. The agave syrup is optional, so taste your mixture before serving. If you find it needs a little more sweetness, add a bit more syrup. Remember, the goal is to create a balanced drink that highlights the tropical flavors of coconut and lime while being refreshing and enjoyable. With these cooking notes in mind, you’ll be well on your way to crafting the perfect Coconut Lime Refresher Mocktail!

Serving Suggestions for Coconut Lime Refresher Mocktail

Ideal Occasions for Serving

The Coconut Lime Refresher Mocktail is a versatile drink that fits perfectly into various occasions. Whether you’re hosting a summer barbecue, a birthday party, or a casual get-together, this mocktail will impress your guests. Its tropical flavors make it an excellent choice for pool parties or beach outings, where a refreshing drink is a must. Additionally, it’s a fantastic option for family gatherings, as everyone, including kids, can enjoy it. You can also serve it at brunches or picnics, where its light and zesty taste will complement a variety of foods. No matter the event, the Coconut Lime Refresher Mocktail adds a touch of fun and refreshment!

Glassware Recommendations

When it comes to serving your Coconut Lime Refresher Mocktail, the right glassware can enhance the experience. For a casual setting, consider using tall glasses or mason jars. These options are perfect for showcasing the vibrant colors of your drink and are easy to hold. If you want to add a touch of elegance, opt for stemless wine glasses or cocktail glasses. These will elevate the presentation and make your mocktail feel more special. Don’t forget to add ice cubes to keep the drink cool and refreshing. Whichever glass you choose, make sure it’s clear to show off the beautiful layers of your Coconut Lime Refresher Mocktail!

Tips for Perfecting Your Coconut Lime Refresher Mocktail

Creating the perfect Coconut Lime Refresher Mocktail is all about attention to detail. Here are some tips to ensure your drink is as refreshing and delicious as possible:

  • Use Fresh Ingredients: Always opt for fresh limes and mint leaves. Fresh ingredients enhance the flavor and aroma of your mocktail, making it more enjoyable.
  • Chill Your Ingredients: For the best experience, chill your coconut water and pineapple juice before mixing. This keeps your drink cool without needing too much ice, which can dilute the flavors.
  • Adjust Sweetness: Taste your mixture before serving. If you prefer a sweeter drink, feel free to add more agave syrup. The goal is to find the perfect balance that suits your taste.
  • Experiment with Garnishes: While lime slices and mint sprigs are classic garnishes, don’t hesitate to get creative. Consider adding edible flowers or colorful fruit slices for a fun twist.
  • Serve Immediately: For the best flavor and freshness, serve your mocktail right after mixing. This ensures that the mint remains vibrant and the fizz from the sparkling water is intact.
  • Make It a Slush: If you want a frozen treat, blend the ingredients with ice instead of serving it over ice. This creates a slushy version of your Coconut Lime Refresher Mocktail that’s perfect for hot days.
  • Pair with Snacks: Consider serving your mocktail with light snacks like fruit skewers or chips and salsa. The refreshing drink complements these foods beautifully.

By following these tips, you’ll be well on your way to crafting a Coconut Lime Refresher Mocktail that’s not only delicious but also visually stunning. Enjoy the process and have fun experimenting with flavors!

Breakdown of Time for Coconut Lime Refresher Mocktail

Prep Time

Preparing the Coconut Lime Refresher Mocktail is quick and easy! You’ll need about 10 minutes to gather your ingredients and prepare the drink. This includes squeezing the limes, measuring out the juices, and muddling the mint leaves. With everything ready, you’ll be set to enjoy your refreshing mocktail in no time!

Cooking Time

There’s no actual cooking involved in making this mocktail, which is one of the best parts! The only time you’ll spend is mixing the ingredients together. This should take around 5 minutes. Just combine the coconut water, lime juice, pineapple juice, and agave syrup, and you’re almost done!

Total Time

In total, you’ll spend about 15 minutes from start to finish. This includes both prep and mixing time. It’s a quick process that allows you to whip up a delicious Coconut Lime Refresher Mocktail whenever you want. Whether it’s for a party or a relaxing evening at home, you can have this delightful drink ready in a flash!

Nutritional Information for Coconut Lime Refresher Mocktail

Calories

When it comes to enjoying a refreshing drink, knowing the calorie content can help you make informed choices. Each serving of the Coconut Lime Refresher Mocktail contains approximately 60 calories. This makes it a light and guilt-free option for those looking to indulge without overdoing it. The combination of coconut water and fresh juices provides a naturally sweet flavor without excessive calories, allowing you to enjoy a delicious drink while keeping your calorie intake in check.

Protein

In terms of protein, the Coconut Lime Refresher Mocktail offers about 1 gram per serving. While this may not seem like a lot, it’s important to remember that this drink is primarily a refreshing beverage rather than a protein source. The coconut water does contain some natural proteins, which contribute to the overall nutritional profile. If you’re looking to boost the protein content, consider pairing your mocktail with a protein-rich snack, such as nuts or yogurt, for a balanced treat.

Sodium

For those monitoring their sodium intake, the Coconut Lime Refresher Mocktail is a great choice. Each serving contains minimal sodium, making it a heart-healthy option. The natural ingredients, such as coconut water and fresh juices, help keep the sodium levels low while providing essential electrolytes. This makes the mocktail not only refreshing but also a good option for hydration, especially on hot days or after physical activities.

Overall, the Coconut Lime Refresher Mocktail is a nutritious and delicious drink that fits well into a balanced diet. With its low calorie count, minimal sodium, and a touch of protein, it’s a perfect choice for anyone looking to enjoy a refreshing beverage without compromising their health goals.

FAQs about Coconut Lime Refresher Mocktail

Can I make Coconut Lime Refresher Mocktail ahead of time?

Yes, you can prepare the Coconut Lime Refresher Mocktail ahead of time! However, it’s best to mix the ingredients without adding ice or sparkling water until you’re ready to serve. This way, the flavors will stay fresh, and the drink won’t become diluted. You can store the mixture in the refrigerator for up to 24 hours. Just remember to give it a good stir before serving and add ice and sparkling water for that refreshing fizz!

What can I substitute for coconut milk?

If you’re looking for a substitute for coconut milk, coconut water is a great option! It provides a similar tropical flavor and is hydrating. If you want a creamier texture, you can use almond milk or oat milk. These alternatives will change the flavor slightly but will still create a delicious mocktail. Just keep in mind that the taste will differ from the original Coconut Lime Refresher Mocktail.

Is Coconut Lime Refresher Mocktail suitable for kids?

Absolutely! The Coconut Lime Refresher Mocktail is a fantastic choice for kids. It’s non-alcoholic and made with fresh, healthy ingredients. The tropical flavors of coconut, lime, and pineapple are sure to delight young taste buds. Plus, it’s a fun way to keep them hydrated during hot days or special occasions. Just make sure to supervise them while enjoying their drinks, especially if you’ve added any garnishes!

How can I make Coconut Lime Refresher Mocktail more festive?

To make your Coconut Lime Refresher Mocktail more festive, consider adding colorful garnishes and fun presentation elements. You can use edible flowers, colorful fruit slices, or even festive straws. For special occasions, serve the mocktail in decorative glasses or add a splash of grenadine for a beautiful gradient effect. You can also create a mocktail bar where guests can customize their drinks with different fruits and herbs. This interactive element adds excitement and makes the drink feel even more special!

Conclusion on Coconut Lime Refresher Mocktail

In conclusion, the Coconut Lime Refresher Mocktail is a delightful and refreshing drink that brings the taste of the tropics right to your glass. With its simple ingredients and easy preparation, it’s perfect for any occasion, whether you’re hosting a summer party or enjoying a quiet evening at home. The combination of coconut water, fresh lime juice, and pineapple juice creates a harmonious blend of flavors that is both hydrating and satisfying.

Moreover, this mocktail is not only delicious but also versatile. You can customize it with fresh fruits or herbs to suit your taste. Whether you prefer a fizzy twist or a slushy version, the possibilities are endless. Plus, it’s a fantastic option for all ages, making it a great choice for family gatherings or celebrations.

As you prepare your Coconut Lime Refresher Mocktail, remember to use fresh ingredients for the best flavor. With a little creativity in garnishing and serving, you can elevate this drink to a whole new level. So, gather your ingredients, mix up this tropical delight, and enjoy the refreshing taste of summer in every sip!

Cheers to good health and great flavors with your Coconut Lime Refresher Mocktail!

Sweet and Tangy Pineapple Chicken Sandwiches are delicious!

Introduction to Sweet Tangy Pineapple Chicken Sandwiches

Are you ready to tantalize your taste buds? Sweet and Tangy Pineapple Chicken Sandwiches are a delightful blend of flavors that will make your meals memorable. This dish combines the juicy goodness of chicken with the vibrant taste of pineapple, creating a sandwich that is both sweet and savory. Perfect for family gatherings, picnics, or a simple weeknight dinner, these sandwiches are sure to impress.

Imagine biting into a soft bun filled with tender, shredded chicken coated in a luscious pineapple barbecue sauce. The sweetness of the pineapple pairs beautifully with the smoky notes of the barbecue sauce, while the optional coleslaw adds a crunchy texture. It’s a dish that brings together comfort and excitement in every bite.

Not only are these sandwiches delicious, but they are also easy to prepare. With just a few simple ingredients and a slow cooker, you can create a meal that feels gourmet without spending hours in the kitchen. Whether you’re a seasoned cook or a beginner, this recipe is straightforward and rewarding.

So, gather your ingredients and get ready to enjoy a meal that’s bursting with flavor. Sweet and Tangy Pineapple Chicken Sandwiches are not just a meal; they’re an experience that you and your loved ones will cherish. Let’s dive into the ingredients and get started on this culinary adventure!

Ingredients for Sweet Tangy Pineapple Chicken Sandwiches

To create the mouthwatering Sweet and Tangy Pineapple Chicken Sandwiches, you’ll need a handful of simple ingredients. Each component plays a vital role in building the delicious flavor profile of this dish. Here’s what you’ll need:

  • 2 pounds boneless, skinless chicken breasts: This is the star of the dish, providing a tender and juicy base.
  • 1 cup pineapple juice: Adds sweetness and a tropical twist that complements the chicken perfectly.
  • 1/2 cup barbecue sauce: Choose your favorite type for a smoky or sweet flavor.
  • 1 tablespoon soy sauce: This enhances the umami flavor, making the dish more savory.
  • 1 teaspoon garlic powder: A must-have for that aromatic kick.
  • 1/2 teaspoon onion powder: Adds depth to the flavor without overpowering the dish.
  • 1/4 teaspoon black pepper: For a subtle hint of spice.
  • 1/4 teaspoon salt: Balances the flavors and enhances the overall taste.
  • 8 hamburger buns: These will hold all the delicious fillings together.
  • 1 cup coleslaw mix (optional): Adds a crunchy texture and freshness to the sandwich.
  • Sliced green onions for garnish (optional): A pop of color and flavor to finish off your sandwich.

Feel free to customize the ingredients based on your preferences. For instance, you can experiment with different types of barbecue sauce to create unique flavor profiles. Whether you prefer honey, smoky, or spicy barbecue sauce, the choice is yours!

Now that you have all the ingredients ready, let’s move on to the next step: preparing the Sweet and Tangy Pineapple Chicken Sandwiches!

Step-by-Step Preparation of Sweet Tangy Pineapple Chicken Sandwiches

Now that you have gathered all the ingredients, it’s time to dive into the preparation of your Sweet and Tangy Pineapple Chicken Sandwiches. This step-by-step guide will help you create a delicious meal that everyone will love. Let’s get started!

Step 1: Marinating the Chicken

First, we need to marinate the chicken to infuse it with flavor. Start by placing the boneless, skinless chicken breasts in a slow cooker. This method ensures that the chicken remains juicy and tender. Next, in a medium bowl, combine the pineapple juice, barbecue sauce, soy sauce, garlic powder, onion powder, black pepper, and salt. Mix these ingredients well until they are fully blended.

Once your marinade is ready, pour it over the chicken in the slow cooker. Make sure the chicken is well-coated with the marinade. This step is crucial as it allows the chicken to absorb all those sweet and tangy flavors. Cover the slow cooker and let it sit for a moment while you prepare for the next step.

Step 2: Preparing the Pineapple Sauce

While the chicken is marinating, you can prepare the pineapple sauce. The marinade you created in Step 1 will serve as the sauce for your sandwiches. This sauce is what makes the dish so special! If you want to enhance the flavor even more, consider adding a teaspoon of sriracha or your favorite hot sauce to the marinade. This will give your sandwiches a delightful kick!

Once you’ve mixed in any additional ingredients, set the sauce aside. It will be ready to use once the chicken is cooked and shredded. The combination of pineapple juice and barbecue sauce creates a perfect balance of sweetness and tanginess that will elevate your sandwiches.

Step 3: Cooking the Chicken

Now it’s time to cook the chicken! Set your slow cooker to low and let it cook for 6-8 hours, or on high for 3-4 hours. The longer you cook it, the more tender the chicken will become. When the chicken is fully cooked, it should shred easily with a fork. This is the moment you’ve been waiting for!

Once the cooking time is up, use two forks to shred the chicken right in the slow cooker. Stir the shredded chicken into the sauce, ensuring every piece is coated. This step is essential as it allows the chicken to soak up all the delicious flavors from the sauce.

Step 4: Assembling the Sandwiches

With the chicken cooked and shredded, it’s time to assemble your sandwiches! If you like, you can toast the hamburger buns for added texture. Start by placing a generous amount of the shredded chicken on the bottom half of each bun. If you’re using coleslaw mix, add a handful on top of the chicken for a crunchy contrast.

Finally, place the top half of the bun over the filling. For an extra touch, sprinkle some sliced green onions on top for garnish. This not only adds flavor but also makes your sandwiches look appealing!

And there you have it! Your Sweet and Tangy Pineapple Chicken Sandwiches are ready to be enjoyed. These sandwiches are perfect for any occasion, and they are sure to be a hit with family and friends. Let’s move on to some variations you can try to make this dish even more exciting!

Variation of Sweet Tangy Pineapple Chicken Sandwiches

While the classic Sweet and Tangy Pineapple Chicken Sandwiches are delicious as they are, there’s always room for creativity in the kitchen! Here are some exciting variations to consider. These alternatives will help you customize the dish to suit your taste or dietary preferences.

Alternative Ingredients for a Unique Twist

To give your Sweet and Tangy Pineapple Chicken Sandwiches a unique twist, consider swapping out some ingredients. Here are a few ideas:

  • Different Proteins: Instead of chicken, try using shredded pork or beef. These meats can absorb the flavors of the marinade just as well, offering a different taste experience.
  • Fruit Additions: Add diced mango or peach to the sauce for an extra fruity flavor. This will enhance the sweetness and add a tropical flair.
  • Spicy Kick: If you love heat, mix in diced jalapeños or a splash of hot sauce to the marinade. This will give your sandwiches a spicy edge that pairs well with the sweetness of the pineapple.
  • Cheese: For a creamy touch, add a slice of pepper jack or cheddar cheese on top of the chicken before closing the sandwich. The melted cheese will add richness to each bite.

These alternative ingredients can transform your sandwiches into something new and exciting. Feel free to mix and match based on what you have on hand or what flavors you enjoy!

Vegetarian Option for Sweet Tangy Pineapple Chicken Sandwiches

If you’re looking for a vegetarian option, you can easily adapt this recipe. Instead of chicken, use grilled or roasted vegetables. Here’s how to make a delicious vegetarian version:

  • Vegetable Choices: Use hearty vegetables like portobello mushrooms, zucchini, or bell peppers. These veggies can be marinated in the same pineapple sauce for a burst of flavor.
  • Tofu or Tempeh: For a protein-packed option, consider using tofu or tempeh. Marinate and cook them just like the chicken for a satisfying texture.
  • Coleslaw Mix: Keep the coleslaw mix for added crunch. You can also add shredded carrots or cabbage for extra freshness.

This vegetarian version of Sweet and Tangy Pineapple Chicken Sandwiches is just as flavorful and satisfying. It’s a great way to enjoy the same delicious taste while catering to different dietary needs.

With these variations, you can enjoy Sweet and Tangy Pineapple Chicken Sandwiches in many delightful ways. Whether you stick to the classic recipe or try something new, you’re sure to create a meal that everyone will love!

Cooking Note for Sweet Tangy Pineapple Chicken Sandwiches

When preparing Sweet and Tangy Pineapple Chicken Sandwiches, a few cooking notes can help ensure your dish turns out perfectly every time. These tips will guide you through the process, making it easier and more enjoyable.

First, always choose high-quality chicken breasts. Fresh, boneless, skinless chicken breasts will yield the best results. If you can, opt for organic chicken for a healthier option. This choice not only enhances the flavor but also ensures you’re serving a nutritious meal.

Next, marinating the chicken is crucial. Allowing the chicken to soak in the pineapple juice and barbecue sauce mixture for a longer time can deepen the flavors. If you have time, consider marinating the chicken overnight in the refrigerator. This extra step will make your sandwiches even more delicious!

When cooking in a slow cooker, remember that every appliance is different. If you find that your chicken isn’t shredding easily after the recommended cooking time, don’t worry! Just let it cook a little longer. The goal is to achieve tender chicken that falls apart with a fork.

Additionally, if you prefer a thicker sauce, you can remove the chicken once it’s cooked and shred it. Then, transfer the remaining sauce to a saucepan and simmer it on the stove for a few minutes. This will help reduce the sauce and intensify the flavors.

Lastly, don’t forget to taste your sauce before serving! Adjust the seasoning if needed. A little extra salt or a dash of hot sauce can elevate the flavor profile to your liking.

By keeping these cooking notes in mind, you’ll be well on your way to creating mouthwatering Sweet and Tangy Pineapple Chicken Sandwiches that everyone will rave about. Happy cooking!

Serving Suggestions for Sweet Tangy Pineapple Chicken Sandwiches

Now that your Sweet and Tangy Pineapple Chicken Sandwiches are ready, it’s time to think about how to serve them! Presentation can elevate your meal, making it even more enjoyable. Here are some delightful serving suggestions to consider:

  • Side Dishes: Pair your sandwiches with classic sides like crispy French fries or sweet potato fries. You can also serve them with a fresh garden salad for a lighter option. The crunch of the salad complements the softness of the sandwich beautifully.
  • Chips and Dips: Serve your sandwiches alongside tortilla chips and a zesty salsa or guacamole. The combination of flavors will add a fun twist to your meal.
  • Pickles: A side of pickles can provide a tangy contrast to the sweetness of the pineapple chicken. Their crunchiness adds an extra layer of texture to your plate.
  • Fruit Salad: A refreshing fruit salad can be a perfect accompaniment. Use seasonal fruits like watermelon, berries, and pineapple to enhance the tropical theme of your meal.
  • Drinks: For beverages, consider serving iced tea, lemonade, or a fruity mocktail. These drinks will complement the sweet and tangy flavors of the sandwiches.

When serving, don’t forget to garnish your sandwiches with sliced green onions or fresh herbs like cilantro for a pop of color. This small touch can make your dish look even more appetizing!

These serving suggestions will help you create a well-rounded meal that everyone will love. Whether it’s a casual family dinner or a festive gathering, your Sweet and Tangy Pineapple Chicken Sandwiches will shine on the table. Enjoy your delicious creation!

Tips for Perfecting Sweet Tangy Pineapple Chicken Sandwiches

To make your Sweet and Tangy Pineapple Chicken Sandwiches truly unforgettable, consider these helpful tips. Each suggestion will enhance the flavors and textures, ensuring that every bite is a delight!

  • Use Fresh Ingredients: Fresh chicken and high-quality sauces make a big difference. Opt for fresh pineapple juice instead of canned for a brighter flavor. If you can, choose organic ingredients for a healthier meal.
  • Adjust the Sweetness: If you prefer a sweeter sandwich, add a bit more pineapple juice or honey to the sauce. Conversely, if you like it tangy, a splash of vinegar can balance the sweetness.
  • Experiment with Seasonings: Don’t hesitate to play with spices! Adding smoked paprika or cayenne pepper can give your chicken an extra kick. Just remember to start with a small amount and adjust to your taste.
  • Let It Rest: After cooking, let the shredded chicken sit in the sauce for a few minutes before serving. This allows the flavors to meld together, making each bite even more delicious.
  • Toast the Buns: Toasting your hamburger buns adds a delightful crunch. It also helps prevent the buns from becoming soggy when filled with the juicy chicken.
  • Garnish Creatively: Enhance the visual appeal of your sandwiches with fresh herbs or colorful toppings. Consider adding sliced jalapeños for heat or avocado for creaminess.
  • Serve Immediately: For the best experience, serve the sandwiches right after assembling. This ensures that the buns remain soft and the chicken is warm.

By following these tips, you’ll elevate your Sweet and Tangy Pineapple Chicken Sandwiches to a whole new level. Each suggestion is designed to enhance the overall flavor and presentation, making your meal a hit with family and friends. Enjoy the process and happy cooking!

Breakdown of Time for Sweet Tangy Pineapple Chicken Sandwiches

Understanding the time needed for each step in preparing Sweet and Tangy Pineapple Chicken Sandwiches can help you plan your cooking efficiently. Here’s a detailed breakdown of the time involved in this delicious recipe.

Prep Time

The prep time for Sweet and Tangy Pineapple Chicken Sandwiches is quite minimal. You’ll spend about 15-20 minutes gathering your ingredients and marinating the chicken. This includes:

  • Measuring and mixing the marinade ingredients.
  • Placing the chicken in the slow cooker.
  • Preparing any optional toppings, like coleslaw or green onions.

With everything ready, you can move on to the cooking phase without any hassle!

Cooking Time

The cooking time is where the magic happens! Depending on your schedule, you can choose between two cooking settings:

  • Low Setting: Cook for 6-8 hours. This is perfect for a slow, steady cook that results in tender chicken.
  • High Setting: Cook for 3-4 hours. This option is great if you’re short on time but still want delicious results.

During this time, you can relax or prepare your sides and toppings. The slow cooker does all the work for you!

Total Time

In total, you can expect to spend about 6-8 hours and 20 minutes to 8 hours and 20 minutes on your Sweet and Tangy Pineapple Chicken Sandwiches, depending on your cooking method. Here’s a quick summary:

  • Prep Time: 15-20 minutes
  • Cooking Time: 3-8 hours (depending on the setting)
  • Total Time: 3 hours and 15 minutes to 8 hours and 20 minutes

With this breakdown, you can easily plan your day around making these delightful sandwiches. Whether you’re preparing for a family dinner or a gathering with friends, knowing the time involved will help you serve up a delicious meal with ease!

Nutritional Information for Sweet Tangy Pineapple Chicken Sandwiches

Understanding the nutritional information of your meals is essential for maintaining a balanced diet. Sweet and Tangy Pineapple Chicken Sandwiches not only taste great but also provide a good source of nutrients. Here’s a breakdown of the key nutritional components of this delicious dish.

Calories

Each serving of Sweet and Tangy Pineapple Chicken Sandwiches contains approximately 290 calories. This makes it a satisfying option for lunch or dinner without overwhelming your daily caloric intake. The combination of chicken, pineapple juice, and barbecue sauce contributes to this calorie count, providing a hearty meal that keeps you energized.

Protein

One of the standout features of this recipe is its protein content. Each sandwich offers about 28 grams of protein. Chicken is an excellent source of lean protein, which is vital for muscle repair and growth. Including protein in your meals helps keep you feeling full and satisfied, making these sandwiches a great choice for a nutritious meal.

Sodium

When it comes to sodium, each serving contains around 600 milligrams. While this is a reasonable amount for a flavorful dish, it’s essential to be mindful of your overall sodium intake throughout the day. If you’re watching your sodium levels, consider using low-sodium barbecue sauce or soy sauce to reduce the overall sodium content without sacrificing flavor.

In summary, Sweet and Tangy Pineapple Chicken Sandwiches are not only delicious but also provide a balanced mix of calories, protein, and sodium. They make for a nutritious meal option that can fit well into a healthy eating plan. Enjoy these sandwiches knowing you’re treating yourself to something both tasty and wholesome!

FAQs about Sweet Tangy Pineapple Chicken Sandwiches

Can I use canned pineapple for the sauce?

Yes, you can use canned pineapple for the sauce! Canned pineapple can be a convenient option, especially if fresh pineapple is not available. Just make sure to use the juice from the can as part of your marinade. This will still give you that sweet and tangy flavor you’re looking for. However, fresh pineapple juice tends to have a brighter taste, so if you have the option, go for fresh!

What type of bread works best for these sandwiches?

Hamburger buns are the classic choice for Sweet and Tangy Pineapple Chicken Sandwiches. They are soft and sturdy enough to hold the juicy filling. However, you can also experiment with other types of bread. Brioche buns add a touch of sweetness, while whole grain or ciabatta rolls can provide a heartier texture. Choose a bread that you enjoy, and it will enhance your sandwich experience!

How can I make the chicken spicier?

If you love a bit of heat, there are several ways to spice up your Sweet and Tangy Pineapple Chicken Sandwiches. One simple method is to add a teaspoon of sriracha or your favorite hot sauce to the marinade. You can also mix in diced jalapeños or red pepper flakes for an extra kick. Just remember to start with a small amount and adjust according to your taste. Enjoy the spicy twist!

Can I prepare the sauce in advance?

Absolutely! Preparing the sauce in advance can save you time on the day you plan to make the sandwiches. You can mix the pineapple juice, barbecue sauce, soy sauce, and spices together and store it in the refrigerator for up to a week. When you’re ready to cook, simply pour the prepared sauce over the chicken in the slow cooker. This way, you’ll have a delicious meal ready to go with minimal effort!

Conclusion on Sweet Tangy Pineapple Chicken Sandwiches

In conclusion, Sweet and Tangy Pineapple Chicken Sandwiches are a delightful dish that brings together a perfect blend of flavors. The combination of tender chicken, sweet pineapple, and zesty barbecue sauce creates a mouthwatering experience that is hard to resist. Whether you’re hosting a gathering or simply enjoying a meal with family, these sandwiches are sure to impress.

Not only are they easy to prepare, but they also offer versatility. With various ingredient options and serving suggestions, you can customize your sandwiches to suit your taste. From adding a spicy kick to creating a vegetarian version, the possibilities are endless. This recipe allows you to explore your culinary creativity while enjoying a delicious meal.

As you gather around the table to savor these sandwiches, you’ll create lasting memories with your loved ones. The joy of sharing a meal is enhanced by the delightful flavors of Sweet and Tangy Pineapple Chicken Sandwiches. So, don’t hesitate to whip up this recipe and experience the joy it brings.

Remember, cooking is not just about the food; it’s about the love and care you put into it. With each bite of these sandwiches, you’ll taste the effort and passion that goes into creating a meal that everyone can enjoy. So, roll up your sleeves, gather your ingredients, and embark on this delicious culinary adventure!

Happy cooking, and enjoy your Sweet and Tangy Pineapple Chicken Sandwiches!

Crockpot BBQ Chicken Recipe is easy and delicious!

Introduction to Crockpot BBQ Chicken Recipe

Crockpot BBQ Chicken Recipe. This dish is not only simple to prepare, but it also delivers mouthwatering flavors that everyone will love. With just a few ingredients and minimal effort, you can create a hearty meal that’s perfect for busy weeknights or weekend gatherings.

What Makes the Crockpot BBQ Chicken Recipe Special?

What sets this recipe apart is its convenience and versatility. The crockpot allows the chicken to cook slowly, resulting in tender, juicy meat that practically falls apart. The combination of barbecue sauce, spices, and a hint of vinegar creates a rich flavor profile that’s both sweet and tangy. Plus, you can customize it to suit your taste preferences!

Crockpot BBQ Chicken Recipe is its adaptability. Whether you want to serve it on buns for sandwiches, over rice, or alongside your favorite sides, the options are endless. You can even use leftovers in salads, tacos, or wraps, making it a fantastic choice for meal prep.

In addition, this recipe is perfect for gatherings. It serves six people, making it ideal for family dinners or potlucks. Just set it and forget it, and you’ll have a delicious meal ready to enjoy without spending hours in the kitchen. So, let’s dive into the ingredients and get started on this delightful dish!

Ingredients for Crockpot BBQ Chicken Recipe

Crockpot BBQ Chicken Recipe, you’ll need a few simple ingredients. Each one plays a vital role in building the rich flavors that make this dish so special. Here’s what you’ll need:

  • 2 pounds boneless, skinless chicken breasts: This is the main ingredient. Chicken breasts are lean and cook beautifully in the crockpot.
  • 1 cup barbecue sauce: Choose your favorite brand or homemade version. The sauce adds sweetness and tanginess.
  • 1 tablespoon apple cider vinegar: This ingredient enhances the flavor and adds a bit of acidity.
  • 1 tablespoon Worcestershire sauce: It brings depth and umami to the dish.
  • 1 teaspoon garlic powder: Garlic powder adds a savory note that complements the barbecue sauce.
  • 1 teaspoon onion powder: This ingredient enhances the overall flavor profile.
  • 1/2 teaspoon smoked paprika: For a hint of smokiness, this spice is a must!
  • 1/2 teaspoon black pepper: A little heat and flavor come from this common seasoning.
  • 1/4 teaspoon salt: Salt is essential for bringing out the flavors of the other ingredients.
  • 1/4 teaspoon cayenne pepper (optional): If you like a bit of heat, this is a great addition!
  • 1 tablespoon olive oil (for searing, optional): Searing the chicken adds extra flavor, but it’s not necessary if you’re short on time.

Crockpot BBQ Chicken Recipe, ensuring a meal that’s both satisfying and flavorful.

Step-by-Step Preparation of Crockpot BBQ Chicken Recipe

Crockpot BBQ Chicken Recipe. This process is straightforward and allows you to enjoy a delicious meal with minimal effort. Let’s get started!

Step 1: Preparing the Chicken

First, you need to prepare the chicken. If you choose to sear the chicken, heat a tablespoon of olive oil in a skillet over medium-high heat. Once the oil is hot, add the boneless, skinless chicken breasts. Sear each side for about 2-3 minutes until they are golden brown. This step adds extra flavor, but it’s completely optional. If you’re short on time, you can skip this step and place the chicken directly into the crockpot.

Step 2: Mixing the BBQ Sauce

Crockpot BBQ Chicken Recipe, so make sure it’s well mixed!

Step 3: Combining Ingredients in the Crockpot

Now, it’s time to bring everything together. Place the prepared chicken breasts into the crockpot. Pour the BBQ sauce mixture over the chicken, ensuring that each piece is well coated. This will help the chicken absorb all those delicious flavors as it cooks. Make sure to spread the sauce evenly over the chicken for the best results.

Step 4: Cooking the Chicken

Once everything is combined, cover the crockpot with its lid. You can choose to cook the chicken on low for 6-8 hours or on high for 3-4 hours. The low and slow method allows the chicken to become incredibly tender, while the high setting is perfect for a quicker meal. Either way, the chicken will be cooked through and easy to shred when it’s done.

Step 5: Shredding the Chicken

Crockpot BBQ Chicken Recipe.

And there you have it! Your delicious BBQ chicken is ready to be served. Let’s move on to some variations and serving suggestions to make your meal even more exciting!

Variations of Crockpot BBQ Chicken Recipe

Crockpot BBQ Chicken Recipe is already a hit, there are many ways to switch things up! Here are two exciting variations that will add a new twist to your meal. Whether you prefer a spicy kick or a sweet and tangy flavor, these options will surely delight your taste buds.

Spicy Crockpot BBQ Chicken Recipe

Spicy Crockpot BBQ Chicken Recipe, simply add more cayenne pepper to the sauce mixture. You can increase it to 1 teaspoon or more, depending on your heat preference. Additionally, consider adding chopped jalapeños or a splash of hot sauce for an extra kick. This variation pairs wonderfully with creamy coleslaw or a refreshing cucumber salad to balance the heat.

Sweet and Tangy Crockpot BBQ Chicken Recipe

Sweet and Tangy Crockpot BBQ Chicken Recipe is a fantastic choice. To achieve this, use a barbecue sauce that has a sweeter profile, such as honey BBQ or a fruit-infused sauce. You can also add a tablespoon of brown sugar or honey to the sauce mixture for added sweetness. This variation is delicious served on toasted buns with pickles and a side of baked beans for a delightful meal.

Crockpot BBQ Chicken Recipe to suit your family’s preferences. Feel free to experiment with different ingredients and find the perfect combination that everyone will love!

Cooking Note for Crockpot BBQ Chicken Recipe

Crockpot BBQ Chicken Recipe, there are a few important cooking notes to keep in mind. These tips will help ensure that your chicken turns out perfectly every time, making your meal a delightful experience.

First, always check the size of your chicken breasts. If they are particularly large, consider cutting them in half. This will help them cook more evenly and quickly. Remember, the goal is to have tender, juicy chicken that shreds easily.

Next, avoid lifting the lid of the crockpot during cooking. Each time you open the lid, heat escapes, which can extend the cooking time. Trust the process! The crockpot is designed to cook food slowly and evenly, so let it do its job.

Additionally, if you prefer a thicker sauce, you can remove the chicken once it’s cooked and shred it. Then, transfer the remaining sauce to a saucepan and simmer it on the stove for a few minutes until it thickens. This step adds a nice glaze to your chicken when you mix it back in.

Crockpot BBQ Chicken Recipe.

By keeping these cooking notes in mind, you’ll be well on your way to creating a delicious and satisfying meal that your family will love. Now, let’s explore some serving suggestions to make your BBQ chicken shine!

Serving Suggestions for Crockpot BBQ Chicken Recipe

Crockpot BBQ Chicken Recipe is ready, it’s time to think about how to serve it! This dish is incredibly versatile, and there are many delicious sides and creative ways to enjoy it. Let’s explore some of the best options to complement your BBQ chicken.

Best Sides to Pair with Crockpot BBQ Chicken Recipe

Crockpot BBQ Chicken Recipe:

  • Coleslaw: A classic side, coleslaw adds a crunchy texture and refreshing flavor. The creaminess balances the tangy BBQ sauce perfectly.
  • Baked Beans: Sweet and savory baked beans are a hearty addition. They complement the BBQ chicken and add a comforting touch to your meal.
  • Corn on the Cob: Grilled or boiled corn on the cob is a summertime favorite. It’s sweet and juicy, making it a great side for BBQ dishes.
  • Potato Salad: Creamy potato salad is another classic choice. It’s filling and pairs well with the flavors of BBQ chicken.
  • Rice or Quinoa: For a lighter option, serve the chicken over rice or quinoa. This adds a nutritious base and absorbs the delicious sauce.

These sides not only enhance the meal but also provide a variety of flavors and textures that everyone will enjoy. Feel free to mix and match based on your family’s preferences!

Creative Ways to Serve Crockpot BBQ Chicken Recipe

Crockpot BBQ Chicken Recipe. Here are some fun ideas:

  • BBQ Chicken Sandwiches: Serve the shredded chicken on toasted buns. Add pickles, coleslaw, or extra BBQ sauce for a delicious sandwich.
  • Tacos: Use the BBQ chicken as a filling for tacos. Top with avocado, cilantro, and a squeeze of lime for a fresh twist.
  • Wraps: Roll the chicken in a tortilla with lettuce, tomatoes, and your favorite dressing for a quick and easy wrap.
  • Salads: Toss the shredded chicken on a bed of greens with your favorite salad toppings. Drizzle with ranch or vinaigrette for a tasty meal.
  • Stuffed Peppers: Mix the BBQ chicken with rice and stuff it into bell peppers. Bake until the peppers are tender for a fun and healthy dish.

Crockpot BBQ Chicken Recipe in different ways. Whether you’re hosting a gathering or just enjoying a family dinner, these options will surely impress!

Tips for Perfecting Your Crockpot BBQ Chicken Recipe

Crockpot BBQ Chicken Recipe turns out perfectly every time, consider these helpful tips. They will enhance the flavor and texture of your dish, making it even more enjoyable for you and your family.

First, always use high-quality ingredients. The flavor of your BBQ sauce can significantly impact the overall taste of the dish. Opt for a sauce that you love, whether it’s sweet, tangy, or smoky. You can even try making your own sauce for a personal touch!

Next, don’t skip the seasoning. While the BBQ sauce is the star, the spices you add are equally important. Make sure to measure your spices accurately. This will help create a balanced flavor profile that enhances the chicken.

Another tip is to avoid overcrowding the crockpot. If you’re cooking a larger batch, consider using two crockpots or cooking in batches. Overcrowding can lead to uneven cooking, which may result in some chicken being undercooked.

Additionally, consider marinating the chicken overnight. This extra step allows the flavors to penetrate the meat, making it even more delicious. Simply mix the BBQ sauce and spices, coat the chicken, and let it sit in the fridge overnight.

Lastly, let the chicken rest after cooking. Once you’ve shredded the chicken, allow it to sit in the sauce for a few minutes before serving. This will help the meat absorb more flavor, making each bite even tastier.

Crockpot BBQ Chicken Recipe. Enjoy the process and have fun experimenting with flavors to create a dish that your family will love!

Breakdown of Time for Crockpot BBQ Chicken Recipe

Crockpot BBQ Chicken Recipe is essential for planning your meal. This dish is not only easy to prepare but also allows you to manage your time effectively. Here’s a breakdown of the time involved in making this delicious meal.

Prep Time

Crockpot BBQ Chicken Recipe is quite minimal. You can expect to spend about 10-15 minutes gathering your ingredients and preparing the chicken. This includes mixing the BBQ sauce and seasoning the chicken. If you choose to sear the chicken, add an extra 5 minutes to your prep time. Overall, you can have everything ready to go in under 20 minutes!

Cooking Time

Once your ingredients are in the crockpot, the cooking time is where the magic happens. You can choose to cook the chicken on low for 6-8 hours or on high for 3-4 hours. The low setting is perfect for those who want to set it and forget it, while the high setting is great for a quicker meal. Regardless of the method you choose, the chicken will turn out tender and flavorful.

Total Time

Crockpot BBQ Chicken Recipe is that you can go about your day while it cooks, making it a convenient option for busy families.

Crockpot BBQ Chicken Recipe fits perfectly into your schedule!

Nutritional Information for Crockpot BBQ Chicken Recipe

Crockpot BBQ Chicken Recipe not only offers great taste but also provides valuable nutrients. Here’s a breakdown of the nutritional content per serving, so you can enjoy this dish while keeping your health in mind.

Calories

Crockpot BBQ Chicken Recipe contains approximately 250 calories. This makes it a relatively low-calorie option for a hearty meal. The balance of protein and carbohydrates ensures that you feel satisfied without overindulging. It’s a great choice for those looking to enjoy a flavorful dish without excessive calorie intake.

Protein

One of the standout features of this recipe is its high protein content. Each serving provides about 30 grams of protein. This is essential for muscle repair and growth, making it an excellent choice for active individuals or anyone looking to maintain a healthy lifestyle. The chicken serves as a lean protein source, helping you feel full and energized throughout the day.

Sodium

When it comes to sodium, each serving contains around 600 milligrams. While this is a reasonable amount for a flavorful dish, it’s important to be mindful of your overall sodium intake, especially if you’re watching your salt consumption. You can reduce the sodium content by choosing low-sodium barbecue sauce or adjusting the seasoning to suit your dietary needs.

Crockpot BBQ Chicken Recipe is not only delicious but also offers a good balance of calories, protein, and sodium. It’s a nutritious option that can fit well into a variety of dietary plans. Enjoy this meal knowing you’re making a tasty and health-conscious choice!

FAQs about Crockpot BBQ Chicken Recipe

Can I use frozen chicken for the Crockpot BBQ Chicken Recipe?

Crockpot BBQ Chicken Recipe. However, it’s important to note that cooking times will vary. If you start with frozen chicken, you should cook it on high for about 4-5 hours instead of the usual 3-4 hours. Always ensure that the chicken reaches an internal temperature of 165°F (75°C) for safe consumption. Using frozen chicken can be a great time-saver, especially on busy days!

How long can I store leftovers from the Crockpot BBQ Chicken Recipe?

Crockpot BBQ Chicken Recipe can be stored in an airtight container in the refrigerator for up to 3-4 days. If you want to keep it longer, consider freezing the leftovers. They can be frozen for up to 3 months. Just make sure to let the chicken cool completely before transferring it to a freezer-safe container. When you’re ready to enjoy it again, simply thaw it in the refrigerator overnight and reheat it on the stove or in the microwave.

What type of BBQ sauce is best for the Crockpot BBQ Chicken Recipe?

Crockpot BBQ Chicken Recipe really depends on your personal taste. You can choose a sweet, tangy, or smoky sauce based on your preference. Some popular options include honey BBQ, hickory smoked, or even a spicy chipotle sauce for those who like a kick. Feel free to experiment with different brands or homemade sauces to find the flavor that you love the most!

Can I make the Crockpot BBQ Chicken Recipe without a crockpot?

Absolutely! If you don’t have a crockpot, you can still make this delicious BBQ chicken using a stovetop or oven. For stovetop cooking, simply simmer the chicken and sauce in a large pot over low heat for about 30-40 minutes, or until the chicken is cooked through and tender. If using the oven, preheat it to 350°F (175°C), place the chicken and sauce in a baking dish, cover it with foil, and bake for about 45 minutes to an hour. Both methods will yield tasty results!

Conclusion on Crockpot BBQ Chicken Recipe

Crockpot BBQ Chicken Recipe is a fantastic choice for anyone looking to create a delicious and satisfying meal with minimal effort. Its simplicity, combined with the rich flavors of barbecue sauce and spices, makes it a family favorite. Whether you’re preparing it for a busy weeknight dinner or a weekend gathering, this recipe is sure to impress.

Not only is it easy to make, but it also offers versatility in serving options. From sandwiches to salads, the possibilities are endless. Plus, with the ability to customize the flavors to suit your taste, you can make this dish your own. Whether you prefer it spicy, sweet, or tangy, there’s a variation for everyone.

Crockpot BBQ Chicken Recipe, remember the helpful tips and variations shared throughout this article. They will guide you in creating the perfect dish every time. And don’t forget to enjoy the process! Cooking should be a fun and rewarding experience.

So, gather your ingredients, set your crockpot, and let the magic happen. Your family will love the tender, flavorful chicken that awaits them. Enjoy your meal, and happy cooking!

Campfire Potatoes with Garlic and Herbs are delicious!

Introduction to Garlic Herb Campfire Potatoes

Are you ready to elevate your outdoor cooking experience? Garlic Herb Campfire Potatoes are the perfect dish to bring flavor and excitement to your next camping trip or backyard barbecue. These delightful potatoes are not only easy to prepare but also packed with deliciousness. Imagine the aroma of garlic and herbs wafting through the air as you gather around the campfire with friends and family.

This recipe is a fantastic way to enjoy the great outdoors while indulging in a comforting side dish. The combination of baby potatoes, fresh garlic, and aromatic herbs creates a mouthwatering flavor that pairs well with any grilled meat or veggie dish. Plus, cooking them in a foil pouch ensures that they stay tender and juicy, making every bite a delight.

Whether you’re a seasoned camper or just looking for a fun way to cook outside, Garlic Herb Campfire Potatoes are a must-try. They are simple enough for beginners yet flavorful enough to impress even the most discerning palates. So, gather your ingredients, fire up the grill or campfire, and get ready to enjoy a delicious side that everyone will love!

Ingredients for Garlic Herb Campfire Potatoes

To create the perfect Garlic Herb Campfire Potatoes, you’ll need a few simple ingredients. These items are easy to find and will help you whip up a delicious side dish that everyone will enjoy. Here’s what you’ll need:

  • 2 pounds baby potatoes – Halved for even cooking and easy handling.
  • 3 tablespoons olive oil – This adds richness and helps the herbs stick to the potatoes.
  • 4 cloves garlic – Minced for a robust flavor that enhances the dish.
  • 1 teaspoon dried rosemary – A fragrant herb that pairs beautifully with potatoes.
  • 1 teaspoon dried thyme – Adds an earthy taste that complements the garlic.
  • 1 teaspoon paprika – For a hint of smokiness and color.
  • Salt and pepper – To taste, enhancing all the flavors in the dish.
  • Fresh parsley – Chopped, for garnish and a pop of color.

These ingredients come together to create a delightful blend of flavors. The baby potatoes are the star of the show, while the garlic and herbs provide a savory backdrop. With just a few pantry staples, you can make a dish that’s sure to impress. So, gather your ingredients and get ready to cook up some tasty Garlic Herb Campfire Potatoes!

Preparation of Garlic Herb Campfire Potatoes

Now that you have gathered all your ingredients, it’s time to prepare your Garlic Herb Campfire Potatoes. This process is simple and fun, making it a great activity for the whole family. Let’s break it down into easy steps!

Step 1: Preparing the Potatoes

Start by washing the baby potatoes thoroughly. This step is important to remove any dirt or debris. Once clean, cut each potato in half. Halving them helps them cook evenly and allows the flavors to penetrate better. After cutting, place the halved potatoes in a large mixing bowl. This will be the base for your delicious dish!

Step 2: Mixing the Garlic Herb Seasoning

Next, it’s time to create the flavorful seasoning mix. In the same bowl with the halved potatoes, add the olive oil, minced garlic, dried rosemary, dried thyme, paprika, salt, and pepper. Use a large spoon or spatula to toss everything together. Make sure each potato half is well coated with the oil and seasonings. This step is crucial as it ensures that every bite is bursting with flavor!

Step 3: Wrapping the Potatoes for Cooking

Once your potatoes are seasoned, it’s time to wrap them up for cooking. Take a large piece of aluminum foil, about 18 inches long. Spoon the seasoned potatoes onto the center of the foil. Fold the sides of the foil over the potatoes, creating a pouch. Make sure to seal it tightly to keep the steam inside. This will help the potatoes cook evenly and stay moist.

Step 4: Cooking the Potatoes Over the Campfire

Now comes the exciting part! Place your foil pouch on the grill grate over the campfire or on your preheated grill. Cook the potatoes for about 25-30 minutes. Be sure to turn the pouch occasionally to ensure even cooking. After the time is up, carefully open the foil pouch, watching out for the hot steam. Your Garlic Herb Campfire Potatoes should be tender and ready to serve!

With these simple steps, you’ll have a delicious side dish that’s perfect for any outdoor gathering. The preparation is quick, and the results are sure to impress your friends and family!

Variation of Garlic Herb Campfire Potatoes

While the classic Garlic Herb Campfire Potatoes are delicious on their own, there are many ways to switch things up! Adding different herbs and spices or incorporating vegetables can enhance the flavor and nutrition of this dish. Let’s explore some fun variations!

Alternative Herbs and Spices

Feel free to experiment with different herbs to suit your taste. For instance, you can replace dried rosemary and thyme with fresh herbs like basil or oregano. These fresh herbs can add a vibrant flavor to your potatoes. Additionally, consider adding a pinch of red pepper flakes for a spicy kick. This small change can transform your dish into a zesty delight!

Adding Vegetables for Extra Flavor

Another great way to enhance your Garlic Herb Campfire Potatoes is by adding vegetables. Sliced bell peppers, onions, or even zucchini can be tossed in with the potatoes. These veggies not only add color but also provide extra nutrients. Just chop them up and mix them in with the potatoes and seasoning. The result is a colorful, flavorful medley that everyone will love!

These variations allow you to customize your dish based on what you have on hand or your personal preferences. So, don’t hesitate to get creative and make this recipe your own!

Cooking Note for Garlic Herb Campfire Potatoes

When preparing Garlic Herb Campfire Potatoes, there are a few cooking notes to keep in mind. These tips will help ensure that your potatoes turn out perfectly every time. First, always check the size of your potato halves. Smaller pieces will cook faster, while larger ones may need a bit more time. If you prefer, you can cut the potatoes into quarters for quicker cooking.

Additionally, the cooking time may vary depending on the heat of your campfire or grill. If you notice that the potatoes are not tender after 30 minutes, give them a few more minutes. Just be careful when opening the foil pouch, as the steam can be very hot!

Lastly, if you’re cooking in a campfire, make sure to place the pouch on a stable surface. This will prevent it from tipping over and spilling the delicious contents. With these tips in mind, you’ll be well on your way to making the best Garlic Herb Campfire Potatoes!

Serving Suggestions for Garlic Herb Campfire Potatoes

Once your Garlic Herb Campfire Potatoes are cooked to perfection, it’s time to serve them! These potatoes make a fantastic side dish for any outdoor meal. They pair wonderfully with grilled meats like chicken, steak, or fish. The savory flavors of the potatoes complement the smoky taste of grilled foods beautifully.

For a complete meal, consider serving the potatoes alongside a fresh salad. A simple green salad with a light vinaigrette can balance the richness of the potatoes. You can also add a dollop of sour cream or a sprinkle of feta cheese on top for an extra layer of flavor.

Don’t forget to garnish your potatoes with fresh parsley before serving. This not only adds a pop of color but also enhances the overall presentation. Your guests will be impressed by the delicious aroma and beautiful appearance of your Garlic Herb Campfire Potatoes!

Tips for Perfect Garlic Herb Campfire Potatoes

To ensure your Garlic Herb Campfire Potatoes turn out perfectly every time, here are some handy tips:

  • Use fresh ingredients: Fresh garlic and herbs will elevate the flavor of your dish.
  • Don’t overcrowd the foil pouch: Leave some space for steam to circulate, which helps cook the potatoes evenly.
  • Experiment with flavors: Try different herbs and spices to find your favorite combination.
  • Check for doneness: Use a fork to test if the potatoes are tender before removing them from the heat.
  • Let them rest: Allow the potatoes to sit for a few minutes after cooking. This helps the flavors meld together.

By following these tips, you’ll be well on your way to mastering the art of making Garlic Herb Campfire Potatoes!

Breakdown of Time for Garlic Herb Campfire Potatoes

Prep Time

Preparing your Garlic Herb Campfire Potatoes takes about 10-15 minutes. This includes washing, cutting, and seasoning the potatoes.

Cooking Time

The cooking time over the campfire or grill is approximately 25-30 minutes. Be sure to check for tenderness before serving.

Total Time

In total, you can expect to spend around 35-45 minutes from start to finish. This makes it a quick and easy side dish for any outdoor gathering!

Nutritional Information for Garlic Herb Campfire Potatoes

Calories

Each serving of Garlic Herb Campfire Potatoes contains about 230 calories. This makes it a satisfying yet light side dish.

Protein

With 3 grams of protein per serving, these potatoes provide a small boost to your meal. Pair them with a protein-rich main dish for a balanced meal.

Sodium

The sodium content will vary based on how much salt you add. Be mindful of your salt intake, especially if you’re watching your sodium levels.

FAQs about Garlic Herb Campfire Potatoes

Can I make Garlic Herb Campfire Potatoes in the oven?

Yes! You can easily make these potatoes in the oven. Just preheat your oven to 400°F (200°C) and bake the foil pouch for about 30-35 minutes.

What type of potatoes are best for this recipe?

Baby potatoes are ideal for this recipe due to their size and texture. However, you can also use regular potatoes, just cut them into smaller pieces.

How can I store leftover Garlic Herb Campfire Potatoes?

Store any leftovers in an airtight container in the refrigerator for up to 3 days. Reheat them in the oven or microwave before serving.

Can I use dried herbs instead of fresh for Garlic Herb Campfire Potatoes?

Absolutely! Dried herbs work well in this recipe. Just remember that dried herbs are more concentrated, so use about one-third of the amount compared to fresh herbs.

Conclusion on Garlic Herb Campfire Potatoes

Garlic Herb Campfire Potatoes are a delightful addition to any outdoor meal. Their simple preparation and delicious flavor make them a favorite among campers and backyard chefs alike. With a few easy steps, you can create a side dish that’s not only tasty but also versatile. Whether you stick to the classic recipe or try out some fun variations, these potatoes are sure to impress. So, gather your ingredients, fire up the grill or campfire, and enjoy a delicious side that everyone will love!

Cooking Note for Garlic Herb Campfire Potatoes

When preparing Garlic Herb Campfire Potatoes, there are a few cooking notes to keep in mind. These tips will help ensure that your potatoes turn out perfectly every time. First, always check the size of your potato halves. Smaller pieces will cook faster, while larger ones may need a bit more time. If you prefer, you can cut the potatoes into quarters for quicker cooking.

Additionally, the cooking time may vary depending on the heat of your campfire or grill. If you notice that the potatoes are not tender after 30 minutes, give them a few more minutes. Just be careful when opening the foil pouch, as the steam can be very hot!

Lastly, if you’re cooking in a campfire, make sure to place the pouch on a stable surface. This will prevent it from tipping over and spilling the delicious contents. With these tips in mind, you’ll be well on your way to making the best Garlic Herb Campfire Potatoes!

Serving Suggestions for Garlic Herb Campfire Potatoes

Once your Garlic Herb Campfire Potatoes are cooked to perfection, it’s time to serve them! These potatoes make a fantastic side dish for any outdoor meal. They pair wonderfully with grilled meats like chicken, steak, or fish. The savory flavors of the potatoes complement the smoky taste of grilled foods beautifully.

For a complete meal, consider serving the potatoes alongside a fresh salad. A simple green salad with a light vinaigrette can balance the richness of the potatoes. You can also add a dollop of sour cream or a sprinkle of feta cheese on top for an extra layer of flavor.

Don’t forget to garnish your potatoes with fresh parsley before serving. This not only adds a pop of color but also enhances the overall presentation. Your guests will be impressed by the delicious aroma and beautiful appearance of your Garlic Herb Campfire Potatoes!

Another great idea is to serve these potatoes in a rustic style. Place the foil pouch directly on a wooden board or a large platter. This creates a fun, casual dining experience that’s perfect for outdoor gatherings. You can even let everyone dig in directly from the pouch, making it a communal dish that encourages sharing and conversation.

If you want to add a bit of zing, consider serving the potatoes with a homemade dipping sauce. A garlic aioli or a zesty chimichurri can elevate the dish even further. These sauces not only enhance the flavor but also add a gourmet touch to your campfire meal.

In summary, Garlic Herb Campfire Potatoes are versatile and can be served in many delightful ways. Whether you keep it simple or get creative with sides and sauces, these potatoes are sure to be a hit at your next outdoor gathering!

Tips for Perfect Garlic Herb Campfire Potatoes

To ensure your Garlic Herb Campfire Potatoes turn out perfectly every time, here are some handy tips:

  • Use fresh ingredients: Fresh garlic and herbs will elevate the flavor of your dish. The difference is noticeable!
  • Don’t overcrowd the foil pouch: Leave some space for steam to circulate. This helps cook the potatoes evenly and prevents them from becoming mushy.
  • Experiment with flavors: Try different herbs and spices to find your favorite combination. You might discover a new twist that you love!
  • Check for doneness: Use a fork to test if the potatoes are tender before removing them from the heat. If they’re not quite done, give them a few more minutes.
  • Let them rest: Allow the potatoes to sit for a few minutes after cooking. This helps the flavors meld together and makes them even tastier.
  • Use quality foil: Opt for heavy-duty aluminum foil. It holds up better over the heat and prevents tearing, keeping all those delicious juices inside.
  • Consider the heat source: If using a campfire, place the pouch on a stable surface. This prevents it from tipping over and spilling the delicious contents.
  • Garnish generously: Don’t skimp on the fresh parsley or any other garnishes. They add a lovely touch and enhance the visual appeal of your dish.

By following these tips, you’ll be well on your way to mastering the art of making Garlic Herb Campfire Potatoes! Each step contributes to a delightful dish that everyone will enjoy. So, get ready to impress your friends and family with your cooking skills!

Breakdown of Time for Garlic Herb Campfire Potatoes

Prep Time

Preparing your Garlic Herb Campfire Potatoes takes about 10-15 minutes. This includes washing, cutting, and seasoning the potatoes. It’s a quick process that allows you to get everything ready without feeling rushed. Just gather your ingredients and enjoy the simple task of prepping!

Cooking Time

The cooking time over the campfire or grill is approximately 25-30 minutes. During this time, the potatoes will become tender and flavorful. Be sure to check for tenderness before serving. If they need a little more time, don’t hesitate to give them a few extra minutes. Just remember to be cautious when opening the foil pouch, as the steam can be very hot!

Total Time

In total, you can expect to spend around 35-45 minutes from start to finish. This makes it a quick and easy side dish for any outdoor gathering! With minimal prep and cooking time, you can focus on enjoying your time with family and friends while savoring the delicious flavors of Garlic Herb Campfire Potatoes.

Nutritional Information for Garlic Herb Campfire Potatoes

Calories

Each serving of Garlic Herb Campfire Potatoes contains approximately 230 calories. This makes it a satisfying yet light side dish that can fit into various meal plans. The balance of flavors and textures ensures that you won’t feel deprived while enjoying this delicious treat. Whether you’re camping or grilling at home, these potatoes are a great way to indulge without overdoing it on calories.

Protein

In terms of protein, each serving provides about 3 grams. While potatoes are not a high-protein food, they do offer a small boost to your meal. Pairing them with a protein-rich main dish, like grilled chicken or fish, can create a well-rounded meal. This combination not only satisfies your hunger but also provides essential nutrients for your body.

Sodium

The sodium content in Garlic Herb Campfire Potatoes can vary based on how much salt you add during preparation. On average, it’s best to keep the sodium levels moderate, especially if you’re watching your intake. A pinch of salt enhances the flavors without overwhelming your dish. Always remember, you can adjust the seasoning to suit your taste and dietary needs.

Overall, Garlic Herb Campfire Potatoes are a nutritious and flavorful addition to your outdoor meals. They provide a good source of carbohydrates and can be easily customized to fit your dietary preferences. Enjoy them guilt-free as part of your next camping adventure or backyard barbecue!

FAQs about Garlic Herb Campfire Potatoes

Can I make Garlic Herb Campfire Potatoes in the oven?

Yes! You can easily make Garlic Herb Campfire Potatoes in the oven. Just preheat your oven to 400°F (200°C) and bake the foil pouch for about 30-35 minutes. This method is perfect for those who want to enjoy this delicious dish without a campfire. The oven will provide even heat, ensuring your potatoes are tender and flavorful.

What type of potatoes are best for this recipe?

Baby potatoes are ideal for this recipe due to their size and texture. They cook quickly and have a creamy interior. However, you can also use regular potatoes. Just cut them into smaller pieces to ensure they cook evenly. The key is to choose potatoes that are firm and fresh for the best results.

How can I store leftover Garlic Herb Campfire Potatoes?

Store any leftovers in an airtight container in the refrigerator for up to 3 days. When you’re ready to enjoy them again, simply reheat in the oven or microwave. If you want to keep them crispy, consider reheating them in a skillet for a few minutes. This will help restore some of their original texture and flavor.

Can I use dried herbs instead of fresh for Garlic Herb Campfire Potatoes?

Absolutely! Dried herbs work well in this recipe. Just remember that dried herbs are more concentrated, so use about one-third of the amount compared to fresh herbs. This adjustment will help maintain the flavor balance in your dish. Dried herbs can be a convenient option, especially when fresh ones are not available.

Conclusion on Garlic Herb Campfire Potatoes

In conclusion, Garlic Herb Campfire Potatoes are a delightful and versatile dish that can elevate any outdoor meal. Their simple preparation and rich flavors make them a favorite among campers and backyard chefs alike. With just a few ingredients, you can create a side dish that is not only delicious but also easy to customize to suit your taste.

Whether you choose to stick with the classic recipe or explore various herbs and vegetable additions, these potatoes are sure to impress. They pair beautifully with grilled meats, fresh salads, and even gourmet dipping sauces. Plus, the communal style of serving them directly from the foil pouch adds a fun and casual touch to your gatherings.

As you embark on your next camping adventure or backyard barbecue, don’t forget to include Garlic Herb Campfire Potatoes in your menu. They are a perfect way to enjoy the great outdoors while indulging in a comforting and flavorful side dish. So gather your ingredients, fire up the grill or campfire, and get ready to savor the deliciousness of Garlic Herb Campfire Potatoes!

Happy cooking, and may your outdoor meals be filled with joy, laughter, and, of course, tasty potatoes!

Campfire Chili Cheese Fries Recipe is a must-try!

Introduction to Campfire Chili Cheese Fries Recipe

Campfire Chili Cheese Fries Recipe is a delightful dish that combines crispy fries, savory chili, and gooey cheese. This recipe is not just about satisfying your hunger; it’s about creating memories around the campfire with friends and family. Whether you’re camping in the woods or enjoying a backyard barbecue, these chili cheese fries are sure to impress.

What Makes Campfire Chili Cheese Fries Special?

What sets campfire chili cheese fries apart from regular fries? It’s all about the flavors and the experience! First, the russet potatoes are transformed into crispy fries, seasoned to perfection. Then, they are topped with warm, hearty chili that can be customized to your taste. Finally, a generous sprinkle of melted cheddar cheese brings everything together. The combination of textures and flavors creates a dish that is both comforting and exciting. Plus, cooking over an open flame adds a unique smoky flavor that you just can’t replicate in the kitchen.

The Perfect Dish for Outdoor Gatherings

When it comes to outdoor gatherings, you want a dish that is easy to prepare and share. Campfire chili cheese fries fit the bill perfectly! They are simple to make and can be enjoyed by everyone. Whether you’re hosting a camping trip, a picnic, or a backyard party, this dish is a crowd-pleaser. It’s also versatile; you can easily adjust the toppings to cater to different dietary preferences. From adding extra veggies to making it spicy with jalapeños, the options are endless. So gather your friends, fire up the grill, and get ready for a delicious treat!

Ingredients for Campfire Chili Cheese Fries Recipe

Campfire Chili Cheese Fries Recipe, you’ll need a few simple ingredients. Each component plays a vital role in delivering that perfect blend of flavors. Here’s what you’ll need:

  • 2 large russet potatoes: These potatoes are ideal for making crispy fries. Their starchy texture helps achieve that perfect crunch.
  • 1 tablespoon olive oil: This helps to coat the fries, ensuring they cook evenly and develop a golden color.
  • 1 teaspoon salt: A must-have for enhancing the flavor of the fries.
  • 1 teaspoon black pepper: Adds a bit of spice and depth to the dish.
  • 1 cup canned chili: Choose your favorite chili, whether it has beans or not. This is the star of the dish!
  • 1 cup shredded cheddar cheese: The gooey cheese melts beautifully over the chili and fries, creating a delicious topping.
  • 1/2 cup sour cream: This creamy addition balances the flavors and adds a cool touch.
  • 1/4 cup sliced green onions: These add a fresh crunch and a pop of color to your dish.
  • 1/4 cup pickled jalapeños (optional): For those who like a kick, these spicy slices are a great addition!

With these ingredients on hand, you’re ready to embark on a culinary adventure. The combination of crispy fries, hearty chili, and melted cheese will surely delight your taste buds. So gather your supplies and let’s get cooking!

Step-by-Step Preparation of Campfire Chili Cheese Fries Recipe

Campfire Chili Cheese Fries Recipe. Follow these simple steps to create a delicious dish that everyone will love!

Step 1: Preparing the Chili

First, let’s get the chili ready. If you’re using canned chili, simply open the can and set it aside. If you prefer homemade chili, you can prepare it ahead of time. Just make sure it’s warm when you’re ready to use it. This will help it blend nicely with the fries. Remember, the chili is the heart of this dish, so choose a flavor you enjoy!

Step 2: Cooking the Fries

Next, it’s time to cook those fries! Start by washing and scrubbing the russet potatoes thoroughly. This removes any dirt and ensures they’re clean. After that, slice the potatoes into thin fry shapes. The thinner the fries, the crispier they will be!

In a large bowl, toss the potato slices with olive oil, salt, and black pepper. Make sure every fry is coated evenly. This step is crucial for achieving that golden, crispy texture. Once coated, lay out a large piece of aluminum foil. Place the seasoned fries in the center and fold the foil into a pouch, sealing the edges tightly. This will keep the heat in while cooking.

Now, place the foil pouch over the campfire or grill. Cook for about 20-25 minutes, turning occasionally. You’ll know they’re done when they’re golden and tender. Be careful when opening the pouch, as steam will escape!

Step 3: Combining Chili and Fries

Once your fries are cooked to perfection, it’s time to combine them with the chili. Carefully open the foil pouch and pour the warm chili over the fries. Make sure to spread it evenly so every fry gets a taste of that delicious chili. This step adds a hearty layer to your dish, making it even more satisfying.

Step 4: Adding Cheese and Toppings

Now comes the best part—adding cheese! Sprinkle the shredded cheddar cheese generously over the chili-covered fries. The cheese will melt beautifully, creating a gooey topping that everyone loves. Close the foil pouch again and return it to the heat for an additional 5-10 minutes. This will ensure the cheese is perfectly melted.

After the cheese has melted, carefully remove the pouch from the heat. Let it cool for a minute before serving. This is the moment you’ve been waiting for! Serve your chili cheese fries topped with sour cream, sliced green onions, and pickled jalapeños if you like a little heat. Enjoy your delicious creation!

Variation of Campfire Chili Cheese Fries Recipe

Campfire Chili Cheese Fries Recipe is already a hit, there are plenty of ways to mix things up! Whether you’re looking for vegetarian options or want to add some spice, these variations will keep your taste buds excited. Let’s explore some delicious alternatives!

Vegetarian Options

If you’re catering to vegetarians, you can easily adapt this recipe. Instead of using canned chili with meat, opt for a hearty vegetarian chili. Many brands offer delicious options packed with beans, vegetables, and spices. You can also make your own by simmering black beans, kidney beans, corn, and diced tomatoes with your favorite seasonings.

Another great addition is roasted vegetables. Consider adding bell peppers, zucchini, or mushrooms to the fries before sealing them in the foil pouch. These veggies will add flavor and nutrition, making your dish even more satisfying. With these vegetarian options, everyone can enjoy the fun of chili cheese fries around the campfire!

Spicy Additions

Campfire Chili Cheese Fries Recipe. Start by choosing a spicy chili, such as one with jalapeños or chipotle peppers. This will give your dish an extra kick right from the start.

Additionally, you can enhance the spice level by adding fresh diced jalapeños on top of the cheese before sealing the pouch. For those who enjoy a fiery flavor, consider drizzling hot sauce over the finished dish. This will take your chili cheese fries to a whole new level of deliciousness!

With these variations, you can customize your chili cheese fries to suit any palate. Whether you prefer a vegetarian twist or a spicy kick, these options ensure that everyone can enjoy this campfire classic!

Cooking Note for Campfire Chili Cheese Fries Recipe

Campfire Chili Cheese Fries Recipe, there are a few important cooking notes to keep in mind. These tips will help ensure that your dish turns out perfectly every time, making your outdoor cooking experience even more enjoyable.

First, always check the heat of your campfire or grill. Medium-high heat is ideal for cooking the fries evenly. If the flames are too high, the fries may burn before they cook through. Conversely, if the heat is too low, they may turn out soggy instead of crispy. A good way to test the heat is to hold your hand above the grill. If you can keep it there for 3-4 seconds, the heat is just right!

Next, consider the type of aluminum foil you use. Heavy-duty foil is recommended for this recipe, as it can withstand the heat better and prevent tearing. If you only have regular foil, you might want to double it up to ensure it holds up during cooking.

Additionally, keep an eye on the cooking time. Cooking times can vary based on the heat of your fire and the thickness of your fries. It’s a good idea to check the fries a few minutes before the suggested time. This way, you can avoid overcooking and ensure they are perfectly golden and tender.

Lastly, remember to let the foil pouch cool for a minute before opening it. The steam inside can be very hot, and you don’t want to risk a burn. Once it’s safe to open, you can enjoy the delicious aroma of your chili cheese fries!

By following these cooking notes, you’ll be well on your way to creating a fantastic dish that everyone will love. Happy cooking!

Serving Suggestions for Campfire Chili Cheese Fries Recipe

Campfire Chili Cheese Fries Recipe, it’s time to think about how to serve them! The right pairings and creative serving ideas can elevate your dish and make your outdoor meal even more enjoyable. Let’s explore some fantastic options!

Best Pairings for Your Chili Cheese Fries

When it comes to pairing, you want to complement the rich flavors of your chili cheese fries. Here are some great options:

  • Grilled Meats: Juicy burgers, hot dogs, or grilled chicken make excellent companions. The smoky flavor from the grill pairs perfectly with the chili cheese fries.
  • Fresh Salads: A light, refreshing salad can balance the richness of the fries. Consider a simple green salad with a tangy vinaigrette or a classic coleslaw.
  • Chips and Salsa: For a fun appetizer, serve tortilla chips with fresh salsa or guacamole. This adds a crunchy texture and a burst of flavor before the main dish.
  • Cold Beverages: Pair your meal with cold drinks like lemonade, iced tea, or even a light beer. These refreshing options will enhance your outdoor dining experience.

These pairings not only complement the flavors of your chili cheese fries but also create a well-rounded meal that everyone will enjoy!

Creative Serving Ideas

Campfire Chili Cheese Fries Recipe can be just as fun as making them! Here are some creative ideas to impress your guests:

  • Individual Portions: Instead of serving from a large dish, consider using small cast-iron skillets or individual foil pouches. This adds a rustic touch and makes it easy for everyone to enjoy their own serving.
  • Chili Cheese Fry Bar: Set up a toppings bar with various options like diced tomatoes, olives, avocado, and different types of cheese. Let everyone customize their fries to their liking!
  • Garnish with Fresh Herbs: Add a sprinkle of fresh cilantro or parsley on top for a pop of color and flavor. This simple touch can make your dish look even more appetizing.
  • Serve with Skewers: For a fun twist, serve your chili cheese fries with skewers of grilled veggies or meats. This adds variety and makes for a delightful presentation.

With these serving suggestions, you can turn your chili cheese fries into a memorable meal that everyone will love. Enjoy the delicious flavors and the great company around the campfire!

Tips for Perfecting Your Campfire Chili Cheese Fries Recipe

Campfire Chili Cheese Fries Recipe truly unforgettable, consider these helpful tips. They will guide you in achieving the perfect balance of flavors and textures, ensuring that every bite is delicious!

First, choose the right potatoes. While russet potatoes are great for fries, you can also experiment with sweet potatoes. They add a unique sweetness and are packed with nutrients. Just remember to adjust the cooking time, as sweet potatoes may cook faster.

Next, don’t skip the seasoning! The olive oil, salt, and pepper are essential for flavor. You can also add garlic powder, paprika, or even chili powder for an extra kick. Seasoning the fries well before cooking will enhance their taste significantly.

When preparing the chili, consider adding your favorite spices or ingredients. A dash of cumin or a sprinkle of oregano can elevate the flavor profile. If you’re using canned chili, look for brands that use high-quality ingredients for the best taste.

Another tip is to keep the foil pouch tightly sealed. This helps trap the heat and steam, cooking the fries evenly. If you notice that the fries are not cooking as quickly as expected, you can carefully adjust the pouch to allow more heat in.

Lastly, don’t forget to let your chili cheese fries cool slightly before serving. This allows the cheese to set a bit, making it easier to enjoy without everything sliding off. Plus, it gives you a moment to appreciate the delicious aroma!

By following these tips, you’ll be well on your way to creating the ultimate campfire chili cheese fries. Gather your friends and family, and enjoy this delightful dish together!

Breakdown of Time for Campfire Chili Cheese Fries Recipe

Campfire Chili Cheese Fries Recipe is essential for planning your outdoor cooking adventure. Here’s a simple breakdown of the time required for preparation and cooking. This will help you manage your time effectively and ensure everything is ready when you want to eat!

Prep Time

The prep time for this delicious dish is quite short. You’ll need about 15-20 minutes to wash, slice, and season the potatoes. If you’re using canned chili, you can skip the cooking time for that, making your prep even quicker. If you decide to make your own chili, factor in an additional 30 minutes for cooking. Overall, you can expect to spend around 15-50 minutes on prep, depending on your choices.

Cooking Time

Once your fries are ready, the cooking time is straightforward. Cooking the fries in the foil pouch over the campfire or grill takes about 20-25 minutes. After adding the chili and cheese, you’ll need an extra 5-10 minutes for the cheese to melt. In total, the cooking time will be approximately 25-35 minutes, ensuring your fries are crispy and the cheese is perfectly gooey.

Total Time

Campfire Chili Cheese Fries Recipe will range from 40 minutes to about 1 hour and 25 minutes. This makes it a quick and satisfying meal option for your outdoor gatherings. With a little planning, you can have this delightful dish ready to enjoy in no time!

Nutritional Information for Campfire Chili Cheese Fries Recipe

Campfire Chili Cheese Fries Recipe is important for making informed choices. This dish is not only delicious but also provides a good balance of nutrients. Here’s a breakdown of the key nutritional components per serving:

Calories

Each serving of these tasty chili cheese fries contains approximately 450 calories. This makes it a hearty option for a meal or a satisfying snack. The calorie count comes from the combination of potatoes, chili, cheese, and toppings, providing energy for your outdoor adventures. If you’re looking to manage your calorie intake, consider sharing a serving or pairing it with a lighter side dish.

Protein

In terms of protein, you can expect about 15 grams per serving. The protein primarily comes from the cheese and chili, making it a filling option. Protein is essential for muscle repair and growth, especially after a day of outdoor activities. If you want to boost the protein content even further, consider adding cooked bacon bits or grilled chicken to your chili cheese fries!

Sodium

Each serving contains around 800 milligrams of sodium. This amount can vary based on the type of chili and cheese you use. While sodium is necessary for bodily functions, it’s important to monitor your intake, especially if you’re watching your salt consumption. To reduce sodium levels, opt for low-sodium chili and cheese options. This way, you can enjoy your campfire chili cheese fries without worrying too much about sodium intake.

Campfire Chili Cheese Fries Recipe while also being aware of your dietary needs. Whether you’re camping or hosting a backyard gathering, this dish is sure to be a hit!

FAQs about Campfire Chili Cheese Fries Recipe

Can I make Campfire Chili Cheese Fries in advance?

Campfire Chili Cheese Fries Recipe in advance! For instance, you can wash and slice the potatoes ahead of time. Just store them in a bowl of water to prevent browning. You can also prepare your chili a day before and keep it in the fridge. When you’re ready to cook, simply heat the chili and follow the remaining steps. This way, you can enjoy your delicious fries without spending too much time cooking at the campsite!

What type of cheese is best for Campfire Chili Cheese Fries?

Campfire Chili Cheese Fries Recipe is shredded cheddar cheese. It melts beautifully and adds a rich flavor that complements the chili and fries perfectly. However, feel free to experiment with other cheeses! Monterey Jack, pepper jack, or even a blend of cheeses can add a unique twist. Just make sure the cheese you choose melts well for that gooey topping everyone loves!

How can I make Campfire Chili Cheese Fries healthier?

Campfire Chili Cheese Fries Recipe healthier is easy with a few simple swaps. First, consider using sweet potatoes instead of russet potatoes. They are lower in calories and packed with nutrients. You can also opt for low-fat cheese or a smaller amount of cheese to reduce fat content. Additionally, using a homemade chili with lean ground turkey or beans can cut down on calories and sodium. Finally, load up on fresh toppings like diced tomatoes, avocado, or extra veggies to boost nutrition without adding too many calories!

Can I use frozen fries for Campfire Chili Cheese Fries Recipe?

Campfire Chili Cheese Fries Recipe. They are convenient and can save you time. Just be sure to adjust the cooking time, as frozen fries may take a bit longer to cook than fresh ones. Place them in the foil pouch and follow the same cooking instructions. Keep an eye on them to ensure they become crispy and golden. Using frozen fries is a great way to enjoy this dish with minimal prep!

Conclusion on Campfire Chili Cheese Fries Recipe

Campfire Chili Cheese Fries Recipe is a fantastic dish that brings together the joy of outdoor cooking and the comfort of hearty flavors. Whether you’re camping under the stars or hosting a backyard gathering, this recipe is sure to be a hit with family and friends. The combination of crispy fries, savory chili, and melted cheese creates a delightful experience that everyone will love.

Moreover, the versatility of this dish allows you to customize it to suit your taste. From vegetarian options to spicy additions, you can easily adapt the recipe to cater to different preferences. Plus, with simple preparation and cooking steps, you can enjoy a delicious meal without spending hours in the kitchen.

As you gather around the campfire, savoring each bite of your chili cheese fries, you’ll create lasting memories with your loved ones. So, fire up the grill, gather your ingredients, and embark on this culinary adventure. Your taste buds will thank you, and your friends will be asking for seconds!

Campfire Chili Cheese Fries Recipe!

Thai Mango Salad Recipe: A Refreshing Delight Today!

Introduction to Thai Mango Salad Recipe

Thai Mango Salad is a vibrant and refreshing dish that brings a burst of flavors to your table. This salad is not just a feast for the eyes; it’s also a delightful mix of textures and tastes. With ripe mangoes, crunchy vegetables, and a zesty dressing, it’s a perfect addition to any meal. Whether you’re looking for a light lunch or a side dish for dinner, this salad fits the bill. Let’s dive into what makes this Thai Mango Salad unique and explore its health benefits.

What Makes Thai Mango Salad Unique?

What sets Thai Mango Salad apart from other salads is its unique combination of sweet, sour, and savory flavors. The ripe mangoes provide a natural sweetness, while the lime juice adds a tangy kick. The fish sauce introduces a savory depth, and the chili flakes give it a hint of heat. This balance of flavors is a hallmark of Thai cuisine, making the salad not only delicious but also exciting to eat.

Moreover, the colorful ingredients create a visually appealing dish. The bright yellow of the mango, the red of the bell pepper, and the green of the cucumber and herbs make it a feast for the eyes. This salad is perfect for gatherings, as it adds a pop of color to your table. Plus, it’s easy to prepare, making it a go-to recipe for both novice and experienced cooks.

The Health Benefits of Thai Mango Salad

Thai Mango Salad is not just tasty; it’s also packed with health benefits. Mangoes are rich in vitamins A and C, which are essential for maintaining healthy skin and boosting your immune system. The fresh vegetables, like cucumbers and bell peppers, are low in calories and high in fiber, promoting good digestion.

Additionally, the herbs like cilantro and mint are known for their antioxidant properties. They can help reduce inflammation and improve overall health. The healthy fats from roasted peanuts provide energy and keep you feeling full longer. Overall, this salad is a nutritious choice that supports a balanced diet while satisfying your taste buds.

Ingredients for Thai Mango Salad Recipe

To create a delicious Thai Mango Salad, you’ll need a variety of fresh ingredients. Each component plays a vital role in achieving the perfect balance of flavors and textures. Here’s what you’ll need:

  • 2 ripe mangoes, peeled and julienned
  • 1 red bell pepper, thinly sliced
  • 1 cup cucumber, julienned
  • 1/2 red onion, thinly sliced
  • 1/4 cup fresh cilantro, chopped
  • 1/4 cup fresh mint, chopped
  • 1/4 cup roasted peanuts, chopped

For the dressing, gather the following ingredients:

  • 3 tablespoons lime juice
  • 2 tablespoons fish sauce
  • 1 tablespoon honey
  • 1 teaspoon chili flakes (adjust to taste)

These ingredients come together to create a refreshing and flavorful salad. The ripe mangoes provide sweetness, while the vegetables add crunch. The herbs bring freshness, and the peanuts add a delightful nuttiness. The dressing ties everything together with its zesty and savory notes. Now that you have your ingredients ready, let’s move on to the preparation steps!

Step-by-Step Preparation of Thai Mango Salad Recipe

Now that you have all your ingredients ready, it’s time to prepare your Thai Mango Salad. This step-by-step guide will help you create a delicious and colorful dish that everyone will love. Let’s get started!

Step 1: Preparing the Mango

First, take your ripe mangoes. Make sure they are soft to the touch, which indicates they are ripe and sweet. Begin by peeling the mangoes with a vegetable peeler. Once peeled, place the mango on a cutting board. Cut the mango into thin strips, known as julienne. This technique helps the mango blend well with the other ingredients. Set the julienned mango aside in a large mixing bowl.

Step 2: Chopping the Vegetables

Next, it’s time to chop the vegetables. Start with the red bell pepper. Slice it in half, remove the seeds, and cut it into thin strips. Then, take the cucumber and julienne it as well. For the red onion, slice it thinly to ensure it mixes well with the other flavors. Once all the vegetables are chopped, add them to the bowl with the mango. The colorful mix will make your salad visually appealing!

Step 3: Making the Dressing

Now, let’s prepare the dressing. In a small bowl, combine the lime juice, fish sauce, honey, and chili flakes. Use a whisk to mix everything together until it’s well combined. The dressing should be tangy, sweet, and slightly spicy. Taste it and adjust the chili flakes if you prefer more heat. This dressing will enhance the flavors of your salad beautifully.

Step 4: Combining Ingredients

With all your ingredients ready, it’s time to combine them. Pour the dressing over the mango and vegetable mixture in the large bowl. Gently toss everything together using tongs or a large spoon. Make sure all the ingredients are evenly coated with the dressing. This step is crucial for ensuring every bite is packed with flavor!

Step 5: Serving the Salad

Finally, let the salad sit for about 10 minutes. This resting time allows the flavors to meld together, making the salad even tastier. You can serve it immediately or chill it in the fridge for up to 30 minutes for a refreshing taste. When ready to serve, give it a gentle toss again and enjoy your vibrant Thai Mango Salad!

Variations of Thai Mango Salad Recipe

While the classic Thai Mango Salad is delicious on its own, there are many ways to customize it. Adding different ingredients can enhance the flavors and make it more filling. Here are some variations to consider for your Thai Mango Salad.

Adding Protein to Your Thai Mango Salad

If you want to turn your Thai Mango Salad into a heartier meal, consider adding protein. Grilled shrimp or chicken are excellent choices. Simply grill the shrimp or chicken until cooked through, then slice or chop them into bite-sized pieces. Toss the protein into the salad along with the other ingredients. This addition not only boosts the protein content but also adds a savory element that complements the sweetness of the mango.

For a different twist, you can also use tofu. Firm tofu works best; just cube it and pan-fry until golden brown. This vegetarian option is perfect for those looking for a meat-free meal. The tofu absorbs the flavors of the dressing, making it a tasty addition to your salad.

Vegetarian and Vegan Options for Thai Mango Salad

For those following a vegetarian or vegan diet, there are simple substitutions to make this salad suitable for you. Instead of fish sauce, use soy sauce or a vegan fish sauce alternative. This change keeps the umami flavor while ensuring the dish remains plant-based.

Additionally, you can add more vegetables to enhance the salad’s texture and nutrition. Consider including shredded carrots, snap peas, or even avocado for creaminess. These ingredients not only add flavor but also increase the salad’s visual appeal.

Another great option is to incorporate quinoa or brown rice. These grains add a satisfying chewiness and make the salad more filling. Simply cook the grains according to package instructions, let them cool, and mix them in with the other ingredients.

With these variations, you can easily adapt the Thai Mango Salad to suit your dietary preferences while keeping it delicious and refreshing!

Cooking Note for Thai Mango Salad Recipe

When preparing your Thai Mango Salad, there are a few cooking notes to keep in mind to ensure the best results. These tips will help you achieve a salad that is not only delicious but also visually appealing and full of flavor.

First, choose ripe mangoes. The sweetness of the mango is key to the salad’s overall taste. Look for mangoes that yield slightly to pressure when gently squeezed. This indicates they are ripe and ready to use. If your mangoes are not ripe yet, you can leave them at room temperature for a few days until they soften.

Next, consider the freshness of your vegetables. Fresh, crisp vegetables will enhance the texture of your salad. Always wash and dry your vegetables thoroughly before chopping. This step ensures that any dirt or pesticides are removed, making your salad healthier.

When it comes to the dressing, feel free to adjust the ingredients to suit your taste. If you prefer a sweeter dressing, add a bit more honey. For those who enjoy a spicier kick, increase the chili flakes. Remember, the dressing should complement the salad, so taste as you go!

Lastly, don’t skip the resting time after combining the ingredients. Allowing the salad to sit for about 10 minutes helps the flavors meld together beautifully. If you choose to chill it, the salad will be even more refreshing, especially on a hot day.

By following these cooking notes, you’ll create a Thai Mango Salad that is bursting with flavor and sure to impress your family and friends!

Serving Suggestions for Thai Mango Salad Recipe

Serving your Thai Mango Salad can be just as fun as making it! This vibrant dish is versatile and can be enjoyed in various ways. Here are some delightful serving suggestions to elevate your dining experience.

First, consider serving the salad in individual bowls. This presentation not only looks appealing but also makes it easy for guests to enjoy their portion. You can garnish each bowl with a sprinkle of extra chopped peanuts and a few fresh herb leaves for a pop of color.

Another great idea is to serve the salad alongside grilled meats or seafood. The refreshing flavors of the Thai Mango Salad complement rich dishes beautifully. For instance, grilled chicken, shrimp, or even fish can create a well-rounded meal. The salad acts as a palate cleanser, balancing the savory notes of the main dish.

If you’re hosting a gathering, consider making a salad bar. Set out the Thai Mango Salad in a large bowl and provide additional toppings like sliced avocado, crispy fried shallots, or even a drizzle of extra dressing. This way, guests can customize their salads to their liking, making it a fun and interactive dining experience.

For a lighter option, serve the salad as a refreshing appetizer. A small portion before the main course can whet the appetite and prepare your guests for the meal ahead. Pair it with a light beverage, such as iced tea or coconut water, to enhance the tropical vibe.

Lastly, if you have leftovers, don’t worry! Thai Mango Salad can be enjoyed the next day. Just give it a gentle toss before serving, and it will still taste delicious. However, keep in mind that the salad is best enjoyed fresh, as the vegetables may lose their crunch over time.

With these serving suggestions, your Thai Mango Salad will not only be a hit at the table but also a delightful addition to any meal!

Tips for Perfecting Your Thai Mango Salad Recipe

Creating the perfect Thai Mango Salad is all about balancing flavors and textures. Here are some helpful tips to ensure your salad turns out delicious every time. With these tricks, you’ll impress your family and friends with your culinary skills!

First, always use ripe mangoes. The sweetness of the mango is crucial for the salad’s flavor. A ripe mango should feel slightly soft when you press it gently. If your mangoes are not ripe yet, leave them at room temperature for a few days. This will help them soften and develop their natural sweetness.

Next, pay attention to the size of your vegetable cuts. Aim for uniform sizes when julienning the mango, cucumber, and bell pepper. This not only makes the salad look more appealing but also ensures that every bite has a balanced mix of flavors. Consistent cuts help the ingredients blend well together.

When it comes to the dressing, don’t hesitate to adjust the ingredients to suit your taste. If you prefer a tangier flavor, add more lime juice. For those who enjoy a sweeter dressing, increase the honey. Remember, the dressing should enhance the salad, so taste it as you mix!

Another tip is to let the salad sit for a few minutes after tossing. This resting time allows the flavors to meld beautifully. If you have time, chilling the salad for about 30 minutes in the fridge can make it even more refreshing, especially on a hot day.

Lastly, consider adding a variety of textures to your salad. Crunchy vegetables like cucumbers and bell peppers are great, but you can also add crispy elements like fried shallots or extra roasted peanuts. These additions will give your salad an exciting crunch that everyone will love.

By following these tips, you’ll create a Thai Mango Salad that is not only delicious but also visually stunning. Enjoy the process and have fun experimenting with different flavors!

Breakdown of Time for Thai Mango Salad Recipe

Understanding the time needed to prepare your Thai Mango Salad can help you plan better. This dish is quick to make, making it perfect for busy days or last-minute gatherings. Here’s a breakdown of the time required for each step.

Prep Time

The prep time for your Thai Mango Salad is approximately 15 minutes. This includes gathering all your ingredients, peeling and julienning the mangoes, chopping the vegetables, and preparing the dressing. If you have everything ready, you can whip up this salad in no time!

Cooking Time

There is no actual cooking time involved in this recipe, as the Thai Mango Salad is a fresh, raw dish. The only time you’ll need is for the resting period after combining the ingredients. This allows the flavors to meld together beautifully. You can let it sit for about 10 minutes before serving.

Total Time

In total, you can expect to spend around 25 minutes from start to finish. This includes the 15 minutes of prep time and the 10 minutes of resting time. If you choose to chill the salad for an additional 30 minutes, the total time will be about 55 minutes. This makes it a quick and easy option for a delicious meal or side dish!

Nutritional Information for Thai Mango Salad Recipe

Understanding the nutritional content of your Thai Mango Salad is essential for maintaining a balanced diet. This salad is not only delicious but also packed with nutrients. Let’s break down the key nutritional components of this refreshing dish.

Calories in Thai Mango Salad

Each serving of Thai Mango Salad contains approximately 180 calories. This makes it a light and healthy option for lunch or as a side dish. The low-calorie count allows you to enjoy this salad without worrying about your daily intake. Plus, the natural sweetness from the mangoes and the crunch from the vegetables make it a satisfying choice!

Protein Content in Thai Mango Salad

In terms of protein, Thai Mango Salad offers about 3 grams per serving. While this may seem low, the salad is primarily a vegetable dish. If you’re looking to increase the protein content, consider adding grilled shrimp, chicken, or tofu, as mentioned earlier. These additions will not only enhance the flavor but also provide a more balanced meal.

Sodium Levels in Thai Mango Salad

The sodium content in Thai Mango Salad is around 500 mg per serving, mainly due to the fish sauce used in the dressing. If you’re watching your sodium intake, you can opt for low-sodium fish sauce or substitute it with soy sauce. This adjustment will help you enjoy the salad while keeping your sodium levels in check.

Overall, Thai Mango Salad is a nutritious choice that offers a variety of vitamins and minerals. It’s a great way to incorporate fresh produce into your diet while enjoying a burst of flavors. Whether you’re serving it as a light meal or a side dish, this salad is sure to please!

FAQs about Thai Mango Salad Recipe

Can I use frozen mango for Thai Mango Salad?

Using frozen mango in your Thai Mango Salad is possible, but it may alter the texture. Frozen mango tends to be softer once thawed, which can make the salad less crunchy. If you choose to use frozen mango, make sure to thaw it completely and drain any excess liquid before adding it to the salad. This way, you can still enjoy the sweet flavor of mango without compromising the salad’s overall texture.

What can I substitute for fish sauce in Thai Mango Salad?

If you need a substitute for fish sauce, there are several options available. For a vegetarian or vegan version, soy sauce is a great alternative. It provides a similar umami flavor without the fish. You can also use tamari, which is gluten-free, or a vegan fish sauce alternative made from seaweed. Adjust the amount to taste, as these substitutes may vary in saltiness compared to traditional fish sauce.

How long can I store Thai Mango Salad in the fridge?

Thai Mango Salad is best enjoyed fresh, but you can store it in the fridge for up to 1 day. To keep the salad crisp, store it in an airtight container. However, be aware that the vegetables may lose their crunch over time, and the dressing can make them soggy. If you have leftovers, consider adding fresh ingredients like more mango or herbs before serving to revive the salad’s freshness.

Is Thai Mango Salad spicy?

The spiciness of Thai Mango Salad can be adjusted to your preference. The chili flakes in the dressing add a mild heat, but you can easily control the spice level. If you prefer a milder salad, reduce the amount of chili flakes or omit them altogether. Conversely, if you enjoy a spicier kick, feel free to add more chili flakes or even fresh sliced chili peppers. This flexibility makes the salad enjoyable for everyone!

Conclusion on Thai Mango Salad Recipe

In conclusion, the Thai Mango Salad is a delightful dish that combines vibrant flavors and fresh ingredients. Its unique blend of sweet, sour, and savory elements makes it a standout choice for any meal. Whether you enjoy it as a light lunch, a side dish, or a refreshing appetizer, this salad is sure to impress your family and friends.

Not only is the Thai Mango Salad easy to prepare, but it also offers numerous health benefits. Packed with vitamins, minerals, and antioxidants, it supports a balanced diet while satisfying your taste buds. The versatility of this recipe allows you to customize it to your liking, whether by adding protein or making it vegetarian or vegan-friendly.

As you explore the various preparation tips and serving suggestions, you’ll find that this salad can fit into any occasion. From casual family dinners to festive gatherings, the Thai Mango Salad adds a burst of color and flavor to your table. So, gather your ingredients, follow the steps, and enjoy the refreshing taste of this delicious salad!

With its bright colors and delightful crunch, the Thai Mango Salad is not just a meal; it’s an experience. So, why not give it a try? You might just find your new favorite dish!

Fresh Fruit Salad with Honey Lime Dressing is Delightful!

Introduction to Fresh Fruit Salad with Honey Lime Dressing

Fresh fruit salad is a delightful dish that brings together the vibrant flavors of nature. It’s not just a treat for your taste buds; it’s also a feast for the eyes. The combination of colors and textures makes it an appealing choice for any occasion. When you add a honey-lime dressing, the salad transforms into a refreshing and zesty experience. This dish is perfect for summer picnics, family gatherings, or even a light dessert after dinner.

The Appeal of Fresh Fruit Salad with Honey Lime Dressing

What makes fresh fruit salad so special? First, it’s incredibly versatile. You can mix and match your favorite fruits, creating a unique blend every time. The honey-lime dressing adds a sweet and tangy twist that enhances the natural flavors of the fruits. Plus, it’s a healthy option packed with vitamins and minerals.

Another great aspect is its simplicity. With just a few ingredients, you can whip up a delicious salad in no time. This makes it an excellent choice for busy days or last-minute gatherings. The freshness of the fruits combined with the light dressing makes it a guilt-free indulgence.

Moreover, this salad is not only tasty but also visually stunning. The bright colors of strawberries, blueberries, and kiwi create a beautiful presentation. It’s sure to impress your guests and make any meal feel special. So, whether you’re serving it at a brunch or enjoying it as a snack, fresh fruit salad with honey lime dressing is a delightful addition to your table.

Ingredients for Fresh Fruit Salad with Honey Lime Dressing

Creating a delicious fresh fruit salad with honey lime dressing starts with selecting the right ingredients. Here’s what you’ll need to make this vibrant dish:

  • 2 cups strawberries, hulled and sliced
  • 2 cups blueberries
  • 2 cups pineapple, diced
  • 2 cups kiwi, peeled and sliced
  • 2 cups seedless grapes, halved
  • 1/4 cup honey
  • 1/4 cup fresh lime juice
  • 1 tablespoon poppy seeds
  • 1/4 teaspoon salt

These ingredients come together to create a colorful and nutritious salad. The strawberries and blueberries provide a sweet burst of flavor, while the pineapple adds a tropical twist. Kiwi brings a unique tartness, and grapes offer a juicy crunch. The honey-lime dressing ties everything together, making each bite refreshing and delightful.

When selecting your fruits, opt for ripe and fresh options. This ensures that your salad is not only tasty but also packed with nutrients. Fresh fruits are rich in vitamins, minerals, and antioxidants, making this salad a healthy choice for any meal. So gather your ingredients, and get ready to create a beautiful fresh fruit salad with honey lime dressing!

Preparation of Fresh Fruit Salad with Honey Lime Dressing

Preparing a fresh fruit salad with honey lime dressing is a simple and enjoyable process. With just a few steps, you can create a delicious and colorful dish that everyone will love. Let’s break it down into three easy steps.

Step 1: Selecting the Right Fruits for Fresh Fruit Salad with Honey Lime Dressing

The first step in making your fresh fruit salad is choosing the right fruits. Freshness is key! Look for fruits that are ripe and in season. This ensures maximum flavor and sweetness. Strawberries should be bright red, blueberries plump, and pineapples should have a sweet aroma. Kiwis should feel slightly soft to the touch, while grapes should be firm and juicy.

Don’t hesitate to mix and match! You can add seasonal fruits like peaches or mangoes for a twist. The goal is to create a colorful and vibrant mix that appeals to the eye and palate. Remember, the more variety you have, the more exciting your salad will be!

Step 2: Preparing the Honey Lime Dressing for Fresh Fruit Salad

Next, it’s time to prepare the honey lime dressing. This dressing is what makes your fruit salad truly special. In a small bowl, combine 1/4 cup of honey with 1/4 cup of fresh lime juice. The lime juice adds a zesty kick that balances the sweetness of the honey.

Whisk these ingredients together until they are well blended. Then, add 1 tablespoon of poppy seeds and 1/4 teaspoon of salt. The poppy seeds add a delightful crunch and a touch of elegance to your dressing. Mix everything until it’s smooth and creamy. This dressing is not only easy to make but also enhances the flavors of the fruits beautifully!

Step 3: Combining Ingredients for Fresh Fruit Salad with Honey Lime Dressing

Now comes the fun part—combining everything! In a large mixing bowl, add your selected fruits. Gently toss them together to ensure they are evenly mixed. Then, drizzle the honey lime dressing over the fruit. Be careful not to drown the fruits; you want just enough dressing to coat them lightly.

Using a spatula or large spoon, gently toss the fruits again to ensure they are well coated with the dressing. This step is crucial as it allows the flavors to meld together. Once everything is combined, cover the bowl and refrigerate the salad for at least 30 minutes. This chilling time allows the flavors to develop, making your fresh fruit salad with honey lime dressing even more delicious!

Variation of Fresh Fruit Salad with Honey Lime Dressing

One of the best things about fresh fruit salad with honey lime dressing is its versatility. You can easily adapt the recipe to suit the season or your personal taste. Let’s explore some exciting variations that can elevate your fruit salad experience!

Seasonal Fruit Options for Fresh Fruit Salad with Honey Lime Dressing

Using seasonal fruits can enhance the flavor and freshness of your salad. In spring and summer, consider adding juicy peaches, nectarines, or cherries. These fruits bring a sweet and fragrant touch to your dish. In the fall, apples and pears can add a crisp texture and a hint of spice. Winter is perfect for citrus fruits like oranges and grapefruits, which provide a refreshing burst of flavor.

Mixing in seasonal fruits not only keeps your salad interesting but also ensures you’re using the freshest ingredients available. This approach can also introduce new flavors and textures, making each salad unique. So, don’t hesitate to experiment with whatever fruits are in season!

Adding Extras to Fresh Fruit Salad with Honey Lime Dressing

To make your fresh fruit salad even more delightful, consider adding some extras. For a crunchy texture, you can mix in 1/2 cup of chopped nuts, such as walnuts or pecans. These nuts not only add a satisfying crunch but also provide healthy fats and protein.

Another great addition is shredded coconut, which can give your salad a tropical flair. You might also want to sprinkle in some chia seeds or flaxseeds for an extra boost of nutrition. If you enjoy a bit of spice, a dash of cinnamon or nutmeg can add warmth and depth to the flavors.

These extras can transform your fresh fruit salad with honey lime dressing into a more filling dish, perfect for breakfast or a light lunch. Feel free to get creative and mix in your favorite ingredients to make this salad truly your own!

Cooking Note for Fresh Fruit Salad with Honey Lime Dressing

When preparing your fresh fruit salad with honey lime dressing, there are a few important cooking notes to keep in mind. These tips will help you achieve the best flavor and texture for your salad.

First, always wash your fruits thoroughly before cutting them. This step is crucial for removing any dirt or pesticides. Rinse them under cool running water and gently scrub the skins of fruits like apples and grapes. After washing, pat them dry with a clean towel to prevent excess moisture in your salad.

Next, consider the ripeness of your fruits. Using fruits that are perfectly ripe will enhance the overall taste of your salad. Overripe fruits can become mushy, while underripe fruits may lack sweetness. Aim for a balance of textures by mixing soft fruits like strawberries with firmer options like apples or grapes.

Additionally, if you plan to serve the salad later, it’s best to keep the dressing separate until just before serving. This prevents the fruits from becoming soggy. You can store the dressing in a sealed container in the refrigerator for up to a week. Just give it a quick whisk before drizzling it over the salad.

Lastly, remember that presentation matters! Arrange your fruits in a colorful pattern in the serving bowl. This not only makes the salad visually appealing but also entices your guests to dig in. A beautiful presentation can elevate your fresh fruit salad with honey lime dressing from simple to spectacular!

Serving Suggestions for Fresh Fruit Salad with Honey Lime Dressing

Serving fresh fruit salad with honey lime dressing is all about presentation and pairing. This vibrant dish can be enjoyed in various ways, making it a versatile addition to any meal. Here are some delightful serving suggestions to enhance your experience:

First, consider serving the salad in individual bowls or cups. This not only makes it easy for guests to enjoy but also adds a touch of elegance to your table. You can use clear glass bowls to showcase the beautiful colors of the fruits. A sprinkle of mint leaves on top can add a refreshing touch and a pop of green.

Another great idea is to serve the fruit salad as a side dish at barbecues or picnics. It pairs wonderfully with grilled meats and savory dishes. The sweet and tangy flavors of the honey lime dressing complement the smoky taste of grilled foods, making it a perfect match.

If you’re hosting a brunch, consider serving the fresh fruit salad alongside pancakes or waffles. The lightness of the salad balances the richness of these breakfast favorites. You can even use the salad as a topping for yogurt or oatmeal, adding a burst of flavor and nutrition to your morning meal.

For a fun twist, try using the fruit salad as a filling for crepes or as a topping for ice cream. This adds a delightful sweetness and freshness to desserts, making them even more enjoyable. The honey lime dressing can also be drizzled over these dishes for an extra layer of flavor.

Lastly, don’t forget about garnishing! A sprinkle of shredded coconut, a few edible flowers, or a dusting of powdered sugar can elevate the presentation. These small touches can make your fresh fruit salad with honey lime dressing not only delicious but also visually stunning.

With these serving suggestions, your fresh fruit salad will shine at any gathering. Whether it’s a casual family meal or a festive celebration, this dish is sure to impress and satisfy everyone’s taste buds!

Tips for Making the Best Fresh Fruit Salad with Honey Lime Dressing

Creating the perfect fresh fruit salad with honey lime dressing is all about attention to detail. Here are some helpful tips to ensure your salad is not only delicious but also visually appealing and nutritious.

First, always choose ripe fruits. Ripe fruits are sweeter and more flavorful, making your salad taste amazing. Check for firmness and aroma when selecting fruits. For example, strawberries should be bright red and fragrant, while pineapples should have a sweet smell. This ensures that your salad is bursting with flavor!

Next, cut your fruits into uniform sizes. This helps with even mixing and makes the salad look more appealing. For instance, slice strawberries into similar thicknesses as kiwi. This way, every bite offers a balanced taste of all the fruits.

Don’t forget to chill your salad before serving! Refrigerating the salad for at least 30 minutes allows the flavors to meld together beautifully. The coolness also makes it refreshing, especially on warm days. Just remember to cover it to keep it fresh.

When preparing the honey lime dressing, whisk it well to combine all ingredients thoroughly. This ensures that every fruit piece gets coated evenly. If you find the dressing too thick, you can add a splash of water or more lime juice to achieve your desired consistency.

For added flavor, consider letting the salad sit for a few minutes after mixing. This allows the fruits to absorb the dressing, enhancing the overall taste. However, avoid letting it sit too long, as the fruits can become mushy.

Lastly, be creative with your presentation! Use a large, clear bowl to showcase the vibrant colors of the fruits. You can also layer the fruits in a trifle dish for a stunning visual effect. Garnishing with fresh mint leaves or a sprinkle of poppy seeds can add a lovely finishing touch.

By following these tips, you’ll create a fresh fruit salad with honey lime dressing that is not only delicious but also a feast for the eyes. Enjoy the process and have fun experimenting with different fruits and flavors!

Breakdown of Time for Fresh Fruit Salad with Honey Lime Dressing

Understanding the time needed to prepare your fresh fruit salad with honey lime dressing can help you plan better. This dish is quick to make, allowing you to enjoy it without spending too much time in the kitchen. Here’s a breakdown of the time involved in making this delightful salad.

Prep Time for Fresh Fruit Salad with Honey Lime Dressing

The prep time for your fresh fruit salad is quite short. You’ll need about 15 to 20 minutes to wash, slice, and dice all the fruits. This includes hulling the strawberries, peeling the kiwi, and cutting the pineapple. If you have all your ingredients ready, you can whip up the salad in no time!

Cooking Time for Fresh Fruit Salad with Honey Lime Dressing

Interestingly, there’s no actual cooking involved in this recipe. The only time you’ll need is for preparing the honey lime dressing, which takes about 5 minutes. Simply whisk together the honey, lime juice, poppy seeds, and salt. It’s that easy!

Total Time for Fresh Fruit Salad with Honey Lime Dressing

When you combine the prep time and the dressing preparation, the total time comes to around 20 to 25 minutes. However, don’t forget to refrigerate the salad for at least 30 minutes before serving. This chilling time allows the flavors to meld beautifully, making your fresh fruit salad with honey lime dressing even more delicious!

In summary, you can have a vibrant and refreshing salad ready in under an hour, making it a perfect choice for any occasion. Whether it’s a family gathering or a casual snack, this dish is quick, easy, and oh-so-tasty!

Nutritional Information for Fresh Fruit Salad with Honey Lime Dressing

Understanding the nutritional content of your fresh fruit salad with honey lime dressing is essential for making healthy choices. This delightful dish is not only tasty but also packed with vitamins and minerals. Let’s take a closer look at the nutritional information to see how this salad can fit into your diet.

Calories in Fresh Fruit Salad with Honey Lime Dressing

Each serving of fresh fruit salad with honey lime dressing contains approximately 150 calories. This makes it a light and refreshing option for a snack or dessert. The low-calorie count allows you to enjoy this salad without feeling guilty. Plus, the natural sweetness from the fruits means you can satisfy your sweet tooth in a healthy way!

Protein Content in Fresh Fruit Salad with Honey Lime Dressing

In terms of protein, this salad offers about 1 gram per serving. While fruit is not typically a high-protein food, it does provide essential nutrients that support overall health. To boost the protein content, consider adding nuts or seeds, which can make the salad more filling and nutritious.

Sodium Levels in Fresh Fruit Salad with Honey Lime Dressing

The sodium level in fresh fruit salad with honey lime dressing is quite low, at around 25 milligrams per serving. This makes it a heart-healthy choice, as low sodium intake is important for maintaining healthy blood pressure levels. The natural ingredients in this salad contribute to its low sodium content, making it a great option for those watching their salt intake.

Overall, fresh fruit salad with honey lime dressing is a nutritious and delicious choice. With its low calorie count, minimal sodium, and a touch of protein, it’s perfect for anyone looking to enjoy a healthy treat. So go ahead and indulge in this vibrant salad, knowing it’s good for you!

FAQs about Fresh Fruit Salad with Honey Lime Dressing

Can I use frozen fruit for Fresh Fruit Salad with Honey Lime Dressing?

Yes, you can use frozen fruit for your fresh fruit salad with honey lime dressing! However, there are a few things to keep in mind. First, thaw the frozen fruit completely before adding it to your salad. This helps prevent excess moisture from making your salad soggy. Once thawed, gently pat the fruit dry with a paper towel to remove any extra water.

While frozen fruit can be convenient, it may not have the same texture as fresh fruit. Frozen fruits tend to be softer and can lose some of their crunch. Nevertheless, they can still add great flavor and nutrition to your salad. Just be sure to mix them with fresh fruits for a delightful combination!

How long can I store Fresh Fruit Salad with Honey Lime Dressing?

Fresh fruit salad with honey lime dressing is best enjoyed within a couple of days. If stored properly in an airtight container in the refrigerator, it can last for about 2 to 3 days. However, the fruits may start to lose their freshness and texture over time.

To keep your salad tasting its best, consider storing the dressing separately. This way, you can add it just before serving. If you notice any fruits starting to look mushy or discolored, it’s best to remove them to maintain the quality of the salad. Enjoy your fresh fruit salad while it’s at its peak for the best flavor and texture!

What fruits work best in Fresh Fruit Salad with Honey Lime Dressing?

The beauty of fresh fruit salad with honey lime dressing is its versatility! You can use a wide variety of fruits to create a delicious mix. Some of the best fruits to include are:

  • Strawberries
  • Blueberries
  • Pineapple
  • Kiwi
  • Seedless grapes
  • Peaches
  • Mangoes
  • Apples
  • Pears
  • Oranges

Feel free to mix and match based on your preferences and what’s in season. The key is to choose ripe, fresh fruits for the best flavor. Combining different textures and flavors will make your salad even more enjoyable. So, get creative and have fun experimenting with your favorite fruits!

Conclusion on Fresh Fruit Salad with Honey Lime Dressing

In conclusion, fresh fruit salad with honey lime dressing is a delightful dish that brings joy to any table. Its vibrant colors and refreshing flavors make it a perfect choice for various occasions, from casual family meals to festive gatherings. The combination of sweet fruits and zesty dressing creates a harmonious balance that is both satisfying and nutritious.

Not only is this salad easy to prepare, but it also allows for endless creativity. You can customize it with seasonal fruits, add crunchy nuts, or even experiment with different dressings. This versatility ensures that you can enjoy a unique salad every time you make it. Plus, the health benefits of fresh fruits make it a guilt-free indulgence that everyone can appreciate.

As you prepare your fresh fruit salad with honey lime dressing, remember to focus on using ripe, fresh ingredients. This will enhance the overall taste and presentation of your dish. Whether you serve it as a side, a dessert, or a light snack, this salad is sure to impress your guests and satisfy your cravings.

So, gather your favorite fruits, whip up that delicious honey lime dressing, and enjoy the delightful experience of fresh fruit salad. It’s a simple yet elegant dish that celebrates the natural sweetness of fruits, making it a must-try for anyone who loves fresh flavors. Enjoy every bite!

Slow Cooker Queso Chicken Tacos Recipe is a must-try!

Introduction to Slow Cooker Queso Chicken Tacos Recipe

Slow Cooker Queso Chicken Tacos Recipe is here to save the day. This dish combines tender chicken with creamy queso, all wrapped in warm tortillas. It’s perfect for busy weeknights or casual gatherings. Plus, it’s a crowd-pleaser that everyone will love!

What Makes Slow Cooker Queso Chicken Tacos Special?

What sets this recipe apart? First, the slow cooker does all the hard work for you. Just toss in the ingredients, and let it cook while you go about your day. The chicken becomes incredibly tender and flavorful, soaking up the spices and salsa. The addition of cream cheese creates a rich, creamy sauce that makes every bite delightful.

Moreover, this recipe is versatile. You can customize it to suit your taste. Want it spicier? Add jalapeños! Prefer a vegetarian option? Swap the chicken for beans. The possibilities are endless! With simple ingredients and easy preparation, you can enjoy a tasty meal without spending hours in the kitchen.

So, gather your ingredients and get ready to make the best tacos ever. Your taste buds will thank you!

Ingredients for Slow Cooker Queso Chicken Tacos Recipe

Slow Cooker Queso Chicken Tacos Recipe, you’ll need a few simple ingredients. Each one plays a vital role in building flavor and texture. Here’s what you’ll need:

  • 2 pounds boneless, skinless chicken breasts: This is the star of the dish. Chicken breasts cook up tender and juicy in the slow cooker.
  • 1 cup salsa: Choose your favorite salsa for a burst of flavor. It adds moisture and spice to the chicken.
  • 1 packet taco seasoning (1 ounce): This seasoning mix brings all the classic taco flavors to your dish.
  • 8 ounces cream cheese, softened: Cream cheese makes the sauce creamy and rich, enhancing the overall taste.
  • 1 cup shredded cheddar cheese: This cheese melts beautifully and adds a delicious cheesy flavor.
  • 12 small corn or flour tortillas: These are the perfect vessels for your tasty filling.
  • 1 cup shredded lettuce: Fresh lettuce adds a nice crunch and balances the richness of the queso.
  • 1 cup diced tomatoes: Juicy tomatoes provide freshness and color to your tacos.
  • 1/2 cup sour cream: Sour cream adds a creamy, tangy touch that complements the flavors.
  • 1/4 cup chopped fresh cilantro (optional): Cilantro adds a burst of freshness and a pop of color.
  • Lime wedges for serving: A squeeze of lime brightens up the flavors and adds a zesty kick.

With these ingredients on hand, you’re ready to dive into the cooking process. Each component contributes to the overall deliciousness of the tacos. So, gather everything and let’s get cooking!

Step-by-Step Preparation of Slow Cooker Queso Chicken Tacos Recipe

Slow Cooker Queso Chicken Tacos Recipe. This process is simple and straightforward, making it easy for anyone to follow. Let’s get started!

Step 1: Preparing the Chicken

First, take your 2 pounds of boneless, skinless chicken breasts. Rinse them under cold water and pat them dry with a paper towel. This helps remove any excess moisture. Next, place the chicken breasts in the bottom of your slow cooker. Make sure they are spread out evenly for even cooking.

Step 2: Mixing the Queso Ingredients

In a separate bowl, combine 1 cup of salsa and 1 packet of taco seasoning. Stir them together until well mixed. This mixture will add a burst of flavor to your chicken. Pour this salsa mixture over the chicken in the slow cooker, ensuring that each piece is coated. This step is crucial for infusing the chicken with delicious flavors.

Step 3: Combining in the Slow Cooker

Now, it’s time to add the cream cheese. Take 8 ounces of softened cream cheese and cut it into small cubes. Scatter these cubes over the chicken and salsa mixture. This will help the cream cheese melt evenly as it cooks. Don’t worry about mixing it just yet; it will blend beautifully during cooking.

Step 4: Cooking the Queso Chicken

Cover the slow cooker with its lid. Set it to cook on low for 6-8 hours or on high for 3-4 hours. The longer you cook, the more tender the chicken will become. As it cooks, the chicken will absorb all the flavors from the salsa and seasoning, creating a mouthwatering dish.

Step 5: Shredding the Chicken

Once the cooking time is up, carefully remove the lid. The chicken should be cooked through and tender. Using two forks, shred the chicken right in the slow cooker. Mix it back into the creamy queso sauce. This step ensures that every bite is packed with flavor and creaminess.

Step 6: Assembling the Tacos

Now comes the fun part—assembling your tacos! Warm your 12 small corn or flour tortillas in a skillet or microwave. Once warmed, take a tortilla and place a generous amount of the queso chicken mixture in the center. Top it off with shredded lettuce, diced tomatoes, and a dollop of sour cream. If you like, sprinkle some chopped fresh cilantro on top for added flavor. Finally, serve with lime wedges on the side for that zesty kick!

Slow Cooker Queso Chicken Tacos Recipe is ready to be enjoyed. Each bite is a delightful combination of flavors and textures that will surely impress everyone at the table.

Variations of Slow Cooker Queso Chicken Tacos Recipe

Slow Cooker Queso Chicken Tacos Recipe is not only delicious but also highly adaptable. You can easily modify it to suit different dietary preferences or to simply mix things up. Here are some exciting variations to consider:

Vegetarian Alternatives

If you’re looking for a vegetarian option, you can swap out the chicken for beans or vegetables. Black beans or pinto beans work wonderfully. Just use 2 cans of drained beans in place of the chicken. You can also add diced bell peppers, zucchini, or corn for extra flavor and texture. The salsa and taco seasoning will still provide that classic taste, making it a satisfying meal for everyone!

Different Cheese Options

Cheese lovers rejoice! While cheddar cheese is a great choice, you can experiment with different types of cheese to enhance your tacos. Try using Monterey Jack for a milder flavor or pepper jack for a spicy kick. You can even mix in some crumbled queso fresco for a unique twist. The key is to choose cheeses that melt well, ensuring a creamy and delicious filling.

Spice Level Adjustments

Do you like your tacos with a bit of heat? Adjusting the spice level is easy! For a milder version, stick with regular salsa. If you want to turn up the heat, consider using spicy salsa or adding diced jalapeños to the slow cooker. You can also sprinkle in some cayenne pepper or crushed red pepper flakes. Just remember to taste as you go, so you get the perfect level of spice for your palate!

Slow Cooker Queso Chicken Tacos Recipe to fit your taste and dietary needs. Whether you’re cooking for a crowd or just for yourself, these options ensure that everyone can enjoy a delicious taco experience!

Cooking Note for Slow Cooker Queso Chicken Tacos Recipe

Slow Cooker Queso Chicken Tacos Recipe, there are a few important cooking notes to keep in mind. These tips will help ensure that your dish turns out perfectly every time.

First, always check the quality of your chicken. Fresh, high-quality chicken breasts will yield the best flavor and texture. If you’re using frozen chicken, make sure to thaw it completely before placing it in the slow cooker. Cooking frozen chicken can lead to uneven cooking and may not reach safe temperatures.

Next, consider the type of salsa you choose. The flavor of your salsa can significantly impact the overall taste of the dish. Opt for a salsa that matches your preferred spice level. If you enjoy a bit of heat, a medium or hot salsa will work wonders. For a milder flavor, stick with a mild salsa.

Another key point is to avoid lifting the lid of the slow cooker during cooking. Each time you lift the lid, heat escapes, which can extend the cooking time. Trust the process! The slow cooker is designed to maintain a consistent temperature, so let it do its job.

Lastly, remember that cooking times can vary based on your slow cooker model. If you find that your chicken isn’t shredding easily after the recommended cooking time, simply let it cook for an additional 30 minutes. The goal is to have tender chicken that easily falls apart with a fork.

Slow Cooker Queso Chicken Tacos Recipe. Enjoy the process and the delicious results!

Serving Suggestions for Slow Cooker Queso Chicken Tacos Recipe

Slow Cooker Queso Chicken Tacos Recipe, it’s time to think about how to serve them. The right toppings and side dishes can elevate your meal, making it even more enjoyable. Here are some fantastic suggestions to enhance your taco experience!

Toppings to Enhance Your Tacos

Toppings can make or break a taco. Here are some delicious options to consider:

  • Avocado or Guacamole: Creamy avocado slices or a dollop of guacamole add richness and flavor.
  • Pickled Red Onions: These add a tangy crunch that complements the creamy queso chicken.
  • Jalapeños: For those who love heat, sliced jalapeños can bring an extra kick to your tacos.
  • Shredded Cheese: Sprinkle some extra cheese on top for a gooey, cheesy finish.
  • Hot Sauce: A few drops of your favorite hot sauce can spice things up even more.

Feel free to mix and match these toppings to create your perfect taco. The combination of flavors and textures will make each bite a delight!

Side Dishes That Pair Well

To round out your meal, consider serving some tasty side dishes alongside your tacos. Here are a few ideas:

  • Mexican Rice: Fluffy rice seasoned with spices complements the flavors of the tacos beautifully.
  • Refried Beans: Creamy refried beans add protein and make for a hearty side.
  • Chips and Salsa: A classic appetizer that’s always a hit. Serve with your favorite salsa for dipping.
  • Grilled Corn: Sweet, grilled corn on the cob is a delicious and seasonal side.
  • Simple Salad: A fresh salad with lime vinaigrette can balance the richness of the tacos.

Slow Cooker Queso Chicken Tacos Recipe but also create a well-rounded meal that everyone will enjoy. So, gather your toppings and sides, and get ready for a taco feast!

Tips for Perfecting Your Slow Cooker Queso Chicken Tacos Recipe

Slow Cooker Queso Chicken Tacos Recipe truly unforgettable, consider these helpful tips. They will guide you in achieving the best flavor and texture, ensuring that every taco is a hit!

First, always season your chicken well. While the taco seasoning adds great flavor, you can enhance it further. A sprinkle of salt and pepper before adding the salsa can make a big difference. This simple step helps to elevate the overall taste of the chicken.

Next, don’t rush the cooking process. Slow cooking is all about patience. Cooking on low for the full 6-8 hours allows the flavors to meld beautifully. If you’re short on time, cooking on high for 3-4 hours is fine, but the chicken may not be as tender. So, if you can, opt for the low setting!

Another tip is to let the cream cheese soften at room temperature before adding it to the slow cooker. This makes it easier to mix into the chicken and salsa. If you forget to take it out ahead of time, you can microwave it for about 15-20 seconds to soften it quickly.

When shredding the chicken, use two forks to pull it apart gently. This method helps to keep the chicken moist and ensures it mixes well with the queso sauce. If you find the chicken is a bit dry, you can add a splash of chicken broth to moisten it up.

Lastly, don’t forget to taste as you go! After mixing everything together, take a moment to sample the filling. If it needs more seasoning, feel free to add a pinch of salt, pepper, or even more taco seasoning. Adjusting the flavors to your liking will make your tacos even more delicious.

Slow Cooker Queso Chicken Tacos Recipe. Enjoy the process and the delightful results!

Breakdown of Time for Slow Cooker Queso Chicken Tacos Recipe

Slow Cooker Queso Chicken Tacos Recipe is essential for planning your meal. Here’s a simple breakdown of the time involved in preparing and cooking this delicious dish.

Prep Time

The prep time for this recipe is quite minimal. You’ll spend about 15-20 minutes gathering your ingredients and preparing the chicken. This includes rinsing the chicken, mixing the salsa and taco seasoning, and cutting the cream cheese into cubes. It’s a quick and easy process that anyone can manage!

Cooking Time

Once everything is in the slow cooker, the cooking time is where the magic happens. If you set your slow cooker to low, it will take about 6-8 hours for the chicken to become tender and flavorful. Alternatively, if you’re short on time, cooking on high will take around 3-4 hours. Just remember, the longer cooking time on low will yield the best results!

Total Time

Slow Cooker Queso Chicken Tacos Recipe to take about 6 hours and 15 minutes to 8 hours and 20 minutes, depending on your cooking method. This includes both prep and cooking time. It’s a perfect option for busy days when you want to set it and forget it!

With this time breakdown, you can easily plan your day around making these tasty tacos. Enjoy the process and the delicious outcome!

Nutritional Information for Slow Cooker Queso Chicken Tacos Recipe

Slow Cooker Queso Chicken Tacos Recipe is essential for those who are health-conscious or following specific dietary guidelines. This recipe not only satisfies your taste buds but also provides a balanced meal. Let’s break down the key nutritional components.

Calories

Slow Cooker Queso Chicken Tacos Recipe contains approximately 360 calories. This makes it a hearty yet manageable option for lunch or dinner. The combination of chicken, cheese, and toppings contributes to the calorie count, ensuring you feel full and satisfied after your meal.

Protein Content

One of the standout features of this recipe is its protein content. Each serving provides about 30 grams of protein. This high protein level comes primarily from the chicken and cheese, making it an excellent choice for those looking to increase their protein intake. Protein is essential for muscle repair and overall health, making these tacos a nutritious option.

Sodium Levels

When it comes to sodium, each serving contains around 800 milligrams. This level is typical for dishes that include salsa and taco seasoning. If you’re watching your sodium intake, consider using low-sodium salsa and taco seasoning. This simple swap can help reduce the overall sodium content while still keeping the flavors intact.

Slow Cooker Queso Chicken Tacos Recipe offers a balanced meal with a good mix of calories, protein, and sodium. By being mindful of ingredient choices, you can easily adjust the nutritional profile to fit your dietary needs. Enjoy these delicious tacos while feeling good about what you’re eating!

FAQs About Slow Cooker Queso Chicken Tacos Recipe

Can I use frozen chicken for this recipe?

Slow Cooker Queso Chicken Tacos Recipe. However, it’s important to note that cooking times may vary. If you choose to use frozen chicken, make sure to cook it on high for about 4-5 hours instead of the usual 3-4 hours. This ensures that the chicken reaches a safe temperature and cooks evenly. Just remember, thawed chicken will yield the best texture and flavor!

How can I make this recipe spicier?

Slow Cooker Queso Chicken Tacos Recipe. First, consider using a spicy salsa instead of mild. You can also add diced jalapeños or serrano peppers to the slow cooker along with the salsa. For an extra kick, sprinkle in some cayenne pepper or crushed red pepper flakes. Just be sure to taste as you go, so you can find the perfect level of spice for your palate!

What toppings are best for Slow Cooker Queso Chicken Tacos?

Slow Cooker Queso Chicken Tacos to the next level! Here are some popular options:

  • Avocado or Guacamole: Adds creaminess and richness.
  • Shredded Cheese: Extra cheese always makes tacos better!
  • Pickled Red Onions: For a tangy crunch.
  • Fresh Cilantro: Adds a burst of freshness.
  • Sour Cream: A classic topping that balances flavors.

Feel free to mix and match these toppings to create your perfect taco experience!

Can I prepare the queso chicken ahead of time?

Absolutely! You can prepare the queso chicken ahead of time. After cooking, let the chicken cool completely, then store it in an airtight container in the refrigerator for up to 3 days. When you’re ready to serve, simply reheat it in the microwave or on the stove until warmed through. This makes it a great option for meal prep or busy weeknights when you want a quick and delicious meal!

Conclusion on Slow Cooker Queso Chicken Tacos Recipe

Slow Cooker Queso Chicken Tacos Recipe is a fantastic choice for anyone seeking a simple yet delicious meal. With its tender chicken, creamy queso, and customizable toppings, it’s sure to please everyone at the table. The slow cooker does all the hard work, allowing you to enjoy more time with family and friends while your meal cooks to perfection.

This recipe not only offers convenience but also versatility. Whether you prefer it spicy, vegetarian, or with different cheese options, you can easily adapt it to suit your taste. Plus, the nutritional benefits, including high protein content, make it a wholesome choice for any day of the week.

So, why not give this recipe a try? Gather your ingredients, set your slow cooker, and let the magic happen. You’ll be rewarded with a flavorful meal that’s perfect for any occasion. Enjoy your cooking adventure and savor every bite of your delicious tacos!

Mediterranean Chicken Pasta Salad Recipe is a must-try!

Introduction to Mediterranean Chicken Pasta Salad Recipe

Mediterranean Chicken Pasta Salad Recipe is just what you need! This vibrant dish combines fresh ingredients with savory flavors, making it a perfect choice for lunch, dinner, or even a picnic. With its colorful presentation and delightful taste, this salad is sure to impress your family and friends.

What Makes Mediterranean Chicken Pasta Salad Unique?

What sets the Mediterranean Chicken Pasta Salad apart from other pasta salads? It’s all about the ingredients! This recipe features a delightful mix of rotini pasta, tender chicken, and a variety of fresh vegetables. The addition of Kalamata olives and feta cheese brings a unique Mediterranean flair that elevates the dish. Plus, the homemade dressing made with olive oil and red wine vinegar adds a zesty kick that ties everything together. Each bite is a burst of flavor, making it a standout option for any meal.

Benefits of Making Mediterranean Chicken Pasta Salad

There are many benefits to making this Mediterranean Chicken Pasta Salad. First, it’s packed with nutrients! The combination of chicken, vegetables, and healthy fats from olive oil provides a balanced meal. Additionally, this salad is versatile. You can easily customize it to suit your taste preferences or dietary needs. Whether you want to add more veggies or switch out the protein, the options are endless. Lastly, it’s a great make-ahead dish. You can prepare it in advance, allowing the flavors to meld together, making it even tastier when served. Enjoy the convenience and health benefits of this delightful salad!

Ingredients for Mediterranean Chicken Pasta Salad Recipe

Fresh Ingredients for the Best Flavor

Mediterranean Chicken Pasta Salad Recipe, using fresh ingredients is key. Here’s what you’ll need:

  • Rotini Pasta: This spiral-shaped pasta holds the dressing well, making each bite flavorful.
  • Cooked Chicken: Shredded chicken adds protein and makes the salad hearty.
  • Cherry Tomatoes: Their sweetness and juiciness brighten up the dish.
  • Cucumber: Diced cucumber adds a refreshing crunch.
  • Red Onion: Finely chopped red onion gives a mild, sweet flavor.
  • Kalamata Olives: These olives bring a briny taste that enhances the Mediterranean vibe.
  • Feta Cheese: Crumbled feta adds creaminess and a tangy kick.
  • Fresh Parsley: Chopped parsley not only adds color but also a fresh herbal note.

These ingredients work together to create a salad that’s not only delicious but also visually appealing. The combination of textures and flavors makes every bite enjoyable!

Optional Ingredients to Customize Your Salad

While the core ingredients are fantastic, you can easily customize your Mediterranean Chicken Pasta Salad to suit your taste. Here are some optional ingredients to consider:

  • Bell Peppers: Diced bell peppers add sweetness and a pop of color.
  • Artichoke Hearts: These can introduce a unique flavor and texture.
  • Sun-Dried Tomatoes: For a richer taste, sun-dried tomatoes are a great addition.
  • Chickpeas: For a vegetarian twist, swap out chicken for chickpeas.
  • Avocado: Adding avocado can provide creaminess and healthy fats.

Feel free to mix and match these optional ingredients. This flexibility allows you to create a salad that fits your preferences and dietary needs. Enjoy experimenting with flavors!

Step-by-Step Preparation of Mediterranean Chicken Pasta Salad Recipe

Step 1: Cook the Pasta

Mediterranean Chicken Pasta Salad Recipe, you need to cook the rotini pasta. Begin by bringing a large pot of salted water to a boil. Once boiling, add the rotini pasta and cook according to the package instructions, usually around 8-10 minutes. Stir occasionally to prevent sticking. When the pasta is al dente, drain it in a colander. Rinse the pasta under cold water to stop the cooking process and cool it down. This step is crucial for a refreshing salad!

Step 2: Prepare the Chicken

If you haven’t already, shred your cooked chicken. You can use leftover chicken or rotisserie chicken for convenience. Simply pull the chicken apart into bite-sized pieces. This adds protein to your salad and makes it more filling. If you prefer, you can also grill or bake fresh chicken breasts, seasoned with salt and pepper, for a homemade touch. Let the chicken cool before adding it to the salad.

Step 3: Chop the Vegetables

Next, it’s time to chop your vegetables. Start with the cherry tomatoes; cut them in half to release their juices. Then, dice the cucumber into small pieces for a refreshing crunch. Finely chop the red onion to add a mild sweetness. Lastly, slice the Kalamata olives. These ingredients will bring color and flavor to your salad, making it visually appealing and delicious!

Step 4: Mix the Dressing

Now, let’s prepare the dressing! In a small bowl, whisk together the olive oil, red wine vinegar, dried oregano, garlic powder, salt, and pepper. This dressing is simple yet flavorful. The olive oil provides healthy fats, while the vinegar adds a tangy kick. Make sure to taste the dressing and adjust the seasoning if needed. A little extra salt or pepper can enhance the flavors!

Step 5: Combine All Ingredients

In a large mixing bowl, combine the cooked pasta, shredded chicken, chopped cherry tomatoes, cucumber, red onion, sliced olives, crumbled feta cheese, and chopped parsley. Pour the dressing over the top. Gently toss all the ingredients together until everything is evenly coated. This step is essential for ensuring that every bite is packed with flavor!

Step 6: Chill and Serve

Finally, cover the salad with plastic wrap or a lid and place it in the refrigerator. Let it chill for at least 30 minutes. This allows the flavors to meld together beautifully. When you’re ready to serve, give the salad a gentle toss again. You can garnish it with extra parsley or feta cheese for a lovely presentation. Enjoy your Mediterranean Chicken Pasta Salad as a delightful meal or side dish!

Variations of Mediterranean Chicken Pasta Salad Recipe

Vegetarian Options

Mediterranean Chicken Pasta Salad Recipe without meat, there are plenty of vegetarian options! One great substitute is chickpeas. They add protein and a hearty texture. Simply rinse and drain a can of chickpeas, then mix them in with the other ingredients.

Another tasty option is to use grilled vegetables. Zucchini, bell peppers, and eggplant can be grilled and added to the salad for a smoky flavor. You can also include roasted red peppers for a sweet touch. These ingredients not only enhance the taste but also add vibrant colors to your salad.

For a creamy twist, consider adding avocado. It provides healthy fats and a rich texture. Just slice or dice the avocado and fold it in gently before serving. With these vegetarian options, you can create a satisfying salad that everyone will love!

Gluten-Free Alternatives

Mediterranean Chicken Pasta Salad Recipe, don’t worry! There are many gluten-free pasta options available today. Look for pasta made from rice, quinoa, or chickpeas. These alternatives cook similarly to traditional pasta and taste great in salads.

Additionally, you can skip the pasta altogether and use a base of mixed greens. Spinach, arugula, or romaine lettuce can serve as a fresh foundation for your salad. Just add the same delicious ingredients like chicken, vegetables, and dressing. This way, you can enjoy a light and refreshing salad that’s still packed with flavor!

With these variations, you can easily adapt the Mediterranean Chicken Pasta Salad to fit different dietary needs while keeping it delicious and satisfying!

Cooking Note for Mediterranean Chicken Pasta Salad Recipe

Tips for Perfectly Cooked Pasta

Mediterranean Chicken Pasta Salad Recipe. First, always use a large pot of boiling salted water. The salt enhances the pasta’s flavor and helps it cook evenly. Stir the pasta occasionally while it cooks to prevent it from sticking together.

Check the pasta a minute or two before the package’s suggested cooking time. You want it to be al dente, which means it should be firm to the bite. Overcooked pasta can become mushy, ruining the texture of your salad. Once cooked, drain the pasta and rinse it under cold water. This stops the cooking process and cools the pasta quickly, making it perfect for your salad!

Storing Leftovers Safely

Mediterranean Chicken Pasta Salad Recipe, storing them properly is essential to maintain freshness. Place the salad in an airtight container and store it in the refrigerator. It’s best to consume the salad within 3-4 days for optimal taste and safety.

When storing, consider keeping the dressing separate if you plan to eat the salad later. This helps prevent the pasta from absorbing too much dressing and becoming soggy. When you’re ready to enjoy your leftovers, simply toss the salad with the dressing again for a fresh taste. Enjoy your delicious Mediterranean Chicken Pasta Salad even after the first serving!

Serving Suggestions for Mediterranean Chicken Pasta Salad Recipe

Ideal Pairings for Your Salad

Mediterranean Chicken Pasta Salad Recipe, pairing it with the right dishes can elevate your meal. This salad is versatile and complements various foods beautifully. Here are some ideal pairings:

  • Grilled Chicken or Fish: For a protein-packed meal, serve your salad alongside grilled chicken or fish. The flavors will harmonize perfectly.
  • Crusty Bread: A slice of warm, crusty bread or a baguette is perfect for soaking up the delicious dressing.
  • Roasted Vegetables: Pair your salad with a side of roasted vegetables for a colorful and nutritious addition.
  • Hummus and Pita: For a Mediterranean twist, serve hummus with pita bread as an appetizer before the salad.
  • Fruit Salad: A light fruit salad can provide a refreshing contrast to the savory flavors of the pasta salad.

These pairings not only enhance the meal but also create a delightful dining experience. Feel free to mix and match based on your preferences!

Presentation Tips for Serving

Mediterranean Chicken Pasta Salad Recipe visually appealing. Here are some tips to serve it beautifully:

  • Use a Large Bowl: Serve the salad in a large, colorful bowl to showcase the vibrant ingredients. A clear glass bowl can highlight the beautiful colors.
  • Garnish with Fresh Herbs: Sprinkle extra chopped parsley or basil on top for a fresh touch. This adds color and enhances the aroma.
  • Feta Crumbles: Add a few extra crumbles of feta cheese on top just before serving. It makes the salad look more inviting.
  • Serve Chilled: Ensure the salad is well-chilled before serving. A cold salad is refreshing, especially on warm days.
  • Individual Portions: For a more elegant presentation, consider serving the salad in individual bowls or plates. This adds a personal touch to each serving.

With these presentation tips, your Mediterranean Chicken Pasta Salad will not only taste great but also look stunning on the table. Enjoy impressing your guests with this delightful dish!

Tips for Making the Best Mediterranean Chicken Pasta Salad Recipe

Ingredient Substitutions

Mediterranean Chicken Pasta Salad Recipe, you might find yourself missing some ingredients or wanting to try something new. No worries! There are plenty of ingredient substitutions that can keep your salad delicious and exciting. Here are some ideas:

  • Pasta: If you don’t have rotini, any short pasta like penne or fusilli works well. For a gluten-free option, try brown rice pasta or quinoa pasta.
  • Chicken: Instead of chicken, you can use turkey or even canned tuna for a different protein source. For a vegetarian option, chickpeas or lentils are great substitutes.
  • Olives: If Kalamata olives aren’t available, green olives or black olives can be used. They will still add that briny flavor.
  • Feta Cheese: If you’re not a fan of feta, try goat cheese or even a dairy-free cheese alternative for a similar creamy texture.
  • Herbs: Fresh herbs like basil or mint can replace parsley for a different flavor profile. Experimenting with herbs can add a unique twist!

These substitutions allow you to customize your salad based on what you have on hand or your personal preferences. Feel free to get creative and make the recipe your own!

Enhancing Flavor Profiles

Mediterranean Chicken Pasta Salad Recipe to the next level, consider enhancing the flavor profiles with a few simple tricks. Here are some tips to make your salad even more delicious:

  • Marinate the Chicken: If you have time, marinate the chicken in olive oil, lemon juice, and herbs before cooking. This adds extra flavor to the meat.
  • Roast the Vegetables: For a deeper flavor, roast your vegetables like bell peppers or zucchini before adding them to the salad. Roasting brings out their natural sweetness.
  • Add Nuts or Seeds: Toss in some toasted pine nuts or sunflower seeds for a crunchy texture and nutty flavor. They also add healthy fats!
  • Use Fresh Lemon Juice: A squeeze of fresh lemon juice just before serving can brighten up the flavors and add a refreshing zing.
  • Experiment with Spices: Try adding a pinch of red pepper flakes for a bit of heat or smoked paprika for a smoky flavor. These spices can elevate the overall taste.

By enhancing the flavors in your Mediterranean Chicken Pasta Salad, you can create a dish that’s not only tasty but also memorable. Enjoy the process of experimenting and discovering new flavor combinations!

Breakdown of Time for Mediterranean Chicken Pasta Salad Recipe

Prep Time

Mediterranean Chicken Pasta Salad Recipe is quick and easy! The prep time typically takes about 15-20 minutes. This includes gathering your ingredients, chopping the vegetables, and shredding the chicken. If you use pre-cooked chicken or rotisserie chicken, you can save even more time. Having everything ready before you start mixing will make the process smoother and more enjoyable!

Cooking Time

The cooking time for this recipe is minimal. Cooking the rotini pasta usually takes around 8-10 minutes. While the pasta cooks, you can prepare the other ingredients, making the most of your time. Once the pasta is cooked and cooled, you’ll be ready to combine everything. Overall, the cooking time is efficient, allowing you to whip up this delicious salad in no time!

Total Time

Mediterranean Chicken Pasta Salad Recipe to take about 30-40 minutes from start to finish. This includes prep and cooking time. If you choose to chill the salad for 30 minutes before serving, the total time will extend to about 1 hour. However, this chilling step is essential for allowing the flavors to meld beautifully. Whether you’re making it for a quick lunch or a gathering, this salad is a fantastic choice that won’t take up your whole day!

Nutritional Information for Mediterranean Chicken Pasta Salad Recipe

Calories and Macronutrients

Mediterranean Chicken Pasta Salad Recipe is essential for maintaining a balanced diet. Each serving of this delightful salad contains approximately 350 calories. Here’s a breakdown of the macronutrients:

  • Net Carbohydrates: 30g
  • Protein: 25g
  • Fat: 18g

This combination of macronutrients makes the salad a well-rounded meal. The protein from the chicken helps build and repair tissues, while the healthy fats from olive oil and feta cheese provide energy and support cell function. The carbohydrates from the pasta and vegetables offer a quick source of energy, making this salad a great option for lunch or dinner.

Health Benefits of Key Ingredients

Mediterranean Chicken Pasta Salad Recipe is not only delicious but also packed with health benefits thanks to its key ingredients. Here’s a closer look at some of the health benefits:

  • Chicken: A great source of lean protein, chicken helps maintain muscle mass and supports overall health.
  • Olive Oil: Rich in monounsaturated fats, olive oil is known for its heart-healthy properties. It can help lower bad cholesterol levels and reduce inflammation.
  • Feta Cheese: This cheese is lower in fat than many other cheeses and provides calcium, which is essential for strong bones.
  • Vegetables: The cherry tomatoes, cucumber, and red onion are loaded with vitamins, minerals, and antioxidants. They support immune function and overall health.
  • Parsley: This herb is not just a garnish! It’s rich in vitamins A, C, and K, and has anti-inflammatory properties.

By enjoying this Mediterranean Chicken Pasta Salad, you’re not only treating your taste buds but also nourishing your body with wholesome ingredients. It’s a perfect example of how healthy eating can be both enjoyable and satisfying!

FAQs about Mediterranean Chicken Pasta Salad Recipe

Can I make Mediterranean Chicken Pasta Salad ahead of time?

Mediterranean Chicken Pasta Salad Recipe is perfect for making ahead of time. In fact, preparing it a few hours or even a day in advance allows the flavors to meld beautifully. Just be sure to store it in an airtight container in the refrigerator. This way, you can enjoy a delicious, ready-to-eat meal whenever you need it. Just remember to give it a gentle toss before serving to redistribute the dressing!

What type of pasta works best for this recipe?

For this salad, rotini pasta is an excellent choice because its spiral shape holds the dressing well. However, you can use other short pasta types like fusilli, penne, or farfalle if you prefer. If you need a gluten-free option, look for pasta made from rice, quinoa, or chickpeas. These alternatives work just as well and will still provide a delightful texture to your salad!

How can I make this salad more filling?

Mediterranean Chicken Pasta Salad Recipe more filling, consider adding extra protein or healthy fats. You can include more shredded chicken, chickpeas, or even diced hard-boiled eggs. Adding avocado is another great way to boost the creaminess and satiety of the salad. Additionally, incorporating nuts or seeds, like walnuts or sunflower seeds, can add a satisfying crunch and extra nutrients!

Is Mediterranean Chicken Pasta Salad suitable for meal prep?

Yes, this salad is fantastic for meal prep! It stores well in the refrigerator and can be made in larger batches. Just prepare the salad as directed, and portion it into individual containers for easy grab-and-go meals throughout the week. If you’re concerned about sogginess, consider keeping the dressing separate until you’re ready to eat. This way, you’ll enjoy a fresh and flavorful salad every time!

Conclusion on Mediterranean Chicken Pasta Salad Recipe

Recap of Key Points

Mediterranean Chicken Pasta Salad Recipe is a delightful dish that combines fresh ingredients, vibrant flavors, and numerous health benefits. With its easy preparation and versatility, this salad is perfect for any occasion, whether it’s a family dinner, a picnic, or meal prep for the week. The key ingredients, such as rotini pasta, shredded chicken, and a variety of colorful vegetables, come together beautifully, creating a satisfying and nutritious meal. Plus, the optional ingredients and variations allow you to customize the salad to fit your taste and dietary needs.

Encouragement to Try the Recipe

Mediterranean Chicken Pasta Salad Recipe a try! Gather your ingredients, follow the simple steps, and enjoy the delicious flavors that await you. Whether you’re cooking for yourself or entertaining guests, this salad is sure to impress. Don’t hesitate to experiment with different ingredients and make it your own. Happy cooking, and enjoy every bite of your Mediterranean Chicken Pasta Salad!

Mediterranean Beef Stir-Fry is a quick, tasty meal.

Introduction to Mediterranean Beef Stir-Fry

If you’re looking for a quick and delicious meal, Mediterranean Beef Stir-Fry is the perfect choice. This dish combines the rich flavors of the Mediterranean with the convenience of a stir-fry. It’s not only easy to prepare but also packed with nutrients, making it a great option for busy weeknights.

The beauty of Mediterranean Beef Stir-Fry lies in its versatility. You can customize it with your favorite vegetables and spices, ensuring that every bite is bursting with flavor. Plus, it’s a fantastic way to introduce more fresh produce into your diet. With just a few simple ingredients, you can create a colorful and satisfying meal that everyone will love.

This dish is also a great source of protein, thanks to the ground beef. When paired with vibrant vegetables like bell peppers, zucchini, and cherry tomatoes, it becomes a well-rounded meal. Whether you serve it over rice, quinoa, or with warm pita bread, Mediterranean Beef Stir-Fry is sure to please your taste buds.

In this article, we will guide you through the ingredients, preparation steps, and variations of this delightful dish. So, let’s dive into the world of Mediterranean flavors and get cooking!

Ingredients for Mediterranean Beef Stir-Fry

To create a delicious Mediterranean Beef Stir-Fry, you’ll need a variety of fresh ingredients that come together to form a flavorful dish. Here’s a list of what you’ll need:

  • 1 pound ground beef: This is the main protein source, providing a hearty base for the stir-fry.
  • 1 tablespoon olive oil: This healthy fat is perfect for sautéing and adds a rich flavor.
  • 1 medium onion, diced: Onions add sweetness and depth to the dish.
  • 2 cloves garlic, minced: Garlic brings a wonderful aroma and taste.
  • 1 bell pepper, diced: Choose any color you like—red, yellow, or green—for a pop of color and crunch.
  • 1 zucchini, sliced: Zucchini adds a tender texture and absorbs the flavors of the dish.
  • 1 cup cherry tomatoes, halved: These juicy tomatoes provide freshness and a burst of flavor.
  • 1 teaspoon dried oregano: Oregano is a classic Mediterranean herb that enhances the overall taste.
  • 1 teaspoon ground cumin: Cumin adds warmth and earthiness to the stir-fry.
  • Salt and pepper to taste: Essential for seasoning and bringing out the flavors of the ingredients.
  • 1/4 cup feta cheese, crumbled: Feta adds a creamy, tangy finish to the dish.
  • Fresh parsley, chopped: This herb is perfect for garnishing and adds a fresh touch.

These ingredients come together to create a vibrant and satisfying meal. Feel free to adjust the quantities based on your preferences or dietary needs. Now that you have your ingredients ready, let’s move on to the preparation steps!

Step-by-Step Preparation of Mediterranean Beef Stir-Fry

Now that you have gathered all your ingredients, it’s time to dive into the preparation of your Mediterranean Beef Stir-Fry. This step-by-step guide will help you create a delicious meal that’s both quick and easy. Let’s get started!

Step 1: Preparing the Ingredients

First things first, you need to prepare your ingredients. Start by washing all your vegetables thoroughly. Dice the onion and bell pepper into small pieces. Slice the zucchini into half-moons and halve the cherry tomatoes. Mince the garlic cloves finely. Having everything prepped and ready will make the cooking process smooth and efficient.

Step 2: Marinating the Beef

While marinating isn’t necessary for this recipe, it can enhance the flavor of the beef. If you choose to marinate, mix the ground beef with a teaspoon of olive oil, a pinch of salt, and a sprinkle of pepper. Let it sit for about 15 minutes. This step allows the flavors to meld together, making your beef even tastier.

Step 3: Cooking the Beef

Heat a large skillet over medium heat and add the tablespoon of olive oil. Once the oil is hot, add the marinated ground beef. Use a spatula to break it apart as it cooks. Stir occasionally, cooking until the beef is browned, which should take about 5-7 minutes. If there’s excess fat, drain it off to keep your dish lighter.

Step 4: Adding Vegetables

Once the beef is cooked, it’s time to add the vegetables. Start by adding the diced onion and minced garlic to the skillet. Sauté for about 3 minutes until the onion becomes translucent. Then, toss in the bell pepper, zucchini, and cherry tomatoes. Sprinkle in the dried oregano, ground cumin, salt, and pepper. Stir everything together and cook for another 5-7 minutes until the vegetables are tender.

Step 5: Final Touches and Serving

After the vegetables are cooked, remove the skillet from heat. Sprinkle the crumbled feta cheese over the top, allowing it to melt slightly from the heat. For a fresh finish, garnish with chopped parsley. Serve your Mediterranean Beef Stir-Fry immediately, either on its own, with pita bread, or over a bed of rice or quinoa. Enjoy your flavorful creation!

Variations of Mediterranean Beef Stir-Fry

While the classic Mediterranean Beef Stir-Fry is delicious as is, there are many ways to switch things up! You can easily customize this dish to suit your taste or dietary preferences. Let’s explore some alternative proteins and different vegetable combinations that can make your stir-fry even more exciting.

Alternative Proteins

If you’re looking to change the protein in your Mediterranean Beef Stir-Fry, there are several great options. Here are a few alternatives:

  • Ground Turkey: A leaner option, ground turkey works well and absorbs flavors beautifully.
  • Chicken Breast: Diced chicken breast can be sautéed in the same way as ground beef, providing a lighter taste.
  • Tofu: For a vegetarian option, use firm tofu. Press it to remove excess moisture, then cube and sauté until golden.
  • Chickpeas: Canned or cooked chickpeas can add protein and a nutty flavor, making the dish hearty and filling.

These alternative proteins can be seasoned similarly to the ground beef, ensuring that your Mediterranean Beef Stir-Fry remains flavorful and satisfying.

Different Vegetable Combinations

Another way to personalize your Mediterranean Beef Stir-Fry is by experimenting with different vegetables. Here are some tasty options:

  • Spinach or Kale: Adding leafy greens can boost the nutritional value and add a lovely color.
  • Eggplant: Diced eggplant can provide a unique texture and absorb the flavors of the dish.
  • Carrots: Sliced or julienned carrots add a sweet crunch and vibrant color.
  • Mushrooms: Sautéed mushrooms can add an earthy flavor that complements the other ingredients.

Feel free to mix and match these vegetables based on what you have on hand or what’s in season. The possibilities are endless, and each combination can create a new and exciting dish!

Cooking Note for Mediterranean Beef Stir-Fry

When preparing Mediterranean Beef Stir-Fry, there are a few cooking notes to keep in mind to ensure your dish turns out perfectly every time. These tips will help you achieve the best flavor and texture, making your meal even more enjoyable.

First, always use a large skillet or wok. This allows for even cooking and prevents overcrowding. If the pan is too small, the ingredients may steam instead of stir-frying, which can lead to a less desirable texture.

Next, make sure your skillet is hot before adding the olive oil. A hot pan helps to sear the beef quickly, locking in juices and flavor. You can test the heat by sprinkling a few drops of water into the pan; if they sizzle and evaporate quickly, it’s ready for cooking.

When cooking the ground beef, break it apart into small pieces. This ensures that it cooks evenly and browns nicely. Stir occasionally, but not too often, to allow the beef to develop a nice crust. This adds depth to the flavor.

As you add vegetables, remember to consider their cooking times. Softer vegetables like zucchini and bell peppers will cook faster than firmer ones like carrots or eggplant. If you choose to add firmer vegetables, consider sautéing them for a few minutes before adding the softer ones.

Lastly, don’t forget to taste as you go! Adjust the seasoning with salt, pepper, or herbs to suit your preferences. This step is crucial for achieving a well-balanced flavor in your Mediterranean Beef Stir-Fry.

By following these cooking notes, you’ll create a delicious and satisfying Mediterranean Beef Stir-Fry that’s sure to impress your family and friends. Happy cooking!

Serving Suggestions for Mediterranean Beef Stir-Fry

Once your Mediterranean Beef Stir-Fry is ready, it’s time to think about how to serve it. This dish is not only flavorful but also versatile, allowing you to pair it with various sides and accompaniments. Here are some delightful serving suggestions to elevate your meal:

  • Pita Bread: Warm pita bread is perfect for scooping up the stir-fry. It adds a lovely texture and complements the Mediterranean flavors beautifully.
  • Rice: Serve your stir-fry over a bed of fluffy white rice or brown rice. The grains soak up the delicious juices, making every bite satisfying.
  • Quinoa: For a healthier option, try serving the stir-fry over quinoa. This protein-packed grain adds a nutty flavor and enhances the dish’s nutritional value.
  • Couscous: Light and fluffy couscous is another excellent choice. It cooks quickly and pairs well with the vibrant ingredients in the stir-fry.
  • Salad: A fresh side salad with mixed greens, cucumbers, and olives can provide a refreshing contrast to the warm stir-fry. Drizzle with a simple vinaigrette for added flavor.
  • Yogurt Sauce: A dollop of tzatziki or plain yogurt can add creaminess and a cooling effect, balancing the spices in the dish.

Feel free to mix and match these serving options based on your preferences. Whether you choose to keep it simple or go for a full Mediterranean feast, your Mediterranean Beef Stir-Fry will shine as the star of the meal. Enjoy your culinary creation!

Tips for Perfect Mediterranean Beef Stir-Fry

Creating the perfect Mediterranean Beef Stir-Fry is all about attention to detail and a few helpful tips. With these suggestions, you can elevate your dish and ensure it’s bursting with flavor and texture. Let’s explore some essential tips to make your stir-fry a hit!

First, always start with fresh ingredients. Fresh vegetables not only taste better but also provide more nutrients. When shopping, look for vibrant colors and firm textures. This will enhance the overall quality of your dish.

Next, don’t rush the cooking process. Cooking over medium heat allows the beef to brown nicely without burning. This step is crucial for developing rich flavors. If you cook too quickly, the beef may end up tough and dry.

Another tip is to prep your ingredients ahead of time. Having everything chopped and ready to go makes the cooking process smoother. Stir-frying is quick, so you won’t have time to chop vegetables once you start cooking.

Consider using a variety of herbs and spices. While oregano and cumin are great, feel free to experiment with others like thyme, basil, or even a pinch of cinnamon for a unique twist. This can add depth and complexity to your Mediterranean Beef Stir-Fry.

Don’t forget to adjust the seasoning as you cook. Taste your stir-fry before serving and add more salt, pepper, or herbs if needed. This ensures that every bite is flavorful and satisfying.

Lastly, let your stir-fry rest for a few minutes before serving. This allows the flavors to meld together, making each bite even more delicious. Plus, it gives you a moment to prepare your serving dishes!

By following these tips, you’ll create a Mediterranean Beef Stir-Fry that’s not only tasty but also visually appealing. Enjoy the process and savor the delightful flavors of the Mediterranean!

Breakdown of Time for Mediterranean Beef Stir-Fry

Understanding the time needed for each step in preparing Mediterranean Beef Stir-Fry can help you plan your cooking efficiently. Here’s a breakdown of the time required for preparation and cooking, ensuring you can enjoy this delicious meal without any rush.

Prep Time

The prep time for Mediterranean Beef Stir-Fry is approximately 15-20 minutes. This includes washing and chopping all your vegetables, dicing the onion and bell pepper, slicing the zucchini, and mincing the garlic. If you choose to marinate the beef, add an extra 15 minutes to this time. Having everything ready before you start cooking will make the process smoother and more enjoyable.

Cooking Time

Once your ingredients are prepped, the cooking time is about 15-20 minutes. Start by sautéing the onion and garlic, then add the ground beef. After browning the beef, you’ll stir in the vegetables and spices. Cook everything together until the vegetables are tender, which should take around 5-7 minutes. This quick cooking time is one of the reasons why stir-fry is such a popular choice for busy weeknights!

Total Time

In total, you can expect to spend about 30-40 minutes from start to finish when making Mediterranean Beef Stir-Fry. This includes both prep and cooking time. It’s a fantastic option for a weeknight dinner, allowing you to serve a nutritious and flavorful meal in no time. With this efficient time breakdown, you can easily fit this dish into your busy schedule!

Nutritional Information for Mediterranean Beef Stir-Fry

Understanding the nutritional content of your meals is essential for maintaining a balanced diet. Mediterranean Beef Stir-Fry not only delights your taste buds but also provides a good mix of nutrients. Here’s a closer look at the nutritional information for this delicious dish.

Calories

Each serving of Mediterranean Beef Stir-Fry contains approximately 320 calories. This makes it a satisfying option for dinner without overwhelming your daily caloric intake. The combination of protein, healthy fats, and vegetables ensures that you feel full and energized after your meal.

Protein

Protein is a vital nutrient for building and repairing tissues, and Mediterranean Beef Stir-Fry delivers! Each serving provides about 25 grams of protein. This high protein content comes primarily from the ground beef, making it an excellent choice for those looking to increase their protein intake. Pairing it with quinoa or chickpeas can further boost the protein levels in your meal.

Sodium

When it comes to sodium, Mediterranean Beef Stir-Fry contains around 600 milligrams per serving. This amount can vary based on the specific ingredients you use, especially if you add salt or use pre-seasoned products. To keep sodium levels in check, consider using low-sodium broth or reducing the amount of added salt. This way, you can enjoy the flavors without compromising your health.

Overall, Mediterranean Beef Stir-Fry is a nutritious meal option that balances calories, protein, and sodium. It’s a great way to enjoy a flavorful dish while also nourishing your body. Whether you’re cooking for yourself or your family, this stir-fry is sure to be a hit!

FAQs about Mediterranean Beef Stir-Fry

What can I substitute for beef in Mediterranean Beef Stir-Fry?

If you’re looking to switch things up, there are several great substitutes for beef in Mediterranean Beef Stir-Fry. Ground turkey is a popular choice, as it’s leaner but still provides a hearty texture. Chicken breast, diced into small pieces, can also work well and cook quickly. For a vegetarian option, consider using firm tofu. Just press it to remove excess moisture, then cube and sauté until golden. Lastly, chickpeas are a fantastic alternative, adding protein and a nutty flavor to the dish. Each of these options can be seasoned similarly to the beef, ensuring your stir-fry remains flavorful and satisfying.

Can I make Mediterranean Beef Stir-Fry ahead of time?

Absolutely! Mediterranean Beef Stir-Fry can be made ahead of time, making it a convenient option for meal prep. After cooking, allow the stir-fry to cool completely before transferring it to an airtight container. It can be stored in the refrigerator for up to three days. When you’re ready to enjoy it, simply reheat in a skillet over medium heat until warmed through. This dish also freezes well, so you can prepare a larger batch and freeze portions for later use. Just remember to let it cool before freezing, and it can last for up to three months in the freezer.

What are the best vegetables to use in Mediterranean Beef Stir-Fry?

The beauty of Mediterranean Beef Stir-Fry is its versatility with vegetables. Some of the best options include bell peppers, zucchini, cherry tomatoes, and onions, as they all cook quickly and add vibrant colors. You can also experiment with spinach, kale, or eggplant for added nutrition and flavor. Carrots and mushrooms are great choices too, providing different textures and tastes. Feel free to mix and match based on what you have on hand or what’s in season. The key is to use fresh, colorful vegetables that will enhance the dish’s overall appeal.

How can I make Mediterranean Beef Stir-Fry spicier?

If you enjoy a bit of heat, there are several ways to spice up your Mediterranean Beef Stir-Fry. One simple method is to add red pepper flakes while cooking the beef. Start with a small amount and adjust to your taste. You can also include diced jalapeños or serrano peppers for a fresh kick. Another option is to use a spicy Mediterranean seasoning blend, which can add both heat and flavor. If you prefer a sauce, consider drizzling some sriracha or hot sauce over the finished dish. These additions will give your stir-fry a delightful spicy twist!

Conclusion on Mediterranean Beef Stir-Fry

In conclusion, Mediterranean Beef Stir-Fry is a delightful dish that brings together the vibrant flavors of the Mediterranean in a quick and easy meal. With its colorful vegetables and hearty ground beef, this stir-fry is not only satisfying but also packed with nutrients. Whether you’re cooking for yourself or for a family, this recipe is sure to impress.

The versatility of Mediterranean Beef Stir-Fry allows you to customize it to your liking. You can easily swap out proteins or add different vegetables based on what you have on hand. This adaptability makes it a fantastic option for any night of the week. Plus, with the tips and variations provided, you can create a unique dish every time you make it.

As you enjoy this flavorful meal, remember that it’s not just about the taste. It’s also about the joy of cooking and sharing a meal with loved ones. So, gather your ingredients, follow the steps, and savor the deliciousness of Mediterranean Beef Stir-Fry. Happy cooking!

Stay Connected

Get recipes via email: