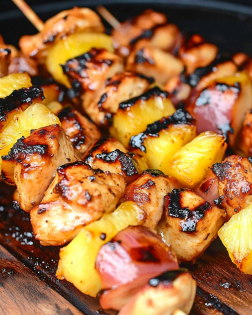
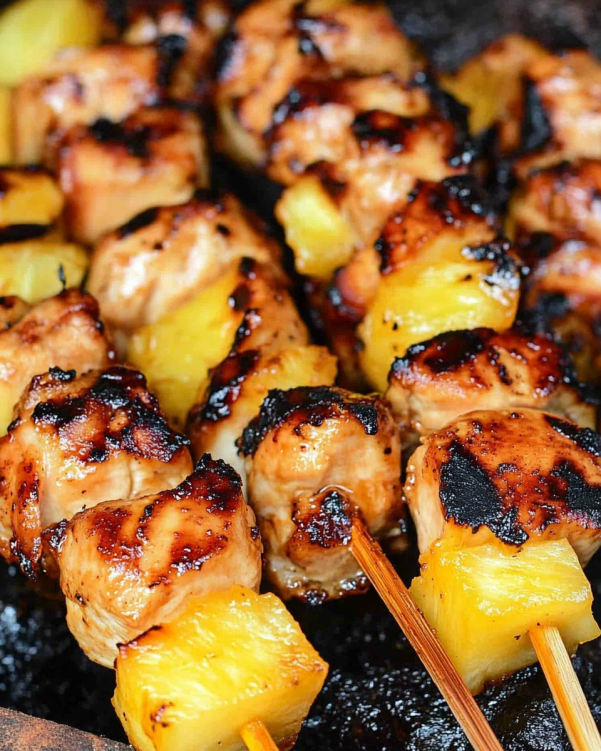
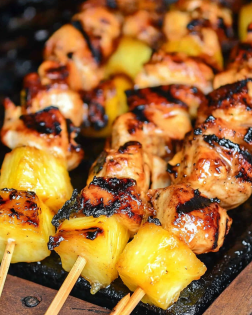
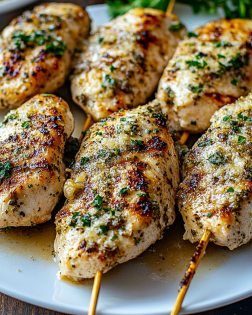
Get ready to transport your taste buds to a sunny island getaway with these Pineapple Grilled Chicken Kebabs! Juicy chicken pieces paired with sweet, caramelized pineapple create a perfect balance of smoky and tropical flavors. Easy to prepare and bursting with freshness, this dish is a vibrant addition to any barbecue or weeknight dinner.
Why You’ll Love This Pineapple Grilled Chicken Kebabs
These Pineapple Grilled Chicken Kebabs are a game-changer for busy families! They come together in no time, making them perfect for those evenings when you’re juggling work and family. The sweet and savory flavors dance on your palate, while the colorful presentation makes them a hit at any gathering. Plus, they’re versatile—great for a casual dinner or a festive BBQ. You’ll love how easy they are to prepare and how quickly they disappear!
Ingredients for Pineapple Grilled Chicken Kebabs
Gathering the right ingredients is the first step to creating these delicious Pineapple Grilled Chicken Kebabs. Here’s what you’ll need:
Boneless, skinless chicken breasts: The star of the show! Cut into 1-inch cubes for even cooking.
Fresh pineapple: Sweet and juicy, it adds a tropical flair. Make sure to use ripe pineapple for the best flavor.
Bell pepper: Choose red or yellow for a pop of color and crunch. They complement the sweetness of the pineapple beautifully.
Red onion: Adds a mild, sweet flavor when grilled. Cut into wedges for easy threading on the skewers.
Soy sauce: This savory ingredient acts as a base for the marinade, infusing the chicken with rich flavor.
Honey: A touch of sweetness that balances the saltiness of the soy sauce. It caramelizes beautifully on the grill.
Olive oil: Helps to keep the chicken moist and adds a lovely richness to the marinade.
Garlic: Minced for a punch of flavor. It’s a must-have in any marinade!
Ground ginger: Adds warmth and a hint of spice, enhancing the tropical vibe.
Black pepper: Just a pinch for seasoning, it brings everything together.
Wooden or metal skewers: Essential for grilling. If using wooden skewers, soak them in water to prevent burning.
For those looking to mix things up, you can substitute chicken with shrimp or tofu for a different protein option. Feel free to get creative with your vegetable choices too! You can find the exact quantities for each ingredient at the bottom of the article, ready for printing.
How to Make Pineapple Grilled Chicken Kebabs
Now that you have all your ingredients ready, let’s dive into the fun part—making these Pineapple Grilled Chicken Kebabs! Follow these simple steps, and you’ll be savoring the tropical flavors in no time.
Step 1: Prepare the Marinade
Start by whisking together the soy sauce, honey, olive oil, minced garlic, ground ginger, and black pepper in a large bowl. This marinade is the magic that infuses the chicken with flavor. The sweet and savory notes will make your taste buds dance! Make sure everything is well combined for an even flavor.
Step 2: Marinate the Chicken
Next, add the chicken cubes to the marinade. Toss them gently to ensure every piece is coated. Cover the bowl and let it sit in the fridge for at least 30 minutes. If you have time, marinating for up to 2 hours will deepen the flavors even more. Trust me, the wait is worth it!
Step 3: Soak the Skewers
If you’re using wooden skewers, don’t forget to soak them in water for about 30 minutes. This step is crucial! Soaking prevents them from burning on the grill, allowing your kebabs to cook perfectly without any charred bits. If you’re using metal skewers, you can skip this step.
Step 4: Preheat the Grill
While the chicken marinates, preheat your grill to medium-high heat. This is key for achieving those beautiful grill marks and ensuring the chicken cooks evenly. A hot grill will give your kebabs that delicious charred flavor we all love!
Step 5: Assemble the Kebabs
Now comes the fun part—assembling your kebabs! Thread the marinated chicken, pineapple, bell pepper, and onion onto the skewers, alternating between the ingredients. This not only looks beautiful but also allows the flavors to meld together as they cook. Don’t pack them too tightly; give them some space to breathe!
Step 6: Grill the Kebabs
Place the assembled skewers on the grill and cook for about 10-12 minutes. Turn them occasionally to ensure even cooking. You’ll know they’re done when the chicken is cooked through and has those lovely grill marks. The pineapple should be caramelized and slightly charred, adding to the tropical goodness!
Step 7: Rest and Serve
Once the kebabs are off the grill, let them rest for a few minutes. This step allows the juices to redistribute, making the chicken even more tender. Serve them warm, and watch as your family devours these delightful Pineapple Grilled Chicken Kebabs!
Tips for Success
For maximum flavor, marinate the chicken overnight if you can.
Use fresh, ripe pineapple for the best sweetness and juiciness.
Don’t overcrowd the skewers; give each piece room to cook evenly.
Keep a close eye on the grill to prevent burning.
Experiment with different veggies like zucchini or cherry tomatoes for variety.
Equipment Needed
Grill: A gas or charcoal grill works perfectly for these kebabs.
Skewers: Use wooden or metal skewers; just remember to soak wooden ones.
Mixing bowl: For whisking the marinade together.
Brush: Optional, for adding extra marinade while grilling.
Variations
Protein Swap: Try using shrimp or tofu instead of chicken for a different twist. Both options absorb the marinade beautifully!
Veggie Medley: Add zucchini, cherry tomatoes, or mushrooms for extra color and flavor. They grill up nicely and add variety.
Spicy Kick: For those who love heat, add sliced jalapeños or a sprinkle of red pepper flakes to the marinade.
Herb Infusion: Incorporate fresh herbs like cilantro or basil into the marinade for a fresh, aromatic touch.
Gluten-Free Option: Use tamari instead of soy sauce to keep it gluten-free while still enjoying that savory flavor.
Serving Suggestions
Side Dishes: Pair your kebabs with a refreshing cucumber salad or coconut rice for a tropical vibe.
Drinks: Serve with a chilled pineapple mojito or a light white wine to complement the flavors.
Presentation: Garnish with fresh cilantro or lime wedges for a pop of color and extra zest.
FAQs about Pineapple Grilled Chicken Kebabs
Can I make Pineapple Grilled Chicken Kebabs ahead of time?
Absolutely! You can marinate the chicken a day in advance. Just keep it in the fridge until you’re ready to grill. This not only saves time but also enhances the flavor!
What can I substitute for chicken in this recipe?
If you’re looking for alternatives, shrimp or tofu work wonderfully! Both options soak up the marinade beautifully and grill to perfection, making them great substitutes.
How do I know when the chicken is fully cooked?
The chicken is done when it reaches an internal temperature of 165°F. You can also check for clear juices running from the meat. If it’s still pink, give it a few more minutes on the grill.
Can I use frozen pineapple for the kebabs?
While fresh pineapple is best for flavor and texture, you can use frozen pineapple in a pinch. Just make sure to thaw and drain it well before adding it to the skewers to avoid excess moisture.
What sides pair well with Pineapple Grilled Chicken Kebabs?
These kebabs shine alongside a light cucumber salad, coconut rice, or even grilled corn on the cob. They bring out the tropical flavors beautifully!
Final Thoughts
Creating these Pineapple Grilled Chicken Kebabs is more than just cooking; it’s about bringing joy to your table. The vibrant colors and tropical flavors transport you to a sunny paradise, even if you’re just in your backyard. Each bite is a celebration of summer, family, and good times. Whether you’re grilling for a casual weeknight dinner or a festive gathering, these kebabs are sure to impress. I hope they become a cherished recipe in your home, just as they have in mine. So fire up that grill and enjoy the deliciousness that awaits!
“`
Olivia
Pineapple Grilled Chicken Kebabs: A Tropical BBQ Delight!
Pineapple Grilled Chicken Kebabs are a tropical BBQ delight featuring marinated chicken, fresh pineapple, and colorful vegetables grilled to perfection.
1poundbonelessskinless chicken breasts, cut into 1-inch cubes
1cupfresh pineapplecut into 1-inch cubes
1bell pepperred or yellow, cut into 1-inch pieces
1medium red onioncut into wedges
1/4cupsoy sauce
2tablespoonshoney
2tablespoonsolive oil
2clovesgarlicminced
1teaspoonground ginger
1/2teaspoonblack pepper
Wooden or metal skewers
Method
In a large bowl, whisk together the soy sauce, honey, olive oil, minced garlic, ground ginger, and black pepper to create the marinade.
Add the chicken cubes to the marinade, making sure they are well coated. Cover and refrigerate for at least 30 minutes, or up to 2 hours for more flavor.
While the chicken marinates, soak wooden skewers in water for about 30 minutes to prevent burning on the grill.
Preheat the grill to medium-high heat.
Thread the marinated chicken, pineapple, bell pepper, and onion onto the skewers, alternating between the ingredients.
Place the skewers on the grill and cook for about 10-12 minutes, turning occasionally, until the chicken is cooked through and has nice grill marks.
Remove from the grill and let rest for a few minutes before serving.
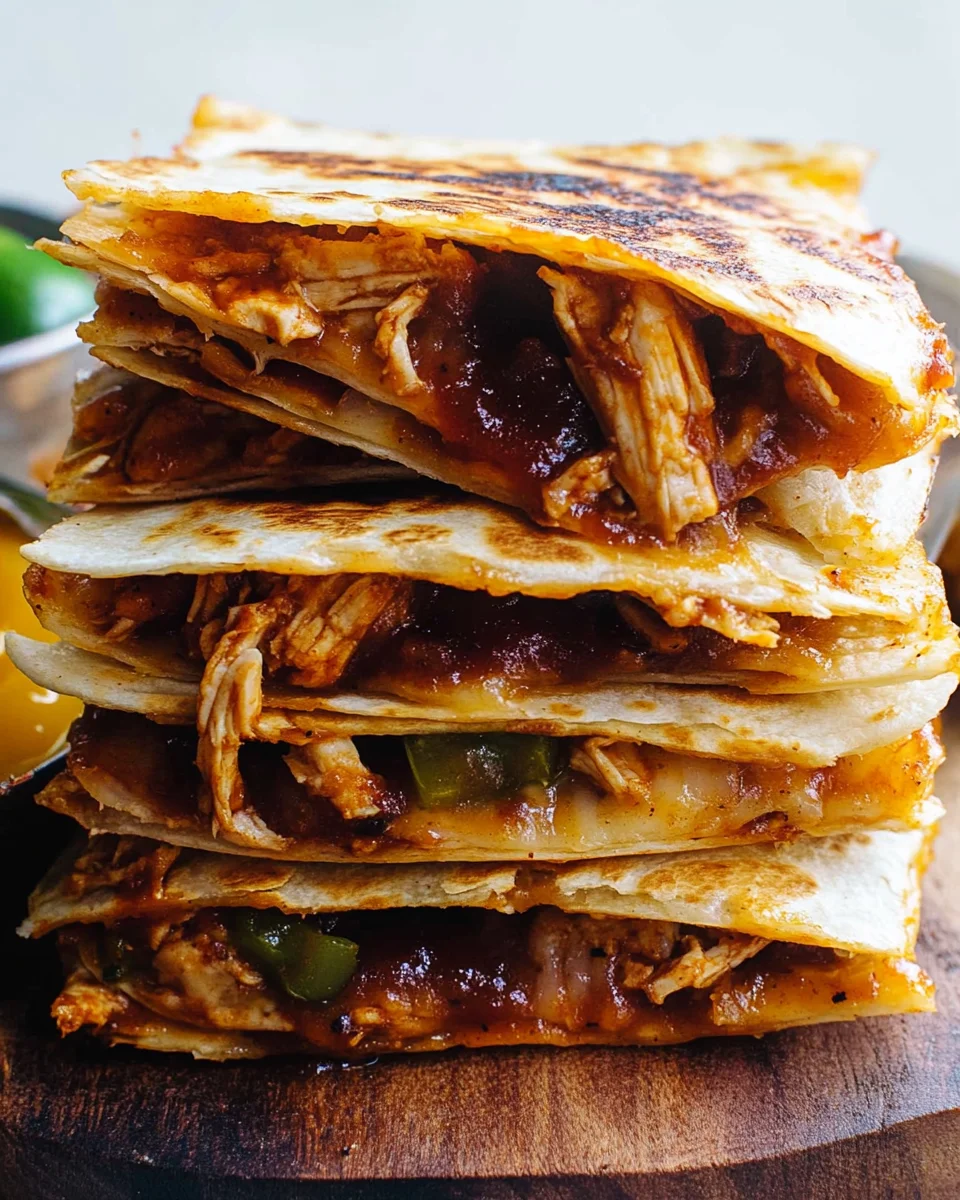
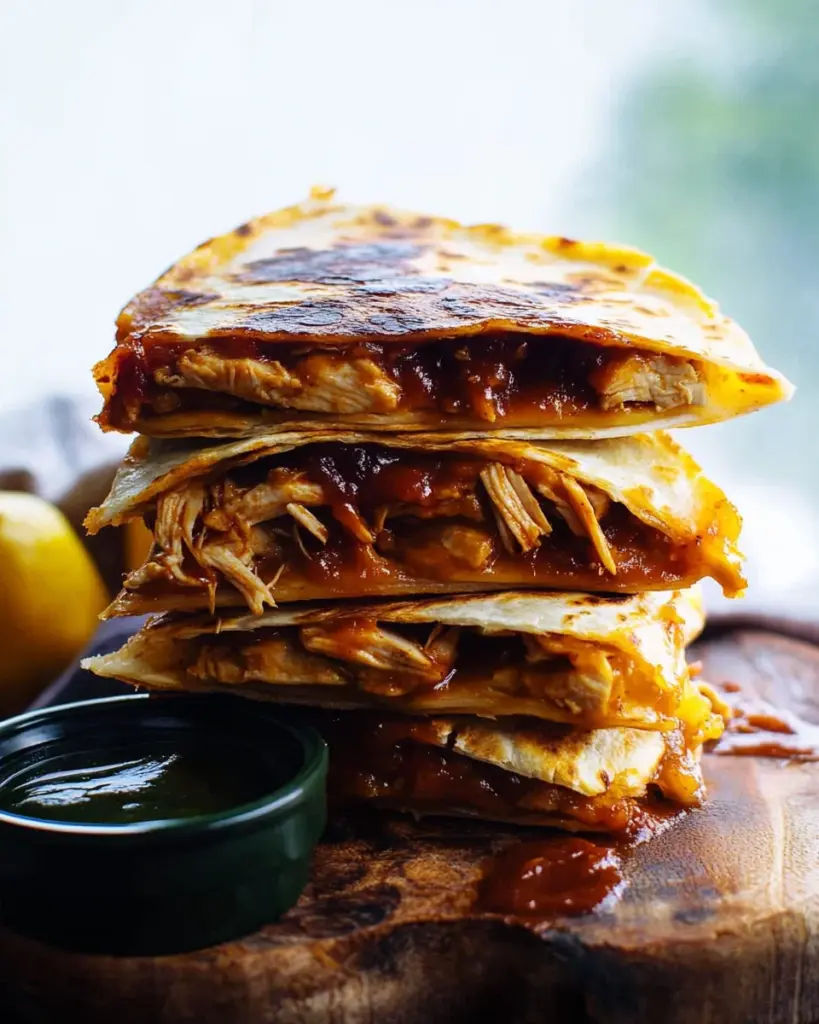
Welcome to my kitchen, where I’m excited to share a recipe that’s become a family favorite: BBQ Chicken Quesadilla Delight! If you’re like me, juggling a busy schedule while trying to whip up something delicious can feel overwhelming. This dish is a quick solution for those hectic weeknights when you want to impress your loved ones without spending hours in the kitchen. With tender shredded chicken, tangy BBQ sauce, and gooey melted cheese all wrapped in a crispy tortilla, it’s a meal that brings smiles to the table. Let’s dive into this delightful recipe!
Why You’ll Love This BBQ Chicken Quesadilla Delight
This BBQ Chicken Quesadilla Delight is not just a meal; it’s a lifesaver for busy moms and professionals alike. It’s incredibly easy to make, taking only about 25 minutes from start to finish. The combination of smoky BBQ flavor and melted cheese is simply irresistible. Plus, it’s versatile enough to please even the pickiest eaters in your family. Trust me, this dish will quickly become a go-to in your weeknight rotation!
Ingredients for BBQ Chicken Quesadilla Delight
Gathering the right ingredients is key to making this BBQ Chicken Quesadilla Delight a hit. Here’s what you’ll need:
Cooked shredded chicken: This is the star of the show! You can use rotisserie chicken for convenience or cook your own.
BBQ sauce: Choose your favorite brand or homemade version for that smoky flavor. It adds a tangy sweetness that pairs perfectly with the chicken.
Shredded cheddar cheese: This cheese melts beautifully and adds a sharp flavor that complements the BBQ sauce.
Shredded mozzarella cheese: For that gooey, stretchy texture that everyone loves in a quesadilla.
Flour tortillas: Large tortillas are best for wrapping all the delicious fillings. You can also use whole wheat or gluten-free options if needed.
Olive oil: A little oil helps achieve that golden, crispy exterior. You can substitute with butter for a richer flavor.
Garlic powder: This adds a subtle depth of flavor that enhances the overall taste.
Onion powder: A pinch of this brings a savory note to the dish.
Black pepper: Just a dash for a bit of heat and flavor.
Salt: Essential for bringing out all the flavors in your quesadilla.
Chopped green onions (optional): These add a fresh crunch and a pop of color. Feel free to skip if you’re not a fan.
Sour cream and salsa: Perfect accompaniments for dipping and adding extra flavor to each bite.
For exact measurements, check the bottom of the article where you can find everything listed for easy printing. Now that you have your ingredients ready, let’s move on to the fun part—making this delicious dish!
How to Make BBQ Chicken Quesadilla Delight
Now that we have our ingredients ready, let’s get cooking! Making this BBQ Chicken Quesadilla Delight is a breeze, and I promise it’ll be worth every minute. Follow these simple steps, and you’ll have a delicious meal in no time!
Step 1: Prepare the Chicken Mixture
Start by grabbing a medium bowl. Combine the cooked shredded chicken with the BBQ sauce. Mix it well until every piece of chicken is coated in that tangy goodness. This step is crucial because it infuses the chicken with flavor, making each bite a delight!
Step 2: Heat the Skillet
Next, heat a large skillet over medium heat. Add the olive oil and let it warm up. You want the oil to shimmer, which means it’s ready for the tortillas. This step ensures that your quesadilla gets that perfect golden-brown crust.
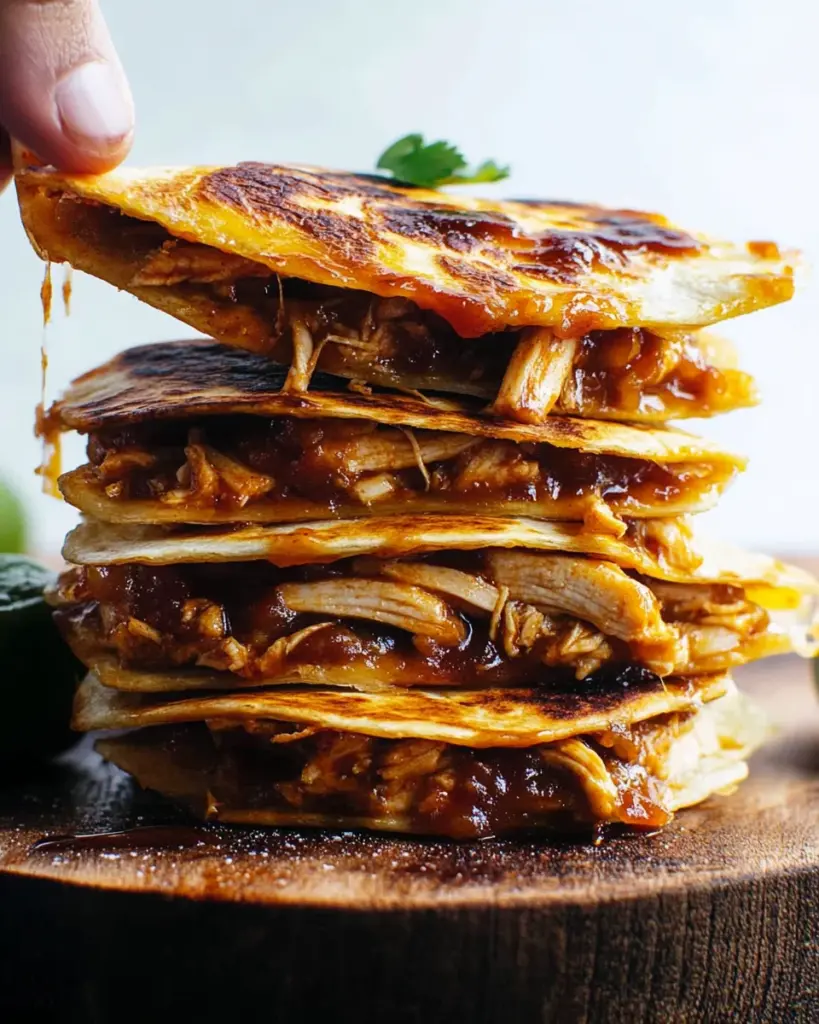
Step 3: Assemble the Quesadilla
Once the skillet is hot, place one tortilla in it. Sprinkle half of the cheddar and mozzarella cheese evenly over the tortilla. Then, spread half of your BBQ chicken mixture on top of the cheese. If you’re using green onions, sprinkle half of those too. Top it off with another tortilla, creating a delicious sandwich of flavors!
Step 4: Cook the Quesadilla
Now comes the fun part! Cook the quesadilla for about 3-4 minutes. You’re looking for a golden-brown bottom and melted cheese. Carefully flip it using a large spatula and cook for another 3-4 minutes on the other side. This step is where the magic happens—watch as the cheese melts and the tortillas crisp up!
Step 5: Cut and Serve
Once both sides are golden and the cheese is gooey, remove the quesadilla from the skillet. Let it cool for a minute before cutting it into wedges. This helps the cheese set a bit, making it easier to handle. Serve warm with sour cream and salsa on the side for dipping. Enjoy your BBQ Chicken Quesadilla Delight!
Tips for Success
Use rotisserie chicken for a quick and easy option.
Don’t overcrowd the skillet; cook one quesadilla at a time for even crispiness.
Experiment with different cheeses for unique flavors.
Let the quesadilla cool slightly before cutting to prevent cheese from oozing out.
For extra flavor, try adding spices like cumin or smoked paprika to the chicken mixture.
Equipment Needed
Large skillet: A non-stick skillet works best, but any large frying pan will do.
Spatula: A wide spatula helps flip the quesadilla without breaking it.
Medium bowl: For mixing the chicken and BBQ sauce.
Knife: To cut the quesadilla into wedges.
Variations
Spicy BBQ Chicken Quesadilla: Add sliced jalapeños or a dash of hot sauce to the chicken mixture for an extra kick.
Vegetarian Option: Substitute the chicken with black beans or grilled vegetables for a delicious meat-free version.
Cheesy BBQ Chicken Quesadilla: Use a blend of different cheeses like pepper jack or gouda for a unique flavor twist.
Gluten-Free Version: Opt for gluten-free tortillas to make this dish suitable for those with gluten sensitivities.
BBQ Pulled Pork Quesadilla: Swap out the chicken for pulled pork for a smoky, hearty alternative.
Serving Suggestions
Pair your BBQ Chicken Quesadilla Delight with a fresh garden salad for a balanced meal.
Serve with crispy tortilla chips and guacamole for a fun appetizer spread.
Complement with a chilled glass of iced tea or lemonade for a refreshing drink.
Garnish with extra green onions or cilantro for a pop of color.
FAQs about BBQ Chicken Quesadilla Delight
As you embark on your culinary adventure with BBQ Chicken Quesadilla Delight, you might have a few questions. Here are some common queries I’ve encountered, along with helpful answers to guide you along the way!
Can I use frozen chicken for this recipe?
Absolutely! Just make sure to cook it thoroughly before shredding. You can use a pressure cooker or slow cooker to make it easier.
What type of BBQ sauce works best?
It really depends on your taste! A sweet and tangy sauce pairs well with the chicken, but feel free to experiment with smoky or spicy varieties for a different flavor profile.
Can I make these quesadillas ahead of time?
Yes! You can prepare the chicken mixture and assemble the quesadillas in advance. Just store them in the fridge and cook them when you’re ready to eat.
What can I serve with BBQ Chicken Quesadilla Delight?
These quesadillas are fantastic with sour cream, salsa, or even a side of guacamole. A fresh salad or tortilla chips also make great accompaniments!
How do I store leftovers?
Store any leftovers in an airtight container in the fridge for up to three days. Reheat in a skillet for the best texture!
Final Thoughts
Creating BBQ Chicken Quesadilla Delight is more than just cooking; it’s about bringing joy to your table. The aroma of melted cheese and smoky BBQ sauce fills the kitchen, making it feel like home. This dish is perfect for busy nights, yet it feels special enough for gatherings. Each bite is a delightful combination of flavors that can turn an ordinary meal into a cherished memory. I hope this recipe becomes a staple in your home, just as it has in mine. Enjoy the smiles and satisfaction it brings to your family!
“`
Olivia
BBQ Chicken Quesadilla Delight: A Tasty Hit You’ll Love!
BBQ Chicken Quesadilla Delight is a delicious and easy-to-make dish that combines shredded chicken with BBQ sauce and melted cheese, all wrapped in a crispy tortilla.
In a medium bowl, combine the shredded chicken and BBQ sauce. Mix well until the chicken is fully coated.
Heat a large skillet over medium heat and add the olive oil.
Place one tortilla in the skillet and sprinkle half of the cheddar and mozzarella cheese evenly over the tortilla.
Spread half of the BBQ chicken mixture over the cheese, then sprinkle with half of the green onions if using.
Top with another tortilla and cook for about 3-4 minutes, or until the bottom tortilla is golden brown and the cheese begins to melt.
Carefully flip the quesadilla using a large spatula and cook for an additional 3-4 minutes on the other side until golden brown and the cheese is fully melted.
Remove from the skillet and let it cool for a minute before cutting into wedges. Repeat with the remaining tortillas and filling.
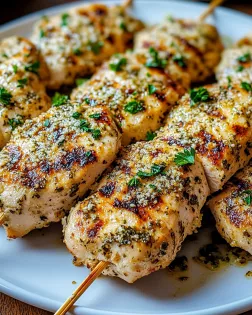
Experience the perfect harmony of bold flavors with this Garlic Parmesan Grilled Chicken! Juicy, tender chicken is infused with the rich taste of garlic and the savory depth of Parmesan, then grilled to perfection. This dish is a simple yet impressive way to bring gourmet flavors to your table, making every meal a delicious celebration.
Why You’ll Love This Garlic Parmesan Grilled Chicken
This Garlic Parmesan Grilled Chicken is a game-changer for busy families. It’s quick to prepare, taking just 45 minutes from start to finish. The marinade infuses the chicken with a rich, savory flavor that will have everyone asking for seconds. Plus, it’s versatile enough to pair with various sides, making it a perfect choice for any occasion. You’ll love how easy it is to create a restaurant-quality meal at home!
Ingredients for Garlic Parmesan Grilled Chicken
Gathering the right ingredients is key to making this Garlic Parmesan Grilled Chicken a hit. Here’s what you’ll need:
Boneless, skinless chicken breasts: The star of the dish! They’re lean, juicy, and perfect for grilling.
Olive oil: This adds moisture and helps the marinade cling to the chicken, enhancing flavor.
Grated Parmesan cheese: A must-have for that rich, cheesy flavor that pairs beautifully with garlic.
Garlic: Freshly minced garlic brings a robust aroma and taste that elevates the dish.
Dried Italian herbs: A blend of oregano, basil, and thyme adds depth and a hint of earthiness.
Salt: Essential for enhancing all the flavors in the marinade.
Black pepper: A dash of pepper adds a subtle kick to the dish.
Fresh parsley: This is for garnish, adding a pop of color and freshness to your plate.
For those who like a bit of heat, consider adding red pepper flakes to the marinade. If you’re out of Parmesan, you can substitute with Pecorino Romano for a different twist. Remember, the exact quantities for these ingredients are listed at the bottom of the article for easy printing!
How to Make Garlic Parmesan Grilled Chicken
Now that you have your ingredients ready, let’s dive into the steps for making this mouthwatering Garlic Parmesan Grilled Chicken. Follow along, and I promise you’ll have a dish that’s not only delicious but also impressively easy to make!
Step 1: Preheat the Grill
First things first, fire up your grill! Preheat it to medium-high heat. This ensures that your chicken gets those beautiful grill marks and cooks evenly. A hot grill is key to achieving that juicy, tender chicken we all crave.
Step 2: Prepare the Marinade
In a large bowl, whisk together the olive oil, grated Parmesan cheese, minced garlic, dried Italian herbs, salt, and black pepper. The aroma of garlic will fill your kitchen, and trust me, it’s heavenly! Make sure everything is well combined. This marinade is what makes the chicken so flavorful.
Step 3: Marinate the Chicken
Now, it’s time to add the chicken breasts to the marinade. Make sure each piece is evenly coated. Cover the bowl and let it marinate in the refrigerator for at least 30 minutes. If you have time, letting it sit for up to 2 hours will deepen the flavors even more. Just don’t forget to set a timer!
Step 4: Grill the Chicken
Once your grill is hot and the chicken has marinated, it’s time to cook! Remove the chicken from the marinade, letting any excess drip off. Place the chicken on the grill and cook for about 6-7 minutes on each side. You want the internal temperature to reach 165°F. This ensures it’s safe to eat and perfectly juicy.
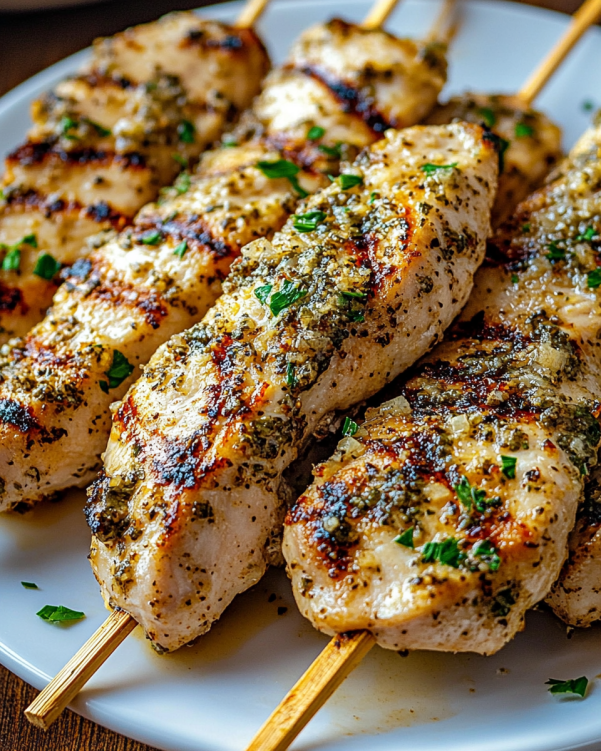
Step 5: Rest and Garnish
After grilling, remove the chicken from the grill and let it rest for about 5 minutes. This step is crucial as it allows the juices to redistribute, keeping your chicken moist. Finally, garnish with fresh parsley before serving. It adds a lovely touch of color and freshness!
Tips for Success
Always preheat your grill for even cooking and those perfect grill marks.
Let the chicken marinate longer for a deeper flavor—up to 2 hours is ideal.
Use a meat thermometer to check for doneness; 165°F is the magic number.
Don’t skip the resting time after grilling; it keeps the chicken juicy.
Experiment with herbs and spices to customize the flavor to your liking!
Equipment Needed
Grill: A gas or charcoal grill works perfectly. If you don’t have one, a grill pan on the stovetop will do.
Mixing bowl: Any large bowl for combining the marinade.
Whisk: For mixing the marinade; a fork can work in a pinch.
Meat thermometer: Essential for checking chicken doneness; a simple knife can also help check if juices run clear.
Variations
Herb-Infused: Swap out the dried Italian herbs for fresh herbs like rosemary or thyme for a vibrant twist.
Cheesy Delight: Add a layer of mozzarella cheese on top of the chicken during the last few minutes of grilling for a melty, cheesy finish.
Spicy Garlic Parmesan: Mix in some red pepper flakes or a dash of hot sauce to the marinade for a spicy kick.
Lemon Zest: Incorporate some freshly grated lemon zest into the marinade for a bright, zesty flavor.
Low-Carb Option: Serve the chicken over a bed of zucchini noodles or cauliflower rice for a healthy, low-carb meal.
Serving Suggestions
Pair your Garlic Parmesan Grilled Chicken with a fresh garden salad for a light meal.
Serve alongside grilled vegetables like zucchini, bell peppers, or asparagus for a colorful plate.
A chilled glass of white wine complements the flavors beautifully.
For a hearty option, consider serving it with garlic bread or creamy mashed potatoes.
FAQs about Garlic Parmesan Grilled Chicken
Can I use chicken thighs instead of breasts?
Absolutely! Chicken thighs are a great alternative. They’re juicier and can handle the marinade well. Just adjust the cooking time slightly, as thighs may take a bit longer to reach 165°F.
How long can I marinate the chicken?
You can marinate the chicken for as little as 30 minutes or up to 2 hours. The longer it marinates, the more flavorful it becomes. Just don’t go overboard, as too much time can make the chicken mushy.
What should I serve with Garlic Parmesan Grilled Chicken?
This dish pairs wonderfully with a variety of sides! Consider serving it with grilled vegetables, a fresh salad, or even some garlic bread. The options are endless!
Can I make this recipe ahead of time?
Yes! You can marinate the chicken a day in advance. Just keep it covered in the refrigerator. When you’re ready to cook, simply grill it as directed. It’s a fantastic time-saver!
Is Garlic Parmesan Grilled Chicken gluten-free?
Yes, this recipe is naturally gluten-free! Just ensure that any additional ingredients or sides you serve are also gluten-free to keep the meal safe for those with gluten sensitivities.
Final Thoughts
Cooking Garlic Parmesan Grilled Chicken is more than just preparing a meal; it’s about creating moments. The aroma of garlic wafting through your kitchen, the sizzle of chicken on the grill, and the smiles around the dinner table make it all worthwhile. This dish is a celebration of flavor and simplicity, perfect for busy nights or special gatherings. I hope this recipe brings joy to your kitchen, just as it has to mine. So fire up that grill, gather your loved ones, and enjoy a delicious meal that’s sure to become a family favorite!
“`
Olivia
Garlic Parmesan Grilled Chicken: A Flavorful Treat!
Garlic Parmesan Grilled Chicken is a flavorful and juicy dish that combines the rich taste of garlic and Parmesan cheese with perfectly grilled chicken.
In a large bowl, whisk together the olive oil, Parmesan cheese, minced garlic, Italian herbs, salt, and black pepper until well combined.
Add the chicken breasts to the bowl, ensuring they are evenly coated with the marinade. Cover and let marinate in the refrigerator for at least 30 minutes, or up to 2 hours for more flavor.
Remove the chicken from the marinade and let any excess drip off.
Place the chicken on the preheated grill and cook for 6-7 minutes on each side, or until the internal temperature reaches 165°F.
Once cooked, remove the chicken from the grill and let it rest for 5 minutes before slicing.
Introduction to Balsamic Steak Gorgonzola Salad with Grilled Corn
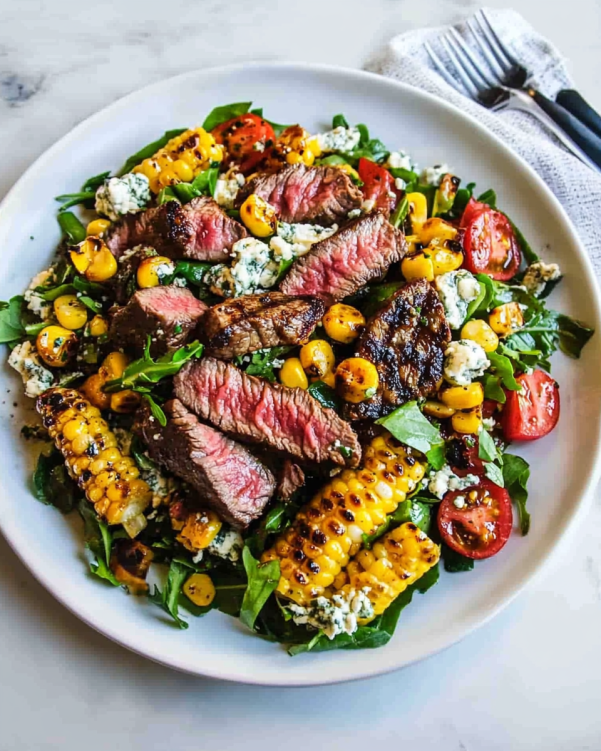
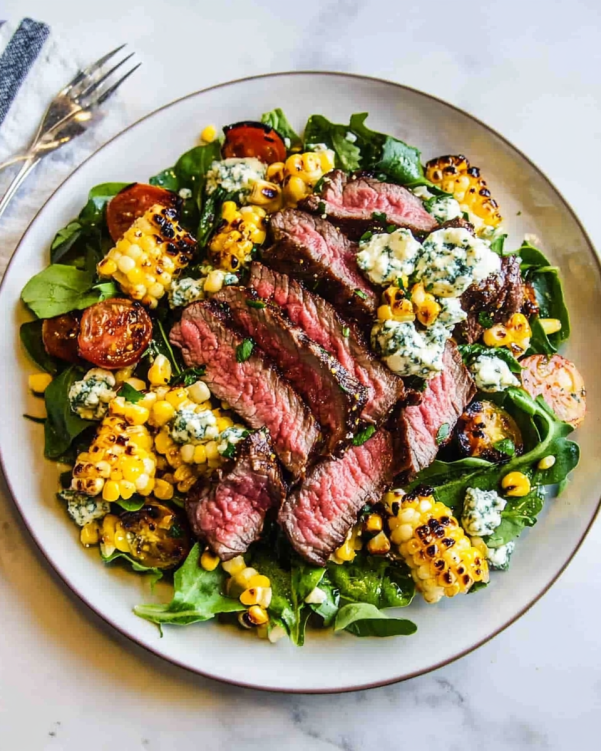
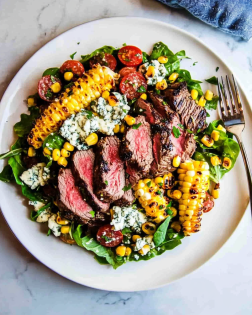
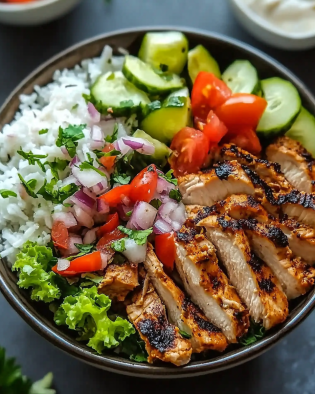
Get ready to elevate your salad game with this Balsamic Steak Gorgonzola Salad with Grilled Corn! Combining the rich, bold flavors of tender steak and tangy Gorgonzola cheese with the sweet smokiness of grilled corn, this dish is a perfect balance of savory and fresh. It’s a vibrant, satisfying meal that turns a simple salad into an unforgettable experience—ideal for those who crave something both hearty and refreshing in every bite.
Why You’ll Love This Balsamic Steak Gorgonzola Salad with Grilled Corn
This Balsamic Steak Gorgonzola Salad with Grilled Corn is a game-changer for busy days. It’s quick to prepare, taking just 30 minutes from start to finish. The combination of flavors is simply divine—savory steak, creamy cheese, and sweet corn create a symphony in your mouth. Plus, it’s a nutritious option that feels indulgent without the guilt. Trust me, this salad will become a staple in your home!
Ingredients for Balsamic Steak Gorgonzola Salad with Grilled Corn
Gathering the right ingredients is key to making this delightful Balsamic Steak Gorgonzola Salad with Grilled Corn. Here’s what you’ll need:
Flank steak: This cut is perfect for grilling, offering a rich flavor and tenderness when cooked properly.
Salt and black pepper: Simple seasonings that enhance the natural flavors of the steak.
Olive oil: A must for grilling; it helps achieve that beautiful sear on the steak.
Mixed salad greens: A colorful blend adds freshness and crunch to your salad.
Cherry tomatoes: These sweet little gems bring a burst of flavor and vibrant color.
Corn kernels: Whether fresh or frozen, they add a sweet, smoky element when grilled.
Gorgonzola cheese: This creamy, tangy cheese elevates the salad, making it feel indulgent.
Balsamic vinegar: The star of the dressing, it provides a tangy sweetness that ties everything together.
Honey: A touch of sweetness to balance the acidity of the balsamic vinegar.
Dijon mustard: Adds a subtle kick and depth to the dressing.
Extra virgin olive oil: For a smooth, rich dressing that coats the salad beautifully.
For those looking to spice things up, consider adding sliced jalapeños or a sprinkle of red pepper flakes. If you’re in the mood for a vegetarian option, swap the flank steak for grilled portobello mushrooms and use feta cheese instead of Gorgonzola. You can find the exact measurements for each ingredient at the bottom of the article, ready for printing!
How to Make Balsamic Steak Gorgonzola Salad with Grilled Corn
Now that you have all your ingredients ready, let’s dive into the steps to create this mouthwatering Balsamic Steak Gorgonzola Salad with Grilled Corn. Each step is simple, and I promise you’ll feel like a culinary rockstar by the end!
Step 1: Season the Steak
Start by seasoning your flank steak generously with salt and black pepper. This simple step is crucial for enhancing the steak’s natural flavors. I like to rub the seasoning in, ensuring every inch is covered. It’s like giving your steak a little spa treatment!
Step 2: Grill the Steak
Next, heat your grill pan or outdoor grill over medium-high heat. Add 2 tablespoons of olive oil to the pan, letting it shimmer. Place the seasoned steak on the grill and cook for about 4-5 minutes on each side for that perfect medium-rare. If you prefer it more done, just add a couple of extra minutes. Once cooked, remove the steak and let it rest for 5-10 minutes. This resting time allows the juices to redistribute, making every bite tender and juicy.
Step 3: Grill the Corn
While the steak is resting, it’s time to grill the corn. If you’re using fresh corn, toss the kernels in a grill pan or directly on the grill. Cook until they’re slightly charred, about 5-7 minutes. If you’re using frozen corn, sauté it in a skillet over medium heat until heated through. The charred bits add a delightful smoky flavor that complements the salad beautifully!
Step 4: Combine Salad Ingredients
In a large bowl, combine the mixed salad greens, halved cherry tomatoes, grilled corn, and the sliced steak. I love the vibrant colors in this salad; it’s like a rainbow on your plate! Toss everything gently to mix the ingredients without bruising the greens.
Step 5: Make the Dressing
In a small bowl, whisk together the balsamic vinegar, honey, Dijon mustard, and extra virgin olive oil. This dressing is the magic touch that brings all the flavors together. The sweetness from the honey balances the tanginess of the balsamic, creating a delightful dressing that you’ll want to drizzle on everything!
Step 6: Toss and Serve
Finally, drizzle the dressing over the salad and toss gently to combine. Top it off with crumbled Gorgonzola cheese for that creamy finish. Serve immediately and watch your family’s faces light up with joy. This Balsamic Steak Gorgonzola Salad with Grilled Corn is not just a meal; it’s a celebration of flavors!
Tips for Success
Let the steak rest after grilling to keep it juicy.
Use fresh ingredients for the best flavor and texture.
Don’t skip the seasoning; it’s key to a tasty steak.
Feel free to customize the salad with your favorite veggies.
Make extra dressing; it’s great on other salads too!
Equipment Needed
Grill pan or outdoor grill: Essential for that perfect sear; a stovetop skillet works too.
Cutting board: A must for slicing the steak; any sturdy board will do.
Whisk: For mixing the dressing; a fork can work in a pinch.
Large bowl: To combine salad ingredients; any mixing bowl will suffice.
Variations
Spicy Kick: Add sliced jalapeños or a sprinkle of red pepper flakes for a fiery twist.
Vegetarian Delight: Substitute grilled portobello mushrooms for the steak and use feta cheese instead of Gorgonzola.
Grain Boost: Toss in some cooked quinoa or farro for added texture and nutrition.
Herb Infusion: Mix in fresh herbs like basil or cilantro for an aromatic touch.
Fruit Fusion: Add sliced strawberries or peaches for a sweet contrast to the savory elements.
Serving Suggestions
Pair this salad with a crisp white wine, like Sauvignon Blanc, for a refreshing complement.
Serve alongside crusty bread or garlic knots to soak up the delicious dressing.
For a colorful presentation, arrange the salad on a large platter.
Add a sprinkle of fresh herbs on top for an extra pop of color.
FAQs about Balsamic Steak Gorgonzola Salad with Grilled Corn
Can I make this salad ahead of time?
Absolutely! You can grill the steak and corn in advance. Just store them separately in the fridge. When you’re ready to serve, toss everything together with the dressing. This makes it a great option for meal prep!
What can I substitute for Gorgonzola cheese?
If Gorgonzola isn’t your favorite, feel free to swap it out for feta or goat cheese. Both options will add a creamy texture and delicious flavor to your Balsamic Steak Gorgonzola Salad with Grilled Corn.
Is this salad gluten-free?
Yes! This salad is naturally gluten-free, making it a perfect choice for those with dietary restrictions. Just ensure that any additional ingredients you add are also gluten-free.
Can I use a different cut of steak?
Definitely! While flank steak is ideal, you can use sirloin or ribeye if you prefer. Just adjust the cooking time based on the thickness of the cut to achieve your desired doneness.
How can I make this salad more filling?
If you want to turn this salad into a heartier meal, consider adding cooked quinoa, chickpeas, or even avocado. These additions will boost the protein and fiber content, making it even more satisfying!
Final Thoughts
Creating this Balsamic Steak Gorgonzola Salad with Grilled Corn is more than just cooking; it’s about bringing joy to your table. The vibrant colors and rich flavors make it a feast for the senses, perfect for family dinners or gatherings with friends. I love how this salad combines simplicity with elegance, making it a go-to recipe for any occasion. Plus, it’s a wonderful way to enjoy fresh ingredients while savoring the satisfaction of a home-cooked meal. Trust me, once you try it, you’ll find yourself making it again and again!
“`
Olivia
Balsamic Steak Gorgonzola Salad with Grilled Corn delights you!
A delicious and hearty salad featuring grilled flank steak, Gorgonzola cheese, and charred corn, all drizzled with a tangy balsamic dressing.
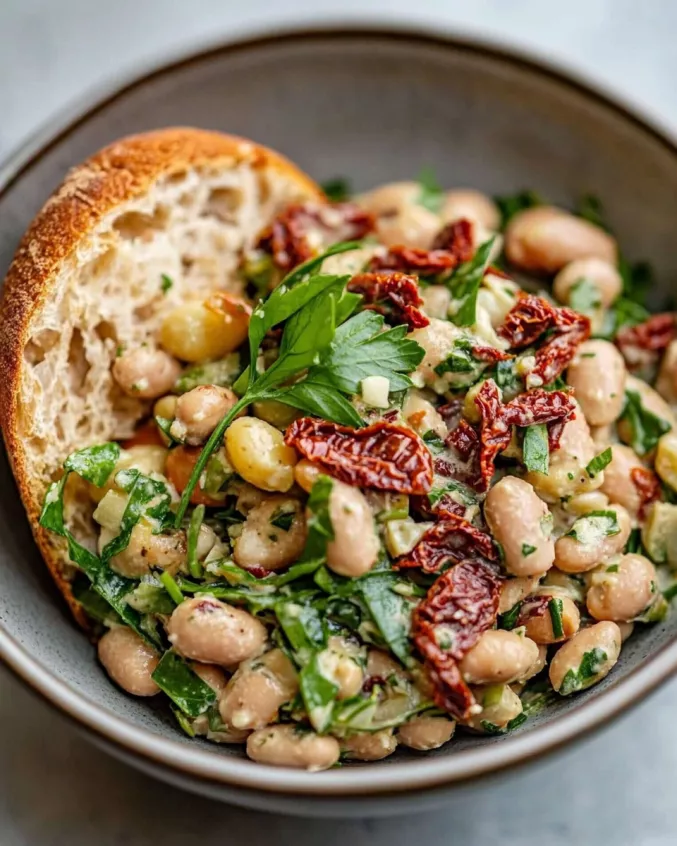
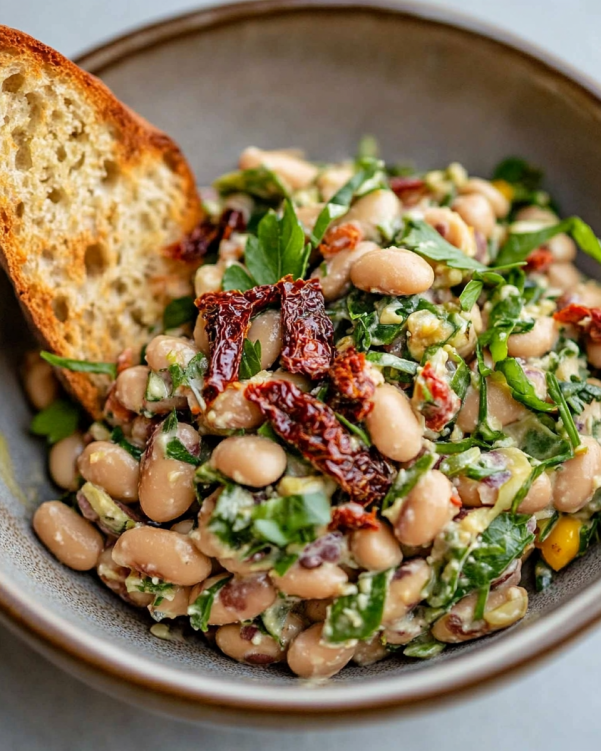
Introduction to Marinated Sun-Dried Tomato Bean Salad
Bursting with vibrant colors and bold flavors, this Marinated Sun-Dried Tomato Bean Salad is a refreshing twist on a classic favorite. The rich, tangy sun-dried tomatoes perfectly complement the hearty beans, all brought together by a zesty marinade that awakens your taste buds. Easy to prepare and packed with wholesome ingredients, this salad makes for a satisfying side or a light meal that will brighten any day. Get ready to savor every bite of this flavorful delight!
Why You’ll Love This Marinated Sun-Dried Tomato Bean Salad
This Marinated Sun-Dried Tomato Bean Salad is a game-changer for busy days. It’s incredibly easy to make, taking just minutes to prepare. The combination of chickpeas and black beans offers a satisfying protein punch, while the sun-dried tomatoes add a burst of flavor. Plus, it’s a make-ahead dish, allowing the flavors to meld beautifully in the fridge. You’ll love how it’s both nutritious and delicious, making it a perfect addition to any meal!
Ingredients for Marinated Sun-Dried Tomato Bean Salad
Gathering the right ingredients is key to making this Marinated Sun-Dried Tomato Bean Salad a hit! Here’s what you’ll need:
Canned chickpeas: These little gems are packed with protein and fiber, making them a hearty base for the salad.
Canned black beans: Rich in flavor and nutrients, black beans add a lovely creaminess that complements the chickpeas.
Sun-dried tomatoes: Opt for those packed in oil for an extra punch of flavor. They bring a sweet and tangy element to the dish.
Red onion: Finely diced, red onion adds a crisp bite and a pop of color, enhancing both taste and presentation.
Fresh parsley: This herb not only brightens the salad but also adds a fresh, earthy flavor that balances the richness of the beans.
Olive oil: A drizzle of good-quality olive oil ties everything together, adding richness and depth to the dressing.
Red wine vinegar: This tangy vinegar elevates the flavors, giving the salad a refreshing zing.
Garlic powder: A sprinkle of garlic powder infuses the salad with a warm, savory note without overpowering the other ingredients.
Salt and black pepper: Essential for seasoning, these staples enhance the overall flavor profile of the salad.
Dried oregano: This herb adds a Mediterranean flair, making each bite feel like a sunny day by the sea.
Crushed red pepper flakes (optional): If you like a little heat, these flakes are a fantastic way to spice things up!
For those looking to customize, consider adding diced cucumber or bell peppers for extra crunch. You can also mix in some diced avocado or crumbled feta cheese for a protein boost. The exact quantities of these ingredients can be found at the bottom of the article, ready for printing!
How to Make Marinated Sun-Dried Tomato Bean Salad
Making this Marinated Sun-Dried Tomato Bean Salad is a breeze! Follow these simple steps, and you’ll have a delicious dish ready in no time. Let’s dive in!
Step 1: Combine the Base Ingredients
Start by grabbing a large mixing bowl. In it, combine the drained chickpeas, black beans, chopped sun-dried tomatoes, finely diced red onion, and fresh parsley. This colorful mix is not only visually appealing but also packed with nutrients. Give it a gentle stir to ensure everything is evenly distributed. The beans provide a hearty base, while the sun-dried tomatoes add a burst of flavor.
Step 2: Prepare the Dressing
In a separate small bowl, whisk together the olive oil, red wine vinegar, garlic powder, salt, black pepper, oregano, and crushed red pepper flakes (if using). This dressing is the magic that ties all the flavors together. Make sure to whisk until it’s well combined and slightly emulsified. The tangy vinegar and rich olive oil create a delightful balance that enhances the salad.
Step 3: Mix and Chill
Pour the dressing over the bean and tomato mixture. Gently toss everything together until all the ingredients are coated in that delicious dressing. Cover the salad with plastic wrap or a lid and refrigerate for at least 30 minutes. For the best flavor, let it chill for about 2 hours. This resting time allows the flavors to meld beautifully, making each bite even more delightful.
Step 4: Serve and Enjoy
When you’re ready to serve, give the salad a gentle stir. Taste it and adjust the seasoning if needed. You can add a little more salt, pepper, or even a splash of vinegar if you like. This Marinated Sun-Dried Tomato Bean Salad is perfect on its own or as a side dish. Enjoy the vibrant flavors and the satisfaction of a healthy meal!
Tips for Success
Always rinse canned beans to reduce sodium and improve flavor.
Let the salad chill longer for deeper flavor; overnight is even better!
Use fresh herbs for a brighter taste; dried herbs work too, but fresh is best.
Adjust the spice level by adding more or less crushed red pepper flakes.
For a creamier texture, mix in diced avocado just before serving.
Equipment Needed
Large mixing bowl: A sturdy bowl for combining ingredients. A salad bowl works too!
Small bowl: For whisking the dressing. A mason jar can double as a mixing container.
Whisk or fork: To mix the dressing. A fork does the job just fine!
Plastic wrap or lid: To cover the salad while it chills. A plate can work in a pinch.
Variations
Quinoa Addition: For a heartier salad, mix in cooked quinoa. It adds a nutty flavor and extra protein.
Vegan Option: Keep it vegan by sticking to the original ingredients. The salad is naturally plant-based!
Cheese Lovers: Crumble feta or goat cheese on top for a creamy, tangy twist.
Herb Swap: Experiment with different herbs like basil or cilantro for a unique flavor profile.
Seasonal Veggies: Toss in seasonal vegetables like zucchini or cherry tomatoes for added freshness.
Serving Suggestions
Pair this Marinated Sun-Dried Tomato Bean Salad with grilled chicken or fish for a complete meal.
Serve it alongside crusty bread or pita chips for a delightful crunch.
For drinks, a chilled white wine or sparkling water with lemon complements the flavors beautifully.
Present the salad in a colorful bowl to enhance its vibrant appearance.
FAQs about Marinated Sun-Dried Tomato Bean Salad
Can I make this Marinated Sun-Dried Tomato Bean Salad ahead of time?
Absolutely! In fact, making it ahead of time allows the flavors to meld beautifully. I recommend preparing it a few hours in advance or even the night before for the best taste.
How long can I store the salad in the fridge?
This salad can be stored in an airtight container in the fridge for up to 3 days. Just give it a good stir before serving, as the ingredients may settle.
Can I use dried beans instead of canned?
Yes, you can! Just make sure to soak and cook the dried beans beforehand. Canned beans are a time-saver, but dried beans can add a lovely texture if you have the time.
Is this salad suitable for meal prep?
Definitely! This Marinated Sun-Dried Tomato Bean Salad is perfect for meal prep. It holds up well and can be enjoyed throughout the week, making it a great option for busy moms and professionals.
What can I serve with this salad?
This salad pairs wonderfully with grilled meats, fish, or even as a filling for wraps. You can also serve it alongside a light soup for a complete meal!
Final Thoughts
Creating this Marinated Sun-Dried Tomato Bean Salad is more than just preparing a meal; it’s about bringing joy to your table. The vibrant colors and bold flavors make it a feast for the eyes and the palate. I love how it effortlessly combines nutrition and taste, making it a go-to for busy days. Whether you’re serving it at a family gathering or enjoying it solo, this salad is sure to impress. Plus, the satisfaction of knowing you’ve made something healthy and delicious is truly rewarding. So, grab your ingredients and let the flavor adventure begin!
“`
Olivial
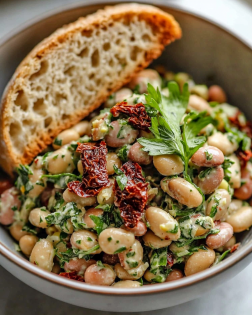
Marinated Sun-Dried Tomato Bean Salad: A Flavorful Delight!
A refreshing and flavorful Marinated Sun-Dried Tomato Bean Salad that combines chickpeas, black beans, and sun-dried tomatoes, perfect for a healthy meal.
1cupsun-dried tomatoeschopped (packed in oil for extra flavor)
1/2cupred onionfinely diced
1/2cupfresh parsleychopped
1/4cupolive oil
2tablespoonsred wine vinegar
1teaspoongarlic powder
1/2teaspoonsalt
1/4teaspoonblack pepper
1/2teaspoondried oregano
1/2teaspooncrushed red pepper flakesoptional
Method
In a large mixing bowl, combine the chickpeas, black beans, sun-dried tomatoes, red onion, and parsley.
In a separate small bowl, whisk together the olive oil, red wine vinegar, garlic powder, salt, black pepper, oregano, and crushed red pepper flakes until well combined.
Pour the dressing over the bean and tomato mixture and gently toss to coat all ingredients evenly.
Cover the salad and refrigerate for at least 30 minutes to allow the flavors to meld. For best results, let it chill for 2 hours.
Before serving, give the salad a gentle stir and adjust seasoning if necessary.
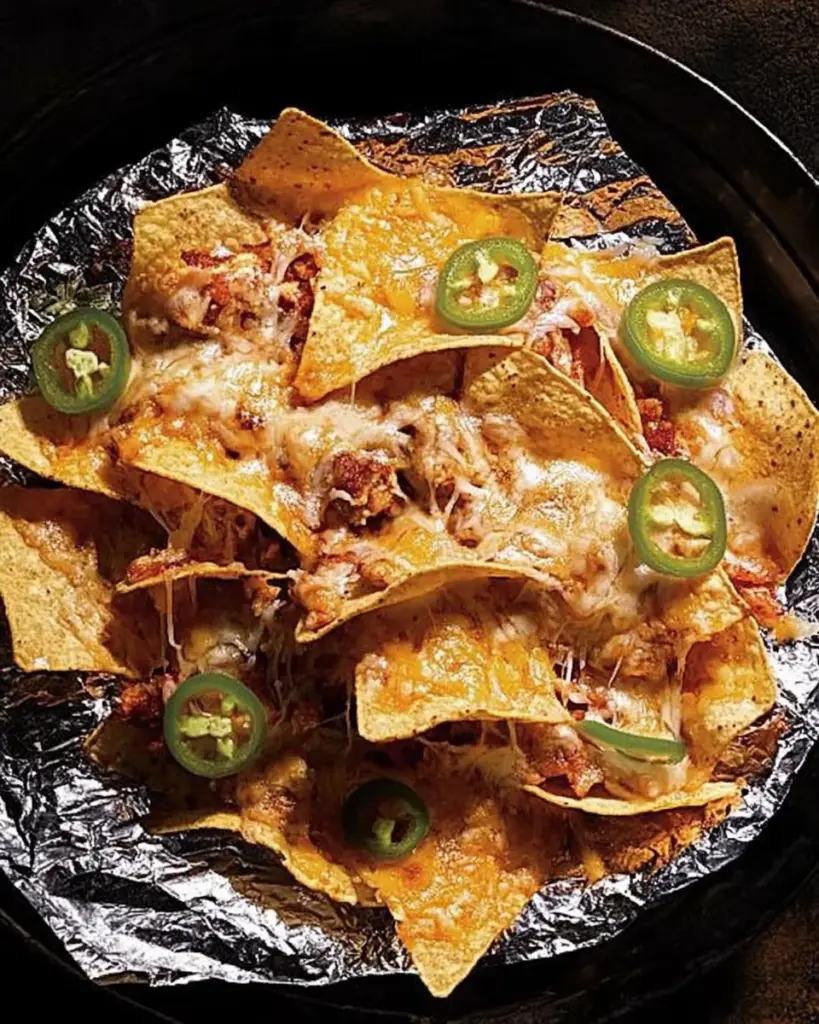
Hey there, fellow food lovers! If you’re anything like me, you know that life can get pretty hectic. Between juggling work, family, and everything in between, finding time to whip up something delicious can feel like a challenge. That’s where my Grilled Nachos Delight comes in! This fun and flavorful dish is perfect for gatherings or just a cozy night in. With layers of crispy tortilla chips, gooey cheese, and fresh toppings, it’s a quick solution that will impress your loved ones. Trust me, once you try it, you’ll be hooked!
Why You’ll Love This Grilled Nachos Delight
Let’s be honest—who doesn’t love nachos? My Grilled Nachos Delight is not only a crowd-pleaser but also incredibly easy to make. In just 25 minutes, you can serve up a dish that’s bursting with flavor and texture. Plus, it’s customizable! Whether you’re feeding picky eaters or adventurous foodies, everyone can enjoy their own twist. It’s the perfect way to bring people together over a shared love of good food!
Ingredients for Grilled Nachos Delight
Gathering the right ingredients is key to making my Grilled Nachos Delight a hit! Here’s what you’ll need:
Tortilla Chips: The base of your nachos. Choose your favorite brand for that perfect crunch.
Shredded Cheddar Cheese: This adds a sharp, tangy flavor that melts beautifully.
Shredded Monterey Jack Cheese: Creamy and mild, it complements the cheddar perfectly.
Black Beans: Rinsed and drained, they provide protein and a hearty texture.
Diced Tomatoes: Fresh and juicy, they add a burst of color and flavor.
Sliced Jalapeños: For those who like a kick! Use fresh or pickled, depending on your preference.
Sour Cream: A cool, creamy topping that balances the heat of the jalapeños.
Fresh Cilantro: Adds a pop of freshness and a hint of herbaceous flavor.
Avocado: Diced for creaminess; it’s a must-have for any nacho lover!
Olive Oil: Helps to bring the black bean mixture together and adds richness.
Chili Powder: A warm spice that enhances the overall flavor profile.
Cumin: Earthy and aromatic, it gives a nice depth to the dish.
Salt and Pepper: Essential for seasoning and bringing out all the flavors.
Feel free to get creative! You can swap black beans for cooked ground beef or shredded chicken for a heartier version. And if you’re feeling adventurous, add some diced fresh jalapeños or a drizzle of hot sauce for an extra kick. For exact quantities, check the bottom of the article where you can find everything available for printing!
How to Make Grilled Nachos Delight
Now that you have all your ingredients ready, let’s dive into the fun part—making my Grilled Nachos Delight! Follow these simple steps, and you’ll have a delicious dish that’s sure to impress.
Step 1: Preheat the Grill
Preheating your grill is crucial for achieving that perfect melt on the cheese. Set your grill to medium heat and let it warm up for about 10 minutes. If you’re using a grill pan, place it on the grill to heat up as well. This step ensures that your nachos cook evenly and get that lovely grilled flavor.
Step 2: Prepare the Black Bean Mixture
In a large bowl, combine the rinsed black beans, diced tomatoes, olive oil, chili powder, cumin, salt, and pepper. Mix everything well until the beans are coated with the spices. This mixture adds a hearty texture and a burst of flavor to your nachos. Plus, it’s packed with protein, making your snack a bit more filling!
Step 3: Assemble the Nachos
On a large piece of aluminum foil, spread out the tortilla chips in an even layer. This is where the magic happens! Sprinkle the shredded cheddar and Monterey Jack cheeses generously over the chips. Then, add the black bean mixture and sliced jalapeños on top. Layering is key here; it ensures every bite is packed with flavor!
Step 4: Create the Foil Packet
Now it’s time to seal in all that goodness. Fold the edges of the foil to create a packet, making sure it’s tightly sealed. This helps retain heat and flavor while the nachos grill. You want to keep all that melted cheese and delicious toppings inside, so don’t be shy about folding it well!
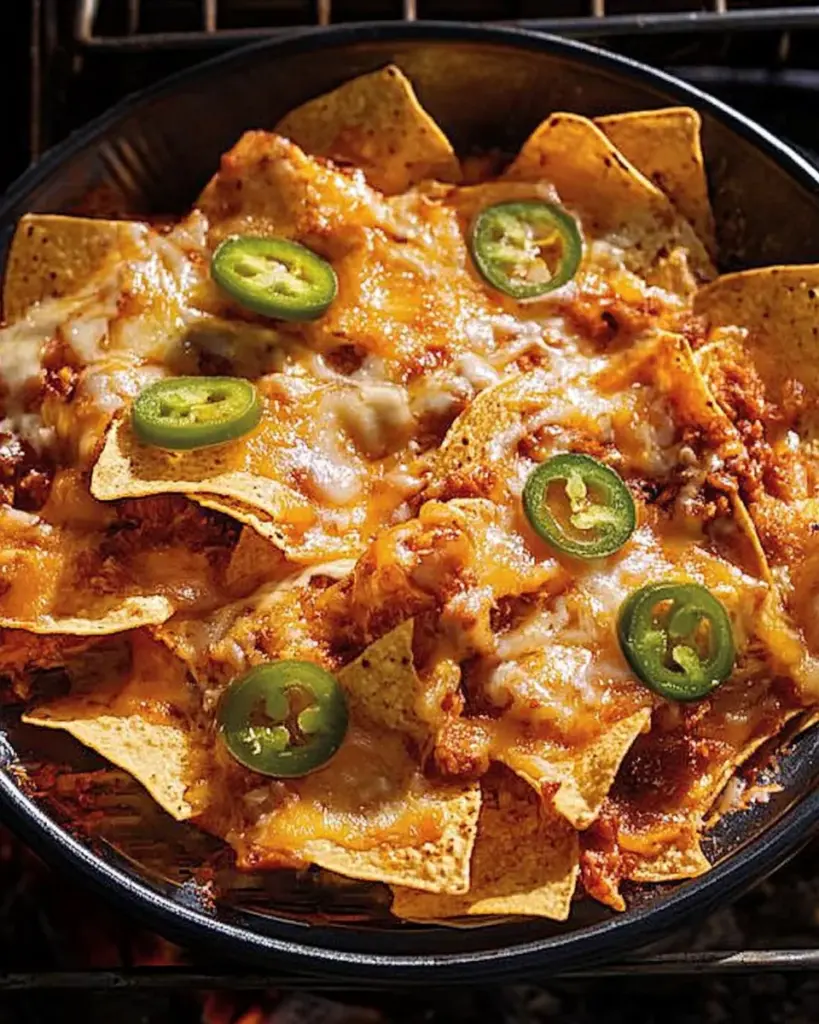
Step 5: Grill the Nachos
Place the foil packet on the grill and let it cook for about 10-15 minutes. Keep an eye on it! You’ll know it’s done when the cheese is melted and bubbly. The aroma wafting from the grill will be irresistible, and your mouth will be watering in anticipation!
Step 6: Serve and Enjoy
Carefully remove the packet from the grill and let it cool for a minute. Open it up and top your nachos with diced avocado, a dollop of sour cream, and a sprinkle of fresh cilantro. Presentation matters! Serve it right in the foil for a fun, casual vibe. Dig in and enjoy every cheesy, flavorful bite!
Tips for Success
Use sturdy tortilla chips to prevent sogginess from the toppings.
Experiment with different cheeses for unique flavors.
Don’t skip the preheating step; it’s key for melting cheese evenly.
For extra crunch, grill the chips for a minute before adding toppings.
Customize toppings based on your family’s preferences for a personal touch.
Equipment Needed
Grill: A standard outdoor grill works best, but a stovetop grill pan is a great alternative.
Aluminum Foil: Essential for creating the foil packet; parchment paper can be used in a pinch.
Large Bowl: For mixing the black bean mixture; any mixing bowl will do.
Spatula: Handy for serving the nachos once they’re ready.
Variations
Meat Lovers: Swap black beans for cooked ground beef, shredded chicken, or pulled pork for a heartier option.
Vegetarian Delight: Add grilled vegetables like bell peppers, zucchini, or corn for a colorful twist.
Cheesy Goodness: Experiment with different cheese blends, such as pepper jack for a spicy kick or feta for a tangy flavor.
Gluten-Free: Use gluten-free tortilla chips to make this dish suitable for gluten-sensitive friends.
Vegan Version: Replace cheese with vegan cheese and sour cream with a plant-based alternative for a delicious vegan treat.
Serving Suggestions
Fresh Salsa: Serve with a side of zesty salsa for an extra flavor boost.
Guacamole: Pair with homemade guacamole for a creamy contrast.
Chilled Beverages: Enjoy with refreshing drinks like iced tea or margaritas.
Fun Presentation: Serve in the foil packet for a casual, festive vibe.
FAQs about Grilled Nachos Delight
Can I make Grilled Nachos Delight in the oven instead of on the grill?
Absolutely! If you don’t have a grill, you can bake your nachos in the oven. Preheat it to 350°F (175°C) and follow the same assembly steps. Just keep an eye on them, as baking may take a bit longer than grilling.
What can I use instead of black beans?
If black beans aren’t your thing, feel free to substitute them with cooked ground beef, shredded chicken, or even refried beans. Each option brings its own unique flavor and texture to the dish!
How can I make my nachos spicier?
For a spicy kick, add diced fresh jalapeños or a drizzle of your favorite hot sauce before serving. You can also use pepper jack cheese for an extra layer of heat!
Can I prepare the ingredients ahead of time?
Yes! You can prep the black bean mixture and chop your toppings a day in advance. Just store them in the fridge until you’re ready to grill. This makes it super easy to whip up your Grilled Nachos Delight on a busy day!
How do I store leftovers?
If you have any leftovers (which is rare!), store them in an airtight container in the fridge for up to 2 days. Reheat in the oven or microwave, but keep in mind that the chips may lose their crunch.
Final Thoughts
Making my Grilled Nachos Delight is more than just cooking; it’s about creating moments. Whether it’s a casual family night or a gathering with friends, this dish brings everyone together. The joy of sharing a plate of cheesy, flavorful nachos is unmatched. Plus, the ease of preparation means you can focus on what truly matters—enjoying time with your loved ones. So, fire up that grill, gather your ingredients, and let the laughter and deliciousness unfold. Trust me, once you experience this delightful dish, it will become a staple in your home!
“`
Olivia
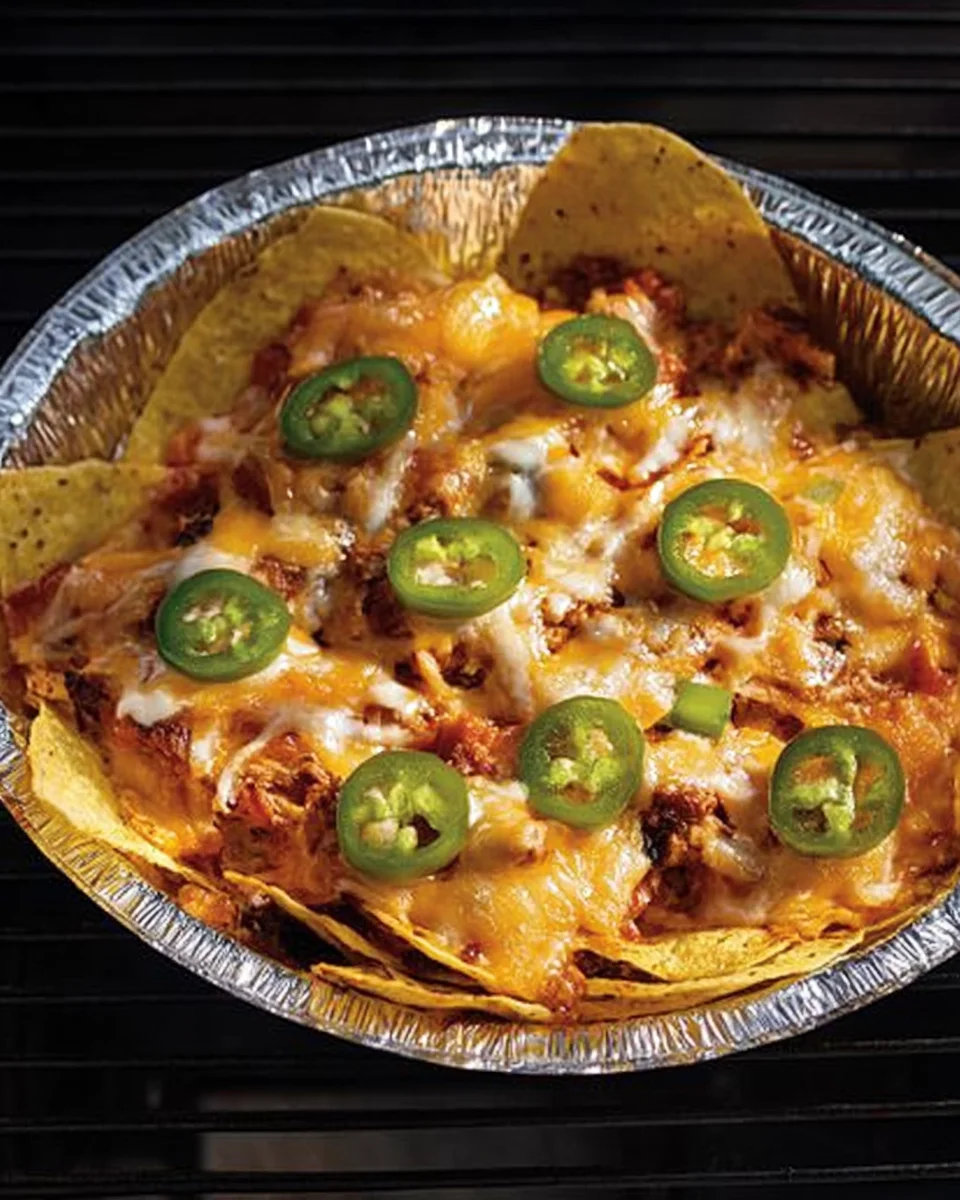
Grilled Nachos Delight: A Fun Recipe to Try Today!
Grilled Nachos Delight is a fun and delicious recipe perfect for gatherings or a casual snack. This dish features layers of tortilla chips, melted cheese, black beans, and fresh toppings, all grilled to perfection.
Preheat your grill to medium heat. If using a grill pan, place it on the grill to heat up.
In a large bowl, combine the black beans, diced tomatoes, olive oil, chili powder, cumin, salt, and pepper. Mix well.
On a large piece of aluminum foil, spread out the tortilla chips in an even layer.
Sprinkle the cheddar and Monterey Jack cheeses over the chips, followed by the black bean mixture and jalapeños.
Fold the edges of the foil to create a packet, sealing it tightly to prevent any cheese from escaping.
Place the foil packet on the grill and cook for about 10-15 minutes, or until the cheese is melted and bubbly.
Carefully remove the packet from the grill and let it cool for a minute. Open the packet and top with diced avocado, sour cream, and fresh cilantro before serving.
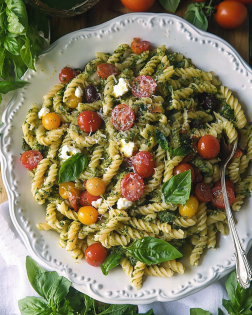
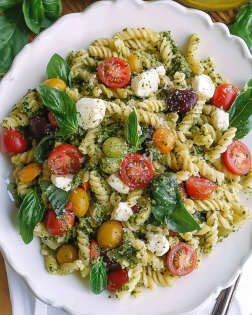
Introduction to Pesto Pasta Salad with Cherry Tomatoes and Mozzarella
I know how precious time can be, especially when it comes to meal prep. That’s why I absolutely adore this Pesto Pasta Salad with Cherry Tomatoes and Mozzarella. It’s not just a dish; it’s a refreshing escape that comes together in a snap! Imagine vibrant cherry tomatoes bursting with flavor, creamy mozzarella, and the aromatic embrace of basil pesto, all mingling together in a delightful salad. Whether you’re hosting a gathering or simply need a quick solution for dinner, this recipe is your go-to. Trust me, your loved ones will be asking for seconds!
Why You’ll Love This Pesto Pasta Salad with Cherry Tomatoes and Mozzarella
This Pesto Pasta Salad is a lifesaver for busy days! It’s quick to whip up, taking just 20 minutes from start to finish. The combination of fresh ingredients creates a burst of flavor that’s simply irresistible. Plus, it’s versatile enough to serve as a main dish or a side. You’ll love how it pleases even the pickiest eaters, making mealtime a breeze!
Ingredients for Pesto Pasta Salad with Cherry Tomatoes and Mozzarella
Gathering the right ingredients is the first step to creating this delightful Pesto Pasta Salad with Cherry Tomatoes and Mozzarella. Here’s what you’ll need:
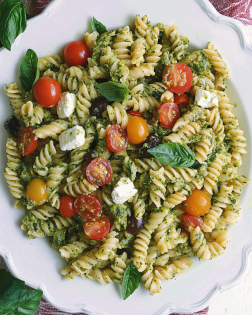
Rotini pasta: This spiral-shaped pasta holds onto the pesto beautifully, making every bite flavorful.
Cherry tomatoes: Their sweetness and juiciness add a pop of color and freshness to the salad.
Fresh mozzarella balls: Creamy and mild, they provide a lovely contrast to the tangy pesto.
Basil pesto: The star of the show! This vibrant sauce brings a burst of herbaceous flavor.
Grated Parmesan cheese: A sprinkle of this adds a nutty richness that elevates the dish.
Extra virgin olive oil: This enhances the overall flavor and helps the ingredients meld together.
Salt and pepper: Essential for seasoning, these simple ingredients can make a world of difference.
Fresh basil leaves (optional): A lovely garnish that adds a touch of elegance and extra flavor.
For those looking to mix things up, consider adding chopped bell peppers or cucumbers for a crunchy twist. If you’re feeling adventurous, swap the mozzarella for feta cheese to introduce a tangy flavor that pairs beautifully with the pesto.
Exact measurements for each ingredient can be found at the bottom of the article, ready for you to print and take to the kitchen!
How to Make Pesto Pasta Salad with Cherry Tomatoes and Mozzarella
Now that you have all your ingredients ready, let’s dive into making this delightful Pesto Pasta Salad with Cherry Tomatoes and Mozzarella. Follow these simple steps, and you’ll have a delicious dish in no time!
Step 1: Cook the Pasta
Start by boiling a pot of water. Add a pinch of salt to enhance the pasta’s flavor. Once the water is bubbling, toss in the rotini pasta. Cook it according to the package instructions until it’s al dente. This usually takes about 8 to 10 minutes. When it’s done, drain the pasta and rinse it under cold water. This stops the cooking process and cools it down quickly.
Step 2: Combine Ingredients
In a large mixing bowl, combine the cooled pasta, halved cherry tomatoes, and mozzarella balls. The colors will start to pop, and your kitchen will smell amazing! Gently mix everything together, ensuring the ingredients are evenly distributed. This is where the magic begins!
Step 3: Add Dressing
Now, it’s time to bring in the flavor! Pour in the basil pesto, grated Parmesan cheese, and extra virgin olive oil. Use a spatula or large spoon to toss everything together. Make sure every piece of pasta is coated in that vibrant green pesto. It’s like a hug for your taste buds!
Step 4: Season to Taste
Next, sprinkle in some salt and pepper. Taste the salad and adjust the seasoning as needed. This step is crucial because it allows you to personalize the dish to your liking. Remember, a little seasoning can elevate the flavors tremendously!
Step 5: Chill the Salad
Cover the salad with plastic wrap or a lid and pop it in the refrigerator. Let it chill for at least 30 minutes. This allows the flavors to meld together beautifully. Plus, it’s a great way to serve it cold on a warm day!
Step 6: Serve and Garnish
When you’re ready to serve, give the salad a gentle toss. If you like, garnish it with fresh basil leaves for an extra touch of elegance. This Pesto Pasta Salad with Cherry Tomatoes and Mozzarella is now ready to impress your family and friends!
Tips for Success
Always salt your pasta water; it enhances the flavor of the pasta.
Use fresh ingredients for the best taste; they make a noticeable difference.
Let the salad chill longer if you have time; it deepens the flavors.
Mix in some toasted pine nuts for added crunch and flavor.
Feel free to adjust the pesto amount to suit your taste preferences.
Equipment Needed
Large pot: For boiling pasta; a deep skillet can work too.
Colander: To drain the pasta; a slotted spoon can be a handy alternative.
Mixing bowl: A large bowl for combining ingredients; any big bowl will do.
Spatula or large spoon: For tossing the salad; a wooden spoon is perfect.
Variations
Protein Boost: Add grilled chicken or shrimp for a heartier meal.
Vegan Option: Substitute mozzarella with vegan cheese and use a dairy-free pesto.
Whole Grain Twist: Use whole wheat rotini for added fiber and nutrients.
Spicy Kick: Toss in some red pepper flakes for a bit of heat.
Seasonal Veggies: Incorporate seasonal vegetables like zucchini or asparagus for extra freshness.
Serving Suggestions
Pair this salad with grilled chicken or fish for a complete meal.
Serve alongside crusty garlic bread for a delightful Italian feast.
Complement with a chilled glass of white wine or sparkling water.
For presentation, serve in a large bowl and garnish with extra basil leaves.
FAQs about Pesto Pasta Salad with Cherry Tomatoes and Mozzarella
Can I make this Pesto Pasta Salad ahead of time?
Absolutely! This salad is perfect for meal prep. You can make it a day in advance and store it in the refrigerator. Just give it a good toss before serving to refresh the flavors.
What can I substitute for basil pesto?
If you don’t have basil pesto on hand, you can use sun-dried tomato pesto or even a homemade version using spinach or arugula. Each will give a unique twist to your Pesto Pasta Salad with Cherry Tomatoes and Mozzarella!
How long will leftovers last in the fridge?
Your leftover salad can be stored in an airtight container for up to three days. Just keep in mind that the pasta may absorb some of the dressing, so you might want to add a splash of olive oil before serving.
Can I add other vegetables to this salad?
Definitely! Feel free to toss in your favorite veggies like bell peppers, cucumbers, or even olives. They’ll add extra crunch and flavor to your Pesto Pasta Salad with Cherry Tomatoes and Mozzarella.
Is this salad gluten-free?
To make it gluten-free, simply swap the rotini pasta for a gluten-free pasta alternative. The rest of the ingredients are naturally gluten-free, so you can enjoy this dish without worry!
Final Thoughts
Creating this Pesto Pasta Salad with Cherry Tomatoes and Mozzarella is more than just a cooking task; it’s a joyful experience that brings family and friends together. The vibrant colors and fresh flavors make it a feast for the eyes and the palate. I love how it can be a quick weeknight dinner or a showstopper at gatherings. Plus, the smiles on my loved ones’ faces when they take that first bite? Priceless! So, roll up your sleeves, embrace the joy of cooking, and let this delightful salad become a staple in your home. You won’t regret it!
“`
Olivia
Pesto Pasta Salad with Cherry Tomatoes and Mozzarella made easy!
A refreshing and easy-to-make Pesto Pasta Salad featuring cherry tomatoes and mozzarella, perfect for any occasion.
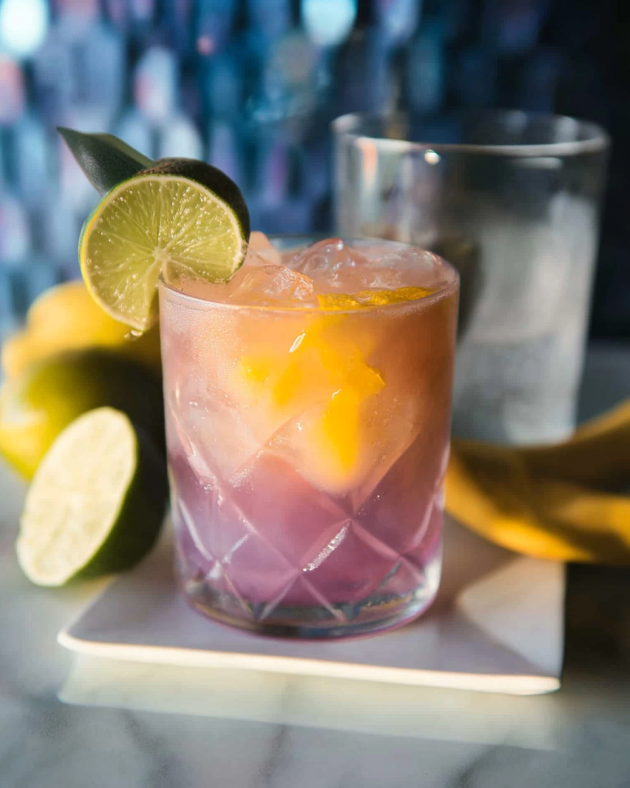
The Maui Mule cocktail is a delightful twist on the classic Moscow Mule. This refreshing drink combines the zing of ginger beer with the tartness of fresh lime juice and the tropical sweetness of passion fruit puree. Served in a chilled copper mug, the Maui Mule is not just a drink; it’s an experience that transports you to a sunny beach in Hawaii. With its vibrant flavors and eye-catching presentation, this cocktail is perfect for summer gatherings or any occasion that calls for a taste of the tropics.
The Origins of the Maui Mule Cocktail
The Maui Mule cocktail draws inspiration from the traditional Moscow Mule, which originated in the United States in the 1940s. The original recipe featured vodka, ginger beer, and lime juice, served in a copper mug. Over time, mixologists began to experiment with different flavors and ingredients, leading to the creation of various mule variations. The Maui Mule, in particular, highlights the tropical essence of Hawaii, incorporating passion fruit puree to enhance its flavor profile. This cocktail not only pays homage to its roots but also celebrates the vibrant culture and natural beauty of Maui.
Ingredients for the Maui Mule Cocktail
To create the perfect Maui Mule cocktail, you’ll need a few simple yet flavorful ingredients. Each component plays a vital role in crafting this refreshing drink. Here’s what you’ll need:
2 ounces vodka: This is the base spirit that gives the cocktail its kick.
1 ounce fresh lime juice: Freshly squeezed lime juice adds a zesty tang that balances the sweetness.
4 ounces ginger beer: The ginger beer provides a spicy fizz that elevates the drink.
1 ounce passion fruit puree: This tropical ingredient brings a unique sweetness and vibrant color.
Ice cubes: Essential for chilling the drink and keeping it refreshing.
Lime wedges and mint leaves for garnish: These not only enhance the presentation but also add a burst of aroma.
For those looking to add a twist, consider incorporating a splash of coconut water. This addition will give your Maui Mule an even more tropical flair. Alternatively, if you prefer a different spirit, you can swap out the vodka for rum. This variation will still maintain the refreshing essence of the cocktail while offering a unique taste experience.
Step-by-Step Preparation of the Maui Mule Cocktail
Step 1: Gather Your Ingredients
Before you start mixing, it’s important to gather all your ingredients. This makes the process smooth and enjoyable. You’ll need:
2 ounces vodka
1 ounce fresh lime juice
4 ounces ginger beer
1 ounce passion fruit puree
Ice cubes
Lime wedges and mint leaves for garnish
Having everything ready will help you create your Maui Mule cocktail without any interruptions. Plus, it’s always fun to see all the colorful ingredients laid out!
Step 2: Prepare the Glassware
Next, it’s time to prepare your glassware. The classic choice for a Maui Mule is a copper mug, which not only looks great but also keeps your drink cold. If you don’t have a copper mug, a regular glass will work just fine. Here’s what to do:
Take your copper mug or glass and fill it with ice cubes.
Make sure the ice fills the glass to the top for a refreshing chill.
Now that your glass is ready, you’re one step closer to enjoying your delicious cocktail!
Step 3: Mix the Ingredients
With your glass prepared, it’s time to mix the ingredients. Follow these simple steps:
Pour 2 ounces of vodka over the ice in your glass.
Add 1 ounce of fresh lime juice for that zesty kick.
Next, pour in 1 ounce of passion fruit puree, which adds a tropical sweetness.
Gently stir the mixture to combine all the flavors.
Finally, top off your drink with 4 ounces of ginger beer. Stir lightly to mix.
Mixing the ingredients well ensures that every sip of your Maui Mule cocktail is bursting with flavor!
Step 4: Garnish and Serve
The last step is to make your cocktail look as good as it tastes. Garnishing is key! Here’s how to finish your Maui Mule:
Add a lime wedge on the rim of the glass for a pop of color.
Place a few fresh mint leaves on top for a refreshing aroma.
Now, your Maui Mule cocktail is ready to be served! Enjoy it on a sunny day or at your next gathering. Cheers to a taste of the tropics!
Variations of the Maui Mule Cocktail
Tropical Fruit Variations
The Maui Mule cocktail is versatile, allowing for delightful variations that can enhance its tropical flair. You can easily switch up the flavors by adding different fruits. Here are some fun ideas:
Pineapple Maui Mule: Substitute the passion fruit puree with fresh pineapple juice. This will give your cocktail a sweet and tangy twist.
Mango Maui Mule: Use mango puree instead of passion fruit. The rich sweetness of mango pairs beautifully with the ginger beer.
Berry Maui Mule: Add a splash of mixed berry puree, such as strawberries or blueberries, for a colorful and fruity drink.
These tropical fruit variations not only add unique flavors but also make your Maui Mule cocktail visually stunning. Feel free to experiment with your favorite fruits to create a personalized version!
Alcohol-Free Maui Mule Cocktail
If you prefer a non-alcoholic option, the Maui Mule can easily be transformed into a refreshing mocktail. Here’s how to make an alcohol-free version:
Replace the vodka with additional ginger beer or sparkling water for a bubbly effect.
Keep the fresh lime juice and passion fruit puree to maintain the cocktail’s signature flavors.
Mix the ingredients as you would for the original recipe, and garnish with lime wedges and mint leaves.
This alcohol-free Maui Mule cocktail is perfect for those who want to enjoy the tropical taste without the buzz. It’s a great option for family gatherings or any occasion where everyone can join in on the fun!
Cooking Note for the Maui Mule Cocktail
When preparing the Maui Mule cocktail, a few cooking notes can enhance your experience and ensure the best results. First, always opt for fresh ingredients. Fresh lime juice is crucial for achieving that zesty flavor. Bottled lime juice may lack the brightness that fresh juice provides.
Next, consider the quality of your vodka. A good-quality vodka can significantly impact the overall taste of your cocktail. Look for brands that are known for their smoothness and purity. This will help create a balanced drink that highlights the other flavors.
Additionally, the ginger beer you choose plays a vital role in the cocktail’s character. Not all ginger beers are created equal. Some are spicier, while others are sweeter. Experiment with different brands to find the one that suits your taste. A spicier ginger beer can add an exciting kick to your Maui Mule, while a sweeter option can create a more mellow drink.
Lastly, don’t rush the mixing process. Take your time to stir the ingredients gently. This ensures that the flavors meld together beautifully, creating a harmonious blend in every sip. Enjoy the process, and remember that the best cocktails are made with care and attention!
Serving Suggestions for the Maui Mule Cocktail
When it comes to serving the Maui Mule cocktail, presentation and pairing can elevate the experience. Here are some delightful serving suggestions to make your cocktail shine:
Chilled Copper Mugs: Always serve your Maui Mule in a chilled copper mug. This not only keeps the drink cold but also adds a touch of elegance. The copper enhances the visual appeal and makes sipping even more enjoyable.
Pair with Tropical Snacks: Complement your cocktail with light, tropical snacks. Consider serving it alongside fresh fruit skewers, coconut shrimp, or a tropical salsa with tortilla chips. These flavors will harmonize beautifully with the Maui Mule.
Perfect for Outdoor Gatherings: The Maui Mule is an ideal drink for outdoor events. Whether it’s a beach party, a backyard barbecue, or a picnic, this cocktail brings a refreshing vibe. Set up a drink station with all the ingredients, allowing guests to mix their own Maui Mules.
Garnish with Style: Enhance the visual appeal by using colorful garnishes. In addition to lime wedges and mint leaves, consider adding edible flowers or slices of tropical fruits like kiwi or pineapple. This adds a festive touch to your cocktail.
Serve with a Straw: For a fun and casual feel, serve your Maui Mule with a colorful straw. This makes it easy to sip and adds a playful element to your drink.
By following these serving suggestions, you can create a memorable experience for yourself and your guests. The Maui Mule cocktail is not just a drink; it’s a celebration of tropical flavors and good times. Cheers to enjoying this delightful cocktail in style!
Tips for Making the Perfect Maui Mule Cocktail
Creating the perfect Maui Mule cocktail is all about attention to detail and a few helpful tips. Here are some key pointers to ensure your drink is refreshing and delicious every time:
Use Fresh Ingredients: Always opt for fresh lime juice and ripe passion fruit puree. Fresh ingredients enhance the flavor and aroma of your cocktail, making it truly special.
Chill Your Glass: For the best experience, chill your copper mug or glass before serving. This keeps your drink colder for longer and adds to the refreshing nature of the Maui Mule.
Experiment with Ginger Beer: Not all ginger beers are the same. Try different brands to find one that matches your taste. Some are spicier, while others are sweeter. Choose one that complements the other flavors in your cocktail.
Stir Gently: When mixing your ingredients, stir gently to combine. This helps to blend the flavors without losing the fizz from the ginger beer.
Garnish Creatively: Don’t be afraid to get creative with your garnishes. In addition to lime wedges and mint leaves, consider adding slices of tropical fruits or even edible flowers for a beautiful presentation.
Adjust Sweetness: If you prefer a sweeter drink, feel free to add a little more passion fruit puree or even a splash of simple syrup. Taste as you go to find the perfect balance for your palate.
Serve Immediately: Enjoy your Maui Mule cocktail right after mixing. This ensures you experience the full freshness and effervescence of the drink.
By following these tips, you’ll be well on your way to mastering the art of making a perfect Maui Mule cocktail. Each sip will transport you to a tropical paradise, making every occasion feel like a celebration!
Breakdown of Time for the Maui Mule Cocktail
Prep Time
Preparing the Maui Mule cocktail is quick and easy. You’ll need about 5 minutes to gather your ingredients and get everything ready. This includes measuring out the vodka, lime juice, ginger beer, and passion fruit puree. It’s a simple process that allows you to enjoy your drink in no time!
Cooking Time
There’s no actual cooking involved in making the Maui Mule cocktail. The only time spent is during the mixing process, which takes about 2 minutes. This includes pouring the ingredients into your glass and giving it a gentle stir. It’s all about combining flavors, so you can whip this up in a flash!
Total Time
In total, you’ll spend around 7 minutes from start to finish to create your Maui Mule cocktail. This quick preparation time makes it perfect for spontaneous gatherings or a refreshing drink after a long day. With just a few minutes, you can enjoy a taste of the tropics right at home!
Nutritional Information for the Maui Mule Cocktail
Calories
The Maui Mule cocktail is not only delicious but also relatively low in calories. Each serving contains approximately 180 calories. This makes it a great choice for those who want to enjoy a refreshing drink without consuming too many calories. The combination of vodka, fresh lime juice, ginger beer, and passion fruit puree creates a flavorful experience without the guilt. So, you can sip on this tropical delight while keeping an eye on your calorie intake!
Protein
When it comes to protein content, the Maui Mule cocktail is quite light. Each serving contains 0 grams of protein. This is typical for most cocktails, as they primarily consist of liquids and sugars rather than protein-rich ingredients. If you’re looking for a protein boost, consider pairing your Maui Mule with a protein-rich snack, like nuts or cheese, to balance your drink with some healthy nutrients.
Sodium
The sodium content in the Maui Mule cocktail is also minimal. Each serving has about 0 milligrams of sodium. This makes it a heart-healthy option, especially when compared to many other cocktails that may contain higher sodium levels due to mixers or added ingredients. Enjoying a Maui Mule cocktail can be a refreshing way to hydrate without worrying about excess sodium intake.
Overall, the Maui Mule cocktail is a delightful choice for those looking to indulge in a tasty drink while keeping nutritional values in mind. With its low calorie and sodium content, you can enjoy this tropical treat guilt-free!
FAQs about the Maui Mule Cocktail
What is the best type of ginger beer for a Maui Mule cocktail?
Choosing the right ginger beer is essential for crafting the perfect Maui Mule cocktail. The best type of ginger beer should have a good balance of spice and sweetness. Look for brands that are known for their bold ginger flavor, as this will enhance the overall taste of your drink. Some popular options include Fever-Tree, Bundaberg, and Q Ginger Beer. Each brand has its unique flavor profile, so feel free to experiment until you find your favorite!
Can I make a Maui Mule cocktail in advance?
While the Maui Mule cocktail is best enjoyed fresh, you can prepare some components in advance. For instance, you can mix the vodka, lime juice, and passion fruit puree ahead of time and store it in the refrigerator. However, it’s best to add the ginger beer and ice just before serving. This ensures that your cocktail remains fizzy and refreshing. Preparing the ingredients in advance can save you time during gatherings, allowing you to enjoy the party!
What are some good garnishes for a Maui Mule cocktail?
Garnishing your Maui Mule cocktail adds a beautiful touch and enhances the drinking experience. Besides lime wedges and mint leaves, consider using other garnishes like:
Edible flowers: These can add a pop of color and elegance.
Fresh fruit slices: Pineapple or kiwi slices can complement the tropical theme.
Spicy ginger slices: For an extra kick, add a thin slice of fresh ginger.
These garnishes not only make your cocktail visually appealing but also add delightful aromas and flavors!
Is the Maui Mule cocktail suitable for parties?
Absolutely! The Maui Mule cocktail is a fantastic choice for parties. Its vibrant flavors and refreshing qualities make it a crowd-pleaser. You can easily scale up the recipe to serve multiple guests. Set up a DIY cocktail station where guests can mix their own Maui Mules. This interactive element adds fun to your gathering. Plus, the tropical vibe of the Maui Mule will transport everyone to a sunny paradise, making your party unforgettable!
Conclusion on the Maui Mule Cocktail
The Maui Mule cocktail is more than just a drink; it’s a celebration of tropical flavors and a refreshing escape from the everyday hustle. With its delightful combination of vodka, fresh lime juice, ginger beer, and passion fruit puree, this cocktail captures the essence of a sunny day in Hawaii. Whether you’re sipping it by the beach or enjoying it at a backyard barbecue, the Maui Mule brings a taste of paradise to any occasion.
As you explore the various ways to enjoy this cocktail, remember that creativity is key. From tropical fruit variations to alcohol-free options, the Maui Mule can be tailored to suit your preferences. Don’t hesitate to experiment with different ingredients and garnishes to make it your own. The joy of crafting cocktails lies in the ability to personalize them, and the Maui Mule is no exception.
So, gather your ingredients, chill your glass, and get ready to mix up a refreshing Maui Mule cocktail. With its vibrant flavors and eye-catching presentation, this drink is sure to impress your friends and family. Cheers to good times, great company, and the delightful taste of the tropics!
A Chicken Shawarma Bowl is a delightful dish that brings together the rich flavors of Middle Eastern cuisine. It features marinated chicken thighs, seasoned with a blend of spices, served over a bed of wholesome brown rice. This bowl is not just about the chicken; it also includes fresh vegetables like cherry tomatoes, cucumbers, and red cabbage, adding a crunchy texture and vibrant colors. Topped with a creamy yogurt-tahini sauce, this meal is both satisfying and nutritious. It’s a perfect option for lunch or dinner, offering a balance of protein, carbs, and healthy fats.
Why You Should Try This Chicken Shawarma Bowl Recipe
There are many reasons to try this Chicken Shawarma Bowl Recipe. First, it’s incredibly easy to make, even for beginners. With simple ingredients and straightforward steps, you can whip up a delicious meal in no time. Second, the flavors are simply irresistible. The combination of spices creates a warm, aromatic experience that will tantalize your taste buds. Plus, it’s customizable! You can adjust the ingredients to suit your preferences, whether you want it spicier or prefer a vegetarian option.
Moreover, this recipe is packed with nutrients. The chicken provides a great source of protein, while the brown rice offers fiber and essential vitamins. The fresh vegetables contribute antioxidants and hydration, making this bowl a well-rounded meal. Lastly, it’s perfect for meal prep. You can make a big batch and enjoy it throughout the week, saving time and effort on busy days. So, gather your ingredients and get ready to enjoy a delicious Chicken Shawarma Bowl!
Ingredients for Chicken Shawarma Bowl Recipe
To create a mouthwatering Chicken Shawarma Bowl, you’ll need a variety of fresh and flavorful ingredients. Here’s what you’ll need:
2 cups cooked brown rice
1 pound boneless, skinless chicken thighs
2 tablespoons olive oil
2 teaspoons ground cumin
2 teaspoons ground coriander
1 teaspoon paprika
1 teaspoon garlic powder
1 teaspoon onion powder
½ teaspoon ground turmeric
½ teaspoon cayenne pepper (optional)
Salt and pepper to taste
1 cup cherry tomatoes, halved
1 cucumber, diced
1 cup red cabbage, shredded
½ cup plain Greek yogurt
2 tablespoons tahini
Juice of 1 lemon
Fresh parsley, chopped (for garnish)
These ingredients come together to create a delicious and nutritious meal. The chicken thighs are marinated in a blend of spices, giving them a rich flavor. The fresh vegetables add crunch and color, while the yogurt-tahini sauce brings creaminess to the dish. Feel free to adjust the ingredients based on your taste preferences or dietary needs. For instance, you can swap brown rice for quinoa or add more veggies for extra nutrition. The possibilities are endless!
Step-by-Step Preparation of Chicken Shawarma Bowl Recipe
Step 1: Marinating the Chicken
Marinating the chicken is a crucial step in this Chicken Shawarma Bowl Recipe. It allows the flavors to penetrate the meat, making it juicy and delicious. Start by taking a large bowl and adding the olive oil, ground cumin, ground coriander, paprika, garlic powder, onion powder, turmeric, cayenne pepper, salt, and pepper. Mix these ingredients well to create a flavorful marinade.
Next, add the boneless, skinless chicken thighs to the bowl. Toss the chicken in the marinade until it is fully coated. This step is essential for ensuring that every bite is packed with flavor. Once coated, cover the bowl with plastic wrap or a lid and let it marinate for at least 30 minutes. If you have more time, marinating for a few hours or overnight in the refrigerator will enhance the taste even more.
Step 2: Cooking the Chicken
After marinating, it’s time to cook the chicken. Preheat your oven to 400°F (200°C) and line a baking sheet with parchment paper. This will prevent the chicken from sticking and make cleanup easier. Place the marinated chicken thighs on the prepared baking sheet, ensuring they are spread out evenly.
Bake the chicken in the preheated oven for 25-30 minutes. You’ll know it’s done when the internal temperature reaches 165°F (75°C). This ensures the chicken is safe to eat and perfectly cooked. Once done, remove the chicken from the oven and let it rest for about 5 minutes. This resting period allows the juices to redistribute, keeping the chicken moist. After resting, slice the chicken into strips for easy serving.
Step 3: Preparing the Bowl Components
While the chicken is baking, you can prepare the other components of your Chicken Shawarma Bowl. Start by cooking the brown rice according to package instructions if you haven’t done so already. Brown rice is a great base for this dish, providing fiber and nutrients.
Next, chop the fresh vegetables. Halve the cherry tomatoes, dice the cucumber, and shred the red cabbage. These colorful veggies not only add crunch but also a variety of vitamins and minerals. Set them aside in separate bowls for easy assembly later.
Now, let’s make the creamy sauce! In a small bowl, combine the plain Greek yogurt, tahini, lemon juice, salt, and pepper. Mix well until smooth. This sauce will add a delicious creaminess to your bowl, balancing the spices from the chicken.
Step 4: Assembling the Chicken Shawarma Bowl
Now comes the fun part—assembling your Chicken Shawarma Bowl! Start by dividing the cooked brown rice among four bowls. This will be the hearty base of your meal. Next, top each bowl with the sliced chicken, ensuring everyone gets a generous portion.
Then, add the prepared cherry tomatoes, diced cucumber, and shredded red cabbage on top of the chicken. Feel free to arrange them in a colorful pattern for a beautiful presentation. Finally, drizzle the yogurt-tahini sauce over the top of each bowl. This adds a creamy texture and enhances the flavors.
To finish, sprinkle some chopped fresh parsley on top for a pop of color and freshness. Serve your Chicken Shawarma Bowls immediately and enjoy the delightful combination of flavors and textures!
Variations of Chicken Shawarma Bowl Recipe
Vegetarian Options
If you’re looking for a vegetarian twist on the Chicken Shawarma Bowl Recipe, you’re in luck! You can easily replace the chicken with roasted chickpeas or marinated tofu. Both options are packed with protein and will absorb the delicious spices just like the chicken. To prepare roasted chickpeas, simply rinse and drain a can of chickpeas, toss them in the same marinade used for the chicken, and roast them in the oven until crispy. This will give you a satisfying crunch and a burst of flavor.
For marinated tofu, press the tofu to remove excess moisture, then cut it into cubes. Marinate the tofu in the same spice mixture for at least 30 minutes before baking. Bake until golden brown, and you’ll have a delightful vegetarian alternative that pairs perfectly with the fresh veggies and creamy sauce.
Gluten-Free Alternatives
For those following a gluten-free diet, this Chicken Shawarma Bowl Recipe is naturally gluten-free! However, it’s essential to ensure that all ingredients are certified gluten-free. For instance, check the labels on your tahini and yogurt to confirm they are gluten-free. Additionally, you can substitute brown rice with quinoa or cauliflower rice for a lighter option. Quinoa is a fantastic gluten-free grain that adds a nutty flavor and extra protein to your bowl. Cauliflower rice is a great low-carb alternative that still provides a satisfying base for your meal.
Feel free to get creative with your toppings as well! Add avocado slices, roasted sweet potatoes, or even a sprinkle of feta cheese for added flavor. These variations will keep your Chicken Shawarma Bowl exciting and delicious, no matter your dietary preferences!
Cooking Note for Chicken Shawarma Bowl Recipe
When preparing the Chicken Shawarma Bowl Recipe, there are a few cooking notes to keep in mind to ensure your dish turns out perfectly every time. First, the marinating time is crucial. While 30 minutes is the minimum, allowing the chicken to marinate for several hours or overnight will enhance the flavors significantly. This extra time allows the spices to penetrate the meat, resulting in a more flavorful dish.
Next, pay attention to the cooking temperature and time. Preheating your oven to 400°F (200°C) is essential for even cooking. If your chicken thighs are thicker, you may need to adjust the cooking time slightly. Always use a meat thermometer to check that the internal temperature reaches 165°F (75°C) for safety. This ensures that the chicken is juicy and tender, not dry.
Additionally, consider the texture of your vegetables. For the best crunch, add the fresh veggies just before serving. This keeps them crisp and vibrant, enhancing the overall experience of your Chicken Shawarma Bowl. If you prefer softer vegetables, you can roast them alongside the chicken for a different flavor profile.
Lastly, don’t hesitate to experiment with the spices! If you enjoy a bit more heat, increase the cayenne pepper or add some chili flakes to the marinade. Alternatively, if you prefer milder flavors, you can reduce the spices to suit your taste. Cooking is all about personal preference, so feel free to make this recipe your own!
Serving Suggestions for Chicken Shawarma Bowl Recipe
When it comes to serving your Chicken Shawarma Bowl, presentation and accompaniments can elevate the dining experience. Here are some delightful serving suggestions to consider:
Garnish with Fresh Herbs: A sprinkle of fresh parsley or cilantro adds a burst of color and freshness. It enhances the visual appeal and complements the flavors beautifully.
Serve with Pita Bread: Warm pita bread on the side is a fantastic addition. You can use it to scoop up the ingredients or wrap them for a fun, handheld meal.
Add a Side Salad: A simple side salad with mixed greens, lemon vinaigrette, and olives can provide a refreshing contrast to the warm bowl. This adds extra nutrients and variety to your meal.
Include Pickled Vegetables: Pickled red onions or cucumbers can add a tangy crunch that balances the richness of the chicken and sauce. They are a traditional accompaniment in Middle Eastern cuisine.
Offer Extra Sauces: Consider serving additional sauces on the side, such as hot sauce or a spicy harissa. This allows guests to customize their bowls according to their spice preferences.
Pair with a Beverage: A refreshing drink like mint lemonade or a yogurt-based drink called Ayran can complement the flavors of the Chicken Shawarma Bowl. These beverages are popular in Middle Eastern cuisine and provide a cooling effect.
By incorporating these serving suggestions, you can create a well-rounded meal that is not only delicious but also visually appealing. Whether you’re hosting a dinner party or enjoying a cozy meal at home, these ideas will make your Chicken Shawarma Bowl a hit!
Tips for Perfecting Your Chicken Shawarma Bowl Recipe
Creating the perfect Chicken Shawarma Bowl is all about attention to detail and a few helpful tips. Here are some suggestions to elevate your dish and ensure it turns out delicious every time:
Choose Quality Chicken: Opt for fresh, high-quality boneless, skinless chicken thighs. They are more flavorful and tender compared to chicken breasts. If you prefer, you can also use chicken breasts, but thighs tend to stay juicier during cooking.
Marinate Longer: For the best flavor, marinate the chicken for at least 1-2 hours, or even overnight. This allows the spices to deeply penetrate the meat, resulting in a more flavorful dish.
Use a Meat Thermometer: To ensure your chicken is perfectly cooked, use a meat thermometer. The internal temperature should reach 165°F (75°C). This guarantees that the chicken is safe to eat while remaining juicy.
Customize Your Spices: Feel free to adjust the spice levels to suit your taste. If you love heat, add more cayenne pepper or chili powder. For a milder flavor, reduce the spices or omit the cayenne altogether.
Prep Ingredients Ahead: To save time, prepare your ingredients in advance. Chop the vegetables and make the sauce a day before. This way, you can quickly assemble your Chicken Shawarma Bowl when you’re ready to eat.
Experiment with Grains: While brown rice is a great base, don’t hesitate to try other grains like quinoa, couscous, or even cauliflower rice. Each option brings a unique flavor and texture to your bowl.
Keep Vegetables Fresh: Add the fresh vegetables just before serving to maintain their crunch. If you prefer softer veggies, consider lightly sautéing them instead of adding them raw.
Garnish Generously: Don’t skimp on the garnishes! Fresh herbs like parsley or cilantro, along with a sprinkle of sesame seeds, can enhance the visual appeal and flavor of your Chicken Shawarma Bowl.
Serve Immediately: For the best experience, serve your Chicken Shawarma Bowl right after assembling. This ensures that the chicken is warm, and the vegetables are crisp, creating a delightful contrast in textures.
By following these tips, you can perfect your Chicken Shawarma Bowl Recipe and impress your family and friends with a delicious, homemade meal. Enjoy the process and feel free to make it your own!
Breakdown of Time for Chicken Shawarma Bowl Recipe
Prep Time
The prep time for the Chicken Shawarma Bowl Recipe is approximately 15-20 minutes. This includes gathering all your ingredients, marinating the chicken, and preparing the vegetables. If you choose to marinate the chicken for longer, you can set it aside in the refrigerator while you chop the veggies and make the sauce. This way, you can maximize your time and have everything ready for cooking.
Cooking Time
The cooking time for this recipe is about 25-30 minutes. During this time, the marinated chicken thighs will bake in the oven until they reach a safe internal temperature of 165°F (75°C). While the chicken is cooking, you can also prepare the brown rice if you haven’t done so already. This multitasking will help you stay efficient in the kitchen.
Total Time
In total, you can expect the Chicken Shawarma Bowl Recipe to take around 45-50 minutes from start to finish. This includes both prep and cooking time. If you allow for longer marinating, the total time may extend, but the extra flavor is well worth it! This makes it a great option for a weeknight dinner or meal prep for the week ahead.
Nutritional Information for Chicken Shawarma Bowl Recipe
Calories
Each serving of the Chicken Shawarma Bowl contains approximately 450 calories. This makes it a satisfying meal that provides energy without being overly heavy. The combination of chicken, brown rice, and fresh vegetables ensures that you’re getting a balanced meal that keeps you full and nourished. If you’re watching your calorie intake, you can adjust the portion sizes or swap out certain ingredients to fit your dietary needs.
Protein
This Chicken Shawarma Bowl is a great source of protein, offering about 30 grams per serving. The boneless, skinless chicken thighs are the primary protein source, making this dish ideal for those looking to increase their protein intake. Protein is essential for muscle repair and growth, making this bowl a perfect post-workout meal. If you opt for the vegetarian version with chickpeas or tofu, you’ll still enjoy a good amount of protein, ensuring that your meal remains satisfying and nutritious.
Sodium
The sodium content in the Chicken Shawarma Bowl is approximately 600 mg per serving. This amount can vary based on the specific brands of ingredients you use, especially in the yogurt and tahini. If you’re concerned about sodium intake, consider using low-sodium options for the yogurt and tahini. Additionally, you can control the amount of salt added during cooking. Balancing sodium levels is important for maintaining healthy blood pressure and overall health.
FAQs about Chicken Shawarma Bowl Recipe
Can I make Chicken Shawarma Bowl Recipe ahead of time?
Absolutely! You can prepare the Chicken Shawarma Bowl ahead of time, making it a great option for meal prep. To do this, marinate the chicken and cook it as directed. Once cooked, let the chicken cool and store it in an airtight container in the refrigerator. You can also prepare the brown rice and chop the vegetables in advance. Just keep the yogurt-tahini sauce separate until you’re ready to serve. This way, everything stays fresh, and you can quickly assemble your bowls when it’s time to eat!
What can I substitute for chicken in the Chicken Shawarma Bowl Recipe?
If you’re looking for a substitute for chicken, there are several delicious options! For a vegetarian version, roasted chickpeas or marinated tofu work wonderfully. Both options can absorb the same spices, providing a flavorful experience. If you prefer seafood, grilled shrimp or fish can also be a tasty alternative. Just remember to adjust the cooking time accordingly, as seafood cooks much faster than chicken. These substitutions will still give you a satisfying and nutritious Chicken Shawarma Bowl!
How can I make the Chicken Shawarma Bowl Recipe spicier?
If you love a bit of heat, there are several ways to spice up your Chicken Shawarma Bowl! First, you can increase the amount of cayenne pepper in the marinade. If you want even more heat, consider adding sliced jalapeños or a drizzle of your favorite hot sauce on top of the finished bowl. Another option is to include spicy pickled vegetables as a topping. These additions will give your dish a fiery kick while still complementing the other flavors beautifully!
Is the Chicken Shawarma Bowl Recipe healthy?
Yes, the Chicken Shawarma Bowl Recipe is a healthy meal option! It is packed with protein from the chicken, fiber from the brown rice, and a variety of vitamins and minerals from the fresh vegetables. The use of olive oil and tahini provides healthy fats, making this bowl a well-rounded meal. Additionally, you can easily customize the ingredients to fit your dietary needs, such as using quinoa for a gluten-free option or adding more veggies for extra nutrients. Overall, this recipe is a delicious way to enjoy a nutritious meal!
Conclusion on Chicken Shawarma Bowl Recipe
In conclusion, the Chicken Shawarma Bowl Recipe is a fantastic way to enjoy a delicious and nutritious meal that is both satisfying and easy to prepare. With its vibrant mix of flavors, textures, and colors, this dish is sure to please everyone at the table. Whether you’re cooking for yourself, your family, or hosting friends, this bowl offers a delightful culinary experience that can be customized to suit various tastes and dietary preferences.
From the marinated chicken thighs bursting with spices to the fresh vegetables and creamy yogurt-tahini sauce, every component of this dish works harmoniously together. Plus, the recipe is versatile, allowing you to experiment with different grains, proteins, and toppings. This means you can enjoy a new twist on the Chicken Shawarma Bowl each time you make it!
Moreover, the nutritional benefits of this recipe make it a smart choice for anyone looking to maintain a balanced diet. With a good source of protein, fiber, and healthy fats, it provides the energy you need to power through your day. Whether you’re meal prepping for a busy week or looking for a quick weeknight dinner, this Chicken Shawarma Bowl is a perfect fit.
So, gather your ingredients, follow the steps, and enjoy the delightful flavors of this Chicken Shawarma Bowl Recipe. It’s not just a meal; it’s an experience that brings the taste of Middle Eastern cuisine right to your kitchen. Happy cooking!
Introduction to Chocolate Chip Banana Bread Recipe
Chocolate Chip Banana Bread Recipe. This scrumptious treat combines the natural sweetness of ripe bananas with the rich, melty goodness of chocolate chips. It’s perfect for breakfast, a snack, or even dessert. Plus, it’s a fantastic way to use up those overripe bananas sitting on your counter!
Why You’ll Love This Chocolate Chip Banana Bread Recipe
Chocolate Chip Banana Bread Recipe. First and foremost, it’s incredibly easy to make. With just a few simple ingredients, you can whip up a loaf that will impress family and friends alike. The aroma of baking banana bread fills your home with warmth and comfort, making it a perfect choice for cozy mornings or afternoon tea.
Moreover, this recipe is versatile. You can customize it to suit your taste. Whether you prefer it nutty, gluten-free, or even vegan, there’s a variation for everyone. The combination of bananas and chocolate creates a delightful flavor that’s hard to resist. Each slice is moist, tender, and bursting with chocolatey goodness.
Not only is this banana bread delicious, but it’s also a healthier option compared to many other baked goods. Bananas provide natural sweetness, reducing the need for excessive sugar. Plus, you can easily incorporate whole grains or nuts for added nutrition. So, let’s get started on this delightful baking adventure!
Ingredients for Chocolate Chip Banana Bread Recipe
Chocolate Chip Banana Bread, you’ll need a handful of simple ingredients. Each one plays a vital role in achieving that moist, flavorful bread we all love. Here’s what you’ll need:
3 ripe bananas, mashed
1/3 cup melted butter
1 teaspoon vanilla extract
1 teaspoon baking soda
Pinch of salt
3/4 cup sugar
1 large egg, beaten
1 cup all-purpose flour
1/2 cup chocolate chips
These ingredients come together to create a delightful blend of flavors and textures. The ripe bananas provide natural sweetness and moisture, while the melted butter adds richness. The baking soda helps the bread rise, ensuring a light and fluffy texture. Don’t forget the chocolate chips! They are the star of the show, adding bursts of chocolatey goodness in every bite.
Chocolate Chip Banana Bread Recipe.
Step-by-Step Preparation of Chocolate Chip Banana Bread Recipe
Chocolate Chip Banana Bread Recipe. Follow these simple steps to create a delicious loaf that will have everyone asking for seconds!
Step 1: Preheat the Oven
First things first, preheat your oven to 350°F (175°C). This step is crucial as it ensures your banana bread bakes evenly. While the oven heats up, you can prepare the batter. Don’t forget to grease your 9×5-inch loaf pan to prevent sticking!
Step 2: Prepare the Banana Mixture
In a mixing bowl, mash the 3 ripe bananas until smooth. You can use a fork or a potato masher for this task. Then, add the 1/3 cup of melted butter to the mashed bananas. Stir them together until they are well blended. The combination of bananas and butter creates a rich base for your bread.
Step 3: Combine Dry Ingredients
Next, it’s time to add the dry ingredients. In the same bowl, mix in 1 teaspoon of baking soda and a pinch of salt. These ingredients help the bread rise and enhance its flavor. Stir until everything is combined, ensuring there are no lumps.
Step 4: Mix Wet and Dry Ingredients
Now, add the sugar and the beaten egg to your banana mixture. Pour in 1 teaspoon of vanilla extract for that lovely aroma. Mix everything together until smooth. Then, gradually add 1 cup of all-purpose flour. Stir gently until just combined. Be careful not to overmix, as this can make the bread tough.
Step 5: Fold in Chocolate Chips
Here comes the best part! Gently fold in 1/2 cup of chocolate chips. This step adds delightful bursts of chocolate in every slice. Make sure the chocolate chips are evenly distributed throughout the batter for a deliciously sweet experience.
Step 6: Pour Batter into the Pan
Once your batter is ready, pour it into the greased loaf pan. Use a spatula to spread it evenly. This ensures that your banana bread bakes uniformly. Smooth the top for a nice finish!
Step 7: Bake the Banana Bread
Now, it’s time to bake! Place the loaf pan in the preheated oven and bake for 60-65 minutes. Keep an eye on it, as oven temperatures can vary. You’ll know it’s done when a toothpick inserted into the center comes out clean. The aroma will fill your kitchen, making it hard to wait!
Step 8: Cool and Serve
Chocolate Chip Banana Bread!
Variations of Chocolate Chip Banana Bread Recipe
Chocolate Chip Banana Bread Recipe is already a hit, there are many fun variations to explore! Each twist adds a unique flavor and texture, making your banana bread even more exciting. Let’s dive into some delicious alternatives that you can try!
Nutty Chocolate Chip Banana Bread
If you love a bit of crunch in your bread, this nutty variation is for you! Simply add 1/2 cup of chopped walnuts or pecans to the batter when you fold in the chocolate chips. The nuts not only enhance the flavor but also provide a delightful texture. They pair perfectly with the sweetness of the bananas and the richness of the chocolate. Enjoy a slice of this nutty goodness with your morning coffee!
Gluten-Free Chocolate Chip Banana Bread
Chocolate Chip Banana Bread Recipe. Substitute the all-purpose flour with a gluten-free flour blend. Make sure to check that your chocolate chips are also gluten-free. This variation maintains the same delicious taste while being friendly for gluten-free diets. You won’t even miss the gluten!
Vegan Chocolate Chip Banana Bread
Craving a vegan option? No problem! To make this banana bread vegan, replace the egg with a flaxseed egg. To create a flaxseed egg, mix 1 tablespoon of ground flaxseed with 2.5 tablespoons of water. Let it sit for a few minutes until it thickens. Additionally, use a plant-based butter or coconut oil instead of regular butter. This vegan twist still delivers the same moist and flavorful banana bread you love, without any animal products!
Chocolate Chip Banana Bread Recipe to fit your taste and dietary needs. Whether you prefer it nutty, gluten-free, or vegan, there’s a delicious option for everyone. So, gather your ingredients and get ready to bake something special!
Cooking Note for Chocolate Chip Banana Bread Recipe
Chocolate Chip Banana Bread Recipe. Here are some important cooking notes to keep in mind:
Banana Ripeness: The riper the bananas, the better! Look for bananas with brown spots. They are sweeter and will give your bread a rich flavor.
Butter Temperature: Make sure your butter is melted but not too hot. If it’s too hot, it can cook the egg when mixed in, leading to an uneven texture.
Mixing Technique: Be gentle when mixing the batter. Overmixing can lead to dense bread. Stir just until the ingredients are combined for a light and fluffy loaf.
Oven Calibration: Every oven is different. If you find your bread is browning too quickly, consider lowering the temperature by 25°F (about 15°C) and extending the baking time.
Cooling Time: Allow the bread to cool completely before slicing. This helps the flavors meld together and makes for cleaner slices.
Chocolate Chip Banana Bread turns out perfectly every time. Happy baking!
Serving Suggestions for Chocolate Chip Banana Bread Recipe
Chocolate Chip Banana Bread, it’s time to think about how to serve it! This delightful treat can be enjoyed in many ways, making it a versatile addition to any meal or occasion. Here are some tasty serving suggestions to elevate your banana bread experience:
Warm with Butter: Serve slices warm with a pat of butter on top. The butter melts into the bread, adding richness and flavor.
With Nut Butter: Spread almond or peanut butter on a slice for a protein-packed snack. The nutty flavor pairs wonderfully with the sweetness of the banana bread.
As French Toast: Transform your banana bread into a decadent breakfast by dipping slices in an egg mixture and frying them. Top with syrup, fresh fruit, or whipped cream for a special treat!
With Ice Cream: For a delightful dessert, serve warm banana bread with a scoop of vanilla or chocolate ice cream. The combination of warm bread and cold ice cream is simply irresistible.
With Fresh Fruit: Pair your banana bread with fresh berries or sliced bananas. This adds a refreshing touch and balances the sweetness of the bread.
As a Gift: Wrap slices in parchment paper and tie with a ribbon for a lovely homemade gift. Everyone loves receiving a delicious treat!
Chocolate Chip Banana Bread Recipe in new and exciting ways. Whether you’re having it for breakfast, dessert, or a snack, there’s no wrong way to savor this delightful loaf. So, slice it up and share the joy with family and friends!
Tips for Perfecting Your Chocolate Chip Banana Bread Recipe
Chocolate Chip Banana Bread Recipe turns out perfectly every time, consider these helpful tips. Each suggestion will enhance the flavor, texture, and overall enjoyment of your banana bread. Let’s dive into some expert advice!
Use Overripe Bananas: The key to sweet and flavorful banana bread is using overripe bananas. Look for bananas with lots of brown spots. They are sweeter and will make your bread moist and delicious.
Measure Ingredients Accurately: Baking is a science! Use measuring cups and spoons for accuracy. Too much flour can lead to a dry loaf, while too little can make it dense.
Don’t Overmix: When combining the wet and dry ingredients, mix just until combined. Overmixing can create a tough texture. A few lumps are perfectly fine!
Check for Doneness: Ovens can vary, so start checking your banana bread a few minutes before the recommended baking time. Insert a toothpick into the center; if it comes out clean, your bread is ready!
Cool Properly: Allow your banana bread to cool in the pan for about 10 minutes before transferring it to a wire rack. This helps it set and makes slicing easier.
Store Correctly: To keep your banana bread fresh, store it in an airtight container at room temperature. It can last for up to 3 days. For longer storage, wrap it tightly and freeze it!
Experiment with Add-Ins: Feel free to get creative! Add nuts, dried fruit, or spices like cinnamon for extra flavor. Each addition can give your banana bread a unique twist.
Chocolate Chip Banana Bread Recipe. Enjoy the process and happy baking!
Breakdown of Time for Chocolate Chip Banana Bread Recipe
Chocolate Chip Banana Bread Recipe can help you plan your baking session better. Here’s a simple breakdown of the time involved in preparing and baking this delicious treat.
Prep Time
Chocolate Chip Banana Bread Recipe is approximately 15-20 minutes. This includes gathering your ingredients, mashing the bananas, and mixing everything together. It’s a quick and easy process, making it perfect for busy days when you want a homemade treat without spending hours in the kitchen.
Cooking Time
Once your batter is ready, the cooking time is about 60-65 minutes. During this time, the bread will rise and develop that lovely golden-brown crust. Keep an eye on it, and remember to check for doneness with a toothpick. If it comes out clean, your banana bread is ready to be enjoyed!
Total Time
Chocolate Chip Banana Bread to share with family or friends. Plus, the delightful aroma that fills your kitchen is worth every minute!
Nutritional Information for Chocolate Chip Banana Bread Recipe
Chocolate Chip Banana Bread Recipe can help you enjoy it even more. This delicious treat not only satisfies your sweet tooth but also provides some essential nutrients. Here’s a breakdown of the nutritional information per serving:
Calories
Each slice of this delightful banana bread contains approximately 200 calories. This makes it a satisfying option for breakfast or a snack without going overboard on calories. The combination of bananas and chocolate chips adds natural sweetness and flavor, making every bite enjoyable.
Protein
In terms of protein, each serving offers about 3 grams. While this may not seem like a lot, it contributes to your daily protein intake. Pairing your banana bread with a source of protein, like yogurt or nut butter, can enhance its nutritional value and keep you feeling full longer.
Sodium
The sodium content in each slice is relatively low, at around 150 mg. This is beneficial for those watching their sodium intake. The pinch of salt used in the recipe helps to enhance the flavors without adding excessive sodium. Enjoy your banana bread guilt-free, knowing it fits well into a balanced diet!
Chocolate Chip Banana Bread Recipe while being mindful of your dietary needs. Whether you’re indulging in a slice for breakfast or dessert, this banana bread is a delicious and nutritious choice!
FAQs about Chocolate Chip Banana Bread Recipe
Can I use frozen bananas for this recipe?
Chocolate Chip Banana Bread Recipe. In fact, frozen bananas can be even sweeter than fresh ones. Just make sure to thaw them completely before mashing. Once thawed, drain any excess liquid to avoid making the batter too wet. This way, you can enjoy delicious banana bread without wasting any overripe bananas!
How do I store leftover chocolate chip banana bread?
Chocolate Chip Banana Bread fresh, store it in an airtight container at room temperature. It can last for up to 3 days. If you want to keep it longer, consider wrapping it tightly in plastic wrap and placing it in the freezer. This way, you can enjoy a slice of banana bread whenever you crave it! Just remember to thaw it at room temperature before serving.
Can I substitute the chocolate chips with something else?
Chocolate Chip Banana Bread Recipe. If you’re looking for a healthier option, try using dark chocolate chips or carob chips. You can also use dried fruits like raisins or cranberries for a fruity twist. Nuts, such as walnuts or pecans, can add a delightful crunch. Feel free to get creative and make it your own!
How ripe should the bananas be for the best flavor?
Chocolate Chip Banana Bread Recipe, use very ripe bananas. Look for bananas that are mostly brown with some black spots. These bananas are sweeter and will give your bread a rich, moist texture. Avoid using green or slightly yellow bananas, as they won’t provide the same level of sweetness. The riper, the better!
Conclusion on Chocolate Chip Banana Bread Recipe
Chocolate Chip Banana Bread Recipe is a delightful treat that brings joy to any kitchen. With its simple ingredients and easy preparation, it’s perfect for bakers of all skill levels. Whether you’re using overripe bananas or experimenting with variations, this recipe is sure to become a favorite in your home.
Not only does this banana bread taste amazing, but it also offers a healthier alternative to many other desserts. The natural sweetness from the bananas and the richness of the chocolate chips create a harmonious blend that’s hard to resist. Plus, with the option to add nuts or substitute ingredients, you can tailor it to fit your dietary preferences.
Chocolate Chip Banana Bread is a reminder of the simple pleasures in life. So, gather your ingredients, follow the steps, and indulge in the deliciousness of this classic recipe!
Happy baking, and may your kitchen always be filled with the delightful aroma of banana bread!