Get my cookbooks

Crispy Bang Bang Salmon Bites Recipe is a must-try!

Introduction to Crispy Bang Bang Salmon Bites Recipe

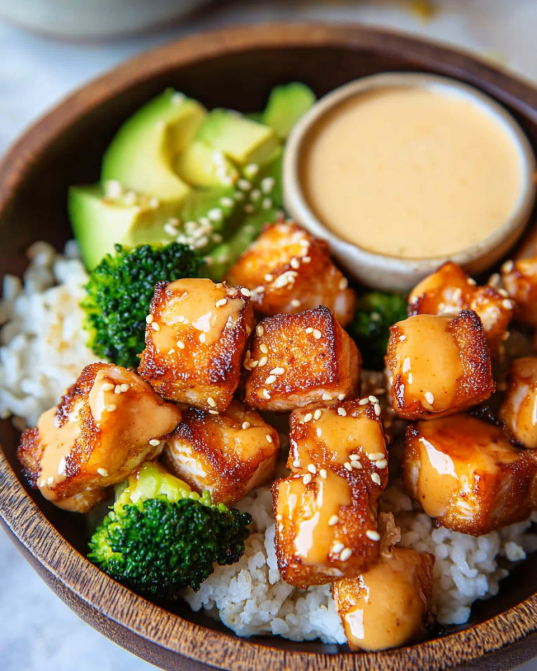
If you’re looking for a delicious and easy-to-make appetizer, look no further than the Crispy Bang Bang Salmon Bites Recipe. These little bites pack a punch of flavor and are perfect for any occasion, whether it’s a family dinner, a party, or just a cozy night in. The combination of crispy salmon and a creamy, spicy sauce makes for a delightful treat that everyone will love.

What Makes Crispy Bang Bang Salmon Bites Special?

What sets these salmon bites apart is their unique blend of textures and flavors. The salmon is tender and flaky on the inside, while the panko breadcrumbs create a satisfying crunch on the outside. This contrast makes each bite exciting and enjoyable. Additionally, the bang bang sauce adds a creamy, spicy kick that elevates the dish to a whole new level.

Moreover, this recipe is versatile. You can easily adjust the spice level of the sauce to suit your taste. Whether you prefer a mild flavor or a fiery kick, you can customize it to your liking. Plus, the recipe is quick to prepare, making it a great option for busy weeknights or last-minute gatherings.

In summary, the Crispy Bang Bang Salmon Bites Recipe is not just a meal; it’s an experience. With its delightful crunch, rich flavors, and easy preparation, it’s sure to become a favorite in your household. So, let’s dive into the ingredients and get started on making these scrumptious bites!

Ingredients for Crispy Bang Bang Salmon Bites Recipe

To create the mouthwatering Crispy Bang Bang Salmon Bites, you’ll need a few simple ingredients. Each component plays a vital role in achieving that perfect balance of flavor and texture. Here’s what you’ll need:

  • 1 pound salmon fillet: Make sure the skin is removed and cut into bite-sized pieces for easy cooking and eating.
  • 1 cup panko breadcrumbs: These breadcrumbs provide the crispy coating that makes the bites so delightful.
  • 1/2 cup all-purpose flour: This helps the salmon bites hold onto the egg and panko coating.
  • 2 large eggs: Beaten eggs act as a binding agent, ensuring the breadcrumbs stick well.
  • 1 teaspoon garlic powder: Adds a savory flavor that complements the salmon beautifully.
  • 1 teaspoon paprika: This spice gives a hint of smokiness and a lovely color to the bites.
  • 1/2 teaspoon salt: Enhances the overall flavor of the salmon.
  • 1/4 teaspoon black pepper: Adds a subtle kick to the dish.
  • 1/4 cup mayonnaise: A creamy base for the bang bang sauce.
  • 2 tablespoons sweet chili sauce: This sauce brings sweetness and a touch of heat.
  • 1 tablespoon sriracha: Adjust this to your taste for a spicy kick.
  • 2 tablespoons chopped green onions: For garnish, adding freshness and color.
  • Lemon wedges: Serve on the side for a zesty finish.

Gathering these ingredients will set you on the right path to making your Crispy Bang Bang Salmon Bites. Each item contributes to the overall taste and texture, ensuring a delightful experience with every bite. Now that you have everything ready, let’s move on to the preparation steps!

Step-by-Step Preparation of Crispy Bang Bang Salmon Bites Recipe

Now that you have all your ingredients ready, it’s time to dive into the step-by-step preparation of your Crispy Bang Bang Salmon Bites. This process is straightforward and fun, making it perfect for cooks of all skill levels. Let’s get started!

Step 1: Preparing the Salmon

First, take your pound of salmon fillet and ensure it is skinless. If you haven’t done this yet, carefully remove the skin using a sharp knife. Next, cut the salmon into bite-sized pieces. Aim for uniform sizes, about 1 to 2 inches, so they cook evenly. Once cut, set the salmon aside on a plate. This preparation is crucial for achieving that perfect texture in your bites.

Step 2: Making the Bang Bang Sauce

While your salmon is resting, let’s whip up the bang bang sauce. In a small bowl, combine the mayonnaise, sweet chili sauce, and sriracha. Stir well until all ingredients are fully blended. Taste the sauce and adjust the sriracha according to your spice preference. This sauce is what gives your salmon bites their signature flavor, so make sure it’s just right for you!

Step 3: Coating the Salmon Bites

Now, it’s time to coat the salmon pieces. Start by setting up a breading station. In one shallow bowl, mix the flour, garlic powder, paprika, salt, and black pepper. In a second bowl, beat the two large eggs until they are well mixed. Finally, place the panko breadcrumbs in a third bowl. Take each piece of salmon and dip it first into the flour mixture, ensuring it’s fully coated. Then, dip it into the beaten eggs, allowing any excess to drip off. Finally, roll the salmon in the panko breadcrumbs, pressing gently to ensure a good coating. Place the coated salmon bites on the prepared baking sheet, ready for baking.

Step 4: Cooking the Salmon Bites

With your salmon bites coated, it’s time to cook them! Preheat your oven to 400°F (200°C) if you haven’t already. Once heated, place the baking sheet in the oven and bake the salmon bites for 12-15 minutes. Keep an eye on them; you want the coating to turn golden brown and crispy. The salmon should be cooked through and flake easily with a fork. When done, remove them from the oven and let them cool slightly before serving.

And there you have it! Your Crispy Bang Bang Salmon Bites are now ready to be enjoyed. The preparation steps are simple, and the result is a delicious dish that’s sure to impress. Next, let’s explore some variations you can try to make this recipe even more exciting!

Variation of Crispy Bang Bang Salmon Bites Recipe

While the original Crispy Bang Bang Salmon Bites Recipe is already a hit, there are plenty of ways to mix things up! Whether you want to try different sauces or explore various cooking methods, these variations will keep your taste buds excited. Let’s dive into some alternative sauces and cooking techniques that can elevate your salmon bites even further.

Alternative Sauces to Try

Experimenting with sauces can completely change the flavor profile of your salmon bites. Here are a few delicious alternatives:

  • Honey Mustard Sauce: Combine equal parts honey and Dijon mustard for a sweet and tangy dip. This sauce pairs wonderfully with the crispy salmon.
  • Garlic Aioli: Mix mayonnaise with minced garlic, lemon juice, and a pinch of salt. This creamy sauce adds a rich flavor that complements the salmon perfectly.
  • Buffalo Sauce: For those who love heat, toss the cooked salmon bites in buffalo sauce. This spicy twist will give your bites a bold kick!
  • Teriyaki Sauce: Drizzle teriyaki sauce over the salmon bites for a sweet and savory Asian-inspired flavor. It’s a delightful change from the traditional bang bang sauce.

Feel free to get creative! You can even mix and match these sauces to find your perfect combination. Each sauce brings its own unique taste, making your salmon bites versatile and exciting.

Different Cooking Methods

While baking is a fantastic way to prepare your Crispy Bang Bang Salmon Bites, there are other cooking methods you can try for different textures and flavors:

  • Air Frying: For a healthier option, air fry the salmon bites at 375°F (190°C) for about 10 minutes. This method gives you a crispy exterior without the need for excess oil.
  • Pan-Frying: Heat a bit of oil in a skillet over medium heat. Cook the salmon bites for about 3-4 minutes on each side until golden brown. This method adds a deliciously crispy texture.
  • Grilling: If you’re feeling adventurous, grill the salmon bites on skewers. This adds a smoky flavor and is perfect for summer barbecues. Just be sure to keep an eye on them to prevent sticking.

Each cooking method offers a unique twist on the classic recipe. Whether you prefer the oven-baked version or want to try air frying or grilling, your Crispy Bang Bang Salmon Bites will always be a hit!

Cooking Note for Crispy Bang Bang Salmon Bites Recipe

When preparing your Crispy Bang Bang Salmon Bites, there are a few important cooking notes to keep in mind. These tips will help ensure that your salmon bites turn out perfectly every time, enhancing both flavor and texture.

First, make sure your salmon is fresh. Fresh salmon not only tastes better but also has a firmer texture, which is ideal for this recipe. If you can, buy your salmon from a trusted source or fish market. This will guarantee quality and freshness.

Next, pay attention to the size of your salmon pieces. Cutting them into uniform bite-sized pieces is crucial. This ensures that they cook evenly, preventing some pieces from being overcooked while others remain undercooked. Aim for pieces that are about 1 to 2 inches in size.

Another key point is the coating process. When you dip the salmon in the flour, egg, and panko, make sure to shake off any excess. This helps the coating adhere better and prevents it from becoming soggy during cooking. A light, even coating will give you that desired crispy texture.

Lastly, keep an eye on the cooking time. Ovens can vary, so it’s essential to check your salmon bites a minute or two before the suggested cooking time. You want them to be golden brown and cooked through, but not overdone. Overcooked salmon can become dry and lose its delicious flavor.

By following these cooking notes, you’ll be well on your way to creating the perfect Crispy Bang Bang Salmon Bites. Enjoy the process and the delightful results!

Serving Suggestions for Crispy Bang Bang Salmon Bites Recipe

Once your Crispy Bang Bang Salmon Bites are ready, it’s time to think about how to serve them. The right sides and presentation can elevate your dish, making it even more enjoyable. Here are some great pairing ideas and tips to make your meal look as good as it tastes!

Pairing with Sides

To create a well-rounded meal, consider pairing your salmon bites with delicious sides. Here are some tasty options:

  • Fresh Salad: A light salad with mixed greens, cherry tomatoes, and a tangy vinaigrette complements the richness of the salmon. The freshness balances the flavors perfectly.
  • Steamed Vegetables: Broccoli, asparagus, or green beans add a nutritious touch. Their vibrant colors and crunch make for a delightful contrast to the crispy salmon.
  • Rice or Quinoa: Serve your salmon bites over a bed of fluffy rice or quinoa. This adds a hearty element to the meal and soaks up any extra bang bang sauce.
  • Sweet Potato Fries: For a fun twist, pair your salmon bites with sweet potato fries. Their sweetness pairs wonderfully with the spicy sauce.

These sides not only enhance the meal but also provide a variety of textures and flavors. Feel free to mix and match based on your preferences and what you have on hand!

Presentation Tips

Presentation is key when serving your Crispy Bang Bang Salmon Bites. Here are some simple tips to make your dish look appealing:

  • Use a Platter: Arrange the salmon bites on a large platter for a beautiful display. This makes it easy for guests to serve themselves.
  • Garnish: Sprinkle chopped green onions over the salmon bites for a pop of color. You can also add fresh herbs like cilantro or parsley for an extra touch.
  • Lemon Wedges: Place lemon wedges around the platter. Not only do they look great, but they also allow guests to add a zesty squeeze to their bites.
  • Serve with Dipping Sauce: Present the bang bang sauce in a small bowl in the center of the platter. This makes it easy for everyone to dip their salmon bites.

By following these presentation tips, your Crispy Bang Bang Salmon Bites will not only taste amazing but also look stunning on the table. Enjoy serving this delightful dish!

Tips for Perfecting Your Crispy Bang Bang Salmon Bites Recipe

To ensure your Crispy Bang Bang Salmon Bites turn out perfectly every time, consider these helpful tips. These suggestions will enhance the flavor, texture, and overall experience of your dish. Let’s dive into some expert advice!

First, always use fresh salmon. Fresh fish not only tastes better but also has a firmer texture, which is essential for achieving that perfect bite. If possible, buy your salmon from a reputable fish market. This guarantees quality and freshness, making your bites even more delicious.

Next, pay attention to the coating process. When you dip the salmon pieces in flour, egg, and panko, make sure to shake off any excess. This helps the coating adhere better and prevents it from becoming soggy during cooking. A light, even coating will give you that desired crispy texture.

Another important tip is to let the coated salmon bites rest for a few minutes before baking. This allows the coating to set, which can help it stay crispy during cooking. While waiting, you can preheat your oven to the right temperature, ensuring it’s hot when you place the salmon bites inside.

Also, consider using a wire rack on your baking sheet. This allows hot air to circulate around the salmon bites, promoting even cooking and crispiness. If you don’t have a wire rack, just make sure to space the bites out on the baking sheet to avoid steaming.

Lastly, keep an eye on the cooking time. Ovens can vary, so it’s essential to check your salmon bites a minute or two before the suggested cooking time. You want them to be golden brown and cooked through, but not overdone. Overcooked salmon can become dry and lose its delicious flavor.

By following these tips, you’ll be well on your way to creating the perfect Crispy Bang Bang Salmon Bites. Enjoy the process and the delightful results!

Breakdown of Time for Crispy Bang Bang Salmon Bites Recipe

Understanding the time needed for each step in the Crispy Bang Bang Salmon Bites Recipe can help you plan your cooking efficiently. Here’s a breakdown of the time required for preparation and cooking, ensuring you can enjoy these delicious bites without any stress.

Prep Time

The prep time for this recipe is approximately 15-20 minutes. This includes gathering your ingredients, cutting the salmon into bite-sized pieces, and preparing the bang bang sauce. Taking your time during this stage ensures everything is ready for the next steps, making the cooking process smoother.

Cooking Time

Once your salmon bites are coated and ready, the cooking time is about 12-15 minutes. If you choose to air fry them, the cooking time will be slightly shorter, around 10 minutes. Keep an eye on them to achieve that perfect golden brown color and crispy texture.

Total Time

In total, you can expect the entire process to take around 30-35 minutes from start to finish. This includes both prep and cooking time. With such a quick turnaround, you can easily whip up these Crispy Bang Bang Salmon Bites for a weeknight dinner or a last-minute gathering!

Nutritional Information for Crispy Bang Bang Salmon Bites Recipe

Understanding the nutritional content of your Crispy Bang Bang Salmon Bites is essential for maintaining a balanced diet. This section will break down the calories, protein content, and sodium levels per serving, helping you make informed choices while enjoying this delicious dish.

Calories

Each serving of Crispy Bang Bang Salmon Bites contains approximately 320 calories. This makes it a satisfying option for an appetizer or a light meal. The calorie count is reasonable, especially considering the protein and healthy fats provided by the salmon. Enjoying these bites can fit well into a balanced diet without excessive calorie intake.

Protein Content

One of the standout features of this recipe is its protein content. Each serving provides about 25 grams of protein. Salmon is an excellent source of high-quality protein, which is essential for muscle repair and overall health. Including these salmon bites in your meal can help you meet your daily protein needs while enjoying a tasty dish.

Sodium Levels

When it comes to sodium, each serving of Crispy Bang Bang Salmon Bites contains approximately 600 milligrams. While this is a moderate amount, it’s important to be mindful of your overall sodium intake, especially if you are watching your salt consumption. You can reduce sodium levels by using low-sodium soy sauce in the bang bang sauce or adjusting the amount of salt in the coating mixture.

In summary, the Crispy Bang Bang Salmon Bites Recipe offers a delicious balance of calories, protein, and sodium. With 320 calories and 25 grams of protein per serving, these bites are a nutritious choice that can be enjoyed guilt-free. Just remember to keep an eye on sodium levels if that’s a concern for you!

FAQs about Crispy Bang Bang Salmon Bites Recipe

Can I use frozen salmon for this recipe?

Yes, you can use frozen salmon for the Crispy Bang Bang Salmon Bites Recipe! However, it’s important to thaw the salmon completely before cooking. You can do this by placing it in the refrigerator overnight or using the defrost setting on your microwave. Once thawed, make sure to pat the salmon dry with paper towels to remove excess moisture. This will help the coating adhere better and ensure a crispy texture when baked.

What can I substitute for the Bang Bang sauce?

If you’re looking for alternatives to the bang bang sauce, there are several delicious options! You can try a honey mustard sauce, garlic aioli, or even a spicy buffalo sauce. Each of these sauces brings a unique flavor that pairs well with the crispy salmon. Feel free to experiment with different combinations to find your favorite dip. The key is to choose a sauce that complements the salmon bites while adding your desired level of flavor and spice.

How do I store leftover salmon bites?

To store leftover Crispy Bang Bang Salmon Bites, allow them to cool completely before placing them in an airtight container. You can keep them in the refrigerator for up to 2-3 days. When you’re ready to enjoy them again, reheat the salmon bites in the oven at 350°F (175°C) for about 10 minutes. This will help restore their crispiness. Avoid using the microwave, as it can make the coating soggy. Enjoy your leftovers while they’re still tasty!

Can I make this recipe gluten-free?

Absolutely! Making the Crispy Bang Bang Salmon Bites gluten-free is easy. Simply substitute the all-purpose flour with a gluten-free flour blend and use gluten-free panko breadcrumbs. Many brands offer gluten-free options that provide the same crispy texture. Just be sure to check the labels to ensure all ingredients are gluten-free. With these simple swaps, you can enjoy this delicious recipe without any gluten concerns!

Conclusion on Crispy Bang Bang Salmon Bites Recipe

In conclusion, the Crispy Bang Bang Salmon Bites Recipe is a delightful dish that combines flavor, texture, and ease of preparation. Whether you’re hosting a gathering or simply enjoying a cozy night at home, these salmon bites are sure to impress. The crispy coating, paired with the creamy and spicy bang bang sauce, creates a mouthwatering experience that is hard to resist.

Not only are these bites delicious, but they are also versatile. You can easily customize the sauce to suit your taste or try different cooking methods for a unique twist. Plus, with the option to substitute salmon with other proteins, everyone can enjoy this recipe, regardless of dietary preferences.

As you prepare your Crispy Bang Bang Salmon Bites, remember the tips and variations shared throughout this article. They will help you achieve the perfect balance of flavors and textures. With just a little effort, you can create a dish that is not only satisfying but also nutritious.

So, gather your ingredients, follow the steps, and get ready to enjoy a plate of crispy, flavorful salmon bites. Your family and friends will be asking for seconds, and you’ll be proud to share this fantastic recipe. Happy cooking!

Cheesy Chicken Bacon Ranch Tater Tot Casserole delights families!

Introduction to Cheesy Chicken Bacon Ranch Tater Tot Casserole Recipe

Cheesy Chicken Bacon Ranch Tater Tot Casserole Recipe is just what you need! This delightful casserole combines tender chicken, crispy bacon, and creamy ranch flavors, all topped with golden tater tots and melted cheese. It’s a comforting meal that’s perfect for busy weeknights or cozy family gatherings.

What Makes This Casserole a Family Favorite?

There are many reasons why this casserole is a hit in households everywhere. First, it’s incredibly easy to prepare. With just a few simple ingredients, you can whip up a delicious meal in no time. Plus, the combination of flavors is simply irresistible. The savory chicken and bacon pair perfectly with the creamy ranch and gooey cheese, creating a taste sensation that everyone will love.

Another reason this dish is a family favorite is its versatility. You can customize it to suit your family’s preferences. Whether you want to add some spice with jalapeños or switch out the chicken for ground beef, the options are endless. This flexibility makes it a go-to recipe for any occasion.

Cheesy Chicken Bacon Ranch Tater Tot Casserole Recipe is a complete meal in one dish. It’s hearty, filling, and packed with protein, making it a satisfying choice for dinner. Serve it with a side salad or some steamed veggies, and you’ve got a well-rounded meal that everyone will enjoy!

Ingredients for Cheesy Chicken Bacon Ranch Tater Tot Casserole Recipe

Cheesy Chicken Bacon Ranch Tater Tot Casserole Recipe, you’ll need a few key ingredients. Each one plays a vital role in bringing flavor and texture to this delightful dish. Here’s what you’ll need:

  • 2 cups cooked chicken, shredded: Use rotisserie chicken for convenience or cook your own. Shredded chicken adds protein and heartiness.
  • 1 cup cooked bacon, crumbled: Crispy bacon brings a smoky flavor that complements the chicken beautifully.
  • 1 packet (1 ounce) ranch seasoning mix: This seasoning mix is the star of the show, infusing the casserole with its signature ranch flavor.
  • 1 cup sour cream: Sour cream adds creaminess and richness, making the casserole extra comforting.
  • 1 cup shredded cheddar cheese: Cheddar cheese provides a sharp flavor that pairs well with the other ingredients.
  • 1 cup shredded mozzarella cheese: Mozzarella adds a gooey texture that melts perfectly over the tater tots.
  • 32 ounces frozen tater tots: These are the base of the casserole, providing a crispy topping that everyone loves.
  • 1/2 cup green onions, sliced (optional): Green onions add a fresh crunch and a pop of color to the dish.
  • Salt and pepper to taste: Seasoning is essential to enhance the flavors of the casserole.

Gather these ingredients, and you’ll be ready to create a mouthwatering casserole that your family will adore. The combination of chicken, bacon, ranch, and cheese is sure to make this dish a hit at your dinner table!

Step-by-Step Preparation of Cheesy Chicken Bacon Ranch Tater Tot Casserole Recipe

Cheesy Chicken Bacon Ranch Tater Tot Casserole Recipe. Follow these simple steps to create a delicious meal that will impress your family and friends!

Step 1: Prepping the Ingredients

Start by gathering all your ingredients on the counter. This makes the cooking process smoother. If you haven’t done so already, shred the cooked chicken and crumble the bacon. You can use store-bought rotisserie chicken for convenience. Also, slice the green onions if you plan to use them as a garnish. Having everything prepped will save you time and make the assembly easier.

Step 2: Cooking the Chicken and Bacon

If you’re using raw chicken, cook it in a skillet over medium heat until it’s no longer pink. This usually takes about 6-8 minutes. For the bacon, cook it in a separate pan until crispy. Once both are cooked, let them cool slightly before shredding the chicken and crumbling the bacon. This step ensures that your casserole has the best flavors and textures.

Step 3: Mixing the Casserole Base

In a large mixing bowl, combine the shredded chicken, crumbled bacon, ranch seasoning mix, and sour cream. Stir everything together until well mixed. Then, add half of the shredded cheddar and mozzarella cheeses. This mixture will be the flavorful base of your casserole, so make sure it’s well combined. The creamy ranch flavor will make your dish irresistible!

Step 4: Assembling the Casserole

Now it’s time to assemble your casserole! Start by spreading the chicken mixture evenly in a greased 9×13-inch baking dish. Make sure it’s spread out nicely. Next, layer the frozen tater tots evenly over the chicken mixture. This will create a crispy topping that everyone loves. Finally, sprinkle the remaining cheddar and mozzarella cheeses on top of the tater tots. This cheesy layer will melt beautifully while baking.

Step 5: Baking the Casserole

Preheat your oven to 375°F (190°C) if you haven’t done so already. Once it’s ready, place your assembled casserole in the oven. Bake for 30-35 minutes, or until the tater tots are golden brown and the cheese is bubbly. The aroma will fill your kitchen, making it hard to wait! Once it’s done, let it cool for a few minutes before serving. If you like, garnish with sliced green onions for a fresh touch.

Cheesy Chicken Bacon Ranch Tater Tot Casserole Recipe is ready to be enjoyed. This step-by-step guide ensures that you create a delicious meal that your family will love.

Variations of Cheesy Chicken Bacon Ranch Tater Tot Casserole Recipe

Cheesy Chicken Bacon Ranch Tater Tot Casserole Recipe is a crowd-pleaser, there are many ways to switch things up! Whether you have dietary restrictions or just want to try something new, these variations will keep your meals exciting and delicious.

Vegetarian Options

If you’re looking for a vegetarian twist, you can easily adapt this casserole. Start by replacing the chicken and bacon with hearty vegetables. Consider using:

  • Mushrooms: Sautéed mushrooms add a rich, umami flavor.
  • Black beans: These provide protein and a nice texture.
  • Spinach: Fresh or frozen spinach can add a pop of color and nutrients.
  • Bell peppers: Diced bell peppers add sweetness and crunch.

Mix these veggies with the ranch seasoning and sour cream, just like in the original recipe. You’ll still enjoy that creamy, cheesy goodness without the meat!

Different Cheese Choices

Cheese lovers rejoice! You can customize the cheese in your casserole to suit your taste. Here are some ideas:

  • Monterey Jack: This cheese melts beautifully and adds a mild flavor.
  • Pepper Jack: For a spicy kick, try using Pepper Jack cheese.
  • Parmesan: A sprinkle of Parmesan on top can add a nice, salty finish.
  • Vegan cheese: If you’re dairy-free, there are many plant-based cheese options available.

Feel free to mix and match different cheeses to create your perfect cheesy topping. The possibilities are endless!

Cheesy Chicken Bacon Ranch Tater Tot Casserole Recipe can be tailored to fit any dietary need or flavor preference. Enjoy experimenting and finding your favorite combination!

Cooking Note for Cheesy Chicken Bacon Ranch Tater Tot Casserole Recipe

Cheesy Chicken Bacon Ranch Tater Tot Casserole Recipe, there are a few important cooking notes to keep in mind. These tips will help ensure that your casserole turns out perfectly every time!

First, make sure to use cooked chicken and bacon. This not only saves time but also ensures that the flavors meld together beautifully during baking. If you’re using raw chicken, be sure to cook it thoroughly before adding it to the casserole. Undercooked chicken can lead to food safety issues.

Next, consider the size of your baking dish. A 9×13-inch dish is ideal for this recipe, as it allows for even cooking and proper layering. If you use a smaller dish, the casserole may take longer to cook, and the tater tots might not crisp up as nicely.

Another tip is to keep an eye on the baking time. Ovens can vary, so check your casserole a few minutes before the recommended time. You want the tater tots to be golden brown and the cheese to be bubbly. If the top is browning too quickly, you can cover it loosely with aluminum foil to prevent burning.

Lastly, let the casserole cool for a few minutes before serving. This allows the layers to set, making it easier to cut and serve. Plus, it gives the flavors a chance to develop even further!

Cheesy Chicken Bacon Ranch Tater Tot Casserole Recipe that your family will love. Happy cooking!

Serving Suggestions for Cheesy Chicken Bacon Ranch Tater Tot Casserole Recipe

Cheesy Chicken Bacon Ranch Tater Tot Casserole Recipe is baked to perfection, it’s time to think about how to serve it! This dish is not only delicious but also versatile, making it easy to pair with various sides and garnishes. Here are some serving suggestions to elevate your meal:

  • Fresh Salad: A crisp green salad is a perfect complement to the rich flavors of the casserole. Consider a simple garden salad with mixed greens, cherry tomatoes, and a light vinaigrette. The freshness of the salad balances the hearty casserole.
  • Steamed Vegetables: Steamed broccoli, green beans, or carrots add a nutritious touch to your meal. Their vibrant colors and crunch provide a nice contrast to the creamy casserole.
  • Garlic Bread: For those who love carbs, serve the casserole with warm garlic bread. The buttery, garlicky flavor pairs wonderfully with the cheesy goodness of the dish.
  • Coleslaw: A tangy coleslaw can add a refreshing crunch. The coolness of the slaw contrasts nicely with the warm, cheesy casserole.
  • Pickles or Olives: For a fun twist, serve some pickles or olives on the side. Their briny flavor can cut through the richness of the casserole, adding an extra layer of taste.

Cheesy Chicken Bacon Ranch Tater Tot Casserole Recipe will be a hit at the dinner table, making every meal a delightful experience!

Tips for Perfecting Your Cheesy Chicken Bacon Ranch Tater Tot Casserole Recipe

Cheesy Chicken Bacon Ranch Tater Tot Casserole Recipe turns out perfectly every time, consider these helpful tips. They will enhance the flavors and textures, making your dish even more enjoyable!

  • Use Quality Ingredients: The better the ingredients, the better the casserole. Opt for fresh chicken and high-quality bacon. This will elevate the overall taste of your dish.
  • Don’t Skip the Seasoning: While ranch seasoning is key, don’t forget to taste and adjust the salt and pepper. A little extra seasoning can make a big difference in flavor.
  • Mix Well: When combining the chicken, bacon, and ranch mixture, ensure everything is evenly mixed. This helps distribute the flavors throughout the casserole.
  • Layering Matters: Spread the chicken mixture evenly in the baking dish. This ensures that every bite has a good balance of chicken, bacon, and cheese.
  • Check for Doneness: Ovens can vary in temperature. Keep an eye on your casserole as it bakes. Look for golden brown tater tots and bubbling cheese to know it’s ready.
  • Let It Rest: After baking, allow the casserole to sit for about 5-10 minutes before serving. This helps the layers set and makes it easier to cut and serve.
  • Experiment with Toppings: Feel free to get creative with toppings! Consider adding crushed tortilla chips, breadcrumbs, or even a drizzle of hot sauce for an extra kick.
  • Make It Ahead: If you’re short on time, prepare the casserole ahead of time. Assemble it, cover it, and store it in the fridge. Just bake it when you’re ready to eat!

Cheesy Chicken Bacon Ranch Tater Tot Casserole Recipe that’s not only delicious but also a true crowd-pleaser. Enjoy the process and happy cooking!

Breakdown of Time for Cheesy Chicken Bacon Ranch Tater Tot Casserole Recipe

Prep Time

Cheesy Chicken Bacon Ranch Tater Tot Casserole Recipe is quick and easy. The prep time usually takes about 15-20 minutes. This includes gathering your ingredients, shredding the chicken, crumbling the bacon, and mixing everything together. If you use rotisserie chicken and pre-cooked bacon, you can save even more time!

Cooking Time

Once your casserole is assembled, it’s time to bake! The cooking time is approximately 30-35 minutes. During this time, the tater tots will become golden brown, and the cheese will melt into a bubbly, delicious topping. Keep an eye on it to ensure it doesn’t overcook.

Total Time

In total, you can expect to spend about 45-55 minutes from start to finish. This includes both prep and cooking time. With such a quick turnaround, you can have a hearty and satisfying meal ready for your family in no time!

Nutritional Information for Cheesy Chicken Bacon Ranch Tater Tot Casserole Recipe

Cheesy Chicken Bacon Ranch Tater Tot Casserole Recipe is not only delicious but also provides a good amount of nutrients. Here’s a breakdown of the nutritional information per serving:

Calories

Each serving of this hearty casserole contains approximately 450 calories. This makes it a filling option for dinner, especially when paired with a light salad or steamed vegetables. The calorie count comes from the combination of chicken, bacon, cheese, and tater tots, all of which contribute to the overall richness of the dish.

Protein

Cheesy Chicken Bacon Ranch Tater Tot Casserole Recipe is its protein content. Each serving provides about 28 grams of protein. This is primarily due to the chicken and bacon, making it a great choice for those looking to increase their protein intake. Protein is essential for muscle repair and growth, making this casserole a satisfying meal after a long day.

Sodium

While the casserole is delicious, it’s important to be mindful of sodium intake. Each serving contains around 800 milligrams of sodium. This is mainly from the ranch seasoning mix and bacon. If you’re watching your sodium levels, consider using low-sodium bacon or making your own ranch seasoning to control the salt content. Balancing this dish with fresh vegetables can also help offset the sodium levels.

Cheesy Chicken Bacon Ranch Tater Tot Casserole Recipe is a tasty and nutritious option for dinner. With its hearty ingredients and satisfying flavors, it’s sure to be a hit at your table!

FAQs about Cheesy Chicken Bacon Ranch Tater Tot Casserole Recipe

Can I make Cheesy Chicken Bacon Ranch Tater Tot Casserole Recipe ahead of time?

Cheesy Chicken Bacon Ranch Tater Tot Casserole Recipe ahead of time. Simply assemble the casserole as directed, but do not bake it right away. Cover it tightly with plastic wrap or aluminum foil and store it in the refrigerator. When you’re ready to enjoy it, just pop it in the oven. You may need to add a few extra minutes to the baking time since it will be cold from the fridge. This makes it a great option for meal prep or when hosting guests!

What can I substitute for ranch dressing in the casserole?

Cheesy Chicken Bacon Ranch Tater Tot Casserole Recipe. You can try using a homemade ranch seasoning mix, which typically includes dried herbs like dill, parsley, and garlic powder. Another option is to use a different dressing, such as blue cheese or Italian dressing, for a unique flavor twist. Just keep in mind that these substitutes may alter the overall taste of the casserole, but they can still be delicious!

How do I store leftovers of Cheesy Chicken Bacon Ranch Tater Tot Casserole Recipe?

Cheesy Chicken Bacon Ranch Tater Tot Casserole Recipe is easy! Allow the casserole to cool completely before transferring it to an airtight container. You can store it in the refrigerator for up to 3-4 days. If you want to keep it longer, consider freezing it. To freeze, wrap the casserole tightly in plastic wrap and then in aluminum foil. It can last in the freezer for up to 2-3 months. When you’re ready to eat, thaw it in the fridge overnight and reheat in the oven until warmed through.

Conclusion on Cheesy Chicken Bacon Ranch Tater Tot Casserole Recipe

Cheesy Chicken Bacon Ranch Tater Tot Casserole Recipe is a delightful dish that brings comfort and joy to any meal. Its combination of tender chicken, crispy bacon, and creamy ranch flavors, all topped with golden tater tots and melted cheese, makes it a true crowd-pleaser. Whether you’re preparing a family dinner or hosting friends, this casserole is sure to impress.

Not only is it easy to make, but it also offers endless possibilities for customization. You can switch up the ingredients to suit your taste or dietary needs, making it a versatile option for any occasion. From adding spicy jalapeños to using different types of cheese, the variations are limited only by your imagination.

Cheesy Chicken Bacon Ranch Tater Tot Casserole Recipe is bound to become a staple in your household.

So, gather your ingredients, follow the steps, and enjoy the deliciousness that this casserole brings to your table. Happy cooking!

Instant Pot Chicken and Dumplings Recipe is a must-try!

Introduction to Instant Pot Chicken and Dumplings Recipe

What Makes This Recipe Special?

Instant Pot Chicken and Dumplings is a delightful dish that brings warmth and comfort to any table. This recipe stands out because it combines tender chicken, fresh vegetables, and fluffy dumplings, all cooked in one pot. The Instant Pot makes the process quick and easy, allowing you to enjoy a homemade meal without spending hours in the kitchen. Plus, the flavors meld beautifully, creating a rich and savory broth that is simply irresistible.

The Comfort of Chicken and Dumplings

Chicken and dumplings is a classic comfort food that many people cherish. It evokes feelings of home and family gatherings. The creamy broth, combined with the soft dumplings, creates a dish that feels like a warm hug on a chilly day. Whether you’re serving it for a family dinner or a cozy night in, this recipe is sure to please everyone. The Instant Pot not only speeds up the cooking time but also locks in flavors, making each bite a delightful experience.

Ingredients for Instant Pot Chicken and Dumplings Recipe

Essential Ingredients

To create a delicious Instant Pot Chicken and Dumplings recipe, you’ll need a few essential ingredients. These items are the backbone of the dish, ensuring that every bite is packed with flavor. Here’s what you’ll need:

  • 2 tablespoons olive oil: This adds richness and helps sauté the vegetables.
  • 1 medium onion, diced: Onions provide a sweet and savory base for the dish.
  • 2 cloves garlic, minced: Garlic enhances the flavor with its aromatic qualities.
  • 1 pound boneless, skinless chicken breasts: Chicken is the star of this recipe, providing protein and heartiness.
  • 4 cups low-sodium chicken broth: Broth adds depth and moisture to the dish.
  • 2 cups carrots, sliced: Carrots bring sweetness and color to the meal.
  • 2 cups celery, sliced: Celery adds crunch and a fresh taste.
  • 1 teaspoon dried thyme: Thyme gives a warm, earthy flavor.
  • 1 teaspoon dried rosemary: Rosemary adds a fragrant touch.
  • Salt and pepper to taste: These seasonings enhance all the flavors.
  • 1 cup frozen peas: Peas add a pop of color and sweetness.
  • 1 can (16 ounces) refrigerated biscuit dough: This is used to make the fluffy dumplings.
  • 2 tablespoons fresh parsley, chopped: Parsley is for garnish, adding freshness.

Optional Ingredients for Extra Flavor

While the essential ingredients create a fantastic dish, you can elevate your Instant Pot Chicken and Dumplings with a few optional ingredients. These additions can enhance the flavor and texture:

  • 1/2 cup heavy cream: For a creamier texture, stir this in after cooking the dumplings.
  • 1 cup corn: Adding corn can provide sweetness and a different texture.
  • 1 teaspoon paprika: This spice adds a subtle smokiness.
  • 1/2 teaspoon cayenne pepper: For those who enjoy a little heat, this can spice things up.
  • Fresh herbs like thyme or dill: These can be added for a fresh burst of flavor.

Feel free to mix and match these optional ingredients to suit your taste. The beauty of this recipe is its versatility, allowing you to create a dish that’s uniquely yours!

Step-by-Step Preparation of Instant Pot Chicken and Dumplings Recipe

Step 1: Prepare the Chicken

First, gather your chicken breasts. Cut them into bite-sized pieces. This helps them cook evenly and quickly. Make sure to trim any excess fat. Once your chicken is ready, set it aside. This step is crucial as it ensures that your chicken will be tender and flavorful in the final dish.

Step 2: Sauté the Vegetables

Next, set your Instant Pot to sauté mode. Add the olive oil and let it heat for about a minute. Then, toss in the diced onion and minced garlic. Sauté them for about 3-4 minutes. You want the onion to become translucent and fragrant. This step builds a delicious base for your dish, enhancing the overall flavor.

Step 3: Add Broth and Seasonings

Now it’s time to add the chicken pieces to the pot. Sprinkle in salt, pepper, dried thyme, and rosemary. Stir everything together to coat the chicken with the seasonings. Then, pour in the low-sodium chicken broth. Add the sliced carrots and celery next. Stir again to combine all the ingredients. This mixture will create a rich and savory broth that is the heart of your dish.

Step 4: Cook the Chicken

Close the lid of the Instant Pot and set the valve to sealing. Cook on high pressure for 10 minutes. This step is essential for ensuring that the chicken is cooked through and tender. Once the cooking time is up, carefully perform a quick release of the pressure. This allows steam to escape quickly, making it safe to open the lid.

Step 5: Make the Dumplings

After removing the lid, stir in the frozen peas. Then, take the refrigerated biscuit dough and cut it into quarters. Drop the pieces of dough into the pot. This will create fluffy dumplings that will cook perfectly in the broth. Make sure to distribute them evenly for the best results.

Step 6: Final Cooking Steps

Close the lid again and set the valve to sealing. Cook on high pressure for an additional 5 minutes. Once the time is up, do another quick release of the pressure. Gently stir the chicken and dumplings to combine everything. Your Instant Pot Chicken and Dumplings is now ready to serve! Garnish with fresh parsley for a pop of color and flavor.

Variations of Instant Pot Chicken and Dumplings Recipe

Healthier Alternatives

If you’re looking to make your Instant Pot Chicken and Dumplings a bit healthier, there are several easy swaps you can make. First, consider using skinless chicken thighs instead of breasts. Thighs are juicier and can add more flavor to your dish. You can also replace the biscuit dough with whole wheat or gluten-free biscuit options. This change can increase the fiber content and cater to different dietary needs.

Another great alternative is to add more vegetables. You can include zucchini, bell peppers, or even spinach. These additions not only boost the nutritional value but also add vibrant colors to your dish. For a lighter broth, use low-sodium vegetable broth instead of chicken broth. This will reduce the sodium content while still providing a delicious base for your meal.

Lastly, if you want to cut down on calories, consider omitting the heavy cream. Instead, you can use a splash of almond milk or coconut milk for a creamy texture without the extra fat. These simple changes can help you enjoy a comforting meal while keeping it healthy!

Different Flavor Profiles

One of the best things about the Instant Pot Chicken and Dumplings recipe is its versatility. You can easily switch up the flavors to suit your taste. For a southwestern twist, add black beans, corn, and a teaspoon of cumin. This will give your dish a unique flair that’s both hearty and satisfying.

If you prefer a more Italian flavor, try adding diced tomatoes, Italian seasoning, and a sprinkle of Parmesan cheese. This combination will create a deliciously rich and savory dish that feels like a warm Italian hug.

For those who enjoy a bit of spice, consider adding diced jalapeños or a dash of hot sauce. This will give your chicken and dumplings a kick that’s sure to please spice lovers. You can also experiment with different herbs, such as basil or cilantro, to create a fresh and vibrant taste.

Feel free to mix and match these variations to create a dish that’s perfect for you and your family. The possibilities are endless, making this recipe a fantastic base for culinary creativity!

Cooking Note for Instant Pot Chicken and Dumplings Recipe

Common Mistakes to Avoid

When making Instant Pot Chicken and Dumplings, a few common mistakes can affect the final dish. First, avoid overcooking the chicken. Cooking it for too long can make it dry and tough. Stick to the recommended cooking times for the best results.

Another mistake is not sealing the Instant Pot properly. If the lid isn’t secured, the pressure won’t build up, and your dish won’t cook correctly. Always check that the valve is set to sealing before starting the cooking process.

Also, be cautious with the amount of liquid you use. Too little broth can lead to burning, while too much can make the dish soupy. Stick to the recipe’s measurements for a balanced consistency.

Lastly, don’t skip the quick release after cooking the dumplings. This step is crucial for achieving the right texture. If you let the pressure release naturally, the dumplings may become overcooked and mushy.

Tips for Perfect Dumplings

To achieve fluffy and delicious dumplings, follow these simple tips. First, make sure not to overwork the biscuit dough. Gently cutting it into quarters and dropping it into the pot will help maintain its light texture.

When adding the dumplings, ensure they are evenly spaced in the broth. This allows them to cook uniformly. Avoid stirring them in too much, as this can break them apart.

If you prefer a golden color on your dumplings, consider using the sauté function after cooking. Simply remove the lid and set the Instant Pot to sauté mode for a few minutes. This will give your dumplings a lovely golden hue.

Lastly, if you want to enhance the flavor of your dumplings, try adding a sprinkle of garlic powder or herbs to the biscuit dough before cooking. This small addition can elevate the taste and make your dish even more enjoyable.

Serving Suggestions for Instant Pot Chicken and Dumplings Recipe

Ideal Side Dishes

When serving Instant Pot Chicken and Dumplings, you might want to consider some delightful side dishes that complement the meal. Here are a few suggestions:

  • Simple Green Salad: A fresh salad with mixed greens, cherry tomatoes, and a light vinaigrette can balance the richness of the chicken and dumplings.
  • Steamed Vegetables: Broccoli, green beans, or asparagus add color and nutrition. Steaming them keeps them crisp and vibrant.
  • Garlic Bread: A warm slice of garlic bread is perfect for soaking up the delicious broth. It adds a comforting touch to the meal.
  • Coleslaw: A tangy coleslaw can provide a crunchy contrast to the soft dumplings. The acidity helps cut through the richness of the dish.
  • Mashed Potatoes: For those who love comfort food, creamy mashed potatoes can be a hearty addition. They pair well with the savory broth.

These side dishes not only enhance the meal but also add variety to your dining experience. Choose one or two to create a well-rounded dinner that everyone will enjoy!

Pairing with Beverages

Choosing the right beverage can elevate your dining experience with Instant Pot Chicken and Dumplings. Here are some great pairing options:

  • White Wine: A crisp white wine, like Sauvignon Blanc or Chardonnay, complements the flavors of the dish beautifully. The acidity in the wine balances the richness of the broth.
  • Herbal Tea: For a non-alcoholic option, a warm cup of herbal tea, such as chamomile or mint, can be soothing and refreshing.
  • Sparkling Water: A glass of sparkling water with a slice of lemon adds a refreshing touch. It cleanses the palate between bites.
  • Apple Cider: In the fall, warm apple cider can be a delightful pairing. Its sweetness contrasts nicely with the savory flavors of the dish.
  • Light Beer: A light lager or wheat beer can also work well. The carbonation and lightness complement the meal without overpowering it.

These beverage options can enhance the flavors of your Instant Pot Chicken and Dumplings, making your meal even more enjoyable. Cheers to a wonderful dining experience!

Tips for Perfecting Your Instant Pot Chicken and Dumplings Recipe

Ingredient Substitutions

Making the Instant Pot Chicken and Dumplings recipe your own is easy with a few ingredient substitutions. If you’re looking for a healthier option, consider using skinless chicken thighs instead of breasts. Thighs are juicier and add more flavor to the dish. For a vegetarian twist, you can replace the chicken with chickpeas or tofu. This will still provide protein while keeping the dish hearty.

If you want to reduce carbs, swap out the biscuit dough for cauliflower dumplings or even zucchini noodles. These alternatives can lighten the dish while still offering a satisfying texture. For those who are gluten-sensitive, gluten-free biscuit dough is widely available and works perfectly in this recipe.

When it comes to vegetables, feel free to get creative! You can add bell peppers, mushrooms, or even sweet potatoes for a different flavor profile. Fresh herbs like basil or cilantro can also be used instead of parsley for a fresh twist. These substitutions allow you to customize the dish to your liking while maintaining its comforting essence.

Storage and Reheating Tips

Storing your Instant Pot Chicken and Dumplings is simple and convenient. Allow the dish to cool completely before transferring it to an airtight container. It can be stored in the refrigerator for up to 3-4 days. If you want to keep it longer, consider freezing it. Just make sure to use a freezer-safe container, and it can last for up to 3 months.

When reheating, you have a couple of options. For the best results, reheat on the stovetop over medium heat. Stir occasionally until heated through. If you’re short on time, you can use the microwave. Just place a portion in a microwave-safe bowl, cover it loosely, and heat in 1-minute intervals until warm. Be cautious, as the dumplings may become a bit softer when reheated.

To refresh the dish, consider adding a splash of chicken broth or water while reheating. This will help maintain the creamy texture and prevent it from drying out. With these storage and reheating tips, you can enjoy your delicious chicken and dumplings even days after making them!

Breakdown of Time for Instant Pot Chicken and Dumplings Recipe

Prep Time

Preparing your Instant Pot Chicken and Dumplings is quick and straightforward. The prep time typically takes about 15-20 minutes. This includes gathering your ingredients, chopping the vegetables, and cutting the chicken into bite-sized pieces. Having everything ready before you start cooking will make the process smoother and more enjoyable.

Cooking Time

The cooking time in the Instant Pot is efficient. Once you have sautéed the vegetables and added the chicken and broth, the first cooking phase takes 10 minutes on high pressure. After a quick release, you’ll add the dumplings and cook for an additional 5 minutes. In total, the cooking time is about 15 minutes. However, keep in mind that the Instant Pot will take some time to come to pressure before the cooking begins, which usually adds around 10-15 minutes.

Total Time

When you combine the prep time and cooking time, the total time for making Instant Pot Chicken and Dumplings is approximately 30-40 minutes. This makes it a fantastic option for a weeknight dinner or a cozy weekend meal. You can enjoy a hearty, homemade dish without spending hours in the kitchen. With this recipe, you’ll have a delicious meal ready in no time!

Nutritional Information for Instant Pot Chicken and Dumplings Recipe

Calories and Macronutrients

Understanding the nutritional content of your meals is essential for maintaining a balanced diet. Each serving of Instant Pot Chicken and Dumplings contains approximately 320 calories. This makes it a satisfying yet manageable option for dinner. Here’s a breakdown of the macronutrients per serving:

  • Net Carbs: 30g
  • Protein: 25g
  • Fat: 10g

This combination of macronutrients provides a good balance of energy, making it a wholesome meal. The protein from the chicken helps in muscle repair and growth, while the carbohydrates from the vegetables and biscuit dough offer energy for your daily activities. The healthy fats from olive oil contribute to overall heart health.

Health Benefits of Ingredients

The ingredients in this Instant Pot Chicken and Dumplings recipe not only create a delicious dish but also offer various health benefits:

  • Chicken: A great source of lean protein, chicken helps build and repair tissues. It also contains essential vitamins and minerals, such as B vitamins and selenium.
  • Vegetables: Carrots and celery are rich in vitamins A and K, as well as fiber. These nutrients support eye health and digestion, making your meal more nutritious.
  • Olive Oil: This healthy fat is known for its heart-healthy properties. It contains antioxidants and can help reduce inflammation in the body.
  • Herbs: Thyme and rosemary not only add flavor but also have antioxidant properties. They can support your immune system and overall health.
  • Peas: These little green gems are packed with protein, fiber, and vitamins. They can help regulate blood sugar levels and promote digestive health.

By enjoying this Instant Pot Chicken and Dumplings recipe, you’re not just treating your taste buds; you’re also nourishing your body with wholesome ingredients. It’s a perfect example of how comfort food can be both delicious and nutritious!

FAQs about Instant Pot Chicken and Dumplings Recipe

Can I use frozen chicken for this recipe?

Yes, you can use frozen chicken for this Instant Pot Chicken and Dumplings recipe! The Instant Pot is designed to cook frozen meat safely and efficiently. Just remember to increase the cooking time slightly. Instead of 10 minutes, cook the chicken for about 12-15 minutes on high pressure. This ensures that the chicken is fully cooked and tender. Always check that the internal temperature reaches 165°F (75°C) for safety.

How do I store leftovers?

Storing leftovers from your Instant Pot Chicken and Dumplings is easy! Allow the dish to cool completely before transferring it to an airtight container. You can keep it in the refrigerator for up to 3-4 days. If you want to store it for a longer period, consider freezing it. Use a freezer-safe container, and it can last for up to 3 months. Just remember to label the container with the date for easy reference!

Can I make this recipe without an Instant Pot?

Absolutely! If you don’t have an Instant Pot, you can still make Chicken and Dumplings on the stovetop. Start by sautéing the vegetables in a large pot, then add the chicken and broth. Bring it to a boil, then reduce the heat and let it simmer for about 20-25 minutes until the chicken is cooked through. For the dumplings, you can drop the biscuit dough pieces on top of the simmering broth, cover the pot, and cook for an additional 15-20 minutes until the dumplings are fluffy and cooked through.

What can I serve with chicken and dumplings?

When serving Instant Pot Chicken and Dumplings, consider pairing it with some delightful side dishes. A simple green salad with a light vinaigrette can balance the richness of the dish. Steamed vegetables like broccoli or green beans add color and nutrition. Garlic bread is perfect for soaking up the delicious broth, while coleslaw provides a crunchy contrast. You can also serve it with creamy mashed potatoes for an extra comforting meal. Choose one or two sides to create a well-rounded dinner that everyone will enjoy!

Conclusion on Instant Pot Chicken and Dumplings Recipe

Recap of Key Points

In summary, the Instant Pot Chicken and Dumplings recipe is a fantastic way to enjoy a comforting meal with minimal effort. With its blend of tender chicken, fresh vegetables, and fluffy dumplings, this dish is sure to become a family favorite. The use of the Instant Pot not only speeds up the cooking process but also enhances the flavors, making each bite a delightful experience. Remember, you can customize the recipe with various ingredients and flavors to suit your taste. Whether you opt for healthier alternatives or different flavor profiles, the possibilities are endless!

Encouragement to Try the Recipe

We encourage you to give this Instant Pot Chicken and Dumplings recipe a try! It’s perfect for busy weeknights or cozy weekends when you want something hearty and satisfying. With just a few simple steps, you can create a delicious meal that warms the heart and nourishes the body. Don’t hesitate to experiment with the ingredients and make it your own. Your family and friends will surely appreciate the effort, and you’ll enjoy the process of cooking this delightful dish. Happy cooking!

Southern Fried Chicken and Waffles Recipe is delicious!

Introduction to Southern Fried Chicken and Waffles Recipe

Southern Fried Chicken and Waffles is more than just a meal; it’s a delightful experience that brings together the best of both worlds. This dish combines crispy, flavorful fried chicken with fluffy, warm waffles, creating a perfect balance of savory and sweet. Whether you’re enjoying it for breakfast, lunch, or dinner, this recipe is sure to satisfy your cravings.

The Origins of Southern Fried Chicken and Waffles

The roots of Southern Fried Chicken and Waffles can be traced back to the 19th century. This dish originated in the Southern United States, where fried chicken was a staple. Waffles, on the other hand, were influenced by European settlers. The combination of these two beloved foods became popular in the African American community, especially in soul food cuisine. Over the years, it has evolved into a classic comfort food that is cherished by many.

Why This Southern Fried Chicken and Waffles Recipe Stands Out

This Southern Fried Chicken and Waffles recipe stands out for its simplicity and flavor. The blend of spices in the chicken coating adds a delightful kick, while the waffles provide a soft, buttery base. The use of buttermilk in the chicken marinade ensures that the meat stays juicy and tender. Plus, the option to double-dip the chicken for extra crunch makes this recipe customizable to your taste. With just a few ingredients and steps, you can create a dish that feels like a special occasion, any day of the week!

Ingredients for Southern Fried Chicken and Waffles Recipe

To create the perfect Southern Fried Chicken and Waffles, you’ll need a selection of fresh ingredients. Each component plays a vital role in achieving that delicious balance of flavors. Here’s what you’ll need:

  • 2 cups all-purpose flour
  • 1 tablespoon baking powder
  • 1 teaspoon salt
  • 1 teaspoon black pepper
  • 1 teaspoon paprika
  • 1 teaspoon garlic powder
  • 1 teaspoon onion powder
  • 1/2 teaspoon cayenne pepper (optional for a spicy kick)
  • 4 large eggs
  • 1 cup buttermilk
  • 2 pounds chicken pieces (legs, thighs, or breasts)
  • Vegetable oil for frying
  • 4 waffles (store-bought or homemade)
  • Maple syrup for serving
  • Butter for serving

These ingredients come together to create a mouthwatering dish that is both comforting and satisfying. The spices in the flour mixture give the chicken its signature flavor, while the buttermilk ensures a tender bite. Whether you choose to make your waffles from scratch or opt for store-bought, this recipe guarantees a delightful meal that everyone will love.

Step-by-Step Preparation of Southern Fried Chicken and Waffles Recipe

Now that you have all your ingredients ready, it’s time to dive into the preparation of this delicious Southern Fried Chicken and Waffles recipe. Follow these steps closely to ensure that your dish turns out perfectly every time.

Step 1: Preparing the Chicken Marinade

Start by marinating the chicken. In a large bowl, combine the buttermilk and eggs. Whisk them together until they are well blended. This mixture will help tenderize the chicken and add flavor. Next, add the chicken pieces to the bowl, ensuring they are fully submerged in the marinade. Cover the bowl with plastic wrap and let it sit in the refrigerator for at least 30 minutes. This step is crucial for achieving juicy, flavorful chicken.

Step 2: Coating the Chicken for Frying

After the chicken has marinated, it’s time to coat it. Take the flour mixture you prepared earlier and place it in a shallow dish. Remove each piece of chicken from the marinade, allowing any excess liquid to drip off. Then, coat the chicken thoroughly in the flour mixture. Make sure every inch is covered for that perfect crunch. Once coated, place the chicken on a wire rack and let it rest for about 15 minutes. This resting period helps the coating adhere better during frying.

Step 3: Frying the Chicken to Perfection

Heat about 2 inches of vegetable oil in a large skillet or deep fryer to 350°F. It’s important to use a thermometer to ensure the oil is at the right temperature. Carefully add the chicken pieces in batches, making sure not to overcrowd the pan. Fry each piece for about 10-12 minutes on each side, or until they are golden brown and cooked through. The internal temperature should reach 165°F. Once done, remove the chicken and let it drain on paper towels to absorb any excess oil.

Step 4: Making the Waffles Batter

While the chicken is frying, you can prepare the waffles. If you’re using a store-bought mix, follow the package instructions. If you prefer homemade waffles, combine flour, baking powder, sugar, and a pinch of salt in a bowl. In another bowl, whisk together eggs, milk, and melted butter. Pour the wet ingredients into the dry ingredients and mix until just combined. Be careful not to overmix; a few lumps are okay!

Step 5: Cooking the Waffles

Preheat your waffle iron according to the manufacturer’s instructions. Once heated, pour the batter into the waffle iron, using the recommended amount for your specific model. Close the lid and cook until the waffles are golden brown and crispy. This usually takes about 4-5 minutes. Once cooked, remove the waffles and keep them warm in a low oven while you finish frying the chicken.

Step 6: Plating the Southern Fried Chicken and Waffles

Now comes the fun part—plating! Start by placing a warm waffle on each plate. Top it with a piece of crispy fried chicken. Drizzle generously with maple syrup for that sweet touch. If you like, add a pat of butter on top for extra richness. Serve immediately and enjoy this delightful Southern Fried Chicken and Waffles recipe with family and friends!

Variation of Southern Fried Chicken and Waffles Recipe

While the classic Southern Fried Chicken and Waffles recipe is a beloved favorite, there are many ways to switch things up. Whether you’re looking for healthier options or want to add a creative twist, these variations will keep your meals exciting and delicious.

Alternative Ingredients for a Healthier Option

If you’re aiming for a lighter version of this dish, consider these alternative ingredients:

  • Whole Wheat Flour: Swap out all-purpose flour for whole wheat flour. This adds fiber and nutrients.
  • Almond Milk: Use unsweetened almond milk instead of buttermilk. It’s lower in calories and still provides moisture.
  • Skinless Chicken: Opt for skinless chicken pieces. This reduces fat content while keeping the chicken juicy.
  • Air Fryer: Instead of frying, use an air fryer. It gives you that crispy texture with much less oil.
  • Maple Syrup Alternatives: Try using sugar-free syrup or fresh fruit as a topping for a healthier sweet option.

These substitutions can help you enjoy the flavors of Southern Fried Chicken and Waffles while keeping your meal lighter and healthier.

Creative Twists on the Classic Recipe

For those who love to experiment in the kitchen, here are some fun twists on the classic recipe:

  • Spicy Chicken: Add more cayenne pepper or hot sauce to the marinade for a spicy kick. This adds a whole new level of flavor!
  • Cheddar Waffles: Mix shredded cheddar cheese into your waffle batter. This adds a savory element that pairs beautifully with the chicken.
  • Fruit Toppings: Top your waffles with fresh berries or sliced bananas along with maple syrup. This adds freshness and a pop of color.
  • Buffalo Chicken Waffles: Toss the fried chicken in buffalo sauce before serving. This gives a tangy, spicy twist that’s sure to impress.
  • Herb-Infused Waffles: Add fresh herbs like rosemary or thyme to the waffle batter for an aromatic flavor that complements the chicken.

These creative variations allow you to enjoy Southern Fried Chicken and Waffles in new and exciting ways. Whether you’re looking for a healthier option or a fun twist, there’s something here for everyone!

Cooking Note for Southern Fried Chicken and Waffles Recipe

Cooking Southern Fried Chicken and Waffles is a delightful journey that requires attention to detail. Here are some essential notes to keep in mind to ensure your dish turns out perfectly every time.

First, temperature control is crucial. When frying chicken, make sure the oil is at 350°F. If the oil is too hot, the chicken will burn on the outside while remaining raw inside. Conversely, if the oil is too cool, the chicken will absorb excess oil, resulting in a greasy texture. Using a thermometer can help you maintain the right temperature throughout the frying process.

Next, don’t rush the marinating process. Allowing the chicken to soak in the buttermilk and egg mixture for at least 30 minutes enhances the flavor and tenderness. For even better results, consider marinating the chicken overnight. This extra time allows the spices to penetrate deeper into the meat.

When it comes to coating the chicken, ensure that you shake off any excess flour. A thick coating can lead to uneven frying and may cause the crust to fall off during cooking. A light, even coating will give you that perfect crunch.

Lastly, let the fried chicken rest on a wire rack instead of paper towels. This prevents steam from building up underneath, which can make the coating soggy. The wire rack allows air to circulate, keeping your chicken crispy.

By following these cooking notes, you’ll elevate your Southern Fried Chicken and Waffles recipe to new heights. Enjoy the process, and savor the delicious results!

Serving Suggestions for Southern Fried Chicken and Waffles Recipe

Once you’ve prepared your Southern Fried Chicken and Waffles, it’s time to think about how to serve this delightful dish. The right sauces, syrups, and side dishes can elevate your meal, making it even more enjoyable. Here are some fantastic serving suggestions to consider.

Best Sauces and Syrups to Pair

The combination of savory fried chicken and sweet waffles is already a match made in heaven. However, adding the right sauces and syrups can enhance the flavors even more. Here are some top choices:

  • Maple Syrup: The classic choice! Drizzling warm maple syrup over your chicken and waffles adds a sweet touch that perfectly balances the savory flavors.
  • Honey: For a floral sweetness, try drizzling honey over your dish. It adds a unique flavor that pairs beautifully with fried chicken.
  • Hot Sauce: If you enjoy a bit of heat, a few dashes of your favorite hot sauce can add a spicy kick. It complements the crispy chicken wonderfully.
  • Barbecue Sauce: For a smoky flavor, serve your chicken with a side of barbecue sauce. This adds a tangy twist that many will love.
  • Fruit Compote: A homemade or store-bought fruit compote, like blueberry or strawberry, can add a fresh and fruity element to your meal.

Feel free to mix and match these options to find your perfect combination. The right sauce or syrup can take your Southern Fried Chicken and Waffles to the next level!

Side Dishes that Complement the Meal

While Southern Fried Chicken and Waffles can stand alone as a hearty meal, adding some side dishes can create a more balanced dining experience. Here are some delicious side dishes to consider:

  • Coleslaw: A refreshing coleslaw adds crunch and a tangy flavor that contrasts nicely with the richness of the chicken and waffles.
  • Green Beans: Steamed or sautéed green beans provide a healthy, vibrant side that complements the meal without overpowering it.
  • Mashed Potatoes: Creamy mashed potatoes are a comforting addition that pairs well with fried chicken. Consider adding gravy for extra flavor!
  • Fried Green Tomatoes: This Southern classic adds a crispy, tart element that enhances the overall meal experience.
  • Fruit Salad: A light fruit salad can provide a refreshing contrast to the savory chicken and waffles, making for a well-rounded plate.

These side dishes not only enhance the meal but also add variety to your dining experience. Choose one or two to serve alongside your Southern Fried Chicken and Waffles for a delightful feast!

Tips for Perfecting Your Southern Fried Chicken and Waffles Recipe

Creating the perfect Southern Fried Chicken and Waffles requires a bit of practice and attention to detail. Here are some valuable tips to help you achieve that crispy chicken and fluffy waffles every time.

Choose the Right Chicken

When selecting chicken, opt for pieces with skin on, like thighs or drumsticks. The skin adds flavor and helps keep the meat juicy during frying. If you prefer white meat, chicken breasts can work too, but they may dry out more easily.

Marinate for Flavor

Don’t skip the marinating step! Soaking the chicken in buttermilk and eggs not only tenderizes the meat but also infuses it with flavor. For best results, marinate overnight if you can. This extra time allows the spices to penetrate deeply.

Perfect Your Coating Technique

For an extra crispy coating, consider double-dipping your chicken. After the first coating of flour, dip it back into the egg mixture and then coat it again in flour. This creates a thicker crust that’s wonderfully crunchy.

Maintain Oil Temperature

Keeping the oil at a steady 350°F is crucial. Use a thermometer to monitor the temperature. If the oil is too hot, the chicken will burn. If it’s too cool, the chicken will absorb too much oil and become greasy. Fry in small batches to maintain the temperature.

Let the Chicken Rest

After frying, let the chicken rest on a wire rack instead of paper towels. This prevents steam from making the coating soggy. The wire rack allows air to circulate, keeping your chicken crispy and delicious.

Experiment with Waffle Flavors

Don’t be afraid to get creative with your waffles! Add spices like cinnamon or nutmeg to the batter for a warm flavor. You can also mix in chocolate chips or nuts for a fun twist. The waffles can be a delightful complement to the savory chicken.

Serve Immediately

For the best experience, serve your Southern Fried Chicken and Waffles right after cooking. The combination of hot, crispy chicken and warm, fluffy waffles is unbeatable. If you need to keep them warm, place them in a low oven, but try to serve them fresh!

By following these tips, you’ll be well on your way to mastering the art of Southern Fried Chicken and Waffles. Enjoy the process, and most importantly, savor every delicious bite!

Breakdown of Time for Southern Fried Chicken and Waffles Recipe

Understanding the time required for each step in the Southern Fried Chicken and Waffles recipe can help you plan your cooking session better. Here’s a detailed breakdown of the time you’ll need for preparation and cooking.

Prep Time

The prep time for this delicious dish is approximately 45 minutes. This includes:

  • Marinating the chicken in buttermilk and eggs (30 minutes minimum, but longer is better).
  • Preparing the flour mixture and waffle batter (15 minutes).

Keep in mind that marinating the chicken overnight can enhance the flavor, so plan ahead if you can!

Cooking Time

The cooking time for Southern Fried Chicken and Waffles is about 30 minutes. This includes:

  • Frying the chicken (approximately 20-25 minutes, depending on the size of the pieces).
  • Cooking the waffles (about 5-10 minutes, depending on your waffle iron).

Frying the chicken in batches may take a little longer, but it ensures that each piece cooks evenly and stays crispy.

Total Time

In total, you can expect to spend around 1 hour and 15 minutes from start to finish, including both prep and cooking time. If you choose to marinate the chicken overnight, the total time will be longer, but the hands-on cooking time remains the same. This makes it a great dish for a weekend brunch or a special family dinner!

Nutritional Information for Southern Fried Chicken and Waffles Recipe

Understanding the nutritional content of your meals is essential for maintaining a balanced diet. The Southern Fried Chicken and Waffles recipe is hearty and satisfying, but it’s good to know what you’re consuming. Here’s a breakdown of the nutritional information per serving:

Calories

Each serving of Southern Fried Chicken and Waffles contains approximately 750 calories. This calorie count includes the fried chicken, waffles, and the toppings like maple syrup and butter. While this dish is indulgent, it can be enjoyed as an occasional treat rather than a daily meal.

Protein Content

Protein is an important part of any meal, and this recipe delivers! Each serving provides about 35 grams of protein. The chicken is the primary source of protein, making it a great option for those looking to increase their protein intake. Pairing it with waffles adds a nice balance of carbohydrates, making it a filling meal.

Sodium Levels

When it comes to sodium, each serving contains around 1,200 milligrams. This level is relatively high, primarily due to the seasoning in the flour mixture and any added sauces. If you’re watching your sodium intake, consider reducing the amount of salt in the flour mixture or opting for low-sodium sauces. Balancing this dish with fresh vegetables or a light salad can also help manage sodium levels in your overall meal.

By being aware of the nutritional information, you can enjoy your Southern Fried Chicken and Waffles recipe while making informed choices about your diet. Remember, moderation is key, and this dish can be a delightful part of a balanced lifestyle!

FAQs about Southern Fried Chicken and Waffles Recipe

Can I make Southern Fried Chicken and Waffles Recipe in advance?

Yes, you can prepare some components of the Southern Fried Chicken and Waffles recipe in advance. For instance, you can marinate the chicken the night before. This allows the flavors to develop and makes the chicken even more tender. You can also prepare the waffle batter ahead of time and store it in the refrigerator. However, it’s best to cook the chicken and waffles fresh for the best texture and flavor. If you do make them in advance, reheat them in the oven to maintain crispiness.

What is the best way to store leftovers of Southern Fried Chicken and Waffles Recipe?

To store leftovers, place the fried chicken and waffles in separate airtight containers. This helps maintain their individual textures. Store them in the refrigerator for up to 3 days. When you’re ready to enjoy them again, reheat the chicken in the oven at 375°F for about 10-15 minutes to restore its crispiness. For the waffles, you can pop them in a toaster or warm them in the oven for a few minutes. This way, you can enjoy your Southern Fried Chicken and Waffles just as delicious as the first time!

Can I use frozen chicken for this Southern Fried Chicken and Waffles Recipe?

Yes, you can use frozen chicken for this recipe, but it’s important to thaw it properly first. Always thaw chicken in the refrigerator overnight or use the defrost setting on your microwave. Never thaw chicken at room temperature, as this can lead to bacterial growth. Once thawed, you can proceed with the marinating and frying steps as usual. Just ensure that the internal temperature of the chicken reaches 165°F during cooking for safe consumption.

What are some common mistakes to avoid when making Southern Fried Chicken and Waffles Recipe?

There are a few common mistakes to watch out for when making Southern Fried Chicken and Waffles:

  • Skipping the Marinade: Don’t skip marinating the chicken! This step is crucial for flavor and tenderness.
  • Overcrowding the Pan: Frying too many pieces at once can lower the oil temperature, leading to greasy chicken. Fry in batches instead.
  • Not Monitoring Oil Temperature: Use a thermometer to keep the oil at 350°F. This ensures even cooking and a crispy coating.
  • Skipping the Resting Period: Letting the chicken rest on a wire rack after frying helps keep it crispy. Avoid placing it on paper towels.
  • Overmixing Waffle Batter: When making waffles, mix until just combined. Overmixing can lead to tough waffles.

By avoiding these common pitfalls, you’ll be well on your way to creating a delicious Southern Fried Chicken and Waffles recipe that everyone will love!

Conclusion on Southern Fried Chicken and Waffles Recipe

In conclusion, the Southern Fried Chicken and Waffles recipe is a delightful dish that brings together the best of savory and sweet flavors. This classic comfort food not only satisfies your taste buds but also creates a warm, inviting atmosphere for family and friends. Whether you’re enjoying it for breakfast, brunch, or dinner, this recipe is sure to impress.

By following the steps outlined in this article, you can create a meal that is both delicious and memorable. The combination of crispy fried chicken and fluffy waffles, drizzled with maple syrup, is a treat that everyone will love. Plus, with the tips and variations provided, you can customize the dish to suit your preferences and dietary needs.

Remember, cooking is all about experimentation and enjoyment. Don’t hesitate to try new flavors or techniques to make this dish your own. Whether you stick to the classic recipe or add your unique twist, the joy of sharing a homemade meal is what truly matters.

So gather your ingredients, roll up your sleeves, and get ready to create a plate of Southern Fried Chicken and Waffles that will leave everyone asking for seconds. Happy cooking!

Beef Gyros with Tzatziki Sauce are a must-try dish!

Introduction to Beef Gyros with Tzatziki

What are Beef Gyros with Tzatziki?

Beef gyros with tzatziki are a delicious and satisfying dish that brings the flavors of Greece right to your table. Gyros are made from seasoned beef, cooked until tender, and served in warm pita bread. The dish is topped with fresh vegetables and a creamy tzatziki sauce, which adds a refreshing touch. Tzatziki is a yogurt-based sauce that combines cucumber, garlic, and herbs, making it the perfect complement to the savory beef. Together, they create a delightful meal that is both hearty and flavorful.

The Origin of Gyros

The word “gyros” comes from the Greek word for “turn” or “revolution,” referring to the way the meat is cooked on a vertical rotisserie. This cooking method has its roots in the Middle East, but gyros as we know them today became popular in Greece in the 1920s. Traditionally, gyros were made with pork, but over time, beef, chicken, and lamb have also become common choices. The dish is often enjoyed as street food, making it a favorite among locals and tourists alike. Today, beef gyros with tzatziki are loved around the world for their rich flavors and satisfying textures.

Ingredients for Beef Gyros with Tzatziki

To create mouthwatering beef gyros with tzatziki, you’ll need a selection of fresh ingredients. Each component plays a vital role in delivering the authentic taste of this beloved dish. Here’s what you’ll need:

For the Beef Gyros:

  • 1.5 pounds beef chuck roast, trimmed and cut into 1-inch cubes
  • 2 tablespoons olive oil
  • 1 teaspoon garlic powder
  • 1 teaspoon onion powder
  • 1 teaspoon dried oregano
  • 1 teaspoon ground cumin
  • 1 teaspoon paprika
  • 1 teaspoon salt
  • ½ teaspoon black pepper
  • 1 cup beef broth
  • 4 pita breads
  • 1 cup shredded lettuce
  • 1 cup diced tomatoes
  • ½ red onion, thinly sliced

For the Tzatziki Sauce:

  • 1 cup plain Greek yogurt
  • 1 cucumber, grated and drained
  • 2 cloves garlic, minced
  • 1 tablespoon fresh dill, chopped (or 1 teaspoon dried dill)
  • 1 tablespoon lemon juice
  • Salt and pepper to taste

These ingredients come together to create a flavorful and satisfying meal. The beef is seasoned with a blend of spices, while the tzatziki sauce adds a cool and creamy element. When served in warm pita bread with fresh veggies, it’s a dish that everyone will love!

Preparation of Beef Gyros with Tzatziki

Step 1: Marinating the Beef

To start, marinating the beef is essential for infusing it with flavor. In a large bowl, combine the beef cubes with olive oil, garlic powder, onion powder, oregano, cumin, paprika, salt, and black pepper. Toss everything together until the beef is evenly coated. This step not only enhances the taste but also helps to tenderize the meat. Let the beef marinate for at least 30 minutes. If you have more time, marinating it for a few hours or overnight in the refrigerator will yield even better results.

Step 2: Preparing the Tzatziki Sauce

While the beef marinates, you can prepare the tzatziki sauce. In a medium bowl, mix together the plain Greek yogurt, grated cucumber, minced garlic, fresh dill, and lemon juice. Season with salt and pepper to taste. The cucumber should be grated and drained to remove excess moisture, ensuring the sauce remains thick and creamy. Once mixed, cover the bowl and refrigerate the tzatziki sauce until you’re ready to serve. This allows the flavors to meld beautifully, making the sauce even more delicious.

Step 3: Cooking the Beef

After marinating, it’s time to cook the beef. Place the seasoned beef cubes into a slow cooker. Pour the beef broth over the top, ensuring the meat is well-covered. Cover the slow cooker and set it to cook on low for 6-8 hours or on high for 3-4 hours. The goal is to have the beef tender and easily shredded. Once cooked, use two forks to shred the beef right in the slow cooker, mixing it with the flavorful juices. This step is crucial for achieving that melt-in-your-mouth texture.

Step 4: Assembling the Gyros

Now comes the fun part—assembling the gyros! Start by warming the pita breads in a skillet or microwave until they are soft and pliable. Take each pita and fill it generously with the shredded beef. Top it off with shredded lettuce, diced tomatoes, and thinly sliced red onion. Finally, drizzle a generous amount of tzatziki sauce over the top. This combination of flavors and textures will make your beef gyros truly irresistible. Serve immediately and enjoy a taste of Greece right at home!

Variation of Beef Gyros with Tzatziki

Alternative Proteins for Beef Gyros

If you’re looking to switch things up, there are several alternative proteins you can use for your gyros. While beef is a classic choice, chicken, lamb, and even pork can create delicious variations. For chicken gyros, use boneless thighs for a juicy result. Simply follow the same marinating and cooking steps as with beef. Lamb offers a rich flavor that pairs beautifully with tzatziki, making it a popular option in Mediterranean cuisine. If you prefer pork, pork shoulder can be used, providing a tender and flavorful filling. Each of these proteins brings its unique taste, allowing you to customize your gyros to suit your preferences.

Vegetarian Options for Tzatziki

For those who prefer a meat-free meal, you can still enjoy the delightful flavors of gyros. Instead of beef, consider using grilled vegetables or falafel as the main filling. Grilled zucchini, bell peppers, and eggplant can add a smoky flavor and vibrant colors to your dish. For a protein-packed option, falafel made from chickpeas is a fantastic choice. It’s crispy on the outside and soft on the inside, making it a satisfying alternative. You can still use the tzatziki sauce, which is naturally vegetarian. If you want to make it vegan, simply substitute the Greek yogurt with a plant-based yogurt. This way, you can enjoy a refreshing and creamy sauce that complements your vegetarian gyros perfectly.

Cooking Note for Beef Gyros with Tzatziki

When preparing beef gyros with tzatziki, there are a few cooking notes to keep in mind to ensure your dish turns out perfectly. First, the choice of beef cut is crucial. Using a chuck roast is ideal because it becomes tender and flavorful when slow-cooked. However, if you prefer a leaner option, consider using sirloin or flank steak. Just remember that these cuts may require less cooking time.

Next, seasoning is key. Make sure to coat the beef evenly with the spices. This not only enhances the flavor but also helps to create a delicious crust when cooked. If you have time, marinating the beef overnight will deepen the flavors even more.

While cooking, keep an eye on the liquid level in the slow cooker. If it seems too dry, add a bit more beef broth to keep the meat moist. On the other hand, if there’s too much liquid, you can remove the lid during the last hour of cooking to allow some of it to evaporate.

Lastly, when assembling your gyros, don’t be shy with the tzatziki sauce! A generous drizzle adds a refreshing contrast to the savory beef. Enjoy your cooking experience, and remember that the best meals are made with love and care!

Serving Suggestions for Beef Gyros with Tzatziki

Best Sides to Pair with Beef Gyros

When serving beef gyros with tzatziki, choosing the right sides can elevate your meal. Here are some delicious options:

  • Greek Salad: A fresh Greek salad made with cucumbers, tomatoes, olives, and feta cheese complements the flavors of the gyros perfectly.
  • Roasted Potatoes: Crispy roasted potatoes seasoned with herbs make a hearty side that pairs well with the tender beef.
  • Rice Pilaf: A light and fluffy rice pilaf with herbs can add a nice texture and flavor contrast to your gyros.
  • Grilled Vegetables: Grilled zucchini, bell peppers, and asparagus can add a colorful and healthy touch to your plate.

Serving Beef Gyros with Tzatziki at Parties

Beef gyros with tzatziki are not only great for family dinners but also perfect for parties! Here are some tips for serving them at gatherings:

  • Make a Gyro Bar: Set up a gyro bar where guests can assemble their own gyros. Provide all the ingredients, including beef, pita, veggies, and tzatziki sauce.
  • Offer Variety: Include different proteins like chicken or lamb, along with vegetarian options, to cater to all dietary preferences.
  • Small Bites: Cut the pitas into smaller pieces for easy snacking. This way, guests can enjoy a taste without committing to a full gyro.
  • Pair with Drinks: Serve refreshing drinks like lemonade or iced tea to complement the flavors of the gyros.

With these serving suggestions, your beef gyros with tzatziki will be a hit at any gathering. Enjoy the delicious flavors and the joy of sharing this delightful dish with friends and family!

Serving Suggestions for Beef Gyros with Tzatziki

Best Sides to Pair with Beef Gyros

When it comes to serving beef gyros with tzatziki, the right sides can enhance your meal experience. Here are some delightful options that pair perfectly:

  • Greek Salad: A fresh Greek salad made with cucumbers, tomatoes, olives, and feta cheese complements the flavors of the gyros perfectly. The crisp veggies and tangy feta add a refreshing contrast to the savory beef.
  • Roasted Potatoes: Crispy roasted potatoes seasoned with herbs make a hearty side that pairs well with the tender beef. The golden, crunchy exterior and fluffy interior create a satisfying bite.
  • Rice Pilaf: A light and fluffy rice pilaf with herbs can add a nice texture and flavor contrast to your gyros. The subtle flavors of the rice balance the bold spices in the beef.
  • Grilled Vegetables: Grilled zucchini, bell peppers, and asparagus can add a colorful and healthy touch to your plate. The smoky flavor from grilling enhances the overall taste of the meal.

Serving Beef Gyros with Tzatziki at Parties

Beef gyros with tzatziki are not only great for family dinners but also perfect for parties! Here are some tips for serving them at gatherings:

  • Make a Gyro Bar: Set up a gyro bar where guests can assemble their own gyros. Provide all the ingredients, including beef, pita, veggies, and tzatziki sauce. This interactive setup encourages guests to customize their meals.
  • Offer Variety: Include different proteins like chicken or lamb, along with vegetarian options, to cater to all dietary preferences. This way, everyone can enjoy a delicious gyro.
  • Small Bites: Cut the pitas into smaller pieces for easy snacking. This way, guests can enjoy a taste without committing to a full gyro. It’s a great way to encourage mingling!
  • Pair with Drinks: Serve refreshing drinks like lemonade or iced tea to complement the flavors of the gyros. A light beverage can enhance the overall dining experience.

With these serving suggestions, your beef gyros with tzatziki will be a hit at any gathering. Enjoy the delicious flavors and the joy of sharing this delightful dish with friends and family!

Tips for Perfect Beef Gyros with Tzatziki

Choosing the Right Cut of Beef

When it comes to making beef gyros with tzatziki, selecting the right cut of beef is crucial for achieving the best flavor and texture. The chuck roast is a popular choice because it becomes tender and juicy when slow-cooked. This cut has enough fat to keep the meat moist, which is essential for a delicious gyro.

If you prefer a leaner option, consider using sirloin or flank steak. These cuts are flavorful but may require less cooking time. Be sure to slice them against the grain for maximum tenderness. Whichever cut you choose, remember that marinating the beef is key. It not only enhances the flavor but also helps to tenderize the meat, making every bite enjoyable.

Enhancing the Flavor of Tzatziki

The tzatziki sauce is a star component of beef gyros, so enhancing its flavor is important. Start with high-quality Greek yogurt, as it provides a rich and creamy base. To elevate the taste, use fresh ingredients like garlic and dill. Fresh dill adds a bright, herbal note that complements the yogurt beautifully.

Don’t forget to drain the grated cucumber well. Excess moisture can make the tzatziki watery, which is not ideal. After mixing all the ingredients, let the sauce chill in the refrigerator for at least 30 minutes. This resting time allows the flavors to meld together, resulting in a more delicious sauce. Adjust the seasoning with salt and pepper to your liking, and feel free to add a splash of lemon juice for extra brightness.

Breakdown of Time for Beef Gyros with Tzatziki

Prep Time

Preparing beef gyros with tzatziki is a straightforward process. The prep time mainly involves marinating the beef and preparing the tzatziki sauce. You should expect to spend about 15-20 minutes on these tasks. This includes:

  • Marinating the beef: 10 minutes (plus at least 30 minutes of resting time)
  • Preparing the tzatziki sauce: 5-10 minutes

While the beef marinates, you can multitask by preparing the tzatziki sauce, making the most of your time in the kitchen.

Cooking Time

The cooking time for beef gyros is primarily determined by the slow cooker. Once you place the marinated beef in the slow cooker with the broth, it will need:

  • On low: 6-8 hours
  • On high: 3-4 hours

This slow cooking method ensures that the beef becomes tender and flavorful, making it easy to shred. The longer cooking time on low allows the flavors to develop even more.

Total Time

When you combine the prep and cooking times, the total time for making beef gyros with tzatziki can vary. Here’s a quick summary:

  • Prep Time: 15-20 minutes (plus marinating time)
  • Cooking Time: 3-8 hours (depending on your slow cooker setting)

In total, you can expect to spend about 3 hours and 15 minutes to 8 hours and 20 minutes from start to finish. However, most of this time is hands-off, allowing you to enjoy your day while the beef cooks to perfection!

Nutritional Information for Beef Gyros with Tzatziki

Calories in Beef Gyros with Tzatziki

When enjoying beef gyros with tzatziki, it’s important to be aware of the nutritional content. Each serving of this delicious dish contains approximately 520 calories. This makes it a satisfying meal that can fit into a balanced diet. The combination of tender beef, fresh vegetables, and creamy tzatziki provides a hearty option for lunch or dinner.

Protein Content

One of the standout features of beef gyros with tzatziki is their protein content. Each serving offers about 38 grams of protein. This high protein level is beneficial for muscle repair and growth, making it an excellent choice for those who lead an active lifestyle. The beef, combined with the yogurt in the tzatziki sauce, ensures you get a good dose of this essential nutrient.

Sodium Levels

While enjoying beef gyros, it’s also wise to consider sodium levels. Each serving contains around 800 milligrams of sodium. This amount is reasonable for a flavorful dish, but if you’re watching your sodium intake, you can make adjustments. For instance, using low-sodium beef broth or reducing the added salt can help lower the overall sodium content without sacrificing taste. Always remember to balance your meals with plenty of fresh fruits and vegetables to maintain a healthy diet.

FAQs about Beef Gyros with Tzatziki

Can I make Beef Gyros with Tzatziki ahead of time?

Absolutely! Making beef gyros with tzatziki ahead of time is a great way to save time during busy days. You can prepare the beef and tzatziki sauce a day in advance. Simply marinate the beef and cook it in the slow cooker as directed. Once it’s tender, shred it and store it in an airtight container in the refrigerator. The tzatziki sauce can also be made ahead and kept chilled. Just remember to warm the beef before assembling your gyros. This way, you can enjoy a delicious meal without the last-minute rush!

What can I substitute for yogurt in Tzatziki?

If you’re looking for a substitute for yogurt in tzatziki, there are several options. For a dairy-free version, you can use plant-based yogurt made from almond, coconut, or soy. These alternatives provide a similar creamy texture. If you prefer a lighter option, you can use sour cream or buttermilk. However, keep in mind that these may alter the flavor slightly. Adding a bit of lemon juice can help mimic the tanginess of yogurt. Whichever substitute you choose, make sure to mix in the grated cucumber and seasonings for that classic tzatziki taste!

How do I store leftover Beef Gyros with Tzatziki?

Storing leftover beef gyros with tzatziki is simple! Place any leftover beef in an airtight container and refrigerate it. The beef can last for up to 3-4 days in the fridge. For the tzatziki sauce, store it separately in another airtight container. It will also keep well for about 3-4 days. When you’re ready to enjoy your leftovers, simply reheat the beef in the microwave or on the stovetop. Serve it with fresh pita and tzatziki for a quick and tasty meal!

Conclusion on Beef Gyros with Tzatziki

In conclusion, beef gyros with tzatziki are a delightful dish that brings the vibrant flavors of Greece to your kitchen. This recipe is not only easy to prepare but also offers a satisfying meal that can be enjoyed by everyone. The tender, seasoned beef combined with the refreshing tzatziki sauce creates a perfect balance of flavors and textures.

Whether you’re cooking for a family dinner or hosting a gathering, beef gyros with tzatziki are sure to impress. The versatility of this dish allows you to customize it with different proteins or vegetarian options, making it suitable for various dietary preferences. Plus, the preparation and cooking process is straightforward, allowing you to enjoy the experience without stress.

As you gather around the table to share this delicious meal, remember that food is not just about nourishment; it’s also about connection and joy. So, gather your loved ones, serve up those gyros, and savor every bite together. With this recipe in hand, you can create a memorable dining experience that celebrates the rich culinary traditions of Greece. Enjoy your cooking adventure and the delightful flavors of beef gyros with tzatziki!

Cheesy Beefaroni Casserole Recipe is a must-try dish!

Introduction to Cheesy Beefaroni Casserole Recipe

What is Cheesy Beefaroni Casserole?

Cheesy Beefaroni Casserole is a delightful dish that combines the comforting flavors of beef, pasta, and cheese. This hearty casserole is a twist on the classic Beefaroni, which many of us enjoyed as kids. It features ground beef, elbow macaroni, and a rich tomato sauce, all topped with gooey melted cheese. The best part? It’s baked to perfection, creating a bubbly, golden crust that is simply irresistible. This dish is not only delicious but also easy to prepare, making it a perfect choice for busy weeknights or family gatherings.

Why You Should Try This Recipe

There are countless reasons to try the Cheesy Beefaroni Casserole Recipe. First, it’s a crowd-pleaser! Whether you’re cooking for your family or hosting friends, this casserole is sure to satisfy everyone’s taste buds. Second, it’s incredibly versatile. You can easily customize it by adding your favorite vegetables or spices. Plus, it’s a one-pot meal, which means less cleanup for you!

Moreover, this recipe is packed with protein and essential nutrients, making it a balanced meal option. With just a few simple ingredients, you can create a comforting dish that warms the heart and fills the belly. So, if you’re looking for a quick, tasty, and filling meal, look no further than this Cheesy Beefaroni Casserole Recipe!

Ingredients for Cheesy Beefaroni Casserole Recipe

To create the delicious Cheesy Beefaroni Casserole, you’ll need a few simple ingredients. Each one plays a vital role in bringing out the rich flavors of this dish. Here’s what you’ll need:

  • 1 pound ground beef: This is the main protein source, providing a hearty base for the casserole.
  • 1 small onion, diced: Onions add sweetness and depth to the flavor.
  • 2 cloves garlic, minced: Garlic brings a wonderful aroma and taste.
  • 1 (15-ounce) can tomato sauce: This gives the casserole its rich, tangy flavor.
  • 1 (14.5-ounce) can diced tomatoes, undrained: Diced tomatoes add texture and freshness.
  • 1 cup beef broth: Broth enhances the overall flavor and keeps the pasta moist.
  • 1 teaspoon Italian seasoning: This blend of herbs adds a classic Italian touch.
  • 1 teaspoon salt: Salt is essential for enhancing all the flavors.
  • ½ teaspoon black pepper: Pepper adds a subtle kick to the dish.
  • 2 cups elbow macaroni: The pasta is the heart of this casserole, making it filling.
  • 1 cup shredded cheddar cheese: Cheddar provides that gooey, melty goodness.
  • ½ cup grated Parmesan cheese: Parmesan adds a sharp, nutty flavor that complements the cheddar.
  • 1 tablespoon olive oil: Olive oil is used for sautéing the onions and garlic.

These ingredients come together to create a comforting and satisfying meal. Feel free to adjust the quantities based on your preferences or dietary needs. Now that you have everything ready, let’s move on to the preparation steps!

Step-by-Step Preparation of Cheesy Beefaroni Casserole Recipe

Step 1: Preheat the Oven

Before you start cooking, it’s important to preheat your oven. Set it to 350°F (175°C). Preheating ensures that your casserole bakes evenly and achieves that perfect golden crust. While the oven heats up, you can prepare the other ingredients.

Step 2: Cook the Ground Beef

In a large skillet, heat 1 tablespoon of olive oil over medium heat. Once the oil is hot, add the diced onion. Sauté the onion for about 3-4 minutes until it becomes soft and translucent. Next, stir in the minced garlic and cook for an additional minute. This step releases a wonderful aroma!

Now, add the 1 pound of ground beef to the skillet. Cook it for about 5-7 minutes, breaking it apart with a spoon as it browns. Make sure to drain any excess fat after cooking. This keeps your casserole from becoming greasy.

Step 3: Prepare the Pasta

While the beef is cooking, you can prepare the elbow macaroni. In a separate pot, bring water to a boil and add a pinch of salt. Cook the 2 cups of elbow macaroni according to the package instructions until al dente. This usually takes about 7-8 minutes. Once cooked, drain the pasta and set it aside.

Step 4: Combine Ingredients

Once the ground beef is browned and the pasta is ready, it’s time to combine everything. In the skillet with the beef, stir in the 15-ounce can of tomato sauce, the 14.5-ounce can of diced tomatoes (undrained), and 1 cup of beef broth. Add the 1 teaspoon of Italian seasoning, 1 teaspoon of salt, and ½ teaspoon of black pepper. Bring this mixture to a gentle simmer.

Step 5: Assemble the Casserole

After the mixture has simmered, add the cooked elbow macaroni to the skillet. Stir everything together until well combined. Remove the skillet from heat and mix in half of the 1 cup of shredded cheddar cheese. This will melt into the mixture, adding extra creaminess.

Next, transfer the entire mixture into a greased 9×13-inch baking dish. Spread it out evenly. Now, sprinkle the remaining cheddar cheese on top, followed by the ½ cup of grated Parmesan cheese. This will create a delicious cheesy crust when baked.

Step 6: Bake the Casserole

Place the baking dish in the preheated oven. Bake for 20-25 minutes, or until the cheese is bubbly and golden brown. The aroma will fill your kitchen, making it hard to wait! Once done, remove the casserole from the oven and let it cool for a few minutes before serving. This allows the flavors to settle and makes it easier to serve.

Variations of Cheesy Beefaroni Casserole Recipe

Vegetarian Option

If you’re looking for a meatless version of the Cheesy Beefaroni Casserole, you’re in luck! This vegetarian option is just as delicious and satisfying. Instead of ground beef, you can use sautéed vegetables. Bell peppers, zucchini, and mushrooms work wonderfully. Start by heating olive oil in your skillet, then add diced onions and garlic as before. Once they are soft, toss in your chosen vegetables and cook until tender.

Next, follow the same steps as the original recipe. Add the tomato sauce, diced tomatoes, and beef broth, along with the seasonings. Stir in the cooked elbow macaroni and half of the cheddar cheese. Transfer the mixture to your baking dish, top with the remaining cheese, and bake as directed. This vegetarian Cheesy Beefaroni Casserole is not only colorful but also packed with nutrients!

Spicy Cheesy Beefaroni Casserole

If you love a little heat in your meals, try the Spicy Cheesy Beefaroni Casserole! To add some spice, simply include a teaspoon of red pepper flakes when you mix in the seasonings. You can also use spicy Italian sausage instead of ground beef for an extra kick. Just cook the sausage in the skillet until browned, then follow the same steps as the original recipe.

For an even spicier twist, consider adding jalapeños or diced green chilies to the mixture. This version will surely satisfy those who enjoy bold flavors. The combination of spicy and cheesy will make this casserole a hit at your next gathering!

Cooking Note for Cheesy Beefaroni Casserole Recipe

When preparing the Cheesy Beefaroni Casserole, there are a few cooking notes to keep in mind to ensure the best results. First, always use a large skillet for cooking the ground beef and vegetables. This allows for even cooking and prevents overcrowding, which can lead to steaming instead of browning.

Next, be mindful of the pasta. Cooking it al dente is crucial, as it will continue to cook while baking in the oven. If you overcook the pasta initially, it may become mushy in the final dish. Also, remember to stir the mixture occasionally while it simmers. This helps to prevent sticking and ensures that all flavors meld together beautifully.

For the cheese, feel free to experiment with different types. While cheddar and Parmesan are classic choices, you can also try mozzarella for a stretchier texture or pepper jack for a spicy kick. Mixing different cheeses can elevate the flavor profile of your casserole.

Lastly, let the casserole cool for a few minutes after baking. This resting time allows the cheese to set, making it easier to serve. Enjoy your delicious Cheesy Beefaroni Casserole with family and friends!

Serving Suggestions for Cheesy Beefaroni Casserole Recipe

When it comes to serving your Cheesy Beefaroni Casserole, there are plenty of delightful options to enhance the meal. This dish is hearty and filling on its own, but pairing it with the right sides can elevate your dining experience. Here are some tasty serving suggestions:

  • Fresh Salad: A crisp green salad is a perfect complement to the rich flavors of the casserole. Consider a simple mixed greens salad with cherry tomatoes, cucumbers, and a light vinaigrette. The freshness of the salad balances the cheesy goodness of the casserole.
  • Garlic Bread: Serve warm garlic bread alongside your casserole for a comforting touch. The buttery, garlicky bread is great for soaking up any extra sauce and adds a delightful crunch to your meal.
  • Steamed Vegetables: For a healthy side, steamed vegetables like broccoli, green beans, or carrots can add color and nutrition to your plate. They provide a nice contrast to the creamy casserole.
  • Coleslaw: A tangy coleslaw can add a refreshing crunch. The coolness of the slaw pairs well with the warm, cheesy casserole, creating a delightful texture combination.
  • Pickles or Olives: For a bit of zing, serve pickles or olives on the side. Their briny flavor can cut through the richness of the cheese and beef, making each bite more enjoyable.

Don’t forget to garnish your Cheesy Beefaroni Casserole with fresh herbs like parsley or basil before serving. This adds a pop of color and a burst of flavor. Whether you’re hosting a family dinner or a casual gathering with friends, these serving suggestions will make your meal even more memorable!

Tips for Perfecting Your Cheesy Beefaroni Casserole Recipe

Creating the perfect Cheesy Beefaroni Casserole is all about attention to detail. With a few simple tips, you can elevate this dish to new heights. Here are some helpful suggestions to ensure your casserole turns out delicious every time:

  • Choose Quality Ingredients: Start with fresh, high-quality ingredients. Fresh ground beef, ripe tomatoes, and good cheese can make a big difference in flavor. Opt for whole tomatoes instead of canned for a fresher taste.
  • Don’t Skip the Seasoning: Seasoning is key! Make sure to taste your mixture before baking. Adjust the salt, pepper, and Italian seasoning to suit your preferences. A little extra seasoning can enhance the overall flavor.
  • Mix Cheeses: While cheddar and Parmesan are classic choices, consider mixing in other cheeses. Mozzarella adds a stretchy texture, while gouda can introduce a smoky flavor. Experiment to find your favorite combination!
  • Let It Rest: After baking, allow the casserole to rest for about 5-10 minutes before serving. This helps the cheese set and makes it easier to cut into portions. Plus, it allows the flavors to meld together beautifully.
  • Use Leftovers Creatively: If you have leftovers, don’t let them go to waste! Reheat them for lunch or dinner the next day. You can also transform them into a new dish by adding a layer of fresh vegetables or a sprinkle of different cheese before reheating.
  • Garnish for Presentation: A simple garnish can make your casserole look even more appealing. Fresh herbs like parsley or basil not only add color but also a burst of flavor. A sprinkle of crushed red pepper flakes can add a nice touch of heat.
  • Adjust Cooking Time: Keep an eye on your casserole while it bakes. Ovens can vary, so check for that golden, bubbly cheese around the 20-minute mark. If it’s not quite there, give it a few more minutes, but watch closely to avoid burning.

By following these tips, you’ll be well on your way to mastering the Cheesy Beefaroni Casserole Recipe. Each bite will be a delightful experience, filled with rich flavors and comforting textures. Enjoy the process and happy cooking!

Breakdown of Time for Cheesy Beefaroni Casserole Recipe

Prep Time

Preparing the Cheesy Beefaroni Casserole is quick and easy. The prep time typically takes about 15-20 minutes. During this time, you will gather all your ingredients, chop the onion and garlic, and cook the ground beef. This step is essential for ensuring that everything is ready to go when you start combining the ingredients. Having everything prepped in advance makes the cooking process smoother and more enjoyable!

Cooking Time

The cooking time for the Cheesy Beefaroni Casserole is approximately 30-35 minutes. This includes the time it takes to simmer the beef mixture and cook the elbow macaroni. After combining everything, you will bake the casserole for 20-25 minutes until the cheese is bubbly and golden. This step is crucial for achieving that delicious, cheesy crust that everyone loves!

Total Time

In total, you can expect the entire process of making the Cheesy Beefaroni Casserole to take about 45-55 minutes. This includes both prep and cooking time. With such a reasonable time commitment, you can easily whip up this comforting dish on a busy weeknight or for a family gathering. The best part? The delightful aroma and cheesy goodness will have everyone eagerly waiting for dinner!

Nutritional Information for Cheesy Beefaroni Casserole Recipe

Calories

When it comes to enjoying a hearty meal, knowing the calorie content is essential. Each serving of the Cheesy Beefaroni Casserole contains approximately 420 calories. This makes it a satisfying option for dinner without going overboard on calories. The combination of beef, pasta, and cheese provides a filling meal that can keep you energized throughout the evening.

Protein

Protein is a vital nutrient for our bodies, and this casserole delivers! Each serving offers about 25 grams of protein. The ground beef is the primary source of protein, making this dish a great choice for those looking to boost their protein intake. Pairing it with a fresh salad or vegetables can further enhance the nutritional value of your meal.

Sodium

While enjoying delicious food, it’s also important to be mindful of sodium levels. Each serving of the Cheesy Beefaroni Casserole contains around 800 milligrams of sodium. This amount is typical for a dish that includes processed ingredients like tomato sauce and broth. If you’re watching your sodium intake, consider using low-sodium broth and sauce to help reduce the overall sodium content without sacrificing flavor.

FAQs about Cheesy Beefaroni Casserole Recipe

Can I make Cheesy Beefaroni Casserole ahead of time?

Absolutely! Making Cheesy Beefaroni Casserole ahead of time is a great idea. You can prepare the entire dish, assemble it, and then cover it tightly with plastic wrap or aluminum foil. Store it in the refrigerator for up to 24 hours before baking. When you’re ready to enjoy it, simply preheat your oven and bake as directed. If you’re baking it straight from the fridge, you may need to add a few extra minutes to the cooking time to ensure it heats through completely.

What can I substitute for ground beef in the Cheesy Beefaroni Casserole Recipe?

If you’re looking for alternatives to ground beef, there are several options! Ground turkey or chicken can be used for a leaner version of the casserole. They provide similar texture and flavor while reducing fat content. For a vegetarian option, consider using sautéed vegetables like bell peppers, zucchini, or mushrooms. You can also use plant-based meat substitutes available in stores. These options will still give you a hearty and satisfying dish without the beef.

How do I store leftovers of Cheesy Beefaroni Casserole?

Storing leftovers of your Cheesy Beefaroni Casserole is simple! Allow the casserole to cool completely before transferring it to an airtight container. You can store it in the refrigerator for up to 3-4 days. If you want to keep it longer, consider freezing it. To freeze, portion the casserole into freezer-safe containers and label them with the date. It can last in the freezer for up to 2-3 months. When you’re ready to eat, thaw it in the refrigerator overnight and reheat in the oven or microwave until heated through.

Conclusion on Cheesy Beefaroni Casserole Recipe

In conclusion, the Cheesy Beefaroni Casserole Recipe is a delightful dish that brings comfort and satisfaction to the dinner table. With its rich flavors, creamy texture, and cheesy goodness, it’s no wonder this casserole has become a favorite for many families. Not only is it easy to prepare, but it also allows for creativity with various ingredient substitutions and variations.

This recipe is perfect for busy weeknights or special gatherings, as it can be made ahead of time and baked when needed. The combination of ground beef, pasta, and cheese creates a filling meal that everyone will love. Plus, with the option to customize it to suit your taste, you can make it your own!

Whether you choose to stick with the classic version or try out the vegetarian or spicy variations, you’re sure to impress your family and friends. So, gather your ingredients, follow the steps, and enjoy the deliciousness of your homemade Cheesy Beefaroni Casserole. Happy cooking!

Healthy Creamy Tuna Pasta Salad is a nutritious delight.

Introduction to Healthy Creamy Tuna Pasta Salad

Healthy Creamy Tuna Pasta Salad. This dish is not only easy to make, but it also packs a punch of flavor and nutrition. With whole wheat pasta, fresh vegetables, and protein-rich tuna, it’s a perfect choice for lunch or dinner.

What Makes Healthy Creamy Tuna Pasta Salad a Great Choice?

First and foremost, this salad is a fantastic source of protein. Tuna is loaded with essential nutrients, making it a smart choice for anyone looking to maintain a healthy diet. Additionally, using whole wheat pasta adds fiber, which is great for digestion and helps keep you feeling full longer.

Moreover, the combination of Greek yogurt and mayonnaise in the dressing provides a creamy texture without excessive calories. This means you can enjoy a rich flavor while still keeping your meal light. Plus, the addition of fresh vegetables like cherry tomatoes and cucumbers not only enhances the taste but also boosts the nutritional value.

Healthy Creamy Tuna Pasta Salad is sure to impress.

In summary, this dish is a wholesome, satisfying option that combines taste and health. It’s perfect for busy weeknights or as a make-ahead meal for lunch. So, let’s dive into the ingredients and get started on this delightful recipe!

Ingredients for Healthy Creamy Tuna Pasta Salad

Healthy Creamy Tuna Pasta Salad, you’ll need a few simple ingredients. Each component plays a vital role in delivering flavor and nutrition. Here’s what you’ll need:

  • 8 ounces whole wheat pasta (such as rotini or penne)
  • 1 can (15 ounces) tuna in water, drained
  • 1 cup cherry tomatoes, halved
  • 1 cup cucumber, diced
  • 1/2 cup red onion, finely chopped
  • 1/2 cup Greek yogurt
  • 1/4 cup mayonnaise
  • 1 tablespoon Dijon mustard
  • 1 tablespoon lemon juice
  • 1 teaspoon garlic powder
  • Salt and pepper to taste
  • 2 tablespoons fresh parsley, chopped (optional)

These ingredients come together to create a creamy, flavorful salad that’s both satisfying and healthy. The whole wheat pasta provides a hearty base, while the tuna adds protein. Fresh vegetables like cherry tomatoes and cucumbers not only add crunch but also contribute vitamins and minerals.

The dressing, made from Greek yogurt and mayonnaise, gives the salad its creamy texture without being overly heavy. Dijon mustard and lemon juice add a zesty kick, making every bite refreshing. Feel free to adjust the seasonings to suit your taste. Now that you have your ingredients ready, let’s move on to the preparation steps!

Step-by-Step Preparation of Healthy Creamy Tuna Pasta Salad

Healthy Creamy Tuna Pasta Salad. This step-by-step guide will help you create a delicious dish that’s perfect for any occasion. Let’s get started!

Step 1: Cook the Pasta

Begin by boiling a large pot of water. Once it’s bubbling, add the 8 ounces of whole wheat pasta. Cook according to the package instructions until it reaches an al dente texture. This usually takes about 8 to 10 minutes. Remember, you want it firm enough to hold its shape in the salad.

After cooking, drain the pasta in a colander. Rinse it under cold water to stop the cooking process. This will also help cool the pasta down, making it perfect for your salad.

Step 2: Prepare the Tuna and Vegetables

While the pasta is cooking, you can prepare the other ingredients. Open the can of tuna and drain the water thoroughly. Place the tuna in a large mixing bowl. Next, chop the cherry tomatoes in half and dice the cucumber. Finely chop the red onion as well. Add all these fresh ingredients to the bowl with the tuna.

These colorful veggies not only add flavor but also provide essential nutrients. Plus, they make your salad visually appealing!

Step 3: Make the Creamy Dressing

In a separate bowl, it’s time to whip up the creamy dressing. Combine 1/2 cup of Greek yogurt, 1/4 cup of mayonnaise, 1 tablespoon of Dijon mustard, 1 tablespoon of lemon juice, and 1 teaspoon of garlic powder. Mix everything together until smooth and creamy.

Healthy Creamy Tuna Pasta Salad so delightful. It’s rich in flavor but still light enough to keep the dish healthy.

Step 4: Combine All Ingredients

Now, it’s time to bring everything together! Add the cooled pasta to the bowl with the tuna and vegetables. Then, pour the creamy dressing over the top. Gently mix everything together until all the ingredients are well coated with the dressing.

Be careful not to mash the tuna or pasta. You want to keep the texture nice and chunky for a satisfying bite!

Step 5: Chill and Serve

Once everything is combined, taste your salad. Adjust the seasoning with salt and pepper as needed. If you like, stir in some fresh parsley for an extra burst of flavor.

Healthy Creamy Tuna Pasta Salad!

Variations of Healthy Creamy Tuna Pasta Salad

Healthy Creamy Tuna Pasta Salad is its versatility. You can easily customize it to suit your taste or dietary needs. Here are some fun variations to consider!

Adding Different Vegetables

While the original recipe is delicious, adding different vegetables can enhance both flavor and nutrition. Here are some great options:

  • Bell Peppers: Diced bell peppers add a sweet crunch. They come in various colors, making your salad vibrant.
  • Spinach: Fresh spinach leaves can be mixed in for added nutrients. They’re rich in iron and vitamins.
  • Carrots: Shredded carrots provide a nice sweetness and a pop of color. They also add a satisfying crunch.
  • Peas: Sweet peas can be tossed in for a burst of flavor. They’re also a great source of protein.

Feel free to mix and match these vegetables based on what you have on hand. The more colorful your salad, the more appealing it will be!

Alternative Protein Options

If you want to switch things up, consider using different protein sources. Here are some tasty alternatives:

  • Chicken: Shredded or diced cooked chicken can replace tuna for a different flavor profile. It’s also a great way to use leftovers!
  • Chickpeas: For a vegetarian option, add canned chickpeas. They’re packed with protein and fiber, making your salad hearty.
  • Salmon: Canned salmon can be a delicious substitute. It offers a unique taste and is rich in omega-3 fatty acids.
  • Tofu: For a vegan option, cubed tofu can be added. It absorbs flavors well and adds a nice texture.

Healthy Creamy Tuna Pasta Salad that suits your preferences. Whether you’re looking for a different taste or a new protein source, the possibilities are endless!

Cooking Note for Healthy Creamy Tuna Pasta Salad

Healthy Creamy Tuna Pasta Salad, there are a few cooking notes to keep in mind. These tips will help ensure that your salad turns out perfectly every time.

First, always check the cooking time for your whole wheat pasta. Different brands may have varying instructions. Cooking it al dente is crucial, as it will hold up better in the salad and not become mushy when mixed with the dressing.

Next, rinsing the pasta under cold water after draining is essential. This step not only cools the pasta but also helps remove excess starch. Removing the starch prevents the pasta from sticking together, ensuring a light and fluffy salad.

When it comes to the tuna, using tuna packed in water is a healthier choice. It has less fat and fewer calories compared to tuna in oil. However, if you prefer the richer flavor of oil-packed tuna, feel free to use it. Just be mindful of the added calories.

For the vegetables, freshness is key. Choose ripe cherry tomatoes and crisp cucumbers for the best flavor and texture. If you’re using other vegetables, make sure they are washed and cut into bite-sized pieces for easy mixing.

Lastly, don’t skip the chilling step! Allowing the salad to sit in the refrigerator for at least 30 minutes helps the flavors meld together beautifully. This waiting time enhances the overall taste, making each bite even more enjoyable.

Healthy Creamy Tuna Pasta Salad that’s not only delicious but also visually appealing. Enjoy your cooking adventure!

Serving Suggestions for Healthy Creamy Tuna Pasta Salad

Healthy Creamy Tuna Pasta Salad is ready, it’s time to think about how to serve it. This dish is not only tasty but also versatile, making it perfect for various occasions. Here are some delightful serving suggestions to elevate your meal:

  • As a Main Dish: Serve the salad as a light main course. It’s filling enough to satisfy your hunger while still being healthy. Pair it with a slice of whole-grain bread for a complete meal.
  • On a Bed of Greens: For a refreshing twist, serve the pasta salad on a bed of mixed greens. This adds extra crunch and nutrients, making your dish even more appealing.
  • In Lettuce Wraps: For a fun and low-carb option, spoon the salad into large lettuce leaves. This makes for a great finger food, perfect for parties or picnics.
  • As a Side Dish: This salad works wonderfully as a side dish for grilled meats or fish. Its creamy texture complements the flavors of grilled foods beautifully.
  • In a Mason Jar: For meal prep or on-the-go lunches, layer the salad in a mason jar. Start with the dressing at the bottom, followed by the pasta, veggies, and tuna. This keeps everything fresh and prevents sogginess.

Healthy Creamy Tuna Pasta Salad is sure to be a hit!

Tips for Making the Best Healthy Creamy Tuna Pasta Salad

Healthy Creamy Tuna Pasta Salad is all about the details. Here are some handy tips to ensure your salad turns out delicious every time:

  • Choose Quality Ingredients: Start with high-quality tuna. Look for brands that use sustainable fishing practices. Fresh vegetables also make a big difference in flavor and texture.
  • Don’t Overcook the Pasta: Keep an eye on the cooking time. Overcooked pasta can become mushy. Aim for al dente, which means it should still have a slight bite.
  • Experiment with Seasonings: Feel free to adjust the seasonings to your liking. Adding a pinch of cayenne pepper or a dash of hot sauce can give your salad a nice kick!
  • Let It Chill: Allowing the salad to chill for at least 30 minutes is crucial. This resting time helps the flavors blend together, making each bite more flavorful.
  • Mix Gently: When combining the ingredients, be gentle. You want to keep the tuna and pasta intact for a satisfying texture. Stir carefully to avoid mashing them.
  • Use Fresh Herbs: Fresh herbs like dill or basil can elevate the flavor. They add a burst of freshness that complements the creamy dressing beautifully.
  • Make It Ahead: This salad is perfect for meal prep. You can make it a day in advance. Just store it in an airtight container in the fridge for up to three days.
  • Serve It Cold: This salad is best served cold. If it’s been sitting out, give it a quick stir and pop it back in the fridge for a bit before serving.

Healthy Creamy Tuna Pasta Salad that’s not only tasty but also visually appealing. Enjoy the process and feel free to get creative with your ingredients!

Breakdown of Time for Healthy Creamy Tuna Pasta Salad

Healthy Creamy Tuna Pasta Salad can help you plan your meals better. Here’s a simple breakdown of the time involved in making this delicious dish.

Prep Time

The prep time for this salad is quite short. You’ll need about 15 minutes to gather your ingredients and chop the vegetables. This includes:

  • Draining the tuna
  • Chopping cherry tomatoes and cucumber
  • Finely chopping the red onion
  • Measuring out the dressing ingredients

With everything ready, you’ll be set to move on to the cooking and mixing steps!

Cooking Time

Cooking the pasta takes about 10 minutes. Here’s how it breaks down:

  • Boiling water: 5 minutes
  • Cooking the pasta: 8 to 10 minutes
  • Draining and rinsing: 2 minutes

So, in total, you can expect the cooking time to be around 10 to 15 minutes, depending on your stove and pasta type.

Total Time

Healthy Creamy Tuna Pasta Salad is approximately 25 to 30 minutes. However, don’t forget to include the chilling time of at least 30 minutes for the best flavor. So, if you plan ahead, you can have a delicious salad ready in about an hour!

This quick and easy timeline makes it simple to whip up this nutritious dish, whether for a busy weeknight dinner or a weekend gathering. Enjoy your cooking!

Nutritional Information for Healthy Creamy Tuna Pasta Salad

Healthy Creamy Tuna Pasta Salad not only tastes great but also offers a variety of nutrients. Here’s a breakdown of the key nutritional information per serving:

Calories

Each serving of this delightful salad contains approximately 320 calories. This makes it a satisfying option without being overly heavy. The combination of whole wheat pasta, tuna, and fresh vegetables ensures that you’re getting a nutritious meal that won’t derail your healthy eating goals.

Protein

Healthy Creamy Tuna Pasta Salad is an excellent choice for those looking to increase their protein intake. Tuna is a fantastic source of lean protein, making this dish perfect for muscle maintenance and overall health.

Sodium

When it comes to sodium, this salad contains around 600 milligrams per serving. While this is a reasonable amount, it’s always good to be mindful of your sodium intake, especially if you’re watching your salt consumption. You can reduce the sodium content by using low-sodium tuna and adjusting the amount of added salt in the dressing.

Healthy Creamy Tuna Pasta Salad is not only delicious but also packed with essential nutrients. With a good balance of calories, protein, and sodium, it’s a great option for a healthy meal. Enjoy this nutritious salad as part of your balanced diet!

FAQs about Healthy Creamy Tuna Pasta Salad

Can I use canned tuna in oil for Healthy Creamy Tuna Pasta Salad?

Healthy Creamy Tuna Pasta Salad. However, keep in mind that it will add extra calories and fat to the dish. If you prefer a lighter option, tuna packed in water is a healthier choice. It still provides great flavor and protein without the added calories from oil.

How long can I store Healthy Creamy Tuna Pasta Salad in the fridge?

Healthy Creamy Tuna Pasta Salad can be stored in the fridge for up to three days. Make sure to keep it in an airtight container to maintain freshness. If you notice any changes in smell or texture, it’s best to discard it. Enjoy it as a quick lunch or snack during the week!

Is Healthy Creamy Tuna Pasta Salad suitable for meal prep?

Healthy Creamy Tuna Pasta Salad is perfect for meal prep. You can make it ahead of time and store it in individual portions. This makes it easy to grab and go for lunch or dinner. Just remember to keep it refrigerated and consume it within three days for the best taste and quality.

What can I substitute for mayonnaise in Healthy Creamy Tuna Pasta Salad?

Healthy Creamy Tuna Pasta Salad, Greek yogurt is an excellent option. It provides a creamy texture while being lower in calories and fat. You can also use avocado for a rich, creamy flavor. Blending avocado with a bit of lemon juice can create a delicious dressing that complements the salad beautifully.

Conclusion on Healthy Creamy Tuna Pasta Salad

Healthy Creamy Tuna Pasta Salad is a delightful dish that combines taste, nutrition, and convenience. With its simple ingredients and easy preparation, it’s perfect for busy weeknights or as a make-ahead meal for lunch. The blend of whole wheat pasta, protein-rich tuna, and fresh vegetables creates a satisfying meal that everyone will love.

This salad not only offers a burst of flavors but also provides essential nutrients that support a healthy lifestyle. The creamy dressing made from Greek yogurt and mayonnaise keeps the dish light while still being indulgent. Plus, the versatility of this recipe allows you to customize it to your liking, whether by adding different vegetables or swapping out the protein.

Healthy Creamy Tuna Pasta Salad, remember to follow the tips and variations provided. They will help you create a dish that’s not only delicious but also visually appealing. Whether you serve it as a main dish, a side, or in a fun lettuce wrap, this salad is sure to impress.

Healthy Creamy Tuna Pasta Salad is bound to become a favorite in your household. Happy cooking!

Jennifer Aniston’s Salad Recipe is a must-try dish!

Introduction to Jennifer Aniston’s Salad Recipe

Jennifer Aniston’s Salad Recipe. This vibrant and nutritious salad has become a favorite among fans of the actress and health enthusiasts alike. But what makes this salad so special? Let’s dive into its origins and discover why it has gained such popularity.

The Story Behind Jennifer Aniston’s Salad Recipe

Jennifer Aniston, known for her iconic role in the television series “Friends,” has always been a beacon of health and wellness. Over the years, she has shared her love for nutritious foods, and this salad is a perfect example. The story goes that during her time on the set of “Friends,” Aniston enjoyed a salad that was packed with wholesome ingredients. It was said to be a staple in her diet, providing her with the energy needed for long filming days.

As the years passed, this salad became a symbol of her healthy lifestyle. Fans began to recreate it, and it quickly spread across social media platforms. The combination of quinoa, fresh vegetables, and feta cheese not only makes it delicious but also offers a balanced meal. It’s no wonder that many people have adopted this recipe into their own kitchens.

Today, Jennifer Aniston’s Salad Recipe is celebrated for its simplicity and flavor. It’s a dish that can be enjoyed at any time of the year, making it a versatile addition to your meal rotation. Whether you’re looking for a light lunch or a side dish for dinner, this salad fits the bill perfectly. So, let’s get ready to explore the ingredients and preparation steps that make this salad a must-try!

Ingredients for Jennifer Aniston’s Salad Recipe

Jennifer Aniston’s Salad Recipe, you’ll need a variety of fresh and wholesome ingredients. Each component plays a crucial role in delivering flavor and nutrition. Here’s a detailed list of what you’ll need:

  • 1 cup cooked quinoa, cooled: Quinoa serves as the base of the salad. It’s a fantastic source of protein and fiber.
  • 1 cup diced cucumber: This adds a refreshing crunch and hydration to the dish.
  • 1 cup diced bell pepper (red or yellow): Bell peppers bring sweetness and vibrant color, making the salad visually appealing.
  • 1 cup chopped parsley: Fresh parsley not only enhances the flavor but also adds a burst of green goodness.
  • 1/2 cup diced red onion: Red onion provides a mild sharpness that complements the other ingredients.
  • 1/2 cup crumbled feta cheese: Feta cheese adds creaminess and a tangy flavor that ties everything together.
  • 1/4 cup chopped walnuts: Walnuts contribute a delightful crunch and healthy fats.
  • 1/4 cup olive oil: Olive oil serves as the dressing base, providing richness and healthy monounsaturated fats.
  • 2 tablespoons lemon juice: Fresh lemon juice brightens the flavors and adds a zesty kick.
  • 1 teaspoon salt: Salt enhances the overall taste of the salad.
  • 1/2 teaspoon black pepper: Black pepper adds a subtle heat and depth of flavor.

These ingredients come together to create a salad that is not only delicious but also packed with nutrients. The combination of textures and flavors makes it a delightful dish for any occasion. Now that you have your ingredients ready, let’s move on to the step-by-step preparation of this fantastic salad!

Step-by-Step Preparation of Jennifer Aniston’s Salad Recipe

Jennifer Aniston’s Salad Recipe, it’s time to dive into the preparation. This salad is simple to make and requires just a few steps. Let’s break it down step by step!

Step 1: Preparing the Base Ingredients

Start by cooking the quinoa. Rinse 1 cup of quinoa under cold water to remove any bitterness. Then, cook it according to the package instructions. Usually, this involves boiling it in water for about 15 minutes until it’s fluffy. Once cooked, let it cool completely. This step is crucial as warm quinoa can wilt the fresh vegetables.

Step 2: Adding the Protein

If you want to boost the protein content, consider adding grilled chicken or chickpeas. For grilled chicken, simply cook it on a grill or stovetop until it’s fully cooked, then dice it into bite-sized pieces. If you prefer chickpeas, you can use canned ones. Just rinse and drain them before adding. This extra protein makes the salad more filling and satisfying.

Step 3: Mixing in the Vegetables

In a large mixing bowl, combine the cooled quinoa with the diced cucumber, bell pepper, chopped parsley, and diced red onion. These fresh vegetables add color, crunch, and essential vitamins. Toss them gently to ensure they are evenly distributed. The vibrant colors will make your salad visually appealing!

Step 4: Creating the Dressing

In a separate small bowl, whisk together the olive oil, lemon juice, salt, and black pepper. This dressing is simple yet flavorful. The olive oil provides healthy fats, while the lemon juice adds a refreshing zing. Make sure to whisk until everything is well combined. This step is key to ensuring that the flavors meld beautifully.

Step 5: Combining Everything Together

Now, pour the dressing over the salad mixture. Toss everything gently to coat the ingredients evenly. Be careful not to mash the feta cheese; you want it to remain crumbly. After mixing, taste the salad and adjust the seasoning if needed. For the best flavor, let the salad chill in the refrigerator for at least 30 minutes before serving. This allows the flavors to blend together beautifully.

Jennifer Aniston’s Salad Recipe ready to be enjoyed. Whether you serve it as a main dish or a side, it’s sure to impress!

Variations of Jennifer Aniston’s Salad Recipe

Jennifer Aniston’s Salad Recipe is already a delightful mix of flavors and textures, there are plenty of ways to customize it to suit your taste. Whether you’re looking for vegetarian options or want to add different proteins, these variations will keep your salad exciting and fresh!

Vegetarian Options

If you want to keep the salad vegetarian, there are several delicious options to consider. One great choice is to add more plant-based proteins. For instance, you can include:

  • Chickpeas: These legumes are packed with protein and fiber. Simply rinse and drain a can of chickpeas, then toss them into the salad.
  • Edamame: These young soybeans add a nice crunch and are rich in protein. You can find them frozen; just steam and add them to your salad.
  • Tofu: For a creamy texture, try adding cubed, marinated tofu. It absorbs flavors well and makes the salad more filling.

These vegetarian options not only enhance the nutritional value but also add variety to the dish. You can mix and match these ingredients based on what you have on hand or your personal preferences.

Adding Different Proteins

If you’re looking to boost the protein content further, consider adding different types of proteins. Here are some tasty suggestions:

  • Grilled Shrimp: Shrimp cooks quickly and adds a delightful seafood flavor. Just grill or sauté them until they turn pink, then toss them in.
  • Turkey: Diced cooked turkey is a lean protein option that pairs well with the salad’s flavors. It’s perfect for using up leftovers!
  • Hard-Boiled Eggs: Sliced hard-boiled eggs can add creaminess and extra protein. They’re easy to prepare and make the salad more satisfying.

These protein additions can transform the salad into a heartier meal. Feel free to experiment with different combinations to find your favorite mix!

Cooking Note for Jennifer Aniston’s Salad Recipe

Jennifer Aniston’s Salad Recipe, there are a few cooking notes to keep in mind to ensure the best results. These tips will help you create a salad that is not only delicious but also visually appealing and nutritious.

First, always use fresh ingredients. Fresh vegetables and herbs will enhance the flavor and texture of your salad. Look for vibrant cucumbers, crisp bell peppers, and bright green parsley. The quality of your ingredients can make a significant difference in the overall taste.

Next, pay attention to the quinoa. Rinse it thoroughly before cooking to remove any bitterness. This step is essential for achieving a pleasant flavor. Additionally, allow the quinoa to cool completely before mixing it with the other ingredients. Warm quinoa can cause the vegetables to wilt, which may affect the salad’s texture.

When it comes to the dressing, whisk it well to ensure all ingredients are combined. This will help distribute the flavors evenly throughout the salad. If you prefer a creamier dressing, consider adding a dollop of Greek yogurt or a splash of tahini for extra richness.

Lastly, don’t rush the chilling process. Allowing the salad to sit in the refrigerator for at least 30 minutes helps the flavors meld together beautifully. This resting time is crucial for achieving a well-balanced taste. If you can, prepare the salad a few hours in advance or even the night before. This way, you can enjoy a refreshing and flavorful dish whenever you’re ready to serve!

Jennifer Aniston’s Salad Recipe that is sure to impress your family and friends. Enjoy the process and savor the delicious results!

Serving Suggestions for Jennifer Aniston’s Salad Recipe

Jennifer Aniston’s Salad Recipe, it’s time to think about how to serve it. This salad is not only nutritious but also visually appealing, making it a perfect centerpiece for any meal. Here are some serving suggestions to elevate your dining experience:

  • As a Main Course: Serve the salad as a light main dish, especially during warm weather. Pair it with a slice of whole-grain bread or pita for a complete meal. The protein from quinoa and added ingredients will keep you satisfied.
  • As a Side Dish: This salad makes an excellent side dish for grilled meats or fish. Its fresh flavors complement the richness of grilled foods beautifully. Consider serving it alongside grilled chicken or salmon for a balanced plate.
  • In a Wrap: For a fun twist, use the salad as a filling for wraps. Spread some hummus or tzatziki on a whole wheat tortilla, add the salad, and roll it up. This makes for a quick and healthy lunch option!
  • In a Mason Jar: For meal prep, layer the salad ingredients in a mason jar. Start with the dressing at the bottom, followed by quinoa, vegetables, and toppings like feta and walnuts. When ready to eat, just shake it up! This is a great way to keep the salad fresh and crisp.
  • Garnished with Fresh Herbs: Enhance the presentation by garnishing the salad with extra parsley or even some fresh mint. This adds a pop of color and an aromatic touch that will impress your guests.

Jennifer Aniston’s Salad Recipe but also make it easy to enjoy in various ways. Whether you’re hosting a gathering or simply enjoying a meal at home, this salad is sure to be a hit!

Tips for Making the Perfect Jennifer Aniston’s Salad Recipe

Jennifer Aniston’s Salad Recipe is all about attention to detail and using quality ingredients. Here are some helpful tips to ensure your salad turns out delicious every time:

  • Choose Quality Quinoa: Opt for high-quality quinoa. Look for organic varieties if possible. Rinse it well before cooking to remove any bitterness. This step is crucial for a pleasant flavor.
  • Chill Your Ingredients: For a refreshing salad, chill your ingredients before mixing. Cold vegetables enhance the overall taste and make the salad more enjoyable, especially on warm days.
  • Fresh Herbs Matter: Use fresh parsley for the best flavor. Dried herbs can’t replicate the vibrant taste of fresh ones. If you want to experiment, try adding fresh mint or cilantro for a unique twist.
  • Customize Your Dressing: Feel free to adjust the dressing to your liking. If you prefer a tangier flavor, add more lemon juice. For a creamier texture, consider mixing in a bit of Greek yogurt or tahini.
  • Let It Marinate: Allow the salad to sit in the refrigerator for at least 30 minutes before serving. This resting time helps the flavors meld together beautifully, making each bite more delicious.
  • Mix Gently: When combining the ingredients, toss gently to avoid mashing the feta cheese. You want to keep the cheese crumbly for the best texture.
  • Experiment with Add-Ins: Don’t hesitate to get creative! Add seasonal fruits like diced apples or pomegranate seeds for a sweet touch. You can also include roasted vegetables for added depth.
  • Serve Fresh: For the best taste, serve the salad fresh. If you have leftovers, store them in an airtight container in the fridge. However, be aware that the vegetables may lose some crunch over time.

Jennifer Aniston’s Salad Recipe that is not only nutritious but also bursting with flavor. Enjoy the process and share this healthy dish with family and friends!

Breakdown of Time for Jennifer Aniston’s Salad Recipe

Jennifer Aniston’s Salad Recipe can help you plan your meals better. This salad is not only quick to make but also allows for flexibility in your schedule. Here’s a breakdown of the time involved in each step:

Prep Time

The prep time for this salad is approximately 15 to 20 minutes. This includes gathering your ingredients, washing and chopping the vegetables, and cooking the quinoa. If you’re using pre-cooked quinoa or canned chickpeas, you can save even more time. Just remember to let the quinoa cool completely before mixing it with the other ingredients!

Cooking Time

Cooking the quinoa typically takes about 15 minutes. You’ll need to bring water to a boil, add the quinoa, and let it simmer until it’s fluffy. Once cooked, allow it to cool for a few minutes before using it in the salad. If you’re adding grilled chicken or any other protein, factor in an additional 10 to 15 minutes for cooking.

Total Time

Jennifer Aniston’s Salad Recipe. This includes both prep and cooking time. If you let the salad chill in the refrigerator for at least 30 minutes before serving, you’ll enhance the flavors even more. So, if you plan ahead, you can have a delicious and nutritious meal ready in under an hour!

Nutritional Information for Jennifer Aniston’s Salad Recipe

Jennifer Aniston’s Salad Recipe is essential for those who are health-conscious or simply want to maintain a balanced diet. This salad is not only delicious but also packed with nutrients that can support your overall well-being. Let’s break down the key nutritional components per serving.

Calories

Jennifer Aniston’s Salad Recipe contains approximately 320 calories. This makes it a great option for a light meal or a satisfying side dish. The combination of quinoa, vegetables, and healthy fats from olive oil and walnuts provides a well-rounded source of energy without being overly heavy.

Protein

In terms of protein, this salad offers about 10 grams per serving. The quinoa and feta cheese contribute significantly to this protein content. If you choose to add grilled chicken, chickpeas, or other protein sources, you can easily increase the protein level, making it even more filling and nutritious.

Sodium

Jennifer Aniston’s Salad Recipe is around 500 milligrams per serving. This amount is primarily from the feta cheese and added salt. If you’re watching your sodium intake, consider using low-sodium feta or reducing the amount of salt in the dressing. This way, you can enjoy the salad while keeping your sodium levels in check.

Jennifer Aniston’s Salad Recipe is a nutritious choice that provides a balance of calories, protein, and essential nutrients. It’s a perfect addition to any healthy eating plan, offering both flavor and health benefits in every bite!

FAQs about Jennifer Aniston’s Salad Recipe

What makes Jennifer Aniston’s Salad Recipe unique?

Jennifer Aniston’s Salad Recipe apart is its delightful combination of flavors and textures. The use of quinoa as a base provides a nutritious foundation, while the fresh vegetables add crunch and color. The addition of feta cheese gives it a creamy, tangy twist, making each bite satisfying. Moreover, the salad is versatile, allowing for various protein options and add-ins, which makes it suitable for different dietary preferences. This unique blend of ingredients not only makes it delicious but also a well-rounded meal.

Can I make Jennifer Aniston’s Salad Recipe ahead of time?

Jennifer Aniston’s Salad Recipe ahead of time, making it a great option for meal prep. In fact, letting the salad chill in the refrigerator for at least 30 minutes enhances the flavors. You can make it a few hours in advance or even the night before. Just be sure to store it in an airtight container to keep it fresh. However, if you add ingredients like avocado or nuts, consider adding them just before serving to maintain their texture and flavor.

What are some common substitutions for ingredients in Jennifer Aniston’s Salad Recipe?

Jennifer Aniston’s Salad Recipe to suit your taste or dietary needs. For instance:

  • Quinoa: You can substitute quinoa with farro, bulgur, or even brown rice for a different grain base.
  • Feta Cheese: If you’re looking for a dairy-free option, try using vegan feta or omit it altogether.
  • Walnuts: If you have nut allergies, sunflower seeds or pumpkin seeds can provide a similar crunch.
  • Vegetables: Feel free to swap in seasonal vegetables like cherry tomatoes, shredded carrots, or even roasted veggies for added flavor.

These substitutions allow you to customize the salad while still keeping it nutritious and delicious!

How can I store leftovers of Jennifer Aniston’s Salad Recipe?

Jennifer Aniston’s Salad Recipe, place the salad in an airtight container and refrigerate it. It’s best to consume the salad within 2 to 3 days for optimal freshness. Keep in mind that some ingredients, like cucumbers and bell peppers, may lose their crunch over time. If you anticipate having leftovers, consider storing the dressing separately. This way, you can add it just before serving to keep the salad crisp and flavorful.

Conclusion on Jennifer Aniston’s Salad Recipe

Jennifer Aniston’s Salad Recipe is more than just a dish; it’s a celebration of fresh ingredients and healthy living. This vibrant salad not only offers a delightful mix of flavors but also packs a nutritional punch. With its base of quinoa and an array of colorful vegetables, it’s a meal that can be enjoyed any time of the year.

Whether you’re looking for a light lunch, a side dish for dinner, or a meal prep option, this salad fits the bill perfectly. The versatility of the recipe allows you to customize it to your liking, whether you choose to add proteins or experiment with different vegetables. Plus, the simple preparation steps make it accessible for cooks of all skill levels.

Jennifer Aniston’s Salad Recipe, remember the importance of using fresh ingredients and allowing the flavors to meld together. This not only enhances the taste but also makes the experience of eating the salad more enjoyable. So, gather your ingredients, follow the steps, and savor each bite of this delicious and nutritious dish.

With its health benefits and delightful taste, it’s no wonder that this salad has become a favorite among many. So why not give it a try? You might just find yourself adding it to your regular meal rotation. Enjoy the journey of creating and sharing this wonderful salad with family and friends!

Coconut Chicken Bake is a delicious family favorite.

Introduction to Coconut Chicken Bake Recipe

Welcome to the delightful world of the Coconut Chicken Bake Recipe! This dish is not just a meal; it’s an experience that brings together rich flavors and comforting textures. Imagine tender chicken thighs, infused with aromatic spices, all enveloped in a creamy coconut sauce. It’s a dish that warms the heart and satisfies the soul.

What Makes the Coconut Chicken Bake Recipe Special?

What sets this Coconut Chicken Bake Recipe apart is its unique blend of ingredients. The combination of coconut milk and spices creates a luscious sauce that perfectly complements the juicy chicken. Each bite is a burst of flavor, making it a favorite for family dinners or special occasions.

Moreover, this recipe is incredibly versatile. You can easily adjust the spice levels to suit your taste. Whether you prefer a mild dish or a spicy kick, this recipe can accommodate your preferences. Plus, it’s simple to prepare, making it perfect for both novice cooks and seasoned chefs.

Another highlight is the nutritional value. With a good balance of protein and healthy fats, this dish can fit into various dietary plans. It’s a wholesome option that doesn’t compromise on taste. So, gather your ingredients and get ready to create a meal that will impress everyone at your table!

Ingredients for Coconut Chicken Bake Recipe

To create the mouthwatering Coconut Chicken Bake, you’ll need a selection of fresh and flavorful ingredients. Here’s what you’ll need:

  • 2 pounds bone-in, skin-on chicken thighs
  • 1 teaspoon salt
  • 1 teaspoon black pepper
  • 1 tablespoon vegetable oil
  • 1 medium onion, chopped
  • 4 cloves garlic, minced
  • 1 tablespoon fresh ginger, grated
  • 1 teaspoon ground cumin
  • 1 teaspoon ground coriander
  • 1 teaspoon turmeric
  • 1 teaspoon paprika
  • 1 can (14 ounces) coconut milk
  • 1 cup chicken broth
  • 1 tablespoon lime juice
  • 1 cup fresh cilantro, chopped
  • Cooked rice, for serving

These ingredients come together to create a dish that is not only delicious but also visually appealing. The vibrant colors of the spices and fresh herbs will make your meal look as good as it tastes. Plus, the use of coconut milk adds a creamy texture that enhances the overall flavor profile.

When selecting your chicken, opt for high-quality, fresh thighs. They provide the best flavor and juiciness. Fresh herbs like cilantro add a burst of freshness, while the spices bring warmth and depth to the dish. With these ingredients on hand, you’re well on your way to preparing a delightful Coconut Chicken Bake that your family and friends will love!

Step-by-Step Preparation of Coconut Chicken Bake Recipe

Now that you have gathered all your ingredients, it’s time to dive into the preparation of your Coconut Chicken Bake. This step-by-step guide will help you create a delicious meal that’s sure to impress. Let’s get started!

Step 1: Preparing the Chicken

First, you need to prepare the chicken. Start by rinsing the bone-in, skin-on chicken thighs under cold water. Pat them dry with paper towels. This step is important as it helps the skin crisp up during cooking. Next, season the chicken thighs generously with salt and black pepper. This simple seasoning enhances the natural flavors of the chicken.

In a large oven-safe skillet, heat 1 tablespoon of vegetable oil over medium-high heat. Once the oil is hot, carefully place the chicken thighs in the skillet, skin-side down. Sear the chicken for about 5 minutes until the skin turns golden brown. Then, flip the chicken and cook for another 5 minutes. This process locks in the juices and adds a lovely color to the dish. After searing, remove the chicken from the skillet and set it aside on a plate.

Step 2: Mixing the Coconut Coating

With the chicken set aside, it’s time to create the flavorful coconut coating. In the same skillet, add the chopped onion. Sauté the onion for 3-4 minutes until it becomes translucent. This step builds a flavorful base for your dish. Next, stir in the minced garlic and grated ginger, cooking for an additional minute. The aroma will be delightful!

Now, it’s time to add the spices. Sprinkle in the ground cumin, ground coriander, turmeric, and paprika. Stir well and let the spices cook for 1-2 minutes until they become fragrant. This step is crucial as it releases the essential oils from the spices, enhancing the overall flavor of your Coconut Chicken Bake.

Step 3: Assembling the Dish

Once your spice mixture is ready, pour in the can of coconut milk and the chicken broth. Stir everything together until well combined. Bring the mixture to a gentle simmer. This creamy sauce will be the heart of your dish!

Now, return the seared chicken thighs to the skillet, placing them skin-side up. Drizzle the chicken with lime juice and sprinkle half of the chopped cilantro over the top. The lime juice adds a zesty kick that balances the richness of the coconut milk.

Step 4: Baking the Chicken

Preheat your oven to 375°F (190°C) if you haven’t done so already. Once the oven is ready, transfer the skillet to the oven. Bake the chicken for 25-30 minutes, or until it reaches an internal temperature of 165°F (74°C). This ensures that the chicken is fully cooked and safe to eat.

After baking, remove the skillet from the oven and let it rest for about 5 minutes. This resting period allows the juices to redistribute, making the chicken even more tender. Before serving, garnish with the remaining cilantro for a fresh touch. Your Coconut Chicken Bake is now ready to be enjoyed!

Variations of Coconut Chicken Bake Recipe

While the classic Coconut Chicken Bake is a delightful dish on its own, there are many ways to customize it. Whether you want to spice things up or explore vegetarian options, these variations will keep your meals exciting and flavorful. Let’s dive into some delicious alternatives!

Spicy Coconut Chicken Bake Recipe

If you love a bit of heat, the Spicy Coconut Chicken Bake is perfect for you! To add some spice, consider incorporating chopped green chilies or a pinch of cayenne pepper into the spice mixture. This will elevate the flavor profile and give your dish a fiery kick.

Another option is to use spicy curry powder instead of the regular spices. This will not only add heat but also introduce a new layer of flavor. You can also serve the dish with a side of spicy mango chutney for an extra burst of flavor. Your taste buds will thank you for this exciting twist!

Vegetarian Alternatives to Coconut Chicken Bake Recipe

For those who prefer a meat-free option, the Coconut Chicken Bake can easily be transformed into a vegetarian delight. Instead of chicken, use hearty vegetables like cauliflower, bell peppers, and chickpeas. These ingredients will soak up the delicious coconut sauce and provide a satisfying texture.

To prepare, follow the same steps as the original recipe. Sauté the vegetables until they are tender, then add the coconut milk and spices. Bake until the vegetables are cooked through and the sauce is bubbling. This vegetarian version is not only delicious but also packed with nutrients, making it a great choice for everyone at the table!

With these variations, you can enjoy the Coconut Chicken Bake in different ways. Whether you’re in the mood for something spicy or a vegetarian option, these recipes will keep your meals fresh and exciting!

Cooking Note for Coconut Chicken Bake Recipe

When preparing the Coconut Chicken Bake, there are a few important cooking notes to keep in mind. These tips will help ensure that your dish turns out perfectly every time. Let’s explore some key points to consider!

First, always check the freshness of your ingredients. Fresh chicken and herbs will significantly enhance the flavor of your dish. If possible, choose organic chicken for a healthier option. Additionally, using fresh spices rather than pre-ground ones can elevate the taste of your Coconut Chicken Bake.

Next, pay attention to the cooking time. The chicken thighs should reach an internal temperature of 165°F (74°C) to ensure they are fully cooked. Using a meat thermometer can help you avoid undercooking or overcooking the chicken. If you opt for boneless, skinless chicken breasts, reduce the cooking time slightly, as they cook faster than thighs.

Another tip is to let the chicken rest after baking. This resting period allows the juices to redistribute throughout the meat, making it more tender and juicy. Cover the skillet with foil while it rests to keep the chicken warm.

Lastly, feel free to experiment with the coconut milk. If you prefer a richer sauce, you can use full-fat coconut milk. For a lighter version, opt for light coconut milk. Both options will still provide that creamy texture and delicious flavor.

By following these cooking notes, you’ll be well on your way to creating a Coconut Chicken Bake that is not only delicious but also visually appealing. Enjoy the process and savor the delightful flavors of this wonderful dish!

Serving Suggestions for Coconut Chicken Bake Recipe

Now that your Coconut Chicken Bake is ready, it’s time to think about how to serve it. The right side dishes and sauces can elevate your meal, making it even more enjoyable. Here are some fantastic serving suggestions to complement your delicious dish!

Side Dishes to Pair with Coconut Chicken Bake Recipe

When it comes to side dishes, you want to choose options that balance the rich flavors of the Coconut Chicken Bake. Here are some great ideas:

  • Coconut Rice: This is a perfect match! The subtle sweetness of coconut rice pairs beautifully with the savory chicken.
  • Steamed Vegetables: Lightly steamed broccoli, green beans, or carrots add a fresh crunch and color to your plate.
  • Quinoa Salad: A refreshing quinoa salad with cucumbers, tomatoes, and a light vinaigrette can provide a nice contrast to the creamy chicken.
  • Flatbreads: Serve warm naan or pita bread to soak up the delicious coconut sauce. It’s a fun and tasty way to enjoy every bite!

These side dishes not only enhance the meal but also add variety to your dining experience. Choose one or two to create a well-rounded plate that everyone will love!

Ideal Sauces and Dips for Coconut Chicken Bake Recipe

To take your Coconut Chicken Bake to the next level, consider adding some sauces or dips. Here are a few options that work wonderfully:

  • Mango Chutney: This sweet and tangy chutney adds a burst of flavor that complements the coconut sauce perfectly.
  • Spicy Yogurt Sauce: A simple mix of yogurt, lime juice, and a pinch of cayenne pepper creates a cooling dip that balances the dish’s richness.
  • Chili Sauce: For those who love heat, a drizzle of chili sauce can add an exciting kick to your meal.
  • Fresh Salsa: A vibrant salsa made with tomatoes, onions, and cilantro can add freshness and brightness to each bite.

These sauces and dips not only enhance the flavors but also add a fun element to your dining experience. Feel free to mix and match to find your favorite combinations!

Tips for Perfecting Your Coconut Chicken Bake Recipe

To ensure your Coconut Chicken Bake turns out perfectly every time, consider these helpful tips. These suggestions will enhance the flavors and textures of your dish, making it a hit at your dinner table!

First, marinate the chicken for a few hours or overnight. This allows the spices to penetrate the meat, resulting in a more flavorful dish. You can use a mixture of lime juice, salt, and spices for the marinade. Just remember to keep it refrigerated!

Next, don’t skip the searing step. Searing the chicken skin-side down creates a crispy texture that adds depth to the dish. It also locks in the juices, keeping the chicken moist and tender. Make sure your skillet is hot enough before adding the chicken.

When adding the coconut milk, consider using full-fat coconut milk for a richer sauce. If you prefer a lighter version, light coconut milk works too. Just be aware that the texture may be slightly different.

Another tip is to adjust the spice levels according to your taste. If you enjoy a milder flavor, reduce the amount of spices. Conversely, if you love heat, feel free to add more chili or cayenne pepper. Taste as you go to find the perfect balance!

Lastly, let the dish rest after baking. This resting time allows the flavors to meld and the juices to redistribute. Cover the skillet with foil to keep the chicken warm while it rests. This simple step can make a big difference in the final result.

By following these tips, you’ll create a Coconut Chicken Bake that is not only delicious but also visually stunning. Enjoy the process and the delightful flavors that come together in this wonderful dish!

Breakdown of Time for Coconut Chicken Bake Recipe

Understanding the time required for each step of the Coconut Chicken Bake Recipe is essential for a smooth cooking experience. Here’s a detailed breakdown of the time you’ll need to prepare and cook this delicious dish.

Prep Time

The prep time for the Coconut Chicken Bake is approximately 20-25 minutes. This includes gathering your ingredients, seasoning the chicken, and preparing the aromatic base with onions, garlic, and spices. Taking your time during this stage ensures that all flavors meld beautifully in the final dish.

Cooking Time

Once you’ve prepped everything, the cooking time is about 30-35 minutes. This includes searing the chicken and baking it in the oven. The searing process takes around 10 minutes, while the baking time is approximately 25-30 minutes. It’s crucial to monitor the internal temperature of the chicken to ensure it reaches 165°F (74°C) for safe consumption.

Total Time

In total, you can expect the Coconut Chicken Bake to take about 50-60 minutes from start to finish. This includes both prep and cooking times. With this timeline, you can plan your meal accordingly, ensuring that everything is ready to serve when your guests arrive. Enjoy the process and the delightful aromas that will fill your kitchen!

Nutritional Information for Coconut Chicken Bake Recipe

Understanding the nutritional content of your meals is essential for maintaining a balanced diet. The Coconut Chicken Bake is not only delicious but also offers a good mix of nutrients. Let’s break down the nutritional information for this delightful dish!

Calories in Coconut Chicken Bake Recipe

Each serving of the Coconut Chicken Bake contains approximately 450 calories. This calorie count makes it a satisfying meal without being overly heavy. The combination of chicken and coconut milk provides a rich flavor while keeping the calorie count reasonable. Enjoying this dish as part of a balanced diet can help you feel full and satisfied.

Protein Content in Coconut Chicken Bake Recipe

One of the standout features of the Coconut Chicken Bake is its protein content. Each serving offers about 30 grams of protein. This high protein level is beneficial for muscle repair and growth, making it an excellent choice for those looking to maintain or build muscle. The chicken thighs are a great source of lean protein, ensuring you get the nutrients you need.

Sodium Levels in Coconut Chicken Bake Recipe

When it comes to sodium, each serving contains around 600 milligrams. While this is a moderate amount, it’s important to be mindful of your overall sodium intake throughout the day. If you’re watching your sodium levels, consider using low-sodium chicken broth and adjusting the salt in the recipe to suit your dietary needs. This way, you can enjoy the flavors without exceeding your daily sodium limit.

In summary, the Coconut Chicken Bake is a nutritious option that provides a good balance of calories, protein, and sodium. It’s a meal that not only tastes great but also supports your health goals. Enjoy this delightful dish knowing you’re nourishing your body with every bite!

FAQs about Coconut Chicken Bake Recipe

Can I use frozen chicken for the Coconut Chicken Bake Recipe?

Yes, you can use frozen chicken for the Coconut Chicken Bake Recipe! However, it’s important to thaw the chicken completely before cooking. This ensures even cooking and helps the chicken absorb the flavors of the spices and coconut milk. You can thaw the chicken in the refrigerator overnight or use the defrost setting on your microwave. Just remember to adjust the cooking time slightly, as frozen chicken may take a bit longer to reach the safe internal temperature of 165°F (74°C).

What can I substitute for coconut in the Coconut Chicken Bake Recipe?

If you’re looking for a substitute for coconut in the Coconut Chicken Bake Recipe, there are a few options. You can use heavy cream or half-and-half for a similar creamy texture. However, keep in mind that this will change the flavor profile slightly. For a dairy-free option, consider using almond milk or cashew cream, but you may need to add a bit of coconut extract to mimic the coconut flavor. Each substitute will create a different taste, so choose one that fits your dietary needs and preferences!

How do I store leftovers from the Coconut Chicken Bake Recipe?

Storing leftovers from the Coconut Chicken Bake is easy! Allow the dish to cool completely before transferring it to an airtight container. You can store it in the refrigerator for up to 3-4 days. If you want to keep it longer, consider freezing the leftovers. Place the cooled chicken and sauce in a freezer-safe container, and it can last for up to 3 months. When you’re ready to enjoy it again, simply thaw it in the refrigerator overnight and reheat on the stove or in the oven until warmed through.

Can I make the Coconut Chicken Bake Recipe ahead of time?

Absolutely! The Coconut Chicken Bake Recipe is perfect for making ahead of time. You can prepare the dish up to the baking step and store it in the refrigerator for up to 24 hours. When you’re ready to bake, simply preheat your oven and cook as directed. This makes it a great option for meal prep or for serving guests, as you can save time on the day of your gathering. Just remember to adjust the cooking time if the dish is cold from the fridge!

Conclusion on Coconut Chicken Bake Recipe

In conclusion, the Coconut Chicken Bake is a delightful dish that brings together a symphony of flavors and textures. With its tender chicken thighs, creamy coconut sauce, and aromatic spices, this recipe is sure to become a favorite in your household. Not only is it easy to prepare, but it also offers a wonderful opportunity to explore different variations, whether you prefer it spicy or vegetarian.

As you gather around the table to enjoy this meal, you’ll appreciate the warmth and comfort it brings. The Coconut Chicken Bake is perfect for family dinners, special occasions, or even a cozy night in. Plus, with its impressive nutritional profile, you can feel good about serving it to your loved ones.

So, why not give this recipe a try? With just a few simple ingredients and steps, you can create a dish that is both satisfying and delicious. Don’t forget to experiment with the suggested variations and serving ideas to make it your own. Enjoy the process, and happy cooking!

Creamy Chicken Gnocchi Soup Recipe for Cozy Nights

Introduction to Creamy Chicken Gnocchi Soup Recipe

What Makes This Soup Special?

Creamy Chicken Gnocchi Soup Recipe stands out for its rich flavors and comforting texture. This delightful dish combines tender chicken, pillowy gnocchi, and fresh vegetables in a creamy broth. Each spoonful is a hug in a bowl, making it perfect for family dinners or cozy nights in.

What truly makes this soup special is its versatility. You can easily customize it to suit your taste. Whether you prefer a lighter version or want to add extra spices, this recipe allows for creativity. Plus, it’s a great way to sneak in some veggies, making it a wholesome meal for everyone!

A Brief History of Gnocchi Soup

Gnocchi, a type of Italian pasta made from potatoes, has a rich history that dates back centuries. Originating in Italy, gnocchi has evolved into various forms and flavors. Traditionally, gnocchi is served with sauces, but it has also found its way into soups, creating a hearty and satisfying dish.

Creamy Chicken Gnocchi Soup Recipe continues this tradition, bringing people together with its delicious taste and heartwarming qualities.

Ingredients for Creamy Chicken Gnocchi Soup Recipe

Essential Ingredients

Creamy Chicken Gnocchi Soup Recipe, you’ll need a selection of essential ingredients. These components work together to build a rich and flavorful base for your soup. Here’s what you’ll need:

  • Olive Oil: 2 tablespoons for sautéing the vegetables.
  • Onion: 1 medium onion, diced, adds sweetness and depth.
  • Garlic: 2 cloves, minced, for a fragrant kick.
  • Carrots: 2 medium carrots, diced, for color and nutrition.
  • Celery: 2 stalks, diced, to enhance the flavor profile.
  • Dried Thyme: 1 teaspoon, for an earthy aroma.
  • Dried Basil: 1 teaspoon, to add a hint of sweetness.
  • Salt: 1/2 teaspoon, to season the soup.
  • Black Pepper: 1/4 teaspoon, for a touch of heat.
  • Chicken Broth: 4 cups, as the soup’s base.
  • Cooked Chicken: 1 pound, shredded, for protein and heartiness.
  • Heavy Cream: 1 cup, to create that creamy texture.
  • Potato Gnocchi: 1 pound, the star of the dish.
  • Fresh Spinach: 2 cups, for a pop of color and nutrients.
  • Parmesan Cheese: 1/4 cup, grated, for a savory finish.

Optional Ingredients for Extra Flavor

While the essential ingredients create a delicious soup, you can elevate the flavors with a few optional additions. Here are some ideas to consider:

  • Half-and-Half: Substitute for heavy cream for a lighter version.
  • Lemon Juice: A squeeze before serving adds brightness.
  • Red Pepper Flakes: For those who enjoy a spicy kick.
  • Fresh Herbs: Such as parsley or dill, for garnish and freshness.
  • Mushrooms: Sautéed and added for an earthy flavor.

Creamy Chicken Gnocchi Soup Recipe to suit your taste preferences. Feel free to experiment and make it your own!

Step-by-Step Preparation of Creamy Chicken Gnocchi Soup Recipe

Step 1: Preparing the Chicken

Creamy Chicken Gnocchi Soup Recipe, start by preparing the chicken. If you have leftover cooked chicken, that’s perfect! Simply shred it into bite-sized pieces. If you’re starting with raw chicken, you can boil or bake it until fully cooked. Once done, let it cool slightly before shredding. This step ensures your soup is hearty and packed with protein.

Step 2: Sautéing the Vegetables

Next, grab a large pot and heat the olive oil over medium heat. Add the diced onion and sauté for about 3-4 minutes until it becomes translucent. Then, stir in the minced garlic and cook for an additional minute. The aroma will be delightful! After that, toss in the diced carrots and celery. Cook these vegetables for 5-7 minutes until they are tender. This step builds a flavorful base for your soup.

Step 3: Adding the Broth and Seasonings

Once your vegetables are tender, it’s time to add the chicken broth. Pour in 4 cups and bring the mixture to a boil. As it heats up, sprinkle in the dried thyme, dried basil, salt, and black pepper. These seasonings will enhance the soup’s flavor. After it reaches a boil, reduce the heat to a simmer and add the shredded chicken. Let it simmer for a few minutes to meld the flavors together.

Step 4: Incorporating the Gnocchi

Now, it’s time to add the star of the show: the potato gnocchi! Stir in 1 pound of gnocchi and cook according to the package instructions, usually about 3-5 minutes. You’ll know they’re ready when they float to the top. This step adds that delightful, pillowy texture that makes the soup so comforting.

Step 5: Making it Creamy

To achieve that rich, creamy texture, stir in 1 cup of heavy cream. Bring the soup back to a gentle simmer. This is where the magic happens! The cream will blend beautifully with the broth, creating a luscious consistency. If you prefer a lighter version, feel free to substitute half-and-half for the heavy cream.

Step 6: Final Touches and Serving

Creamy Chicken Gnocchi Soup Recipe. Adjust the seasoning if needed, and serve hot, garnished with more Parmesan if desired. Enjoy your delicious creation!

Variations of Creamy Chicken Gnocchi Soup Recipe

Vegetarian Version

Creamy Chicken Gnocchi Soup Recipe can easily be transformed into a delicious vegetarian dish. Start by replacing the shredded chicken with hearty vegetables like mushrooms, zucchini, or bell peppers. These veggies will add texture and flavor to your soup.

For the broth, use vegetable broth instead of chicken broth. This will keep the soup rich and flavorful without the meat. You can also add protein by including beans or lentils. They not only enhance the nutritional value but also make the soup filling. Finally, don’t forget to keep the heavy cream or substitute it with a plant-based cream for a creamy finish. This vegetarian version is just as comforting and satisfying!

Gluten-Free Options

Creamy Chicken Gnocchi Soup Recipe without worry. First, ensure that the potato gnocchi you choose is labeled gluten-free. Many brands offer gluten-free gnocchi made from rice flour or other gluten-free ingredients.

Additionally, check the labels on your chicken broth and any other packaged ingredients to ensure they are gluten-free. If you want to thicken the soup without using flour, consider adding a cornstarch slurry. Simply mix a tablespoon of cornstarch with cold water and stir it into the soup as it simmers. This will help achieve that creamy texture without any gluten. Enjoy your gluten-free version of this comforting soup!

Cooking Note for Creamy Chicken Gnocchi Soup Recipe

Tips for Perfect Texture

Creamy Chicken Gnocchi Soup Recipe is essential for a delightful experience. Here are some tips to ensure your soup turns out just right:

  • Don’t Overcook the Gnocchi: Keep an eye on the gnocchi while cooking. They should float to the top when done, which usually takes about 3-5 minutes. Overcooking can make them mushy.
  • Use Fresh Ingredients: Fresh vegetables and herbs can significantly enhance the flavor and texture of your soup. Opt for fresh spinach instead of frozen for a vibrant look.
  • Adjust Creaminess: If you prefer a thicker soup, you can add a bit more heavy cream or even a splash of cream cheese. This will give your soup a richer texture.
  • Simmer Gently: When adding the cream, keep the heat low to avoid boiling. A gentle simmer helps maintain a smooth and creamy consistency.

Common Mistakes to Avoid

Creamy Chicken Gnocchi Soup Recipe, it’s easy to make a few common mistakes. Here’s what to watch out for:

  • Skipping the Sauté: Don’t skip sautéing the onions and garlic. This step builds a flavorful base that enhances the overall taste of the soup.
  • Using Cold Ingredients: Make sure your chicken broth and cream are at room temperature before adding them to the pot. Cold ingredients can shock the soup and affect the texture.
  • Not Tasting as You Go: Always taste your soup as you cook. Adjust the seasoning to your liking. A little extra salt or pepper can make a big difference!
  • Overloading with Vegetables: While adding extra veggies is great, be careful not to overcrowd the pot. Too many ingredients can dilute the flavors and change the soup’s consistency.

Creamy Chicken Gnocchi Soup Recipe that everyone will love!

Serving Suggestions for Creamy Chicken Gnocchi Soup Recipe

Best Accompaniments

Creamy Chicken Gnocchi Soup Recipe, the right accompaniments can elevate your meal. Here are some delightful options to consider:

  • Crusty Bread: A warm, crusty baguette or sourdough bread is perfect for dipping into the creamy soup. The texture of the bread complements the soup beautifully.
  • Garlic Bread: For a flavorful twist, serve garlic bread alongside your soup. The buttery, garlicky goodness pairs wonderfully with the rich flavors of the soup.
  • Salad: A light, fresh salad can balance the richness of the soup. Consider a simple mixed greens salad with a vinaigrette dressing for a refreshing contrast.
  • Cheese Platter: A small cheese platter with a variety of cheeses can be a great addition. Include some crackers and fruits for a delightful appetizer before the soup.
  • Herb Butter: Spread some herb-infused butter on your bread for an extra layer of flavor. This can enhance the overall dining experience.

Creamy Chicken Gnocchi Soup Recipe but also create a well-rounded meal that everyone will enjoy!

Ideal Serving Temperature

Creamy Chicken Gnocchi Soup Recipe at the right temperature is key to enjoying its flavors. Ideally, the soup should be served hot, around 165°F (74°C). This temperature ensures that the creaminess is at its best and the flavors are fully developed.

To maintain the soup’s warmth, consider using warmed bowls. You can do this by rinsing the bowls with hot water before serving. This simple step helps keep the soup hot longer, allowing everyone to savor each spoonful.

Creamy Chicken Gnocchi Soup Recipe while it’s hot for the ultimate comfort food experience!

Tips for Making the Best Creamy Chicken Gnocchi Soup Recipe

Ingredient Substitutions

Creamy Chicken Gnocchi Soup Recipe is all about flexibility. If you find yourself missing an ingredient, don’t worry! Here are some easy substitutions to keep your soup delicious:

  • Chicken: If you don’t have cooked chicken, rotisserie chicken works great. You can also use turkey or even tofu for a vegetarian option.
  • Heavy Cream: For a lighter soup, substitute half-and-half or whole milk. You can also use coconut milk for a dairy-free version.
  • Gnocchi: If you can’t find potato gnocchi, try using pasta like small shells or even rice. Just adjust the cooking time accordingly.
  • Spinach: Kale or Swiss chard can be used instead of spinach. They add a nice texture and flavor to the soup.
  • Herbs: Fresh herbs like thyme or parsley can replace dried herbs. Just use about three times the amount of fresh herbs for the best flavor.

Creamy Chicken Gnocchi Soup Recipe that fits your pantry and dietary needs. Feel free to get creative!

Storage and Reheating Tips

Creamy Chicken Gnocchi Soup Recipe properly ensures you can enjoy it later. Here are some tips for storage and reheating:

  • Storage: Allow the soup to cool completely before transferring it to an airtight container. It can be stored in the refrigerator for up to 3 days.
  • Freezing: If you want to keep it longer, consider freezing the soup. However, it’s best to freeze it without the gnocchi. The gnocchi can become mushy when thawed. Store the soup base separately and add fresh gnocchi when reheating.
  • Reheating: To reheat, warm the soup on the stove over medium heat. Stir occasionally until heated through. If the soup is too thick, add a splash of chicken broth or water to reach your desired consistency.
  • Microwave: You can also reheat individual portions in the microwave. Use a microwave-safe bowl and cover it loosely to prevent splatters. Heat in 1-minute intervals, stirring in between.

Creamy Chicken Gnocchi Soup Recipe even days after making it!

Breakdown of Time for Creamy Chicken Gnocchi Soup Recipe

Prep Time

Creamy Chicken Gnocchi Soup Recipe is a breeze! The prep time typically takes about 15-20 minutes. During this time, you’ll gather all your ingredients, dice the vegetables, and shred the chicken. Having everything ready before you start cooking makes the process smoother and more enjoyable. Plus, it allows you to focus on creating that delicious soup without any interruptions!

Cooking Time

The cooking time for this comforting soup is around 25-30 minutes. This includes sautéing the vegetables, simmering the broth, and cooking the gnocchi. Each step is essential for building flavor and ensuring the ingredients are cooked to perfection. The best part? You’ll have a warm, hearty meal ready in no time!

Total Time

Creamy Chicken Gnocchi Soup Recipe. This includes both prep and cooking time. It’s a quick and satisfying meal that’s perfect for busy weeknights or a cozy weekend dinner. With just a little time and effort, you’ll have a delicious soup that warms the heart and fills the belly!

Nutritional Information for Creamy Chicken Gnocchi Soup Recipe

Calories and Macronutrients

Creamy Chicken Gnocchi Soup Recipe can help you make informed choices. Each serving of this delightful soup contains approximately 350 calories. Here’s a breakdown of the macronutrients:

  • Net Carbs: 30g
  • Protein: 20g
  • Fat: 18g

This balance of macronutrients makes the soup a satisfying meal. The protein from the chicken helps keep you full, while the carbohydrates from the gnocchi provide energy. The healthy fats from the cream and olive oil contribute to a creamy texture and rich flavor.

Health Benefits of Key Ingredients

Creamy Chicken Gnocchi Soup Recipe is not only delicious but also packed with health benefits thanks to its key ingredients:

  • Chicken: A great source of lean protein, chicken supports muscle growth and repair. It also contains essential vitamins and minerals, such as B vitamins and selenium.
  • Spinach: This leafy green is loaded with vitamins A, C, and K, along with iron and antioxidants. Spinach promotes healthy skin, boosts immunity, and supports bone health.
  • Carrots: Rich in beta-carotene, carrots are excellent for eye health. They also provide fiber, which aids digestion and helps maintain a healthy weight.
  • Olive Oil: A heart-healthy fat, olive oil is known for its anti-inflammatory properties. It can help reduce the risk of chronic diseases and improve overall heart health.
  • Parmesan Cheese: This cheese adds flavor and calcium to the soup. Calcium is essential for strong bones and teeth, making it a valuable addition to your meal.

Creamy Chicken Gnocchi Soup Recipe, you’re not just treating your taste buds; you’re also nourishing your body with wholesome ingredients. It’s a perfect blend of comfort and nutrition!

FAQs about Creamy Chicken Gnocchi Soup Recipe

Can I use store-bought gnocchi?

Creamy Chicken Gnocchi Soup Recipe. This makes it easy to whip up a comforting meal without the extra effort!

How can I make this soup spicier?

Creamy Chicken Gnocchi Soup Recipe. One simple method is to add red pepper flakes while sautéing the vegetables. Start with a pinch and adjust to your taste. You can also include diced jalapeños or a splash of hot sauce for an extra kick. Experimenting with spices can create a unique flavor profile that suits your palate!

Can I freeze Creamy Chicken Gnocchi Soup?

Creamy Chicken Gnocchi Soup Recipe, but with a little caution. It’s best to freeze the soup without the gnocchi, as they can become mushy when thawed. Store the soup base in an airtight container for up to three months. When you’re ready to enjoy it, simply reheat the soup and add fresh gnocchi. This way, you’ll maintain the perfect texture and flavor!

What can I substitute for heavy cream?

Creamy Chicken Gnocchi Soup Recipe. Half-and-half is a popular choice that still provides creaminess without being too rich. You can also use whole milk or a dairy-free alternative like coconut milk or almond milk. Just keep in mind that these substitutes may slightly alter the flavor and texture, but they will still create a delicious soup!

Conclusion on Creamy Chicken Gnocchi Soup Recipe

Recap of Key Points

Creamy Chicken Gnocchi Soup Recipe is a delightful dish that combines rich flavors and comforting textures. With its essential ingredients like tender chicken, pillowy gnocchi, and fresh vegetables, this soup is perfect for any occasion. The step-by-step preparation makes it easy to follow, ensuring that even novice cooks can create a delicious meal.

We explored various variations, including vegetarian and gluten-free options, allowing you to customize the recipe to fit your dietary needs. Additionally, we provided tips for perfect texture and common mistakes to avoid, ensuring your soup turns out just right every time. With the right accompaniments and serving suggestions, you can elevate your dining experience and enjoy this comforting dish to the fullest.

Encouragement to Try the Recipe

Creamy Chicken Gnocchi Soup Recipe yourself! Whether you’re cooking for family, friends, or just for yourself, this soup is sure to bring warmth and joy to your table. Don’t hesitate to experiment with flavors and ingredients to make it your own. We hope you enjoy every spoonful of this heartwarming dish!

So, gather your ingredients, follow the steps, and savor the deliciousness of your homemade soup. Happy cooking!

Stay Connected

Get recipes via email: