Get my cookbooks

Mediterranean Steak Bowl Recipe is a must-try dish!

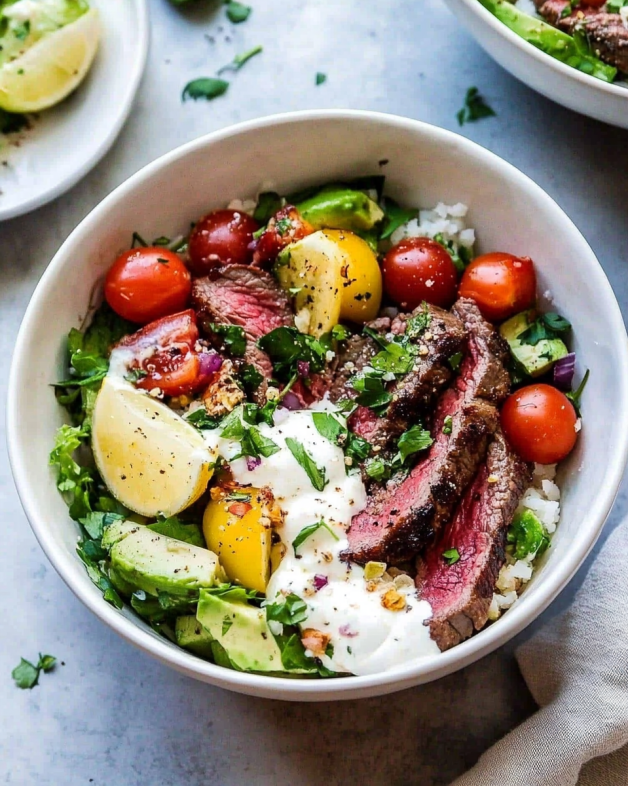
Introduction to the Mediterranean Steak Bowl Recipe

Are you looking for a delicious and healthy meal that’s easy to prepare? The Mediterranean Steak Bowl Recipe is just what you need! This dish combines the rich flavors of grilled flank steak with fresh vegetables and wholesome grains. It’s not only satisfying but also packed with nutrients. Whether you’re hosting a dinner party or just cooking for yourself, this recipe is sure to impress.

What Makes the Mediterranean Steak Bowl Unique?

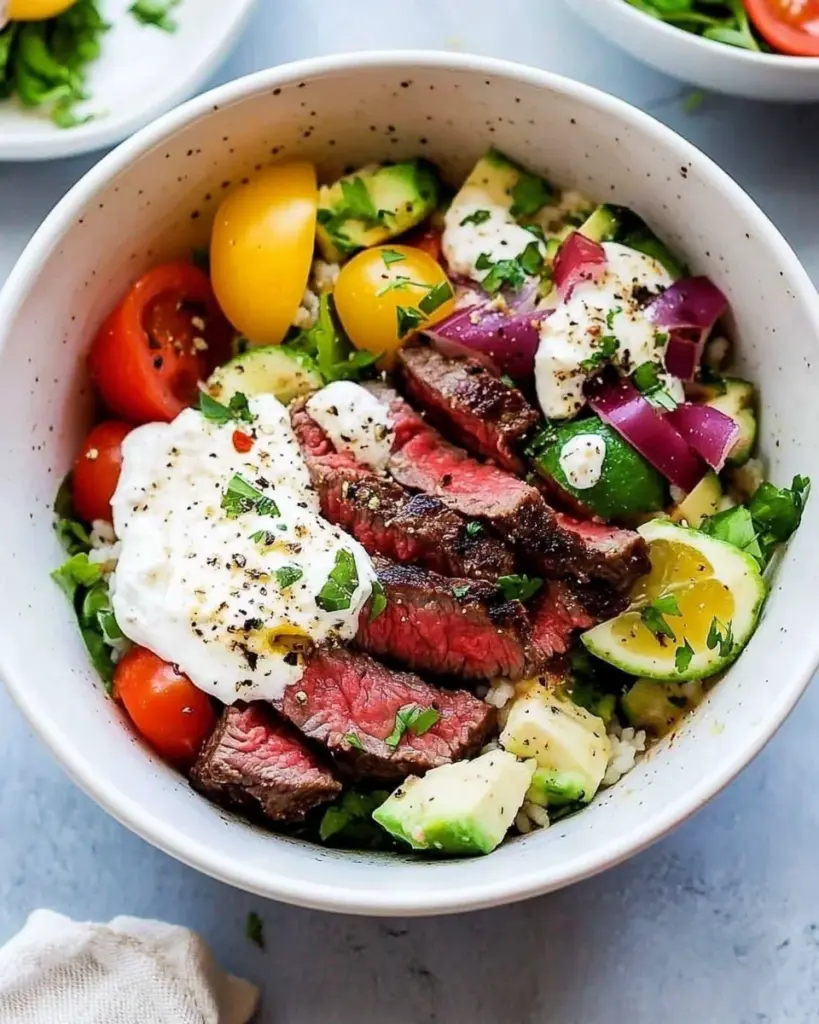
The Mediterranean Steak Bowl stands out for several reasons. First, it brings together a variety of textures and flavors. The tender steak pairs beautifully with crunchy cucumbers and juicy cherry tomatoes. Plus, the creamy feta cheese adds a delightful richness. The use of quinoa as a base makes it a nutritious choice, providing protein and fiber.

Another unique aspect is the blend of spices used to season the steak. Garlic powder, onion powder, and smoked paprika create a savory profile that enhances the meat’s natural flavors. Additionally, the fresh parsley and lemon juice brighten the dish, making it refreshing and vibrant.

This recipe is also versatile. You can easily customize it to suit your dietary preferences. Whether you want to go vegetarian or switch up the protein, the Mediterranean Steak Bowl can adapt to your needs. With its colorful presentation and delicious taste, it’s a meal that everyone will love!

Ingredients for the Mediterranean Steak Bowl Recipe

To create a mouthwatering Mediterranean Steak Bowl, you’ll need a selection of fresh ingredients. Here’s what you’ll need:

  • 1 pound flank steak
  • 1 teaspoon garlic powder
  • 1 teaspoon onion powder
  • 1 teaspoon smoked paprika
  • Salt and pepper to taste
  • 2 tablespoons olive oil
  • 1 cup cooked quinoa
  • 1 cup cherry tomatoes, halved
  • 1 cucumber, diced
  • 1 cup baby spinach
  • 1/2 cup feta cheese, crumbled
  • 1/4 cup Kalamata olives, pitted and sliced
  • 2 tablespoons fresh parsley, chopped
  • Juice of 1 lemon

These ingredients come together to create a balanced meal that’s not only delicious but also nutritious. The flank steak provides a hearty protein source, while the quinoa and vegetables add essential vitamins and minerals. The feta cheese and olives contribute healthy fats, making this dish a well-rounded option for any meal.

Feel free to adjust the quantities based on your preferences or the number of servings you need. This recipe serves four, but it can easily be scaled up or down. Now that you have your ingredients ready, let’s move on to the preparation steps!

Step-by-Step Preparation of the Mediterranean Steak Bowl Recipe

Step 1: Marinating the Steak

Marinating the steak is a crucial step that enhances its flavor. Start by mixing garlic powder, onion powder, smoked paprika, salt, and pepper in a small bowl. This spice blend will give the steak a delicious taste. Next, rub this mixture all over the flank steak, ensuring it’s evenly coated. Then, drizzle olive oil over the steak. This not only adds flavor but also helps keep the meat juicy while cooking. Let the steak marinate for about 15 minutes. If you have more time, marinating overnight will deepen the flavors even more!

Step 2: Cooking the Steak

Once the steak has marinated, it’s time to cook it! Preheat your grill or grill pan over medium-high heat. This ensures a nice sear on the steak. Place the marinated flank steak on the grill and cook for about 4-5 minutes on each side for medium-rare. If you prefer your steak more well-done, simply cook it a little longer. After grilling, remove the steak from the heat and let it rest for 5 minutes. Resting allows the juices to redistribute, making the steak tender and flavorful.

Step 3: Preparing the Vegetables

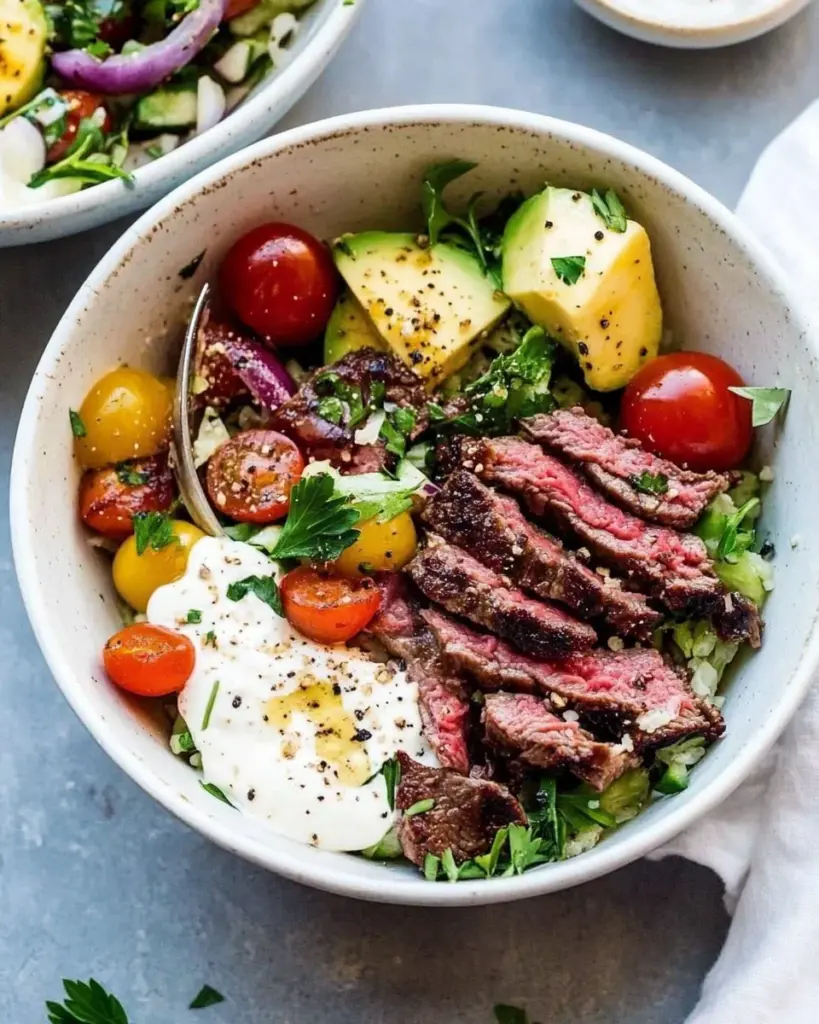
While the steak is resting, you can prepare the fresh vegetables for your bowl. In a large bowl, combine the cooked quinoa, halved cherry tomatoes, diced cucumber, and baby spinach. These ingredients add color and crunch to your dish. Next, crumble the feta cheese and slice the Kalamata olives, adding them to the bowl as well. Finally, sprinkle the chopped fresh parsley over the top. This not only adds flavor but also a pop of color!

Step 4: Assembling the Bowl

Now comes the fun part—assembling your Mediterranean Steak Bowl! Start by placing a generous scoop of the quinoa and vegetable mixture in each bowl. Then, slice the rested steak against the grain into thin strips. Lay the steak slices on top of the quinoa salad. To finish, squeeze fresh lemon juice over the entire bowl. This brightens the flavors and adds a refreshing touch. Your Mediterranean Steak Bowl is now ready to serve!

Variations of the Mediterranean Steak Bowl Recipe

The Mediterranean Steak Bowl is a versatile dish that can easily be adapted to suit different tastes and dietary needs. Whether you’re looking for vegetarian options or alternative proteins, there are plenty of ways to enjoy this delicious meal. Let’s explore some exciting variations!

Vegetarian Options

If you want to enjoy a meat-free version of the Mediterranean Steak Bowl, there are several tasty alternatives. One popular option is to use grilled portobello mushrooms. These mushrooms have a meaty texture and absorb flavors beautifully. Simply marinate them in the same spice blend as the steak and grill until tender.

Another great choice is roasted chickpeas. They add a satisfying crunch and are packed with protein. To prepare, toss canned chickpeas with olive oil and your favorite spices, then roast them in the oven until crispy. You can also use a mix of roasted vegetables, such as bell peppers, zucchini, and eggplant, for a colorful and nutritious bowl.

For a creamy touch, consider adding avocado slices or a dollop of hummus. These ingredients not only enhance the flavor but also provide healthy fats. With these vegetarian options, you can create a Mediterranean Bowl that’s just as delicious and satisfying!

Alternative Proteins

If you’re not a fan of flank steak or simply want to switch things up, there are plenty of alternative proteins to consider. Grilled chicken breast is a popular choice. It’s lean, flavorful, and pairs well with the Mediterranean ingredients. Just season it with the same spices and grill until cooked through.

For seafood lovers, grilled shrimp or salmon can be fantastic additions. The lightness of shrimp complements the fresh vegetables, while salmon adds a rich flavor. Simply season and grill until cooked to your liking.

To keep it plant-based, you can also try marinated tofu. Firm tofu absorbs flavors well and can be grilled or sautéed for a delicious protein source. Whichever protein you choose, the Mediterranean Steak Bowl will remain a delightful and nutritious meal!

Cooking Note for the Mediterranean Steak Bowl Recipe

When preparing the Mediterranean Steak Bowl, there are a few cooking notes to keep in mind to ensure your dish turns out perfectly every time. First, the quality of your flank steak is essential. Look for a cut that has a nice marbling of fat, as this will enhance the flavor and tenderness of the meat. If flank steak is not available, you can also use skirt steak or sirloin as alternatives.

Next, pay attention to the cooking temperature. Preheating your grill or grill pan is crucial. A hot cooking surface will create a beautiful sear on the steak, locking in the juices and flavor. If you’re using a grill, make sure to oil the grates lightly to prevent sticking.

Another important tip is to let the steak rest after cooking. This step is often overlooked but is vital for juicy meat. Resting allows the juices to redistribute throughout the steak, making each bite tender and flavorful. Aim for at least 5 minutes of resting time before slicing.

Lastly, feel free to get creative with your vegetables. While the recipe suggests specific ingredients, you can mix and match based on what you have on hand. Bell peppers, radishes, or even roasted sweet potatoes can add unique flavors and textures to your bowl. The Mediterranean Steak Bowl is all about fresh, vibrant ingredients, so don’t hesitate to experiment!

By following these cooking notes, you’ll elevate your Mediterranean Steak Bowl to a whole new level of deliciousness. Enjoy the process and savor the delightful flavors of this healthy meal!

Serving Suggestions for the Mediterranean Steak Bowl Recipe

When it comes to serving your Mediterranean Steak Bowl, presentation and pairing can elevate the dining experience. Here are some delightful serving suggestions to consider:

  • Garnish with Fresh Herbs: A sprinkle of fresh herbs like basil or mint can add a burst of flavor and color. These herbs complement the Mediterranean theme beautifully.
  • Serve with Pita Bread: Warm pita bread on the side is a great addition. It’s perfect for scooping up the quinoa and veggies, making each bite even more enjoyable.
  • Pair with a Light Salad: A simple side salad with mixed greens, cucumbers, and a light vinaigrette can enhance the meal. This adds extra crunch and freshness.
  • Offer a Yogurt Sauce: A dollop of tzatziki or a lemony yogurt sauce can provide a creamy contrast to the savory steak. This sauce is refreshing and ties the flavors together.
  • Include a Glass of Wine: For adults, a glass of white wine, like Sauvignon Blanc, pairs wonderfully with the Mediterranean flavors. It adds a touch of elegance to your meal.

These serving suggestions not only enhance the flavor but also create a visually appealing dish. The Mediterranean Steak Bowl is perfect for family dinners, gatherings, or even meal prep for the week. Enjoy the vibrant colors and delicious tastes as you share this delightful meal with others!

Tips for Perfecting Your Mediterranean Steak Bowl Recipe

Creating the perfect Mediterranean Steak Bowl is all about attention to detail and a few helpful tips. Here are some suggestions to ensure your dish turns out delicious every time:

  • Choose Quality Ingredients: Start with fresh, high-quality ingredients. Look for organic vegetables and grass-fed flank steak if possible. Fresh ingredients enhance the overall flavor of your dish.
  • Marinate Longer: While 15 minutes is great, marinating the steak overnight will deepen the flavors. This extra time allows the spices to penetrate the meat, making it even tastier.
  • Use a Meat Thermometer: To achieve your desired doneness, consider using a meat thermometer. For medium-rare, aim for an internal temperature of 130-135°F. This ensures perfectly cooked steak every time.
  • Let the Steak Rest: After grilling, always let the steak rest for at least 5 minutes. This step is crucial for juicy meat, as it allows the juices to redistribute throughout the steak.
  • Customize Your Bowl: Feel free to mix and match ingredients based on your preferences. Add roasted vegetables, different grains, or even nuts for added crunch. The Mediterranean Steak Bowl is versatile!
  • Balance Flavors: When assembling your bowl, aim for a balance of flavors. The salty feta, tangy olives, and fresh lemon juice should complement the savory steak and earthy quinoa.
  • Presentation Matters: Take a moment to arrange your bowl beautifully. Layer the ingredients in a way that showcases the vibrant colors. A well-presented dish is always more appetizing!
  • Experiment with Dressings: While lemon juice is refreshing, you can also try different dressings. A light vinaigrette or tahini dressing can add a unique twist to your Mediterranean Steak Bowl.

By following these tips, you’ll elevate your Mediterranean Steak Bowl to new heights. Enjoy the process of cooking and savor the delightful flavors that come together in this healthy and satisfying meal!

Breakdown of Time for the Mediterranean Steak Bowl Recipe

Prep Time

Preparing the Mediterranean Steak Bowl is quick and easy. The prep time typically takes about 20 minutes. This includes gathering your ingredients, marinating the steak, and chopping the vegetables. If you choose to marinate the steak overnight, you can save time on the day of cooking. Just remember to plan ahead!

Cooking Time

The cooking time for the Mediterranean Steak Bowl is approximately 15 minutes. This includes grilling the steak for about 8-10 minutes and allowing it to rest for 5 minutes. While the steak is cooking, you can prepare the quinoa and mix the vegetables, making the most of your time in the kitchen.

Total Time

In total, you can expect to spend around 35 minutes from start to finish. This includes both prep and cooking time. With such a quick turnaround, the Mediterranean Steak Bowl is perfect for busy weeknights or when you want to impress guests without spending hours in the kitchen. Enjoy the delicious flavors in no time!

Nutritional Information for the Mediterranean Steak Bowl Recipe

Understanding the nutritional content of your meals is essential for maintaining a balanced diet. The Mediterranean Steak Bowl is not only delicious but also packed with nutrients. Here’s a breakdown of the key nutritional information for this recipe:

Calories

Each serving of the Mediterranean Steak Bowl contains approximately 450 calories. This makes it a satisfying meal that provides energy without being overly heavy. The combination of protein, healthy fats, and carbohydrates ensures you feel full and satisfied after eating.

Protein

With about 35 grams of protein per serving, the Mediterranean Steak Bowl is an excellent source of this essential nutrient. Protein is vital for muscle repair and growth, making this dish a great option for active individuals. The flank steak, quinoa, and feta cheese all contribute to the protein content, ensuring you get a well-rounded meal.

Sodium

The sodium content in the Mediterranean Steak Bowl is approximately 800 milligrams per serving. While this is a moderate amount, it’s important to be mindful of your overall sodium intake, especially if you are watching your salt consumption. To reduce sodium, consider using low-sodium feta cheese and olives, or simply adjust the amount of salt you add during cooking.

Overall, the Mediterranean Steak Bowl is a nutritious choice that fits well into a healthy eating plan. With its balance of calories, protein, and other essential nutrients, it’s a meal you can feel good about enjoying!

FAQs about the Mediterranean Steak Bowl Recipe

Can I use a different type of meat for the Mediterranean Steak Bowl?

Absolutely! The Mediterranean Steak Bowl is quite versatile. You can substitute flank steak with other meats like chicken breast, pork tenderloin, or even lamb. Each option brings its own unique flavor to the dish. Just remember to adjust the cooking time based on the type of meat you choose. For instance, chicken may take a bit longer to cook than flank steak. Enjoy experimenting with different proteins!

How can I make the Mediterranean Steak Bowl recipe gluten-free?

Making the Mediterranean Steak Bowl gluten-free is simple! The main ingredients in this recipe are naturally gluten-free. Just ensure that the quinoa you use is certified gluten-free, as some brands may be processed in facilities that handle gluten-containing grains. Additionally, check the labels on any packaged ingredients, like feta cheese or olives, to confirm they are gluten-free. With these adjustments, you can enjoy a delicious gluten-free meal!

What are some good side dishes to serve with the Mediterranean Steak Bowl?

Pairing side dishes with your Mediterranean Steak Bowl can enhance the meal experience. Here are a few tasty options:

  • Greek Salad: A refreshing Greek salad with cucumbers, tomatoes, olives, and feta complements the flavors of the bowl.
  • Roasted Vegetables: Roasted seasonal vegetables, such as zucchini, bell peppers, and eggplant, add a delicious touch.
  • Hummus and Pita: Serve a side of hummus with warm pita bread for a delightful appetizer.
  • Tabbouleh: This herby bulgur salad is a great addition, bringing fresh flavors to your meal.

These sides not only pair well but also add variety to your dining experience!

How long can I store leftovers of the Mediterranean Steak Bowl?

Leftovers of the Mediterranean Steak Bowl can be stored in an airtight container in the refrigerator for up to 3 days. To maintain freshness, it’s best to keep the steak and salad components separate until you’re ready to eat. When reheating, you can warm the steak in a skillet or microwave, but be careful not to overcook it. Enjoy your delicious leftovers!

Conclusion on the Mediterranean Steak Bowl Recipe

The Mediterranean Steak Bowl is a delightful dish that brings together vibrant flavors, fresh ingredients, and wholesome nutrition. With its combination of tender grilled steak, colorful vegetables, and protein-packed quinoa, this recipe is not only satisfying but also easy to prepare. Whether you’re cooking for yourself or entertaining guests, this bowl is sure to impress.

As you’ve seen, the Mediterranean Steak Bowl is incredibly versatile. You can easily customize it to fit your dietary preferences, whether you choose to go vegetarian or switch up the protein. The options are endless, allowing you to create a meal that suits your taste buds perfectly.

Moreover, the tips and variations provided in this article will help you perfect your Mediterranean Steak Bowl every time you make it. From marinating the steak to selecting the right vegetables, each step contributes to a delicious outcome. Remember, cooking is all about experimenting and finding what works best for you.

So, gather your ingredients, fire up the grill, and enjoy the process of creating this flavorful dish. The Mediterranean Steak Bowl is not just a meal; it’s an experience filled with fresh tastes and healthy goodness. Bon appétit!

Street Corn Chicken Rice Bowl Recipe is a must-try!

Introduction to the Street Corn Chicken Rice Bowl Recipe

Street Corn Chicken Rice Bowl Recipe. This dish combines tender chicken, sweet corn, creamy sauces, and fresh toppings, all served over a bed of fluffy rice. It’s a delightful mix of textures and tastes that will surely please your palate.

What Makes the Street Corn Chicken Rice Bowl Special?

What sets this recipe apart is its unique blend of ingredients. The seasoned chicken is cooked to perfection, providing a savory base. The corn adds a sweet crunch, reminiscent of the popular street corn dish known as elote. The creamy lime mayonnaise drizzled on top elevates the flavors, making each bite a burst of freshness. Plus, the addition of crumbled cotija cheese and fresh cilantro gives it an authentic touch.

This bowl is not just about taste; it’s also about convenience. It’s a one-bowl meal that’s easy to prepare and perfect for busy weeknights. You can customize it to suit your preferences, whether you want to add more veggies or spice it up with jalapeños. With its vibrant colors and mouthwatering flavors, the Street Corn Chicken Rice Bowl is sure to become a family favorite.

So, roll up your sleeves and get ready to create a dish that’s not only delicious but also fun to make. Let’s dive into the ingredients and preparation steps that will help you whip up this delightful meal!

Ingredients for the Street Corn Chicken Rice Bowl Recipe

Street Corn Chicken Rice Bowl Recipe, you’ll need a variety of fresh and flavorful ingredients. Here’s what you’ll need:

  • 2 cups cooked white rice
  • 1 pound boneless, skinless chicken breasts
  • 1 tablespoon olive oil
  • 1 teaspoon chili powder
  • 1 teaspoon garlic powder
  • 1 teaspoon cumin
  • Salt and pepper to taste
  • 1 cup corn kernels (fresh, frozen, or canned)
  • 1/2 cup mayonnaise
  • 1/4 cup sour cream
  • 1/2 cup crumbled cotija cheese
  • 1/4 cup chopped fresh cilantro
  • 1 lime, juiced
  • 1 avocado, sliced
  • 1/4 teaspoon smoked paprika (optional)

These ingredients come together to create a delightful mix of flavors and textures. The chicken is seasoned with spices that give it a warm, savory taste. The corn adds a sweet crunch, while the creamy sauce ties everything together beautifully. Don’t forget the fresh cilantro and lime juice, which add a burst of freshness to each bite!

Feel free to adjust the ingredients based on your preferences. For instance, you can swap out the chicken for a plant-based protein or use brown rice for a healthier option. The versatility of this recipe makes it easy to cater to different tastes and dietary needs.

Step-by-Step Preparation of the Street Corn Chicken Rice Bowl Recipe

Street Corn Chicken Rice Bowl Recipe. Follow these simple steps to create a delicious meal that’s sure to impress!

Step 1: Preparing the Chicken

First, let’s focus on the chicken. Start by taking your boneless, skinless chicken breasts and placing them on a cutting board. Use a meat mallet or rolling pin to gently pound the chicken to an even thickness. This helps it cook evenly.

Next, season the chicken with chili powder, garlic powder, cumin, salt, and pepper. Make sure to coat both sides well for maximum flavor. The spices will give the chicken a warm, savory taste that pairs perfectly with the other ingredients.

Now, heat a tablespoon of olive oil in a large skillet over medium-high heat. Once the oil is hot, carefully add the seasoned chicken. Cook for about 6-7 minutes on each side, or until the chicken is fully cooked and no longer pink in the center. Use a meat thermometer to check that the internal temperature reaches 165°F (75°C).

Once cooked, remove the chicken from the skillet and let it rest for a few minutes. This allows the juices to redistribute, keeping the chicken moist. After resting, slice the chicken into strips and set aside.

Step 2: Cooking the Rice

While the chicken is cooking, you can prepare the rice. If you haven’t done so already, cook 2 cups of white rice according to the package instructions. Typically, this involves rinsing the rice, adding it to boiling water, and simmering until tender.

Once the rice is cooked, fluff it with a fork to separate the grains. This will give your rice a light and airy texture, making it the perfect base for your bowl. Keep the rice warm while you finish the other components of the dish.

Step 3: Making the Street Corn Mixture

Now, let’s move on to the corn. In the same skillet you used for the chicken, add the corn kernels. You can use fresh, frozen, or canned corn, depending on what you have on hand. Sauté the corn over medium heat for about 3-4 minutes, stirring occasionally.

As the corn cooks, it will become slightly charred, enhancing its natural sweetness. This step is crucial as it adds a delightful crunch to your bowl. Once heated through, remove the skillet from the heat and set the corn aside.

Step 4: Assembling the Bowl

It’s time to put everything together! Start by dividing the cooked rice among four bowls. This will be the base of your Street Corn Chicken Rice Bowl.

Next, top each bowl with the sliced chicken and sautéed corn. Add a few slices of avocado for creaminess. Then, drizzle the lime mayonnaise mixture generously over the top. This creamy sauce ties all the flavors together beautifully.

Finally, sprinkle crumbled cotija cheese and chopped cilantro over each bowl. The cheese adds a salty kick, while the cilantro brings a fresh, herbal note. Serve your bowls immediately and enjoy the vibrant flavors of this delightful dish!

Variations of the Street Corn Chicken Rice Bowl Recipe

Street Corn Chicken Rice Bowl Recipe is not only delicious but also highly adaptable. You can easily modify it to suit different dietary preferences or to add a twist to the classic flavors. Here are some exciting variations to consider:

Vegetarian Options

If you want to make a vegetarian version of this dish, you can replace the chicken with plant-based proteins. Here are a few ideas:

  • Grilled Tofu: Marinate firm tofu in the same spices used for the chicken. Grill or sauté until golden brown.
  • Black Beans: Use canned black beans for a protein-packed option. Rinse and heat them before adding to the bowl.
  • Roasted Vegetables: Toss your favorite vegetables, like bell peppers, zucchini, or mushrooms, with olive oil and spices. Roast them until tender and slightly charred.

These vegetarian options maintain the vibrant flavors of the original recipe while providing a satisfying meal. You can still enjoy the creamy lime sauce and all the delicious toppings!

Spicy Additions

Street Corn Chicken Rice Bowl Recipe. Here are some ideas to kick up the spice level:

  • Diced Jalapeños: Add fresh or pickled jalapeños to the bowl for a zesty kick.
  • Hot Sauce: Drizzle your favorite hot sauce over the top of the bowl for an extra layer of flavor.
  • Spicy Lime Mayo: Mix in some sriracha or cayenne pepper into the lime mayonnaise for a spicy twist.

These spicy additions will enhance the overall flavor profile of your dish, making it even more exciting. Feel free to adjust the spice level to your liking!

Cooking Note for the Street Corn Chicken Rice Bowl Recipe

Street Corn Chicken Rice Bowl Recipe, there are a few cooking notes to keep in mind to ensure your dish turns out perfectly every time. These tips will help you achieve the best flavors and textures, making your meal even more enjoyable.

First, always use fresh ingredients when possible. Fresh corn, for instance, will provide a sweeter and crunchier texture compared to frozen or canned options. If you choose to use frozen corn, make sure to thaw it completely before cooking to avoid excess moisture in your dish.

Next, when cooking the chicken, it’s essential to let it rest after cooking. This resting period allows the juices to redistribute throughout the meat, keeping it moist and flavorful. If you slice the chicken too soon, you may end up with dry pieces.

Additionally, feel free to adjust the seasoning to your taste. If you prefer a milder flavor, reduce the amount of chili powder or cumin. On the other hand, if you enjoy bold flavors, don’t hesitate to add more spices or even experiment with different herbs.

Lastly, presentation matters! When assembling your bowls, take a moment to arrange the ingredients neatly. A well-presented dish not only looks appetizing but also enhances the overall dining experience. Use colorful toppings like avocado and cilantro to make your bowl visually appealing.

Street Corn Chicken Rice Bowl that your family and friends will love. Happy cooking!

Serving Suggestions for the Street Corn Chicken Rice Bowl Recipe

Street Corn Chicken Rice Bowl Recipe, presentation and accompaniments can elevate your meal to a whole new level. Here are some delightful serving suggestions to enhance your dining experience:

  • Garnish with Extra Lime Wedges: Serve your bowls with additional lime wedges on the side. This allows everyone to squeeze fresh lime juice over their dish, adding a zesty kick that brightens the flavors.
  • Pair with a Fresh Salad: A light salad made with mixed greens, cherry tomatoes, and a simple vinaigrette complements the richness of the rice bowl. The freshness of the salad balances the hearty ingredients.
  • Offer Tortilla Chips: Serve some crispy tortilla chips on the side for a crunchy texture. They can be enjoyed as a snack or crumbled over the top of the bowl for added crunch.
  • Include a Side of Black Beans: A small serving of seasoned black beans can add extra protein and fiber to your meal. They pair wonderfully with the flavors of the chicken and corn.
  • Serve with a Cold Beverage: Consider pairing your meal with a refreshing drink. A cold glass of iced tea, lemonade, or even a light beer can complement the flavors of the dish beautifully.

Street Corn Chicken Rice Bowl with these delightful accompaniments!

Tips for Perfecting Your Street Corn Chicken Rice Bowl Recipe

Street Corn Chicken Rice Bowl Recipe truly shine, consider these helpful tips. They will guide you in achieving the best flavors and textures, ensuring a delightful meal every time.

First, marinate the chicken for at least 30 minutes before cooking. This allows the spices to penetrate the meat, enhancing its flavor. You can use a simple mixture of olive oil, lime juice, and spices for a quick marinade.

Next, when cooking the chicken, avoid overcrowding the skillet. If necessary, cook the chicken in batches. This ensures even cooking and helps achieve a nice sear, which adds flavor.

For the corn, try grilling it instead of sautéing. Grilling gives the corn a smoky flavor that complements the other ingredients beautifully. If you don’t have a grill, you can use a grill pan on your stovetop.

When preparing the lime mayonnaise, taste it before serving. Adjust the lime juice or add a pinch of salt to balance the flavors. A well-seasoned sauce can elevate the entire dish.

Don’t forget about the toppings! Fresh ingredients like avocado, cilantro, and cotija cheese add not only flavor but also visual appeal. Consider adding sliced radishes or pickled onions for an extra crunch and tang.

Lastly, serve your bowls immediately after assembling. This keeps the rice warm and the toppings fresh. If you need to prepare in advance, keep components separate until serving to maintain their textures.

Street Corn Chicken Rice Bowl that’s bursting with flavor and sure to impress your family and friends. Enjoy the process and happy cooking!

Breakdown of Time for the Street Corn Chicken Rice Bowl Recipe

Street Corn Chicken Rice Bowl Recipe can help you plan your cooking efficiently. Here’s a breakdown of the time required for preparation and cooking:

Prep Time

The prep time for this delicious dish is approximately 15-20 minutes. During this time, you will gather all your ingredients, season the chicken, and prepare the lime mayonnaise mixture. It’s a great idea to have everything ready before you start cooking. This way, you can enjoy a smooth cooking experience without any interruptions.

Cooking Time

Street Corn Chicken Rice Bowl Recipe is about 20-25 minutes. This includes cooking the chicken, preparing the rice, and sautéing the corn. The chicken takes around 12-14 minutes to cook thoroughly, while the rice typically takes about 10-15 minutes, depending on the method used. Sautéing the corn will only take about 3-4 minutes, making it a quick and easy step.

Total Time

In total, you can expect to spend around 35-45 minutes from start to finish. This includes both prep and cooking time. It’s a perfect option for a weeknight dinner when you want something tasty without spending hours in the kitchen. Plus, the vibrant flavors and satisfying textures make it well worth the effort!

Nutritional Information for the Street Corn Chicken Rice Bowl Recipe

Street Corn Chicken Rice Bowl Recipe not only delights your taste buds but also provides a good mix of nutrients. Here’s a breakdown of the nutritional information per serving:

Calories

Street Corn Chicken Rice Bowl contains approximately 550 calories. This makes it a hearty meal that can keep you satisfied throughout the day. The combination of chicken, rice, and toppings contributes to the calorie count, providing energy for your activities.

Protein

With about 30 grams of protein per serving, this dish is an excellent source of this essential nutrient. The chicken is the primary protein source, helping to build and repair tissues in your body. Protein is also vital for maintaining muscle mass, making this bowl a great option for active individuals.

Sodium

The sodium content in each serving is approximately 800 milligrams. While this is a reasonable amount for a meal, it’s important to be mindful of your overall sodium intake throughout the day. You can reduce the sodium level by using low-sodium mayonnaise or omitting added salt during cooking.

Street Corn Chicken Rice Bowl Recipe offers a balanced mix of calories, protein, and sodium, making it a nutritious choice for lunch or dinner. Enjoy this flavorful dish while also being mindful of your dietary needs!

FAQs about the Street Corn Chicken Rice Bowl Recipe

Can I use frozen corn for the Street Corn Chicken Rice Bowl Recipe?

Street Corn Chicken Rice Bowl Recipe. In fact, frozen corn is a convenient option that retains its sweetness and flavor. Just make sure to thaw it completely before cooking. This will help avoid excess moisture in your dish. Sauté the thawed corn in the skillet for a few minutes until heated through and slightly charred, just like you would with fresh corn. It will still add that delightful crunch and sweetness to your bowl!

What can I substitute for chicken in the Street Corn Chicken Rice Bowl Recipe?

If you’re looking for alternatives to chicken, there are plenty of delicious options! You can substitute chicken with:

  • Grilled Tofu: Marinate and grill tofu for a plant-based protein option.
  • Black Beans: Use canned black beans for a hearty and protein-rich alternative.
  • Seitan: This meat substitute has a chewy texture and absorbs flavors well.
  • Chickpeas: Roasted or sautéed chickpeas can add a nice crunch and flavor.

Street Corn Chicken Rice Bowl while catering to different dietary preferences.

How can I make the Street Corn Chicken Rice Bowl Recipe spicier?

Street Corn Chicken Rice Bowl Recipe:

  • Diced Jalapeños: Add fresh or pickled jalapeños to your bowl for a zesty kick.
  • Hot Sauce: Drizzle your favorite hot sauce over the top for an extra layer of flavor.
  • Spicy Lime Mayo: Mix sriracha or cayenne pepper into the lime mayonnaise for a spicy twist.
  • Chili Flakes: Sprinkle some chili flakes over the assembled bowl for added heat.

Feel free to adjust the spice level to your liking, and enjoy the fiery flavors!

Can I prepare the Street Corn Chicken Rice Bowl Recipe in advance?

Street Corn Chicken Rice Bowl Recipe in advance! Here’s how:

  • Cooked Chicken: You can grill or sauté the chicken ahead of time. Store it in an airtight container in the refrigerator for up to 3 days.
  • Rice: Cook the rice in advance and keep it in the fridge. Reheat it before serving.
  • Corn: Sauté the corn and store it in the fridge. Reheat it quickly in a skillet before assembling your bowl.
  • Lime Mayo: Prepare the lime mayonnaise mixture ahead of time and store it in the fridge.

When you’re ready to serve, simply reheat the components and assemble your bowls. This makes it a great option for meal prep or busy weeknights!

Conclusion on the Street Corn Chicken Rice Bowl Recipe

Street Corn Chicken Rice Bowl Recipe is a delightful dish that brings together a variety of flavors and textures in one bowl. With its tender chicken, sweet corn, creamy sauce, and fresh toppings, it’s a meal that’s sure to satisfy your cravings. Not only is it delicious, but it’s also easy to prepare, making it perfect for busy weeknights or casual gatherings with family and friends.

This recipe allows for plenty of customization, so you can make it your own. Whether you choose to add spicy elements, swap out the chicken for a vegetarian option, or experiment with different grains, the possibilities are endless. The vibrant colors and fresh ingredients make it visually appealing, while the combination of flavors creates a memorable dining experience.

Street Corn Chicken Rice Bowl, remember to enjoy the process. Cooking can be a fun and rewarding activity, especially when you’re creating something as delicious as this bowl. So gather your ingredients, follow the steps, and savor each bite of this delightful dish.

We hope you enjoy making and sharing this recipe with your loved ones. It’s a fantastic way to bring the flavors of street food into your home, and we’re confident it will become a favorite in your household. Happy cooking!

Soft and Chewy Sugar Cookies are a must-try treat!

Introduction to Soft Chewy Sugar Cookies

Soft chewy sugar cookies are a delightful treat that brings joy to any occasion. Whether you’re celebrating a birthday, hosting a holiday gathering, or simply indulging in a sweet snack, these cookies are sure to please. Their tender texture and sweet flavor make them a favorite among both kids and adults.

What sets soft chewy sugar cookies apart is their unique combination of ingredients. The use of butter creates a rich flavor, while the perfect balance of sugar ensures a delightful sweetness. When baked, these cookies develop a golden edge while remaining soft and chewy in the center. This contrast in texture is what makes each bite so enjoyable.

Moreover, the versatility of soft chewy sugar cookies allows for endless variations. You can easily customize them by adding chocolate chips, nuts, or even colorful sprinkles. This adaptability makes them perfect for any season or celebration. Plus, they are simple to make, requiring just a few basic ingredients that you likely already have in your pantry.

In this article, we will guide you through the ingredients, preparation steps, and tips to achieve the perfect batch of soft chewy sugar cookies. So, roll up your sleeves and get ready to bake a batch of these delicious cookies that will surely become a family favorite!

Ingredients for Soft Chewy Sugar Cookies

To create the perfect batch of soft chewy sugar cookies, you’ll need a few simple ingredients. Each component plays a vital role in achieving that delightful texture and flavor. Here’s what you’ll need:

  • 2 3/4 cups all-purpose flour
  • 1 teaspoon baking soda
  • 1/2 teaspoon baking powder
  • 1 cup unsalted butter, softened
  • 1 1/2 cups granulated sugar
  • 1 egg
  • 1 teaspoon vanilla extract
  • 1/2 teaspoon almond extract (optional)
  • 1/4 teaspoon salt
  • 1/4 cup granulated sugar (for rolling)

These ingredients are easy to find and often already in your kitchen. The all-purpose flour provides the structure, while the butter adds richness. Sugar sweetens the cookies, and the egg helps bind everything together. The baking soda and baking powder ensure the cookies rise perfectly, giving them that soft, chewy texture we all love.

Don’t forget the extracts! Vanilla adds a classic flavor, while almond extract gives a unique twist. You can choose to include it or leave it out based on your preference. Now that you have your ingredients ready, let’s move on to the preparation steps!

Step-by-Step Preparation of Soft Chewy Sugar Cookies

Now that you have gathered all the necessary ingredients, it’s time to dive into the fun part: preparing your soft chewy sugar cookies! Follow these simple steps to create a batch that will impress everyone.

Step 1: Preheat the Oven

375°F. This step is crucial as it ensures that your cookies bake evenly. A hot oven helps achieve that perfect golden edge while keeping the centers soft and chewy.

Step 2: Mix the Dry Ingredients

2 3/4 cups of all-purpose flour, 1 teaspoon of baking soda, 1/2 teaspoon of baking powder, and 1/4 teaspoon of salt. Mixing these dry ingredients first helps distribute the leavening agents evenly throughout the flour. Set this bowl aside for now.

Step 3: Cream the Butter and Sugar

1 cup of softened unsalted butter and 1 1/2 cups of granulated sugar until the mixture is light and fluffy. This process usually takes about 2-3 minutes. The air incorporated during this step is what makes your cookies soft and airy.

Step 4: Combine Wet and Dry Ingredients

1 egg, 1 teaspoon of vanilla extract, and 1/2 teaspoon of almond extract (if you’re using it). Mix until everything is well combined. Gradually add the dry ingredients to the wet mixture, stirring until just combined. Be careful not to overmix, as this can lead to tougher cookies.

Step 5: Shape the Cookies

1/4 cup of granulated sugar to coat. This step adds a lovely sweetness and a bit of crunch to the outside of your cookies.

Step 6: Bake the Cookies

2 inches apart. Bake in your preheated oven for 8-10 minutes, or until the edges are lightly golden but the centers remain soft. After baking, let the cookies cool on the baking sheets for 5 minutes before transferring them to wire racks to cool completely.

And there you have it! A simple yet effective method to prepare soft chewy sugar cookies that everyone will love. Now, let’s explore some fun variations to make these cookies even more exciting!

Variation of Soft Chewy Sugar Cookies

Once you’ve mastered the classic soft chewy sugar cookies, you might want to explore some fun variations. These tweaks can add exciting flavors and textures to your cookies, making them even more delightful. Here are a couple of ideas to get you started:

Adding Flavor Variations

1/2 cup of chocolate chips for a rich, sweet twist. If you’re feeling festive, consider adding sprinkles to the dough for a colorful touch. You can also experiment with different extracts, like coconut or lemon, to create unique flavor profiles.

Alternative Ingredients for Dietary Needs

coconut oil or a dairy-free butter substitute. These alternatives can help you create delicious cookies that everyone can enjoy!

With these variations, your soft chewy sugar cookies can cater to different tastes and dietary needs. Now, let’s move on to some important cooking notes to ensure your cookies turn out perfectly every time.

Cooking Note for Soft Chewy Sugar Cookies

room temperature ingredients. This means letting your butter and egg sit out for about 30 minutes before you start. Room temperature ingredients blend more easily, creating a smoother dough.

Next, be mindful of your baking time. Every oven is different, so keep an eye on your cookies as they bake. You want the edges to be golden, but the centers should still look slightly underbaked. This will ensure they stay soft and chewy once cooled.

Lastly, allow your cookies to cool on the baking sheets for a few minutes before transferring them to wire racks. This step helps them set and prevents them from breaking apart. Following these cooking notes will help you create the perfect batch of soft chewy sugar cookies every time!

Serving Suggestions for Soft Chewy Sugar Cookies

Soft chewy sugar cookies are not only delicious but also versatile when it comes to serving. Here are some fun ideas to enjoy your cookies:

  • With Milk: Pair your cookies with a glass of cold milk. The creamy texture complements the sweetness of the cookies perfectly.
  • As Ice Cream Sandwiches: Take two cookies and add a scoop of your favorite ice cream in between. This creates a delightful treat that’s perfect for warm days.
  • With Coffee or Tea: Enjoy your cookies with a warm cup of coffee or tea. The flavors blend beautifully, making for a cozy snack.
  • Decorated for Occasions: Use icing or colored sugar to decorate your cookies for special events. This adds a festive touch and makes them even more appealing.

These serving suggestions can elevate your soft chewy sugar cookies, making them a hit at any gathering. Now, let’s dive into some tips to ensure your cookies turn out perfectly every time!

Tips for Perfect Soft Chewy Sugar Cookies

To achieve the ultimate soft chewy sugar cookies, consider these helpful tips:

  • Don’t Overmix: When combining wet and dry ingredients, mix until just combined. Overmixing can lead to tougher cookies.
  • Chill the Dough: If you have time, chill the dough for about 30 minutes before baking. This helps the cookies maintain their shape and enhances the flavors.
  • Use a Cookie Scoop: For uniform cookies, use a cookie scoop to portion out the dough. This ensures even baking and a consistent size.
  • Experiment with Toppings: Try adding toppings like sea salt or crushed nuts before baking for an extra flavor boost.

By following these tips, you’ll be well on your way to baking the perfect soft chewy sugar cookies that everyone will love!

Breakdown of Time for Soft Chewy Sugar Cookies

Understanding the time needed for each step can help you plan your baking session. Here’s a quick breakdown:

Prep Time

15-20 minutes. This includes measuring, mixing, and shaping the cookies.

Cooking Time

8-10 minutes. Keep an eye on them to ensure they don’t overbake.

Total Time

30-40 minutes from start to finish, including cooling time. This makes it a quick and enjoyable baking project!

Nutritional Information for Soft Chewy Sugar Cookies

Understanding the nutritional content of your soft chewy sugar cookies can help you enjoy them in moderation. Here’s a quick overview:

Calories

150 calories. This makes them a sweet treat that can fit into a balanced diet.

Protein

2 grams of protein per cookie, they provide a small boost of energy.

Sodium

50 mg of sodium.

Now that you have all the information, let’s answer some frequently asked questions about soft chewy sugar cookies!

Cooking Note for Soft Chewy Sugar Cookies

room temperature ingredients. This means letting your butter and egg sit out for about 30 minutes before you start. Room temperature ingredients blend more easily, creating a smoother dough.

Next, be mindful of your baking time. Every oven is different, so keep an eye on your cookies as they bake. You want the edges to be golden, but the centers should still look slightly underbaked. This will ensure they stay soft and chewy once cooled.

Lastly, allow your cookies to cool on the baking sheets for a few minutes before transferring them to wire racks. This step helps them set and prevents them from breaking apart. Following these cooking notes will help you create the perfect batch of soft chewy sugar cookies every time!

Serving Suggestions for Soft Chewy Sugar Cookies

Soft chewy sugar cookies are not only delicious but also versatile when it comes to serving. Here are some fun ideas to enjoy your cookies:

  • With Milk: Pair your cookies with a glass of cold milk. The creamy texture complements the sweetness of the cookies perfectly.
  • As Ice Cream Sandwiches: Take two cookies and add a scoop of your favorite ice cream in between. This creates a delightful treat that’s perfect for warm days.
  • With Coffee or Tea: Enjoy your cookies with a warm cup of coffee or tea. The flavors blend beautifully, making for a cozy snack.
  • Decorated for Occasions: Use icing or colored sugar to decorate your cookies for special events. This adds a festive touch and makes them even more appealing.

These serving suggestions can elevate your soft chewy sugar cookies, making them a hit at any gathering. Whether you’re hosting a party or enjoying a quiet afternoon, these ideas will enhance your cookie experience. Now, let’s dive into some tips to ensure your cookies turn out perfectly every time!

Tips for Perfect Soft Chewy Sugar Cookies

To achieve the ultimate soft chewy sugar cookies, consider these helpful tips:

  • Don’t Overmix: When combining wet and dry ingredients, mix until just combined. Overmixing can lead to tougher cookies. Remember, a little lumpiness is okay!
  • Chill the Dough: If you have time, chill the dough for about 30 minutes before baking. This helps the cookies maintain their shape and enhances the flavors. Chilling also prevents spreading, resulting in thicker cookies.
  • Use a Cookie Scoop: For uniform cookies, use a cookie scoop to portion out the dough. This ensures even baking and a consistent size, making your cookies look professional!
  • Experiment with Toppings: Try adding toppings like sea salt or crushed nuts before baking for an extra flavor boost. A sprinkle of sea salt can enhance the sweetness beautifully.
  • Check for Doneness: Keep an eye on your cookies as they bake. They should be lightly golden around the edges but still soft in the center. Remember, they will continue to cook slightly after being removed from the oven.
  • Store Properly: To keep your cookies soft, store them in an airtight container. You can also add a slice of bread to the container. The bread will help maintain moisture, keeping your cookies chewy.

By following these tips, you’ll be well on your way to baking the perfect soft chewy sugar cookies that everyone will love! Happy baking!

Breakdown of Time for Soft Chewy Sugar Cookies

Understanding the time needed for each step can help you plan your baking session. Here’s a quick breakdown:

Prep Time

15-20 minutes. This includes measuring, mixing, and shaping the cookies. Make sure to gather all your ingredients beforehand to streamline the process. It’s a great way to keep things organized and efficient!

Cooking Time

8-10 minutes. Keep an eye on them to ensure they don’t overbake. Remember, the cookies will continue to cook slightly after you take them out of the oven. So, it’s best to remove them when they are just lightly golden around the edges.

Total Time

30-40 minutes from start to finish, including cooling time. This makes it a quick and enjoyable baking project! With such a short time commitment, you can easily whip up a batch of soft chewy sugar cookies whenever the craving strikes.

Nutritional Information for Soft Chewy Sugar Cookies

Understanding the nutritional content of your soft chewy sugar cookies can help you enjoy them in moderation. Here’s a quick overview of the key nutritional components:

Calories

150 calories. This makes them a sweet treat that can fit into a balanced diet. While they are delicious, it’s always good to be mindful of portion sizes, especially if you’re enjoying them as a snack or dessert.

Protein

2 grams of protein per cookie, they provide a small boost of energy. While sugar cookies aren’t a significant source of protein, they can still be part of a well-rounded diet when paired with other nutritious foods.

Sodium

50 mg of sodium. This is a modest amount, allowing you to enjoy your cookies without worrying too much about your sodium intake.

In summary, soft chewy sugar cookies can be enjoyed as a delightful treat without compromising your dietary goals. Just remember to savor each bite and share them with friends and family for a truly enjoyable experience!

FAQs about Soft Chewy Sugar Cookies

What makes sugar cookies chewy?

The secret to chewy sugar cookies lies in the balance of ingredients and baking time. Using a higher ratio of butter and sugar creates a moist dough, which contributes to that delightful chewiness. Additionally, underbaking the cookies slightly ensures that the centers remain soft while the edges get just the right amount of crispness. This combination is what makes each bite so enjoyable!

Can I freeze soft chewy sugar cookies?

Absolutely! Freezing soft chewy sugar cookies is a great way to enjoy them later. To freeze, let the cookies cool completely, then place them in an airtight container or a freezer bag. You can also freeze the cookie dough before baking. Just scoop the dough into balls, freeze them on a baking sheet, and once solid, transfer them to a bag. When you’re ready to bake, you can bake them straight from the freezer, adding a minute or two to the baking time.

How do I store soft chewy sugar cookies?

To keep your soft chewy sugar cookies fresh, store them in an airtight container at room temperature. This helps maintain their softness. If you want to keep them even fresher for longer, you can add a slice of bread to the container. The bread will help retain moisture, ensuring your cookies stay chewy and delicious for days!

What is the best way to decorate soft chewy sugar cookies?

Decorating soft chewy sugar cookies can be a fun and creative process! For a simple yet beautiful look, you can use royal icing or buttercream frosting. Spread a thin layer of icing on top and let it set. For a festive touch, sprinkle colored sugar or edible glitter on top before the icing dries. You can also use food-safe markers to draw designs or write messages on the cookies. The possibilities are endless, so let your creativity shine!

Conclusion on Soft Chewy Sugar Cookies

In conclusion, soft chewy sugar cookies are a delightful treat that can brighten any day. Their simple ingredients and easy preparation make them a favorite for bakers of all skill levels. Whether you enjoy them plain or with fun variations, these cookies are sure to satisfy your sweet tooth.

By following the steps outlined in this article, you can create a batch of cookies that are not only delicious but also perfect for sharing with family and friends. Remember to keep the tips in mind for achieving that perfect soft and chewy texture. With a little practice, you’ll be able to whip up these cookies in no time!

So, gather your ingredients, preheat your oven, and get ready to enjoy the warm, sweet aroma of freshly baked soft chewy sugar cookies. They are perfect for any occasion, from casual snacks to festive celebrations. Happy baking!

Oven-Baked Herb Chicken is a delicious weeknight meal.

Introduction to Oven-Baked Herb Chicken

Oven-Baked Herb Chicken is a delightful dish that brings together simplicity and flavor. This recipe is perfect for busy weeknights or special occasions. With just a few ingredients, you can create a meal that is both satisfying and healthy. The combination of herbs and spices elevates the chicken, making it juicy and full of taste.

What Makes Oven-Baked Herb Chicken Special?

What sets Oven-Baked Herb Chicken apart is its versatility. You can easily customize the flavors to suit your taste. The use of fresh herbs and spices not only enhances the chicken’s natural flavor but also adds a burst of aroma that fills your kitchen. Plus, baking the chicken in the oven ensures it remains moist and tender, unlike frying, which can dry it out.

Another reason this dish is special is its health benefits. Chicken breast is a lean source of protein, making it an excellent choice for those looking to maintain a healthy diet. With minimal added fats from olive oil, this recipe keeps the calorie count low while still being delicious. Each serving is packed with protein, making it a great option for anyone looking to fuel their body with nutritious food.

In addition, Oven-Baked Herb Chicken is incredibly easy to prepare. With just a few simple steps, you can have a flavorful meal ready in no time. Whether you’re cooking for yourself or for a family gathering, this dish is sure to impress. So, let’s dive into the ingredients and preparation steps to create this mouthwatering meal!

Ingredients for Oven-Baked Herb Chicken

To create the perfect Oven-Baked Herb Chicken, you’ll need a handful of simple ingredients. Each one plays a vital role in enhancing the flavor and texture of the chicken. Here’s what you’ll need:

  • 2 large boneless, skinless chicken breasts (about 1.5 pounds total)
  • 2 tablespoons olive oil – This adds moisture and richness.
  • 1 teaspoon garlic powder – For a savory kick.
  • 1 teaspoon onion powder – To enhance the overall flavor.
  • 1 teaspoon dried oregano – A classic herb that pairs well with chicken.
  • 1 teaspoon dried thyme – Adds a warm, earthy taste.
  • 1 teaspoon paprika – For a hint of smokiness and color.
  • Salt and pepper to taste – Essential for seasoning.
  • Fresh parsley, chopped – For garnish and a pop of color.

These ingredients come together to create a deliciously seasoned chicken that is both juicy and flavorful. The combination of herbs and spices not only enhances the chicken’s natural taste but also makes it visually appealing. Now that you have your ingredients ready, let’s move on to the preparation steps!

Step-by-Step Preparation of Oven-Baked Herb Chicken

Now that you have gathered all your ingredients, it’s time to prepare your Oven-Baked Herb Chicken. Following these simple steps will ensure that your chicken turns out perfectly every time. Let’s get started!

Step 1: Prepping the Chicken

First, take your chicken breasts and pat them dry with paper towels. This step is important because it helps the herb mixture stick better to the chicken. Plus, it ensures a nice, crispy exterior when baked. After drying, place the chicken breasts in a baking dish. Make sure they are spaced out evenly for even cooking.

Step 2: Mixing the Herb Marinade

Next, grab a small bowl and combine the olive oil, garlic powder, onion powder, oregano, thyme, paprika, salt, and pepper. Stir the mixture well until all the ingredients are fully blended. This herb marinade is what gives your chicken its delicious flavor. The aroma of the herbs will make your kitchen smell amazing!

Step 3: Marinating the Chicken

Now, it’s time to coat the chicken with the herb mixture. Use a brush or your hands to spread the marinade evenly over both chicken breasts. Make sure every part is well coated. If you have time, consider letting the chicken marinate for 1-2 hours in the refrigerator. This extra step allows the flavors to penetrate the meat, making it even tastier.

Step 4: Preheating the Oven

While the chicken is marinating, preheat your oven to 400°F (200°C). Preheating is crucial because it ensures that the chicken cooks evenly. A hot oven will help seal in the juices, keeping the chicken moist and tender. Once the oven reaches the desired temperature, you’re ready to bake!

Step 5: Baking the Chicken

Place the baking dish with the marinated chicken in the preheated oven. Bake for 25-30 minutes. The chicken should be golden brown and cooked through. The aroma will fill your kitchen, making it hard to wait! Remember, the key is to avoid opening the oven door too often, as this can lower the temperature and affect cooking time.

Step 6: Checking for Doneness

To ensure your chicken is fully cooked, use a meat thermometer. The internal temperature should reach 165°F (75°C). If you don’t have a thermometer, you can cut into the thickest part of the chicken. The juices should run clear, and the meat should no longer be pink. Once done, remove the chicken from the oven and let it rest for 5 minutes before slicing. This resting period allows the juices to redistribute, making the chicken even juicier!

Variation of Oven-Baked Herb Chicken

One of the best things about Oven-Baked Herb Chicken is its flexibility. You can easily switch up the herbs and add vegetables to create a unique dish every time. Let’s explore some exciting variations that will keep your meals fresh and flavorful!

Different Herbs to Use

While the original recipe calls for oregano and thyme, feel free to experiment with other herbs. Here are some great options:

  • Rosemary: This herb adds a fragrant, pine-like flavor that pairs beautifully with chicken.
  • Basil: Fresh or dried basil brings a sweet, slightly peppery taste that can brighten up the dish.
  • Parsley: Adding parsley not only enhances the flavor but also adds a fresh touch.
  • Sage: This herb has a strong, earthy flavor that works well with chicken, especially in fall recipes.
  • Italian seasoning: A blend of herbs like thyme, oregano, and basil can simplify your seasoning process.

Mix and match these herbs to find your favorite combination. Each herb brings its own unique flavor, making your Oven-Baked Herb Chicken a new experience every time!

Adding Vegetables to the Dish

Another fantastic way to enhance your Oven-Baked Herb Chicken is by adding vegetables. This not only makes the meal more colorful but also boosts its nutritional value. Here are some vegetables that pair well:

  • Bell Peppers: Slice them up and add them to the baking dish for a sweet crunch.
  • Zucchini: Cut into rounds, zucchini cooks quickly and absorbs the herb flavors.
  • Carrots: Chopped carrots add a touch of sweetness and a nice texture.
  • Onions: Sliced onions caramelize beautifully in the oven, adding depth to the dish.
  • Broccoli: This green veggie adds a pop of color and is packed with nutrients.

To add vegetables, simply toss them in olive oil and season with salt and pepper. Place them around the chicken in the baking dish. They will roast alongside the chicken, soaking up all the delicious flavors!

With these variations, you can enjoy Oven-Baked Herb Chicken in countless ways. Whether you stick to the classic recipe or try something new, this dish is sure to please!

Cooking Note for Oven-Baked Herb Chicken

When preparing Oven-Baked Herb Chicken, there are a few important cooking notes to keep in mind. These tips will help you achieve the best results and ensure your chicken is flavorful and juicy every time.

First, always start with high-quality chicken breasts. Fresh, organic chicken can make a significant difference in taste and texture. If possible, choose chicken that is free from added hormones and antibiotics. This choice not only benefits your health but also enhances the overall flavor of the dish.

Next, consider the thickness of your chicken breasts. If they are uneven in thickness, they may cook at different rates. To solve this, you can gently pound the chicken to an even thickness. This step helps the chicken cook evenly, ensuring that every bite is tender and juicy.

Another key point is to avoid overcooking the chicken. Overcooked chicken can become dry and tough. Using a meat thermometer is the best way to check for doneness. Remember, the internal temperature should reach 165°F (75°C). If you don’t have a thermometer, look for clear juices and no pink meat when cutting into the chicken.

Lastly, let the chicken rest after baking. This resting period allows the juices to redistribute throughout the meat, making it more succulent. Cover the chicken loosely with foil while it rests to keep it warm. This simple step can elevate your dish from good to great!

By following these cooking notes, you’ll be well on your way to mastering Oven-Baked Herb Chicken. Enjoy the process and savor the delicious results!

Serving Suggestions for Oven-Baked Herb Chicken

Once your Oven-Baked Herb Chicken is ready, it’s time to think about how to serve it. The right side dishes and sauces can elevate your meal, making it even more enjoyable. Here are some fantastic serving suggestions that will complement your delicious chicken perfectly!

Ideal Side Dishes

Choosing the right side dishes can enhance the flavors of your Oven-Baked Herb Chicken. Here are some ideal options:

  • Roasted Vegetables: A mix of seasonal vegetables like carrots, zucchini, and bell peppers roasted alongside the chicken adds color and nutrition.
  • Steamed Broccoli: This green veggie is not only healthy but also provides a nice crunch that pairs well with the tender chicken.
  • Quinoa or Rice: A fluffy side of quinoa or brown rice can soak up the juices from the chicken, making each bite flavorful.
  • Mashed Potatoes: Creamy mashed potatoes are a classic comfort food that complements the savory chicken beautifully.
  • Garden Salad: A fresh salad with mixed greens, tomatoes, and cucumbers adds a refreshing contrast to the warm chicken.

These side dishes not only balance the meal but also add variety to your plate. Feel free to mix and match based on your preferences and what you have on hand!

Pairing with Sauces

Adding a sauce can take your Oven-Baked Herb Chicken to the next level. Here are some delicious sauce options to consider:

  • Lemon Butter Sauce: A simple sauce made with melted butter, lemon juice, and garlic can brighten up the dish with a zesty flavor.
  • Honey Mustard Sauce: This sweet and tangy sauce pairs wonderfully with the herbs, adding a delightful twist.
  • Barbecue Sauce: For a smoky flavor, brush some barbecue sauce on the chicken during the last few minutes of baking.
  • Garlic Cream Sauce: A rich garlic cream sauce can add a luxurious touch to your chicken, making it feel like a gourmet meal.
  • Chimichurri: This vibrant sauce made with parsley, garlic, and vinegar adds a fresh, herby kick that complements the chicken perfectly.

These sauces can be drizzled over the chicken or served on the side for dipping. They add an extra layer of flavor that can make your meal even more enjoyable.

With these serving suggestions, your Oven-Baked Herb Chicken will be a hit at the dinner table. Enjoy the delicious flavors and the smiles from your family and friends!

Tips for Perfect Oven-Baked Herb Chicken

To achieve the best results with your Oven-Baked Herb Chicken, consider these helpful tips. They will ensure your chicken is flavorful, juicy, and cooked to perfection every time. Let’s dive into some expert advice!

First, always use fresh ingredients. Fresh herbs and spices can significantly enhance the flavor of your dish. If you can, opt for fresh garlic instead of garlic powder. The difference in taste is remarkable! Fresh herbs like thyme and parsley can also elevate your chicken’s flavor profile.

Next, don’t skip the marinating step. Allowing the chicken to marinate for at least an hour, or even overnight, can make a world of difference. This extra time lets the flavors soak into the meat, resulting in a more delicious and aromatic dish. If you’re short on time, even a quick 30-minute marinade can still add flavor.

Another important tip is to let the chicken rest after baking. This step is crucial for juicy chicken. When you let it rest for about 5 minutes, the juices redistribute throughout the meat. This means every bite will be tender and moist. Cover the chicken loosely with foil to keep it warm while it rests.

Also, consider using a baking dish that allows for even heat distribution. A glass or ceramic dish works well, as it helps retain heat and moisture. Avoid using a metal pan, as it can cause uneven cooking. If you have a roasting rack, use it! Elevating the chicken allows hot air to circulate around it, promoting even cooking.

Lastly, keep an eye on the cooking time. Every oven is different, so check your chicken a few minutes before the recommended time. Use a meat thermometer to ensure it reaches the safe internal temperature of 165°F (75°C). This way, you’ll avoid overcooking and keep your chicken juicy.

By following these tips, you’ll be well on your way to mastering the art of Oven-Baked Herb Chicken. Enjoy the process and the delicious results!

Breakdown of Time for Oven-Baked Herb Chicken

Understanding the time needed for each step in preparing Oven-Baked Herb Chicken can help you plan your meal better. Here’s a simple breakdown of the time involved in this delicious recipe.

Prep Time

The prep time for Oven-Baked Herb Chicken is quite short. You’ll need about 10-15 minutes to gather your ingredients and prepare the chicken. This includes patting the chicken dry, mixing the herb marinade, and coating the chicken. If you choose to marinate the chicken for extra flavor, you can add an additional 1-2 hours to this time. However, marinating is optional and not required for a tasty dish!

Cooking Time

Once your chicken is prepped and ready, the cooking time is straightforward. Bake the chicken in the preheated oven for 25-30 minutes. During this time, the chicken will cook through and develop a beautiful golden color. Remember to check the internal temperature to ensure it reaches 165°F (75°C) for safe consumption.

Total Time

In total, if you include the optional marinating time, you’re looking at about 1 hour and 45 minutes from start to finish. If you skip the marinating step, the total time will be around 35-45 minutes. This makes Oven-Baked Herb Chicken a quick and easy meal option, perfect for busy weeknights or when you want to impress guests without spending all day in the kitchen!

With this time breakdown, you can easily plan your cooking schedule. Enjoy the process and the delicious results of your Oven-Baked Herb Chicken!

Nutritional Information for Oven-Baked Herb Chicken

Understanding the nutritional content of your meals is essential for maintaining a balanced diet. Oven-Baked Herb Chicken is not only delicious but also packed with nutrients. Let’s take a closer look at the nutritional information for this tasty dish.

Calories

Each serving of Oven-Baked Herb Chicken contains approximately 320 calories. This makes it a great option for those looking to enjoy a satisfying meal without consuming too many calories. The combination of lean chicken breast and healthy olive oil keeps the calorie count in check while providing essential nutrients.

Protein Content

One of the standout features of Oven-Baked Herb Chicken is its high protein content. Each serving provides about 60 grams of protein. This makes it an excellent choice for anyone looking to build muscle or maintain a healthy weight. Protein is vital for repairing tissues and keeping you feeling full longer, making this dish a smart addition to your diet.

Sodium Levels

When it comes to sodium, Oven-Baked Herb Chicken is relatively low. The sodium content per serving is around 300 milligrams, depending on how much salt you add during preparation. This level is reasonable for most diets, especially when compared to processed foods. However, if you are watching your sodium intake, you can easily adjust the amount of salt used in the recipe.

Overall, Oven-Baked Herb Chicken is a nutritious meal option that provides a good balance of calories, protein, and sodium. It’s a dish that not only satisfies your taste buds but also supports your health goals. Enjoy this flavorful chicken as part of a well-rounded diet!

FAQs about Oven-Baked Herb Chicken

Can I use frozen chicken for Oven-Baked Herb Chicken?

Yes, you can use frozen chicken for Oven-Baked Herb Chicken, but there are a few important steps to follow. First, make sure to thaw the chicken completely before cooking. You can do this by placing it in the refrigerator overnight or using the defrost setting on your microwave. Cooking frozen chicken directly can lead to uneven cooking and may not allow the flavors to penetrate the meat properly. Once thawed, you can proceed with the recipe as usual, ensuring that the chicken is well coated with the herb mixture.

How long should I marinate the chicken?

For the best flavor, marinate the chicken for at least 1-2 hours. This allows the herbs and spices to infuse into the meat, making it more flavorful. If you have more time, marinating overnight in the refrigerator can enhance the taste even further. However, if you’re short on time, even a quick 30-minute marinade can still add a nice flavor boost. Just remember, the longer you marinate, the more intense the flavor will be!

What temperature should I bake the chicken at?

The ideal temperature for baking Oven-Baked Herb Chicken is 400°F (200°C). This temperature allows the chicken to cook evenly while developing a beautiful golden-brown exterior. Preheating your oven is crucial, as it ensures that the chicken starts cooking at the right temperature. This helps seal in the juices, keeping the chicken moist and tender throughout the cooking process.

Can I use other types of meat for this recipe?

Absolutely! While this recipe is designed for chicken breasts, you can easily adapt it for other types of meat. For example, you can use chicken thighs, which are juicier and have a richer flavor. If you prefer pork, boneless pork chops work well with the same herb mixture. Just be sure to adjust the cooking time, as different meats may require different baking durations. Always check the internal temperature to ensure the meat is cooked through and safe to eat.

Conclusion on Oven-Baked Herb Chicken

In conclusion, Oven-Baked Herb Chicken is a fantastic dish that combines simplicity, flavor, and nutrition. With its easy preparation and delicious results, it’s perfect for any occasion, whether it’s a busy weeknight dinner or a special gathering with friends and family. The blend of herbs and spices not only enhances the chicken’s natural taste but also fills your kitchen with a delightful aroma that will have everyone eagerly awaiting the meal.

This recipe is versatile, allowing you to experiment with different herbs and add vegetables to create a unique dish every time. Plus, the nutritional benefits of lean chicken breast make it a smart choice for those looking to maintain a healthy lifestyle. With high protein content and low calories, Oven-Baked Herb Chicken is a meal that satisfies both your taste buds and your health goals.

As you prepare this dish, remember the tips and variations shared throughout the article. They will help you achieve the best results and keep your meals exciting. Whether you serve it with roasted vegetables, a fresh salad, or a flavorful sauce, Oven-Baked Herb Chicken is sure to impress.

So, gather your ingredients, follow the steps, and enjoy the deliciousness of Oven-Baked Herb Chicken. It’s a meal that brings joy to the table and is bound to become a favorite in your household. Happy cooking!

Buffalo Chicken Dip Recipe is a must-try for gatherings!

Introduction to Buffalo Chicken Dip Recipe

Buffalo Chicken Dip Recipe is a crowd-pleaser that brings a burst of flavor to any occasion. This creamy, cheesy dip combines the bold taste of buffalo sauce with tender chicken, making it a perfect appetizer for parties, game days, or family get-togethers.

Imagine a warm, bubbling dish filled with shredded chicken, rich cream cheese, and zesty ranch dressing. It’s not just delicious; it’s also easy to prepare! In just a few simple steps, you can whip up this delightful dip that pairs perfectly with tortilla chips or crunchy celery sticks.

Whether you’re a fan of spicy foods or just looking for something new to try, this dip is sure to impress. Plus, it’s versatile! You can adjust the heat level to suit your taste, making it a hit for everyone. So, gather your ingredients, and let’s dive into the world of Buffalo Chicken Dip!

Ingredients for Buffalo Chicken Dip Recipe

Buffalo Chicken Dip Recipe, you’ll need a few simple ingredients. Each one plays a vital role in delivering that rich, creamy, and spicy flavor that everyone loves. Here’s what you’ll need:

  • 2 cups cooked shredded chicken
  • 8 ounces cream cheese, softened
  • 1/2 cup buffalo wing sauce
  • 1/2 cup ranch dressing
  • 1 cup shredded cheddar cheese
  • 1/2 cup crumbled blue cheese (optional)
  • 1/4 cup chopped green onions (for garnish)
  • Tortilla chips or celery sticks (for serving)

These ingredients come together to create a dip that is not only flavorful but also satisfying. The shredded chicken provides protein, while the cream cheese and ranch dressing add creaminess. The buffalo wing sauce gives it that signature kick, and the cheddar cheese melts beautifully, making every bite irresistible.

Feel free to customize your dip! If you prefer a milder flavor, you can reduce the amount of buffalo sauce. On the other hand, if you love heat, add more sauce or even a dash of hot sauce. The choice is yours!

Step-by-Step Preparation of Buffalo Chicken Dip Recipe

Buffalo Chicken Dip Recipe. Follow these simple steps to create a delicious dip that will have everyone coming back for more!

Step 1: Gather Your Ingredients

Before you start cooking, make sure you have everything you need. Gather your ingredients and tools. You’ll need a mixing bowl, a baking dish, and a spatula. Having everything in one place makes the process smoother and more enjoyable!

Step 2: Prepare the Chicken

If you haven’t done so already, shred your cooked chicken. You can use leftover chicken or rotisserie chicken for convenience. Just make sure it’s cooked and cooled. Shredding the chicken into small pieces helps it mix well with the other ingredients, ensuring every bite is packed with flavor.

Step 3: Mix the Ingredients

In a large mixing bowl, combine the softened cream cheese, buffalo wing sauce, and ranch dressing. Use a spatula to mix until the mixture is smooth and creamy. Next, add the shredded chicken and half of the cheddar cheese. If you’re using blue cheese, toss that in too! Stir everything together until well combined. This step is crucial, as it ensures that every ingredient is evenly distributed, giving you that perfect flavor in every scoop.

Step 4: Bake the Buffalo Chicken Dip

Now it’s time to transfer your mixture to a baking dish. Spread it out evenly to ensure even cooking. Top the dip with the remaining cheddar cheese. This will create a delicious, cheesy crust on top. Place the baking dish in your preheated oven and bake for 20-25 minutes. You’ll know it’s ready when the dip is bubbly and the cheese is melted. The aroma will fill your kitchen, making it hard to wait!

Step 5: Serve and Enjoy

Once your dip is out of the oven, let it cool for a few minutes. This will help prevent burns when you dig in. Before serving, sprinkle chopped green onions on top for a fresh touch. Serve your warm Buffalo Chicken Dip with tortilla chips or crunchy celery sticks. Enjoy the creamy, spicy goodness with friends and family!

Variations of Buffalo Chicken Dip Recipe

Buffalo Chicken Dip Recipe is incredibly versatile! While the classic version is a hit, you can easily switch things up to cater to different tastes and dietary preferences. Here are a couple of exciting variations to try out:

Spicy Buffalo Chicken Dip Recipe

If you love heat, this spicy version is for you! To amp up the flavor, simply add more buffalo wing sauce to the original recipe. You can also mix in some diced jalapeños or a splash of hot sauce for an extra kick. For those who enjoy a smoky flavor, consider adding a teaspoon of smoked paprika. This will give your dip a unique twist that will have everyone reaching for more!

Another fun idea is to top the dip with sliced fresh jalapeños before baking. This not only adds heat but also a pop of color. Just remember to adjust the spice level according to your guests’ preferences. With these tweaks, your spicy Buffalo Chicken Dip will be a fiery favorite!

Vegetarian Buffalo Chicken Dip Recipe

For a vegetarian-friendly option, you can create a delicious Buffalo dip without chicken. Start by replacing the shredded chicken with cooked and shredded cauliflower or chickpeas. Both options provide a hearty texture that mimics the original dip. You can also add some finely chopped bell peppers or carrots for added crunch and flavor.

To keep the dip creamy, stick with the cream cheese, ranch dressing, and buffalo sauce. Mix everything together just like in the original recipe. Bake until bubbly, and you’ll have a tasty vegetarian dip that everyone can enjoy. This version is perfect for those who want to indulge without the meat!

These variations not only keep things interesting but also ensure that everyone at your gathering can enjoy the deliciousness of Buffalo Chicken Dip. So, whether you’re in the mood for something spicy or a vegetarian delight, you’ve got options!

Cooking Note for Buffalo Chicken Dip Recipe

Buffalo Chicken Dip Recipe, there are a few cooking notes to keep in mind to ensure your dip turns out perfectly every time. These tips will help you achieve the best flavor and texture, making your dip a standout dish at any gathering.

First, always use softened cream cheese. This makes it easier to mix with the other ingredients, resulting in a smooth and creamy dip. If you forget to take it out of the fridge ahead of time, you can soften it quickly by cutting it into small cubes and microwaving it for about 15-20 seconds. Just be careful not to melt it!

Next, consider the type of buffalo wing sauce you use. Different brands have varying levels of heat and flavor. If you’re unsure, start with a milder sauce and adjust to your taste. You can always add more sauce later if you want more heat. Remember, it’s easier to add than to take away!

Another important note is to keep an eye on the baking time. Ovens can vary, so check your dip a few minutes before the recommended time. You want it to be bubbly and golden on top, but not overcooked. If you notice the cheese browning too quickly, you can cover the dish with aluminum foil to prevent burning.

Lastly, let the dip cool for a few minutes after baking. This not only helps with serving but also allows the flavors to meld together. Plus, it’s safer to eat when it’s not piping hot! With these cooking notes in mind, you’ll be well on your way to creating a delicious Buffalo Chicken Dip that everyone will love.

Serving Suggestions for Buffalo Chicken Dip Recipe

Buffalo Chicken Dip Recipe, it’s time to think about how to serve it! The right serving suggestions can elevate your dip and make it even more enjoyable for your guests. Here are some tasty ideas to consider:

  • Tortilla Chips: The classic choice! Crunchy tortilla chips are perfect for scooping up the creamy dip. Their texture complements the dip’s richness, making each bite satisfying.
  • Celery Sticks: For a healthier option, serve your dip with fresh celery sticks. The crispness of the celery adds a refreshing crunch that balances the dip’s creaminess.
  • Carrot Sticks: Similar to celery, carrot sticks provide a sweet crunch. They are a great alternative for those who prefer a bit of sweetness with their savory dip.
  • Pita Chips: For a different twist, try serving your dip with pita chips. Their unique flavor pairs well with the spicy buffalo chicken, adding a delightful crunch.
  • Crackers: Offer a variety of crackers for guests to choose from. Whole grain or flavored crackers can add an interesting taste to the mix.
  • Veggie Platter: Create a colorful veggie platter with bell peppers, cucumbers, and cherry tomatoes. This not only looks appealing but also provides a healthy option for dipping.
  • Mini Bread Bowls: For a fun presentation, serve the dip in mini bread bowls. Guests can scoop out the dip and enjoy the bread as a tasty bonus!

Don’t forget to provide plenty of napkins and plates for your guests. You can also set up a self-serve station, allowing everyone to help themselves. This makes for a relaxed atmosphere where guests can mingle and enjoy the delicious flavors of your Buffalo Chicken Dip. With these serving suggestions, your dip will be the star of the show!

Tips for Perfecting Your Buffalo Chicken Dip Recipe

Buffalo Chicken Dip Recipe is all about the details. With a few handy tips, you can elevate your dip from good to absolutely amazing! Here are some expert suggestions to help you perfect your dish:

  • Use Quality Ingredients: The flavor of your dip starts with the ingredients. Opt for high-quality buffalo wing sauce and fresh cream cheese. This will enhance the overall taste and make your dip stand out.
  • Adjust the Heat: Everyone has different spice tolerances. Start with a moderate amount of buffalo sauce, then taste and adjust as needed. You can always add more, but it’s tough to tone down the heat once it’s in!
  • Mix Thoroughly: When combining your ingredients, make sure to mix them well. This ensures that every bite is packed with flavor. A good mix will help distribute the spices and creaminess evenly throughout the dip.
  • Experiment with Cheese: While cheddar cheese is a classic choice, don’t hesitate to experiment! Try mixing in pepper jack for a spicy twist or mozzarella for a gooey texture. Each cheese brings its own unique flavor.
  • Garnish Creatively: A sprinkle of chopped green onions adds a fresh touch, but you can get creative! Consider adding diced tomatoes, cilantro, or even a drizzle of ranch dressing on top for extra flair.
  • Serve Warm: Buffalo Chicken Dip is best enjoyed warm. If you’re serving it at a party, consider using a slow cooker to keep it warm throughout the event. This way, guests can enjoy it at the perfect temperature!
  • Pair with the Right Dippers: While tortilla chips are a favorite, don’t shy away from offering a variety of dippers. This allows guests to choose their preferred way to enjoy the dip, making it more fun!
  • Make it Ahead: If you’re short on time, prepare the dip a day in advance. Just mix everything together and store it in the fridge. When you’re ready to serve, simply bake it! This saves time and allows the flavors to meld.

By following these tips, you’ll be well on your way to creating a Buffalo Chicken Dip that will impress your friends and family. Remember, cooking is all about experimenting and having fun, so don’t be afraid to make it your own!

Breakdown of Time for Buffalo Chicken Dip Recipe

Buffalo Chicken Dip Recipe can help you plan better, especially when hosting a gathering. Here’s a simple breakdown of the time required for each step, so you can manage your cooking efficiently.

Prep Time

The prep time for this delicious dip is quite short. You’ll need about 10-15 minutes to gather your ingredients and prepare them. This includes shredding the chicken, mixing the cream cheese, buffalo sauce, and ranch dressing, and combining everything in a bowl. If you’re using rotisserie chicken, this step will be even quicker!

Cooking Time

Once your dip is mixed and ready, it’s time to bake! The cooking time is approximately 20-25 minutes. You’ll want to keep an eye on it as it bakes, ensuring it becomes bubbly and the cheese melts perfectly. This is when your kitchen will fill with that irresistible aroma!

Total Time

In total, you’re looking at about 30-40 minutes from start to finish. This includes both prep and cooking time. With such a quick turnaround, you can easily whip up this tasty dip even on a busy day. Plus, it’s a fantastic option for last-minute gatherings or game day snacks!

Buffalo Chicken Dip Recipe and impress your guests with minimal effort. Enjoy the process and the delicious results!

Nutritional Information for Buffalo Chicken Dip Recipe

Buffalo Chicken Dip Recipe is essential, especially if you’re mindful of your diet. This dip is not only delicious but also provides a good balance of protein and fats. Here’s a closer look at the nutritional information per serving:

Calories

Each serving of this tasty dip contains approximately 250 calories. This makes it a satisfying option for an appetizer without being overly heavy. The combination of cream cheese, chicken, and cheese contributes to the calorie count, but it also ensures that you feel full and satisfied after enjoying it.

Protein

Buffalo Chicken Dip Recipe is its protein content. Each serving provides about 18 grams of protein. This is primarily due to the shredded chicken and cheese, making it a great choice for those looking to increase their protein intake. Protein is essential for muscle repair and overall health, so this dip can be a tasty way to meet your dietary needs.

Sodium

While the dip is delicious, it’s important to note that it does contain sodium. Each serving has around 600 milligrams of sodium. This is mainly from the ranch dressing and buffalo wing sauce. If you’re watching your sodium intake, consider using low-sodium versions of these ingredients. This way, you can enjoy the dip while keeping your health goals in check.

Buffalo Chicken Dip Recipe offers a delightful mix of flavors and nutrients. It’s perfect for gatherings, and with a few adjustments, you can tailor it to fit your dietary preferences. Enjoy this dip guilt-free, knowing it’s packed with protein and flavor!

FAQs about Buffalo Chicken Dip Recipe

What can I serve with Buffalo Chicken Dip?

Buffalo Chicken Dip Recipe, the options are endless! The classic choice is crunchy tortilla chips, which are perfect for scooping up the creamy dip. You can also offer fresh celery sticks for a healthier option. They add a nice crunch and balance the dip’s richness. Other great choices include carrot sticks, pita chips, and a variety of crackers. For a fun twist, consider mini bread bowls or a colorful veggie platter. This way, your guests can choose their favorite dippers and enjoy the dip in their own style!

Can I make Buffalo Chicken Dip ahead of time?

Buffalo Chicken Dip Recipe ahead of time is a great idea, especially for busy days or gatherings. You can prepare the dip a day in advance. Just mix all the ingredients together and store it in the fridge. When you’re ready to serve, simply bake it until bubbly. This not only saves time but also allows the flavors to meld together, making the dip even tastier!

How do I store leftover Buffalo Chicken Dip?

Buffalo Chicken Dip Recipe, storing them is easy! Allow the dip to cool completely, then transfer it to an airtight container. You can keep it in the refrigerator for up to 3-4 days. When you’re ready to enjoy it again, simply reheat it in the oven or microwave until warm. Just be sure to stir it well before serving to ensure even heating!

Is Buffalo Chicken Dip spicy?

Buffalo Chicken Dip Recipe can vary based on the buffalo wing sauce you use. Some sauces are milder, while others pack a punch! If you prefer a milder dip, start with a small amount of buffalo sauce and taste as you go. You can always add more if you want extra heat. For those who love spice, feel free to add more sauce or even some diced jalapeños. This dip is customizable, so you can make it as spicy or mild as you like!

Conclusion on Buffalo Chicken Dip Recipe

Buffalo Chicken Dip Recipe is a fantastic addition to any gathering. Its creamy texture, combined with the bold flavors of buffalo sauce and tender chicken, makes it a favorite among guests. Whether you’re hosting a game day party, a family get-together, or just a casual night in, this dip is sure to impress.

Not only is it easy to prepare, but it also offers plenty of room for customization. You can adjust the spice level, try different cheeses, or even create vegetarian versions. This versatility ensures that everyone can enjoy a delicious dip that suits their taste preferences.

Remember, the key to a great Buffalo Chicken Dip lies in using quality ingredients and mixing them well. With the right preparation and a few helpful tips, you can create a dip that will have everyone coming back for seconds. So, gather your ingredients, follow the steps, and get ready to serve up a dish that will be the highlight of your next event!

Enjoy the process of making this delightful dip, and don’t forget to share it with friends and family. After all, good food is best enjoyed together. Happy dipping!

Brown Sugar Garlic Chicken Recipe is a must-try dish!

Introduction to Brown Sugar Garlic Chicken Recipe

Brown Sugar Garlic Chicken Recipe. This delightful meal is not only easy to prepare but also packed with flavor that will impress your family and friends. The combination of brown sugar and garlic creates a mouthwatering glaze that perfectly complements tender chicken thighs. Whether you’re hosting a dinner party or just cooking for yourself, this recipe is sure to become a favorite.

What Makes Brown Sugar Garlic Chicken Special?

What sets this dish apart is its unique blend of ingredients. The brown sugar adds a rich sweetness, while the soy sauce and ketchup provide a savory depth. Minced garlic and ground ginger enhance the flavor profile, making each bite a delightful experience. Plus, the cooking method ensures that the chicken remains juicy and tender.

Another reason this recipe shines is its versatility. You can easily customize it to suit your taste. Want a little heat? Add some red pepper flakes! Looking to make it healthier? Serve it with a side of steamed vegetables. The possibilities are endless!

In just a few simple steps, you can create a dish that not only tastes amazing but also looks beautiful on the plate. So, let’s dive into the ingredients and get started on this delicious journey!

Ingredients for Brown Sugar Garlic Chicken Recipe

Brown Sugar Garlic Chicken Recipe, you’ll need a few simple ingredients. Each one plays a vital role in building the rich flavors that make this dish so special. Here’s what you’ll need:

  • 2 pounds boneless, skinless chicken thighs: These are perfect for absorbing the delicious sauce.
  • 1/2 cup brown sugar: This adds sweetness and helps create a lovely glaze.
  • 1/4 cup soy sauce: This brings a savory umami flavor to the dish.
  • 1/4 cup ketchup: This adds a tangy twist and enhances the sauce’s consistency.
  • 1 tablespoon minced garlic: Garlic is essential for that aromatic flavor.
  • 1 teaspoon ground ginger: This adds warmth and depth to the overall taste.
  • 1/2 teaspoon black pepper: A little spice to balance the sweetness.
  • 1 tablespoon olive oil: This is used for searing the chicken, adding richness.
  • 2 green onions, sliced: These are for garnish, adding a fresh touch.

With these ingredients on hand, you’re ready to embark on your cooking adventure. Each component contributes to the overall flavor, making this dish a delightful experience for your taste buds. Now, let’s move on to the step-by-step preparation of this fantastic recipe!

Step-by-Step Preparation of Brown Sugar Garlic Chicken Recipe

Brown Sugar Garlic Chicken Recipe. Following these simple steps will ensure that your chicken turns out juicy, flavorful, and absolutely delicious. Let’s get started!

Step 1: Marinating the Chicken

Begin by marinating the chicken thighs. This step is crucial for infusing flavor into the meat. In a large bowl, place the chicken thighs and pour half of the brown sugar garlic mixture over them. Make sure each piece is well coated. Cover the bowl with plastic wrap and let it marinate in the refrigerator for at least 30 minutes. If you have more time, marinating for a few hours will enhance the flavor even more!

Step 2: Preparing the Garlic and Brown Sugar Mixture

While the chicken is marinating, it’s time to prepare the garlic and brown sugar mixture. In a medium bowl, whisk together the remaining brown sugar, soy sauce, ketchup, minced garlic, ground ginger, and black pepper. Mix until everything is well combined. This sauce will be the star of your dish, so make sure it’s perfectly blended!

Step 3: Cooking the Chicken

Once the chicken has marinated, it’s time to cook it. Preheat your oven to 375°F (190°C). In a large oven-safe skillet, heat the olive oil over medium-high heat. Add the marinated chicken thighs to the skillet, searing them for about 3-4 minutes on each side until they are golden brown. This step locks in the juices and gives the chicken a beautiful color.

Step 4: Glazing the Chicken with Sauce

After searing the chicken, pour the prepared brown sugar garlic sauce over the chicken in the skillet. Ensure that each piece is generously coated with the sauce. This will create a delicious glaze as the chicken cooks. Now, transfer the skillet to the preheated oven and bake for 25-30 minutes. The chicken is done when it reaches an internal temperature of 165°F (74°C). Once cooked, remove the skillet from the oven and let the chicken rest for 5 minutes before serving.

Brown Sugar Garlic Chicken Recipe that will impress everyone at the table. Next, let’s explore some variations to make this dish even more exciting!

Variations of Brown Sugar Garlic Chicken Recipe

Brown Sugar Garlic Chicken Recipe is already a hit, there are many ways to add your personal touch. By incorporating different ingredients or flavors, you can create a unique dish that suits your taste. Here are a couple of exciting variations to consider!

Adding Vegetables to the Brown Sugar Garlic Chicken Recipe

Brown Sugar Garlic Chicken Recipe is by adding vegetables. Not only does this boost the nutritional value, but it also adds color and texture to your dish. Here are some vegetables that pair well:

  • Bell Peppers: Slice them into strips and add them to the skillet while searing the chicken. They will soften and soak up the delicious sauce.
  • Broccoli: Add florets during the last 10 minutes of baking. This will keep them vibrant and crunchy.
  • Carrots: Thinly slice or julienne carrots and toss them in with the chicken. They will add a nice sweetness and crunch.
  • Snap Peas: These can be added in the last few minutes of cooking for a fresh, crisp bite.

By adding these vegetables, you create a one-pan meal that is not only tasty but also visually appealing. Plus, it makes for a quick and easy cleanup!

Spicy Twist on the Brown Sugar Garlic Chicken Recipe

Brown Sugar Garlic Chicken Recipe a spicy twist. Here are some ideas to spice things up:

  • Red Pepper Flakes: Add 1 teaspoon of red pepper flakes to the sauce for a mild kick. Adjust the amount based on your spice preference.
  • Chili Paste: Stir in a tablespoon of chili paste into the sauce for a bolder flavor. This will add depth and heat.
  • Fresh Jalapeños: Slice fresh jalapeños and add them to the skillet while searing the chicken. They will infuse the dish with a fresh, spicy flavor.

Brown Sugar Garlic Chicken Recipe to suit your taste buds!

Cooking Note for Brown Sugar Garlic Chicken Recipe

Brown Sugar Garlic Chicken Recipe, there are a few important cooking notes to keep in mind. These tips will help ensure that your chicken turns out perfectly every time, making your cooking experience enjoyable and stress-free.

First, always check the freshness of your ingredients. Fresh chicken thighs will yield the best flavor and texture. If possible, choose organic or free-range chicken for a more wholesome meal. Additionally, using high-quality soy sauce and ketchup can significantly enhance the overall taste of the dish.

Next, marinating the chicken is a crucial step. Allowing the chicken to soak in the brown sugar garlic mixture for at least 30 minutes will infuse it with flavor. If you have the time, marinating overnight in the refrigerator will deepen the taste even further.

When searing the chicken, make sure your skillet is hot enough. This will create a nice golden crust, locking in the juices. Avoid overcrowding the skillet, as this can cause the chicken to steam instead of sear. If necessary, cook the chicken in batches to achieve that perfect sear.

Lastly, always use a meat thermometer to check the internal temperature of the chicken. It should reach 165°F (74°C) to ensure it is fully cooked and safe to eat. Letting the chicken rest for a few minutes after baking allows the juices to redistribute, resulting in a tender and juicy dish.

Brown Sugar Garlic Chicken Recipe. Now, let’s explore some serving suggestions to make your meal even more delightful!

Serving Suggestions for Brown Sugar Garlic Chicken Recipe

Brown Sugar Garlic Chicken Recipe is ready, it’s time to think about how to serve it. The right sides and presentation can elevate your meal, making it even more enjoyable. Here are some great ideas to consider!

Pairing Sides with Brown Sugar Garlic Chicken

Brown Sugar Garlic Chicken Recipe. Here are some delicious options:

  • Steamed Rice: A classic choice! The fluffy rice absorbs the sweet and savory sauce beautifully.
  • Quinoa: This nutritious grain adds a nutty flavor and is a great alternative to rice.
  • Roasted Vegetables: Carrots, zucchini, and bell peppers roasted with olive oil make a colorful and healthy side.
  • Mashed Potatoes: Creamy mashed potatoes provide a comforting base that pairs well with the chicken.
  • Green Salad: A fresh salad with mixed greens, cucumbers, and a light vinaigrette balances the richness of the chicken.

These sides not only complement the chicken but also add variety to your meal. Feel free to mix and match based on your preferences!

Presentation Tips for Brown Sugar Garlic Chicken Recipe

Brown Sugar Garlic Chicken Recipe. Here are some tips to make your dish look as good as it tastes:

  • Use a Large Platter: Transfer the chicken to a large serving platter. This allows for a beautiful display of the glazed chicken.
  • Garnish with Green Onions: Sprinkle sliced green onions over the chicken for a pop of color and freshness.
  • Drizzle Extra Sauce: If you have leftover sauce, drizzle it over the chicken for added flavor and visual appeal.
  • Serve with Colorful Sides: Arrange your sides around the chicken on the platter. This creates a vibrant and inviting meal.
  • Use Fresh Herbs: Adding fresh herbs like cilantro or parsley can enhance the presentation and flavor.

Brown Sugar Garlic Chicken Recipe!

Tips for Perfecting Your Brown Sugar Garlic Chicken Recipe

Brown Sugar Garlic Chicken Recipe, there are several tips and tricks you can follow. These will help you achieve the best flavor and texture, ensuring that your dish is a hit every time. Here are some essential tips to keep in mind:

  • Choose the Right Chicken: Opt for boneless, skinless chicken thighs. They are juicier and more flavorful than chicken breasts, making them perfect for this recipe.
  • Marinate Longer: If time allows, marinate the chicken for several hours or even overnight. This will deepen the flavors and make the chicken even more tender.
  • Adjust the Sweetness: Feel free to tweak the amount of brown sugar based on your taste. If you prefer a less sweet dish, reduce the sugar slightly.
  • Experiment with Sauces: Try using different types of soy sauce, like low-sodium or tamari, for a gluten-free option. Each type will give a unique flavor to the dish.
  • Use Fresh Ingredients: Fresh garlic and ginger will provide a more vibrant flavor compared to dried versions. Always opt for fresh when possible!
  • Monitor Cooking Time: Keep an eye on the chicken while it bakes. Ovens can vary, so check for doneness a few minutes early to avoid overcooking.
  • Let It Rest: After baking, let the chicken rest for a few minutes before serving. This allows the juices to redistribute, resulting in a juicier bite.
  • Serve with Extra Sauce: If you have leftover sauce, serve it on the side. This adds an extra layer of flavor and allows guests to customize their meal.

Brown Sugar Garlic Chicken Recipe. Each step contributes to a delicious and satisfying meal that everyone will love. Now, let’s break down the time needed for this recipe!

Breakdown of Time for Brown Sugar Garlic Chicken Recipe

Brown Sugar Garlic Chicken Recipe is essential for planning your meal. Here’s a detailed breakdown of the time you’ll need for preparation and cooking.

Prep Time

The prep time for this delicious dish is relatively short. You’ll need about 10-15 minutes to gather your ingredients and prepare the chicken. This includes marinating the chicken, which is a crucial step for flavor. If you choose to marinate the chicken for longer, you can set it aside for 30 minutes to several hours in the refrigerator. However, the active prep time remains around 10-15 minutes.

Cooking Time

Once you’ve prepped the chicken, the cooking time is straightforward. Searing the chicken takes about 8-10 minutes, followed by baking it in the oven for 25-30 minutes. This brings the total cooking time to approximately 35-40 minutes. It’s important to ensure the chicken reaches an internal temperature of 165°F (74°C) for safe consumption.

Total Time

Brown Sugar Garlic Chicken Recipe is around 45-55 minutes. If you include marinating time, the total can extend to 1 hour or more, depending on how long you choose to marinate the chicken. This makes it a perfect option for a weeknight dinner or a weekend gathering!

With this time breakdown, you can easily plan your cooking schedule. Now that you know how long it takes, let’s dive into the nutritional information for this delightful dish!

Nutritional Information for Brown Sugar Garlic Chicken Recipe

Brown Sugar Garlic Chicken Recipe not only delights your taste buds but also provides valuable nutrients. Here’s a closer look at the nutritional information for this delicious dish.

Calories in Brown Sugar Garlic Chicken Recipe

Brown Sugar Garlic Chicken Recipe contains approximately 320 calories. This makes it a satisfying option for dinner without being overly heavy. The balance of protein and carbohydrates ensures that you feel full and energized after your meal.

Protein Content in Brown Sugar Garlic Chicken Recipe

Protein is an essential nutrient for building and repairing tissues. In this recipe, you’ll find about 24 grams of protein per serving. The boneless, skinless chicken thighs are an excellent source of lean protein, making this dish a great choice for those looking to increase their protein intake.

Sodium Levels in Brown Sugar Garlic Chicken Recipe

Brown Sugar Garlic Chicken Recipe contains approximately 800 milligrams of sodium. This level is primarily due to the soy sauce used in the recipe. If you’re watching your sodium intake, consider using low-sodium soy sauce to reduce the overall sodium content without sacrificing flavor.

Brown Sugar Garlic Chicken Recipe while also being mindful of your dietary needs. Now, let’s move on to some frequently asked questions about this delightful dish!

FAQs about Brown Sugar Garlic Chicken Recipe

Can I use other types of sugar in the Brown Sugar Garlic Chicken Recipe?

Brown Sugar Garlic Chicken Recipe, you can experiment with other types of sugar. White sugar can be used, but it won’t provide the same depth of flavor. If you want a healthier option, consider using coconut sugar or honey. Just keep in mind that honey will add a different taste and may require slight adjustments to the liquid ingredients.

How can I make the Brown Sugar Garlic Chicken Recipe healthier?

Brown Sugar Garlic Chicken Recipe healthier. First, you can use skinless chicken breasts instead of thighs for a leaner option. Additionally, reduce the amount of brown sugar in the sauce to cut down on sweetness and calories. You can also add more vegetables to the dish, which will increase the fiber content and add nutrients. Lastly, consider serving it with a side of whole grains, like brown rice or quinoa, for a more balanced meal.

What can I substitute for garlic in the Brown Sugar Garlic Chicken Recipe?

Brown Sugar Garlic Chicken Recipe, there are a few options. You can use garlic powder as a quick alternative; about 1/4 teaspoon of garlic powder equals one clove of fresh garlic. If you’re looking for a different flavor, shallots or leeks can also work well. They provide a milder taste but still add a nice aromatic quality to the dish.

How long can I store leftovers of Brown Sugar Garlic Chicken?

Brown Sugar Garlic Chicken Recipe can be stored in an airtight container in the refrigerator for up to 3-4 days. If you want to keep it longer, consider freezing the chicken. It can last in the freezer for about 2-3 months. Just make sure to thaw it in the refrigerator before reheating. When reheating, ensure the chicken is heated through to an internal temperature of 165°F (74°C) for safe consumption.

Conclusion on Brown Sugar Garlic Chicken Recipe

Brown Sugar Garlic Chicken Recipe is a delightful dish that brings together sweet and savory flavors in a way that is both satisfying and easy to prepare. With its simple ingredients and straightforward cooking process, this recipe is perfect for busy weeknights or special occasions alike. The tender chicken thighs, coated in a rich brown sugar garlic glaze, create a meal that is sure to impress.

Brown Sugar Garlic Chicken Recipe can be tailored to meet your preferences.

Moreover, the nutritional benefits of this recipe make it a great choice for those looking to enjoy a balanced meal. With a good amount of protein and the option to incorporate healthy sides, you can feel good about what you’re serving to your family and friends.

Brown Sugar Garlic Chicken. We hope it becomes a staple in your kitchen, bringing joy and satisfaction to your dining table. Happy cooking!

Easy Rotisserie Chicken Tacos: Quick and Delicious Recipe!

Easy Rotisserie Chicken Tacos

Introduction to Easy Rotisserie Chicken Tacos

After a long day, the last thing I want to do is spend hours in the kitchen. That’s where these Easy Rotisserie Chicken Tacos come to the rescue! They’re not just quick to whip up; they’re bursting with flavor and perfect for satisfying those taco cravings. Whether it’s a busy weeknight or a casual gathering with friends, this recipe is a lifesaver. With just a few simple ingredients, you can create a delicious meal that feels special without the fuss. Trust me, your family will be asking for seconds!

Why You’ll Love This Easy Rotisserie Chicken Tacos

These Easy Rotisserie Chicken Tacos are a game-changer for anyone juggling a busy schedule. They come together in just 15 minutes, making them perfect for those hectic weeknights. The flavor is incredible, thanks to the seasoned chicken, and you can customize them to suit your taste. Plus, they’re a hit with both kids and adults, ensuring everyone leaves the table happy. What’s not to love?

Ingredients for Easy Rotisserie Chicken Tacos

Gathering the right ingredients is key to making these Easy Rotisserie Chicken Tacos a success. Here’s what you’ll need:

  • Shredded rotisserie chicken: The star of the show! It’s pre-cooked, saving you time and effort.
  • Olive oil: A splash of this adds richness and helps the spices stick to the chicken.
  • Chili powder: This brings a warm, smoky flavor that’s essential for taco seasoning.
  • Cumin: Earthy and aromatic, cumin enhances the overall taste of the chicken.
  • Garlic powder: A must-have for that savory kick; it’s a pantry staple for a reason!
  • Onion powder: Adds depth without the hassle of chopping onions.
  • Salt and black pepper: Simple seasonings that elevate the flavors of the dish.
  • Tortillas: Choose between corn or flour, depending on your preference for texture.
  • Shredded lettuce: For a fresh crunch that balances the richness of the chicken.
  • Diced tomatoes: Juicy and vibrant, they add color and freshness to your tacos.
  • Shredded cheese: Cheddar or a Mexican blend melts beautifully and adds creaminess.
  • Sour cream: A dollop of this tangy goodness cools down the spices.
  • Fresh cilantro: Optional, but it adds a burst of freshness and color.
  • Lime wedges: A squeeze of lime brightens up the flavors and adds zest.

For exact measurements, check the bottom of the article where you can find everything listed for easy printing. Feel free to mix and match ingredients based on what you have on hand or your dietary preferences!

How to Make Easy Rotisserie Chicken Tacos

Creating these Easy Rotisserie Chicken Tacos is a breeze! Follow these simple steps, and you’ll have a delicious meal ready in no time. Let’s dive into the process!

Step 1: Heat the Chicken Mixture

Start by heating a tablespoon of olive oil in a skillet over medium heat. Once the oil shimmers, add in your shredded rotisserie chicken. Sprinkle in the chili powder, cumin, garlic powder, onion powder, salt, and black pepper. Stir everything together, letting the spices coat the chicken. Cook for about five minutes, or until everything is heated through and fragrant. Your kitchen will smell amazing!

Step 2: Warm the Tortillas

While the chicken is heating, it’s time to warm your tortillas. You can do this in a dry skillet over low heat for about 30 seconds on each side, or pop them in the microwave for about 15-20 seconds. This makes them soft and pliable, perfect for wrapping around your tasty filling.

Step 3: Assemble the Tacos

Now comes the fun part! Take a warm tortilla and place a generous scoop of the seasoned chicken mixture in the center. Top it off with a handful of shredded lettuce, a sprinkle of diced tomatoes, and a handful of shredded cheese. Don’t forget a dollop of sour cream for that creamy goodness. Each bite will be a delightful explosion of flavors!

Step 4: Garnish and Serve

For a finishing touch, sprinkle fresh cilantro over the top if you like that extra burst of flavor. Serve your tacos with lime wedges on the side for a zesty squeeze. These Easy Rotisserie Chicken Tacos are best enjoyed fresh, so gather your loved ones and dig in!

Tips for Success

  • Use high-quality rotisserie chicken for the best flavor.
  • Don’t skip warming the tortillas; it makes a big difference in texture.
  • Feel free to customize toppings based on your family’s preferences.
  • For extra flavor, marinate the chicken in spices for a few minutes before heating.
  • Make a double batch and enjoy leftovers for lunch the next day!

Equipment Needed

  • Skillet: A non-stick skillet works best, but any frying pan will do.
  • Spatula: Use this to stir and serve your delicious tacos.
  • Microwave or stovetop: For warming tortillas, either method is effective.
  • Measuring spoons: Handy for precise seasoning, though you can eyeball it too!

Variations

  • Spicy Kick: Add diced jalapeños or a splash of your favorite hot sauce to the chicken mixture for an extra kick.
  • Vegetarian Option: Substitute the rotisserie chicken with black beans or grilled vegetables for a hearty, meat-free meal.
  • Different Proteins: Try shredded beef, pork, or even shrimp for a twist on the classic taco.
  • Flavorful Marinades: Marinate the chicken in lime juice and spices before heating for a zesty flavor boost.
  • Cheesy Delight: Mix in cream cheese or queso fresco with the chicken for a creamy texture.

Serving Suggestions

  • Pair your Easy Rotisserie Chicken Tacos with a side of Mexican street corn for a delightful crunch.
  • Serve with a refreshing cucumber salad to balance the flavors.
  • For drinks, consider a chilled margarita or a fruity agua fresca.
  • Garnish with extra lime wedges and colorful salsa for a vibrant presentation.

FAQs about Easy Rotisserie Chicken Tacos

Can I use frozen chicken instead of rotisserie chicken?

Absolutely! If you have frozen chicken, just cook it thoroughly before shredding. However, rotisserie chicken saves time and adds great flavor, making it my go-to choice for these Easy Rotisserie Chicken Tacos.

How can I make these tacos healthier?

To lighten up your Easy Rotisserie Chicken Tacos, opt for whole wheat tortillas and load up on fresh veggies. You can also use Greek yogurt instead of sour cream for a protein boost!

What toppings do you recommend?

While I love the classic toppings, feel free to get creative! Avocado slices, pickled onions, or even a drizzle of chipotle sauce can elevate your Easy Rotisserie Chicken Tacos to the next level.

Can I prepare the chicken mixture in advance?

Yes! You can prepare the seasoned chicken mixture ahead of time and store it in the fridge. Just reheat it when you’re ready to assemble your tacos for a quick meal.

How do I store leftovers?

Store any leftover chicken mixture in an airtight container in the fridge for up to three days. Reheat it gently before serving again in fresh tortillas for another round of delicious Easy Rotisserie Chicken Tacos.

Final Thoughts

These Easy Rotisserie Chicken Tacos are more than just a meal; they’re a celebration of flavor and simplicity. Each bite transports me back to family gatherings filled with laughter and good food. The joy of sharing these tacos with loved ones is unmatched, and the ease of preparation means I can focus on what truly matters—creating memories. Whether it’s a busy weeknight or a casual get-together, this recipe brings everyone together around the table. I hope you find as much joy in making and enjoying these tacos as I do!

Easy Rotisserie Chicken Tacos
jhessica

Easy Rotisserie Chicken Tacos: Quick and Delicious Recipe!

Quick and delicious tacos made with shredded rotisserie chicken, perfect for a weeknight meal.
Prep Time 10 minutes
Cook Time 5 minutes
Total Time 15 minutes
Servings: 4 servings
Course: Main Dish
Cuisine: Mexican
Calories: 320

Ingredients
  

  • 2 cups shredded rotisserie chicken
  • 1 tablespoon olive oil
  • 1 teaspoon chili powder
  • 1 teaspoon cumin
  • 1 teaspoon garlic powder
  • 1/2 teaspoon onion powder
  • 1/2 teaspoon salt
  • 1/4 teaspoon black pepper
  • 8 small corn or flour tortillas
  • 1 cup shredded lettuce
  • 1 cup diced tomatoes
  • 1/2 cup shredded cheese cheddar or Mexican blend
  • 1/4 cup sour cream
  • 1/4 cup fresh cilantro chopped (optional)
  • Lime wedges for serving

Method
 

  1. In a skillet, heat the olive oil over medium heat. Add the shredded rotisserie chicken, chili powder, cumin, garlic powder, onion powder, salt, and black pepper. Stir to combine and cook for about 5 minutes, or until heated through.
  2. While the chicken is heating, warm the tortillas in a separate pan or microwave until pliable.
  3. To assemble the tacos, place a generous portion of the seasoned chicken onto each tortilla.
  4. Top with shredded lettuce, diced tomatoes, shredded cheese, and a dollop of sour cream.
  5. Garnish with fresh cilantro if desired and serve with lime wedges on the side.

Nutrition

Serving: 1tacoCalories: 320kcalCarbohydrates: 30gProtein: 25gFat: 12gSaturated Fat: 5gPolyunsaturated Fat: 7gCholesterol: 60mgSodium: 600mgFiber: 2gSugar: 3g

Notes

  • For a spicier kick, add diced jalapeños or a splash of hot sauce to the chicken mixture.
  • You can substitute the rotisserie chicken with shredded beef or black beans for a vegetarian option.

Tried this recipe?

Let us know how it was!

Cowboy Butter Chicken Linguine Recipe is a must-try!

Introduction to Cowboy Butter Chicken Linguine Recipe

Are you ready to tantalize your taste buds with a dish that combines comfort and flavor? The Cowboy Butter Chicken Linguine recipe is a delightful meal that brings together tender chicken, rich butter, and perfectly cooked pasta. This dish is not just a meal; it’s an experience that will leave you craving more. Whether you’re cooking for family or friends, this recipe is sure to impress!

What Makes Cowboy Butter Chicken Linguine Unique?

What sets Cowboy Butter Chicken Linguine apart from other pasta dishes? It’s all about the cowboy butter sauce! This sauce is a blend of melted butter, Worcestershire sauce, and a hint of lemon juice, creating a rich and savory flavor profile. The addition of smoked paprika and cayenne pepper gives it a unique twist, making it both comforting and exciting. The combination of these ingredients creates a creamy, flavorful coating that clings to the linguine, ensuring every bite is packed with taste.

Moreover, the use of fresh parsley and Parmesan cheese adds a burst of freshness and a touch of elegance. This dish is not only delicious but also visually appealing, making it perfect for any occasion. Whether it’s a casual weeknight dinner or a special gathering, Cowboy Butter Chicken Linguine is a standout choice.

The Origins of Cowboy Butter Chicken Linguine

The origins of Cowboy Butter Chicken Linguine can be traced back to the heart of American cuisine, where hearty meals are a staple. The term “cowboy butter” itself reflects a rustic, down-home cooking style that celebrates bold flavors and simple ingredients. This dish draws inspiration from traditional Southern cooking, where butter and spices are used generously to enhance the natural flavors of the ingredients.

As pasta became a beloved staple in American kitchens, it was only natural to combine it with the rich, buttery flavors of cowboy cuisine. The result is a dish that embodies the spirit of comfort food while offering a modern twist. Today, Cowboy Butter Chicken Linguine is enjoyed by many, bringing together families and friends around the dinner table.

Ingredients for Cowboy Butter Chicken Linguine Recipe

To create the mouthwatering Cowboy Butter Chicken Linguine, you’ll need a selection of fresh and flavorful ingredients. Each component plays a vital role in building the dish’s rich taste and satisfying texture. Here’s what you’ll need:

  • 8 ounces linguine pasta: This will serve as the base of your dish, providing a perfect canvas for the sauce.
  • 1 pound boneless, skinless chicken breasts: Cut into bite-sized pieces, the chicken adds protein and heartiness.
  • 1 teaspoon salt: Essential for seasoning the chicken and enhancing flavors.
  • 1/2 teaspoon black pepper: Adds a mild kick to the dish.
  • 2 tablespoons olive oil: Used for cooking the chicken, it adds richness and helps prevent sticking.
  • 4 cloves garlic, minced: Garlic brings a wonderful aroma and depth of flavor.
  • 1 teaspoon smoked paprika: This spice gives a smoky flavor that complements the butter.
  • 1/2 teaspoon cayenne pepper: Adjust this to your taste for a spicy kick!
  • 1/2 cup unsalted butter, melted: The star of the show, creating a luscious sauce.
  • 1 tablespoon Worcestershire sauce: Adds a savory umami flavor.
  • 1 tablespoon lemon juice: Brightens the dish with a touch of acidity.
  • 1/4 cup fresh parsley, chopped: For garnish and a fresh flavor boost.
  • 1/4 cup grated Parmesan cheese: Adds a creamy, cheesy finish to the dish.

With these ingredients on hand, you’re ready to embark on a culinary adventure that will delight your taste buds. Each item contributes to the overall flavor, making this Cowboy Butter Chicken Linguine a dish you’ll want to make again and again!

Step-by-Step Preparation of Cowboy Butter Chicken Linguine Recipe

Now that you have all your ingredients ready, it’s time to dive into the cooking process! Follow these simple steps to create your Cowboy Butter Chicken Linguine. Each step is designed to ensure that your dish turns out delicious and satisfying.

Step 1: Preparing the Chicken

Start by preparing the chicken. First, take your boneless, skinless chicken breasts and cut them into bite-sized pieces. This helps them cook evenly and makes for easy eating. Next, season the chicken with salt and black pepper. This simple seasoning enhances the chicken’s natural flavor. In a large skillet, heat 2 tablespoons of olive oil over medium-high heat. Once the oil is hot, add the seasoned chicken pieces. Cook for about 5-7 minutes, stirring occasionally, until the chicken is browned and cooked through. Make sure there’s no pink left in the center!

Step 2: Making the Cowboy Butter Sauce

While the chicken is cooking, you can prepare the Cowboy Butter Sauce. In a small bowl, combine 1/2 cup of melted unsalted butter, 1 tablespoon of Worcestershire sauce, and 1 tablespoon of lemon juice. Whisk these ingredients together until they are well blended. This sauce is what makes the dish so rich and flavorful. Set it aside for now; you’ll add it to the chicken shortly.

Step 3: Cooking the Linguine

While the chicken is finishing up, it’s time to cook the linguine. Bring a large pot of salted water to a boil. Add 8 ounces of linguine pasta and cook according to the package instructions until it reaches an al dente texture. This usually takes about 8-10 minutes. Once cooked, drain the pasta and set it aside. Remember, you want the pasta to be firm enough to hold up against the sauce!

Step 4: Combining Ingredients

Now that your chicken is cooked and your linguine is ready, it’s time to combine everything. Add the minced garlic, 1 teaspoon of smoked paprika, and 1/2 teaspoon of cayenne pepper to the skillet with the chicken. Sauté for an additional 1-2 minutes until the garlic becomes fragrant. Then, pour the Cowboy Butter Sauce over the chicken and stir to combine. Finally, add the cooked linguine to the skillet. Toss everything together until the pasta is well coated with the sauce. Cook for another 2-3 minutes to heat through.

Step 5: Final Touches and Serving

Once everything is heated through, remove the skillet from the heat. Stir in 1/4 cup of chopped fresh parsley and 1/4 cup of grated Parmesan cheese. These final touches add freshness and a creamy finish to your dish. Serve your Cowboy Butter Chicken Linguine immediately, garnished with extra parsley or cheese if desired. Enjoy this delightful meal with family and friends!

Variations of Cowboy Butter Chicken Linguine Recipe

While the traditional Cowboy Butter Chicken Linguine is a crowd-pleaser, there are several variations you can try. These adaptations allow you to cater to different dietary preferences and spice levels. Let’s explore some exciting options!

Vegetarian Options

If you’re looking for a vegetarian twist on this dish, you can easily substitute the chicken with hearty vegetables. Consider using:

  • Mushrooms: Sauté sliced mushrooms for a meaty texture.
  • Tofu: Use firm tofu, cubed and pan-fried until golden brown.
  • Chickpeas: Add canned chickpeas for a protein boost and a nutty flavor.

Follow the same steps as the original recipe, replacing the chicken with your chosen ingredient. The Cowboy Butter Sauce will still provide that rich, savory flavor, making it a satisfying meal for everyone!

Spicy Cowboy Butter Chicken Linguine

If you love a bit of heat, you can easily spice up your Cowboy Butter Chicken Linguine. Here are a few ways to add some kick:

  • Jalapeños: Dice fresh jalapeños and sauté them with the chicken for a fresh, spicy flavor.
  • Red Pepper Flakes: Sprinkle in red pepper flakes when cooking the chicken for an extra layer of heat.
  • Hot Sauce: Drizzle your favorite hot sauce into the Cowboy Butter Sauce for a fiery finish.

Adjust the spice level to your liking, and enjoy a zesty version of this delicious dish!

Cooking Note for Cowboy Butter Chicken Linguine Recipe

When preparing the Cowboy Butter Chicken Linguine, there are a few cooking notes to keep in mind to ensure your dish turns out perfectly every time. These tips will help you navigate the cooking process smoothly and enhance the overall flavor of your meal.

First, always use fresh ingredients. Fresh garlic, parsley, and chicken will elevate the taste of your dish significantly. Fresh herbs, in particular, add a burst of flavor that dried herbs simply cannot match. If possible, opt for high-quality butter as well, as it will contribute to the richness of the sauce.

Next, pay attention to the cooking times. Overcooking the chicken can lead to a dry texture, while undercooking can be unsafe. Aim for a golden-brown color on the chicken, and ensure it reaches an internal temperature of 165°F (75°C). Using a meat thermometer can help you achieve this with confidence.

Additionally, when cooking the linguine, make sure to salt the water generously. This step is crucial as it enhances the pasta’s flavor. Remember to reserve a bit of pasta water before draining. This starchy water can be added to the sauce if you find it too thick, helping to create a silky texture.

Lastly, don’t rush the combining process. Toss the linguine and chicken together gently, allowing the sauce to coat every strand of pasta. This ensures that each bite is flavorful and satisfying. Enjoy the cooking process, and don’t hesitate to adjust the seasonings to suit your taste. Happy cooking!

Serving Suggestions for Cowboy Butter Chicken Linguine Recipe

Once your Cowboy Butter Chicken Linguine is ready, it’s time to think about how to serve it! Presentation can elevate your dining experience, making the meal even more enjoyable. Here are some delightful serving suggestions to consider:

  • Garnish with Fresh Herbs: A sprinkle of extra chopped parsley or basil on top adds a pop of color and freshness. It also enhances the dish’s aroma, making it even more inviting.
  • Pair with a Side Salad: A light, crisp salad complements the richness of the pasta. Consider a simple mixed greens salad with a lemon vinaigrette to balance the flavors.
  • Serve with Garlic Bread: Warm, buttery garlic bread is a perfect side. It’s great for soaking up any leftover sauce, ensuring nothing goes to waste!
  • Offer Grated Cheese: Provide extra grated Parmesan cheese at the table. Guests can add as much as they like, enhancing the creamy texture of the dish.
  • Include a Glass of Wine: A chilled glass of white wine, like Sauvignon Blanc or Chardonnay, pairs beautifully with the buttery flavors of the dish. It adds a touch of elegance to your meal.

These serving suggestions not only enhance the dining experience but also allow you to customize the meal to your guests’ preferences. Whether it’s a cozy family dinner or a gathering with friends, these ideas will make your Cowboy Butter Chicken Linguine shine on the table!

Tips for Perfecting Cowboy Butter Chicken Linguine Recipe

To make your Cowboy Butter Chicken Linguine truly unforgettable, consider these helpful tips. Each suggestion is designed to enhance the flavors and textures of your dish, ensuring a delightful dining experience for everyone.

First, always taste as you go. This is key to achieving the perfect balance of flavors. After adding the Cowboy Butter Sauce, take a moment to taste the dish. If it needs more seasoning, feel free to adjust with additional salt, pepper, or even a splash more lemon juice for brightness.

Next, don’t skip the resting time for the chicken. After cooking, let the chicken rest for a few minutes before adding it to the sauce. This allows the juices to redistribute, keeping the chicken moist and flavorful.

When cooking the linguine, remember to stir it occasionally. This prevents the pasta from sticking together and ensures even cooking. Also, consider cooking the pasta just a minute less than the package instructions suggest. This way, it will finish cooking in the sauce, absorbing all those delicious flavors.

For a richer flavor, try using a combination of butter and olive oil. While the recipe calls for unsalted butter, adding a bit of olive oil can enhance the overall taste and prevent the butter from burning during cooking.

Lastly, don’t be afraid to experiment! Feel free to add your favorite vegetables, such as spinach or bell peppers, to the dish. They not only add color but also boost the nutritional value. You can also try different types of pasta, like fettuccine or penne, for a fun twist on the classic recipe.

By following these tips, you’ll be well on your way to creating a Cowboy Butter Chicken Linguine that’s bursting with flavor and sure to impress your family and friends!

Breakdown of Time for Cowboy Butter Chicken Linguine Recipe

Understanding the time needed for each step in the Cowboy Butter Chicken Linguine recipe can help you plan your cooking efficiently. Here’s a breakdown of the time required for preparation and cooking, ensuring you can enjoy this delicious meal without any rush.

Prep Time

The prep time for this Cowboy Butter Chicken Linguine recipe is approximately 15 minutes. During this time, you will gather all your ingredients, cut the chicken into bite-sized pieces, and mince the garlic. It’s also a good time to chop the parsley and measure out the spices. Having everything ready will make the cooking process smoother and more enjoyable!

Cooking Time

The cooking time for this dish is about 20 minutes. This includes:

  • Cooking the chicken in the skillet for about 5-7 minutes until browned and cooked through.
  • Sautéing the garlic and spices for an additional 1-2 minutes.
  • Cooking the linguine pasta for 8-10 minutes until al dente.
  • Combining all ingredients and heating through for another 2-3 minutes.

Each step is quick, allowing you to create a flavorful meal in no time!

Total Time

In total, you can expect to spend around 35 minutes from start to finish. This includes both prep and cooking time. With this efficient timeline, you can easily whip up a delicious Cowboy Butter Chicken Linguine for a weeknight dinner or a special occasion. Enjoy the process and the delightful flavors that come together in this fantastic dish!

Nutritional Information for Cowboy Butter Chicken Linguine Recipe

Understanding the nutritional content of your meals is essential for maintaining a balanced diet. The Cowboy Butter Chicken Linguine recipe not only satisfies your taste buds but also provides a good amount of nutrients. Here’s a breakdown of the nutritional information per serving, so you can enjoy this dish while being mindful of your dietary needs.

Calories

Each serving of Cowboy Butter Chicken Linguine contains approximately 550 calories. This calorie count includes the rich flavors from the butter, chicken, and pasta, making it a hearty meal. While it’s important to enjoy this dish, be mindful of portion sizes if you’re watching your calorie intake.

Protein

Protein is a vital nutrient for building and repairing tissues, and this recipe delivers! Each serving provides about 30 grams of protein, primarily from the chicken. This makes it a great option for those looking to increase their protein intake, whether for muscle building or overall health.

Sodium

The sodium content in Cowboy Butter Chicken Linguine is approximately 800 milligrams per serving. This includes the salt used for seasoning and the sodium from the Worcestershire sauce. If you’re watching your sodium intake, consider using low-sodium butter and sauce alternatives to help reduce the overall sodium content without sacrificing flavor.

By keeping these nutritional facts in mind, you can enjoy your Cowboy Butter Chicken Linguine while making informed choices about your diet. This dish is not only delicious but also provides a good balance of calories, protein, and flavor!

FAQs about Cowboy Butter Chicken Linguine Recipe

Can I use other types of pasta for this recipe?

Absolutely! While linguine is the star of this dish, you can easily swap it for other types of pasta. Options like fettuccine, penne, or even spaghetti work well. Just keep in mind that cooking times may vary slightly, so be sure to check the package instructions. The key is to choose a pasta that can hold onto the delicious Cowboy Butter Sauce!

How can I make Cowboy Butter Chicken Linguine spicier?

If you’re a fan of heat, there are several ways to spice up your Cowboy Butter Chicken Linguine. You can add diced jalapeños or fresh chili peppers when cooking the chicken. Another option is to sprinkle in red pepper flakes during the sautéing process. For an extra kick, consider drizzling your favorite hot sauce into the Cowboy Butter Sauce. Adjust the spice level to your liking, and enjoy the fiery twist!

What can I substitute for chicken in this recipe?

For those looking for alternatives to chicken, there are plenty of options! You can use shrimp, which cooks quickly and pairs beautifully with the Cowboy Butter Sauce. Alternatively, try cubed tofu for a vegetarian option or even chickpeas for a hearty, plant-based protein. Just remember to adjust cooking times accordingly to ensure everything is cooked perfectly!

How do I store leftovers of Cowboy Butter Chicken Linguine?

Storing leftovers is easy! Allow the Cowboy Butter Chicken Linguine to cool completely before transferring it to an airtight container. It can be stored in the refrigerator for up to 3 days. When you’re ready to enjoy it again, simply reheat in a skillet over low heat, adding a splash of water or broth to loosen the sauce if needed. This way, you can savor the delicious flavors all over again!

Conclusion on Cowboy Butter Chicken Linguine Recipe

In conclusion, the Cowboy Butter Chicken Linguine recipe is a delightful dish that brings together rich flavors and comforting textures. With its creamy cowboy butter sauce, tender chicken, and perfectly cooked linguine, this meal is sure to become a favorite in your household. Not only is it easy to prepare, but it also offers a variety of options to cater to different tastes and dietary preferences.

Whether you choose to stick with the classic recipe or explore variations like vegetarian or spicy versions, the essence of this dish remains the same: it’s all about enjoying good food with loved ones. The combination of fresh ingredients and bold flavors makes every bite a joy. Plus, with the tips and serving suggestions provided, you can elevate your dining experience and impress your guests.

So, gather your ingredients, roll up your sleeves, and get ready to create a meal that’s not just about nourishment but also about connection and joy. The Cowboy Butter Chicken Linguine is more than just a recipe; it’s an invitation to share delicious moments around the table. Enjoy every bite, and happy cooking!

Slow Cooker BBQ Brisket is a must-try recipe today!

Introduction to Slow Cooker BBQ Brisket

Slow Cooker BBQ Brisket is a dish that brings comfort and joy to any meal. It’s perfect for family gatherings, weekend barbecues, or even a cozy dinner at home. The beauty of this recipe lies in its simplicity and the rich flavors that develop during the slow cooking process. With just a few ingredients, you can create a mouthwatering dish that will impress your guests and satisfy your cravings.

What Makes Slow Cooker BBQ Brisket Special?

What sets Slow Cooker BBQ Brisket apart from other meat dishes? First, the slow cooking method allows the brisket to become incredibly tender. As it cooks, the flavors meld together, creating a deliciously rich sauce that seeps into the meat. This method also means you can set it and forget it, making it a hassle-free option for busy cooks.

Moreover, the combination of spices and sauces used in this recipe enhances the natural flavors of the beef. The smoked paprika adds a hint of smokiness, while the barbecue sauce brings a sweet and tangy kick. Each bite is a delightful experience, making it a favorite among meat lovers.

Additionally, the versatility of this dish is remarkable. You can easily customize the flavors by experimenting with different barbecue sauces or adding spices to suit your taste. Whether you prefer a sweet, spicy, or tangy profile, Slow Cooker BBQ Brisket can be tailored to your liking.

In summary, Slow Cooker BBQ Brisket is not just a meal; it’s an experience. The tender meat, rich flavors, and ease of preparation make it a standout choice for any occasion. So, let’s dive into the ingredients and preparation steps to create this delicious dish!

Ingredients for Slow Cooker BBQ Brisket

To create the perfect Slow Cooker BBQ Brisket, you’ll need a few key ingredients. Each component plays a vital role in building flavor and ensuring the brisket turns out tender and juicy. Here’s what you’ll need:

  • 2 to 3 pounds beef brisket: This is the star of the dish. Choose a well-marbled cut for the best flavor.
  • 1 teaspoon salt: Enhances the overall taste of the meat.
  • 1 teaspoon black pepper: Adds a subtle heat and depth.
  • 1 teaspoon garlic powder: Provides a savory kick.
  • 1 teaspoon onion powder: Complements the garlic and adds sweetness.
  • 1 teaspoon smoked paprika: Infuses a smoky flavor that’s essential for BBQ.
  • 1 cup beef broth: Keeps the brisket moist and adds richness.
  • 1 cup barbecue sauce: The key ingredient for that classic BBQ taste.
  • 1 tablespoon Worcestershire sauce: Adds a tangy depth to the sauce.
  • 1 tablespoon apple cider vinegar: Balances the sweetness of the barbecue sauce.
  • 1 tablespoon brown sugar: Enhances the sweetness and caramelization.
  • 1 tablespoon mustard: Adds a zesty flavor that brightens the dish.

These ingredients come together to create a mouthwatering dish that’s sure to please everyone at the table. Feel free to adjust the spices and sauces to match your personal taste. Now that you have your ingredients ready, let’s move on to the preparation steps!

Preparation of Slow Cooker BBQ Brisket

Now that you have gathered all your ingredients, it’s time to prepare your Slow Cooker BBQ Brisket. This process is straightforward and allows you to create a delicious meal with minimal effort. Let’s break it down into easy steps.

Step 1: Preparing the Brisket

First, you need to prepare the brisket. Start by trimming any excess fat from the meat. However, leave a thin layer of fat to keep the brisket juicy and flavorful during cooking. After trimming, pat the meat dry with paper towels. This step is important as it helps the seasoning stick better to the meat.

Step 2: Seasoning the Brisket

Next, it’s time to season the brisket. In a small bowl, mix together the salt, black pepper, garlic powder, onion powder, and smoked paprika. This spice blend will enhance the flavor of the beef. Rub this mixture all over the brisket, ensuring it’s evenly coated. The more seasoning you apply, the more flavorful your brisket will be!

Step 3: Searing the Brisket (Optional)

If you want to add an extra layer of flavor, consider searing the brisket before placing it in the slow cooker. Heat a skillet over medium-high heat and add a little oil. Once hot, sear the brisket on all sides until it’s browned. This step is optional but can enhance the overall taste of your dish.

Step 4: Adding Ingredients to the Slow Cooker

Now, it’s time to add the brisket to the slow cooker. Place the seasoned brisket in the cooker, making sure it fits snugly. Pour the beef broth around the meat, being careful not to wash off the spice rub. In a separate bowl, mix the barbecue sauce, Worcestershire sauce, apple cider vinegar, brown sugar, and mustard. Pour this flavorful mixture over the brisket, ensuring it’s well covered.

Step 5: Cooking the Brisket

Finally, cover the slow cooker and set it to cook on low for 8 to 10 hours. This slow cooking method allows the brisket to become tender and flavorful. When it’s done, the meat should easily shred with a fork. Once cooked, remove the brisket from the slow cooker and let it rest for about 15 minutes before slicing. This resting period helps the juices redistribute, making each bite juicy and delicious.

With these preparation steps complete, you’re well on your way to enjoying a delightful Slow Cooker BBQ Brisket. Next, let’s explore some variations to make this dish even more exciting!

Variation of Slow Cooker BBQ Brisket

While the classic Slow Cooker BBQ Brisket recipe is delicious on its own, there are many ways to switch things up. By experimenting with different sauces and cooking methods, you can create a unique dish that suits your taste. Let’s explore some exciting variations!

Different Sauces to Use

The barbecue sauce you choose can dramatically change the flavor of your brisket. Here are some options to consider:

  • Honey BBQ Sauce: This sauce adds a sweet and sticky glaze to your brisket. It’s perfect for those who enjoy a sweeter flavor profile.
  • Spicy Chipotle Sauce: If you like a bit of heat, try using a spicy chipotle barbecue sauce. It brings a smoky and spicy kick that pairs well with the beef.
  • Mustard-Based Sauce: For a tangy twist, consider a mustard-based barbecue sauce. This sauce adds a zesty flavor that complements the richness of the brisket.
  • Teriyaki Sauce: For an Asian-inspired twist, use teriyaki sauce. It adds a sweet and savory flavor that’s both unique and delicious.

Feel free to mix and match these sauces with the other ingredients in your recipe. You can even create your own signature sauce by combining different flavors!

Alternative Cooking Methods

While the slow cooker is a fantastic way to prepare BBQ brisket, there are other methods you can try. Here are a couple of alternatives:

  • Oven Roasting: If you prefer, you can roast the brisket in the oven. Preheat your oven to 300°F (150°C). Place the seasoned brisket in a roasting pan, cover it with foil, and cook for about 4 to 5 hours. This method allows for a nice crust to form on the outside while keeping the inside tender.
  • Grilling: For a smoky flavor, consider grilling your brisket. Use indirect heat on your grill and cook the brisket low and slow. This method can take several hours, but the result is a deliciously smoky flavor that’s hard to beat.

Each cooking method offers a different texture and flavor, so don’t hesitate to try them out. With these variations, your Slow Cooker BBQ Brisket can become a new favorite dish every time you make it!

Cooking Note for Slow Cooker BBQ Brisket

When it comes to making the perfect Slow Cooker BBQ Brisket, a few cooking notes can help ensure your dish turns out just right. Understanding the nuances of slow cooking can elevate your brisket from good to great. Here are some essential tips to keep in mind:

First, always choose a quality cut of brisket. Look for a well-marbled piece, as the fat will render during cooking, keeping the meat moist and flavorful. A brisket with good marbling will yield a tender and juicy result, which is what you want for this dish.

Next, consider the size of your brisket. If you’re using a larger cut, you may need to adjust the cooking time. A 3-pound brisket may take closer to 10 hours on low, while a smaller cut could be done in about 8 hours. Always check for tenderness; the meat should easily shred with a fork when it’s ready.

Additionally, avoid lifting the lid of the slow cooker during cooking. Each time you open the lid, heat escapes, which can extend the cooking time. Trust the process and let the slow cooker do its job!

Lastly, don’t forget to let the brisket rest after cooking. This step is crucial as it allows the juices to redistribute throughout the meat. If you slice it too soon, you may end up with dry brisket. A 15-minute rest is usually sufficient for optimal juiciness.

By following these cooking notes, you’ll be well on your way to creating a delicious Slow Cooker BBQ Brisket that will impress your family and friends. Now, let’s move on to some serving suggestions to make your meal even more enjoyable!

Serving Suggestions for Slow Cooker BBQ Brisket

Once your Slow Cooker BBQ Brisket is ready, it’s time to think about how to serve it. The right side dishes and presentation can elevate your meal and make it even more enjoyable. Here are some fantastic serving suggestions to consider.

Best Side Dishes to Pair

When it comes to side dishes, you want to complement the rich flavors of the brisket. Here are some delicious options:

  • Coleslaw: A classic pairing, coleslaw adds a crunchy texture and a refreshing taste that balances the richness of the brisket.
  • Macaroni and Cheese: Creamy and cheesy, this dish is a comfort food favorite that pairs perfectly with BBQ.
  • Cornbread: Sweet and fluffy cornbread is a great addition. It soaks up the BBQ sauce beautifully!
  • Baked Beans: The sweetness of baked beans complements the smoky flavors of the brisket, making it a hearty side.
  • Grilled Vegetables: For a healthier option, serve grilled vegetables. They add color and nutrition to your plate.

These side dishes not only enhance the meal but also provide a variety of flavors and textures that everyone will love. Feel free to mix and match based on your preferences!

Creative Ways to Serve

Serving your Slow Cooker BBQ Brisket can be fun and creative! Here are some ideas to make your presentation stand out:

  • Brisket Sandwiches: Slice the brisket and serve it on soft buns with extra barbecue sauce. Add pickles or coleslaw for a delicious sandwich.
  • Tacos: Shred the brisket and use it as a filling for tacos. Top with diced onions, cilantro, and a squeeze of lime for a tasty twist.
  • BBQ Brisket Nachos: Layer tortilla chips with shredded brisket, cheese, jalapeños, and drizzle with barbecue sauce for a fun appetizer.
  • Stuffed Potatoes: Serve the brisket over baked potatoes, topped with cheese, sour cream, and chives for a hearty meal.
  • Charcuterie Board: Include slices of brisket on a charcuterie board with cheeses, crackers, and fruits for a unique serving option.

These creative serving ideas not only make your meal more exciting but also allow your guests to enjoy the brisket in different ways. Whether you choose to serve it traditionally or get a bit adventurous, your Slow Cooker BBQ Brisket is sure to be a hit!

Tips for Perfect Slow Cooker BBQ Brisket

To achieve the best results with your Slow Cooker BBQ Brisket, a few tips can make all the difference. From selecting the right cut of meat to adjusting cooking times, these insights will help you create a tender and flavorful dish every time. Let’s explore some essential tips!

Choosing the Right Cut of Meat

The cut of meat you choose is crucial for a successful Slow Cooker BBQ Brisket. Opt for a well-marbled beef brisket, as the fat content enhances flavor and tenderness. Look for cuts labeled as “flat” or “point.” The flat cut is leaner, while the point cut has more fat, making it juicier. Both cuts work well, but the point cut is often preferred for its rich flavor.

Additionally, consider the quality of the meat. Grass-fed beef tends to have a more robust flavor compared to grain-fed. If possible, buy from a trusted butcher or local farm. This ensures you get a high-quality brisket that will yield the best results in your slow cooker.

Adjusting Cooking Time for Different Sizes

Cooking time is another important factor to consider when making Slow Cooker BBQ Brisket. The size of your brisket will determine how long it needs to cook. A general rule of thumb is to cook the brisket on low for about 1 hour per pound. For example, a 2-pound brisket will take around 8 hours, while a 3-pound brisket may need closer to 10 hours.

Always check for tenderness as the cooking time approaches its end. The brisket should be fork-tender and easily shred apart. If it’s not quite there, give it an extra hour. Remember, every slow cooker is different, so keep an eye on your brisket to ensure it turns out perfectly every time.

By following these tips, you’ll be well on your way to mastering the art of Slow Cooker BBQ Brisket. With the right cut of meat and proper cooking time, your dish will be a hit at any gathering!

Breakdown of Time for Slow Cooker BBQ Brisket

Understanding the time involved in making Slow Cooker BBQ Brisket is essential for planning your meal. Knowing how long each step takes can help you serve a delicious dish right on time. Here’s a breakdown of the time you’ll need for preparation and cooking.

Prep Time

The prep time for your Slow Cooker BBQ Brisket is relatively short. You can expect to spend about 15 to 20 minutes getting everything ready. This includes trimming the brisket, mixing the spices, and preparing the sauce. If you choose to sear the brisket, add an extra 5 to 10 minutes for that step. Overall, you can have everything prepped and ready to go in under half an hour!

Cooking Time

The cooking time is where the magic happens! For the best results, cook your brisket on low for 8 to 10 hours. This slow cooking method allows the meat to become tender and absorb all the delicious flavors. If you’re in a hurry, you can cook it on high for about 4 to 5 hours, but the low setting is recommended for optimal tenderness.

Total Time

When you combine the prep time and cooking time, the total time for making Slow Cooker BBQ Brisket is approximately 8 hours and 15 minutes to 10 hours and 20 minutes. This includes the time spent preparing the ingredients and the long, slow cooking process. While it may seem like a lengthy commitment, most of that time is hands-off, allowing you to go about your day while the brisket cooks to perfection.

With this time breakdown, you can easily plan your meal and ensure that your Slow Cooker BBQ Brisket is ready when you need it. Now that you have a clear understanding of the timing, let’s move on to the nutritional information for this delicious dish!

Nutritional Information for Slow Cooker BBQ Brisket

Understanding the nutritional content of your Slow Cooker BBQ Brisket is essential for making informed choices about your meals. This dish is not only delicious but also provides a good balance of nutrients. Let’s break down the key nutritional components of this hearty meal.

Calories

Each serving of Slow Cooker BBQ Brisket contains approximately 350 calories. This calorie count makes it a satisfying option for dinner without being overly heavy. The combination of protein and fat in the brisket contributes to its calorie content, providing energy and fullness. If you’re watching your calorie intake, consider pairing the brisket with lighter side dishes to balance your meal.

Protein

One of the standout features of Slow Cooker BBQ Brisket is its protein content. Each serving offers about 30 grams of protein. Protein is essential for building and repairing tissues, making it a vital part of a healthy diet. The beef brisket is an excellent source of high-quality protein, which can help keep you feeling full and satisfied for longer periods. This makes it a great choice for those looking to maintain or build muscle.

Sodium

When it comes to sodium, each serving of Slow Cooker BBQ Brisket contains around 800 milligrams. While sodium is necessary for various bodily functions, it’s important to monitor your intake, especially if you have dietary restrictions. The sodium content primarily comes from the barbecue sauce and Worcestershire sauce used in the recipe. If you’re concerned about sodium levels, consider using low-sodium versions of these sauces or adjusting the amount to suit your dietary needs.

In summary, Slow Cooker BBQ Brisket is a flavorful dish that provides a good amount of calories, protein, and sodium. By being mindful of your portion sizes and side dishes, you can enjoy this delicious meal while maintaining a balanced diet. Now that you have a clear understanding of the nutritional information, let’s move on to some frequently asked questions about this delightful dish!

FAQs about Slow Cooker BBQ Brisket

Can I use a different cut of meat for Slow Cooker BBQ Brisket?

Absolutely! While beef brisket is the traditional choice for this recipe, you can use other cuts of meat as well. Cuts like chuck roast or beef short ribs can work nicely. These alternatives also have good marbling, which helps keep the meat tender and juicy during cooking. Just keep in mind that cooking times may vary depending on the cut you choose. Always check for tenderness to ensure your meat is cooked to perfection!

How long should I cook Slow Cooker BBQ Brisket?

The cooking time for Slow Cooker BBQ Brisket typically ranges from 8 to 10 hours on low heat. This slow cooking method allows the meat to become incredibly tender. If you’re short on time, you can cook it on high for about 4 to 5 hours, but the low setting is recommended for the best results. Always check the brisket for tenderness; it should easily shred with a fork when it’s done. Remember, patience is key for a delicious BBQ brisket!

What can I do with leftovers from Slow Cooker BBQ Brisket?

Leftovers from your Slow Cooker BBQ Brisket can be a delightful treat! There are many creative ways to use them. You can slice the brisket for sandwiches, shred it for tacos, or even mix it into a hearty chili. Another great option is to make BBQ brisket nachos by layering tortilla chips with cheese, brisket, and your favorite toppings. You can also store the leftovers in an airtight container in the fridge for up to 3 days or freeze them for longer storage. This way, you can enjoy the delicious flavors of your brisket even after the main meal!

Conclusion on Slow Cooker BBQ Brisket

In conclusion, Slow Cooker BBQ Brisket is a fantastic dish that combines simplicity with rich flavors. The slow cooking method ensures that the brisket becomes tender and juicy, making it a perfect choice for any occasion. Whether you’re hosting a family gathering or enjoying a quiet dinner at home, this recipe is sure to impress.

With just a few ingredients and minimal effort, you can create a meal that is both satisfying and delicious. The versatility of this dish allows you to experiment with different sauces and cooking methods, ensuring that each time you make it, it can be a unique experience. From honey BBQ to spicy chipotle, the options are endless!

Moreover, the nutritional benefits of Slow Cooker BBQ Brisket make it a great addition to your meal rotation. With a good balance of protein and flavor, it can keep you feeling full and satisfied. Just remember to pair it with complementary side dishes for a well-rounded meal.

So, gather your ingredients, set your slow cooker, and get ready to enjoy a delightful dish that will have everyone coming back for seconds. Slow Cooker BBQ Brisket is not just a meal; it’s a celebration of flavors and a wonderful way to bring people together. Happy cooking!

Rosemary Garlic Roast Beef is a must-try recipe!

Introduction to Rosemary Garlic Roast Beef

Rosemary Garlic Roast Beef. This classic dish combines the rich flavors of tender beef with the aromatic essence of rosemary and garlic. It’s perfect for special occasions or a cozy family dinner.

Roast beef has been a beloved dish for generations. Its savory taste and satisfying texture make it a favorite at many tables. The addition of rosemary and garlic elevates this dish, giving it a fragrant and mouthwatering aroma. Plus, it’s easy to prepare, making it a great choice for both novice and experienced cooks.

In this article, we will guide you through the ingredients, preparation steps, and tips to create the perfect Rosemary Garlic Roast Beef. Whether you’re serving it for a holiday feast or a casual Sunday dinner, this recipe is sure to become a staple in your kitchen. So, roll up your sleeves and get ready to enjoy a meal that is not only delicious but also filled with warmth and love.

Ingredients for Rosemary Garlic Roast Beef

Rosemary Garlic Roast Beef, you’ll need a few simple yet flavorful ingredients. Each component plays a vital role in enhancing the taste of the beef. Here’s what you’ll need:

  • 2 to 3 pounds beef roast: Choose either chuck or ribeye for the best results.
  • 4 cloves garlic: Minced to release its aromatic flavor.
  • 2 tablespoons fresh rosemary: Chopped finely. If fresh isn’t available, you can use 2 teaspoons of dried rosemary.
  • 2 tablespoons olive oil: This helps to keep the roast moist and adds richness.
  • 1 teaspoon salt: Essential for enhancing the overall flavor.
  • 1 teaspoon black pepper: Adds a bit of heat and depth.
  • 1 teaspoon onion powder: For an extra layer of flavor.
  • 1 teaspoon thyme (optional): This herb complements the rosemary beautifully.
  • 1 cup beef broth: Pour this into the roasting pan to keep the meat juicy.

Gathering these ingredients is the first step toward creating a delightful roast beef that will tantalize your taste buds. Each ingredient contributes to the overall flavor profile, making your meal not just satisfying but also memorable. Now that you have everything ready, let’s move on to the preparation steps!

Preparation of Rosemary Garlic Roast Beef

Rosemary Garlic Roast Beef. This process is straightforward and will lead you to a delicious meal. Let’s break it down into easy steps.

Step 1: Preparing the Beef

Start by patting the beef roast dry with paper towels. This step is crucial as it helps the marinade stick better to the meat. A dry surface allows for a nice crust to form during cooking, enhancing the flavor and texture. Once dry, place the roast on a clean cutting board, ready for seasoning.

Step 2: Making the Rosemary Garlic Marinade

In a small bowl, combine the minced garlic, chopped rosemary, olive oil, salt, black pepper, onion powder, and thyme (if you’re using it). Mix these ingredients well until they form a thick paste. This aromatic mixture will infuse the beef with rich flavors, making every bite delightful.

Step 3: Marinating the Beef

Now, it’s time to rub the marinade all over the beef roast. Use your hands to ensure the mixture covers every inch of the meat. This step is essential for flavor penetration. For an even more intense taste, consider marinating the beef in the refrigerator for a few hours or overnight. This allows the flavors to meld beautifully.

Step 4: Prepping for Cooking

Once the beef is marinated, it’s time to prepare for cooking. Preheat your oven to 375°F. While the oven heats up, place the marinated roast in a roasting pan. Pour the beef broth into the bottom of the pan. This broth will keep the meat moist and create a delicious base for the pan juices.

Step 5: Cooking the Rosemary Garlic Roast Beef

With everything in place, it’s time to cook! Place the roasting pan in the preheated oven. Roast the beef for about 1 hour, or until the internal temperature reaches 135°F for medium-rare or 145°F for medium. Using a meat thermometer is the best way to ensure accuracy. Once cooked, remove the roast from the oven and cover it loosely with aluminum foil. Let it rest for 15-20 minutes before slicing. This resting period allows the juices to redistribute, ensuring a juicy and tender roast.

Rosemary Garlic Roast Beef, you’re just a few steps away from serving a delightful meal. Let’s explore some variations and serving suggestions next!

Variation of Rosemary Garlic Roast Beef

Rosemary Garlic Roast Beef recipe is delicious on its own, there are many ways to customize it. By experimenting with different herbs, spices, and cuts of beef, you can create a unique dish that suits your taste. Let’s explore some exciting variations!

Alternative Herbs and Spices

Herbs and spices can dramatically change the flavor profile of your roast beef. Here are some alternatives to consider:

  • Thyme: This herb pairs wonderfully with rosemary. It adds a subtle earthiness that enhances the overall flavor.
  • Oregano: Known for its robust flavor, oregano can give your roast a Mediterranean twist.
  • Sage: This herb has a strong, savory flavor that complements beef beautifully. Use it sparingly, as it can be quite potent.
  • Smoked Paprika: For a hint of smokiness, add smoked paprika to your marinade. It brings a warm, rich flavor to the dish.
  • Red Pepper Flakes: If you enjoy a bit of heat, sprinkle some red pepper flakes into the marinade for a spicy kick.

Feel free to mix and match these herbs and spices to create a flavor profile that excites your palate. The beauty of cooking is in the creativity!

Different Cuts of Beef to Use

While chuck and ribeye are popular choices for roast beef, there are several other cuts you can use. Each cut offers a unique texture and flavor:

  • Sirloin: This cut is leaner than ribeye but still tender. It’s a great option for those looking for a healthier roast.
  • Brisket: Known for its rich flavor, brisket requires longer cooking times but results in a melt-in-your-mouth texture.
  • Round Roast: This cut is lean and economical. It’s best cooked to medium-rare to keep it tender.
  • Filet Mignon: For a luxurious treat, filet mignon is incredibly tender and flavorful. It cooks quickly, so keep an eye on it!

Rosemary Garlic Roast Beef experience. Each cut brings its own character to the dish, allowing you to tailor it to your preferences.

Now that you know how to vary your roast beef, let’s move on to some cooking notes and serving suggestions to make your meal even more enjoyable!

Cooking Note for Rosemary Garlic Roast Beef

Rosemary Garlic Roast Beef requires attention to detail and a few essential tips. These notes will help you achieve a tender, flavorful roast that will impress everyone at your table.

First, always use a meat thermometer. This tool is your best friend in the kitchen. It ensures that your roast reaches the desired doneness without overcooking. For medium-rare, aim for an internal temperature of 135°F. For medium, look for 145°F. Remember, the roast will continue to cook slightly while resting, so take it out of the oven a few degrees before it reaches your target temperature.

Next, let the roast rest after cooking. This step is crucial! Resting allows the juices to redistribute throughout the meat, making it juicier and more flavorful. Cover the roast loosely with aluminum foil and let it sit for 15-20 minutes before slicing. This patience pays off in the end!

Additionally, consider the size and shape of your roast. A thicker cut may require a longer cooking time, while a thinner cut will cook faster. Adjust your cooking time accordingly to ensure even cooking throughout.

Lastly, don’t forget about the pan juices! After removing the roast, you can use the flavorful broth left in the pan to create a delicious gravy. Simply strain the juices, add a bit of flour or cornstarch to thicken, and simmer until it reaches your desired consistency. This gravy will enhance your roast beef experience, making every bite even more delightful.

Rosemary Garlic Roast Beef. Now, let’s explore some serving suggestions that will complement your delicious roast!

Serving Suggestions for Rosemary Garlic Roast Beef

Rosemary Garlic Roast Beef, it’s time to think about how to serve it. The right side dishes and beverages can elevate your meal, making it even more enjoyable. Here are some fantastic suggestions to complement your roast beef.

Side Dishes that Pair Well

Choosing the right side dishes can enhance the flavors of your roast beef. Here are some delicious options:

  • Roasted Vegetables: A mix of carrots, potatoes, and Brussels sprouts roasted with olive oil and herbs makes a colorful and tasty side.
  • Garlic Mashed Potatoes: Creamy mashed potatoes with a hint of garlic pair perfectly with the savory flavors of the roast.
  • Green Beans Almondine: Sautéed green beans with toasted almonds add a crunchy texture and fresh taste to your meal.
  • Cauliflower Gratin: This cheesy dish is a comforting side that complements the richness of the beef.
  • Classic Caesar Salad: A crisp salad with romaine lettuce, croutons, and Caesar dressing provides a refreshing contrast to the hearty roast.

These side dishes not only taste great but also add variety to your plate. Feel free to mix and match based on your preferences and what you have on hand!

Wine Pairing Recommendations

Rosemary Garlic Roast Beef can enhance the dining experience. Here are some excellent wine options:

  • Cabernet Sauvignon: This full-bodied red wine has bold flavors that complement the richness of the beef.
  • Merlot: A softer red wine, Merlot offers fruity notes that balance the savory flavors of the roast.
  • Syrah/Shiraz: With its spicy undertones, this wine pairs beautifully with the garlic and rosemary in the dish.
  • Malbec: Known for its dark fruit flavors, Malbec is a great match for roasted meats.
  • Pinot Noir: If you prefer a lighter wine, Pinot Noir’s acidity and fruitiness can enhance the meal without overpowering it.

Choosing the right wine can elevate your meal, making it a memorable experience. Whether you prefer red or white, there’s a perfect pairing for your roast beef.

Rosemary Garlic Roast Beef will shine on the dinner table. Next, let’s explore some tips for perfecting your roast beef!

Tips for Perfect Rosemary Garlic Roast Beef

Rosemary Garlic Roast Beef is all about attention to detail and a few helpful tips. These suggestions will ensure that your roast is not only delicious but also visually appealing. Let’s dive into some essential tips to elevate your cooking game!

First, always choose high-quality beef. Look for cuts that have good marbling, as this fat will melt during cooking, keeping the meat juicy and flavorful. Freshness matters, so buy your beef from a trusted butcher or grocery store.

Next, seasoning is key. Don’t be shy with the garlic and rosemary mixture. Make sure to rub it generously all over the roast. This will create a flavorful crust that enhances the overall taste. If you have time, let the seasoned roast sit at room temperature for about 30 minutes before cooking. This helps it cook more evenly.

Another important tip is to use a roasting rack. Elevating the roast allows hot air to circulate around it, promoting even cooking. If you don’t have a rack, you can create one using vegetables like carrots and celery. This not only supports the roast but also adds flavor to the pan juices.

Keep an eye on the cooking time. Every oven is different, so it’s wise to check the internal temperature a bit earlier than the suggested time. Remember, the roast will continue to cook while resting, so remove it from the oven when it’s about 5°F below your target temperature.

Lastly, don’t skip the resting period! This step is crucial for juicy meat. Cover the roast loosely with aluminum foil and let it rest for 15-20 minutes. This allows the juices to redistribute, ensuring that every slice is tender and flavorful.

Rosemary Garlic Roast Beef. Your family and friends will be impressed with your culinary skills, and you’ll enjoy a delicious meal that’s worth celebrating!

Breakdown of Time for Rosemary Garlic Roast Beef

Rosemary Garlic Roast Beef is essential for a smooth cooking experience. Here’s a detailed breakdown of the time you’ll need for preparation and cooking.

Prep Time

Rosemary Garlic Roast Beef is approximately 20 to 30 minutes. This includes:

  • Gathering all your ingredients.
  • Patting the beef roast dry.
  • Making the rosemary garlic marinade.
  • Rubbing the marinade onto the roast.
  • Marinating the beef (if you choose to do so for a few hours or overnight).

Keep in mind that if you decide to marinate the beef overnight, you’ll need to plan ahead. This extra time allows the flavors to penetrate the meat, resulting in a more flavorful roast.

Cooking Time

Rosemary Garlic Roast Beef is about 1 hour. This includes:

  • Preheating the oven to 375°F.
  • Roasting the beef until it reaches the desired internal temperature (135°F for medium-rare or 145°F for medium).

Using a meat thermometer is crucial to ensure your roast is cooked perfectly. Remember, the cooking time may vary slightly based on the size and thickness of your roast.

Total Time

Rosemary Garlic Roast Beef, depending on whether you marinate the beef. Here’s a quick summary:

  • Prep Time: 20-30 minutes
  • Cooking Time: 1 hour
  • Total Time: 1 hour 30 minutes to 2 hours (including marinating time)

With this time breakdown, you can plan your cooking schedule effectively. Now that you know how long it takes, let’s move on to the nutritional information for your delicious roast!

Nutritional Information for Rosemary Garlic Roast Beef

Rosemary Garlic Roast Beef is essential for maintaining a balanced diet. This dish not only satisfies your taste buds but also provides valuable nutrients. Let’s break down the key nutritional components per serving.

Calories

Rosemary Garlic Roast Beef contains approximately 350 calories. This makes it a hearty option for a main course, providing energy to fuel your day. The calorie content can vary slightly based on the cut of beef used and any additional ingredients you may include.

Protein

One of the standout features of this roast beef is its protein content. Each serving offers about 30 grams of protein. Protein is vital for building and repairing tissues, making it an essential part of a healthy diet. Including this dish in your meals can help you meet your daily protein needs, especially if you lead an active lifestyle.

Sodium

In terms of sodium, each serving contains around 600 milligrams. While sodium is necessary for various bodily functions, it’s important to monitor your intake. If you’re watching your sodium levels, consider using low-sodium beef broth or adjusting the salt in the marinade to suit your dietary needs.

Rosemary Garlic Roast Beef is a nutritious choice that provides a good balance of calories, protein, and essential nutrients. It’s a delicious way to enjoy a satisfying meal while also nourishing your body. Now that you have a clear understanding of the nutritional information, let’s move on to some frequently asked questions about this delightful dish!

FAQs about Rosemary Garlic Roast Beef

What is the best cut of beef for roasting?

When it comes to roasting, the best cuts of beef are those that are tender and flavorful. Popular choices include chuck roast and ribeye. Chuck roast is well-marbled, making it juicy and rich in flavor. Ribeye, on the other hand, is known for its tenderness and buttery texture. Other great options include sirloin and brisket, each offering unique flavors and textures. Ultimately, the best cut depends on your personal preference and budget.

How long should I marinate the beef?

Rosemary Garlic Roast Beef for at least 2 hours is recommended. However, if you have the time, marinating it overnight in the refrigerator will yield even better results. This allows the flavors of the garlic and rosemary to penetrate the meat deeply, enhancing its taste and tenderness. Just remember to bring the beef to room temperature before cooking for even cooking.

Can I use dried rosemary instead of fresh?

Rosemary Garlic Roast Beef. Just be sure to mix it well into your marinade for even distribution.

What temperature should the roast beef be cooked to?

Rosemary Garlic Roast Beef depends on your preferred level of doneness. For medium-rare, aim for an internal temperature of 135°F. If you prefer medium, cook it until it reaches 145°F. Using a meat thermometer is the best way to ensure accuracy. Remember, the roast will continue to cook slightly while resting, so it’s wise to remove it from the oven a few degrees before it reaches your target temperature.

Rosemary Garlic Roast Beef. Whether you’re a seasoned cook or a beginner, this dish is sure to impress! Now, let’s wrap up with a conclusion that highlights the joy of preparing this delightful meal.

Conclusion on Rosemary Garlic Roast Beef

Rosemary Garlic Roast Beef is more than just a meal; it’s an experience that brings family and friends together. The combination of tender beef, aromatic garlic, and fragrant rosemary creates a dish that is both comforting and impressive. Whether you’re celebrating a special occasion or enjoying a cozy dinner at home, this roast beef recipe is sure to delight everyone at the table.

As you’ve learned throughout this article, the preparation is straightforward, and the variations allow for creativity in the kitchen. From choosing the right cut of beef to experimenting with different herbs and spices, you can tailor this dish to suit your taste preferences. Plus, the nutritional benefits make it a wholesome choice for any meal.

Remember to take your time with each step, from marinating the beef to letting it rest after cooking. These small details make a big difference in the final result. And don’t forget to enjoy the process! Cooking is not just about the end product; it’s about the joy of creating something delicious.

Rosemary Garlic Roast Beef. With this recipe in your culinary arsenal, you’ll be well on your way to becoming a roast beef master. Happy cooking!

Stay Connected

Get recipes via email: