Get my cookbooks

Garlic Butter Steak Bites Recipe is a must-try dish!

Introduction to Garlic Butter Steak Bites Recipe

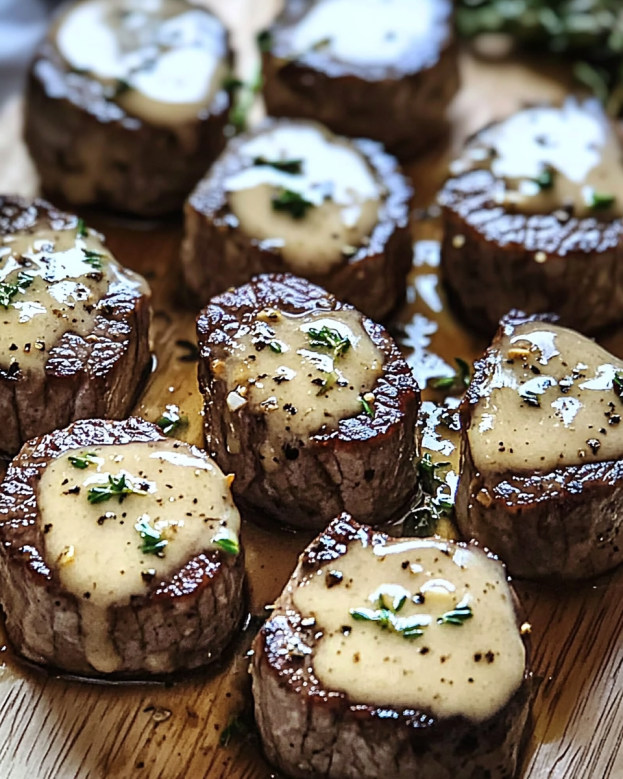
Garlic Butter Steak Bites Recipe is a delightful dish that combines the rich flavors of steak with the aromatic essence of garlic and butter. This recipe is not just about cooking; it’s about creating a memorable meal that will impress your family and friends. Whether you’re hosting a dinner party or enjoying a cozy night in, these steak bites are sure to be a hit!

What Makes Garlic Butter Steak Bites Special?

What sets this recipe apart? First, it’s the simplicity. With just a few ingredients, you can whip up a dish that tastes gourmet. The sirloin steak is tender and juicy, while the garlic butter adds a luscious richness that enhances every bite. Plus, the fresh thyme brings a hint of earthiness that perfectly complements the meat.

Another reason these steak bites shine is their versatility. You can serve them as an appetizer, a main course, or even toss them into a salad for a protein boost. The quick cooking time makes them perfect for busy weeknights, yet they’re fancy enough for special occasions. In just a matter of minutes, you can have a plate of delicious steak bites ready to enjoy!

Garlic Butter Steak Bites Recipe is your answer. Let’s dive into the ingredients and get started on this mouthwatering journey!

Ingredients for Garlic Butter Steak Bites Recipe

Garlic Butter Steak Bites Recipe, you’ll need a handful of simple yet flavorful ingredients. Each component plays a vital role in bringing out the best in this dish. Here’s what you’ll need:

  • 1 pound sirloin steak: Cut into 1-inch cubes. Sirloin is a great choice for its tenderness and flavor.
  • 4 tablespoons unsalted butter: This will create a rich, buttery sauce that coats the steak bites beautifully.
  • 4 cloves garlic: Minced. Fresh garlic adds a wonderful aroma and taste.
  • 1 teaspoon fresh thyme leaves: Or use ½ teaspoon dried thyme. Thyme enhances the dish with its earthy notes.
  • Salt and pepper: To taste. These basic seasonings are essential for bringing out the flavors of the steak.
  • 2 tablespoons chopped fresh parsley: For garnish. This adds a pop of color and freshness to your dish.

With these ingredients on hand, you’re well on your way to making a delicious meal. The combination of juicy steak, aromatic garlic, and rich butter creates a dish that’s hard to resist. Now that you have your ingredients ready, let’s move on to the step-by-step preparation!

Step-by-Step Preparation of Garlic Butter Steak Bites Recipe

Garlic Butter Steak Bites Recipe. Each step is simple and straightforward, ensuring that you can create this delicious dish with ease. Let’s get started!

Step 1: Choosing the Right Cut of Steak

The first step in making your steak bites is selecting the right cut of meat. Sirloin steak is an excellent choice due to its balance of tenderness and flavor. When shopping, look for a cut that has a nice marbling of fat. This fat will melt during cooking, adding extra juiciness to your steak bites. If you prefer, you can also use ribeye or tenderloin for a more luxurious option. Just remember, the key is to choose a cut that will cook quickly and remain tender.

Step 2: Preparing the Garlic Butter Mixture

Next, let’s prepare the garlic butter mixture. Start by mincing the garlic cloves finely. This will ensure that the garlic infuses its flavor into the butter beautifully. In a small bowl, combine the minced garlic with the fresh thyme leaves. If you’re using dried thyme, just sprinkle it in. Set this mixture aside for later. The aroma of garlic and thyme will make your kitchen smell amazing!

Step 3: Cooking the Steak Bites

Now, it’s time to cook the steak bites! Heat a large skillet over medium-high heat and add 2 tablespoons of unsalted butter. Once the butter is melted and bubbling, season the steak cubes with salt and pepper. Carefully add the steak to the skillet in a single layer. Avoid overcrowding the pan, as this can cause the steak to steam instead of sear. Cook the steak for about 2-3 minutes without stirring, allowing it to develop a nice brown crust. Then, flip the steak bites and cook for an additional 2-3 minutes for medium-rare. Adjust the cooking time if you prefer your steak more well-done.

Step 4: Combining Steak Bites with Garlic Butter

Once your steak bites are cooked to perfection, it’s time to add the garlic butter mixture. Reduce the heat to medium and add the remaining 2 tablespoons of butter to the skillet. Then, add the garlic and thyme mixture. Stir everything together, allowing the garlic to cook for about 1-2 minutes. You want the garlic to become fragrant but not burnt. This step is crucial, as it creates a rich, flavorful sauce that will coat your steak bites beautifully. Once everything is combined, remove the skillet from heat and garnish with chopped parsley before serving.

Garlic Butter Steak Bites Recipe is ready to be enjoyed. The combination of tender steak and aromatic garlic butter is simply irresistible. Let’s explore some variations to make this dish even more exciting!

Variations of Garlic Butter Steak Bites Recipe

Garlic Butter Steak Bites Recipe is already a crowd-pleaser, there are many ways to add your personal touch. By incorporating different ingredients or flavors, you can create variations that suit your taste. Here are two exciting options to consider!

Adding Vegetables to Garlic Butter Steak Bites

One delightful way to enhance your steak bites is by adding vegetables. This not only boosts the nutritional value but also adds color and texture to your dish. Consider including bell peppers, zucchini, or mushrooms. Simply chop the vegetables into bite-sized pieces and add them to the skillet after cooking the steak for a few minutes. Sauté them until they are tender, then proceed with adding the garlic butter mixture. This combination creates a vibrant and hearty meal that everyone will love!

Spicy Garlic Butter Steak Bites Variation

If you enjoy a bit of heat, try making spicy garlic butter steak bites! To achieve this, add a pinch of red pepper flakes to the garlic butter mixture. You can also use a dash of hot sauce or even a sprinkle of cayenne pepper for an extra kick. This spicy twist will elevate the flavor profile and give your steak bites a delightful zing. Just be cautious with the amount of spice you add, as you want to enhance the dish without overpowering it.

Garlic Butter Steak Bites Recipe to fit your preferences. Whether you choose to add vegetables or spice things up, you’re sure to create a dish that’s both delicious and satisfying. Now, let’s move on to some cooking notes to ensure your steak bites turn out perfectly every time!

Cooking Note for Garlic Butter Steak Bites Recipe

Garlic Butter Steak Bites Recipe, a few cooking notes can help you achieve the best results. These tips will ensure that your steak bites are tender, flavorful, and cooked to perfection. Let’s take a closer look at some essential cooking notes!

First, always start with a hot skillet. Preheating your skillet is crucial for achieving a nice sear on the steak. A hot pan helps lock in the juices, giving you that delicious crust on the outside while keeping the inside tender. If the skillet isn’t hot enough, the steak may steam instead of sear, resulting in a less flavorful bite.

Next, avoid overcrowding the skillet. Cooking the steak in batches is often necessary. If you add too many pieces at once, they will release moisture and steam rather than brown. This can lead to chewy steak bites instead of the tender, juicy ones you desire. If you have a lot of steak, consider cooking it in two or more batches.

Another important note is to let the steak rest after cooking. Once you remove the steak bites from the skillet, allow them to rest for a few minutes. This resting period helps the juices redistribute throughout the meat, making each bite more flavorful and juicy. Cutting into the steak too soon can cause the juices to run out, leaving you with dry bites.

Garlic Butter Steak Bites Recipe.

By keeping these cooking notes in mind, you’ll be well on your way to creating the perfect garlic butter steak bites. Now that you’re equipped with these tips, let’s explore some serving suggestions to make your meal even more enjoyable!

Serving Suggestions for Garlic Butter Steak Bites Recipe

Garlic Butter Steak Bites Recipe, it’s time to think about how to serve this delicious dish. The right side dishes and presentation can elevate your meal and impress your guests. Here are some fantastic serving suggestions to consider!

Best Side Dishes to Pair with Garlic Butter Steak Bites

When it comes to side dishes, you want to complement the rich flavors of the steak bites. Here are some excellent options:

  • Garlic Mashed Potatoes: Creamy and buttery, these mashed potatoes are a classic pairing. The garlic flavor will echo the steak bites, creating a harmonious meal.
  • Roasted Vegetables: A mix of seasonal vegetables like carrots, broccoli, and bell peppers adds color and nutrition. Roasting brings out their natural sweetness, making them a perfect match.
  • Caesar Salad: A crisp Caesar salad with crunchy croutons and a tangy dressing provides a refreshing contrast to the rich steak bites.
  • Rice Pilaf: Fluffy rice pilaf with herbs and spices can soak up the delicious garlic butter sauce, making every bite delightful.

These side dishes not only enhance the meal but also add variety to your plate. Choose one or two to create a balanced and satisfying dinner!

Creative Ways to Serve Garlic Butter Steak Bites

Garlic Butter Steak Bites Recipe. Here are some creative ideas to make your dish stand out:

  • Skewers: Thread the steak bites onto skewers for a fun and easy-to-eat option. This is perfect for parties or casual gatherings.
  • On a Bed of Greens: Serve the steak bites over a bed of fresh greens, like arugula or spinach. Drizzle with a light vinaigrette for a refreshing touch.
  • In Tacos: Use small tortillas to create steak tacos. Top with avocado, salsa, and a squeeze of lime for a delicious twist.
  • As an Appetizer: Serve the steak bites on toothpicks as a tasty appetizer. Pair with a dipping sauce, like a spicy aioli or chimichurri, for added flavor.

These creative serving ideas will not only make your meal visually appealing but also enhance the overall dining experience. Whether you’re hosting a dinner party or enjoying a family meal, these suggestions will surely impress!

Tips for Perfect Garlic Butter Steak Bites Recipe

Garlic Butter Steak Bites Recipe turns out perfectly every time, consider these helpful tips. Each suggestion is designed to enhance the flavor and texture of your steak bites, making your cooking experience even more enjoyable.

First, always use high-quality steak. The better the meat, the better the flavor. Look for cuts with good marbling, as this fat will melt during cooking, keeping the steak juicy and tender. Freshness matters too; try to buy your steak from a reputable butcher or grocery store.

Next, let your steak come to room temperature before cooking. This step helps the meat cook evenly. If you place cold steak directly into a hot skillet, the outside may cook too quickly while the inside remains undercooked. Allowing it to sit out for about 30 minutes before cooking can make a big difference.

When seasoning your steak, don’t be shy with the salt and pepper. Generously season the cubes before cooking. This enhances the natural flavors of the meat and ensures every bite is delicious. Remember, you can always add more seasoning later, but you can’t take it away once it’s added.

Another tip is to use a meat thermometer for perfect doneness. If you’re unsure about cooking times, a thermometer can help. For medium-rare, aim for an internal temperature of 130°F to 135°F. This way, you can achieve your desired level of doneness without guesswork.

Lastly, don’t rush the resting period after cooking. Allowing the steak bites to rest for a few minutes before serving is crucial. This resting time lets the juices redistribute throughout the meat, resulting in a more flavorful and juicy bite. Cutting into the steak too soon can lead to dry pieces, which is something we want to avoid!

Garlic Butter Steak Bites Recipe. Each bite will be tender, flavorful, and absolutely irresistible. Now that you’re equipped with these insights, let’s break down the time needed for this delicious recipe!

Breakdown of Time for Garlic Butter Steak Bites Recipe

Garlic Butter Steak Bites Recipe can help you plan your cooking efficiently. Here’s a simple breakdown of the time you’ll need for preparation and cooking.

Prep Time

The prep time for this recipe is quite short, making it perfect for busy weeknights. You’ll need about 10-15 minutes to gather your ingredients and prepare them. This includes cutting the sirloin steak into cubes, mincing the garlic, and measuring out the butter and seasonings. With everything ready, you’ll be set to start cooking!

Cooking Time

Once you begin cooking, the total cooking time is approximately 8-10 minutes. This includes:

  • 2-3 minutes for searing the first side of the steak bites.
  • 2-3 minutes for cooking the second side to your desired doneness.
  • 1-2 minutes for combining the steak with the garlic butter mixture.

Overall, the cooking process is quick and straightforward, allowing you to enjoy your meal in no time!

Total Time

Garlic Butter Steak Bites Recipe is around 20-25 minutes. This makes it an excellent choice for a delicious meal that doesn’t take all evening to prepare. You can have a gourmet dish ready to serve in less than half an hour!

With this time breakdown, you can easily fit this recipe into your schedule. Now that you know how to manage your time, let’s take a look at the nutritional information for this delightful dish!

Nutritional Information for Garlic Butter Steak Bites Recipe

Garlic Butter Steak Bites Recipe not only satisfies your taste buds but also provides valuable nutrients. Let’s break down the nutritional information for this delicious dish!

Calories in Garlic Butter Steak Bites

Garlic Butter Steak Bites Recipe contains approximately 320 calories. This makes it a hearty yet manageable option for dinner. The calorie count comes primarily from the protein-rich sirloin steak and the flavorful butter used in the recipe. If you’re watching your calorie intake, consider pairing the steak bites with lighter side dishes, such as a fresh salad or steamed vegetables.

Protein Content in Garlic Butter Steak Bites

Garlic Butter Steak Bites Recipe an excellent choice for those looking to increase their protein intake. Protein is essential for muscle repair and growth, making this dish a great option for active individuals or anyone looking to maintain a healthy lifestyle.

Sodium Levels in Garlic Butter Steak Bites

When it comes to sodium, each serving contains around 600 milligrams. This level is typical for a dish that includes butter and seasoning. If you’re concerned about sodium intake, you can easily adjust the amount of salt you add to the steak. Additionally, using unsalted butter allows you to control the sodium levels more effectively. Always remember to balance your meals with plenty of fresh fruits and vegetables to help manage sodium intake.

Garlic Butter Steak Bites Recipe is not only delicious but also packed with protein and essential nutrients. With a reasonable calorie count and manageable sodium levels, it can fit well into a balanced diet. Now that you’re informed about the nutritional aspects, let’s move on to some frequently asked questions about this delightful recipe!

FAQs about Garlic Butter Steak Bites Recipe

Can I use a different type of steak for this recipe?

Garlic Butter Steak Bites Recipe, you can use other cuts as well. Ribeye, tenderloin, or flank steak are all great alternatives. Each cut has its unique flavor and tenderness, so feel free to experiment. Just remember that cooking times may vary slightly depending on the cut you choose. Always aim for a tender cut that cooks quickly for the best results!

How do I store leftover Garlic Butter Steak Bites?

If you have any leftovers, storing them is easy! Place the steak bites in an airtight container and refrigerate them. They will stay fresh for up to 3 days. When you’re ready to enjoy them again, simply reheat in a skillet over low heat. You can also microwave them, but be cautious not to overcook, as this can make the steak tough. Enjoying these delicious bites the next day is a great way to savor the flavors again!

Can I make Garlic Butter Steak Bites ahead of time?

Garlic Butter Steak Bites Recipe is best enjoyed fresh, you can prepare some components ahead of time. For instance, you can cut the steak into cubes and store them in the fridge. You can also mince the garlic and mix it with the thyme in advance. However, it’s best to cook the steak bites just before serving to maintain their tenderness and flavor. This way, you’ll have a quick and easy meal ready in no time!

What can I substitute for butter in this recipe?

If you’re looking for a butter substitute, there are several options available. You can use olive oil or avocado oil for a healthier alternative. These oils will still provide a rich flavor, although they won’t have the same creamy texture as butter. For a dairy-free option, consider using vegan butter or coconut oil. Each substitute will slightly change the flavor, but they can still create a delicious dish. Just remember to adjust the quantity as needed!

Conclusion on Garlic Butter Steak Bites Recipe

Garlic Butter Steak Bites Recipe is a fantastic dish that brings together simplicity and flavor in a delightful way. With just a few ingredients, you can create a meal that is not only satisfying but also impressive enough for any occasion. The tender sirloin steak, combined with the rich garlic butter and fresh herbs, creates a symphony of flavors that will leave your taste buds dancing.

Whether you’re cooking for a special gathering or a cozy family dinner, this recipe is sure to please. The versatility of steak bites allows you to serve them in various ways, from appetizers to main courses. Plus, with the option to customize the dish with vegetables or spices, you can make it your own.

Remember to follow the cooking tips and notes provided to ensure your steak bites turn out perfectly every time. With a little practice, you’ll master the art of cooking steak bites that are juicy, flavorful, and utterly irresistible.

Garlic Butter Steak Bites Recipe is not just a dish; it’s an experience that brings people together around the table. Happy cooking!

Creamy Butter Chicken Recipe that Everyone Will Love!

Introduction to Creamy Butter Chicken Recipe

Creamy Butter Chicken Recipe. This dish is not just a meal; it’s an experience that brings warmth and comfort to your dining table. With its rich flavors and creamy texture, butter chicken has become a favorite in many households. Whether you’re cooking for family or friends, this recipe is sure to impress.

What Makes Creamy Butter Chicken Special?

What sets creamy butter chicken apart from other chicken dishes? It’s all about the combination of spices and the creamy sauce. The marinated chicken absorbs the flavors of spices like cumin, coriander, and garam masala, creating a mouthwatering taste. The addition of heavy cream gives the dish its signature richness, making every bite a delight. Plus, it’s versatile! You can serve it with rice, naan, or even enjoy it on its own.

Another reason this dish is special is its ability to bring people together. It’s often served at gatherings and celebrations, making it a staple in Indian cuisine. The aroma of butter chicken wafting through the air is enough to make anyone’s mouth water. It’s a dish that invites conversation and laughter, creating memories around the dinner table.

A Brief History of Butter Chicken

Butter chicken, or “Murgh Makhani,” has a fascinating history. It originated in the 1950s in Delhi, India. The story goes that the chefs at the Moti Mahal restaurant created this dish by mixing leftover chicken with tomatoes, butter, and cream. This innovative idea transformed leftover food into a culinary masterpiece.

Since then, butter chicken has gained popularity worldwide. It’s now a beloved dish in many countries, often adapted to suit local tastes. Despite its variations, the essence of butter chicken remains the same: a deliciously creamy sauce that complements tender chicken. This dish is a true testament to the creativity and richness of Indian cuisine.

Ingredients for Creamy Butter Chicken Recipe

Creamy Butter Chicken Recipe, you’ll need a selection of fresh ingredients that come together to form a delightful dish. Here’s what you’ll need:

  • 2 pounds boneless, skinless chicken thighs, cut into bite-sized pieces
  • 1 teaspoon salt
  • 1 teaspoon black pepper
  • 1 tablespoon ground cumin
  • 1 tablespoon ground coriander
  • 1 tablespoon garam masala
  • 1 teaspoon turmeric
  • 1 tablespoon vegetable oil
  • 1 medium onion, finely chopped
  • 4 cloves garlic, minced
  • 1 tablespoon fresh ginger, minced
  • 1 (15-ounce) can tomato sauce
  • 1 cup heavy cream
  • 1 tablespoon sugar
  • 2 tablespoons unsalted butter
  • Fresh cilantro, for garnish
  • Cooked basmati rice or naan, for serving

These ingredients are not just essential; they are the heart of the dish. The chicken thighs provide a juicy base, while the spices add depth and warmth. The heavy cream and butter create that signature creamy texture that makes butter chicken so irresistible. Don’t forget the fresh cilantro! It adds a pop of color and a burst of freshness to your dish.

Gather these ingredients, and you’re one step closer to making a delicious creamy butter chicken that will surely impress your family and friends!

Step-by-Step Preparation of Creamy Butter Chicken Recipe

Creamy Butter Chicken Recipe. Each step is simple and straightforward, ensuring that you can create this delicious dish with ease. Let’s get started!

Step 1: Marinating the Chicken

First, take your bite-sized chicken pieces and place them in a large bowl. Sprinkle in the salt, black pepper, ground cumin, ground coriander, garam masala, and turmeric. Mix everything well, ensuring that each piece of chicken is coated evenly with the spices. This marination process is crucial as it allows the chicken to absorb all those wonderful flavors.

For the best results, let the chicken marinate for at least 30 minutes. If you have more time, refrigerate it for up to 2 hours. This extra time will deepen the flavors, making your butter chicken even more delicious!

Step 2: Preparing the Sauce

While the chicken is marinating, you can prepare the sauce. Start by heating the vegetable oil in a large skillet over medium heat. Once the oil is hot, add the finely chopped onion. Sauté the onion for about 5 minutes, or until it becomes soft and translucent. This step builds the base flavor of your sauce.

Next, add the minced garlic and ginger to the skillet. Cook them for an additional 1-2 minutes until they release their fragrant aroma. This combination of onion, garlic, and ginger is what makes the sauce so flavorful!

Step 3: Cooking the Chicken

Now it’s time to cook the marinated chicken. Increase the heat to medium-high and add the chicken pieces to the skillet. Cook the chicken for about 8-10 minutes, stirring occasionally. You want the chicken to be browned and cooked through. This step locks in the spices and gives the chicken a lovely color.

Step 4: Combining Chicken and Sauce

Once the chicken is cooked, it’s time to bring everything together. Stir in the tomato sauce, heavy cream, and sugar. This combination creates the rich, creamy sauce that butter chicken is known for. Bring the mixture to a gentle simmer, then reduce the heat to low. Let it simmer for 10-15 minutes. This allows the flavors to meld beautifully.

Step 5: Final Touches and Garnishing

After simmering, stir in the unsalted butter until it melts and combines well with the sauce. This final touch adds an extra layer of creaminess. Taste your butter chicken and adjust the seasoning if needed. Once you’re satisfied with the flavor, it’s time to serve!

Garnish your creamy butter chicken with fresh cilantro for a pop of color and freshness. Serve it over cooked basmati rice or with warm naan. Enjoy the delightful flavors of your homemade creamy butter chicken!

Variations of Creamy Butter Chicken Recipe

Creamy Butter Chicken Recipe is a beloved classic, there are many ways to adapt it to suit different tastes and dietary preferences. Here are some exciting variations that you can try!

Vegetarian Alternatives

If you’re looking for a vegetarian option, you can easily swap out the chicken for paneer or tofu. Paneer, a type of Indian cheese, absorbs flavors beautifully and adds a creamy texture to the dish. Simply cut the paneer into bite-sized cubes and follow the same marinating and cooking steps as you would with chicken.

For a tofu version, use firm tofu. Press it to remove excess moisture, then cut it into cubes. Marinate the tofu just like the chicken, and sauté it until golden brown. The creamy sauce will complement the tofu perfectly, making it a satisfying meal for vegetarians.

Another option is to use mixed vegetables. You can include bell peppers, peas, and cauliflower. Sauté the vegetables until tender, then add the sauce. This variation is colorful and packed with nutrients, making it a great choice for a healthy meal.

Spicy Versions of Creamy Butter Chicken

If you love a bit of heat, you can easily spice up your creamy butter chicken. To make it spicier, add 1-2 teaspoons of red chili powder or cayenne pepper to the marinade. This will give the chicken a fiery kick that spice lovers will enjoy.

Another way to add heat is by incorporating green chilies. Finely chop a couple of green chilies and add them to the skillet along with the garlic and ginger. This will infuse the dish with a fresh, spicy flavor.

For an even bolder flavor, consider adding a splash of hot sauce or a pinch of crushed red pepper flakes to the sauce while it simmers. Adjust the spice level to your liking, and enjoy a creamy butter chicken that packs a punch!

Creamy Butter Chicken Recipe to fit your preferences. Whether you choose a vegetarian alternative or a spicier version, you’re sure to create a delicious dish that everyone will love!

Cooking Note for Creamy Butter Chicken Recipe

Creamy Butter Chicken Recipe, there are a few important cooking notes to keep in mind. These tips will help ensure that your dish turns out perfectly every time, enhancing both flavor and texture.

First, marination is key. Allowing the chicken to marinate for at least 30 minutes, or even longer, helps the spices penetrate the meat. This step is crucial for achieving that rich, flavorful taste that butter chicken is known for. If you can, marinate overnight in the refrigerator for the best results.

Next, pay attention to the heat levels while cooking. Start with medium heat when sautéing the onions, garlic, and ginger. This allows them to soften and develop their flavors without burning. When you add the marinated chicken, increase the heat to medium-high. This helps to brown the chicken, sealing in the juices and flavors.

Another important note is to avoid overcooking the chicken. Once it’s browned and cooked through, remove it from the heat. Overcooked chicken can become dry and tough, which is not what you want in a creamy butter chicken dish. Aim for tender, juicy pieces that soak up the delicious sauce.

When combining the sauce ingredients, stir gently to ensure everything is well mixed. The heavy cream and butter should be added at the end of cooking to maintain their creamy texture. If you add them too early, they may separate or curdle, affecting the overall consistency of your sauce.

Lastly, don’t forget to taste your dish before serving. Adjust the seasoning as needed, whether it’s adding a pinch of salt, a dash of sugar, or a bit more spice. This final touch can elevate your creamy butter chicken to new heights!

Creamy Butter Chicken Recipe that will impress everyone at your table.

Serving Suggestions for Creamy Butter Chicken Recipe

Creamy Butter Chicken Recipe, it’s time to think about how to serve it. The right side dishes and accompaniments can elevate your meal, making it even more enjoyable. Here are some fantastic serving suggestions to consider!

Best Side Dishes to Pair

When it comes to side dishes, you have plenty of options that complement the rich flavors of butter chicken. Here are some popular choices:

  • Basmati Rice: This fragrant rice is a classic pairing. Its fluffy texture soaks up the creamy sauce beautifully, making every bite delightful.
  • Naan Bread: Soft and warm naan is perfect for scooping up the butter chicken. You can choose plain naan or garlic naan for an extra flavor boost.
  • Raita: A cooling yogurt-based side, raita helps balance the spices in the butter chicken. Cucumber raita is especially refreshing!
  • Vegetable Samosas: These crispy pastries filled with spiced potatoes and peas make a great appetizer or side dish, adding a crunchy texture to your meal.
  • Saag Paneer: This creamy spinach dish pairs well with butter chicken, providing a nutritious and flavorful addition to your plate.

These side dishes not only enhance the meal but also add variety to your dining experience. Feel free to mix and match based on your preferences!

Ideal Accompaniments for Serving

In addition to side dishes, consider these ideal accompaniments to complete your butter chicken meal:

  • Fresh Cilantro: A sprinkle of chopped cilantro adds a burst of freshness and color to your dish. It’s a simple yet effective garnish!
  • Lemon Wedges: A squeeze of fresh lemon juice can brighten the flavors of the butter chicken, adding a zesty touch.
  • Pickles: Indian pickles, or “achar,” offer a tangy and spicy contrast to the creamy sauce, enhancing the overall flavor profile.
  • Chutney: A side of mango or mint chutney can add sweetness or freshness, making each bite even more exciting.
  • Cold Beverages: Pair your meal with a refreshing drink like mango lassi or iced tea to balance the spices and enhance your dining experience.

Creamy Butter Chicken Recipe in the best light. Enjoy the delightful flavors and the company of your loved ones as you savor this delicious dish!

Tips for Perfecting Your Creamy Butter Chicken Recipe

Creamy Butter Chicken Recipe turns out perfectly every time, it’s essential to be aware of common mistakes and know how to make ingredient substitutions. Here are some helpful tips to guide you through the cooking process.

Common Mistakes to Avoid

Even the best cooks can make mistakes. Here are some common pitfalls to watch out for:

  • Skipping the Marination: Marinating the chicken is crucial. It allows the spices to penetrate the meat, enhancing flavor. Don’t rush this step!
  • Overcooking the Chicken: Keep an eye on the cooking time. Overcooked chicken can become dry and tough. Aim for tender, juicy pieces.
  • Using Low-Quality Ingredients: Fresh, high-quality ingredients make a big difference. Opt for fresh spices, good-quality chicken, and real butter for the best results.
  • Not Adjusting Seasoning: Always taste your dish before serving. Adjust the seasoning as needed to ensure a balanced flavor.
  • Adding Cream Too Early: Add the heavy cream and butter towards the end of cooking. This keeps the sauce creamy and prevents it from curdling.

By avoiding these common mistakes, you’ll be on your way to creating a delicious creamy butter chicken that everyone will love!

Ingredient Substitutions

Sometimes, you may not have all the ingredients on hand. Here are some substitutions you can use without compromising flavor:

  • Chicken: If you prefer, you can use boneless, skinless chicken breasts instead of thighs. They are leaner but can dry out if overcooked.
  • Heavy Cream: For a lighter version, substitute half of the heavy cream with Greek yogurt. Stir it in just before serving for a creamy texture.
  • Butter: If you want a healthier option, you can use olive oil instead of butter. It will change the flavor slightly but still works well.
  • Spices: If you don’t have garam masala, you can make a quick substitute by mixing equal parts of cumin, coriander, and a pinch of cinnamon.
  • Vegetables: Feel free to add vegetables like bell peppers or peas for added nutrition. They can be sautéed along with the onions.

Creamy Butter Chicken Recipe based on what you have available. Enjoy experimenting and making this dish your own!

Breakdown of Time for Creamy Butter Chicken Recipe

Creamy Butter Chicken Recipe can help you plan your cooking efficiently. Here’s a breakdown of the time you’ll need for preparation and cooking.

Prep Time

The prep time for this delicious dish is approximately 40 minutes. This includes:

  • 30 minutes for marinating the chicken (you can marinate it longer if you wish)
  • 10 minutes for chopping onions, garlic, ginger, and measuring out spices

By preparing your ingredients ahead of time, you’ll make the cooking process smoother and more enjoyable!

Cooking Time

Creamy Butter Chicken Recipe is about 30 minutes. This includes:

  • 5 minutes for sautéing the onions
  • 10 minutes for cooking the marinated chicken
  • 15 minutes for simmering the sauce with the chicken

This efficient cooking time allows you to create a flavorful dish without spending hours in the kitchen.

Total Time

In total, you can expect to spend around 1 hour and 10 minutes from start to finish. This includes both prep and cooking time. Here’s a quick summary:

  • Prep Time: 40 minutes
  • Cooking Time: 30 minutes
  • Total Time: 1 hour and 10 minutes

Creamy Butter Chicken Recipe into your busy schedule. Enjoy the process and the delicious results!

Nutritional Information for Creamy Butter Chicken Recipe

Calories and Macronutrients

Creamy Butter Chicken Recipe is essential for maintaining a balanced diet. Each serving of this delicious dish provides a satisfying amount of calories and macronutrients. Here’s a breakdown of the nutritional information per serving:

  • Calories: 450
  • Net Carbs: 8g
  • Protein: 30g
  • Fat: 30g

This nutritional profile makes creamy butter chicken a hearty meal option. The protein content is particularly beneficial for muscle repair and growth, while the fats provide essential energy. The low net carbs make it suitable for those watching their carbohydrate intake.

Health Benefits of Ingredients

Creamy Butter Chicken Recipe not only contribute to its delicious flavor but also offer various health benefits. Here’s a closer look at some key ingredients:

  • Chicken Thighs: Rich in protein, chicken thighs are a great source of essential amino acids. They also contain vitamins B6 and B12, which support energy metabolism and brain health.
  • Spices: Spices like cumin, coriander, and turmeric are known for their anti-inflammatory properties. Turmeric, in particular, contains curcumin, which has been linked to numerous health benefits, including improved brain function.
  • Heavy Cream: While heavy cream is high in calories, it also provides fat-soluble vitamins like A, D, E, and K. These vitamins are essential for various bodily functions, including maintaining healthy skin and vision.
  • Fresh Ginger and Garlic: Both ginger and garlic are known for their immune-boosting properties. They can help reduce inflammation and improve digestion, making them excellent additions to your diet.
  • Cilantro: This fresh herb is not only a flavorful garnish but also packed with antioxidants. Cilantro may help detoxify the body and support heart health.

Creamy Butter Chicken Recipe becomes not just a delicious meal but also a wholesome choice for your family. Enjoy the flavors and the health benefits that come with each bite!

FAQs about Creamy Butter Chicken Recipe

Can I make Creamy Butter Chicken in advance?

Creamy Butter Chicken Recipe in advance is a great idea. You can prepare the dish a day ahead and store it in the refrigerator. Just make sure to let it cool completely before transferring it to an airtight container. When you’re ready to serve, gently reheat it on the stove over low heat. Stir occasionally to ensure even heating. This method allows the flavors to deepen, making your butter chicken even more delicious!

What can I substitute for heavy cream in this recipe?

Creamy Butter Chicken Recipe.

How can I make this recipe less spicy?

Creamy Butter Chicken Recipe, you can simply reduce the amount of spices used in the marinade. For instance, use less garam masala and skip the red chili powder or cayenne pepper. Additionally, you can add a bit more heavy cream or yogurt to the sauce. This will help mellow out the heat while maintaining the creamy texture. Remember, you can always adjust the spices to suit your taste!

Is it possible to freeze Creamy Butter Chicken?

Creamy Butter Chicken Recipe for later enjoyment! To do this, let the dish cool completely after cooking. Then, transfer it to a freezer-safe container or a resealable plastic bag. Make sure to remove as much air as possible to prevent freezer burn. When you’re ready to eat, thaw it in the refrigerator overnight and reheat it on the stove. The flavors will still be delicious, making it a convenient meal option for busy days!

Conclusion on Creamy Butter Chicken Recipe

Creamy Butter Chicken Recipe is more than just a dish; it’s a celebration of flavors and a testament to the rich culinary heritage of India. With its tender chicken, aromatic spices, and luscious creamy sauce, this recipe is sure to become a favorite in your home. Whether you’re cooking for a special occasion or a cozy family dinner, butter chicken brings warmth and joy to the table.

As you’ve seen, the preparation is straightforward, making it accessible for cooks of all skill levels. From marinating the chicken to simmering the sauce, each step is designed to enhance the flavors and create a delightful meal. Plus, the variations allow you to customize the dish to suit your preferences, whether you prefer a vegetarian option or a spicier kick.

Remember to take your time with the marination and cooking process. These steps are crucial for achieving that rich, flavorful experience that butter chicken is known for. And don’t forget to pair it with delicious sides like basmati rice or naan to complete your meal.

Creamy Butter Chicken Recipe. Your family and friends will surely appreciate the effort, and you’ll be rewarded with smiles and satisfied appetites. Happy cooking!

Hearty Chicken Dumpling Soup warms your soul and heart.

Introduction to Hearty Chicken Dumpling Soup

Hearty Chicken Dumpling Soup is a warm and comforting dish that brings joy to any table. This delightful soup is perfect for chilly days or when you need a little pick-me-up. With its rich flavors and satisfying texture, it’s no wonder that this recipe has become a family favorite.

Imagine a bowl filled with tender chicken, fresh vegetables, and fluffy dumplings, all swimming in a savory broth. Each spoonful is a hug in a bowl, making it an ideal meal for gatherings or cozy nights at home. Not only is it delicious, but it’s also packed with nutrients, making it a wholesome choice for everyone.

In this article, we will guide you through the ingredients and preparation steps to create your own Hearty Chicken Dumpling Soup. Whether you’re a seasoned chef or a beginner in the kitchen, you’ll find this recipe easy to follow and incredibly rewarding. So, roll up your sleeves and get ready to enjoy a bowl of comfort that warms the heart and soul!

Ingredients for Hearty Chicken Dumpling Soup

To create a delicious bowl of Hearty Chicken Dumpling Soup, you’ll need a variety of fresh ingredients. Each component plays a vital role in building the rich flavors and comforting texture of this dish. Here’s what you’ll need:

  • 3 tablespoons olive oil: This adds a nice depth of flavor and helps sauté the vegetables.
  • 1 medium onion, diced: Onions provide a sweet and savory base for the soup.
  • 2 carrots, diced: Carrots add sweetness and color, making the soup visually appealing.
  • 2 celery stalks, diced: Celery contributes a crunchy texture and enhances the overall flavor.
  • 3 cloves garlic, minced: Garlic brings a wonderful aroma and taste to the dish.
  • 8 cups chicken broth: This is the heart of the soup, providing a rich and savory base.
  • 2 cups cooked, shredded chicken: Chicken adds protein and makes the soup hearty.
  • 1 teaspoon dried thyme: Thyme adds an earthy flavor that complements the chicken.
  • 1 teaspoon dried rosemary: Rosemary gives a fragrant touch to the soup.
  • Salt and pepper to taste: These seasonings enhance the flavors of all the ingredients.
  • 1 cup frozen peas: Peas add a pop of color and sweetness to the soup.
  • 1 cup heavy cream: This makes the soup creamy and rich, adding to its comfort factor.

For the dumplings, you will need:

  • 2 cups all-purpose flour: This is the main ingredient for the dumplings.
  • 1 tablespoon baking powder: Baking powder helps the dumplings rise and become fluffy.
  • 1 teaspoon salt: Salt enhances the flavor of the dumplings.
  • 1 tablespoon fresh parsley, chopped: Fresh parsley adds a burst of color and freshness.
  • 1 cup milk: Milk keeps the dumplings moist and tender.
  • 2 tablespoons melted butter: Butter adds richness and flavor to the dumplings.

Gather these ingredients, and you’ll be well on your way to making a delightful Hearty Chicken Dumpling Soup that everyone will love!

Preparation of Hearty Chicken Dumpling Soup

Now that you have all your ingredients ready, it’s time to dive into the preparation of your Hearty Chicken Dumpling Soup. This process is straightforward and enjoyable. Let’s break it down into easy steps!

Step 1: Preparing the Chicken and Broth

Start by heating the olive oil in a large pot over medium heat. Once the oil is hot, add the diced onion, carrots, and celery. Sauté these vegetables for about 5-7 minutes. You want them to soften and become fragrant. Next, stir in the minced garlic and cook for an additional minute. This step builds a flavorful base for your soup.

After the vegetables are ready, pour in the chicken broth. Bring the mixture to a gentle simmer. Then, add the cooked, shredded chicken along with the dried thyme, dried rosemary, salt, and pepper. Let everything simmer together for about 10 minutes. This allows the flavors to meld beautifully.

Step 2: Making the Dumpling Dough

While your soup is simmering, it’s time to prepare the dumpling dough. In a mixing bowl, combine the all-purpose flour, baking powder, salt, and chopped parsley. These dry ingredients will form the base of your dumplings. In another bowl, mix the milk and melted butter together. Once combined, pour the wet ingredients into the dry mixture. Stir gently until just combined. Be careful not to overmix, as this can make the dumplings tough.

Step 3: Cooking the Soup Base

Once your soup has simmered for 10 minutes, it’s time to check the flavors. Taste the broth and adjust the seasoning if needed. If you want a little more depth, feel free to add a pinch more salt or pepper. The broth should be savory and inviting, setting the stage for the dumplings to come.

Step 4: Adding Dumplings to the Soup

Now comes the fun part! Using a spoon, drop spoonfuls of the dumpling batter into the simmering soup. Make sure to space them out a bit, as they will expand while cooking. Once all the dumplings are in, cover the pot with a lid. It’s important not to lift the lid during this time. Let the dumplings cook for 15 minutes. This will ensure they become fluffy and light.

Step 5: Final Touches and Serving

After 15 minutes, it’s time to add the finishing touches. Gently stir in the frozen peas and heavy cream. This will add a lovely creaminess to your soup. Allow it to cook for an additional 5 minutes. Once everything is heated through, your Hearty Chicken Dumpling Soup is ready to serve! Ladle it into bowls and garnish with extra parsley if desired. Enjoy the warmth and comfort of this delightful dish!

Variation of Hearty Chicken Dumpling Soup

While the classic Hearty Chicken Dumpling Soup is a beloved favorite, there are many ways to switch things up! By using alternative ingredients or creating a vegetarian version, you can enjoy this comforting dish in new and exciting ways. Let’s explore some variations that will keep your taste buds happy!

Alternative Ingredients for a Unique Flavor

Sometimes, a little creativity can lead to delightful surprises in the kitchen. Here are some alternative ingredients you can use to give your Hearty Chicken Dumpling Soup a unique twist:

  • Different Proteins: Instead of chicken, try using turkey or even shredded beef for a different flavor profile.
  • Herbs and Spices: Experiment with fresh herbs like basil or cilantro. You can also add a pinch of cayenne pepper for a spicy kick.
  • Vegetable Additions: Consider adding corn, green beans, or bell peppers for extra color and nutrition. These veggies can enhance the soup’s texture and flavor.
  • Broth Variations: Swap chicken broth for vegetable broth or even a homemade bone broth for a richer taste.
  • Cheese: Stir in some grated Parmesan or cheddar cheese just before serving for a creamy, cheesy finish.

These alternative ingredients can transform your Hearty Chicken Dumpling Soup into a new culinary experience while still keeping the comforting essence of the original recipe.

Vegetarian Version of Hearty Chicken Dumpling Soup

If you’re looking for a vegetarian option, you can easily adapt the Hearty Chicken Dumpling Soup to suit your dietary preferences. Here’s how to make a delicious vegetarian version:

  • Replace the Chicken: Use chickpeas, lentils, or tofu as your protein source. These options are nutritious and will keep the soup hearty.
  • Vegetable Broth: Use vegetable broth instead of chicken broth to maintain the rich flavor without meat.
  • Extra Vegetables: Load up on a variety of vegetables like zucchini, mushrooms, and spinach. These will add depth and color to your soup.
  • Seasoning: Enhance the flavor with additional spices like cumin or smoked paprika for a warm, earthy taste.

This vegetarian version of Hearty Chicken Dumpling Soup is just as comforting and satisfying. It’s perfect for those who prefer plant-based meals while still enjoying a warm bowl of soup.

Cooking Note for Hearty Chicken Dumpling Soup

When preparing your Hearty Chicken Dumpling Soup, there are a few important cooking notes to keep in mind. These tips will help ensure that your soup turns out perfectly every time, making it a delightful experience for you and your loved ones.

First, always use fresh ingredients when possible. Fresh vegetables and herbs can significantly enhance the flavor of your soup. If you have access to a local farmer’s market, consider picking up your produce there. Fresh ingredients not only taste better but also provide more nutrients.

Next, be mindful of the cooking times. Dumplings need to cook undisturbed for 15 minutes to achieve that fluffy texture. Lifting the lid during this time can cause them to collapse. So, resist the urge to peek! Trust the process, and you’ll be rewarded with perfectly cooked dumplings.

Additionally, if you prefer a thicker soup, you can add a cornstarch slurry. Mix 1 tablespoon of cornstarch with 2 tablespoons of cold water, then stir it into the soup during the last few minutes of cooking. This will give your soup a heartier consistency without compromising the flavor.

Lastly, don’t hesitate to adjust the seasoning to your taste. Everyone has different preferences, so feel free to add more salt, pepper, or herbs as you see fit. Taste as you go, and make your Hearty Chicken Dumpling Soup uniquely yours!

By following these cooking notes, you’ll create a delicious and satisfying Hearty Chicken Dumpling Soup that will warm hearts and fill bellies. Enjoy the process and the wonderful aromas that fill your kitchen!

Serving Suggestions for Hearty Chicken Dumpling Soup

Serving your Hearty Chicken Dumpling Soup is just as important as making it. The right presentation can elevate the dining experience and make your meal even more enjoyable. Here are some delightful serving suggestions to consider:

  • Garnish with Fresh Herbs: A sprinkle of fresh parsley or thyme on top of each bowl adds a pop of color and freshness. It also enhances the aroma, making the soup even more inviting.
  • Pair with Crusty Bread: Serve your soup with a side of warm, crusty bread or dinner rolls. This is perfect for dipping and soaking up the delicious broth.
  • Accompany with a Salad: A light green salad with a tangy vinaigrette can balance the richness of the soup. Consider using mixed greens, cherry tomatoes, and cucumber for a refreshing side.
  • Offer Cheese on the Side: Provide grated Parmesan or cheddar cheese for guests to sprinkle on their soup. This adds a creamy, savory touch that many will love.
  • Serve in Individual Bowls: For a more elegant presentation, serve the soup in individual bowls. This makes it easy for guests to enjoy and adds a personal touch to each serving.
  • Use Colorful Bowls: Brightly colored bowls can make your Hearty Chicken Dumpling Soup visually appealing. Choose bowls that contrast with the soup’s colors for a vibrant display.

These serving suggestions will not only enhance the look of your Hearty Chicken Dumpling Soup but also create a delightful dining experience. Whether it’s a family dinner or a gathering with friends, these tips will help you serve a meal that’s as beautiful as it is delicious!

Tips for Perfecting Hearty Chicken Dumpling Soup

Creating the perfect Hearty Chicken Dumpling Soup is an art that combines the right ingredients, techniques, and a dash of love. Here are some valuable tips to help you master this comforting dish and impress your family and friends!

First, always start with quality ingredients. Fresh vegetables and high-quality chicken broth can make a significant difference in flavor. If you have the time, consider making your own broth. It’s simple and adds a rich depth to your soup.

Next, pay attention to the size of your vegetable cuts. Dicing your carrots, celery, and onions into uniform pieces ensures even cooking. This way, every bite will have a balanced mix of flavors and textures.

When it comes to the dumplings, don’t overmix the batter. Stir just until the ingredients are combined. Overmixing can lead to tough dumplings, which is not what you want in a comforting soup. Light and fluffy dumplings are the goal!

Another tip is to let the soup simmer gently. A rolling boil can break apart the dumplings and make them dense. Instead, keep the heat at a low simmer to allow the flavors to meld beautifully while keeping the dumplings intact.

For added flavor, consider incorporating a splash of white wine or lemon juice into the broth. This can brighten the overall taste and add a delightful zing to your Hearty Chicken Dumpling Soup.

Lastly, don’t forget to taste as you go! Adjust the seasoning to your liking. Everyone has different preferences, so feel free to add more herbs, salt, or pepper to make the soup truly yours.

By following these tips, you’ll be well on your way to perfecting your Hearty Chicken Dumpling Soup. Enjoy the process, and savor the delicious results!

Breakdown of Time for Hearty Chicken Dumpling Soup

Understanding the time needed to prepare your Hearty Chicken Dumpling Soup can help you plan your cooking session better. Here’s a simple breakdown of the time required for each step, ensuring you can enjoy this comforting dish without any rush.

Prep Time

The prep time for your Hearty Chicken Dumpling Soup is approximately 20-25 minutes. This includes gathering all your ingredients, washing and chopping the vegetables, and shredding the cooked chicken. Taking your time during this step ensures that everything is ready for a smooth cooking process.

Cooking Time

The cooking time for the soup itself is about 30-35 minutes. This includes sautéing the vegetables, simmering the broth with chicken, and cooking the dumplings. It’s essential to follow the timing closely, especially when cooking the dumplings, to achieve that perfect fluffy texture.

Total Time

In total, you can expect to spend around 50-60 minutes from start to finish. This includes both prep and cooking times. With this timeframe, you can have a delicious pot of Hearty Chicken Dumpling Soup ready to serve in less than an hour. It’s a perfect option for a weeknight dinner or a cozy weekend meal!

Nutritional Information for Hearty Chicken Dumpling Soup

Understanding the nutritional content of your Hearty Chicken Dumpling Soup can help you make informed choices about your meals. This comforting dish not only warms the heart but also provides essential nutrients. Let’s break down the key nutritional components of this delicious soup.

Calories

Each serving of Hearty Chicken Dumpling Soup contains approximately 450 calories. This makes it a satisfying meal that can keep you full and energized. The combination of chicken, vegetables, and dumplings provides a hearty balance of nutrients, making it a great option for lunch or dinner.

Protein

With about 25 grams of protein per serving, this soup is an excellent source of this essential nutrient. The shredded chicken contributes significantly to the protein content, helping to support muscle health and keep you feeling satisfied. Protein is vital for overall health, making this soup a nutritious choice for everyone.

Sodium

The sodium content in Hearty Chicken Dumpling Soup can vary based on the chicken broth used. On average, each serving contains around 800-900 milligrams of sodium. If you’re watching your sodium intake, consider using low-sodium chicken broth. This simple swap can help you enjoy the flavors of the soup while keeping your sodium levels in check.

Overall, Hearty Chicken Dumpling Soup is a well-rounded meal that offers a good balance of calories, protein, and essential nutrients. Enjoying this dish can be a delicious way to nourish your body while indulging in a comforting favorite!

FAQs about Hearty Chicken Dumpling Soup

What can I substitute for chicken in Hearty Chicken Dumpling Soup?

If you’re looking for a substitute for chicken in your Hearty Chicken Dumpling Soup, there are several tasty options. You can use shredded turkey, which offers a similar flavor and texture. For a vegetarian option, consider using chickpeas, lentils, or tofu. These ingredients provide protein and help keep the soup hearty. Additionally, you can add more vegetables like mushrooms or zucchini to enhance the flavor and nutrition of your soup.

Can I freeze Hearty Chicken Dumpling Soup?

Yes, you can freeze Hearty Chicken Dumpling Soup! However, it’s best to freeze the soup without the dumplings. Dumplings can become soggy when thawed and reheated. To freeze, let the soup cool completely, then transfer it to an airtight container. It can be stored in the freezer for up to three months. When you’re ready to enjoy it, thaw the soup in the refrigerator overnight and reheat it on the stove. You can then prepare fresh dumplings to add just before serving.

How do I store leftovers of Hearty Chicken Dumpling Soup?

Storing leftovers of Hearty Chicken Dumpling Soup is simple! Allow the soup to cool to room temperature, then transfer it to an airtight container. Store it in the refrigerator for up to three days. When reheating, you can warm it on the stove over low heat. If the dumplings have absorbed too much broth, you may want to add a splash of chicken broth or water to restore the soup’s consistency. Stir gently to avoid breaking the dumplings.

What are some common mistakes to avoid when making Hearty Chicken Dumpling Soup?

When making Hearty Chicken Dumpling Soup, there are a few common mistakes to watch out for. First, avoid overmixing the dumpling batter. This can lead to tough dumplings instead of fluffy ones. Second, be careful not to lift the lid while the dumplings are cooking. This can cause them to collapse. Lastly, ensure you use fresh ingredients for the best flavor. Using stale or old vegetables can affect the overall taste of your soup. By keeping these tips in mind, you’ll create a delicious and comforting soup every time!

Conclusion on Hearty Chicken Dumpling Soup

In conclusion, Hearty Chicken Dumpling Soup is more than just a meal; it’s a comforting experience that brings warmth and joy to any table. With its rich flavors, tender chicken, and fluffy dumplings, this dish is perfect for family gatherings, cozy nights in, or even a simple weeknight dinner. The combination of fresh ingredients and easy preparation makes it accessible for cooks of all skill levels.

As you explore the variations and tips shared in this article, you can customize your soup to suit your taste preferences. Whether you choose to stick with the classic recipe or experiment with alternative ingredients, the essence of comfort remains the same. This soup not only nourishes the body but also warms the heart, making it a beloved favorite for many.

So, gather your ingredients, roll up your sleeves, and dive into the delightful process of making Hearty Chicken Dumpling Soup. Enjoy the wonderful aromas that fill your kitchen and the smiles that come with each bowl served. Remember, cooking is not just about the food; it’s about creating memories and sharing love with those around you. Happy cooking!

Sweet and Tangy Orange Chicken Recipe is a must-try!

Introduction to Sweet and Tangy Orange Chicken Recipe

Welcome to the delightful world of Sweet and Tangy Orange Chicken! This dish is not just a meal; it’s an experience that brings together vibrant flavors and comforting textures. Whether you’re cooking for family or friends, this recipe is sure to impress. The combination of sweet orange marmalade and savory barbecue sauce creates a unique taste that dances on your palate. Plus, it’s easy to prepare, making it perfect for busy weeknights or special occasions.

What Makes This Recipe Special?

What sets this Sweet and Tangy Orange Chicken apart is its perfect balance of flavors. The sweetness from the orange marmalade pairs beautifully with the smoky notes of barbecue sauce. This harmony creates a dish that is both satisfying and exciting. Additionally, the use of chicken thighs ensures that the meat remains juicy and tender throughout the cooking process. The recipe is versatile, allowing you to customize it with your favorite spices or add a spicy kick if you prefer. It’s a dish that caters to various tastes, making it a crowd-pleaser.

A Brief History of Orange Chicken

Orange chicken has its roots in Chinese-American cuisine, where it has become a staple in many restaurants. The dish is believed to have originated in the 1980s, gaining popularity for its sweet and tangy flavor profile. While traditional recipes often use deep-fried chicken, this Sweet and Tangy Orange Chicken recipe offers a healthier baked alternative without sacrificing taste. Over the years, it has evolved, with many variations emerging, but the essence of orange chicken remains the same: a delightful blend of sweet and savory that brings joy to every bite.

Ingredients for Sweet and Tangy Orange Chicken Recipe

To create this mouthwatering Sweet and Tangy Orange Chicken, you’ll need a few simple ingredients. Each component plays a vital role in building the dish’s unique flavor. Here’s what you’ll need:

  • 2 pounds boneless, skinless chicken thighs, cut into bite-sized pieces
  • 1 cup orange marmalade
  • 1 cup barbecue sauce
  • 1 tablespoon soy sauce
  • 1 teaspoon garlic powder
  • 1 teaspoon ground ginger
  • Salt and pepper to taste
  • Chopped green onions for garnish (optional)

These ingredients are not only easy to find but also work together to create a delightful balance of flavors. The chicken thighs provide a juicy base, while the orange marmalade adds sweetness. The barbecue sauce brings a smoky depth, and the soy sauce enhances the overall umami taste. Garlic powder and ground ginger add aromatic notes that elevate the dish further.

Feel free to adjust the quantities based on your taste preferences. For instance, if you love a bit of heat, consider adding red pepper flakes to the sauce mixture. This flexibility allows you to make the recipe your own while still enjoying the core flavors that make this dish so special.

Step-by-Step Preparation of Sweet and Tangy Orange Chicken Recipe

Now that you have gathered all the ingredients, it’s time to dive into the preparation of your Sweet and Tangy Orange Chicken. This step-by-step guide will help you create a delicious dish that is sure to impress. Let’s get started!

Step 1: Preparing the Chicken

First, take your boneless, skinless chicken thighs and cut them into bite-sized pieces. This size ensures that the chicken cooks evenly and absorbs the flavors of the sauce. After cutting, place the chicken pieces in a large bowl. Make sure to wash your hands and any surfaces that came into contact with raw chicken to maintain food safety.

Step 2: Making the Orange Sauce

Next, it’s time to whip up the sweet and tangy sauce. In a separate bowl, combine the orange marmalade, barbecue sauce, soy sauce, garlic powder, ground ginger, salt, and pepper. Stir the mixture well until it’s smooth and all the ingredients are fully blended. This sauce is the heart of the dish, so take a moment to enjoy the delightful aroma as you mix!

Step 3: Cooking the Chicken

Now, preheat your oven to 400°F (200°C). While the oven heats up, spread the chicken pieces in a single layer on a baking sheet lined with parchment paper. This step is crucial for even cooking and easy cleanup. Bake the chicken in the preheated oven for 25-30 minutes. Remember to stir the chicken halfway through cooking to ensure it gets an even glaze from the sauce.

Step 4: Combining Chicken and Sauce

Once the chicken is cooked through and has a beautiful glaze, it’s time to combine it with the sauce. Remove the chicken from the oven and transfer it to the bowl with the orange sauce. Toss the chicken pieces gently until they are well coated. This step enhances the flavor, making every bite a burst of sweet and tangy goodness!

Step 5: Final Touches

For an extra touch of flavor, you can broil the chicken for an additional 2-3 minutes. This step caramelizes the sauce slightly, adding a delightful texture. After broiling, let the chicken rest for a few minutes before serving. If you like, garnish with chopped green onions for a pop of color and freshness. Your Sweet and Tangy Orange Chicken is now ready to be enjoyed!

Variations of Sweet and Tangy Orange Chicken Recipe

While the classic Sweet and Tangy Orange Chicken is a hit on its own, there are many ways to switch things up! Whether you’re looking for healthier alternatives or vegetarian options, these variations will keep your meals exciting and delicious. Let’s explore some creative twists on this beloved recipe.

Healthier Alternatives

If you’re aiming for a lighter version of Sweet and Tangy Orange Chicken, there are several easy swaps you can make. First, consider using skinless chicken breasts instead of thighs. Chicken breasts are leaner and lower in fat, making them a great choice for a healthier meal. You can also reduce the amount of orange marmalade and barbecue sauce to cut down on sugar. Instead, add fresh orange juice and zest for a natural sweetness.

Another option is to bake the chicken with a light coating of olive oil and spices instead of using sauce. This method allows the natural flavors of the chicken to shine through while still providing a tasty dish. Additionally, serve the chicken over a bed of steamed vegetables or cauliflower rice instead of traditional rice. This not only lowers the carb count but also adds more nutrients to your meal.

Vegetarian Options

For those who prefer a plant-based diet, you can easily adapt the Sweet and Tangy Orange Chicken recipe to suit your needs. One popular substitute is to use tofu or tempeh. Both options absorb flavors well and provide a satisfying texture. To prepare, press the tofu to remove excess moisture, then cut it into bite-sized cubes. Marinate the tofu in the same orange sauce mixture before baking.

Another delicious alternative is to use chickpeas or cauliflower. Roasted chickpeas can add a crunchy texture, while cauliflower florets provide a hearty bite. Simply toss them in the sauce and bake until golden brown. These vegetarian variations maintain the sweet and tangy flavor profile while offering a delightful twist on the classic dish. Enjoy experimenting with these options to find your favorite!

Cooking Note for Sweet and Tangy Orange Chicken Recipe

Cooking is an art, and every dish has its nuances. When preparing your Sweet and Tangy Orange Chicken, a few key notes can help you achieve the best results. First, always ensure your chicken is at room temperature before cooking. This step helps the meat cook evenly, resulting in juicy, tender pieces.

Next, pay attention to the baking time. Ovens can vary, so it’s wise to check the chicken a few minutes before the suggested cooking time. Use a meat thermometer to ensure the internal temperature reaches 165°F (75°C). This guarantees that your chicken is safe to eat while remaining moist and flavorful.

Another important tip is to let the chicken rest after baking. Allowing it to sit for a few minutes helps the juices redistribute throughout the meat, enhancing its tenderness. If you choose to broil the chicken for that caramelized finish, keep a close eye on it. Broiling can quickly turn from perfect to burnt, so stay nearby!

Lastly, don’t hesitate to adjust the sauce to your liking. If you prefer a thicker sauce, consider simmering it on the stove for a few minutes before tossing it with the chicken. This step intensifies the flavors and gives you a delightful glaze. With these cooking notes in mind, you’re well on your way to creating a delicious Sweet and Tangy Orange Chicken that will impress everyone at the table!

Serving Suggestions for Sweet and Tangy Orange Chicken Recipe

Now that your Sweet and Tangy Orange Chicken is ready, it’s time to think about how to serve it! The right side dishes can elevate your meal and create a well-rounded dining experience. Here are some fantastic serving suggestions that pair beautifully with this flavorful dish.

Best Side Dishes

When it comes to side dishes, you want to complement the sweet and tangy flavors of the chicken. Here are some great options:

  • Steamed Broccoli: This green vegetable adds a nice crunch and balances the sweetness of the chicken.
  • Roasted Vegetables: A mix of bell peppers, carrots, and zucchini roasted with olive oil and herbs can add color and flavor.
  • Coleslaw: A refreshing coleslaw with a tangy dressing can provide a nice contrast to the warm chicken.
  • Garden Salad: A simple salad with mixed greens, cucumbers, and a light vinaigrette can lighten up the meal.

These side dishes not only enhance the meal but also add nutritional value. Feel free to mix and match based on your preferences and what you have on hand!

Pairing with Rice or Noodles

Rice and noodles are classic accompaniments for Sweet and Tangy Orange Chicken. They help soak up the delicious sauce and make the meal more filling. Here are some ideas:

  • Steamed White Rice: A fluffy bowl of white rice is a perfect base for the chicken, allowing the sauce to shine.
  • Brown Rice: For a healthier option, brown rice adds a nutty flavor and extra fiber.
  • Quinoa: This protein-packed grain is a great alternative to rice and adds a unique texture.
  • Lo Mein Noodles: Tossed with a bit of sesame oil, these noodles can be a delightful addition to your meal.

Whether you choose rice or noodles, they will enhance the overall experience of your Sweet and Tangy Orange Chicken. Enjoy your meal with family and friends, and watch as they savor every bite!

Tips for Perfecting Your Sweet and Tangy Orange Chicken Recipe

To ensure your Sweet and Tangy Orange Chicken turns out perfectly every time, consider these helpful tips. Cooking is all about learning and improving, so let’s dive into some common mistakes to avoid and storage tips to keep your dish fresh and delicious!

Common Mistakes to Avoid

Even the best cooks can make mistakes! Here are some common pitfalls to watch out for:

  • Overcooking the Chicken: One of the biggest mistakes is cooking the chicken for too long. This can lead to dry, tough meat. Always check the internal temperature with a meat thermometer. Aim for 165°F (75°C) for perfectly cooked chicken.
  • Not Marinating Long Enough: If you have time, let the chicken marinate in the sauce for at least 30 minutes before cooking. This allows the flavors to penetrate the meat, making it more flavorful.
  • Skipping the Broiling Step: Broiling adds a lovely caramelized finish to the chicken. Don’t skip this step! Just keep an eye on it to prevent burning.
  • Using the Wrong Type of Chicken: While chicken breasts can be used, chicken thighs are recommended for their juiciness. If you use breasts, be careful not to overcook them.

By avoiding these common mistakes, you’ll be on your way to creating a delicious Sweet and Tangy Orange Chicken that everyone will love!

Storage Tips

After enjoying your Sweet and Tangy Orange Chicken, you might have some leftovers. Here’s how to store them properly:

  • Refrigeration: Store any leftover chicken in an airtight container in the refrigerator. It will stay fresh for up to 3-4 days.
  • Freezing: If you want to keep it longer, consider freezing the chicken. Place it in a freezer-safe container or bag, and it can last for up to 3 months. Just remember to label it with the date!
  • Reheating: When you’re ready to enjoy the leftovers, reheat them in the oven or microwave. If using the oven, cover the dish with foil to keep it moist. If using the microwave, add a splash of water to prevent drying out.

With these storage tips, you can enjoy your Sweet and Tangy Orange Chicken even after the first serving. It’s a great way to savor the flavors again!

Breakdown of Time for Sweet and Tangy Orange Chicken Recipe

Understanding the time commitment for your Sweet and Tangy Orange Chicken is essential for planning your meal. Here’s a simple breakdown of the time you’ll need for preparation and cooking. This will help you manage your kitchen time effectively and ensure everything is ready when you want to serve.

Prep Time

The prep time for this delicious dish is quite manageable. You’ll need about 15-20 minutes to gather your ingredients and prepare the chicken and sauce. This includes cutting the chicken into bite-sized pieces and mixing the sauce ingredients. If you decide to marinate the chicken for extra flavor, you might want to add an additional 30 minutes to this time. However, marinating is optional and not required for a tasty result!

Cooking Time

Once you’ve prepped everything, the cooking time is straightforward. Baking the chicken will take approximately 25-30 minutes in the oven at 400°F (200°C). If you choose to broil the chicken for that caramelized finish, add an extra 2-3 minutes. Keep an eye on it during this step to avoid burning. Overall, the cooking time is quick, making this recipe perfect for busy weeknights.

Total Time

In total, you can expect to spend about 40-50 minutes from start to finish. This includes both prep and cooking time. If you opt to marinate the chicken, the total time could extend to about 1 hour and 20 minutes. Regardless of your choice, this Sweet and Tangy Orange Chicken is worth every minute spent in the kitchen!

Nutritional Information for Sweet and Tangy Orange Chicken Recipe

Understanding the nutritional content of your meals is essential for maintaining a balanced diet. The Sweet and Tangy Orange Chicken is not only delicious but also provides a good amount of nutrients. Here’s a breakdown of the nutritional information per serving, which serves as a helpful guide for your meal planning.

Calories

Each serving of Sweet and Tangy Orange Chicken contains approximately 350 calories. This makes it a satisfying option for dinner without being overly heavy. The calorie count comes from the combination of chicken, sauces, and any additional ingredients you may choose to add. If you’re watching your calorie intake, consider pairing it with lighter side dishes to keep your meal balanced.

Protein

Protein is an essential nutrient for building and repairing tissues, and this recipe delivers! Each serving provides about 25 grams of protein, primarily from the chicken thighs. This high protein content makes it a great choice for those looking to increase their protein intake, whether for muscle building or overall health. Pairing the chicken with a side of quinoa or brown rice can further enhance the protein content of your meal.

Sodium

When it comes to sodium, each serving contains around 800 milligrams. This amount is primarily due to the soy sauce and barbecue sauce used in the recipe. If you’re concerned about sodium levels, consider using low-sodium soy sauce or barbecue sauce to reduce the overall sodium content. Balancing your meal with fresh vegetables can also help offset the sodium levels, making it a healthier option.

By keeping these nutritional facts in mind, you can enjoy your Sweet and Tangy Orange Chicken while being mindful of your dietary needs. It’s all about balance and making informed choices that fit your lifestyle!

FAQs about Sweet and Tangy Orange Chicken Recipe

Can I use frozen chicken for this recipe?

Yes, you can use frozen chicken for your Sweet and Tangy Orange Chicken! However, it’s important to thaw the chicken completely before cooking. This ensures even cooking and helps the chicken absorb the flavors of the sauce. You can thaw the chicken in the refrigerator overnight or use the defrost setting on your microwave. Once thawed, follow the same preparation and cooking steps as you would with fresh chicken. Just keep in mind that cooking time may vary slightly, so always check the internal temperature to ensure it reaches 165°F (75°C).

How can I make the sauce less sweet?

If you find the sauce too sweet for your taste, there are a few simple adjustments you can make. First, reduce the amount of orange marmalade in the recipe. You can also add a splash of vinegar, such as rice vinegar or apple cider vinegar, to balance the sweetness with a bit of tang. Another option is to incorporate some fresh orange juice, which adds acidity without increasing the sweetness. Lastly, consider adding a pinch of salt or soy sauce to enhance the savory flavors, which can help offset the sweetness of the sauce.

What can I substitute for orange juice?

If you don’t have orange juice on hand, there are several substitutes you can use in your Sweet and Tangy Orange Chicken. Lemon juice is a great alternative, as it provides a similar acidity and brightness. You can also use lime juice for a different flavor profile. If you prefer a sweeter option, consider using pineapple juice, which will add a tropical twist to the dish. Just remember to adjust the sweetness of the sauce accordingly, especially if you’re using a sweeter juice. These substitutes will still give you a deliciously tangy flavor in your chicken!

Conclusion on Sweet and Tangy Orange Chicken Recipe

In conclusion, the Sweet and Tangy Orange Chicken recipe is a delightful dish that brings joy to any dining table. Its unique blend of flavors—sweet, tangy, and savory—creates a memorable meal that is both satisfying and easy to prepare. Whether you’re cooking for a family dinner or hosting friends, this recipe is sure to impress.

With simple ingredients and straightforward steps, you can whip up this delicious dish in no time. Plus, the versatility of the recipe allows you to customize it to suit your taste preferences. From healthier alternatives to vegetarian options, there’s something for everyone to enjoy.

As you explore the world of Sweet and Tangy Orange Chicken, remember to embrace the cooking process. Don’t hesitate to experiment with flavors and ingredients. Each time you make this dish, you’ll discover new ways to enhance its deliciousness. So gather your ingredients, follow the steps, and enjoy the delightful experience of creating a meal that is sure to become a favorite in your household.

Happy cooking, and may your Sweet and Tangy Orange Chicken bring smiles and satisfaction to all who share it!

Creamy Garlic Parmesan Chicken Pasta Recipe is delicious!

Introduction

What is Creamy Garlic Parmesan Chicken Pasta?

Creamy Garlic Parmesan Chicken Pasta is a delightful dish that combines tender chicken, rich cream, and savory Parmesan cheese. This recipe is perfect for busy weeknights or special occasions. The creamy sauce envelops the pasta, creating a comforting meal that everyone will love. With its simple ingredients and easy preparation, this dish is a go-to for many home cooks.

Imagine a plate of perfectly cooked penne pasta, tossed with juicy chicken pieces and a luscious garlic sauce. The aroma of garlic fills the kitchen, making it hard to resist. This recipe not only satisfies your taste buds but also provides a hearty serving of protein and flavor. Plus, it’s versatile! You can easily customize it with your favorite vegetables or spices.

Whether you’re cooking for family or friends, Creamy Garlic Parmesan Chicken Pasta is sure to impress. It’s creamy, cheesy, and oh-so-delicious. So, let’s dive into the ingredients and preparation steps to create this mouthwatering dish!

Ingredients

To create the delicious Creamy Garlic Parmesan Chicken Pasta, you will need the following ingredients:

  • 8 ounces penne pasta
  • 1 tablespoon olive oil
  • 1 pound boneless, skinless chicken breasts, cut into bite-sized pieces
  • 1 teaspoon salt
  • 1/2 teaspoon black pepper
  • 4 cloves garlic, minced
  • 1 cup heavy cream
  • 1 cup grated Parmesan cheese
  • 1/2 teaspoon Italian seasoning
  • 1/4 teaspoon red pepper flakes (optional)
  • Fresh parsley, chopped (for garnish)

These ingredients come together to create a rich and creamy sauce that perfectly coats the pasta and chicken. The combination of garlic and Parmesan adds a wonderful depth of flavor, making this dish a favorite among many. Feel free to adjust the seasonings to suit your taste. Now that you have your ingredients ready, let’s move on to the preparation steps!

Preparation of Creamy Garlic Parmesan Chicken Pasta Recipe

Step 1: Cook the Pasta

Start by bringing a large pot of salted water to a boil. Once boiling, add the penne pasta. Cook it according to the package instructions until it reaches an al dente texture. This usually takes about 8-10 minutes. Remember to stir occasionally to prevent sticking. Once cooked, drain the pasta in a colander and set it aside. This step is crucial as it forms the base of your dish, soaking up all the delicious flavors later on.

Step 2: Prepare the Chicken

Next, heat a tablespoon of olive oil in a large skillet over medium heat. Once the oil is hot, add the bite-sized pieces of chicken. Season them with salt and black pepper. Cook the chicken for about 5-7 minutes, stirring occasionally. You want it to be golden brown and fully cooked through. Once done, remove the chicken from the skillet and set it aside. This step ensures that your chicken is juicy and flavorful, ready to be mixed with the creamy sauce.

Step 3: Make the Creamy Garlic Sauce

In the same skillet, add the minced garlic. Sauté it for about 1 minute until it becomes fragrant. Be careful not to burn it, as burnt garlic can taste bitter. After that, pour in the heavy cream and bring it to a gentle simmer. Stir in the grated Parmesan cheese, Italian seasoning, and red pepper flakes if you like a bit of heat. Allow the sauce to cook for 2-3 minutes until it thickens slightly. This creamy garlic sauce is what makes the dish so rich and satisfying.

Step 4: Combine Ingredients

Now it’s time to bring everything together! Return the cooked chicken to the skillet with the creamy sauce. Then, add the drained penne pasta. Toss everything together gently until the pasta and chicken are well coated in the sauce. This step is essential for ensuring that every bite is packed with flavor. Cook for an additional 2-3 minutes to heat everything through. The aroma will be irresistible!

Step 5: Serve and Enjoy

Finally, it’s time to serve your delicious Creamy Garlic Parmesan Chicken Pasta! Spoon the pasta onto plates or into bowls. Garnish with freshly chopped parsley for a pop of color and freshness. Enjoy this comforting dish hot, and watch as everyone digs in with delight. It’s perfect for family dinners or gatherings with friends. You’ll surely impress your guests with this creamy, cheesy delight!

Variation of Creamy Garlic Parmesan Chicken Pasta Recipe

Alternative Proteins

If you’re looking to switch things up, there are several alternative proteins you can use in your Creamy Garlic Parmesan Chicken Pasta. For instance, shrimp is a fantastic option. Simply sauté the shrimp in olive oil until they turn pink and opaque, then follow the same steps to create the creamy sauce. This adds a delightful seafood twist to the dish.

Another great alternative is turkey. Ground turkey can be used instead of chicken. Cook it in the skillet until browned, then proceed with the recipe as usual. This option is leaner and still packed with flavor. You can also try using cooked sausage for a heartier meal. Just slice it and add it to the sauce for a deliciously rich taste.

Vegetarian Options

For those who prefer a meatless meal, there are plenty of vegetarian options to consider. One popular choice is to use mushrooms. Sauté sliced mushrooms in olive oil until they are golden brown, then add them to the creamy sauce. Mushrooms provide a wonderful umami flavor that complements the garlic and Parmesan beautifully.

Another option is to incorporate plant-based proteins like tofu or tempeh. Cube the tofu and sauté it until golden, or crumble tempeh and cook it until browned. Both options absorb the flavors of the sauce well, making them a satisfying addition to your pasta dish.

Lastly, consider adding a variety of vegetables such as spinach, zucchini, or bell peppers. These not only enhance the nutritional value but also add vibrant colors and textures to your meal. Simply sauté the vegetables along with the garlic before adding the cream, and enjoy a deliciously creamy vegetarian pasta!

Cooking Note for Creamy Garlic Parmesan Chicken Pasta Recipe

When preparing your Creamy Garlic Parmesan Chicken Pasta, there are a few cooking notes to keep in mind to ensure the best results. First, always use fresh ingredients whenever possible. Fresh garlic and high-quality Parmesan cheese can significantly enhance the flavor of your dish. If you can, grate the cheese yourself instead of using pre-grated options. This will give you a creamier texture and richer taste.

Next, be mindful of the heat when cooking the garlic. Garlic can burn quickly, leading to a bitter flavor. Sauté it just until fragrant, which usually takes about a minute. If you notice it starting to brown too much, lower the heat immediately.

Another important tip is to reserve a bit of pasta water before draining the penne. This starchy water can be added to the sauce if it becomes too thick. Just a splash can help achieve the perfect creamy consistency without losing flavor.

Lastly, don’t rush the cooking process. Allow the sauce to simmer gently to develop its flavors fully. The longer it simmers, the more the ingredients meld together, creating a deliciously rich sauce. Enjoy the cooking process, and remember that patience often leads to the best meals!

Serving Suggestions for Creamy Garlic Parmesan Chicken Pasta Recipe

When it comes to serving your Creamy Garlic Parmesan Chicken Pasta, there are plenty of delightful options to enhance your meal. Here are some suggestions to make your dining experience even more enjoyable:

  • Garlic Bread: Serve warm, crispy garlic bread on the side. The buttery, garlicky flavor pairs perfectly with the creamy pasta, making each bite even more satisfying.
  • Side Salad: A fresh side salad adds a nice crunch and balances the richness of the pasta. Consider a simple mixed greens salad with a light vinaigrette or a classic Caesar salad for a delicious contrast.
  • Roasted Vegetables: Roasted vegetables like asparagus, zucchini, or bell peppers can add color and nutrition to your plate. Their natural sweetness complements the savory flavors of the pasta.
  • Wine Pairing: If you enjoy wine, consider pairing your meal with a glass of white wine, such as Chardonnay or Sauvignon Blanc. These wines enhance the creamy flavors and elevate the dining experience.
  • Extra Parmesan: For cheese lovers, offer extra grated Parmesan on the table. A sprinkle of fresh cheese can take the dish to the next level, adding even more flavor.
  • Herb Garnish: Besides parsley, try garnishing with fresh basil or thyme. These herbs add a fragrant touch and a burst of freshness to the dish.

These serving suggestions not only complement the Creamy Garlic Parmesan Chicken Pasta but also create a well-rounded meal. Whether it’s a cozy family dinner or a gathering with friends, these additions will surely impress your guests and make the meal memorable. Enjoy your delicious creation!

Tips for Perfecting Your Creamy Garlic Parmesan Chicken Pasta Recipe

To make your Creamy Garlic Parmesan Chicken Pasta truly exceptional, consider these helpful tips. They will enhance the flavors and ensure a delightful dining experience for you and your guests.

  • Use Fresh Ingredients: Fresh garlic and high-quality Parmesan cheese can elevate your dish. Fresh ingredients provide a more vibrant flavor compared to dried or pre-packaged options.
  • Don’t Overcook the Pasta: Cook the penne pasta until it’s al dente. This means it should be firm to the bite. Overcooked pasta can become mushy and won’t hold up well in the creamy sauce.
  • Adjust the Creaminess: If you prefer a lighter sauce, consider using half-and-half instead of heavy cream. You can also reduce the amount of cheese for a less rich flavor.
  • Experiment with Seasonings: Feel free to adjust the Italian seasoning and red pepper flakes to suit your taste. Adding a pinch of nutmeg can also enhance the creaminess of the sauce.
  • Incorporate Fresh Herbs: Fresh herbs like basil or thyme can add a burst of flavor. Toss them in just before serving for a fresh touch.
  • Save Some Pasta Water: Before draining the pasta, reserve a cup of the cooking water. This starchy water can help loosen the sauce if it becomes too thick.
  • Let the Sauce Simmer: Allow the sauce to simmer gently for a few extra minutes. This helps the flavors meld together, creating a richer taste.
  • Garnish Generously: Don’t skip the garnish! Fresh parsley or basil not only adds color but also enhances the overall flavor of the dish.
  • Serve Immediately: Creamy Garlic Parmesan Chicken Pasta is best enjoyed fresh. Serve it right after cooking for the creamiest texture and the best flavor.

By following these tips, you’ll create a Creamy Garlic Parmesan Chicken Pasta that’s not only delicious but also memorable. Enjoy the process of cooking and the joy of sharing this delightful dish with others!

Breakdown of Time for Creamy Garlic Parmesan Chicken Pasta Recipe

Prep Time

The prep time for your Creamy Garlic Parmesan Chicken Pasta is quite manageable. You’ll need about 10-15 minutes to gather and prepare all your ingredients. This includes chopping the chicken into bite-sized pieces, mincing the garlic, and measuring out the pasta and other ingredients. Having everything ready before you start cooking will make the process smoother and more enjoyable.

Cooking Time

Once you’re ready to cook, the actual cooking time will take around 20-25 minutes. This includes boiling the pasta, cooking the chicken, and making the creamy garlic sauce. Each step is quick, but it’s essential to keep an eye on the chicken and garlic to ensure they don’t overcook. The total cooking time is efficient, making this dish perfect for a weeknight dinner.

Total Time

In total, you can expect to spend about 30-40 minutes from start to finish. This includes both prep and cooking time. With such a quick turnaround, you can have a delicious, homemade meal on the table in no time. It’s a fantastic option for busy evenings when you want something comforting and satisfying without spending hours in the kitchen.

Nutritional Information for Creamy Garlic Parmesan Chicken Pasta Recipe

Calories

Each serving of Creamy Garlic Parmesan Chicken Pasta contains approximately 620 calories. This makes it a hearty meal that provides energy and satisfaction. While it’s rich and creamy, it’s essential to enjoy it in moderation, especially if you’re watching your calorie intake. Pairing it with a light salad or vegetables can help balance the meal.

Protein

This delicious dish is also a great source of protein, offering about 38 grams per serving. The chicken provides lean protein, which is vital for muscle repair and overall health. Including protein in your meals helps keep you feeling full longer, making this pasta a filling option for lunch or dinner. If you choose to add extra protein, like shrimp or turkey, you can increase this amount even further!

Sodium

Each serving contains around 800 milligrams of sodium. While sodium is necessary for bodily functions, it’s important to monitor your intake, especially if you have dietary restrictions. To reduce sodium levels, consider using low-sodium chicken broth or cheese. Additionally, you can control the amount of salt you add during cooking. This way, you can enjoy the creamy goodness without worrying too much about sodium content.

FAQs about Creamy Garlic Parmesan Chicken Pasta Recipe

Can I use a different type of pasta?

Absolutely! While penne pasta is a great choice for this recipe, you can use other types of pasta as well. Options like fettuccine, spaghetti, or even rotini work wonderfully. Just keep in mind that cooking times may vary slightly depending on the pasta shape you choose. The key is to cook it until al dente, so it holds up well in the creamy sauce.

How can I make this recipe healthier?

There are several ways to lighten up your Creamy Garlic Parmesan Chicken Pasta. First, consider using half-and-half instead of heavy cream. This will reduce the fat content while still providing a creamy texture. You can also cut back on the amount of cheese or use a lower-fat cheese option. Adding more vegetables, like spinach or broccoli, not only boosts nutrition but also adds flavor and color. Lastly, using whole grain or legume-based pasta can increase fiber and protein content, making the dish healthier overall.

Can I prepare the sauce in advance?

Yes, you can prepare the creamy garlic sauce in advance! Simply follow the steps to make the sauce, then let it cool before storing it in an airtight container in the refrigerator. When you’re ready to serve, reheat the sauce gently on the stove, adding a splash of milk or reserved pasta water to loosen it up if needed. Just remember to cook the pasta fresh for the best texture and flavor!

What can I serve with Creamy Garlic Parmesan Chicken Pasta?

There are many delicious options to serve alongside your Creamy Garlic Parmesan Chicken Pasta. A fresh side salad is always a great choice, providing a nice crunch and balance to the creamy dish. Garlic bread or breadsticks are perfect for soaking up the sauce. You can also serve roasted or steamed vegetables for added nutrition. If you enjoy wine, a glass of white wine pairs beautifully with this pasta, enhancing the overall dining experience. Whatever you choose, these sides will complement your meal perfectly!

Conclusion

In conclusion, the Creamy Garlic Parmesan Chicken Pasta Recipe is a delightful dish that brings comfort and flavor to your dining table. With its rich, creamy sauce and tender chicken, it’s a meal that satisfies both the palate and the soul. Whether you’re cooking for family or hosting friends, this recipe is sure to impress.

By following the simple steps outlined in this article, you can create a delicious pasta dish that is not only easy to prepare but also customizable to suit your taste. Remember, the key to a great meal lies in using fresh ingredients and allowing the flavors to meld together. Don’t hesitate to experiment with different proteins or vegetables to make this dish your own.

As you enjoy your Creamy Garlic Parmesan Chicken Pasta, take a moment to appreciate the joy of cooking and sharing meals with loved ones. This recipe is more than just a dish; it’s an opportunity to create memories around the dinner table. So, gather your ingredients, roll up your sleeves, and get ready to indulge in a creamy, cheesy delight that everyone will love!

Happy cooking!

Mediterranean Chicken Meatballs: A Flavorful Delight!

Introduction to Mediterranean Chicken Meatballs

Escape to the sunny shores of the Mediterranean with every bite of these irresistible Chicken Meatballs. Bursting with vibrant herbs, zesty garlic, and a hint of lemon, this dish is a flavorful delight that brings a taste of the Mediterranean straight to your kitchen. Whether you’re serving them over rice, tucked into a pita, or alongside a fresh salad, these meatballs are a delicious way to elevate your everyday dinner routine.

Why You’ll Love This Mediterranean Chicken Meatballs

These Mediterranean Chicken Meatballs are a game-changer for your dinner routine. They come together in just 40 minutes, making them perfect for busy evenings. The combination of fresh herbs and spices creates a burst of flavor that will have your family asking for seconds. Plus, they’re healthy and versatile, fitting into various diets without sacrificing taste. You’ll love how easy they are to prepare and how satisfying they are to eat!

Ingredients for Mediterranean Chicken Meatballs

Gathering the right ingredients is the first step to creating these delightful Mediterranean Chicken Meatballs. Here’s what you’ll need:

  • Ground chicken: The star of the show! It’s lean and packed with protein, making it a healthier choice.
  • Breadcrumbs: These add texture and help bind the meatballs together. You can use regular or whole wheat for a healthier option.
  • Grated Parmesan cheese: A sprinkle of this cheese brings a savory depth to the meatballs.
  • Fresh parsley: This herb adds a burst of color and freshness. Feel free to substitute with cilantro if you prefer.
  • Red onion: Chopped finely, it gives a sweet and tangy flavor that complements the spices.
  • Garlic: Minced garlic is a must for that aromatic kick. You can use garlic powder in a pinch.
  • Egg: This acts as a binder, helping the meatballs hold their shape while cooking.
  • Dried oregano: A classic Mediterranean herb that adds a warm, earthy flavor.
  • Salt and black pepper: Essential seasonings that enhance all the flavors in the dish.
  • Crushed red pepper flakes (optional): For those who like a little heat, these flakes add a spicy kick.
  • Olive oil: Used for cooking, it adds richness and helps achieve that beautiful golden-brown color.

For exact measurements, check the bottom of the article where you can find everything listed for easy printing. Happy cooking!

How to Make Mediterranean Chicken Meatballs

Creating these Mediterranean Chicken Meatballs is a straightforward process that will fill your kitchen with delightful aromas. Follow these simple steps, and you’ll have a delicious meal ready in no time!

Step 1: Preheat the Oven

Start by preheating your oven to 400°F. This step is crucial for even cooking. A hot oven ensures that the meatballs cook through while developing a lovely golden-brown crust. Trust me, you want that crispy exterior!

Step 2: Mix the Ingredients

In a large mixing bowl, combine the ground chicken, breadcrumbs, Parmesan cheese, parsley, red onion, garlic, egg, oregano, salt, black pepper, and optional crushed red pepper flakes. Use your hands to gently mix everything together. Be careful not to overmix; you want the ingredients to be just combined. Overmixing can lead to tough meatballs, and nobody wants that!

Step 3: Form the Meatballs

Now it’s time to shape your meatballs! Take a small amount of the mixture and roll it into a ball about 1 to 1.5 inches in diameter. This size is perfect for cooking evenly. If you find the mixture sticking to your hands, a little olive oil can help. Keep your meatballs uniform in size for consistent cooking.

Step 4: Brown the Meatballs

Heat olive oil in a large oven-safe skillet over medium heat. Once hot, add the meatballs in batches, making sure not to overcrowd the pan. Brown them on all sides for about 5-7 minutes. This step is essential for flavor; browning adds a rich, caramelized taste that elevates your Mediterranean Chicken Meatballs.

Step 5: Bake the Meatballs

After browning, transfer the skillet to your preheated oven. Bake the meatballs for 15-20 minutes, or until they reach an internal temperature of 165°F. To check for doneness, use a meat thermometer. This ensures they’re cooked through and safe to eat. Once done, let them cool for a few minutes before serving. Enjoy the deliciousness!

Tips for Success

  • Use fresh herbs for the best flavor; dried herbs can work in a pinch but won’t be as vibrant.
  • Don’t skip the browning step; it adds depth and richness to your meatballs.
  • Keep your hands slightly wet when forming meatballs to prevent sticking.
  • For extra moisture, consider adding a splash of chicken broth to the mixture.
  • Let the meatballs rest for a few minutes after baking for better texture.

Equipment Needed

  • Large mixing bowl: Essential for combining ingredients. A sturdy pot can work in a pinch.
  • Oven-safe skillet: Perfect for browning and baking. A baking dish can be used if you don’t have one.
  • Meat thermometer: Ensures meatballs are cooked through. A knife can help check doneness if needed.
  • Cookie scoop or spoon: Great for portioning meatballs. Your hands will do just fine too!

Variations of Mediterranean Chicken Meatballs

  • Ground turkey: Swap ground chicken for ground turkey for a leaner option that still packs a punch of flavor.
  • Chickpea meatballs: For a vegetarian twist, use mashed chickpeas or lentils as the base, adding spices for that Mediterranean flair.
  • Herb variations: Experiment with different herbs like mint or basil for a unique flavor profile that complements the dish.
  • Cheese alternatives: Try feta cheese instead of Parmesan for a tangy kick that enhances the Mediterranean essence.
  • Spicy version: Increase the crushed red pepper flakes or add diced jalapeños for a spicier meatball that will wake up your taste buds.

Serving Suggestions for Mediterranean Chicken Meatballs

  • Pair with a refreshing Greek salad for a light and vibrant meal.
  • Serve alongside warm pita bread and tzatziki sauce for dipping.
  • Complement with roasted vegetables for a colorful plate.
  • Enjoy with a glass of crisp white wine or sparkling water.
  • Garnish with extra parsley or a sprinkle of feta for a beautiful presentation.

FAQs about Mediterranean Chicken Meatballs

As you embark on your culinary journey with Mediterranean Chicken Meatballs, you might have a few questions. Here are some common queries that can help you along the way:

Can I make Mediterranean Chicken Meatballs ahead of time?

Absolutely! You can prepare the meatballs in advance and store them in the refrigerator for up to 24 hours before cooking. This makes them a fantastic option for meal prep!

What can I serve with Mediterranean Chicken Meatballs?

These meatballs pair wonderfully with a variety of sides. Consider serving them with a fresh Greek salad, warm pita bread, or even over a bed of fluffy couscous for a complete meal.

Can I freeze Mediterranean Chicken Meatballs?

Yes, you can freeze them! After cooking, let the meatballs cool completely, then place them in an airtight container. They can be frozen for up to three months. Just reheat them in the oven or on the stovetop when you’re ready to enjoy!

Are Mediterranean Chicken Meatballs gluten-free?

To make these meatballs gluten-free, simply substitute regular breadcrumbs with gluten-free breadcrumbs. This way, everyone can enjoy this delicious dish without worry!

How do I know when the meatballs are done cooking?

The best way to check for doneness is by using a meat thermometer. The internal temperature should reach 165°F. If you don’t have one, cut a meatball in half; it should be cooked through with no pink remaining.

Final Thoughts

Cooking Mediterranean Chicken Meatballs is more than just preparing a meal; it’s about creating memories and sharing joy with those you love. The vibrant flavors and delightful aromas will fill your kitchen, inviting everyone to gather around the table. Each bite is a celebration of health and taste, making it a dish you’ll return to time and again. Whether it’s a cozy family dinner or a gathering with friends, these meatballs are sure to impress. So roll up your sleeves, embrace the process, and enjoy the delicious journey of cooking together!

Mediterranean Chicken Meatballs
jhessica

Mediterranean Chicken Meatballs: A Flavorful Delight!

Mediterranean Chicken Meatballs are a flavorful and healthy dish made with ground chicken and a blend of Mediterranean spices and herbs.
Prep Time 15 minutes
Cook Time 25 minutes
Total Time 40 minutes
Servings: 4 servings
Course: Main Course
Cuisine: Mediterranean
Calories: 250

Ingredients
  

  • 1 pound ground chicken
  • 1/2 cup breadcrumbs
  • 1/4 cup grated Parmesan cheese
  • 1/4 cup chopped fresh parsley
  • 1/4 cup chopped red onion
  • 2 cloves garlic minced
  • 1 large egg
  • 1 teaspoon dried oregano
  • 1 teaspoon salt
  • 1/2 teaspoon black pepper
  • 1/4 teaspoon crushed red pepper flakes optional
  • 1 tablespoon olive oil for cooking

Method
 

  1. Preheat your oven to 400°F.
  2. In a large mixing bowl, combine the ground chicken, breadcrumbs, Parmesan cheese, parsley, red onion, garlic, egg, oregano, salt, black pepper, and crushed red pepper flakes (if using).
  3. Mix the ingredients together until well combined, but do not overmix.
  4. Using your hands, form the mixture into meatballs, about 1 to 1.5 inches in diameter.
  5. Heat the olive oil in a large oven-safe skillet over medium heat. Add the meatballs in batches, cooking until browned on all sides, about 5-7 minutes.
  6. Once browned, transfer the skillet to the preheated oven and bake for 15-20 minutes, or until the meatballs are cooked through (internal temperature should reach 165°F).
  7. Remove from the oven and let cool for a few minutes before serving.

Nutrition

Serving: 1meatballCalories: 250kcalCarbohydrates: 10gProtein: 28gFat: 12gSaturated Fat: 3gPolyunsaturated Fat: 9gCholesterol: 70mgSodium: 600mgFiber: 1gSugar: 1g

Notes

  • For added flavor, serve the meatballs with a side of tzatziki sauce or a fresh Greek salad.
  • You can substitute ground turkey for the chicken for a leaner option.
  • For a vegetarian version, try using chickpeas or lentils as the base.

Tried this recipe?

Let us know how it was!

Cheesy Chicken Burrito Casserole Recipe is a must-try!

Introduction to Cheesy Chicken Burrito Casserole Recipe

Cheesy Chicken Burrito Casserole Recipe. This dish combines all the flavors of a classic burrito into a warm, cheesy casserole. It’s perfect for busy weeknights or cozy weekends. With just a few simple ingredients, you can create a hearty meal that’s both satisfying and comforting.

What Makes This Recipe Special?

What sets this casserole apart is its delightful blend of flavors and textures. The tender, shredded chicken pairs perfectly with the creamy cheeses and zesty spices. Plus, the addition of black beans and corn adds a nutritious touch. Each bite is a burst of flavor that will leave you wanting more. The best part? It’s all baked together in one dish, making cleanup a breeze!

Why You Should Try Cheesy Chicken Burrito Casserole

Cheesy Chicken Burrito Casserole Recipe. First, it’s incredibly versatile. You can easily customize it to suit your taste. Want it spicier? Just add some jalapeños! Prefer a vegetarian option? Swap the chicken for beans or veggies. Second, it’s a great way to use up leftover chicken or rice. Lastly, this casserole is a crowd-pleaser. Whether you’re serving it at a family dinner or a potluck, everyone will enjoy it. So, gather your ingredients and get ready to make a dish that’s sure to impress!

Ingredients for Cheesy Chicken Burrito Casserole Recipe

Cheesy Chicken Burrito Casserole Recipe, you’ll need a variety of ingredients that come together to make this dish truly special. Here’s a complete list of what you’ll need:

  • 2 cups cooked and shredded chicken
  • 1 can (15 ounces) black beans, rinsed and drained
  • 1 can (15 ounces) corn, drained
  • 1 can (10 ounces) diced tomatoes with green chilies
  • 1 cup cooked rice (white or brown)
  • 1 cup shredded cheddar cheese
  • 1 cup shredded Monterey Jack cheese
  • 1 tablespoon taco seasoning
  • 1 teaspoon garlic powder
  • 1 teaspoon onion powder
  • 1/2 teaspoon salt
  • 1/4 teaspoon black pepper
  • 1/4 cup fresh cilantro, chopped (optional)
  • 1/2 cup sour cream (for serving)
  • 1 avocado, diced (for serving)

These ingredients are not only easy to find but also combine to create a delightful flavor profile. The shredded chicken serves as the main protein, while the black beans and corn add texture and nutrition. The combination of cheddar and Monterey Jack cheeses provides a creamy, cheesy topping that melts beautifully in the oven. Don’t forget the spices! They elevate the dish, giving it that classic burrito taste.

Feel free to adjust the ingredients based on your preferences. For instance, if you want a vegetarian version, you can replace the chicken with more beans or your favorite vegetables. The flexibility of this recipe makes it a fantastic choice for any occasion!

Step-by-Step Preparation of Cheesy Chicken Burrito Casserole Recipe

Cheesy Chicken Burrito Casserole Recipe. Follow these simple steps to create a delicious meal that everyone will love!

Step 1: Prepping the Ingredients

First things first, let’s get everything prepped. Start by gathering all your ingredients on the counter. This makes the cooking process smoother. If you haven’t done so already, cook your rice according to the package instructions. While the rice is cooking, shred your chicken if it’s not already done. You can use rotisserie chicken for convenience. Next, rinse and drain the black beans and corn. Finally, chop the fresh cilantro if you’re using it. Having everything ready will make assembling the casserole a breeze!

Step 2: Cooking the Chicken

If you’re using raw chicken, you’ll need to cook it first. You can boil, bake, or sauté the chicken until it’s fully cooked. If you choose to boil, place the chicken in a pot of water and let it simmer for about 15-20 minutes. Once cooked, let it cool slightly before shredding it with two forks. This step is crucial as it ensures your chicken is tender and easy to mix with the other ingredients.

Step 3: Assembling the Casserole

Now comes the fun part—assembling your casserole! In a large mixing bowl, combine the shredded chicken, black beans, corn, diced tomatoes, cooked rice, taco seasoning, garlic powder, onion powder, salt, and black pepper. Mix everything well until all the ingredients are evenly coated with the spices. Then, transfer this mixture into a greased 9×13-inch baking dish. Spread it out evenly to ensure even cooking. Finally, sprinkle the shredded cheddar and Monterey Jack cheese generously on top. This cheesy layer will melt beautifully in the oven!

Step 4: Baking the Casserole

It’s time to bake! Preheat your oven to 350°F. Cover the baking dish with aluminum foil to keep the moisture in. Bake for 25 minutes. After that, remove the foil and bake for an additional 10-15 minutes. You’ll know it’s ready when the cheese is bubbly and golden brown. Once baked, take it out of the oven and let it cool for about 5 minutes. This cooling time helps the casserole set, making it easier to serve.

Cheesy Chicken Burrito Casserole is now ready to be enjoyed. The combination of flavors and textures will surely delight your taste buds!

Variations of Cheesy Chicken Burrito Casserole Recipe

Cheesy Chicken Burrito Casserole Recipe is not only delicious but also incredibly versatile. You can easily modify it to suit different dietary preferences or to simply mix things up. Here are some exciting variations to consider!

Vegetarian Options

If you’re looking for a vegetarian twist, you can easily swap out the chicken for a variety of plant-based ingredients. Consider using:

  • Black Beans: Increase the amount of black beans for added protein and fiber.
  • Chickpeas: These can add a nutty flavor and a hearty texture.
  • Vegetables: Add diced bell peppers, zucchini, or mushrooms for extra nutrients and flavor.
  • Tofu: Crumbled tofu can be a great substitute for chicken, absorbing all the delicious spices.

These options not only make the casserole vegetarian-friendly but also keep it filling and satisfying!

Spicy Additions

Cheesy Chicken Burrito Casserole Recipe. Here are some ideas:

  • Diced Jalapeños: Mix in fresh or pickled jalapeños for a zesty kick.
  • Hot Sauce: A splash of your favorite hot sauce can elevate the flavor.
  • Spicy Sausage: Substitute the chicken with spicy sausage for a meaty, flavorful twist.

These spicy additions will surely satisfy your cravings for heat while enhancing the overall taste of the casserole!

Alternative Cheeses

Cheese is a key ingredient in this casserole, and you can experiment with different types to find your favorite combination. Here are some alternatives:

  • Pepper Jack Cheese: This cheese adds a creamy texture and a spicy flavor.
  • Queso Fresco: Crumbled queso fresco can provide a fresh, tangy taste.
  • Feta Cheese: For a unique twist, try adding feta for a salty, rich flavor.

Mixing and matching cheeses can create a delightful flavor profile that keeps your casserole exciting and new!

Cheesy Chicken Burrito Casserole Recipe to fit any occasion or preference. Whether you’re cooking for vegetarians, spice lovers, or cheese enthusiasts, there’s a version for everyone!

Cooking Note for Cheesy Chicken Burrito Casserole Recipe

Cheesy Chicken Burrito Casserole Recipe, there are a few important cooking notes to keep in mind. These tips will help ensure that your casserole turns out perfectly every time!

First, make sure to use cooked and shredded chicken. This not only saves time but also ensures that the chicken is tender and flavorful. If you’re using leftover chicken, it’s a great way to reduce waste and create a delicious meal.

Next, consider the type of rice you use. Both white and brown rice work well, but brown rice adds a nutty flavor and extra fiber. If you’re short on time, you can use instant rice, which cooks quickly and easily.

Don’t forget to rinse and drain the black beans and corn thoroughly. This step removes excess sodium and ensures that your casserole doesn’t become too watery. Properly drained ingredients will help maintain the right texture.

When mixing the ingredients, be gentle. You want to combine everything without breaking up the beans or chicken too much. A light hand will keep the textures intact, making each bite enjoyable.

Lastly, keep an eye on the baking time. Ovens can vary, so check your casserole a few minutes before the suggested time. You want the cheese to be bubbly and golden, but not burnt. If you notice the cheese browning too quickly, you can cover it with foil for the last few minutes of baking.

Cheesy Chicken Burrito Casserole that’s not only delicious but also visually appealing. Enjoy the process and the delightful meal that awaits!

Serving Suggestions for Cheesy Chicken Burrito Casserole Recipe

Cheesy Chicken Burrito Casserole is baked to perfection, it’s time to think about how to serve it. The right side dishes and garnishes can elevate your meal, making it even more enjoyable. Here are some fantastic serving suggestions to consider!

Ideal Side Dishes

Pairing your casserole with the right side dishes can enhance the overall dining experience. Here are some ideal options:

  • Mexican Rice: A side of fluffy Mexican rice complements the flavors of the casserole beautifully.
  • Refried Beans: Creamy refried beans add a rich texture and are a classic pairing with burrito-inspired dishes.
  • Guacamole: Fresh guacamole brings a creamy, cool element that balances the warmth of the casserole.
  • Simple Green Salad: A light salad with lettuce, tomatoes, and a zesty dressing can provide a refreshing contrast.
  • Chips and Salsa: Crunchy tortilla chips with salsa make for a fun and tasty appetizer before the main dish.

Cheesy Chicken Burrito Casserole but also add variety to your meal, making it more satisfying.

Garnishes and Toppings

Garnishes and toppings can take your casserole to the next level. Here are some delicious options to consider:

  • Fresh Cilantro: Chopped cilantro adds a burst of freshness and color to your dish.
  • Sour Cream: A dollop of sour cream provides creaminess and balances the spices in the casserole.
  • Diced Avocado: Creamy avocado adds a rich texture and enhances the overall flavor.
  • Chopped Green Onions: Sprinkle some green onions on top for a mild onion flavor and a pop of color.
  • Hot Sauce: For those who love heat, a drizzle of hot sauce can add an extra kick!

Cheesy Chicken Burrito Casserole but also allow each person to customize their serving to their liking. Enjoy your meal with these delightful additions!

Tips for Perfecting Your Cheesy Chicken Burrito Casserole Recipe

Cheesy Chicken Burrito Casserole Recipe truly outstanding, consider these helpful tips. They will ensure that your dish is not only delicious but also visually appealing and satisfying!

First, always use fresh ingredients. Fresh vegetables and herbs can significantly enhance the flavor of your casserole. If possible, opt for organic produce for a healthier option. Fresh cilantro, for example, adds a vibrant taste that elevates the entire dish.

Next, don’t skimp on the cheese! A generous layer of cheese on top creates a deliciously gooey texture. Mixing different types of cheese can also add depth to the flavor. Experiment with combinations to find your favorite mix!

Another tip is to let the casserole rest after baking. Allowing it to cool for about 5-10 minutes helps the layers set. This makes it easier to serve and ensures that each slice holds together nicely.

For added flavor, consider marinating your chicken before cooking. A simple marinade of lime juice, garlic, and spices can infuse the chicken with extra zest. This step is especially beneficial if you’re using plain, cooked chicken.

Lastly, don’t hesitate to get creative with toppings. Adding a variety of garnishes can make your casserole visually appealing. Consider using sliced jalapeños, diced tomatoes, or even a sprinkle of lime juice for a fresh finish. These small touches can make a big difference!

Cheesy Chicken Burrito Casserole that’s not only delicious but also a feast for the eyes. Enjoy the process and the delightful meal that awaits!

Breakdown of Time for Cheesy Chicken Burrito Casserole Recipe

Prep Time

Cheesy Chicken Burrito Casserole Recipe is quite manageable. You can expect to spend about 15-20 minutes gathering and preparing your ingredients. This includes cooking the rice, shredding the chicken, and rinsing the beans and corn. Having everything ready will make the assembly process quick and easy!

Cooking Time

Once your casserole is assembled, the cooking time is approximately 35-40 minutes. First, you’ll bake it covered with foil for 25 minutes. Then, you’ll remove the foil and bake for an additional 10-15 minutes. This allows the cheese to melt and become bubbly, creating that delicious golden topping we all love!

Total Time

In total, you’re looking at about 50-60 minutes from start to finish. This includes both prep and cooking time. It’s a relatively quick meal to prepare, especially considering how satisfying and flavorful it is. Perfect for busy weeknights or when you want to impress guests without spending hours in the kitchen!

Nutritional Information for Cheesy Chicken Burrito Casserole Recipe

Cheesy Chicken Burrito Casserole Recipe not only satisfies your taste buds but also provides valuable nutrients. Here’s a breakdown of the nutritional information per serving:

Calories

Each serving of this delicious casserole contains approximately 360 calories. This makes it a hearty meal option without being overly heavy. The combination of chicken, beans, and cheese provides a satisfying dish that can keep you full for hours.

Protein

Cheesy Chicken Burrito Casserole Recipe is its protein content. Each serving offers about 28 grams of protein. This is primarily due to the shredded chicken and black beans, making it an excellent choice for those looking to increase their protein intake. Protein is essential for muscle repair and overall health, making this casserole a nutritious option.

Sodium

When it comes to sodium, each serving contains around 800 milligrams. While this is a reasonable amount for a flavorful dish, it’s important to be mindful of your overall sodium intake throughout the day. To reduce sodium levels, consider using low-sodium canned beans and tomatoes. This small adjustment can help you enjoy the casserole while keeping your sodium consumption in check.

Cheesy Chicken Burrito Casserole Recipe is a balanced meal that provides a good mix of calories, protein, and flavor. It’s perfect for family dinners or gatherings, ensuring everyone leaves the table satisfied. Enjoy this delicious dish while being mindful of your nutritional needs!

FAQs about Cheesy Chicken Burrito Casserole Recipe

Can I make Cheesy Chicken Burrito Casserole ahead of time?

Cheesy Chicken Burrito Casserole Recipe ahead of time. Simply assemble the casserole as directed, but do not bake it. Cover it tightly with plastic wrap or aluminum foil and store it in the refrigerator for up to 24 hours. When you’re ready to bake, just remove the cover and bake it as instructed. You may need to add a few extra minutes to the cooking time if it’s cold from the fridge.

What can I substitute for chicken in this recipe?

If you want to substitute chicken, there are plenty of options! You can use:

  • Ground Turkey or Beef: These meats can provide a different flavor while still being hearty.
  • Tofu: Crumbled tofu is a great plant-based option that absorbs flavors well.
  • More Beans: Increase the amount of black beans or add pinto beans for extra protein.
  • Vegetables: Diced bell peppers, zucchini, or mushrooms can add a delicious twist.

These substitutions will keep your casserole tasty and satisfying!

How do I store leftovers of Cheesy Chicken Burrito Casserole?

Cheesy Chicken Burrito Casserole to cool completely before transferring it to an airtight container. You can keep it in the refrigerator for up to 3-4 days. When you’re ready to enjoy it again, simply reheat individual portions in the microwave or warm it in the oven until heated through.

Can I freeze Cheesy Chicken Burrito Casserole?

Cheesy Chicken Burrito Casserole Recipe! To do this, prepare the casserole as directed but do not bake it. Instead, cover it tightly with plastic wrap and then aluminum foil to prevent freezer burn. It can be frozen for up to 2-3 months. When you’re ready to bake it, thaw it in the refrigerator overnight and then bake as usual. This makes for a convenient meal option on busy days!

Conclusion on Cheesy Chicken Burrito Casserole Recipe

Cheesy Chicken Burrito Casserole Recipe is a delightful dish that brings together the best flavors of a classic burrito in a convenient and satisfying casserole form. With its combination of tender chicken, hearty beans, and creamy cheeses, this recipe is sure to become a family favorite. Not only is it easy to prepare, but it also offers endless possibilities for customization, making it suitable for various dietary preferences.

Whether you’re hosting a gathering, preparing a weeknight dinner, or simply craving something comforting, this casserole fits the bill perfectly. The step-by-step preparation ensures that even novice cooks can create a delicious meal with confidence. Plus, the ability to make it ahead of time or freeze it for later adds to its convenience.

Cheesy Chicken Burrito Casserole can be tailored to suit your taste buds. So, gather your ingredients, follow the steps, and enjoy a warm, cheesy dish that’s packed with flavor and nutrition.

We hope you enjoy making and sharing this casserole with your loved ones. It’s more than just a meal; it’s a way to create memories around the dinner table. Happy cooking!

Southern Fried Chicken and Waffles Recipe is delicious!

Introduction to Southern Fried Chicken and Waffles Recipe

Southern Fried Chicken and Waffles is more than just a meal; it’s a delightful experience that brings together the best of both worlds. This dish combines crispy, flavorful fried chicken with fluffy, warm waffles, creating a perfect balance of savory and sweet. Whether you’re enjoying it for breakfast, lunch, or dinner, this recipe is sure to satisfy your cravings.

The Origins of Southern Fried Chicken and Waffles

The roots of Southern Fried Chicken and Waffles can be traced back to the 19th century. This dish originated in the Southern United States, where fried chicken was a staple. Waffles, on the other hand, were brought to America by European settlers. The combination of these two beloved foods became popular in the African American community, especially in soul food cuisine. Over the years, it has evolved into a classic comfort food that is loved by many.

Interestingly, the pairing of chicken and waffles was not common until the 1930s. It gained popularity in Harlem, New York, where it was served in jazz clubs. The dish quickly became a favorite among musicians and patrons alike, leading to its rise in fame across the country. Today, Southern Fried Chicken and Waffles is celebrated in restaurants and homes, showcasing the rich culinary history of the South.

Why This Southern Fried Chicken and Waffles Recipe Stands Out

This Southern Fried Chicken and Waffles recipe stands out for its simplicity and flavor. The crispy chicken is seasoned with a blend of spices that enhance its taste, while the waffles are light and fluffy, providing the perfect base. The addition of maple syrup adds a sweet touch that complements the savory chicken beautifully.

Moreover, this recipe is versatile. You can easily adjust the spice levels to suit your taste. Whether you prefer a mild flavor or a spicy kick, this recipe can accommodate your preferences. Plus, it’s a crowd-pleaser, making it ideal for family gatherings or brunch with friends. With just a few ingredients and simple steps, you can create a dish that feels special and indulgent.

So, roll up your sleeves and get ready to dive into this delicious Southern Fried Chicken and Waffles recipe. It’s time to bring a taste of the South to your table!

Ingredients for Southern Fried Chicken and Waffles Recipe

To create the perfect Southern Fried Chicken and Waffles, you’ll need a selection of fresh ingredients. Each component plays a vital role in achieving that delightful balance of flavors and textures. Here’s what you’ll need:

  • 2 cups all-purpose flour
  • 1 tablespoon baking powder
  • 1 teaspoon salt
  • 1 teaspoon black pepper
  • 1 teaspoon paprika
  • 1 teaspoon garlic powder
  • 1 teaspoon onion powder
  • 1/2 teaspoon cayenne pepper (optional for spice)
  • 4 large eggs
  • 1 cup buttermilk
  • 4 chicken thighs (bone-in, skin-on)
  • 4 chicken drumsticks
  • Vegetable oil (for frying)
  • 4 frozen or homemade waffles
  • Maple syrup (for serving)
  • Butter (for serving)

These ingredients come together to create a dish that is not only delicious but also comforting. The spices in the flour mixture give the chicken its signature flavor, while the buttermilk ensures it stays juicy and tender. The waffles provide a fluffy counterpart to the crispy chicken, making each bite a delightful experience.

Feel free to customize the ingredients to suit your taste. For instance, you can add more spices for a bolder flavor or use whole wheat flour for a healthier option. The beauty of this Southern Fried Chicken and Waffles recipe lies in its flexibility, allowing you to make it your own!

Step-by-Step Preparation of Southern Fried Chicken and Waffles Recipe

Now that you have gathered all the ingredients, it’s time to dive into the preparation of your Southern Fried Chicken and Waffles. This step-by-step guide will help you create a delicious meal that is sure to impress. Let’s get started!

Step 1: Preparing the Chicken Marinade

First, you need to marinate the chicken to enhance its flavor and tenderness. In a large bowl, combine the buttermilk and eggs. Whisk them together until well blended. This mixture will help the flour adhere to the chicken and keep it moist during frying.

Next, add the chicken thighs and drumsticks to the buttermilk mixture. Make sure each piece is fully submerged. Cover the bowl with plastic wrap and let it marinate in the refrigerator for at least 1 hour. For best results, marinate overnight. This allows the flavors to penetrate the chicken, making it juicy and flavorful.

Step 2: Coating the Chicken for Frying

After marinating, it’s time to coat the chicken. In a separate large bowl, mix together the all-purpose flour, baking powder, salt, black pepper, paprika, garlic powder, onion powder, and cayenne pepper. This seasoned flour will give your chicken that crispy, flavorful crust.

Remove each piece of chicken from the buttermilk mixture, allowing any excess to drip off. Then, dip it into the flour mixture, ensuring it is fully coated. For an extra crunchy texture, consider double-dipping: return the chicken to the buttermilk and then back into the flour. Once coated, place the chicken on a wire rack and let it rest for about 15 minutes. This helps the coating stick better during frying.

Step 3: Frying the Chicken to Perfection

Now, it’s time to fry the chicken! In a large skillet, heat about 1 inch of vegetable oil over medium-high heat. Use a thermometer to check the oil temperature; it should reach 350°F for optimal frying. Carefully add the chicken pieces to the hot oil, making sure not to overcrowd the pan. Fry in batches if necessary.

Cook the chicken for about 12-15 minutes, turning occasionally. You want it to be golden brown and crispy. To ensure it’s fully cooked, check that the internal temperature reaches 165°F. Once done, remove the chicken from the oil and place it on a paper towel-lined plate to drain any excess oil. This will keep your chicken crispy!

Step 4: Making the Waffles from Scratch

While the chicken is frying, you can prepare the waffles. If you’re using frozen waffles, simply follow the package instructions to heat them up. However, if you prefer homemade waffles, here’s a quick recipe:

  • In a bowl, mix 2 cups of all-purpose flour, 2 tablespoons of sugar, 1 tablespoon of baking powder, and a pinch of salt.
  • In another bowl, whisk together 2 large eggs, 1 3/4 cups of milk, and 1/2 cup of melted butter.
  • Combine the wet and dry ingredients, stirring until just mixed. Avoid overmixing.
  • Preheat your waffle iron and pour the batter according to the manufacturer’s instructions. Cook until golden brown.

Once your waffles are ready, keep them warm in a low oven until you’re ready to serve.

Step 5: Combining Chicken and Waffles

Now comes the best part—combining the chicken and waffles! On a warm plate, place a fluffy waffle. Top it with a piece of crispy fried chicken. Drizzle generously with maple syrup for that sweet touch. If you like, add a pat of butter on top for extra richness.

And there you have it! Your Southern Fried Chicken and Waffles are ready to be enjoyed. This dish is perfect for any occasion, whether it’s a cozy family breakfast or a festive brunch with friends. Enjoy every delicious bite!

Variations of Southern Fried Chicken and Waffles Recipe

While the classic Southern Fried Chicken and Waffles recipe is a beloved favorite, there are many exciting variations to explore. These adaptations allow you to enjoy this dish in new and creative ways. Whether you’re looking for a spicy twist or a plant-based option, there’s something for everyone. Let’s dive into two popular variations!

Spicy Southern Fried Chicken and Waffles Recipe

If you love a little heat, the Spicy Southern Fried Chicken and Waffles recipe is perfect for you! To add a fiery kick, simply modify the buttermilk marinade. Start by mixing in a few dashes of your favorite hot sauce. This will infuse the chicken with a zesty flavor that pairs beautifully with the sweetness of the waffles.

Additionally, you can increase the cayenne pepper in the flour mixture to amp up the spice level. For an extra layer of flavor, consider adding some crushed red pepper flakes to the coating. This variation is sure to satisfy those who enjoy a bold taste in their meals!

Vegan Southern Fried Chicken and Waffles Recipe

For those following a plant-based diet, the Vegan Southern Fried Chicken and Waffles recipe offers a delicious alternative. Instead of chicken, you can use tofu or seitan as the main protein. Start by pressing the tofu to remove excess moisture, then cut it into thick slices.

Next, prepare a vegan buttermilk by mixing plant-based milk (like almond or soy) with a tablespoon of vinegar. Let it sit for a few minutes to curdle. Dip the tofu slices into the vegan buttermilk, then coat them in the seasoned flour mixture just like you would with chicken.

Fry the tofu in vegetable oil until golden brown and crispy. Serve it on top of your waffles, drizzled with maple syrup. This vegan version is not only tasty but also a great way to enjoy the classic dish without any animal products!

These variations of Southern Fried Chicken and Waffles allow you to customize the dish to your liking. Whether you prefer it spicy or vegan, you can still enjoy the comforting flavors that make this meal so special. So, gather your ingredients and get ready to try these exciting twists!

Cooking Note for Southern Fried Chicken and Waffles Recipe

Cooking Southern Fried Chicken and Waffles is a delightful journey that requires attention to detail. Here are some essential notes to ensure your dish turns out perfectly every time. These tips will help you achieve that crispy chicken and fluffy waffles that everyone loves.

First, the temperature of the oil is crucial. If the oil is too hot, the chicken will burn on the outside while remaining raw inside. Conversely, if the oil is not hot enough, the chicken will absorb too much oil and become greasy. Use a thermometer to maintain the oil temperature at 350°F for optimal frying.

Next, don’t rush the marinating process. Allowing the chicken to soak in the buttermilk mixture for at least an hour, or even overnight, enhances its flavor and tenderness. This step is vital for achieving juicy chicken that is packed with flavor.

When coating the chicken, ensure that each piece is thoroughly covered in the flour mixture. This will create a delicious, crunchy crust. For an extra layer of crunch, consider double-dipping the chicken in the buttermilk and flour mixture before frying.

As for the waffles, if you’re making them from scratch, avoid overmixing the batter. Stir just until the ingredients are combined to keep the waffles light and fluffy. If you prefer to use frozen waffles, opt for high-quality brands that offer a good texture and flavor.

Lastly, serve the chicken and waffles immediately after cooking. This ensures that the chicken remains crispy and the waffles stay warm. If you need to keep them warm, place them in a low oven (around 200°F) until ready to serve. Enjoy your cooking adventure, and savor every bite of this classic Southern dish!

Serving Suggestions for Southern Fried Chicken and Waffles Recipe

Once you’ve prepared your Southern Fried Chicken and Waffles, it’s time to think about how to elevate your meal even further. While the dish is delicious on its own, adding some sides and sauces can enhance the overall experience. Here are some ideal pairings and serving suggestions to consider.

Ideal Sides to Pair with Southern Fried Chicken and Waffles

To complement the rich flavors of Southern Fried Chicken and Waffles, consider serving some tasty sides. Here are a few suggestions:

  • Collard Greens: This classic Southern side dish adds a nutritious touch. The slight bitterness of collard greens balances the sweetness of the waffles.
  • Macaroni and Cheese: Creamy and cheesy, this dish is a comfort food favorite. It pairs perfectly with the crispy chicken.
  • Fried Green Tomatoes: These tangy, crispy bites add a delightful crunch and a unique flavor that complements the meal.
  • Coleslaw: A refreshing coleslaw can provide a crunchy texture and a tangy contrast to the savory chicken and sweet waffles.

These sides not only enhance the meal but also create a well-rounded dining experience. Feel free to mix and match based on your preferences and what you have on hand!

Best Sauces and Syrups for Serving

When it comes to sauces and syrups, the right choices can elevate your Southern Fried Chicken and Waffles to new heights. Here are some delicious options:

  • Maple Syrup: The classic choice! Its sweetness perfectly complements the savory chicken and fluffy waffles.
  • Honey: Drizzling honey over the chicken adds a floral sweetness that enhances the dish’s flavor.
  • Hot Sauce: For those who enjoy a spicy kick, a few dashes of hot sauce can add a delightful heat that contrasts beautifully with the sweetness.
  • Barbecue Sauce: A tangy barbecue sauce can provide a smoky flavor that pairs well with the fried chicken.

Experiment with these sauces to find your favorite combination. Whether you prefer sweet, spicy, or tangy, there’s a perfect match for your Southern Fried Chicken and Waffles!

Tips for Perfecting Your Southern Fried Chicken and Waffles Recipe

Creating the perfect Southern Fried Chicken and Waffles requires a bit of practice and attention to detail. Here are some valuable tips to help you achieve that crispy chicken and fluffy waffles every time. With these suggestions, you’ll impress your family and friends with your culinary skills!

First, always start with high-quality chicken. Fresh, organic chicken will yield the best flavor and texture. Look for pieces that are plump and have a good amount of skin, as this will help create that crispy exterior.

Next, don’t skip the marinating step. Marinating the chicken in buttermilk not only adds flavor but also tenderizes the meat. If you have time, let it marinate overnight for the best results. This will ensure your chicken is juicy and flavorful.

When it comes to frying, maintaining the right oil temperature is crucial. Use a thermometer to keep the oil at 350°F. If the oil is too hot, the chicken will burn. If it’s too cool, the chicken will absorb too much oil and become greasy. Fry in small batches to avoid lowering the oil temperature.

For an extra crispy coating, consider double-dipping the chicken. After the initial coating in flour, dip it back into the buttermilk and then coat it again in the flour mixture. This creates a thicker crust that’s wonderfully crunchy.

As for the waffles, avoid overmixing the batter. Stir just until the ingredients are combined. Overmixing can lead to dense waffles instead of light and fluffy ones. If you’re using a waffle iron, preheat it properly to ensure even cooking.

Lastly, serve your Southern Fried Chicken and Waffles immediately after cooking. This keeps the chicken crispy and the waffles warm. If you need to keep them warm, place them in a low oven (around 200°F) until ready to serve. Enjoy your delicious creation!

Breakdown of Time for Southern Fried Chicken and Waffles Recipe

Understanding the time required for each step in the Southern Fried Chicken and Waffles recipe can help you plan your cooking session effectively. Here’s a breakdown of the time you’ll need for preparation and cooking.

Prep Time

The prep time for this delicious dish is approximately 1 hour and 15 minutes. This includes:

  • Marinating the Chicken: 1 hour (or longer if you choose to marinate overnight)
  • Preparing the Coating: 15 minutes
  • Making the Waffle Batter: 10 minutes (if making from scratch)

Keep in mind that marinating the chicken is essential for flavor and tenderness. If you have the time, marinating overnight is highly recommended!

Cooking Time

The cooking time for Southern Fried Chicken and Waffles is about 30 minutes. This includes:

  • Frying the Chicken: 15-20 minutes, depending on the size of the chicken pieces and the temperature of the oil.
  • Cooking the Waffles: 10-15 minutes, depending on whether you are using frozen waffles or making them from scratch.

Make sure to keep an eye on the chicken while frying to ensure it reaches that perfect golden brown color!

Total Time

In total, you can expect to spend around 1 hour and 45 minutes to 2 hours on this Southern Fried Chicken and Waffles recipe. This includes both prep and cooking time. If you choose to marinate the chicken overnight, the total time will be longer, but the hands-on time remains the same.

With this time breakdown, you can plan your cooking session accordingly. Enjoy the process and the delicious results of your Southern Fried Chicken and Waffles!

Nutritional Information for Southern Fried Chicken and Waffles Recipe

Understanding the nutritional content of your meals is essential for maintaining a balanced diet. The Southern Fried Chicken and Waffles recipe is a delightful treat, but it’s important to be aware of its nutritional values. Here’s a breakdown of the key nutritional information per serving:

Calories

750 calories. This calorie count includes the fried chicken, waffles, and the addition of maple syrup and butter. While this dish is indulgent, it can be enjoyed as an occasional treat rather than a daily meal.

Protein

30 grams of protein per serving. The chicken is the primary source of protein, making this dish a satisfying option for those looking to increase their protein intake.

Sodium

1,200 milligrams. This amount can vary based on the seasoning used and the type of syrup added. It’s important to monitor sodium intake, especially for those with dietary restrictions. Consider using low-sodium options for the seasoning and syrup to reduce the overall sodium content.

In summary, while Southern Fried Chicken and Waffles is a delicious and hearty meal, it’s wise to enjoy it in moderation. Balancing it with lighter meals throughout the day can help maintain a healthy diet. Remember, the joy of cooking and sharing this dish is just as important as its nutritional content!

FAQs about Southern Fried Chicken and Waffles Recipe

What is the best way to store leftover Southern Fried Chicken and Waffles?

Storing leftover Southern Fried Chicken and Waffles properly is key to maintaining their deliciousness. First, allow the chicken to cool completely before storing. Place the chicken in an airtight container, separating layers with parchment paper to prevent sticking. For the waffles, stack them in a separate container or wrap them in aluminum foil. Store both in the refrigerator for up to 3 days.

If you want to keep them longer, consider freezing them. Wrap the chicken and waffles individually in plastic wrap, then place them in a freezer-safe bag. They can be frozen for up to 3 months. When you’re ready to enjoy them again, simply reheat the chicken in the oven at 375°F until heated through and crispy, and warm the waffles in a toaster or microwave.

Can I make Southern Fried Chicken and Waffles in advance?

Yes, you can prepare some components of Southern Fried Chicken and Waffles in advance! For instance, you can marinate the chicken the night before. This allows the flavors to develop, making the chicken even tastier. Additionally, you can make the waffle batter ahead of time and store it in the refrigerator for up to 24 hours.

However, it’s best to fry the chicken and cook the waffles just before serving. This ensures that the chicken remains crispy and the waffles are fluffy. If you need to serve a crowd, consider frying the chicken in batches and keeping it warm in a low oven until everything is ready to go!

What are some common mistakes to avoid when making Southern Fried Chicken and Waffles?

When making Southern Fried Chicken and Waffles, there are a few common mistakes to watch out for. First, don’t skip the marinating step. This is crucial for flavor and tenderness. Also, be mindful of the oil temperature. If it’s too hot, the chicken will burn; if it’s too cool, it will absorb too much oil and become greasy.

Another mistake is overcrowding the frying pan. Fry the chicken in batches to ensure even cooking and a crispy texture. Lastly, avoid overmixing the waffle batter. Stir just until combined to keep the waffles light and fluffy. By avoiding these pitfalls, you’ll be on your way to creating a delicious Southern Fried Chicken and Waffles dish!

Conclusion on Southern Fried Chicken and Waffles Recipe

In conclusion, the Southern Fried Chicken and Waffles recipe is a delightful dish that brings together the best of savory and sweet flavors. This classic comfort food not only satisfies your taste buds but also offers a glimpse into the rich culinary traditions of the South. With its crispy chicken and fluffy waffles, it’s no wonder this dish has become a beloved favorite across the country.

By following the steps outlined in this article, you can create a mouthwatering meal that is perfect for any occasion. Whether you’re hosting a brunch, celebrating a special event, or simply treating yourself to a delicious dinner, this recipe is sure to impress. Remember, the key to success lies in the details—marinating the chicken, maintaining the right oil temperature, and serving everything fresh and warm.

Feel free to experiment with variations, such as adding spices for a kick or trying a vegan alternative. The beauty of this dish is its versatility, allowing you to tailor it to your preferences. So gather your ingredients, roll up your sleeves, and enjoy the process of creating this iconic Southern dish.

As you savor each bite of your Southern Fried Chicken and Waffles, take a moment to appreciate the history and culture behind it. This dish is not just a meal; it’s a celebration of flavors, traditions, and the joy of sharing good food with loved ones. Happy cooking!

Smoky Herb-Infused Chicken Breast is a must-try recipe!

Introduction to Smoky Herb-Infused Chicken Recipe

Smoky Herb-Infused Chicken Recipe is here to impress! This dish combines the rich flavors of herbs and spices with the delightful smokiness that only a good cooking method can provide. Whether you’re hosting a dinner party or just enjoying a cozy meal at home, this recipe is sure to be a hit.

What Makes This Recipe Unique?

Smoky Herb-Infused Chicken Recipe a standout choice for any meal.

Benefits of Cooking with Herbs and Spices

Smoky Herb-Infused Chicken Recipe a regular part of your cooking routine?

Ingredients for Smoky Herb-Infused Chicken Recipe

Smoky Herb-Infused Chicken Recipe, you’ll need a few simple ingredients. Each one plays a vital role in building the rich flavors that make this dish so special. Here’s what you’ll need:

  • 2 boneless, skinless chicken breasts (about 1 pound total)
  • 2 tablespoons olive oil
  • 1 tablespoon smoked paprika
  • 1 teaspoon garlic powder
  • 1 teaspoon onion powder
  • 1 teaspoon dried thyme
  • 1 teaspoon dried oregano
  • 1 teaspoon salt
  • ½ teaspoon black pepper
  • ½ teaspoon cayenne pepper (optional for heat)
  • Juice of 1 lemon

These ingredients are not only easy to find but also work together to create a deliciously smoky and herbaceous flavor profile. The olive oil helps to keep the chicken moist while the spices add depth and character. Feel free to adjust the spices according to your taste preferences. For instance, if you love a bit of heat, the cayenne pepper is a great addition. On the other hand, if you prefer a milder flavor, you can skip it. With these ingredients, you’re well on your way to making a delightful meal that everyone will enjoy!

Step-by-Step Preparation of Smoky Herb-Infused Chicken Recipe

Smoky Herb-Infused Chicken Recipe. Following these simple steps will ensure that your chicken is flavorful and juicy. Let’s get started!

Step 1: Marinating the Chicken

First, you’ll want to marinate the chicken. This step is crucial for infusing flavor. Start by patting the chicken breasts dry with paper towels. This helps the marinade stick better. Next, take your marinade mixture from the next step and rub it evenly over both sides of the chicken breasts. Make sure every inch is covered! For best results, let the chicken marinate for at least 30 minutes. If you have time, marinating overnight in the refrigerator will enhance the flavors even more.

Step 2: Preparing the Herb Mixture

While the chicken is marinating, prepare your herb mixture. In a small bowl, combine the olive oil, smoked paprika, garlic powder, onion powder, dried thyme, dried oregano, salt, black pepper, and cayenne pepper (if you’re using it). Mix everything well until it forms a smooth paste. This mixture is what will give your chicken that delicious smoky flavor. The herbs will also add a wonderful aroma that fills your kitchen!

Step 3: Cooking the Chicken

Once your chicken has marinated, it’s time to cook! Preheat your smoker to 225°F. If you’re using a grill, set it up for indirect heat. Place the marinated chicken breasts in the smoker or on the grill. Cook for about 1.5 to 2 hours. You’ll know the chicken is done when it reaches an internal temperature of 165°F. This slow cooking method ensures that the chicken stays juicy and tender while absorbing all those smoky flavors.

Step 4: Resting and Serving the Chicken

Smoky Herb-Infused Chicken Recipe with your favorite sides.

Variations of Smoky Herb-Infused Chicken Recipe

Smoky Herb-Infused Chicken Recipe is already packed with flavor, there are many ways to customize it to suit your taste. By experimenting with different herbs and cooking methods, you can create a unique dish every time. Let’s explore some exciting variations!

Different Herbs to Use

Herbs are a fantastic way to change the flavor profile of your chicken. Here are some alternatives you can try:

  • Rosemary: This herb adds a fragrant, woodsy flavor that pairs well with chicken. Use fresh rosemary for a more intense taste.
  • Basil: If you love a sweeter, slightly peppery flavor, basil is a great choice. It works especially well in summer dishes.
  • Cilantro: For a fresh and zesty twist, consider using cilantro. It adds a bright flavor that can lighten up the dish.
  • Parsley: This versatile herb can be used for a mild flavor. It’s perfect if you want to keep things simple.

Feel free to mix and match these herbs to create your own signature blend. The key is to find what you enjoy most!

Alternative Cooking Methods

While smoking or grilling is a fantastic way to prepare this chicken, there are other methods you can use to achieve delicious results:

  • Oven Baking: Preheat your oven to 375°F. Place the marinated chicken on a baking sheet and cook for about 25-30 minutes, or until the internal temperature reaches 165°F.
  • Pan-Seering: Heat a skillet over medium-high heat. Add a little olive oil and cook the chicken for about 6-7 minutes on each side, until golden brown and cooked through.
  • Slow Cooking: For a hands-off approach, use a slow cooker. Place the marinated chicken in the slow cooker and cook on low for 4-6 hours. This method will make the chicken incredibly tender.

Each cooking method brings out different flavors and textures in the chicken. So, don’t hesitate to try them all and see which one you like best!

Cooking Note for Smoky Herb-Infused Chicken Recipe

Smoky Herb-Infused Chicken Recipe, there are a few important cooking notes to keep in mind. These tips will help you achieve the best results and ensure your chicken is flavorful and juicy.

First, always use a meat thermometer to check the internal temperature of the chicken. This is crucial for food safety. The chicken should reach an internal temperature of 165°F to be fully cooked. If you don’t have a meat thermometer, you can cut into the thickest part of the chicken. The juices should run clear, and the meat should no longer be pink.

Next, consider the thickness of your chicken breasts. If they are particularly thick, they may require a bit more cooking time. Conversely, thinner breasts will cook faster. To ensure even cooking, you can pound the chicken to an even thickness before marinating. This helps the chicken cook uniformly and prevents any dry spots.

Additionally, if you’re using a grill, make sure to keep the lid closed as much as possible while cooking. This helps maintain a consistent temperature and allows the smoke to flavor the chicken effectively. If you’re using a smoker, avoid opening the door frequently, as this can let out heat and smoke.

Lastly, don’t skip the resting period after cooking. Allowing the chicken to rest for 5-10 minutes before slicing helps the juices redistribute throughout the meat. This simple step can make a big difference in the tenderness and flavor of your chicken.

Smoky Herb-Infused Chicken Recipe. Enjoy the process and the delicious results!

Serving Suggestions for Smoky Herb-Infused Chicken Recipe

Smoky Herb-Infused Chicken Recipe, it’s time to think about how to serve it. The right side dishes and presentation can elevate your meal, making it even more enjoyable. Here are some ideas to help you create a delightful dining experience.

Side Dishes that Pair Well

Choosing the right side dishes can enhance the flavors of your chicken. Here are some delicious options:

  • Grilled Vegetables: A mix of bell peppers, zucchini, and asparagus drizzled with olive oil and grilled until tender complements the smoky chicken perfectly.
  • Quinoa Salad: A refreshing quinoa salad with cherry tomatoes, cucumber, and a light lemon vinaigrette adds a healthy touch to your meal.
  • Garlic Mashed Potatoes: Creamy mashed potatoes with a hint of garlic provide a comforting side that pairs beautifully with the chicken.
  • Coleslaw: A crunchy coleslaw with a tangy dressing adds a nice contrast to the smoky flavors of the chicken.
  • Rice Pilaf: Fluffy rice pilaf with herbs and spices can soak up the juices from the chicken, making every bite delicious.

Feel free to mix and match these sides based on your preferences and what you have on hand. Each option brings its own unique flavor and texture to the table!

Presentation Tips

Smoky Herb-Infused Chicken Recipe shine:

  • Use a Colorful Plate: Choose a vibrant plate to make the colors of your food pop. A white plate can make the smoky chicken stand out beautifully.
  • Garnish with Fresh Herbs: Sprinkle some fresh herbs, like parsley or cilantro, over the chicken before serving. This adds a touch of color and freshness.
  • Arrange Neatly: Place the chicken slices neatly on the plate, and arrange your side dishes around it. This creates an inviting and organized look.
  • Add a Lemon Wedge: A lemon wedge on the side not only looks appealing but also allows guests to add a splash of citrus if they desire.
  • Serve on a Wooden Board: For a rustic touch, consider serving the chicken on a wooden cutting board. This adds a homey feel to your meal.

Smoky Herb-Infused Chicken Recipe will not only taste amazing but also look stunning on the table. Enjoy your meal with family and friends!

Tips for Perfecting Your Smoky Herb-Infused Chicken Recipe

Smoky Herb-Infused Chicken Recipe, there are a few tips that can help you achieve the best results. These tips will ensure your chicken is flavorful, juicy, and perfectly cooked every time. Let’s dive into some essential advice!

Choosing the Right Chicken

When it comes to chicken, quality matters. Opt for fresh, organic chicken breasts whenever possible. They tend to have better flavor and texture compared to conventional options. If you can, look for chicken that is free from antibiotics and hormones. This not only benefits your health but also enhances the overall taste of your dish.

Additionally, consider the size of the chicken breasts. If they are too thick, they may take longer to cook, leading to uneven results. If you find that your chicken breasts are particularly thick, you can butterfly them or pound them to an even thickness. This ensures they cook evenly and remain juicy.

Adjusting Spice Levels

Smoky Herb-Infused Chicken Recipe is that you can customize the spice levels to suit your taste. If you enjoy a bit of heat, feel free to increase the amount of cayenne pepper. On the other hand, if you prefer milder flavors, you can reduce or omit the cayenne altogether.

Don’t be afraid to experiment with other spices as well. Adding a pinch of cumin or chili powder can give your chicken a unique twist. Remember, the key is to find the right balance that works for you and your family. Taste as you go, and adjust the spices to create a dish that everyone will love!

Smoky Herb-Infused Chicken Recipe. Enjoy the process of cooking and the delicious results that come from it!

Breakdown of Time for Smoky Herb-Infused Chicken Recipe

Smoky Herb-Infused Chicken Recipe is essential for planning your meal. Here’s a simple breakdown to help you manage your cooking time effectively.

Prep Time

The prep time for this recipe is quite manageable. You’ll need about 10-15 minutes to gather your ingredients and prepare the marinade. This includes mixing the spices and rubbing them onto the chicken. If you choose to marinate the chicken overnight, you can do this step the night before, saving you time on the day of cooking.

Cooking Time

Cooking the chicken is where the magic happens! Depending on your method, the cooking time will vary:

  • Smoking or Grilling: Expect to spend about 1.5 to 2 hours cooking the chicken at 225°F. This slow cooking allows the flavors to develop beautifully.
  • Oven Baking: If you opt for the oven, plan for about 25-30 minutes at 375°F.
  • Pan-Seering: Cooking in a skillet will take around 12-15 minutes, flipping halfway through.
  • Slow Cooking: If you choose this method, allow 4-6 hours on low for perfectly tender chicken.

Total Time

Smoky Herb-Infused Chicken Recipe can range from about 1.5 hours to over 6 hours, depending on your cooking method and whether you marinate overnight. This flexibility allows you to fit this delicious meal into your schedule, whether you’re in a hurry or have time to spare.

By keeping track of these time estimates, you can ensure that your cooking experience is smooth and enjoyable. Happy cooking!

Breakdown of Time for Smoky Herb-Infused Chicken Recipe

Smoky Herb-Infused Chicken Recipe is essential for planning your meal. Here’s a simple breakdown to help you manage your cooking time effectively.

Prep Time

The prep time for this recipe is quite manageable. You’ll need about 10-15 minutes to gather your ingredients and prepare the marinade. This includes mixing the spices and rubbing them onto the chicken. If you choose to marinate the chicken overnight, you can do this step the night before, saving you time on the day of cooking. This way, you can enjoy a flavorful meal without feeling rushed!

Cooking Time

Cooking the chicken is where the magic happens! Depending on your method, the cooking time will vary:

  • Smoking or Grilling: Expect to spend about 1.5 to 2 hours cooking the chicken at 225°F. This slow cooking allows the flavors to develop beautifully.
  • Oven Baking: If you opt for the oven, plan for about 25-30 minutes at 375°F.
  • Pan-Seering: Cooking in a skillet will take around 12-15 minutes, flipping halfway through.
  • Slow Cooking: If you choose this method, allow 4-6 hours on low for perfectly tender chicken.

Total Time

Smoky Herb-Infused Chicken Recipe can range from about 1.5 hours to over 6 hours, depending on your cooking method and whether you marinate overnight. This flexibility allows you to fit this delicious meal into your schedule, whether you’re in a hurry or have time to spare. By keeping track of these time estimates, you can ensure that your cooking experience is smooth and enjoyable. Happy cooking!

Nutritional Information for Smoky Herb-Infused Chicken Recipe

Smoky Herb-Infused Chicken Recipe not only delights your taste buds but also provides valuable nutrients. Here’s a breakdown of the key nutritional information per serving:

Calories

Smoky Herb-Infused Chicken Recipe contains approximately 320 calories. This makes it a great option for those looking to enjoy a flavorful meal without consuming excessive calories. The combination of chicken and healthy fats from olive oil contributes to a satisfying dish that can fit into various dietary plans.

Protein

Protein is vital for building and repairing tissues, and this recipe delivers! Each serving provides about 36 grams of protein. Chicken breast is an excellent source of lean protein, making it a perfect choice for those looking to increase their protein intake. Whether you’re an athlete or just aiming to maintain a healthy lifestyle, this dish can help you meet your protein needs.

Sodium

When it comes to sodium, this recipe contains around 1,200 milligrams per serving. While this may seem high, it’s important to consider that sodium levels can vary based on the specific ingredients used. If you’re watching your sodium intake, you can easily adjust the amount of salt in the marinade. Using low-sodium alternatives can also help you enjoy this delicious chicken while keeping your sodium levels in check.

Smoky Herb-Infused Chicken Recipe is a nutritious option that provides a good balance of calories, protein, and flavor. Enjoy this dish as part of a well-rounded meal, and feel good knowing you’re nourishing your body!

FAQs about Smoky Herb-Infused Chicken Recipe

Can I use frozen chicken for this recipe?

Smoky Herb-Infused Chicken Recipe, but there are a few important steps to follow. First, make sure to fully thaw the chicken before marinating. This ensures that the marinade can penetrate the meat effectively, enhancing the flavor. You can thaw the chicken in the refrigerator overnight or use the defrost setting on your microwave. Once thawed, proceed with the marinating and cooking steps as usual. Just remember, cooking times may vary slightly, so always check the internal temperature to ensure it reaches 165°F.

How long should I marinate the chicken?

For the best flavor, marinate the chicken for at least 30 minutes. However, if you have more time, marinating overnight in the refrigerator is ideal. This longer marination allows the spices and herbs to deeply infuse the chicken, resulting in a more flavorful dish. If you’re short on time, even a quick 30-minute soak will still yield delicious results. Just make sure to cover the chicken in the marinade well, so every part gets that smoky, herb-infused goodness!

What can I substitute for fresh herbs?

Smoky Herb-Infused Chicken Recipe. A general rule of thumb is to use one-third of the amount of dried herbs compared to fresh. For example, if the recipe calls for 1 tablespoon of fresh thyme, use about 1 teaspoon of dried thyme instead. Dried herbs are more concentrated in flavor, so a little goes a long way. This way, you can still enjoy the delicious flavors of the recipe, even without fresh herbs!

Conclusion on Smoky Herb-Infused Chicken Recipe

Smoky Herb-Infused Chicken Recipe is a delightful dish that brings together the rich flavors of herbs and spices with a smoky twist. Whether you’re a seasoned cook or just starting out, this recipe is easy to follow and yields impressive results. The combination of marinating and slow cooking ensures that the chicken remains juicy and flavorful, making it a perfect choice for any occasion.

Not only does this recipe offer a delicious meal, but it also provides numerous health benefits. With its high protein content and the use of wholesome ingredients, you can feel good about serving this dish to your family and friends. Plus, the flexibility to customize the herbs and cooking methods allows you to make it your own, ensuring that every meal is unique.

Smoky Herb-Infused Chicken Recipe can easily become a staple in your cooking repertoire.

So, gather your ingredients, fire up your smoker or grill, and get ready to impress your loved ones with this flavorful dish. Enjoy the process of cooking and the joy of sharing a delicious meal together. Happy cooking!

Grilled Herb Chicken Breasts Recipe is a must-try!

Introduction to Grilled Herb Chicken Breasts Recipe

Grilled Herb Chicken Breasts are a delightful dish that brings together the juicy tenderness of chicken with the vibrant flavors of fresh herbs. This recipe is not only simple to prepare but also offers a healthy option for any meal. Whether you’re hosting a summer barbecue or looking for a quick weeknight dinner, this dish is sure to impress your family and friends.

Why Choose Grilled Herb Chicken Breasts?

Choosing Grilled Herb Chicken Breasts is a fantastic decision for several reasons. First, chicken is a lean source of protein, making it a great choice for those looking to maintain a healthy diet. Each serving packs a punch with 30 grams of protein, which is essential for muscle growth and repair.

Moreover, the marinade used in this recipe infuses the chicken with rich flavors. The combination of olive oil, lemon juice, and herbs creates a mouthwatering taste that elevates the dish. Plus, grilling adds a smoky flavor that enhances the overall experience.

Another reason to love this recipe is its versatility. You can easily customize the herbs and spices to suit your taste. Whether you prefer a hint of spice with red pepper flakes or a fresh twist with basil, the options are endless. This adaptability makes Grilled Herb Chicken Breasts a favorite among home cooks.

Finally, this dish is quick to prepare. With just a little marinating time and a short grilling process, you can have a delicious meal ready in no time. It’s perfect for busy weeknights or spontaneous gatherings. So, let’s dive into the ingredients and get started on this flavorful journey!

Ingredients for Grilled Herb Chicken Breasts Recipe

To create the perfect Grilled Herb Chicken Breasts, you’ll need a few simple ingredients. Each component plays a vital role in enhancing the flavor and texture of the chicken. Here’s what you’ll need:

  • 2 large boneless, skinless chicken breasts (about 1.5 pounds total)
  • 1/4 cup olive oil
  • 2 tablespoons lemon juice
  • 2 teaspoons garlic powder
  • 2 teaspoons onion powder
  • 1 teaspoon dried oregano
  • 1 teaspoon dried thyme
  • 1 teaspoon salt
  • 1/2 teaspoon black pepper
  • 1/4 teaspoon red pepper flakes (optional)
  • Fresh parsley, chopped (for garnish)

These ingredients are not only easy to find but also work together to create a deliciously marinated chicken. The olive oil adds moisture, while the lemon juice provides a zesty kick. The garlic and onion powders contribute depth, and the herbs bring freshness to the dish.

Feel free to experiment with the herbs and spices. For instance, you can swap out oregano and thyme for your favorites like basil or rosemary. This flexibility allows you to tailor the recipe to your personal taste. Now that you have your ingredients ready, let’s move on to the preparation steps!

Step-by-Step Preparation of Grilled Herb Chicken Breasts Recipe

Now that you have gathered all your ingredients, it’s time to dive into the preparation of your Grilled Herb Chicken Breasts. This step-by-step guide will ensure that your chicken turns out flavorful and juicy. Let’s get started!

Step 1: Marinating the Chicken

Marinating is a crucial step that enhances the flavor of the chicken. Begin by taking a medium bowl and whisking together the olive oil, lemon juice, garlic powder, onion powder, oregano, thyme, salt, black pepper, and red pepper flakes (if you like a bit of heat). This mixture will serve as your marinade.

Next, place the chicken breasts in a resealable plastic bag or a shallow dish. Pour the marinade over the chicken, ensuring it is well-coated. Seal the bag or cover the dish and refrigerate for at least 30 minutes. For even more flavor, let it marinate for up to 2 hours. This allows the chicken to absorb all those delicious flavors!

Step 2: Preparing the Grill

While the chicken is marinating, it’s time to prepare your grill. Preheat your grill to medium-high heat, which is about 400°F. This temperature is perfect for achieving those beautiful grill marks while keeping the chicken juicy.

If you’re using a charcoal grill, make sure the coals are evenly distributed. For gas grills, simply turn on the burners and let them heat up. Once the grill is hot, you can lightly oil the grates to prevent sticking. A paper towel dipped in oil works well for this task.

Step 3: Grilling the Chicken

After marinating, it’s time to grill the chicken! Remove the chicken breasts from the marinade and discard the leftover marinade. Place the chicken on the grill, making sure not to move it around. Cook for about 6-7 minutes on one side. This allows for a nice sear.

Once the first side is done, flip the chicken and grill for another 6-7 minutes. You want to ensure the internal temperature reaches 165°F for safe consumption. Using a meat thermometer can help you check this accurately.

Step 4: Resting the Chicken

After grilling, it’s important to let the chicken rest. Remove it from the grill and let it sit for about 5 minutes. This resting period allows the juices to redistribute throughout the meat, making it more tender and flavorful.

Once rested, slice the chicken and garnish it with fresh parsley. Now, your Grilled Herb Chicken Breasts are ready to be served! Enjoy the delicious flavors and the satisfaction of a meal well-prepared.

Variations of Grilled Herb Chicken Breasts Recipe

While the classic Grilled Herb Chicken Breasts recipe is already bursting with flavor, there are many ways to switch things up. By experimenting with different herbs and marinades, you can create a unique dish every time. Let’s explore some exciting variations!

Different Herbs to Use

Herbs are the heart of this recipe, and using different ones can completely change the flavor profile. Here are some great alternatives:

  • Basil: This sweet herb adds a fresh, aromatic touch. It pairs wonderfully with lemon and garlic.
  • Rosemary: Known for its strong flavor, rosemary gives a woodsy taste that complements grilled chicken beautifully.
  • Thyme: While thyme is already in the original recipe, you can increase its amount for a more pronounced flavor.
  • Cilantro: For a zesty twist, try cilantro. It adds a bright, fresh taste that works well with lime juice instead of lemon.
  • Mint: If you’re feeling adventurous, mint can add a refreshing flavor that’s perfect for summer grilling.

Feel free to mix and match these herbs to find your favorite combination. The beauty of this recipe lies in its flexibility!

Marinade Alternatives

In addition to changing herbs, you can also play around with the marinade. Here are some tasty alternatives:

  • Yogurt Marinade: Use plain yogurt as a base. It tenderizes the chicken and adds a creamy texture. Mix in garlic, lemon juice, and your choice of herbs.
  • Honey Mustard Marinade: Combine honey, Dijon mustard, and olive oil for a sweet and tangy flavor. This pairs well with grilled chicken.
  • Teriyaki Marinade: For an Asian twist, use teriyaki sauce. It adds a sweet and savory flavor that’s delicious on grilled chicken.
  • Spicy Marinade: Add hot sauce or chili paste to the original marinade for a spicy kick. This is perfect for those who love heat!

These marinade alternatives can enhance the chicken’s flavor and make your meal even more exciting. Don’t hesitate to get creative and find what works best for you!

Cooking Note for Grilled Herb Chicken Breasts Recipe

When it comes to grilling, a few key tips can make all the difference in achieving perfectly cooked Grilled Herb Chicken Breasts. Here are some important cooking notes to keep in mind:

  • Use a Meat Thermometer: To ensure your chicken is cooked safely, use a meat thermometer. The internal temperature should reach 165°F. This guarantees that the chicken is not only safe to eat but also juicy and tender.
  • Let the Chicken Come to Room Temperature: Before grilling, allow the marinated chicken to sit at room temperature for about 15-20 minutes. This helps it cook more evenly and reduces the risk of drying out.
  • Don’t Overcrowd the Grill: If you’re grilling multiple chicken breasts, make sure to leave enough space between them. Overcrowding can lead to uneven cooking and prevent that beautiful sear.
  • Keep the Lid Closed: When grilling, keep the grill lid closed as much as possible. This helps maintain a consistent temperature and allows the chicken to cook through without drying out.
  • Experiment with Cooking Times: Cooking times may vary based on the thickness of the chicken breasts. Thicker pieces may require a bit more time, while thinner ones will cook faster. Always check for doneness with a thermometer.

By following these cooking notes, you’ll be well on your way to grilling delicious and flavorful chicken every time. Happy grilling!

Serving Suggestions for Grilled Herb Chicken Breasts Recipe

Once your Grilled Herb Chicken Breasts are perfectly cooked and garnished, it’s time to think about how to serve them. The right side dishes and serving styles can elevate your meal and create a delightful dining experience. Let’s explore some fantastic options!

Side Dishes to Pair

Choosing the right side dishes can complement the flavors of your grilled chicken. Here are some delicious options:

  • Grilled Vegetables: A mix of bell peppers, zucchini, and asparagus grilled alongside the chicken adds color and nutrition. The smoky flavor pairs beautifully with the herb chicken.
  • Quinoa Salad: A light quinoa salad with cherry tomatoes, cucumber, and a lemon vinaigrette offers a refreshing contrast. It’s healthy and filling!
  • Garlic Mashed Potatoes: Creamy mashed potatoes with a hint of garlic provide a comforting side. They soak up the juices from the chicken wonderfully.
  • Coleslaw: A crunchy coleslaw adds a nice texture and a bit of tang. It’s perfect for balancing the richness of the chicken.
  • Rice Pilaf: Fluffy rice pilaf with herbs and spices can be a great base for the chicken. It’s simple yet satisfying.

Feel free to mix and match these sides based on your preferences and the occasion. Each option brings its own unique flavor to the table!

Serving Styles

How you serve your Grilled Herb Chicken Breasts can make a big difference in presentation. Here are some serving styles to consider:

  • Plated Dinner: For a formal setting, slice the chicken and arrange it neatly on a plate. Add a scoop of your chosen side and garnish with fresh herbs for a beautiful presentation.
  • Family Style: Serve the chicken whole on a large platter, surrounded by side dishes. This encourages sharing and creates a warm, inviting atmosphere.
  • Wraps or Sandwiches: For a casual meal, slice the grilled chicken and serve it in wraps or sandwiches with fresh veggies and sauces. This is perfect for picnics or lunch!
  • Salad Topping: Chop the grilled chicken and use it as a topping for salads. This adds protein and flavor, making your salad more satisfying.
  • Skewers: If you have leftovers, cut the chicken into cubes and thread them onto skewers with veggies. This makes for a fun and easy meal option.

These serving styles not only enhance the visual appeal of your meal but also make it more enjoyable for everyone. Choose the one that fits your occasion best!

Tips for Perfect Grilled Herb Chicken Breasts Recipe

To achieve the best results with your Grilled Herb Chicken Breasts, a few tips can make all the difference. From selecting the right chicken to mastering grilling techniques, these insights will help you create a delicious meal every time. Let’s explore these essential tips!

Choosing the Right Chicken

When it comes to chicken, quality matters. Here are some tips for selecting the best chicken breasts:

  • Freshness: Always choose fresh chicken breasts. Look for a bright pink color and avoid any that appear dull or have an off smell.
  • Size: Opt for chicken breasts that are similar in size. This ensures even cooking. If some pieces are much thicker, consider pounding them to an even thickness.
  • Organic or Free-Range: If possible, choose organic or free-range chicken. These options often have better flavor and are raised without antibiotics or hormones.
  • Bone-In vs. Boneless: While this recipe calls for boneless chicken breasts, bone-in pieces can also be used. They tend to be juicier, but will require longer cooking times.

By selecting high-quality chicken, you set the foundation for a delicious meal. Fresh, well-sourced chicken will enhance the flavors of your grilled dish.

Grilling Techniques

Grilling is an art, and mastering a few techniques can elevate your Grilled Herb Chicken Breasts. Here are some helpful tips:

  • Preheat the Grill: Always preheat your grill before adding the chicken. This helps create a nice sear and prevents sticking.
  • Use Direct Heat: For chicken breasts, direct heat is ideal. This method cooks the chicken quickly and gives it those beautiful grill marks.
  • Don’t Flip Too Soon: Allow the chicken to cook undisturbed for the first 6-7 minutes. This helps develop a nice crust and prevents tearing.
  • Let It Rest: After grilling, let the chicken rest for a few minutes. This allows the juices to redistribute, making the chicken more tender and flavorful.
  • Experiment with Heat Levels: If you find the chicken is browning too quickly, adjust the heat. Lowering the temperature can help cook the chicken through without burning the outside.

By applying these grilling techniques, you’ll ensure that your chicken is perfectly cooked, juicy, and full of flavor. Happy grilling!

Breakdown of Time for Grilled Herb Chicken Breasts Recipe

Understanding the time needed for each step in the Grilled Herb Chicken Breasts recipe can help you plan your meal better. Here’s a quick breakdown of the time involved in preparing and cooking this delicious dish.

Prep Time

The prep time for this recipe is quite manageable. You’ll need about 10-15 minutes to gather your ingredients and prepare the marinade. This includes whisking together the olive oil, lemon juice, and spices. After that, you’ll need to marinate the chicken for at least 30 minutes. However, for the best flavor, consider marinating for up to 2 hours. So, the total prep time can range from 40 minutes to 2 hours and 15 minutes, depending on how long you choose to marinate.

Cooking Time

Once your chicken is marinated, the cooking time is relatively quick. Preheating the grill takes about 10 minutes. After that, grilling the chicken will take approximately 12-14 minutes. This includes 6-7 minutes on one side and another 6-7 minutes after flipping. So, the total cooking time is around 22-24 minutes.

Total Time

When you combine the prep time and cooking time, the total time for the Grilled Herb Chicken Breasts recipe can range from about 1 hour to 2 hours and 39 minutes. This total time includes the minimum marinating time of 30 minutes. If you choose to marinate for the full 2 hours, the total time will be closer to 2 hours and 39 minutes. Regardless of the time, the end result is a flavorful and juicy chicken dish that’s well worth the wait!

Nutritional Information for Grilled Herb Chicken Breasts Recipe

Understanding the nutritional content of your meals is essential for maintaining a balanced diet. The Grilled Herb Chicken Breasts recipe not only offers delicious flavors but also provides valuable nutrients. Here’s a breakdown of the key nutritional information for this dish:

Calories

Each serving of Grilled Herb Chicken Breasts contains approximately 280 calories. This makes it a great option for those looking to enjoy a satisfying meal without consuming too many calories. The combination of lean protein and healthy fats from the olive oil contributes to a well-rounded dish that can fit into various dietary plans.

Protein

One of the standout features of this recipe is its high protein content. Each serving provides about 30 grams of protein. Protein is essential for muscle repair and growth, making this dish an excellent choice for active individuals or anyone looking to increase their protein intake. It helps keep you feeling full and satisfied, which can be beneficial for weight management.

Sodium

The sodium content in this recipe is approximately 600 milligrams per serving. While this is a moderate amount, it’s important to consider your overall daily sodium intake, especially if you are watching your salt consumption. You can easily adjust the sodium level by reducing the amount of salt in the marinade or opting for low-sodium alternatives.

Overall, the Grilled Herb Chicken Breasts recipe is a nutritious choice that provides a good balance of calories, protein, and sodium. It’s a delicious way to enjoy a healthy meal that supports your dietary goals!

FAQs about Grilled Herb Chicken Breasts Recipe

Can I use frozen chicken breasts for this recipe?

Yes, you can use frozen chicken breasts for this recipe, but there are a few important steps to follow. First, make sure to thaw the chicken completely before marinating. You can do this by placing the chicken in the refrigerator overnight or using the defrost setting on your microwave. Once thawed, proceed with the marinating process as usual. Keep in mind that frozen chicken may require a bit longer to cook on the grill, so always check the internal temperature to ensure it reaches 165°F for safe consumption.

How long should I marinate the chicken?

For the best flavor, marinate the chicken for at least 30 minutes. However, if you have more time, letting it marinate for up to 2 hours is ideal. This longer marinating time allows the chicken to absorb all the delicious flavors from the marinade. Just be cautious not to exceed 2 hours, as the acidity from the lemon juice can start to break down the chicken, making it mushy. So, plan accordingly to enjoy the perfect grilled chicken!

What can I substitute for fresh herbs?

If you don’t have fresh herbs on hand, don’t worry! You can easily substitute dried herbs in this recipe. A general rule of thumb is to use one-third of the amount of dried herbs compared to fresh. For example, if the recipe calls for 1 tablespoon of fresh herbs, use about 1 teaspoon of dried herbs instead. Additionally, you can use herb blends like Italian seasoning or poultry seasoning for a quick alternative. These substitutions will still provide great flavor to your Grilled Herb Chicken Breasts!

Conclusion on Grilled Herb Chicken Breasts Recipe

In conclusion, the Grilled Herb Chicken Breasts recipe is a fantastic choice for anyone looking to enjoy a delicious and healthy meal. With its simple ingredients and straightforward preparation, this dish is perfect for both novice cooks and seasoned chefs alike. The combination of juicy chicken and flavorful herbs creates a delightful experience that can elevate any dining occasion.

Not only is this recipe easy to follow, but it also allows for plenty of customization. Whether you prefer different herbs, marinades, or side dishes, the possibilities are endless. This versatility makes it a go-to recipe for family dinners, summer barbecues, or even meal prep for the week ahead.

Moreover, the nutritional benefits of Grilled Herb Chicken Breasts cannot be overlooked. With a high protein content and moderate calories, it fits well into a balanced diet. Plus, the healthy fats from olive oil contribute to overall wellness.

So, gather your ingredients, fire up the grill, and enjoy the process of creating this flavorful dish. Your family and friends will surely appreciate the effort, and you’ll be rewarded with a satisfying meal that’s both tasty and nutritious. Happy grilling!

Stay Connected

Get recipes via email: