Delicious Mini Baked Chicken Tacos Ready in 30 Minutes

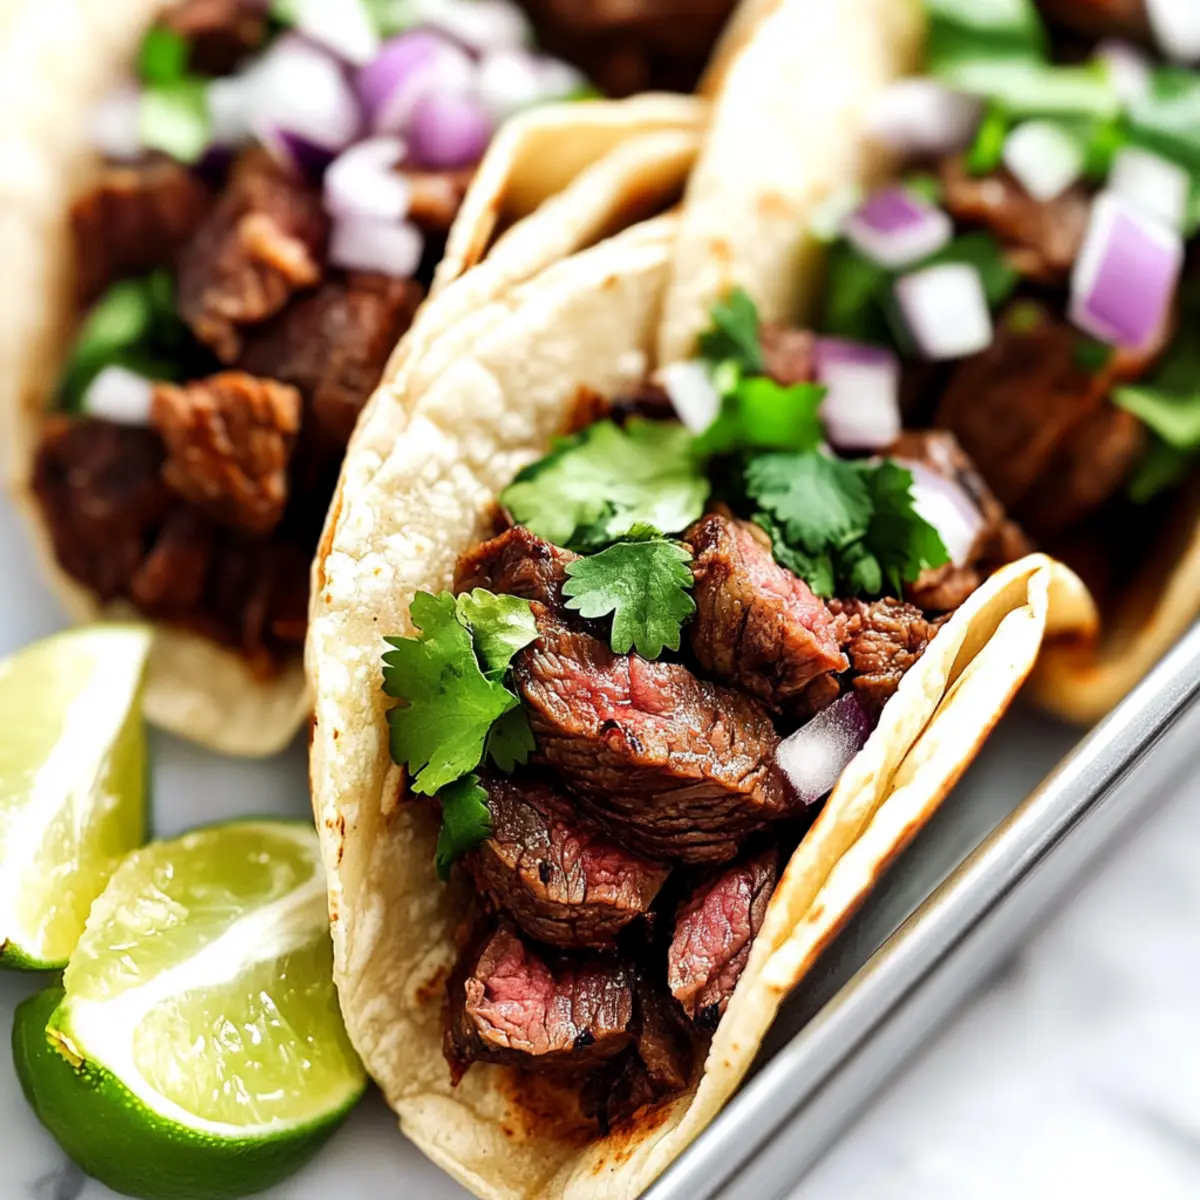
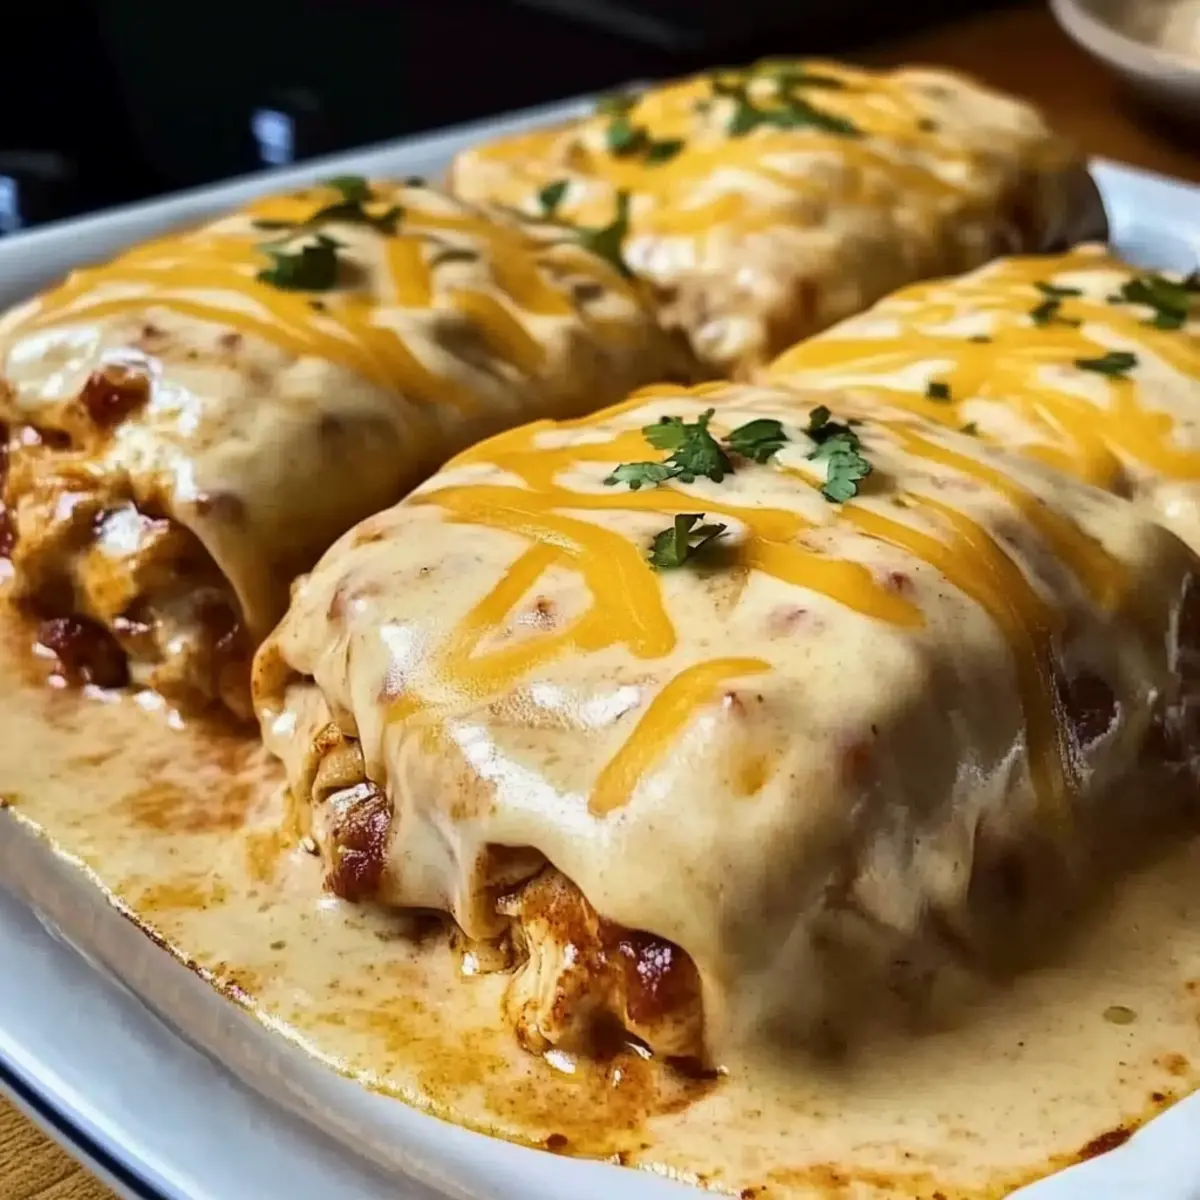
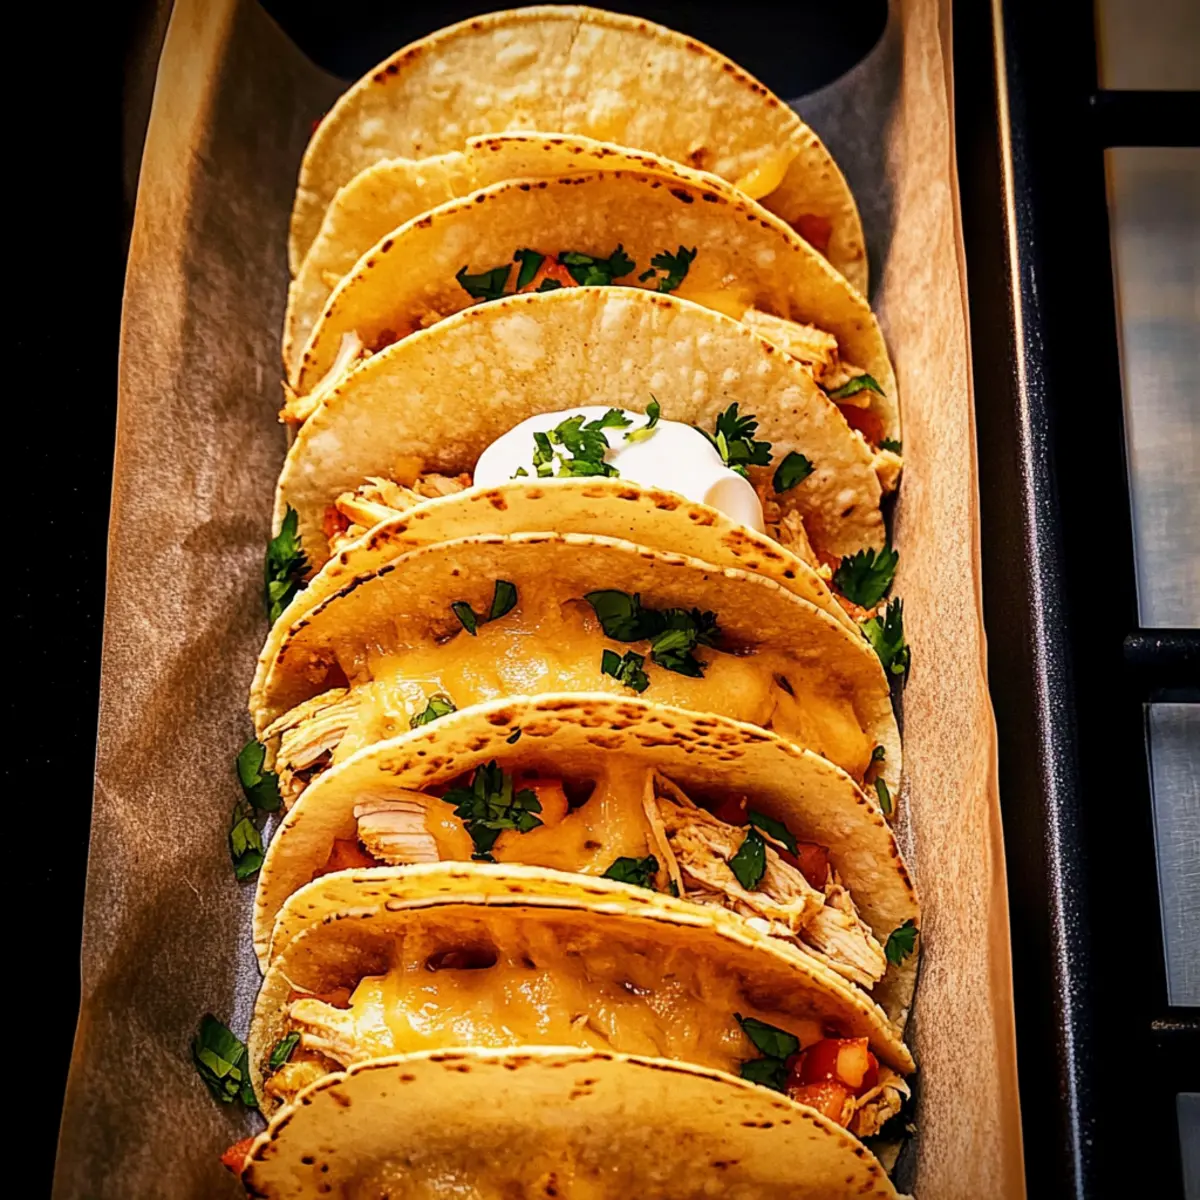
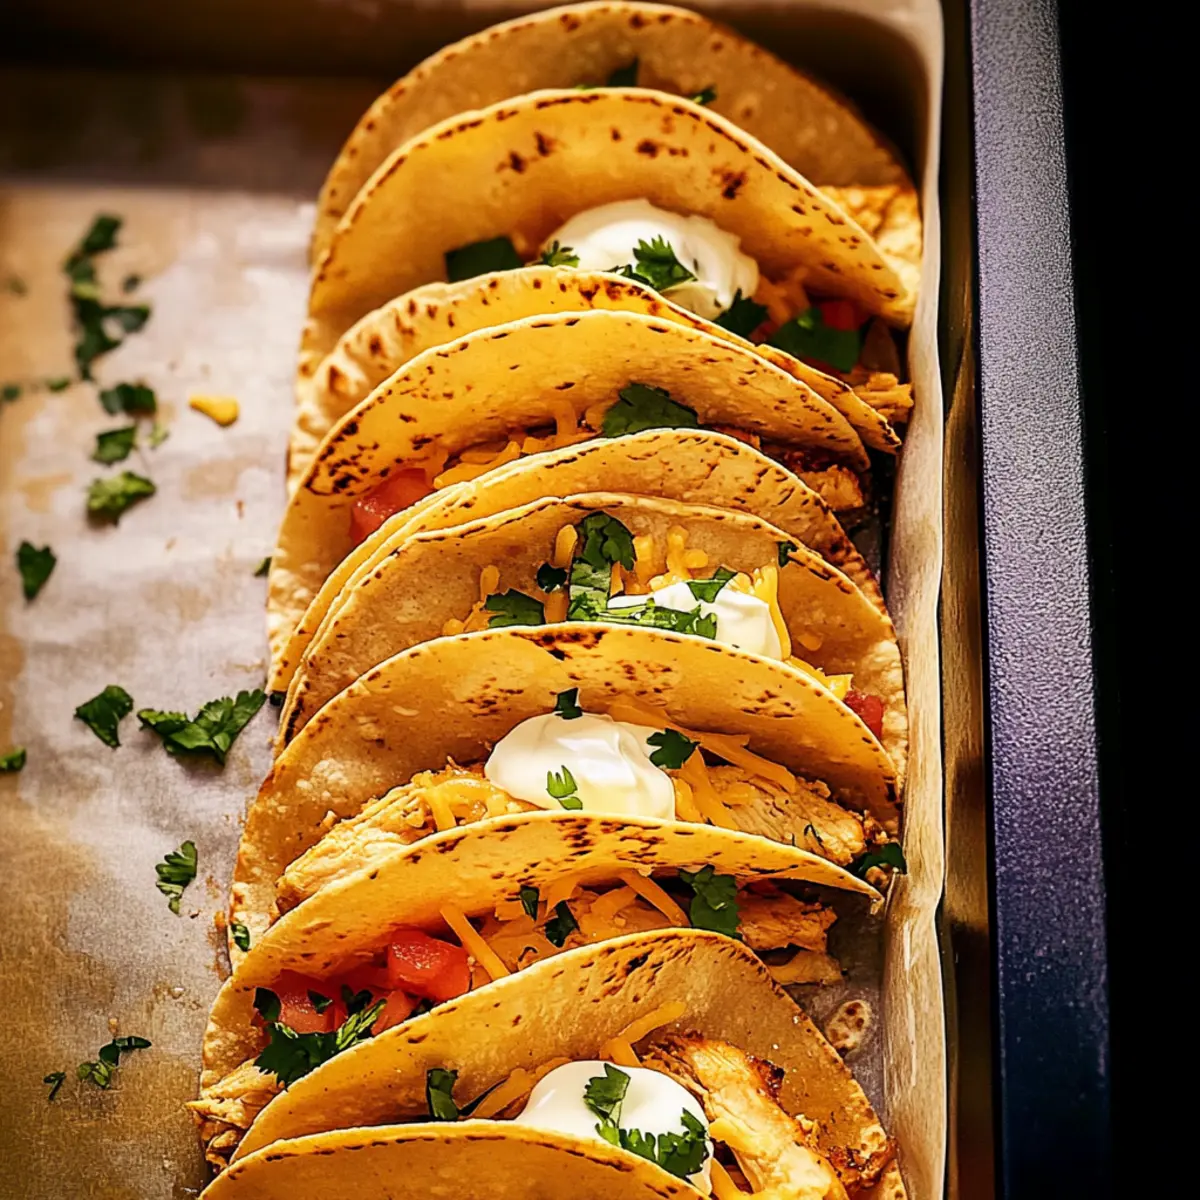
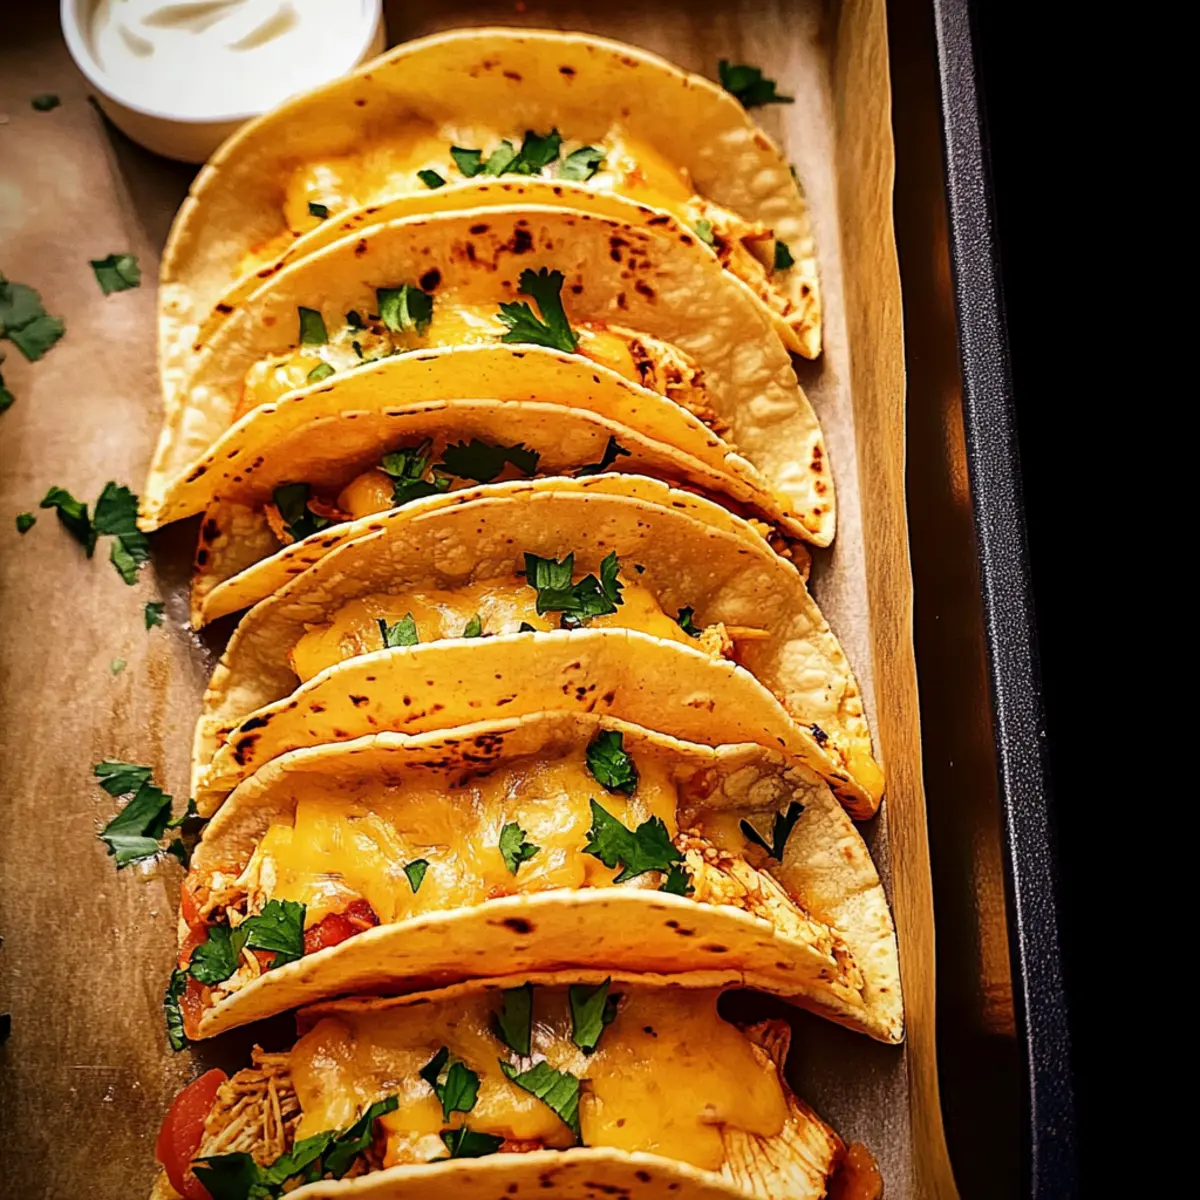
As I pulled the warm, crispy Mini Baked Chicken Tacos from the oven, a comforting aroma filled my kitchen, instantly transporting me to family gatherings filled with laughter and joy. These easy-to-make bites are perfect for busy weeknights yet fancy enough for a gathering, striking the ideal balance between convenience and comfort. With just 30 minutes of prep time, you can create a delicious meal with tender chicken enveloped in a golden shell, making them a delightful family-friendly option. Plus, they’re fully customizable to suit every palate, allowing everyone to indulge in their favorite toppings. Ready to bring some festive cheer to your dinner table? Let’s dive into these crowd-pleasers that promise to satisfy cravings and brighten up any meal!

Why are Mini Baked Chicken Tacos a Must-Try?

Quick and Easy: In just 30 minutes, you can have a delightful meal on the table that the whole family will love.

Customizable to Perfection: Load them with your favorite toppings – whether it’s fresh cilantro or zesty salsa, each taco can be tailored to individual tastes.

Healthy Alternative: Enjoy that crunchy taco experience without the frying, making these a healthier choice for your weeknight dinners.

Crowd-Pleaser: Perfect for gatherings, these bite-sized wonders are sure to please guests of all ages, similar to the ever-popular Chilli Chicken Takeout.

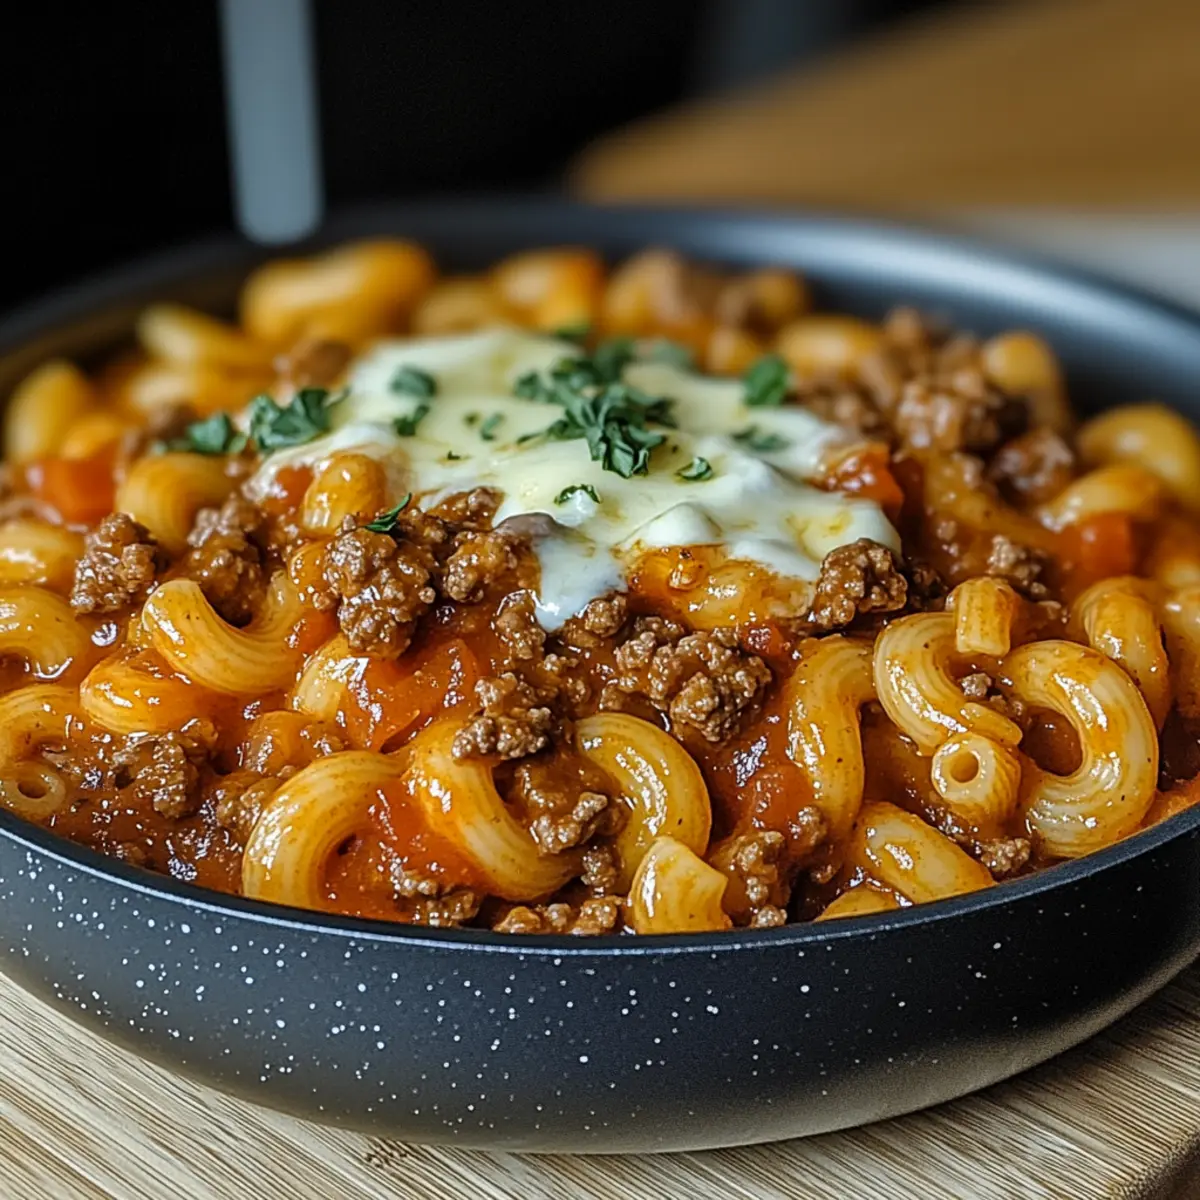
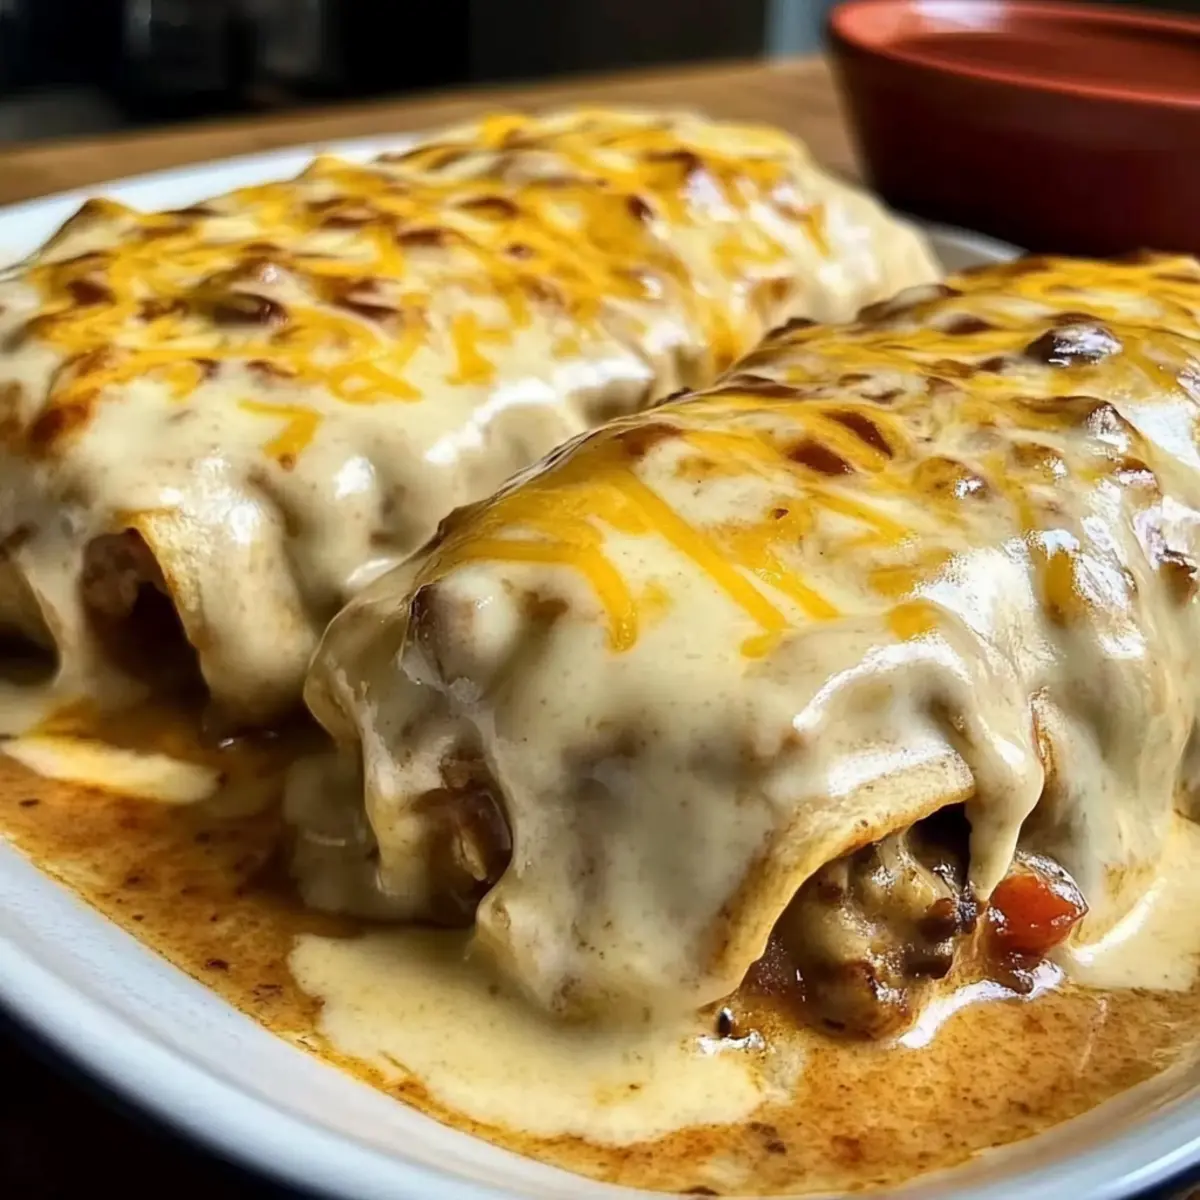
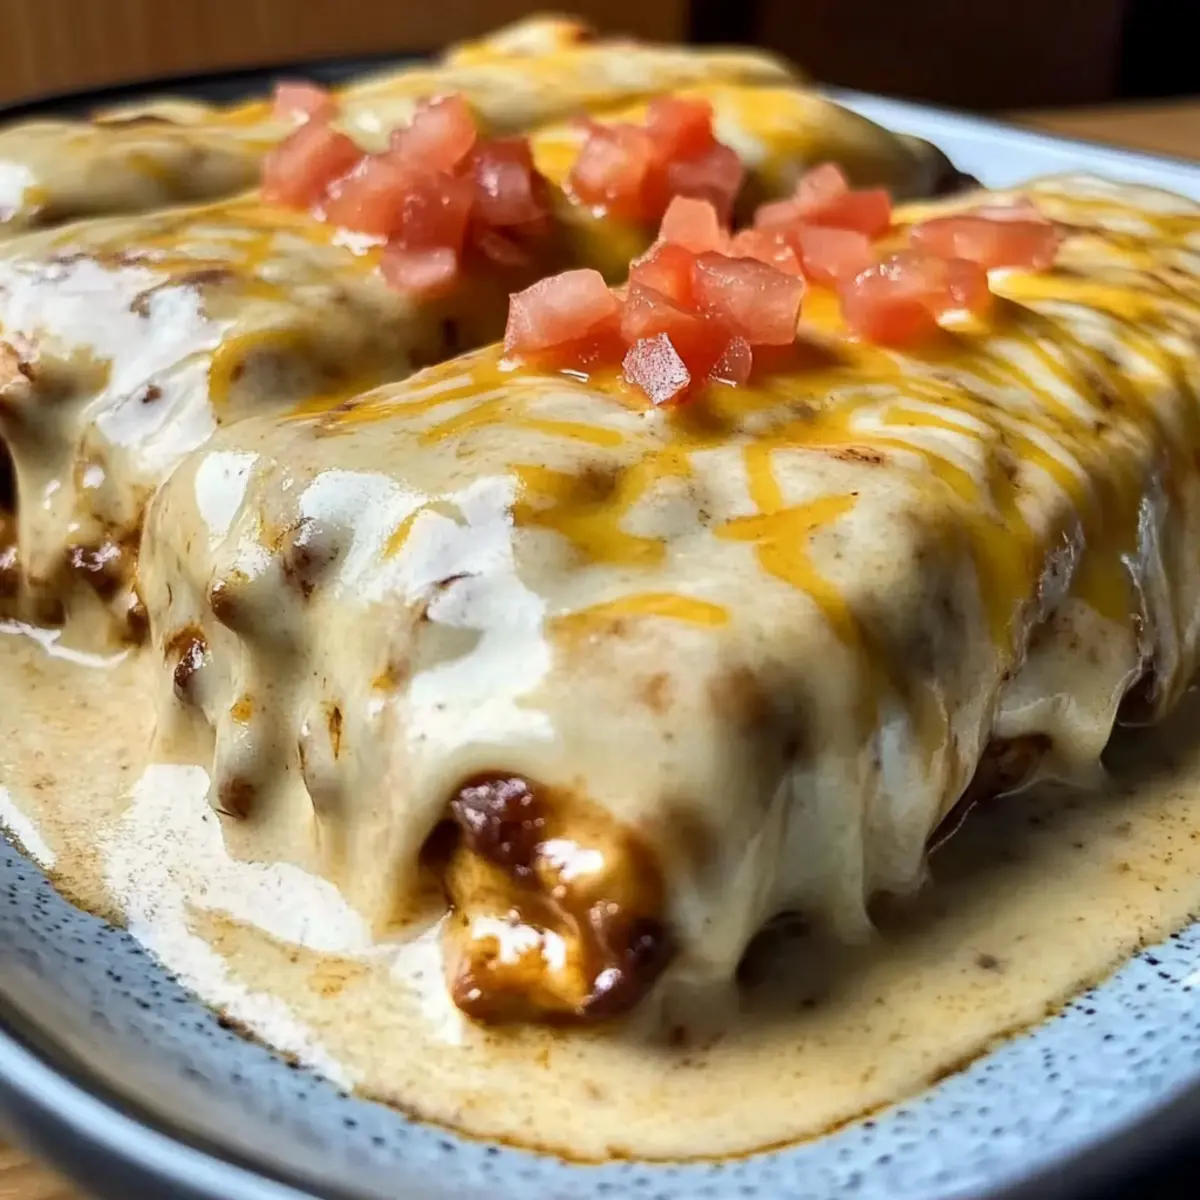
Flavorful Filling: The taco-seasoned chicken combined with gooey cheese creates a savory explosion in every bite, reminiscent of your favorite restaurant dish but made right at home.

Your family will love these, and you might just find yourself making them again and again!

Mini Baked Chicken Tacos Ingredients

For the Filling
1 ½ lbs cooked chicken (shredded) – Provides the protein base of the tacos; substitute with rotisserie chicken for convenience.
3 cups shredded Mexican cheese – Adds creaminess and flavor; feel free to swap in cheddar or Monterey Jack for a twist.

For the Taco Shells
10 small corn tortillas – These form the crispy taco shells; they provide the best texture, but you can use flour tortillas with a baking time adjustment.
1 tablespoon olive oil – Helps crisp the tortillas; use a light touch to avoid sogginess.

For the Optional Toppings
Sour cream – Adds a creamy richness to each bite.
Salsa – A fresh and zesty contrast that enhances flavor.
Chopped fresh cilantro – Brightens up the dish with a hint of freshness.
Lime wedges – A squeeze of lime brings a refreshing zing to your tacos.

With these Mini Baked Chicken Tacos ingredients ready, you’re one step closer to a delightful meal that will dazzle your family and friends! Enjoy the culinary adventure and let your creativity shine with customization!

Step‑by‑Step Instructions for Mini Baked Chicken Tacos

Step 1: Preheat the Oven
Begin by preheating your oven to 425°F (220°C). While it heats, line a large sheet pan with parchment paper to prevent sticking. This ensures that your Mini Baked Chicken Tacos will bake evenly and get that golden crisp texture that everyone loves.

Step 2: Prepare Taco Shells
Using a pastry brush, lightly coat both sides of each small corn tortilla with olive oil. This step is essential for achieving that perfect crunch. Arrange the tortillas in a baking dish, creating a slight bend to hold your filling once assembled.

Step 3: Fill the Tortillas
Start filling the tortillas by placing shredded chicken mixture on one side of each taco shell. Scoop a generous amount of the delicious filling, just enough to maintain structure. Follow up with a sprinkle of shredded Mexican cheese on top of the chicken; this will help bind everything together as it melts.

Step 4: Bake the Tacos
Carefully fold each filled tortilla in half and place them on the parchment-lined sheet pan. Bake them in the preheated oven for 8-12 minutes, watching closely until the tortillas are golden brown and the cheese is melty and just bubbling. The visual cue of a light golden color indicates they’re ready to come out.

Step 5: Cool and Fold Gently
Once done, remove the sheet pan from the oven. Allow the tacos to cool slightly for a minute; this cooling helps maintain their structure. Gently fold the tacos back while they are warm to prevent cracking.

Step 6: Serve with Toppings
Transfer your delicious Mini Baked Chicken Tacos to a serving platter. Offer a variety of optional toppings like sour cream, salsa, cilantro, and lime wedges in separate bowls. This customization allows everyone to create their perfect taco combination, elevating your meal experience!

Make Ahead Options

These Mini Baked Chicken Tacos are perfect for meal prep enthusiasts! You can prepare the taco filling up to 3 days in advance, simply refrigerate it in an airtight container. Additionally, you can brush the tortillas with olive oil and store them in the fridge for up to 24 hours before assembly, which helps maintain their freshness and prevent sogginess. When you’re ready to enjoy, simply fill the tortillas with the chilled filling, fold them, and bake as directed. This way, you’ll have a delightful, crowd-pleasing meal ready with minimal effort, allowing you to savor the deliciousness without the rush!

How to Store and Freeze Mini Baked Chicken Tacos

Fridge: Keep leftover Mini Baked Chicken Tacos in an airtight container for up to 3 days. Reheat in the oven at 350°F (175°C) for best results.

Freezer: For long-term storage, wrap individual tacos in plastic wrap or aluminum foil and place them in a freezer-safe container. They will last up to 2 months.

Reheating: When ready to enjoy, thaw in the fridge overnight and reheat in the oven at 350°F (175°C) until warmed through, about 10-15 minutes. Avoid microwaving to maintain crispiness.

Make-Ahead: You can prepare the taco filling and store it in the fridge for up to 2 days. Assemble and bake just before serving for fresh, warm Mini Baked Chicken Tacos.

Expert Tips for Mini Baked Chicken Tacos

Cheese Layering: Top the chicken filling with cheese before folding the tortillas to help prevent them from opening during baking.

Oil Control: Use just a light brush of olive oil on your tortillas. Too much oil can result in soggy shells instead of the desired crunch.

Keep Warm: If serving a crowd, keep the baked tacos warm in a low oven until guests are ready. This ensures they remain crispy and delicious.

Cooling Time: Allow tacos to cool slightly after baking before folding them; this helps maintain their structure and prevents cracking.

Custom Fillings: Don’t hesitate to substitute the shredded chicken with black beans or grilled veggies for a wonderful vegetarian version of the Mini Baked Chicken Tacos.

Mini Baked Chicken Tacos Variations

Feel free to unleash your creativity with these Mini Baked Chicken Tacos and make them your own!

  • Vegetarian Delight: Swap shredded chicken for black beans or grilled veggies for a hearty vegetarian twist. This keeps the flavor without compromising on heartiness.

  • Cheese Swaps: Try using different types of cheese like pepper jack for a kick or goat cheese for a creamy tang. Each cheese brings a unique flavor to the taco experience.

  • Heat Level: Add diced jalapeños or sliced serrano peppers for a spicy kick. If you love heat, this will elevate your tacos to a whole new level of deliciousness.

  • Tortilla Options: Use larger tortillas for oversized tacos or cut standard tortillas into quarters for bite-sized appetizers. These mini delights are perfect for parties!

  • Flavor Boost: Mix in some taco seasoning or smoked paprika into the chicken mixture for a zesty surprise. A little extra spice can make a world of difference in flavor.

  • Crunchy Toppings: Top your tacos with crushed tortilla chips or freshly made pico de gallo for added crunch. The texture variation will enhance your dining experience, much like a good BLT Chicken Salad.

  • Different Oils: Experiment with flavored oils, like garlic-infused olive oil, to brush on the tortillas. The subtle garlic flavor can elevate your tacos to new heights.

  • Service Style: Serve them as a build-your-own taco bar, letting guests choose their own toppings. It’s always a hit and makes for a fun dining experience!

With these variations, the possibilities are endless, ensuring that every time you make these Mini Baked Chicken Tacos, it’s a unique experience!

What to Serve with Mini Baked Chicken Tacos?

Elevate your taco night with these delightful sides that perfectly complement the savory flavors of your baked chicken delights!

  • Creamy Guacamole: Adds rich creaminess and freshness, balancing the spices in the tacos. A dollop of guacamole brings taste and texture to each bite!

  • Zesty Mexican Rice: This dish pairs wonderfully with the chicken tacos, providing a hearty texture and a vibrant boost of flavor. The spices in the rice harmonize beautifully with the taco seasoning.

  • Black Bean Salad: A refreshing medley of black beans, corn, and lime. This dish not only brightens the meal but also adds a nutritious punch. The crunchiness and zest will enhance every taco bite!

  • Charred Corn on the Cob: The sweet, smoky flavor of grilled corn elevates the meal. Slather with lime and a sprinkle of cheese for a fun, finger-licking side!

  • Pico de Gallo: Fresh and vibrant, this salsa is the perfect topping for your tacos! The tang of lime and crunch of vegetables provide a burst of flavor, enhancing the overall experience.

  • Tortilla Chips with Salsa: Crunchy chips paired with a zesty tomato salsa create an irresistible appetizer. They add texture and a touch of salsa joy before you dive into the tacos!

  • Margaritas: A classic pairing that brings a festive spirit to your meal! The zesty, citrusy flavors perfectly complement the spicy chicken tacos and are sure to liven up your dinner table.

  • Churros for Dessert: End the meal on a sweet note with these cinnamon-sugar treats. Their warmth and sweetness contrast beautifully with the savory tacos, creating a delightful finish.

Mini Baked Chicken Tacos Recipe FAQs

What type of chicken is best for Mini Baked Chicken Tacos?
Absolutely! Using shredded rotisserie chicken is a great time-saver and adds wonderful flavor to these tacos. If you prefer, you can cook and shred your own chicken breast seasoned with taco spices for a more customized taste.

How should I store leftover Mini Baked Chicken Tacos?
Leftover Mini Baked Chicken Tacos can be stored in an airtight container in the refrigerator for up to 3 days. Just make sure they cool down first to avoid condensation inside the container. Reheat them in the oven at 350°F (175°C) for about 10-15 minutes to regain that lovely crispiness.

Can I freeze Mini Baked Chicken Tacos?
Yes, you can freeze Mini Baked Chicken Tacos! Wrap each taco individually in plastic wrap or foil, then place them in a freezer-safe container. They can last up to 2 months in the freezer. When you’re ready to eat, thaw in the refrigerator overnight before reheating in the oven.

What can I do if my tacos are soggy?
If your Mini Baked Chicken Tacos turn soggy, make sure to use a light brush of olive oil rather than soaking them. You can also try pre-baking the tortillas on their own for a few minutes before adding the filling to give them a better crunch. The crispiness is key for an enjoyable taco experience!

Are there any dietary considerations for these tacos?
Very! These tacos can easily be made gluten-free by using corn tortillas. Additionally, for those with dairy allergies, you can substitute cheese with dairy-free alternatives. If you’re considering a vegetarian version, black beans or grilled veggies are excellent substitutions for cheese and chicken!

Can I prep the filling in advance?
Absolutely! You can prepare the taco filling up to 2 days in advance. Store it in an airtight container in the fridge. When you’re ready to serve, simply assemble the tacos with the filling and bake them fresh for a warm, delectable meal!

Mini Baked Chicken Tacos

Delicious Mini Baked Chicken Tacos Ready in 30 Minutes

These Mini Baked Chicken Tacos are easy to make and customizable, perfect for busy weeknights or gatherings.
Prep Time 15 minutes
Cook Time 15 minutes
Cooling Time 1 minute
Total Time 30 minutes
Servings: 4 tacos
Course: Dinner
Cuisine: Mexican
Calories: 350

Ingredients
  

For the Filling
  • 1.5 lbs cooked chicken (shredded) Substitute with rotisserie chicken for convenience.
  • 3 cups shredded Mexican cheese Feel free to swap in cheddar or Monterey Jack for a twist.
For the Taco Shells
  • 10 small corn tortillas Use flour tortillas with a baking time adjustment if desired.
  • 1 tablespoon olive oil Use a light touch to avoid sogginess.
For the Optional Toppings
  • Sour cream Adds a creamy richness.
  • Salsa A fresh and zesty contrast.
  • Chopped fresh cilantro Brightens up the dish.
  • Lime wedges Brings a refreshing zing.

Equipment

  • Oven
  • Sheet Pan
  • Parchment Paper
  • Pastry Brush

Method
 

Step-by-Step Instructions
  1. Preheat your oven to 425°F (220°C) and line a large sheet pan with parchment paper.
  2. Lightly coat both sides of each tortilla with olive oil using a pastry brush and arrange them in a baking dish.
  3. Fill the tortillas by placing shredded chicken on one side and top with cheese.
  4. Fold each filled tortilla in half, place them on the sheet pan, and bake for 8-12 minutes until golden brown.
  5. Allow the tacos to cool slightly before gently folding them back to maintain structure.
  6. Serve the tacos on a platter with optional toppings in separate bowls.

Nutrition

Serving: 2tacosCalories: 350kcalCarbohydrates: 30gProtein: 25gFat: 18gSaturated Fat: 7gPolyunsaturated Fat: 2gMonounsaturated Fat: 5gCholesterol: 80mgSodium: 600mgPotassium: 250mgFiber: 3gSugar: 1gVitamin A: 20IUVitamin C: 5mgCalcium: 25mgIron: 10mg

Notes

Enjoy customizing these Mini Baked Chicken Tacos with various fillings and toppings for a personalized meal experience.

Tried this recipe?

Let us know how it was!

Savor Bold Mexican Street Tacos with Perfectly Grilled Steak

As I stood at the vibrant food market, the aroma of sizzling meat and fresh cilantro filled the air, transporting me to the lively streets of Mexico. Today, I want to share my take on Authentic Mexican Street Tacos, an enticing recipe featuring tender flank or skirt steak marinated in a blend of zesty lime juice, garlic, and spices. Not only are these tacos a breeze to prepare, but they also recreate that mouthwatering street food experience right in your kitchen, elevating simple weeknight dinners into something special. Whether you enjoy them topped with crunchy red onions or fresh cilantro, each bite delivers joy and satisfaction. Are you ready to bring a little fiesta to your plate? Let’s dive in!

Why Are These Street Tacos Irresistible?

Bold Flavors: The marinade infuses flank or skirt steak with zesty lime and aromatic spices, creating a taste sensation that is pure bliss.

Quick to Prepare: With only a few ingredients and minimal prep time, you’ll have delicious tacos on the table faster than you can say “taco Tuesday!”

Customizable Delight: Personalize each taco with your favorite toppings, whether it’s fresh cilantro, spicy salsa, or crunchy onions, giving everyone a chance to create their perfect bite.

Authentic Experience: These Mexican Street Tacos deliver genuine street food vibes right at home, making it a fun, interactive meal to share with family or friends.

Crowd-Pleasing: Perfect for gatherings, serve with sides like Mexican Taco Soup or Birria Tacos Culinary to complete your feast!

Mexican Street Tacos Ingredients

For the Marinade

  • Vegetable Oil – Provides moisture and helps in cooking. (Can substitute with canola oil.)
  • Fresh Lime Juice – Adds acidity and a bright flavor. (Fresh lemon juice can be used as an alternative.)
  • Low Sodium Soy Sauce – Contributes umami flavor and saltiness. (Tamari can be used for gluten-free.)
  • Garlic (minced) – Enhances aroma and depth of flavor. (Fresh garlic is recommended for the best taste.)
  • Chili Powder – Adds heat and a robust flavor profile. (Adjust according to spice preference.)
  • Ground Cumin – Offers a warm, earthy note. (Ground coriander can be a substitute for a different flavor.)
  • Dried Oregano – Complements the other spices with herby notes. (Mexican oregano is preferred if available.)

For the Tacos

  • Flank Steak or Skirt Steak (cut in ½-inch pieces) – The main protein, provides rich flavor and tenderness when cooked properly. (Chuck steak can be a cost-effective alternative.)
  • Street Taco Size or Mini Corn/Flour Tortillas – Serve as the base of the taco, providing a vehicle for flavorful fillings. (Use gluten-free tortillas for a gluten-free option.)

For the Toppings

  • Freshly Chopped Cilantro – Adds freshness and a burst of herbal flavor. (Can be omitted for those who dislike its taste.)
  • Freshly Diced Red Onion – Provides crunch and sharpness to balance the richness of steak. (Shallots can be used as a milder option.)
  • Fresh Limes Cut into Wedges – Used for squeezing over tacos for added acidity and flavor.

Enjoy these Mexican Street Tacos with your favorite toppings for a delightful meal that brings the taste of Mexico to your table!

Step‑by‑Step Instructions for Mexican Street Tacos

Step 1: Prepare the Marinade
In a large bowl, start by whisking together ¼ cup of vegetable oil, ¼ cup of fresh lime juice, ¼ cup of low sodium soy sauce, 2 minced garlic cloves, 2 tablespoons of chili powder, 1 tablespoon of ground cumin, and 1 tablespoon of dried oregano. This vibrant marinade should have a rich, aromatic scent.

Step 2: Marinate the Steak
Add your 1 pound of flank or skirt steak, cut into ½-inch pieces, into the marinade. Ensure each piece is thoroughly coated for maximum flavor exposure. Cover the bowl with plastic wrap and refrigerate for at least 2 hours, or ideally up to 12 hours for the best results.

Step 3: Heat the Skillet
When you’re ready to cook, place a large skillet on the stove and heat it over medium-high heat for about 3 minutes. Check that the skillet is hot by sprinkling a few drops of water on the surface; they should sizzle and evaporate immediately, indicating the right temperature to sear the meat.

Step 4: Cook the First Batch of Steak
Using a slotted spoon, carefully remove half of the marinated steak from the bowl and place it in the hot skillet. Sear the steak pieces for about 4 minutes, stirring occasionally, until they develop a nice brown crust and reach your desired doneness—look for a rich, caramelized surface.

Step 5: Tent and Repeat Cooking
Once cooked, tent the first batch of steak with aluminum foil to keep it warm. Return the skillet to heat and repeat the cooking process with the remaining steak pieces, using the same method until they are cooked to perfection.

Step 6: Discard the Marinade
After all the steak is cooked, discard any leftover marinade that has been in contact with raw meat to ensure food safety. The skillet should now be full of deliciously seared steak, ready to be served.

Step 7: Assemble Your Tacos
Warm your street taco size or mini corn/flour tortillas in the skillet for about 30 seconds on each side until they are soft and pliable. Fill each tortilla generously with the cooked steak, then top with freshly chopped cilantro, diced red onion, and a squeeze of lime juice to elevate those flavors.

Step 8: Serve and Enjoy
Plate your Mexican Street Tacos warm and invite everyone to customize their tacos with additional lime wedges or other favorite toppings. The combination of juicy steak and fresh toppings creates a delightful meal that captures the essence of authentic street food.

What to Serve with Authentic Mexican Street Tacos

Transform your dining experience into a vibrant fiesta with these delectable pairings that harmonize beautifully with your flavorful tacos.

  • Mexican Rice: This fluffy, seasoned rice serves as a perfect base while adding a comforting touch to your tacos. Its mild flavor complements the robust spices in the tacos beautifully.

  • Fresh Guacamole: Creamy and luscious, the rich texture of homemade guacamole adds a delightful contrast, while the zesty lime and fresh cilantro enhance the overall flavor profile.

  • Pico de Gallo: This fresh salsa brings a crisp, juicy element that brightens every bite, with juicy tomatoes and onions balancing the savory depth of the steak.

  • Refried Beans: Their creamy consistency pairs well with the crunchy elements of the tacos, and they add a protein boost, making your meal more hearty and satisfying.

  • Corn on the Cob: Grilled or boiled, with a sprinkle of chili powder and lime, sweet corn provides a sweet, crunchy counterpart to the spiced meat, leaving everyone wanting more.

  • Margaritas: Kick off your meal with a refreshing margarita! The citrusy cocktail complements the flavors of the tacos while adding a festive twist to your gathering.

  • Churros: End your meal on a sweet note with classic churros. Their crispy exterior and soft center dusted in cinnamon sugar create a delightful contrast to the savory tacos.

  • Spicy Salsa Verde: Drizzle this vibrant green salsa atop your tacos for an added kick. Its fresh herbs and tangy flavor enhance the experience without overdoing the heat.

  • Cabbage Slaw: A crunchy slaw, lightly dressed with lime juice, cuts through the richness of the steak, offering a refreshing contrast to each bite of your tacos.

Expert Tips for Mexican Street Tacos

  • Marination Time: Longer is better: Aim for marinating the steak for up to 12 hours to fully absorb those bold flavors of the marinade.

  • Searing Success: Don’t overcrowd the skillet: Cooking in batches ensures you achieve that perfect sear instead of steaming the meat, which can happen if too much is added at once.

  • Cooking Temp: Get it hot: Ensure your skillet is hot before adding the steak; this is key for developing a beautifully browned crust that enhances the flavor of your Mexican Street Tacos.

  • Taco Assembly: Layering matters: Start with the meat and then add toppings, allowing the juices to interact with the other flavors for an unforgettable bite every time.

  • Flavorful Toppings: Get creative: Add tangy Pico de Gallo or creamy guacamole for extra flavor profiles that can elevate your Mexican Street Tacos from good to fantastic!

How to Store and Freeze Mexican Street Tacos

Fridge: Store cooked steak in an airtight container for up to 3 days. Reheat gently in a skillet for the best texture before serving in fresh tortillas.

Freezer: If you have leftover marinated steak, freeze it before cooking for up to 3 months. Thaw in the fridge overnight before cooking for your tacos.

Tortillas: If you have unused tortillas, keep them in a sealed bag in the fridge for up to a week, or freeze for up to 3 months. Warm before serving.

Reheating: To reheat assembled tacos, wrap them in foil and place in a warm oven until heated through, about 10 minutes. Enjoy the delicious flavors of Mexican Street Tacos!

Mexican Street Tacos Variations & Substitutions

Feel free to unleash your creativity and make these tacos uniquely yours with these delightful swaps and additions!

  • Vegetarian: Swap the steak for grilled portobello mushrooms or marinated jackfruit for a delicious plant-based alternative.
    Bring this twist to life with a smoky marinade for added depth, and you won’t miss the meat!

  • Pico de Gallo: Replace red onions with fresh pico de gallo for a burst of flavor and color.
    Combine chopped tomatoes, onions, cilantro, and lime juice for this vibrant topping.

  • Spicy Salsa: Add a dollop of your favorite spicy salsa on top for heat.
    Choose a salsa verde for a tangy kick or a smoky chipotle salsa for deep flavor.

  • Different Meat Options: Try chicken, pork, or even shrimp instead of steak for varied protein choices.
    Each type brings its own distinct taste, making your taco nights feel like global cuisine adventures!

  • Gluten-Free: Use corn tortillas or gluten-free flour tortillas to make the dish suitable for gluten-sensitive guests.
    They provide a softer texture and a hint of sweetness that pairs perfectly with the savory filling.

  • Avocado Crema: Drizzle creamy avocado sauce over your tacos for a luscious finish.
    Blend ripe avocados with lime juice, garlic, and Greek yogurt for a cool, refreshing topping.

  • Heat Level: Adjust the chili powder or add diced jalapeños for more spice.
    This will elevate the bold flavors and ensure every bite is packed with heat—perfect for thrill-seekers!

These variations will keep your taco nights exciting and flavorful! For more incredible flavor combinations, consider adding a side of Mexican Taco Soup or a refreshing street corn dish like Street Corn Chicken. Enjoy your culinary adventure!

Make Ahead Options

These Mexican Street Tacos are a fantastic meal prep option for busy weeknights! You can marinate the flank or skirt steak up to 24 hours in advance, ensuring maximum flavor absorption while keeping the meat tender. Just combine the marinade ingredients, coat the steak, and let it chill in the refrigerator. Additionally, chopped cilantro and diced red onions can be prepared a day ahead and stored in airtight containers to maintain freshness. When you’re ready to serve, simply cook the marinated steak as directed, warm your tortillas, and assemble the tacos. This way, you’ll enjoy delicious, homemade street tacos with minimal effort and time!

Mexican Street Tacos Recipe FAQs

How do I choose the right flank or skirt steak?
Absolutely! Look for cuts of flank or skirt steak that are deep red with a bit of marbling. Avoid any pieces with dark spots or a grayish hue as they may be less fresh. Quality meat will make a noticeable difference in the flavor and tenderness of your Mexican Street Tacos!

How should I store leftover cooked steak from the tacos?
To keep your delicious steak fresh, place it in an airtight container in the fridge. It’s best to consume it within 3 days. When you’re ready to enjoy it again, gently reheat the steak in a skillet over low heat until warmed through, ensuring it retains its juicy goodness.

Can I freeze the marinated steak for later use?
Yes, you can! If you want to save time for future taco nights, freeze the marinated steak before cooking. Simply place it in a freezer-safe bag, remove as much air as possible, and it’s good for up to 3 months. When you’re ready to use it, thaw the steak in the fridge overnight before cooking to preserve its texture and flavor.

What can I do if my tacos turn out too dry?
Very! If you find your steak is dry, it might be from overcooking. Use a meat thermometer next time—medium-rare is about 135°F (57°C). You can also add some reserved marinade (cooked) or a squeeze of lime juice to the tacos after assembly for added moisture and flavor!

Are Mexican Street Tacos safe for those with gluten allergies?
Great question! To make your Mexican Street Tacos gluten-free, simply use tamari instead of soy sauce and opt for gluten-free corn tortillas. Be vigilant about ensuring that any toppings such as salsas or sauces are also gluten-free. Enjoy your tacos worry-free!

Mexican Street Tacos

Savor Bold Mexican Street Tacos with Perfectly Grilled Steak

Enjoy authentic Mexican Street Tacos made with marinated steak and fresh toppings, bringing festive flavors to your dinner table.
Prep Time 15 minutes
Cook Time 15 minutes
Marinating Time 2 hours
Total Time 2 hours 30 minutes
Servings: 4 tacos
Course: Dinner
Cuisine: Mexican
Calories: 300

Ingredients
  

Marinade
  • ¼ cup Vegetable Oil Can substitute with canola oil.
  • ¼ cup Fresh Lime Juice Fresh lemon juice can be used as an alternative.
  • ¼ cup Low Sodium Soy Sauce Tamari can be used for gluten-free.
  • 2 cloves Garlic (minced) Fresh garlic is recommended for the best taste.
  • 2 tablespoons Chili Powder Adjust according to spice preference.
  • 1 tablespoon Ground Cumin Ground coriander can be a substitute for a different flavor.
  • 1 tablespoon Dried Oregano Mexican oregano is preferred if available.
Tacos
  • 1 pound Flank Steak or Skirt Steak (cut in ½-inch pieces) Chuck steak can be a cost-effective alternative.
  • 8 tortillas Street Taco Size or Mini Corn/Flour Tortillas Use gluten-free tortillas for a gluten-free option.
Toppings
  • Freshly Chopped Cilantro Can be omitted for those who dislike its taste.
  • Freshly Diced Red Onion Shallots can be used as a milder option.
  • Fresh Limes Cut into Wedges

Equipment

  • Large bowl
  • Skillet
  • slotted spoon

Method
 

Instructions
  1. In a large bowl, whisk together vegetable oil, lime juice, soy sauce, minced garlic, chili powder, ground cumin, and dried oregano to prepare the marinade.
  2. Add flank or skirt steak to the marinade, ensuring it is thoroughly coated. Cover and refrigerate for at least 2 hours, ideally up to 12 hours.
  3. Heat a large skillet over medium-high heat for about 3 minutes until hot.
  4. Remove half of the marinated steak with a slotted spoon and sear in the skillet for about 4 minutes until browned.
  5. Tent the cooked steak with foil to keep warm and repeat the cooking process with the remaining steak.
  6. Discard any leftover marinade that has been in contact with raw meat.
  7. Warm tortillas in the skillet for about 30 seconds on each side, then fill with cooked steak and top with cilantro, red onion, and lime juice.
  8. Serve warm, allowing everyone to customize their tacos with additional lime wedges or toppings.

Nutrition

Serving: 1tacoCalories: 300kcalCarbohydrates: 30gProtein: 20gFat: 15gSaturated Fat: 4gPolyunsaturated Fat: 1gMonounsaturated Fat: 10gCholesterol: 65mgSodium: 600mgPotassium: 400mgFiber: 2gSugar: 1gVitamin A: 200IUVitamin C: 20mgCalcium: 30mgIron: 3mg

Notes

Marinating the steak for up to 12 hours is recommended for enhanced flavor. Avoid overcrowding the skillet when cooking for a perfect sear.

Tried this recipe?

Let us know how it was!

Apple Cider Braised Pork Shoulder – Cozy Autumn Comfort Meal

There’s something undeniably magical about the first whiff of autumn wafting through your kitchen, isn’t there? This Apple Cider-Braised Pork Shoulder recipe captures that warmth perfectly, blending tender, slow-cooked pork with the sweet and tangy notes of unfiltered apple cider and seasonal veggies. Not only does it deliver in the comfort food department, but it also shines as a simple one-pot meal, making it a go-to for both family dinners and festive gatherings. With the mouthwatering aroma filling your home, you’ll find it just as heartwarming to serve as it is to savor. Are you ready to embark on a culinary adventure that celebrates the best of fall flavors?

What Makes This Recipe a Must-Try?

Comforting Hearty Dish: The Apple Cider-Braised Pork Shoulder is the ultimate cozy meal for chilly evenings. Rich Flavors: Each bite bursts with the perfect balance of sweet apple cider and savory pork, creating a symphony of autumn flavors. Easy One-Pot Wonder: With minimal cleanup, you can spend more time enjoying with family instead of washing dishes! Crowd-Pleasing Delight: Impress your friends and family at gatherings with this stunning, aromatic dish that suits all palates. Plus, if you’re craving more seasonal options, check out my Apple Crisp Cinnamon for dessert or pair it with my Sweet Savory Delights for a well-rounded feast!

Apple Cider Braised Pork Shoulder Ingredients

For the Pork
Pork Shoulder Roast – Look for a boneless, skinless roast to ensure tenderness and rich flavor when braised.
Kosher Salt – Generously season the pork to enhance its natural flavors evenly.

For Searing
Extra-Virgin Olive Oil – Use this to create a golden crust on the pork, adding depth and richness to the dish.

For the Aromatics
Large Shallots (2) – These provide sweetness and earthy depth; if needed, onions can be used as a substitute.
Fennel (1 small head) – The unique sweet-anise flavor elevates the dish, but you can replace it with leeks or omit entirely.
Garlic Cloves (6) – Roughly chopped to infuse robust flavor throughout the braising liquid.
Freshly Cracked Black Pepper – A must for seasoning with a hint of aromatic heat.

For the Heat
Cayenne Pepper (¼ teaspoon) – Adds a subtle kick; feel free to adjust or omit based on your spice preference.
Fennel Seeds (2 teaspoons, optional) – Intensifies the fennel flavor; leave out if using leeks instead.

For the Braising Liquid
Unfiltered Apple Cider (2 cups) – This ingredient is key for providing sweetness and acidity, balancing all the savory notes.
Apple Cider Vinegar (2 teaspoons) – Adds a layer of acidity that enhances the overall complexity of flavors.
Chicken Stock (2 cups) – Use homemade or low-sodium for a richer braising liquid that complements the pork beautifully.

For the Final Touch
Apples (2) – Cored and quartered for a perfect sweet and tender accompaniment to the braised dish.

Embrace the warm, comforting essence of autumn with this delightful Apple Cider Braised Pork Shoulder recipe!

Step‑by‑Step Instructions for Apple Cider Braised Pork Shoulder

Step 1: Preheat Oven
Begin by preheating your oven to 350°F (175°C), positioning the rack in the center. This temperature is ideal for slow braising, allowing the flavors of the Apple Cider Braised Pork Shoulder to develop beautifully.

Step 2: Prepare Pork
While the oven heats, take your boneless pork shoulder roast and pat it dry with paper towels. Generously season the meat with kosher salt on all sides, enhancing its natural flavors. This step sets the stage for a deliciously tender result.

Step 3: Sear the Meat
In a large Dutch oven, heat a couple of tablespoons of extra-virgin olive oil over medium heat. Once hot, place the seasoned pork shoulder in the pot and sear it on all sides for about 4 minutes per side, until it’s golden brown. This creates a crust that locks in moisture.

Step 4: Sauté Vegetables
Remove the browned pork and set it aside. In the same Dutch oven, add the chopped shallots and fennel. Sauté for about 5 minutes until they soften and begin to caramelize, stirring frequently. If they start to brown too quickly, pour in a splash of chicken stock to deglaze the pot.

Step 5: Make Braising Liquid
Next, add the minced garlic to the sautéed vegetables and cook for an additional minute until fragrant. Stir in freshly cracked black pepper, cayenne, optional fennel seeds, apple cider, apple cider vinegar, and chicken stock. Bring this mixture to a boil while scraping up the tasty browned bits from the bottom of the pot.

Step 6: Braise Pork
Return the seared pork shoulder to the pot, ensuring it’s mostly submerged in the flavorful liquid. Cover the pot with a lid and transfer it to the preheated oven. Let it braise for about 2 hours, during which the meat will become tender and infused with the aromatic flavors.

Step 7: Add Apples
After 2 hours, carefully remove the pot from the oven and add the quartered apples to the braise. Stir in the sautéed vegetables, cover the pot again, and return it to the oven. Continue braising for an additional 30 minutes, allowing the flavors to meld beautifully.

Step 8: Rest and Serve
Once the pork is fork-tender and easily shreds, remove the pot from the oven. Allow the pork shoulder to rest for 10 minutes before slicing or shredding. Serve it warm, topped with the delicious braised apples and vegetables, and drizzle the rich braising liquid over the dish, embracing the essence of your Apple Cider Braised Pork Shoulder.

Expert Tips for Apple Cider-Braised Pork Shoulder

  • Choose the Right Cut: For optimal tenderness and flavor, always use a boneless pork shoulder roast rather than pork butt to enjoy the rich taste of your Apple Cider Braised Pork Shoulder.

  • Searing is Key: Don’t skip the searing step! Browning the pork creates a delicious crust that locks in juices, enhancing the overall flavor of the dish.

  • Watch Your Vegetables: When sautéing shallots and fennel, keep an eye on them to prevent burning. If they heat too quickly, deglaze with a splash of chicken stock to keep them tender and flavorful.

  • Adjust Seasoning Wisely: Taste your braising liquid before returning the pork. A quick sprinkle of salt or more cayenne can elevate the flavor before it goes in the oven.

  • Let it Rest: After braising, allow the pork shoulder to rest for at least 10 minutes before slicing. This allows the juices to redistribute, ensuring a moist and tender dish.

  • Store Leftovers Well: If you have any leftover Apple Cider Braised Pork Shoulder, store it in an airtight container in the fridge. The flavors deepen and become even more delicious upon reheating!

What to Serve with Apple Cider-Braised Pork Shoulder

A delightful meal awaits when you complement this cozy dish with perfectly chosen sides that enhance its rich flavors.

  • Creamy Mashed Potatoes: Their buttery smoothness and rich texture soak up the savory braising liquid, making every bite a comforting experience.

  • Roasted Brussels Sprouts: The slight bitterness balances the sweetness of the cider-braised pork, adding a delightful crunch to the plate.

  • Buttery Cornbread: Warm, fluffy, and golden, this bread is perfect for sopping up the delectable juices and makes for a true comfort food pairing.

  • Garlic Green Beans: Their crisp-tender texture and freshness contrast beautifully with the hearty pork, adding a burst of color and nutrition to your meal.

  • Apple and Walnut Salad: A light and refreshing salad featuring crisp apples and crunchy walnuts can balance the richness of the pork, providing a satisfying bite.

  • Pumpkin Ale: The subtle spices in this seasonal beverage contrast nicely with the sweet apple flavor in the dish, complementing the fall-inspired meal beautifully.

  • Warm Cinnamon Apples: Enhance your autumn experience with these sweet, tender bites that echo the apple flavor of the pork while providing a comforting finish.

With these delicious accompaniments, your Apple Cider-Braised Pork Shoulder is sure to shine on the dinner table!

Make Ahead Options

These Apple Cider-Braised Pork Shoulders are fantastic for meal prep, allowing you to save valuable time on busy weeknights! You can season and sear the pork up to 24 hours in advance; simply refrigerate it after browning. The sautéed vegetables can also be prepped ahead and stored in an airtight container for up to 3 days. When you’re ready to cook, combine the pork, braising liquid, and vegetables, and let them braise in the oven for about 2.5 hours. This method not only helps deepen the flavors but ensures your meal is just as delicious with minimal effort. Serve the dish straight from the oven for a wholesome, hearty family meal!

How to Store and Freeze Apple Cider-Braised Pork Shoulder

Fridge: Store leftovers in an airtight container for up to 3 days. The flavors deepen and become richer upon reheating, making them even more delightful!

Freezer: For longer storage, freeze the braised pork in an airtight container for up to 3 months. Allow it to cool before freezing to maintain texture and flavor.

Reheating: Thaw overnight in the fridge if frozen. Gently reheat in a pot over medium heat, adding a splash of chicken stock if necessary to maintain moisture.

Room Temperature: Avoid leaving the pork out for longer than 2 hours to maintain food safety. Always refrigerate leftovers promptly!

Apple Cider Braised Pork Shoulder Swaps

Feel free to make this dish your own with these delightful twists and substitutions!

  • Root Veggie Boost: Add carrots or parsnips for an extra layer of sweetness and earthiness, enhancing the autumn vibes.

  • Spicy Kick: Increase cayenne pepper for a bolder flavor or serve with spicy mustard for a zesty contrast that pairs perfectly with the sweet cider base.

  • Beef Variation: Substitute the pork shoulder with beef chuck roast for a hearty, beefy alternative that still captures delicious flavor.

  • Herb Infusion: Toss in fresh rosemary or thyme during braising to elevate the herbaceous notes, adding a fragrant touch to the dish.

  • Vegetarian Option: Use mushroom or jackfruit as a substitute for pork; braise in the same liquid for a delightful plant-based experience.

  • Cider Variety Swap: Check out different apple ciders for unique flavor profiles, like spice-infused or bubbly varieties, adding a fun twist to the original recipe.

  • Savory Sweetness: Throw in dried cranberries or raisins for bursts of sweetness that contrast beautifully with the savory ingredients.

  • Crockpot Convenience: Adapt this dish for a slow cooker by browning the pork first and following the same braising process on low for 6-8 hours for an effortless meal.

For more seasonal inspiration, you might love trying my Apple Crisp Cinnamon for dessert or pair with my Sweet Savory Delights for a complete autumn feast!

Apple Cider-Braised Pork Shoulder Recipe FAQs

How do I choose a ripe pork shoulder?
Absolutely! When selecting a pork shoulder for this recipe, look for a boneless, skinless roast that is firm and has a pinkish-red hue. Avoid any cuts with dark spots or discolored patches as these can indicate spoilage. Opt for a piece that has a bit of marbling, as the fat will contribute to the tenderness and richness of the dish during cooking.

How should I store leftover Apple Cider-Braised Pork Shoulder?
Very! Store your leftovers in an airtight container in the fridge for up to 3 days. This helps retain moisture and flavor. When reheating, I recommend gently warming it on the stove over medium heat to bring back that delicious juiciness; add a splash of chicken stock if it seems a bit dry. For longer storage, you can freeze the pork for up to 3 months!

Can I freeze Apple Cider-Braised Pork Shoulder?
Absolutely! To freeze, allow the pork to cool completely first. Then, transfer it to an airtight container, making sure to remove as much air as possible to prevent freezer burn. Label with the date and enjoy a comforting meal later by thawing it overnight in the fridge before reheating.

What if my sauce is too thin after braising?
No worries! If your sauce seems too thin after braising, simply remove the pork and turn up the heat to medium-high. Allow the braising liquid to simmer for about 10-15 minutes until it reduces and thickens to your liking. Alternatively, you can mix 1 tablespoon of cornstarch with a little cold water, then stir it into the liquid and heat until it thickens.

Is Apple Cider-Braised Pork Shoulder safe for my pets?
Good question! While the pork itself is safe in moderation, avoid giving your pet seasoned or sauced portions, especially due to ingredients like garlic and onion that can be harmful to them. Always consult your veterinarian before introducing any new foods to your pet’s diet.

What if I’m allergic to fennel?
No problem at all! If you have a fennel allergy, you can substitute it with leeks or celery. However, keep in mind that this will change the flavor profile of the dish slightly; leeks offer a mild sweetness, while celery provides a fresh crunch. Omission is also perfectly acceptable if you prefer a simpler taste!

Apple Cider Braised Pork Shoulder

Apple Cider Braised Pork Shoulder – Cozy Autumn Comfort Meal

This Apple Cider Braised Pork Shoulder recipe combines tender pork with sweet apple cider and seasonal veggies for a heartwarming autumn dish.
Prep Time 20 minutes
Cook Time 2 hours 30 minutes
Resting Time 10 minutes
Total Time 3 hours
Servings: 6 servings
Course: Dinner
Cuisine: American
Calories: 500

Ingredients
  

For the Pork
  • 1 piece Pork Shoulder Roast Boneless and skinless for tenderness
  • 2 teaspoons Kosher Salt For seasoning
For Searing
  • 2 tablespoons Extra-Virgin Olive Oil For searing
For the Aromatics
  • 2 large Shallots Chopped
  • 1 small head Fennel Chopped, optional
  • 6 cloves Garlic Roughly chopped
  • 1 teaspoon Freshly Cracked Black Pepper For seasoning
For the Heat
  • 0.25 teaspoon Cayenne Pepper Adjust based on spice preference
  • 2 teaspoons Fennel Seeds Optional
For the Braising Liquid
  • 2 cups Unfiltered Apple Cider Key for sweetness and acidity
  • 2 teaspoons Apple Cider Vinegar For added acidity
  • 2 cups Chicken Stock Homemade or low-sodium for richness
For the Final Touch
  • 2 pieces Apples Cored and quartered

Equipment

  • Dutch oven

Method
 

Step-by-Step Instructions
  1. Preheat your oven to 350°F (175°C), positioning the rack in the center.
  2. Pat the pork shoulder dry with paper towels and season generously with kosher salt.
  3. Heat olive oil in a large Dutch oven over medium heat and sear the pork shoulder on all sides for about 4 minutes each.
  4. Remove the pork and add chopped shallots and fennel to the pot, sauté for about 5 minutes until soft.
  5. Add minced garlic and cook for an additional minute. Stir in pepper, cayenne, fennel seeds, apple cider, apple cider vinegar, and chicken stock.
  6. Return the pork to the pot, cover, and braise for about 2 hours.
  7. After 2 hours, add the quartered apples to the braise, cover, and continue braising for an additional 30 minutes.
  8. Once tender, remove from the oven and let rest for 10 minutes before slicing or shredding.

Nutrition

Serving: 1servingCalories: 500kcalCarbohydrates: 30gProtein: 40gFat: 20gSaturated Fat: 5gPolyunsaturated Fat: 1gMonounsaturated Fat: 12gCholesterol: 100mgSodium: 800mgPotassium: 800mgFiber: 2gSugar: 10gVitamin A: 100IUVitamin C: 5mgCalcium: 30mgIron: 2mg

Notes

Allowing the pork to rest after braising ensures juicy, tender meat. Store leftovers in an airtight container for up to 3 days.

Tried this recipe?

Let us know how it was!

One Pot Beefaroni: Your Ultimate Comfort Food Rescue

As I stirred the bubbling pot, the rich aroma of One Pot Beefaroni filled the air, instantly transporting me back to cozy family dinners. This dish harmoniously combines tender ground beef, pasta, and a luscious tomato sauce, creating a comforting meal that’s perfect for any busy weeknight. Not only is it a breeze to prepare, but it’s also budget-friendly and customizable, allowing you to infuse your unique flair with every bite. Whether you’re a seasoned home chef or just diving into cooking, this recipe promises satisfaction and simplicity, leaving your kitchen filled with warmth and delightful scents. Ready to bring some serious comfort to your table? Let’s dive into this delicious one-pot wonder together!

Why is One Pot Beefaroni a Must-Try?

Comforting and Easy: This cozy dish requires minimal effort, making it the ultimate weeknight dinner solution.
Versatile Customizations: Tailor it to your taste—swap ground beef for lentils or add in your favorite veggies like spinach or bell peppers.
Rich Flavor Profile: The combination of savory beef, rich tomato sauce, and melted cheese guarantees satisfaction in every bite.
Budget-Friendly: Make a hearty meal without breaking the bank; perfect for families or anyone craving a fulfilling meal.
One Pot Wonder: No need for multiple dishes—easy cleanup means more time to enjoy your meal! Dive into this delicious recipe and if you’re looking for more one-pot inspiration, check out One Pan Chili for another comforting option!

One Pot Beefaroni Ingredients

For the Beef and Pasta
Ground Beef – Provides richness and protein; substitute with plant-based crumbles for a vegetarian version.
Elbow Macaroni – This staple pasta gives the dish its comforting texture; other small pasta shapes like shells or penne work well.

For the Sauce
Tomato Sauce – Adds tangy depth and moisture; opt for homemade sauce for a fresher flavor.
Beef Broth – Enhances flavor depth and helps cook the pasta; use vegetable broth for a vegetarian option.
Italian Seasoning – Introduces herbs and spices to elevate the overall flavor; adjust amounts to your taste.

For the Creaminess
Cheese (e.g., shredded cheddar or mozzarella) – Contributes creaminess and richness; a mix of Italian cheeses can complement the dish.
Parmesan Cheese – Provides a salty, nutty finish; optional for extra flavor.

For Freshness
Fresh Parsley or Basil – Offers color and a refreshing aroma at serving; optional but highly recommended for garnish.

Step‑by‑Step Instructions for One Pot Beefaroni

Step 1: Brown the Beef
In a large pot, heat over medium heat for about 5 minutes. Add the ground beef along with diced onion and minced garlic, cooking until the beef is browned and the onions are translucent, roughly 7-10 minutes. Stir occasionally to break up the meat and ensure even browning.

Step 2: Combine Sauces and Pasta
Once the meat is browned, stir in a generous amount of tomato sauce and beef broth, ensuring the mixture is well combined. Sprinkle in Italian seasoning, then add the elbow macaroni, pressing it down to submerge most of the pasta in the liquid. This creates a hearty base for your One Pot Beefaroni.

Step 3: Simmer and Cook
Bring the pot to a gentle boil, then reduce the heat to low and cover with a lid. Allow it to simmer for about 15 minutes, stirring occasionally to prevent the pasta from sticking to the bottom. You’ll know it’s done when the pasta is tender, and the sauce has thickened beautifully.

Step 4: Melt the Cheese
Once the pasta is cooked to perfection, stir in the shredded cheese of your choice until melted and creamy. This adds an irresistible richness to your One Pot Beefaroni. Continue stirring for a couple of minutes until the cheese is fully incorporated and has transformed the sauce into a luscious coating for the pasta.

Step 5: Garnish and Serve
Remove the pot from heat and serve hot, topping each bowl with freshly chopped herbs like parsley or basil. For an added boost of flavor, sprinkle some grated Parmesan cheese on top if desired. This final touch elevates your One Pot Beefaroni and makes it truly irresistible!

Make Ahead Options

One Pot Beefaroni is a fantastic recipe for those busy weeknights when you want delicious comfort food without the fuss! You can prep the beef and sauce mixture up to 24 hours in advance. Simply cook the ground beef, onions, and garlic, then stir in the tomato sauce, beef broth, and Italian seasoning. Allow it to cool, then refrigerate in an airtight container. When you’re ready to serve, bring the mixture to a simmer and add the elbow macaroni—this way, it’ll cook freshly and maintain its texture. For best quality, avoid adding cheese until right before serving to keep it creamy and mouthwatering! Enjoy a hearty meal with minimal effort!

How to Store and Freeze One Pot Beefaroni

Fridge: Refrigerate leftover One Pot Beefaroni in an airtight container for up to 3 days to maintain freshness and flavor.

Freezer: For longer storage, freeze portions of One Pot Beefaroni in airtight containers for up to 2 months. This way, you can enjoy a comforting meal whenever cravings strike!

Reheating: When you’re ready to enjoy your beefaroni again, gently reheat on the stovetop over low heat or in the microwave until warmed through, stirring occasionally.

Expert Tips for One Pot Beefaroni

Stay Stirring: Stir occasionally while simmering to prevent the pasta from sticking to the bottom of the pot.

Add Some Heat: For those who enjoy a kick, consider mixing in red pepper flakes or diced jalapeños during cooking.

Pasta Type Matters: Watch the cooking time with different pasta types; adjust as needed for optimal texture and flavor in your One Pot Beefaroni.

Fresh Herbs are Key: Garnish with freshly chopped parsley or basil right before serving to enhance the dish’s aroma and flavor.

Cleanup Made Easy: Embrace the one-pot nature of this meal for effortless cleanup—spend more time enjoying dinner and less on washing dishes!

What to Serve with One Pot Beefaroni?

As you enjoy your delicious One Pot Beefaroni, consider these delightful pairings that will enhance your meal experience.

  • Garlic Bread: This classic side brings a warm, buttery crunch, perfectly complementing the creamy beefaroni. The bread acts as a delightful vehicle for scooping up that rich sauce.

  • Simple Green Salad: A crisp, refreshing salad with mixed greens and a light vinaigrette adds brightness and balances the dish’s richness, making every bite feel lighter.

  • Roasted Vegetables: Seasonal roasted veggies introduce lovely caramelized flavors and varied textures, creating a colorful balance on your plate. Sweetness from roasted carrots or bell peppers contrasts beautifully with the savory beefaroni.

  • Cheesy Breadsticks: These fun, cheesy accompaniments add a delightful texture and flavor. Plus, they’re perfect for dipping into leftover sauce! Kids and adults alike can’t resist them.

  • Fruit Salad: A fresh fruit salad can uplift the meal with its natural sweetness. Combine berries, melons, and a hint of mint for a refreshing contrast to the warm, hearty beefaroni.

  • Sparkling Lemonade: A fizzy drink like sparkling lemonade cleanses the palate between bites, adding a bright and refreshing element to your comfort meal. Perfect for a casual family dinner!

  • Chocolate Chip Cookies: For dessert, classic chocolate chip cookies offer a sweet, nostalgic finish. Their chewy texture and sweetness provide a comforting closure to your meal.

  • Iced Tea: A cool glass of iced tea brings a refreshing respite, especially in warmer months. It complements the dish while keeping the meal cozy and casual.

One Pot Beefaroni Customizations

Feel free to get creative in the kitchen and make this dish uniquely yours with these delightful variations!

  • Vegetarian Option: Swap ground beef with cooked lentils for a hearty, protein-packed vegetarian alternative that still feels comforting.
  • Pasta Swaps: Use smaller pasta shapes, like shells or penne, instead of elbow macaroni for a fun texture twist that excites your palate.
  • Veggie Boost: Add diced bell peppers, spinach, or mushrooms during cooking for an extra nutritional punch and colorful presentation.

As you incorporate different veggies, you’ll find the dish not only looks vibrant but also offers an explosion of flavors.

  • Spicy Kick: For those who crave heat, mix in red pepper flakes or diced jalapeños while cooking to elevate your One Pot Beefaroni to the next level.
  • Cheese Medley: Experiment with a mix of Italian cheeses, such as Fontina and Asiago, to create a unique flavor profile that’s truly indulgent.

Pairing it with a cheese medley can turn a comforting dish into a gourmet delight!

  • Fresh Herb Variations: Try garnishing your dish with fresh herbs beyond parsley, like cilantro or thyme, to add new taste dimensions with each bite.
  • Creamy Sauce Add-Ins: Stir in a dollop of sour cream or cream cheese at the end for extra creaminess and richness that will make your taste buds sing.

If you’re looking for more flavorful options, be sure to check out Cajun Honey Butter for a perfect side dish or add your own touch to a comforting meal!

One Pot Beefaroni Recipe FAQs

How do I choose the right ripeness of tomatoes for my sauce?
Absolutely! If you’re using fresh tomatoes instead of canned sauce, look for tomatoes that are firm but slightly yielding to pressure. They should have a vibrant color—avoid those with dark spots or signs of overripeness. Heirloom or Roma tomatoes are excellent for sauces due to their rich flavor.

How should I store leftover One Pot Beefaroni?
To keep your One Pot Beefaroni fresh, place any leftovers in an airtight container in the refrigerator for up to 3 days. Ensure it cools to room temperature before sealing it to prevent condensation, which can make it mushy.

Can I freeze One Pot Beefaroni?
Very! Freezing is a great option to save this dish! Portion out the cooled beefaroni into airtight containers or freezer bags, removing as much air as possible. It can be frozen for up to 2 months. When ready to enjoy, simply thaw overnight in the fridge and reheat on low heat on the stovetop, stirring occasionally until warmed through.

What should I do if the pasta is sticking to the pot?
If you find that the pasta is sticking during cooking, there are a few things you can do. First, ensure you’re stirring occasionally, as I always recommend. If it happens, add a splash of broth or water to loosen it up and continue cooking. The pasta should be tender and coated in sauce, but if it’s too much sticking, you may need to reduce the heat and adjust cooking time since different types of pasta have various cooking needs.

Is One Pot Beefaroni suitable for those with gluten allergies?
Absolutely! To make this dish gluten-free, simply substitute regular elbow macaroni with gluten-free pasta. Many brands offer excellent alternatives that maintain the same comforting texture. Just keep an eye on the cooking time, as gluten-free pasta often cooks faster than traditional pasta.

Can I add vegetables to my One Pot Beefaroni?
Yes, indeed! I love to incorporate veggies such as bell peppers, spinach, or mushrooms for added nutrition. Simply sauté your chosen vegetables along with the ground beef in step one, allowing them to soften and mingle with the flavors. This not only boosts the health factor but also adds color and visual appeal to the dish!

One Pot Beefaroni

One Pot Beefaroni: Your Ultimate Comfort Food Rescue

One Pot Beefaroni combines tender ground beef, pasta, and luscious tomato sauce for a comforting weeknight meal.
Prep Time 10 minutes
Cook Time 30 minutes
Total Time 40 minutes
Servings: 4 servings
Course: Dinner
Cuisine: American
Calories: 450

Ingredients
  

For the Beef and Pasta
  • 1 lb Ground Beef substitute with plant-based crumbles for vegetarian version
  • 2 cups Elbow Macaroni can use other small pasta shapes like shells or penne
For the Sauce
  • 2 cups Tomato Sauce opt for homemade for a fresher flavor
  • 1 cup Beef Broth use vegetable broth for vegetarian option
  • 2 teaspoons Italian Seasoning adjust amounts to taste
For the Creaminess
  • 1 cup Cheese (e.g., shredded cheddar or mozzarella) a mix of Italian cheeses can complement the dish
  • 1/4 cup Parmesan Cheese optional for extra flavor
For Freshness
  • 1/4 cup Fresh Parsley or Basil optional but highly recommended for garnish

Equipment

  • Large pot

Method
 

Step‑by‑Step Instructions for One Pot Beefaroni
  1. In a large pot, heat over medium heat for about 5 minutes. Add the ground beef along with diced onion and minced garlic, cooking until the beef is browned and the onions are translucent, roughly 7-10 minutes.
  2. Once the meat is browned, stir in a generous amount of tomato sauce and beef broth, ensuring the mixture is well combined. Sprinkle in Italian seasoning, then add the elbow macaroni, pressing it down to submerge most of the pasta in the liquid.
  3. Bring the pot to a gentle boil, then reduce the heat to low and cover with a lid. Allow it to simmer for about 15 minutes, stirring occasionally to prevent the pasta from sticking to the bottom.
  4. Once the pasta is cooked to perfection, stir in the shredded cheese of your choice until melted and creamy.
  5. Remove the pot from heat and serve hot, topping each bowl with freshly chopped herbs like parsley or basil.

Nutrition

Serving: 1bowlCalories: 450kcalCarbohydrates: 45gProtein: 25gFat: 20gSaturated Fat: 10gPolyunsaturated Fat: 2gMonounsaturated Fat: 8gTrans Fat: 1gCholesterol: 70mgSodium: 800mgPotassium: 600mgFiber: 3gSugar: 6gVitamin A: 800IUVitamin C: 5mgCalcium: 200mgIron: 3mg

Notes

For optimal texture, watch the cooking time with different pasta types; adjust as needed. Garnish with fresh herbs just before serving for enhanced aroma and flavor.

Tried this recipe?

Let us know how it was!

Cheesy Chicken Enchiladas: Your New Family Favorite Tonight

The aroma of freshly baked Cheesy Chicken Enchiladas wafts through my kitchen, transporting me to a cozy Mexican eatery where the only decision is whether to order another serving. In just 45 minutes, this comforting dish transforms shredded chicken and soft tortillas into a creamy, cheese-laden masterpiece perfect for family dinners. The best part? It’s not only a quick meal that pleases picky eaters, but it also offers a lighter twist if you’re looking to keep things healthy. Let’s dive into this delight, where every bite is a warm hug wrapped in tortillas. Want to know the secret to making these enchiladas even creamier? Keep reading!

Why are Cheesy Chicken Enchiladas a Must-Try?

Comforting Flavors: Each bite is a warm hug, featuring tender chicken wrapped in soft, creamy goodness that’s simply irresistible.
Quick & Easy: In just 45 minutes, you’ll have a satisfying meal ready for your family that is perfect for busy weeknights.
Customizable Options: Want to keep it lighter? Swap sour cream with Greek yogurt or try corn tortillas for a gluten-free twist.
Family-Friendly: These enchiladas are a crowd-pleaser; even picky eaters will be asking for seconds! Pair them with a fresh salad on the side for a complete meal.
Make Ahead: Prep them up to two days in advance and bake when ready—perfect for those hectic days when home-cooked meals feel like a luxury. For more cheesy goodness, don’t miss my recipes for Cheesy Garlic Chicken and Cheesy Spinach Artichoke!

Cheesy Chicken Enchiladas Ingredients

For the Filling

  • Shredded Chicken – Use rotisserie chicken for convenience and extra flavor.
  • Flour Tortillas – Opt for warm tortillas for easy rolling; corn tortillas work great too!
  • Cheddar Cheese – Adds a fantastic melting quality; try Monterey Jack for a milder taste.
  • Monterey Jack Cheese – Boosts creaminess for that desired rich flavor.
  • Onions – Enhances depth; shallots offer a sweeter alternative.
  • Cumin & Chili Powder – Key spices that elevate the flavor profile; adjust based on your spice preference.
  • Salt & Pepper – Essential for enhancing all flavors in your cheesy chicken enchiladas.

For the Creamy Sauce

  • Sour Cream – The base for this creamy sauce; Greek yogurt is a lighter option.
  • Heavy Cream – Adds luxurious richness; substitute with half-and-half for a lighter sauce.
  • Chicken Broth – Essential liquid for the sauce; vegetable broth is a vegetarian alternative.
  • Garlic Powder – Enhances overall taste; feel free to use fresh garlic for added vibrancy.
  • Smoked Paprika & Cayenne Pepper – Infuses warmth and smokiness; adjust to suit your desired heat level.

For Garnishing

  • Fresh Salsa – Brightens and adds zing on top of your finished dish.
  • Chopped Cilantro – For that fresh touch and vibrant presentation.

Step‑by‑Step Instructions for Cheesy Chicken Enchiladas

Step 1: Sauté Onions
In a large skillet, heat 1 tablespoon of olive oil over medium heat. Add chopped onions and sauté for about 3-4 minutes until they become translucent. Then, mix in the shredded chicken, cumin, chili powder, salt, and pepper, stirring everything together for an additional 2-3 minutes until heated through and fragrant.

Step 2: Preheat Oven
While the chicken mixture is cooling, preheat your oven to 375°F (190°C). Grease a 9×13-inch baking dish with a bit of olive oil or cooking spray to ensure your cheesy chicken enchiladas don’t stick while baking.

Step 3: Prepare Tortillas
Take each tortilla and lay it flat on a clean surface. Spoon a generous amount of the chicken mixture into the center of each tortilla, sprinkle with a bit of cheddar and Monterey Jack cheese, then roll the tortilla tightly around the filling. Place each rolled enchilada seam-side down in the greased baking dish.

Step 4: Make Creamy Sauce
In a medium saucepan over medium heat, whisk together 1 cup of sour cream, 1 cup of heavy cream, and 1 cup of chicken broth. Stir continuously for 5-7 minutes until the mixture thickens and is creamy. Add garlic powder, smoked paprika, cayenne pepper, and salt to taste, mixing well to combine thoroughly.

Step 5: Combine and Bake
Once your creamy sauce is ready, pour it generously over the prepared enchiladas in the baking dish, making sure each enchilada is well-coated. Then, sprinkle any remaining cheese evenly on top. Bake in the preheated oven for 20-25 minutes, or until the sauce is bubbly and golden brown around the edges.

Step 6: Serve
After removing the cheesy chicken enchiladas from the oven, let them rest for about 5 minutes to allow the flavors to settle. Garnish with fresh salsa and chopped cilantro for a burst of color and flavor before serving to your eager family.

Storage Tips for Cheesy Chicken Enchiladas

Fridge: Store your leftover Cheesy Chicken Enchiladas in an airtight container in the refrigerator for up to 4 days. Be sure to cover them well to preserve the creamy sauce.

Freezer: For longer storage, freeze unbaked enchiladas for up to 3 months. Make sure to wrap them tightly in plastic wrap or foil before placing them in a freezer-safe container.

Reheating: To reheat, thaw enchiladas in the fridge overnight, then bake in a preheated oven at 350°F (175°C) for about 25 minutes until heated through and bubbly.

Make-Ahead Tip: Prepare components ahead of time and freeze, then assemble before baking for an easy-to-prepare meal any night of the week.

Expert Tips for Cheesy Chicken Enchiladas

  • Warm Tortillas First: Prevent tearing by warming tortillas slightly before rolling. This makes them more pliable and easier to handle.
  • Whisk Gently: Keep the sauce on medium-low heat while whisking continuously to avoid curdling the sour cream, ensuring a smooth texture in your creamy sauce.
  • Don’t Overstuff: Be careful not to overfill your enchiladas; too much filling can make rolling difficult and cause them to burst during baking.
  • Use Fresh Ingredients: For the best flavor, use fresh spices and high-quality cheese in these cheesy chicken enchiladas; it really elevates the final dish.
  • Make-Ahead Friendly: You can prepare the filling and sauce up to 2 days in advance. Just assemble and bake when ready for a quick turnaround on a busy night.

Make Ahead Options

These Cheesy Chicken Enchiladas are a fantastic choice for meal prep enthusiasts! You can prepare the filling and sauce up to 3 days in advance; simply sauté the onions and chicken mixture, then allow it to cool before storing in an airtight container in the refrigerator. The creamy sauce can also be made ahead and refrigerated. When you’re ready to serve, just roll the tortillas with the prepped filling, pour the sauce over the assembled enchiladas, and bake them for about 20-25 minutes at 375°F (190°C). This way, you’ll enjoy the same delicious, comforting flavors with minimal effort on busy weeknights!

What to Serve with Cheesy Chicken Enchiladas with Creamy Sauce

Embrace a festive vibe by pairing your delicious enchiladas with sides that complement their creamy goodness.

  • Mexican Rice: Fluffy and seasoned, this dish soaks up the flavors of the enchiladas, creating a perfect balance on your plate.

  • Refried Beans: Creamy and rich, they add an earthy depth that contrasts beautifully with the cheesy enchiladas. You can even top them with a sprinkle of cheese for added indulgence.

  • Fresh Garden Salad: A crisp salad with lime vinaigrette brings a refreshing brightness, cutting through the richness of the creamy sauce. Add avocado for creamy texture, elevating your meal.

  • Corn on the Cob: Sweet, buttery corn enhances the comfort food experience and adds a delightful crunch to the meal.

  • Guacamole: Creamy and zesty, this adds a cool counterpart to the warm enchiladas, making every bite an explosion of flavors.

  • Crispy Tortilla Chips: Serve these with a side of fresh salsa for dipping. Their crunchiness pairs wonderfully with the softness of the enchiladas.

  • Horchata: This sweet rice drink offers a refreshing finish, perfectly balancing the spiciness and richness of the dish.

  • Churros: End your meal on a sweet note with these fried dough pastries, dusted with cinnamon sugar for a satisfying crunch.

Cheesy Chicken Enchiladas Variations & Substitutions

Feel free to customize these cheesy chicken enchiladas to suit your taste and dietary needs, creating a dish that truly feels like your own home-cooked favorite!

  • Corn Tortillas: Swap out flour tortillas for corn tortillas for a gluten-free option. Just warm them briefly to make rolling easier!
  • Greek Yogurt: Lighten the creamy sauce by using Greek yogurt in place of sour cream. It adds a tangy flavor while cutting down on calories.
  • Spicy Kick: Add diced jalapeños or a dash of your favorite hot sauce for an extra kick. Spice lovers will enjoy this flavorful enhancement!
  • Vegetarian Delight: Replace shredded chicken with black beans or veggies for a meatless version. Pack in some bell peppers and zucchini for added crunch and nutrients.
  • Creamy Mushroom: Incorporate sautéed mushrooms into the chicken filling for an earthy infusion. The mushrooms pair beautifully with the creamy sauce.
  • Half-and-Half: Use half-and-half instead of heavy cream in the sauce for a lighter option without sacrificing flavor. It still retains that velvety texture!
  • Herbal Twist: Experiment by adding fresh herbs like cilantro or parsley to the filling for a pop of freshness. This will brighten up every bite and elevate the flavors further.
  • Cheese Variety: Swap out cheddar cheese for Pepper Jack if you want an extra cheesy kick with a hint of spice. The different cheese dimensions make it an exciting alternative.

Tantalize your taste buds further with a side of BLT Chicken Salad or some Sizzling Chicken Pepper for a delightful meal that transforms ordinary nights into something special!

Cheesy Chicken Enchiladas Recipe FAQs

What type of shredded chicken is best for these enchiladas?
Absolutely! I recommend using rotisserie chicken for convenience and added flavor. It not only saves time but also provides that delicious, seasoned taste that complements the cheese and sauce perfectly.

How should I store leftover Cheesy Chicken Enchiladas?
Very simply! To store your leftovers, place them in an airtight container and refrigerate for up to 4 days. Make sure to cover them well to preserve that creamy sauce, ensuring every bite remains delightful!

Can I freeze Cheesy Chicken Enchiladas? If so, how should I do it?
Yes, indeed! You can freeze unbaked enchiladas for up to 3 months. Wrap each enchilada tightly in plastic wrap or foil and place them in a freezer-safe container. When ready to enjoy, simply thaw in the fridge overnight and bake as instructed.

What if my creamy sauce curdles?
No worries! If your sauce happens to curdle, it’s usually because of excessive heat. Keep it on medium-low heat while whisking continually to maintain a smooth consistency. If you still face curdling, you can try blending it in a blender for a few seconds to restore creaminess.

Are these enchiladas suitable for people with dietary restrictions?
Definitely! For a lighter version, you can swap sour cream with Greek yogurt and use half-and-half instead of heavy cream. If you have gluten sensitivities, consider using corn tortillas, which also add a wonderful flavor. Always check ingredient labels to avoid allergens, especially for cheese and broth!

Cheesy Chicken Enchiladas

Cheesy Chicken Enchiladas: Your New Family Favorite Tonight

Cheesy Chicken Enchiladas are a comforting dish that transforms chicken and tortillas into a creamy masterpiece, perfect for family dinners.
Prep Time 15 minutes
Cook Time 30 minutes
Resting Time 5 minutes
Total Time 45 minutes
Servings: 4 enchiladas
Course: Dinner
Cuisine: Mexican
Calories: 450

Ingredients
  

For the Filling
  • 3 cups Shredded Chicken Use rotisserie chicken for convenience
  • 6 pieces Flour Tortillas Opt for warm tortillas for easy rolling
  • 1 cup Cheddar Cheese Adds a fantastic melting quality
  • 1 cup Monterey Jack Cheese Boosts creaminess
  • 1 medium Onion Enhances depth
  • 1 teaspoon Cumin
  • 1 teaspoon Chili Powder
  • to taste Salt
  • to taste Pepper
For the Creamy Sauce
  • 1 cup Sour Cream Base for creamy sauce
  • 1 cup Heavy Cream Adds richness
  • 1 cup Chicken Broth Essential liquid
  • 1 teaspoon Garlic Powder
  • 1 teaspoon Smoked Paprika
  • 1/4 teaspoon Cayenne Pepper Adjust to suit your desired heat
For Garnishing
  • 1 cup Fresh Salsa To top the finished dish
  • 1/4 cup Chopped Cilantro For garnish

Equipment

  • Large skillet
  • medium saucepan
  • 9x13 inch baking dish

Method
 

Step-by-Step Instructions
  1. In a large skillet, heat 1 tablespoon of olive oil over medium heat. Add chopped onions and sauté for about 3-4 minutes until they become translucent. Then, mix in the shredded chicken, cumin, chili powder, salt, and pepper, stirring everything together for an additional 2-3 minutes until heated through and fragrant.
  2. While the chicken mixture is cooling, preheat your oven to 375°F (190°C). Grease a 9x13-inch baking dish with a bit of olive oil or cooking spray.
  3. Take each tortilla and lay it flat on a clean surface. Spoon a generous amount of the chicken mixture into the center of each tortilla, sprinkle with a bit of cheddar and Monterey Jack cheese, then roll the tortilla tightly around the filling. Place each rolled enchilada seam-side down in the greased baking dish.
  4. In a medium saucepan over medium heat, whisk together 1 cup of sour cream, 1 cup of heavy cream, and 1 cup of chicken broth. Stir continuously for 5-7 minutes until the mixture thickens and is creamy. Add garlic powder, smoked paprika, cayenne pepper, and salt to taste.
  5. Once your creamy sauce is ready, pour it generously over the prepared enchiladas in the baking dish, making sure each enchilada is well-coated. Then, sprinkle any remaining cheese evenly on top. Bake in the preheated oven for 20-25 minutes, or until the sauce is bubbly and golden brown around the edges.
  6. After removing the cheesy chicken enchiladas from the oven, let them rest for about 5 minutes to allow the flavors to settle. Garnish with fresh salsa and chopped cilantro before serving.

Nutrition

Serving: 1enchiladaCalories: 450kcalCarbohydrates: 35gProtein: 25gFat: 25gSaturated Fat: 12gPolyunsaturated Fat: 1gMonounsaturated Fat: 6gCholesterol: 95mgSodium: 800mgPotassium: 400mgFiber: 3gSugar: 2gVitamin A: 800IUVitamin C: 5mgCalcium: 300mgIron: 2mg

Notes

Warm tortillas first to prevent tearing. Whisk gently to avoid curdling sour cream in the sauce, and use fresh ingredients for best flavor.

Tried this recipe?

Let us know how it was!

Comforting Crustless Chicken Pot Pie – A Healthy Twist

As the chill of winter settles in, I find myself reaching for comforting bowls of warmth, and this Cozy Crustless Chicken Pot Pie Soup has quickly become my go-to. With creamy goodness and hearty bites, it embraces you like a blanket on a cold day. Not only is this recipe healthy and lower in carbs, but it’s also a one-pot marvel that you can whip up in under 30 minutes! Imagine serving this wholesome dish to your family for dinner or preparing it in advance for an easy meal prep option. It’s a delightful twist on the classic pot pie, without all the fuss of a crust, making it perfect for anyone looking to savor homemade goodness without sacrificing flavor. So, what are you waiting for? Let’s get cooking and discover the comforting heart of this delightful soup!

Why is this soup a must-try?

Comforting, this Crustless Chicken Pot Pie Soup is like your favorite hug in a bowl, making cold days feel cozier. Quick and Easy, it can be prepared in just under 30 minutes, perfect for those busy weeknights. Healthy and Wholesome, it serves ample protein and fiber with lower carbs, making it suitable for various dietary needs. Versatile, you can easily swap ingredients like sweet potatoes or add spinach to boost nutrition, catering to your family’s preferences. Whether you’re meal prepping or serving a hearty dinner, this soup will leave everyone satisfied and asking for seconds!

Crustless Chicken Pot Pie Ingredients

• The essentials for your cozy soup!

For the Base

  • Butter – Adds richness and flavor; for a dairy-free option, substitute with olive oil.
  • Yellow Onion – Provides the foundational flavor that enhances the entire dish.
  • Carrots – Adds natural sweetness and vibrant color to the soup.
  • Celery – Offers a mild, fresh flavor that complements other vegetables.
  • Garlic – Enhances flavors with aromatic depth; an essential in any cozy dish.
  • Whole Wheat/All-Purpose Flour – Thicken the soup beautifully; switch to gluten-free flour for a gluten-free option.

For the Soup

  • Low-Sodium Chicken Stock – The flavorful base that brings the soup to life.
  • Milk – Provides creaminess; can be swapped with almond or coconut milk for a dairy-free twist.
  • Sweet Potatoes – Offer a healthy starch; alternatively, use Yukon gold, russet, or baby potatoes for variety.
  • Salt & Pepper – Essential seasonings that elevate all the flavors.
  • Fresh Thyme – Infuses aromatic herbal notes; use dried thyme in a smaller quantity if fresh isn’t available.

For the Add-Ins

  • Cooked Shredded Chicken – The main protein source; rotisserie chicken simplifies your prep work.
  • Frozen Peas – Provide a pop of color and sweetness, complementing the savory elements.
  • Fresh Parsley – Adds a touch of freshness; feel free to omit if you prefer.
  • Baby Spinach (optional) – Boosts nutrition and adds vibrant color; an easy way to sneak in some greens.

This Crustless Chicken Pot Pie is not just a recipe; it’s a warm bowl of love that the whole family will enjoy!

Step‑by‑Step Instructions for Cozy Crustless Chicken Pot Pie Soup

Step 1: Melt the Base
In a large Dutch oven, melt 2 tablespoons of butter over medium-low heat. Allow it to foam and bubble gently, creating a flavorful base for your soup. As the butter melts, prepare your vegetables by chopping one yellow onion, two carrots, and two celery stalks for a burst of flavor.

Step 2: Sauté the Vegetables
Add the chopped onion, carrots, and celery to the melted butter. Cook these aromatic vegetables for 6-8 minutes, stirring occasionally, until they soften and become fragrant. You’re looking for the onion to turn translucent and the carrots to brighten in color, which will create a delicious foundation for your crustless chicken pot pie soup.

Step 3: Add Garlic for Flavor
Incorporate 2 minced garlic cloves into the pot for the last 30 seconds of cooking. Stir them in, allowing their fragrant aroma to fill your kitchen while keeping a close watch so they don’t burn. This will add a delightful depth to your cozy soup, enhancing the overall flavor profile with the richness of the garlic.

Step 4: Thicken the Soup
Sprinkle 2 tablespoons of flour over the sautéed vegetables. Stir continuously for about 1 minute, ensuring each piece of vegetable is well-coated. This process will create a roux, which will thicken your Cozy Crustless Chicken Pot Pie Soup, giving it that comforting, creamy texture that everyone loves.

Step 5: Introduce the Stock and Milk
Gradually pour in 4 cups of low-sodium chicken stock and 1 cup of milk while stirring continuously. This combination will come together beautifully, bubbling and thickening as it heats. Add diced sweet potatoes (about 2 cups) along with salt and pepper to taste, then sprinkle in a teaspoon of fresh thyme for aromatic flair. Bring the mixture to a boil over medium-high heat.

Step 6: Simmer Until Tender
Once boiling, reduce the heat to low and let the soup simmer uncovered for 15-20 minutes. Stir occasionally and keep an eye on the sweet potatoes; they should become fork-tender but not mushy. The soup will thicken as it cooks, enveloping you in warmth and flavor, embodying the essence of a traditional pot pie without the crust.

Step 7: Combine the Main Ingredients
Stir in about 2 cups of shredded cooked chicken and 1 cup of frozen peas, allowing them to warm through for about 5 minutes. If you’re adding baby spinach for an extra nutritional boost, toss it in now. The vibrant colors will brighten your cozy crustless chicken pot pie soup, making it visually inviting.

Step 8: Final Seasoning and Serve
Taste and adjust seasoning with more salt, pepper, or thyme if desired. Once the flavors meld together beautifully and the soup is served warm, ladle it into bowls and sprinkle with freshly chopped parsley for a lovely finishing touch. Enjoy the comforting essence of this delicious soup with family and friends!

Expert Tips for Crustless Chicken Pot Pie Soup

  • Creamier Texture: For an extra creamy soup, consider substituting heavy cream for milk during preparation. This step enhances the richness and makes every spoonful feel indulgent.

  • Using Raw Chicken: If you prefer to use raw chicken instead of rotisserie, cut it into small pieces and sauté it in the pot after melting the butter. Make sure to cook it until browned before adding the vegetables.

  • Avoiding Burning Garlic: When adding minced garlic, stir it in for the last 30 seconds to prevent burning. Burnt garlic can create a bitter taste, which detracts from the delicious flavor of your crustless chicken pot pie soup.

  • Thickening Tips: If your soup is too thin after simmering, stir in a little more flour mixed with cold water to thicken it up. Remember to let it simmer a bit longer for the right texture.

  • Stir Occasionally: Stirring occasionally while the soup simmers helps prevent the ingredients from sticking to the bottom of the pot, ensuring even cooking and a well-blended flavor.

  • Season to Taste: Taste the soup before serving and adjust the seasoning with more salt, pepper, or herbs if needed. This simple adjustment can elevate the flavor and perfectly suit your palate.

Make Ahead Options

These Cozy Crustless Chicken Pot Pie Soup preparations are perfect for busy home cooks looking to save time! You can chop the vegetables (onion, carrots, and celery) and store them in the refrigerator for up to 3 days ahead of cooking. Additionally, cooked shredded chicken can be prepped and refrigerated for up to 4 days. To maintain the soup’s creamy texture, it’s best to prepare the soup base (steps 1-6) in advance and refrigerate it for up to 24 hours. When you’re ready to serve, simply reheat the base over medium heat, add the chicken, peas, and any extra ingredients (like spinach) for a quick finish. This way, you enjoy just as delicious results with minimal effort, making weeknight meals a delight!

What to Serve with Cozy Crustless Chicken Pot Pie Soup

As you savor the warm embrace of this delicious soup, consider these delightful accompaniments to create a memorable meal experience.

  • Garlic Bread: Perfect for dipping, the buttery, garlicky goodness adds a bold flavor that complements the soup’s creamy texture. The crunch of the crust creates a satisfying contrast with every bite.

  • Homemade Almond Milk Biscuits: These soft, flaky biscuits are a wholesome choice, perfect for sopping up the hearty soup. Their nutty flavor pairs beautifully, enhancing the overall comfort of the meal.

  • Simple Green Salad: A fresh salad with mixed greens, cucumbers, and a light vinaigrette adds a refreshing crunch. It beautifully balances the rich flavors of the soup, making for an appetizing contrast.

  • Roasted Vegetables: Toss seasonal veggies with olive oil and herbs, then roast until tender. Their caramelized sweetness enriches your meal, while the textures provide a delightful contrast to the creamy soup.

  • Apple Crisp for Dessert: End your meal on a sweet note with warm apple crisp. The comforting flavors of cinnamon and tender apples harmonize with the heartiness of the soup, creating a lovely finish.

  • Chilled White Wine: A glass of chilled Sauvignon Blanc or a light Pinot Grigio offers a crisp, refreshing pairing, enhancing the comfort of the soup while keeping the meal light.

With these delightful pairings, you’ll create a full, nourishing meal to warm your heart and satisfy your taste buds.

How to Store and Freeze Crustless Chicken Pot Pie Soup

Fridge: Store leftovers in airtight containers for up to 4-5 days, ensuring the soup remains fresh and flavorful.

Freezer: Freeze in freezer-safe containers for up to 3 months. Leave some space for expansion, as soups can thicken and expand when frozen.

Reheating: Thaw overnight in the fridge, then reheat on the stovetop over medium heat, stirring occasionally until warmed through.

Make-Ahead Tip: Prepare this Crustless Chicken Pot Pie Soup in advance and store for a comforting meal that’s just a reheating away!

Crustless Chicken Pot Pie Variations

Feel free to personalize this cozy dish with your favorite ingredients and flavor twists for a truly unique experience!

  • Dairy-Free: Replace milk with almond or coconut milk for a creamy, dairy-free option that maintains richness.
  • Gluten-Free: Use gluten-free flour in place of regular flour to keep the soup thick while catering to gluten sensitivities.
  • Veggie Boost: Add in green beans, corn, or bell peppers for more color and textures; this makes each bowl more vibrant and nutrient-rich.
  • Spicy Kick: Toss in a dash of cayenne pepper or hot sauce for those who enjoy a little heat in their meals. It can elevate the flavor profile beautifully!
  • Chicken Twist: Switch out rotisserie chicken for cooked turkey or even chickpeas for a vegetarian version that’s just as hearty and satisfying.
  • Herb Swap: Incorporate fresh herbs like rosemary or sage instead of thyme for a different aromatic experience that transforms the flavor.
  • Add Crunch: Top your serving with crispy onions or croutons for added texture contrast; these simple additions can make leftovers feel gourmet!
  • Double the Greens: Stir in more baby spinach or kale towards the end for extra nutrition without sacrificing flavor. It’s a brilliant way to sneak in those greens for the family.

For additional inspiration, don’t miss out on trying my BBQ Chicken Grilled Cheese Sandwich for a delightful recipe that pairs well with any cozy soup!

Crustless Chicken Pot Pie Soup Recipe FAQs

What type of chicken is best for this soup?
While rotisserie chicken is a fantastic time-saver, you can absolutely use raw chicken instead. Simply cut the chicken into small pieces and add it to the pot right after you melt the butter. Cook the chicken thoroughly until browned before proceeding with sautéing the vegetables. This method enhances the flavor of the soup and gives you the satisfaction of using fresh ingredients.

How should I store leftovers?
After enjoying your meal, make sure to let any leftovers cool before transferring them to airtight containers. They can be refrigerated for about 4-5 days. When you’re ready to enjoy the soup again, just reheat it on the stovetop over medium heat, stirring occasionally until warmed through. Trust me, it stays delicious!

Can I freeze Crustless Chicken Pot Pie Soup?
Absolutely! To freeze this soup, pour it into freezer-safe containers, leaving a bit of space at the top for expansion (soups often thicken and expand when frozen). It’s best to freeze it for up to 3 months. When it’s time to enjoy it again, thaw overnight in the refrigerator, then reheat on the stovetop, stirring occasionally until it’s nice and hot.

What should I do if my soup is too thick?
If you find your soup has thickened more than you’d like, simply add a splash of additional chicken stock or water to reach your desired consistency. Heat the soup gently over medium heat, stirring well to combine. This will keep your soup creamy and comforting without losing any of its lovely flavors.

Can I make this soup dairy-free?
Yes, you can easily adapt this recipe for a dairy-free version! Swap out the regular milk with almond milk or coconut milk. Additionally, use olive oil instead of butter for sautéing the vegetables. These simple substitutions allow everyone to enjoy this comforting soup while catering to dietary restrictions.

What vegetables can I substitute or add?
Feel free to get creative with the vegetables! You can substitute sweet potatoes with regular potatoes, add in green beans, or toss in some corn for a pop of flavor and texture. Remember, the more colorful the mix, the more appealing (and nutritious) your soup will be!

Crustless Chicken Pot Pie

Comforting Crustless Chicken Pot Pie – A Healthy Twist

This Crustless Chicken Pot Pie is a warm, comforting, and healthy recipe perfect for winter nights.
Prep Time 10 minutes
Cook Time 20 minutes
Total Time 30 minutes
Servings: 6 servings
Course: Casserole
Cuisine: American
Calories: 350

Ingredients
  

For the Base
  • 2 tablespoons Butter Substitute with olive oil for dairy-free option.
  • 1 Yellow Onion Chopped.
  • 2 Carrots Chopped.
  • 2 Celery Stalks Chopped.
  • 2 cloves Garlic Minced.
  • 2 tablespoons Whole Wheat/All-Purpose Flour Use gluten-free flour for gluten-free option.
For the Soup
  • 4 cups Low-Sodium Chicken Stock
  • 1 cup Milk Substitute with almond or coconut milk for dairy-free option.
  • 2 cups Sweet Potatoes Diced.
  • to taste Salt
  • to taste Pepper
  • 1 teaspoon Fresh Thyme Use dried thyme in smaller quantity if fresh isn’t available.
For the Add-Ins
  • 2 cups Cooked Shredded Chicken Rotisserie chicken simplifies prep.
  • 1 cup Frozen Peas
  • to taste Fresh Parsley Omit if preferred.
  • to taste Baby Spinach Optional.

Equipment

  • Dutch oven

Method
 

Step-by-Step Instructions
  1. Melt the butter in a large Dutch oven over medium-low heat.
  2. Add chopped onion, carrots, and celery, cooking for 6-8 minutes.
  3. Incorporate minced garlic for the last 30 seconds of cooking.
  4. Sprinkle flour over the sautéed vegetables and stir for 1 minute.
  5. Pour in chicken stock and milk, add sweet potatoes, salt, pepper, and thyme.
  6. Bring to a boil, then reduce heat and let simmer uncovered for 15-20 minutes.
  7. Stir in shredded chicken and frozen peas, warming through for about 5 minutes.
  8. Taste and adjust seasoning, then serve warm with parsley on top.

Nutrition

Serving: 1bowlCalories: 350kcalCarbohydrates: 30gProtein: 25gFat: 12gSaturated Fat: 7gPolyunsaturated Fat: 1gMonounsaturated Fat: 3gCholesterol: 60mgSodium: 700mgPotassium: 800mgFiber: 5gSugar: 4gVitamin A: 150IUVitamin C: 30mgCalcium: 10mgIron: 15mg

Notes

Store leftovers in airtight containers for up to 4-5 days. Freeze in freezer-safe containers for up to 3 months.

Tried this recipe?

Let us know how it was!

Cantonese Shumai: Easy Pork and Shrimp Dumplings at Home

The aroma wafting from my kitchen was enough to spark nostalgia, whisking me away to bustling dim sum restaurants filled with the chatter of eager diners. This is where I first encountered Cantonese Shumai, those tender little dumplings, lovingly made with pork and shrimp, that seem to call out for your attention with every steamy bite. What I adore about this easy-to-make recipe is not just its authentic taste—thanks to shiitake mushrooms enhancing the flavor profile—but also its ability to transform any gathering into a memorable feast. Perfect for both impressing guests or indulging as a family treat, these dumplings are a delightful addition to your home-cooked repertoire. Are you ready to learn how to create this Chinese delicacy in your own kitchen?

Why Is Cantonese Shumai So Loved?

Authenticity at Home: Enjoy the genuine flavor of Cantonese cuisine without stepping out! Easy-to-Make: With straightforward steps, anyone can whip these up, whether you’re a seasoned chef or a beginner. Bursting with Flavor: The combination of pork, shrimp, and shiitake mushrooms delivers a tantalizingly rich taste that will impress your family. Versatile Twists: Try incorporating vegetables or different proteins, and make this dish your own; check out my variation ideas for more. Perfect for Any Occasion: Whether it’s a family dinner or a gathering with friends, these dumplings are sure to be a hit.

Cantonese Shumai Ingredients

For the Filling

  • Dried Shiitake Mushrooms – Adds umami flavor and texture; can substitute with fresh mushrooms if unavailable.
  • Shrimp – Provides sweet seafood flavor; ensure it’s shelled and deveined for easier prep.
  • Ground Pork – The main protein, contributing to the dumpling’s juiciness; could swap with ground chicken or turkey for less fat.
  • Cornstarch – Acts as a binding agent, creating a tender filling.
  • Ginger – Adds warmth and depth; grated ginger is preferred for smooth integration.
  • Green Onions – Provides freshness and crunch; finely diced for even distribution.
  • Sugar – Balances savory flavors.
  • Chicken Bouillon – Increases depth of flavor; can substitute with vegetable bouillon for a vegetarian option.
  • Salt – Enhances overall taste.
  • White Pepper – Adds subtle heat; can be replaced with black pepper if needed.
  • Light Soy Sauce – Provides saltiness and color; avoid dark soy sauce for light-colored dumplings.
  • Shaoxing Wine – Enhances flavor complexity; use dry sherry as an alternative.
  • Oyster Sauce – Introduces sweetness and richness; could be omitted for a gluten-free version.
  • Water – For moisture balance in the filling.
  • Sesame Oil – Adds nutty aroma; replace with another oil like canola if allergic.

For Assembly

  • Shumai Wrappers – Thin, round wrappers are needed for authentic dumpling skin; can use wonton wrappers in a pinch.
  • Carrot – Used for garnish; finely minced to add a pop of color.

Dive into this easy recipe and get ready to savor the delightful flavors of Cantonese shumai!

Step‑by‑Step Instructions for Cantonese Shumai

Step 1: Prep Mushrooms
Start by soaking the dried shiitake mushrooms in boiling water for about 30 minutes. This helps to soften them, enhancing their umami flavor. Once softened, drain and finely mince the mushrooms using a cutting board and knife, setting them aside to be incorporated into the Cantonese shumai filling.

Step 2: Prep Shrimp
While the mushrooms soak, take your shrimp and chop them into small pieces to enhance texture and flavor in the dumplings. Aim for a fine chop if you prefer a smoother filling, or leave some larger chunks for occasional bites of sweetness. Once prepared, set the shrimp aside with the minced mushrooms.

Step 3: Prepare Pork
In a mixing bowl, combine the ground pork with cornstarch. Use your hands to mix until the mixture becomes a smooth paste. This step is crucial for ensuring the dumpling filling remains tender and juicy once cooked. The ground pork will act as the flavorful base for your Cantonese shumai.

Step 4: Combine Filling
In the same bowl, mix in the minced shiitake mushrooms, chopped shrimp, grated ginger, finely diced green onions, sugar, chicken bouillon, salt, white pepper, light soy sauce, Shaoxing wine, oyster sauce, water, and sesame oil. Stir until all the ingredients are fully incorporated, creating a harmonious filling for your shumai.

Step 5: Assemble Dumplings
Now, take a shumai wrapper and place it in the palm of your hand. Fill the center with approximately 1 tablespoon of the prepared filling, shaping it into a standing dumpling, leaving the top exposed. Sprinkle a pinch of minced carrot on top for a colorful garnish. Repeat this process until all the filling is used.

Step 6: Freeze (Optional)
If you’re not cooking all the shumai immediately, you can freeze them for future meals. Arrange the dumplings on a parchment-lined tray, ensuring they don’t touch each other, and place them in the freezer for a few hours until solid. Once frozen, transfer the dumplings to a freezer-friendly bag for long-term storage.

Step 7: Steam
To cook the Cantonese shumai, prepare a steamer lined with parchment paper to prevent sticking. Place the dumplings in the steamer basket, spaced 1 inch apart, and steam over boiling water for about 7-8 minutes. The dumplings are done when they reach an internal temperature of 165°F and are tender to the touch.

What to Serve with Easy Cantonese Shumai?

Elevate your dining experience by pairing these delightful pork and shrimp dumplings with a variety of complementary dishes that enhance their rich flavors.

  • Soy Sauce and Chili Oil: Perfect for dipping, these classic condiments balance the savory and slightly sweet notes of the shumai.
  • Steamed Bok Choy: Light and fresh, the crisp texture of bok choy adds a refreshing contrast to the warm dumplings.

Pairing shumai with steamed vegetables not only adds a healthy touch but also brings a colorful plate to your table.

  • Fried Rice: A fragrant side dish that rounds out the meal with its savory, seasoned grains, making each bite of shumai even more satisfying.
  • Miso Soup: The warmth of miso soup complements the dumplings while offering a soothing sip before or alongside your main course.

Don’t forget to serve the soup in delicate cups for an authentic feel!

  • Cucumber Salad: A crunchy, tangy cucumber salad with sesame dressing can cleanse the palate and offer a palate-cleansing bite between dumplings.
  • Green Tea: This lightly fragrant drink pairs beautifully, enhancing the flavors and adding to the overall experience of your meal.

Enjoy crafting a meal that not only tantalizes the taste buds but also nourishes the soul, perfecting your Cantonese shumai experience!

Expert Tips for Cantonese Shumai

  • Wrapper Choice: Use authentic Hong Kong-style thin round wrappers for the best results. Wonton wrappers can work, but may alter the texture slightly.

  • Avoid Sticking: Line your steamer with parchment paper and space dumplings at least 1 inch apart. This prevents sticking and ensures even steaming.

  • Freezing Technique: If freezing, do not defrost before cooking. Steam directly from frozen for optimal texture and flavor in your Cantonese shumai.

  • Flavor Boost: For a richer taste, consider adding a dash of fish sauce to the filling or experimenting with additional vegetables for a nutritious twist.

  • Steaming Time: Keep an eye on the steaming time; overcooking can toughen the dumplings. Aim for 7-8 minutes until the internal temperature reaches 165°F for perfect shumai.

Cantonese Shumai: Delicious Variations

Feel free to get creative and tailor these traditional dumplings to your taste buds! Each variation allows you to explore new flavors or adapt to dietary needs.

  • Dairy-Free: Simply omit any cheese or dairy ingredients like creamer, allowing the rich umami flavors to shine through.
  • Vegetarian: Swap the pork and shrimp for a mix of finely chopped mushrooms, tofu, and veggies like peas or carrots.
  • Spicy: Add a tablespoon of chili garlic sauce into the filling for a fiery kick in every bite.
  • Gluten-Free: Use gluten-free soy sauce and rice paper wrappers instead of traditional shumai wrappers for a gluten-free option.
  • Herbed Twist: Enhance the flavor profile with fresh herbs like cilantro or basil finely chopped into the filling.
  • Beef Shumai: Substitute ground pork with ground beef or lamb for a different protein profile while maintaining that juicy texture.
  • Crunchy Surprise: Fold in some finely shredded vegetables, like zucchini or carrots, for added crunch and nutrition.

Experimenting with these variations allows for a personal touch to your Cantonese Shumai, making every cook an exciting opportunity to delight your loved ones!

Make Ahead Options

These Cantonese shumai are perfect for busy home cooks who want to save time without sacrificing flavor! You can prepare the filling up to 24 hours in advance by combining the minced shiitake mushrooms, chopped shrimp, pork, and seasonings, then refrigerate it until you’re ready to assemble the dumplings. Additionally, you can shape the shumai and freeze them for up to 3 months. Just place them on a parchment-lined tray, freeze until solid, and transfer them to a freezer bag. When ready to serve, steam the frozen dumplings directly without thawing, ensuring they remain just as delicious! By prepping ahead, you’ll have delightful homemade dim sum ready to impress your family at a moment’s notice.

Storage Tips for Cantonese Shumai

Fridge: Store leftover Cantonese shumai in an airtight container in the fridge for up to 3 days. Reheat by steaming or using a microwave to preserve their tender texture.

Freezer: Raw shumai can be frozen for up to 3 months. Place them on a parchment-lined tray, freeze until solid, then transfer to a freezer bag. Steam directly from frozen without defrosting.

Reheating: When reheating, place cooked shumai in a steamer for about 3-5 minutes until heated through, ensuring they stay moist and flavorful.

Cantonese Shumai (Pork and Shrimp Dumplings) Recipe FAQs

What kind of mushrooms should I use for the filling?
Absolutely! I recommend using dried shiitake mushrooms, as they add a rich umami flavor and texture to the filling. If you can’t find dried, fresh shiitake or even button mushrooms will work in a pinch, but they won’t provide the same depth of flavor.

How should I store leftover shumai?
Very simple! You can store leftover Cantonese shumai in an airtight container in the refrigerator for up to 3 days. When ready to enjoy them again, steam or microwave gently to reheat while keeping that tender texture intact.

Can I freeze shumai, and how do I do it?
Yes, you can! To freeze raw shumai, place them on a parchment-lined tray, ensuring they don’t touch each other. Freeze until solid, then transfer them to a freezer-friendly bag. They can last in the freezer for up to 3 months. The best part? You can steam them directly from the freezer without thawing—just add a few extra minutes to the steaming time!

What if my dumpling wrappers are sticking together?
If you find that your dumpling wrappers are sticking together, there are a few simple fixes! First, ensure that you’re keeping them covered with a damp cloth while you’re working to prevent them from drying out. Additionally, lightly dusting the wrappers with cornstarch or flour can help reduce stickiness. Make sure to space the dumplings at least 1 inch apart in the steamer.

Are there any dietary considerations for Cantonese shumai?
Yes! If you’re cooking for someone with gluten sensitivity, you can easily adapt this recipe. Choose gluten-free soy sauce and omit the oyster sauce or look for a gluten-free version. For those with shellfish allergies, you could replace the shrimp with finely chopped vegetables like carrots or zucchini, but keep in mind it may alter the flavor profile.

Cantonese Shumai

Cantonese Shumai: Easy Pork and Shrimp Dumplings at Home

Cantonese Shumai are tender dumplings filled with pork and shrimp, perfect for impressing guests and enjoying at home.
Prep Time 30 minutes
Cook Time 8 minutes
Freezing Time 2 hours
Total Time 38 minutes
Servings: 4 dumplings
Course: Appetizers
Cuisine: Cantonese
Calories: 90

Ingredients
  

For the Filling
  • 4 grams Dried Shiitake Mushrooms can substitute with fresh mushrooms
  • 200 grams Shrimp shelled and deveined
  • 250 grams Ground Pork can swap with ground chicken or turkey
  • 2 tablespoons Cornstarch
  • 1 tablespoon Ginger grated
  • 2 tablespoons Green Onions finely diced
  • 1 teaspoon Sugar
  • 1 cube Chicken Bouillon can substitute with vegetable bouillon
  • 1 teaspoon Salt
  • 1/2 teaspoon White Pepper can be replaced with black pepper
  • 2 tablespoons Light Soy Sauce avoid dark soy sauce
  • 1 tablespoon Shaoxing Wine use dry sherry as an alternative
  • 1 tablespoon Oyster Sauce omit for gluten-free
  • 2 tablespoons Water
  • 1 tablespoon Sesame Oil replace with another oil if allergic
For Assembly
  • 20 pieces Shumai Wrappers can use wonton wrappers
  • 1 medium Carrot finely minced for garnish

Equipment

  • steamer
  • Mixing Bowl
  • Cutting board
  • Knife
  • Parchment Paper

Method
 

Step-by-Step Instructions for Cantonese Shumai
  1. Start by soaking the dried shiitake mushrooms in boiling water for about 30 minutes.
  2. While the mushrooms soak, chop the shrimp into small pieces.
  3. In a mixing bowl, combine the ground pork with cornstarch and mix until smooth.
  4. Mix the minced mushrooms, chopped shrimp, ginger, green onions, sugar, chicken bouillon, salt, white pepper, soy sauce, Shaoxing wine, oyster sauce, water, and sesame oil into the pork mixture.
  5. Take a shumai wrapper, fill it with approximately 1 tablespoon of filling, and shape into a standing dumpling, garnishing with minced carrot.
  6. If freezing, arrange the dumplings on a parchment-lined tray and freeze until solid.
  7. To cook, steam the dumplings over boiling water for about 7-8 minutes until tender.

Nutrition

Serving: 1dumplingCalories: 90kcalCarbohydrates: 5gProtein: 7gFat: 4gSaturated Fat: 1gPolyunsaturated Fat: 0.5gMonounsaturated Fat: 2.5gCholesterol: 30mgSodium: 200mgPotassium: 100mgSugar: 1gVitamin A: 500IUCalcium: 20mgIron: 0.5mg

Notes

These dumplings can be made in advance and frozen for convenience. Reheat by steaming for a tender texture.

Tried this recipe?

Let us know how it was!

Creamy Southern Spaghetti Bake: A Cozy Comfort Food Delight

As the savory aroma of baked pasta fills the kitchen, I can’t help but smile—this is the unmistakable vibe of a warm gathering around the dinner table. My Creamy Southern Spaghetti Bake embodies all the comfort of Southern cooking, draping tender noodles in a velvety cream cheese sauce that melds with shredded chicken and a sprinkle of crispy bacon on top. What makes this casserole truly special? It’s not just easy to prepare; it’s also kid-friendly, making it an instant hit for family meals or potluck gatherings. Whether you’re navigating a busy weeknight or planning a cozy Sunday dinner, this dish brings everyone together in the best way possible. Are you ready to dive into a plateful of happiness?

Why Is This Spaghetti Bake Irresistible?

Comforting, Heartwarming Taste: This Creamy Southern Spaghetti Bake delivers a delightful blend of flavors that transport you straight to the cozy kitchens of the South.

Kid-Friendly Appeal: Packed with creamy goodness and delicious toppings, it caters to even the pickiest eaters, making dinner time a breeze.

Easy to Prepare: With simple ingredients and straightforward steps, you’ll have this comforting casserole ready in no time.

Perfect for Gatherings: Whether for a family dinner or a potluck, this dish impresses guests and satisfies appetites, much like our flavorful Mexican Soup or Protein Egg Bake.

Leftover Friendly: It stores well in the fridge for easy reheating, ensuring you can enjoy this scrumptious meal (again!) throughout the week.

Unique Textures: The creamy filling and crispy bacon topping create a satisfying bite that’s simply addictive!

Creamy Southern Spaghetti Bake Ingredients

• Get ready to create this delicious dish with these wholesome ingredients!

For the Pasta Base

  • Spaghetti – The sturdy base of this comforting bake; cook it al dente for the best texture!

For the Filling

  • Cooked Shredded Chicken – Provides heartiness; rotisserie chicken is a convenient and tasty option!
  • Cream Cheese – Adds rich creaminess; ensure it’s softened for smooth blending.
  • Cream of Chicken Soup – Acts as a savory binder; consider a homemade version for extra flair!
  • Sour Cream – Enhances the tangy flavor; Greek yogurt makes a great substitute too.
  • Ranch Seasoning Mix – Infuses that signature Southern taste; feel free to swap for alternative herbs.
  • Garlic Powder – Boosts aromatic depth; fresh minced garlic could elevate the flavor even more.
  • Black Pepper – A dash for subtle heat, balancing the richness of your bake.

For the Toppings

  • Cheddar Cheese – The main melty cheese, opt for sharp cheddar for an extra flavor punch!
  • Parmesan Cheese – Adds a nutty richness; grated or shredded will work perfectly.
  • Bacon – Offers a delightful crunch on top; turkey bacon can be a lighter alternative.
  • Chopped Parsley (optional) – A finishing touch for freshness and a pop of color in presentation.

Dive into these ingredients and get ready to whip up a Creamy Southern Spaghetti Bake that the whole family will love!

Step‑by‑Step Instructions for Creamy Southern Spaghetti Bake

Step 1: Preheat the Oven
Begin by preheating your oven to 350°F (175°C). While the oven warms up, grab a 9×13-inch baking dish and grease it lightly with cooking spray or butter. This will help ensure your Creamy Southern Spaghetti Bake doesn’t stick, making for easy serving later.

Step 2: Cook the Spaghetti
Bring a large pot of salted water to a rolling boil. Add the spaghetti and cook according to package instructions until just al dente, usually about 8-10 minutes. Drain the pasta and set it aside in a large mixing bowl, ensuring the noodles don’t stick together while you prepare the filling.

Step 3: Prepare the Creamy Mixture
In a separate large mixing bowl, add the softened cream cheese, cream of chicken soup, sour cream, ranch seasoning, garlic powder, and black pepper. Using an electric mixer or whisk, beat the mixture until it’s smooth and creamy, about 2-3 minutes. This flavorful base is essential for your Creamy Southern Spaghetti Bake!

Step 4: Mix in Chicken and Cheese
Carefully fold in the shredded chicken, 1½ cups of cheddar cheese, and Parmesan cheese until everything is thoroughly combined. Then, add the drained spaghetti to the mixture, stirring gently until all the pasta is coated with the creamy sauce and the ingredients are well distributed.

Step 5: Assemble the Bake
Pour the creamy spaghetti mixture into the prepared baking dish, spreading it evenly with a spatula. Make sure the filling reaches all corners of the dish. Top it off with the remaining cheddar cheese and crumbled bacon, giving it that delicious crispy layer that will bake to perfection.

Step 6: Bake Covered
Cover the baking dish tightly with aluminum foil and place it in the preheated oven. Bake for 25 minutes to allow the flavors to meld and the dish to heat through. The aroma will start to fill your kitchen, letting you know your Creamy Southern Spaghetti Bake is well on its way!

Step 7: Bake Uncovered
After 25 minutes, remove the foil and bake for an additional 10-15 minutes. Keep an eye on it until the top is golden brown and bubbly—this is when your casserole transforms into a mouthwatering masterpiece.

Step 8: Let it Rest
Once baked, take the dish out of the oven and let it sit for 5-10 minutes. This resting period allows the layers to settle and makes slicing easier. Garnish with freshly chopped parsley if desired, adding a touch of color and freshness to your beautiful Creamy Southern Spaghetti Bake.

Step 9: Serve and Enjoy
Now it’s time to serve up this delightful casserole! Scoop portions onto plates and watch as family and friends gather around, excited to dive into your Creamy Southern Spaghetti Bake, brimming with creamy, cheesy goodness and crispy bacon on top.

Storage Tips for Creamy Southern Spaghetti Bake

Fridge: Store leftovers in an airtight container for up to 3 days to maintain freshness and flavor.

Freezer: For longer storage, freeze individual portions wrapped tightly in plastic wrap, followed by aluminum foil, for up to 2 months.

Reheating: Thaw overnight in the fridge before reheating. Warm in the oven at 350°F (175°C) covered with foil for about 20 minutes, or microwave until heated through, ensuring the Creamy Southern Spaghetti Bake is warmed evenly.

Make-Ahead: You can assemble the entire dish a day in advance and refrigerate it before baking. This will enhance the flavors and save time on busy evenings!

Creamy Southern Spaghetti Bake Variations

Feel free to make this dish your own with these delightful twists and substitutions!

  • Pasta Swap: Substitute spaghetti with other pasta shapes like penne or rotini for a different texture and bite.

  • Vegetarian Delight: Replace chicken and bacon with sautéed seasonal vegetables, like zucchini and bell peppers, plus vegetable broth in place of cream of chicken soup. This brings a fresh, colorful twist!

  • Cheese Medley: Experiment with different cheese combinations, such as incorporating mozzarella or gouda, for a unique flavor profile that will surprise your taste buds.

  • Spice It Up: Add red pepper flakes or diced jalapeños to the creamy mixture for a spicy kick, bringing an exciting heat that will have everyone reaching for more.

  • Gluten-Free Option: Use gluten-free pasta to make this beloved bake accessible for those following a gluten-free diet, without losing its comforting charm.

  • Healthier Choice: Swap out regular cream cheese for a reduced-fat option or Greek yogurt, maintaining that creamy texture while cutting down on calories.

  • Add Crunch: For an extra texture boost, mix in chopped nuts like pecans or walnuts into the filling, providing a surprising crunch that pairs beautifully with the creamy sauce.

With these variations, you can delight your family with a new twist on the classic every time you whip up this Creamy Southern Spaghetti Bake. And if you’re in the mood for other comforting favorites, try our delicious Cheesy Spinach Bake or classic Southern Fried Chicken for a delicious family meal option!

What to Serve with Creamy Southern Spaghetti Bake

The perfect meal isn’t complete without delicious sides to enhance the experience.

  • Garlic Bread: Warm, crusty garlic bread is perfect for scooping up the creamy goodness, adding a wonderful texture contrast to each bite.
  • Fresh Garden Salad: Crisp greens tossed with a tangy vinaigrette offer a refreshing balance to the richness of the bake and cleanse the palate beautifully.
  • Steamed Broccoli: A side of bright, vibrant broccoli brings earthy flavors and a pop of color, complementing the casserole’s indulgence while providing a nutritious touch.
  • Roasted Brussels Sprouts: These caramelized bites add earthy notes that resonate well with the savory flavors of the spaghetti bake. Their slight crispiness elevates the texture experience.
  • Coleslaw: A tangy, crunchy coleslaw can be a delightful addition, adding crunch and brightness to the meal. Its bite-sized pieces create a perfect pairing with the rich bake.
  • Iced Tea or Lemonade: A cool glass of sweet iced tea or refreshing lemonade provides a delightful thirst-quencher that complements the comforting nature of this Southern dish.
  • Chocolate Chip Cookies: End the meal with classic chocolate chip cookies; their warm, gooey goodness is like a hug in dessert form, perfectly capping off family dinner time.

Expert Tips for Creamy Southern Spaghetti Bake

  • Prep Ahead: Assemble the Creamy Southern Spaghetti Bake a day in advance and refrigerate until ready to bake. This enhances flavor and saves time!

  • Watch the Spaghetti: Avoid overcooking the noodles; they should be just al dente as they’ll continue cooking while baking, preventing a mushy texture.

  • Customize Flavors: Feel free to mix in sautéed vegetables like bell peppers or provide a spicy kick with red pepper flakes or jalapeños for a personal touch.

  • Perfect Toppings: Ensure the bacon is evenly crumbled on top for the crispiest finish. Using turkey bacon can lighten up the dish without losing flavor.

  • Storage Tips: Store leftovers in an airtight container for up to 3 days, making it an easy meal option for busy nights or quick lunches!

Make Ahead Options

These Creamy Southern Spaghetti Bake options are perfect for busy home cooks looking to save time! You can prepare the entire casserole up to 24 hours in advance by assembling it in the baking dish, covering it tightly with foil, and refrigerating. This allows the flavors to meld beautifully. Ensure you seal it well to prevent drying out. When you’re ready to bake, simply remove it from the refrigerator and follow the original instructions, allowing for an additional 10 minutes of baking time since it’s starting cold. You’ll have a comforting dish ready to enjoy without the stress of last-minute cooking!

Creamy Southern Spaghetti Bake Recipe FAQs

What kind of spaghetti should I use for the Creamy Southern Spaghetti Bake?
For this recipe, I recommend using regular spaghetti cooked to al dente. This ensures the noodles maintain a nice texture during baking. You can also experiment with other pasta shapes like penne or rotini if you want a different twist!

How should I store leftovers of the Creamy Southern Spaghetti Bake?
Store any leftovers in an airtight container in the fridge for up to 3 days. When reheating, I suggest using the oven to maintain the dish’s flavor and texture. Heat it at 350°F (175°C) covered with foil for about 20 minutes, or until heated through.

Can I freeze the Creamy Southern Spaghetti Bake?
Absolutely! To freeze, wrap individual portions tightly in plastic wrap, followed by aluminum foil to prevent freezer burn. It will keep well for up to 2 months. When you’re ready to enjoy it again, simply thaw it overnight in the fridge and reheat in the oven or microwave.

What if my cream cheese is too cold to mix easily?
If your cream cheese is still cold, it can be tricky to blend smoothly. To soften it quickly, cut it into cubes and let it sit at room temperature for about 20-30 minutes. You can also microwave it in 10-second intervals until it’s soft but not melted, which helps it mix better into the creamy filling.

Can I adjust the recipe for dietary restrictions?
Certainly! For a lighter option, you can use turkey bacon instead of regular bacon. If you’re making this dish vegetarian, simply swap out the chicken and bacon for sautéed seasonal vegetables. Just be sure to use vegetable broth in place of the cream of chicken soup for the right flavor!

How long can I make the Creamy Southern Spaghetti Bake in advance?
You can assemble the dish up to a day ahead of time! Cover it tightly with plastic wrap or foil and refrigerate it until you’re ready to bake. This not only saves time but also allows the flavors to meld beautifully.

Creamy Southern Spaghetti Bake

Creamy Southern Spaghetti Bake: A Cozy Comfort Food Delight

Creamy Southern Spaghetti Bake is a delightful and kid-friendly casserole that brings warmth and comfort to any gathering.
Prep Time 20 minutes
Cook Time 40 minutes
Resting Time 10 minutes
Total Time 1 hour 10 minutes
Servings: 8 slices
Course: Casserole
Cuisine: Southern
Calories: 450

Ingredients
  

For the Pasta Base
  • 1 package Spaghetti Cook al dente
For the Filling
  • 2 cups Cooked Shredded Chicken Rotisserie chicken is a great option
  • 8 oz Cream Cheese Softened for easy blending
  • 1 can Cream of Chicken Soup Homemade version can be used
  • 1 cup Sour Cream Greek yogurt is a good substitute
  • 1 pack Ranch Seasoning Mix Can substitute for other herbs
  • 1 teaspoon Garlic Powder Fresh minced garlic can enhance flavor
  • 1 teaspoon Black Pepper To taste
For the Toppings
  • 2 cups Cheddar Cheese Sharp cheddar for flavor
  • 1/2 cup Parmesan Cheese Grated or shredded
  • 6 slices Bacon Can use turkey bacon
  • 1/4 cup Chopped Parsley Optional for garnish

Equipment

  • 9x13 inch baking dish
  • Large pot
  • Mixing Bowl
  • electric mixer or whisk
  • spatula

Method
 

Preparation Steps
  1. Preheat your oven to 350°F (175°C). Grease a 9×13-inch baking dish.
  2. Bring a large pot of salted water to a boil. Cook spaghetti until al dente, about 8-10 minutes. Drain and set aside.
  3. In a large mixing bowl, combine softened cream cheese, cream of chicken soup, sour cream, ranch seasoning, garlic powder, and black pepper. Beat until smooth.
  4. Fold in the shredded chicken, 1½ cups of cheddar cheese, and Parmesan cheese. Add drained spaghetti and stir until coated.
  5. Pour the mixture into the greased baking dish. Top with remaining cheddar cheese and crumbled bacon.
  6. Cover with aluminum foil and bake for 25 minutes. Remove foil and bake for an additional 10-15 minutes until golden brown.
  7. Let it rest for 5-10 minutes before serving. Garnish with parsley if desired.

Nutrition

Serving: 1sliceCalories: 450kcalCarbohydrates: 45gProtein: 25gFat: 22gSaturated Fat: 10gPolyunsaturated Fat: 2gMonounsaturated Fat: 12gTrans Fat: 1gCholesterol: 70mgSodium: 800mgPotassium: 350mgFiber: 2gSugar: 3gVitamin A: 800IUVitamin C: 2mgCalcium: 300mgIron: 2mg

Notes

Casserole stores well and can be made ahead for convenience. Customize with additional vegetables or spices as desired.

Tried this recipe?

Let us know how it was!

Crispy Cantonese Chow Mein in Under 15 Minutes!

There’s something magical about the sound of sizzling noodles hitting a hot wok, especially when you’re whipping up a batch of Cantonese Chow Mein. In just under 15 minutes, you can create a delicious, crispy dish that rivals your favorite takeout spots, all while using pantry staples you probably have on hand. This quick and hearty meal is not only a feast for the senses but also a wonderful way to impress friends or family without the stress of a lengthy cooking process. Plus, it’s easily adaptable for vegetarians, allowing everyone to enjoy that crunchy goodness. Ready to transform your dinner routine? Let’s dive into this flavorful recipe that promises both comfort and convenience!

Why is this chow mein so special?

Quick Preparation: In less than 15 minutes, you can serve up a restaurant-quality dish from the comfort of your home.

Crispy Texture: Enjoy the delightful crunch of perfectly pan-fried noodles that hold their shape and flavor.

Savory Depth: A harmonious blend of dark soy, oyster sauce, and sesame oil brings out rich, umami flavors, keeping every bite exciting.

Pantry-Friendly: This dish uses ingredients found in most pantries, making it a go-to meal for those busy evenings.

Customizable: Easily adapt the recipe with your favorite veggies or proteins, transforming it to suit any dietary needs.

Crowd-Pleasing: Whether for family dinners or a casual gathering, this chow mein is guaranteed to impress and satisfy everyone at the table.

Cantonese Chow Mein Ingredients

For the Noodles
Chow Mein Egg Noodles – Thin fresh noodles provide the basis for the dish’s texture; Hong Kong-style noodles work best.

For the Vegetables
Yellow Onion – Adds sweetness and depth; substitute with shallots for a milder flavor.
Green Onions – Use both the white and green parts for enhanced flavor and color; chives are a suitable alternative.
Bean Sprouts – Provide crunch and freshness; consider using shredded carrots or bell peppers if you prefer.

For Cooking
Corn Oil – Ideal for cooking due to its neutral flavor; can be swapped with vegetable or canola oil.
Sesame Oil – A little goes a long way, adding a nutty finish; use sparingly for flavor enhancement.

For the Sauce
Dark Soy Sauce – Delivers robust color and flavor; opt for regular soy sauce for a lighter touch.
Regular Soy Sauce – Balances flavors without overwhelming saltiness; tamari is a great gluten-free replacement.
Oyster Sauce – Adds depth and umami; switch to mushroom sauce for a vegetarian option.
Fish Sauce – Gives a savory, complex element; omit for a vegetarian version.
Granulated Sugar – Balances the savory notes; any sweetener can be used as a replacement.
Water – Adjusts sauce consistency when mixed.

Enjoy creating this quick and flavorful Cantonese Chow Mein that brings a taste of takeout to your home dining experience!

Step‑by‑Step Instructions for Crispy Cantonese Chow Mein

Step 1: Prepare Noodles
Begin by boiling water in a large pot. Once it reaches a rolling boil, add the chow mein egg noodles and soak for 30 seconds until softened. Carefully drain the noodles in a colander and allow them to steam for a minute to remove excess moisture, ensuring they’re ready for that perfect crisp later on.

Step 2: Make Sauce
In a mixing bowl, combine the dark soy sauce, regular soy sauce, oyster sauce, fish sauce, granulated sugar, and water. Whisk the ingredients together until the sugar fully dissolves. This sauce will add a savory depth to your crispy Cantonese chow mein, so set it aside while you prepare the other ingredients.

Step 3: Cook Aromatics
Heat a tablespoon of corn oil in a large wok over medium-high heat until shimmering. Add the chopped yellow onion and the white parts of the green onions, sautéing for about 1 minute until they become fragrant and slightly translucent. Once cooked, transfer the aromatics to a plate, leaving the flavorful oil in the wok for the next step.

Step 4: Pan-Fry Noodles
Return the wok to high heat and add enough corn oil to coat the bottom. Spread the soaked chow mein noodles evenly in the hot oil, letting them sit without stirring for about 2 minutes. This helps the bottom crisp up beautifully. After 2 minutes, carefully flip the noodles, adding a bit more oil if needed, and crisp the other side for an additional 2 minutes.

Step 5: Combine
Reduce the heat to medium, then add the sautéed onions, green onions, and bean sprouts to the crispy noodles in the wok. Pour the prepared sauce over the mixture and gently toss everything together for about 1-2 minutes, ensuring the noodles are heated through and evenly coated with the delicious flavors of the Cantonese chow mein sauce.

Step 6: Serve
Once combined and hot, remove the wok from heat. Drizzle a small amount of sesame oil over the chow mein and toss to integrate the nutty flavor. Plate your crispy Cantonese chow mein immediately, allowing the enticing aromas to captivate you and your guests as you serve this flavorful meal hard to resist!

Storage Tips for Cantonese Chow Mein

Fridge: Store leftover Cantonese chow mein in an airtight container for up to 3 days. This keeps the flavors intact while preventing the noodles from drying out.

Freezer: If you want to keep it longer, freeze in a freezer-safe container for up to 1 month. Thaw in the refrigerator overnight before reheating.

Reheating: Reheat in a hot wok or with a bit of water in the microwave to revive the noodles’ texture. Stir well to ensure even heating.

Airtight Storage: For the best results, always use an airtight container to maintain freshness and prevent odors from mingling with other foods.

Helpful Tricks for Cantonese Chow Mein

  • Hot Oil is Key: Ensure your oil is very hot before adding the noodles to achieve that signature crispiness that makes Cantonese chow mein irresistible.

  • Avoid Overcrowding: Do not overcrowd the wok while pan-frying. Work in batches if necessary to ensure even cooking and crispy noodles.

  • Proper Sauce Mixing: Mix the sauce thoroughly until the sugar is completely dissolved before pouring it over the noodles to maximize flavor distribution in your chow mein.

  • Tweak to Taste: Adjust seasoning after combining. A little extra soy sauce or salt can enhance the overall flavor of your Cantonese chow mein, making it just right for your palate.

  • Fresh Additions: Feel free to add fresh vegetables or protein to the stir-fry—this not only boosts nutrition but makes each dish uniquely yours!

What to Serve with Quick and Crispy Cantonese Chow Mein

Elevate your meal experience by pairing this satisfyingly crispy chow mein with delightful side dishes and drinks that complement its bold flavors.

  • Spring Rolls:
    Crispy, vegetable-stuffed spring rolls add a crunchy contrast and are perfect for dipping in sweet and sour sauce.

  • Steamed Dumplings:
    Soft, savory dumplings filled with pork or vegetables create a comforting combination, enhancing the overall dining experience with their unique flavors.

  • Hot and Sour Soup:
    This flavorful soup offers a delightful burst of spice and tang that perfectly balances the sweet and savory notes of the chow mein.

  • Sesame Broccoli:
    Tossed in a light sesame dressing, this vibrant and slightly crunchy side dish adds a fresh, nutritious element, enhancing both texture and healthiness.

  • Teriyaki Tofu Skewers:
    Marinated tofu skewers grilled to perfection will provide a satisfying protein addition, ensuring that every plate is bursting with color and flavor.

  • Green Tea:
    A warm cup of green tea refreshes the palate, marrying well with the meal’s bold flavors while promoting relaxation after a hearty dish.

  • Lemon Sorbet:
    For dessert, a light lemon sorbet cleanses the palate, leaving a refreshing finish to your meal that rounds out the delightful dining experience.

Cantonese Chow Mein Variations & Substitutions

Get ready to put your own spin on this classic dish; the possibilities are endless!

  • Colorful Veggie Medley: Swap bean sprouts for a mix of bell peppers and zucchini to infuse a burst of color and flavor.

  • Protein-Packed Options: Add your choice of protein by incorporating diced tofu or chicken for a heartier meal. It’s a lovely way to elevate the dish!

  • Whole Wheat Noodles: For a healthier twist, choose whole wheat chow mein noodles, giving a nutty taste while maintaining a satisfying chewiness.

  • Gluten-Free Goodness: Opt for gluten-free noodles and tamari to make this chow mein accessible for those with dietary restrictions. It’s just as tasty with these alternatives!

  • Spice It Up: Kick the flavor up a notch by adding sliced jalapeños or crushed red pepper flakes for a vibrant heat that dances on your palate.

  • Asian Greens Addition: Consider tossing in some bok choy or spinach for added nutrition and a fresh, tender bite that complements the dish beautifully.

  • Crushed Peanuts: For a crunchy texture, sprinkle crushed peanuts on top before serving. They bring a satisfying crunch and an extra layer of flavor.

  • Sesame Flavors Galore: Try adding sesame seeds along with the sesame oil. This amplifies the delightful nuttiness and adds an attractive touch to your dish.

Feel free to explore any of these variations, and don’t hesitate to share your creations. And if you’re looking for more deliciousness, check out our Vegetarian Options, or dive into our quick tips for crafting a perfect stir-fry and Cooking Methods that ensure splendid results every time!

Make Ahead Options

These Cantonese Chow Mein are perfect for meal prep enthusiasts! You can prepare the sauce (mixing dark soy sauce, oyster sauce, fish sauce, sugar, and water) up to 3 days in advance, storing it in an airtight container in the refrigerator to maintain its vibrant flavors. Additionally, chop the onions and bean sprouts, sealing them in a separate container to keep them fresh until you’re ready to cook. When you’re set to serve, simply heat the wok, crisp up your noodles, and toss everything together with the sauce to create a delicious meal in minutes. This prep-ahead approach saves time and ensures that every bite is just as satisfying as when freshly made!

Cantonese Chow Mein Recipe FAQs

What type of noodles should I use for the best texture?
Absolutely! For an authentic Cantonese chow mein, I highly recommend using Hong Kong-style chow mein egg noodles. These thin, fresh noodles deliver the ideal texture and crispiness. If you can’t find them, you may use regular chow mein noodles or lo mein, but make sure they are not too thick.

How should I store leftover Cantonese chow mein?
To keep your delicious chow mein fresh, store it in an airtight container in the refrigerator for up to 3 days. This will lock in flavors while preventing the noodles from drying out. For reheating, simply toss it back into a hot wok or microwave with a splash of water to help revive the texture.

Can I freeze leftover chow mein?
Yes, you can absolutely freeze your Cantonese chow mein! Allow it to cool completely, then place it in a freezer-safe container. It will stay fresh for up to 1 month. When you’re ready to enjoy it again, simply thaw it overnight in the refrigerator and reheat in a non-stick skillet or microwave, adding a little water to ensure it warms evenly.

What if I have leftover sauce?
You can store leftover sauce separately in the fridge for up to a week. To use it later, just give it a good stir before adding it back into your stir-fries. This versatile sauce works well with a variety of dishes and is a fantastic way to elevate your meals!

Is there a vegetarian version of Cantonese chow mein?
Very much so! To make the dish vegetarian, simply omit the fish sauce and substitute oyster sauce with mushroom sauce. This way, you can still enjoy those rich, umami flavors without compromising your dietary choices. Additionally, feel free to load up on extra veggies or add tofu for protein.

How do I troubleshoot soggy noodles?
If your noodles turn out soggy, don’t fret! To prevent this, make sure to drain them well after boiling and let them steam for a minute to remove excess moisture. When frying, ensure your oil is hot enough before adding the noodles. If they’re overcooked, they can soak up moisture from the sauce—so it’s key to mix and serve them right away!

Cantonese Chow Mein

Crispy Cantonese Chow Mein in Under 15 Minutes!

Enjoy this quick and delicious Cantonese Chow Mein that's ready in under 15 minutes, perfect for busy evenings.
Prep Time 5 minutes
Cook Time 10 minutes
Total Time 15 minutes
Servings: 2 servings
Course: Dinner
Cuisine: Cantonese
Calories: 350

Ingredients
  

For the Noodles
  • 200 grams Chow Mein Egg Noodles Hong Kong-style noodles work best.
For the Vegetables
  • 1 medium Yellow Onion Substitute with shallots for a milder flavor.
  • 2 stalks Green Onions Use both white and green parts; chives are a suitable alternative.
  • 100 grams Bean Sprouts Can substitute with shredded carrots or bell peppers.
For Cooking
  • 3 tablespoons Corn Oil Can be swapped with vegetable or canola oil.
  • 1 teaspoon Sesame Oil Use sparingly for flavor enhancement.
For the Sauce
  • 2 tablespoons Dark Soy Sauce Opt for regular soy sauce for a lighter touch.
  • 1 tablespoon Regular Soy Sauce Tamari is a great gluten-free replacement.
  • 1 tablespoon Oyster Sauce Switch to mushroom sauce for a vegetarian option.
  • 1 teaspoon Fish Sauce Omit for a vegetarian version.
  • 1 teaspoon Granulated Sugar Any sweetener can be used as a replacement.
  • 3 tablespoons Water Adjust to sauce consistency.

Equipment

  • wok
  • Large pot
  • Mixing Bowl
  • Colander

Method
 

Step-by-Step Instructions for Crispy Cantonese Chow Mein
  1. Prepare Noodles: Boil water in a large pot, add the chow mein egg noodles, soak for 30 seconds, drain, and let steam for 1 minute.
  2. Make Sauce: Combine dark soy sauce, regular soy sauce, oyster sauce, fish sauce, granulated sugar, and water in a mixing bowl. Whisk until sugar dissolves.
  3. Cook Aromatics: Heat corn oil in a wok, sauté onions and green onions for about 1 minute until fragrant and translucent.
  4. Pan-Fry Noodles: Add more corn oil and spread soaked noodles in the hot oil, cooking without stirring for 2 minutes, then flip and cook another 2 minutes.
  5. Combine: Reduce heat to medium, add aromatics and bean sprouts to noodles, pour sauce over, and toss for 1-2 minutes until heated through.
  6. Serve: Remove from heat, drizzle with sesame oil, toss to combine, and plate immediately.

Nutrition

Serving: 1servingCalories: 350kcalCarbohydrates: 50gProtein: 12gFat: 14gSaturated Fat: 2gPolyunsaturated Fat: 6gMonounsaturated Fat: 4gCholesterol: 10mgSodium: 900mgPotassium: 300mgFiber: 2gSugar: 2gVitamin A: 10IUVitamin C: 15mgCalcium: 4mgIron: 10mg

Notes

For the best results, always let the oil heat properly before adding the noodles to achieve the desired crispiness.

Tried this recipe?

Let us know how it was!

Beef and Cheese Ravioli Casserole: Your New Comfort Food Hero

As I pulled out the casserole from the oven, the cheesy aroma wafted through the kitchen, instantly transforming it into my favorite gathering spot. This Decadent Beef and Cheese Ravioli Casserole is more than just a meal; it’s a warm hug after a long day—a quick weeknight dish that delivers all the comfort food vibes we crave. With layers of tender ground beef, gooey mozzarella, and luscious stuffed ravioli, it’s wonderfully customizable, allowing you to adjust ingredients based on dietary preferences. Whether you’re feeding a family or just treating yourself, this dish is as satisfying as it is simple to prepare. Ready to discover how to whip up this million-dollar delight in your own kitchen? Let’s dive in!

Why Is This Casserole a Must-Try?

Comforting Appeal: This Decadent Beef and Cheese Ravioli Casserole is the ultimate crowd-pleaser, perfect for families and gatherings.
Easy to Customize: With simple swaps like ground turkey or veggies, it’s adaptable to various dietary needs.
Hearty Flavor: Each bite bursts with savory beef, melted cheese, and tender ravioli, satisfying even the pickiest eaters.
Time-Saving Delight: Prepare it in under an hour, making it an ideal quick weeknight meal.
Meal Prep Friendly: Make it ahead of time and enjoy it throughout the week or freeze for later—who doesn’t love a comforting dinner ready to go?
Pair it with a fresh side salad or crusty garlic bread for a complete, delicious experience!

Beef and Cheese Ravioli Casserole Ingredients

For the Meat Sauce
Ground Beef – Main protein source that provides richness and depth; substitute with ground turkey or plant-based meat for lighter or vegetarian options.
Onion – Enhances flavor by forming the base of your meat sauce; can be replaced with shallots for a milder taste.
Garlic – Adds aromatic flavor, ensuring a savory dish; use garlic powder if fresh isn’t available.
Marinara Sauce – Forms the flavor foundation of the casserole; store-bought is convenient, but homemade options can add a depth of flavor.

For the Casserole
Cheese-Filled Ravioli – The key carbohydrate component that enriches both texture and flavor; use gluten-free ravioli if necessary.
Mozzarella Cheese – Delivers meltiness and a gooey top layer; substitute with cheddar or Gouda for a different taste experience.
Parmesan Cheese – Adds a salty depth to the dish; can replace with Pecorino Romano for a change in flavor.
Salt and Pepper – Essential for seasoning; adjust according to your taste preferences.

Feel free to mix and match these ingredients to create your perfect Beef and Cheese Ravioli Casserole!

Step‑by‑Step Instructions for Beef and Cheese Ravioli Casserole

Step 1: Preheat the Oven
Begin by preheating your oven to 375°F (190°C). This essential step ensures that your Beef and Cheese Ravioli Casserole bakes evenly and develops a beautiful golden crust. While the oven heats, gather your ingredients so that everything is within reach when you’re ready to assemble.

Step 2: Cook the Beef
In a large skillet over medium heat, add ground beef and cook until it’s browned, about 5-7 minutes. Break up any clumps with a spatula to ensure even cooking. Once browned, you’ll want to add diced onion and minced garlic. Sauté for another 3-4 minutes, until the onion is softened and translucent, releasing a delightful aroma.

Step 3: Add the Marinara Sauce
Once the beef mixture is aromatic and well-cooked, pour in your marinara sauce. Stir to combine thoroughly and let the mixture simmer for about 5 minutes. This allows the flavors to meld beautifully, creating the savory base essential for your Beef and Cheese Ravioli Casserole.

Step 4: Prepare the Ravioli
While the meat sauce simmers, bring a pot of salted water to a boil. Cook the cheese-filled ravioli according to package instructions, typically for 4-5 minutes, until they are tender but still firm. Drain the ravioli and set them aside; they’ll soak up the delicious flavors of the casserole.

Step 5: Layer the Casserole
In a greased casserole dish, start layering by spreading a portion of the beef and marinara mixture at the bottom. Then, add a layer of cooked ravioli, followed by a generous sprinkle of mozzarella and Parmesan cheese. Continue to layer these components until all ingredients have been used, finishing with a layer of cheese on top.

Step 6: Season and Bake
Before baking, season the top layer with a sprinkle of salt and pepper. Cover the casserole dish with aluminum foil to prevent excessive browning. Place it in the preheated oven and bake for 20 minutes. This allows the flavors to meld and the cheese to start melting.

Step 7: Uncover and Finish Baking
After 20 minutes, carefully remove the foil and return the casserole to the oven. Bake for an additional 10 minutes until the top is bubbly and golden brown. Keep an eye on it, as the visual cue of melted cheese and crisp edges will indicate that your Beef and Cheese Ravioli Casserole is ready to enjoy.

Step 8: Cool and Garnish
Once baked to perfection, allow the casserole to cool for about 5-10 minutes. This step helps the layers stabilize, making it easier to serve. For an added touch of freshness and flavor, garnish with chopped fresh basil before serving, enhancing the comforting appeal of your Beef and Cheese Ravioli Casserole.

Make Ahead Options

These Decadent Beef and Cheese Ravioli Casserole options are perfect for those busy weeknights! You can assemble the entire casserole up to 24 hours in advance and simply store it in the refrigerator, tightly covered. This allows the flavors to meld beautifully, making it even tastier when baked. If you need to prep it further in advance, consider freezing the casserole for up to 3 months; just ensure it cools completely before wrapping it tightly in plastic wrap and aluminum foil. To maintain quality, avoid overcooking the ravioli initially, as they’ll continue to soften while baking. When you’re ready to serve, simply bake from chilled for about 30-40 minutes, or if frozen, allow it to thaw overnight in the fridge before baking. Enjoy the convenience of a comforting meal ready to go!

Expert Tips for Beef and Cheese Ravioli Casserole

  • Avoid Overcooked Ravioli: Ensure to cook the ravioli just until tender. Overcooking can lead to mushy pasta after baking in the casserole.
  • Layer Wisely: Start with a layer of meat sauce at the bottom to prevent the noodles from sticking. This ensures an easy serving experience.
  • Bring to Room Temp: If you prepared the casserole in advance, let it sit at room temperature for 30 minutes before baking for even cooking.
  • Customize Spices: Feel free to add oregano, basil, or red pepper flakes to the meat sauce for a personalized kick! Don’t hesitate to explore your flavor preferences.
  • Cheese Variations: Experiment with different cheese combinations to discover new flavors in your Beef and Cheese Ravioli Casserole; a blend of mozzarella and cheddar can work wonders!
  • Check for Doneness: Keep an eye on your casserole during the final few minutes. You want it bubbly and golden, but not burnt. Enjoy the delicious aromas filling your kitchen!

What to Serve with Decadent Beef and Cheese Ravioli Casserole

Prepare to elevate your dining experience with these delightful accompaniments that enhance the heartwarming flavors of your casserole.

  • Garlic Bread: This classic side offers a crunchy contrast to the creamy casserole, perfect for sopping up any delicious sauce left behind. Imagine the aroma of freshly baked bread mingling with the casserole’s cheesy scent—absolutely irresistible!

  • Caesar Salad: Crisp romaine with tangy Caesar dressing provides a refreshing counterbalance to the rich casserole. The crunch of croutons and tang of Parmesan cheese will invigorate each bite of pasta.

  • Roasted Vegetables: A medley of roasted seasonal veggies adds vibrant colors and earthy flavors, turning your meal into a balanced feast. Think of tender bell peppers and zucchini drizzled with olive oil—pure culinary harmony!

  • Steamed Broccoli: Lightly steamed broccoli not only enhances your plate’s presentation but also adds a nutritious and vibrant touch. Its mild flavor won’t compete, making it the ideal partner for the bold casserole.

  • Red Wine: A robust red wine, like a Chianti or Cabernet Sauvignon, complements the savory beef and cheese beautifully, heightening the flavors of your meal. Picture a warm glass as you gather around the table—what could be more inviting?

  • Tiramisu: Finish with a decadent dessert like tiramisu, which offers a light, coffee-flavored finish after a hearty meal. The layers of cream and cocoa beautifully close out your comforting dinner experience.

Beef and Cheese Ravioli Casserole: Variations Galore!

Feel free to express your culinary creativity and customize this delightful casserole to suit your taste and dietary needs.

  • Ground Turkey: Swap ground beef for ground turkey to lighten the dish while maintaining richness.

  • Vegetarian Option: Use plant-based meat alternatives or mushrooms for a hearty, vegetarian twist that’s still satisfying.

  • Assorted Cheeses: Mix in different cheeses like pepper jack for a spicy kick or gouda for a smoky flavor explosion. The melting cheese is pure bliss!

  • Veggie Boost: Add vibrant veggies such as bell peppers, zucchini, or spinach to load up the casserole with nutrition and color.

  • Herb Infusion: Sprinkle fresh or dried herbs like basil or oregano into the beef mixture for layers of aromatic flavors that brighten each bite.

  • Gluten-Free Twist: Opt for gluten-free ravioli to cater to gluten-sensitive family members without sacrificing on flavor.

  • Creamy Addition: For a creamier casserole, mix in a dollop of ricotta cheese between the layers for added richness and texture.

  • Heat Up: For those who enjoy a bit of spice, add red pepper flakes or diced jalapeños to the meat sauce for that extra zing.

Each of these variations can enhance the flavors and textures of your Beef and Cheese Ravioli Casserole, making it a delightful and adaptable recipe. As always, feel free to pair this comforting dish with a fresh side salad or some crusty garlic bread for a complete and satisfying meal!

How to Store and Freeze Beef and Cheese Ravioli Casserole

Fridge: Store leftovers in an airtight container for up to 3 days. To keep the flavors intact, ensure it’s properly covered to avoid drying out.

Freezer: This casserole freezes beautifully! Cool completely, then portion into airtight containers and freeze for up to 3 months. Label with the date for easy tracking.

Reheating: Thaw overnight in the fridge for best results. Reheat in a preheated oven at 350°F (175°C) for about 25-30 minutes, or until heated through and bubbly.

Make-Ahead Tip: Assemble the Beef and Cheese Ravioli Casserole up to 24 hours in advance and refrigerate before baking. A perfect solution for busy nights!

Beef and Cheese Ravioli Casserole Recipe FAQs

What is the best way to choose fresh ravioli?
When selecting fresh ravioli, look for packages that have plump and intact pasta. Check the expiration date and avoid any that seem squished or have dark spots, as these may indicate spoilage. If possible, choose ravioli from reputable brands or local shops known for quality. Fresh ravioli should have a nice, firm texture that feels slightly springy when pressed.

How do I store leftovers of the Beef and Cheese Ravioli Casserole?
Absolutely! Store leftovers in an airtight container in the fridge for up to 3 days. To prevent the casserole from drying out, cover it tightly. When reheating, you can add a splash of marinara sauce to help retain moisture.

Can I freeze the Beef and Cheese Ravioli Casserole?
Yes, this casserole freezes wonderfully! Allow it to cool completely before portioning it into airtight containers. Freeze it for up to 3 months. When you’re ready to enjoy, thaw it overnight in the fridge and reheat in a preheated oven at 350°F (175°C) for 25-30 minutes until heated through and bubbly.

What should I do if my casserole is too watery?
If you find that your casserole is too watery, there are a couple of tricks to manage it. First, ensure you cook the beef enough to reduce excess moisture. If you’ve already baked it, allow it to sit uncovered for a few minutes after taking it out of the oven, which can help evaporate some of the liquid. You can also mix in a spoonful of more cheese to absorb some moisture and enhance the flavor!

Are there any dietary considerations I should be aware of when making this casserole?
Definitely! For those with gluten intolerance, opt for gluten-free ravioli to enjoy this comforting dish without worry. Additionally, if there are dairy allergies, you could substitute non-dairy cheese options. This casserole is also easily adaptable for those who follow a lower-fat diet by replacing ground beef with ground turkey or plant-based alternatives. Always check all ingredient labels to ensure they meet your dietary needs.

Beef and Cheese Ravioli Casserole

Beef and Cheese Ravioli Casserole: Your New Comfort Food Hero

This Beef and Cheese Ravioli Casserole is a warm hug after a long day, delivering all the comfort food vibes we crave.
Prep Time 15 minutes
Cook Time 35 minutes
Cooling Time 10 minutes
Total Time 1 hour
Servings: 6 servings
Course: Casserole
Cuisine: Italian
Calories: 450

Ingredients
  

Meat Sauce
  • 1 lb Ground Beef Can substitute with ground turkey or plant-based meat.
  • 1 medium Onion Can replace with shallots for a milder taste.
  • 2 cloves Garlic Use garlic powder if fresh isn’t available.
  • 24 oz Marinara Sauce Store-bought or homemade.
Casserole
  • 2 cups Cheese-Filled Ravioli Use gluten-free ravioli if necessary.
  • 2 cups Mozzarella Cheese Can substitute with cheddar or Gouda.
  • 1 cup Parmesan Cheese Can replace with Pecorino Romano.
  • to taste Salt
  • to taste Pepper

Equipment

  • Large skillet
  • casserole dish
  • Pot
  • spatula

Method
 

Steps
  1. Preheat your oven to 375°F (190°C). Gather your ingredients.
    Beef and Cheese Ravioli Casserole
  2. In a large skillet over medium heat, cook ground beef until browned, about 5-7 minutes. Add diced onion and minced garlic, and sauté for another 3-4 minutes.
    Beef and Cheese Ravioli Casserole
  3. Pour in the marinara sauce and stir. Let simmer for about 5 minutes.
    Beef and Cheese Ravioli Casserole
  4. Cook cheese-filled ravioli according to package instructions, typically for 4-5 minutes. Drain and set aside.
    Beef and Cheese Ravioli Casserole
  5. In a greased casserole dish, layer beef mixture, ravioli, mozzarella, and parmesan. Repeat layers.
    Beef and Cheese Ravioli Casserole
  6. Season top layer with salt and pepper. Cover with foil and bake for 20 minutes.
    Beef and Cheese Ravioli Casserole
  7. Remove foil and bake for an additional 10 minutes until bubbly and golden brown.
    Beef and Cheese Ravioli Casserole
  8. Allow to cool for 5-10 minutes before serving. Garnish with chopped fresh basil.
    Beef and Cheese Ravioli Casserole

Nutrition

Serving: 1servingCalories: 450kcalCarbohydrates: 30gProtein: 25gFat: 20gSaturated Fat: 10gPolyunsaturated Fat: 1gMonounsaturated Fat: 2gCholesterol: 80mgSodium: 900mgPotassium: 600mgFiber: 3gSugar: 5gVitamin A: 200IUVitamin C: 2mgCalcium: 350mgIron: 3mg

Notes

Customize with different meats and cheeses to suit your taste preferences. Perfect for meal prep!

Tried this recipe?

Let us know how it was!