Get my cookbooks

Fiery Chicken Ramen: Spicy Comfort in Every Slurp

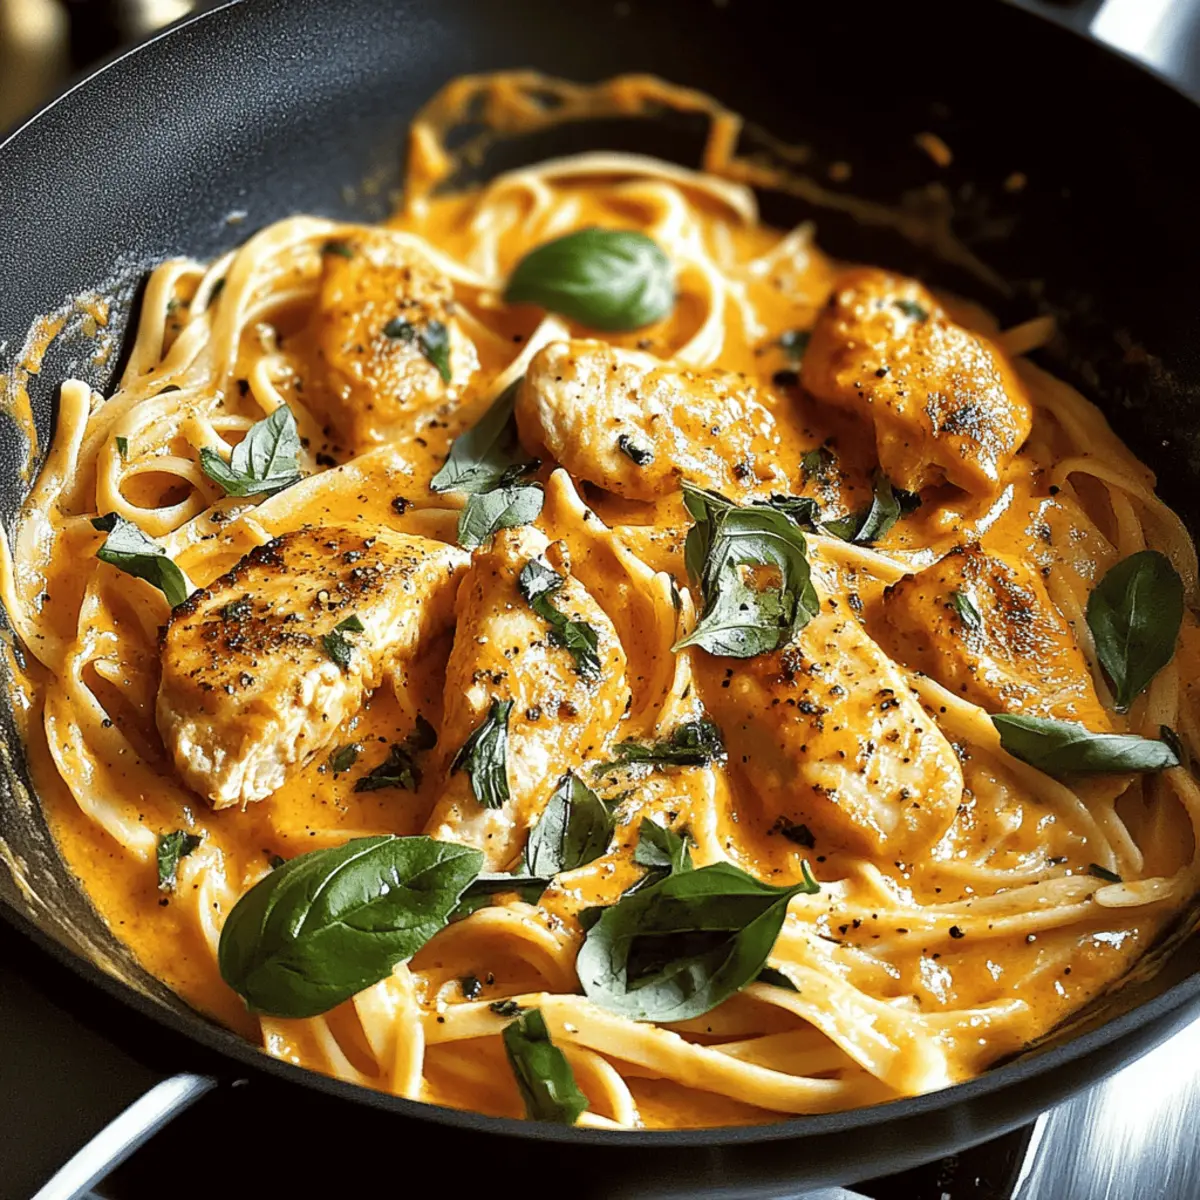
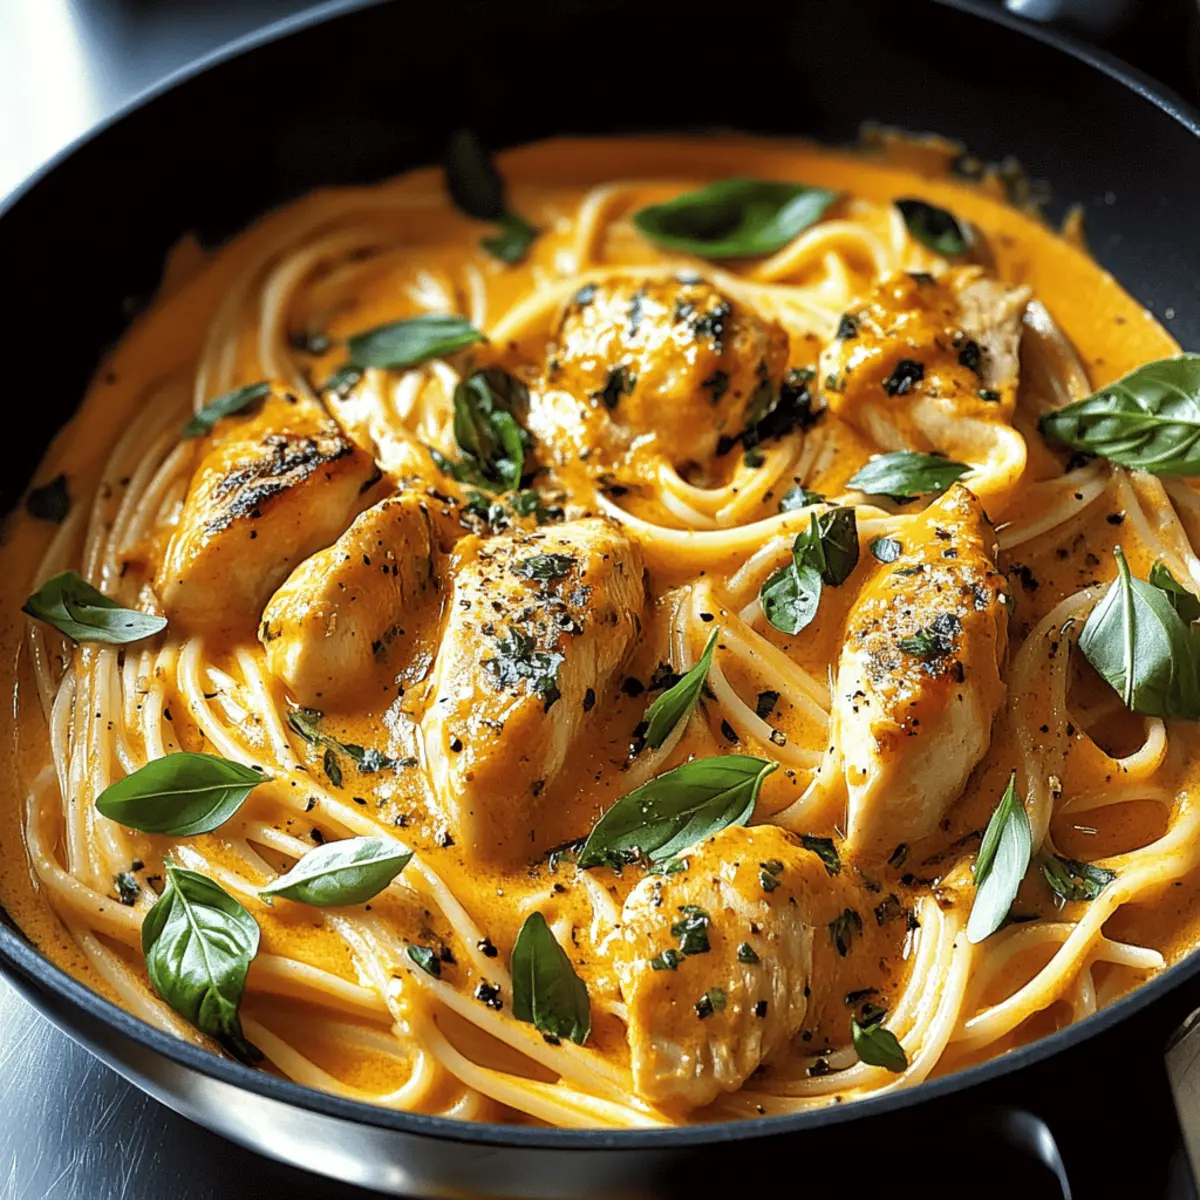
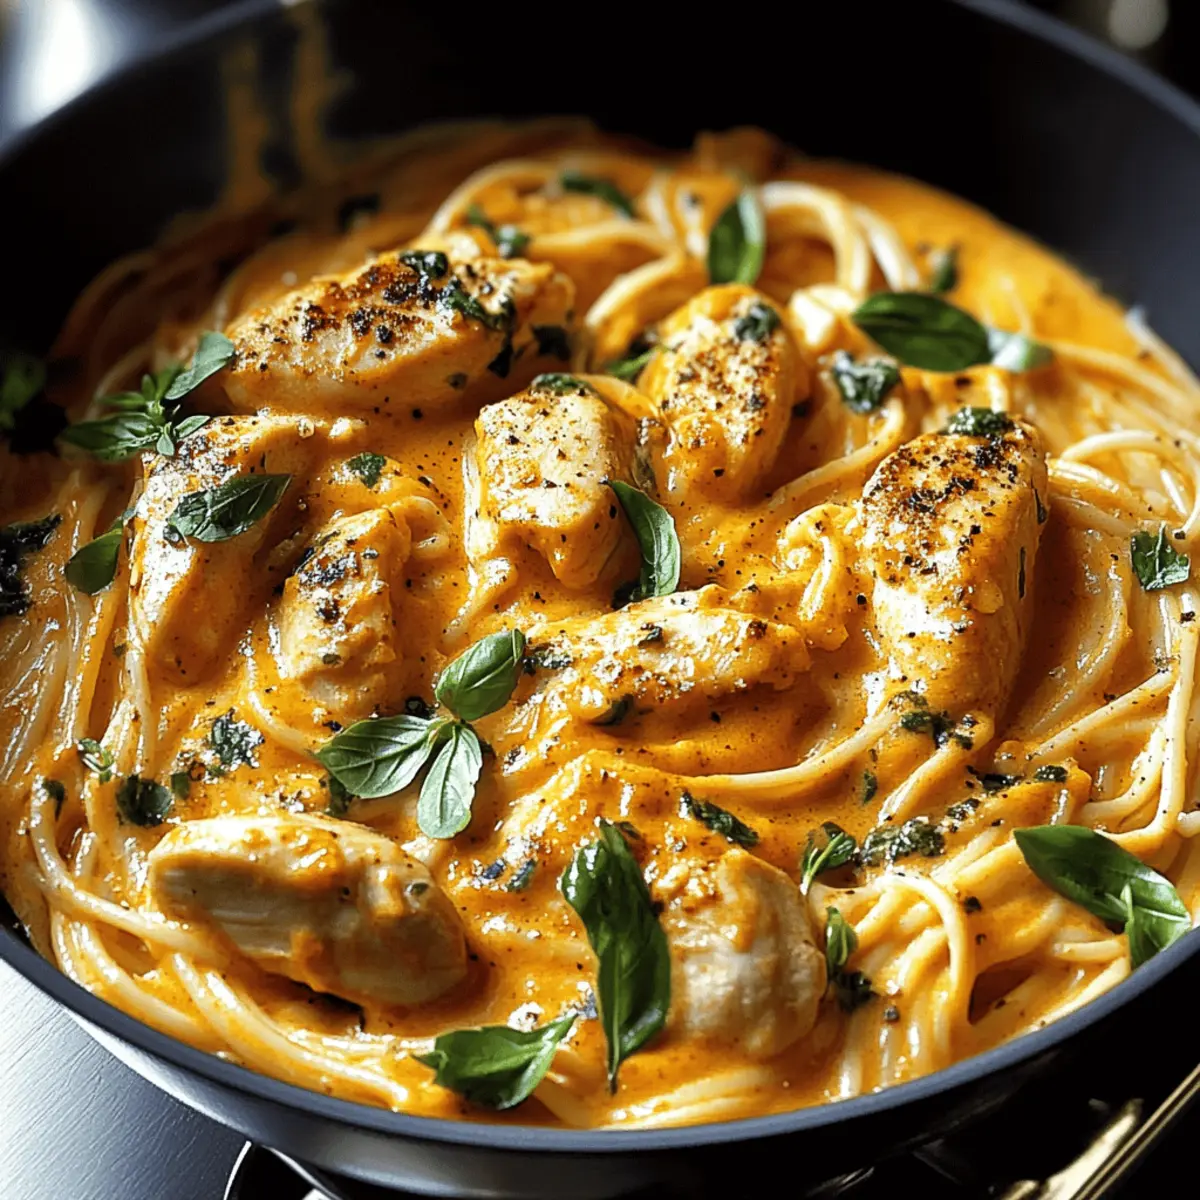
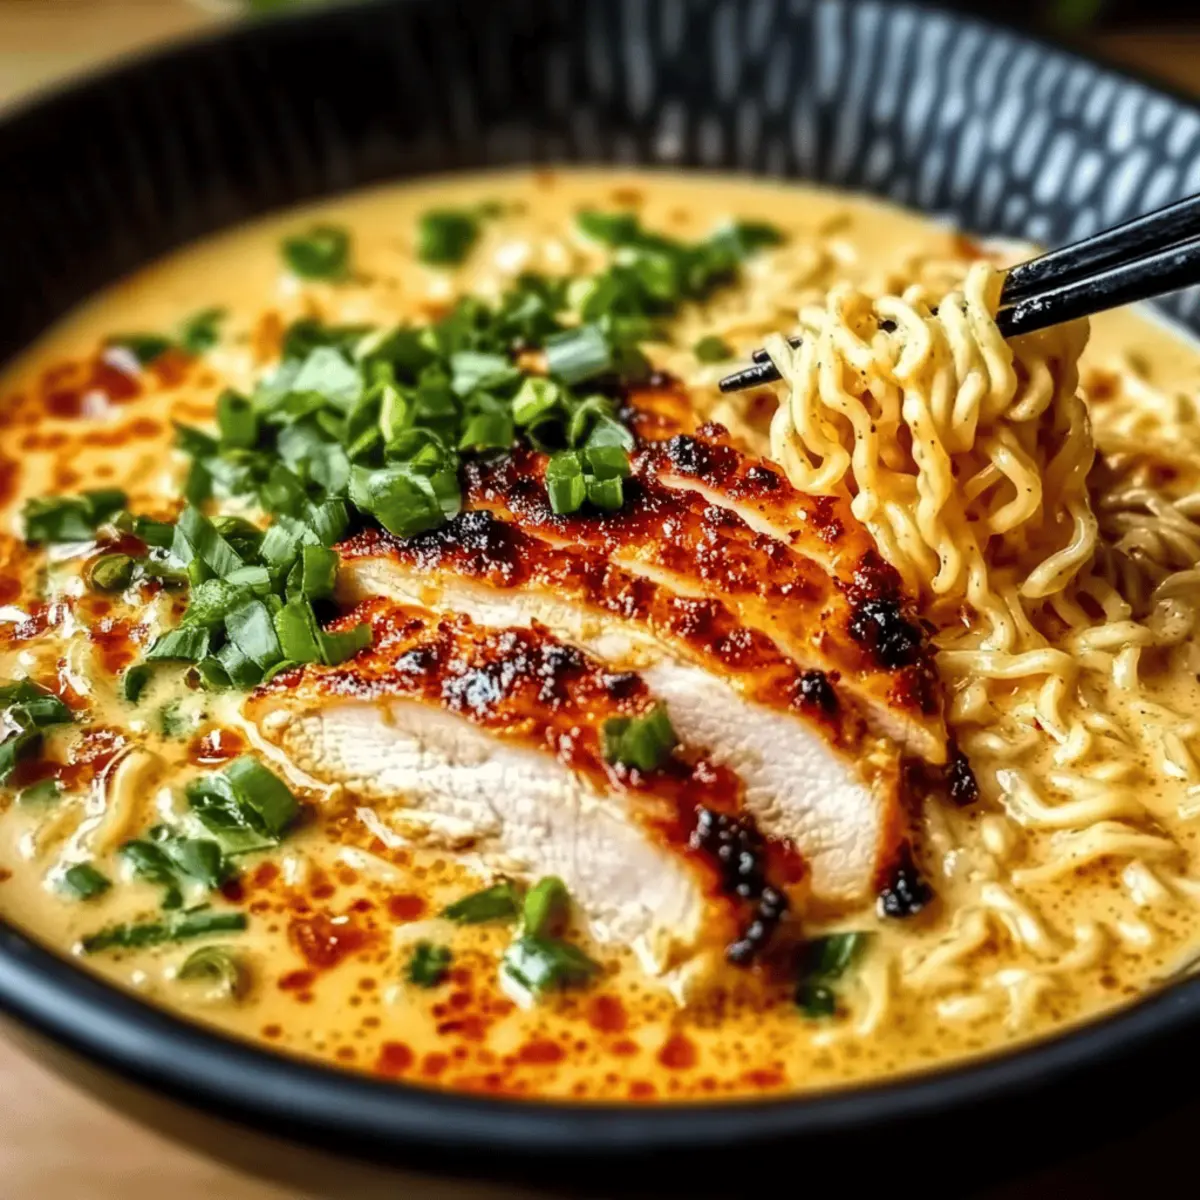
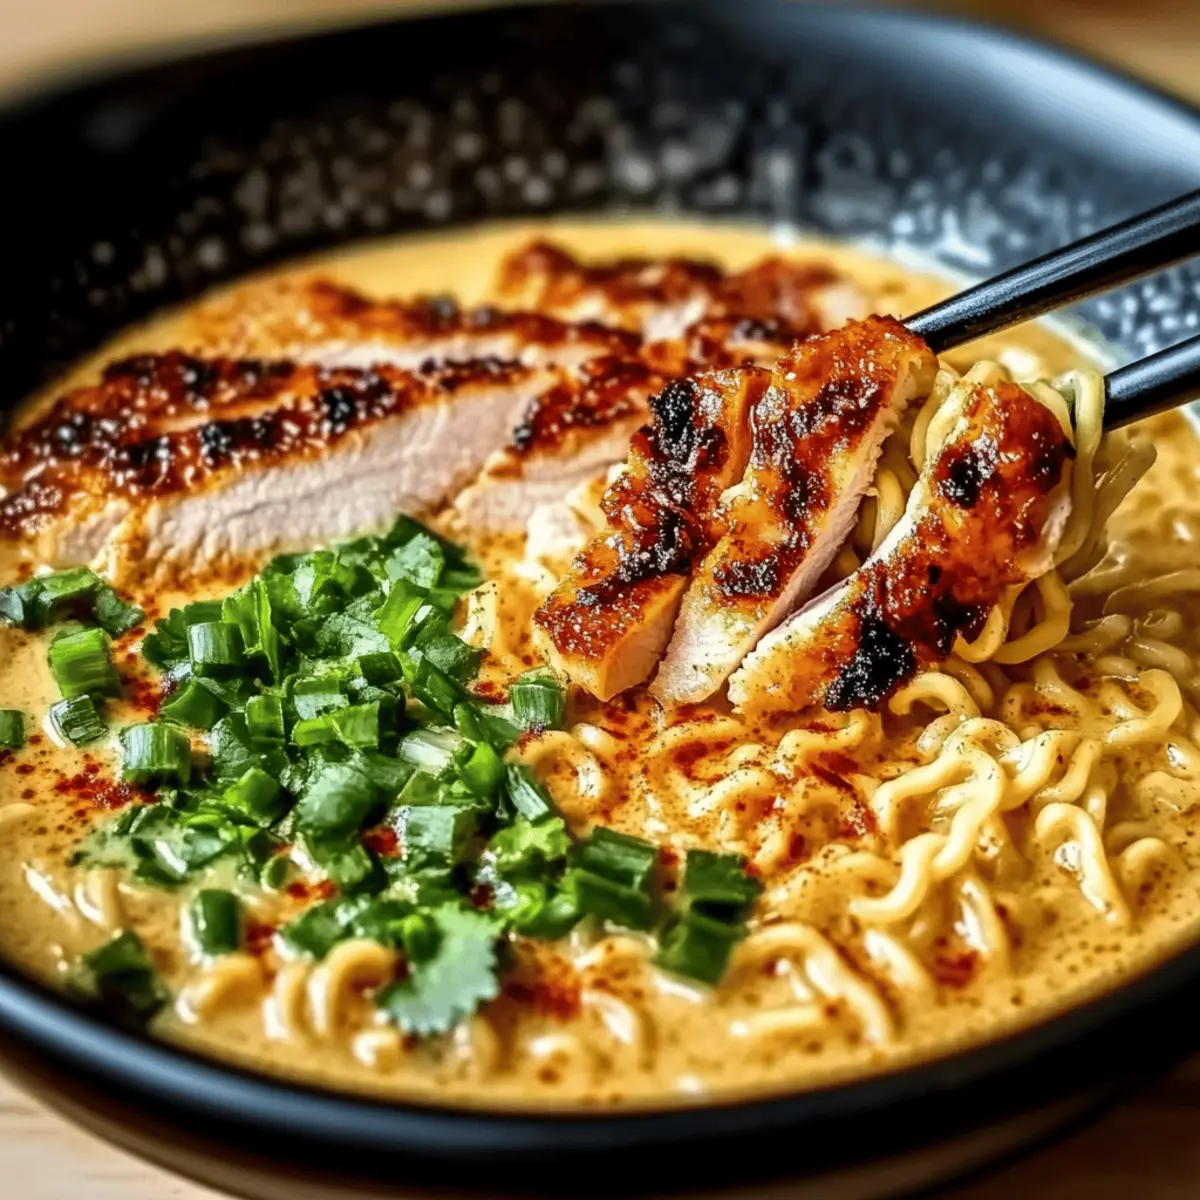
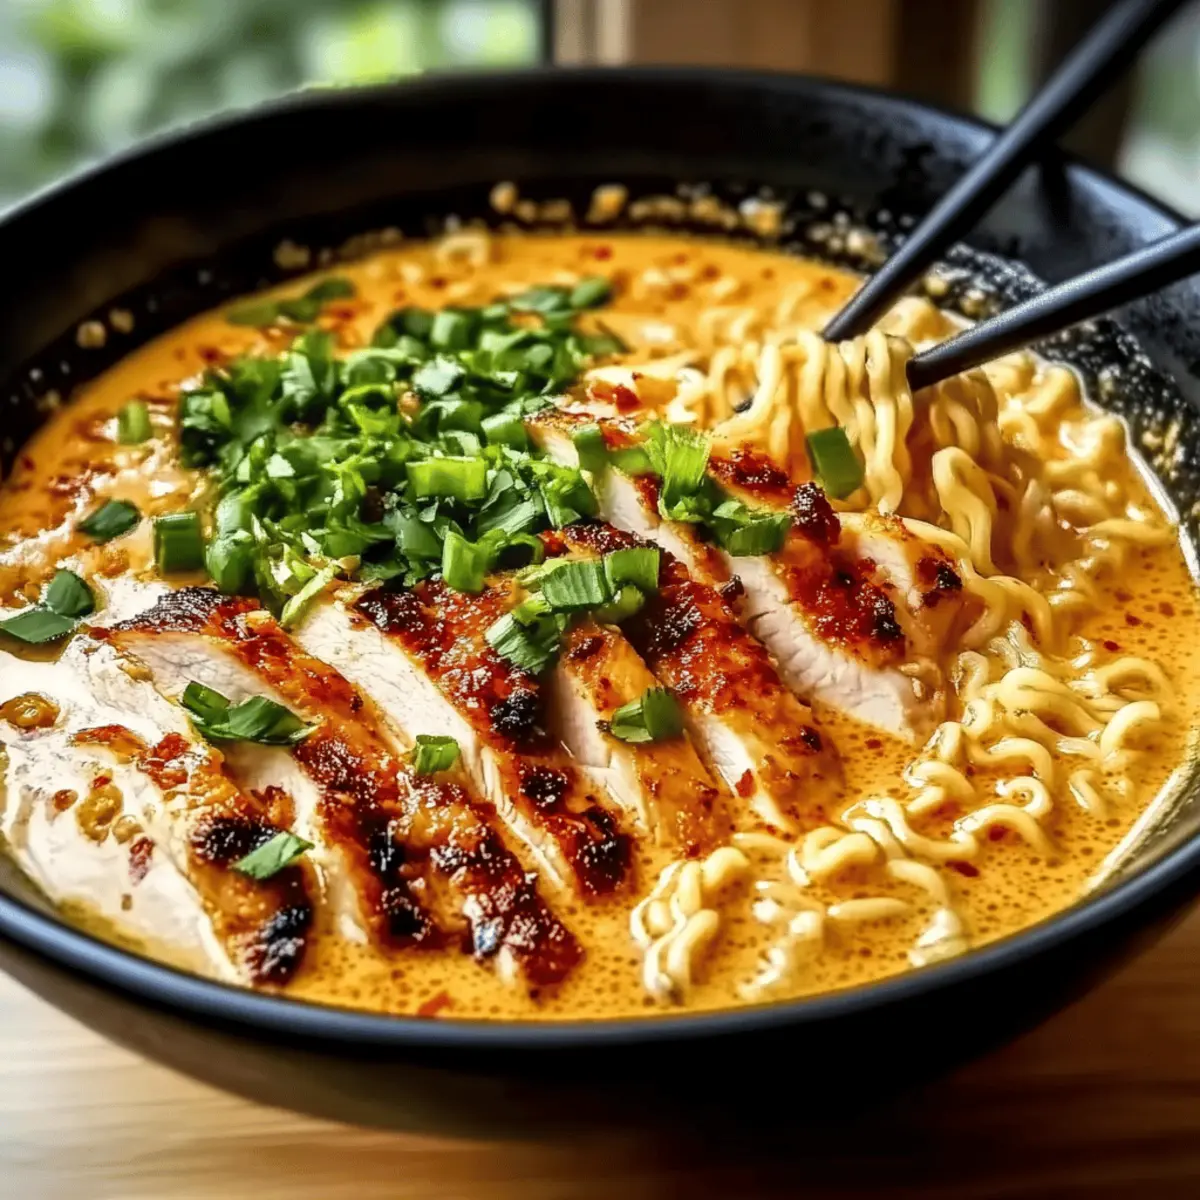
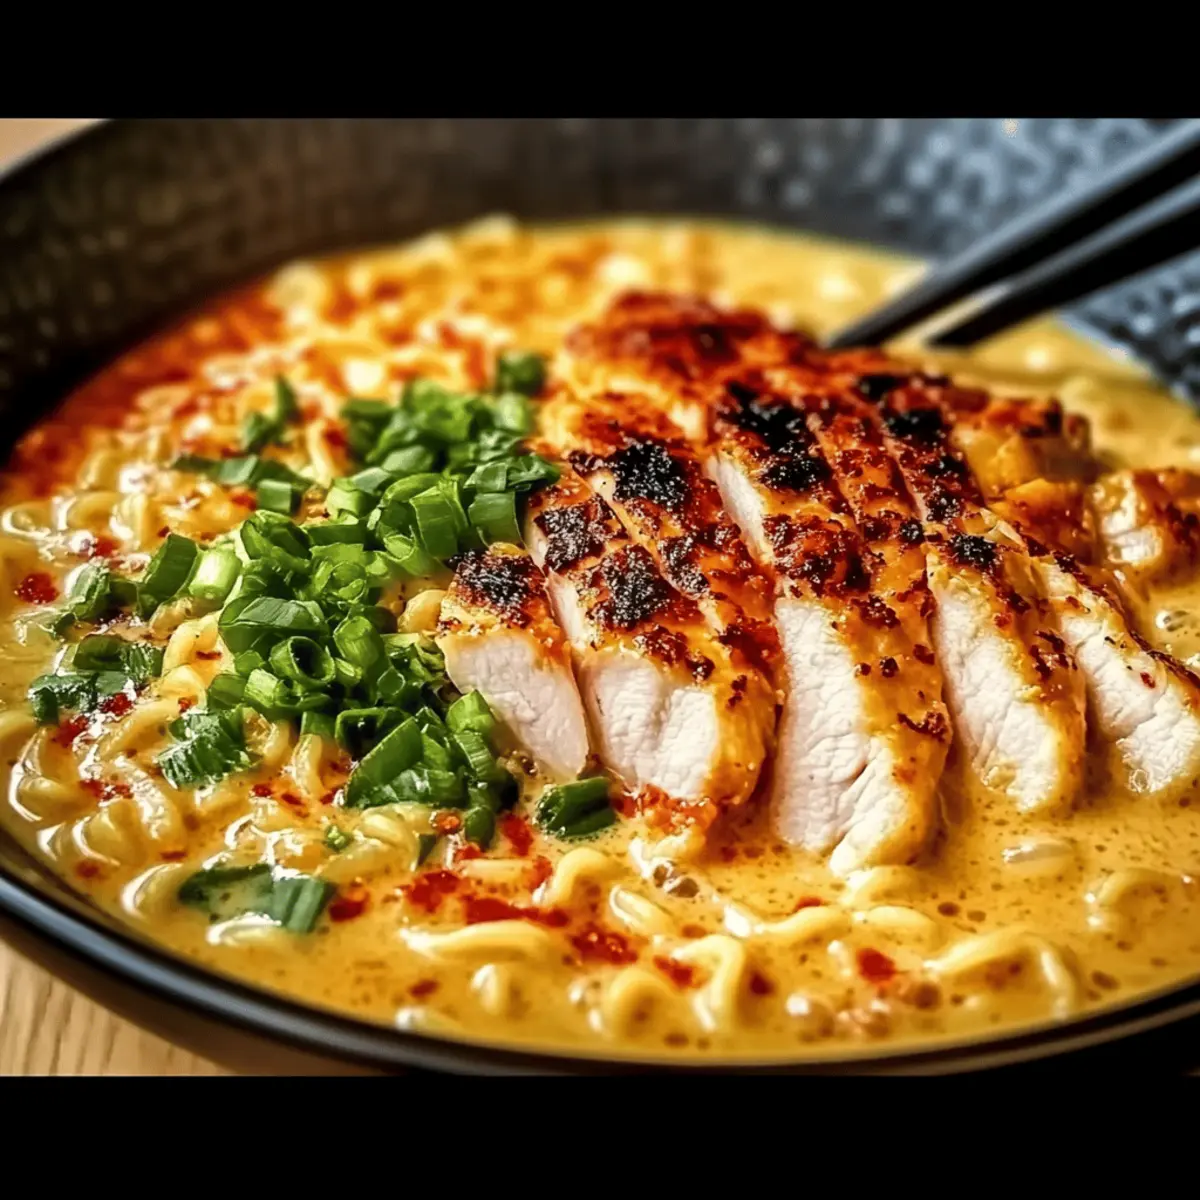
As I twirled my fork through the silky noodles, the rich aroma filled the room, instantly transporting me to a bustling ramen shop in Tokyo. Nothing quite matches the comfort of Fiery Chicken Ramen with Creamy Garlic Sauce on a chilly evening. This dish perfectly balances spicy and creamy, making it a customizable weeknight dinner that your loved ones will adore. Not only is it a time-saver, taking minimal effort to prepare, but the flavors transform simple ingredients into an exciting meal that warms the heart. Whether you prefer tender chicken thighs or succulent breasts, you can tailor this recipe to suit your taste buds. Ready to dive into this culinary adventure? Let’s explore how to elevate your dinner table with this scrumptious dish!

What Makes This Ramen So Special?

Bold flavors unite in this Fiery Chicken Ramen, offering a delicious, spicy kick with a creamy touch that’s simply irresistible. Customizable ingredients allow you to switch between chicken types or dairy alternatives, catering to your preferences. Quick preparation makes it an ideal choice for busy weeknights when you crave a comforting meal. You can even add veggies like bok choy or bell peppers for extra nutrition! Plus, the silky garlic sauce wraps around every noodle, making each bite a comforting embrace. If you enjoy other quick, flavorful dishes, check out my Sizzling Chicken Pepper or Garlic Chicken Gnocchi for more culinary inspiration.

Fiery Chicken Ramen Ingredients

Discover the perfect blend of spicy and creamy in this delightful dish!

For the Chicken

  • Chicken Breast/Thighs – Choose thighs for a juicier, richer flavor that pairs wonderfully with the creamy sauce.

For the Noodles

  • Ramen Noodles – Fresh noodles provide a delightful texture, elevating your Fiery Chicken Ramen experience.

For the Sauce

  • Heavy Cream – Offers a luxurious richness; consider alternatives like coconut milk if you’re looking for a dairy-free option.
  • Garlic – Freshly minced garlic is crucial for depth of flavor in the creamy sauce.

For the Heat

  • Cayenne Pepper – Adjust according to your spice tolerance; this ingredient packs a fiery punch!
  • Chili Powder – Add to enhance the heat further, making your ramen perfectly spicy.

For the Finish

  • Fresh Lime Juice – A splash brightens the dish and balances the richness of the sauce; don’t skip this vital step!

Feel free to tweak the ingredients to suit your unique taste, and enjoy every slurp of this comforting and warming bowl of Fiery Chicken Ramen!

Step‑by‑Step Instructions for Fiery Chicken Ramen

Step 1: Prepare the Chicken
Begin by coating your choice of chicken breast or thighs with cayenne and chili powder for an extra kick. Heat a tablespoon of oil in a large skillet over medium-high heat. Sauté the chicken for about 6-8 minutes, turning occasionally until it’s golden brown on the outside and cooked through—juicy and tender in the center. Remove the chicken and let it rest while you prepare the noodles.

Step 2: Cook Ramen
In a separate pot, bring water to a roaring boil. Add the fresh ramen noodles and cook according to package directions, usually around 3-4 minutes, until they are al dente and slightly springy. Once done, drain the noodles and set them aside, making sure to reserve a little cooking water in case you need it later to loosen your sauce.

Step 3: Make the Sauce
Using the same skillet, lower the heat to medium and add freshly minced garlic. Sauté for about 1 minute, allowing the garlic to become fragrant without burning. Next, pour in the heavy cream, stirring continuously as you incorporate the chicken juices left in the pan. Allow the sauce to simmer gently, stirring for another 3-4 minutes until it thickens and becomes velvety.

Step 4: Combine Ingredients
Now it’s time to bring everything together. Add the cooked ramen noodles to the creamy garlic sauce, tossing gently to coat every strand evenly. If the sauce seems too thick, splash in a bit of the reserved noodle cooking water to achieve the desired consistency. Taste and adjust seasoning, adding more cayenne or chili powder if you crave more heat in your Fiery Chicken Ramen.

Step 5: Serve
Plate your delicious ramen and slice the rested chicken into strips, arranging it beautifully on top. Drizzle with fresh lime juice to brighten the dish and enhance the flavors. Feel free to garnish with green onions or sesame seeds for added flair. Your comforting bowl of Fiery Chicken Ramen is ready to devour!

Fiery Chicken Ramen Variations

Get ready to explore delightful twists that will make your Fiery Chicken Ramen uniquely yours!

  • Dairy-Free: Substitute heavy cream with coconut milk for a rich and creamy flavor without the dairy.
  • Vegetarian Delight: Swap chicken for tofu and use vegetable broth to create a delicious plant-based version of this ramen.
  • Extra Crunch: Add a handful of roasted peanuts or sesame seeds on top for a delightful crunch with each bite.
  • Spice It Up: For a fiery boost, toss in some sliced jalapeños or fresh chili peppers along with the garlic for added heat.
  • Vegetable Medley: Include sautéed veggies like bok choy, snap peas, or bell peppers for extra nutrition and vibrant color.
  • Noodle Alternatives: Try substituting traditional ramen noodles with udon or soba noodles for a delightful texture change.
  • Lime Lovers: Enhance the lime juice with lime zest for a tangy burst of flavor that brightens the entire dish.
  • Creamy Cheesy Ramen: Stir in some cream cheese or a sprinkle of parmesan for an extra layer of creamy richness.

Feel free to mix and match these variations for the perfect bowl that suits your cravings! If you’re in the mood for more deliciousness, consider trying my BBQ Chicken Grilled Cheese Sandwich or a cozy Tuscan Chicken Soup to warm your soul!

How to Store and Freeze Fiery Chicken Ramen

Fridge: Keep your Fiery Chicken Ramen in an airtight container for up to 2 days. Reheat gently on the stove, adding a splash of water to maintain creaminess.

Freezer: For longer storage, freeze the creamy ramen mixture (without the chicken) for up to 3 months. Thaw in the fridge overnight before reheating.

Reheating: When ready to enjoy, reheat on low heat, stirring frequently. If the sauce thickens, add a bit of reserved noodle water or additional cream to restore its luxurious texture.

Airtight Storage: Always make sure your leftovers are stored in airtight containers to prevent moisture loss and keep your ramen fresh!

Make Ahead Options

These Fiery Chicken Ramen bowls are perfect for meal prep enthusiasts! You can marinate the chicken (with spices) and refrigerate it up to 24 hours in advance, which enhances the flavor and tenderness. Additionally, the ramen noodles can be cooked and stored separately for up to 3 days in the fridge; just toss them in a little oil to prevent sticking. When you’re ready to enjoy, simply sauté the marinated chicken until cooked through, prepare the creamy garlic sauce, and reheat the noodles before combining them. With these make-ahead steps, you’ll serve a delicious, restaurant-quality meal with minimal effort on busy weeknights!

What to Serve with Fiery Chicken Ramen?

Elevate your dining experience with delightful side dishes and beverages that complement the bold flavors of this sumptuous ramen.

  • Crispy Tempura Vegetables: Lightly battered and fried, these tempura veggies add a delightful crunch and showcase the essence of Japanese cuisine. Serve alongside your ramen for a textural contrast.

  • Spicy Edamame: Tossed with sea salt and chili flakes, these protein-packed pods offer a perfect pre-meal snack that balances the richness of the ramen.

  • Garlic Bok Choy: Steamed or sautéed with minced garlic, this vibrant green vegetable adds a fresh touch, providing nutrients while complementing the creamy garlic sauce.

  • Sesame Garlic Spinach: Sautéed with sesame oil and garlic, this dish brings earthiness, enhancing the meal’s flavor profile with its nutty undertones.

  • Chilled Soba Noodles: A refreshing alternative, tossed in a light soy vinaigrette to contrast the warmth of the ramen, making for an enticing appetizer.

  • Fruity Ginger Lemonade: This zesty drink cuts through the heat, with ginger’s spiciness and lemon’s tang making each sip a refreshing counterpoint to the dish.

  • Matcha Green Tea: Earthy and slightly bitter, this traditional beverage beautifully balances the rich flavors, providing a calming finish to your dining experience.

These pairings will transform your Fiery Chicken Ramen into a full culinary adventure everyone will rave about!

Expert Tips for Fiery Chicken Ramen

  • Control Spice Level: Adjust cayenne and chili powder to suit your taste; for a milder dish, increase the cream or add cheese for warmth.
  • Fresh Noodles: Always opt for fresh ramen noodles over dried for a silkier texture and better mouthfeel in your Fiery Chicken Ramen.
  • Veggie Boost: Toss in some nutritious veggies like bok choy or spinach for added flavor and color. They complement the creamy sauce beautifully!
  • Perfect Sauce Consistency: If your sauce is too thick, add a splash of reserved noodle cooking water to achieve the desired creaminess without losing flavor.
  • Quick Storage: Store any leftovers in an airtight container and consume within 2 days to enjoy the best taste and texture!

Fiery Chicken Ramen Recipe FAQs

What type of chicken is best for Fiery Chicken Ramen?
Choosing between chicken breasts and thighs can elevate your dish! I recommend chicken thighs for a juicier, more flavorful experience. If you prefer a leaner option, chicken breasts will work well too—just ensure they’re sliced thin for even cooking.

How should I store leftover Fiery Chicken Ramen?
Absolutely! To store your ramen, place it in an airtight container in the fridge. It’s best consumed within 2 days for optimal freshness. When reheating, add a splash of water to help maintain creaminess and prevent it from drying out.

Can I freeze Fiery Chicken Ramen?
Yes, you can! But for best results, freeze only the creamy ramen mixture without the chicken, as this helps maintain texture. Transfer the mixture to an airtight container and freeze for up to 3 months. When ready to enjoy, thaw it overnight in the fridge, then reheat on low, stirring occasionally.

What if my sauce is too thick when reheating?
Don’t worry! If your sauce thickens too much upon reheating, simply add a splash of the reserved noodle cooking water or more cream to restore the luscious, creamy texture you love. Stir constantly and gradually until it reaches the consistency you desire.

Any dietary considerations for Fiery Chicken Ramen?
Very! If you have dietary restrictions, consider swapping heavy cream for alternatives like coconut milk for a dairy-free option. Always ensure that all spices and ingredients are suitable for your needs to create a delicious meal everyone can enjoy!

How do I select ripe ingredients for my Fiery Chicken Ramen?
Selecting fresh ingredients is key! Look for bright, vibrant vegetables and plump, juicy chicken without any dark spots or odd smells. Fresh garlic should be firm and without any discoloration, ensuring your creamy sauce has the best flavor boost possible.

Fiery Chicken Ramen

Fiery Chicken Ramen: Spicy Comfort in Every Slurp

Fiery Chicken Ramen combines spicy flavors with a creamy garlic sauce for a comforting and delicious meal.
Prep Time 15 minutes
Cook Time 20 minutes
Total Time 35 minutes
Servings: 4 bowls
Course: Dinner
Cuisine: Japanese
Calories: 620

Ingredients
  

For the Chicken
  • 1 pound Chicken Breast or Thighs Choose thighs for richer flavor.
For the Noodles
  • 8 ounces Ramen Noodles Fresh noodles preferred.
For the Sauce
  • 1 cup Heavy Cream Can substitute with coconut milk for dairy-free.
  • 3 cloves Garlic Freshly minced.
For the Heat
  • 1 teaspoon Cayenne Pepper Adjust according to spice tolerance.
  • 1 teaspoon Chili Powder Enhances heat.
For the Finish
  • 1 tablespoon Fresh Lime Juice Brightens the dish.

Equipment

  • Skillet
  • Pot
  • Fork
  • serving plate

Method
 

Cooking Steps
  1. Coat chicken with cayenne and chili powder, heat oil in skillet over medium-high heat, sauté chicken for 6-8 minutes until golden brown, then remove and let rest.
  2. Bring water to a boil in a separate pot, add ramen noodles and cook for 3-4 minutes until al dente, then drain and set aside, reserving some cooking water.
  3. In the same skillet, lower heat, add garlic and sauté for 1 minute, pour in heavy cream, stir in chicken juices, simmer for 3-4 minutes until thickened.
  4. Add cooked ramen to creamy sauce, toss gently, adjust thickness with reserved noodle water, and season to taste.
  5. Plate ramen, slice chicken, arrange on top, drizzle with lime juice, and serve.

Nutrition

Serving: 1bowlCalories: 620kcalCarbohydrates: 45gProtein: 34gFat: 30gSaturated Fat: 18gPolyunsaturated Fat: 2gMonounsaturated Fat: 8gCholesterol: 120mgSodium: 1500mgPotassium: 700mgFiber: 3gSugar: 2gVitamin A: 500IUVitamin C: 20mgCalcium: 120mgIron: 3mg

Notes

Feel free to add veggies like bok choy or bell peppers for extra nutrition.

Tried this recipe?

Let us know how it was!

Peachy Pizza with Goat Cheese and Balsamic Drizzle Bliss

The aroma of summer wafts through my kitchen as I slice into ripe, fragrant peaches for this Just Peachy Pizza with Goat Cheese, Basil, Gorgonzola, and Balsamic Drizzle. The marriage of sweet peaches and creamy goat cheese creates a delightful symphony of flavors, all elevated by a tangy balsamic drizzle that ties it together beautifully. Not only does this gourmet pizza make for a stunning centerpiece at any gathering, but it’s also incredibly easy to whip up, proving that you don’t need to fuss in the kitchen to impress your guests. Perfect for those who crave a refreshing yet satisfying dish that embraces seasonal produce, this pizza will surely become a favorite. Are you ready to take your summer gatherings to the next level?

Why is this pizza a must-try?

Uniqueness: This Just Peachy Pizza transforms summer’s sweet bounty into a gourmet delight that will wow your guests. Easy Preparation: With minimal effort and a few fresh ingredients, you can create a dish that looks and tastes like it’s from a high-end restaurant. Savory-Sweet Balance: The harmony of juicy peaches, creamy goat cheese, and tangy gorgonzola delivers a flavor explosion. Perfect for Gatherings: Whether at a picnic, barbecue, or dinner party, it’s a crowd-pleaser that sparks conversations and compliments. Seasonal Freshness: Embracing ripe peaches and fragrant basil means you’re highlighting the best summer has to offer. Elevate your next meal with this marvelous pizza and consider serving it alongside a refreshing shrimp avocado bowl with mango salsa for a delightful and colorful feast!

Peachy Pizza Ingredients

For the Pizza Base

  • Pizza Crust – Use store-bought or homemade for the best results; a whole grain option adds a nutty flavor.
  • Olive Oil – High-quality olive oil enhances flavor and helps achieve a crispy crust.
  • Garlic – Mince it finely to infuse rich aroma and taste throughout the pizza.
  • Kosher Salt – Sprinkle evenly across the crust to balance all the flavors.

For the Toppings

  • Goat Cheese – Creamy and tangy, it’s perfect for this Peachy Pizza with Goat Cheese, Basil, Gorgonzola, and Balsamic Drizzle.
  • Gorgonzola Cheese – Offers a sharp contrast to sweet peaches; can be substituted with blue cheese if desired.
  • Fresh Peaches – The star ingredient provides sweetness and juiciness; choose ripe and fragrant ones.
  • Fresh Basil – Adds a delightful herbaceous aroma; remember to slice it thinly before combining.
  • Aged Balsamic Vinegar – Use a high-quality option for depth of flavor, or make your own by reducing regular balsamic with honey for a sweet finish.

Step‑by‑Step Instructions for Peachy Pizza with Goat Cheese, Basil, Gorgonzola, and Balsamic Drizzle

Step 1: Preheat the Oven
Begin by preheating your oven to 425°F (220°C). This temperature is ideal for achieving a perfectly crisp crust for your Peachy Pizza with Goat Cheese, Basil, Gorgonzola, and Balsamic Drizzle. Make sure your oven is fully preheated before you slide the pizza in, ensuring that the crust cooks evenly and develops a golden color.

Step 2: Prepare the Peaches
Thinly slice your ripe peaches and place them in a bowl. Drizzle 1 tablespoon of aged balsamic vinegar over the slices, gently tossing them to coat. Set aside while you prepare the rest of the ingredients. This step not only enhances the peaches’ flavor but also allows them to soften and caramelize beautifully when baked.

Step 3: Broil the Peaches
Next, arrange the sliced peaches on a lined baking sheet in a single layer. Broil them in your preheated oven for about 8-10 minutes, or until they start to soften and caramelize. Keep an eye on them to prevent burning, as the natural sugars can quickly turn from golden to charred. Once done, remove them from the oven and let them cool slightly.

Step 4: Combine Ingredients
In a mixing bowl, thinly slice fresh basil and combine it with the cooled peaches. Drizzle the remaining balsamic vinegar over the mixture and toss gently, allowing the flavors to meld. This combination will create a delightful topping for your Peachy Pizza, ensuring that each bite bursts with fresh summer flavors.

Step 5: Prepare the Pizza Crust
Take your pizza crust and place it on a baking sheet or pizza stone. Drizzle a generous amount of high-quality olive oil over the crust and spread minced garlic evenly to infuse flavor. Sprinkle kosher salt across the surface to enhance all the ingredients and set the stage for a delicious base that’s ready for toppings.

Step 6: Layer the Cheeses
Now it’s time to build your Peachy Pizza. Start by evenly distributing the creamy goat cheese across the prepared crust. Follow this with the peach-basil mixture, making sure to cover the surface well. The goat cheese will melt deliciously while the peaches and basil add a burst of color and flavor—a perfect harmony of tastes.

Step 7: Add Gorgonzola
Crumble the gorgonzola cheese over the top of your pizza. This cheese brings a delightful tanginess that balances the sweetness of the peaches perfectly. You can adjust the amount based on your taste preference, ensuring that each slice of your Peachy Pizza with Goat Cheese, Basil, Gorgonzola, and Balsamic Drizzle has that inviting contrast.

Step 8: Bake the Pizza
Place your assembled pizza in the oven and bake for 15-20 minutes, or until the crust is golden brown and crispy. The cheeses should be nicely melted and bubbling. This is the moment you’ve been waiting for, as the aroma will fill your kitchen with mouthwatering delight.

Step 9: Cool and Slice
Once out of the oven, let your pizza set for about 5 minutes to allow the flavors to settle and the cheese to firm slightly. Then, slice into wedges. The combination of textures and flavors will not only look beautiful but also invite everyone to enjoy a slice of this amazing Peachy Pizza with Goat Cheese, Basil, Gorgonzola, and Balsamic Drizzle.

How to Store and Freeze Just Peachy Pizza

Fridge: Store any leftover Peachy Pizza with Goat Cheese, Basil, Gorgonzola, and Balsamic Drizzle in an airtight container for up to 3 days to maintain freshness.

Freezer: While best enjoyed fresh, you can freeze slices wrapped tightly in plastic wrap for up to 2 months. Thaw in the fridge overnight before reheating.

Reheating: For best results, reheat in a preheated oven at 350°F (175°C) for 10-15 minutes to restore crispiness. Avoid microwaving, as it can result in a soggy crust.

Enjoy Fresh: This pizza is truly a delight when served fresh, so try to consume it the same day it’s made for the best flavor experience!

Peachy Pizza with Goat Cheese Variations

Customize your pizza experience by exploring these delightful variations, perfect for spring and summer gatherings.

  • Gluten-Free: Use a gluten-free pizza crust for those with dietary restrictions, ensuring everyone can enjoy this summer treat.

  • Herb Swaps: Add fresh thyme or oregano alongside basil for a fragrant twist that enhances the pizza’s summery aroma. Each herb brings its unique profile to the table!

  • Fruit Twist: Substitute fresh figs for peaches in fall or winter to create a gourmet pizza that celebrates the changing seasons. They’re equally sweet and delicious!

  • Cheese Variety: Swap gorgonzola for feta or creamy ricotta for a lighter taste that still satisfies cheese lovers. Both options give the pizza a new flavor direction.

  • Nutty Crunch: Add toasted walnuts or pine nuts on top for a delightful crunch, providing an unexpected texture that complements the softness of the cheeses and peaches.

  • Spicy Kick: Drizzle with chili oil or sprinkle crushed red pepper flakes before baking to introduce a warming heat, contrasting beautifully with the sweet peaches.

  • Balsamic Reduction: Enhance the flavor by creating a balsamic reduction; simmer balsamic vinegar until thickened for a sweeter, more intense drizzle.

Enhance your meal with a refreshing side like Chicken Soup Warms or pair it with a shrimp avocado bowl with mango salsa to create a summer feast!

What to Serve with Just Peachy Pizza with Goat Cheese, Basil, Gorgonzola, and Balsamic Drizzle

Enhance your summer meal with vibrant, complementary dishes that make the flavors of this pizza shine.

  • Mixed Green Salad: A refreshing salad with crisp lettuce, cherry tomatoes, and a light vinaigrette provides a tangy contrast to the pizza’s sweetness.

  • Grilled Vegetable Platter: Charred zucchini, bell peppers, and asparagus add a smoky flavor that complements the peachy pizza, while their textures provide delightful crunch.

  • Quinoa Tabbouleh: The nutty quinoa and fresh herbs in this salad provide a light yet hearty side that pairs beautifully with the creamy cheeses.

  • Extra Virgin Olive Oil Dip: Serve warm, crusty bread with a dip of high-quality olive oil, spiced with herbs, for a delightful, savory starter that sets the stage for your pizza.

  • Rosé Wine: A chilled glass of rosé harmonizes with the sweet peach flavors while adding an elegant touch suitable for summer gatherings.

  • Lemon Sorbet: Finish your meal with a refreshing scoop of lemon sorbet, cleansing the palate while echoing the bright flavors of the pizza.

  • Homemade Lemonade: A citrusy, thirst-quenching drink that enhances the summer vibes balances the richness of the pizza perfectly.

  • Grilled Shrimp Skewers: Juicy, slightly smoky shrimp add a savory protein option alongside your Peachy Pizza, enhancing both texture and flavor.

  • Balsamic Roasted Brussels Sprouts: Their rich, roasted notes and tangy balsamic glaze create an exquisite harmony with the pizza’s ingredients.

  • Cheese Platter: Offer a selection of mild cheeses to complement the gorgonzola, creating a delightful grazing experience before diving into the vibrant pizza.

Make Ahead Options

These Peachy Pizza with Goat Cheese, Basil, Gorgonzola, and Balsamic Drizzle are perfect for busy home cooks looking to save time during the week! You can prep the peach-basil mixture and cheese toppings up to 24 hours in advance; simply slice the peaches and drizzle them with balsamic vinegar to prevent browning before refrigerating. Additionally, you can pre-bake the pizza crust for a few minutes, allowing it to cool completely before storing in an airtight container for up to 3 days. When ready to serve, layer the ingredients on the crust and bake as instructed for a delicious meal that feels fresh and effortless!

Expert Tips for Peachy Pizza

  • Quality Ingredients: Always use fresh, high-quality ingredients, especially the peaches and cheeses. This will elevate your Peachy Pizza with Goat Cheese, Basil, Gorgonzola, and Balsamic Drizzle significantly.

  • Crust Matters: If making your own pizza crust, allow it to rest adequately to achieve the perfect texture. A rested dough is easier to stretch and creates a better crumb.

  • Don’t Skip the Broil: Broiling the peaches intensifies their sweetness and enhances their flavor. Make sure to watch them closely to prevent burning.

  • Balancing Flavors: Adjust the amount of gorgonzola cheese to your taste preference. Too much can overshadow the delicate sweetness of the peaches, so balance is key.

  • Serve Fresh: This pizza is best enjoyed right out of the oven. Reheating may lead to a soggy crust. If you have leftovers, store them covered and consume within a day for optimal taste.

Just Peachy Pizza with Goat Cheese, Basil, Gorgonzola, and Balsamic Drizzle Recipe FAQs

How do I choose the right peaches for this pizza?
Absolutely! Selecting the right peaches is crucial for achieving that sweet and juicy flavor. Look for peaches that are slightly soft to the touch with a sweet fragrance. Avoid any peaches that have dark spots all over or feel hard as they may be under ripe; perfect peaches should feel firm yet yield slightly when pressed.

How should I store leftovers of my Peachy Pizza?
To maintain freshness, store any leftover Peachy Pizza with Goat Cheese, Basil, Gorgonzola, and Balsamic Drizzle in an airtight container in the fridge for up to 3 days. This will help keep the crust from getting too soggy while preserving the delightful flavors.

Can I freeze slices of this pizza?
Certainly! You can freeze slices of this gourmet pizza. Wrap each slice tightly in plastic wrap, then place them in a freezer bag or container to prevent freezer burn. It can be frozen for up to 2 months. To thaw, simply move the desired amount to the fridge overnight, and then reheat in a preheated oven at 350°F (175°C) for about 10-15 minutes to ensure the crust regains its crispiness.

What should I do if my crust is soggy after baking?
If you’re finding your crust isn’t as crispy as you’d like, try pre-baking the crust before adding your toppings. Assemble your pizza with just the olive oil, garlic, and a thin layer of cheese and bake for about 5-7 minutes. Then remove it, add the rest of your toppings, and return it to the oven for the full baking time; this method helps achieve that desired crispiness!

Is this recipe suitable for people with nut allergies?
Yes, indeed! This Peachy Pizza with Goat Cheese, Basil, Gorgonzola, and Balsamic Drizzle is inherently nut-free as it features fruits and cheeses. However, always check the packaging of store-bought crusts to confirm they are made in a nut-free environment, particularly if you’re using a gluten-free option as cross-contamination can occur.

Peachy Pizza with Goat Cheese, Basil, Gorgonzola, and Balsamic Drizzle

Peachy Pizza with Goat Cheese and Balsamic Drizzle Bliss

This Peachy Pizza with Goat Cheese, Basil, Gorgonzola, and Balsamic Drizzle is a summer delight that wows with its sweet and savory combination.
Prep Time 25 minutes
Cook Time 20 minutes
Cooling Time 5 minutes
Total Time 50 minutes
Servings: 4 slices
Course: Dinner
Cuisine: Italian
Calories: 330

Ingredients
  

For the Pizza Base
  • 1 piece Pizza Crust Store-bought or homemade
  • 2 tablespoons Olive Oil High-quality
  • 2 cloves Garlic Minced
  • 1 teaspoon Kosher Salt
For the Toppings
  • 4 ounces Goat Cheese Creamy and tangy
  • 4 ounces Gorgonzola Cheese Can substitute with blue cheese
  • 2 cups Fresh Peaches Ripe and fragrant, sliced
  • 1 cup Fresh Basil Thinly sliced
  • 2 tablespoons Aged Balsamic Vinegar High-quality

Equipment

  • Oven
  • Baking Sheet
  • Mixing Bowl

Method
 

Step‑by‑Step Instructions
  1. Preheat your oven to 425°F (220°C).
  2. Thinly slice peaches, drizzle with balsamic vinegar, and set aside.
  3. Arrange peach slices on a baking sheet and broil for about 8-10 minutes.
  4. Combine cooled peaches with basil and drizzle remaining balsamic vinegar.
  5. Prepare pizza crust with olive oil, garlic, and kosher salt.
  6. Layer goat cheese, peach-basil mixture, and gorgonzola on the crust.
  7. Bake pizza for 15-20 minutes until crust is golden and crispy.
  8. Let the pizza cool for 5 minutes before slicing into wedges.

Nutrition

Serving: 1sliceCalories: 330kcalCarbohydrates: 36gProtein: 10gFat: 15gSaturated Fat: 8gPolyunsaturated Fat: 1gMonounsaturated Fat: 6gCholesterol: 30mgSodium: 400mgPotassium: 250mgFiber: 2gSugar: 5gVitamin A: 500IUVitamin C: 6mgCalcium: 200mgIron: 1mg

Notes

Use high-quality ingredients for the best flavor and enjoy the pizza fresh from the oven.

Tried this recipe?

Let us know how it was!

Gochujang Brussels Sprouts: Spicy, Sweet, and Irresistible Delight

The aroma hits me first—sweet, spicy, and downright irresistible. These Spicy Gochujang Brussels Sprouts have become a staple in my kitchen, and I can’t get enough of their vibrant flavor. This recipe offers a delightful twist, transforming the often-maligned Brussels sprout into a sensational side dish that even the pickiest eaters will happily devour. Quick to whip up and filled with umami goodness, it pairs perfectly with everything from grilled chicken to a hearty bowl of rice. Plus, the simplicity of preparation means you can savor a gourmet experience without hours in the kitchen. So, are you ready to give this uniquely tasty dish a try? Let’s dive in!

Why are Gochujang Brussels Sprouts a Must-Try?

Irresistible Flavor: Imagine crispy, caramelized Brussels sprouts coated in a sweet and spicy gochujang glaze—that’s what you get with this dish!

Quick and Easy: With minimal prep time, this recipe comes together in a flash, allowing you to enjoy an impressive side without the fuss.

Unique Twist: Elevate traditional roasted veggies to culinary stardom with the bold, umami-rich essence of gochujang, transforming the mundane into something extraordinary.

Crowd-Pleasing Satisfaction: Perfect for dinner parties or family meals, these Brussels sprouts will win over even the most skeptical eaters.

Versatile Pairing: Serve them with grilled chicken, tofu, or a bowl of rice, making them a delightful addition to any main dish! Simply put, they’re a must-try for any home cook looking to spice things up in the kitchen.

Gochujang Brussels Sprouts Ingredients

• Here’s everything you need to prepare these delicious Gochujang Brussels Sprouts:

For the Sprouts

  • Brussels Sprouts – Fresh and firm sprouts create that perfect nutty flavor and texture.
  • Olive Oil – Richness helps roast the sprouts evenly; you can also use avocado oil for a higher smoke point.
  • Salt – Essential for enhancing flavor; adjust according to your preference.
  • Black Pepper – Freshly ground adds subtle heat and depth, amplifying the overall taste.

For the Sauce

  • Gochujang Paste – This key ingredient delivers the spicy, sweet, and umami flavor that makes these sprouts irresistible; you can substitute with sriracha for a different, yet delightful heat profile.
  • Soy Sauce – Provides additional umami; opt for tamari for a gluten-free option.
  • Maple Syrup – Sweetness balances the spice; honey or agave syrup also make great alternatives.
  • Lime Juice – Brightens the dish with a fresh tang; lemon juice can substitute if lime is not available.

Now that you have all the ingredients, let’s turn these Gochujang Brussels Sprouts into a show-stopping side dish!

Step‑by‑Step Instructions for Gochujang Brussels Sprouts

Step 1: Preheat the Oven
Begin by preheating your oven to 400°F (200°C). This high temperature will ensure that your Gochujang Brussels Sprouts roast to perfection, achieving that lovely crispy exterior as they caramelize. Preparing the oven ahead of time also helps to give the sprouts that delicious roasted flavor, making your kitchen feel cozy and inviting.

Step 2: Prepare the Brussels Sprouts
While the oven heats, take your fresh Brussels sprouts and trim the stems, removing any yellowed leaves. Cut each sprout in half vertically, keeping them connected at the base. This method allows them to hold their shape while roasting. Place the halved Brussels sprouts in a large mixing bowl, and drizzle with olive oil. Season with salt and black pepper, tossing to coat evenly.

Step 3: Roast the Brussels Sprouts
Spread the seasoned Brussels sprouts out on a baking sheet lined with parchment paper for easy cleanup. Make sure they are arranged in a single layer without overcrowding to promote even roasting. Place the baking sheet in the preheated oven and roast the sprouts for about 20 minutes, or until they are golden brown and crisp on the edges. Keep an eye on them as they cook to ensure they don’t burn.

Step 4: Mix the Gochujang Sauce
While the Brussels sprouts are roasting, prepare your flavorful sauce. In a medium-sized bowl, whisk together the gochujang paste, soy sauce, maple syrup, and freshly squeezed lime juice. The combination of these ingredients will create a sweet and spicy glaze that perfectly complements the roasted sprouts. Taste the sauce and adjust the sweetness or heat according to your preferences for your Gochujang Brussels Sprouts.

Step 5: Coat and Return to Oven
After 20 minutes, remove the baking sheet from the oven, and carefully drizzle the gochujang sauce over the roasted Brussels sprouts. Use a spatula to toss the sprouts gently, ensuring each piece is thoroughly coated with the glossy sauce. Once well coated, return the baking sheet to the oven and continue roasting for an additional 10 to 12 minutes, allowing the glaze to caramelize slightly on the Brussels sprouts.

Step 6: Final Touches and Serve
Once the Brussels sprouts are nicely caramelized and tender, remove them from the oven. They should glisten with a beautiful glaze and have a crispy texture. Let them cool for a moment, then transfer to a serving dish, optionally garnishing with sesame seeds for added crunch and flavor. Serve your Gochujang Brussels Sprouts warm, and watch as everyone enjoys this delicious and vibrant side dish!

What to Serve with Gochujang Brussels Sprouts

The perfect meal is just a few delicious pairings away, elevating your cooking experience to the next level.

  • Steamed Jasmine Rice: A fluffy side that balances the heat, soaking up the umami-rich sauce beautifully.

  • Sesame Crusted Tofu: Crispy tofu adds a lovely texture, marrying well with the sweet and spicy notes of the Brussels sprouts.

  • Grilled Chicken Thighs: Juicy and flavorful, the savory richness of chicken complements the bright zing of the gochujang.

  • Cucumber Salad: Light and refreshing, this salad provides a cool contrast to the fiery flavor of the Brussels sprouts.

  • Sweet Potato Mash: Creamy and subtly sweet, the mashed potatoes create a comforting element alongside the spicy kick.

  • Korean Fried Rice: Elevate your meal with stir-fried rice featuring vegetables and an extra dose of gochujang for harmonious flavors.

  • Sautéed Bok Choy: This lightly cooked green adds a crunch and freshness that livens up the plate, enhancing all the delicious elements.

  • Kimchi: A side of tangy, fermented vegetables brings added depth and a traditional Korean flair to your meal.

  • Chilled Sake or Beer: A chilled drink can balance the spiciness of the dish, making for a delightful dining experience.

Expert Tips for Gochujang Brussels Sprouts

  • Even Coating: Ensure each sprout is well-coated with the sauce for consistent flavor; you’ll want every bite bursting with that spicy goodness.

  • Space on Sheet: Avoid overcrowding your baking sheet; this allows the sprouts to roast evenly and achieve that coveted crispy texture.

  • Adjust for Size: If you have larger sprouts, be mindful to adjust the roasting time accordingly; larger pieces may need a bit more love in the oven.

  • Flavor Boost: For an added kick, consider mixing in chopped garlic or grated ginger with the sauce for an even richer umami experience in your Gochujang Brussels Sprouts.

  • Watch the Time: Keep an eye on the roasting process; every oven is different, and a minute can make all the difference between perfect and burnt!

Make Ahead Options

These Gochujang Brussels Sprouts are perfect for meal prep enthusiasts! You can wash and trim the Brussels sprouts up to 24 hours in advance, storing them in an airtight container in the refrigerator to keep them fresh. Additionally, you can prepare the spicy gochujang sauce and refrigerate it separately for up to 3 days; just give it a good stir before using. When you’re ready to enjoy, simply toss the prepped sprouts in olive oil, season them, roast for 20 minutes, then coat them with the sauce and roast for an additional 10-12 minutes. This way, you’ll savor the same delicious and vibrant flavors with minimal effort on busy nights!

Gochujang Brussels Sprouts: Customization Ideas

Feel free to get creative with your Gochujang Brussels Sprouts—there are so many ways to make this dish your own!

  • Sweet Twist: Replace maple syrup with brown sugar for a deeper caramelized flavor on the sprouts.
    A hint of molasses adds a beautiful richness that pairs wonderfully with the gochujang glaze.

  • Extra Crunch: Add chopped nuts like almonds or cashews for a delightful crunch and nutty flavor.
    The added texture elevates the dish, making it even more satisfying with every bite.

  • Protein Boost: Toss in shredded chicken or crispy tofu during the final roasting stage for a complete meal.
    This hearty addition makes your Gochujang Brussels Sprouts a fulfilling dish that stands alone!

  • Herb Appeal: Fresh herbs like cilantro or green onions sprinkled on top right before serving brighten everything up.
    Their vibrant flavors harmonize beautifully with the sweet and spicy elements of the dish.

  • Zesty Flavor: Squeeze in some extra lime juice or add lime zest to enhance that tangy brightness and freshen up the palate.
    A little citrus can really take your flavor profile to new heights!

  • Spicy Alternative: If you prefer a milder kick, substitute gochujang with a mild chili paste or even sweet chili sauce.
    This swap gives you that sweet-spicy balance without overwhelming heat, appealing to a wider range of palates.

  • Garlic Infusion: Mix in minced garlic or ginger with your sauce for an aromatic touch that enhances the umami richness.
    These additions amplify the depth of flavor, making every bite even more scrumptious.

  • Asian-Style Fusion: For a twist, serve your Gochujang Brussels Sprouts over a bed of japchae (Korean sweet potato noodles).
    This fusion adds a comforting and hearty element to your dish, making it truly unique and delightful!

Whichever variations you choose, these suggestions will help you craft a dish that’s not just good, but truly unforgettable!

Storage Tips for Gochujang Brussels Sprouts

Fridge: Store any leftover Gochujang Brussels Sprouts in an airtight container in the refrigerator for up to 3 days to maintain freshness and flavor.

Freezer: If you wish to store your Brussels sprouts longer, freeze them in a single layer on a baking sheet before transferring to a freezer-safe bag or container for up to 2 months.

Reheating: For the best texture, reheat in the oven at 350°F (175°C) for about 10-15 minutes, ensuring they regain some of their crispiness. Avoid the microwave as it can make them soggy.

Serving: Enjoy these spicy delights warm; they pair well with various dishes, making them an ideal addition to your meals throughout the week!

Gochujang Brussels Sprouts Recipe FAQs

What should I look for when selecting Brussels sprouts?
When selecting Brussels sprouts, aim for fresh, firm sprouts without any yellow leaves or dark spots all over. The ideal sprouts are tightly packed and bright green, indicating they’re at their peak freshness. If you’re unsure, pick the ones that feel heavy for their size; they should feel solid when held.

How should I store leftover Gochujang Brussels Sprouts?
Absolutely! Store any leftover Gochujang Brussels Sprouts in an airtight container in the refrigerator for up to 3 days. Ensure they are completely cool before sealing. To maintain their crispiness when reheating, place them in the oven at 350°F (175°C) for about 10-15 minutes instead of using a microwave, which can make them soggy.

Can I freeze Gochujang Brussels Sprouts?
Yes, you can! To freeze Gochujang Brussels Sprouts, first cool them completely. Spread them out in a single layer on a baking sheet and place them in the freezer until firm (about 1-2 hours). Once frozen, transfer them to a freezer-safe bag or container, and they can be stored for up to 2 months. When ready to enjoy, simply reheat in the oven from frozen until warmed through and crispy.

What if my Brussels sprouts are too bitter?
If you find your Brussels sprouts too bitter, this may happen if they were overcooked or are old. To counteract bitterness, try trimming away any yellow leaves and cutting larger sprouts into quarters for more even cooking. Also, increasing the sweetness in your glaze with more maple syrup or honey can help balance that bitter flavor. Adding a touch of lemon juice or vinegar can also brighten the dish and cut through the bitterness.

Are there any dietary considerations for Gochujang Brussels Sprouts?
Yes! While this recipe is vegetarian and can be made gluten-free with tamari in place of soy sauce, be sure to check for allergies to ingredients like soy or sesame, especially if you’re garnishing with sesame seeds. Additionally, for those with spicy food sensitivities, adjust the amount of gochujang to suit your taste by substituting with less spicy options like sweet chili sauce.

Gochujang Brussels Sprouts

Gochujang Brussels Sprouts: Spicy, Sweet, and Irresistible Delight

These Gochujang Brussels Sprouts are a spicy, sweet, and irresistible side dish that even picky eaters will love.
Prep Time 10 minutes
Cook Time 32 minutes
Total Time 42 minutes
Servings: 4 servings
Course: Side Dish
Cuisine: Korean
Calories: 150

Ingredients
  

For the Sprouts
  • 1 pound Brussels Sprouts Fresh and firm, trimmed and halved
  • 2 tablespoons Olive Oil Or avocado oil for a higher smoke point
  • 1 teaspoon Salt Adjust according to preference
  • 1/2 teaspoon Black Pepper Freshly ground
For the Sauce
  • 3 tablespoons Gochujang Paste Can substitute with sriracha
  • 2 tablespoons Soy Sauce Opt for tamari for gluten-free option
  • 1 tablespoon Maple Syrup Can also use honey or agave syrup
  • 1 tablespoon Lime Juice Freshly squeezed; lemon juice can be substituted

Equipment

  • Oven
  • Baking Sheet
  • Mixing Bowl
  • spatula

Method
 

Step-by-Step Instructions
  1. Preheat the oven to 400°F (200°C).
  2. Trim the Brussels sprouts and cut them in half vertically. Toss with olive oil, salt, and black pepper in a bowl.
  3. Arrange the Brussels sprouts on a baking sheet and roast for about 20 minutes until golden brown.
  4. While roasting, mix together the gochujang, soy sauce, maple syrup, and lime juice in a bowl.
  5. After 20 minutes, drizzle the sauce over the sprouts and toss to coat. Roast for an additional 10 to 12 minutes.
  6. Once caramelized, transfer to a serving dish and garnish with sesame seeds if desired.

Nutrition

Serving: 1servingCalories: 150kcalCarbohydrates: 12gProtein: 4gFat: 10gSaturated Fat: 1gPolyunsaturated Fat: 2gMonounsaturated Fat: 7gSodium: 300mgPotassium: 450mgFiber: 5gSugar: 5gVitamin A: 500IUVitamin C: 120mgCalcium: 50mgIron: 2mg

Notes

For an added kick, mix in garlic or ginger with the sauce. Store leftovers in an airtight container in the fridge for up to 3 days.

Tried this recipe?

Let us know how it was!

Creamy Spaghetti & Spinach with Sun-Dried Tomato Magic

As the aromatic scent of garlic fills the kitchen, I find myself transported to a cozy Italian trattoria, where each dish tells a story. Today, we’re diving into a delightful recipe for Spaghetti & Spinach with Sun-Dried Tomato Cream Sauce. This comforting vegetarian dish not only tantalizes your taste buds with a creamy sauce, but it also delivers a healthy dose of greens, making it a favorite amongst family and friends. The best part? It comes together in just under 30 minutes, perfect for those busy weeknights when you crave something extraordinary without the fuss. Imagine gathering around the table, sharing laughter and love, with bowls of this vibrant pasta as your centerpiece. Curious about how to whip it up and impress your loved ones? Let’s get started!

Why Is This Pasta Recipe a Must-Try?

Comforting Flavors: A delightful blend of creamy, earthy, and tangy notes, this dish is the epitome of comfort food.

Nutritious Spinach: It’s packed with fresh spinach, giving you a satisfying meal that’s as healthy as it is delicious.

Quick & Easy: Ready in under 30 minutes, it’s perfect for busy evenings when you need a gourmet touch without the hassle.

Crowd-Pleaser: Whether for family dinners or special occasions, this spaghetti dish impresses everyone at the table. Pair it with some crunchy garlic bread or a fresh salad for a complete meal!

Versatile Adjustments: Feel free to incorporate proteins like grilled chicken or shrimp, or even substitute gluten-free pasta to cater to dietary needs.

With such a winning combination, you’ll be craving more! Don’t miss out on trying other delicious recipes like Cheesy Spinach Artichoke or Baked Salmon with Honey Mustard Sauce for varied mealtime delights.

Spaghetti & Spinach with Sun-Dried Tomato Cream Sauce Ingredients

For the Pasta
Spaghetti – The main carbohydrate base; opt for whole wheat for added fiber.

For the Cream Sauce
Heavy Cream – Creates that rich, velvety sauce; substitute with half-and-half for a lighter option.
Garlic – Enhances flavor; use minced or roasted for a milder taste.
Parmesan Cheese – Adds umami flavor and richness; swap with nutritional yeast for a vegan alternative.
Olive Oil – Essential for sautéing garlic and adding richness; can replace with butter for a different flavor profile.

For the Veggies
Fresh Spinach – Adds nutrition and vibrant color; substitute with kale for a heartier green.
Sun-Dried Tomatoes – Provides tang and depth; can swap with fresh tomatoes but reduce moisture for guide.

With these all-star ingredients in hand, you’ll be well on your way to crafting an unforgettable Spaghetti & Spinach with Sun-Dried Tomato Cream Sauce!

Step‑by‑Step Instructions for Spaghetti & Spinach with Sun-Dried Tomato Cream Sauce

Step 1: Cook Pasta
Begin by bringing a large pot of salted water to a rolling boil. Add the spaghetti and cook according to the package instructions until al dente, typically about 8-10 minutes. Stir occasionally to prevent sticking. Once cooked, drain the pasta in a colander, reserving a cup of pasta water for later, and set aside.

Step 2: Sauté Garlic
In a large skillet, heat 2 tablespoons of olive oil over medium heat, allowing it to shimmer slightly. Add minced garlic and sauté for about 1 minute, stirring constantly until the garlic is fragrant and golden—be careful not to burn it! This aroma sets the stage for the delicious creamy sauce that will follow.

Step 3: Add Spinach and Tomatoes
Next, introduce the fresh spinach and chopped sun-dried tomatoes to the skillet. Stir everything together for about 3-4 minutes until the spinach wilts down and the tomatoes soften, creating a vibrant mixture. The colors will pop, signaling it’s time to move on to the next step.

Step 4: Make Sauce
Pour in 1 cup of heavy cream, increasing the heat slightly to bring the mixture to a gentle simmer. Stir in ½ cup of Parmesan cheese, allowing it to melt into the cream and thicken the sauce. After about 3-5 minutes, the sauce should be silky and just thickened enough to cling to the spinach and tomatoes beautifully.

Step 5: Combine with Pasta
Add the drained spaghetti to the skillet, tossing it gently with the creamy sauce until every strand is well coated. If the sauce seems too thick, gradually incorporate some reserved pasta water until your desired consistency is reached. Taste and adjust seasoning with salt and freshly cracked pepper.

Step 6: Serve and Garnish
Serve your comforting Spaghetti & Spinach with Sun-Dried Tomato Cream Sauce immediately, plating it into warm bowls. For a touch of extra flavor, sprinkle more Parmesan cheese on top and perhaps a drizzle of olive oil. This dish is best enjoyed fresh while the sauce is creamy and enticing.

Spaghetti & Spinach with Sun-Dried Tomato Cream Sauce Variations

Inviting you to explore delightful twists and substitutions to make this dish your own and enhance your dining experience.

  • Gluten-Free Pasta: Use gluten-free spaghetti to cater to dietary needs without sacrificing flavor or texture.
  • Vegan Delight: Swap heavy cream with cashew cream and Parmesan with nutritional yeast for a creamy, dairy-free version.
  • Kick it Up: Add red pepper flakes or a dash of crushed chili for a subtle heat that beautifully complements the creamy sauce.
  • Sautéed Mushrooms: Incorporate sautéed mushrooms for an earthy depth that pairs wonderfully with the sun-dried tomatoes.
  • Zucchini Noodles: Replace spaghetti with spiralized zucchini for a fresh, low-carb alternative without losing the delicious essence of the sauce.
  • Herbed Addition: Stir in fresh basil or thyme to elevate the flavor profile with aromatic notes that enhance every bite.
  • Protein Boost: Add grilled chicken or shrimp for a satisfying protein addition that transforms this vegetarian dish into a heartier meal.
  • Creamy Dream: Mix in a dollop of cream cheese for an ultra-rich sauce that elevates the comfort factor to new heights.

Whether you’re looking for seasonal variations or quick substitutions, get inspired and have fun with your cooking! And for more delectable fare, try out my famous Honeybun Carrot Cake or treat yourself to Chocolate Granola Cups with Peanut Butter Filling.

Expert Tips for Spaghetti & Spinach

  • Quality Ingredients: Choose high-quality sun-dried tomatoes for a richer flavor in your sauce; your Spaghetti & Spinach with Sun-Dried Tomato Cream Sauce deserves it!

  • Reserve Pasta Water: Always save a cup of pasta cooking water. It’s perfect for adjusting the sauce consistency after mixing it with spaghetti.

  • Perfect Creaminess: Adjust the amount of heavy cream based on your preference—use more for a richer sauce and less if you prefer it lighter.

  • Don’t Rush the Garlic: Sauté the garlic until fragrant but avoid browning it; burnt garlic can impart a bitter taste that may overwhelm your dish.

  • Finish with Freshness: Garnish with extra Parmesan or fresh herbs like basil or parsley to elevate the dish and add brightness before serving.

What to Serve with Creamy Spaghetti & Spinach with Sun-Dried Tomato Sauce

A full meal is just a few delicious pairings away from elevating your spaghetti experience to new heights.

  • Garlic Bread: This crispy, buttery classic perfectly balances the creamy pasta, adding an irresistible crunch and enhancing the overall dining experience.

  • Mixed Green Salad: A light, refreshing salad with citrus dressing cuts through the richness while adding a vibrant, fresh component to your meal.

  • Roasted Vegetables: Seasonal veggies drizzled with olive oil and herbs not only complement the dish but add a delightful depth of flavor and texture.

  • Parmesan-Infused Risotto: This creamy, cheesy side keeps the theme of comfort alive, offering an extra dose of indulgence that pairs beautifully with the pasta.

  • Pesto Caprese Skewers: The fresh basil and tangy mozzarella skewers bring a burst of brightness, harmonizing with the flavors of sun-dried tomatoes and spinach.

  • Lemonade or Iced Tea: A refreshing beverage with a hint of citrus helps cleanse the palate, enhancing each sumptuous bite of your spaghetti dish.

Delight in the interplay of flavors; each pairing brings something unforgettable to your table.

Make Ahead Options

These Creamy Spaghetti & Spinach with Sun-Dried Tomato Sauce are perfect for meal prep enthusiasts! You can cook the spaghetti and prepare the creamy sauce up to 24 hours in advance. Simply sauté the garlic, spinach, and sun-dried tomatoes, then combine them with the cream and Parmesan. Allow the mixture to cool before storing it in an airtight container in the refrigerator. When you’re ready to enjoy this dish, just reheat the sauce gently on the stove while adding the cooked spaghetti and a splash of cream to maintain that luscious texture. This way, you’ll have a comforting meal ready in no time—just as delicious as when freshly made!

How to Store and Freeze Spaghetti & Spinach with Sun-Dried Tomato Cream Sauce

Fridge: Store leftovers in an airtight container for up to 3 days. Ensure the dish has cooled before sealing to maintain freshness and prevent condensation.

Freezer: For longer storage, freeze in a freezer-safe container for up to 2 months. Consider portioning it out for easy reheating later.

Reheating: When you’re ready to enjoy again, thaw overnight in the fridge and reheat gently on the stovetop, adding a splash of cream to restore the sauce’s creamy texture.

Room Temperature: Avoid leaving out at room temperature for more than 2 hours to ensure food safety.

Spaghetti & Spinach with Sun-Dried Tomato Cream Sauce Recipe FAQs

What type of spaghetti should I use?
Absolutely! You can opt for regular refined spaghetti or whole wheat for a boost in fiber. Whole wheat not only adds nutrition but also gives a nutty flavor that complements the creamy sauce beautifully.

How long can I store leftovers?
Leftovers can be safely stored in an airtight container in the refrigerator for up to 3 days. Be sure to let it cool down before sealing to preserve its fresh flavors. Reheating gently on the stove with a little splash of cream helps revive the delicious texture!

Can I freeze this pasta dish?
Very much so! To freeze your Spaghetti & Spinach with Sun-Dried Tomato Cream Sauce, let it cool down then portion it into freezer-safe containers. Make sure to label and date them! It will last up to 2 months in the freezer. When you’re ready to enjoy it, just thaw it overnight in the fridge and reheat on the stove, adding a splash of cream as you go to bring back its creamy goodness.

What should I do if the sauce is too thick?
No worries at all! If your sauce turns out thicker than you’d like, simply stir in a little of the reserved pasta cooking water. Start with a tablespoon and mix it in gradually until you achieve your preferred consistency. This simple step restores the silky texture of the sauce, making it perfect for coating the pasta.

Are there any dietary considerations for this recipe?
Yes, absolutely! If you’re catering to specific dietary needs, consider substituting heavy cream with coconut milk or using a dairy-free cream for those who are vegan or lactose intolerant. For a nut-free option, make sure to choose dairy-free cheese alternatives. Always check for allergens in sun-dried tomatoes as some brands may include preservatives.

How can I tell if my spinach is fresh?
When choosing fresh spinach, look for bright, vibrant leaves without any dark spots or wilting. If the leaves feel crisp and are free of moisture, they are fresh! If you see spots all over or the leaves feel slimy, it’s best to avoid them and select a healthier batch.

Spaghetti & Spinach with Sun-Dried Tomato Cream Sauce

Creamy Spaghetti & Spinach with Sun-Dried Tomato Magic

A delightful vegetarian recipe for Spaghetti & Spinach with Sun-Dried Tomato Cream Sauce, ready in under 30 minutes.
Prep Time 10 minutes
Cook Time 20 minutes
Total Time 30 minutes
Servings: 4 servings
Course: Pasta
Cuisine: Italian
Calories: 550

Ingredients
  

For the Pasta
  • 8 oz Spaghetti Use whole wheat for added fiber.
For the Cream Sauce
  • 1 cup Heavy Cream Substitute with half-and-half for a lighter option.
  • 2 cloves Garlic Use minced or roasted for a milder taste.
  • 0.5 cup Parmesan Cheese Swap with nutritional yeast for a vegan alternative.
  • 2 tablespoons Olive Oil Can replace with butter for a different flavor.
For the Veggies
  • 5 cups Fresh Spinach Substitute with kale for a heartier green.
  • 0.5 cup Sun-Dried Tomatoes Can swap with fresh tomatoes but reduce moisture.

Equipment

  • Large pot
  • Colander
  • Large skillet

Method
 

Step-by-Step Instructions
  1. Bring a large pot of salted water to a rolling boil. Add the spaghetti and cook until al dente, about 8-10 minutes. Drain, reserving a cup of pasta water.
  2. In a large skillet, heat 2 tablespoons of olive oil over medium heat. Add minced garlic and sauté for about 1 minute.
  3. Add fresh spinach and sun-dried tomatoes to the skillet; stir for about 3-4 minutes until the spinach wilts.
  4. Pour in 1 cup of heavy cream and bring to a gentle simmer. Stir in ½ cup of Parmesan cheese and allow it to melt.
  5. Add the drained spaghetti and toss gently with the sauce. Add some reserved pasta water to adjust the consistency as needed.
  6. Serve immediately, garnished with extra Parmesan cheese and a drizzle of olive oil.

Nutrition

Serving: 1servingCalories: 550kcalCarbohydrates: 52gProtein: 15gFat: 34gSaturated Fat: 19gPolyunsaturated Fat: 1gMonounsaturated Fat: 12gCholesterol: 80mgSodium: 400mgPotassium: 600mgFiber: 3gSugar: 3gVitamin A: 2500IUVitamin C: 15mgCalcium: 250mgIron: 3mg

Notes

Store leftovers in an airtight container for up to 3 days, or freeze for up to 2 months. Reheat gently with a splash of cream to restore texture.

Tried this recipe?

Let us know how it was!

Mexican Deviled Eggs Recipe: Creamy, Spicy Delight in 30 Min

“Have you ever experienced that moment when a simple dish transforms into something extraordinary?” These Spicy Mexican Deviled Eggs with Avocado & Jalapeño are about to take your appetizer game to a fiery new level! Bursting with creamy avocado, zesty lime, and a kick from fresh jalapeño, this Mexican deviled eggs recipe is not just a feast for the palate; it’s a vibrant party on your plate. Perfect for gatherings, this dish requires just about 30 minutes to whip up, making it an ideal choice for busy hosts or anyone looking to impress friends and family without spending hours in the kitchen. Plus, they’re gluten-free and can be made keto-friendly with a few simple swaps. Ready to add a touch of fiesta to your next meal? Keep scrolling for the full recipe that will make anyone fall in love with deviled eggs all over again!

Why Make Mexican Deviled Eggs?

Quick preparation means you can have these spicy treats ready in just 30 minutes, perfect for last-minute gatherings. Bold flavor from creamy avocado and fresh jalapeño elevates the classic deviled egg, guaranteeing rave reviews. Gluten-free and keto-friendly adjustments make this recipe accessible for everyone. Vibrant presentation, with colorful garnishes, ensures these deviled eggs are as beautiful as they are delicious. For more inspiration, try pairing these with some refreshing guacamole or spicy salsa for a full-on fiesta experience!

Mexican Deviled Eggs Ingredients

Get ready to gather everything for your delightful Mexican deviled eggs recipe!

For the Filling

  • Large eggs – Hard-boiled eggs provide the sturdy base for this appetizing treat.
  • Ripe avocado – Adds a creamy texture and richness that elevates the flavor.
  • Mayonnaise – Brings moisture and a subtle tang; choose Mexican crema for a twist.
  • Jalapeño pepper – Infuses the eggs with spice and vibrant flavor; adjust the amount for your heat preference.
  • Lime juice – Brightens the dish and keeps the avocado fresh and vibrant.
  • Fresh cilantro – Adds an unmistakable herbaceous note that enhances the overall taste.
  • Ground cumin, chili powder, garlic powder – These spices introduce warmth and complexity; tailor to your liking.
  • Salt and pepper – Essential for bringing all the flavors together, season to taste.

For the Garnish

  • Smoked paprika – A sprinkle adds a smoky depth and visual appeal.
  • Cilantro leaves – Fresh sprigs for that vibrant touch on top, completing the dish beautifully.
  • Jalapeño slices – For an extra kick and attractive presentation.
  • Lime wedges – Serve on the side to squeeze a bit more zest over the eggs if desired.

Prepare to impress with these colorful, creamy bites that are sure to become a favorite!

Step‑by‑Step Instructions for Mexican Deviled Eggs Recipe

Step 1: Boil the Eggs
Begin by placing the large eggs in a single layer in a large saucepan and cover them with water, ensuring they’re submerged by about an inch. Bring the water to a rolling boil over medium-high heat, then reduce the heat to low and cover the pot. Simmer the eggs for exactly 10 minutes for perfect hard-boiled results. Once done, transfer the eggs to an ice bath immediately to cool for 5 minutes, which also makes peeling easier.

Step 2: Peel and Slice the Eggs
After the eggs have cooled, gently tap each egg on a hard surface to crack the shell and then peel them under running water, if necessary, for a smoother peel. Slice each egg in half lengthwise and carefully remove the yolks, placing them into a medium mixing bowl. Set the whites aside, making sure they’re intact for the filling.

Step 3: Mash the Filling
In the bowl with the yolks, add the ripe avocado and use a fork to mash them together until you achieve a smooth, creamy consistency. This combination is the heart of your Mexican deviled eggs, so ensure there are no lumps. The vibrant green of the avocado should blend beautifully with the yolks, creating a rich filling that promises to be delicious.

Step 4: Mix in the Remaining Ingredients
To the mashed yolk and avocado mixture, add a dollop of mayonnaise, the fresh lime juice, diced jalapeño, chopped cilantro, and your choice of spices—ground cumin, chili powder, and garlic powder. Mix everything together until well combined. Taste and add salt and pepper according to your preference, ensuring that the flavors pop in this Mexican deviled eggs recipe.

Step 5: Fill the Egg Whites
Now it’s time to fill the prepared egg whites! You can either use a spoon to carefully scoop the mixture into the halves or, for a more polished look, use a piping bag fitted with a star tip. Make sure each egg white is generously filled, showing off the bright green mixture that represents your beautiful Mexican deviled eggs.

Step 6: Garnish for Presentation
To elevate the visual appeal and flavor, sprinkle each filled egg with a pinch of smoked paprika and add fresh cilantro leaves, jalapeño slices, and lime wedges for garnish. This step not only engages the eyes but will invite your guests to dig in!

Step 7: Chill Before Serving
For the best flavor, place the filled eggs in the refrigerator and allow them to chill for at least 30 minutes. This resting time allows the spicy and creamy flavors to meld together beautifully, making your Mexican deviled eggs even more irresistible at serving time.

What to Serve with Spicy Mexican Deviled Eggs with Avocado & Jalapeño

Create a colorful and memorable meal experience by pairing these delightful deviled eggs with complementary dishes and drinks.

  • Fresh Pico de Gallo: This zesty salsa offers a burst of freshness, enhancing the flavors of the creamy eggs while adding a delightful crunch.

  • Crispy Tortilla Chips: Perfect for dipping into any leftover filling or enjoying alongside, these chips add a satisfying crunch to each bite.

  • Guacamole: Creamy, smooth guacamole complements the richness of the deviled eggs, providing a luscious contrast that guests will adore.

  • Zesty Mexican Street Corn: This grilled corn dish, with its smoky, spicy mayo, pairs excellently with the flavors in your deviled eggs—perfectly uniting a fiesta theme!

  • Margaritas: The tangy and refreshing notes of a margarita beautifully complement the heat of the jalapeños and the creaminess of the deviled eggs, making for a fun pairing.

  • Chilled Mexican Beer: A light-bodied cerveza provides a crisp counterpoint to the spicy deviled eggs, enhancing the overall dining experience.

  • Cilantro Lime Rice: This flavorful side dish brings a touch of freshness and balances the richness of the deviled eggs—ideal for a family-friendly meal.

  • Fruity Sorbet: For a light dessert, a refreshing sorbet with hints of lime or mango cleanses the palate while continuing the vibrant theme of your meal.

Each of these pairings creates a delightful experience, allowing the bold flavors of the Mexican deviled eggs to shine even brighter!

Make Ahead Options

These Mexican deviled eggs are ideal for meal prep, allowing you to save time and stress during busy gatherings! You can prepare the filling up to 3 days in advance; simply mix the yolks, avocado, mayonnaise, lime juice, jalapeño, cilantro, and spices, then store it in an airtight container in the refrigerator to maintain freshness. To keep the avocado from browning, ensure it’s well-mixed with lime juice. On the day of serving, fill the egg whites just before gathering with friends, and garnish for that eye-catching presentation. With these make-ahead tips, you can enjoy delicious Mexican deviled eggs with minimal effort and maximum flavor!

How to Store and Freeze Mexican Deviled Eggs

Fridge: Store the assembled Mexican deviled eggs in an airtight container, and enjoy them within 3 days for optimal freshness and flavor.

Filling: If you want to prepare ahead, make the filling a day in advance and keep it separate from the egg whites to maintain texture.

Reheating: These eggs are best served cold or at room temperature; avoid reheating them as the texture may suffer.

Freezing: It’s not recommended to freeze these deviled eggs, as the combination of eggs and avocado won’t maintain its quality once thawed.

Mexican Deviled Eggs Recipe Variations

Feel free to explore these delightful twists and make this recipe truly yours!

  • Dairy-Free: Swap mayonnaise for mashed silken tofu for a creamy, dairy-free filling.
  • Spicy Kick: Add diced chipotle peppers to the filling for a smoky heat that packs a punch!
  • Herb Swap: Replace cilantro with fresh dill or chives for a unique flavor twist. Each herb brings its own personality to the dish!
  • Avocado-Free: Use a mix of Greek yogurt and mayo for a tangy alternative that maintains creaminess.
  • Texture Twist: Mix in crunchy bacon bits for added texture and salty goodness. This unexpected addition will surprise your taste buds!
  • Sweet & Spicy: Add a dash of honey or agave to the filling for a sweet contrast to the jalapeño heat.
  • Low-Carb Delight: For a keto-friendly option, substitute the egg whites with thin slices of cucumber for a fresh take.
  • Flavor Infusion: Incorporate lime zest into the filling to amplify the citrusy brightness; it’s a game-changer!

If you’re in need of a full Mexican feast, consider pairing these deviled eggs with some Cabbage Fat Burning Soup or enjoy them alongside the delicious Feta Fried Eggs. Add any of these variations to discover new favorites and impress your guests without straying too far from this classic recipe!

Expert Tips for Mexican Deviled Eggs Recipe

Chilling Matters: Allow the filled eggs to chill for at least 30 minutes before serving; this enhances the flavor melding and makes them even better.

Perfect Presentation: Use a piping bag with a star tip for beautiful filling application, but a zip-top bag with a cut corner will work in a pinch.

Egg Peeling Hack: To make peeling easier, crack the eggs gently and peel them under running water—this helps remove stubborn shells.

Adjusting Spice: If you prefer less heat, remove the seeds from the jalapeños, or substitute with milder peppers to suit your taste in this Mexican deviled eggs recipe.

Storage Secrets: Store any leftovers in an airtight container in the fridge for up to 3 days; consume within 24 hours for peak freshness and flavor.

Mexican Deviled Eggs Recipe FAQs

How do I select the best ripe avocado for this recipe?
Absolutely! Look for avocados that yield slightly when pressed but don’t feel mushy. If there are dark spots all over or if the skin feels too hard, it’s best to choose another one. A ripe avocado will not only add that creamy texture but will also elevate the flavors in your Mexican deviled eggs.

Can I store these deviled eggs, and how long will they last?
Very! You can store assembled Mexican deviled eggs in an airtight container in the refrigerator for up to 3 days. For the best taste, I recommend consuming them within 24 hours. If you’ve made the filling ahead of time, keep it separate from the egg whites to preserve their texture and freshness.

What’s the best way to freeze leftover filling?
It’s better to avoid freezing the whole egg or the combined filling since the texture of eggs and avocado doesn’t hold well after thawing. However, if you would like to freeze only the filling, you can do so by placing it in an airtight freezer-safe container. Make sure to use it within 1 month for the best flavor and texture. Thaw in the refrigerator, then mix well before using.

What should I do if my eggs don’t peel easily?
Don’t worry! If you encounter stubborn shells, try peeling them under running water. This method often helps the shell come off more smoothly. If you find any remnants of shell still clinging, a gentle rub with your fingers can usually do the trick.

Are these deviled eggs suitable for people with dietary restrictions?
Yes, indeed! These Mexican deviled eggs can easily be adjusted for dietary needs. If you’re catering to gluten-free or keto diets, just make sure to use gluten-free mayonnaise and consider the filling alternatives I mentioned. For anyone with avocado allergies, you can substitute with plain Greek yogurt for a similarly creamy texture.

Can my pet have a taste of these deviled eggs?
While sharing is caring, it’s best not to give your pets any of these deviled eggs. Ingredients like avocado are toxic to dogs and cats, and the seasonings, such as salt and spices, may not be suitable for them either. Stick to pet-safe treats for your furry friends!

Mexican Deviled Eggs Recipe

Mexican Deviled Eggs Recipe: Creamy, Spicy Delight in 30 Min

Enjoy a zesty twist on a classic appetizer with this Mexican Deviled Eggs recipe, featuring creamy avocado and jalapeño!
Prep Time 10 minutes
Cook Time 20 minutes
Chilling Time 30 minutes
Total Time 1 hour
Servings: 12 pieces
Course: Appetizers
Cuisine: Mexican
Calories: 80

Ingredients
  

For the Filling
  • 6 large eggs hard-boiled
  • 2 medium ripe avocado
  • 3 tablespoons mayonnaise or Mexican crema
  • 1 medium jalapeño pepper diced
  • 2 tablespoons lime juice
  • 2 tablespoons fresh cilantro chopped
  • 1 teaspoon ground cumin
  • 1 teaspoon chili powder
  • 1 teaspoon garlic powder
  • to taste salt
  • to taste pepper
For the Garnish
  • 1 teaspoon smoked paprika
  • 2 sprigs cilantro leaves
  • 2 slices jalapeño for decoration
  • 2 wedges lime for serving

Equipment

  • Saucepan
  • Mixing Bowl
  • Piping Bag

Method
 

Preparation Steps
  1. Boil the Eggs: Place eggs in a saucepan, cover with water, bring to a boil, then simmer for 10 minutes. Cool in an ice bath for 5 minutes.
  2. Peel and Slice the Eggs: Crack and peel eggs, then slice each in half and remove yolks into a bowl.
  3. Mash the Filling: Mash yolks and avocado together until smooth and creamy.
  4. Mix in the Remaining Ingredients: Add mayonnaise, lime juice, jalapeño, cilantro, and spices to the mixture. Combine thoroughly.
  5. Fill the Egg Whites: Use a spoon or piping bag to fill egg whites with the mixture.
  6. Garnish for Presentation: Sprinkle paprika, add cilantro leaves, jalapeño slices, and lime wedges to garnish.
  7. Chill Before Serving: Refrigerate filled eggs for at least 30 minutes to enhance flavors.

Nutrition

Serving: 1egg halfCalories: 80kcalCarbohydrates: 1gProtein: 6gFat: 6gSaturated Fat: 1gPolyunsaturated Fat: 0.5gMonounsaturated Fat: 4.5gCholesterol: 186mgSodium: 180mgPotassium: 70mgVitamin A: 250IUVitamin C: 5mgCalcium: 20mgIron: 1mg

Notes

These Mexican Deviled Eggs are perfect for gatherings and can be modified for different spice levels. Serve cold for the best taste.

Tried this recipe?

Let us know how it was!

Marry Me Pumpkin Chicken Pasta: Cozy Fall Flavor Bliss

As I stirred the creamy sauce in my skillet, the warm aroma of pumpkin and herbs enveloped my kitchen like a cozy hug. This Marry Me Pumpkin Chicken Pasta isn’t just another fall recipe; it’s comfort food redefined in the most delightful way. With tender chicken and notes of sage and thyme, this dish combines rich flavors that whisper of chilly evenings spent at home. The best part? It’s a quick and easy meal perfect for busy weeknights or those moments when you want to impress someone special with minimal fuss. Yes, one bite may just win their heart! Are you ready to create a dish that might inspire a proposal? Let’s dive in!

Why is this recipe a must-try?

Irresistible Flavor: The creamy pumpkin sauce, enhanced by sage and thyme, creates a cozy taste that warms the soul.

Effortless Cooking: Simple techniques make this dish perfect for both beginner and experienced cooks.

Versatile Enjoyment: Whether it’s a weeknight dinner or a romantic date night, this pasta fits every occasion beautifully.

Quick & Easy: Ready in under 30 minutes, making it a perfect fit for those busy evenings.

Hearty & Wholesome: Packed with protein and vitamins, it’s a dish that nourishes both body and spirit. Pair it with a fresh salad or some garlic bread for a complete meal, and check out this delicious BLT Chicken Salad for more ideas!

Marry Me Pumpkin Chicken Pasta Ingredients

For the Chicken
Boneless, Skinless Chicken Breasts – Main protein source; turkey breasts are a leaner substitute.
Salt and Pepper – Essential for seasoning; fresh-ground pepper enhances the flavor.
Olive Oil – Used for searing the chicken; canola oil is an alternative if needed.

For the Pasta
Spaghetti, Linguine, or Bucatini – Base of the dish; opt for gluten-free pasta to suit dietary needs.
Salted Butter – Adds richness to the sauce; use unsalted butter with added salt as a substitute.

For the Sauce
Garlic (minced) – Essential for flavor; fresh garlic is recommended over jarred.
Chicken Broth – Adds depth to the sauce; vegetable broth can lighten it up for a vegetarian option.
Dried Thyme – Herb for seasoning; fresh thyme can be used, just double the amount.
Dried Sage – Complements autumn flavors; can be omitted if needed.
Crushed Red Pepper Flakes – Offers a hint of heat; fresh chili is a fresher alternative.
Canned Pumpkin Purée – Brings creaminess and flavor; fresh pumpkin can be roasted and puréed if preferred.
Heavy Cream – Creates a rich sauce; use half-and-half or coconut cream for a dairy-free version.
Grated Parmesan Cheese – Adds a savory note; nutritional yeast works for a vegan option.
Grated Mozzarella – Enhances creaminess and texture; can be omitted if desired.

For Garnish
Chopped Fresh Parsley or Micro Greens – Adds visual appeal; basil or chives can be used alternatively.

This Marry Me Pumpkin Chicken Pasta is truly a celebration of cozy, creamy flavors perfect for the fall season!

Step‑by‑Step Instructions for Marry Me Pumpkin Chicken Pasta

Step 1: Sear the Chicken
Begin by seasoning the boneless, skinless chicken breasts generously with salt and pepper. In a large skillet, heat 2 tablespoons of olive oil over medium-high heat. Once shimmering, add the chicken and sear for 5-6 minutes per side until golden brown and cooked through. Remove the chicken from the skillet and let it rest on a cutting board to juice up.

Step 2: Cook the Pasta
In a large pot, bring salted water to a rolling boil. Add your choice of spaghetti, linguine, or bucatini and cook according to package instructions until al dente, about 8-10 minutes. Once cooked, drain the pasta and toss it with a drizzle of olive oil to prevent sticking while you prepare the sauce.

Step 3: Prepare the Sauce
In the same skillet used for the chicken, melt 2 tablespoons of salted butter over medium heat. Add the minced garlic and sauté for about 1 minute until fragrant, stirring constantly to avoid burning. Pour in 1 cup of chicken broth, scraping up any browned bits from the pan, and bring it to a gentle simmer to enhance the flavor.

Step 4: Create the Sauce
Stir in 1 cup of canned pumpkin purée, along with the dried thyme, dried sage, and a pinch of crushed red pepper flakes. Gradually whisk in 1 cup of heavy cream and ½ cup of grated Parmesan cheese until the mixture is smooth and creamy. Let it simmer for another 3-4 minutes until slightly thickened, stirring frequently to prevent sticking.

Step 5: Combine the Ingredients
Slice the rested chicken into bite-sized pieces and return it to the skillet with the creamy pumpkin sauce, along with the cooked pasta. Gently toss everything together, ensuring the pasta and chicken are well coated in the rich sauce. Allow it to simmer for an additional 5 minutes to meld the flavors together perfectly.

Step 6: Serve the Dish
To finish off your Marry Me Pumpkin Chicken Pasta, garnish the dish with freshly chopped parsley or micro greens for a burst of color. Serve it warm and enjoy the comforting flavors, ideal for a cozy dinner setting or an impressive meal that may just inspire a proposal!

Expert Tips for Marry Me Pumpkin Chicken Pasta

  • Rest the Chicken: Allow the chicken to rest for 10 minutes after searing. This prevents dryness and keeps it juicy when you cut it.

  • Pasta Perfection: Don’t overcook the pasta; aim for al dente. It will continue to cook in the sauce, ensuring the perfect texture.

  • Whisk That Sauce: Stir the sauce frequently while it simmers to prevent it from sticking to the skillet and ensure an even consistency.

  • Flavor Boost: For enhanced flavor, consider using fresh herbs instead of dried ones. Fresh thyme and sage can really elevate the Marry Me Pumpkin Chicken Pasta.

  • Cheese Choices: Feel free to experiment with your cheese choices. Nutritional yeast can provide a savory, vegan alternative without sacrificing flavor.

What to Serve with Marry Me Pumpkin Chicken Pasta

Imagine a comforting fall evening, where savoring each bite of creamy pasta is only enhanced by perfect pairings to create a delightful meal experience.

  • Garlic Bread: Perfectly toasted with a touch of herb-infused butter, it’s great for mopping up that irresistible sauce.

  • Arugula Salad: This peppery green adds a refreshing touch to balance the richness of the pasta, making each bite more exciting.

  • Roasted Brussels Sprouts: Their crunchy texture and earthy flavor contribute a wholesome contrast that beautifully complements the creamy sauce.

  • Mushroom Risotto: Creamy and indulgent, the umami flavor of the mushrooms pairs perfectly with the pumpkin and chicken, enriching your meal.

  • Crisp White Wine: A chilled Sauvignon Blanc or Chardonnay can elevate the flavors and create a delightful dining experience.

  • Pumpkin Spice Dessert: End the meal with a slice of pumpkin pie or spiced cookies to echo the flavors of your Marry Me Pumpkin Chicken Pasta while closing with a sweet note.

Each pairing not only enhances the main dish but also creates an inviting atmosphere, perfect for sharing this comforting meal with loved ones.

Storage Tips for Marry Me Pumpkin Chicken Pasta

Fridge: Store leftovers in an airtight container in the refrigerator for up to 3 days. This keeps the flavors intact while maintaining the creamy texture of the sauce.

Freezer: You can freeze this dish for up to 2 months. Make sure to let it cool completely, then transfer to a freezer-safe container for best results.

Reheating: When ready to enjoy, reheat gently on the stovetop over low heat. You may need to add a splash of chicken broth or cream to bring back the sauce’s creamy consistency.

Note: Avoid freezing if you’ve added any fresh garnishes, as they may not hold up well in the freezer. Enjoy this comforting Marry Me Pumpkin Chicken Pasta at your convenience!

Make Ahead Options

These Marry Me Pumpkin Chicken Pasta are perfect for meal prep enthusiasts! You can prepare the chicken and sauce up to 24 hours in advance; just cook the chicken, let it cool completely, and store it in an airtight container in the refrigerator. The sauce can also be made ahead—combine the pumpkin purée and heavy cream with the spices as instructed, then refrigerate it separately. On the day you plan to serve, simply reheat the chicken and sauce over low heat, while cooking your pasta fresh for perfect texture. This method ensures your meal maintains its creamy goodness and comforting flavors, making dinner a breeze on busy nights!

Marry Me Pumpkin Chicken Pasta Variations

Feel free to personalize this creamy delight to suit your taste buds and dietary preferences!

  • Vegetarian Swap: Replace chicken with sautéed mushrooms or chickpeas for a hearty vegetarian alternative. The creamy sauce holds up beautifully, allowing the earthy flavors to shine.

  • Gluten-Free Pasta: Use gluten-free spaghetti or your favorite gluten-free noodles to cater to dietary restrictions. The dish remains just as creamy and delicious with a simple swap!

  • Extra Greens: Toss in a handful of fresh spinach or kale during the last few minutes of cooking. Not only does this add nutrition, but it also brightens the dish with refreshing color and flavor.

  • Spice It Up: Increase the heat by adding more crushed red pepper flakes, or include sliced jalapeños for a bold kick. The warmth will contrast nicely with the creamy pumpkin.

  • Cream Variations: Switch out heavy cream for coconut cream for a dairy-free version that offers a unique tropical twist.

  • Cheese Choices: Try different cheeses such as crumbled goat cheese or feta for a tangy contrast. Sprinkle it on just before serving for a delightful salty finish.

  • Nutty Flavor Boost: Incorporate toasted pine nuts or walnuts for added crunch and a distinct nutty flavor. Add them in just before serving to maintain their texture.

  • Herb Infusion: Experiment with fresh herbs like basil or chives instead of parsley for a different aromatic experience. The freshness will elevate the dish wonderfully.

For even more delicious ideas, why not check out this comforting Sizzling Chicken Pepper or indulge in a cozy bowl of Tuscan Chicken Soup?

Marry Me Pumpkin Chicken Pasta Recipe FAQs

How do I choose the right pumpkin purée?
Absolutely! When selecting pumpkin purée, opt for brands that use 100% pumpkin with no added sugars or fillers. Check for a smooth consistency without lumps. If you prefer fresh pumpkin, roast it until tender and purée it for a fresher taste.

How should I store leftover Marry Me Pumpkin Chicken Pasta?
To store your delicious leftovers, place them in an airtight container and keep them in the refrigerator for up to 3 days. When ready to reheat, do so gently on the stovetop or in the microwave to maintain the creamy texture of the sauce.

Can I freeze this pasta dish?
Certainly! You can freeze Marry Me Pumpkin Chicken Pasta for up to 2 months. Make sure to let it cool completely before transferring it to a freezer-safe container. When reheating, please add a splash of chicken broth or cream to reconstitute the sauce and enhance its creaminess.

What should I do if my sauce is too thick?
If you find your sauce too thick, fear not! Simply add a bit of chicken broth or heavy cream, a tablespoon at a time, until you achieve your desired consistency. Stir well to incorporate and let it heat through on low.

Is this recipe suitable for my family with dairy allergies?
Definitely! You can make Marry Me Pumpkin Chicken Pasta dairy-free by using coconut cream instead of heavy cream and omitting the cheeses. For a cheesy flavor, try incorporating nutritional yeast into the sauce. Always check the labels on your broth and pasta for any hidden dairy ingredients.

What can I substitute for chicken in this dish?
For a delightful vegetarian twist, consider swapping out the chicken for sautéed mushrooms or chickpeas. Both options provide a hearty element and pair beautifully with the creamy pumpkin sauce, making this dish versatile and suitable for various diets!

Marry Me Pumpkin Chicken Pasta

Marry Me Pumpkin Chicken Pasta: Cozy Fall Flavor Bliss

This Marry Me Pumpkin Chicken Pasta is a comforting dish that'll warm your soul with its creamy pumpkin sauce and tender chicken.
Prep Time 10 minutes
Cook Time 20 minutes
Total Time 30 minutes
Servings: 4 servings
Course: Pasta
Cuisine: American
Calories: 650

Ingredients
  

For the Chicken
  • 1 pound Boneless, Skinless Chicken Breasts Turkey breasts are a leaner substitute.
  • to taste Salt
  • to taste Pepper Fresh-ground pepper enhances flavor.
  • 2 tablespoons Olive Oil Canola oil is an alternative.
For the Pasta
  • 8 ounces Spaghetti, Linguine, or Bucatini Opt for gluten-free pasta if needed.
  • 2 tablespoons Salted Butter Use unsalted butter with added salt as a substitute.
For the Sauce
  • 2 cloves Garlic (minced) Fresh garlic is recommended.
  • 1 cup Chicken Broth Vegetable broth can be used for a vegetarian option.
  • 1 teaspoon Dried Thyme Use double the amount if using fresh.
  • 1 teaspoon Dried Sage Can be omitted if needed.
  • 1 teaspoon Crushed Red Pepper Flakes Use fresh chili as an alternative.
  • 1 cup Canned Pumpkin Purée Fresh pumpkin can be roasted and puréed.
  • 1 cup Heavy Cream Use half-and-half or coconut cream for dairy-free.
  • ½ cup Grated Parmesan Cheese Nutritional yeast works for a vegan option.
  • ½ cup Grated Mozzarella Can be omitted if desired.
For Garnish
  • to taste Chopped Fresh Parsley or Micro Greens Basil or chives can be used alternatively.

Equipment

  • Skillet
  • Pot
  • Cutting board
  • Knife

Method
 

Step‑by‑Step Instructions
  1. Begin by seasoning the chicken breasts with salt and pepper. Heat olive oil over medium-high heat in a skillet. Sear chicken for 5-6 minutes per side until golden brown and cooked through. Let rest on a cutting board.
  2. In a large pot, bring salted water to a boil. Add pasta and cook according to package instructions until al dente, about 8-10 minutes. Drain and toss with olive oil to prevent sticking.
  3. In the same skillet, melt butter over medium heat. Sauté minced garlic for about 1 minute. Add chicken broth, scraping browned bits from the pan, and bring to a simmer.
  4. Stir in pumpkin purée, dried thyme, dried sage, and crushed red pepper flakes. Gradually whisk in heavy cream and grated Parmesan until smooth. Let simmer for 3-4 minutes.
  5. Slice rested chicken into bite-sized pieces and return to the sauce along with cooked pasta. Toss everything together, allowing to simmer for an additional 5 minutes.
  6. Garnish with chopped parsley or micro greens. Serve warm and enjoy!

Nutrition

Serving: 1servingCalories: 650kcalCarbohydrates: 60gProtein: 40gFat: 25gSaturated Fat: 10gPolyunsaturated Fat: 2gMonounsaturated Fat: 8gCholesterol: 120mgSodium: 800mgPotassium: 800mgFiber: 5gSugar: 5gVitamin A: 600IUVitamin C: 2mgCalcium: 200mgIron: 3mg

Notes

Allow the chicken to rest after cooking to prevent dryness. Aim for al dente pasta as it will continue to cook in the sauce. Stir the sauce frequently to prevent sticking.

Tried this recipe?

Let us know how it was!

Indulge in Sweetness with Cookies and Cream Puppy Chow

The aroma of chocolate and cookies fills the air, transporting me back to carefree childhood days spent munching on Oreos. If you’re like me and have a soft spot for sweet, crunchy snacks, you’re going to love this Cookies and Cream Puppy Chow. This delightful sweet snack mix combines the satisfying crunch of rice Chex with the creamy richness of chocolate and white chocolate, making it a quick and easy no-bake treat to share at movie nights or road trips. Plus, it’s a fantastic way to indulge your sweet tooth without the fuss of baking! Whether you’re planning a festive gathering or just craving a tasty pick-me-up, this recipe is bound to be a favorite among kids and adults alike. Are you ready to whip up this irresistible delight?

Why is Cookies and Cream Puppy Chow Irresistible?

Indulgent and perfect for all ages, this Cookies and Cream Puppy Chow combines beloved Oreos with a delightful crunch that kids and adults just can’t resist. No-bake simplicity makes it a breeze to whip up, freeing you from the stress of kitchen time. Versatile enough to customize; try adding nuts or even seasonal flavors for a fun twist! Perfect for sharing, it’s an ideal treat for movie nights, parties, or even as a sweet surprise in lunchboxes. If you love quick and satisfying snacks, this snack mix will soon be on repeat in your home!

Cookies and Cream Puppy Chow Ingredients

For the Snack Mix
Rice Chex – Adds a delightful crunch; choose gluten-free Chex for a gluten-free treat.
White Chocolate Chips – Brings sweetness and creaminess; vanilla chips are a good alternative if needed.
Semisweet Chocolate Chips – Offers a rich chocolate flavor; try dark chocolate chips for a deeper cocoa experience.
Coconut Oil – Helps melt and blend the chocolate smoothly; butter or shortening can work as a substitute.
Powdered Sugar – Coats the cereal for just the right sweetness; blend granulated sugar for a quick DIY version.
Oreos – This star ingredient adds that iconic chocolate cookie flavor; experiment with other sandwich cookies to mix things up.

For the Coating
Extra Powdered Sugar – Use this for an additional coating layer; it keeps the mix extra sweet and prevents clumping.

Step‑by‑Step Instructions for Cookies and Cream Puppy Chow

Step 1: Melt the White Chocolate
In a large microwave-safe bowl, combine 2 cups of white chocolate chips and 2 tablespoons of coconut oil. Microwave on high for 20-30 seconds, then stir. Repeat in 15-second intervals until the mixture is smooth and silky, taking care not to overheat it. Once melted, you’ll notice a glossy appearance, perfect for coating the rice Chex.

Step 2: Coat the First Batch of Chex
Add 4 cups of rice Chex to the melted white chocolate mixture, stirring gently to ensure each piece is thoroughly coated. Once evenly coated, transfer the mixture to a Ziploc bag containing 2 cups of powdered sugar. Seal tightly and shake the bag vigorously until all the Chex are completely covered in sweet, snowy goodness.

Step 3: Melt the Semisweet Chocolate
Using the same large bowl, combine 2 cups of semisweet chocolate chips and the remaining 2 tablespoons of coconut oil. Microwave on high for 20-30 seconds, then stir well. Continue to heat in 15-second intervals until the chocolate is melted and smooth, resembling a rich chocolate sauce that will perfectly envelop the remaining Chex.

Step 4: Coat the Second Batch of Chex
Add the remaining 4 cups of rice Chex to the melted semisweet chocolate, gently folding the Chex into the chocolate mixture. Ensure that each piece is well-coated before transferring this mixture into another Ziploc bag filled with the remaining 2 cups of powdered sugar. Seal the bag and shake until every Chex is evenly coated, creating a deliciously rich layer.

Step 5: Combine and Add Oreos
In a large mixing bowl, combine both batches of coated Chex from the Ziploc bags. Lightly crush about 10 Oreos and add them to the bowl, folding gently to incorporate them without breaking them down too much. This crucial step infuses the Cookies and Cream Puppy Chow with that classic Oreo flavor and delightful crunch.

Step 6: Store the Puppy Chow
Once everything is well mixed, transfer your Cookies and Cream Puppy Chow into an airtight container. This scrumptious treat can be stored at room temperature for up to a week, making it a fantastic make-ahead snack for gatherings or movie nights. Enjoy the delightful crunch and sweet flavors whenever cravings strike!

Expert Tips for Cookies and Cream Puppy Chow

  • Avoid Clumping: Ensure each piece of Chex is well-coated with chocolate and powdered sugar to maintain a light, crunchy texture.
  • Crush Oreos Gently: Mix in the crushed Oreos after the Chex to keep them intact, enhancing the Cookies and Cream Puppy Chow’s crunchiness.
  • Clean Melting Process: Use separate bowls for melting chocolate to minimize mixing and make cleanup easier, keeping your kitchen stress-free.
  • Customize for Fun: Feel free to swap Oreos for seasonal flavors or add nuts and dried fruits, personalizing the recipe to suit your taste.
  • Proper Storage: Store your Cookies and Cream Puppy Chow in an airtight container at room temperature to keep it fresh and tasty for up to a week.

Cookies and Cream Puppy Chow Variations

Feel free to get creative and customize your Cookies and Cream Puppy Chow with these fun ideas that will elevate your sweet snack experience!

  • Dairy-Free: Use dairy-free chocolate chips instead of semisweet and white chocolate to cater to lactose intolerance. Coconut oil adds a delicious touch to your mix.

  • Nutty Delight: Add a half cup of chopped nuts like almonds or pecans for an added crunchy texture and a delightful nutty flavor twist. They create a perfect contrast to the sweetness of the chocolate and Oreos.

  • Peanut Butter Twist: Stir in 1/2 cup of creamy peanut butter along with the melted chocolate for a irresistible chocolate-peanut butter fusion that will enchant every bite.

  • Seasonal Flavors: Swap Oreos for seasonal varieties like pumpkin spice or peppermint for a festive touch that captures the essence of the holidays with each delicious munch.

  • Candy Bar Mix: Cut up your favorite candy bars, such as Snickers or Reese’s, and mix them in for a delightful surprise that will take your puppy chow to a whole new level.

  • Coconut Flakes: Fold in shredded coconut to add a tropical flare to your Cookies and Cream Puppy Chow; the coconut’s chewiness perfectly complements the crunch of Chex.

  • Spicy Kick: For those who like a little heat in their sweets, sprinkle in crushed chili flakes or a touch of cayenne pepper when coating the Chex. It adds a surprising kick to the sweet flavor.

Looking for more inspirations for your snack cravings? Check out these delicious recipes for Bacon Soup Comfort and Blueberry Breakfast Cookies for more sweet and savory delights!

Make Ahead Options

Cookies and Cream Puppy Chow is a fantastic treat to prepare ahead of time, making your life easier during busy weeks or festive gatherings! You can create the coated Chex and store them separately in airtight containers up to 3 days in advance, ensuring they maintain their crunchy texture. After mixing in the crushed Oreos, it’s best to serve the snack mix within 24 hours for optimal freshness and flavor. To finish, simply combine the ingredients right before serving to maintain their delightful crunch. This way, you can have a delicious, homemade snack mix ready at a moment’s notice, perfect for movie nights or surprise guests!

How to Store and Freeze Cookies and Cream Puppy Chow

Room Temperature: Store your Cookies and Cream Puppy Chow in an airtight container at room temperature for up to 1 week; this keeps it fresh and crunchy.

Fridge: If you prefer a colder treat, store it in the fridge for up to 2 weeks; just ensure it’s in an airtight container to prevent drying out.

Freezer: For longer storage, you can freeze the puppy chow for up to 3 months. Place it in a freezer-safe bag, removing as much air as possible before sealing.

Reheating: No need to reheat since this snack is delightful served cold or at room temperature; simply allow chilled portions to sit out for a few minutes before enjoying.

What to Serve with Cookies and Cream Puppy Chow?

Imagine the sweet crunch of Cookies and Cream Puppy Chow paired with delightful side dishes that enhance your snacking experience.

  • Creamy Fruit Salad: A refreshing mix of seasonal fruits adds a burst of freshness, balancing the richness of the snack mix beautifully.
  • Savory Cheese Platter: Include a variety of cheeses and crackers; the savory flavors provide a delightful contrast to the sweet puppy chow.
  • Chocolate-Dipped Pretzels: Their salty crunch complements the sweet chocolate flavors, making for an irresistible sweet and salty combination.
  • Vanilla Ice Cream: Serve a scoop alongside; its creamy texture pairs perfectly with the crunchy delight, evoking dessert nostalgia.
  • Homemade Whipped Cream: A dollop adds an extra layer of sweetness and richness, perfect for dipping your puppy chow pieces.
  • Iced Coffee or Hot Cocoa: These drinks provide a cozy beverage option, ideal for enjoying with your sweet mix during movie nights or chilly days.
  • Mini Cupcakes: Their fluffy sweetness can elevate celebrations while offering a variety of flavors; they’re a perfect treat for pairing with your puppy chow.
  • Fruit Smoothies: Smoothies made with yogurt and berries create a nutritious and fun option; they contrast wonderfully with the crunch of your inventive mix.
  • Popcorn Mix: A bowl filled with buttered popcorn, tossed with chocolate drizzles, adds texture and a sweet-salty flavor twist to your snacking spread.

Cookies and Cream Puppy Chow Recipe FAQs

How do I choose the best Oreos for this recipe?
Absolutely! Use the classic Oreos for that nostalgic flavor. However, you can also explore seasonal flavors like pumpkin spice or peppermint for a festive twist. Just pick whatever cookie you enjoy most!

What is the best way to store leftover Cookies and Cream Puppy Chow?
Store your Cookies and Cream Puppy Chow in an airtight container at room temperature for up to a week. If you want to keep it longer, consider refrigeration, which can extend the shelf life to about two weeks while keeping it fresh.

Can I freeze Cookies and Cream Puppy Chow?
Yes, you can! To freeze, simply transfer the Puppy Chow into a freezer-safe bag, removing as much air as possible before sealing. It can be stored for up to 3 months. When you’re ready to enjoy, just let it thaw at room temperature, and it’ll be as crunchy and delicious as ever!

What should I do if my Puppy Chow gets clumpy?
Very! If you encounter clumping, don’t worry. You can break apart the clumps gently with your fingers or a spoon. Ensuring that each Chex piece is thoroughly coated during the mixing process will also help prevent clumping in future batches.

Is this recipe safe for my pets?
No, unfortunately! The ingredients in Cookies and Cream Puppy Chow, especially chocolate, can be harmful to pets. Please keep this delicious snack away from your furry friends.

What are some alternatives if I’m allergic to certain ingredients?
Certainly! If you’re allergic to dairy, consider using dairy-free chocolate chips and coconut oil. For gluten sensitivities, opt for gluten-free rice Chex. You could even use maple syrup or coconut sugar in place of powdered sugar if needed. Just ensure to adjust according to your dietary needs!

Cookies and Cream Puppy Chow

Indulge in Sweetness with Cookies and Cream Puppy Chow

This Cookies and Cream Puppy Chow is a delightful no-bake treat that features crunchy Chex and sweet chocolate.
Prep Time 10 minutes
Cook Time 10 minutes
Total Time 20 minutes
Servings: 12 cups
Course: Dessert
Cuisine: American
Calories: 200

Ingredients
  

For the Snack Mix
  • 4 cups Rice Chex Choose gluten-free for a gluten-free treat.
  • 2 cups White Chocolate Chips Vanilla chips are an alternative.
  • 2 cups Semisweet Chocolate Chips Dark chocolate chips can be used for richer flavor.
  • 4 tablespoons Coconut Oil Can substitute with butter or shortening.
  • 2 cups Powdered Sugar Blend granulated sugar for a quick DIY version.
  • 10 pieces Oreos Experiment with other sandwich cookies.
For the Coating
  • 2 cups Extra Powdered Sugar Use for an additional coating.

Equipment

  • microwave-safe bowl
  • Ziploc bags
  • Mixing Bowl

Method
 

Step-by-Step Instructions
  1. In a large microwave-safe bowl, combine white chocolate chips and coconut oil. Microwave on high for 20-30 seconds, then stir. Repeat until smooth.
  2. Add rice Chex to the melted white chocolate mixture, stir gently to coat. Transfer to a Ziploc bag with powdered sugar, seal, and shake until covered.
  3. In the same bowl, melt semisweet chocolate chips with remaining coconut oil as before. Stir until smooth.
  4. Fold remaining rice Chex into the melted chocolate and transfer to another Ziploc bag with powdered sugar, seal, and shake until coated.
  5. Combine both batches of Chex in a large mixing bowl. Lightly crush Oreos and fold gently into the mix.
  6. Store the puppy chow in an airtight container. It can be kept at room temperature for up to a week.

Nutrition

Serving: 1cupCalories: 200kcalCarbohydrates: 30gProtein: 2gFat: 9gSaturated Fat: 5gPolyunsaturated Fat: 1gMonounsaturated Fat: 3gSodium: 60mgPotassium: 100mgFiber: 1gSugar: 18gCalcium: 1mgIron: 2mg

Notes

Store in an airtight container for optimal freshness. Enjoy at room temperature or chilled.

Tried this recipe?

Let us know how it was!

Bacon Mushroom Swiss Cheese Meatloaf That’s Comforting Goodness

In the hustle of everyday life, there’s nothing quite like the comforting aroma of a home-cooked meal wafting through the air, instantly transporting me back to my own family dinners. This Juicy Bacon Mushroom Swiss Cheese Meatloaf takes a nostalgic classic and adds an exciting twist with crispy bacon, savory mushrooms, and gooey melted Swiss cheese. Perfect for busy weeknights or cozy gatherings, this dish not only nourishes the spirit but also embraces your loved ones around the dinner table, making it a true family favorite. Whether you’re looking for a hearty meal or a satisfying crowd-pleaser, this recipe brings together a delightful medley of flavors and an easy prep that’ll leave everyone asking for seconds. So, what do you say? Ready to whip up some comfort on a plate?

Why is this meatloaf a must-try?

Comforting Goodness: This Bacon Mushroom Swiss Cheese Meatloaf combines classic flavors with a modern twist that your family will adore.

Easy Prep: Simply mix ingredients and let the oven do the work, making it perfect for busy weeknights.

Rich Flavors: Crispy bacon, savory mushrooms, and gooey Swiss cheese create a savory masterpiece that satisfies.

Versatile Options: Switch ground pork for turkey or add veggies for a nutrition boost, offering flexibility for your kitchen creativity.

Crowd-Pleaser: Whether it’s a family dinner or a potluck, this dish is bound to impress and leave everyone coming back for more.

Bacon Mushroom Swiss Cheese Meatloaf Ingredients

For the Meatloaf

  • Ground Beef – Provides a hearty base with rich flavor; can use ground turkey for a lighter version.
  • Ground Pork – Adds moisture and tenderness to the meatloaf; can replace with more ground beef or ground chicken.
  • Onion (medium, finely chopped) – Adds sweetness and depth; consider using shallots for a milder flavor.
  • Garlic (2 cloves, minced) – Essential for enhancing savory profiles; adjust according to taste preference.
  • Breadcrumbs (1 cup) – Binds the mixture and retains moisture; use gluten-free breadcrumbs for a gluten-free option.
  • Egg (1 large) – Acts as a binder for the meat mixture; no egg substitutions are suggested as it’s essential for structure.
  • Milk (½ cup) – Keeps the meatloaf moist and tender; can substitute with a non-dairy milk alternative.
  • Worcestershire sauce (1 tbsp) – Adds a rich umami flavor; soy sauce can be used as a substitute for a similar taste.
  • Salt (1 tsp) – Enhances all flavors; adjust to taste, especially if using salted bacon.
  • Black Pepper (½ tsp) – Balances flavors with a hint of heat; increase for extra spiciness.

For the Mix-ins

  • Swiss Cheese (1 cup, shredded) – Melts beautifully, adding creaminess; can swap for cheddar or gouda for different flavors.
  • Bacon (6 slices, cooked and crumbled) – Adds smoky, crispy texture; use turkey bacon as a leaner alternative.
  • Mushrooms (1 cup, finely chopped) – Provides earthy flavor and moisture; any variety of mushrooms can be used.

For the Glaze

  • Ketchup (¼ cup) – Forms the base for the glaze, offering sweetness; substitute with barbecue sauce for variation.
  • Brown Sugar (2 tbsp) – Balances the tartness of the ketchup; honey or maple syrup can serve as a substitute.

Step‑by‑Step Instructions for Bacon Mushroom Swiss Cheese Meatloaf

Step 1: Preheat Your Oven
Begin by preheating your oven to 375°F (190°C). This step ensures that your Bacon Mushroom Swiss Cheese Meatloaf will bake evenly and develop a beautiful golden-brown crust. While the oven warms up, you can prepare the meat mixture, maximizing efficiency and keeping your cooking process seamless.

Step 2: Mix the Meatloaf Ingredients
In a large mixing bowl, combine the ground beef, ground pork, finely chopped onion, minced garlic, breadcrumbs, egg, milk, Worcestershire sauce, salt, and black pepper. Use your hands or a spatula to mix the ingredients together until just incorporated, ensuring not to overwork the mixture to maintain a tender texture in the final meatloaf.

Step 3: Add the Flavorful Mix-ins
Next, gently fold in the shredded Swiss cheese, crumbled bacon, and finely chopped mushrooms into your meat mixture. This step is crucial as it distributes these key ingredients evenly throughout, allowing the flavors of your Bacon Mushroom Swiss Cheese Meatloaf to meld beautifully during baking and creating pockets of melty goodness.

Step 4: Transfer to a Loaf Pan
Grease a loaf pan generously with cooking spray or oil to prevent sticking. Carefully spoon the meat mixture into the pan, pressing it down slightly to pack it evenly. Level the top with a spatula or the back of a spoon to ensure uniform cooking, resulting in a well-shaped meatloaf that looks inviting when served.

Step 5: Prepare the Glaze
In a small bowl, whisk together ketchup and brown sugar to create a sweet and tangy glaze for your meatloaf. Once mixed, spread the glaze evenly over the top of your meatloaf, which will caramelize beautifully in the oven, adding an appetizing finish and round out the comforting flavors of the dish.

Step 6: Bake the Meatloaf
Place the loaf pan in the preheated oven and bake for approximately 60 minutes. This timeframe allows the internal temperature to reach 160°F (71°C), ensuring the meatloaf is cooked through. As it bakes, you’ll enjoy the tantalizing aroma filling your kitchen, inviting everyone to the dinner table.

Step 7: Let It Rest
After baking, remove your Bacon Mushroom Swiss Cheese Meatloaf from the oven and let it rest for about 10 minutes before slicing. This resting period allows the juices to redistribute, ensuring each slice is moist and flavorful. Resist the temptation to cut immediately – the wait will be well worth it!

What to Serve with Bacon Mushroom Swiss Cheese Meatloaf

Elevate your meal experience with delicious sides that beautifully complement the comforting flavors of this meatloaf.

  • Creamy Mashed Potatoes:
    Their smooth and buttery texture pairs perfectly with the juicy meatloaf, soaking up the savory juices for a satisfying bite.

  • Roasted Vegetables:
    A mix of seasonal veggies adds a crunchy contrast and earthy tones, balancing the richness of the meatloaf for a well-rounded meal.

  • Fresh Green Salad:
    A crisp salad with a zesty vinaigrette brightens the plate, providing a refreshing counterpoint to the hearty meatloaf.

  • Garlic Bread:
    The crunchy, buttery goodness of garlic bread is irresistibly satisfying, making it the perfect companion to soak up every last bite.

  • Coleslaw:
    This tangy, crunchy side brings a delightful contrast and adds an element of brightness to each forkful of meatloaf.

  • Apple Sauce:
    The sweet and tart notes of apple sauce complement the savory flavors of the meatloaf beautifully, evoking classic comfort food harmony.

  • Red Wine:
    A glass of bold red wine enhances the rich flavors of the meatloaf, creating a warm and inviting dining experience.

  • Chocolate Cake:
    End your meal on a sweet note! A slice of moist chocolate cake provides the perfect rich dessert following the comforting meatloaf.

Bacon Mushroom Swiss Cheese Meatloaf Variations

Feel free to add your personal touch to this delicious meatloaf for a delightful twist that excites the taste buds!

  • Ground Turkey: Swap out ground pork for ground turkey for a leaner option, while still keeping the meatloaf juicy and flavorful. A great way to enjoy a healthier meal without sacrificing taste.

  • Extra Veggies: Add diced bell peppers or shredded carrots for a nutrient-packed boost. This not only enhances the flavor but also adds color and texture, making your dish even more appealing.

  • Herb Infusion: Incorporate fresh herbs like parsley or thyme to elevate the flavor complexity. A sprinkle of fresh herbs will brighten the meatloaf while giving it that homemade allure.

  • Cheese Swap: Try swapping Swiss cheese for sharp cheddar or creamy gouda for a different cheesy experience. Each variety brings its own unique flavor profile, allowing for delightful experimentation.

  • Spicy Kick: For a bit of heat, add diced jalapeños or a dash of hot sauce to the meat mixture. This adds an exciting zing, perfect for those who crave some spice in their comfort food.

  • Glaze Update: Replace ketchup with barbecue sauce for a different glaze that adds a sweet and tangy twist. Or, for a gourmet touch, consider using balsamic glaze for a unique flavor experience.

  • Mushroom Variety: Experiment with various mushrooms, like shiitake or portobello, to create diverse earthy notes. This simple switch can enhance the umami essence of your meatloaf.

  • Nutty Crunch: Add crushed nuts like walnuts or pecans for added texture and a nutty flavor. This unexpected twist provides a wonderful crunch that complements the soft and juicy meatloaf.

By customizing this Bacon Mushroom Swiss Cheese Meatloaf, you’re sure to create a comforting dish that feels special every time! Looking for more comforting favorites? Check out my Potato Bacon Soup or delicious Chicken Grilled Cheese for wonderful meal ideas tailored just for you!

Make Ahead Options

These Bacon Mushroom Swiss Cheese Meatloaf preparations are perfect for busy home cooks looking to save time during the week! You can prepare the meat mixture up to 24 hours in advance; simply mix all ingredients, cover tightly, and refrigerate. For longer storage, the shaped meatloaf can also be frozen for up to 3 months; wrap it tightly in plastic wrap and aluminum foil. When ready to bake, thaw overnight in the refrigerator before placing it in the oven. To maintain the meatloaf’s juicy texture, avoid overmixing and let it rest for 10 minutes after baking. Finish with glaze right before baking for a deliciously caramelized top!

Expert Tips for Bacon Mushroom Swiss Cheese Meatloaf

  • Avoid Overmixing: Mixing the meat too much can lead to a dense texture. Just combine until everything is incorporated for a light and tender meatloaf.

  • Check Temperature: Use a meat thermometer to ensure your Bacon Mushroom Swiss Cheese Meatloaf reaches 160°F (71°C). This guarantees that it’s cooked perfectly without being dry.

  • Chill Before Baking: Refrigerate the meat mixture for about 30 minutes before baking to help it hold its shape and ensure even cooking.

  • Rest for Juiciness: Let the meatloaf rest for 10 minutes after baking. This allows the juices to settle, making each slice moist and flavorful.

  • Experiment with Flavors: Don’t hesitate to add your favorite herbs or spices to enhance the flavor profile. Fresh parsley or thyme can add a nice touch to the meatloaf.

How to Store and Freeze Bacon Mushroom Swiss Cheese Meatloaf

Fridge: Store leftovers in an airtight container for up to 3 days. Make sure to cool it fully before sealing to prevent condensation.

Freezer: Wrap the meatloaf tightly in plastic wrap and then foil, or use a freezer-safe container. It can be frozen for up to 3 months.

Reheating: Thaw overnight in the fridge and reheat in the oven at 350°F (175°C) for about 20-30 minutes, or until heated through. Enjoy the delicious flavors of your Bacon Mushroom Swiss Cheese Meatloaf again!

Make-Ahead: You can prepare the meat mixture up to 24 hours in advance. Simply refrigerate it before baking for quick and easy weeknight meals.

Bacon Mushroom Swiss Cheese Meatloaf Recipe FAQs

Which mushrooms are best to use for this meatloaf?
Mushrooms such as cremini, button, or shiitake work wonderfully in this recipe. They each bring their unique earthy flavors, so feel free to use your favorite variety! Ensure they are fresh and firm, avoiding any that have dark spots or appear slimy, as this indicates they are past their prime.

How should I store leftovers of the Bacon Mushroom Swiss Cheese Meatloaf?
To store leftovers, place them in an airtight container and refrigerate for up to 3 days. Make sure the meatloaf has cooled completely before sealing to prevent moisture buildup, which can lead to spoilage.

Can the bacon mushroom swiss cheese meatloaf be frozen?
Absolutely! To freeze your meatloaf, wrap it tightly in plastic wrap, followed by a layer of aluminum foil, or place it in a freezer-safe container. This protects it from freezer burn, allowing it to be stored for up to 3 months. When ready to enjoy, thaw it overnight in the fridge and reheat it in a preheated oven at 350°F (175°C) for 20-30 minutes until heated through.

What should I do if my meatloaf falls apart when slicing?
If your meatloaf crumbles when you try to slice it, there are a few potential causes. Ensure you didn’t overwork the meat mixture; mixing just until combined is key. Additionally, consider chilling the meat mixture before baking to help it hold its shape. A lightly greased loaf pan also aids in maintaining structure. Allowing the meatloaf to rest for 10 minutes after baking will ensure the juices redistribute, resulting in neater slices.

Are there any gluten-free options for this recipe?
Yes! To make the Bacon Mushroom Swiss Cheese Meatloaf gluten-free, simply substitute regular breadcrumbs with gluten-free breadcrumbs. This small adjustment allows everyone to enjoy this comforting dish without worry, ensuring it remains delicious and satisfying.

Bacon Mushroom Swiss Cheese Meatloaf

Bacon Mushroom Swiss Cheese Meatloaf That's Comforting Goodness

This Bacon Mushroom Swiss Cheese Meatloaf delivers comforting goodness with crispy bacon, savory mushrooms, and gooey melted Swiss cheese.
Prep Time 20 minutes
Cook Time 1 hour
Resting Time 10 minutes
Total Time 1 hour 30 minutes
Servings: 6 slices
Course: Dinner
Cuisine: American
Calories: 350

Ingredients
  

For the Meatloaf
  • 1 pound Ground Beef Can use ground turkey for a lighter version.
  • 1 pound Ground Pork Can replace with more ground beef or ground chicken.
  • 1 medium Onion, finely chopped Consider using shallots for a milder flavor.
  • 2 cloves Garlic, minced Adjust according to taste preference.
  • 1 cup Breadcrumbs Use gluten-free breadcrumbs for a gluten-free option.
  • 1 large Egg Essential for structure; no substitutions suggested.
  • ½ cup Milk Can substitute with non-dairy milk alternative.
  • 1 tbsp Worcestershire sauce Soy sauce can be used as a substitute.
  • 1 tsp Salt Adjust to taste, especially if using salted bacon.
  • ½ tsp Black Pepper Increase for extra spiciness.
For the Mix-ins
  • 1 cup Swiss Cheese, shredded Can swap for cheddar or gouda.
  • 6 slices Bacon, cooked and crumbled Use turkey bacon as a leaner alternative.
  • 1 cup Mushrooms, finely chopped Any variety of mushrooms can be used.
For the Glaze
  • ¼ cup Ketchup Substitute with barbecue sauce for variation.
  • 2 tbsp Brown Sugar Honey or maple syrup can serve as a substitute.

Equipment

  • Loaf Pan
  • Mixing Bowl
  • whisk

Method
 

Step-by-Step Instructions
  1. Preheat your oven to 375°F (190°C).
  2. In a large mixing bowl, combine the ground beef, ground pork, finely chopped onion, minced garlic, breadcrumbs, egg, milk, Worcestershire sauce, salt, and black pepper.
  3. Gently fold in the shredded Swiss cheese, crumbled bacon, and finely chopped mushrooms into your meat mixture.
  4. Grease a loaf pan generously and carefully spoon the meat mixture into the pan.
  5. Whisk together ketchup and brown sugar to create a glaze, then spread it over the top of the meatloaf.
  6. Place the loaf pan in the oven and bake for approximately 60 minutes.
  7. Remove from the oven and let it rest for about 10 minutes before slicing.

Nutrition

Serving: 1sliceCalories: 350kcalCarbohydrates: 18gProtein: 25gFat: 20gSaturated Fat: 8gPolyunsaturated Fat: 2gMonounsaturated Fat: 5gCholesterol: 80mgSodium: 900mgPotassium: 500mgFiber: 1gSugar: 5gVitamin A: 500IUVitamin C: 5mgCalcium: 150mgIron: 3mg

Notes

Allow the meatloaf to rest for juiciness and avoid overmixing for a tender texture.

Tried this recipe?

Let us know how it was!

Delightful Homemade Pistachio Wedding Cookies You’ll Love

At first bite, the delicate crunch of these Homemade Pistachio Wedding Cookies transports me to a sun-drenched wedding banquet adorned with blossoms and twinkling lights. This recipe is simplicity at its finest, effortlessly blending rich buttery textures with a whisper of nutty pistachio delight. Not only are they incredibly easy to whip up, but these cookies also bring an elegant touch to any gathering, making them perfect for weddings, holidays, or a cozy coffee break at home. Imagine sharing this melt-in-your-mouth treat with loved ones, creating warmth and joy in every blissful bite. Are you ready to charm your guests or spoil yourself with a little homemade indulgence? Let’s get baking!

Why are Homemade Pistachio Wedding Cookies special?

Unforgettable Elegance: These cookies elevate any occasion with their refined appearance and taste, making them the ideal treat for weddings and celebrations.

Easy to Make: With just a handful of ingredients, you can create mouthwatering cookies without complicated techniques, perfect for bakers of all skill levels.

Delightful Texture: The combination of buttery softness and crunchy pistachio pieces makes each bite a delightful experience, akin to a soft shortbread.

Versatile Options: Feel free to experiment—substituting other nuts or adding zests can offer a unique twist to this classic treat.

Perfect for Gifting: Beautifully packaged, these cookies make a charming gift, showing thoughtfulness and love that everyone will appreciate. You might also enjoy making Homemade Corned Beef for a savory companion dish to serve at your next gathering!

Homemade Pistachio Wedding Cookies Ingredients

For the Cookie Dough

  • Unsalted Butter – Provides a rich, tender texture essential for melt-in-your-mouth bliss.
  • Powdered Sugar – Sweetens the dough while giving that characteristic meltiness; granulated sugar may alter the texture.
  • Vanilla Extract – Introduces a lovely depth of flavor; opt for pure vanilla for the best results.
  • All-Purpose Flour – Ensures proper structure for cookies; consider gluten-free flour if needed.
  • Chopped Pistachios – Adds delightful nuttiness and a pleasant crunch; choose fresh, quality pistachios for the best taste.
  • Salt – Balances the sweetness and enhances flavors; remember to omit if using salted butter.
  • Water – Assists in binding the dough; only add as needed for the right consistency.

For the Finishing Touch

  • Powdered Sugar (for dusting) – Adds a snowy, elegant appearance and enhances sweetness once cooled.

These Homemade Pistachio Wedding Cookies are sure to impress, offering a delightful combination of flavor and texture for any special occasion!

Step‑by‑Step Instructions for Homemade Pistachio Wedding Cookies

Step 1: Preheat the Oven
Begin by preheating your oven to 350°F (175°C). While the oven warms up, take a baking sheet and line it with parchment paper to prevent sticking. This preparation will ensure your Homemade Pistachio Wedding Cookies bake evenly and beautifully, ready to melt in your mouth as soon as they’re done.

Step 2: Chop the Pistachios
Next, take your fresh, high-quality pistachios and roughly chop them into small pieces. Aim for a mix of sizes to maintain some delightful crunch in your Homemade Pistachio Wedding Cookies. This step not only adds texture but also releases the nutty aroma, creating an inviting atmosphere in your kitchen.

Step 3: Mix Butter and Sugar
In a large mixing bowl, add softened unsalted butter and powdered sugar. Using an electric mixer, beat them together on medium speed for about 3-4 minutes until the mixture is light and fluffy. The fluffiness is key; it helps achieve that melt-in-your-mouth texture you’ll love in every bite of your cookies.

Step 4: Incorporate Vanilla and Salt
Once your butter and sugar are beautifully whipped, add in pure vanilla extract and a pinch of salt. Mix well until everything is evenly combined. The vanilla will deepen the flavor profile of your Homemade Pistachio Wedding Cookies, enhancing the overall taste and making these treats truly memorable.

Step 5: Add Dry Ingredients
Slowly add all-purpose flour to the bowl, mixing gradually to prevent a flour cloud. Once incorporated, fold in the chopped pistachios and a splash of water if necessary, until a soft dough forms. Be careful not to overmix; a gentle touch will ensure your cookies remain soft and delightful.

Step 6: Shape the Cookies
With your dough ready, scoop out portions and roll them into 1-inch balls using your palms. Place each ball on the lined baking sheet, leaving ample space between them to allow for spreading while baking. The shaping process is where your Homemade Pistachio Wedding Cookies begin to take form!

Step 7: Bake the Cookies
Transfer your baking sheet to the preheated oven and bake for 12-15 minutes. Keep a close eye on them; you’re looking for golden edges while the centers remain soft. This baking time will ensure that your cookies achieve that lovely, buttery richness everyone will enjoy.

Step 8: Cooling and Dusting
After baking, let the cookies cool on the baking sheet for about 5 minutes. Then carefully transfer them to a wire rack to cool completely. Once cooled, roll each cookie in powdered sugar to give them an elegant, snowy finish. This final touch enhances both the visual appeal and sweetness of your Homemade Pistachio Wedding Cookies.

Expert Tips for Homemade Pistachio Wedding Cookies

  • Keep It Light: Avoid overmixing the dough when combining flour and pistachios; this ensures your cookies remain soft and tender.

  • Citrusy Twist: For a refreshing touch, add some lemon or orange zest to the dough, enhancing the flavor profile of your Homemade Pistachio Wedding Cookies.

  • Salt Balancing Act: If you choose to use salted butter, remember to reduce the added salt to maintain a harmonious balance of flavors.

  • Storing Freshness: To enjoy your cookies at their best, store them in an airtight container at room temperature for up to 1 week, or freeze for longer storage.

  • Experiment with Nuts: Try substituting chopped pistachios with almonds, walnuts, or hazelnuts for a different flavor twist while keeping your cookies deliciously unique.

How to Store and Freeze Homemade Pistachio Wedding Cookies

Room Temperature: Store cookies in an airtight container at room temperature for up to 1 week to maintain their delightful texture and flavor.

Freezer: To freeze, place baked cookies in a single layer on a baking sheet, freeze until solid, then transfer to a freezer-safe bag for up to 2 months.

Reheating: When ready to enjoy, thaw at room temperature or reheat in the oven at 300°F (150°C) for 5-7 minutes to restore freshness.

Make-Ahead Dough: You can prepare the dough in advance; refrigerate it wrapped tightly in plastic for up to 2 days before baking your Homemade Pistachio Wedding Cookies.

Homemade Pistachio Wedding Cookies Variations

Feel free to explore these delightful twists and personalized adaptations that can elevate your cookie experience to new heights.

  • Nutty Alternatives: Swap pistachios for almonds, walnuts, or hazelnuts to create a different flavor profile and texture. Each nut brings its unique crunch that complements the buttery base perfectly.

  • Chocolate Drizzle: To add a decadent twist, drizzle or dip your baked cookies in melted chocolate. This indulgent layer not only enhances sweetness but also adds a rich contrast to the nutty flavor.

  • Citrus Zest: Incorporate some lemon or orange zest into the dough for a refreshing citrusy flavor that brightens up each bite. This elevates the sophistication and pairs beautifully with the pistachios.

  • Gluten-Free Option: Use a gluten-free flour blend in place of all-purpose flour for a gluten-free version of these delightful cookies. You won’t sacrifice flavor, and everyone can enjoy them!

  • Nut Extract: If you want to bypass nuts altogether, consider using almond extract or hazelnut extract instead. This provides a wonderful nutty flavor without any allergens.

  • Spiced Cookies: Add a pinch of cinnamon or cardamom to the dough for a warm, inviting spice that complements the pistachio beautifully, giving a lovely aromatic touch.

  • Caramel Infusion: Drizzle a bit of caramel sauce on top after baking for an exquisite finish. The caramel will add sweetness and a chewy contrast that makes these cookies irresistible.

  • Crunchy Variants: For a toasted flavor, lightly toast your chopped nuts before adding them to the dough. This deepens their flavor profile, turning the cookies into a truly gourmet experience.

Feel free to get creative, and remember to enjoy the journey of baking! And if you’d like to explore more comforting recipes, don’t forget to check out my Blueberry Breakfast Cookies or indulge in some Homemade Parmesan Crusted delights. Happy baking!

What to Serve with Homemade Pistachio Wedding Cookies

Creating a delightful experience with these delicious cookies is easy when you consider the perfect accompaniments that balance their rich, nutty flavor.

  • Elegant Tea: A warm cup of jasmine or Earl Grey tea highlights the buttery sweetness while adding a fragrant floral note that complements the cookies beautifully.
  • Fresh Berries: Juicy strawberries, raspberries, or blueberries provide a burst of freshness, contrasting with the cookies’ rich texture for a refreshing bite.
  • Creamy Vanilla Ice Cream: The velvety smoothness of vanilla ice cream pairs exquisitely, allowing the cookies to melt into a creamy indulgence that is simply divine.
  • Scented Coffee: A rich cup of coffee or espresso unleashes a deep flavor that enhances the cookies, making each nibble feel like a luxurious treat.
  • Whipped Cream: A dollop of freshly whipped cream brings a light, airy element that balances the richness of the cookies while adding an extra touch of elegance.
  • Chocolate Drizzle: A light drizzle of dark chocolate over the cookies adds a decadent twist; the bittersweet flavor pairs harmoniously with their buttery goodness.
  • Sparkling Lemonade: Refreshing sparkling lemonade adds a zesty brightness that contrasts the cookies’ sweetness, perfect for a sunny afternoon gathering.
  • White Wine: A chilled glass of semi-sweet white wine, such as Moscato, beautifully complements the cookies’ rich texture, elevating any occasion with sophistication.
  • Nutty Biscotti: Serve alongside nutty biscotti for a textural contrast, allowing each bite to bring something crunchy, further enhancing your overall experience.

Make Ahead Options

These Homemade Pistachio Wedding Cookies are perfect for meal prep, allowing you to enjoy their delightful flavor without the last-minute stress! You can prepare the cookie dough up to 2 days in advance; simply form the dough into balls and refrigerate them in an airtight container. By chilling the dough, you help the flavors meld while maintaining freshness. When you’re ready to bake, just place the chilled dough balls on a baking sheet and add an extra minute to the baking time if needed. This way, you’ll have the same melt-in-your-mouth quality, making it an ideal solution for busy weeknights or special occasions!

Homemade Pistachio Wedding Cookies Recipe FAQs

What is the best way to select ripe pistachios?
When choosing pistachios, look for nuts that are bright green and have an appealing aroma. Avoid ones that are dull or have dark spots, as these may indicate staleness. Buying in small batches can help ensure you get the freshest options.

How do I store leftover cookies, and how long do they last?
Absolutely! To keep your Homemade Pistachio Wedding Cookies fresh, store them in an airtight container at room temperature. They will maintain their delightful texture and flavor for up to 1 week, perfect for enjoying a treat each day!

Can I freeze my Homemade Pistachio Wedding Cookies, and how?
Very! To freeze your cookies, place them in a single layer on a baking sheet and freeze until completely solid. Once frozen, transfer them to a freezer-safe bag or container, where they can be kept for up to 2 months. When you’re ready to indulge, simply thaw them at room temperature or warm them in the oven at 300°F (150°C) for 5-7 minutes for that freshly-baked taste.

What should I do if my cookies come out too flat?
If your cookies are turning out too flat, it may be due to overmixing or too much butter. Next time, gently mix just until combined, and be sure to use softened butter rather than melted. Chilling the dough for about 30 minutes before baking can also help them maintain shape.

Are there any common allergies associated with these cookies?
Yes, these Homemade Pistachio Wedding Cookies contain nuts, specifically pistachios, which can pose allergies for some individuals. Always inform your guests about the ingredients, and if you’re catering to someone with nut allergies, consider substituting the pistachios with seeds or dried fruits instead.

Can I prepare the dough in advance?
Of course! You can prepare the cookie dough in advance. Just wrap it tightly in plastic wrap and refrigerate for up to 2 days. When you’re ready to bake, simply scoop and shape the dough as instructed without needing to worry about fresh ingredients!

Homemade Pistachio Wedding Cookies

Delightful Homemade Pistachio Wedding Cookies You’ll Love

These Homemade Pistachio Wedding Cookies offer a charming blend of rich buttery textures and nutty pistachio delight, perfect for any gathering.
Prep Time 20 minutes
Cook Time 15 minutes
Cooling Time 5 minutes
Total Time 40 minutes
Servings: 24 cookies
Course: Dessert
Cuisine: American
Calories: 100

Ingredients
  

For the Cookie Dough
  • 1 cup Unsalted Butter softened
  • 1 cup Powdered Sugar
  • 1 teaspoon Vanilla Extract preferably pure
  • 2 cups All-Purpose Flour or gluten-free flour
  • 1 cup Chopped Pistachios fresh and quality
  • 1/4 teaspoon Salt omit if using salted butter
  • 1-2 tablespoons Water to bind dough as needed
For the Finishing Touch
  • 1/2 cup Powdered Sugar for dusting

Equipment

  • Mixing Bowl
  • Electric mixer
  • Baking Sheet
  • Parchment Paper
  • Wire rack

Method
 

Step‑by‑Step Instructions
  1. Preheat your oven to 350°F (175°C) and line a baking sheet with parchment paper.
  2. Chop your fresh, high-quality pistachios into small pieces, ensuring a mix of sizes for texture.
  3. In a mixing bowl, beat softened unsalted butter and powdered sugar until light and fluffy (3-4 minutes).
  4. Add pure vanilla extract and a pinch of salt and mix until combined.
  5. Gradually add all-purpose flour and fold in the chopped pistachios, adding water if necessary to form a soft dough.
  6. Scoop and roll the dough into 1-inch balls and place them on the lined baking sheet, leaving space in between.
  7. Bake for 12-15 minutes until golden edges form while keeping centers soft.
  8. Allow cookies to cool for about 5 minutes before transferring to a wire rack. Roll cooled cookies in powdered sugar.

Nutrition

Serving: 1cookieCalories: 100kcalCarbohydrates: 10gProtein: 1gFat: 5gSaturated Fat: 3gPolyunsaturated Fat: 1gMonounsaturated Fat: 1gCholesterol: 15mgSodium: 30mgPotassium: 50mgSugar: 5gVitamin A: 200IUCalcium: 10mgIron: 0.5mg

Notes

Cookies can be stored in an airtight container for up to 1 week or frozen for longer storage. You may also prepare the dough up to 2 days in advance.

Tried this recipe?

Let us know how it was!

Teriyaki Salmon Sushi Bake: A Cozy Twist on Sushi Night

As I prepared to surprise my family with an easy dinner, the scent of savory teriyaki salmon wafted through the kitchen, igniting excitement for a comforting meal. This Teriyaki Salmon Sushi Bake is my go-to recipe when I crave the deliciousness of sushi but want to skip the fancy rolling. With tender, marinated salmon nestled atop a bed of sticky sushi rice, it’s a dish that’s both impressive and effortlessly satisfying. The creamy avocado, spicy mayo, and crispy fried onions add delightful layers of texture that elevate this comfort food. Plus, it’s fully customizable, so everyone can tweak their portions just how they like! Are you ready to dive into this mouthwatering sushi-inspired creation?

Why is this Teriyaki Salmon Sushi Bake a must-try?

Comforting Appeal: This dish combines the beloved flavors of sushi into an easy-to-make bake, perfect for any night of the week.

Unforgettable Flavor: The perfectly glazed salmon bursts with savory teriyaki goodness, while the creamy avocado and spicy mayo add a delicious twist.

Customizable Fun: Personalize each portion with a variety of toppings to suit everyone’s taste buds!

Effortless Preparation: Skip the rolling, as this simple bake only requires a few steps to achieve impressive results.

Crowd-Pleasing Delight: Ideal for family dinners or casual get-togethers, it’s a guaranteed hit that invites second helpings!

For more sushi-inspired ideas, don’t miss out on my Honey Garlic Salmon or the delicious Baked Salmon Honey recipes!

Teriyaki Salmon Sushi Bake Ingredients

• Here’s everything you need to create this delicious Teriyaki Salmon Sushi Bake!

For the Salmon

  • ¾ lb Salmon – Coho salmon is recommended for its firm texture and flavor.
  • 3 tablespoons Teriyaki Sauce – Adds sweetness and depth; can substitute with Japanese BBQ sauce.
  • ¼ teaspoon Kosher Salt – Enhances salmon flavor; adjust based on personal preference.
  • ¼ teaspoon Garlic Powder – Adds flavor depth; fresh garlic can be used for a stronger flavor.

For the Base

  • 3 cups Cooked Sushi Rice – The sticky rice is essential for sushi-style texture.
  • 1 tablespoon Brown Sugar – Enhances caramelization; reduce for a less sweet profile.

For the Toppings

  • 1 small Avocado, cubed – Adds creaminess and freshness; can substitute with sliced cucumbers for crunch.
  • 3 tablespoons Spicy Mayo – Combines mayonnaise with sriracha for a creamy and spicy kick.
  • 1 tablespoon Furikake – A Japanese seasoning blend that enhances umami; can use sesame seeds and nori as substitutes.
  • 2 tablespoons Crispy Fried Onion Bits – Adds crunch; can be replaced with chopped nuts for a different texture.
  • 2 tablespoons Scallions, finely diced – Brightens the dish with a mild onion kick; can substitute with chives.

Step‑by‑Step Instructions for Teriyaki Salmon Sushi Bake

Step 1: Prepare the Salmon
Start by removing the skin from ¾ lb of coho salmon and cutting it into 1-inch pieces. In a bowl, combine the salmon with 3 tablespoons of teriyaki sauce, ¼ teaspoon of kosher salt, and ¼ teaspoon of garlic powder, allowing the flavors to meld for at least 15 minutes while you prep the rice and the baking dish.

Step 2: Build the Sushi Bake
Preheat your oven to 400°F. Take 3 cups of cooked sushi rice and press it evenly into the bottom of a greased baking dish, creating a solid base. Layer the marinated salmon pieces on top, ensuring even coverage. Sprinkle 1 tablespoon of brown sugar over the salmon to enhance the caramelization during broiling.

Step 3: Broil the Salmon
Set your oven to broil and position the baking dish on the top rack, about 6 inches from the heating element. Broil the sushi bake for about 6 minutes or until the salmon is caramelized and cooked through. Keep a close eye on it, as broiler times can vary; the salmon should look golden and slightly crispy on the edges.

Step 4: Add Toppings
Once broiled, carefully remove the dish from the oven. Start layering with the cubed avocado, distributing it evenly for creaminess. Next, drizzle on 3 tablespoons of spicy mayo, and then sprinkle 1 tablespoon of furikake for an umami kick. Finish the dish by adding 2 tablespoons of crispy fried onion bits and 2 tablespoons of finely diced scallions for a pop of color and crunch.

Step 5: Serve and Enjoy
Your Teriyaki Salmon Sushi Bake is now ready to be enjoyed! Serve it immediately while hot, allowing the layers of flavors and textures to shine. The warm salmon, sticky rice, and fresh toppings combine into a comforting dish that’s sure to impress your family or guests.

Teriyaki Salmon Sushi Bake Variations

Feel free to make this Teriyaki Salmon Sushi Bake your own with these delightful twists!

  • Shrimp Swap: Substitute the salmon with cooked shrimp. Their sweet flavor will pair beautifully with the teriyaki sauce!
  • Vegetarian Delight: Use cubed tofu or imitation crab for a vegetarian version that still captures the essence of sushi.
  • Creamy Addition: Add a layer of cream cheese before baking for a richer, decadent experience that dazzles the taste buds!
  • Crispy Crunch: Replace crispy fried onions with chopped nuts like almonds or pecans for a buttery crunch and a different flavor profile.
  • Tangy Twist: Incorporate diced pickled radish or cucumber for a refreshing crunch that brightens the dish.
  • Heat it Up: Adjust the spice by adding more sriracha to your spicy mayo or sprinkle togarashi seasoning on top for an extra kick!
  • Umami Boost: Mix in sautéed mushrooms for an earthy, umami-rich element that deepens the dish’s flavor.
  • Sushi Night Fun: Serve with sides like homemade ginger salad or miso soup for a complete sushi night experience!

For more sushi-inspired ideas, consider trying my Cheesy Spinach Bake or the Protein Egg Bake for delightful dishes that will impress your family!

Make Ahead Options

This Teriyaki Salmon Sushi Bake is ideal for meal prep, saving you time on busy weeknights! You can marinate the salmon and assemble the dish up to 24 hours in advance; simply cover it tightly with plastic wrap and refrigerate. The sushi rice can be cooked a day ahead and kept in an airtight container to maintain its moisture. When you’re ready to enjoy this delightful dish, broil the assembled bake directly from the fridge for about 6 minutes, or until the salmon is perfectly caramelized. This way, you’ll have a fresh, crowd-pleasing meal without the last-minute hustle, ensuring it remains just as delicious!

Storage Tips for Teriyaki Salmon Sushi Bake

Fridge: Store leftovers in an airtight container for up to 2 days. Make sure to let it cool completely before sealing to prevent condensation.

Freezer: For longer storage, freeze leftovers in an airtight container for up to 2 months. Thaw in the fridge overnight before reheating.

Reheating: To maintain texture, reheat gently in the oven at 350°F for about 10-15 minutes or until warmed through. Avoid the microwave, as it can make the rice chewy.

Serving: Refresh the dish by adding fresh toppings like avocado and scallions just before serving to enhance flavor and texture in your Teriyaki Salmon Sushi Bake.

Expert Tips for Teriyaki Salmon Sushi Bake

  • Marinate Well: Ensure the salmon is marinated for at least 15 minutes to infuse maximum teriyaki flavor into the fish.

  • Use Fresh Rice: Opt for freshly cooked sushi rice for the best texture. Cold rice can become too hard and lose its stickiness.

  • Watch the Broil: Keep a close eye while broiling to avoid burning. Cook until salmon is caramelized yet still tender.

  • Customize Toppings: Feel free to customize your Teriyaki Salmon Sushi Bake toppings according to your family’s preferences for a more personalized dish!

  • Keep it Warm: Serve immediately while hot for the best taste and melt-in-your-mouth experience. Reheat leftovers gently to maintain texture.

What to Serve with Teriyaki Salmon Sushi Bake

As you savor the layers of this delightful bake, consider these perfect accompaniments to create a warm and inviting meal.

  • Miso Soup: A comforting bowl of umami-rich miso soup balances the savory flavors of the sushi bake, providing a soothing start to your meal.

  • Steamed Edamame: Lightly salted edamame adds a fresh pop of green and a satisfying crunch, making it a nutritious and easy side.

  • Cucumber Salad: Refreshing cucumber salad drizzled with rice vinegar and sesame oil complements the richness of the salmon, enhancing your dining experience.

  • Sautéed Bok Choy: This tender, sautéed vegetable brings a mild crunch and a hint of sweetness that pairs beautifully with the soy notes in the dish.

  • Rice Paper Rolls: Fresh rice paper rolls filled with crispy vegetables and herbs provide a lovely contrast in texture, adding a fun, interactive element to your meal.

  • Chilled Sake: For the perfect drink pairing, serve chilled sake. Its smooth flavors harmonize with the teriyaki glaze while enhancing the overall dining experience.

  • Green Tea Ice Cream: Finish your meal on a delightful note with a scoop of creamy green tea ice cream. Its refreshing, slightly bitter flavor creates a perfect balance after the savory dish.

Teriyaki Salmon Sushi Bake Recipe FAQs

What should I look for when selecting salmon?
Absolutely! When selecting salmon for your Teriyaki Salmon Sushi Bake, look for bright, vibrant flesh without any dark spots or discoloration. Fresh salmon should have a mild, ocean-like smell — avoid those that have a strong fishy odor. I often recommend coho salmon for its firm texture, which holds up beautifully in this dish!

How should I store leftovers?
Very! Leftovers should be stored in an airtight container in the fridge for up to 2 days. Allow the sushi bake to cool completely before sealing to prevent condensation, which could make the rice soggy. When ready to enjoy, reheat gently in the oven at 350°F for about 10-15 minutes to restore its delightful texture.

Can I freeze the Teriyaki Salmon Sushi Bake?
Absolutely! To freeze, first let the dish cool completely. Then, store it in an airtight container or tightly wrap it in aluminum foil for up to 2 months. When you’re ready to enjoy, thaw it overnight in the fridge. Reheat it gently in the oven at 350°F until warmed through, which helps maintain the delicious texture.

What if my sushi rice is too dry?
Very! If your sushi rice seems too dry, you can add a small splash of water or a bit of additional teriyaki sauce to enhance its moisture. Gently fold it into the rice after cooking. Also, ensure that your rice is cooked properly: it should be sticky yet fluffy, not hard or clumpy, which can happen if it isn’t cooked or cooled correctly.

Are there any dietary considerations with this recipe?
Absolutely! If you’re accommodating dietary restrictions, you can substitute the salmon for cooked shrimp, imitation crab, or tofu for a vegetarian version. Additionally, be mindful of allergies when choosing toppings—whether you’re using spicy mayo, which includes sriracha, or fried onion bits, and be sure to check that they fit your dietary needs. Always feel free to experiment with flavors and ingredients!

Teriyaki Salmon Sushi Bake

Teriyaki Salmon Sushi Bake: A Cozy Twist on Sushi Night

This Teriyaki Salmon Sushi Bake combines savory teriyaki salmon with sticky rice for a comforting meal that's easy to prepare.
Prep Time 15 minutes
Cook Time 12 minutes
Total Time 27 minutes
Servings: 4 servings
Course: Dinner
Cuisine: Japanese
Calories: 360

Ingredients
  

For the Salmon
  • ¾ lb Salmon Coho salmon is recommended for its firm texture and flavor.
  • 3 tablespoons Teriyaki Sauce Adds sweetness and depth; can substitute with Japanese BBQ sauce.
  • ¼ teaspoon Kosher Salt Enhances salmon flavor; adjust based on personal preference.
  • ¼ teaspoon Garlic Powder Adds flavor depth; fresh garlic can be used for a stronger flavor.
For the Base
  • 3 cups Cooked Sushi Rice The sticky rice is essential for sushi-style texture.
  • 1 tablespoon Brown Sugar Enhances caramelization; reduce for a less sweet profile.
For the Toppings
  • 1 small Avocado Cubed; adds creaminess and freshness.
  • 3 tablespoons Spicy Mayo Combines mayonnaise with sriracha for a creamy and spicy kick.
  • 1 tablespoon Furikake A Japanese seasoning blend that enhances umami.
  • 2 tablespoons Crispy Fried Onion Bits Adds crunch; can be replaced with chopped nuts.
  • 2 tablespoons Scallions Finely diced; brightens the dish.

Equipment

  • baking dish
  • Oven

Method
 

Step-by-Step Instructions
  1. Start by removing the skin from ¾ lb of coho salmon and cutting it into 1-inch pieces. In a bowl, combine the salmon with 3 tablespoons of teriyaki sauce, ¼ teaspoon of kosher salt, and ¼ teaspoon of garlic powder, allowing the flavors to meld for at least 15 minutes while you prep the rice and the baking dish.
  2. Preheat your oven to 400°F. Take 3 cups of cooked sushi rice and press it evenly into the bottom of a greased baking dish, creating a solid base. Layer the marinated salmon pieces on top, ensuring even coverage. Sprinkle 1 tablespoon of brown sugar over the salmon to enhance the caramelization during broiling.
  3. Set your oven to broil and position the baking dish on the top rack, about 6 inches from the heating element. Broil the sushi bake for about 6 minutes or until the salmon is caramelized and cooked through.
  4. Once broiled, carefully remove the dish from the oven. Start layering with the cubed avocado, distributing it evenly for creaminess. Next, drizzle on 3 tablespoons of spicy mayo, and then sprinkle 1 tablespoon of furikake. Finish the dish by adding 2 tablespoons of crispy fried onion bits and 2 tablespoons of finely diced scallions.
  5. Your Teriyaki Salmon Sushi Bake is now ready to be enjoyed! Serve it immediately while hot, allowing the layers of flavors and textures to shine.

Nutrition

Serving: 1sliceCalories: 360kcalCarbohydrates: 40gProtein: 20gFat: 15gSaturated Fat: 3gPolyunsaturated Fat: 4gMonounsaturated Fat: 7gCholesterol: 60mgSodium: 500mgPotassium: 600mgFiber: 3gSugar: 2gVitamin A: 300IUVitamin C: 6mgCalcium: 40mgIron: 2mg

Notes

Customize toppings according to your preference for a more personalized dish.

Tried this recipe?

Let us know how it was!

Stay Connected

Get recipes via email: