Get my cookbooks

Savory Baked Salmon: Quick, Healthy Delight for Dinner

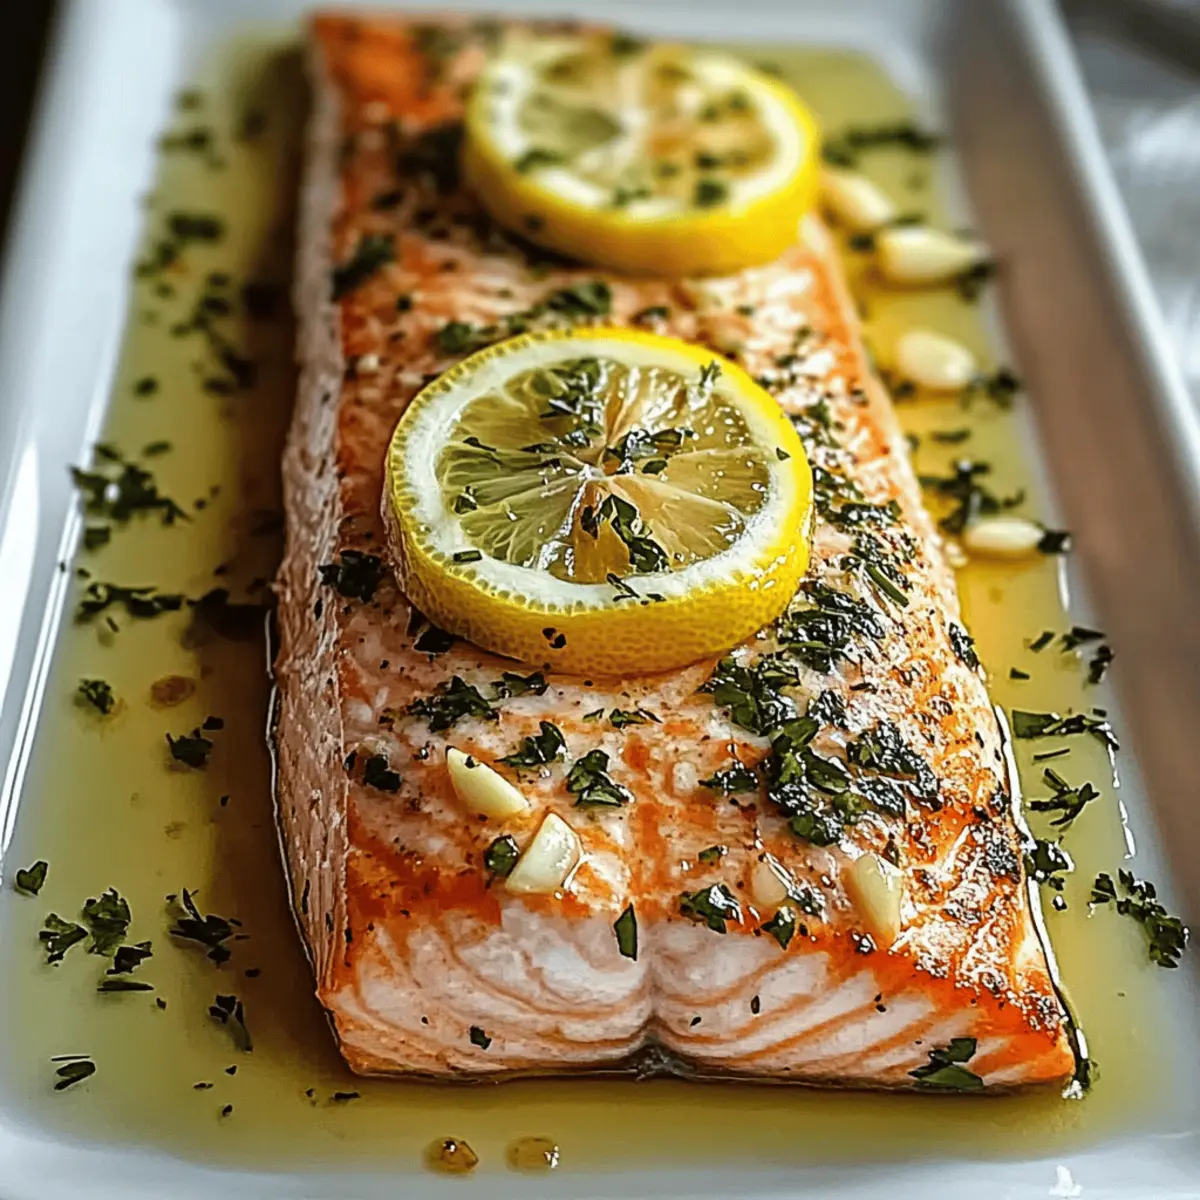
As the clock ticks down to dinner, the familiar sizzle of salmon fills the air, reminding me why I love cooking. The scent is like a warm hug—comforting yet invigorating, setting the stage for a delightful meal. Savory Baked Salmon is my go-to recipe when I want to impress without the fuss. This dish not only offers a healthy dose of omega-3 fatty acids but also comes together in a flash, making it perfect for busy weeknights. With its flaky texture and a tantalizing marinade, it’s a crowd-pleaser that turns an ordinary evening into something special. Curious about how to create this flavorful masterpiece? Let’s dive in!

Why is Savory Baked Salmon a Must-Try?

Freshness Matters: Using quality salmon fillets makes all the difference in flavor and texture. Effortless Prep: With just a few ingredients, you can have a gourmet dinner ready in no time. Health Benefits: The omega-3s in salmon are fantastic for your heart health—perfect for nutritious weeknight meals. Versatile Pairings: Serve it with roasted vegetables or a light salad for a complete meal. Interested in adding more variety? Try serving it alongside Sweet Savory Brown pork chops for something truly delightful! Embrace the joy of home-cooked meals with this simple yet impressive recipe.

Savory Baked Salmon Ingredients

For the Salmon
Salmon Fillets – Use bright, moist fillets for the best flavor and texture.
Olive Oil – Adds richness; can be substituted with melted butter for a different taste.
Lemon Juice – Fresh lemon juice brightens flavors beautifully—bottled is a quick alternative if needed.
Minced Garlic – Enhances the depth of flavor; feel free to swap with garlic powder in a pinch.
Oregano – An earthy note that pairs perfectly with salmon; try thyme or rosemary for a lovely variation.
Salt and Black Pepper – Essential for seasoning; kosher salt offers better control when seasoning.
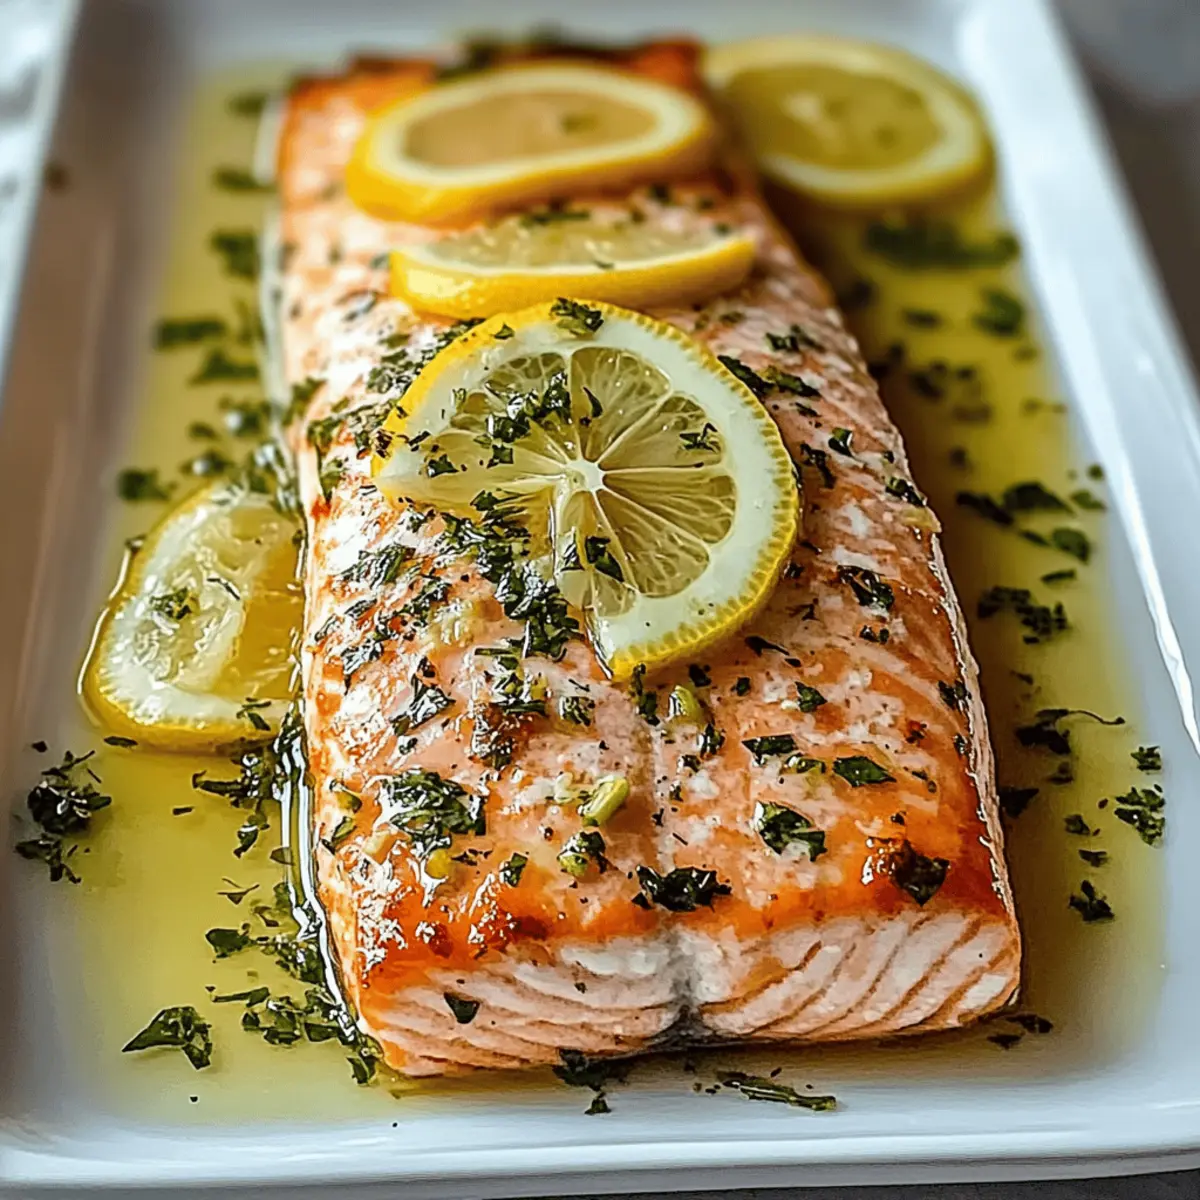
Lemon Slices – Optional, but they add a lovely touch and extra flavor on serving.

For Garnish (Optional)
Fresh Parsley – Optional garnish that adds a pop of color and freshness to your dish.

Experience the delightful taste of Savory Baked Salmon, and enjoy an easy yet wholesome meal!

Step‑by‑Step Instructions for Savory Baked Salmon

Step 1: Preheat the Oven
Begin by preheating your oven to 375°F (190°C). This ensures the ideal cooking temperature for your Savory Baked Salmon, resulting in a perfectly flaky texture. While the oven heats up, take a moment to gather your ingredients and prepare your baking dish. A glass or ceramic dish works beautifully for even cooking.

Step 2: Make the Marinade
In a mixing bowl, whisk together the olive oil, fresh lemon juice, minced garlic, oregano, salt, and black pepper to create a rich marinade. The combination of these ingredients will add depth and flavor to your salmon fillets. Keep whisking until everything is well blended, and the oil emulsifies with the other ingredients.

Step 3: Prepare the Salmon
Place the fresh salmon fillets skin-side down in your prepared baking dish. Drizzle the marinade evenly over each fillet, ensuring they are well coated. Consider using a brush or spoon to spread the marinade if needed—it helps enhance the flavor throughout the cooking process.

Step 4: Marinate the Salmon
Allow the salmon to marinate for at least 15 minutes, or up to an hour for more intense flavor. As you wait, you can tidy up your kitchen or prepare side dishes. This resting period allows for the ingredients to soak in and makes the flavors of your Savory Baked Salmon pop.

Step 5: Bake the Salmon
Once marinated, place the baking dish in your preheated oven and bake for 12-15 minutes. Keep an eye on the salmon; it should become opaque and flake easily when tested with a fork. The internal temperature should reach 145°F (63°C) for perfect doneness.

Step 6: Garnish and Serve
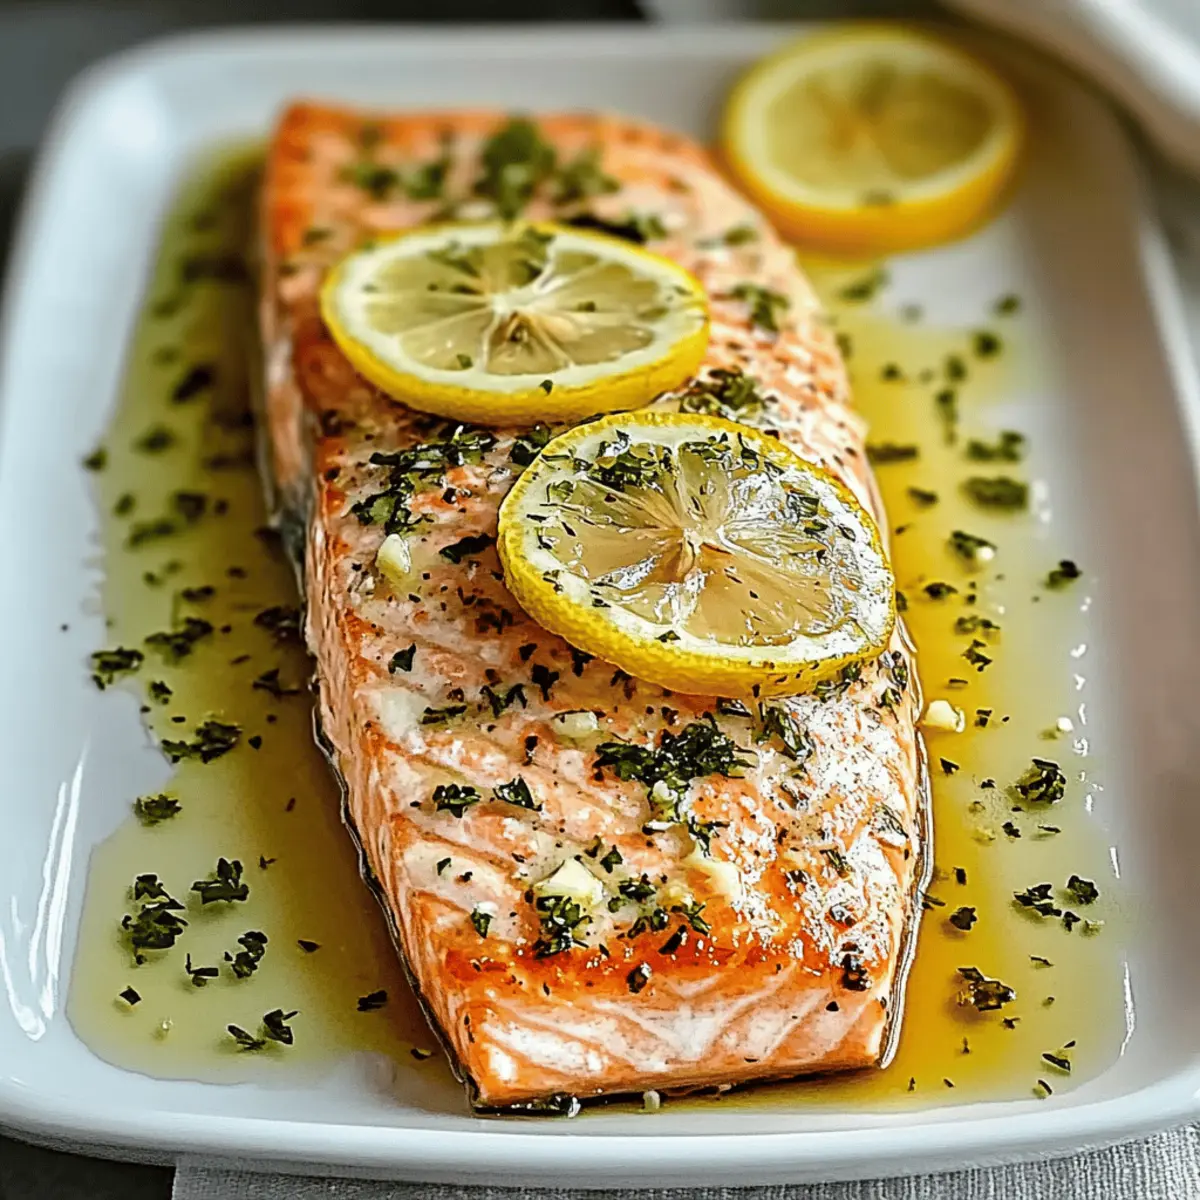
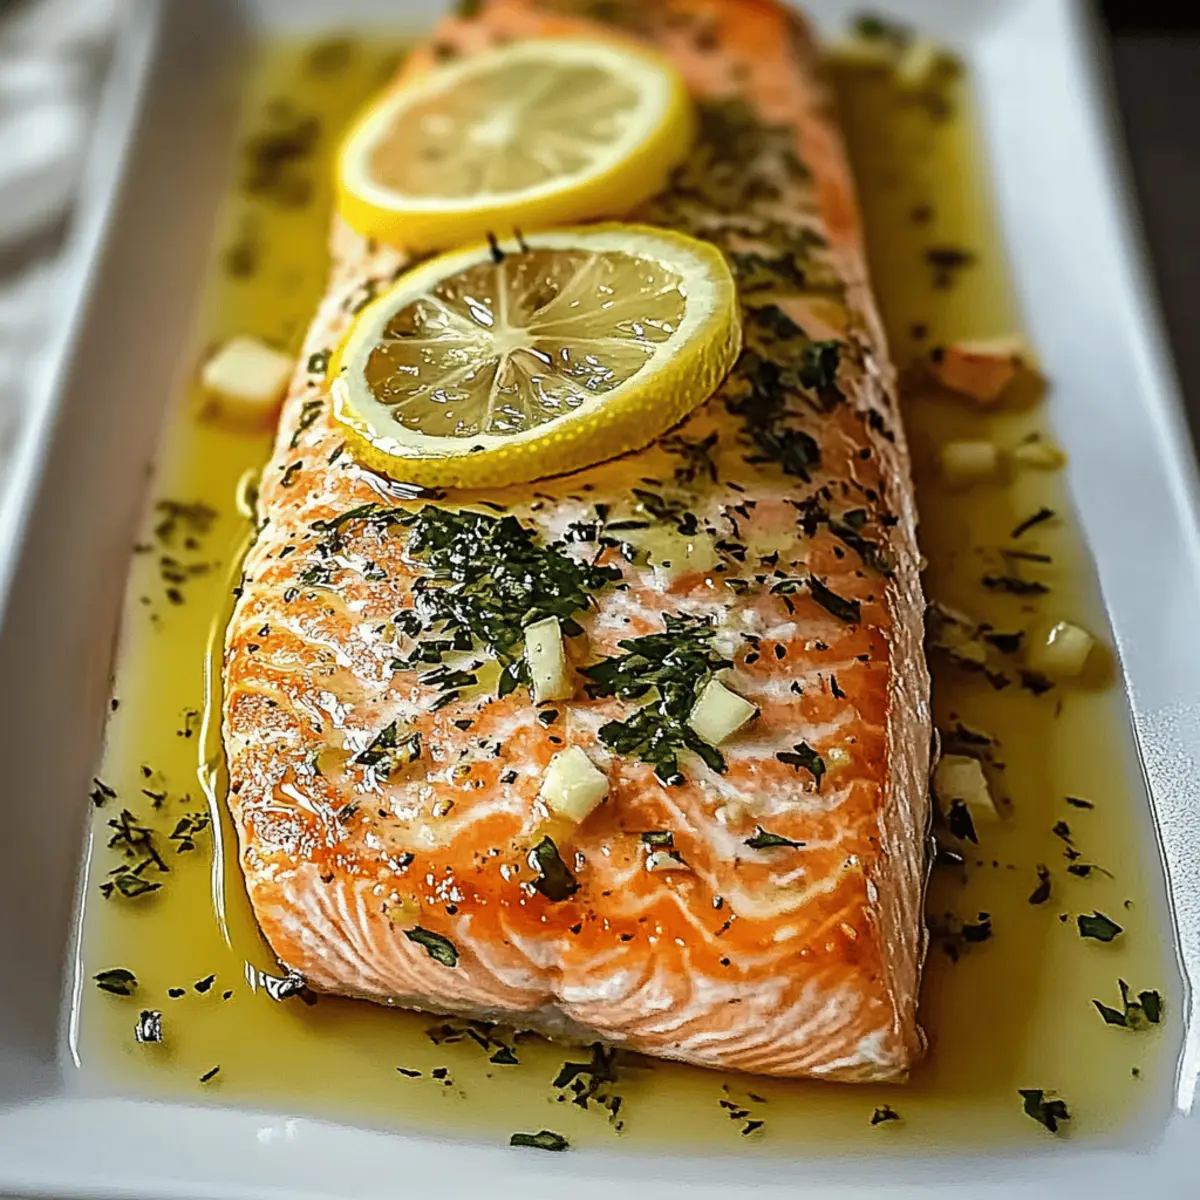
When your Savory Baked Salmon is done, remove it from the oven and let it sit for a few moments. Garnish with fresh lemon slices and parsley if desired, adding vibrant color and freshness to your dish. Serve it alongside your favorite sides for a wholesome and delightful meal.

How to Store and Freeze Savory Baked Salmon

  • Fridge: Store leftover Savory Baked Salmon in an airtight container for up to 3 days. This keeps it fresh and ready for quick meals or snacks.
  • Freezer: For longer storage, wrap salmon tightly in plastic wrap and foil before placing it in the freezer. It can last for up to 3 months this way.
  • Reheating: To enjoy reheated salmon, place it in a preheated oven at 350°F (175°C) for about 10-15 minutes. This will help it retain its moisture and flaky texture.
  • Avoiding Dryness: If reheating from the fridge or freezer, consider adding a splash of lemon juice or a drizzle of olive oil to keep the salmon moist and flavorful.

Make Ahead Options

Savory Baked Salmon is an excellent choice for meal prep enthusiasts! You can marinate the salmon fillets up to 24 hours in advance, allowing the flavors to deepen perfectly. To do this, simply follow the marinade instructions, place the salmon in an airtight container, and refrigerate it. When ready to cook, just preheat your oven and bake as directed—this ensures your salmon is just as delicious as if made fresh! Additionally, any side dishes you plan to serve can be prepped ahead, allowing for stress-free cooking during busy weeknights. Enjoy a wholesome and flavorful dinner with minimal effort!

What to Serve with Savory Baked Salmon

Create an unforgettable dining experience by pairing fresh flavors and textures that complement your savory salmon dish.

  • Creamy Mashed Potatoes: Their buttery richness contrasts beautifully with the flaky salmon, making each bite a comforting delight.
  • Lemon-Garlic Roasted Asparagus: The crispness of asparagus, tossed in garlic and lemon, brightens your plate and enhances the dish’s citrus notes.
  • Quinoa Salad: A protein-packed blend of quinoa, cherry tomatoes, and herbs adds a light, refreshing side that’s as nutritious as it is delicious.
  • Garlic Butter Green Beans: Tender green beans sautéed in garlic butter balance the flavors, providing a delightful crunch with the salmon’s tenderness.
  • Fresh Garden Salad: Crisp romaine, arugula, and cucumber with a zesty vinaigrette create a bright, refreshing contrast that elevates the meal.
  • Chardonnay or Sauvignon Blanc: A chilled glass of these white wines pairs exceptionally well, enhancing the salmon’s flavors while providing a refreshing sip.
  • Citrus Fruit Salad: A sweet and tangy fruit salad with oranges, grapefruit, and mint adds a vibrant finish to your dinner, cleansing the palate beautifully.
  • Chocolate Mousse: For dessert, a light and airy chocolate mousse offers a decadent treat that feels indulgent without being overwhelming after the savory main course.

Expert Tips for Savory Baked Salmon

  • Monitor Doneness: Use a meat thermometer to ensure your salmon reaches 145°F (63°C) for perfect texture without drying out.
  • Marinade Time: Allowing the salmon to marinate for at least 15 minutes boosts flavor. For best results, marinate up to an hour.
  • Avoid Overcooking: Keep a close eye as it bakes; overcooking will lead to a tough, dry texture. Check for flakiness at around 12 minutes.
  • Choose Quality Ingredients: Fresh salmon fillets will make your Savory Baked Salmon shine. Look for bright, moist fillets to ensure the best flavor.
  • Experiment with Herbs: Don’t hesitate to try different herbs like dill or basil in the marinade for exciting variations in taste!

Savory Baked Salmon: Customization Ideas

Feel free to let your creativity shine by customizing this delicious recipe to suit your taste buds.

  • Herb Variations: Try mixing in different herbs like dill or basil. They provide a refreshing twist and elevate the salmon’s flavor profile beautifully.
  • Citrus Swap: Instead of lemon juice, use lime juice for a zesty alternative. This minor change brightens the dish with a different citrus kick.
  • Butter Up: Substitute olive oil with melted butter for a richer taste that adds depth and a touch of indulgence.
  • Spice it Up: Add a pinch of cayenne pepper or chili flakes to the marinade for a delightful spicy kick. The heat will balance with the richness of the salmon, creating an exciting flavor contrast.
  • Smoky Profile: Incorporate smoked paprika into the marinade for a hint of smokiness that pairs beautifully with the salmon’s natural flavor.
  • Sweet Touch: Consider drizzling a bit of honey over the salmon before baking for a sweet and savory contrast. It caramelizes beautifully, creating a glossy finish.
  • Vegetable Medley: Layer your salmon on a bed of asparagus or zucchini in the baking dish. The veggies will absorb the flavors while braising, making a delightful one-pan meal.

For more delicious ideas, if you’re in the mood for something different, try the Honey Garlic Salmon bites or explore the rich flavors of Garlic Butter Baked chicken! Enjoy your culinary adventures!

Savory Baked Salmon Recipe FAQs

What should I look for when selecting salmon fillets?
When choosing salmon fillets, prioritize freshness. Look for bright, moist fillets with a vibrant pink or red color. Avoid any with dark spots or a dull appearance, as these can indicate aging. Firmness is also key; the fillets should bounce back when pressed gently.

How do I store leftover Savory Baked Salmon?
Store leftover Savory Baked Salmon in an airtight container in the refrigerator for up to 3 days. It’s great for quick meals! Make sure to let it cool completely before sealing to maintain freshness. Enjoy it cold in salads, or gently reheat in the oven to savor it warm again.

Can I freeze Savory Baked Salmon?
Absolutely! To freeze Savory Baked Salmon, wrap it tightly in plastic wrap, followed by aluminum foil or place it in a freezer bag to prevent freezer burn. This method keeps it fresh for up to 3 months. Just remember to defrost it overnight in the refrigerator when you’re ready to enjoy it again.

What if my salmon turns out dry after baking?
Dry salmon often results from overcooking. To avoid that, keep an eye on the clock and check for doneness as soon as it hits 12 minutes of baking time. Use a meat thermometer to ensure it reaches an internal temperature of 145°F (63°C). If you find your salmon has dried out, try serving it with a sauce or a drizzle of olive oil to add moisture back in.

Is Savory Baked Salmon safe for my pet to eat?
While salmon is generally safe for dogs in moderation, ensure it’s fully cooked and free of any seasoning or additives. Avoid any large bones that could pose a choking hazard. Always consult your veterinarian for dietary recommendations tailored to your pet’s specific health needs.

Can I use other herbs or spices instead of oregano?
The more the merrier! You can easily switch oregano for other herbs like dill, thyme, or basil to reinvent the flavor profile of your Savory Baked Salmon. If you prefer a spicier kick, consider adding red pepper flakes or smoked paprika to the marinade for a delightful twist.

Savory Baked Salmon

Savory Baked Salmon: Quick, Healthy Delight for Dinner

Savory Baked Salmon is a quick and healthy dinner option packed with omega-3s, perfect for busy weeknights.
Prep Time 15 minutes
Cook Time 15 minutes
Marinating Time 15 minutes
Total Time 45 minutes
Servings: 4 servings
Course: Dinner
Cuisine: American
Calories: 300

Ingredients
  

For the Salmon
  • 4 fillets Salmon Use bright, moist fillets for the best flavor and texture.
  • 2 tablespoons Olive Oil Can be substituted with melted butter.
  • 2 tablespoons Lemon Juice Fresh is best; bottled is a quick alternative.
  • 2 cloves Minced Garlic Can substitute with garlic powder in a pinch.
  • 1 teaspoon Oregano Pairs perfectly with salmon; try thyme or rosemary.
  • to taste Salt Kosher salt offers better control.
  • to taste Black Pepper
  • optional Lemon Slices Add a lovely touch and flavor.
For Garnish
  • 1 tablespoon Fresh Parsley Optional garnish for color and freshness.

Equipment

  • Oven
  • Mixing Bowl
  • baking dish

Method
 

Step‑by‑Step Instructions
  1. Preheat the oven to 375°F (190°C). Prepare your baking dish.
  2. In a mixing bowl, whisk together olive oil, lemon juice, minced garlic, oregano, salt, and black pepper to create the marinade.
  3. Place the salmon fillets skin-side down in the baking dish and drizzle the marinade over them.
  4. Allow the salmon to marinate for at least 15 minutes.
  5. Bake the salmon in the preheated oven for 12-15 minutes, until opaque and flakes easily.
  6. Garnish with lemon slices and parsley, then serve.

Nutrition

Serving: 1filletCalories: 300kcalProtein: 35gFat: 17gSaturated Fat: 3gPolyunsaturated Fat: 3gMonounsaturated Fat: 8gCholesterol: 70mgSodium: 250mgPotassium: 700mgVitamin A: 500IUVitamin C: 2mgCalcium: 15mgIron: 0.5mg

Notes

Fresh salmon fillets will enhance the flavor significantly. Marinating longer boosts flavor.

Tried this recipe?

Let us know how it was!

Savory Garlic Butter Meatballs for Cozy Nights In

As I stood in my kitchen, the inviting scent of garlic dancing with melted butter sent my senses on a delicious adventure. It’s moments like this that remind me why I adore cooking—transforming everyday ingredients into something extraordinary. Today, I’m thrilled to share my Garlic Butter Meatballs with Parmesan Linguine, a dish that turns comfort food into an elegant meal, perfect for both cozy family dinners and special gatherings. One of the best perks? This recipe is quick to prepare, meaning you can savor homemade goodness without spending hours in the kitchen. Plus, the creamy linguine paired with these savory meatballs is sure to win over even the pickiest eaters. Are you ready to bring a taste of Italian-American magic to your table? Let’s dive into the recipe!

What makes Garlic Butter Meatballs special?

Irresistible Aroma: The moment you start cooking, the combination of garlic and butter fills your kitchen with a mouthwatering scent that beckons everyone to join you at the table.

Quick and Easy: In just under 30 minutes, you can transform simple ingredients into a delicious meal, making it perfect for busy weeknights or impromptu gatherings.

Crowd-Pleasing Flavor: The savory meatballs, bathed in rich garlic butter, marry perfectly with creamy Parmesan linguine, ensuring there’s something for everyone to love.

Versatile Creativity: Feel free to mix in your choice of herbs or spices, or substitute linguine with spiralized veggies for a lighter option; this dish adapts to many preferences!

Comfort Food Elevated: Serve it with a side of garlic bread or a fresh salad, and you’ll not only enjoy a hearty meal, but a delightful dining experience too!

This is culinary comfort food that comes together effortlessly, making your home-cooked confections feel gourmet!

Garlic Butter Meatballs Ingredients

For the Meatballs
Ground Beef – Primary protein source; mixing with ground pork enhances flavor.
Large Egg – Binds the meatball mixture, crucial for structure; don’t skip it!
Breadcrumbs – Provides texture; gluten-free breadcrumbs are a great substitute.
Grated Parmesan Cheese – Adds rich creaminess; freshly grated yields the best flavor.
Chopped Parsley – Freshness and color; you can also use basil or oregano for variety.
Garlic (minced) – Essential for flavor; freshly minced garlic has a stronger taste.
Salt & Black Pepper – Enhances all flavors; adjust to your taste preference.

For the Garlic Butter Sauce
Unsalted Butter – Forms the base for the garlic butter sauce; unsalted offers better seasoning control.
Olive Oil – Used for searing the meatballs; vegetable oil is a good alternative.
Red Pepper Flakes (optional) – Adds a touch of heat; cayenne is a spicy substitute.
Lemon Juice – Brightens up the sauce; always opt for freshly squeezed.

For the Linguine
Linguine – The perfect base for serving meatballs; substitute with any pasta or spiralized veggies for a lighter dish.
Heavy Cream – Creates a creamy sauce; consider a milk and butter blend for a lighter option.

This Garlic Butter Meatballs recipe is not just a meal; it’s a warm invitation to gather around the table!

Step‑by‑Step Instructions for Garlic Butter Meatballs

Step 1: Make the Meatballs
In a large mixing bowl, combine ground beef, egg, breadcrumbs, grated Parmesan, chopped parsley, minced garlic, salt, and black pepper. Mix gently until just combined, being careful not to overmix, which can make the meatballs tough. Shape the mixture into 1-inch meatballs and place them on a baking sheet while you prepare to cook them.

Step 2: Sear the Meatballs
Heat 2 tablespoons of olive oil in a skillet over medium heat. Once the oil shimmers, carefully add the meatballs in a single layer. Sear for 6–8 minutes, turning occasionally, until they are browned on all sides but not fully cooked through. Remove the meatballs from the skillet and set them aside on a plate while you make the sauce.

Step 3: Cook the Garlic Butter Sauce
In the same skillet, reduce the heat to low and add 4 tablespoons of unsalted butter. Allow the butter to melt, then add minced garlic and red pepper flakes if using. Sauté for 1–2 minutes until the garlic is fragrant and just starting to turn golden, stirring frequently to avoid burning. Stir in the lemon juice and chopped parsley.

Step 4: Simmer the Meatballs
Return the browned meatballs to the skillet, ensuring they’re coated in the garlic butter sauce. Cover the skillet and let them simmer on low heat for 5–7 minutes, or until the meatballs are fully cooked, reaching an internal temperature of 160°F. The sauce should slightly thicken and envelop the meatballs in its rich flavor.

Step 5: Make the Pasta
While the meatballs are simmering, cook linguine according to package instructions in a large pot of boiling salted water. This usually takes about 8–10 minutes for al dente. Reserve ½ cup of the pasta water before draining the linguine. Return the drained pasta to the pot for the next step.

Step 6: Create the Creamy Sauce
In a separate saucepan, melt another tablespoon of butter over medium heat. Add ½ cup of heavy cream and bring to a gentle simmer. Stir in the reserved pasta water and grated Parmesan cheese until melted and creamy. Season the sauce with salt and pepper to taste, mixing well until everything is combined.

Step 7: Plate and Serve
To serve, twirl a generous portion of creamy linguine onto each plate, topping it with several garlic butter meatballs. Drizzle the pan’s garlic butter sauce over the dish and garnish with additional chopped parsley and freshly grated Parmesan. Serve while warm and enjoy this delightful Garlic Butter Meatballs dish!

Garlic Butter Meatballs Variations

Feel free to personalize these delightful garlic butter meatballs to suit your taste and dietary needs!

  • Turkey Meatballs: Substitute ground beef with ground turkey for a lighter option, packed with lean protein.
    Let your kitchen be filled with an aromatic twist—turkey meatballs offer a fresh take while keeping the comfort factor intact!

  • Low-Carb Option: Swap linguine with spiralized zucchini for a delightful, veggie-packed alternative.
    This twist will brighten your plate while allowing the savory flavors of the meatballs to shine through!

  • Spicy Version: Increase the amount of red pepper flakes or add cayenne pepper for a fiery kick.
    Crank up the heat and awaken your taste buds—this will add a dimension of excitement to your meal!

  • No Cream Alternative: Replace heavy cream with a mix of olive oil and pasta water combined with cheese for a lighter sauce.
    Enjoy the same velvety texture without the added creaminess—a great choice for those mindful of calories!

  • Vegetarian Meatballs: Use lentils or mushrooms blended with spices and breadcrumbs for a meat-free delight.
    These alternatives provide a hearty and satisfying bite, ensuring nobody misses the beef!

  • Add Veggies: Mix in finely chopped spinach or grated carrots into the meatball mixture for extra nutrition.
    This subtle inclusion gives you added goodness without sacrificing flavor—everyone will love the hidden veggies!

  • Herb-Infused: Experiment with different herbs; try adding rosemary or thyme for a fragrant, flavorful twist.
    Switching up the herbs will create a unique experience every time you make these delicious meatballs!

For even more delicious inspiration, consider trying out Garlic Butter Baked Chicken or dive into the rich flavors of Honey Garlic Salmon for a different kind of culinary adventure!

Expert Tips for Garlic Butter Meatballs

  • Don’t Overmix: When combining ingredients, mix just until incorporated. Overmixing can lead to tough meatballs, undermining their tenderness.

  • Perfect Brown: Sear meatballs until they are golden brown on the outside. This enhances flavor—just be sure not to cook them through at this stage.

  • Watch the Garlic: Pay close attention while cooking the garlic; it can burn quickly and turn bitter. Perfectly sautéed garlic is key to a delicious sauce!

  • Creamy Consistency: If the creamy sauce seems too thick, add more reserved pasta water gradually until you reach your desired consistency.

  • Garnish Wisely: A sprinkle of fresh parsley and an extra dash of Parmesan not only beautifies the plate but elevates the flavors of the Garlic Butter Meatballs!

  • Store Properly: Leftover meatballs can be stored in an airtight container for up to 4 days. Reheat gently to maintain their lush saucy quality.

How to Store and Freeze Garlic Butter Meatballs

Refrigerator: Store leftovers in an airtight container for up to 4 days. Ensure they are completely cooled before sealing to maintain freshness.

Freezer: Freeze cooked Garlic Butter Meatballs (without pasta) for up to 3 months. Place them in a single layer on a baking sheet to freeze, then transfer to a freezer bag for space-saving storage.

Reheat: When ready to enjoy, warm the meatballs and garlic butter sauce on the stovetop over low heat, adding a splash of water if necessary to prevent drying out.

Thawing: For best results, thaw frozen meatballs overnight in the fridge before reheating. This will help maintain their juicy texture!

What to Serve with Garlic Butter Meatballs with Parmesan Linguine

A delightful meal deserves equally delicious accompaniments to elevate your dining experience even further.

  • Crisp Green Salad: A light, refreshing salad with mixed greens and a simple vinaigrette balances the richness of the meatballs and creamy linguine.
  • Garlic Bread: Warm, buttery garlic bread provides the perfect vehicle for savoring every drop of that delicious garlic butter sauce.
  • Roasted Vegetables: Colorful roasted veggies like zucchini, bell peppers, and cherry tomatoes add a burst of flavor and nutrition to your dinner table.
  • Sautéed Spinach: A quick sauté of fresh spinach with garlic complements the flavors of the dish while adding a healthy touch.
  • Chardonnay or Pinot Grigio: A glass of chilled white wine beautifully enhances the meal, with its acidity cutting through the richness of the butter and cream.
  • Tiramisu: End your meal on a sweet note with this classic Italian dessert, offering a creamy, coffee-infused contrast to the savory main course.

These pairings not only complement the savory Garlic Butter Meatballs but also create a memorable dining experience that invites everyone to linger at the table a little longer.

Make Ahead Options

These Garlic Butter Meatballs are perfect for busy home cooks looking to save time during the week! You can prepare the meatball mixture and shape the balls up to 24 hours in advance; just refrigerate them in an airtight container to maintain their freshness. Additionally, you can cook and freeze the meatballs without the sauce for up to 3 months. When you’re ready to serve, simply reheat the meatballs in the garlic butter sauce on the stove. To prevent the meatballs from drying out, add a splash of water when reheating. With these make-ahead options, you can enjoy a comforting meal with minimal effort on hectic evenings!

Garlic Butter Meatballs with Parmesan Linguine Recipe FAQs

What should I look for when selecting ground beef?
Absolutely! When choosing ground beef for your Garlic Butter Meatballs, look for meat that is bright red in color with a good amount of marbling. This means it has a healthy amount of fat, which will keep the meatballs juicy and flavorful. Try to select ground beef with a lean-to-fat ratio of around 80/20 for the best balance of taste and tenderness.

How long can I store leftover meatballs in the fridge?
Very! You can store leftover Garlic Butter Meatballs in an airtight container in the refrigerator for up to 4 days. Make sure to allow them to cool completely before sealing to keep them fresh and safe.

Can I freeze Garlic Butter Meatballs, and how do I properly do it?
Absolutely! To freeze your Garlic Butter Meatballs, cool them completely before placing them on a baking sheet in a single layer. Freeze them for about 1-2 hours until solid, then transfer them to a freezer-safe bag or container. They can be stored in the freezer for up to 3 months. When you’re ready to enjoy, thaw them overnight in the fridge before reheating.

What should I do if my meatballs turn out tough?
If your meatballs end up tough, it’s likely that they were overmixed or overcooked. To avoid this in the future, be gentle when combining the ingredients—just mix until everything is combined. When cooking, brown the meatballs on the outside but only cook them through during the simmering step to keep them tender and juicy.

Are there any allergen considerations for this recipe?
Very! The Garlic Butter Meatballs contain common allergens like gluten (from breadcrumbs), dairy (from cheese and cream), and eggs. If you’re catering to specific dietary needs, you can use gluten-free breadcrumbs and opt for dairy-free cheese or cream alternatives. Always double-check the labels to ensure safety for anyone with food allergies.

How can I best reheat the frozen meatballs?
To reheat frozen meatballs, thaw them overnight in the refrigerator for even warming. Then, place them in a pan over low heat with a splash of water or broth to prevent drying out. Cook gently until heated through, about 10–15 minutes, making sure they reach a safe internal temperature of 165°F before serving. Enjoy that delightful garlic butter goodness!

Garlic Butter Meatballs

Savory Garlic Butter Meatballs for Cozy Nights In

Indulge in Garlic Butter Meatballs, a quick and elegant comfort meal perfect for cozy gatherings.
Prep Time 15 minutes
Cook Time 20 minutes
Total Time 35 minutes
Servings: 4 servings
Course: Dinner
Cuisine: Italian-American
Calories: 450

Ingredients
  

For the Meatballs
  • 1 pound Ground Beef Mix with ground pork for enhanced flavor.
  • 1 large Egg Binds the meatball mixture.
  • 1/2 cup Breadcrumbs Gluten-free breadcrumbs are a great substitute.
  • 1/3 cup Grated Parmesan Cheese Freshly grated yields the best flavor.
  • 1/4 cup Chopped Parsley Freshness and color.
  • 2 cloves Garlic (minced) Freshly minced garlic has a stronger taste.
  • 1 teaspoon Salt Enhances all flavors.
  • 1/2 teaspoon Black Pepper Adjust to your taste preference.
For the Garlic Butter Sauce
  • 4 tablespoons Unsalted Butter Forms the base for the garlic butter sauce.
  • 2 tablespoons Olive Oil Vegetable oil is a good alternative.
  • 1/4 teaspoon Red Pepper Flakes (optional) Adds a touch of heat.
  • 1 tablespoon Lemon Juice Always opt for freshly squeezed.
For the Linguine
  • 8 ounces Linguine Substitute with any pasta or spiralized veggies for a lighter dish.
  • 1/2 cup Heavy Cream Consider a milk and butter blend for a lighter option.

Equipment

  • Mixing Bowl
  • Skillet
  • Saucepan
  • Baking Sheet
  • Pot

Method
 

Step-by-Step Instructions
  1. In a large mixing bowl, combine ground beef, egg, breadcrumbs, grated Parmesan, chopped parsley, minced garlic, salt, and black pepper. Mix gently until just combined, shape into 1-inch meatballs and place them on a baking sheet.
  2. Heat 2 tablespoons of olive oil in a skillet over medium heat. Add the meatballs in a single layer and sear for 6–8 minutes, turning occasionally, until browned on all sides but not fully cooked. Remove from skillet.
  3. In the same skillet, reduce the heat to low and add 4 tablespoons of unsalted butter. Allow to melt, then add minced garlic and red pepper flakes. Sauté for 1–2 minutes until garlic is fragrant. Stir in lemon juice and chopped parsley.
  4. Return the browned meatballs to the skillet, ensuring they're coated in the garlic butter sauce. Cover and let them simmer on low heat for 5–7 minutes, or until fully cooked.
  5. While the meatballs are simmering, cook linguine according to package instructions in boiling salted water for about 8–10 minutes. Reserve ½ cup of pasta water before draining.
  6. In a separate saucepan, melt another tablespoon of butter. Add ½ cup of heavy cream and bring to a gentle simmer. Stir in reserved pasta water and grated Parmesan until creamy. Season sauce with salt and pepper.
  7. To serve, twirl a generous portion of creamy linguine onto each plate, top with several garlic butter meatballs, drizzle with garlic butter sauce, and garnish with chopped parsley and fresh Parmesan.

Nutrition

Serving: 1servingCalories: 450kcalCarbohydrates: 30gProtein: 25gFat: 30gSaturated Fat: 15gPolyunsaturated Fat: 5gMonounsaturated Fat: 8gCholesterol: 120mgSodium: 800mgPotassium: 600mgFiber: 2gSugar: 2gVitamin A: 10IUVitamin C: 15mgCalcium: 20mgIron: 15mg

Notes

Leftover meatballs can be stored in an airtight container for up to 4 days. Reheat gently to maintain their quality.

Tried this recipe?

Let us know how it was!

Savory Garlic Butter Meatballs for Cozy Nights In

As I stood in my kitchen, the inviting scent of garlic dancing with melted butter sent my senses on a delicious adventure. It’s moments like this that remind me why I adore cooking—transforming everyday ingredients into something extraordinary. Today, I’m thrilled to share my Garlic Butter Meatballs with Parmesan Linguine, a dish that turns comfort food into an elegant meal, perfect for both cozy family dinners and special gatherings. One of the best perks? This recipe is quick to prepare, meaning you can savor homemade goodness without spending hours in the kitchen. Plus, the creamy linguine paired with these savory meatballs is sure to win over even the pickiest eaters. Are you ready to bring a taste of Italian-American magic to your table? Let’s dive into the recipe!

What makes Garlic Butter Meatballs special?

Irresistible Aroma: The moment you start cooking, the combination of garlic and butter fills your kitchen with a mouthwatering scent that beckons everyone to join you at the table.

Quick and Easy: In just under 30 minutes, you can transform simple ingredients into a delicious meal, making it perfect for busy weeknights or impromptu gatherings.

Crowd-Pleasing Flavor: The savory meatballs, bathed in rich garlic butter, marry perfectly with creamy Parmesan linguine, ensuring there’s something for everyone to love.

Versatile Creativity: Feel free to mix in your choice of herbs or spices, or substitute linguine with spiralized veggies for a lighter option; this dish adapts to many preferences!

Comfort Food Elevated: Serve it with a side of garlic bread or a fresh salad, and you’ll not only enjoy a hearty meal, but a delightful dining experience too!

This is culinary comfort food that comes together effortlessly, making your home-cooked confections feel gourmet!

Garlic Butter Meatballs Ingredients

For the Meatballs
Ground Beef – Primary protein source; mixing with ground pork enhances flavor.
Large Egg – Binds the meatball mixture, crucial for structure; don’t skip it!
Breadcrumbs – Provides texture; gluten-free breadcrumbs are a great substitute.
Grated Parmesan Cheese – Adds rich creaminess; freshly grated yields the best flavor.
Chopped Parsley – Freshness and color; you can also use basil or oregano for variety.
Garlic (minced) – Essential for flavor; freshly minced garlic has a stronger taste.
Salt & Black Pepper – Enhances all flavors; adjust to your taste preference.

For the Garlic Butter Sauce
Unsalted Butter – Forms the base for the garlic butter sauce; unsalted offers better seasoning control.
Olive Oil – Used for searing the meatballs; vegetable oil is a good alternative.
Red Pepper Flakes (optional) – Adds a touch of heat; cayenne is a spicy substitute.
Lemon Juice – Brightens up the sauce; always opt for freshly squeezed.

For the Linguine
Linguine – The perfect base for serving meatballs; substitute with any pasta or spiralized veggies for a lighter dish.
Heavy Cream – Creates a creamy sauce; consider a milk and butter blend for a lighter option.

This Garlic Butter Meatballs recipe is not just a meal; it’s a warm invitation to gather around the table!

Step‑by‑Step Instructions for Garlic Butter Meatballs

Step 1: Make the Meatballs
In a large mixing bowl, combine ground beef, egg, breadcrumbs, grated Parmesan, chopped parsley, minced garlic, salt, and black pepper. Mix gently until just combined, being careful not to overmix, which can make the meatballs tough. Shape the mixture into 1-inch meatballs and place them on a baking sheet while you prepare to cook them.

Step 2: Sear the Meatballs
Heat 2 tablespoons of olive oil in a skillet over medium heat. Once the oil shimmers, carefully add the meatballs in a single layer. Sear for 6–8 minutes, turning occasionally, until they are browned on all sides but not fully cooked through. Remove the meatballs from the skillet and set them aside on a plate while you make the sauce.

Step 3: Cook the Garlic Butter Sauce
In the same skillet, reduce the heat to low and add 4 tablespoons of unsalted butter. Allow the butter to melt, then add minced garlic and red pepper flakes if using. Sauté for 1–2 minutes until the garlic is fragrant and just starting to turn golden, stirring frequently to avoid burning. Stir in the lemon juice and chopped parsley.

Step 4: Simmer the Meatballs
Return the browned meatballs to the skillet, ensuring they’re coated in the garlic butter sauce. Cover the skillet and let them simmer on low heat for 5–7 minutes, or until the meatballs are fully cooked, reaching an internal temperature of 160°F. The sauce should slightly thicken and envelop the meatballs in its rich flavor.

Step 5: Make the Pasta
While the meatballs are simmering, cook linguine according to package instructions in a large pot of boiling salted water. This usually takes about 8–10 minutes for al dente. Reserve ½ cup of the pasta water before draining the linguine. Return the drained pasta to the pot for the next step.

Step 6: Create the Creamy Sauce
In a separate saucepan, melt another tablespoon of butter over medium heat. Add ½ cup of heavy cream and bring to a gentle simmer. Stir in the reserved pasta water and grated Parmesan cheese until melted and creamy. Season the sauce with salt and pepper to taste, mixing well until everything is combined.

Step 7: Plate and Serve
To serve, twirl a generous portion of creamy linguine onto each plate, topping it with several garlic butter meatballs. Drizzle the pan’s garlic butter sauce over the dish and garnish with additional chopped parsley and freshly grated Parmesan. Serve while warm and enjoy this delightful Garlic Butter Meatballs dish!

How to Store and Freeze Garlic Butter Meatballs

Refrigerator: Store leftovers in an airtight container for up to 4 days. Ensure they are completely cooled before sealing to maintain freshness.

Freezer: Freeze cooked Garlic Butter Meatballs (without pasta) for up to 3 months. Place them in a single layer on a baking sheet to freeze, then transfer to a freezer bag for space-saving storage.

Reheat: When ready to enjoy, warm the meatballs and garlic butter sauce on the stovetop over low heat, adding a splash of water if necessary to prevent drying out.

Thawing: For best results, thaw frozen meatballs overnight in the fridge before reheating. This will help maintain their juicy texture!

What to Serve with Garlic Butter Meatballs with Parmesan Linguine

A delightful meal deserves equally delicious accompaniments to elevate your dining experience even further.

  • Crisp Green Salad: A light, refreshing salad with mixed greens and a simple vinaigrette balances the richness of the meatballs and creamy linguine.
  • Garlic Bread: Warm, buttery garlic bread provides the perfect vehicle for savoring every drop of that delicious garlic butter sauce.
  • Roasted Vegetables: Colorful roasted veggies like zucchini, bell peppers, and cherry tomatoes add a burst of flavor and nutrition to your dinner table.
  • Sautéed Spinach: A quick sauté of fresh spinach with garlic complements the flavors of the dish while adding a healthy touch.
  • Chardonnay or Pinot Grigio: A glass of chilled white wine beautifully enhances the meal, with its acidity cutting through the richness of the butter and cream.
  • Tiramisu: End your meal on a sweet note with this classic Italian dessert, offering a creamy, coffee-infused contrast to the savory main course.

These pairings not only complement the savory Garlic Butter Meatballs but also create a memorable dining experience that invites everyone to linger at the table a little longer.

Expert Tips for Garlic Butter Meatballs

  • Don’t Overmix: When combining ingredients, mix just until incorporated. Overmixing can lead to tough meatballs, undermining their tenderness.

  • Perfect Brown: Sear meatballs until they are golden brown on the outside. This enhances flavor—just be sure not to cook them through at this stage.

  • Watch the Garlic: Pay close attention while cooking the garlic; it can burn quickly and turn bitter. Perfectly sautéed garlic is key to a delicious sauce!

  • Creamy Consistency: If the creamy sauce seems too thick, add more reserved pasta water gradually until you reach your desired consistency.

  • Garnish Wisely: A sprinkle of fresh parsley and an extra dash of Parmesan not only beautifies the plate but elevates the flavors of the Garlic Butter Meatballs!

  • Store Properly: Leftover meatballs can be stored in an airtight container for up to 4 days. Reheat gently to maintain their lush saucy quality.

Garlic Butter Meatballs Variations

Feel free to personalize these delightful garlic butter meatballs to suit your taste and dietary needs!

  • Turkey Meatballs: Substitute ground beef with ground turkey for a lighter option, packed with lean protein.
    Let your kitchen be filled with an aromatic twist—turkey meatballs offer a fresh take while keeping the comfort factor intact!

  • Low-Carb Option: Swap linguine with spiralized zucchini for a delightful, veggie-packed alternative.
    This twist will brighten your plate while allowing the savory flavors of the meatballs to shine through!

  • Spicy Version: Increase the amount of red pepper flakes or add cayenne pepper for a fiery kick.
    Crank up the heat and awaken your taste buds—this will add a dimension of excitement to your meal!

  • No Cream Alternative: Replace heavy cream with a mix of olive oil and pasta water combined with cheese for a lighter sauce.
    Enjoy the same velvety texture without the added creaminess—a great choice for those mindful of calories!

  • Vegetarian Meatballs: Use lentils or mushrooms blended with spices and breadcrumbs for a meat-free delight.
    These alternatives provide a hearty and satisfying bite, ensuring nobody misses the beef!

  • Add Veggies: Mix in finely chopped spinach or grated carrots into the meatball mixture for extra nutrition.
    This subtle inclusion gives you added goodness without sacrificing flavor—everyone will love the hidden veggies!

  • Herb-Infused: Experiment with different herbs; try adding rosemary or thyme for a fragrant, flavorful twist.
    Switching up the herbs will create a unique experience every time you make these delicious meatballs!

For even more delicious inspiration, consider trying out Garlic Butter Baked Chicken or dive into the rich flavors of Honey Garlic Salmon for a different kind of culinary adventure!

Make Ahead Options

These Garlic Butter Meatballs are perfect for busy home cooks looking to save time during the week! You can prepare the meatball mixture and shape the balls up to 24 hours in advance; just refrigerate them in an airtight container to maintain their freshness. Additionally, you can cook and freeze the meatballs without the sauce for up to 3 months. When you’re ready to serve, simply reheat the meatballs in the garlic butter sauce on the stove. To prevent the meatballs from drying out, add a splash of water when reheating. With these make-ahead options, you can enjoy a comforting meal with minimal effort on hectic evenings!

Garlic Butter Meatballs Recipe FAQs

What should I look for when selecting ground beef?
Absolutely! When choosing ground beef, look for cuts labeled 80/20 for a balance of flavor and moisture. The meat should be bright red and free from any dark spots or excessive liquid. Avoid anything that has a grayish color, as that may indicate it’s not fresh.

How do I store leftovers of garlic butter meatballs?
Very simply! Store any leftovers in an airtight container in the refrigerator for up to 4 days. Make sure to cool them to room temperature before sealing the container to maintain freshness. For longer storage, freeze the meatballs separately from the linguine.

Can I freeze garlic butter meatballs?
Absolutely! To freeze, arrange cooked meatballs in a single layer on a baking sheet. Freeze them for about 1-2 hours until firm, then transfer them to an airtight container or freezer bag. They can be frozen for up to 3 months! Simply thaw them in the refrigerator overnight before reheating.

Why are my meatballs falling apart?
It happens! If your meatballs fall apart, it could be due to overmixing or insufficient binding. Make sure to mix just until combined, and do not skip the egg, as it is crucial for binding the mixture together. If they still crumble, try adding a little extra breadcrumbs to the mix for added structure.

Are garlic butter meatballs safe for pet consumption?
Not exactly! While the ingredients in garlic butter meatballs are generally safe for humans, garlic is toxic to dogs and cats. If you want to share with your furry friends, prepare a separate batch using ground meat and plain breadcrumbs, avoiding any seasoning.

Can I adjust the spiciness in garlic butter meatballs?
Very much! If you prefer milder flavors, reduce or omit the red pepper flakes. You might also consider using sweet paprika or even a pinch of Italian seasoning for flavor without the heat. The more the merrier when it comes to personalizing your dish!

Garlic Butter Meatballs

Savory Garlic Butter Meatballs for Cozy Nights In

Delicious Garlic Butter Meatballs that transform simple ingredients into a cozy comfort food, perfect for quick family dinners.
Prep Time 15 minutes
Cook Time 15 minutes
Total Time 30 minutes
Servings: 4 meatballs
Course: Dinner
Cuisine: Italian-American
Calories: 400

Ingredients
  

For the Meatballs
  • 1 pound Ground Beef Mix with ground pork for enhanced flavor.
  • 1 large Egg Binds the mixture.
  • 1 cup Breadcrumbs Gluten-free options available.
  • 1/2 cup Grated Parmesan Cheese Freshly grated preferred.
  • 1/4 cup Chopped Parsley Can substitute with basil or oregano.
  • 3 cloves Garlic (minced) Freshly minced for stronger flavor.
  • 1 teaspoon Salt
  • 1/2 teaspoon Black Pepper Adjust to taste.
For the Garlic Butter Sauce
  • 4 tablespoons Unsalted Butter Offers better seasoning control.
  • 2 tablespoons Olive Oil For searing meatballs.
  • 1/2 teaspoon Red Pepper Flakes (optional) For added heat.
  • 1 tablespoon Lemon Juice Freshly squeezed.
For the Linguine
  • 8 ounces Linguine Can substitute with any pasta or spiralized veggies.
  • 1/2 cup Heavy Cream For a creamy sauce.

Equipment

  • Mixing Bowl
  • Skillet
  • Saucepan
  • Baking Sheet
  • Large pot

Method
 

Step-by-Step Instructions for Garlic Butter Meatballs
  1. In a large mixing bowl, combine ground beef, egg, breadcrumbs, grated Parmesan, chopped parsley, minced garlic, salt, and black pepper. Mix gently until just combined, then shape into 1-inch meatballs and place on a baking sheet.
  2. Heat 2 tablespoons of olive oil in a skillet over medium heat. Once shimmering, add meatballs in a single layer. Sear for 6–8 minutes, turning occasionally until browned on all sides.
  3. In the same skillet, reduce heat to low and add 4 tablespoons of unsalted butter, allowing it to melt. Add minced garlic and red pepper flakes, sauté for 1–2 minutes.
  4. Return browned meatballs to the skillet, coating in garlic butter sauce. Cover and simmer for 5–7 minutes until fully cooked at 160°F.
  5. While meatballs simmer, cook linguine according to package instructions, usually about 8–10 minutes.
  6. In a separate saucepan, melt another tablespoon of butter over medium heat. Add 1/2 cup of heavy cream and simmer, then stir in reserved pasta water and grated Parmesan until creamy.
  7. To serve, twirl creamy linguine onto plates, top with meatballs, drizzle with garlic butter sauce, and garnish with parsley and Parmesan.

Nutrition

Serving: 2meatballsCalories: 400kcalCarbohydrates: 30gProtein: 25gFat: 20gSaturated Fat: 10gPolyunsaturated Fat: 2gMonounsaturated Fat: 8gCholesterol: 80mgSodium: 600mgPotassium: 500mgFiber: 2gSugar: 2gVitamin A: 500IUVitamin C: 2mgCalcium: 200mgIron: 2mg

Notes

Leftover meatballs can be stored in an airtight container for up to 4 days. Reheat gently for best texture.

Tried this recipe?

Let us know how it was!

Garlic Butter Meatballs That Melt in Your Mouth

As I pulled my Chocolate Ooey Gooey Cake from the oven, the warm, sweet aroma enveloped my kitchen, inviting a sense of comfort that only a home-baked dessert can provide. This recipe is a true game-changer, combining convenience and indulgence in each rich slice. With just a few simple ingredients, including a cake mix and a luscious cream cheese filling, you’ll find that creating this chocolate-lover’s dream is not only quick but utterly satisfying! Perfect for gatherings or a delightful treat just for you, this decadent cake boasts a beautifully gooey center paired with a moist outer layer. Ready to impress your friends and family with a dessert that’s as easy to make as it is luxurious? Let’s dive into the world of pure chocolate bliss!

Why Is This Cake So Irresistible?

Decadent flavors abound in this Chocolate Ooey Gooey Cake. Its rich chocolate base pairs perfectly with the creamy filling, making every bite a luxurious experience. Effortless preparation ensures that you won’t need hours in the kitchen—simply mix and bake! Perfect for gatherings, it’s sure to impress family and friends at your next get-together. And don’t forget to serve it warm with a scoop of ice cream for an extra touch of indulgence! Discover how it stands out from other desserts, just like the delightful Garlic Butter Meatballs or the Garlic Butter Baked Chicken.

Chocolate Ooey Gooey Cake Ingredients

For the Cake Mix
Cake Mix – This sweet base provides structure; chocolate or devil’s food mixes yield the richest flavor.
Eggs – Essential for moistness and binding; for a vegan alternative, flax eggs or applesauce work well.
Water – Helps combine the batter; coffee can be swapped in for an extra flavor kick.

For the Creamy Filling
Cream Cheese – Creates the gooey filling; softened cheese ensures a smooth mixture without lumps.
Confectioners’ Sugar – Sweetens the filling nicely; feel free to reduce for a less sugary touch.
Chocolate Chips – Deepen the chocolate flavor with semi-sweet, dark, or even white chocolate; these add delightful pockets of gooeyness.

Feel the magic as you combine these ingredients, and get ready for an experience that will have everyone coming back for seconds—just like my favorite Garlic Butter Meatballs!

Step-by-Step Instructions for Chocolate Ooey Gooey Cake

Step 1: Preheat and Prepare
Start by preheating your oven to 350°F (175°C). While the oven heats, grease a 9×13 inch baking pan with butter or cooking spray to ensure your cake releases smoothly after baking. This Chocolate Ooey Gooey Cake will need a perfect stage to shine, so make sure the pan is well-prepared!

Step 2: Combine the Cake Batter
In a large mixing bowl, combine your cake mix, eggs, and water. Use an electric mixer or whisk vigorously until the mixture is completely smooth and well-blended, which should take about 2-3 minutes. The batter will be thick and chocolatey, leading to a delightful base for your ooey gooey filling.

Step 3: Pour the Batter
Carefully pour the cake batter into the prepared baking pan, spreading it out evenly with a spatula. The batter should fill the pan halfway, ensuring room for the heavenly filling. Once it’s evenly distributed, you’re ready to add the gooey layer on top, which is the star of this Chocolate Ooey Gooey Cake.

Step 4: Make the Creamy Filling
In a separate bowl, blend together softened cream cheese, confectioners’ sugar, and your choice of chocolate chips. Beat the mixture until it reaches a creamy and smooth consistency, about 3-4 minutes. This luscious filling is crucial for that signature gooeyness; make sure there are no lumps for the best texture!

Step 5: Spoon the Filling
Spoon the creamy filling mixture gently over the cake batter, spreading it out evenly with a spatula. You want to create pockets of gooeyness, so don’t worry if it doesn’t look perfectly smooth—variations will add character to your Chocolate Ooey Gooey Cake as it bakes.

Step 6: Bake the Cake
Place the baking pan in your preheated oven and bake for 40-45 minutes. Keep an eye on it, and look for a set outer edge with a slightly gooey center. This combination of textures makes the cake truly irresistible. A toothpick inserted should come out with moist crumbs, just not wet batter.

Step 7: Cool and Serve
Once baked, remove the cake from the oven and let it cool for about 10-15 minutes. This cooling period will help the center to set slightly, enhancing the gooey texture. Serve warm and delight in the rich, chocolatey goodness that is your Chocolate Ooey Gooey Cake!

Make Ahead Options

These Chocolate Ooey Gooey Cake preparations are perfect for busy home cooks looking to save time! You can prepare the cake batter and cream cheese filling up to 24 hours in advance. Simply mix the cake batter and place it in the greased baking pan, then cover it tightly with plastic wrap. The cream cheese filling can also be made ahead; just blend it until smooth, store it in an airtight container in the refrigerator, and refrigerate until you’re ready to bake. When you’re ready to serve, pour the filling over the prepared batter and bake the cake as instructed. This way, you’ll enjoy all the indulgence with minimal last-minute effort and just as delicious results!

Expert Tips for Chocolate Ooey Gooey Cake

Softened Cream Cheese: Make sure your cream cheese is at room temperature; this prevents lumps and ensures a smooth filling that enhances the overall texture of the Chocolate Ooey Gooey Cake.

Watch the Bake Time: Avoid overbaking! The cake should be set around the edges with a gooey center. Check with a toothpick; moist crumbs indicate it’s perfect.

Cooling Time Counts: Let the cake cool for at least 10-15 minutes before slicing. This helps the gooey center to set, making it easier to cut and serving the cake at its best.

Flavor Boosting: Consider substituting water with coffee in the cake batter for a deeper, richer chocolate flavor, bringing out the best in your Chocolate Ooey Gooey Cake.

Experiment with Fillings: Mix in flavored extracts like vanilla or almond to elevate the filling, or try adding a sprinkle of sea salt on top for a perfect sweet-salty balance.

How to Store and Freeze Chocolate Ooey Gooey Cake

Refrigerator: Store leftovers in an airtight container for up to 3 days. This helps maintain the moistness of the cake while preserving its rich, gooey filling.

Freezer: For longer storage, freeze portions in an airtight container for up to 2 months. Wrap each piece individually in plastic wrap to prevent freezer burn.

Reheating: When ready to enjoy, microwave a slice briefly (10-15 seconds) to restore that delightful gooeyness. Keep an eye on it to avoid overheating.

Serving Tip: Serve warm to truly savor the luscious layers of this Chocolate Ooey Gooey Cake, just like the first slice fresh from the oven!

Chocolate Ooey Gooey Cake Variations

Feel free to get creative with this Chocolate Ooey Gooey Cake – each twist leads to even more delicious possibilities!

  • Nutty Addition: Add chopped walnuts or pecans to the batter for a delightful crunch that balances the gooey texture.

  • Flavored Extracts: Incorporate a teaspoon of vanilla or mint extract into the creamy filling for a subtle flavor enhancement that takes each bite to another level.

  • Chip Swap: Swap chocolate chips for caramel or peanut butter chips for exciting new flavor profiles that are equally indulgent.

  • Vegan Option: For a vegan twist, use a plant-based cake mix and swap the eggs for flax eggs or unsweetened applesauce, creating a delicious alternative.

  • Fruity Fun: Add raspberries or cherries on top of the filling before baking for a tart burst of freshness that pairs wonderfully with the rich chocolate.

  • Decadent Drizzle: Drizzle some chocolate or caramel sauce over the top of the baked cake for an irresistible finish that looks as good as it tastes.

  • Gourmet Sprinkles: Boost your presentation by adding a sprinkle of sea salt or edible glitter on top for a touch of elegance at any gathering.

  • Spice it Up: Add a touch of cinnamon or espresso powder to the cake batter for a warm flavor that complements the chocolate beautifully, just like in my Garlic Butter Baked Chicken.

Whatever route you choose, each variation will enhance your baking experience, leading to a dessert that’s uniquely yours and just as delightful as my other family favorites like Garlic Butter Meatballs!

What to Serve with Chocolate Ooey Gooey Cake

Indulging in a rich dessert like this cake calls for delightful companions that elevate the whole experience.

  • Vanilla Ice Cream: The creamy coolness contrasts beautifully with the warm, gooey cake, adding a refreshing touch to each bite.
  • Fresh Raspberries: Their tartness cuts through the richness and adds a pop of color to your plate, making it visually appealing.
  • Chocolate Ganache: Drizzling this luxurious layer on top intensifies the chocolaty flavor, making the dessert even more decadent.
  • Whipped Cream: A dollop of light, airy whipped cream enhances the texture, making each forkful feel like a cloud of sweetness.
  • Espresso: A small cup of robust espresso balances the sweetness of the cake and brings out the chocolate flavor.
  • Pecan Pralines: Their crunchy texture and caramel sweetness provide an irresistible contrast to the soft, gooey cake.
  • Mint Leaves: A few fresh mint leaves not only brighten up the presentation but also add a refreshing note that complements the chocolate.
  • Chocolate Chip Cookies: For true chocolate lovers, serving a warm cookie alongside the cake doubles the indulgence in a delightful pairing.
  • Coconut Macaroons: Their chewy texture and mild sweetness complement the richness of the cake, creating a balance of flavors.

Chocolate Ooey Gooey Cake Recipe FAQs

What type of cake mix is best to use for this recipe?
Absolutely! For the richest flavor, I recommend using chocolate or devil’s food cake mixes. The deeper chocolate taste harmonizes beautifully with the creamy filling, ensuring every bite is a chocolate lover’s dream.

How should I store leftovers of the Chocolate Ooey Gooey Cake?
Store any leftovers in an airtight container in the refrigerator for up to 3 days. Doing so preserves the cake’s moist texture and gooey filling, ensuring your dessert remains delightful for as long as possible!

Can I freeze Chocolate Ooey Gooey Cake? How?
Yes, you can definitely freeze this delicious cake! Wrap individual slices in plastic wrap and place them in an airtight container, where they can stay fresh for up to 2 months. When you’re ready to enjoy, simply microwave a slice for about 10-15 seconds to restore that lovely gooeyness.

What should I do if my filling has lumps in it?
If your filling is lumpy, it likely means the cream cheese wasn’t softened enough! Always ensure it’s at room temperature before mixing, as this will create a smooth, creamy filling. If your mixture still has lumps, try blending it for a bit longer until smooth.

Can I make a vegan version of the Chocolate Ooey Gooey Cake?
Very! To create a vegan version, replace the eggs with 1/4 cup of unsweetened applesauce or mix 1 tablespoon of flaxseed meal with 2.5 tablespoons of water per egg and let it sit for 5 minutes to thicken. This substitution will still provide moisture and binding for a delicious cake!

Garlic Butter Meatballs That Melt in Your Mouth

Irresistibly delicious Garlic Butter Meatballs that offer a rich, comforting flavor in every bite.
Prep Time 15 minutes
Cook Time 30 minutes
Total Time 45 minutes
Servings: 4 meatballs
Course: Dinner
Cuisine: American
Calories: 150

Ingredients
  

For the Meatballs
  • 1 pound Ground beef Or ground turkey for a lighter option.
  • 1 cup Breadcrumbs Use plain or Italian seasoned.
  • 1 large Egg Acts as a binder.
  • 1 teaspoon Salt
  • 1 teaspoon Pepper
  • 2 cloves Garlic Minced.
  • 1 tablespoon Parsley Chopped, for garnish.
For the Garlic Butter Sauce
  • 1/2 cup Butter Melted.
  • 4 cloves Garlic Minced.
  • 1 tablespoon Parsley Chopped, for serving.

Equipment

  • Mixing Bowl
  • Oven
  • Baking Pan

Method
 

Cooking Steps
  1. Preheat your oven to 400°F (200°C). In a bowl, mix ground beef, breadcrumbs, egg, salt, pepper, and minced garlic until well combined.
  2. Shape the mixture into meatballs and place them on a baking sheet.
  3. Bake the meatballs for 20-25 minutes until cooked through and browned.
  4. In a saucepan, melt butter over medium heat. Add minced garlic and sauté until fragrant.
  5. Remove from heat and stir in parsley. Coat the baked meatballs with the garlic butter sauce.
  6. Serve the meatballs warm, garnished with additional parsley.

Nutrition

Serving: 1meatballCalories: 150kcalCarbohydrates: 5gProtein: 10gFat: 10gSaturated Fat: 4gMonounsaturated Fat: 5gCholesterol: 30mgSodium: 300mgPotassium: 200mgVitamin A: 250IUVitamin C: 1mgCalcium: 25mgIron: 1mg

Notes

These meatballs can be paired with pasta, rice, or served as appetizers with toothpicks.

Tried this recipe?

Let us know how it was!

Smashburger Quesadillas: A Tasty Twist on Dinner Tonight

“Have you ever felt that moment of joy when your cravings collide with creative cooking? That’s exactly what happens with Smashburger Quesadillas! This recipe brings together the satisfying flavors of a smash burger wrapped in crispy, cheesy tortillas, making it a delightful quick dinner option for those busier weeknights. With just 20 minutes of prep time, these customizable quesadillas cater to everyone’s tastes—whether you prefer a juicy beef center or a vegetarian twist using black beans or Impossible Meat. They’re not just easy to make, but also perfect for sharing at gatherings, allowing your creativity to shine through with various toppings and fillings. Ready to transform your dinner routine? Let’s dive into these mouthwatering Smashburger Quesadillas!”

Why Are Smashburger Quesadillas a Must-Try?

Bold flavors come together in these quesadillas, delivering the essence of your favorite smash burger in each bite. Quick prep time ensures a stress-free dinner that can be on the table in just 20 minutes. Customizable options make them perfect for everyone, from meat lovers to vegetarians. Crispy texture paired with gooey cheese creates a delightful experience that keeps everyone coming back for more. Family-friendly and ideal for gatherings, you can easily serve with a variety of toppings for a fun twist. Don’t forget to check out our variation ideas for even more exciting ways to enjoy these delicious quesadillas!

Smashburger Quesadilla Ingredients

Unlock the secrets to these flavorful quesadillas with the perfect blend of ingredients!

For the Beef Filling

  • Ground Beef – Ideally 80/20 for juicy smashburger flavor; swap for seasoned black beans for a vegetarian twist.
  • Salt – Essential for enhancing the savory beef; adjust to your taste preference.
  • Pepper – Adds a mild kick; freshly ground provides the best flavor.
  • Garlic Powder – Infuses richness and depth; use fresh garlic for a stronger punch.

For the Tortilla

  • Flour Tortillas – Burrito-size wraps hold the fillings well; almond flour tortillas are great for gluten-free options.

For the Cheesy Goodness

  • Shredded Cheese – A mix of sharp cheddar and American cheese melts beautifully; try a dairy-free cheese like Violife for a vegan alternative.

Optional Flavor Boosters

  • Pickles – Add tangy crunch; dill pickles complement the burger flavors perfectly.
  • Diced Onions – Fresh or grilled, they enhance the savory notes of the quesadillas.
  • Burger Sauce – A creamy topping that brings all the flavors together; try mixing ketchup and mayonnaise for a quick version.
  • Lettuce – Freshness on top adds a nice crunch; keep it crisp to balance the gooey filling.
  • Crushed Chips – Sprinkle on for an extra crunch; use tortilla chips for a fun twist.

These Smashburger Quesadillas come together to create a memorable dining experience that everyone will adore!

Step‑by‑Step Instructions for Smashburger Quesadillas

Step 1: Preheat Skillet
Start by heating a cast-iron skillet or griddle over medium-high heat for 3-5 minutes until it’s sizzling. A well-heated surface is crucial for achieving that crispy texture on your Smashburger Quesadillas, so don’t rush this step. Feel the heat with your hand above the skillet—if you can feel the warmth, you’re ready to go!

Step 2: Prepare Tortillas
While your skillet heats up, lightly brush the outside of the flour tortillas with mayonnaise for a beautiful golden color when grilled. This step adds both flavor and helps to crisp up the tortillas as they cook. Lay the tortillas on a clean surface and ensure they’re ready for the delicious filling.

Step 3: Add Beef
Take a quarter of the ground beef and press it onto one half of each tortilla. Season it generously with salt, pepper, and garlic powder to bring out the savory flavors. Make sure the beef is spread evenly for consistent cooking, allowing the quesadilla to come together beautifully once it’s grilled.

Step 4: Cook
Carefully place the tortillas beef-side-down on the hot skillet. Cook for about 2-3 minutes until the beef is browned and the tortilla edges start to crisp. Keep an eye on it; the beef should be seared nicely, releasing a mouthwatering aroma that signals it’s time to flip!

Step 5: Flip & Fold
Once the beef is cooked to a golden hue, flip the quesadilla over. Immediately sprinkle shredded cheese on the beef side and fold the tortilla in half, gently pressing it down. Grill for an additional 1-2 minutes on each side until the cheese is melted and the tortilla is crispy, watching for that tempting golden-brown color.

Step 6: Serve
After grilling, let the Smashburger Quesadillas rest for a minute on a cutting board. This resting period allows the cheese to set slightly, preventing spillage when slicing. Once they’re ready, slice them into triangles, and serve hot with your favorite toppings for an extra burst of flavor.

How to Store and Freeze Smashburger Quesadillas

Fridge: Keep cooked Smashburger Quesadillas in an airtight container for up to 3 days. Reheat in a skillet or microwave, but for the best crispiness, use a skillet.

Freezer: For longer storage, wrap individual quesadillas in plastic wrap and then aluminum foil to prevent freezer burn. They can be frozen for up to 2 months.

Reheating: When ready to enjoy, thaw overnight in the fridge if frozen. Reheat on a skillet over medium heat for about 5 minutes until warmed through and crispy again.

Make-Ahead: You can prepare and cool the quesadillas ahead of time, wrapping them tightly before refrigerating. This makes weeknight dinners a breeze!

Expert Tips for Smashburger Quesadillas

  • Skillet Temperature: Make sure your skillet is sizzling hot; a well-heated skillet creates that sought-after crispy texture we love in smashburger quesadillas.

  • Resting Time: Allow quesadillas to rest for a minute before slicing. This step prevents cheese spillage and maintains the perfect gooey filling.

  • Cheese Melting: If your cheese isn’t melting well, opt for freshly shredded cheese rather than pre-shredded; anti-caking agents can hinder that delightful gooeyness.

  • Don’t Rush Cooking: Cooking the beef thoroughly before folding is key. Undercooked meat can lead to unsafe eating; ensure it’s browned nicely for the best flavor.

  • Customization is Key: Feel free to mix up the fillings based on what you enjoy! Smashburger Quesadillas are highly customizable, perfect for feeding different tastes at the table.

What to Serve with Smashburger Quesadillas

Dive into a fun culinary adventure as you explore vibrant sides and satisfying pairings that elevate your meal experience!

  • Crispy Waffle Fries: Elevate your dinner with these extra crispy fries that provide a delightful crunch, perfect for dipping in homemade sauces.
  • Fresh Guacamole: Creamy and zesty, this avocado dip adds a fresh twist that balances the richness of the quesadillas beautifully.
  • Zesty Coleslaw: A tangy coleslaw combines crunch and acidity, complementing the gooey, savory filling with a refreshing bite.
  • Spicy Salsa: The heat from your favorite salsa spices things up, making every bite an exciting flavor journey that mingles wonderfully with the quesadillas.
  • Creamy Ranch Dip: This cool and creamy dressing serves as a perfect balance to the warm, cheesy quesadillas, inviting everyone to indulge in a delightful dip.
  • Mini Salad Bowls: Bright mixed greens dressed with a light vinaigrette offer a fresh and vibrant contrast, making your plate colorful and enticing.
  • Frozen Margueritas: Refreshing and slightly tart, these cocktails are the perfect companion, enhancing the fun ambiance of your meal.
  • Chocolate Chip Cookies: Wind down your meal with warm, gooey cookies for a sweet finish that rounds off the burger-inspired feast on a high note!

Smashburger Quesadillas Variations

Make these scrumptious quesadillas your own by exploring some delightful twists and substitutions!

  • Breakfast Smash: Add scrambled eggs and crispy bacon for a hearty morning delight. Breakfast just became exciting when it combines the best of both worlds!

  • Spicy Fiesta: Incorporate spicy chorizo and pepper jack cheese for an authentic kick. This bold flavor combination will dance on your taste buds and elevate your quesadilla game!

  • Hawaiian Vibes: Toss in sweet pineapple and brush the tortilla with teriyaki sauce. This tropical twist provides a luscious sweetness that pairs beautifully with the savory beef.

  • Pizza Party: Swap out the beef for Italian sausage, and serve with a side of marinara sauce. Why choose between pizza and quesadillas when you can have both?

  • Healthier Twist: Replace beef with ground turkey or chicken, and fold in grated zucchini for added nutrients. Enjoy guilt-free indulgence without compromising on taste!

  • Vegetarian Delight: Use seasoned black beans or Impossible Meat to keep it meatless yet satisfyingly hearty. These alternatives still deliver that punchy flavor experience everyone loves.

  • Extra Crunch: Incorporate crushed tortilla chips into the filling for an unexpected crunch. A little texture can elevate the entire dining experience, adding fun to every bite!

  • Zesty Lime: Drizzle fresh lime juice on top before serving. This simple addition brightens all the flavors, giving your quesadilla that refreshing zing!

Feel free to explore these variations—your kitchen is your canvas! And don’t forget to pair them with delightful toppings for a culinary adventure, like our optional flavor boosters for even more inspiration. Enjoy every bite!

Make Ahead Options

These Smashburger Quesadillas are a fantastic option for busy home cooks looking to save time during the week! You can prepare the beef filling (seasoned ground beef) up to 24 hours in advance. Simply cook and cool the beef, then store it in an airtight container in the refrigerator. For the tortillas, you can brush and stack them with sheets of parchment paper between each one to prevent sticking. When you’re ready to serve, assemble the quesadillas by filling the tortillas with the prepped beef and cheese, grill them until crispy, and enjoy a delicious meal that tastes just as fresh as if you made it that day! This make-ahead approach makes dinner both quick and satisfying, perfect for those hectic weeknights.

Smashburger Quesadillas Recipe FAQs

How do I choose the right ground beef for Smashburger Quesadillas?
Absolutely! For the juiciest flavor, I recommend using ground beef with an 80/20 fat ratio. This level of fat ensures your quesadillas are rich and flavorful. If you’re looking for a healthier option, feel free to substitute with lean ground turkey or an Impossible Meat alternative for a vegetarian twist.

How should I store leftover Smashburger Quesadillas?
Keep your cooked Smashburger Quesadillas in an airtight container in the fridge for up to 3 days. I often reheat mine in a skillet to regain that crispy texture, but you can also use a microwave if you’re in a hurry. Just remember, for the best results, the skillet is the king of reheating!

Can I freeze Smashburger Quesadillas for later?
Yes! You can freeze your quesadillas for up to 2 months. Wrap each one tightly in plastic wrap, then in aluminum foil to prevent freezer burn. When you’re ready to enjoy them, thaw overnight in the fridge and reheat on a skillet over medium heat for about 5 minutes until they’re crispy and warmed through. This makes for an easy dinner option on busy nights—trust me, it’s a lifesaver!

What can I do if the cheese isn’t melting well in my quesadillas?
If you notice your cheese isn’t melting as expected, consider shredding your cheese fresh rather than using pre-shredded versions. Pre-shredded cheeses often have anti-caking agents which can prevent a smooth melt. Grate your cheese from a block for a gooey experience and a perfect finish!

Are Smashburger Quesadillas suitable for people with allergies?
Definitely! You can customize these quesadillas to fit various dietary needs. For gluten-free options, simply use almond flour tortillas. If you have cheese allergies, try a dairy-free cheese alternative like Violife. Just keep an eye on individual ingredients to ensure everyone at the table can enjoy this scrumptious dish.

What are some tasty topping ideas for my Smashburger Quesadillas?
The more, the merrier! Enhance your quesadillas with toppings like pickles, diced onions, or crispy lettuce for a fresh crunch. You can even add a dollop of burger sauce made from ketchup and mayonnaise, or for an adventurous twist, try adding kimchi or crushed tortilla chips for some exciting textures. Get creative!

Smashburger Quesadillas

Smashburger Quesadillas: A Tasty Twist on Dinner Tonight

Smashburger Quesadillas combine the flavors of a smash burger in a crispy, cheesy tortilla, perfect for a quick, customizable dinner.
Prep Time 20 minutes
Cook Time 10 minutes
Total Time 30 minutes
Servings: 4 quesadillas
Course: Dinner
Cuisine: American
Calories: 350

Ingredients
  

For the Beef Filling
  • 1 pound Ground Beef Ideally 80/20 for juicy flavor
  • 1 teaspoon Salt Adjust to taste
  • 1 teaspoon Pepper Freshly ground for best flavor
  • 1 teaspoon Garlic Powder Use fresh garlic for stronger punch
For the Tortilla
  • 4 large Flour Tortillas Burrito-size wraps
For the Cheesy Goodness
  • 2 cups Shredded Cheese Mix of sharp cheddar and American
Optional Flavor Boosters
  • 1 cup Pickles Dill pickles for best flavor
  • 1 cup Diced Onions Fresh or grilled
  • 1/2 cup Burger Sauce Mixed ketchup and mayonnaise
  • 1 cup Lettuce Keep fresh and crisp
  • 1 cup Crushed Chips Use tortilla chips for crunch

Equipment

  • cast-iron skillet
  • griddle

Method
 

Step-by-Step Instructions for Smashburger Quesadillas
  1. Preheat a cast-iron skillet or griddle over medium-high heat for 3-5 minutes until sizzling.
  2. Brush the outside of the tortillas with mayonnaise and lay them on a clean surface.
  3. Press a quarter of the ground beef onto one half of each tortilla and season with salt, pepper, and garlic powder.
  4. Place the tortillas beef-side-down on the hot skillet and cook for 2-3 minutes until browned and crispy.
  5. Flip the quesadilla, sprinkle shredded cheese on the beef side, fold in half, and grill for an additional 1-2 minutes on each side.
  6. Let the quesadillas rest on a cutting board for a minute before slicing into triangles and serving hot.

Nutrition

Serving: 1quesadillaCalories: 350kcalCarbohydrates: 30gProtein: 20gFat: 18gSaturated Fat: 8gPolyunsaturated Fat: 0.5gMonounsaturated Fat: 1gCholesterol: 60mgSodium: 600mgPotassium: 300mgFiber: 2gSugar: 2gVitamin A: 10IUVitamin C: 2mgCalcium: 20mgIron: 15mg

Notes

These quesadillas are highly customizable and perfect for any gathering. Don’t rush the cooking process for the best results.

Tried this recipe?

Let us know how it was!

Brown Sugar Banana Bread Pancakes That Will Change Breakfast Forever

As I stood in my kitchen, the comforting aroma of warm cinnamon wafted through the air, instantly transporting me to my favorite breakfast memories. Today, I’m excited to share my take on indulgent Brown Sugar Banana Bread Pancakes—a heavenly combination that transforms the classic pancake into something extraordinary. These pancakes are not just quick and easy to whip up; they’re also the perfect solution for those overripe bananas languishing on your countertop. Fluffy, sweet, and infused with the delightful flavor of brown sugar, these pancakes make for an irresistibly cozy breakfast that’ll have everyone coming back for seconds. Curious about how to recreate this mouthwatering dish in your own home? Let’s dive in!

Why Are These Pancakes So Irresistible?

Simplicity: This recipe is a breeze to make, requiring only basic ingredients and minimal prep time. It’s a perfect choice for any skill level!

Fluffy Delight: The texture is simply heavenly; light and airy pancakes combined with the moistness of mashed bananas create a breakfast experience you won’t forget.

Sweet & Spiced: Infused with rich brown sugar and warm cinnamon, every bite offers a delightful explosion of flavor, reminiscent of your favorite banana bread.

Versatile Treat: Feel free to mix in chocolate chips or nuts for added crunch, or serve with fresh fruit for a stunning topping. These pancakes suit all tastes!

Quick Fix: Ready in just 30 minutes, they are the ideal solution for busy mornings or lazy weekends alike—because who wants to spend hours in the kitchen?

Crowd-Pleaser: Whether for breakfast guests or just a cozy family meal, these pancakes are sure to satisfy everyone at the table. Don’t forget to check out my Honey Banana Grilled cheese for another delicious way to enjoy bananas!

Brown Sugar Banana Bread Pancakes Ingredients

For the Pancake Batter
All-Purpose Flour – Provides the structure and stability for fluffy pancakes; you can swap it for whole wheat flour for a healthier twist.
Baking Powder – This leavening agent creates the pancakes’ signature fluffiness; ensure it’s fresh for optimal results.
Salt – Enhances the sweetness of the batter; no substitutions are needed here.
Packed Light Brown Sugar – Adds moisture and a delightful sweetness akin to banana bread; brown sugar can be used for a deeper flavor.
Ground Cinnamon – Imparts warm, inviting notes; it’s optional but complements the banana flavor beautifully.
Milk – Adds moisture to the batter; substitute with almond milk or buttermilk for dietary variations.
Vanilla Extract – Introduces rich depth; I recommend sticking with vanilla for this recipe.
Unsalted Butter – Ensures richness in flavor; melted for smooth mixing—coconut oil is great for a dairy-free option.
Mashed Ripe Bananas – The star of the show, bringing moisture and sweetness; overripe bananas are ideal for the best taste.

For Serving
Fresh Sliced Bananas – Adds a fresh twist and enhances the banana flavor; perfect for a colorful presentation.
Whipped Cream – A dollop of this creamy goodness elevates the cozy vibe; ideal for those occasions when you want to indulge.
Honey or Maple Syrup – A drizzle adds the perfect finishing touch, enhancing the pancakes’ sweetness!

Indulging in these Brown Sugar Banana Bread Pancakes will not only satisfy your cravings but also bring joy to your breakfast table. Enjoy!

Step‑by‑Step Instructions for Brown Sugar Banana Bread Pancakes

Step 1: Preheat Your Griddle
Start by preheating an electric griddle or a nonstick skillet over medium heat, allowing about 5 minutes for it to warm up. Lightly grease the surface with nonstick cooking spray or a pat of butter to ensure the pancakes don’t stick. You want a hot enough surface that water sizzles on contact, providing the perfect base for your Brown Sugar Banana Bread Pancakes.

Step 2: Mix Dry Ingredients
In a large mixing bowl, whisk together the all-purpose flour, baking powder, salt, packed light brown sugar, and ground cinnamon. Stir the mixture for about 30 seconds until well combined and no lumps remain, ensuring an even distribution of ingredients. This step is crucial for the fluffiness of your Brown Sugar Banana Bread Pancakes, so take your time to get it right.

Step 3: Combine Wet Ingredients
Next, in a separate bowl, mix the milk, vanilla extract, and melted unsalted butter until well-blended. Pour this wet mixture into your bowl of dry ingredients, stirring gently with a whisk or spatula. Aim for a smooth batter, taking about 1-2 minutes; it’s okay if a few lumps remain, as overmixing can lead to dense pancakes.

Step 4: Incorporate Bananas
Gently fold in the mashed ripe bananas into the batter using a spatula. This should only take about 1 minute; be careful not to overmix. You want to maintain some banana chunks for delicious flavor pockets in your Brown Sugar Banana Bread Pancakes, contributing to that delightful banana bread essence with every bite.

Step 5: Cook Pancakes
Using a 1/4 cup measuring cup, pour the pancake batter onto the preheated griddle, keeping them spaced at least 2 inches apart. Allow the pancakes to cook for 2-3 minutes, or until you see small bubbles forming on the surface and the edges look set. This is a good indicator that it’s time to flip them over for that irresistible golden hue.

Step 6: Flip and Finish Cooking
Carefully flip each pancake using a spatula and cook for an additional 1-2 minutes on the other side. You’ll know they’re ready when they turn a beautiful golden brown and are cooked through. If you like, gently press down on the pancakes for an even cook.

Step 7: Keep Warm and Serve
Once cooked, transfer the pancakes to a cooling rack to maintain their fluffiness—this prevents them from getting soggy. Repeat the cooking process with the remaining batter, greasing the griddle as needed. Serve the warm Brown Sugar Banana Bread Pancakes immediately with fresh sliced bananas, whipped cream, and a drizzle of honey or maple syrup for a delightful breakfast treat.

Make Ahead Options

These Brown Sugar Banana Bread Pancakes are perfect for meal prep enthusiasts! You can prepare the pancake batter up to 24 hours in advance. Simply mix all the dry ingredients (flour, baking powder, salt, brown sugar, and cinnamon) in one bowl, and combine the wet ingredients (milk, vanilla extract, and melted butter) in another. Store each mixture separately in the refrigerator to maintain freshness. When you’re ready to cook, just stir in the mashed ripe bananas, and this will help prevent browning. Cook as directed, and enjoy fluffy pancakes that taste just as delicious as if they were made fresh!

What to Serve with Brown Sugar Banana Bread Pancakes

Elevate your breakfast experience with thoughtful pairings that beautifully complement the sweet and cozy flavors of your pancakes.

  • Fresh Sliced Bananas:
    Enhance the banana goodness by serving with fresh slices. Their natural sweetness and vibrant color make for an inviting presentation.

  • Creamy Whipped Cream:
    A dollop of whipped cream adds a luxurious touch, creating a delightful contrast against the fluffy pancakes. It’s an indulgent finish everyone will love.

  • Warm Maple Syrup:
    Drizzle with warm maple syrup to amplify the sweet flavor profile. The subtle caramel notes beautifully enhance the brown sugar essence of the pancakes.

  • Crispy Bacon:
    The salty, crispy goodness of bacon offers a savory contrast to the sweet pancakes, making for a breakfast duo that satisfies every craving.

  • Cinnamon Sugar Butter:
    For added richness, top with a cinnamon sugar butter blend. This provides a sweet and spiced layer, elevating every bite to new heights.

  • Fruit Salad:
    A refreshing fruit salad adds a burst of freshness—combining textures and flavors that balance out the richness of the pancakes and keep things light.

  • Iced Coffee or Latte:
    Serve alongside a chilled cup of iced coffee or a creamy latte. The rich coffee flavors work harmoniously with the sweetness of the pancakes.

  • Chocolate Chips:
    Mixing chocolate chips into pancake batter or as a topping offers gooey chocolate bursts, perfectly mingling with the banana flavor.

  • Nutty Granola:
    A sprinkle of crunchy granola adds texture and nutty goodness, making each bite even more satisfying. It’s the perfect way to enjoy a wholesome breakfast!

Brown Sugar Banana Bread Pancakes Variations

Feel free to let your creativity shine as you personalize these pancakes with delightful twists and substitutions!

  • Dairy-Free: Swap regular milk for almond milk or oat milk to keep this breakfast delicious without dairy.
  • Gluten-Free: Use a gluten-free flour blend to ensure everyone can enjoy these fluffy pancakes. They’ll still taste amazing!
  • Sweet & Nutty: Stir in chopped walnuts or pecans for a delightful crunch that enhances the banana flavor beautifully.
  • Extra Spicy: Add a pinch of nutmeg or a dash of cardamom for an exciting twist on the traditional spices. The warmth will cozy up your breakfast!
  • Chocolate Lovers: Fold in chocolate chips before cooking for a sweet surprise in every bite. You could even drizzle melted chocolate on top!
  • Banana-Infused: For a bolder banana flavor, blend banana puree directly into the batter along with the mashed bananas for a thicker consistency.
  • Honey Drizzle: Skip the syrup and majorly enhance your pancakes with a honey or maple syrup glaze for an extra touch of sweetness.
  • Pumpkin Spice: Introduce fall vibes by adding pumpkin puree and a sprinkle of pumpkin spice to the batter for a seasonal twist.

For more delicious ways to enjoy bananas, feel free to explore my Bananas Foster Cinnamon rolls or go sweet and savory with my Honey Banana Grilled cheese! Get ready to elevate your breakfast game!

Storage Tips for Brown Sugar Banana Bread Pancakes

Fridge: Store leftover pancakes in an airtight container in the refrigerator for up to 3 days to maintain freshness and flavor.

Freezer: For longer storage, freeze pancakes in a single layer on a baking sheet before transferring them to a freezer-safe airtight container. They will keep for up to 2 months.

Reheating: Reheat pancakes in a toaster or skillet until warmed through; this helps regain their fluffy texture. You can also microwave them for about 20-30 seconds, but be careful not to overheat.

Keep Ingredients Fresh: If you have leftover batter, it’s best to use it immediately. Pancake batter doesn’t store well due to the baking powder’s leavening action, so whip up those delicious Brown Sugar Banana Bread Pancakes as soon as possible!

Tips for the Best Brown Sugar Banana Bread Pancakes

Keep it Fresh: Use ripe bananas with lots of brown spots for maximum sweetness and flavor—overripe bananas are the secret to making the best pancakes.

Don’t Overmix: Gently fold the batter rather than stirring vigorously. A few lumps are just fine; overmixing can result in dense pancakes.

Mind the Heat: Ensure your griddle isn’t too hot. If it is, your pancakes may burn on the outside while staying raw on the inside. Aim for medium heat.

Use a Cooling Rack: After cooking, place pancakes on a cooling rack instead of a plate. This prevents them from getting soggy and helps maintain fluffiness.

Try Different Mix-ins: Feel free to add chocolate chips, nuts, or spices to your batter for an exciting twist on the classic Brown Sugar Banana Bread Pancakes.

Brown Sugar Banana Bread Pancakes Recipe FAQs

What type of bananas should I use for the best pancakes?
Absolutely! For the richest flavor, I recommend using overripe bananas with plenty of brown spots. These bananas are sweeter, softer, and add that delicious banana bread essence to your Brown Sugar Banana Bread Pancakes.

How do I store leftover pancakes?
Store leftover pancakes in an airtight container in the refrigerator for up to 3 days. This will help maintain their freshness. When you’re ready to enjoy them again, simply reheat in a toaster or skillet to bring back their fluffy texture.

Can I freeze these pancakes?
Yes, you can definitely freeze your delicious pancakes! Start by laying them out in a single layer on a baking sheet and place them in the freezer for about 1 hour until firm. After that, transfer them to a freezer-safe airtight container or zip-top bag. They can be frozen for up to 2 months.

What can I do if my pancake batter is too thick?
Very! If you find that your pancake batter is too thick, you can easily rectify this by gradually adding a bit more milk—about 1 tablespoon at a time—until you reach your desired consistency. Remember, the ideal pancake batter should be pourable but not too runny!

Are these pancakes suitable for dietary restrictions?
Absolutely! If you have dietary considerations, here’s how to tweak the recipe: substitute the all-purpose flour with whole wheat flour or a gluten-free blend. For a dairy-free alternative, opt for almond milk in place of regular milk and coconut oil instead of butter.

How long does the pancake batter last in the refrigerator?
The pancake batter is best used fresh, but if you need to store it, keep it in the fridge for no longer than 24 hours. Since the leavening power of baking powder diminishes over time, it’s important to whip up those Brown Sugar Banana Bread Pancakes as soon as possible for the best results!

Brown Sugar Banana Bread Pancakes

Brown Sugar Banana Bread Pancakes That Will Change Breakfast Forever

Indulge in these Brown Sugar Banana Bread Pancakes that transform breakfast with fluffy texture, rich flavors, and a cozy feel.
Prep Time 10 minutes
Cook Time 20 minutes
Total Time 30 minutes
Servings: 4 pancakes
Course: Breakfast
Calories: 250

Ingredients
  

For the Pancake Batter
  • 1 cup all-purpose flour can substitute with whole wheat flour
  • 1 tbsp baking powder ensure it’s fresh
  • 1/4 tsp salt
  • 1/2 cup packed light brown sugar can use brown sugar for deeper flavor
  • 1/2 tsp ground cinnamon optional
  • 3/4 cup milk can substitute with almond milk or buttermilk
  • 1 tsp vanilla extract
  • 3 tbsp unsalted butter melted
  • 2 medium mashed ripe bananas overripe for best taste
For Serving
  • 1 medium fresh sliced bananas
  • 1 cup whipped cream
  • to taste honey or maple syrup

Equipment

  • electric griddle
  • Nonstick skillet
  • Mixing Bowl
  • spatula

Method
 

Step-by-Step Instructions for Brown Sugar Banana Bread Pancakes
  1. Preheat your griddle or skillet over medium heat, lightly greasing the surface.
  2. In a bowl, whisk together flour, baking powder, salt, brown sugar, and cinnamon.
  3. In a separate bowl, mix milk, vanilla extract, and melted butter; then combine with dry ingredients.
  4. Gently fold in the mashed bananas.
  5. Pour pancake batter onto the preheated griddle, cooking for 2-3 minutes until bubbles form.
  6. Flip pancakes and cook for another 1-2 minutes until golden brown.
  7. Transfer pancakes to a cooling rack to maintain fluffiness, serve warm with toppings.

Nutrition

Serving: 2pancakesCalories: 250kcalCarbohydrates: 40gProtein: 4gFat: 8gSaturated Fat: 4gPolyunsaturated Fat: 0.5gMonounsaturated Fat: 2.5gCholesterol: 15mgSodium: 200mgPotassium: 300mgFiber: 2gSugar: 12gVitamin A: 200IUVitamin C: 5mgCalcium: 100mgIron: 1.5mg

Notes

For best results, use very ripe bananas and avoid overmixing the batter to keep pancakes fluffy. Store leftovers properly.

Tried this recipe?

Let us know how it was!

Creamy Pumpkin Pasta Sauce with Sage for Cozy Nights

As the crisp autumn air sweeps in, I find myself yearning for the warm comfort of a hearty dish that captures the essence of the season. That’s where my Creamy Pumpkin Pasta Sauce with Sage comes into play, a delightful blend that transforms simple ingredients into an extraordinary meal. This recipe not only brings the rich flavors of pumpkin and aromatic sage to your table, but it also caters to a variety of diets—vegetarian, dairy-free, and gluten-free, making it accessible for everyone. With its quick prep time, you can whip up this fall favorite in under an hour, allowing you to savor each delicious bite without spending all night in the kitchen. So, are you ready to create a dish that feels like a warm hug on a chilly evening? Let’s dive into this culinary journey!

Why is pumpkin pasta sauce so special?

Rich, Creamy Texture: This Creamy Pumpkin Pasta Sauce delivers a velvety smoothness that feels indulgent while being entirely plant-based.

Fall-Inspired Flavor: The combination of pumpkin and sage creates the perfect autumnal flavor profile, warming you from the inside out!

Quick and Easy: Whip this up in under an hour—ideal for busy evenings when you crave comfort without long hours in the kitchen.

Health-Conscious Choice: With its dairy-free and gluten-free ingredients, this sauce is perfect for a variety of dietary needs, making it a versatile option for everyone.

Crowd-Pleasing Delight: Serve it at your next gathering to impress family and friends; they won’t believe it’s both vegan and delicious! Enhance your meal with suggestions like adding cooked sausage or some sautéed spinach for extra nutrition—it’s all about making it your own.

Creamy Pumpkin Pasta Sauce Ingredients

For the Pasta

  • Gluten-Free Pasta – The main component of this dish; substituting with brown rice pasta adds a delightful chew.

For the Sauce

  • Pumpkin Puree – Provides that creamy texture and rich flavor; always choose pure pumpkin and not the pie filling for the best results.
  • Full Fat Coconut Milk – Essential for creaminess in this sauce; other plant-based milks can be used if you prefer a lighter option.
  • Sweet Onion, Diced – Adds a touch of sweetness and depth; feel free to swap in yellow onion as a substitute.
  • Fresh Sage – Infuses the sauce with earthy notes; if fresh sage is unavailable, frozen sage is a perfect alternative.
  • Garlic, Minced – Brings aromatic depth to the dish; fresh garlic provides a more pronounced flavor.
  • Olive Oil – Used for sautéing the vegetables; any cooking oil will work fine here.
  • Salt – A vital seasoning that enhances flavor; adjust according to your taste preferences.
  • Paprika – Introduces warmth and a hint of smokiness; for heat, substitute with chili powder.
  • Cinnamon – Adds a subtle sweetness that beautifully complements the pumpkin; you can reduce or omit it if preferred.

This Creamy Pumpkin Pasta Sauce will wrap you in a joyful embrace, perfect for cozy nights!

Step‑by‑Step Instructions for Creamy Pumpkin Pasta Sauce with Sage

Step 1: Sauté Aromatics
Heat a generous tablespoon of olive oil in a large skillet over medium heat. Once hot, add the diced sweet onion and sauté for about 3-4 minutes until they turn translucent. Stir in the minced garlic and chopped fresh sage, cooking for an additional 1-2 minutes until fragrant, ensuring the ingredients meld beautifully together to form a flavorful base for your creamy pumpkin pasta sauce.

Step 2: Combine Sauce Ingredients
Next, stir in the pumpkin puree and full-fat coconut milk, mixing well to achieve a creamy consistency. Sprinkle in the paprika, cinnamon, and salt, and continue to cook for 3-4 more minutes. Look for a uniform and creamy texture, allowing the flavors to blend harmoniously as the sauce warms up, enticing you with its autumnal aroma.

Step 3: Simmer for Flavor
Reduce the heat to low and cover the skillet, letting the sauce simmer for about 25-30 minutes. Stir occasionally to prevent sticking and ensure even cooking. This step is crucial as it allows the flavors of the creamy pumpkin pasta sauce to deepen and develop richer notes, making every bite a comforting delight.

Step 4: Cook the Pasta
While the sauce simmers, cook your choice of gluten-free pasta according to the package instructions. Generally, this should take about 8-10 minutes. Aim for al dente texture, as the pasta will continue to soften once mixed with the sauce, ensuring it holds up well in your creamy pumpkin pasta sauce.

Step 5: Combine Pasta and Sauce
Once the pasta is cooked, drain it and return it to the pot. Pour the creamy pumpkin sauce over the pasta, gently tossing to coat every strand evenly. You’ll know it’s ready when you see the pasta glistening with the rich, vibrant sauce, creating a beautiful and inviting dish to serve.

What to Serve with Creamy Pumpkin Pasta Sauce with Sage

As the leaves turn and the chill settles in, the perfect accompaniment can elevate your cozy pasta dish into a full meal of warmth and flavor.

  • Garlic Bread: This classic side adds a crunchy texture to your meal while the garlic butter brings rich flavors that are irresistible. It’s ideal for sopping up any leftover sauce!

  • Roasted Brussels Sprouts: The caramelized edges and nutty flavor bring a beautiful contrast to the creamy sauce, while their slight bitterness balances out the sweetness of the pumpkin beautifully.

  • Savory Kale Salad: A bright, fresh salad with lemon vinaigrette enhances the meal, providing crunchy freshness. Toss in some nuts for an added crunch and healthy fats that round out your plate.

  • Crispy Tempura Vegetables: Lightly battered and fried veggies offer a delightful crunch that complements the silky sauce, creating a satisfying blend of textures in every bite.

  • Warm Apple Crisp: End your meal with a comforting dessert that highlights fall flavors. The sweet, spiced apples and crunchy topping perfectly contrast the creamy pumpkin sauce, leaving you with a warm, cozy feeling.

  • Hot Apple Cider: A warm beverage with hints of cinnamon and clove not only delights the senses but also enhances the autumnal theme, making it the perfect drink to sip while enjoying your meal.

  • Vegan Caesar Salad: This creamy and tangy salad counterbalances the richness of the pumpkin sauce, and its crispy romaine lettuce offers a lovely textural change.

Each pairing enhances the coziness of your creamy pumpkin pasta sauce with sage, ensuring a delightful dining experience perfect for the season!

Make Ahead Options

These Creamy Pumpkin Pasta Sauce with Sage are perfect for meal prep! You can prepare the sauce up to 3 days in advance. Simply follow the initial steps of sautéing the onions, garlic, and sage, then stir in the pumpkin puree and coconut milk, letting it simmer as directed. Once the sauce has cooled, store it in an airtight container in the refrigerator. For optimal flavor, reheat the sauce on the stovetop over medium-low heat, stirring occasionally. Cook your gluten-free pasta fresh when you’re ready to serve; this ensures a delightful texture and keeps the dish just as delicious as when freshly made. Enjoy the convenience of having a comforting meal ready to go!

How to Store and Freeze Creamy Pumpkin Pasta Sauce

Fridge: Store leftover creamy pumpkin pasta sauce in an airtight glass container for up to 4-5 days. This keeps it fresh and ready for a quick reheating session.

Freezer: If you want to enjoy this comforting sauce later, freeze it in a freezer-safe container for up to 2-3 months. Just remember to leave some space for expansion.

Reheating: When you’re ready to indulge again, thaw the sauce overnight in the fridge. Reheat gently on the stovetop over medium-low heat, stirring until warmed through.

Prevent Sogginess: To keep your pasta from becoming mushy, store the creamy pumpkin pasta sauce separately from the cooked pasta until you’re ready to serve.

Creamy Pumpkin Pasta Sauce Variations

Feel free to mix and match these delicious ideas to make this creamy sauce truly your own!

  • Dairy-Free Delight: Use almond or oat milk instead of coconut milk for a lighter variation without losing that creamy texture. The nutty flavors can beautifully complement the pumpkin.

  • Extra Protein: Incorporate cooked sausage or ground turkey when sautéing the onions for a heartier dish. This twist transforms your pasta into a filling one-pot meal that’s sure to satisfy.

  • Veggie Boost: Stir in sautéed vegetables like spinach or kale before combining the sauce with the pasta. The added greens not only enhance nutrition but also bring a vibrant color to your plate.

  • Nutty Twist: For a creamier texture, replace coconut milk with cashew cream. Simply blend soaked cashews with water until smooth—this adds a lovely richness with a hint of nuttiness.

  • Spicy Kick: Swap out the paprika for chili powder or a dash of crushed red pepper flakes if you’re craving some heat. This variation adds an exciting layer of flavor that may just ignite your taste buds!

  • Savory Swap: For a different flavor profile, use thyme or rosemary instead of sage. These herbs provide their own delightful aromas, setting your dish apart with a unique twist.

  • Cinnamon Spice: Feel free to increase the cinnamon for a sweeter sauce if you adore that warm, autumnal flavor. This can make each bite feel like a cozy, nostalgic hug.

  • Creamy Alternative: Blend a small amount of roasted red peppers into the sauce for a smoky, creamy component. They pair beautifully with pumpkin and add a surprising depth to the sauce.

You can explore even more comforting options like Sausage Tortellini Soup or spice it up with Cajun Sausage Pasta. There’s no limit to how you can create a comforting dish tailored to your tastes!

Expert Tips for Creamy Pumpkin Pasta Sauce

  • Use Fresh Ingredients: For the best flavor, stick with fresh garlic and sage. Dried herbs won’t deliver the same aromatic depth in your creamy pumpkin pasta sauce.

  • Achieve Ideal Consistency: If your sauce becomes too thick, gradually add reserved pasta water or vegetable broth until it reaches your desired creaminess.

  • Enhance the Flavors: Allow the sauce to simmer longer for deeper flavors. A good 25-30 minutes will significantly improve the taste profile of your creamy pumpkin pasta sauce.

  • Cook Pasta Al Dente: This ensures your pasta maintains its texture, preventing it from becoming mushy after mixing with the sauce.

  • Store Wisely: Keep leftover sauce in an airtight container, separate from pasta, to maintain its creaminess for up to 5 days in the fridge.

Creamy Pumpkin Pasta Sauce with Sage Recipe FAQs

How do I select ripe and fresh ingredients for the sauce?
Absolutely! For the best flavor, choose a pumpkin puree that is 100% pure pumpkin—avoid any varieties that are pre-mixed with sugar or spices. Fresh garlic should be firm and plump, while sweet onions should be smooth with no dark spots or soft areas. Fresh sage leaves should be vibrant and fragrant; if they appear wilted or discolored, opt for a fresher batch.

How should I store leftover creamy pumpkin pasta sauce?
You can store your leftover creamy pumpkin pasta sauce in an airtight glass container in the fridge for up to 4-5 days. This allows you to enjoy the flavors again soon without losing freshness. If you have more sauce than you can eat within that timeframe, freezing is a great option!

Can I freeze creamy pumpkin pasta sauce?
Definitely! To freeze your creamy pumpkin pasta sauce, pour it into a freezer-safe container, leaving some space at the top for expansion (about an inch). Seal it tightly and label with the date. It can be frozen for 2-3 months. When you’re ready to enjoy, thaw it overnight in the fridge and reheat gently on the stovetop.

What if my sauce is too thick?
Very common! If you find your creamy pumpkin pasta sauce is thicker than you’d like, simply add a splash of reserved pasta water or vegetable broth. Start with a small amount, mixing well, and continue adding until you achieve your desired consistency. This little tip can make all the difference!

Is this recipe safe for people with dietary restrictions?
Absolutely! This creamy pumpkin pasta sauce is vegan, dairy-free, and gluten-free, making it suitable for a variety of dietary needs. Always double-check the labels on your gluten-free pasta and other ingredients to avoid cross-contamination, especially if you’re cooking for someone with a severe allergy.

Can I add other ingredients to the sauce?
Very much so! Feel free to enhance your creamy pumpkin pasta sauce by adding sautéed vegetables like spinach or kale for added nutrition, or cooked sausage or ground turkey for a heartier option. Experimenting with ingredients can make every dish uniquely yours!

Creamy Pumpkin Pasta Sauce with Sage

Creamy Pumpkin Pasta Sauce with Sage for Cozy Nights

Enjoy the warmth of creamy pumpkin pasta sauce with sage, a comforting dish perfect for autumn nights.
Prep Time 10 minutes
Cook Time 30 minutes
Total Time 40 minutes
Servings: 4 servings
Course: Pasta
Cuisine: Italian
Calories: 320

Ingredients
  

For the Pasta
  • 12 oz Gluten-Free Pasta Brown rice pasta is a good substitute.
For the Sauce
  • 1 cup Pumpkin Puree Use pure pumpkin, not pie filling.
  • 1 cup Full Fat Coconut Milk Other plant-based milks can be used.
  • 1 medium Sweet Onion, Diced Yellow onion can be substituted.
  • 6 leaves Fresh Sage Or use frozen sage.
  • 3 cloves Garlic, Minced Fresh garlic is recommended.
  • 1 tbsp Olive Oil Any cooking oil can be used.
  • 1 tsp Salt Adjust to taste.
  • 1 tsp Paprika Substitute chili powder for heat.
  • 1/2 tsp Cinnamon Optional; reduce or omit if preferred.

Equipment

  • Large skillet
  • Pot

Method
 

Step-by-Step Instructions
  1. Heat a tablespoon of olive oil in a large skillet over medium heat. Add the diced sweet onion and sauté for 3-4 minutes until translucent. Stir in minced garlic and chopped sage, cooking for another 1-2 minutes.
  2. Stir in pumpkin puree and coconut milk, mixing well. Sprinkle in paprika, cinnamon, and salt, cooking for 3-4 more minutes until creamy.
  3. Reduce heat to low and cover, letting the sauce simmer for 25-30 minutes, stirring occasionally.
  4. While the sauce simmers, cook gluten-free pasta according to package instructions, about 8-10 minutes for al dente.
  5. Drain the pasta and return it to the pot. Pour the creamy pumpkin sauce over the pasta, gently tossing to coat.

Nutrition

Serving: 1servingCalories: 320kcalCarbohydrates: 40gProtein: 8gFat: 15gSaturated Fat: 11gPolyunsaturated Fat: 1gMonounsaturated Fat: 3gSodium: 500mgPotassium: 350mgFiber: 4gSugar: 4gVitamin A: 100IUVitamin C: 15mgCalcium: 4mgIron: 8mg

Notes

For best results, use fresh ingredients. Adjust sauce thickness with reserved pasta water if needed. Store sauce separately from pasta to prevent sogginess.

Tried this recipe?

Let us know how it was!

Classic Christmas Toffee: Irresistibly Crunchy & Buttery Treat

As the scent of melting sugar and butter fills the air, it transports me straight to the heart of the holidays. There’s something magical about creating a batch of Classic Christmas Toffee—its irresistible crunch and richness make it the ultimate festive treat. Not only is this toffee incredibly easy to whip up, but it also makes for a thoughtful homemade gift or a delightful companion for cozy movie nights. Whether you’re catering to dietary needs with a dairy-free or nut-free option, this recipe is crafted to impress everyone at your table. So, are you ready to bring a little sweetness into your holiday season? Let’s dive in!

Why is Classic Christmas Toffee a Must-Make?

Irresistible Crunch: The delightful combination of buttery toffee and nutty crunch creates a texture that will have everyone coming back for seconds.
Easily Customizable: With substitutes like coconut oil for a dairy-free version or coconut sugar for the less refined option, this recipe caters to diverse palates.
Quick & Simple: You’ll whip this up in no time, leaving you free to enjoy the holiday festivities with family and friends.
Perfect for Gifting: Package your toffee beautifully for heartfelt gifts that express your love—especially when paired with a little cheat meal treat like Stuffed Bell Peppers for a festive gathering.
Crowd-Pleaser: If you’re hosting a party or a cozy movie night, this chunky toffee is guaranteed to impress every palate.
Get ready for a sweet holiday experience that will have your taste buds dancing with joy!

Classic Christmas Toffee Ingredients

For the Toffee Base

  • Chopped Pecans or Almonds – These nuts provide a delightful crunch; switch to walnuts or hazelnuts if preferred.
  • Granulated Sugar – This is the main sweetener; for a less refined sugar option, use coconut or maple sugar.
  • Butter – Adds a rich creaminess to the toffee; coconut oil is a great dairy-free substitute.
  • Salt – Just a pinch enhances the overall flavor profile.
  • Water – Helps with melting the sugar to achieve that perfect gooey consistency.
  • Vanilla Extract – Essential for aromatic flavor, giving caramel its quintessential taste.

For the Topping

  • Chocolate Chips – This adds a sweet and creamy layer; choose dark or milk chocolate based on taste.
  • Flaked Sea Salt (optional) – Sprinkling this on top adds an exciting contrast to the sweetness, enhancing the overall flavor of your Classic Christmas Toffee.

Get ready to bring this crunchy, buttery delight to life—each ingredient contributes a little magic to your holiday celebrations!

Step‑by‑Step Instructions for Classic Christmas Toffee

Step 1: Preparation
Begin by gathering all your ingredients for the Classic Christmas Toffee. Line a 9″x9″ baking dish with parchment paper, ensuring the paper overhangs for easy removal later. Spread 1 cup of chopped pecans evenly on the bottom of the dish, setting the stage for a delightful nutty crunch that will complement the buttery toffee.

Step 2: Combining Ingredients
In a medium saucepan, combine 1 cup of butter, 1 cup of granulated sugar, 1/4 cup of water, and 1/2 teaspoon of salt. Set the pot over medium heat, stirring continuously until the mixture melts together and begins to bubble, about 5 minutes. This step is crucial, as the completely combined mix will form a smooth caramel base when heated properly.

Step 3: Reaching Temperature
Insert a candy thermometer into the bubbling mixture and keep stirring occasionally. Continue cooking until the temperature reaches 300°F, which is the hard crack stage. This process will take about 10–15 minutes, so stay vigilant; the mixture will turn a rich golden brown, indicating it’s almost ready for the next step.

Step 4: Incorporating Flavor
Once your thermometer hits 300°F, promptly remove the saucepan from heat to prevent burning. Stir in 1 teaspoon of vanilla extract, which enhances the flavor profile of your Classic Christmas Toffee. Pour the hot caramel mixture carefully over the prepared pecans in the baking dish, ensuring an even distribution across the nuts for maximum flavor.

Step 5: Adding Chocolate
Allow the caramel to cool for about 5 minutes, just until it’s warm but not hot. Sprinkle an even layer of chocolate chips over the toffee, covering the surface completely. Cover the dish with a clean kitchen towel or aluminum foil to trap the heat, allowing the chocolate to melt beautifully for about 5–10 minutes.

Step 6: Swirling Topping
After the chocolate has softened, use a spatula to gently swirl it over the caramel. Add extra finely chopped pecans on top for added texture and crunch. For those who enjoy a burst of flavor, sprinkle a bit of flaked sea salt as well. This creates a lovely contrast to the sweetness of the toffee and chocolate.

Step 7: Cooling and Setting
Let your Classic Christmas Toffee cool completely at room temperature for at least 4 hours. For a quicker option, place it in the refrigerator for 1–2 hours to speed up the setting process. The toffee should become firm and easily breakable, ensuring the perfect candy texture.

Step 8: Serving
Once cooled and set, lift the toffee out of the baking dish by holding onto the parchment paper edges. Transfer it to a cutting board and slice it into bite-sized pieces. Enjoy your Classic Christmas Toffee as a sweet treat or a delightful gift for the holiday season!

What to Serve with Classic Christmas Toffee

As you delight in the sweet richness of this festive treat, consider these delightful pairings to elevate your holiday spread.

  • Festive Cheese Board: Elegant cheeses paired with dried fruits and nuts create a beautiful contrast to the sweetness of the toffee. The creamy textures mingle perfectly, making each bite an indulgence.

  • Rich Hot Chocolate: A warm mug of hot chocolate, topped with whipped cream, enhances the holiday vibe and complements the toffee’s buttery richness. Why not add a sprinkle of cinnamon for that extra warmth?

  • Spiced Chai Latte: The aromatic spices in chai pair beautifully with the sweet, crunchy toffee, creating a cozy drink that everyone will love. Think of it as a hug in a cup during chilly evenings!

  • Crisp Apple Slices: Fresh, tart apple slices offer a refreshing crunch that contrasts well with the toffee’s sweetness, making for a balanced snack at your festive gatherings.

  • Yummy Caramel Popcorn: A bowl of homemade caramel popcorn adds texture and sweetness, making it a fun and delightful pairing with the rich crunch of the toffee.

  • Gingerbread Cookies: The warm spices of gingerbread cookies complement the buttery flavor beautifully. Serve alongside for a nostalgic holiday experience.

  • Mulled Wine: The warm, spiced tones of mulled wine enhance the festive spirit and match wonderfully with the crunchy sweetness of your Classic Christmas Toffee. Cheers to that!

  • Chocolate-Covered Pretzels: The salty-sweet combination of chocolate-covered pretzels adds an exciting twist to your dessert platter. Each bite will be a delightful contrast to the toffee’s texture.

  • Vanilla Ice Cream: Serve the toffee over a scoop of vanilla ice cream for a decadent dessert. The cold creaminess balances the rich sweetness, offering a delightful experience.

  • Creamy Eggnog: Celebrate the season with a glass of eggnog! Its creamy and spiced richness pairs perfectly with the crunchy, buttery toffee for a festive touch.

Make Ahead Options

These Classic Christmas Toffee are perfect for meal prep enthusiasts looking to save time during the busy holiday season! You can prepare the base layer with pecans and the caramel mixture up to 3 days in advance to help streamline your holiday baking. Prepare the toffee as directed until the cooling step, then cover tightly with plastic wrap and refrigerate. This ensures the quality remains just as delicious without any compromising flavors. When ready to serve, simply melt the chocolate on top, swirl as directed, and allow it to set before cutting into pieces. With this make-ahead tip, enjoy your holiday gatherings without any last-minute stress!

Expert Tips for Classic Christmas Toffee

  • Temperature Precision: Ensure you reach exactly 300°F to achieve the hard crack stage; too low will result in a chewy texture.
  • Continuous Stirring: Stir constantly while cooking to prevent the sugar from burning, which can ruin the flavor of your Classic Christmas Toffee.
  • Cooling Time: Allow for sufficient cooling time; rushing this process can lead to a sticky or soft toffee that doesn’t set properly.
  • Ingredient Substitutions: If using substitutions, know they may slightly alter taste and texture, so test smaller batches first if you’re unsure.
  • Storage Tip: Keep your Classic Christmas Toffee in an airtight container at room temperature to maintain its crunch and freshness.

Classic Christmas Toffee Variations

Feel free to get creative and customize your Classic Christmas Toffee to suit your taste and dietary needs!

  • Dairy-Free: Replace butter with equal parts coconut oil for a creamy, rich toffee that everyone can enjoy without dairy.

  • Nut-Free: Swap the nuts with sunflower or pumpkin seeds. These provide a delightful crunch without the allergens, making your toffee safe for all guests.

  • Less Refined Sugar: Use coconut sugar or maple sugar instead of granulated sugar. This not only adds a unique flavor but also slightly alters the color, making your toffee even more appealing.

  • Spiced Version: Add a dash of cinnamon or nutmeg to the butter-sugar mix before it reaches the hard crack stage. This warm spice will elevate the seasonal flavors beautifully.

  • Preview Chocolate: Try using white chocolate instead of semi-sweet chocolate chips for a deliciously sweet and creamy twist. It will contrast perfectly with the crunchy toffee base.

  • Heat it Up: For a spicy kick, mix in a pinch of cayenne pepper or chili powder into your caramel just after removing it from heat. This surprising element will create a delightful contrast to the sweet toffee.

  • Full of Flavor: Incorporate a splash of almond extract along with vanilla for a rich, nutty flavor that adds depth to your toffee experience.

  • Gourmet Touch: Experiment with toppings; consider drizzling dark chocolate over the cooled toffee for an extra layer of decadence, or sprinkle some crushed freeze-dried fruit for a pop of color and flavor.

These variations are sure to elevate your Classic Christmas Toffee, making it even more special this holiday season. If you’re looking for more festive treats, consider pairing it with some delicious Comforting Charm Baked goodies for your celebrations!

How to Store and Freeze Classic Christmas Toffee

Room Temperature: Store your Classic Christmas Toffee in an airtight container at room temperature for up to 3 weeks, preserving its delightful crunch and flavor.

Fridge: If you prefer, you can refrigerate the toffee to prolong its freshness, but it may slightly alter the texture; consume within 4 weeks.

Freezer: For longer storage, wrap pieces of toffee tightly in plastic wrap and then place them in an airtight freezer bag. It can stay frozen for up to 3 months.

Reheating: When ready to enjoy, let it sit at room temperature for about 30 minutes before serving to restore its original texture and flavor.

Classic Christmas Toffee Recipe FAQs

What type of nuts should I use for the Classic Christmas Toffee?
You can use chopped pecans or almonds for your Classic Christmas Toffee, providing a delicious crunch. If you or someone you’re serving has a nut allergy, feel free to substitute them with sunflower seeds or pumpkin seeds for a delightful nut-free version.

How long can I store Classic Christmas Toffee?
Store your Classic Christmas Toffee in an airtight container at room temperature for up to 3 weeks. It’s a good idea to keep it away from direct sunlight or heat to maintain that delightful crunch.

Can I freeze Classic Christmas Toffee?
Absolutely! To freeze your Classic Christmas Toffee, wrap individual pieces tightly in plastic wrap and then place them in an airtight freezer bag. They can be enjoyed for up to 3 months. When you’re ready to savor your toffee, just let it sit at room temperature for about 30 minutes to restore its delightful texture.

What if my toffee doesn’t set properly?
If your Classic Christmas Toffee hasn’t set as desired, it might not have reached the hard crack stage at 300°F. You can try reheating the mixture gently while stirring constant until it reaches the correct temperature. Once achieved, pour it over the nuts and let it cool completely.

Can I make Classic Christmas Toffee dairy-free?
Yes, you can easily make this recipe dairy-free by substituting butter with coconut oil. This still provides that rich texture while catering to those with dairy sensitivities. Just ensure you use dairy-free chocolate chips for the topping and enjoy the same deliciousness!

Classic Christmas Toffee

Classic Christmas Toffee: Irresistibly Crunchy & Buttery Treat

This Classic Christmas Toffee is an irresistible, crunchy, and buttery treat perfect for the holiday season.
Prep Time 15 minutes
Cook Time 15 minutes
Cooling Time 4 hours
Total Time 4 hours 30 minutes
Servings: 20 pieces
Course: Dessert
Cuisine: American
Calories: 150

Ingredients
  

For the Toffee Base
  • 1 cup Chopped Pecans or Almonds Can substitute with walnuts or hazelnuts
  • 1 cup Granulated Sugar Can substitute with coconut or maple sugar
  • 1 cup Butter Coconut oil can be used for dairy-free version
  • 1/2 teaspoon Salt
  • 1/4 cup Water
  • 1 teaspoon Vanilla Extract Essential for flavor
For the Topping
  • 1 cup Chocolate Chips Choose dark or milk chocolate based on preference
  • Flaked Sea Salt Optional, to enhance sweetness contrast

Equipment

  • medium saucepan
  • candy thermometer
  • baking dish

Method
 

Step-by-Step Instructions
  1. Prepare by lining a 9"x9" baking dish with parchment paper, spreading 1 cup of chopped pecans evenly on the bottom.
  2. In a medium saucepan, combine butter, granulated sugar, water, and salt over medium heat, stirring continuously until melted and bubbling, about 5 minutes.
  3. Insert a candy thermometer and cook until the mixture reaches 300°F, stirring occasionally, about 10-15 minutes.
  4. Remove from heat and stir in vanilla extract; pour the caramel mixture over the prepared pecans.
  5. Allow the caramel to cool for 5 minutes, then sprinkle chocolate chips on top and cover to let melt for 5-10 minutes.
  6. Gently swirl melted chocolate over the caramel and sprinkle with chopped pecans and flaked sea salt if desired.
  7. Let cool completely at room temperature for at least 4 hours, or refrigerate for 1-2 hours.
  8. Lift the toffee out using the parchment paper and slice into pieces to serve.

Nutrition

Serving: 1pieceCalories: 150kcalCarbohydrates: 20gProtein: 1gFat: 8gSaturated Fat: 5gPolyunsaturated Fat: 1gMonounsaturated Fat: 2gCholesterol: 15mgSodium: 50mgPotassium: 20mgFiber: 1gSugar: 18gVitamin A: 5IUCalcium: 2mgIron: 2mg

Notes

Ensure precise temperatures and adequate cooling time for the best texture. Store in an airtight container to maintain crunch.

Tried this recipe?

Let us know how it was!

Irresistible Maple Walnut Cheesecake You Need to Try Today

As I whisked together the ingredients for my Maple Walnut Cheesecake, a wave of sweet nostalgia washed over me. This recipe is all about the delightful combination of crunchy walnuts and rich maple syrup, nestled in a buttery brown sugar crust. The crowning glory is a silky smooth cheesecake filling that brings together the warmth of fall and the comfort of homemade dessert. Not only is this Maple Walnut Cheesecake a true showstopper that’s perfect for gatherings, but it also comes together surprisingly easily, making it a crowd-pleaser for both novice bakers and seasoned pros. So, are you ready to take your dessert game to the next level? Let’s dive into the world of creamy goodness!

Why is Maple Walnut Cheesecake a Must-Try?

Indulge in a dessert that perfectly blends richness and nostalgia—this Maple Walnut Cheesecake features a crunchy brown sugar crust that elevates its flavor profile. Effortless preparation makes it accessible for bakers of any level, while its gorgeous presentation will steal the spotlight at any gathering. Rich, velvety filling combines sweet maple syrup and creamy cheese, appealing to both cheesecake lovers and new fans alike. Ultimate versatility allows for delightful variations, such as using pecans or mini cheesecakes for bite-sized joy. Whether serving at parties or enjoying as an everyday treat, you’ll love this dessert that truly satisfies every sweet craving! For more enticing cheesecake ideas, check out my Strawberry Cheesecake Dump or Carrot Cake Cheesecake.

Maple Walnut Cheesecake Ingredients

For the Crust

  • Walnuts – Essential for crunch; lightly toast for enhanced flavor.
  • Graham Crackers – Base of the crust; contributes crunch and texture. Can substitute with gluten-free graham crackers.
  • Light Brown Sugar – Adds sweetness and a hint of caramel flavor to the crust; can substitute with coconut sugar for a deeper flavor.
  • Salt – Enhances flavor across components; use kosher or sea salt.
  • Unsalted Butter – Binds the crust mixture and adds richness; can use coconut oil for a lighter option.

For the Cheesecake Filling

  • Full-Fat Cream Cheese – Main component of cheesecake for a rich, creamy filling; ensure it’s at room temperature for easy mixing.
  • Sour Cream – Adds tanginess and creaminess to the filling; substitute with Greek yogurt if desired.
  • Granulated Sugar – Sweetens the cheesecake filling; reduce for less sweetness if preferred.
  • Vanilla Extract – Provides aroma and flavor complexity; use pure vanilla extract for best results.
  • Eggs & Egg Yolks – Provide structure and creaminess, contributing to the cheesecake’s richness; room temperature eggs ensure better blending.
  • Maple Syrup – Core flavor adds sweetness and depth; use high-quality, real maple syrup for optimal taste.
  • Maple Extract – Enhances the maple flavor profile; substitute with vanilla extract if unavailable.
  • Heavy Cream – Adds richness to the filling; can replace with full-fat coconut milk for a dairy-free option.
  • All-Purpose Flour – Stabilizes the filling, preventing cracks; can be omitted for a gluten-free version.

For the Topping

  • Unsalted Butter – Basis for the maple walnut topping that adds richness; can use vegan butter for a dairy-free option.
  • Light Brown Sugar – Sweetens the topping and creates a caramel-like consistency.
  • Heavy Cream – Enhances sauce texture.
  • Walnuts – Coated in syrup for added texture and flavor; use whole or roughly chopped based on preference.
  • Vanilla Extract – Enhances the topping flavor.
  • Maple Syrup – Adds depth of maple flavor to the topping; essential for that Maple Walnut Cheesecake experience.
  • Bourbon – Adds complexity to the topping flavor; can be omitted for a non-alcoholic version.

Step‑by‑Step Instructions for Maple Walnut Cheesecake

Step 1: Preheat and Prepare the Pan
Preheat your oven to 350°F (175°C). While the oven is heating, prepare a 9-inch springform pan by wrapping the bottom with aluminum foil to catch any leaks, then spray the sides with non-stick cooking spray. This will ensure your Maple Walnut Cheesecake has a beautiful, intact presentation when it’s ready to serve.

Step 2: Make the Crust
In a food processor, pulse the walnuts until they are finely chopped. Combine these with graham cracker crumbs, light brown sugar, and a pinch of salt in a mixing bowl. Add melted unsalted butter and mix until the texture resembles wet sand. Press this mixture firmly into the bottom of the prepared pan, and bake in the preheated oven for 10 minutes. Remove and let it cool completely.

Step 3: Create the Cheesecake Filling
Reduce the oven temperature to 325°F (160°C). In the cleaned food processor, blend together room temperature cream cheese and sour cream until the mixture is completely smooth and creamy. Gradually add granulated sugar and vanilla extract, blending well for about a minute. This step is crucial for achieving a perfectly smooth Maple Walnut Cheesecake filling.

Step 4: Incorporate Eggs and Flavorings
Add the eggs one at a time, mixing on low speed just until combined after each addition. Next, pour in the maple syrup, maple extract, and heavy cream, mixing gently. Finally, fold in the all-purpose flour until just combined. The mixture should be smooth and rich, perfect for enveloping the wonderful flavors of maple and walnuts.

Step 5: Bake the Cheesecake
Carefully pour the cheesecake filling over the cooled crust, smoothing out the top with a spatula. Place the springform pan into a larger baking dish filled with hot water (about halfway up the sides) to create a water bath. Bake in the oven for 1 hour and 20 minutes, until the edges are set and the center has a slight jiggle. After baking, turn off the oven and leave the cheesecake inside for an additional 30 minutes.

Step 6: Cool and Chill
Once the cheesecake has finished baking, remove it from the oven and the water bath. Allow it to cool to room temperature, then cover it and refrigerate for at least 6 hours, or preferably overnight. Chilling is essential for the Maple Walnut Cheesecake to firm up properly and develop its delightful flavors.

Step 7: Prepare the Topping
To make the topping, melt unsalted butter in a skillet over medium heat. Stir in the light brown sugar, allowing it to bubble for a minute. Gradually whisk in heavy cream and a pinch of salt until well combined. Add the walnuts to the sauce, ensuring they are thoroughly coated. Off the heat, mix in the vanilla extract, maple syrup, and bourbon if using, then let cool slightly.

Step 8: Assemble and Serve
When the cheesecake is fully chilled, remove it from the springform pan. Spoon the warm maple walnut topping over the cheesecake, spreading it evenly to cover the top. Slice the cheesecake and serve chilled for the ultimate Maple Walnut Cheesecake experience, delighting your guests with every rich, creamy bite.

Make Ahead Options

These Maple Walnut Cheesecake are perfect for busy home cooks looking to save time without sacrificing flavor! You can prepare the cheesecake filling up to 24 hours in advance and store it, tightly covered, in the refrigerator for optimal freshness. The crust can also be made and baked in advance; simply cool it and keep it covered at room temperature or in the fridge. When you’re ready to serve, pour the filling over the cooled crust and bake as directed. Allow it to chill for at least 6 hours before serving to ensure a creamy texture. With these make-ahead tips, you can enjoy a delightful dessert while keeping your schedule stress-free!

Maple Walnut Cheesecake Variations

Feel free to personalize this delightful Maple Walnut Cheesecake with these creative twists for a unique flavor experience!

  • Nut Swap: Substitute walnuts with pecans for a sweeter, softer nut flavor. This change brings a new layer of nuttiness that pairs beautifully with maple.
  • Flavored Extracts: Experiment with different extracts like hazelnut or almond for varied taste profiles. Each brings its unique characteristics, making the cheesecake exciting each time.
  • Mini Cheesecakes: Make adorable mini cheesecakes in cupcake liners for easier serving. These bite-sized treats are perfect for parties, ensuring everyone gets their share of deliciousness!
  • Dairy-Free Option: Use coconut cream instead of cream cheese and heavy cream for a totally dairy-free version. You’ll experience a creamy texture that is still rich and satisfying.
  • Spice it Up: Add a hint of cinnamon or nutmeg to the filling for a warm twist. These spices elevate the flavor profile, giving it that cozy feel we all love.
  • Swirled Maple: Drizzle maple syrup into the cheesecake batter before baking for a beautiful marbled effect. This will enhance the maple flavor, making each slice extra special.
  • Caramel Drizzle: Top your cheesecake with a caramel sauce for an indulgent upgrade. The sweetness of caramel complements the maple and walnut flavors perfectly.
  • Fruit Topping: Consider topping with fresh apples or pears for a fruity contrast that brightens the rich cheesecake. This addition provides flavor and decorative flair, making it a stunning centerpiece.

For more delectable cheesecake ideas, don’t miss out on my Strawberry Cheesecake Dump or dive into the flavors of my Carrot Cake Cheesecake.

How to Store and Freeze Maple Walnut Cheesecake

Fridge: Store your Maple Walnut Cheesecake covered in plastic wrap or an airtight container in the refrigerator for up to 5 days for optimal freshness.

Freezer: To freeze, wrap the cheesecake tightly in plastic wrap and aluminum foil, ensuring no air escapes. It can be frozen for up to 3 months; thaw in the fridge overnight before serving.

Reheating: Cheesecake is best enjoyed chilled, but if you prefer it slightly warm, allow it to sit at room temperature for about 30 minutes before serving.

Topping Storage: If you prepare the maple walnut topping separately, store it in a sealed container in the refrigerator for up to 3 days. Reheat gently before serving to bring back its gooey texture.

Tips for the Best Maple Walnut Cheesecake

Room Temperature Ingredients: Ensure your cream cheese and eggs are at room temperature for a smooth, lump-free mixture that creates the perfect Maple Walnut Cheesecake.

Proper Mixing Technique: Mix the ingredients on low speed after adding eggs to avoid incorporating too much air, which can cause cracks in your cheesecake.

Water Bath Method: Using a water bath helps regulate the temperature while baking, preventing cracks and ensuring a creamier texture.

Cooling Time: Allow the cheesecake to cool slowly in the oven with the door ajar before refrigerating. This prevents sudden temperature changes that could lead to cracks.

Chill Well: Always chill your cheesecake for at least six hours, or preferably overnight. This allows the flavors to meld beautifully and the texture to firm up.

Topping Secrets: Prepare the topping shortly before serving for the best texture and flavor. Warm sauce complements the cold cheesecake perfectly, enhancing the maple flavor.

What to Serve with Maple Walnut Cheesecake

Treat yourself and your loved ones to a full meal experience that beautifully complements the rich sweetness of this delightful dessert.

  • Fresh Berries: A tangy mix of raspberries and blueberries adds a refreshing burst of flavor, balancing the cheesecake’s richness.
  • Creamy Whipped Cream: A dollop of lightly sweetened whipped cream elevates the cheesecake, giving each bite a luxurious feel.
  • Coffee: A robust cup of freshly brewed coffee enhances the dessert’s flavors, creating a warm and cozy pairing that’s hard to resist.
  • Fruit Salad: An assortment of seasonal fruits lends a fresh crunch, beautifully contrasting the creamy texture of the cheesecake.
  • Chocolate Sauce: Drizzling a rich chocolate sauce over each slice brings an added layer of indulgence and pairs perfectly with maple notes.
  • Caramel Sauce: The buttery simplicity of caramel adds a luxurious touch, making each bite a delightful journey of flavors.
  • Vanilla Ice Cream: A scoop of vanilla ice cream perfectly complements the cheesecake’s creaminess while adding a cooling sensation.
  • Nutty Biscotti: Crunchy biscotti with almond or walnut flavors provide a satisfying texture, perfect for dipping alongside the cheesecake.
  • Sparkling Apple Cider: A bubbly, non-alcoholic drink enhances your meal’s festive atmosphere while balancing the sweetness of your dessert.
  • Lemon Sorbet: The tartness of lemon sorbet cleanses the palate, making it a light and refreshing contrast to the sweet cheesecake.

Maple Walnut Cheesecake Recipe FAQs

How do I choose the right walnuts for the crust?
Absolutely! For the best flavor in your Maple Walnut Cheesecake, choose walnuts that are fresh and firm, free from any dark spots or rancid smell—these can indicate age. I recommend lightly toasting them for 5 to 8 minutes to bring out their natural nuttiness.

How should I store leftover cheesecake?
Very! Store your Maple Walnut Cheesecake covered in plastic wrap or an airtight container in the refrigerator. It will remain fresh for up to 5 days. If you’d like, you can place a piece of parchment paper between the cheesecake and the wrap to keep it from sticking.

Can I freeze the cheesecake? What’s the best way?
Certainly! To freeze, wrap your Maple Walnut Cheesecake tightly in plastic wrap followed by a layer of aluminum foil, preventing freezer burn. It can be stored in the freezer for up to 3 months. When you’re ready to enjoy it, simply thaw it in the fridge overnight before serving.

What if the cheesecake cracks while baking?
Oh no! This can happen, but don’t worry! Here’s what you can do: First, ensure you’re mixing your ingredients at low speed, especially after adding eggs. This minimizes air bubbles, which can lead to cracks. Secondly, using a water bath during baking creates a gentle heat that helps maintain a creamy texture, reducing the chance of cracking.

Is this cheesecake suitable for those with allergies?
Absolutely! If you have nut allergies, you can substitute walnuts with other nuts like pecans or even leave them out entirely. Additionally, for those watching dairy consumption, use plant-based cream cheese and coconut milk in your Maple Walnut Cheesecake. Always check labels for any allergens before serving!

Can I make this cheesecake in advance?
Definitely! You can prepare your Maple Walnut Cheesecake up to two days in advance, storing it in the refrigerator to allow the flavors to deepen. The topping should be made fresh on the day of serving for the best texture and taste. Enjoy the delights of this dessert hassle-free at your next gathering!

Maple Walnut Cheesecake

Irresistible Maple Walnut Cheesecake You Need to Try Today

This Maple Walnut Cheesecake combines crunchy walnuts and rich maple syrup in a silky smooth filling, making it an irresistible dessert for any gathering.
Prep Time 30 minutes
Cook Time 1 hour 20 minutes
Chilling Time 6 hours
Total Time 7 hours 50 minutes
Servings: 12 slices
Course: Dessert
Cuisine: American
Calories: 350

Ingredients
  

For the Crust
  • 1 cup walnuts lightly toasted
  • 1 cup graham crackers or gluten-free graham crackers
  • 1/4 cup light brown sugar or coconut sugar
  • 1/4 teaspoon salt kosher or sea salt
  • 1/2 cup unsalted butter or coconut oil
For the Cheesecake Filling
  • 16 oz full-fat cream cheese room temperature
  • 1 cup sour cream or Greek yogurt
  • 1 cup granulated sugar
  • 1 tablespoon vanilla extract preferably pure
  • 3 large eggs room temperature
  • 3/4 cup maple syrup high-quality
  • 1 teaspoon maple extract or vanilla extract
  • 1/2 cup heavy cream or full-fat coconut milk
  • 2 tablespoons all-purpose flour omit for gluten-free
For the Topping
  • 1/4 cup unsalted butter or vegan butter
  • 1/4 cup light brown sugar
  • 1/4 cup heavy cream
  • 1 cup walnuts whole or roughly chopped
  • 1 teaspoon vanilla extract
  • 1/4 cup maple syrup
  • 1 tablespoon bourbon optional

Equipment

  • 9-inch springform pan
  • Food Processor
  • Skillet
  • Mixing Bowl

Method
 

Step-by-Step Instructions
  1. Preheat your oven to 350°F (175°C) and prepare a 9-inch springform pan.
  2. Pulse walnuts in a food processor, then combine with graham cracker crumbs, sugar, salt, and melted butter.
  3. Press the mixture into the bottom of the prepared pan and bake for 10 minutes. Let cool.
  4. Reduce oven temperature to 325°F (160°C) and blend cream cheese and sour cream until smooth.
  5. Gradually add sugar and vanilla, then mix in eggs one at a time.
  6. Fold in maple syrup, maple extract, heavy cream, and flour until smooth.
  7. Pour filling over crust and bake in a water bath for 1 hour and 20 minutes.
  8. Turn off oven and leave cheesecake inside for 30 minutes.
  9. Cool to room temperature, then refrigerate for at least 6 hours.
  10. Melt butter in a skillet, add brown sugar, then whisk in cream and add walnuts.
  11. Remove cheesecake from pan, top with warm walnut mixture, slice, and serve.

Nutrition

Serving: 1sliceCalories: 350kcalCarbohydrates: 32gProtein: 5gFat: 24gSaturated Fat: 14gPolyunsaturated Fat: 0.1gMonounsaturated Fat: 0.5gCholesterol: 90mgSodium: 220mgPotassium: 150mgFiber: 1gSugar: 20gVitamin A: 500IUCalcium: 50mgIron: 1mg

Notes

Ensure cream cheese and eggs are at room temperature for best mixing results. Chill for at least 6 hours for optimal texture and flavor.

Tried this recipe?

Let us know how it was!

Strawberry Oreo Cheesecake Cups for Easy Summer Bliss

As I sat on my porch savoring the remnants of summer, the thought of a quick dessert made from a few favorite flavors danced in my mind. These Strawberry Oreo Cheesecake Cups are not just a treat; they’re an experience—combining the satisfying crunch of Oreos with a light, creamy filling, all while being completely no-bake! This easy dessert is great for warm days and perfect for anyone looking to whip up something special without a fuss. Whether you’re entertaining friends or treating yourself, these customizable cups can even cater to various dietary preferences—think dairy-free or vegan options! Curious how to create this delightful indulgence? Let’s dive into the recipe!

Why are Strawberry Oreo Cheesecake Cups perfect?

No-Bake Convenience: These cups are incredibly simple to whip up without the need for an oven, making them ideal for hot summer days.

Customizable Flavors: Switch up your Oreos or layer in different berries like raspberries for a unique twist.

Perfect Portions: Individual servings mean no sharing required—great for parties or a personal treat!

Crowd-Pleasing Delight: With the creamy filling and crunchy layers, they’re sure to impress your guests, whether at a potluck or a casual get-together.

Easy Adaptability: Want a vegan version? No problem! You can easily swap ingredients for plant-based alternatives.

Quick Chill Time: Just chill for about 30 minutes, and you’re ready to indulge in a refreshing dessert that embodies summer bliss!

Strawberry Oreo Cheesecake Cup Ingredients

• Here’s everything you need to create these delightful, no-bake treats!

For the Base:

  • Oreos – Crushed for a crunchy base; consider using Golden Oreos for a twist!

For the Cheesecake Filling:

  • Cream Cheese (8 oz) – Creates a smooth base for the creamy filling; can be substituted with dairy-free cream cheese for a vegan option.
  • Powdered Sugar (¼ cup) – Sweetens the filling; feel free to adjust or use a sugar-free sweetener.
  • Vanilla Extract (1 tsp) – Adds depth to the flavor; no substitutions needed.
  • Heavy Whipping Cream (½ cup) – Provides a fluffy texture; you can swap this with Cool Whip if preferred.

For the Strawberries:

  • Fresh Strawberries (1 cup) – Offer a juicy freshness; try using different berries like blueberries for variety.

For Garnish:

  • Mini Oreos (2 tbsp) – Use these to enhance visual appeal; optional but highly recommended for that extra touch!

Step‑by‑Step Instructions for Strawberry Oreo Cheesecake Cup

Step 1: Prep Oreos
Begin by crushing the Oreos into fine crumbs. Use a food processor for efficiency, or place them in a zip-top bag and crush with a rolling pin until you achieve a sand-like texture. This will serve as the delightful base for your Strawberry Oreo Cheesecake Cups. Set aside about two tablespoons of crumbs for garnish later.

Step 2: Make Filling
In a large mixing bowl, beat the room-temperature cream cheese with powdered sugar and vanilla extract until smooth and creamy, about 2-3 minutes. In a separate bowl, whip the heavy cream until soft peaks form, which should take around 3-5 minutes. Gently fold the whipped cream into the cheesecake mixture until well combined, creating the light and airy filling for your Strawberry Oreo Cheesecake Cups.

Step 3: Prep Strawberries
Wash and dry one cup of fresh strawberries, then slice them evenly into thin pieces to maintain a beautiful presentation in your dessert. If desired, prepare a quick strawberry sauce by blending a few extra strawberries with a bit of sugar to drizzle on top later. This fruity layer will add vibrant color and sweetness to your cups.

Step 4: Layer Cups
Start assembling your cups by placing a layer of the crushed Oreos at the bottom of each serving container. Follow this with a generous layer of the cream cheese filling, then add a layer of the sliced strawberries. Repeat these layers until you reach the top, finishing with a layer of cheesecake filling to create a visually appealing Strawberry Oreo Cheesecake Cup perfect for any occasion.

Step 5: Garnish
To enhance the visual appeal of your Strawberry Oreo Cheesecake Cups, top each cup with the reserved Oreo crumbs, extra sliced strawberries, and a few mini Oreos for that extra touch. If you created a strawberry sauce, drizzle a bit on top for a beautiful finishing touch. These garnishes will not only look delightful but also add a burst of flavor to each bite.

Step 6: Chill
Refrigerate the assembled Strawberry Oreo Cheesecake Cups for at least 30 minutes, or up to a few hours if time permits. This chilling step is crucial as it allows the flavors to meld and the filling to set, creating a refreshing dessert that is easy to serve. For optimal texture, serve them chilled, letting everyone enjoy the cool, decadent layers!

Strawberry Oreo Cheesecake Cup Variations

Feel free to explore these creative options to make the recipe truly your own!

  • Flavor Swap: Replace Oreos with Golden Oreos or try a mint variety for a fresh twist. Each flavor brings its own unique charm to the cups!

  • Vegan Delight: Use dairy-free cream cheese and whipped coconut cream for a completely plant-based version. You won’t miss the traditional ingredients—trust me!

  • Berry Bliss: Substitute the fresh strawberries with raspberries or blueberries for a burst of different fruit flavors. Each berry brings a new dimension to the sweet creaminess.

  • Sweetener Change: For a healthier version, swap powdered sugar with a sugar-free sweetener like Stevia. Adjust to taste, ensuring your dessert remains delightful!

  • Nutty Crunch: Add a layer of chopped nuts like almonds or walnuts between layers for an unexpected crunch. The contrast of textures will surprise you!

  • Larger Serving: Want to serve more? Create a trifle by layering the ingredients in a large dish instead of individual cups. Perfect for gatherings and easy to serve!

  • Chocolate Drizzle: Drizzle melted chocolate over the top before serving for an indulgent treat that chocolate lovers will adore.

  • Spicy Kick: Add a pinch of cinnamon or a dash of chili powder to your cheesecake filling for a surprising twist that elevates the flavor profile beautifully!

Feel inspired? Now you can make this dessert a true reflection of your taste and creativity! If you’re on the lookout for more dessert ideas, check out my delightful Strawberry Cheesecake Dump or give the fabulous Carrot Cake Cheesecake a try!

How to Store and Freeze Strawberry Oreo Cheesecake Cups

Fridge: Store your Strawberry Oreo Cheesecake Cups in an airtight container for up to 2 days. This keeps them fresh and maintains their creamy texture.

Freezer: For longer storage, freeze assembled cups for up to 1 month. Place them in an airtight container, but know that the texture may change slightly once thawed.

Thawing: To enjoy frozen cups, transfer them to the fridge for several hours or overnight to thaw gently. Avoid microwave thawing, as it can compromise the filling’s texture.

Re-garnishing: Add fresh strawberries and any additional garnishes just before serving for the best taste and presentation.

What to Serve with Strawberry Oreo Cheesecake Cups

Elevate your dessert experience and create a memorable meal by pairing these delightful cups with complementary flavors and textures.

  • Fresh Berries: A medley of raspberries and blueberries adds vibrant color and tangy contrast, enhancing the fruity notes of the cheesecake cups.

  • Whipped Cream: A dollop of freshly whipped cream on top not only boosts creaminess but also adds an airy texture that balances the richness of the dessert.

  • Chocolate Drizzle: Adding a warm chocolate drizzle brings an indulgent twist, creating an enticing visual feast while introducing a new layer of flavor to each bite.

  • Sparkling Lemonade: The citrusy zing from sparkling lemonade refreshes the palate, making it an ideal companion for the sweet and creamy cheesecake.

  • Mint Sprigs: Garnish the cups with fresh mint leaves. Their crisp flavor brings a refreshing lift and a delightful pop of color, enhancing the presentation.

  • Coffee or Espresso: A strong cup of coffee pairs beautifully, cutting through the sweetness while complementing the chocolate notes of the Oreo crust.

  • Ice Cream: A scoop of vanilla or strawberry ice cream can take your dessert to the next level. The creaminess and temperature contrast will delight your taste buds!

  • Chocolate-Covered Pretzels: The salty crunch of chocolate-covered pretzels offers a unique contrast in texture and flavor, adding a fun and unexpected twist to the dessert experience.

  • Fruit Salad: A light fruit salad with tropical fruits like pineapple and mango serves as a refreshing side, balancing the richness of the cheesecake cups nicely.

Make Ahead Options

These delightful Strawberry Oreo Cheesecake Cups are perfect for meal prep enthusiasts! You can prepare the cheesecake filling and the crushed Oreo base up to 24 hours in advance. Simply mix the cream cheese, powdered sugar, and vanilla, and fold in the whipped cream before refrigerating it in an airtight container. Store the crushed Oreos separately to maintain their crunch. When you’re ready to serve, layer the prepped components with fresh strawberries and some extra garnish for a vibrant presentation. This way, you can enjoy an indulgent, no-bake dessert that saves time and still tastes just as delicious!

Expert Tips for Strawberry Oreo Cheesecake Cups

  • Room Temperature Cream Cheese: Ensure your cream cheese is at room temperature for easy blending. This will avoid lumps and give you a smooth filling.

  • Don’t Over-Whip Cream: When whipping the heavy cream, stop once soft peaks form. Over-whipping can lead to a grainy texture in your cheesecake cups.

  • Chill Time is Key: Refrigerate the cups for at least 30 minutes to allow flavors to meld and the texture to set. This is crucial for the best Strawberry Oreo Cheesecake Cups!

  • Taste as You Go: If using sugar-free or alternative sweeteners, adjust sweetness to your preference as you mix. Everyone’s taste buds are different, so fine-tune it!

  • Use Clear Cups for Presentation: Consider using clear dessert cups to showcase the beautiful layers of your Strawberry Oreo Cheesecake Cups. Visual appeal makes the experience even more delightful!

Strawberry Oreo Cheesecake Cups Recipe FAQs

What type of Oreos should I use for the best flavor?
For these Strawberry Oreo Cheesecake Cups, classic Oreos work beautifully for that signature crunch and rich chocolate flavor. However, feel free to experiment with Golden Oreos for a different taste, or even flavored varieties like mint or strawberry for a unique twist. The more the merrier when it comes to flavor combinations!

How should I store Strawberry Oreo Cheesecake Cups?
Store your Strawberry Oreo Cheesecake Cups in an airtight container in the refrigerator for up to 2 days. This ensures they remain fresh and the creamy texture is maintained. If you’d like to prepare them in advance, simply cover them well in plastic wrap or a container to keep moisture out, enhancing their longevity.

Can I freeze Strawberry Oreo Cheesecake Cups?
Absolutely! To freeze, place your assembled cups in an airtight container and freeze for up to 1 month. Just be aware that the texture may change slightly after thawing due to the creamy nature of the filling. To thaw, simply move them to the refrigerator for several hours or overnight to gently defrost, avoiding the microwave to prevent any texture issues.

What if my cream cheese mixture is lumpy?
No worries! If your cream cheese is not at room temperature, it might not blend smoothly. To fix this, let the cream cheese sit out for about 30 minutes before mixing. If you still face lumps, continue beating until the mixture is smooth and creamy, ensuring all ingredients are nicely combined.

Are these Strawberry Oreo Cheesecake Cups safe for people with allergies?
When making these cups, consider dietary restrictions like dairy or gluten allergies. You can easily make them gluten-free by using gluten-free Oreos and can substitute with dairy-free cream cheese for a vegan option. Always check the packaging for allergens, and adjust ingredients based on individual needs for a safe and delightful dessert!

How long should I chill the cups before serving?
Chill the Strawberry Oreo Cheesecake Cups for at least 30 minutes, but for best results, aim for 2-3 hours or even overnight. This allows the flavors to blend beautifully, ensuring a refreshing dessert that is splendidly creamy and satisfying when served!

Strawberry Oreo Cheesecake Cup

Strawberry Oreo Cheesecake Cups for Easy Summer Bliss

Delight in Strawberry Oreo Cheesecake Cups, a no-bake dessert perfect for summer, combining Oreos and a creamy filling for a delightful experience.
Prep Time 15 minutes
Chill Time 30 minutes
Total Time 45 minutes
Servings: 4 cups
Course: Dessert
Cuisine: American
Calories: 290

Ingredients
  

For the Base
  • 20 pieces Oreos Crushed for a crunchy base; consider using Golden Oreos for a twist!
For the Cheesecake Filling
  • 8 oz Cream Cheese Can be substituted with dairy-free cream cheese for a vegan option.
  • 0.25 cup Powdered Sugar Feel free to adjust or use a sugar-free sweetener.
  • 1 tsp Vanilla Extract No substitutions needed.
  • 0.5 cup Heavy Whipping Cream You can swap this with Cool Whip if preferred.
For the Strawberries
  • 1 cup Fresh Strawberries Try using different berries like blueberries for variety.
For Garnish
  • 2 tbsp Mini Oreos Optional but highly recommended for that extra touch!

Equipment

  • Food Processor
  • Mixing Bowl
  • Zip-top Bag
  • Rolling Pin

Method
 

Step-by-Step Instructions
  1. Begin by crushing the Oreos into fine crumbs. Use a food processor or place them in a zip-top bag and crush with a rolling pin until sand-like. Set aside about two tablespoons for garnish later.
  2. In a large mixing bowl, beat the room-temperature cream cheese with powdered sugar and vanilla extract until smooth and creamy, about 2-3 minutes. In a separate bowl, whip the heavy cream until soft peaks form, which should take around 3-5 minutes. Gently fold the whipped cream into the cheesecake mixture until well combined.
  3. Wash and dry one cup of fresh strawberries, then slice them evenly into thin pieces. Prepare a quick strawberry sauce by blending a few extra strawberries with sugar if desired.
  4. Assemble by placing a layer of crushed Oreos at the bottom of each serving container. Follow with a layer of cream cheese filling, then add a layer of sliced strawberries. Repeat, finishing with cheesecake filling.
  5. Top each cup with reserved Oreo crumbs, extra sliced strawberries, and a few mini Oreos. Drizzle with strawberry sauce if made.
  6. Refrigerate the assembled cups for at least 30 minutes to allow flavors to meld and the filling to set.

Nutrition

Serving: 1cupCalories: 290kcalCarbohydrates: 30gProtein: 3gFat: 18gSaturated Fat: 10gPolyunsaturated Fat: 1gMonounsaturated Fat: 1gCholesterol: 45mgSodium: 200mgPotassium: 120mgFiber: 1gSugar: 15gVitamin A: 500IUVitamin C: 30mgCalcium: 40mgIron: 1mg

Notes

Use room temperature cream cheese for easier blending and avoid lumps. Don't over-whip cream; stop at soft peaks. Refrigerate for best texture and flavor.

Tried this recipe?

Let us know how it was!

Stay Connected

Get recipes via email: