Get my cookbooks

High-Protein Greek Yogurt Pumpkin Muffins for Guilt-Free Indulgence

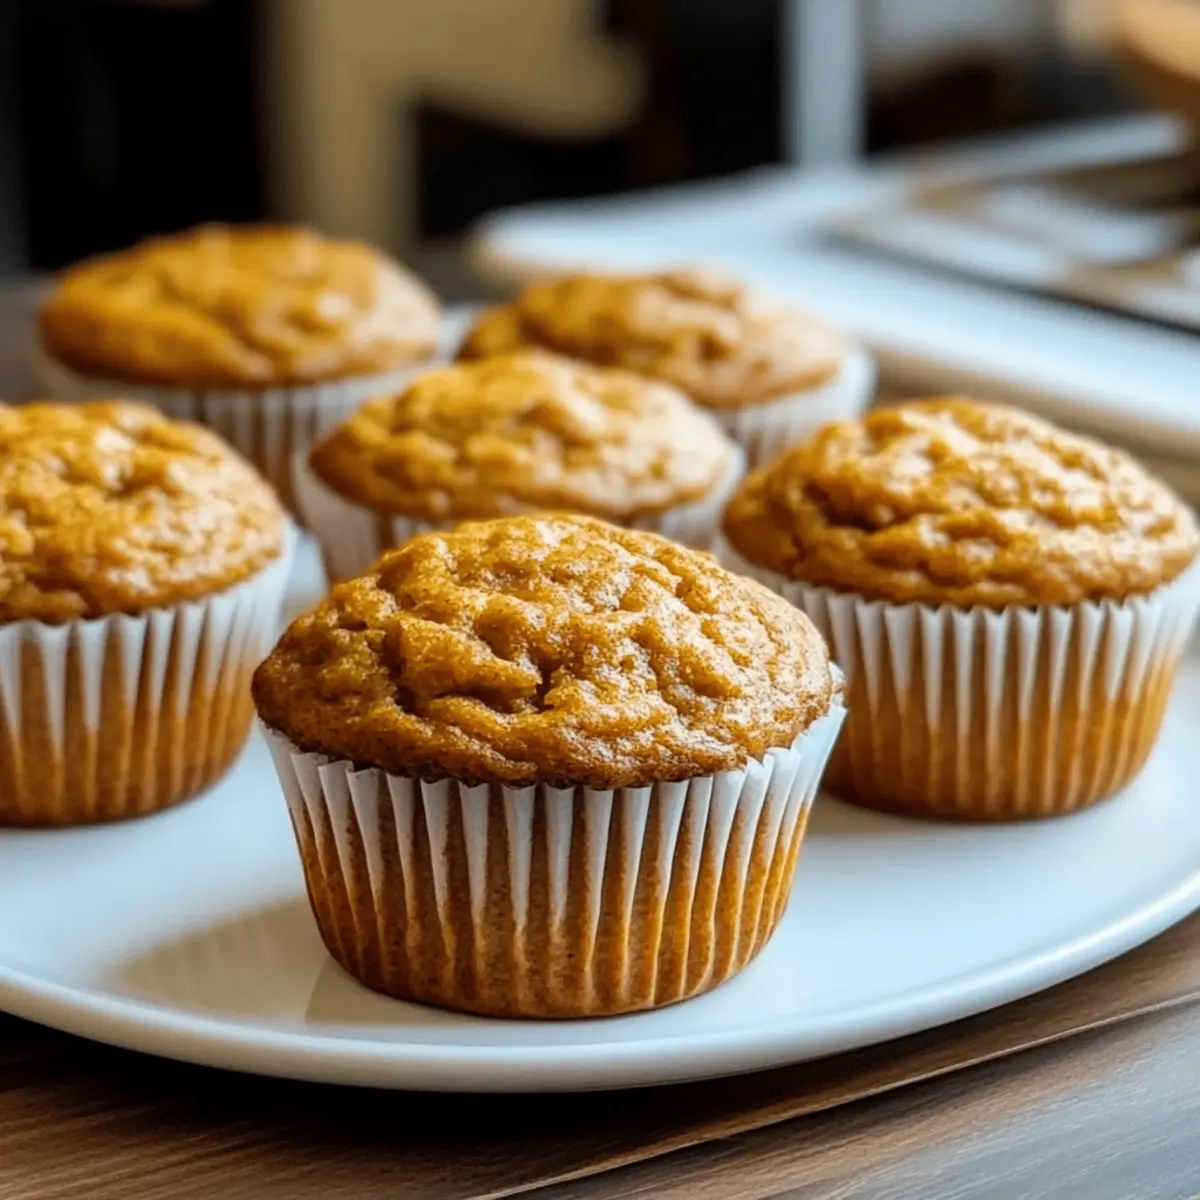
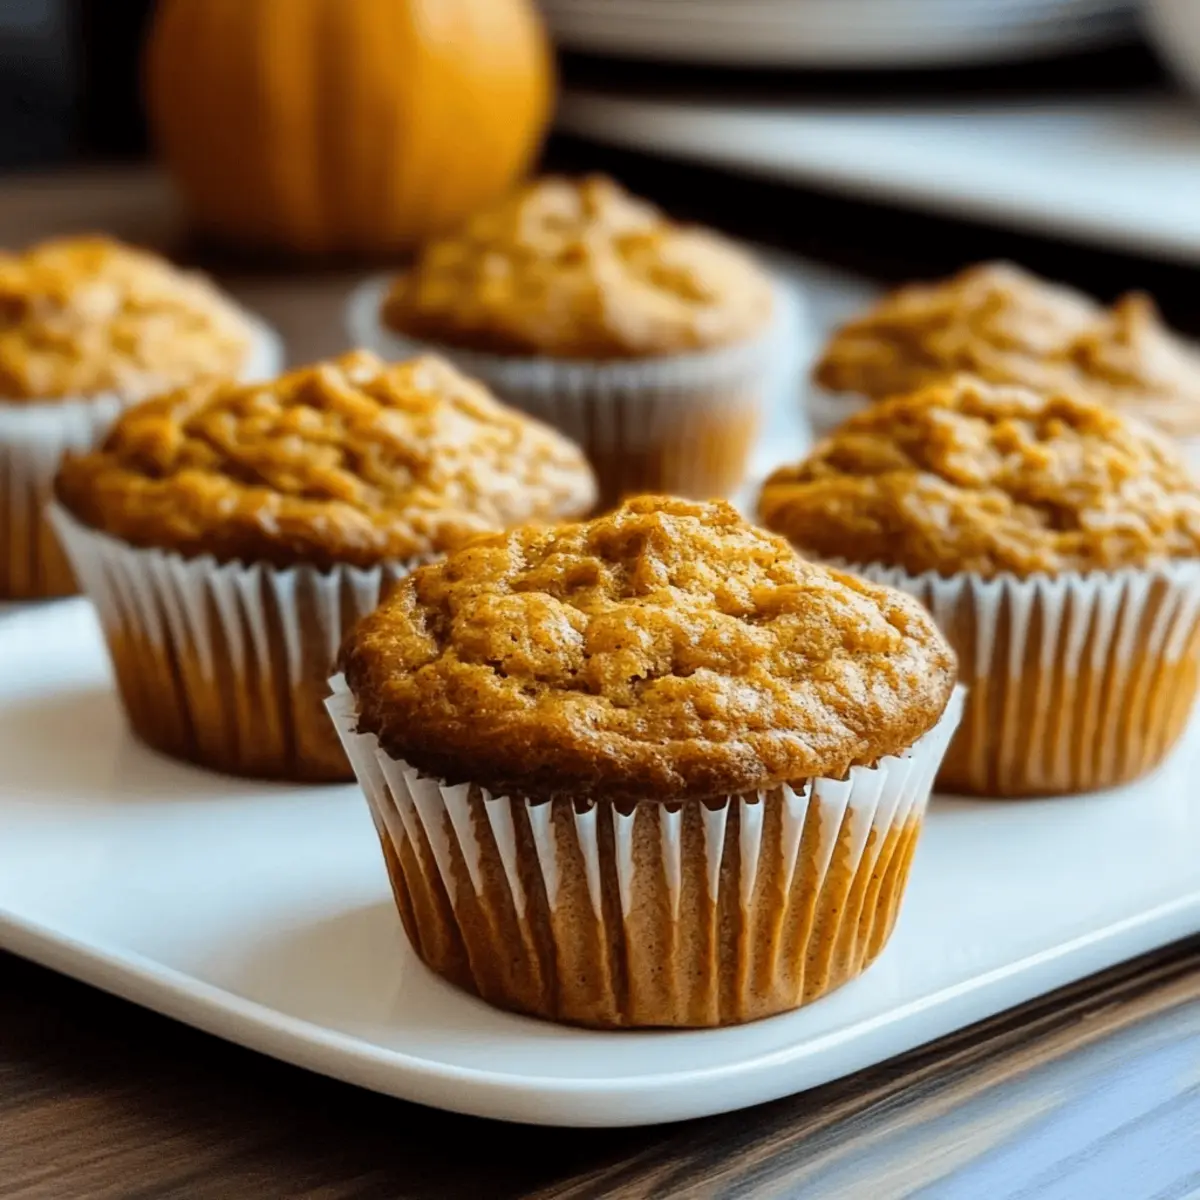
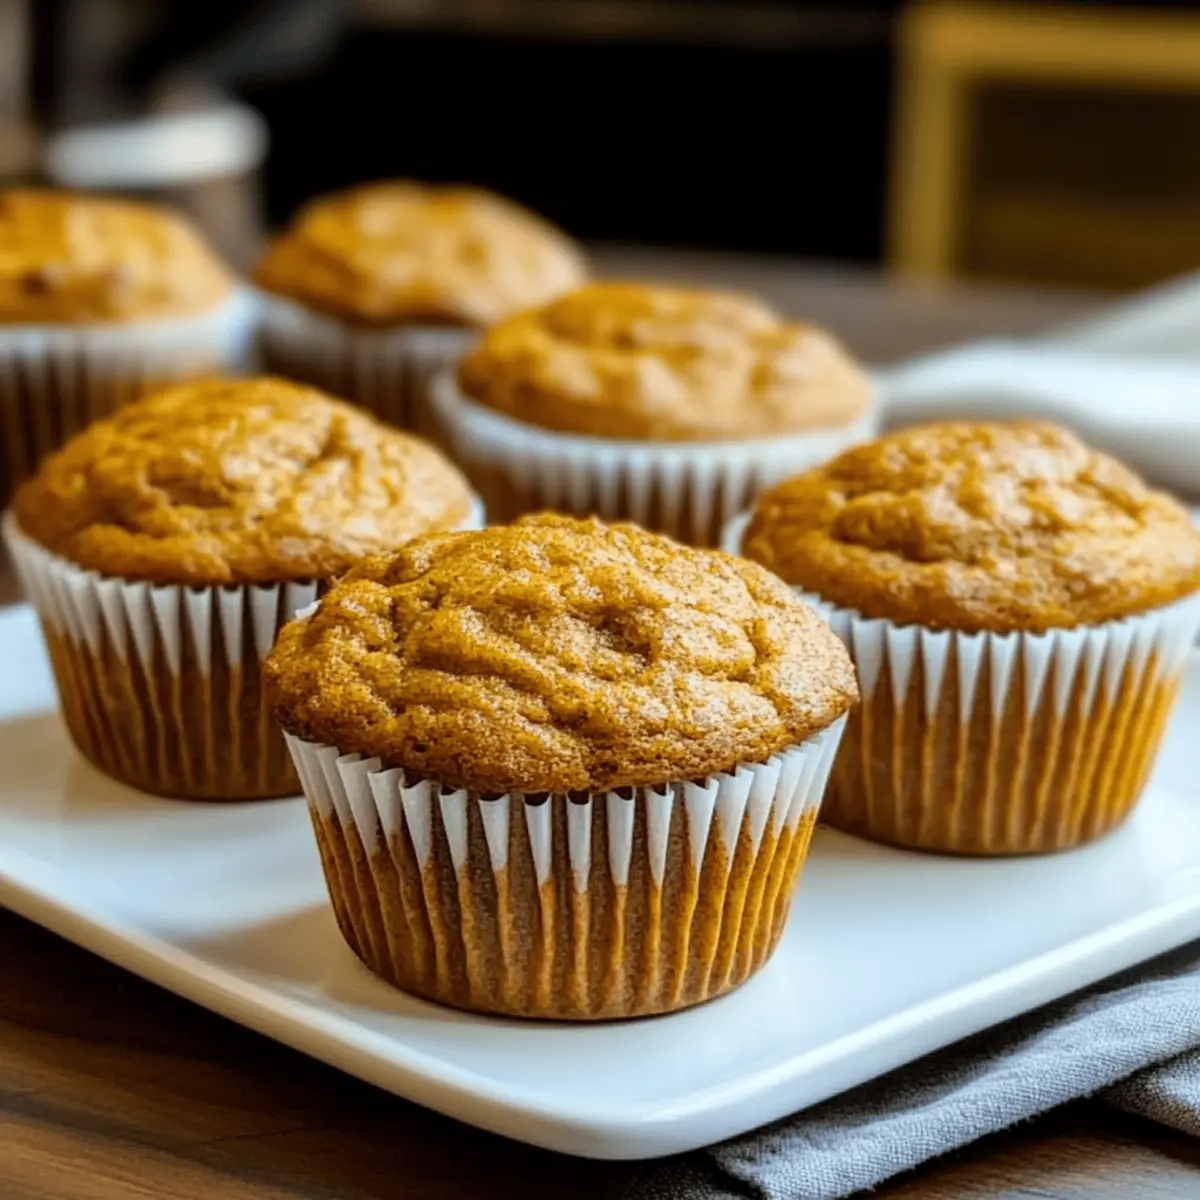
As I stood in my kitchen the other day, the scent of warm spices wafted through the air, instantly transporting me to cozy autumn mornings. That’s when I decided it was the perfect time for my High-Protein Greek Yogurt Pumpkin Muffins. These delightful treats marry creamy pumpkin puree with the wholesome benefits of Greek yogurt, making them not just delicious but also a nutritional powerhouse perfect for busy days. Not only do they pack a satisfying protein punch, but they’re also incredibly simple to whip up—ideal for breakfast or a guilt-free afternoon snack. So, what if I told you there’s a way to enjoy the taste of fall while keeping your health goals in check? Ready to dive into this delicious recipe with me?

Why Are These Muffins a Must-Try?

Nutritional Powerhouse: Each muffin boasts an impressive 15 grams of protein, perfect for fueling your day.
Versatile Variations: Easily swap ingredients for dietary needs, like using almond flour for gluten-free muffins or dairy-free yogurt.
Comforting Spices: The warm notes of cinnamon and nutmeg create an irresistible autumn aroma that fills your kitchen.
Quick and Easy: With just a few simple steps, you can have these muffins ready in less than 30 minutes!
Crowd-Pleasing Treat: They’re not just nutritious; everyone will be asking for seconds—perfect for gatherings or cozy family breakfasts!
For a delightful twist on seasonal flavors, you might also enjoy Joumou Haitian Pumpkin.

High-Protein Greek Yogurt Pumpkin Muffin Ingredients

• The perfect blend of flavors and nutrition awaits you with these muffins!

For the Muffin Batter

  • Pumpkin Puree – Provides moisture and rich flavor; fresh pumpkin can substitute if pureed well.
  • Plain Greek Yogurt – Adds creaminess and a protein boost; opt for thick plant-based yogurt for a vegan version.
  • Oat Flour – Serves as the gluten-free base; ensure it’s certified gluten-free for a safe option.
  • Vanilla Protein Powder – Increases protein content; can choose between whey or a plant-based alternative.
  • Pure Maple Syrup – Natural sweetener that enhances flavor; honey or agave can be used as substitutes (note that honey is not vegan).
  • Unsweetened Almond Milk – Offers moisture; feel free to swap with any non-dairy milk of your choice.
  • Baking Powder – Essential for helping muffins rise; always check freshness for best results.
  • Ground Cinnamon & Nutmeg – Adds warm, cozy notes; pumpkin pie spice can be used instead for convenience.
  • Salt – Enhances sweetness and balances flavor; a little goes a long way!
  • Vanilla Extract – Adds depth of flavor; using pure extract makes a noticeable difference.

For the Topping

  • Cinnamon Sugar – Provides a delightful sweet, crunchy finish; sprinkle generously on top before baking.

Get ready to savor these High-Protein Greek Yogurt Pumpkin Muffins—perfect for a nutritious breakfast or snack!

Step‑by‑Step Instructions for High-Protein Greek Yogurt Pumpkin Muffins

Step 1: Preheat the Oven
Begin by preheating your oven to 350°F (175°C). This step is crucial for ensuring your High-Protein Greek Yogurt Pumpkin Muffins bake evenly and rise perfectly. As the oven heats up, prepare your muffin tin by lining it with paper liners or greasing each cup to prevent sticking.

Step 2: Mix the Dry Ingredients
In a large mixing bowl, combine the oat flour, vanilla protein powder, baking powder, ground cinnamon, ground nutmeg, and salt. Sifting these dry ingredients together helps to aerate the mixture, ensuring a light and fluffy texture in your muffins. Stir well to evenly distribute the spices and leavening agents for optimal flavor and rise.

Step 3: Combine the Wet Ingredients
In another bowl, whisk together the pumpkin puree, plain Greek yogurt, pure maple syrup, unsweetened almond milk, and vanilla extract. Blend these ingredients thoroughly until you achieve a smooth consistency, adjusting the almond milk as needed for a batter-like texture. This mixture is the heart of your High-Protein Greek Yogurt Pumpkin Muffins, adding moisture and flavor.

Step 4: Fold it Together
Gently fold the dry ingredients into the wet mixture using a spatula or wooden spoon. Be careful not to overmix; stir just until the ingredients are combined, and you no longer see any flour. The goal is to keep the batter light and airy to achieve that perfect muffin texture—this will create delicious, high-protein muffins.

Step 5: Fill the Muffin Cups
Scoop the batter into your prepared muffin tin, filling each cup about 3/4 full. This allows enough space for the batter to rise beautifully while baking. You should see a lovely swirl of pumpkin and spices as you fill each cup, setting the stage for your High-Protein Greek Yogurt Pumpkin Muffins to become golden and puffy.

Step 6: Add the Topping
Sprinkle a generous amount of cinnamon sugar over the top of each muffin before baking. This adds a sweet, crunchy finish that complements the warm spices in your muffins perfectly. The sugar will create a delightful crust that contrasts beautifully with the soft, moist muffin inside.

Step 7: Bake to Perfection
Place the muffin tin in the preheated oven and bake for 20-25 minutes. Keep an eye on the muffins as they bake, checking for doneness by inserting a toothpick into the center; it should come out clean or with a few moist crumbs. The muffins will be lightly golden and fragrant when ready.

Step 8: Cool and Enjoy
Once baked, let the muffins cool in the pan for 5 minutes before transferring them to a wire rack to cool completely. This cooling step is essential and allows the flavors to set while ensuring they don’t become soggy. Once cool, your High-Protein Greek Yogurt Pumpkin Muffins are ready to be enjoyed, perfect for any time of day!

High-Protein Greek Yogurt Pumpkin Muffins Variations

Customize your High-Protein Greek Yogurt Pumpkin Muffins with these delightful twists that’ll keep your taste buds excited!

  • Dairy-Free: Substitute Greek yogurt with a thick plant-based yogurt to make these muffins completely dairy-free and just as creamy.

  • Gluten-Free: Use almond flour instead of oat flour for a nutty flavor and gluten-free option that still delivers deliciousness and moisture.

  • Sweet Alternative: Swap pure maple syrup for agave nectar or honey (if not vegan) for an equally delightful and sweet taste.

  • Extra Spice: For a warming twist, add a teaspoon of ground ginger or increase the cinnamon for a spicier flavor that warms your soul.

  • Chocolate Lovers: Toss in chocolate chips or chopped nuts for added texture and richness; the chocolate melts perfectly into the muffin warm.

  • Seasonal Additions: Stir in dried cranberries or pecans for a festive feel, perfect for special gatherings or cozy family breakfasts.

  • Pumpkin Pie Remix: To capture the pumpkin pie essence, include a dash of molasses or a pinch of cloves alongside the cinnamon and nutmeg.

For more pumpkin-inspired creativity, consider trying out a comforting bowl of Joumou Haitian Pumpkin soup! It’s another delicious way to celebrate fall flavors.

Make Ahead Options

These High-Protein Greek Yogurt Pumpkin Muffins are perfect for meal prep, saving you time on busy mornings! To get ahead, you can prepare the batter up to 24 hours in advance. Simply mix the dry ingredients and store them separately from the wet ingredients in airtight containers. You can also combine the wet ingredients and refrigerate them to maintain freshness. When you’re ready to bake, simply fold the dry mixture into the wet ingredients, fill your muffin tin, and sprinkle with cinnamon sugar. This way, you’ll have delicious, nutritious muffins that are just as delightful as fresh-baked, all with minimal effort. Enjoy your guilt-free indulgence any day of the week!

Expert Tips for High-Protein Greek Yogurt Pumpkin Muffins

  • No Overmixing: Keep it light: Overmixing the batter can lead to dense muffins. Fold gently until just combined for fluffy results.
  • Fresh Ingredients: Check your baking powder: Ensure your baking powder is fresh for maximum rise; stale powder can result in flat muffins.
  • Perfect Timing: Oven variations matter: Start checking your muffins a few minutes early. Every oven is different, and you don’t want to overbake!
  • Cooling is Key: Let them breathe: Allow muffins to cool completely before storing; this prevents moisture buildup that can make them soggy.
  • Storage Savvy: Keep them fresh: Store muffins in an airtight container for up to 2 days at room temperature or freeze for longer enjoyment.

Enjoy baking your High-Protein Greek Yogurt Pumpkin Muffins with these helpful tips!

What to Serve with High-Protein Greek Yogurt Pumpkin Muffins

Warm, inviting, and packed with nutrition, these muffins are the perfect complement to many delightful sides and beverages.

  • Creamy Oatmeal: Enjoy a warm bowl of oatmeal on the side for an extra hearty breakfast. Its smooth texture contrasts beautifully with the muffin’s fluffy consistency.

  • Spiced Chai Latte: A cup of spiced chai latte adds a touch of warmth, enhancing the muffins’ autumn spices and creating a cozy atmosphere for any meal.

  • Fresh Fruit Salad: Bright, seasonal fruits like apples and pears provide a refreshing crunch and natural sweetness, balancing the muffin’s rich pumpkin flavor.

  • Nutty Granola: Top your muffin with a sprinkle of homemade granola for added crunch and flavor. The nutty complexities will elevate the muffin experience.

  • Avocado Toast: Serve with creamy avocado toast for a delightful brunch spread. The richness of the avocado pairs harmoniously with the muffins’ earthy spices.

  • Maple Yogurt Dip: Combine Greek yogurt with a drizzle of maple for a delightful dip that enhances the muffin while keeping with the high-protein theme.

  • Herbal Tea: Accompany your muffins with a warm cup of herbal tea, such as chamomile or peppermint, for a soothing and comforting drink.

  • Pumpkin Spice Latte: Embrace the season with a pumpkin spice latte, reinforcing those comforting flavors and making for a perfect indulgent treat.

Storage Tips for High-Protein Greek Yogurt Pumpkin Muffins

Room Temperature: Keep muffins in an airtight container for up to 2 days to maintain freshness and taste. They’re perfect for quick snacks or breakfasts.

Fridge: For longer storage, place your muffins in the refrigerator where they can last up to 5 days while remaining deliciously moist and flavorful.

Freezer: For extended enjoyment, freeze muffins individually for up to 2 months. Wrap each muffin tightly in plastic wrap and store in a zip-top bag.

Reheating: To enjoy your muffins warm, simply thaw at room temperature and pop them in the microwave for about 15-20 seconds. Perfect for a cozy treat!

High-Protein Greek Yogurt Pumpkin Muffins Recipe FAQs

How do I select the best pumpkin puree for my muffins?
Absolutely! When choosing pumpkin puree, look for a rich, thick consistency without excessive water. Fresh pumpkin is a great option, but if using canned, ensure it’s 100% pure pumpkin with no additives. A good visual cue is a deep orange color; avoid any cans with dark spots or bulges as they may indicate spoilage.

What’s the best way to store muffins after baking?
I often recommend keeping your High-Protein Greek Yogurt Pumpkin Muffins in an airtight container at room temperature for up to 2 days. For longer freshness, move them to the refrigerator where they can last for about 5 days. Be sure they’re completely cool before storing to prevent moisture buildup, which could lead to sogginess.

Can I freeze these muffins?
Yes, indeed! To freeze your muffins, wrap each one tightly in plastic wrap and place them in a zip-top bag. They can be stored in the freezer for up to 2 months. When you’re ready to enjoy them, simply thaw them at room temperature or pop them in the microwave for 15-20 seconds to warm them up nicely.

What if my muffins turn out too dense?
Very common! If your muffins end up dense, it’s usually due to overmixing or stale baking powder. Make sure to fold the ingredients gently until just combined to maintain a light texture. And always check that your baking powder is fresh—if it’s more than six months old, it might be time to replace it!

Can I make these muffins gluten-free?
Absolutely! To create gluten-free High-Protein Greek Yogurt Pumpkin Muffins, swap the oat flour for a certified gluten-free alternative, like almond flour or a gluten-free all-purpose blend. Also, check that your yogurt and any other additions are gluten-free to ensure a safe treat for dietary needs.

Are these muffins suitable for my dog?
It’s always best to be cautious! While the ingredients in the High-Protein Greek Yogurt Pumpkin Muffins are generally safe for dogs, remember to exclude any sweeteners like maple syrup or sugar, as they aren’t good for pets. If you want a dog-friendly version, consider baking a separate batch without sweeteners and spices.

High-Protein, Greek Yogurt Pumpkin Muffins

High-Protein Greek Yogurt Pumpkin Muffins for Guilt-Free Indulgence

Enjoy guilt-free indulgence with these High-Protein Greek Yogurt Pumpkin Muffins, a perfect blend of flavor and nutrition.
Prep Time 10 minutes
Cook Time 25 minutes
Total Time 35 minutes
Servings: 12 muffins
Course: Breakfast
Cuisine: American
Calories: 150

Ingredients
  

For the Muffin Batter
  • 1 cup Pumpkin Puree Fresh pumpkin can substitute if pureed well.
  • 1 cup Plain Greek Yogurt Opt for thick plant-based yogurt for a vegan version.
  • 1 cup Oat Flour Ensure it’s certified gluten-free.
  • 1/2 cup Vanilla Protein Powder Choose between whey or a plant-based alternative.
  • 1/4 cup Pure Maple Syrup Honey or agave can be used as substitutes.
  • 1/2 cup Unsweetened Almond Milk Feel free to swap with any non-dairy milk.
  • 2 teaspoons Baking Powder Check freshness for best results.
  • 1 teaspoon Ground Cinnamon
  • 1/2 teaspoon Ground Nutmeg Pumpkin pie spice can be used instead.
  • 1/4 teaspoon Salt A little goes a long way!
  • 1 teaspoon Vanilla Extract Using pure extract makes a difference.
For the Topping
  • 3 tablespoons Cinnamon Sugar Sprinkle generously on top before baking.

Equipment

  • Oven
  • Mixing bowls
  • Muffin Tin
  • whisk
  • spatula

Method
 

Step-by-Step Instructions
  1. Preheat your oven to 350°F (175°C) and prepare your muffin tin.
  2. In a large mixing bowl, combine the oat flour, vanilla protein powder, baking powder, ground cinnamon, ground nutmeg, and salt.
  3. In another bowl, whisk together the pumpkin puree, plain Greek yogurt, pure maple syrup, unsweetened almond milk, and vanilla extract until smooth.
  4. Gently fold the dry ingredients into the wet mixture until just combined.
  5. Scoop the batter into the prepared muffin tin, filling each cup about 3/4 full.
  6. Sprinkle cinnamon sugar over the top of each muffin before baking.
  7. Bake for 20-25 minutes, checking for doneness with a toothpick.
  8. Let the muffins cool in the pan for 5 minutes before transferring them to a wire rack.

Nutrition

Serving: 1muffinCalories: 150kcalCarbohydrates: 20gProtein: 15gFat: 3gSaturated Fat: 0.5gPolyunsaturated Fat: 0.2gMonounsaturated Fat: 1gCholesterol: 5mgSodium: 150mgPotassium: 200mgFiber: 2gSugar: 5gVitamin A: 500IUVitamin C: 3mgCalcium: 80mgIron: 1mg

Notes

Store muffins in an airtight container for up to 2 days at room temperature or freeze for longer enjoyment.

Tried this recipe?

Let us know how it was!

Irresistibly Fluffy Sweet Coconut Cream Pancakes at Home

The moment I first tasted pancakes infused with coconut cream, a wave of tropical bliss washed over me. These Sweet Coconut Cream Pancakes become a breakfast sensation that transforms even the busiest mornings into a mini-vacation. Bursting with the rich aroma of coconut, they promise to please even the pickiest of eaters while being light and fluffy, ready in just 25 minutes. With their quick prep time and endless topping customization options, these pancakes aren’t just a meal; they’re a canvas for your favorite flavors. Whether you prefer fresh fruits, a drizzle of syrup, or a sprinkle of shredded coconut, every bite is a treat waiting to be savored. Curious to discover how to whip up this delightful breakfast experience? Let’s dive in!

Why Are Coconut Cream Pancakes So Special?

Irresistible Flavor: The tropical aroma of coconut elevates this breakfast staple into a sweet escape you won’t forget.

Quick and Easy: With just 25 minutes from start to finish, you’ll have a delicious meal that fits perfectly into your busy schedule.

Customizable Delight: Top with your favorites—fresh fruits or a drizzle of syrup transform each pancake into a unique delight.

Heavenly Texture: These pancakes are a fluffy dream; each heavenly bite will keep you coming back for more!

Nutritionally Friendly: This vegetarian recipe caters to health-conscious eaters, even allowing substitutions for a lower glycemic index, making them a great choice for everyone.

Experience the fun of breakfast with these Sweet Coconut Cream Pancakes, perfect for a lazy brunch or a special morning treat!

Sweet Coconut Cream Pancake Ingredients

For the Batter

  • All-Purpose Flour – Provides structure and texture. Substitution: Whole wheat flour for a healthier option.
  • Sugar – Adds sweetness. Note: Can use coconut sugar for a lower glycemic index.
  • Baking Powder – Leavening agent that helps pancakes rise.
  • Baking Soda – Works alongside baking powder for additional lift.
  • Salt – Enhances flavor.
  • Coconut Cream – Richness and tropical flavor. Substitution: Full-fat coconut milk for a different texture.
  • Large Egg – Binds ingredients together.
  • Melted Butter – Adds moisture and richness. Substitution: Coconut oil or plant-based butter for a dairy-free option.
  • Vanilla Extract – Imparts flavor.
  • Shredded Coconut (optional) – For added texture and coconut flavor.

Step‑by‑Step Instructions for Sweet Coconut Cream Pancakes

Step 1: Mix Dry Ingredients
In a large mixing bowl, whisk together 1 cup all-purpose flour, 2 tablespoons sugar, 1 teaspoon baking powder, 1/2 teaspoon baking soda, and a pinch of salt. Ensure the mixture is consistent in texture and free of lumps, which typically takes about 1–2 minutes. This blend creates the perfect foundation for your Sweet Coconut Cream Pancakes.

Step 2: Combine Wet Ingredients
In another bowl, whisk together 3/4 cup coconut cream, 1 large egg, 2 tablespoons melted butter, and 1 teaspoon vanilla extract until well blended and smooth. This step usually takes around 1 minute, and you’ll know it’s ready when the texture is creamy and homogeneous. This coconut-vanilla mix will bring a luscious flavor to your pancakes.

Step 3: Mix Wet and Dry Ingredients
Gently pour the wet ingredients into the dry ingredient bowl. Using a spatula, fold the mixtures together carefully until just combined, taking care not to overmix. The batter will be slightly lumpy and should take about 1 minute to combine. This cautious blending ensures your Sweet Coconut Cream Pancakes remain light and fluffy.

Step 4: Heat the Skillet
Preheat a non-stick skillet or griddle over medium heat (around 350°F or 175°C). Lightly grease the surface with a small amount of butter or oil. To check if it’s hot enough, sprinkle a few drops of water onto the skillet; they should sizzle and evaporate immediately. This preparation sets the stage for perfectly cooked pancakes.

Step 5: Cook the Pancakes
Pour 1/4 cup of pancake batter onto the skillet for each pancake. Cook for about 2–3 minutes, or until bubbles form on the surface and the edges look set. Once the bottom is golden brown, carefully flip the pancake using a spatula and cook for an additional 1–2 minutes until both sides are beautifully browned. Your Sweet Coconut Cream Pancakes will now begin to resemble fluffy clouds.

Step 6: Serve and Enjoy
Once cooked, stack your pancakes on a warm plate and serve immediately. Top with your favorite toppings like fresh fruits, maple syrup, or an extra sprinkle of shredded coconut for that tropical touch. The pancakes should be soft, warm, and inviting, perfect for a delightful breakfast experience.

What to Serve with Sweet Coconut Cream Pancakes?

Indulge in a tropical breakfast adventure by pairing your pancakes with vibrant and delicious sides that elevate your meal to new heights.

  • Fresh Tropical Fruit: Juicy mangoes, pineapples, or berries add a refreshing taste that complements the rich coconut flavor beautifully.
  • Maple Syrup Drizzle: A touch of warm maple syrup enhances the natural sweetness of the pancakes, creating a delightful contrast.
  • Greek Yogurt: Creamy yogurt provides a tangy richness and a protein boost, making your breakfast more satisfying and balanced.
  • Chopped Nuts: Toasted almonds or walnuts offer a crunchy texture that juxtaposes the soft pancakes, adding an appealing bite.
  • Coconut Whipped Cream: For coconut fans, a dollop of this light, fluffy topping amplifies the tropical experience, ensuring every bite is heavenly.
  • Breakfast Smoothie: Pair with a blended smoothie made of banana, spinach, and coconut milk for a refreshing and nourishing addition to your meal. Each sip complements the pancakes’ fluffy texture delightfully.

Expert Tips for Sweet Coconut Cream Pancakes

  • Avoid Overmixing: Gently stir the batter until just combined. Overmixing can lead to dense pancakes instead of fluffy Sweet Coconut Cream Pancakes.

  • Heat Matters: Ensure your skillet is truly hot before adding the batter. A properly heated surface prevents sticking and promotes even cooking.

  • Freezing Extra Pancakes: Make a large batch and freeze extras for busy mornings. They reheat beautifully in the toaster, making breakfast quick and easy.

  • Sifting for Smoothness: For an extra fluffy texture, sift your dry ingredients before mixing. This ensures an even blend and helps achieve that light, airy feel.

  • Customize to Taste: Feel free to experiment with toppings or mix-ins, like nuts or flavored extracts, to create a personal twist on your Sweet Coconut Cream Pancakes.

How to Store and Freeze Sweet Coconut Cream Pancakes

Room Temperature: Store leftover pancakes in an airtight container at room temperature for up to 1 day. Be sure to avoid stacking them to prevent sogginess.

Fridge: Keep your pancakes in an airtight container in the fridge for up to 3 days. Reheat individually in the microwave for a quick breakfast treat!

Freezer: To freeze, place cooled pancakes in a single layer on a baking sheet before transferring to an airtight container or freezer bag. They can last for up to 1 month without losing their delicious coconut flavor.

Reheating: For the best results, reheat frozen pancakes in the toaster or microwave until warmed through. Enjoy that fluffy goodness anytime!

Make Ahead Options

These Sweet Coconut Cream Pancakes are perfect for meal prep enthusiasts! You can prepare the batter up to 24 hours in advance by mixing the dry ingredients in one bowl and the wet ingredients in another, then refrigerating both separately. Just remember to combine them shortly before cooking to ensure the pancakes remain fluffy. Additionally, leftover cooked pancakes can be stored in an airtight container for up to 3 days in the refrigerator or frozen for a month. To reheat, simply pop them in the toaster or microwave for a quick breakfast that tastes just as delicious as when they were first made!

Sweet Coconut Cream Pancakes Variations

Feel inspired to make these Sweet Coconut Cream Pancakes your own with delightful twists and substitutions!

  • Dairy-Free: Use coconut oil or a plant-based butter instead of melted butter for a lush, dairy-free option. This keeps all the tropical vibes intact!

  • Flour Swap: Try whole wheat flour for a heartier version. Not only will it add some nutty flavor, but it also boosts the nutritional profile.

  • Sweetener Alternatives: Switch to coconut sugar or honey for a lower glycemic sweetener. This gives a unique flavor while keeping your pancakes sweet!

  • Flavor Infusion: Add vanilla bean paste or almond extract for an exciting flavor twist. These options elevate your pancake experience with unexpected depth.

  • Chocolate Lovers: Fold in dark chocolate chips or cocoa powder for a sweet treat perfect for dessert. Imagine the rich, sweet embrace of chocolate paired with coconut!

  • Nutty Crunch: Add chopped macadamia nuts or walnuts for texture and healthy fats. This twist brings a satisfying crunch to your fluffy pancakes.

  • Spice It Up: Incorporate ground cinnamon or nutmeg for a warm, comforting flavor. This adds a delightful aromatic touch that makes each bite even more inviting.

  • Tropical Fruit Topping: Serve with fresh mango or pineapple chunks for a vibrant, fruity burst. This combination takes your pancake stack to a whole new tropical level!

Pair these pancakes with a side of Sweet Chili Chicken for a delicious brunch or try out these heavenly Nutella Pancakes Blend as an indulgent treat for a special morning!

Sweet Coconut Cream Pancakes Recipe FAQs

What type of coconut cream should I use for this recipe?
Absolutely! I recommend using full-fat coconut cream for a rich, creamy texture and tropical flavor. If you can’t find it, full-fat coconut milk can also work; just note that the consistency may be a bit thinner, so adjust the flour slightly if needed.

How should I store leftover pancakes?
For room temperature storage, keep them in an airtight container for up to 1 day. If you want to enjoy them longer, refrigerate in an airtight container for up to 3 days. Just reheat in the microwave individually for a quick fix!

Can I freeze Sweet Coconut Cream Pancakes?
Yes, you can! To freeze, allow the pancakes to cool completely, then lay them in a single layer on a baking sheet. Once frozen, transfer them to a freezer bag or airtight container. They will stay delicious for up to 1 month. Just reheat in the toaster or microwave when you crave a fluffy breakfast!

What if my pancake batter is too thick or too thin?
If your batter is too thick, add a splash of milk or coconut cream to loosen it up. If it’s too thin, simply add a bit more flour, a tablespoon at a time. Aim for a consistency that’s slightly lumpy but not runny; this ensures your Sweet Coconut Cream Pancakes will be perfectly fluffy!

Are these pancakes safe for those with allergies?
Great question! This recipe contains gluten and dairy (unless you use substitutions). If you’re making these for someone with allergies, opt for gluten-free flour and plant-based butter or coconut oil for a dairy-free alternative. Always check labels to be certain of cross-contamination with allergens.

What toppings go well with Sweet Coconut Cream Pancakes?
The more the merrier! Fresh fruits like bananas or berries are delightful. You can also add a drizzle of maple syrup, a sprinkle of powdered sugar, or even some extra shredded coconut for that tropical touch. Mix and match to make it your own!

Sweet Coconut Cream Pancakes

Irresistibly Fluffy Sweet Coconut Cream Pancakes at Home

These Sweet Coconut Cream Pancakes offer a tropical breakfast escape, bursting with coconut flavor and ready in just 25 minutes.
Prep Time 10 minutes
Cook Time 15 minutes
Total Time 25 minutes
Servings: 4 pancakes
Course: Breakfast
Cuisine: Tropical
Calories: 150

Ingredients
  

For the Batter
  • 1 cup All-Purpose Flour Substitution: Whole wheat flour for a healthier option.
  • 2 tablespoons Sugar Can use coconut sugar for a lower glycemic index.
  • 1 teaspoon Baking Powder
  • 1/2 teaspoon Baking Soda
  • 1 pinch Salt
  • 3/4 cup Coconut Cream Substitution: Full-fat coconut milk for a different texture.
  • 1 large Egg
  • 2 tablespoons Melted Butter Substitution: Coconut oil or plant-based butter for a dairy-free option.
  • 1 teaspoon Vanilla Extract
  • 1/4 cup Shredded Coconut optional

Equipment

  • Mixing bowls
  • whisk
  • spatula
  • Non-stick skillet

Method
 

Step‑by‑Step Instructions
  1. In a large mixing bowl, whisk together flour, sugar, baking powder, baking soda, and salt until consistent in texture and free of lumps.
  2. In another bowl, whisk together coconut cream, egg, melted butter, and vanilla extract until well blended and smooth.
  3. Gently pour the wet ingredients into the dry ingredients, folding them together carefully until just combined.
  4. Preheat a non-stick skillet over medium heat and lightly grease it.
  5. Pour 1/4 cup of batter onto the skillet for each pancake and cook until bubbles form and the edges look set, flipping once.
  6. Stack cooked pancakes on a warm plate, serve immediately, and top with your favorites.

Nutrition

Serving: 1pancakeCalories: 150kcalCarbohydrates: 20gProtein: 3gFat: 6gSaturated Fat: 4gPolyunsaturated Fat: 0.5gMonounsaturated Fat: 1.5gCholesterol: 30mgSodium: 150mgPotassium: 100mgFiber: 1gSugar: 4gVitamin A: 100IUCalcium: 50mgIron: 1mg

Notes

For the best results, avoid overmixing the batter and ensure your skillet is properly heated before cooking the pancakes.

Tried this recipe?

Let us know how it was!

Pasta Screamavera: A Fun Halloween Twist on Pasta Salad

As the leaves start to turn and the air gets crisp, it’s time to add a splash of Halloween fun to our tables with Pasta Screamavera! This pasta salad, dressed in playful spooky flair, combines the richness of pesto with fresh vegetables and mini pepperoni. The delightful mozzarella ghosts peeking out of black squid ink fusilli not only make for a stunning presentation but also offer a dish that is a hit at any gathering. What I love most about this recipe is its quick prep—just toss everything together, and you’ve got a crowd-pleaser that can sit comfortably in the fridge overnight while flavors develop. Plus, it’s versatile enough to let your creativity shine with different veggies or gluten-free adaptations. Ready to make a dish that’ll impress your guests and fill their plates with festive cheer? Let’s dive into the details!

Why is Pasta Screamavera so special?

Delightful Visuals: This Pasta Screamavera isn’t just tasty; it’s a feast for the eyes! The black squid ink pasta and molded mozzarella ghosts create an eye-catching centerpiece for any Halloween gathering.

Effortless Preparation: With minimal cooking needed, this recipe comes together quickly—perfect for busy hosts wanting to impress! Simply combine ingredients and let flavors mingle overnight.

Versatile Options: Feel free to swap ingredients based on personal preferences or dietary needs. Whether using whole wheat pasta or loading it up with extra veggies, this dish is adaptable for everyone.

Crowd-Pleasing Flavor: A mix of creamy, savory, and zesty elements ensures that each bite is bursting with flavor. Plus, the playful combination of mini pepperoni and fresh veggies appeals to both kids and adults alike.

Make-Ahead Friendly: Ideal for potlucks or parties, this pasta salad can be prepped a day ahead, ensuring you have more time to enjoy the festivities! For more pasta party ideas, check out Cajun Sausage Pasta and Shrimp Scampi Pasta.

Pasta Screamavera Ingredients

• Get ready to create a spooky and delicious dish!

For the Salad

  • Fresh Mozzarella Balls – These creamy treats become delightful little ghosts; any mild cheese can work as a substitute!
  • Squid Ink Fusilli Pasta – Its striking black color adds a haunting flair; regular fusilli serves just as well if squid ink is hard to find.
  • Mini Pepperoni Slices – They provide a fun umami burst; diced salami or turkey pepperoni are great alternatives for different flavor profiles.
  • Zucchini (diced small) – Adds a fresh, crisp texture; consider yellow squash for a colorful swap.
  • Red Bell Pepper (diced) – Brings a sweet crunch and festive color; any bell pepper variety or even diced tomatoes work here.
  • Shallot (finely minced) – Adds aromatic depth; use red onion if shallots are unavailable.
  • Dried Italian Seasoning – This enhances the dish with classic Italian flavors; feel free to use fresh herbs for an extra boost.
  • Bottled Italian Dressing – Provides moisture and zesty tang; a homemade vinaigrette can be a fantastic alternative.
  • Prepared Pesto – A rich basil flavor that ties it all together; you can swap it with homemade pesto or spinach puree for a lighter taste.
  • Garlic (grated) – Infuses the salad with a zesty aroma; garlic powder can work if you’re out of fresh garlic.
  • Salt and Pepper – Essential for seasoning to your taste!

Embrace this Pasta Screamavera recipe and enjoy a delightful Halloween twist on pasta salad that’s perfect for your next gathering!

Step‑by‑Step Instructions for Pasta Screamavera

Step 1: Mold the Cheese
Preheat your oven to 350°F (175°C). While it’s warming up, take two fresh mozzarella balls and place them in a silicone ghost mold. Bake in the oven for about 8 minutes until they soften, then carefully press them into the mold. Allow the molded cheese to chill in the refrigerator while you prepare the other ingredients.

Step 2: Cook the Pasta
Bring a large pot of salted water to a boil, then add the squid ink fusilli pasta. Cook according to the package instructions, usually around 8-10 minutes, until al dente. Once cooked, drain the pasta and rinse it thoroughly under cold water to stop the cooking process, making it cool and ready for the Pasta Screamavera salad.

Step 3: Combine Ingredients
In a spacious mixing bowl, combine the cooled squid ink fusilli, mini pepperoni slices, diced zucchini, red bell pepper, and finely minced shallot. Sprinkle in the dried Italian seasoning, along with salt and pepper to taste. Gently toss all ingredients together until everything is evenly mixed, creating a colorful base for the Pasta Screamavera.

Step 4: Prepare Dressing
In a medium-sized bowl, whisk together the bottled Italian dressing, prepared pesto, and grated garlic until well combined. This zesty and rich dressing will enhance the flavors of your Pasta Screamavera. Once mixed, pour half of this dressing over your pasta salad and stir well to ensure all ingredients are coated.

Step 5: Chill
Cover the bowl with plastic wrap and place it in the refrigerator. Allow the Pasta Screamavera to chill for at least an hour, or even overnight, to let the flavors meld beautifully. Chilling enhances the dish’s taste and makes it incredibly refreshing for your upcoming gathering.

Step 6: Serve
Before serving, carefully fold in the molded mozzarella ghosts and drizzle the remaining dressing over the pasta salad. Mix gently to avoid breaking the cheese ghosts. Taste and adjust the seasoning if needed. Garnish with fresh basil and parsley for an added burst of color and flavor, making your Pasta Screamavera a delightful centerpiece on your Halloween table.

How to Store and Freeze Pasta Screamavera

Fridge: Store your Pasta Screamavera in an airtight container for up to 3 days. This helps preserve its fresh flavors and texture, making it ready for quick snacks or meals.

Make-Ahead: This dish can be prepared a day in advance. Simply assemble and chill, allowing the flavors to meld beautifully before serving at your Halloween gathering.

Freezer: While it’s best enjoyed fresh, you can freeze the salad without the mozzarella ghosts for up to 1 month. Thaw in the fridge before serving and add fresh cheese just before enjoying.

Reheating: If you choose to store leftovers, gently reheat in the microwave or on the stovetop. To maintain texture, consider adding a splash of extra dressing when warming up your Pasta Screamavera.

Make Ahead Options

These Pasta Screamavera are perfect for meal prep enthusiasts! You can prepare the pasta salad mixture (except for the mozzarella ghosts) up to 24 hours in advance by combining the cooled squid ink fusilli, mini pepperoni, zucchini, bell pepper, and shallot. To ensure freshness, store it in an airtight container in the refrigerator. You can also whip up the dressing ahead of time and refrigerate it separately. When you’re ready to serve, simply fold in the molded cheese ghosts and drizzle the remaining dressing over the salad. This way, your Pasta Screamavera will be just as delicious, allowing you more time to enjoy your Halloween festivities with family and friends!

What to Serve With Pasta Screamavera?

Elevate your Halloween festivities with delightful accompaniments that enhance the vibrant flavors of this unique pasta salad.

  • Garlic Bread: This warm, buttery delight adds a crunchy texture that perfectly balances the creaminess of the Pasta Screamavera.
  • Green Salad: A fresh side salad with mixed greens and a light vinaigrette brings brightness and cuts through the richness of the dish.
  • Roasted Vegetables: Seasoned autumn veggies like carrots and Brussels sprouts provide a warm, earthy contrast to the playful Halloween theme.
  • Apple Cider: A chilled glass of spiced apple cider complements the savory notes of the salad while tying in seasonal flavors.
  • Pumpkin Soup: A warm, creamy bowl of pumpkin soup adds comfort and a festive touch to your Halloween soirée. Perfect for those cozy evenings!
  • Chocolate Mousse Cups: End on a sweet note with these light, velvety treats laden with rich chocolate, offering a decadent finale to your meal.
  • Cheese Platter: Curate a selection of cheeses, crackers, and fruits for a sophisticated pairing that appeals to sophisticated palates.
  • Sparkling Water: To refresh the palate, serve some sparkling water infused with lemon or herbs for a zesty hint.
  • Candy Corn Cupcakes: For a fun dessert twist, these festive cupcakes bring a playful sweetness that kids and adults alike will adore!

Variations & Substitutions for Pasta Screamavera

Feel free to get creative with Pasta Screamavera, transforming this dish to suit your taste and dietary preferences!

  • Gluten-Free: Swap squid ink fusilli for gluten-free pasta to accommodate gluten-sensitive guests without sacrificing flavor.
  • Vegetarian: Omit mini pepperoni and replace it with chickpeas or more veggies like spinach and artichokes for added texture.
  • Spicy Kick: Add sliced jalapeños or crushed red pepper flakes to amp up the heat and create a thrilling twist for spice lovers.
  • Extra Veggies: Toss in diced cherry tomatoes or grated carrots for added color, sweetness, and crunch to your pasta salad.
  • Dairy-Free: Use plant-based mozzarella or omit the cheese altogether, and substitute pesto with a vitamin-packed avocado spread.
  • Herbaceous Twist: Enhance flavor with fresh basil, parsley, or oregano. Fresh herbs bring brightness that elevates the dish further.
  • Tangy Flair: Mix in a splash of balsamic vinegar or lemon juice for a zesty finish that cuts through the richness of the ingredients.
  • Creamy Variation: Stir in a dollop of cream cheese or Greek yogurt for an extra creamy dressing that takes your flavors to a new level.

With these creative adjustments, your Pasta Screamavera can play host to a range of delicious variations that make every gathering just a touch more special! And for more pasta inspiration, don’t forget to check out Marry Shrimp Pasta and Shrimp Scampi Pasta for their own flavorful takes!

Expert Tips for Pasta Screamavera

  • Chill Time: Allow the Pasta Screamavera to chill properly; this enhances the flavor blending and makes each bite more enjoyable.

  • Handle with Care: Be cautious when molding the cheese—it can release hot liquid, so let it cool before handling!

  • Fresh Herbs Boost: For an extra burst of flavor, consider stirring in fresh herbs or a splash of dressing just before serving to brighten up your dish.

  • Adapt the Recipe: Don’t hesitate to swap out ingredients to suit your taste or dietary needs; this Pasta Screamavera is versatile to cater to everyone!

  • Serve Stylishly: Consider using fun serving dishes or garnishes to elevate your presentation; a visually striking dish adds to the festive spirit of Halloween!

Pasta Screamavera Recipe FAQs

How do I select the best ingredients for my Pasta Screamavera?
Absolutely! Look for fresh mozzarella balls that are smooth and firm, avoiding any that have dark spots or are overly soft. For the squid ink fusilli, ensure it has a vibrant black color—if you can’t find it, any regular pasta works wonderfully too! Choose mini pepperoni that are fresh, and pick zucchini with a firm exterior for crunch. Bell peppers should be bright and firm, signaling they’re fresh and ripe.

How should I store my Pasta Screamavera?
You can store your Pasta Screamavera in an airtight container in the refrigerator for up to 3 days. Make sure it’s completely cooled down before sealing to maintain texture and flavor. If you want to prepare it in advance, feel free to chill it overnight—this actually allows the flavors to blend even better!

Can I freeze the Pasta Screamavera?
Yes, but with a little tweak! I recommend freezing just the salad base (without the molded mozzarella ghosts) in a freezer-safe container for up to 1 month. When you’re ready to enjoy it, thaw it in the refrigerator overnight. After thawing, you can add fresh cheese just before serving to keep that delightful creamy touch without losing the beloved ghostly shape.

What should I do if my pasta salad turns out too dry?
No worries! If you find your Pasta Screamavera is a bit dry, simply drizzle in some extra Italian dressing or a splash of olive oil just before serving. You can also stir in a bit of fresh pesto to bring life back to the flavors. If it’s been chilling overnight, it might need a slight refresh!

Are there any dietary considerations I should be aware of?
Very! This recipe can easily be adapted for various dietary needs. For dairy-free options, try substituting mozzarella with a plant-based cheese. If you’re catering for gluten sensitivities, you can swap in gluten-free pasta for the squid ink fusilli. Always check ingredient labels for allergens, especially with the dressing and pesto, as they can contain nuts or dairy.

Can I switch out any of the ingredients?
The more the merrier! I often mix and match based on what I have on hand. If you want to make it vegetarian, simply omit the pepperoni and amp up the veggies with favorites like spinach or olives. You could even experiment with different dressings to find your own perfect flavor profile!

Pasta Screamavera

Pasta Screamavera: A Fun Halloween Twist on Pasta Salad

Pasta Screamavera is a Halloween-inspired pasta salad featuring pesto, mini pepperoni, and mozzarella ghosts for a delightful crowd-pleaser.
Prep Time 15 minutes
Cook Time 10 minutes
Chill Time 1 hour
Total Time 1 hour 25 minutes
Servings: 6 servings
Course: Pasta
Cuisine: Italian
Calories: 300

Ingredients
  

For the Salad
  • 2 cups Fresh Mozzarella Balls Any mild cheese can work as a substitute.
  • 8 ounces Squid Ink Fusilli Pasta Regular fusilli serves if squid ink is hard to find.
  • 1 cup Mini Pepperoni Slices Diced salami or turkey pepperoni can be used.
  • 1 cup Zucchini Diced small; can substitute with yellow squash.
  • 1 cup Red Bell Pepper Diced; any bell pepper variety or diced tomatoes work.
  • 1 medium Shallot Finely minced; use red onion if unavailable.
  • 1 teaspoon Dried Italian Seasoning Feel free to use fresh herbs.
  • 1/2 cup Bottled Italian Dressing Homemade vinaigrette can be a fantastic alternative.
  • 1/2 cup Prepared Pesto Swap with homemade pesto or spinach puree for a lighter taste.
  • 2 cloves Garlic Grated; garlic powder can work if you're out of fresh garlic.
  • to taste Salt
  • to taste Pepper

Equipment

  • Silicone ghost mold
  • Large pot
  • Mixing Bowl
  • Medium-sized bowl

Method
 

Step-by-Step Instructions
  1. Preheat your oven to 350°F (175°C). Place two mozzarella balls in a silicone ghost mold and bake for about 8 minutes until softened. Chill in the refrigerator after molding.
  2. Bring a large pot of salted water to a boil and add squid ink fusilli. Cook for 8-10 minutes until al dente, then drain and rinse under cold water.
  3. In a mixing bowl, combine cooled fusilli, mini pepperoni, zucchini, red bell pepper, and shallot. Add Italian seasoning, salt, and pepper, and toss together.
  4. In another bowl, whisk together Italian dressing, pesto, and garlic. Pour half over the salad and stir to coat.
  5. Cover and refrigerate for at least 1 hour or overnight to let flavors meld.
  6. Before serving, gently fold in the molded mozzarella ghosts and drizzle remaining dressing over the salad. Adjust seasoning and garnish with herbs.

Nutrition

Serving: 1servingCalories: 300kcalCarbohydrates: 30gProtein: 10gFat: 15gSaturated Fat: 8gPolyunsaturated Fat: 1gMonounsaturated Fat: 1gCholesterol: 30mgSodium: 500mgPotassium: 300mgFiber: 3gSugar: 2gVitamin A: 500IUVitamin C: 20mgCalcium: 250mgIron: 2mg

Notes

Allow flavors to meld beautifully by chilling properly. Feel free to adapt ingredients as needed for dietary preferences.

Tried this recipe?

Let us know how it was!

Mini Halloween Pizzas That Make Spooky Fun Delicious

As the autumn leaves begin to fall and the air turns crisp, my mind fills with nostalgic images of Halloween nights filled with laughter and creativity. What better way to celebrate than with these Spooky Mini Halloween Pizzas? These delightful bites are not only fun to assemble but also quick to whip up, taking less than 30 minutes from prep to plate. With customizable toppings like ghostly mozzarella and cheeky bell pepper faces, they’re perfect for family gatherings or cozy parties. Plus, the kids can join in on the fun, making every pizza their canvas for creativity! Ready to add a little haunting flavor to your Halloween festivities?

Why are Mini Halloween Pizzas a Hit?

Delightfully Fun: These pizzas turn mealtime into a mini art project, where creativity meets spookiness. Quick Preparation: Ready in under 30 minutes, they fit perfectly into busy schedules. Customizable Toppings: With options like ghostly mozzarella or jack-o’-lantern faces, even picky eaters will find their favorite! Kid-Friendly: Engaging children in assembling their own pizzas makes for a memorable family activity. Crowd-Pleasing Treat: Ideal for Halloween parties or casual gatherings, everyone will love these fun-sized delights! If you’re curious about more quick and easy Halloween treats, check out our Halloween Snack Ideas for more delicious inspiration.

Mini Halloween Pizzas Ingredients

• Dive into the spooky fun with these delightful ingredients!

For the Pizza Base

  • Mini Pizza Crusts – The foundation for your creepy creations; store-bought saves time, or make them from scratch if you’re feeling adventurous!
  • Pizza Sauce – Helps add moisture and flavor; you can switch it up with garlic butter or pesto for a unique twist.

For the Toppings

  • Shredded Mozzarella Cheese – Melts beautifully to create a gooey layer; try cheddar for a different flavor profile!
  • Mozzarella Slices – Perfect for crafting ghost shapes; use cookie cutters to make them as spooky as you like.
  • Pepperoni Slices – Adds savory goodness and forms the spooky “mouth” and “teeth”; feel free to use veggies or other meats for variety.
  • Black Olives – Sliced for adorable eyes on ghosts and mummies; capers or small cherry tomatoes work as fun alternatives.
  • Orange Bell Pepper – Essential for creating jack-o’-lantern faces; get creative with different colors or shapes for added flair!

Unleash your culinary creativity and whip up these Mini Halloween Pizzas for an unforgettable celebration!

Step‑by‑Step Instructions for Mini Halloween Pizzas

Step 1: Preheat the Oven
Begin by preheating your oven to 400°F (200°C). As the oven heats, line a baking sheet with parchment paper to prevent your Mini Halloween Pizzas from sticking. This will ensure even baking and easy clean-up afterward. While waiting, take a moment to prepare your toppings so you’re ready to assemble once the bases are prepared.

Step 2: Arrange Pizza Crusts
Once your oven reaches the desired temperature, carefully lay out the mini pizza crusts on the lined baking sheet. Make sure they are evenly spaced to allow for even heat circulation. This step is crucial for achieving that perfect crispy base that makes these Mini Halloween Pizzas so delightful.

Step 3: Spread the Sauce
Take your pizza sauce and evenly spread a generous layer over each mini pizza crust using the back of a spoon. This will not only add flavor but also help to keep the toppings in place. Aim for a nice, even coverage, leaving a little space at the edges to allow the crust to rise and get golden.

Step 4: Create Ghost Pizzas
For the ghostly versions, use cookie cutters to cut mozzarella slices into spooky ghost shapes. Place these ghostly figures on the sauce-covered pizzas, then add olive slices as eyes. This step is all about having fun with your Mini Halloween Pizzas, so let your creativity flow!

Step 5: Assemble Mummy Pizzas
Now it’s time for the mummies! Take shredded mozzarella cheese and layer it in a criss-cross pattern across the sauce. Be sure to leave gaps that will represent the “bandages.” Add olive slices as eyes to complete the look. These savory mummy pizzas add a delightful spooky touch to your Halloween spread.

Step 6: Form Jack-o’-Lantern Faces
Next, grab your orange bell pepper and cut it into small shapes to form jack-o’-lantern faces on the remaining mini pizzas. Layer these on top of the cheese. The burst of color against the golden crust will be visually appealing and festive. Each pizza will soon take on a personality of its own!

Step 7: Bake the Pizzas
Place the assembled baking sheet into the preheated oven and bake for 8-10 minutes. Keep an eye on them, as the cheese should be bubbly and the edges of the crust golden brown. This is the moment when your Mini Halloween Pizzas transform into deliciously spooky treats, filling your kitchen with delightful aromas.

Step 8: Serve and Enjoy
Once the pizzas are baked to perfection, carefully remove them from the oven. Let them cool for a brief moment, then serve warm. Gather your family and friends to share in the fun and creativity of these Mini Halloween Pizzas. They’re not just meals; they’re an invitation to enjoy the spirit of the Halloween season together!

Expert Tips for Mini Halloween Pizzas

  • Preheat Properly: Make sure your oven is thoroughly preheated to ensure even cooking and a perfectly crisp crust. This step is crucial for your Mini Halloween Pizzas!

  • Choose Your Crust Wisely: Opt for light-colored baking sheets to prevent your crust from burning easily. A dark pan can trap heat and lead to overcooked edges.

  • Watch the Clock: Keep an eye on your baking time; 8-10 minutes is ideal, but it may vary depending on the thickness of your crust. Adjust as needed for personal preference.

  • Involve the Kids: Encouraging children to help assemble the toppings can turn dinner into a fun family activity, sparking creativity and excitement.

  • Experiment with Toppings: Don’t hesitate to customize your Mini Halloween Pizzas with unique toppings like different cheeses, veggies, or even themed alternatives for added fun!

Storage Tips for Mini Halloween Pizzas

  • Room Temperature: Mini Halloween Pizzas should not be left out for more than 2 hours to avoid bacterial growth; store leftovers promptly.
  • Fridge: Keep any uneaten Mini Halloween Pizzas in an airtight container in the fridge for up to 3 days to maintain freshness and flavor.
  • Freezer: If you have prepared pizzas to store for longer, wrap them individually in plastic wrap and place in a freezer-safe bag for up to 2 months.
  • Reheating: For the best texture, reheat in the oven at 350°F (175°C) for about 10 minutes until warm and crispy. Avoid microwaving, as it can make the crust soggy.

Mini Halloween Pizzas Variations & Substitutions

Feel free to get creative and customize these Mini Halloween Pizzas to suit your taste buds and dietary needs!

  • Gluten-Free: Swap regular crusts for gluten-free mini pizza bases to cater to dietary restrictions. Everyone can indulge in the fun!

  • Whole Wheat: Use whole wheat mini pizza crusts for a healthier twist without compromising on flavor or fun. It’s a simple swap that adds nutrition.

  • Sweet Treat: Turn these into dessert pizzas by using Nutella as the base and topping with fruits like strawberries and bananas—perfect for a spooky dessert bar.

  • Vegan: Substitute cheese with plant-based cheese alternatives and use vegan crusts for a delightful version that’s friendly to all!

  • Spice It Up: Add sliced jalapeños or red pepper flakes to give your pizzas a spicy kick. It’s a great way to delight the adults at your festive gathering.

  • Creative Toppings: Get festive by using toppings like sliced bell peppers or black olives to create themed designs, making the pizza-making process even more enjoyable for kids.

  • Cheese Variations: Experiment by using different cheeses like cheddar or feta to change up the flavor profile, ensuring delightful surprises in every bite.

If you’re looking for more fun ideas, check out our Halloween Snack Ideas or explore different flavor profiles in our Creative Pizza Topping Guide!

What to Serve with Mini Halloween Pizzas

These delightful, spooky bites are perfect for rounding out an enchanting Halloween feast.

  • Colorful Veggie Platter: Fresh, crisp vegetables like carrots, celery, and bell peppers add a crunchy contrast, delighting your guests and balancing the cheesy richness of the pizzas.
  • Witch’s Brew Punch: A fantastical drink made with ginger ale and green food coloring offers a festive touch that will quench thirst while keeping the spooky spirit alive.
  • Garlic Breadsticks: These warm and buttery treats provide a savory counterpart to the piped mini pizzas, making them a comforting addition to the menu.
  • Pumpkin Soup: Serve a warm, creamy pumpkin soup for a luscious dip option that resonates with the Halloween theme, complementing the savory flavors of the pizzas.
  • Sweet Treats Platter: Include Halloween-themed desserts like ghost-shaped cookies or pumpkin cupcakes for a sweet finale that leaves both kids and adults craving more!
  • Crispy Apple Slices: Sweet, crunchy apple slices provide a refreshing palate cleanser after the savory pizzas, and can be paired with caramel dip for added indulgence.
  • Charming Candy Corn Parfaits: Layering candy corn and whipped cream in clear cups creates a visually stunning treat that celebrates the season and delights partygoers.
  • Spooky Drinks for Adults: Serve themed cocktails like “Black Magic” martinis to elevate the Halloween gathering, offering an adult twist to your festive party.

Make Ahead Options

These Spooky Mini Halloween Pizzas are perfect for meal prep enthusiasts! You can prepare the pizza crusts and toppings up to 24 hours in advance, storing them separately in airtight containers in the refrigerator. To maintain freshness and quality, keep the sauce, shredded mozzarella, and prepped toppings like ghost shapes and jack-o’-lantern faces separated until you’re ready to bake. When it’s time to serve, simply assemble your pizzas, top with the sauce and cheese, and bake them in a preheated oven at 400°F (200°C) for about 8-10 minutes. You’ll enjoy the convenience of this time-saving approach, serving delightful Mini Halloween Pizzas with minimal effort and maximum flavor!

Mini Halloween Pizzas Recipe FAQs

What type of mini pizza crusts should I use?
You can use store-bought mini pizza crusts for convenience, but making them from scratch can add a delightful homemade touch. I often recommend whole wheat or gluten-free crusts to accommodate various dietary needs. They both add a wonderful flavor and texture!

How should I store leftover Mini Halloween Pizzas?
To keep your leftovers fresh, store them in an airtight container in the fridge for up to 3 days. Make sure to cool the pizzas completely before sealing, as trapping steam can lead to sogginess!

Can I freeze Mini Halloween Pizzas?
Absolutely! You can freeze prepared Mini Halloween Pizzas before baking. Just wrap each one individually in plastic wrap, then place them in a freezer-safe bag for up to 2 months. When you’re ready, bake them straight from the freezer—just add a few extra minutes to the cooking time.

What do I do if my crusts are burning before the cheese melts?
If you notice your crusts are burning while the cheese isn’t melting, the oven temperature may be too high. Try lowering it to 375°F (190°C) and extend the baking time slightly, keeping an eye on them. You can also place a piece of aluminum foil on top of the pizzas halfway through baking to prevent over-browning.

Are there any dietary considerations for Mini Halloween Pizzas?
Yes! If you’re making these pizzas for children or guests with allergies, always check for gluten-free crust options and ensure cheese and toppings are nut-free. It’s also fun to create variations—like using vegan cheese for dairy-free options or adding extra veggies for a healthier touch.

Can I prepare Mini Halloween Pizzas in advance?
Definitely! You can assemble the pizzas ahead of time and store them in the fridge for a few hours. However, for the best texture and flavor, I recommend baking them just before serving. This way, you’ll have that fresh-baked goodness that everyone loves!

Mini Halloween Pizzas

Mini Halloween Pizzas That Make Spooky Fun Delicious

These Mini Halloween Pizzas are a fun and creative appetizer that brings spooky flavors to your Halloween celebrations.
Prep Time 10 minutes
Cook Time 10 minutes
Total Time 20 minutes
Servings: 12 pizzas
Course: Appetizers
Cuisine: American
Calories: 150

Ingredients
  

For the Pizza Base
  • 12 pieces Mini Pizza Crusts Store-bought or homemade
  • 1 cup Pizza Sauce Or garlic butter/pesto for a twist
For the Toppings
  • 2 cups Shredded Mozzarella Cheese Can substitute with cheddar
  • 8 slices Mozzarella Slices For ghost shapes
  • 15 slices Pepperoni Slices Or use veggies/meats
  • 1/2 cup Black Olives Sliced for eyes
  • 1 piece Orange Bell Pepper For jack-o'-lantern faces

Equipment

  • Oven
  • Baking Sheet
  • Parchment Paper
  • Cookie Cutters
  • Spoon

Method
 

Step‑by‑Step Instructions
  1. Preheat your oven to 400°F (200°C) and line a baking sheet with parchment paper.
  2. Lay out the mini pizza crusts on the lined baking sheet.
  3. Spread a generous layer of pizza sauce over each mini pizza crust.
  4. Cut mozzarella slices into ghost shapes using cookie cutters and place them on the pizzas along with olive slices for eyes.
  5. Layer shredded mozzarella in a criss-cross pattern for mummy pizzas, adding olive slices as eyes.
  6. Cut the orange bell pepper into shapes for jack-o'-lantern faces and layer on top of the cheese.
  7. Bake the pizzas in the preheated oven for 8-10 minutes until cheese is bubbly and crust is golden brown.
  8. Remove from the oven, let cool briefly, and serve warm.

Nutrition

Serving: 1pizzaCalories: 150kcalCarbohydrates: 15gProtein: 7gFat: 6gSaturated Fat: 3gMonounsaturated Fat: 2gCholesterol: 20mgSodium: 300mgPotassium: 150mgFiber: 1gSugar: 1gVitamin A: 400IUVitamin C: 15mgCalcium: 150mgIron: 1mg

Notes

These Mini Halloween Pizzas are a fantastic way to get kids involved in cooking and can be customized with various toppings.

Tried this recipe?

Let us know how it was!

Crispy Air Fryer Fried Macaroni and Cheese Balls You’ll Love

The moment I took my first bite of Air Fryer Fried Macaroni and Cheese Balls, I felt as though I had rediscovered the essence of comfort food. Crispy outside and beautifully creamy inside, these delightful bites bring an innovative twist to a classic dish. Best of all, they’re a fantastic crowd-pleaser that can be whipped up quickly in the air fryer, cutting down on the guilt of traditional frying. You can also customize these bites to suit your cravings—think spicy jalapeños or extra cheddar! Whether you’re preparing a cozy family dinner or just treating yourself, these macaroni and cheese balls are bound to satisfy your cheesy dreams. Ready to dive into the crispy, gooey goodness? Let’s get cooking!

Why are these mac and cheese balls amazing?

Crispy Texture: The air fryer ensures a perfectly crispy coating that’s less greasy than traditional frying.

Creamy Interior: Inside, the rich blend of mozzarella and Parmesan creates a comforting, gooey surprise that delights every bite.

Customization Options: Tailor these balls to your taste; add spices or mix in different cheeses for a unique twist!

Quick and Easy: With simple ingredients and straightforward steps, you can have these crowd-pleasers ready in no time.

Healthy Twist: Enjoy the classic flavors of mac and cheese without the extra calories, making them a guilt-free indulgence.

Perfect for Sharing: These bites are a great addition to any gathering, sure to impress friends and family, just like our Korean Fried Chicken does!

Air Fryer Fried Macaroni and Cheese Balls Ingredients

For the Base

  • Elbow macaroni – For a classic taste; feel free to swap for penne or rotini if desired.
  • Butter – Adds richness to the sauce; margarine works for a dairy-free option.
  • All-purpose flour – Thickens the cheese sauce for a velvety texture; gluten-free flour can be used if needed.
  • Milk – Adds creaminess to the mixture; opt for almond or oat milk for a dairy-free alternative.

For the Flavoring

  • Garlic powder – Provides a mild, aromatic touch; fresh garlic can give a more robust flavor.
  • Onion powder – Enhances depth in the sauce; can be omitted if not on hand.
  • Salt – Essential for enhancing overall flavor.
  • Black pepper – Offers a hint of heat; adjust to suit your taste.

For the Cheesy Goodness

  • Shredded mozzarella cheese – Creates that gooey, melty texture; cheddar can substitute for a sharper flavor.
  • Grated Parmesan cheese – Adds a nutty finish; consider nutritional yeast for a vegan option.
  • Large egg – Binds the mixture together; a flax egg or unsweetened applesauce is great for a vegan substitute.

For the Coating

  • Bread crumbs – Gives a crispy exterior; crushed crackers or cornflakes make a great alternative.
  • Panko bread crumbs – Offers an extra crunch; can be swapped with regular breadcrumbs if you prefer.
  • Vegetable oil for spraying – Ensures a crispy finish; olive oil can be used instead.

These Air Fryer Fried Macaroni and Cheese Balls are not just a snack, but a joyous bite of comfort that your friends and family will adore!

Step‑by‑Step Instructions for Air Fryer Fried Macaroni and Cheese Balls

Step 1: Cook the Pasta
Begin by boiling a pot of salted water and adding elbow macaroni. Cook until al dente, roughly 7-8 minutes, then drain and set aside in a large mixing bowl. Make sure to rinse with cool water to stop the cooking process. This cooked pasta will serve as the hearty base for your Air Fryer Fried Macaroni and Cheese Balls.

Step 2: Make the Cheese Sauce
In a medium saucepan, melt 2 tablespoons of butter over medium heat, stirring continuously. Once melted, sprinkle in 2 tablespoons of all-purpose flour, whisking to form a roux. Cook for about 1-2 minutes, allowing it to turn a light golden color. This roux will give your cheese sauce a rich base, essential for the macaroni mixture.

Step 3: Whisk in the Milk
Gradually pour in 1 cup of milk while whisking to prevent lumps from forming. Continue stirring for 3-4 minutes until the mixture thickens and bubbles gently. You want a creamy consistency, perfect for enveloping the macaroni. Once thickened, remove the saucepan from heat; it will soon transform into a delightful cheese sauce.

Step 4: Add Flavorings
Stir in 1 teaspoon of garlic powder, ½ teaspoon of onion powder, and a pinch of salt and black pepper to the cheese sauce. Mix until smooth and fragrant. The aroma will signal that your cheese sauce is ready, enhancing the flavor profile of these Air Fryer Fried Macaroni and Cheese Balls.

Step 5: Incorporate the Cheeses
Next, add 1 cup of shredded mozzarella cheese and ½ cup of grated Parmesan cheese to the hot sauce, stirring until melted and well combined. The smooth, gooey texture will create an irresistible cheesy filling. This is the moment your macaroni mixture transforms into a comfort food sensation, ready to be combined with the pasta.

Step 6: Combine Macaroni and Cheese Sauce
Fold the cooked macaroni into the cheese mixture, ensuring every piece is coated evenly. Allow this mixture to cool for about 15-20 minutes at room temperature, which will help you form the balls easily. The cooling process is crucial as a warm mixture can be difficult to handle for shaping.

Step 7: Shape the Balls
Once cooled, scoop out approximately 2 tablespoons of the macaroni mixture and roll it into a ball shape with your hands. Place each ball on a parchment-lined baking sheet as you form them. Repeat until all the mixture is shaped. This step will give your Air Fryer Fried Macaroni and Cheese Balls their fun and inviting bite-sized form.

Step 8: Set Up the Breading Stations
Prepare your breading station by whisking 1 large egg in a bowl and combining 1 cup of breadcrumbs with ½ cup of panko in another bowl. Dip each macaroni ball first into the egg, ensuring it’s fully coated, then roll it in the breadcrumb mixture to create a crispy coating. This double-dipping will add that perfect crunch you’re after.

Step 9: Spray with Oil and Preheat
Lightly spray the breaded mac and cheese balls with vegetable oil for enhanced crispiness. Preheat your air fryer to 375°F (190°C) for about 5 minutes. This ensures an even cook and crisp finish when the balls are placed in the air fryer. The perfect temperature is key to achieving golden-brown perfection.

Step 10: Air Fry the Balls
Place the coated macaroni balls in a single layer in the air fryer basket, ensuring not to overcrowd. Cook for 8-10 minutes, flipping halfway through, until they are a lovely golden brown. The air fryer will work its magic, providing that crispy exterior while retaining the creamy interior of your Air Fryer Fried Macaroni and Cheese Balls.

Step 11: Cool and Serve
Once cooked, carefully remove the mac and cheese balls from the air fryer and let them cool for a few minutes. Serve warm with your favorite dipping sauces, such as marinara or spicy ranch. This cooling step allows the flavors to settle, ensuring every bite is a satisfying experience filled with cheesy goodness.

Make Ahead Options

These Air Fryer Fried Macaroni and Cheese Balls are perfect for meal prep! You can prepare the macaroni and cheese mixture up to 24 hours in advance; simply make it and let it cool, then form into balls and refrigerate. For the best texture, keep the formed balls in an airtight container lined with parchment paper for up to 3 days. When you’re ready to cook, just spray them lightly with vegetable oil and air fry them straight from the fridge, adding an extra minute to the cook time if they’re chilled. This way, you’ll enjoy that crispy, cheesy goodness without the last-minute rush!

How to Store and Freeze Air Fryer Fried Macaroni and Cheese Balls

Fridge: Store cooled macaroni and cheese balls in an airtight container lined with paper towels for up to 2-3 days to absorb moisture and maintain crispness.

Freezer: Freeze the balls individually on a baking sheet before transferring to a freezer-safe bag or container for up to 2 months. This prevents them from sticking together.

Reheating: For best results, reheat frozen or refrigerated balls in the air fryer at 375°F (190°C) for about 5-8 minutes until heated through and crispy again.

Thawing: If frozen, allow the air fryer fried macaroni and cheese balls to thaw in the fridge overnight before reheating to achieve optimal texture.

Expert Tips for Air Fryer Fried Macaroni and Cheese Balls

  • Cool Mixture Well: Allow your macaroni mixture to cool completely before forming balls; this helps prevent them from falling apart during cooking.

  • Avoid Crowding: Don’t overcrowd the air fryer basket; leave space between the balls for even cooking and crisping.

  • Even Coating: Ensure each ball is fully coated in both egg and breadcrumbs for that perfectly crispy finish.

  • Oil Spray: A light mist of vegetable oil before cooking ensures you achieve a crisp exterior without the need for deep frying; don’t skip this step!

  • Flip Halfway: Remember to flip the balls halfway through cooking for uniform browning on both sides, guaranteeing that irresistible golden color on your Air Fryer Fried Macaroni and Cheese Balls.

What to Serve with Air Fryer Fried Macaroni and Cheese Balls

Elevate your meal by pairing these crispy, gooey bites with delightful sides and complements that enhance their comforting charm.

  • Zesty Marinara: A classic dipping sauce that adds a tangy kick, balancing the richness of the mac and cheese balls wonderfully.

  • Fresh Green Salad: Crisp greens with a light vinaigrette offer a refreshing contrast, perfect for cutting through the creamy texture.

  • Spicy Ranch Dressing: This creamy dip adds a flavor punch, making every bite of your air fryer fried macaroni and cheese balls even more exciting.

  • Garlic Bread: Warm, toasted bread infused with garlic butter provides a terrific crunch and comfort, making it a great sidekick for this creamy dish.

  • Grilled Veggies: Colorful, charred vegetables like bell peppers and zucchini add vibrant flavor and nutrients, balancing out the indulgence of the cheese balls.

  • Crispy Potato Wedges: Golden, seasoned wedges offer a delightful texture while complementing the cheesy goodness of your air fryer fried macaroni and cheese balls.

  • Sweet Potato Fries: Their natural sweetness works beautifully against the savory flavor of the mac and cheese, creating a satisfying harmony of tastes.

  • Sangria: Chill out with a refreshing glass of sangria, which adds fruity notes and a bit of zest to your table, creating a cheerful atmosphere.

Air Fryer Fried Macaroni and Cheese Balls Variations

Feel inspired to make this recipe your own? Let your culinary creativity shine with these fun twists and substitutions!

  • Spicy Kick: Add 1 teaspoon of hot sauce or smoked paprika to the cheese mixture for a delightful heat. Embrace the warmth, and let each bite tickle your taste buds!

  • Cheesy Variety: Use cheddar or pepper jack cheese instead of mozzarella for a unique flavor profile. Exploring different cheese combinations can take these balls to new cheesy heights!

  • Creamy Alternatives: Substitute milk with coconut milk for a subtly sweet twist. This alternative adds a rich creaminess, balancing wonderfully with savory elements.

  • Crunchy Coating: Swap panko breadcrumbs with crushed cornflakes or crushed crackers for an exciting texture change. You’ll love the extra crunch that adds a surprising element.

  • Hearty Add-ins: Consider mixing in chopped cooked bacon or diced jalapeños into the macaroni mixture for added flavor and heartiness. Each bite becomes an adventure of taste!

  • Dipping Delights: Serve with a variety of dipping sauces such as spicy ranch, marinara, or a zesty lemon vinaigrette. These dips can elevate the entire experience, mixing flavors with every bite!

  • Herb Infusion: Incorporate fresh herbs like chopped chives or parsley into the macaroni mixture for an aromatic flavor boost. Fresh herbs add a pop of color and freshness, brightening the whole dish.

  • Vegan Version: For a completely plant-based option, replace cheese with nutritional yeast and the egg with a flax egg. Your vegan friends will be thrilled to enjoy this comforting dish too!

Each change offers a unique approach that not only makes these Air Fryer Fried Macaroni and Cheese Balls your own but also keeps your taste buds excited for more! For a fun twist, don’t forget to try them alongside our scrumptious Banana Grilled Cheese or Cheesy Fried Egg recipes!

Air Fryer Fried Macaroni and Cheese Balls Recipe FAQs

How do I select the right macaroni for this recipe?
Absolutely! I recommend using elbow macaroni for the classic flavor and texture, but feel free to experiment with other small pasta shapes like penne or rotini. Just ensure that the pasta is sturdy enough to hold the creamy cheese mixture.

What’s the best way to store leftover macaroni and cheese balls?
For storage, allow macaroni and cheese balls to cool completely before placing them in an airtight container lined with paper towels to absorb moisture. This helps maintain their crispness. They’ll stay fresh in the fridge for up to 2-3 days.

Can I freeze these cheese balls and how should I do it?
Very! To freeze, place the shaped and breaded macaroni and cheese balls on a baking sheet in a single layer and freeze them for about an hour. Once solid, transfer them to a freezer-safe bag or container for up to 2 months. This method prevents them from sticking together, making cooking a breeze later on!

What should I do if my cheese balls fall apart while cooking?
This can happen if the macaroni mixture is too warm or not set properly. To avoid this, make sure the mixture cools completely for about 15-20 minutes before shaping. Also, be mindful not to overcrowd the air fryer; giving each ball some space ensures they cook evenly without falling apart.

Are there any dietary alternatives I can use in this recipe?
Absolutely! You can easily make these Air Fryer Fried Macaroni and Cheese Balls vegan by replacing the large egg with a flax egg (1 tablespoon ground flaxseed mixed with 2.5 tablespoons water) or unsweetened applesauce. For non-dairy options, substitute butter with margarine and use almond or oat milk instead of regular milk.

Can pets eat these macaroni and cheese balls?
It’s best to keep these cheese balls away from pets. Ingredients like garlic and onion powder can be harmful to pets, so avoid sharing any of the air-fried goodness with them. Always stick to pet-friendly treats to ensure their safety!

Air Fryer Fried Macaroni and Cheese Balls

Crispy Air Fryer Fried Macaroni and Cheese Balls You’ll Love

Crispy Air Fryer Fried Macaroni and Cheese Balls combine a crunchy exterior with a creamy interior for comfort food bliss.
Prep Time 30 minutes
Cook Time 10 minutes
Cooling Time 20 minutes
Total Time 1 hour
Servings: 6 balls
Course: Appetizers
Cuisine: American
Calories: 150

Ingredients
  

For the Base
  • 2 cups elbow macaroni or penne or rotini
  • 2 tablespoons butter or margarine for dairy-free
  • 2 tablespoons all-purpose flour or gluten-free flour
  • 1 cup milk or almond/oat milk for dairy-free
For the Flavoring
  • 1 teaspoon garlic powder or fresh garlic
  • 1/2 teaspoon onion powder optional
  • 1 teaspoon salt
  • 1/2 teaspoon black pepper to taste
For the Cheesy Goodness
  • 1 cup shredded mozzarella cheese or cheddar for sharper flavor
  • 1/2 cup grated Parmesan cheese or nutritional yeast for vegan
  • 1 large egg or flax egg/applesauce for vegan
For the Coating
  • 1 cup bread crumbs or crushed crackers/cornflakes
  • 1/2 cup panko bread crumbs or regular breadcrumbs
  • as needed vegetable oil for spraying or olive oil

Equipment

  • Air Fryer
  • medium saucepan
  • large mixing bowl
  • Baking Sheet
  • whisk

Method
 

Cooking Instructions
  1. Begin by boiling a pot of salted water and adding elbow macaroni. Cook until al dente, roughly 7-8 minutes, then drain and rinse with cool water.
  2. In a medium saucepan, melt 2 tablespoons of butter over medium heat. Sprinkle in 2 tablespoons of all-purpose flour and whisk to form a roux.
  3. Gradually pour in 1 cup of milk while whisking to prevent lumps. Stir for 3-4 minutes until the mixture thickens.
  4. Stir in 1 teaspoon of garlic powder, 1/2 teaspoon of onion powder, and a pinch of salt and black pepper to the cheese sauce.
  5. Add 1 cup of shredded mozzarella cheese and 1/2 cup of grated Parmesan cheese to the sauce, stirring until melted and combined.
  6. Fold the cooked macaroni into the cheese mixture, ensuring every piece is coated evenly. Let it cool for about 15-20 minutes.
  7. Once cooled, scoop out approximately 2 tablespoons of the mixture and roll it into a ball. Place each ball on a parchment-lined baking sheet.
  8. Prepare your breading station by whisking 1 large egg in one bowl and combining 1 cup of breadcrumbs with 1/2 cup of panko in another bowl.
  9. Dip each macaroni ball into the egg and then roll it in the breadcrumb mixture. Spray with oil for extra crispiness.
  10. Preheat your air fryer to 375°F (190°C) for about 5 minutes. Cook the balls in a single layer in the air fryer for 8-10 minutes, flipping halfway through.
  11. Remove the balls from the air fryer and let them cool for a few minutes. Serve warm with your favorite dipping sauces.

Nutrition

Serving: 1ballCalories: 150kcalCarbohydrates: 20gProtein: 5gFat: 6gSaturated Fat: 3gPolyunsaturated Fat: 0.5gMonounsaturated Fat: 2gCholesterol: 30mgSodium: 350mgPotassium: 100mgFiber: 1gSugar: 1gVitamin A: 250IUCalcium: 150mgIron: 1mg

Notes

Ensure to cool the macaroni mixture well before forming the balls to prevent them from falling apart. Avoid overcrowding the air fryer for even cooking.

Tried this recipe?

Let us know how it was!

Crispy Blueberry Grilled Cheese That Will Jazz Up Your Lunch

As I stood in my kitchen, the comforting aroma of toasting bread filled the air, mingling with the sweet scent of blueberries bubbling away on the stovetop. That’s when it hit me: the idea for a Crispy Blueberry Grilled Cheese! This delightful creation balances the luscious tartness of homemade blueberry compote with the rich, gooey goodness of mozzarella and sharp white cheddar. Not only is it a fun twist on a classic comfort food, but it’s also incredibly quick to whip up, making it perfect for a satisfying lunch or a gourmet snack. Whether you’re a seasoned home chef or just tired of the same old fast food routine, this grilled cheese will elevate your taste buds and spark joy in your kitchen. Curious about how to achieve that perfect crispy texture and flavor explosion? Let’s dive into this delicious recipe together!

Why Is This Grilled Cheese Unique?

Unexpected Flavor Combination: This Crispy Blueberry Grilled Cheese fuses sweet and savory, making each bite an adventure.

Crisp Perfection: With a golden-brown crust enveloping gooey cheese and luscious compote, it’s a textural delight!

Quick and Easy: Perfect for busy days, it comes together swiftly, bringing gourmet flair without the hassle.

Versatile Pairing: Enjoy it solo or with sides like a refreshing mixed green salad or comforting tomato soup for a meal that pleases all.

Crowd-Pleased Gourmet: Impress your guests or family with this sophisticated twist on traditional grilled cheese – it’s sure to spark conversations!

Crispy Blueberry Grilled Cheese Ingredients

For the Sandwiches
Bread – Use sturdy slices like sourdough or whole grain for the best texture.
White Cheddar Cheese – Opt for medium to sharp varieties to enhance the flavor profile.
Mozzarella Cheese – Whole milk mozzarella works best for that ooey-gooey meltiness.
Butter – Unsalted butter is preferred for better control over the saltiness of your sandwich.

For the Blueberry Compote
Fresh Blueberries – Sweet and tart, these burst with flavor in the compote—but feel free to swap in frozen if needed.
Sugar – This helps balance the natural tartness of the blueberries, ensuring a delightful taste.
Lemon Juice – A splash of lemon juice brightens up the compote, adding necessary acidity.
Lemon Thyme – For a fragrant herbal touch; substituting with fresh thyme is also a delicious option.

This Crispy Blueberry Grilled Cheese is not just a meal; it’s a delightful adventure for your taste buds!

Step‑by‑Step Instructions for Crispy Blueberry Grilled Cheese

Step 1: Prepare the Blueberry Compote
In a medium saucepan over medium heat, combine 2 cups of fresh blueberries, 1/3 cup of sugar, the juice of 1 lemon, and a few sprigs of lemon thyme. Bring the mixture to a boil, stirring occasionally; then reduce the heat and let it simmer gently for about 20 minutes. The compote should thicken and become jammy. Once done, remove from heat and allow it to cool while you prepare the sandwiches.

Step 2: Assemble the Sandwiches
Take four slices of sturdy bread, like sourdough, and spread a generous layer of the cooled blueberry compote on two of the slices. Next, layer each with thick slices of white cheddar and mozzarella cheese, ensuring an even distribution for excellent melting. Top with the remaining slices of bread to create two sandwiches, ready for the skillet.

Step 3: Cook the Sandwiches
Preheat a cast-iron skillet over medium heat and add 2 tablespoons of unsalted butter, allowing it to melt and bubble slightly. Once the butter is sizzling, gently place the assembled sandwiches in the skillet. Cover with a lid and cook for about 2-3 minutes, or until the bread is a beautiful golden-brown and the cheese starts to melt.

Step 4: Flip and Crisp
Carefully flip each sandwich using a spatula, adding a bit more butter to the skillet if necessary. Cover again and cook for another 2-3 minutes on this side until crispy and golden. Peek underneath to check for the desired doneness; the cheese should be bubbling and melty, ready to provide that delightful gooeyness.

Step 5: Serve and Enjoy
Once both sides are nicely browned, transfer the Crispy Blueberry Grilled Cheese to a cutting board. Cut each sandwich in half to reveal the melted cheese and blueberry compote inside. For an extra touch, sprinkle with flaky sea salt and garnish with a few thyme leaves if desired. Enjoy this delightful sandwich warm!

Make Ahead Options

These Crispy Blueberry Grilled Cheese sandwiches are perfect for busy home cooks looking to save time without sacrificing flavor. You can prepare the blueberry compote up to 3 days in advance and store it in an airtight container in the refrigerator to keep it fresh and prevent it from browning. If you want to prep the sandwiches themselves, assemble them without cooking and refrigerate for up to 24 hours. To maintain that delightful crispiness, store the assembled sandwiches wrapped lightly in foil. When you’re ready to enjoy, simply heat a skillet over medium and cook the sandwiches according to the original instructions until they’re golden brown and the cheese is melty—creating the same delicious experience with minimal effort!

Expert Tips for Crispy Blueberry Grilled Cheese

Compote Consistency: Ensure the blueberry compote reaches a thick, jammy texture to prevent your sandwich from getting soggy.

Cheese Tips: Freshly shred your cheeses instead of using pre-shredded varieties for a smoother melt. This will elevate your Crispy Blueberry Grilled Cheese.

Perfect Heat: Maintain a medium-low heat while cooking to achieve golden-brown bread without burning.

Flavor Enhancements: Experiment by adding a pinch of cinnamon to the blueberry compote for an extra flavor twist that complements the cheese.

Creative Pairings: Think outside the box! Pair your grilled cheese with unique sides like sweet potato fries or a refreshing fruit salad for a delightful meal.

How to Store and Freeze Crispy Blueberry Grilled Cheese

Fridge: Store assembled sandwiches in an airtight container for up to 2 days to maintain freshness. Reheat on a skillet for the best crispy texture.

Blueberry Compote: You can refrigerate any leftover compote in a sealed jar for up to 1 week, making it easy to whip up more sandwiches later.

Freezer: If you wish to freeze assembled sandwiches, wrap them tightly in plastic wrap and then in aluminum foil for up to 1 month. Reheat directly from frozen on a skillet, allowing extra cooking time.

Reheating: For best results, reheat in a skillet over medium heat until crispy and warmed through, ensuring that the cheese is melty and gooey for that perfect bite of Crispy Blueberry Grilled Cheese.

What to Serve with Crispy Blueberry Grilled Cheese

Elevate your meal by pairing this delightful grilled cheese with complementary sides that balance flavors and textures perfectly.

  • Tomato Soup: The classic pairing offers a vibrant acidity that contrasts beautifully with the sweetness of the blueberry compote. A warm bowl of tomato soup makes every bite of the grilled cheese even more comforting.

  • Mixed Green Salad: A light, crisp salad brings freshness to the table. Tossed with a zesty vinaigrette, it cuts through the richness of the sandwich, creating a well-rounded meal.

  • Sweet Potato Fries: Crispy, savory fries add a delightful crunch and a hint of sweetness, echoing the flavors of the compote. Their hearty texture provides a satisfying contrast to the soft grilled cheese.

  • Cucumber and Feta Salad: The coolness of cucumber combined with tangy feta brings a refreshing element. This salad adds a lovely crunch and a vibrant burst of flavor that complements the sandwich.

  • Fruit Salad: A colorful fruit medley brightens up the plate and adds a refreshing sweetness. The natural juices and flavors highlight the blueberries, creating harmony on your palate.

  • Herbal Lemonade: A refreshing drink infused with herbs and citrus enhances the dining experience. The bright flavors cleanse your palate, making each bite of the grilled cheese a tasty delight.

Crispy Blueberry Grilled Cheese Variations

Feel the freedom to make this Crispy Blueberry Grilled Cheese your own with these delicious twists and substitutions!

  • Gouda Magic: Swap white cheddar for gouda to add a nutty, creamy flavor that enhances the overall taste.
  • Nutty Crunch: Add a layer of sliced almonds or walnuts for a delightful crunch in each bite!
  • Banana Boost: Layer in some thin banana slices for a sweet, tropical twist that pairs beautifully with blueberries.
  • Herby Delight: Try incorporating fresh basil or mint alongside the lemon thyme for an aromatic pop of flavor.
  • Spicy Kick: Add a sprinkle of crushed red pepper flakes to the blueberry compote for a touch of heat.
  • Vegan Version: Substitute dairy cheeses with nut-based cheeses, and use vegan butter for a plant-based delight.
  • Brioche Bliss: Use brioche bread for an indulgent, buttery flavor that elevates the entire sandwich experience.

For a delightful breakfast or brunch idea, you might also enjoy a cozy pairing with a steaming cup of hot chocolate or even a fresh fruit salad. If you have a fondness for sweet treats, don’t miss out on the yummy Banana Blueberry Breakfast you can whip up alongside!

Crispy Blueberry Grilled Cheese Recipe FAQs

What kind of bread should I use for the Crispy Blueberry Grilled Cheese?
Absolutely, the best choices for this sandwich are sturdy breads like sourdough or whole grain. These types provide the necessary support to hold up against the toppings and maintain that delightful crispy texture. I usually opt for sourdough for its tangy flavor, which perfectly complements the sweet blueberry compote.

How should I store leftover Crispy Blueberry Grilled Cheese?
To keep these sandwiches fresh, store them in an airtight container in the fridge for up to 2 days. When you’re ready to enjoy them again, I recommend reheating on a skillet over medium heat. This method will help retain that delicious crispiness while melting the cheese perfectly.

Can I freeze assembled Crispy Blueberry Grilled Cheese sandwiches?
Yes, you can! To freeze, wrap each sandwich tightly in plastic wrap and then in aluminum foil. They can be frozen for up to 1 month. When you’re ready to enjoy, just reheat directly from frozen in a skillet on medium heat, allowing for a bit of extra cooking time to ensure everything is heated through and crispy.

What should I do if my blueberry compote is too thin?
If your compote isn’t thickening as desired, don’t worry! Simply return it to the stovetop and let it simmer for an additional 5-10 minutes. Stir frequently to avoid burning. If the compote is still too thin after this time, you can mix a teaspoon of cornstarch with a tablespoon of water and stir that into the compote, cooking for a few more minutes until it thickens nicely.

Are there any dietary considerations I should be aware of when making this recipe?
Yes! If you’re accommodating food allergies, consider using dairy-free cheese alternatives, as well as gluten-free bread if needed. Always check the labels to ensure they fit your dietary needs. For those with sensitive tummies, using low-sugar options for compote or organic ingredients can also be a healthier twist on this gourmet treat.

Can I prepare the blueberry compote ahead of time?
Very! You can make the blueberry compote a few days in advance. Just store it in the fridge for up to a week in a sealed jar. This makes it super convenient for a quick sandwich fix whenever cravings strike!

Crispy Blueberry Grilled Cheese

Crispy Blueberry Grilled Cheese That Will Jazz Up Your Lunch

This Crispy Blueberry Grilled Cheese offers a delightful blend of sweet and savory flavors, elevating your lunch experience.
Prep Time 10 minutes
Cook Time 15 minutes
Total Time 25 minutes
Servings: 2 sandwiches
Course: Lunch
Cuisine: American
Calories: 450

Ingredients
  

For the Sandwiches
  • 4 slices sturdy bread like sourdough or whole grain
  • 4 ounces white cheddar cheese medium to sharp varieties
  • 4 ounces mozzarella cheese whole milk mozzarella
  • 2 tablespoons unsalted butter
For the Blueberry Compote
  • 2 cups fresh blueberries or frozen if needed
  • 1/3 cup sugar
  • 1 tablespoon lemon juice juice of 1 lemon
  • a few sprigs lemon thyme or fresh thyme

Equipment

  • medium saucepan
  • cast-iron skillet
  • spatula
  • Cutting board

Method
 

Instructions
  1. In a medium saucepan over medium heat, combine 2 cups of fresh blueberries, 1/3 cup of sugar, the juice of 1 lemon, and a few sprigs of lemon thyme. Bring to a boil, stirring occasionally; then reduce heat and simmer gently for about 20 minutes until thickened.
  2. Take four slices of sturdy bread and spread a layer of cooled blueberry compote on two of the slices. Top with thick slices of white cheddar and mozzarella cheese, then cover with the remaining slices to create sandwiches.
  3. Preheat a cast-iron skillet over medium heat and add 2 tablespoons of unsalted butter. Once melted, place the assembled sandwiches in the skillet. Cover and cook for 2-3 minutes until golden-brown and cheese starts to melt.
  4. Carefully flip each sandwich using a spatula, adding more butter if necessary. Cover again and cook for another 2-3 minutes until crispy and golden. Check for desired doneness.
  5. Transfer the sandwiches to a cutting board, cut in half to reveal the melted cheese and blueberry compote. Optionally, sprinkle with flaky sea salt and garnish with thyme leaves. Enjoy warm!

Nutrition

Serving: 1sandwichCalories: 450kcalCarbohydrates: 45gProtein: 20gFat: 20gSaturated Fat: 12gPolyunsaturated Fat: 0.5gMonounsaturated Fat: 6gCholesterol: 55mgSodium: 800mgPotassium: 300mgFiber: 3gSugar: 10gVitamin A: 500IUVitamin C: 10mgCalcium: 300mgIron: 2mg

Notes

Ensure the blueberry compote reaches a thick, jammy texture to prevent sogginess in the sandwich. Freshly shred your cheeses for the best melt.

Tried this recipe?

Let us know how it was!

Delicious Hot Honey Flatbread Pizza for a Quick Flavor Boost

The enticing aroma of freshly baked flatbread wafts through my kitchen as I whip up my latest obsession: delicious hot honey flatbread pizza. This isn’t just any pizza; with its crispy crust, melty cheese, and that incredible kick of sweet and spicy goodness from the hot honey, it’s the perfect weeknight dinner that feels surprisingly gourmet. I love how adaptable this recipe is, allowing you to throw on whatever toppings you have on hand—whether you’re craving classic pepperoni or vibrant roasted veggies, it never disappoints. Plus, it’s quick and easy enough to turn a busy evening into a satisfying culinary adventure. Are you ready to elevate your pizza night? Let’s dive into this flavor-packed journey together!

Why is hot honey pizza a must-try?

Irresistible Flavors: The sweet, spicy kick from the hot honey blends perfectly with melty cheese, creating a flavor sensation unlike any other pizza.

Quick & Simple: Perfect for busy weeknights, you can whip this up in under 20 minutes without compromising on taste!

Endless Toppings: Customize this flatbread with whatever toppings you have on hand; whether it’s honey banana grilled cheese or roasted vegetables, you can make it your own.

Gourmet Feel: What feels like a gourmet dish is surprisingly straightforward, so impress your friends or family with minimal effort.

Versatile Base: Using flatbread as the base allows for a crispy texture without the fuss of traditional dough-making.

With these features, it’s no wonder this hot honey flatbread pizza will quickly become your new favorite recipe!

Delicious Hot Honey Flatbread Pizza Ingredients

For the Flatbread Pizza
Flatbread – Store-bought is perfect for a quick meal, but you can also make your own for added freshness.
Pizza Sauce – A thin layer is key to avoid sogginess and maintain the crispiness of the crust.
Mozzarella Cheese – Use either fresh or shredded for that perfect melty texture that complements the pizza.

For the Toppings
Toppings (e.g., pepperoni, jalapeños, olives) – Choose your favorites; get creative and mix them up based on what you have in the fridge.

For the Flavor Boost
Hot Honey – This is the star of the dish, providing a sweet and spicy kick that elevates your delicious hot honey flatbread pizza to new heights.
Hot Sauce & Chili Flakes – Adjust these ingredients to customize the heat to your liking, intensifying the overall flavor experience.

Step‑by‑Step Instructions for Delicious Hot Honey Flatbread Pizza

Step 1: Preheat Your Oven
Begin by preheating your oven to 450°F (230°C). As the oven heats, place a baking tray inside to warm up—this will help achieve that perfectly crispy crust for your delicious hot honey flatbread pizza. Aim for about 5 minutes of preheating before proceeding to the next step.

Step 2: Prepare the Hot Honey Mix
In a small bowl, combine your hot honey with a few drops of your favorite hot sauce and a pinch of chili flakes to elevate the spice level. Warm this mixture in the microwave for about 20-30 seconds until it’s just slightly hot, then set it aside to cool, allowing the flavors to meld beautifully.

Step 3: Spread the Sauce
Once your oven is ready, remove the hot baking tray and place your flatbread on it. Using a spoon, spread a thin layer of pizza sauce over the flatbread, ensuring it’s an even coating. This step is crucial to avoid a soggy base, setting the stage for your delicious hot honey flatbread pizza masterpiece.

Step 4: Add Cheese and Toppings
Next, distribute a generous handful of mozzarella cheese over the sauce, letting it cascade over the edges for that melting effect. Now, elevate your pizza with your choice of toppings, such as pepperoni and jalapeños, or any leftover veggies you have. Keep toppings balanced to ensure even cooking and a delightful mix of flavors.

Step 5: Bake to Perfection
Carefully place the tray back in the oven and bake for 8-10 minutes. Watch the pizza as it cooks—the cheese should bubble and the edges of the flatbread will turn golden brown and slightly charred, which indicates it’s time to pull it out to enjoy your delicious hot honey flatbread pizza.

Step 6: Final Touch with Hot Honey
Once baked, remove the pizza from the oven and let it cool for a minute. Drizzle the prepared hot honey mixture generously over the hot pizza, letting the sweetness and spice blend into the cheese and toppings. This final flourish accentuates the flavors and seals the deal on your incredible creation!

Expert Tips for Delicious Hot Honey Flatbread Pizza

Pre-bake for Crispiness: To avoid a soggy crust, pre-bake the flatbread for 2-3 minutes before adding toppings. This step really makes your delicious hot honey flatbread pizza shine!

Layer Wisely: For even cooking, avoid overloading on toppings. A balanced layer ensures that all ingredients cook through and don’t weigh down your pizza, maintaining that delightful crunch.

Cool Before Drizzling: Always drizzle the hot honey mixture on your pizza after baking. This prevents burning and ensures you experience the full flavor profile when it’s still warm.

Experiment with Cheeses: Try different cheeses like goat cheese or feta for added flavor dimensions. They can elevate your delicious hot honey flatbread pizza from ordinary to extraordinary!

Adjust Spice Level: Don’t forget that you can easily customize the heat in your hot honey combination. Start with a little hot sauce or chili flakes and adjust it to fit your preference for a perfect kick!

Make Ahead Options

These delicious hot honey flatbread pizzas are a fantastic option for meal prep! You can prep the flatbread and toppings up to 24 hours in advance. Begin by mixing your hot honey sauce and refrigerating it overnight to allow the flavors to develop fully. When you’re ready to enjoy, simply spread a thin layer of pizza sauce on the flatbread, add mozzarella cheese, and your prepped toppings. Bake in a preheated oven at 450°F (230°C) for 8-10 minutes until the cheese is bubbly and the crust is golden. By preparing components ahead of time, you’ll save precious moments on busy weeknights, making this gourmet dish just as delicious with minimal effort!

Delicious Hot Honey Flatbread Pizza Variations

Feel free to get creative with your delicious hot honey flatbread pizza, elevating it to suit your taste buds and pantry staples!

  • Vegetarian: Swap meat toppings for roasted vegetables like bell peppers, zucchini, or mushrooms for a fresh twist that packs a flavor punch. You’ll enjoy the colorful medley and satisfying textures.

  • Dairy-Free: Use a plant-based cheese alternative or simply rely more on the delicious hot honey for flavor explosion. This version remains just as delightful without dairy!

  • Spicy Twist: Add fresh jalapeños or drizzles of your favorite spicy sauce before baking for those extra heat lovers. It’s a simple way to turn up the warmth on any bite.

  • Herbed Delight: Sprinkle fresh herbs like basil or arugula after baking for a fresh burst of flavor. This adds an aromatic touch that complements the sweet and spicy beautifully.

  • Different Cheeses: Experiment with unique cheeses such as goat or blue cheese, offering a robust flavor profile and creamy texture that will surprise your palate.

  • Tortilla Alternative: Use a large flour tortilla instead of flatbread for a lighter, crispy take on your pizza! This method results in a delightful crunch and is super quick to prepare.

  • Add Protein: Throw on some sliced grilled chicken or pepperoni for a heartier meal. The added protein keeps you fuller for longer, balancing the sweetness of the honey.

  • Dessert Pizza: Create a sweet pizza by topping the flatbread with soft cheese and drizzling it with honey instead, then bake for a sweet treat! Pairing it with fresh fruits like peaches or berries can turn your creation into a delightful dessert.

Feel free to explore these variations, or get inspired to create your own! With the endless possibilities, every pizza night can be an exciting culinary adventure. Don’t forget to check out ideas for baked salmon with honey mustard sauce or perhaps add some crispy elements with BLT chicken salad for a side dish!

What to Serve with Delicious Hot Honey Flatbread Pizza

The delightful flavors of your pizza deserve equally tasty companions that elevate your meal experience.

  • Crisp Caesar Salad: The crunch of romaine and creamy dressing offers a refreshing contrast to the sweet and spicy pizza.
  • Garlic Knots: Soft, buttery breadsticks coated in garlic and herbs complement the full flavor of the hot honey flatbread beautifully.
  • Buffalo Wings: These spicy bites pair perfectly, adding an extra layer of heat and a fun twist to your pizza night.
  • Roasted Vegetables: Seasonal veggies, roasted to perfection, will add vibrant colors and a healthy element to balance out the richness of the pizza.
  • Coleslaw: A tangy, crunchy coleslaw is a great way to introduce a refreshing bite that cuts through the heat of your dish.
  • Red Wine Spritzer: A light and fizzy drink enhances the meal while maintaining an elegant touch that complements the sweet heat.
  • Chocolate Chip Cookies: End your meal on a sweet note with warm cookies that add just the right finale.

Storage Tips for Delicious Hot Honey Flatbread Pizza

Fridge: Store leftovers in an airtight container for up to 3 days to maintain freshness and flavor.

Freezer: For longer storage, wrap individual slices in plastic wrap or aluminum foil and freeze for up to 2 months.

Reheating: To bring your delicious hot honey flatbread pizza back to life, reheat in the oven at 375°F (190°C) for about 10-15 minutes until crispy again.

Room Temperature: If serving immediately, keep at room temperature for no more than 2 hours to ensure food safety.

Delicious Hot Honey Flatbread Pizza Recipe FAQs

How do I choose the best flatbread for my pizza?
Absolutely! Look for flatbreads that are sturdy enough to hold toppings without getting soggy. If you’re using store-bought, whole wheat or traditional varieties work great. Homemade flatbread can elevate flavors and freshness, allowing you to customize thickness and texture based on your preference.

What’s the best way to store leftover hot honey flatbread pizza?
To keep your pizza fresh, store leftovers in an airtight container in the fridge for up to 3 days. If you’re looking to save it for longer, wrap individual slices in plastic wrap or aluminum foil and freeze for up to 2 months. Just be sure to reheat in the oven at 375°F (190°C) to bring back that crispy texture!

Can I freeze the hot honey flatbread pizza?
Yes, you can! For best results, freeze individual slices wrapped tightly to prevent freezer burn. When you’re ready to enjoy, simply reheat in the oven at 375°F (190°C) for about 10-15 minutes. This way, you can enjoy your delicious hot honey flatbread pizza with that fresh-out-of-the-oven taste.

What should I do if my pizza crust becomes soggy?
Don’t worry, this can happen to the best of us! To prevent a soggy crust, ensure you spread only a thin layer of sauce and consider pre-baking the flatbread for 2-3 minutes before adding toppings. Make sure to also avoid overloading toppings to maintain a crispy base. If it happens despite your best efforts, you can always pop it in the oven for a few more minutes to help crisp it back up!

Is this recipe suitable for people with dietary restrictions?
Very! This delicious hot honey flatbread pizza can easily be made vegetarian-friendly by choosing toppings like bell peppers, mushrooms, or olives. For gluten-free options, substitute regular flatbread with a gluten-free variant, and always check labels for hot sauces and honey if there are specific allergies. You can easily adjust the recipe to cater to various dietary needs, making it a versatile choice for gatherings.

Delicious Hot Honey Flatbread Pizza

Delicious Hot Honey Flatbread Pizza for a Quick Flavor Boost

Experience the perfect balance of sweet and spicy with this delicious hot honey flatbread pizza, ideal for a quick weeknight dinner.
Prep Time 5 minutes
Cook Time 10 minutes
Total Time 15 minutes
Servings: 2 slices
Course: Dinner
Cuisine: Italian
Calories: 300

Ingredients
  

For the Flatbread Pizza
  • 1 piece Flatbread Store-bought is perfect for a quick meal
  • 1/4 cup Pizza Sauce Thin layer to avoid sogginess
  • 1 cup Mozzarella Cheese Fresh or shredded
For the Toppings
  • 1/2 cup Toppings e.g., pepperoni, jalapeños, olives
For the Flavor Boost
  • 1/4 cup Hot Honey Star of the dish
  • 1 teaspoon Hot Sauce Adjust to taste
  • 1/2 teaspoon Chili Flakes Adjust to taste

Equipment

  • Oven
  • Baking Tray
  • Microwave
  • small bowl
  • Spoon

Method
 

Step-by-Step Instructions
  1. Preheat your oven to 450°F (230°C) and place a baking tray inside to warm up.
  2. In a small bowl, combine your hot honey with a few drops of hot sauce and a pinch of chili flakes. Warm in the microwave for 20-30 seconds.
  3. Remove the baking tray and place your flatbread on it. Spread a thin layer of pizza sauce over the flatbread.
  4. Distribute mozzarella cheese over the sauce and add your choice of toppings.
  5. Bake for 8-10 minutes until cheese bubbles and edges are golden brown.
  6. Drizzle the hot honey mixture generously over the pizza after baking.

Nutrition

Serving: 1sliceCalories: 300kcalCarbohydrates: 35gProtein: 15gFat: 10gSaturated Fat: 5gPolyunsaturated Fat: 1gMonounsaturated Fat: 4gCholesterol: 20mgSodium: 600mgPotassium: 300mgFiber: 2gSugar: 3gVitamin A: 10IUVitamin C: 5mgCalcium: 15mgIron: 8mg

Notes

For best results, pre-bake flatbread for 2-3 minutes to avoid sogginess. Adjust spice levels to fit your preference.

Tried this recipe?

Let us know how it was!

Creamy Chicken Mozzarella Pasta for Cozy Weeknight Dinners

Stepping into my kitchen always feels like unlocking a treasure chest of flavors, especially when I whip up a plate of Creamy Chicken Mozzarella Pasta. This dish is my go-to comfort food, effortlessly combining tender chicken and luscious pasta in a delightful tomato cream sauce that can turn any weeknight into a special occasion. What I love most about this recipe is how quick it comes together—ready in under 30 minutes—and it’s beginner-friendly, so you can impress your friends and family without the fuss. Plus, it’s perfect for those nights when you crave something satisfying but don’t want to spend hours slaving away. Are you curious to find out how to recreate this cozy Italian classic at home?

Why is Chicken Mozzarella Pasta a must-try?

Quick and Easy: This dish comes together in just 30 minutes, making it the perfect solution for busy weeknights.

Creamy Delight: The rich tomato cream sauce beautifully coats the pasta, creating a comforting, hearty meal your family will adore.

Versatile Options: Substitute ingredients easily, whether you prefer using different types of cheese or opting for a vegetarian twist with sautéed veggies.

Crowd-Pleasing Flavor: With tender chicken and gooey mozzarella, it’s in the flavor department that this recipe truly shines, appealing to both kids and adults alike.

Ultimate Comfort Food: Imagine a bowl of this creamy goodness warming you up; it’s like a cozy hug in every bite. Pair it with a side of crisp salad or some delicious garlic bread for a complete meal!

Chicken Mozzarella Pasta Ingredients

For the Pasta
Pasta – Provides structure for the dish; feel free to switch it up with fusilli or rigatoni for a fun twist.

For the Chicken
Chicken Breast – Essential protein, cut into bite-sized pieces; can be substituted with sautéed vegetables for a hearty vegetarian option.

For the Sauce
Olive Oil – Used for cooking chicken; any cooking oil can be a great substitute.
Garlic – Adds aromatic flavor; fresh garlic is preferred, but garlic powder works in a pinch.
Dried Italian Herbs – Enhances the sauce’s flavor; fresh basil or oregano adds vibrancy if available.
Crushed Tomatoes – The main base for the sauce; in a pinch, fresh tomatoes or tomato sauce make good substitutes.
Heavy Cream – Contributes to the dish’s luxurious creaminess; half-and-half or a non-dairy alternative can work just as well.
Salt & Pepper – Essential for seasoning; adjust to your taste.

For the Cheese
Shredded Mozzarella Cheese – Key for a creamy texture and delicious topping; feel free to try provolone or fontina instead.
Grated Parmesan Cheese – Adds sharpness and flavor depth; nutritional yeast makes a great vegan substitution.

For Garnish
Fresh Basil Leaves – Provides a touch of freshness and color; parsley is a handy substitute if basil is unavailable.
Red Pepper Flakes – Optional for a kick of heat; omit if milder flavors are preferred.

Embark on a journey of flavors and prepare to create a charming and satisfying Chicken Mozzarella Pasta that transforms any evening into a delectable occasion!

Step‑by‑Step Instructions for Chicken Mozzarella Pasta

Step 1: Cook the Pasta
Bring a large pot of salted water to a rolling boil, then add your pasta of choice. Cook according to package directions until al dente, usually around 8-10 minutes. Once done, drain the pasta in a colander, making sure to shake off excess water, and set it aside to keep warm while you prepare the sauce.

Step 2: Sauté the Chicken
In a large skillet, heat 2 tablespoons of olive oil over medium heat. Add bite-sized chicken pieces, seasoning with salt, pepper, and dried Italian herbs. Cook for about 5-7 minutes, stirring occasionally, until the chicken is golden brown and no longer pink inside. Once cooked, transfer the chicken to a plate and cover to keep warm.

Step 3: Sauté the Garlic
In the same skillet, add a bit more olive oil if needed, then toss in minced garlic. Sauté for approximately 1 minute or until fragrant, stirring frequently to prevent burning. You want the garlic to become golden and aromatic, which will enhance the flavor of your Chicken Mozzarella Pasta sauce.

Step 4: Cook the Tomatoes
Add the crushed tomatoes to the skillet with the sautéed garlic. Stir to combine, then reduce the heat to low and let it simmer for about 5 minutes. During this time, allow the tomatoes to thicken slightly and develop a robust flavor, stirring occasionally for an even cook and to prevent sticking.

Step 5: Make it Creamy
Stir in the heavy cream to the simmering tomato mixture, increasing the heat slightly if needed. Allow the sauce to simmer for an additional 2-3 minutes until it’s creamy and well blended. Watch for the sauce to thicken and take on a rich consistency, which will coat the pasta beautifully later on.

Step 6: Combine the Chicken
Return the cooked chicken to the skillet with the creamy sauce. Stir well, allowing the flavors to meld together for about 1 minute. This will ensure that the chicken is reheated through and thoroughly coated in that luscious sauce, making your Chicken Mozzarella Pasta even more delicious.

Step 7: Toss in the Pasta
Gently add the drained pasta to the skillet, using tongs or a large spoon to toss everything together. Mix well, ensuring that every piece of pasta is coated in the creamy tomato sauce and chicken. This step is crucial for evenly distributing the flavors throughout your Chicken Mozzarella Pasta.

Step 8: Add the Cheeses
Sprinkle the shredded mozzarella and grated Parmesan cheese over the pasta mixture in the skillet. Stir continuously until the cheeses melt into the sauce, creating a creamy, cheesy final texture. You’ll know it’s ready when everything is melty and well-combined, giving that comforting appearance.

Step 9: Garnish and Serve
Remove the skillet from heat and garnish your Chicken Mozzarella Pasta with fresh basil leaves and a sprinkle of red pepper flakes if you desire a little heat. Serve immediately while hot, and watch everyone enjoy this delightful dish that brings a taste of comfort to your dining table.

Chicken Mozzarella Pasta Variations

Feel free to get creative with this recipe; customizing it will elevate your dining experience!

  • Vegetarian Option: Swap the chicken for sautéed zucchini, bell peppers, or mushrooms to create a hearty vegetarian delight that’s equally satisfying.
    This twist ensures you won’t miss the meat while soaking up the creamy sauce with vibrant veggies.

  • Cheese Swap: Substitute mozzarella and Parmesan with gouda or fontina for a different cheesy flavor profile; try blending them for a richer taste.
    Using different cheeses can introduce exciting new notes while keeping the dish comforting!

  • Add Protein: For a bolder protein kick, try adding cooked Italian sausage or shrimp; their rich flavors will mingle beautifully with the creamy sauce.
    This addition takes your Chicken Mozzarella Pasta to the next level of indulgence, perfect for impressing guests!

  • Pasta Shape Change: Experiment with pasta shapes like penne or bowties instead of traditional spaghetti, making each forkful a fun surprise.
    Different shapes add personality, and each will hold that creamy sauce in a uniquely delightful way.

  • Herb Infusion: Want a fresh burst of flavor? Toss in fresh basil or spinach along with the chicken for added color and a nutrient boost.
    Layering these will brighten the dish visually and enhance the overall taste, making it even more irresistible.

  • Spicy Kick: If you love heat, add diced jalapeños or a pinch more red pepper flakes to amp up the spiciness level just how you like it.
    A spicy version brings excitement to the table, making sure your taste buds are tingling with each bite!

  • Sauce Variations: Switch up the creamy sauce by incorporating pesto or sun-dried tomatoes for a gourmet twist; this adds depth without much effort.
    These alternatives will transform your Chicken Mozzarella Pasta into something special, reminiscent of your favorite Italian restaurant.

For sides, consider serving with some crusty garlic bread or a fresh green salad for a balanced meal. And if you want a comforting bowl for later, check out my delicious Tuscan Chicken Soup as a side option!

Make Ahead Options

These Chicken Mozzarella Pasta make-ahead tips are a lifesaver for busy home cooks! You can chop the chicken and veggies, and even measure out your pasta and spices up to 24 hours in advance. Additionally, the creamy tomato sauce can be made a day ahead; simply allow it to cool before storing it in an airtight container in the refrigerator. When you’re ready to serve, cook the pasta according to package instructions, reheat the sauce gently on the stove, and combine everything just before serving to maintain that luscious creamy texture. This way, you’ll enjoy a comforting, home-cooked meal with minimal effort on hectic weeknights!

Expert Tips for Chicken Mozzarella Pasta

Avoid Overcooking: Always check your pasta a minute before the package instructions say it’s done to ensure it stays al dente in the final dish.

Creamy Sauce: For the best creamy consistency in your Chicken Mozzarella Pasta, avoid boiling the sauce after adding the heavy cream; just gently simmer.

Cook Chicken Properly: Ensure your chicken reaches an internal temperature of 165°F (75°C) to prevent food safety issues; use a meat thermometer for accuracy.

Use a Large Skillet: A spacious skillet allows for better mixing and helps to combine the pasta and sauce evenly, preventing overcrowding.

Fresh Herbs: Garnish with fresh basil for an aromatic touch; if unavailable, parsley works well in its place and still brings freshness to the dish.

How to Store and Freeze Chicken Mozzarella Pasta

Fridge: Store leftover Chicken Mozzarella Pasta in an airtight container for up to 3 days. Reheat gently on the stovetop with added cream or a splash of water for best results.

Freezer: Freeze portions in airtight containers or heavy-duty freezer bags for up to 2 months. To prevent freezer burn, make sure to remove as much air as possible before sealing.

Thawing: To enjoy your frozen Chicken Mozzarella Pasta, thaw overnight in the refrigerator before reheating. This ensures even warming and retains the creamy texture.

Reheating: Reheat in a saucepan over low heat, stirring occasionally until heated through. Add a little cream or water to restore creaminess if needed.

What to Serve with Chicken Mozzarella Pasta

Elevate your Chicken Mozzarella Pasta experience with these delightful pairings that create a well-rounded meal.

  • Garlic Bread: The crispy, buttery goodness of garlic bread complements the creamy sauce, making each bite irresistibly comforting.
  • Fresh Green Salad: A light salad of mixed greens brightens the dish, adding a refreshing crunch and balancing the richness of the pasta.
  • Roasted Vegetables: Seasonal roasted veggies enhance flavors with their caramelized sweetness, bringing a wholesome touch to your table.
  • Steamed Broccoli: Tender, vibrant broccoli adds a glorious pop of color and nutrients while offering a satisfying crunch against the creamy pasta.
  • Italian Wine: A chilled glass of Pinot Grigio harmonizes beautifully with the dish, enhancing the Italian flavors and creating a lovely dining experience.
  • Tiramisu: Cap off your meal with this classic Italian dessert, where the layers of coffee-soaked ladyfingers and mascarpone cheese provide a delightful sweet contrast.
  • Homemade Pesto: Drizzle a little pesto over your dish for a burst of fresh, herby flavor that complements the creamy sauce beautifully.
  • Antipasto Platter: An assortment of cured meats, cheeses, and olives offers a savory appetizer that sets the mood for a delicious Italian feast.

Chicken Mozzarella Pasta Recipe FAQs

How do I choose the right pasta for Chicken Mozzarella Pasta?
When selecting pasta, look for shapes that can hold onto the sauce well, such as penne or rotini. For a fun twist, fusilli or rigatoni works beautifully too. Always choose fresh pasta if available for the best texture, as it cooks faster and has a lovely bite.

What is the best way to store leftover Chicken Mozzarella Pasta?
Store any leftovers in an airtight container in the refrigerator for up to 3 days. To reheat, I recommend warming it gently on the stovetop with a splash of cream or water to bring back its creamy consistency. This will help prevent the pasta from drying out.

Can I freeze Chicken Mozzarella Pasta? What’s the process?
Absolutely! You can freeze Chicken Mozzarella Pasta for up to 2 months. First, allow it to cool completely. Then, portion it into airtight containers or heavy-duty freezer bags, pressing out any excess air to prevent freezer burn. To enjoy later, thaw it overnight in the refrigerator before reheating on low heat.

What should I do if my sauce is too thick?
If you find your sauce is too thick, don’t worry! Simply stir in a splash of chicken broth or a little extra cream while warming it on low heat. This will loosen the sauce and keep everything creamy and delicious. Remember to taste and adjust seasonings as you go!

Are there any dietary considerations I should keep in mind?
Yes, if you’re cooking for someone with dietary restrictions, there are great alternatives! Use gluten-free pasta for those with gluten intolerance and substitute heavy cream with a dairy-free option like coconut cream for a vegan version. Additionally, ensure any cheese substitutes are suitable for your guests’ diet.

Can my pet have leftovers from Chicken Mozzarella Pasta?
While the chicken itself can be a good protein source for pets, it’s best to avoid giving them pasta sauced with cream, salt, or herbs. Instead, set aside plain chicken and unseasoned pasta before seasoning the dish for yourself, ensuring it’s pet-friendly and delicious for everyone!

Chicken Mozzarella Pasta

Creamy Chicken Mozzarella Pasta for Cozy Weeknight Dinners

Creamy Chicken Mozzarella Pasta is a quick, comforting dish perfect for weeknight dinners, balancing tender chicken with a delightful tomato cream sauce.
Prep Time 10 minutes
Cook Time 20 minutes
Total Time 30 minutes
Servings: 4 servings
Course: Pasta
Cuisine: Italian
Calories: 550

Ingredients
  

For the Pasta
  • 8 oz Pasta Fusilli or rigatoni can be used for a twist.
For the Chicken
  • 1 lb Chicken Breast Cut into bite-sized pieces.
For the Sauce
  • 2 tbsp Olive Oil Can substitute with any cooking oil.
  • 2 cloves Garlic Fresh garlic preferred.
  • 1 tbsp Dried Italian Herbs Fresh basil or oregano can also be used.
  • 1 16 oz Crushed Tomatoes Fresh tomatoes or tomato sauce can be used as substitutes.
  • 1 cup Heavy Cream Half-and-half or a non-dairy alternative can work.
  • to taste Salt
  • to taste Pepper
For the Cheese
  • 1 cup Shredded Mozzarella Cheese Provolone or fontina can be tried.
  • 1/2 cup Grated Parmesan Cheese Nutritional yeast is a great vegan alternative.
For Garnish
  • 1/4 cup Fresh Basil Leaves Parsley can be used as a substitute.
  • to taste Red Pepper Flakes Omit for milder flavors.

Equipment

  • Large pot
  • Large skillet
  • Colander

Method
 

Step-by-Step Instructions
  1. Cook the Pasta: Bring a large pot of salted water to a rolling boil, then add your pasta of choice. Cook according to package directions until al dente, usually around 8-10 minutes. Drain and keep warm.
  2. Sauté the Chicken: In a large skillet, heat 2 tablespoons of olive oil over medium heat. Add bite-sized chicken pieces, seasoned with salt, pepper, and dried Italian herbs. Cook for about 5-7 minutes until golden brown and cooked through. Set aside to keep warm.
  3. Sauté the Garlic: In the same skillet, add more olive oil if needed, then toss in minced garlic. Sauté for approximately 1 minute until fragrant, stirring frequently.
  4. Cook the Tomatoes: Add crushed tomatoes to the skillet with sautéed garlic. Stir and reduce heat to low, simmer for about 5 minutes.
  5. Make it Creamy: Stir in the heavy cream to the tomato mixture, increasing heat slightly if needed. Simmer for an additional 2-3 minutes until creamy and blended well.
  6. Combine the Chicken: Return the cooked chicken to the skillet with the creamy sauce. Stir well for about 1 minute.
  7. Toss in the Pasta: Add drained pasta to the skillet, using tongs to toss everything together, ensuring an even coating of sauce.
  8. Add the Cheeses: Sprinkle shredded mozzarella and grated Parmesan over the pasta mixture, stirring until melted and creamy.
  9. Garnish and Serve: Remove from heat and garnish with fresh basil leaves and red pepper flakes. Serve immediately.

Nutrition

Serving: 1servingCalories: 550kcalCarbohydrates: 45gProtein: 30gFat: 30gSaturated Fat: 15gPolyunsaturated Fat: 2gMonounsaturated Fat: 10gCholesterol: 100mgSodium: 750mgPotassium: 800mgFiber: 3gSugar: 6gVitamin A: 600IUVitamin C: 8mgCalcium: 300mgIron: 2mg

Notes

For the best creamy sauce, avoid boiling after adding heavy cream. Use a large skillet to mix evenly.

Tried this recipe?

Let us know how it was!

Halloween Brownie Pops That Kids Will Adore and Devour

As I was watching my little ones excitedly prepare for Halloween, a brilliant idea struck me—what if we could combine their love for treats with a bit of creative fun? Enter these Halloween Brownie Pops! These delightful and adorable treats are incredibly easy to whip up and are sure to become the star of your festive gatherings. Shaped like whimsical mummies, playful ghosts, and cheerful pumpkins, they offer the perfect sweet indulgence without any frosting fuss. Not only are they a surefire hit with the kids, but they also make for a fun family activity that brings everyone together in the kitchen. Plus, they’re perfect for parties or as a spooky surprise in lunchboxes! Who could resist these charming pops? Come join me as we dive into this treat-making adventure!

Why are Halloween Brownie Pops a Must-Make?

Easy to Create: These Halloween Brownie Pops require minimal effort and skill, making them an approachable treat for bakers of all levels. Kid-Friendly Fun: With their playful designs, they’re not just treats but also a crafting activity for the whole family to enjoy together! Irresistible Flavors: The rich, chocolatey brownie base fused with a sweet candy coating offers a combination that’s hard to resist. Versatile Decorations: Customizable decorations allow you to get creative and transform the pops for various occasions — think festive sprinkles or themed candy toppings! Perfect for Any Gathering: They make striking additions to Halloween parties or school events, guaranteed to impress both kids and adults alike. Let your imagination run wild and celebrate the spooky season with these delightful treats!

Halloween Brownie Pops Ingredients

For the Brownie Base
Fudge Brownie Mix – This provides the essential base for your pops. Feel free to swap with a homemade brownie recipe if you’re feeling adventurous!
Melted Butter – Adds richness and moisture, elevating flavor. Substituting with oil is fine, but melted butter yields a superior texture.
Eggs – Important for binding the mixture together. You can use an egg substitute for a quick vegan version.
Water – Required as per the box instructions to prepare the brownie mix.

For the Candy Coating
Chocolate Candy Melts – Ideal for coating the brownie pops, giving them a shiny candy shell. You can replace these with chocolate chips mixed with a bit of coconut oil for easier melting.

For Decoration
Edible Decorations – Bring your pop to life with sprinkles, candy eyes, or fun themed decorations. Customize them based on your Halloween themes or personal preferences!

Dive into this creative process and make Halloween Brownie Pops your new favorite treat this spooky season!

Step‑by‑Step Instructions for Halloween Brownie Pops

Step 1: Preparation
Begin by preheating your oven according to the instructions on the brownie mix box. While it heats, spray an 8″x8″ or 9″x13″ baking dish with nonstick spray, or line it with parchment paper for easy removal. Making this simple step sets the stage for your Halloween Brownie Pops to bake perfectly and ensures no sticking!

Step 2: Bake Brownies
Prepare the fudge brownie mix by combining it with the melted butter, eggs, and water as directed on the box. Pour the mixture into your prepared baking dish and bake for 2-3 minutes less than the recommended time. Once baked, allow the brownies to cool in the pan for about 1 hour, ensuring they are set and ready for shaping.

Step 3: Mash Brownies
After the brownies are completely cooled, trim the edges (if desired) to create a neat shape. Use a spatula to scoop out the brownie center into a large mixing bowl. Mash the brownie firmly until it becomes soft and scoopable, creating the perfect base for your delightful Halloween Brownie Pops.

Step 4: Form Shapes
Using a small cookie scoop, form the brownie mixture into balls about 1 inch in diameter. For the mummies and ghosts, pinch the top slightly to create distinct shapes, and for the pumpkins, roll the balls fully to achieve a round form. These playful shapes are what will make your Halloween Brownie Pops so much fun!

Step 5: Chill
Place the formed brownie balls onto a baking sheet lined with parchment paper and freeze them for about 15 minutes. This chilling step firms up the pops, making them easier to work with during coating and decoration, ensuring your Halloween Brownie Pops maintain their shape.

Step 6: Melt Candy Coating
While the brownie pops chill, prepare the candy coating. In a microwave-safe bowl, melt the chocolate candy melts in 30-second increments, stirring in between until the mixture is smooth and melted. A perfectly melted coating is essential for a shiny finish on your Halloween Brownie Pops.

Step 7: Insert Sticks
Once your chocolate is smooth, dip the tip of each lollipop stick into the melted chocolate, then gently insert half of the stick into the center of each brownie ball. Allow them to sit for a few minutes until the chocolate sets slightly, securing the sticks in place for your pops.

Step 8: Dip in Chocolate
Next, carefully dip each brownie pop into the melted chocolate, ensuring they are fully coated. Allow any excess coating to drip off before moving on to the next step. This creates a luscious chocolate shell that perfectly wraps around your Halloween Brownie Pops, enhancing the flavor.

Step 9: Decorate
Before the chocolate coating completely sets, add your edible decorations! Use candy eyes, sprinkles, or any fun themed toppings to bring your Halloween Brownie Pops to life. Let the pops sit until the coating hardens, creating an adorable and festive treat that’s ready for any spooky celebration.

Step 10: Firming Up
If your brownie pops feel too soft to dip during coating or decoration, return them to the freezer for an additional 10-15 minutes. This ensures they stay firm and maintain their cute shapes, resulting in delightful Halloween Brownie Pops that will impress friends and family alike.

What to Serve with Halloween Brownie Pops

As the spooky season approaches, imagine delightful treats that not only satisfy your sweet tooth but also elevate your festive gatherings.

  • Crispy Apple Slices: Fresh and crunchy, these slices provide a refreshing contrast to the rich sweetness of the brownie pops. Perfect for balancing flavors at a Halloween party!

  • Pumpkin Spice Hot Chocolate: Cozy up with this warm drink that’s infused with the flavors of fall. Its creamy sweetness pairs wonderfully with the fudgy brownie texture.

  • Spooky Cheese Platter: A selection of cheeses, crackers, and themed fruits adds savory elements to the table. The contrast of flavors makes for an exciting treat spread.

  • Ghostly Vanilla Cupcakes: Light, fluffy cupcakes with ghostly meringue tops make for a fun and sweet pairing. Kids go wild for the combination of flavors and textures!

  • Ghoulish Green Smoothies: Blend spinach with banana and coconut milk for a nutritious drink that’s festively green. It’s a great way to hide some veggies with a sweet Halloween twist!

  • Candy Corn Trail Mix: Combining candy corn, nuts, and dried fruit adds playfulness and crunch. This mix complements the brownie pops while adding a festive touch to your spread.

  • Chilled Apple Cider: Serve this classic fall drink chilled alongside your treats. It offers a refreshing sip that balances the sweetness of the brownie pops.

  • Chocolate Dipped Pretzels: Crispy and salty, these pretzels drizzled with chocolate provide a delightful crunch. They’re a fun snack to enjoy in between brownie pops!

  • Caramel-Apple Dip: Creamy caramel brings a luscious element to crunchy apple slices. It’s a delicious treat that echoes the fall festivities and pairs nicely with sweeter desserts.

Make Ahead Options

These Halloween Brownie Pops are perfect for busy home cooks looking to save time while delivering delightful treats! You can prepare the brownie base up to 24 hours in advance; simply bake the brownies, allow them to cool, then cover tightly and refrigerate. The formed brownie balls can also be made up to 3 days ahead. Once shaped, place them on a baking sheet and freeze until firm before transferring to an airtight container. When you’re ready to serve, simply dip them in melted chocolate and add decorations, guaranteeing fresh and adorable pops that are just as delicious as if made that day! This prep-ahead method takes the stress out of last-minute party preparations, leaving you free to enjoy the festivities!

Storage Tips for Halloween Brownie Pops

Room Temperature: Store your Halloween Brownie Pops in an airtight container at room temperature for up to 5 days to maintain their freshness and flavor.

Fridge: If you prefer them chilled, you can refrigerate the pops for up to a week. Just ensure they’re well-covered to prevent drying out.

Freezer: For longer storage, freeze the Halloween Brownie Pops in a single layer on a baking sheet until solid, then transfer to an airtight container. They can be kept in the freezer for up to 3 months.

Reheating: Enjoy the frozen pops directly from the freezer or allow them to thaw in the fridge for a few hours before serving.

Expert Tips for Halloween Brownie Pops

  • Melted Butter Magic: Using melted butter instead of oil enhances flavor and texture, making your Halloween Brownie Pops irresistibly rich.

  • Chill Before Dipping: Always chill your brownie balls for at least 15 minutes before dipping. This helps them hold their shape and makes coating easier.

  • Smooth Coating: Adding a teaspoon of coconut oil to chocolate chips ensures a smoother melt and prevents clumping, which is perfect for those beautifully coated pops.

  • Decoration Fun: Get creative with decorations! Aim for colorful sprinkles or themed candy eyes that not only enhance the visual appeal but also make the Halloween Brownie Pops more exciting.

  • Storing Leftovers: Keep any leftover pops in an airtight container at room temperature. They’ll stay delicious for up to 5 days, perfect for enjoying a spooky treat beyond Halloween!

Halloween Brownie Pops Variations & Substitutions

Feel free to bring your own twist to these delightful treats with these fun variations and swaps that will make your Halloween Brownie Pops even more enjoyable!

  • Gluten-Free: Use a gluten-free brownie mix to cater to those with dietary restrictions, ensuring everyone can join in the fun!
  • Dairy-Free: Swap the butter for vegan butter or any plant-based oil to create a delicious dairy-free treat that still packs a flavor punch.
  • Nutty Surprise: Add chopped nuts, like walnuts or pecans, to the brownie mixture for an added crunch that complements the fudgy texture perfectly.
  • Colorful Coating: Experiment with candy melts in vibrant colors, like orange or green, to give your Halloween Brownie Pops a festive flair that can match any spooky theme.
  • Spooky Sprinkles: Use Halloween-themed sprinkles or edible glitter for an extra touch of whimsy. They add both visual appeal and a playful pop of texture!
  • Decadent Drizzle: For an extra sweet twist, drizzle some caramel or white chocolate on top after dipping in chocolate, creating a beautiful design that’s equally delicious.
  • Flavor Infusion: Add a teaspoon of peppermint extract or orange zest to the brownie mix for a refreshing twist that will elevate the classic chocolate flavor.
  • Themed Toppers: Instead of candy eyes, consider using mini marshmallows or pumpkin-shaped candies for creating unique designs that stir the imagination!

Let your creativity shine and enjoy making these delightful Halloween Brownie Pops even more unique with these variations! You might even find inspiration for a new favorite treat. If you’re looking to add more fun spins to your Halloween treats, check out my fun Halloween dessert ideas or explore other kid-friendly recipes that will make your celebrations sweeter!

Halloween Brownie Pops Recipe FAQs

What type of brownie mix is best for Halloween Brownie Pops?
Using a fudge brownie mix works perfectly as it provides a rich flavor and moist texture. If you’re feeling adventurous, feel free to use a homemade brownie recipe for a personal touch!

How long can I store Halloween Brownie Pops?
You can store your Halloween Brownie Pops in an airtight container at room temperature for up to 5 days. If you want them to last longer, refrigerate them for up to a week, or freeze them for up to 3 months.

Can I freeze my Halloween Brownie Pops?
Absolutely! To freeze, first place the pops in a single layer on a baking sheet until they are solid. Then, transfer them to an airtight container, where they can stay fresh for up to 3 months. Thaw them in the fridge before serving for the best texture.

My brownie pops are too soft to dip. What should I do?
Very common! If your brownie pops feel too soft when it’s time to dip, just pop them back into the freezer for an additional 10-15 minutes. This chilling step helps them firm up, making dipping easy and ensuring they maintain their shape.

Are there any dietary considerations for Halloween Brownie Pops?
If you’re making these for kids or guests with dietary restrictions, you can use an egg substitute to create a vegan version. Additionally, be cautious with any decorations or coatings that may contain allergens, such as nuts or gluten, and select suitable alternatives when decorating.

How can I customize decorations for Halloween Brownie Pops?
The decorating options are limitless! Get creative by using different colored candy melts or sprinkles, and add themed decorations like edible glitter or mini candy corn. Tailor your designs based on the occasion—for example, festive flowers for springtime or spooky monsters for Halloween!

Halloween Brownie Pops

Halloween Brownie Pops That Kids Will Adore and Devour

These Halloween Brownie Pops are delightful, easy to make, and fun for kids, combining irresistible flavors with creative designs that make for a perfect festive treat.
Prep Time 30 minutes
Cook Time 30 minutes
Chilling Time 15 minutes
Total Time 1 hour 15 minutes
Servings: 12 pops
Course: Dessert
Cuisine: American
Calories: 150

Ingredients
  

For the Brownie Base
  • 1 box Fudge Brownie Mix Feel free to swap with a homemade brownie recipe if you’re feeling adventurous!
  • 1/2 cup Melted Butter Substituting with oil is fine, but melted butter yields a superior texture.
  • 2 large Eggs You can use an egg substitute for a quick vegan version.
  • 1/4 cup Water Required as per the box instructions to prepare the brownie mix.
For the Candy Coating
  • 1 cup Chocolate Candy Melts You can replace these with chocolate chips mixed with a bit of coconut oil for easier melting.
For Decoration
  • 1 cup Edible Decorations Customize them based on your Halloween themes or personal preferences!

Equipment

  • Oven
  • Mixing Bowl
  • baking dish
  • Parchment Paper
  • spatula
  • Cookie Scoop
  • Microwave
  • Baking Sheet

Method
 

Preparation and Baking
  1. Preheat your oven according to the instructions on the brownie mix box and prepare the baking dish.
  2. Prepare the fudge brownie mix by combining it with the melted butter, eggs, and water as directed. Bake for 2-3 minutes less than the recommended time and cool for 1 hour.
Shaping and Chilling
  1. Trim the brownies as desired and mash the brownie firmly in a bowl until soft.
  2. Form the brownie mixture into balls and pinch the tops slightly for mummies and ghosts, rolling fully for pumpkins.
  3. Freeze brownie balls for about 15 minutes to firm them up.
Coating and Decorating
  1. Melt the chocolate candy melts in 30-second increments in a microwave-safe bowl.
  2. Dip the tip of each lollipop stick into the melted chocolate, then insert into each brownie ball.
  3. Carefully dip each brownie pop into the melted chocolate until fully coated.
  4. Before the chocolate sets, add your edible decorations and let them sit until hardened.
  5. If pops feel too soft, return to the freezer for an additional 10-15 minutes.

Nutrition

Serving: 1popCalories: 150kcalCarbohydrates: 20gProtein: 2gFat: 7gSaturated Fat: 4gPolyunsaturated Fat: 0.5gMonounsaturated Fat: 1.5gCholesterol: 30mgSodium: 90mgPotassium: 100mgFiber: 1gSugar: 10gCalcium: 2mgIron: 4mg

Notes

Store any leftover pops in an airtight container at room temperature for up to 5 days or in the fridge for up to a week.

Tried this recipe?

Let us know how it was!

Hogwarts Houses Butterbeer Swirl Cheesecake: Magic in Every Bite

As I swirled vibrant colors into the creamy batter, I could almost hear the joyous cheers from the Great Hall at Hogwarts. The Hogwarts Houses Butterbeer Swirl Cheesecake captures the magic and whimsy of the beloved wizarding world, blending the rich, buttery flavors reminiscent of a warm butterbeer with the enchanting charm of cozy gatherings. This delightful dessert is not only a showstopper for themed parties but also an easy crowd-pleaser that will impress your friends and family. With its vegetarian-friendly ingredients and a delightful presentation, it’s the perfect way to bring a touch of magic to your kitchen. Are you ready to dive into a slice of this whimsical cheesecake adventure?

Why is this cheesecake a must-try?

Whimsical Delights: This enchanting dessert combines the beloved flavors of butterbeer with a creamy cheesecake that captures the essence of Hogwarts.
Eye-Catching Swirls: The colorful house-themed designs make it not just a treat but a captivating centerpiece for any gathering.
Easy to Make: With simple ingredients and straightforward steps, even novice bakers can create this magical masterpiece.
Versatile Options: Feel free to adapt with alternatives—vegan, gluten-free, or different crusts—making it suitable for guests with dietary preferences.
Perfect for Sharing: Whether it’s a birthday, holiday, or cozy night, this cheesecake is sure to bring smiles to everyone at the table.
Don’t forget to check out other fabulous options like my Carrot Cake Cheesecake for more delicious inspiration!

Hogwarts Houses Butterbeer Swirl Cheesecake Ingredients

For the Crust
Graham Cracker Crumbs – Provides a buttery base; can substitute with gluten-free crumbs for a gluten-free version.
Granulated Sugar – Adds sweetness to the crust; feel free to swap with coconut sugar for a healthier alternative.
Unsalted Butter – Binds the crust and adds richness; use vegan butter for a dairy-free option.

For the Cheesecake Filling
Cream Cheese – Forms the creamy filling; substitute with vegan cream cheese for a dairy-free variant.
Sour Cream – Contributes creaminess and tang; Greek yogurt can work as a substitute.
Vanilla Extract – Adds depth of flavor; no substitute is necessary.
Large Eggs – Provides structure to the cheesecake; use flax eggs for a vegan option.
Cream Soda – Enhances that unique butterbeer flavor; regular soda can be used if needed.

For the Butterscotch Swirls
Heavy Cream – Creates the lush butterscotch mixture for swirls; milk or half-and-half can be lighter alternatives.
Brown Sugar – Provides deeper sweetness and rich flavor; maple syrup makes for a delightful substitute.
Gel Food Coloring (Red, Yellow, Blue, Green) – For vibrant house-themed swirls; consider natural food dyes based on preference.

Each ingredient plays a vital role in making your Hogwarts Houses Butterbeer Swirl Cheesecake a magical experience that your friends and family won’t soon forget!

Step‑by‑Step Instructions for Hogwarts Houses Butterbeer Swirl Cheesecake

Step 1: Prepare the Crust
Preheat your oven to 325°F (160°C). In a mixing bowl, combine graham cracker crumbs, ½ cup of granulated sugar, and ½ cup of melted unsalted butter until well combined. Press this mixture firmly into the bottom of a 9-inch springform pan. Bake for 8-10 minutes until lightly golden, then remove from the oven and let it cool completely while you prepare the cheesecake filling.

Step 2: Make the Cheesecake Filling
In a large mixing bowl, beat together four packages of cream cheese and 1 cup of granulated sugar on medium speed until creamy and smooth. Add in 1 cup of sour cream, 1 teaspoon of vanilla extract, and three large eggs, mixing in one egg at a time. Finally, pour in ¾ cup of cream soda, and blend everything together until just combined and smooth, being careful not to overmix.

Step 3: Create the Butterbeer Swirls
In a small saucepan over medium heat, combine ½ cup of heavy cream, ½ cup of brown sugar, and ¼ cup of unsalted butter. Stir the mixture until completely melted and combined, then remove from heat and add 1 teaspoon of vanilla extract. Divide this butterscotch mixture into four separate bowls, and use gel food coloring to achieve vibrant red, yellow, blue, and green colors, carefully mixing each until the dye is fully incorporated.

Step 4: Assemble & Bake
Pour the smooth cheesecake filling over the cooled crust, using a spatula to evenly spread it. Drizzle the colored butterscotch mixture in a swirl pattern across the cheesecake. Using a skewer or knife, gently swirl the colors into the filling to create a marbled effect. Bake the Hogwarts Houses Butterbeer Swirl Cheesecake for 50-60 minutes, or until the edges are set but the center still jiggles slightly when you gently shake the pan.

Step 5: Chill & Serve
Once baked, turn off the oven and leave the cheesecake inside with the door slightly ajar for about one hour to cool gradually. After this, refrigerate the cheesecake for at least 4 hours or overnight to achieve the best texture. Before serving, garnish as desired and slice, using a warm knife for clean cuts. Now, you’re ready to share this magical dessert with friends and family!

Hogwarts Houses Butterbeer Swirl Cheesecake Variations

Customize your cheesecake adventure with delightful twists and swaps to suit your taste buds and dietary needs!

  • Gluten-Free Crust: Use gluten-free graham cracker crumbs for a buttery alternative that everyone can enjoy.
  • Dairy-Free Delight: Swap cream cheese and sour cream for vegan alternatives to maintain the creamy texture without dairy.
  • Flavor Infusion: Add crushed toffee bits for an extra layer of crunch and caramel flavor that amplifies the butterbeer essence.
  • Sweet Spice: Incorporate warm spices like cinnamon or nutmeg into the filling for a cozy twist reminiscent of fall evenings.
  • Oreo Crust Twist: For a chocolatey variation, use crushed Oreo cookies instead of graham cracker crumbs for the crust.
  • Fruitful Surprise: Swirl in pureed berries like raspberries or strawberries for a fruity contrast to the rich cheesecake.
  • Nutty Crunch: Top with chopped nuts, such as pecans or walnuts, for an exciting texture boost that pairs beautifully with the cheesecake.
  • Heat Kick: Add a pinch of cayenne or chili powder to the butterscotch swirls for a surprising hint of spice that enhances the butterbeer flavor.

Each variation opens up new possibilities for your Hogwarts Houses Butterbeer Swirl Cheesecake! And if you’re looking for more whimsical desserts, don’t miss my delightful Strawberry Cheesecake Dump or the luscious Strawberry Cheesecake recipes!

What to Serve with Hogwarts Houses Butterbeer Swirl Cheesecake

Pair your magical cheesecake with these delightful companions that enhance both flavor and presentation, creating an unforgettable feast.

  • Creamy Vanilla Ice Cream: This classic pairing adds a cool, velvety texture that balances the richness of the cheesecake beautifully.

  • Pumpkin Juice: A whimsical Harry Potter-themed drink that brings warmth and spice, perfectly complementing the buttery flavors of the cheesecake.

  • Butterbeer Cupcakes: Channel the same delicious buttery notes in these fluffy treats for a dreamy dessert spread that celebrates the wizarding world.

  • Chocolate-Dipped Pretzels: The salty crunch of these pretzels provides a fun textural contrast to the smooth, creamy cheesecake, making every bite exciting.

  • Spiced Apple Cider: Warm and inviting, this drink offers autumnal spices that enhance the flavors of the cheesecake, capturing a magical feeling.

  • Caramel Sauce Drizzle: A rich swirl of caramel sauce on top creates an alluring look, bringing a touch of sweetness that pairs perfectly.

  • Fresh Berries: Light, juicy berries like raspberries or strawberries brighten the plate, offering a refreshing contrast to the cheesecake’s decadence.

  • Honeyed Pecan Pie: The nutty, sweet flavors echo the cozy elements in the cheesecake while adding richness to your dessert table.

  • Warm Vanilla Chai: Indulge in a soothing beverage that adds spiced warmth alongside your cheesecake for an experience that pleases the senses.

  • Mint Chocolate Chip Cookies: For a playful touch, these cookies introduce a refreshing minty bite that contrasts beautifully with the buttery cheesecake.

Storage Tips for Hogwarts Houses Butterbeer Swirl Cheesecake

Refrigerator: Keep your cheesecake in an airtight container for up to 5 days to maintain its creamy texture and flavor.

Freezer: For longer storage, freeze the uncut cheesecake in a freezer-safe container for up to 2 months; ensure it’s tightly wrapped to prevent freezer burn.

Thawing: When ready to enjoy, thaw the Hogwarts Houses Butterbeer Swirl Cheesecake in the refrigerator overnight to preserve its creaminess before serving.

Serving Freshness: For the best experience, serve the cheesecake cold, but allow it to sit at room temperature for about 15 minutes before slicing to enhance flavors.

Make Ahead Options

These delightful Hogwarts Houses Butterbeer Swirl Cheesecake are perfect for busy meal prep enthusiasts! You can prepare the crust up to 24 hours in advance—just refrigerate it wrapped tightly in plastic wrap to maintain its freshness. Additionally, the cheesecake filling can be made the day before you plan to bake, allowing the flavors to meld beautifully overnight. When you’re ready to bake, pour the filling over the chilled crust, create your magical butterscotch swirls, and bake according to the recipe instructions. This method ensures that your cheesecake remains just as delicious and visually appealing while significantly lightening your workload on the day of serving.

Expert Tips for Hogwarts Houses Butterbeer Swirl Cheesecake

  • Gentle Mixing: Avoid overmixing the filling to prevent cracks; mix just until combined for a smooth texture in your cheesecake.

  • Cool Gradually: Once baked, let your cheesecake cool in the oven to prevent temperature shock, which can lead to cracks on the surface.

  • Warm Knife Trick: For clean slices, dip the knife in hot water and wipe it between each cut; this keeps the presentation pretty for your Hogwarts Houses Butterbeer Swirl Cheesecake.

  • Swirl Techniques: Don’t overdo the swirling; too much mixing will blend the colors. Just a few gentle swirls can create beautiful designs.

  • Ingredient Substitutions: Feel free to experiment with vegan options—like vegan cream cheese and butter—to suit dietary needs without sacrificing flavor.

Hogwarts Houses Butterbeer Swirl Cheesecake Recipe FAQs

What should I look for when selecting graham cracker crumbs?
Absolutely! When selecting graham cracker crumbs, look for those that are finely crushed without large chunks. Check the packaging for freshness; if they smell stale or the texture is dry, opt for a fresh box. If you’re gluten-free, make sure to choose certified gluten-free graham cracker crumbs to enjoy this magical cheesecake without concerns!

How do I properly store the cheesecake to maintain its freshness?
Very good question! Store your Hogwarts Houses Butterbeer Swirl Cheesecake in an airtight container in the refrigerator for up to 5 days. This keeps it fresh and delicious, preserving that creamy texture. If you need longer storage, you can freeze the uncut cheesecake in a freezer-safe container for up to 2 months. Just be sure to wrap it tightly to prevent freezer burn.

Can I freeze the cheesecake, and if so, how?
Absolutely! To freeze your cheesecake, first, allow it to cool completely after baking. Then, wrap it tightly in plastic wrap and aluminum foil to prevent air from entering. Place it in a labeled freezer-safe container, and it can stay good for up to 2 months. When you’re ready to enjoy it, thaw it in the refrigerator overnight for the best results.

What if the cheesecake cracks while baking?
Oh no, it happens! To avoid cracks, ensure you mix the cheesecake filling gently, and avoid overmixing, which can incorporate too much air. If it does crack, don’t worry! You can cover the crack with whipped cream or a drizzle of butterscotch sauce to keep it looking beautiful. Remember, the taste is what matters most!

Are there any dietary considerations I should be aware of?
Yes, I recommend being mindful of allergies and dietary restrictions. This cheesecake can be made vegetarian, and by substituting with vegan cream cheese and butter, it can be made suitable for dairy-free diets. Additionally, ensure that none of your ingredients contain nuts if you’re serving guests with nut allergies.

Hogwarts Houses Butterbeer Swirl Cheesecake

Hogwarts Houses Butterbeer Swirl Cheesecake: Magic in Every Bite

Hogwarts Houses Butterbeer Swirl Cheesecake brings the magic of the wizarding world with its rich, buttery flavors and delightful presentation.
Prep Time 30 minutes
Cook Time 1 hour
Chilling Time 4 hours
Total Time 5 hours 30 minutes
Servings: 12 slices
Course: Dessert
Cuisine: American
Calories: 350

Ingredients
  

For the Crust
  • 1 cup Graham Cracker Crumbs Can substitute with gluten-free crumbs.
  • 0.5 cup Granulated Sugar Feel free to swap with coconut sugar for a healthier alternative.
  • 0.5 cup Unsalted Butter Use vegan butter for a dairy-free option.
For the Cheesecake Filling
  • 4 packages Cream Cheese Substitute with vegan cream cheese for a dairy-free variant.
  • 1 cup Sour Cream Greek yogurt can work as a substitute.
  • 1 teaspoon Vanilla Extract
  • 3 large Eggs Use flax eggs for a vegan option.
  • 0.75 cup Cream Soda Regular soda can be used if needed.
For the Butterscotch Swirls
  • 0.5 cup Heavy Cream Milk or half-and-half can be lighter alternatives.
  • 0.5 cup Brown Sugar Maple syrup makes for a delightful substitute.
  • 1 teaspoon Gel Food Coloring (Red, Yellow, Blue, Green) Consider natural food dyes based on preference.

Equipment

  • 9-inch springform pan
  • Mixing Bowl
  • spatula
  • Small saucepan

Method
 

Step‑by‑Step Instructions for Hogwarts Houses Butterbeer Swirl Cheesecake
  1. Preheat your oven to 325°F (160°C). In a mixing bowl, combine graham cracker crumbs, ½ cup of granulated sugar, and ½ cup of melted unsalted butter until well combined. Press this mixture firmly into the bottom of a 9-inch springform pan. Bake for 8-10 minutes until lightly golden, then remove from the oven and let it cool completely while you prepare the cheesecake filling.
  2. In a large mixing bowl, beat together four packages of cream cheese and 1 cup of granulated sugar on medium speed until creamy and smooth. Add in 1 cup of sour cream, 1 teaspoon of vanilla extract, and three large eggs, mixing in one egg at a time. Finally, pour in ¾ cup of cream soda, and blend everything together until just combined and smooth, being careful not to overmix.
  3. In a small saucepan over medium heat, combine ½ cup of heavy cream, ½ cup of brown sugar, and ¼ cup of unsalted butter. Stir the mixture until completely melted and combined, then remove from heat and add 1 teaspoon of vanilla extract. Divide this butterscotch mixture into four separate bowls, and use gel food coloring to achieve vibrant red, yellow, blue, and green colors, carefully mixing each until the dye is fully incorporated.
  4. Pour the smooth cheesecake filling over the cooled crust, using a spatula to evenly spread it. Drizzle the colored butterscotch mixture in a swirl pattern across the cheesecake. Using a skewer or knife, gently swirl the colors into the filling to create a marbled effect. Bake the Hogwarts Houses Butterbeer Swirl Cheesecake for 50-60 minutes, or until the edges are set but the center still jiggles slightly when you gently shake the pan.
  5. Once baked, turn off the oven and leave the cheesecake inside with the door slightly ajar for about one hour to cool gradually. After this, refrigerate the cheesecake for at least 4 hours or overnight to achieve the best texture. Before serving, garnish as desired and slice, using a warm knife for clean cuts.

Nutrition

Serving: 1sliceCalories: 350kcalCarbohydrates: 40gProtein: 5gFat: 20gSaturated Fat: 12gCholesterol: 75mgSodium: 220mgPotassium: 150mgFiber: 1gSugar: 25gVitamin A: 500IUCalcium: 100mgIron: 1mg

Notes

For best results, follow temperature and mixing guidelines to ensure a smooth and crack-free cheesecake.

Tried this recipe?

Let us know how it was!

Stay Connected

Get recipes via email: