Get my cookbooks

Mini Pumpkin Oreo Cheesecakes for Cozy Fall Flavor Bliss

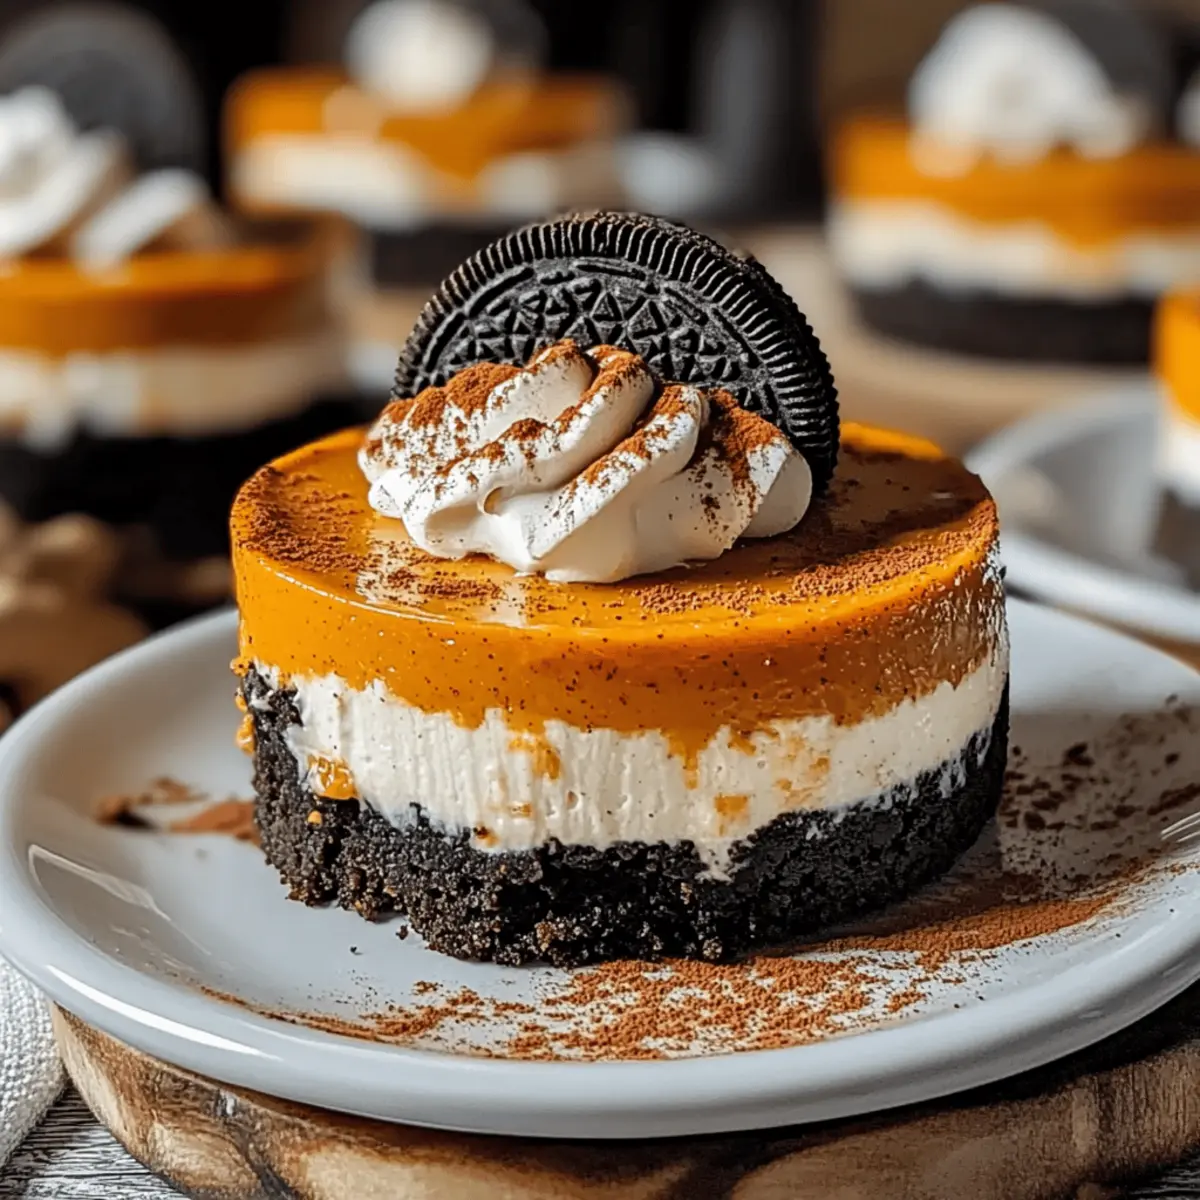
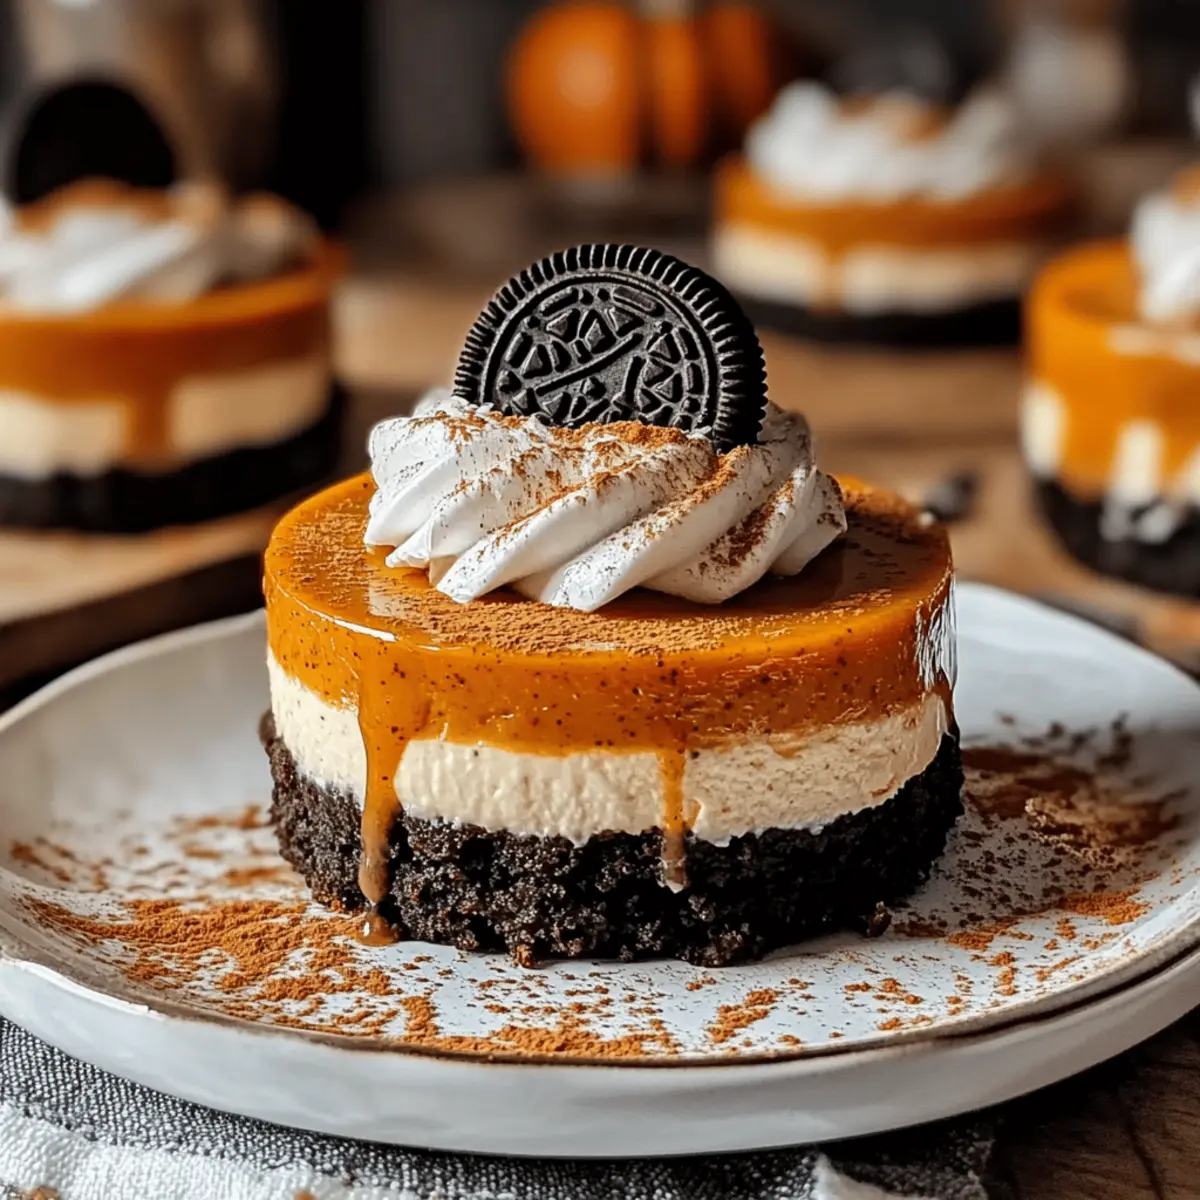
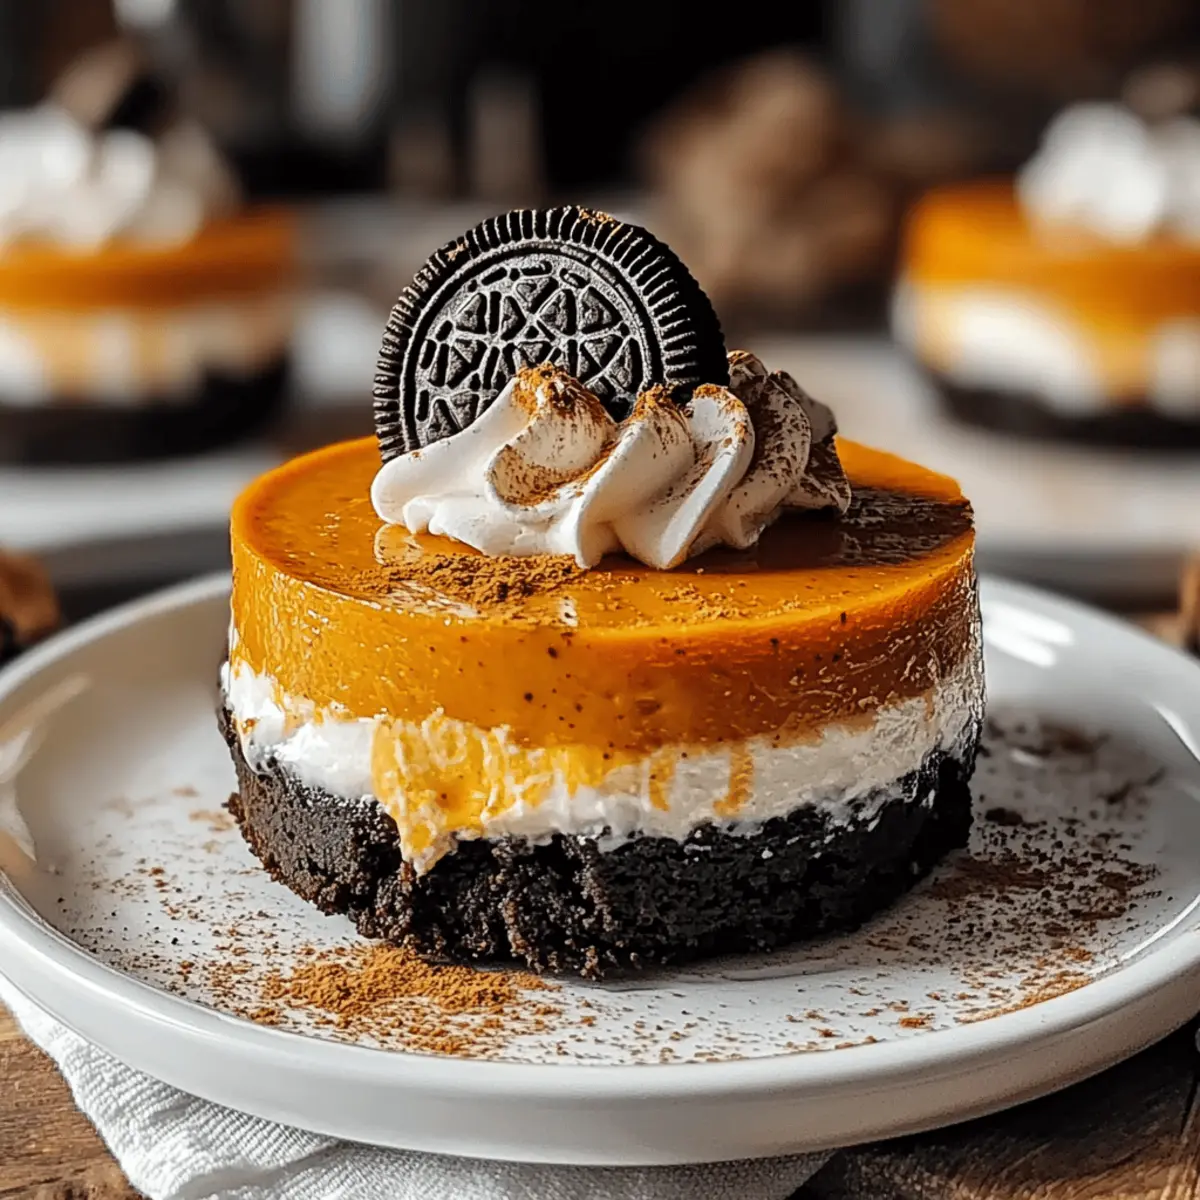
As I stepped into the kitchen, the warm scent of autumn filled the air, instantly whisking me back to cozy family gatherings and festive celebrations. Today, I’m excited to share my recipe for Mini Pumpkin Oreo Cheesecakes, a delightful treat that combines the seasonal flavors of pumpkin with the rich, chocolatey goodness of Oreo crusts. These mini cheesecakes are not only simple to whip up but also customizable—perfect for those moments when you want to impress your guests without spending hours in the kitchen. With the option to make them gluten-free and add a twist of maple syrup or espresso, they’re sure to be a hit at any fall gathering. Curious about how to create these little bites of joy? Let’s dive in!

Why Are Mini Pumpkin Oreo Cheesecakes Irresistible?

Unique Twist: These mini cheesecakes combine flavors that are beloved in the fall season, making them a fantastic treat for any autumn gathering.
Endless Customization: You can easily tweak the recipe to fit your taste preferences by adding spices like nutmeg or even a splash of maple syrup.
Crowd Pleaser: Perfect for sharing, they are sure to impress at parties or family dinners, bringing smiles with every bite.
Quick & Easy: In just a few steps, your kitchen can be filled with the aroma of deliciousness, leaving you with more time to enjoy your guests.
Gluten-Free Option: For those with dietary restrictions, adapting the recipe is a breeze, so everyone can indulge with delight! If you’re looking for more comforting dishes, consider trying out Joumou Haitian Pumpkin for a taste of something special!

Mini Pumpkin Oreo Cheesecake Ingredients

For the Crust

  • Oreo Cookie Crumbs – This serves as the deliciously rich chocolate base; opt for gluten-free Oreos to make a gluten-free version.
  • Unsalted Butter – It binds the crust together perfectly; you can substitute with coconut oil for a dairy-free option.
  • Granulated Sugar – Enhances the sweetness of the crust; this is optional depending on your taste preference.

For the Filling

  • Cream Cheese – Creates the creamy texture that cheesecake is famous for; make sure it’s at room temperature for easy blending.
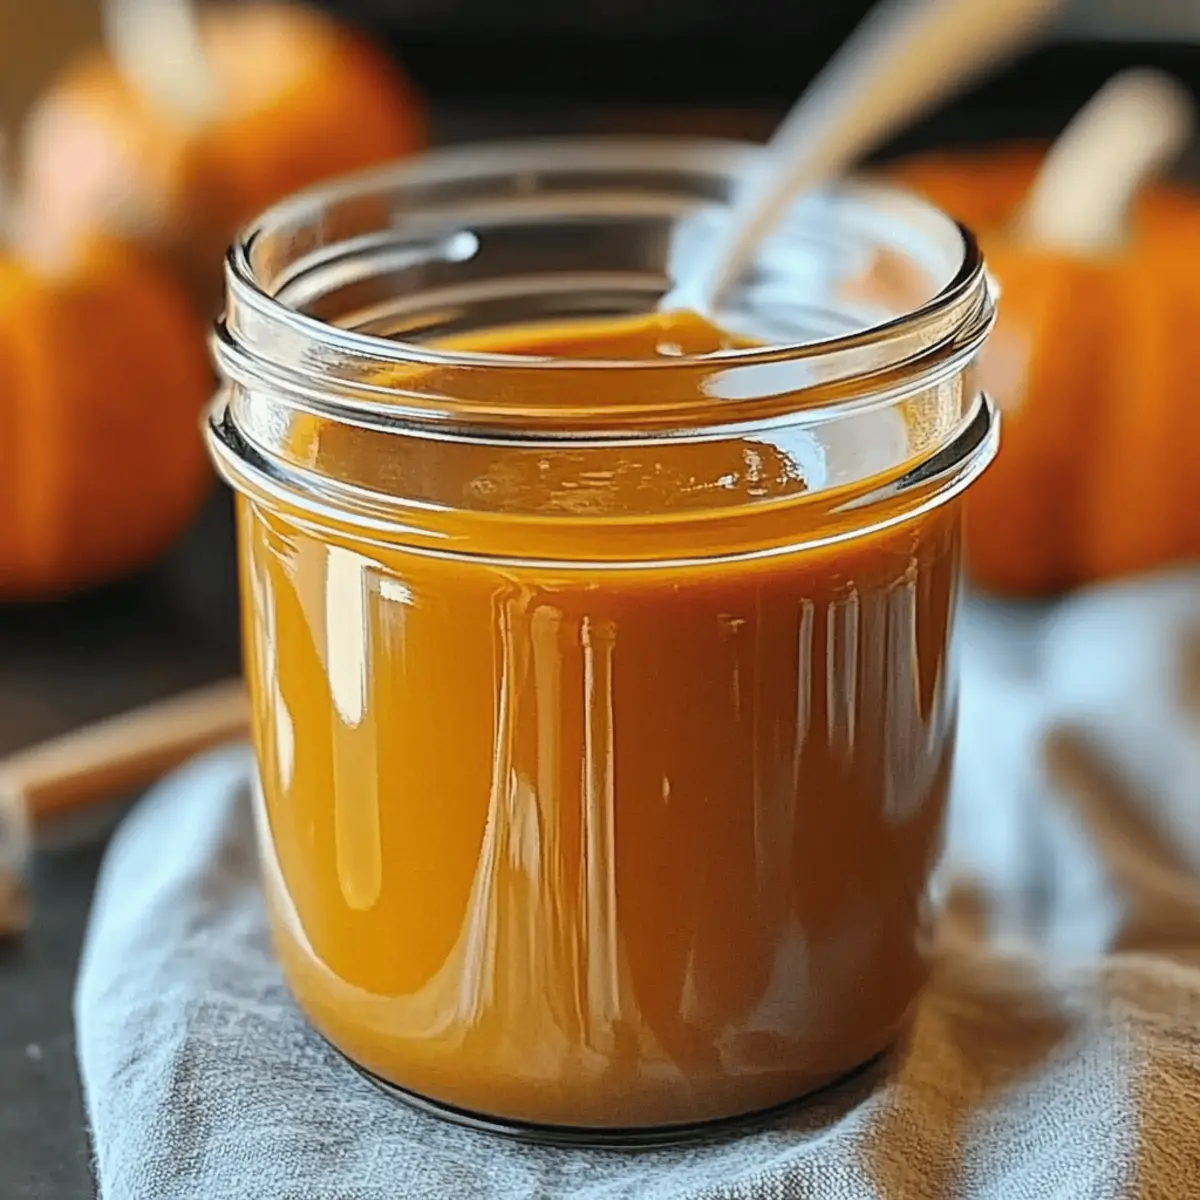
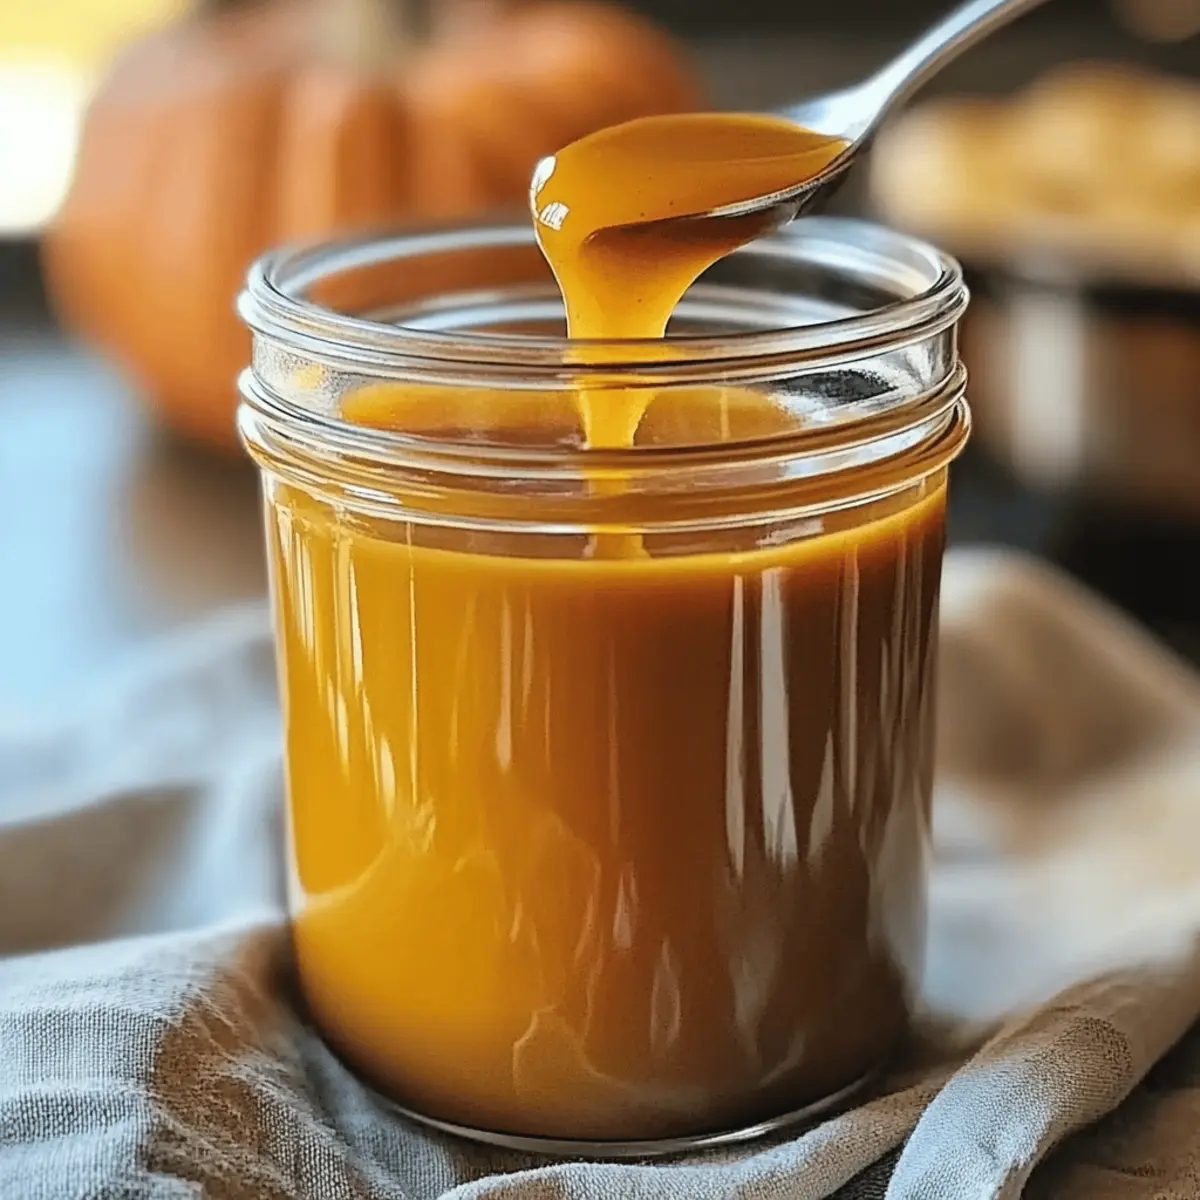
  • Canned Pumpkin Puree – Adds moistness and a deep pumpkin flavor; avoid using pumpkin pie filling to keep it authentic.
  • Granulated Sugar – Sweetens the filling; adjust based on how sweet you like it.
  • Brown Sugar – Offers a rich depth of flavor with a touch of molasses in the mix.
  • Eggs – Essential for setting the cheesecake; room temperature eggs mix in more evenly for a smooth batter.
  • Vanilla Extract – Enhances the overall flavor; using pure vanilla extract is always best.
  • Ground Cinnamon, Nutmeg, Ginger, and Cloves – These spices define fall flavors; feel free to adjust them based on your spice tolerance.

Step‑by‑Step Instructions for Mini Pumpkin Oreo Cheesecakes

Step 1: Prepare the Oreo Crust
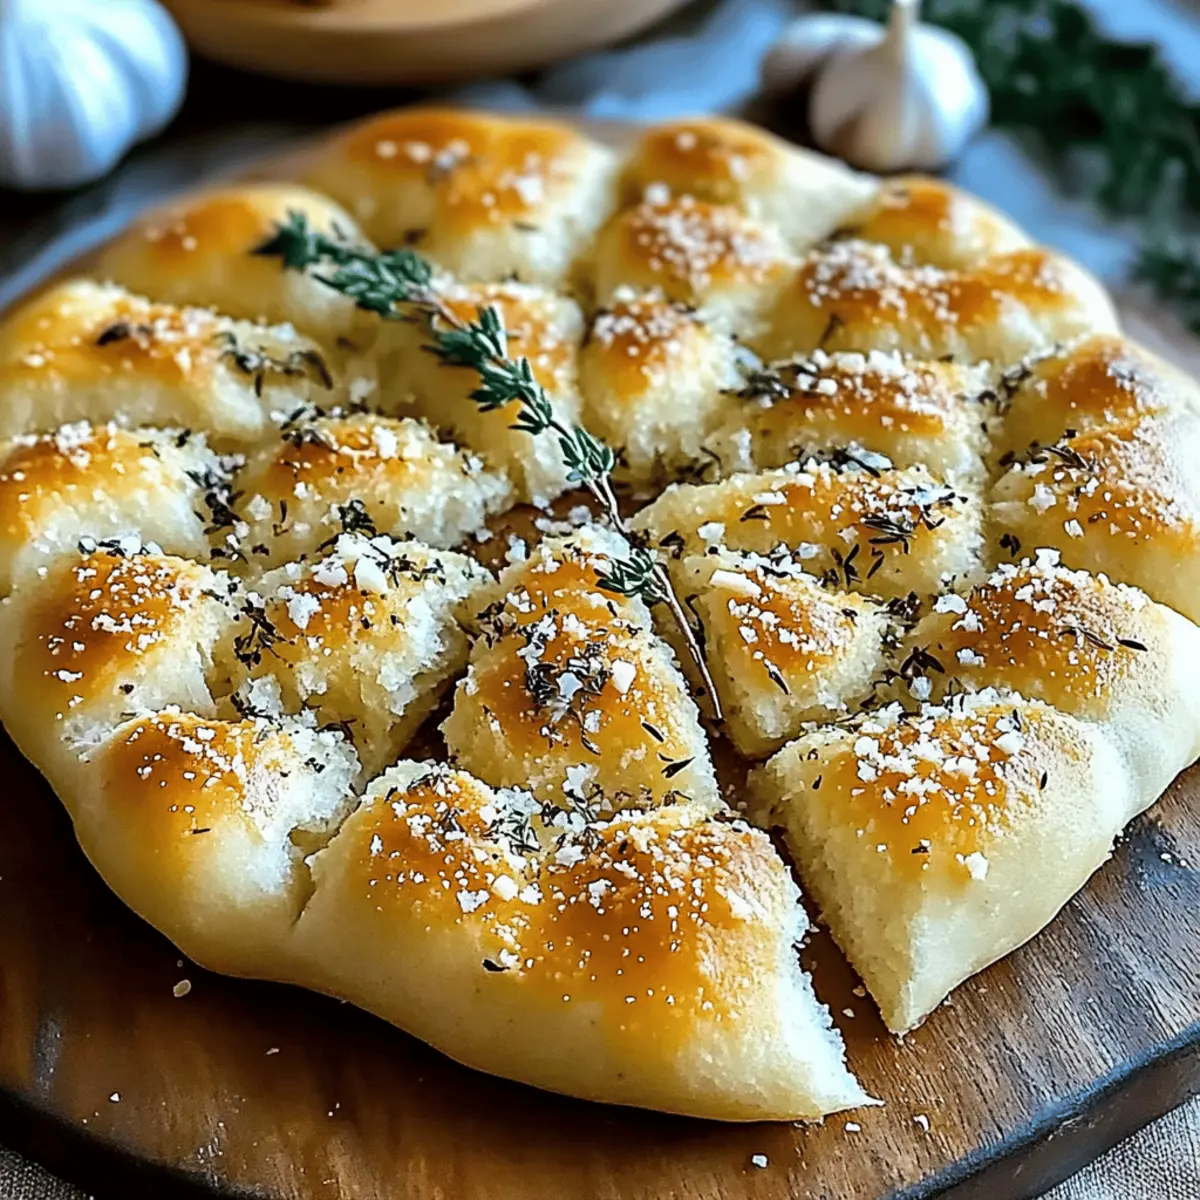
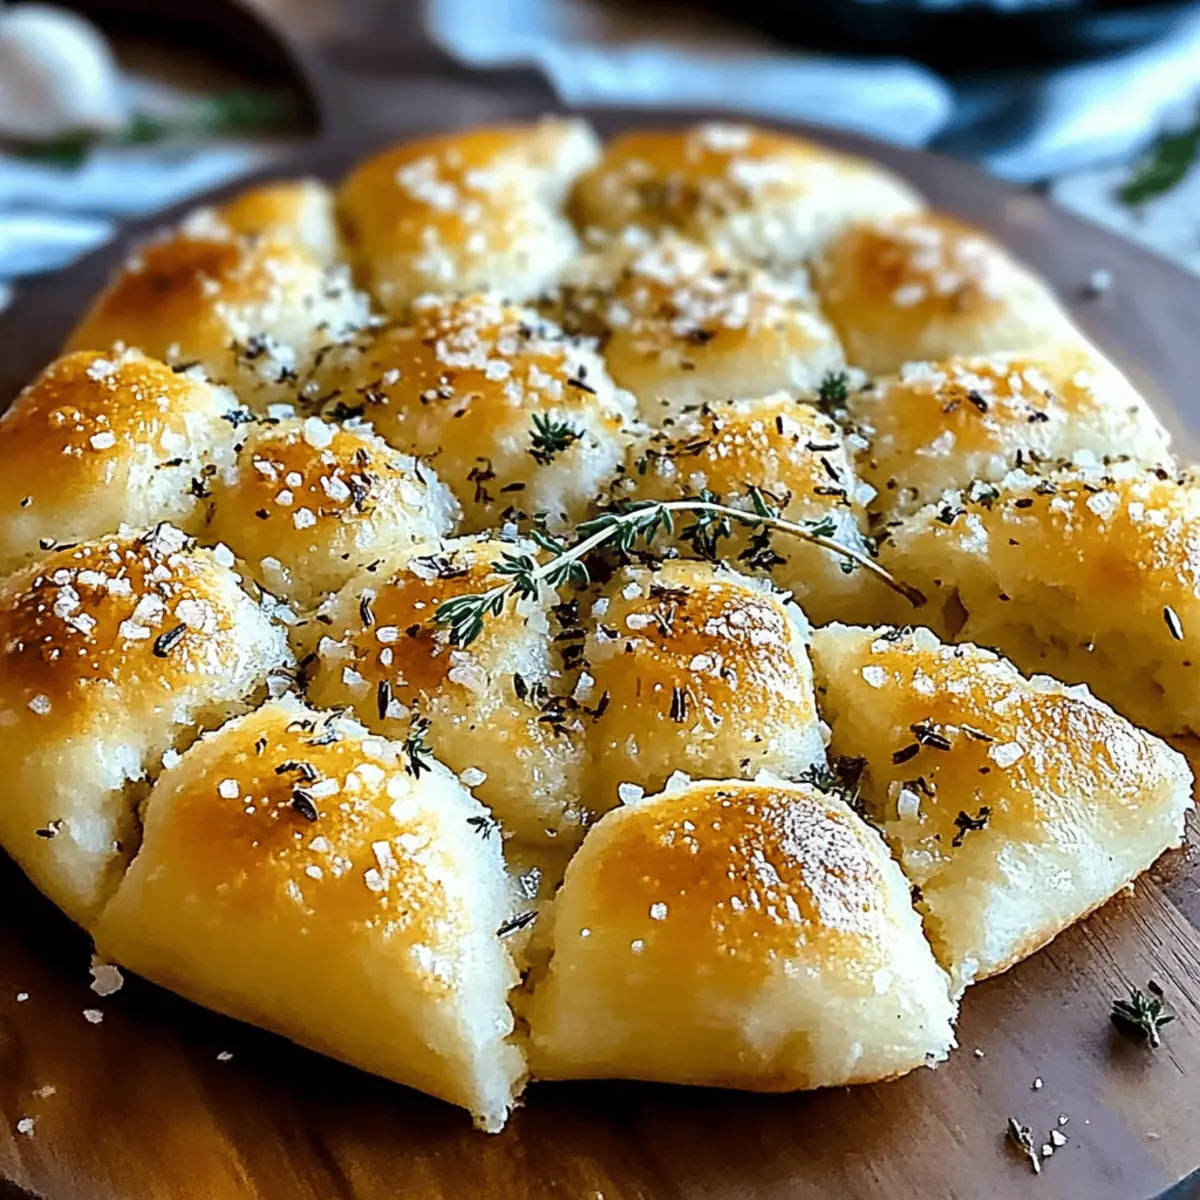
Preheat your oven to 325°F (163°C). In a mixing bowl, crush Oreo cookies into fine crumbs, then mix in melted unsalted butter and optional granulated sugar until well combined. Press this mixture firmly into the bottom of lined muffin tins, creating a nice base for the Mini Pumpkin Oreo Cheesecakes. Chill the crust in the refrigerator while you prepare the filling.

Step 2: Make the Pumpkin Cheesecake Filling
In a large mixing bowl, beat the softened cream cheese with a hand mixer until smooth and creamy. Gradually add in the canned pumpkin puree, granulated sugar, brown sugar, ground spices, and a pinch of salt, mixing until fully incorporated. Next, add the eggs one at a time, blending after each addition, followed by the vanilla extract. This mixture will be the luscious filling for your Mini Pumpkin Oreo Cheesecakes.

Step 3: Fill the Crusts
Remove the chilled muffin tin from the refrigerator and carefully spoon the pumpkin cheesecake filling into each crust, filling them about three-quarters full. Ensure even distribution for consistent baking. The filling should look smooth and slightly glossy. Place the muffin tin in the preheated oven and bake for 18–22 minutes until the edges are set but the centers still have a slight wobble.

Step 4: Cool and Chill
Once baked, take the muffin tin out of the oven and let it cool for 10-15 minutes at room temperature. This helps the Mini Pumpkin Oreo Cheesecakes set without cracking. After cooling slightly, transfer the cheesecakes to the refrigerator and chill for a minimum of 4 hours or overnight, allowing all flavors to meld beautifully and the texture to firm up.

Step 5: Serve and Enjoy
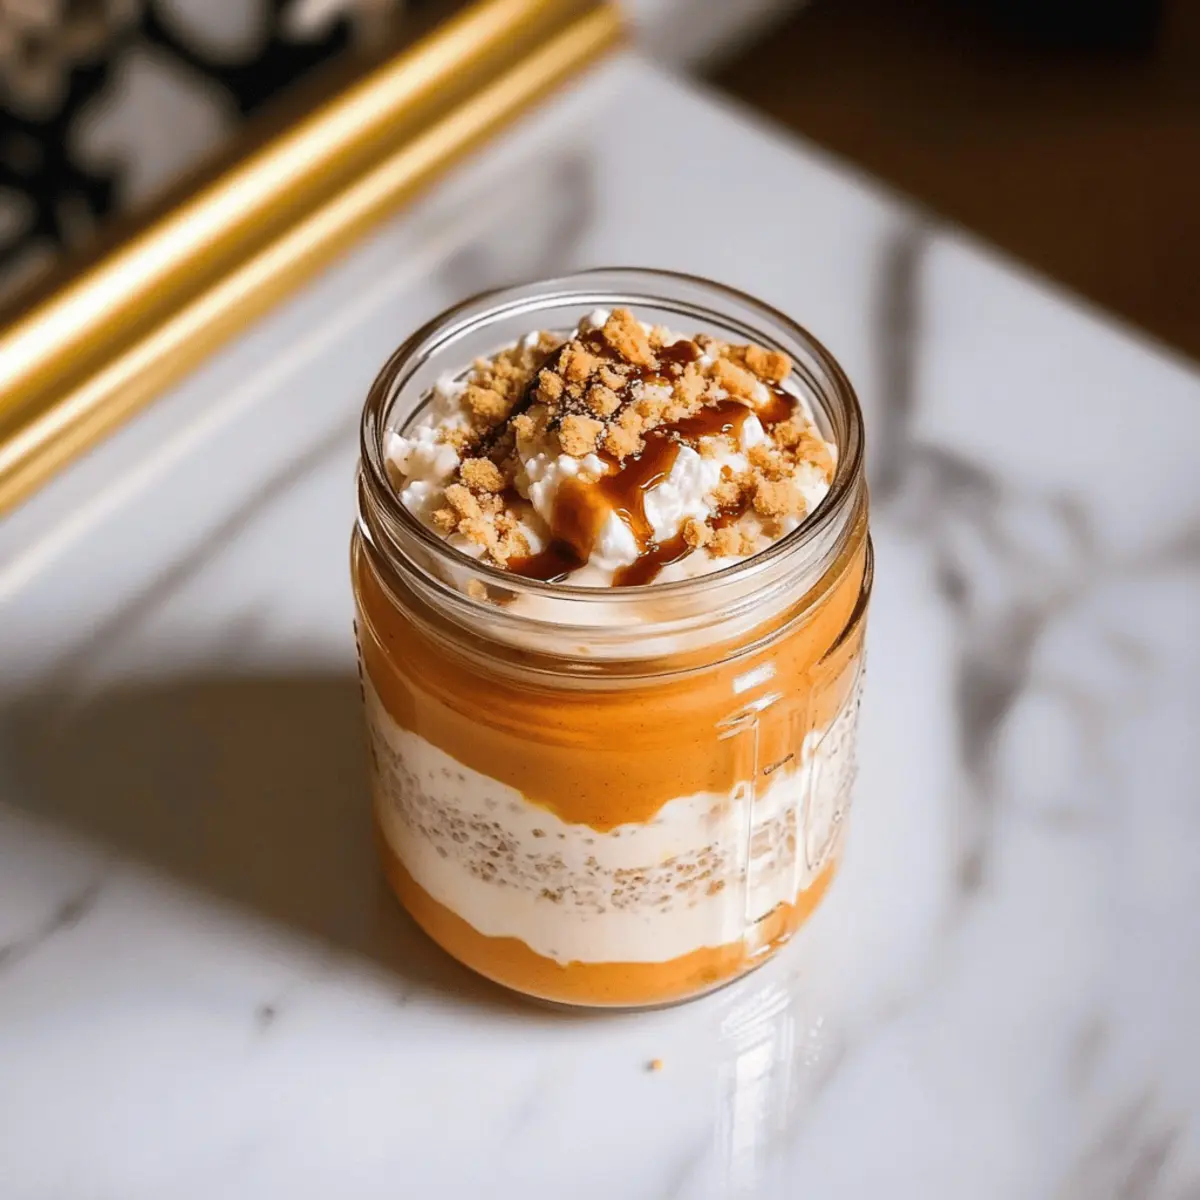
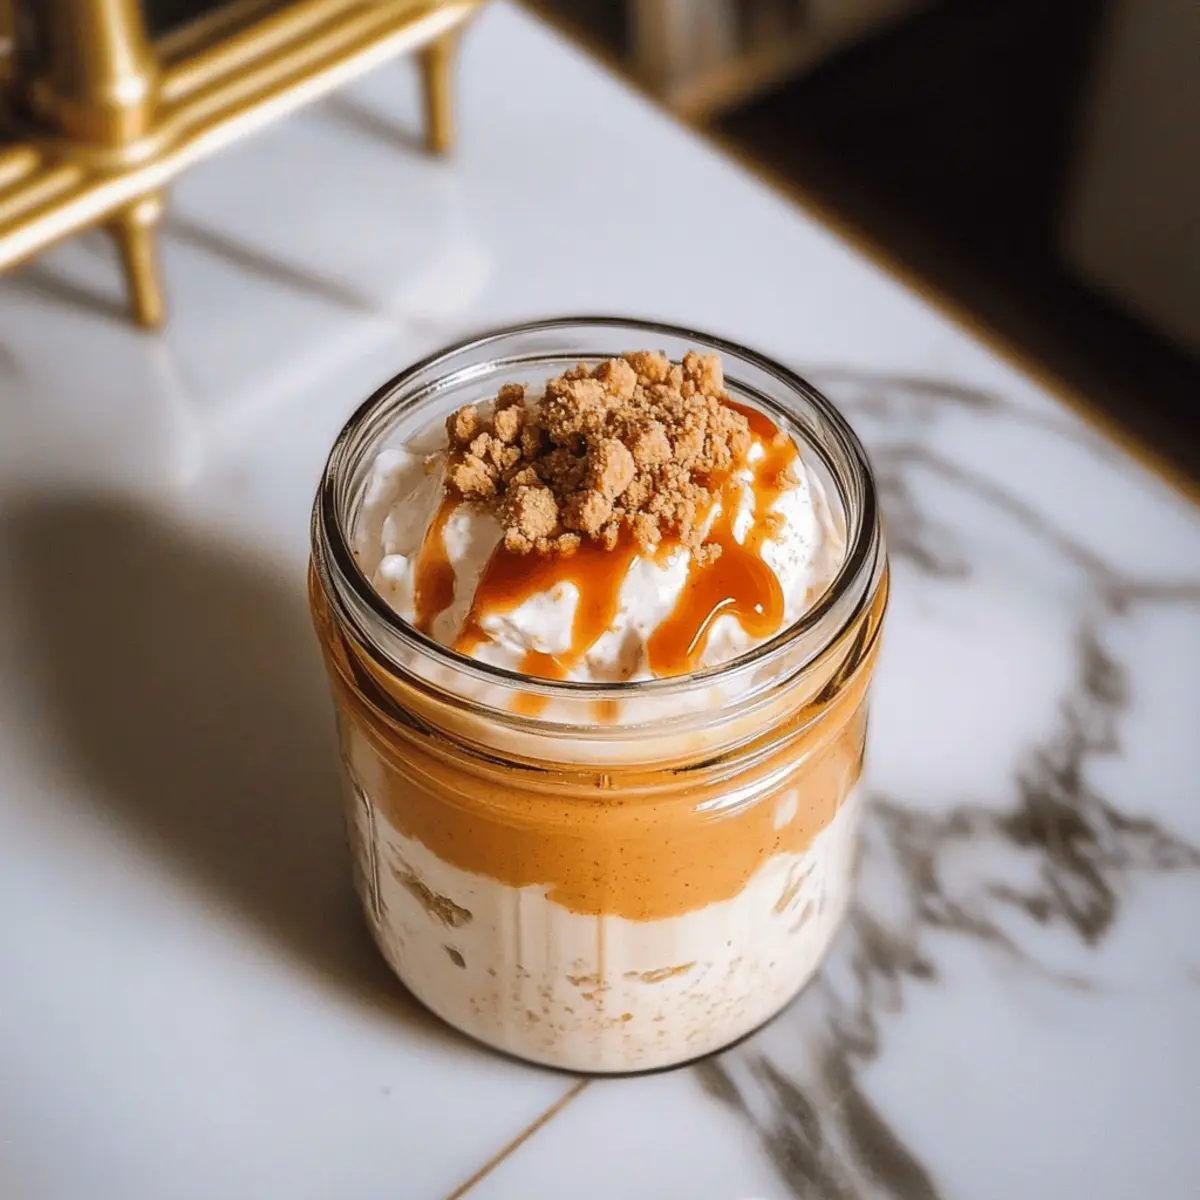
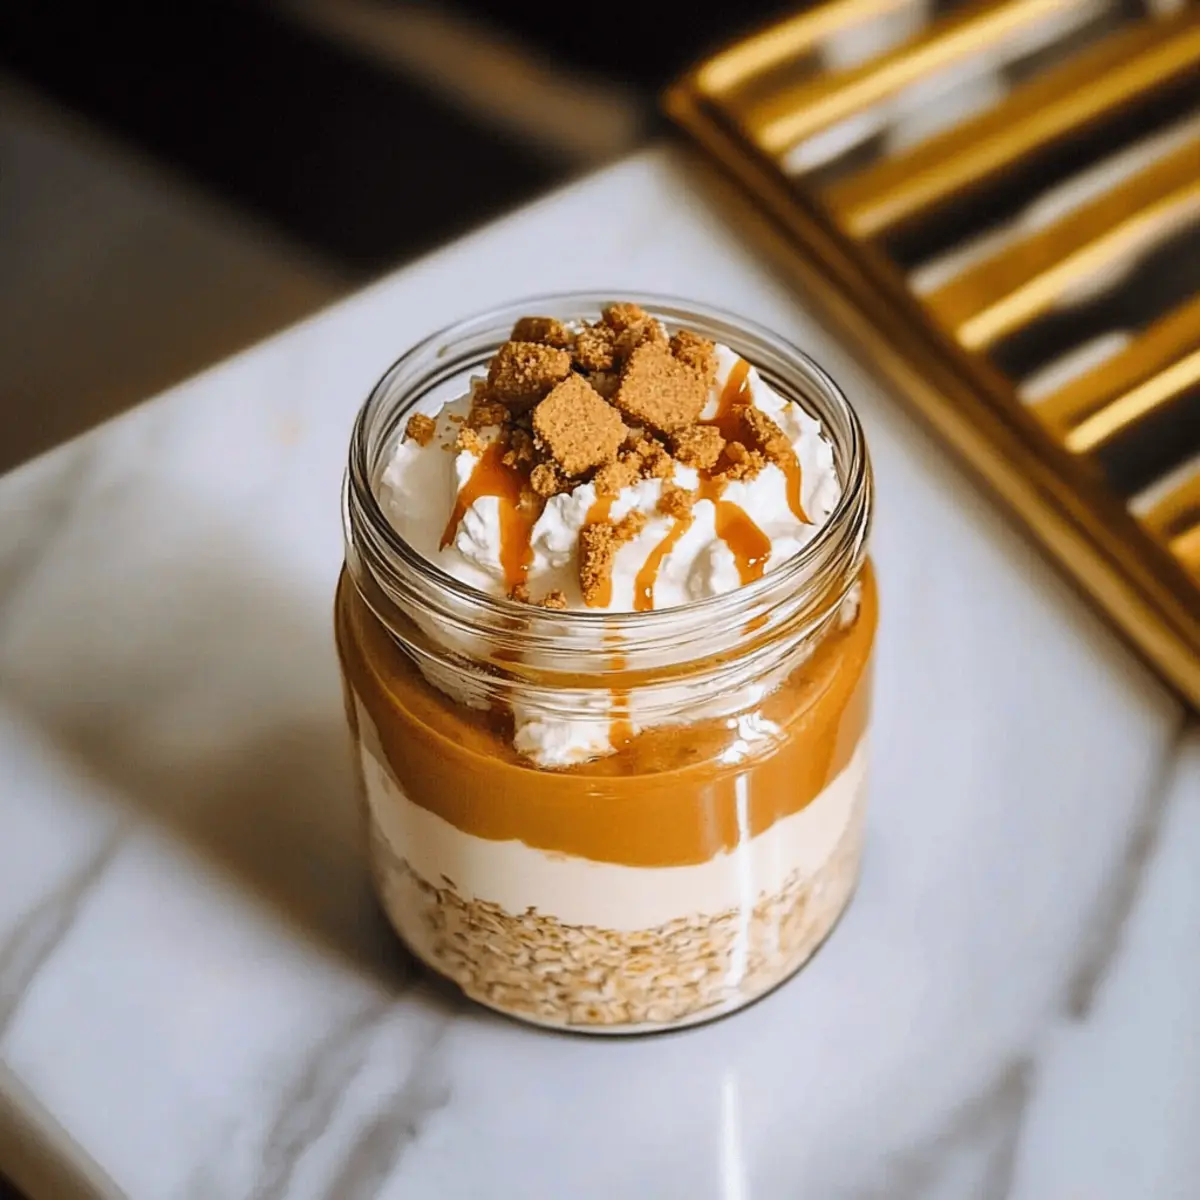
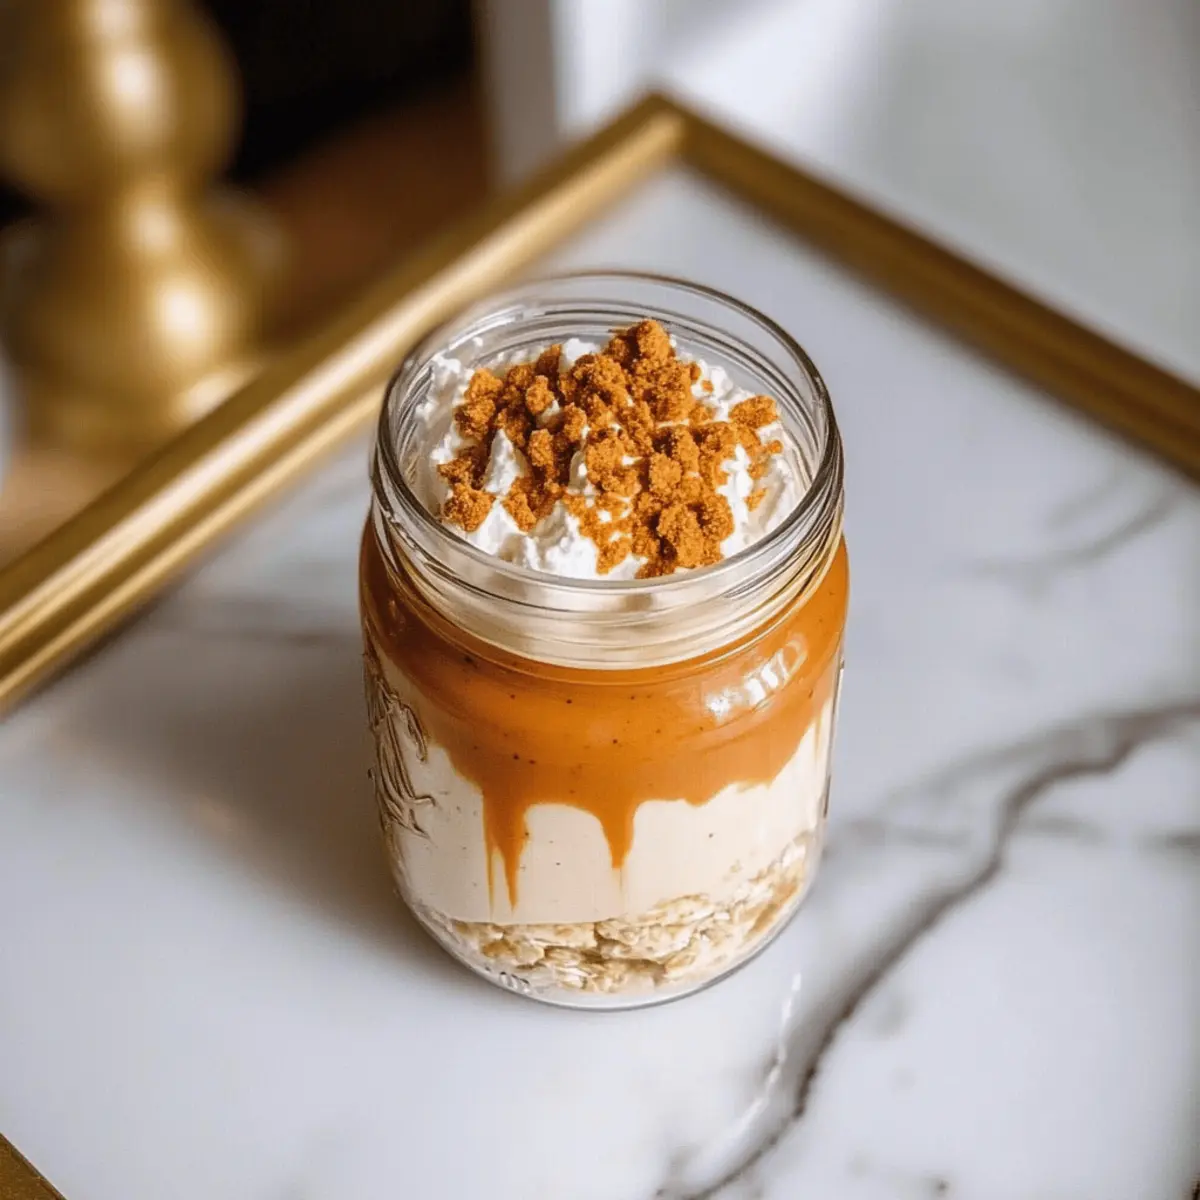
When ready to serve, carefully remove the Mini Pumpkin Oreo Cheesecakes from the muffin tin. For a festive touch, you can top them with homemade whipped cream, a sprinkle of pumpkin spice, or even a mini Oreo on each one. Present these delightful treats on a cake stand to impress your guests as you indulge in the flavors of autumn!

Make Ahead Options

These Mini Pumpkin Oreo Cheesecakes are perfect for meal prep enthusiasts! You can whip up the Oreo crust and the pumpkin cheesecake filling up to 24 hours in advance, ensuring a stress-free dessert. Simply prepare the crust, chill it in the refrigerator, and store the filling covered with plastic wrap to prevent drying. When you’re ready to bake, pour the filling into the crusts and bake as directed, adding a few extra minutes if needed. This approach not only saves time but ensures the cheesecakes are just as delicious as if made on the day of serving. Enjoy the flavors of fall without the rush!

Mini Pumpkin Oreo Cheesecakes Variations

Feel free to get creative with these Mini Pumpkin Oreo Cheesecakes and customize them to suit your taste!

  • Maple Infusion: Add a tablespoon of maple syrup to the filling for a deliciously sweet twist that captures autumn’s essence.
  • Espresso Kick: Blend in a teaspoon of espresso powder for a delightful coffee flavor that pairs beautifully with pumpkin.
  • Whipped Cream Topping: Top each cheesecake with homemade whipped cream and a sprinkle of pumpkin spice for a festive touch.
  • Alternative Cookie Base: Switch up the crust by using chocolate wafers or graham crackers if you’re looking for a different flavor profile.
  • Vegan Delight: Substitute cream cheese with a dairy-free alternative and replace eggs with flax eggs or aquafaba for a plant-based version.
  • Add Some Heat: Spice things up by mixing in a pinch of cayenne pepper or chili powder for a surprising kick.
  • Nutty Crust: Incorporate chopped nuts or crushed pecans into the crust for added texture and flavor depth.
  • Chocolate Drizzle: Drizzle melted dark chocolate over the top for an indulgent touch that chocolate lovers will adore.

If you want to explore more delicious fall recipes, consider making Joumou Haitian Pumpkin for a comforting dish that celebrates the season!

Storage Tips for Mini Pumpkin Oreo Cheesecakes

Fridge: Keep your Mini Pumpkin Oreo Cheesecakes in an airtight container in the refrigerator for up to 4-5 days to maintain their freshness and creamy texture.

Freezer: For longer storage, you can freeze the cheesecakes for up to 2 months. Wrap each cheesecake individually in plastic wrap and place them in a freezer-safe bag to prevent freezer burn.

Thawing: When ready to enjoy, move the frozen cheesecakes to the refrigerator for a few hours or overnight to thaw. Serve chilled for the best flavor experience.

Reheating: It’s not recommended to reheat these cheesecakes, as they are best enjoyed cold. Simply take them out of the fridge, and they’re ready to delight your taste buds!

What to Serve with Mini Pumpkin Oreo Cheesecakes

As the leaves turn golden and the crisp air fills the atmosphere, pairing these delightful mini cheesecakes with complementary dishes will create an unforgettable fall feast.

  • Creamy Mashed Potatoes: These buttery potatoes offer a creamy counterpart to the cheesecakes’ rich texture, balancing the meal perfectly.

  • Spiced Apple Cider: A warm cup of spiced apple cider enhances the autumn experience, enveloping you in cozy flavors as you enjoy your dessert.

  • Maple Glazed Carrots: The sweetness and earthiness of these carrots bring a vibrant color and flavor that harmonizes beautifully with pumpkin desserts.

  • Chilled Pear and Walnut Salad: This refreshing salad adds a crisp bite and nutty richness, cutting through the indulgence of the cheesecake while providing a fresh contrast.

  • Homemade Whipped Cream: A dollop of whipped cream can elevate your mini pumpkin Oreo cheesecakes, making each bite feel decadent and festive.

  • Cinnamon Sugar Cookies: For those who can’t get enough of the fall flavors, these cookies serve as a delightful treat alongside the cheesecakes, enhancing the sweet experience.

Remember, each pairing is an opportunity to share warmth and joy with your loved ones as you savor the flavors of the season!

Expert Tips for Mini Pumpkin Oreo Cheesecakes

  • Room Temperature Ingredients: Ensure your cream cheese and eggs are at room temperature for a seamless filling, preventing lumps in your Mini Pumpkin Oreo Cheesecakes.
  • Don’t Overmix: Mix the filling just until combined to avoid incorporating too much air, which can lead to cracking when baked.
  • Chill Time Matters: Allowing your cheesecakes to chill completely helps them set properly—don’t skip the overnight chill for the best texture!
  • Pumpkin Purity: Always use canned pumpkin puree instead of pie filling for authentic taste; it makes all the difference in your Mini Pumpkin Oreo Cheesecakes.
  • Custom Flavor Boost: Consider adding a teaspoon of maple syrup or espresso powder to elevate your filling’s flavor even more!
  • Gluten-Free Option: For a gluten-free version, be sure to select gluten-free Oreo cookies; it’s an easy swap that keeps everyone included!

Mini Pumpkin Oreo Cheesecakes Recipe FAQs

How do I select the best pumpkin for my cheesecakes?
When choosing pumpkin puree, look for canned varieties labeled “100% pumpkin” without additives. The brand really can make a difference; I recommend Libby’s for its consistent flavor and quality. You can also use fresh pumpkin; just roast, puree, and strain it to remove excess moisture for the best texture!

How should I store Mini Pumpkin Oreo Cheesecakes?
Store your Mini Pumpkin Oreo Cheesecakes in an airtight container in the refrigerator for up to 4-5 days. This will help maintain their creamy texture while keeping them fresh. If you want to enjoy them over a longer period, freezing is a great option.

Can I freeze Mini Pumpkin Oreo Cheesecakes?
Absolutely! To freeze, wrap each cheesecake individually in plastic wrap, then place them in a freezer-safe bag. They can be frozen for up to 2 months. Just remember to label them if you’re making different varieties! To thaw, transfer them to the refrigerator overnight for a great taste experience.

Why do my mini cheesecakes have cracks on top?
Cracking can occur if the filling is overmixed, incorporating too much air, or if they were baked at too high a temperature. To prevent this, mix just until combined and always use room temperature ingredients. Don’t skip the chilling step either; it ensures proper set-up and texture.

Are these Mini Pumpkin Oreo Cheesecakes suitable for gluten-free diets?
Yes! Simply use gluten-free Oreo cookies for the crust. Additionally, you can substitute cream cheese with a dairy-free alternative and eggs with flax eggs or aquafaba for a vegan version, ensuring everyone can enjoy these delightful treats!

Can I add additional flavors to the cheesecakes?
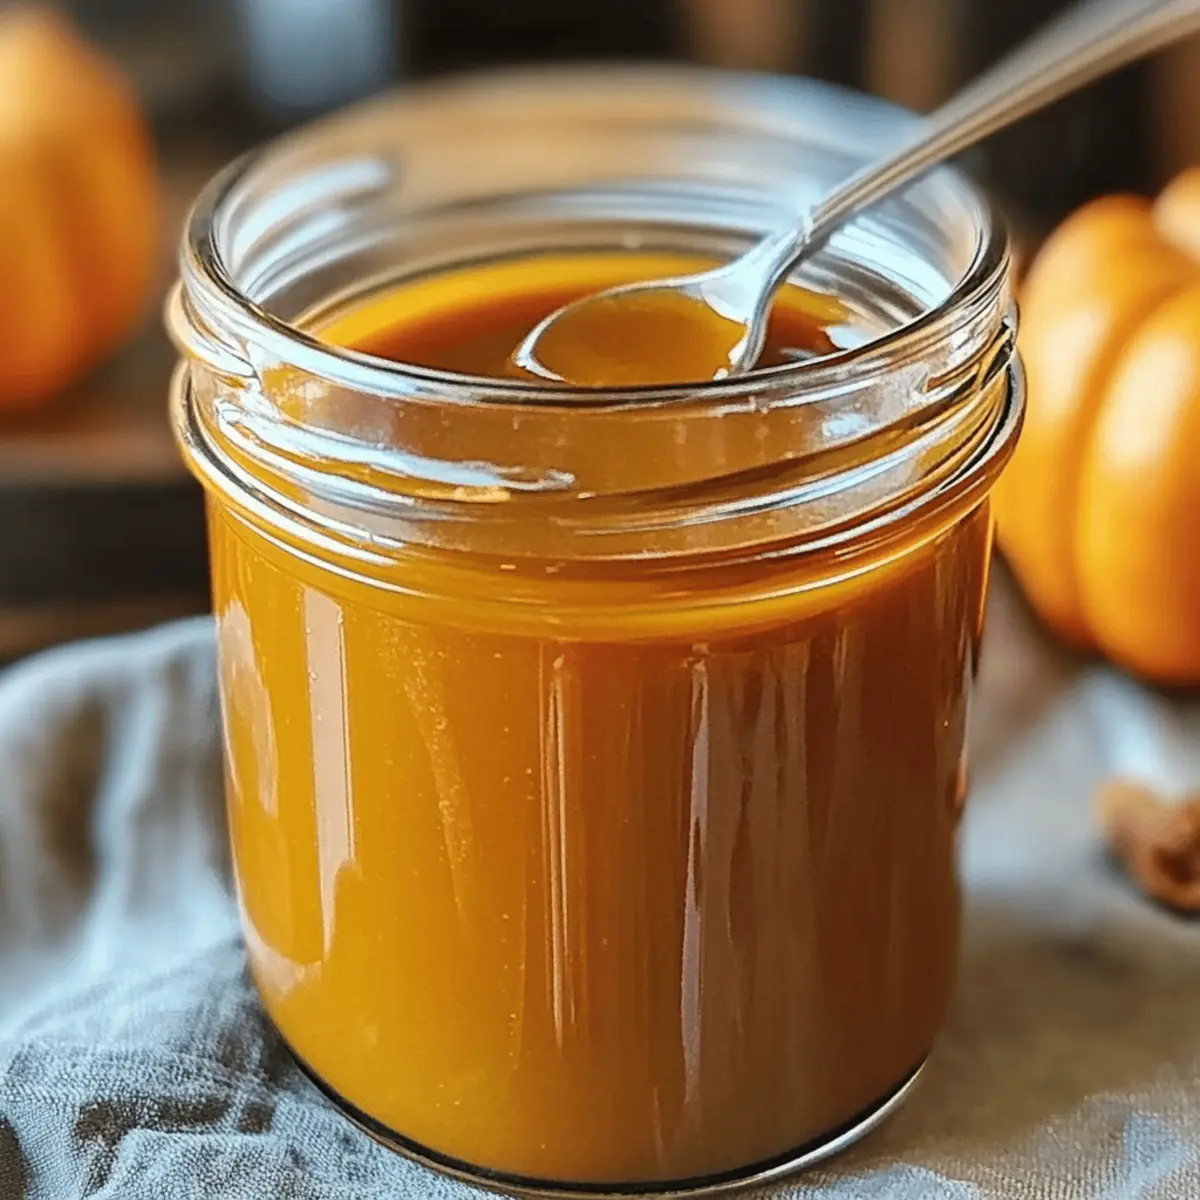
The more the merrier! You can enhance the flavor by mixing in a tablespoon of maple syrup, a dash of espresso powder, or even drizzling some caramel on top. Have fun experimenting to create your unique twist that your family and friends will love!

Mini Pumpkin Oreo Cheesecakes

Mini Pumpkin Oreo Cheesecakes for Cozy Fall Flavor Bliss

Delight in Mini Pumpkin Oreo Cheesecakes, a perfect treat combining seasonal pumpkin flavors with Oreo crusts. Ideal for gatherings and easily customizable.
Prep Time 15 minutes
Cook Time 22 minutes
Chill Time 4 hours
Total Time 4 hours 37 minutes
Servings: 12 cheesecakes
Course: Dessert
Cuisine: American
Calories: 230

Ingredients
  

For the Crust
  • 24 cookies Oreo Cookie Crumbs Use gluten-free Oreos for gluten-free option.
  • 5 tablespoons Unsalted Butter Can substitute with coconut oil for dairy-free option.
  • 2 tablespoons Granulated Sugar Optional, depending on taste preference.
For the Filling
  • 16 ounces Cream Cheese Must be at room temperature.
  • 1 cup Canned Pumpkin Puree Avoid pumpkin pie filling.
  • 1/2 cup Granulated Sugar Adjust sweetening to preference.
  • 1/4 cup Brown Sugar Provides depth of flavor.
  • 2 large Eggs Room temperature for even mixing.
  • 1 teaspoon Vanilla Extract Use pure vanilla for best flavor.
  • 1 teaspoon Ground Cinnamon Adjust spices to taste.
  • 1/2 teaspoon Ground Nutmeg
  • 1/2 teaspoon Ground Ginger
  • 1/4 teaspoon Ground Cloves

Equipment

  • Mixing Bowl
  • Muffin Tin
  • Hand mixer

Method
 

Step-by-Step Instructions
  1. Preheat your oven to 325°F (163°C). Crush Oreo cookies into fine crumbs, mix with melted butter and optional sugar. Press into the bottom of muffin tins and chill.
  2. In a large mixing bowl, beat softened cream cheese until smooth. Gradually add pumpkin puree, granulated sugar, brown sugar, spices, and a pinch of salt. Mix in eggs one by one, then add vanilla.
  3. Fill crusts with cheesecake filling, filling about three-quarters full. Bake for 18–22 minutes until edges are set but centers are slightly wobbly.
  4. Cool for 10-15 minutes, then chill in the refrigerator for at least 4 hours or overnight.
  5. Remove from muffin tin, serve with whipped cream, pumpkin spice, or mini Oreo.

Nutrition

Serving: 1cheesecakeCalories: 230kcalCarbohydrates: 24gProtein: 3gFat: 14gSaturated Fat: 8gPolyunsaturated Fat: 3gMonounsaturated Fat: 3gCholesterol: 50mgSodium: 180mgPotassium: 180mgFiber: 1gSugar: 12gVitamin A: 620IUCalcium: 40mgIron: 0.5mg

Notes

Ensure cream cheese and eggs are at room temperature for best results. Mix filling just until combined to avoid cracks. Use canned pumpkin puree for authentic taste.

Tried this recipe?

Let us know how it was!

Delightful Spider Web Pizza Recipe for Halloween Fun

As the leaves turn and the air becomes crisp, I find myself dreaming of festive gatherings filled with laughter and creativity. This Halloween, why not elevate your dinner game with my Spooktacular Spider Web Pizza Recipe? Not only is this dish a fun and playful centerpiece adorned with a whimsical sour cream web and playful black olive spiders, but it’s also super simple to whip up, making it perfect for busy nights. Plus, whether you prefer gluten-free goodness or a vegan twist, this recipe is flexible and accommodating for everyone at the table. Who says Halloween treats can’t also be homemade masterpieces? Ready to impress your family and friends with this enchanting creation? Let’s dive in!

Why is Spider Web Pizza a Must-Make?

Fun and Festive: This Spider Web Pizza not only delights the taste buds but also makes for a playful addition to your Halloween festivities. Versatile Options: Whether you’re accommodating dietary preferences with a gluten-free or vegan version, this recipe adapts beautifully. Quick and Simple: Whipping up this striking pizza requires minimal time and effort, perfect for busy schedules! Crowd-Pleaser: Kids and adults alike will be enchanted by the whimsical spider design, ensuring smiles all around. Enjoy it alongside other comforting soups like Mexican Taco Soup or Cozy Broccoli Cheddar for a fulfilling Halloween feast!

Spider Web Pizza Recipe Ingredients

For the Dough
Pizza Dough – This forms the delicious base of your Spider Web Pizza; you can use homemade or store-bought.

For the Sauce
Pizza Sauce – Essential for flavor and moisture; keep it thin to avoid a soggy crust.

For the Cheese
Low-Moisture Mozzarella Cheese (2 ½ cups) – Adds that gooey texture and flavor essential for the spider web design; necessary for an authentic taste.
Full-Fat Sour Cream (¼ cup) – Used for piping the web; choose full-fat to maintain shape and stability in your design.

For the Toppings
Black Olives – Create spooky spider decorations; if you don’t have them, feel free to use bell peppers or grapes for a fun twist.

For Added Crunch (Optional)
Cornmeal – Sprinkled on the pan for extra texture; not required but highly recommended for that crispy crust!

Remember, this Spider Web Pizza Recipe is not only beautiful but also adaptable for everyone at your Halloween table!

Step‑by‑Step Instructions for Spider Web Pizza Recipe

Step 1: Prepare Oven & Pan
Begin by preheating your oven to 425°F (220°C) to achieve that perfect crust. While the oven heats up, grease your pizza pan with a light coat of oil to prevent sticking. For an extra crunch, sprinkle a thin layer of cornmeal on the pan, creating a delightful texture for your finished Spider Web Pizza.

Step 2: Shape Dough
On a floured surface, take your pizza dough and stretch it into a 12-14 inch circle. Use your fingers to dock the dough, creating small dimples to prevent bubbling, ensuring that the base cooks evenly. Carefully lift the dough onto your prepared pan, aiming for a rustic shape that will hold all your toppings beautifully.

Step 3: Add Sauce & Cheese
Spread a thin layer of pizza sauce evenly over the dough, leaving about a ½-inch border around the edges for a crust. This Spider Web Pizza will shine with gooey, deliciousness, so generously sprinkle the low-moisture mozzarella cheese over the sauce, ensuring complete coverage up to the edges.

Step 4: Pipe the Web
Fill a squeeze bottle with full-fat sour cream and start at the center of the pizza, piping a spiral outward to create a stunning web design. To add detail, take a toothpick and drag it outward through the sour cream spiral, carefully pulling away from the center. Watch as your Spider Web Pizza transforms into a festive masterpiece!

Step 5: Create Spiders & Bake
Now it’s time for the fun part! Place black olives onto the web design to form whimsical spider shapes, positioning them for maximum spookiness. Slide the decorated pizza into the preheated oven and bake for 12-18 minutes. Keep a close eye on it until the crust is golden brown and the cheese is bubbling, filling your kitchen with mouthwatering aromas.

Step 6: Allow to Rest
Once out of the oven, let your Spider Web Pizza rest for about 5 minutes. This allows the cheese to set for easier slicing. As the aroma fills the air, gather your family around, ready to share in the delicious, festive treat you’ve just created.

Make Ahead Options

These Spooktacular Spider Web Pizza preparations are perfect for meal prep aficionados! You can prepare the pizza dough and sauce up to 24 hours in advance; simply store them in airtight containers in the refrigerator. The low-moisture mozzarella cheese can also be shredded and kept in the fridge for 1-2 days, ensuring it’s ready for topping. To maintain the quality, make sure to keep the sour cream separate until it’s time to pipe the web. When you’re ready to bake, simply assemble your pizza, add the sour cream web and olive spiders, then pop it in the oven for a delightful dinner experience with minimal effort!

Spider Web Pizza Variations

Inviting creativity into the kitchen can transform your pizza experience from ordinary to extraordinary!

  • Gluten-Free: Use a pre-made or homemade gluten-free pizza crust for everyone to enjoy.
  • Vegan Version: Substitute mozzarella with vegan cheese and swap sour cream for a dairy-free alternative for a plant-based feast!
  • Extra Spicy: Add jalapeños or crushed red pepper flakes to the cheese for a fiery kick that elevates every bite.
  • Sweet Twist: Incorporate sliced bell peppers or grapes instead of olives for a delightful mix of fun and sweetness.
  • Hearty Additions: Top with cooked sausage or pepperoni under the cheese to create a more filling pizza experience.
  • Thin Crust Lovers: Roll out the dough thinner for a crispier base that everyone will love, perfect for those who enjoy that crunch.
  • Herb Infusion: Sprinkle fresh herbs like basil or oregano on top before baking for added flavor and aroma.
  • Cheesy Crust: For another layer of indulgence, sprinkle cheese on the outer crust before baking to achieve a spectacular cheesy edge.

Enjoying your Spider Web Pizza alongside comforting dishes, like Shepherds Pie Soup or Fat Burning Soup, truly brings a festive flair to your Halloween table!

What to Serve with Spooktacular Spider Web Pizza

As you slice into your playful Spider Web Pizza, consider delightful accompaniments that enhance your Halloween dining experience.

  • Halloween Salad: A vibrant mix of mixed greens, orange carrots, and black olives creates a festive and refreshing side that balances the pizza’s richness.

  • Garlic Breadsticks: Crunchy and buttery, these breadsticks are a perfect dippable option, pairing beautifully with the savory flavors of the pizza.

  • Roasted Vegetables: Caramelized seasonal veggies like butternut squash and Brussels sprouts add a comforting warmth and earthy flavors, rounding out the meal seamlessly.

  • Crispy Pumpkin Chips: These sweet and savory chips bring a delightful crunch and a hint of sweetness, enhancing the Halloween spirit on your table.

  • Spooky Fruit Platter: Use seasonal fruits like clementines, grapes, and berries arranged in ghostly shapes to add a fun, healthy, and visually appealing touch.

  • Witch’s Brew Mocktail: This festive drink, made with sparkling apple cider and a splash of cranberry juice, elevates the meal into a celebratory feast, delighting both kids and adults alike.

Expert Tips for Spider Web Pizza

  • Dough Choice: Opt for high-quality pizza dough: Store-bought options can save time, but homemade creates a personalized touch and taste.

  • Sauce Control: Spread sparingly: Too much sauce can lead to a soggy crust. Aim for an even, thin layer to maintain that crispy base.

  • Cheese Coverage: Use full moisture mozzarella for best results: This not only enhances flavor but ensures the web design holds its shape as well.

  • Piping Perfection: Full-fat sour cream is key: It creates a beautiful web that won’t run; steer clear of low-fat versions that may become watery.

  • Spooky Spiders: Be creative with toppings: If black olives aren’t on hand, try using veggies like bell peppers for a colorful twist on the spider decoration.

  • Rest Time: Don’t skip this step: Let your Spider Web Pizza rest after baking for easier cutting and serving, ensuring everyone gets a perfect slice.

How to Store and Freeze Spider Web Pizza

Fridge: Store leftover Spider Web Pizza in an airtight container for up to 3 days. Reheat slices in the oven to retain that lovely crispy crust.

Freezer: If you want to freeze Spider Web Pizza, wrap it tightly in plastic wrap and aluminum foil for up to 2 months. Thaw in the fridge before reheating.

Reheating: For best quality, reheat the pizza in a preheated oven at 350°F (175°C) for about 10-15 minutes, until warmed through and the cheese is melty.

Spider Web Pizza Recipe FAQs

What type of pizza dough should I use?
Absolutely! You can use homemade or store-bought pizza dough for your Spider Web Pizza Recipe. If you’re looking to go gluten-free, many stores offer gluten-free pizza dough that works just as well!

How should I store leftover Spider Web Pizza?
To keep your Spider Web Pizza fresh, store any leftovers in an airtight container in the refrigerator for up to 3 days. I always recommend reheating it in the oven to maintain a crispy crust—just pop it in at 350°F (175°C) for about 10–15 minutes, and enjoy it fresh again!

Can I freeze Spider Web Pizza?
Yes, you can! Wrap your Spider Web Pizza tightly in plastic wrap and then wrap it in aluminum foil to prevent freezer burn. It will last in the freezer for up to 2 months. When you’re ready to enjoy it, thaw it in the fridge overnight before reheating as mentioned above.

What if my sour cream is too runny for piping the web?
If you find your sour cream isn’t thick enough for piping, consider using full-fat sour cream, as it holds shape better. If you’ve already used a low-fat version, try adding a bit of softened cream cheese mixed with some milk to thicken it up. This will give you the perfect consistency for creating that spooky spider web!

Are there dietary concerns with the ingredients?
Absolutely! If you or any guests have dietary restrictions, you can easily adapt the Spider Web Pizza Recipe. For a vegan version, substitute low-moisture mozzarella with vegan cheese and use dairy-free sour cream. Always check for allergies when using ingredients like olives or specific pizza sauces that may contain allergens.

How do I prevent a soggy crust?
To keep your crust crispy, spread a thin layer of pizza sauce—less is more! Also, preheat your oven adequately before baking, and resist the temptation to overload on cheese and toppings; this way, your Spider Web Pizza Recipe will come out beautifully crunchy!

Spider Web Pizza Recipe

Delightful Spider Web Pizza Recipe for Halloween Fun

Enjoy this delightful Spider Web Pizza Recipe, perfect for Halloween fun and flexible for dietary preferences.
Prep Time 15 minutes
Cook Time 18 minutes
Resting Time 5 minutes
Total Time 38 minutes
Servings: 4 slices
Course: Dinner
Cuisine: American
Calories: 300

Ingredients
  

For the Dough
  • 1 package Pizza Dough homemade or store-bought
For the Sauce
  • 1 cup Pizza Sauce keep it thin
For the Cheese
  • 2.5 cups Low-Moisture Mozzarella Cheese
  • 0.25 cup Full-Fat Sour Cream for piping the web
For the Toppings
  • 1 cup Black Olives for decorations
For Added Crunch (Optional)
  • 0.25 cup Cornmeal for extra texture

Equipment

  • Oven
  • Pizza Pan
  • Squeeze Bottle
  • Toothpick

Method
 

Preparation
  1. Preheat the oven to 425°F (220°C) and grease your pizza pan with oil.
  2. Sprinkle a thin layer of cornmeal on the pan for extra crunch.
  3. On a floured surface, stretch the pizza dough into a 12-14 inch circle and dock it.
  4. Lift the dough onto your prepared pan aiming for a rustic shape.
  5. Spread a thin layer of pizza sauce over the dough leaving a ½-inch border.
  6. Sprinkle low-moisture mozzarella cheese generously over the sauce.
  7. Fill a squeeze bottle with sour cream and pipe a spiral to create the web.
  8. Use a toothpick to drag outward through the spiral for web design.
  9. Place black olives on the web to form spider shapes.
  10. Bake the pizza in the oven for 12-18 minutes until golden brown.
  11. Let the pizza rest for about 5 minutes before slicing.

Nutrition

Serving: 1sliceCalories: 300kcalCarbohydrates: 35gProtein: 12gFat: 15gSaturated Fat: 7gPolyunsaturated Fat: 2gMonounsaturated Fat: 5gCholesterol: 30mgSodium: 500mgPotassium: 300mgFiber: 2gSugar: 5gVitamin A: 300IUVitamin C: 1mgCalcium: 200mgIron: 2mg

Notes

Store leftovers in an airtight container for up to 3 days or freeze for up to 2 months.

Tried this recipe?

Let us know how it was!

Delightful Marshmallow Rice Bubbles Halloween Brains Treats

As I rummaged through my pantry, searching for inspiration, I couldn’t help but feel a mischievous spark—Halloween was around the corner! That’s when I decided to whip up a batch of Marshmallow Rice Bubbles Halloween Brains. These delightful creations not only come together in under 20 minutes but also require just five ingredients, making them a quick and easy no-bake treat. Creamy and crunchy, they’re perfect for adding a spooky twist to your Halloween festivities. Plus, they’re a wonderful family activity, letting everyone of all ages unleash their creativity while shaping these eerie yet tasty snacks. Ready to conjure up some fun in the kitchen? Let’s dive into the ghoulish details!

Why Make These Halloween Treats?

Quick and Easy: With just five simple ingredients, you can whip up these delicious treats in under 20 minutes—perfect for those busy Halloween preparations.

Fun for Everyone: This recipe turns kitchen time into family fun as everyone can pitch in to shape and decorate their own spooky snacks.

Creepy Yet Tasty: The gooey marshmallows and crispy Rice Bubbles not only resemble brains but also delight the taste buds, making them a hit with both kids and adults!

Versatile Creativity: Feel free to mix up the colors or add edible glitter to your brain treats, allowing for personalized Halloween creations that will impress at any gathering.

Perfect for Parties: Whether you’re hosting a Halloween bash or attending one, these treats are easy to transport and sure to be a conversation starter, just like my Corn Chicken Rice recipe!

Marshmallow Rice Bubbles Halloween Brains Ingredients

• Gather these easy ingredients for your spooky treats!

For the Base

  • Unsalted Butter – Provides moisture and richness; can substitute with salted butter (omit extra salt).
  • Regular Marshmallows – The main binding ingredient that contributes sweetness and texture; feel free to use pink or white marshmallows.
  • Rice Bubbles (Krispies) – Adds crisp texture essential for creating the “brain” shape.

For Flavor and Color

  • Salt – Enhances overall flavor; use ½ tsp for unsalted butter or omit if using salted.
  • Red Food Coloring – Mimics the look of real brains for visual appeal; adjust the quantity based on the desired effect.

Get ready to create your spooky treats with these simple ingredients, and let your creativity shine!

Step‑by‑Step Instructions for Marshmallow Rice Bubbles Halloween Brains

Step 1: Prepare Bain-Marie
Begin by filling a small pot with ½ cup of water and set it over medium heat to bring it to a gentle boil. Once the water is simmering, place a large heatproof bowl over the pot, ensuring the bottom of the bowl does not touch the water. This creates a double boiler effect, perfect for melting the ingredients for your Marshmallow Rice Bubbles Halloween Brains.

Step 2: Melt Ingredients
Add 4 tablespoons of unsalted butter and 16 ounces of regular marshmallows into the bowl above the simmering water. Whisk continuously for about 2-4 minutes until the mixture is completely smooth and glossy, resembling a creamy sauce. Keep a close eye on it, as you want the marshmallows to melt fully without burning.

Step 3: Add Seasoning
Carefully remove the bowl from the heat, taking care not to burn yourself. Sprinkle in ½ teaspoon of salt to enhance the flavor and mix well. Then add a few drops of red food coloring, stirring until the color is evenly distributed throughout the marshmallow mixture, giving it a brain-like appearance.

Step 4: Combine with Rice Bubbles
In a large mixing bowl, measure out 6 cups of Rice Bubbles and pour the melted marshmallow mixture over them. Use a spatula to gently fold the mixture until all the Rice Bubbles are thoroughly coated. This step is crucial for ensuring your Marshmallow Rice Bubbles Halloween Brains have the right texture and flavor.

Step 5: Shape Brains
Once fully combined, it’s time to shape your treats. Lightly oil your hands to prevent sticking, then grab handfuls of the mixture and mold them into oval shapes that resemble brains. Use the flat side of a butter knife to create a dent in the center of each brain for added detail.

Step 6: Decorate
For a truly spooky effect, take a toothpick and dip it into some more red food coloring. Use it to draw vein-like designs on the surface of each shaped brain, adding an extra touch of eeriness to your Marshmallow Rice Bubbles Halloween Brains that will impress your friends and family.

Step 7: Store
Let your treats cool completely at room temperature for about 10-15 minutes before transferring them to an airtight container. These fun snacks can be stored at room temperature for up to a week, making them a perfect Halloween treat for any occasion!

What to Serve with Marshmallow Rice Bubbles Halloween Brains?

Add the perfect finishing touches to your spooky treats, delighting your friends and family with a festive dining experience.

  • Crispy Chocolate Spider Cookies: These treats complement the marshmallow sweetness with chocolatey crunch, making a delightful contrast in textures.

  • Witch’s Brew Punch: A fruity, bubbling punch fills your party with festive spirit, providing a refreshing drink to balance the sweet brains.

  • Ghostly Fruit Platter: Offer a variety of fresh fruits like ghost-shaped cantaloupe or banana ghosts, adding vibrant colors and healthy options amidst the sweets.

  • Savory Cheese and Crackers: Create a savory platter that balances the sweetness of the treats, offering a delightful crunch that guests can enjoy between bites of dessert.

  • Mini Pumpkin Pies: These bite-sized desserts keep with the Halloween theme while pairing perfectly with the chewy marshmallow texture, providing a comforting fall flavor.

  • Chocolate-Dipped Pretzels: The salty crunch of pretzels coated in chocolate offers a contrasting flavor profile, pleasing both sweet and savory lovers.

  • Gummy Worms and Bug Mix: A fun addition to your Halloween spread, this candy mix brings in playful and spooky textures that kids will love.

  • Cinnamon-Spiced Apple Slices: Fresh, crisp apple slices dusted with cinnamon add a hint of tartness to balance the sweetness, refreshing your palate.

These delightful serve-alongs not only enhance the theme of your celebration but also create a holistic and enjoyable experience for your guests!

Marshmallow Rice Bubbles Halloween Brains Variations

Get creative with these spooktacular treats, and let your imagination run wild as you decorate and customize your Halloween brains!

  • Flavor Addition:
    Mix in a teaspoon of vanilla extract for a delightful twist that adds a warm, sweet depth to the marshmallow flavor.

  • Nut-Free Crunch:
    Substitute Rice Bubbles with puffed rice cereal for a nut-free option that still retains the crispiness, ensuring everyone can enjoy!

  • Spooky Edible Glitter:
    Sprinkle edible glitter on top for a magical effect that makes these treats shine, taking your Halloween creations to a new enchanting level.

  • Mini Monster Treats:
    Create mini brain-shaped treats using smaller amounts of mixture; these bite-sized snacks are perfect for little hands at parties.

  • Dairy-Free Delight:
    Swap the butter for coconut oil to cater to dairy-free diets while adding a hint of tropical flavor, keeping your treats inclusive.

  • Fruit Flavoring:
    Incorporate a few drops of raspberry or cherry extract for an added fruity zing that enhances the deliciously gooey marshmallow sweetness.

  • Texture Twist:
    Add crushed graham crackers into the mixture for a crunchy texture inside the brains, creating a delightful contrast with the chewier marshmallows.

  • Chili Kick:
    Add a sprinkle of cayenne or chili powder for adults who love a spicy kick, creating an unexpectedly thrilling treat for Halloween gatherings.

As you experiment, think of pairing these fun treats with other easy-to-make dishes like Oven Chicken Rice or our heartwarming Comfort Sausage Rice for a spooky feast that will keep everyone smiling!

Expert Tips for Marshmallow Rice Bubbles Halloween Brains

  • Mix Hot: Combine Rice Bubbles with the marshmallow mixture while hot to promote better binding and avoid clumping.
  • Shape Quickly: Work fast when shaping the brains, as the mixture will set and become difficult to mold after a few minutes.
  • Oiled Hands: Oil your hands lightly before shaping to prevent the marshmallow mixture from sticking, ensuring a smooth process.
  • Customize Colors: Feel free to experiment with different food colorings for various effects, creating unique Marshmallow Rice Bubbles Halloween Brains for your celebration.
  • Keep Airtight: Store your treats in an airtight container at room temperature to maintain their crispness for an extended period.

Make Ahead Options

These Marshmallow Rice Bubbles Halloween Brains are perfect for meal prep enthusiasts! You can melt the butter and marshmallows, and mix in the salt and food coloring up to 24 hours in advance, refrigerating the mixture in an airtight container until you’re ready to combine it with the Rice Bubbles. This keeps everything fresh while saving you time on busy Halloween days. When you’re ready to prepare your spooky treats, simply reheat the mixture gently in the microwave until it becomes pourable, then mix with the Rice Bubbles as instructed. This way, your brain treats will be just as delicious, and you’ll impress your guests with minimal effort!

Storage Tips for Marshmallow Rice Bubbles Halloween Brains

Room Temperature: Store the treats in an airtight container at room temperature to maintain their crispness for up to 7 days. Avoid exposure to humidity, which can make them sticky.

Fridge: If you need to store them longer, you can refrigerate the treats, but be aware that this may alter the texture, making them chewier rather than crispy.

Freezer: For extended storage, these Halloween brains can be frozen for up to 3 months. Wrap them tightly in plastic wrap and then in foil before placing them in a freezer-safe container.

Reheating: If thawed from the freezer, let them sit at room temperature for about 30 minutes before serving, allowing them to regain some of their original texture.

Marshmallow Rice Bubbles Halloween Brains Recipe FAQs

How do I select the right marshmallows for this recipe?
Absolutely! You can use regular white or pink marshmallows, depending on the look you prefer for your Halloween brains. Look for plump, fresh marshmallows without any hard or discolored spots, which indicates they may be stale.

How should I store Marshmallow Rice Bubbles Halloween Brains?
Great question! Store them in an airtight container at room temperature for up to 7 days to keep them crisp. Make sure to place them in a cool, dry area away from humidity, as that can make them sticky.

Can I freeze Marshmallow Rice Bubbles Halloween Brains?
Yes, you can freeze them! To do this, wrap each brain tightly in plastic wrap, followed by a layer of foil. Store them in a freezer-safe container, and they’ll remain good for up to 3 months. When you’re ready to enjoy them, let them thaw at room temperature for about 30 minutes.

What can I do if my marshmallow mixture becomes too stiff to shape?
No worries! If your mixture becomes too stiff, gently reheat it in your microwave in 10-second intervals until it’s just pliable again. You can also try adding a few more drops of melted butter, mixing until it achieves a smoother consistency for easier shaping.

Are these treats suitable for people with nut allergies?
Very much so! Marshmallow Rice Bubbles Halloween Brains are nut-free, making them a kid-friendly snack that’s perfect for school events or gatherings where nut allergies are a concern. Always check individual ingredient labels to ensure they meet your dietary needs.

Marshmallow Rice Bubbles Halloween Brains

Delightful Marshmallow Rice Bubbles Halloween Brains Treats

Quick and easy Marshmallow Rice Bubbles Halloween Brains make for a delightful Halloween treat for all ages.
Prep Time 20 minutes
Cooling Time 15 minutes
Total Time 35 minutes
Servings: 12 treats
Course: Dessert
Cuisine: American
Calories: 150

Ingredients
  

For the Base
  • 4 tablespoons Unsalted Butter Can substitute with salted butter (omit extra salt)
  • 16 ounces Regular Marshmallows Feel free to use pink or white marshmallows
  • 6 cups Rice Bubbles (Krispies)
For Flavor and Color
  • 0.5 teaspoon Salt Enhances overall flavor; use this for unsalted butter or omit if using salted
  • As needed Red Food Coloring Adjust the quantity based on desired effect

Equipment

  • Heatproof bowl
  • spatula
  • Toothpick

Method
 

Step-by-Step Instructions
  1. Prepare Bain-Marie by filling a small pot with ½ cup of water and placing a large heatproof bowl over it.
  2. Add 4 tablespoons of unsalted butter and 16 ounces of marshmallows to the bowl, whisking for 2-4 minutes until smooth.
  3. Remove from heat, add ½ teaspoon of salt and a few drops of red food coloring, stirring well.
  4. In a large bowl, measure 6 cups of Rice Bubbles and pour the melted marshmallow mixture over them, folding gently.
  5. Lightly oil your hands and shape the mixture into oval shapes resembling brains.
  6. Dip a toothpick into red food coloring to draw vein-like designs on the surface of each brain.
  7. Let treats cool for 10-15 minutes before storing them in an airtight container.

Nutrition

Serving: 1treatCalories: 150kcalCarbohydrates: 30gProtein: 1gFat: 4gSaturated Fat: 2gCholesterol: 10mgSodium: 90mgPotassium: 50mgSugar: 20g

Notes

Mix hot for better binding, shape quickly before mixture sets, and customize colors for unique creations.

Tried this recipe?

Let us know how it was!

Effortless 5-Minute McGriddle Recipe for Busy Mornings

The sound of sizzling bacon and the aroma of sweet maple syrup wafting through the kitchen instantly takes me back to those lazy weekend mornings. Today, I want to share my Easy 5-Minute McGriddle Recipe, a delightful homemade twist on the beloved fast-food breakfast sandwich that keeps the whole family coming back for more. With a prep time under 30 minutes, these delicious Homemade McGriddle Sandwiches strike the perfect balance between convenience and satisfaction. Not only are they customizable according to your tastes, but they’re also budget-friendly—hellooo, homemade breakfast bliss! So, are you ready to transform your kitchen into a cozy diner and whip up your own McGriddle masterpiece? Let’s dive in!

Why Make Your Own McGriddle?

Convenience: Whipping up these Homemade McGriddle Sandwiches takes less than 30 minutes—perfect for busy mornings!

Customization: Tailor each sandwich to your family’s preferences; switch up meats, cheeses, or even add fruits.

Budget-Friendly: Save money by creating a fast-food favorite at home without compromising on taste or quality.

Deliciousness: The combination of fluffy pancakes and savory fillings delivers mouthwatering flavor that rivals any restaurant.

Nostalgic Flavors: Enjoy the cozy diner experience and recapture the joy of classic McDonald’s breakfasts right at your kitchen table.

5-Minute McGriddle Ingredients

For the Pancakes
Pancake Mix – This is the base structure for the sandwich; consider using whole-grain mix for added nutrition.
Milk – Adds moisture; feel free to substitute with any plant-based milk for a dairy-free option.
Egg – Acts as a binding agent and is a great protein source; for a lighter version, use egg whites.
Vegetable Oil – Enhances the texture; you can swap this for melted butter to add rich flavor.
Maple Syrup – Provides sweetness and that signature flavor; for a lower sugar option, try maple extract instead.

For the Filling
Cheese (e.g., American) – Adds creaminess; if you’re feeling adventurous, try pepper jack for a spicy kick.
Breakfast Meat (Bacon/Sausage) – Offers protein and savory flavor; substitute with turkey bacon or vegetarian patties for a healthier twist.

For Assembly
Maple Syrup (for brushing) – Lightly brush the tops of the assembled sandwiches to enhance that classic sweet and savory experience found in a 5-Minute McGriddle Recipe.

Step‑by‑Step Instructions for 5-Minute McGriddle Recipe

Step 1: Prepare Pancake Batter
Start by combining the pancake mix, milk, egg, vegetable oil, and maple syrup in a bowl. Mix until just combined, ensuring not to over-mix for fluffier pancakes. Let the batter rest for about 5 minutes; this allows it to thicken slightly and enhances the texture of your pancake buns in this delicious 5-Minute McGriddle Recipe.

Step 2: Cook Pancake Buns
Heat a skillet over medium heat and lightly grease it with oil or butter. Use a cookie cutter or ring mold to pour about ¼ cup of pancake batter into the skillet. Cook for 2-3 minutes, or until bubbles form on the surface and the edges appear set. Carefully flip and brown the other side for another 1-2 minutes, creating a total of 8 pancake buns.

Step 3: Cook Eggs
In the same skillet, crack your eggs and season with salt and pepper, if desired. Cover the skillet with a lid to help the eggs cook evenly. After about 3-4 minutes, check for doneness; the eggs should be fully cooked through but still tender. If you prefer perfectly round eggs, you can use a ring mold during this step.

Step 4: Prepare Breakfast Meat
While the eggs are cooking, prepare your choice of breakfast meat. If using bacon, cook until crispy in the skillet, usually around 4-5 minutes, or according to package directions for sausage. Make sure the meat is well-cooked, as this adds a savory flavor element to your homemade McGriddle sandwiches.

Step 5: Assemble McGriddles
It’s time to bring everything together! Layer a pancake bun with a slice of cheese, a cooked egg, and your choice of breakfast meat. Top with another pancake bun and lightly brush the tops with warm maple syrup to enhance the sweet and savory combination in every bite of your 5-Minute McGriddle Recipe.

Step 6: Serve
Serve your Homemade McGriddle Sandwiches warm for the best experience. Pair them with optional sides like fresh fruit or hash browns to create a delightful breakfast spread. Enjoy the scrumptious taste of your homemade version that captures the essence of fast-food convenience!

Make Ahead Options

These Easy 5-Minute McGriddle Sandwiches are a fantastic option for meal prep, making busy mornings a breeze! You can prepare the pancake batter and store it in the refrigerator for up to 24 hours; just give it a gentle stir before cooking to restore its fluffiness. Additionally, the cooked pancake buns can be refrigerated for up to 3 days or frozen for longer storage. To maintain their quality, place parchment paper between the layers when freezing to prevent sticking. When you’re ready to serve, simply reheat the pancake buns in a skillet or microwave, cook your eggs fresh, and assemble your sandwiches. You’ll have delicious, homemade McGriddle sandwiches ready to enjoy without the fast-food rush!

What to Serve with Homemade McGriddle Sandwiches?

Enjoying a homemade breakfast is a treat for the senses, and it’s easy to elevate your meal with delightful pairings that add balance and flavor.

  • Fresh Fruit Salad: Bright, juicy fruits introduce a refreshing contrast, balancing out the sweetness and savoriness of the McGriddle.
  • Crispy Hash Browns: Golden, crispy potatoes add a satisfying crunch, making each bite of your breakfast a delightful experience.
  • Yogurt Parfait: Creamy yogurt layered with granola and berries adds a healthful touch and a creamy element to your meal.
  • Smoothie with Spinach: A nutrient-packed smoothie brings both vibrancy and healthiness into your breakfast spread, complementing the flavors beautifully.
  • Syrup-Infused Pancakes: If you love pancakes, whip up an extra batch with varied toppings for an indulgent experience alongside the McGriddles.
  • Breakfast Tea or Coffee: A steaming cup of your favorite beverage enriches the breakfast atmosphere, enhancing those cozy morning vibes.

Pairing these elements with your Homemade McGriddle Sandwiches allows you to craft a breakfast that feels both hearty and satisfying, perfect for lazy mornings.

Variations & Substitutions for 5-Minute McGriddle Recipe

Feel free to let your creativity shine by customizing this recipe to suit your taste buds and dietary needs!

  • Whole Wheat: Use whole wheat pancake mix for a nutritious twist, adding fiber and a slightly nutty flavor.
  • Fruit-Infused Pancakes: Add blueberries or diced bananas to the batter for a sweet burst of fruitiness in every bite.
  • Dairy-Free: Swap cheese for a dairy-free alternative and use plant-based milk for a completely dairy-free version.
  • Vegetarian Delight: For a meat-free option, fill your McGriddles with sliced avocado, spinach, or grilled veggies for a fresh taste.
  • Spicy Kick: Incorporate jalapeños into the pancake batter or use pepper jack cheese to add a layer of heat.
  • Savory Pancakes: Add chopped herbs like chives or parsley to the pancake batter for an savory twist that elevates flavor.
  • Maple Extract Substitute: If you don’t have syrup, use a couple of drops of maple extract for that classic flavor without the sugar.
  • Experiment with Cheeses: Try a sharp cheddar or creamy goat cheese instead of American for a different taste experience.

These delightful adaptations allow you to explore flavors while keeping the essence of the beloved McGriddle alive. If you’re a fan of hearty soups, check out the Hamburger Potato Soup or the comforting Broccoli Cheddar Soup for more wholesome meal ideas!

Expert Tips for 5-Minute McGriddle Recipe

  • Pancake Perfection: Ensure you don’t over-mix the batter; this keeps pancakes fluffy and light. Just mix until combined!
  • Ring Mold Magic: Use a cookie cutter or ring mold to create perfectly shaped pancake buns and eggs for a professional touch.
  • Oh-So-Golden: Maintain medium heat while cooking to achieve a beautiful golden color on your pancakes without burning them.
  • Storage Savvy: Store leftover pancake buns in an airtight container in the refrigerator for up to 3 days or freeze them for future use.
  • Maple Infusion: For enhanced sweetness, add a dollop of thickened maple syrup in the batter before cooking; it creates delightful maple pockets.

Storage Tips for 5-Minute McGriddle Recipe

Fridge: Store leftover pancake buns in an airtight container for up to 3 days, ensuring they retain their fluffy texture for your next breakfast.

Freezer: Freeze pancake buns in a single layer on a baking sheet, then transfer to an airtight container for up to 3 months. They’re perfect for quick breakfasts later!

Reheating: To reheat, pop the buns in the microwave for about 30 seconds or briefly toast them in a skillet until warmed through, bringing back that fresh taste of your 5-Minute McGriddle Recipe.

5-Minute McGriddle Recipe FAQs

What type of pancake mix should I use?
Using a good quality pancake mix as the base for your 5-Minute McGriddle Recipe is essential. I often recommend whole-grain mixes for added nutrition, but feel free to experiment with gluten-free options if you’re accommodating dietary needs.

How should I store leftover McGriddle pancake buns?
Store any leftover pancake buns in an airtight container in the refrigerator for up to 3 days. To maintain their fluffy texture, ensure the container is sealed tightly. If you’re looking to prepare ahead and keep them longer, you can freeze them!

Can I freeze the pancake buns for later use?
Absolutely! To freeze, lay the pancake buns in a single layer on a baking sheet and flash freeze for about 1-2 hours. Once frozen, transfer them to an airtight container or freezer bag. They can last up to 3 months in the freezer. For reheating, just microwave for about 30 seconds or toast in a skillet until warm.

What if my pancake batter is too thick?
If your pancake batter turns out too thick, don’t worry! Simply add a tablespoon of milk at a time until you reach your desired consistency. Mixing just until combined can help avoid overly dense pancakes. Remember, a little air in the batter means fluffier buns!

Are there any dietary considerations for this recipe?
Definitely! You can customize your 5-Minute McGriddle Recipe to fit various dietary preferences. For a lighter version, substitute regular eggs with egg whites or use a plant-based milk if you’re avoiding dairy. Additionally, consider turkey bacon or vegetarian sausage to accommodate your dietary choices. Always check ingredient labels for allergens like gluten or dairy!

How do I make the pancakes sweet without overdoing sugar?
To infuse lovely sweetness into your pancakes without relying on excess sugar, try using real maple syrup in the batter itself or add small dollops of thickened syrup before flipping the pancakes. This way, you can achieve delightful maple pockets while keeping the overall sugar content in check!

-Minute McGriddle Recipe

Effortless 5-Minute McGriddle Recipe for Busy Mornings

Make delicious Homemade McGriddles in under 5 minutes with this easy recipe perfect for busy mornings!
Prep Time 5 minutes
Cook Time 15 minutes
Resting Time 5 minutes
Total Time 25 minutes
Servings: 4 sandwiches
Course: Breakfast
Cuisine: American
Calories: 320

Ingredients
  

For the Pancakes
  • 1 cup Pancake Mix Consider using whole-grain mix for added nutrition.
  • 1 cup Milk Feel free to substitute with any plant-based milk for a dairy-free option.
  • 1 large Egg Or use egg whites for a lighter version.
  • 2 tablespoons Vegetable Oil Can be swapped for melted butter.
  • 2 tablespoons Maple Syrup For a lower sugar option, try maple extract.
For the Filling
  • 4 slices Cheese (e.g., American) Pepper jack can be used for a spicy kick.
  • 4 slices Breakfast Meat (Bacon/Sausage) Turkey bacon or vegetarian patties can be used.
For Assembly
  • 2 tablespoons Maple Syrup (for brushing) Enhances the sweet and savory experience.

Equipment

  • Skillet
  • Mixing Bowl
  • Cookie Cutter or Ring Mold

Method
 

Step-by-Step Instructions
  1. Start by combining the pancake mix, milk, egg, vegetable oil, and maple syrup in a bowl. Mix until just combined and let the batter rest for about 5 minutes.
  2. Heat a skillet over medium heat and lightly grease it. Pour about ¼ cup of pancake batter into the skillet, cook for 2-3 minutes, flip and brown the other side for another 1-2 minutes.
  3. In the same skillet, crack your eggs and season with salt and pepper. Cover to help cook evenly for about 3-4 minutes.
  4. Prepare your breakfast meat by cooking bacon until crispy or following package directions for sausage.
  5. Layer a pancake bun with a slice of cheese, cooked egg, and breakfast meat. Top with another pancake bun and brush with warm maple syrup.
  6. Serve warm with optional sides like fresh fruit or hash browns.

Nutrition

Serving: 1sandwichCalories: 320kcalCarbohydrates: 45gProtein: 14gFat: 12gSaturated Fat: 5gPolyunsaturated Fat: 1gMonounsaturated Fat: 3gCholesterol: 150mgSodium: 600mgPotassium: 300mgFiber: 2gSugar: 8gVitamin A: 500IUVitamin C: 2mgCalcium: 200mgIron: 2mg

Notes

For better pancakes, avoid over-mixing the batter. Store leftovers properly to enjoy fresh flavors later.

Tried this recipe?

Let us know how it was!

Pancake Tacos: The Fun and Customizable Breakfast Delight

As I flipped my morning pancakes, a thought struck me—why not turn these fluffy circles into something a bit more whimsical? Enter Pancake Tacos, a playful twist on breakfast that’s as fun to eat as it is to make. These delightful creations not only come together in under 15 minutes but also invite a world of customization, ensuring there’s something for everyone at the table. Whether you prefer sweet, fruity toppings or a rich, nutty filling, pancake tacos can cater to all your morning cravings while keeping the process simple and enjoyable. Join me in transforming your breakfast routine into a delightful adventure—what delicious fillings will you try today?

Why Choose Pancake Tacos for Breakfast?

Fun and Playful: Pancake tacos transform a classic breakfast into an exciting culinary experience, appealing to both kids and adults.

Customization Galore: With endless options for fillings and toppings, you can tailor each taco to suit various taste preferences, ensuring everyone at the table finds their perfect bite.

Quick Prep Time: Ready in under 15 minutes, this recipe is perfect for busy mornings or impromptu brunch gatherings.

Crowd-Pleasing Delight: Who can resist the combination of fluffy pancakes and creamy fillings? This dish is sure to impress family and friends alike!

Easy Clean-Up: Utilizing simple ingredients and straightforward instructions, pancake tacos minimize kitchen chaos—allowing you to savor every delicious moment.

For more inspiration, check out these amazing recipes for Nutella Pancakes or Chocolate Chip Pancakes that could also be delightful options for your breakfast spread!

Pancake Tacos Ingredients

For the Pancakes

  • All-Purpose Flour – Provides the perfect base for fluffy pancake tacos.
  • Sugar – Adds a touch of sweetness to balance flavors.
  • Baking Powder – Ensures your pancakes rise nicely and achieve that soft texture.
  • Eggs – Acts as a binding agent to hold everything together.
  • Milk – Adds moisture and richness; dairy or a plant-based alternative works well.

For the Creamy Filling

  • Cream Cheese – Brings a rich, tangy flavor; consider using flavored cream cheese for a twist.
  • Yogurt – A lighter option to create a creamy filling that can be sweetened to taste.
  • Nutella – A delightful chocolatey option for those who prefer a sweet indulgence.

For the Toppings

  • Fresh Fruit – Adds vibrant flavors and nutrients; try strawberries, blueberries, or banana slices.
  • Chocolate Syrup – Drizzle for an extra sweet touch that pairs perfectly with any filling.
  • Whipped Cream – Top your pancake tacos for that luxurious finish.

For the Syrup

  • Maple Syrup – A classic choice that enhances the sweetness of your pancake tacos; consider warming it slightly.
  • Honey – A natural sweetener that can add a unique flavor.

With these Pancake Tacos ingredients, you’ll be on your way to creating a breakfast that’s not only visually stunning but also full of scrumptious flavors. Get ready to make breakfast fun and customizable for everyone at the table!

Step‑by‑Step Instructions for Pancake Tacos

Step 1: Prep Batter
In a large mixing bowl, whisk together 1 cup of all-purpose flour, 2 tablespoons of sugar, and 2 teaspoons of baking powder. In a separate bowl, beat 1 large egg and add 1 cup of milk. Combine the wet and dry ingredients, stirring gently until just blended; small lumps are okay. Let the batter rest for a few minutes while you heat the skillet.

Step 2: Cook Pancakes
Heat a non-stick skillet over medium heat, allowing it to warm for about 2 minutes. Once ready, pour 1/4 cup of batter into the skillet to form small pancakes, each roughly 4 inches in diameter. Cook for about 1-2 minutes, or until bubbles form on the surface and the edges look set; then flip and cook for an additional 1-2 minutes until golden brown.

Step 3: Shape Pancakes
Once cooked, carefully remove the pancakes from the skillet and place them on a plate. While they are still warm, gently fold each pancake in half to form a taco shape. This step is crucial for achieving that fun, taco-like presentation that holds the creamy filling beautifully.

Step 4: Fill Tacos
Using a spatula, open each folded pancake slightly and spoon in your choice of creamy filling, such as cream cheese or yogurt. Aim for around 2 tablespoons of filling per taco, depending on your preference for richness. The filling should be spread evenly inside the pancake to ensure every bite is delicious.

Step 5: Top and Serve
Now comes the fun part! Top your pancake tacos with fresh fruits like sliced strawberries, blueberries, or bananas. Drizzle with chocolate syrup or maple syrup to add sweetness and a touch of indulgence. Serve warm for the best experience, inviting everyone to customize their own pancake tacos with various toppings.

Pancake Tacos Variations & Substitutions

Feel free to unleash your creativity and make these pancake tacos truly your own with deliciously unique twists!

  • Dairy-Free: Substitute regular milk with almond or oat milk and switch out cream cheese for a dairy-free yogurt alternative.
    Explore rich flavors while keeping it light; a touch of maple syrup will elevate the taste!

  • Nutella Twist: Swap out the creamy filling for Nutella, adding a decadent chocolate indulgence that pairs perfectly with fresh strawberries.
    The combination of chocolate and fruit is a match made in breakfast heaven!

  • Banana Pancakes: Mix mashed bananas into the pancake batter for natural sweetness and a fluffy texture.
    Every bite is like a mini banana bread experience that will make your mornings special.

  • Spiced Pancakes: Add a teaspoon of vanilla extract or a dash of cinnamon to your batter, creating warm, fragrant pancakes.
    This subtle boost will bring a cozy touch to your breakfast that everyone will adore!

  • Tropical Vibes: Top your pancake tacos with coconut flakes and pineapple chunks for a refreshing, island-inspired breakfast.
    The burst of tropical flavors will transport you to sandy beaches with every delicious bite!

  • Protein-Packed: Incorporate protein powder into your pancake mix for an energizing twist.
    This is a great way to fuel your day without compromising on flavor!

  • Nutty Crunch: For added texture, mix in chopped nuts or granola into your fillings, providing delightful crunch with creamy goodness.
    The contrast between creamy and crunchy will keep you excited for more!

  • Spicy Kick: Add a sprinkle of cayenne or chili flakes to your filling for a surprising spicy kick.
    This unexpected twist is perfect for those who love a little heat to wake up their taste buds!

For more amazing breakfast inspirations, don’t miss out on these enchanting recipes for Nutella Pancakes and Chocolate Chip Pancakes that are sure to delight!

Expert Tips for Pancake Tacos

  • Heat Matters: Ensure your skillet is hot enough before adding batter. This prevents sticking and helps achieve that perfect golden color.

  • Let the Batter Rest: For fluffier pancakes, allow the batter to rest for about 5 minutes. This hydrates the flour and boosts the texture, making your pancakes even more delightful.

  • Customize Your Fillings: Don’t be afraid to experiment! Try using Greek yogurt, flavored cream cheese, or even peanut butter to create a personalized pancake taco experience everyone will love.

  • Monitor Cooking Time: Keep an eye on your pancakes as they cook. Overcooking can lead to dryness; aim for a light, fluffy texture.

  • Presentation Counts: Folding the pancakes while warm helps them keep their taco shape. Serve immediately and invite guests to assemble their own toppings for extra fun!

  • Avoid Overstuffy Tacos: While it’s tempting to fill them to the brim, too much filling can cause a messy breakfast. Stick to around 2 tablespoons per taco for the perfect bite!

What to Serve with Pancake Tacos

Pairing delicious sides with pancake tacos elevates your breakfast spread into a delightful feast.

  • Creamy Mashed Potatoes: Their rich, buttery flavor contrasts beautifully with the sweetness of the pancake tacos. Enjoying both adds a twist to your breakfast table!

  • Fresh Fruit Salad: A medley of berries, melons, and citrus not only contributes a refreshing taste but also adds color and nutrition to balance the indulgence of the pancakes.

  • Maple Syrup Drizzle: This classic sweetener enhances both the flavors of your pancake tacos and the crispy textures of any complementary sides, creating a harmonious blend of sweetness.

  • Greek Yogurt Parfait: Layer yogurt with granola and honey for a creamy component that brings protein and a satisfying crunch. It offers a healthy accompaniment to your sweet tacos.

  • Whipped Cream Topping: Adding a dollop of whipped cream not only enhances the pancakes but also creates a luscious experience that feels indulgent and festive.

  • Iced Coffee or Tea: A refreshing drink choice that complements the flavors perfectly, inviting everyone to relax and enjoy their meal without the rush.

  • Chocolate Chip Cookies: A decadent treat to finish off your breakfast, they offer a delightful balance of textures with the soft pancake tacos, satisfying any sweet tooth!

Combine these ideas to create a breakfast spread that’s not only satisfying but also memorable!

Storage Tips for Pancake Tacos

Fridge: Store leftover pancake tacos in an airtight container in the refrigerator for up to 2 days. Reheat in a skillet or microwave before serving for the best texture.

Freezer: If you’d like to make them ahead, freeze individual pancake tacos wrapped in plastic wrap, then place them in a freezer-safe bag. They can be stored for up to 1 month.

Reheating: To reheat frozen pancake tacos, allow them to thaw in the fridge overnight. Then, warm directly in a skillet on low heat or use the microwave for 30-60 seconds until heated through.

Assembly Tip: To keep ingredients fresh, store the pancakes, fillings, and toppings separately, assembling right before serving. This maintains the delightful texture of your pancake tacos!

Make Ahead Options

These Pancake Tacos are perfect for busy mornings, offering a delightful meal prep solution! You can prepare the pancake batter up to 24 hours in advance, storing it in a sealed container in the refrigerator to keep it fresh. For even more efficiency, cook the pancakes and store them in an airtight container for up to 3 days. To maintain their fluffy texture, reheat them in a skillet over low heat or in the microwave briefly before filling. When it’s time to serve, simply shape the warm pancakes into tacos, fill them with your creamy filling, and top with fresh fruits and syrups. You’ll enjoy delicious pancake tacos with minimal effort!

Pancake Tacos Recipe FAQs

How do I choose the right ingredients for pancake tacos?
Absolutely! When selecting ingredients, opt for all-purpose flour that is fresh and dry, avoiding any with dark spots or a stale smell. For fruits, look for those that are ripe yet firm—bananas should be slightly yellow and not overly spotty, while strawberries should be bright red with green leaves for the best flavor.

How should I store leftover pancake tacos?
You can store leftover pancake tacos in an airtight container in the refrigerator for up to 2 days. I recommend reheating them gently in a skillet or microwave so they preserve their delightful texture and warmth. Just remember to keep any fillings and toppings stored separately to maintain freshness!

Can I freeze pancake tacos?
Definitely! To freeze pancake tacos, wrap each one individually in plastic wrap and place them in a freezer-safe bag. They can be stored for up to 1 month. When you’re ready to enjoy them, thaw in the fridge overnight, then reheat in a skillet over low heat or pop them in the microwave for about 30-60 seconds.

What should I do if my pancakes are too thick or too thin?
If your pancake batter is too thick, add a splash of milk to loosen it up until you reach a pourable consistency. On the other hand, if it’s too thin, you can sprinkle in a little more flour, mixing gently until combined. Aim for a batter that’s slightly lumpy but holds together when poured onto the skillet.

Are there any dietary considerations for pancake tacos?
Very much so! If you or someone at your table has dietary restrictions, you can easily adjust this recipe. For gluten-free options, substitute the all-purpose flour with a gluten-free blend. If allergic to dairy, use plant-based yogurt or nut butters for the creamy filling. Always read labels to ensure the toppings align with dietary needs.

How can I make pancake tacos more nutritious?
To enhance the nutritional value, consider using whole-grain flour instead of all-purpose for added fiber. You can also mix in some chia seeds or flaxseeds into the batter, which not only boosts health benefits but can also add a delightful texture. Plus, loading your tacos with fresh fruits and nuts provides essential vitamins and minerals—it’s fun and healthy!

Pancake Tacos

Pancake Tacos: The Fun and Customizable Breakfast Delight

Pancake Tacos are a whimsical, customizable breakfast that's quick to make and fun to eat.
Prep Time 10 minutes
Cook Time 5 minutes
Resting Time 5 minutes
Total Time 15 minutes
Servings: 4 tacos
Course: Breakfast
Cuisine: American
Calories: 300

Ingredients
  

For the Pancakes
  • 1 cup All-Purpose Flour Provides the perfect base for fluffy pancake tacos.
  • 2 tablespoons Sugar Adds a touch of sweetness to balance flavors.
  • 2 teaspoons Baking Powder Ensures your pancakes rise nicely.
  • 1 large Egg Acts as a binding agent.
  • 1 cup Milk Adds moisture; use dairy or plant-based.
For the Creamy Filling
  • 4 ounces Cream Cheese Brings a rich, tangy flavor.
  • 1 cup Yogurt A lighter creamy filling.
  • 1 cup Nutella Chocolatey option.
For the Toppings
  • 1 cup Fresh Fruit Try strawberries, blueberries, or bananas.
  • 1 cup Chocolate Syrup Drizzle for extra sweetness.
  • 1 cup Whipped Cream Luxurious finish.
For the Syrup
  • 1/2 cup Maple Syrup Classic choice for sweetness.
  • 1/4 cup Honey Natural sweetener.

Equipment

  • Mixing Bowl
  • Non-stick skillet
  • spatula

Method
 

Step-by-Step Instructions
  1. In a large mixing bowl, whisk together flour, sugar, and baking powder. In another bowl, beat egg and add milk. Combine wet and dry ingredients, stirring gently. Let batter rest.
  2. Heat a non-stick skillet over medium heat. Pour 1/4 cup of batter to form pancakes and cook until bubbles form. Flip and cook until golden brown.
  3. Remove pancakes and fold each in half to shape like a taco.
  4. Open each folded pancake and spoon in creamy filling, about 2 tablespoons per taco.
  5. Top with fresh fruit, drizzle with chocolate or maple syrup, and serve warm.

Nutrition

Serving: 1tacoCalories: 300kcalCarbohydrates: 45gProtein: 6gFat: 12gSaturated Fat: 6gPolyunsaturated Fat: 1gMonounsaturated Fat: 5gCholesterol: 50mgSodium: 300mgPotassium: 200mgFiber: 2gSugar: 10gVitamin A: 5IUVitamin C: 5mgCalcium: 10mgIron: 6mg

Notes

Customize your fillings with different fruits and toppings for a unique experience.

Tried this recipe?

Let us know how it was!

Pumpkin Cheesecake Overnight Oats to Brighten Your Mornings

There’s something truly magical about waking up to a breakfast that feels like dessert, and these Pumpkin Cheesecake Overnight Oats do just that. They whisper sweet reminders of fall’s warm spice and creamy bliss, yet they’re crafted to be a healthy, no-bake meal that anyone can whip up in minutes. With just a handful of wholesome ingredients, you’ll create a filling, nutritious start to your day without the guilt of traditional cheesecake. Not only are these oats a fantastic make-ahead option, they also balance comfort and health perfectly—ideal for busy mornings or a cozy weekend breakfast. What flavors and textures will you discover with each delicious spoonful? Let’s dive in!

Why Are Overnight Oats So Popular?

Simplicity: These Pumpkin Cheesecake Overnight Oats are incredibly easy to prepare—just mix and chill overnight!
Flavor Explosion: Indulge in the rich flavors of pumpkin and spices, making each bite a comforting experience.
Health-Conscious: Packed with fiber and protein, they are the perfect guilt-free breakfast choice to kick start your day.
Versatile: Customize with toppings like fresh fruit or nuts to suit your taste and add extra crunch.
Time-Saver: Ideal for busy mornings, these oats are a quick, nutritious option that can be prepped in advance, letting you enjoy a mini dessert first thing.

Pumpkin Cheesecake Overnight Oats Ingredients

Transform your mornings with these delightful and healthy Pumpkin Cheesecake Overnight Oats!

For the Oats Base
Rolled Oats – Provide structure and heartiness; use gluten-free oats for a gluten-free option.
Milk – Adds creaminess and moisture; substitute with almond milk for a dairy-free version.
Canned Pumpkin Purée – Offers flavor and serves as a nutritious base; avoid pumpkin pie filling for an authentic taste.
Chia Seeds – Thickens the mixture and boosts nutrition; substituting with flaxseeds works well too.
Vanilla Extract – Enhances the flavor profile; it’s essential for a delicious outcome!
Pumpkin Pie Spice – Infuses warmth and spiced flavor typical of fall; a mix of cinnamon, nutmeg, and ginger is a great alternative.
Maple Syrup or Honey – A natural sweetener that adds flavor; use maple syrup for a vegan option.

For the Cheesecake Layer
Greek Yogurt or Cream Cheese – Adds creaminess and that essential cheesecake flavor; opt for dairy-free yogurt if desired.
Additional Milk (for cheesecake layer) – Helps achieve desired consistency; add more if needed for smoothness.

For the Topping
Crushed Graham Crackers – Optional topping that provides a delightful crunch and authentic cheesecake flavor.

Now you’re ready to create these delightful Pumpkin Cheesecake Overnight Oats—the perfect guilt-free start to your day!

Step‑by‑Step Instructions for Pumpkin Cheesecake Overnight Oats

Step 1: Mix Oats Base
In a medium bowl or a mason jar, combine rolled oats, milk, canned pumpkin purée, chia seeds, vanilla extract, pumpkin pie spice, and maple syrup. Stir vigorously with a spoon or whisk for about 1-2 minutes until everything is well incorporated, and the oats are evenly coated. This mixture will form the heart of your Pumpkin Cheesecake Overnight Oats, so ensure there are no dry clumps.

Step 2: Prepare Cheesecake Layer
In a separate small bowl, add Greek yogurt or cream cheese, along with a splash of additional milk and another drizzle of maple syrup for sweetness. Whisk everything together for 2-3 minutes until the mixture reaches a smooth and creamy consistency. This cheesecake layer will provide that delightful contrast in your Pumpkin Cheesecake Overnight Oats, giving it a rich, indulgent flavor.

Step 3: Layer in Jar
Begin assembling your jars by spooning half of the oat mixture into the bottom. Then, add a generous layer of the creamy cheesecake mixture on top, spreading it evenly. Finally, add the remaining oat mixture as the top layer. Use a spoon to gently press down and create a compact, even texture. This layering technique allows the flavors to meld beautifully as the oats soak.

Step 4: Refrigerate
Cover the jars with lids or plastic wrap and place them in the refrigerator. Allow the Pumpkin Cheesecake Overnight Oats to chill for at least 4 hours, or overnight if possible. This refrigeration time is essential for the oats to absorb the liquid and flavors, resulting in a delightful, creamy texture that is rich in pumpkin spice goodness.

Step 5: Finish & Serve
In the morning, remove the jars from the refrigerator and give the oats a good stir. If the oats are too thick, add a splash of milk to reach your desired consistency. Top your delicious Pumpkin Cheesecake Overnight Oats with crushed graham crackers for that iconic cheesecake crunch, and drizzle a little more maple syrup on top before enjoying a wholesome, delicious breakfast.

What to Serve with Pumpkin Cheesecake Overnight Oats

There’s nothing quite like creating a cozy breakfast spread to accompany these delightful Pumpkin Cheesecake Overnight Oats.

  • Fresh Fruit Salad: A colorful medley of seasonal fruits adds a burst of freshness and contrasts beautifully with the creamy oats. Think juicy apples, tart berries, and sweet bananas.
  • Crispy Bacon or Sausage: For a savory twist, crispy bacon or savory sausage offers a satisfying crunch and complements the sweetness of the oats perfectly, creating a lovely sweet and salty flavor balance.
  • Nutty Granola: Sprinkle some crunchy granola on top for added texture and nutty flavor. This will enhance the overall taste while providing an extra protein boost to your meal.
  • Spiced Chai Latte: Sip on a warm spiced chai latte with its soothing flavors that harmonize wonderfully with the pumpkin spices in the oats, creating an inviting atmosphere.
  • Maple Syrup Drizzle: For those who love extra sweetness, a drizzle of pure maple syrup over the top brings out the flavors and makes each bite even more indulgent.
  • Greek Yogurt parfait: Serve a small bowl of Greek yogurt on the side; its creamy tanginess pairs well and adds more protein to the meal, making this breakfast not just delicious but also nourishing.
  • Chia Seed Pudding: A small cup of chia seed pudding adds a nice contrast with its own creamy texture while boosting nutritional value. Flavored with vanilla or almond milk, this can enhance the overall experience.
  • Warm Spiced Apple Compote: A small bowl of warm spiced apple compote offers a delightful, fruity topping for the oats, enhancing the warm flavors of fall and giving a comforting touch.

Expert Tips for Pumpkin Cheesecake Overnight Oats

Quality Ingredients: Always use real pumpkin purée for the best flavor; avoid sweetened pumpkin pie filling that can alter the taste.

Creamy Texture: For added creaminess, consider incorporating a spoonful of cream cheese or coconut yogurt into the oats mixture.

Dairy-Free Option: To make it dairy-free, easily substitute regular yogurt and milk with plant-based alternatives like almond or coconut milk.

Overnight Soak: Letting the oats sit in the fridge overnight allows for maximum flavor absorption and optimal texture. Don’t skip this step!

Adjust Consistency: If your oats seem too thick in the morning, simply add a splash of milk until you achieve the desired creaminess.

How to Store and Freeze Pumpkin Cheesecake Overnight Oats

Fridge: Keep your Pumpkin Cheesecake Overnight Oats in an airtight container for up to 3 days in the refrigerator to maintain freshness and flavor.

Freezer: For longer storage, you can freeze the oats in individual portions. Just be sure to use freezer-safe containers, and they should last up to 2 months.

Thawing: To enjoy frozen oats, thaw them overnight in the fridge before serving, then stir well and add a splash of milk if needed for creaminess.

Reheating: You can enjoy the oats cold straight from the fridge, or warm them gently in the microwave for about 30-60 seconds if you prefer a cozy breakfast.

Pumpkin Cheesecake Overnight Oats Variations

Feel free to personalize these delightful Pumpkin Cheesecake Overnight Oats to suit your tastes and dietary needs!

  • Sweet Potato:
    Swap the pumpkin purée with mashed sweet potato for a different flavor and nutrient boost.

  • Banana Twist:
    Use ripe bananas instead of pumpkin purée for a naturally sweet and fruity profile.

  • Nutty Crunch:
    Top your oats with toasted pecans or walnuts for a satisfying texture and healthy fat.

  • Protein Boost:
    Mix in a scoop of vanilla protein powder to enhance the protein content and keep you full longer.

  • Coconut Delight:
    Replace Greek yogurt with coconut yogurt for a tropical twist that’s also dairy-free.

  • Spice It Up:
    Add a dash of cayenne or cinnamon to amplify the warmth and spice of these creamy oats.

  • Vegan-Friendly:
    Substitute all non-vegan ingredients, including maple syrup with agave or date syrup for a fully plant-based breakfast.

  • Chocolate Drizzle:
    For an indulgent treat, add a drizzle of melted dark chocolate on top—it pairs beautifully with the pumpkin flavors.

As you’re enjoying these variations, why not also explore the creamy goodness of an Overnight Creme Brulee? Or if you’re in the mood for something different, check out the delicious Joumou Haitian Pumpkin for a savory twist!

Make Ahead Options

These Pumpkin Cheesecake Overnight Oats are ideal for meal prep, saving you time on busy mornings! You can prepare the oat mixture and the cheesecake layer up to 24 hours in advance. Combine the rolled oats, milk, pumpkin purée, chia seeds, vanilla extract, pumpkin pie spice, and maple syrup in a jar. In a separate bowl, mix the Greek yogurt and milk for the cheesecake layer. Layer the oat mixture and cheesecake mix in jars, cover, and refrigerate. To maintain freshness, keep them in airtight containers; they’ll stay delicious for up to 3 days. When you’re ready to enjoy, simply stir, adjust the consistency with additional milk if needed, and top with graham crackers!

Pumpkin Cheesecake Overnight Oats Recipe FAQs

What type of oats should I use for Pumpkin Cheesecake Overnight Oats?
I recommend using rolled oats for the best texture and heartiness. If you’re looking for a gluten-free option, you can easily substitute with certified gluten-free rolled oats.

How should I store Pumpkin Cheesecake Overnight Oats?
For the freshest taste, store your Pumpkin Cheesecake Overnight Oats in an airtight container in the refrigerator for up to 3 days. This way, they’ll stay creamy and delicious as the flavors continue to meld.

Can Pumpkin Cheesecake Overnight Oats be frozen?
Absolutely! For longer storage, you can freeze your oats in individual portions using freezer-safe containers. They will stay good for up to 2 months. Just remember to thaw them in the refrigerator overnight before enjoying!

What do I do if my oats are too thick in the morning?
If you find your oats are thicker than desired after chilling, simply add a splash of milk and give them a good stir. You can adjust the consistency until it’s just right for your preference—creamy and delicious!

Is this recipe suitable for those with dairy allergies?
Yes, it can be! Just substitute regular yogurt and milk with non-dairy alternatives such as almond milk and dairy-free yogurt. You’ll still create a sumptuous Pumpkin Cheesecake Overnight Oats that everyone can enjoy!

How can I make these Pumpkin Cheesecake Overnight Oats even more delicious?
You can enhance your oats with toppings like crushed nuts for added crunch or seasonal fruits like sliced bananas or fresh apples. Each spoonful can become a delightful surprise filled with flavors and textures!

Pumpkin Cheesecake Overnight Oats

Pumpkin Cheesecake Overnight Oats to Brighten Your Mornings

Enjoy a delicious and healthy start to your day with Pumpkin Cheesecake Overnight Oats, a dessert-like breakfast that's easy to prepare.
Prep Time 10 minutes
Refrigeration Time 4 hours
Total Time 4 hours 10 minutes
Servings: 2 servings
Course: Breakfast
Cuisine: American
Calories: 300

Ingredients
  

For the Oats Base
  • 1 cup Rolled Oats Use gluten-free oats for a gluten-free option.
  • 1 cup Milk Substitute with almond milk for a dairy-free version.
  • 1/2 cup Canned Pumpkin Purée Avoid pumpkin pie filling for an authentic taste.
  • 2 tablespoons Chia Seeds Substituting with flaxseeds works well too.
  • 1 teaspoon Vanilla Extract Essential for a delicious outcome.
  • 1 teaspoon Pumpkin Pie Spice A mix of cinnamon, nutmeg, and ginger is a great alternative.
  • 2 tablespoons Maple Syrup or Honey Use maple syrup for a vegan option.
For the Cheesecake Layer
  • 1 cup Greek Yogurt or Cream Cheese Opt for dairy-free yogurt if desired.
  • 1/4 cup Additional Milk Helps achieve desired consistency.
For the Topping
  • 1/4 cup Crushed Graham Crackers Optional topping for crunch and flavor.

Equipment

  • Mason jar or medium bowl
  • whisk
  • Spoon

Method
 

Preparation
  1. In a medium bowl or mason jar, combine rolled oats, milk, canned pumpkin purée, chia seeds, vanilla extract, pumpkin pie spice, and maple syrup. Stir vigorously for about 1-2 minutes until everything is well incorporated.
  2. In a separate bowl, mix Greek yogurt or cream cheese with a splash of additional milk and a drizzle of maple syrup. Whisk until smooth and creamy.
  3. Layer half of the oat mixture in jars, then add cheesecake layer, followed by the remaining oat mixture. Press down gently to create an even texture.
  4. Cover jars and refrigerate for at least 4 hours, or overnight, to allow flavors to meld.
  5. In the morning, stir the oats and adjust consistency with more milk if needed. Top with crushed graham crackers and drizzle with maple syrup before serving.

Nutrition

Serving: 1servingCalories: 300kcalCarbohydrates: 45gProtein: 10gFat: 9gSaturated Fat: 3gPolyunsaturated Fat: 1gMonounsaturated Fat: 3gCholesterol: 5mgSodium: 150mgPotassium: 400mgFiber: 8gSugar: 12gVitamin A: 600IUVitamin C: 2mgCalcium: 150mgIron: 2mg

Notes

For best flavor, use real pumpkin purée and let oats sit overnight for optimal taste and texture.

Tried this recipe?

Let us know how it was!

Satisfy Your Cravings with Chicken Alfredo Sloppy Joes

As I stood in the kitchen, the aroma of sautéed garlic and onions filled the air, transporting me to a cozy bistro in Italy. That’s when my mind sparked the idea for a recipe that marries comfort food with a quick weeknight solution: Chicken Alfredo Sloppy Joes. Picture this delightful dish featuring tender ground chicken smothered in a creamy Alfredo sauce, all tucked between soft, toasty buns. Not only is it a fantastic way to switch up dinner, but it also offers a satisfying indulgence that comes together in no time. Whether you’re whipping up a meal for your family or hosting friends for a game night, this recipe is sure to be a crowd-pleaser! Are you ready to elevate your Sloppy Joe game?

Why Try Chicken Alfredo Sloppy Joes?

Comfort Food Reimagined: The combination of creamy Alfredo sauce and tender chicken transforms the classic Sloppy Joe into a luxurious bite that’s not only indulgent but also a breeze to prepare.

Quick and Easy: Designed for busy weeknights, this recipe comes together in just 30 minutes, making it an ideal choice for families craving homemade goodness without the hassle.

Crowd-Pleasing Appeal: Perfect for gatherings or a cozy dinner, these Sloppy Joes can easily satisfy both kids and adults alike, ensuring everyone leaves the table happy.

Versatile Recipes: You can spice things up by adding sautéed mushrooms or your favorite cheese, allowing for endless variations. If you love rich flavors, try pairing with our Bbq Chicken Grilled or opt for a fresh twist with a Blt Chicken Salad as a side!

Easy Leftovers: If you happen to have any leftovers (which is rare!), they store beautifully and can be reheated for a delicious lunch the next day. This ensures precious time isn’t wasted, maximizing enjoyment with minimal effort.

Chicken Alfredo Sloppy Joes Ingredients

For the Chicken Filling

  • Ground Chicken – The main protein that makes this dish hearty and satisfying; feel free to substitute with ground turkey or beef for a different flavor.
  • Olive Oil – Adds moisture and helps sauté the vegetables; can be swapped for canola oil or butter if preferred.
  • Onion (finely chopped) – Brings flavor and sweetness; shallots can be used as a milder alternative.
  • Garlic (minced) – Enhances aroma and taste; garlic powder (1/2 teaspoon) works well in a pinch.

For the Creamy Alfredo Sauce

  • Heavy Cream – Creates that rich and creamy Alfredo sauce; you can use half-and-half or a lower-fat cream alternative for a lighter version.
  • Grated Parmesan Cheese – Contributes savory, cheesy flavor; try Pecorino Romano for a sharper taste if desired.
  • Italian Seasoning – A blend of herbs to elevate the flavor; oregano and basil can substitute if necessary.
  • Salt and Pepper – Essential seasonings to taste; adjust as needed for a personalized flavor.

For the Assembly

  • Hamburger Buns – Ideal vessels for the filling; opt for ciabatta rolls or whole grain buns for added texture.
  • Fresh Parsley – Adds a pop of color and freshness for garnish; you can omit it if desired.

This scrumptious recipe for Chicken Alfredo Sloppy Joes brings comfort food to a new level that is sure to impress family and friends alike!

Step‑by‑Step Instructions for Chicken Alfredo Sloppy Joes

Step 1: Prepare Ingredients
Begin by gathering all your ingredients for the Chicken Alfredo Sloppy Joes. This includes ground chicken, olive oil, onion, garlic, heavy cream, Parmesan cheese, Italian seasoning, salt, pepper, hamburger buns, and fresh parsley. Having everything ready will streamline the cooking process and make it more enjoyable as you create this creamy dish.

Step 2: Sauté Vegetables
In a large skillet, heat 2 tablespoons of olive oil over medium heat. Once hot, add the finely chopped onion and sauté for about 3-4 minutes until it turns translucent and fragrant. Next, stir in the minced garlic and cook for an additional 1-2 minutes, making sure not to let it burn. This aromatic base will set the stage for your Chicken Alfredo Sloppy Joes.

Step 3: Cook Chicken
Add the ground chicken to the skillet, breaking it apart with a spatula as it cooks. Continue to sauté for about 5-7 minutes, stirring occasionally, until the chicken is thoroughly cooked through and no longer pink. This ensures a tender filling that forms the heart of your Chicken Alfredo Sloppy Joes, providing flavor and protein.

Step 4: Make Alfredo Sauce
Reduce the heat to low and pour in 1 cup of heavy cream, stirring to combine with the chicken mixture. Gradually sprinkle in the grated Parmesan cheese while stirring continuously, allowing it to melt into the sauce over 2-3 minutes. Season with Italian seasoning, salt, and pepper to taste, adjusting the consistency with a splash of chicken broth if it’s too thick.

Step 5: Assemble Sloppy Joes
Lightly toast the hamburger buns on a skillet or in the oven for a couple of minutes until golden. Generously spoon the creamy Chicken Alfredo mixture onto the bottom half of each bun, then top with the other half. For extra indulgence, sprinkle more cheese on top before closing. Your Chicken Alfredo Sloppy Joes are just about ready to serve!

Step 6: Serve
Transfer your assembled Chicken Alfredo Sloppy Joes to a serving platter and garnish with fresh parsley for a pop of color. Serve warm alongside crispy fries or a refreshing garden salad to balance the richness of the dish. Enjoy every bite of this comforting meal, perfect for any gathering or family dinner!

How to Store and Freeze Chicken Alfredo Sloppy Joes

Fridge: Store leftovers in an airtight container for up to 3 days. To maintain the best texture, keep the filling and buns separate until ready to enjoy.

Freezer: For long-term storage, place the chicken Alfredo mixture in a freezer-safe container. It will last up to 3 months.

Reheating: When ready to eat, thaw the filling overnight in the fridge, then reheat gently on the stovetop. Toast fresh buns before serving for an optimal experience.

Assembly Tips: If you freeze the filling, simply warm it and assemble with fresh buns for a quick and satisfying meal anytime you crave Chicken Alfredo Sloppy Joes.

What to Serve With Chicken Alfredo Sloppy Joes?

The perfect accompaniment can elevate your Chicken Alfredo Sloppy Joes into a memorable feast that delights every palate.

  • Crispy Sweet Potato Fries: The natural sweetness and crisp texture create a nice contrast to the creamy filling. They add a pop of color and nutrition too!

  • Fresh Garden Salad: A light salad with mixed greens and a tangy vinaigrette cuts through the richness of the Sloppy Joes, providing a refreshing balance.

  • Garlic Breadsticks: These buttery, herb-infused delights are perfect for mopping up any leftover Alfredo sauce, ensuring no flavor is wasted.

  • Coleslaw: This crunchy side adds a delightful crunch and a hint of sweetness that complements the creamy Chicken Alfredo flavors beautifully.

  • Pasta Salad: A serve of pasta salad with vegetables gives a fun twist, incorporating even more textures and flavors onto the plate.

  • Classic Potato Chips: For that extra crunch, a side of salty potato chips offers a nostalgic crunch that pairs perfectly with the warmth of the Sloppy Joes.

  • Sparkling Lemonade: Refreshing and slightly tart, this drink adds a burst of flavor that complements the rich and creamy nature of the dish, making your meal even more enjoyable.

  • Brownie Sundae: For dessert, consider chocolate brownie sundaes topped with vanilla ice cream for a decadent finish that matches the indulgent feel of your meal.

Make Ahead Options

These Chicken Alfredo Sloppy Joes are perfect for meal prep enthusiasts! You can prepare the creamy Chicken Alfredo mixture up to 3 days in advance and store it in an airtight container in the refrigerator. This allows the flavors to meld beautifully while saving you precious time during busy weeknights. Simply cook the ground chicken, sauté the onions and garlic, and create the Alfredo sauce as instructed. When you’re ready to serve, just heat the mixture gently on the stovetop, spoon it onto toasted buns, and enjoy your delicious, hassle-free dinner, just as satisfying as if you made it fresh!

Chicken Alfredo Sloppy Joes Variations

Feel free to get creative and make this recipe your own; your kitchen should be your playground!

  • Dairy-Free: Substitute heavy cream with coconut cream and use nutritional yeast in place of Parmesan for a creamy, cheesy flavor without the dairy.

  • Spicy Kick: Add red pepper flakes or diced jalapeños to the chicken mixture while it cooks for a delightful heat that brightens up the dish.

  • Veggie Boost: Toss in sautéed mushrooms or fresh spinach right after the garlic to enhance the flavor and add healthy veggies to your Joes.

  • Cheese Swap: For a unique twist, try using mozzarella or fontina cheese instead of Parmesan. This will give a different texture and a lovely gooeyness.

  • Zesty Flavor: Stir in a bit of lemon zest or a splash of lemon juice just before serving for a refreshing, zesty finish that elevates the creaminess.

  • Whole Grain Goodness: Use whole grain or artisan bread instead of traditional hamburger buns for a heartier, more textured base that adds nutrition.

  • Italian Twist: Incorporate sun-dried tomatoes or olives into the mixture for a Mediterranean vibe that will transport your taste buds to a seaside café.

If you’re still eager for flavor escapades, you might find itself paired with our savory Tuscan Chicken Soup or opt for a flavorful crunch with Sizzling Chicken Pepper. In the end, the only limit is your imagination!

Expert Tips for Chicken Alfredo Sloppy Joes

  • Cook Chicken Thoroughly: Always make sure the ground chicken is fully cooked with no pink remaining to ensure safety and flavor.

  • Watch the Sauce Consistency: If your Alfredo sauce becomes too thick, simply add a splash of chicken broth to adjust it, keeping that creamy texture.

  • Enhance Nutrients: Consider adding chopped veggies like bell peppers or spinach to the sautéed onions for a nutritious twist in your Chicken Alfredo Sloppy Joes.

  • Toast Your Buns: Lightly toasting the buns before assembly adds a delightful crunch and prevents them from getting soggy.

  • Custom Seasoning: Feel free to adjust the Italian seasoning and sprinkle in a pinch of red pepper flakes if you like a bit of heat in your filling!

Chicken Alfredo Sloppy Joes Recipe FAQs

How do I select ripe ingredients for my Chicken Alfredo Sloppy Joes?
Absolutely! When choosing ingredients, always look for ground chicken that is fresh and has a nice pink color. If you opt for vegetables, select onions that are firm and have a fresh smell. For the best flavor, choose heavy cream that is not close to its expiration date, and grated Parmesan cheese that is fresh, as it will melt better into your sauce.

How should I store leftover Chicken Alfredo Sloppy Joes?
Very good question! Store any leftover Chicken Alfredo filling in an airtight container in the refrigerator for up to 3 days. If you’re saving the buns too, keep them in a separate bag to avoid sogginess. When you’re ready to enjoy your leftovers, simply reheat the chicken mixture gently in a skillet and toast fresh buns for the best texture!

Can I freeze Chicken Alfredo Sloppy Joes?
Of course! To freeze, place the chicken Alfredo mixture in a freezer-safe container. Be sure to let it cool completely before sealing it to prevent condensation. It can last up to 3 months in the freezer. When you’re ready to enjoy it, thaw the filling in the refrigerator overnight and then reheat on the stovetop for a quick meal.

What if my Alfredo sauce is too thick during cooking?
Don’t worry; it happens! If you find that your Alfredo sauce is a bit too thick, simply add a splash of chicken broth or water to loosen it up. Stirr gently while it warms back up on low heat, and adjust until you reach that creamy consistency that’s perfect for spooning onto your buns.

Are there any dietary considerations for Chicken Alfredo Sloppy Joes?
Certainly! If allergies are a concern, this recipe can be customized. For a gluten-free option, use gluten-free buns. Also, make sure to check the labels on the heavy cream and cheese for any dairy allergies. If you’re making it for pets, remember that foods high in fat and dairy may not be suitable—stick to their regular diet!

What should I do if I want to add more vegetables to my Chicken Alfredo Sloppy Joes?
Great thought! You can easily mix in other veggies like finely chopped spinach or sautéed bell peppers along with your onions. Simply add them to the skillet when you sauté your onions, cooking them until they’re tender before adding the ground chicken. This not only enhances the flavor but adds a nutritious boost to your meal too!

Chicken Alfredo Sloppy Joes

Satisfy Your Cravings with Chicken Alfredo Sloppy Joes

Indulge in Chicken Alfredo Sloppy Joes, a creamy twist on a classic favorite that combines comfort food with quick preparation.
Prep Time 10 minutes
Cook Time 20 minutes
Total Time 30 minutes
Servings: 4 sloppy joes
Course: Dinner
Cuisine: Italian
Calories: 450

Ingredients
  

For the Chicken Filling
  • 1 pound Ground Chicken can substitute with ground turkey or beef
  • 2 tablespoons Olive Oil can use canola oil or butter as an alternative
  • 1 medium Onion (finely chopped) or shallots for a milder flavor
  • 2 cloves Garlic (minced) or use garlic powder (1/2 teaspoon)
For the Creamy Alfredo Sauce
  • 1 cup Heavy Cream or half-and-half for a lighter version
  • 1 cup Grated Parmesan Cheese Pecorino Romano is a good substitute
  • 1 teaspoon Italian Seasoning alternatively, use oregano and basil
  • to taste Salt
  • to taste Pepper
For the Assembly
  • 4 buns Hamburger Buns ciabatta rolls or whole grain buns can be used
  • optional Fresh Parsley for garnish

Equipment

  • Large skillet
  • spatula

Method
 

Step-by-Step Instructions
  1. Prepare Ingredients: Gather all ingredients for the Chicken Alfredo Sloppy Joes.
  2. Sauté Vegetables: Heat olive oil in a skillet, add onion and sauté for 3-4 minutes, then add minced garlic.
  3. Cook Chicken: Add ground chicken to skillet and cook for 5-7 minutes until no longer pink.
  4. Make Alfredo Sauce: Pour in heavy cream, add Parmesan cheese, and season with Italian seasoning, salt, and pepper.
  5. Assemble Sloppy Joes: Toast buns and fill with Chicken Alfredo mixture, topping with bun half.
  6. Serve: Garnish with parsley and serve warm with sides.

Nutrition

Serving: 1sloppy joeCalories: 450kcalCarbohydrates: 40gProtein: 30gFat: 22gSaturated Fat: 10gPolyunsaturated Fat: 2gMonounsaturated Fat: 8gCholesterol: 80mgSodium: 700mgPotassium: 600mgFiber: 3gSugar: 3gVitamin A: 800IUVitamin C: 2mgCalcium: 300mgIron: 2mg

Notes

If you have leftovers, store in an airtight container for up to 3 days. The filling can also be frozen for up to 3 months.

Tried this recipe?

Let us know how it was!

Cheesy Chicken Crescent Rolls for Cozy Comfort Every Time

As I pulled a tray of golden, flaky Cheesy Chicken Crescent Rolls from the oven, the warm, buttery aroma danced through the kitchen, instantly lifting my spirits. These delightful bundles are not just easy to whip up, taking only 30 minutes from start to finish, but they also promise to be a crowd-pleaser for any gathering or weeknight dinner. Imagine creamy, cheesy shredded chicken cradled in delicate crescent dough—comfort food at its finest! What I love most is their versatility; you can customize these rolls with any number of ingredients, ensuring they become a staple in your kitchen repertoire. Ready to fill your home with irresistible flavors? Let’s dive into this recipe that will have everyone asking for seconds!

Why Are Cheesy Chicken Crescent Rolls Irresistible?

Simplicity at its finest: These Cheesy Chicken Crescent Rolls come together in just 30 minutes, making dinner a breeze.
Flavor explosion: The combination of creamy chicken, tangy cheese, and herbs creates a rich taste that everyone will love.
Endless customization: With options to add veggies or swap cheeses, these rolls can fit any palate or dietary need.
Crowd-pleaser allure: They’re perfect for family dinners, parties, or even as a delightful snack while watching your favorite show.
Make-ahead magic: Prepare them in advance and bake at your convenience for stress-free hosting. For more delicious options, try out our Cheesy Garlic Chicken or explore the savory goodness of a Cheesy Spinach Artichoke.

Cheesy Chicken Crescent Rolls Ingredients

For the Dough

  • Crescent Dough – The flaky base that perfectly wraps the delicious filling; if unavailable, puff pastry or biscuit dough can be a great alternative.

For the Filling

  • Shredded Cooked Chicken – Provides protein and savory richness, and using rotisserie chicken can save you time and enhance flavor.
  • Cream Cheese – Ensures a creamy, luxurious filling; for a lighter option, swap it with Neufchâtel cheese.
  • Shredded Cheddar Cheese – Adds sharpness and flavor; try substituting with mozzarella for a gooey texture or pepper jack for some heat.
  • Garlic Powder – Elevates the flavor profile; fresh minced garlic adds an extra punch if you prefer a stronger taste.
  • Chopped Fresh Parsley – Gives a fresh burst of color and flavor; you can also use herbs like chives or thyme for a unique twist.
  • Salt and Pepper – Essential for bringing all the flavors together; season to your taste.

Feel the warmth of home with these Cheesy Chicken Crescent Rolls in no time!

Step‑by‑Step Instructions for Cheesy Chicken Crescent Rolls

Step 1: Preheat the Oven
Begin by preheating your oven to 375°F (190°C). While the oven heats up, take a moment to lightly grease a baking sheet with cooking spray or brush it with olive oil. This will prevent your Cheesy Chicken Crescent Rolls from sticking and ensure a golden, flaky finish.

Step 2: Prepare the Filling
In a large mixing bowl, combine the shredded cooked chicken, softened cream cheese, shredded cheddar cheese, garlic powder, chopped parsley, and season with salt and pepper. Stir the mixture thoroughly until all ingredients are well incorporated and creamy. This flavorful filling will make your rolls rich and delightful.

Step 3: Assemble the Rolls
Open the crescent dough package and unroll it onto a clean surface. Separate the dough into triangles and place a generous spoonful of the cheesy chicken filling on the wide end of each triangle. Roll the dough toward the pointed end, tucking in the sides as you go to keep the filling secure.

Step 4: Place on Baking Sheet
Carefully arrange the assembled Cheesy Chicken Crescent Rolls on the greased baking sheet, ensuring they’re spaced apart to allow for even baking. Take a moment to admire your creations before baking; their flaky appearance will entice everyone in the house.

Step 5: Bake Until Golden
Put the baking sheet in the preheated oven and bake for 12-15 minutes. Keep an eye on the rolls as they turn golden brown and puff up beautifully. You’ll know they’re ready when the tops are flaky and lightly browned.

Step 6: Cool and Serve
Once baked, remove the Cheesy Chicken Crescent Rolls from the oven and allow them to cool for a few minutes on the baking sheet. This brief rest will make handling easier while the filling remains nice and warm inside. Now they’re ready to be served!

Expert Tips for Cheesy Chicken Crescent Rolls

  • Don’t Overfill: Avoid excessive filling to prevent spillage during baking. A generous spoonful should suffice for perfect rolls.
  • Shred Chicken Well: Ensure your chicken is shredded into small pieces for even distribution and consistent flavor in your cheesy chicken crescent rolls.
  • Proper Dough Handling: Keep the crescent dough refrigerated until you’re ready to use it, as it’s easier to work with when cold.
  • Even Baking: Space the rolls adequately on the baking sheet to allow proper heat circulation, ensuring all rolls bake evenly.
  • Check Doneness: Bake until golden brown; under-baking can lead to doughy texture while over-baking can dry out the filling.
  • Experiment with Herbs: Don’t hesitate to try different herbs and spices in the filling to create your unique twist on these cheesy chicken crescent rolls.

What to Serve with Cheesy Chicken Crescent Rolls

Create a delightful meal around these cheesy bundles that will have everyone coming back for more!

  • Garden Salad: Fresh greens, crisp cucumbers, and ripe tomatoes tossed with a light vinaigrette balance the richness of the rolls perfectly. The refreshing crunch adds a nice contrast to the creamy interior of the crescent rolls.

  • Roasted Vegetables: Seasonal veggies, tossed in olive oil and herbs, bring earthy flavors and a bit of sweetness to the table—ideal for adding color and nutrition to your meal.

  • Ranch Dressing: A side of creamy ranch is a classic pairing that enhances each bite of the Cheesy Chicken Crescent Rolls. It not only adds a zesty kick but invites a fun dipping experience for your dinner guests.

  • Spicy Buffalo Sauce: For those who crave a bit of heat, serving some buffalo sauce on the side will take your rolls to the next level. The spicy kick complements the rich filling beautifully.

  • Marinara Sauce: A warm bowl of marinara makes for a comforting dip that resonates with the flavors of the cheesy, savory filling. It’s a classic combination that will satisfy pasta lovers and roll enthusiasts alike.

  • Garlic Aioli: This creamy, garlicky sauce offers a savory twist that blends beautifully with the flaky dough and warm filling. It elevates the flavor experience for sophisticated palates.

  • Sweet Potato Fries: A crispy, golden side of sweet potato fries adds a hint of sweetness to contrast the savory rolls, creating an irresistible combination that pairs perfectly with dipping sauces.

  • Refreshing Sparkling Water: A bubbly drink not only quenches your thirst but also cleanses your palate between bites, making the flavors of the Cheesy Chicken Crescent Rolls shine through.

  • Chocolate Chip Cookies: For dessert, who could resist classic chocolate chip cookies? The warm, gooey chocolate is a sweet ending that pairs nostalgically with the comforting nature of the main dish.

Cheesy Chicken Crescent Rolls: Endless Variations

Feel free to get creative with these Cheesy Chicken Crescent Rolls—your taste buds will thank you!

  • Gluten-Free: Use gluten-free crescent dough to accommodate dietary needs without sacrificing flavor.
  • Creamy Alternative: Swap cream cheese for ricotta or cottage cheese for a lighter, fluffy filling. It’s a delightful twist that maintains creaminess while offering a different texture!
  • Veggie Boost: Incorporate cooked spinach, roasted red peppers, or chopped broccoli into the filling for added nutrients and flavor. Imagine the pop of color and taste with each delightful bite!
  • Cheese Swap: Try pepper jack or gouda instead of cheddar for a spicy kick or a smoky flavor. The choice can transform these rolls into a gourmet experience.
  • Herb Infusion: Use fresh dill or basil in place of parsley for a refreshing twist. These herbs will brighten the filling and add a new layer of flavor.
  • Spicy Kick: Add diced jalapeños or a pinch of cayenne pepper for an exciting heat that elevates your crescent rolls to new heights. Pair with a cooling dip for a perfect balance!
  • Breakfast Version: Replace the chicken with scrambled eggs, cheese, and diced ham for a hearty breakfast treat. Who says you can’t have crescent rolls in the morning?
  • Dipping Delight: Serve with a side of sriracha or homemade ranch dressing for an enticing flavor experience. Dip away and enjoy every scrumptious moment!

These customizations are here to inspire you—let your creativity shine in the kitchen! For more delicious ideas, check out our Sizzling Chicken Pepper or try out a hearty BLT Chicken Salad for your next meal.

Storage Tips for Cheesy Chicken Crescent Rolls

  • Room Temperature: Cheesy Chicken Crescent Rolls can be kept at room temperature for up to 2 hours. Be sure to cover them with a clean kitchen towel to keep them from drying out.
  • Fridge: Store leftover rolls in an airtight container in the fridge for up to 3 days. This helps maintain their flaky texture and prevents them from absorbing other odors.
  • Freezer: To freeze, wrap the rolls tightly in plastic wrap, then place them in a freezer-safe bag. They can last for up to 3 months. Bake from frozen, adding an extra 5-10 minutes to the baking time.
  • Reheating: Reheat leftover rolls in a preheated oven at 350°F (175°C) for about 10 minutes or until warmed through to bring back their delightful crispiness.

Make Ahead Options

Prepare a delicious batch of Cheesy Chicken Crescent Rolls ahead of time to save on busy weeknights! You can assemble the rolls and store them in the refrigerator for up to 24 hours before baking. Simply follow the recipe instructions to prepare the filling and fill the crescent dough, then cover them tightly with plastic wrap or foil to maintain freshness. When you’re ready to enjoy them, preheat your oven and bake directly from the fridge—no need for added wait time. If you prefer, you can also freeze the assembled rolls for up to 3 months; just add extra baking time when cooking from frozen. Enjoy restaurant-quality comfort food at home with minimal fuss!

Cheesy Chicken Crescent Rolls Recipe FAQs

What type of chicken is best to use for the filling?
Absolutely! Shredded cooked chicken is ideal for these rolls. You can use leftover chicken or even rotisserie chicken for added convenience and flavor. The key is to ensure your chicken is well-shredded into small pieces so it distributes evenly throughout the cheesy filling.

How long can I store leftovers, and what’s the best way to store them?
Cheesy Chicken Crescent Rolls can be stored in an airtight container in the refrigerator for up to 3 days. They should be kept at room temperature for no longer than 2 hours. When storing in the fridge, it’s helpful to place them in a container that maintains their flaky texture, so they don’t absorb moisture or other odors.

Can I freeze Cheesy Chicken Crescent Rolls, and how do I do that?
Definitely! To freeze, wrap each roll tightly in plastic wrap and then place them in a freezer-safe bag. They can be stored in the freezer for up to 3 months. When you’re ready to enjoy them, you can bake them directly from frozen—just add an extra 5-10 minutes to the baking time to ensure they’re heated through and golden.

What if my dough rips while assembling the rolls?
No worries! If your crescent dough tears, simply patch it up with a small piece of extra dough or press it back together gently. A little hole won’t affect the final result, but be sure to avoid overfilling to prevent any spillage during baking.

Can I customize the filling for dietary needs, like gluten-free?
Absolutely! You can make these rolls gluten-free by using a gluten-free crescent dough option. Additionally, if anyone has dairy allergies, consider using dairy-free cream cheese and cheese substitutes. Feel free to explore various fillings like chopped spinach, cooked mushrooms, or different cheeses to accommodate dietary preferences.

How should I reheat leftover Cheesy Chicken Crescent Rolls?
For the best results, reheat these rolls in a preheated oven at 350°F (175°C) for about 10 minutes. This method helps restore their delightful crispiness. Alternatively, you can use a microwave, but keep in mind that the texture may not be as flaky. Enjoy your leftover goodies just as delicious as when they were fresh!

Cheesy Chicken Crescent Rolls

Cheesy Chicken Crescent Rolls for Cozy Comfort Every Time

Delightful Cheesy Chicken Crescent Rolls are quick to make and perfect for gatherings, with creamy, cheesy chicken wrapped in flaky dough.
Prep Time 15 minutes
Cook Time 15 minutes
Total Time 30 minutes
Servings: 4 rolls
Course: Appetizers
Cuisine: American
Calories: 250

Ingredients
  

For the Dough
  • 1 package Crescent Dough Can substitute with puff pastry or biscuit dough.
For the Filling
  • 2 cups Shredded Cooked Chicken Use rotisserie chicken for convenience.
  • 8 oz Cream Cheese Can substitute with Neufchâtel cheese for a lighter option.
  • 1 cup Shredded Cheddar Cheese Can substitute with mozzarella or pepper jack.
  • 1 teaspoon Garlic Powder Use fresh minced garlic for a stronger flavor.
  • 2 tablespoons Chopped Fresh Parsley Can use other herbs like chives or thyme.
  • to taste Salt
  • to taste Pepper

Equipment

  • Oven
  • Baking Sheet
  • Mixing Bowl

Method
 

Step-by-Step Instructions for Cheesy Chicken Crescent Rolls
  1. Preheat your oven to 375°F (190°C) and lightly grease a baking sheet.
  2. In a large mixing bowl, combine shredded chicken, cream cheese, cheddar cheese, garlic powder, parsley, salt, and pepper. Stir until creamy.
  3. Open the crescent dough package, separate into triangles, and place filling on the wide end. Roll towards the pointed end, tucking in sides.
  4. Arrange the rolls on the greased baking sheet, spaced apart for even baking.
  5. Bake for 12-15 minutes until golden brown. Monitor the rolls to avoid over-baking.
  6. Allow the rolls to cool for a few minutes before serving.

Nutrition

Serving: 1rollCalories: 250kcalCarbohydrates: 15gProtein: 15gFat: 15gSaturated Fat: 8gPolyunsaturated Fat: 1gMonounsaturated Fat: 5gCholesterol: 50mgSodium: 500mgPotassium: 200mgFiber: 1gSugar: 1gVitamin A: 500IUVitamin C: 2mgCalcium: 200mgIron: 1mg

Notes

These rolls are customizable with various ingredients and can be made ahead of time for convenience.

Tried this recipe?

Let us know how it was!

Garlic Parmesan Focaccia Bread: A Cozy Homemade Treat

There’s nothing quite like the mouthwatering scent of freshly baked bread wafting through the house—it’s the essence of comfort. Today, I’m thrilled to share my simple recipe for Garlic Parmesan Focaccia Bread, which has quickly become my go-to when friends drop by unannounced or when I’m in need of a satisfying culinary project. This recipe not only offers an easy way to impress guests, but it also opens the door to endless customization with your favorite toppings. Whether enjoyed as a stand-alone snack with olive oil and balsamic vinegar, or as a hearty accompaniment to soups and salads, this focaccia delivers both warmth and flavor. So, what creative twist will you add to your batch? Let’s dive in!

What makes this focaccia irresistible?

Ease of Preparation: Making Garlic Parmesan Focaccia Bread is a breeze, even for novice bakers! You’ll be pleasantly surprised by how simple it is to whip up.

Customizable Delights: Feel free to let your imagination run wild with toppings! From sliced olives to red pepper flakes, the possibilities are endless.

Hearty Comfort: Every bite delivers a savory explosion of flavor, making it a brilliant addition to any meal. On nights when you crave something special, this bread meets the mark.

Crowd-Pleasing Aroma: Your kitchen will be filled with the mouthwatering scent of garlic and herbs, inviting everyone to gather around the dining table. Pair it with a drizzle of olive oil, and you’re all set! If you love comforting flavors, be sure to check out my Garlic Parmesan Chicken or Honey Garlic Salmon for an inspiring meal ensemble.

Garlic Parmesan Focaccia Ingredients

• The following ingredients will help you create a delightful Garlic Parmesan Focaccia Bread that is sure to impress your family and friends!

For the Dough

  • Warm Water – Activates the yeast; for best results, ensure it’s around 110°F.
  • Active Dry Yeast – Provides the lift for the bread; if unavailable, instant yeast works just as well.
  • Sugar – Fuels the yeast for a better rise and adds a touch of sweetness; any granulated sugar will do.
  • All-Purpose Flour – Gives structure to the bread; feel free to switch to whole wheat for a nuttier flavor.
  • Salt – Enhances flavor and regulates yeast activity; you can use different types, just adjust the quantity as needed.
  • Olive Oil – Adds moisture and flavor, creating that crispy crust; substitute with neutral oil if needed.

For the Flavors

  • Garlic – Infuses depth and richness; feel free to adjust the amount or use roasted garlic for a milder flavor.
  • Grated Parmesan Cheese – Adds a delightful, umami kick; Pecorino Romano can be used as an alternative, or go for nutritional yeast for a dairy-free option.
  • Fresh Rosemary – Provides aromatic notes; dried rosemary can be used or simply omitted according to your taste.

For the Topping

  • Coarse Sea Salt – Adds an extra kick with texture; regular sea salt can substitute, but slightly reduce the quantity.

Step‑by‑Step Instructions for Garlic Parmesan Focaccia Bread

Step 1: Prepare the Yeast Mixture
Start by combining 1 cup of warm water (around 110°F), 2 teaspoons of active dry yeast, and 1 teaspoon of sugar in a large mixing bowl. Stir gently until combined, then let it sit for 5 minutes. You’ll know it’s ready when the mixture becomes frothy and bubbly, indicating that the yeast is activated and ready to create a delightful rise in your Garlic Parmesan Focaccia Bread.

Step 2: Mix the Dough Ingredients
Once the yeast mixture is frothy, add 3 cups of all-purpose flour, 1 teaspoon of salt, and 1/4 cup of olive oil to the bowl. Mix with a wooden spoon or spatula until a sticky dough forms. It should hold together but still be slightly tacky. This mixture forms the base of your garlic-infused, savory focaccia, tantalizing your senses with every stir.

Step 3: Knead the Dough
Transfer the sticky dough onto a well-floured surface and knead it for about 5-7 minutes until it becomes smooth and elastic. Alternatively, you can use a stand mixer fitted with a dough hook to knead for about 5 minutes. The dough is ready when it’s stretchy and slightly tacky but doesn’t stick to your fingers, ensuring a perfect texture for your Garlic Parmesan Focaccia Bread.

Step 4: Let the Dough Rise
Place the kneaded dough in a greased bowl, covering it with a damp cloth. Set it in a warm spot, allowing it to rise for 1-2 hours until it doubles in size. You’ll know the dough has risen sufficiently when you can press it gently, and it springs back slowly—this step is crucial for achieving that soft, airy crumb in your focaccia.

Step 5: Preheat the Oven and Prepare the Baking Sheet
As the dough rises, preheat your oven to 425°F and grease a 13×18-inch baking sheet with 1-2 tablespoons of olive oil. Ensure the baking sheet is evenly coated so that the Garlic Parmesan Focaccia Bread develops a beautifully crispy crust. The fragrant olive oil will enhance the bread’s rich flavors while baking, delivering warm delightful aromas.

Step 6: Shape the Dough
Once the dough has risen, punch it down to release the air, then carefully transfer it to the greased baking sheet. Stretch the dough gently with your fingers to fill the sheet, taking care not to tear it. This step provides that signature focaccia shape, and it’s fun to see how it fills out as it rests before baking!

Step 7: Dimple and Top the Dough
Using your fingertips, create dimples across the surface of the stretched dough. Drizzle additional olive oil on top, followed by a sprinkling of minced garlic, grated Parmesan cheese, chopped fresh rosemary, and coarse sea salt. The dimples not only add visual appeal but also allow the flavors to infuse, creating a savory crust that’s simply irresistible.

Step 8: Final Resting Period
Allow the topped dough to rest for 20-30 minutes while the oven preheats. This final proofing will help the dough rise a bit more, ensuring a light and airy Garlic Parmesan Focaccia Bread that’s comforting and warm straight out of the oven. Gear up for that mouthwatering aroma about to fill your kitchen!

Step 9: Bake the Focaccia
Once rested, bake the focaccia in the preheated oven for about 20-25 minutes or until it turns a beautiful golden brown. Keep an eye out for that perfect crust—golden and slightly crisp. It will also emit a heavenly garlicky aroma that’s sure to make everyone in your home eager to taste this delightful homemade bread.

Step 10: Cool and Slice
After baking, remove the Garlic Parmesan Focaccia Bread from the oven and let it cool slightly on a wire rack. Allowing it to cool will help maintain its softness, making it easier to slice. Once cooled, cut into squares or wedges and enjoy this delicious homemade treat with your favorite dipping oils or as part of an inviting meal!

Expert Tips for Garlic Parmesan Focaccia Bread

Fresh Yeast Matters: Ensure your yeast is fresh and active for the best rise. Old yeast can lead to dense, flat bread.

Don’t Over-Knead: Kneading too long can toughen the dough. Aim for just enough time until it’s smooth and slightly tacky.

Let It Rest: Allow the focaccia to cool slightly before slicing. Cutting too soon can cause a gummy texture, ruining the fluffy experience.

Dimple It Right: Press dimples gently in the dough to hold toppings. Avoid piercing all the way through to keep the moisture in.

Experiment with Toppings: Feel free to mix in toppings like caramelized onions or sun-dried tomatoes for added flavor. This customization can elevate your garlic Parmesan focaccia bread!

Garlic Parmesan Focaccia Bread Variations

Get ready to unleash your creativity and elevate this delicious bread with exciting twists and substitutions!

  • Spicy Kick: Add red pepper flakes to the garlic infusion for a zesty twist that brings warmth to every bite.

  • Herb Lovers: Swap out rosemary for fresh thyme or oregano to explore different herby flavor profiles that will delight your palate.

  • Vegan Version: Replace grated Parmesan with nutritional yeast for a cheesy flavor without the dairy, perfect for any vegan gathering.

  • Bold Toppings: Try sliced olives or sun-dried tomatoes atop your focaccia for a Mediterranean flair that makes each slice a mini masterpiece.

  • Cheesy Bliss: Experiment with different cheeses! Crumbled feta or mozzarella can create a gooey texture that adds indulgence to your focaccia.

  • Caramelized Onions: Add some sweetness by layering on caramelized onions before baking. The contrast between savory and sweet will have everyone talking.

  • Garlic Butter Drizzle: Elevate the garlic experience by brushing melted garlic butter over the focaccia right before baking for an extra burst of flavor.

  • Seasonal Spin: In the fall, incorporate pumpkin puree into your dough for a seasonal twist that’s both savory and sweet. It pairs perfectly with soups and salads.

No matter how you choose to customize, this Garlic Parmesan Focaccia is sure to impress! Ready for a meal pairing? Check out my Comfort Garlic Butter or Homemade Parmesan Crusted bringing flavors together beautifully!

Make Ahead Options

These Garlic Parmesan Focaccia Bread are a fantastic solution for busy weeknights when you want to save time without sacrificing flavor. You can prepare the dough and let it rise, then refrigerate it for up to 24 hours. To do this, follow the recipe up to the first rise, then place the covered dough in the fridge. This not only develops deeper flavors but also allows you to bake fresh focaccia the next day. When you’re ready to bake, simply remove the dough, shape it, and let it rest for 30 minutes before topping and baking as directed. By prepping in advance, you’ll have delicious homemade focaccia with minimal effort, perfect for any occasion!

How to Store and Freeze Garlic Parmesan Focaccia Bread

Room Temperature: Store leftover focaccia in an airtight container or wrap it tightly in plastic wrap for up to 2 days. This keeps it soft and ready for snacking!

Freezer: For longer storage, slice the focaccia and place it in a freezer-safe bag. It can be frozen for up to 3 months without losing flavor or texture.

Reheating: To enjoy frozen focaccia, preheat your oven to 350°F, and bake slices for about 10-15 minutes until warmed through. This revives that freshly baked taste you love!

Make-Ahead Tip: If you plan to make focaccia in advance, baking it and freezing it is a great option. Reheat for the best flavor when you’re ready to serve.

What to Serve with Garlic Parmesan Focaccia Bread

Elevate your dining experience with these delightful pairings that perfectly complement the rich flavors of freshly baked focaccia.

  • Creamy Tomato Soup: This classic pairing creates a warm, comforting meal. The smooth texture and tangy flavor of the soup beautifully balance the savory focaccia.

  • Mixed Green Salad: A light, refreshing salad topped with vinaigrette adds a crisp contrast. The freshness of the greens enhances the savory garlic and Parmesan notes.

  • Antipasto Platter: Combine olives, cured meats, and cheeses for a delicious appetizer spread. This platter brings vibrant flavors and a variety of textures that will elevate your focaccia experience.

  • Herb-Infused Olive Oil: Drizzling a quality olive oil infused with herbs offers a simple yet elegant dipping option. The fragrant oil accentuates the aromatic garlic and rosemary in the focaccia.

  • Grilled Vegetables: Smoky, grilled veggies such as bell peppers and zucchini add depth and warmth. This pairing not only boosts nutritional value but also complements the bread’s rich flavors.

  • Chardonnay or Light Red Wine: A glass of chilled Chardonnay or a light red wine brings out the savory undertones beautifully. Perfect for unwinding with friends as you share this delightful bread!

Each of these pairings enhances the homemade charm of your Garlic Parmesan Focaccia Bread, creating an inviting meal that family and friends will adore.

Garlic Parmesan Focaccia Bread Recipe FAQs

How do I choose the right ingredients for my focaccia?
Absolutely! Selecting the right ingredients is key to the perfect Garlic Parmesan Focaccia Bread. Look for fresh, active dry yeast; it should not be expired. For best flavor, opt for high-quality olive oil, and consider using freshly grated Parmesan for richer taste. When it comes to garlic, the fresher, the better; avoid any that has sprouted or has dark spots. If you’re using herbs, fresh rosemary adds a wonderful aroma but dried can also work in a pinch.

How should I store leftover focaccia?
Very simply! Wrap any leftover focaccia in plastic wrap or place it in an airtight container at room temperature for up to 2 days. This will keep it soft and delicious. If you find you have more than you can eat in that timeframe, consider freezing it as described below.

Can I freeze my focaccia?
Absolutely! Freezing your Garlic Parmesan Focaccia Bread is a fantastic way to enjoy it later. Once it’s cooled, slice the bread and wrap each piece tightly in plastic wrap, then place them in a freezer-safe bag. It will keep in the freezer for up to 3 months. When you’re ready to enjoy it, preheat your oven to 350°F, and bake for about 10-15 minutes until warmed through; this will bring back that fresh-baked aroma and texture!

What should I do if my dough isn’t rising?
If your dough isn’t rising, it’s possible your yeast isn’t activated. Ensure you’re using warm water (around 110°F) when mixing with the yeast and sugar. After combining, let it sit until frothy; if it doesn’t foam after 5 minutes, the yeast may be expired. To troubleshoot, give it another try with fresh yeast! If the environment is too cold, consider placing the bowl in a warm spot like an oven (turned off) with the light on to encourage rising.

Is this focaccia suitable for those with dietary restrictions?
You can absolutely make substitutions to accommodate dietary needs! To make it dairy-free, simply replace Parmesan with nutritional yeast or leave it out; the focaccia will still be flavorful. If anyone in your household has allergies, ensure to adjust the toppings according to their needs, and always check your ingredient packaging to avoid cross-contamination.

How can I enhance the flavor profile of my focaccia?
The more the merrier when it comes to toppings! Consider adding red pepper flakes for a kick, sliced olives for a briny flavor, or even caramelized onions for sweetness. You can experiment with different herb combinations such as thyme or oregano. Adding toppings like sun-dried tomatoes or cheese varieties can elevate your Garlic Parmesan Focaccia Bread to new heights of deliciousness!

Garlic Parmesan Focaccia Bread

Garlic Parmesan Focaccia Bread: A Cozy Homemade Treat

Delight in the warm, aromatic flavors of Garlic Parmesan Focaccia Bread, a comforting homemade treat perfect for any occasion.
Prep Time 20 minutes
Cook Time 25 minutes
Resting Time 30 minutes
Total Time 1 hour 15 minutes
Servings: 8 pieces
Course: Dinner
Cuisine: Italian
Calories: 160

Ingredients
  

Dough Ingredients
  • 1 cup Warm Water Around 110°F
  • 2 teaspoons Active Dry Yeast
  • 1 teaspoon Sugar
  • 3 cups All-Purpose Flour Can substitute with whole wheat
  • 1 teaspoon Salt
  • 1/4 cup Olive Oil Can substitute with neutral oil
Flavor Ingredients
  • 4 cloves Garlic Minced; adjust amount as desired
  • 1 cup Grated Parmesan Cheese Can substitute with Pecorino Romano or nutritional yeast
  • 2 tablespoons Fresh Rosemary Can use dried rosemary or omit
Topping Ingredients
  • 1 teaspoon Coarse Sea Salt Regular sea salt can be substituted

Equipment

  • Mixing Bowl
  • Baking Sheet
  • Wooden spoon
  • Oven
  • Wire rack

Method
 

Step-by-Step Instructions
  1. Prepare the yeast mixture by combining warm water, active dry yeast, and sugar in a bowl. Let it sit for 5 minutes until frothy.
  2. Mix the dough ingredients by adding flour, salt, and olive oil to the yeast mixture. Mix until a sticky dough forms.
  3. Knead the dough on a floured surface for 5-7 minutes until smooth and elastic.
  4. Let the dough rise in a greased bowl, covered with a damp cloth, for 1-2 hours until it doubles in size.
  5. Preheat the oven to 425°F and grease a baking sheet with olive oil.
  6. Shape the dough by transferring it to the greased sheet and stretching it to fill the sheet.
  7. Dimple the dough using your fingertips and top with additional olive oil, minced garlic, Parmesan cheese, rosemary, and sea salt.
  8. Allow the topped dough to rest for 20-30 minutes before baking.
  9. Bake the focaccia for 20-25 minutes or until golden brown.
  10. Cool slightly on a wire rack, then slice and serve.

Nutrition

Serving: 1pieceCalories: 160kcalCarbohydrates: 25gProtein: 4gFat: 5gSaturated Fat: 1gPolyunsaturated Fat: 0.5gMonounsaturated Fat: 3gCholesterol: 2mgSodium: 220mgPotassium: 120mgFiber: 1gSugar: 1gVitamin A: 50IUCalcium: 80mgIron: 1mg

Notes

This focaccia bread is perfect for serving with olive oil or balsamic vinegar, and can be customized with various toppings.

Tried this recipe?

Let us know how it was!

Homemade Starbucks Style Pumpkin Syrup: Fall’s Sweet Embrace

As I stood in my kitchen, the rich aroma of pumpkin spices floated through the air, instantly whisking me away to my favorite coffee shop. This Homemade Starbucks-Style Pumpkin Syrup is not just a seasonal delight—it’s a cozy hug in a jar, ready to transform your lattes and pancakes into something extraordinary. In just 20 minutes, you can whip up this versatile syrup tailored to your preferences, making it sugar-free or vegan without losing an ounce of flavor. Plus, it’s an affordable alternative to store-bought versions packed with additives. Are you ready to embrace fall with this simple, delightful recipe? Let’s dive into making your mornings a little sweeter!

Why is Pumpkin Syrup So Special?

Irresistible Aroma: The moment you start simmering, your kitchen will fill with warm, inviting scents of fall spices that will have everyone eager to indulge.

Quick & Easy: In just 20 minutes, you can create a rich and flavorful syrup without breaking a sweat, making it perfect for busy mornings or last-minute brunches.

Customizable Delight: Whether you prefer it sugar-free or vegan, this recipe adapts easily to fit your dietary needs without sacrificing taste.

Versatile Use: Drizzle it over pancakes, mix it into your favorite coffee, or even add it to desserts for an autumn twist—its uses are endless!

Economical Choice: Save money and avoid preservatives with this homemade version, which is kinder to your wallet and your health compared to store-bought options.

Get cozy in the kitchen and embrace fall at its finest! Check out my other recipes like Joumou Haitian Pumpkin for more delicious ideas.

Starbucks Style Pumpkin Syrup Ingredients

For the Syrup
Pumpkin Puree – This is the star of the show, providing the warm, rich flavor essential for your Starbucks Style Pumpkin Syrup.
Granulated Sugar – Sweetens and thickens the syrup; feel free to swap with brown sugar for a caramel touch.
Water – Vital for dissolving the sugar and forming a smooth syrup base.
Vanilla Extract – For that sweet aroma and depth of flavor; opt for pure vanilla for the best results.
Pumpkin Pie Spice – Adds a lovely warmth; you can substitute with your own mix of cinnamon, ginger, and nutmeg if desired.
Salt – A pinch of salt enhances the overall flavors and balances the sweetness.

Unleash the flavors of fall with this delightful Starbucks Style Pumpkin Syrup, perfect for elevating your favorite treats!

Step‑by‑Step Instructions for Starbucks Style Pumpkin Syrup

Step 1: Combine Sugar & Water
In a medium saucepan, combine 1 cup of granulated sugar and 1 cup of water over medium heat. Stir continuously until the sugar fully dissolves, creating a clear syrup base. This should take about 3-5 minutes. You’ll know it’s ready when you see no granules and the mixture is smooth.

Step 2: Incorporate Pumpkin & Spices
Once your syrup base is ready, whisk in 1 cup of pumpkin puree, 1 teaspoon of pumpkin pie spice, and 1/2 teaspoon of salt. Continue to stir until the mixture is fully combined and smooth, allowing the rich flavors of your Starbucks Style Pumpkin Syrup to meld together. This process should take around 2-3 minutes.

Step 3: Bring to Boil & Simmer
Increase the heat to bring the mixture to a gentle boil, then reduce to a simmer. Allow it to simmer for about 10 minutes, stirring occasionally to prevent any sticking. You’ll notice the syrup thickening and the aroma of fall spices filling your kitchen, signaling it’s just about done.

Step 4: Finish with Vanilla
After simmering, remove the saucepan from the heat and stir in 1 teaspoon of pure vanilla extract. This step adds a delightful aromatic flavor to your Starbucks Style Pumpkin Syrup. Make sure to mix it well, letting the sweet fragrance of vanilla mingle with the pumpkin spice before moving on to the next step.

Step 5: Cool & Strain
Allow the syrup to cool to room temperature, which should take around 10-15 minutes. Once cooled, strain the mixture through a fine-mesh sieve into a clean bowl or jar to remove any solids, ensuring your syrup remains smooth and pourable.

Step 6: Store
Finally, pour the strained syrup into a clean jar with an airtight lid. Seal it tightly and refrigerate; the syrup can be stored for up to two weeks. Now you have your homemade Starbucks Style Pumpkin Syrup ready to elevate your favorite drinks and desserts!

How to Store and Freeze Starbucks Style Pumpkin Syrup

  • Fridge: Keep your freshly made Starbucks Style Pumpkin Syrup in an airtight container in the refrigerator for up to two weeks. Always check for spoilage before use.

  • Freezer: For longer storage, pour the cooled syrup into ice cube trays and freeze. This allows you to use small amounts later, and it will keep for up to six months.

  • Thawing: When ready to use frozen cubes, simply transfer them to the fridge overnight or warm them gently in the microwave for quick use in your favorite recipes.

  • Reheating: If the syrup thickens too much after refrigeration, gently reheat it on the stove or in the microwave, stirring frequently until it reaches your desired consistency.

What to Serve with Homemade Starbucks-Style Pumpkin Syrup?

Indulge in the delightful spirit of fall by pairing your sweet pumpkin syrup with these comforting accompaniments.

  • Fluffy Pancakes: Drizzle it atop warm pancakes for a breakfast that tastes like a cozy autumn morning. The pancake’s fluffy texture contrasts beautifully with the syrup’s smooth richness.

  • Cinnamon Waffles: Serve with crispy cinnamon waffles for an irresistible weekend brunch. The spiced batter perfectly complements the warm, sweet notes of the syrup.

  • Rich Lattes: Stir into your favorite latte for a pumpkin-infused café experience at home. The syrup elevates your morning ritual, adding a seasonal twist to every sip.

  • Warm Oatmeal: Swirl it into a bowl of oatmeal for a hearty, comforting breakfast. The flavors meld wonderfully, creating a delightful bowl of warmth that fuels your day.

  • Vegan Ice Cream: Drizzle over coconut-based vanilla ice cream for a fall-inspired dessert. The syrup adds a creamy, festive touch, making every spoonful feel like autumn.

  • Pumpkin Muffins: Enhance your pumpkin spice muffins with an extra splash of syrup. The sweetness intensifies the delicious flavors, making for a perfect treat alongside your morning coffee.

  • Apple Crisp: Serve over a warm apple crisp for a sweet, gooey topping that takes this classic dessert to new heights. The syrup intersects beautifully with the baked apples’ spice and sweetness.

  • Spiced Hot Chocolate: Mix a spoonful into your hot chocolate for a luxurious winter drink. The pumpkin flavor introduces warmth, turning a classic favorite into a seasonal delight.

Expert Tips for Starbucks Style Pumpkin Syrup

  • Fresh Spices Matter: Using freshly ground spices creates a more robust flavor; skip pre-ground spices for an elevated taste experience.
  • Watch the Heat: Simmer the syrup gently to prevent burning, which can create a bitter taste; a consistent low heat is key.
  • Strain Well: Straining the syrup thoroughly is essential; it ensures a smooth consistency without any chunky bits that can affect the final product.
  • Avoid Excess Sugar: Be mindful of sugar quantities—too much can overpower the pumpkin; start with less and adjust according to your sweetness preference.
  • Seal for Freshness: Store your Starbucks Style Pumpkin Syrup in an airtight container to maintain its rich flavor for as long as possible.

Starbucks Style Pumpkin Syrup Variations

Feel free to explore these delightful twists and turns on your syrup, allowing you to personalize every drop!

  • Sugar-Free: Swap granulated sugar for stevia or monk fruit sweetener to create a deliciously lighter version.

  • Vegan: Use agave syrup or coconut nectar instead of traditional sugar to make a cruelty-free treat that everyone can enjoy. To add an extra layer of flavor, consider incorporating a touch of maple syrup for earthiness.

  • Flavor Boost: Add a pinch of cardamom or a teaspoon of cocoa powder for a gourmet twist that will take your syrup to the next level. These little additions can create a cozy, unique taste that’s playful yet comforting.

  • Make it Spicy: For those who love a kick, add a dash of cayenne pepper or a few drops of hot sauce to your syrup. Just a hint will surprise your taste buds and elevate your lattes, creating a perfect blend of flavors that stand out.

  • Seasonal Variations: Consider substituting pumpkin puree with butternut squash for a different texture or sweet potatoes in spring. This is a great way to explore seasonal produce while keeping the essence of fall alive.

  • Different Sweeteners: Use honey or maple syrup for a richer, more complex sweetness that enhances the syrup’s natural flavors. Experiment with various sweeteners to find your personal favorite!

For more inspiration, try drizzling this syrup over pancakes or adding it to homemade lattes, just like in my Chicken Takeout Style recipe! And, if you’re in the mood for something hearty, don’t forget to check out my Joumou Haitian Pumpkin for a delicious seasonal treat.

Make Ahead Options

Making your own Starbucks-Style Pumpkin Syrup is perfect for busy weeknights or those who love to meal prep! You can prepare the syrup up to 3 days ahead of time by following the complete steps, then simply store it in an airtight container in the refrigerator to maintain its rich flavor. To keep the syrup fresh and delicious, ensure it’s well-strained before storage and sealed tightly. When you’re ready to enjoy it, just give the jar a gentle shake and pour it over your pancakes or mix it into your coffee. This way, you’ll have a delightful taste of fall at your fingertips with minimal effort!

Starbucks Style Pumpkin Syrup Recipe FAQs

What kind of pumpkin puree should I use?
Absolutely! For the best flavor, I recommend using homemade pumpkin puree or canned puree with no added sugars. Just look for pure pumpkin without any additives—this ensures you’re getting that rich, natural pumpkin taste that makes this syrup so delightful.

How should I store my pumpkin syrup, and how long will it last?
After making your Starbucks Style Pumpkin Syrup, pour it into an airtight container and refrigerate. It will keep for up to two weeks. Be sure to check for any spoilage signs like odd smells or visible mold before using.

Can I freeze the pumpkin syrup for later use?
Very! To freeze your pumpkin syrup, simply pour the cooled syrup into ice cube trays. Once frozen, transfer the cubes into a resealable freezer bag and store them for up to six months. When you want to use them, just microwave or thaw them in the fridge overnight.

What if my syrup is too thick?
No worries! If your syrup ends up thicker than you’d like after cooling, you can gently reheat it on the stove or in the microwave. Add a little water while stirring until it reaches your desired consistency. Just remember to heat it slowly to avoid burning!

Are there any dietary considerations I should be aware of?
Definitely! If someone in your household has dietary restrictions, this recipe is highly customizable. You can easily make it sugar-free by substituting with your favorite sugar alternative, and it can be made vegan just by using plant-based sweeteners. Always check for allergies related to spices or sweeteners you choose to use.

How can I enhance the flavor of my pumpkin syrup?
Consider trying a more gourmet touch by adding a pinch of freshly ground nutmeg or cardamom. Alternatively, for a slightly richer flavor, you can incorporate a hint of cocoa powder. These small adjustments can take your Starbucks Style Pumpkin Syrup to a whole new level!

Starbucks Style Pumpkin Syrup

Homemade Starbucks Style Pumpkin Syrup: Fall’s Sweet Embrace

This Homemade Starbucks Style Pumpkin Syrup is a cozy hug in a jar, ready to enhance your lattes and pancakes, capturing the essence of fall.
Prep Time 10 minutes
Cook Time 10 minutes
Cooling Time 10 minutes
Total Time 20 minutes
Servings: 10 tablespoons
Course: Drinks
Cuisine: American
Calories: 50

Ingredients
  

For the Syrup
  • 1 cup granulated sugar can substitute with brown sugar
  • 1 cup water
  • 1 cup pumpkin puree
  • 1 teaspoon pumpkin pie spice can substitute with a mix of cinnamon, ginger, and nutmeg
  • 1/2 teaspoon salt balances sweetness
  • 1 teaspoon vanilla extract opt for pure vanilla for best results

Equipment

  • medium saucepan

Method
 

Step-by-Step Instructions
  1. Combine 1 cup of granulated sugar and 1 cup of water over medium heat in a medium saucepan, stirring until fully dissolved (3-5 minutes).
  2. Whisk in 1 cup of pumpkin puree, 1 teaspoon of pumpkin pie spice, and 1/2 teaspoon of salt until fully combined (2-3 minutes).
  3. Bring mixture to a gentle boil, then reduce to a simmer for 10 minutes, stirring occasionally.
  4. Remove from heat and stir in 1 teaspoon of pure vanilla extract.
  5. Allow syrup to cool for 10-15 minutes, then strain through a fine-mesh sieve into a clean bowl or jar.
  6. Pour the strained syrup into a clean jar with an airtight lid, seal tightly, and refrigerate for up to two weeks.

Nutrition

Serving: 1tablespoonCalories: 50kcalCarbohydrates: 13gSodium: 5mgPotassium: 30mgSugar: 12gVitamin A: 500IUCalcium: 5mg

Notes

Using freshly ground spices enhances flavor. Strain thoroughly for smooth consistency. Store in an airtight container for freshness.

Tried this recipe?

Let us know how it was!

Stay Connected

Get recipes via email: