Get my cookbooks

Mongolian Ground Beef Noodles: A Flavorful Dinner Idea

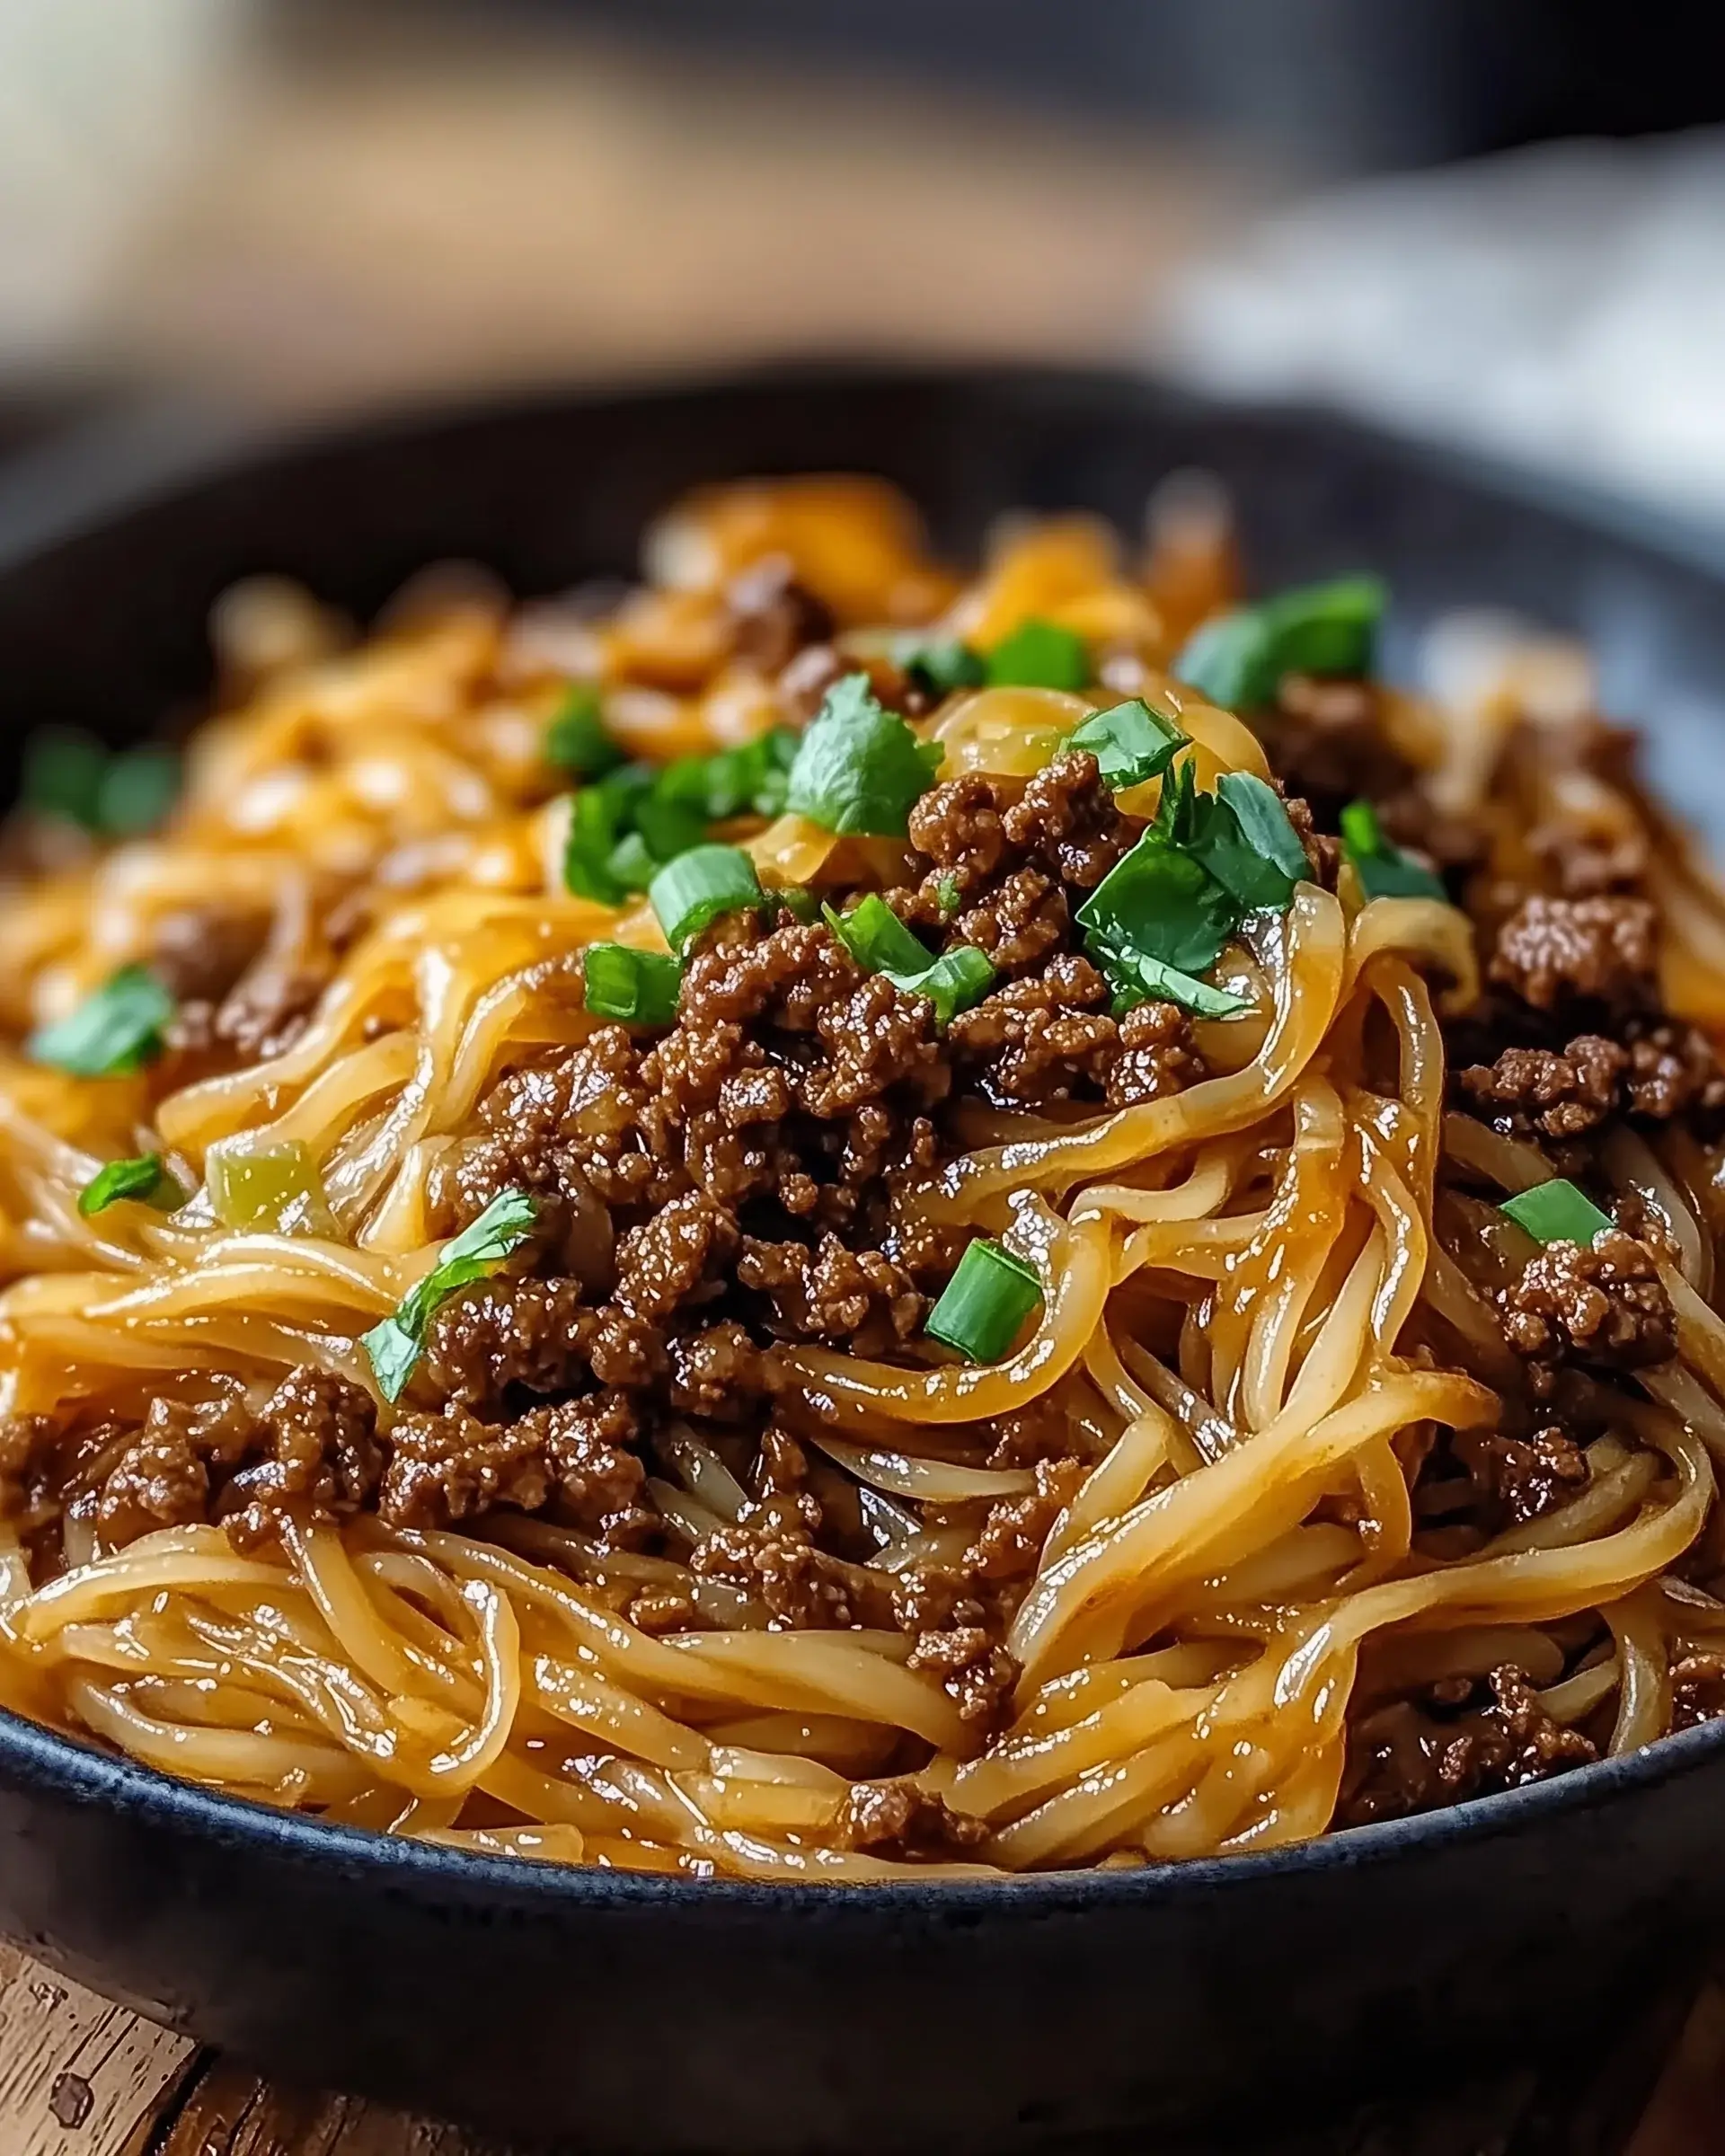
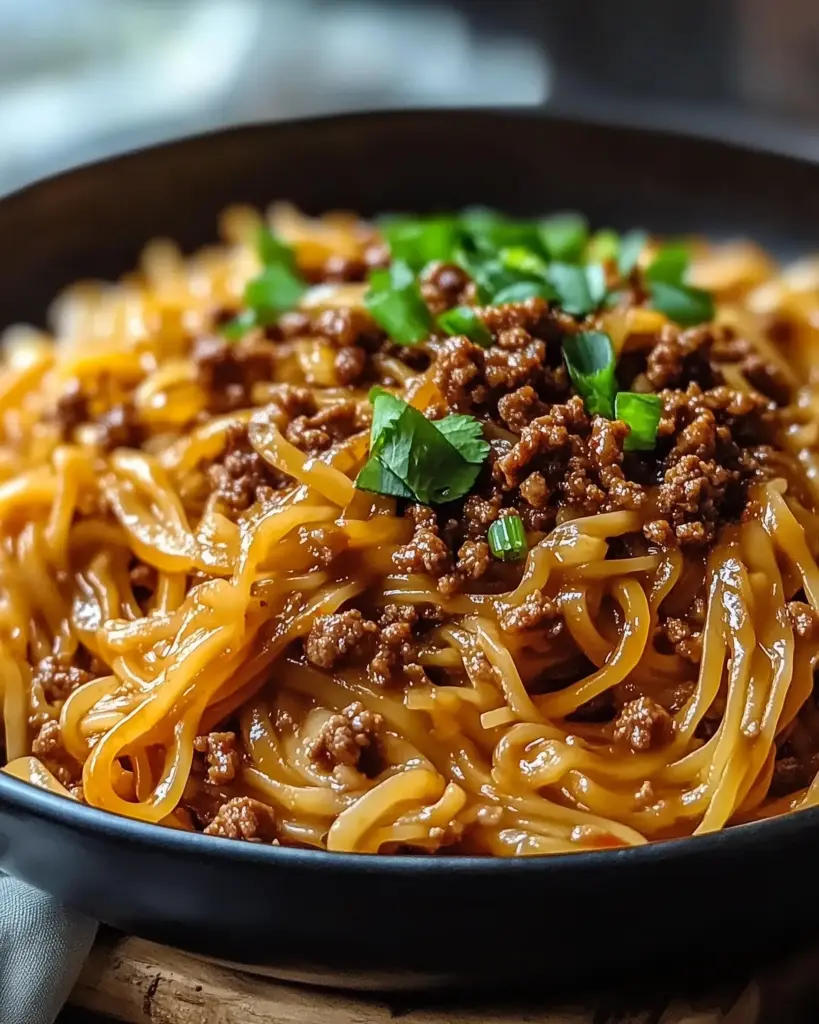
Introduction to Mongolian Ground Beef Noodles

There’s something magical about a dish that brings comfort and flavor together, and Mongolian Ground Beef Noodles does just that. After a long day, when the thought of cooking feels overwhelming, this recipe shines as a quick solution. It’s not just about filling your stomach; it’s about savoring every bite. The tender egg noodles, seasoned ground beef, and vibrant veggies create a symphony of taste that’s sure to impress your loved ones. Whether it’s a weeknight dinner or a casual gathering, this dish is your ticket to a satisfying meal that everyone will love.

Why You’ll Love This Mongolian Ground Beef Noodles

This dish is a game-changer for busy nights. It’s quick to whip up, taking just 30 minutes from start to finish. The flavors are bold yet comforting, making it a hit with everyone at the table. Plus, it’s versatile! You can easily customize it with your favorite veggies or proteins. With Mongolian Ground Beef Noodles, you get a delicious meal that satisfies cravings without the fuss.

Ingredients for Mongolian Ground Beef Noodles

Gathering the right ingredients is the first step to creating a delicious plate of Mongolian Ground Beef Noodles. Here’s what you’ll need:

  • Egg Noodles: These are the backbone of the dish, providing a chewy texture that soaks up the sauce beautifully.
  • Ground Beef: The star protein! It adds richness and flavor. You can swap it for ground turkey or chicken for a lighter option.
  • Vegetable Oil: Used for sautéing, it helps to cook the ingredients evenly without sticking.
  • Onion: Diced onions bring sweetness and depth to the dish. They’re essential for building flavor.
  • Garlic: Minced garlic adds a punch of aroma and taste, elevating the overall flavor profile.
  • Bell Pepper: Sliced bell peppers add a pop of color and crunch. Feel free to use any color you like!
  • Broccoli Florets: These not only add nutrition but also a lovely green contrast to the dish.
  • Soy Sauce: This savory sauce is key for that umami flavor. Low-sodium options are available if you’re watching your salt intake.
  • Brown Sugar: A touch of sweetness balances the saltiness of the soy sauce, creating a harmonious flavor.
  • Rice Vinegar: This adds a tangy note that brightens the dish. You can substitute it with apple cider vinegar if needed.
  • Ground Ginger: A hint of warmth and spice, ginger complements the other flavors beautifully.
  • Red Pepper Flakes: Optional, but they add a nice kick if you enjoy a bit of heat.
  • Green Onions: Sliced for garnish, they add freshness and a mild onion flavor to finish off the dish.

For exact quantities, check the bottom of the article where you can find everything listed for easy printing!

How to Make Mongolian Ground Beef Noodles

Creating Mongolian Ground Beef Noodles is a straightforward process that yields a delicious meal. Follow these simple steps, and you’ll have a flavorful dish ready in no time!

Step 1: Cook the Egg Noodles

Start by boiling a pot of water. Once it’s bubbling, add the egg noodles and cook them according to the package instructions. Usually, this takes about 5-7 minutes. You want them al dente, so they hold up when mixed with the beef and veggies. After cooking, drain the noodles and set them aside. A quick rinse under cold water can help prevent sticking.

Step 2: Sauté the Onions and Garlic

In a large skillet or wok, heat the vegetable oil over medium-high heat. Toss in the diced onion and sauté for about 2-3 minutes until they soften and become translucent. This step is crucial; it builds the flavor base for your dish. Next, add the minced garlic and cook for another 30 seconds. You’ll know it’s ready when the kitchen fills with that irresistible aroma!

Step 3: Brown the Ground Beef

Now, it’s time for the ground beef to shine. Add it to the skillet, breaking it apart with a spatula. Cook for about 5-7 minutes until it’s browned and no longer pink. Make sure to stir occasionally to ensure even cooking. This step is essential for achieving that rich, savory flavor that makes Mongolian Ground Beef Noodles so satisfying.

Step 4: Add Vegetables

Once the beef is cooked through, it’s time to add the sliced bell pepper and broccoli florets. Stir them in and cook for another 3-4 minutes. You want the veggies to be tender but still vibrant. This timing ensures they retain some crunch, adding texture to your dish.

Step 5: Prepare the Sauce

In a small bowl, whisk together the soy sauce, brown sugar, rice vinegar, ground ginger, and red pepper flakes (if you’re feeling spicy). This sauce is the heart of the dish, bringing all the flavors together. Pour it over the beef and vegetables in the skillet, stirring to coat everything evenly.

Step 6: Combine Everything

Finally, add the cooked egg noodles to the skillet. Toss everything together gently, ensuring the noodles are well coated with the sauce and mixed with the beef and veggies. Heat through for about 2-3 minutes. This step is where the magic happens, transforming all the ingredients into a cohesive, mouthwatering dish!

Tips for Success

  • Don’t overcook the noodles; they should be al dente for the best texture.
  • Use a large skillet or wok to give everything room to cook evenly.
  • Feel free to customize with your favorite vegetables for added nutrition.
  • For extra flavor, let the sauce simmer for a minute before adding the noodles.
  • Garnish with fresh herbs for a pop of color and taste!

Equipment Needed

  • Large Skillet or Wok: Essential for sautéing and combining ingredients. A deep frying pan works too.
  • Pot: For boiling the egg noodles. Any large pot will do.
  • Spatula: Perfect for breaking apart the beef and stirring.
  • Measuring Cups and Spoons: Handy for accurate ingredient measurements.

Variations

  • Protein Swaps: Try using ground turkey, chicken, or even tofu for a vegetarian option.
  • Vegetable Medley: Add snap peas, carrots, or zucchini for extra color and nutrition.
  • Spicy Kick: Incorporate sriracha or chili paste for a bolder flavor profile.
  • Gluten-Free Option: Use gluten-free noodles or spiralized vegetables like zucchini or sweet potatoes.
  • Herb Infusion: Toss in fresh basil or cilantro at the end for a fresh twist.

Serving Suggestions

  • Side Salad: A crisp green salad with a tangy vinaigrette complements the richness of the noodles.
  • Steamed Rice: Serve with a side of jasmine or basmati rice to soak up the delicious sauce.
  • Drink Pairing: A light beer or iced tea balances the flavors perfectly.
  • Presentation: Garnish with extra green onions and sesame seeds for a pop of color.

FAQs about Mongolian Ground Beef Noodles

Can I make Mongolian Ground Beef Noodles ahead of time?

Absolutely! You can prepare the beef and vegetable mixture in advance and store it in the fridge. Just cook the noodles fresh when you’re ready to serve. This way, you’ll have a quick meal ready to go!

What can I substitute for ground beef?

If you’re looking for alternatives, ground turkey or chicken works well. For a vegetarian option, try using crumbled tofu or tempeh. Each option brings its own unique flavor to the dish!

How can I make this dish spicier?

To amp up the heat, add more red pepper flakes or a splash of sriracha to the sauce. You can also toss in some sliced jalapeños for an extra kick. Adjust to your taste!

Is this recipe gluten-free?

Yes, you can make Mongolian Ground Beef Noodles gluten-free by using gluten-free egg noodles or spiralized vegetables like zucchini. Just ensure your soy sauce is gluten-free as well.

Can I add more vegetables to this dish?

Definitely! Feel free to get creative with your veggie choices. Snap peas, carrots, or even baby corn can add color and nutrition. Just remember to adjust the cooking time for optimal tenderness.

Final Thoughts

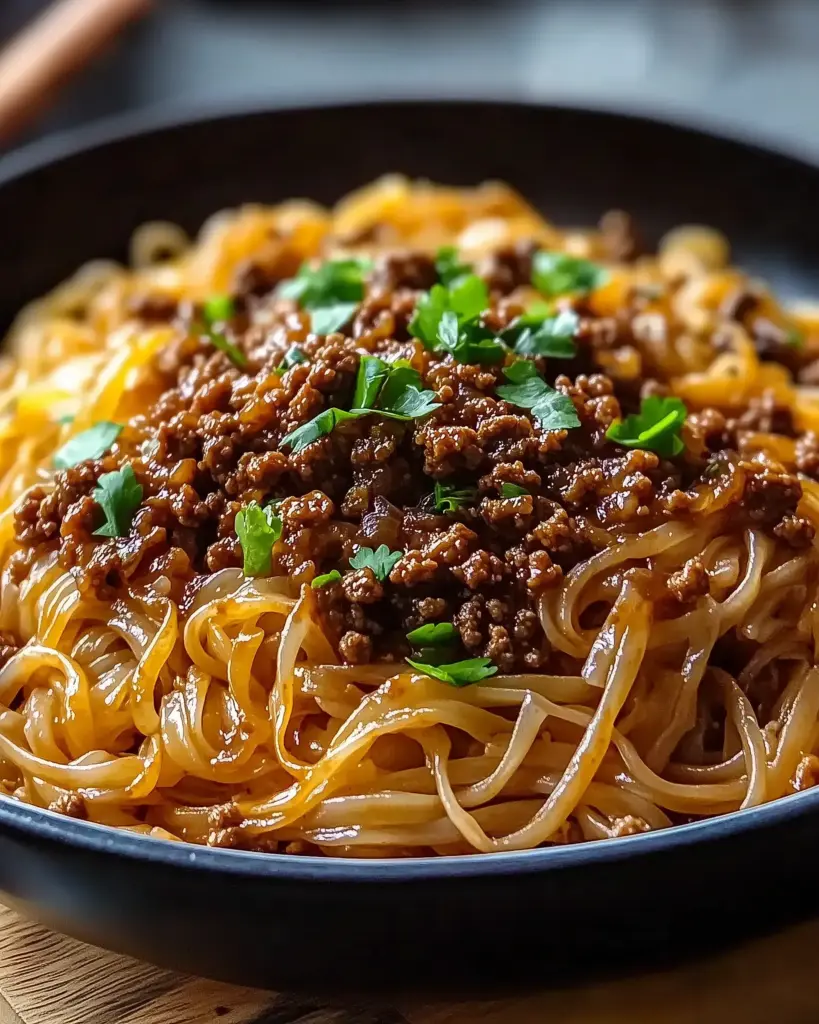
Cooking Mongolian Ground Beef Noodles is more than just preparing a meal; it’s about creating a moment of joy. The aroma wafting through your kitchen, the vibrant colors on your plate, and the satisfaction of a dish that pleases everyone at the table make it all worthwhile. This recipe is a reminder that delicious food doesn’t have to be complicated. With just a few ingredients and a little love, you can whip up a comforting dinner that brings smiles and full bellies. So, roll up your sleeves and dive into this culinary adventure—you won’t regret it!

jhessica

Mongolian Ground Beef Noodles: A Flavorful Dinner Idea

Mongolian Ground Beef Noodles is a flavorful and satisfying dish that combines tender egg noodles with seasoned ground beef and fresh vegetables, all tossed in a savory sauce.
Prep Time 10 minutes
Cook Time 20 minutes
Total Time 30 minutes
Servings: 4 servings
Course: Dinner
Cuisine: Mongolian
Calories: 450

Ingredients
  

  • 8 ounces of egg noodles
  • 1 pound of ground beef
  • 2 tablespoons of vegetable oil
  • 1 small onion diced
  • 3 cloves of garlic minced
  • 1 cup of bell pepper sliced
  • 1 cup of broccoli florets
  • 1/4 cup of soy sauce
  • 2 tablespoons of brown sugar
  • 1 tablespoon of rice vinegar
  • 1 teaspoon of ground ginger
  • 1/2 teaspoon of red pepper flakes optional
  • 2 green onions sliced (for garnish)

Method
 

  1. Cook the egg noodles according to package instructions. Drain and set aside.
  2. In a large skillet or wok, heat the vegetable oil over medium-high heat. Add the diced onion and cook for 2-3 minutes until softened.
  3. Add the minced garlic and cook for an additional 30 seconds until fragrant.
  4. Add the ground beef to the skillet, breaking it apart with a spatula. Cook until browned and cooked through, about 5-7 minutes.
  5. Stir in the sliced bell pepper and broccoli florets. Cook for another 3-4 minutes until the vegetables are tender.
  6. In a small bowl, whisk together the soy sauce, brown sugar, rice vinegar, ground ginger, and red pepper flakes (if using). Pour this sauce over the beef and vegetables in the skillet.
  7. Add the cooked egg noodles to the skillet and toss everything together until well combined and heated through, about 2-3 minutes.
  8. Serve hot, garnished with sliced green onions.

Nutrition

Serving: 1servingCalories: 450kcalCarbohydrates: 45gProtein: 25gFat: 20gSaturated Fat: 7gPolyunsaturated Fat: 13gCholesterol: 70mgSodium: 800mgFiber: 2gSugar: 8g

Notes

  • For a healthier option, substitute ground turkey or chicken for the beef.
  • Add additional vegetables like snap peas or carrots for extra color and nutrition.

Tried this recipe?

Let us know how it was!

Irish Soda Bread Muffins: Enjoy a Delightful Recipe!

Introduction to Irish Soda Bread Muffins

There’s something magical about the aroma of freshly baked goods wafting through the kitchen. It takes me back to my childhood, where my grandmother would whip up her famous Irish Soda Bread. Now, I’ve transformed that classic into delightful Irish Soda Bread Muffins. These muffins are not just easy to make; they’re a quick solution for busy mornings or a cozy snack to share with friends. With a tender crumb and a hint of sweetness, they’re perfect for breakfast or an afternoon treat. Trust me, once you try these, they’ll become a staple in your home!

Why You’ll Love This Irish Soda Bread Muffins

These Irish Soda Bread Muffins are a game-changer in the kitchen. They come together in just 35 minutes, making them perfect for those hectic mornings. The combination of all-purpose and whole wheat flour gives them a hearty texture, while the buttermilk adds a delightful tang. Plus, they’re versatile! Whether you enjoy them plain or with a handful of raisins, each bite is a warm hug for your taste buds.

Ingredients for Irish Soda Bread Muffins

Gathering the right ingredients is the first step to creating these delightful Irish Soda Bread Muffins. Here’s what you’ll need:

  • All-purpose flour: This forms the base of your muffins, providing structure and a light texture.
  • Whole wheat flour: Adds a nutty flavor and extra fiber, making your muffins heartier.
  • Baking soda: The leavening agent that helps the muffins rise, giving them that perfect fluffy texture.
  • Salt: Enhances the flavors and balances the sweetness in the muffins.
  • Granulated sugar: Just a touch of sweetness to complement the savory elements.
  • Buttermilk: This ingredient adds moisture and a tangy flavor, making the muffins tender.
  • Large egg: Binds the ingredients together and adds richness.
  • Unsalted butter: Melted for a rich flavor and moist texture; it’s a must for that homemade taste.
  • Raisins or currants (optional): These dried fruits add a sweet burst, but feel free to skip them if you prefer a more traditional muffin.

For those looking to mix things up, consider substituting the raisins with dried cranberries or chopped dried apricots for a different flavor profile. You can find the exact measurements for these ingredients at the bottom of the article, ready for printing!

How to Make Irish Soda Bread Muffins

Step 1: Preheat the Oven

Start by preheating your oven to 375°F (190°C). This step is crucial for achieving that perfect rise and golden color. While the oven warms up, prepare your muffin tin by lining it with paper liners or giving it a light grease. This ensures easy removal later!

Step 2: Mix Dry Ingredients

In a large mixing bowl, combine the all-purpose flour, whole wheat flour, baking soda, salt, and sugar. Whisk them together until they’re well blended. This step is essential for evenly distributing the baking soda, which helps your muffins rise beautifully. A good mix sets the stage for success!

Step 3: Combine Wet Ingredients

In a separate bowl, whisk together the buttermilk, egg, and melted butter until smooth. This mixture brings moisture and richness to your muffins. The buttermilk adds a delightful tang, enhancing the overall flavor. Make sure everything is well combined for a consistent batter!

Step 4: Combine Wet and Dry Ingredients

Now, pour the wet ingredients into the dry ingredients. Gently stir until just combined. Be careful not to overmix; a few lumps are perfectly fine! If you’re adding raisins or currants, fold them in at this stage. This keeps your muffins light and fluffy.

Step 5: Fill Muffin Cups

Using a spoon or a scoop, fill each muffin cup about ¾ full with batter. This allows room for the muffins to rise without overflowing. An even fill ensures that all your muffins bake uniformly, giving you that perfect shape and texture!

Step 6: Bake the Muffins

Place the muffin tin in the preheated oven and bake for 18-20 minutes. Keep an eye on them! You’ll know they’re done when they’re golden brown and a toothpick inserted in the center comes out clean. This is the moment you’ve been waiting for!

Step 7: Cool and Serve

Once baked, let the muffins cool in the pan for about 5 minutes. Then, transfer them to a wire rack to cool completely. Serve them warm or at room temperature. They’re delightful on their own or with a pat of butter. Enjoy every bite!

Tips for Success

  • Measure your flour accurately; too much can lead to dense muffins.
  • Use room temperature ingredients for better mixing.
  • Don’t overmix the batter; it’s okay if it’s a bit lumpy.
  • Experiment with add-ins like nuts or chocolate chips for extra flavor.
  • Store leftover muffins in an airtight container to keep them fresh.

Equipment Needed

  • Muffin tin: Essential for baking your muffins. If you don’t have one, use a cupcake pan as an alternative.
  • Mixing bowls: A set of various sizes is handy for combining ingredients.
  • Whisk: Perfect for mixing dry and wet ingredients smoothly.
  • Spoon or scoop: For filling muffin cups evenly.
  • Wire rack: Ideal for cooling your muffins after baking.

Variations

  • Nutty Delight: Add ½ cup of chopped walnuts or pecans for a crunchy texture and nutty flavor.
  • Chocolate Lovers: Mix in ½ cup of chocolate chips for a sweet twist that’s sure to please.
  • Fruit Fusion: Substitute raisins with dried cranberries, apricots, or even chopped apples for a fruity kick.
  • Herb-Infused: Add a teaspoon of dried herbs like rosemary or thyme for a savory version that pairs well with soups.
  • Gluten-Free Option: Use a gluten-free flour blend to make these muffins suitable for those with gluten sensitivities.

Serving Suggestions

  • Pair your muffins with a steaming cup of Irish breakfast tea for a cozy experience.
  • Spread a little butter or cream cheese on warm muffins for added richness.
  • Serve alongside a fresh fruit salad for a balanced breakfast.
  • For a sweet touch, drizzle honey or maple syrup over the muffins.

FAQs about Irish Soda Bread Muffins

Can I make these muffins ahead of time?

Absolutely! You can prepare the batter the night before and store it in the fridge. Just remember to give it a gentle stir before baking. Freshly baked Irish Soda Bread Muffins in the morning? Yes, please!

What can I substitute for buttermilk?

If you don’t have buttermilk on hand, mix one cup of milk with a tablespoon of vinegar or lemon juice. Let it sit for about 5 minutes, and you’ll have a perfect buttermilk substitute for your muffins.

How do I store leftover muffins?

To keep your muffins fresh, store them in an airtight container at room temperature for up to three days. You can also freeze them for longer storage. Just thaw and enjoy whenever you crave a tasty treat!

Can I add other ingredients to the batter?

Definitely! Feel free to get creative. You can add nuts, chocolate chips, or even spices like cinnamon for a unique twist on these Irish Soda Bread Muffins. The possibilities are endless!

Are these muffins suitable for a vegetarian diet?

Yes, these muffins are vegetarian-friendly! They contain no meat or animal-derived ingredients, making them a great option for anyone following a vegetarian lifestyle.

Final Thoughts

Making Irish Soda Bread Muffins is more than just baking; it’s about creating memories and sharing joy. The simplicity of the recipe allows anyone to whip up a batch, filling the kitchen with warmth and delightful aromas. Each muffin is a little piece of comfort, perfect for breakfast or a snack. Whether you enjoy them plain or with your favorite add-ins, these muffins are sure to bring smiles to your table. So, roll up your sleeves, gather your ingredients, and let the magic of baking transform your day. Trust me, you won’t regret it!

jhessica

Irish Soda Bread Muffins: Enjoy a Delightful Recipe!

Delicious and easy-to-make Irish Soda Bread Muffins, perfect for breakfast or a snack.
Prep Time 15 minutes
Cook Time 20 minutes
Total Time 35 minutes
Servings: 12 muffins
Course: Baking
Cuisine: Irish
Calories: 150

Ingredients
  

  • 2 cups all-purpose flour
  • 1 cup whole wheat flour
  • 1 teaspoon baking soda
  • 1 teaspoon salt
  • 1 tablespoon granulated sugar
  • 1 ¾ cups buttermilk
  • 1 large egg
  • 4 tablespoons unsalted butter melted
  • ½ cup raisins or currants optional

Method
 

  1. Preheat your oven to 375°F (190°C) and line a muffin tin with paper liners or grease it lightly.
  2. In a large mixing bowl, whisk together the all-purpose flour, whole wheat flour, baking soda, salt, and sugar until well combined.
  3. In a separate bowl, mix the buttermilk, egg, and melted butter until smooth.
  4. Pour the wet ingredients into the dry ingredients and stir gently until just combined. If using, fold in the raisins or currants. Be careful not to overmix.
  5. Divide the batter evenly among the muffin cups, filling each about ¾ full.
  6. Bake in the preheated oven for 18-20 minutes, or until the muffins are golden brown and a toothpick inserted in the center comes out clean.
  7. Allow the muffins to cool in the pan for 5 minutes before transferring them to a wire rack to cool completely.

Nutrition

Serving: 1muffinCalories: 150kcalCarbohydrates: 25gProtein: 4gFat: 5gSaturated Fat: 3gPolyunsaturated Fat: 2gCholesterol: 20mgSodium: 200mgFiber: 1gSugar: 1g

Notes

  • For a sweeter muffin, add ½ cup of chopped nuts or chocolate chips to the batter.
  • Substitute the raisins with dried cranberries or chopped dried apricots for a different flavor profile.

Tried this recipe?

Let us know how it was!

Cream Cheese Banana Bread: Discover a Delicious Twist!

Introduction to Cream Cheese Banana Bread

There’s something magical about the aroma of freshly baked bread wafting through the house. It takes me back to my childhood, where my mom would whip up banana bread on lazy Sunday mornings. This Cream Cheese Banana Bread is a delightful twist on that classic recipe, adding a rich creaminess that elevates every bite. Whether you’re looking for a quick solution for a busy day or a dish to impress your loved ones, this recipe is your answer. It’s simple, satisfying, and perfect for any occasion, making it a must-try for every home cook.

Why You’ll Love This Cream Cheese Banana Bread

This Cream Cheese Banana Bread is a game-changer in the kitchen. It’s incredibly easy to whip up, making it perfect for those busy mornings or last-minute gatherings. The rich cream cheese adds a depth of flavor that takes the traditional banana bread to new heights. Plus, it’s a crowd-pleaser! Your family and friends will be begging for seconds, and you’ll love how quickly it disappears.

Ingredients for Cream Cheese Banana Bread

Gathering the right ingredients is the first step to creating this delicious Cream Cheese Banana Bread. Here’s what you’ll need:

  • Ripe Bananas: The star of the show! Look for bananas that are brown-speckled for maximum sweetness and flavor.
  • Cream Cheese: This adds a rich, creamy texture that elevates the bread. Make sure it’s softened for easy mixing.
  • Unsalted Butter: A must for that buttery flavor. Softened butter blends seamlessly with the cream cheese.
  • Granulated Sugar: Sweetness is key! It balances the flavors and helps create a lovely crust.
  • Large Eggs: These provide structure and moisture. They also help bind everything together.
  • Vanilla Extract: A splash of vanilla enhances the overall flavor, making each bite more delightful.
  • Baking Soda: This is your leavening agent, helping the bread rise to perfection.
  • Salt: Just a pinch! It enhances the sweetness and balances the flavors.
  • All-Purpose Flour: The base of your bread. It gives it structure and a nice crumb.
  • Chopped Walnuts or Pecans (optional): For a delightful crunch! Feel free to skip them if you prefer a smoother texture.

For those interested in variations, you can substitute half of the all-purpose flour with whole wheat flour for a healthier twist. If you’re feeling adventurous, consider adding chocolate chips for a sweet surprise!

Exact measurements for these ingredients can be found at the bottom of the article, ready for printing.

How to Make Cream Cheese Banana Bread

Now that you have your ingredients ready, let’s dive into the fun part—making this Cream Cheese Banana Bread! Follow these simple steps, and you’ll have a delicious loaf in no time.

Step 1: Preheat the Oven

First things first, preheat your oven to 350°F (175°C). This ensures your bread bakes evenly. While the oven warms up, prepare your loaf pan by greasing it or lining it with parchment paper. This will make it easier to remove the bread later.

Step 2: Cream the Butter and Cream Cheese

In a large mixing bowl, beat the softened cream cheese and butter together until smooth and creamy. This step is crucial! The creaminess will give your banana bread that rich texture we all love. Use a hand mixer or a sturdy whisk—whatever you have on hand.

Step 3: Combine with Sugar

Next, add the granulated sugar to the cream cheese mixture. Beat it all together until well combined. You want the sugar to dissolve into the creamy goodness, creating a sweet base for your bread.

Step 4: Mix in Bananas and Eggs

Now, it’s time to incorporate the mashed bananas, eggs, and vanilla extract. Mix until everything is fully combined. The bananas add moisture and flavor, while the eggs help bind the ingredients together. Don’t be shy—get in there and mix it up!

Step 5: Combine Dry Ingredients

In a separate bowl, whisk together the baking soda, salt, and flour. Gradually add this dry mixture to the wet ingredients. Stir gently until just combined. Be careful not to overmix; a few lumps are perfectly fine. This will keep your bread light and fluffy.

Step 6: Fold in Nuts

If you’re using nuts, now’s the time to gently fold in the chopped walnuts or pecans. They add a delightful crunch and flavor. If you prefer a smoother texture, feel free to skip this step.

Step 7: Pour and Bake

Pour the batter into your prepared loaf pan. Smooth the top with a spatula to ensure even baking. Pop it in the preheated oven and bake for 55-65 minutes. You’ll know it’s done when a toothpick inserted into the center comes out clean. The aroma will be irresistible!

Step 8: Cool and Serve

Once baked, allow the bread to cool in the pan for about 10 minutes. Then, transfer it to a wire rack to cool completely. This step is essential for achieving the perfect texture. Slice it up and enjoy your delicious Cream Cheese Banana Bread!

Tips for Success

  • Use overripe bananas for maximum sweetness and flavor.
  • Don’t overmix the batter; a few lumps are okay!
  • Let the cream cheese and butter soften at room temperature for easier blending.
  • Check for doneness with a toothpick; it should come out clean.
  • Store leftovers in an airtight container to keep it fresh.

Equipment Needed

  • Loaf Pan: A standard 9×5-inch loaf pan works best. If you don’t have one, a round cake pan can do in a pinch.
  • Mixing Bowls: Use a large bowl for mixing. A sturdy whisk or hand mixer will make your life easier.
  • Spatula: A rubber spatula is perfect for scraping down the sides and smoothing the batter.
  • Measuring Cups and Spoons: Essential for accuracy, but you can eyeball it if you’re feeling adventurous!

Variations

  • Chocolate Chip Cream Cheese Banana Bread: Add 1/2 cup of chocolate chips to the batter for a sweet twist that chocolate lovers will adore.
  • Whole Wheat Option: Substitute half of the all-purpose flour with whole wheat flour for a healthier version that still tastes amazing.
  • Spiced Banana Bread: Add a teaspoon of cinnamon or nutmeg to the dry ingredients for a warm, spiced flavor that complements the bananas beautifully.
  • Nut-Free Version: Simply omit the nuts for a smooth texture, perfect for those with nut allergies.
  • Fruit Add-Ins: Toss in some dried cranberries or blueberries for a fruity burst in every slice.

Serving Suggestions

  • Fresh Fruit: Serve slices with a side of fresh berries or sliced apples for a refreshing contrast.
  • Coffee or Tea: Pair your banana bread with a hot cup of coffee or herbal tea for a cozy treat.
  • Toast with Butter: A pat of butter on warm slices enhances the flavor and adds richness.
  • Presentation: Dust with powdered sugar or drizzle with a simple glaze for an elegant touch.

FAQs about Cream Cheese Banana Bread

Can I use frozen bananas for this recipe?

Absolutely! Frozen bananas work great in this Cream Cheese Banana Bread. Just thaw them first and mash them up. They’ll add the same delicious flavor and moisture.

How do I store leftover banana bread?

To keep your Cream Cheese Banana Bread fresh, store it in an airtight container at room temperature for up to three days. You can also refrigerate it for a week or freeze it for longer storage.

Can I make this recipe without cream cheese?

While cream cheese adds a unique richness, you can substitute it with sour cream or Greek yogurt for a similar texture. The flavor will differ slightly, but it’ll still be delicious!

What can I serve with Cream Cheese Banana Bread?

This banana bread pairs wonderfully with a hot cup of coffee or tea. You can also enjoy it with a dollop of whipped cream or a smear of butter for extra indulgence.

How can I tell when my banana bread is done baking?

Check for doneness by inserting a toothpick into the center of the bread. If it comes out clean or with a few crumbs, it’s ready! If it’s wet, give it a few more minutes in the oven.

Final Thoughts

Baking this Cream Cheese Banana Bread is more than just a culinary task; it’s an experience filled with warmth and nostalgia. The rich, creamy texture combined with the sweet aroma brings back memories of family gatherings and cozy mornings. Each slice is a delightful treat, perfect for sharing or savoring alone with a cup of coffee. Whether you’re a seasoned baker or just starting out, this recipe invites you to create something special. So, roll up your sleeves, embrace the joy of baking, and let this delicious twist on a classic become a staple in your kitchen!

jhessica

Cream Cheese Banana Bread: Discover a Delicious Twist!

A delicious twist on traditional banana bread, featuring creamy cream cheese for added richness.
Prep Time 15 minutes
Cook Time 1 hour
Total Time 1 hour 15 minutes
Servings: 8 servings
Course: Dessert
Cuisine: American
Calories: 210

Ingredients
  

  • 3 ripe bananas mashed
  • 8 ounces cream cheese softened
  • 1/2 cup unsalted butter softened
  • 1 cup granulated sugar
  • 2 large eggs
  • 1 teaspoon vanilla extract
  • 1 teaspoon baking soda
  • 1/2 teaspoon salt
  • 1 1/2 cups all-purpose flour
  • 1/2 cup chopped walnuts or pecans optional

Method
 

  1. Preheat your oven to 350°F (175°C). Grease a 9×5-inch loaf pan or line it with parchment paper.
  2. In a large mixing bowl, beat the softened cream cheese and butter together until smooth and creamy.
  3. Add the granulated sugar to the cream cheese mixture and beat until well combined.
  4. Mix in the mashed bananas, eggs, and vanilla extract until fully incorporated.
  5. In a separate bowl, whisk together the baking soda, salt, and flour. Gradually add this dry mixture to the wet ingredients, mixing until just combined. Be careful not to overmix.
  6. If using, fold in the chopped walnuts or pecans.
  7. Pour the batter into the prepared loaf pan and smooth the top with a spatula.
  8. Bake in the preheated oven for 55-65 minutes, or until a toothpick inserted into the center comes out clean.
  9. Allow the bread to cool in the pan for about 10 minutes before transferring it to a wire rack to cool completely.

Nutrition

Serving: 1sliceCalories: 210kcalCarbohydrates: 30gProtein: 3gFat: 9gSaturated Fat: 5gPolyunsaturated Fat: 4gCholesterol: 40mgSodium: 200mgFiber: 1gSugar: 15g

Notes

  • For a chocolate twist, add 1/2 cup of chocolate chips to the batter before baking.
  • You can substitute half of the all-purpose flour with whole wheat flour for a healthier version.

Tried this recipe?

Let us know how it was!

Irish Potato Bread: Discover a Delicious Recipe Today!

Introduction to Irish Potato Bread

There’s something magical about the aroma of freshly baked bread wafting through the kitchen. It takes me back to my childhood, where my grandmother would whip up her famous Irish Potato Bread. This traditional Irish bread is not just a recipe; it’s a warm hug on a plate. Perfect for a quick solution on a busy day or a delightful side to impress your loved ones, it’s incredibly easy to make. With just a handful of ingredients, you can create a comforting dish that pairs beautifully with soups, stews, or simply a pat of butter. Let’s dive into this delicious journey!

Why You’ll Love This Irish Potato Bread

This Irish Potato Bread is a game-changer in the kitchen. It’s quick to whip up, taking only about 30 minutes from start to finish. The taste? Absolutely divine! The combination of fluffy potatoes and warm, buttery goodness creates a comforting flavor that’s hard to resist. Plus, it’s versatile enough to serve with any meal, making it a staple you’ll want to keep coming back to. Trust me, your taste buds will thank you!

Ingredients for Irish Potato Bread

Gathering the right ingredients is the first step to creating this delightful Irish Potato Bread. Here’s what you’ll need:

  • Mashed Potatoes: The star of the show! Use about two medium potatoes. They add moisture and a unique flavor.
  • All-Purpose Flour: This is your base. It gives the bread structure and helps it rise.
  • Baking Powder: A must for that fluffy texture. It helps the bread rise while cooking.
  • Salt: Just a pinch enhances the flavors. It’s essential for balancing the taste.
  • Unsalted Butter: Adds richness and a lovely buttery flavor. Make sure it’s softened for easy mixing.
  • Milk: This helps bind the dough. You can adjust the amount based on the dough’s consistency.
  • Chopped Fresh Chives (optional): For a pop of color and flavor, add these if you like a bit of herbaceousness.

For exact measurements, check the bottom of the article where you can find everything listed for easy printing. Feel free to experiment with ingredients; for instance, using whole wheat flour can add a nutty flavor, or adding cheese can make it even more indulgent!

How to Make Irish Potato Bread

Now that you have your ingredients ready, let’s get to the fun part—making the Irish Potato Bread! Follow these simple steps, and you’ll have a delicious loaf in no time.

Step 1: Prepare the Mashed Potatoes

Start by peeling the potatoes. Cut them into chunks and place them in a pot of boiling water. Cook until they’re tender, about 15 minutes. Once done, drain the water and mash the potatoes until smooth. Let them cool for a few minutes. This cooling time is crucial; it prevents the dough from becoming too hot when mixed.

Step 2: Mix the Dry Ingredients

In a large mixing bowl, combine the cooled mashed potatoes with the all-purpose flour, baking powder, and salt. Use a fork or a whisk to mix everything together until well combined. This step is essential for ensuring that the baking powder is evenly distributed, which helps the bread rise beautifully.

Step 3: Form the Dough

Next, add the softened butter and milk to the dry mixture. Stir until a dough begins to form. If the dough feels too sticky, sprinkle in a bit more flour. Conversely, if it’s too dry, add a splash more milk, one tablespoon at a time. You want a soft, pliable dough that holds together well.

Step 4: Knead the Dough

Turn the dough out onto a floured surface. Gently knead it for about 1-2 minutes. You’re not looking for a workout here; just enough to bring the dough together and make it smooth. This step helps develop the gluten, giving your bread a nice texture.

Step 5: Shape the Dough

Divide the dough into two equal portions. Shape each portion into a round disc, about 1/2 inch thick. Don’t worry about making them perfect; rustic is part of the charm! These discs will puff up beautifully when cooked.

Step 6: Cook the Bread

Heat a non-stick skillet or griddle over medium heat. Once hot, place each disc in the skillet. Cook for about 5-7 minutes on each side, or until they turn golden brown. Keep an eye on them; you want that perfect crust without burning!

Step 7: Cool and Slice

Once cooked, remove the bread from the skillet and let it cool slightly on a wire rack. This cooling time allows the steam to escape, ensuring your bread doesn’t get soggy. After a few minutes, slice it up and enjoy!

Tips for Success

  • Use starchy potatoes like Russets for the best texture.
  • Don’t over-knead the dough; a gentle touch is key.
  • Adjust the milk gradually to achieve the right dough consistency.
  • Keep the skillet at medium heat to avoid burning the bread.
  • Experiment with add-ins like cheese or herbs for extra flavor.

Equipment Needed

  • Pot: For boiling potatoes. A large saucepan works well.
  • Mixing Bowl: Any large bowl will do; a glass or stainless steel one is ideal.
  • Skillet or Griddle: A non-stick skillet is best, but cast iron works too.
  • Masher: A potato masher or fork for mashing potatoes.
  • Measuring Cups: For accurate ingredient measurements.

Variations of Irish Potato Bread

  • Cheesy Delight: Add shredded cheese like cheddar or mozzarella to the dough for a rich, savory twist.
  • Bacon Bliss: Incorporate cooked bacon bits for a smoky flavor that pairs perfectly with the potatoes.
  • Herb Infusion: Mix in fresh herbs like rosemary or thyme for an aromatic touch that elevates the bread.
  • Whole Wheat Option: Substitute half of the all-purpose flour with whole wheat flour for a nuttier flavor and added fiber.
  • Gluten-Free Version: Use a gluten-free all-purpose flour blend to make this recipe suitable for gluten-sensitive diets.

Serving Suggestions for Irish Potato Bread

  • Warm Butter: Serve slices warm with a generous pat of butter melting on top.
  • Soups and Stews: Pair with hearty soups like Irish stew or creamy chowder for a comforting meal.
  • Salads: Complement with a fresh garden salad for a light, balanced dish.
  • Herb Garnish: Sprinkle fresh chives or parsley on top for a pop of color.
  • Beer Pairing: Enjoy with a pint of stout or a light lager for a classic Irish experience.

FAQs about Irish Potato Bread

As you embark on your journey to make Irish Potato Bread, you might have a few questions. Here are some common queries that can help you along the way:

Can I use leftover mashed potatoes for this recipe?

Absolutely! Leftover mashed potatoes work perfectly in this Irish Potato Bread recipe. Just make sure they’re not overly seasoned, as you’ll be adding salt and other ingredients.

How do I store Irish Potato Bread?

To keep your bread fresh, store it in an airtight container at room temperature for up to three days. You can also freeze it for longer storage; just wrap it tightly in plastic wrap and then in foil.

Can I make this bread ahead of time?

Yes! You can prepare the dough in advance and refrigerate it for up to 24 hours. Just let it come to room temperature before cooking. This can save you time on busy days!

What can I serve with Irish Potato Bread?

This bread pairs wonderfully with soups, stews, or even a simple salad. It’s also delicious on its own with a bit of butter or topped with your favorite spreads.

Is Irish Potato Bread suitable for a gluten-free diet?

Yes, you can make a gluten-free version by using a gluten-free all-purpose flour blend. Just ensure that all other ingredients are gluten-free as well!

Final Thoughts

Making Irish Potato Bread is more than just a cooking task; it’s a delightful experience that brings warmth to your kitchen and joy to your table. The simple ingredients come together to create a comforting bread that’s perfect for any occasion. Whether you’re enjoying it with a hearty stew or savoring a slice with butter, each bite is a reminder of home and tradition. I hope this recipe inspires you to create your own memories and share them with loved ones. So roll up your sleeves, and let’s bake some happiness together!

jhessica

Irish Potato Bread: Discover a Delicious Recipe Today!

A traditional Irish bread made with mashed potatoes, perfect for serving warm with butter or alongside soups and stews.
Prep Time 15 minutes
Cook Time 15 minutes
Total Time 30 minutes
Servings: 4 servings
Course: Bread
Cuisine: Irish
Calories: 150

Ingredients
  

  • 2 cups mashed potatoes about 2 medium potatoes
  • 2 cups all-purpose flour
  • 1 teaspoon baking powder
  • 1 teaspoon salt
  • 1 tablespoon unsalted butter softened
  • 1/4 cup milk more if needed
  • 1 tablespoon chopped fresh chives optional

Method
 

  1. Begin by preparing the mashed potatoes. Peel and boil the potatoes until tender, then mash them until smooth. Allow them to cool slightly.
  2. In a large mixing bowl, combine the mashed potatoes, flour, baking powder, and salt. Mix until well combined.
  3. Add the softened butter and milk to the mixture. Stir until a dough forms. If the dough is too sticky, add a little more flour; if it’s too dry, add more milk, one tablespoon at a time.
  4. Turn the dough out onto a floured surface and knead gently for about 1-2 minutes until smooth.
  5. Divide the dough into two equal portions and shape each into a round disc about 1/2 inch thick.
  6. Heat a non-stick skillet or griddle over medium heat. Cook each disc for about 5-7 minutes on each side, or until golden brown and cooked through.
  7. Remove from the skillet and let cool slightly before slicing.

Nutrition

Serving: 1pieceCalories: 150kcalCarbohydrates: 28gProtein: 3gFat: 3gSaturated Fat: 1gPolyunsaturated Fat: 2gCholesterol: 5mgSodium: 300mgFiber: 2gSugar: 1g

Notes

  • For a richer flavor, try adding shredded cheese or cooked bacon bits to the dough before cooking.
  • Serve the bread warm with butter or alongside soups and stews for a comforting meal.

Tried this recipe?

Let us know how it was!

Hearty Tomato and Cannellini Bean Soup Recipe You’ll Love!

Introduction to Hearty Tomato and Cannellini Bean Soup

There’s something magical about a warm bowl of soup on a chilly evening. The aroma of simmering tomatoes and savory beans fills the air, instantly making you feel at home. My Hearty Tomato and Cannellini Bean Soup is not just a meal; it’s a hug in a bowl. Perfect for busy weeknights or a cozy weekend gathering, this recipe is both comforting and nutritious. With just a handful of ingredients, you can whip up a dish that impresses your loved ones while nourishing your body. Let’s dive into this delightful culinary adventure!

Why You’ll Love This Hearty Tomato and Cannellini Bean Soup

This Hearty Tomato and Cannellini Bean Soup is a game-changer for anyone juggling a busy schedule. It’s quick to prepare, taking just 40 minutes from start to finish. The rich flavors meld beautifully, creating a dish that’s both satisfying and nutritious. Plus, it’s vegetarian-friendly, making it a great option for everyone at the table. You’ll find yourself reaching for this recipe time and again, and your taste buds will thank you!

Ingredients for Hearty Tomato and Cannellini Bean Soup

Gathering the right ingredients is the first step to creating this delicious Hearty Tomato and Cannellini Bean Soup. Each component plays a vital role in building flavor and texture. Here’s what you’ll need:

  • Olive oil: A staple in Italian cooking, it adds richness and depth.
  • Onion: Diced onion brings sweetness and aroma, forming the base of the soup.
  • Garlic: Minced garlic infuses the dish with a robust flavor that’s hard to resist.
  • Carrot: Diced carrot adds a touch of natural sweetness and vibrant color.
  • Celery: This crunchy vegetable contributes a subtle earthiness and enhances the soup’s overall flavor.
  • Crushed tomatoes: The star of the show, providing a rich, tangy base that makes the soup hearty.
  • Cannellini beans: These creamy beans add protein and a satisfying texture, making the soup filling.
  • Vegetable broth: A flavorful liquid that ties all the ingredients together, enhancing the soup’s depth.
  • Dried basil and oregano: These herbs bring a classic Italian flavor, elevating the dish to new heights.
  • Salt and pepper: Essential for seasoning, they help balance the flavors perfectly.
  • Fresh spinach: Adding this at the end gives a pop of color and nutrients, making the soup even healthier.
  • Lemon juice: A splash of acidity brightens the flavors and adds a refreshing twist.
  • Grated Parmesan cheese: Optional, but a sprinkle on top adds a delightful creaminess and umami flavor.

For those looking to customize, consider adding a pinch of red pepper flakes for heat or cooked pasta for extra heartiness. You can find the exact quantities for each ingredient at the bottom of the article, ready for printing!

How to Make Hearty Tomato and Cannellini Bean Soup

Step 1: Sauté the Vegetables

Start by heating the olive oil in a large pot over medium heat. Once it shimmers, toss in the diced onion. Sauté for about 5 minutes until it turns translucent and fragrant. Then, add the minced garlic, diced carrot, and celery. Stir everything together and let it cook for another 5 minutes. The vegetables should soften and blend beautifully, creating a flavorful base for your Hearty Tomato and Cannellini Bean Soup.

Step 2: Add the Base Ingredients

Now it’s time to build the heart of the soup. Pour in the crushed tomatoes, followed by the drained and rinsed cannellini beans. Next, add the vegetable broth, dried basil, and oregano. Season with salt and pepper to taste. Stir everything together, ensuring the ingredients are well combined. This mixture will create a rich, comforting base that’s perfect for your soup.

Step 3: Simmer the Soup

Bring the soup to a gentle boil, then reduce the heat to low. Let it simmer uncovered for about 20 minutes. This allows the flavors to meld together, creating a deliciously hearty soup. Stir occasionally to prevent sticking. The aroma will fill your kitchen, making it hard to resist sneaking a taste before it’s done!

Step 4: Add Fresh Ingredients

After simmering, it’s time to add some freshness. Stir in the fresh spinach and squeeze in the lemon juice. Cook for an additional 5 minutes until the spinach wilts and brightens the soup. This step not only enhances the flavor but also adds a vibrant color to your Hearty Tomato and Cannellini Bean Soup, making it even more appealing.

Step 5: Serve and Enjoy

Once everything is cooked, taste your soup and adjust the seasoning if needed. Serve it hot, topped with a sprinkle of grated Parmesan cheese if you like. This adds a creamy finish that complements the soup perfectly. Enjoy your Hearty Tomato and Cannellini Bean Soup with crusty bread or a side salad for a complete meal!

Tips for Success

  • Prep your ingredients ahead of time to streamline the cooking process.
  • Don’t skip the simmering step; it’s crucial for flavor development.
  • Adjust the seasoning gradually; taste as you go for the best results.
  • For a creamier texture, blend a portion of the soup before adding spinach.
  • Store leftovers in an airtight container for up to three days.

Equipment Needed

  • Large pot: A sturdy pot is essential; a Dutch oven works great too.
  • Wooden spoon: Perfect for stirring without scratching your pot.
  • Measuring cups and spoons: For accurate ingredient measurements.
  • Cutting board and knife: Essential for prepping your vegetables.

Variations of Hearty Tomato and Cannellini Bean Soup

  • Spicy Kick: Add a pinch of red pepper flakes or diced jalapeños for a fiery twist.
  • Meaty Option: Incorporate cooked Italian sausage or diced chicken for added protein and flavor.
  • Herb Infusion: Experiment with fresh herbs like thyme or rosemary for a fragrant touch.
  • Vegetable Medley: Toss in other veggies like zucchini, bell peppers, or kale for extra nutrition.
  • Gluten-Free: Substitute regular pasta with gluten-free pasta or quinoa for a hearty alternative.
  • Vegan Delight: Omit the Parmesan cheese or use a vegan cheese alternative for a plant-based version.

Serving Suggestions for Hearty Tomato and Cannellini Bean Soup

  • Pair with crusty garlic bread for a satisfying dip.
  • Serve alongside a fresh green salad for a balanced meal.
  • Top with a dollop of pesto for an extra flavor boost.
  • Enjoy with a glass of red wine to complement the rich flavors.

FAQs about Hearty Tomato and Cannellini Bean Soup

Can I freeze Hearty Tomato and Cannellini Bean Soup?

Absolutely! This soup freezes beautifully. Just let it cool completely, then transfer it to an airtight container. It can be stored in the freezer for up to three months. When you’re ready to enjoy it, simply thaw in the fridge overnight and reheat on the stovetop.

What can I serve with this soup?

This Hearty Tomato and Cannellini Bean Soup pairs wonderfully with crusty bread, a fresh salad, or even a grilled cheese sandwich. You can also top it with a sprinkle of Parmesan cheese for added flavor.

How can I make this soup spicier?

If you’re looking for a spicy kick, add a pinch of red pepper flakes while sautéing the vegetables. You can also toss in some diced jalapeños for an extra layer of heat. Adjust the spice level to your liking!

Can I use other beans instead of cannellini beans?

Definitely! While cannellini beans are creamy and delicious, you can substitute them with other beans like kidney beans or chickpeas. Each will bring its own unique flavor and texture to the soup.

Is this soup suitable for meal prep?

Yes! This Hearty Tomato and Cannellini Bean Soup is perfect for meal prep. It keeps well in the fridge for up to three days, making it an excellent option for quick lunches or dinners throughout the week.

Final Thoughts

Cooking this Hearty Tomato and Cannellini Bean Soup is more than just preparing a meal; it’s about creating a moment of warmth and comfort. Each spoonful is a reminder of the simple joys in life, whether shared with family or enjoyed solo on a quiet evening. The vibrant flavors and nourishing ingredients come together to create a dish that not only fills your belly but also warms your heart. So, grab your pot and let the aromas fill your kitchen. You’ll find that this soup becomes a cherished staple, bringing smiles and satisfaction to your table time and again.

jhessica

Hearty Tomato and Cannellini Bean Soup Recipe You’ll Love!

A comforting and nutritious soup made with tomatoes and cannellini beans, perfect for any meal.
Prep Time 10 minutes
Cook Time 30 minutes
Total Time 40 minutes
Servings: 6 servings
Course: Soup
Cuisine: Italian
Calories: 180

Ingredients
  

  • 2 tablespoons olive oil
  • 1 medium onion diced
  • 2 cloves garlic minced
  • 1 carrot diced
  • 1 celery stalk diced
  • 1 28-ounce can crushed tomatoes
  • 1 15-ounce can cannellini beans, drained and rinsed
  • 4 cups vegetable broth
  • 1 teaspoon dried basil
  • 1 teaspoon dried oregano
  • Salt and pepper to taste
  • 2 cups fresh spinach
  • 1 tablespoon lemon juice
  • Grated Parmesan cheese for serving optional

Method
 

  1. In a large pot, heat the olive oil over medium heat. Add the diced onion and sauté for about 5 minutes until translucent.
  2. Stir in the minced garlic, diced carrot, and diced celery. Cook for another 5 minutes until the vegetables are softened.
  3. Add the crushed tomatoes, cannellini beans, vegetable broth, dried basil, and dried oregano. Season with salt and pepper. Bring the mixture to a boil, then reduce the heat and let it simmer for 20 minutes.
  4. Stir in the fresh spinach and lemon juice. Cook for an additional 5 minutes until the spinach is wilted.
  5. Taste and adjust seasoning if necessary. Serve hot, topped with grated Parmesan cheese if desired.

Nutrition

Serving: 1cupCalories: 180kcalCarbohydrates: 25gProtein: 8gFat: 5gSaturated Fat: 1gPolyunsaturated Fat: 4gSodium: 400mgFiber: 6gSugar: 4g

Notes

  • For a spicier kick, add a pinch of red pepper flakes when sautéing the vegetables.
  • To make it heartier, add cooked pasta or quinoa during the last 5 minutes of cooking.

Tried this recipe?

Let us know how it was!

Crispy Air Fryer Shrimp: A Quick and Tasty Delight!

Introduction to Crispy Air Fryer Shrimp

There’s something magical about the aroma of shrimp sizzling in the kitchen. When I think of my favorite quick meals, crispy air fryer shrimp always comes to mind. This dish is not just a treat for the taste buds; it’s a lifesaver on busy weeknights. Whether you’re looking to impress your loved ones or simply craving a delicious snack, this recipe is your go-to solution. With minimal prep and cook time, you can whip up a delightful dish that’s both crispy and satisfying. Let’s dive into this culinary adventure together!

Why You’ll Love This Crispy Air Fryer Shrimp

What’s not to love about crispy air fryer shrimp? This dish is a game-changer for anyone juggling a busy schedule. It’s quick, taking just 20 minutes from start to finish, and the flavor is out of this world. Plus, the air fryer gives you that satisfying crunch without the guilt of deep frying. Perfect for a weeknight dinner or a weekend gathering, it’s sure to please everyone at the table!

Ingredients for Crispy Air Fryer Shrimp

Gathering the right ingredients is the first step to creating your crispy air fryer shrimp masterpiece. Here’s what you’ll need:

  • Large shrimp: Fresh or frozen, peeled and deveined shrimp are the stars of this dish. They cook quickly and soak up flavors beautifully.
  • Breadcrumbs: These provide the crunch! You can use regular or panko breadcrumbs for extra texture.
  • Grated Parmesan cheese: This adds a savory, cheesy flavor that elevates the dish. Feel free to substitute with nutritional yeast for a vegan option.
  • Garlic powder: A must-have for that aromatic kick. It enhances the overall flavor without overpowering the shrimp.
  • Paprika: This spice brings warmth and a hint of smokiness. You can use smoked paprika for an even deeper flavor.
  • Salt and black pepper: Essential for seasoning. Adjust to your taste preferences.
  • Eggs: They act as a binder, helping the breadcrumbs stick to the shrimp for that perfect crispy coating.
  • Olive oil: A light spray or brush of olive oil helps achieve that golden-brown finish. You can substitute with avocado oil if you prefer.
  • Lemon wedges: For serving, these add a refreshing zing that complements the shrimp beautifully.

For those looking to spice things up, consider adding cayenne pepper to the breadcrumb mixture. If you need a gluten-free option, simply swap regular breadcrumbs for gluten-free ones. You can find the exact quantities for each ingredient at the bottom of the article, ready for printing!

How to Make Crispy Air Fryer Shrimp

Now that you have your ingredients ready, let’s get cooking! Making crispy air fryer shrimp is a straightforward process that will have your taste buds dancing. Follow these simple steps, and you’ll be on your way to a delicious meal in no time.

Step 1: Preheat the Air Fryer

Preheating your air fryer is crucial. It ensures that the shrimp cook evenly and achieve that perfect crispy texture. Set your air fryer to 400°F (200°C) and let it warm up for about 5 minutes. This little step makes a big difference in the final result!

Step 2: Prepare the Coating

In a shallow bowl, combine your breadcrumbs, grated Parmesan cheese, garlic powder, paprika, salt, and black pepper. Mix them well until they’re evenly distributed. This flavorful coating is what gives the shrimp that irresistible crunch. The combination of spices adds depth, making each bite a delight!

Step 3: Beat the Eggs

In another bowl, beat the eggs until they’re well combined. The eggs play a vital role in this process. They act as a glue, helping the breadcrumb mixture stick to the shrimp. This ensures that every piece is coated evenly, leading to that satisfying crunch we all love.

Step 4: Coat the Shrimp

Now comes the fun part! Dip each shrimp into the egg mixture, allowing any excess to drip off. Then, coat it in the breadcrumb mixture, pressing gently to make sure it adheres well. This step is key for maximum crispiness. Don’t rush it; take your time to ensure each shrimp is perfectly coated!

Step 5: Arrange in the Air Fryer

Place the coated shrimp in a single layer in the air fryer basket. Make sure they’re spaced out and not touching. This spacing is essential for even cooking. If they’re crowded, they won’t crisp up as nicely. A little room goes a long way!

Step 6: Cook the Shrimp

Cook the shrimp in the air fryer for 8-10 minutes, flipping them halfway through. Keep an eye on them as they cook. You’ll know they’re done when they turn golden brown and are cooked through. The air fryer does its magic quickly, so don’t wander too far!

Step 7: Serve and Enjoy

Once your crispy air fryer shrimp are ready, serve them immediately with lemon wedges on the side. The fresh squeeze of lemon adds a zesty brightness that complements the shrimp beautifully. You can also pair them with your favorite dipping sauce for an extra flavor boost. Enjoy your culinary creation!

Tips for Success

  • Make sure your shrimp are completely thawed and patted dry for the best coating.
  • Don’t skip the preheating step; it’s key for that crispy texture.
  • Experiment with different spices in the breadcrumb mixture for unique flavors.
  • For extra crunch, consider double-coating the shrimp by repeating the egg and breadcrumb steps.
  • Serve immediately for the best taste and texture!

Equipment Needed

  • Air Fryer: The star of the show! Any model will do, but a basket-style air fryer works best for even cooking.
  • Shallow Bowls: For mixing your coatings. You can use pie plates or any flat dish.
  • Tongs: Perfect for flipping the shrimp without making a mess.
  • Measuring Cups: Handy for precise ingredient measurements, though you can eyeball it if you’re feeling adventurous!

Variations

  • Spicy Shrimp: Add 1/2 teaspoon of cayenne pepper to the breadcrumb mixture for a fiery kick.
  • Herb-Infused: Mix in dried herbs like oregano or thyme to the breadcrumb mixture for an aromatic twist.
  • Asian-Inspired: Substitute the breadcrumbs with crushed rice crackers and add sesame seeds for a unique flavor.
  • Gluten-Free: Use gluten-free breadcrumbs to make this dish suitable for those with dietary restrictions.
  • Cheesy Variation: Mix in additional grated cheese, like mozzarella, into the breadcrumb mixture for an extra cheesy bite.

Serving Suggestions

  • Side Dishes: Pair your crispy air fryer shrimp with a fresh garden salad or coleslaw for a refreshing contrast.
  • Dipping Sauces: Serve with cocktail sauce, garlic aioli, or a spicy sriracha mayo for added flavor.
  • Presentation: Garnish with fresh parsley and lemon wedges for a vibrant touch.

FAQs about Crispy Air Fryer Shrimp

Can I use frozen shrimp for this recipe?

Absolutely! Just make sure to thaw the shrimp completely and pat them dry before coating. This helps the breadcrumbs stick better and ensures even cooking.

How do I know when the shrimp are done cooking?

Your crispy air fryer shrimp are ready when they turn golden brown and reach an internal temperature of 120°F (49°C). They should be firm to the touch and opaque in color.

Can I make these shrimp ahead of time?

While it’s best to enjoy them fresh, you can prepare the shrimp and coat them in advance. Store them in the fridge for a few hours before air frying. Just remember to cook them right before serving for that perfect crunch!

What dipping sauces pair well with crispy air fryer shrimp?

There are plenty of delicious options! Try cocktail sauce, garlic aioli, or a zesty lemon herb dip. Each adds a unique flavor that complements the shrimp beautifully.

Can I use a different type of seafood?

Definitely! This air fryer method works well with other seafood like scallops or fish fillets. Just adjust the cooking time based on the thickness of the seafood for the best results.

Final Thoughts

Cooking crispy air fryer shrimp is more than just a recipe; it’s an experience that brings joy to the table. The satisfying crunch, the burst of flavor, and the ease of preparation make it a winner for any occasion. Whether you’re hosting friends or enjoying a quiet night in, this dish is sure to impress. Plus, it’s a fantastic way to introduce seafood to those who might be hesitant. So, roll up your sleeves, gather your ingredients, and let the air fryer work its magic. You’ll be savoring every bite and creating delicious memories in no time!

jhessica

Crispy Air Fryer Shrimp: A Quick and Tasty Delight!

A quick and tasty delight, these crispy air fryer shrimp are perfect for a delicious appetizer or main dish.
Prep Time 10 minutes
Cook Time 10 minutes
Total Time 20 minutes
Servings: 4 servings
Course: Appetizer
Cuisine: American
Calories: 250

Ingredients
  

  • 1 pound large shrimp peeled and deveined
  • 1 cup breadcrumbs
  • 1/2 cup grated Parmesan cheese
  • 1 teaspoon garlic powder
  • 1 teaspoon paprika
  • 1/2 teaspoon salt
  • 1/4 teaspoon black pepper
  • 2 large eggs
  • 1 tablespoon olive oil
  • Lemon wedges for serving

Method
 

  1. Preheat the air fryer to 400°F (200°C) for about 5 minutes.
  2. In a shallow bowl, combine breadcrumbs, Parmesan cheese, garlic powder, paprika, salt, and black pepper. Mix well.
  3. In another bowl, beat the eggs until well combined.
  4. Dip each shrimp first into the egg mixture, allowing any excess to drip off, then coat it in the breadcrumb mixture, pressing gently to adhere.
  5. Place the coated shrimp in a single layer in the air fryer basket. Lightly spray or brush the shrimp with olive oil for extra crispiness.
  6. Cook the shrimp in the air fryer for 8-10 minutes, flipping halfway through, until they are golden brown and cooked through.
  7. Serve immediately with lemon wedges on the side.

Nutrition

Serving: 1servingCalories: 250kcalCarbohydrates: 10gProtein: 24gFat: 12gSaturated Fat: 3gPolyunsaturated Fat: 9gCholesterol: 200mgSodium: 600mgFiber: 1gSugar: 1g

Notes

  • For a spicy kick, add 1/2 teaspoon of cayenne pepper to the breadcrumb mixture.
  • For a gluten-free version, substitute regular breadcrumbs with gluten-free breadcrumbs.

Tried this recipe?

Let us know how it was!

Creamy Spring Vegetable Soup: A Delight in Every Spoonful

Introduction to Creamy Spring Vegetable Soup

There’s something magical about spring, isn’t there? The air is fresh, flowers bloom, and the produce section bursts with vibrant colors. This is the perfect time to whip up a bowl of **Creamy Spring Vegetable Soup**.

It’s not just a meal; it’s a warm hug in a bowl. Whether you’re looking for a quick solution after a long day or a dish to impress your loved ones, this soup has you covered. Packed with fresh veggies and creamy goodness, it’s a delightful way to celebrate the season. Let’s dive into this delicious recipe together!

Why You’ll Love This Creamy Spring Vegetable Soup

This **Creamy Spring Vegetable Soup** is a game-changer for busy weeknights.

It comes together in just 40 minutes, making it a quick and satisfying option.

The flavors are fresh and vibrant, showcasing the best of spring produce.

Plus, it’s versatile! You can easily customize it to suit your taste or dietary needs.

With every spoonful, you’ll feel the warmth and comfort that only a homemade soup can provide.

Ingredients for Creamy Spring Vegetable Soup

Creating a delicious **Creamy Spring Vegetable Soup** starts with fresh, vibrant ingredients. Here’s what you’ll need:

  • Olive oil: A staple in many kitchens, it adds richness and depth to the soup.
  • Onion: Chopped onion brings a sweet, aromatic base that enhances the overall flavor.
  • Garlic: Minced garlic adds a punch of flavor, making everything taste better.
  • Carrots: Diced carrots contribute sweetness and a lovely pop of color.
  • Celery: This crunchy vegetable adds a refreshing note and balances the flavors.
  • Potatoes: Peeled and diced, they create a creamy texture when blended.
  • Vegetable broth: The heart of the soup, it infuses everything with savory goodness.
  • Green beans: Trimmed and cut, they add a delightful crunch and vibrant green color.
  • Peas: Fresh or frozen, peas bring a sweet burst of flavor and a beautiful hue.
  • Asparagus: Cut into pieces, asparagus adds a unique taste and a touch of elegance.
  • Dried thyme: This herb enhances the soup with its earthy aroma and flavor.
  • Salt and pepper: Essential for seasoning, they elevate all the other flavors.
  • Heavy cream: The star ingredient that makes the soup luxuriously creamy.
  • Fresh parsley: Chopped for garnish, it adds a fresh finish and a pop of color.

Feel free to get creative! For a lighter version, consider substituting heavy cream with coconut milk or a dairy-free alternative. If you want to add some protein, cooked chicken or white beans work beautifully.

You can find the exact quantities for each ingredient at the bottom of the article, ready for printing!

How to Make Creamy Spring Vegetable Soup

Making this **Creamy Spring Vegetable Soup** is a breeze. Follow these simple steps, and you’ll have a delicious bowl of comfort in no time.

Step 1: Sauté the Aromatics

Start by heating the olive oil in a large pot over medium heat.

Add the chopped onion and minced garlic.

Sauté them until the onion turns translucent, about 5 minutes.

This step builds a flavorful base for your soup.

Step 2: Add the Vegetables

Next, toss in the diced carrots, celery, and potatoes.

Cook for another 5 minutes, stirring occasionally.

The veggies will soften slightly, releasing their natural sweetness.

Step 3: Pour in the Broth

Now, it’s time to pour in the vegetable broth.

Bring the mixture to a boil, then reduce the heat.

Let it simmer for 15 minutes, or until the vegetables are tender.

This is where the magic happens, as the flavors meld together.

Step 4: Incorporate the Green Veggies

Stir in the green beans, peas, and asparagus.

Add the dried thyme for that earthy aroma.

Continue to simmer for an additional 5 minutes.

You’ll see the vibrant colors of spring come to life in your pot.

Step 5: Blend the Soup

Using an immersion blender, carefully blend the soup until smooth.

If you prefer a chunkier texture, blend only half of it.

This step transforms your soup into a creamy delight.

Step 6: Finish with Cream

Stir in the heavy cream, giving the soup its luxurious texture.

Season with salt and pepper to taste.

Heat through for another 2-3 minutes, allowing the flavors to combine.

Step 7: Serve and Garnish

Ladle the soup into bowls and garnish with fresh parsley.

Serve hot, and watch your loved ones enjoy every spoonful.

This **Creamy Spring Vegetable Soup** is not just a meal; it’s a celebration of spring!

Tips for Success

  • Prep your veggies ahead of time to save on cooking time.
  • Use fresh, seasonal vegetables for the best flavor.
  • Don’t skip the blending step; it’s key for that creamy texture.
  • Adjust seasoning to your taste; a little extra salt can make a big difference.
  • Store leftovers in an airtight container for up to three days.

Equipment Needed

  • Large pot: A sturdy pot is essential for cooking the soup. A Dutch oven works great too.
  • Immersion blender: This handy tool makes blending easy. A regular blender can be used, but be cautious with hot liquids.
  • Cutting board and knife: For chopping your fresh veggies.

Variations

  • Herb-Infused: Add fresh herbs like basil or dill for an aromatic twist.
  • Spicy Kick: Incorporate a pinch of red pepper flakes or a dash of hot sauce for some heat.
  • Protein Boost: Mix in cooked chicken, turkey, or white beans for added protein and heartiness.
  • Vegan Option: Substitute heavy cream with coconut milk or a plant-based cream for a vegan-friendly version.
  • Root Veggie Variation: Swap out potatoes for sweet potatoes or parsnips for a different flavor profile.

Serving Suggestions

  • Pair your **Creamy Spring Vegetable Soup** with crusty bread or a warm baguette for dipping.
  • A light salad with a citrus vinaigrette complements the soup beautifully.
  • Serve with a chilled glass of white wine, like Sauvignon Blanc, for a refreshing touch.
  • Garnish with extra parsley or a drizzle of olive oil for an elegant presentation.

FAQs about Creamy Spring Vegetable Soup

Can I make this soup ahead of time?

Absolutely! This **Creamy Spring Vegetable Soup** tastes even better the next day. Just store it in an airtight container in the fridge for up to three days. Reheat gently on the stove before serving.

Can I freeze the soup?

Yes, you can freeze this soup! Allow it to cool completely, then transfer it to freezer-safe containers. It will keep well for up to three months. Just remember to leave some space in the container for expansion.

What can I use instead of heavy cream?

If you’re looking for a lighter option, coconut milk or a dairy-free cream alternative works wonderfully. It will still give you that creamy texture without the heaviness.

How can I make this soup spicier?

For a spicy kick, add a pinch of red pepper flakes or a dash of hot sauce while cooking. Adjust the amount to suit your heat preference!

What are some good side dishes to serve with this soup?

This soup pairs beautifully with a simple green salad, crusty bread, or even a light sandwich. The fresh flavors complement each other perfectly!

Final Thoughts

Cooking this **Creamy Spring Vegetable Soup** is more than just preparing a meal; it’s about embracing the season and the joy of fresh ingredients.

Each spoonful is a reminder of the vibrant flavors spring offers, bringing warmth and comfort to your table.

Whether you’re sharing it with family or enjoying a quiet moment alone, this soup has a way of making everything feel a little brighter.

So, roll up your sleeves, gather those fresh veggies, and let the magic of spring fill your kitchen.

You’ll find that every bowl is a celebration worth savoring!

jhessica

Creamy Spring Vegetable Soup: A Delight in Every Spoonful

A creamy and delicious spring vegetable soup packed with fresh vegetables and flavors.
Prep Time 10 minutes
Cook Time 30 minutes
Total Time 40 minutes
Servings: 6 servings
Course: Soup
Cuisine: American
Calories: 220

Ingredients
  

  • 2 tablespoons olive oil
  • 1 medium onion chopped
  • 2 cloves garlic minced
  • 1 cup carrots diced
  • 1 cup celery diced
  • 1 cup potatoes peeled and diced
  • 4 cups vegetable broth
  • 1 cup green beans trimmed and cut into 1-inch pieces
  • 1 cup peas fresh or frozen
  • 1 cup asparagus cut into 1-inch pieces
  • 1 teaspoon dried thyme
  • Salt and pepper to taste
  • 1 cup heavy cream
  • Fresh parsley chopped (for garnish)

Method
 

  1. In a large pot, heat the olive oil over medium heat. Add the chopped onion and garlic, sautéing until the onion is translucent, about 5 minutes.
  2. Add the diced carrots, celery, and potatoes to the pot. Cook for another 5 minutes, stirring occasionally.
  3. Pour in the vegetable broth and bring the mixture to a boil. Reduce the heat and let it simmer for 15 minutes, or until the vegetables are tender.
  4. Stir in the green beans, peas, asparagus, and dried thyme. Continue to simmer for an additional 5 minutes.
  5. Using an immersion blender, carefully blend the soup until smooth. If you prefer a chunkier texture, blend only half of the soup.
  6. Stir in the heavy cream and season with salt and pepper to taste. Heat through for another 2-3 minutes.
  7. Serve hot, garnished with fresh parsley.

Nutrition

Serving: 1cupCalories: 220kcalCarbohydrates: 18gProtein: 4gFat: 15gSaturated Fat: 8gPolyunsaturated Fat: 7gCholesterol: 40mgSodium: 500mgFiber: 3gSugar: 3g

Notes

  • For a lighter version, substitute the heavy cream with coconut milk or a dairy-free cream alternative.
  • Add cooked chicken or white beans for extra protein and heartiness.

Tried this recipe?

Let us know how it was!

Gingerbread Brownies: Delight in this Easy Recipe!

Introduction to Gingerbread Brownies

There’s something magical about the aroma of gingerbread wafting through the house, isn’t there? These Gingerbread Brownies are a delightful twist on a classic favorite, perfect for cozy evenings or festive gatherings. Whether you’re looking to impress your loved ones or simply treat yourself after a long day, this easy recipe is your go-to solution. With just a handful of ingredients and minimal prep time, you can whip up a batch that’s sure to warm hearts and satisfy sweet cravings. Let’s dive into this spiced treat that’s as comforting as a hug on a chilly day!

Why You’ll Love This Gingerbread Brownies

These Gingerbread Brownies are a game-changer for anyone who loves a quick, delicious dessert. They come together in just 45 minutes, making them perfect for busy weeknights or last-minute holiday gatherings. The rich, spiced flavor will transport you to a cozy winter wonderland, while the fudgy texture keeps you coming back for more. Plus, they’re easy to customize, so you can make them your own!

Ingredients for Gingerbread Brownies

Gathering the right ingredients is the first step to creating these delightful Gingerbread Brownies. Here’s what you’ll need:

  • All-purpose flour: This forms the base of your brownies, giving them structure and a soft texture.
  • Unsweetened cocoa powder: Adds a rich chocolate flavor, balancing the spices beautifully.
  • Baking powder: Helps the brownies rise, ensuring they’re light and fluffy.
  • Baking soda: Works alongside baking powder for that perfect lift.
  • Salt: Enhances the flavors, making the sweetness pop.
  • Ground ginger: The star spice! It brings warmth and a zesty kick to the brownies.
  • Ground cinnamon: Adds a comforting, sweet aroma that’s synonymous with the holiday season.
  • Ground nutmeg: Just a pinch adds depth and a hint of earthiness.
  • Unsalted butter: Provides richness and moisture, making the brownies fudgy.
  • Brown sugar: This gives a deep, caramel-like sweetness that complements the spices.
  • Granulated sugar: Balances the flavors and contributes to the brownies’ chewy texture.
  • Large eggs: Essential for binding the ingredients together and adding moisture.
  • Vanilla extract: A splash of vanilla rounds out the flavors, making everything taste harmonious.
  • Molasses: This adds a rich, dark sweetness and enhances the gingerbread flavor.
  • Chocolate chips (optional): For those who can’t resist a little extra chocolatey goodness!

For exact measurements, check the bottom of the article where you can find everything listed for easy printing. Feel free to get creative with your ingredients! You can swap in whole wheat flour for a healthier twist or use coconut sugar for a different flavor profile. The possibilities are endless!

How to Make Gingerbread Brownies

Making these Gingerbread Brownies is a breeze! Follow these simple steps, and you’ll have a delicious treat ready in no time. Let’s get started!

Step 1: Preheat the Oven

First things first, preheat your oven to 350°F (175°C). This step is crucial because it ensures even baking. While the oven warms up, grease a 9×9-inch baking pan or line it with parchment paper. This will make it easy to remove the brownies later. Trust me, you don’t want to lose any of that deliciousness!

Step 2: Mix Dry Ingredients

In a medium bowl, whisk together the all-purpose flour, cocoa powder, baking powder, baking soda, salt, ground ginger, cinnamon, and nutmeg. Mixing these dry ingredients well is essential for the right texture. It helps distribute the leavening agents evenly, ensuring your brownies rise perfectly. Plus, the spices will blend beautifully, creating that signature gingerbread flavor!

Step 3: Combine Wet Ingredients

In a large bowl, mix the melted unsalted butter, brown sugar, and granulated sugar until smooth. This is where the magic begins! Add the eggs one at a time, mixing well after each addition. Then, stir in the vanilla extract and molasses. Each ingredient plays a role: the butter adds richness, the sugars provide sweetness, and the molasses deepens that gingerbread flavor. It’s a symphony of flavors!

Step 4: Combine Wet and Dry Ingredients

Now, gradually add the dry ingredients to the wet mixture. Stir gently until just combined. Be careful not to overmix; this keeps your brownies fudgy and moist. If you’re feeling adventurous, fold in the chocolate chips at this stage for an extra layer of indulgence. Who can resist a little chocolate?

Step 5: Bake the Brownies

Pour the batter into your prepared baking pan and spread it evenly. Bake for 25-30 minutes. To check for doneness, insert a toothpick into the center. It should come out with a few moist crumbs, not wet batter. This is the sweet spot for that perfect fudgy texture!

Step 6: Cool and Serve

Once baked, allow the brownies to cool in the pan for about 10 minutes. This helps them set up nicely. Then, transfer them to a wire rack to cool completely. When you’re ready to serve, cut them into squares. A little dusting of powdered sugar or a drizzle of caramel sauce can elevate your presentation. Enjoy every bite!

Tips for Success

  • Use room temperature eggs for better mixing and texture.
  • Don’t skip the parchment paper; it makes removal a breeze!
  • For extra flavor, let the batter sit for 10 minutes before baking.
  • Check your brownies a few minutes early to avoid overbaking.
  • Store leftovers in an airtight container to keep them moist.

Equipment Needed

  • 9×9-inch baking pan: A square pan is ideal, but an 8×8-inch pan works too.
  • Mixing bowls: Use one large and one medium for convenience.
  • Whisk: A whisk is great for mixing dry ingredients; a fork can work in a pinch.
  • Spatula: A rubber spatula helps fold ingredients and scrape the bowl clean.
  • Toothpick: Essential for checking the brownies’ doneness.

Variations

  • Nutty Delight: Add chopped walnuts or pecans for a crunchy texture that complements the fudgy brownies.
  • Fruit Fusion: Incorporate dried cranberries or cherries for a tart contrast to the sweetness.
  • Gluten-Free Option: Substitute all-purpose flour with a gluten-free blend for a delicious alternative.
  • Vegan Version: Replace eggs with flaxseed meal mixed with water and use coconut oil instead of butter.
  • Spicy Kick: Increase the ground ginger to 2 tablespoons for a bolder flavor that packs a punch.

Serving Suggestions

  • Pair with Ice Cream: A scoop of vanilla or ginger ice cream complements the warm brownies perfectly.
  • Hot Beverages: Serve with a cup of spiced chai or hot cocoa for a cozy treat.
  • Presentation: Dust with powdered sugar or drizzle with caramel sauce for an elegant touch.
  • Fresh Fruit: Add a side of sliced apples or pears for a refreshing contrast.

FAQs about Gingerbread Brownies

Can I make Gingerbread Brownies ahead of time?

Absolutely! These brownies store well. You can make them a day in advance and keep them in an airtight container. Just remember to let them cool completely before storing to maintain that fudgy texture.

What can I substitute for molasses?

If you don’t have molasses on hand, you can use honey or maple syrup as a substitute. While the flavor will differ slightly, it will still add sweetness and moisture to your Gingerbread Brownies.

How do I know when my brownies are done baking?

To check for doneness, insert a toothpick into the center of the brownies. If it comes out with a few moist crumbs, they’re perfect! If it’s wet with batter, give them a few more minutes.

Can I freeze Gingerbread Brownies?

<pYes, you can freeze them! Just wrap the cooled brownies tightly in plastic wrap and then in aluminum foil. They’ll stay fresh for up to three months. Thaw them in the fridge before serving.

What’s the best way to store leftover brownies?

Store your leftover Gingerbread Brownies in an airtight container at room temperature for up to a week. If you want to keep them longer, consider freezing them as mentioned earlier!

Final Thoughts

Creating these Gingerbread Brownies is more than just baking; it’s about crafting memories. The warm spices and rich chocolate create a comforting embrace that feels like home. Whether you’re sharing them with family during the holidays or enjoying a quiet moment with a cup of coffee, these brownies bring joy to any occasion. They’re easy to make, deliciously satisfying, and perfect for any time of year. So, roll up your sleeves, gather your ingredients, and let the delightful aroma fill your kitchen. Trust me, every bite will remind you why you love baking!

jhessica

Gingerbread Brownies: Delight in this Easy Recipe!

Delight in these easy-to-make Gingerbread Brownies, perfect for the holiday season or any time you crave a spiced treat.
Prep Time 15 minutes
Cook Time 30 minutes
Total Time 45 minutes
Servings: 9 servings
Course: Dessert
Cuisine: American
Calories: 210

Ingredients
  

  • 1 cup all-purpose flour
  • 1/2 cup unsweetened cocoa powder
  • 1 teaspoon baking powder
  • 1/2 teaspoon baking soda
  • 1/2 teaspoon salt
  • 1 tablespoon ground ginger
  • 1 tablespoon ground cinnamon
  • 1/2 teaspoon ground nutmeg
  • 1/2 cup unsalted butter melted
  • 1 cup brown sugar packed
  • 1/2 cup granulated sugar
  • 2 large eggs
  • 1 teaspoon vanilla extract
  • 1/4 cup molasses
  • 1/2 cup chocolate chips optional

Method
 

  1. Preheat your oven to 350°F (175°C). Grease a 9×9-inch baking pan or line it with parchment paper for easy removal.
  2. In a medium bowl, whisk together the flour, cocoa powder, baking powder, baking soda, salt, ginger, cinnamon, and nutmeg until well combined.
  3. In a large bowl, mix the melted butter, brown sugar, and granulated sugar until smooth. Add the eggs one at a time, mixing well after each addition. Stir in the vanilla extract and molasses until fully incorporated.
  4. Gradually add the dry ingredients to the wet ingredients, stirring until just combined. If using, fold in the chocolate chips.
  5. Pour the batter into the prepared baking pan and spread it evenly. Bake for 25-30 minutes, or until a toothpick inserted into the center comes out with a few moist crumbs.
  6. Allow the brownies to cool in the pan for about 10 minutes before transferring them to a wire rack to cool completely. Cut into squares and serve.

Nutrition

Serving: 1brownieCalories: 210kcalCarbohydrates: 30gProtein: 3gFat: 9gSaturated Fat: 5gPolyunsaturated Fat: 4gCholesterol: 30mgSodium: 150mgFiber: 1gSugar: 20g

Notes

  • For a spicier flavor, increase the ground ginger to 2 tablespoons.
  • You can also add chopped nuts or dried fruit for added texture and flavor.
  • For a festive touch, top with a dusting of powdered sugar or a drizzle of caramel sauce before serving.

Tried this recipe?

Let us know how it was!

Buttermilk Blueberry Breakfast Cake: A Delightful Recipe!

Introduction to Buttermilk Blueberry Breakfast Cake

There’s something magical about waking up to the aroma of freshly baked goods wafting through the house.

The Buttermilk Blueberry Breakfast Cake is just that—a warm hug in cake form, perfect for those busy mornings or leisurely brunches with friends.

This delightful treat is not only moist and flavorful but also incredibly easy to whip up.

Whether you’re looking to impress your loved ones or simply want a quick solution for breakfast, this cake is your go-to recipe.

Trust me, once you try it, you’ll be dreaming of blueberries and buttermilk long after the last slice is gone.

Why You’ll Love This Buttermilk Blueberry Breakfast Cake

This Buttermilk Blueberry Breakfast Cake is a game-changer for your mornings.

It’s quick to prepare, taking just 15 minutes of your time, and the baking process fills your kitchen with a mouthwatering scent.

The combination of tangy buttermilk and sweet blueberries creates a flavor explosion that will have everyone asking for seconds.

Plus, it’s versatile enough to serve at brunch or as a delightful snack throughout the day.

Ingredients for Buttermilk Blueberry Breakfast Cake

Gathering the right ingredients is the first step to creating this delightful Buttermilk Blueberry Breakfast Cake.

Here’s what you’ll need:

  • All-purpose flour: The backbone of your cake, providing structure and a soft crumb.
  • Granulated sugar: Sweetens the cake and helps create that lovely golden crust.
  • Baking powder: This leavening agent gives the cake its rise, making it light and fluffy.
  • Baking soda: Works in tandem with the buttermilk to create a tender texture.
  • Salt: Enhances the flavors, balancing the sweetness of the cake.
  • Unsalted butter: Adds richness and moisture; make sure it’s softened for easy mixing.
  • Buttermilk: The star ingredient! It adds tanginess and keeps the cake moist.
  • Large eggs: Bind the ingredients together and contribute to the cake’s structure.
  • Vanilla extract: A splash of this adds warmth and depth to the flavor profile.
  • Blueberries: Fresh or frozen, these juicy gems burst with flavor and color in every bite.
  • Lemon zest (optional): A hint of citrus brightness that complements the blueberries beautifully.
  • Powdered sugar (optional): For a sweet dusting on top, making your cake look as good as it tastes.

Feel free to get creative!

For a nutty twist, consider adding chopped walnuts or pecans.

If you prefer a citrusy flavor, swap the lemon zest for orange zest.

Exact measurements for these ingredients can be found at the bottom of the article, ready for printing.

How to Make Buttermilk Blueberry Breakfast Cake

Creating this Buttermilk Blueberry Breakfast Cake is a breeze.

Follow these simple steps, and you’ll have a delicious cake ready to impress.

Let’s dive in!

Step 1: Preheat the Oven

First things first, preheat your oven to 350°F (175°C).

While it warms up, prepare your baking pan.

Grease and flour a 9×13-inch pan or line it with parchment paper for easy removal later.

Step 2: Mix Dry Ingredients

In a large mixing bowl, whisk together the all-purpose flour, granulated sugar, baking powder, baking soda, and salt.

Make sure everything is well combined.

This step is crucial for a uniform texture in your cake.

Step 3: Combine Wet Ingredients

In another bowl, beat the softened butter until it’s creamy and smooth.

Add the buttermilk, large eggs, and vanilla extract.

Mix until everything is well blended.

This mixture will bring moisture and flavor to your cake.

Step 4: Combine Wet and Dry Ingredients

Now, gradually add the wet ingredients to the dry ingredients.

Stir gently until just combined.

Be careful not to overmix; a few lumps are perfectly fine.

This will keep your cake light and fluffy.

Step 5: Fold in Blueberries

Gently fold in the blueberries and lemon zest, if you’re using it.

Make sure they’re evenly distributed throughout the batter.

This is where the magic happens—those juicy blueberries will burst with flavor!

Step 6: Bake the Cake

Pour the batter into your prepared baking pan and spread it evenly.

Bake in the preheated oven for 35-40 minutes.

Check for doneness by inserting a toothpick into the center; it should come out clean.

Step 7: Cool and Serve

Once baked, allow the cake to cool in the pan for about 10 minutes.

Then, transfer it to a wire rack to cool completely.

If you like, dust it with powdered sugar before serving.

This adds a lovely touch and makes it look even more inviting!

Tips for Success

  • Use room temperature ingredients for better mixing and a smoother batter.
  • Don’t overmix the batter; it can lead to a dense cake.
  • For even baking, rotate the pan halfway through the baking time.
  • Let the cake cool completely before cutting for cleaner slices.
  • Store leftovers in an airtight container to keep it moist.

Equipment Needed

  • 9×13-inch baking pan: A standard size for this cake; you can use a similar-sized dish if needed.
  • Mixing bowls: A couple of medium-sized bowls will do the trick.
  • Whisk: Essential for mixing dry ingredients; a fork can work in a pinch.
  • Rubber spatula: Perfect for folding in blueberries; a wooden spoon is a good alternative.
  • Wire rack: For cooling; if you don’t have one, a plate will suffice.

Variations of Buttermilk Blueberry Breakfast Cake

  • Nutty Delight: Add 1/2 cup of chopped walnuts or pecans for a crunchy texture and nutty flavor.
  • Citrus Twist: Swap lemon zest for orange zest to give your cake a refreshing citrus kick.
  • Gluten-Free Option: Use a gluten-free all-purpose flour blend to make this cake suitable for gluten-sensitive friends.
  • Vegan Version: Replace eggs with flax eggs and use plant-based butter and buttermilk for a vegan-friendly treat.
  • Berry Medley: Mix in other berries like raspberries or blackberries for a colorful and flavorful twist.

Serving Suggestions for Buttermilk Blueberry Breakfast Cake

  • Fresh Fruit: Serve with a side of sliced strawberries or a fruit salad for a refreshing contrast.
  • Coffee or Tea: Pair with a hot cup of coffee or herbal tea to enhance the flavors.
  • Yogurt: A dollop of Greek yogurt adds creaminess and a tangy balance.
  • Presentation: Dust with powdered sugar and garnish with mint leaves for a beautiful touch.

FAQs about Buttermilk Blueberry Breakfast Cake

Can I use frozen blueberries in this recipe?

Absolutely! Frozen blueberries work just as well as fresh ones. Just toss them in a bit of flour before folding them into the batter to prevent them from sinking.

How do I store leftover Buttermilk Blueberry Breakfast Cake?

Store any leftovers in an airtight container at room temperature for up to three days. For longer storage, you can refrigerate it for up to a week.

Can I make this cake ahead of time?

Yes! You can bake the cake a day in advance. Just let it cool completely, then cover it tightly. It will taste just as delicious the next day!

What can I substitute for buttermilk?

If you don’t have buttermilk on hand, you can make a quick substitute by mixing one cup of milk with one tablespoon of vinegar or lemon juice. Let it sit for about 5 minutes before using.

Is this cake suitable for a brunch gathering?

<pDefinitely! This Buttermilk Blueberry Breakfast Cake is perfect for brunch. Its delightful flavor and moist texture will impress your guests and keep them coming back for more.

Final Thoughts

Baking this Buttermilk Blueberry Breakfast Cake is more than just a recipe; it’s an experience that fills your home with warmth and joy.

Each slice is a reminder of cozy mornings and shared moments with loved ones.

The combination of tangy buttermilk and sweet blueberries creates a delightful harmony that dances on your taste buds.

Whether you enjoy it with a cup of coffee or as a sweet treat after dinner, this cake brings smiles all around.

So, roll up your sleeves, gather your ingredients, and let the magic of baking brighten your day!

jhessica

Buttermilk Blueberry Breakfast Cake: A Delightful Recipe!

A delightful and moist buttermilk blueberry breakfast cake, perfect for any morning or brunch.
Prep Time 15 minutes
Cook Time 40 minutes
Total Time 55 minutes
Servings: 12 servings
Course: Breakfast
Cuisine: American
Calories: 210

Ingredients
  

  • 2 cups all-purpose flour
  • 1 cup granulated sugar
  • 1 tablespoon baking powder
  • 1/2 teaspoon baking soda
  • 1/2 teaspoon salt
  • 1/2 cup unsalted butter softened
  • 1 cup buttermilk
  • 2 large eggs
  • 1 teaspoon vanilla extract
  • 2 cups fresh or frozen blueberries
  • 1 tablespoon lemon zest optional
  • Powdered sugar for dusting optional

Method
 

  1. Preheat your oven to 350°F (175°C). Grease and flour a 9×13-inch baking pan or line it with parchment paper for easy removal.
  2. In a large mixing bowl, whisk together the flour, sugar, baking powder, baking soda, and salt until well combined.
  3. In another bowl, beat the softened butter until creamy. Add the buttermilk, eggs, and vanilla extract, mixing until smooth.
  4. Gradually add the wet ingredients to the dry ingredients, stirring gently until just combined. Be careful not to overmix.
  5. Fold in the blueberries and lemon zest, if using, until evenly distributed throughout the batter.
  6. Pour the batter into the prepared baking pan and spread it evenly.
  7. Bake in the preheated oven for 35-40 minutes, or until a toothpick inserted into the center comes out clean.
  8. Allow the cake to cool in the pan for about 10 minutes, then transfer it to a wire rack to cool completely. Dust with powdered sugar before serving, if desired.

Nutrition

Serving: 1sliceCalories: 210kcalCarbohydrates: 30gProtein: 3gFat: 9gSaturated Fat: 5gPolyunsaturated Fat: 4gCholesterol: 50mgSodium: 200mgFiber: 1gSugar: 15g

Notes

  • For a nutty flavor, add 1/2 cup of chopped walnuts or pecans to the batter.
  • For a citrus twist, replace the lemon zest with orange zest for a different flavor profile.

Tried this recipe?

Let us know how it was!

Mediterranean Chicken Patties: Discover This Simple Recipe!

Introduction to Mediterranean Chicken Patties

When I think of comfort food, Mediterranean Chicken Patties always come to mind.

These little gems are not just delicious; they’re a quick solution for those busy weeknights when you want something satisfying without spending hours in the kitchen.

Packed with flavor and easy to whip up, they’re perfect for impressing family or friends.

Whether you’re a seasoned cook or just starting out, this recipe will have you feeling like a culinary rock star in no time.

Let’s dive into this delightful dish that’s sure to become a staple in your home!

Why You’ll Love This Mediterranean Chicken Patties

These Mediterranean Chicken Patties are a game changer for any home cook.

They come together in just 27 minutes, making them perfect for those hectic evenings.

The combination of juicy chicken, tangy feta, and fresh herbs creates a flavor explosion that will have everyone asking for seconds.

Plus, they’re versatile enough to serve as a main dish or a tasty appetizer.

Trust me, once you try them, you’ll be hooked!

Ingredients for Mediterranean Chicken Patties

Creating these Mediterranean Chicken Patties is a breeze, especially with the right ingredients.

Here’s what you’ll need to bring this flavorful dish to life:

  • Ground chicken: The star of the show, it’s lean and packed with protein.
  • Breadcrumbs: They help bind the patties together, giving them a nice texture.
  • Feta cheese: This crumbly cheese adds a tangy flavor that elevates the dish.
  • Fresh parsley: A burst of freshness that brightens up the patties.
  • Garlic: Minced for that aromatic kick that makes everything better.
  • Dried oregano: A classic Mediterranean herb that brings warmth and depth.
  • Salt: Essential for enhancing all the flavors in the patties.
  • Black pepper: A dash of spice to round out the taste.
  • Red pepper flakes (optional): For those who like a little heat, this is your go-to.
  • Egg: Acts as a binder, helping the patties hold their shape while cooking.
  • Olive oil: Perfect for cooking, it adds richness and a hint of Mediterranean flair.

Feel free to get creative! You can mix in chopped sun-dried tomatoes or olives for an extra flavor boost.

For exact measurements, check the bottom of the article where you can find everything listed for easy printing.

How to Make Mediterranean Chicken Patties

Making Mediterranean Chicken Patties is as easy as pie, and trust me, the results are worth every minute.

Let’s break it down step by step, so you can impress everyone at the dinner table.

Step 1: Combine Ingredients

In a large bowl, toss together the ground chicken, breadcrumbs, feta cheese, parsley, garlic, oregano, salt, black pepper, and red pepper flakes if you’re feeling adventurous.

Mix everything until it’s well combined.

The aroma of garlic and herbs will already start to fill your kitchen, making your mouth water.

Step 2: Add the Egg

Now, crack that large egg into the mixture.

This little addition is crucial; it binds everything together, ensuring your patties hold their shape while cooking.

Mix again until the egg is fully incorporated.

You want a cohesive mixture that’s not too wet or dry.

Step 3: Form the Patties

Time to get your hands a little messy!

Take a handful of the mixture and form it into patties about 2-3 inches in diameter.

You should end up with around eight patties.

If you want them to cook evenly, try to keep them uniform in size.

Step 4: Heat the Skillet

Grab a large skillet and pour in the olive oil.

Heat it over medium heat until it shimmers.

This is the perfect temperature for cooking your patties to golden perfection.

Too hot, and they’ll burn; too cool, and they’ll stick.

Step 5: Cook the Patties

Carefully place the patties in the skillet, making sure not to overcrowd them.

Cook for about 5-6 minutes on each side.

You’re looking for a beautiful golden brown color and a cooked-through center.

Flip them gently to avoid breaking.

Step 6: Rest and Serve

Once cooked, remove the patties from the skillet and let them rest on a paper towel.

This helps absorb any excess oil, keeping them light and delicious.

Serve them warm, perhaps with a side of tzatziki sauce or a fresh salad.

You’ll be amazed at how quickly they disappear!

Tips for Success

  • Use fresh herbs for the best flavor; dried herbs can work in a pinch but won’t pack the same punch.
  • Don’t overmix the ingredients; a gentle hand keeps the patties tender.
  • Let the patties rest for a few minutes before cooking to help them hold their shape.
  • Experiment with spices; a pinch of cumin or coriander can add a unique twist.
  • Keep the skillet at medium heat to avoid burning while ensuring they cook through.

Equipment Needed

  • Large bowl: For mixing the ingredients. A sturdy mixing bowl works well.
  • Skillet: A non-stick skillet is ideal, but any frying pan will do.
  • Spatula: To flip the patties without breaking them.
  • Measuring cups: Helpful for portioning ingredients accurately.

Variations

  • Herbed Chicken Patties: Add fresh dill or mint for a refreshing twist that enhances the Mediterranean flavor.
  • Spicy Chicken Patties: Mix in chopped jalapeños or a dash of hot sauce for an extra kick.
  • Vegetarian Option: Substitute ground chicken with chickpeas or lentils for a hearty, plant-based version.
  • Cheesy Delight: Incorporate shredded mozzarella or provolone cheese for a gooey, melty center.
  • Gluten-Free: Use gluten-free breadcrumbs or crushed gluten-free crackers to keep it celiac-friendly.

Serving Suggestions

  • Pair the patties with a refreshing Greek salad for a light, vibrant meal.
  • Serve with tzatziki sauce for a creamy, tangy dip that complements the flavors.
  • Consider a side of roasted vegetables for a colorful and nutritious addition.
  • A glass of chilled white wine enhances the Mediterranean experience.

FAQs about Mediterranean Chicken Patties

Can I use ground turkey instead of ground chicken?

Absolutely! Ground turkey is a great substitute for ground chicken in these Mediterranean Chicken Patties. It will still yield delicious results, just with a slightly different flavor profile.

How do I store leftovers?

Store any leftover patties in an airtight container in the fridge for up to three days. You can also freeze them for up to three months. Just reheat in a skillet or microwave when you’re ready to enjoy them again!

Can I make these patties ahead of time?

Yes! You can prepare the mixture and form the patties a day in advance. Just cover them and refrigerate until you’re ready to cook. This makes for a quick meal on busy days!

What can I serve with Mediterranean Chicken Patties?

These patties pair wonderfully with tzatziki sauce, a fresh salad, or even in a pita with veggies. The options are endless, so feel free to get creative!

Are Mediterranean Chicken Patties gluten-free?

They can be! Just use gluten-free breadcrumbs or crushed gluten-free crackers in the recipe. This way, everyone can enjoy these tasty patties without worry.

Final Thoughts

Cooking Mediterranean Chicken Patties is more than just preparing a meal; it’s about creating moments.

The joy of mixing fresh ingredients, the aroma wafting through your kitchen, and the satisfaction of serving a dish that delights everyone at the table is truly rewarding.

These patties are versatile, easy to make, and bursting with flavor, making them a perfect addition to your culinary repertoire.

Whether you’re enjoying them on a busy weeknight or impressing guests at a gathering, they’re sure to bring smiles and compliments.

So roll up your sleeves and dive into this delicious adventure!

jhessica

Mediterranean Chicken Patties: Discover This Simple Recipe!

A simple and delicious recipe for Mediterranean Chicken Patties that are packed with flavor and easy to make.
Prep Time 15 minutes
Cook Time 12 minutes
Total Time 27 minutes
Servings: 4 servings
Course: Main Course
Cuisine: Mediterranean
Calories: 250

Ingredients
  

  • 1 pound ground chicken
  • 1/2 cup breadcrumbs
  • 1/4 cup feta cheese crumbled
  • 1/4 cup fresh parsley chopped
  • 2 cloves garlic minced
  • 1 teaspoon dried oregano
  • 1 teaspoon salt
  • 1/2 teaspoon black pepper
  • 1/4 teaspoon red pepper flakes optional
  • 1 large egg
  • 2 tablespoons olive oil for cooking

Method
 

  1. In a large bowl, combine the ground chicken, breadcrumbs, feta cheese, parsley, garlic, oregano, salt, black pepper, and red pepper flakes. Mix until well combined.
  2. Add the egg to the mixture and mix until everything is evenly incorporated.
  3. Form the mixture into patties, about 2-3 inches in diameter. You should get around 8 patties.
  4. Heat the olive oil in a large skillet over medium heat.
  5. Cook the patties for about 5-6 minutes on each side, or until they are golden brown and cooked through.
  6. Remove the patties from the skillet and let them rest on a paper towel to absorb excess oil.

Nutrition

Serving: 1pattyCalories: 250kcalCarbohydrates: 10gProtein: 25gFat: 14gSaturated Fat: 3gPolyunsaturated Fat: 10gCholesterol: 70mgSodium: 600mgFiber: 1gSugar: 1g

Notes

  • For added flavor, try mixing in some chopped sun-dried tomatoes or olives into the patty mixture.
  • Serve the patties with a side of tzatziki sauce or a fresh salad for a complete meal.

Tried this recipe?

Let us know how it was!

Stay Connected

Get recipes via email: