Get my cookbooks

Teriyaki Shrimp Sushi Bowl: A Flavorful Recipe Guide

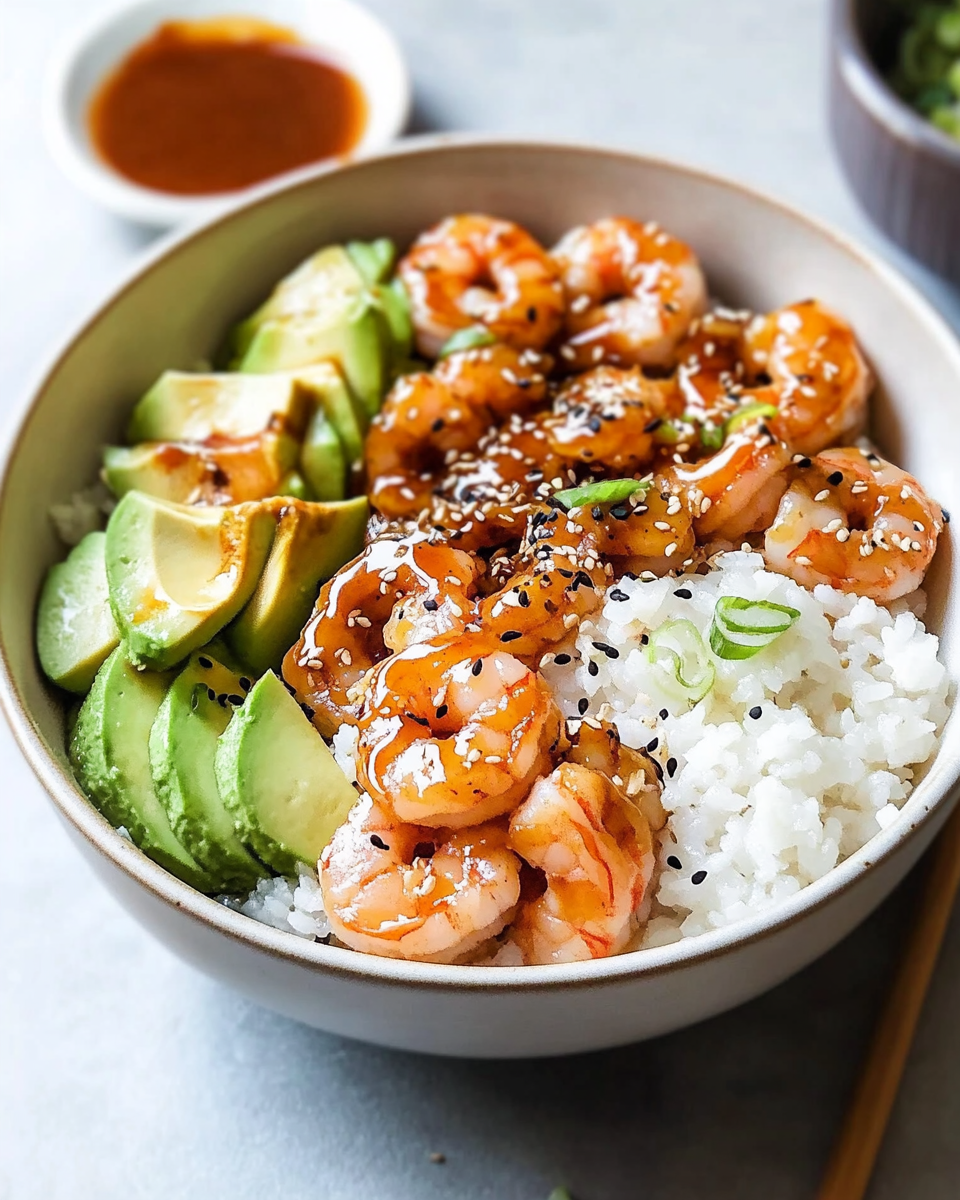
Introduction to Teriyaki Shrimp Sushi Bowl

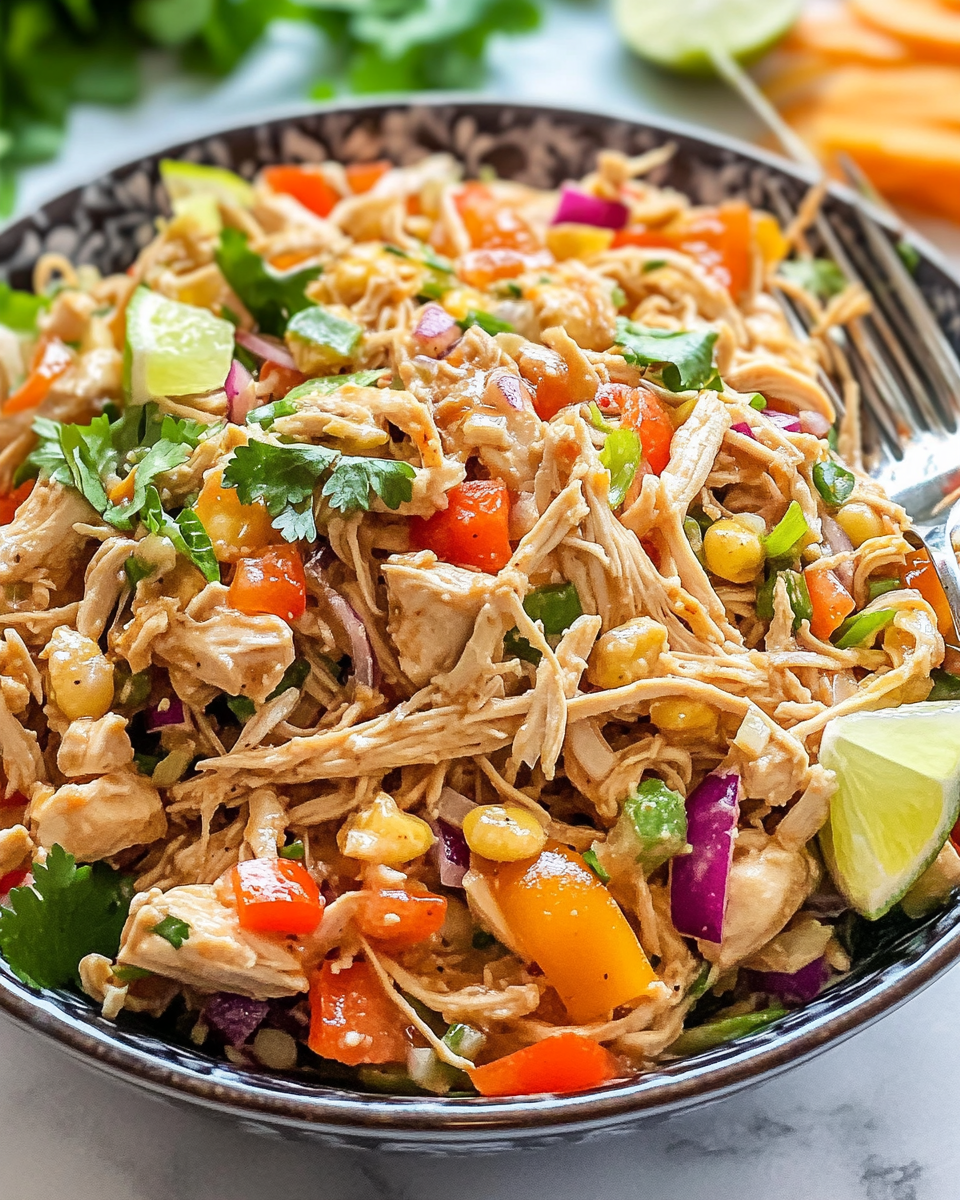
There’s something magical about a bowl of Teriyaki Shrimp Sushi Bowl that brings back memories of family dinners and laughter. This dish is not just a meal; it’s a celebration of flavors and colors that can brighten any busy day. Whether you’re looking to impress your loved ones or simply craving a quick, satisfying dinner, this recipe has you covered. With succulent shrimp, fresh veggies, and a homemade teriyaki sauce, it’s a delightful way to enjoy a taste of Japan right in your kitchen. Let’s dive into this culinary adventure together!

Why You’ll Love This Teriyaki Shrimp Sushi Bowl

This Teriyaki Shrimp Sushi Bowl is a game-changer for busy weeknights. It’s quick to prepare, taking just 45 minutes from start to finish. The combination of tender shrimp, vibrant veggies, and that sweet-savory teriyaki sauce creates a flavor explosion that’s hard to resist. Plus, it’s customizable! You can easily swap ingredients based on what you have on hand, making it a versatile dish for any occasion.

Ingredients for Teriyaki Shrimp Sushi Bowl

Gathering the right ingredients is the first step to creating your Teriyaki Shrimp Sushi Bowl. Here’s what you’ll need:

  • Shrimp: Large, peeled, and deveined shrimp are the stars of this dish. They cook quickly and soak up the teriyaki sauce beautifully.
  • Sushi Rice: This short-grain rice is sticky and perfect for sushi bowls. It gives that authentic Japanese feel.
  • Water: Essential for cooking the sushi rice to fluffy perfection.
  • Soy Sauce: A key ingredient in the teriyaki sauce, it adds depth and umami flavor.
  • Honey: This natural sweetener balances the saltiness of the soy sauce, creating a delicious glaze.
  • Rice Vinegar: It adds a tangy note to the sauce and helps season the rice.
  • Sesame Oil: A drizzle of this oil brings a nutty aroma and flavor that enhances the dish.
  • Avocado: Creamy avocado slices add richness and a fresh touch to the bowl.
  • Cucumber: Thinly sliced cucumber provides a refreshing crunch that contrasts nicely with the shrimp.
  • Shredded Carrots: These add color and a slight sweetness, making the bowl visually appealing.
  • Green Onions: Chopped green onions give a pop of flavor and a bit of color.
  • Sesame Seeds: A sprinkle of these seeds adds a delightful crunch and a touch of elegance.
  • Salt and Pepper: Simple seasonings to enhance the shrimp’s flavor.

For those looking to mix things up, consider substituting shrimp with tofu or tempeh for a vegetarian option. You can also add pickled ginger or wasabi for an extra kick. The exact quantities for each ingredient are available at the bottom of the article for easy printing!

How to Make Teriyaki Shrimp Sushi Bowl

Creating your Teriyaki Shrimp Sushi Bowl is a straightforward process that’s as enjoyable as it is delicious. Follow these simple steps, and you’ll have a stunning meal ready in no time!

Step 1: Prepare the Sushi Rice

Start by rinsing the sushi rice under cold water. This step is crucial; it removes excess starch and prevents the rice from becoming gummy. Keep rinsing until the water runs clear.

Next, combine the rinsed rice and water in a medium saucepan. Bring it to a boil over medium heat. Once boiling, reduce the heat to low, cover, and let it simmer for 18-20 minutes. The rice should be tender and the water fully absorbed.

After cooking, remove the saucepan from heat but let it sit, covered, for an additional 10 minutes. This resting period allows the rice to steam and become fluffy, ensuring a perfect base for your sushi bowl.

Step 2: Make the Teriyaki Sauce

While the rice is cooking, it’s time to whip up the teriyaki sauce. In a small saucepan, combine soy sauce, honey, rice vinegar, and sesame oil. Stir the mixture well to blend the flavors.

Bring the sauce to a simmer over medium heat. As it heats, the aroma will fill your kitchen, making your mouth water. Keep stirring occasionally until the sauce thickens slightly, which should take about 5-7 minutes. Once done, remove it from heat and set it aside.

Step 3: Cook the Shrimp

Now, let’s focus on the shrimp. Heat a large skillet over medium-high heat and add the peeled and deveined shrimp. Season them with salt and pepper to enhance their natural flavor.

Cook the shrimp for about 2-3 minutes on each side. You’ll know they’re done when they turn pink and opaque. This is the moment to pour half of the teriyaki sauce over the shrimp. Toss them gently to coat, allowing the sauce to cling beautifully to each piece. Remove from heat once coated.

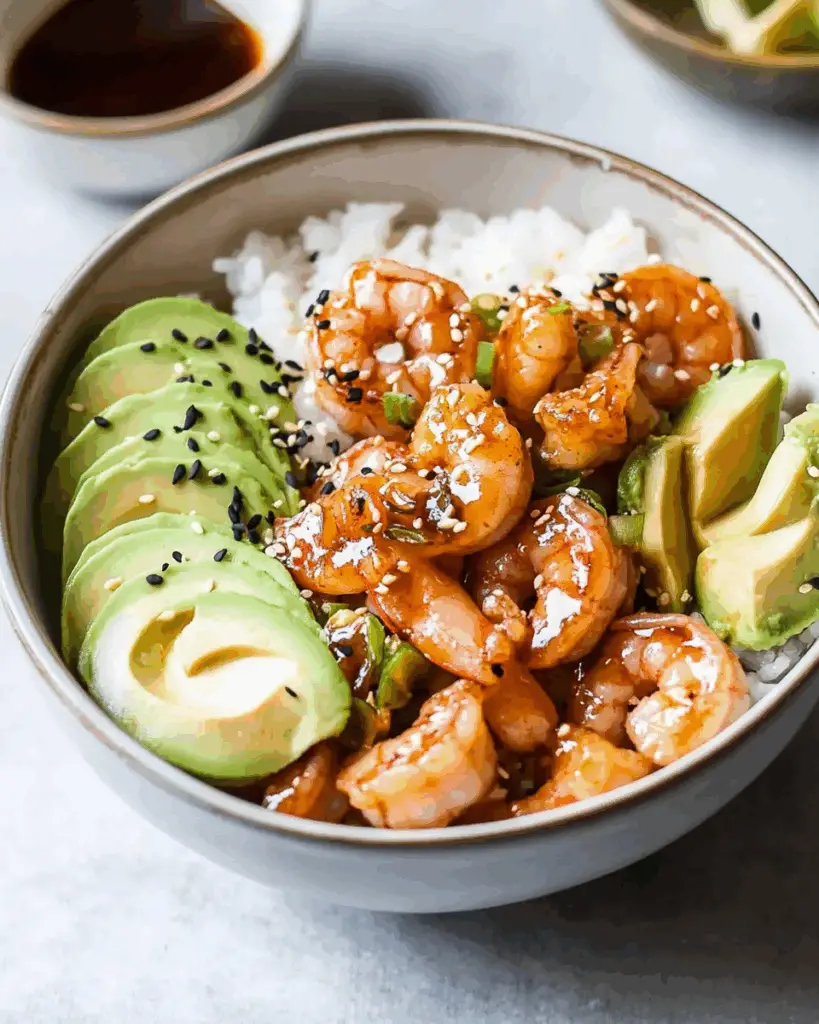
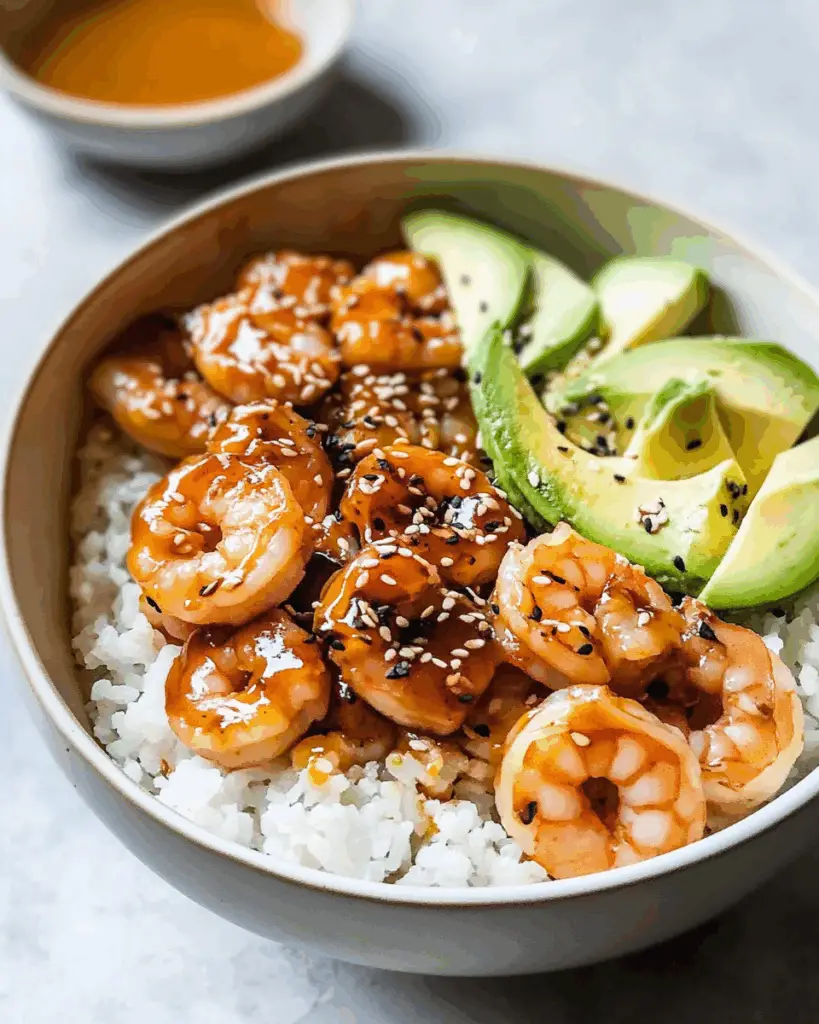
Step 4: Assemble the Bowls

It’s time for the fun part—assembling your bowls! Start by dividing the cooked sushi rice among four bowls. This will be the hearty base of your dish.

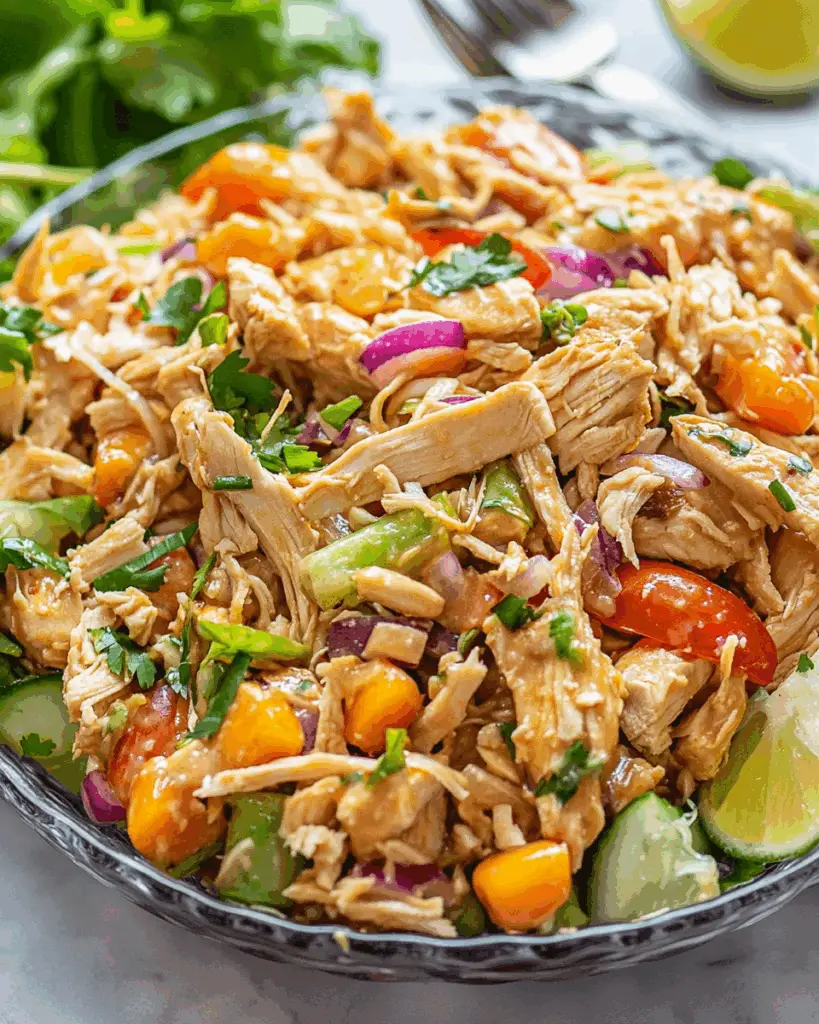
Next, top each bowl with the teriyaki shrimp, followed by slices of creamy avocado, refreshing cucumber, and colorful shredded carrots. Don’t forget to sprinkle chopped green onions on top for an extra burst of flavor.

Finally, drizzle the remaining teriyaki sauce over the assembled bowls and finish with a sprinkle of sesame seeds. This not only adds a delightful crunch but also makes your dish look restaurant-worthy!

Tips for Success

  • Always rinse sushi rice thoroughly to achieve the perfect texture.
  • Let the rice sit covered after cooking for fluffiness.
  • Don’t overcook the shrimp; they should be pink and opaque.
  • Feel free to customize veggies based on your preferences.
  • Make extra teriyaki sauce for dipping or drizzling on other dishes.

Equipment Needed

  • Medium saucepan: For cooking sushi rice. A regular pot works too.
  • Small saucepan: To make the teriyaki sauce. A skillet can be used in a pinch.
  • Large skillet: Essential for cooking shrimp. A non-stick pan is ideal.
  • Measuring cups: For accurate ingredient portions. Use a kitchen scale if preferred.
  • Cutting board and knife: For slicing veggies and shrimp.

Variations

  • Vegetarian Option: Swap shrimp for tofu or tempeh, and use a plant-based teriyaki sauce for a delicious vegetarian bowl.
  • Spicy Kick: Add sliced jalapeños or a drizzle of sriracha to the teriyaki sauce for a spicy twist.
  • Quinoa Base: Replace sushi rice with quinoa for a protein-packed alternative that’s gluten-free.
  • Extra Veggies: Incorporate bell peppers, snap peas, or edamame for added color and nutrition.
  • Fruit Fusion: Toss in some mango or pineapple chunks for a sweet and tropical flavor contrast.

Serving Suggestions

  • Pair your Teriyaki Shrimp Sushi Bowl with a side of miso soup for a comforting touch.
  • Serve with a chilled green tea or a light Japanese beer to complement the flavors.
  • For a beautiful presentation, garnish with extra sesame seeds and a slice of lime.

FAQs about Teriyaki Shrimp Sushi Bowl

Can I make the teriyaki sauce ahead of time?

Absolutely! You can prepare the teriyaki sauce in advance and store it in the refrigerator for up to a week. Just give it a quick reheat before using it in your Teriyaki Shrimp Sushi Bowl.

What can I substitute for shrimp in this recipe?

If shrimp isn’t your thing, tofu or tempeh makes a fantastic substitute. Just ensure you marinate them in the teriyaki sauce for a bit to soak up those delicious flavors.

Is this Teriyaki Shrimp Sushi Bowl gluten-free?

Yes, this dish can be gluten-free! Just make sure to use gluten-free soy sauce or tamari in your teriyaki sauce. It’s a simple swap that keeps all the flavor intact.

How can I store leftovers?

Leftovers can be stored in an airtight container in the fridge for up to two days. Just keep in mind that the rice may become a bit firmer, so a splash of water when reheating can help.

Can I add more vegetables to the bowl?

Definitely! Feel free to get creative with your veggies. Bell peppers, snap peas, or even some steamed broccoli can add extra color and nutrition to your Teriyaki Shrimp Sushi Bowl.

Final Thoughts

Creating a Teriyaki Shrimp Sushi Bowl is more than just cooking; it’s about bringing joy to your table. The vibrant colors, fresh ingredients, and that irresistible homemade teriyaki sauce come together to create a dish that’s both satisfying and visually stunning. Each bite is a delightful mix of flavors and textures, making it perfect for family dinners or a cozy night in. Plus, the ease of preparation means you can whip it up even on the busiest days. So, gather your ingredients, roll up your sleeves, and enjoy the culinary adventure that awaits!

jhessica

Teriyaki Shrimp Sushi Bowl: A Flavorful Recipe Guide

A delicious and easy-to-make Teriyaki Shrimp Sushi Bowl that combines succulent shrimp with fresh vegetables and sushi rice, all drizzled with a homemade teriyaki sauce.
Prep Time 15 minutes
Cook Time 30 minutes
Total Time 45 minutes
Servings: 4 servings
Course: Main Dish
Cuisine: Japanese
Calories: 450

Ingredients
  

  • 1 pound large shrimp peeled and deveined
  • 1 cup sushi rice
  • 2 cups water
  • 1/4 cup soy sauce
  • 1/4 cup honey
  • 2 tablespoons rice vinegar
  • 1 tablespoon sesame oil
  • 1 avocado sliced
  • 1 cup cucumber thinly sliced
  • 1/2 cup shredded carrots
  • 1/4 cup green onions chopped
  • 1 tablespoon sesame seeds
  • Salt and pepper to taste

Method
 

  1. Rinse the sushi rice under cold water until the water runs clear. Combine the rice and water in a medium saucepan and bring to a boil. Once boiling, reduce the heat to low, cover, and simmer for 18-20 minutes until the rice is tender and water is absorbed. Remove from heat and let it sit, covered, for 10 minutes.
  2. While the rice is cooking, prepare the teriyaki sauce by combining soy sauce, honey, rice vinegar, and sesame oil in a small saucepan. Bring to a simmer over medium heat, stirring occasionally, until the sauce thickens slightly, about 5-7 minutes. Remove from heat and set aside.
  3. In a large skillet over medium-high heat, add the shrimp. Season with salt and pepper and cook for 2-3 minutes on each side until they turn pink and opaque. Pour half of the teriyaki sauce over the shrimp and toss to coat. Remove from heat.
  4. To assemble the bowls, divide the cooked sushi rice among four bowls. Top each bowl with the teriyaki shrimp, avocado slices, cucumber, shredded carrots, and green onions.
  5. Drizzle the remaining teriyaki sauce over the bowls and sprinkle with sesame seeds. Serve immediately.

Nutrition

Serving: 1bowlCalories: 450kcalCarbohydrates: 55gProtein: 25gFat: 15gSaturated Fat: 2gPolyunsaturated Fat: 13gCholesterol: 200mgSodium: 800mgFiber: 3gSugar: 15g

Notes

  • For a vegetarian option, substitute shrimp with tofu or tempeh and use a plant-based teriyaki sauce.
  • Add pickled ginger or wasabi for an extra kick of flavor.

Tried this recipe?

Let us know how it was!

Chicken Caesar Pasta Salad: A Refreshing Summer Delight!

Introduction to Chicken Caesar Pasta Salad

Summer is here, and with it comes the quest for the perfect dish that’s both refreshing and satisfying. Enter the Chicken Caesar Pasta Salad! This delightful recipe combines the classic flavors of Caesar salad with hearty pasta, making it a fantastic choice for gatherings or a quick weeknight dinner. I remember the first time I made this salad; it was a hit at a barbecue, and everyone kept asking for the recipe. It’s easy to whip up, and trust me, your loved ones will be impressed!

Why You’ll Love This Chicken Caesar Pasta Salad

This Chicken Caesar Pasta Salad is a game-changer for busy days. It’s quick to prepare, taking just about 15 minutes of your time. The combination of tender chicken, crisp romaine, and zesty dressing creates a flavor explosion that’s hard to resist. Plus, it’s versatile enough to serve as a main dish or a side. Whether you’re hosting friends or just feeding the family, this salad is sure to please!

Ingredients for Chicken Caesar Pasta Salad

Gathering the right ingredients is key to making a delicious Chicken Caesar Pasta Salad. Here’s what you’ll need:

  • Rotini pasta: This spiral-shaped pasta holds onto the dressing beautifully, making every bite flavorful.
  • Cooked chicken breast: Diced chicken adds protein and heartiness, making this salad a complete meal.
  • Cherry tomatoes: Their sweetness and juiciness provide a lovely contrast to the savory elements.
  • Romaine lettuce: Crisp and refreshing, it adds a nice crunch to the salad.
  • Caesar dressing: The star of the show! It brings that classic Caesar flavor we all love.
  • Grated Parmesan cheese: This adds a rich, nutty flavor that enhances the overall taste.
  • Croutons: For that extra crunch, croutons are a must! They add texture and a bit of fun.
  • Salt and pepper: Simple seasonings that elevate the flavors of the dish.
  • Olive oil (optional): A drizzle can add a touch of richness if you desire.

Feel free to get creative! You can substitute Greek yogurt for half of the Caesar dressing for a lighter version. Adding sliced cucumbers or bell peppers can also boost the crunch factor and nutrition. For exact measurements, check the bottom of the article where you can find everything available for printing.

How to Make Chicken Caesar Pasta Salad

Creating a Chicken Caesar Pasta Salad is a breeze! Follow these simple steps, and you’ll have a delicious dish ready in no time. Let’s dive in!

Step 1: Cook the Pasta

Start by boiling a pot of water. Add a pinch of salt to enhance the flavor. Once it’s bubbling, toss in the rotini pasta. Cook according to the package instructions, usually around 8-10 minutes. You want it al dente, so it holds up well in the salad. After cooking, drain the pasta and rinse it under cold water. This stops the cooking process and cools it down quickly.

Step 2: Combine Ingredients

In a large mixing bowl, combine the cooled pasta, diced chicken, halved cherry tomatoes, and chopped romaine lettuce. This is where the magic begins! The colors and textures come together beautifully. Give it a gentle stir to mix everything evenly.

Step 3: Add Dressing

Now, it’s time for the star of the show: the Caesar dressing! Drizzle it over the pasta mixture. Don’t be shy; this dressing is what brings all the flavors to life. Toss everything together gently, ensuring every piece is coated in that creamy goodness.

Step 4: Mix in Cheese and Croutons

Next, sprinkle in the grated Parmesan cheese and croutons. These add a delightful crunch and a burst of flavor. Toss again to combine. You want to make sure the cheese is evenly distributed, so every bite is cheesy and satisfying.

Step 5: Season and Toss

Now, it’s time to season! Add salt and pepper to taste. Remember, you can always add more, but you can’t take it out. Give everything one last toss to mix in the seasonings. This step is crucial for elevating the overall taste of your Chicken Caesar Pasta Salad.

Step 6: Chill Before Serving

For the best flavor, cover the bowl and chill your salad in the refrigerator for at least 30 minutes. This allows the flavors to meld together beautifully. When you’re ready to serve, give it a quick toss again. Enjoy your refreshing Chicken Caesar Pasta Salad!

Tips for Success

  • Always rinse the pasta with cold water after cooking to stop the cooking process and keep it firm.
  • Use rotini or any pasta shape that holds dressing well for maximum flavor in every bite.
  • Chill the salad for at least 30 minutes to let the flavors meld together.
  • Feel free to customize with your favorite veggies for added crunch and nutrition.
  • Make it ahead of time for easy meal prep during busy weeks!

Equipment Needed

  • Large pot: For boiling pasta. A deep skillet can work in a pinch.
  • Colander: To drain the pasta. A slotted spoon can also do the job.
  • Mixing bowl: A large bowl for combining ingredients. Any big bowl will suffice.
  • Measuring cups: For accurate ingredient portions. Use standard cups if you don’t have measuring ones.

Variations

  • Grilled Veggie Twist: Add grilled zucchini, bell peppers, or asparagus for a smoky flavor and extra nutrients.
  • Protein Swap: Substitute the chicken with shrimp, tofu, or chickpeas for a different protein source.
  • Whole Wheat Pasta: Use whole wheat rotini for a healthier, fiber-rich option that still tastes great.
  • Herb Infusion: Mix in fresh herbs like basil or parsley for a burst of freshness and added flavor.
  • Spicy Kick: Add a dash of red pepper flakes or a drizzle of sriracha for those who enjoy a little heat.

Serving Suggestions

  • Pair with Garlic Bread: Serve warm, crusty garlic bread on the side for a delightful crunch.
  • Refreshing Drinks: Complement with iced tea or a light white wine for a perfect summer vibe.
  • Presentation: Garnish with extra Parmesan and fresh herbs for a beautiful touch.

FAQs about Chicken Caesar Pasta Salad

Can I make Chicken Caesar Pasta Salad ahead of time?

Absolutely! This salad is perfect for meal prep. Just make it a few hours in advance or even the night before. The flavors will meld beautifully, making it even tastier!

What can I substitute for the chicken?

If you’re looking for alternatives, try shrimp, tofu, or even chickpeas. Each option brings its own unique flavor and texture to the Chicken Caesar Pasta Salad.

How long does Chicken Caesar Pasta Salad last in the fridge?

Stored in an airtight container, it can last up to 3 days in the fridge. Just give it a good toss before serving again to refresh the flavors.

Can I use a different type of pasta?

Definitely! While rotini is great for holding the dressing, feel free to use penne, fusilli, or any pasta shape you prefer. Just make sure it’s cooked al dente!

Is this Chicken Caesar Pasta Salad suitable for a low-calorie diet?

Yes! With lean chicken and plenty of veggies, this salad is a great option. You can also lighten it up by using Greek yogurt in place of some of the Caesar dressing.

Final Thoughts

Creating a Chicken Caesar Pasta Salad is more than just whipping up a meal; it’s about bringing people together. The vibrant colors and flavors make it a feast for the eyes and the palate. Whether you’re enjoying it at a summer barbecue or as a quick weeknight dinner, this salad is sure to spark joy. I love how it combines the classic Caesar taste with the heartiness of pasta, making it a crowd-pleaser. So, grab your ingredients, and let’s make some delicious memories together with this refreshing dish!

jhessica

Chicken Caesar Pasta Salad: A Refreshing Summer Delight!

A refreshing and hearty Chicken Caesar Pasta Salad perfect for summer gatherings.
Prep Time 15 minutes
Cook Time 10 minutes
Total Time 55 minutes
Servings: 4 servings
Course: Salad
Cuisine: American
Calories: 450

Ingredients
  

  • 8 ounces rotini pasta
  • 1 pound cooked chicken breast diced
  • 1 cup cherry tomatoes halved
  • 1 cup romaine lettuce chopped
  • ½ cup Caesar dressing
  • ½ cup grated Parmesan cheese
  • ¼ cup croutons
  • Salt and pepper to taste
  • 1 tablespoon olive oil optional

Method
 

  1. Cook the rotini pasta according to package instructions. Drain and rinse under cold water to cool.
  2. In a large bowl, combine the cooked pasta, diced chicken, cherry tomatoes, and chopped romaine lettuce.
  3. Drizzle the Caesar dressing over the mixture and toss gently to combine.
  4. Add the grated Parmesan cheese and croutons, then season with salt and pepper to taste. Toss again to mix well.
  5. If desired, drizzle with olive oil for extra flavor and toss once more.
  6. Chill in the refrigerator for at least 30 minutes before serving to allow the flavors to meld.

Nutrition

Serving: 1servingCalories: 450kcalCarbohydrates: 30gProtein: 35gFat: 20gSaturated Fat: 5gPolyunsaturated Fat: 15gCholesterol: 80mgSodium: 800mgFiber: 2gSugar: 3g

Notes

  • For a lighter version, substitute Greek yogurt for half of the Caesar dressing.
  • Add sliced cucumbers or bell peppers for extra crunch and nutrition.

Tried this recipe?

Let us know how it was!

Beef Lombardi Casserole: The Ultimate Cozy Dinner Recipe

Introduction to Beef Lombardi Casserole

There’s something magical about a warm, hearty meal that wraps around you like a favorite blanket. The Beef Lombardi Casserole is just that—a cozy dinner that brings comfort and satisfaction to the table. Whether you’re coming home after a long day or hosting friends for a casual gathering, this dish is your go-to solution. It’s easy to whip up, and the flavors meld together beautifully, making it a hit with everyone. Plus, who can resist that bubbling cheese on top? Let’s dive into this delightful recipe that’s sure to impress your loved ones!

Why You’ll Love This Beef Lombardi Casserole

This Beef Lombardi Casserole is a game-changer for busy weeknights. It’s not just quick to prepare; it’s also a one-pot wonder that minimizes cleanup. The rich flavors of beef, tomatoes, and melted cheese create a comforting dish that feels like a warm hug. Plus, it’s versatile enough to please picky eaters, making it a family favorite. Trust me, once you try it, you’ll be hooked!

Ingredients for Beef Lombardi Casserole

Gathering the right ingredients is the first step to creating a delicious Beef Lombardi Casserole. Here’s what you’ll need:

  • Ground beef: The star of the dish, providing rich flavor and protein. You can also use ground turkey or chicken for a lighter option.
  • Onion: Chopped onion adds sweetness and depth to the casserole. It’s a classic base for many savory dishes.
  • Garlic: Minced garlic brings a punch of flavor that elevates the entire dish. Fresh is best, but jarred works in a pinch.
  • Tomato sauce: This forms the saucy backbone of the casserole, adding moisture and tanginess.
  • Diced tomatoes: Undrained diced tomatoes add texture and a burst of freshness. They complement the sauce beautifully.
  • Italian seasoning: A blend of herbs that infuses the dish with classic Italian flavors. Feel free to adjust based on your taste.
  • Salt and black pepper: Essential seasonings that enhance all the flavors. Don’t skip these!
  • Elbow macaroni: The perfect pasta shape for this casserole, soaking up all the delicious sauce. You can swap it for whole wheat pasta for added fiber.
  • Beef broth: This adds richness and depth to the dish. You can use low-sodium broth to control the saltiness.
  • Shredded mozzarella cheese: Melts beautifully on top, creating that gooey, cheesy goodness we all love.
  • Grated Parmesan cheese: Adds a salty, nutty flavor that complements the mozzarella perfectly.
  • Fresh parsley: Optional, but a sprinkle of chopped parsley adds a pop of color and freshness to the finished dish.

For exact measurements, check the bottom of the article where you can find everything listed for easy printing!

How to Make Beef Lombardi Casserole

Creating a Beef Lombardi Casserole is a straightforward process that yields delicious results. Follow these simple steps, and you’ll have a comforting meal ready in no time!

Step 1: Preheat the Oven

Start by preheating your oven to 350°F (175°C). This ensures that your casserole bakes evenly and comes out perfectly golden. While the oven heats up, you can prepare the other ingredients.

Step 2: Brown the Beef

In a large skillet over medium heat, add the ground beef along with the chopped onion and minced garlic. Cook until the beef is no longer pink, stirring occasionally. This step is crucial for developing flavor. Once browned, drain any excess fat to keep your casserole from being greasy.

Step 3: Add the Sauces and Seasonings

Next, stir in the tomato sauce, undrained diced tomatoes, Italian seasoning, salt, and black pepper. Bring the mixture to a simmer. This is where the magic happens! The aromas will fill your kitchen, making it hard to resist sneaking a taste.

Step 4: Combine with Macaroni and Broth

Now, add the uncooked elbow macaroni and beef broth to the skillet. Stir everything together until well combined. The macaroni will soak up all those delicious flavors as it cooks.

Step 5: Simmer the Mixture

Cover the skillet and let it simmer for about 10 minutes. Stir occasionally to prevent sticking. You want the macaroni to become tender and for most of the liquid to be absorbed. This step is key to achieving that perfect casserole texture.

Step 6: Add Cheese

Remove the skillet from heat and stir in half of the shredded mozzarella cheese. This will create a creamy, cheesy base that binds everything together. Who doesn’t love extra cheese?

Step 7: Transfer to Baking Dish

Carefully transfer the mixture to a greased 9×13 inch baking dish. Spread it out evenly, then top with the remaining mozzarella cheese and sprinkle with grated Parmesan cheese. This cheesy layer will create a beautiful crust as it bakes.

Step 8: Bake to Perfection

Place the baking dish in the preheated oven and bake for 20-25 minutes. Keep an eye on it until the cheese is bubbly and golden. Once done, remove it from the oven and let it cool for about 5 minutes before serving. This allows the flavors to settle and makes it easier to serve.

Tips for Success

  • Use lean ground beef to reduce excess fat and calories.
  • Don’t skip the simmering step; it’s crucial for flavor development.
  • For a creamier texture, add a splash of heavy cream before baking.
  • Let the casserole sit for a few minutes after baking for easier serving.
  • Experiment with different cheeses for a unique twist on flavor.

Equipment Needed

  • Large skillet: Essential for browning the beef. A Dutch oven works well too.
  • Baking dish: A 9×13 inch dish is perfect. You can use any oven-safe dish of similar size.
  • Wooden spoon: Great for stirring. A spatula can also do the job.
  • Measuring cups: Handy for precise ingredient amounts, though you can eyeball it if you’re confident!

Variations

  • Spicy Kick: Add 1 teaspoon of red pepper flakes or diced jalapeños for a fiery twist.
  • Vegetarian Option: Substitute ground beef with lentils or mushrooms for a hearty, meatless version.
  • Cheesy Delight: Mix in cream cheese or ricotta for an extra creamy texture.
  • Whole Wheat Pasta: Use whole wheat elbow macaroni for added fiber and a healthier option.
  • Herb Infusion: Experiment with fresh herbs like basil or oregano for a burst of freshness.

Serving Suggestions

  • Garlic Bread: Serve with warm, buttery garlic bread for a delightful crunch.
  • Side Salad: A fresh green salad with a tangy vinaigrette balances the richness of the casserole.
  • Wine Pairing: A glass of red wine, like Chianti, complements the flavors beautifully.
  • Presentation: Garnish with fresh parsley for a pop of color before serving.

FAQs about Beef Lombardi Casserole

Can I make Beef Lombardi Casserole ahead of time?
Absolutely! You can prepare the casserole in advance and store it in the fridge for up to 24 hours before baking. Just cover it tightly with foil. When you’re ready to bake, add a few extra minutes to the cooking time.

Can I freeze Beef Lombardi Casserole?
Yes, this casserole freezes well! After baking, let it cool completely, then wrap it tightly in plastic wrap and aluminum foil. It can be frozen for up to three months. To reheat, thaw in the fridge overnight and bake until heated through.

What can I substitute for ground beef?
If you’re looking for alternatives, ground turkey or chicken works great. For a vegetarian option, try using lentils or mushrooms. Both options will still give you a hearty and satisfying dish.

How do I store leftovers?
Store any leftovers in an airtight container in the fridge for up to three days. Reheat in the microwave or oven until warmed through. It’s just as delicious the next day!

Can I add more vegetables to the casserole?
Definitely! Feel free to toss in some chopped bell peppers, zucchini, or spinach. Adding veggies not only boosts the nutrition but also enhances the flavor and texture of your Beef Lombardi Casserole.

Final Thoughts

Cooking the Beef Lombardi Casserole is more than just preparing a meal; it’s about creating memories around the dinner table. The aroma wafting through your home, the laughter shared over bubbling cheese, and the satisfaction of a hearty dish all contribute to a cozy atmosphere. This recipe is a reminder that comfort food doesn’t have to be complicated. It’s a simple yet delightful way to bring family and friends together. So, roll up your sleeves, embrace the joy of cooking, and let this casserole become a staple in your home. You won’t regret it!

jhessica

Beef Lombardi Casserole: The Ultimate Cozy Dinner Recipe

A hearty and comforting Beef Lombardi Casserole perfect for cozy dinners.
Prep Time 15 minutes
Cook Time 30 minutes
Total Time 45 minutes
Servings: 6 servings
Course: Dinner
Cuisine: American
Calories: 400

Ingredients
  

  • 1 pound ground beef
  • 1 medium onion chopped
  • 2 cloves garlic minced
  • 1 can 15 ounces tomato sauce
  • 1 can 14.5 ounces diced tomatoes, undrained
  • 1 teaspoon Italian seasoning
  • 1 teaspoon salt
  • ½ teaspoon black pepper
  • 2 cups uncooked elbow macaroni
  • 2 cups beef broth
  • 1 cup shredded mozzarella cheese
  • ½ cup grated Parmesan cheese
  • 2 tablespoons chopped fresh parsley optional, for garnish

Method
 

  1. Preheat your oven to 350°F (175°C).
  2. In a large skillet over medium heat, brown the ground beef with the chopped onion and minced garlic until the beef is no longer pink. Drain excess fat.
  3. Stir in the tomato sauce, diced tomatoes, Italian seasoning, salt, and black pepper. Bring to a simmer.
  4. Add the uncooked elbow macaroni and beef broth to the skillet. Stir well to combine.
  5. Cover the skillet and let it simmer for about 10 minutes, stirring occasionally, until the macaroni is tender and most of the liquid is absorbed.
  6. Remove from heat and stir in half of the mozzarella cheese.
  7. Transfer the mixture to a greased 9×13 inch baking dish. Top with the remaining mozzarella cheese and sprinkle with Parmesan cheese.
  8. Bake in the preheated oven for 20-25 minutes, or until the cheese is bubbly and golden.
  9. Remove from the oven and let it cool for 5 minutes before serving. Garnish with chopped parsley if desired.

Nutrition

Serving: 1servingCalories: 400kcalCarbohydrates: 40gProtein: 25gFat: 18gSaturated Fat: 8gPolyunsaturated Fat: 10gCholesterol: 70mgSodium: 800mgFiber: 2gSugar: 6g

Notes

  • For a spicier version, add 1 teaspoon of red pepper flakes or diced jalapeños to the beef mixture.
  • Substitute ground turkey or chicken for a lighter option, and use whole wheat pasta for added fiber.

Tried this recipe?

Let us know how it was!

Southwest Ground Beef and Sweet Potato Skillet Recipe You’ll Love!

Introduction to Southwest Ground Beef and Sweet Potato Skillet

Cooking can sometimes feel like a race against the clock, especially after a long day. That’s where my Southwest Ground Beef and Sweet Potato Skillet comes in—a delicious, hearty meal that’s ready in just 40 minutes! This dish is not only packed with flavor but also loaded with nutritious ingredients that will satisfy your hunger and impress your loved ones. Whether you’re looking for a quick weeknight dinner or a comforting meal to share, this skillet recipe is your go-to solution. Let’s dive into the vibrant world of Southwest flavors!

Why You’ll Love This Southwest Ground Beef and Sweet Potato Skillet

This Southwest Ground Beef and Sweet Potato Skillet is a game-changer for busy nights. It’s quick to prepare, taking just 40 minutes from start to finish. The combination of savory ground beef and sweet potatoes creates a satisfying meal that’s bursting with flavor. Plus, it’s a one-pan wonder, making cleanup a breeze. You’ll love how easy it is to whip up a dish that feels both hearty and wholesome!

Ingredients for Southwest Ground Beef and Sweet Potato Skillet

Gathering the right ingredients is the first step to creating a fantastic Southwest Ground Beef and Sweet Potato Skillet. Here’s what you’ll need:

  • Ground Beef: The star of the dish, providing rich flavor and protein. You can also use ground turkey or chicken for a leaner option.
  • Sweet Potatoes: These add a natural sweetness and a hearty texture. They’re packed with vitamins and fiber, making them a nutritious choice.
  • Onion: A must-have for building flavor. It adds depth and sweetness when sautéed.
  • Garlic: Freshly minced garlic brings a punch of flavor that elevates the dish.
  • Red Bell Pepper: This adds a pop of color and sweetness. Feel free to swap it for green or yellow bell peppers if you prefer.
  • Black Beans: Canned black beans are a great source of protein and fiber. Rinse them well to remove excess sodium.
  • Corn: Whether fresh, frozen, or canned, corn adds a delightful sweetness and texture to the skillet.
  • Chili Powder: This spice brings warmth and a hint of smokiness. Adjust the amount based on your heat preference.
  • Cumin: Earthy and aromatic, cumin enhances the Southwestern flavor profile.
  • Smoked Paprika: This adds a subtle smokiness that complements the other spices beautifully.
  • Salt and Pepper: Essential for seasoning, these enhance all the flavors in the dish.
  • Olive Oil: Used for sautéing, it adds healthy fats and richness.
  • Cilantro: Fresh cilantro is perfect for garnishing, adding a burst of freshness.
  • Avocado: Diced avocado adds creaminess and balances the spices.
  • Lime Wedges: A squeeze of lime brightens the dish and adds a zesty finish.

For exact measurements, check the bottom of the article where you can find everything available for printing. Enjoy the process of gathering these ingredients, as each one plays a vital role in creating a delicious meal!

How to Make Southwest Ground Beef and Sweet Potato Skillet

Creating your Southwest Ground Beef and Sweet Potato Skillet is a straightforward process that brings together vibrant flavors in one pan. Follow these simple steps, and you’ll have a delicious meal ready in no time!

Step 1: Sauté the Aromatics

Start by heating the olive oil in a large skillet over medium heat. Once the oil is shimmering, toss in the diced onion. Sauté for about 3-4 minutes until the onion becomes translucent. This step builds a flavorful base for your dish.

Step 2: Add Garlic and Bell Pepper

Next, add the minced garlic and diced red bell pepper to the skillet. Sauté for another 2-3 minutes until the peppers soften. The aroma will be irresistible, and your kitchen will start to feel like a cozy Southwestern eatery!

Step 3: Brown the Ground Beef

Now, increase the heat to medium-high and add the ground beef. Cook until it’s browned, about 5-7 minutes. Use a spatula to break it apart as it cooks. If there’s excess fat, don’t forget to drain it. This keeps your dish from becoming greasy.

Step 4: Incorporate Sweet Potatoes and Spices

Stir in the diced sweet potatoes along with the chili powder, cumin, smoked paprika, salt, and pepper. Mix everything well to ensure the sweet potatoes are coated in those delicious spices. This is where the magic begins!

Step 5: Cook Until Tender

Add 1/2 cup of water to the skillet, cover it, and reduce the heat to medium. Let it cook for about 10-15 minutes, stirring occasionally. You want the sweet potatoes to become tender and soak up all those flavors.

Step 6: Add Beans and Corn

Once the sweet potatoes are tender, stir in the black beans and corn. Cook for an additional 3-5 minutes until everything is heated through. This step adds texture and a pop of color to your skillet.

Step 7: Garnish and Serve

Finally, remove the skillet from heat. Garnish your dish with fresh cilantro and diced avocado. Serve with lime wedges on the side for that zesty finish. Enjoy your hearty and flavorful Southwest Ground Beef and Sweet Potato Skillet!

Tips for Success

  • Prep your ingredients ahead of time to streamline the cooking process.
  • Don’t skip the seasoning; it’s key to enhancing the flavors of your dish.
  • Adjust the spice levels to suit your taste—add jalapeños for heat!
  • Use a non-stick skillet to prevent sticking and make cleanup easier.
  • Leftovers taste even better the next day, so make extra!

Equipment Needed

  • Large Skillet: A non-stick skillet works best, but any large pan will do.
  • Spatula: Use a sturdy spatula for breaking up the ground beef.
  • Knife and Cutting Board: Essential for chopping your veggies.
  • Measuring Cups: Handy for measuring ingredients like water and spices.

Variations

  • Spicy Kick: Add diced jalapeños or a pinch of cayenne pepper for an extra layer of heat.
  • Vegetarian Delight: Substitute ground beef with a plant-based meat alternative or use extra beans for protein.
  • Sweet Potato Swap: Try butternut squash or regular potatoes if you want a different flavor profile.
  • Cheesy Goodness: Sprinkle shredded cheese on top during the last few minutes of cooking for a melty finish.
  • Herb Infusion: Experiment with fresh herbs like oregano or thyme for a unique twist on flavor.

Serving Suggestions

  • Side Salad: Pair your skillet with a fresh green salad for a light and refreshing contrast.
  • Rice or Quinoa: Serve over a bed of rice or quinoa to soak up the delicious juices.
  • Cold Beverages: Enjoy with a cold beer or a refreshing iced tea to complement the flavors.
  • Presentation: Serve in colorful bowls and garnish with extra cilantro for a vibrant look.

FAQs about Southwest Ground Beef and Sweet Potato Skillet

Can I make this Southwest Ground Beef and Sweet Potato Skillet ahead of time?

Absolutely! This dish stores well in the fridge for up to three days. Just reheat it on the stove or in the microwave when you’re ready to enjoy it again.

What can I substitute for ground beef in this recipe?

If you’re looking for a leaner option, ground turkey or chicken works great. For a vegetarian version, try using a plant-based meat alternative or simply add more beans.

How can I make the Southwest Ground Beef and Sweet Potato Skillet spicier?

For a spicy kick, add diced jalapeños or a pinch of cayenne pepper while cooking the beef. Adjust the spice level to suit your taste!

Can I freeze leftovers of this skillet dish?

Yes, you can freeze leftovers! Just let it cool completely, then store in an airtight container. It will keep well for up to three months. Thaw in the fridge before reheating.

What sides pair well with this Southwest Ground Beef and Sweet Potato Skillet?

This dish is delicious on its own, but you can serve it with a side salad, rice, or quinoa for a complete meal. A cold beverage like iced tea or a light beer also complements the flavors beautifully!

Final Thoughts

Cooking the Southwest Ground Beef and Sweet Potato Skillet is more than just preparing a meal; it’s about creating a moment of joy in your kitchen. The vibrant colors and enticing aromas fill your home, inviting everyone to gather around the table. Each bite is a delightful blend of flavors that warms the soul and satisfies the appetite. Whether you’re sharing it with family or enjoying it solo, this dish brings comfort and a taste of the Southwest right to your plate. Embrace the experience, and let this skillet become a staple in your culinary repertoire!

jhessica

Southwest Ground Beef and Sweet Potato Skillet Recipe You’ll Love!

A delicious and hearty Southwest Ground Beef and Sweet Potato Skillet that combines savory flavors and nutritious ingredients for a satisfying meal.
Prep Time 10 minutes
Cook Time 30 minutes
Total Time 40 minutes
Servings: 4 servings
Course: Main Dish
Cuisine: Southwestern
Calories: 450

Ingredients
  

  • 1 pound ground beef
  • 2 medium sweet potatoes peeled and diced (about 2 cups)
  • 1 medium onion diced
  • 2 cloves garlic minced
  • 1 red bell pepper diced
  • 1 can 15 ounces black beans, drained and rinsed
  • 1 cup corn fresh, frozen, or canned
  • 1 tablespoon chili powder
  • 1 teaspoon cumin
  • 1 teaspoon smoked paprika
  • Salt and pepper to taste
  • 2 tablespoons olive oil
  • 1/4 cup fresh cilantro chopped (for garnish)
  • 1 avocado diced (for garnish)
  • Lime wedges for serving

Method
 

  1. In a large skillet, heat the olive oil over medium heat. Add the diced onion and cook for about 3-4 minutes until it becomes translucent.
  2. Add the minced garlic and diced red bell pepper to the skillet. Sauté for another 2-3 minutes until the peppers soften.
  3. Increase the heat to medium-high and add the ground beef. Cook until browned, breaking it apart with a spatula, about 5-7 minutes. Drain excess fat if necessary.
  4. Stir in the diced sweet potatoes, chili powder, cumin, smoked paprika, salt, and pepper. Mix well to combine.
  5. Add 1/2 cup of water to the skillet, cover, and reduce the heat to medium. Cook for about 10-15 minutes, stirring occasionally, until the sweet potatoes are tender.
  6. Once the sweet potatoes are cooked, stir in the black beans and corn. Cook for an additional 3-5 minutes until heated through.
  7. Remove from heat and garnish with fresh cilantro and diced avocado. Serve with lime wedges on the side.

Nutrition

Serving: 1servingCalories: 450kcalCarbohydrates: 30gProtein: 30gFat: 20gSaturated Fat: 7gPolyunsaturated Fat: 10gCholesterol: 80mgSodium: 500mgFiber: 8gSugar: 5g

Notes

  • For a spicier dish, add diced jalapeños or a pinch of cayenne pepper when cooking the beef.
  • Substitute ground turkey or chicken for a leaner option, or use a plant-based meat alternative for a vegetarian version.

Tried this recipe?

Let us know how it was!

Blueberry Oatmeal Breakfast Bars: Delicious & Easy Recipe!

Introduction to Blueberry Oatmeal Breakfast Bars

There’s something magical about starting your day with a homemade treat. These Blueberry Oatmeal Breakfast Bars are not just delicious; they’re a warm hug in food form. Perfect for busy mornings, they offer a quick solution to fuel your day without the guilt. I remember my mom whipping up something similar when I was a kid, and the smell of baked oats and berries would fill the house. Now, I get to share that joy with you. Whether you’re rushing out the door or enjoying a leisurely breakfast, these bars are sure to impress.

Why You’ll Love This Blueberry Oatmeal Breakfast Bars

These Blueberry Oatmeal Breakfast Bars are a game-changer for your morning routine. They’re incredibly easy to whip up, taking just 10 minutes of prep time. The taste? A delightful blend of sweet bananas and juicy blueberries that will make your taste buds dance. Plus, they’re packed with nutrients, making them a guilt-free option for breakfast or a snack. You’ll love how they keep you energized throughout the day!

Ingredients for Blueberry Oatmeal Breakfast Bars

Gathering the right ingredients is the first step to creating these delightful Blueberry Oatmeal Breakfast Bars. Here’s what you’ll need:

  • Rolled oats: The base of our bars, providing fiber and a hearty texture.
  • Mashed ripe bananas: These add natural sweetness and moisture, making the bars soft and chewy.
  • Blueberries: Fresh or frozen, they burst with flavor and antioxidants, giving a fruity kick.
  • Almond milk: A dairy-free option that keeps the bars moist. Feel free to use any milk you prefer.
  • Honey or maple syrup: A touch of sweetness that balances the flavors beautifully.
  • Almond butter: This adds creaminess and healthy fats. Peanut butter works just as well!
  • Vanilla extract: A splash of this elevates the flavor profile, making it aromatic and inviting.
  • Baking powder: This helps the bars rise, giving them a light texture.
  • Cinnamon: A warm spice that enhances the overall taste, making each bite comforting.
  • Salt: Just a pinch to balance the sweetness and bring out the flavors.

For those looking to mix things up, consider adding chopped nuts or seeds for extra crunch. You can also swap out blueberries for other fruits like raspberries, chopped apples, or even dried cranberries for a different twist. Exact measurements for these ingredients can be found at the bottom of the article, ready for printing!

How to Make Blueberry Oatmeal Breakfast Bars

Step 1: Preheat and Prepare

Start by preheating your oven to 350°F (175°C). While it warms up, grab an 8×8-inch baking dish and line it with parchment paper. Leave some overhang on the sides; this will make it easier to lift the bars out later. Trust me, this little trick saves time and mess!

Step 2: Mix Dry Ingredients

In a large bowl, combine the rolled oats, baking powder, cinnamon, and salt. Stir them together until they’re well mixed. This step is crucial because it ensures that the baking powder and spices are evenly distributed throughout your Blueberry Oatmeal Breakfast Bars. A little mix goes a long way!

Step 3: Combine Wet Ingredients

In another bowl, mash those ripe bananas until smooth. Then, add the almond milk, honey (or maple syrup), almond butter, and vanilla extract. Mix everything together until it’s creamy and well-blended. This mixture will bring sweetness and moisture to your bars, making them irresistibly delicious!

Step 4: Combine Mixtures

Now, pour the wet ingredients into the bowl with the dry ingredients. Stir until everything is fully combined. Gently fold in the blueberries, being careful not to crush them. This step is where the magic happens, as the blueberries will create little bursts of flavor in every bite!

Step 5: Bake

Pour the mixture into your prepared baking dish, spreading it evenly. Pop it in the oven and bake for 25-30 minutes. You’ll know it’s done when the edges are golden brown and a toothpick inserted in the center comes out clean. The aroma will fill your kitchen, making it hard to wait!

Step 6: Cool and Cut

Once baked, allow the bars to cool in the pan for about 10 minutes. Then, lift them out using the parchment paper and let them cool completely on a wire rack. Once cooled, cut them into squares. Enjoy your homemade Blueberry Oatmeal Breakfast Bars as a perfect start to your day!

Tips for Success

  • Use ripe bananas for maximum sweetness and moisture.
  • Don’t overmix the batter; a few lumps are okay!
  • Let the bars cool completely before cutting for cleaner edges.
  • Store leftovers in an airtight container to keep them fresh.
  • Experiment with different fruits or nuts to find your favorite combination.

Equipment Needed

  • Baking dish: An 8×8-inch dish works best, but a 9×9-inch will do in a pinch.
  • Parchment paper: Essential for easy removal; aluminum foil can be a substitute.
  • Mixing bowls: Use two medium bowls for wet and dry ingredients.
  • Measuring cups: Accurate measurements ensure perfect results.
  • Spatula: Great for mixing and spreading the batter evenly.

Variations

  • Nutty Delight: Add 1/4 cup of chopped walnuts or pecans for a crunchy texture and extra healthy fats.
  • Berry Medley: Swap blueberries for a mix of raspberries, strawberries, or blackberries for a colorful twist.
  • Chocolate Chip: Stir in 1/4 cup of dark chocolate chips for a sweet treat that feels indulgent.
  • Spiced Up: Add a pinch of nutmeg or ginger for a warm, spiced flavor that’s perfect for fall.
  • Gluten-Free: Use certified gluten-free oats to make these bars suitable for gluten-sensitive diets.

Serving Suggestions

  • Pair your Blueberry Oatmeal Breakfast Bars with a dollop of Greek yogurt for added creaminess and protein.
  • Enjoy them alongside a fresh fruit salad for a refreshing contrast.
  • A warm cup of coffee or herbal tea complements these bars perfectly.
  • For a fun presentation, cut the bars into fun shapes using cookie cutters!

FAQs about Blueberry Oatmeal Breakfast Bars

Can I use frozen blueberries in the recipe?
Absolutely! Frozen blueberries work just as well as fresh ones. Just fold them in gently to avoid breaking them apart too much. They’ll still provide that burst of flavor!

How do I store the leftover bars?
Store your Blueberry Oatmeal Breakfast Bars in an airtight container at room temperature for up to three days. For longer storage, keep them in the fridge for up to a week or freeze them for up to three months.

Can I make these bars vegan?
Yes! To make them vegan, simply use maple syrup instead of honey and ensure your almond milk is plant-based. The bananas already provide a great binding agent!

What can I substitute for almond butter?
If you’re not a fan of almond butter, peanut butter or sunflower seed butter are excellent alternatives. They’ll still give your bars that creamy texture and delicious flavor.

How can I make these bars more filling?
To amp up the protein and fiber, consider adding a scoop of protein powder or some chia seeds. This will make your Blueberry Oatmeal Breakfast Bars even more satisfying!

Final Thoughts

Creating these Blueberry Oatmeal Breakfast Bars is more than just a cooking task; it’s a delightful experience that fills your kitchen with warmth and nostalgia. Each bite is a reminder of simpler times, where wholesome ingredients come together to create something truly special. Whether you’re enjoying them on a busy morning or sharing them with loved ones, these bars bring joy and satisfaction. They’re not just a breakfast option; they’re a way to start your day with a smile. So, roll up your sleeves and dive into this delicious adventure—you won’t regret it!

jhessica

Blueberry Oatmeal Breakfast Bars: Delicious & Easy Recipe!

Delicious and easy-to-make blueberry oatmeal breakfast bars that are perfect for a healthy start to your day.
Prep Time 10 minutes
Cook Time 30 minutes
Total Time 40 minutes
Servings: 9 bars
Course: Breakfast
Cuisine: American
Calories: 150

Ingredients
  

  • 2 cups rolled oats
  • 1 cup mashed ripe bananas about 2 medium bananas
  • 1 cup blueberries fresh or frozen
  • 1/2 cup almond milk or any milk of your choice
  • 1/4 cup honey or maple syrup
  • 1/4 cup almond butter or peanut butter
  • 1 teaspoon vanilla extract
  • 1 teaspoon baking powder
  • 1/2 teaspoon cinnamon
  • 1/4 teaspoon salt

Method
 

  1. Preheat your oven to 350°F (175°C) and line an 8×8-inch baking dish with parchment paper, leaving some overhang for easy removal.
  2. In a large bowl, combine the rolled oats, baking powder, cinnamon, and salt. Mix well.
  3. In another bowl, mix together the mashed bananas, almond milk, honey (or maple syrup), almond butter, and vanilla extract until smooth.
  4. Pour the wet ingredients into the dry ingredients and stir until fully combined. Gently fold in the blueberries.
  5. Pour the mixture into the prepared baking dish and spread it evenly.
  6. Bake for 25-30 minutes, or until the edges are golden brown and a toothpick inserted in the center comes out clean.
  7. Allow the bars to cool in the pan for about 10 minutes, then lift them out using the parchment paper and let them cool completely on a wire rack before cutting into squares.

Nutrition

Serving: 1barCalories: 150kcalCarbohydrates: 24gProtein: 4gFat: 5gSaturated Fat: 0.5gPolyunsaturated Fat: 4.5gSodium: 150mgFiber: 3gSugar: 8g

Notes

  • For added texture, mix in 1/4 cup of chopped nuts or seeds, such as walnuts or chia seeds.
  • Substitute the blueberries with other fruits like raspberries, chopped apples, or dried cranberries for a different flavor.

Tried this recipe?

Let us know how it was!

Thai Chicken Salad: A Fresh and Flavorful Delight!

Introduction to Thai Chicken Salad

There’s something magical about a salad that bursts with flavor and freshness, and this Thai Chicken Salad is just that. I remember the first time I tried it at a local Thai restaurant; the vibrant colors and zesty dressing danced on my palate. This dish is perfect for those busy days when you want something quick yet impressive. With tender shredded chicken, crisp veggies, and a creamy peanut dressing, it’s a delightful way to nourish your body and satisfy your taste buds. Trust me, this salad will become a go-to in your kitchen!

Why You’ll Love This Thai Chicken Salad

This Thai Chicken Salad is a game-changer for anyone looking to whip up a delicious meal in no time. It’s not just quick to prepare; it’s also packed with vibrant flavors that will make your taste buds sing. The combination of fresh ingredients and a creamy peanut dressing creates a satisfying dish that feels indulgent yet healthy. Plus, it’s versatile enough to please even the pickiest eaters in your family!

Ingredients for Thai Chicken Salad

Gathering the right ingredients is key to making this Thai Chicken Salad a hit. Here’s what you’ll need:

  • Cooked chicken: Shredded chicken is the star here. You can use rotisserie chicken for convenience or grill your own for a fresh touch.
  • Mixed salad greens: A blend of romaine, spinach, and arugula adds a variety of textures and flavors.
  • Shredded carrots: These add a sweet crunch and vibrant color to the salad.
  • Red bell pepper: Thinly sliced, it brings a sweet, juicy bite and a pop of color.
  • Cucumber: Fresh and crisp, it balances the richness of the dressing.
  • Cilantro: This herb adds a fresh, zesty flavor that’s essential in Thai cuisine.
  • Green onions: Chopped for a mild onion flavor that complements the other ingredients.
  • Chopped peanuts (optional): For those who love a crunchy texture, these add a delightful finish.

Now, let’s talk about the creamy peanut dressing:

  • Peanut butter: The base of the dressing, it provides creaminess and a rich flavor.
  • Soy sauce: Adds a savory umami kick that enhances the overall taste.
  • Lime juice: Freshly squeezed lime juice brightens the dish with its tangy zest.
  • Honey: A touch of sweetness to balance the flavors.
  • Sesame oil: This adds a nutty depth that complements the peanut butter.
  • Fresh ginger: Grated ginger gives a warm, spicy note that elevates the dressing.
  • Garlic: Minced garlic adds a punch of flavor that ties everything together.
  • Water: To thin the dressing to your desired consistency.

For those looking to mix things up, consider substituting the chicken with grilled tofu or chickpeas for a vegetarian option. You can also add sliced avocado for extra creaminess and healthy fats. Exact measurements for these ingredients can be found at the bottom of the article, ready for printing!

How to Make Thai Chicken Salad

Step 1: Prepare the Salad Base

Start by grabbing a large bowl. Toss in the mixed salad greens, shredded chicken, shredded carrots, red bell pepper, cucumber, cilantro, and green onions. Each ingredient adds its own flair, creating a colorful medley. Gently mix everything together, ensuring the flavors start to mingle. This salad base is where the magic begins, so take your time to get it just right!

Step 2: Make the Peanut Dressing

In a separate bowl, it’s time to whip up that creamy peanut dressing. Combine the peanut butter, soy sauce, lime juice, honey, sesame oil, grated ginger, and minced garlic. Whisk everything together until smooth. If the dressing feels too thick, add water a tablespoon at a time until you reach your desired consistency. This dressing is the heart of the Thai Chicken Salad, so make sure it’s well-blended!

Step 3: Combine and Toss

Now, drizzle the peanut dressing over your salad base. Use a spatula or tongs to gently toss everything together. You want each piece of chicken and vegetable to be coated in that delicious dressing. This step is crucial for ensuring every bite is bursting with flavor!

Step 4: Add Crunch

If you’re feeling adventurous, sprinkle chopped peanuts on top for an extra crunch. They add a delightful texture that complements the creamy dressing beautifully. Plus, who doesn’t love a little extra crunch in their salad?

Step 5: Serve or Chill

Finally, you can serve your Thai Chicken Salad immediately for a fresh experience. Alternatively, let it chill in the refrigerator for 15-30 minutes. This allows the flavors to meld together, making each bite even more delicious!

Tips for Success

  • Use rotisserie chicken for a quick and easy option.
  • Don’t skip the lime juice; it brightens the flavors.
  • Adjust the dressing thickness by adding water gradually.
  • Chill the salad before serving for enhanced flavor.
  • Feel free to customize with your favorite veggies or proteins.

Equipment Needed

  • Large bowl: Essential for mixing your salad. A mixing bowl works just as well.
  • Whisk: Perfect for blending the dressing. A fork can do the job in a pinch.
  • Spatula or tongs: Great for tossing the salad. Use your hands if you prefer!
  • Measuring cups: Handy for precise ingredient amounts, but eyeballing works too.

Variations

  • Vegetarian Delight: Swap the chicken for grilled tofu or chickpeas for a hearty vegetarian option.
  • Spicy Kick: Add sliced jalapeños or a dash of sriracha to the dressing for a spicy twist.
  • Fruit Fusion: Toss in some diced mango or pineapple for a sweet and tropical flavor.
  • Nut-Free Version: Omit the peanuts and use sunflower seeds for crunch without the nuts.
  • Low-Carb Option: Replace the carrots and bell pepper with shredded cabbage for a lower-carb salad.

Serving Suggestions

  • Pair your Thai Chicken Salad with a side of crispy spring rolls for a delightful crunch.
  • Serve it alongside a refreshing coconut water or iced green tea to complement the flavors.
  • For presentation, use a large platter and garnish with extra cilantro and lime wedges.

FAQs about Thai Chicken Salad

Can I make Thai Chicken Salad ahead of time?

Absolutely! You can prepare the salad base and dressing separately. Just combine them right before serving to keep the greens crisp. Chilling the salad for 15-30 minutes enhances the flavors, making it even more delicious!

Is Thai Chicken Salad gluten-free?

Yes, this Thai Chicken Salad can easily be made gluten-free. Just ensure you use gluten-free soy sauce in the dressing. The rest of the ingredients are naturally gluten-free, making it a safe choice for those with dietary restrictions.

What can I substitute for peanut butter in the dressing?

If you’re looking for alternatives, try almond butter or sunflower seed butter. Both will provide a creamy texture and flavor, while keeping the dressing deliciously rich.

How can I make this salad more filling?

To add more substance, consider including quinoa or brown rice. These grains will not only make the salad heartier but also add a nice texture and additional nutrients.

Can I use different vegetables in this salad?

Definitely! Feel free to mix in your favorite veggies. Bell peppers, snap peas, or even shredded cabbage can add a unique twist to your Thai Chicken Salad. The key is to keep it colorful and fresh!

Final Thoughts

Creating this Thai Chicken Salad is more than just a cooking task; it’s an experience that brings joy to your kitchen. The vibrant colors and bold flavors remind me of sun-soaked days and shared meals with loved ones. Each bite is a celebration of freshness, making it a perfect dish for any occasion. Whether you’re enjoying it solo or impressing guests, this salad is sure to become a favorite. So, roll up your sleeves, gather those ingredients, and let the magic of this Thai Chicken Salad transform your meal into something truly special!

jhessica

Thai Chicken Salad: A Fresh and Flavorful Delight!

A fresh and flavorful Thai Chicken Salad that combines shredded chicken with vibrant vegetables and a creamy peanut dressing.
Prep Time 15 minutes
Total Time 15 minutes
Servings: 4 servings
Course: Salad
Cuisine: Thai
Calories: 350

Ingredients
  

  • 2 cups cooked chicken shredded
  • 4 cups mixed salad greens such as romaine, spinach, and arugula
  • 1 cup shredded carrots
  • 1 cup red bell pepper thinly sliced
  • 1 cup cucumber thinly sliced
  • 1/2 cup chopped fresh cilantro
  • 1/4 cup chopped green onions
  • 1/4 cup chopped peanuts optional
  • 1/4 cup peanut butter for dressing
  • 2 tablespoons soy sauce for dressing
  • 2 tablespoons lime juice for dressing
  • 1 tablespoon honey for dressing
  • 1 teaspoon sesame oil for dressing
  • 1 teaspoon grated fresh ginger for dressing
  • 1 clove garlic minced (for dressing)
  • 2-3 tablespoons water to thin dressing, as needed

Method
 

  1. In a large bowl, combine the mixed salad greens, shredded chicken, carrots, bell pepper, cucumber, cilantro, and green onions. Toss gently to combine.
  2. In a separate bowl, whisk together the peanut butter, soy sauce, lime juice, honey, sesame oil, ginger, and garlic. Add water a tablespoon at a time until the dressing reaches your desired consistency.
  3. Drizzle the dressing over the salad and toss until everything is evenly coated.
  4. If using, sprinkle chopped peanuts on top for added crunch.
  5. Serve immediately or chill in the refrigerator for 15-30 minutes to let the flavors meld before serving.

Nutrition

Serving: 1servingCalories: 350kcalCarbohydrates: 12gProtein: 30gFat: 20gSaturated Fat: 3gPolyunsaturated Fat: 15gCholesterol: 70mgSodium: 600mgFiber: 3gSugar: 8g

Notes

  • For a vegetarian option, substitute the chicken with grilled tofu or chickpeas.
  • Add sliced avocado for extra creaminess and healthy fats.

Tried this recipe?

Let us know how it was!

Monterey Chicken Spaghetti: A Tasty Recipe You’ll Love!

Introduction to Monterey Chicken Spaghetti

There’s something magical about a dish that brings everyone together, and Monterey Chicken Spaghetti does just that. This hearty meal combines tender chicken, spaghetti, and a zesty barbecue sauce, all topped with gooey Monterey Jack cheese. Whether you’re racing against the clock on a busy weeknight or looking to impress friends at a weekend gathering, this recipe is your go-to solution. It’s not just about filling bellies; it’s about creating moments. Trust me, once you serve this up, you’ll be the hero of the dinner table!

Why You’ll Love This Monterey Chicken Spaghetti

This Monterey Chicken Spaghetti is a game-changer for any home cook. It’s quick to whip up, taking just 45 minutes from start to finish. The combination of flavors is simply irresistible, with the smoky barbecue sauce and creamy cheese creating a delightful harmony. Plus, it’s a one-dish wonder, making cleanup a breeze. Perfect for busy nights or when you want to impress without the fuss!

Ingredients for Monterey Chicken Spaghetti

Gathering the right ingredients is the first step to culinary success. For this Monterey Chicken Spaghetti, you’ll need a mix of staples and a few flavorful additions. Here’s what you’ll be working with:

  • Cooked spaghetti: The base of the dish, providing that comforting, chewy texture.
  • Boneless, skinless chicken breasts: Tender and juicy, they soak up all the delicious flavors.
  • Salt and black pepper: Essential seasonings that enhance the natural flavors of the chicken.
  • Olive oil: For cooking the chicken, adding a touch of richness.
  • Barbecue sauce: The star of the show! Choose your favorite brand for that smoky, tangy kick.
  • Shredded Monterey Jack cheese: Melts beautifully, adding creaminess and flavor.
  • Diced red and green bell peppers: These add color, crunch, and a hint of sweetness.
  • Diced onion: A classic flavor base that brings depth to the dish.
  • Garlic powder: For that aromatic punch without the fuss of fresh garlic.
  • Paprika: Adds a subtle smokiness and a pop of color.
  • Cayenne pepper (optional): For those who like a little heat, this is your secret weapon!
  • Fresh parsley (optional): A lovely garnish that brightens up the dish.

For exact quantities, check the bottom of the article where you can find everything listed for easy printing. Feel free to get creative with substitutions; for instance, if you’re not a fan of Monterey Jack, cheddar or pepper jack can work wonders too!

How to Make Monterey Chicken Spaghetti

Now that you have all your ingredients ready, let’s dive into the cooking process. This Monterey Chicken Spaghetti is straightforward, and I promise you’ll feel like a pro in no time. Follow these steps, and you’ll have a delicious meal that’s sure to impress!

Step 1: Preheat the Oven

First things first, preheat your oven to 375°F (190°C). This will ensure it’s hot and ready for that cheesy goodness when it’s time to bake.

Step 2: Cook the Spaghetti

In a large pot, bring water to a boil and cook the spaghetti according to the package instructions. Once it’s al dente, drain it and set it aside. This will be the comforting base of your dish.

Step 3: Season the Chicken

While the spaghetti cooks, season your boneless, skinless chicken breasts. Sprinkle salt, black pepper, garlic powder, paprika, and cayenne pepper (if you’re feeling adventurous) on both sides. This seasoning will infuse the chicken with flavor.

Step 4: Cook the Chicken

Heat olive oil in a large skillet over medium-high heat. Add the seasoned chicken breasts and cook for 6-7 minutes on each side. You want them fully cooked and no longer pink in the center. Once done, remove them from the skillet and let them rest for a few minutes before slicing.

Step 5: Sauté the Vegetables

In the same skillet, toss in the diced red and green bell peppers along with the onion. Sauté for about 3-4 minutes until they’re softened. This step adds a lovely crunch and sweetness to your dish.

Step 6: Combine Ingredients

In a large mixing bowl, combine the cooked spaghetti, sautéed vegetables, barbecue sauce, and half of the shredded Monterey Jack cheese. Mix everything well to ensure the flavors meld together beautifully.

Step 7: Assemble the Dish

Transfer the spaghetti mixture to a greased 9×13 inch baking dish. Lay the sliced chicken on top and sprinkle the remaining Monterey Jack cheese over everything. This is where the magic happens!

Step 8: Bake

Pop the dish into your preheated oven and bake for 20-25 minutes. You’ll know it’s ready when the cheese is melted and bubbly, creating that irresistible golden crust.

Step 9: Serve

Once out of the oven, let it cool for a few minutes. Garnish with fresh parsley if desired, and then serve it up! Your Monterey Chicken Spaghetti is ready to be enjoyed.

Tips for Success

  • Don’t overcook the chicken; it should be juicy and tender.
  • Use a high-quality barbecue sauce for the best flavor.
  • Feel free to add more veggies like mushrooms or zucchini for extra nutrition.
  • Let the dish sit for a few minutes after baking to set up nicely.
  • Experiment with different cheeses for a unique twist!

Equipment Needed

  • Large pot: For boiling spaghetti; a deep skillet can work too.
  • Skillet: A non-stick skillet is ideal for cooking chicken and veggies.
  • Baking dish: A 9×13 inch dish is perfect; any oven-safe dish will do.
  • Mixing bowl: Use a large bowl for combining ingredients; a pot can suffice.
  • Meat thermometer: Optional, but great for ensuring chicken is cooked through.

Variations

  • Spicy Monterey Chicken Spaghetti: Add diced jalapeños or use a spicy barbecue sauce for an extra kick.
  • Vegetarian Option: Substitute chicken with grilled portobello mushrooms or chickpeas for a hearty, meatless dish.
  • Cheese Swap: Experiment with different cheeses like sharp cheddar or pepper jack for a unique flavor profile.
  • Whole Wheat Pasta: Use whole wheat spaghetti for a healthier, fiber-rich alternative.
  • Low-Carb Version: Replace spaghetti with zucchini noodles or spaghetti squash for a lighter meal.

Serving Suggestions

  • Side Salad: A crisp green salad with a tangy vinaigrette complements the richness of the dish.
  • Garlic Bread: Serve warm garlic bread for a delightful crunch and extra flavor.
  • Drink Pairing: A chilled iced tea or a light beer pairs perfectly with Monterey Chicken Spaghetti.
  • Presentation: Garnish with fresh parsley for a pop of color and freshness.

FAQs about Monterey Chicken Spaghetti

Can I make Monterey Chicken Spaghetti ahead of time?

Absolutely! You can prepare the dish up to the baking step, cover it, and refrigerate for up to 24 hours. Just pop it in the oven when you’re ready to serve!

What can I substitute for Monterey Jack cheese?

If Monterey Jack isn’t your favorite, cheddar or pepper jack cheese are excellent alternatives. They’ll add a different flavor while still melting beautifully.

Is Monterey Chicken Spaghetti gluten-free?

Yes, as long as you use gluten-free spaghetti, this dish can easily fit into a gluten-free diet. Just check the labels on your ingredients!

Can I add more vegetables to this recipe?

Definitely! Feel free to toss in veggies like mushrooms, zucchini, or spinach. They’ll add nutrition and flavor, making your Monterey Chicken Spaghetti even more delightful.

How do I store leftovers?

Store any leftovers in an airtight container in the fridge for up to three days. Reheat in the oven or microwave until warmed through. Enjoy your delicious meal again!

Final Thoughts

Cooking Monterey Chicken Spaghetti is more than just preparing a meal; it’s about creating a warm, inviting experience for family and friends. The blend of tender chicken, vibrant veggies, and that gooey cheese makes every bite a celebration of flavors. Whether it’s a busy weeknight or a special gathering, this dish brings comfort and joy to the table. Plus, the smiles and compliments you’ll receive are the cherry on top! So roll up your sleeves, embrace the process, and enjoy the delicious moments that come with sharing this delightful recipe. You won’t regret it!

jhessica

Monterey Chicken Spaghetti: A Tasty Recipe You’ll Love!

Monterey Chicken Spaghetti is a delicious and hearty dish that combines tender chicken, spaghetti, and a flavorful barbecue sauce topped with melted Monterey Jack cheese.
Prep Time 15 minutes
Cook Time 30 minutes
Total Time 45 minutes
Servings: 6 servings
Course: Main Course
Cuisine: American
Calories: 450

Ingredients
  

  • 2 cups cooked spaghetti
  • 1 pound boneless skinless chicken breasts
  • 1 teaspoon salt
  • 1 teaspoon black pepper
  • 1 tablespoon olive oil
  • 1 cup barbecue sauce
  • 1 cup shredded Monterey Jack cheese
  • 1/2 cup diced red bell pepper
  • 1/2 cup diced green bell pepper
  • 1/2 cup diced onion
  • 1 teaspoon garlic powder
  • 1/2 teaspoon paprika
  • 1/4 teaspoon cayenne pepper optional
  • Fresh parsley for garnish optional

Method
 

  1. Preheat your oven to 375°F (190°C).
  2. In a large pot, cook the spaghetti according to package instructions. Drain and set aside.
  3. Season the chicken breasts with salt, pepper, garlic powder, paprika, and cayenne pepper (if using).
  4. In a large skillet, heat olive oil over medium-high heat. Add the seasoned chicken and cook for 6-7 minutes on each side, or until fully cooked and no longer pink in the center. Remove from skillet and let rest for a few minutes before slicing.
  5. In the same skillet, add the diced red and green bell peppers and onion. Sauté for about 3-4 minutes until softened.
  6. In a large mixing bowl, combine the cooked spaghetti, sautéed vegetables, barbecue sauce, and half of the Monterey Jack cheese. Mix well to combine.
  7. Transfer the spaghetti mixture to a greased 9×13 inch baking dish. Top with sliced chicken and sprinkle the remaining Monterey Jack cheese on top.
  8. Bake in the preheated oven for 20-25 minutes, or until the cheese is melted and bubbly.
  9. Remove from the oven and let cool for a few minutes. Garnish with fresh parsley if desired before serving.

Nutrition

Serving: 1servingCalories: 450kcalCarbohydrates: 38gProtein: 30gFat: 18gSaturated Fat: 7gPolyunsaturated Fat: 8gCholesterol: 70mgSodium: 800mgFiber: 2gSugar: 10g

Notes

  • For a spicier kick, add jalapeños or use a spicy barbecue sauce.
  • Substitute the Monterey Jack cheese with cheddar or pepper jack for a different flavor profile.

Tried this recipe?

Let us know how it was!

Mixed Berry Shortcake: A Delicious Step-by-Step Recipe!

Introduction to Mixed Berry Shortcake

There’s something magical about a dessert that brings people together, and Mixed Berry Shortcake does just that.

I remember the first time I made this delightful treat; it was a sunny afternoon, and my kids were buzzing with excitement.

This recipe is not just a quick solution for a busy day; it’s a way to impress your loved ones with minimal effort.

With its fluffy shortcakes and vibrant berries, it’s a celebration of flavors that feels like a warm hug.

Let’s dive into this easy-to-follow recipe that will surely become a family favorite!

Why You’ll Love This Mixed Berry Shortcake

This Mixed Berry Shortcake is a game-changer for any dessert lover.

It’s incredibly easy to whip up, making it perfect for those busy weeknights or last-minute gatherings.

The combination of sweet, juicy berries and fluffy shortcakes creates a taste explosion that will leave everyone asking for seconds.

Plus, it’s versatile enough to adapt to any occasion, from casual family dinners to elegant summer parties.

Ingredients for Mixed Berry Shortcake

Creating the perfect Mixed Berry Shortcake starts with gathering the right ingredients.

Here’s what you’ll need:

  • All-purpose flour: The backbone of your shortcake, providing structure and fluffiness.
  • Baking powder: This leavening agent helps the shortcakes rise, giving them that light, airy texture.
  • Salt: Just a pinch enhances the flavors and balances the sweetness.
  • Granulated sugar: Sweetens the dough and adds a touch of caramelization when baked.
  • Unsalted butter: Cold and cubed, it creates those flaky layers we all love in a shortcake.
  • Heavy cream: Adds richness and moisture, making the shortcakes tender and delicious.
  • Vanilla extract: A splash of this aromatic essence elevates the flavor profile.
  • Mixed berries: A delightful medley of strawberries, blueberries, and raspberries brings freshness and vibrant color.
  • Powdered sugar: Used to sweeten the berries, it dissolves easily and creates a lovely syrup.
  • Lemon juice: A squeeze brightens the berry mixture, enhancing their natural sweetness.

Feel free to get creative!

You can swap in your favorite berries or even add a splash of orange juice for a citrusy twist.

For a lighter version, consider substituting half of the heavy cream with Greek yogurt.

Exact measurements are at the bottom of the article, ready for printing.

How to Make Mixed Berry Shortcake

Making Mixed Berry Shortcake is a delightful journey that’s as enjoyable as the final product.

Let’s break it down step by step, ensuring you have all the tips you need for success.

Step 1: Preheat the Oven

Start by preheating your oven to 400°F.

This ensures your shortcakes bake evenly and rise beautifully.

While the oven warms up, line a baking sheet with parchment paper.

This will prevent sticking and make cleanup a breeze.

Step 2: Prepare the Dry Ingredients

In a large bowl, whisk together the all-purpose flour, baking powder, salt, and granulated sugar.

This mix is the foundation of your shortcake.

Next, add the cold, cubed butter.

Using a pastry cutter or your fingers, mix until the mixture resembles coarse crumbs.

This step is crucial for achieving that flaky texture we all love.

Step 3: Combine Wet Ingredients

Now, pour in the heavy cream and vanilla extract.

Stir gently until just combined.

Be careful not to overmix; a few lumps are perfectly fine.

This will keep your shortcakes light and airy.

Step 4: Shape the Dough

Turn the dough out onto a floured surface.

Gently knead it a few times until it comes together.

Then, pat the dough into a 1-inch thick rectangle.

This thickness is key for the perfect rise during baking.

Step 5: Cut Out Shortcakes

Using a round biscuit cutter or a glass, cut out shortcakes from the dough.

Place them on the prepared baking sheet, leaving a little space between each one.

This allows them to expand while baking.

Step 6: Bake the Shortcakes

Brush the tops of the shortcakes with a little heavy cream.

This will give them a lovely golden finish.

Bake for 15-18 minutes or until they are golden brown.

Once done, let them cool slightly on a wire rack.

The aroma will be irresistible!

Step 7: Prepare the Mixed Berries

While the shortcakes are baking, it’s time to prepare the mixed berries.

In a medium bowl, combine the berries, powdered sugar, and lemon juice.

Toss gently to coat the berries, then let them sit for about 10 minutes.

This allows the juices to release, creating a delicious syrup.

Step 8: Assemble the Shortcake

To assemble, slice the shortcakes in half horizontally.

Spoon a generous amount of the mixed berries onto the bottom half.

If you like, add a dollop of whipped cream for extra indulgence.

Finally, place the top half back on.

Your Mixed Berry Shortcake is now ready to be enjoyed!

Tips for Success

  • Use cold butter for flaky shortcakes; it’s the secret to that perfect texture.
  • Don’t overmix the dough; a few lumps are okay for lightness.
  • Let the mixed berries sit to enhance their natural sweetness.
  • Experiment with different berries for unique flavors.
  • Brush the tops with cream for a beautiful golden finish.

Equipment Needed

  • Mixing bowls: A set of various sizes is handy; you can use any large bowl you have.
  • Whisk: Essential for mixing dry ingredients; a fork works in a pinch.
  • Baking sheet: A standard one will do; line it with parchment paper for easy cleanup.
  • Biscuit cutter: A round cutter is ideal, but a glass can work just as well.
  • Pastry brush: For brushing cream on top; a clean paintbrush can be a fun alternative.

Variations

  • Berry Medley: Swap out the mixed berries for your favorite fruits, like peaches or cherries, for a unique twist.
  • Gluten-Free Option: Use a gluten-free all-purpose flour blend to make this dessert suitable for those with gluten sensitivities.
  • Vegan Version: Replace the heavy cream with coconut cream and use a plant-based butter alternative for a dairy-free delight.
  • Chocolate Drizzle: Add a drizzle of melted dark chocolate over the assembled shortcake for a decadent touch.
  • Herb Infusion: Incorporate fresh mint or basil into the berry mixture for a refreshing herbal note.

Serving Suggestions

  • Pair with Ice Cream: A scoop of vanilla or strawberry ice cream complements the shortcake beautifully.
  • Fresh Mint Garnish: Add a sprig of mint on top for a pop of color and freshness.
  • Serve with Lemonade: A glass of homemade lemonade balances the sweetness perfectly.
  • Presentation: Serve on a rustic wooden board for a charming, homemade feel.

FAQs about Mixed Berry Shortcake

Can I make Mixed Berry Shortcake ahead of time?

Absolutely! You can prepare the shortcakes a day in advance and store them in an airtight container. Just assemble them right before serving to keep everything fresh and fluffy.

What berries work best for this recipe?

While strawberries, blueberries, and raspberries are classic choices, feel free to mix in blackberries or even sliced peaches for a delightful twist. The key is to use ripe, juicy fruits for the best flavor.

How do I store leftover shortcake?

Store any leftover shortcake in an airtight container at room temperature for up to two days. If you have leftover berries, keep them in the fridge and add them just before serving.

Can I freeze Mixed Berry Shortcake?

Yes! You can freeze the baked shortcakes for up to three months. Just wrap them tightly in plastic wrap and place them in a freezer bag. Thaw at room temperature before serving.

What can I substitute for heavy cream?

If you’re looking for a lighter option, you can substitute half of the heavy cream with Greek yogurt. This will still give you a deliciously moist shortcake while cutting down on calories.

Final Thoughts

Creating a Mixed Berry Shortcake is more than just baking; it’s about crafting memories.

The joy of watching your loved ones savor each bite is truly priceless.

This dessert is a celebration of simplicity and flavor, perfect for any occasion.

Whether it’s a family gathering or a quiet evening at home, this shortcake brings a touch of sweetness to life.

So roll up your sleeves, gather those ingredients, and let the aroma of fresh berries and baked goodness fill your kitchen.

Trust me, this recipe will become a cherished tradition in your home!

jhessica

Mixed Berry Shortcake: A Delicious Step-by-Step Recipe!

A delicious and easy-to-follow recipe for Mixed Berry Shortcake, perfect for any occasion.
Prep Time 20 minutes
Cook Time 18 minutes
Total Time 38 minutes
Servings: 6 servings
Course: Dessert
Cuisine: American
Calories: 320

Ingredients
  

  • 2 cups all-purpose flour
  • 1 tablespoon baking powder
  • 1/2 teaspoon salt
  • 1/4 cup granulated sugar
  • 1/2 cup unsalted butter cold and cubed
  • 1 cup heavy cream plus extra for brushing
  • 1 teaspoon vanilla extract
  • 2 cups mixed berries strawberries, blueberries, raspberries
  • 1/4 cup powdered sugar
  • 1 tablespoon lemon juice

Method
 

  1. Preheat your oven to 400°F. Line a baking sheet with parchment paper.
  2. In a large bowl, whisk together the flour, baking powder, salt, and granulated sugar. Add the cold, cubed butter and mix until the mixture resembles coarse crumbs.
  3. Pour in the heavy cream and vanilla extract. Stir until just combined. Do not overmix.
  4. Turn the dough out onto a floured surface and gently knead it a few times until it comes together. Pat the dough into a 1-inch thick rectangle.
  5. Cut out shortcakes using a round biscuit cutter or a glass. Place them on the prepared baking sheet.
  6. Brush the tops of the shortcakes with a little heavy cream for a golden finish. Bake for 15-18 minutes or until golden brown. Let them cool slightly on a wire rack.
  7. While the shortcakes are baking, prepare the mixed berries. In a medium bowl, combine the berries, powdered sugar, and lemon juice. Toss gently and let sit for about 10 minutes to release their juices.
  8. To assemble, slice the shortcakes in half horizontally. Spoon a generous amount of the mixed berries onto the bottom half, add a dollop of whipped cream if desired, and then place the top half back on.

Nutrition

Serving: 1shortcakeCalories: 320kcalCarbohydrates: 34gProtein: 4gFat: 18gSaturated Fat: 10gPolyunsaturated Fat: 8gCholesterol: 50mgSodium: 200mgFiber: 2gSugar: 14g

Notes

  • For a lighter version, substitute half of the heavy cream with Greek yogurt.
  • You can use any combination of berries you prefer.
  • Add a splash of orange juice for a citrusy twist.

Tried this recipe?

Let us know how it was!

Red, White, and Blue Sugar Cookies That Wow Your Guests!

Introduction to Red, White, and Blue Sugar Cookies

There’s something magical about baking that takes me back to my childhood. The aroma of cookies wafting through the house always felt like a warm hug. These Red, White, and Blue Sugar Cookies are not just a treat; they’re a celebration on a plate! Perfect for summer gatherings, holidays, or just a sweet way to brighten your day, this recipe is a quick solution for busy schedules. With vibrant colors and delightful flavors, they’re sure to impress your loved ones. Let’s dive into this festive baking adventure together!

Why You’ll Love This Red, White, and Blue Sugar Cookies

These Red, White, and Blue Sugar Cookies are a breeze to whip up, making them perfect for any occasion. With just a handful of ingredients and minimal prep time, you can have a batch ready in under 30 minutes. The buttery sweetness paired with a pop of color makes them not only delicious but also visually stunning. Trust me, they’ll be the star of your dessert table!

Ingredients for Red, White, and Blue Sugar Cookies

Gathering the right ingredients is the first step to cookie perfection. Here’s what you’ll need for these delightful Red, White, and Blue Sugar Cookies:

  • All-purpose flour: The backbone of any cookie, providing structure and chewiness.
  • Baking soda: This leavening agent helps the cookies rise and become fluffy.
  • Baking powder: Works alongside baking soda for that perfect lift.
  • Unsalted butter: Adds richness and flavor; make sure it’s softened for easy mixing.
  • White sugar: Sweetens the cookies and contributes to their lovely texture.
  • Egg: Acts as a binder, helping to hold everything together.
  • Vanilla extract: A must-have for that classic cookie flavor.
  • Almond extract: Just a hint adds a delightful twist to the taste.
  • Salt: Enhances the sweetness and balances the flavors.
  • Red sugar sprinkles: These festive sprinkles give a pop of color and crunch.
  • Blue sugar sprinkles: Complements the red and adds to the patriotic theme.

For those looking to get creative, consider adding a few drops of red and blue food coloring to the dough for a marbled effect. If you want to switch things up, colored chocolate chips or M&M’s can be a fun substitute for the sprinkles. You can find all the exact measurements at the bottom of the article, ready for printing!

How to Make Red, White, and Blue Sugar Cookies

Step 1: Preheat and Prepare

Start by preheating your oven to 375°F (190°C). This ensures your cookies bake evenly. While the oven warms up, line two baking sheets with parchment paper. This simple step prevents sticking and makes cleanup a breeze. Trust me, your future self will thank you!

Step 2: Mix Dry Ingredients

In a medium bowl, whisk together the all-purpose flour, baking soda, baking powder, and salt. This combination is crucial for achieving that perfect cookie texture. Set this mixture aside for now. It’s like a secret waiting to be revealed in your cookie masterpiece!

Step 3: Cream Butter and Sugar

In a large bowl, cream together the softened butter and white sugar until smooth and fluffy. This step is where the magic begins! Beat in the egg, vanilla extract, and almond extract until everything is well combined. The aroma will make your kitchen feel like a bakery!

Step 4: Combine Ingredients

Gradually add the dry ingredients to the wet mixture, mixing until just combined. Don’t overdo it; a few flour streaks are okay. This is where the dough starts to come together, and you can almost taste the sweetness in the air. Exciting, right?

Step 5: Shape the Cookies

Scoop out tablespoon-sized portions of dough and roll them into balls. Then, roll each ball in the red and blue sugar sprinkles, ensuring they’re well coated. This step adds a festive flair, making your Red, White, and Blue Sugar Cookies truly pop with color!

Step 6: Bake the Cookies

Place the coated dough balls on the prepared baking sheets, spacing them about 2 inches apart. Bake in the preheated oven for 8 to 10 minutes, or until the edges are lightly golden. Let them cool on the baking sheets for 5 minutes before transferring to a wire rack. The anticipation is half the fun!

Tips for Success

  • Make sure your butter is softened to room temperature for easy creaming.
  • Don’t skip the chilling step if you have time; it helps the cookies hold their shape.
  • Use a cookie scoop for uniform sizes, ensuring even baking.
  • Experiment with different sprinkles or toppings for a unique twist.
  • Store cookies in an airtight container to keep them fresh longer.

Equipment Needed

  • Baking sheets: Essential for baking; you can use any flat, oven-safe tray.
  • Parchment paper: Prevents sticking; aluminum foil works in a pinch.
  • Mixing bowls: A set of various sizes is handy; any large bowl will do.
  • Whisk: For mixing dry ingredients; a fork can work as an alternative.
  • Cookie scoop: Ensures uniform cookie sizes; a tablespoon can substitute.

Variations

  • Chocolate Chip Twist: Add semi-sweet or white chocolate chips to the dough for a delightful chocolatey surprise.
  • Gluten-Free Option: Substitute all-purpose flour with a gluten-free blend to accommodate dietary needs.
  • Nutty Flavor: Incorporate chopped nuts like almonds or pecans for added crunch and flavor.
  • Fruit Zest: Add a teaspoon of lemon or orange zest to the dough for a refreshing citrus twist.
  • Vegan Version: Replace butter with coconut oil and use a flax egg instead of a regular egg for a plant-based treat.

Serving Suggestions

  • Pair these Red, White, and Blue Sugar Cookies with a scoop of vanilla ice cream for a delightful dessert.
  • Serve alongside fresh fruit like strawberries and blueberries for a colorful platter.
  • For drinks, consider iced tea or lemonade to complement the sweetness.
  • Display cookies on a festive platter, garnished with fresh mint leaves for a pop of color.

FAQs about Red, White, and Blue Sugar Cookies

Can I make these cookies ahead of time?
Absolutely! You can prepare the dough in advance and refrigerate it for up to three days. Just roll the dough into balls and coat them in sprinkles right before baking for the freshest taste.

What can I substitute for the almond extract?
If almond extract isn’t your thing, feel free to use an extra splash of vanilla extract. You can also try coconut extract for a tropical twist!

How should I store leftover cookies?
To keep your Red, White, and Blue Sugar Cookies fresh, store them in an airtight container at room temperature. They’ll stay delicious for about a week—if they last that long!

Can I freeze these cookies?
Yes! These cookies freeze beautifully. Just place them in a single layer on a baking sheet until frozen, then transfer them to a freezer-safe bag. They can be stored for up to three months.

What’s the best way to decorate these cookies?
For an extra festive touch, drizzle melted white chocolate over the cooled cookies or add edible glitter. You can also use royal icing for more intricate designs!

Final Thoughts

Creating these Red, White, and Blue Sugar Cookies is more than just baking; it’s about crafting memories. The joy of mixing, rolling, and decorating brings a sense of nostalgia that connects us to our loved ones. Each bite is a celebration of flavor and color, perfect for any gathering. Whether it’s a backyard barbecue or a festive holiday, these cookies will surely steal the show. So, roll up your sleeves, gather your ingredients, and let the sweet aroma fill your home. Trust me, the smiles on your guests’ faces will be worth every moment spent in the kitchen!

jhessica

Red, White, and Blue Sugar Cookies That Wow Your Guests!

Delicious and festive Red, White, and Blue Sugar Cookies perfect for celebrations.
Prep Time 20 minutes
Cook Time 10 minutes
Total Time 30 minutes
Servings: 24 cookies
Course: Dessert
Cuisine: American
Calories: 150

Ingredients
  

  • 2 ¾ cups all-purpose flour
  • 1 teaspoon baking soda
  • ½ teaspoon baking powder
  • 1 cup unsalted butter softened
  • 1 ½ cups white sugar
  • 1 egg
  • 1 teaspoon vanilla extract
  • ½ teaspoon almond extract
  • ½ teaspoon salt
  • ½ cup red sugar sprinkles
  • ½ cup blue sugar sprinkles

Method
 

  1. Preheat your oven to 375°F (190°C). Line two baking sheets with parchment paper.
  2. In a medium bowl, whisk together the flour, baking soda, baking powder, and salt. Set aside.
  3. In a large bowl, cream together the softened butter and white sugar until smooth. Beat in the egg, vanilla extract, and almond extract until well combined.
  4. Gradually add the dry ingredients to the wet ingredients, mixing until just combined.
  5. Scoop out tablespoon-sized portions of dough and roll them into balls. Roll each ball in red sugar sprinkles, then in blue sugar sprinkles, ensuring they are well coated.
  6. Place the coated dough balls on the prepared baking sheets, spacing them about 2 inches apart.
  7. Bake in the preheated oven for 8 to 10 minutes, or until the edges are lightly golden. Remove from the oven and let them cool on the baking sheets for 5 minutes before transferring to a wire rack to cool completely.

Nutrition

Serving: 1cookieCalories: 150kcalCarbohydrates: 22gProtein: 1gFat: 7gSaturated Fat: 4gPolyunsaturated Fat: 3gCholesterol: 20mgSodium: 100mgSugar: 10g

Notes

  • For a festive touch, add a few drops of red and blue food coloring to the dough for a marbled effect.
  • Substitute the sugar sprinkles with colored chocolate chips or M&M’s for a different flavor and texture.

Tried this recipe?

Let us know how it was!

Triple Berry Icebox Cake: A Refreshing Dessert Recipe

Introduction to Triple Berry Icebox Cake

There’s something magical about desserts that require little effort but deliver big on flavor. The Triple Berry Icebox Cake is just that—a delightful treat that’s as easy to make as it is to enjoy.

I remember the first time I made this cake; it was a hot summer day, and I wanted something refreshing. This no-bake dessert became my go-to for gatherings, impressing friends and family alike.

With layers of whipped cream and vibrant berries, it’s perfect for busy days or when you want to wow your loved ones without spending hours in the kitchen.

Why You’ll Love This Triple Berry Icebox Cake

This Triple Berry Icebox Cake is a game-changer for anyone who loves dessert but hates the fuss.

It’s incredibly easy to whip up, requiring no baking at all.

In just 20 minutes, you can create a stunning dessert that’s perfect for warm weather.

The combination of creamy whipped topping and fresh berries is a flavor explosion that will leave your taste buds dancing.

Trust me, it’s a crowd-pleaser!

Ingredients for Triple Berry Icebox Cake

Creating the perfect Triple Berry Icebox Cake starts with gathering the right ingredients. Here’s what you’ll need:

  • Heavy whipping cream: This is the star of the show, providing that rich, creamy texture.
  • Powdered sugar: A touch of sweetness to balance the tartness of the berries.
  • Vanilla extract: Adds a warm, aromatic flavor that enhances the overall taste.
  • Strawberries: Fresh, hulled, and sliced, they bring a juicy burst of flavor.
  • Blueberries: These little gems add a pop of color and a sweet-tart contrast.
  • Raspberries: Their tangy flavor complements the other berries beautifully.
  • Graham crackers: The base of the cake, providing a crunchy texture that softens as it chills.
  • Fresh mint leaves: Optional, but they make a lovely garnish that adds a refreshing touch.

Feel free to get creative! You can swap out the berries for your favorite fruits, like peaches or mangoes, for a unique twist.

For exact measurements, check the bottom of the article where you can find everything you need for printing.

How to Make Triple Berry Icebox Cake

Making a Triple Berry Icebox Cake is a breeze, and I’m here to guide you through each step.

Let’s dive into this no-bake wonder that will have everyone asking for seconds!

Step 1: Whip the Cream

Start by pouring the heavy whipping cream into a large mixing bowl.

Using an electric mixer, whip it on medium speed until it begins to thicken.

Gradually add the powdered sugar and vanilla extract.

Keep whipping until you see stiff peaks form.

This is the creamy cloud that will hold everything together!

Step 2: Prepare the Base

Grab a 9×13-inch baking dish and spread a thin layer of that luscious whipped cream on the bottom.

This layer acts as a glue, keeping the graham crackers in place.

It’s like laying the foundation for a delicious dessert masterpiece!

Step 3: Layer the Graham Crackers

Now, take six graham crackers and lay them over the whipped cream.

Don’t worry if you need to break some to fit; it’s all part of the charm.

These crackers will soften as they chill, creating a delightful texture.

Step 4: Add the Berries

Spread half of the remaining whipped cream over the graham crackers.

Next, layer half of your sliced strawberries, blueberries, and raspberries on top.

The colors will pop, making your cake look as good as it tastes!

Step 5: Repeat the Layers

Time to repeat!

Add another six graham crackers, followed by the rest of the whipped cream.

Top it off with the remaining berries.

This double-layer action is what makes the Triple Berry Icebox Cake so irresistible.

Step 6: Chill and Serve

Cover your masterpiece with plastic wrap and pop it in the fridge.

Let it chill for at least four hours, or overnight if you can wait.

This allows the graham crackers to soften and the flavors to meld.

When you’re ready to serve, garnish with fresh mint leaves for that extra touch.

Now, slice it up and watch the smiles appear!

Tips for Success

  • Use cold heavy cream for better whipping results.
  • Don’t rush the chilling process; overnight is best for flavor.
  • Experiment with different berries or fruits for a unique twist.
  • For a richer taste, add a splash of almond extract to the cream.
  • Keep the cake covered in the fridge to maintain freshness.

Equipment Needed

  • Mixing bowl: A large bowl for whipping cream; a stand mixer works great too.
  • Electric mixer: Essential for achieving those stiff peaks; a whisk can work, but it’ll take longer.
  • Baking dish: A 9×13-inch dish is ideal; any similar-sized dish will do.
  • Plastic wrap: To cover the cake while it chills; foil can be a substitute.

Variations

  • Chocolate Twist: Add cocoa powder to the whipped cream or use chocolate graham crackers for a decadent flavor.
  • Fruit Swap: Substitute the berries with your favorite fruits like peaches, mangoes, or even bananas for a different taste experience.
  • Nutty Crunch: Incorporate crushed nuts like almonds or pecans between the layers for added texture and flavor.
  • Dairy-Free Option: Use coconut cream instead of heavy whipping cream for a dairy-free version that’s just as creamy.
  • Low-Sugar Version: Replace powdered sugar with a sugar substitute to reduce the sweetness while keeping the flavor intact.

Serving Suggestions

  • Pair with a scoop of vanilla ice cream for an extra creamy treat.
  • Serve alongside a refreshing glass of iced tea or lemonade to complement the flavors.
  • For a beautiful presentation, garnish each slice with additional berries and a sprig of mint.
  • Consider a drizzle of chocolate sauce for a decadent touch.

FAQs about Triple Berry Icebox Cake

Can I make Triple Berry Icebox Cake ahead of time?

Absolutely! In fact, making it a day in advance allows the flavors to meld beautifully. Just keep it covered in the fridge until you’re ready to serve.

What can I substitute for graham crackers?

If graham crackers aren’t your thing, you can use vanilla wafers or even crushed cookies like Oreos for a fun twist. Just remember, the texture will change slightly.

How long does the cake last in the fridge?

This cake is best enjoyed within 3-4 days. After that, the graham crackers may become too soggy, but it will still taste delicious!

Can I use frozen berries instead of fresh?

Yes, frozen berries work well! Just make sure to thaw and drain them before layering to avoid excess moisture in your cake.

Is this dessert suitable for a gluten-free diet?

To make a gluten-free version, simply use gluten-free graham crackers or any gluten-free cookie alternative. The rest of the ingredients are naturally gluten-free!

Final Thoughts

Creating a Triple Berry Icebox Cake is more than just whipping up a dessert; it’s about crafting memories.

Each layer tells a story, from the creamy clouds of whipped cream to the vibrant burst of berries.

This no-bake delight is perfect for summer gatherings, family barbecues, or simply treating yourself after a long day.

The joy of sharing this cake with loved ones is unmatched.

So, roll up your sleeves, gather your ingredients, and dive into this refreshing treat.

Trust me, every slice will bring smiles and satisfaction, making it a recipe you’ll cherish for years to come!

jhessica

Triple Berry Icebox Cake: A Refreshing Dessert Recipe

A refreshing dessert made with layers of whipped cream and mixed berries, perfect for warm weather.
Prep Time 20 minutes
Total Time 4 hours 20 minutes
Servings: 8 servings
Course: Dessert
Cuisine: American
Calories: 250

Ingredients
  

  • 2 cups heavy whipping cream
  • 1/2 cup powdered sugar
  • 1 teaspoon vanilla extract
  • 1 cup strawberries hulled and sliced
  • 1 cup blueberries
  • 1 cup raspberries
  • 1 package 14.4 ounces graham crackers
  • Fresh mint leaves for garnish optional

Method
 

  1. In a large mixing bowl, whip the heavy cream with an electric mixer on medium speed until it starts to thicken. Gradually add the powdered sugar and vanilla extract, then continue to whip until stiff peaks form.
  2. In a 9×13-inch baking dish, spread a thin layer of whipped cream on the bottom.
  3. Layer 6 graham crackers over the whipped cream, breaking them if necessary to fit.
  4. Spread half of the remaining whipped cream over the graham crackers, then layer half of the sliced strawberries, blueberries, and raspberries on top.
  5. Repeat the layers by adding another 6 graham crackers, the remaining whipped cream, and the rest of the berries.
  6. Cover the dish with plastic wrap and refrigerate for at least 4 hours, or overnight for best results, to allow the graham crackers to soften.
  7. Before serving, garnish with fresh mint leaves if desired.

Nutrition

Serving: 1sliceCalories: 250kcalCarbohydrates: 22gProtein: 3gFat: 18gSaturated Fat: 10gPolyunsaturated Fat: 8gCholesterol: 60mgSodium: 50mgFiber: 1gSugar: 15g

Notes

  • For a chocolate twist, add cocoa powder to the whipped cream or use chocolate graham crackers.
  • Substitute the berries with your favorite fruits, such as peaches or mangoes, for a different flavor profile.

Tried this recipe?

Let us know how it was!

Stay Connected

Get recipes via email: