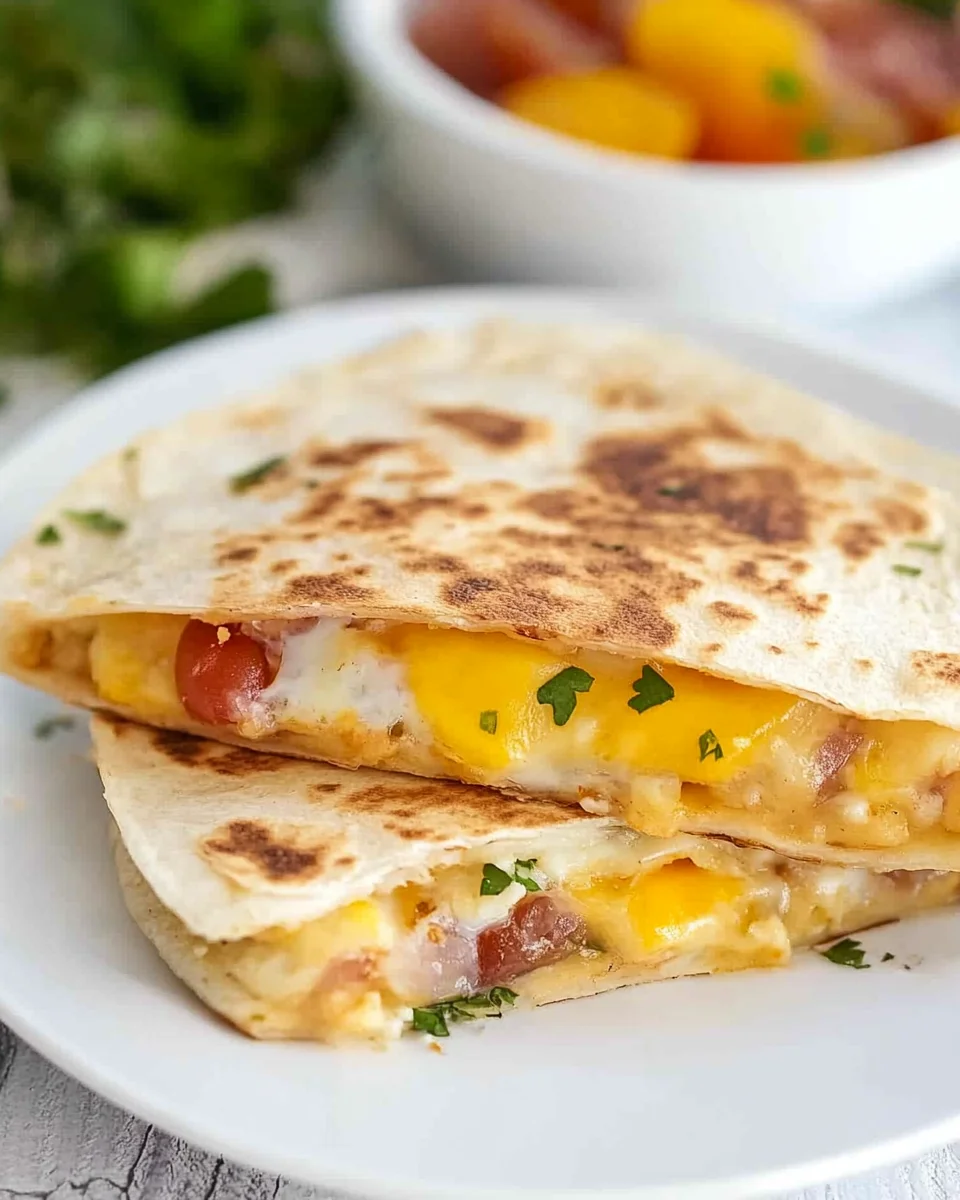
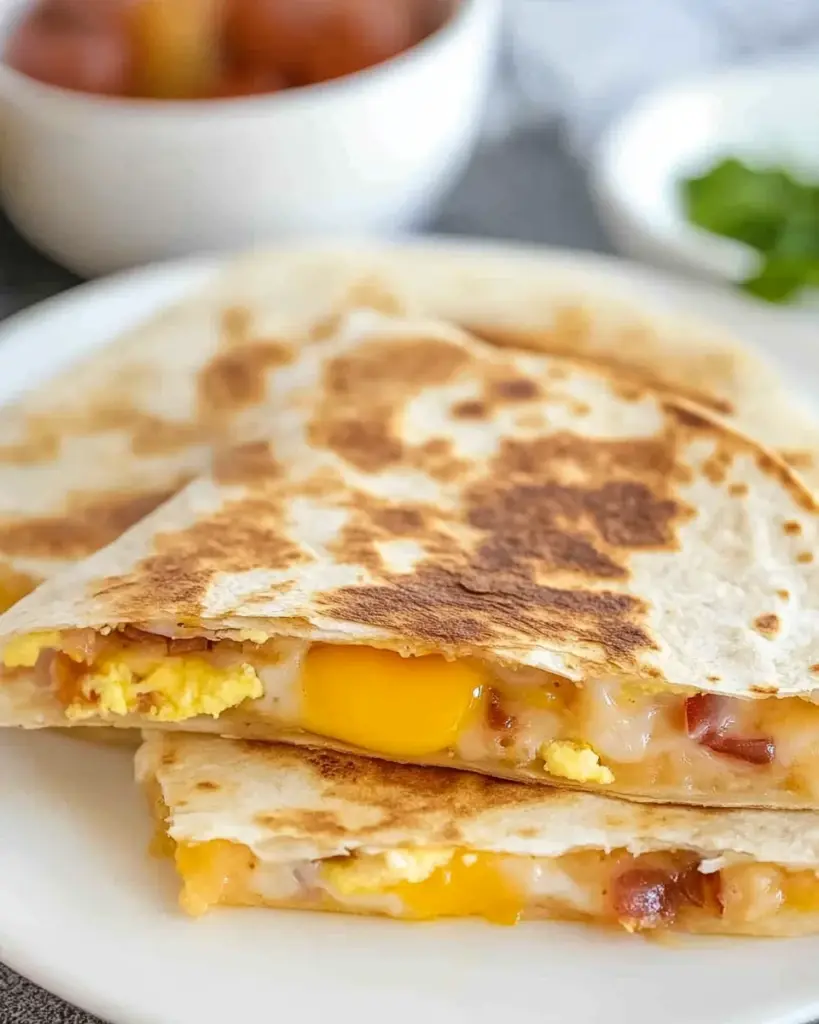
Introduction to Cheesy Fried Egg Quesadilla
There’s something magical about a Cheesy Fried Egg Quesadilla that brings back memories of lazy Sunday mornings. The aroma of melting cheese and sizzling eggs fills the kitchen, making it feel like a warm hug. This recipe is not just a quick solution for a busy day; it’s a delightful way to impress your loved ones with minimal effort. Whether you’re rushing out the door or enjoying a leisurely brunch, this quesadilla is your go-to dish. It’s simple, satisfying, and oh-so-delicious—perfect for any time of day!
Why You’ll Love This Cheesy Fried Egg Quesadilla
This Cheesy Fried Egg Quesadilla is a game-changer for anyone who craves a quick, tasty meal. It’s incredibly easy to whip up, taking just 15 minutes from start to finish. The combination of gooey cheese and fluffy scrambled eggs creates a flavor explosion that’s hard to resist. Plus, it’s versatile enough to customize with your favorite ingredients, making it a perfect fit for any palate or occasion!
Ingredients for Cheesy Fried Egg Quesadilla
Gathering the right ingredients is the first step to creating your Cheesy Fried Egg Quesadilla. Here’s what you’ll need:
- Large eggs: The star of the show! Eggs provide protein and a creamy texture that makes this dish satisfying.
- Shredded cheddar cheese: This melty goodness adds a rich flavor. Feel free to experiment with different cheeses for a unique twist.
- Flour tortillas: These are the perfect vessel for your cheesy filling. Opt for 8-inch tortillas for the best size.
- Butter: A little butter adds richness and helps achieve that golden-brown crust. You can substitute with olive oil if you prefer.
- Salt and pepper: Essential for seasoning your eggs. Adjust to your taste for the perfect flavor.
- Sour cream: A dollop on the side adds a creamy tang that complements the quesadilla beautifully.
- Salsa: For a zesty kick, serve with your favorite salsa. It’s a great way to add freshness!
For those looking to elevate their quesadilla, consider mixing in diced bell peppers or onions with the scrambled eggs. You can also try different types of cheese, like pepper jack or mozzarella, for a delightful variation. Exact quantities for each ingredient are available at the bottom of the article for easy printing!
How to Make Cheesy Fried Egg Quesadilla
Creating a Cheesy Fried Egg Quesadilla is a breeze! Follow these simple steps, and you’ll have a delicious meal ready in no time. Let’s dive in!
Step 1: Whisk the Eggs
Start by cracking the large eggs into a small bowl. Use a fork or whisk to beat them together. Add a pinch of salt and pepper to taste. Whisk until the mixture is smooth and well combined. This step is crucial for fluffy scrambled eggs!
Step 2: Scramble the Eggs
Next, heat a non-stick skillet over medium heat. Add the butter and let it melt, swirling it around to coat the pan. Once the butter is bubbly, pour in the whisked eggs. Stir gently with a spatula, cooking for about 2-3 minutes until the eggs are fully scrambled and no longer runny. Remove from heat and set aside.
Step 3: Assemble the Quesadilla
Now it’s time to build your quesadilla! Lay one flour tortilla flat in the skillet. Sprinkle half of the shredded cheddar cheese evenly over the tortilla. Spoon the scrambled eggs on top of the cheese, then add the remaining cheese. Finally, place the second tortilla on top, creating a cheesy sandwich.
Step 4: Cook the Quesadilla
Cook the quesadilla for about 3-4 minutes on one side. You want the bottom tortilla to turn golden brown and the cheese to start melting. Carefully flip the quesadilla using a spatula and cook for another 3-4 minutes on the other side. Both sides should be golden and crispy, with gooey cheese inside.
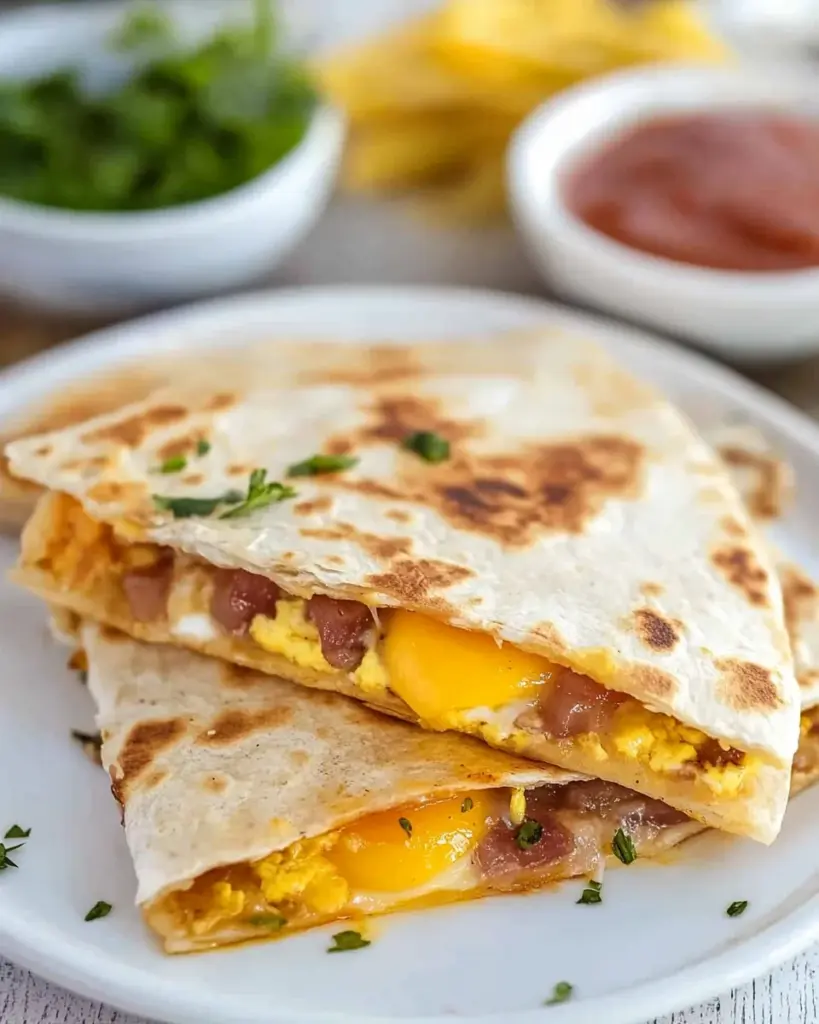
Step 5: Serve and Enjoy
Once your quesadilla is cooked to perfection, remove it from the skillet and let it cool for a minute. Cut it into wedges for easy serving. Pair it with a dollop of sour cream and a side of salsa for that extra zing. Enjoy your delicious Cheesy Fried Egg Quesadilla!
Tips for Success
- Use fresh eggs for the best flavor and texture.
- Don’t rush the cooking process; let the cheese melt thoroughly.
- Experiment with spices like paprika or cumin for added depth.
- Keep the heat medium to avoid burning the tortillas.
- For a crispy finish, press down gently on the quesadilla while cooking.
Equipment Needed
- Non-stick skillet: Essential for cooking without sticking. A cast-iron skillet works too!
- Spatula: Perfect for flipping your quesadilla with ease.
- Mixing bowl: For whisking the eggs. Any bowl will do!
- Fork or whisk: To beat the eggs until fluffy.
Variations
- Veggie Delight: Add diced bell peppers, onions, or spinach to the scrambled eggs for a nutritious boost.
- Spicy Kick: Mix in jalapeños or a sprinkle of cayenne pepper for those who love heat.
- Cheese Lovers: Experiment with different cheeses like pepper jack, mozzarella, or feta for unique flavors.
- Meat Option: Add cooked bacon, sausage, or ham for a heartier quesadilla.
- Gluten-Free: Use corn tortillas instead of flour for a gluten-free version.
Serving Suggestions
- Pair your quesadilla with a fresh garden salad for a light meal.
- Serve with a side of guacamole for a creamy contrast.
- Enjoy with a cold beer or a refreshing iced tea.
- Garnish with fresh cilantro for a pop of color.
FAQs about Cheesy Fried Egg Quesadilla
Can I make Cheesy Fried Egg Quesadilla ahead of time?
Absolutely! You can prepare the scrambled eggs and assemble the quesadilla in advance. Just store it in the fridge and cook it when you’re ready to eat. It’s a great way to save time on busy mornings!
What can I use instead of cheddar cheese?
If cheddar isn’t your favorite, feel free to swap it out for other cheeses like pepper jack for a spicy kick or mozzarella for a milder flavor. The beauty of a quesadilla is its versatility!
How do I keep my quesadilla from getting soggy?
To prevent sogginess, make sure to cook the eggs just until they’re set, not overcooked. Also, avoid adding too many wet ingredients. A light hand with salsa or sour cream on the side will keep it crispy!
Can I freeze Cheesy Fried Egg Quesadilla?
Yes, you can freeze them! Just wrap the cooked quesadilla tightly in plastic wrap and store it in an airtight container. When you’re ready to enjoy, reheat it in a skillet or microwave.
What’s a good side dish for Cheesy Fried Egg Quesadilla?
A fresh garden salad or some crispy tortilla chips with guacamole make excellent sides. They add a nice crunch and balance out the cheesy goodness of the quesadilla!
Final Thoughts
Cooking a Cheesy Fried Egg Quesadilla is more than just making a meal; it’s about creating a moment. The joy of biting into that crispy tortilla, with warm, gooey cheese and fluffy eggs, is simply unbeatable. It’s a dish that brings comfort and satisfaction, whether you’re enjoying it solo or sharing it with family. Plus, the ease of preparation means you can whip it up anytime the craving strikes. So, grab your ingredients and let this quesadilla become a staple in your kitchen. Trust me, once you try it, you’ll be hooked!
Cheesy Fried Egg Quesadilla: Discover the Ultimate Recipe!
Ingredients
Method
- In a small bowl, crack the eggs and whisk them together with a pinch of salt and pepper until well combined.
- Heat a non-stick skillet over medium heat and add the butter. Once melted, pour in the eggs and scramble until fully cooked, about 2-3 minutes. Remove from heat.
- Lay one tortilla flat in the skillet. Sprinkle half of the shredded cheese evenly over the tortilla.
- Spoon the scrambled eggs over the cheese, then top with the remaining cheese. Place the second tortilla on top.
- Cook for about 3-4 minutes, or until the bottom tortilla is golden brown and the cheese is starting to melt. Carefully flip the quesadilla using a spatula and cook for an additional 3-4 minutes on the other side.
- Once both sides are golden and the cheese is melted, remove the quesadilla from the skillet and let it cool for a minute. Cut into wedges and serve with sour cream and salsa.
Nutrition
Notes
- For added flavor, mix in diced bell peppers or onions with the scrambled eggs.
- Try using different types of cheese, such as pepper jack or mozzarella, for a unique twist.