Get my cookbooks

Hot Honey Pizza Recipe: A Sweet and Spicy Delight

Introduction to Hot Honey Pizza Recipe

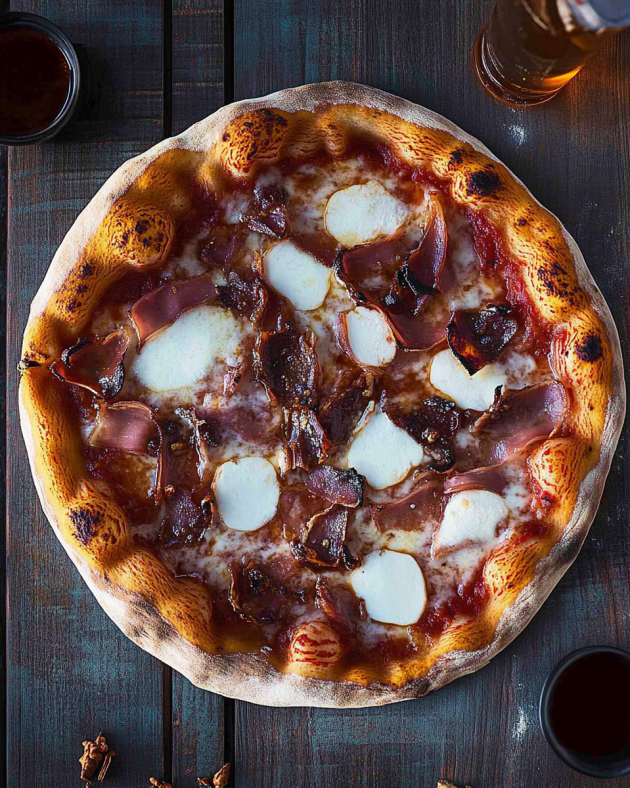
Hot Honey Pizza Recipe is a delightful twist on the classic pizza that combines savory and sweet flavors. Imagine biting into a crispy crust topped with gooey mozzarella, spicy pepperoni, and a drizzle of hot honey that adds a unique kick. This pizza is not just a meal; it’s an experience!

Hot honey has gained popularity in recent years, and for good reason. It brings a sweet heat that perfectly complements the rich flavors of cheese and sauce. Whether you’re hosting a gathering or enjoying a cozy night in, this pizza is sure to impress your family and friends.

Hot Honey Pizza Recipe. You’ll learn how to create this mouthwatering dish from scratch, ensuring that every bite is packed with flavor. So, roll up your sleeves and get ready to make a pizza that will have everyone asking for seconds!

Ingredients for Hot Honey Pizza Recipe

Hot Honey Pizza Recipe, you’ll need a few key ingredients. Each component plays a vital role in delivering that delicious flavor combination. Here’s what you’ll need:

  • 1 pound pizza dough: You can use store-bought dough for convenience or make your own for a personal touch.
  • 1 cup marinara sauce: This will serve as the base for your pizza, adding moisture and flavor.
  • 2 cups shredded mozzarella cheese: The star of the show! Mozzarella melts beautifully and gives that classic pizza taste.
  • 1/2 cup sliced pepperoni: This adds a savory, spicy kick that pairs perfectly with the hot honey.
  • 1/4 cup hot honey: The secret ingredient! It brings a sweet heat that elevates the entire dish.
  • 1 tablespoon olive oil: Use this to brush the dough for a golden, crispy crust.
  • 1 teaspoon dried oregano: This herb adds a lovely aroma and flavor to your pizza.
  • 1/2 teaspoon red pepper flakes (optional): If you like it spicy, sprinkle some on for an extra kick!
  • Fresh basil leaves for garnish (optional): These add a pop of color and freshness to your finished pizza.

Hot Honey Pizza Recipe. Each item contributes to the overall taste, making it a delightful dish for any occasion!

Step-by-Step Preparation of Hot Honey Pizza Recipe

Step 1: Preparing the Dough for Hot Honey Pizza Recipe

First things first, let’s get that dough ready! If you’re using store-bought pizza dough, simply take it out of the package and let it sit at room temperature for about 30 minutes. This helps it become easier to roll out. If you’re making your own dough, follow your favorite recipe and let it rise until it doubles in size.

Once your dough is ready, sprinkle some flour on a clean surface. This prevents sticking. Now, take your dough and gently press it down with your hands. Then, using a rolling pin, roll it out into a circle about 12 inches in diameter. You can make it thicker or thinner based on your preference. Just remember, a thinner crust will be crispier!

Step 2: Making the Sauce for Hot Honey Pizza Recipe

Next up is the sauce! If you’re using store-bought marinara sauce, you can skip this step. However, if you want to make your own, it’s super easy! In a small saucepan, heat a tablespoon of olive oil over medium heat. Add minced garlic and sauté for about a minute until fragrant. Then, pour in a can of crushed tomatoes, and season with salt, pepper, and a pinch of sugar. Let it simmer for about 10 minutes to blend the flavors.

Once your sauce is ready, let it cool slightly before spreading it on the pizza dough. This will help prevent the dough from getting soggy.

Step 3: Assembling the Hot Honey Pizza Recipe

Now comes the fun part—assembling your pizza! Start by transferring your rolled-out dough onto a pizza peel or a baking sheet lined with parchment paper. Brush the surface of the dough with olive oil to give it a nice golden color when baked.

Next, spread the marinara sauce evenly over the dough, leaving a small border around the edges. This will be your crust! After that, sprinkle the shredded mozzarella cheese generously over the sauce. Don’t be shy; cheese is what makes pizza delicious!

Now, add the sliced pepperoni on top of the cheese. If you’re feeling adventurous, you can also add any other toppings you like. Finally, sprinkle dried oregano and red pepper flakes for an extra flavor boost.

Step 4: Baking the Hot Honey Pizza Recipe

It’s time to bake your masterpiece! Carefully transfer the assembled pizza to the preheated oven. If you’re using a pizza stone, slide it right onto the stone. Bake for about 12-15 minutes, or until the crust is golden brown and the cheese is bubbly and slightly browned.

Hot Honey Pizza Recipe is ready to be enjoyed!

Variation of Hot Honey Pizza Recipe

Alternative Toppings for Hot Honey Pizza Recipe

Hot Honey Pizza Recipe is its versatility. You can easily customize it to suit your taste buds! Here are some alternative toppings to consider:

  • Vegetables: Add bell peppers, red onions, or mushrooms for a fresh crunch. Spinach or arugula can also add a nice touch.
  • Meats: Try adding cooked sausage, bacon, or even grilled chicken for a heartier pizza.
  • Cheese Varieties: Experiment with different cheeses like feta, goat cheese, or even blue cheese for a unique flavor profile.
  • Fruits: For a sweet twist, consider adding sliced figs or pears. They pair wonderfully with the hot honey!
  • Herbs: Fresh herbs like thyme or rosemary can elevate the flavor even more. Just sprinkle them on before baking.

Hot Honey Pizza Recipe. The possibilities are endless, and you can make each pizza a new adventure!

Gluten-Free Options for Hot Honey Pizza Recipe

Hot Honey Pizza Recipe. Here are some tips:

  • Gluten-Free Pizza Dough: Many stores offer gluten-free pizza dough. You can also make your own using gluten-free flour blends.
  • Cauliflower Crust: For a low-carb option, try using a cauliflower crust. It’s a tasty alternative that holds up well with toppings.
  • Chickpea Flour Crust: Another great option is a chickpea flour crust. It’s packed with protein and has a unique flavor.

Hot Honey Pizza Recipe without missing out!

Cooking Note for Hot Honey Pizza Recipe

Hot Honey Pizza Recipe, a few cooking notes can help you achieve the best results. These tips will ensure that your pizza turns out delicious every time!

First, always preheat your oven. This step is crucial for achieving a crispy crust. If you’re using a pizza stone, make sure it’s in the oven while it heats up. A hot stone helps create that perfect, crunchy base.

Next, consider the thickness of your dough. If you prefer a thicker crust, roll the dough out to about 1/2 inch thick. For a thinner, crispier crust, aim for about 1/4 inch. Just remember, the baking time may vary slightly based on the thickness.

When spreading the marinara sauce, be careful not to overload it. Too much sauce can make the pizza soggy. A thin, even layer is all you need to keep the crust nice and crispy.

Don’t forget to keep an eye on the cheese while it bakes. You want it to be bubbly and slightly golden, but not burnt. If you notice it browning too quickly, you can lower the oven temperature slightly.

Finally, let your pizza cool for a few minutes after baking. This allows the cheese to set a bit, making it easier to slice. Plus, it helps you avoid burning your mouth on that delicious hot honey drizzle!

Hot Honey Pizza Recipe. Enjoy the process, and don’t hesitate to experiment with flavors and toppings!

Serving Suggestions for Hot Honey Pizza Recipe

Hot Honey Pizza Recipe is baked to perfection, it’s time to think about how to serve it! The way you present your pizza can enhance the dining experience. Here are some delightful serving suggestions to consider:

  • Pair with a Fresh Salad: A light, crisp salad can balance the richness of the pizza. Consider a simple arugula salad with lemon vinaigrette or a classic Caesar salad.
  • Serve with Dipping Sauces: Offer a variety of dipping sauces on the side. Garlic butter, ranch dressing, or even a spicy marinara can add an extra layer of flavor.
  • Accompany with Beverages: Pair your pizza with refreshing drinks. A chilled soda, iced tea, or even a light beer can complement the flavors beautifully.
  • Garnish with Extra Herbs: Before serving, sprinkle additional fresh herbs like basil or parsley on top. This adds a pop of color and freshness that enhances the presentation.
  • Slice and Share: Cut the pizza into generous slices and serve on a large wooden board. This creates a rustic feel and encourages sharing among friends and family.

Hot Honey Pizza Recipe look appealing but also enhance the overall dining experience. Enjoy every bite and the smiles it brings to your table!

Tips for Perfecting Your Hot Honey Pizza Recipe

Hot Honey Pizza Recipe is all about attention to detail. With a few simple tips, you can elevate your pizza-making skills and impress everyone at the table. Here are some essential tips to help you achieve pizza perfection:

  • Use Quality Ingredients: The flavor of your pizza starts with the ingredients. Opt for high-quality mozzarella cheese and fresh marinara sauce. If possible, use fresh herbs and spices for the best taste.
  • Don’t Rush the Dough: Allow your pizza dough to rest and rise properly. This step is crucial for developing flavor and texture. If you’re using store-bought dough, let it sit at room temperature for at least 30 minutes before rolling it out.
  • Preheat Your Oven: Always preheat your oven to the right temperature. A hot oven is key to achieving a crispy crust. If you’re using a pizza stone, let it heat up for at least 30 minutes before baking.
  • Experiment with Cheese: While mozzarella is a classic choice, don’t hesitate to mix in other cheeses. Blending mozzarella with provolone or gouda can add depth to the flavor.
  • Balance the Sweet and Spicy: The hot honey is the star of this recipe. Drizzle it on after baking to maintain its flavor. Adjust the amount based on your preference for sweetness and heat.
  • Let It Cool: After baking, let your pizza cool for a few minutes before slicing. This helps the cheese set and makes it easier to cut without making a mess.
  • Get Creative with Toppings: Don’t be afraid to try new toppings! From spicy jalapeños to sweet pineapple, the Hot Honey Pizza Recipe can handle a variety of flavors. Just remember to balance the toppings to avoid overwhelming the pizza.
  • Practice Makes Perfect: Don’t be discouraged if your first pizza doesn’t turn out exactly as you hoped. Pizza-making is an art, and with practice, you’ll find your rhythm and preferences.

Hot Honey Pizza Recipe. Each pizza you make will be a delicious adventure, and soon enough, you’ll be known as the pizza expert among your friends and family!

Breakdown of Time for Hot Honey Pizza Recipe

Prep Time for Hot Honey Pizza Recipe

Hot Honey Pizza Recipe is a breeze! The prep time usually takes about 20-30 minutes. This includes gathering your ingredients, rolling out the dough, and preparing the sauce if you’re making it from scratch. If you’re using store-bought dough and sauce, you can save even more time!

Cooking Time for Hot Honey Pizza Recipe

Hot Honey Pizza Recipe is approximately 12-15 minutes. Keep an eye on it as it bakes. You want the crust to be golden brown and the cheese to be bubbly and slightly browned. If you’re using a pizza stone, it may cook a bit faster, so check it a minute or two earlier.

Total Time for Hot Honey Pizza Recipe

In total, you’re looking at about 35-45 minutes from start to finish. This includes both prep and cooking time. It’s a quick and satisfying meal that’s perfect for any night of the week. Plus, the delicious aroma of baking pizza will have everyone eagerly waiting for dinner!

Nutritional Information for Hot Honey Pizza Recipe

Calories in Hot Honey Pizza Recipe

Hot Honey Pizza Recipe, it’s good to know what you’re consuming. Each serving contains approximately 320 calories. This makes it a satisfying option for a meal without going overboard on calories. If you’re watching your calorie intake, consider pairing it with a light salad to balance your meal.

Protein Content in Hot Honey Pizza Recipe

Hot Honey Pizza Recipe delivers! Each serving provides about 14 grams of protein. This comes mainly from the mozzarella cheese and pepperoni. Protein helps keep you full and satisfied, making this pizza a great choice for a hearty meal.

Sodium Levels in Hot Honey Pizza Recipe

Hot Honey Pizza Recipe contains around 700 milligrams of sodium. While this is a reasonable amount for a pizza, it’s always wise to be mindful of your overall sodium intake throughout the day. If you’re looking to reduce sodium, consider using low-sodium marinara sauce or cheese alternatives.

Hot Honey Pizza Recipe can help you make informed choices. Enjoy your pizza while keeping these details in mind, and feel free to adjust the ingredients to suit your dietary needs!

FAQs about Hot Honey Pizza Recipe

What is hot honey and how is it used in the Hot Honey Pizza Recipe?

Hot Honey Pizza Recipe, it’s drizzled over the pizza after baking. This not only enhances the taste but also gives a beautiful glossy finish. The combination of sweet honey and spicy heat creates a delightful contrast that elevates the entire pizza experience.

Can I make the Hot Honey Pizza Recipe ahead of time?

Hot Honey Pizza Recipe ahead of time! You can make the dough and sauce in advance. Just store them in the refrigerator. When you’re ready to bake, let the dough come to room temperature before rolling it out. This makes it easier to work with. You can also slice your toppings ahead of time. However, it’s best to bake the pizza fresh for the best taste and texture.

What are some popular toppings for Hot Honey Pizza Recipe?

Hot Honey Pizza Recipe lies in its versatility! Popular toppings include:

  • Pepperoni: A classic choice that pairs perfectly with hot honey.
  • Vegetables: Bell peppers, onions, and mushrooms add freshness.
  • Meats: Sausage or bacon can make it heartier.
  • Cheese: Mixing mozzarella with provolone or gouda can enhance flavor.
  • Fruits: Sliced figs or pears can add a sweet twist.

Hot Honey Pizza Recipe can handle a variety of flavors.

How spicy is the Hot Honey Pizza Recipe?

Hot Honey Pizza Recipe can vary based on the type of hot honey you use. Some hot honey brands are mild, while others pack a punch. If you prefer a milder flavor, you can drizzle less hot honey on your pizza. Additionally, if you add red pepper flakes or spicy toppings, it will increase the heat level. Adjust the spice to your liking, and enjoy the balance of sweet and spicy!

Conclusion on Hot Honey Pizza Recipe

Hot Honey Pizza Recipe is a delightful fusion of flavors that brings excitement to your dining table. With its crispy crust, gooey cheese, and the perfect drizzle of hot honey, this pizza is sure to become a favorite in your household. Whether you’re enjoying it on a casual weeknight or serving it at a gathering, it’s a dish that invites smiles and satisfied appetites.

As you’ve learned, making this pizza is not only simple but also allows for endless customization. From choosing your favorite toppings to experimenting with different cheeses, the possibilities are truly limitless. Plus, with gluten-free options available, everyone can join in on the fun!

Hot Honey Pizza Recipe lies in the process, so don’t hesitate to get creative and make it your own.

So, gather your ingredients, roll out that dough, and get ready to impress your family and friends with a pizza that’s bursting with flavor. Enjoy every bite, and don’t forget to share your delicious creations with others. Happy pizza-making!

Big Mac Bowl recipe: A delicious twist on burgers!

Introduction to the Big Mac Bowl Recipe

What is a Big Mac Bowl?

The Big Mac Bowl is a delicious twist on the classic Big Mac burger. Instead of a traditional sandwich, this recipe presents all the beloved flavors in a hearty bowl. Imagine layers of seasoned ground beef, fresh lettuce, juicy tomatoes, and creamy Thousand Island dressing, all topped with shredded cheese and crunchy pickles. It’s a fun and satisfying way to enjoy the iconic taste of a Big Mac without the bun. Perfect for lunch or dinner, this bowl is not only tasty but also customizable to fit your dietary needs.

Why You Should Try the Big Mac Bowl Recipe

There are many reasons to give the Big Mac Bowl recipe a try! First, it’s quick and easy to prepare, making it ideal for busy weeknights. In just about 30 minutes, you can have a flavorful meal ready to serve. Second, this recipe is versatile. You can easily swap ingredients to suit your preferences or dietary restrictions. Whether you’re looking for a low-carb option or a vegetarian version, the Big Mac Bowl can adapt to your needs.

Moreover, the Big Mac Bowl is a crowd-pleaser. It’s perfect for family dinners or gatherings with friends. Everyone can build their own bowl, choosing their favorite toppings and ingredients. Plus, it’s a fun way to enjoy a classic fast-food flavor in a healthier format. So, gather your ingredients and get ready to enjoy a delightful meal that’s sure to impress!

Ingredients for the Big Mac Bowl Recipe

To create a delicious Big Mac Bowl, you’ll need a few simple ingredients. Each component plays a vital role in bringing the classic Big Mac flavors to life. Here’s what you’ll need:

  • 1 pound ground beef
  • 1 teaspoon onion powder
  • 1 teaspoon garlic powder
  • 1 teaspoon salt
  • 1 teaspoon black pepper
  • 1 tablespoon Worcestershire sauce
  • 4 cups chopped romaine lettuce
  • 1 cup diced tomatoes
  • 1 cup shredded cheddar cheese
  • 1/2 cup pickles, sliced
  • 1/2 cup Thousand Island dressing
  • Sesame seeds for garnish (optional)

These ingredients combine to create a flavorful and satisfying meal. The ground beef provides protein, while the fresh vegetables add crunch and nutrition. The Thousand Island dressing ties everything together with its creamy, tangy taste. Feel free to adjust the quantities based on your preferences or the number of servings you need. Now that you have your ingredients ready, let’s move on to the preparation steps!

Step-by-Step Preparation of the Big Mac Bowl Recipe

Step 1: Preparing the Base

To start your Big Mac Bowl, you need to prepare the base. Begin by washing and chopping the romaine lettuce. This leafy green will serve as the foundation of your bowl. Aim for about four cups of chopped lettuce. It should be crisp and fresh, providing a nice crunch. Once chopped, place the lettuce in a large bowl. This will be the first layer of your delicious creation.

Step 2: Cooking the Protein

Next, it’s time to cook the protein. In a large skillet, heat over medium heat. Add one pound of ground beef to the skillet. As it cooks, break the meat apart with a spatula. This should take about 5-7 minutes until the beef is browned. After that, drain any excess fat from the skillet. Then, stir in the onion powder, garlic powder, salt, black pepper, and Worcestershire sauce. Cook for an additional 2-3 minutes. This step ensures that the beef is flavorful and well-seasoned, making it the star of your Big Mac Bowl.

Step 3: Assembling the Big Mac Bowl

Now comes the fun part—assembling your Big Mac Bowl! Start by layering the cooked ground beef mixture over the chopped romaine lettuce. Spread it evenly to cover the lettuce. This creates a hearty base that mimics the classic Big Mac. Next, add one cup of diced tomatoes on top of the beef. The juicy tomatoes will add freshness and color to your bowl.

Step 4: Adding the Toppings

Finally, it’s time to add the toppings! Sprinkle one cup of shredded cheddar cheese over the tomatoes. The cheese will melt slightly from the warmth of the beef, creating a deliciously gooey texture. Then, add half a cup of sliced pickles for that signature Big Mac crunch. Drizzle half a cup of Thousand Island dressing over the entire bowl. This creamy dressing ties all the flavors together beautifully. If you like, you can also sprinkle sesame seeds on top for an extra touch. Your Big Mac Bowl is now ready to serve!

Variations of the Big Mac Bowl Recipe

Vegetarian Big Mac Bowl Recipe

If you’re looking for a meat-free option, the Vegetarian Big Mac Bowl is a fantastic choice! Instead of ground beef, you can use plant-based protein like lentils, black beans, or even a store-bought meat substitute. Start by cooking your chosen protein in the same way as the beef, adding the same seasonings for that classic Big Mac flavor. Layer the cooked protein over the romaine lettuce, just like in the original recipe. Then, add your diced tomatoes, shredded cheese, and pickles. Drizzle with Thousand Island dressing, and you have a delicious vegetarian meal that everyone will love!

Low-Carb Big Mac Bowl Recipe

For those following a low-carb diet, the Low-Carb Big Mac Bowl is perfect! Simply replace the romaine lettuce with a mix of leafy greens like spinach or kale. You can also skip the cheese or use a low-fat version to reduce calories. The ground beef remains the same, but you can add extra veggies like bell peppers or cucumbers for added crunch. When assembling, layer the cooked beef over the greens, then top with your diced tomatoes and pickles. Finish with a generous drizzle of Thousand Island dressing. This version keeps the flavors you love while being mindful of your carb intake!

Cooking Note for the Big Mac Bowl Recipe

When preparing the Big Mac Bowl, there are a few cooking notes to keep in mind to ensure your dish turns out perfectly. First, always choose high-quality ground beef. Look for lean options to reduce excess fat while still enjoying the rich flavor. If you prefer a healthier alternative, ground turkey or chicken can work just as well.

Next, be mindful of the cooking temperature. Cooking the beef over medium heat allows it to brown nicely without burning. Stirring occasionally helps to break up the meat evenly, ensuring that every bite is flavorful. If you notice any excess grease, don’t hesitate to drain it off. This step keeps your bowl from becoming too greasy and helps maintain a balanced flavor.

Additionally, feel free to customize the seasonings to suit your taste. If you love a bit of heat, consider adding a pinch of cayenne pepper or some diced jalapeños to the beef mixture. This can elevate the flavor profile and add a delightful kick to your Big Mac Bowl.

Lastly, remember that presentation matters! Layering the ingredients thoughtfully not only enhances the visual appeal but also ensures that each bite is a perfect mix of flavors. Enjoy the process, and don’t be afraid to get creative with your toppings. The Big Mac Bowl is all about making it your own!

Serving Suggestions for the Big Mac Bowl Recipe

When it comes to serving your Big Mac Bowl, there are plenty of fun and creative ways to make the meal even more enjoyable. Here are some serving suggestions to elevate your dining experience:

  • Individual Bowls: Serve each portion in individual bowls. This allows everyone to customize their Big Mac Bowl with their favorite toppings. It’s a great way to make mealtime interactive and fun!
  • Side Dishes: Pair your Big Mac Bowl with some delicious side dishes. Consider serving crispy sweet potato fries or a light cucumber salad. These sides complement the flavors of the bowl while adding variety to the meal.
  • Garnishes: Enhance the presentation by adding fresh herbs like chopped parsley or cilantro on top. A sprinkle of sesame seeds not only adds a nice crunch but also gives a nod to the classic Big Mac.
  • Extra Dressing: Offer extra Thousand Island dressing on the side for those who love a little more creaminess. You can also provide other dressings like ranch or a spicy sriracha mayo for a twist.
  • Meal Prep Containers: If you’re making this for meal prep, use clear containers to showcase the colorful layers. This makes it easy to grab and go while keeping everything fresh and appealing.

These serving suggestions can help you create a delightful dining experience with your Big Mac Bowl. Whether it’s a casual family dinner or a gathering with friends, these ideas will surely impress your guests and make the meal memorable!

Tips for Making the Perfect Big Mac Bowl Recipe

Creating the perfect Big Mac Bowl is all about attention to detail and personal touches. Here are some helpful tips to ensure your bowl turns out delicious every time:

  • Choose Quality Ingredients: Start with fresh, high-quality ingredients. Opt for lean ground beef or your preferred protein. Fresh vegetables will enhance the flavor and texture of your bowl.
  • Season Generously: Don’t be shy with the seasonings! The right amount of onion powder, garlic powder, and Worcestershire sauce can elevate the taste of your beef. Feel free to adjust the spices to match your flavor preferences.
  • Layer Wisely: When assembling your bowl, layer the ingredients thoughtfully. Start with the lettuce, then add the beef, followed by tomatoes, cheese, and pickles. This ensures that every bite is a delightful mix of flavors.
  • Customize Your Toppings: The beauty of the Big Mac Bowl is its versatility. Experiment with different toppings like avocado, crispy bacon, or even jalapeños for a spicy kick. Make it your own!
  • Serve Fresh: For the best experience, serve your Big Mac Bowl immediately after assembling. This keeps the lettuce crisp and the flavors vibrant. If you’re prepping ahead, store the components separately and assemble just before serving.
  • Mind the Dressing: Thousand Island dressing is a classic choice, but don’t hesitate to try other dressings. A tangy ranch or zesty vinaigrette can add a new twist to your bowl.
  • Garnish for Appeal: A sprinkle of sesame seeds or fresh herbs can make your Big Mac Bowl visually appealing. Presentation matters, and a beautiful bowl is always more inviting!
  • Involve Everyone: If you’re serving a group, set up a “build-your-own” station. Lay out all the ingredients and let everyone customize their bowl. It’s a fun way to enjoy the meal together!

By following these tips, you’ll be well on your way to making a Big Mac Bowl that’s not only delicious but also tailored to your taste. Enjoy the process and have fun experimenting with flavors!

Breakdown of Time for the Big Mac Bowl Recipe

Prep Time

Preparing the Big Mac Bowl is quick and straightforward. The prep time typically takes about 10-15 minutes. During this time, you’ll wash and chop the romaine lettuce, dice the tomatoes, and gather all your ingredients. Having everything ready before you start cooking makes the process smoother and more enjoyable. So, take a moment to set up your workspace and get organized!

Cooking Time

The cooking time for the Big Mac Bowl is approximately 15-20 minutes. This includes browning the ground beef and mixing in the seasonings. Cooking the beef until it’s perfectly browned ensures that it’s flavorful and juicy. Remember to drain any excess fat to keep your bowl light and healthy. With just a little patience, you’ll have a delicious protein ready to layer into your bowl!

Total Time

In total, you can expect the Big Mac Bowl recipe to take around 30-35 minutes from start to finish. This makes it an excellent option for a quick weeknight dinner or a satisfying lunch. With minimal time spent in the kitchen, you can enjoy a hearty meal that captures all the classic flavors of a Big Mac. So, gather your ingredients and get ready to whip up this delightful dish!

Nutritional Information for the Big Mac Bowl Recipe

Calories

When it comes to enjoying a delicious meal, knowing the calorie content is essential. Each serving of the Big Mac Bowl contains approximately 450 calories. This makes it a satisfying option without going overboard on calories. The combination of protein, healthy fats, and fresh vegetables ensures that you’re getting a balanced meal that keeps you full and energized.

Protein

Protein is a vital nutrient for our bodies, and the Big Mac Bowl delivers! Each serving provides around 30 grams of protein. This comes primarily from the ground beef, which is an excellent source of high-quality protein. Protein helps build and repair tissues, making it essential for overall health. If you choose to substitute with ground turkey or a plant-based protein, you can still enjoy a hearty dose of protein in your bowl.

Sodium

Sodium content is another important factor to consider. Each serving of the Big Mac Bowl contains about 800 milligrams of sodium. While this is a reasonable amount for a flavorful meal, it’s always good to be mindful of your sodium intake, especially if you’re watching your salt consumption. You can reduce sodium by using low-sodium Worcestershire sauce or opting for fresh ingredients without added salt. This way, you can enjoy your Big Mac Bowl while keeping your health goals in check!

FAQs about the Big Mac Bowl Recipe

Can I make the Big Mac Bowl recipe ahead of time?

Yes, you can prepare parts of the Big Mac Bowl ahead of time! You can cook the ground beef mixture and store it in the refrigerator for up to three days. Just reheat it when you’re ready to assemble your bowl. You can also chop the lettuce and dice the tomatoes in advance. However, it’s best to keep the dressing and toppings separate until serving. This way, your lettuce stays crisp, and the flavors remain fresh!

What can I substitute for the ground beef in the Big Mac Bowl recipe?

If you’re looking for alternatives to ground beef, there are plenty of options! Ground turkey or chicken are great substitutes that still provide protein but with less fat. For a vegetarian option, consider using lentils, black beans, or a plant-based meat substitute. Each of these options can be seasoned similarly to maintain that classic Big Mac flavor. Feel free to experiment and find what you enjoy the most!

Is the Big Mac Bowl recipe suitable for meal prep?

Absolutely! The Big Mac Bowl is perfect for meal prep. You can prepare the beef mixture and store it in individual containers along with the chopped lettuce and toppings. Just keep the dressing separate until you’re ready to eat. This makes it easy to grab a healthy meal on the go. Plus, it allows you to enjoy a delicious Big Mac Bowl throughout the week without the hassle of cooking every day!

How can I make the Big Mac Bowl recipe healthier?

There are several ways to make the Big Mac Bowl healthier! First, consider using lean ground beef or swapping it for ground turkey or chicken. You can also increase the vegetable content by adding more toppings like cucumbers, bell peppers, or avocado. For a lighter dressing, try using a yogurt-based dressing instead of Thousand Island. Lastly, be mindful of portion sizes and enjoy your bowl with a side of fresh veggies for a balanced meal!

Conclusion on the Big Mac Bowl Recipe

The Big Mac Bowl recipe is a delightful and innovative way to enjoy the classic flavors of a Big Mac without the bun. This dish brings together seasoned ground beef, fresh vegetables, and creamy dressing, all in a convenient bowl. It’s not only quick to prepare but also customizable, making it suitable for various dietary preferences.

Whether you’re looking for a hearty meal for your family or a fun dish for a gathering, the Big Mac Bowl fits the bill perfectly. With its vibrant colors and delicious taste, it’s sure to impress everyone at the table. Plus, the nutritional benefits, including a good amount of protein and fresh veggies, make it a smart choice for those mindful of their health.

As you explore this recipe, don’t hesitate to get creative with your toppings and variations. From vegetarian options to low-carb adaptations, the Big Mac Bowl can be tailored to suit your needs. So, gather your ingredients, follow the steps, and enjoy a satisfying meal that captures the essence of a beloved fast-food favorite. Happy cooking!

Crispy Homemade Chicken Nuggets Recipe for Everyone!

Introduction to Crispy Homemade Chicken Nuggets Recipe

Crispy Homemade Chicken Nuggets Recipe, you can enjoy this classic dish fresh from your kitchen. Not only are they delicious, but making your own nuggets allows you to control the ingredients, ensuring a healthier option for your family.

Why Make Your Own Chicken Nuggets?

There are several reasons to whip up a batch of homemade chicken nuggets. First, you can choose high-quality chicken, free from preservatives and additives. This means you know exactly what you’re feeding your loved ones. Plus, homemade nuggets are often fresher and tastier than store-bought versions.

Another great reason is customization. You can experiment with different spices and flavors to create a nugget that suits your taste. Want a little kick? Add some cayenne pepper! Prefer a cheesy flavor? Mix in some grated parmesan with your breadcrumbs. The possibilities are endless!

Finally, making chicken nuggets at home can be a fun activity. Involve your kids in the cooking process. They’ll love dipping the chicken and watching it transform into crispy bites. It’s a great way to bond while teaching them valuable cooking skills.

So, roll up your sleeves and get ready to create your own crispy, golden nuggets that will surely impress everyone at the dinner table!

Ingredients for Crispy Homemade Chicken Nuggets Recipe

Crispy Homemade Chicken Nuggets Recipe, you’ll need a few simple ingredients. Each component plays a vital role in achieving that perfect crunch and flavor. Here’s what you’ll need:

  • 1 pound boneless, skinless chicken breasts: Cut into bite-sized pieces for easy cooking and eating.
  • 1 cup all-purpose flour: This will help create a nice coating on the chicken.
  • 2 large eggs: Beaten eggs act as a binding agent for the breadcrumbs.
  • 1 cup breadcrumbs: Panko breadcrumbs are preferred for extra crunch, but regular breadcrumbs work too.
  • 1 teaspoon garlic powder: Adds a savory flavor that enhances the overall taste.
  • 1 teaspoon onion powder: Complements the garlic and adds depth to the flavor.
  • 1 teaspoon paprika: Gives a subtle smokiness and a lovely color to the nuggets.
  • 1 teaspoon salt: Essential for seasoning the chicken and enhancing flavors.
  • 1/2 teaspoon black pepper: Adds a hint of spice to the mix.
  • Vegetable oil: For frying the nuggets until they are golden brown and crispy.

These ingredients are easy to find and often already in your pantry. With this list in hand, you’re ready to start your cooking adventure. Remember, the quality of your ingredients can make a big difference in the final result. So, choose fresh chicken and high-quality breadcrumbs for the best outcome!

Step-by-Step Preparation of Crispy Homemade Chicken Nuggets Recipe

Crispy Homemade Chicken Nuggets Recipe. Follow these simple steps to create delicious nuggets that everyone will love!

Step 1: Preparing the Chicken

Start by washing your hands and ensuring your workspace is clean. Take the pound of boneless, skinless chicken breasts and cut them into bite-sized pieces. Aim for uniform sizes so they cook evenly. This step is crucial for achieving that perfect crispy texture. Once cut, place the chicken pieces in a bowl and set them aside while you prepare the breading station.

Step 2: Creating the Breading Station

Next, set up your breading station. You’ll need three shallow bowls. In the first bowl, mix the all-purpose flour with garlic powder, onion powder, paprika, salt, and black pepper. This mixture will give your nuggets a flavorful coating. In the second bowl, beat the two large eggs until they are well combined. Finally, pour the breadcrumbs into the third bowl. If you’re using panko breadcrumbs, you’ll get that extra crunch that everyone loves!

Step 3: Breading the Chicken

Now comes the fun part! Take each piece of chicken and dip it into the flour mixture first. Make sure to coat it evenly, shaking off any excess flour. Then, dip the chicken into the beaten eggs, allowing any extra egg to drip off. Finally, roll the chicken in the breadcrumbs, pressing gently to ensure they stick well. Repeat this process for all the chicken pieces. This three-step breading process is what makes your nuggets crispy and delicious!

Step 4: Frying the Nuggets

Once all the chicken pieces are breaded, it’s time to fry them. Heat about 1 inch of vegetable oil in a large skillet over medium-high heat. You want the oil to reach around 350°F for the best frying results. Carefully add the chicken nuggets in batches, making sure not to overcrowd the pan. Fry them for about 4-5 minutes on each side, or until they turn golden brown and are cooked through. Keep an eye on them to prevent burning!

Step 5: Draining and Cooling

After frying, use a slotted spoon to remove the nuggets from the oil. Place them on a paper towel-lined plate to drain any excess oil. This step is important to keep your nuggets crispy and not greasy. Allow them to cool for a few minutes before serving. This way, they’ll be safe to eat and still maintain that delightful crunch!

Now that you’ve prepared your crispy homemade chicken nuggets, you’re ready to enjoy them with your favorite dipping sauces. Let’s explore some delicious variations and serving suggestions next!

Variation of Crispy Homemade Chicken Nuggets Recipe

Crispy Homemade Chicken Nuggets Recipe, it’s time to get creative! There are many ways to switch things up, making your nuggets even more exciting. Let’s explore some alternative breading options and flavor variations that will take your chicken nuggets to the next level.

Alternative Breading Options

If you want to change the texture or flavor of your nuggets, consider these alternative breading options:

  • Whole Wheat Breadcrumbs: For a healthier twist, use whole wheat breadcrumbs. They add a nutty flavor and extra fiber.
  • Crushed Cornflakes: For a super crunchy coating, crush cornflakes and use them instead of breadcrumbs. They give a delightful crunch!
  • Almond Flour: If you’re looking for a gluten-free option, almond flour works great. It adds a slightly sweet flavor and is packed with nutrients.
  • Parmesan Cheese: Mix grated parmesan cheese with your breadcrumbs for a cheesy, savory flavor. This adds richness and depth to your nuggets.

Feel free to mix and match these options to find your favorite combination. Each alternative brings its unique taste and texture, making your chicken nuggets even more enjoyable!

Flavor Variations to Try

Now, let’s talk about flavor! You can easily customize your chicken nuggets by adding different spices and herbs. Here are some tasty ideas:

  • Spicy Nuggets: Add cayenne pepper or chili powder to the flour mixture for a spicy kick. Adjust the amount based on your heat preference.
  • Herb-Infused Nuggets: Mix dried herbs like oregano, thyme, or basil into the breadcrumb mixture. This adds a fresh, aromatic flavor.
  • Buffalo Chicken Nuggets: Toss the cooked nuggets in buffalo sauce after frying for a tangy, spicy treat. Serve with blue cheese dressing for dipping!
  • Sweet and Sour Nuggets: Add a touch of honey or brown sugar to the flour mixture for a hint of sweetness. Pair with a sweet and sour sauce for dipping.

These flavor variations can make your homemade chicken nuggets exciting and new every time you make them. Experiment with different combinations to find your family’s favorites!

Cooking Note for Crispy Homemade Chicken Nuggets Recipe

Crispy Homemade Chicken Nuggets Recipe, there are a few important cooking notes to keep in mind. These tips will help ensure that your nuggets turn out perfectly crispy and delicious every time.

First, temperature is key. Make sure your oil is hot enough before adding the chicken. If the oil isn’t hot, the nuggets will absorb too much oil and become greasy. A good way to test the oil is to drop a small piece of bread into it. If it sizzles and turns golden brown in about 60 seconds, the oil is ready for frying.

Next, avoid overcrowding the pan. Frying too many nuggets at once can lower the oil temperature, leading to soggy nuggets. Instead, fry them in batches. This way, each nugget gets enough space to cook evenly and achieve that desired crunch.

Also, consider chilling the breaded nuggets before frying. Placing them in the refrigerator for about 30 minutes helps the coating adhere better during cooking. This extra step can make a big difference in achieving that crispy texture.

Lastly, keep an eye on the cooking time. Nuggets can cook quickly, so check them frequently. You want them to be golden brown and cooked through, but not overdone. Using a meat thermometer can help; the internal temperature should reach 165°F for safe consumption.

By following these cooking notes, you’ll be well on your way to creating the perfect crispy homemade chicken nuggets that everyone will love. Happy cooking!

Serving Suggestions for Crispy Homemade Chicken Nuggets Recipe

Crispy Homemade Chicken Nuggets Recipe, it’s time to think about how to serve them! The right accompaniments can elevate your meal and make it even more enjoyable. Let’s explore some tasty dipping sauces and side dishes that pair perfectly with your homemade nuggets.

Dipping Sauces to Pair

Dipping sauces can add a burst of flavor to your chicken nuggets. Here are some popular options to consider:

  • Ketchup: A classic choice that never goes out of style. Its sweet and tangy flavor complements the crispy nuggets perfectly.
  • Barbecue Sauce: For a smoky and sweet taste, barbecue sauce is a fantastic option. It adds a rich flavor that pairs well with the chicken.
  • Honey Mustard: This sauce combines sweetness and tanginess, making it a delightful dip for your nuggets.
  • Ranch Dressing: Creamy ranch dressing is a favorite for many. Its coolness balances the heat from fried nuggets.
  • Buffalo Sauce: If you like a little heat, toss your nuggets in buffalo sauce for a spicy kick. Serve with blue cheese dressing for a classic combo.

Feel free to mix and match these sauces to find your favorite combinations. You can even create a dipping sauce bar for a fun family meal!

Side Dishes That Complement

To round out your meal, consider serving your chicken nuggets with some delicious side dishes. Here are a few ideas:

  • French Fries: Crispy fries are a classic side that pairs perfectly with chicken nuggets. You can also try sweet potato fries for a healthier twist.
  • Coleslaw: A refreshing coleslaw adds crunch and a tangy flavor that complements the richness of the nuggets.
  • Vegetable Sticks: Serve carrot and celery sticks with a side of ranch dressing for a healthy and crunchy option.
  • Macaroni and Cheese: For a comforting meal, serve your nuggets with creamy macaroni and cheese. It’s a hit with both kids and adults!
  • Salad: A light salad with fresh greens and a simple vinaigrette can balance the richness of the fried nuggets.

These side dishes not only enhance your meal but also provide a variety of flavors and textures. Enjoy your crispy homemade chicken nuggets with these tasty accompaniments for a delightful dining experience!

Tips for Perfecting Your Crispy Homemade Chicken Nuggets Recipe

Crispy Homemade Chicken Nuggets Recipe turns out perfectly every time, consider these helpful tips. They will guide you in achieving that ideal crunch and flavor that everyone loves!

First, always use fresh chicken. Fresh chicken breasts not only taste better but also have a firmer texture, which helps the nuggets hold their shape during cooking. If possible, buy organic or free-range chicken for the best quality.

Next, don’t skip the seasoning! The flour mixture is where you can infuse flavor into your nuggets. Feel free to add more spices or herbs to suit your taste. A pinch of cayenne pepper or a dash of Italian seasoning can elevate the flavor profile significantly.

When breading the chicken, make sure to coat each piece thoroughly. This ensures that every bite is packed with flavor and crunch. Press the breadcrumbs onto the chicken gently to help them stick better. A well-coated nugget is key to achieving that crispy exterior.

Another important tip is to maintain the oil temperature. If the oil cools down too much, the nuggets will absorb more oil and become greasy. Use a thermometer to keep track of the temperature, or test with a small piece of bread. If it sizzles, you’re good to go!

Also, consider double breading your nuggets for extra crunch. After the first round of breading, dip the chicken back into the egg and then into the breadcrumbs again. This creates a thicker coating that results in an even crispier nugget.

Lastly, let the nuggets rest after frying. Allowing them to sit for a few minutes on a paper towel-lined plate helps them maintain their crispiness. This resting period also allows the steam to escape, preventing sogginess.

By following these tips, you’ll be well on your way to perfecting your crispy homemade chicken nuggets. Enjoy the process and the delicious results!

Breakdown of Time for Crispy Homemade Chicken Nuggets Recipe

Prep Time

Crispy Homemade Chicken Nuggets Recipe is a breeze! The prep time typically takes about 15-20 minutes. This includes cutting the chicken into bite-sized pieces and setting up your breading station. Having everything organized will make the cooking process smoother and more enjoyable.

Cooking Time

Once your nuggets are breaded, the cooking time is around 10-15 minutes. Frying each batch takes about 4-5 minutes per side. If you’re making a larger quantity, you may need to fry them in multiple batches. Just remember to keep an eye on the oil temperature to ensure perfect crispiness!

Total Time

In total, you can expect to spend about 30-35 minutes from start to finish. This includes both prep and cooking time. With this quick and easy recipe, you can have delicious, homemade chicken nuggets ready to serve in no time!

Nutritional Information for Crispy Homemade Chicken Nuggets Recipe

Crispy Homemade Chicken Nuggets Recipe is essential for making informed choices about your meals. Here’s a breakdown of the key nutritional components per serving, so you can enjoy your nuggets while keeping track of your dietary needs.

Calories

Each serving of these delicious chicken nuggets contains approximately 350 calories. This makes them a satisfying option for a meal or snack without being overly heavy. The calorie count can vary slightly based on the cooking method and any additional ingredients you choose to add.

Protein Content

One of the standout features of this recipe is its high protein content. Each serving provides about 30 grams of protein. This is great for muscle repair and growth, making these nuggets a fantastic choice for active individuals or anyone looking to maintain a balanced diet.

Sodium Levels

In terms of sodium, each serving contains around 600 milligrams. While this is a reasonable amount for a tasty treat, it’s important to be mindful of your overall sodium intake throughout the day. If you’re watching your sodium levels, consider using low-sodium seasonings or sauces to keep your meal healthier.

By keeping these nutritional facts in mind, you can enjoy your crispy homemade chicken nuggets while being aware of their health benefits. They are not only delicious but also provide essential nutrients that can fit into a balanced diet!

FAQs About Crispy Homemade Chicken Nuggets Recipe

Can I bake the chicken nuggets instead of frying them?

Crispy Homemade Chicken Nuggets Recipe, preheat your oven to 400°F. Place the breaded nuggets on a baking sheet lined with parchment paper. Bake for about 20-25 minutes, flipping them halfway through. This method will give you crispy nuggets without the extra oil. Just keep an eye on them to ensure they don’t overcook!

How do I store leftover chicken nuggets?

If you have any leftover chicken nuggets, storing them is easy! Allow the nuggets to cool completely, then place them in an airtight container. You can keep them in the refrigerator for up to 3 days. For longer storage, consider freezing them. Place the cooled nuggets in a freezer-safe bag or container, and they can last for up to 3 months. When you’re ready to eat, reheat them in the oven for the best texture!

What can I use instead of breadcrumbs?

If you’re out of breadcrumbs or looking for alternatives, there are several options! You can use crushed cornflakes, panko, or even ground oats. For a gluten-free option, try almond flour or crushed rice cereal. Each alternative will give your nuggets a unique texture and flavor, so feel free to experiment!

How can I make chicken nuggets gluten-free?

Crispy Homemade Chicken Nuggets Recipe without worry!

Conclusion on Crispy Homemade Chicken Nuggets Recipe

Crispy Homemade Chicken Nuggets Recipe is not only a fun and rewarding experience, but it also allows you to enjoy a delicious meal that you can feel good about serving to your family. With simple ingredients and easy steps, you can create crispy, flavorful nuggets that rival any fast-food option.

By following the tips and variations provided, you can customize your nuggets to suit your taste preferences. Whether you prefer them spicy, cheesy, or herb-infused, the possibilities are endless. Plus, involving your kids in the cooking process can turn a simple meal into a memorable family activity.

Remember, the key to achieving that perfect crunch lies in the preparation and cooking techniques. From maintaining the right oil temperature to ensuring a thorough breading, each step contributes to the final result. With practice, you’ll master the art of making chicken nuggets that are crispy on the outside and tender on the inside.

Crispy Homemade Chicken Nuggets Recipe!

Cheesy Garlic Chicken Wraps are a family favorite meal.

Introduction to Cheesy Garlic Chicken Wraps

Cheesy Garlic Chicken Wraps. These wraps are not only packed with flavor, but they are also quick to prepare. With tender shredded chicken, creamy cheeses, and a hint of garlic, every bite is a delight.

Whether you’re hosting a casual dinner or need a quick lunch, these wraps fit the bill perfectly. They are versatile, allowing you to customize them with your favorite toppings. Plus, they can be made in just a few simple steps, making them a go-to recipe for busy weeknights.

Cheesy Garlic Chicken Wraps. You’ll discover how to make these tasty wraps from scratch, ensuring that you can enjoy them anytime you crave a cheesy, garlicky treat. So, roll up your sleeves and get ready to impress your taste buds!

Ingredients for Cheesy Garlic Chicken Wraps

Cheesy Garlic Chicken Wraps, you’ll need a few simple ingredients. Each component plays a vital role in delivering that creamy, cheesy goodness. Here’s what you’ll need:

  • 2 cups cooked chicken, shredded
  • 1 cup shredded mozzarella cheese
  • 1/2 cup cream cheese, softened
  • 1/4 cup sour cream
  • 2 tablespoons garlic powder
  • 1 tablespoon onion powder
  • 1 teaspoon salt
  • 1/2 teaspoon black pepper
  • 4 large flour tortillas
  • 1/4 cup chopped fresh parsley (optional)
  • 1 cup shredded lettuce (optional)
  • 1/2 cup diced tomatoes (optional)

These ingredients come together to create a delightful filling that is both creamy and flavorful. The shredded chicken provides protein, while the combination of mozzarella and cream cheese adds a rich texture. Garlic powder and onion powder enhance the taste, making every bite irresistible.

Feel free to customize your wraps with optional ingredients like fresh parsley, lettuce, or tomatoes. These additions not only add color but also a refreshing crunch. Now that you have your ingredients ready, let’s move on to the preparation steps!

Preparation of Cheesy Garlic Chicken Wraps

Cheesy Garlic Chicken Wraps. This process is straightforward and fun! Follow these steps to create a delicious meal that everyone will enjoy.

Step 1: Preparing the Chicken

First, you need to prepare the chicken. If you have leftover cooked chicken, that’s perfect! Simply shred it into bite-sized pieces. If you’re starting with raw chicken, cook it thoroughly in a skillet or oven until it’s no longer pink. Once cooked, let it cool slightly before shredding. This step is crucial as it ensures your chicken is tender and easy to mix with the other ingredients.

Step 2: Making the Garlic Sauce

Next, let’s make the creamy garlic sauce. In a large mixing bowl, combine the shredded chicken with mozzarella cheese, cream cheese, and sour cream. Then, add the garlic powder, onion powder, salt, and black pepper. Mix everything together until it’s well combined and creamy. This sauce is what makes your wraps so flavorful and cheesy!

Step 3: Assembling the Wraps

Now comes the fun part—assembling your wraps! Lay out the large flour tortillas on a clean surface. If you like, sprinkle a little chopped parsley on each tortilla for an extra burst of flavor. Then, divide the chicken mixture evenly among the tortillas, spreading it in a line down the center. If you’re using optional toppings like shredded lettuce or diced tomatoes, add them on top of the chicken mixture. This adds freshness and crunch to your wraps!

Step 4: Cooking the Wraps

Finally, it’s time to cook your wraps. Heat a skillet over medium heat. Place the wraps seam-side down in the skillet. Cook for about 3-4 minutes on each side, or until they are golden brown and crispy. This step gives your wraps a delightful crunch while keeping the inside warm and cheesy. Once cooked, remove them from the skillet and let them cool for a minute before slicing in half. Serve warm and enjoy!

Variation of Cheesy Garlic Chicken Wraps

Cheesy Garlic Chicken Wraps are delicious on their own, there are many ways to switch things up! You can experiment with alternative ingredients and different cooking methods to create your own unique version. Let’s explore some exciting variations that will keep your taste buds guessing.

Alternative Ingredients for Cheesy Garlic Chicken Wraps

Cheesy Garlic Chicken Wraps is their versatility. You can easily swap out ingredients to suit your taste or dietary needs. Here are some ideas:

  • Protein Substitutes: Instead of chicken, try using cooked ground beef, turkey, or even shredded pork. Each option brings a different flavor profile to the wraps.
  • Cheese Options: While mozzarella is a favorite, you can use cheddar, pepper jack, or even a blend of cheeses for a more robust taste.
  • Vegetarian Version: For a meatless option, replace the chicken with sautéed vegetables like bell peppers, mushrooms, and zucchini. Add some black beans for extra protein.
  • Spicy Kick: If you love heat, mix in diced jalapeños or a few dashes of hot sauce into the chicken mixture. This will give your wraps a zesty twist!
  • Herbs and Spices: Experiment with different herbs like cilantro or basil. You can also add spices like cumin or paprika for added depth of flavor.

These alternative ingredients can help you create a wrap that’s perfect for any occasion. Whether you’re feeding picky eaters or looking for a new favorite, the possibilities are endless!

Different Cooking Methods for Cheesy Garlic Chicken Wraps

Cheesy Garlic Chicken Wraps. Here are a few options:

  • Oven-Baked: Preheat your oven to 375°F (190°C). Place the assembled wraps on a baking sheet and bake for about 15-20 minutes, or until they are golden and crispy. This method is great for making multiple wraps at once!
  • Grilled: For a smoky flavor, grill the wraps on a preheated grill. Cook for about 3-4 minutes on each side, just like in the skillet. This adds a nice char and enhances the taste.
  • Air Fryer: If you have an air fryer, this is a fantastic option! Preheat it to 375°F (190°C) and cook the wraps for about 8-10 minutes, flipping halfway through. They’ll come out crispy and delicious!
  • Microwave: In a hurry? You can microwave the wraps for about 1-2 minutes. While they won’t be crispy, they’ll still be warm and cheesy!

By trying out these different cooking methods, you can find the one that works best for you. Each method brings its own unique texture and flavor to the wraps, making them even more enjoyable!

Cooking Note for Cheesy Garlic Chicken Wraps

Cheesy Garlic Chicken Wraps, there are a few cooking notes to keep in mind to ensure your wraps turn out perfectly every time. These tips will help you achieve the best flavor and texture, making your meal even more enjoyable.

First, always use cooked chicken. This can be leftover rotisserie chicken, grilled chicken, or any other cooked chicken you have on hand. Shredding the chicken allows it to mix well with the creamy filling, ensuring every bite is packed with flavor.

Next, be mindful of the cream cheese. Make sure it’s softened before mixing. This will help create a smooth and creamy filling. If it’s too cold, it can be difficult to blend with the other ingredients, resulting in a lumpy mixture.

When it comes to seasoning, feel free to adjust the garlic and onion powder to your taste. If you love garlic, add a bit more! The same goes for salt and pepper. Taste the mixture before assembling the wraps to ensure it’s just right for you.

As you cook the wraps, keep an eye on the heat. Medium heat is ideal for achieving a golden brown exterior without burning. If the skillet is too hot, the outside may cook too quickly while the inside remains cold. Flip the wraps gently to avoid spilling the delicious filling.

Lastly, let the wraps cool for a minute after cooking. This allows the cheese to set slightly, making them easier to slice and eat. Plus, it prevents you from burning your mouth on the hot filling!

Cheesy Garlic Chicken Wraps that are not only tasty but also visually appealing. Enjoy the process and savor the delightful flavors of your homemade wraps!

Serving Suggestions for Cheesy Garlic Chicken Wraps

Cheesy Garlic Chicken Wraps are cooked to perfection, it’s time to think about how to serve them. Presentation can elevate your meal, making it even more enjoyable. Here are some delightful serving suggestions to consider:

  • With Dipping Sauces: Serve your wraps with a variety of dipping sauces. Ranch dressing, barbecue sauce, or a spicy sriracha mayo can add an extra layer of flavor. These sauces complement the cheesy filling beautifully.
  • On a Bed of Greens: For a fresh touch, place your wraps on a bed of mixed greens or spinach. This not only adds color but also provides a healthy crunch. You can drizzle a light vinaigrette over the greens for added zest.
  • Garnished with Fresh Herbs: Sprinkle some chopped fresh parsley or cilantro on top of the wraps before serving. This adds a pop of color and enhances the overall flavor profile.
  • With a Side of Veggies: Pair your wraps with a side of fresh vegetables like carrot sticks, cucumber slices, or bell pepper strips. This adds a refreshing crunch and balances the richness of the wraps.
  • Accompanied by a Salad: A simple side salad can complement your wraps perfectly. Consider a Caesar salad or a light coleslaw to add some crunch and freshness to your meal.
  • As Part of a Platter: For gatherings or parties, arrange your wraps on a large platter alongside other finger foods. Mini sliders, stuffed mushrooms, or cheese platters can create a delightful spread that guests will love.

Cheesy Garlic Chicken Wraps but also provide a variety of flavors and textures. Whether you’re enjoying them for a casual family dinner or serving them at a gathering, these ideas will make your meal even more special. Enjoy every bite!

Tips for Perfect Cheesy Garlic Chicken Wraps

Cheesy Garlic Chicken Wraps is all about attention to detail. With a few simple tips, you can elevate your wraps to a whole new level of deliciousness. Here are some helpful suggestions to ensure your wraps turn out perfectly every time:

  • Use Fresh Ingredients: Fresh ingredients make a big difference in flavor. Opt for fresh herbs, crisp vegetables, and high-quality cheese. This will enhance the overall taste of your wraps.
  • Don’t Overfill: While it’s tempting to load up your wraps, be careful not to overfill them. A generous amount is great, but too much filling can make it hard to roll them up. Aim for a balanced amount that allows for easy folding.
  • Warm Tortillas: Before assembling, warm your tortillas slightly in the microwave or on a skillet. This makes them more pliable and easier to roll without tearing.
  • Experiment with Seasoning: Taste your chicken mixture before wrapping. Adjust the seasoning to your liking. If you love a bit of spice, add more pepper or hot sauce. Personalizing the flavor will make your wraps even more enjoyable.
  • Let the Filling Cool: If your chicken mixture is too hot, it can make the tortillas soggy. Allow it to cool slightly before assembling. This helps maintain the texture of the wraps.
  • Seal the Wraps: When rolling your wraps, make sure to tuck in the sides as you go. This helps keep the filling secure and prevents it from spilling out during cooking.
  • Cook in Batches: If you’re making multiple wraps, consider cooking them in batches. This ensures that each wrap gets the attention it deserves, resulting in a perfectly crispy exterior.
  • Serve Immediately: For the best experience, serve your wraps right after cooking. They are at their crispiest and most flavorful when enjoyed fresh out of the skillet.

Cheesy Garlic Chicken Wraps that are not only delicious but also visually appealing. Enjoy the process and have fun experimenting with flavors and textures!

Breakdown of Time for Cheesy Garlic Chicken Wraps

Cheesy Garlic Chicken Wraps can help you plan your meal better. Here’s a simple breakdown of the time required for each step, so you can enjoy these delicious wraps without any stress.

Prep Time

Cheesy Garlic Chicken Wraps is approximately 15-20 minutes. This includes gathering your ingredients, shredding the chicken, and mixing the creamy filling. If you have leftover chicken, this step will be even quicker! Just remember to soften the cream cheese beforehand for easy mixing.

Cooking Time

Cooking the wraps takes about 8-10 minutes. You’ll need around 3-4 minutes on each side in a skillet to achieve that golden brown and crispy texture. If you choose to bake or grill them, the cooking time may vary slightly, but it generally stays within this range.

Total Time

Cheesy Garlic Chicken Wraps. This makes them a fantastic option for a quick weeknight dinner or a satisfying lunch. With just a little time and effort, you’ll have a delicious meal ready to enjoy!

Nutritional Information for Cheesy Garlic Chicken Wraps

Cheesy Garlic Chicken Wraps, knowing the nutritional information can help you make informed choices. These wraps are not only delicious but also provide a good balance of nutrients. Here’s a closer look at the nutritional breakdown per serving:

Calories

Cheesy Garlic Chicken Wraps contains approximately 450 calories. This makes them a satisfying meal option that can keep you energized throughout the day. The combination of chicken, cheese, and creamy ingredients contributes to the calorie count, ensuring you get a hearty meal.

Protein

One of the standout features of these wraps is their protein content. Each serving provides about 30 grams of protein. This is primarily from the shredded chicken and cheese, making these wraps a great choice for those looking to increase their protein intake. Protein is essential for muscle repair and overall health, making these wraps a nutritious option.

Sodium

In terms of sodium, each serving contains around 800 milligrams. While this is a moderate amount, it’s important to be mindful of your overall sodium intake, especially if you are watching your salt consumption. You can reduce the sodium content by using low-sodium chicken or cheese options, or by adjusting the amount of added salt in the recipe.

Cheesy Garlic Chicken Wraps offer a balanced meal with a good mix of calories, protein, and flavor. They can fit well into a healthy diet when enjoyed in moderation. So, go ahead and indulge in these tasty wraps while keeping an eye on your nutritional needs!

FAQs about Cheesy Garlic Chicken Wraps

What can I substitute for chicken in Cheesy Garlic Chicken Wraps?

Cheesy Garlic Chicken Wraps. You can use cooked ground beef or turkey for a different flavor. Shredded pork also works well, adding a nice twist. For a vegetarian option, consider sautéed vegetables like bell peppers, mushrooms, and zucchini. You can even add black beans for extra protein. These alternatives will keep your wraps delicious and satisfying!

Can I make Cheesy Garlic Chicken Wraps ahead of time?

Cheesy Garlic Chicken Wraps ahead of time. Simply assemble the wraps and store them in the refrigerator for up to 24 hours before cooking. When you’re ready to enjoy them, just heat them in a skillet or oven until they are warm and crispy. This makes them a great option for meal prep or quick lunches during the week!

What type of cheese works best in Cheesy Garlic Chicken Wraps?

Cheesy Garlic Chicken Wraps, you can experiment with other types of cheese as well. Cheddar cheese adds a sharp flavor, while pepper jack brings a spicy kick. A blend of cheeses can also create a rich and creamy filling. Feel free to mix and match to find the combination that you love the most!

How can I make Cheesy Garlic Chicken Wraps healthier?

Cheesy Garlic Chicken Wraps healthier is easy with a few simple adjustments. Start by using whole wheat or low-carb tortillas instead of regular flour tortillas. You can also reduce the amount of cream cheese and sour cream, or opt for low-fat versions. Adding more vegetables, like spinach or bell peppers, can boost the nutritional value. Lastly, consider using grilled chicken instead of fried for a leaner protein option. These changes will help you enjoy a delicious meal while keeping it nutritious!

Conclusion on Cheesy Garlic Chicken Wraps

Cheesy Garlic Chicken Wraps are a delightful and versatile meal option that can easily become a family favorite. With their creamy filling, tender chicken, and crispy exterior, these wraps offer a satisfying combination of flavors and textures. Whether you’re preparing them for a quick weeknight dinner or serving them at a gathering, they are sure to impress.

By following the simple steps outlined in this article, you can create your own delicious wraps in no time. Remember, the beauty of this recipe lies in its adaptability. Feel free to experiment with different ingredients and cooking methods to make it your own. From spicy variations to vegetarian options, the possibilities are endless!

Cheesy Garlic Chicken Wraps, don’t forget to share them with family and friends. Cooking is not just about the food; it’s about creating memories and enjoying time together. So gather around the table, savor each bite, and celebrate the joy of good food.

Cheesy Garlic Chicken Wraps!

Mongolian Ground Beef Noodles: A Flavorful Delight!

Mongolian Ground Beef Noodles

Introduction to Mongolian Ground Beef Noodles

Few meals hit the sweet spot between comfort and convenience quite like Mongolian Ground Beef Noodles. When the day’s been long and your stomach starts to rumble, this dish steps in as the hero—rich, flavorful, and ready in a flash. It’s the kind of go-to recipe that earns a permanent spot in your weekly lineup. It’s quick, satisfying, and bursting with savory goodness. Picture tender ground beef mingling with egg noodles, all enveloped in a rich sauce. This dish isn’t just a meal; it’s a delightful experience that can impress your loved ones or simply make a busy weeknight feel special. Let’s dive into this culinary adventure!

Why You’ll Love This Mongolian Ground Beef Noodles

This dish is a lifesaver for busy weeknights. With just a handful of ingredients and minimal prep time, you can whip up a delicious meal in under 30 minutes. The combination of savory beef, tender noodles, and vibrant veggies creates a flavor explosion that will have everyone asking for seconds. Plus, it’s versatile enough to adapt to your family’s tastes, making it a go-to recipe for any occasion!

Ingredients for Mongolian Ground Beef Noodles

Gathering the right ingredients is the first step to creating a delicious plate of Mongolian Ground Beef Noodles. Here’s what you’ll need:

  • Ground Beef: The star of the dish, providing rich flavor and protein. You can also use ground turkey or chicken for a leaner option.
  • Egg Noodles: These noodles are perfect for soaking up the savory sauce. They cook quickly and add a delightful texture.
  • Vegetable Oil: Used for sautéing the beef and veggies, it helps achieve that perfect golden-brown color.
  • Garlic: Freshly minced garlic adds a fragrant kick that elevates the dish. It’s a must-have for flavor!
  • Ginger: Minced ginger brings warmth and a hint of spice, balancing the sweetness of the sauce.
  • Soy Sauce: This salty, umami-rich ingredient forms the base of the sauce, giving it depth and character.
  • Brown Sugar: A touch of sweetness that complements the savory elements, creating a well-rounded flavor profile.
  • Rice Vinegar: Adds a tangy brightness to the sauce, enhancing the overall taste.
  • Red Pepper Flakes: Optional, but they provide a spicy kick for those who enjoy a little heat.
  • Green Onions: Chopped green onions add freshness and a pop of color, making the dish visually appealing.
  • Bell Peppers: Sliced bell peppers contribute crunch and sweetness, making the dish more vibrant.
  • Salt and Pepper: Essential for seasoning, these staples help bring all the flavors together.

For exact measurements, check the bottom of the article where you can find everything listed for easy printing. Happy cooking!

How to Make Mongolian Ground Beef Noodles

Now that you have all your ingredients ready, let’s get cooking! This process is straightforward and fun, making it perfect for a weeknight dinner. Follow these simple steps to create a delicious plate of Mongolian Ground Beef Noodles.

Step 1: Cook the Egg Noodles

Start by boiling a large pot of water. Once it’s bubbling, add the egg noodles and cook according to the package instructions, usually around 5-7 minutes. You want them al dente, so they hold up well when mixed with the beef and sauce. After cooking, drain the noodles and set them aside. A quick rinse under cold water can help prevent sticking.

Step 2: Brown the Ground Beef

In a large skillet, heat up the vegetable oil over medium heat. Once hot, add the ground beef. Use a spatula to break it apart as it cooks, about 5-7 minutes until it’s nicely browned. If there’s excess fat, carefully drain it off to keep the dish from becoming greasy. This step is crucial for achieving that perfect texture!

Step 3: Add Aromatics

With the beef browned, it’s time to add the minced garlic and ginger. These two ingredients are the heart of the flavor in this dish. Stir them in and cook for about 1-2 minutes until fragrant. The aroma will fill your kitchen, making it hard to resist sneaking a taste!

Step 4: Create the Sauce

Now, let’s bring the magic together! Stir in the soy sauce, brown sugar, rice vinegar, and red pepper flakes (if you’re feeling spicy). Mix everything well and let it simmer for about 3-5 minutes. This allows the flavors to meld beautifully, creating a rich sauce that will coat your noodles perfectly.

Step 5: Combine Everything

It’s time for the grand finale! Add the cooked egg noodles, chopped green onions, and sliced bell peppers to the skillet. Toss everything together gently, ensuring the noodles are well coated in that delicious sauce. Cook for an additional 2-3 minutes until everything is heated through. The colors and aromas will be irresistible!

Step 6: Serve and Enjoy

Once everything is combined, it’s time to serve! Dish out the Mongolian Ground Beef Noodles onto plates and garnish with extra green onions if desired. A sprinkle of sesame seeds can add a nice touch too. Enjoy this delightful meal hot, and watch as your family digs in with smiles on their faces!

Tips for Success

  • Prep all your ingredients before starting to cook. It makes the process smoother and more enjoyable.
  • Don’t overcook the noodles; they should be al dente to hold up in the dish.
  • Feel free to adjust the sweetness or spice level by adding more brown sugar or red pepper flakes.
  • For extra flavor, consider marinating the ground beef in soy sauce for 15 minutes before cooking.
  • Leftovers can be stored in the fridge for up to three days, making for a quick lunch!

Equipment Needed

  • Large Pot: For boiling the egg noodles. A deep skillet can work in a pinch.
  • Skillet: A non-stick skillet is ideal for browning the beef and mixing everything together.
  • Spatula: Essential for breaking up the beef and stirring the ingredients.
  • Colander: For draining the cooked noodles. A slotted spoon can also do the job.

Variations

  • Vegetarian Option: Swap the ground beef for crumbled tofu or tempeh for a delicious plant-based version.
  • Gluten-Free: Use gluten-free egg noodles or rice noodles to make this dish suitable for gluten-sensitive diets.
  • Extra Veggies: Add more colorful vegetables like broccoli, snap peas, or carrots for added nutrition and crunch.
  • Spicy Twist: Incorporate sriracha or chili paste into the sauce for an extra kick of heat.
  • Asian Flair: Toss in some bok choy or mushrooms for a more authentic Mongolian flavor profile.

Serving Suggestions

  • Side Salad: A crisp cucumber and carrot salad pairs beautifully, adding freshness to the meal.
  • Drink Pairing: Serve with a light iced tea or a refreshing lemonade to balance the flavors.
  • Presentation: Garnish with sesame seeds and extra green onions for a pop of color and texture.
  • Chopsticks: For a fun twist, serve with chopsticks to enhance the dining experience!

FAQs about Mongolian Ground Beef Noodles

Can I use a different type of meat for Mongolian Ground Beef Noodles?

Absolutely! Ground turkey or chicken works well if you prefer a leaner option. For a vegetarian twist, crumbled tofu or tempeh can be substituted, making it a delightful plant-based meal.

How can I make Mongolian Ground Beef Noodles spicier?

If you love heat, consider adding sriracha or chili paste to the sauce. You can also increase the amount of red pepper flakes for an extra kick!

Can I prepare Mongolian Ground Beef Noodles in advance?

Yes! You can cook the beef and sauce ahead of time and store it in the fridge. Just reheat and toss with freshly cooked noodles when you’re ready to serve.

What can I serve with Mongolian Ground Beef Noodles?

A crisp side salad or steamed vegetables pairs wonderfully with this dish. You might also enjoy it with a refreshing drink like iced tea or lemonade.

How do I store leftovers of Mongolian Ground Beef Noodles?

Leftovers can be stored in an airtight container in the fridge for up to three days. Reheat in the microwave or on the stovetop, adding a splash of water if needed to keep it moist.

Final Thoughts

Cooking Mongolian Ground Beef Noodles is more than just preparing a meal; it’s about creating a moment of joy in your kitchen. The delightful aroma that fills your home, the vibrant colors on your plate, and the smiles around the table make it all worthwhile. This dish is a reminder that even on the busiest days, you can whip up something delicious and satisfying. Whether you’re sharing it with family or enjoying it solo, each bite is a celebration of flavor and comfort. So grab your ingredients and let the culinary adventure begin!

Mongolian Ground Beef Noodles
jhessica

Mongolian Ground Beef Noodles: A Flavorful Delight!

Mongolian Ground Beef Noodles is a flavorful dish featuring tender ground beef, egg noodles, and a savory sauce, perfect for a quick weeknight dinner.
Prep Time 10 minutes
Cook Time 20 minutes
Total Time 30 minutes
Servings: 4 servings
Course: Main Course
Cuisine: Mongolian
Calories: 450

Ingredients
  

  • 1 pound ground beef
  • 8 ounces egg noodles
  • 2 tablespoons vegetable oil
  • 3 cloves garlic minced
  • 1 tablespoon fresh ginger minced
  • 1/4 cup soy sauce
  • 1/4 cup brown sugar
  • 1 tablespoon rice vinegar
  • 1/2 teaspoon red pepper flakes optional
  • 1 cup green onions chopped
  • 1 cup bell peppers sliced
  • Salt and pepper to taste

Method
 

  1. Cook the egg noodles according to package instructions. Drain and set aside.
  2. In a large skillet, heat the vegetable oil over medium heat. Add the ground beef and cook until browned, breaking it apart with a spatula, about 5-7 minutes. Drain excess fat if necessary.
  3. Add the minced garlic and ginger to the skillet, cooking for an additional 1-2 minutes until fragrant.
  4. Stir in the soy sauce, brown sugar, rice vinegar, and red pepper flakes (if using). Mix well and let simmer for about 3-5 minutes.
  5. Add the cooked egg noodles, green onions, and bell peppers to the skillet. Toss everything together until well combined and heated through, about 2-3 minutes. Season with salt and pepper to taste.
  6. Serve hot, garnished with additional green onions if desired.

Nutrition

Serving: 1servingCalories: 450kcalCarbohydrates: 40gProtein: 25gFat: 20gSaturated Fat: 7gPolyunsaturated Fat: 13gCholesterol: 70mgSodium: 800mgFiber: 2gSugar: 10g

Notes

  • For a spicier kick, add sriracha or chili paste to the sauce.
  • You can substitute ground turkey or chicken for a leaner option.
  • For a vegetarian version, use tofu or tempeh instead of ground beef.

Tried this recipe?

Let us know how it was!

Hearty Vegetable Beef Soup: A Comforting Family Recipe

Hearty Vegetable Beef Soup

Introduction to Hearty Vegetable Beef Soup

There’s something truly comforting about a steaming bowl of Hearty Vegetable Beef Soup—it wraps you in warmth like a cozy hug on a cold day. I remember my grandmother stirring her big pot on the stove, the aroma filling the house and drawing everyone to the kitchen. This recipe is perfect for those busy weeknights when you crave comfort but don’t have hours to spare. It’s a dish that not only nourishes the body but also brings loved ones together, making it a staple in my home. Let’s dive into this delightful family recipe!

Why You’ll Love This Hearty Vegetable Beef Soup

This Hearty Vegetable Beef Soup is a true lifesaver for busy families. It’s not just easy to make; it’s also packed with flavor and nutrition. In about two hours, you can create a meal that warms the soul and satisfies even the pickiest eaters. Plus, the leftovers taste even better the next day, making it a perfect choice for meal prep. You’ll find yourself reaching for this recipe time and again!

Ingredients for Hearty Vegetable Beef Soup

Gathering the right ingredients is the first step to creating a delicious Hearty Vegetable Beef Soup. Here’s what you’ll need:

  • Beef stew meat: Tender cuts like chuck work best, providing rich flavor and texture.
  • Olive oil: This adds a lovely depth of flavor while browning the beef.
  • Onion: A staple in many dishes, it brings sweetness and aroma to the soup.
  • Garlic: Minced garlic enhances the overall flavor, giving it that comforting kick.
  • Carrots: Their natural sweetness balances the savory elements and adds color.
  • Celery: This adds a subtle crunch and depth, making the soup more complex.
  • Green beans: Fresh or frozen, they provide a nice pop of color and nutrition.
  • Potatoes: Diced potatoes add heartiness and help thicken the soup as they cook.
  • Diced tomatoes: Canned tomatoes bring acidity and richness, enhancing the broth.
  • Beef broth: The base of the soup, it infuses everything with savory goodness.
  • Dried thyme and oregano: These herbs add aromatic flavors that complement the beef.
  • Salt and pepper: Essential for seasoning, they elevate all the other flavors.
  • Kale or spinach (optional): Adding greens boosts nutrition and adds a vibrant touch.

For exact measurements, check the bottom of the article where you can find everything listed for easy printing. Feel free to mix and match ingredients based on what you have on hand or your family’s preferences!

How to Make Hearty Vegetable Beef Soup

Creating a pot of Hearty Vegetable Beef Soup is a delightful journey that fills your kitchen with mouthwatering aromas. Follow these simple steps to craft a comforting meal that your family will love.

Step 1: Brown the Beef

Start by heating the olive oil in a large pot over medium heat. Once the oil shimmers, add the beef stew meat. Brown the meat on all sides, which should take about 5-7 minutes. This step is crucial; it locks in the flavors and gives the soup a rich, savory base. Don’t rush it—let that beef get a nice sear!

Step 2: Sauté the Aromatics

Next, toss in the chopped onion and minced garlic. Cook them until the onion turns translucent, about 3-4 minutes. This step is where the magic happens! The sweet aroma of sautéing onions and garlic will fill your kitchen, enhancing the overall flavor of the soup. It’s like a warm welcome for all the other ingredients.

Step 3: Add the Vegetables

Now it’s time to add the carrots, celery, green beans, and potatoes. Stir them in and let them cook for another 5 minutes. This brief cooking time helps to soften the vegetables while keeping their vibrant colors and crunch. Each bite will be a delightful mix of textures and flavors!

Step 4: Combine and Simmer

Pour in the diced tomatoes and beef broth, then sprinkle in the dried thyme, oregano, salt, and pepper. Bring the mixture to a boil, then reduce the heat to low. Cover the pot and let it simmer for 1 to 1.5 hours. This slow cooking process allows the beef to become tender and the flavors to meld beautifully. Patience is key here!

Step 5: Final Touches

In the last 5 minutes of cooking, stir in the chopped kale or spinach if you’re using them. This adds a pop of color and boosts the nutrition of your Hearty Vegetable Beef Soup. Before serving, taste and adjust the seasoning as needed. A little extra salt or pepper can make all the difference!

Tips for Success

  • Prep your ingredients ahead of time to streamline the cooking process.
  • Don’t skip browning the beef; it adds depth to the flavor.
  • Feel free to customize the vegetables based on what’s in season or your family’s favorites.
  • For a thicker soup, mash some potatoes against the pot before serving.
  • Let the soup cool completely before storing leftovers in the fridge.

Equipment Needed

  • Large pot: A Dutch oven works great, but any heavy-bottomed pot will do.
  • Wooden spoon: Perfect for stirring and scraping up those delicious browned bits.
  • Cutting board and knife: Essential for chopping your veggies and meat.
  • Measuring cups and spoons: Handy for precise ingredient measurements.

Variations of Hearty Vegetable Beef Soup

  • Swap the Meat: Use chicken or turkey for a lighter version, or go vegetarian by omitting meat entirely and adding more beans.
  • Spice it Up: Add a pinch of red pepper flakes or a dash of hot sauce for a spicy kick that warms you from the inside out.
  • Herb Infusion: Experiment with fresh herbs like parsley or basil for a burst of freshness instead of dried herbs.
  • Seasonal Veggies: Incorporate seasonal vegetables like zucchini, squash, or bell peppers to keep the soup exciting year-round.
  • Grain Boost: Stir in cooked barley, quinoa, or rice for added texture and heartiness.

Serving Suggestions for Hearty Vegetable Beef Soup

  • Crusty Bread: Serve with a warm, crusty baguette or sourdough for dipping.
  • Salad: Pair with a fresh garden salad for a light, refreshing contrast.
  • Cheese: Sprinkle grated Parmesan or cheddar on top for extra flavor.
  • Wine: A glass of red wine complements the rich flavors beautifully.

FAQs about Hearty Vegetable Beef Soup

As you embark on your culinary adventure with Hearty Vegetable Beef Soup, you might have a few questions. Here are some common queries that can help you along the way:

  • Can I make Hearty Vegetable Beef Soup in a slow cooker? Absolutely! Just brown the beef and sauté the aromatics first, then transfer everything to your slow cooker. Cook on low for 6-8 hours for a deliciously tender result.
  • How can I store leftovers? Let the soup cool completely before transferring it to an airtight container. It can be stored in the fridge for up to 3 days or frozen for up to 3 months.
  • What can I substitute for beef broth? If you prefer a lighter option, vegetable broth works well. You can also use chicken broth for a different flavor profile.
  • Is this soup gluten-free? Yes, as long as you use gluten-free beef broth and ensure that your ingredients are free from gluten contamination.
  • Can I add more vegetables? Definitely! Feel free to get creative with seasonal veggies like zucchini, bell peppers, or even corn for added flavor and nutrition.

Final Thoughts

Cooking Hearty Vegetable Beef Soup is more than just preparing a meal; it’s about creating memories and sharing warmth with those you love. Each spoonful is a reminder of family gatherings and cozy nights in. The rich flavors and vibrant colors bring joy to the table, making it a dish everyone looks forward to. Whether you’re serving it on a chilly evening or packing it for lunch, this soup is a comforting embrace in a bowl. I hope this recipe becomes a cherished part of your family traditions, just as it has in mine!

Hearty Vegetable Beef Soup
jhessica

Hearty Vegetable Beef Soup: A Comforting Family Recipe

A comforting and hearty vegetable beef soup perfect for family meals.
Prep Time 15 minutes
Servings: 6 servings
Course: Soup
Cuisine: American
Calories: 280

Ingredients
  

  • 1 pound beef stew meat cut into 1-inch cubes
  • 2 tablespoons olive oil
  • 1 medium onion chopped
  • 2 cloves garlic minced
  • 3 carrots sliced
  • 2 celery stalks sliced
  • 1 cup green beans chopped
  • 1 cup potatoes diced
  • 1 can 14.5 ounces diced tomatoes, undrained
  • 4 cups beef broth
  • 1 teaspoon dried thyme
  • 1 teaspoon dried oregano
  • Salt and pepper to taste
  • 2 cups kale or spinach chopped (optional)

Method
 

  1. In a large pot, heat the olive oil over medium heat. Add the beef stew meat and brown on all sides, about 5-7 minutes.
  2. Add the chopped onion and minced garlic to the pot, cooking until the onion is translucent, about 3-4 minutes.
  3. Stir in the carrots, celery, green beans, and potatoes. Cook for another 5 minutes, stirring occasionally.
  4. Pour in the diced tomatoes and beef broth. Add the dried thyme, dried oregano, salt, and pepper. Bring the mixture to a boil.
  5. Reduce the heat to low, cover, and let simmer for 1 to 1.5 hours, or until the beef is tender.
  6. If using, stir in the chopped kale or spinach during the last 5 minutes of cooking.
  7. Taste and adjust seasoning if necessary before serving.

Nutrition

Serving: 1cupCalories: 280kcalCarbohydrates: 15gProtein: 24gFat: 12gSaturated Fat: 3gPolyunsaturated Fat: 9gCholesterol: 70mgSodium: 600mgFiber: 3gSugar: 5g

Notes

  • For a thicker soup, you can mash some of the potatoes against the side of the pot before serving.
  • If you prefer a spicier kick, add a pinch of red pepper flakes or a dash of hot sauce during cooking.

Tried this recipe?

Let us know how it was!

Thanksgiving Cheese Board: Create a Festive Delight Today!

Introduction to Thanksgiving Cheese Board Ideas

The Importance of a Cheese Board for Thanksgiving

Thanksgiving is a time for family, friends, and, of course, delicious food. One delightful addition to your holiday spread is a cheese board. A well-crafted cheese board not only looks beautiful but also offers a variety of flavors and textures that can please every palate. It serves as a perfect appetizer, allowing guests to nibble while waiting for the main feast.

Creating a Thanksgiving cheese board is more than just arranging cheese on a platter. It’s about bringing people together. As guests gather around the board, they can share stories, enjoy each other’s company, and indulge in tasty bites. This communal experience enhances the festive atmosphere of the holiday.

Moreover, a cheese board can be customized to fit your theme and preferences. You can choose seasonal ingredients that reflect the spirit of Thanksgiving. Think about adding cranberries, nuts, and fresh fruits that are abundant this time of year. This not only makes your cheese board visually appealing but also adds a touch of seasonal flavor.

In addition, a cheese board can cater to various dietary needs. Whether your guests are cheese lovers, vegetarians, or those with nut allergies, you can easily adjust the ingredients to ensure everyone can enjoy it. This flexibility makes it a fantastic choice for any gathering.

So, as you plan your Thanksgiving celebration, consider the importance of a cheese board. It’s a simple yet elegant way to elevate your holiday meal and create lasting memories with loved ones. Let’s dive into the ingredients and preparation steps to create the perfect Thanksgiving cheese board!

Ingredients for Thanksgiving Cheese Board Ideas

Essential Cheese Selections

When crafting your Thanksgiving cheese board, the selection of cheeses is crucial. Each cheese brings its unique flavor and texture, creating a delightful experience for your guests. Here are some essential cheese options to consider:

  • Brie Cheese: This soft cheese is creamy and mild, making it a favorite among many. Its rich texture pairs well with fruits and nuts.
  • Sharp Cheddar Cheese: With its bold flavor, sharp cheddar adds a nice contrast to the creaminess of brie. It’s a classic choice that everyone loves.
  • Goat Cheese: This cheese is tangy and crumbly, offering a different taste profile. It’s perfect for spreading on crackers or drizzling with honey.

Feel free to mix and match these cheeses or substitute them with your favorites. Gouda, blue cheese, or even a flavored cheese can add a unique twist to your board. The key is to have a variety of flavors that complement each other.

Accompaniments to Enhance Your Cheese Board

Accompaniments are just as important as the cheese itself. They enhance the flavors and provide a delightful crunch or sweetness. Here are some must-have accompaniments:

  • Assorted Crackers: Choose a variety of textures and flavors. From plain to herb-infused, crackers are perfect for pairing with cheese.
  • Dried Cranberries: These add a sweet and tart flavor that balances the richness of the cheese. They also bring a pop of color to your board.
  • Mixed Nuts: A combination of almonds, walnuts, and pecans adds crunch and healthy fats. They are a great snack on their own, too!

These accompaniments not only enhance the taste but also make your cheese board visually appealing. Arrange them thoughtfully around the cheeses for a beautiful presentation.

Seasonal Fruits and Nuts for Thanksgiving Cheese Board Ideas

Incorporating seasonal fruits and nuts is a fantastic way to celebrate Thanksgiving. They add freshness and a burst of flavor. Here are some great options:

  • Sliced Apples: Crisp and juicy, apples are a classic choice. Their sweetness pairs wonderfully with sharp cheeses.
  • Grapes: These bite-sized fruits are easy to grab and enjoy. They add a refreshing sweetness to the board.
  • Pears: For a seasonal twist, consider adding sliced pears. Their soft texture and sweet flavor complement cheese beautifully.

Don’t forget to sprinkle some nuts around the fruits for added texture. This combination not only tastes great but also looks stunning on your Thanksgiving cheese board!

Preparation of Thanksgiving Cheese Board Ideas

Step 1: Choosing the Right Board or Platter

The first step in creating your Thanksgiving cheese board is selecting the right board or platter. A large wooden or marble board works beautifully, as it provides a rustic and elegant backdrop for your cheeses and accompaniments. If you don’t have a cheese board, a large serving platter or even a clean cutting board can do the trick.

Consider the size of your board based on the number of guests you’re serving. A bigger board allows for more variety, while a smaller one can be perfect for an intimate gathering. Make sure the board is clean and dry before you start arranging your ingredients. This ensures that everything looks fresh and appetizing!

Step 2: Selecting and Arranging the Cheeses

Next, it’s time to select and arrange your cheeses. Start by cutting the brie and cheddar into wedges or cubes. This makes it easy for guests to grab a piece. Place these cheeses on the board, leaving some space between them for the other ingredients.

For the goat cheese, crumble it into a small bowl and place it on the board. This adds a nice visual element and makes it easy for guests to spread on crackers. Remember, the goal is to create an inviting and colorful display, so don’t be afraid to play around with the arrangement until it feels just right!

Step 3: Adding Accompaniments and Garnishes

Now it’s time to fill in the spaces around the cheese with your chosen accompaniments. Start by adding assorted crackers. Arrange them in a way that creates a beautiful contrast with the cheeses. You can even stack some crackers for added height.

Next, slice the apples into thin wedges and arrange them in a fan shape on one side of the board. Scatter grapes around the apples for a pop of color. Then, add small piles of dried cranberries and mixed nuts in various spots on the board. This not only enhances the flavor but also makes the board visually appealing.

Step 4: Final Touches for Presentation

Finally, it’s time for the finishing touches! Drizzle honey over the goat cheese or serve it in a small dish on the board. This adds a sweet element that pairs wonderfully with the tangy cheese.

To complete your Thanksgiving cheese board, garnish it with fresh rosemary sprigs. These not only add a festive touch but also a lovely aroma. Once everything is arranged, step back and admire your creation. Your Thanksgiving cheese board is now ready to be served!

Variation of Thanksgiving Cheese Board Ideas

Themed Cheese Boards for Different Tastes

Creating a themed cheese board can add a fun twist to your Thanksgiving celebration. By focusing on specific flavors or ingredients, you can cater to different tastes and preferences. Here are a few ideas to inspire you:

  • Italian Cheese Board: Include cheeses like mozzarella, parmesan, and gorgonzola. Pair them with Italian meats like prosciutto and salami. Add olives, sun-dried tomatoes, and a drizzle of balsamic glaze for a Mediterranean flair.
  • Spicy Cheese Board: For those who enjoy a kick, select cheeses like pepper jack and smoked gouda. Add spicy nuts, jalapeño slices, and hot pepper jelly. This board will surely excite the taste buds!
  • Sweet and Savory Board: Combine sweet cheeses like mascarpone with savory options like aged cheddar. Include honey, fig jam, and fresh fruits like strawberries and figs. This balance of flavors will delight your guests.

By choosing a theme, you can create a cohesive and exciting cheese board that reflects your guests’ preferences. Don’t hesitate to get creative and mix different elements to make it your own!

Dietary Considerations in Thanksgiving Cheese Board Ideas

When planning your Thanksgiving cheese board, it’s essential to consider dietary restrictions. This ensures that all your guests can enjoy the spread. Here are some tips to accommodate various dietary needs:

  • Vegetarian Options: Most cheeses are vegetarian-friendly, but double-check labels for rennet. Include plenty of fruits, nuts, and crackers that are free from animal products.
  • Gluten-Free Choices: Offer gluten-free crackers or fresh vegetables like cucumber and bell pepper slices. These can serve as great alternatives for dipping into cheese.
  • Dairy-Free Alternatives: For guests who are lactose intolerant or vegan, consider using nut-based cheeses. These can provide similar flavors and textures without dairy.

By being mindful of dietary considerations, you can create a Thanksgiving cheese board that everyone can enjoy. This thoughtful approach will make your gathering even more special!

Cooking Note for Thanksgiving Cheese Board Ideas

When it comes to preparing a Thanksgiving cheese board, there are a few important cooking notes to keep in mind. These tips will help ensure that your cheese board is not only delicious but also safe and enjoyable for everyone.

First, always check the expiration dates on your cheeses and accompaniments. Freshness is key to a great cheese board. If you’re using pre-packaged items, make sure they are within their use-by dates. This will help you avoid any unpleasant surprises when it’s time to serve your guests.

Next, consider the temperature of your cheeses. Cheese tastes best when served at room temperature. To achieve this, take your cheeses out of the refrigerator about 30 to 60 minutes before serving. This allows the flavors to develop fully, making each bite more enjoyable.

Additionally, keep food safety in mind. If your cheese board will be out for an extended period, especially in warm environments, it’s wise to monitor the temperature. Cheese can spoil if left out too long. As a general rule, aim to keep your cheese board at room temperature for no more than two hours.

Lastly, don’t hesitate to experiment with flavors and textures. While the classic combinations are always a hit, trying new cheeses or accompaniments can surprise and delight your guests. Whether it’s a unique cheese or an unexpected fruit, these little twists can make your Thanksgiving cheese board truly memorable.

By following these cooking notes, you’ll create a safe, delicious, and visually stunning Thanksgiving cheese board that everyone will love!

Serving Suggestions for Thanksgiving Cheese Board Ideas

Pairing Wines with Your Cheese Board

Wine can elevate your Thanksgiving cheese board experience. The right wine enhances the flavors of the cheese and complements the accompaniments. Here are some excellent wine pairings to consider:

  • Chardonnay: This white wine is creamy and buttery, making it a perfect match for brie cheese. Its fruity notes also pair well with apples and grapes.
  • Cabernet Sauvignon: A bold red wine, Cabernet Sauvignon works wonderfully with sharp cheddar. Its rich flavors balance the cheese’s intensity.
  • Pinot Noir: This light red wine is versatile and pairs nicely with goat cheese. Its fruity and earthy notes enhance the tanginess of the cheese.
  • Prosecco: For a bubbly option, Prosecco is refreshing and pairs well with a variety of cheeses. Its sweetness complements dried cranberries and nuts.

When serving wine, consider offering a small selection. This allows guests to choose their favorite pairing. You can even create a mini wine tasting experience alongside your cheese board. This adds an interactive element to your gathering!

Creative Serving Ideas for Thanksgiving Cheese Board Ideas

Serving your Thanksgiving cheese board can be just as fun as preparing it. Here are some creative ideas to make your presentation stand out:

  • Use Different Heights: Elevate your cheese board by using small stands or cake plates. This adds dimension and makes the display more visually appealing.
  • Incorporate Seasonal Decor: Add small pumpkins, gourds, or fall leaves around the board. This enhances the festive atmosphere and ties in with the Thanksgiving theme.
  • Label Your Cheeses: Use small chalkboard signs or tags to label each cheese. This not only informs guests but also adds a charming touch to your board.
  • Offer Dipping Options: Include small bowls of dips like fig jam, mustard, or olive tapenade. These can add extra flavor and variety to your cheese board.

By incorporating these creative serving ideas, you can make your Thanksgiving cheese board a centerpiece of your holiday gathering. It will not only be delicious but also a feast for the eyes!

Tips for Creating the Perfect Thanksgiving Cheese Board Ideas

Timing Your Cheese Board Preparation

Timing is everything when it comes to preparing your Thanksgiving cheese board. To ensure everything is fresh and delicious, plan your preparation carefully. Start by gathering all your ingredients a day or two before the big day. This way, you can check for freshness and make any last-minute purchases.

On the day of your gathering, aim to prepare your cheese board about 30 to 60 minutes before serving. This allows the cheeses to come to room temperature, enhancing their flavors. If you’re using fruits, slice them just before serving to keep them looking fresh and vibrant. You can also prepare your accompaniments, like nuts and crackers, ahead of time. Just store them in airtight containers to maintain their crunch.

Lastly, if you’re planning to include any dips or spreads, prepare those in advance as well. This will save you time and stress on the day of your celebration. By timing your preparation well, you’ll create a stunning cheese board that’s ready to impress your guests!

Balancing Flavors and Textures

Creating a perfect Thanksgiving cheese board is all about balance. You want to offer a variety of flavors and textures that complement each other. Start by selecting cheeses with different profiles. For example, pair creamy brie with sharp cheddar and tangy goat cheese. This variety will keep your guests excited as they explore different tastes.

Next, consider the accompaniments. Include sweet elements like dried cranberries and honey to contrast with the savory cheeses. Crunchy nuts add texture, while soft fruits like grapes and apples provide freshness. Aim for a mix of sweet, salty, and savory flavors to create a well-rounded experience.

Don’t forget about the visual appeal! Arrange your cheeses and accompaniments in a way that’s colorful and inviting. Use different shapes and sizes to create interest. By balancing flavors and textures, you’ll ensure that your Thanksgiving cheese board is not only delicious but also a feast for the eyes!

Breakdown of Time for Thanksgiving Cheese Board Ideas

Prep Time

Preparing your Thanksgiving cheese board is a fun and creative process. The prep time can vary based on how elaborate you want your board to be. Generally, you can expect to spend about 30 to 45 minutes gathering ingredients and arranging them on your board. This includes:

  • Choosing and cutting the cheeses into wedges or cubes.
  • Slicing fruits like apples and pears.
  • Arranging crackers and nuts around the cheeses.
  • Drizzling honey and adding garnishes.

Taking your time during this step allows you to create a beautiful and inviting display that will impress your guests.

Cooking Time

While there’s no actual cooking involved in making a cheese board, you may want to consider the time needed for any dips or spreads you plan to include. If you’re preparing homemade dips, allow about 15 to 20 minutes for that. However, if you’re using store-bought options, you can skip this step entirely!

Overall, the cooking time for a Thanksgiving cheese board is minimal, making it a stress-free addition to your holiday meal.

Total Time

In total, you can expect to spend about 45 minutes to 1 hour on your Thanksgiving cheese board. This includes prep time and any additional time for dips or spreads. The beauty of a cheese board is that it can be prepared ahead of time, allowing you to focus on other aspects of your Thanksgiving celebration.

By planning your time wisely, you’ll create a stunning cheese board that adds a delightful touch to your holiday gathering!

Nutritional Information for Thanksgiving Cheese Board Ideas

Calories

When enjoying a Thanksgiving cheese board, it’s essential to be mindful of the calories. Each serving of this delightful spread contains approximately 250 calories. This makes it a relatively light option for an appetizer, allowing guests to indulge without feeling overly full before the main meal. The combination of cheeses, fruits, and nuts provides a satisfying snack that can keep everyone energized for the festivities ahead.

Protein

Protein is an important nutrient, especially during a holiday feast. Each serving of your Thanksgiving cheese board offers about 8 grams of protein. The cheeses, particularly the sharp cheddar and goat cheese, contribute significantly to this protein content. This makes the cheese board not only delicious but also a good source of energy, helping to keep your guests feeling satisfied as they mingle and enjoy the celebration.

Sodium

Sodium is another factor to consider when preparing your cheese board. On average, each serving contains around 400 milligrams of sodium. While cheese can be higher in sodium, it’s important to balance this with fresh fruits and nuts, which are naturally low in sodium. If you’re concerned about sodium intake, consider choosing lower-sodium cheese options or serving smaller portions. This way, everyone can enjoy the flavors without worrying too much about their salt intake.

FAQs about Thanksgiving Cheese Board Ideas

What cheeses are best for a Thanksgiving cheese board?

When selecting cheeses for your Thanksgiving cheese board, variety is key. A mix of textures and flavors will delight your guests. Some of the best cheeses to include are:

  • Brie: This soft cheese is creamy and mild, making it a crowd favorite.
  • Sharp Cheddar: Its bold flavor contrasts beautifully with softer cheeses.
  • Goat Cheese: Tangy and crumbly, it adds a unique taste to the board.
  • Gouda: This semi-hard cheese is rich and nutty, perfect for pairing with fruits.
  • Blue Cheese: For those who enjoy strong flavors, blue cheese can be a great addition.

Feel free to mix and match these cheeses based on your guests’ preferences. The goal is to create a balanced selection that everyone can enjoy!

How can I make a Thanksgiving cheese board vegetarian-friendly?

Making your Thanksgiving cheese board vegetarian-friendly is simple! Most cheeses are already suitable for vegetarians, but here are some tips to ensure everyone can enjoy it:

  • Check Cheese Labels: Some cheeses contain animal rennet. Look for vegetarian-friendly options.
  • Focus on Plant-Based Accompaniments: Include a variety of fruits, nuts, and vegetables. These add color and flavor without any animal products.
  • Offer Dips: Consider adding hummus or bean dips as tasty spreads that are vegetarian-friendly.

By being mindful of your selections, you can create a delicious cheese board that caters to vegetarian guests!

What fruits pair well with cheese for Thanksgiving?

Fruits are a fantastic addition to your Thanksgiving cheese board. They provide sweetness and freshness that balance the richness of the cheese. Here are some fruits that pair well:

  • Apples: Their crisp texture and sweetness complement sharp cheeses.
  • Pears: Soft and juicy, pears work beautifully with creamy cheeses.
  • Grapes: These bite-sized fruits are easy to enjoy and add a refreshing touch.
  • Dried Cranberries: Their tartness enhances the flavors of the cheeses.
  • Figs: Fresh or dried, figs add a unique sweetness that pairs well with many cheeses.

Mixing these fruits on your board will create a colorful and flavorful experience for your guests!

How far in advance can I prepare my Thanksgiving cheese board?

Preparing your Thanksgiving cheese board in advance can save you time on the big day. Here’s a timeline to help you plan:

  • 1-2 Days Before: Purchase all your ingredients. You can also prepare any dips or spreads at this time.
  • Day Of: Assemble your cheese board about 30-60 minutes before serving. This allows the cheeses to come to room temperature, enhancing their flavors.

While you can cut fruits ahead of time, it’s best to slice them just before serving to keep them fresh. By planning ahead, you’ll have a stunning cheese board ready to impress your guests!

Conclusion on Thanksgiving Cheese Board Ideas

As Thanksgiving approaches, the excitement of gathering with family and friends fills the air. One delightful way to enhance your holiday celebration is by creating a stunning Thanksgiving cheese board. This versatile dish not only serves as a beautiful centerpiece but also offers a variety of flavors and textures that cater to every palate.

By carefully selecting your cheeses, accompaniments, and seasonal fruits, you can craft a cheese board that reflects the spirit of Thanksgiving. Remember, it’s all about balance—combining creamy, sharp, and tangy cheeses with sweet fruits and crunchy nuts creates a delightful experience for your guests. Plus, the communal aspect of sharing a cheese board fosters connection and conversation, making your gathering even more special.

Don’t forget to consider dietary needs and preferences, ensuring that everyone can enjoy the spread. With a little creativity, you can customize your cheese board to suit various tastes, making it a truly inclusive dish. Whether you opt for classic combinations or explore themed boards, the possibilities are endless.

As you prepare for your Thanksgiving feast, let your cheese board shine as a delicious and inviting appetizer. With the right planning and presentation, it will surely impress your guests and become a cherished part of your holiday traditions. So gather your ingredients, unleash your creativity, and enjoy the process of making a memorable Thanksgiving cheese board that everyone will love!

Hawaiian Roll French Toast Casserole Recipe is delightful!

Introduction to Hawaiian Roll French Toast Casserole Recipe

Hawaiian Roll French Toast Casserole Recipe is a sweet and satisfying treat that combines the soft, fluffy texture of Hawaiian sweet rolls with a rich, creamy custard. This dish is perfect for special occasions, holiday gatherings, or even a cozy weekend morning.

Imagine waking up to the warm aroma of cinnamon and vanilla wafting through your home. This casserole is not only easy to prepare, but it also allows you to enjoy a delicious meal without spending hours in the kitchen. With just a few simple ingredients, you can create a dish that is both comforting and indulgent.

The beauty of this recipe lies in its versatility. You can customize it to suit your taste by adding fruits, nuts, or even chocolate chips. Plus, it can be made ahead of time, making it a convenient option for busy mornings. Whether you serve it with a drizzle of maple syrup, a dusting of powdered sugar, or a handful of fresh berries, this casserole is sure to be a hit.

So, gather your ingredients and get ready to whip up a batch of this delightful Hawaiian Roll French Toast Casserole. Your taste buds will thank you!

Ingredients for Hawaiian Roll French Toast Casserole Recipe

Hawaiian Roll French Toast Casserole Recipe, you’ll need a few simple ingredients. Each component plays a vital role in achieving that perfect blend of flavors and textures. Here’s what you’ll need:

  • 6 cups Hawaiian sweet rolls, cut into cubes
  • 4 large eggs
  • 1 cup whole milk
  • 1 cup heavy cream
  • 1/2 cup granulated sugar
  • 1 teaspoon vanilla extract
  • 1 teaspoon ground cinnamon
  • 1/4 teaspoon salt
  • 1/2 cup unsalted butter, melted
  • 1/2 cup maple syrup (for serving)
  • Powdered sugar (for serving)
  • Fresh berries (optional, for serving)

These ingredients come together to create a rich and creamy casserole that is both sweet and satisfying. The Hawaiian sweet rolls provide a unique flavor and texture, while the eggs and cream create a luscious custard. The addition of vanilla and cinnamon adds warmth and depth to the dish.

Feel free to get creative! You can add your favorite fruits or nuts to enhance the flavor even more. This recipe is all about making it your own, so don’t hesitate to experiment with different ingredients.

Step-by-Step Preparation of Hawaiian Roll French Toast Casserole Recipe

Hawaiian Roll French Toast Casserole Recipe. This step-by-step guide will help you create a delicious dish that everyone will love. Let’s get started!

Step 1: Preparing the Hawaiian Rolls

First, take your Hawaiian sweet rolls and cut them into cubes. Aim for about 1-inch pieces. This size allows the rolls to soak up the custard mixture perfectly. Place the cubed rolls in a large mixing bowl. Make sure to use fresh rolls for the best flavor and texture. If your rolls are a bit stale, don’t worry! They will still work well in this recipe.

Step 2: Mixing the Egg Mixture

Next, grab a separate large mixing bowl. In this bowl, whisk together the eggs, whole milk, heavy cream, granulated sugar, vanilla extract, ground cinnamon, and salt. Whisk until everything is well combined and smooth. This mixture is what will transform your rolls into a creamy, custardy delight. The combination of eggs and cream is key to achieving that rich texture.

Step 3: Assembling the Casserole

Now it’s time to combine the two mixtures. Gently fold the cubed Hawaiian rolls into the egg mixture. Make sure every piece is coated well. Let the mixture sit for about 10 minutes. This resting time allows the rolls to soak up the custard, ensuring a moist and flavorful casserole. After soaking, pour the mixture into your greased 9×13-inch baking dish. Spread it out evenly, so it bakes uniformly. Drizzle the melted butter over the top for added richness.

Step 4: Baking the Casserole

Preheat your oven to 350°F (175°C) if you haven’t done so already. Place the baking dish in the oven and bake for 30-35 minutes. You’ll know it’s ready when the top is golden brown and the center is set. Once baked, remove it from the oven and let it cool for a few minutes. This cooling time helps the casserole firm up a bit, making it easier to serve.

And there you have it! Your Hawaiian Roll French Toast Casserole is now ready to be enjoyed. The warm, sweet aroma will fill your kitchen, making it hard to resist. Get ready to serve this delightful dish to your family and friends!

Variation of Hawaiian Roll French Toast Casserole Recipe

Hawaiian Roll French Toast Casserole Recipe is already a delicious treat, but you can easily enhance it with some fun variations. By adding fruits, nuts, or alternative toppings, you can create a unique dish that suits your taste. Let’s explore some exciting options!

Adding Fruits and Nuts

Fruits and nuts can elevate your casserole to a whole new level. Consider mixing in some fresh or frozen fruits before baking. Berries, such as blueberries or strawberries, add a burst of flavor and color. You can also use sliced bananas or diced apples for a delightful twist.

If you enjoy a bit of crunch, adding nuts is a great idea. Chopped pecans or walnuts can provide a satisfying texture. Simply fold them into the mixture along with the cubed rolls. This addition not only enhances the flavor but also adds healthy fats and protein to your dish.

For a tropical touch, try adding shredded coconut or diced pineapple. These ingredients will complement the sweetness of the Hawaiian rolls beautifully. Feel free to mix and match your favorite fruits and nuts to create a casserole that’s truly your own!

Alternative Toppings for Hawaiian Roll French Toast Casserole Recipe

Toppings can make a big difference in how your casserole is enjoyed. While maple syrup is a classic choice, there are many other delicious options to consider. A drizzle of honey or agave syrup can add a different sweetness. You might also try a fruit compote made from simmered berries or peaches for a fresh, fruity flavor.

For a decadent touch, consider adding whipped cream or a dollop of mascarpone cheese on top. This creamy addition will make each bite feel indulgent. You can also sprinkle some powdered sugar over the casserole for a beautiful presentation.

Lastly, don’t forget about the option of serving it with a scoop of ice cream! This can turn your breakfast into a delightful dessert. With these alternative toppings, your Hawaiian Roll French Toast Casserole will be a hit at any gathering!

Cooking Note for Hawaiian Roll French Toast Casserole Recipe

Hawaiian Roll French Toast Casserole Recipe, there are a few important cooking notes to keep in mind. These tips will help ensure that your casserole turns out perfectly every time.

First, using fresh Hawaiian sweet rolls is key. Fresh rolls will absorb the custard mixture better, resulting in a moist and flavorful casserole. If you can, buy them the day you plan to make the dish. However, if you only have day-old rolls, they will still work well. Just make sure to cut them into cubes and let them soak longer in the egg mixture.

Next, be mindful of the baking time. Every oven is different, so keep an eye on your casserole as it bakes. You want the top to be golden brown and the center to be set. If you notice that the top is browning too quickly, you can cover it loosely with aluminum foil to prevent burning while the center continues to cook.

Additionally, letting the casserole cool for a few minutes after baking is essential. This cooling time allows the casserole to firm up, making it easier to cut and serve. If you try to serve it immediately, it may fall apart, and you won’t get those beautiful slices.

Lastly, feel free to experiment with the spices. While cinnamon is a classic choice, you can also add nutmeg or even a pinch of cardamom for a unique flavor twist. These spices can enhance the overall taste and make your casserole even more delightful.

By following these cooking notes, you’ll be well on your way to creating a delicious Hawaiian Roll French Toast Casserole that everyone will love!

Serving Suggestions for Hawaiian Roll French Toast Casserole Recipe

Hawaiian Roll French Toast Casserole Recipe is baked to perfection, it’s time to think about how to serve it. Presentation can elevate your dish and make it even more enjoyable. Here are some delightful serving suggestions to consider:

  • Maple Syrup: A classic choice! Drizzle warm maple syrup over each serving for a sweet touch. The syrup complements the rich flavors of the casserole beautifully.
  • Powdered Sugar: For a touch of elegance, dust powdered sugar over the top just before serving. This adds a lovely sweetness and makes the dish look appealing.
  • Fresh Berries: Add a handful of fresh berries, such as strawberries, blueberries, or raspberries, on the side or on top. They not only enhance the flavor but also add a pop of color.
  • Whipped Cream: A dollop of whipped cream can make your casserole feel extra special. It adds a light and airy texture that pairs well with the rich custard.
  • Ice Cream: For a fun twist, serve warm slices with a scoop of vanilla or coconut ice cream. This turns your breakfast into a delightful dessert!
  • Yogurt: For a healthier option, consider serving with a side of Greek yogurt. It adds creaminess and a tangy flavor that balances the sweetness of the casserole.

Feel free to mix and match these serving ideas to create a beautiful and delicious presentation. Whether it’s for a special occasion or a cozy family breakfast, these suggestions will make your Hawaiian Roll French Toast Casserole a memorable dish!

Tips for Perfecting Hawaiian Roll French Toast Casserole Recipe

Hawaiian Roll French Toast Casserole Recipe turns out perfectly every time, consider these helpful tips. They will guide you in achieving a delicious and satisfying dish that everyone will love.

First, always use fresh Hawaiian sweet rolls. Fresh rolls absorb the custard mixture better, resulting in a moist and flavorful casserole. If you can, buy them the day you plan to make the dish. However, if you only have day-old rolls, they will still work well. Just make sure to cut them into cubes and let them soak longer in the egg mixture.

Next, don’t skip the soaking time! Allowing the cubed rolls to soak in the egg mixture for at least 10 minutes is crucial. This step ensures that every piece is well-coated and absorbs the flavors. If you have time, letting them soak for 20-30 minutes can enhance the texture even more.

When it comes to baking, keep an eye on the casserole. Every oven is different, so baking times may vary. You want the top to be golden brown and the center to be set. If you notice that the top is browning too quickly, cover it loosely with aluminum foil. This will prevent burning while the center continues to cook.

For added flavor, consider experimenting with spices. While cinnamon is a classic choice, you can also add nutmeg or a pinch of cardamom for a unique twist. These spices can enhance the overall taste and make your casserole even more delightful.

Lastly, let the casserole cool for a few minutes after baking. This cooling time allows it to firm up, making it easier to cut and serve. If you try to serve it immediately, it may fall apart, and you won’t get those beautiful slices.

By following these tips, you’ll be well on your way to creating a delicious Hawaiian Roll French Toast Casserole that everyone will rave about!

Breakdown of Time for Hawaiian Roll French Toast Casserole Recipe

Hawaiian Roll French Toast Casserole Recipe is essential for planning your meal. Here’s a simple breakdown of the time required for preparation and cooking. This will help you manage your schedule and ensure everything is ready when you want to serve it.

Prep Time

The prep time for this delicious casserole is approximately 15-20 minutes. This includes gathering your ingredients, cutting the Hawaiian rolls into cubes, and mixing the egg custard. Make sure to take your time during this step to ensure everything is well-prepared. A little extra care in the preparation will lead to a more flavorful dish!

Cooking Time

Once your casserole is assembled, it will need to bake in the oven for about 30-35 minutes. During this time, the top will become golden brown, and the center will set perfectly. Keep an eye on it as it bakes, and remember that every oven is different. You may need to adjust the time slightly based on your oven’s performance.

Total Time

In total, you can expect to spend around 45-55 minutes from start to finish. This includes both the prep and cooking times. With this quick and easy recipe, you’ll have a delightful breakfast or brunch dish ready to serve in no time. Enjoy the process, and get ready to impress your family and friends with this tasty Hawaiian Roll French Toast Casserole!

Nutritional Information for Hawaiian Roll French Toast Casserole Recipe

Hawaiian Roll French Toast Casserole Recipe is important for those who are mindful of their dietary choices. This delicious dish is not only a treat but also provides essential nutrients. Here’s a breakdown of the key nutritional components per serving:

Calories

Each serving of this delightful casserole contains approximately 350 calories. This calorie count makes it a satisfying option for breakfast or brunch without being overly indulgent. The combination of Hawaiian sweet rolls, eggs, and cream contributes to the overall calorie content, providing energy to kickstart your day.

Protein

In terms of protein, each serving offers about 7 grams. This protein content comes primarily from the eggs and milk used in the recipe. Protein is essential for building and repairing tissues, making this casserole a good choice to fuel your morning activities.

Sodium

The sodium content in each serving is approximately 300 mg. While this is a moderate amount, it’s important to be aware of your overall sodium intake, especially if you are watching your salt consumption. Using unsalted butter and fresh ingredients can help manage sodium levels in your dish.

Hawaiian Roll French Toast Casserole Recipe provides a balanced mix of calories, protein, and sodium, making it a delicious and satisfying option for breakfast or brunch. Enjoy this delightful dish while being mindful of your nutritional needs!

FAQs about Hawaiian Roll French Toast Casserole Recipe

Can I make Hawaiian Roll French Toast Casserole Recipe ahead of time?

Hawaiian Roll French Toast Casserole Recipe is its make-ahead convenience. You can prepare the casserole the night before. Simply follow the recipe up to the point of baking, then cover it tightly with plastic wrap or aluminum foil. Store it in the refrigerator overnight. In the morning, just remove it from the fridge, let it sit at room temperature for about 15 minutes, and then bake as directed. This way, you can enjoy a delicious breakfast without the morning rush!

What can I substitute for Hawaiian rolls in this recipe?

If you can’t find Hawaiian rolls, don’t worry! There are several great substitutes. You can use any soft, sweet bread, such as challah, brioche, or even cinnamon rolls. These alternatives will still provide a delightful flavor and texture. Just make sure to cut them into similar-sized cubes to ensure even soaking and baking. Each option will give your casserole a unique twist while keeping it delicious!

How do I store leftovers of Hawaiian Roll French Toast Casserole Recipe?

Hawaiian Roll French Toast Casserole has cooled completely, transfer any leftovers to an airtight container. You can keep it in the refrigerator for up to 3-4 days. When you’re ready to enjoy it again, simply reheat individual portions in the microwave or warm it in the oven at 350°F (175°C) until heated through. This way, you can savor the deliciousness of your casserole even after the initial serving!

Can I freeze Hawaiian Roll French Toast Casserole Recipe?

Yes, you can freeze this delightful casserole! To freeze, prepare the casserole as directed but do not bake it. Instead, cover it tightly with plastic wrap and then with aluminum foil to prevent freezer burn. It can be stored in the freezer for up to 2 months. When you’re ready to bake it, remove it from the freezer and let it thaw in the refrigerator overnight. Then, bake it as usual. This makes it a fantastic option for meal prep or special occasions!

Conclusion on Hawaiian Roll French Toast Casserole Recipe

Hawaiian Roll French Toast Casserole Recipe is a delightful dish that brings joy to any breakfast or brunch table. Its sweet, fluffy texture combined with a rich custard makes it a favorite among family and friends. Whether you’re celebrating a special occasion or simply enjoying a cozy weekend morning, this casserole is sure to impress.

With its easy preparation and versatility, you can customize it to suit your taste. From adding fruits and nuts to experimenting with different toppings, the possibilities are endless. Plus, the make-ahead option allows you to enjoy a delicious meal without the morning rush, making it perfect for busy days.

As you gather around the table to share this warm and comforting dish, you’ll create lasting memories with your loved ones. The aroma of cinnamon and vanilla will fill your home, inviting everyone to indulge in a slice of this delightful casserole. So, don’t hesitate to whip up this recipe and treat yourself and your family to a breakfast that’s both satisfying and delicious.

Hawaiian Roll French Toast Casserole Recipe today, and let it become a cherished part of your breakfast traditions. Enjoy every bite, and happy cooking!

Blueberry Baked Oatmeal Recipe is a healthy breakfast!

Introduction to Blueberry Baked Oatmeal Recipe

Blueberry Baked Oatmeal Recipe is a fantastic choice that combines the goodness of oats with the sweetness of blueberries. This dish is not only easy to prepare but also packed with nutrients, making it perfect for busy mornings or leisurely weekends.

Imagine waking up to the warm aroma of baked oatmeal wafting through your kitchen. This recipe is a delightful way to start your day. It’s comforting, filling, and can be enjoyed by the whole family. Plus, it’s versatile! You can easily customize it with your favorite fruits or nuts.

Blueberries are not just tasty; they are also rich in antioxidants, vitamins, and minerals. They can help boost your immune system and improve heart health. When combined with oats, which are high in fiber, this dish becomes a powerhouse of nutrition. It keeps you full longer and provides sustained energy throughout the day.

Blueberry Baked Oatmeal Recipe is sure to impress. It’s simple enough for beginners yet delicious enough to satisfy even the most discerning palates. So, let’s dive into the ingredients and get started on this delightful breakfast treat!

Ingredients for Blueberry Baked Oatmeal Recipe

Blueberry Baked Oatmeal Recipe, you’ll need a few simple ingredients. These items are easy to find and can often be found in your pantry or local grocery store. Here’s what you’ll need:

  • 2 cups rolled oats: These oats form the base of your baked oatmeal, providing a hearty texture.
  • 1 teaspoon baking powder: This helps the oatmeal rise and become fluffy.
  • 1 teaspoon ground cinnamon: A warm spice that adds flavor and aroma.
  • 1/4 teaspoon salt: Enhances the overall taste of the dish.
  • 2 cups almond milk: You can use any milk of your choice, such as cow’s milk or oat milk.
  • 1/4 cup maple syrup: This natural sweetener adds a lovely sweetness. Honey is a great alternative.
  • 1 teaspoon vanilla extract: Adds a delightful flavor that complements the blueberries.
  • 1 cup fresh or frozen blueberries: The star of the dish! They provide sweetness and a burst of flavor.
  • 1/2 cup chopped walnuts (optional): For added crunch and healthy fats.
  • 1/4 cup brown sugar (for topping): This gives a sweet, caramelized finish.
  • 1/4 cup unsalted butter, melted (for topping): Adds richness to the topping.
  • 1/2 cup old-fashioned oats (for topping): Creates a crunchy texture on top.
  • 1/2 teaspoon ground cinnamon (for topping): Enhances the flavor of the topping.

With these ingredients, you’re well on your way to making a delicious and nutritious breakfast. Feel free to adjust the quantities based on your taste preferences or dietary needs. Now that you have everything ready, let’s move on to the preparation steps!

Preparation of Blueberry Baked Oatmeal Recipe

Blueberry Baked Oatmeal Recipe. This process is straightforward and quick, making it perfect for any morning. Follow these simple steps to create a delicious breakfast that everyone will love!

Step 1: Preheat the Oven

First things first, preheat your oven to 350°F (175°C). This step is crucial as it ensures that your oatmeal bakes evenly. While the oven heats up, you can prepare the rest of your ingredients. Don’t forget to grease a 9×9-inch baking dish to prevent sticking!

Step 2: Prepare the Oatmeal Mixture

In a large bowl, combine the rolled oats, baking powder, ground cinnamon, and salt. Mix these dry ingredients well. This combination will give your baked oatmeal a lovely texture and flavor. Make sure there are no clumps of baking powder or salt!

Step 3: Combine Wet and Dry Ingredients

In another bowl, whisk together the almond milk, maple syrup, and vanilla extract. This mixture adds moisture and sweetness to your oatmeal. Once combined, pour the wet ingredients into the dry ingredients. Stir gently until everything is well mixed. You want a nice, even consistency without over-mixing.

Step 4: Add Blueberries

Now comes the fun part! Gently fold in the blueberries and walnuts, if you’re using them. The blueberries will burst during baking, creating a deliciously sweet flavor throughout the dish. Make sure they are evenly distributed in the mixture for the best results.

Step 5: Bake the Oatmeal

Pour the oatmeal mixture into the prepared baking dish, spreading it out evenly. In a small bowl, mix together the brown sugar, melted butter, old-fashioned oats, and ground cinnamon for the topping. Sprinkle this mixture evenly over the oatmeal. Bake in the preheated oven for 30-35 minutes, or until the top is golden brown and the oatmeal is set. Once done, allow it to cool for about 10 minutes before serving. Enjoy your warm, comforting breakfast!

Variation of Blueberry Baked Oatmeal Recipe

Blueberry Baked Oatmeal Recipe is its versatility. You can easily switch up the ingredients to suit your taste or dietary needs. Let’s explore some alternative fruits and dietary modifications that can make this dish even more delightful!

Alternative Fruits to Use

If blueberries aren’t your favorite, don’t worry! There are plenty of other fruits you can use in this recipe. Here are some tasty alternatives:

  • Raspberries: These tart berries add a nice contrast to the sweetness of the oatmeal.
  • Strawberries: Chopped strawberries bring a juicy sweetness that pairs well with oats.
  • Bananas: Mashed bananas can add natural sweetness and a creamy texture.
  • Peaches: Fresh or frozen peaches can give a lovely summer flavor to your baked oatmeal.
  • Apples: Diced apples, especially when mixed with cinnamon, create a warm, comforting taste.

Feel free to mix and match these fruits! You can even create a fruit medley for a colorful and flavorful dish.

Dietary Modifications

Blueberry Baked Oatmeal Recipe. Here are some ideas to cater to different dietary needs:

  • Gluten-Free: Use certified gluten-free oats to ensure your baked oatmeal is safe for those with gluten sensitivities.
  • Vegan: This recipe is already vegan-friendly if you use maple syrup and plant-based milk. Just skip the butter or use a vegan alternative.
  • Nut-Free: If you have nut allergies, simply omit the walnuts or replace them with seeds like sunflower or pumpkin seeds.
  • Lower Sugar: Reduce the amount of maple syrup or use a sugar substitute to lower the sweetness without sacrificing flavor.

These modifications allow everyone to enjoy this delicious breakfast, no matter their dietary preferences. So, get creative and make this recipe your own!

Cooking Note for Blueberry Baked Oatmeal Recipe

Blueberry Baked Oatmeal Recipe, there are a few cooking notes to keep in mind. These tips will help ensure that your baked oatmeal turns out perfectly every time. Let’s explore some important points to consider!

First, always check the freshness of your ingredients. Using fresh blueberries will enhance the flavor and texture of your dish. If you opt for frozen blueberries, there’s no need to thaw them beforehand. Just fold them into the mixture directly from the freezer. This helps prevent the batter from becoming too watery.

Next, be mindful of the baking time. Ovens can vary in temperature, so keep an eye on your oatmeal as it bakes. You want the top to be golden brown and the center to be set. If you notice that the top is browning too quickly, you can cover it loosely with aluminum foil to prevent burning while the inside continues to cook.

Additionally, let your baked oatmeal cool for about 10 minutes before serving. This cooling time allows the dish to firm up a bit, making it easier to cut into squares. It also helps the flavors meld together, resulting in a more delicious bite!

Lastly, feel free to experiment with the toppings. While the brown sugar and oat topping is delightful, you can also try adding a sprinkle of shredded coconut, a drizzle of nut butter, or even a dollop of yogurt on top when serving. These additions can elevate your breakfast experience and add extra nutrition.

Blueberry Baked Oatmeal Recipe. Enjoy the process and have fun creating a breakfast that’s not only tasty but also nourishing!

Serving Suggestions for Blueberry Baked Oatmeal Recipe

Blueberry Baked Oatmeal Recipe is out of the oven and cooled slightly, it’s time to serve it up! This dish is not only delicious but also very versatile when it comes to serving options. Here are some delightful ways to enjoy your baked oatmeal:

  • Warm with Milk: Serve your baked oatmeal warm, drizzled with a splash of almond milk or your favorite milk. This adds creaminess and enhances the overall flavor.
  • Top with Yogurt: A dollop of Greek yogurt or dairy-free yogurt on top adds a creamy texture and a boost of protein. You can also sprinkle some granola for extra crunch!
  • Fresh Fruit: Add fresh fruit on top, such as sliced bananas, strawberries, or more blueberries. This not only looks appealing but also adds freshness and flavor.
  • Nut Butter Drizzle: A drizzle of almond butter, peanut butter, or sunflower seed butter can elevate the dish. It adds richness and healthy fats, making it even more satisfying.
  • Maple Syrup or Honey: For those who love a touch of sweetness, drizzle a little extra maple syrup or honey over the top just before serving. This can enhance the flavor and make it feel like a special treat.
  • Spices and Nuts: Sprinkle some extra cinnamon or chopped nuts on top for added flavor and texture. This can make each bite even more enjoyable!

Blueberry Baked Oatmeal Recipe to suit your taste. Whether you prefer it simple or loaded with toppings, this dish is sure to please everyone at the breakfast table. Enjoy your delicious creation!

Tips for Perfecting Your Blueberry Baked Oatmeal Recipe

Blueberry Baked Oatmeal Recipe truly shine, consider these helpful tips. They will guide you in achieving the best flavor and texture, ensuring that every bite is delightful. Let’s explore some expert advice to elevate your baking game!

  • Use Quality Ingredients: The quality of your ingredients can significantly impact the final dish. Opt for fresh, organic blueberries when possible. They not only taste better but also provide more nutrients.
  • Don’t Overmix: When combining wet and dry ingredients, mix just until combined. Overmixing can lead to a dense texture. A few lumps are perfectly fine!
  • Experiment with Spices: While cinnamon is a classic choice, feel free to experiment with other spices. Nutmeg, ginger, or even a pinch of cardamom can add a unique twist to your baked oatmeal.
  • Adjust Sweetness: Taste your mixture before baking. If you prefer a sweeter oatmeal, add a bit more maple syrup or honey. Remember, the sweetness can also come from the fruit you choose.
  • Let It Rest: After baking, allow your oatmeal to rest for a few minutes. This helps it set and makes it easier to cut into squares. Plus, the flavors will meld together beautifully!
  • Store Properly: If you have leftovers, store them in an airtight container in the fridge. Reheat individual portions in the microwave for a quick breakfast on busy mornings.
  • Get Creative with Toppings: Don’t hesitate to get creative with your toppings! Try adding seeds, coconut flakes, or even a sprinkle of chocolate chips for a fun twist.

Blueberry Baked Oatmeal Recipe. Each batch will be delicious, nutritious, and sure to impress your family and friends. Happy baking!

Breakdown of Time for Blueberry Baked Oatmeal Recipe

Blueberry Baked Oatmeal Recipe is essential for planning your breakfast. Knowing how long each step takes can help you manage your morning routine better. Here’s a simple breakdown of the time involved in preparing this delicious dish.

Prep Time

Blueberry Baked Oatmeal Recipe is approximately 15 minutes. During this time, you will gather all your ingredients, preheat the oven, and mix the dry and wet ingredients together. It’s a quick process, making it easy to fit into your busy morning schedule!

Cooking Time

Once you’ve prepared the mixture, the cooking time is about 30 to 35 minutes. This is when the oatmeal bakes in the oven, allowing the flavors to meld together and the top to become golden brown. Keep an eye on it as it bakes to ensure it doesn’t overcook.

Total Time

In total, you can expect the entire process to take around 45 to 50 minutes. This includes both the prep and cooking times. With such a short time commitment, you can enjoy a warm, hearty breakfast that’s both nutritious and satisfying. Plus, the leftovers can be stored for quick breakfasts throughout the week!

Blueberry Baked Oatmeal Recipe. Enjoy the process and the delicious results!

Nutritional Information for Blueberry Baked Oatmeal Recipe

Blueberry Baked Oatmeal Recipe is not only delicious but also packed with nutrients. Let’s break down the nutritional information to see how this breakfast option can fit into your daily intake.

Calories

Blueberry Baked Oatmeal Recipe contains approximately 210 calories. This makes it a satisfying yet light breakfast choice. The combination of oats and blueberries provides energy to kickstart your day without weighing you down. It’s a great way to fuel your morning activities!

Protein

In terms of protein, each serving offers about 5 grams. While this may not seem like a lot, it contributes to your daily protein needs. Pairing your baked oatmeal with yogurt or nut butter can boost the protein content even further. This combination will help keep you feeling full and satisfied until your next meal.

Sodium

The sodium content in this recipe is relatively low, with each serving containing around 150 milligrams. This is beneficial for those watching their sodium intake. By using natural ingredients like oats and fresh fruit, you can enjoy a wholesome breakfast without excessive salt. It’s a heart-healthy option that supports overall wellness.

Blueberry Baked Oatmeal Recipe is a nutritious choice that provides a good balance of calories, protein, and low sodium. It’s a fantastic way to start your day on a healthy note while enjoying the delightful flavors of oats and blueberries. So, dig in and enjoy this wholesome breakfast!

FAQs about Blueberry Baked Oatmeal Recipe

Can I use frozen blueberries in the Blueberry Baked Oatmeal Recipe?

Blueberry Baked Oatmeal Recipe. In fact, there’s no need to thaw them before adding them to the mixture. Just fold them in directly from the freezer. This helps keep the batter from becoming too watery and ensures that the blueberries maintain their shape during baking. Plus, frozen blueberries are often just as nutritious as fresh ones!

How do I store leftovers of Blueberry Baked Oatmeal Recipe?

Blueberry Baked Oatmeal Recipe has cooled completely, place it in an airtight container. You can keep it in the refrigerator for up to five days. When you’re ready to enjoy it again, simply reheat individual portions in the microwave or oven. This makes for a quick and convenient breakfast option on busy mornings!

Can I make Blueberry Baked Oatmeal Recipe ahead of time?

Blueberry Baked Oatmeal Recipe ahead of time! Prepare the mixture the night before and store it in the refrigerator. In the morning, simply pour it into the baking dish and bake as directed. This is a great way to save time and enjoy a warm, hearty breakfast without the morning rush. Just remember to adjust the baking time slightly if the mixture is cold from the fridge.

What can I substitute for eggs in the Blueberry Baked Oatmeal Recipe?

Blueberry Baked Oatmeal Recipe is naturally egg-free, making it a great option for those avoiding eggs. However, if you want to add a bit of extra binding, you can use a flaxseed meal or chia seed mixture. To do this, mix 1 tablespoon of flaxseed meal or chia seeds with 2.5 tablespoons of water. Let it sit for about 5 minutes until it thickens, then add it to your wet ingredients. This will help give your oatmeal a nice texture without using eggs!

Conclusion on Blueberry Baked Oatmeal Recipe

Blueberry Baked Oatmeal Recipe is a delightful and nutritious breakfast option that everyone can enjoy. It combines the wholesome goodness of oats with the sweet burst of blueberries, creating a dish that is both satisfying and energizing. Whether you’re looking for a quick weekday breakfast or a leisurely weekend treat, this recipe fits the bill perfectly.

Not only is it easy to prepare, but it also allows for endless customization. You can switch up the fruits, adjust the sweetness, or even modify it to meet dietary needs. This flexibility makes it a fantastic choice for families with varying tastes and preferences. Plus, the nutritional benefits of oats and blueberries make it a smart choice for anyone aiming to maintain a healthy lifestyle.

As you experiment with this recipe, remember to have fun! Try different toppings, mix in your favorite nuts, or even add a sprinkle of chocolate for a special touch. The possibilities are endless, and each variation can bring a new twist to your breakfast routine.

So, gather your ingredients, preheat that oven, and get ready to enjoy a warm, comforting bowl of blueberry baked oatmeal. It’s a delicious way to start your day, and you’ll be glad you did. Happy baking!

Crispy Air Fryer Salmon: A Delightful Dinner Recipe!

Crispy Air Fryer Salmon

Introduction to Crispy Air Fryer Salmon

After a long day, the last thing I want is to spend hours in the kitchen. That’s where my love for Crispy Air Fryer Salmon comes in! This delightful recipe is not only quick but also incredibly satisfying. Imagine sinking your teeth into perfectly cooked salmon, with a crispy exterior and tender, flaky inside. It’s a dish that impresses family and friends, yet is simple enough for a weeknight dinner. Plus, it’s healthy! With just a handful of ingredients, you can whip up a meal that feels gourmet without the fuss.

Ingredients for Crispy Air Fryer Salmon

Gathering the right ingredients is the first step to creating your Crispy Air Fryer Salmon. Here’s what you’ll need:

  • Salmon fillets: Fresh, high-quality salmon is key. Look for fillets that are vibrant in color and firm to the touch.
  • Olive oil: This adds richness and helps the seasoning stick. You can substitute with avocado oil for a different flavor.
  • Garlic powder: A must for that savory kick. Fresh garlic can be used, but it may burn in the air fryer.
  • Paprika: This gives a lovely color and a hint of smokiness. Smoked paprika can elevate the flavor even more.
  • Dried oregano: A classic herb that complements the salmon beautifully. Feel free to swap it with thyme or dill.
  • Salt: Essential for enhancing all the flavors. Use sea salt or kosher salt for the best results.
  • Black pepper: Freshly ground pepper adds a nice bite. Adjust to your taste preference.
  • Lemon wedges: A squeeze of lemon brightens the dish and adds a refreshing zing.
  • Fresh parsley: This is for garnish, adding a pop of color and freshness to your plate.

For those who like a bit of heat, consider adding cayenne pepper to the seasoning mix. You can find the exact quantities for each ingredient at the bottom of the article, ready for printing!

How to Make Crispy Air Fryer Salmon

Creating your Crispy Air Fryer Salmon is a breeze! Follow these simple steps, and you’ll have a delicious dinner on the table in no time.

Step 1: Preheat the Air Fryer

Start by preheating your air fryer to 400°F (200°C). This step is crucial for achieving that perfect crispy texture. Preheating takes about 5 minutes, so use this time to gather your ingredients and get ready!

Step 2: Prepare the Seasoning

In a small bowl, mix together the olive oil, garlic powder, paprika, oregano, salt, and black pepper. This flavorful blend will coat the salmon beautifully. If you’re feeling adventurous, add a pinch of cayenne pepper for a spicy kick!

Step 3: Prepare the Salmon

Pat the salmon fillets dry with paper towels. This helps the seasoning stick better and ensures a crispy finish. Brush the olive oil mixture evenly over the top of each fillet. Make sure every inch is covered for maximum flavor!

Step 4: Air Fry the Salmon

Place the salmon fillets in the air fryer basket, skin-side down. Avoid crowding the basket; this allows the hot air to circulate and cook the salmon evenly. Cook for 8-10 minutes, or until the internal temperature reaches 145°F. The fish should flake easily with a fork when it’s done.

Step 5: Rest and Serve

Once cooked, carefully remove the salmon from the air fryer. Let it rest for a couple of minutes. This helps the juices redistribute, making each bite tender and juicy. Serve with lemon wedges and garnish with fresh parsley for a beautiful presentation!

Tips for Success

  • Always preheat your air fryer for the best results.
  • Pat the salmon dry to enhance crispiness.
  • Don’t overcrowd the air fryer basket; cook in batches if needed.
  • Use a meat thermometer to check for doneness at 145°F.
  • Experiment with different herbs and spices to customize the flavor.

Equipment Needed

  • Air Fryer: The star of the show! Any model will do, but a basket-style air fryer works best for even cooking.
  • Mixing Bowl: For combining your seasoning. A small bowl is perfect.
  • Brush: Use a pastry brush to apply the olive oil mixture evenly.
  • Meat Thermometer: Optional, but great for ensuring perfect doneness.

Variations

  • Herb-Crusted Salmon: Swap the dried oregano for fresh herbs like dill or basil for a vibrant twist.
  • Asian-Inspired: Use soy sauce, ginger, and sesame oil in place of olive oil for a deliciously different flavor profile.
  • Maple Glaze: Drizzle a bit of maple syrup over the salmon before cooking for a sweet and savory combination.
  • Spicy Cajun: Add Cajun seasoning to the spice mix for a zesty kick that will wake up your taste buds.
  • Low-Carb Option: Serve the salmon over a bed of cauliflower rice instead of traditional sides for a healthy, low-carb meal.

Serving Suggestions

  • Pair your Crispy Air Fryer Salmon with a side of sautéed spinach for a nutritious boost.
  • Roasted vegetables, like asparagus or Brussels sprouts, complement the salmon beautifully.
  • Serve with a chilled glass of white wine, such as Sauvignon Blanc, for a refreshing touch.
  • Garnish with lemon wedges and a sprinkle of fresh parsley for a vibrant presentation.

FAQs about Crispy Air Fryer Salmon

Can I use frozen salmon for this recipe?

Absolutely! Just make sure to thaw the salmon completely before cooking. You may need to adjust the cooking time slightly, so keep an eye on it.

What can I serve with Crispy Air Fryer Salmon?

This dish pairs wonderfully with a variety of sides. Consider serving it with roasted vegetables, a fresh salad, or even some quinoa for a complete meal.

How do I know when the salmon is done cooking?

The best way to check is by using a meat thermometer. The internal temperature should reach 145°F. If you don’t have one, the salmon should flake easily with a fork when it’s done.

Can I make this recipe ahead of time?

While it’s best enjoyed fresh, you can prepare the seasoning and salmon fillets in advance. Just store them in the fridge until you’re ready to cook!

What if I don’t have an air fryer?

No worries! You can bake the salmon in a conventional oven at 400°F for about 12-15 minutes. Just keep an eye on it to ensure it doesn’t overcook.

Final Thoughts

Cooking Crispy Air Fryer Salmon is more than just a meal; it’s an experience that brings joy to the table. The aroma of seasoned salmon wafting through your kitchen is enough to make anyone’s mouth water. Each bite is a delightful combination of crispy and tender, making it a dish that feels special yet is so easy to prepare. Whether you’re sharing it with family or enjoying a quiet dinner alone, this recipe is sure to become a favorite. Embrace the simplicity and flavor, and let this salmon dish brighten your weeknight dinners!

Crispy Air Fryer Salmon
jhessica

Crispy Air Fryer Salmon: A Delightful Dinner Recipe!

A delightful and easy recipe for crispy salmon cooked in an air fryer, perfect for a healthy dinner.
Prep Time 10 minutes
Cook Time 10 minutes
Total Time 20 minutes
Course: Dinner
Cuisine: American
Calories: 320

Ingredients
  

  • 4 salmon fillets about 6 ounces each
  • 2 tablespoons olive oil
  • 1 teaspoon garlic powder
  • 1 teaspoon paprika
  • 1 teaspoon dried oregano
  • 1 teaspoon salt
  • ½ teaspoon black pepper
  • Lemon wedges for serving
  • Fresh parsley for garnish

Method
 

  1. Preheat the air fryer to 400°F (200°C) for about 5 minutes.
  2. In a small bowl, mix together the olive oil, garlic powder, paprika, oregano, salt, and black pepper.
  3. Pat the salmon fillets dry with paper towels. Brush the olive oil mixture evenly over the top of each fillet.
  4. Place the salmon fillets in the air fryer basket, skin-side down, ensuring they are not crowded.
  5. Cook the salmon in the air fryer for 8-10 minutes, or until the internal temperature reaches 145°F and the fish flakes easily with a fork.
  6. Carefully remove the salmon from the air fryer and let it rest for a couple of minutes.
  7. Serve with lemon wedges and garnish with fresh parsley.

Nutrition

Serving: 1filletCalories: 320kcalProtein: 34gFat: 20gSaturated Fat: 3gPolyunsaturated Fat: 17gCholesterol: 90mgSodium: 500mg

Notes

  • For a spicy kick, add ½ teaspoon of cayenne pepper to the seasoning mix.
  • Serve the salmon over a bed of sautéed spinach or alongside roasted vegetables for a complete meal.

Tried this recipe?

Let us know how it was!

Stay Connected

Get recipes via email: