Get my cookbooks

Experience the Mouthwatering Crispy Chilli Beef

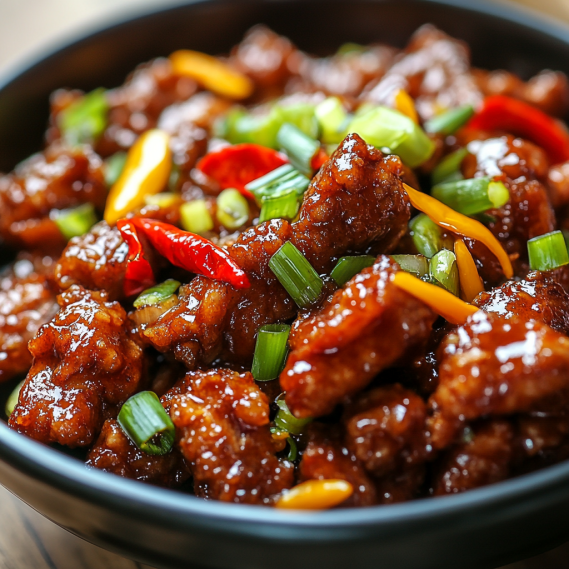
Imagine coming home after a long day and smelling something amazing in the kitchen. The scent of Crispy Chilli Beef fills the air, inviting you to dinner. This Chinese stir fry is a mix of tender beef, colorful veggies, and a spicy kick.

It’s easy to make and perfect for impressing friends or a cozy night in. Let’s explore how to make Crispy Chilli Beef and bring Asian flavors to your home!

Key Takeaways

  • Crispy Chilli Beef is a delicious and popular Chinese stir fry.
  • The dish features a perfect blend of spicy and savory flavors.
  • It’s an easy and quick recipe, ideal for weeknight dinners.
  • With the right ingredients, anyone can whip up this tasty dish.
  • This meal pairs wonderfully with rice or noodles, making it even more appealing.

What is Crispy Chilli Beef?

Crispy Chilli Beef is a favorite in Asian cuisine. It’s known for its tasty flavors and crunchy texture. The dish has tender beef strips in a crispy batter, mixed with spices and chilies.

This mix of flavors and textures makes it a hit. It’s loved in both old and new places to eat.

A Brief History of the Dish

The story of Crispy Chilli Beef starts in Chinese cooking. It’s all about finding the perfect mix of tastes. Chefs used stir-frying and deep-frying to create this dish.

As Chinese food spread around the world, the dish changed. It picked up flavors from other places, pleasing more people.

Origins in Chinese Cuisine

Crispy Chilli Beef is at the heart of Chinese cooking. It’s all about bold tastes and looks. The dish is a highlight on menus everywhere.

It got its spicy edge from Sichuan chilies. Chefs then tried different beef cuts and spice levels, making it even more interesting.

Popular Variations

Crispy Chilli Beef has many versions to suit everyone. You can find the classic sweet and spicy sauce version. Or, you might see it with extra veggies or special spices.

Some add broccoli or bell peppers. Others make it milder for those who don’t like too much heat. Each version keeps the dish’s core appeal while adding something new.

The Perfect Ingredients for Crispy Chilli Beef

Making delicious Crispy Chilli Beef begins with picking the right ingredients. The quality of your beef greatly affects the dish’s texture and taste. Choose cuts like flank steak or sirloin for tender, juicy results.

These cuts turn your crispy beef strips into a delightful treat. The right mix of essential spices also boosts the flavors, making the dish unforgettable.

Choosing the Right Cut of Beef

For the best Crispy Chilli Beef, picking the right meat is key. Flank steak and sirloin are top choices because they’re tender and easy to slice. Always slice the beef against the grain for a tender bite.

Chilling the beef before cutting is a smart move. It helps achieve those crispy beef strips everyone loves.

Essential Spices and Seasonings

To make your dish pop, add essential spices. Soy sauce, garlic, ginger, and chili flakes are must-haves. They create a flavorful marinade that will excite your taste buds.

Feel free to play with different spice ratios to find your favorite mix. This way, you can customize the flavors while cooking at home.

Fresh Vegetables to Enhance Flavor

Crispy Chilli Beef needs fresh veggies for that extra crunch. Bell peppers and green onions add color and nutrients. They also boost the dish’s flavor and texture.

Adding a variety of colorful veggies makes your dish even more appealing. It’s all about the mix of colors and textures from the vegetable aisle.

For a simple recipe that combines all these elements, check out this Crispy Chilli Beef guide. With the right ingredients, you’ll impress everyone with your cooking skills.

How to Prepare Crispy Chilli Beef

Crispy Chilli Beef is a tasty dish that brings Chinese flavors to your home. It’s easy to make at home with the right steps. This guide will help you make every bite crispy and tender.

Step-by-Step Cooking Instructions

Start by picking high-quality beef. Slice the steak thinly. This helps the meat soak up the marinade’s flavors.

Marinate the beef in soy sauce, garlic, and ginger for 30 minutes. Then, coat each slice with cornstarch for crispiness. Heat a lot of oil in a pan and fry the beef in batches. This ensures even cooking.

Once the beef is golden, set it aside. Stir-fry bell peppers and onions in the same pan. Then, add the beef back in with a sweet and spicy sauce. Serve with rice or noodles for a quick and easy meal.

Tips for Achieving Maximum Crispiness

For extra crispiness, heat your oil well before frying. Use cornstarch for coating, as it makes the beef lighter and crunchier. After frying, let the beef sit on paper towels to drain excess oil.

Common Mistakes to Avoid

Avoid overcrowding the pan when frying. Fry in small batches for the best results. Keep an eye on the oil temperature to prevent the beef from absorbing too much oil or burning.

Don’t skip the marinating step. It’s important for flavor. Let the beef soak in the marinade for the best taste.

Cooking Techniques for Crispy Chilli Beef

Choosing the right cooking methods is key for Crispy Chilli Beef. Stir-frying and deep-frying offer different textures and tastes. Using a wok or skillet is also important for great results. Learning to control the temperature ensures crispy beef.

Stir-Frying vs. Deep-Frying

Stir-frying keeps flavors and nutrients by cooking quickly with little oil. It makes the dish lighter. Deep-frying, on the other hand, gives a crispy coating. Your choice depends on taste and crispiness level.

Using a Wok vs. Skillet

A wok is best for stir-frying because it spreads heat evenly. This ensures all beef is cooked right. Skillets can also work well but need careful heat control to avoid burning.

Temperature Control for Optimal Results

Keeping oil at the right temperature is vital for crispiness. For deep-frying, heat it to 350°F to 375°F. Stir-frying works with a bit lower heat for even cooking. A thermometer helps keep the temperature perfect for crispy beef.

Serving Suggestions for Crispy Chilli Beef

Crispy Chilli Beef is a flavorful dish that truly shines with the right accompaniments. Choosing the ideal side dishes can enhance the unique flavors of the beef. This ensures a satisfying meal. From pairing with rice to incorporating creative serving ideas, there are many ways to elevate your dining experience.

Ideal Side Dishes

Some of the perfect *ideal side dishes* for Crispy Chilli Beef include:

  • Crispy fried rice with vegetables
  • Garlic sautéed green beans
  • Steamed broccoli with sesame oil
  • Stir-fried asparagus
  • Egg fried rice garnished with green onions

Pairing with Rice or Noodles

For a well-rounded meal, consider *pairing with rice* or noodles. Options include:

  • Jasmine rice to soak up the sauce
  • Sticky rice for a pleasing texture
  • Egg noodles for a chewy complement
  • Rice vermicelli for a lighter choice

Creative Serving Ideas

Get creative with your presentation by exploring some *creative serving ideas*. Ideas to consider include:

  • Garnishing with toasted sesame seeds and fresh cilantro
  • Serving in lettuce wraps for a refreshing twist
  • Adding a side of sweet chili sauce for dipping
  • Creating a vibrant platter with assorted pickled vegetables

By combining ideal side dishes, thoughtful pairings with rice, and creative serving ideas, you can elevate the enjoyment of your Crispy Chilli Beef. Impress your guests with these ideas.

Nutritional Information of Crispy Chilli Beef

Crispy Chilli Beef is not just tasty; it’s also packed with nutrients. Knowing what’s in your food helps you make better choices. This part will look at calories and nutrients, and suggest healthier swaps. It’s important to balance your meals, even when they’re as delicious as this.

Caloric Breakdown

ComponentAmount per Serving
Calories350
Protein25g
Fat20g
Carbohydrates30g
Sodium800mg

Healthier Ingredient Substitutions

To make Crispy Chilli Beef healthier, try these swaps:

  • Choose lean cuts of beef, like flank steak or sirloin, to cut down fat.
  • Use reduced-sodium soy sauce to lower sodium without losing flavor.
  • Add more vegetables, like bell peppers and broccoli, for fiber and nutrients.
  • Opt for whole grain rice instead of white rice for better nutrition.

Balancing Your Meal

It’s key to balance your meal for a complete dining experience. Serving Crispy Chilli Beef with veggies boosts flavor and nutrition. Whole grains, like brown rice, add fiber and vitamins. These changes make your meal fulfilling without losing taste.

Popular Restaurants Serving Crispy Chilli Beef

Looking for the best Crispy Chilli Beef? Check out popular restaurants. Each place has its own twist on this tasty dish. You’ll find must-try versions that please everyone. Here’s a list of top spots in the U.S. for this flavorful meal.

Top Dining Spots in the U.S.

Choosing the right place for Crispy Chilli Beef makes a big difference. Here are some top spots known for their amazing versions:

Restaurant NameLocationFeatured Variant
HakkasanLas Vegas, NVSpicy Rib-eye with Cashews
Chinatown BistroNew York, NYCrispy Chilli Beef with Vegetables
Fusing FlavorsLos Angeles, CAGinger-Infused Crispy Beef
Modern Asian KitchenChicago, ILGarlic-Chili Flank Steak

Must-Try Variants by Renowned Chefs

Chefs across the country have their own Crispy Chilli Beef recipes. For example, Gordon Ramsay’s version has a tangy orange zest and sesame oil. To try new flavors, check out these chef creations.

Local Favorites and Hidden Gems

Exploring neighborhood spots can reveal local favorites with amazing Crispy Chilli Beef. From cozy family places to fancy bistros, these gems show the dish’s versatility. Ask locals for their top picks to find more delicious options.

Fun Facts About Crispy Chilli Beef

Crispy Chilli Beef is loved for its tasty flavor and rich history. It shows the culinary traditions of China and how it has spread to the West. Learning these fun facts can deepen your love for this dish.

Cultural Significance

The origins of Crispy Chilli Beef are rooted in Chinese cooking. It combines flavors and textures that are key in Chinese food. In Chinese culture, spices are used to mark special occasions, making this dish a favorite for celebrations.

Adaptations in Western Cuisine

Crispy Chilli Beef is now found in Western restaurants too. Adaptations in cooking have made it popular in the US and UK. Chefs mix local ingredients with Chinese flavors, creating dishes that please many tastes. They often add different sauces or spices to suit Western preferences.

Trivia That Will Impress Your Friends

  • The dish is a mix of traditional Chinese cooking and Western fast-food methods.
  • In many places, Crispy Chilli Beef is a top choice, showing its broad appeal.
  • It gained fame in the 1980s, as Chinese food became more popular in the West.

How to Make Crispy Chilli Beef at Home

Want to make Crispy Chilli Beef at home? There are recipes for all skill levels. Beginners can start with easy recipes that let you enjoy this tasty dish without stress. The secret is in the thinly sliced beef and a sauce made from chili, tomato ketchup, and dark soy sauce.

With a little prep, you can enjoy this dish quickly.

Easy Recipes for Beginners

Starting your cooking journey with Crispy Chilli Beef is rewarding. First, tenderize the beef with baking soda or pound it. Then, dip it in a light batter before frying. This way, it stays crispy and tender.

For more detailed recipes, check out this source.

Advanced Techniques for Seasoned Cooks

Seasoned cooks can try advanced techniques to improve the dish. Marinate the beef longer or experiment with different frying methods. Also, adjust the sauce to your taste.

Tips for Customizing Your Recipe

Customizing your recipe makes it truly yours. You can change the spice level or add fresh veggies like capsicum and red chili. Small changes can make a big difference. Cooking is about making recipes your own, tailored to your taste!


FAQ

What is Crispy Chilli Beef?

Crispy Chilli Beef is a tasty Chinese stir fry. It has crispy beef strips in a spicy sauce. The sauce is made from soy sauce, garlic, ginger, and chili flakes.

How can I achieve maximum crispiness in my Crispy Chilli Beef?

For crispiness, marinate the beef in soy sauce and cornstarch. Make sure the oil is hot for frying. Don’t overcrowd the pan to keep the beef crispy.

Can I customize the spice level in my Crispy Chilli Beef?

Yes! You can change the spice level by adjusting chili flakes or fresh chilies. For less heat, use fewer chili flakes or add sweet bell peppers.

What are some good side dishes to serve with Crispy Chilli Beef?

Good sides include crispy fried rice and steamed veggies. Rice or noodles make a great pair. Try it in lettuce wraps with sesame seeds for a twist.

Can I make a healthier version of Crispy Chilli Beef?

Yes! Use leaner beef and less oil for a healthier version. Add more veggies and use low-sodium soy sauce to reduce sodium.

Where can I find some of the best Crispy Chilli Beef in the U.S.?

Look for Asian cuisine specialists. Top chefs offer unique Crispy Chilli Beef. Also, check out local spots for their own versions.

Is Crispy Chilli Beef easy to make at home?

Yes! It’s a quick and easy recipe. Even beginners can make it with simple steps and ingredients.

Chocolate Granola Cups with Peanut Butter Filling

Imagine coming home after a long day, feeling tired but craving something sweet. The idea of chocolate and peanut butter makes you think of happy memories. That’s what Chocolate Granola Cups with Peanut Butter Filling offer, a mix of crunchy homemade granola and creamy peanut butter.

These treats are a chocolate recipe that’s both a snack and a sweet escape. They’re perfect for any time, whether you’re in a rush in the morning or enjoying a quiet evening. So, let’s make these unforgettable sweet treats together! You can find the full recipe details here: Chocolate Granola Cups with Peanut Butter.

Key Takeaways

  • Delightful blend of chocolate and peanut butter for an indulgent snack.
  • Made with simple ingredients, promoting healthy snacking.
  • Perfect for breakfast or on-the-go treats.
  • Easy to customize with toppings like banana slices or nuts.
  • No baking required—ideal for quick preparation.

Why You’ll Love Chocolate Granola Cups

Chocolate Granola Cups with Peanut Butter Filling are a tasty mix of flavors and textures. They offer a sweet and salty taste with a crunchy feel. These treats not only satisfy your cravings but also give you a nutritional boost.

A Perfect Balance of Flavors

The flavors in these granola cups are truly special. Dark chocolate and creamy peanut butter blend perfectly. You can add honey for sweetness or roasted nuts for saltiness. Each bite is a delightful experience, making them a great choice for any craving.

Nutritious Ingredients

These granola cups are packed with good stuff for your body. They have whole grains for fiber and peanut butter for healthy fats. Dark chocolate adds antioxidants, making them tasty and healthy. Enjoying these cups means you’re treating yourself right.

Ingredients You’ll Need

Making tasty Chocolate Granola Cups needs careful picking of ingredients. Knowing your options is key to making the perfect snack. This part covers the main ingredients, like chocolate, granola, and peanut butter.

Real Chocolate vs. Cocoa Powder

Choosing between real chocolate and cocoa powder is important. Real chocolate adds a deep, rich flavor to your granola cups. It’s full of healthy fats and antioxidants.

Cocoa powder, though, is lower in calories but has a similar taste. Your choice depends on what you like and your diet. Both add something special to your treats, so try them out to see what you prefer.

The Best Granola Choices

Granola choices are vast, so picking the right one is key. Store-bought granolas are easy and consistent, but homemade lets you control what goes in. For a healthy snack, pick granolas with less sugar and more fiber.

Whole grain granolas add extra nutrients, making them great for your Chocolate Granola Cups.

Choosing the Right Peanut Butter

Peanut butter can make your granola cups even better. You can choose smooth or crunchy, each with its own feel. Opt for natural peanut butter without added sugars for a healthier choice.

Look for brands with simple ingredients for the best taste and health benefits. Your favorite peanut butter style will make your treats special and healthy.

Step-by-Step Recipe Guide

Making Chocolate Granola Cups is a fun journey in homemade snacks. This guide gives you simple steps to make cooking easier and the results delicious. Follow this guide for a chocolate recipe that everyone will enjoy.

Preparing the Granola Mixture

First, get your ingredients ready: oats, nuts, honey, and chocolate chips. In a bowl, mix the oats and nuts for texture. In a saucepan, melt the honey and chocolate over low heat until it’s smooth.

Then, mix the wet ingredients with the dry ones until everything is well-coated.

Forming the Cups

Now, prepare your muffin tin. You can use cupcake liners or grease each cup to prevent sticking. Fill each cup with the granola mixture, pressing it down to make it stick together after baking.

Make sure the mixture is evenly distributed. This will help the cups be the same size and texture.

Making the Peanut Butter Filling

For the filling, mix creamy peanut butter with a bit of powdered sugar until it’s smooth. You can adjust the sweetness to your liking. Once the granola cups cool, fill each one with the peanut butter mixture.

Tips for Perfect Granola Cups

To make the perfect granola cup, follow some key baking tips. Knowing the right baking time and how to avoid sticking are important. These tips will help you make delicious granola cups.

Choosing the Right Baking Time

The baking time is key for perfect granola cups. Bake at 325°F for 15-20 minutes. Watch them closely because oven temperatures can differ.

They should be lightly golden when done. This ensures they’re crunchy but not overcooked. Try different times to find your ideal texture.

Avoiding Sticking Issues

Sticky granola cups are a problem. But, there are easy fixes. Use non-stick spray or silicone liners in your muffin tins.

Both prevent sticking and make cleaning easy. Let the cups cool a bit in the pan. Then, use a butter knife to gently loosen them. These tips will make baking stress-free.

Variations to Try

Chocolate Granola Cups are perfect for making your own special treats. You can add different ingredients to make them healthier and tastier. Let’s explore some fun ways to add nuts and seeds, and try out different sweeteners.

Adding Nuts or Seeds

Adding nuts and seeds makes your granola cups crunchy and nutritious. Here are some great choices:

  • Chopped almonds for a classic taste.
  • Walnuts for added omega-3 fatty acids.
  • Pumpkin seeds for a seasonal twist.
  • Sunflower seeds to enhance texture and flavor.

By choosing your favorites, you can make each bite of your chocolate granola cups a delightful surprise.

Sweeteners to Consider

Trying different sweetening options can change the taste of your granola cups. Here are some options to try:

SweetenerFlavor ProfileNotes
HoneyFloral and sweetGreat for moistness in desserts.
Agave SyrupMild and neutralLower glycemic index than sugar.
Maple SyrupRich and earthyWonderful addition for fall flavors.
Coconut SugarCaramel-likeRich in minerals compared to refined sugar.

Trying these sweeteners can make your chocolate granola cups even better. They’ll be delicious and just right for you.

Storing Your Granola Cups

Keeping your Chocolate Granola Cups fresh is key. Using the right storage tips makes them even more enjoyable. Whether you’re enjoying them at home or on the go, knowing how to store them is important.

Best Storage Methods

For the best taste, store them in airtight containers. Glass or plastic containers with tight lids are perfect. They keep moisture out and keep the texture right.

Place parchment paper between layers to stop them from sticking. Some prefer resealable bags, but make sure to remove air for the best keeping snacks fresh.

How Long They Last

The shelf life of your granola cups depends on storage. At room temperature, they last about two weeks. Refrigeration can extend this to three weeks.

Freezing is the best option, lasting up to three months. Just thaw what you need in the fridge before eating. For more tips, check out this resource.

Serving Suggestions

Enhancing your experience with Chocolate Granola Cups is easy with different serving ideas. These treats are even better with fresh fruits or a glass of milk. Each pairing brings its own flavor and texture, making them great for breakfast, snacks, or dessert.

Pairing with Fruits

Pairing snacks with fruits makes Chocolate Granola Cups even tastier. Fresh berries like strawberries or blueberries add natural sweetness. Bananas, sliced and next to the cups, add a creamy touch.

These fruits not only taste great but also look good. They’re perfect for sharing.

Enjoying with a Glass of Milk

A glass of milk is the classic drink to go with Chocolate Granola Cups. Choose whole, almond, or oat milk for a satisfying taste. The milk’s creaminess pairs well with the chocolate and peanut butter.

Health Benefits of Chocolate & Peanut Butter

Dark chocolate and peanut butter are great for healthy snacking. They offer a tasty treat and important nutrients for well-being.

Nutritional Perks of Dark Chocolate

Dark chocolate, rich in cacao, has many health benefits. It’s full of antioxidants that fight free radicals and help the heart. Eating dark chocolate regularly can improve blood flow and heart function.

Choosing dark chocolate can make your snacks healthier without losing flavor.

Benefits of Peanut Butter

Peanut butter is another key ingredient in these cups. It’s full of protein and healthy fats, boosting energy. It also helps you feel full, leading to healthier snacking.

Adding peanut butter to your snacks makes them taste better and adds important nutrients for your health.

For a tasty and healthy treat, try the Chocolate Peanut Butter Granola Cups. They combine great taste with health benefits from these nutrient-rich foods.

Chocolate Granola Cups for Special Diets

Chocolate granola cups can be made for everyone. They’re perfect for those looking for gluten-free snacks or vegan desserts. It’s easy to make them fit all diets.

Gluten-Free Alternatives

For gluten-free granola cups, start with certified gluten-free oats. Many brands have gluten-free granola mixes. This way, you get great flavors without gluten.

Make sure to check the labels. This ensures that all ingredients are gluten-free. So, even those with gluten sensitivities can enjoy these treats.

Vegan Options

For vegan chocolate granola cups, try almond or cashew butter instead of peanut butter. It adds a unique taste and keeps it plant-based. Use maple syrup or agave nectar for sweetness instead of honey.

These changes make the cups vegan-friendly. Now, anyone can enjoy them while following vegan guidelines.

Fun Ways to Decorate

Getting creative with your Chocolate Granola Cups adds fun and flavor. Whether it’s for a party or a simple snack, decorating can turn treats into delightful masterpieces. With a few creative toppings, you can make your treats look great.

Topping Ideas for Presentation

There are many ways to decorate your granola cups. Consider using:

  • Shredded coconut for a tropical vibe
  • Colorful sprinkles to add excitement
  • Drizzles of chocolate for an indulgent touch
  • Chopped nuts for added crunch
  • Fresh berries for a pop of color and flavor

These toppings not only make your presentation better. They also add a delightful texture and taste that goes well with the granola cups.

Incorporating Seasonal Flavors

Seasonal recipes can keep your Chocolate Granola Cups exciting all year. Try adding:

  • Pumpkin spice during autumn for a cozy flavor
  • Mint extract in winter for a refreshing twist
  • Fresh fruits like strawberries in spring for a fruity touch
  • Cinnamon during the holidays for warmth

By using these flavors, you can make each treat a celebration of the season. It’s a great way to elevate your decorating snacks game.

Final Thoughts on Chocolate Granola Cups

Chocolate Granola Cups are more than just a tasty treat. They are a perfect mix of deliciousness and health. The blend of chocolate and peanut butter is both sweet and nutritious. It’s a great choice for any snack time.

Exploring different flavors is exciting. You can add nuts, cinnamon, or try different butters. Each change makes the recipe special. It’s a fun way to get creative and find your favorite version.

Starting with Chocolate Granola Cups is a great idea. They let you enjoy good taste while making healthy choices. With a few ingredients and some creativity, you can make these treats a regular part of your diet.


FAQ

Can I use store-bought granola for the Chocolate Granola Cups?

Absolutely! Store-bought granola can save time. Just pick a kind that’s low in sugar and made with wholesome ingredients for the best results.

How can I make these granola cups vegan?

To make the Chocolate Granola Cups vegan, use dairy-free chocolate. Also, make sure your peanut butter doesn’t have any dairy.

What are some alternative sweeteners I can use for the peanut butter filling?

Honey, maple syrup, and agave syrup are great alternatives. They add sweetness without losing flavor in your peanut butter filling.

How should I store my Chocolate Granola Cups for freshness?

Store them in an airtight container at room temperature. They last 5-7 days. For longer storage, freeze them!

Can I add nuts or seeds to the granola mixture?

Yes! Adding nuts or seeds boosts nutrition. It also adds crunch and flavor to your granola cups.

What type of chocolate should I use for these cups?

Dark chocolate is best for its rich flavor and health benefits. But, milk chocolate works too if you like it sweeter.

Can I make the granola cups ahead of time?

Definitely! Prepare them ahead and store them. Just keep them in an airtight container to stay fresh.

What are some fun ways to decorate my Chocolate Granola Cups?

Decorate with shredded coconut, chocolate drizzles, or edible glitter. It adds a fun and festive touch!

Are Chocolate Granola Cups a healthy snack option?

Yes! They’re made with nutritious ingredients like granola and peanut butter. They’re a healthy snack full of energy-boosting nutrients.

What other fillings can I try in my granola cups?

Try almond butter, Nutella, or yogurt for different flavors. Just make sure they hold up well as cups.

Perfect Chocolate Chip Pancakes Recipe | Quick & Easy

Imagine a lazy Sunday morning with the sun shining in. The kitchen fills with the sweet smell of Chocolate Chip Pancakes. It’s a moment that brings back happy memories and family times.

You don’t need to be a pro to make this easy pancake recipe. In a few simple steps, you can turn a regular morning into a special treat. Warm, fluffy pancakes with chocolate chips are ready to delight everyone at the table.

These pancakes are great for any day, whether it’s a regular breakfast or a weekend brunch. They’re sure to make everyone smile. Let’s make this quick and easy recipe together!

Key Takeaways

  • Chocolate Chip Pancakes are perfect for a cozy breakfast experience.
  • This recipe is quick and easy, making it accessible for everyone.
  • These pancakes are loved by both kids and adults alike.
  • An ideal homemade breakfast option for any occasion.
  • Incorporate fun add-ins to customize your pancakes.

Why Chocolate Chip Pancakes Make a Great Breakfast

Chocolate chip pancakes are loved by many for their mix of nostalgia and joy. They are a classic breakfast treat that brings back happy memories of mornings with family. The fluffy pancakes with chocolate chips are a treat for everyone. They’re not just tasty but also bring people together.

The Comfort Food Factor

The comfort of chocolate chip pancakes is undeniable. Each bite offers a mix of rich flavors that satisfy. They’re a top pick for breakfast comfort, making everyone feel welcome. Their sweetness and warmth can brighten up any morning.

Ideal for Any Age

Kids love these pancakes because of the fun and sweet chocolate chips. They make breakfast fun for kids. Grown-ups enjoy how easy they are to make and the homemade taste. They’re perfect for families of all ages.

Perfect for Any Occasion

Chocolate chip pancakes are great for any time. They’re perfect for a quick breakfast or a special brunch. You can add fresh fruits or syrup to make them even more special. They always impress, no matter the occasion.

Ingredients You’ll Need for Success

Making the perfect chocolate chip pancakes is easy with the right ingredients. Having these items ready makes cooking fun and ensures tasty results. Whether you’re making classic pancakes or trying new recipes, the right ingredients are key.

Essential Pantry Staples

  • All-purpose flour
  • Baking powder
  • Granulated sugar
  • Eggs
  • Milk
  • Vanilla extract
  • Salt

These ingredients work well together. Flour gives the pancakes structure, and baking powder makes them light. Eggs help them stick together, and milk keeps them moist. Vanilla adds a special touch to the flavor.

Fun Add-Ins to Enhance Flavor

Adding fun ingredients can make your pancakes even better. Try adding:

  • Sliced bananas
  • Chopped nuts (walnuts, almonds, or pecans)
  • Seasonal fruits (berries, peaches, or apples)
  • Cinnamon or nutmeg for warmth

These extras add texture and excitement. Don’t be afraid to mix and match to create your own special pancake recipes. They’re sure to be a hit at breakfast.

Step-by-Step Guide to Making Pancake Batter

Making the perfect pancake batter is key to getting those fluffy pancakes everyone loves. This easy pancake recipe will walk you through each step. Follow these steps for delicious results.

Mixing Dry Ingredients

First, gather all your dry ingredients. In a large bowl, mix flour, baking powder, sugar, and a pinch of salt. Whisk until everything is well mixed and there are no lumps. This step is important for your pancakes to rise right.

Incorporating Wet Ingredients

Now, add the wet ingredients. In another bowl, mix milk, eggs, and melted butter. Slowly add this mix to the dry ingredients. Stir gently with a spatula or spoon. Don’t overmix; a few lumps are okay for a tender texture.

Tips for Achieving the Right Consistency

The last step is getting the batter just right. It should be thick but pourable. If it’s too thick, add a bit of milk. If it’s too thin, add flour. Let the batter rest for a few minutes. This makes your pancakes even fluffier.

Choosing the Right Chocolate Chips

Choosing the right chocolate chips is key for great chocolate chip pancakes. The type of chocolate affects flavor, texture, and overall taste. Whether you prefer traditional or specialty chocolate, there’s something for everyone.

Dark vs. Milk Chocolate

Dark chocolate has a deep, rich flavor that balances with pancake sweetness. Milk chocolate, on the other hand, is creamier and sweeter. It’s a classic choice for many. Try both to see which you like best.

Specialty Chocolate Options

Looking to try something new? Specialty chocolate chips are out there. White chocolate adds a sweet touch that’s great with fruit. Flavored chips like mint or caramel can add a fun twist. Check out different chocolate chip options to find your new favorite.

Cooking Techniques for Fluffy Pancakes

Making perfect chocolate chip pancakes is more than just using the right ingredients. It’s also about mastering cooking techniques. Getting the skillet temperature right is key to avoid burnt or undercooked pancakes. This lets you confidently follow an easy pancake recipe.

Optimal Skillet Temperature

The perfect skillet temperature for pancakes is about 375°F (190°C). This heat melts chocolate chips smoothly without ruining the pancake’s texture. To check the skillet, drop a few water drops. If they quickly evaporate, it’s ready for batter.

This method ensures a golden outside and a soft inside. It’s a simple trick for perfect pancakes.

Perfecting the Flip

Knowing when to flip pancakes is important for their look and feel. Watch for bubbles on the surface. This means it’s time to turn them. Use a spatula to lift the edge and check for color before flipping.

A quick but careful flip keeps the pancake’s shape. This technique makes your pancakes irresistibly fluffy and impressive.

For more tips on making great chocolate chip pancakes, check out this easy pancake recipe. It offers more advice for success.

Tips for Serving Your Pancakes

Chocolate chip pancakes are not just tasty; they can also make your brunch or breakfast special. Add some flair to your pancakes with creative serving ideas. Move away from the usual butter and syrup for a fun twist that will wow your guests.

Creative Serving Ideas

Try out exciting toppings to make your pancakes a real treat. Here are some ideas:

  • Add a dollop of whipped cream for a light touch.
  • Top with Greek yogurt for extra protein.
  • Include fresh fruits like strawberries, bananas, or blueberries for sweetness and color.
  • Drizzle nut butter for a rich, nutty taste.

Pairing with Syrups and Fruits

Choosing the right syrup can really enhance the taste. Go for classic maple syrup or try something new like caramel or chocolate sauce. These combinations can make your pancakes a memorable and balanced meal, ideal for brunch. Want a recipe to start with? Check out this chocolate chip pancakes recipe for inspiration.

Making Them Healthier

If you love chocolate chip recipes but want a healthier version, there are easy changes you can make. These tweaks can turn your homemade breakfast into a nutritious treat. You can enjoy your favorite flavors without losing out on health.

Whole Wheat Flour Alternatives

Using whole wheat flour can boost the fiber in your pancakes. This change not only helps with digestion but also adds a nutty taste that goes well with chocolate chips. If you want something lighter, mix whole wheat with all-purpose flour. This keeps the texture right while adding health perks.

Reducing Sugar Without Sacrificing Flavor

Lowering sugar doesn’t mean your pancakes have to be less sweet. Try using honey or mashed bananas to sweeten them. These natural sweeteners add a touch of sweetness and extra nutrients, making your breakfast healthier.

Storage Tips for Leftover Pancakes

Leftover chocolate chip pancakes can be enjoyed again with the right storage. Keeping them fresh lets you enjoy them later. Whether you refrigerate or freeze, keeping quality is important.

Best Practices for Refrigeration

For refrigerating pancakes, let them cool first. Stack them with parchment paper to prevent sticking. Use an airtight container to keep them moist and flavorful. Try to eat them within three to four days for the best taste.

Reheating Methods for Quality

Reheating pancakes is easy and keeps them tasty. Here are some ways to do it:

  • Toaster: Great for a crispy outside. Just pop them in until warm.
  • Oven: Preheat to 350°F. Place on a baking sheet for 10 minutes for even heat.
  • Microwave: Place on a microwave-safe plate with a damp paper towel. Heat for 30 seconds to 1 minute. This keeps them moist but be careful not to overheat.

These methods help your pancakes stay delicious, reducing waste and making meal prep easier.

Variations to Try

Trying different versions of classic chocolate chip pancakes can make cooking fun. It lets everyone enjoy these treats, tailored to their diet. You can find vegan or gluten-free options that are just as tasty.

Vegan Chocolate Chip Pancakes

To make vegan chocolate chip pancakes, use plant-based ingredients. Try almond milk or oat milk instead of regular milk. Flaxseed mixed with water is a great egg substitute.

This mix not only adds texture but also nutrients. It makes these pancakes just as good as the original.

Gluten-Free Options

If you can’t have gluten, there are many flour substitutes. Almond flour and oat flour are great for gluten-free pancakes. They offer a rich taste and keep the pancakes fluffy.

Conclusion: Enjoy Your Perfect Chocolate Chip Pancakes!

Now you know how to make chocolate chip pancakes. It’s time to enjoy the yummy results of your breakfast adventure. These pancakes are not just tasty but also make memories at the breakfast table.

Making chocolate chip pancakes is fun to do with family. It brings joy and starts the day with smiles.

Share Your Pancake Creations

Share your pancake recipes and creations on social media. Every pancake tells a story, whether it’s classic or creative. This is a great way to inspire friends and family to join in the fun.

Join the Pancake Lovers Community

Connect with other pancake lovers who share your passion. The pancake community loves to share ideas and tips. It’s a great way to find new recipes and appreciate the joy of chocolate chip pancakes.


FAQ

Can I make chocolate chip pancakes without eggs?

Absolutely! You can use mashed bananas, applesauce, or flaxseed mixed with water. These options make a vegan version that’s fluffy.

What’s the secret to fluffy pancakes?

To get fluffy pancakes, don’t overmix the batter. Just stir until it’s combined. Let it sit for a few minutes before cooking. Fresh baking powder helps them rise well.

How do I store leftover chocolate chip pancakes?

Keep leftover pancakes in an airtight container in the fridge for up to 3 days. Or freeze them for longer. Reheat in a toaster or oven to keep them fluffy.

What can I use instead of all-purpose flour?

Try whole wheat flour or gluten-free options like oat or almond flour. They add unique flavors and textures to your pancakes.

How can I customize my chocolate chip pancakes?

Add nuts, berries, or cinnamon for extra taste. Try different chocolate chip recipes to find your favorite!

What toppings do you recommend for serving pancakes?

Top with whipped cream, fresh fruits, yogurt, or maple or chocolate syrup. A sprinkle of powdered sugar adds a sweet touch!

Are chocolate chip pancakes a good option for brunch gatherings?

Yes! They’re loved by everyone, making them great for brunch. Offer various toppings for a fun breakfast experience!

Nutella Pancakes: Perfect Blend of Sweet & Savory

Waking up to the smell of pancakes is magical. It brings back memories of Saturday mornings in the kitchen. The laughter of family and the smell of breakfast were unforgettable.

Now, imagine making those memories even sweeter with Nutella pancakes. The chocolate hazelnut spread adds a rich flavor to the fluffy pancakes. It’s a perfect homemade breakfast.

Whether you’re having brunch with friends or just want a tasty start to your day, this recipe is perfect. It’s a delicious mix of sweet and savory in every bite. Get ready to enjoy a world of flavors!

Key Takeaways

  • Nutella pancakes combine the creamy richness of Nutella with soft, fluffy pancakes.
  • Perfect for breakfast, brunch, or even dessert!
  • This easy recipe allows for numerous variations and add-ins.
  • Make delicious pancakes from scratch with just a few simple ingredients.
  • Enjoying Nutella pancakes creates lasting family traditions and sweet memories.

Introduction to Nutella Pancakes

Nutella pancakes have become a hit in breakfast and brunch. They are loved for their rich flavor and soft texture. Mixing chocolate hazelnut spread with fluffy pancakes is a winning combination. It’s a treat that everyone, young and old, enjoys.

The sweetness from the chocolate hazelnut spread adds a special touch. This makes Nutella pancakes perfect for any time of day or special event.

What Makes Nutella Pancakes Special?

Nutella pancakes are a treat for the taste buds. The smooth chocolate hazelnut spread pairs well with the light pancakes. This mix offers a delicious bite every time.

They’re great for breakfast, brunch, or even dessert. Nutella pancakes are versatile and can be customized in many ways.

A Brief History of Pancakes and Nutella

Pancakes have a long history, dating back to ancient times. They were made with simple ingredients like grains and water. Over time, pancakes became a favorite dish worldwide.

In the 1940s, Nutella was introduced, adding a new twist to pancakes. This mix of old and new shows how tastes have changed. Now, Nutella pancakes are a favorite for many.

Ingredients for the Ultimate Nutella Pancakes

To make delicious pancakes, you need the right ingredients. For Nutella pancakes, these ingredients come together perfectly. This makes a breakfast treat that everyone will love. An easy recipe can lead to amazing results with the right ingredients.

Essential Ingredients You’ll Need

  • 1 cup all-purpose flour
  • 2 tablespoons sugar
  • 2 teaspoons baking powder
  • 1/2 teaspoon salt
  • 1 large egg
  • 1 cup milk
  • 2 tablespoons melted butter
  • Nutella (for spreading)

Optional Add-Ins for Extra Flavor

  • 1 teaspoon vanilla extract
  • 1/2 teaspoon ground cinnamon
  • Chocolate chips
  • Sliced bananas or strawberries

Adding extra ingredients can make your pancakes even better. Try different ingredients to find your favorite flavors. Customize your pancakes to make them your own!

Step-by-Step Guide to Making Nutella Pancakes

Making Nutella pancakes is easy. This recipe is perfect for a sweet homemade breakfast. It will impress everyone!

Preparing the Pancake Batter

Start by mixing dry ingredients like flour, sugar, baking powder, and salt. In another bowl, whisk together eggs, milk, and melted butter. Slowly add the wet ingredients to the dry ones, stirring until it’s smooth.

Let the batter rest for 10-15 minutes. This makes your pancakes extra fluffy.

Cooking Tips for Fluffy Pancakes

Heat a nonstick skillet or griddle over medium heat. Pour batter with a ladle, making small pancakes. Wait for bubbles before flipping.

Flipping only once keeps them fluffy. For thicker pancakes, rest the batter longer.

Adding the Nutella: When and How

Swirl Nutella into the batter before flipping for a rich taste. Or, spread it on top after cooking for a chocolatey finish. This adds that special Nutella flavor everyone loves.

Creative Variations of Nutella Pancakes

Nutella pancakes are a great base for many flavors. You can go for something fruity or nutty. Each mix adds something special to the rich chocolate-hazelnut taste, making every pancake a treat.

Nutella Banana Pancakes

Nutella banana pancakes mix sweet bananas with creamy Nutella. The banana’s sweetness contrasts beautifully with the chocolate. You can mash banana into the batter or layer it between pancakes for a special treat.

Nutella Strawberry Pancakes

Nutella strawberry pancakes add a fresh twist. Top pancakes with strawberries and drizzle with warm Nutella for a springtime feel. The strawberries’ sweetness balances the chocolate, making for a delightful taste.

Nutella and Peanut Butter Twist

The Nutella and peanut butter twist adds a nutty flavor. Mixing peanut butter into the batter or using it as a spread is irresistible. It’s perfect for those who love chocolate and peanut butter together.

Check out more delicious pancakes to spice up your breakfast. Each twist brings new flavors, making every pancake stack unique. There’s always something new to try with Nutella.

Serving Suggestions for Nutella Pancakes

Enjoying delicious pancakes with Nutella is more than just eating. Thoughtful serving suggestions can make your breakfast or brunch special. Choose the right toppings and drinks to enhance your meal.

Best Toppings to Enhance Flavor

  • Whipped cream adds a light and airy touch.
  • Fresh fruits such as strawberries or bananas bring a refreshing contrast.
  • A sprinkle of powdered sugar offers a sweet finish.
  • Maple syrup or a drizzle of honey enhances the overall flavor profile.

Pairing Drinks with Nutella Pancakes

Pair your Nutella pancakes with drinks that balance their sweetness. Try a cold glass of milk, strong coffee, or a fruity smoothie. Each sip will make your meal unforgettable.

Healthier Alternatives for Nutella Pancakes

Making healthier pancakes doesn’t mean losing flavor. With a few tweaks, you can enjoy a tasty stack without giving up on health. Using whole wheat flour and dairy-free options brings rich textures and flavors. This easy recipe is perfect for anyone who wants to enjoy Nutella pancakes while staying healthy.

Whole Wheat Pancakes with Nutella

Choosing whole wheat flour makes pancakes healthier, full of fiber and nutrients. This change boosts the nutritional value without losing flavor. Whole wheat adds a heartier taste and better digestion, making your breakfast more wholesome. Top your fluffy pancakes with Nutella for a sweet treat.

Dairy-Free Options for Pancake Lovers

For those who prefer dairy-free, almond milk or oat milk works great. These alternatives are good for those with lactose intolerance and add a nutty flavor. They make sure everyone can enjoy pancakes, no matter their dietary needs.

Adding these variations makes it easy to stick to dietary preferences while enjoying Nutella pancakes. For an even simpler way, try this easy recipe. You’ll impress everyone with your creativity and health focus in making pancakes.

Nutella Pancakes: A Crowd-Pleaser

Nutella pancakes are loved by all, from early birds to night owls. They mix sweet and savory in a perfect way. This makes them a hit at any event.

Perfect for Breakfast, Brunch, or Dessert

They’re a top pick for breakfast, starting the day off right. At brunch, they impress with their rich taste and soft texture. And for dessert, they’re a showstopper with whipped cream or berries.

Hosting a Pancake Party: Tips and Ideas

Hosting a pancake party? Get creative! Set up a pancake bar with:

  • Fresh fruits like strawberries, bananas, and blueberries
  • Diverse spreads, including peanut butter, marshmallow fluff, and fruit preserves
  • Crunchy options such as chopped nuts, granola, or sprinkles
  • A variety of syrups, including maple syrup, chocolate syrup, or honey

This interactive bar turns a meal into fun. Guests can make their own special pancakes. Your party will be a hit!

Troubleshooting Common Pancake Issues

Making pancakes can sometimes be tricky. But, with the right tips, you can fix any problem and enjoy delicious Nutella pancakes every time.

How to Fix a Batter That’s Too Thick

If your batter is too thick, your pancakes might turn out dense. To fix this, just add a bit of milk. Mix it in slowly until the batter is smooth again. This trick often makes your pancakes lighter and fluffier.

What to Do if Your Pancakes Are Too Dry

Overcooking can make pancakes dry. To prevent this, watch the cooking time closely. Flip the pancakes when bubbles appear and the edges are set. This keeps them moist and delicious. Follow these tips to make soft and tasty pancakes.

Storing and Reheating Leftover Nutella Pancakes

Leftover Nutella pancakes can be a delightful treat to enjoy later. Properly storing pancakes ensures they remain fresh and delicious. With a few effective reheating tips, you can savor these tasty creations whenever you desire.

Best Practices for Storing Pancakes

For optimal freshness, consider placing leftover pancakes in an airtight container. This method significantly increases their shelf life in the refrigerator, allowing you to enjoy them for up to three days. If you want to store them for a longer period, freezing is an excellent option. Wrap individual pancakes in plastic wrap and place them in a freezer-safe bag. This approach maintains their flavor and texture.

How to Reheat for Optimal Taste

When it’s time to enjoy your stored pancakes, several reheating tips can help. Placing them in a toaster or warming them in a skillet works wonders. A skillet allows for even heating while keeping the pancakes fluffy and delicious. Just a few minutes on low heat brings them back to life, ensuring they retain that wonderful Nutella-filled experience.

Nutella Pancakes Around the World

Pancakes are loved all over the world, with many different versions. Each region has its own twist, using local ingredients and cooking methods. Nutella has become a favorite, mixed with traditional pancake recipes in many places.

International Pancake Variations

From French crêpes to Russian blinis, there are countless variations. French crêpes are thin and delicate, enjoyed with many fillings. In Japan, soufflé pancakes are all the rage for their light and fluffy texture.

Every cultural take on pancakes shows the endless creativity in cooking. It’s a world of possibilities.

Nutella’s Global Influence on Pancake Culture

Nutella has become a global favorite, changing pancake recipes everywhere. In Italy and Brazil, it’s added to traditional dishes, creating new flavors. You can try new Nutella pancake recipes, like the Nutella Pancakes with Nutella inside.

Nutella’s versatility has made pancakes even more exciting. It invites people to try new and delicious versions of this classic dish.

Conclusion: Enjoying Nutella Pancakes Anytime

Nutella pancakes are more than just a meal. They are a delightful mix of sweet and savory in every bite. Their rich flavor and soft, fluffy texture make them a favorite for breakfast. Making them is easy and fun, thanks to the tips in this article.

When making your Nutella pancakes, don’t be afraid to try new things. Add fruits, nuts, or different spreads to make them your own. Nutella pancakes are perfect for any time, whether it’s a family breakfast or brunch with friends.

Make your Nutella pancakes unique. Every change you make can lead to new memories in the kitchen. So, get your ingredients ready, be creative, and enjoy Nutella pancakes whenever you want!


FAQ

What are Nutella pancakes?

Nutella pancakes are tasty pancakes with a Nutella twist. They use traditional pancake ingredients but add Nutella for a chocolate hazelnut flavor. They’re a favorite for breakfast or brunch.

How do I make Nutella pancakes from scratch?

To make Nutella pancakes, you need flour, eggs, milk, baking powder, and Nutella. Mix the dry and wet ingredients. Cook on a griddle until they’re fluffy. Then, add Nutella for that chocolatey taste.

Can I make Nutella pancakes healthier?

Yes! Use whole wheat flour for more nutrients. Or, try dairy-free milk like almond or oat milk. This keeps the Nutella flavor without the extra calories.

What are some creative variations of Nutella pancakes?

Try Nutella banana pancakes with sliced bananas. Or, make Nutella strawberry pancakes with fresh strawberries. You can also add peanut butter for a unique twist!

What toppings pair well with Nutella pancakes?

Top your pancakes with whipped cream, fresh fruits, or powdered sugar. A drizzle of maple syrup or honey adds a special touch. Each topping brings a unique flavor to your pancakes.

How should I store leftover Nutella pancakes?

Keep leftover pancakes in an airtight container in the fridge for up to three days. You can also freeze them for later. This way, you can enjoy them whenever you want!

Can Nutella pancakes be served as dessert?

Yes! Nutella pancakes are great for dessert too. Add whipped cream, fresh fruit, or chocolate sauce. It’s a sweet treat that will satisfy your cravings.

What drinks pair well with Nutella pancakes?

Coffee, milk, or fresh fruit smoothies go well with Nutella pancakes. They add to the breakfast or brunch experience with their balanced flavors.

Forgotten Chicken and Rice: Your Effortless Dinner Delight!

Forgotten Chicken and Rice

Introduction to Forgotten Chicken and Rice

Life can get hectic, can’t it? Between juggling work, family, and everything in between, finding time to cook can feel like a daunting task. That’s where my beloved Forgotten Chicken and Rice comes in. This dish is a warm hug in a baking dish, perfect for those busy evenings when you want something delicious without the fuss. With just a few simple ingredients, you can create a comforting meal that will impress your loved ones. Trust me, this effortless one-pan wonder will quickly become a staple in your dinner rotation!

Why You’ll Love This Forgotten Chicken and Rice

This dish is a lifesaver for busy weeknights. It’s incredibly easy to prepare, allowing you to spend less time in the kitchen and more time with your family. The flavors meld beautifully as it bakes, creating a comforting aroma that fills your home. Plus, it’s a one-pan meal, which means less cleanup! With Forgotten Chicken and Rice, you’ll enjoy a hearty dinner that’s both satisfying and stress-free.

Ingredients for Forgotten Chicken and Rice

Gathering the right ingredients is the first step to creating your delicious Forgotten Chicken and Rice. Here’s what you’ll need:

  • Bone-in, skin-on chicken thighs: These provide rich flavor and moisture, making your dish succulent.
  • Long-grain white rice: This fluffy rice cooks perfectly in the oven, soaking up all the delicious flavors.
  • Cream of mushroom soup: A creamy base that adds depth and a touch of umami to the dish.
  • Chicken broth: Enhances the flavor of the rice and keeps everything moist while baking.
  • Chopped onion: Adds sweetness and aroma, creating a savory foundation for your meal.
  • Garlic powder: A quick way to infuse that beloved garlic flavor without the chopping.
  • Paprika: This spice brings a subtle smokiness and vibrant color to the dish.
  • Salt and black pepper: Essential seasonings that elevate all the flavors in your meal.
  • Frozen mixed vegetables: A convenient way to add color and nutrition; peas, carrots, and corn work beautifully.
  • Fresh parsley (optional): A sprinkle of this herb adds a fresh touch and a pop of color when serving.

For those looking to switch things up, consider marinating the chicken in your favorite seasoning blend or buttermilk for extra flavor. If you prefer a different taste, you can swap the cream of mushroom soup for cream of chicken soup. And if you’re feeling adventurous, brown rice can be used instead of white; just remember to adjust the cooking time accordingly. You can find the exact quantities for each ingredient at the bottom of the article, ready for printing!

How to Make Forgotten Chicken and Rice

Creating this delightful Forgotten Chicken and Rice is as easy as pie! Follow these simple steps, and you’ll have a comforting meal ready to enjoy. Let’s dive in!

Step 1: Preheat the Oven

First things first, preheat your oven to 375°F (190°C). This ensures that your dish cooks evenly and thoroughly. While the oven warms up, you can gather your ingredients and get ready for the next steps.

Step 2: Prepare the Rice Mixture

In a large mixing bowl, combine the long-grain white rice, cream of mushroom soup, and chicken broth. Add the chopped onion, garlic powder, paprika, salt, and black pepper. Stir everything together until well mixed. This mixture is the heart of your dish, so make sure it’s combined nicely!

Step 3: Assemble the Dish

Spread the rice mixture evenly in the bottom of a 9×13-inch baking dish. Next, place the bone-in, skin-on chicken thighs on top of the rice, skin side up. This allows the chicken to baste the rice as it cooks, infusing it with flavor. Sprinkle the frozen mixed vegetables around the chicken, adding a splash of color and nutrition.

Step 4: Bake the Dish

Cover the baking dish tightly with aluminum foil. This helps trap moisture, ensuring the rice cooks perfectly. Bake in the preheated oven for 1 hour. After that, remove the foil and bake for an additional 15-20 minutes. You want the chicken to be golden brown and reach an internal temperature of 165°F. The aroma wafting through your kitchen will be irresistible!

Step 5: Final Touches

Once the chicken is cooked, let the dish rest for about 5 minutes before serving. This allows the flavors to settle. If you like, garnish with fresh parsley for a pop of color. Now, you’re ready to dig into your delicious Forgotten Chicken and Rice!

Tips for Success

  • For extra flavor, marinate the chicken thighs a few hours ahead of time.
  • Use a meat thermometer to ensure the chicken reaches 165°F for perfect doneness.
  • Feel free to swap in your favorite frozen vegetables for a personal touch.
  • Let the dish rest before serving to enhance the flavors.
  • Double the recipe for leftovers that reheat beautifully!

Equipment Needed

  • 9×13-inch baking dish: A classic choice, but any large oven-safe dish will work.
  • Mixing bowl: Use any bowl you have on hand for combining ingredients.
  • Aluminum foil: Essential for covering the dish; parchment paper can be a substitute.
  • Meat thermometer: Handy for checking chicken doneness; a simple knife can also work.

Variations of Forgotten Chicken and Rice

  • Herb-Infused: Add fresh herbs like thyme or rosemary to the rice mixture for an aromatic twist.
  • Spicy Kick: Incorporate diced jalapeños or a dash of cayenne pepper for a spicy version.
  • Vegetarian Delight: Replace chicken with chickpeas or tofu for a hearty vegetarian option.
  • Cheesy Goodness: Stir in shredded cheese like cheddar or mozzarella before baking for a creamy texture.
  • Asian Flair: Use soy sauce and sesame oil instead of cream of mushroom soup for an Asian-inspired dish.

Serving Suggestions for Forgotten Chicken and Rice

  • Fresh Salad: Pair with a crisp green salad dressed in a light vinaigrette for a refreshing contrast.
  • Garlic Bread: Serve with warm garlic bread to soak up the delicious sauce.
  • Wine Pairing: A chilled white wine, like Sauvignon Blanc, complements the dish beautifully.
  • Presentation: Garnish with lemon wedges and extra parsley for a vibrant touch.

FAQs about Forgotten Chicken and Rice

Curious about this delightful dish? Here are some common questions I often hear about Forgotten Chicken and Rice, along with my answers to help you out!

Can I use boneless chicken thighs instead of bone-in?

Absolutely! Boneless chicken thighs will work just fine. Just keep in mind that they may cook a bit faster, so check for doneness a little earlier.

What if I don’t have cream of mushroom soup?

No worries! You can substitute it with cream of chicken soup or even a homemade white sauce. Both options will still give you that creamy texture.

Can I make this dish ahead of time?

Yes! You can prepare the rice mixture and assemble the dish a day in advance. Just cover it tightly and store it in the fridge. When you’re ready, pop it in the oven!

Is Forgotten Chicken and Rice gluten-free?

Yes, this recipe is gluten-free as long as you use gluten-free cream of mushroom soup. Always check labels to be sure!

How do I store leftovers?

Store any leftovers in an airtight container in the fridge for up to three days. Reheat in the oven or microwave until warmed through. Enjoy your delicious meal again!

Final Thoughts

Cooking should be a joyful experience, and Forgotten Chicken and Rice embodies that spirit perfectly. This dish not only fills your home with mouthwatering aromas but also brings loved ones together around the dinner table. The simplicity of preparation allows you to savor the moment rather than stress over complicated steps. Each bite is a reminder of the comfort that home-cooked meals provide. Whether it’s a busy weeknight or a cozy weekend gathering, this recipe is sure to become a cherished favorite. So, roll up your sleeves and enjoy the delightful journey of creating this effortless meal!

Forgotten Chicken and Rice
jhessica

Forgotten Chicken and Rice: Your Effortless Dinner Delight!

A simple and delicious one-pan meal featuring chicken thighs and rice, perfect for a hassle-free dinner.
Prep Time 15 minutes
Cook Time 1 hour 15 minutes
Total Time 1 hour 30 minutes
Servings: 4 servings
Course: Dinner
Cuisine: American
Calories: 450

Ingredients
  

  • 4 bone-in skin-on chicken thighs
  • 1 cup long-grain white rice
  • 1 can 10.5 ounces cream of mushroom soup
  • 1 can 10.5 ounces chicken broth
  • 1 onion chopped
  • 1 teaspoon garlic powder
  • 1 teaspoon paprika
  • 1 teaspoon salt
  • ½ teaspoon black pepper
  • 1 cup frozen mixed vegetables peas, carrots, corn
  • Fresh parsley for garnish (optional)

Method
 

  1. Preheat your oven to 375°F (190°C).
  2. In a large mixing bowl, combine the rice, cream of mushroom soup, chicken broth, chopped onion, garlic powder, paprika, salt, and black pepper. Stir until well mixed.
  3. Spread the rice mixture evenly in the bottom of a 9×13-inch baking dish.
  4. Place the chicken thighs on top of the rice mixture, skin side up.
  5. Sprinkle the frozen mixed vegetables around the chicken in the baking dish.
  6. Cover the baking dish tightly with aluminum foil.
  7. Bake in the preheated oven for 1 hour.
  8. After 1 hour, remove the foil and bake for an additional 15-20 minutes, or until the chicken is golden brown and cooked through (internal temperature should reach 165°F).
  9. Let the dish rest for 5 minutes before serving. Garnish with fresh parsley if desired.

Nutrition

Serving: 1servingCalories: 450kcalCarbohydrates: 40gProtein: 30gFat: 20gSaturated Fat: 5gPolyunsaturated Fat: 15gCholesterol: 100mgSodium: 800mgFiber: 2gSugar: 2g

Notes

  • For added flavor, marinate the chicken thighs in your favorite seasoning blend or buttermilk for a few hours before cooking.
  • Substitute the cream of mushroom soup with cream of chicken soup for a different flavor profile.
  • You can also use brown rice instead of white rice; just adjust the cooking time as brown rice typically takes longer to cook.

Tried this recipe?

Let us know how it was!

Cozy Broccoli Cheddar Soup Recipe

On a chilly afternoon, the kitchen filled with a warm smell. It was mom’s Cozy Broccoli Cheddar Soup Recipe. This soup made everyone feel cozy and warm.

It was more than just food; it was a comfort. This easy recipe is great for any family dinner. It’s perfect for beginners or experienced cooks.

As the cheese melted with the broccoli, memories of laughter filled the room. This soup was like a warm hug. And the best part? It’s quick to make!

Key Takeaways

  • Cozy Broccoli Cheddar Soup brings warmth and comfort to chilly days.
  • Homemade soup recipes like this one are easy to follow for all skill levels.
  • This recipe features fresh ingredients and simple steps for quick preparation.
  • Cheesy goodness makes it a favorite among family members.
  • Perfect for cozy dinners or shared moments with loved ones.

Introduction to Cozy Broccoli Cheddar Soup

Cozy Broccoli Cheddar Soup is the essence of comfort food. It has a creamy texture and rich flavors that warm the heart. The mix of tender broccoli and sharp cheddar cheese is loved by all. It’s a healthy dinner option that’s easy to make.

What Makes This Soup Special?

This soup is special for many reasons. Broccoli adds vitamins and minerals, while cheddar cheese makes it creamy. You can customize it to your liking with spices or herbs. This makes it perfect for everyone.

Benefits of Homemade Soup

Homemade soup has many benefits. You can make it fit your dietary needs, ensuring everyone enjoys it. Using fresh ingredients makes it healthier. Plus, it’s a great way to bond with your family over a delicious meal.

Ingredients for Broccoli Cheddar Soup

Choosing the right ingredients is key for a great cheesy broccoli soup. This recipe is easy to make and uses simple ingredients. Knowing the best broccoli and cheese options can make your soup even better.

Fresh vs. Frozen Broccoli

Fresh and frozen broccoli have different tastes and benefits. Fresh broccoli tastes vibrant and crunchy. Frozen broccoli is nutritious and easy to use.

When you can get fresh broccoli, it’s the best choice. You can find it at farmers’ markets or local stores. Frozen broccoli, which is blanched before freezing, is also a good option for soups.

Cheddar Cheese Options

The type of cheddar cheese you pick changes your soup’s flavor. Sharp cheddar is bold, while mild cheddar is creamier. Aged cheddar adds a rich, complex taste.

Mixing different cheddars can balance the flavors. This makes your soup more interesting and delicious.

Additional Flavor Enhancements

Adding garlic and onion can make your soup even better. These ingredients add warmth and depth. Spices like nutmeg and a bit of cayenne pepper can also enhance the flavor.

These additions let you customize your broccoli cheddar soup. They keep it tasty and comforting. For a detailed recipe, visit this link.

Kitchen Tools You’ll Need

To make the perfect Cozy Broccoli Cheddar Soup, you need the right tools. These pieces of cooking equipment make the process smoother. They help your soup taste great every time.

Essential Cookware

Begin with a strong pot for simmering the soup. A pot with a heavy bottom spreads heat evenly. This prevents hot spots. A whisk is also useful for blending the soup smoothly.

Here’s a look at other important cookware:

CookwarePurpose
Large PotSimmering soup ingredients
WhiskMixing broth and cheese
StockpotCooking larger batches

Recommended Utensils

Along with cookware, the right utensils make cooking better. A sharp knife quickly chops vegetables. A sturdy cutting board is key for safe prep.

Measuring cups help you get the right amounts. This ensures your soup tastes perfect. Here is a list of key utensils you should consider:

  • Chopping Knife
  • Cutting Board
  • Measuring Cups
  • Wooden Spoon

With these tools, making your cozy soup is fun. Check out this broccoli cheddar soup recipe for more tips on making this tasty dish!

Step-by-Step Cooking Instructions

Making a cozy broccoli cheddar soup is fun, thanks to easy recipe steps. Follow these steps for a smooth cooking process and a delicious meal.

Preparing the Vegetables

Begin by washing fresh broccoli under running water. Cut it into small florets for even cooking. Use a knife and cutting board for this.

Don’t forget to chop onions and mince garlic. These will add great flavor to your soup.

Making the Soup Base

In a large pot, heat olive oil over medium heat. Add onions and sauté until they’re translucent, about 5 minutes. Then, add minced garlic and stir for a minute until it smells good.

Pour in vegetable or chicken broth and bring it to a gentle boil.

Adding Broccoli and Cheese

When the broth boils, add broccoli florets. Let them simmer for 10-12 minutes until they’re tender. Then, lower the heat and add shredded cheddar cheese slowly.

Stir until the cheese melts into the soup. For a creamier soup, use an immersion blender. This will make your soup smooth and comforting.

This guide makes cooking easy for everyone, whether you’re new or experienced. Enjoy the warmth and richness of your homemade broccoli cheddar soup!

Tips for the Perfect Texture

Mastering the art of broccoli cheddar soup starts with texture. Getting it just right makes this comfort food even more inviting. Here are some tips to help you achieve that velvety finish.

Achieving Creaminess

For a smooth soup, blending is key. Cook your veggies until they’re soft, then blend them right in the pot. For a chunkier soup, blend half and mix it back in.

To make it creamier, add heavy cream or whole milk after blending. Stir gently to mix it in.

Handling Cheese Properly

Adding cheese right is important for a rich finish. Use freshly grated cheddar to avoid anti-caking agents. Remove the soup from heat before adding cheese to prevent clumps.

Slowly add the cheese while stirring. This ensures it melts evenly. Keeping the soup warm helps preserve the flavors and texture.

Follow these tips to make a broccoli cheddar soup that’s both comforting and creamy. Every spoonful will be a delight.

Customizations and Variations

This Cozy Broccoli Cheddar Soup is super customizable. You can make it your own by adding special touches. It’s easy to change it up to fit your diet. Try new ingredients or make different versions to add flavor and meet your dietary needs.

Vegetarian Options

Want a vegetarian version? Swap chicken broth for vegetable broth. Add veggies like diced bell peppers or peas for extra taste and texture. Use spices or fresh herbs to make it even more flavorful.

Adding Protein Sources

Looking to add more protein? Chicken or turkey chunks are great. They mix well with the creamy cheddar. Beans or tofu are also good for a vegetarian option. Each adds flavor and makes the soup more satisfying. Check out variations of the recipe for more ideas.

Serving Suggestions

Adding comforting broccoli cheddar soup to your meals can make them special. Choosing the right sides can turn a simple soup into a cozy family dinner. Here are some ideas to make your soup experience better.

Ideal Accompaniments

  • Crusty bread: A warm, crusty baguette or sourdough loaf pairs wonderfully with soup, perfect for dipping.
  • Fresh salad: A vibrant salad featuring seasonal greens adds a refreshing contrast to the creamy soup.
  • Cheese toast: Melty cheese on toasted bread enhances the soup’s flavors, making it a satisfying combo.
  • Grilled sandwiches: A classic grilled cheese sandwich can be the ultimate comfort food, perfect for kids.

Perfect Serving Sizes

Think about the occasion when deciding on portion sizes. For a casual family dinner, 1.5 to 2 cups in serving cups or bowls is ideal. For bigger events, serve soup in smaller bowls as an appetizer, about 1 cup each. This way, everyone gets a taste without feeling too full.

OccasionServing SizeAccompaniments
Family Dinner1.5 – 2 cupsCrusty bread, fresh salad
Casual Gathering1 cupGrilled sandwiches, cheese toast
Lunch Event1.5 cupsCheese toast, fresh salad

Leftover Storage Tips

After enjoying a hearty bowl of cozy broccoli cheddar soup, it’s essential to think about how to best manage the leftovers. Proper soup storage not only helps maintain the flavor but ensures food safety as well. Here are some valuable tips for refrigerating and freezing your delicious creations.

Storing in the Refrigerator

When preserving leftovers in the refrigerator, make sure to transfer the soup into airtight containers. This prevents any unwanted odors from affecting its taste. Ideally, leftover soup should be consumed within three to four days.

For optimal enjoyment, let the soup cool to room temperature before placing it in the fridge. This practice helps retain its rich flavors and creamy texture.

Freezing for Future Enjoyment

If you have a larger batch of soup, freezing is a great option for preserving leftovers long-term. Use freezer-safe containers or heavy-duty freezer bags, ensuring you leave some space for expansion. Label the containers with the date, and aim to use the soup within three months for the best quality.

When ready to enjoy, thaw in the refrigerator overnight and reheat gently on the stovetop. This way, you’ll savor that comforting broccoli cheddar flavor all over again!

Health Benefits of Broccoli Cheddar Soup

Broccoli cheddar soup is more than a cozy meal. It’s packed with nutritional benefits and tastes great. It’s a top pick for a healthy dinner because of its vitamins and minerals.

Nutritional Insights

Broccoli is a nutritional superstar. It’s full of vitamins C and K, and fiber for better digestion. Cheddar cheese adds calcium and protein, boosting the soup’s healthiness.

Together, these ingredients make a tasty soup that’s good for you. They support your health while you enjoy the flavors.

Comfort Food with a Twist

This soup is a healthy twist on comfort food. It has a creamy texture and rich taste. It’s perfect for a meal that’s both nourishing and satisfying.

Enjoying a bowl of broccoli cheddar soup feels like a treat. Yet, it’s also part of a balanced diet.

Conclusion: Enjoy Your Cozy Broccoli Cheddar Soup

Making Cozy Broccoli Cheddar Soup is more than cooking. It brings joy and warmth to your home. This homemade soup is satisfying and can become a family favorite for years.

The creamy texture and rich flavor are perfect for chilly days. They bring everyone together at the dinner table.

Final Thoughts

Every bowl of this soup shows off your cooking skills. It’s a chance to share comforting moments with your loved ones. Whether you stick to the classic recipe or try something new, it’s always exciting.

For those wanting to make this dish, check out the step-by-step guide here. Turn this tasty soup into a cherished family favorite.

Encouragement to Share Your Experience

As you enjoy your soup, share your experience with friends and family. Talking about personal touches or extra ingredients can spark creativity. It encourages others to try their own versions.

Building a community around this dish can make meals special. It turns ordinary gatherings into unforgettable memories.

Additional Resources and Recommendations

If you loved the Cozy Broccoli Cheddar Soup, you might want more recipe ideas. Trying new things can make your meals exciting and comforting. Think about adding different veggies, spices, or a bit of cream for extra richness. The kitchen is your playground, so get creative!

Recipe Variations

There are many ways to make the broccoli cheddar soup your own. Try using Gruyère or Monterey Jack cheese for a different taste. Adding spinach or kale can make it healthier and more colorful. Also, changing the broth can completely transform the soup.

Suggested Cookbooks and Websites

For more soup recipes, check out cookbooks like “Soup for Syria” or “The Soup Book” by Dianne Jacob. They offer a wide range of options. Food blogs like Minimalist Baker and Cookie and Kate also have great recipes. These resources will help you improve your cooking and make your kitchen a happier place.


FAQ

Can I use frozen broccoli for the Cozy Broccoli Cheddar Soup?

Yes! Frozen broccoli is a great choice and saves time. Just remember, it might cook faster than fresh broccoli.

What type of cheddar cheese is best for this soup?

Sharp cheddar adds a bold flavor. But, milder cheddar or a mix can also make a creamy soup.

Is this soup suitable for meal prep?

Absolutely! It’s perfect for meal prep. You can store it in the fridge or freeze it for later.

How can I customize this recipe to make it vegetarian?

To make it vegetarian, use vegetable broth instead of chicken broth. Add more veggies like carrots or bell peppers for extra flavor.

What are some good sides to serve with Broccoli Cheddar Soup?

Try it with crusty bread, cheesy garlic bread, or a fresh salad. These pair well with the soup.

Can I add proteins to this soup?

Yes! Adding proteins like shredded chicken, beans, or tofu makes it more filling and nutritious.

What are the main health benefits of Broccoli Cheddar Soup?

Broccoli is full of vitamins and fiber. The cheddar cheese adds calcium and protein, making it a healthy choice.

How do I store leftover soup?

Cool the soup completely before storing it in an airtight container. It keeps in the fridge for 3-4 days or can be frozen.

Is this soup easy to make for beginner cooks?

Absolutely! It’s an easy recipe for anyone. It has simple ingredients and clear instructions.

Cheesy Protein Egg Bake Recipe

Imagine waking up to the delicious aroma of a Cheesy Protein Egg Bake in your kitchen. The sun is just starting to peek through your windows. You’ve had a busy week, balancing work, family, and trying to eat healthy.

This easy egg bake recipe is just what you need. It’s rich in protein, satisfying, and utterly delightful. Eggs are the star, combined with flavorful cheeses. This dish turns into a high-protein meal perfect for any morning.

Whether you’re meal prepping for the week or looking for a nutritious breakfast, this recipe is for you. It’s a healthy breakfast recipe that the whole family will love. Get ready to savor every cheesy, protein-packed bite!

Key Takeaways

  • Cheesy Protein Egg Bake combines eggs and cheese for a nutritious breakfast.
  • This recipe is perfect for meal prep and easy to customize.
  • A high-protein meal that aligns with low-carb diets.
  • Simple preparation makes this egg bake an ideal morning choice.
  • Leftovers can be enjoyed in many creative ways.
  • This dish provides essential nutrients to kickstart your day.

Introduction to Cheesy Protein Egg Bake

The Cheesy Protein Egg Bake is a tasty dish perfect for breakfast lovers. It mixes cheeses with eggs, making a hearty meal. This dish is easy to make and packed with protein.

Having a nutritious breakfast like this can make your day better. It sets a positive tone for the morning.

What is Cheesy Protein Egg Bake?

The Cheesy Protein Egg Bake is a dish with eggs, cheeses, herbs, and sometimes veggies or meats. You can make it your own by adding your favorite ingredients. It’s a filling breakfast that’s also good for you.

Benefits of Protein in Your Diet

Adding protein to your diet has many health benefits. It helps repair muscles, aids in weight management, and keeps you full. Eating protein-rich foods like the Cheesy Protein Egg Bake boosts your metabolism and overall health.

Starting your day with a nutritious breakfast gives you energy and focus. It makes mornings better.

Key Ingredients for Cheesy Protein Egg Bake

Making a tasty cheesy protein egg bake starts with knowing the key ingredients. These ingredients make the dish both healthy and delicious. Let’s explore the essential parts that add flavor and nutrition.

Eggs: The Star of the Dish

Eggs are the base of any great egg casserole. They’re full of protein, vitamins B12 and D, and amino acids. These nutrients help repair muscles and keep us healthy. Eggs also soak up flavors well, making them a great choice for a filling meal.

Cheese Varieties You Can Use

Cheese makes this dish go from good to great. Try using cheddar for a sharp taste, mozzarella for creaminess, or feta for a tangy flavor. Each cheese adds its own special touch, making the dish burst with flavor.

Additional Ingredients to Consider

To make the dish even better, add veggies and meats. Spinach and bell peppers add color and freshness. Bacon or sausage bring a rich, savory taste. These extras not only enhance the flavor but also make the dish a complete meal.

Step-by-Step Preparation Instructions

Making a tasty Cheesy Protein Egg Bake is easy. Just follow these simple steps. Start by getting your ingredients ready. Then, mix and bake for a dish everyone will love.

Preparing the Ingredients

First, wash and chop any veggies like bell peppers or spinach. Cook meats like bacon or sausage before adding them. Get your eggs, cheese, and seasonings ready. This makes the process smoother.

Mixing the Egg Mixture

In a big bowl, beat the eggs until they’re smooth. Add some milk for creaminess. Then, mix in your cheese, veggies, and seasonings. Make sure everything is well combined for a flavorful dish.

Baking Instructions for Perfect Consistency

Heat your oven to 350°F (175°C). Put the egg mix in a greased dish and spread it out. Bake for 25-30 minutes, or until it’s set and the top is golden. Check if it’s done by inserting a toothpick; it should come out clean. Let it cool a bit before serving for the best texture.

Tips for Making the Best Cheesy Protein Egg Bake

Making a tasty Cheesy Protein Egg Bake requires some key cooking tips. Choosing the right bakeware is very important. Glass or ceramic dishes are great because they distribute heat evenly. This ensures your egg bake cooks perfectly.

Here are some tips on bakeware and cooking times to help you.

Choosing the Right Bakeware

The type of bakeware you use is critical for a great egg bake. Glass and ceramic are top choices because they keep heat well. Here’s a quick look at the best bakeware types:

Bakeware TypeBenefits
GlassEven heating, non-reactive, easily visible cooking progress
CeramicRetains heat well, beautiful presentation, available in various designs
MetalQuick heat conduction, durable, available in various sizes

Adjusting Cooking Time for Different Ovens

Ovens can vary a lot, affecting your egg bake’s cooking time. Here are some tips:

  • Regularly check for doneness, specially with a new oven.
  • Start monitoring your bake 5-10 minutes before the recommended time.
  • Use a toothpick or knife to test for set consistency in the center.

By following these tips and choosing the right bakeware, your Cheesy Protein Egg Bake will be a hit. For a simple recipe, check out this recipe link.

Customizing Your Cheesy Protein Egg Bake

Customizing your Cheesy Protein Egg Bake lets you mix flavors and nutrition. It’s a base for many healthy breakfasts. You can try different tastes.

Adding Vegetables for Extra Flavor

Adding vegetables can make your egg bake better. Try these:

  • Chopped tomatoes for freshness
  • Diced zucchini for a mild taste
  • Sauteed mushrooms for umami richness
  • Spinach or kale for added nutrients

These veggies add flavor and nutrition. They make your egg bake a balanced meal.

Incorporating Different Meats or Proteins

You can change the protein in your egg bake. Here are some ideas:

  • Cooked bacon or sausage for a hearty bite
  • Grilled chicken for a lean protein source
  • Plant-based proteins like tofu or tempeh for a vegetarian option

This way, your egg bake fits many diets. It’s a meal that keeps things interesting.

Serving Suggestions for Your Egg Bake

There’s more to your Cheesy Protein Egg Bake than just cooking it. Adding thoughtful serving suggestions can make it a memorable meal. Pair it with fresh sides for a complete breakfast or brunch that’s sure to please.

Ideal Accompaniments to Serve

  • Serve with a side salad for a refreshing balance of flavors.
  • Accompany the egg bake with fresh fruit for a sweet contrast.
  • Include whole-grain toast or avocado for added texture and nutrients.

Ideas for Leftover Egg Bake

Don’t let leftover egg bake go to waste! Get creative with it for quick meals all week. Here are some ideas:

  • Add slices of the egg bake into wraps with greens and spreads.
  • Mix it with fresh veggies to create a hearty salad.
  • Reheat and serve as a speedy breakfast option on busy mornings.

Nutritional Information of Cheesy Protein Egg Bake

The Cheesy Protein Egg Bake is not just tasty; it’s also packed with nutrients. It’s a great way to start your day with protein and essential nutrients. Knowing the calorie and macronutrient breakdown shows it’s a healthy breakfast choice.

Breakdown of Calories and Macronutrients

IngredientCaloriesProtein (g)Fat (g)Carbohydrates (g)
2 Eggs14012100
Cottage Cheese (1/2 cup)901414
Cherry Tomatoes (1/2 cup)150.80.23.4
Olive Oil (1 tbsp)1200140
Total (per serving)36526.825.27.4

How It Fits into a Balanced Diet

This breakfast is high in protein, making it good for low-carb and keto diets. It helps you feel full and supports muscle health. It’s also easy to make and fits well with healthy eating goals. For more info on similar recipes and health benefits, check out this link.

Storage and Reheating Guidelines

Storing your Cheesy Protein Egg Bake right is key to keeping it fresh and tasty. By following the right storage guidelines, you can enjoy your dish again later. Place it in airtight containers and refrigerate it within a few hours after serving.

Proper Storage Techniques

To keep your leftover egg bake fresh, try these tips:

  • Use airtight containers to keep moisture and odors out.
  • Mark containers with the date to remember when you made it.
  • Keep it in the fridge for 3-4 days, or freeze for longer.

Best Ways to Reheat Your Egg Bake

Reheating your egg bake right keeps it tasty and moist. Here are some reheating tips to follow:

  1. Oven: Heat to 350°F (175°C), cover with foil, and warm for 20 minutes.
  2. Microwave: Put a slice on a safe plate, cover lightly, and heat in 30-second bursts until warm.

These steps help your leftover egg bake stay delicious. It makes it easy to fit into your busy life without losing quality.

Conclusion: Why You’ll Love This Recipe

The Cheesy Protein Egg Bake is a top pick for meal prep. It’s easy to make ahead and serves many. This makes mornings less stressful, turning breakfast into a breeze.

Perfect for Meal Prep

If you’re always on the go, this egg bake is perfect. It’s quick to make in bulk, saving time during the week. You can keep it in the fridge and reheat it fast, ideal for busy lives.

A Versatile Dish for Any Occasion

This recipe is great for any time of day. It’s perfect for brunch or a cozy Sunday morning. You can change up the ingredients to match your taste, making it a favorite in any home.

Call to Action: Try the Recipe Today!

Now that you know about the Cheesy Protein Egg Bake, it’s time to try it out! This dish is full of protein and great for any meal. It’s perfect for brunch or a healthy breakfast. So, get your ingredients ready and start cooking!

After making your own egg bake, we want to hear about it. Share your experience and any special touches you added. Talking with other food lovers can make a fun community. You can also share your thoughts on egg bake variations on social media.

For more breakfast ideas, check out protein-packed breakfast recipes. Let your creativity shine in the kitchen. And don’t forget to share your yummy creations with your loved ones!


FAQ

What can I serve with my Cheesy Protein Egg Bake?

Serve it with side salads, fresh fruit, or whole-grain toast for a balanced meal. Adding avocado gives it extra healthy fats!

How can I customize my Cheesy Protein Egg Bake?

Add veggies like spinach, tomatoes, or bell peppers for more flavor and nutrition. Try different meats or plant-based proteins to fit your diet, whether it’s keto-friendly or vegetarian.

How do I properly store and reheat my leftovers?

Store it in an airtight container in the fridge for a few days for the best taste. Reheat in the oven or microwave to keep it delicious.

Can I freeze my Cheesy Protein Egg Bake for later?

Yes, you can freeze it! Cool it down first, then put it in a freezer-safe container. It stays good for up to 2 months, making meal prep easier.

Is the Cheesy Protein Egg Bake suitable for a low-carb diet?

Absolutely! It’s low in carbs, making it great for low-carb or keto diets. It’s full of protein and healthy fats!

How long does it take to prepare the Cheesy Protein Egg Bake?

Prep takes 15-20 minutes, and baking takes 25-30 minutes, depending on your oven. It’s quick and easy for busy mornings!

What types of cheese work best in this egg bake?

Cheddar, mozzarella, and feta are popular choices. But feel free to try other cheeses to find your favorite flavor!

Lemon Blueberry Delight Recipe | Summery Dessert

On those sun-drenched summer afternoons, nothing beats the joy of indulging in a dessert that matches the brightness of the season. Imagine a family gathered in the backyard, laughter echoing as kids chase each other. The enticing aroma of grilled meals wafts in the air.

Suddenly, someone brings out a stunning Lemon Blueberry Delight. Its vibrant layers of creamy lemon filling are topped with generous amounts of juicy blueberries. These glisten in the sunlight. As the first slice is cut, everyone leans forward eagerly.

They are eager to enjoy this refreshing treat. With its harmonious blend of tangy and sweet, this easy dessert recipe quickly becomes the highlight of the day. It leaves satisfied smiles all around. Let’s dive into the details of how you can recreate this delightful summer dessert to bring that same joy to your gatherings.

Key Takeaways

  • Lemon Blueberry Delight is a refreshing, summery dessert perfect for gatherings.
  • This recipe combines sweet blueberries and zesty lemon for a delightful flavor.
  • It’s an easy dessert recipe anyone can make at home.
  • The visually appealing layers add a touch of elegance to any table.
  • Perfect for warm days when you crave something light yet satisfying.

What is Lemon Blueberry Delight?

The Lemon Blueberry Delight dessert is a refreshing treat that captures the essence of summer. It combines the tartness of lemons with the sweetness of fresh blueberries. This creates a layered masterpiece that is both visually appealing and delicious.

Description of the Dessert

This dessert features a creamy lemon filling between juicy blueberries. It offers a beautiful contrast of flavors and textures. The light and airy consistency makes it perfect for warm weather gatherings.

Each bite is a burst of zesty lemon and the natural sweetness of blueberries. It delivers a symphony of tastes that dance on the palate.

Origins and History

The lemon dessert origins date back to early American cooking. Simple ingredients were often turned into delightful treats. Fruits like blueberries have a rich history in desserts.

As berries and citrus became more popular, the Lemon Blueberry Delight emerged. It became a favorite at picnics and family gatherings. Its presence in American cuisine shows the appeal of combining fresh, seasonal ingredients.

Key Ingredients for the Recipe

To make the perfect Lemon Blueberry Delight, you need the right ingredients. They mix together to create a summer dessert that’s both tasty and beautiful. Each part is important for the dessert’s flavor and texture.

Fresh Blueberries

Fresh blueberries are the main attraction in this dessert. Their sweetness and deep color add a nice contrast. Choose plump, firm berries for the best taste and texture.

Zesty Lemons

Zesty lemons bring a refreshing tang to the mix. The juice and zest of the lemons add a vibrant twist. Make sure to pick ripe lemons for the best flavor.

Other Essential Ingredients

Other ingredients are key to getting the perfect balance. Granulated sugar adds sweetness, while heavy cream makes it rich. A graham cracker crust adds a nice crunch. Using quality ingredients is important for flavor and looks.

Step-by-Step Preparation Instructions

Making the Lemon Blueberry Delight is a fun process. It involves several steps that make the dessert taste great and look amazing.

Preparing the Lemon Filling

Start by mixing the lemon filling. Use fresh lemon juice, zest, sugar, and cream. Whisk until it’s smooth. This filling is the base for the dessert’s layers.

Making the Blueberry Layer

Next, make the blueberry layer. Cook fresh blueberries with sugar until they burst. Add cornstarch to thicken it. This step is key for the dessert’s rich taste.

Assembling the Dessert

Now, it’s time to put it all together. Start with a graham cracker crust. Then, layer the lemon filling and blueberry mixture. This makes the dessert look stunning. Let it chill in the fridge for at least six hours. For more details, see this guide to Lemon Blueberry Delight preparation.

Tips for Perfecting Your Lemon Blueberry Delight

Making a great Lemon Blueberry Delight takes a few key steps. Using the right ingredients and techniques is key. Here are some tips to help you make the best dessert.

Choosing the Right Blueberries

Choosing the right blueberries is important for flavor and texture. Look for berries that are:

  • Firm and plump.
  • Deep blue in color.
  • Covered with a slight sheen.

These signs mean the berries are fresh. Freshness is key to a great dessert.

Tips for Squeezing Lemons

Using a lemon squeezer can really help with squeezing lemons. It gets more juice and keeps seeds out. Make sure to:

  • Select ripe lemons for more juice.
  • Roll the lemon on a flat surface before cutting to release more juice.

These steps help get the most flavor from your lemons. This makes your dish tangier.

Timing and Temperature

Letting your Lemon Blueberry Delight chill in the fridge is important. It makes the flavors better and the texture smoother. Try to:

  • Chill it for at least two hours after making it.
  • Serve it cool for the best taste.

Serving Suggestions

When serving Lemon Blueberry Delight, the right *serving suggestions* can make a big difference. This dessert goes well with many things that bring out its taste and look.

Ideal Pairings with the Dessert

For the best taste, try these options:

  • Dollops of whipped cream for added richness
  • Scoops of vanilla ice cream to introduce a creamy texture
  • Fresh berries for a burst of color and flavor
  • A drizzle of blueberry sauce to complement the blueberry layer

These pairings turn serving Lemon Blueberry Delight into a special treat.

Garnishing Ideas

How you present the dessert is key. Here are some ideas to make your Lemon Blueberry Delight look great:

  • Fresh mint leaves for a pop of vibrant green
  • Sprinkles of lemon zest to enhance aroma and brightness
  • Powdered sugar dusting for an elegant finish

Try serving it in individual glasses for a fancy look. It will impress your guests and show off the dessert’s beauty.

Storage Tips for Leftovers

Keeping your Lemon Blueberry Delight fresh is key. Simple storage tips can help. This way, you can enjoy it for days.

How to Store Properly

Store leftovers in an airtight container to keep flavors and textures right. Don’t leave it out; refrigeration is a must. Freezing is also an option, but it might change the texture a bit.

Shelf Life Expectations

Leftovers can last 3 to 5 days in the fridge. This ensures you enjoy the lemon and blueberry mix without losing quality. Freezing extends this to 2 months. Always check for spoilage before eating.

Variations on the Classic Recipe

Exploring variations of Lemon Blueberry Delight lets everyone enjoy this dessert. It’s great for those with special dietary needs. You can make a vegan dessert or a gluten-free dessert. Both keep the taste amazing and make sure everyone can enjoy it.

Vegan Lemon Blueberry Delight

To make a vegan version, use coconut cream instead of dairy. Choose a plant-based sweetener too. This way, the dessert stays creamy and zesty. It’s perfect for vegans who love this treat.

Gluten-Free Alternatives

For gluten-free options, try a crust made from nuts like almonds. Or use gluten-free cookies. This keeps the dessert tasty while being safe for those with gluten issues. For more ideas, visit this link.

Variation TypeMain IngredientsDietary Information
Classic Lemon Blueberry DelightGraham cracker crust, cream cheese, blueberriesNot vegan, not gluten-free
Vegan Lemon Blueberry DelightCoconut cream, plant-based sweetener, blueberriesVegan
Gluten-Free Lemon Blueberry DelightNut-based crust or gluten-free cookies, cream cheese, blueberriesGluten-free

Health Benefits of Key Ingredients

The Lemon Blueberry Delight is not just tasty. It’s also packed with health benefits. Each ingredient adds to your well-being, making every bite a treat.

Benefits of Blueberries

Blueberries are known for their health perks. They’re full of antioxidants that fight stress and inflammation. They’re also rich in vitamins C and K, and fiber, which helps with digestion.

Studies show that blueberries can improve heart health and brain function. They’re a great choice for a healthy diet.

Advantages of Lemon

Lemons are more than just a burst of flavor. They’re also good for you. They’re full of vitamin C, which boosts your immune system and skin health.

Lemons can also help with digestion and keep you hydrated. Adding lemons to your diet can boost your overall health. They’re a key ingredient in any healthy dessert.

Lemon Blueberry Delight for Special Occasions

Lemon Blueberry Delight is perfect for special occasions, like summer gatherings. It’s light and refreshing, with a zesty flavor that’s great for warm weather. Its vibrant colors and creamy texture make it a hit with guests.

Summer Picnics and Gatherings

For summer picnics, Lemon Blueberry Delight is a great choice. It’s a sweet and tangy contrast to savory dishes. Plus, it’s easy to make, perfect for hosts who want to impress without stress.

The mix of juicy blueberries and lemon is irresistible. It makes any outdoor event feel more welcoming.

Holidays and Celebrations

Holidays are a great time to serve Lemon Blueberry Delight. It’s a hit at events like the Fourth of July, with its bright colors and flavors. It’s perfect for family gatherings or casual get-togethers with friends.

Looking for a memorable holiday recipe? This layered delight is a standout choice.

Common Mistakes to Avoid

Making the perfect Lemon Blueberry Delight needs careful attention. Knowing common dessert mistakes can make your dessert better. Avoiding overcooking and picking the right blueberries will make your dessert more enjoyable.

Overcooking the Filling

One big mistake is overcooking the lemon filling. This can make it curdled, ruining the dessert. It’s key to watch the cooking time and temperature closely. This helps keep the filling creamy, as desired.

Using Ripe or Overripe Blueberries

Choosing the right blueberries is also important. Using too ripe berries can make the dessert mushy. Pick fresh, vibrant blueberries to keep the dessert’s flavor balanced. This ensures your Lemon Blueberry Delight is as refreshing as it should be.

Conclusion

The Lemon Blueberry Delight is a refreshing dessert that captures the essence of summer. It’s easy to make and loved by both new and experienced bakers. This dessert perfectly balances the tartness of lemons and the sweetness of blueberries.

It’s also versatile, making it great for any celebration. This makes it a perfect treat for any occasion.

Recap of the Recipe’s Appeal

The Lemon Blueberry Delight is loved for its mix of textures and flavors. It’s perfect for a sunny afternoon or a festive event. Its taste and refreshing qualities make it a hit with guests.

It’s a must-try for anyone wanting to improve their baking skills. This dessert is sure to impress and delight.

Encouragement to Try It Out

We encourage you to make your own Lemon Blueberry Delight. Try different variations and add your own twist. Enjoy the vibrant flavors it brings to any event.

Preparing this dessert is a fun challenge. Share it with your loved ones. It will become a favorite in your dessert collection.


FAQ

What is Lemon Blueberry Delight?

Lemon Blueberry Delight is a layered dessert. It mixes creamy lemon filling with fresh blueberries. This creates a perfect balance of tart and sweet, great for summer.

What are the key ingredients in this recipe?

The main ingredients are fresh blueberries, zesty lemons, sugar, cream, and a graham cracker crust. Together, they make a delicious and beautiful dessert.

How do I prepare the lemon filling?

To make the lemon filling, mix lemon juice and zest with sugar and cream until smooth. Make sure to mix well for a creamy texture.

What are some tips for making a perfect Lemon Blueberry Delight?

Pick firm, ripe blueberries and use a lemon squeezer for juice. Always chill the dessert in the fridge before serving to bring out the flavors.

Can I make Lemon Blueberry Delight vegan?

Yes, you can make a vegan version. Use coconut cream and a plant-based sweetener instead of dairy. It keeps the same great taste.

How should I store leftovers?

Keep leftovers in an airtight container in the fridge for 3-5 days. Don’t leave it at room temperature to keep the crust fresh.

What health benefits do the main ingredients provide?

Blueberries are full of antioxidants and vitamins, good for the heart and immune system. Lemons have lots of vitamin C, which helps with digestion and skin.

Is Lemon Blueberry Delight suitable for special occasions?

Absolutely! It’s perfect for summer picnics, family gatherings, and holidays. It’s a great choice for any festive event.

What common mistakes should I avoid when making this dessert?

Don’t overcook the lemon filling, as it can curdle. Also, pick fresh, firm blueberries for the best taste and texture.

Shepherd’s Pie Soup Recipe: Comfort in a Bowl

Winter’s chill brings nothing like a warm, hearty meal with loved ones. Imagine a cozy evening with the smell of delicious food filling your home. It’s like a warm hug in a bowl. The Shepherd’s Pie Soup Recipe turns ground meat, veggies, and creamy potatoes into a comforting broth.

This dish is perfect for cold nights. It not only delights your taste buds but also brings back memories of family gatherings. It’s a favorite in many homes.

With just a few ingredients, like fresh veggies and savory meat, you can make a cozy potato soup. It’s great for impressing at family gatherings or for a relaxing night in. Let’s explore how to make this comforting meal. For more details, check out here.

Key Takeaways

  • Shepherd’s Pie Soup is a comforting twist on the traditional dish.
  • This cozy potato soup is perfect for chilly evenings and family gatherings.
  • Easy to customize with various ingredients to suit personal tastes.
  • Combines familiar flavors into a warm, savory broth.
  • A delightful, sit-down meal that evokes a sense of nostalgia.

A Brief History of Shepherd’s Pie

Shepherd’s Pie has a rich history that shows its growth as a favorite dish. It started in the 18th century in the United Kingdom. It was made to use leftover meat and potatoes, often with lamb or mutton.

This was a smart way to use what was available back then. It became a staple in many homes.

Origins of Shepherd’s Pie

The roots of comfort food go back to these early cooking ways. Shepherd’s pie is a perfect example of being resourceful and satisfying. It combines meat and veggies under a creamy mashed potato layer.

This mix provided warmth and nourishment. It was a hit with families.

Evolution to Soup Form

As life changed and cooking methods grew, people started to try new things. They turned shepherd’s pie into a soup. This kept the meat, veggies, and potatoes’ flavors but in a soup.

This change meets today’s taste for lighter meals. Yet, it keeps the comforting taste that made shepherd’s pie famous. Now, you can enjoy it in a bowl.

Ingredients You’ll Need for the Soup

Making a delicious shepherd’s pie soup needs careful picking of ingredients. Fresh veggies and herbs are key for the soup’s bright flavors. Onions, carrots, and peas add sweetness and depth. Thyme and rosemary bring out the aroma and taste.

Adding seasonal veggies makes the meal personal and nutritious. It’s a great way to mix things up while keeping it healthy.

Fresh Vegetables and Herbs

Fresh veggies are essential for the best taste in your shepherd’s pie soup. Make sure to include:

  • Onions
  • Carrots
  • Peas
  • Thyme
  • Rosemary

These ingredients form the base of the soup’s aroma. Adding seasonal produce boosts nutrition, making it a hit with families.

Meat Choices: Traditional vs. Vegetarian

Ground lamb or beef are the usual protein sources in shepherd’s pie soup. They give a rich, savory taste. But, for those who prefer plants, lentils or other vegetarian proteins are great options.

This variety lets everyone enjoy the soup, no matter their diet. It’s a flexible choice for easy comfort food.

Essential Pantry Staples

Some pantry staples are needed to complete the recipe. You’ll need:

  • Vegetable or chicken broth
  • Flour
  • Salt
  • Pepper
  • Paprika

These items help build the soup’s flavor. They make cooking easy and fun. Having them ready ensures a smooth soup-making process.

Step-by-Step Preparation Guide

Learning how to prepare a Shepherd’s Pie Soup Recipe can make cooking more fun. This guide shows you how to make a hearty dish that warms your heart. Follow these steps to go from ingredients to a delicious bowl of soup.

Preparing the Base: Browning the Meat

Start by heating oil in a big pot over medium heat. Add the meat to brown it. This step is key because it adds a rich flavor to your soup. The fat from the meat makes the soup taste even better.

Adding Vegetables and Broth

After the meat is brown, add your chopped veggies. Let them cook until they’re soft. Then, add a flavorful broth to the pot. This step is important for a savory flavor that makes your soup special.

Simmering to Perfection

Once the broth is in, let the soup simmer gently. Let it cook for 20-30 minutes. Taste it often and adjust the seasoning as needed. This is when your soup turns into a cozy, homemade meal. For more tips, check out this cooking guide.

Flavor Enhancements to Consider

Adding the right spices to your Shepherd’s Pie Soup can make it truly special. The right mix of spices can turn a simple dish into a feast for the taste buds. By adjusting the seasonings, you can make the soup your own, creating a cozy and satisfying meal.

Spices and Seasonings to Elevate Taste

Using different spices and seasonings can really improve your soup’s flavor. Here are a few suggestions:

  • Worcestershire sauce: Adds a rich umami depth.
  • Garlic: Provides aromatic notes that enhance the overall taste.
  • Hot sauce: A dash can introduce a delightful kick.

These additions blend well with the classic ingredients, making your meal both comforting and exciting. Don’t be afraid to try new spices to make your dish unique.

The Role of Toppings in Shepherd’s Pie Soup

Toppings are key to making your soup not just tasty but also pretty. They add texture and make the meal more enjoyable. Some popular toppings include:

  • Fresh parsley: Offers a pop of color and freshness.
  • Shredded cheese: Melts beautifully, adding creaminess.
  • Crispy fried onions: Delivers an appealing crunch.

These garnishes add contrasting flavors that elevate your Shepherd’s Pie Soup to gourmet status. Feel free to mix and match toppings to find your favorite combination.

Tips for Making the Best Shepherd’s Pie Soup

Making the best Shepherd’s Pie Soup takes a few key steps. These steps make sure every bowl is full of flavor. Let’s look at some tips for better flavor and handling big batches.

Cooking Techniques for Optimal Flavor

Caramelizing vegetables before adding them to the soup is key. It makes them sweeter and boosts the flavor. Also, chilling the soup overnight before reheating is a good idea. It lets the flavors mix well, making the soup richer.

Batch Cooking and Freezing Options

Batch cooking is great for busy days. Making a big pot of Shepherd’s Pie Soup is easy. You can freeze it in portions for later.

Just thaw it in the fridge and reheat it on the stove. This way, you always have a warm meal ready.

Serving Suggestions for Enjoyment

Shepherd’s Pie Soup is more than just a comforting dish; it’s a canvas for wonderful serving suggestions. Pairing this hearty soup with crusty bread, buttered biscuits, or crunchy crackers can elevate your dining experience significantly. These accompaniments not only enhance the flavors of the soup but also create a satisfying meal that warms the heart and soul, making it perfect for chilly days.

When it comes to sizing portions, understanding your gathering is essential. For intimate family meals, consider smaller servings that allow everyone to enjoy a taste without excess. Larger bowls can be set for more indulgent moments, where friends and family share and savor every spoonful. Thoughtfully sizing portions ensures not just a delightful experience but also minimizes waste, making your entertaining both enjoyable and responsible.

For more detailed serving ideas, check out this recipe page that offers additional ways to enhance your Shepherd’s Pie Soup experience. The right serving suggestions help make every meal a memorable occasion, uniting loved ones over satisfying meals.

The Nutritional Benefits of Shepherd’s Pie Soup

Shepherd’s Pie Soup is a mix of comfort and health. It uses ingredients that boost its nutritional value. This dish is great for families looking for a meal that’s both tasty and healthy.

It has lean proteins, fresh veggies, and wholesome broth. These add lots of vitamins and minerals. So, the soup is not just yummy but also good for you.

Healthy Ingredients for a Balanced Meal

Shepherd’s Pie Soup is made with fresh, whole ingredients. It’s perfect for those wanting a balanced meal. Lean proteins like ground turkey or beans are used, providing important nutrients for muscles and health.

It also has a variety of veggies like carrots, peas, and celery. These veggies are full of fiber, helping with digestion and a healthy gut.

Comfort Food that Nourishes

Comfort food doesn’t have to be unhealthy. Shepherd’s Pie Soup shows that it can be nourishing too. By using wholesome foods, it becomes a lighter option for a healthy diet.

This recipe brings joy, warmth, and satisfaction. It lets you enjoy familiar flavors without losing health benefits.

Customization Ideas for Personal Taste

Make your Shepherd’s Pie Soup your own by trying new vegetables and proteins. A few simple changes can make it taste just right for you. It keeps the cozy feel of the classic dish.

Adding Unique Vegetables

Be bold with your veggies. Try adding zucchini, sweet potatoes, or corn to your soup. These can make it taste better and be healthier. They add new textures and flavors that can make your soup even better.

Exploring Alternative Proteins

Looking for different proteins? Use chickpeas or tempeh instead of meat. They’re great for those who don’t eat meat. Just remember to adjust the cooking time and liquid to keep the soup thick and tasty. This way, your soup can fit many different diets.

IngredientProtein SourceCooking Time
Ground BeefTraditional20 minutes
ChickpeasAlternative10 minutes
TempehAlternative15 minutes

Conclusion: Why This Recipe is a Must-Try

Shepherd’s Pie Soup is a warm reminder of comforting meals that unite families. It brings back memories of home-cooked meals, making it a key dish in your collection. It’s a perfect mix of flavors, perfect for cold nights when you need something cozy.

Final Thoughts on Comfort Food

This recipe is more than food; it’s a way to feel close and warm. Shepherd’s Pie Soup can become a special family tradition. It’s a chance to share meals and make memories in a busy world.

Encouragement to Experiment and Enjoy

Don’t be afraid to add your own twist to this recipe! Try new ingredients or proteins to make it yours. Shepherd’s Pie Soup is all about trying new things and enjoying your meals. So, get creative, enjoy the soup, and let your imagination soar!


FAQ

What makes Shepherd’s Pie Soup a comforting meal?

Shepherd’s Pie Soup is a warm hug in a bowl. It combines tender meat, fresh veggies, and creamy mashed potatoes. This mix turns a classic dish into a cozy, easy meal. It’s perfect for chilly nights and family get-togethers, bringing warmth and joy.

Can I customize the ingredients in this soup recipe?

Yes, you can! Try adding zucchini or sweet potatoes, or use lentils or chickpeas for a veggie option. This lets you create a meal that suits your family’s taste.

What are some good pairings with Shepherd’s Pie Soup?

Enjoy it with crusty bread, buttered biscuits, or crunchy crackers. These add-ons make the meal complete. They highlight the soup’s comforting nature.

How can I make this soup ahead of time?

It’s perfect for making in bulk! Cook a big batch, then chill or freeze it. Reheat it for a comforting meal on hectic days.

Is this Shepherd’s Pie Soup healthy?

Absolutely! It’s full of lean proteins and veggies, making it a balanced, healthy choice. It’s a nutritious way to enjoy a comforting meal.

How can I enhance the flavor of my Shepherd’s Pie Soup?

Add spices like Worcestershire sauce or garlic for more depth. Toppings like parsley, cheese, or crispy onions can also boost the flavor and texture.

What traditional ingredients are used in the soup?

It includes onions, carrots, peas, and ground lamb or beef. These classic ingredients give it the authentic taste of traditional Shepherd’s Pie.

Strawberry Cheesecake Dump Cake Recipe

Summer gatherings have a special magic that brings people together. I remember a family picnic where my aunt brought a warm Strawberry Cheesecake Dump Cake. The sun was out, and everyone laughed as we enjoyed this sweet treat.

This Strawberry Cheesecake Dump Cake is easy to make with just five ingredients. It shows how simple desserts can be full of flavor. It’s perfect for any event, from casual meetups to big celebrations.

Key Takeaways

  • The Strawberry Cheesecake Dump Cake is an easy dessert recipe that anyone can make.
  • It combines creamy cheesecake flavors with sweet strawberries, making it irresistible.
  • With just five simple ingredients, it qualifies as a quick and convenient option for busy bakers.
  • This dessert can be served warm or cold, allowing for versatile enjoyment.
  • It’s an excellent choice for family gatherings, parties, or casual get-togethers.

What is a Strawberry Cheesecake Dump Cake?

A Strawberry Cheesecake Dump Cake is a delightful dessert. It combines creamy cheesecake with fresh strawberries. This dessert is more than a simple cake. It has a rich cheesecake layer with juicy strawberries, making it stunning and inviting.

A Delicious Dessert Overview

This easy cake design is great for gatherings or family dinners. It’s perfect when you want something sweet. The mix of sweetness and creaminess is beautiful. Plus, it’s easy to make and clean up.

The result is a dessert that impresses everyone. It’s delicious and looks amazing, all without needing to be a pro at baking.

The Unique Concept of a Dump Cake

The dump cake concept makes baking easy. You don’t need to mix ingredients for a long time. Just ‘dump’ everything into a dish. This is perfect for beginners or those short on time.

With a few simple steps, you can make a cheesecake dessert. It’s both tasty and beautiful to look at.

Ingredients You’ll Need

To make a delicious strawberry cheesecake dump cake, you need certain ingredients. These ingredients mix together to create a tasty and textured dessert. You can choose from a variety of options to make it your own.

Fresh Strawberries

Fresh strawberries are the heart of this dessert. They add natural sweetness and a burst of flavor. Choose ripe, juicy strawberries for the best taste and look.

Cream Cheese

Cream cheese is key for the cheesecake’s creamy texture. Softened cream cheese blends well with other ingredients. It gives the cake a rich, cheesecake flavor.

Cake Mix Options

There are many cake mix choices. You can use vanilla, yellow, or strawberry mixes. This lets you tailor the flavor to your liking, making it more enjoyable.

Toppings and Variations

Get creative with toppings. Try whipped cream, chocolate syrup, or more strawberries. You can also swap out strawberries for blueberries or raspberries. This makes the dessert even more versatile.

Step-by-Step Instructions

Making a tasty strawberry cheesecake dump cake needs careful steps. Follow these to layer and assemble it right, for a yummy result.

Preparing the Strawberries

Start by washing and hulling the strawberries. Cut them into pieces for even distribution. This step makes the cake look good and taste great.

Mixing the Cream Cheese Layer

Mix softened cream cheese, sugar, and vanilla in a bowl. Use an electric mixer or whisk until it’s smooth. Make sure it’s creamy and lump-free for a velvety texture.

Assembling the Cake

Spread fresh strawberries at the bottom of a baking dish. Then, pour the cream cheese mix over them. Sprinkle cake mix on top and drizzle with melted butter. This ensures everything bakes well together.

Baking Your Strawberry Cheesecake Dump Cake

Getting the baking process right is key for a perfect Strawberry Cheesecake Dump Cake. Follow the baking instructions to ensure a delicious result. Start by preheating your oven to 350°F (175°C). Then, put your cake in the oven and remember the right cake bake time.

Recommended Bake Time

The typical baking time is about 40-45 minutes. This is when the flavors blend together beautifully. Use a timer to avoid overcooking or underbaking.

Checking for Doneness

When your cake is almost done, check if it’s ready. Look for a golden-brown top and bubbling edges. Use a toothpick to check the center; if it’s clean or has a few crumbs, it’s done. These tips will help you make a dessert everyone will love.

For more detailed baking instructions and tips, explore further. Happy baking!

Serving Suggestions

Enjoying your Strawberry Cheesecake Dump Cake is even better with the right pairings. A few simple suggestions can make it shine. Try it with whipped cream or a scoop of vanilla ice cream for extra sweetness and texture.

Fresh mint leaves add a refreshing touch. A drizzle of strawberry syrup can also add a burst of flavor. Each bite becomes even more delightful.

Perfect Complementary Pairings

  • Whipped cream
  • Vanilla ice cream
  • Fresh mint leaves
  • Drizzle of strawberry syrup

Ideal Occasions for Serving

This dessert is perfect for any special occasion. It’s great for summer gatherings, birthday parties, or holiday celebrations. Its deliciousness works for both casual and formal events.

Storage Tips

Storing your strawberry cheesecake dump cake right lets you enjoy it even after it’s been baked. A few simple steps can keep your cake tasting great for longer. The right storage keeps your dessert’s texture and flavor just right.

How to Store Leftovers

To keep your dump cake fresh, put leftovers in an airtight container. Store it in the fridge for up to four days. Cool the cake completely before sealing to avoid it getting soggy.

Reheating Recommendations

Ready to enjoy your dessert again? Use the right reheating tips. For a quick warm-up, microwave a portion for 20-30 seconds. For a crispier texture, reheat in a 350°F oven for 10-15 minutes. This keeps the cake moist and delicious.

Customization Ideas

A Strawberry Cheesecake Dump Cake is super versatile. You can try different fruits and flavors. Think about using peaches, blueberries, or apples for a fruity twist. You can also add almond or coconut to the cream cheese layer for a unique touch.

These ideas let you make a special dessert while keeping the classic recipe’s essence. It’s a fun way to experiment and find new flavors.

Flavor Combinations

Trying new flavors keeps your dessert exciting and caters to different tastes. Use a mix of fresh fruits and flavored extracts for a great look. Here are some flavor options to try:

  • Peach and Almond
  • Blueberry and Coconut
  • Apple Cinnamon
  • Raspberry Lemonade

Dietary Modifications

For those with dietary needs, there are easy swaps. If you’re gluten-free, use a gluten-free cake mix. For a vegan option, use dairy-free cream cheese. These changes make sure everyone can enjoy a slice:

Standard IngredientDietary Swap
Cake MixGluten-Free Cake Mix
Cream CheeseDairy-Free Cream Cheese
SugarNatural Sweeteners (like Stevia or Maple Syrup)

Common Mistakes to Avoid

Making a tasty strawberry cheesecake dump cake is easy. But, some mistakes can mess up your results. Avoid overmixing and get the right ingredient ratios for the best texture and taste.

Overmixing the Ingredients

Overmixing is a big mistake in baking. It makes the cream cheese layer too dense. This ruins the cake’s light and fluffy texture. Mix ingredients just until they’re combined for the perfect cake.

Not Using Enough Strawberries

Not enough strawberries can make your cake taste bland. Use at least two cups of fresh strawberries for the best flavor. This amount works well with the cake mix and cream cheese, making the cake more appealing. For more tips on avoiding common pitfalls, check out this helpful resource that covers typical mistakes in dump cake preparation.

Healthier Alternatives

Making a delicious strawberry cheesecake dump cake doesn’t mean you have to sacrifice health for flavor. You can turn your favorite indulgence into a lighter recipe. The key is using alternative ingredients that keep the dish’s essence but cut calories and boost nutrition.

Lightening Up Your Dump Cake

To make a healthier dump cake, start with lower-fat cream cheese and a sugar substitute. This keeps sweetness without extra calories. Choosing a whole-grain cake mix instead of traditional one boosts nutrition, adding fiber and essential nutrients.

Substitutions for a Guilt-Free Treat

Consider using applesauce to replace oil or Greek yogurt for a creamy texture without fat. These swaps help achieve that luscious taste while being healthier. Making these changes lets you enjoy every bite without guilt.

Why You’ll Love This Recipe

The Strawberry Cheesecake Dump Cake is perfect for quick dessert lovers. It’s easy to make and tastes amazing. You don’t need to spend a lot of time in the kitchen to enjoy it.

Simple and Quick to Make

This dessert is easy to make with just a few steps. It combines fresh strawberries and creamy cheesecake. Even beginners can make it, and it’s ready fast.

Perfect for Any Dessert Lover

This treat will impress anyone who loves sweets. It’s great for cheesecake fans, those who love fruity desserts, or anyone looking for a tasty option. You can find the full recipe here. It’s perfect for any occasion.


FAQ

What is a Strawberry Cheesecake Dump Cake?

A Strawberry Cheesecake Dump Cake is a tasty dessert. It mixes creamy cheesecake with fresh strawberries. This cake is easy to make because you just layer the ingredients without mixing a lot.

How long does it take to prepare the cake?

It takes about 20-30 minutes to prepare the Strawberry Cheesecake Dump Cake. This makes it a quick choice for dessert.

Can I use frozen strawberries instead of fresh ones?

Yes, you can use frozen strawberries. Just thaw and drain them first. This prevents too much moisture that could change the cake’s texture.

What type of cake mix should I use?

You can pick from vanilla, yellow, or strawberry cake mix. Choose what you like best to match the flavors of your dump cake.

How should I store leftovers?

Keep leftovers in an airtight container in the fridge. They stay good for up to four days. Always let the cake cool down before refrigerating.

Can this recipe be made gluten-free?

Yes! Use a gluten-free cake mix to make a gluten-free Strawberry Cheesecake Dump Cake. This way, everyone can enjoy it.

What are some great serving options for this dessert?

Serve it with whipped cream, vanilla ice cream, or strawberry syrup. Adding fresh mint leaves is also a nice touch.

How do I reheat leftover dump cake?

Reheat in the microwave for 20-30 seconds. Or, warm it in the oven at 350°F for 10-15 minutes.

How can I customize this recipe?

Try using blueberries, raspberries, or peaches for a different flavor. You can also add almond or coconut to the cream cheese for a unique taste.

What are some common mistakes to avoid?

Avoid overmixing, which can make the cake dense. Also, use at least two cups of strawberries for enough flavor. Too few strawberries can make the cake taste bland.

Stay Connected

Get recipes via email: