Get my cookbooks

Delightful Chocolate Pancakes for a Sweet Breakfast Treat

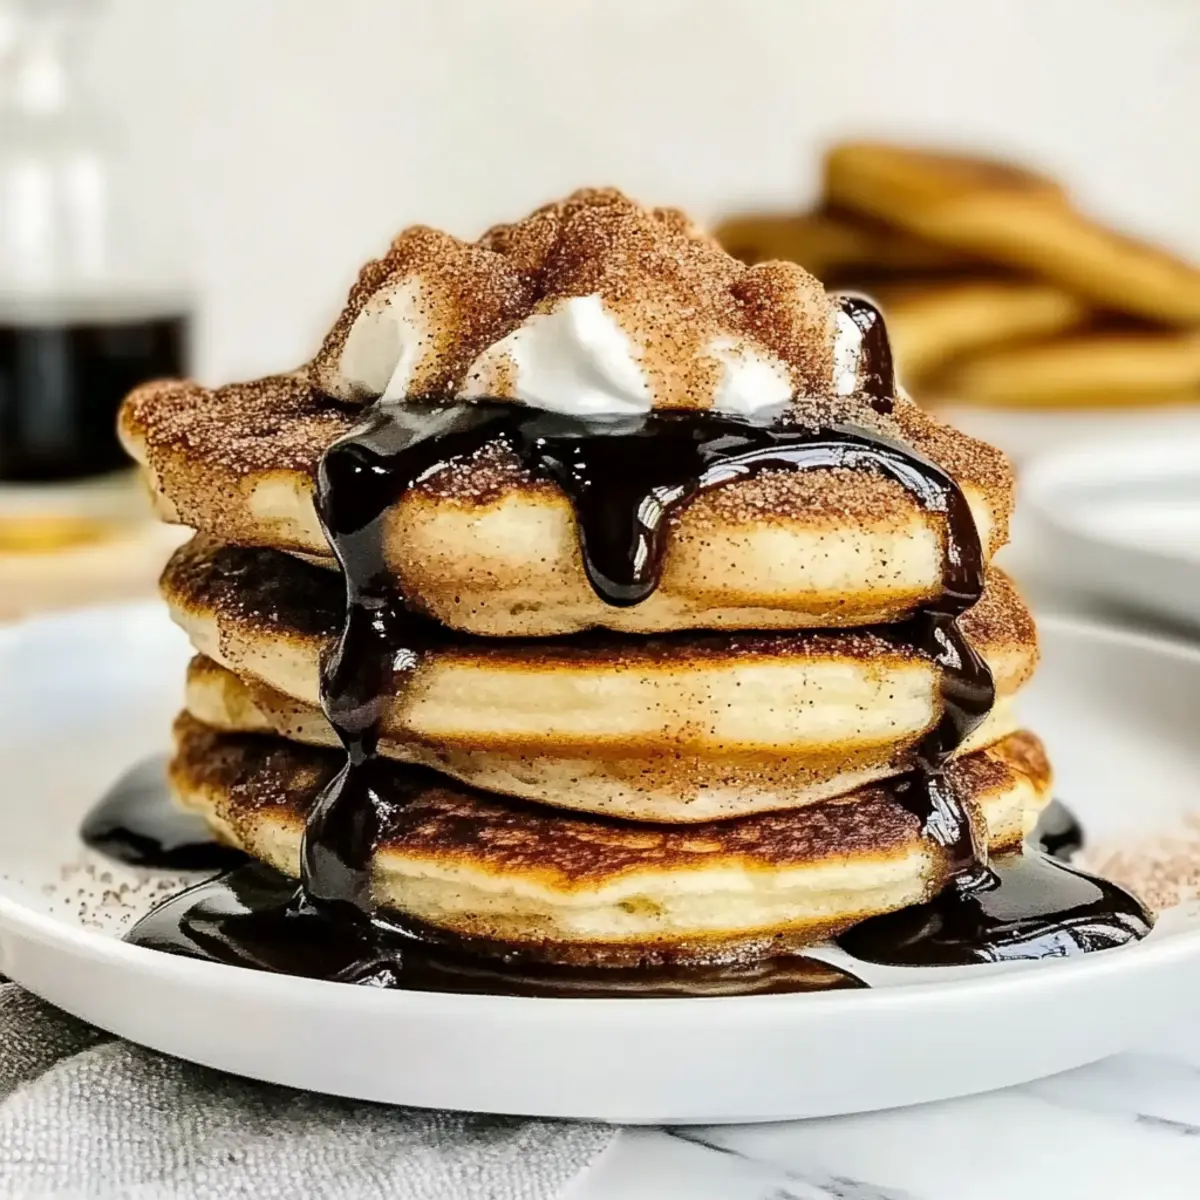
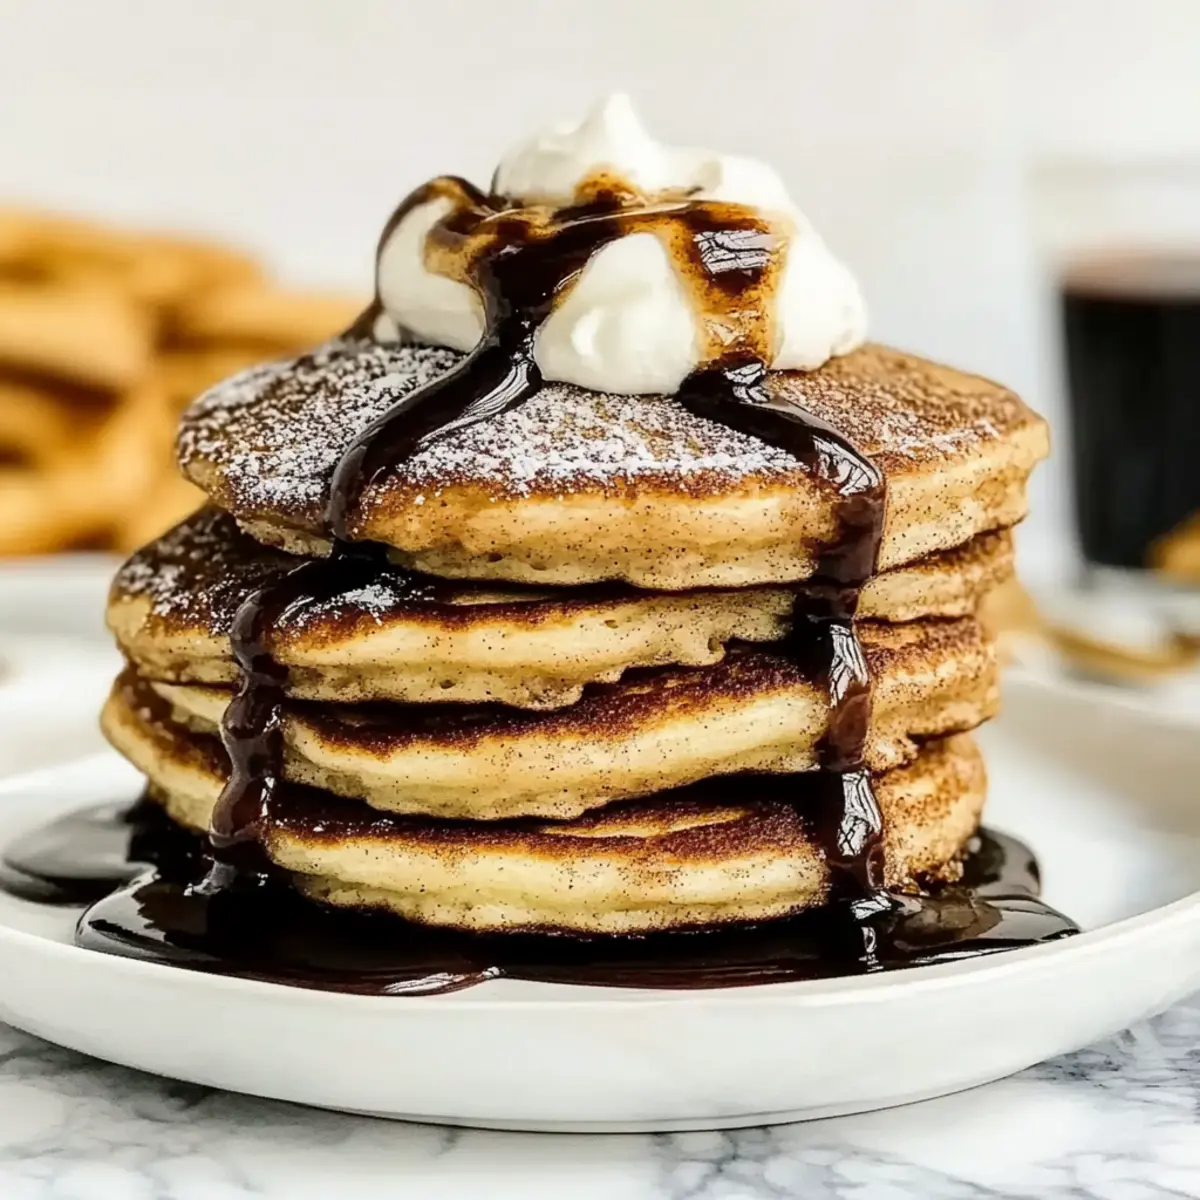
As the morning sun gently streams through the kitchen window, I’m greeted by an irresistible craving for something sweet and comforting. That’s when I whip up my fluffy Chocolate Pancakes with Ganache Sauce. These delightful pancakes are more than just a breakfast item; each delectable bite feels like enjoying dessert at the start of your day. In under 30 minutes, you can create a stack of joy that’s not only quick to prepare but also a surefire crowd-pleaser for anyone tired of fast food. So, whether you’re treating yourself to a special breakfast or surprising a loved one, why not elevate your morning routine with this indulgent recipe? What toppings will you choose to make it your own?

Why Are These Chocolate Pancakes Special?

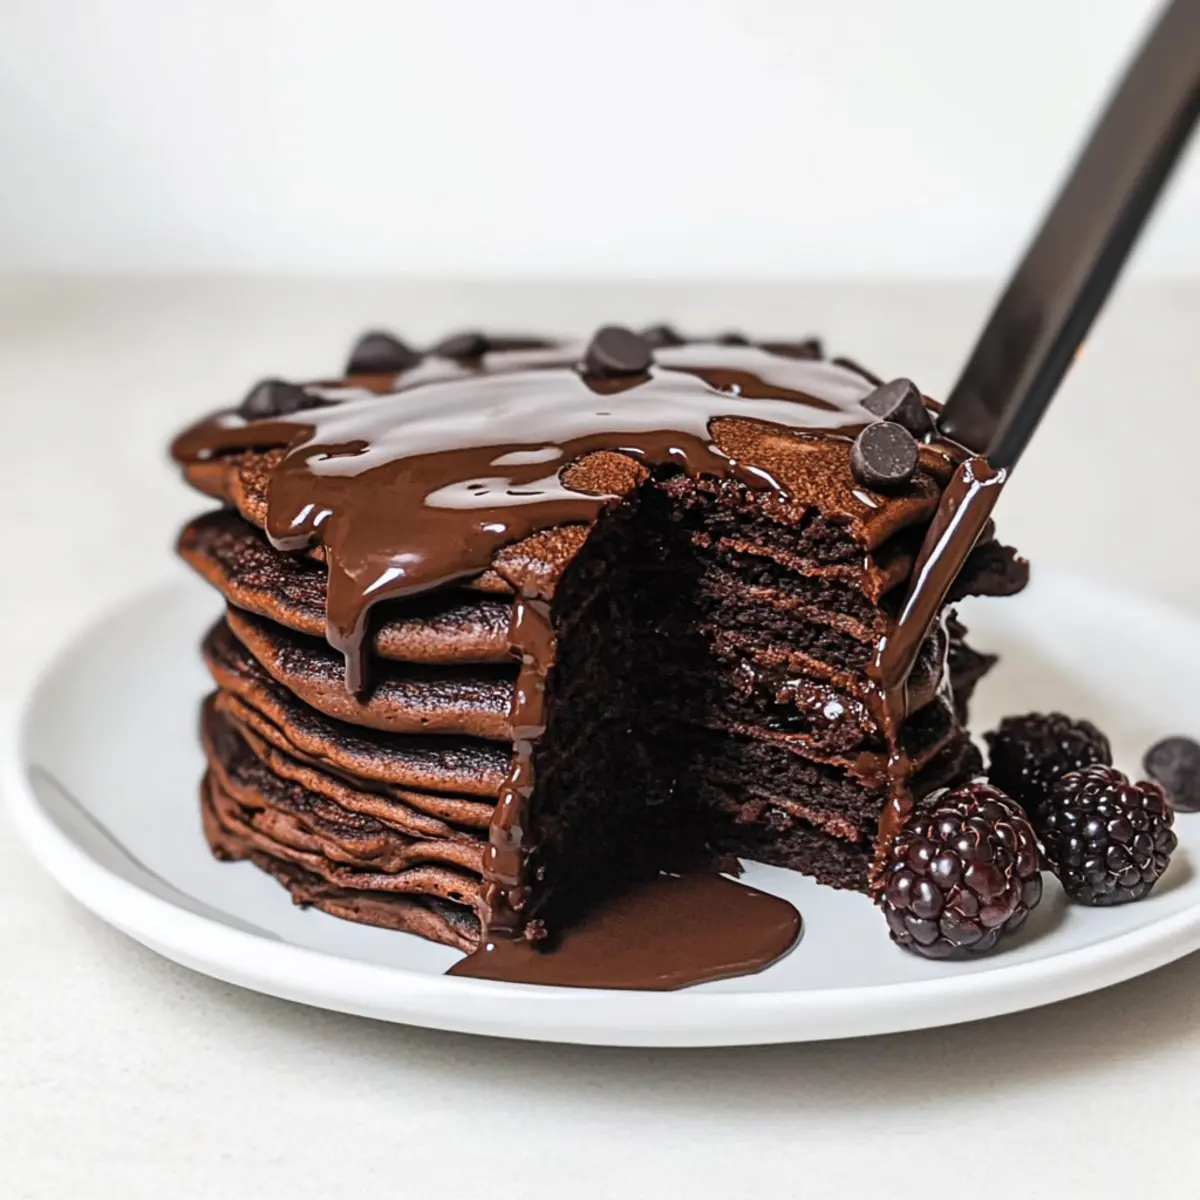
Decadent flavors combine chocolate and cream in every bite, making this breakfast feel like an indulgent dessert. Quick and easy to whip up, this recipe takes less than 30 minutes, perfect for busy mornings. Versatile at its core, you can customize toppings to your liking—think fresh berries or a scoop of vanilla ice cream! Serve them alongside Chocolate Fudge Cupcakes for a sweet brunch gathering. Fluffy and light, these pancakes are a delightful twist on your typical breakfast routine, bound to impress guests and family alike!

Chocolate Pancake Ingredients

• Unlock the secrets to fluffy chocolate perfection!

For the Pancakes

  • All-Purpose Flour – Provides structure to the pancakes; swap with gluten-free flour if needed.
  • Cocoa Powder – Adds rich chocolate flavor; Dutch-processed gives a deeper taste.
  • Baking Powder – Essential for fluffiness; ensure it’s fresh for best results.
  • Salt – Balances sweetness and enhances overall flavor.
  • Eggs – Contributes moisture and richness; can use flax eggs for a vegan option.
  • Granulated Sugar – Sweetens the batter; try honey or maple syrup for a natural alternative.
  • Whole Milk – Hydrates the batter for fluffiness; swap with almond or oat milk for lactose-free pancakes.
  • Canola Oil (or Melted Butter) – Keeps pancakes moist; melted coconut oil is a great substitute.
  • Vanilla Extract – Amplifies the flavor; use pure vanilla for the best taste.
  • Chocolate Chips or Chunks – Adds extra chocolatey goodness; consider white chocolate chips as an alternative.
  • Butter or Oil (for cooking) – Prevents sticking; oil is a healthier option.

For the Chocolate Ganache Sauce:

  • Bittersweet or Semisweet Chocolate – The star of the ganache; opt for high-quality bars for superior flavor.
  • Heavy Cream – Ensures a smooth texture and richness; coconut cream works for a dairy-free option.

Step‑by‑Step Instructions for Fluffy Chocolate Pancakes with Ganache Sauce

Step 1: Prep Dry Ingredients
In a large mixing bowl, sift together 1 cup of all-purpose flour, 1/3 cup of cocoa powder, 2 teaspoons of baking powder, and a pinch of salt. This process helps avoid lumps and combines the dry ingredients thoroughly. Set this mixture aside as you prepare the wet ingredients, ensuring a smooth batter for your fluffy chocolate pancakes.

Step 2: Combine Wet Ingredients
In a separate bowl, whisk together 2 large eggs and 1/4 cup of granulated sugar until well blended and slightly frothy. Next, incorporate 1 cup of whole milk, 3 tablespoons of canola oil (or melted butter), and 1 teaspoon of vanilla extract. Mix until just combined; this will add moisture and richness to your chocolate pancake batter.

Step 3: Merge Mixtures
Gently pour the wet ingredients into the dry ingredient mixture. Using a spatula, stir until just combined; it’s normal for the batter to be a little lumpy—this ensures fluffy pancakes! To intensify the chocolate flavor, fold in 1/2 cup of chocolate chips, making sure they are evenly distributed throughout the batter without overmixing.

Step 4: Make Ganache Sauce
To create the chocolate ganache, chop 4 ounces of bittersweet or semisweet chocolate into small pieces and place it in a microwave-safe bowl. Heat 1/2 cup of heavy cream in a small saucepan until simmering, then pour it over the chopped chocolate. Allow it to sit for a minute before stirring until smooth; microwave for 20-30 seconds if needed for a creamier consistency.

Step 5: Cook Pancakes
Preheat a non-stick skillet or griddle over medium heat. Lightly grease the surface with butter or oil to prevent sticking. Pour 1/4 cup of pancake batter onto the skillet for each pancake. Cook until bubbles form on the surface, about 2-3 minutes, then flip and cook for another 1-2 minutes until golden brown. Repeat with the remaining batter.
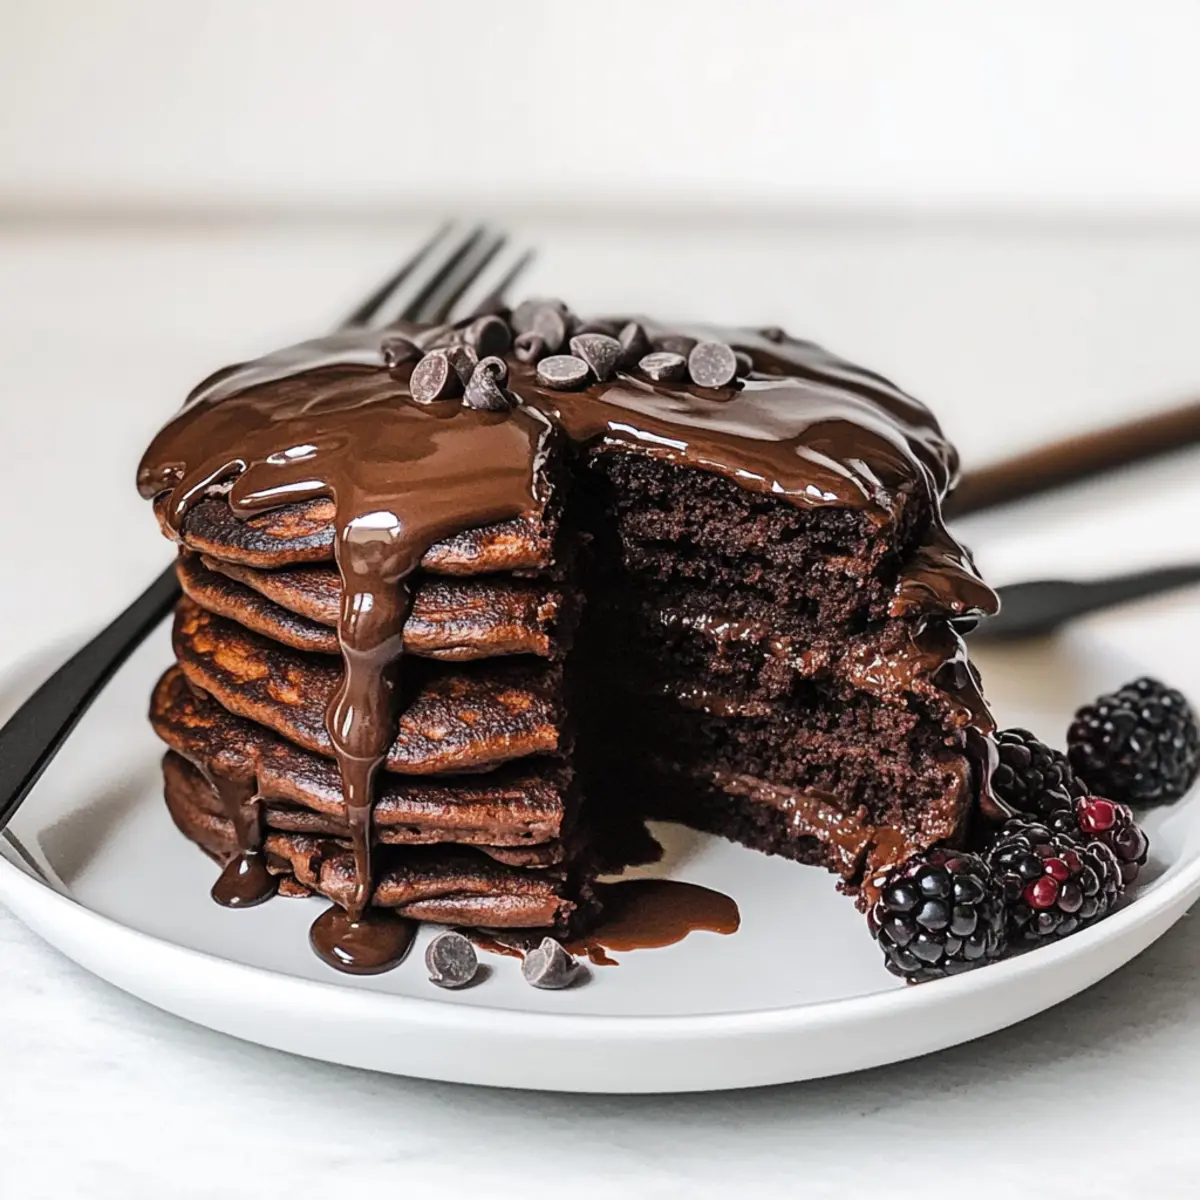
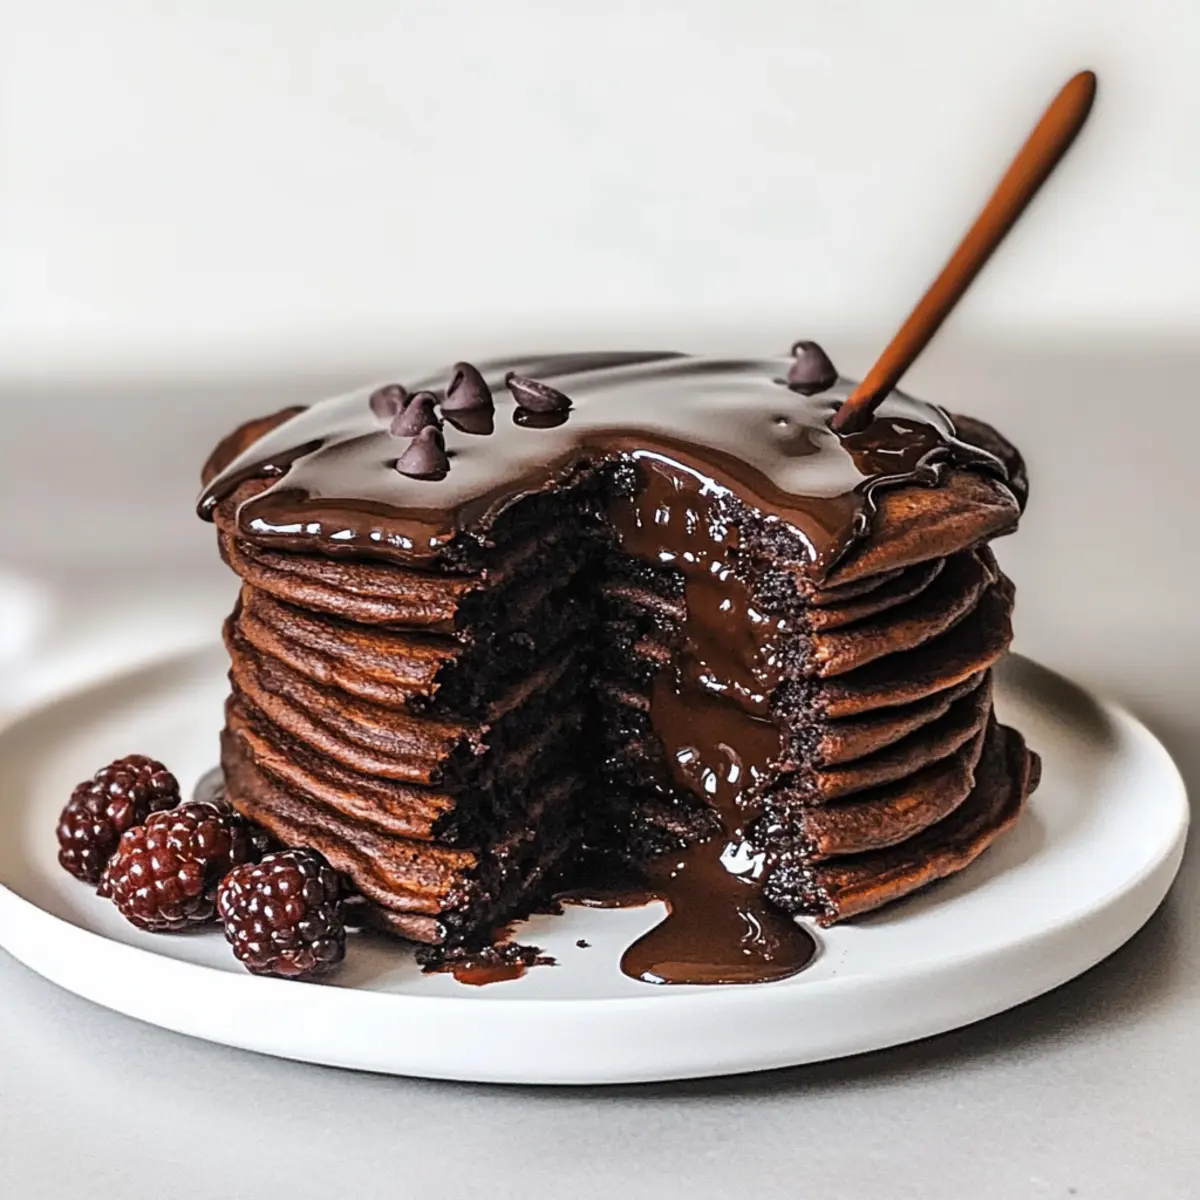
Step 6: Serve
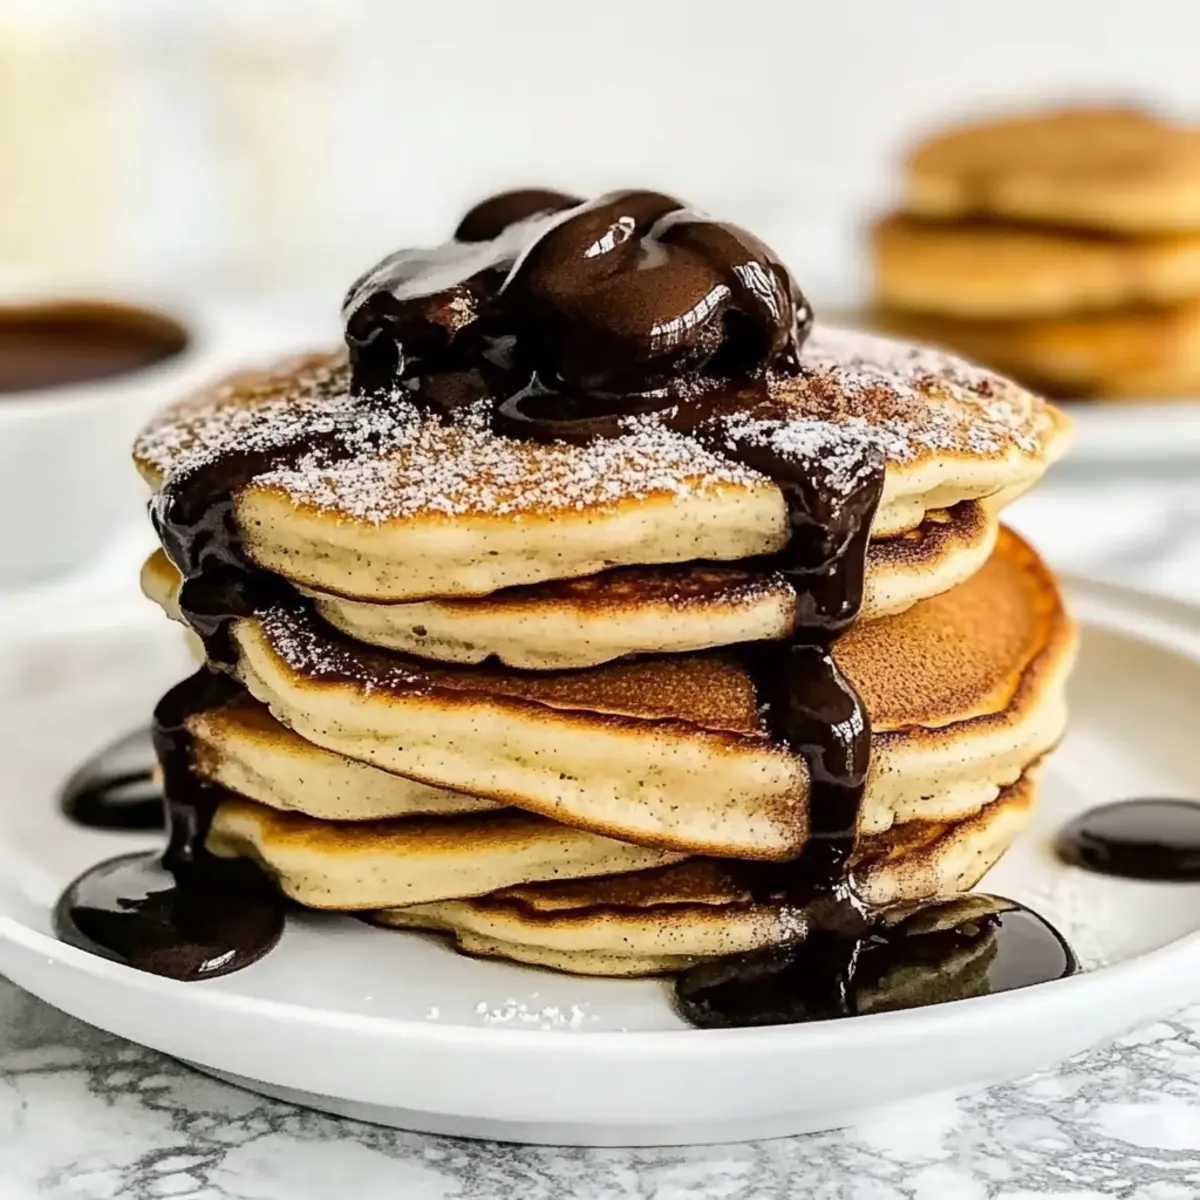
Arrange the fluffy chocolate pancakes on a plate and generously drizzle the warm chocolate ganache over the top. Serve immediately for the best indulgent experience, perhaps with fresh berries or a dollop of whipped cream, and delight in every chocolatey bite!

Make Ahead Options

These delightful Chocolate Pancakes are perfect for meal prep, allowing you to enjoy a decadent breakfast even during the busiest mornings! You can prepare the batter up to 24 hours in advance by mixing the dry ingredients and wet ingredients separately, then combining them just before cooking. Just make sure to refrigerate the batter to maintain its freshness. Additionally, the cooked pancakes can be stored in the refrigerator for up to 3 days—just reheat them in the microwave or toaster for a quick treat. When you’re ready to serve, warm the pancakes and drizzle with fresh ganache for a deliciously indulgent experience that feels just as special as freshly made!

What to Serve with Fluffy Chocolate Pancakes with Ganache Sauce

Indulging in these delightful pancakes opens the door to an array of scrumptious pairings that enhance their chocolatey goodness.

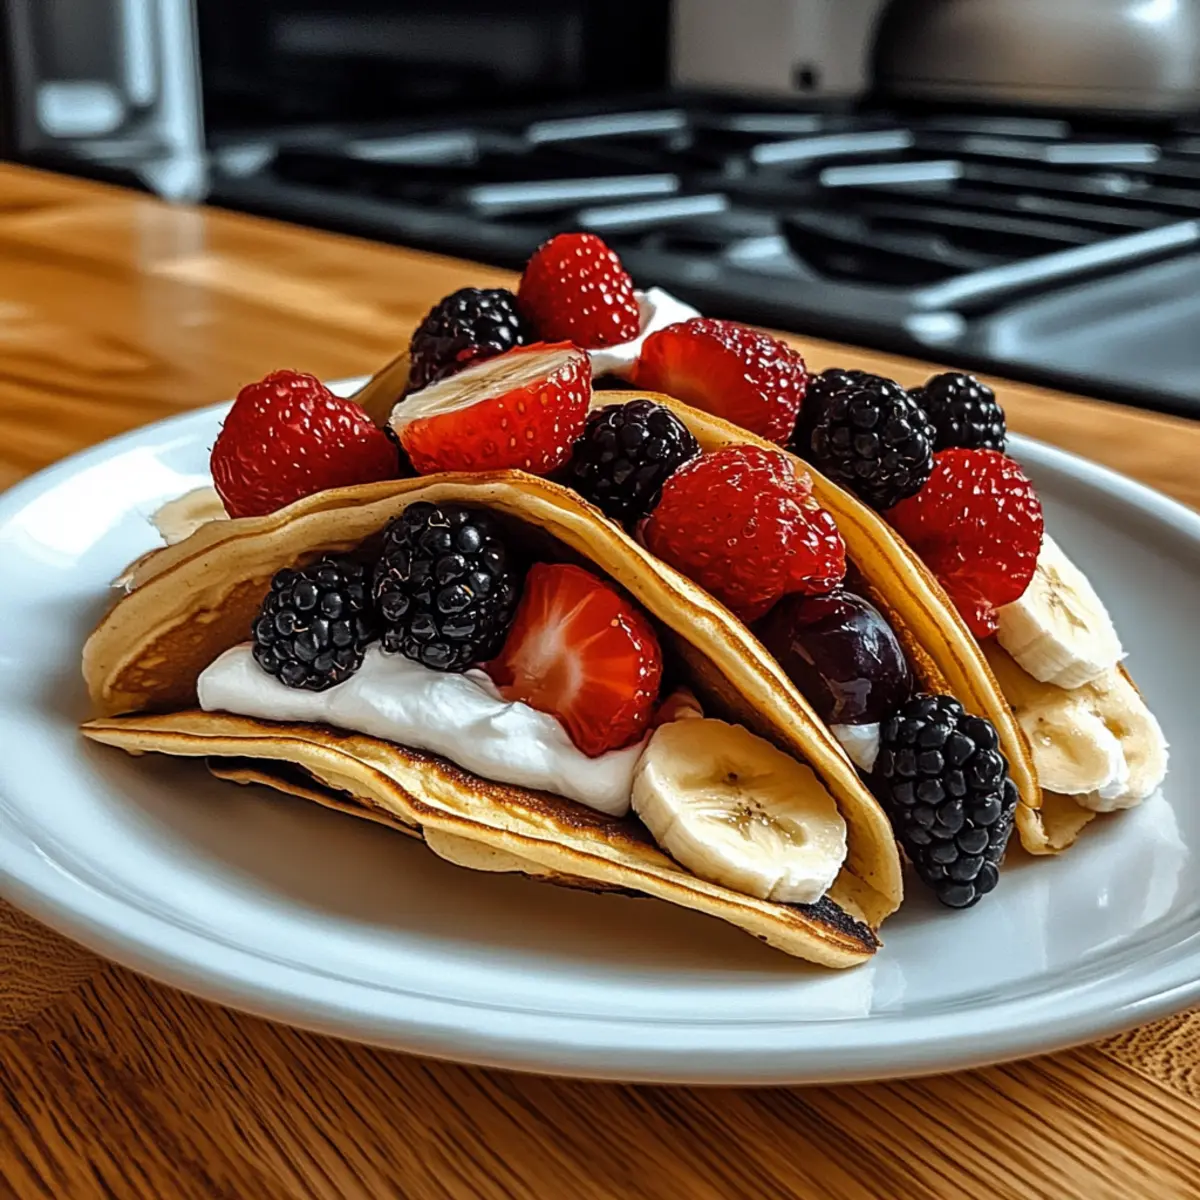
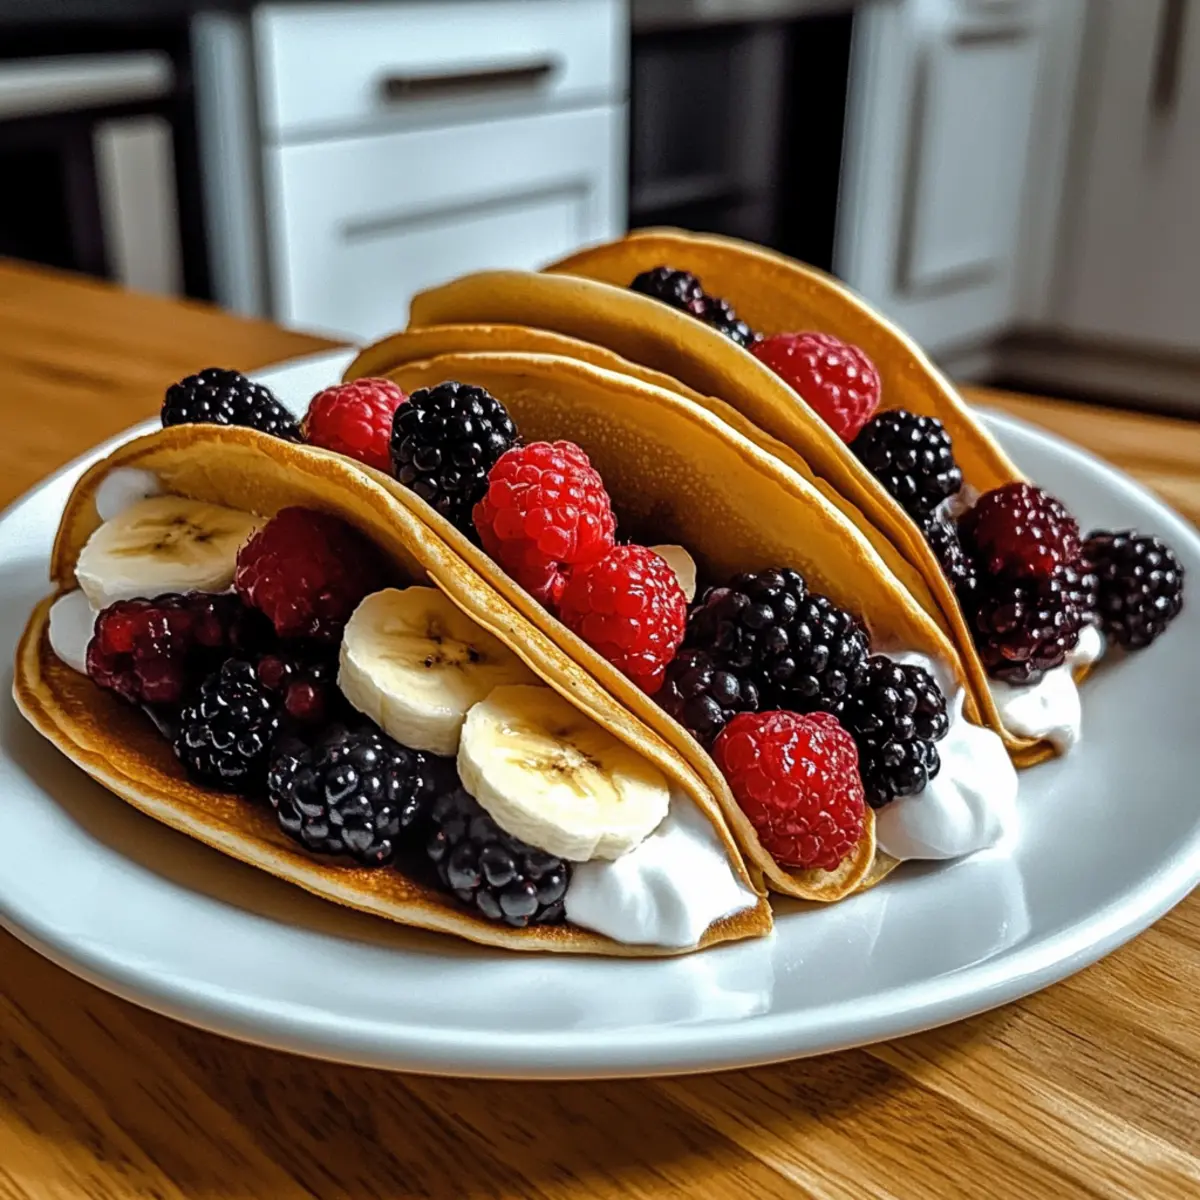
  • Fresh Berries: The tartness of strawberries or raspberries adds a refreshing contrast, balancing the rich chocolate flavors perfectly.
  • Whipped Cream: A dollop of fluffy whipped cream brings an airy, creamy texture, making each bite even more decadent and delightful.
  • Vanilla Ice Cream: For an extra indulgent treat, add a scoop of vanilla ice cream that melts into the warm pancakes, creating a luxurious experience.
  • Maple Syrup: A drizzle of maple syrup introduces a lovely sweetness that harmonizes beautifully with the chocolate, creating a breakfast classic.
  • Peanut Butter Drizzle: A warm swirl of peanut butter adds a nutty depth, making every bite a delicious fusion of flavors.
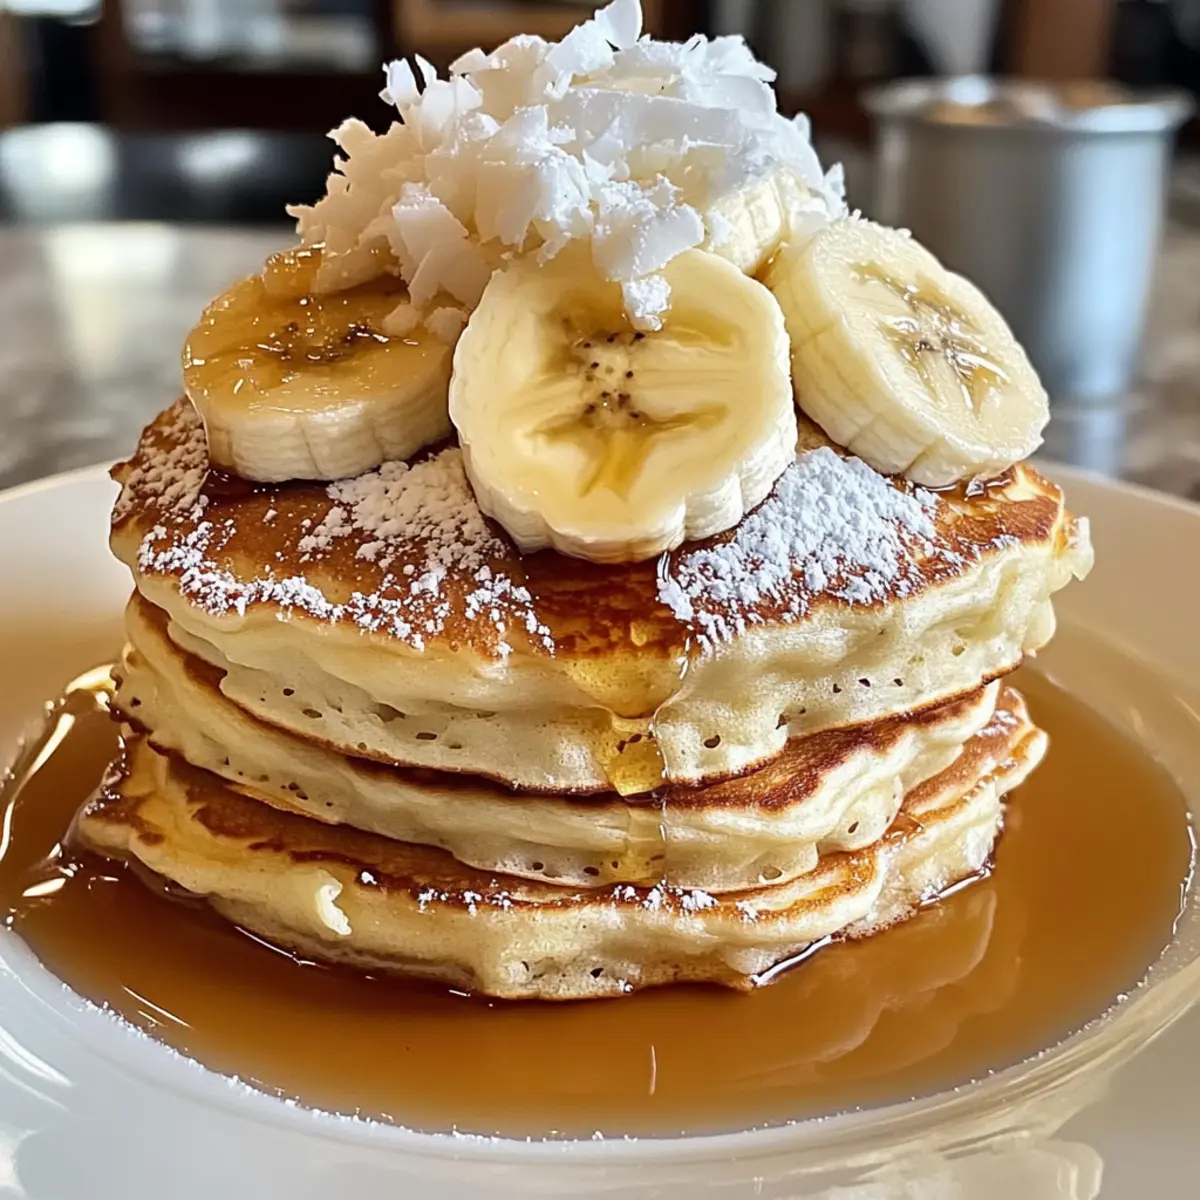
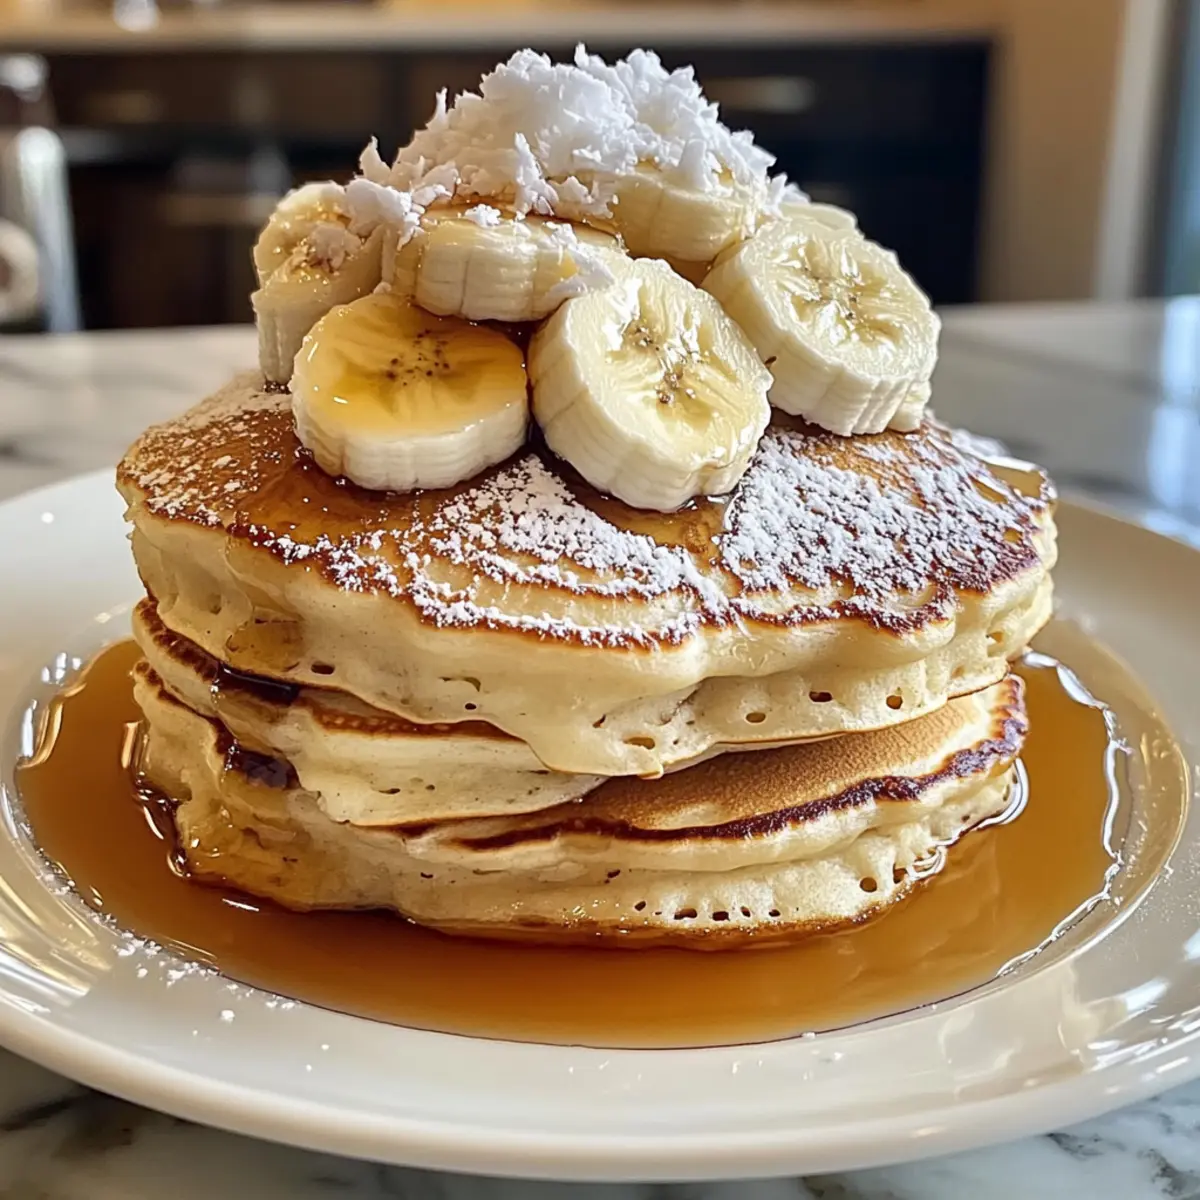
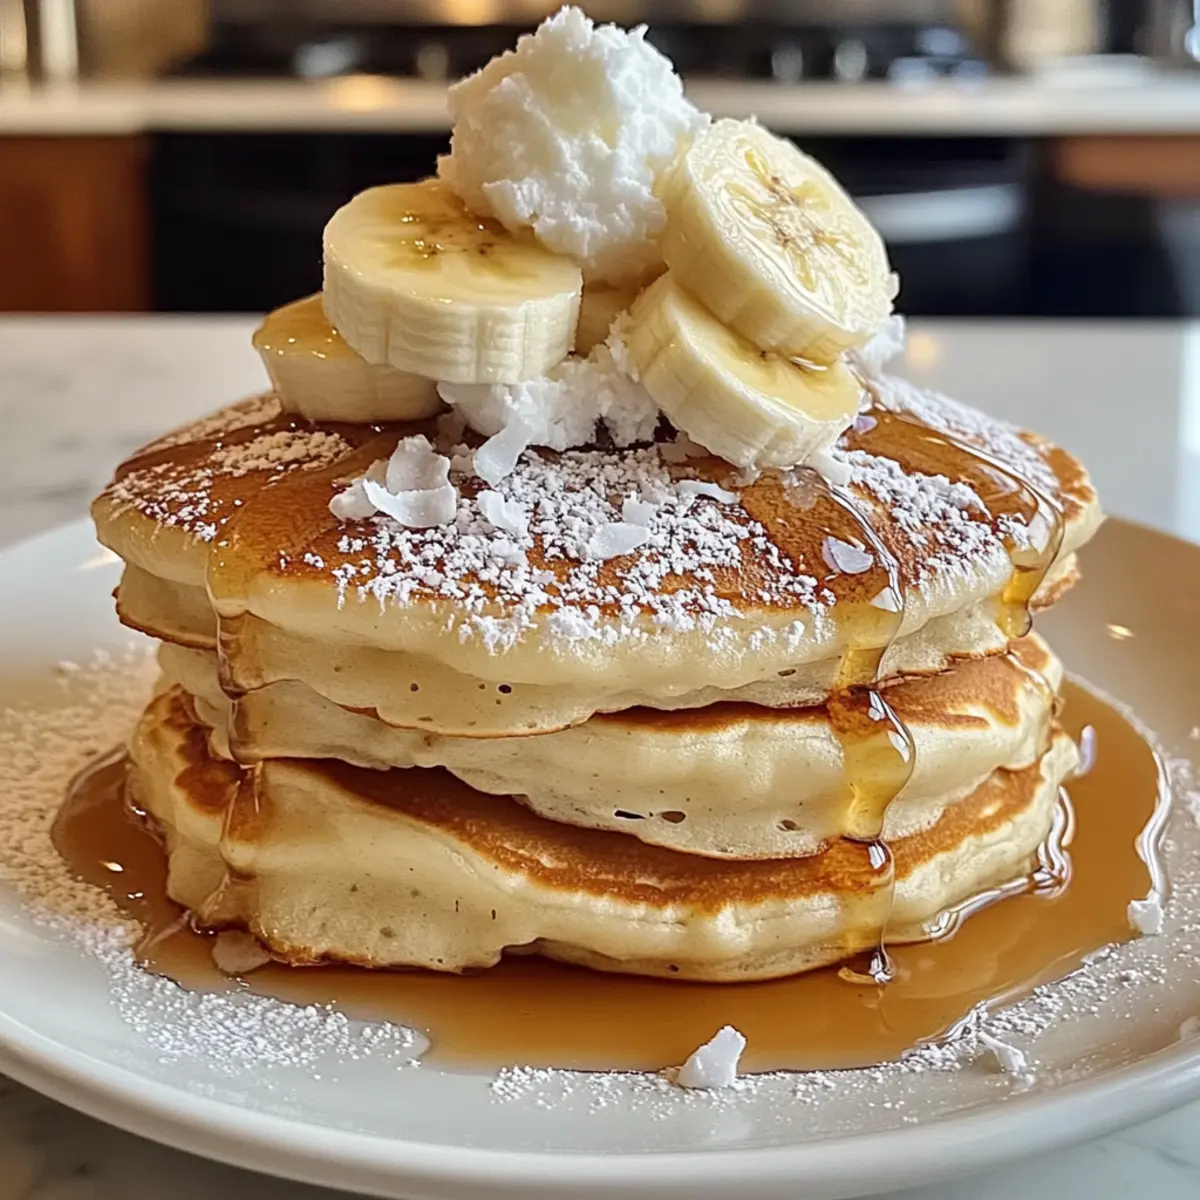
  • Coconut Flakes: Toasted coconut flakes offer a tropical crunch that contrasts beautifully with the soft, fluffy texture of the pancakes.
  • Coffee or Espresso: Pairing with a rich coffee enhances the chocolate notes, creating a delightful contrast that elevates the breakfast experience.
  • Chocolate Milkshake: For a truly indulgent pairing, serve with a chocolate milkshake to amplify the chocolate experience—pure bliss in a glass!
  • Caramel Sauce: Drizzling warm caramel sauce over the pancakes provides a sweet, buttery flavor that takes them to another level of deliciousness.

Tips for the Best Chocolate Pancakes

  • Perfectly Fluffy: The key to fluffy chocolate pancakes is to avoid overmixing the batter. Stir until just combined for the best texture.
  • Test Cooking Temperature: Don’t fret if the first pancake isn’t perfect; use it as a temperature gauge for subsequent ones. Adjust heat as necessary!
  • Consistent Greasing: Always re-grease the skillet between pancakes to prevent sticking. This ensures your pancakes flip easily and maintain their lovely shape.
  • High-Quality Chocolate: For your ganache sauce, opt for high-quality bittersweet or semisweet chocolate to elevate the overall flavor of the dish.
  • Serving Suggestions: Consider topping with fresh berries or whipped cream to balance the rich chocolate flavors, making every bite a sweet delight.

Storage Tips for Chocolate Pancakes

Fridge: Place cooked pancakes in an airtight container lined with parchment paper to absorb moisture, and store in the fridge for up to 3 days.

Freezer: For longer storage, freeze pancakes individually wrapped in plastic wrap, then place in a freezer bag. They can be kept for up to 2 months.

Reheating: To reheat, microwave for 30-45 seconds or toast in a toaster until warmed through. You can also reheat on a skillet for a freshly-cooked taste.

Ganache Storage: Store leftover chocolate ganache in the fridge in an airtight container for up to 5 days. Reheat gently in the microwave to restore its silky texture before serving with your chocolate pancakes.

Chocolate Pancakes: Variations & Substitutions

Feel free to get creative with these scrumptious chocolate pancakes! There are so many ways to customize this beloved recipe to suit your taste.

  • Gluten-Free: Substitute all-purpose flour with a 1:1 gluten-free baking blend for a delicious gluten-free version.
  • Vegan: Replace eggs with flax eggs and use almond milk instead of dairy for a plant-based pancake delight.
  • Nutty Twist: Add chopped nuts like walnuts or pecans into the batter for added crunch and richness. They bring a beautiful texture that complements the softness of the pancakes.
  • Zesty Flavor: A teaspoon of orange zest can elevate the taste. The citrusy zing pairs beautifully with the chocolate, making for an unexpected yet delightful surprise!
  • Savory Touch: For a unique twist, try adding a pinch of cayenne pepper or chili powder to the batter for a warm, spicy kick that balances the sweetness.
  • Dairy-Free Ganache: Use coconut cream instead of heavy cream in the ganache for a deliciously dairy-free topping that remains rich and indulgent.
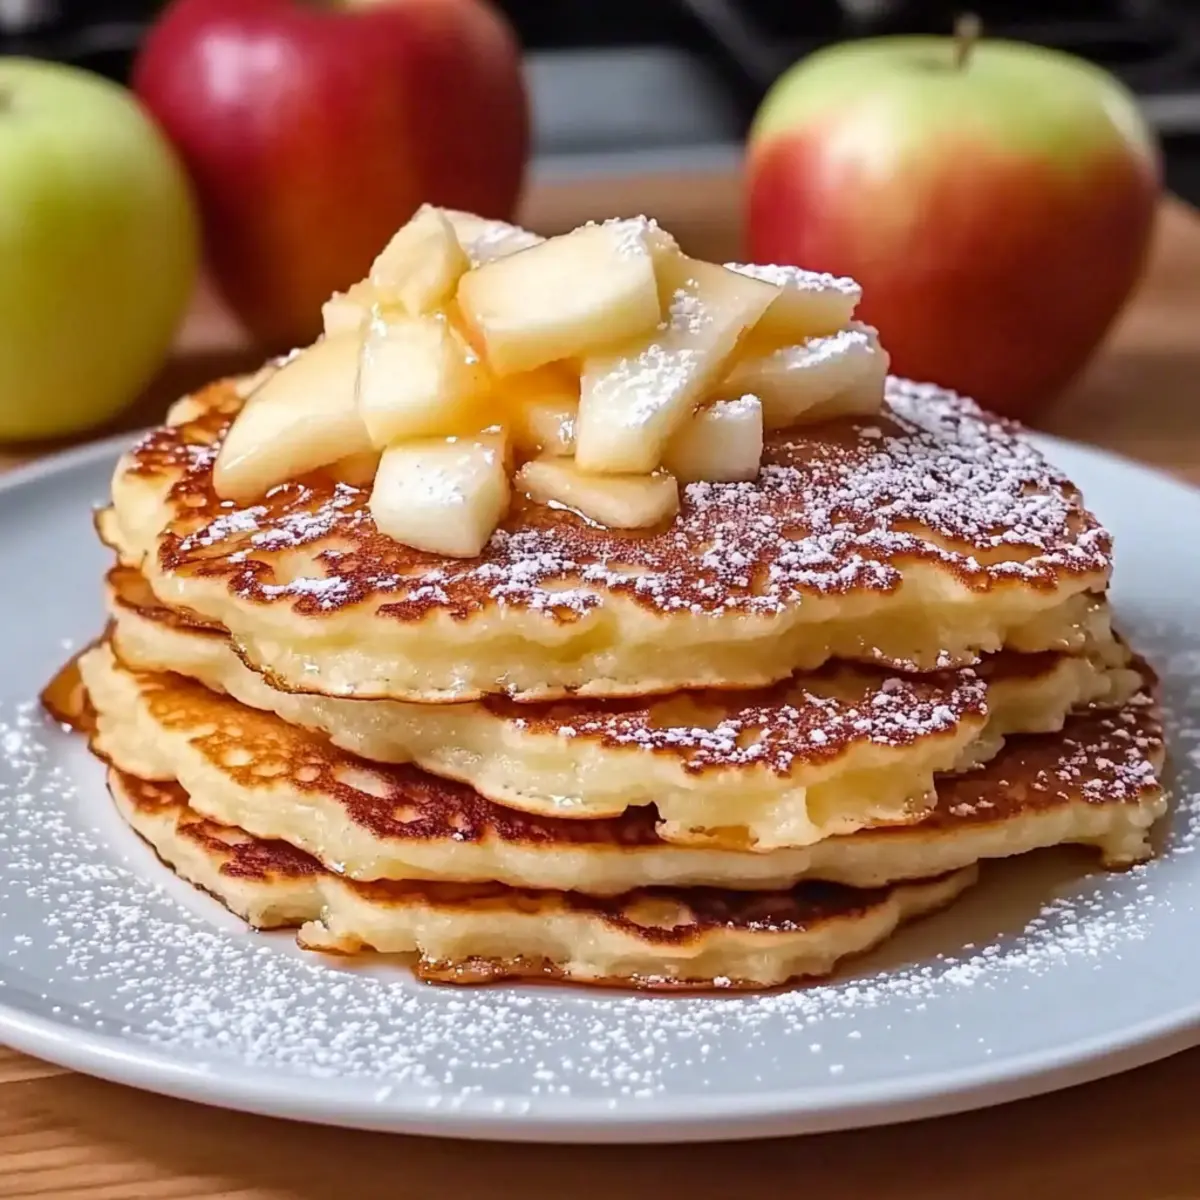
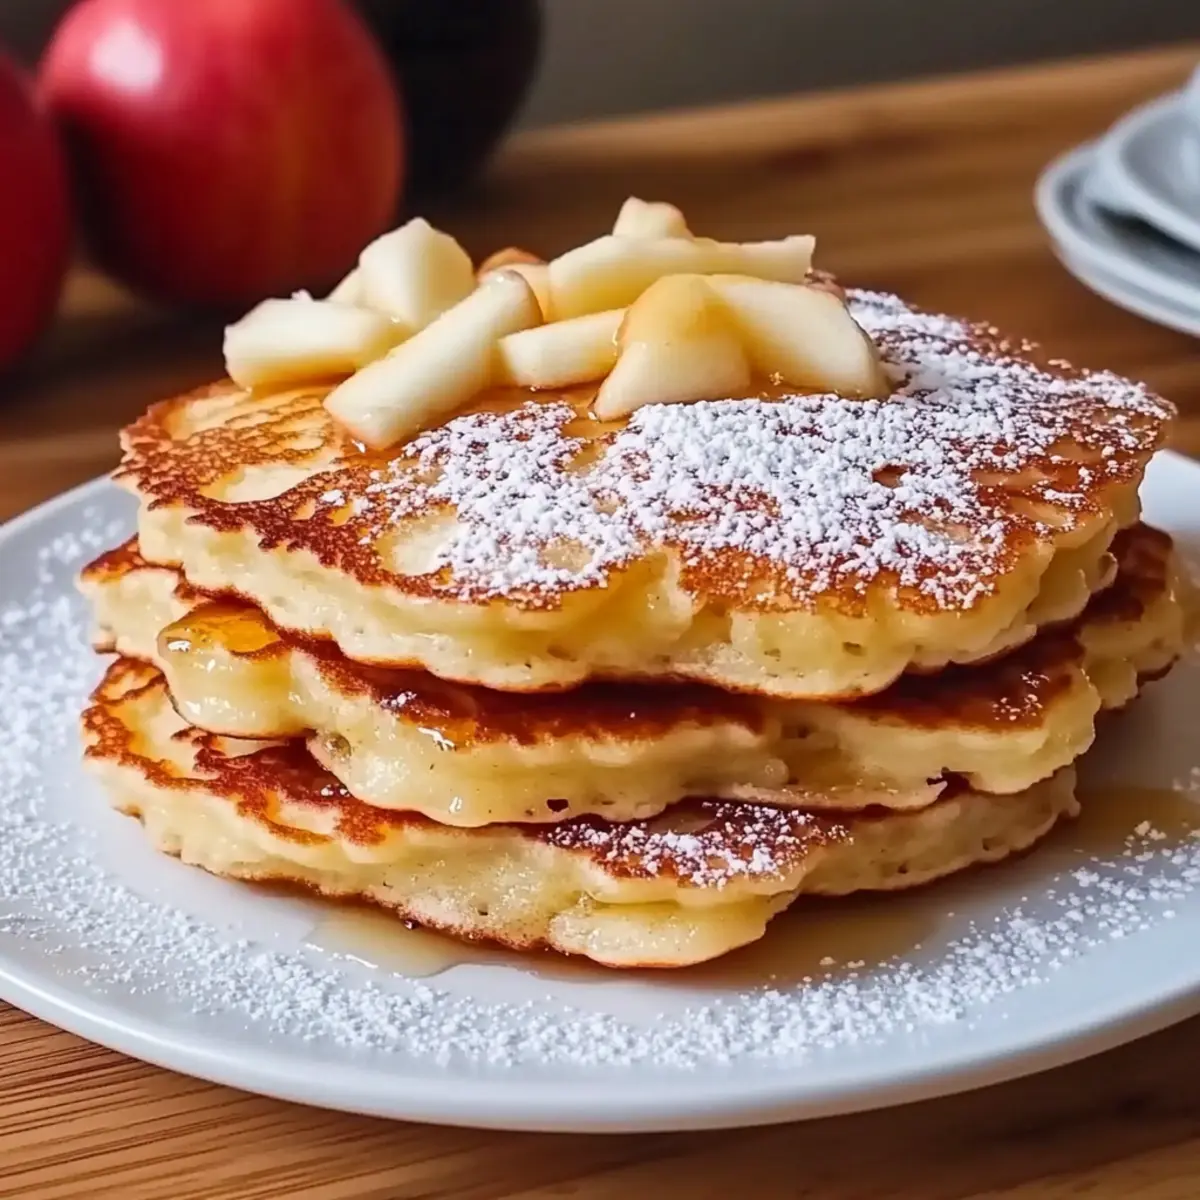
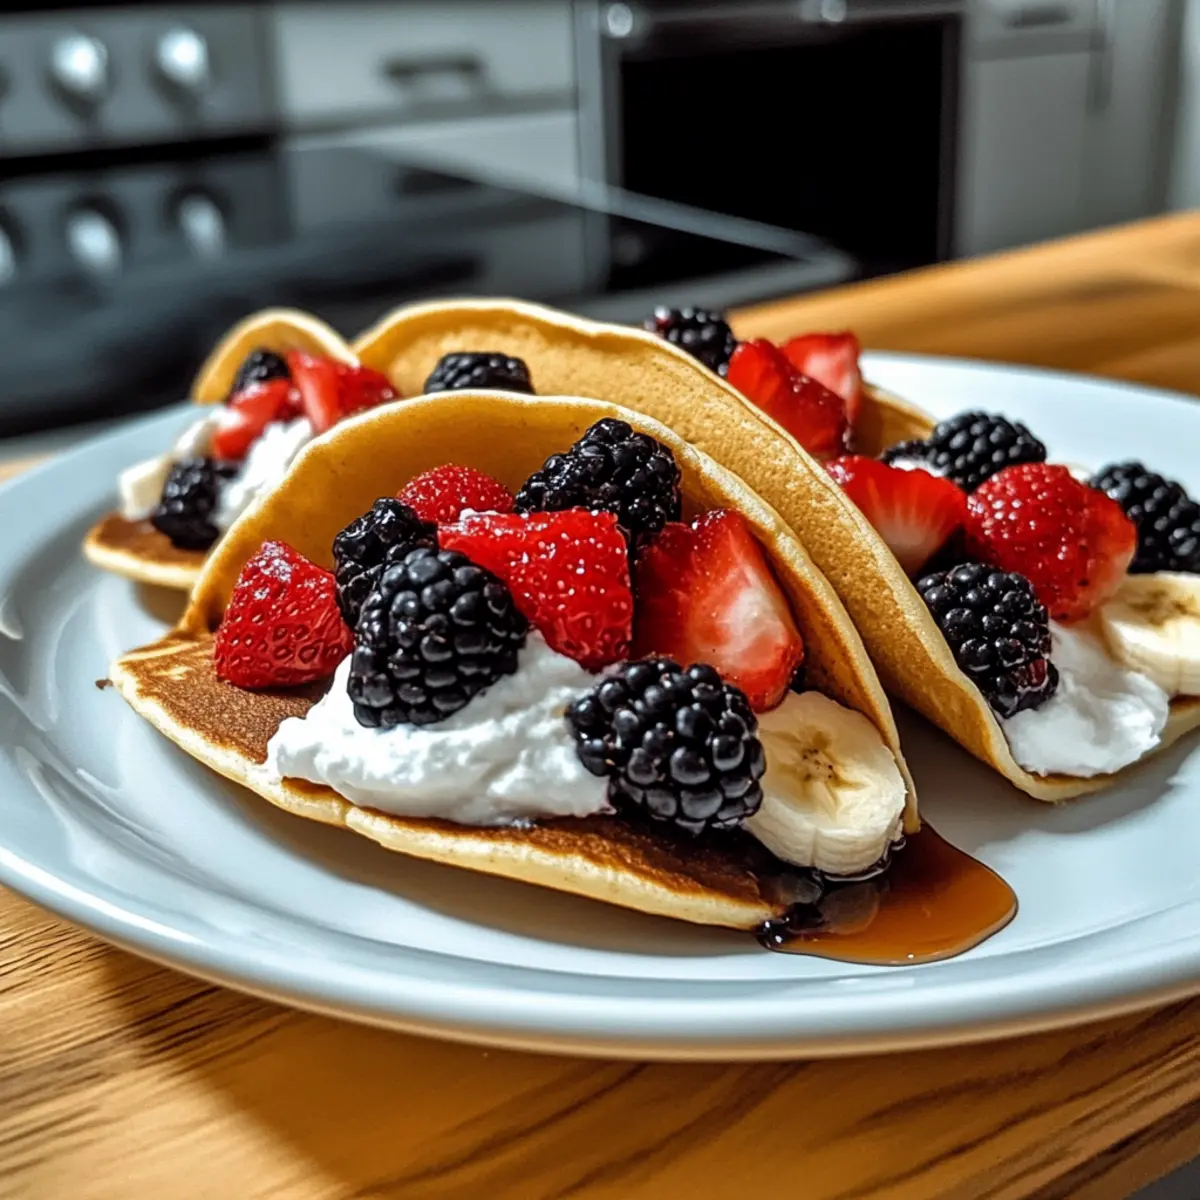
  • Fruit Lover: Serve pancakes topped with warm mixed berries or a banana caramel sauce for a burst of fresh flavor and added sweetness. This beautifully balances the rich chocolate with a fruity note.
  • Choco-Mint Indulgence: For a refreshing take, add a few drops of peppermint extract to the batter, creating a lovely mint-chocolate combination reminiscent of your favorite holiday treats.

Get inspired, and let your imagination run wild with these variations! If you’re in the mood for more chocolatey goodness, be sure to check out my Nutella Pancakes Blend or whip up some delightful Chocolate Fudge Cupcakes as a delicious treat alongside your pancakes.

Fluffy Chocolate Pancakes with Ganache Sauce Recipe FAQs

How do I choose the best cocoa powder for chocolate pancakes?
When selecting cocoa powder, Dutch-processed is my recommendation for its rich flavor. However, any unsweetened cocoa will work just fine. Look for a cocoa powder that’s deep in color and has a pleasant chocolate aroma; this often indicates quality.

What’s the best way to store leftover chocolate pancakes?
Cooked pancakes can be stored in an airtight container in the fridge for up to three days. To keep them fresh, line the container with parchment paper to absorb moisture. Simply reheat them in the microwave for 30-45 seconds, or in a toaster for a freshly-cooked taste!

Can I freeze chocolate pancakes for later?
Absolutely! For freezing, wrap each pancake individually in plastic wrap, then place them in a freezer bag. They can be stored for up to 2 months. To reheat, simply pop them in the microwave for 30-45 seconds or toast them to warm through. This way, you can enjoy a delicious chocolate breakfast anytime!

What if my pancake batter is too thick?
If you find your pancake batter is too thick, it could be due to over-measuring flour. Add a tablespoon of milk at a time until you reach a batter consistency similar to thick cake batter. Don’t hesitate to make adjustments—pancake-making is forgiving, and a little tweak can make all the difference!

Are chocolate pancakes safe for those with nut allergies?
When making chocolate pancakes, you can substitute whole milk with a lactose-free option, such as oat or almond milk. However, be cautious with added ingredients like chocolate chips, as some may contain nuts. Always check labels to ensure they’re safe for your dietary needs, and feel free to use nut-free chocolate alternatives.

How can I make chocolate pancakes vegan?
To make these delightful chocolate pancakes vegan, substitute eggs with a flax egg (1 tablespoon of ground flaxseed mixed with 2.5 tablespoons of water) and replace whole milk with almond or oat milk. For the ganache, use coconut cream instead of heavy cream. Follow the same steps for a delicious vegan treat!

Chocolate Pancakes

Delightful Chocolate Pancakes for a Sweet Breakfast Treat

These Chocolate Pancakes are a sweet indulgence, combining fluffy texture and rich cocoa goodness for a delightful breakfast treat.
Prep Time 10 minutes
Cook Time 15 minutes
Total Time 25 minutes
Servings: 4 pancakes
Course: Breakfast
Cuisine: American
Calories: 220

Ingredients
  

For the Pancakes
  • 1 cup All-Purpose Flour Swap with gluten-free flour if needed.
  • 1/3 cup Cocoa Powder Dutch-processed gives a deeper taste.
  • 2 teaspoons Baking Powder Ensure it's fresh for best results.
  • 1 pinch Salt Balances sweetness.
  • 2 large Eggs Can use flax eggs for a vegan option.
  • 1/4 cup Granulated Sugar Try honey or maple syrup for natural alternatives.
  • 1 cup Whole Milk Swap with almond or oat milk for lactose-free.
  • 3 tablespoons Canola Oil Or melted butter.
  • 1 teaspoon Vanilla Extract Use pure vanilla for best taste.
  • 1/2 cup Chocolate Chips or Chunks Consider white chocolate chips as an alternative.
  • 1 tablespoon Butter or Oil For cooking to prevent sticking.
For the Chocolate Ganache Sauce
  • 4 ounces Bittersweet or Semisweet Chocolate Opt for high-quality bars.
  • 1/2 cup Heavy Cream Coconut cream works for a dairy-free option.

Equipment

  • Mixing Bowl
  • whisk
  • Skillet or Griddle
  • microwave-safe bowl
  • spatula

Method
 

Step-by-Step Instructions
  1. In a large mixing bowl, sift together all-purpose flour, cocoa powder, baking powder, and salt. Set aside.
  2. In a separate bowl, whisk together eggs and granulated sugar until frothy. Then mix in whole milk, canola oil, and vanilla extract.
  3. Pour the wet ingredients into the dry ingredients. Stir gently and fold in chocolate chips.
  4. Chop bittersweet or semisweet chocolate and place in a microwave-safe bowl. Heat cream until simmering, pour over chocolate, stir until smooth.
  5. Preheat skillet over medium heat. Grease with butter or oil, and pour 1/4 cup of batter for each pancake. Cook until bubbles form, about 2-3 minutes, then flip and cook another 1-2 minutes.
  6. Serve pancakes with warm ganache drizzled on top. Enjoy your delightful breakfast!

Nutrition

Serving: 1pancakeCalories: 220kcalCarbohydrates: 30gProtein: 4gFat: 10gSaturated Fat: 3gPolyunsaturated Fat: 1gMonounsaturated Fat: 2gCholesterol: 30mgSodium: 150mgPotassium: 200mgFiber: 2gSugar: 8gVitamin A: 5IUVitamin C: 1mgCalcium: 6mgIron: 10mg

Notes

For added toppings, consider fresh berries or whipped cream. Store leftovers in the refrigerator for up to 3 days or freeze for longer storage.

Tried this recipe?

Let us know how it was!

Raspberry Vanilla Cream Crepes to Elevate Your Brunch Game

As the sun peeked through my kitchen window, the aroma of warm vanilla and tart raspberries danced in the air, instantly lifting my spirits. There’s something truly enchanting about making Raspberry Vanilla Cream Crepes—a delightful brunch treat that’s as simple to create as it is to savor. These crepes are not just visually stunning; they are a breeze to whip up, making them perfect for both leisurely weekend breakfasts and special festive gatherings. Imagine delighting your family and friends with a dish that doesn’t just look exquisite but is also a comfortable, sweet embrace for the taste buds. Plus, they allow a fun twist on traditional brunch fare that will make you the star of the table! Curious how to bring this French confection to life in your own kitchen? Let’s dive into the recipe!

Why Make Raspberry Vanilla Cream Crepes?

Irresistible combination: The fresh raspberries paired with smooth vanilla cream create an unforgettable flavor experience.

Effortless elegance: These crepes look elegant but require minimal effort—perfect for impressing guests or treating yourself during a cozy brunch at home.

Versatile delight: They can easily be modified with your favorite fruits, making it a go-to dish for any occasion, whether it’s a sweet breakfast or a chic dessert to follow a hearty meal.

Time-saving treat: Ready in just minutes, you won’t need to spend hours in the kitchen to enjoy this gourmet dish.

Crowd-pleaser: Everyone loves crepes! Serve these alongside a cup of fresh coffee or tea, and you have a brunch spread that’s sure to delight, much like our delicious Parmesan Italian Sausage or comforting Potato Bacon Soup.

Raspberry Vanilla Cream Crepes Ingredients

For the Crepe Batter

  • All-purpose flour – Forms the base of the crepes, providing structure and tenderness.
  • Eggs – Adds richness and helps bind the ingredients together.
  • Milk – Ensures a smooth and pourable consistency for easy cooking.
  • Butter – Enhances flavor and prevents the crepes from sticking to the pan.
    Note: For gluten-free options, consider using almond flour or a gluten-free flour blend.

For the Vanilla Cream Filling

  • Heavy cream – Adds richness and a smooth texture to the vanilla cream filling.
    Alternative: Use Greek yogurt for a lighter filling.
  • Mascarpone or cream cheese – Contributes to the cream’s richness and luscious flavor.
    Substitute with ricotta for a different texture.
  • Vanilla extract – Elevates the flavor profile of the cream.
    Can replace with almond extract for a unique twist.

For the Fresh Toppings

  • Fresh raspberries – Provide natural sweetness and tartness to the dish.
    Frozen raspberries can also be used; just thaw before incorporating.
  • Powdered sugar – Optional for dusting to add an elegant finish.
    Use coconut sugar for a natural alternative.

Optional Flavor Boosters

  • Lemon zest – Adds brightness to the vanilla cream.
  • Raspberry liqueur – Enhances the fruit flavor for a delightful twist.
    These can be adjusted based on personal preference.

Whether you’re preparing these delicious Raspberry Vanilla Cream Crepes for a cozy brunch or a festive gathering, this ingredient list has everything you need for a whimsical and elegant touch!

Step‑by‑Step Instructions for Raspberry Vanilla Cream Crepes

Step 1: Prep the Batter
In a mixing bowl, whisk together all-purpose flour, eggs, milk, melted butter, and a pinch of salt until smooth and fully combined. Allow the batter to rest for 30 minutes at room temperature; this relaxes the gluten and results in tender crepes. A rested batter will yield a thin, lump-free mixture that easily flows off your whisk.

Step 2: Cook Crepes
Heat a non-stick skillet or crepe pan over medium heat and lightly brush it with butter. Pour a small amount of batter (about ¼ cup) into the pan, swirling to evenly coat the bottom. Cook for 1-2 minutes or until the edges begin to lift and turn golden. Carefully flip the crepe and cook for another 30-60 seconds until lightly browned. Stack cooked crepes on a warm plate, covering them with a clean towel to keep moist.

Step 3: Make Vanilla Cream
In a large bowl, whip heavy cream with mascarpone or cream cheese, and vanilla extract using an electric mixer. Beat until soft peaks form—aim for a light, airy texture without over-whipping. This creamy filling will perfectly complement the delicate crepes and enhance the overall experience of your Raspberry Vanilla Cream Crepes. Set aside once ready.

Step 4: Assemble Crepes
To assemble each crepe, lay one crepe flat on a plate and spoon or pipe a generous amount of the vanilla cream along one edge. Add a handful of fresh raspberries on top of the cream, then gently fold or roll the crepe. Arrange the assembled crepes neatly for a beautiful presentation, either in halves or triangular shapes, showcasing the vibrant raspberries.

Step 5: Finishing Touches
Dust the finished Raspberry Vanilla Cream Crepes with powdered sugar for an elegant touch. Optionally, drizzle with raspberry coulis or melted chocolate, and garnish with fresh mint leaves for a pop of color. Serve immediately while still warm, and watch as your family and friends delight in this lovely brunch treat that is sure to impress!

Raspberry Vanilla Cream Crepes Variations

Feel free to get creative with these delightful crepes by adding your personal touch—everyone loves a customized dish!

  • Fruit Swap: Replace fresh raspberries with strawberries, blueberries, or even peaches for a different flavor. Each fruit brings its unique sweetness and texture to the party!

  • Greek Yogurt Filling: Instead of heavy cream, use Greek yogurt for a refreshing and lower-calorie version of the filling that’s still divine. It’s light, tangy, and pairs beautifully with the crepes.

  • Nutty Twist: Add a tablespoon of almond butter or hazelnut spread to the vanilla cream for a rich, nutty flavor. This adds complexity and a luxurious feel to your crepes, making them irresistible.

  • Chocolate Drizzle: Go decadent by drizzling melted chocolate over the assembled crepes. The contrast between rich chocolate and tart fruit creates a mouthwatering balance.

  • Lemon Zest: Incorporate lemon zest into the vanilla cream for a bright, citrusy punch. The zing of lemon pairs perfectly with the sweetness of the raspberries, elevating the dish to new heights.

  • Coconut Sugar: Instead of powdered sugar, dust the crepes with coconut sugar for a subtly caramel flavor. It’s a perfect alternative that adds a unique taste without sacrificing sweetness.

  • Spiced Infusion: Add a pinch of cinnamon or nutmeg to the crepe batter for an aromatic warmth that enhances the flavor without overpowering it. This twist makes your crepes perfect for cozy mornings.

As you indulge in these delicious variations, don’t forget to enjoy them with a steaming cup of coffee, much like how we savor a bowl of Tortellini Soup Comfort. Feel free to explore the flavors and make this delightful dish your own!

Expert Tips for Raspberry Vanilla Cream Crepes

  • Rest the Batter: Allowing the batter to rest for 30 minutes helps relax the gluten, ensuring thinner and more tender crepes that won’t tear easily during cooking.

  • Use a Non-Stick Pan: A well-heated non-stick skillet makes it easy to cook the crepes without sticking. Lightly butter the pan for the best results.

  • Don’t Over-whip the Cream: When preparing the vanilla cream, whip just until soft peaks form. Over-whipping can lead to a grainy texture, ruining your velvety filling.

  • Warm Crepes Before Serving: Keep the cooked crepes warm by covering them with a towel. This ensures they stay soft and flexible for easy assembly.

  • Assemble Just Before Serving: To preserve the freshness of the raspberries and vanilla cream, assemble the Raspberry Vanilla Cream Crepes right before serving for a delightful experience.

What to Serve with Raspberry Vanilla Cream Crepes?

Imagine a bubbly gathering filled with laughter and warmth as you set the perfect table alongside these delicate creations.

  • Fresh Fruit Salad: A medley of seasonal fruits adds a refreshing, colorful burst, balancing the creaminess of the crepes and enhancing their sweetness.

  • Lightly Whipped Cream: Fluffy whipped cream on the side adds to the delightful decadence of the raspberry vanilla filling, offering an indulgent touch.

  • Sparkling Rosé: The effervescent qualities and slight acidity of sparkling rosé complement the richness of the crepes, elevating your brunch experience to a delightful celebration.

  • Vanilla Ice Cream: A scoop of smooth vanilla ice cream drizzled with a bit of warm raspberry coulis creates an unforgettable dessert combo that melts in your mouth.

  • Chocolate Drizzle: A warm drizzle of rich chocolate sauce not only enhances the presentation but provides a luscious depth of flavor that enhances the sweet raspberries.

  • Chai Latte: A spiced chai latte swirled with milk offers warming spices that beautifully contrast the sweet cream and fruit, making each bite an adventure of flavor.

Let your imagination run wild with these pairings, transforming a simple dish into a feast for the senses!

Make Ahead Options

These Raspberry Vanilla Cream Crepes are perfect for meal prep enthusiasts! You can make the crepe batter up to 24 hours in advance; simply whisk together the ingredients and store it in the refrigerator. For optimal results, allow the batter to rest at room temperature for about 20 minutes before cooking. You can also prepare the vanilla cream filling up to 3 days ahead; just keep it in an airtight container in the fridge. Assemble the crepes just before serving to ensure the raspberries remain fresh and bright. Simply fill and garnish the crepes right before your guests arrive, and you’ll have a stunning brunch treat ready in no time!

How to Store and Freeze Raspberry Vanilla Cream Crepes

Fridge: Store cooked crepes in an airtight container in the fridge for up to 2 days. Keep the vanilla cream filling separate until you’re ready to serve to prevent sogginess.

Freezer: If you want to keep crepes longer, freeze them in layers separated by parchment paper in an airtight container for up to 2 months. Thaw in the fridge overnight before use.

Reheating: To reheat, warm crepes in a non-stick skillet over low heat for a minute on each side or microwave for 15-20 seconds. Avoid overheating to prevent toughening.

Assembly Reminder: Always assemble your Raspberry Vanilla Cream Crepes just before serving to maintain the freshness of the raspberries and cream!

Raspberry Vanilla Cream Crepes Recipe FAQs

How do I select ripe raspberries for my crepes?
Absolutely! Choose raspberries that are bright in color with a slight sheen. They should be firm yet yield slightly to gentle pressure. Avoid those with dark spots or mold, as they might be overripe.

What’s the best way to store leftover crepes?
Very! Store cooked crepes in an airtight container in the fridge for up to 2 days to maintain their texture. For the vanilla cream filling, keep it separate until you’re ready to serve to prevent sogginess.

Can I freeze the crepes? If so, how?
Yes, you can! To freeze, stack your crepes, placing parchment paper between each layer to prevent sticking. Place them in an airtight container or freezer bag and store them for up to 2 months. When you’re ready to enjoy, thaw overnight in the fridge, then warm in a skillet or microwave.

What if my crepes are tearing while cooking?
No worries! If you’re experiencing tears, ensure your batter has rested for at least 30 minutes to relax the gluten. Cooking at too high a temperature can also cause tearing; try lowering the heat and using a well-buttered non-stick skillet for easier flipping.

Are these crepes suitable for those with dietary restrictions?
Absolutely! For a gluten-free option, use almond flour or a gluten-free flour blend. You can also substitute mascarpone with Greek yogurt for a lighter cream. Always check for any allergies regarding the ingredients, especially the cream and vanilla extract.

How should I serve Raspberry Vanilla Cream Crepes?
For the best experience, assemble and serve immediately to keep the raspberries fresh. Dust with powdered sugar, drizzle with raspberry coulis or chocolate, and garnish with mint for an elegant touch. Enjoy this delightful dish warm!

Raspberry Vanilla Cream Crepes

Raspberry Vanilla Cream Crepes to Elevate Your Brunch Game

Delight in Raspberry Vanilla Cream Crepes, a simple yet elegant brunch treat that combines fresh raspberries with smooth vanilla cream.
Prep Time 30 minutes
Cook Time 10 minutes
Resting Time 30 minutes
Total Time 1 hour 10 minutes
Servings: 4 crepes
Course: Dessert
Cuisine: French
Calories: 280

Ingredients
  

For the Crepe Batter
  • 1 cup all-purpose flour For gluten-free options, consider using almond flour or a gluten-free flour blend.
  • 2 large eggs
  • 1 cup milk
  • 2 tablespoons butter Melted.
For the Vanilla Cream Filling
  • 1 cup heavy cream Alternatively, use Greek yogurt for a lighter filling.
  • 8 ounces mascarpone or cream cheese Substitute with ricotta for a different texture.
  • 1 teaspoon vanilla extract Can replace with almond extract for a unique twist.
For the Fresh Toppings
  • 1 cup fresh raspberries Frozen raspberries can also be used; just thaw before incorporating.
  • 1 tablespoon powdered sugar Optional for dusting.
Optional Flavor Boosters
  • 1 teaspoon lemon zest Adds brightness to the vanilla cream.
  • 1 tablespoon raspberry liqueur Enhances the fruit flavor.

Equipment

  • Mixing Bowl
  • Non-stick skillet or crepe pan
  • Electric mixer

Method
 

Step-by-Step Instructions
  1. In a mixing bowl, whisk together all-purpose flour, eggs, milk, melted butter, and a pinch of salt until smooth and fully combined. Allow the batter to rest for 30 minutes at room temperature.
  2. Heat a non-stick skillet or crepe pan over medium heat and lightly brush it with butter. Pour a small amount of batter (about ¼ cup) into the pan, swirling to evenly coat the bottom. Cook for 1-2 minutes or until the edges begin to lift and turn golden. Carefully flip the crepe and cook for another 30-60 seconds.
  3. In a large bowl, whip heavy cream with mascarpone or cream cheese, and vanilla extract using an electric mixer until soft peaks form.
  4. To assemble each crepe, lay one crepe flat on a plate and spoon or pipe a generous amount of the vanilla cream along one edge. Add a handful of fresh raspberries on top of the cream, then gently fold or roll the crepe.
  5. Dust the finished crepes with powdered sugar for an elegant touch and serve immediately.

Nutrition

Serving: 1crepeCalories: 280kcalCarbohydrates: 30gProtein: 4gFat: 15gSaturated Fat: 9gPolyunsaturated Fat: 1gMonounsaturated Fat: 4gCholesterol: 50mgSodium: 160mgPotassium: 200mgFiber: 1gSugar: 8gVitamin A: 500IUVitamin C: 5mgCalcium: 50mgIron: 1mg

Notes

Always assemble your Raspberry Vanilla Cream Crepes just before serving to maintain freshness.

Tried this recipe?

Let us know how it was!

Cinnamon Apple Grape Salad with a Crunchy Nut Twist

As I stood in my kitchen, the warm scent of cinnamon wrapped around me like a cozy blanket, I couldn’t help but smile at the vibrant colors of my Cinnamon Apple Grape Salad with Toasted Pecans. This dish is a celebration of crisp apples and juicy grapes, perfectly complemented by crunchy nuts and a delightful cinnamon-honey drizzle. Not only is it ready in just 10 minutes, but it’s also naturally gluten-free and vegetarian, making it a fantastic choice for an energizing breakfast or a wholesome snack. Plus, it’s versatile enough to double as a colorful side at your next gathering! Are you ready to transform these simple ingredients into something truly special? Let’s dive in!

Why is this salad a must-try?

Simplicity Meets Flavor: You can whip up this Cinnamon Apple Grape Salad in just 10 minutes, making it a go-to for busy days!

Crunchy Twist: Toasted pecans add a delightful crunch, elevating the salad’s texture and rich flavor profile.

Healthy Delight: Naturally gluten-free and vegetarian, it’s perfect for anyone seeking a wholesome yet indulgent treat.

Versatile Dish: Pair this salad with Greek yogurt for breakfast, or serve it alongside grilled chicken for an amazing meal.

Endless Variations: Experiment with different nuts or sweeteners like maple syrup for a unique spin—your creativity knows no bounds!

This salad is bound to impress your family or guests, proving healthy can be delicious!

Cinnamon Apple Grape Salad Ingredients

• Here’s what you need to create this delightful salad bursting with flavors!

For the Salad

  • Apples – Choose firm varieties like Honeycrisp for the best texture; pears work too for a softer bite.
  • Red Grapes – Juicy and sweet, they balance out the tartness of the apples; substitute with berries for a twist.
  • Pecans or Walnuts – Toasted for crunch and richness; feel free to swap with toasted almonds if desired.

For the Dressing

  • Honey – Sweetens the salad beautifully and enhances the cinnamon flavor; try maple syrup or agave nectar for a vegan option.
  • Ground Cinnamon – Lends warmth and spice; add nutmeg or cardamom for a unique flavor boost.
  • Fresh Lemon Juice – Stops apples from browning while adding a fresh zing; coat apples immediately after slicing.
  • Pinch of Sea Salt – Amplifies the flavors, making your salad truly irresistible!

Now you have everything you need for your Cinnamon Apple Grape Salad—let’s get cooking!

Step‑by‑Step Instructions for Cinnamon Apple Grape Salad

Step 1: Toast the Nuts
In a skillet over medium heat, add chopped pecans or walnuts and toast for 3-5 minutes until they’re fragrant and golden brown. Stir occasionally to ensure even toasting and prevent burning. Once done, remove them from the heat and set aside to cool while you prepare the rest of the ingredients.

Step 2: Prepare the Fruit
Wash the apples and red grapes thoroughly. Dice the apples into bite-sized pieces and slice the grapes in half. To maintain the apples’ vibrant color, immediately toss them in a bowl with fresh lemon juice, ensuring they’re evenly coated to prevent browning while you assemble your Cinnamon Apple Grape Salad.

Step 3: Make the Dressing
In a small bowl, whisk together honey, ground cinnamon, and a pinch of sea salt until well combined. If your honey is too thick, consider warming it gently in the microwave for 10-15 seconds to make mixing easier. This dressing will bring delightful sweetness and spice to your salad.

Step 4: Combine Ingredients
In a large mixing bowl, combine the lemon-coated apples, halved grapes, and toasted nuts. Drizzle your homemade dressing over the top and gently toss the ingredients to coat everything evenly. Make sure to handle the fruit with care to keep the apples from becoming mushy in your delightful Cinnamon Apple Grape Salad.

Step 5: Serve or Chill
Serve your salad immediately for the best texture, letting the flavors meld together beautifully. Alternatively, if you prefer serving it chilled, refrigerate for up to 2 hours, ensuring you keep the nuts separate until just before serving to maintain their crunchiness.

Expert Tips for Cinnamon Apple Grape Salad

  • Nuts Just Before Serving: Add your toasted pecans or walnuts right before serving to ensure they stay crunchy and don’t get soggy.

  • Crisp Apples Essential: Opt for firm apple varieties like Honeycrisp or Granny Smith to maintain the salad’s texture and avoid mushiness.

  • Experiment with Sweetness: If you prefer a sweeter salad, drizzle in some maple syrup or adjust the honey to taste for your ideal balance in this Cinnamon Apple Grape Salad.

  • Substitutions Galore: Feel free to swap nuts or sweeteners based on personal preferences; toasted almonds or agave nectar can offer delicious twists.

  • Prevent Browning: Always toss your apples in lemon juice immediately after cutting to keep them fresh and vibrant throughout serving.

Cinnamon Apple Grape Salad Variations

Feel free to customize this recipe and make it your own with delightful twists and substitutions!

  • Nutty Swaps: Replace pecans with walnuts or almonds for a different crunch profile that still delivers flavor.
  • Sweetener Switch: Use maple syrup or agave nectar instead of honey for a vegan adaptation that’s equally delicious.
  • Berry Boost: Add in mixed berries like blueberries or strawberries for a juicy burst of flavor that brightens the salad.
  • Dried Fruit Addition: Incorporate dried cranberries or cherries for a chewy texture that complements the fresh fruit beautifully.
  • Spice It Up: Experiment with adding a dash of nutmeg or cardamom for an aromatic twist that elevates the entire dish.
  • Creamy Touch: Mix in a dollop of Greek yogurt for a creamy contrast that enhances the freshness of the salad.
  • Herb Infusion: Toss in fresh mint or basil for a herby freshness that will make this salad even more refreshing.
  • Extra Crunch: For an even crunchier salad, sprinkle some toasted pumpkin seeds or sunflower seeds atop right before serving.

For other inspired recipes, don’t forget to check out these links for Apple Crisp Cinnamon and Bananas Foster Cinnamon, or try something savory like the Blt Chicken Salad to round out your meal options!

What to Serve with Cinnamon Apple Grape Salad

Let the vibrant colors and crisp textures of this refreshing mix inspire you to complete your meal with delightful companions.

  • Greek Yogurt: A creamy counterpart that adds a dose of protein, making your breakfast or snack even more satisfying.
  • Grilled Chicken: Juicy grilled chicken provides a wonderful savory contrast, enhancing the sweetness of the salad beautifully. A perfect option for a wholesome lunch!
  • Quinoa: Nutty and fluffy, quinoa serves as a nutritious base, bringing heartiness to your meal while complementing the fruit’s sweetness.
  • Cheese Platter: Pair with a selection of cheeses like brie or cheddar for a satisfying contrast of flavors—this will elevate your dining experience!
  • Chilled White Wine: A crisp, fruity white wine, such as Sauvignon Blanc, perfectly enhances the refreshing elements of the salad while adding a touch of elegance.
  • Chocolate-Dipped Strawberries: For dessert, these sweet indulgences echo the salad’s flavors, creating a delightful ending to your meal that feels special.
  • Nuts and Dried Fruits: Serve a small bowl of mixed nuts and dried fruits for a crunchy snack or appetizer, giving a boost of energy and flavor right before the main event.
  • Roasted Veggies: The earthy goodness of roasted veggies, like sweet potatoes or Brussels sprouts, provides a fantastic warm contrast and rounds out your meal with wholesome flavors.

Make Ahead Options

These Cinnamon Apple Grape Salad preparations are a fantastic way to save time and hassle during busy weeks! You can prepare the fruit components (apples and grapes) up to 24 hours in advance, just be sure to toss the apple pieces in lemon juice immediately after cutting to prevent browning. The toasted pecans can be made a few days ahead, as they’ll keep their crunch in an airtight container. When you’re ready to serve, simply combine the prepped fruit and nuts, drizzle with the cinnamon-honey dressing (which can also be made ahead), and toss gently. This way, you’ll have a vibrant, delicious salad ready to enjoy without the last-minute rush!

How to Store and Freeze Cinnamon Apple Grape Salad

Fridge: Store any leftover salad in an airtight container in the fridge for up to 2 days to keep it fresh. Keep nuts separate until ready to serve for maximum crunch.

Freezer: Freezing is not recommended for this salad, as apples and grapes can become mushy and lose their crisp texture once thawed.

Make-Ahead Tips: This salad can be prepared 2-4 hours in advance. Just remember to add the nuts just before serving to maintain their delightful crunch!

Serving: For best results, serve immediately after preparation or chill for a short while to allow the flavors to meld beautifully.

Cinnamon Apple Grape Salad Recipe FAQs

What type of apples are best for this salad?
Absolutely! I recommend using firm varieties like Honeycrisp or Granny Smith for the best texture and refreshing flavor. If you’re looking for a softer bite, pears can be a wonderful substitute.

How should I store leftover Cinnamon Apple Grape Salad?
For storing, place any leftovers in an airtight container in the fridge, where they will stay fresh for up to 2 days. To keep the nuts crunchy, it’s best to store them separately until you’re ready to enjoy the salad again!

Can I freeze Cinnamon Apple Grape Salad?
Freezing is not recommended for this salad, as the apples and grapes can become mushy and lose their crisp texture once thawed. If you’re looking to prepare it ahead of time, I suggest making it fresh and tossing the nuts in just before serving.

What if my apples start to brown before serving?
No worries! To prevent browning, immediately toss your diced apples in fresh lemon juice right after cutting. This will keep them vibrant and fresh for several hours.

Are there any dietary considerations I should be aware of?
This salad is naturally gluten-free and vegetarian, making it suitable for a variety of diets! However, if you have nut allergies, you can substitute the pecans or walnuts with crispy sunflower seeds or pumpkin seeds for a safe alternative.

How long can I keep the salad in the refrigerator?
If you store it properly in an airtight container, the Cinnamon Apple Grape Salad can last up to 2 days in the fridge. Just remember to keep the nuts separate until you’re ready to serve for maximum crunch!

Cinnamon Apple Grape Salad

Cinnamon Apple Grape Salad with a Crunchy Nut Twist

Cinnamon Apple Grape Salad is a delightful and quick-to-make dish bursting with flavor, perfect as a snack or side.
Prep Time 10 minutes
Cook Time 5 minutes
Total Time 15 minutes
Servings: 4 servings
Course: Salad
Cuisine: Gluten-Free, Vegetarian
Calories: 180

Ingredients
  

For the Salad
  • 2 cups Apples, diced Firm varieties like Honeycrisp preferred
  • 1 cup Red Grapes, halved Juicy and sweet
  • 1 cup Pecans or Walnuts, toasted Substitute with almonds if desired
For the Dressing
  • 2 tablespoons Honey Maple syrup or agave nectar can be used
  • 1 teaspoon Ground Cinnamon For warmth and spice
  • 1 tablespoon Fresh Lemon Juice To coat apples and prevent browning
  • 1 pinch Sea Salt For amplifying flavors

Equipment

  • Skillet
  • Mixing Bowl
  • small bowl
  • whisk

Method
 

Step-by-Step Instructions
  1. Toast the nuts in a skillet over medium heat for 3-5 minutes until fragrant and golden brown.
  2. Prepare the fruit by washing thoroughly, dicing the apples, and halving the grapes. Toss apples in lemon juice.
  3. Make the dressing by whisking honey, ground cinnamon, and a pinch of salt in a small bowl.
  4. Combine the lemon-coated apples, grapes, and toasted nuts in a large bowl. Drizzle with dressing and toss gently.
  5. Serve immediately or refrigerate for up to 2 hours before serving, keeping nuts separate until then.

Nutrition

Serving: 1servingCalories: 180kcalCarbohydrates: 25gProtein: 3gFat: 8gSaturated Fat: 1gPolyunsaturated Fat: 3gMonounsaturated Fat: 4gSodium: 55mgPotassium: 200mgFiber: 3gSugar: 15gVitamin A: 200IUVitamin C: 10mgCalcium: 30mgIron: 0.5mg

Notes

Serve salad immediately for best texture or chill briefly to meld flavors. Add nuts before serving to maintain crunchiness.

Tried this recipe?

Let us know how it was!

Irresistibly Tasty Homemade Cup Noodles You Can Customize

As I was rummaging through my pantry one rainy afternoon, a lightbulb moment struck me—why not transform my humble ramen into a quick, customizable feast? Enter my Homemade Cup Noodles, a perfect solution for anyone longing for a hearty meal without much fuss. These delightful noodle jars come together in just 5 minutes, making them an ideal companion for busy weekdays or cozy nights in. Not only can you personalize them with your favorite veggies and flavors, but they’re also a healthier twist on traditional instant noodles. Just imagine having a delicious bowl of savory broth filled with vibrant ingredients ready anytime you need a comfort meal. Curious to see how simple it is to whip up your own version? Let’s dive in!

Why Make Homemade Cup Noodles?

Customizable: With endless flavor combinations, you control the ingredients! From spicy to savory, personalize your cup noodles however you like.

Quick & Easy: Just 5 minutes to prep! Perfect for busy weekdays or cozy movie nights when you crave something comforting yet quick.

Healthy Twist: Farewell, sodium-packed instant noodles! Create a nutritious meal by adding fresh veggies and lean proteins, making it a wholesome option.

Meal Prep Dream: Assemble jars ahead of time and store them in the fridge for up to 4 days—a hassle-free lunch option that makes you the envy of the office!

Taste Upgrade: Enjoy the rich flavors of homemade bouillon and fresh ingredients, elevating your noodle experience beyond typical fast-food alternatives. Your taste buds will thank you!

Homemade Cup Noodles Ingredients

For the Base

  • Ramen Noodles – Use any instant ramen noodles, like Ocean’s Halo Organic Ramen, for a delicious foundation.
  • Mixed Vegetables – Adds nutrition and color; consider using frozen or fresh varieties like carrots, corn, or spinach for extra flavor!

For the Broth

  • Bouillon Paste – Enhances the richness and umami flavor of the broth; adjust based on your salt preference for the ultimate taste.
  • Soy Sauce – Provides depth and saltiness; try low-sodium soy sauce for a healthier option without sacrificing flavor.

For the Fresh Finish

  • Green Onions – Offers a burst of freshness and mild oniony flavor; wrap them in plastic wrap until you’re ready to use for maximum crispness.

Dive into the delightful world of homemade cup noodles with these simple ingredients that allow you to personalize your meal experience!

Step‑by‑Step Instructions for Homemade Cup Noodles

Step 1: Gather Your Ingredients
Begin by collecting all your ingredients for the Homemade Cup Noodles. You’ll need instant ramen noodles, mixed vegetables, bouillon paste, soy sauce, and fresh green onions. Use wide-mouth mason jars for easy layering! Arrange your ingredients on a clean countertop and ensure you have boiling water readily available to kick off the process.

Step 2: Layer the Ingredients
In your mason jar, first, place a block of ramen noodles at the bottom. Next, layer your mixed vegetables for a colorful display. Add a spoonful of bouillon paste, followed by a drizzle of soy sauce to create a flavorful soup base. Take a moment to appreciate the beautiful colors before moving to the next step!

Step 3: Sprinkle Green Onions
If you’re using fresh green onions, sprinkle them generously on top of your layered ingredients. This adds freshness and bursts of flavor to your Homemade Cup Noodles. Make sure to tuck the onions in neatly—they should sit atop the other ingredients, ready to release their aroma once hot water is added.

Step 4: Add Boiling Water
Carefully pour 1 ¼ cups of boiling water over the layered ingredients in the mason jar. Watch as the water seeps through the noodles and vegetables, creating a delicious broth. Make sure the noodles are fully submerged to ensure even cooking. This step is crucial for the flavors to meld beautifully.

Step 5: Seal and Wait
Replace the lid on the mason jar tightly, sealing in the heat. Allow your Homemade Cup Noodles to sit undisturbed for 5 minutes. During this time, the noodles will soften and absorb the flavors of the vegetables and broth. Use this moment to set the table or prepare any extra sides you plan to enjoy.

Step 6: Stir and Serve
After 5 minutes, remove the lid and give your cup noodles a good stir to combine all the delicious flavors. Ensure the bouillon paste is well dissolved, creating a rich, savory broth. Your Homemade Cup Noodles are now ready to be enjoyed; simply grab a fork and dig into your creation!

Step 7: Optional Microwave Method
For a quick alternative, you can microwave your assembled jar. Loosely cover it with a microwave-safe lid and heat for 2 minutes. After microwaving, stir well to mix the ingredients. This method is ideal if you’re short on time, allowing you to savor your cup noodles even faster!

Make Ahead Options

These Homemade Cup Noodles are perfect for meal prep enthusiasts! You can assemble the jars with all the ingredients up to 4 days in advance, making lunch the easiest part of your day. Simply layer the ramen noodles, mixed vegetables, bouillon paste, and soy sauce in a wide-mouth mason jar, followed by a sprinkling of fresh green onions (which can be wrapped in plastic to keep fresh). To maintain quality, refrigerate the assembled jars until you’re ready to enjoy them. When you’re set to serve, just add 1 ¼ cups of boiling water, seal the jar, and let it sit for 5 minutes. Stir well for a delightful, homemade meal ready in no time!

Expert Tips for Homemade Cup Noodles

  • Perfecting Noodles: To avoid mushy noodles, always monitor the soaking time. Letting them sit too long can lead to an unpleasant texture.

  • Veggie Choices: Use firm vegetables like broccoli or bell peppers to maintain a bit of crunch after soaking. Avoid watery veggies, which can make the broth dilute.

  • Spice It Up: If you love heat, add chili flakes or a drop of hot sauce before sealing the jar. It creates a delicious kick without overpowering the base flavors.

  • Protein Power: Adding protein like cooked chicken or tofu just before serving ensures it’s warm but retains a good texture—you want it to be tender, not overcooked!

  • Mason Jar Safety: Always check your mason jars for heat resistance, especially if using the microwave. This keeps your delightful Homemade Cup Noodles safe for indulgent meals!

What to Serve with Homemade Cup Noodles

Looking to create a delightful spread that complements the comforting notes of your homemade noodles?

  • Crisp Side Salad: A fresh salad with mixed greens and a tangy vinaigrette adds a refreshing crunch to your meal and balances the savory flavors.

  • Seasoned Edamame: These easy-to-make appetizers are protein-packed and provide a delightful bite that pairs well with broth-based dishes.

  • Grilled Chicken Skewers: Juicy, tender chicken skewers add substance and a delicious charred flavor, making your meal feel heartier and more satisfying.

  • Vegetable Spring Rolls: Light and crunchy, spring rolls offer a satisfying contrast to the soft noodles, plus a lovely burst of flavor with every bite.

  • Spicy Sesame Dipping Sauce: Drizzle or serve this sauce alongside your cup noodles—it adds a rich, nutty finish, enhancing the overall taste experience.

  • Chilled Fruit Salad: A medley of seasonal fruits provides a refreshing sweetness, making a delightful counterbalance to the savory cup noodles.

  • Ginger Lemon Tea: This warm, fragrant drink complements the meal beautifully, soothing your senses while enhancing the flavors of the noodles.

  • Chocolate-Covered Almonds: For a little sweet treat afterward, these nutty delights offer a perfect balance of rich chocolate and crunchy textures.

Homemade Cup Noodles Variations & Substitutions

Feel free to get creative and tailor your cup noodles to match your cravings and dietary preferences!

  • Protein Boost: Add cooked chicken, crab, or tofu just before serving for an extra punch of protein and heartiness.

  • Vegetarian Delight: Switch out bouillon paste for vegetable broth for a completely vegetarian-friendly option! You’ll still enjoy all the umami flavors.

  • Creamy Twist: Stir in a dollop of coconut milk or a slice of cheese for a decadent, creamy broth that warms the soul.

  • Spice It Up: For those who enjoy heat, toss in some chili oil, Sriracha, or red pepper flakes to amp up the flavor!

  • Texture Variety: Incorporate toasted nuts or seeds, like sesame or sunflower seeds, before serving for a delightful crunch that contrasts with the soft noodles.

  • Herb Infusion: Elevate your cup noodles with fresh herbs like basil or cilantro for a refreshing twist. These herbs bring bright flavors that pop in every bite.

  • Seasoning Swap: Experiment with different seasoning mixes, such as curry powder or chili seasoning, for a new flavor profile that transports you to a different cuisine.

If you’re in the mood for something a bit different, why not pair these with a simple side like a fresh salad or some fruit? While crafting your unique cup noodles, take a moment to explore other delectable recipes, like these easy Dragon Noodles Colorful or satisfying Sticky Beef Noodles. Your tastebuds will appreciate the adventure!

How to Store and Freeze Homemade Cup Noodles

Fridge: Store assembled jars in the refrigerator for up to 4 days. Just add boiling water when you’re ready to serve, keeping your meal prep hassle-free.

Freezer: If you want to extend their shelf life, freeze the dry ingredients (noodles, vegetables, and bouillon paste) in airtight bags for up to 2 months.

Reheating: When ready to enjoy, simply thaw overnight in the fridge, then follow the original cooking instructions for the best results.

Room Temperature: Avoid storing assembled jars at room temperature for more than 2 hours to ensure food safety and freshness of your Homemade Cup Noodles.

Homemade Cup Noodles Recipe FAQs

How do I ensure my vegetables stay fresh when preparing my Homemade Cup Noodles?
Absolutely! To keep your mixed vegetables fresh, I recommend using a combination of frozen and fresh ingredients. If you’re using fresh vegetables like green onions, wrap them tightly in plastic wrap and store them in the fridge until you’re ready to use them. This helps preserve their crispness for your Homemade Cup Noodles.

What’s the best way to store assembled jars of Homemade Cup Noodles?
Very! You can refrigerate assembled jars for up to 4 days. Just make sure to tightly seal the lids to keep everything fresh. When you’re ready to enjoy, simply add boiling water to the jar, and wait for that delightful meal to come together in just 5 minutes!

Can I freeze the ingredients for my Homemade Cup Noodles?
Definitely! To extend the shelf life, you can freeze the dry components—like the noodles, mixed vegetables, and bouillon paste—in airtight bags for up to 2 months. When you’re ready to use them, simply thaw overnight in the refrigerator and follow the assembly instructions to prepare your hot dish.

What should I do if my noodles end up mushy?
No problem! If your noodles turn mushy, it’s likely they soaked for too long. To troubleshoot, I suggest sticking to the recommended soaking time of 5 minutes. If you prefer a firmer texture, reduce the soaking time, or monitor it closely while waiting for those delicious flavors to meld.

Are there any allergies I should consider for my Homemade Cup Noodles?
Absolutely! If you or someone you’re serving has food allergies, it’s important to choose safe alternatives. For example, if you’re allergic to soy, you might use coconut aminos instead of soy sauce. Always double-check your ingredient labels for potential allergens, especially for packaged items like noodles and bouillon paste.

Can I add protein to my Homemade Cup Noodles? How should I do it?
Very! You can easily incorporate protein such as cooked chicken, tofu, or edamame by adding it just before serving to maintain the right texture. Simply layer the protein in the jar with the other ingredients. Keeping it separate until you’re ready to eat helps ensure it retains its ideal tenderness once you add the hot water.

Homemade Cup Noodles

Irresistibly Tasty Homemade Cup Noodles You Can Customize

Homemade Cup Noodles offer a customizable, quick meal option for busy days, combining fresh ingredients with delicious flavors.
Prep Time 5 minutes
Resting Time 5 minutes
Total Time 10 minutes
Servings: 1 jar
Course: Lunch
Cuisine: Asian
Calories: 300

Ingredients
  

For the Base
  • 1 block instant ramen noodles like Ocean's Halo Organic Ramen
  • 1 cup mixed vegetables e.g., carrots, corn, or spinach
For the Broth
  • 1 tablespoon bouillon paste adjust based on salt preference
  • 1 tablespoon soy sauce low-sodium for a healthier option
For the Fresh Finish
  • 2 tablespoons green onions wrap in plastic wrap until ready to use

Equipment

  • wide-mouth mason jars

Method
 

Step-by-Step Instructions for Homemade Cup Noodles
  1. Gather all your ingredients: instant ramen noodles, mixed vegetables, bouillon paste, soy sauce, and fresh green onions. Use wide-mouth mason jars for easy layering.
  2. In your mason jar, first place a block of ramen noodles at the bottom. Layer mixed vegetables, a spoonful of bouillon paste, and a drizzle of soy sauce.
  3. Sprinkle fresh green onions generously on top of the layered ingredients for added freshness and flavor.
  4. Pour 1 ¼ cups of boiling water over the layered ingredients in the mason jar, ensuring everything is submerged.
  5. Seal the mason jar tightly and let it sit for 5 minutes for the noodles to soften and absorb flavors.
  6. After 5 minutes, remove the lid and stir to combine all the flavors. Your Homemade Cup Noodles are ready to enjoy!
  7. For a quick alternative, microwave your assembled jar loosely covered for 2 minutes, then stir well.

Nutrition

Serving: 1jarCalories: 300kcalCarbohydrates: 45gProtein: 10gFat: 5gSaturated Fat: 1gPolyunsaturated Fat: 1gMonounsaturated Fat: 3gSodium: 800mgPotassium: 500mgFiber: 4gSugar: 2gVitamin A: 250IUVitamin C: 10mgCalcium: 40mgIron: 2mg

Notes

Store assembled jars in the fridge for up to 4 days. You can freeze the dry ingredients for up to 2 months.

Tried this recipe?

Let us know how it was!

Delicious Eggs in Hash Brown Baskets for a Perfect Brunch

The sizzling sound of crispy hash browns being molded into small nests brings back vivid memories of weekend brunches at home. There’s something undeniably charming about Eggs in Hash Brown Baskets—a dish that transforms a classic breakfast into a stunning centerpiece. This recipe showcases the comforting crunch of golden hash browns cradling perfectly cooked eggs and gooey melted cheese, creating a delightful harmony of textures. Not only is it visually appealing, but it packs a protein-rich punch that will fuel your day. Whether you’re hosting a cozy brunch or simply indulging in a leisurely breakfast, these customizable baskets are a quick triumph that will impress family and friends alike. Ready to whip up this delightful dish and elevate your morning routine? Let’s dive into the delicious details!

Why make Eggs in Hash Brown Baskets?

Comforting Crunch: The golden, crispy hash browns serve as a delightful nest for the eggs, creating a texture that’s both satisfying and fun to eat.

Protein-Packed: Each serving is loaded with protein from eggs and cheese, making it an excellent choice for a hearty breakfast or brunch that keeps you energized.

Customizable Goodness: Feel free to add your favorite fillings like vegetables, meats, or different cheeses. Consider trying this with Feta Fried Eggs for an exciting twist!

Visual Appeal: These baskets are not just delicious; they’re a feast for the eyes and perfect for impressing guests at brunch gatherings.

Time-Saving Delight: Quick to prepare and bake, this dish can be ready in under an hour, meaning you’ll spend less time in the kitchen and more time enjoying your meal.

Crowd-Pleasing: Whether it’s a family breakfast or a brunch party, everyone will love digging into their own individual basket!

Eggs in Hash Brown Baskets Ingredients

For the Hash Brown Base

  • Hash Browns – Essential for structure and texture; fresh or thawed frozen works perfectly.
  • Olive Oil – Ensures even browning and enhances the crunchiness of the baskets.
  • Salt – For seasoning; adjust to taste depending on your preference.
  • Black Pepper – Adds a mild heat; freshly ground is recommended for the best flavor.

For the Egg & Cheese Filling

  • Eggs – Provide protein and creamy richness; use large eggs for optimal results.
  • Shredded Cheese – Adds flavor and creaminess; cheddar, mozzarella, or Swiss are great options.

Optional Toppings

  • Sliced Green Onions – Add a fresh, mild onion flavor for garnish and crunch.
  • Diced Tomatoes – These give a juicy pop and visual appeal; consider cherry tomatoes for sweetness.
  • Fresh Herbs – Such as parsley or chives for a fragrant finish and added flavor.

Feel free to customize your recipe to create the perfect Eggs in Hash Brown Baskets that will leave everyone asking for more!

Step‑by‑Step Instructions for Eggs in Hash Brown Baskets

Step 1: Preheat Oven
Begin by preheating your oven to 425°F (220°C). This is crucial for achieving perfectly crispy baskets. As it heats up, gather your ingredients and prepare your muffin tin. Having everything ready will make the process smoother and more enjoyable as you embark on creating these delightful Eggs in Hash Brown Baskets.

Step 2: Season Hash Browns
In a mixing bowl, combine your hash browns with a generous drizzle of olive oil, salt, and freshly ground black pepper. Toss everything together to ensure that each piece of hash brown is well-seasoned and coated with oil. This step will enhance the overall flavor and crunch of your hash brown baskets, setting the stage for a delicious brunch.

Step 3: Form Baskets
Lightly grease a muffin tin with non-stick spray or oil to prevent sticking. Take the seasoned hash brown mixture and press it firmly into each muffin cup, creating a nest shape. Aim for a thin, even layer to ensure the baskets bake evenly. Once formed, you’ll notice the potential for each crispy hash brown basket that will cradle your eggs perfectly.

Step 4: Bake Baskets
Place the muffin tin in your preheated oven and bake for 20-25 minutes. Keep an eye on them; you’re looking for a golden-brown color and crispy edges. The aroma will fill your kitchen, signaling that your hash brown baskets are on their way to becoming a delightful base for the Eggs in Hash Brown Baskets.

Step 5: Add Eggs & Cheese
Once the baskets are bubbly and golden, carefully remove them from the oven. Crack a large egg into each crispy hash brown basket, taking care not to overflow. Sprinkle a generous amount of shredded cheese over the top of each egg. The heat from the baskets will start to melt the cheese, enhancing the flavor of this breakfast masterpiece.

Step 6: Finish Baking
Return the muffin tin to the oven and bake for an additional 10-15 minutes. Keep an eye on the eggs; bake until the whites are set, and the yolks are cooked to your desired level of doneness. For runny yolks, aim for about 10 minutes; longer for fully cooked yolks. The smell of Eggs in Hash Brown Baskets will surely become irresistible.

Step 7: Serve
After baking, let the baskets cool slightly for easier handling. With a gentle touch, use a fork to carefully lift each basket out of the muffin tin. Garnish your Eggs in Hash Brown Baskets with optional toppings like sliced green onions or diced tomatoes for added flavor and presentation. Now, gather your loved ones and serve these delightful creations warm!

What to Serve with Eggs in Hash Brown Baskets?

Elevate your brunch experience with delightful accompaniments that enhance the joy of these crispy creations.

  • Fresh Fruit Salad: A medley of seasonal fruits offers a refreshing sweetness that balances the richness of the eggs and cheese. Each bite brings a burst of color and flavor to your plate.

  • Mixed Greens Salad: A light, zesty salad dressed in vinaigrette complements the warmth of the hash brown baskets, adding a crunchy texture and fresh flavors. Consider adding nuts for an extra crunch and protein.

  • Avocado Toast: Creamy avocado spread on toasted bread pairs perfectly with the crispy nests, offering healthy fats and a modern twist to your brunch table. Top with red pepper flakes for some heat!

  • Smoothies: A fruity smoothie made with bananas, spinach, or berries adds a nutritious boost, perfect for revitalizing your morning. The cold drink contrasts beautifully with the warm eggs, striking a delightful balance.

  • Bacon or Sausage Links: Crispy bacon or savory sausages offer a protein-packed upgrade that many brunch lovers crave. Their salty bite brings a familiar comfort to the meal, creating a well-rounded feast.

  • Herbed Yogurt Dip: A creamy yogurt dip infused with garlic and herbs provides a refreshing dip for your baskets. It’s an unexpected but satisfying option that adds a gourmet touch and keeps everything light.

Eggs in Hash Brown Baskets Variations

Feel free to get creative with this delightful dish and make it your own!

  • Meaty Addition: Add diced ham or crumbled bacon for a heartier meal that adds wonderful savory flavor.

  • Veggie Delight: Incorporate sautéed vegetables like spinach, mushrooms, or caramelized onions beneath the egg for a delicious boost of flavors.

  • Spicy Twist: Use pepper jack cheese instead of the usual cheddar to give your baskets a zesty kick that elevates each bite.

  • Lighten It Up: Swap in egg whites or a light egg mixture for a healthier option, perfect for those watching their calorie intake.

  • Herb Infusion: Mix fresh herbs such as parsley, chives, or basil into your egg for a refreshing herbal touch. This elevates the flavor while making it more visually appealing.

  • Cheese Fusion: Experiment with different cheeses to find your favorite; try goat cheese for a creamy tang or a blend of cheeses for a flavor bonanza. If you’re a cheese lover, consider mixing in some creamy feta to take it to the next level—think of the deliciousness found in Sweet Savory Brown!

  • Crunchy Toppers: For an added layer of texture, sprinkle some crushed tortilla chips or breadcrumbs on top before the final bake. This not only enhances flavor but also creates a satisfying crunch.

  • Flavor Boosters: Drizzle sriracha, hot sauce, or your favorite condiment over the top before serving for an extra burst of flavor that everyone will enjoy.

Each variation allows you to tailor this dish to your preferences, ensuring that every batch of Eggs in Hash Brown Baskets is uniquely delicious!

Expert Tips for Eggs in Hash Brown Baskets

  • Pack Firmly: Make sure to press the hash browns firmly into the muffin tin to create sturdy baskets; this prevents them from falling apart when filled.

  • Check Egg Doneness: Customize the egg doneness to your preference; for runny yolks, bake about 10 minutes longer for fully cooked ones.

  • Mix it Up: Don’t hesitate to switch up the fillings! Adding diced vegetables or different cheeses can enhance the flavor of your Eggs in Hash Brown Baskets.

  • Watch for Browning: Keep an eye on the hash brown baskets as they bake; you want them golden brown but not burnt for the perfect crunch.

  • Use Quality Cheese: Opt for high-quality shredded cheese for a richer flavor; freshly shredded cheese melts better than pre-shredded varieties.

  • Reheat for Crispiness: If making ahead, reheat the baskets in the oven rather than the microwave to preserve their delicious crispiness.

How to Store and Freeze Eggs in Hash Brown Baskets

Fridge: Store leftover Eggs in Hash Brown Baskets in an airtight container for up to 3 days. Keep them separate from any toppings to maintain texture.

Freezer: For longer storage, freeze the baked baskets individually wrapped in plastic wrap and placed in a freezer bag for up to 2 months.

Reheating: To reheat, bake frozen baskets directly from the freezer at 375°F (190°C) for about 15-20 minutes. This ensures the crispy texture is retained.

Make-Ahead Tip: Consider preparing the hash brown baskets in advance. You can store them in the fridge for up to 2 days or in the freezer, ready to be filled with eggs whenever you’re ready to enjoy your Eggs in Hash Brown Baskets.

Make Ahead Options

These Eggs in Hash Brown Baskets are perfect for busy home cooks looking to simplify their meal prep! You can prepare the hash brown baskets up to 3 days in advance by following the baking steps and storing them in an airtight container. To maintain their crispiness, allow the baskets to cool completely before refrigerating. When you’re ready to serve, simply crack an egg into each basket, sprinkle with cheese, and bake for an additional 10-15 minutes until the eggs reach your desired doneness. This make-ahead strategy not only saves you valuable time but ensures that you can enjoy a delightful, protein-rich breakfast without the morning rush!

Eggs in Hash Brown Baskets Recipe FAQs

How do I choose the right hash browns for this recipe?
Absolutely! You can use either freshly grated potatoes or thawed frozen hash browns. For the best result, look for hash browns that are golden and dry, avoiding those with excess moisture. If using fresh potatoes, ensure they are firm and without dark spots, as this guarantees texture in your baskets.

How should I store leftover Eggs in Hash Brown Baskets?
Very easy! Store any leftovers in an airtight container in the fridge for up to 3 days, keeping any toppings separate to maintain their crispness. If you want to enjoy them later, you can also freeze them, as detailed below.

Can I freeze Eggs in Hash Brown Baskets?
Of course! To freeze your baskets, allow them to cool completely first. Then individually wrap each basket in plastic wrap, followed by placing them in a freezer-safe bag. They can be stored in the freezer for up to 2 months. When you’re ready to indulge, bake them directly from frozen at 375°F (190°C) for 15-20 minutes.

What should I do if my hash brown baskets fall apart?
Oh no! If you find your baskets crumbling, make sure to press the hash browns firmly into the muffin tin to create a strong base. It also helps to ensure you’re using a good amount of oil to bind the potatoes together. If they do crumble, don’t worry—just enjoy the deliciousness in a bowl!

Are there any dietary considerations I should keep in mind?
Yes! If you or your guests have dietary restrictions, keep options open by using egg whites instead of whole eggs for a lighter alternative. If someone is avoiding dairy, consider using lactose-free cheese or skipping it altogether, and try adding extra veggies for flavor. Always check ingredients if allergies are a concern.

Can I customize the toppings on my Eggs in Hash Brown Baskets?
Absolutely! The more the merrier! Feel free to get creative with your toppings. Fresh herbs, diced tomatoes, or even hot sauce can create an exciting twist. For added flavor, consider mixing sautéed spinach or mushrooms into the egg mixture before filling the baskets.

Eggs in Hash Brown Baskets

Delicious Eggs in Hash Brown Baskets for a Perfect Brunch

Experience charming Eggs in Hash Brown Baskets, a delightful blend of crispy hash browns and perfectly cooked eggs.
Prep Time 15 minutes
Cook Time 30 minutes
Total Time 45 minutes
Servings: 4 baskets
Course: Breakfast
Cuisine: American
Calories: 280

Ingredients
  

For the Hash Brown Base
  • 2 cups Hash Browns fresh or thawed frozen
  • 2 tablespoons Olive Oil for even browning
  • 1 teaspoon Salt adjust to taste
  • 1/2 teaspoon Black Pepper freshly ground
For the Egg & Cheese Filling
  • 4 large Eggs for optimal results
  • 1 cup Shredded Cheese cheddar, mozzarella, or Swiss
Optional Toppings
  • 1/4 cup Sliced Green Onions for garnish
  • 1/2 cup Diced Tomatoes consider cherry tomatoes
  • 2 tablespoons Fresh Herbs such as parsley or chives

Equipment

  • Muffin Tin
  • Mixing Bowl

Method
 

Step‑by‑Step Instructions for Eggs in Hash Brown Baskets
  1. Preheat your oven to 425°F (220°C). Gather your ingredients and prepare your muffin tin.
  2. In a mixing bowl, combine hash browns with olive oil, salt, and pepper. Toss to coat evenly.
  3. Lightly grease a muffin tin and press the seasoned hash browns into each muffin cup to form nests.
  4. Bake the muffin tin for 20-25 minutes until golden brown and crispy.
  5. Remove from oven and crack a large egg into each hash brown basket, adding shredded cheese on top.
  6. Return to the oven and bake for an additional 10-15 minutes until eggs are cooked to your liking.
  7. Let the baskets cool slightly, then lift each out with a fork. Garnish and serve warm.

Nutrition

Serving: 1basketCalories: 280kcalCarbohydrates: 20gProtein: 12gFat: 18gSaturated Fat: 7gPolyunsaturated Fat: 2gMonounsaturated Fat: 9gCholesterol: 200mgSodium: 450mgPotassium: 350mgFiber: 2gSugar: 1gVitamin A: 500IUVitamin C: 3mgCalcium: 200mgIron: 1mg

Notes

Customize with your favorite fillings for a personalized touch.

Tried this recipe?

Let us know how it was!

Irresistible Churro Pancakes with Sweet Cinnamon Crunch

As I flipped through an old cookbook, a wave of nostalgia washed over me—those cherished childhood weekends filled with the smell of fresh pancakes dancing in the air. Today, I’m bringing that beloved memory to life with my Churro Pancakes, which seamlessly blend the comforting warmth of breakfast with a hint of dessert delight. Imagine sinking your teeth into fluffy buttermilk pancakes, each bite generously coated in crunchy cinnamon sugar. Not only are these pancakes a fun and creative twist on a classic, but they also come together quickly—perfect for those busy mornings or lazy brunches with friends. With an indulgent drizzle of chocolate sauce or a splash of condensed milk, these pancakes turn any ordinary day into a celebration. Ready to whip up a batch and share a moment of joy? Let’s dive in!

Why Are Churro Pancakes So Irresistible?

Indulgent Flavors: The blend of fluffy buttermilk pancakes and sweet cinnamon sugar elevates breakfast into a dessert experience you won’t forget.

Quick and Easy: With simple ingredients and straightforward steps, you can whip these up in no time, making them ideal for those bustling mornings or relaxed brunch gatherings.

Crowd-Pleaser: Whether for your family or a gathering of friends, these churro pancakes always impress, reminding everyone of sweet childhood treats.

Versatile Toppings: From a luxurious drizzle of chocolate sauce to a generous scoop of whipped cream, these pancakes can be customized to suit every taste.

Comfy Vibes: Each bite transports you to a cozy café, making these pancakes the perfect choice for anyone longing for a taste of comfort.

Craving more delicious pancake ideas? Check out my Nutella Pancakes Blend or dive into these delightful Chocolate Chip Pancakes.

Churro Pancakes Ingredients

• • Let’s gather the essentials!

For the Pancake Batter

  • All-Purpose Flour – Provides structure and texture to the pancakes; can be exchanged with gluten-free flour for a gluten-free version.
  • Sugar – Adds sweetness to the pancakes and balances flavors; use brown sugar for a deeper taste.
  • Ground Cinnamon – Contributes warmth and spice, enhancing the churro experience; feel free to adjust to your taste for a stronger cinnamon kick.
  • Baking Powder – The leavening agent that ensures fluffiness; check for freshness for best results.
  • Salt – A necessary ingredient to enhance the overall flavor; don’t skip it!
  • Buttermilk – Enriches the pancakes, making them moist; you can substitute it with any milk, dairy or plant-based.
  • Egg – Serves to bind ingredients and add protein; use a flax egg for a vegan alternative if desired.
  • Vegetable Oil – Keeps pancakes moist and aids in cooking; melted coconut oil or butter can work as substitutes.
  • Vanilla Extract – Adds a delightful depth of flavor; interchangeably use vanilla paste if you have it on hand.

For Coating & Topping

  • Unsalted Butter (optional) – Helps the cinnamon sugar adhere while adding a rich flavor; omit if you prefer dairy-free.
  • Cinnamon Sugar – A delightful mixture of sugar and cinnamon to coat the pancakes; you can easily make your own or buy pre-mixed.
  • Chocolate Sauce or Condensed Milk – These luxurious toppings provide that sweet finish; consider using fresh fruit or whipped cream for variety.

Grab these ingredients, and let’s treat ourselves to a sensational breakfast with these heavenly Churro Pancakes!

Step‑by‑Step Instructions for Churro Pancakes

Step 1: Prepare the Dry Ingredients
In a large mixing bowl, whisk together 1 cup of all-purpose flour, 2 tablespoons of sugar, 1.5 teaspoons of ground cinnamon, 2 teaspoons of baking powder, and a pinch of salt. This mixture will form the dry foundation of your Churro Pancakes. Ensure there are no lumps; the flour should be light and airy, ready to blend with the wet ingredients.

Step 2: Mix the Wet Ingredients
In a separate medium bowl, combine 1 cup of buttermilk, 1 large egg, 2 tablespoons of vegetable oil, and 1 teaspoon of vanilla extract. Whisk these ingredients together until fully blended and smooth. The wet mixture will enrich the pancakes, making them moist and tender, so take a moment to achieve a uniform consistency.

Step 3: Combine Wet and Dry Mixtures
Gently pour the wet mixture into the bowl with your dry ingredients, using a spatula to fold them together. Stir just until incorporated—be careful not to overmix, as a few lumps are perfectly fine. This ensures your Churro Pancakes remain fluffy, giving them that delightful texture we all love.

Step 4: Preheat the Skillet
Heat a nonstick skillet or griddle over medium-low heat, allowing it to warm for about 2–3 minutes. Once ready, lightly grease the surface with a drizzle of oil or a small pat of butter. You should hear a soft sizzle when the batter hits the pan—this is the sound of perfection in the making!

Step 5: Cook the Pancakes
Pour scant ¼ cup of batter onto the skillet for each pancake. Cook for about 2 minutes, or until bubbles form on the surface and the edges look set. Flip gently with a spatula and cook for another minute or so, until golden brown. The pancakes should be fluffy and puffy, enticing you with their irresistible aroma.

Step 6: Coat in Cinnamon Sugar
Mix ¼ cup of sugar with ½ teaspoon of cinnamon in a shallow dish for the finishing touch. After cooking each pancake, brush it lightly with melted butter, then dredge it in the cinnamon sugar mixture. This creates that signature churro crunch, elevating your Churro Pancakes into a delightful treat.

Step 7: Serve Warm with Toppings
Serve your scrumptious Churro Pancakes immediately while they’re warm. Drizzle with chocolate sauce or condensed milk, or add fresh fruit or whipped cream for an extra touch of indulgence. Each bite invites you to savor the sweet flavors and cozy memories wrapped up in these fabulous pancakes.

Churro Pancakes Variations & Substitutions

Feel free to let your creativity shine and make these Churro Pancakes your own with these delightful twists!

  • Gluten-Free: Substitute all-purpose flour with a gluten-free blend to enjoy these pancakes without gluten.

  • Dairy-Free: Swap buttermilk with any plant-based milk like almond or coconut milk for a dairy-free delight.

  • Vegan: Replace the egg with a flax egg (1 tablespoon flaxseed meal mixed with 2.5 tablespoons water) for a completely vegan pancake.

  • Brown Sugar Boost: Use brown sugar instead of white for a deeper flavor that enhances the cinnamon goodness.

  • Cinnamon-Raisin: Fold in a handful of raisins or even chocolate chips for a sweet and chewy texture twist, reminiscent of dessert.

  • Waffle Transformation: Just reduce the milk to 1 cup, and pour the batter into a waffle maker for an exciting spin on classic waffles.

  • Spicy Kick: Add a pinch of cayenne pepper to the cinnamon sugar for those who enjoy a bit of heat alongside the sweet.

  • Flavor Infusion: Experiment with different extracts like almond or orange for a unique flavor twist that complements the cinnamon.

Feeling inspired? You might also want to check out my rich Nutella Pancakes Blend or treat yourself to scrumptious Chocolate Chip Pancakes for more delicious breakfast options!

Make Ahead Options

These Churro Pancakes are a fantastic choice for meal prep, making breakfast a breeze on busy mornings! You can prepare the pancake batter up to 24 hours in advance and store it in the refrigerator in an airtight container. Additionally, mix the cinnamon sugar topping ahead of time and keep it in a separate container to maintain its crunch. When you’re ready to serve, simply heat your skillet, pour the batter, and cook the pancakes as instructed—just a quick flip and a dusting of cinnamon sugar will have them tasting just as delicious as when freshly made! Enjoy the time saved while delighting your family with this sweet breakfast twist!

Storage Tips for Churro Pancakes

Room Temperature: Store leftover churro pancakes on a plate, covered loosely with foil, for up to 2 hours. This helps maintain their warmth if you plan to eat them soon.

Fridge: Keep any leftover pancakes in an airtight container in the refrigerator for up to 3 days. This will help preserve their moistness and flavor.

Freezer: Freeze churro pancakes individually, separated by parchment paper, in a freezer-safe bag for up to 2 months. This way, you can enjoy a quick breakfast any time you crave them!

Reheating: Reheat pancakes in a toaster or skillet. For the best results, a medium-low setting works great—just enough to warm through without drying them out. Enjoy the delightful flavors again!

Expert Tips for Churro Pancakes

  • Don’t Overmix: Ensure you stir the batter just until combined. Overmixing can lead to tough pancakes instead of light and fluffy churro pancakes.

  • Preheat Properly: Allow your skillet to preheat on medium-low heat for even cooking. A hot pan can burn the pancakes, while a cool one won’t cook them through.

  • Use Fresh Ingredients: Check the expiration dates on your baking powder and cinnamon. Fresh ingredients are key for fluffy pancakes and maximum flavor.

  • Adjust Cooking Time: Every stove is different; watch for bubbles forming on the surface. Flipping too soon might result in undercooked pancakes.

  • Variety in Toppings: Feel free to change it up! Consider adding nuts, fruit, or even a scoop of ice cream for a dessert twist on your churro pancakes.

What to Serve with Decadent Churro Pancakes?

The perfect pairing can elevate your Churro Pancakes from delightful to unforgettable, helping to create a scrumptious breakfast experience.

  • Fresh Fruit Salad: A mix of seasonal berries and sliced bananas adds a refreshing burst of flavor and natural sweetness that complements the rich pancakes.

  • Whipped Cream: Light and airy, whipped cream provides a luscious contrast to the crunchy cinnamon sugar topping, enhancing indulgence.

  • Maple Syrup: Drizzle real maple syrup over the pancakes for a classic sweet touch that balances the cinnamon, creating comfort in every bite.

  • Chocolate Sauce: For the chocolate lovers, a warm chocolate sauce creates a decadent layer that takes these pancakes to dessert territory.

  • Vanilla Ice Cream: A scoop of vanilla ice cream melts beautifully atop warm pancakes, transforming them into a delicious dessert that’s perfect after any meal.

  • Caramel Sauce: Drizzling rich caramel sauce over your Churro Pancakes adds a sweet, buttery counterpoint to the cinnamon, making every bite irresistible.

  • Chai Latte: Sip on a warm chai latte alongside your pancakes for a cozy pairing that complements the spicy notes of cinnamon.

  • Iced Coffee: For a refreshing contrast, serve your pancakes with a cold brew or iced coffee, balancing the sweetness with a bold kick.

  • Cinnamon Butter: Whip softened butter with sugar and extra cinnamon for a sweet spread that echoes the churro theme and adds creaminess with each bite.

Churro Pancakes Recipe FAQs

What type of flour should I use for churro pancakes?
All-purpose flour is perfect for churro pancakes, providing the right structure and texture. If you need a gluten-free option, feel free to substitute it with a gluten-free flour blend—many work wonderfully!

How should I store leftover churro pancakes?
For a quick fix, keep your leftover churro pancakes on a plate covered loosely with foil for up to 2 hours at room temperature. If you want to store them longer, place them in an airtight container in the fridge for up to 3 days. Just reheat them in a skillet or toaster before serving for the best flavor!

Can I freeze churro pancakes?
Absolutely! To freeze churro pancakes, let them cool completely first. Then, place the pancakes between layers of parchment paper and store them in a freezer-safe bag. They can last for up to 2 months. When you’re ready to enjoy them again, just reheat straight from the freezer—it’s as easy as that!

Why did my churro pancakes turn out dense?
A common reason pancakes can turn out dense is overmixing the batter. When combining wet and dry ingredients, stir just until you see no dry flour—lumps are perfectly fine! Also, check that your baking powder is fresh; old leavening agents can greatly affect the fluffiness.

Are churro pancakes suitable for vegans?
Yes, you can easily make churro pancakes vegan! Replace the egg with a flax egg (1 tablespoon of ground flaxseed mixed with 2.5 tablespoons of water, set for about 5 minutes) and substitute buttermilk with plant-based milk like almond or soy. Just ensure any optional toppings like butter are also dairy-free.

Churro Pancakes

Irresistible Churro Pancakes with Sweet Cinnamon Crunch

These Churro Pancakes combine the comforting warmth of breakfast with dessert delight, each bite coated in crunchy cinnamon sugar.
Prep Time 15 minutes
Cook Time 10 minutes
Total Time 25 minutes
Servings: 4 pancakes
Course: Breakfast
Cuisine: American
Calories: 190

Ingredients
  

For the Pancake Batter
  • 1 cup all-purpose flour can be exchanged with gluten-free flour
  • 2 tablespoons sugar use brown sugar for deeper taste
  • 1.5 teaspoons ground cinnamon adjust to taste for a stronger kick
  • 2 teaspoons baking powder ensure freshness for best results
  • 1 pinch salt enhances overall flavor
  • 1 cup buttermilk substitute with any milk
  • 1 large egg use flax egg for vegan option
  • 2 tablespoons vegetable oil melted coconut oil or butter can substitute
  • 1 teaspoon vanilla extract or use vanilla paste
For Coating & Topping
  • 2 tablespoons unsalted butter optional, for adherence
  • 1/4 cup cinnamon sugar make your own or buy pre-mixed
  • 1 cup chocolate sauce or condensed milk can substitute with fresh fruit or whipped cream

Equipment

  • Mixing bowls
  • whisk
  • spatula
  • Nonstick skillet

Method
 

Preparation Steps
  1. In a large mixing bowl, whisk together the dry ingredients: flour, sugar, ground cinnamon, baking powder, and salt.
  2. In a separate medium bowl, combine the wet ingredients: buttermilk, egg, vegetable oil, and vanilla extract.
  3. Gently fold the wet ingredients into the dry ingredients until incorporated. Do not overmix.
  4. Preheat a nonstick skillet over medium-low heat and lightly grease it.
  5. Pour scant ¼ cup of batter for each pancake. Cook until bubbles form and edges look set; flip and cook until golden.
  6. Mix sugar and cinnamon for coating. Brush pancakes with melted butter and dredge in cinnamon sugar.
  7. Serve warm with toppings like chocolate sauce or condensed milk.

Nutrition

Serving: 1pancakeCalories: 190kcalCarbohydrates: 29gProtein: 4gFat: 7gSaturated Fat: 2gPolyunsaturated Fat: 1gMonounsaturated Fat: 4gCholesterol: 30mgSodium: 200mgPotassium: 220mgSugar: 8gVitamin A: 150IUCalcium: 50mgIron: 1mg

Notes

Ensure to stir the batter just until combined and use fresh ingredients for the best results.

Tried this recipe?

Let us know how it was!

Deliciously Fluffy Apple Yogurt Pancakes for Healthy Mornings

As I stood by the stove one morning, the comforting aroma of cinnamon and warm apples wafted through my kitchen, casting a cozy spell that instantly uplifted my spirits. These Fluffy Apple Yogurt Pancakes are not just any breakfast option; they’re a delightful fusion of hearty nutrition and irresistible flavor. What I love most about this recipe is its health-conscious twist—it’s perfect for busy mornings with a prep time of under 30 minutes. Whether you’re a culinary novice or a seasoned pro, these pancakes offer a light, fluffy experience that can easily be customized to your taste. Picture them drizzled with maple syrup or topped with fresh fruit for a satisfying breakfast that doesn’t compromise on health. Ready to whip up something delicious? Let’s dive into this mouthwatering journey!

Why are Apple Yogurt Pancakes a Must-Try?

Nutritious Twist: The fluffy texture of these pancakes combined with the natural sweetness of apples makes for a wholesome breakfast that fuels your day.

Quick to Make: Whip them up in under 30 minutes—perfect for busy mornings when you still crave something delicious.

Endless Customization: Feel free to experiment! You can add nuts, substitute with whole wheat flour, or even go vegan.

Comfort Food Redefined: Each bite is a warm hug of flavor, reminiscent of cozy breakfasts that satisfy your cravings.

Family-Friendly Appeal: Kids and adults alike will love these pancakes topped with fresh fruit or a drizzle of maple syrup—a guaranteed crowd-pleaser!

For more delightful breakfast ideas, check out my Nutella Pancakes Blend or indulge in some Chocolate Chip Pancakes.

Apple Yogurt Pancakes Ingredients

For the Batter

  • All-Purpose Flour – Provides structure; substitution: Whole wheat flour can be used for added nutrition.
  • Plain Yogurt (Greek or Regular) – Adds moisture and fluffiness; note: Greek yogurt creates a thicker pancake, while regular gives a lighter texture.
  • Medium Apple – Adds natural sweetness and tartness; preparation: Peel and grate for best results.
  • Large Eggs – Binds ingredients together and enhances richness.
  • Sugar (optional) – Enhances sweetness; adjustment: Can be reduced or omitted since apples provide natural sweetness.
  • Baking Powder – Helps pancakes rise for a fluffy texture.
  • Baking Soda – Works with yogurt’s acidity for leavening.
  • Cinnamon – Imparts warm flavor; optional: Add nutmeg for an extra spice twist.
  • Salt – Balances sweetness.
  • Vegetable Oil or Melted Butter – Adds moisture and flavor.
  • Cooking Spray or Oil – For greasing the skillet.

With these ingredients, you’ll be on your way to delightful Apple Yogurt Pancakes that will brighten your mornings!

Step‑by‑Step Instructions for Apple Yogurt Pancakes

Step 1: Mix Dry Ingredients
In a medium bowl, whisk together 1 cup of all-purpose flour, 1 teaspoon of baking powder, 1/2 teaspoon of baking soda, 1 teaspoon of cinnamon, and a pinch of salt until well combined. Look for a uniform blend to ensure even rising. This mix will provide the foundation for your Apple Yogurt Pancakes’ fluffy texture, so take your time to get it right.

Step 2: Prepare Wet Ingredients
In a separate bowl, combine 3/4 cup of plain yogurt, 2 large eggs, and 1 tablespoon of sugar, if desired. Whisk these together until the mixture is smooth and creamy, which adds moisture to your pancakes. The yogurt’s tanginess will balance beautifully with the sweetness of the apples, ensuring a delightful flavor in every bite.

Step 3: Incorporate Grated Apple
Peel and grate one medium apple, then fold it gently into the wet mixture. Make sure the apple is evenly distributed to maximize its delightful flavor throughout the batter. As you fold, enjoy the sweet aroma that fills your kitchen, creating anticipation for your homemade Apple Yogurt Pancakes.

Step 4: Combine Mixtures
Gradually fold the dry ingredient mixture into the wet mixture, stirring just until combined. Be careful not to over-mix; a few lumps are perfectly fine. This gentle approach ensures your pancakes will rise beautifully on the griddle, resulting in a light and fluffy texture that will make your breakfast memorable.

Step 5: Add Oil
Now, add 2 tablespoons of vegetable oil or melted butter to the batter and stir until just incorporated. This addition will enhance the moisture and flavor, giving your pancakes that irresistible richness. Allow your batter to rest for a few minutes—it helps create a softer pancake when cooking.

Step 6: Heat the Pan
Preheat a non-stick skillet over medium heat and lightly grease it with cooking spray or a bit of oil. This temperature is crucial for achieving that golden-brown crust while keeping the inside tender. You’ll know it’s ready when a few drops of water skitter across the surface.

Step 7: Cook Pancakes
Pour 1/4 cup of batter onto the hot skillet for each pancake, spacing them apart to allow for spreading. Cook the pancakes until bubbles form on the surface and the edges appear set, approximately 2–3 minutes. This visual cue signals when it’s almost time to flip your Apple Yogurt Pancakes.

Step 8: Flip
Carefully flip each pancake using a spatula and continue cooking for another 2–3 minutes, until they turn golden brown. Keep an eye on them; this step is crucial for achieving that delightful color and texture that makes everyone excited for breakfast.

Step 9: Repeat
Continue the process with the remaining batter, greasing the skillet as necessary to prevent sticking. Be patient, and enjoy the wonderful aroma drifting through your kitchen as you whip up the rest of your fluffy Apple Yogurt Pancakes.

Step 10: Serve
Once all pancakes are cooked, transfer them to a warm plate and serve immediately. Drizzle with maple syrup, top with fresh fruit, or enjoy them plain. The warm, fluffy Apple Yogurt Pancakes are ready to bring joy to your breakfast table!

Tips for the Best Apple Yogurt Pancakes

  • Fresh Ingredients: Use only fresh, crisp apples for the best flavor and texture in your pancakes. Older apples may lead to a mushy result.
  • Avoid Over-mixing: Stir your batter gently until just combined. Over-mixing can yield dense pancakes, while a few lumps are perfectly fine for fluffiness.
  • Right Temperature: Preheat your skillet to medium heat to ensure even cooking. Too high can burn the pancakes and leave the insides raw.
  • Batch Cooking: If making in batches, keep cooked pancakes warm in a preheated oven set at about 200°F (93°C). This keeps them fluffy until serving.
  • Flavor Variations: Experiment with yogurt flavors—like vanilla or honey—for a fun twist on the classic Apple Yogurt Pancakes.

What to Serve with Apple Yogurt Pancakes?

Start your day on a flavorful note by complementing these light, fluffy pancakes with tasty and nutritious sides that elevate your breakfast experience.

  • Fresh Berry Medley: Bright, tangy berries add freshness and nutrition, balancing the sweetness of the pancakes beautifully.
  • Maple Syrup Drizzle: A classic pairing, a warm drizzle of pure maple syrup enhances the pancake’s natural sweetness while adding a rich, comforting touch.
  • Creamy Yogurt Topping: A dollop of Greek yogurt provides protein and creaminess, which complements the fluffy texture, making each bite more satisfying.
  • Nutty Granola Crunch: Sprinkle some crunchy granola on top or on the side for added texture and a nutty flavor that pairs well with the apple and cinnamon.
  • Scrambled Eggs: Light and fluffy scrambled eggs add a protein boost, making your breakfast more filling and well-rounded.
  • Herbal Tea or Fresh Juice: A fragrant herbal tea or a refreshing glass of orange juice can cleanse your palate, complementing the rich flavors of your pancakes.

Each of these accompaniments brings something special to the table, ensuring a delightful breakfast that’s not only delicious but also nourishing!

Make Ahead Options

These Fluffy Apple Yogurt Pancakes are a fantastic choice for meal prep enthusiasts! You can prepare the batter up to 24 hours in advance by mixing the dry ingredients and keeping them stored in an airtight container, while the wet ingredients (yogurt, eggs, and grated apple) can be refrigerated. To maintain quality and freshness, keep them separate until you’re ready to cook. When you’re ready to enjoy your pancakes, simply combine the mixtures, add the oil, and proceed with cooking as usual. This way, you’ll have a warm and delicious breakfast ready in no time, perfect for busy mornings when you crave something delightful!

Storage Tips for Apple Yogurt Pancakes

  • Fridge: Store leftover pancakes in an airtight container for up to 3-4 days. Be sure to separate layers with parchment paper to prevent sticking.
  • Freezer: Freeze pancakes in a single layer on a baking sheet, then transfer to a resealable bag for up to 3 months. This way, they stay fresh and delicious for future breakfasts.
  • Reheating: To reheat, place pancakes in a toaster or microwave. If using a microwave, heat in short intervals to prevent them from becoming tough. Enjoy your Apple Yogurt Pancakes as if they were just made!
  • Make-Ahead: You can prepare the batter the night before and store it in the fridge. Just give it a good stir before cooking for fluffy results.

Apple Yogurt Pancakes Variations

Feel free to let your creativity shine as you customize these delightful pancakes with these fun and tasty variations!

  • Whole Wheat Twist: Substitute all-purpose flour with whole wheat flour for added nutrition and a hearty texture. A wonderful way to incorporate more fiber into your breakfast routine!

  • Vegan Delight: For a plant-based option, replace eggs with flax eggs (1 tablespoon flaxseed meal mixed with 2.5 tablespoons water) and use dairy-free yogurt. This ensures no one misses out on the fluffy goodness!

  • Nutty Addition: Fold in some chopped walnuts or pecans for a delightful crunch and an extra layer of flavor. The nuttiness pairs beautifully with the sweetness of the apples!

  • Seasonal Fruit Swap: Try swapping apples for your favorite seasonal fruits like pears, bananas, or even berries. Each choice brings a unique flavor while keeping that delightful pancake goodness intact.

  • Cinnamon Spice Dream: Boost the warm aroma by adding a pinch of nutmeg or allspice along with the cinnamon. This creates a comforting, cozy vibe, perfect for chilly mornings.

  • Chocolate Chip Temptation: For a sweet twist, fold in chocolate chips along with the batter—because who says pancakes can’t be a little indulgent?

  • Savory Style: Add crumbled feta cheese or spinach for a savory pancake variation, offering a delightful breakfast with a twist.

For more delicious breakfast ideas to complement your mornings, don’t forget to check out these mouthwatering recipes: Apple Crisp Cinnamon or perhaps treat yourself to some lovely Nutella Pancakes Blend!

Apple Yogurt Pancakes Recipe FAQs

What type of apples should I use for Apple Yogurt Pancakes?
Absolutely! Using fresh, crisp apples like Granny Smith or Honeycrisp is best. They not only add natural sweetness but also maintain their texture in the pancakes. Look for apples without dark spots or blemishes for optimal flavor.

How should I store leftover Apple Yogurt Pancakes?
Sure thing! Store your leftover pancakes in an airtight container in the fridge for up to 3-4 days. To prevent them from sticking together, I recommend separating layers with parchment paper. This way, they’ll be ready for a quick breakfast whenever you need them!

Can Apple Yogurt Pancakes be frozen?
Yes, indeed! To freeze, lay the cooked pancakes in a single layer on a baking sheet and place them in the freezer for about an hour. Once frozen, transfer them to a resealable bag for up to 3 months. When you’re ready to enjoy, simply reheat them in a toaster or microwave—it’s that easy!

What if my pancake batter is too thick or too thin?
Very common! If your batter is too thick, try adding a splash of milk or water, a tablespoon at a time, until you reach a pourable consistency. If it’s too thin, just sprinkle in a bit more flour to thicken it up. Remember, a few lumps in the batter are perfectly okay; do your best not to overmix!

Are Apple Yogurt Pancakes suitable for people with dietary restrictions?
Sure! For a healthier twist, you can substitute whole wheat flour for all-purpose flour to boost the fiber content. If you have egg allergies, flax eggs (1 tablespoon of flaxseed meal mixed with 2.5 tablespoons of water) work well. Additionally, you can use plant-based yogurt for a vegan version. Always double-check ingredient labels for allergies.

Apple Yogurt Pancakes

Deliciously Fluffy Apple Yogurt Pancakes for Healthy Mornings

These Apple Yogurt Pancakes are a nutritious start to your day, combining apples and yogurt for a delightful breakfast.
Prep Time 15 minutes
Cook Time 15 minutes
Resting Time 5 minutes
Total Time 35 minutes
Servings: 4 pancakes
Course: Breakfast
Cuisine: American
Calories: 300

Ingredients
  

For the Batter
  • 1 cup All-Purpose Flour Substitution: Whole wheat flour can be used for added nutrition.
  • 3/4 cup Plain Yogurt Greek or Regular yogurt adds moisture and fluffiness.
  • 1 medium Apple Peeled and grated for best results.
  • 2 large Eggs Enhances richness and binds ingredients.
  • 1 tablespoon Sugar Optional; can be reduced or omitted.
  • 1 teaspoon Baking Powder Helps pancakes rise for a fluffy texture.
  • 1/2 teaspoon Baking Soda Works with yogurt's acidity for leavening.
  • 1 teaspoon Cinnamon Optional: Add nutmeg for extra spice.
  • 1 pinch Salt Balances sweetness.
  • 2 tablespoons Vegetable Oil or Melted Butter Adds moisture and flavor.
  • Cooking Spray or Oil For greasing the skillet.

Equipment

  • Mixing bowls
  • whisk
  • Skillet
  • spatula

Method
 

Step-by-Step Instructions
  1. In a medium bowl, whisk together all-purpose flour, baking powder, baking soda, cinnamon, and salt until well combined.
  2. In a separate bowl, combine yogurt, eggs, and sugar (if desired). Whisk until the mixture is smooth and creamy.
  3. Peel and grate the apple, then fold it into the wet mixture.
  4. Gradually fold the dry mixture into the wet mixture without over-mixing.
  5. Add vegetable oil or melted butter to the batter and stir until just incorporated.
  6. Preheat a non-stick skillet over medium heat and lightly grease it.
  7. Pour batter onto the skillet for each pancake, cooking until bubbles form on the surface.
  8. Carefully flip each pancake and cook until golden brown.
  9. Repeat with remaining batter, greasing the skillet as necessary.
  10. Serve immediately with maple syrup, fresh fruit, or plain.

Nutrition

Serving: 2pancakesCalories: 300kcalCarbohydrates: 45gProtein: 10gFat: 10gSaturated Fat: 3gPolyunsaturated Fat: 2gMonounsaturated Fat: 4gCholesterol: 70mgSodium: 300mgPotassium: 300mgFiber: 2gSugar: 5gVitamin A: 50IUVitamin C: 3mgCalcium: 150mgIron: 1mg

Notes

Use fresh ingredients for the best flavor and texture. Avoid over-mixing to preserve fluffiness. You can prepare batter ahead of time and store it in the fridge.

Tried this recipe?

Let us know how it was!

Delicious Greek Yogurt Bagels for a Healthy Breakfast Boost

As the smell of warm bagels drifts through your kitchen, you realize that breakfast can truly be the highlight of your day. Enter my High-Protein Greek Yogurt Bagels—a delightful revelation that will revolutionize your morning routine! Not only are these bagels simple to whip up, but each one is also packed with over 9 grams of protein, perfect for fueling those busy mornings. Whether you savor them plain or dress them up with your favorite toppings, they promise to be a comforting, homemade option that’s far superior to any drive-thru fare. Curious about how easy it is to make these chewy delights? Let’s dive into this mouthwatering recipe!

Why Should You Make Greek Yogurt Bagels?

Deliciously Simple: Creating these bagels requires minimal ingredients and no fancy equipment. Just mix, shape, and bake!
Protein Powerhouse: Each bagel packs a hefty 9 grams of protein, keeping you satisfied throughout your day.
Customizable Delight: Feel free to experiment with toppings like Everything bagel seasoning or fresh herbs for a personal twist.
Guilt-Free Indulgence: With fewer calories than traditional options, these bagels are a wholesome alternative that won’t derail your healthy eating goals.
Quick to Satisfy: They bake in just 22-25 minutes, perfect for busy mornings on the go! Whether enjoyed plain or topped with cream cheese, these bagels outperform any fast food breakfast. Ready to treat yourself?

Greek Yogurt Bagels Ingredients

For the Bagels

  • All-Purpose Flour – Provides structure and chewiness; substitute with whole wheat flour for added nutrients.
  • Baking Powder – A leavening agent that eliminates the need for yeast, making preparation easier.
  • Salt – Enhances overall flavor.
  • Greek Yogurt – Adds moisture and high protein content, aiming for a thick yogurt for optimal results.
  • Egg (for egg wash) – Gives your bagels a shiny finish when baked.

Optional Toppings

  • Everything Bagel Seasoning – A fantastic blend to elevate your bagels’ flavor profile.
  • Cinnamon – Perfect for a sweet twist; add it to the dough or sprinkle it on top.
  • Shredded Cheese – Adds a savory touch and melts beautifully on top.
  • Garlic & Herbs – Infuse an aromatic experience that complements the bagels wonderfully.
  • Chocolate Chips – For a sweet treat that’s still high in protein, perfect for a breakfast twist.

With these simple ingredients, your Greek Yogurt Bagels will not only be nutritious but also irresistibly delicious! Dive into this wholesome delight and enjoy a homemade breakfast that’s truly satisfying!

Step‑by‑Step Instructions for Greek Yogurt Bagels

Step 1: Preheat & Prepare
Begin by preheating your oven to 400°F (200°C) and lining a baking sheet with parchment paper. This ensures your Greek Yogurt Bagels bake evenly and don’t stick. Take a moment to gather all your ingredients and equipment, setting the stage for this delightful baking experience.

Step 2: Mix Dry Ingredients
In a large mixing bowl, whisk together 2 cups of all-purpose flour, 1 tablespoon of baking powder, and 1 teaspoon of salt until well combined. This step is crucial as it ensures the leavening agent is evenly distributed throughout the flour, preparing your bagels for a perfect rise. If you’re feeling adventurous, mix in a pinch of cinnamon for a sweet twist.

Step 3: Incorporate Yogurt
Add 1 cup of Greek yogurt to the flour mixture, using a spatula or your hands to blend until a shaggy dough forms. Knead the dough briefly in the bowl or on a lightly floured surface, approximately 1–2 minutes, until it’s smooth and slightly elastic. This high-protein base is what makes your Greek Yogurt Bagels so delicious.

Step 4: Shape the Bagels
Divide your dough into four equal portions, rolling each portion into a ball. Then, use your fingers to poke a hole in the center of each ball, gently expanding the hole to form a bagel shape. Place the formed bagels onto the prepared baking sheet, ensuring they have enough space to rise without touching.

Step 5: Egg Wash & Toppings
In a small bowl, whisk one egg to create an egg wash. Brush each bagel lightly with the egg wash to give them a beautiful golden finish as they bake. Feel free to sprinkle your choice of toppings, like Everything bagel seasoning or shredded cheese, generously on top to enhance their flavor and appearance.

Step 6: Bake the Bagels
Carefully place the baking sheet in the preheated oven, and bake the Greek Yogurt Bagels for 22-25 minutes. Keep an eye on them, and they are ready when they’re golden brown and slightly firm to the touch. The delightful aroma filling your kitchen will let you know they’re close to done!

Step 7: Cool & Serve
Once baked to perfection, remove the bagels from the oven and let them cool on a wire rack for about 5–10 minutes. This cooling period allows the bagels to firm up nicely, making them easier to slice. Once cooled, cut your Greek Yogurt Bagels and serve them with cream cheese or your favorite toppings for an indulgent breakfast treat.

What to Serve with Greek Yogurt Bagels

Embrace the warmth of a delightful breakfast as you explore my favorite pairings to elevate your Greek yogurt bagels!

  • Creamy Avocado Spread: This luscious, buttery topping adds a rich texture and healthy fats, making it the perfect partner. Spread it generously over your bagel for a satisfying bite.

  • Fresh Tomato Slices: Juicy, ripe tomatoes offer a burst of freshness that brightens each bite. Their acidity perfectly balances the doughy bagel.

  • Smoked Salmon: The savory, smoky flavor of salmon makes for a classic pairing with bagels. Add a touch of cream cheese to create an indulgent breakfast.

  • Herbed Cream Cheese: Blend cream cheese with fresh herbs for an aromatic spread that adds depth and flavor, enhancing the overall experience.

  • Sautéed Spinach: This earthy addition brings a touch of greens to your plate. Toss with garlic and olive oil for an extra boost of flavor.

  • Fruit Salad: A refreshing bowl of mixed berries and melons provides a sweet contrast, making your meal feel light and vibrant.

  • Chai Tea Latte: Cozy up with a spiced tea latte for a comforting drink that pairs beautifully with the warm, chewy bagels.

  • Greek Yogurt with Honey: For those with a sweet tooth, a small bowl of Greek yogurt drizzled with honey complements the bagels while keeping the protein punch intact.

Feel free to mix and match these delightful sides for a truly satisfying breakfast experience!

Make Ahead Options

These Greek Yogurt Bagels are perfect for meal prep enthusiasts looking to save time during busy mornings! You can prepare the dough up to 24 hours in advance; simply mix and shape the bagels, then cover with plastic wrap and refrigerate. This method helps the flavors meld beautifully without compromising quality. When you’re ready to bake, just preheat the oven and give them an egg wash with your favorite toppings before sliding them into the oven. Alternatively, you can bake the bagels and then freeze them for up to 2 months. To enjoy, simply thaw and toast directly from the freezer for a deliciously fresh breakfast!

How to Store and Freeze Greek Yogurt Bagels

Room Temperature: Store bagels in a cool, dry place in a breadbox or paper bag for up to 2 days for optimal freshness.

Fridge: Place in an airtight container and refrigerate for up to 1 week. This helps maintain their moisture but may slightly alter the texture.

Freezer: Freeze bagels for up to 2 months. Slice them before freezing to allow for quick toasting whenever you crave a delicious Greek Yogurt Bagel.

Reheating: For best results, toast directly from the freezer or warm in the oven at 350°F (175°C) for about 10 minutes for that freshly baked goodness.

Expert Tips for Greek Yogurt Bagels

  • Dough Consistency: If your dough is too sticky, add more flour gradually until it becomes manageable; this will ensure perfect bagels.
  • Hands-On Mixing: Mixing by hand can speed up the process compared to using a spatula, so don’t be afraid to get a little messier!
  • Proper Baking: Keep an eye on your bagels; they should be golden brown, indicating they’re baked through and full of flavor.
  • Storage Know-How: Store leftover bagels in an airtight container at room temperature for up to 2 days or freeze for longer freshness—slice them before freezing for easy toasting.
  • Versatile Toppings: Feel free to experiment with various toppings; adding them before baking enhances both flavor and visual appeal of your Greek Yogurt Bagels.

Greek Yogurt Bagels: Customization Ideas

Feel free to let your creativity shine with these delightful variations that will make your Greek Yogurt Bagels uniquely yours!

  • Herb-Infused: Add 1 tablespoon of your favorite fresh herbs, like rosemary or thyme, to the dough for fragrant flavors.
  • Savory Cheese: Incorporate shredded cheese like cheddar or feta into the dough for a deliciously cheesy twist.
  • Sweet Surprise: Swirl in 1/4 cup of honey or maple syrup right before shaping for a hint of sweetness.
  • Spicy Kick: Mix in a pinch of red pepper flakes for a spicy bagel that’ll wake up your taste buds.
  • Fruit Twist: Fold in blueberries or chopped dried fruits into the dough for a fruity breakfast option.
  • Gluten-Free: Substitute all-purpose flour with your favorite gluten-free blend while yogurt remains the same.
  • Chocolate Chip: For a dessert-like treat, toss in some chocolate chips and enjoy a sweet morning indulgence.

Exploring these substitutes will not only diversify your breakfast options but also tantalize your palate just the way you like it! If you’re intrigued by the idea of toppings, why not try them topped with cream cheese or layer on fresh vegetables or smoked salmon for an exquisite bite?

Greek Yogurt Bagels Recipe FAQs

What type of Greek yogurt should I use?
Absolutely! For the best results, aim to use thick Greek yogurt. This will help achieve the right dough consistency and ensure your bagels turn out soft and chewy. If you only have regular yogurt, you can strain it through a cheesecloth or fine mesh sieve for a few hours to reduce excess moisture.

How long can I store Greek Yogurt Bagels?
You can keep your bagels at room temperature for up to 2 days in a cool, dry place, like a breadbox or paper bag. If you’d like to preserve them for a longer period, store them in an airtight container in the refrigerator for up to 1 week. Make sure to check for any signs of staleness, such as a dry texture or dark spots.

Can I freeze my Greek Yogurt Bagels?
Very! Freezing is a great option to extend the life of your bagels. Slice them before freezing so that it’s easy to grab a piece later. Place them in a freezer-safe bag or airtight container, and they will stay fresh for up to 2 months. When you’re ready to enjoy one, simply toast it directly from the freezer for a quick and delicious breakfast!

What should I do if my bagel dough is too sticky?
If your dough seems a bit too sticky, don’t worry! Just add flour gradually—about a tablespoon at a time—until it reaches a workable consistency. Kneading for 1-2 minutes should help create a smooth dough that’s easy to handle. Remember, it’s better to add flour as you go rather than adding too much at once.

Can my pet eat Greek Yogurt Bagels?
While Greek yogurt itself can be a healthy treat in moderation for pets, it’s important to note that these bagels contain flour and other ingredients not suitable for pets. Always consult your veterinarian to find out what’s safe for your dog or cat.

Are Greek Yogurt Bagels suitable for gluten-free diets?
If you’re looking for a gluten-free option, you can absolutely substitute the all-purpose flour with a gluten-free flour blend. Be sure to choose a blend designed for baking, as this will provide the necessary structure and texture. Just keep in mind that the results may vary slightly, so feel free to experiment until you find your perfect mix!

Greek Yogurt Bagels

Delicious Greek Yogurt Bagels for a Healthy Breakfast Boost

These Greek Yogurt Bagels are a high-protein, delicious option for breakfast, perfect for busy mornings.
Prep Time 15 minutes
Cook Time 25 minutes
Cooling Time 10 minutes
Total Time 50 minutes
Servings: 4 bagels
Course: Breakfast
Cuisine: Greek
Calories: 150

Ingredients
  

For the Bagels
  • 2 cups all-purpose flour or substitute with whole wheat flour
  • 1 tablespoon baking powder
  • 1 teaspoon salt
  • 1 cup Greek yogurt use thick yogurt for best results
  • 1 egg (for egg wash)
Optional Toppings
  • Everything Bagel Seasoning
  • Cinnamon
  • Shredded Cheese
  • Garlic & Herbs
  • Chocolate Chips

Equipment

  • Oven
  • Baking Sheet
  • Mixing Bowl
  • whisk
  • spatula
  • Wire rack
  • small bowl

Method
 

Step-by-Step Instructions for Greek Yogurt Bagels
  1. Preheat your oven to 400°F (200°C) and line a baking sheet with parchment paper.
  2. In a large mixing bowl, whisk together 2 cups of all-purpose flour, 1 tablespoon of baking powder, and 1 teaspoon of salt until well combined.
  3. Add 1 cup of Greek yogurt to the flour mixture, blending until a shaggy dough forms.
  4. Divide dough into four equal portions, shape each into a bagel, and place on the baking sheet.
  5. Brush each bagel with egg wash and sprinkle with desired toppings.
  6. Bake the bagels for 22-25 minutes or until golden brown.
  7. Let the bagels cool on a wire rack for about 5-10 minutes before serving.

Nutrition

Serving: 1bagelCalories: 150kcalCarbohydrates: 30gProtein: 9gFat: 2gSaturated Fat: 1gMonounsaturated Fat: 1gCholesterol: 30mgSodium: 300mgPotassium: 150mgFiber: 2gSugar: 1gVitamin A: 50IUCalcium: 50mgIron: 1mg

Notes

Store leftover bagels in an airtight container for up to 2 days, or freeze for up to 2 months.

Tried this recipe?

Let us know how it was!

Pancake Tacos: Easy, Fluffy Breakfast with Endless Fillings

Who knew breakfast could be this much fun? These Fluffy Pancake Tacos bring together the joy of pancakes and the playful twist of tacos, delivering a breakfast experience like no other. In just under 15 minutes, you can whip up these delightful treats that not only wow your taste buds but also allow for personalized creativity with various fillings and toppings. Whether you’re after a sweet fruit explosion or a rich creamy filling, these pancake tacos are your quick go-to for an easy, customizable breakfast that caters to everyone—from picky eaters to adventurous foodies. Curious about how to make your mornings more exciting with these fluffy wonders? Let’s dive into the recipe!

Why Love Pancake Tacos?

Delightful texture: The unique fluffy pancakes are expertly shaped like tacos, making breakfast a fun experience for everyone.

Customization galore: Endless filling options mean you can create a new flavor combination every time—think fresh fruits, sweet spreads, or even savory options!

Quick to prepare: This recipe is your perfect under-15-minute breakfast solution for hectic mornings.

Family-friendly appeal: Whether you’re cooking for kids or adults, these pancake tacos are sure to impress all palates.

Creative leftovers: Elevate your breakfast with some unique variations, like using flavored yogurt or incorporating nuts for added crunch, just like in our Nutella Pancakes Blend or your favorite Chocolate Chip Pancakes.

With their playful appeal and versatility, Pancake Tacos are about to become a favorite in your breakfast rotation!

Pancake Tacos Ingredients

For the Pancakes

  • Pancake Mix – Provides a delicious and fluffy base; feel free to use homemade batter or a gluten-free mix for dietary preferences.
  • Milk – Adds moisture and richness; almond milk or any non-dairy substitute works well for lactose intolerance.
  • Eggs – Essential for binding and richness; replace with a flax egg or chia seeds for a vegan option.

For the Filling

  • Cream Cheese (or Greek Yogurt) – Creates a creamy filling that complements the pancakes; ricotta or dairy-free alternatives also make great swaps.
  • Fresh Fruit (Berries, Bananas) – Adds a burst of color and flavor; use seasonal fruits or dried alternatives if fresh isn’t available.

For the Toppings

  • Maple Syrup or Chocolate Sauce – Drizzle for added sweetness; agave syrup or honey can serve as tasty alternatives.

Customize your Pancake Tacos with your favorite fillings and toppings, making breakfast both fun and delicious!

Step‑by‑Step Instructions for Pancake Tacos

Step 1: Prepare the Pancake Batter
In a large mixing bowl, combine the pancake mix, milk, and eggs. Whisk the ingredients together until just blended—be careful not to over-mix, as this can make the pancakes tough. The batter should be slightly lumpy and thick. Allow it to sit for a couple of minutes while you heat the skillet.

Step 2: Cook the Pancakes
Preheat a non-stick skillet over medium heat for about 2 minutes. Using a ladle, pour small amounts of batter (about ¼ cup) onto the skillet. Cook the pancakes until bubbles form on the surface, approximately 1-2 minutes. Flip each pancake once the bottom is golden brown and cook the other side until fluffy and lightly browned, about another 1-2 minutes.

Step 3: Shape the Taco Shells
Once the pancakes are cooked, carefully transfer them to a plate and let them cool for a minute. While they are still warm and pliable, gently fold each pancake in half to form a taco shape. Take your time to avoid tearing the pancakes, ensuring they can hold your delicious fillings later.

Step 4: Prepare the Creamy Filling
In a separate bowl, mix the cream cheese (or Greek yogurt) with a sweetener of your choice for added flavor, if desired. Use a hand mixer or whisk to blend until smooth and creamy, aiming for a spreadable consistency. This filling adds a rich layer to your pancake tacos, perfectly complementing the fluffy texture.

Step 5: Assemble the Pancake Tacos
Spoon the creamy filling into each folded pancake taco, evenly distributing the deliciousness. Next, top each taco with your favorite fresh fruits, such as berries or banana slices, for a burst of color and flavor. Drizzle with maple syrup or chocolate sauce for an extra touch of sweetness that ties all the flavors together.

Step 6: Serve and Enjoy
Arrange your assembled Pancake Tacos on a serving platter, making sure they look as inviting as they taste. Pair them with a side of whipped cream or additional fruit if you desire. These delightful, fluffy pancake tacos are ready to impress everyone at the breakfast table—enjoy the smiles and compliments they bring!

Pancake Tacos Variations & Substitutions

Feel free to explore these delicious twists to make your Pancake Tacos truly your own!

  • Vegan Option: Use a flax egg and almond milk in your pancake mix, along with a dairy-free filling like coconut yogurt. They’ll be just as fluffy and flavorful!

  • Gluten-Free: Swap out regular pancake mix for a gluten-free variety to cater to dietary restrictions without sacrificing taste or texture.

  • Nutty Delight: Add a sprinkle of chopped nuts, like almonds or walnuts, into your pancake batter for extra crunch and rich flavor that pairs beautifully with fresh fruits.

  • Savory Adventure: Instead of sweet fillings, try a savory cream cheese with herbs and spices, and fill with sautéed veggies for a delightful brunch twist!

  • Flavored Yogurt: Opt for flavored yogurt as your creamy filling—vanilla, berry, or even a chocolate version can elevate your pancake tacos to a whole new level of yum!

  • Seasonal Fruits: Adjust your toppings based on the season—think peaches in summer or cranberries in the fall, making your pancake tacos appealing year-round.

  • Chocolate Drizzle: For a sweet touch, swap maple syrup for a decadent chocolate sauce drizzled over your pancakes—perfect for the chocolate lovers out there!

  • Berries and Cream: Layer your pancake tacos with a mixture of fresh berries and whipped cream for a berry explosion that’s visually stunning and delicious!

With so many ways to customize, you could make a different version of Pancake Tacos every weekend! For more creative breakfast ideas, check out our enticing Nutella Pancakes Blend or explore the delightful world of Chocolate Chip Pancakes. Happy cooking!

Expert Tips for Pancake Tacos

Don’t Overmix Batter: Mixing too much can lead to tough pancakes. Aim for a lumpy batter for the fluffiest results.

Even Cooking: Use a non-stick skillet and ensure medium heat for consistent cooking; avoid too high temperatures that might burn the pancakes.

Cool Before Folding: Allow pancakes to cool slightly after cooking before folding to prevent tearing and ensure they hold their taco shape.

Filling Variations: For more fun, experiment with flavorings in your filling, like vanilla or cinnamon, to make your pancake tacos even more delicious.

Extra Crispiness: For a little crunch, consider adding nuts or granola on top of the fresh fruit in your pancake tacos for delightful texture contrast.

Enjoy making your Pancake Tacos, tailored to your taste!

Make Ahead Options

These Pancake Tacos are a fantastic meal prep option for busy mornings! You can prepare the pancake batter up to 24 hours in advance; simply mix the pancake mix, milk, and eggs, then refrigerate. The cooked pancakes can also be stored in an airtight container for up to 3 days—just make sure they cool completely to maintain their softness. When you’re ready to serve, gently reheat the pancakes in a microwave to make them fluffy again. For the filling, you can mix the cream cheese or Greek yogurt ahead of time; just store it in the fridge to keep it fresh. Assemble the pancake tacos right before serving for a delightful breakfast that feels freshly made!

What to Serve with Pancake Tacos?

Elevate your breakfast experience by pairing these fluffy wonders with delightful sides that create a balanced meal.

  • Crispy Bacon: The salty crunch of bacon adds a savory contrast to your sweet pancake tacos, making each bite a flavor adventure.

  • Fresh Fruit Salad: A colorful mix of seasonal fruits brightens your plate and enhances the fresh flavors of the pancake tacos. Keep it light and refreshing.

  • Vanilla Yogurt: Creamy, tangy yogurt complements the sweetness of the pancakes and provides a silky texture that enhances each bite.

  • Whipped Cream: Adding a dollop of fluffy whipped cream offers a sweet touch that pairs beautifully with the fruity toppings, making mornings feel indulgent.

  • Maple Syrup Drizzle: A warm drizzle of pure maple syrup enhances the sweetness of the taco, bringing everything together in a touching harmony of flavors.

  • Iced Coffee or Tea: A chilled beverage can cut through the richness of the pancakes and is a delightful way to start your day. Don’t forget to customize your drink!

How to Store and Freeze Pancake Tacos

Fridge: Keep leftover pancake tacos in an airtight container in the refrigerator for up to 2 days. Reheat gently in the microwave, ensuring they’re warm but not dried out.

Freezer: For longer storage, freeze individual pancake tacos by placing parchment paper between them. They can be stored in a freezer-safe bag for up to 1 month.

Reheating: To enjoy frozen pancake tacos, thaw in the fridge overnight and reheat in the microwave or a skillet until warmed through.

Avoid Soggy Tacos: Store the creamy filling separately to prevent sogginess, adding it fresh just before serving for the best taste and texture.

Pancake Tacos Recipe FAQs

What type of pancake mix should I use?
You can use any pancake mix you like—regular, homemade, or gluten-free. If you’re feeling adventurous, homemade pancake batter often results in an even fluffier texture, and you can control the ingredients.

How long will my pancake tacos stay fresh in the fridge?
Stored in an airtight container, your pancake tacos will remain fresh for up to 2 days. Just remember to store the creamy filling separately to avoid sogginess—this keeps your pancakes fluffy and delicious!

Can I freeze leftover pancake tacos?
Absolutely! To freeze, stack the pancake tacos with parchment paper between them to prevent sticking, then place them in a freezer-safe bag. They’ll keep well for up to 1 month. To reheat, simply thaw in the fridge overnight, then warm them gently in the microwave or skillet.

What can I do if my pancakes are too thick or too runny?
If your pancake batter is too thick, add a splash of milk to reach the desired consistency. Conversely, if it’s too runny, sprinkle in a bit more pancake mix until it thickens up. Aim for a lumpy but spreadable texture for the fluffiest pancakes!

How can I customize the filling for my pancake tacos?
Customization is key! You can mix flavored yogurt, add vanilla or cinnamon to the filling, and even incorporate different fruits as toppings. If you’re feeling creative, why not try a savory twist with some creamy ricotta and herbs? The options are endless!

Are pancake tacos suitable for those with dietary restrictions?
Yes, absolutely! You can easily make pancake tacos gluten-free by using a gluten-free pancake mix and replace dairy ingredients with non-dairy alternatives. Vegans can substitute eggs with a flax egg or chia seed mixture and use dairy-free cream cheese. Tailoring pancakes to fit dietary needs is a breeze!

Pancake Tacos

Pancake Tacos: Easy, Fluffy Breakfast with Endless Fillings

Pancake Tacos combine fluffy pancakes with endless fillings for a fun and customizable breakfast experience.
Prep Time 10 minutes
Cook Time 5 minutes
Total Time 15 minutes
Servings: 4 tacos
Course: Breakfast
Cuisine: American
Calories: 200

Ingredients
  

For the Pancakes
  • 1 cup Pancake Mix Can use homemade batter or gluten-free mix.
  • 1 cup Milk Almond milk or any non-dairy substitute works well.
  • 1 large Egg Replace with a flax egg or chia seeds for a vegan option.
For the Filling
  • 1 cup Cream Cheese Can substitute with Greek yogurt or ricotta.
  • 1 cup Fresh Fruit Berries or bananas; use seasonal fruits if fresh isn't available.
For the Toppings
  • 1/4 cup Maple Syrup Alternative options include agave syrup or honey.

Equipment

  • Mixing Bowl
  • Non-stick skillet
  • ladle
  • whisk

Method
 

Directions
  1. In a large mixing bowl, combine the pancake mix, milk, and eggs. Whisk until just blended and slightly lumpy.
  2. Preheat a non-stick skillet over medium heat for about 2 minutes. Pour ¼ cup of batter onto the skillet and cook until bubbles form, flipping once golden brown.
  3. Transfer cooked pancakes to a plate, cool, and gently fold each in half to form taco shapes.
  4. In a separate bowl, mix cream cheese with a sweetener until creamy and spreadable.
  5. Spoon the creamy filling into each folded pancake taco, add fresh fruits, and drizzle with syrup or sauce.
  6. Arrange on a platter and serve immediately, possibly with whipped cream or additional fruit.

Nutrition

Serving: 1tacoCalories: 200kcalCarbohydrates: 30gProtein: 6gFat: 7gSaturated Fat: 3gPolyunsaturated Fat: 1gMonounsaturated Fat: 3gCholesterol: 60mgSodium: 200mgPotassium: 150mgFiber: 2gSugar: 10gVitamin A: 200IUVitamin C: 2mgCalcium: 150mgIron: 1mg

Notes

For best results, do not overmix the batter and allow pancakes to cool slightly before folding.

Tried this recipe?

Let us know how it was!

Sweet Coconut Cream Pancakes for a Tropical Breakfast Treat

As I woke up to the warm scent of coconut dancing through my kitchen, I knew today called for something special—Sweet Coconut Cream Pancakes! These delightful creations promise a fluffy texture and a tropical escape that can effortlessly elevate any ordinary morning into a sunny celebration. In just 25 minutes, you can whip up this vegetarian breakfast option, perfect for impressing friends, family, or simply treating yourself to a little indulgence. Whether enjoyed stacked high with fresh fruit or drizzled with syrup, these pancakes offer a hearty breakfast that’s not just quick but a joyful way to welcome the day. Curious about how to bring this coconut paradise to your table? Keep reading!

Why choose Sweet Coconut Cream Pancakes?

Tropical Escape: Each bite transports you to a sun-kissed beach, thanks to the luscious coconut flavor that brightens your morning.

Quick and Easy: With just 25 minutes needed, these pancakes are perfect even for the busiest mornings.

Endless Toppings: Stack them with fresh fruits, syrup, or even a drizzle of coconut syrup for a personalized touch that excites your palate.

Vegetarian Delight: Perfectly suited for everyone—these pancakes are a vegetarian dream, satisfying both sweet cravings and health-conscious choices.

Make-Ahead Convenience: Prep the batter the night before for a no-fuss breakfast that can be whipped up in minutes—say goodbye to the fast-food temptation!

Enjoy your pancakes alongside a Coconut Syrup or try them with some Chocolate Chip Pancakes for a delightful breakfast spread!

Sweet Coconut Cream Pancakes Ingredients

For the Batter
All-purpose flour – Provides structure and texture; substitute with whole wheat flour for added health benefits.
Sugar – Adds sweetness and enhances flavor; for a tropical twist, consider coconut sugar.
Baking powder – A leavening agent to help the pancakes rise—no substitutes recommended.
Baking soda – Ensures fluffiness; no substitutes needed here.
Salt – Enhances the flavors of the other ingredients; essential for balance.
Coconut cream – Adds a rich coconut flavor and creamy texture; full-fat coconut milk works as a substitute, but flavor may vary.
Large egg – Binds the mixture together and provides structure; for a vegan option, a flax egg is a great alternative.
Melted butter – Infuses richness and moisture; use coconut oil for a dairy-free option.
Vanilla extract – Boosts the overall flavor; don’t skip this for a delightful aroma.
Shredded coconut (optional) – Adds texture and amplifies the coconut flavor; enhance your Sweet Coconut Cream Pancakes experience with this addition.

Step‑by‑Step Instructions for Sweet Coconut Cream Pancakes

Step 1: Mix Dry Ingredients
In a large mixing bowl, whisk together 1 cup of all-purpose flour, 2 tablespoons of sugar, 2 teaspoons of baking powder, 1/2 teaspoon of baking soda, and a pinch of salt until evenly combined. This mixture will provide the fluffy foundation for your Sweet Coconut Cream Pancakes. Set aside for a moment while you gather your wet ingredients.

Step 2: Combine Wet Ingredients
In a separate bowl, blend together 3/4 cup of coconut cream, 1 large egg, 2 tablespoons of melted butter, and 1 teaspoon of vanilla extract until the mixture is smooth and creamy. Be sure to thoroughly combine these ingredients, as this rich mixture will infuse your pancakes with delightful coconut flavor, contributing to their overall fluffiness.

Step 3: Combine Mixtures
Gently pour the wet ingredients into the bowl containing the dry ingredients. Using a spatula, fold the mixtures together carefully until just combined—remember, it’s okay to leave some lumps! To further enhance your Sweet Coconut Cream Pancakes, you can optionally fold in 1/4 cup of shredded coconut for added texture.

Step 4: Heat the Skillet
Preheat a non-stick skillet or griddle over medium heat for about 5 minutes. Lightly grease the surface with butter or cooking spray to ensure that your pancakes don’t stick while cooking. When the skillet is hot, you’ll know it’s ready when a few drops of water flicked onto the surface sizzle and evaporate.

Step 5: Cook the Pancakes
Pour 1/4 cup of batter onto the heated skillet for each pancake. Cook them for about 2-3 minutes, or until you see bubbles forming on the surface and the edges look set. A golden-brown color will indicate it’s time to flip the pancakes; use a spatula to gently turn them over.

Step 6: Finish Cooking
Cook the flipped pancake for an additional 1-2 minutes, or until they are perfectly golden brown and fluffy. Keep a close eye on them to avoid burning. Once cooked, transfer your Sweet Coconut Cream Pancakes to a warm plate. Continue this process until all batter is used, lightly greasing the skillet between batches if necessary.

Step 7: Serve and Enjoy
Serve your Sweet Coconut Cream Pancakes warm, stacked high, and topped with fresh fruits, syrup, or powdered sugar. The delightful coconut flavor is sure to brighten your morning, making each bite a tropical celebration. Enjoy with your favorite accompaniments for an unforgettable breakfast experience!

Expert Tips for Sweet Coconut Cream Pancakes

  • Avoid Overmixing: Gently stir the batter until just combined; overmixing can lead to tough pancakes rather than the fluffy texture you desire.

  • Skillet Temperature: Ensure your skillet is heated properly before adding the batter; a too-cold surface will yield dense pancakes instead of light, fluffy Sweet Coconut Cream Pancakes.

  • Use Fresh Ingredients: Opt for fresh coconut cream for the best flavor; it truly enhances the tropical experience and richness of the pancakes.

  • Customizable Add-Ins: Feel free to add in your favorite flavors like chocolate chips or bananas; just remember to adjust cooking times as needed for additions.

  • Optimal Serving: Serve pancakes warm and stack them high with tropical fruits and syrup to create a joyful morning experience that brightens your day!

What to Serve with Sweet Coconut Cream Pancakes?

Transform your breakfast experience with delightful sides that elevate these fluffy tropical treats.

  • Fresh Tropical Fruit: Slices of pineapple, mango, or papaya add a refreshing contrast and juicy vibrance, perfectly balancing the rich coconut flavor.

  • Coconut Syrup: A drizzle of this sweet syrup enhances the coconut essence of the pancakes, making each bite taste like a tropical dream.

  • Greek Yogurt: Creamy and tangy, it complements the pancakes beautifully and adds protein, making your breakfast even heartier.

  • Scrambled Eggs: Fluffy, seasoned eggs provide a savory counterpart, turning your meal into a satisfying feast that pleases every palate.

  • Coffee or Tea: A warm cup of your favorite brew creates the ultimate breakfast experience, enhancing the rich flavors of your pancakes while offering caffeine perfection.

  • Chocolate Chips: Top your pancakes with these rich morsels for a sweet surprise that melds beautifully with the coconut, perfect for those with a sweet tooth.

Let your morning shine with these delicious pairings that make your Sweet Coconut Cream Pancakes the star of a cozy breakfast table!

Storage Tips for Sweet Coconut Cream Pancakes

Fridge: Store leftover pancakes in an airtight container in the refrigerator for up to 3 days. Before serving, reheat in a microwave or a skillet until warm.

Freezer: For longer storage, freeze pancakes in a single layer on a baking sheet, then transfer to an airtight container with parchment paper between layers for up to 1 month.

Reheating: Reheat frozen pancakes in the microwave or toaster. For an oven method, wrap in foil and warm at 350°F (175°C) until heated through.

Serving: Enjoy your pancakes straight from the fridge or freezer with your favorite toppings for a delightful tropical treat anytime!

Sweet Coconut Cream Pancakes Variations

Feel free to get creative and personalize your Sweet Coconut Cream Pancakes with these delightful twists!

  • Flour Swap: Replace all-purpose flour with whole wheat flour for a healthier, nuttier flavor. This choice adds fiber, making each bite a bit more wholesome.

  • Sweetener Change: Instead of regular sugar, try coconut sugar to intensify that tropical vibe. Its rich flavor beautifully complements the coconut and adds a touch of caramel sweetness.

  • Vegan Option: Substitute the large egg with a flax egg (1 tablespoon ground flaxseed mixed with 2.5 tablespoons water). This simple swap makes your pancakes vegan while keeping them fluffy and delicious—perfect for everyone!

  • Dairy-Free Delight: Use coconut oil in place of melted butter for a totally dairy-free version. Your pancakes will still come out rich and moist, with the added bonus of more coconut flavor.

  • Extra Coconut: Add 1/4 cup of shredded coconut into your batter for a chewy texture and lovely coconut bursts. This creates lovely bites of coconut goodness that enhance the overall experience.

  • Fruity Twist: Mix in a mashed ripe banana or some chocolate chips into the pancake batter for an extra layer of flavor. The banana lends natural sweetness, while chocolate gives a delightful richness.

  • Flavorful Toppings: Experiment with delightful toppings such as whipped cream, fresh berries, or even a drizzle of Coconut Syrup to elevate your pancake experience to new heights.

  • Global Spice: For a unique flavor boost, add a pinch of cinnamon or nutmeg to the batter. The warm spices will beautifully complement the coconut and make your kitchen smell heavenly.

No matter how you choose to customize, each variation will bring a little slice of tropical joy to your morning!

Make Ahead Options

These Sweet Coconut Cream Pancakes are a perfect solution for busy mornings! You can prepare the pancake batter up to 24 hours in advance; simply mix the dry ingredients together and separately combine the wet ingredients. Store the batter in an airtight container in the refrigerator to ensure freshness. Just before cooking, give it a gentle stir to re-incorporate any settled ingredients. Additionally, you can also prep toppings, such as sliced fruits or coconut syrup, and keep them in the fridge for quick access. When you’re ready to enjoy, heat your skillet and cook the pancakes as instructed, ensuring a delightful breakfast experience that saves you time without sacrificing flavor!

Sweet Coconut Cream Pancakes Recipe FAQs

What type of coconut cream should I use for the best flavor?
Absolutely! For the richest flavor and creamy texture, I recommend using fresh coconut cream, as it provides a delightful tropical essence. If you can’t find fresh, opt for good-quality canned coconut cream, available in most grocery stores.

How should I store leftover pancakes?
Store leftover Sweet Coconut Cream Pancakes in an airtight container in the refrigerator for up to 3 days. When reheating, a few seconds in the microwave or a quick warm-up in a skillet will do the trick. Just be sure not to overheat them to keep that fluffy texture intact!

Can I freeze these pancakes for later?
Very! To freeze, first lay the pancakes in a single layer on a baking sheet until they’re firm (about an hour), then stack them in an airtight container with parchment paper between layers to prevent sticking. They’ll stay fresh for up to 1 month. For reheating, simply pop them in the microwave or toaster, or warm it in an oven wrapped in foil at 350°F until heated through.

What can I do if my pancakes turn out dense instead of fluffy?
If your pancakes are dense, don’t panic! It may be due to overmixing the batter, which can create a tough texture. Next time, mix until just combined—it’s okay to have a few lumps! Also, ensure your skillet is at the right temperature; too cool can prevent proper rising.

Are there any dietary considerations to keep in mind?
Absolutely! If you’re cooking for someone with allergies, be mindful of the egg and dairy products. You can easily make these pancakes vegan by using a flax egg—just mix 1 tablespoon of ground flaxseed with 2.5 tablespoons of water, allowing it to set for about 5 minutes as a replacement for the egg.

Sweet Coconut Cream Pancakes

Sweet Coconut Cream Pancakes for a Tropical Breakfast Treat

Sweet Coconut Cream Pancakes promise a fluffy texture and a tropical escape, perfect for elevating your breakfast.
Prep Time 15 minutes
Cook Time 10 minutes
Total Time 25 minutes
Servings: 4 pancakes
Course: Breakfast
Cuisine: Tropical
Calories: 200

Ingredients
  

For the Batter
  • 1 cup all-purpose flour or whole wheat flour as a substitute
  • 2 tablespoons sugar coconut sugar for tropical twist
  • 2 teaspoons baking powder
  • 1/2 teaspoon baking soda
  • a pinch salt to enhance flavors
  • 3/4 cup coconut cream full-fat coconut milk can be used
  • 1 large egg or a flax egg for vegan option
  • 2 tablespoons melted butter or coconut oil for dairy-free
  • 1 teaspoon vanilla extract for delightful aroma
  • 1/4 cup shredded coconut optional for added texture

Equipment

  • Mixing Bowl
  • Skillet
  • spatula

Method
 

Step-by-Step Instructions for Sweet Coconut Cream Pancakes
  1. Mix Dry Ingredients: In a large mixing bowl, whisk together all-purpose flour, sugar, baking powder, baking soda, and a pinch of salt until combined. Set aside.
  2. Combine Wet Ingredients: In another bowl, blend coconut cream, egg, melted butter, and vanilla extract until smooth.
  3. Combine Mixtures: Gently pour wet ingredients into dry ingredients and fold together until just combined. Optionally fold in shredded coconut.
  4. Heat the Skillet: Preheat a skillet over medium heat and lightly grease it.
  5. Cook the Pancakes: Pour 1/4 cup of batter onto the skillet and cook until bubbles form. Flip and cook until golden brown.
  6. Finish Cooking: Transfer cooked pancakes to a plate and repeat until all batter is used.
  7. Serve and Enjoy: Serve warm, stacked high, and topped with fresh fruits or syrup.

Nutrition

Serving: 1pancakeCalories: 200kcalCarbohydrates: 30gProtein: 4gFat: 8gSaturated Fat: 6gMonounsaturated Fat: 2gCholesterol: 40mgSodium: 180mgPotassium: 150mgFiber: 1gSugar: 5gVitamin A: 200IUCalcium: 20mgIron: 1mg

Notes

Serve pancakes with a variety of toppings for a fun breakfast experience. Prep batter the night before for convenience.

Tried this recipe?

Let us know how it was!

Stay Connected

Get recipes via email: