Get my cookbooks

Cheddar & Bacon Dutch Baby: Your New Favorite Breakfast Treat

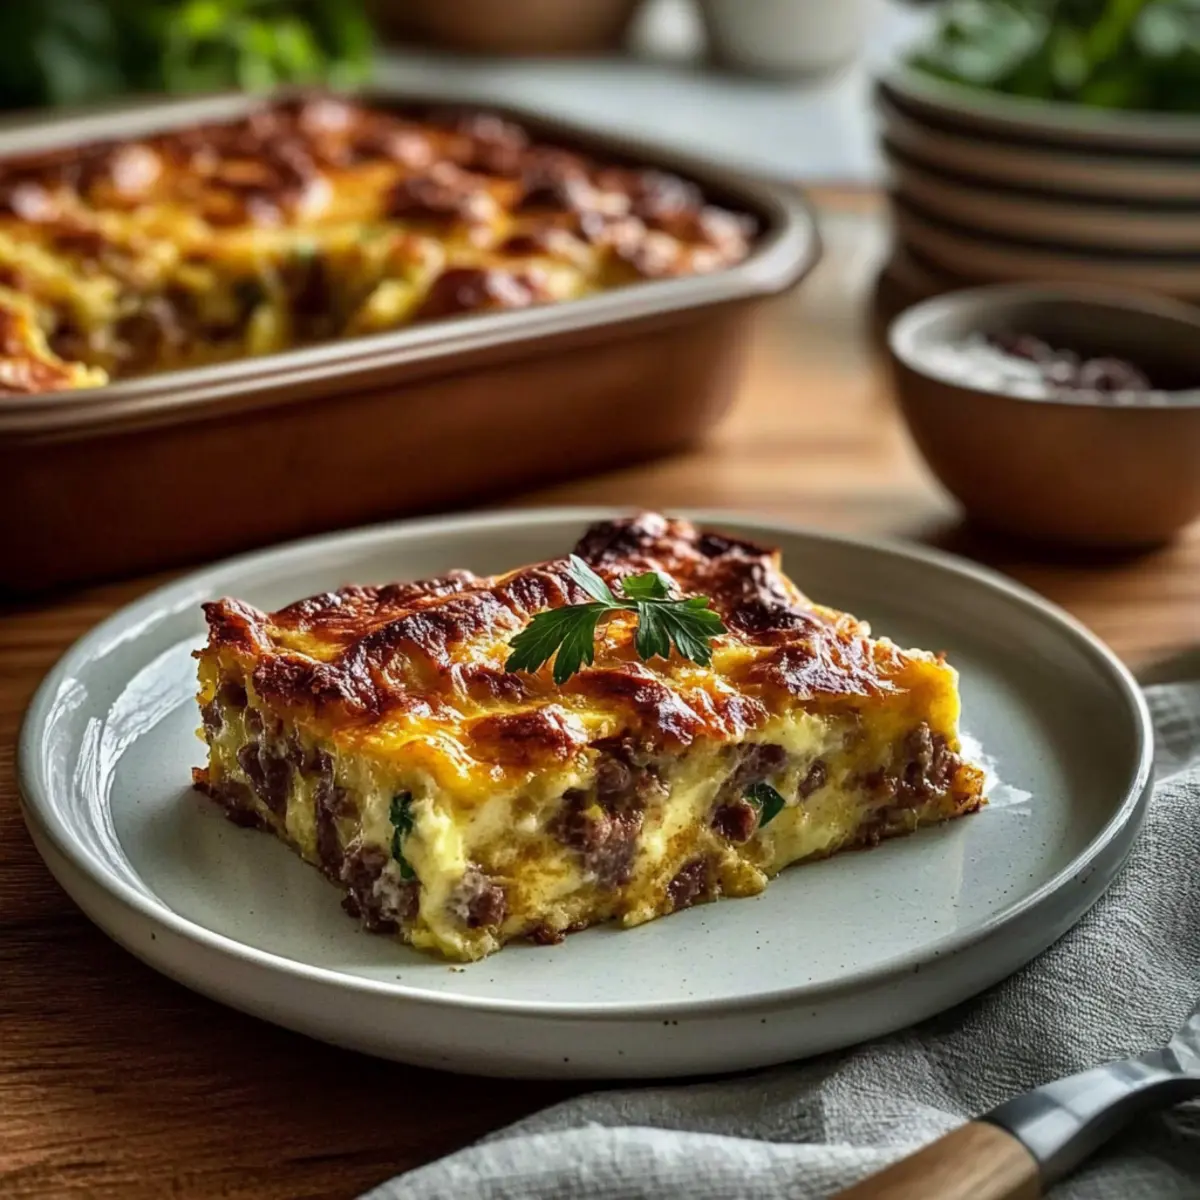
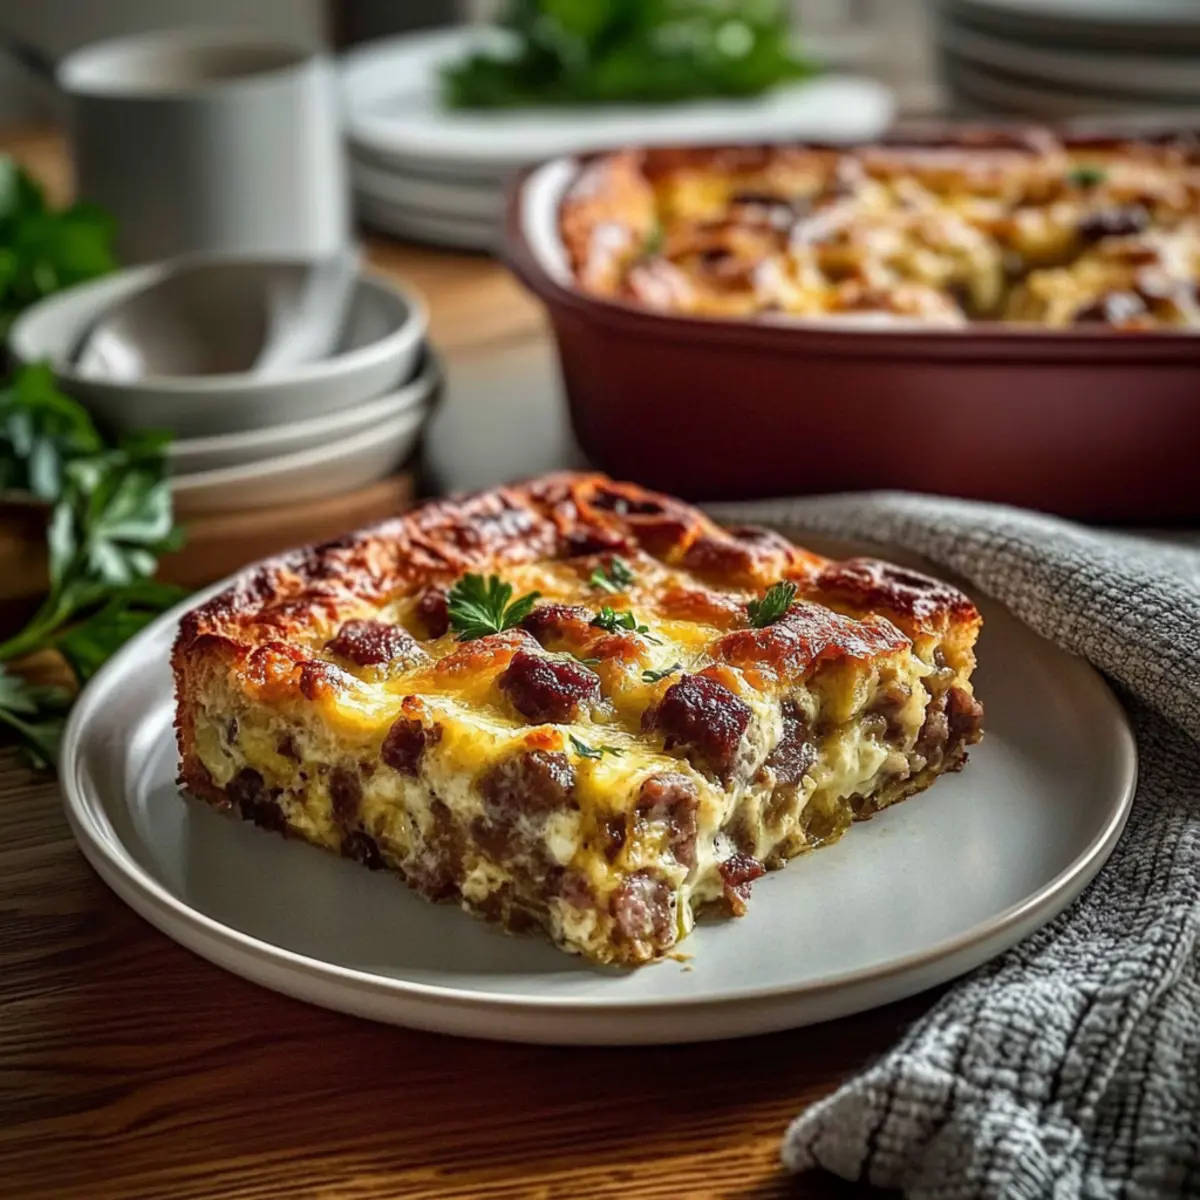
A whiff of crispy bacon and melted cheddar can whisk you straight to brunch heaven! Today, I’m thrilled to share my recipe for Savory Cheddar & Bacon Dutch Baby, a dish that perfectly marries the fluffiness of a pancake with the richness of quiche. In just 35 minutes, you can whip up this brunch showstopper that’s not only a delight to the palate but also a versatile canvas—feel free to customize it with gluten-free flour or swap out the bacon for sautéed veggies if you prefer a vegetarian twist. It’s the kind of meal that makes your kitchen feel like a cozy café, and I guarantee it will have your loved ones asking for seconds. Are you ready to elevate your breakfast game? Let’s dive into this delicious recipe!

Why is this Dutch Baby so special?

Fluffy Texture: The Savory Cheddar & Bacon Dutch Baby achieves a delightful puffiness, creating a light and airy sensation with every bite.

Versatile Base: Not only is it delicious as is, but you can easily customize by opting for gluten-free flour or swapping in your favorite vegetables instead of bacon.

Quick Cooking Time: With a total prep and cook time of just 35 minutes, this dish is perfect for busy mornings or impromptu brunch gatherings.

Crowd Pleaser: Its impressive presentation and savory flavor make it an instant favorite among friends and family—perfect for sharing or special occasions.

Comforting Flavor: The combination of crispy bacon and melted cheddar guarantees each mouthful is packed with rich, savory goodness. Try pairing it with a fresh fruit salad or crispy hash browns for the ultimate brunch experience!

Cheddar & Bacon Dutch Baby Ingredients

Get ready to savor each scrumptious bite!

For the Batter

  • Eggs – Essential for providing structure and lift.
  • All-Purpose Flour – Creates the base of the batter; provides structure.
  • Substitution Note: Use gluten-free flour for a gluten-free option.
  • Milk – Adds moisture and richness to the batter.
  • Substitution Note: Substitute with almond milk for a dairy-free version.
  • Melted Butter – Adds richness and flavor to the batter.
  • Substitution Note: Use olive oil or coconut oil for a dairy-free option.
  • Salt – Enhances flavors of the other ingredients.
  • Black Pepper – Adds a touch of spice; can be adjusted based on preference.
  • Substitution Note: Omit for a milder flavor.

For Toppings

  • Sharp Cheddar Cheese – Provides creaminess and flavor.
  • Substitution Note: Try gouda or feta for a distinct flavor experience.
  • Crispy Bacon – Adds savory richness to the dish.
  • Substitution Note: Use sautéed mushrooms or crispy tempeh for a meat-free option.
  • Fresh Parsley & Chives – Optional garnishes that enhance flavor and appearance.
  • Honey or Hot Honey – Adds a sweet-savory twist if drizzled over the finished dish.
  • Substitution Note: Optional for those who prefer sweetness.

Step‑by‑Step Instructions for Cheddar & Bacon Dutch Baby

Step 1: Preheat the Oven
Begin by preheating your oven to 425°F (220°C). Place a cast-iron skillet on the middle rack to heat up simultaneously. This crucial step ensures that the skillet is sizzling hot, which is key for creating those crispy edges in your Cheddar & Bacon Dutch Baby. Allow the oven to preheat for about 10-15 minutes.

Step 2: Blend the Batter
While the skillet heats, grab a blender and combine the eggs, all-purpose flour, milk, melted butter, salt, and black pepper. Blend the mixture until it’s smooth and frothy, which should take around 30 seconds. This step is essential for achieving a light texture in your Dutch Baby, so blend well and set the batter aside for a few minutes to let it rest.

Step 3: Prepare the Hot Skillet
After the oven has reached temperature, carefully remove the hot skillet using oven mitts. Be cautious of the heat! Add a generous pat of butter to the skillet, swirling it around until it’s melted and evenly coats the bottom. This will create a rich, flavorful base for your Cheddar & Bacon Dutch Baby and help prevent sticking.

Step 4: Pour in the Batter
Once the butter has melted, pour the rested batter directly into the hot skillet. Be careful to pour evenly, which will help the Dutch Baby puff up beautifully while baking. You should hear a slight sizzle as the batter meets the hot surface. This is a good sign that your Dutch Baby will develop a delightful texture.

Step 5: Add Toppings
Sprinkle the shredded sharp cheddar cheese and crumbled crispy bacon evenly over the batter in the skillet. The cheese will melt into the mixture, adding creamy goodness, while the bacon contributes a savory richness. Arrange your toppings to ensure every bite of your Cheddar & Bacon Dutch Baby is packed with flavor.

Step 6: Bake to Perfection
Place the skillet back into the preheated oven and bake for about 20-25 minutes. Look for the edges to puff up and turn a golden brown color while the center remains soft yet set. Avoid opening the oven door during baking to let it rise fully. The aroma will be irresistible!

Step 7: Garnish and Serve
Once baked, remove the skillet from the oven and let it cool slightly. Garnish your Cheddar & Bacon Dutch Baby with freshly chopped parsley and chives for a burst of color and flavor. If desired, drizzle with honey or hot honey for a sweet-savory accent. Serve warm straight from the skillet for a delightful brunch experience!

Expert Tips for Cheddar & Bacon Dutch Baby

  • Preheat Thoroughly: Ensure your skillet is very hot when you pour in the batter; this creates the crispy edges that make the Cheddar & Bacon Dutch Baby truly special.

  • Let it Rest: Allow the batter to rest for 5 minutes before pouring it into the skillet; this simple step improves the fluffiness of the final dish.

  • Avoid Opening the Oven: Do not open the oven door while baking! This prevents the Dutch Baby from deflating, ensuring it puffs elegantly.

  • Quality Ingredients Matter: Fresh, high-quality bacon and cheddar significantly enhance the flavor of your Dutch Baby; consider using artisanal cheese or local bacon for the best results.

  • Customize Wisely: Feel free to swap bacon for veggies, but be cautious with moisture levels when using ingredients like spinach to avoid a soggy Dutch Baby.

Cheddar & Bacon Dutch Baby Variations

Feel free to explore these exciting twists to make your Cheddar & Bacon Dutch Baby truly your own!

  • Gluten-Free: Use a gluten-free flour blend to keep it light and airy for those avoiding gluten. This way, everyone can enjoy this fabulous dish without compromise.

  • Vegetarian: Swap the bacon with sautéed mushrooms, spinach, or even roasted cherry tomatoes for a hearty, veggie-rich version. Your Dutch Baby will still be packed with flavor, just without the meat!

  • Dairy-Free: Substitute the milk with almond milk and use dairy-free cheese to make this breakfast dish suitable for those avoiding dairy. You won’t sacrifice taste; it still comes alive with flavor!

  • Spicy Kick: Add a pinch of cayenne pepper or diced jalapeños to the batter for a touch of heat! This vibrant variation will bring a delightful zing to your Dutch Baby.

  • Cheese Adventure: Try replacing sharp cheddar with gouda, feta, or even pepper jack for different flavor profiles. Each cheese will give your Dutch Baby a unique twist and added depth.

  • Savory Herbs: Mix fresh herbs like thyme or rosemary into the batter for an aromatic lift. These hints of freshness will make your breakfast even more inviting.

  • Sweet and Savory: Drizzle hot honey over the top before serving for a wonderful contrast against the rich flavors. This delightful addition turns a breakfast classic into a sweet adventure!

  • Loaded Style: Top with diced tomatoes, avocado slices, and a dollop of sour cream or Greek yogurt for an extravagant brunch experience. These toppings add creaminess and freshness to each bite!

Feel free to explore these variations and make this Cheddar & Bacon Dutch Baby a dish that reflects your taste! And don’t forget, if you’re in the mood for more comforting flavors, check out my bubbly Potato Bacon Soup or my creamy Cozy Broccoli Cheddar Soup. You’ll find plenty of comfort food delights to share!

What to Serve with Cheddar & Bacon Dutch Baby

Elevate your breakfast experience with delightful accompaniments that complement the rich flavors of this savory dish.

  • Fresh Fruit Salad: Bright, juicy fruits like berries and melons add a refreshing contrast to the savory richness, balancing flavors beautifully.

  • Crispy Hash Browns: The crunchy texture of golden-brown hash browns pairs perfectly, providing a comforting and satisfying bite alongside the fluffy Dutch Baby.

  • Arugula Salad: A light salad with peppery arugula, cherry tomatoes, and a lemon vinaigrette adds brightness and a hint of pepperiness, enhancing each bite.

  • Mimosas: This classic brunch cocktail, a mix of sparkling wine and fresh orange juice, offers a celebratory touch, perfectly complementing the savory notes of the dish.

  • Yogurt Parfait: Layered with granola and fresh fruit, a yogurt parfait provides a creamy, sweet, and crunchy contrast to the Cheddar & Bacon Dutch Baby, making each mouthful a delightful experience.

  • Creamy Avocado Toast: The creamy richness of avocado on toasted bread adds a luxurious texture and flavor that complements the Dutch Baby’s savory elements.

Each of these pairings will enhance your dining experience, making your meal not just satisfying but truly memorable!

Make Ahead Options

Preparing your Savory Cheddar & Bacon Dutch Baby in advance is a fantastic way to streamline your busy mornings! You can mix the batter, combining the eggs, flour, milk, melted butter, salt, and pepper, up to 24 hours before baking—just refrigerate it in an airtight container. Additionally, you can pre-cook the bacon and have it ready to sprinkle on top. When you’re ready to bake, simply bring the batter to room temperature, pour it into your hot skillet, add the cheese and bacon, and bake as directed. This way, you’ll enjoy a delicious, homemade breakfast in no time, making it perfect for meal prep!

Storage Tips for Cheddar & Bacon Dutch Baby

  • Room Temperature: If you have any leftovers, you can leave the Cheddar & Bacon Dutch Baby out for up to 2 hours after cooking, but be sure to refrigerate it afterward to keep it fresh.

  • Fridge: Store any cooled leftovers in an airtight container in the fridge for up to 3 days. This helps maintain its texture while preserving its delightful flavors.

  • Freezer: For longer storage, wrap individual portions tightly in plastic wrap and then place them in a freezer-safe bag. The Dutch Baby can be frozen for up to 2 months.

  • Reheating: When ready to enjoy again, reheat in the oven at 350°F (175°C) for about 10-15 minutes until warmed through. This will help retain the crispy edges and fluffy texture.

Cheddar & Bacon Dutch Baby Recipe FAQs

How do I choose the right bacon for my Cheddar & Bacon Dutch Baby?
When selecting bacon, look for high-quality, thick-cut varieties for the best flavor and texture. Fresh bacon with a good balance of meat and fat will render nicely, contributing savory richness to the dish. Check for a nice pink color with minimal dark spots on the packaging; this indicates freshness.

How should I store leftovers of the Cheddar & Bacon Dutch Baby?
Store any cooled leftovers in an airtight container in the fridge for up to 3 days. This will help maintain its delightful fluffiness and flavors. If you want to keep it for longer, wrap individual portions tightly in plastic wrap and place them in a freezer-safe bag. They can be frozen for up to 2 months.

Can I freeze my Cheddar & Bacon Dutch Baby? How?
Absolutely! To freeze, just let the Dutch Baby cool completely, then slice it into individual portions. Wrap each slice tightly in plastic wrap, followed by aluminum foil, to prevent freezer burn. Place the wrapped portions in a labeled freezer-safe bag. When ready to eat, simply reheat in the oven at 350°F (175°C) for about 10-15 minutes until warmed through. This helps retain that wonderful fluffy texture!

What should I do if my Dutch Baby doesn’t rise properly?
If your Dutch Baby doesn’t rise as expected, it could be due to a few factors. Make sure your oven is preheated properly, as a hot skillet is crucial for that perfect puff. Also, blend your batter until smooth—air incorporated during blending adds lift. Lastly, avoid opening the oven door while it bakes, as even a small change in temperature can cause it to deflate.

Are there any dietary concerns I should consider with this recipe?
If you’re cooking for someone with dietary restrictions, this recipe is quite adaptable! To make it gluten-free, use a dedicated gluten-free flour blend. For dairy-free options, substitute the milk with almond milk and use dairy-free cheese. If there are allergy concerns regarding bacon, consider swapping it with sautéed mushrooms or crispy tempeh for a delightful vegetarian alternative.

Cheddar & Bacon Dutch Baby

Cheddar & Bacon Dutch Baby: Your New Favorite Breakfast Treat

Experience brunch heaven with this Cheddar & Bacon Dutch Baby, a delicious fusion of pancake fluffiness and quiche richness.
Prep Time 15 minutes
Cook Time 20 minutes
Resting Time 5 minutes
Total Time 35 minutes
Servings: 4 slices
Course: Breakfast
Cuisine: American
Calories: 300

Ingredients
  

For the Batter
  • 4 large Eggs
  • 1 cup All-Purpose Flour Use gluten-free flour for a gluten-free option.
  • 1 cup Milk Substitute with almond milk for a dairy-free version.
  • 3 tablespoons Melted Butter Use olive oil or coconut oil for a dairy-free option.
  • 1/2 teaspoon Salt
  • 1/4 teaspoon Black Pepper Omit for a milder flavor.
For Toppings
  • 1 cup Sharp Cheddar Cheese Try gouda or feta for a distinct flavor experience.
  • 6 slices Crispy Bacon Use sautéed mushrooms or crispy tempeh for a meat-free option.
  • 1/4 cup Fresh Parsley & Chives Optional garnishes.
  • to taste Honey or Hot Honey Optional for those who prefer sweetness.

Equipment

  • cast-iron skillet
  • blender

Method
 

Step-by-Step Instructions
  1. Preheat your oven to 425°F (220°C) and place a cast-iron skillet inside to heat up for about 10-15 minutes.
  2. Blend the eggs, all-purpose flour, milk, melted butter, salt, and black pepper until smooth and frothy. Allow it to rest for a few minutes.
  3. Carefully remove the hot skillet, add a pat of butter, and swirl until melted to prevent sticking.
  4. Pour the rested batter into the hot skillet evenly, ensuring a sizzling sound.
  5. Sprinkle sharp cheddar cheese and crumbled bacon over the batter.
  6. Bake for 20-25 minutes until puffed and golden brown; do not open the oven door.
  7. Let it cool slightly, then garnish with parsley and chives, drizzle with honey if desired, and serve warm.

Nutrition

Serving: 1sliceCalories: 300kcalCarbohydrates: 30gProtein: 12gFat: 15gSaturated Fat: 7gPolyunsaturated Fat: 1gMonounsaturated Fat: 6gCholesterol: 150mgSodium: 600mgPotassium: 250mgFiber: 1gSugar: 1gVitamin A: 500IUVitamin C: 1mgCalcium: 200mgIron: 2mg

Notes

This Dutch Baby is delicious as is but can be customized with gluten-free flour or vegetables instead of bacon. Avoid opening the oven while baking for best results.

Tried this recipe?

Let us know how it was!

Savory Breakfast Lasagna: A Hearty Morning Delight

As I stood in my kitchen on a lazy Sunday morning, the tantalizing aroma of breakfast wafted through the air, instantly cheering me up. That’s the magic of this Hearty Spicy Breakfast Lasagna—layer upon layer of creamy, cheesy delight waiting to be devoured! Ideal for those who crave a hearty meal, this recipe combines fluffy scrambled eggs, savory breakfast sausage, and crispy hash browns into a beautiful bake that not only satisfies but also saves precious time. It’s perfect for a stress-free brunch with friends or a cozy family gathering. Plus, it doubles as a fantastic make-ahead dish, ensuring you’ll have a delicious morning treat ready when you need it most. Are you ready to elevate your breakfast game? Let’s dive into this exciting and hearty dish!

Why is Breakfast Lasagna a Must-Make?

Hearty layers of flavor: This Spicy Breakfast Lasagna brings together fluffy eggs, savory sausage, and crispy hash browns for a satisfying start to your day.

Make-Ahead Magic: Prepare it the night before for effortless morning dining—just bake and serve!

Crowd-Pleasing Delight: Perfect for brunch gatherings, this dish pleases both family and friends, leaving everyone wanting seconds.

Nutrient-Rich Benefits: With high protein content, this meal fuels your day while being indulgent.

Versatile Options: Feeling adventurous? Customize it with your favorite veggies or a dash of hot sauce for that extra kick!

As you explore this recipe, don’t forget to check out my Banana Blueberry Breakfast for a lovely side or my Croissant Breakfast Sandwich to complete your brunch spread!

Breakfast Lasagna Ingredients

This dish is packed with all the hearty flavors and textures you crave!

For the Cheese Mixture
Cottage Cheese (3 cups) – Provides creaminess and protein; Ricotta can be used for a similar texture.
Chives (1/2 cup) – Adds a mild onion flavor; Green onions or scallions can replace chives if desired.

For the Egg Mixture
Large Eggs (18) – Forms the base for your breakfast lasagna, providing structure and protein.
2% Milk (1/3 cup) – Adds moisture to the eggs; Whole milk or a plant-based milk also works well.
Salt (1/2 tsp) and Pepper (1/4 tsp) – Enhances the overall flavor profile.

For the Layers
Lasagna Noodles (8, cooked and drained) – Creates the layered structure; Avoid no-boil noodles for the best results.
Frozen Shredded Hash Browns (4 cups, thawed) – Provides a crispy layer; Homemade or leftover potatoes can do the trick.
Bulk Pork Sausage (1 lb, cooked and crumbled) – Delivers richness and a spiced kick; Use plant-based sausage for a vegetarian alternative.

For the Toppings
Pepper Jack Cheese (8 oz, sliced) – Adds creaminess and a spicy kick; Monterey Jack offers a milder flavor if preferred.
Muenster Cheese (8 oz, sliced) – Melts beautifully and enhances the overall creaminess.

This rich and hearty breakfast lasagna is sure to be a hit at your next gathering. Happy cooking!

Step‑by‑Step Instructions for Hearty Spicy Breakfast Lasagna

Step 1: Prepare the Cheese Mixture
In a large mixing bowl, combine the cottage cheese, chives, and green onions. Stir until well blended, ensuring the ingredients are evenly distributed. This creamy mixture sets the foundation for your Hearty Spicy Breakfast Lasagna. Set the bowl aside while you prepare the eggs.

Step 2: Whisk the Egg Mixture
In another bowl, whisk together the eggs, milk, salt, and pepper until fully combined and frothy. This mixture will form the core protein layer of your breakfast lasagna. Aim for a smooth consistency to ensure an even texture when cooked.

Step 3: Scramble the Eggs
Heat a tablespoon of butter in a skillet over medium heat. Pour in the egg mixture and gently scramble, stirring continuously until the eggs are just thickened but still slightly runny—about 3-4 minutes. Remove from heat; the eggs will continue cooking in the oven, adding the perfect fluffiness to your lasagna.

Step 4: Assemble the Baking Dish
Grease a 13×9-inch baking dish with butter. Start layering by placing 4 lasagna noodles at the bottom, ensuring they slightly overlap for even coverage. This base holds the entire Hearty Spicy Breakfast Lasagna together.

Step 5: Layer the Ingredients
Spread half the hash browns over the noodles, followed by the scrambled eggs, crumbled sausage, and half of the cottage cheese mixture. This step builds the hearty layers of flavor. Repeat the process for even distribution, ensuring each layer remains balanced and flavorful.

Step 6: Add Cheese and Final Layers
Top the lasagna with slices of pepper jack cheese. Then add the remaining lasagna noodles, followed by the rest of the hash browns and cottage cheese mixture. This final assembly seals in the flavors and ensures every bite is deliciously cheesy.

Step 7: Finish with Muenster Cheese
Layer the Muenster cheese slices evenly over the top of the assembled lasagna. This will melt beautifully during baking, creating a golden crust that’s as enticing as it is delicious, making your Hearty Spicy Breakfast Lasagna irresistible.

Step 8: Refrigerate Before Baking
Cover the dish tightly with plastic wrap and refrigerate for at least 8 hours or overnight if possible. This not only enhances the flavors but also allows the lasagna to set, making it easier to bake evenly.

Step 9: Preheat and Let Sit
On the day of baking, preheat your oven to 350°F (175°C). Remove the lasagna from the refrigerator and let it sit at room temperature for about 30 minutes before baking. This helps the dish bake more evenly, ensuring a perfect texture.

Step 10: Bake to Perfection
Bake the Hearty Spicy Breakfast Lasagna uncovered for 35-40 minutes, or until the top is golden and set. The cheese should be bubbling, and a toothpick inserted into the center should come out clean.

Step 11: Rest and Slice
Once baked, remove the dish from the oven and let it rest for 5 minutes. This resting time allows the lasagna to set further, making it easier to slice. Serve warm and watch everyone delight in the savory flavor of your creation.

Expert Tips for Breakfast Lasagna

  • Egg Care: Avoid overcooking the scrambled eggs; they will firm up while baking, which may toughen your breakfast lasagna.
  • Layer Wisely: Ensure even layering of ingredients for a balanced taste in every slice, making the dish enjoyable from start to finish.
  • Cooling Time: Let the lasagna sit for 5 minutes after baking before slicing; this helps with cleaner cuts and a more appealing presentation.
  • Moisture Management: Adjust moisture when using vegetarian sausage or extra veggies; too much may make your breakfast lasagna soggy.
  • Prep Ahead: Feel free to prepare the lasagna the night before; chilling allows the flavors to meld beautifully for a delicious morning dish!

How to Store and Freeze Breakfast Lasagna

Fridge: Store leftovers in an airtight container for up to 4 days. Place parchment paper between layers to prevent sticking and maintain freshness.

Freezer: You can freeze the breakfast lasagna before or after baking. Wrap it tightly in plastic wrap and then aluminum foil; it lasts up to 2 months.

Reheating: Thaw overnight in the fridge before reheating. Bake at 350°F (175°C) for about 25-30 minutes until heated through. Enjoy every flavorful bite!

What to Serve with Hearty Spicy Breakfast Lasagna

Elevate your brunch experience by pairing this delightful breakfast bake with complementary sides that entice the senses.

  • Fresh Mixed Fruit Salad: A bright medley of seasonal fruits adds a refreshing contrast to the savory lasagna, cleansing the palate between bites.

  • Crispy Toasted Garlic Bread: The crunchy texture and warm garlic flavor enhance the lasagna’s heartiness, making each meal feel indulgent and satisfying.

  • Zesty Lemony Arugula Salad: The peppery arugula, tossed with a light lemon vinaigrette, balances the richness of the lasagna beautifully and adds a refreshing element.

  • Savory Sausage Links: For a true breakfast feast, serve with extra sausages that echo the flavors in your lasagna, ensuring everyone leaves the table satisfied.

  • Warm Maple Syrup: Drizzling a bit of maple syrup over your slice adds a delightful sweet touch, enhancing the come-together flavors in this hearty dish.

  • Classic Mimosas: A refreshing citrusy drink, mimosas cut through the richness of the lasagna and add a festive flair to any brunch occasion.

Make Ahead Options

These Hearty Spicy Breakfast Lasagna are perfect for busy home cooks! You can assemble the entire lasagna up to 24 hours in advance, ensuring you’re one step closer to a stress-free breakfast. Simply prepare all layers, and once assembled, cover the dish tightly with plastic wrap and refrigerate. To maintain quality, let it sit at room temperature for about 30 minutes before baking, which allows for even cooking. When you’re ready to serve, preheat your oven to 350°F, bake uncovered for 35-40 minutes, and enjoy a flavor-packed, hearty meal with minimal morning effort!

Breakfast Lasagna: Exciting Variations Await

Feel free to unleash your culinary creativity and customize this delicious breakfast lasagna to your liking!

  • Vegetarian Delight: Swap out the sausage for sautéed mushrooms, diced bell peppers, or fresh spinach. This way, you keep all the hearty flavor while catering to vegetarian eaters.
  • Spicy Kick: Stir in some hot sauce or diced jalapeños into the cottage cheese mixture for those mornings when you crave an extra burst of heat. A little spice goes a long way!
  • Extra Veggies: Add more nutrition and color by layering in zucchini, sun-dried tomatoes, or even bell peppers. These vibrant veggies will infuse flavor and elevate your dish visually too.
  • Cheesy Bliss: Experiment with different cheeses! You can mix in sharp cheddar or gouda instead of the pepper jack for a distinct twist. Each cheese brings its own unique flavor profile.
  • Herb Infusion: Add chopped fresh herbs like parsley, cilantro, or basil to the cheese mixture or sprinkle on top before serving. Fresh herbs add brightness and elevate the flavor!
  • Hash Brown Substitution: Use leftover roasted potatoes or homemade hash browns instead of store-bought, making use of what you have on hand for a personal touch.
  • Breakfast-Style: Toss in crispy bacon or diced ham for a classic breakfast addition. This twist will bring a savory, smoky flavor to your lasagna while keeping it hearty.

Don’t forget to enhance your brunch experience with my delightful Easter Chocolate Lasagna for dessert after this savory dish!

Spicy Breakfast Lasagna Recipe FAQs

What kind of cheese should I use for the Breakfast Lasagna?
For a creamy and flavorful combination, I recommend using cottage cheese, pepper jack, and Muenster cheese. If you prefer a milder taste, feel free to substitute the pepper jack with Monterey Jack. The cottage cheese can also be replaced with ricotta for a rich texture.

How do I know if the ingredients are ripe or fresh?
When selecting eggs, choose large eggs that are clean and free from cracks. For cottage cheese, look for a smooth texture without dark spots. If you’re using frozen shredded hash browns, ensure they’re thawed properly; they should be moist but not soggy, which helps in achieving that crispy layer.

What’s the best way to store leftovers from the Breakfast Lasagna?
Absolutely! Store leftovers in an airtight container in the refrigerator for up to 4 days. To keep the layers from sticking together, I recommend placing parchment paper between the layers. This little tip ensures you can enjoy every slice fresh and delicious!

Can I freeze the Breakfast Lasagna, and how should I do it?
Yes, you can freeze it! Wrap your assembled or baked lasagna tightly in plastic wrap and then cover it with aluminum foil. This preserves its freshness and prevents freezer burn, allowing it to last for up to 2 months. When you’re ready to enjoy it, thaw overnight in the refrigerator before reheating at 350°F for about 25-30 minutes.

What if I want to adjust the recipe for dietary restrictions?
Certainly! To make this Breakfast Lasagna vegetarian, you can substitute the sausage with sautéed mushrooms or diced bell peppers, adjusting the moisture level as you go. If you’re concerned about allergies, always check labels for any potential allergens in the ingredients like cheese or pre-packaged items.

Why did my eggs turn out runny in the Breakfast Lasagna?
This can happen if the eggs are undercooked during scrambling. Be sure to cook the scrambled eggs until they’re thickened but still slightly runny (about 3-4 minutes on medium heat). They will continue to cook in the oven, giving you that perfect fluffy texture in the lasagna. Adjusting the cooking time ensures everything bakes together beautifully!

Breakfast Lasagna

Savory Breakfast Lasagna: A Hearty Morning Delight

This Breakfast Lasagna combines fluffy scrambled eggs, savory sausage, and crispy hash browns into a delicious bake.
Prep Time 30 minutes
Cook Time 40 minutes
Cooling Time 5 minutes
Total Time 1 hour 15 minutes
Servings: 8 slices
Course: Breakfast
Cuisine: American
Calories: 400

Ingredients
  

For the Cheese Mixture
  • 3 cups Cottage Cheese Ricotta can be used for a similar texture.
  • 1/2 cup Chives Green onions or scallions can replace chives if desired.
For the Egg Mixture
  • 18 large Eggs
  • 1/3 cup 2% Milk Whole milk or a plant-based milk also works well.
  • 1/2 tsp Salt
  • 1/4 tsp Pepper
For the Layers
  • 8 pieces Lasagna Noodles Cooked and drained; Avoid no-boil noodles for the best results.
  • 4 cups Frozen Shredded Hash Browns Thawed; Homemade or leftover potatoes can do the trick.
  • 1 lb Bulk Pork Sausage Cooked and crumbled; Use plant-based sausage for a vegetarian alternative.
For the Toppings
  • 8 oz Pepper Jack Cheese Sliced; Monterey Jack offers a milder flavor if preferred.
  • 8 oz Muenster Cheese Sliced.

Equipment

  • Mixing Bowl
  • Skillet
  • baking dish

Method
 

Step-by-Step Instructions
  1. Prepare the Cheese Mixture by combining the cottage cheese, chives, and green onions in a large mixing bowl until well blended.
  2. Whisk the Egg Mixture together with eggs, milk, salt, and pepper until fully combined and frothy.
  3. Scramble the eggs in a skillet over medium heat, stirring continuously until thickened but slightly runny.
  4. Assemble the Baking Dish by greasing a 13x9-inch baking dish with butter and layering 4 lasagna noodles at the bottom.
  5. Layer the Ingredients by spreading half the hash browns, followed by scrambled eggs, crumbled sausage, and half of the cottage cheese mixture; repeat for even distribution.
  6. Add Cheese and Final Layers by topping with slices of pepper jack cheese, then adding the remaining lasagna noodles, hash browns, and cottage cheese mixture.
  7. Finish with Muenster Cheese by layering the slices evenly over the top of the assembled lasagna.
  8. Refrigerate Before Baking by covering tightly with plastic wrap and chilling for at least 8 hours or overnight.
  9. Preheat and Let Sit by preheating the oven to 350°F (175°C) and letting the lasagna sit at room temperature for about 30 minutes before baking.
  10. Bake to Perfection by baking uncovered for 35-40 minutes until the top is golden and set.
  11. Rest and Slice by removing from oven and letting it rest for 5 minutes before slicing.

Nutrition

Serving: 1sliceCalories: 400kcalCarbohydrates: 28gProtein: 25gFat: 23gSaturated Fat: 10gPolyunsaturated Fat: 2gMonounsaturated Fat: 6gCholesterol: 300mgSodium: 800mgPotassium: 650mgFiber: 3gSugar: 2gVitamin A: 600IUVitamin C: 2mgCalcium: 300mgIron: 2mg

Notes

Let the lasagna sit for 5 minutes after baking for cleaner cuts. Adjust moisture if using vegetarian sausage or extra veggies to prevent sogginess.

Tried this recipe?

Let us know how it was!

Homemade Crumpets That Are Fluffy, Soft, and Irresistible

As I reached for a steaming cup of tea, a warm whiff of nostalgia washed over me, transporting me back to cozy mornings filled with the chatter of friends and family. There’s something uniquely comforting about homemade crumpets—those delightful, soft, spongey circles with their trademark holes, just waiting to soak up a generous pat of butter or your favorite jam. This recipe for homemade crumpets is truly a game-changer. Not only is it simple to whip up, but it also transforms ordinary ingredients into a brunch staple that will impress anyone at your table. Plus, they freeze beautifully, making future breakfasts a breeze! So, who’s ready to dive into this peculiar yet rewarding world of crumpet-making?

Why are Homemade Crumpets the Best?

Irresistible Texture: Imagine sinking your teeth into crumpets that are soft and spongy, with those perfect holes to capture melting butter!
Quick Preparation: With just a little mixing and waiting, you can have a delicious breakfast on the table in no time.
Versatile Delights: Top them with anything from classic butter and jam to savory cheese or even Vegemite—your options are endless!
Crowd-Pleasing: Whether it’s brunch with friends or a cozy family breakfast, these homemade crumpets are sure to impress every palate.
Freezer-Friendly: Whip up a batch and freeze for hassle-free mornings—just toast and enjoy! Don’t miss out on serving these alongside a lovely cup of tea or even with Homemade Corned Beef for a unique twist!

Homemade Crumpets Ingredients

For the Batter
Plain Flour – Gives your crumpets the perfect structure; all-purpose flour works too!
Sugar – Adds a hint of sweetness while helping the yeast activate; adjust to taste.
Table Salt – Enhances flavor and regulates yeast activity; sea salt is a great substitute.
Instant Yeast – Promotes fermentation for that fluffy texture; ensure freshness to get the best rise.
Baking Soda – Essential for fluffiness and nice browning; don’t skip this ingredient!
Warm Tap Water – Activates the yeast and creates a perfect batter consistency; warm but not hot is key.
Oil – Used for greasing your pan to prevent sticking; butter can add a rich, decadent flavor.

For Cooking
Crumpet Rings – These are crucial for shaping the crumpets perfectly; make sure to grease them well!

Enjoy creating your homemade crumpets with these simple ingredients!

Step‑by‑Step Instructions for Homemade Crumpets

Step 1: Mix Dry Ingredients
In a large mixing bowl, combine the plain flour, sugar, salt, instant yeast, and baking soda, ensuring that the yeast does not come into direct contact with the salt. This mixture sets the foundation for your homemade crumpets. Stir them together thoroughly until well blended, which will take about 1 minute.

Step 2: Combine Ingredients
Gradually pour in warm tap water while mixing with an electric beater on low speed for approximately 1 minute. The goal is to achieve a smooth, thick batter that clings to the beater without completely losing its form. You might notice a few lumps; that’s okay! The batter should be a bit thicker than pancake batter.

Step 3: Rest Batter
Cover the bowl with a clean kitchen towel and allow it to rest in a warm location for 30-45 minutes. This resting period is crucial as it allows the homemade crumpets to develop bubbles, giving them that airy texture. Look for the surface to become frothy and bubbly, but don’t expect the batter to rise dramatically.

Step 4: Prepare Crumpet Rings
While the batter rests, grease and dust the insides of your crumpet rings with a little oil and flour to prevent sticking during cooking. Make sure they’re well-greased, as this will help you easily remove the crumpets later. Set them aside on your counter, ready for use.

Step 5: Heat Pan
Preheat a large non-stick skillet over medium-high heat until it’s hot but not smoking, which takes about 3-4 minutes. Ensure that the heat is even across the skillet to promote consistent cooking of your homemade crumpets. If the skillet is too hot, the crumpets might burn before they cook through.

Step 6: Cook Crumpets (Stage 1)
Place the greased crumpet rings into the skillet and pour about 1/4 cup of batter into each ring. Cook for 5-6 minutes, keeping an eye on the edges; they should gradually dry out, and bubbles will rise to the surface. This is a good sign they’re cooking perfectly.

Step 7: Cook Crumpets (Stage 2)
Reduce the heat to low-medium and allow the crumpets to cook for another 5-6 minutes. During this time, they should appear completely dry on the top, and all the bubbles should pop, creating the signature holes that crumpets are known for. Patience is key to achieving a delightful texture.

Step 8: Flip to Seal
Once they’re cooked, carefully remove the crumpet rings and flip each crumpet for just 2-3 seconds to seal the tops slightly. This quick step helps to enhance their structure. Place them on a wire rack to cool, which helps to maintain their soft texture.

Step 9: Toast & Serve
Toast the cooled crumpets until golden brown on the outside, which usually takes about 2-3 minutes in a toaster or under a broiler. This final step adds a delicious crispiness while keeping the inside soft and airy. They’re now ready to enjoy with your preferred toppings, making your homemade crumpets irresistible!

Make Ahead Options

These homemade crumpets are perfect for busy mornings when you want to save time without sacrificing flavor! You can prepare the batter up to 24 hours in advance—simply mix the ingredients and cover the bowl before refrigerating. This resting period not only saves you time but also allows the flavors to develop. When you’re ready to cook, just pull the batter out, let it sit at room temperature for a few minutes, and follow the cooking instructions as usual. To maintain quality, be sure to store any cooked crumpets in an airtight container in the fridge for up to 3 days or freeze them for longer storage. Just toast to reheat when serving, and you’ll enjoy those delightful homemade crumpets with minimal effort!

Homemade Crumpets Variations Galore!

Feel free to sprinkle some creativity into your homemade crumpets—the possibilities are endless, and I can’t wait to see which twist you choose!

  • Gluten-Free: Use a gluten-free flour blend for a delightful version that’s friendly to those with dietary restrictions.
  • Herb-Infused: Mix in dried herbs like rosemary or thyme for a savory crumpet that pairs beautifully with cheese.
  • Cheese Crumpets: Add shredded cheese to the batter for a gooey, flavorful twist. These crumpets are a must-try for a brunch feast!
  • Fruit-Packed: Fold in small pieces of your favorite dried fruit, such as cranberries or apricots, for a sweet touch and added texture.
  • Cinnamon Sugar: Incorporate ground cinnamon and a touch of sugar to the batter for a sweet breakfast treat. Top with a sprinkle of cinnamon sugar after toasting!
  • Savory Spicy: Add a pinch of cayenne pepper or chili flakes for a spicy kick. Serve them warm with avocado and poached eggs for a breakfast sensation.
  • Fruity Toppings: Swap out the traditional butter for a spread of fruit preserves or a fresh fruit compote. This adds a refreshing burst to your crumpets!
  • Chocolate Delight: Stir in mini chocolate chips to create a decadent dessert crumpet. Pair with whipped cream for an indulgent treat!

No matter how you choose to experiment, these variations ensure that each batch of your homemade crumpets can become a completely new adventure. Enjoy these delightful creations alongside a soothing cup of tea or even with a slice of Homemade Corned Beef for a surprising brunch combination!

Storage Tips for Homemade Crumpets

Room Temperature: Store cooked crumpets in an airtight container at room temperature for up to 3 days; this keeps them soft and ready for toasting.

Freezer: For longer storage, place crumpets in a freezer-safe bag or container, with baking paper between them to prevent sticking. They can be frozen for up to 3 months.

Reheating: To reheat frozen homemade crumpets, simply toast them directly from the freezer until golden brown, ensuring they retain their fluffy interior.

Thawing: If you prefer to thaw, let them sit at room temperature for about 15-20 minutes before toasting, making breakfast a seamless experience!

Expert Tips for Homemade Crumpets

Perfect Temperature: Ensure your warm tap water is around 100°F (37°C). Too hot can kill the yeast, while too cold won’t activate it properly.

Batter Consistency: Aim for a thick batter that clings to the beater. Adjust with a bit more water if needed, but avoid making it too runny for the best homemade crumpets.

Preheating Matters: Give your skillet ample time to heat up evenly. An uneven surface can lead to undercooked or burnt crumpets.

Timing Is Key: Don’t rush the resting time for the batter. This step is essential for creating those characteristic bubbles, ensuring the final texture is fluffy.

Greasing Crumpet Rings: Don’t skimp on greasing your crumpet rings well. This prevents sticking and allows for easy removal once cooked.

Storing Crumpets: For the best storage, consider freezing the crumpets with baking paper in between each to prevent sticking. Enjoy fresh homemade crumpets any time!

What to Serve with Perfect Homemade Crumpets?

These delectable, fluffy crumpets can be the highlight of any breakfast or brunch, and pairing them right can elevate your meal to new heights!

  • Melted Butter: The classic choice; hot, melted butter seeps into the crumpets, making them even more irresistible.

  • Fruit Jam: Try strawberry or raspberry—sweet and tangy spreads offer a perfect contrast to the crumpets’ soft texture, bringing a burst of flavor in every bite.

  • Honey or Maple Syrup: Drizzling honey or syrup adds a delightful sweetness. The gooey texture pairs wonderfully with the fluffy crumpets.

  • Cream Cheese with Peaches: A refreshing twist, the creaminess complements the crumpet’s airy bite while the fruit adds a summery brightness.

  • Savory Toppings: Imagine crumpets topped with fresh avocado and a sprinkle of salt. This savory option creates a satisfying balance, perfect for brunch.

  • Eggs Benedict Style: Elevate your crumpets by topping them with poached eggs and hollandaise sauce for an over-the-top breakfast experience that oozes luxury.

  • Chai or Earl Grey Tea: A warm, spiced tea lifts the crumpets’ warmth while keeping the mood cozy. Sip as you savor each crumpet!

  • Mixed Berry Compote: A warm berry compote balances sweetness and tartness, infusing each bite with a luscious topping that feels indulgent.

  • Crispy Bacon: For a savory kick, pairing crumpets with crispy bacon brings a crunchy texture that harmonizes beautifully, creating a delightful range of flavors.

Embrace these pairing ideas, and create a breakfast that not only fills your tummy but also warms your heart!

Homemade Crumpets Recipe FAQs

How do I select the right flour for homemade crumpets?
Absolutely! Using plain flour is optimal for achieving the right structure in your homemade crumpets. All-purpose flour can also work well if that’s what you have on hand. Just avoid using whole wheat flour, as it may alter the texture.

How should I store leftover crumpets?
For homemade crumpets, store them in an airtight container at room temperature for up to 3 days. This keeps them soft and ready for toasting. If you find you have extra, freeze them for up to 3 months to enjoy later!

What’s the best way to freeze homemade crumpets?
To freeze, place cooked crumpets in a single layer with baking paper in between each one. This helps prevent them from sticking together. Store them in a freezer-safe bag or container for up to 3 months, ensuring a quick breakfast option later.

Why didn’t my crumpets rise properly?
Very! A common issue is if the yeast was either inactive or too old. Ensure your yeast is fresh by checking the expiration date, and remember that warm water (around 100°F/37°C) is essential for activating it. If the batter seems too thick, add a touch more warm water to achieve the right consistency.

Can I make these crumpets gluten-free?
Indeed! For gluten-free homemade crumpets, use a gluten-free all-purpose flour blend that contains xanthan gum for best results. Adjust the liquid slightly as needed to reach the right batter consistency, keeping it thicker than pancake batter.

Can pets have crumpets?
I recommend avoiding giving homemade crumpets to pets. Ingredients like sugar and yeast may not sit well with their digestive systems, and toppings could pose further risks. Always opt for pet-safe treats instead!

Homemade Crumpets

Homemade Crumpets That Are Fluffy, Soft, and Irresistible

This homemade crumpets recipe transforms simple ingredients into fluffy, irresistible treats that are perfect for breakfast.
Prep Time 45 minutes
Cook Time 15 minutes
Resting Time 30 minutes
Total Time 1 hour
Servings: 4 crumpets
Course: Breakfast
Cuisine: British
Calories: 150

Ingredients
  

For the Batter
  • 2 cups plain flour all-purpose flour works too
  • 1 tablespoon sugar adjust to taste
  • 1 teaspoon table salt sea salt is a great substitute
  • 1 packet instant yeast ensure freshness
  • 1 teaspoon baking soda
  • 1.5 cups warm tap water about 100°F (37°C)
  • 1 tablespoon oil for greasing the pan
For Cooking
  • 4 pieces crumpet rings grease them well

Equipment

  • large mixing bowl
  • Electric beater
  • Non-stick skillet
  • Crumpet rings

Method
 

Step-by-Step Instructions
  1. In a large mixing bowl, combine the plain flour, sugar, salt, instant yeast, and baking soda, ensuring that the yeast does not come into direct contact with the salt. Stir together until well blended, about 1 minute.
  2. Gradually pour in warm tap water while mixing with an electric beater on low speed for approximately 1 minute until you achieve a smooth, thick batter.
  3. Cover the bowl with a clean kitchen towel and allow it to rest in a warm location for 30-45 minutes until the surface is frothy and bubbly.
  4. Grease and dust the insides of your crumpet rings with a little oil and flour. Set them aside.
  5. Preheat a non-stick skillet over medium-high heat for about 3-4 minutes.
  6. Place the greased crumpet rings into the skillet and pour about 1/4 cup of batter into each ring. Cook for 5-6 minutes until edges dry out and bubbles rise.
  7. Reduce heat to low-medium and cook for another 5-6 minutes until the tops are dry and bubbles pop.
  8. Carefully remove the crumpet rings and flip each crumpet for 2-3 seconds to seal the tops slightly, then place on a wire rack to cool.
  9. Toast the cooled crumpets in a toaster or under a broiler until golden brown, usually about 2-3 minutes.

Nutrition

Serving: 1crumpetCalories: 150kcalCarbohydrates: 30gProtein: 4gFat: 2gSaturated Fat: 0.5gMonounsaturated Fat: 1gSodium: 200mgPotassium: 120mgFiber: 1gSugar: 2gCalcium: 1mgIron: 5mg

Notes

Enjoy your homemade crumpets with various toppings such as butter, jam, or cheese. They are perfect for any breakfast occasion.

Tried this recipe?

Let us know how it was!

Irresistible Apple Kringle with Creamy Vanilla Glaze Bliss

As I flipped through my grandmother’s recipe book, a familiar scent swept me away—warm apples mingling with cinnamon—a nostalgic reminder of cozy afternoons in her kitchen. Today, I’m excited to share my take on a classic: the Luscious Apple Kringle with Creamy Vanilla Glaze. This delightful Danish pastry not only brings a flaky, airy texture to the table but also features a sweet and spiced apple filling that’s bound to warm your heart. One of the best parts? It’s incredibly customizable, allowing you to swap in your favorite fruits or nuts for a fun twist. Plus, it makes an impressive centerpiece for any occasion, whether it’s brunch with friends or a sweet pick-me-up during the week. Are you ready to roll up your sleeves and give this a try?

Why is this Apple Kringle a must-try?

Irresistible Flavor: The combination of warm apples and fragrant cinnamon enveloped in a buttery, flaky pastry creates a taste sensation that echoes comfort.

Customizable Goodness: With options for gluten-free dough and a variety of fillings, like berries or nuts, this recipe allows for endless creativity.

Simple Steps: The approach is straightforward, making it perfect for bakers of all levels.

Crowd Favorite: It’s eye-catching and delicious, ensuring you impress guests during brunch or special occasions. Serve it alongside a delightful cup of coffee or tea for an elevated treat!

Perfect for Any Time: Whether it’s breakfast, dessert, or a cozy snack, this Kringle is suitable for every craving. Plus, if you’re looking for more delicious pastries, check out this Honeybun Carrot Cake or explore the comforting flavors of Chicken Soup Warms.

Apple Kringle Ingredients

• Get ready to create a delightful treat!

For the Dough

  • All-purpose flour – Provides structure for the dough. Substitute with gluten-free flour blend for a gluten-free version.
  • Salt – Enhances overall flavor. Use sea salt for a different taste profile.
  • Sugar – Adds sweetness and enriches flavor. Can be substituted with brown sugar for a deeper flavor.
  • Chilled, cubed butter – Creates flakiness in the pastry. Ensure the butter is very cold for best results.
  • Cold water – Helps bring the dough together without activating gluten. Use ice water for optimal dough consistency.

For the Apple Filling

  • Apples (peeled and diced) – Main filling ingredient that provides sweetness and texture. Granny Smith apples work well for a tart flavor.
  • Brown sugar – Sweetens the apple filling and adds moisture. Substitute with coconut sugar for a healthier option.
  • Cinnamon – Adds warmth and spice to the filling. Can be swapped with nutmeg for a different flavor.
  • Lemon juice – Brightens the apple filling. Substitute with apple cider vinegar for a similar effect.
  • Cornstarch – Thickens the apple filling as it bakes. Can be replaced with arrowroot powder.

For the Vanilla Glaze

  • Powdered sugar – For the vanilla glaze, adds sweetness and texture. Use erythritol for a low-sugar alternative.
  • Milk – Provides liquid in the glaze to achieve the right consistency. Use non-dairy milk for a vegan option.
  • Vanilla extract – Infuses flavor into the glaze. Almond extract can be used as a substitute for a different flavor profile.

Now that you have all the essentials for your Apple Kringle with Vanilla Glaze, let’s take this journey into delightful baking!

Step‑by‑Step Instructions for Apple Kringle with Vanilla Glaze

Step 1: Dough Preparation
In a large mixing bowl, combine all-purpose flour, salt, and sugar. Cut in chilled, cubed butter using a pastry cutter until the mixture resembles coarse crumbs. Gradually add ice-cold water, mixing until a dough forms. Wrap the dough in plastic wrap and refrigerate for at least 30 minutes to allow it to firm up for rolling.

Step 2: Apple Filling
While the dough is chilling, prepare the apple filling. In a medium bowl, mix peeled and diced apples with brown sugar, cinnamon, lemon juice, and cornstarch. Stir well to ensure the apples are evenly coated. Let the mixture sit for about 10 minutes to meld the flavors, creating a fragrant filling for your Apple Kringle.

Step 3: Assembly
After chilling, preheat your oven to 375°F (190°C). Roll out the dough on a floured surface into a large rectangle, about 1/4 inch thick. Place the apple filling in the center of the dough, ensuring there’s a border around the edges. Cut slits along both sides of the filling, then fold the dough over the apples, alternating sides to create a braid-like effect.

Step 4: Baking
Transfer the assembled Apple Kringle to a parchment-lined baking sheet. Bake in the preheated oven for 25-30 minutes or until the pastry is golden brown and flaky. Keep an eye on it; once you see a beautiful golden hue, it’s almost ready! After baking, allow it to cool on the baking sheet for about 10 minutes before adding the glaze.

Step 5: Glaze Preparation
While the Kringle cools, prepare the creamy vanilla glaze. In a small bowl, whisk together powdered sugar, milk, and vanilla extract until smooth and drizzling consistency is achieved. If the glaze is too thick, add a splash of milk; if too thin, add a little more powdered sugar.

Step 6: Finishing Touch
Once the Apple Kringle has cooled slightly, drizzle the vanilla glaze generously over the top, allowing it to cascade down the sides. The glaze will create a lovely shine and sweetness that complements the warm apple filling. Slice and serve your delightful Apple Kringle with Vanilla Glaze warm or at room temperature, ready for everyone to enjoy!

Make Ahead Options

These Apple Kringle with Vanilla Glaze are perfect for busy home cooks who love meal prep! You can prepare the dough and apple filling up to 24 hours in advance for a delightful time-saving solution. Simply follow the dough preparation and apple filling steps, then wrap the dough tightly in plastic wrap and refrigerate it. Store the filling in an airtight container in the fridge to keep it fresh. When you’re ready to bake, roll out the chilled dough, assemble the Kringle, and bake as instructed. You’ll have a freshly baked treat with all the flavors intact, making your mornings or dessert times just a little sweeter!

How to Store and Freeze Apple Kringle

Room Temperature: Store leftover Apple Kringle tightly wrapped in plastic wrap for up to 2 days to maintain its delightful flakiness.

Fridge: If you prefer a longer storage option, refrigerate wrapped Kringle for up to a week; make sure it’s well-sealed to prevent drying out.

Freezer: For longer preservation, freeze the wrapped Apple Kringle for up to 3 months. Thaw it overnight in the refrigerator before reheating.

Reheating: To bring back that warm, flaky goodness, reheat slices in the oven at 350°F (175°C) for about 10-15 minutes or until warmed through.

What to Serve with Apple Kringle with Vanilla Glaze

Create a delightful dining experience that complements the sweetness of this pastry!

  • Warm Spiced Cider: The comforting aroma and flavors of spiced apple cider create a cozy atmosphere, perfectly highlighting the apple filling of the Kringle.

  • Pumpkin Spice Latte: This seasonal favorite adds creaminess and a hint of spice, enhancing your dessert experience while evoking feelings of fall.

  • Whipped Cream: A dollop of fresh whipped cream elevates each slice, adding a light and airy contrast to the rich flavors of the pastry.

  • Vanilla Ice Cream: The melty creaminess plays wonderfully with the warm Kringle, creating a luscious dessert duo that’s irresistibly indulgent.

  • Fresh Berries Salad: A mix of tart berries like raspberries and blueberries adds a refreshing element that balances the sweetness of the pastry beautifully.

  • Herbal Tea: A soothing cup of herbal tea, like chamomile or mint, offers a calming finish alongside the sweet indulgence, perfect for winding down after a meal.

  • Chocolate Drizzle: For a decadent twist, drizzling a bit of melted chocolate over the glaze adds rich flavor that will make your taste buds sing.

  • Nutty Granola: Serving a side of crunchy, nutty granola introduces delightful texture and healthy elements, creating a well-rounded snack or breakfast option.

  • Caramel Sauce: A drizzle of caramel sauce can transform each bite into a luxurious treat, enhancing the sweet apple flavor while tempting your palate.

Expert Tips for Apple Kringle

  • Chill Ingredients: Always use cold butter and water to maintain flakiness in the dough, which is key for a perfect Apple Kringle.

  • Uniform Apples: Dice your apples evenly for consistent cooking. This prevents some apples from becoming mushy while others remain crunchy.

  • Don’t Overwork Dough: Handle the dough gently to avoid activating gluten, which can lead to a tough pastry instead of a light and flaky texture.

  • Watch the Bake: Ovens can vary significantly; always monitor the Kringle closely, and look for a golden-brown color to know it’s done.

  • Glaze Adjustments: If your glaze is too thin after mixing, add a little more powdered sugar. For a thicker glaze, incorporate a splash more milk gradually.

  • Creative Fillings: Feel free to explore different fillings beyond apples. Mixed berries or nuts can add a delightful twist to your custom Apple Kringle.

Apple Kringle with Vanilla Glaze Variations

Feel free to get creative with your Apple Kringle by experimenting with unique flavors and textures that will delight your taste buds!

  • Pears: Substitute apples with pears for a subtly sweet and tender filling that adds a lovely twist.

  • Berries: Add a mix of berries like blueberries or cranberries for a tart burst of flavor that perfectly complements the sweet glaze. Imagine savoring warm fruit with that vanilla touch – pure bliss!

  • Nuts: Incorporate chopped walnuts or pecans for added crunch and a nutty sweetness that elevates the overall texture.

  • Cream Cheese Filling: Layer in a cream cheese mixture for extra richness; simply blend cream cheese with a bit of sugar and vanilla for a delightful surprise.

  • Spices: Swap cinnamon for nutmeg or allspice to create a different warm flavor profile that’s sure to impress. Each bite will introduce new dimensions of comfort!

  • Vegan Option: Use a plant-based butter and non-dairy milk for both the dough and glaze, making this a delightful treat for all diets.

  • Chocolate Drizzle: For those with a sweet tooth, drizzle melted chocolate over the vanilla glaze for an indulgent chocolate-apple experience.

  • Savory Twist: Try adding sautéed spinach and feta cheese for a savory option that still keeps that flaky pastry goodness. This unexpected fusion will surprise your guests!

With these variations, feel free to explore and combine—your Apple Kringle can be as unique as the memories it creates. For more delightful desserts, don’t miss my Honeybun Carrot Cake or consider a comforting Korean BBQ Meatballs with Spicy Mayo to serve alongside!

Apple Kringle with Vanilla Glaze Recipe FAQs

What apples are best for Apple Kringle?
I recommend using Granny Smith apples for their tartness and firm texture, which holds up beautifully during baking. However, you can also experiment with sweeter varieties like Honeycrisp or Fuji for a different flavor profile. Just make sure the apples are fresh and firm, avoiding any with dark spots or soft areas.

How long can I store the Apple Kringle?
You can keep leftover Apple Kringle tightly wrapped at room temperature for up to 2 days. If you opt for refrigerating, it will stay fresh for up to a week. Just ensure it’s well-sealed to prevent drying out. For maximum freshness, I suggest consuming the Kringle within this timeframe to enjoy its delightful flakiness.

Can I freeze Apple Kringle?
Absolutely! To freeze your Apple Kringle, wrap it tightly in plastic wrap and then in aluminum foil to prevent freezer burn. It can be stored in the freezer for up to 3 months. When you’re ready to enjoy it, simply thaw it overnight in the refrigerator before reheating.

How do I troubleshoot if my pastry doesn’t turn out flaky?
If your Apple Kringle isn’t as flaky as you’d like, it may be due to overworking the dough or using ingredients that weren’t cold enough. Always ensure your butter and water are chilled, and handle the dough gently. If the dough feels tough, it might help to let it rest in the fridge a bit longer before rolling it out.

Is this recipe suitable for people with gluten allergies?
Yes! To make the Apple Kringle gluten-free, simply substitute the all-purpose flour with a gluten-free flour blend. Just make sure to check that all your other ingredients, like the vanilla extract and baking powder (if used), are also gluten-free to prevent any cross-contamination.

What should I do if my glaze turns out too thin?
If your glaze is too runny, you can easily thicken it by gradually adding more powdered sugar until you reach your desired consistency. Alternatively, if you want it thinner, just add a tiny splash of milk and whisk until smooth. Adjusting the glaze is all about finding that perfect balance, and it’s okay to tweak as you go!

Apple Kringle with Vanilla Glaze

Irresistible Apple Kringle with Creamy Vanilla Glaze Bliss

A delightful Apple Kringle with Vanilla Glaze featuring a spiced apple filling and flaky pastry, perfect for any occasion.
Prep Time 30 minutes
Cook Time 30 minutes
Chilling Time 30 minutes
Total Time 1 hour 30 minutes
Servings: 8 slices
Course: Dessert
Cuisine: Danish
Calories: 300

Ingredients
  

For the Dough
  • 2 cups All-purpose flour Substitute with gluten-free flour blend for a gluten-free version.
  • 1 teaspoon Salt Use sea salt for a different taste profile.
  • 1 tablespoon Sugar Can be substituted with brown sugar for a deeper flavor.
  • 1 cup Chilled, cubed butter Ensure the butter is very cold for best results.
  • 6 tablespoons Cold water Use ice water for optimal dough consistency.
For the Apple Filling
  • 3 cups Apples (peeled and diced) Granny Smith apples work well for a tart flavor.
  • 1/2 cup Brown sugar Substitute with coconut sugar for a healthier option.
  • 1 teaspoon Cinnamon Can be swapped with nutmeg for a different flavor.
  • 1 tablespoon Lemon juice Substitute with apple cider vinegar for a similar effect.
  • 2 tablespoons Cornstarch Can be replaced with arrowroot powder.
For the Vanilla Glaze
  • 1 cup Powdered sugar Use erythritol for a low-sugar alternative.
  • 2 tablespoons Milk Use non-dairy milk for a vegan option.
  • 1 teaspoon Vanilla extract Almond extract can be used as a substitute for a different flavor.

Equipment

  • Mixing Bowl
  • pastry cutter
  • Baking Sheet
  • Plastic Wrap
  • whisk

Method
 

Dough Preparation
  1. In a large mixing bowl, combine all-purpose flour, salt, and sugar. Cut in chilled, cubed butter using a pastry cutter until the mixture resembles coarse crumbs. Gradually add ice-cold water, mixing until a dough forms. Wrap the dough in plastic wrap and refrigerate for at least 30 minutes to allow it to firm up for rolling.
Apple Filling
  1. While the dough is chilling, prepare the apple filling. In a medium bowl, mix peeled and diced apples with brown sugar, cinnamon, lemon juice, and cornstarch. Stir well to ensure the apples are evenly coated. Let the mixture sit for about 10 minutes to meld the flavors, creating a fragrant filling for your Apple Kringle.
Assembly
  1. After chilling, preheat your oven to 375°F (190°C). Roll out the dough on a floured surface into a large rectangle, about 1/4 inch thick. Place the apple filling in the center of the dough, ensuring there's a border around the edges. Cut slits along both sides of the filling, then fold the dough over the apples, alternating sides to create a braid-like effect.
Baking
  1. Transfer the assembled Apple Kringle to a parchment-lined baking sheet. Bake in the preheated oven for 25-30 minutes or until the pastry is golden brown and flaky. After baking, allow it to cool on the baking sheet for about 10 minutes before adding the glaze.
Glaze Preparation
  1. While the Kringle cools, prepare the creamy vanilla glaze. In a small bowl, whisk together powdered sugar, milk, and vanilla extract until smooth and drizzling consistency is achieved. If too thick, add a splash of milk; if too thin, add a little more powdered sugar.
Finishing Touch
  1. Once the Apple Kringle has cooled slightly, drizzle the vanilla glaze generously over the top, allowing it to cascade down the sides. The glaze will create a lovely shine and sweetness that complements the warm apple filling. Slice and serve your delightful Apple Kringle with Vanilla Glaze warm or at room temperature.

Nutrition

Serving: 1sliceCalories: 300kcalCarbohydrates: 45gProtein: 3gFat: 15gSaturated Fat: 9gPolyunsaturated Fat: 1gMonounsaturated Fat: 4gCholesterol: 35mgSodium: 150mgPotassium: 100mgFiber: 2gSugar: 15gVitamin A: 200IUVitamin C: 5mgCalcium: 20mgIron: 1mg

Notes

Use cold ingredients for best results, and feel free to experiment with different fillings for a creative touch.

Tried this recipe?

Let us know how it was!

Chewy French Toast Cookies to Transform Your Breakfast Game

The sweet aroma of freshly baked cookies wafting through the house is truly one of life’s little joys. It’s like a warm hug on a chilly morning, and that’s precisely what these Chewy French Toast Cookies deliver. With a delightful fusion of flavors that remind us of our favorite breakfast, this quick bake is simple to whip up, making it an excellent choice for busy mornings or a cozy afternoon treat. What’s even better? They only take about 30 minutes from start to finish, catering perfectly to your craving for something sweet without the fuss. Whether you enjoy them with a steaming cup of coffee, or save them as a dessert, these cookies are bound to be a crowd-pleaser. Aren’t you curious about how deliciously comforting they can be? Let’s dive into this delightful recipe!

Why Are These French Toast Cookies Irresistible?

Comforting flavors: These Chewy French Toast Cookies boast the nostalgic warmth of maple and cinnamon, evoking memories of cozy breakfasts.

Quick to bake: With less than 30 minutes from prep to plate, they’re perfect for busy mornings or spontaneous cravings.

Versatile treats: Enjoy them as breakfast, dessert, or a midday snack; these cookies adapt to any time of day.

Crowd-pleaser: With a chewy center and slightly crisp exterior, they’re sure to win over family and friends alike.

Dietary-friendly: Easily swap out ingredients for vegan or gluten-free options, making them accessible to everyone—why not try adding some Blueberry Breakfast Cookies for variety?

French Toast Cookies Ingredients

• Here’s what you need to create these delightful Chewy French Toast Cookies!

For the Cookie Dough

  • Unsalted Butter – Adds richness and moisture; you can substitute with vegan butter for a dairy-free option.
  • Granulated Sugar – Provides sweetness and texture; consider using coconut sugar for a lower glycemic alternative.
  • Light Brown Sugar – Enhances moisture and adds a caramel flavor; swap with dark brown sugar for a deeper taste.
  • Large Egg Yolk – Acts as a binding agent; substitute with 1 tablespoon flaxseed meal mixed with 2.5 tablespoons water for a vegan version.
  • Light Corn Syrup – Contributes to chewiness and texture; honey works as an alternative.
  • Pure Vanilla Extract – Enhances flavor depth; always choose pure for the best results.
  • Maple Extract – Provides signature maple flavor; you can substitute it with an extra tablespoon of maple syrup.
  • All-Purpose Flour – Gives structure; feel free to swap in a gluten-free flour blend if needed.
  • Ground Cinnamon – Adds warmth and spice; replace with ground cardamom for a different touch.
  • Ground Nutmeg – Offers a fragrant hint of spice; omit or substitute with ginger for a twist.
  • Baking Soda – Works as a leavening agent; make sure it’s fresh for optimal results.
  • Salt – Balances flavors; use kosher or sea salt for a better taste.

Feel free to get creative with these ingredients—your kitchen can become a canvas for cookies that bring the lovely taste of breakfast into every bite!

Step‑by‑Step Instructions for Chewy French Toast Cookies

Step 1: Preheat Oven
Begin by preheating your oven to 350°F (177°C). While it’s heating, line two baking sheets with parchment paper, ensuring you have a non-stick surface ready for your Chewy French Toast Cookies. This preparation will help the cookies bake evenly and release easily after they’re done.

Step 2: Cream Ingredients
In a mixing bowl, combine ½ cup of unsalted butter with ½ cup of granulated sugar and ½ cup of light brown sugar. Using an electric mixer, cream the mixture on medium speed for about 2-3 minutes until it appears light and fluffy. This step creates a perfect base for your cookies, ensuring they’ll be chewy and delicious.

Step 3: Add Wet Ingredients
Next, add in 1 large egg yolk, ¼ cup of light corn syrup, 1 teaspoon of pure vanilla extract, and 1 teaspoon of maple extract to the creamed mixture. Mix on low until combined and smooth, about 1 minute. This blend adds moisture and flavor, essential for your scrumptious Chewy French Toast Cookies.

Step 4: Combine Dry Ingredients
In a separate bowl, whisk together 2 cups of all-purpose flour, 1 teaspoon of ground cinnamon, ¼ teaspoon of ground nutmeg, ½ teaspoon of baking soda, and a pinch of salt. This will ensure all dry ingredients are evenly distributed, aiding in the proper texture of your cookies.

Step 5: Mix Together
Gradually add the dry mixture to the wet mixture, stirring gently until just combined. Avoid overmixing, as this can lead to tough cookies. The dough should be cohesive but still somewhat sticky—a good sign your Chewy French Toast Cookies will be perfectly chewy.

Step 6: Shape Cookies
With your hands, scoop portions of dough and form them into 1.5-inch balls. Roll each ball in granulated sugar for a sweet, crunchy coating. This step not only enhances the visual appeal of your cookies but also adds a delightful sweetness that complements the French toast flavors.

Step 7: Arrange on Sheets
Place the sugar-coated cookie balls on the prepared baking sheets, leaving about 2 inches between each ball. This spacing allows the cookies to spread during baking without merging together. Make sure they are evenly spaced for uniform baking.

Step 8: Bake
Slide the cookie sheets into the preheated oven and bake for 10-12 minutes. You’ll know they’re ready when the edges are set, and the centers are still slightly soft. The aroma of cinnamon and maple will fill your kitchen—an irresistible hint of the delicious treats coming!

Step 9: Cool
Once baked, remove the cookies from the oven and let them cool on the baking sheets for about 5 minutes. This resting time allows the cookies to set properly before transferring them to wire racks for complete cooling. Enjoy the wonderful aroma as you anticipate the delightful taste of your Chewy French Toast Cookies!

Variations of French Toast Cookies

Embrace the joy of customization with these delightful cookie variations that will elevate your baking experience!

  • Vegan: Replace the egg yolk with 1 tablespoon flaxseed meal mixed with 2.5 tablespoons water and use vegan butter for a guilt-free version. Feel free to enjoy the same sweetness without compromising your values!

  • Gluten-Free: Swap all-purpose flour for a gluten-free blend to cater to dietary needs. You’ll still enjoy the irresistible chewiness, just without the gluten!

  • Nutty Delight: Add ½ cup of chopped pecans or walnuts to the dough for a delightful crunch. The added texture enhances the cookies’ flavor profile, making them even more satisfying.

  • Chocolate Chip: Fold in ½ cup of chocolate chips for a rich, decadent twist on classic flavors. Imagine the gooey chocolate melting in your mouth with every bite!

  • Cinnamon-Sugar Coating: Instead of rolling the dough in granulated sugar, create a mixture of cinnamon and sugar for an extra burst of flavor. This sugary coat enhances the overall sweetness and complements the warm spices beautifully.

  • Spicy Variance: Swap ground cinnamon for ground cardamom for a unique, exotic flavor twist. This change will transport you to a whole new realm of deliciousness!

  • Maple Burst: Boost the maple goodness by adding an extra tablespoon of maple syrup to the dough. You won’t believe how much richer the cookies will taste!

For more tasty inspirations, why not try pairing these cookies with a deliciously comforting Creme Brulee French Toast for a spectacular brunch treat? Each variation allows you to explore and tailor to your taste, making your baking journey a cherished adventure!

Expert Tips for Chewy French Toast Cookies

  • Cream Well: Ensure butter and sugars are creamed thoroughly to achieve a light, chewy texture. Without this, cookies may turn out dense.

  • Avoid Overmixing: Gently mix the dough until just combined. Overmixing can lead to tough cookies—not what you want with French Toast Cookies!

  • Keep an Eye on Baking: Monitor your cookies closely while baking, removing them when the edges are set, but the centers are still soft for the perfect chewy bite.

  • Proper Storage: Store your cookies in an airtight container to maintain their chewiness and freshness. They’re meant to be enjoyed for days!

  • Experiment Freely: Feel free to substitute ingredients based on your preferences. This makes the French Toast Cookies versatile and adaptable to dietary needs.

Make Ahead Options

These Chewy French Toast Cookies are perfect for busy home cooks looking to save time! You can prepare the cookie dough up to 24 hours in advance; just refrigerate it and let it come to room temperature before baking. If you prefer, you can also bake the cookies ahead of time, storing them in an airtight container at room temperature for up to 5 days or refrigerate for up to 10 days. To maximize freshness, be sure to let the cookies cool completely before sealing. When ready to serve, enjoy them as they are or warm them briefly in the oven for that fresh-baked taste. Your future self will thank you for this easy meal prep solution!

What to Serve with Chewy French Toast Cookies?

The delectable blend of flavors in these cookies invites a variety of pairings that can elevate your next breakfast or snack experience.

  • Fresh Berries: Bright and juicy, berries add a refreshing contrast to the sweet, rich cookies while enhancing the breakfast vibe.

  • Maple Syrup Drizzle: A drizzle of warm maple syrup accentuates the cookies’ flavor, providing that nostalgic breakfast touch each bite—indeed, a lovely indulgence!

  • Greek Yogurt: Creamy and tangy, Greek yogurt balances the sweetness of the cookies, making it a delightful breakfast option or light dessert.

  • Coffee: A hot cup of coffee makes for an invigorating pairing, enhancing the warm, comforting vibe while its bold flavor cuts through the sweetness.

  • Vanilla Ice Cream: Indulge in the ultimate treat by serving these cookies with a scoop of vanilla ice cream. The melted creaminess perfectly complements their chewy texture.

  • Whipped Cream: Light and airy, a dollop of whipped cream brings an elegant touch to your dessert experience, elevating each savory bite of the cookies.

  • Crispy Bacon: The savory crunch of bacon adds an interesting texture contrast, bringing a unique twist to your breakfast plate—sweet and salty perfection!

  • Milk: A classic glass of cold milk is a perfect companion. It not only satisfies but also brings a nostalgic comfort with every chewy bite of the cookies.

How to Store and Freeze French Toast Cookies

Room Temperature: Keep cookies in an airtight container at room temperature for up to 5 days. This prevents them from drying out and maintains their delightful chewiness.

Fridge: If not consumed within 5 days, refrigerate cookies in an airtight container for up to 10 days. This helps prolong freshness while still keeping them soft and enjoyable.

Freezer: For longer storage, freeze cookies in a single layer until solid, then transfer them to a freezer-safe container. They can be stored for up to 3 months without losing their scrumptious flavor.

Reheating: To enjoy them warm, simply reheat individual cookies in the microwave for about 10-15 seconds or pop them in a preheated oven at 350°F (177°C) for 5 minutes.

Chewy French Toast Cookies Recipe FAQs

What type of butter should I use for the cookies?
Absolutely! I recommend using unsalted butter to control the amount of salt in your recipe and enhance the buttery flavor. If you’re looking for a dairy-free option, substitute with vegan butter. Just make sure it’s at room temperature for easier creaming with the sugars!

How long can I store the baked cookies?
You can keep your Chewy French Toast Cookies in an airtight container at room temperature for up to 5 days. If you want them to stay fresh a bit longer, refrigerate them for up to 10 days. Just remember, storing them properly is key to maintaining their delightful chewiness!

Can I freeze these cookies? How do I do it?
Yes, you can freeze your Chewy French Toast Cookies! First, place them in a single layer on a baking sheet until solid. Then, transfer them to a freezer-safe container or bag. These cookies can be stored in the freezer for up to 3 months. When you’re ready to enjoy, simply reheat them in the microwave for about 10-15 seconds or bake them in a preheated oven at 350°F (177°C) for 5 minutes to warm them through.

What do I do if my cookie dough feels too dry?
If your cookie dough is too dry, it could be that you accidentally added too much flour. To fix this, try adding a tablespoon of milk (or a dairy-free alternative) at a time until the dough comes together. Alternatively, you can add a tiny bit more corn syrup to increase moisture without affecting the flavor too much. Always keep an eye on the consistency!

Can I make these cookies vegan?
Very much so! To make the Chewy French Toast Cookies vegan, use a plant-based butter instead of traditional butter, and replace the egg yolk with a mixture of 1 tablespoon flaxseed meal and 2.5 tablespoons of water. This flax egg acts as a perfect binding agent. You’re welcome to substitute light corn syrup with maple syrup or agave syrup as well!

What’s the best way to ensure my cookies stay chewy?
To guarantee your Chewy French Toast Cookies remain chewy, make sure not to overmix the dough when combining the dry and wet ingredients—it’s best to mix until just combined. Additionally, take them out of the oven when the edges are set but the centers still look slightly soft; they will continue to firm up while cooling on the baking sheet.

French Toast Cookies

Chewy French Toast Cookies to Transform Your Breakfast Game

These Chewy French Toast Cookies blend nostalgic maple and cinnamon flavors, transforming breakfast into a delightful treat.
Prep Time 15 minutes
Cook Time 12 minutes
Cooling Time 5 minutes
Total Time 30 minutes
Servings: 24 cookies
Course: Dessert
Cuisine: American
Calories: 120

Ingredients
  

For the Cookie Dough
  • 1/2 cup Unsalted Butter Substitute with vegan butter for a dairy-free option.
  • 1/2 cup Granulated Sugar Consider using coconut sugar for a lower glycemic alternative.
  • 1/2 cup Light Brown Sugar Swap with dark brown sugar for a deeper taste.
  • 1 large Egg Yolk Substitute with 1 tablespoon flaxseed meal mixed with 2.5 tablespoons water for a vegan version.
  • 1/4 cup Light Corn Syrup Honey works as an alternative.
  • 1 teaspoon Pure Vanilla Extract Always choose pure for the best results.
  • 1 teaspoon Maple Extract Can be substituted with an extra tablespoon of maple syrup.
  • 2 cups All-Purpose Flour Feel free to swap in a gluten-free flour blend if needed.
  • 1 teaspoon Ground Cinnamon Replace with ground cardamom for a different touch.
  • 1/4 teaspoon Ground Nutmeg Omit or substitute with ginger for a twist.
  • 1/2 teaspoon Baking Soda Make sure it’s fresh for optimal results.
  • 1 pinch Salt Use kosher or sea salt for a better taste.

Equipment

  • Mixing Bowl
  • Electric mixer
  • Baking Sheets
  • Parchment Paper

Method
 

Preparation Steps
  1. Preheat your oven to 350°F (177°C) and line two baking sheets with parchment paper.
  2. In a mixing bowl, cream together 1/2 cup of unsalted butter, 1/2 cup of granulated sugar, and 1/2 cup of light brown sugar until light and fluffy.
  3. Add 1 large egg yolk, 1/4 cup of light corn syrup, 1 teaspoon of pure vanilla extract, and 1 teaspoon of maple extract to the mixture and mix until smooth.
  4. In a separate bowl, whisk together 2 cups of all-purpose flour, 1 teaspoon of ground cinnamon, 1/4 teaspoon of ground nutmeg, 1/2 teaspoon of baking soda, and a pinch of salt.
  5. Gradually add the dry mixture to the wet mixture, stirring gently until combined.
  6. Scoop portions of dough and roll them into 1.5-inch balls, rolling each in granulated sugar.
  7. Place the sugar-coated balls on the prepared baking sheets, leaving about 2 inches apart.
  8. Bake for 10-12 minutes until the edges are set but centers are slightly soft.
  9. Allow cooling on the sheets for 5 minutes before transferring to wire racks.

Nutrition

Serving: 1cookieCalories: 120kcalCarbohydrates: 18gProtein: 1gFat: 5gSaturated Fat: 3gPolyunsaturated Fat: 0.5gMonounsaturated Fat: 1.5gCholesterol: 10mgSodium: 50mgPotassium: 40mgFiber: 0.5gSugar: 8gVitamin A: 200IUCalcium: 20mgIron: 0.5mg

Notes

Store cookies in an airtight container to maintain chewiness and freshness. Enjoy for days!

Tried this recipe?

Let us know how it was!

Starbucks Egg Bites: Customize Your Delicious Breakfast Treat

As I stood in my kitchen, the aroma of something savory wafted through the air, instantly lifting my spirits. What was that delightful scent? It was my version of Starbucks Egg Bites, right from my cozy home! These creamy, protein-packed bites transform busy mornings into a delicious experience, making them ideal for anyone seeking a satisfying breakfast without the fast-food guilt. The best part? They’re incredibly customizable! Whether you’re craving a Mediterranean twist or a spicy Mexican kick, these bites cater to various dietary preferences, from gluten-free to keto-friendly. Plus, with their quick prep time, they fit seamlessly into any meal prep routine. Are you ready to become the breakfast hero in your own kitchen?

Why Are Starbucks Egg Bites So Irresistible?

Creamy, Protein-Packed Goodness: These egg bites are not only delicious but also a nutritious way to start your day, loaded with protein.

Endless Customizations: Mix in your favorite vegetables and cheeses, from bell peppers to feta, allowing you to create a unique breakfast every time.

Quick and Easy: With minimal prep time, you can whip these up in no time, perfect for busy mornings or meal prep.

Versatile and Family-Friendly: Whether you’re serving kids or entertaining guests, these bites will please everyone, much like my Cheesy Protein Egg Bake.

Diet-Friendly: Gluten-free, keto-friendly, and low-carb options mean you can enjoy them without the guilt!

Elevate your mornings with these star bites that truly shine in both taste and convenience!

Starbucks Egg Bites Ingredients

For the Egg Mixture
6 large eggs – The base providing protein and structure for these egg bites.
1/2 cup cottage cheese – Adds a creamy texture; ricotta can be a tasty substitute for a different mouthfeel.
1/4 teaspoon salt – Essential for enhancing the overall flavor; adjust according to dietary preferences.
1/4 teaspoon black pepper – Introduces a gentle heat; feel free to omit or decrease if preferred.
1/4 teaspoon garlic powder (optional) – Infuses depth; fresh minced garlic can be swapped for a robust flavor.

For the Flavor Add-Ins
1/2 cup shredded cheese (cheddar or mozzarella) – Provides richness and taste; experiment with feta or pepper jack for a twist.
1/2 cup diced vegetables (spinach, bell peppers, or mushrooms) – Boosts nutrients and flavor; use seasonal vegetables for freshness.

For Preparation
Cooking spray or oil – Necessary for greasing the muffin tin to ensure easy removal of the egg bites.

With these ingredients, you’ll be well on your way to creating delicious Starbucks Egg Bites that are not only satisfying but also perfectly customizable!

Step‑by‑Step Instructions for Starbucks Egg Bites

Step 1: Preheat the Oven
Begin by preheating your oven to 325°F (160°C). This gentle heat ensures that your Starbucks Egg Bites will cook evenly without burning. As the oven warms up, you can gather your ingredients and prepare for the next steps, creating a smooth workflow in your kitchen.

Step 2: Prepare the Muffin Tin
While the oven is heating, take a standard muffin tin and generously grease each cup with cooking spray or a light brushing of oil. This will prevent your egg bites from sticking and ensure that they slide out easily after baking. Set the prepared tin aside while you move on to the egg mixture.

Step 3: Whisk Eggs Together
In a large mixing bowl, crack open 6 large eggs and add 1/2 cup of cottage cheese along with 1/4 teaspoon of salt, 1/4 teaspoon of black pepper, and the optional garlic powder. Use a whisk to combine these ingredients until smooth and well blended. You’ll know it’s ready when you see no visible lumps, creating a nice, creamy base for your Starbucks Egg Bites.

Step 4: Add Cheese and Vegetables
Gently fold in 1/2 cup of shredded cheese and 1/2 cup of diced vegetables into the egg mixture. Choose your favorite veggies, such as spinach, bell peppers, or mushrooms, for a delicious addition. Ensure everything is evenly distributed, giving your bites a burst of flavor in every delicious morsel.

Step 5: Fill Muffin Tins
Carefully pour the egg mixture into each greased muffin cup, filling them about 3/4 full. It’s important not to overfill, as the egg bites will puff up while baking. Take a moment to admire your colorful mixture before sliding the muffin tin into the hot oven.

Step 6: Bake and Check for Doneness
Place the muffin tin in the preheated oven and let the egg bites bake for 20-25 minutes. Keep an eye on them; they should puff up and set around the edges. The tops should appear slightly golden and firm, signaling that they are ready to come out of the oven.

Step 7: Cool Before Removing
Once baked, remove the muffin tin from the oven and let the Starbucks Egg Bites cool for about 5 minutes. This cooling time allows them to firm up slightly, making removal easier. You’ll notice a delightful aroma filling your kitchen!

Step 8: Serve Warm or Store for Later
Carefully run a knife around the edges of each egg bite to loosen them, then gently pop them out of the muffin tin. Serve warm for a delicious breakfast treat, or store in an airtight container in the fridge for up to 5 days. Reheat as needed, and enjoy your homemade Starbucks Egg Bites!

Starbucks Egg Bites: Delightful Variations Await

Let your culinary creativity flow with these delicious variations to elevate your Starbucks Egg Bites experience!

  • Mediterranean Twist: Add sun-dried tomatoes, black olives, and feta cheese for a vibrant Mediterranean flavor that’s tangy and refreshing. Perfect for sunlit breakfasts or brunch gatherings!

  • Bacon & Cheese: Stir in crispy bacon bits along with sharp cheddar for a heartier version that brings all the flavors of a classic breakfast. It’s a crowd-pleaser, especially when served warm with a side of fruit.

  • Veggie Delight: Incorporate a medley of seasonal vegetables like zucchini, kale, or roasted red peppers for a nutritious boost. The bright colors and flavors will make these bites visually appealing!

  • Herb Infusion: Toss in fresh herbs such as basil, chives, or cilantro to enhance the taste with aromatic notes that delight the senses. A sprinkle of herbs adds an elegant touch to your breakfast table.

  • Spicy Mexican Style: Throw in jalapeños and cotija cheese for a fiery twist that jazzes up your morning routine. Serve alongside avocado and salsa for a fiesta in every bite!

  • Dairy-Free Option: Substitute cottage cheese and regular cheese with a dairy-free alternative, such as vegan cream cheese and nutritional yeast, keeping it creamy yet suitable for lactose intolerance.

  • Low-Carb Hero: Replace the regular vegetables with high-fiber options like cauliflower rice and spinach, offering a delicious, low-carb treat that fits perfectly into your keto-friendly lifestyle.

  • Cheesy Garlic Goodness: For garlic lovers, increase the garlic powder or introduce roasted garlic and a mix of your favorite shredded cheeses. This indulgent variation pairs beautifully with breakfast potatoes or a fresh salad!

Feel free to explore these variations while enjoying your Starbucks Egg Bites, and don’t forget to check out my recipes for Comfort Garlic Potatoes or a wholesome Cheesy Fried Egg Quesadilla for delightful accompaniments!

Make Ahead Options

These Starbucks Egg Bites are perfect for meal prep, saving you precious time on busy mornings! You can prepare the egg mixture (eggs, cottage cheese, salt, pepper, and optional garlic powder) up to 24 hours in advance; simply store it in an airtight container in the fridge. You can also chop your vegetables and shredded cheese ahead of time to make assembly a breeze. When you’re ready to enjoy, mix in the cheese and veggies, fill the muffin tins, and bake as directed. To maintain quality, let them cool completely before refrigerating them in an airtight container for up to 5 days, ensuring they stay just as delicious as when freshly made!

Expert Tips for Starbucks Egg Bites

Fresh Ingredients Matter: Use only fresh eggs and vegetables for the best flavor and texture in your Starbucks Egg Bites.

Avoid Overfilling: Fill your muffin cups only 3/4 full to prevent overflow while baking. This way, your bites will achieve the perfect puff!

Customize Wisely: While variations are endless, sticking to 1/2 cup of add-ins will ensure the right balance without compromising the egg mixture.

Check for Doneness: Fully cooked egg bites will puff up and have no wet spots in the center, so keep an eye on them during those last few minutes.

Serving Suggestions: Try serving with fresh herbs or a dollop of salsa for added flavor and a vibrant presentation!

Storage Savvy: These egg bites can be stored in an airtight container for up to 5 days, making them a perfect meal prep option.

What to Serve with Starbucks Egg Bites?

Elevate your breakfast experience by pairing these creamy morsels with delicious sides that complement their delightful flavor.

  • Fresh Fruit Salad: A mix of seasonal fruits adds sweetness and brightness, enhancing the overall breakfast experience.
  • Avocado Toast: The creaminess of avocado on warm, toasted bread provides a satisfying contrast to the fluffy egg bites.
  • Sautéed Spinach: This garlicky greens dish adds depth and nutrition, creating a heartier morning meal.
  • Whole Grain Toast: Nutty and wholesome, it brings a comfortable crunch that beautifully balances the soft textures of the egg bites.
  • Homemade Salsa: A zesty, spicy salsa awakens your taste buds and pairs perfectly with the savory egg flavors.
  • Coffee or Herbal Tea: Whether you prefer a warm cup of coffee or soothing herbal tea, a beverage brings a cozy touch to your breakfast ritual. These drinks provide a moment of comfort as you savor each bite.
  • Greek Yogurt with Honey: Creamy yogurt topped with a drizzle of honey and nuts can create a sweet finish, leaving you fully satisfied.
  • Smoothie Bowl: Blend up your favorite fruits and serve them in a bowl for a refreshing, nutritious side that complements the egg bites perfectly!

Storage Tips for Starbucks Egg Bites

Fridge: Store the egg bites in an airtight container for up to 5 days. This keeps them fresh and ready to enjoy at a moment’s notice.

Freezer: If you want to keep them longer, you can freeze Starbucks Egg Bites for up to 3 months. Place them in a single layer on a baking sheet to freeze individually before transferring to a freezer-safe bag.

Reheating: To reheat, simply microwave for 30-60 seconds or warm in the oven at 350°F (175°C) for about 10-15 minutes, ensuring they’re heated through and ready to savor again.

Prepping Ahead: Make these bites in batches for convenient meal prep. They’re perfect for busy mornings when you need a quick, satisfying breakfast!

Starbucks Egg Bites Recipe FAQs

How do I choose the best vegetables for my Starbucks Egg Bites?
Choosing the right vegetables is key to enhancing the flavor of your egg bites. Look for fresh, vibrant vegetables like spinach, bell peppers, or mushrooms, as they not only add color but also vital nutrients. If you notice dark spots or wilting on the veggies, it’s best to skip those. I often recommend using seasonal vegetables for optimal freshness and taste!

What’s the best way to store leftover Starbucks Egg Bites?
To keep your egg bites fresh, store them in an airtight container in the fridge for up to 5 days. This method retains their flavor and texture beautifully! Just make sure to let them cool completely before sealing them up to avoid condensation causing sogginess.

Can I freeze Starbucks Egg Bites? What’s the best way?
Absolutely! Freezing is a great option if you want to enjoy them later. First, allow your egg bites to cool completely. Then, place them in a single layer on a baking sheet and freeze until solid, about 1-2 hours. Once frozen, transfer them to a freezer-safe bag and store for up to 3 months. When you’re ready to eat, just reheat them in the microwave for about 30-60 seconds, or in the oven at 350°F (175°C) for about 10-15 minutes until warmed through.

What should I do if my Starbucks Egg Bites don’t puff up while baking?
If your egg bites don’t puff up, it could be due to overfilling the muffin cups or not using fresh ingredients. Make sure to fill each cup only 3/4 full and check if your eggs are fresh for the best rise. Additionally, ensure your oven is properly preheated to 325°F (160°C) before baking—this helps them cook evenly!

Are Starbucks Egg Bites suitable for everyone, including those with dietary restrictions?
Yes, these egg bites are highly customizable to fit various dietary needs. They are naturally gluten-free and can be tailored to be low-carb or keto-friendly. Just be cautious with your add-ins, especially regarding allergies. For cheese, opt for lactose-free options if you’re lactose intolerant. Enjoy making these bites work for your lifestyle!

Can I add spices to my Starbucks Egg Bites for extra flavor?
Very! Spices can elevate your egg bites to a whole new level. I often suggest adding paprika, cayenne pepper, or even herbs like basil and cilantro. Just be mindful of your spice tolerance and adjust accordingly. This way, you can make your egg bites uniquely delicious and truly yours!

Starbucks Egg Bites

Starbucks Egg Bites: Customize Your Delicious Breakfast Treat

Starbucks Egg Bites are creamy, protein-packed breakfast treats that are highly customizable and perfect for busy mornings.
Prep Time 10 minutes
Cook Time 25 minutes
Cooling Time 5 minutes
Total Time 40 minutes
Servings: 4 bites
Course: Breakfast
Cuisine: American
Calories: 150

Ingredients
  

For the Egg Mixture
  • 6 large eggs The base providing protein and structure.
  • 1/2 cup cottage cheese Adds a creamy texture; ricotta can be a substitute.
  • 1/4 teaspoon salt Adjust according to dietary preferences.
  • 1/4 teaspoon black pepper Introduces gentle heat; omit or decrease if preferred.
  • 1/4 teaspoon garlic powder Infuses depth; fresh minced garlic can be swapped.
For the Flavor Add-Ins
  • 1/2 cup shredded cheese Cheddar or mozzarella; experiment with feta or pepper jack.
  • 1/2 cup diced vegetables Spinach, bell peppers, or mushrooms; use seasonal vegetables.
For Preparation
  • cooking spray or oil Necessary for greasing the muffin tin.

Equipment

  • Muffin Tin
  • Mixing Bowl
  • whisk

Method
 

Step-by-Step Instructions
  1. Preheat your oven to 325°F (160°C) to ensure even cooking.
  2. Grease the muffin tin generously with cooking spray or oil.
  3. In a large mixing bowl, whisk together the eggs, cottage cheese, salt, black pepper, and garlic powder until smooth.
  4. Fold in the shredded cheese and diced vegetables into the egg mixture.
  5. Pour the egg mixture into each greased muffin cup, filling about 3/4 full.
  6. Bake for 20-25 minutes until puffed and golden.
  7. Cool the egg bites for 5 minutes before removing them from the muffin tin.
  8. Serve warm or store in an airtight container for up to 5 days.

Nutrition

Serving: 2bitesCalories: 150kcalCarbohydrates: 5gProtein: 12gFat: 10gSaturated Fat: 5gPolyunsaturated Fat: 1gMonounsaturated Fat: 4gCholesterol: 200mgSodium: 400mgPotassium: 200mgFiber: 1gSugar: 2gVitamin A: 500IUVitamin C: 15mgCalcium: 200mgIron: 1mg

Notes

Use fresh ingredients for the best flavor and texture. Avoid overfilling muffin cups to ensure proper baking and puffing.

Tried this recipe?

Let us know how it was!

Cheesy Garlic Breadsticks: Your New Favorite Quick Snack

There’s something magical about the aroma of freshly baked bread wafting through the kitchen—like a warm hug from the oven. Enter my Quick & Easy Cheesy Garlic Breadsticks, a timeless recipe that brings a slice of pizzeria joy right to your home. These delightful breadsticks are not only quick to whip up in just 25 minutes, but they’re also a fantastic vegetarian snack that everyone will adore. Perfect for last-minute gatherings or quiet nights in, this recipe offers multiple variations, including gluten-free options, so you can customize every batch to suit your taste. Imagine tearing into that crispy golden crust, revealing a gooey, cheesy center that’s impossible to resist! Ready to elevate your snacking game? Let’s dive into the recipe!

Why Are These Cheesy Garlic Breadsticks Irresistible?

Quick Preparation: In just 25 minutes, you can have warm, cheesy goodness fresh out of the oven. Perfect for spontaneous snacks or parties!

Customization Options: Make them your own! Whether you prefer gluten-free options or want to swap in some veggies, the recipe supports a variety of delightful tweaks.

Flavors That Pop: The combination of garlic, mozzarella, and herbs creates an irresistibly savory aroma and taste that will have everyone reaching for more.

Crowd-Pleaser: Ideal for gatherings or cozy nights in, these breadsticks pair beautifully with sauces like marinara or garlic butter, making them a hit for kids and adults alike!

Homemade Feel: Enjoy that fresh bakery charm right at home. There’s nothing like the satisfaction of pulling apart a warm, cheesy breadstick straight from your kitchen!

Want more delicious ideas? Try these Cheesy Garlic Chicken wraps or a comforting side of Honey Garlic Salmon with your breadsticks!

Cheesy Garlic Breadsticks Ingredients

• Perfect for your next snack!

For the Dough
Pizza Dough – Use store-bought for convenience or make your own for extra freshness.

For the Topping
Butter – Imparts richness; substitute with olive oil for a lighter twist.
Garlic – Fresh minced garlic brings aromatic warmth; garlic powder works in a pinch.
Mozzarella Cheese – The star of the show, providing the gooey, stretchy texture we all crave!
Parmesan Cheese (optional) – Adds a savory nutty flavor when grated on top.
Dried Oregano/Italian Seasoning – Enhances the breadsticks’ flavor; fresh herbs can elevate the dish even more.
Salt & Black Pepper – Essential for balancing flavors.
Fresh Parsley (optional) – A bright, colorful garnish that adds freshness to the presentation.

Step‑by‑Step Instructions for Cheesy Garlic Breadsticks

Step 1: Preheat and Prepare
Begin by preheating your oven to 425°F (220°C). While the oven heats up, prepare a baking sheet by greasing it lightly with butter or lining it with parchment paper. This will help your Cheesy Garlic Breadsticks bake evenly and prevent sticking. Set the prepared baking sheet aside as you move on to the dough.

Step 2: Shape the Dough
On a lightly floured surface, roll or stretch your pizza dough into a rectangular shape about ½ inch thick. Make sure to keep the edges smooth, as this will ensure a uniform bake and beautiful presentation. If using store-bought dough, let it sit at room temperature for easier handling. Once shaped, transfer it gently to your prepared baking sheet.

Step 3: Prepare the Garlic Butter
In a small bowl, melt about 4 tablespoons of butter in the microwave or on the stove. Once melted, mix in freshly minced garlic, salt, and black pepper to create a flavorful garlic butter. This aromatic mixture will elevate your Cheesy Garlic Breadsticks and bring out the best in every bite. Brush the garlic butter generously over the dough, ensuring even coverage for that irresistible flavor.

Step 4: Add the Cheesy Toppings
Sprinkle dried oregano or Italian seasoning evenly across the brushed dough, followed by a generous layer of shredded mozzarella cheese. Make sure to leave no gaps, as this will ensure every bite is cheesy and delicious. If you’re using Parmesan cheese, sprinkle that on top as well for an extra layer of flavor. The combination of these cheeses will create a gooey, melty texture that everyone will love.

Step 5: Bake the Breadsticks
Carefully place the baking sheet in your preheated oven and bake for about 10-15 minutes. Keep an eye on them until the edges are golden brown and the cheese is bubbling and slightly browned. The heavenly aroma of garlic and cheese will fill your kitchen, signaling that your Cheesy Garlic Breadsticks are nearly ready.

Step 6: Rest and Slice
Once baked to perfection, remove the baking sheet from the oven and let the breadsticks rest for 1-2 minutes. This resting period allows the cheese to set slightly, making for cleaner slices. After resting, use a sharp knife or pizza cutter to slice the breadsticks into strips, creating perfect portions for sharing.

Step 7: Garnish and Serve
For a pop of color and freshness, sprinkle some chopped fresh parsley over the sliced breadsticks. Serve your warm Cheesy Garlic Breadsticks with your choice of dipping sauce, such as marinara or garlic butter, and enjoy the delightful mix of flavors in this comforting homemade snack!

Cheesy Garlic Breadsticks: Fun Variations!

Feel free to unleash your creativity and customize these delightful breadsticks to suit your cravings with a few simple twists!

  • Gluten-Free: Use gluten-free pizza dough for a delicious alternative that everyone can enjoy without compromising on flavor.

  • Herb-Infused: Replace dried oregano with fresh basil or rosemary for a vibrant, aromatic twist that elevates flavors to new heights. Nothing beats the freshness of garden herbs!

  • Veggie Delight: Top your breadsticks with thinly sliced bell peppers, red onions, or spinach before baking. These colorful veggies not only add nutrition but also bring a lovely crunch.

  • Spicy Kick: Add a sprinkle of red pepper flakes to the garlic butter for a bit of heat. This small tweak will ignite your taste buds and add a fun surprise!

  • Cheesy Overload: Swap mozzarella for a blend of cheeses such as cheddar or fontina for a richer flavor profile. Imagine pulling apart a cheesy breadstick wallpapered in melted goodness!

  • Pesto Drizzle: Drizzle homemade or store-bought pesto over the cooked breadsticks for an Italian flair. It adds a delightful freshness and a burst of flavor that everyone will love.

  • Balsamic Glaze: For a touch of sophistication, drizzle a little balsamic glaze over the breadsticks just before serving. It complements the cheesy goodness beautifully!

  • Caprese Style: Add sliced tomatoes and fresh mozzarella just before baking and sprinkle with balsamic vinegar after pulling them from the oven for a fresh Caprese-inspired flavor.

If you loved these and need more inspiration, why not whip up some Cheesy Spinach Artichoke dip for dipping? Or perhaps savor the irresistible flavors of Garlic Butter Steak Bites? Enjoy your culinary adventure!

How to Store and Freeze Cheesy Garlic Breadsticks

Fridge: Store leftover Cheesy Garlic Breadsticks in an airtight container for up to 2-3 days. Reheat them in the oven for the best texture.

Freezer: For longer storage, freeze baked breadsticks on a baking sheet until solid, then transfer to a resealable bag for up to 2 months.

Reheating: To revive frozen breadsticks, preheat the oven to 375°F (190°C) and bake directly from the freezer for about 10-12 minutes until heated through and crispy.

Make-Ahead Tips: Prepare the dough ahead of time and refrigerate it after shaping with toppings. Bake fresh when you’re ready for warm, cheesy goodness!

Make Ahead Options

These Cheesy Garlic Breadsticks are perfect for meal prep, allowing you to enjoy delectable snacks any day of the week! You can prepare the dough and assemble the toppings up to 24 hours in advance. Simply shape the dough, brush it with the garlic butter mixture, and sprinkle the cheese and seasonings. Cover the prepared baking sheet tightly with plastic wrap and refrigerate until you’re ready to bake. When it’s time to serve, preheat your oven and bake directly from the fridge for about 10-15 minutes until golden and bubbly. This method ensures the breadsticks are just as delicious as if made fresh, saving you hassle on busy weeknights!

What to Serve with Cheesy Garlic Breadsticks

These deliciously warm snacks pair perfectly with a variety of accompaniments, making your meal even more memorable.

  • Marinara Sauce: The classic tomato-based dip enhances the breadsticks’ flavor, adding a tangy contrast to the cheesy goodness.

  • Garlic Butter Dip: Rich and aromatic, this dip takes your cheesy experience to the next level with its creamy warmth.

  • Fresh Salad: A light, verdant salad provides a refreshing crunch that balances the richness of the breadsticks. Think mixed greens with a zesty vinaigrette!

  • Creamy Tomato Soup: The comforting creaminess of tomato soup complements the cheesy texture, creating a classic pairing that’s hard to resist.

  • Hummus: For a twist, serve with hummus—its nutty notes and smooth consistency offer a delightful contrast to the crispy, cheesy bites.

  • Roasted Vegetables: Add color and nutrients by serving alongside lightly roasted veggies; they provide a wholesome crunch with each bite.

  • Sparkling Water or Lemonade: A refreshing drink like sparkling water or homemade lemonade enhances the whole experience, cleansing the palate beautifully.

  • Ice Cream: For dessert, a scoop of vanilla ice cream rounds off the meal; the sweet contrast to the garlic will leave you craving more!

Expert Tips for Cheesy Garlic Breadsticks

  • Room-Temperature Dough: Using dough that’s at room temperature will make stretching it easier and lead to a more even bake.

  • Mind the Baking Time: Keep a close watch on the breadsticks while baking to avoid over-browning the cheese. Aim for golden edges and bubbling cheese.

  • Allow to Rest: Let the breadsticks rest for 1-2 minutes post-baking. This helps the cheese stabilize, preventing messy slices and ensuring a satisfying pull.

  • For Extra Crispiness: Position the baking sheet lower in the oven during the last couple of minutes to enhance the crunchiness of your Cheesy Garlic Breadsticks.

  • Best Reheating Method: Avoid using the microwave to reheat leftovers, as it can turn them soggy. Instead, use the oven to restore that delightful crispness.

Cheesy Garlic Breadsticks Recipe FAQs

How do I choose the best pizza dough for Cheesy Garlic Breadsticks?
Absolutely! For a perfect base, I recommend using fresh, store-bought pizza dough for convenience. However, if you have the time, homemade dough can elevate the flavor and freshness! Look for dough that is soft and pliable, avoiding any that appears overly dry or stale.

What is the best way to store leftovers?
After enjoying your Cheesy Garlic Breadsticks, store any leftovers in an airtight container in the refrigerator for up to 2-3 days. To reheat, simply place them in the oven at 375°F (190°C) for about 5-7 minutes until they’re warm and crispy again. This will help maintain their delightful texture!

Can I freeze Cheesy Garlic Breadsticks?
Absolutely! To freeze, first bake the breadsticks as per the recipe. Allow them to cool completely, then place them in a single layer on a baking sheet and freeze until solid. Once frozen, transfer them to a resealable bag and label with the date. They can be stored for up to 2 months. When you’re ready to enjoy them, bake directly from frozen at 375°F (190°C) for about 10-12 minutes.

What if my breadsticks are too soft after baking?
If your Cheesy Garlic Breadsticks turn out too soft, it might be due to overbaking or not letting them rest long enough post-baking. Make sure to keep an eye on them while they’re in the oven and allow them to rest for 1-2 minutes after baking to help the cheese set and firm up.

Are there any allergy considerations for Cheesy Garlic Breadsticks?
Yes! If you’re adapting for allergies, you can use gluten-free pizza dough for those with gluten sensitivities. Additionally, substitute dairy-free butter and cheese alternatives if you’re avoiding dairy. Always check labels to ensure no hidden allergens in your ingredients.

How can I add more flavor to my breadsticks?
Very! For added flavor, consider rubbing a little minced garlic on the dough before adding the topping. You can also experiment with additional spices like red pepper flakes for a kick, or even sprinkle some fresh herbs over the top after baking for an aromatic finish.

Cheesy Garlic Breadsticks

Cheesy Garlic Breadsticks: Your New Favorite Quick Snack

Cheesy Garlic Breadsticks are a quick, delightful vegetarian snack that brings pizzeria joy home in just 25 minutes.
Prep Time 10 minutes
Cook Time 15 minutes
Resting Time 2 minutes
Total Time 25 minutes
Servings: 8 sticks
Course: Appetizers
Cuisine: Italian
Calories: 150

Ingredients
  

For the Dough
  • 1 pkg Pizza Dough Use store-bought for convenience or make your own.
For the Topping
  • 4 tbsp Butter Substitute with olive oil for a lighter twist.
  • 3 cloves Garlic Fresh minced garlic brings aromatic warmth.
  • 2 cups Mozzarella Cheese Shredded for easy melting.
  • 1/2 cup Parmesan Cheese Optional, grated on top.
  • 1 tbsp Dried Oregano/Italian Seasoning Fresh herbs can elevate the dish even more.
  • 1 tsp Salt
  • 1 tsp Black Pepper
  • 1/4 cup Fresh Parsley Optional, for garnishing.

Equipment

  • Baking Sheet
  • Oven
  • Mixing Bowl
  • Rolling Pin

Method
 

Step-by-Step Instructions
  1. Preheat your oven to 425°F (220°C) and prepare a baking sheet by greasing it or lining it with parchment paper.
  2. On a lightly floured surface, roll or stretch the pizza dough into a rectangular shape about ½ inch thick and transfer it to the prepared baking sheet.
  3. Melt about 4 tablespoons of butter, and mix in minced garlic, salt, and black pepper. Brush generously over the dough.
  4. Sprinkle dried oregano and mozzarella cheese evenly across the brushed dough, adding Parmesan if desired.
  5. Bake for about 10-15 minutes until the edges are golden brown and the cheese is bubbling.
  6. Remove from the oven and let the breadsticks rest for 1-2 minutes. Slice into strips.
  7. Garnish with chopped parsley and serve with dipping sauce.

Nutrition

Serving: 1stickCalories: 150kcalCarbohydrates: 15gProtein: 5gFat: 7gSaturated Fat: 4gMonounsaturated Fat: 2gCholesterol: 20mgSodium: 300mgPotassium: 100mgFiber: 1gSugar: 1gVitamin A: 200IUVitamin C: 1mgCalcium: 150mgIron: 1mg

Notes

For extra crispiness, position the baking sheet lower in the oven during the last couple of minutes to enhance crunchiness.

Tried this recipe?

Let us know how it was!

Mouthwatering Breakfast Pizza Loaded with Eggs and Sausage

The aroma of savory breakfast sausage sizzling in a pan can make anyone’s morning feel special. As I prepared to whip up this Hearty Breakfast Pizza, my mind drifted to those cozy family brunches where laughter and stories flow freely. This delightful breakfast pizza combines fluffy scrambled eggs enveloped in a creamy sauce, paired perfectly with vibrant peppers and onions, all nestled on a crispy crust. It’s not just a meal—it’s a heartwarming way to gather your loved ones around the table. Plus, the quick prep makes it a brilliant choice for busy mornings, and it’s versatile enough to please even the pickiest eaters. Ready to elevate your breakfast game? Let’s dive into this scrumptious recipe that will leave you craving more with every bite!

Why is Breakfast Pizza a Must-Try?

Versatile and customizable, this breakfast pizza allows you to mix and match your favorite toppings. Quick prep means you can whip it up in no time, making it perfect for busy mornings. Family-friendly and hearty, it caters to all taste buds, so everyone will be satisfied. Savory flavors from the sausage and cheese blend beautifully with the creamy eggs, creating a delicious meal experience. If you love delicious breakfast ideas, be sure to check out my Banana Blueberry Breakfast for a wholesome treat or try the Croissant Breakfast Sandwich for another delightful morning option!

Breakfast Pizza Ingredients

For the Crust

  • Pizza Dough – This is the pizza’s foundation; use store-bought or a homemade option for best flavor.

For the Filling

  • Breakfast Sausage – Adds a savory protein punch; turkey sausage is a lighter choice if desired.
  • Onion – Sweetness and depth are essential; any onion variety works, though red or yellow is recommended.
  • Peppers (Red or Green) – They add color and crunch; feel free to swap in spinach or mushrooms for a veggie boost.
  • Butter – This helps create a creamy filling; you can substitute with margarine if needed.
  • All-Purpose Flour – Thickens the sauce for the eggs; use gluten-free flour as a good alternative.
  • Milk or Half-and-Half – This creates the creamy consistency; almond or soy milk works for a dairy-free option.
  • Eggs – They are crucial for protein and texture; look for fresh farm eggs for the best taste.

For the Topping

  • Sharp Cheddar Cheese – Brings a delightful tang; swap for mozzarella if you prefer a milder flavor.
  • Mozzarella Cheese – Essential for that stretch and melty goodness; provolone can also be used for variety.

Your Breakfast Pizza adventure awaits—use these ingredients to craft a morning masterpiece that is sure to delight!

Step‑by‑Step Instructions for Hearty Breakfast Pizza

Step 1: Prepare the Pizza Dough
Begin by preheating your oven to 400°F (200°C). If you’re using store-bought pizza dough, roll it out to a 14″ circle or a 12″ x 16″ rectangle on a floured surface, ensuring it’s even. Transfer the shaped dough onto a baking sheet lined with parchment paper. Let it sit while you prepare the filling, allowing for a slightly risen crust as it rests.

Step 2: Sauté the Vegetables
In a large skillet over medium heat, melt 1 tablespoon of butter. Add 1 finely chopped onion and 1 cup of diced red or green peppers. Sauté for 5–7 minutes, stirring occasionally, until the vegetables become tender and translucent. This fragrant mixture will serve as a vibrant base for your Hearty Breakfast Pizza.

Step 3: Cook the Breakfast Sausage
Next, add 1 pound of breakfast sausage to the skillet with the softened vegetables. Use a wooden spoon to break up the sausage and cook for about 6–8 minutes, or until it browns and is no longer pink. Once cooked, drain excess fat, ensuring the mixture remains flavorful without sogginess on your pizza.

Step 4: Make the Creamy Sauce
In the same skillet, reduce the heat to low and melt 2 tablespoons of butter. Stir in 2 tablespoons of all-purpose flour, cooking for 4 minutes without letting it brown. Then, gradually whisk in 1 cup of milk or half-and-half until the mixture thickens. Stir in the cracked eggs, cooking gently until set but still creamy, approximately 3–4 minutes.

Step 5: Assemble the Breakfast Pizza
Spread the creamy egg mixture evenly over your prepared pizza dough. Next, distribute the sausage and vegetable mixture on top of the eggs, ensuring every slice will be hearty and full of flavor. Don’t hesitate to get creative at this stage with toppings—make it your own!

Step 6: Add the Cheese Toppings
Finish your Hearty Breakfast Pizza by generously sprinkling 1 cup of shredded sharp cheddar cheese and 1 cup of shredded mozzarella cheese over the top. This melty combination will create a deliciously gooey layer, ensuring that every bite is full of cheesy goodness.

Step 7: Bake to Perfection
Carefully place your assembled pizza into the preheated oven and bake for 15–18 minutes. Keep an eye on it, looking for a golden crust and bubbly cheese as visual cues of doneness. Your Hearty Breakfast Pizza is nearly ready to impress!

Step 8: Cool and Serve
Once out of the oven, let your breakfast pizza cool for a few minutes to set the cheese before slicing into wedges. The aroma will fill your kitchen, making it hard to resist! Pair it with your favorite sides like a fresh fruit salad or a warm cup of coffee.

What to Serve with Hearty Breakfast Pizza

Start your morning off right by pairing this delicious dish with complementary sides that enhance its rich, savory goodness.

  • Fresh Fruit Salad: A refreshing mix of seasonal fruits adds a touch of sweetness and brightens up the meal.
  • Crispy Hash Browns: Their crunchy texture contrasts beautifully with the soft pizza, creating a delightful harmony of flavors.
  • Breakfast Smoothie: Blend your choice of berries, yogurt, and spinach for a nutritious drink that balances the richness of the pizza.
  • Herbed Yoghurt Dip: A dollop of herbed yogurt brings a cool, creamy element that pairs wonderfully with the warm pizza slices.
  • Savory Grilled Tomatoes: The caramelized sweetness accentuates the savory notes of the pizza, making each bite even more satisfying.
  • Rich Coffee or Espresso: A bold brew elevates the whole breakfast experience, perfectly complementing the hearty flavors of Breakfast Pizza.
  • Mini Cinnamon Rolls: Add a touch of sweetness to your meal; these pastries are delightful bites that balance the savory pizza well.
  • Buttery Croissants: Flaky and tender, buttery croissants alongside your pizza offers a delightful contrast in texture and a hint of elegance.

Expert Tips for Breakfast Pizza

  • Egg Cooking: Ensure to cook the eggs just until they are softly set to avoid rubbery texture that can ruin your breakfast pizza.
  • Sausage Drainage: Drain the sausage mixture thoroughly to prevent a soggy crust; nobody wants a limp pizza, right?
  • Cooling Technique: Let the pizza cool for a few minutes before slicing to ensure the cheese firms up and makes for cleaner cuts.
  • Vegetable Substitutions: Don’t hesitate to swap in your favorite vegetables for added nutrition and flavor; chopped spinach or mushrooms work wonders!
  • Dough Thickness: For a fluffier crust, let the dough rise a little longer before baking; this extra time makes a delicious difference!

Make Ahead Options

These Hearty Breakfast Pizzas are perfect for meal prep enthusiasts! You can prepare the pizza dough and filling up to 24 hours in advance. Simply roll out the dough and store it wrapped tightly in the fridge to keep it fresh. Likewise, cook the sausage and veggie mixture, then refrigerate it until you’re ready to bake. When morning arrives, all you need to do is whisk the eggs into the creamy sauce, spread it over the dough, and top with the sausage mix and cheeses before popping it in the oven. This method saves you precious time on busy mornings while ensuring your breakfast pizza is just as delicious as if you made it from scratch that day!

Breakfast Pizza Variations & Substitutions

Feel free to explore the delightful world of customization with your breakfast pizza! Each variation offers a unique twist to satisfy different cravings.

  • Vegetarian: Substitute the sausage with sautéed mushrooms and spinach for a flavorful veggie option that still packs a punch.
  • Gluten-Free: Use a gluten-free pizza dough or even a cauliflower crust for a lighter, gluten-free delight.
  • Dairy-Free: Opt for almond or soy milk instead of regular milk, and use dairy-free cheese to keep things creamy without the dairy.
  • Cheese Lovers: Experiment with exotic cheeses like feta or goat cheese for an elevated flavor profile that will impress everyone at the table.
  • Spicy Kick: Add sliced jalapeños or a sprinkle of crushed red pepper for an exciting spicy twist that will heat things up deliciously.
  • Herbaceous Touch: Fresh herbs like chives, parsley, or basil can add a refreshing aroma and additional flavor to your breakfast pizza.
  • Breakfast Burrito Style: Layer in some black beans and avocado for a hearty, burrito-inspired breakfast pizza that’s full of surprises.
  • Savory Sweet: Drizzle a touch of maple syrup over the top before baking for a sweet-savory combination that’s simply irresistible.

Let your creativity soar with these variations! Interested in more breakfast ideas? Don’t forget to check out the flavorful Escape Charm Hawaiian for a unique twist on breakfast goodness!

Storage Tips for Breakfast Pizza

Fridge: Store leftover breakfast pizza in an airtight container for up to 3 days. This keeps the flavors intact while preventing it from drying out.

Freezer: For longer storage, wrap slices of breakfast pizza tightly in plastic wrap and aluminum foil, then freeze for up to 2 months. This preserves the taste and texture beautifully.

Reheating: Reheat slices in a preheated oven at 350°F (175°C) for about 10–15 minutes or until warmed through and the cheese is melty again. Freshly reheated breakfast pizza tastes just like when it was first baked!

Make-Ahead: You can prepare and assemble your breakfast pizza a day in advance. Just cover it and refrigerate, then bake it fresh in the morning for a delightful breakfast treat!

Breakfast Pizza Recipe FAQs

What type of pizza dough should I use for breakfast pizza?
You can use store-bought pizza dough for convenience or make your own for a more personal touch. For a healthier twist, consider whole wheat dough, which adds fiber and depth of flavor. Roll it out to a 14″ circle or a 12″ x 16″ rectangle, depending on your baking sheet size.

How do I store leftover breakfast pizza?
Store leftover breakfast pizza in an airtight container in the refrigerator for up to 3 days. This will help keep the flavors fresh and prevent the pizza from drying out. If you want to enjoy it later, consider freezing individual slices wrapped tightly in plastic wrap and aluminum foil for up to 2 months.

Can I freeze breakfast pizza?
Absolutely! To freeze breakfast pizza, slice it into individual portions and wrap each slice tightly with plastic wrap. Then, place them in a freezer-safe container or bag. When you’re ready to enjoy it, remove a slice, unwrap it, and reheat in a preheated oven at 350°F (175°C) for about 10–15 minutes until warmed through.

What if my pizza crust is soggy?
A soggy crust can happen, but don’t fret! To avoid this, make sure to drain the sausage mixture well before adding it to the pizza, and keep an eye on the creamy sauce. Also, bake the pizza long enough for the crust to get golden brown and crisp. If you notice dark spots appearing on the crust, that’s a good sign it’s crisping up nicely!

Are there any dietary considerations for breakfast pizza?
If you’re catering to dietary restrictions, there are plenty of options! Substitute traditional sausage with turkey sausage or a meat alternative for a lighter or vegetarian-friendly option. Use gluten-free flour for the sauce, and opt for almond or soy milk to make the dish dairy-free. Always check for allergies, especially with cheese and potential allergens in your chosen toppings.

How long does breakfast pizza last once baked?
Once baked, breakfast pizza is best enjoyed fresh but can last in the fridge for up to 3 days. The reheating process can help bring back some of that fresh-baked texture, making it almost as delightful as when it first came out of the oven!

Breakfast Pizza

Mouthwatering Breakfast Pizza Loaded with Eggs and Sausage

Discover the delightful Breakfast Pizza loaded with eggs and sausage, perfect for family brunches.
Prep Time 20 minutes
Cook Time 18 minutes
Cooling Time 5 minutes
Total Time 43 minutes
Servings: 8 slices
Course: Breakfast
Cuisine: American
Calories: 300

Ingredients
  

For the Crust
  • 1 package Pizza Dough store-bought or homemade
For the Filling
  • 1 lb Breakfast Sausage can substitute with turkey sausage
  • 1 medium Onion finely chopped, red or yellow preferred
  • 1 cup Peppers (Red or Green) diced, can use spinach or mushrooms
  • 2 tbsp Butter can substitute with margarine
  • 2 tbsp All-Purpose Flour gluten-free flour is a good alternative
  • 1 cup Milk or Half-and-Half almond or soy milk for dairy-free option
  • 6 large Eggs fresh farm eggs recommended
For the Topping
  • 1 cup Sharp Cheddar Cheese shredded
  • 1 cup Mozzarella Cheese shredded

Equipment

  • Large skillet
  • Baking Sheet
  • Parchment Paper
  • whisk

Method
 

Step-by-Step Instructions for Hearty Breakfast Pizza
  1. Preheat the oven to 400°F (200°C). Roll out the pizza dough to a 14" circle or a 12" x 16" rectangle on a floured surface and transfer to a baking sheet lined with parchment paper.
  2. Melt 1 tablespoon of butter in a large skillet over medium heat. Add the onion and peppers, sauté for 5–7 minutes until tender.
  3. Add the breakfast sausage to the skillet, breaking it up and cooking for 6–8 minutes until browned. Drain excess fat.
  4. In the same skillet, reduce heat to low and melt 2 tablespoons of butter. Stir in 2 tablespoons of flour and cook for 4 minutes. Gradually whisk in milk until thickened, then stir in the eggs and cook gently until set.
  5. Spread the creamy egg mixture over the pizza dough, then top with the sausage and vegetable mixture.
  6. Sprinkle shredded cheddar and mozzarella cheese over the top.
  7. Bake in the preheated oven for 15–18 minutes until the crust is golden and the cheese is bubbly.
  8. Allow to cool for a few minutes before slicing into wedges.

Nutrition

Serving: 1sliceCalories: 300kcalCarbohydrates: 30gProtein: 20gFat: 15gSaturated Fat: 8gPolyunsaturated Fat: 1gMonounsaturated Fat: 4gCholesterol: 180mgSodium: 600mgPotassium: 200mgFiber: 1gSugar: 2gVitamin A: 500IUVitamin C: 40mgCalcium: 250mgIron: 2mg

Notes

For the fluffiest crust, let the dough rise a little longer before baking. Customize toppings as desired.

Tried this recipe?

Let us know how it was!

Savory Overnight Breakfast Casserole for Easy Mornings

With a chilly morning breeze nudging me awake, the promise of a warm, hearty breakfast lured me into the kitchen. There’s something utterly satisfying about preparing Ina Garten’s Overnight Breakfast Casserole, a dish that wraps savory breakfast sausage and melted Cheddar cheese in a creamy egg custard. Not only is this casserole a comforting crowd-pleaser, but it also embraces the beauty of make-ahead convenience. Imagine serving a dish that’s ready to go right out of the oven when your guests arrive—pure bliss! Whether it’s a cozy family brunch or a festive holiday gathering, this hearty breakfast will surely capture everyone’s hearts (and appetites). Are you ready to bring a sprinkle of joy to your mornings with this delicious recipe?

Why is a Breakfast Casserole Perfect?

Make-Ahead Magic: This Overnight Breakfast Casserole lets you prepare everything the night before, freeing up hectic mornings for relaxation and joy.
Rich, Hearty Flavors: It combines savory breakfast sausage and melty Cheddar in luscious egg custard, offering unforgettable taste with every bite.
Crowd-Pleaser: Ideal for gatherings, this dish satisfies both family and friends, leaving everyone feeling content and energized.
Versatile Ingredients: Feel free to customize with your favorite veggies or cheese to suit any palate. If you love hearty recipes, you might enjoy these Banana Blueberry Breakfast cookies or French Toast Casserole as well!
Satisfying Texture: Imagine a golden, puffy casserole that’s both creamy and crunchy—pure comfort in a bite.
Nutritional Balance: Pair it with fresh fruit or yogurt for a complete meal, making breakfast feel indulgent yet wholesome!

Overnight Breakfast Casserole Ingredients

Dive into deliciousness with Ina Garten’s Overnight Breakfast Casserole and create a dish that’s sure to impress!

For the Base

  • Italian or French Bread – Choose day-old bread for the best texture, absorbing custard without becoming soggy.
  • Large Eggs (10) – These act as the binding agent, making for a perfect custard that holds everything together.
  • Whole Milk (2 ½ cups) – Opt for whole milk for a creamy texture; low-fat milk can be a lighter alternative.
  • Heavy Cream (½ cup) – Adds richness to the custard; substitute with more milk for a lighter version.

For the Cheese

  • Shredded Cheddar Cheese (1 ½ cups) – A must for flavor; feel free to swap with mozzarella or sharper cheeses for a bolder taste.
  • Grated Parmesan Cheese (½ cup) – Adds an optional cheesy crust and great umami flavor; perfect for elevating your Overnight Breakfast Casserole.

For the Filling

  • Breakfast Sausage or Bacon (1 pound) – The heartiness you need; vegetarian sausage can be a great substitute for a meat-free dish.
  • Diced Onion (1 small) – Elevates the flavor profile; shallots can work as a milder alternative.
  • Diced Bell Peppers (1 cup, optional) – Provides color and additional flavor; mix it up with spinach or mushrooms for a veggie-packed version.

For Seasoning

  • Salt (1 tsp) and Black Pepper (½ tsp) – Essential seasoning; adjust these to cater to your taste buds.

For Garnish

  • Fresh Parsley – A sprinkle before serving brightens the dish and adds a fresh touch to your casserole.

Step‑by‑Step Instructions for Ina Garten’s Savory Overnight Breakfast Casserole

Step 1: Prepare the Base
Start by greasing a 9×13-inch baking dish with non-stick spray or butter. Cut the day-old Italian or French bread into bite-sized cubes and layer them evenly in the dish. This creates a sturdy base that will absorb the delicious custard mixture without becoming soggy.

Step 2: Cook the Fillings
In a large skillet over medium heat, brown the breakfast sausage or bacon until it’s fully cooked and crispy, about 5-7 minutes. Drain excess grease and then add the diced onion to the pan. Sauté for an additional 3-4 minutes until the onion is soft and translucent, allowing the flavors to meld beautifully.

Step 3: Layer the Casserole
Evenly distribute the cooked sausage and sautéed onion over the bread cubes in the baking dish. If desired, sprinkle in the diced bell peppers or any other vegetables you’re using, ensuring an even mixture. This step adds a savory, hearty element to the Overnight Breakfast Casserole that everyone will love.

Step 4: Whisk the Custard
In a large mixing bowl, whisk together the 10 large eggs, 2 ½ cups of whole milk, and ½ cup of heavy cream until smooth and well combined. Add salt and black pepper to taste, blending them into the custard. This creamy mixture will bind everything together in a gloriously rich way.

Step 5: Assemble and Chill
Pour the custard mixture evenly over the bread and filling layers, using a spatula to gently press down on the bread to ensure it soaks up the custard. Next, sprinkle 1 ½ cups of shredded Cheddar cheese and optional ½ cup of grated Parmesan cheese on top. Cover the dish with plastic wrap and refrigerate overnight, allowing it to set for at least 8 hours.

Step 6: Bake the Casserole
Preheat your oven to 350°F (175°C). Remove the casserole from the fridge and uncover it. Bake in the preheated oven for about 45-50 minutes or until the top is golden brown and the custard is set. You’ll know it’s ready when it puffs up and smells simply divine!

Step 7: Rest and Serve
Once baked, let the Overnight Breakfast Casserole cool for about 5-10 minutes before slicing. This resting time allows the flavors to settle and makes for easier serving. Before enjoying, garnish with fresh parsley to add a lovely pop of color and freshness to your delicious creation!

Overnight Breakfast Casserole Variations

Feel free to take this Overnight Breakfast Casserole in new and exciting directions that tantalize your taste buds!

  • Gluten-Free: Use cooked hash browns or thinly sliced potatoes instead of bread for a delightful gluten-free dish. The crispy potatoes bring a comforting twist that pairs beautifully with the creamy custard.

  • Vegetarian Delight: Swap out breakfast sausage for a veggie alternative or load it up with extra vegetables like spinach and mushrooms. This version is perfect for meat-free mornings while ensuring everyone gets their fill of flavor.

  • Spicy Kick: Add diced jalapeños or a sprinkle of cayenne pepper to the custard for a fun heat boost. This variation transforms the overall flavor profile into a bold, exciting treat!

  • Cheese Lovers: Combine Cheddar with other cheeses like mozzarella or pepper jack for a melty cheese extravaganza. Experimenting with different cheese flavors can create a unique and personalized casserole each time!

  • Herb Infusion: Stir freshly chopped herbs like thyme, chives, or basil into the custard for a burst of freshness. The aromatic herbs lend a delightful fragrance and flavor that brightens every slice.

  • Breakfast Classic: Substitute diced ham for the sausage, creating a traditional breakfast casserole reminiscent of family brunches. It’s a delightful nod to the classic flavors we love at breakfast!

  • Cream Cheese Swirl: Fold in dollops of cream cheese into the custard mixture before baking for added creaminess and a delightful tang. Each bite will surprise you with its smooth texture and delicious flavor.

  • Nutty Crunch: Top off the casserole with a sprinkle of crushed nuts like pecans or walnuts before baking to add a delightful crunch. This variation brings an unexpected twist that complements the creaminess beautifully.

If you’re searching for more ways to enhance your breakfasts, try pairing this Overnight Breakfast Casserole with a side of fresh fruit or consider serving it alongside classic dishes like Tater Tot Casserole for a truly comforting spread. Happy cooking!

How to Store and Freeze Overnight Breakfast Casserole

Fridge: Store the casserole in an airtight container for up to 3 days. If you’ve already baked it, make sure it cools to room temperature before refrigerating to maintain its freshness.

Freezer: The assembled casserole can be frozen for up to 2 months. Cover tightly with plastic wrap and foil to prevent freezer burn. For best results, thaw it overnight in the refrigerator before baking.

Reheating: To reheat leftovers, place individual portions in the microwave for 1-2 minutes, or warm them in the oven at 350°F (175°C) for about 15-20 minutes, until heated through. Enjoy this delicious Overnight Breakfast Casserole again!

Make-Ahead: You can also assemble the casserole the night before and refrigerate it, allowing for a seamless breakfast experience the next morning!

Expert Tips for Overnight Breakfast Casserole

  • Stale Bread Advantage: Using stale bread is crucial, as it absorbs the custard without becoming mushy, ensuring a perfect texture for your Overnight Breakfast Casserole.

  • Chill for Flavor: Letting the casserole sit overnight in the fridge allows flavors to meld beautifully. Don’t rush this step—it enhances the taste!

  • Monitor Browning: If the top starts to brown too quickly while baking, cover it with foil. This prevents burning while the insides set perfectly.

  • Rest Before Serving: Allow the casserole to cool for 5-10 minutes after baking; it helps in slicing neat portions and enhances the overall presentation.

  • Customize with Ease: Feel free to change up the veggies or cheese to suit your family’s tastes. Different ingredients can make your Overnight Breakfast Casserole a crowd favorite!

Make Ahead Options

Preparing Ina Garten’s Overnight Breakfast Casserole in advance is a fantastic way to save time on busy mornings! You can assemble the entire casserole up to 24 hours ahead of time. Simply layer the cubed bread, cooked sausage, sautéed onions, and any desired veggies in your greased baking dish, then pour the custard mixture over it. Cover and refrigerate overnight to allow flavors to meld beautifully. To maintain quality, avoid baking until you’re ready to serve; just pop it in the preheated oven when guests arrive. After baking for 45-50 minutes and allowing it to rest for a few minutes, you’ll have a delicious, hearty breakfast that’s ready to delight!

What to Serve with Ina Garten’s Savory Overnight Breakfast Casserole

Imagine a delightful morning filled with warmth and flavor, perfectly complemented by simple yet satisfying side dishes that elevate your breakfast experience.

  • Fresh Fruit Salad: A vibrant mix of seasonal fruits adds a refreshing contrast to the savory casserole, balancing flavors and providing a burst of natural sweetness.

  • Greek Yogurt Parfaits: Creamy yogurt layered with granola and berries enhances the indulgence while providing a tangy kick that pairs beautifully with the rich breakfast casserole.

  • Light Green Salad: A crisp salad with mixed greens and a citrus vinaigrette brings a refreshing crunch, making for a light and healthy addition to your hearty meal.

  • Crispy Hash Browns: Golden, crispy hash browns beneath a layer of melted cheese offer a satisfying texture contrast. The slight crunch makes them a perfect partner with the soft casserole.

  • Warm Croissants: Flaky croissants served warm add a touch of elegance and a buttery hint that complements the casserole’s flavors beautifully.

  • Mimosas or Coffee: Light and bubbly mimosas brighten your brunch, while a rich cup of coffee ensures a warm, cozy environment, ideal for lingering over the delicious meal.

Ina Garten’s Savory Overnight Breakfast Casserole Recipe FAQs

What type of bread is best for the casserole?
Absolutely! Day-old Italian or French bread is ideal for this Overnight Breakfast Casserole. It holds its structure while soaking up the custard, creating the perfect texture. Fresh bread can become soggy, so stick to the stale stuff for better results.

How long can I store the baked casserole in the fridge?
You can store your baked Overnight Breakfast Casserole in an airtight container for up to 3 days. Make sure it cools completely before placing it in the fridge. Simply reheat individual portions in the microwave for a quick breakfast!

Can I freeze the Overnight Breakfast Casserole? If so, how?
Yes, you can freeze the assembled casserole for up to 2 months! Wrap it tightly in plastic wrap and then cover it with aluminum foil to prevent freezer burn. When you’re ready to enjoy it, thaw it overnight in the refrigerator before baking. This process ensures it retains its delicious flavors and textures!

What if my casserole is too watery after baking?
Not to worry! If your casserole turns out watery, it may be due to using fresh bread or not allowing enough soaking time. Next time, ensure you use stale bread and let the mixture sit in the fridge overnight for proper absorption. If you find yourself in a pinch, baking it a little longer can help firm things up!

Are there any dietary considerations for this recipe?
Very! If you have guests with dietary restrictions, you can customize the casserole easily. Use vegetarian sausage for a meat-free option and substitute the heavy cream with additional milk for a lighter version. Make sure to check for any allergies regarding cheese or bread ingredients!

How long should the casserole sit before serving?
Let it rest for about 5-10 minutes after baking. This short cooling time allows the flavors to settle and makes slicing easier, leading to neat and tempting portions that look just as good as they taste!

Overnight Breakfast Casserole

Savory Overnight Breakfast Casserole for Easy Mornings

Enjoy a delicious Overnight Breakfast Casserole, combining savory breakfast sausage, melted Cheddar cheese, and creamy egg custard—perfect for easy mornings.
Prep Time 30 minutes
Cook Time 50 minutes
Resting Time 10 minutes
Total Time 1 hour 30 minutes
Servings: 8 slices
Course: Breakfast
Cuisine: American
Calories: 350

Ingredients
  

For the Base
  • 10 large eggs
  • 2.5 cups whole milk Opt for whole milk for creaminess.
  • 0.5 cups heavy cream Adds richness.
  • 1 loaf Italian or French bread Day-old bread preferred.
For the Cheese
  • 1.5 cups shredded Cheddar cheese Swap with mozzarella if desired.
  • 0.5 cups grated Parmesan cheese Optional for topping.
For the Filling
  • 1 pound breakfast sausage or bacon Vegetarian sausage can be a substitute.
  • 1 small diced onion Shallots work as a milder option.
  • 1 cup diced bell peppers Optional; substitute with veggies as preferred.
For Seasoning
  • 1 tsp salt Adjust to taste.
  • 0.5 tsp black pepper Adjust to taste.
For Garnish
  • fresh parsley To sprinkle before serving.

Equipment

  • 9x13 inch baking dish
  • Large skillet
  • whisk
  • Mixing Bowl

Method
 

Preparation Steps
  1. Grease a 9x13-inch baking dish with non-stick spray or butter. Cut the day-old bread into bite-sized cubes and layer them evenly in the dish.
  2. In a large skillet over medium heat, brown the breakfast sausage or bacon until fully cooked and crispy, about 5-7 minutes. Drain excess grease, then add diced onion and sauté for an additional 3-4 minutes.
  3. Evenly distribute the cooked sausage and sautéed onion over the bread cubes. Sprinkle in diced bell peppers or any other vegetables, ensuring an even mixture.
  4. Whisk together eggs, whole milk, and heavy cream in a large mixing bowl until smooth. Add salt and black pepper to taste, blending into the custard.
  5. Pour the custard mixture evenly over the bread and filling layers, gently pressing down on the bread. Sprinkle shredded Cheddar and optional Parmesan cheese on top. Cover with plastic wrap and refrigerate overnight.
  6. Preheat the oven to 350°F (175°C). Remove casserole from the fridge and uncover it. Bake for about 45-50 minutes or until golden brown and custard is set.
  7. Let the casserole cool for about 5-10 minutes before slicing. Garnish with fresh parsley before serving.

Nutrition

Serving: 1sliceCalories: 350kcalCarbohydrates: 20gProtein: 22gFat: 22gSaturated Fat: 10gPolyunsaturated Fat: 2gMonounsaturated Fat: 8gCholesterol: 180mgSodium: 800mgPotassium: 320mgFiber: 1gSugar: 3gVitamin A: 600IUVitamin C: 5mgCalcium: 250mgIron: 2mg

Notes

Using stale bread is crucial for absorbing custard without becoming mushy. Chill overnight for best flavor.

Tried this recipe?

Let us know how it was!

Cinnamon French Toast Roll Ups for a Cozy Holiday Breakfast

As I stood in my kitchen, the comforting aroma of cinnamon began to dance through the air, instantly whisking me away to festive mornings of my childhood. Today, I’m sharing my go-to recipe for Cinnamon French Toast Roll Ups, a delightful twist on classic breakfast fare that’s perfect for holiday gatherings. Not only are these roll-ups quick to whip up, but they also encapsulate that warm, sweet craving we all adore during the Christmas season. Each bite reveals a soft, pillowy interior, making them a crowd-pleaser that’ll have family and friends reaching for seconds. Plus, they’re incredibly versatile—ideal for both breakfast or a sweet dessert! Ready to indulge in this easy, soul-warming treat? Let’s dive into the recipe!

Why are these Roll Ups a Must-Try?

Quick and Easy: This recipe fits seamlessly into busy mornings, allowing you to impress your family without spending hours in the kitchen. Festive Flavor: The blend of cinnamon and sugar encapsulates holiday spirit, making these roll-ups a perfect treat for Christmas breakfast. Crowd-Pleasing Delight: Their sweet, pillowy texture has everyone coming back for more—no one can resist! Endless Variations: Customize your roll-ups with fillings like Nutella or cream cheese, ensuring there’s something for every palate. Serve with Style: Pair them with fresh berries or a drizzle of maple syrup to elevate your breakfast presentation. These delightful bites are sure to become a cherished holiday tradition!

Cinnamon French Toast Roll Ups Ingredients

Get ready to create a delightful treat that will bring warmth and cheer to your holiday mornings!

For the Roll Ups
Toast Bread Slices – Use thick slices for better structure; these are your canvas for deliciousness!
Butter (1/2 stick, softened) – Adds richness and helps the filling stick; unsalted works best for flavor balance.
Light Brown Sugar (1/4 cup) – Sweetens the filling beautifully; coconut sugar is a great lower glycemic substitute.
Cinnamon (3 tsp + 1 tsp to coat) – Infuses warmth and flavor; feel free to adjust the amount to your taste preference.
Eggs (2) – Binds the ingredients together; large eggs provide the best texture.
Milk (3 tbsp) – Adds moisture to your egg mixture; any milk, including non-dairy, works perfectly.

For the Coating
Granulated Sugar (2 tbsp) – For that delightful sugar coating; you can omit it if you prefer less sweetness.
Powdered Sugar (optional) – A lovely dusting for serving; it adds an extra touch of elegance.

For Cooking
Butter for Cooking (2 tbsp, more if necessary) – Ensures even browning while frying; add more as needed for that perfect golden color.

These Cinnamon French Toast Roll Ups are not just simple to make but filled with flavor that captures the essence of the holiday season! Enjoy crafting these with loved ones and make cherished memories around the breakfast table.

Step-by-Step Instructions for Cinnamon French Toast Roll Ups

Step 1: Create the Filling
In a small mixing bowl, combine ½ stick of softened butter, ¼ cup of light brown sugar, and 3 teaspoons of cinnamon. Using a fork or spoon, mix until it forms a smooth, spreadable paste. This luscious filling will bring a delightful sweetness to your Cinnamon French Toast Roll Ups, so make sure it’s well combined for even flavor throughout.

Step 2: Prepare the Sugar Coating
In a separate bowl, mix together 2 tablespoons of granulated sugar with an additional teaspoon of cinnamon. This sugary coating adds a wonderful touch to the exterior of your roll-ups, providing a sweet contrast to the warm, spiced filling. Set the mixture aside for later; the tantalizing aroma will have your taste buds tingling in anticipation.

Step 3: Whisk the Egg Mixture
Crack 2 large eggs into a shallow bowl and add 3 tablespoons of milk. Use a whisk or fork to beat the mixture until fully blended, with a light froth forming. This egg wash is crucial for coating your roll-ups, ensuring they cook to a beautiful golden brown. The milk adds richness and moisture, making each bite of your Cinnamon French Toast Roll Ups even more decadent.

Step 4: Prepare the Bread Slices
Trim the crusts from thick slices of toast bread, then use a rolling pin to flatten them to about ⅛ inch thick. This step is essential, as it allows you to roll the filling tightly inside and enjoy a pillowy texture. Gather your flattened slices on a clean surface, ready to be generously spread with the cinnamon filling.

Step 5: Assemble the Roll Ups
Spread a thick layer of your cinnamon filling across each flattened slice of bread, ensuring you reach the edges. Carefully roll each slice up tightly from one end to the other, pinching the ends to seal the filling inside. Position the rolls seam-side down as you finish assembling, setting the stage for a delicious frying session.

Step 6: Heat the Pan
Preheat a non-stick skillet over medium heat and melt 1 tablespoon of butter. Watch for the butter to foam slightly; this indicates it’s ready for cooking. If you desire extra flavor, feel free to add a splash more butter for frying. This step is key to achieving a perfectly crisp and golden exterior on your Cinnamon French Toast Roll Ups.

Step 7: Dip and Cook the Roll Ups
Carefully dip each roll in the prepared egg mixture, ensuring they are well-coated but not soaking. Place the roll-ups seam-side down in the hot skillet and cook for about 3-4 minutes on each side, or until they turn a lovely golden brown. Keep an eye on them to avoid burning—I find the enticing smell is the perfect indication that they’re almost ready to flip!

Step 8: Finish with Coating
Once golden brown on both sides, remove the Cinnamon French Toast Roll Ups from the skillet and immediately roll them in the sugar-cinnamon mixture for a sweet finish. For a touch of elegance, you can also dust them with powdered sugar before serving. These finishing touches will elevate each bite, making your holiday breakfast even more special!

Step 9: Serve and Enjoy!
Serve your warm Cinnamon French Toast Roll Ups immediately, allowing everyone to indulge in this comforting treat. You can enhance the presentation with fresh berries or a drizzle of maple syrup. Each roll-up is a delightful combination of crispy, sweet, and warm, perfect for celebrating any special occasion at your breakfast table.

How to Store and Freeze Cinnamon French Toast Roll Ups

Fridge: Store your Cinnamon French Toast Roll Ups in an airtight container for up to 2 days. To maintain freshness, reheat them in a skillet for the best texture.

Freezer: For longer storage, freeze the roll-ups in a single layer on a baking sheet before transferring them to a freezer-safe bag. They can be kept for up to 2 months.

Reheating: When ready to enjoy, thaw overnight in the fridge, then reheat in a skillet or oven until heated through and crispy.

Room Temperature: If you choose to serve them immediately, enjoy while warm for the best taste and texture; they’re not recommended for prolonged room temperature storage.

Expert Tips for Cinnamon French Toast Roll Ups

Choose the Right Bread: Use thick slices of bread for better structure and a satisfying bite. Don’t skimp on freshness!

Even Filling Distribution: Spread your cinnamon filling evenly to prevent any dry bites. This ensures each Cinnamon French Toast Roll Up is bursting with flavor.

Monitor Cooking Heat: Keep an eye on your pan’s temperature; too high can lead to burnt outsides and undercooked insides. Adjust heat as needed for perfect browning.

Proper Egg Coating: Dip each roll adequately but briefly to avoid sogginess. This helps create that delightful crispy exterior while keeping the inside fluffy.

Customize your Recipe: Experiment with fillings like Nutella or cream cheese, or add nuts and raisins to mix up the flavors. There are limitless ways to enjoy these roll-ups!

These tips will help you create the ultimate Cinnamon French Toast Roll Ups that everyone will love!

What to Serve with Cinnamon French Toast Roll Ups

Start your festive breakfast experience with delightful accompaniments to elevate these sweet treats.

  • Maple Syrup: A warm drizzle adds a luxurious touch, balancing the sweetness of the roll ups with rich, buttery flavor.

  • Fresh Berries: Strawberries, blueberries, or raspberries introduce a burst of color and tartness, brightening up the plate and complementing the comforting cinnamon taste.

  • Whipped Cream: Light and airy, a dollop of whipped cream creates a creamy contrast, making every bite feel like a special occasion.

  • Crispy Bacon: The salty, savory crunch of bacon pairs wonderfully with the sweetness, adding a satisfying textural contrast that everyone loves.

  • Hot Chocolate or Coffee: Cozy beverages like hot chocolate or fresh coffee enhance the warmth of your breakfast, perfect for chilly mornings filled with holiday spirit.

  • Fruit Salad: A refreshing medley of seasonal fruits can cleanse the palate between bites, providing a healthy and vibrant contrast to the rich roll ups.

  • Powdered Sugar: A light dusting of powdered sugar on top adds a touch of elegance, making your presentation as sweet as the flavors.

Make Ahead Options

These Cinnamon French Toast Roll Ups are perfect for meal prep and can significantly save time on busy mornings! You can assemble the rolls, complete with the cinnamon filling, and refrigerate them in an airtight container for up to 24 hours. To maintain their quality, make sure to tightly wrap each roll to prevent them from drying out. When you’re ready to serve, simply dip the chilled rolls in the egg mixture and cook them in a preheated skillet. They’ll be just as delicious, turning golden brown with that irresistible warm filling, making your holiday breakfast effortless and delightful!

Cinnamon French Toast Roll Ups Variations

Feel free to get creative with these delicious roll-ups—your kitchen will thank you for it!

  • Gluten-Free: Use certified gluten-free bread to ensure everyone can indulge in this tasty treat without worry.

  • Vegan: Substitute eggs with a mixture of flaxseed meal and water along with almond milk for a vegan-friendly option.

  • Decadent Nutella: Spread a layer of Nutella inside before adding the cinnamon filling for an indulgently rich twist.

  • Fruit-Focused: Add fresh blueberries or sliced strawberries to the filling for a pop of fruity flavor in every bite.

  • Spiced Up: Experiment with a pinch of nutmeg or cardamom in the filling for an extra layer of warm spice.

  • Cream Cheese Filling: Swap the cinnamon filling with a sweetened cream cheese mixture for a deliciously creamy alternative.

  • Crispy Coating: Add crushed nuts to the sugar coating to introduce a lovely crunch that contrasts beautifully with the soft interior.

  • Cozy Pumpkin Spice: Substitute the cinnamon with pumpkin pie spice for a seasonal flair that’s particularly enchanting during autumn and winter!

These variations will ensure your Cinnamon French Toast Roll Ups are a hit, no matter what occasion you’re serving them for. And if you’re looking for more breakfast inspiration, consider trying out my Sweet Escape Toast or the delightful flavors of Blueberry French Toast Casserole. Each recipe has its own unique charm, perfect for cozy mornings at home!

Cinnamon French Toast Roll Ups Recipe FAQs

How do I choose the right bread for Cinnamon French Toast Roll Ups?
Absolutely! For the best results, opt for thick slices of bread, like challah or brioche. The structure of thicker slices allows for better rolling and ensures a delightful chewiness. Fresh bread is key, as it adds to the overall softness and prevents tearing during preparation.

How should I store Cinnamon French Toast Roll Ups?
To keep them fresh, store your Cinnamon French Toast Roll Ups in an airtight container in the refrigerator for up to 2 days. When you’re ready to enjoy them again, reheat in a skillet over medium heat for the best texture. This method helps regain some of that crispy exterior!

Can I freeze Cinnamon French Toast Roll Ups?
Yes, you can! To freeze, place your roll-ups in a single layer on a baking sheet, then freeze until solid. After that, transfer them to a freezer-safe bag or container. They’ll stay good for up to 2 months. When ready to eat, thaw them overnight in the fridge, and then reheat in a skillet or the oven for a warm treat.

What if my roll-ups are burning on the outside but not cooked inside?
Very common! If you’re experiencing this issue, adjust your cooking temperature to medium-low. This allows the roll-ups to cook through without burning the outside. Additionally, make sure to coat them thoroughly in the egg mixture, which helps create an even cook all around.

Can I customize the fillings in these roll-ups?
Absolutely! Feel free to get creative. You can swap the cinnamon filling for Nutella, cream cheese, or even add chopped fruits, nuts, or raisins for added texture. Mixing things up can turn a simple recipe into a unique and delicious breakfast treat that everyone will rave about!

Are there any dietary considerations for these roll-ups?
The Cinnamon French Toast Roll Ups can be adapted for various dietary needs. For a dairy-free option, use non-dairy milk and vegan butter. You can also opt for gluten-free bread if you’re avoiding gluten. Just ensure all ingredients align with the specific dietary requirements you need to accommodate!

Cinnamon French Toast Roll Ups

Cinnamon French Toast Roll Ups for a Cozy Holiday Breakfast

Delight in these Cinnamon French Toast Roll Ups that embody warmth and festive flavors, perfect for holiday gatherings.
Prep Time 20 minutes
Cook Time 15 minutes
Total Time 35 minutes
Servings: 4 rolls
Course: Breakfast
Cuisine: American
Calories: 180

Ingredients
  

For the Roll Ups
  • 8 slices thick toast bread Use thick slices for better structure.
  • 0.5 sticks unsalted butter Softened, adds richness.
  • 0.25 cups light brown sugar Sweetens the filling beautifully.
  • 4 tsp cinnamon 3 tsp for filling and 1 tsp to coat.
  • 2 large eggs Provides the best texture.
  • 3 tbsp milk Any milk works perfectly.
For the Coating
  • 2 tbsp granulated sugar For coating.
  • powdered sugar Optional for serving.
For Cooking
  • 2 tbsp butter for cooking Add more if needed.

Equipment

  • Non-stick skillet
  • Mixing bowls
  • whisk
  • Rolling Pin

Method
 

Step-by-Step Instructions for Cinnamon French Toast Roll Ups
  1. In a small bowl, combine ½ stick of softened butter, ¼ cup of light brown sugar, and 3 teaspoons of cinnamon to create the filling.
  2. In another bowl, mix 2 tablespoons of granulated sugar with 1 teaspoon of cinnamon for the sugar coating.
  3. In a shallow bowl, beat 2 large eggs with 3 tablespoons of milk until blended.
  4. Trim the crusts from thick toast bread slices and flatten them with a rolling pin.
  5. Spread a thick layer of filling on each slice and roll tightly from one end to the other.
  6. Preheat a non-stick skillet over medium heat and melt 1 tablespoon of butter.
  7. Dip each roll in the egg mixture and place seam-side down in the skillet, cooking for 3-4 minutes on each side until golden brown.
  8. Roll the cooked roll-ups in the sugar-cinnamon mixture immediately after cooking.
  9. Serve warm, optionally dusted with powdered sugar and paired with fresh berries or maple syrup.

Nutrition

Serving: 1rollCalories: 180kcalCarbohydrates: 25gProtein: 3gFat: 8gSaturated Fat: 5gCholesterol: 70mgSodium: 180mgPotassium: 150mgFiber: 1gSugar: 12gVitamin A: 400IUVitamin C: 1mgCalcium: 50mgIron: 1mg

Notes

For best results, monitor cooking temperatures and adjust as needed to achieve perfect browning.

Tried this recipe?

Let us know how it was!

Stay Connected

Get recipes via email: