Get my cookbooks

Ham and Swiss Cracker Melts for Effortless Snack Perfection

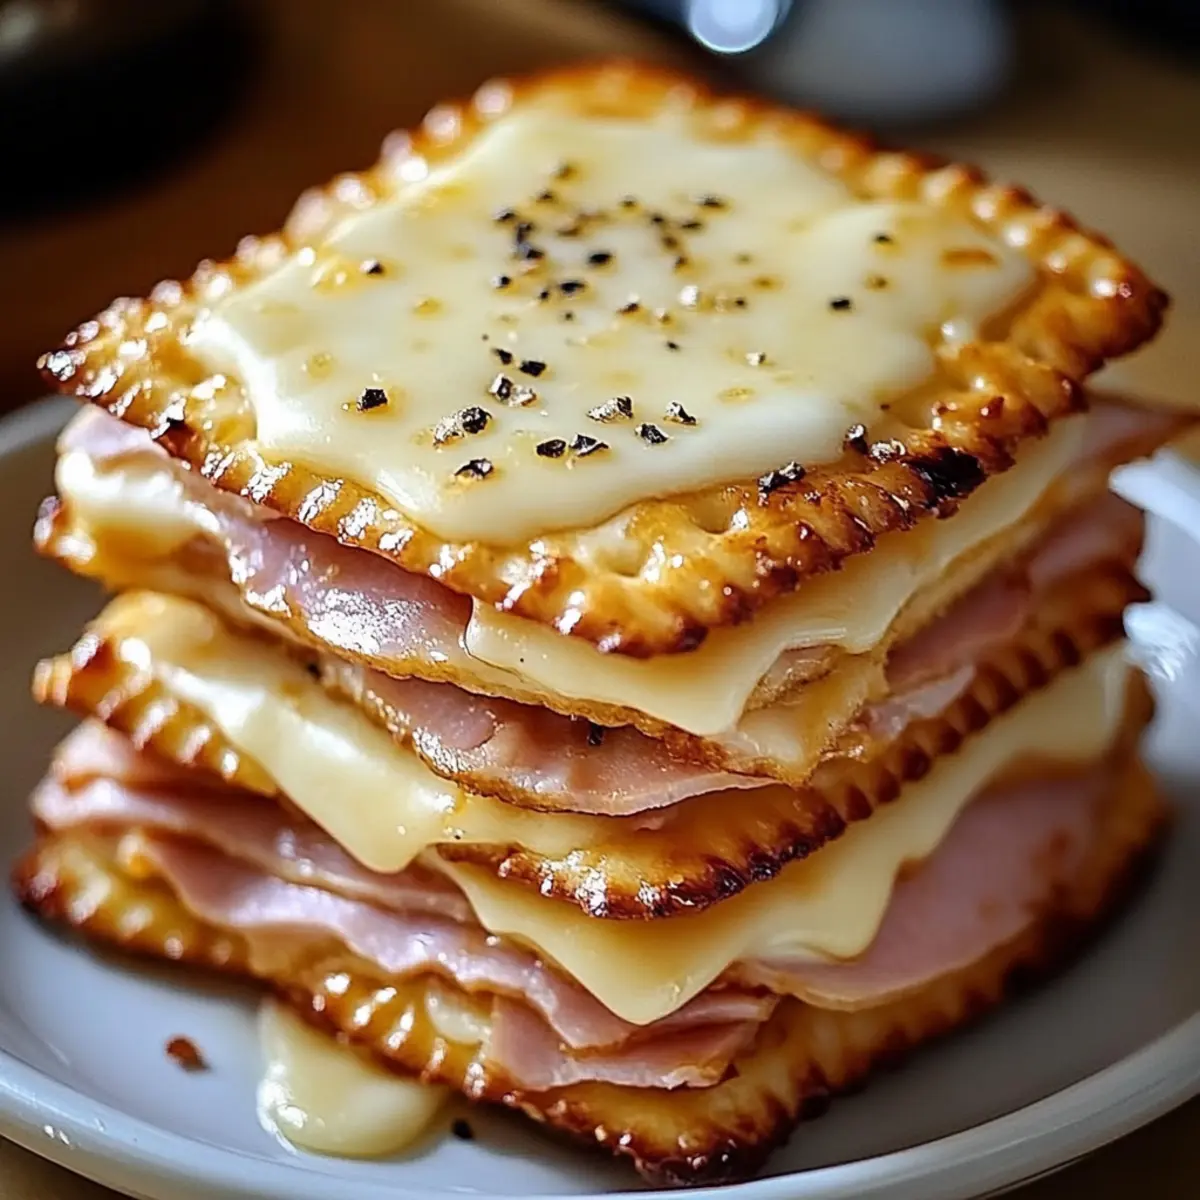
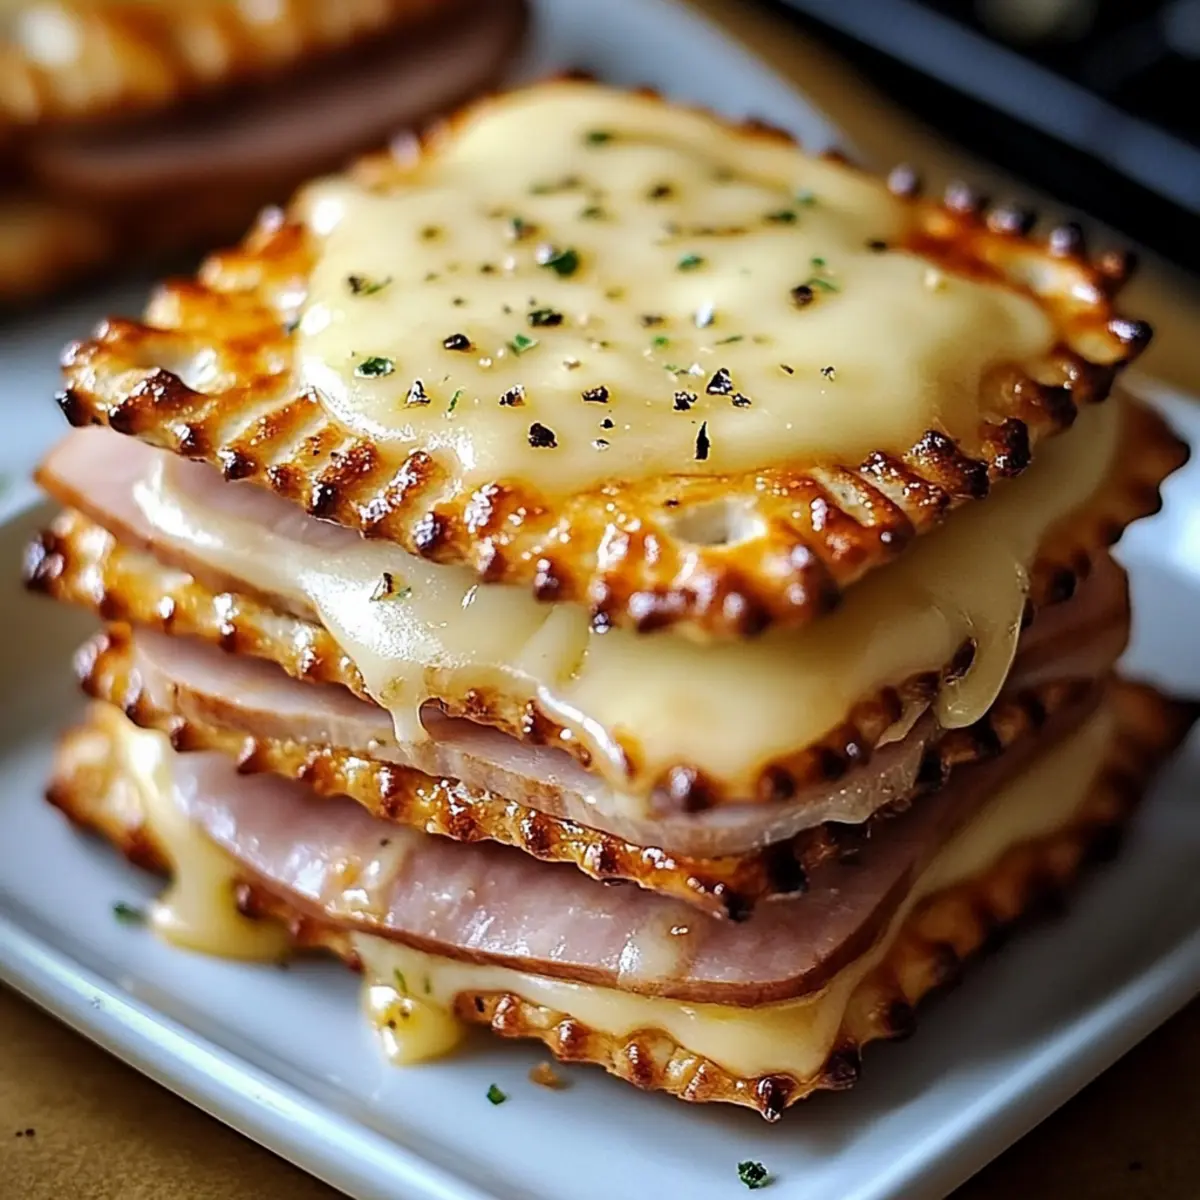
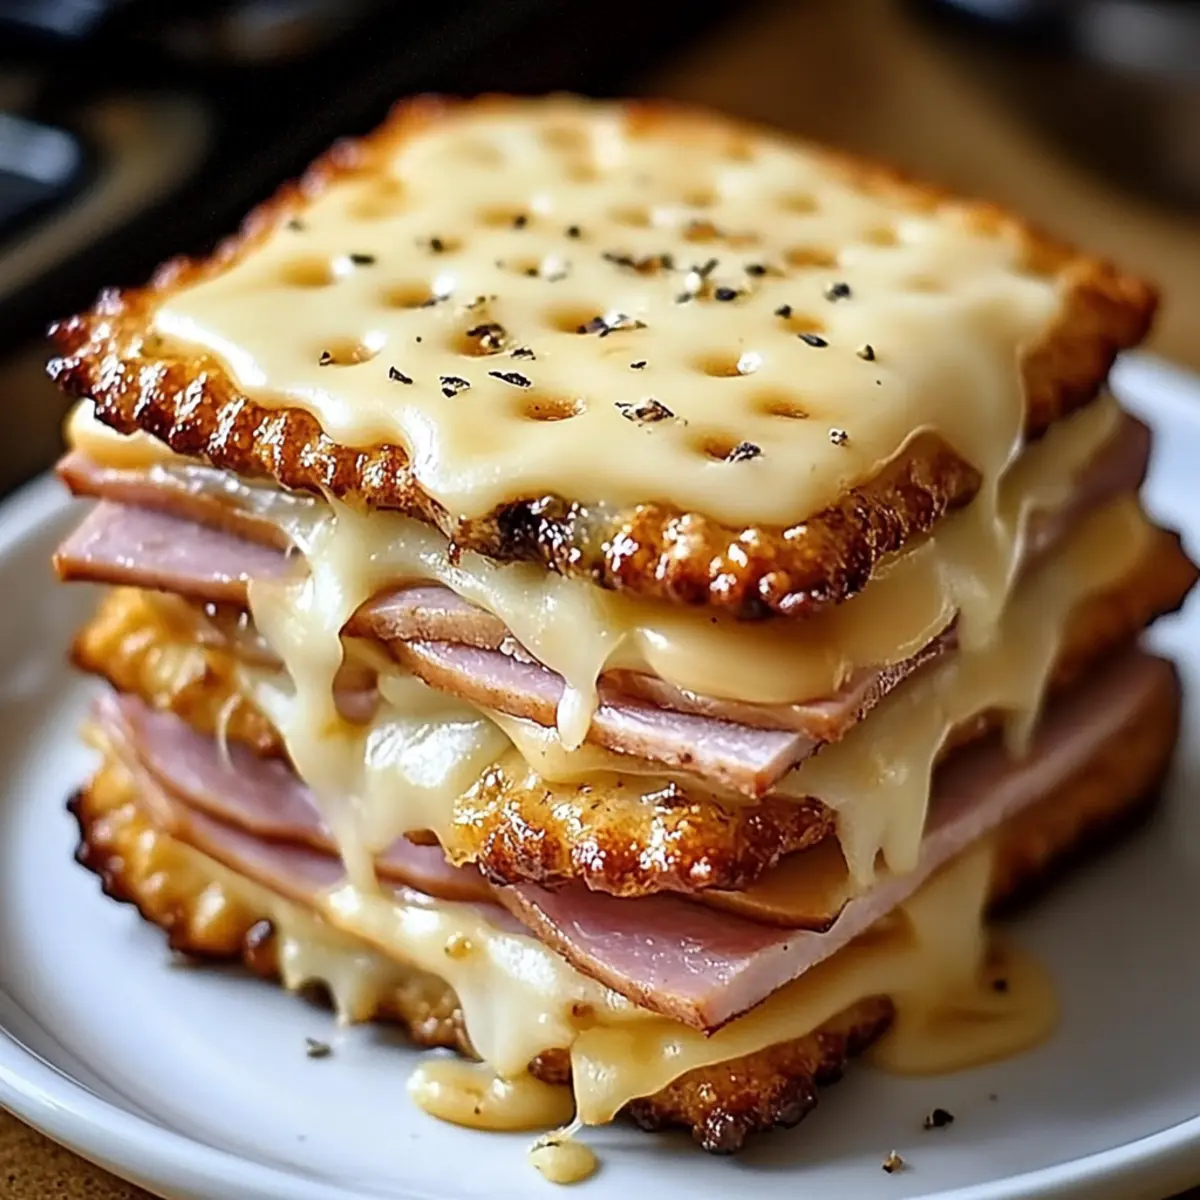
As I embarked on a quest to create the perfect finger food, I stumbled upon a delightful surprise—Ham and Swiss Cracker Melts. These little bites of joy wrap savory deli ham and gooey Swiss cheese in buttery Ritz crackers, making them an instant crowd-pleaser. With just 20 minutes of prep time, these elegant appetizers are not only quick to whip up, but they’re also a fantastic way to impress your guests without a lot of fuss. Whether it’s game day or a casual get-together, serving these golden treats will make you the star of the evening. Ready to find out why everyone will be raving about them? Let’s dive into the recipe!

Why are Ham and Swiss Cracker Melts irresistible?

Quick and Easy: You’ll love how effortlessly these delicious bites come together, with just 20 minutes from prep to plate!

Crowd-Pleasing Delight: Perfectly combining savory ham and creamy Swiss cheese, they are sure to satisfy guests at any gathering!

Versatility: Feel free to experiment by adding different cheeses or even swapping in turkey for a fresh twist.

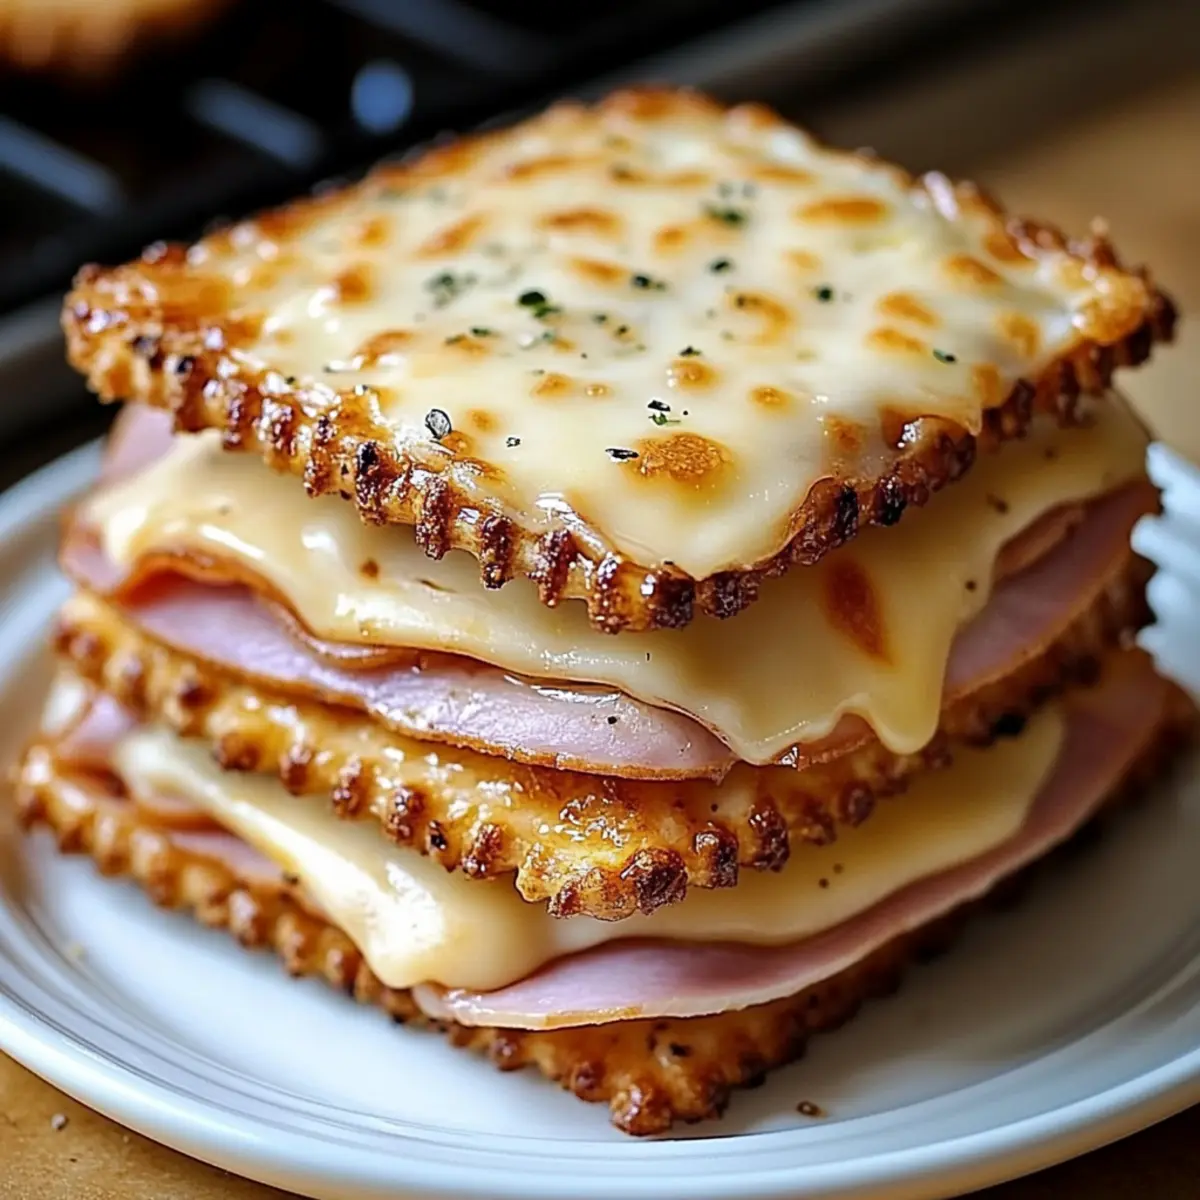
Elegant Presentation: Their golden, crispy appearance elevates any occasion, making them a great addition to a charcuterie board or game day spread.

Flavor Explosion: The balance of buttery Ritz crackers, tangy Dijon mustard, and rich Worcestershire sauce creates a rich taste profile you won’t want to miss.

For a cozy evening snack, why not pair these with Potato Bacon Soup for a hearty meal?

Ham and Swiss Cracker Melts Ingredients

Get ready to whip up some tasty snacks with these essential ingredients!

For the Cracker Base
Ritz Crackers – The buttery flavor provides the perfect crispy foundation for your melts.

For the Filling
Deli Ham – Choose from honey, smoked, or Black Forest to customize the rich, savory taste.
Swiss Cheese – Melts like a dream and adds creamy goodness; feel free to swap with cheddar for a different flavor.

For the Butter Mixture
Butter – Adds moisture and richness; make sure it’s melted for the best results.
Dijon Mustard – This tangy touch enhances the overall flavor profile of your Ham and Swiss Cracker Melts.
Worcestershire Sauce – Brings depth and umami, making the buttery mixture irresistible.
Garlic Powder – Adds savory notes to the mix; fresh minced garlic can be a great alternative for a bolder flavor.

For the Topping
Poppy Seeds – Sprinkle on top for added texture and visual appeal; feel free to leave them out if you don’t have any.
Dried Minced Onion – Infuses onion flavor without added moisture, perfect for maintaining cracker crispness.

Step‑by‑Step Instructions for Ham and Swiss Cracker Melts

Step 1: Preheat the Oven
Begin your culinary journey by preheating your oven to 350°F (175°C). This ensures that your Ham and Swiss Cracker Melts will bake evenly and achieve that beautiful golden-brown color. While the oven warms up, you can prepare your baking dish and all the ingredients, so you’re ready for the next steps.

Step 2: Prepare the Cracker Layer
In a 9×13-inch baking dish, arrange half of the Ritz crackers with the flat side facing down. This sturdy base will hold all the delightful ingredients together. Make sure they are evenly spaced for consistent baking, and visualize how the crispy crust will soon cradle the savory filling, setting the stage for your perfect appetizer.

Step 3: Add the Deli Ham
Tear your deli ham into strips and place a piece atop each Ritz cracker. This savory layer is crucial for your Ham and Swiss Cracker Melts—be generous, as each bite should be filled with flavor. The ham will complement the richness of the Swiss cheese, ensuring that every guest at your gathering will savor each delightful mouthful.

Step 4: Top with Swiss Cheese
Cut the Swiss cheese into 1-inch squares, placing one on top of each ham-covered cracker. This cheesy goodness will melt beautifully, creating that iconic gooey texture everyone loves. Think of how inviting your dish will look as the cheese begins to warm up, creating a luscious, molten layer once it’s baked.

Step 5: Mix the Butter Mixture
In a small bowl, combine melted butter, Dijon mustard, Worcestershire sauce, and garlic powder, stirring until well mixed. This flavorful concoction is vital; it adds moisture and a wonderful savory richness to your Ham and Swiss Cracker Melts. Visualize the heavenly aroma wafting through your kitchen as it reaches the oven!

Step 6: Drizzle the Butter Mixture
Evenly drizzle the buttery mixture over the assembled cracker sandwiches, ensuring each one gets a delicious coating. This step is key to achieving that perfect balance of buttery flavor and texture. Be careful not to over-saturate; you want just enough to enhance, not overpower, the crispy base of the crackers.

Step 7: Add Final Touches
Sprinkle poppy seeds and dried minced onion over the top of the cracker melts. These additions will not only enhance the flavor but also add a lovely visual appeal. Imagine the crunch of the poppy seeds as guests take their first bites, elevating the overall experience of enjoying your delightful Ham and Swiss Cracker Melts.

Step 8: Bake to Perfection
Place the baking dish in the preheated oven and bake for 10-12 minutes, or until the cheese is melted and the tops are golden brown. Keep an eye on them, as the sizzling and bubbling will be the signal that they’re almost ready. The aroma filling your kitchen will surely leave everyone eager to dig in!

Step 9: Serve Warm
Once baked, remove the dish from the oven and let your Ham and Swiss Cracker Melts cool for a minute. Serve them warm to enjoy the cheesy goodness at its finest. These delightful bites make for the ultimate quick appetizer, perfect for impressing guests or treating yourself to a cozy homemade snack.

Expert Tips for Ham and Swiss Cracker Melts

  • Prevent Sogginess: Use a light coating of the butter mixture; too much can make your Ritz crackers soft and sad instead of crunchy and delightful.

  • Cheese Choices: Experiment with different cheeses, like cheddar or provolone, for unique flavors, but be mindful of how each cheese melts to maintain the perfect texture.

  • Even Baking: Ensure your oven is completely preheated before placing the melts inside. This guarantees uniform baking and that golden-brown finish everyone loves.

  • Ingredient Quality: Choose high-quality deli ham for richer flavor. The better the ham, the more savory depth your Ham and Swiss Cracker Melts will have!

  • Garnishes Galore: Don’t forget to sprinkle the poppy seeds and dried minced onion on top for added crunch and flavor. They’re the finishing touch that enhances both taste and appearance.

Storage Tips for Ham and Swiss Cracker Melts

Fridge: Store leftovers in an airtight container in the fridge for up to 2 days. This helps maintain the flavor while keeping your Ham and Swiss Cracker Melts fresh.

Freezer: If you’d like to keep them longer, freeze the individual melts on a baking sheet before transferring them to an airtight container. They can be frozen for up to 2 months.

Reheating: To restore that signature crunch, reheat from the fridge in a preheated oven at 350°F (175°C) for about 10 minutes. For frozen melts, add a few extra minutes until heated through.

Serving Tip: Enjoy these delectable bites warm for the best taste experience—perfect for impromptu gatherings or snack cravings!

Make Ahead Options

These Ham and Swiss Cracker Melts are perfect for meal prep enthusiasts! You can assemble the entire dish up to 24 hours in advance and refrigerate it before baking—this not only saves you time but also allows the flavors to meld beautifully overnight. Simply follow the initial steps of placing the crackers and fillings in your baking dish, then cover it tightly with plastic wrap to prevent drying out. When you’re ready to serve, just remove the wrap, drizzle the butter mixture on top, and bake as directed. With minimal effort, you’ll have delicious, crispy appetizers, just as delightful as if freshly made!

What to Serve with Ham and Swiss Cracker Melts

Amp up your snack game with delightful pairings that bring out the best in these tasty bites.

  • Creamy Potato Salad: Provides a cool, creamy contrast to the warm, savory melts. Its mild flavors balance everything beautifully.

  • Fresh Garden Salad: A bright, crisp salad with mixed greens, tomatoes, and cucumbers offers a refreshing crunch that complements the richness of the melts. Toss with a tangy vinaigrette for extra zing.

  • Vegetable Platter: Crisp, raw veggies like carrots, bell peppers, and celery add a satisfying crunch. Pair them with a dip, such as ranch or hummus, for a delightful twist.

  • Savory Pickle Chips: Their vinegar tang cuts through the richness, creating an irresistible flavor combination when paired with the melts. The crunchiness adds a fun texture that’s hard to resist!

  • Sparkling Lemonade: A refreshing, bubbly drink with a hint of citrus brightness enhances the savory flavors of the Ham and Swiss Cracker Melts, making every bite pop!

  • Chocolate Chip Cookies: Serve warm cookies for dessert to end the meal on a sweet note. The gooey sweetness wonderfully offsets the savory appetizer, rounding out the experience perfectly.

Ham and Swiss Cracker Melts Variations

Unlock your culinary creativity with exciting twists on Ham and Swiss Cracker Melts that will tickle your taste buds!

  • Turkey Alternative: Swap deli ham for turkey slices for a leaner option that still packs a savory punch.
    Your guests will appreciate the lighter choice without sacrificing flavor.

  • Cheese Swap: Try cheddar or provolone instead of Swiss cheese for a bold, creamy flavor enhancement.
    Each cheese brings its own character, making the melts exciting and varied.

  • Herb Infusion: Add fresh herbs like thyme or oregano to the butter mixture for a fragrant twist.
    It elevates the flavor profile and transforms the dish into a garden-fresh delight.

  • Hot and Spicy: Include jalapeño slices or a dash of hot sauce for those who crave heat.
    The spice will create a fiery contrast to the melty cheese and savory ham!

  • Pickle Power: Top the ham with dill pickle slices for a tangy crunch that brightens each bite.
    This unexpected zing will make your melts even more irresistible!

  • Barbecue Bliss: Blend in a teaspoon of barbecue sauce into the butter for a smoky, sweet flavor.
    The combination will surprise your palette and add a fun twist to the classic melts.

  • Sweet and Savory: Incorporate a drizzle of honey or fig jam on top for a delightful sweetness.
    This dual flavor will make your Ham and Swiss Cracker Melts memorable and unique!

  • Veggie Boost: Add roasted red peppers or spinach to the filling for more nutrition and color.
    Not only will the flavors blend beautifully, but your melts will also look stunning!

For an equally delightful pairing, serve these melts alongside a hearty bowl of Potato Bacon Soup for a comforting meal!

Ham and Swiss Cracker Melts Recipe FAQs

What type of crackers should I use for Ham and Swiss Cracker Melts?
Absolutely! Ritz Crackers are a staple for this recipe due to their buttery flavor and crispy texture. However, if you prefer a change, feel free to swap them out for Club crackers or any buttery cracker of your liking.

How long can I store leftover Ham and Swiss Cracker Melts?
Leftover melts can be kept in an airtight container in the fridge for up to 2 days. To maintain their scrumptious flavor and texture, make sure the container is sealed well. Enjoy them warm for the best experience!

Can I freeze Ham and Swiss Cracker Melts?
Yes, you can! To freeze, first, arrange the melts on a baking sheet and freeze them until solid. Next, transfer them to an airtight container or freezer bag separating layers with parchment paper. They can be stored for up to 2 months. When you’re ready to enjoy, simply reheat in a preheated oven at 350°F (175°C) for about 10-12 minutes.

Why are my Ham and Swiss Cracker Melts soggy?
The culprit is usually too much of the buttery mixture. To prevent this, use a light drizzle rather than soaking the crackers. Also, ensure your oven is properly preheated before baking—this helps the crackers stay crispy.

Are there any dietary considerations for Ham and Swiss Cracker Melts?
If you’re concerned about allergies, keep in mind that the recipe contains dairy and gluten from the crackers and cheese. For a gluten-free option, swap the Ritz crackers for a gluten-free cracker brand and ensure the deli ham doesn’t contain gluten additives. It’s always a good idea to double-check the ingredient labels for any dietary restrictions as well.

Ham and Swiss Cracker Melts

Ham and Swiss Cracker Melts for Effortless Snack Perfection

Ham and Swiss Cracker Melts are savory snacks featuring deli ham and gooey Swiss cheese on buttery Ritz crackers.
Prep Time 20 minutes
Cook Time 12 minutes
Total Time 32 minutes
Servings: 12 melts
Course: Appetizers
Calories: 150

Ingredients
  

For the Cracker Base
  • 24 Ritz Crackers buttery flavor provides the perfect crispy foundation
For the Filling
  • 8 oz Deli Ham choose honey, smoked, or Black Forest
  • 8 oz Swiss Cheese or swap with cheddar for a different flavor
For the Butter Mixture
  • 1/2 cup Butter melted
  • 2 tbsp Dijon Mustard enhances flavor profile
  • 1 tbsp Worcestershire Sauce adds depth and umami
  • 1 tsp Garlic Powder or fresh minced garlic
For the Topping
  • 1 tbsp Poppy Seeds optional
  • 1 tbsp Dried Minced Onion infuses onion flavor without moisture

Equipment

  • 9x13 inch baking dish

Method
 

Step‑by‑Step Instructions
  1. Preheat your oven to 350°F (175°C).
  2. In a 9x13-inch baking dish, arrange half of the Ritz crackers with the flat side facing down.
  3. Tear deli ham into strips and place a piece atop each Ritz cracker.
  4. Cut Swiss cheese into 1-inch squares and place one on top of each ham-covered cracker.
  5. In a small bowl, combine melted butter, Dijon mustard, Worcestershire sauce, and garlic powder, stirring until well mixed.
  6. Evenly drizzle the buttery mixture over the assembled cracker sandwiches.
  7. Sprinkle poppy seeds and dried minced onion over the top.
  8. Place the baking dish in the preheated oven and bake for 10-12 minutes, or until the cheese is melted and golden brown.
  9. Once baked, let your Ham and Swiss Cracker Melts cool for a minute and serve warm.

Nutrition

Serving: 1meltCalories: 150kcalCarbohydrates: 10gProtein: 5gFat: 10gSaturated Fat: 5gCholesterol: 30mgSodium: 400mgPotassium: 50mgSugar: 1gVitamin A: 200IUCalcium: 100mgIron: 0.5mg

Notes

Prevent sogginess by using a light coating of the butter mixture. Experiment with cheese varieties for unique flavors. Ensure even baking by preheating the oven fully.

Tried this recipe?

Let us know how it was!

Guy Fieri Macaroni Salad That’s Perfect for Summer BBQs

As the sun sets on another warm summer evening, the delightful aroma of a backyard BBQ fills the air, and I can’t help but think about the dish that steals the spotlight: Guy Fieri Macaroni Salad. This creamy and tangy salad isn’t just a side; it transforms any gathering into a festive event. Known for being a guaranteed crowd-pleaser, it’s incredibly easy to whip up, making it the ideal choice for those spontaneous cookouts with friends and family. The versatility of this recipe allows you to customize it to your heart’s content, whether you’re adding in crunchy veggies or protein-packed hard-boiled eggs. It’s the perfect balance of flavor and simplicity, ensuring you’ll soon have a new go-to recipe for all your summer parties. Are you ready to impress your guests with this creamy delight?

Why is this macaroni salad a must-try?

Creaminess at its finest: The silky mayonnaise base combined with sweet pickle relish creates a luscious texture that’s hard to resist.
Crowd-Pleaser effect: This macaroni salad is always a hit, making it perfect for summer BBQs and potlucks.
Customizable delight: Feel free to play with ingredients; add crisp veggies or even proteins like chicken or ham for a heartier option.
Simplicity reigns: With just a few basic ingredients and steps, this dish comes together effortlessly, making it a stress-free choice for any gathering.
And if you love easy showstopper recipes, you might also enjoy our Blt Chicken Salad!

Guy Fieri Macaroni Salad Ingredients

• Dive into making the perfect Guy Fieri macaroni salad with these simple ingredients!

For the Salad

  • Elbow Macaroni – This pasta serves as the perfect base; cook until al dente for that delightful chew.
  • Mayonnaise – The creamy hero of the dish; feel free to adjust the amount for your preferred richness.
  • Sweet Pickle Relish – Adds a delightful sweetness and tang; substitute with dill pickles if you’re feeling adventurous.
  • Celery – Infuses crunch and freshness; finely chop for the best texture.
  • Onion – Enriches the flavor profile; finely diced onion ensures it melds beautifully without overpowering.
  • Apple Cider Vinegar – Balances the richness nicely; adjust to suit your taste for that perfect tang.
  • Yellow Mustard – Introduces a subtle yet essential flavor complexity; don’t skip this ingredient for authentic taste.
  • Salt & Pepper – Enhances all flavors; season to taste, remembering that a touch of salt makes everything pop.
  • Hard-Boiled Eggs (Optional) – Boosts protein and adds heartiness; a delicious choice if you want a richer salad.
  • Paprika (for garnish) – A sprinkle adds color and a mild flavor twist to elevate your dish visually and tastefully.

Step‑by‑Step Instructions for Guy Fieri Macaroni Salad

Step 1: Cook the Macaroni
Begin by bringing a large pot of salted water to a rolling boil over medium-high heat. Add the elbow macaroni and cook for 7-8 minutes, or until tender but still al dente. Once done, drain the pasta in a colander and rinse it under cold water until fully cooled. Set it aside to ensure it drains thoroughly, preventing sogginess in your Guy Fieri macaroni salad.

Step 2: Prepare the Dressing
In a spacious mixing bowl, combine the creamy mayonnaise, sweet pickle relish, finely chopped celery, and onion. Whisk in apple cider vinegar and yellow mustard, blending until the mixture is smooth and creamy. Taste the dressing and season it with salt and pepper to enhance the flavors. This tangy dressing is the heart of your delicious Guy Fieri macaroni salad!

Step 3: Combine Pasta and Dressing
Once the macaroni has cooled and drained, gently fold it into the dressing. Use a spatula or wooden spoon to toss the pasta until every piece is evenly coated. If you’re including hard-boiled eggs in your salad, fold them in at this stage, being careful not to break them apart too much. This step is crucial for achieving that flavorful, creamy texture signature to the Guy Fieri macaroni salad.

Step 4: Chill the Salad
Cover the bowl with plastic wrap or a lid and place it in the refrigerator for at least 1 hour, though longer is preferable. Chilling allows the flavors to meld and develop beautifully. As you wait, you can dream about how this creamy delight will elevate your summer BBQs and gatherings!

Step 5: Serve with a Smile
Before serving your Guy Fieri macaroni salad, take a moment to taste and adjust the seasoning, adding a pinch more salt or vinegar if desired. When ready, garnish with a sprinkle of paprika for added color and flavor. Serve this delightful salad cold alongside your favorite grilled meats or at any summer gathering, and watch it become an instant hit!

Guy Fieri Macaroni Salad Variations

Feel free to get creative with your macaroni salad; there are so many delicious ways to customize this classic dish!

  • Protein-Packed: Add diced ham or chicken instead of hard-boiled eggs for a heartier version. This twist makes for a filling meal that family and friends will adore.
  • Veggie Delight: Stir in finely diced bell peppers for a vibrant burst of color and crunch that enhances both taste and texture. Your guests won’t be able to resist that extra crunch!
  • Sweet Peas: Toss in some sweet peas for added sweetness and a pop of green, making every bite a delightful surprise. They complement the creaminess perfectly!
  • Spice it Up: For those who love heat, mix in some diced jalapeños or a dash of hot sauce for a zesty kick. This variation will definitely ignite your taste buds!
  • Herbs Galore: Fresh herbs like dill or parsley can brighten up the salad, offering refreshing notes that balance the creaminess wonderfully. Try it, and you’ll fall in love with the new flavor profile!
  • Greek Inspired: Swap out mayo for Greek yogurt and add cucumbers and olives for a Mediterranean twist. This healthy substitute gives it a tangy flavor that’s both creamy and refreshing.
  • Sweet Surprise: Incorporate a handful of diced pineapple for a sweet, tropical flair. The contrasting flavors create an unexpected but delightful combination.
  • Classic Touch: If you love the flavor of classic potato salad, try adding cubed potatoes for a mash-up of the best of both worlds—it’s comfort food at its finest!

And if you’re looking for more delicious ideas, this Blt Chicken Salad will surely inspire your next culinary creation! Enjoy customizing!

Expert Tips for Guy Fieri Macaroni Salad

  • Cook Al Dente: Ensure the elbow macaroni is cooked al dente; overcooked pasta can lead to a mushy salad. A slight bite maintains the integrity of your Guy Fieri macaroni salad.
  • Customize Wisely: While adding extra ingredients, maintain balance. Too many heavy items can overpower the dressing, diluting the charm of this creamy dish.
  • Chill Time Matters: Refrigerate for at least an hour. Chilling enhances flavors, so resist the urge to serve immediately.
  • Seasoning is Key: Taste before serving and adjust seasoning. A pinch more salt or dash of vinegar can elevate all the flavors in this delightful treat.
  • Garnish With Purpose: Use paprika as a garnish not just for aesthetics but to introduce a subtle flavor twist that completes your Guy Fieri macaroni salad beautifully.

Make Ahead Options

These Guy Fieri Macaroni Salad options are perfect for busy meal prep! You can cook the elbow macaroni and prepare the dressing up to 24 hours in advance, refrigerating them separately to maintain their freshness. The macaroni should be rinsed thoroughly and stored in an airtight container, while the dressing can be kept in a sealed jar. When you’re ready to serve, simply combine the chilled macaroni with the dressing and gently toss in any hard-boiled eggs if desired. This way, you ensure the salad is just as creamy and delicious on serving day, allowing you to enjoy more time with your guests at those summer BBQs!

What to Serve with Guy Fieri Macaroni Salad

As you prepare to enjoy this creamy delight, consider these enticing side dishes that will elevate your summer gathering experience.

  • Grilled Chicken: Juicy and smoky, grilled chicken pairs beautifully with the creamy macaroni salad, enhancing its rich texture while adding a savory element.
  • BBQ Ribs: The sweet and tangy flavors of BBQ ribs create a mouthwatering contrast against the salad, making every bite a delicious adventure.
  • Corn on the Cob: This classic summer side adds a sweet crunch that complements the salad’s creaminess, providing a fresh burst of flavor.
  • Coleslaw: The crispy texture and tangy dressing of coleslaw balance the macaroni salad, creating a delightful mix of flavors and crunch with every bite.
  • Potato Chips: A crunchy side that provides a salty and satisfying contrast, potato chips ground the meal in nostalgia and simplicity.
  • Fresh Fruit Salad: A light and sweet addition, fresh fruit salad brightens the table with its vibrant colors and refreshing flavors, making it a hit with guests.

These pairings not only enhance your meal but also create a symphony of flavors that bring everyone together around the table.

How to Store and Freeze Guy Fieri Macaroni Salad

Fridge: Store any leftover Guy Fieri macaroni salad in an airtight container in the refrigerator for up to 3 days to maintain freshness.

Make-Ahead: This salad is perfect for making ahead! Prepare it a few hours or even a day before your gathering to allow flavors to meld beautifully.

Freezer: While it’s best enjoyed fresh, you can freeze the macaroni salad for up to 2 months. Thaw in the fridge overnight and stir well before serving.

Reheating: If serving leftovers from the fridge, enjoy it cold! If desired, gently warm in the microwave, but keep in mind that the texture may change slightly.

Guy Fieri Macaroni Salad Recipe FAQs

What type of macaroni should I use for this salad?
Absolutely go for elbow macaroni! It’s the classic choice for macaroni salad thanks to its shape, which perfectly holds onto the creamy dressing. Make sure to cook it until al dente for the best texture—about 7-8 minutes in boiling salted water.

How do I store leftover macaroni salad?
Store any leftover Guy Fieri macaroni salad in an airtight container in the refrigerator for up to 3-4 days. If you find it thickens in the fridge, simply add a splash of apple cider vinegar or a dollop of mayonnaise to loosen it back up before serving.

Can I freeze macaroni salad?
While it’s best enjoyed fresh, you can freeze the macaroni salad for up to 2 months. To freeze, place it in a freezer-safe container, leaving some space at the top as it may expand. When you’re ready to enjoy it, simply thaw it overnight in the refrigerator and stir well before serving—though keep in mind that the texture might change slightly.

What can I use as a substitute for sweet pickle relish?
If you’re not a fan of sweet pickle relish, you can substitute it with finely chopped dill pickles or even minced capers for a brinier flavor. Just be sure to adjust the initial seasoning, as these substitutes may vary in taste.

Can I add extra ingredients to this salad?
Very! This Guy Fieri macaroni salad is super customizable. Why not try adding diced bell peppers, peas, or even proteins like diced chicken or ham for a heartier version? Just aim to maintain balance so the flavors meld well together.

Is this recipe suitable for people with allergies?
Always consider specific dietary needs! The base recipe contains common allergens like eggs (if you choose to include hard-boiled eggs) and mayonnaise (which may contain eggs and other allergens). For a vegan option, simply swap out the creamy mayonnaise for a plant-based version and eliminate the eggs. Always check the labels to ensure they meet any dietary restrictions.

Guy Fieri Macaroni Salad

Guy Fieri Macaroni Salad That's Perfect for Summer BBQs

Guy Fieri Macaroni Salad is a creamy and tangy delight that transforms any summer gathering into a festive event.
Prep Time 15 minutes
Cook Time 8 minutes
Chilling Time 1 hour
Total Time 1 hour 23 minutes
Servings: 6 servings
Course: Salad
Cuisine: American
Calories: 300

Ingredients
  

For the Salad
  • 2 cups Elbow Macaroni cook until al dente
  • 1 cup Mayonnaise adjust for preferred richness
  • 1/2 cup Sweet Pickle Relish or substitute with dill pickles
  • 2 stalks Celery finely chopped
  • 1/2 cup Onion finely diced
  • 2 tablespoons Apple Cider Vinegar adjust to taste
  • 1 tablespoon Yellow Mustard
  • to taste Salt
  • to taste Pepper
  • 2 pieces Hard-Boiled Eggs optional
  • 1 teaspoon Paprika for garnish

Equipment

  • Large pot
  • Colander
  • Mixing Bowl
  • whisk
  • spatula

Method
 

Step-by-Step Instructions
  1. Bring a large pot of salted water to a boil, add elbow macaroni, cook for 7-8 minutes until al dente, drain, and rinse with cold water.
  2. In a mixing bowl, combine mayonnaise, sweet pickle relish, celery, onion, apple cider vinegar, and yellow mustard. Whisk until smooth and season with salt and pepper.
  3. Gently fold the cooled macaroni into the dressing until evenly coated. If using, fold in hard-boiled eggs cautiously.
  4. Cover and refrigerate for at least 1 hour to allow flavors to meld.
  5. Check seasoning before serving; garnish with paprika and serve cold with grilled meats.

Nutrition

Serving: 1cupCalories: 300kcalCarbohydrates: 40gProtein: 8gFat: 12gSaturated Fat: 2gCholesterol: 80mgSodium: 400mgPotassium: 200mgFiber: 2gSugar: 4gVitamin A: 500IUVitamin C: 3mgCalcium: 20mgIron: 1mg

Notes

This macaroni salad can be made ahead of time and stored in the refrigerator for up to 3 days. It can also be frozen for up to 2 months, though it's best enjoyed fresh.

Tried this recipe?

Let us know how it was!

Cinnamon Roll French Toast Roll-Ups for a Sweet Morning Treat

The aroma of cinnamon wafts through the air, awakening my senses and sparking joy as I flip through my recipe book. Today, I’m excited to share a delicious twist on a classic breakfast with these Cinnamon Roll French Toast Roll-Ups. These scrumptious bites are not only a feast for the eyes but also incredibly easy to prepare, making them perfect for busy mornings or special brunches. Packed with gooey cinnamon goodness and a crispy exterior, they strike the perfect balance between comfort food and indulgence. What’s more, you can whip up a batch within minutes, leaving plenty of time to savor the moment—or sneak an extra one for yourself! Are you ready to elevate your breakfast game? Let’s dive into this delightful recipe together!

Why are Cinnamon Roll French Toast Roll-Ups special?

Irresistible Flavor: These roll-ups bring together the warm, comforting taste of cinnamon rolls and crispy French toast for a truly unique breakfast experience.

Quick and Easy: With simple ingredients and straightforward steps, you’ll have this delightful treat ready in no time—perfect for busy mornings!

Crowd-Pleaser: Serve them at brunch or as a special family breakfast, and watch everyone’s faces light up with joy.

Versatile: Customize your roll-ups with cream cheese or chocolate chips for added indulgence, or try different kinds of bread like brioche for a gourmet twist!

Make Ahead: Enjoy the convenience of prepping these roll-ups in advance, or freeze extras for a delicious breakfast that’s real comfort food whenever you crave it!

Pair this delightful dish with a drizzle of maple syrup or fresh fruit alongside your favorite options like Blueberry French Toast for a breakfast to remember.

Cinnamon Roll French Toast Roll-Ups Ingredients

For the Roll-Ups
White Sandwich Bread – This provides a soft and easy-to-roll base; fresh bread works best for seamless rolling.
Butter (3 tablespoons, melted) – Adds richness to the roll-ups; margarine can be used as a substitute.
Brown Sugar (3 tablespoons) – Delivers sweetness with a hint of molasses; can swap with coconut sugar for a deeper flavor.
Ground Cinnamon (2 tablespoons + ½ teaspoon) – Essential for that warm, cinnamon goodness in both the filling and coating; opt for fresh ground for maximum flavor.
Large Eggs (3) – Forms a custardy layer when frying; no substitutes recommended for traditional results.
Milk (1 tablespoon) – Brings creaminess to the egg mixture; dairy-free alternatives such as almond or oat milk work well too.
Vanilla Extract (½ teaspoon) – Adds flavor depth and is highly recommended for a delicious finish.
Butter for Frying (2-3 tablespoons) – Used to cook the roll-ups until golden brown; a mix of butter and oil can increase smoke point for frying.

With these Cinnamon Roll French Toast Roll-Ups ingredients, you’re just moments away from presenting a delightful breakfast that feels special. Let’s keep the excitement rolling!

Step‑by‑Step Instructions for Cinnamon Roll French Toast Roll-Ups

Step 1: Prepare the Bread
Begin by removing the crusts from each slice of white sandwich bread. Using a rolling pin, flatten the slices gently until they are about 1/4 inch thick. This will make them easier to roll and will give you a delightful texture in your Cinnamon Roll French Toast Roll-Ups.

Step 2: Make the Cinnamon Filling
In a small bowl, combine the melted butter, brown sugar, and 2 tablespoons of ground cinnamon until well blended. The mixture should become a smooth paste. This sweet cinnamon filling will provide a delicious burst of flavor, so be sure to mix it thoroughly before spreading it on the bread.

Step 3: Spread the Filling
Take each flattened bread slice and spread a generous layer of the cinnamon mixture on top, leaving a small border around the edges. This will prevent the filling from oozing out when you roll them up. Make sure each slice is evenly coated to ensure every bite is delicious in your Cinnamon Roll French Toast Roll-Ups.

Step 4: Roll the Bread Slices
Carefully roll each slice of bread tightly, starting from one end and moving to the other while pressing gently to seal it. The tightness of your roll will help keep the filling intact while cooking. Place each rolled-up slice seam-side down to maintain its shape as you continue preparing the rest.

Step 5: Prepare the Egg Mixture
In a shallow bowl, whisk together the eggs, milk, remaining 1/2 teaspoon of cinnamon, and vanilla extract until well combined. The egg mixture will create a custardy coating that is essential for achieving that delicious French toast texture on your roll-ups.

Step 6: Heat the Skillet
Warm a non-stick skillet over medium heat and add 2-3 tablespoons of butter, allowing it to melt completely. Make sure the skillet is hot enough that the butter begins to foam, which will create a nice golden brown crust on the outside of your Cinnamon Roll French Toast Roll-Ups.

Step 7: Dip and Cook the Roll-Ups
Dip each cinnamon roll into the egg mixture, ensuring they are coated evenly before placing them seam-side down in the skillet. Cook for about 2-3 minutes, rotating the rolls gently to brown all sides. You’ll know they’re ready when they’re golden brown and slightly crispy on the outside.

Step 8: Serve and Enjoy
Once the roll-ups are perfectly cooked, remove them from the skillet and let them cool for a moment. Serve warm, drizzled with maple syrup or sprinkled with powdered sugar. These Cinnamon Roll French Toast Roll-Ups are best enjoyed fresh, right after cooking, for maximum gooey goodness!

How to Store and Freeze Cinnamon Roll French Toast Roll-Ups

Fridge: Store leftover roll-ups in an airtight container in the refrigerator for up to 3 days. This keeps them fresh and ready for a quick breakfast.

Freezer: For longer storage, freeze the roll-ups in a single layer on a baking sheet. Once frozen, transfer them to a freezer-safe bag or container for up to 1 month.

Reheating: To enjoy, reheat in a toaster oven or microwave until warmed through. For the best results, use the oven to restore crispiness.

Make Ahead: You can prepare the roll-ups in advance, making them a convenient option for busy mornings or brunch gatherings!

What to Serve with Cinnamon Roll French Toast Roll-Ups

Imagine the table set with delicious accompaniments that elevate your breakfast experience to a whole new level.

  • Maple Syrup: A classic pairing that adds a rich sweetness and complements the cinnamon flavor beautifully.
  • Fresh Berries: Juicy strawberries, blueberries, or raspberries provide a refreshing contrast, balancing the sweetness of the roll-ups.
  • Whipped Cream: Light and airy, this decadent topping creates a delightful creaminess that enriches each bite of your roll-ups.
  • Bacon or Sausage: Crispy bacon or savory sausage on the side adds a salty element, enhancing the overall breakfast experience.
  • Fruit Salad: A colorful medley of fruits not only adds vibrancy to your plate but also offers a refreshing balance to the roll-ups’ richness.
  • Coffee or Latte: A warm cup of coffee or a frothy latte pairs perfectly, bringing comfort and a rich depth that harmonizes with your breakfast spread.
  • Powdered Sugar: Dusting your roll-ups with powdered sugar not only looks gorgeous but adds a lovely sweetness that guests will adore.
  • Chocolate Sauce: For a sweet twist, drizzle some chocolate sauce over the top for an indulgent treat that elevates the experience.

With these delightful accompaniments, your Cinnamon Roll French Toast Roll-Ups will be an unforgettable feast that everyone will cherish.

Cinnamon Roll French Toast Roll-Ups Variations

Feel free to indulge your creativity with these roll-ups; your taste buds will thank you!

  • Whole Grain Bread: Swap white bread for whole grain to add fiber and a nutty flavor while keeping the roll still soft.
  • Brioche Delight: Try using brioche bread for a richer, buttery base that elevates the overall indulgence of your roll-ups.
  • Creamy Filling: Spread cream cheese inside the rolls before adding the cinnamon mixture for an extra layer of creamy goodness.
  • Chocolate Surprise: Add chocolate chips within the filling to introduce a decadent twist that chocolate lovers will adore, melting beautifully.
  • Pumpkin Spice Twist: Mix pumpkin puree and pumpkin spice into the egg mixture for a fall-inspired version that brings autumn flavors to life.
  • Nutty Crunch: Toss some chopped pecans or walnuts into the cinnamon filling for delightful texture and added flavor; the crunch will surprise you!
  • Banana Boost: Add thin banana slices inside the rolls for a fruity twist that complements the cinnamon perfectly and enhances the gooey richness.
  • Spicy Kick: Sprinkle cayenne pepper or a dash of nutmeg into the egg mixture for a surprising heat that contrasts beautifully with the sweetness.

These delightful variations ensure that your Cinnamon Roll French Toast Roll-Ups remain a fun and exciting breakfast option! You might also want to check out ideas for a delightful Sweet Escape Toast or a comforting Blueberry French Toast for more delicious indulgences!

Make Ahead Options

These Cinnamon Roll French Toast Roll-Ups are a fantastic choice for busy mornings! You can prepare the filling and roll the bread up to 24 hours in advance—simply spread the cinnamon mixture on the flattened bread, roll, and store in an airtight container in the refrigerator. To maintain quality, ensure they are tightly wrapped to avoid drying out. When you’re ready to cook, whisk together the egg mixture (which can also be made ahead), dip the rolls, and fry them up. They cook quickly, giving you that warm, gooey breakfast treat with minimal effort and maximum flavor, just like as if you made them fresh!

Expert Tips for Cinnamon Roll French Toast Roll-Ups

  • Use Fresh Bread: Ensure the white sandwich bread is fresh and soft; this helps achieve that perfect roll and prevents tearing.

  • Avoid Soggy Rolls: Dip the roll-ups quickly in the egg mixture. Over-soaking can lead to sogginess, which is not what you want!

  • Monitor Heat: Keep the skillet at medium heat. Too high, and the rolls will burn outside while remaining uncooked inside.

  • Experiment with Add-ins: Feel free to customize your Cinnamon Roll French Toast Roll-Ups by adding cream cheese, fruit, or chocolate chips for an extra flavor boost!

  • Make-ahead Magic: These roll-ups can be prepared in advance and stored in the fridge or freezer. Just reheat them for a quick and delicious breakfast any day!

Cinnamon Roll French Toast Roll-Ups Recipe FAQs

How do I choose the best bread for my roll-ups?
Absolutely! For the best Cinnamon Roll French Toast Roll-Ups, I recommend using fresh, soft white sandwich bread as it rolls easily without tearing. If you like experimenting, try brioche or whole-grain bread for added flavor and texture!

What’s the best way to store leftover roll-ups?
To keep your roll-ups fresh, store them in an airtight container in the refrigerator for up to 3 days. Make sure they’re completely cool before sealing to avoid moisture buildup.

Can I freeze Cinnamon Roll French Toast Roll-Ups?
Yes, you can! To freeze your roll-ups, place them in a single layer on a baking sheet until fully frozen. Then, transfer them to a freezer-safe bag or container. They’ll be good for up to 1 month! Be sure to look for the dough to be firm before packing them up.

How do I reheat frozen roll-ups?
To reheat, you have a few options! For the best results, use an oven or toaster oven. Preheat to 350°F (175°C), place the roll-ups on a baking sheet, and heat for about 10-15 minutes until warmed through and crispy. Alternatively, you can microwave them for 1-2 minutes, but they may lose some of their crispiness.

What can I do if my roll-ups are soggy?
Very! If your roll-ups turn out soggy, this usually means they were oversoaked in the egg mixture. To avoid this, I suggest dipping them quickly—just enough to coat, but not penetrate deeply. If they’re already soggy, try frying them a bit longer to cook off excess moisture.

Are there any dietary considerations I should be aware of?
Definitely! If you’re serving these roll-ups to children or those with dietary restrictions, keep in mind they contain eggs and dairy. For a dairy-free version, you can substitute almond or oat milk and use coconut oil instead of butter. Always check for potential allergies!

Cinnamon Roll French Toast Roll-Ups

Cinnamon Roll French Toast Roll-Ups for a Sweet Morning Treat

Delight in the Cinnamon Roll French Toast Roll-Ups, a perfect blend of comfort and flavor for your mornings.
Prep Time 15 minutes
Cook Time 10 minutes
Total Time 25 minutes
Servings: 4 roll-ups
Course: Breakfast
Cuisine: American
Calories: 200

Ingredients
  

For the Roll-Ups
  • 6 slices White Sandwich Bread Fresh bread works best for seamless rolling.
  • 3 tablespoons Butter, melted Adds richness to the roll-ups; margarine can be used as a substitute.
  • 3 tablespoons Brown Sugar Delivers sweetness; can swap with coconut sugar for deeper flavor.
  • 2.5 tablespoons Ground Cinnamon Essential for warm, cinnamon goodness.
  • 3 large eggs Large Eggs Forms a custardy layer when frying; no substitutes recommended.
  • 1 tablespoon Milk Brings creaminess; dairy-free alternatives work well.
  • 0.5 teaspoon Vanilla Extract Adds flavor depth.
  • 2-3 tablespoons Butter for Frying Used to cook the roll-ups until golden brown.

Equipment

  • Rolling Pin
  • Shallow bowl
  • Non-stick skillet

Method
 

Step-by-Step Instructions
  1. Prepare the Bread: Remove the crusts from each slice of white sandwich bread and flatten gently with a rolling pin.
  2. Make the Cinnamon Filling: Combine melted butter, brown sugar, and 2 tablespoons of ground cinnamon until smooth.
  3. Spread the Filling: Spread a generous layer of cinnamon mixture on each flattened bread slice.
  4. Roll the Bread Slices: Roll each slice tightly, pressing gently to seal it. Place seam-side down.
  5. Prepare the Egg Mixture: Whisk together eggs, milk, remaining cinnamon, and vanilla in a shallow bowl.
  6. Heat the Skillet: Warm a non-stick skillet over medium heat and add 2-3 tablespoons of butter.
  7. Dip and Cook the Roll-Ups: Dip each roll into the egg mixture and place seam-side down in the skillet. Cook until golden brown.
  8. Serve and Enjoy: Remove from skillet and serve warm, drizzled with maple syrup or powdered sugar.

Nutrition

Serving: 1roll-upCalories: 200kcalCarbohydrates: 28gProtein: 4gFat: 8gSaturated Fat: 4gCholesterol: 70mgSodium: 180mgPotassium: 100mgFiber: 1gSugar: 8gVitamin A: 300IUCalcium: 50mgIron: 1mg

Notes

Store leftover roll-ups in an airtight container in the refrigerator for up to 3 days, or freeze for up to 1 month. Reheat in a toaster oven or microwave.

Tried this recipe?

Let us know how it was!

Cheesy Hashbrown Breakfast Casserole for Stress-Free Mornings

As I stood in my kitchen with a lingering aroma of sizzling bacon and melting cheese, I realized that an Easy Cheesy Hash Brown Breakfast Casserole is the kind of dish that can turn any morning into a celebration. This bright, hearty casserole combines crispy hash browns with creamy eggs and savory meat, making it perfect for brunches, especially when hosting friends and family. One of the greatest perks? Not only is it a stress-free, make-ahead option, but it can also feed a crowd with minimal effort, allowing you to enjoy more time at the table. Imagine serving up slices of this comforting casserole, its golden crust beckoning everyone to dig in. Curious about how to create a dish that guarantees smiles all around? Let’s dive into the recipe!

Why Choose This Cheesy Casserole?

Simplicity Made Delicious: Preparing this Easy Cheesy Hash Brown Breakfast Casserole is a breeze, requiring just a handful of ingredients and minimal kitchen skills.

Crowd-Pleaser: With its cheesy goodness and hearty flavors, it’s a surefire hit at any gathering—imagine the smiles as you serve it!

Versatile Ingredients: Customize it with your favorite vegetables or swap the meat for a veggie option, making this dish perfect for any dietary need.

Make-Ahead Wonder: Prepare it the night before to save time in the morning, allowing you to relax and enjoy the company of your guests.

Comfort Food Classic: This casserole captures the essence of home-cooked comfort, reminiscent of festive family gatherings. Pair it with a fresh fruit salad or some sweet cinnamon buns for a brunch that dazzles! Want a change of pace? Try out the Cheesy Low Casserole for another hearty option!

Cheesy Hash Brown Breakfast Casserole Ingredients

For the Casserole
Shredded Potatoes – Provides the base structure and heartiness; feel free to use frozen for convenience.
Melted Butter – Adds richness and helps to crisp the bottom layer, ensuring a delightful texture.
Large Eggs – Acts as the binding agent for the casserole, providing essential moisture and structure.
Whole Milk – Enhances creaminess and flavor; can be swapped for half-and-half if you prefer a richer dish.
Green Onions – Provides a fresh flavor and slight crunch; consider using more for a vibrant garnish.
Small Onion – Adds depth to the overall flavor profile; can be replaced with a shallot for a milder touch.
Green and Red Peppers – Introduces color and sweetness; don’t hesitate to substitute with any favored vegetables like spinach or mushrooms.
Salt and Pepper – Essential for seasoning; remember to adjust according to your taste.
Chopped Ham/Bacon/Sausage – Contributes protein and smokiness; ensure it’s thoroughly cooked before mixing in.
Shredded Cheese – Adds creaminess and savory goodness; opt for any melty cheese you love, such as cheddar or mozzarella.

Optional Garnish
Fresh Herbs – A sprinkle of parsley or cilantro adds a burst of freshness; perfect for a lively presentation.
Hot Sauce – Drizzle a little for those who enjoy a spicy kick with their cheesy hash brown breakfast casserole!

Step‑by‑Step Instructions for Cheesy Hashbrown Breakfast Casserole

Step 1: Preheat the Oven
Begin by preheating your oven to 375°F (190°C). This is a crucial step to ensure that your Cheesy Hashbrown Breakfast Casserole bakes evenly and achieves that delightful golden-brown crust. While the oven heats up, gather and prepare your ingredients to streamline the process.

Step 2: Cook the Meat
In a skillet over medium heat, cook the chopped bacon, sausage, or ham until browned and crispy, about 5-7 minutes. As the meat cooks, occasionally stir to avoid sticking. Once done, use a slotted spoon to transfer it to a paper towel-lined plate, allowing excess grease to drain. This savory component will enhance your casserole’s flavor.

Step 3: Prepare the Baking Dish
Take a 9 x 13-inch baking dish and grease it generously with melted butter, ensuring the bottom is well-coated for a non-stick surface. This step is vital for achieving a crispy bottom layer in your casserole. Spread it evenly, then set the dish aside while you layer the hash browns.

Step 4: Layer the Hash Browns
Evenly distribute the shredded potatoes at the bottom of your prepared baking dish, pressing down gently to form a solid base. This hearty layer serves as the foundation for your Cheesy Hashbrown Breakfast Casserole. Ensure that the potatoes cover the entire bottom to create a deliciously crispy texture as they bake.

Step 5: Mix the Egg Mixture
In a large mixing bowl, whisk together the large eggs and whole milk until smooth and well combined. Stir in the chopped green onions, diced peppers, cooked meat, salt, and pepper, blending all the ingredients thoroughly. This egg mixture will bind the casserole and create a creamy texture, enriching every bite.

Step 6: Pour the Egg Mixture
Carefully pour the egg mixture over the layered hash browns, ensuring even coverage throughout. Gently shake the baking dish to help the mixture settle, ensuring that every potato is enveloped in eggy goodness. This step fills the casserole with flavor and moisture, making it irresistibly delicious.

Step 7: Add the Cheese
Generously sprinkle shredded cheese on top of the casserole for that gooey, melty goodness we all love. You can mix different cheeses if you’d like for added flavor. As the Cheesy Hashbrown Breakfast Casserole bakes, this layer will melt into a delightful topping that perfectly complements the savory layers beneath.

Step 8: Bake the Casserole
Place the baking dish in the preheated oven and bake for 45-60 minutes. Keep an eye on it; the casserole is ready when the center is fully set and no longer jiggles. Look for a golden, bubbly topping that promises an irresistible crunch and cheesy finish.

Step 9: Let It Rest
Once baked to perfection, remove the casserole from the oven and allow it to rest for about 10 minutes. This resting period is essential as it lets the casserole set up, making it easier to slice into squares. As it cools, the flavors meld together while you prepare for serving.

Step 10: Serve and Enjoy
After resting, slice your Cheesy Hashbrown Breakfast Casserole into squares, ready to be served. This dish pairs wonderfully with fresh fruit or sweet cinnamon buns, making it a fantastic option for any brunch. Enjoy the heartwarming smiles as you share this delightful homemade meal with family and friends!

Expert Tips for Cheesy Hashbrown Breakfast Casserole

Prep Ahead: Prepare the dish a night before without cheese. Just add the cheese before baking to save time in the morning.

Vegetable Boost: For a nutritious twist, incorporate 1/2 cup of diced mushrooms, broccoli, or spinach to increase your veggie intake in this cheesy hashbrown breakfast casserole.

Freezing Made Easy: This casserole freezes beautifully! Wrap tightly and freeze for up to 2 months. Thaw overnight in the fridge before baking.

Cook Your Meat: Always ensure that meat is thoroughly cooked before mixing it into the casserole to enhance flavor and ensure food safety.

Customize It: Feel free to swap ingredients based on your preferences or dietary needs, such as using sweet potatoes or crumbled tofu instead of hash browns.

Make Ahead Options

These Easy Cheesy Hash Brown Breakfast Casseroles are perfect for busy mornings! You can prepare the casserole (without the cheese) up to 24 hours in advance by following the layering instructions and covering it tightly with plastic wrap. As you store it in the refrigerator, this will keep the ingredients fresh and flavorful for when you’re ready to bake. On the day of serving, simply sprinkle the shredded cheese on top before putting it in the oven. By taking these steps, you’ll have a delicious breakfast ready to pop in the oven, allowing you to enjoy more time with loved ones while serving up smiles all around.

What to Serve with Easy Cheesy Hash Brown Breakfast Casserole

There’s something magical about creating a complete meal that not only satisfies the taste buds but also warms the heart.

  • Fresh Fruit Salad: A vibrant medley of seasonal fruits adds a refreshing touch, balancing the richness of the casserole beautifully.
  • Sweet Cinnamon Buns: These soft, gooey treats offer a delightful sweetness that perfectly complements the savory casserole, making every bite a treat!
  • Honey-Glazed Carrots: Their natural sweetness and tender bite provide a lovely contrast, adding a pop of color and nutrition to your brunch table.
  • Crispy Bacon Strips: For those who crave an extra salty crunch, crispy bacon pairs perfectly, enhancing the savory aspects of the casserole.
  • Spinach Salad: Tossed with a light vinaigrette, the peppery greens offer a fresh and tangy element, balancing the casserole’s richness.
  • Hot Coffee or Mimosas: Keep the energy up with a pot of rich coffee or serve mimosas for a bubbly touch that brightens the entire brunch experience.
  • Maple Syrup Drizzle: Offer a side of maple syrup for those who enjoy a sweet kick with their savory bites, adding layers of flavor to this filling dish.
  • Yogurt Parfaits: Layer creamy yogurt with granola and berries for a refreshing counterpoint, ensuring everyone finds something they love on the table.
  • Savory Scones: These flaky, herb-infused scones provide a delightful texture contrast and pair wonderfully with the casseroles’ cheesy goodness.
  • Chilled Iced Tea: A refreshing drink option, iced tea offers a cooling complement to the warm casserole, making every bite feel more vibrant.

How to Store and Freeze Cheesy Hashbrown Breakfast Casserole

Fridge: Store leftovers in an airtight container for up to 3-4 days. Reheat individual portions in the microwave until warmed through.

Freezer: This cheesy hashbrown breakfast casserole freezes well! Wrap tightly in plastic wrap or aluminum foil and freeze for up to 2 months.

Thawing: To prepare, thaw overnight in the fridge. Bake at 375°F (190°C) until heated through, ensuring it’s cooked thoroughly before serving.

Reheating: For best results, reheat in the oven instead of the microwave to maintain its delightful texture and cheesy crust.

Cheesy Hashbrown Breakfast Casserole Variations

Feel free to unleash your culinary creativity and make this casserole your own with these delightful variations!

  • Vegetarian Substitute: Replace meat with crumbled tofu or extra vegetables for a hearty vegetarian version. It’s a fantastic way to maintain a satisfying texture and flavor!

  • Different Cheese: Try a blend of different cheeses like feta for a tangy twist or even pepper jack for a little heat. The choice of cheese can transform the flavor profile entirely!

  • Sweet Potato Swap: Use sweet potatoes in place of traditional hash browns for added sweetness and a unique taste. This twist can also elevate the nutritional content of the dish.

  • Spicy Kick: Add diced jalapeños or a sprinkle of cayenne pepper to the egg mixture for a fiery update. This variation brings an invigorating zing to each square!

  • Hidden Veggies: Add up to 1 cup of finely chopped vegetables like spinach, mushrooms, or zucchini for extra nutrition and a delightful crunch. It’s an excellent way to sneak in those greens!

  • Herb Infusion: Mixing in fresh herbs like dill or parsley can brighten the flavor. These fresh additions offer a lovely aroma while elevating the overall taste experience.

  • Gluten-Free Option: Opt for gluten-free hash browns to create a dish that accommodates gluten sensitivities. It’s the same delicious comfort food without the gluten!

  • Cheesy Baked Goodness: Serve with a side of Cheesy Garlic Chicken for a double dose of cheesy satisfaction at your brunch gathering!

These variations make your casserole versatile and exciting, ensuring there’s something for everyone at the table!

Cheesy Hashbrown Breakfast Casserole Recipe FAQs

What kind of shredded potatoes should I use?
Absolutely! You can use either frozen or freshly shredded potatoes for this recipe. Frozen shredded potatoes are convenient and save prep time, while freshly shredded potatoes may offer a slightly better texture.

How do I store leftovers of the casserole?
Store any leftovers in an airtight container in the refrigerator for up to 3-4 days. Reheat individual portions in the microwave until warmed through, or for best results, place them in the oven at 350°F (175°C) until heated all the way through.

Can I freeze the Cheesy Hashbrown Breakfast Casserole?
Very much so! Wrap the assembled casserole tightly in plastic wrap or aluminum foil and freeze it for up to 2 months. When you’re ready to bake, thaw it overnight in the fridge. Bake at 375°F (190°C) until heated through and enjoy the cheesy goodness!

What if I want to add more vegetables?
I often recommend incorporating extra diced vegetables like mushrooms, broccoli, or spinach! You can easily mix in 1/2 cup of any of these for added flavor and nutrition. Just sauté them lightly before adding them to the egg mixture to help them release moisture and enhance cookware flavors.

Is this recipe pet-friendly?
It’s important to be cautious! This casserole is not suited for pets due to ingredients like onions and garlic, which can be harmful to dogs and cats. Always check with your veterinarian before sharing human food with your furry friends.

What if my casserole doesn’t set in the middle?
No problem! If you encounter a jiggle in the center, simply extend the baking time by 5-10 minutes. Make sure the temperature is accurate; you want the center solid and no longer wobbly. For future reference, an oven thermometer can be a helpful tool to ensure your oven is baking correctly!

Cheesy Hashbrown Breakfast Casserole

Cheesy Hashbrown Breakfast Casserole for Stress-Free Mornings

This Cheesy Hashbrown Breakfast Casserole combines crispy hash browns, creamy eggs, and savory meat for a delicious stress-free breakfast option.
Prep Time 15 minutes
Cook Time 1 hour
Resting Time 10 minutes
Total Time 1 hour 25 minutes
Servings: 8 slices
Course: Breakfast
Cuisine: American
Calories: 350

Ingredients
  

For the Casserole
  • 30 oz Shredded Potatoes Feel free to use frozen for convenience.
  • 1/2 cup Melted Butter Helps to crisp the bottom layer.
  • 8 Large Eggs Acts as the binding agent.
  • 1 cup Whole Milk Can be swapped for half-and-half for a richer dish.
  • 1/4 cup Green Onions Provides a fresh flavor and slight crunch.
  • 1 small Onion Can be replaced with shallot for a milder touch.
  • 1 cup Green and Red Peppers Can substitute with favored vegetables.
  • 1 tsp Salt Essential for seasoning.
  • 1 tsp Pepper Essential for seasoning.
  • 1 cup Chopped Ham/Bacon/Sausage Ensure it’s thoroughly cooked.
  • 2 cup Shredded Cheese Opt for any melty cheese you love.
Optional Garnish
  • 1/4 cup Fresh Herbs A sprinkle of parsley or cilantro.
  • to taste Hot Sauce For those who enjoy a spicy kick.

Equipment

  • Oven
  • Skillet
  • Mixing Bowl
  • 9 x 13-inch Baking Dish

Method
 

Step-by-Step Instructions
  1. Preheat your oven to 375°F (190°C).
  2. In a skillet, cook the chopped bacon, sausage, or ham until browned and crispy, about 5-7 minutes.
  3. Grease a 9 x 13-inch baking dish generously with melted butter.
  4. Evenly distribute the shredded potatoes at the bottom of your prepared baking dish.
  5. In a large mixing bowl, whisk together the eggs and whole milk. Stir in the green onions, peppers, cooked meat, salt, and pepper.
  6. Pour the egg mixture over the layered hash browns.
  7. Sprinkle shredded cheese on top of the casserole.
  8. Bake for 45-60 minutes until the center is fully set and the top is golden.
  9. Remove from the oven and let it rest for about 10 minutes.
  10. Slice into squares and serve.

Nutrition

Serving: 1sliceCalories: 350kcalCarbohydrates: 30gProtein: 20gFat: 20gSaturated Fat: 10gCholesterol: 180mgSodium: 800mgPotassium: 600mgFiber: 2gSugar: 2gVitamin A: 500IUVitamin C: 30mgCalcium: 250mgIron: 2mg

Notes

Prepare the dish a night before without cheese, just add cheese before baking. This casserole can be customized with vegetables and can be frozen for up to 2 months.

Tried this recipe?

Let us know how it was!

Delicious Blueberry Croissant Breakfast Casserole to Impress

The first bite of my Easy Blueberry Croissant Bake transports me straight to a cozy café on a sun-drenched morning. The harmony of buttery, flaky croissants enveloped in sweet, juicy blueberries creates an irresistible dish that’s as much about comfort as it is about flavor. This fantastic breakfast casserole not only brightens up your brunch table but also impresses without eating up your valuable time in the kitchen. With just a few simple ingredients, you’ll whip up a creamy, crowd-pleasing delight that’s perfect for both lazy Sundays and festive gatherings alike. Ready to elevate your morning routine with this deliciously easy recipe? Let’s dive into the bliss!

Why is this Casserole a Must-Try?

Irresistible Combination: The flaky croissant paired with juicy blueberries creates a heavenly flavor explosion that your taste buds will adore.
Easy to Prepare: No complicated steps here! This dish is simple enough for any home cook to master, making it perfect for lazy morning brunches or gatherings with friends.
Serve it Up Stylishly: Add a dusting of powdered sugar or a drizzle of maple syrup for that café-worthy presentation that will wow your guests.
Make It Your Own: Whether you want to swap blueberries for raspberries or add nuts for crunch, the versatility of this recipe means you can tailor it to your taste. Use it as a delightful brunch centerpiece or pair it with your favorite sides, like a fresh fruit platter or a cup of coffee.
Crowd-Pleaser: Everyone at the table will be reaching for seconds! It’s the ultimate comfort food that brings people together, perfect for family gatherings or brunch parties.
Make-Ahead Convenience: Prepare it the night before to simplify your morning routine, just like I recommend for my Blueberry French Toast. Enjoy the heavenly aroma and satisfaction of serving up this decadent dish to grateful friends and family!

Blueberry Croissant Breakfast Casserole Ingredients

• Delight in the simplicity of this delicious recipe!

For the Casserole

  • Croissants – Use stale croissants for better absorption of the cream mixture.
  • Blueberries – Fresh or frozen blueberries will add that juicy burst of flavor.
  • Cream Cheese – Soften it for an easier blend to create a smooth, rich filling.
  • Granulated Sugar – Adjust the sweetness to your liking; a little goes a long way.
  • Eggs – Vital for binding the ingredients and providing richness.
  • Vanilla Extract – Opt for pure vanilla for a more robust flavor experience.
  • Cinnamon – Adds warmth; don’t skip it for that extra depth of flavor!
  • Milk – Use whole or substitute with almond or oat milk for a creamy consistency.

For Serving

  • Powdered Sugar – A light dusting just before serving enhances presentation.
  • Maple Syrup – Drizzle it on top for a sweet finishing touch that your guests will love!

With these delightful ingredients, you’re ready to create a Blueberry Croissant Breakfast Casserole that’s sure to be a hit!

Step‑by‑Step Instructions for Blueberry Croissant Breakfast Casserole

Step 1: Preheat the Oven
Begin by preheating your oven to 350°F (175°C). While it’s warming up, take a moment to prepare a 9×13-inch baking dish by coating it thoroughly with cooking spray. This will ensure your Blueberry Croissant Breakfast Casserole comes out seamlessly without sticking. The inviting warmth of the oven will set the stage for a cozy bake.

Step 2: Prepare the Croissants
Next, cut your stale croissants into bite-sized pieces, ensuring a good mix of flaky texture and rich flavor. Spread the cut croissants evenly in the greased baking dish. Now, sprinkle a generous handful of blueberries over the croissant pieces, letting their vibrant color and sweetness peek through. This delightful base is just the start of your irresistible casserole.

Step 3: Mix the Cream Filling
In a medium mixing bowl, beat together the softened cream cheese and granulated sugar until smooth and creamy. Incorporate the eggs, vanilla extract, and cinnamon, blending thoroughly to create a rich filling. This mixture should be velvety and well-combined, making sure there are no lumps of cream cheese. The aroma of vanilla and cinnamon will elevate your anticipation for the tasty casserole ahead.

Step 4: Add Milk to the Mixture
Gradually mix in the milk, stirring until the entire cream mixture is well-blended and creamy. This will enhance the custard-like quality of the filling, ensuring it pours beautifully over the croissants. As you blend, check for desired creaminess; it should be smooth and ready to pour over the croissant and blueberry combination, bathing them in sweet goodness.

Step 5: Pour the Cream Mixture
Pour the creamy filling evenly over the croissants and blueberries, ensuring every piece is soaked in that delicious mixture. Gently press down with a spatula to help the croissants absorb the flavors. This step is crucial for flavor infusion, transforming the casserole into a rich, indulgent breakfast experience that your guests will love.

Step 6: Let it Soak
Allow your Blueberry Croissant Breakfast Casserole to sit for approximately 10-20 minutes. This resting time is essential for the croissants to soak up the creamy mixture, ensuring the final texture is soft and custard-like. Use this time to tidy up the kitchen or prepare any accompanying sides while the casserole absorbs all those wonderful flavors.

Step 7: Bake to Perfection
Place the baking dish in your preheated oven and bake for about 55 minutes. Keep an eye on it; the casserole should be set and have a golden brown top when done, creating a vivid contrast. For an even cook, you may cover with foil for the last 10 minutes if it gets too brown. This will prevent excessive browning while ensuring the inside is thoroughly baked.

Step 8: Cool and Serve
Once baked, take the casserole out and let it cool for about 5-10 minutes. This cooling period makes it easier to slice and serve, while the flavors continue to meld. When you’re ready to serve, dust the top with powdered sugar for that café-style finish and consider a drizzle of maple syrup for added sweetness. Enjoy this comforting Blueberry Croissant Breakfast Casserole warm!

What to Serve with Blueberry Croissant Bake

Elevate your brunch experience with delightful pairings that complement each creamy bite of this breakfast casserole.

  • Fresh Fruit Salad: A colorful medley of seasonal fruits adds a refreshing, vibrant contrast to the sweet richness of the casserole.
  • Greek Yogurt Parfait: The creamy tang of yogurt topped with granola provides a textural contrast, balancing the soft casserole perfectly.
  • Maple Bacon: The crispy, savory twist of maple bacon harmonizes beautifully, keeping the flavors rich and indulgent.
  • Cinnamon Roll Coffee Cake: For an extra layer of sweetness and warmth, this cake pairs beautifully with the casserole’s flavors, creating a delightful ensemble.
  • Coffee or Latte: The deep, rich taste of freshly brewed coffee or a creamy latte enhances the brunch experience, awakening your senses.
  • Fizzy Lemonade: For a refreshing zing, sip on a sparkling lemonade; its citrus notes brighten the meal full of creamy goodness.
  • Dark Chocolate Squares: Who can resist a little indulgence? Add a few dark chocolate squares for a sophisticated sweet finish.
  • Oven-Baked Sausages: Pair this with a side of sausages, their savory and juicy profile creating a satisfying contrast with the sweet bake.
  • Herbal Tea: A soothing cup of herbal tea rounds out the meal, providing a calming effect after a delightful feast, inviting relaxation.

Expert Tips for Blueberry Croissant Breakfast Casserole

  • Cream Cheese Prep: Make sure the cream cheese is fully softened to avoid lumps, ensuring a smooth mixture that melds perfectly with the croissants.
  • Soaking Time Matters: Let the casserole soak for at least 10 minutes before baking. This allows the croissants to absorb the flavors, making the final dish extra rich and custardy.
  • Adjust Sweetness: Taste the cream mixture before pouring it over the croissants. You can always add a bit more sugar if you like it sweeter or adjust based on your blueberry sweetness.
  • Avoid Over-Baking: Keep an eye on the casserole as it bakes. If the top browns too quickly, cover it with foil for the last 10 minutes to ensure an evenly baked Blueberry Croissant Breakfast Casserole.
  • Serving Ideas: Serve warm with powdered sugar or a drizzle of maple syrup. Add a side of fresh fruit for a complete brunch experience that will impress your guests.

Storage Tips for Blueberry Croissant Breakfast Casserole

Fridge: Store leftovers in an airtight container for up to 3 days to maintain freshness and flavor. Reheat individual portions in the oven or microwave, adding a splash of milk for moisture.

Freezer: For longer storage, freeze the casserole either before or after baking. Wrap it tightly in plastic wrap and foil, and use within 2-3 months for best quality.

Reheating: When ready to enjoy, thaw overnight in the fridge if frozen, then reheat at 350°F (175°C) until warmed through. This ensures the creamy texture remains delightful.

Preparation Tip: Consider pre-assembling the casserole the night before and storing it in the refrigerator. Bake it in the morning for a warm and comforting breakfast treat that’s ready to impress!

Make Ahead Options

These Blueberry Croissant Breakfast Casserole are perfect for busy mornings! You can prepare the casserole up to 24 hours in advance by assembling all the ingredients in your baking dish, then covering tightly with plastic wrap and refrigerating. This allows the croissants to soak up the creamy mixture overnight, enhancing the flavor and texture. When you’re ready to bake, simply remove the dish from the refrigerator and let it sit at room temperature for about 30 minutes before placing it in a preheated oven. This preparation ensures you can enjoy a delicious, homemade breakfast with minimal effort, while still delivering the same warm and comforting results your family will love!

Blueberry Croissant Breakfast Casserole Variations

Feel free to switch things up and personalize this recipe to your taste — it’s all about creating your own breakfast masterpiece!

  • Berry Swap: Substitute blueberries with fresh raspberries or blackberries for a delightful twist on flavor.
  • Nuts Included: Add a handful of chopped nuts, like pecans or almonds, to bring a pleasing crunch to each bite. The nutty flavor complements the sweet blueberries beautifully.
  • Chocolate Lovers: For a sweet indulgence, mix in chocolate chips or drizzle melted chocolate on top before serving. You might never look back!
  • Dairy-Free: Use almond or oat milk instead of regular milk for a dairy-free option. This change is perfect for those who are lactose intolerant while still enjoying a creamy texture.
  • Extra Spice: Try adding a pinch of nutmeg or a dash of pumpkin pie spice to the cream mixture for a warm, festive flavor that elevates your breakfast.
  • Citoreal Crunch: Layer in your favorite cereal (like granola) on top before baking for an added crunchy layer that provides texture contrast. It’s a fun twist that everyone will love!
  • Savory Twist: Use spinach and feta instead of sweet ingredients to create a savory croissant casserole. Pair it with a side of fresh fruit for balance.
  • Mix & Match: Combine different fruits like peaches, strawberries, or even apples — the possibilities are endless! Get creative and make it a mixed-fruit sensation.

Whichever variation you choose, your Blueberry Croissant Breakfast Casserole will remain a crowd favorite! If you’re interested in more dreamy breakfast options, check out these delightful recipes, such as Banana Blueberry Breakfast or a classic Croissant Breakfast Sandwich. Enjoy your culinary adventure!

Blueberry Croissant Breakfast Casserole Recipe FAQs

How do I choose the best croissants for this recipe?
Absolutely! For the best results, I recommend using stale croissants as they absorb the cream mixture better, creating a rich and custard-like texture. If your croissants are fresh, you can leave them out for a few hours to dry out slightly before using them in the recipe.

What is the best way to store leftovers?
Very! Store any leftovers in an airtight container in the refrigerator for up to 3 days. I often reheat them in the oven at 350°F (175°C) for about 10-15 minutes, adding a splash of milk to keep them moist and delicious.

Can I freeze the casserole for later?
You can absolutely freeze the Blueberry Croissant Breakfast Casserole! Wrap it tightly in plastic wrap and foil if you’d like to freeze it for 2-3 months. For freezing before baking, make sure to let it thaw in the fridge overnight before popping it in the oven.

What should I do if my casserole is too dry after baking?
If you find that your casserole is dry, it may be that it wasn’t soaked for long enough in the cream mixture before baking. Next time, I suggest letting it sit for at least 15-20 minutes. Additionally, a splash of milk during reheating can help revive that creamy texture!

Is this casserole suitable for my dairy-free friends?
Of course! To make a dairy-free version, you can substitute the cream cheese for a dairy-free cream cheese alternative and use almond or oat milk instead of regular milk. Just ensure your croissants are dairy-free, and you’ll have a delicious casserole that accommodates everyone’s dietary needs!

How can I adjust the sweetness of the casserole?
Great question! Adjusting the sweetness is quite simple. Before pouring the cream mixture over the croissants, taste it and add more granulated sugar to your liking. You could also consider using a sweeter variety of blueberries for a naturally sweeter flavor. Just remember, a little sweetness goes a long way!

Blueberry Croissant Breakfast Casserole

Delicious Blueberry Croissant Breakfast Casserole to Impress

Easy Blueberry Croissant Breakfast Casserole featuring flaky croissants and juicy blueberries for a perfect start to your day.
Prep Time 20 minutes
Cook Time 55 minutes
Soaking Time 15 minutes
Total Time 1 hour 30 minutes
Servings: 8 slices
Course: Breakfast
Cuisine: American
Calories: 320

Ingredients
  

  • 6 pieces croissants use stale for better absorption
  • 2 cups blueberries fresh or frozen
  • 8 ounces cream cheese softened
  • 1/2 cup granulated sugar adjust sweetness to taste
  • 4 large eggs
  • 1 tablespoon vanilla extract use pure for best flavor
  • 1 teaspoon cinnamon adds warmth
  • 2 cups milk whole or substitute with almond/oat milk
For Serving
  • 1 cup powdered sugar for dusting
  • 1/2 cup maple syrup for drizzling

Equipment

  • 9x13 inch baking dish
  • Mixing Bowl
  • spatula
  • Oven

Method
 

Step-by-Step Instructions
  1. Preheat your oven to 350°F (175°C) and grease a 9x13-inch baking dish.
  2. Cut stale croissants into bite-sized pieces and spread evenly in the baking dish. Sprinkle blueberries on top.
  3. In a bowl, beat softened cream cheese and granulated sugar until smooth. Incorporate eggs, vanilla extract, and cinnamon.
  4. Gradually mix in milk until creamy and well-blended.
  5. Pour the creamy mixture over the croissants and blueberries, pressing down to soak.
  6. Let the casserole soak for 10-20 minutes.
  7. Bake for about 55 minutes until golden brown and set.
  8. Cool for 5-10 minutes before serving. Dust with powdered sugar and drizzle with maple syrup.

Nutrition

Serving: 1sliceCalories: 320kcalCarbohydrates: 40gProtein: 8gFat: 15gSaturated Fat: 8gPolyunsaturated Fat: 1gMonounsaturated Fat: 4gCholesterol: 100mgSodium: 320mgPotassium: 200mgFiber: 2gSugar: 15gVitamin A: 500IUVitamin C: 2mgCalcium: 150mgIron: 1mg

Notes

For best results, allow the casserole to soak before baking and adjust sweetness to your preference. Serve warm for a comforting breakfast treat.

Tried this recipe?

Let us know how it was!

Flaky Cruffins with Cinnamon Filling: Your New Favorite Treat

The aroma of cinnamon wafted through my kitchen, pulling me back to my childhood—those mornings filled with warm pastries and laughter. Today, I’m thrilled to share my recipe for easy cinnamon sugar cruffins, the irresistible sweet treat that combines the best of croissants and muffins into a delightful experience. With just four ingredients and a quick prep time of 30 minutes, these flaky cruffins with cinnamon filling are perfect for breakfast, brunch, or even a cozy dessert. Not only are they simple to make, but they also promise to be a crowd-pleaser—whether you’re surprising your family or treating yourself. Ready to roll up your sleeves and dive into a buttery adventure? Let’s get started!

Why Are These Cruffins So Irresistible?

Flaky Texture: The combination of crescent roll dough and buttery layers creates an airy, flaky masterpiece that melts in your mouth.

Quick & Easy: With only four ingredients and just 30 minutes of prep, you can whip up these delightful treats in no time!

Perfect for Any Occasion: Whether served for breakfast, brunch, or dessert, these cruffins are sure to please everyone.

Customizable: Play with flavors! Add chocolate chips for a sweet surprise or experiment with fillings like cream cheese for something truly unique.

Crowd-Pleaser: Serve these warm out of the oven, and watch them disappear! For more flavor inspiration, try our Bananas Foster Cinnamon Rolls or Apple Crisp Cinnamon Roll Casserole.

Dive into this delicious recipe that keeps giving and delighting!

Flaky Cruffins with Cinnamon Filling

Get ready to enjoy these delightful treats!

For the Dough
Crescent Rolls – Provides the flaky, buttery texture; feel free to substitute with puff pastry for a different twist.
Softened Butter – Adds richness and ensures the cinnamon sugar adheres perfectly; vegetable oil can be a lighter option.

For the Cinnamon Sugar
Granulated Sugar – Brings sweetness and forms that delicious cinnamon sugar coating; try brown sugar for a deeper flavor enhancement.
Cinnamon – Infuses warmth and flavor into the cruffins; consider nutmeg for a unique spice alternative.

With these ingredients ready, you’re well on your way to creating flaky cruffins with cinnamon filling that will charm your taste buds and warm your heart!

Step‑by‑Step Instructions for Flaky Cruffins with Cinnamon Filling

Step 1: Preheat Your Oven
Begin by preheating your oven to 350°F (175°C). While the oven warms up, grease a 12-cup muffin tin thoroughly to ensure easy removal of your flaky cruffins once baked. This step sets the stage for perfectly golden-brown pastries that will fill your kitchen with a heavenly aroma.

Step 2: Prepare the Dough
Unroll the crescent rolls on a clean surface, ensuring to pinch the seams together to create a cohesive sheet of dough. Using a rolling pin, gently roll over the dough to smooth it out, creating a larger rectangle to work with. This uniformity is key for achieving evenly baked flakiness in your cruffins.

Step 3: Add Butter and Cinnamon Sugar
Spread approximately 2 tablespoons of softened butter evenly over the entire surface of the dough. Next, sprinkle 2 tablespoons of cinnamon sugar atop the butter, making sure to cover the whole area. The butter acts as an adhesive for the cinnamon sugar, infusing each flaky cruffin with sweet, warm flavor as they bake.

Step 4: Roll and Cut the Dough
Starting from the long side of the rectangle, roll the dough tightly into a log shape. Once rolled, slice the log in half, then cut each half into quarters. This will yield a total of 12 sections, each eager to become stuffed with flavor when baked. The tighter you roll, the more layers your cruffins will have.

Step 5: Shape the Cruffins
Take each section and gently roll it into a spiral shape. This twisting motion encourages a lovely layered effect, crucial for the flaky texture. Place each spiral in the greased muffin tin, leaving a little space between them to allow for expansion while baking.

Step 6: Bake Until Golden
Slide your muffin tin into the preheated oven and bake for 20-22 minutes or until the cruffins turn a delightful golden brown. Keep an eye on them toward the end; you want that perfect balance of crispy exterior and soft inside. The visual cue here is a beautifully golden crust that beckons to be enjoyed!

Step 7: Coat in Cinnamon Sugar
Once baked, remove the muffin tin from the oven and let the cruffins cool in the tin for about 5 minutes. While they are still warm, roll each cruffin in the remaining cinnamon sugar to coat the outside, enhancing their sweetness. This final touch ensures every bite is an irresistible experience filled with buttery, cinnamon goodness.

What to Serve with Flaky Cruffins with Cinnamon Filling

Indulging in flaky cruffins with cinnamon filling opens the door to a world of delightful pairings that will elevate your meal experience.

  • Creamy Yogurt: The tanginess of yogurt complements the sweetness of the cruffins perfectly, adding a refreshing contrast to each bite. Serve it plain or mix in some honey for extra flavor.

  • Rich Coffee: A steaming cup of coffee enhances the warm spices of the cruffins, creating a comforting morning ritual. Opt for a smooth blend that won’t overpower the sweet notes.

  • Fresh Berries: Ripe strawberries or blueberries provide a burst of juicy freshness, balancing the richness of the flaky cruffins. The vibrant colors also add a lovely visual appeal to your plate.

  • Vanilla Ice Cream: For an extra indulgent dessert, pair warm cruffins with a scoop of creamy vanilla ice cream. The melting ice cream contrasts beautifully with the crispy texture, making for an unforgettable treat.

  • Chai Tea: The aromatic spices in chai tea harmonize with the cinnamon filling in the cruffins, creating a cozy and inviting beverage choice. Sip it slowly while enjoying your cruffins for a delightful experience.

  • Maple Syrup Drizzle: A light drizzle of maple syrup brings a sweet, earthy flavor that complements the cinnamon cruffins beautifully. It’s a delightful way to enhance each bite!

  • Chocolate-Covered Strawberries: This elegant pairing adds decadence; the sweet fruit balances the warm, spiced flavors of the cruffins while introducing a fun texture contrast.

  • Nutty Granola: A handful of granola sprinkled alongside adds crunch and a nutty flavor, making your breakfast or brunch spread even more delightful. It’s a perfect contrast to the soft, flaky texture of the cruffins.

Flaky Cruffins with Cinnamon Filling

Embrace the joy of creating your own delightful treats! Feel free to experiment and make these cruffins uniquely yours.

  • Pumpkin Spice: Swap out the cinnamon for a sprinkle of pumpkin spice for a cozy, autumnal twist.
  • Nutty Delight: Add finely chopped nuts or chocolate chips into the dough for an extra burst of flavor and crunch.
  • Cheesy Cream: Stuff the cruffins with cream cheese mixed with a bit of sugar for a rich, creamy surprise in every bite.
  • Fruit-Filled: Try adding dollops of fruit preserves between layers of dough—berry or apple can bring a brilliant sweetness.
  • Maple Twist: Replace granulated sugar with maple sugar in the cinnamon mixture for a maple-infused cruffin experience.
  • Mini Muffin Adaptation: Cut the dough into smaller sections to create mini cruffins, perfect for snacking or sharing—perfect for parties!
  • Savory Option: For a savory twist, omit the sugar and cinnamon, then fill with a mixture of cheese and herbs for brunch.
  • Dough Variation: Substitute crescent rolls with puff pastry for an even flakier texture; just roll and bake as usual.

With these options, you’ll find that the sky’s the limit when it comes to customizing your flaky cruffins with cinnamon filling. If you’re searching for more exciting recipes, you might also enjoy our Chocolate Granola Cups with Peanut Butter Filling or the scrumptious Honeybun Carrot Filling alongside your cruffins. Happy baking!

Make Ahead Options

These flaky cruffins with cinnamon filling are perfect for busy home cooks looking to save time! You can prepare the dough rolls up to 24 hours in advance by following the first few steps of the recipe—unroll the crescent rolls, spread the butter, and sprinkle on the cinnamon sugar. After rolling and cutting them into sections, cover the muffin tin with plastic wrap and refrigerate. This method keeps them fresh and ensures they maintain their flaky texture. When you’re ready to bake, simply take them out and let them sit at room temperature for 15-20 minutes before popping them in the oven. You’ll have delicious, homemade cruffins ready with minimal effort!

Storage Tips for Flaky Cruffins with Cinnamon Filling

Room Temperature: Store cruffins in an airtight container at room temperature for up to 3 days to preserve their flaky texture and sweetness.

Freezer: For longer storage, freeze cruffins by wrapping them tightly in plastic wrap and placing them in a freezer-safe bag. They can last up to 3 months in the freezer.

Reheating: To enjoy warm cruffins again, preheat your oven to 350°F (175°C) and heat them for about 10 minutes. This will help restore their delightful flakiness.

Thawing: If frozen, thaw cruffins at room temperature for about an hour before reheating for the best texture and flavor experience.

Expert Tips for Flaky Cruffins with Cinnamon Filling

Pinch the Seams: Ensure the crescent roll seams are tightly pinched; this prevents the dough from unraveling during baking and maintains those flaky layers.

Watch the Bake Time: Keep an eye on the cruffins as they bake to avoid dryness. Look for a golden brown color for best results!

Mini Variation: Want a smaller bite? Cut the log into smaller sections to create mini cruffins. This yields 24 delightful, flaky cruffins with cinnamon filling!

Butter Application: Spread the softened butter evenly and generously; this will help the sugar adhere properly and create a beautiful, rich flavor.

Storage Tips: To maintain freshness, store cruffins in an airtight container at room temperature for up to 3 days. Enjoy them warm for the best experience!

Flaky Cruffins with Cinnamon Filling Recipe FAQs

How do I choose the best crescent rolls for my cruffins?
Absolutely! Look for crescent rolls that are fresh and ideally from the refrigerated section of your grocery store. Check the expiration date to ensure freshness, and avoid packages with dark spots or bulges, which can indicate spoilage. If you’re feeling adventurous, you can also try puff pastry for a different texture.

What’s the best way to store leftover cruffins?
For perfect preservation, store your flaky cruffins in an airtight container at room temperature for up to 3 days. This keeps them fresh and maintains their delightful texture. If you want to keep them for longer, wrap them in plastic wrap and place them in a freezer-safe bag to freeze for up to 3 months.

How should I reheat cruffins after freezing?
When you’re ready to enjoy your cruffins again, preheat your oven to 350°F (175°C). Place the frozen cruffins on a baking sheet and heat them for about 10 minutes. This gentle warmth restores their flaky texture and delightful flavor, reminiscent of freshly baked goodness!

Why did my cruffins not rise properly?
Very! If your cruffins didn’t rise, it could be due to rolling the dough too loosely or not pinching the seams tight enough, which might cause them to unravel during baking. Make sure to roll your dough tightly and ensure the seams are well sealed for that beautiful, layered look.

Can my pets enjoy these cruffins?
Definitely not! While these cruffins are delicious for humans, be cautious about sharing with pets. The high sugar and butter content can upset their stomachs. It’s always best to stick with treats that are specifically made for them!

What if I want to make mini cruffins instead?
Great question! To make mini cruffins, simply cut each log into smaller sections after rolling. For the best results, aim for 24 sections from the roll. This variation gives you bite-sized treats perfect for sharing—or keeping all to yourself!

Flaky Cruffins with Cinnamon Filling

Flaky Cruffins with Cinnamon Filling

Enjoy flaky cruffins with cinnamon filling for a delightful treat that's perfect for breakfast or brunch.
Prep Time 30 minutes
Cook Time 22 minutes
Total Time 52 minutes
Servings: 12 cruffins
Course: Breakfast
Cuisine: American
Calories: 200

Ingredients
  

For the Dough
  • 1 pack Crescent Rolls Substitute with puff pastry for a different twist.
  • 2 tablespoons Softened Butter Vegetable oil can be a lighter option.
For the Cinnamon Sugar
  • 1/2 cup Granulated Sugar Try brown sugar for a deeper flavor enhancement.
  • 2 tablespoons Cinnamon Consider nutmeg for a unique spice alternative.

Equipment

  • Muffin Tin
  • Rolling Pin

Method
 

Step-by-Step Instructions
  1. Preheat your oven to 350°F (175°C) and grease a 12-cup muffin tin thoroughly.
  2. Unroll the crescent rolls and pinch the seams together. Roll the dough to create a larger rectangle.
  3. Spread the softened butter over the dough; sprinkle cinnamon sugar evenly on top.
  4. Roll the dough tightly from the long side into a log, slice into 12 sections.
  5. Shape each section into a spiral and place in the greased muffin tin.
  6. Bake for 20-22 minutes or until golden brown.
  7. Cool in the tin for 5 minutes, then roll in remaining cinnamon sugar.

Nutrition

Serving: 1cruffinCalories: 200kcalCarbohydrates: 30gProtein: 2gFat: 10gSaturated Fat: 5gPolyunsaturated Fat: 1gMonounsaturated Fat: 3gCholesterol: 15mgSodium: 150mgPotassium: 50mgFiber: 1gSugar: 10gVitamin A: 200IUCalcium: 20mgIron: 0.5mg

Notes

Ensure the crescent roll seams are tightly pinched to prevent unraveling during baking. Store cruffins in an airtight container at room temperature for up to 3 days.

Tried this recipe?

Let us know how it was!

Cottage Cheese and Herb Biscuits for a Wholesome Breakfast

As I stood in my kitchen, a delightful aroma wafted through the air, beckoning with warmth and comfort. Fluffy Cottage Cheese and Herb Biscuits are a game-changer for anyone looking to elevate their breakfast or brunch. This easy, healthy recipe pairs creamy cottage cheese with fresh herbs, creating a deliciously versatile dish that’s perfect on its own or alongside soup and salad. Not only are these biscuits a quick fix for those busy mornings, but they also embrace a healthier twist on traditional recipes without sacrificing taste. Imagine biting into a golden-brown biscuit, its tender interior bursting with flavor—not to mention the wholesome goodness of cottage cheese packed in each fluffy bite. Are you ready to bring a little magic to your breakfast table? Let’s get baking!

Why Are These Biscuits a Must-Try?

Versatile Flavors: These Cottage Cheese and Herb Biscuits are fantastic on their own or as a delightful side for soups and salads, adding a unique twist to your meals.

Quick and Easy: With just a few simple ingredients, you can whip up these biscuits in no time, making them perfect for those bustling mornings.

Healthy Twist: The incorporation of cottage cheese brings added protein and moisture, allowing you to enjoy a delicious breakfast without the guilt.

Crowd-Pleasing Delight: Whether it’s a cozy brunch or an afternoon tea, these biscuits will impress your guests and have them coming back for more.

Perfect Pairing: Enjoy them warm with butter or your favorite spread, or try them alongside dishes like Chicken Grilled Cheese for a dinner that excites the taste buds.

Customizable Goodness: Feel free to experiment with different herbs or even a hint of garlic for a personalized touch that your family will love!

Cottage Cheese and Herb Biscuit Ingredients

For the Biscuit Dough
All-Purpose Flour – Provides structure; substitute with whole wheat flour for a heartier texture.
Baking Powder – Acts as a leavening agent for fluffiness; ensure it is fresh for optimal rising.
Salt – Enhances flavor; adjust based on dietary needs; low-sodium salt can be used as a substitute.
Cold Butter – Adds richness and helps create a flaky texture; can be substituted with margarine or a vegan butter alternative.
Cottage Cheese – Adds moisture and protein; low-fat versions can be used, though they may yield a slightly drier biscuit.
Fresh Herbs (e.g., chives, parsley, dill) – Provide flavor and aroma; use finely chopped fresh herbs for the best flavor; dried herbs can be used but may be overpowering and require adjustments.

Feel free to experiment with the ingredients to make your Cottage Cheese and Herb Biscuits uniquely yours!

Step‑by‑Step Instructions for Cottage Cheese and Herb Biscuits

Step 1: Preheat Your Oven
Preheat your oven to 400°F (200°C) to create the perfect baking environment for your Cottage Cheese and Herb Biscuits. While the oven heats, prepare a baking sheet by lining it with parchment paper, ensuring your biscuits won’t stick during baking. This step sets the stage for a crispy, golden crust.

Step 2: Combine Dry Ingredients
In a large mixing bowl, whisk together 2 cups of all-purpose flour, 1 tablespoon of baking powder, and 1 teaspoon of salt. This mixture will form the base of your biscuit dough. Make sure to blend these ingredients thoroughly to ensure even rising, as any clumps of baking powder can lead to uneven biscuits.

Step 3: Cut in the Butter
Take ½ cup of cold butter and cut it into small cubes, then add it to the flour mixture. Using a pastry cutter or your fingertips, blend the butter into the flour until the mixture resembles coarse crumbs. This step is crucial for creating that coveted flaky texture in your Cottage Cheese and Herb Biscuits.

Step 4: Mix in Cottage Cheese and Herbs
Gently fold in 1 cup of cottage cheese along with ¼ cup of finely chopped fresh herbs like chives or parsley into the mixture. Stir until just combined, being careful not to overmix; a few lumps are perfectly fine. The cottage cheese adds moisture and a delightful richness to your biscuits.

Step 5: Shape the Dough
Turn your dough out onto a lightly floured surface. Knead it gently for just a minute or so, then pat it down into a 1-inch thick round. Using a biscuit cutter or a glass, cut out rounds and place them on your prepared baking sheet. Each biscuit should be fluffy and slightly sticky to ensure the best texture.

Step 6: Bake to Perfection
Place the baking sheet in the preheated oven and bake for 15-20 minutes. Keep a close eye on them, checking for a lovely golden brown color. The biscuits are done when they are firm to the touch and have that irresistible golden crust—your Cottage Cheese and Herb Biscuits are almost ready!

Step 7: Cool and Serve
Once baked, remove your biscuits from the oven and let them cool on a wire rack for a few minutes. This brief cooling period helps them set properly while keeping the insides fluffy. Serve warm with butter or your favorite spread to elevate your breakfast or brunch!

What to Serve with Fluffy Cottage Cheese and Herb Biscuits

These delightful biscuits are perfect for creating a comforting breakfast or brunch experience that warms the heart and tantalizes the taste buds.

  • Creamy Garlic Soup: The velvety texture and rich flavors of garlic soup pair beautifully with warm biscuits, making for a cozy meal.
  • Simple Garden Salad: A fresh salad with ripe tomatoes, cucumbers, and a zesty dressing complements the rich biscuits, adding brightness.
  • Savory Omelette: A fluffy omelette filled with cheese and herbs offers a delightful contrast, complementing the flavors of the biscuits perfectly.
  • Honey Butter Spread: A dollop of honey-infused butter enhances the biscuits’ flavors, adding sweetness to your savory experience.
  • Fresh Fruit Compote: Sweetened berries or stone fruit compote provide a luscious finish, balancing out the savory notes of the biscuits.
  • Herbal Tea: A warm cup of herbal tea, like chamomile or mint, will evoke a sense of calm while pairing splendidly with the biscuits’ herbaceous notes.
  • Cheesy Tomato Soup: The combination of rich, cheesy tomato soup with the fluffy biscuits makes every bite incredible, perfect for those chilly days.
  • Sparkling Water: For a refreshing drink that cleanses the palate between bites, sparkling water enhances any meal with a light fizz.
  • Dark Chocolate Mousse: For a decadent dessert option, this rich and creamy treat rounds out your meal on a sweet note that delights the senses!

Cottage Cheese and Herb Biscuits Variations

Feel free to make these Cottage Cheese and Herb Biscuits your own with these delightful twists on the classic!

  • Whole Wheat: Substitute all-purpose flour with whole wheat flour for a nutty flavor and extra fiber. These biscuits will still be fluffy and delicious, offering a lovely texture change.

  • Cheesy Addition: Add 1 cup of shredded cheese, like cheddar or mozzarella, for a rich, savory twist. The gooey melted cheese pairs beautifully with the herbs and puts a smile on every face at the breakfast table.

  • Herb Swap: Experiment with different finely chopped herbs such as basil, thyme, or rosemary for various flavor profiles. Each herb brings its unique essence to the biscuits, making every batch a new experience.

  • Spicy Kick: Incorporate a pinch of red pepper flakes into the biscuit mix for a hint of heat. This subtle addition can elevate your biscuits, making them perfect for those who crave a little excitement with their morning meal.

  • Garlic Infusion: Mix in 1 teaspoon of garlic powder or a few minced fresh garlic cloves for aromatic depth. The garlic enhances the herbiness and creates a savory biscuit that pairs wonderfully with soups like Mediterranean Herb Crusted Salmon or salads.

  • Sweeten the Deal: For a twist, add a dollop of honey or maple syrup into the dough. This will give a subtle sweetness that makes them perfect for a brunch spread alongside a fresh fruit salad or dessert items like Strawberry Cheesecake Dump Cake.

  • Nutty Flavor: Incorporate a mix of nuts, such as chopped walnuts or pecans, for added crunch and richness. This gives your biscuits a delightful texture that adds contrast to the softness of the cottage cheese.

  • Vegan Friendly: Use plant-based butter and substitute the cottage cheese with a vegan alternative made from almond or soy. This creates a deliciously fluffy biscuit that everyone can enjoy, making them perfect for gatherings.

How to Store and Freeze Cottage Cheese and Herb Biscuits

Room Temperature: Store leftover biscuits in an airtight container at room temperature for up to 2 days to maintain their freshness and softness.

Fridge: If you plan to enjoy them later, refrigerate in an airtight container for up to 5 days, reheating in the oven for best results.

Freezer: For longer storage, wrap each biscuit tightly in plastic wrap or foil and freeze for up to 3 months. This preserves the texture and flavor for future enjoyment.

Reheating: When ready to savor your Cottage Cheese and Herb Biscuits, reheat directly from frozen or after thawing in the microwave or oven until warm throughout.

Expert Tips for Cottage Cheese and Herb Biscuits

  • Fresh Ingredients: Always use fresh baking powder and herbs to ensure maximum fluffiness and flavor. Stale leavening agents can lead to dense biscuits.

  • Avoid Overmixing: Gently mix the dough until just combined; overmixing can create tough biscuits. A few lumps are perfectly fine and will improve the texture.

  • Butter Temperature: Use cold butter cutting into the flour to create flaky layers. If the butter is too warm, your biscuits won’t rise adequately.

  • Monitor Baking Time: Ovens vary, so keep an eye on your biscuits as they bake. Look for a golden-brown color and a firm touch for perfect Cottage Cheese and Herb Biscuits.

  • Storage Tips: Store any leftovers in an airtight container for up to 2 days, or freeze them wrapped for up to three months to maintain freshness.

Make Ahead Options

These Cottage Cheese and Herb Biscuits are a fantastic option for meal prep, saving you time during busy mornings! You can prepare the dry ingredients up to 3 days in advance; simply combine the flour, baking powder, and salt, and store it in an airtight container. Additionally, you can mix the wet ingredients (cottage cheese and herbs) and store them, refrigerated, for up to 24 hours. When you’re ready to bake, just cut the cold butter into the dry mix, then fold in the cottage cheese and herbs, creating a dough that will yield the same delicious results! Baking them fresh not only provides the best texture but also keeps the flavors vibrant and delightful.

Cottage Cheese and Herb Biscuits Recipe FAQs

What type of cottage cheese is best for these biscuits?
I recommend using full-fat cottage cheese for the best moisture and flavor. However, you can opt for low-fat versions if you prefer a lighter biscuit, keeping in mind they may be slightly drier. Always choose cottage cheese that is fresh and has no dark spots or off smells.

How should I store leftover biscuits?
To keep your Cottage Cheese and Herb Biscuits fresh, store them in an airtight container at room temperature for up to 2 days. If you want to enjoy them later, refrigerate them in a sealed container for up to 5 days. For longer storage, consider freezing them!

Can I freeze these biscuits?
Absolutely! To freeze your biscuits, let them cool completely after baking, then wrap each one tightly in plastic wrap or aluminum foil. Place them in a freezer-safe bag and store for up to 3 months. When you’re ready to enjoy them, heat them directly from frozen in the oven until warmed through, about 10-15 minutes at 350°F (175°C).

What should I do if my biscuits come out dense?
If your Cottage Cheese and Herb Biscuits turn out dense, it might be due to overmixing the dough or using stale baking powder. When mixing, stop as soon as the ingredients are combined, leaving a few lumps for a lighter texture. Always check the expiration date on your baking powder before use to ensure maximum fluffiness.

Are there any dietary considerations I should be aware of?
Yes, if you’re accommodating dietary restrictions, look for low-sodium alternatives for salt or use dairy-free butter substitutes to cater to vegan preferences. Always check your cottage cheese for allergens if you’re cooking for someone with lactose intolerance or a dairy allergy. If you have pets, be cautious as human foods can sometimes upset their digestion.

Cottage Cheese and Herb Biscuits

Cottage Cheese and Herb Biscuits for a Wholesome Breakfast

Fluffy Cottage Cheese and Herb Biscuits are a game-changer for breakfast, combining cottage cheese with fresh herbs for a deliciously versatile dish.
Prep Time 15 minutes
Cook Time 20 minutes
Cooling Time 5 minutes
Total Time 40 minutes
Servings: 8 biscuits
Course: Breakfast
Cuisine: American
Calories: 150

Ingredients
  

For the Biscuit Dough
  • 2 cups all-purpose flour Substitute with whole wheat flour for a heartier texture.
  • 1 tablespoon baking powder Ensure it is fresh for optimal rising.
  • 1 teaspoon salt Adjust based on dietary needs; low-sodium salt can be used as a substitute.
  • 1/2 cup cold butter Can be substituted with margarine or a vegan butter alternative.
  • 1 cup cottage cheese Low-fat versions can be used, though they may yield a slightly drier biscuit.
  • 1/4 cup fresh herbs (e.g., chives, parsley, dill) Use finely chopped fresh herbs for best flavor.

Equipment

  • Oven
  • Mixing Bowl
  • Baking Sheet
  • pastry cutter
  • Biscuit Cutter

Method
 

Step-by-Step Instructions
  1. Preheat your oven to 400°F (200°C) and line a baking sheet with parchment paper.
  2. In a large mixing bowl, whisk together 2 cups of all-purpose flour, 1 tablespoon of baking powder, and 1 teaspoon of salt.
  3. Cut ½ cup of cold butter into small cubes and blend it into the flour mixture until it resembles coarse crumbs.
  4. Gently fold in 1 cup of cottage cheese and ¼ cup of finely chopped fresh herbs into the mixture.
  5. Turn the dough out onto a lightly floured surface, knead gently, and pat it into a 1-inch thick round.
  6. Cut out rounds with a biscuit cutter and place them on the prepared baking sheet.
  7. Bake for 15-20 minutes, checking for a golden brown color.
  8. Remove from the oven and cool on a wire rack for a few minutes before serving.

Nutrition

Serving: 1biscuitCalories: 150kcalCarbohydrates: 20gProtein: 5gFat: 6gSaturated Fat: 4gPolyunsaturated Fat: 0.5gMonounsaturated Fat: 1.5gCholesterol: 20mgSodium: 300mgPotassium: 150mgFiber: 1gSugar: 1gVitamin A: 200IUVitamin C: 1mgCalcium: 80mgIron: 0.8mg

Notes

Store leftovers in an airtight container for up to 2 days or freeze for up to three months. Reheat before serving.

Tried this recipe?

Let us know how it was!

Delicious Hash Brown Egg Cups for Busy Mornings

As I rifled through my fridge one frantic morning, I stumbled upon a treasure trove of ingredients just waiting to come together. That’s when my Hash Brown Egg Cups took shape! With their crisp hash brown crust, creamy egg filling, and a world of mix-ins at your fingertips, these delightful morsels are the answer to any breakfast rush. They’re not only quick to whip up in under 30 minutes but also offer a customizable twist that lets you use whatever leftovers or flavor combinations you have on hand. Perfect for busy weekday mornings or as a make-ahead option for lazy weekends, they’re a true game-changer for your morning routine. Curious to see how these little cups of joy come together? Let’s dive in!

Why Will You Adore Hash Brown Egg Cups?

Crispy Perfection: These cups start with a wonderfully crunchy hash brown base that makes every bite satisfying.
Endless Customization: Whether it’s bacon, bell peppers, or even spicy jalapeños, you can tailor these delightful morsels to your heart’s desire!
Quick and Easy: In just 30 minutes, you can have a delicious breakfast ready to fuel your day—perfect for busy mornings.
Make-Ahead Magic: Prepare them in advance and simply bake when you’re ready to eat; they’ll save you time without sacrificing flavor.
Healthy and Nutritious: Packed with protein and fiber, these egg cups are a balanced breakfast option that keeps you full and energized.
Feeling inspired? Pair them with Cheesy Protein Egg Bake for even more breakfast goodness!

Hash Brown Egg Cups Ingredients

For the Hash Brown Base
Shredded Hash Browns – Provides the crispy base; make sure they’re well-thawed and pressed to eliminate excess moisture.
Salt and Pepper – Essential seasonings to taste; don’t be shy—season well for a flavorful crust.

For the Egg Filling
Large Eggs – The star ingredient, bringing protein and structure to your cups.
Milk – Creates a fluffy texture; substitute with plant-based milk for a dairy-free option.
Shredded Cheddar Cheese – Adds richness; feel free to swap for mozzarella or Monterey Jack.

Optional Add-Ins
Cooked Bacon – Introduces a savory depth; can be replaced with crumbled sausage or diced ham for variety.
Diced Bell Peppers – Contributes color and crunch; any color bell pepper will work great here.
Diced Onion – Adds sweetness and depth of flavor; yellow or sweet onions are perfect.
Fresh Herbs – Use for garnish to enhance flavor and presentation; parsley or chives work beautifully.

Embark on your breakfast adventure with these delicious Hash Brown Egg Cups that can be customized to fit your palate!

Step‑by‑Step Instructions for Hash Brown Egg Cups

Step 1: Preheat and Prepare
Begin by preheating your oven to 400°F (200°C). While the oven heats up, generously grease a 12-cup muffin tin with cooking spray or butter to prevent sticking. This ensures that your Hash Brown Egg Cups slide out easily once baked, giving them that perfect golden hue and crispy texture.

Step 2: Create the Hash Brown Crust
In a mixing bowl, combine your thawed and drained shredded hash browns with salt and pepper to taste. Once seasoned, divide the mixture among the greased muffin cups and firmly press it into the bottom and up the sides to form nests. Aim for a good thickness to achieve that delightful crunch when baked.

Step 3: Bake the Hash Brown Nests
Place the muffin tin in the preheated oven and bake the hash brown nests for about 20 minutes. You’re looking for a golden-brown crust that’s crispy around the edges. Keep an eye on them during the last few minutes to ensure they don’t over-bake, as this is crucial for your Hash Brown Egg Cups.

Step 4: Prepare the Egg Mixture
Meanwhile, in a large bowl, whisk together the large eggs, milk, salt, and pepper, creating a fluffy and well-combined egg mixture. Stir in the remaining shredded cheddar cheese, and if you’re using any optional add-ins like cooked bacon or diced vegetables, fold them in now for added flavor and texture.

Step 5: Fill the Hash Brown Cups
Once the nests are beautifully baked and cooled slightly, reduce the oven temperature to 350°F (175°C). Carefully pour the egg mixture into each hash brown cup, filling them about three-quarters full to allow room for the eggs to puff up while baking.

Step 6: Bake the Egg Cups
Return the muffin tin to the oven and bake for an additional 15 to 18 minutes. The Hash Brown Egg Cups are done when the eggs are set and lightly browned on top; they should spring back when gently pressed. Keep an eye on them, as oven temperatures can vary.

Step 7: Cool and Garnish
Once baked, remove the muffin tin from the oven and allow the Hash Brown Egg Cups to cool in the tin for a few minutes. This helps them set further, making it easier to remove them. If desired, garnish with fresh herbs like parsley or chives for a pop of color and an extra layer of flavor before serving.

What to Serve with Hash Brown Egg Cups?

Enjoy a delightful breakfast spread that perfectly complements each satisfying bite of these crispy, creamy egg cups.

  • Fresh Fruit Salad: Bright, juicy fruits like berries and melon add a refreshing touch, balancing the richness of the egg cups.

  • Avocado Toast: Creamy avocado on toasted bread offers a delightful contrast in texture, making each meal feel gourmet.

  • Garden Salad: A light, crunchy salad with mixed greens and a zesty vinaigrette enhances the overall meal, making it vibrant and healthy.

  • Yogurt Parfait: Layered yogurt with granola and fruits provides a perfect sweet contrast, making your breakfast complete and visually appealing.

  • Coffee or Herbal Tea: A warm beverage can elevate your breakfast experience; try a smooth coffee blend or soothing herbal tea for a cozy touch.

  • Homemade Salsa: A fresh, spicy salsa brings a zesty kick, adding layers of flavor that enhance the overall enjoyment of your Hash Brown Egg Cups.

  • Savory Smoothie: Blend spinach, banana, and almond milk for a nutritious drink that complements the meal while adding a healthy boost.

  • Crispy Bacon or Sausage: For those wanting a protein punch, the savory richness of crispy bacon or sausage pairs beautifully with the cups’ flavors.

  • Mini Muffins: A side of sweet mini muffins offers a delightful touch of indulgence, balancing hearty and sweet beautifully.

Elevate your breakfast game with these thoughtful pairings that create a memorable morning routine!

Expert Tips for Hash Brown Egg Cups

  • Press Well: Ensure you press the hash browns firmly into the muffin tin; this creates a crispy crust and prevents falling apart.

  • Non-Stick Necessity: Generously coat your muffin tin with cooking spray or butter to avoid sticking; nobody wants a delicious cup that won’t come out easily!

  • Adjust Baking Times: If using frozen hash browns or adding more fillings, you may need to adjust baking times slightly, so keep an eye on them.

  • Cool Before Serving: Let the Hash Brown Egg Cups cool for a few minutes in the tin to set properly, making them easier to remove and enjoy.

  • Experiment with Add-Ins: Feel free to mix in different vegetables or proteins to suit your taste; just remember not to overload them to maintain structure.

Storage Tips for Hash Brown Egg Cups

Fridge: Store leftover Hash Brown Egg Cups in an airtight container for up to 3 days. Reheat in the microwave for 30–60 seconds or bake at 350°F for about 10–12 minutes.

Freezer: To freeze, place the cups in a single layer on a baking sheet until firm. Then transfer to a freezer-safe bag or container for up to 2 months.

Reheating: When ready to enjoy, reheat directly from frozen in the oven at 350°F, adding an extra few minutes to the baking time until heated through.

Room Temperature: It’s best to avoid leaving Hash Brown Egg Cups out at room temperature for more than 2 hours to ensure freshness and safety.

Hash Brown Egg Cups Variations

Feel free to get creative and make these delightful Hash Brown Egg Cups your own with these scrumptious ideas!

  • Vegetarian: Omit the bacon and add sautéed mushrooms or fresh spinach for a vibrant twist. This option adds not only color but also a boost of nutrients!

  • Spicy: For a kick, incorporate diced jalapeños or a sprinkle of cayenne pepper. These Hash Brown Egg Cups can bring the heat without overwhelming the palate.

  • Cheesy Delight: Experiment with different cheese blends like gouda or pepper jack to elevate the flavor profile. The beautiful melty texture will be irresistible!

  • Low-Carb Alternative: Substitute traditional hash browns with cauliflower rice. You’ll still enjoy a satisfying breakfast while keeping the carbs in check.

  • Sweet Addition: For a surprising twist, mix in finely diced apples or pears along with a sprinkle of cinnamon. It’ll create a unique sweet-and-savory experience sure to impress!

  • Fresh Herbs Galore: Don’t hold back on your herb garden! Toss in bright basil, dill, or chives to add fresh layers to your egg filling. Bursting with flavor, it’ll transform each bite into something special.

  • Get Saucy: Top with a dollop of your favorite salsa or hot sauce before serving. It adds not just flavor, but also a splash of color to your plate.

Feeling hungry for more? Pair these lovely Hash Brown Egg Cups with these Chocolate Granola Cups for a delightful breakfast spread or a sweet treat afterward!

Make Ahead Options

These Hash Brown Egg Cups are absolutely perfect for meal prep! You can prepare the hash brown crusts up to 24 hours in advance by assembling them in the muffin tin and refrigerating them. This keeps the crust crispy and ready to go. Additionally, you can whisk together the egg mixture, including any add-ins, and store it in the fridge for up to 3 days; just be sure to cover it tightly to maintain freshness. When you’re ready to serve, simply fill the baked nests with the egg mixture and pop them in the oven. You’ll have a delicious breakfast ready in no time, just as tasty as if you made it fresh!

Hash Brown Egg Cups Recipe FAQs

How do I choose the right hash browns?
Absolutely! For the best Hash Brown Egg Cups, opt for frozen shredded hash browns. Make sure they are well-thawed and pressed to eliminate excess moisture, which helps achieve that perfect crispiness. If you can, choose brands that don’t have added ingredients or preservatives for a cleaner taste.

How should I store leftover Hash Brown Egg Cups?
Store your leftover Hash Brown Egg Cups in an airtight container in the fridge for up to 3 days. To reheat, simply microwave for 30–60 seconds or bake at 350°F (175°C) for 10–12 minutes. It’s an easy way to enjoy a quick breakfast on those busy mornings!

Can I freeze Hash Brown Egg Cups?
Yes, you can! To freeze your Hash Brown Egg Cups, first bake them as directed. Once cooled, place the cups in a single layer on a baking sheet until firm. Then transfer them to a freezer-safe bag or container, where they can last for up to 2 months. When you’re ready to enjoy them, reheat straight from the freezer; just add a few extra minutes to the baking time until heated through.

What if my Hash Brown Egg Cups fall apart?
Very! If your Hash Brown Egg Cups fall apart, it’s often due to not pressing the hash browns firmly enough in the muffin tin or not baking them long enough initially. Make sure to press them firmly, creating a good base, and closely monitor the baking time to achieve that golden crispiness. If you’re adding lots of ingredients, consider reducing the amount slightly to maintain structure.

Are Hash Brown Egg Cups suitable for my gluten-free diet?
Absolutely! Just ensure you’re using gluten-free hash browns and check that your chosen cheese and any other add-ins, like bacon or spices, are also gluten-free. These tasty cups can easily fit into various dietary needs while still packing a delightful flavor punch!

Hash Brown Egg Cups

Delicious Hash Brown Egg Cups for Busy Mornings

Delight in these Hash Brown Egg Cups, perfect for a quick breakfast with customizable ingredients.
Prep Time 10 minutes
Cook Time 30 minutes
Total Time 40 minutes
Servings: 12 cups
Course: Breakfast
Cuisine: American
Calories: 180

Ingredients
  

For the Hash Brown Base
  • 30 oz Shredded Hash Browns Thawed and pressed to eliminate excess moisture
  • to taste Salt
  • to taste Pepper
For the Egg Filling
  • 6 large Eggs The star ingredient
  • 1/2 cup Milk Can substitute with plant-based milk
  • 1 cup Shredded Cheddar Cheese Can substitute with mozzarella or Monterey Jack
Optional Add-Ins
  • 4 oz Cooked Bacon Can replace with crumbled sausage or diced ham
  • 1 cup Diced Bell Peppers Any color will work
  • 1/2 cup Diced Onion Yellow or sweet onions work best
  • to taste Fresh Herbs For garnish, like parsley or chives

Equipment

  • Muffin Tin
  • Mixing Bowl
  • whisk

Method
 

Step‑by‑Step Instructions for Hash Brown Egg Cups
  1. Preheat your oven to 400°F (200°C) and grease a 12-cup muffin tin.
  2. Combine thawed shredded hash browns with salt and pepper; press into muffin cups.
  3. Bake hash brown nests for about 20 minutes until golden brown.
  4. In a bowl, whisk together eggs, milk, salt, and pepper. Mix in shredded cheddar and optional add-ins.
  5. Pour egg mixture into hash brown cups, filling them three-quarters full.
  6. Bake for an additional 15 to 18 minutes until eggs are set and lightly browned.
  7. Allow to cool for a few minutes, then garnish with fresh herbs before serving.

Nutrition

Serving: 1cupCalories: 180kcalCarbohydrates: 15gProtein: 10gFat: 10gSaturated Fat: 4gPolyunsaturated Fat: 0.5gMonounsaturated Fat: 4gCholesterol: 210mgSodium: 300mgPotassium: 250mgFiber: 1gSugar: 2gVitamin A: 500IUVitamin C: 15mgCalcium: 150mgIron: 1.5mg

Notes

Press hash browns firmly to create a crispy crust. Adjust baking times as needed for variations in cooking equipment.

Tried this recipe?

Let us know how it was!

Delicious Vegan Cinnamon Roll Pancakes for a Cozy Breakfast

As I poured the pancake batter onto the griddle, the aroma of cinnamon began swirling through my kitchen, instantly wrapping me in a warm hug of nostalgia. These Vegan Cinnamon Roll Pancakes are a delightful mashup of two beloved breakfast classics, designed to bring joy to your morning routine. Not only are they an easy and quick breakfast option, but they also serve as a festive treat perfect for holiday gatherings. With a fluffy texture and a sweet cinnamon swirl, these pancakes will easily steal the spotlight at your brunch table. Are you ready to elevate your breakfast game and impress your family and friends?

Why are Vegan Cinnamon Roll Pancakes a must-try?

Indulgent Flavor: The fusion of cinnamon roll sweetness with fluffy pancake goodness creates a breakfast treat that’s simply irresistible.

Quick and Easy: Perfect for busy mornings, these pancakes come together in no time, allowing you to enjoy a homemade meal without the hassle.

Vegan-Friendly: Enjoy all the classic flavors without any animal products, making them suitable for everyone.

Crowd-Pleasing: Impress family and friends at holiday brunches with a dish that’s both visually stunning and delicious! Pair them with a drizzle of maple syrup or a vegan cream cheese glaze for an extra treat, similar to Nutella Pancakes Blend or Chocolate Chip Pancakes.

Versatile Options: Feel free to customize them with your favorite plant-based milks or add-ins, like nuts or chocolate chips, for added flair!

Vegan Cinnamon Roll Pancakes Ingredients

For the Pancake Base

  • All-Purpose Flour – This provides the structure needed for fluffy Vegan Cinnamon Roll Pancakes; whole wheat flour can be substituted with careful liquid adjustments.
  • Ground Cinnamon – Adds the signature warmth of cinnamon rolls to each bite; feel free to experiment with other spices like nutmeg or cardamom.
  • Brown Sugar – Sweetens the pancakes and enhances flavor depth; you can opt for coconut sugar for a healthier alternative.
  • Vegan Butter – Gives a rich flavor and contributes to golden edges; avocado oil works well if you’re looking for a lighter option.
  • Soy Milk – Creates a vegan buttermilk for a fluffy texture; almond or pea milk can be excellent substitutes for added protein.
  • Apple Cider Vinegar – Activates the baking soda and baking powder to create that fluffy consistency; lemon juice serves as an effective equal substitute.
  • Vegan Yogurt – Boosts moisture and lightness; choosing a thicker variety will produce the best results.

For the Cinnamon Swirl

  • Ground Cinnamon – Reinforces that delightful cinnamon flavor you love; it’s essential for creating the swirl.
  • Brown Sugar – Used again here to create that sticky, sweet swirl; coconut sugar can substitute seamlessly.
  • Almond Butter – This adds creaminess and binds the swirl together; peanut butter can also be a tasty alternative.
  • Maple Syrup – Provides additional sweetness and helps to blend the swirl mix; agave syrup can be used if you prefer.

These ingredients blend perfectly to create a breakfast experience that goes beyond the ordinary, leaving your taste buds begging for more! So gather your ingredients, and let’s get cooking!

Step‑by‑Step Instructions for Vegan Cinnamon Roll Pancakes

Step 1: Prepare the Vegan Buttermilk
In a measuring cup, combine 1 cup of soy milk with 1 tablespoon of apple cider vinegar. Allow it to sit for about 5 minutes until it curdles and thickens slightly. This activates the leavening agents, ensuring your Vegan Cinnamon Roll Pancakes come out fluffy and light.

Step 2: Make the Cinnamon Swirl Mixture
In a medium mixing bowl, blend together 2 tablespoons of brown sugar, 1 teaspoon of ground cinnamon, 1 tablespoon of almond butter, and 1 tablespoon of maple syrup. Stir until smooth. Transfer this mixture to a sandwich bag, cutting a small hole in one corner, which will be used to create your appealing cinnamon swirl.

Step 3: Whisk the Dry Ingredients
In a large mixing bowl, whisk together 1 cup of all-purpose flour, 2 tablespoons of brown sugar, 2 teaspoons of baking powder, 1/2 teaspoon of baking soda, 1 teaspoon of ground cinnamon, and 1/4 teaspoon of salt. This step not only combines the ingredients but also aerates the flour, vital for the fluffiness of your Vegan Cinnamon Roll Pancakes.

Step 4: Combine the Wet Ingredients
Add 2 tablespoons of melted vegan butter, 1/2 cup of vegan yogurt, 1 teaspoon of vanilla extract, and your prepared soy milk mixture to the bowl of dry ingredients. Gently mix until just combined; it’s okay if there are a few lumps. Let the batter rest for about 5 minutes to enhance the texture and rise.

Step 5: Preheat the Griddle
While the batter rests, heat a non-stick griddle over medium heat and lightly grease it with vegan butter or cooking spray. Ensure the griddle is hot enough before adding the batter—this will give your pancakes beautiful golden edges and fluffy interiors.

Step 6: Cook the Pancakes
Pour 1/4 cup of pancake batter onto the hot griddle. Using the sandwich bag filled with the cinnamon swirl mixture, pipe a beautiful swirl on top of the pancake. Cook for about 2-3 minutes, or until you see the edges drying and bubbles forming on the surface, indicating it’s time to flip.

Step 7: Finish Cooking the Pancakes
Carefully flip the pancake and cook for another 2-3 minutes, until golden brown and cooked through. The aroma of cinnamon will fill the air, making it hard to resist these Vegan Cinnamon Roll Pancakes!

Step 8: Serve Warm
Once cooked, remove the pancakes from the griddle and serve them warm. Drizzle with maple syrup or a vegan cream cheese glaze for an extra decadent treat. Enjoy this delightful breakfast that combines the best of both pancakes and cinnamon rolls!

How to Store and Freeze Vegan Cinnamon Roll Pancakes

Fridge: Keep cooked pancakes in an airtight container, where they will last up to 3 days. Reheat in the microwave or on a skillet for a quick breakfast treat.

Freezer: Store pancakes in the freezer by layering parchment paper between each one and placing them in a sealed bag. They can last up to 2 months, ready to be reheated in the toaster.

Reheating: When reheating, consider popping them in the toaster for a crispy exterior or warming them in the microwave for about 30 seconds to 1 minute, based on your preference.

Serving Suggestion: Drizzle with maple syrup or a vegan cream cheese glaze to enhance those delicious Vegan Cinnamon Roll Pancakes!

Vegan Cinnamon Roll Pancakes Variations

Feel free to play around with these delightful pancake variations to make them uniquely yours!

  • Whole Wheat Flour: Swap all-purpose flour for whole wheat flour, adjusting liquid as necessary for added nutrition. This twist provides a heartier pancake that brings a wholesome touch.

  • Nut Milk Variety: Use your favorite plant-based milk like almond, oat, or coconut milk instead of soy. Each option offers its unique flavor profile, enhancing both creaminess and taste.

  • Cinnamon Roll Twist: Add a dash of nutmeg or cardamom to your cinnamon swirl for an extra flavorful kick. These spices elevate the aroma and make your pancakes even more irresistible!

  • Chocolate Chip Delight: Stir in some dairy-free chocolate chips into the batter before cooking for a luscious chocolatey flavor. These pancakes become a sweet treat fans will adore.

  • Fruity Flavors: Incorporate mashed bananas or diced apples into the batter or serve with fresh strawberries for a fruity twist. The natural sweetness adds layers of flavor, making breakfast feel extra special.

  • Nutty Crunch: Add chopped nuts like walnuts or pecans to the batter for a delightful crunch. This variation not only enhances texture but also boosts healthy fats.

  • Spicy Sweetness: Drizzle with spicy maple syrup or add a pinch of cayenne pepper to the cinnamon swirl for a surprising heat that contrasts beautifully with the sweetness.

Feeling inspired? The possibilities are endless—give these variations a go and watch your Vegan Cinnamon Roll Pancakes steal the show! After all, similar to our recipes like Sweet Escape Charm and Out Egg Roll, customization allows for creativity and joy in the kitchen!

What to Serve with Vegan Cinnamon Roll Pancakes

A cozy breakfast isn’t complete without the perfect companions to elevate the flavors and textures of your delightful pancakes.

  • Fresh Berries: A burst of juicy strawberries, raspberries, or blueberries not only adds a vibrant color but also balances the sweetness with a tart contrast. The refreshing taste enhances every bite of your cinnamon swirl pancakes.

  • Vegan Cream Cheese Glaze: Drizzling this creamy glaze over your pancakes takes them from delicious to decadent. The tanginess of the cream cheese complements the sweetness beautifully, creating a rich flavor profile that’s hard to resist.

  • Maple Syrup: Pouring warm maple syrup gives your pancakes that classic breakfast feel, enhancing the sweetness and adding a comforting, syrupy glaze that soaks into every bite.

  • Toasted Nuts: Sprinkle some toasted walnuts or pecans for a crunchy texture that contrasts delightfully with the fluffy pancakes. Their rich, nutty flavor adds depth, making each bite even more satisfying.

  • Coconut Whipped Cream: Light and airy, coconut whipped cream is a delightful alternative that contributes a subtle flavor and luxurious finish, creating a creamy experience with each mouthful.

  • Cold Brew Coffee: A refreshing glass of cold brew enhances the brunch experience, providing a rich coffee flavor that balances the sweetness of the pancakes perfectly. Enjoying it with a splash of oat milk creates a lovely harmony of flavors.

Make Ahead Options

These Vegan Cinnamon Roll Pancakes are perfect for meal prep enthusiasts! You can prepare the pancake batter and refrigerate it for up to 24 hours; just be sure to cover it tightly to keep it fresh. Additionally, you can make the cinnamon swirl mixture ahead of time and store it in the refrigerator in an airtight container for up to 3 days. When ready to serve, simply let the batter sit at room temperature for about 15 minutes while you preheat your griddle, then cook as directed. This strategy allows you to enjoy delicious, fluffy pancakes without the morning rush, ensuring they remain just as delightful!

Expert Tips for Vegan Cinnamon Roll Pancakes

  • Mix Wisely: Avoid overmixing the batter, as this can cause tough pancakes. Lumps are perfectly fine for fluffy Vegan Cinnamon Roll Pancakes!
  • Let It Rest: Allow the batter to rest for 5 minutes. This step helps the pancakes achieve an airy texture.
  • Griddle Temperature: Ensure your griddle is adequately preheated. A hot surface will create golden edges while keeping the insides fluffy.
  • Swirl Technique: When piping the cinnamon swirl, start from the center and work your way outwards to create a visually appealing design.
  • Watch for Bubbles: Look for bubbles forming on the pancake surface as an indicator that it’s time to flip. This avoids undercooking.

Vegan Cinnamon Roll Pancakes Recipe FAQs

How do I choose ripe ingredients for my pancakes?
Absolutely! For the best flavor, use fresh, ripe bananas if you’re adding them to your batter. If you’re using plant-based milks, opt for unsweetened versions to avoid overpowering sweetness. Check the dates on your vegan yogurt and make sure the cinnamon isn’t too old for optimal flavor.

How should I store leftovers?
Store your cooked Vegan Cinnamon Roll Pancakes in an airtight container in the fridge, where they’ll stay fresh for up to 3 days. If you plan to enjoy them later, simply reheat them on a skillet or in the microwave for a quick breakfast treat!

Can I freeze these pancakes?
Absolutely! To freeze your Vegan Cinnamon Roll Pancakes, layer them with parchment paper in between and place them in a sealed freezer bag. They can last in the freezer for up to 2 months. When you’re ready to enjoy, simply pop them in the toaster or microwave for a quick and easy breakfast.

What if my pancakes come out too dense?
If your pancakes turn out dense, it could be due to overmixing the batter. Remember, lumps are perfectly fine! Another tip is to ensure your baking powder is fresh, as expired leavening agents can result in flat pancakes. If they still seem heavy, try adding a little more liquid or letting the batter rest longer.

Are these pancakes suitable for people with allergies?
Yes! These Vegan Cinnamon Roll Pancakes are free of animal products, making them suitable for those following a vegan diet. However, if you have nut allergies, be cautious with almond butter and consider substituting it with sunflower seed butter or a similar alternative to suit your dietary needs.

Can I customize this recipe for different flavors?
Very! Feel free to play with flavors by adding spices like nutmeg or vanilla extract for extra depth. You can also incorporate add-ins like nuts, chocolate chips, or even fruit to create personalized variations. The more, the merrier!

Vegan Cinnamon Roll Pancakes

Delicious Vegan Cinnamon Roll Pancakes for a Cozy Breakfast

These Vegan Cinnamon Roll Pancakes are a delightful mashup of two beloved breakfast classics, designed to bring joy to your morning routine.
Prep Time 10 minutes
Cook Time 15 minutes
Resting Time 5 minutes
Total Time 30 minutes
Servings: 4 pancakes
Course: Breakfast
Cuisine: Vegan
Calories: 200

Ingredients
  

Pancake Base
  • 1 cup All-Purpose Flour Whole wheat flour can be substituted
  • 1 cup Soy Milk Can substitute with almond or pea milk
  • 1 tbsp Apple Cider Vinegar Can use lemon juice as an alternative
  • 1 tbsp Vegan Butter Avocado oil can be used for a lighter option
  • 2 tbsp Brown Sugar Coconut sugar is a healthier alternative
  • 2 tsp Baking Powder
  • 1/2 tsp Baking Soda
  • 1 tsp Ground Cinnamon Feel free to experiment with other spices
  • 1/4 tsp Salt
  • 1/2 cup Vegan Yogurt Choosing a thicker variety works best
  • 1 tsp Vanilla Extract
Cinnamon Swirl
  • 2 tbsp Brown Sugar Coconut sugar can substitute
  • 1 tsp Ground Cinnamon
  • 1 tbsp Almond Butter Peanut butter can also be a substitute
  • 1 tbsp Maple Syrup Agave syrup can be used as a substitute

Equipment

  • Mixing bowls
  • griddle
  • Measuring cups
  • whisk
  • Spoon
  • Sandwich Bag

Method
 

Preparation
  1. In a measuring cup, combine soy milk with apple cider vinegar and let it sit for 5 minutes.
  2. In a mixing bowl, blend brown sugar, ground cinnamon, almond butter, and maple syrup for the cinnamon swirl mixture.
  3. In a large bowl, whisk together all-purpose flour, brown sugar, baking powder, baking soda, ground cinnamon, and salt.
  4. Add melted vegan butter, vegan yogurt, vanilla extract, and the soy milk mixture to the dry ingredients and mix gently.
  5. Preheat the griddle over medium heat and lightly grease it with vegan butter.
  6. Pour pancake batter onto the griddle, pipe the cinnamon swirl on top, and cook until bubbles form, about 2-3 minutes.
  7. Flip the pancake and cook until golden brown for another 2-3 minutes.
  8. Serve warm, drizzled with maple syrup or a vegan cream cheese glaze.

Nutrition

Serving: 1pancakeCalories: 200kcalCarbohydrates: 30gProtein: 4gFat: 8gSaturated Fat: 1gPolyunsaturated Fat: 3gMonounsaturated Fat: 4gSodium: 200mgPotassium: 150mgFiber: 2gSugar: 6gCalcium: 10mgIron: 8mg

Notes

Enjoy these delightful pancakes that combine the best of pancakes and cinnamon rolls!

Tried this recipe?

Let us know how it was!

Cottage Cheese Blueberry Bread: A Light, Wholesome Treat

As I pulled the golden loaf from the oven, the delicate aroma of warm blueberries filled my kitchen, instantly making my mouth water. Today, I’m excited to share my take on a delightful twist—Fluffy Cottage Cheese Blueberry Cloud Bread. This recipe is a perfect marriage of airy texture and wholesome goodness, ideal for breakfast enthusiasts and snack lovers alike. Not only is it low-carb and gluten-free, but it packs a protein punch with the addition of creamy cottage cheese, ensuring that each slice is both satisfying and nutritious. Whether you’re looking to impress guests or simply enjoy a guilt-free bite, this healthy bread is incredibly easy to whip up, making it a fabulous choice for all skill levels. Ready to elevate your baking game? Let’s dive into creating this magical treat!

Why Choose Cottage Cheese Blueberry Bread?

Nutrition Meets Flavor: Packed with protein, this recipe offers a delicious way to enjoy healthy eating without sacrificing taste.

Guilt-Free Indulgence: Perfect for those on low-carb or gluten-free diets, each slice provides a satisfying treat that feels indulgent.

Easy to Make: With just a few simple ingredients, you can create a delightful loaf that’s ideal for both experienced bakers and novices.

Versatile Serving Options: Whether enjoyed for breakfast, as a snack, or paired with a fresh salad, it suits any meal time.

Creative Twist: Swap blueberries for other fruits like raspberries or strawberries to keep your taste buds entertained!

This Cottage Cheese Blueberry Bread is not just about taste; it’s an experience. Serve it fresh with a little almond butter for a boost of healthy fats or check out my recipe for Banana Blueberry Breakfast for another wholesome delight!

Cottage Cheese Blueberry Bread Ingredients

For the Base

  • Cottage Cheese – Provides moisture and protein; blend until smooth for even incorporation.
  • Egg Whites – Essential for fluffiness; must be whipped to stiff peaks for the desired airy texture.
  • Blueberries – Adds natural sweetness and antioxidants; use fresh or properly prepared frozen.
  • Cream of Tartar – Stabilizes egg whites during beating; optional but enhances volume.
  • Vanilla Extract – Optional for added flavor depth, making the Cottage Cheese Blueberry Bread more delightful.
  • Salt – Enhances the overall taste; a small amount is crucial to balance flavors.

For Serving (Optional)

  • Almond Butter – A wonderful spread to add healthy fats and creamy goodness on top of your bread.
  • Fresh Herbs or Salad Greens – Pair with greens for a light, refreshing side dish or topping option.

Step‑by‑Step Instructions for Cottage Cheese Blueberry Bread

Step 1: Preheat the Oven
Begin by preheating your oven to 300°F (150°C). This low temperature is key for creating the fluffy texture in your Cottage Cheese Blueberry Bread. While the oven heats, line a baking sheet with parchment paper; this will prevent sticking and make cleanup a breeze.

Step 2: Blend the Cottage Cheese
In a mixing bowl, place your cottage cheese and blend it until smooth. This step is crucial as it ensures even distribution throughout the bread, contributing to its airy consistency. A handheld blender or food processor will work wonders here, taking about 2-3 minutes for the perfect texture.

Step 3: Whip the Egg Whites
In a separate, clean bowl, add your egg whites along with a pinch of cream of tartar for stabilization. Using an electric mixer, beat the egg whites until they form stiff peaks—this will take approximately 3-5 minutes. They should look glossy and hold their shape firmly, setting the foundation for a light and fluffy loaf.

Step 4: Combine the Mixtures
Gently fold the smooth cottage cheese into the whipped egg whites using a spatula. Be careful to maintain the airiness you’ve created; the goal here is a homogenous mix without deflating the egg whites. This delicate integration is essential for achieving the cloud-like texture of your Cottage Cheese Blueberry Bread.

Step 5: Add Blueberries and Season
Next, gently fold in your fresh or prepared frozen blueberries, followed by a sprinkle of salt. Mixing slowly will retain the fluffy structure of the batter while ensuring the blueberries are evenly distributed. You want to see pockets of vibrant berries throughout the mixture for bursts of flavor in every bite.

Step 6: Spoon the Mixture onto the Baking Sheet
Using a large spoon or spatula, carefully transfer the cottage cheese mixture onto the prepared baking sheet, shaping it into a loaf. Aim for an even thickness to promote uniform baking. This step is vital for the Cottage Cheese Blueberry Bread to rise evenly and develop a beautiful golden crust.

Step 7: Bake the Bread
Place the baking sheet in the preheated oven and bake for 30 minutes. You’ll know it’s ready when the bread is golden brown and set in the middle, signaling that the internal texture is fluffy yet firm. Keep an eye on it in the last few minutes to avoid over-baking.

Step 8: Cool and Serve
Once baked, remove your Cottage Cheese Blueberry Bread from the oven and let it cool slightly on a wire rack. This cooling period allows the bread to set further, making it easier to slice. After about 10 minutes, it’s ready to be sliced and enjoyed, whether as a snack or a delightful breakfast treat.

What to Serve with Fluffy Cottage Cheese Blueberry Cloud Bread?

Elevate your meal experience by pairing this light and airy treat with delightful accompaniments that complete the culinary journey.

  • Almond Butter: This creamy spread adds healthy fats and a nutty flavor, perfect for slathering on a warm slice.

  • Fresh Fruit Salad: A medley of bright, seasonal fruits adds a refreshing, juicy contrast, enhancing the natural sweetness of the blueberries.

  • Greek Yogurt Parfait: Layer creamy yogurt with granola and fresh berries for a protein-packed, nutritious breakfast option that feels indulgent.

  • Herbed Green Salad: A simple salad with mixed greens and a light vinaigrette balances flavors and textures, creating a satisfying meal.

  • Scrambled Eggs: The fluffy texture of scrambled eggs pairs beautifully with the cloud bread, providing a hearty yet light breakfast idea.

  • Honey Drizzle: A touch of honey adds a warm sweetness that perfectly complements the tangy blueberries in the bread.

  • Sparkling Water with Citrus: A refreshing beverage option, infusing sparkling water with lemon or lime brightens the meal.

  • Dark Chocolate Squares: For a sweet treat, enjoy a few squares of dark chocolate alongside your bread—the rich flavors play well together.

Make Ahead Options

These Cottage Cheese Blueberry Bread loaves are perfect for meal prep enthusiasts! You can blend the cottage cheese and whip the egg whites up to 24 hours in advance, storing them separately in the refrigerator to maintain freshness. Additionally, you can mix the dry ingredients together (including the salt and cream of tartar) up to 3 days before baking for a quick assembly. When you’re ready to serve, simply fold everything together, add the blueberries, shape the loaf, and bake it fresh for a delightful treat that’s just as delicious as when made the same day. Enjoy the ease of having part of your baking prepped ahead, ensuring you have healthy, homemade options at your fingertips!

Expert Tips for Cottage Cheese Blueberry Bread

Grease-Free Bowls: Ensure that all bowls and utensils are completely clean and grease-free to achieve maximum volume in your egg whites.

Gentle Folding: When incorporating the cottage cheese into your whipped egg whites, fold gently to maintain airiness; overmixing can lead to a dense bread.

Fresh or Frozen Blueberries: Prefer fresh blueberries for the best flavor, but if you use frozen, be sure to rinse and dry them thoroughly to prevent excess moisture in the batter.

Monitor Baking Time: Keep an eye on your Cottage Cheese Blueberry Bread while it bakes; the perfect golden crust is your cue that it’s ready—avoid over-baking for the best texture.

Experiment with Flavors: Feel free to swap blueberries for other fruits like raspberries or strawberries, or consider adding lemon zest for a refreshing twist.

How to Store and Freeze Cottage Cheese Blueberry Bread

Room Temperature: Store the Cottage Cheese Blueberry Bread in an airtight container at room temperature for up to 3 days. This keeps it fresh without compromising its fluffy texture.

Fridge: If you prefer, refrigerate the bread in an airtight container for up to 5 days. Be sure to allow it to reach room temperature before serving for optimal taste.

Freezer: Freeze the bread by wrapping individual slices tightly in plastic wrap and then placing them in a freezer-safe bag. It can last up to 3 months; just thaw at room temperature when you’re ready to enjoy.

Reheating: For a warm treat, simply pop slices in the toaster or microwave, heating in short intervals until warm. Avoid overheating to maintain its delightful fluffiness.

Cottage Cheese Blueberry Bread Variations

Customize your Cottage Cheese Blueberry Bread to suit your taste and dietary needs with these fun variations!

  • Berry Swap: Replace blueberries with raspberries or strawberries for a refreshing twist. Both fruits offer unique flavors and delightful bursts of sweetness.

  • Sweetener Boost: Add a splash of honey or maple syrup to the mixture for extra sweetness. Just keep in mind this will slightly alter the carb count, making it a perfect treat for those who can indulge a little.

  • Zesty Delight: Incorporate lemon zest into the batter for a bright, citrusy flavor. The zest enhances the overall profile and pairs beautifully with the sweetness of the blueberries.

  • Creamy Alternative: Switch cottage cheese for Greek yogurt for a creamier texture. This change not only keeps the fluffiness intact but also adds a subtle tanginess.

  • Nutty Crunch: Fold in some chopped walnuts or pecans for added texture and healthy fats. The crunch of nuts complements the soft, airy bread beautifully.

  • Heat it Up: For those who enjoy a little spice, consider adding a pinch of cayenne pepper or crushed red pepper flakes to the batter. It creates an unexpected flavor contrast that’s sure to excite.

  • Flavored Extracts: Try swapping vanilla extract for almond extract for a delightful twist that adds depth and richness to your Cottage Cheese Blueberry Bread.

  • Savory Touch: Transform this bread into a savory option by adding herbs like rosemary or thyme. Pair it with a light salad for a refreshing lunch or snack option.

Let your creativity shine with this Cottage Cheese Blueberry Bread! Serve it fresh with almond butter or enjoy it alongside a light salad. If you’re looking for other delightful recipes, don’t miss out on my Lemon Blueberry Summery dish that is equally refreshing!

Cottage Cheese Blueberry Bread Recipe FAQs

What type of cottage cheese should I use?
For this recipe, I recommend using full-fat or 2% cottage cheese to achieve the best flavor and moisture. Make sure to blend it until smooth. This helps in achieving an even consistency throughout your Cottage Cheese Blueberry Bread, resulting in a cloud-like texture.

How should I store leftover Cottage Cheese Blueberry Bread?
Store your Cottage Cheese Blueberry Bread in an airtight container at room temperature for up to 3 days. For longer storage, you can refrigerate it for up to 5 days. Just be sure to let it come to room temperature before serving to enjoy the full flavor and texture.

Can I freeze Cottage Cheese Blueberry Bread, and how?
Absolutely! To freeze your Cottage Cheese Blueberry Bread, first wrap individual slices tightly in plastic wrap. Then, place them in a freezer-safe bag. This way, they can last up to 3 months in the freezer. Thaw at room temperature, and to warm them up, pop the slices in the toaster or microwave for a quick treat without losing the fluffiness.

What to do if my egg whites aren’t whipping up?
If your egg whites aren’t forming stiff peaks, ensure your mixing bowl and utensils are completely grease-free—any residual fat can inhibit the whipping process. It’s also helpful to start with room temperature egg whites, as they whip better. Be patient; sometimes, it can take a few extra minutes to reach that perfect stage!

Can I make this recipe dairy-free or suitable for allergies?
If you’re looking to make a dairy-free version, you can try using a dairy-free cottage cheese alternative or silken tofu as a base. However, be mindful that changing ingredients may alter the texture and flavor. Always check the labels to avoid allergens, and ensure that the rest of your ingredients are compliant with dietary needs.

Cottage Cheese Blueberry Bread

Cottage Cheese Blueberry Bread: A Light, Wholesome Treat

Cottage Cheese Blueberry Bread is a light and healthy treat that's low-carb and gluten-free.
Prep Time 15 minutes
Cook Time 30 minutes
Cooling Time 10 minutes
Total Time 55 minutes
Servings: 8 slices
Course: Breakfast
Cuisine: Wholesome
Calories: 120

Ingredients
  

For the Base
  • 1 cup Cottage Cheese Blend until smooth
  • 4 large Egg Whites Whipped to stiff peaks
  • 1 cup Blueberries Fresh or properly prepared frozen
  • 1/2 tsp Cream of Tartar Optional, for stabilization
  • 1 tsp Vanilla Extract Optional for added flavor
  • 1/4 tsp Salt Balances flavors
For Serving (Optional)
  • 1 tbsp Almond Butter For spreading
  • Fresh Herbs or Salad Greens Use as a light side

Equipment

  • Mixing Bowl
  • Electric mixer
  • spatula
  • Baking Sheet
  • Parchment Paper
  • Handheld blender or food processor

Method
 

Step-by-Step Instructions
  1. Preheat your oven to 300°F (150°C) and line a baking sheet with parchment paper.
  2. Blend the cottage cheese until smooth.
  3. Whip the egg whites with cream of tartar until they form stiff peaks.
  4. Gently fold the cottage cheese into the whipped egg whites.
  5. Fold in blueberries and sprinkle salt.
  6. Transfer the mixture onto the baking sheet and shape into a loaf.
  7. Bake for 30 minutes until golden brown.
  8. Cool on a wire rack for 10 minutes before slicing.

Nutrition

Serving: 1sliceCalories: 120kcalCarbohydrates: 9gProtein: 10gFat: 4gSaturated Fat: 1gPolyunsaturated Fat: 1gMonounsaturated Fat: 2gSodium: 100mgPotassium: 200mgFiber: 2gSugar: 3gVitamin A: 2IUVitamin C: 6mgCalcium: 10mgIron: 4mg

Notes

Store in an airtight container at room temperature for up to 3 days, or refrigerate for 5 days. Can be frozen for 3 months.

Tried this recipe?

Let us know how it was!

Stay Connected

Get recipes via email: