Tropical Hawaiian Cheesecake Salad: A No-Bake Tropical Treat

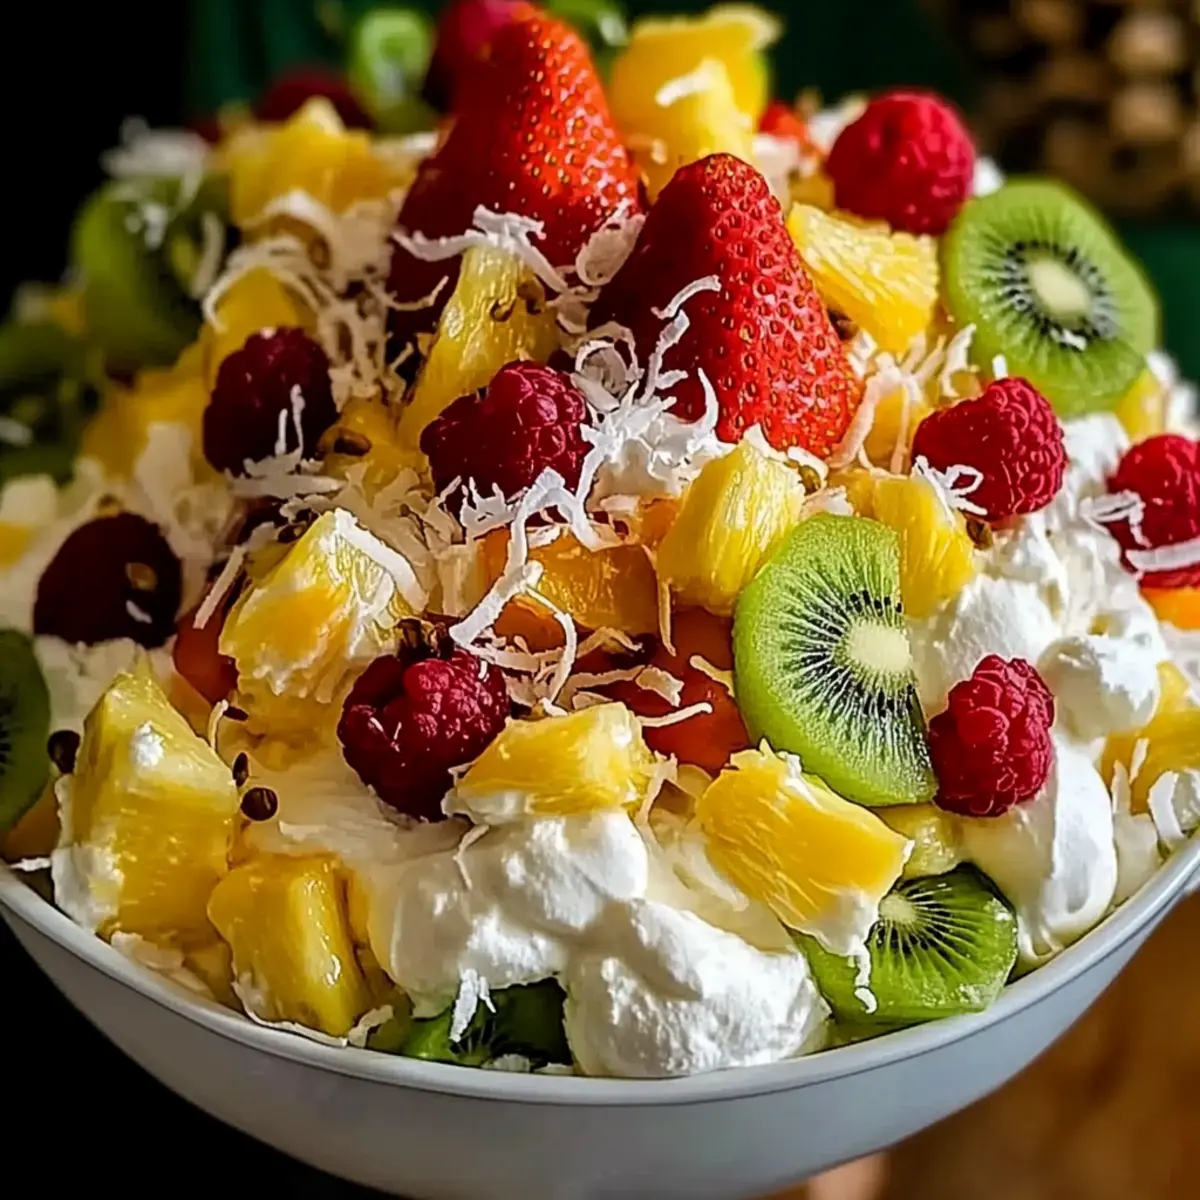
The sun-drenched beaches of Hawaii beckon with their vibrant colors and tropical delights, and today, I’m bringing that paradise right to your kitchen with my Tropical Hawaiian Cheesecake Salad. This no-bake dessert is not only a visual feast but also incredibly easy to whip up, making it a perfect choice for sunny summer gatherings and potlucks. Imagine juicy pineapples, succulent strawberries, and zesty kiwis all enveloped in a silky cheesecake-flavored whipped cream—it’s like a refreshing vacation in every bite! Plus, it’s vegetarian and can be customized with your favorite fruits. Are you ready to dive into this creamy, dreamy concoction that promises to impress your guests and satisfy your sweet tooth? Let’s get started!

Why is this dessert a must-try?

Creamy Delight: The touch of cream cheese blended with cloud-like whipped topping creates an ultra-creamy texture that’s simply irresistible.

Tropical Freshness: Juicy fruits like pineapples, strawberries, and kiwis provide bursts of flavor, transporting you to a sun-soaked paradise with every bite.

No-Bake Convenience: Perfect for busy days, this no-bake recipe saves you precious time without sacrificing taste—ideal for summer BBQs!

Customizable Options: Feel free to mix it up with other fruits like bananas or mangoes for added variety. Want a fruity twist? Try different combinations to keep it exciting!

Instant Crowd-Pleaser: With its vibrant presentation and delicious flavor, this salad is bound to impress guests at any gathering. Don’t forget to check out my tips for storing and serving!

Hawaiian Cheesecake Salad Ingredients

Get ready to create a tropical delight with these vibrant ingredients!

For the Cheesecake Base

  • Cream Cheese – Use softened to easily blend into a creamy base.
  • Whipped Topping – Store-bought is best for stability in this no-bake dessert.
  • Powdered Sugar – Adjust the sweetness to match the ripeness of your fruits.
  • Vanilla Extract – Enhance flavor with pure vanilla for the best taste.

For the Fruit Medley

  • Fresh Strawberries – Hull and halve for sweetness and beautiful color.
  • Pineapple Chunks – Use fresh for a tropical kick; drain canned pineapple well to reduce moisture.
  • Kiwis – Peel and slice to add tangy brightness and vibrant color.
  • Raspberries – Use fresh for a juicy pop of flavor that’s quick to prepare.
  • Optional Fruits (Banana, Blueberries, Mango) – Use these to add even more deliciousness and color to your Hawaiian Cheesecake Salad!

For the Topping

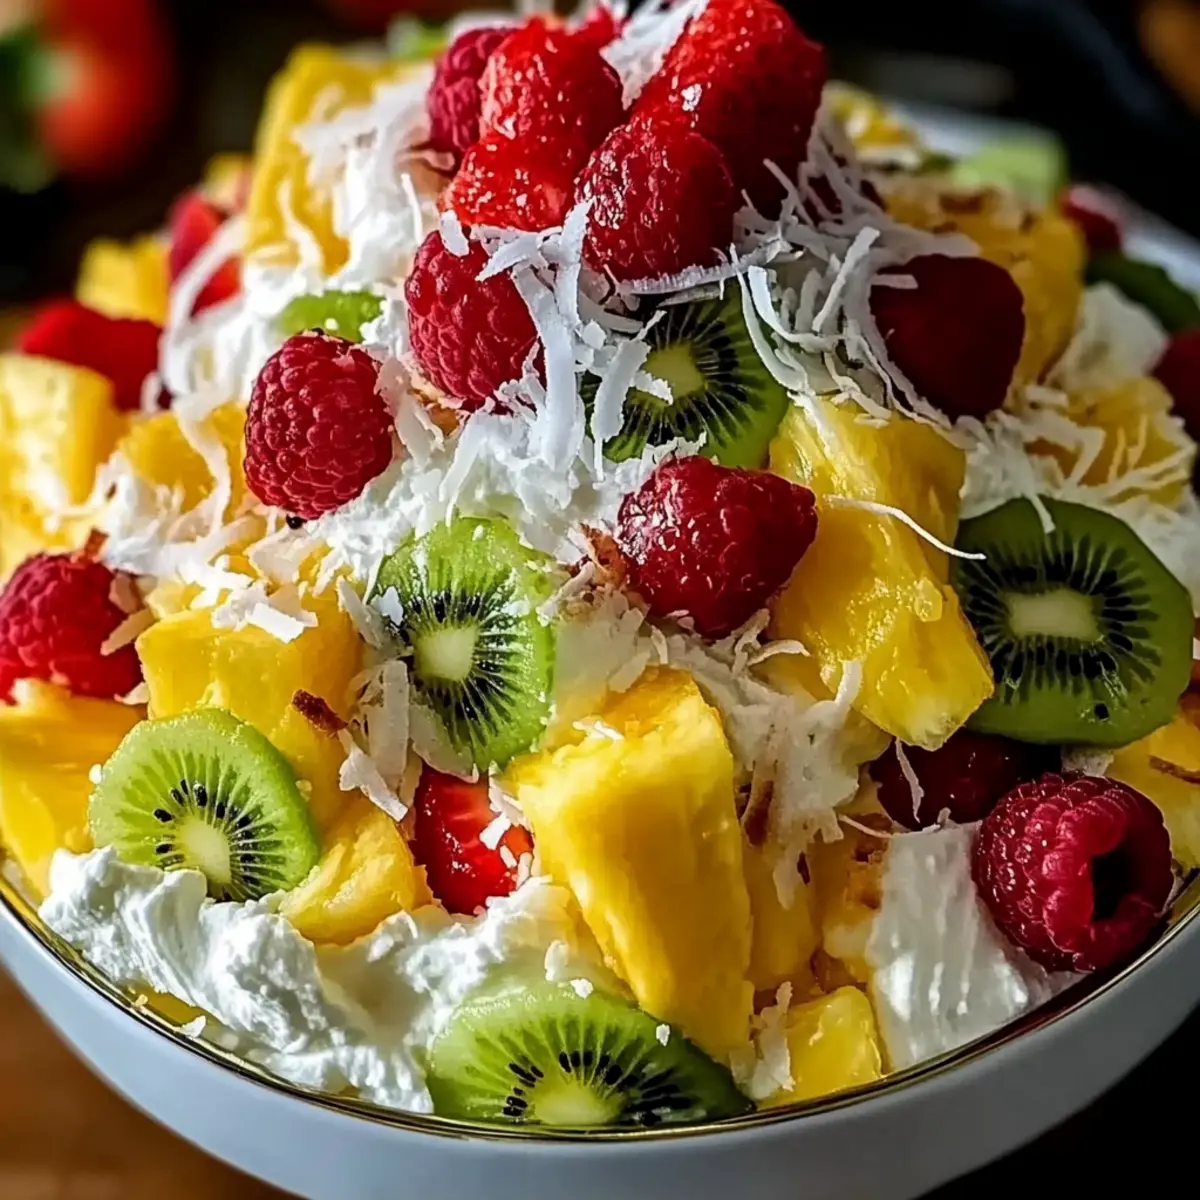
  • Toasted Coconut Flakes – Sprinkle on top for added crunch and tropical flair!

Step‑by‑Step Instructions for Tropical Hawaiian Cheesecake Salad

Step 1: Beat the Cheesecake Base
In a large mixing bowl, use an electric mixer to beat 8 ounces of softened cream cheese on medium speed until it’s smooth and creamy, about 2-3 minutes. Look for a fluffy texture that’s easy to scoop. This creamy base sets the foundation for your Tropical Hawaiian Cheesecake Salad.

Step 2: Sweeten and Flavor
Gradually add 1 cup of powdered sugar and 1 teaspoon of vanilla extract to the cream cheese mixture, mixing on low speed until everything is thoroughly combined. The mixture should be sweet and aromatic, a perfect canvas for the fruity additions.

Step 3: Incorporate Whipped Topping
Gently fold in 8 ounces of thawed whipped topping using a spatula until light and airy, ensuring not to deflate the mixture. This will help create a lush, creamy texture for your Tropical Hawaiian Cheesecake Salad that complements the vibrant fruits beautifully.

Step 4: Prepare the Fruits
Rinse, dry, and prepare all your fruits: hull and halve strawberries, peel and slice kiwis, and chop pineapples into bite-sized pieces. Take a moment to admire the colorful display of tropical fruits, as this will add visual appeal to your salad.

Step 5: Mix in the Fruits
Carefully fold the prepared fruits into the cheesecake mixture until they are evenly coated, making sure to maintain the shape of the fruits to enhance the presentation. You should see bursts of color from the strawberries, pineapples, and kiwis in your Tropical Hawaiian Cheesecake Salad.

Step 6: Chill the Salad
Cover the bowl with plastic wrap and refrigerate the prepared salad for at least 1 hour. This chilling time allows the flavors to meld together beautifully and ensures the salad is refreshingly cool when served.

Step 7: Add the Finishing Touches
Just before serving, sprinkle toasted coconut flakes on top for a delightful crunch and added texture. The toasted coconut will complement the fresh fruits, making your Tropical Hawaiian Cheesecake Salad visually stunning and delicious!

What to Serve with Tropical Hawaiian Cheesecake Salad

Imagine a sunny picnic or a cozy gathering—this salad pairs beautifully with delightful sides and drinks that elevate your tropical experience.

  • Grilled Chicken Skewers: Marinated in a sweet and spicy sauce, these skewers bring a smoky flavor that complements the fruity freshness perfectly, making for a balanced meal.

  • Crispy Spring Rolls: Light and crunchy, filled with fresh veggies and served with a tangy dipping sauce, these provide a delightful contrast to the creamy dessert.

  • Lemonade or Iced Tea: Refreshing drinks like homemade lemonade or iced tea offer a perfect thirst-quencher, enhancing the flavor of the tropical fruits in the salad.

  • Coconut Rice: This subtly sweet and fragrant rice dish not only echoes the salad’s tropical theme but also provides a beautiful textural contrast.

  • Mini Fruit Tarts: Bring out the dessert-loving side in everyone with these bite-sized treats, echoing similar fruity flavors while adding a sugary crunch.

  • Pineapple Coconut Smoothie: Blending these ingredients creates a creamy, refreshing drink that ties together the flavors of the meal, making for a wholesome tropical dining experience.

Storage Tips for Hawaiian Cheesecake Salad

Refrigerator: Store any leftover Hawaiian Cheesecake Salad in an airtight container in the fridge for up to 24 hours. For best flavor and texture, consume it by this time.

Separation: If making ahead, keep the fruits and cheesecake mixture separate until just before serving to maintain freshness and prevent sogginess.

Freezer: While not recommended for the salad itself, you can freeze individual fruits (like pineapple or strawberries) to use in your next batch of Hawaiian Cheesecake Salad!

Serving: To enjoy it again, simply take it out of the fridge, give it a gentle stir, and no need to reheat—serve chilled for a refreshing treat!

Expert Tips for Hawaiian Cheesecake Salad

Chill Ingredients: Keeping all ingredients chilled before preparation enhances texture and flavor, ensuring your Hawaiian Cheesecake Salad is refreshing.

Dry Fruits Well: After rinsing, ensure fruits are thoroughly dried to prevent excess moisture, which can make your salad watery and less appealing.

Add Bananas Last: To maintain vibrant color and freshness, add banana slices just before serving, avoiding browning that can occur if they sit too long.

Use Ripe Fruits: Select fruits that are perfectly ripe but not overripe. This will keep your salad flavorful and prevent mushiness in the mixture.

Toast Coconut Flakes: Toasting coconut flakes enhances their flavor and adds a crunchy texture, making your tropical delight even more irresistible.

Hawaiian Cheesecake Salad Variations

Feel free to let your creativity shine and customize your Hawaiian Cheesecake Salad with these delightful twists!

  • Berry Blast: Swap out raspberries for blueberries or mixed berries for a vibrant burst of flavors. These berries complement the creamy base beautifully and offer a new depth to each spoonful.

  • Dairy-Free: For a lactose-free option, use dairy-free cream cheese and coconut whipped topping. This adaptation allows everyone to indulge guilt-free while still enjoying that creamy texture.

  • Citrus Kick: Add mandarin orange segments for a zesty contrast against the richness of the cream cheese. The bright citrus notes will perk up your salad, providing a refreshing twist.

  • Tropical Medley: Mix in or substitute with tropical fruits like mango or passion fruit for an exotic flair. Each bite will be a delightful taste of the tropics, making your dessert feel like a getaway.

  • Fruity Nut Crunch: Top with finely chopped macadamia nuts or almonds for a crunchy texture. Nuts will add a delightful layer of flavor that contrasts beautifully with the creaminess of the salad.

  • Spicy Touch: If you’re feeling adventurous, sprinkle a pinch of chili powder or cayenne pepper into the mix for a surprising kick. This unexpected heat will elevate the flavor profile and excite your taste buds.

  • Banana Bliss: Incorporate sliced bananas for added creaminess and sweetness. Just remember to fold them in just before serving to keep them looking fresh and bright.

  • Herb Infusion: Add a hint of fresh mint or basil for an aromatic lift. These herbs will offer a nice counterpoint to the sweetness of the fruits and create a unique, refreshing experience for your palate.

Now, gather your favorite fruits, and let’s make this Tropical Hawaiian Cheesecake Salad a masterpiece that suits every taste! Don’t forget to check out my expert tips for more delightful ways to serve this dessert!

Make Ahead Options

These Tropical Hawaiian Cheesecake Salad components are perfect for meal prep, making your summer gatherings a breeze! You can prep the cheesecake base and fruits up to 24 hours ahead by mixing the cream cheese, whipped topping, powdered sugar, and vanilla. Simply store the mixture in an airtight container in the refrigerator. Keep the fruits—strawberries, pineapples, kiwis, and raspberries—separate until you’re ready to serve to maintain their freshness and prevent excess moisture. When it’s time to serve, gently fold the fruits into the cheesecake mixture, add the toasted coconut flakes, and enjoy this luscious dessert that will impress your guests without the last-minute rush!

Tropical Hawaiian Cheesecake Salad Recipe FAQs

How do I select ripe fruits for this salad?
Absolutely! When picking fruits for your Hawaiian Cheesecake Salad, look for strawberries that are bright red and firm, pineapples with a sweet aroma and a slight give when pressed, kiwis that are slightly soft but not mushy, and raspberries that are plump and vibrant. Avoid fruits with blemishes or dark spots all over.

How should I store leftovers of the salad?
Very good question! Store any leftover Hawaiian Cheesecake Salad in an airtight container in the refrigerator for up to 24 hours for optimal freshness. To prevent a soggy salad, keep the fruits and cream mixture separate until just before serving, especially if you plan on prepping ahead of time.

Can I freeze the Hawaiian Cheesecake Salad?
While I don’t recommend freezing the entire salad mixture due to the texture change, you can freeze individual fruits like pineapple or strawberries for later use. To do this, rinse, dry, and chop the fruit, then spread them out on a baking sheet to freeze. Once frozen, transfer them to a freezer-safe bag where they can stay for up to 3 months!

What if my whipped topping won’t hold its shape?
Don’t fret! If your whipped topping is too soft, try refrigerating it for 15-30 minutes to firm it up before gently folding it into the cream cheese mixture. If you’re making your own, ensure it’s whipped to soft peaks, not overwhipped, as that can cause deflation and make it watery.

Is this dessert suitable for kids or those with allergies?
Absolutely! It’s a hit with kids! However, if someone has dairy allergies, simply use dairy-free cream cheese and coconut whipped topping. Also, take note of any specific fruit allergies (like pineapple) so that you can substitute those with safe alternatives such as bananas or blueberries.

undefined

Tropical Hawaiian Cheesecake Salad: A No-Bake Tropical Treat

Enjoy the refreshing flavors of this Tropical Hawaiian Cheesecake Salad, an easy no-bake dessert featuring vibrant fruits and a creamy cheesecake base.
Prep Time 30 minutes
Chilling Time 1 hour
Total Time 1 hour 30 minutes
Servings: 8 servings
Course: Dessert
Cuisine: Hawaiian
Calories: 250

Ingredients
  

For the Cheesecake Base
  • 8 ounces Cream Cheese Use softened to easily blend into a creamy base.
  • 8 ounces Whipped Topping Store-bought is best for stability in this no-bake dessert.
  • 1 cup Powdered Sugar Adjust the sweetness to match the ripeness of your fruits.
  • 1 teaspoon Vanilla Extract Enhance flavor with pure vanilla for the best taste.
For the Fruit Medley
  • 1 cup Fresh Strawberries Hull and halve for sweetness and beautiful color.
  • 1 cup Pineapple Chunks Use fresh for a tropical kick; drain canned pineapple well to reduce moisture.
  • 1 cup Raspberries Use fresh for a juicy pop of flavor.
  • Optional Fruits (Banana, Blueberries, Mango) Use these to add even more deliciousness and color.
For the Topping
  • 1 cup Toasted Coconut Flakes Sprinkle on top for added crunch and tropical flair!

Equipment

  • Mixing Bowl
  • Electric mixer
  • spatula
  • Plastic Wrap

Method
 

Step-by-Step Instructions
  1. In a large mixing bowl, use an electric mixer to beat 8 ounces of softened cream cheese on medium speed until it's smooth and creamy, about 2-3 minutes.
  2. Gradually add 1 cup of powdered sugar and 1 teaspoon of vanilla extract to the cream cheese mixture, mixing on low speed until everything is thoroughly combined.
  3. Gently fold in 8 ounces of thawed whipped topping using a spatula until light and airy.
  4. Rinse, dry, and prepare all your fruits: hull and halve strawberries, peel and slice kiwis, and chop pineapples into bite-sized pieces.
  5. Carefully fold the prepared fruits into the cheesecake mixture until they are evenly coated.
  6. Cover the bowl with plastic wrap and refrigerate the prepared salad for at least 1 hour.
  7. Just before serving, sprinkle toasted coconut flakes on top for a delightful crunch.

Nutrition

Serving: 1servingCalories: 250kcalCarbohydrates: 30gProtein: 3gFat: 12gSaturated Fat: 7gPolyunsaturated Fat: 1gMonounsaturated Fat: 3gCholesterol: 30mgSodium: 180mgPotassium: 150mgFiber: 1gSugar: 20gVitamin A: 500IUVitamin C: 15mgCalcium: 70mgIron: 0.5mg

Notes

Chill ingredients beforehand and dry fruits well to prevent excess moisture in the salad. Add bananas just before serving to maintain freshness.

Tried this recipe?

Let us know how it was!

Mini Melting Moments Sliders with Garlic Aioli Bliss

As I stood in my kitchen, a delightful aroma of sizzling patties danced in the air, instantly transforming my space into a cozy gathering spot. With these Mini Melting Moments Sliders with Garlic Aioli, I’ve discovered the ultimate crowd-pleaser that’s not only quick and easy to whip up but also incredibly customizable. Picture juicy, mouthwatering mini burgers nestled between buttery brioche buns, topped off with a luscious garlic aioli that brings it all together. This recipe is a game-changer for any get-together, whether you’re hosting friends for game night or looking for a satisfying family dinner. Plus, with options for turkey, lamb, and plant-based alternatives, everyone can indulge in their favorite version. Ready to dive into the world of sliders? Let’s create something unforgettable together!

Why will you love these sliders?

Customization Galore: Tailor these sliders to your taste with options for ground turkey, lamb, or plant-based meat.

Quick & Easy: Whip up these delectable bites in under 30 minutes, perfect for last-minute gatherings.

Irresistibly Flavorful: The rich, buttery brioche buns combined with a zesty garlic aioli create a taste sensation.

Crowd-Pleasing Delight: Whether for a casual dinner or a festive game night, these sliders are sure to impress everyone at the table.

Healthy Alternatives: Embrace gluten-free options or turn keto by swapping buns for lettuce wraps; everyone can enjoy a delicious slider!

Built for Sharing: Pair them with sweet potato fries or a vibrant quinoa salad for a complete meal that invites seconds.

Mini Melting Moments Sliders Ingredients

• For those looking to make these delicious Mini Melting Moments Sliders at home, here’s what you’ll need!

For the Patties

  • Ground Beef (80% lean) – This provides richness and structure; substitute with ground turkey, lamb, or plant-based crumbles for a variation.
  • Sea Salt – Enhances the meat’s natural flavors; choose coarse sea salt for better texture.
  • Black Pepper – Freshly ground adds a warm kick; you can use white pepper for a milder flavor.

For the Buns

  • Mini Brioche Buns – Buttery softness that complements the patties; use gluten-free mini buns or lettuce wraps for a low-carb option.

For the Toppings

  • Sharp Cheddar Cheese – Provides creamy flavor that melts beautifully; swap for pepper jack for heat or dairy-free cheese for vegan options.
  • Mixed Lettuce Leaves – Adds a fresh crunch; try arugula for a peppery twist.
  • Quick-Pickled Cucumbers – Offers crunch and acidity; substitute with thinly sliced red onion or jalapeños for an extra bite.

For the Garlic Aioli

  • Mayonnaise – Acts as a creamy base; swap with vegan mayo for a dairy-free option.
  • Garlic (minced) – Brings intense flavor to the aioli; adjust to your liking for more or less garlic flavor.
  • Dijon Mustard – Adds tanginess; mustard powder can work in a pinch.
  • Lemon Juice – Brightens and balances flavors; lime juice can be used as an alternative for a different profile.

These Mini Melting Moments Sliders ingredients set the stage for an unforgettable culinary experience that’s as enjoyable to make as it is to eat. Grab your apron, and let’s turn your kitchen into a slider paradise!

Step‑by‑Step Instructions for Mini Melting Moments Sliders with Garlic Aioli

Step 1: Prepare Patties
In a mixing bowl, gently combine the ground beef, sea salt, and black pepper until just combined to maintain tenderness. Form the mixture into ½-inch thick patties, making a small dimple in the center of each to prevent puffing while cooking. Set the formed patties aside on a plate or cutting board.

Step 2: Make Aioli
In a separate bowl, whisk together the mayonnaise, minced garlic, Dijon mustard, and lemon juice until smooth and creamy. Season the mixture with salt and pepper to taste, adjusting the flavors as desired. Cover the bowl and place the garlic aioli in the refrigerator to chill while you cook the patties.

Step 3: Cook Patties
Heat a skillet over medium-high heat and add a splash of oil. When the pan is hot, place your formed patties in the skillet, being careful not to overcrowd. Cook for about 3-4 minutes on one side until browned, then flip and top each with a slice of sharp cheddar cheese. Continue to cook for another 3-4 minutes, or until the cheese is melty and the patties reach an internal temperature of 160°F.

Step 4: Toast Buns
While the patties finish cooking, take the mini brioche buns and slice them in half. Lightly toast the cut sides in the same skillet for about 30 seconds, just until they are golden and slightly crispy. This adds an irresistible texture that complements the sliders perfectly.

Step 5: Assemble Sliders
To assemble your Mini Melting Moments Sliders, spread a generous layer of the garlic aioli on the bottom half of each toasted bun. Layer on a few mixed lettuce leaves, followed by a cheesy beef patty. Top with quick-pickled cucumber slices for added crunch and zest, and then crown with the top half of the bun.

Step 6: Serve
Serve the sliders immediately while the patties are warm and melty. Arrange them on a serving platter alongside your favorite side dishes like sweet potato fries or a vibrant quinoa salad. Enjoy the delightful combination of flavors in every satisfying bite!

Expert Tips for Mini Melting Moments Sliders

  • Keep It Cool: Refrigerate the patties before cooking to ensure they stay juicy and are easier to handle during cooking.

  • Gentle Mixing: Avoid over-mixing the meat when forming patties to maintain a tender texture; lightly combine the ingredients instead.

  • Don’t Press Down: Resist the urge to press down on patties while they cook; this helps retain the delicious juices and keeps them flavorful.

  • Use a Thermometer: Ensure safety by cooking patties to an internal temperature of 160°F for ground beef, guaranteeing they are fully cooked.

  • Prep Ahead: Prepare the garlic aioli, veggies, and buns before you cook the meat to streamline the assembly process and enhance efficiency!

What to Serve with Mini Melting Moments Sliders

Elevate your slider experience by complementing them with delightful side dishes that enhance every bite.

  • Sweet Potato Fries: The natural sweetness and crunch of these fries provide a perfect contrast to the savory sliders.

  • Tangy Coleslaw: A creamy coleslaw adds a refreshing crunch that balances the rich flavors of the sliders superbly.

  • Quinoa Salad: A bright, colorful quinoa salad filled with veggies brings a nutritious and flavorful touch to your meal.

  • Garlic Butter Corn on the Cob: Hot, buttery corn drizzled with garlic enhances the comfort food vibe while offering a delicious pairing.

  • Zesty Pickle Chips: The sharp acidity of pickle chips complements the sliders well, adding an irresistible crunch.

  • Margaritas or Lemonade: A chilled glass of margaritas or lemonade brings a refreshing zest, perfect for summer gatherings.

  • Chocolate Chip Cookies: Finish your meal on a sweet note with warm cookies that invite everyone back for dessert.

Each of these suggestions pairs wonderfully, creating a complete meal around your Mini Melting Moments Sliders.

Mini Melting Moments Sliders Variations

Feel free to make these sliders your own, adding your favorite flavors and dietary choices!

  • Turkey Option: Substitute ground beef with ground turkey for a lighter take. Just keep an eye on cooking time, as it may vary slightly!

  • Lamb Delight: Swap in ground lamb for a rich, savory flavor that elevates your sliders to a gourmet level.

  • Plant-Based Alternative: Use plant-based crumbles or patties for a vegetarian or vegan-friendly version. They’re equally delicious and satisfying!

  • Cheese Swap: Experiment with different cheeses like pepper jack for a spicy kick or creamy goat cheese for a tangy twist.

  • Paprika Aioli: Fold in smoked paprika into the garlic aioli to add a warm, smoky flavor that enhances every bite of your slider.

  • Low-Carb Option: Ditch the buns entirely and serve the patties on crisp lettuce wraps. Add creamy avocado for an extra velvety texture.

  • Crunchy Toppings: Replace quick-pickled cucumbers with crunchy jalapeños or thinly sliced red onions for an added zing that brings the sliders to life.

  • Zesty Sauce: Spice things up with a drizzle of Sriracha or homemade barbecue sauce to give your mini sliders an exciting flavor boost.

Whether you’re looking for healthier alternatives or new flavor bursts, these variations ensure that your sliders are always a hit. For a tasty side, consider pairing them with sweet potato fries, or for a fresh contrast, whip up a quinoa salad that complements the sliders perfectly!

Make Ahead Options

These Mini Melting Moments Sliders are perfect for meal prep, saving you valuable time during busy weeknights! You can prepare the patties and garlic aioli up to 24 hours in advance. Simply form the patties, cover them, and refrigerate to maintain freshness, while storing the aioli in a sealed container. The quick-pickled cucumbers can also be made ahead and stored in the fridge for up to 3 days. When you’re ready to serve, just cook the patties and toast the buns—isn’t that simple? You’ll end up with the same juicy, flavorful sliders that everyone loves, but with much less stress to create them!

Storage Tips for Mini Melting Moments Sliders

Room Temperature: Store sliders at room temperature for up to 2 hours if serving immediately; beyond that, refrigerate to maintain freshness.

Fridge: Keep cooked sliders in an airtight container in the fridge for up to 3 days. To preserve their taste, store patties and buns separately.

Freezer: For long-term storage, freeze patties and buns separately for up to 2 months. Wrap them well in plastic wrap followed by foil for best results.

Reheating: Reheat patties in a preheated oven at 350°F for 8-10 minutes. Warm buns for the last 2 minutes, uncovered, to maintain their freshness. Enjoy your stored Mini Melting Moments Sliders!

Mini Melting Moments Sliders with Garlic Aioli Recipe FAQs

What should I look for when selecting ground beef?
When choosing ground beef, opt for 80% lean for the perfect balance of flavor and juiciness. Look for bright red color without any dark spots or excessive liquid in the packaging. If you prefer a lighter option, ground turkey or lamb can be great substitutes!

How can I store leftover sliders?
To keep your Mini Melting Moments Sliders fresh, allow them to cool completely before storing. Place the patties and buns in separate airtight containers, and they can be stored in the fridge for up to 3 days. For longer storage, wrap them tightly in plastic wrap, followed by foil, and freeze for up to 2 months.

Can I freeze the sliders? If so, how?
Absolutely! To freeze, follow these steps:

  1. Allow the cooked patties to cool completely.
  2. Wrap each patty tightly in plastic wrap.
  3. Place the wrapped patties in a freezer bag and remove as much air as possible.
  4. For buns, wrap them individually or store them in a separate freezer bag.
    They’ll last in the freezer for up to 2 months. Just thaw and reheat before serving for that freshly-made taste!

Why did my patties shrink while cooking?
Patties can shrink if they’re pressed down while cooking or if they weren’t shaped correctly. Always form patties gently and make a small dimple in the center to prevent puffing up during cooking. This way, you’ll retain their juicy goodness and keep them perfectly tender!

Are there any dietary considerations for these sliders?
These sliders are versatile and can cater to various dietary preferences! For gluten-free eaters, swap mini brioche buns for gluten-free buns or lettuce wraps. If you’re looking for vegetarian options, use plant-based crumbles instead of meat. Always read labels to check for potential allergens, especially with store-bought ingredients like aioli or cheese.

How can I spice up the garlic aioli?
To enhance the flavor of your garlic aioli, consider adding a pinch of smoked paprika for warmth or a dash of hot sauce for heat. For a fresh twist, incorporate chopped herbs like parsley or basil. Feel free to experiment to find your perfect mix of flavors!

undefined

Mini Melting Moments Sliders with Garlic Aioli Bliss

Delightful Mini Melting Moments Sliders featuring customizable patties and a creamy garlic aioli, perfect for gatherings.
Prep Time 10 minutes
Cook Time 20 minutes
Chill Time 10 minutes
Total Time 40 minutes
Servings: 4 sliders
Course: Dinner
Cuisine: American
Calories: 300

Ingredients
  

For the Patties
  • 1 lb Ground Beef (80% lean) or substitute with ground turkey, lamb, or plant-based crumbles
  • 1 tsp Sea Salt coarse preferred
  • 1 tsp Black Pepper freshly ground
For the Buns
  • 12 count Mini Brioche Buns or gluten-free mini buns, or lettuce wraps
For the Toppings
  • 4 slices Sharp Cheddar Cheese or substitute with pepper jack or dairy-free cheese
  • 1 cup Mixed Lettuce Leaves or arugula for a peppery twist
  • 1 cup Quick-Pickled Cucumbers or thinly sliced red onion or jalapeños
For the Garlic Aioli
  • 1/2 cup Mayonnaise or vegan mayo for dairy-free option
  • 2 cloves Garlic (minced) adjust to taste
  • 1 tbsp Dijon Mustard mustard powder can be used as alternative
  • 1 tbsp Lemon Juice or lime juice as an alternative

Equipment

  • Mixing Bowl
  • Skillet
  • whisk
  • serving platter

Method
 

Preparation Steps
  1. In a mixing bowl, gently combine the ground beef, sea salt, and black pepper until just combined to maintain tenderness. Form into ½-inch thick patties.
  2. In a separate bowl, whisk together the mayonnaise, minced garlic, Dijon mustard, and lemon juice until smooth. Season the mixture and refrigerate.
  3. Heat a skillet over medium-high heat and cook the patties for about 3-4 minutes on each side, topping with cheddar cheese until melted.
  4. Slice and lightly toast the mini brioche buns in the skillet for about 30 seconds until golden.
  5. Assemble sliders by spreading garlic aioli, adding lettuce, a patty, pickled cucumbers, and topping with the bun.
  6. Serve immediately with sides like sweet potato fries or quinoa salad.

Nutrition

Serving: 1sliderCalories: 300kcalCarbohydrates: 25gProtein: 20gFat: 15gSaturated Fat: 5gPolyunsaturated Fat: 1gMonounsaturated Fat: 4gCholesterol: 60mgSodium: 600mgPotassium: 300mgFiber: 1gSugar: 3gVitamin A: 10IUVitamin C: 8mgCalcium: 15mgIron: 10mg

Notes

Refrigerate patties before cooking for best results. Use a thermometer to check for doneness at 160°F.

Tried this recipe?

Let us know how it was!

Delicious Hawaiian Roll French Toast for a Cozy Breakfast

As I stood in the kitchen this morning, the enticing aroma of cinnamon and vanilla whisked me back to my childhood breakfast table. Those were the days when a simple meal felt like an event, and the magic happened with just a few ingredients. Enter my Heavenly Hawaiian Roll French Toast Bites—a delightful twist on the classic dish that has quickly become a family favorite. These bites are quick to whip up, making them perfect for lazy weekend mornings or festive brunch gatherings. Plus, their pillowy texture and burst of sweetness transform breakfast into a delightful experience that everyone will love. If you’re looking to wow your guests or simply indulge in some comforting goodness, these bites are just the ticket. Ready to dive in and create a breakfast masterpiece? Let’s get started!

Why You’ll Crave These Bites?

Simplicity Made Delicious: With minimal ingredients like King’s Hawaiian Rolls, eggs, and milk, you can easily whip up this recipe without any fuss.
Flavor Explosion: Infused with warm cinnamon and vanilla, each bite offers a sweet, indulgent flavor that delights your senses.
Perfect for Sharing: These bite-sized treats are ideal for brunch gatherings or family breakfasts. Imagine serving them with fresh fruit and maple syrup!
Versatile Delight: Whether you want a hearty breakfast or a sweet dessert, these bites adapt effortlessly, inviting creative toppings like whipped cream or chocolate drizzle.
Quick and Easy: Ready in minutes, this recipe saves time without sacrificing flavor, perfect for those busy mornings.

Hawaiian Roll French Toast Ingredients

For the Batter
King’s Hawaiian Rolls – These sweet rolls provide the perfect fluffy base. Substitute with any soft sweet bread if needed.
Large Eggs – Essential for the custard base, providing binding; no substitutions necessary.
Half and Half or Whole Milk – Adds a creamy richness; almond milk or oat milk can be used for a lighter option.
Vanilla Extract – Enhances flavor; consider almond extract for a unique twist.
Ground Cinnamon – Infuses a warm spice; nutmeg can be used for a different flavor profile.
Brown Sugar – Adds depth and sweetness; white sugar works in a pinch.
Salt – Balances sweetness and lifts all flavors; an essential component.

For Cooking
Butter – For a rich, golden finish; olive or coconut oil can substitute for dairy-free.

For Serving
Powdered Sugar – A lovely dusting finishing touch; feel free to omit based on preference.
Fresh Fruit and Maple Syrup – Serve with berries like strawberries or blueberries for a refreshing element; maple syrup perfectly complements the sweetness of Hawaiian Roll French Toast.

Step-by-Step Instructions for Heavenly Hawaiian Roll French Toast Bites

Step 1: Prepare the Custard Mixture
In a large bowl, whisk together 4 large eggs and 1 cup of half and half until fully combined. Add 1 teaspoon of vanilla extract, 1 teaspoon of ground cinnamon, 2 tablespoons of brown sugar, and a pinch of salt. Mix until the sugar dissolves and the mixture is smooth, creating a sweet and fragrant custard that will infuse your Hawaiian Roll French Toast bites with delicious flavor.

Step 2: Soak the Rolls
Using a toothpick, poke several holes in the bottoms of each King’s Hawaiian Roll to allow the custard to soak in effectively. Slightly dip each roll into the custard mixture for about 30 seconds, ensuring all sides are coated. Avoid oversaturation to prevent sogginess; the goal is a deliciously custardy interior while maintaining the structure of the rolls.

Step 3: Heat the Skillet
Place a nonstick skillet over medium-low heat and add 2 tablespoons of butter. Allow the butter to melt completely, coating the skillet evenly, and wait for it to foam but not burn. This step ensures your Hawaiian Roll French Toast bites will turn golden brown on all sides, creating a delightful crispy exterior that contrasts beautifully with the fluffy inside.

Step 4: Cook the French Toast Bites
Carefully place the soaked Hawaiian Roll bites in the skillet. Cook each side for about 30 to 60 seconds, or until they become golden brown and crispy. Use a spatula to gently flip them, ensuring even cooking. Pay attention to the sizzling sound, which indicates they are cooking perfectly and developing a delicious crust.

Step 5: Serve and Enjoy
Once cooked, transfer the Hawaiian Roll French Toast bites to a serving plate. Dust them lightly with powdered sugar for an elegant finish, and consider adding a handful of fresh berries and a drizzle of maple syrup atop the bites. Serve warm, and relish the moment as you share this delightful breakfast treat with family and friends.

Make Ahead Options

These Heavenly Hawaiian Roll French Toast Bites are fantastic for meal prep lovers! You can prepare the custard mixture and soak the Hawaiian rolls up to 24 hours in advance. After poking holes in the rolls, dip them in the custard for about 30 seconds, then store them in an airtight container in the refrigerator to prevent any browning. When it’s time to serve, simply heat 2 tablespoons of butter in a skillet and cook the soaked bites for 30 to 60 seconds per side until golden brown. This way, you get to enjoy a delicious breakfast with minimal effort and time on busy mornings!

Expert Tips for Hawaiian Roll French Toast

  • Monitor Soaking Time: Limit soaking the rolls to 30 seconds to avoid sogginess; too long may lead to a mushy texture instead of fluffy bites.
  • Cook at Medium-Low Heat: This temperature ensures that the custard sets perfectly without burning, producing that golden brown crust we crave for Hawaiian Roll French Toast.
  • Use Nonstick Cookware: A nonstick skillet or griddle is essential to prevent sticking; this allows for easier flipping and perfect browning of the bites.
  • Customize Your Toppings: Feel free to get creative! Consider adding toppings like whipped cream or chocolate drizzle for a festive twist on your Hawaiian Roll French Toast.
  • Prep Ahead: For a quicker breakfast, prepare the custard mixture the night before and soak the rolls just before cooking to maintain the ideal texture.

Hawaiian Roll French Toast Variations

Customize your Hawaiian Roll French Toast bites with these delightful twists that will tantalize your taste buds!

  • Nutty Delight: Add a handful of chopped nuts like pecans or walnuts to the custard mixture for a crunchy texture.

  • Cinnamon Rolls: Swap the Hawaiian rolls for cinnamon rolls for an extra layer of sweet, spiced flavor. It’s like a cozy hug for your taste buds!

  • Extra Sweetness: Stir in mini chocolate chips to the custard for a decadent touch that the whole family will adore. Just imagine that gooey chocolate melting in every bite!

  • Fruit Fusion: Mix in fresh or frozen berries such as blueberries or strawberries to the custard for a fruity burst that enhances sweetness and freshness. Pairing flavors is a delightful way to keep things interesting!

  • Vegan Option: Use a flax or chia seed mixture and plant-based milk to create a vegan version without sacrificing the deliciousness of the original.

  • Spiced Up: Add a pinch of cayenne pepper or a drizzle of maple syrup with chili for a surprising kick that will spice up your morning.

  • Whipped Indulgence: Top with freshly whipped cream and drizzled caramel sauce for an extravagant dessert twist when served after dinner.

  • Savory Surprise: For a savory kick, add some cooked bacon or ham inside the French toast bites for an unexpected flavor combination that’s all about balance.

These variations not only offer exciting flavor profiles but also cater to different dietary preferences, helping you create a breakfast that’s uniquely yours. Happy cooking!

How to Store and Freeze Hawaiian Roll French Toast

Fridge: Store leftover Hawaiian Roll French Toast bites in an airtight container for up to 3 days. Reheat in a skillet over low heat, adding a little butter for extra flavor.

Freezer: If you want to keep your French toast bites longer, freeze them in a single layer on a baking sheet, then transfer to a resealable bag or container. They can last for up to 2 months.

Reheating: To enjoy frozen bites, thaw them overnight in the fridge, then reheat in a skillet or toaster oven until warmed through and crispy.

Tip: For best results, avoid soaking the rolls too long during preparation to preserve their texture, even after storage.

What to Serve with Heavenly Hawaiian Roll French Toast Bites

Elevate your breakfast experience with satisfying sides and delightful accompaniments that create a memorable meal.

  • Crispy Bacon: The salty crunch of bacon contrasts beautifully with the sweetness of the French toast, adding heartiness to your plate.
  • Fresh Berries: Top with strawberries, blueberries, or raspberries for a burst of freshness and a pop of color that complements the dish.
  • Maple Syrup: A drizzle of real maple syrup enhances the flavors with its rich sweetness, making every bite indulgent and flavorful.
  • Sausage Links: The savory flavor of sausage pairs perfectly with the sweet bites, creating a delightful balance that everyone will enjoy.
  • Whipped Cream: A dollop of homemade whipped cream adds a luxurious touch, transforming breakfast into a delightful dessert experience.
  • Chocolate Drizzle: Drizzling melted chocolate over the bites can turn your French toast into an irresistible treat that everyone craves.
  • Coffee or Latte: Pair with a warm cup of coffee or a frothy latte to enhance the breakfast experience with comfort and warmth.
  • Coconut Flakes: Sprinkling toasted coconut on top adds an unexpected tropical flair, enhancing the Hawaiian essence of your meal.
  • Cream Cheese Icing: For a dessert-like feel, serve with a side of cream cheese icing for dipping; it’s an indulgent twist that’s fun to enjoy.

Hawaiian Roll French Toast Recipe FAQs

What type of King’s Hawaiian Rolls should I use for this recipe?
Absolutely! Use any soft, sweet rolls for this recipe. King’s Hawaiian Rolls are perfect due to their sweetness and texture, but feel free to experiment with other soft sweet breads like brioche if you can’t find them.

How should I store leftover Hawaiian Roll French Toast bites?
To keep them fresh, store leftover bites in an airtight container in the fridge for up to 3 days. When you’re ready to indulge again, simply reheat them in a skillet over low heat with a touch of butter for added flavor!

Can I freeze Hawaiian Roll French Toast?
Yes, you can! Place the bites in a single layer on a baking sheet to freeze initially. Once they are solid, transfer them to a resealable bag or airtight container. They can stay fresh in the freezer for up to 2 months. To enjoy, thaw overnight in the fridge, then reheat in a skillet or toaster oven until warm and crispy.

What should I do if my French toast bites are too soggy?
To prevent sogginess, be mindful of the soaking time—30 seconds is ideal. If you find your bites soggy after cooking, it might be due to oversoaking or using too much custard. For next time, ensure you’re gently dipping and not fully submerging the rolls.

Are there any dietary considerations for this recipe?
Great question! For those with dairy restrictions, substitute half and half with almond or oat milk, and use coconut oil instead of butter for cooking. Always be mindful of potential allergies related to eggs, milk, and gluten in the rolls if you’re serving guests with dietary restrictions.

Can I make the custard mixture ahead of time?
Very! You can prepare the custard the night before. Just whisk together the ingredients and store them in the fridge. Soak the rolls just before cooking to maintain that delightful fluffy texture. Happy cooking!

undefined

Delicious Hawaiian Roll French Toast for a Cozy Breakfast

Heavenly Hawaiian Roll French Toast Bites, a delightful twist on the classic dish perfect for breakfast.
Prep Time 15 minutes
Cook Time 10 minutes
Total Time 25 minutes
Servings: 4 bites
Course: Breakfast
Cuisine: Hawaiian
Calories: 180

Ingredients
  

For the Batter
  • 4 large eggs Essential for the custard base
  • 1 cup half and half Can use whole milk
  • 1 teaspoon vanilla extract Enhances flavor
  • 1 teaspoon ground cinnamon Infuses a warm spice
  • 2 tablespoons brown sugar Adds depth and sweetness
  • a pinch salt Essential component
  • 1 package King's Hawaiian Rolls Provides the perfect fluffy base
For Cooking
  • 2 tablespoons butter For a rich, golden finish
For Serving
  • to taste powdered sugar A lovely dusting finishing touch
  • to taste fresh fruit and maple syrup Berries complement the sweetness

Equipment

  • Nonstick skillet

Method
 

Step-by-Step Instructions
  1. In a large bowl, whisk together eggs and half and half until fully combined. Add vanilla extract, ground cinnamon, brown sugar, and salt. Mix until smooth.
  2. Poke several holes in the bottoms of each King's Hawaiian Roll. Dip each roll into the custard mixture for about 30 seconds.
  3. Heat a nonstick skillet over medium-low heat and melt butter, coating the skillet evenly.
  4. Place soaked Hawaiian Roll bites in the skillet. Cook each side for about 30 to 60 seconds until golden brown and crispy.
  5. Transfer cooked Hawaiian Roll bites to a serving plate, dust with powdered sugar, and serve warm with fresh berries and maple syrup.

Nutrition

Serving: 1biteCalories: 180kcalCarbohydrates: 22gProtein: 4gFat: 8gSaturated Fat: 5gPolyunsaturated Fat: 0.5gMonounsaturated Fat: 2gCholesterol: 100mgSodium: 250mgPotassium: 130mgFiber: 1gSugar: 5gVitamin A: 300IUCalcium: 100mgIron: 0.5mg

Notes

Limit soaking time to avoid sogginess and cook at medium-low heat for the best results.

Tried this recipe?

Let us know how it was!

Caprese Stuffed Balsamic Chicken That Will Wow Your Tastebuds

As I stood in my kitchen, the tantalizing aroma of balsamic vinegar simmering on the stove pulled me right back to a little Italian trattoria I stumbled upon during my travels. This Caprese Stuffed Balsamic Chicken combines juicy chicken breasts filled with creamy mozzarella, fresh tomatoes, and fragrant basil—all smothered in a rich balsamic glaze that beautifully balances savory and sweet. Not only is this dish a crowd-pleaser that transforms dinner into an occasion, but it’s also an effortless gluten-free option, perfect for those weeknights when you crave something homemade yet easy to prepare. Curious how a few simple ingredients can bring a taste of Italy to your table? Let’s dive in!

Why is This Chicken Recipe a Must-Try?

Irresistible Flavor: The combination of gooey mozzarella, fresh tomatoes, and aromatic basil creates a burst of delightful taste in every bite.

Ease of Preparation: With straightforward steps, you can whip up this dish in no time—perfect for busy weeknights or impressing guests without fuss.

Gluten-Free Delight: This recipe accommodates gluten-free diets, making it a versatile choice for all your dinner guests.

Crowd-Pleasing Appeal: Whether you’re hosting a family dinner or a casual gathering, this Caprese Stuffed Chicken is sure to satisfy and leave everyone asking for seconds.

Feel free to pair it with a refreshing side salad or some warm garlic bread for a complete meal that feels gourmet!

Caprese Stuffed Balsamic Chicken Ingredients

Ready to bring a taste of Italy to your kitchen? Here’s what you need to make this flavorful dish!

For the Chicken
Large Chicken Breasts – Make sure they’re thick enough to hold all that delicious filling.
Salt and Pepper – Essential seasonings that enhance the natural flavors of the chicken. Adjust to your taste.
Dried Oregano & Basil – Adds aromatic notes of herbaceous goodness; fresh herbs can elevate the flavor even more.

For the Stuffing
Roma Tomatoes – These juicy beauties keep the chicken moist and add a fresh pop; cherry tomatoes are a great substitute if you prefer.
Sun-Dried Tomato Strips in Oil – Intensifies flavor with a sweet and tangy kick; homemade sun-dried tomatoes work too!
Thick Sliced Mozzarella Cheese – Melts beautifully and adds that creamy texture we all crave; go for dairy-free cheese if you need an allergen-friendly option.
Basil Leaves – Fresh basil not only adds color but invigorates the dish’s profile; use additional for garnishing.

For the Balsamic Glaze
Garlic Cloves – Imparts an aromatic depth to the glaze; feel free to adjust how garlicky you like it!
Balsamic Vinegar – The star of the sauce that offers a tangy punch; red wine vinegar is an emergency substitute.
Brown Sugar – Balances the acidity of the vinegar with its sweetness; honey can also serve as a natural alternative.

Topping
Additional Chopped Basil Leaves – Sprinkling these at the end enhances both presentation and flavor!

Dive into creating this mouthwatering Caprese Stuffed Balsamic Chicken – it’s a dish destined to impress!

Step‑by‑Step Instructions for Caprese Stuffed Balsamic Chicken with Mozzarella and Fresh Basil

Step 1: Preheat the Oven
Begin by preheating your oven to 350°F (175°C). This temperature is essential for ensuring that the Caprese Stuffed Balsamic Chicken cooks evenly, resulting in juicy, tender chicken. As the oven warms up, you can prep the chicken, making efficient use of your time.

Step 2: Prepare the Chicken Breasts
Take the large chicken breasts and butterfly them by cutting them partially, creating pockets for stuffing without completely halving them. This technique allows you to fill them with the delicious stuffing while keeping them intact. Set the chicken aside on a clean cutting board as you season it.

Step 3: Season the Chicken
Generously season both sides of the chicken breasts with salt, pepper, dried oregano, and basil. Make sure to rub the seasonings in well to enhance the flavor of your Caprese Stuffed Balsamic Chicken. This step adds depth and richness that will permeate the meat as it cooks.

Step 4: Add Sun-Dried Tomato Oil
Spoon some of the reserved oil from the sun-dried tomatoes onto the chicken, ensuring that the oil is evenly rubbed into the pockets you created. This flavorful oil will infuse the chicken with a delightful taste while adding moisture during cooking. Keep the chicken ready for the next step of stuffing.

Step 5: Stuff the Chicken
Now it’s time to fill those chicken pockets! Divide fresh tomatoes, sun-dried tomato strips, thick mozzarella slices, and fresh basil leaves among the pockets. Pack them generously, ensuring each bite of the Caprese Stuffed Balsamic Chicken will be bursting with flavor.

Step 6: Secure the Filling
To ensure the stuffing stays in place, secure each chicken breast with toothpicks. This step helps maintain the shape of the chicken during cooking and prevents the delicious filling from spilling out, allowing you to achieve a stunning presentation.

Step 7: Sear the Chicken
In an oven-safe skillet, heat a drizzle of oil over medium-high heat. Once hot, carefully place the stuffed chicken breasts in the skillet and sear for about 2 minutes on each side, until they turn golden brown. This browning adds flavor and creates a beautiful crust.

Step 8: Prepare the Balsamic Sauce
While the chicken is searing, prepare the balsamic glaze by mixing balsamic vinegar, brown sugar, and minced garlic in a bowl. Once the chicken is browned, pour this sauce around the chicken in the skillet. This step adds a tangy sweetness that complements the savory stuffing perfectly.

Step 9: Simmer the Sauce
Allow the sauce to simmer for 2-3 minutes until it slightly thickens, releasing a wonderful aroma throughout your kitchen. This will create a luscious glaze that clings to the chicken and infuses it with flavor.

Step 10: Bake the Chicken
Transfer the skillet to your preheated oven and bake the Caprese Stuffed Balsamic Chicken for 15-17 minutes or until the chicken is thoroughly cooked and its internal temperature reaches 165°F (75°C). The cheese should melt beautifully, and the chicken will remain juicy.

Step 11: Cool and Garnish
Once baked, carefully remove the skillet from the oven and let the chicken cool for about 5 minutes. After cooling, remove the toothpicks and gently drizzle the pan juices over the chicken. Sprinkle additional chopped basil on top for a fresh finishing touch.

Step 12: Serve
Finally, your Caprese Stuffed Balsamic Chicken is ready to be served! This dish pairs wonderfully with a side salad or warm bread, creating a delightful meal that feels special yet is easy to prepare.

How to Store and Freeze Caprese Stuffed Balsamic Chicken

  • Fridge: Store any leftover Caprese Stuffed Balsamic Chicken in an airtight container for up to 3 days. This helps maintain its flavor and moisture.

  • Freezer: For longer storage, wrap the stuffed chicken tightly in plastic wrap or aluminum foil, then place in an airtight container. It can be frozen for up to 3 months.

  • Reheating: When ready to enjoy, thaw in the fridge overnight. Reheat in the oven at 350°F (175°C) for about 20 minutes or until heated through.

  • Serving Tip: To enhance taste, drizzle with extra balsamic glaze or fresh basil before serving after reheating.

Make Ahead Options

These Caprese Stuffed Balsamic Chicken breasts are ideal for meal prep enthusiasts! You can prepare the filling (mozzarella, tomatoes, and basil) up to 24 hours in advance and store it in the refrigerator. Simply stuff the chicken breasts with the filling and secure them with toothpicks the day you plan to cook. If you’re looking to prepare the chicken entirely, you can assemble and refrigerate the stuffed chicken up to 3 days ahead. When you’re ready to serve, sear the chicken and bake it as instructed, ensuring it remains just as delicious and succulent. This approach not only saves time but also infuses the flavors beautifully, perfect for busy weeknights!

Expert Tips for Caprese Stuffed Balsamic Chicken

  • Use Thick Chicken Breasts: Ensure your chicken is thick enough to hold all the flavorful stuffing. Thin breasts can dry out easily, affecting texture.

  • Searing Secret: Sear the chicken until golden brown for maximum flavor. Not browning enough may lead to a bland flavor profile.

  • Don’t Skip the Toothpicks: Secureting the stuffed chicken with toothpicks prevents the delicious filling from spilling out during cooking—keep your chicken looking beautiful!

  • Monitor Internal Temperature: Always check that the chicken reaches 165°F (75°C). This ensures it’s fully cooked and safe for your family.

  • Let It Rest: Allow the chicken to cool for 5 minutes before serving. This resting time helps retain juices, making each bite succulent and flavorful.

Dive into this recipe and enjoy a delicious, gluten-free Caprese Stuffed Balsamic Chicken that will wow everyone at your dinner table!

Caprese Stuffed Balsamic Chicken Variations

Customize this delightful dish to satisfy your palate or dietary needs with these exciting twists!

  • Pesto-Stuffed: Replace the mozzarella with a generous scoop of basil pesto for a herby and vibrant flavor explosion.

  • Bacon-Wrapped: Elevate the savoriness by wrapping each chicken breast in crispy bacon, adding a smoky crunch that everyone will love.

  • Greek-Style: Stir in some crumbled feta and chopped olives with the stuffing for a Mediterranean flair that pairs beautifully with fresh herbs.

  • Spicy Twist: Add a dash of red pepper flakes to the balsamic glaze for a delightful kick that enhances the overall flavor profile.

  • Vegetarian Version: Swap the chicken for large portobello mushrooms, stuffed with the same ingredients for a hearty, plant-based meal that captures the flavors beautifully.

  • Herb-Infused Oil: Use infused oils instead of plain olive oil to enhance each bite—try garlic or chili-infused oils for added depth.

  • Citrus Zing: Incorporate a splash of lemon juice or zest into the balsamic glaze; this brightens the sauce and brings a refreshing twist that tantalizes the taste buds.

  • Smoky BBQ: Brush the chicken with your favorite BBQ sauce before baking for a smoky-sweet variant that is irresistibly good on those summer nights.

Whether you choose a gluten-free option or a flavor-packed twist, each variation brings something uniquely delicious to your dinner table. And don’t forget, serving your chicken alongside a fresh side salad or some warm garlic bread elevates the experience even more!

What to Serve with Caprese Stuffed Balsamic Chicken

As you relish the incredible taste of this vibrant chicken dish, consider these delightful pairings to create a full and satisfying meal.

  • Garlic Bread: Warm, buttery garlic bread offers a crispy texture, perfect for mopping up the rich balsamic glaze. Every bite feels like a hug for your taste buds.

  • Mixed Green Salad: A light salad with fresh greens, cucumbers, and a tangy vinaigrette adds a refreshing contrast, balancing the savory flavors of the chicken beautifully.

  • Roasted Vegetables: Roasted seasonal vegetables like zucchini, bell peppers, and asparagus provide a crunchy texture and colorful presentation that complements the dish perfectly.

  • Creamy Risotto: The creamy, dreamy texture of risotto enhances the dish’s luxurious feel and soaks up those lovely juices that come from the stuffed chicken.

  • Quinoa Salad: A hearty quinoa salad loaded with herbs and lemon zest offers a nutty flavor and is packed with protein, making it a satisfying yet light side.

  • White Wine: A chilled glass of Sauvignon Blanc or Pinot Grigio harmonizes with the balsamic chicken, bringing out the subtle flavors of the dish while adding a refreshing zing.

Elevate your dining experience by choosing one or more of these delicious options to enhance your Caprese Stuffed Balsamic Chicken!

Caprese Stuffed Balsamic Chicken Recipe FAQs

How do I select ripe tomatoes for this recipe?
Absolutely! When choosing tomatoes, look for ripe Roma tomatoes that are firm yet slightly soft to the touch. Avoid any with dark spots or blemishes, as those can indicate overripeness. A vibrant color and fragrant smell are also good signs of freshness. If you can’t find Roma tomatoes, cherry tomatoes can be a delightful substitute!

How can I store leftovers of Caprese Stuffed Balsamic Chicken?
Store any leftover Caprese Stuffed Balsamic Chicken in an airtight container in the refrigerator for up to 3 days. This method helps maintain the dish’s moistness and flavor. When you’re ready to enjoy it again, simply reheat in the oven at 350°F (175°C) for about 20 minutes for optimal taste.

Can I freeze Caprese Stuffed Balsamic Chicken?
Very! To freeze, wrap each stuffed chicken tightly in plastic wrap or aluminum foil to prevent freezer burn, then place them in an airtight container. The dish can be frozen for up to 3 months. When you’re ready to cook, thaw the chicken in the fridge overnight and follow the original baking instructions straight from there—just add an extra 5 minutes to ensure it’s heated through.

What should I do if the chicken isn’t cooking evenly?
If your Caprese Stuffed Balsamic Chicken ends up not cooking evenly, first check the thickness of the chicken breasts. Using thicker breasts can help maintain moisture and ensure even cooking. Additionally, make sure your oven is adequately preheated. If you find that one side is cooking faster than the other, rotating the skillet midway can encourage even cooking.

Is there a gluten-free alternative for the balsamic glaze?
Absolutely! Balsamic vinegar itself is naturally gluten-free, so you can use it without worry. However, if you prefer an alternative, red wine vinegar works in a pinch. Just be sure to check any other ingredients, like sweeteners, for gluten if you need to stay strict about gluten-free options.

Can I make this dish ahead of time?
Absolutely! You can prepare the Caprese Stuffed Balsamic Chicken and store it in the fridge—uncooked—for up to 24 hours. Just season, stuff, and secure the chicken as usual, then cover it tightly until you’re ready to bake it. The flavors will meld beautifully, enhancing your dish once it’s cooked!

undefined

Caprese Stuffed Balsamic Chicken That Will Wow Your Tastebuds

This gluten-free Caprese Stuffed Balsamic Chicken combines juicy chicken breasts filled with mozzarella, tomatoes, and basil, all smothered in a rich balsamic glaze.
Prep Time 20 minutes
Cook Time 30 minutes
Cooling Time 5 minutes
Total Time 55 minutes
Servings: 4 pieces
Course: Dinner
Cuisine: Italian
Calories: 350

Ingredients
  

For the Chicken
  • 4 large Chicken Breasts Make sure they’re thick enough to hold all that delicious filling.
  • to taste Salt Essential seasoning.
  • to taste Pepper Essential seasoning.
  • 1 tsp Dried Oregano
  • 1 tsp Dried Basil
For the Stuffing
  • 2 cups Roma Tomatoes Juicy tomatoes keep the chicken moist.
  • 1 cup Sun-Dried Tomato Strips in Oil Intensifies flavor.
  • 8 oz Thick Sliced Mozzarella Cheese Melts beautifully.
  • 1/2 cup Basil Leaves Fresh basil for stuffing.
For the Balsamic Glaze
  • 3 cloves Garlic Minced.
  • 1/2 cup Balsamic Vinegar The star of the sauce.
  • 1 tbsp Brown Sugar Balances acidity.
Topping
  • 1/4 cup Chopped Basil Leaves For garnishing.

Equipment

  • Oven-safe skillet

Method
 

Step-by-Step Instructions
  1. Preheat your oven to 350°F (175°C).
  2. Butterfly the chicken breasts, creating pockets for stuffing.
  3. Season both sides of the chicken with salt, pepper, oregano, and basil.
  4. Rub sun-dried tomato oil into the chicken pockets.
  5. Stuff the chicken with tomatoes, sun-dried tomato strips, mozzarella, and basil.
  6. Secure each breast with toothpicks.
  7. Sear the chicken in a hot skillet for about 2 minutes on each side.
  8. Mix balsamic vinegar, brown sugar, and garlic to make the glaze.
  9. Pour the balsamic sauce around the chicken in the skillet.
  10. Simmer the sauce for 2-3 minutes until slightly thickened.
  11. Bake the chicken for 15-17 minutes until cooked through.
  12. Let the chicken cool for 5 minutes before serving.
  13. Garnish with additional chopped basil before serving.

Nutrition

Serving: 1pieceCalories: 350kcalCarbohydrates: 12gProtein: 34gFat: 18gSaturated Fat: 8gPolyunsaturated Fat: 2gMonounsaturated Fat: 8gCholesterol: 120mgSodium: 600mgPotassium: 800mgFiber: 2gSugar: 6gVitamin A: 15IUVitamin C: 25mgCalcium: 20mgIron: 6mg

Notes

This gluten-free dish is perfect for busy weeknights or impressing guests without fuss.

Tried this recipe?

Let us know how it was!

Crispy Shredded Tofu Bulgogi Bowl That’s Pure Comfort Food

As I stood at the counter, a medley of ingredients lay before me, and it hit me—how could a humble bowl of crispy shredded tofu deliver such an exciting dinner? This Crispy Shredded Tofu Bulgogi Bowl does just that, combining the captivating crunch of golden tofu with an irresistible bulgogi sauce that’s spicy, savory, and slightly sweet. This vegan delight is not just a feast for the senses; it’s a wholesome meal that comes together in no time, perfect for those evenings when you crave something delicious yet easy to prepare. Plus, it’s entirely plant-based and gluten-free when made with the right soy sauce! Curious to discover the secret behind this flavorful bowl? Let’s dive into the recipe!

Why is This Tofu Dish so Special?

Unique Twist: This Crispy Shredded Tofu Bulgogi Bowl puts a delightful plant-based spin on a Korean classic, appealing to everyone’s taste buds. Fast and Easy: Whipping this dish together takes mere minutes, making it an excellent choice for busy weeknights. Flavor Explosion: With the perfect balance of spicy, sweet, and savory, every bite bursts with deliciousness. Versatile Options: Don’t hesitate to mix in your favorite veggies or use it as a filling for dumplings—creativity is welcome here! Healthy Comfort: Enjoy a nourishing meal that’s light on calories but heavy on satisfaction—each serving is about 249 kcal, making it a guilt-free indulgence!

Crispy Shredded Tofu Bulgogi Bowl Ingredients

• Here’s everything you need to create this delightful dish!

For the Tofu

  • Extra Firm Tofu – 17.5 oz, ensures the best texture for shredding without becoming mushy.

For the Bulgogi Sauce

  • Grated Asian Pear or Fuji Apple – 1/2 cup, adds a natural sweetness that beautifully balances flavors; feel free to substitute with any sweet apple!
  • Soy Sauce – 1-2 tbsp, provides a rich, salty depth; adjust to your sodium preference.
  • Gochujang – 1.5 tbsp, a Korean chili paste that brings a delightful heat; modify based on your spice tolerance.
  • Sesame Oil – 2 tbsp, enhances the dish’s nutty undertones; don’t skip this for authentic flavor!
  • Dark Soy Sauce – 1 tsp, optional, for deeper color and richness in the sauce.

For the Seasoning

  • Grated Ginger – 1.5 tsp, infuses warmth and enhances the overall taste profile.
  • Minced Garlic – 3 cloves, adds aromatic and savory notes to the dish.
  • Sugar – 2 tbsp, balances the savory elements perfectly; you can reduce or swap for a sugar alternative if desired.
  • Sesame Seeds – 1 tbsp, optional, they add delightful crunch and nuttiness.

For Serving

  • Chopped Green Onions – to garnish, adds a fresh and colorful finish.
  • Steamed Rice – serves as the comforting base; consider using Japanese short grain or sushi rice for the best texture.

This Crispy Shredded Tofu Bulgogi Bowl combines wonderful flavors and textures that will make your dinner unforgettable!

Step-by-Step Instructions for Crispy Shredded Tofu Bulgogi Bowl

Step 1: Prepare the Tofu
Begin by draining 17.5 oz of extra firm tofu, ensuring it’s well-pressed to remove excess moisture. Next, grate the tofu using a cheese grater or food processor for a fluffy texture. While preparing, preheat your air fryer or oven to 350°F (180°C) to ready it for cooking the tofu.

Step 2: Cook the Tofu
Spread the grated tofu evenly on a lined baking sheet or in your air fryer basket. Cook for 12-15 minutes, checking at the halfway mark to flip the tofu for even browning. You’ll know it’s ready when the tofu is lightly golden brown—watch carefully to prevent overcooking, which can make it tough.

Step 3: Make the Sauce
While the tofu is cooking, prepare the bulgogi sauce in a mixing bowl by combining 1/2 cup of grated Asian pear (or Fuji apple), 1-2 tbsp soy sauce, 1.5 tbsp gochujang, and 2 tbsp sesame oil. Add 2 tbsp sugar, 1.5 tsp grated ginger, and 3 minced garlic cloves, mixing until well blended. Taste and adjust the sweetness or saltiness to suit your preference.

Step 4: Combine
Once the tofu is perfectly golden, carefully transfer it to the bowl containing the bulgogi sauce. Gently mix the shredded tofu with the sauce to ensure every bit is beautifully coated in that savory, spicy goodness. Let it soak for a moment to absorb those delightful flavors.

Step 5: Finish Cooking
Heat a medium wok or pan over medium heat, adding the coated tofu and sauce mixture. Cook for about 7-8 minutes, stirring frequently until the sauce thickens and clings to the tofu, creating a lovely glaze. The dish should start to bubble, indicating it’s ready for the final presentation.

Step 6: Serve
To serve your Crispy Shredded Tofu Bulgogi Bowl, spoon the fragrant tofu over a bed of warm steamed rice. Don’t forget to garnish with chopped green onions and a sprinkle of sesame seeds for added color and texture. Enjoy this delightful vegan dish immediately!

How to Store and Freeze Crispy Shredded Tofu Bulgogi Bowl

Fridge: Store leftovers in an airtight container for up to 5-7 days. This keeps the flavors locked in while maintaining the vibrancy of your dish.

Freezer: If you’ve made more than you can eat, freeze portions in a freezer-safe container for up to 3 months. To reheat, allow it to thaw overnight in the fridge before warming.

Reheating: For the best texture, reheat the tofu in a skillet over medium heat, stirring occasionally until warmed through. Avoid the microwave if you want to retain that delightful crunch!

Separation: Note that the sauce may thicken when stored; feel free to add a splash of water or additional soy sauce while reheating to reach your desired consistency. Enjoy your crispy shredded tofu bulgogi bowl again and again!

What to Serve with Crispy Shredded Tofu Bulgogi Bowl

There’s nothing quite like a cozy meal that leaves a lasting impression, and these accompanying dishes will help complete your delightful spread.

  • Steamed Jasmine Rice: Fluffy and fragrant, it perfectly soaks up the bulgogi sauce, making every bite irresistible.
  • Quick Pickled Vegetables: Bright and tangy, they add a refreshing contrast and complement the savory flavors of the bowl.
  • Garlic Green Beans: Sautéed with sesame oil, they introduce a delightful crunch and nutty flavor that harmonizes beautifully with the tofu.
  • Crispy Wontons: Light and flaky, they provide an engaging textural contrast and can be filled with your favorite ingredients.

For a sweet ending to your meal, try:

  • Mango Sticky Rice: The creamy coconut and ripe mango deliver a delightful sweetness that balances the savory notes of your dish.
  • Chocolate Avocado Mousse: Silky and rich, this plant-based dessert is a surprising yet satisfying way to round off your dining experience.

These sides will transform your Crispy Shredded Tofu Bulgogi Bowl into a memorable feast that pleases all the senses!

Crispy Shredded Tofu Bulgogi Bowl Variations

Feel free to explore these delightful twists on your Crispy Shredded Tofu Bulgogi Bowl and elevate your dining experience!

  • Sweet Apple Twist: Substitute grated Asian pear with Fuji apple for a different yet delightful sweetness. Just adjust sugar levels to taste for balance!
  • Veggie Boost: Add shredded carrots, bell peppers, or even zucchini to amp up the nutrition and color. A generous handful of veggies will make it even more vibrant!
  • Gluten-Free: Use gluten-free soy sauce to ensure the dish meets gluten-free dietary needs without sacrificing flavor. You’ll still get that rich taste everyone craves!
  • Dumpling Filling: Use the bulgogi tofu as a savory filling for dumplings or bao. Simply wrap it up and steam or fry for a fun twist!
  • Extra Saucy: If you love a saucy bowl, consider doubling the bulgogi sauce ingredients. Just note, you’ll also want to use a bit more tofu to absorb it.
  • Spice Level Up: Want a kick? Increase the amount of gochujang or add a splash of sriracha for an extra layer of heat. Your taste buds will thank you!
  • Nutty Flavor: Mix in some crushed peanuts or cashews at the final step for delightful texture and nutty richness. It adds a crunch that contrasts beautifully with the tofu!
  • Rice Alternatives: Swap steamed rice for quinoa or cauliflower rice to create a lower-carb option that’s still satisfying. It’s a fantastic way to change up the base!

Ready to experiment? Each variation ensures your Crispy Shredded Tofu Bulgogi Bowl stays exciting, with countless combinations tailored to your cravings!

Make Ahead Options

These Crispy Shredded Tofu Bulgogi Bowls are fantastic for meal prepping! To save time on busy weeknights, you can prepare the shredded tofu and the bulgogi sauce separately up to 24 hours in advance. Simply grate and drain the tofu, then refrigerate in an airtight container. For the sauce, mix your grated pear or apple with the other sauce ingredients and store it in another airtight container in the fridge. When you’re ready to enjoy your meal, just bake the tofu as instructed, combine it with the prepared sauce, and finish cooking on the stove. This method allows you to enjoy a delicious homemade dinner with minimal effort—just as comforting the second day!

Expert Tips for Crispy Shredded Tofu Bulgogi Bowl

  • Proper Tofu Prep: Ensure you drain and press the tofu thoroughly before grating. This helps achieve the best texture in your Crispy Shredded Tofu Bulgogi Bowl.

  • Cooking Time Matters: Monitor the cooking of the tofu closely to avoid overcooking. Light golden brown pieces will provide the perfect crunch, while overcooked tofu can turn tough.

  • Customize Your Sauce: Feel free to adjust the sauce ingredients to your taste. Doubling the sauce may provide the extra flavor kick you desire, especially if you love a saucy dish!

  • Veggie Variations: Add additional shredded vegetables like carrots or bell peppers for extra nutrition and color. It’s a great way to customize your bowl!

  • Serve Fresh: For the best experience, enjoy the dish straight after cooking. The textures and flavors are at their peak, making every bite a delight!

Crispy Shredded Tofu Bulgogi Bowl Recipe FAQs

What type of tofu should I use for this recipe?
Extra firm tofu is best for achieving the desired texture in your Crispy Shredded Tofu Bulgogi Bowl. Soft or silken tofu won’t hold its shape when shredded and cooked, which can lead to a mushy dish.

How do I store leftovers of the Crispy Shredded Tofu Bulgogi Bowl?
Store any leftovers in an airtight container in the fridge for up to 5-7 days. Make sure to let the dish cool before transferring it to the container to maintain its flavor and texture.

Can I freeze the Crispy Shredded Tofu Bulgogi Bowl?
Absolutely! You can freeze portions of the dish in a freezer-safe container for up to 3 months. When you’re ready to enjoy it again, let it thaw overnight in the fridge before reheating.

What’s the best way to reheat the Crispy Shredded Tofu Bulgogi Bowl?
To maintain that delightful crunch, reheat the tofu in a skillet over medium heat, stirring occasionally until warmed through. Avoid the microwave if possible, as it can make the tofu soggy.

Can I make this bowl gluten-free?
Yes, to make your Crispy Shredded Tofu Bulgogi Bowl gluten-free, simply use gluten-free soy sauce instead of regular soy sauce. This way, you can enjoy the dish without any gluten concerns!

What vegetables can I add to this recipe?
Feel free to get creative and add your favorite shredded vegetables! Carrots, bell peppers, or even broccoli work wonderfully. Simply toss them in with the tofu while cooking to enhance the nutrition and color of your bowl!

undefined

Crispy Shredded Tofu Bulgogi Bowl That's Pure Comfort Food

This Crispy Shredded Tofu Bulgogi Bowl is a delicious vegan meal that combines crispy tofu with a savory bulgogi sauce, making it perfect for dinner.
Prep Time 15 minutes
Cook Time 30 minutes
Total Time 45 minutes
Servings: 4 bowls
Course: Dinner
Cuisine: Korean
Calories: 249

Ingredients
  

For the Tofu
  • 17.5 oz Extra Firm Tofu ensures the best texture for shredding without becoming mushy.
For the Bulgogi Sauce
  • 0.5 cup Grated Asian Pear or Fuji Apple adds a natural sweetness that beautifully balances flavors.
  • 1-2 tbsp Soy Sauce provides a rich, salty depth; adjust to your sodium preference.
  • 1.5 tbsp Gochujang a Korean chili paste that brings a delightful heat.
  • 2 tbsp Sesame Oil enhances the dish’s nutty undertones;
  • 1 tsp Dark Soy Sauce optional, for deeper color and richness in the sauce.
For the Seasoning
  • 1.5 tsp Grated Ginger infuses warmth and enhances the overall taste profile.
  • 3 cloves Minced Garlic adds aromatic and savory notes.
  • 2 tbsp Sugar balances the savory elements perfectly.
  • 1 tbsp Sesame Seeds optional; adds delightful crunch and nuttiness.
For Serving
  • Chopped Green Onions to garnish, adds a fresh and colorful finish.
  • Steamed Rice serves as the comforting base.

Equipment

  • Air Fryer
  • Mixing Bowl
  • Baking Sheet
  • Wok or pan

Method
 

Step-by-Step Instructions
  1. Drain the tofu and press to remove excess moisture. Grate the tofu using a cheese grater or food processor.
  2. Preheat your air fryer or oven to 350°F (180°C).
  3. Spread the grated tofu on a lined baking sheet or air fryer basket. Cook for 12-15 minutes, flipping halfway for even browning.
  4. Prepare the bulgogi sauce by mixing grated Asian pear, soy sauce, gochujang, and sesame oil in a bowl. Add sugar, grated ginger, and minced garlic, blending well.
  5. Transfer cooked tofu to the bulgogi sauce bowl and mix gently to coat. Let it soak briefly.
  6. In a wok over medium heat, add the tofu and sauce mixture. Cook for 7-8 minutes, stirring until sauce thickens.
  7. Spoon the tofu over steamed rice, garnish with green onions and sesame seeds, and serve immediately.

Nutrition

Serving: 1bowlCalories: 249kcalCarbohydrates: 38gProtein: 16gFat: 8gSaturated Fat: 1gPolyunsaturated Fat: 3gMonounsaturated Fat: 3gSodium: 600mgPotassium: 400mgFiber: 5gSugar: 2gVitamin A: 10IUVitamin C: 8mgCalcium: 15mgIron: 10mg

Notes

Enjoy a nourishing meal that's light on calories but heavy on satisfaction—each serving is about 249 kcal. For best results, serve fresh after cooking.

Tried this recipe?

Let us know how it was!

Crispy Shredded Tofu Bulgogi Bowl That’s Pure Comfort Food

As I stood at the counter, a medley of ingredients lay before me, and it hit me—how could a humble bowl of crispy shredded tofu deliver such an exciting dinner? This Crispy Shredded Tofu Bulgogi Bowl does just that, combining the captivating crunch of golden tofu with an irresistible bulgogi sauce that’s spicy, savory, and slightly sweet. This vegan delight is not just a feast for the senses; it’s a wholesome meal that comes together in no time, perfect for those evenings when you crave something delicious yet easy to prepare. Plus, it’s entirely plant-based and gluten-free when made with the right soy sauce! Curious to discover the secret behind this flavorful bowl? Let’s dive into the recipe!

Why is This Tofu Dish so Special?

Unique Twist: This Crispy Shredded Tofu Bulgogi Bowl puts a delightful plant-based spin on a Korean classic, appealing to everyone’s taste buds. Fast and Easy: Whipping this dish together takes mere minutes, making it an excellent choice for busy weeknights. Flavor Explosion: With the perfect balance of spicy, sweet, and savory, every bite bursts with deliciousness. Versatile Options: Don’t hesitate to mix in your favorite veggies or use it as a filling for dumplings—creativity is welcome here! Healthy Comfort: Enjoy a nourishing meal that’s light on calories but heavy on satisfaction—each serving is about 249 kcal, making it a guilt-free indulgence!

Crispy Shredded Tofu Bulgogi Bowl Ingredients

• Here’s everything you need to create this delightful dish!

For the Tofu

  • Extra Firm Tofu – 17.5 oz, ensures the best texture for shredding without becoming mushy.

For the Bulgogi Sauce

  • Grated Asian Pear or Fuji Apple – 1/2 cup, adds a natural sweetness that beautifully balances flavors; feel free to substitute with any sweet apple!
  • Soy Sauce – 1-2 tbsp, provides a rich, salty depth; adjust to your sodium preference.
  • Gochujang – 1.5 tbsp, a Korean chili paste that brings a delightful heat; modify based on your spice tolerance.
  • Sesame Oil – 2 tbsp, enhances the dish’s nutty undertones; don’t skip this for authentic flavor!
  • Dark Soy Sauce – 1 tsp, optional, for deeper color and richness in the sauce.

For the Seasoning

  • Grated Ginger – 1.5 tsp, infuses warmth and enhances the overall taste profile.
  • Minced Garlic – 3 cloves, adds aromatic and savory notes to the dish.
  • Sugar – 2 tbsp, balances the savory elements perfectly; you can reduce or swap for a sugar alternative if desired.
  • Sesame Seeds – 1 tbsp, optional, they add delightful crunch and nuttiness.

For Serving

  • Chopped Green Onions – to garnish, adds a fresh and colorful finish.
  • Steamed Rice – serves as the comforting base; consider using Japanese short grain or sushi rice for the best texture.

This Crispy Shredded Tofu Bulgogi Bowl combines wonderful flavors and textures that will make your dinner unforgettable!

Step-by-Step Instructions for Crispy Shredded Tofu Bulgogi Bowl

Step 1: Prepare the Tofu
Begin by draining 17.5 oz of extra firm tofu, ensuring it’s well-pressed to remove excess moisture. Next, grate the tofu using a cheese grater or food processor for a fluffy texture. While preparing, preheat your air fryer or oven to 350°F (180°C) to ready it for cooking the tofu.

Step 2: Cook the Tofu
Spread the grated tofu evenly on a lined baking sheet or in your air fryer basket. Cook for 12-15 minutes, checking at the halfway mark to flip the tofu for even browning. You’ll know it’s ready when the tofu is lightly golden brown—watch carefully to prevent overcooking, which can make it tough.

Step 3: Make the Sauce
While the tofu is cooking, prepare the bulgogi sauce in a mixing bowl by combining 1/2 cup of grated Asian pear (or Fuji apple), 1-2 tbsp soy sauce, 1.5 tbsp gochujang, and 2 tbsp sesame oil. Add 2 tbsp sugar, 1.5 tsp grated ginger, and 3 minced garlic cloves, mixing until well blended. Taste and adjust the sweetness or saltiness to suit your preference.

Step 4: Combine
Once the tofu is perfectly golden, carefully transfer it to the bowl containing the bulgogi sauce. Gently mix the shredded tofu with the sauce to ensure every bit is beautifully coated in that savory, spicy goodness. Let it soak for a moment to absorb those delightful flavors.

Step 5: Finish Cooking
Heat a medium wok or pan over medium heat, adding the coated tofu and sauce mixture. Cook for about 7-8 minutes, stirring frequently until the sauce thickens and clings to the tofu, creating a lovely glaze. The dish should start to bubble, indicating it’s ready for the final presentation.

Step 6: Serve
To serve your Crispy Shredded Tofu Bulgogi Bowl, spoon the fragrant tofu over a bed of warm steamed rice. Don’t forget to garnish with chopped green onions and a sprinkle of sesame seeds for added color and texture. Enjoy this delightful vegan dish immediately!

Crispy Shredded Tofu Bulgogi Bowl Variations

Feel free to explore these delightful twists on your Crispy Shredded Tofu Bulgogi Bowl and elevate your dining experience!

  • Sweet Apple Twist: Substitute grated Asian pear with Fuji apple for a different yet delightful sweetness. Just adjust sugar levels to taste for balance!
  • Veggie Boost: Add shredded carrots, bell peppers, or even zucchini to amp up the nutrition and color. A generous handful of veggies will make it even more vibrant!
  • Gluten-Free: Use gluten-free soy sauce to ensure the dish meets gluten-free dietary needs without sacrificing flavor. You’ll still get that rich taste everyone craves!
  • Dumpling Filling: Use the bulgogi tofu as a savory filling for dumplings or bao. Simply wrap it up and steam or fry for a fun twist!
  • Extra Saucy: If you love a saucy bowl, consider doubling the bulgogi sauce ingredients. Just note, you’ll also want to use a bit more tofu to absorb it.
  • Spice Level Up: Want a kick? Increase the amount of gochujang or add a splash of sriracha for an extra layer of heat. Your taste buds will thank you!
  • Nutty Flavor: Mix in some crushed peanuts or cashews at the final step for delightful texture and nutty richness. It adds a crunch that contrasts beautifully with the tofu!
  • Rice Alternatives: Swap steamed rice for quinoa or cauliflower rice to create a lower-carb option that’s still satisfying. It’s a fantastic way to change up the base!

Ready to experiment? Each variation ensures your Crispy Shredded Tofu Bulgogi Bowl stays exciting, with countless combinations tailored to your cravings!

How to Store and Freeze Crispy Shredded Tofu Bulgogi Bowl

Fridge: Store leftovers in an airtight container for up to 5-7 days. This keeps the flavors locked in while maintaining the vibrancy of your dish.

Freezer: If you’ve made more than you can eat, freeze portions in a freezer-safe container for up to 3 months. To reheat, allow it to thaw overnight in the fridge before warming.

Reheating: For the best texture, reheat the tofu in a skillet over medium heat, stirring occasionally until warmed through. Avoid the microwave if you want to retain that delightful crunch!

Separation: Note that the sauce may thicken when stored; feel free to add a splash of water or additional soy sauce while reheating to reach your desired consistency. Enjoy your crispy shredded tofu bulgogi bowl again and again!

Expert Tips for Crispy Shredded Tofu Bulgogi Bowl

  • Proper Tofu Prep: Ensure you drain and press the tofu thoroughly before grating. This helps achieve the best texture in your Crispy Shredded Tofu Bulgogi Bowl.

  • Cooking Time Matters: Monitor the cooking of the tofu closely to avoid overcooking. Light golden brown pieces will provide the perfect crunch, while overcooked tofu can turn tough.

  • Customize Your Sauce: Feel free to adjust the sauce ingredients to your taste. Doubling the sauce may provide the extra flavor kick you desire, especially if you love a saucy dish!

  • Veggie Variations: Add additional shredded vegetables like carrots or bell peppers for extra nutrition and color. It’s a great way to customize your bowl!

  • Serve Fresh: For the best experience, enjoy the dish straight after cooking. The textures and flavors are at their peak, making every bite a delight!

Make Ahead Options

These Crispy Shredded Tofu Bulgogi Bowls are perfect for meal prep enthusiasts! You can prepare the sauce and the shredded tofu up to 24 hours in advance to save time during busy weeknights. Simply cook the tofu as directed, let it cool, and store it in an airtight container in the refrigerator. The bulgogi sauce can also be made ahead and kept sealed for up to 3 days in the fridge. When you’re ready to enjoy your delicious bowl, reheat the tofu gently in a pan, toss it with the sauce, and cook for about 7-8 minutes until hot and flavorful. This way, you’ll have a restaurant-quality meal at home with minimal effort!

What to Serve with Crispy Shredded Tofu Bulgogi Bowl

There’s nothing quite like a cozy meal that leaves a lasting impression, and these accompanying dishes will help complete your delightful spread.

  • Steamed Jasmine Rice: Fluffy and fragrant, it perfectly soaks up the bulgogi sauce, making every bite irresistible.
  • Quick Pickled Vegetables: Bright and tangy, they add a refreshing contrast and complement the savory flavors of the bowl.
  • Garlic Green Beans: Sautéed with sesame oil, they introduce a delightful crunch and nutty flavor that harmonizes beautifully with the tofu.
  • Crispy Wontons: Light and flaky, they provide an engaging textural contrast and can be filled with your favorite ingredients.

For a sweet ending to your meal, try:

  • Mango Sticky Rice: The creamy coconut and ripe mango deliver a delightful sweetness that balances the savory notes of your dish.
  • Chocolate Avocado Mousse: Silky and rich, this plant-based dessert is a surprising yet satisfying way to round off your dining experience.

These sides will transform your Crispy Shredded Tofu Bulgogi Bowl into a memorable feast that pleases all the senses!

Crispy Shredded Tofu Bulgogi Bowl Recipe FAQs

What type of tofu should I use for the best results?
Absolutely, for this Crispy Shredded Tofu Bulgogi Bowl, I recommend using extra firm tofu. This variety has the right density to maintain its shape after shredding and cooking. Soft or silken tofu won’t hold up, leading to a mushy texture instead of the delightful crunch you’re looking for!

How should I store leftovers of this dish?
You can store any leftovers in an airtight container in the fridge for up to 5-7 days. Make sure to cool the dish completely before sealing it to maintain its freshness. When you’re ready to enjoy again, simply reheat it on the stovetop or in the microwave until warmed through!

Can I freeze the Crispy Shredded Tofu Bulgogi Bowl?
Definitely! To freeze, allow the dish to cool completely then portion it into airtight containers. It can safely be frozen for up to 3 months. To reheat, let it thaw in the fridge overnight and then warm it up on the stovetop over medium heat, adding a splash of water if the sauce needs rehydrating.

What can I do if the tofu isn’t crispy enough?
If you find the tofu isn’t as crispy as you’d like, ensure you’re starting with properly drained tofu. You may also want to increase cooking time by a couple of minutes, but keep an eye on it to avoid overcooking. Flipping the tofu halfway through helps achieve an even golden color, enhancing that beautiful crispy texture!

Are there any dietary considerations with this recipe?
This Crispy Shredded Tofu Bulgogi Bowl is naturally vegan and can be gluten-free if you use gluten-free soy sauce. Always double-check the labels to ensure that your ingredients align with your dietary needs. If you’re serving it to pets or individuals with allergies, keep in mind that some might react to soy or sesame products, so proceed with caution.

undefined

Crispy Shredded Tofu Bulgogi Bowl That's Pure Comfort Food

Enjoy a delightful bowl of crispy shredded tofu with bulgogi sauce that's spicy, savory, and slightly sweet, perfect for a quick vegan dinner.
Prep Time 10 minutes
Cook Time 25 minutes
Total Time 35 minutes
Servings: 4 bowls
Course: Dinner
Cuisine: Korean
Calories: 249

Ingredients
  

For the Tofu
  • 17.5 oz Extra Firm Tofu ensures the best texture for shredding without becoming mushy.
For the Bulgogi Sauce
  • 0.5 cup Grated Asian Pear or Fuji Apple adds a natural sweetness that beautifully balances flavors.
  • 1-2 tbsp Soy Sauce provides a rich, salty depth; adjust to your sodium preference.
  • 1.5 tbsp Gochujang a Korean chili paste that brings a delightful heat.
  • 2 tbsp Sesame Oil enhances the dish’s nutty undertones.
  • 1 tsp Dark Soy Sauce optional, for deeper color and richness in the sauce.
For the Seasoning
  • 1.5 tsp Grated Ginger infuses warmth and enhances the overall taste profile.
  • 3 cloves Minced Garlic adds aromatic and savory notes to the dish.
  • 2 tbsp Sugar balances the savory elements perfectly.
  • 1 tbsp Sesame Seeds optional, they add delightful crunch and nuttiness.
For Serving
  • Chopped Green Onions to garnish, adds a fresh and colorful finish.
  • Steamed Rice serves as the comforting base.

Equipment

  • Air Fryer
  • medium bowl
  • Skillet
  • Box grater

Method
 

Step-by-Step Instructions
  1. Drain the tofu and shred it into fine pieces. Preheat your air fryer or oven to 350°F (180°C). Lay the grated tofu on a paper towel to absorb excess moisture.
  2. Spread the shredded tofu evenly on a lined baking sheet or in your air fryer basket. Cook for 12-15 minutes, flipping halfway through until lightly golden brown.
  3. In a medium bowl, combine the grated pear or Fuji apple, soy sauces, gochujang, sesame oil, sugar, grated ginger, and minced garlic. Mix thoroughly until smooth.
  4. Once the tofu is done cooking, transfer it to the bowl with the sauce and gently mix until well coated.
  5. Heat a medium wok or skillet over medium heat and add the coated tofu and sauce. Cook for about 7-8 minutes, stirring frequently until the sauce thickens.
  6. Serve your crispy shredded tofu bulgogi hot over rice. Sprinkle with green onions and sesame seeds.

Nutrition

Serving: 1bowlCalories: 249kcalCarbohydrates: 25gProtein: 20gFat: 10gSaturated Fat: 1gPolyunsaturated Fat: 5gMonounsaturated Fat: 4gSodium: 800mgPotassium: 300mgFiber: 3gSugar: 5gVitamin A: 30IUVitamin C: 2mgCalcium: 150mgIron: 3mg

Notes

For best results, use extra firm tofu and ensure it is properly drained to achieve a crispy texture. Adjust seasoning to your taste preference.

Tried this recipe?

Let us know how it was!

Hearty African Peanut Stew for Cozy Nights In

The air was thick with warmth and spice as I stirred my pot, that familiar aroma from faraway shores enveloping my kitchen. This Hearty African Peanut Stew brings together vibrant sweet potatoes, fresh spinach, and a luscious peanut-tomato sauce that’s as comforting as a hug on a chilly evening. Not only is this recipe a delicious dish to savor, but it’s also a breeze to make—perfect for those busy weeknights or when you want to impress guests with minimal effort. Plus, it’s versatile for any dietary needs, with vegetarian and gluten-free options. Imagine everyone gathering around the table, bowls in hand, eager to dive into the rich, hearty goodness of this stew. Are you ready to create a meal that warms the heart and satisfies the soul?

Why is this stew a must-try?

Hearty flavors: The blend of sweet potatoes and creamy peanut butter creates a comforting bowl that’s rich in taste.
Versatile options: Adapt the recipe easily for any dietary needs with vegetarian and gluten-free choices.
Quick cooking: With methods for the Instant Pot and slow cooker, dinner is ready with minimal effort.
Crowd pleaser: This stew’s tantalizing aroma and satisfying texture guarantee it will impress family and friends.
Easy customization: Experiment with your favorite vegetables or proteins to make it your own. You can even swap in chickpeas for a filling vegan option if you want to explore vegetarian variations. Enjoy the warmth and connection that sharing this meal brings.

African Peanut Stew Ingredients

Get ready to dive into the heart of this comforting dish!

For the Sauce

  • Tomato Sauce – adds base flavor and moisture; a can of plain diced tomatoes works if you’re in a pinch.
  • Creamy Peanut Butter (Natural, No-Stir) – brings creaminess and earthiness; you can swap it out for almond or cashew butter for a unique twist.

For the Spices

  • Smoked Paprika – infuses a subtle smokiness; feel free to use regular paprika if needed.
  • Ground Coriander – contributes a floral note; ground cumin can replace it if you’re out.
  • Kosher Salt & Black Pepper – enhance all flavors; adjust them to your taste.
  • Optional Cayenne Pepper – adds heat for those who like it spicy!

For the Cooking Oil

  • Neutral Flavor Cooking Oil – used for sautéing; consider avocado, vegetable, or olive oil for flexibility.

For the Protein

  • Boneless Pork, Chicken, Turkey, or Beef Stew Meat – optional additions for meat lovers; use chickpeas or lentils for a vegetarian take.

For the Broth

  • Broth or Stock – vegetable or chicken; choose based on your dietary preferences.

For the Vegetables

  • Chopped Onion – perfect for flavor; sauté it to golden perfection.
  • Sweet Potatoes – add natural sweetness and heartiness; don’t skimp on these!
  • Spinach (or Kale) – brings nutrition and color; fresh is best, but frozen works in a pinch.
  • Carrots – contribute sweetness and texture; chop them into bite-sized pieces.

For the Aromatics

  • Minced Garlic – packs in flavor depth; make sure it’s fresh for optimum taste.
  • Fresh Ginger – intensifies the dish with a zesty kick; ground ginger can be a substitute if needed.

Now that you have all the delicious ingredients ready, you’re one step closer to enjoying a delightful African Peanut Stew that will undoubtedly warm your soul!

Step‑by‑Step Instructions for Hearty African Peanut Stew

Step 1: Prepare the Sauce
In a blender, combine the tomato sauce and creamy peanut butter until smooth. In a large pot, heat a couple of tablespoons of your chosen neutral cooking oil over medium heat. Add minced garlic and fresh ginger, sautéing for about 2-3 minutes until aromatic and golden. This will create a fragrant base for your Hearty African Peanut Stew.

Step 2: Combine Ingredients
Stir in the chopped onion, followed by diced sweet potatoes and carrots, allowing them to sauté with the aromatics for another 5 minutes. Pour in your broth, then add the blended tomato-peanut sauce mixture. Stir everything together thoroughly, ensuring all ingredients are evenly coated in the sauce to create the heartwarming flavors of the stew.

Step 3: Cooking on the Stove Top
Cover your pot and bring the mixture to a gentle simmer over medium-low heat. Let it cook for 40-60 minutes, stirring occasionally until the sweet potatoes are tender when pierced with a fork. This slow simmer allows the flavors to meld beautifully, enhancing the comforting essence of your Hearty African Peanut Stew.

Step 4: Cooking in the Instant Pot
If using an Instant Pot, first set the device to the sauté function and follow the steps for sautéing aromatics. After adding the rest of the ingredients, secure the lid and pressure cook on high for about 10 minutes. When done, allow the steam to release naturally for a few minutes before carefully opening the lid for a quick stir.

Step 5: Cooking in the Slow Cooker
For a slow cooker method, add all the sautéed ingredients along with the rest directly into the cooker. Set to low for 4.5-5 hours or high for about 3 hours. The sweet potatoes should break down slightly, creating a rich, thick stew while mingling flavors infuse beautifully over time.

Step 6: Garnish and Serve
Once the stew is cooked, taste and adjust seasonings. Serve the Hearty African Peanut Stew hot, ladling it into bowls. Top each serving with crushed peanuts and fresh cilantro for added flavor and a delightful crunch. Pair it with rice, quinoa, or your favorite side, and let the comforting experience begin!

How to Store and Freeze African Peanut Stew

Fridge: Store leftovers in an airtight container for up to 4 days. Allow the stew to cool completely before sealing to maintain freshness.

Freezer: Freeze the African Peanut Stew in freezer-safe containers for up to 3 months. Make sure to leave some space at the top for expansion as it freezes.

Reheating: To reheat, gently warm the stew on the stove over medium heat, adding a splash of broth if needed to achieve the desired consistency. Stir occasionally until heated through.

Make-Ahead Tips: This stew can be made in advance on meal prep day, making dinnertime a breeze! Simply refrigerate or freeze as directed.

Expert Tips for Hearty African Peanut Stew

  • Spice Balance: Start with a mild spice level and encourage your guests to add cayenne for extra heat. Everyone has their unique taste preferences!
  • Thicker Consistency: If you want a thicker stew, simply simmer uncovered during the last 10 minutes of cooking. This allows for moisture to evaporate.
  • Sauté Aromatics: Don’t rush the sautéing step for garlic and ginger; they should reach a golden color to unleash their full flavors in your African Peanut Stew.
  • Meat Prep: If including meat, remember to brown it well before adding to the stew. This step locks in flavors and keeps the meat tender.
  • Vegetable Variations: Feel free to experiment with seasonal vegetables like zucchini or bell peppers for additional nutrition and color. The stew welcomes your creativity!

Make Ahead Options

These Hearty African Peanut Stew preparations are ideal for busy cooks looking to save time while still enjoying a nourishing meal. To make this stew ahead of time, you can chop your vegetables and store them in an airtight container in the refrigerator for up to 3 days. Additionally, blend the sauce—tomato and peanut butter—up to 24 hours in advance, keeping it in the fridge to maintain its flavor and texture. When you’re ready to serve, simply cook the stew as directed, adding the prepared components to your pot. This way, you’ll enjoy a rich and satisfying dish that still tastes just as delicious as when freshly made!

What to Serve with Hearty African Peanut Stew

Your table is about to transform into a comforting spread, creating a warm atmosphere filled with delicious aromas and flavors.

  • Fluffy Rice: Serve over a bed of fluffy jasmine or basmati rice to soak up the rich, creamy peanut sauce.
  • Savory Quinoa: Nutty quinoa adds a protein-packed base that complements the stew beautifully, making each bite satisfying.
  • Cauliflower Rice: For a low-carb option, fluffy cauliflower rice provides a light and fresh contrast to the hearty stew. It’s perfect for balancing those rich flavors.
  • Crispy Flatbreads: Pair with warm, soft flatbreads to scoop up the stew, bringing a delightful texture and warm comfort in every bite.
  • Fresh Salad: A light salad with crunchy cucumbers, ripe tomatoes, and zesty lemon dressing brightens the meal and offers a refreshing contrast to the stew’s richness.
  • Roasted Vegetables: Oven-roasted seasonal veggies add an earthy sweetness that perfectly complements the savory elements of your Hearty African Peanut Stew, enhancing its overall flavor.

Finish your meal with a sweet touch! A simple coconut pudding or fruit salad can provide a delightful end, echoing the warmth of the stew with a nourishing finish.

African Peanut Stew Variations & Substitutions

Feel free to play around with this recipe to make it your own, unleashing your culinary creativity!

  • Vegan: Swap out any meat for chickpeas or lentils to create a plant-based delight. This option brings a hearty texture while keeping the flavor profile vibrant.
  • Vegetable Boost: Try adding kale instead of spinach or toss in diced bell peppers and zucchini for an extra nutrient punch. Their colors and textures will elevate the stew beautifully!
  • Creamy Twist: For a richer stew, stir in a can of coconut milk. It enhances the creaminess and provides a delightful hint of sweetness.
  • Heat Level: Adjust the spice by including fresh diced chilies or more cayenne pepper for those who crave heat. It’s your stew, so dial it up to your liking!
  • Nut-Free: If you have nut allergies, replace peanut butter with sunflower seed butter for similar creaminess without the nuts. It’s a tasty alternative that still offers richness.
  • Protein Variety: Incorporate bite-sized pieces of boneless chicken or turkey for added protein. They’re easy to mix in and will absorb the flavors beautifully.
  • Herb Infusion: Enhance flavors further by adding a handful of fresh herbs like cilantro or parsley just before serving. It gives a fresh pop that contrasts wonderfully with the hearty stew.
  • Serving Style: Serve your stew over quinoa or cauliflower rice instead of traditional rice for a delightful twist that adds both flavor and extra nutrition.

Explore these variations and enjoy creating a unique dish that fits your taste—who knows, you might discover a new favorite! Enjoy your cooking journey!

African Peanut Stew Recipe FAQs

What kind of sweet potatoes should I use for the stew?
Absolutely! Look for firm sweet potatoes that are deep in color, as they add both flavor and sweetness. Avoid those with dark spots or soft spots that indicate overripeness.

How should I store leftover African Peanut Stew?
Store your hearty stew in an airtight container in the refrigerator for up to 4 days. Make sure to let it cool completely before sealing the container to help maintain its freshness.

Can I freeze African Peanut Stew?
Very! To freeze, place the cooled stew in freezer-safe containers or bags, leaving some space at the top for expansion, and enjoy it for up to 3 months. When you’re ready to enjoy it, simply thaw it in the refrigerator overnight before reheating.

What if my stew is too thick?
If you find your African Peanut Stew too thick, fear not! Just add a bit of broth or water while reheating to achieve your preferred consistency. Stir well and heat gently over medium heat until warmed through.

Is African Peanut Stew safe for pets or individuals with nut allergies?
It’s important to take care when serving this dish. Avoid feeding it to pets, as ingredients like onions can be harmful to them. For those with nut allergies, consider substituting the peanut butter with sunflower seed butter, which still provides creaminess without the allergens.

How can I adjust the spice levels in the stew?
The more the merrier! Start with the recommended spice levels, and allow diners to add cayenne pepper or hot sauce to their own servings. This way, everyone can customize the heat according to their taste preferences!

undefined

Hearty African Peanut Stew for Cozy Nights In

Hearty African Peanut Stew, filled with sweet potatoes and spinach, offers comforting flavors perfect for busy weeknights.
Prep Time 15 minutes
Cook Time 1 hour
Total Time 1 hour 15 minutes
Servings: 4 bowls
Course: Dinner
Cuisine: African
Calories: 350

Ingredients
  

For the Sauce
  • 1 can Tomato Sauce a can of plain diced tomatoes works in a pinch.
  • 1 cup Creamy Peanut Butter (Natural, No-Stir) can swap for almond or cashew butter.
For the Spices
  • 1 teaspoon Smoked Paprika feel free to use regular paprika.
  • 1 teaspoon Ground Coriander ground cumin can replace it.
  • 1 teaspoon Kosher Salt adjust to taste.
  • 1 teaspoon Black Pepper adjust to taste.
  • 1/4 teaspoon Cayenne Pepper optional for added heat.
For the Cooking Oil
  • 2 tablespoons Neutral Flavor Cooking Oil consider avocado, vegetable, or olive oil.
For the Protein
  • 1 pound Boneless Pork, Chicken, Turkey, or Beef Stew Meat optional for meat lovers; use chickpeas or lentils for vegetarian.
For the Broth
  • 4 cups Broth or Stock vegetable or chicken based on dietary preferences.
For the Vegetables
  • 1 cup Chopped Onion sauté to golden perfection.
  • 2 medium Sweet Potatoes add natural sweetness and heartiness.
  • 4 cups Spinach (or Kale) fresh is best, frozen works in a pinch.
  • 2 medium Carrots chop into bite-sized pieces.
For the Aromatics
  • 3 cloves Minced Garlic use fresh for optimum taste.
  • 1 tablespoon Fresh Ginger ground ginger can be a substitute.

Equipment

  • blender
  • Large pot
  • Instant Pot
  • Slow Cooker

Method
 

Step‑by‑Step Instructions
  1. In a blender, combine the tomato sauce and creamy peanut butter until smooth.
  2. In a large pot, heat a couple of tablespoons of your chosen neutral cooking oil over medium heat. Add minced garlic and fresh ginger, sauté for about 2-3 minutes until aromatic and golden.
  3. Stir in the chopped onion, followed by diced sweet potatoes and carrots, allowing them to sauté with the aromatics for another 5 minutes.
  4. Pour in your broth, then add the blended tomato-peanut sauce mixture. Stir everything together thoroughly.
  5. Cover your pot and bring the mixture to a gentle simmer over medium-low heat. Let it cook for 40-60 minutes, stirring occasionally, until the sweet potatoes are tender.
  6. If using an Instant Pot, first set the device to the sauté function, follow the sautéing steps, then pressure cook on high for about 10 minutes.
  7. For a slow cooker method, add all sautéed ingredients and rest directly into the cooker. Set to low for 4.5-5 hours or high for about 3 hours.
  8. Once cooked, taste and adjust seasonings. Serve hot, ladling into bowls and topping each with crushed peanuts and fresh cilantro.

Nutrition

Serving: 1bowlCalories: 350kcalCarbohydrates: 40gProtein: 15gFat: 18gSaturated Fat: 3gPolyunsaturated Fat: 9gMonounsaturated Fat: 5gCholesterol: 20mgSodium: 700mgPotassium: 800mgFiber: 10gSugar: 6gVitamin A: 3000IUVitamin C: 30mgCalcium: 80mgIron: 3mg

Notes

This recipe is easy to customize with different vegetables or proteins based on your preference. Consider meal prepping ahead for convenience.

Tried this recipe?

Let us know how it was!

Mouthwatering Jamaican Brown Stew Chicken in One Pot

The first whiff of spice warms my kitchen, instantly transporting me to the vibrant streets of Jamaica. If you’re craving a rich, comforting dish that’s packed with flavor, you’re in for a treat with this Authentic Jamaican Brown Stew Chicken. This one-pot wonder not only brings the bold tastes of the Caribbean to your table, but it also offers quick and easy preparation—perfect for busy weeknights or cozy family gatherings. Just imagine tender chicken simmered with aromatic herbs, all enveloped in a thick, savory gravy that pairs seamlessly with your favorite sides. Are you ready to dive into the tantalizing world of Jamaican cuisine? Let’s start making memories together, one delicious bite at a time!

What Makes This Dish So Special?

Simplicity: This Jamaican Brown Stew Chicken is incredibly easy to prepare, requiring minimal effort while maximizing flavor.
Flavor Explosion: Infused with aromatic spices and herbs, each bite delivers a burst of Caribbean goodness that will leave everyone asking for seconds!
One-Pot Wonder: Enjoy a delicious meal without the hassle of multiple dishes, making clean-up a breeze—perfect for busy weeknights!
Customizable: Whether you prefer it spicy with Scotch Bonnet or milder, this recipe allows you to tailor the heat to your liking.
Family-Friendly: With its rich and savory gravy, this dish is sure to please both adults and kids alike, making it a go-to for family dinners!
Nostalgic Appeal: Transport yourself to the heart of Jamaica, bringing a taste of tradition into your home with every mouthful. Don’t forget to try it with Jamaican Rice and Peas for a complete experience!

Jamaican Brown Stew Chicken Ingredients

For the Chicken
Whole Chicken – Use a whole broken-down chicken or your favorite parts for depth of flavor.
Scotch Bonnet Pepper – Adds heat; use finely chopped for more or less spice as desired. Alternatives: Habanero or other peppers.

For the Marinade
Onion – Adds sweetness and depth; substitute with sweet or yellow onion for best results.
Garlic – Fresh garlic is preferred; minced or grated will give a stronger punch.
Escallion (Green Onion) – Adds a mild peppery taste; finely chopped for best flavor.
Fresh Thyme – Crucial for Caribbean cooking; always opt for fresh.
Bay Leaves – Optional for added aroma; use if available.
Browning Sauce – Adds color and depth; homemade alternatives can be used.
Dark Brown Sugar – Balances flavors with a hint of sweetness.
Homemade Seasoning Salt/All-Purpose Seasoning and Paprika – For added flavor complexity.
Pimento Seeds – Allspice berries that provide warmth; can be crushed or used whole.

For Cooking and Flavor Enhancements
Salt and Black Pepper – Essential for seasoning; adjust to taste.
Low Sodium Chicken Stock – Used for simmering and achieving the right gravy consistency.
Red and Green Bell Pepper – Adds color and sweetness; sliced or julienned.
Ketchup – Thickens the sauce and adds sweetness; adjust as needed.
Soy Sauce – Optional for an umami flavor addition.

These ingredients combine to create a delightful Jamaican stewed chicken that is quick, easy, and bursting with flavor! Enjoy the process and the delicious results from your kitchen.

Step‑by‑Step Instructions for Authentic Jamaican Brown Stew Chicken

Step 1: Prepare the Chicken
Start by trimming excess fat from your whole chicken and washing it with vinegar or lemon to ensure cleanliness. Chop the chicken into smaller pieces for even cooking and pat them dry with paper towels to remove excess moisture. This preparation is crucial for achieving that perfect golden-brown crust during frying.

Step 2: Marinate the Chicken
In a large bowl or resealable bag, combine the chicken pieces with finely chopped onion, garlic, green onion, fresh thyme, bay leaves, browning sauce, dark brown sugar, pimento seeds, paprika, salt, black pepper, and the optional Scotch Bonnet pepper. Ensure every piece is well-coated, then let it marinate for at least an hour, or for best results, overnight in the fridge to absorb all those vibrant flavors.

Step 3: Brown the Chicken
Heat a couple of tablespoons of oil over medium-high heat in a large Dutch oven. Carefully remove the marinated chicken from the bowl or bag and place it in the hot oil. Sear each piece until they are golden brown on all sides, which should take about 5 to 10 minutes. This browning step locks in moisture and adds depth to your Jamaican Brown Stew Chicken.

Step 4: Simmer the Chicken
Once the chicken is browned, stir in the reserved marinade and pour in enough low-sodium chicken stock to cover the chicken halfway. Increase the heat to bring the mixture to a boil, then cover the pot and reduce the heat to a simmer. Let it cook gently for 20 minutes, allowing the chicken to become tender and soak up the aromatic flavors from the spices.

Step 5: Add Ketchup & Reduce
After 20 minutes of simmering, carefully add the ketchup to the pot, which not only adds sweetness but also thickens the gravy. Lower the heat to medium-low and continue simmering for another 10 minutes, stirring occasionally. The chicken should be fully cooked and tender, and the sauce should be reduced to a glossy, flavorful consistency. Taste and adjust seasoning as necessary.

Step 6: Serve the Dish
Before serving, carefully remove the bay leaves and any whole pepper pieces that may remain. Serve your Authentic Jamaican Brown Stew Chicken hot, alongside your favorite side dishes such as rice and peas, steamed vegetables, or a fresh salad. This dish is not only vibrant but also inviting—a true feast for the senses!

Storage Tips for Jamaican Brown Stew Chicken

Cool Completely: Allow the Jamaican Brown Stew Chicken to cool completely after cooking before transferring it to storage containers to prevent condensation and sogginess.

Fridge: Store in an airtight container in the fridge for up to 3 days, ensuring the chicken retains its flavorful taste and tenderness.

Freezer: For longer storage, freeze the chicken in airtight containers or heavy-duty freezer bags for up to 2–3 months. Thaw in the fridge overnight before reheating.

Reheating: To reheat, place the chicken in a saucepan over low heat, adding a splash of chicken stock or water to prevent drying out, and warm until heated through.

Make Ahead Options

These Jamaican Brown Stew Chicken delights are perfect for busy cooks looking to save time during the week! To prep ahead, marinate the chicken with the spices and aromatics for up to 24 hours in advance—this allows the flavors to deeply penetrate, ensuring a rich taste. You can also chop your vegetables (like bell peppers and onions) and store them in the refrigerator for up to 3 days before you plan to cook. When you’re ready to serve, simply brown the marinated chicken, simmer it with the reserved marinade and chicken stock, then finish with ketchup. This way, you’ll have a comforting, flavorful dish with minimal effort, just as delicious as if made fresh!

Expert Tips for Jamaican Brown Stew Chicken

Marinate Wisely: Massage the marinade into the chicken for deep flavor penetration; this step takes your dish from good to unforgettable.

Avoid Overcrowding: When browning the chicken, don’t overcrowd the pot. Cooking in batches ensures even browning, leading to moist Jamaican stewed chicken.

Mind the Heat: Adjust the Scotch Bonnet pepper to your heat preference—start with half if you’re cautious, and taste the marinade before adding more.

Time is Key: Marinate overnight for the best flavor. Even a few hours can make a difference, but longer is truly better!

Perfect Gravy Texture: For thicker sauce, mix equal parts cornstarch and cold water, then stir in during the last simmering stage.

Taste as You Go: Always taste and adjust seasoning throughout the cooking process to ensure your Jamaican Brown Stew Chicken is just right!

Jamaican Brown Stew Chicken Variations

Feel free to mix things up with these personalized twists that take your Jamaican Brown Stew Chicken to the next level!

  • Protein Swap: Use fish, pork, or beef instead of chicken to explore different flavors and textures. Each protein brings a unique taste to the dish!

  • Vegetable Boost: Incorporate diced carrots or chunks of sweet potatoes for added nutrition and vibrant color. Plus, they will soak up the delicious gravy!

  • Mild Heat: If you’re not a fan of spice, substitute the Scotch Bonnet with a milder pepper like bell pepper or even jalapeño to keep things flavorful but less intense.

  • Herb Infusion: Experiment with herbs like cilantro or parsley to give a fresh twist. These herbs will brighten the rich flavors and add an aromatic touch.

  • Coconut Cream Addition: Stir in a splash of coconut cream during the simmering process for a creamy texture and subtle sweetness that complements the spices perfectly!

  • Zesty Flavor: Add the juice of a lime or lemon just before serving for a refreshing zing that cuts through the richness of the gravy.

  • Umami Punch: Include a tablespoon of miso paste or a dash of Worcestershire sauce to amplify the umami flavors in your stew, adding depth to the overall dish.

  • Asian Fusion: Swap out the ketchup for some hoisin sauce for an unexpected sweet-savory delight that adds a delightful twist to your stew.

These variations not only allow you to customize your dish but can also turn your family gatherings into a delightful culinary adventure. Don’t forget to pair your creation with Jamaican Rice and Peas for a complete meal experience!

What to Serve with Authentic Jamaican Brown Stew Chicken

Enjoy this aromatic dish that bursts with the essence of the Caribbean, creating a lovely culinary experience for any family gathering.

  • Jamaican Rice and Peas: A classic pairing, this dish absorbs the robust flavors of the stew while adding creamy texture that complements the richness.
  • Sweet Fried Plantains: Their caramelized sweetness offers a delightful contrast to the savory, spiced chicken, bringing balance to your plate.
  • Steamed Vegetables: Fresh, crisp greens like broccoli or carrots add a bright and nutritious touch, providing color and health benefits alongside your hearty meal.
  • Coleslaw: The cool, tangy crunch of coleslaw helps cut through the richness of the stew, making each bite more refreshing.
  • Coconut Rice: Infused with coconut milk, this rice adds a subtle sweetness that pairs beautifully with the bold flavors of the chicken.
  • Festival Dumplings: These slightly sweet and doughy treats are perfect for soaking up the savory gravy, adding a fun twist to any dinner table.
  • Mango Chutney: A spoonful of mango chutney brings a fruity bite, elevating the overall experience with a touch of sweetness and spice.
  • Ginger Beer: To complement the meal, sip on this refreshing drink for a delightful zing that mirrors the vibrant flavors of the stew.
  • Cornbread: Its soft, slightly sweet texture creates a perfect canvas for enjoying the rich gravy, enhancing every delicious mouthful!

Jamaican Brown Stew Chicken Recipe FAQs

What should I look for when selecting chicken for this recipe?
Absolutely! When choosing chicken, look for a whole bird or your preferred cuts that are firm and plump with smooth skin. Avoid any that show signs of freezer burn or have dark spots all over, which indicate age. Freshness is key to achieving the best flavor and texture in your dish!

How should I store leftovers of Jamaican Brown Stew Chicken?
Very easy! Allow your dish to cool completely after cooking. Then, transfer it to an airtight container and store in the fridge for up to 3 days. If you want to savor it longer, freeze it in freezer-safe containers for up to 2-3 months. Just remember, flavors often improve with a little time!

Can I freeze Jamaican Brown Stew Chicken?
Absolutely! To freeze, first let the chicken cool completely, then place it in airtight containers or heavy-duty freezer bags. Be sure to squeeze out excess air from the bags to prevent freezer burn. When you’re ready to enjoy it again, thaw overnight in the fridge, then reheat gently on the stove or in the microwave, adding a splash of water or chicken stock to keep it moist.

What if my Jamaican Brown Stew Chicken turns out too salty?
Certainly! If you find your stew a bit too salty, one effective method is to add a diced potato to the pot as it simmers; it absorbs some of the saltiness. Allow it to cook for about 15-20 minutes, then remove the potato before serving. Alternatively, you can add more low-sodium chicken stock to dilute the seasoning.

Are there any dietary considerations I should keep in mind?
Very much so! If you’re preparing this dish for guests, keep in mind that Scotch Bonnet peppers can be quite spicy—consider providing a milder pepper or omitting it entirely for those who are heat-sensitive. Furthermore, this dish is naturally gluten-free; just ensure that your soy sauce is a gluten-free variety if gluten is a concern for any diners.

undefined

Mouthwatering Jamaican Brown Stew Chicken in One Pot

Authentic Jamaican Brown Stew Chicken delivering a rich, comforting flavor experience packed with spices.
Prep Time 1 hour
Cook Time 30 minutes
Total Time 1 hour 30 minutes
Servings: 4 servings
Course: Dinner
Cuisine: Jamaican
Calories: 450

Ingredients
  

For the Chicken
  • 1 whole Chicken Broken down or your favorite parts
  • 1 Scotch Bonnet Pepper Finely chopped, adjust for spice
For the Marinade
  • 1 large Onion Sweet or yellow onion preferred
  • 4 cloves Garlic Minced or grated
  • 3 stalks Escallion (Green Onion) Finely chopped
  • 2 sprigs Fresh Thyme Always opt for fresh
  • 2 Bay Leaves Optional
  • 2 tablespoons Browning Sauce Adds color and depth
  • 2 tablespoons Dark Brown Sugar Balances flavors
  • 2 tablespoons Homemade Seasoning Salt/All-Purpose Seasoning
  • 1 teaspoon Paprika
  • 1 teaspoon Pimento Seeds Allspice berries
For Cooking and Flavor Enhancements
  • 1 teaspoon Salt Adjust to taste
  • 1 teaspoon Black Pepper Adjust to taste
  • 2 cups Low Sodium Chicken Stock
  • 1 each Red and Green Bell Pepper Sliced or julienned
  • 1/4 cup Ketchup Adjust as needed
  • 1 tablespoon Soy Sauce Optional

Equipment

  • Dutch oven

Method
 

Step‑by‑Step Instructions
  1. Prepare the Chicken: Trim excess fat and wash the chicken. Chop into smaller pieces and pat dry.
  2. Marinate the Chicken: Combine chicken with onion, garlic, green onion, thyme, bay leaves, browning sauce, dark brown sugar, pimento seeds, paprika, salt, pepper, and Scotch Bonnet. Let it marinate for at least an hour, preferably overnight.
  3. Brown the Chicken: Heat oil in a Dutch oven. Sear marinated chicken until golden brown on all sides, about 5 to 10 minutes.
  4. Simmer the Chicken: Stir in the marinade and enough chicken stock to cover halfway. Bring to a boil, then reduce heat to simmer for 20 minutes.
  5. Add Ketchup & Reduce: Stir in ketchup after 20 minutes. Simmer for another 10 minutes until sauce thickens.
  6. Serve the Dish: Remove bay leaves and serve hot with sides like rice and peas or steamed vegetables.

Nutrition

Serving: 1servingCalories: 450kcalCarbohydrates: 15gProtein: 30gFat: 25gSaturated Fat: 7gPolyunsaturated Fat: 1gMonounsaturated Fat: 8gCholesterol: 90mgSodium: 600mgPotassium: 500mgFiber: 2gSugar: 5gVitamin A: 500IUVitamin C: 20mgCalcium: 20mgIron: 2mg

Notes

Marinate overnight for the best flavor. Taste and adjust seasoning as needed throughout the cooking process.

Tried this recipe?

Let us know how it was!

Nigerian Chicken Stew: Bold Flavors for Cozy Nights

A delightful wave of spices hit my senses as I ventured into the heart of Nigerian cuisine. Nigerian Chicken Stew is not just a dish; it’s a comforting embrace that will wrap you in warmth with every bite. This recipe showcases seared chicken simmered in a vibrant tomato-and-pepper sauce, which offers a rich flavor profile that can be customized to suit your taste preferences. Say goodbye to fast food and hello to this crowd-pleasing comfort food that’s perfect for gatherings or cozy family nights. Whether you serve it over a bed of fluffy rice, alongside sweet plantains, or with hearty yams, this stew is bound to impress. Are you ready to elevate your home-cooked meals with a splash of West African flair? Let’s get cooking!

Why is Nigerian Chicken Stew a Must-Try?

Comforting, Bold Flavor: Each bite of this Nigerian Chicken Stew offers a burst of spices that warm the soul. Ease of Preparation: With only essential ingredients and straightforward steps, even novice cooks can master it effortlessly. Customizable Spice Levels: Adjust the heat to your liking, ensuring everyone at the table can enjoy it. Perfect for Sharing: This dish brings family and friends together, making it ideal for gatherings. Pair it with fluffy rice or sweet plantains for the ultimate comfort food experience that beats fast food any day.

Nigerian Chicken Stew Ingredients

For the Chicken
Chicken – Use bone-in for richer flavor; boneless is fine if you shorten the cooking time.

For the Marinade
Salt – Enhances flavor and draws out moisture during marination.
Black Pepper – Adds a mild heat and layers of depth to the stew.
Paprika – Provides a beautiful color and subtle sweetness; smoked paprika offers extra depth.
Curry Powder – Infuses warmth and complexity, crucial to Nigerian flavor.
Thyme – Adds a delightful herbal note; fresh is best, but dried can work too.
Onion – The aromatic base; red onion lends a sweeter touch.

For the Stew Base
Vegetable Oil – Needed for searing chicken and frying the tomato paste; swap for olive oil if preferred.
Roma Tomatoes – Fresh creates the best sauce; canned is a good backup.
Red Bell Pepper – Boosts sweetness and color in your stew.
Scotch Bonnet Peppers – Packs authentic heat; reduce for milder flavor or use habanero instead.
Tomato Paste – Deepens the stew’s flavor; sauté before adding fresh ingredients for optimal taste.

For Flavor Enhancement
Garlic Powder & Ginger Powder – Elevate the overall flavor; fresh versions are preferable.
Bouillon Cube – Adds umami depth; homemade broth is a great substitute for a richer base.

For Garnish
Parsley/Cilantro – Fresh herbs provide a bright, lovely finish to the dish.

This sumptuous Nigerian Chicken Stew is sure to be a favorite in your home, proving that comfort food can be delightful and full of flavor!

Step-by-Step Instructions for Nigerian Chicken Stew

Step 1: Marinate the Chicken
Begin by marinating your chicken pieces with salt, pepper, paprika, curry powder, thyme, and chopped onion. Make sure each piece is well coated for at least 30 minutes. This not only infuses the chicken with flavor but also helps tenderize the meat. If possible, refrigerate while marinating for deeper flavor penetration.

Step 2: Sear the Chicken
Heat a large skillet over medium-high heat and add vegetable oil until shimmering. Once hot, carefully place the marinated chicken in the skillet, ensuring not to overcrowd the pan. Sear the chicken until golden brown, about 5-7 minutes per side. This step is crucial for building flavor, so don’t rush. Once browned, remove the chicken and set aside.

Step 3: Prepare the Tomato Blend
In a blender, combine the Roma tomatoes, red bell pepper, onion, and scotch bonnet peppers. Process until you achieve a smooth puree. This vibrant mix forms the base of your Nigerian Chicken Stew. The fresh ingredients enhance the sauce’s flavor profile, so make sure it’s well blended before moving to the next step.

Step 4: Cook the Tomato Paste
In the same skillet used for the chicken, add a little more oil if needed and sauté about 2 tablespoons of tomato paste over medium heat. Stir frequently for about 2 minutes until the paste darkens slightly, deepening the stew’s flavor. This caramelization adds a rich depth to the Nigerian Chicken Stew.

Step 5: Combine the Ingredients
Pour the blended tomato mixture into the skillet with the cooked tomato paste. Stir well to combine and allow it to simmer for about 10 minutes. You’ll notice it thickening as it cooks; keep an eye on it to prevent sticking. This simmering will enhance the flavor of the stew, making it more robust and inviting.

Step 6: Add the Spices
Stir in garlic powder, ginger powder, and the bouillon cube, mixing well to incorporate all flavors. If you prefer a saltier taste, adjust the seasoning to your liking. Allow the stew base to simmer for another 5 minutes, giving the spices time to meld beautifully, enriching your Nigerian Chicken Stew.

Step 7: Simmer with Chicken
Return the browned chicken pieces to the skillet, ensuring they are well coated with the sauce. Cover the skillet and let it simmer on low heat for 25-30 minutes, allowing the chicken to become tender and absorb the stew’s flavors. The sauce should reduce slightly, creating a luscious coating on the chicken.

Step 8: Garnish and Serve
Once the chicken is perfectly cooked and tender, remove the skillet from heat. Sprinkle fresh parsley or cilantro over the stew for a bright finish. This adds a fragrant touch that complements the rich flavors. Serve your enticing Nigerian Chicken Stew hot, alongside fluffy rice, sweet plantains, or hearty yams for a comforting meal.

What to Serve with Nigerian Chicken Stew

The warmth and richness of this dish invite a variety of enticing accompaniments that elevate your meal experience.

  • Fluffy White Rice: A classic pairing, it absorbs the spicy stew, creating a balanced and satisfying plate. Each forkful offers a delightful contrast of texture against the hearty sauce.

  • Fried Sweet Plantains: Sweet and caramelized, these golden bites complement the spicy notes of the stewed chicken. They provide a lovely sweetness that brightens each savory bite.

  • Boiled Yams: Their creamy texture serves as the perfect canvas for the luscious stew, making for a filling and comforting meal. Plus, they introduce a subtle earthiness that harmonizes beautifully with the dish.

  • Cucumber Salad: A refreshing burst of crunch, this salad adds a cooling effect that offsets the spice of the stew. Tossed with a light vinaigrette, it aligns perfectly with the hearty flavors.

  • Garlic Naan: For an extra indulgent experience, serve warm naan bread to scoop up the stew. The soft bread is ideal for mopping up every last bit of sauce, making each bite a savory adventure.

  • Nigerian Jollof Rice: A staple in Nigerian cuisine, this tomato-infused rice offers vibrant flavors that beautifully accompany the rich stew. Its spiciness and depth enhance the overall dining experience.

  • Mint Lemonade: To wash it all down, consider a refreshing mint lemonade. Its tartness and herbal notes provide a unique counterbalance to the stew’s earthy richness.

Nigerian Chicken Stew Variations

Feel free to make this dish your own by exploring these delightful tweaks that will elevate your culinary experience!

  • Spice Level Boost: Increase the number of scotch bonnet peppers for an extra kick. The stewing process will mellow out some heat, enhancing the stew’s flavor.

  • Vegetable Power: Add diced carrots or zucchini for extra nutrition and a lovely color contrast. These vibrant veggies will soak up the flavorful sauce while contributing their own sweetness.

  • Coconut Cream Twist: Stir in a splash of coconut cream towards the end for richness. It creates a luscious texture and introduces a subtle sweetness that complements the spices beautifully.

  • Protein Swap: Replace chicken with shrimp or firm tofu for a quick-cooking, vibrant alternative. Both options pair wonderfully with the stew’s savory base while accommodating varied diets.

  • Gluten-Free Alternative: Use gluten-free bouillon cubes if you need a gluten-free version. They will keep the stew’s umami integrity intact, ensuring everyone can enjoy this comforting dish.

  • Heat Variation: For a milder flavor, substitute scotch bonnet peppers with Poblano or Anaheim peppers. They retain the essence of a pepper without overwhelming the palate.

  • Herb Infusion: Enhance the freshness by infusing with bay leaves during simmering. Remove before serving; they add an aromatic depth that harmonizes beautifully with the other flavors.

Remember, cooking is all about creativity and personal taste! If you love a certain ingredient or flavor, don’t hesitate to make it shine in your version of this delightful, comforting dish. For a complete meal experience, serve your stew with a side of fluffy rice or try crispy fried sweet plantains for a satisfying contrast. Enjoy the journey of flavors!

Make Ahead Options

These Nigerian Chicken Stew preparations are perfect for busy weeknights! You can marinate the chicken up to 24 hours in advance, allowing the spices to deeply infuse flavor. Additionally, the tomato blend can be prepped and refrigerated for up to 3 days. Simply blend and store it in an airtight container. When ready to finish, sear your marinated chicken and combine it with the prepared sauce, simmering it until fully cooked (about 25-30 minutes). This way, you’ll enjoy a delicious, homemade meal with minimal effort, making weeknight dinners a breeze!

Expert Tips for Nigerian Chicken Stew

  • Marination Magic: Allow the chicken to marinate for at least 30 minutes, or even overnight, to ensure maximum flavor absorption and tenderness.

  • Sauce Thickness: If your stew is too thin, let it simmer uncovered for an additional 10-15 minutes. This concentrates the flavors and improves the consistency of your Nigerian Chicken Stew.

  • Heat Control: Adjust the heat level by modifying the amount of scotch bonnet peppers. Start with one and gradually add more if you prefer extra spice.

  • Flavor Balancing: Taste your stew before serving. If it feels too acidic, a pinch of sugar can balance out the flavors nicely without overpowering the dish.

  • Ingredient Freshness: Use fresh herbs and vegetables whenever possible. They significantly enhance the flavor and freshness of your Nigerian Chicken Stew.

How to Store and Freeze Nigerian Chicken Stew

Fridge: Store your cooled Nigerian Chicken Stew in an airtight container for up to 4 days. This ensures the flavors remain vibrant and fresh while preserving the stew’s delightful quality.

Freezer: For longer storage, freeze the stew in airtight containers for up to 3 months. Make sure to leave some space for expansion as it freezes to maintain texture and flavor.

Reheating: When ready to enjoy, gently reheat the stew on the stove over low heat or in the microwave until warmed through. Add a splash of water if it appears too thick after freezing.

Serving Tips: To revive its fresh flavors, consider garnishing with chopped parsley or cilantro after reheating for a bright finish to your Nigerian Chicken Stew.

Nigerian Chicken Stew Recipe FAQs

What kind of chicken is best for Nigerian Chicken Stew?
Absolutely! I recommend using bone-in chicken pieces for richer flavor and moisture, but boneless chicken can work as well if you’re short on time. Just remember to reduce the cooking time slightly if you choose boneless.

How do I store leftover Nigerian Chicken Stew?
You’ll want to store your cooled Nigerian Chicken Stew in an airtight container in the fridge for up to 4 days. Ensure it cools completely before sealing, which helps maintain its rich flavor and texture.

Can I freeze Nigerian Chicken Stew?
Definitely! For freezing, pour the cooled stew into airtight containers or heavy-duty freezer bags, and it will stay fresh for up to 3 months. When freezing, remember to leave some space in the container to allow for expansion.

What if my stew is too thin?
If your stew happens to turn out too thin, don’t worry! Simply let it simmer uncovered on low heat for an extra 10-15 minutes. This method will help concentrate the flavors and thicken the sauce, achieving that perfect texture you’re aiming for.

Is Nigerian Chicken Stew suitable for special diets?
Yes! Nigerian Chicken Stew can be made halal by sourcing meat from halal-certified suppliers. If you or your guests have spice sensitivities, feel free to adjust the amount of scotch bonnet peppers to suit your taste. Always ensure to check for any allergies related to the ingredients like bouillon cubes or spices.

How can I add more vegetables to the stew?
Great question! You can easily incorporate additional veggies like diced carrots, bell peppers, or even spinach towards the end of cooking. Simply add them along with the chicken, and let them simmer. This not only adds nutrition but also enhances the flavor and color of your Nigerian Chicken Stew!

undefined

Nigerian Chicken Stew: Bold Flavors for Cozy Nights

Nigerian Chicken Stew is a comforting dish filled with bold flavors and spices, perfect for cozy family nights.
Prep Time 30 minutes
Cook Time 1 hour
Marinating Time 30 minutes
Total Time 2 hours
Servings: 4 servings
Course: Dinner
Cuisine: Nigerian
Calories: 450

Ingredients
  

For the Chicken
  • 1 kg Chicken Use bone-in for richer flavor; boneless is fine if you shorten the cooking time.
For the Marinade
  • 1 tbsp Salt Enhances flavor and draws out moisture during marination.
  • 1 tsp Black Pepper Adds a mild heat and layers of depth to the stew.
  • 1 tbsp Paprika Provides a beautiful color and subtle sweetness; smoked paprika offers extra depth.
  • 1 tbsp Curry Powder Infuses warmth and complexity, crucial to Nigerian flavor.
  • 1 tsp Thyme Adds a delightful herbal note; fresh is best, but dried can work too.
  • 1 large Onion The aromatic base; red onion lends a sweeter touch.
For the Stew Base
  • 3 tbsp Vegetable Oil Needed for searing chicken and frying the tomato paste; swap for olive oil if preferred.
  • 6 medium Roma Tomatoes Fresh creates the best sauce; canned is a good backup.
  • 1 large Red Bell Pepper Boosts sweetness and color in your stew.
  • 1 piece Scotch Bonnet Peppers Packs authentic heat; reduce for milder flavor or use habanero instead.
  • 2 tbsp Tomato Paste Deepens the stew’s flavor; sauté before adding fresh ingredients for optimal taste.
For Flavor Enhancement
  • 1 tsp Garlic Powder Elevates the overall flavor; fresh versions are preferable.
  • 1 tsp Ginger Powder Elevates the overall flavor; fresh versions are preferable.
  • 1 piece Bouillon Cube Adds umami depth; homemade broth is a great substitute.
For Garnish
  • 2 tbsp Parsley/Cilantro Fresh herbs provide a bright, lovely finish to the dish.

Equipment

  • Skillet
  • blender
  • Measuring spoons
  • Cutting board
  • Knife

Method
 

Step-by-Step Instructions for Nigerian Chicken Stew
  1. Marinate your chicken pieces with salt, pepper, paprika, curry powder, thyme, and chopped onion for at least 30 minutes.
  2. Heat a large skillet over medium-high heat and add vegetable oil until shimmering. Sear the marinated chicken until golden brown, about 5-7 minutes per side. Remove and set aside.
  3. In a blender, combine the Roma tomatoes, red bell pepper, onion, and scotch bonnet peppers. Blend until smooth to form the tomato base for your stew.
  4. In the same skillet, add more oil if needed and sauté the tomato paste over medium heat for about 2 minutes until it darkens slightly.
  5. Pour the blended tomato mixture into the skillet with the tomato paste and simmer for about 10 minutes.
  6. Stir in garlic powder, ginger powder, and bouillon cube. Adjust salt to taste and let the stew base simmer for another 5 minutes.
  7. Return the browned chicken to the skillet, cover, and simmer on low heat for 25-30 minutes, until the chicken is tender.
  8. Sprinkle fresh parsley or cilantro over the stew before serving for a bright finish.

Nutrition

Serving: 1bowlCalories: 450kcalCarbohydrates: 30gProtein: 30gFat: 25gSaturated Fat: 5gPolyunsaturated Fat: 5gMonounsaturated Fat: 10gCholesterol: 80mgSodium: 700mgPotassium: 800mgFiber: 5gSugar: 5gVitamin A: 30IUVitamin C: 50mgCalcium: 50mgIron: 3mg

Notes

Allow chicken to marinate for maximum flavor. Use fresh herbs and vegetables for best results. Adjust heat level according to preference.

Tried this recipe?

Let us know how it was!

Easy Thai Shrimp Soup with Red Curry for Cozy Nights

As I lifted the lid off my pot, a waft of fragrant spices and creamy goodness enveloped me, transporting me straight to the streets of Thailand. This Easy Thai Shrimp Soup with Red Curry is a delightful journey for your taste buds, combining tender shrimp with a luscious coconut broth that’s a breeze to prepare. Not only does this dish bring vibrant flavors to your table in just one pot, but it also offers a healthy, satisfying alternative to those late-night takeout cravings. Imagine gathering your loved ones around a warm bowl of this comforting soup, filled with colorful veggies and aromatic herbs. Who could resist? Let’s dive into this heartwarming recipe that’s sure to become a family favorite! What protein twist will you choose?

What makes this soup a must-try?

Simplicity reigns supreme: This Quick Easy Thai Shrimp Soup requires minimal effort, perfect for busy weeknights. Flavor explosion: The combination of fragrant red curry and creamy coconut milk creates a symphony of taste that’s simply irresistible. One-pot wonder: Say goodbye to messy kitchens! Everything cooks in one pot, saving you both time and cleanup. Versatile options: Swap out shrimp for chicken, tofu, or even seasonal veggies to suit your taste. Crowd-pleaser: Whether it’s a cozy night in or a gathering with friends, this soup is sure to impress and satisfy everyone at the table.

Easy Thai Shrimp Soup Ingredients

This preparation makes gathering ingredients a breeze!

For the Base

  • Basmati Rice – Provides a fluffy base that absorbs the soup’s flavors; substitute with jasmine rice for a more authentic Thai texture.
  • Unsalted Butter – Adds richness and depth to the soup; use olive oil for a dairy-free version.
  • Vegetable Stock – Forms the soup base, adding depth; chicken stock can be used for a richer flavor.

For the Protein

  • Medium Shrimp – The main protein source; peeled and deveined for convenience; can substitute with chicken or tofu for different protein options.

For the Aromatics

  • Onion – Adds sweetness and a savory base; yellow or white onion can be used interchangeably.
  • Garlic – Boosts aroma and flavor intensity, creating a fragrant experience.
  • Fresh Ginger – Adds a warm, aromatic note; fresh is preferred over powdered for maximum flavor.

For the Vegetables

  • Red Bell Pepper – Offers a sweet and slightly tangy flavor, adding color; substitute with other bell peppers or sugar snap peas for crunch.

For the Flavor

  • Red Curry Paste – The pivotal flavor enhancer, providing warmth and spice; brands like Thai Kitchen or Mae Ploy are recommended.
  • Kosher Salt & Black Pepper – Enhances flavors; adjust to taste.

For the Creaminess

  • Coconut Milk – Creates a creamy texture, balancing the heat; avoid freezing as it may separate; use light coconut milk to reduce calories.

For Brightness

  • Fresh Lime Juice – Brightens the dish; adds acidity and a refreshing kick!
  • Fresh Cilantro – Garnish that adds freshness and a pop of color; perfect for that finishing touch!

Now you’re ready to make a luscious bowl of Easy Thai Shrimp Soup with Red Curry! Enjoy the vibrant flavors and the love you pour into this dish.

Step‑by‑Step Instructions for Easy Thai Shrimp Soup with Red Curry

Step 1: Cook the Rice
Begin by cooking the basmati rice according to the package instructions, usually around 15-20 minutes in boiling water. Once done, fluff it with a fork and set it aside to absorb any leftover steam. This fluffy rice will serve as a perfect base to soak up the rich flavors of your Easy Thai Shrimp Soup.

Step 2: Prepare the Shrimp
Season your medium shrimp with kosher salt and black pepper to enhance their natural flavor. In a large stockpot, melt unsalted butter over medium-high heat. Add the shrimp and cook for about 2-3 minutes, or until they turn pink and opaque. Once cooked, carefully remove the shrimp from the pot and set them aside, making room for the aromatic vegetables.

Step 3: Sauté the Vegetables
In the same pot, add the chopped onion and red bell pepper, stirring them together. Sauté for 3-4 minutes until they become tender and slightly translucent. This step brings out their natural sweetness and provides a flavorful foundation for your soup. As the veggies soften, the kitchen will fill with a mouthwatering aroma that sets the stage for the Easy Thai Shrimp Soup.

Step 4: Add Aromatics and Spice
Next, stir in the red curry paste, minced garlic, and freshly grated ginger, cooking for about 2 minutes. Watch for the mixture to become fragrant, which signals that the spices are releasing their flavors. This vibrant blend is essential to infuse your Easy Thai Shrimp Soup with its characteristic warmth and depth.

Step 5: Incorporate Liquids
Pour in the coconut milk and vegetable stock, stirring smoothly to mix. Season with additional salt and pepper to taste. Bring the pot to a gentle boil, then reduce the heat and let it simmer for 8-10 minutes. The soup should thicken slightly, creating a rich and creamy texture that will beautifully envelop the shrimp and vegetables.

Step 6: Combine and Serve
Finally, stir in the cooked basmati rice, reserved shrimp, and fresh lime juice to complete your Easy Thai Shrimp Soup. Give everything a gentle mix, distributing ingredients evenly. Allow the soup to cook together for another 2-3 minutes to warm through, then garnish with fresh cilantro before serving. Enjoy this cozy bowl of comfort with loved ones!

Easy Thai Shrimp Soup Variations

Feel free to add your personal touch to this delicious soup, making it even more delightful with these clever swaps!

  • Chicken for Shrimp: Substitute medium shrimp with diced chicken breast. Sauté until cooked through for a heartier version.

  • Tofu Option: For a plant-based twist, swap in firm tofu. Cube and sauté until golden for a satisfying texture.

  • Vegetable Boost: Add spinach or mushrooms to enhance nutrition and flavor. They’ll soften beautifully in the rich broth!

  • Curry Paste Variations: Experiment with different curry pastes like Massaman or green curry. Each will offer a unique flavor profile, keeping it exciting!

  • Vegan-Friendly: Use vegetable stock, and replace butter with olive oil for a lovely dairy-free option that everyone can enjoy.

  • Heat it Up: If you like extra spice, toss in sliced fresh chilies or a dash of sriracha. This will give your soup a fiery kick!

  • Rice Alternatives: Swap basmati rice for quinoa or zucchini noodles to lighten things up.Both create a delicious base for the soup’s flavors.

  • Fresh Herbs: Enhance the aroma with fresh basil or mint alongside the cilantro. They’ll add a vibrant freshness that brightens each bite.

Dive into your cooking adventure and see what satisfying change you can create today! If you’re ever in need of delicious ideas, check out my vegetable soup recipes or explore the richness of Thai flavors that will elevate your meals!

What to Serve with Easy Thai Shrimp Soup with Red Curry

This vibrant soup pairs beautifully with delicious sides that enhance its flavors and comfort!

  • Crispy Spring Rolls: These are light and crunchy, offering a delightful texture contrast to the creamy soup. Perfect for sharing, they bring that authentic Thai street food vibe to your meal.

  • Steamed Jasmine Rice: This fragrant rice complements the soup’s flavors and absorbs the spicy broth beautifully. It’s an easy addition that transport you to a cozy Thai kitchen.

  • Thai Cucumber Salad: Light and refreshing, this salad adds a crunchy, tangy balance to the richness of the soup. The acidity cuts through the creamy coconut, making each bite irresistible.

  • Garlic Naan Bread: Soft and pillowy, naan is great for dipping into the soup. The garlicky flavor elevates the dish while adding a comforting touch.

  • Green Papaya Salad: This salad brings a zesty crunch that contrasts well with the soup. The vibrant acidity and freshness make it a perfect palate cleanser between bites.

  • Chili Lime Mango: A sweet and spicy fruit salad that adds bright, tropical notes, enhancing your meal experience. It’s a simple, refreshing dessert option to round off your cozy dinner.

  • Coconut Water: A hydrating drink that echoes the flavors of the soup while offering a refreshingly sweet option. This will keep the meal light and satisfying.

Expert Tips for Easy Thai Shrimp Soup

  • Prep Ahead: Gather and chop all ingredients before cooking. This simple step streamlines your process, ensuring a relaxed cooking experience for your Easy Thai Shrimp Soup.
  • Taste Test: Serve it up and taste the soup before serving! If it needs more heat, add a bit more red curry paste to enhance the flavors.
  • Perfectly Cook Shrimp: As shrimp can overcook quickly, aim for just 2-3 minutes on the heat. They’ll be tender and juicy without becoming rubbery when properly timed.
  • Fresh Ingredients: Opt for fresh ginger and vibrant vegetables to maximize flavor. Dried spices won’t provide the same aromatic experience in your Easy Thai Shrimp Soup.
  • Avoid Texture Issues: Refrain from freezing the soup after adding coconut milk to maintain its delightful creamy texture and avoid separation.

Make Ahead Options

These Easy Thai Shrimp Soup with Red Curry preparations are perfect for busy cooks looking to save time during the week! You can prepare the soup base (without shrimp and coconut milk) up to 3 days in advance; simply refrigerate it in an airtight container. For the best quality, sauté the vegetables and spices, then allow the mixture to cool before sealing. When you’re ready to serve, reheat the soup mixture and add the coconut milk and shrimp, cooking until the shrimp are pink and fully cooked—this keeps the flavors vibrant and just as delicious. This way, you get a rich, flavorful soup on the table quickly, ensuring a nourishing meal for your loved ones!

How to Store and Freeze Easy Thai Shrimp Soup

Fridge: Store any leftover Easy Thai Shrimp Soup in an airtight container for up to 1-2 days. It’s best enjoyed fresh but can be reheated gently on the stove or in the microwave.

Freezer: Avoid freezing the soup after adding coconut milk, as it may separate. If desired, freeze the soup base (without coconut milk) for up to 3 months. Thaw in the fridge before reheating.

Reheating: When reheating, add a splash of coconut milk to restore creaminess. Warm it on the stovetop over low heat, stirring occasionally until heated through.

Airtight Storage: For both fridge and freezer storage, use airtight containers to keep your Easy Thai Shrimp Soup fresh and flavorful.

Easy Thai Shrimp Soup with Red Curry Recipe FAQs

What should I look for when selecting shrimp?
Absolutely! When choosing shrimp, look for those that are firm and have a slight ocean scent. Fresh shrimp should be translucent without any black spots or a strong fishy odor. If purchasing frozen, ensure they’re free from ice crystals, as this can indicate thawing and refreezing.

How should I store leftover Easy Thai Shrimp Soup?
Leftovers can be stored in an airtight container in the fridge for 1-2 days. Always allow the soup to cool to room temperature before sealing it in your container to minimize condensation, which can affect texture.

Can I freeze Easy Thai Shrimp Soup?
I recommend avoiding freezing the soup after you’ve added coconut milk, as it may separate and lose its creamy texture. Instead, store the soup base (without the coconut milk) in an airtight container for up to 3 months. When you’re ready to enjoy it, simply thaw in the fridge overnight, then reheat and stir in the coconut milk before serving.

What if my soup turns out too thick?
No stress! If your Easy Thai Shrimp Soup thickens more than you’d like, simply add a splash of vegetable stock or water during reheating until you reach the desired consistency. This can help restore the soup’s velvety feel without losing flavor. Always taste and adjust seasoning accordingly!

Can I make this recipe dairy-free?
Very! You can easily make this Easy Thai Shrimp Soup dairy-free by substituting the unsalted butter with olive oil. The richness you gain from the coconut milk will still provide a luxurious texture without any dairy involvement.

Are there any dietary considerations for this recipe?
Absolutely! If serving this soup to someone with shellfish allergies, consider replacing the shrimp with chicken or tofu. Additionally, those following gluten-free diets can be assured that all the suggested ingredients are gluten-free, but do check that your curry paste isn’t processed in facilities that may cross-contaminate.

undefined

Easy Thai Shrimp Soup with Red Curry for Cozy Nights

This Easy Thai Shrimp Soup brings vibrant flavors to your table in a creamy, healthy broth with aromatic spices.
Prep Time 15 minutes
Cook Time 25 minutes
Total Time 40 minutes
Servings: 4 bowls
Course: Dinner
Cuisine: Thai
Calories: 320

Ingredients
  

For the Base
  • 1 cup Basmati Rice Substitute with jasmine rice for a more authentic texture.
  • 2 tablespoons Unsalted Butter Use olive oil for a dairy-free version.
  • 4 cups Vegetable Stock Chicken stock can be used for a richer flavor.
For the Protein
  • 1 pound Medium Shrimp Peeled and deveined; can substitute with chicken or tofu.
For the Aromatics
  • 1 medium Onion Yellow or white onion can be used interchangeably.
  • 3 cloves Garlic Minced.
  • 1 tablespoon Fresh Ginger Fresh is preferred over powdered for maximum flavor.
For the Vegetables
  • 1 medium Red Bell Pepper Substitute with other bell peppers or sugar snap peas.
For the Flavor
  • 2 tablespoons Red Curry Paste Brands like Thai Kitchen or Mae Ploy recommended.
  • to taste Kosher Salt Adjust to taste.
  • to taste Black Pepper Adjust to taste.
For the Creaminess
  • 1 can Coconut Milk Avoid freezing as it may separate; use light coconut milk for fewer calories.
For Brightness
  • 2 tablespoons Fresh Lime Juice Adds acidity and a refreshing kick.
  • 1/4 cup Fresh Cilantro For garnish.

Equipment

  • large stockpot

Method
 

Step-by-Step Instructions
  1. Cook the basmati rice according to the package instructions, usually around 15-20 minutes in boiling water. Fluff with a fork and set aside.
  2. Season the medium shrimp with kosher salt and black pepper. In a large stockpot, melt unsalted butter over medium-high heat. Add shrimp and cook for 2-3 minutes until pink and opaque. Remove and set aside.
  3. In the same pot, add chopped onion and red bell pepper. Sauté for 3-4 minutes until tender and slightly translucent.
  4. Stir in red curry paste, minced garlic, and grated ginger. Cook for about 2 minutes until fragrant.
  5. Pour in coconut milk and vegetable stock, stirring to mix. Season with salt and pepper. Bring to a gentle boil, then simmer for 8-10 minutes until thickened.
  6. Stir in cooked basmati rice, reserved shrimp, and fresh lime juice. Mix gently and warm for another 2-3 minutes. Garnish with fresh cilantro before serving.

Nutrition

Serving: 1bowlCalories: 320kcalCarbohydrates: 36gProtein: 22gFat: 14gSaturated Fat: 10gPolyunsaturated Fat: 1gMonounsaturated Fat: 4gCholesterol: 160mgSodium: 800mgPotassium: 500mgFiber: 2gSugar: 3gVitamin A: 800IUVitamin C: 50mgCalcium: 40mgIron: 2mg

Notes

Prep ahead by gathering and chopping all ingredients before cooking. Always taste and adjust seasoning before serving. Fresh ingredients maximize flavor, while avoiding freezing post-coconut milk keeps the soup's texture intact.

Tried this recipe?

Let us know how it was!