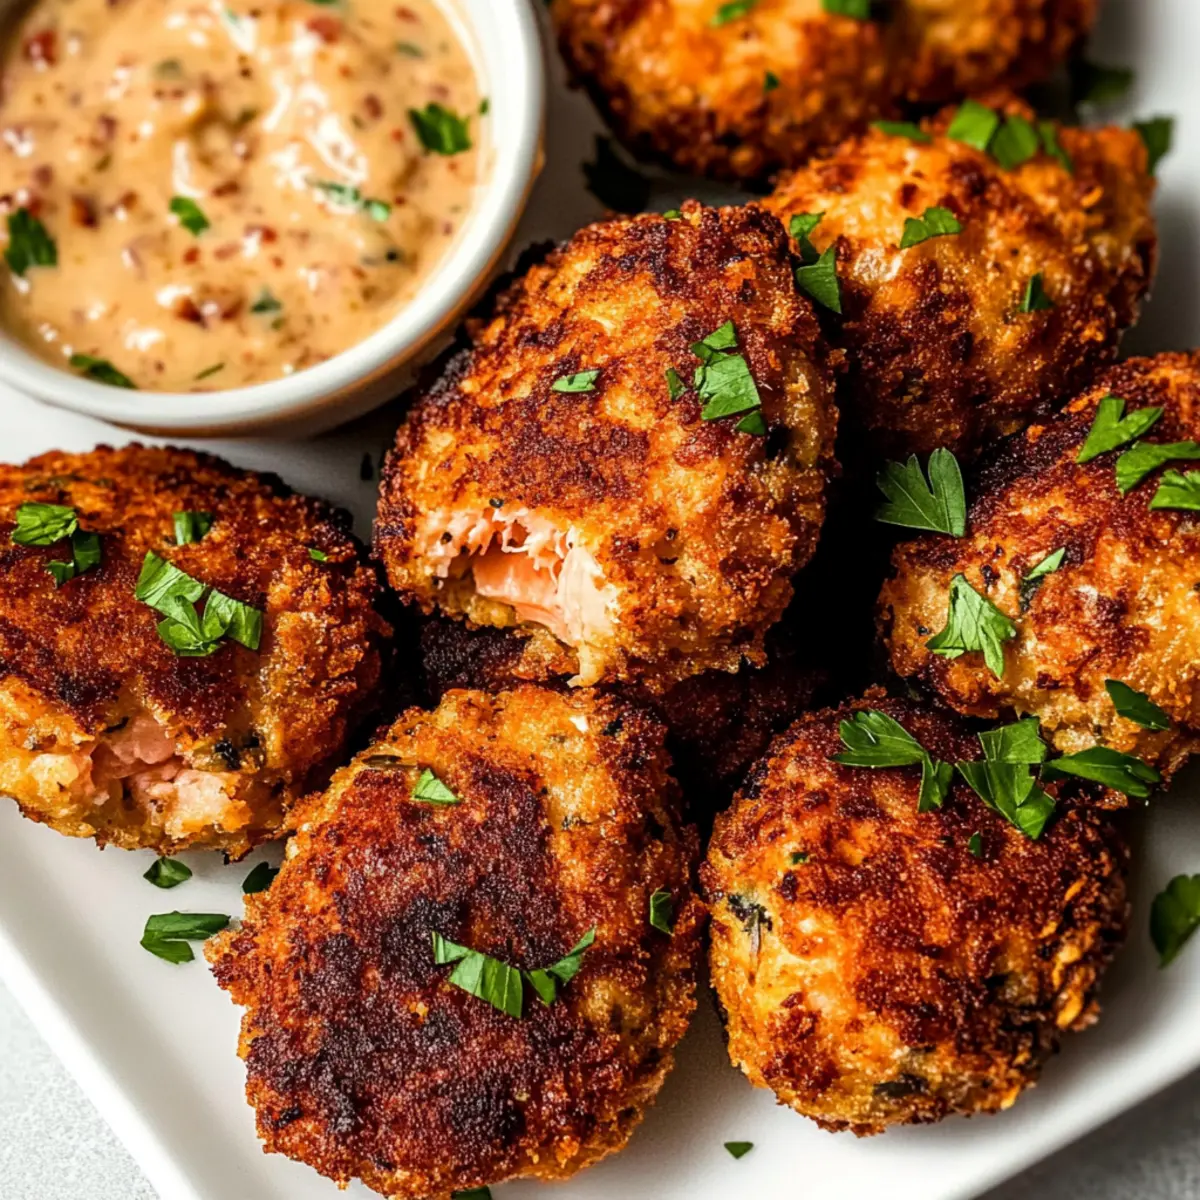
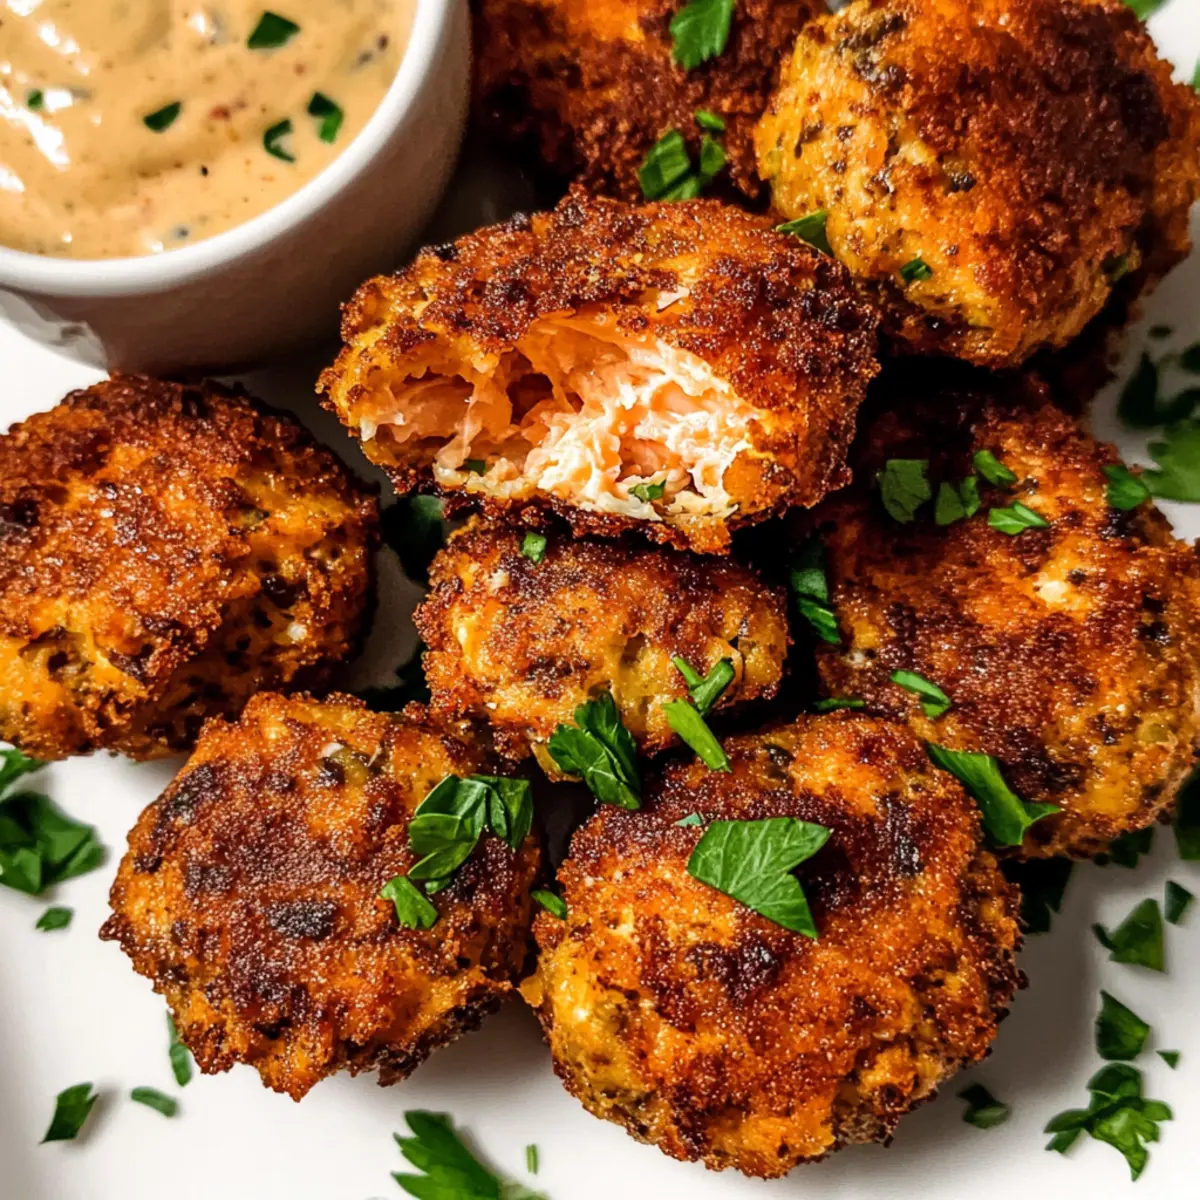
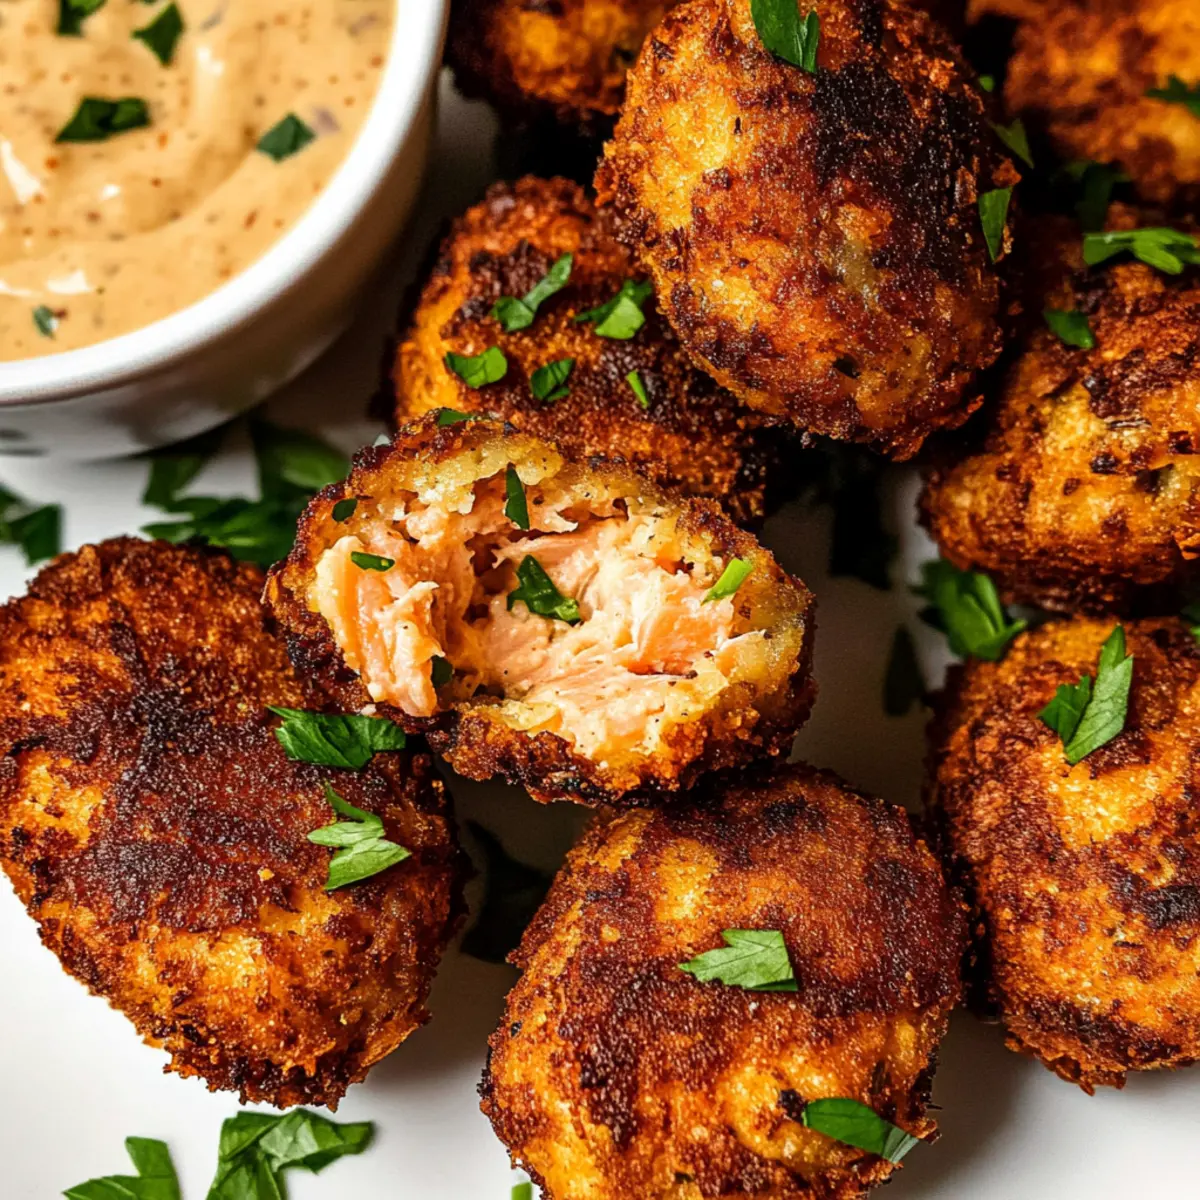
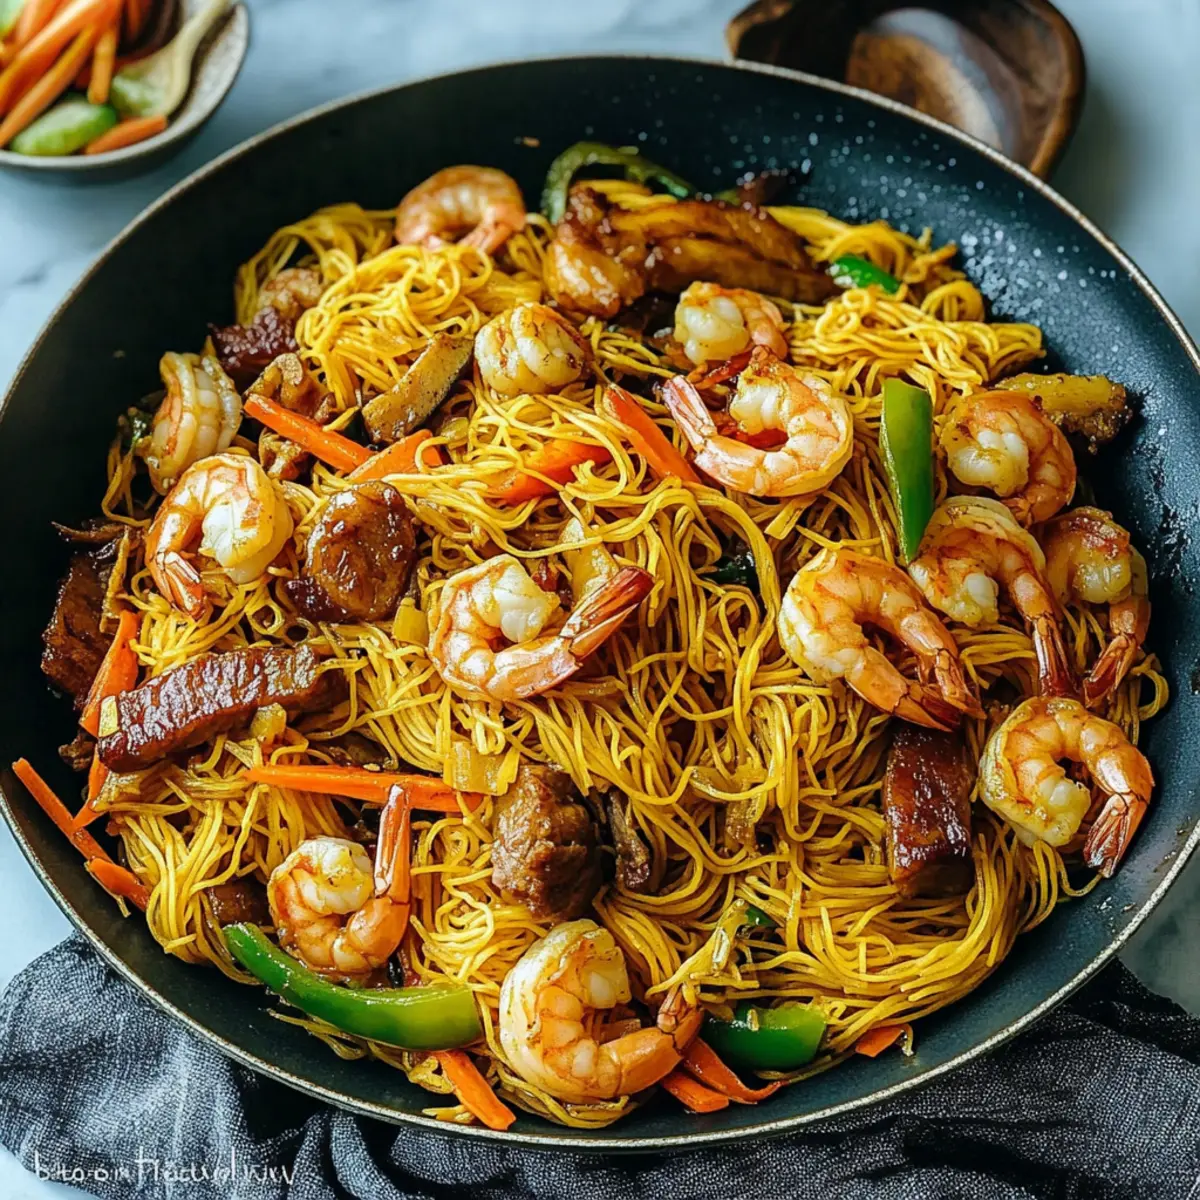
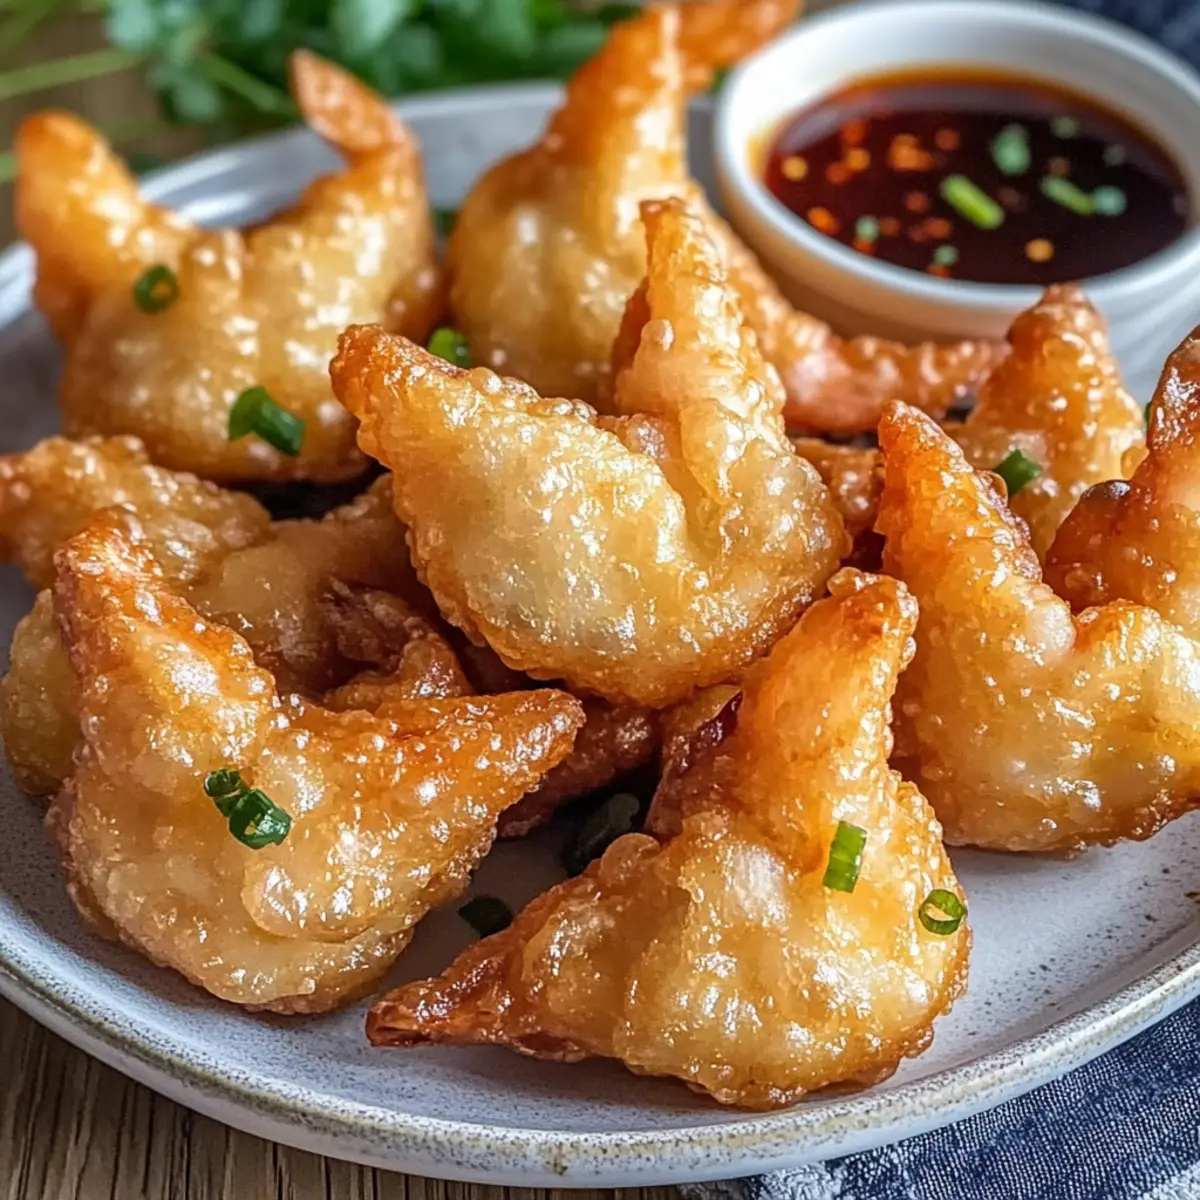
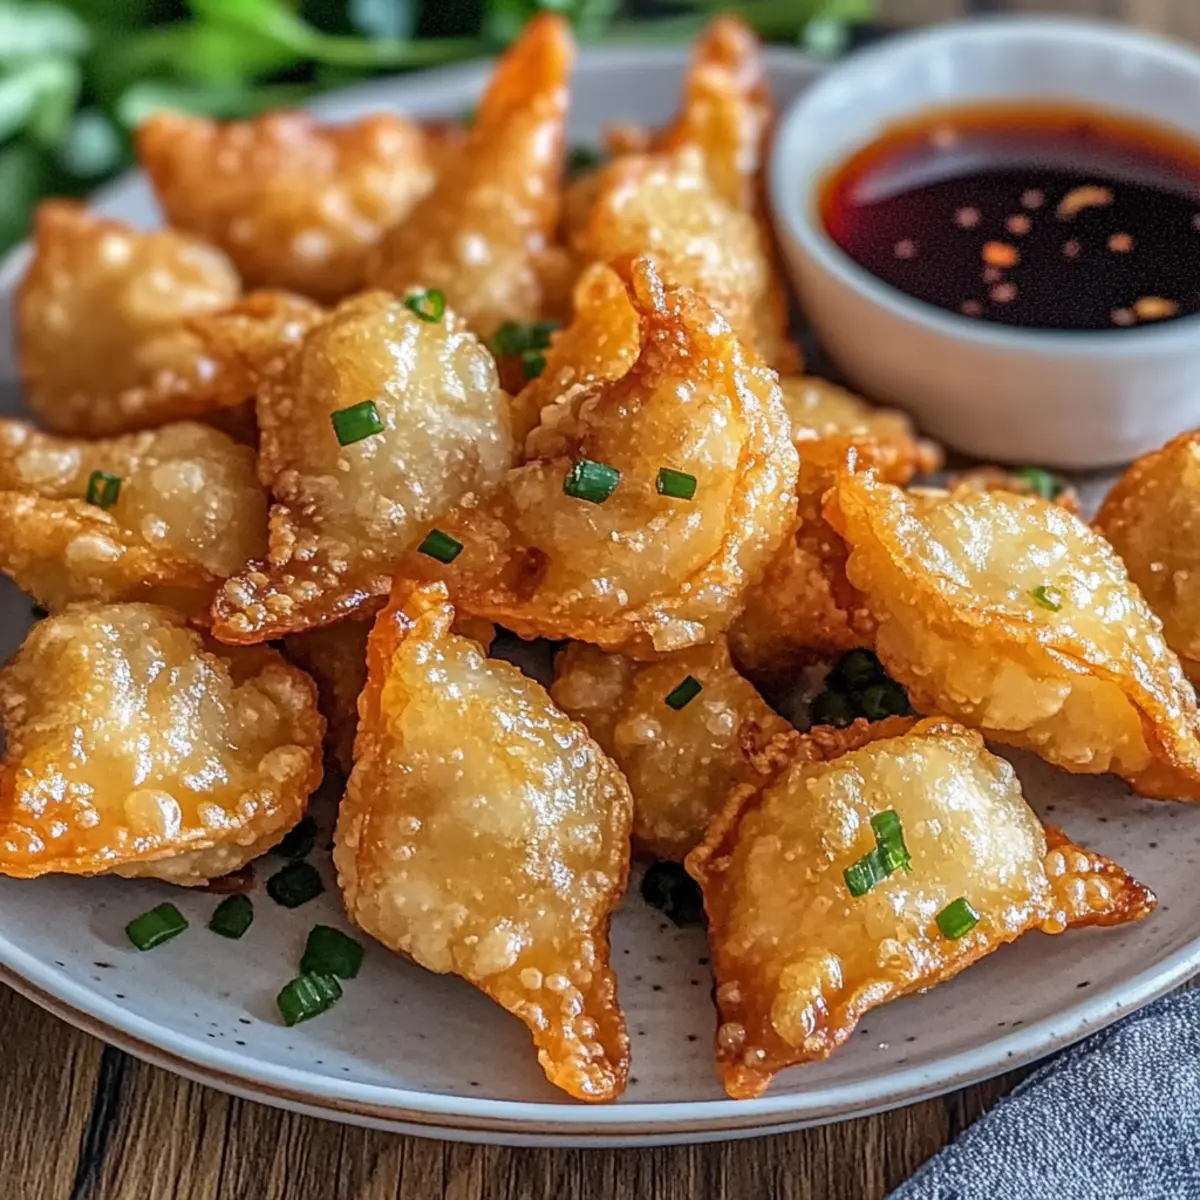
As I stood in the kitchen, the sizzling sound of frying filled the air, and I couldn’t help but smile at the magic happening right before my eyes. The aroma of garlic and ginger wafted through, setting the stage for my Crispy Wonton-Wrapped Shrimp, an appetizer that never fails to steal the show. This easy recipe is not only a crowd-pleaser but also brings the joy of homemade dining right to your table. With a golden, crunchy exterior and a succulent shrimp filling, these delightful bites are perfect for gatherings or when the craving hits at home. Plus, you can customize them with spicy twists or even vegetarian alternatives, making them versatile enough for any occasion. Curious to discover how to master this quick and delicious appetizer? Let’s dive into the recipe and make your next culinary moment unforgettable!
Why Are Crispy Wonton-Wrapped Shrimp a Must-Try?
Crowd-Pleaser: These crispy bites combine flavor and crunch, making them an instant hit at any gathering!
Endless Variations: From spicy chili flakes to creamy cheese, customize to your heart’s content.
Quick & Easy: With just a few simple steps, you can whip up this impressive appetizer in no time.
Healthy Options: Need a vegetarian twist? Substitute shrimp with tofu or avocado without losing the allure!
Perfect Pairings: Serve them alongside a refreshing cucumber salad for a delightful balance of textures.
Once you try these wontons, they’ll quickly become a favorite in your recipe repertoire!
Crispy Wonton-Wrapped Shrimp Ingredients
For the Wontons
- Shrimp – Peeled and deveined, providing a tender, sweet bite; opt for high-quality shrimp for the best flavor.
- Wonton wrappers – Thin and crispy for that satisfying crunch when fried; ensure they are fresh for optimal results.
- Egg – Used to seal the wonton wrappers, keeping your delightful shrimp filling intact during frying.
For the Flavor Mixture
- Garlic – Minced for a robust savory flavor that elevates the shrimp mixture.
- Green onions – Finely chopped to introduce a fresh, mild onion flavor that brightens the dish.
- Ginger – Grated to add warmth and depth, making every bite aromatic.
- Salt and pepper – Essential for seasoning the shrimp mixture to your taste; adjust for flavor balance.
For Cooking
- Oil – A neutral oil is required for frying; this ensures your wontons achieve that perfect crispiness without overwhelming flavors.
Optional Add-ins
- Chili flakes – For a spicy twist, incorporate these to add heat and excitement to your wontons.
- Cheese – Cream cheese or cheddar can create a rich, creamy filling that enhances the overall taste.
- Fresh herbs – Consider cilantro or parsley to brighten the flavor profile with a fresh touch.
- Chopped vegetables – Finely chopped bell peppers or carrots can add extra crunch and flavor contrast to the filling.
Using these ingredients, you’ll master the art of making Crispy Wonton-Wrapped Shrimp that will wow your guests!
Step‑by‑Step Instructions for Crispy Wonton-Wrapped Shrimp
Step 1: Prepare the Shrimp Mixture
Begin by finely chopping the green onions and mincing the garlic. In a mixing bowl, combine the peeled and deveined shrimp with the green onions, garlic, grated ginger, salt, and pepper. Mix thoroughly to ensure all flavors meld together, then cover the bowl and let the shrimp mixture marinate for 15 minutes at room temperature. This step infuses your crispy wonton-wrapped shrimp with a burst of flavor!
Step 2: Heat the Oil
While the shrimp mixture is marinating, pour about two inches of neutral oil into a deep pan and heat it over medium heat. Use a thermometer to monitor the temperature, aiming for around 350°F (175°C) for frying. Keep an eye on the oil, waiting until it’s shimmering but not smoking, which indicates it’s ready for the crispy wonton-wrapped shrimp.
Step 3: Assemble the Wontons
Lay a wonton wrapper on a clean surface, and place a generous spoonful of the shrimp mixture in the center. Lightly brush the edges of the wrapper with the beaten egg to help seal it. Fold the wrapper over the filling to form a triangle or bring the corners together to shape a pouch. Ensure there are no air pockets by pressing the edges tightly to secure your delightful filling inside.
Step 4: Fry the Wontons
Once the oil is hot, carefully place a few sealed wontons into the pan, ensuring not to overcrowd them. Fry for approximately 3-4 minutes, turning occasionally with a slotted spoon until they turn golden brown and crispy all over. The aroma wafting through your kitchen will be hard to resist, making this step a highlight for your crispy wonton-wrapped shrimp!
Step 5: Drain and Serve
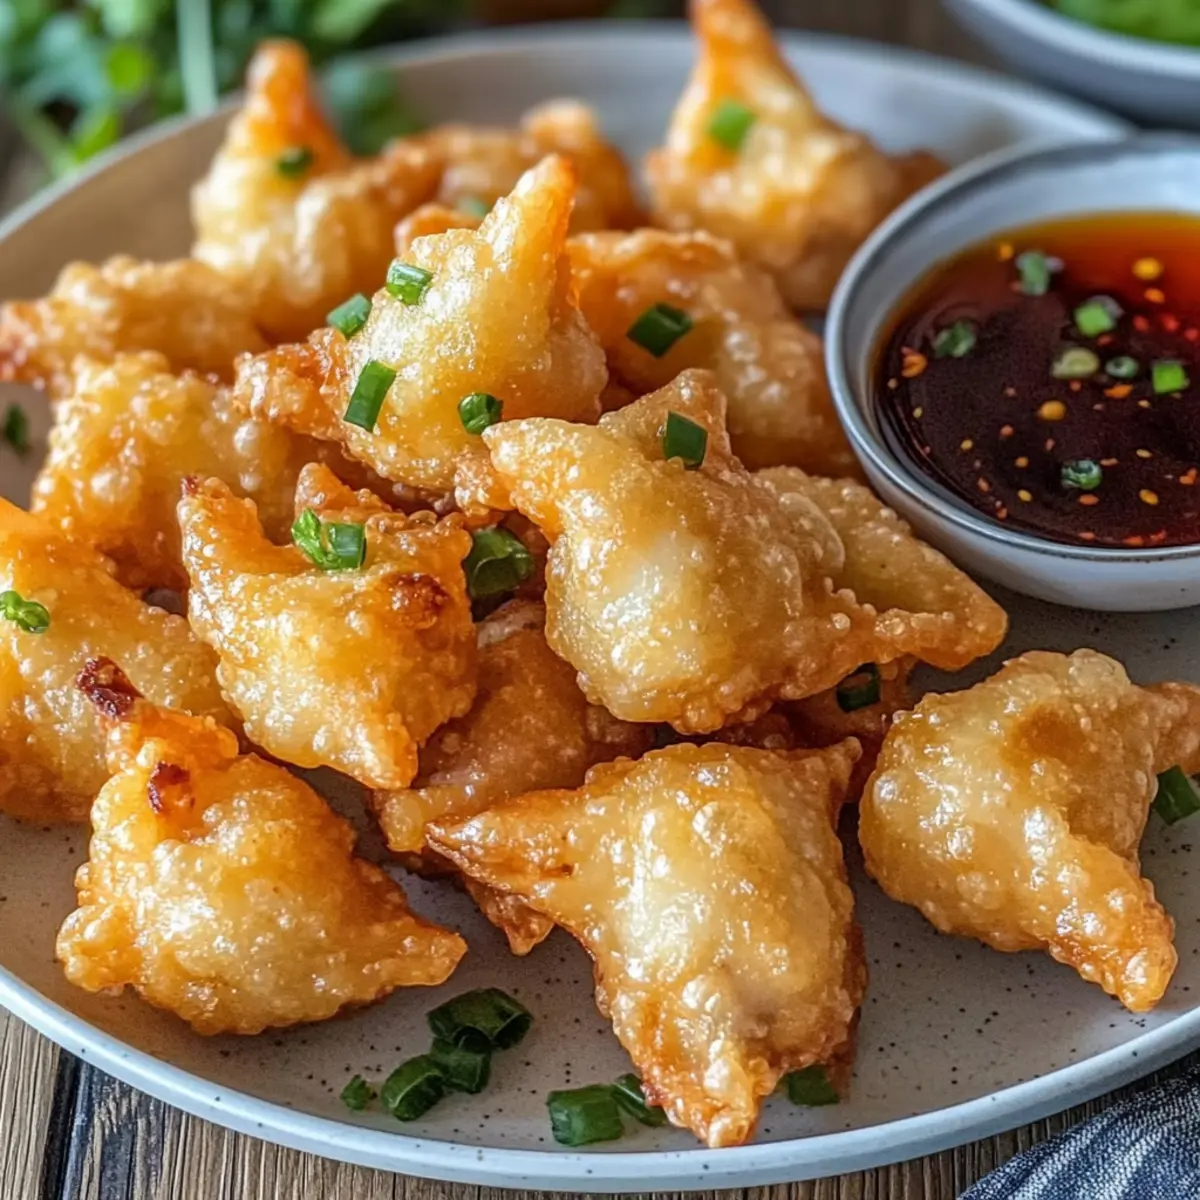
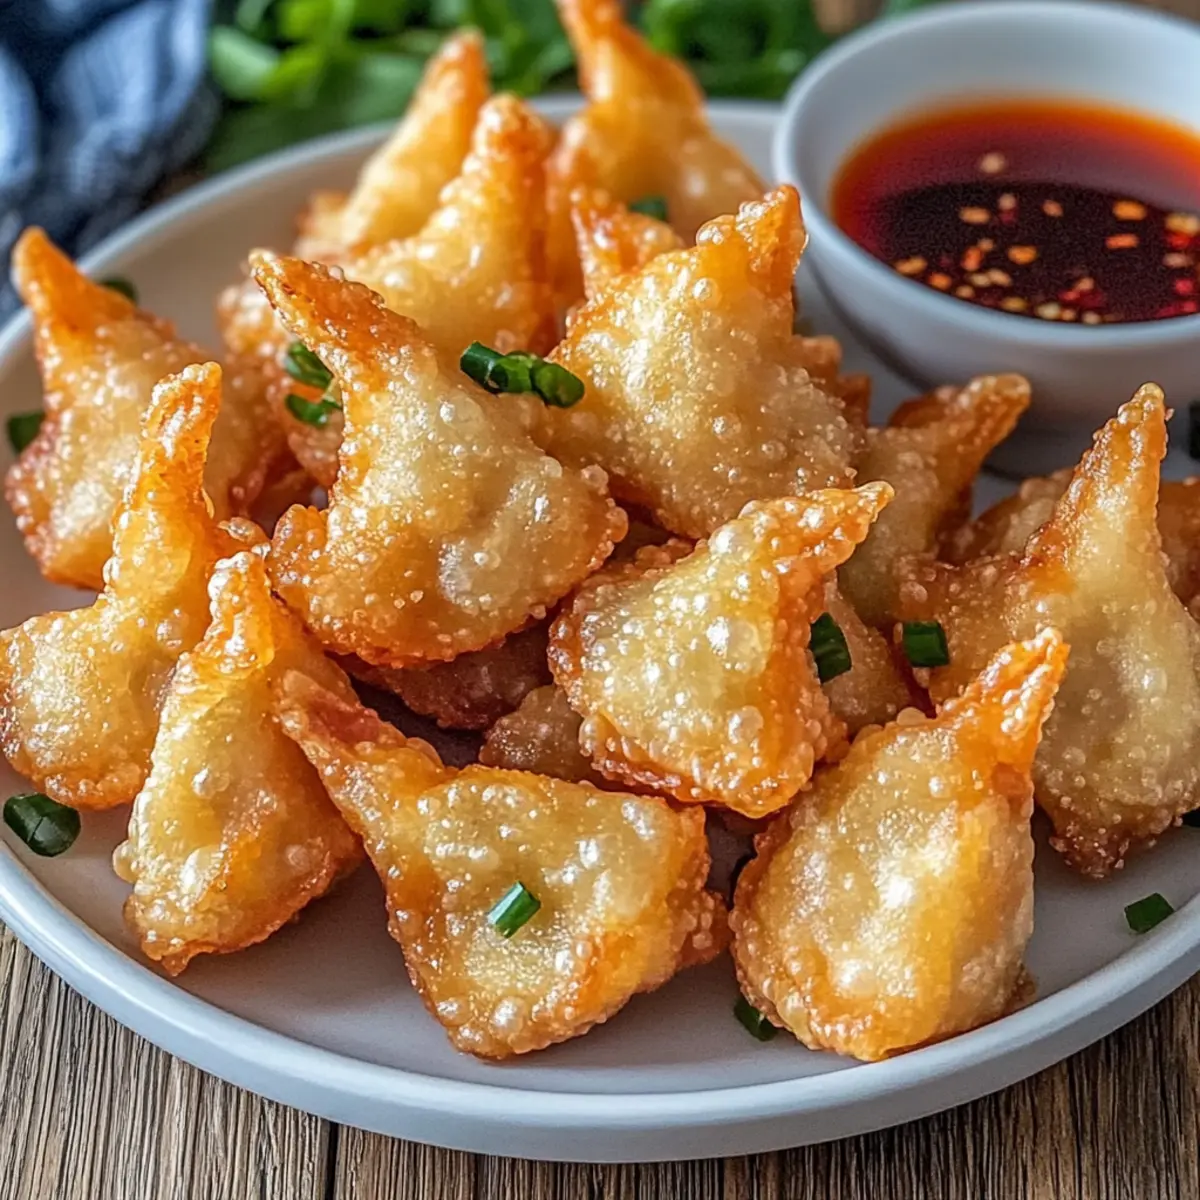
Using a slotted spoon, carefully remove the fried wontons from the oil and place them on a paper towel-lined plate to drain excess oil. Allow them to cool for a minute before arranging the crispy wonton-wrapped shrimp on a serving platter. Pair them with your favorite dipping sauces, such as sweet chili or soy sauce, and get ready to impress your guests with this delicious appetizer!
What to Serve with Crispy Wonton-Wrapped Shrimp?
Gearing up for a gathering or simply craving a flavorful snack? Let’s explore delectable pairings that will elevate your meal experience.
-
Refreshing Cucumber Salad: The cool crunch of cucumber salad balances out the crispy texture of the wontons, making every bite a delight.
-
Sweet Chili Sauce: This tangy, sweet dip enhances the shrimp’s flavors, adding an irresistible zing that guests will rave about.
-
Spicy Asian Slaw: A mix of crunchy vegetables with a zesty dressing adds brightness and freshness, complementing the crispy shrimp.
-
Coconut Rice: The creamy, fragrant notes of coconut rice offer a subtle sweetness that pairs perfectly with the savory shrimp.
-
Garlic Edamame: A protein-packed side that retains a satisfying crunch. Tossed simply with sea salt, these pods are addictive and nutritious.
-
Chilled Green Tea: Refreshing and light, this beverage cleanses the palate while enhancing the flavors of your appetizer.
-
Mango Salsa: The sweetness and acidity of fresh mango salsa add a vibrant touch to the plate, creating a harmony of flavor.
-
Mini Dessert Spring Rolls: For a sweet finish, serve these with a chocolate or mango filling, perfect for a cohesive Asian-inspired menu.
Variations & Substitutions for Crispy Wonton-Wrapped Shrimp
Feel free to customize these delightful wontons to suit your taste and dietary needs!
-
Spicy Twist: Add chili flakes to the shrimp mixture for an extra kick that ignites your taste buds. Spice lovers will appreciate this fiery update!
-
Vegetarian Option: Substitute shrimp with diced avocado or tofu, providing a creamy texture that complements the crispy exterior. This not only makes it vegetarian but equally delicious!
-
Creamy Filling: Incorporate cream cheese or pepper jack into the shrimp mixture for a rich and indulgent surprise inside each wonton. Creamy goodness is always a crowd-pleaser!
-
Flavor Boost: Add fresh herbs like cilantro or basil to the filling for a burst of freshness. These herbs elevate the flavor profile and add a beautiful touch!
-
Crunchy Veggie: Mix in finely chopped bell peppers or carrots to the shrimp mixture for added crunch and vibrant color. It’s a tasty way to amp up the nutrition without compromising flavor!
-
Zesty Dipping Sauce: Pair your crispy wontons with a homemade mango salsa or spicy peanut sauce for an exciting flavor contrast. A great sauce can take your appetizer to the next level!
-
Savory Garlic: Infuse the oil with garlic by briefly sautéing minced garlic before frying the wontons. This aromatic touch enhances the overall flavor and makes your kitchen smell divine!
-
Herbed Wrappers: Use spinach or beet wonton wrappers for a pop of color and subtle flavor. They make your dish visually stunning and add a unique twist!
With these variations, you’ll never run out of ways to enjoy your Crispy Wonton-Wrapped Shrimp! If you’re feeling adventurous, try making a batch with different fillings and see which one becomes your family’s new favorite! Wouldn’t they be perfect served alongside a refreshing cucumber salad or even some Asian-inspired slaw? Happy cooking!
Storage Tips for Crispy Wonton-Wrapped Shrimp
-
Room Temperature: It’s best to enjoy crispy wonton-wrapped shrimp right after frying. If left out, they should not be kept at room temperature for more than 2 hours to ensure freshness.
-
Fridge: Store any leftover crispy wonton-wrapped shrimp in an airtight container in the fridge for up to 3 days. Make sure they are completely cooled before sealing to prevent condensation.
-
Freezer: For longer storage, freeze the wontons before frying. Arrange them in a single layer on a baking sheet; once frozen, transfer to a freezer bag and store for up to 3 months. Fry straight from frozen for best results.
-
Reheating: To reheat leftover crispy wonton-wrapped shrimp and maintain their crunch, use the oven. Bake at 375°F (190°C) for about 10-15 minutes, until warmed through and crispy again.
Expert Tips for Crispy Wonton-Wrapped Shrimp
-
Marinate for Flavor: Ensure the shrimp is adequately marinated for at least 15 minutes to enhance the overall flavor of your crispy wonton-wrapped shrimp.
-
Maintain Oil Temperature: Use a thermometer to help keep the oil temperature consistent at 350°F (175°C); this prevents oily or soggy wontons.
-
Avoid Overcrowding: Fry in small batches; overcrowding the pan can lead to uneven cooking and less crispiness. Give each wonton space to fry perfectly.
-
Seal Properly: Make sure you press the edges of the wonton wrappers tightly to avoid leaks during frying; loose edges can lead to a mess in the oil.
-
Experiment with Fillings: Don’t hesitate to add optional ingredients like cheese or chopped vegetables for a twist; they elevate the flavor of your crispy wonton-wrapped shrimp.
Make Ahead Options
Preparing Crispy Wonton-Wrapped Shrimp ahead of time is a game changer for busy cooks! You can assemble the wontons up to 24 hours in advance; just place them on a baking sheet lined with parchment paper, cover with plastic wrap, and refrigerate. If you’re looking to prep even further, the shrimp mixture can be made up to 3 days ahead and stored in an airtight container in the fridge. To maintain quality, avoid frying them until you’re ready to serve—this ensures that the wontons stay crispy and delightful. When it’s time to enjoy your appetizer, simply heat the oil and fry the wontons until golden brown, letting the irresistible aroma fill your kitchen while saving you valuable time!
Crispy Wonton-Wrapped Shrimp Recipe FAQs
How can I select the best shrimp for this recipe?
Absolutely! Look for shrimp that are firm and have a slight sheen. Fresh shrimp should not have any dark spots or an unusual odor. Larger shrimp, such as 16/20 count shrimp, provide a nice bite and are easy to handle when wrapping in wontons.
What’s the best way to store leftover crispy wonton-wrapped shrimp?
I recommend keeping any leftovers in an airtight container in the fridge for up to 3 days. Make sure they’re completely cooled before sealing to prevent moisture buildup, which can make them soggy.
Can I freeze crispy wonton-wrapped shrimp?
Yes, you can! To freeze, arrange the assembled but un-fried wontons in a single layer on a baking sheet and freeze until solid. Once frozen, transfer them to a freezer bag and store for up to 3 months. To cook from frozen, no need to thaw! Just fry directly from the freezer until golden and crispy, which typically takes an extra minute.
How do I maintain the crispness when reheating?
To reheat leftover crispy wonton-wrapped shrimp, preheat the oven to 375°F (190°C) and bake for about 10-15 minutes. This helps to restore their delightful crunch instead of making them soggy like microwaving would.
What can I use as a vegetarian substitute for shrimp?
For a delicious vegetarian option, you can substitute the shrimp with finely diced tofu or even mashed avocado. If using tofu, make sure to press and drain it well before mixing with the other ingredients to prevent excess moisture, and season it liberally for flavor!
Can my pets eat shrimp from this recipe?
While shrimp is generally safe for dogs in moderation, always consult with your veterinarian before introducing new foods into your pet’s diet. Keep in mind that the seasonings and fried nature of these wontons could be unsuitable for them, so it’s best to stick with plain shrimp without any added ingredients.
Crispy Wonton-Wrapped Shrimp That’ll Wow Your Guests
Ingredients
Equipment
Method
- Prepare the shrimp mixture by combining shrimp, green onions, garlic, ginger, salt, and pepper in a bowl. Marinate for 15 minutes.
- Heat oil in a deep pan to 350°F (175°C).
- Assemble the wontons by placing shrimp mixture on wonton wrappers and sealing with egg.
- Fry wontons for 3-4 minutes until golden brown.
- Drain on paper towels and serve with your favorite dipping sauces.