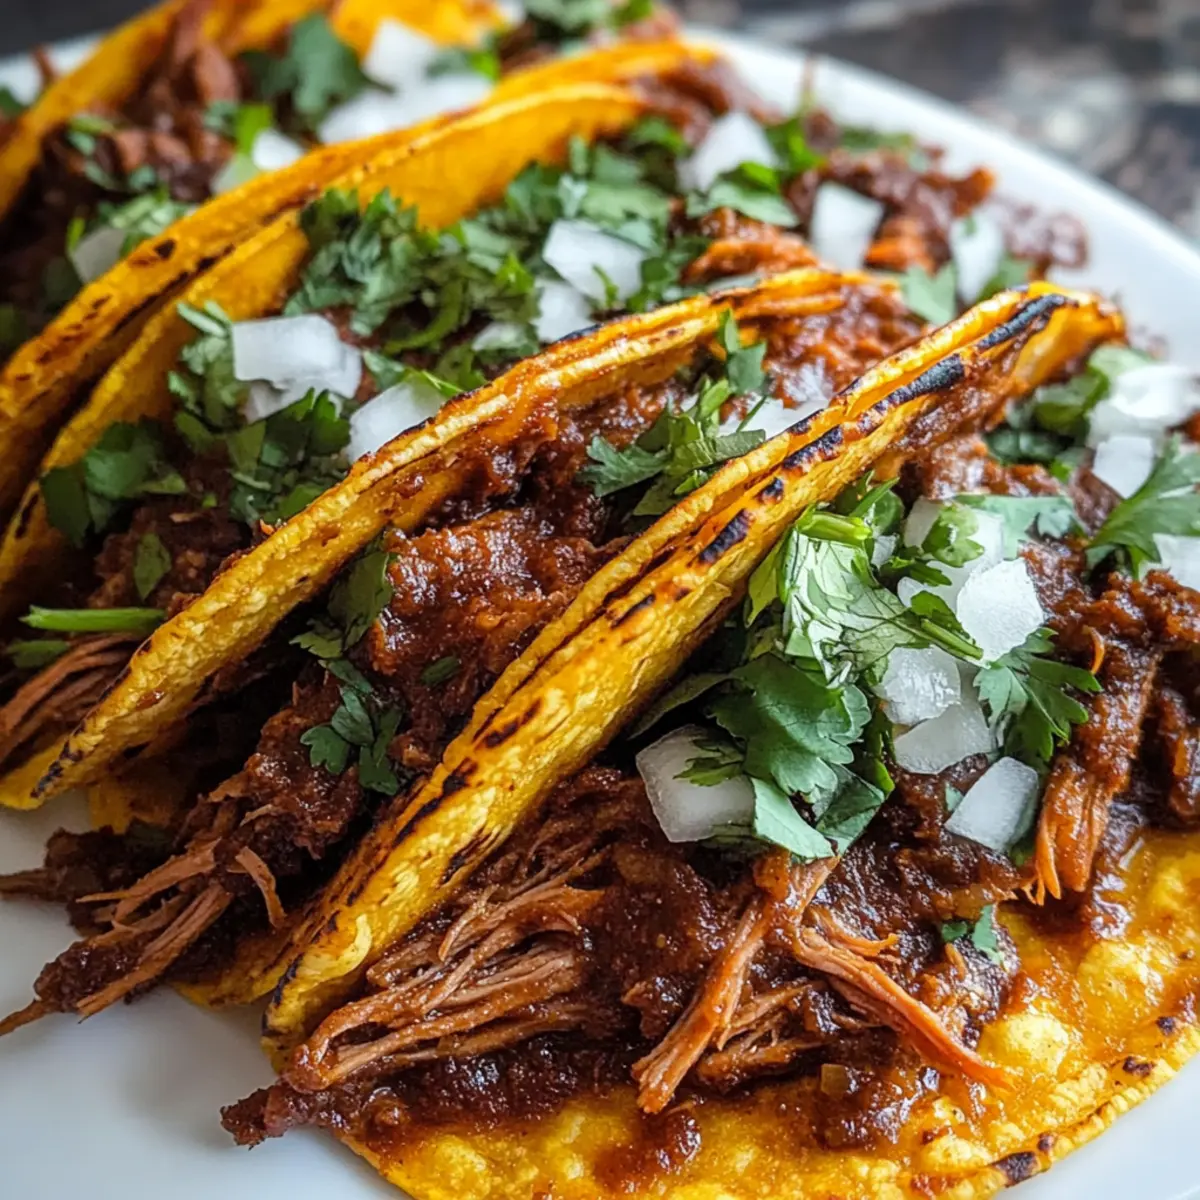
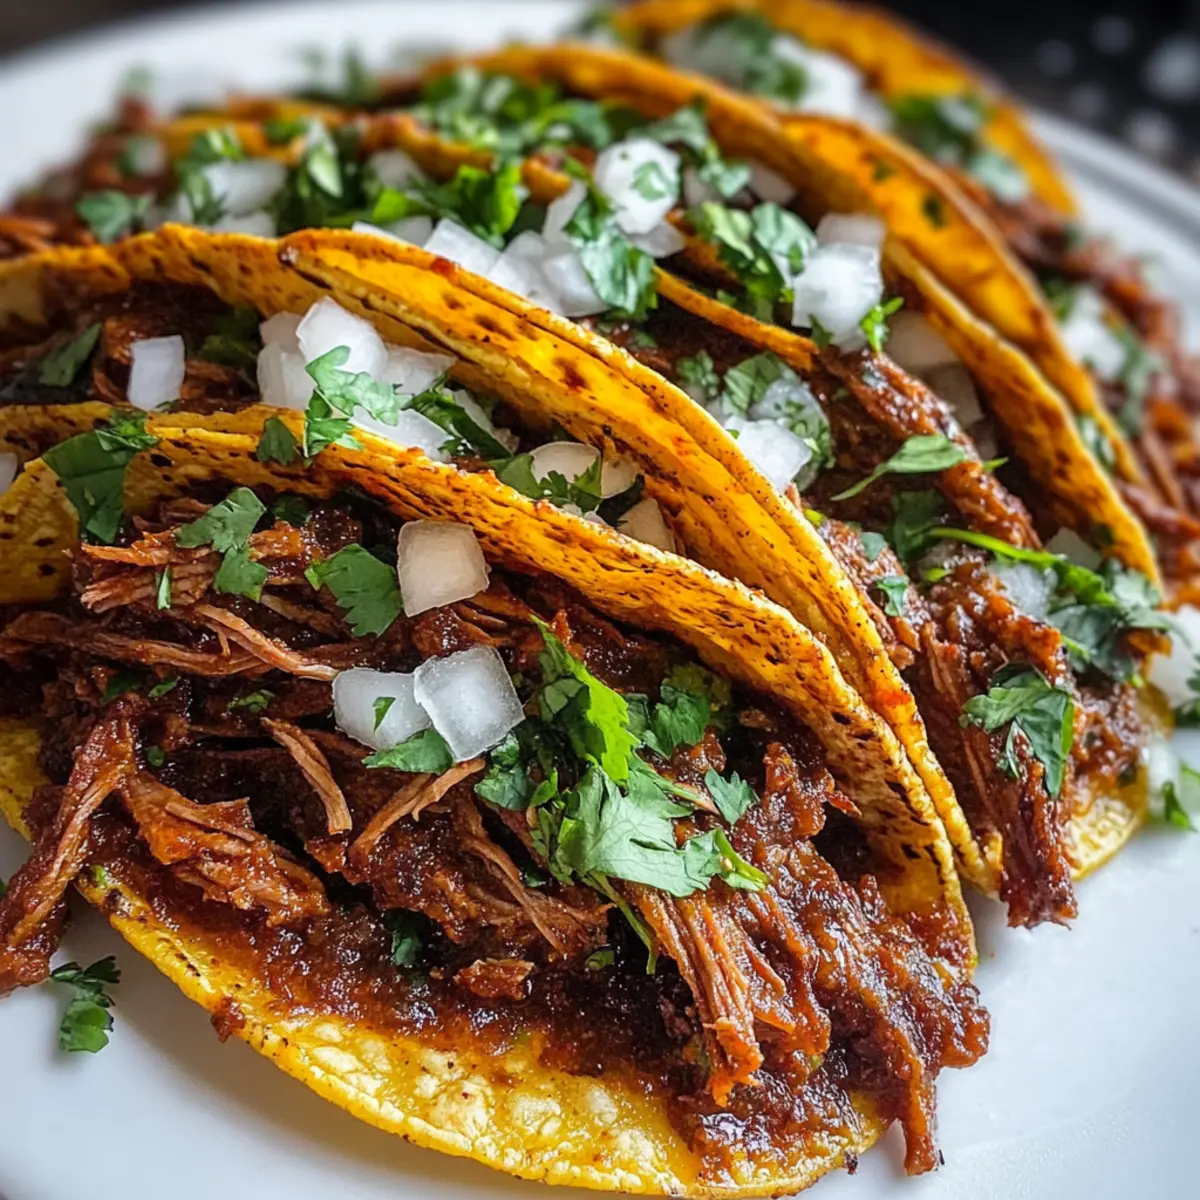
As I wandered through the vibrant streets of Guadalajara, the rich aroma of spices wafting from colorful food stalls made my stomach rumble with anticipation. That unforgettable experience inspired me to recreate the magic of Mexican cuisine right at home, which is why I’m thrilled to share my recipe for Crock Pot Birria Tacos. These authentic tacos are not only impressively simple to make but also perfect for family gatherings, ensuring you spend less time in the kitchen and more time enjoying with loved ones! With bold, slow-cooked flavors and tender beef, each bite is a celebration of savory goodness. Curious to discover how to bring this mouthwatering dish to your table? Let’s dive into the delicious details!

Why are Birria Tacos so irresistible?
Authenticity: Whisk yourself away to Mexico with every bite of these Crock Pot Birria Tacos; they are a true reflection of rich culinary traditions.
Effortless Cooking: Set your slow cooker and let it do the magic—just hands-off preparation for a bustling family meal!
Flavor Explosion: The lingual dance of spices and tender beef creates a fiesta of flavor that keeps everyone coming back for more.
Crowd-Pleaser: Perfect for any occasion, these tacos will please picky eaters and the adventurous alike! Pair them with a side of rice or beans for a complete meal.
Customizable: Get creative! Adjust the spice levels or switch up the protein—this recipe is as versatile as it is delicious. Want to learn more about different variations? Check out variation ideas for a taco experience tailored just for you!
Crock Pot Birria Tacos Ingredients
Unlock the secrets to deliciousness with these amazing ingredients!
For the Beef
- Beef (Chuck Roast or Short Ribs) – This is your main protein, providing a rich flavor base; feel free to substitute with lamb for something different!
For the Sauce
- Dried Chilies (e.g., Guajillo, Ancho) – These add essential spiciness and depth to your broth; remember to soak them in hot water for easier blending.
- Onion – Gives a touch of sweetness and aroma; shallots make a great substitute if you have them on hand.
- Garlic – An absolute flavor enhancer; always go for fresh garlic over powdered for the best results.
- Tomatoes – They bring acidity and moisture; canned tomatoes are a fine alternative if fresh ones aren’t available.
- Beef Broth – Essential for cooking, it enhances the beef flavor beautifully; for a lighter take, vegetable broth works too!
- Vinegar (White or Apple Cider) – This balances the flavors with a hint of acidity; it’s optional, but it can brighten your dish!
For Seasoning
- Oregano, Cumin, Bay Leaves, Salt, and Pepper – These are your trusty seasonings, elevating the flavor profile of your dish; the soy-based seasonings are a must for authentic crock pot birria tacos!
Each ingredient plays a vital role in creating the ultimate platter of Crock Pot Birria Tacos, ensuring your family and friends will be raving about this dish for days!
Step-by-Step Instructions for Crock Pot Birria Tacos
Step 1: Prep Chilies
Begin by soaking your dried chilies, such as Guajillo and Ancho, in hot water for about 15 minutes. This will soften the chilies, making them easier to blend. Once softened, drain the chilies and place them in a blender. Add diced onion, fresh garlic, and tomatoes to the blender, then blend until you achieve a smooth and vibrant sauce.
Step 2: Combine in Crock Pot
Take your prepared beef, either chuck roast or short ribs, and place it in the crock pot. Pour the chili sauce you just blended over the meat, ensuring it’s well coated. Next, add beef broth, a splash of vinegar, and sprinkle in oregano, cumin, bay leaves, salt, and pepper. Stir gently to combine all the ingredients, prepping it for a full day of delightful slow-cooking.
Step 3: Cook
Set your crock pot to low and let it work its magic for 8 to 10 hours. As it cooks, the meat will tenderize beautifully, absorbing all the rich flavors from the broth. You’ll know it’s done when the beef can be easily shredded with a fork and the aroma has filled your kitchen with a wonderful, savory scent.
Step 4: Shred Beef
Once the cooking time is complete, carefully remove the beef from the crock pot and place it on a cutting board. Using two forks, shred the beef into bite-sized pieces. Return the shredded beef to the crock pot, mixing it back into the flavorful sauce for a cohesive and delicious filling for your tacos.
Step 5: Fry Tortillas
Heat a generous amount of oil in a skillet over medium heat. Dip tortillas quickly into the fat layer of the broth from the crock pot, allowing them to soak up some of that rich flavor. Fry the dipped tortillas in the hot oil for about 1-2 minutes on each side, until they’re golden and crispy, creating a perfect vessel for your filling.
Step 6: Assemble Tacos
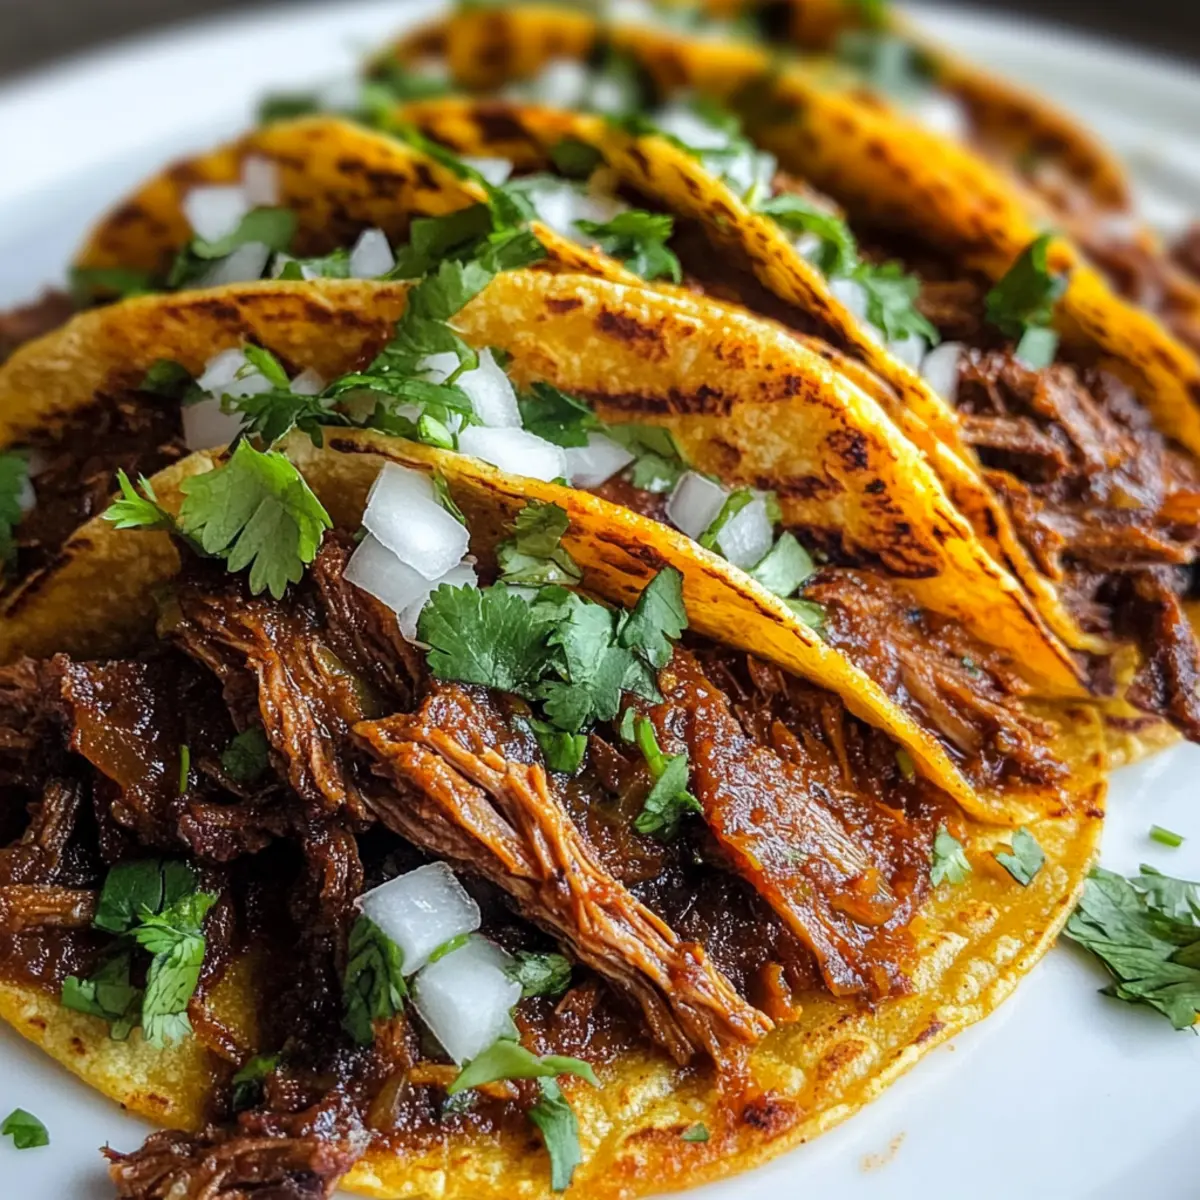
Once the tortillas are ready, fill each one with a portion of the shredded beef mixture, folding them in half. Return the assembled tacos to the skillet and fry them again for 1-2 minutes on each side until they are crispy and heated through. This step gives your Crock Pot Birria Tacos an irresistible crunch that perfectly complements the savory filling.
Step 7: Serve
Plate your delicious Crock Pot Birria Tacos and serve them warm with a side of the rich broth for dipping. Garnish with freshly chopped cilantro and diced onions for an added burst of flavor. These tacos are perfect for sharing and will surely create a memorable meal filled with authentic Mexican flavor.
Make Ahead Options
These Crock Pot Birria Tacos are perfect for meal prep enthusiasts! You can prepare the chili sauce by blending the soaked chilies, onion, garlic, and tomatoes up to 24 hours in advance; just store it in an airtight container in the refrigerator to keep the flavors vibrant. Additionally, you can season the beef and refrigerate it up to 3 days prior to cooking. When ready to enjoy, simply add the marinated beef and chili sauce to your crock pot, cover, and let it cook for 8-10 hours. This way, you’ll have authentic, flavor-packed tacos with minimal effort, allowing you more time to relax and savor the meal with your loved ones!
What to Serve with Crock Pot Birria Tacos
Elevate your taco night by pairing these savory delights with complementary sides and drinks that will transport your taste buds straight to Mexico.
-
Spanish Rice: A fluffy, seasoned rice adds a cozy texture that soaks up all those rich taco flavors perfectly.
-
Refried Beans: Creamy beans offer a satisfying contrast, enhancing the comforting side experience; top with cheese for an extra touch.
-
Fresh Salsa: A zesty tomato salsa adds brightness, freshness, and crunch, balancing the robust tastes of the birria in every bite.
-
Guacamole: The creamy, buttery essence of guacamole cools the palate and enhances the overall flavor experience—simply irresistible!
-
Cilantro Lime Slaw: This refreshing slaw brings a delightful crunch and acidity, perfectly cutting through the richness of the tacos.
-
Mexican Street Corn: Sweet, smoky, and slightly spicy, elote is a festive side that harmonizes beautifully with the deeper flavors of the tacos.
-
Churros: For dessert, crispy churros dusted with cinnamon sugar offer a sweet finish that pairs wonderfully after savoring savory tacos.
-
Margaritas: Refreshing and tangy margaritas create a celebratory atmosphere, perfectly complementing the spicy and savory notes of the dish.
Make your meal a memorable fiesta by selecting your favorites from this pairing list!
How to Store and Freeze Crock Pot Birria Tacos
Fridge: Store leftover Crock Pot Birria Tacos in an airtight container for up to 3 days. Separate the beef filling from the tortillas to maintain texture.
Freezer: For longer storage, freeze the beef filling in a freezer-safe container for up to 3 months. Thaw overnight in the fridge when ready to use.
Reheating: Reheat the beef filling on the stovetop or microwave until heated through. For freshly fried tortillas, consider reheating them in a skillet for that delightful crispiness.
Storage Tip: Always label your containers with the date and contents, making it easier to keep track of your delicious leftovers!
Expert Tips for Crock Pot Birria Tacos
-
Tender Meat: Make sure your beef is well marbled; it will result in more tender, flavorful meat that’s easier to shred. If in doubt, cook longer.
-
Chilies Prep: Soaking dried chilies is critical for easy blending. Don’t skip this step; it enhances the sauce’s depth and flavor.
-
Tortilla Technique: For perfectly crispy tortillas, don’t soak them too long in the broth. A quick dip will absorb flavor without making them soggy.
-
Customize Spice Levels: Feel free to mix and match chilies to suit your family’s taste. Add more hotter varieties for a kick!
-
Leftover Love: If you have leftovers, store the beef and broth separately to maintain texture. Reheat them together for the best flavor.
Each of these helpful tips will elevate your Crock Pot Birria Tacos experience while ensuring everyone enjoys the authentic taste you create!
Variations & Substitutions
Feel free to make this recipe your own and unleash your creativity in the kitchen!
- Lamb Swap: Substitute beef with lamb for a unique twist that adds a rich, gamey flavor!
- Spicy Kick: Include chipotle peppers for a smoky heat that will tantalize your taste buds.
- Vegetarian Delight: Use jackfruit or mushrooms instead of meat for a hearty, plant-based alternative.
- Corn Tortillas: Swap out flour tortillas for corn for a gluten-free option and a traditional taste.
- Smoky Flavor: Add a dash of smoked paprika to the sauce to deepen the flavor profile.
- Extra Veggies: Toss in some diced bell peppers or carrots to the crock pot for a delightful veggie boost.
- Herb Infusion: Mix in fresh cilantro or parsley at the end for a burst of freshness and color.
- Heat Level: For kids or sensitive palates, omit the dried chilies and use sweet bell peppers instead; they’re great for flavor without the spice!
Feel inspired to explore these delightful options, and if you’re looking for more creative ideas, check out these variation ideas for a taco experience tailored just for you!
Crock Pot Birria Tacos Recipe FAQs
What types of beef can I use for Birria Tacos?
Absolutely! While Chuck Roast and Short Ribs are traditional choices for their richness and tenderness, you can also experiment with different cuts such as Brisket or even Lamb for a unique twist. Each cut brings its own flavor and texture, making each batch a delightful surprise!
How should I store leftovers?
You can store leftover Crock Pot Birria Tacos in an airtight container in the refrigerator for up to 3 days. I recommend keeping the beef filling separate from the tortillas to maintain their texture and crispiness. For added convenience, you can also label your containers with the date to keep track of freshness.
Can I freeze the beef filling, and how?
Yes, you can freeze the beef filling for up to 3 months! Just let it cool completely before transferring it to a freezer-safe container. Be sure to remove as much air as possible to prevent freezer burn. To thaw, simply place it in the refrigerator overnight. When ready to eat, reheat on the stovetop or microwave until warmed through.
What can I do if my tortillas are coming out soggy?
If your tortillas are soggy, it often means they’ve absorbed too much moisture. To avoid this, dip them quickly into the broth rather than soaking them. Also, consider frying them at a higher temperature to achieve a nice crispiness. They should be able to hold the filling without falling apart!
What if I have dietary restrictions, like gluten intolerance?
No problem at all! You can easily make these Crock Pot Birria Tacos gluten-free by using corn tortillas instead of flour. They’re just as delicious and provide a delightful flavor contrast to the beef filling. If you have concerns about other ingredients or allergies, always double-check labels to ensure everything meets your dietary needs.
How should I adjust for spice levels?
To cater to varying spice preferences, start with a mild blend of chilies, like Guajillo and Ancho. If you’re cooking for someone who enjoys heat, you can easily add spicier varieties like Pasilla or Chipotle. Always taste the blend before cooking to ensure it meets your desired level of spiciness!
Crock Pot Birria Tacos for a Flavorful Family Fiesta
Ingredients
Equipment
Method
- Soak the dried chilies in hot water for about 15 minutes to soften. Drain and blend with onion, garlic, and tomatoes.
- Place the prepared beef in the crock pot. Pour the blended chili sauce over the meat, then add beef broth, vinegar, and seasonings.
- Set the crock pot to low and cook for 8 to 10 hours until the meat is tender and shreds easily.
- Remove the beef from the crock pot, shred it, and mix it back into the sauce.
- Heat oil in a skillet. Dip tortillas in the broth and fry for 1-2 minutes per side until golden and crispy.
- Fill each tortilla with shredded beef and fry again for 1-2 minutes until heated through and crispy.
- Serve warm with rich broth for dipping and garnish with cilantro and onions.