Get my cookbooks

Irish Potato Cakes: Discover the Perfect Recipe!

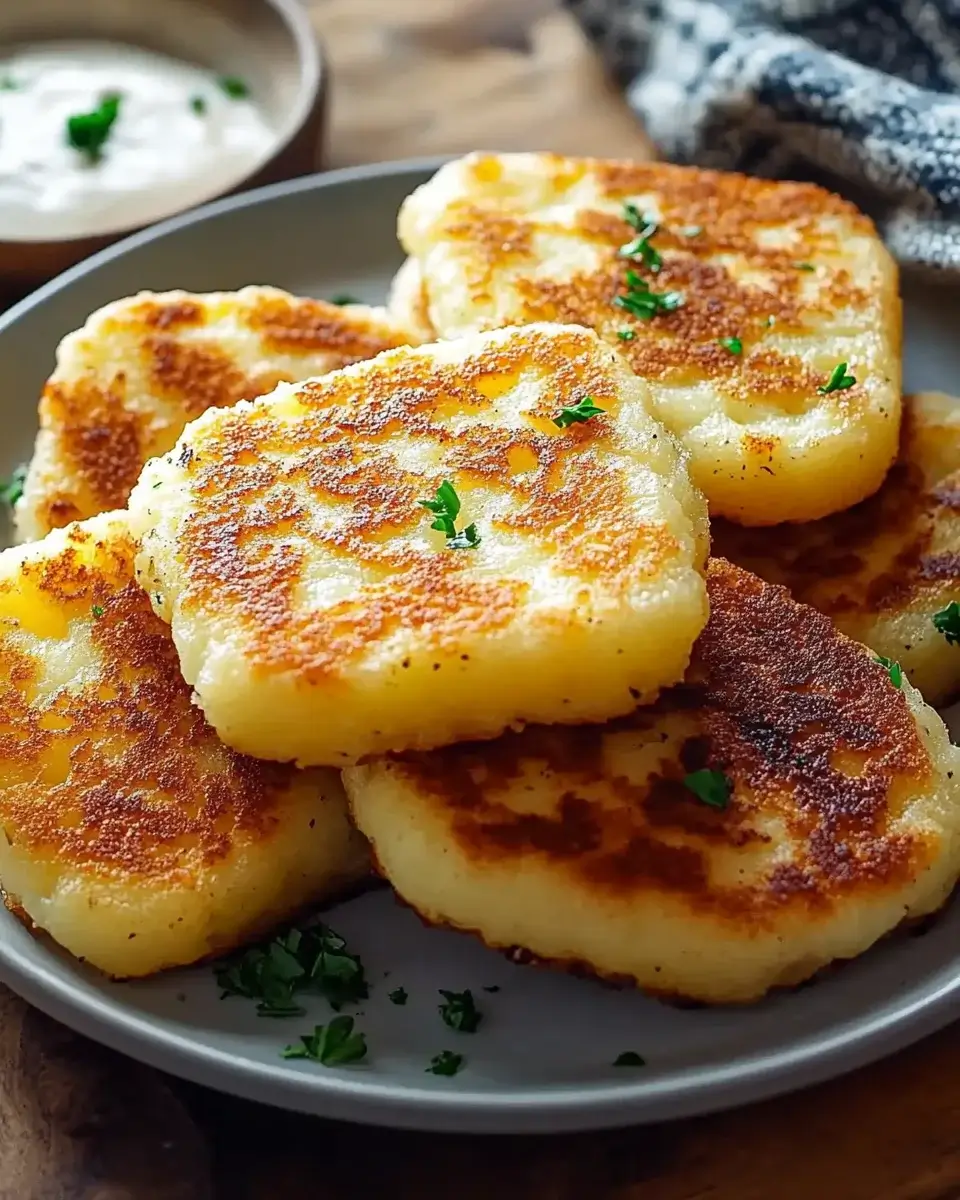
Introduction to Irish Potato Cakes

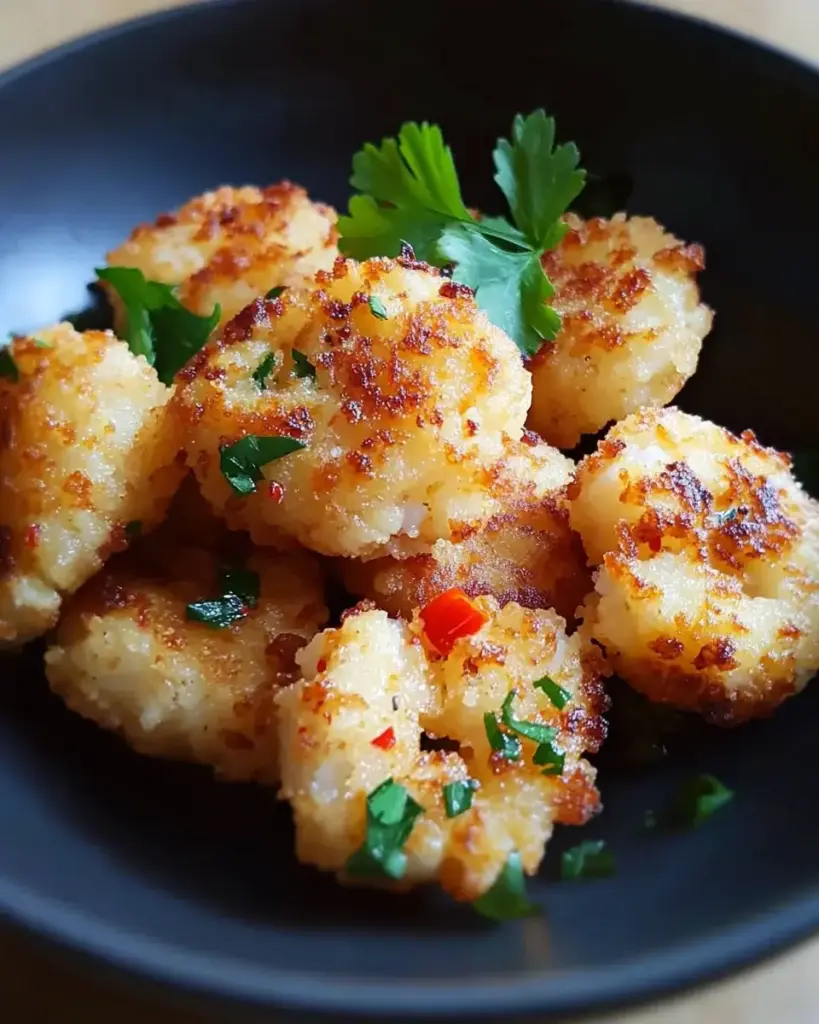
Growing up, my kitchen was always filled with the comforting aroma of home-cooked meals. One dish that stood out was Irish Potato Cakes. These delightful treats are not just a recipe; they’re a warm hug on a plate. Perfect for a quick solution on a busy day or a side dish that impresses your loved ones, they bring a taste of Ireland right to your table. With just a handful of ingredients, you can whip up crispy, golden cakes that are sure to please everyone. Let’s dive into this simple yet satisfying recipe!

Why You’ll Love This Irish Potato Cakes

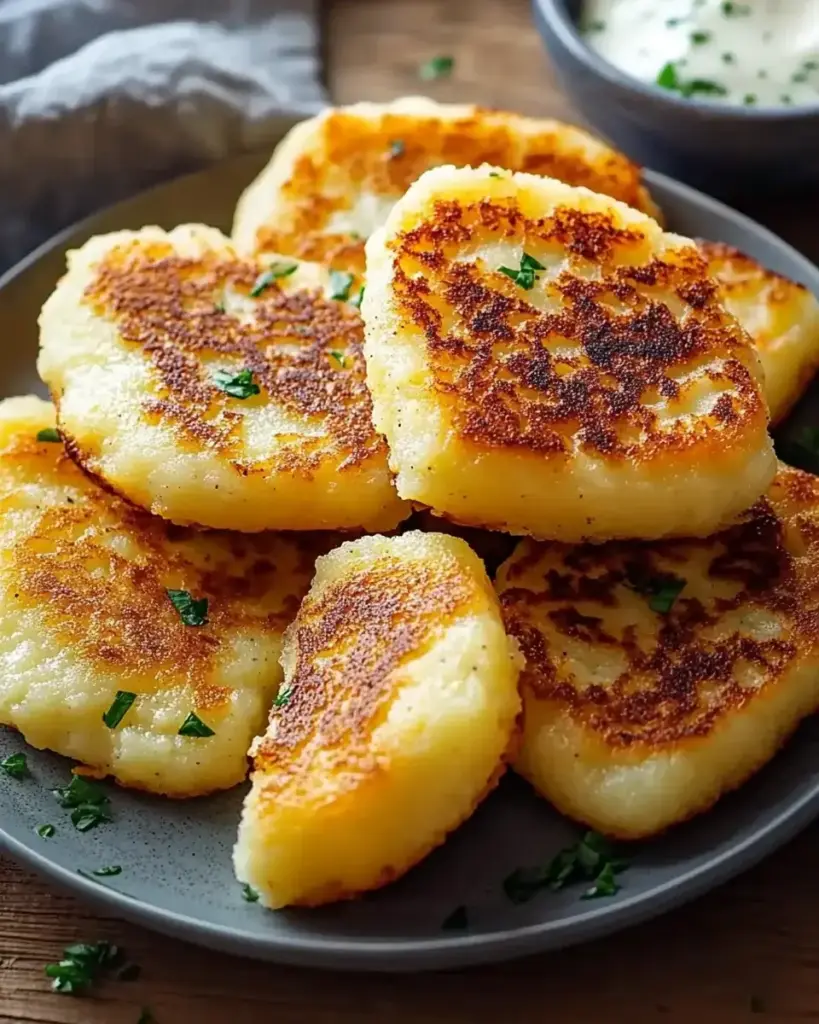
Irish Potato Cakes are a game-changer in the kitchen. They’re incredibly easy to make, taking just 25 minutes from start to finish. The crispy exterior gives way to a fluffy interior, creating a delightful contrast that’s hard to resist. Plus, they’re versatile! Serve them as a side dish, snack, or even breakfast. With endless customization options, you can make them your own. Trust me, once you try them, you’ll be hooked!

Ingredients for Irish Potato Cakes

Gathering the right ingredients is the first step to creating these delicious Irish Potato Cakes. Here’s what you’ll need:

  • Mashed Potatoes: The star of the show! Use about two large potatoes, cooked and mashed until smooth. They provide the base and creamy texture.
  • All-Purpose Flour: This helps bind everything together. It gives the cakes structure and a nice crispy exterior.
  • Baking Powder: A little leavening agent that adds fluffiness to the cakes, making them light and airy.
  • Salt: Essential for enhancing flavor. It brings out the natural taste of the potatoes.
  • Black Pepper: A dash of spice to elevate the flavor profile. Feel free to adjust according to your taste.
  • Chopped Green Onions (optional): These add a fresh, mild onion flavor. They’re a great way to introduce some color and zest.
  • Shredded Cheese (optional): For those who love a cheesy twist, adding cheese can make these cakes even more indulgent.
  • Butter: Used for frying, it gives the cakes a rich flavor and helps achieve that golden-brown crust. You can substitute with olive oil for a healthier option.

For exact measurements, check the bottom of the article where you can find everything listed for easy printing. Now that you have your ingredients ready, let’s get cooking!

How to Make Irish Potato Cakes

Now that you have your ingredients ready, it’s time to roll up your sleeves and get cooking! Making Irish Potato Cakes is a straightforward process that yields delicious results. Follow these simple steps, and you’ll have a plateful of crispy goodness in no time.

Step 1: Prepare the Dough

Start by grabbing a large bowl. Combine the mashed potatoes, all-purpose flour, baking powder, salt, and black pepper. Mix everything together until a dough forms. It should be soft but not sticky. If it feels too wet, sprinkle in a bit more flour. This dough is the foundation of your Irish Potato Cakes, so make sure it’s just right!

Step 2: Add Optional Ingredients

If you’re feeling adventurous, now’s the time to fold in the chopped green onions and shredded cheese. These ingredients add a burst of flavor and a delightful texture. Mix until they’re evenly distributed throughout the dough. Trust me, the extra flavor is worth it!

Step 3: Shape the Patties

Next, turn the dough out onto a floured surface. Divide it into eight equal portions. Shape each portion into a patty, about half an inch thick. Don’t worry about making them perfect; a little rustic charm adds character. Just ensure they’re all roughly the same size for even cooking.

Step 4: Dust the Patties

Lightly dust the patties with flour to prevent sticking. This step is crucial! It helps create that beautiful, crispy exterior we all love. Plus, it makes flipping them in the skillet a breeze.

Step 5: Fry the Cakes

Heat a large skillet over medium heat and add the butter. Once it’s melted and bubbling, carefully add the potato cakes to the skillet in batches. Be cautious not to overcrowd the pan; this ensures they fry evenly and get that perfect golden-brown crust.

Step 6: Cook Until Golden Brown

Cook the cakes for about 4-5 minutes on each side. You’re looking for that beautiful golden color and a crispy texture. Keep an eye on them; they can go from perfect to burnt in a flash!

Step 7: Drain Excess Grease

Once they’re cooked, remove the cakes from the skillet. Place them on a paper towel-lined plate to absorb any excess grease. This step keeps them crispy and not too oily. You want to enjoy the flavor without the heaviness!

Step 8: Serve Warm

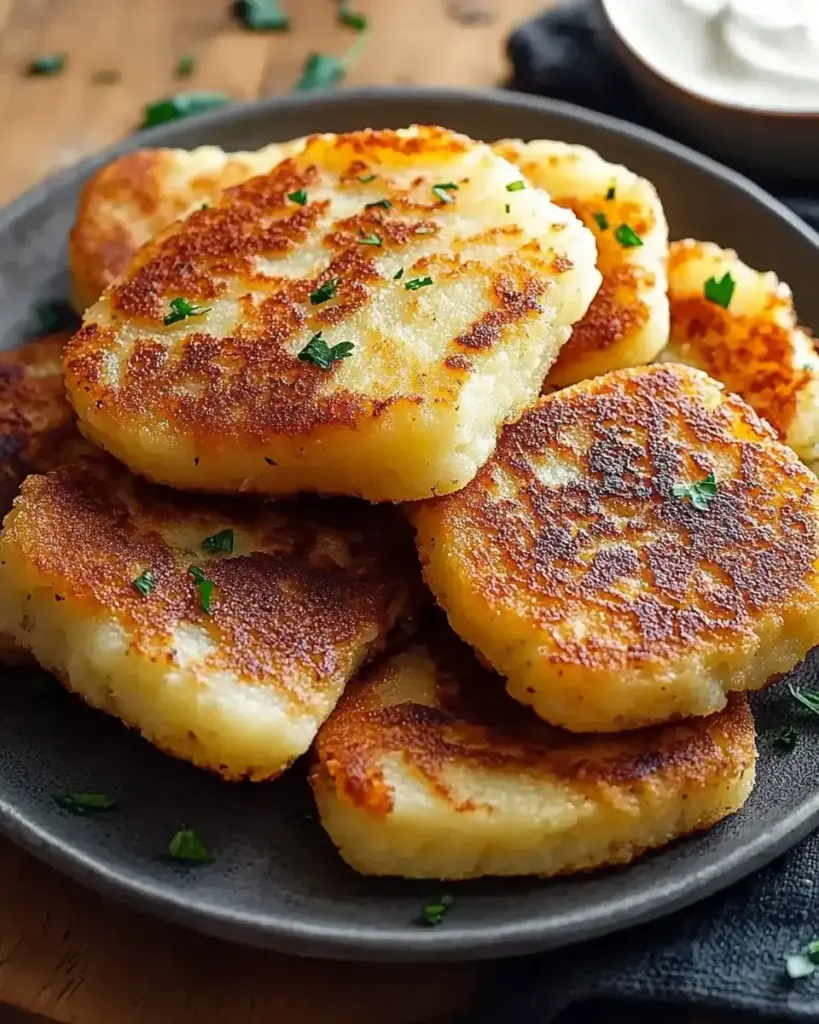
Finally, serve your Irish Potato Cakes warm for the best taste and texture. They’re perfect on their own or paired with your favorite dipping sauce. Enjoy the crispy, fluffy goodness that’s sure to impress!

Tips for Success

  • Use leftover mashed potatoes for a quicker prep time.
  • Don’t skip the dusting of flour; it’s key for that crispy crust.
  • Keep the heat at medium to avoid burning while cooking.
  • Experiment with herbs or spices to customize the flavor.
  • Make a double batch and freeze extras for a quick snack later!

Equipment Needed

  • Large Bowl: For mixing the dough. A mixing bowl works just as well.
  • Skillet: A non-stick skillet is ideal for frying. A cast-iron skillet can add extra flavor.
  • Spatula: To flip the cakes easily. A slotted spatula helps drain excess oil.
  • Measuring Cups: For accurate ingredient portions. You can use a kitchen scale if preferred.

Variations

  • Herbed Potato Cakes: Add fresh herbs like parsley, chives, or dill for a burst of flavor.
  • Spicy Kick: Mix in some diced jalapeños or a pinch of cayenne pepper for a spicy twist.
  • Cheesy Delight: Experiment with different cheeses like cheddar, feta, or pepper jack for varied flavors.
  • Vegetable Medley: Incorporate finely chopped vegetables like bell peppers or spinach for added nutrition.
  • Gluten-Free Option: Substitute all-purpose flour with gluten-free flour for a gluten-free version.

Serving Suggestions

  • Pair with a dollop of sour cream or Greek yogurt for a creamy contrast.
  • Serve alongside a fresh green salad for a light meal.
  • Enjoy with a side of applesauce for a sweet touch.
  • Complement with a pint of Irish stout or a crisp lager.
  • Garnish with fresh herbs for a pop of color and flavor.

FAQs about Irish Potato Cakes

As you embark on your culinary journey with Irish Potato Cakes, you might have a few questions. Here are some common queries that can help you along the way:

Can I use leftover mashed potatoes for this recipe?

Absolutely! Leftover mashed potatoes are perfect for making Irish Potato Cakes. They save time and add great flavor. Just ensure they’re not too watery; if they are, you might need to adjust the flour.

What can I serve with Irish Potato Cakes?

These cakes are incredibly versatile! You can serve them with sour cream, applesauce, or even a fresh salad. They also pair well with a pint of Irish stout for a complete experience.

Can I make these potato cakes ahead of time?

Yes, you can! Prepare the patties and store them in the fridge for up to a day before frying. You can also freeze them for later use. Just fry them straight from the freezer, adding a couple of extra minutes to the cooking time.

Are Irish Potato Cakes gluten-free?

To make gluten-free Irish Potato Cakes, simply substitute the all-purpose flour with a gluten-free flour blend. This way, you can enjoy the same delicious taste without the gluten!

How do I store leftover Irish Potato Cakes?

Store any leftovers in an airtight container in the fridge for up to three days. Reheat them in a skillet for a few minutes to regain that crispy texture. Enjoy them as a quick snack or side dish!

Final Thoughts

Making Irish Potato Cakes is more than just cooking; it’s about creating memories and sharing joy. The crispy exterior and fluffy interior bring a delightful contrast that warms the heart. Whether you’re whipping them up for a family dinner or a casual snack, these cakes are sure to impress. They invite creativity, allowing you to customize flavors to suit your taste. Each bite is a reminder of home, comfort, and the simple pleasures of life. So, gather your ingredients, roll up your sleeves, and enjoy the delicious journey of making these delightful treats!

jhessica

Irish Potato Cakes: Discover the Perfect Recipe!

Delicious and crispy Irish Potato Cakes made from mashed potatoes, perfect as a side dish or snack.
Prep Time 15 minutes
Cook Time 10 minutes
Total Time 25 minutes
Servings: 4 servings
Course: Side Dish
Cuisine: Irish
Calories: 210

Ingredients
  

  • 2 cups mashed potatoes about 2 large potatoes
  • 1 cup all-purpose flour plus extra for dusting
  • 1 teaspoon baking powder
  • 1 teaspoon salt
  • 1/2 teaspoon black pepper
  • 1/4 cup chopped green onions optional
  • 1/4 cup shredded cheese optional
  • 1/4 cup butter for frying

Method
 

  1. In a large bowl, combine the mashed potatoes, flour, baking powder, salt, and black pepper. Mix until a dough forms.
  2. If using, fold in the chopped green onions and shredded cheese until evenly distributed.
  3. Turn the dough out onto a floured surface. Divide it into 8 equal portions and shape each portion into a patty, about 1/2 inch thick.
  4. Dust the patties lightly with flour to prevent sticking.
  5. Heat a large skillet over medium heat and add the butter. Once melted and bubbling, add the potato cakes to the skillet in batches, being careful not to overcrowd.
  6. Cook for about 4-5 minutes on each side or until golden brown and crispy.
  7. Remove the cakes from the skillet and place them on a paper towel-lined plate to absorb excess grease.
  8. Serve warm.

Nutrition

Serving: 1cakeCalories: 210kcalCarbohydrates: 30gProtein: 4gFat: 9gSaturated Fat: 5gPolyunsaturated Fat: 3gCholesterol: 20mgSodium: 400mgFiber: 2gSugar: 1g

Notes

  • For a healthier version, use olive oil instead of butter for frying.
  • Add cooked bacon bits or herbs like parsley for extra flavor.

Tried this recipe?

Let us know how it was!

Strawberry Banana Blueberry Bread that Everyone Loves

Introduction to Strawberry Banana Blueberry Bread

There’s something magical about the aroma of freshly baked bread wafting through the kitchen. It takes me back to my childhood, where my mom would whip up delightful treats on lazy Sunday mornings. One of my favorites was her Strawberry Banana Blueberry Bread. This recipe is a delightful blend of sweet, ripe bananas, juicy strawberries, and plump blueberries, making it a perfect quick solution for busy days or a cozy snack to impress your loved ones. Whether you’re enjoying it for breakfast or as an afternoon treat, this bread is sure to bring smiles all around.

Why You’ll Love This Strawberry Banana Blueberry Bread

This Strawberry Banana Blueberry Bread is a game-changer in the kitchen. It’s incredibly easy to whip up, making it perfect for those hectic mornings or lazy weekends. The combination of flavors is simply irresistible, with the sweetness of bananas and berries dancing on your taste buds. Plus, it’s a fantastic way to use up overripe fruit, reducing waste while treating yourself to something delicious. Who wouldn’t love that?

Ingredients for Strawberry Banana Blueberry Bread

Gathering the right ingredients is the first step to creating this delightful Strawberry Banana Blueberry Bread. Here’s what you’ll need:

  • Ripe Bananas: The star of the show! They add natural sweetness and moisture.
  • Fresh Strawberries: These juicy gems bring a burst of flavor and a lovely color.
  • Fresh Blueberries: Sweet and slightly tart, they complement the other fruits perfectly.
  • Granulated Sugar: This sweetener helps balance the flavors and enhances the bread’s texture.
  • Brown Sugar: Adds a hint of caramel flavor and moisture, making the bread even more delicious.
  • Unsalted Butter: Provides richness and helps create a tender crumb.
  • Large Eggs: Essential for binding the ingredients together and adding structure.
  • Vanilla Extract: A splash of this adds warmth and depth to the flavor profile.
  • Baking Soda: The leavening agent that helps the bread rise and become fluffy.
  • Salt: Just a pinch enhances all the flavors and balances the sweetness.
  • All-Purpose Flour: The base of the bread, providing structure and body.

For those looking to mix things up, consider adding cinnamon or nutmeg for a warm spice note. If you want a healthier twist, swap half of the all-purpose flour for whole wheat flour or toss in some chopped nuts for added crunch. You can find the exact quantities for these ingredients at the bottom of the article, ready for printing!

How to Make Strawberry Banana Blueberry Bread

Now that you have your ingredients ready, let’s dive into the fun part—making this delicious Strawberry Banana Blueberry Bread! Follow these simple steps, and you’ll have a warm loaf ready to enjoy in no time.

Step 1: Preheat the Oven

Start by preheating your oven to 350°F (175°C). This step is crucial because it ensures even baking. While the oven heats up, prepare your 9×5-inch loaf pan by greasing it or lining it with parchment paper. This will help the bread slide out easily once it’s baked.

Step 2: Cream the Butter and Sugars

In a large mixing bowl, combine the softened unsalted butter, granulated sugar, and brown sugar. Using a hand mixer or a whisk, cream them together until the mixture is light and fluffy. This process incorporates air, which is key for a tender texture in your bread. It should look pale and creamy—just like a cloud!

Step 3: Mix in the Bananas and Eggs

Next, add the mashed ripe bananas, large eggs, and vanilla extract to the butter-sugar mixture. Mix until everything is well combined. The bananas not only add sweetness but also keep the bread moist and flavorful. You’ll love how the aroma fills your kitchen at this stage!

Step 4: Combine Dry Ingredients

In a separate bowl, whisk together the all-purpose flour, baking soda, and salt. Mixing these dry ingredients separately is important to ensure the baking soda is evenly distributed. This will help your bread rise beautifully and avoid any clumps of flour.

Step 5: Fold in the Fruits

Now comes the fun part—gently fold in the diced strawberries and blueberries. Use a spatula to carefully incorporate the fruits into the batter. Be cautious not to overmix; you want those lovely berries to stay intact and not turn your batter into a colorful swirl.

Step 6: Bake the Bread

Pour the batter into your prepared loaf pan, smoothing the top with a spatula. Place it in the preheated oven and bake for 55-65 minutes. To check for doneness, insert a toothpick into the center. If it comes out clean or with a few crumbs, your bread is ready to come out!

Step 7: Cool and Serve

Once baked, allow the bread to cool in the pan for about 10 minutes. Then, transfer it to a wire rack to cool completely. This cooling time is essential; it helps the flavors meld together. Slice it up and enjoy it warm, or store it for later. It’s perfect with a pat of butter or a drizzle of honey!

Tips for Success

  • Use overripe bananas for maximum sweetness and moisture.
  • Don’t skip the creaming step; it’s vital for a light texture.
  • Gently fold in the fruits to keep them intact and juicy.
  • Check for doneness a few minutes early to avoid overbaking.
  • Let the bread cool completely for the best slicing experience.

Equipment Needed

  • 9×5-inch loaf pan: Essential for baking; a round cake pan works in a pinch.
  • Mixing bowls: Use any size; a large bowl is best for mixing ingredients.
  • Hand mixer or whisk: A hand mixer speeds up the creaming process, but a whisk works too.
  • Spatula: Perfect for folding in fruits and smoothing the batter.
  • Wire rack: Ideal for cooling; a plate can substitute if needed.

Variations

  • Nutty Delight: Add a handful of chopped walnuts or pecans for a crunchy texture.
  • Chocolate Chip Twist: Fold in some semi-sweet chocolate chips for a sweet surprise.
  • Whole Wheat Option: Substitute half of the all-purpose flour with whole wheat flour for a healthier twist.
  • Spiced Up: Incorporate 1/2 teaspoon of cinnamon or nutmeg for a warm, cozy flavor.
  • Vegan Version: Replace eggs with flaxseed meal mixed with water and use coconut oil instead of butter.

Serving Suggestions

  • Enjoy a warm slice with a pat of butter or a drizzle of honey for extra richness.
  • Pair it with a cup of coffee or tea for a delightful breakfast or afternoon snack.
  • Serve with a side of Greek yogurt topped with fresh berries for a balanced meal.
  • For a fun presentation, dust with powdered sugar before serving.

FAQs about Strawberry Banana Blueberry Bread

As you embark on your baking adventure with Strawberry Banana Blueberry Bread, you might have a few questions. Here are some common queries that can help you along the way:

Can I use frozen fruit instead of fresh?

Absolutely! Frozen strawberries and blueberries work well in this recipe. Just make sure to thaw and drain them to avoid excess moisture in your batter.

How do I store leftover bread?

To keep your Strawberry Banana Blueberry Bread fresh, wrap it tightly in plastic wrap or aluminum foil. It can be stored at room temperature for up to three days or in the fridge for about a week.

Can I make this bread ahead of time?

Yes! This bread actually tastes even better the next day as the flavors meld together. You can bake it a day in advance and store it properly for a delicious treat ready to enjoy.

What can I substitute for eggs?

If you’re looking for an egg substitute, try using 1/4 cup of unsweetened applesauce or a flaxseed meal mixed with water. This will help maintain the moisture and binding properties in your bread.

Is this recipe suitable for a gluten-free diet?

To make a gluten-free version, simply replace the all-purpose flour with a gluten-free flour blend. Just ensure that your baking soda is also gluten-free for the best results!

Final Thoughts

Creating this Strawberry Banana Blueberry Bread is more than just baking; it’s about crafting memories. The joy of mixing ripe fruits and watching them transform into a warm, inviting loaf fills the kitchen with love and laughter. Each slice is a reminder of simple pleasures, perfect for sharing with family or savoring alone with a cup of coffee. Whether it’s a busy morning or a leisurely afternoon, this bread brings a touch of sweetness to any moment. So, roll up your sleeves, embrace the process, and enjoy the delightful rewards of your efforts!

jhessica

Strawberry Banana Blueberry Bread that Everyone Loves

A delicious and moist Strawberry Banana Blueberry Bread that combines the sweetness of ripe bananas, strawberries, and blueberries, perfect for breakfast or a snack.
Prep Time 15 minutes
Cook Time 1 hour
Total Time 1 hour 15 minutes
Servings: 8 servings
Course: Baking
Cuisine: American
Calories: 180

Ingredients
  

  • 2 ripe bananas mashed
  • 1 cup fresh strawberries hulled and diced
  • 1 cup fresh blueberries
  • 1/2 cup granulated sugar
  • 1/4 cup brown sugar packed
  • 1/2 cup unsalted butter softened
  • 2 large eggs
  • 1 teaspoon vanilla extract
  • 1 teaspoon baking soda
  • 1/2 teaspoon salt
  • 1 1/2 cups all-purpose flour

Method
 

  1. Preheat your oven to 350°F (175°C). Grease a 9×5-inch loaf pan or line it with parchment paper.
  2. In a large mixing bowl, cream together the softened butter, granulated sugar, and brown sugar until light and fluffy.
  3. Add the mashed bananas, eggs, and vanilla extract to the butter mixture. Mix until well combined.
  4. In a separate bowl, whisk together the flour, baking soda, and salt. Gradually add the dry ingredients to the wet ingredients, mixing until just combined.
  5. Gently fold in the diced strawberries and blueberries, being careful not to overmix.
  6. Pour the batter into the prepared loaf pan and smooth the top with a spatula.
  7. Bake in the preheated oven for 55-65 minutes, or until a toothpick inserted into the center comes out clean.
  8. Allow the bread to cool in the pan for about 10 minutes before transferring it to a wire rack to cool completely.

Nutrition

Serving: 1sliceCalories: 180kcalCarbohydrates: 30gProtein: 2gFat: 7gSaturated Fat: 4gPolyunsaturated Fat: 2gCholesterol: 40mgSodium: 150mgFiber: 1gSugar: 15g

Notes

  • For a richer flavor, try adding 1/2 teaspoon of cinnamon or nutmeg to the dry ingredients.
  • To make it a bit healthier, substitute half of the all-purpose flour with whole wheat flour or add a handful of chopped nuts for added texture.

Tried this recipe?

Let us know how it was!

Crispy Shrimp Cakes recipe that will wow your guests!

Introduction to Crispy Shrimp Cakes

There’s something magical about the sound of sizzling shrimp cakes in a hot skillet.

The aroma wafts through the kitchen, instantly transporting me back to family gatherings where laughter and good food filled the air.

Crispy shrimp cakes are not just a dish; they’re a delightful experience that can impress your guests or simply elevate a weeknight dinner.

Whether you’re looking for a quick solution for a busy day or a show-stopping appetizer for your next gathering, these shrimp cakes deliver on flavor and texture.

Trust me, once you try them, you’ll be hooked!

Why You’ll Love This Crispy Shrimp Cakes

Crispy shrimp cakes are a game-changer in the kitchen.

They come together quickly, making them perfect for busy weeknights or last-minute gatherings.

The combination of fresh shrimp and vibrant ingredients creates a flavor explosion that will have everyone asking for seconds.

Plus, they’re versatile! Serve them as an appetizer, a main dish, or even a fun snack.

You’ll love how easy they are to whip up and how much joy they bring to the table!

Ingredients for Crispy Shrimp Cakes

Creating crispy shrimp cakes is all about using fresh, quality ingredients that come together to create a delightful dish.

Here’s what you’ll need:

  • Raw shrimp: The star of the show! Fresh, peeled, and deveined shrimp provide that sweet, briny flavor.
  • Breadcrumbs: These add the perfect crunch and help bind the mixture together. You can use panko for extra crispiness.
  • Mayonnaise: This creamy ingredient keeps the cakes moist and adds richness. You can swap it for Greek yogurt for a lighter option.
  • Green onions: Finely chopped, they bring a fresh, mild onion flavor that brightens the dish.
  • Red bell pepper: Adds a pop of color and sweetness. Feel free to substitute with yellow or orange bell pepper.
  • Dijon mustard: A touch of tanginess that enhances the overall flavor profile.
  • Lemon juice: Freshly squeezed lemon juice adds acidity, balancing the richness of the shrimp cakes.
  • Garlic powder: For that savory depth, garlic powder is a must. You can use fresh garlic if you prefer.
  • Old Bay seasoning: This classic seafood seasoning brings a unique blend of spices that elevates the shrimp cakes.
  • Salt and black pepper: Essential for seasoning, these enhance all the flavors in the dish.
  • Egg: A beaten egg acts as a binder, helping the cakes hold their shape during cooking.
  • Olive oil: Used for frying, it gives the cakes a beautiful golden crust. You can also bake them for a healthier option.

For exact measurements, check the bottom of the article where you can find everything listed for easy printing.

With these ingredients, you’re well on your way to creating a dish that will wow your guests!

How to Make Crispy Shrimp Cakes

Making crispy shrimp cakes is a straightforward process that yields delicious results.

Follow these simple steps, and you’ll have a plateful of golden goodness in no time!

Step 1: Prepare the Shrimp

Start by chopping the raw shrimp into small pieces.

You can use a knife for a rustic texture or a food processor for a finer mix.

Just be careful not to puree them; we want chunks, not mush!

Step 2: Mix the Ingredients

In a large mixing bowl, combine the chopped shrimp with breadcrumbs, mayonnaise, green onions, and red bell pepper.

Add in the Dijon mustard, lemon juice, garlic powder, Old Bay seasoning, salt, black pepper, and the beaten egg.

Mix everything until well combined.

This is where the magic happens!

Step 3: Chill the Mixture

Cover the mixture and pop it in the fridge for at least 30 minutes.

Chilling helps the flavors meld and makes it easier to shape the patties.

Trust me, this step is worth it!

Step 4: Form the Patties

Once chilled, take the mixture out and form it into patties about 2-3 inches in diameter.

You should get around 8-10 patties.

If they’re a bit crumbly, don’t worry; they’ll hold together when cooked.

Step 5: Fry the Cakes

Heat olive oil in a large skillet over medium heat.

Once hot, add the shrimp cakes in batches, making sure not to overcrowd the pan.

Cook for about 4-5 minutes on each side until they’re golden brown and cooked through.

Transfer them to a paper towel-lined plate to drain excess oil.

Step 6: Serve and Enjoy

Serve the crispy shrimp cakes warm with your favorite dipping sauce, like cocktail or tartar sauce.

They’re perfect for impressing guests or enjoying a cozy night in.

Dig in and savor every bite!

Tips for Success

  • Use fresh shrimp for the best flavor and texture.
  • Don’t skip the chilling step; it helps the cakes hold their shape.
  • Experiment with herbs like parsley or cilantro for added freshness.
  • For a healthier option, bake the cakes instead of frying.
  • Keep the oil hot to achieve that perfect crispy crust.

Equipment Needed

  • Large mixing bowl: Essential for combining ingredients. A sturdy plastic or glass bowl works well.
  • Skillet: A non-stick or cast-iron skillet is perfect for frying. You can also use an air fryer for a healthier option.
  • Spatula: A flat spatula helps flip the cakes without breaking them.
  • Measuring cups and spoons: For accurate ingredient measurements.
  • Paper towels: Great for draining excess oil after frying.

Variations

  • Spicy Shrimp Cakes: Add diced jalapeños or a dash of hot sauce to the mixture for a kick of heat.
  • Herbed Shrimp Cakes: Mix in fresh herbs like dill, cilantro, or basil for a burst of flavor.
  • Vegetable-Loaded Cakes: Incorporate finely chopped zucchini or carrots for added nutrition and texture.
  • Gluten-Free Option: Use gluten-free breadcrumbs or crushed rice crackers to keep it celiac-friendly.
  • Asian-Inspired Cakes: Swap out the Dijon mustard for soy sauce and add sesame oil for a unique twist.

Serving Suggestions for Crispy Shrimp Cakes

  • Pair with a zesty cocktail sauce or creamy tartar sauce for dipping.
  • Serve alongside a fresh green salad for a light meal.
  • Complement with crispy sweet potato fries for a satisfying crunch.
  • For drinks, try a chilled white wine or a refreshing beer.
  • Garnish with lemon wedges and fresh herbs for a vibrant presentation.

FAQs about Crispy Shrimp Cakes

Can I use frozen shrimp for this recipe?

Absolutely! Just make sure to thaw the shrimp completely and pat them dry before chopping. This will help maintain the texture of your crispy shrimp cakes.

How can I make these shrimp cakes ahead of time?

You can prepare the mixture and form the patties a day in advance. Just store them in the fridge, covered, until you’re ready to fry them. This makes for a quick meal when you’re short on time!

What dipping sauces pair well with crispy shrimp cakes?

Classic cocktail sauce and tartar sauce are favorites, but you can also try a spicy aioli or a zesty remoulade for a fun twist. The options are endless!

Can I bake the shrimp cakes instead of frying them?

Yes! For a healthier option, bake the shrimp cakes at 400°F for 15-20 minutes, flipping halfway through. They’ll still be delicious and crispy!

What can I serve with crispy shrimp cakes?

These shrimp cakes are versatile! Serve them with a fresh salad, sweet potato fries, or even as a topping for a seafood taco. They’re sure to impress!

Final Thoughts

Crispy shrimp cakes are more than just a dish; they’re a celebration of flavor and creativity in the kitchen.

Each bite offers a delightful crunch, paired with the tender sweetness of shrimp, making them a hit at any gathering.

Whether you’re impressing guests or enjoying a cozy night in, these cakes bring joy and satisfaction to the table.

With their versatility and ease of preparation, they’re bound to become a staple in your culinary repertoire.

So, roll up your sleeves, gather your ingredients, and let the magic of crispy shrimp cakes transform your next meal!

jhessica

Crispy Shrimp Cakes recipe that will wow your guests!

A delicious recipe for crispy shrimp cakes that are sure to impress your guests with their flavor and texture.
Prep Time 30 minutes
Cook Time 15 minutes
Total Time 45 minutes
Servings: 4 servings
Course: Appetizer
Cuisine: American
Calories: 280

Ingredients
  

  • 1 pound raw shrimp peeled and deveined
  • 1/2 cup breadcrumbs
  • 1/4 cup mayonnaise
  • 1/4 cup green onions finely chopped
  • 1/4 cup red bell pepper finely chopped
  • 1 tablespoon Dijon mustard
  • 1 tablespoon lemon juice
  • 1 teaspoon garlic powder
  • 1 teaspoon Old Bay seasoning
  • 1/2 teaspoon salt
  • 1/4 teaspoon black pepper
  • 1 large egg beaten
  • 2 tablespoons olive oil for frying

Method
 

  1. Begin by chopping the shrimp into small pieces. You can use a food processor for a finer texture if desired, but be careful not to puree them.
  2. In a large mixing bowl, combine the chopped shrimp, breadcrumbs, mayonnaise, green onions, red bell pepper, Dijon mustard, lemon juice, garlic powder, Old Bay seasoning, salt, black pepper, and the beaten egg. Mix until all ingredients are well incorporated.
  3. Cover the mixture and refrigerate for at least 30 minutes to allow it to firm up and make it easier to shape.
  4. After chilling, form the mixture into patties, about 2-3 inches in diameter. You should get around 8-10 patties.
  5. Heat olive oil in a large skillet over medium heat. Once hot, add the shrimp cakes in batches, being careful not to overcrowd the pan.
  6. Cook for about 4-5 minutes on each side, or until golden brown and cooked through. Transfer to a paper towel-lined plate to drain excess oil.
  7. Serve warm with your favorite dipping sauce, such as cocktail sauce or tartar sauce.

Nutrition

Serving: 1cakeCalories: 280kcalCarbohydrates: 12gProtein: 20gFat: 16gSaturated Fat: 2gPolyunsaturated Fat: 14gCholesterol: 150mgSodium: 500mgFiber: 1gSugar: 1g

Notes

  • For added flavor, consider mixing in some chopped fresh herbs like parsley or cilantro.
  • If you prefer a healthier option, bake the shrimp cakes at 400°F for 15-20 minutes, flipping halfway through, instead of frying.

Tried this recipe?

Let us know how it was!

French Onion Pasta Salad: A Delicious Recipe to Try!

Introduction to French Onion Pasta Salad

There’s something magical about the combination of creamy textures and rich flavors, especially when it comes to a dish like French Onion Pasta Salad. This recipe is a delightful twist on the classic French onion soup, transforming it into a pasta salad that’s perfect for any gathering. Whether you’re hosting a backyard barbecue or just need a quick solution for a busy day, this salad is sure to impress your loved ones. With its creamy dressing and caramelized onions, it’s a dish that brings comfort and joy to the table, making every bite a celebration.

Why You’ll Love This French Onion Pasta Salad

This French Onion Pasta Salad is a game-changer for busy weeknights or casual get-togethers. It’s incredibly easy to whip up, taking just about 30 minutes from start to finish. The rich, savory flavor of caramelized onions combined with creamy dressing makes it a crowd-pleaser. Plus, it can be made ahead of time, allowing the flavors to meld beautifully. Trust me, your taste buds will thank you!

Ingredients for French Onion Pasta Salad

Gathering the right ingredients is the first step to creating a delicious French Onion Pasta Salad. Here’s what you’ll need:

  • Rotini pasta: This spiral-shaped pasta holds onto the creamy dressing beautifully. You can swap it for any pasta shape you prefer, like penne or fusilli.
  • Olive oil: A staple in many kitchens, it’s perfect for sautéing the onions and adds a rich flavor.
  • Onion: The star of the show! Thinly sliced onions caramelize to bring out their natural sweetness.
  • Sugar: Just a teaspoon helps to enhance the caramelization of the onions, making them golden and delicious.
  • Salt and black pepper: Essential seasonings that elevate the overall flavor of the dish.
  • Garlic powder: A quick way to add depth without the fuss of fresh garlic.
  • Mayonnaise: This creamy base binds everything together, giving the salad its luscious texture.
  • Sour cream: Adds a tangy kick that balances the richness of the mayonnaise.
  • Parmesan cheese: A sprinkle of this cheese adds a savory note that complements the onions perfectly.
  • Fresh parsley: Chopped parsley not only adds color but also a fresh flavor that brightens the dish.
  • Green onions: Sliced green onions provide a mild onion flavor and a nice crunch.

For those looking to amp up the flavor, consider adding cooked bacon or diced ham. If you’re aiming for a healthier option, whole wheat pasta works wonderfully too. You can find the exact quantities for each ingredient at the bottom of the article, ready for printing!

How to Make French Onion Pasta Salad

Creating this French Onion Pasta Salad is a breeze. Follow these simple steps, and you’ll have a delicious dish ready in no time. Let’s dive in!

Step 1: Cook the Pasta

Start by boiling a pot of salted water. Once it’s bubbling, add the rotini pasta. Cook it according to the package instructions until it’s al dente. This usually takes about 8-10 minutes. When it’s done, drain the pasta and rinse it under cold water. This stops the cooking process and helps cool it down quickly. Set it aside while you work on the onions.

Step 2: Caramelize the Onions

In a large skillet, heat the olive oil over medium heat. Add the thinly sliced onions, sugar, salt, and black pepper. Stir them around to coat evenly. Now, let them cook for about 10-15 minutes. Keep an eye on them, stirring occasionally. You want those onions to turn a beautiful golden brown and become sweet and tender. Once they’re caramelized, remove them from the heat and let them cool.

Step 3: Combine Ingredients

In a large mixing bowl, combine the cooled pasta and caramelized onions. Sprinkle in the garlic powder, mayonnaise, sour cream, and Parmesan cheese. Toss everything together until the pasta is well coated. Add the chopped parsley and sliced green onions for a fresh touch. Mix again to ensure every bite is packed with flavor.

Step 4: Chill and Serve

Cover the bowl with plastic wrap or a lid and pop it in the refrigerator. Let it chill for at least an hour. This allows the flavors to meld beautifully. When you’re ready to serve, give it a quick stir. You can enjoy this salad chilled or at room temperature. Either way, it’s a crowd-pleaser!

Tips for Success

  • Don’t rush the caramelization process; low and slow is key for sweet, golden onions.
  • Make the salad a day ahead for even better flavor as it sits in the fridge.
  • Adjust the creaminess by adding more or less mayonnaise and sour cream to your taste.
  • For a kick, toss in some red pepper flakes or a splash of hot sauce.
  • Experiment with different herbs like dill or chives for a unique twist.

Equipment Needed

  • Large pot: For boiling pasta. A Dutch oven works well too.
  • Skillet: A non-stick skillet is ideal for caramelizing onions.
  • Mixing bowl: Any large bowl will do for combining ingredients.
  • Measuring cups and spoons: Essential for accurate ingredient amounts.
  • Spatula or wooden spoon: Perfect for stirring and mixing.

Variations

  • Bacon Lovers: Add crispy cooked bacon or pancetta for a savory crunch that elevates the flavor.
  • Vegetarian Delight: Swap the rotini for whole wheat or gluten-free pasta to cater to dietary needs.
  • Herb Infusion: Experiment with fresh herbs like basil or thyme for a fragrant twist.
  • Cheesy Goodness: Mix in crumbled feta or goat cheese for an extra creamy texture and tangy flavor.
  • Spicy Kick: Add diced jalapeños or a sprinkle of cayenne pepper for those who enjoy a bit of heat.

Serving Suggestions

  • Pair with Grilled Chicken: This salad complements grilled chicken perfectly, adding a creamy contrast to the smoky flavors.
  • Serve with Crusty Bread: A slice of fresh baguette or garlic bread makes for a delightful side.
  • Refreshing Drinks: Enjoy with iced tea or a light white wine for a refreshing touch.
  • Presentation: Garnish with extra parsley or Parmesan for a beautiful finish.

FAQs about French Onion Pasta Salad

Can I make French Onion Pasta Salad ahead of time?

Absolutely! In fact, making it a day ahead allows the flavors to meld beautifully. Just store it in the fridge, and it’ll be ready to serve when you are.

What can I substitute for rotini pasta?

You can use any pasta shape you like! Penne, fusilli, or even whole wheat pasta work wonderfully in this French Onion Pasta Salad.

How long does this salad last in the fridge?

This salad can last up to 3 days in the fridge. Just make sure to keep it covered to maintain freshness.

Can I add protein to this salad?

<pDefinitely! Cooked bacon, diced ham, or even grilled chicken can be added for a heartier dish. It’s a great way to make it more filling.

Is this salad suitable for vegetarians?

<pYes, this French Onion Pasta Salad is vegetarian-friendly! Just skip any meat additions, and you’re good to go.

Final Thoughts

Creating this French Onion Pasta Salad is more than just cooking; it’s about bringing people together. The rich, creamy flavors and the sweetness of caramelized onions create a dish that feels like a warm hug on a plate. Whether you’re serving it at a family gathering or enjoying it as a quick weeknight meal, this salad is sure to delight. Plus, the versatility allows you to make it your own. So, roll up your sleeves, gather your ingredients, and let the joy of cooking fill your kitchen. Trust me, every bite will be worth it!

jhessica

French Onion Pasta Salad: A Delicious Recipe to Try!

A delicious and creamy French Onion Pasta Salad that combines the flavors of caramelized onions with pasta, perfect for any gathering.
Prep Time 15 minutes
Cook Time 15 minutes
Total Time 1 hour 30 minutes
Servings: 6 servings
Course: Salad
Cuisine: French
Calories: 290

Ingredients
  

  • 8 ounces rotini pasta
  • 1 tablespoon olive oil
  • 1 medium onion thinly sliced
  • 1 teaspoon sugar
  • 1 teaspoon salt
  • 1/2 teaspoon black pepper
  • 1/2 teaspoon garlic powder
  • 1/2 cup mayonnaise
  • 1/2 cup sour cream
  • 1/4 cup shredded Parmesan cheese
  • 1/4 cup chopped fresh parsley
  • 1/2 cup sliced green onions

Method
 

  1. Cook the rotini pasta according to package instructions until al dente. Drain and rinse under cold water to cool.
  2. In a large skillet, heat the olive oil over medium heat. Add the sliced onion, sugar, salt, and pepper. Cook, stirring frequently, for about 10-15 minutes until the onions are caramelized and golden brown. Remove from heat and let cool.
  3. In a large mixing bowl, combine the cooled pasta, caramelized onions, garlic powder, mayonnaise, sour cream, Parmesan cheese, parsley, and green onions. Mix well until all ingredients are evenly coated.
  4. Cover the bowl and refrigerate for at least 1 hour to allow the flavors to meld. Serve chilled or at room temperature.

Nutrition

Serving: 1servingCalories: 290kcalCarbohydrates: 30gProtein: 6gFat: 15gSaturated Fat: 3gPolyunsaturated Fat: 12gCholesterol: 15mgSodium: 500mgFiber: 1gSugar: 2g

Notes

  • For added flavor, consider stirring in some cooked bacon or diced ham.
  • You can substitute the rotini pasta with your favorite pasta shape or use whole wheat pasta for a healthier option.

Tried this recipe?

Let us know how it was!

Rhubarb Almond Cake: A Delicious Dessert Recipe Unveiled!

Introduction to Rhubarb Almond Cake

When I think of comfort desserts, the Rhubarb Almond Cake always comes to mind.

It’s that perfect blend of tart and sweet, a delightful treat that feels like a warm hug after a long day.

This cake is not just a recipe; it’s a way to bring a little joy into your kitchen.

Whether you’re looking to impress friends at a gathering or simply want a quick solution for a busy weeknight, this cake fits the bill.

With its nutty almond flavor and vibrant rhubarb, it’s sure to become a favorite in your home.

Why You’ll Love This Rhubarb Almond Cake

This Rhubarb Almond Cake is a game-changer for dessert lovers.

It’s incredibly easy to whip up, making it perfect for those busy evenings when you crave something sweet.

The combination of tart rhubarb and nutty almond flavor creates a taste sensation that’s hard to resist.

Plus, it’s a crowd-pleaser, so you can impress your friends and family without spending hours in the kitchen.

What’s not to love?

Ingredients for Rhubarb Almond Cake

Creating a delicious Rhubarb Almond Cake starts with gathering the right ingredients.

Here’s what you’ll need:

  • Rhubarb: Fresh, vibrant rhubarb adds a tartness that balances the sweetness of the cake. Look for firm stalks with a bright color.
  • All-purpose flour: This is the backbone of your cake, providing structure and stability.
  • Granulated sugar: Sweetens the cake and helps create a lovely texture. You can adjust the amount based on your taste.
  • Unsalted butter: Softened butter is key for a rich flavor and tender crumb. It’s best to let it sit at room temperature before using.
  • Almond flour: This adds a nutty depth and moisture to the cake. If you’re out, you can make your own by grinding blanched almonds.
  • Eggs: They bind the ingredients together and contribute to the cake’s rise. Use large eggs for the best results.
  • Vanilla extract: A splash of vanilla enhances the overall flavor, making it more aromatic.
  • Baking powder and baking soda: These leavening agents help the cake rise, creating a light and fluffy texture.
  • Salt: Just a pinch enhances the flavors and balances the sweetness.
  • Milk: Adds moisture to the batter. You can substitute with almond milk for a dairy-free option.
  • Powdered sugar: Optional for dusting on top before serving, adding a touch of sweetness and a beautiful finish.

For exact measurements, check the bottom of the article where you can find everything listed for easy printing.

Happy baking!

How to Make Rhubarb Almond Cake

Making a Rhubarb Almond Cake is a delightful journey that fills your kitchen with warmth and sweet aromas.

Let’s dive into the steps that will lead you to this delicious dessert.

Step 1: Preheat the Oven

Start by preheating your oven to 350°F (175°C).

This step is crucial because it ensures even baking.

While the oven warms up, prepare your 9-inch round cake pan by greasing and flouring it or lining it with parchment paper.

This will help the cake release easily once it’s baked.

Step 2: Prepare the Rhubarb

Next, chop your fresh rhubarb into 1-inch pieces.

In a medium bowl, toss the rhubarb with 2 tablespoons of granulated sugar.

Let it sit for about 10 minutes.

This maceration process draws out the juices, enhancing the flavor and tenderness of the rhubarb.

You’ll love the sweet-tart burst it adds to the cake!

Step 3: Cream the Butter and Sugar

In a large mixing bowl, cream together the softened unsalted butter and the remaining granulated sugar.

Beat them until the mixture is light and fluffy.

This step is vital for creating a tender texture in your cake.

The air you incorporate here will help the cake rise beautifully.

Step 4: Add Eggs and Vanilla

Now, it’s time to add the eggs, one at a time.

Mix well after each addition to ensure they’re fully incorporated.

Stir in the vanilla extract, which adds a lovely aroma and depth of flavor.

Eggs are essential for binding the ingredients and giving the cake structure.

Step 5: Combine Dry Ingredients

In another bowl, whisk together the all-purpose flour, almond flour, baking powder, baking soda, and salt.

Mixing the dry ingredients separately helps distribute the leavening agents evenly.

This ensures your cake rises uniformly, giving it that perfect fluffy texture.

Step 6: Mix Wet and Dry Ingredients

Gradually add the dry mixture to the wet ingredients, alternating with the milk.

Start and end with the dry ingredients.

This technique helps achieve the right batter consistency without overmixing.

You want a smooth batter, but don’t worry if a few lumps remain.

Step 7: Fold in the Rhubarb

Gently fold the macerated rhubarb into the batter.

Use a spatula to carefully combine, preserving the airiness of the mixture.

This step is crucial; you want those lovely rhubarb pieces to be evenly distributed without deflating the batter.

Step 8: Bake the Cake

Pour the batter into your prepared cake pan and smooth the top.

Bake for 35-40 minutes.

To check for doneness, insert a toothpick into the center.

If it comes out clean, your cake is ready.

The aroma wafting through your kitchen will be irresistible!

Step 9: Cool and Serve

Once baked, allow the cake to cool in the pan for about 10 minutes.

Then, transfer it to a wire rack to cool completely.

Dust with powdered sugar before serving for an elegant touch.

Pair it with a scoop of vanilla ice cream or a dollop of whipped cream for an extra treat!

Tips for Success

  • Always use fresh rhubarb for the best flavor and texture.
  • Let your butter soften at room temperature for easier creaming.
  • Don’t overmix the batter; a few lumps are perfectly fine.
  • Check your cake a few minutes before the suggested baking time.
  • For a twist, add a teaspoon of almond extract for extra flavor.

Equipment Needed

  • 9-inch round cake pan: A standard choice, but you can use a square pan if that’s what you have.
  • Mixing bowls: A set of various sizes is handy for different steps.
  • Electric mixer: A hand mixer works well, but a stand mixer can save time.
  • Spatula: Essential for folding in ingredients and scraping the bowl.
  • Wire rack: Useful for cooling the cake evenly; a plate can work in a pinch.

Variations of Rhubarb Almond Cake

  • Berry Bliss: Substitute rhubarb with fresh strawberries or blueberries for a sweeter twist.
  • Gluten-Free Option: Use a gluten-free all-purpose flour blend instead of regular flour for a gluten-free version.
  • Nutty Delight: Add chopped walnuts or pecans to the batter for an extra crunch and flavor.
  • Spiced Up: Incorporate a teaspoon of cinnamon or nutmeg for a warm, spiced flavor profile.
  • Vegan Version: Replace eggs with flax eggs and use plant-based butter and milk for a vegan-friendly cake.

Serving Suggestions for Rhubarb Almond Cake

  • Serve warm with a scoop of vanilla ice cream for a delightful contrast.
  • Pair with a dollop of freshly whipped cream for added richness.
  • Garnish with fresh mint leaves for a pop of color.
  • Enjoy with a cup of herbal tea or coffee for a cozy afternoon treat.

FAQs about Rhubarb Almond Cake

Can I use frozen rhubarb for this cake?

Absolutely! Frozen rhubarb works well in this recipe. Just make sure to thaw and drain any excess moisture before using it. This will help maintain the cake’s texture.

How do I store leftover Rhubarb Almond Cake?

Store any leftover cake in an airtight container at room temperature for up to three days. For longer storage, refrigerate it, and it should last about a week. You can also freeze slices for up to three months!

Can I make this cake ahead of time?

Yes! You can bake the cake a day in advance. Just let it cool completely, then wrap it tightly in plastic wrap. This will keep it fresh and ready to serve when you need it.

What can I substitute for almond flour?

If you don’t have almond flour, you can use additional all-purpose flour. However, keep in mind that you’ll miss out on that lovely nutty flavor. Ground hazelnuts or walnuts can also be a great alternative!

Is this cake suitable for a gluten-free diet?

Yes, you can make a gluten-free version by using a gluten-free all-purpose flour blend. Just ensure that all other ingredients are also gluten-free. Enjoy a delicious dessert without the gluten!

Final Thoughts

Baking this Rhubarb Almond Cake is more than just following a recipe; it’s about creating memories in your kitchen.

The delightful aroma that fills your home as it bakes is simply irresistible.

Each slice offers a perfect balance of tart rhubarb and nutty almond flavors, making it a dessert that everyone will love.

Whether you’re sharing it with family or enjoying a quiet moment with a cup of coffee, this cake brings joy to any occasion.

So, roll up your sleeves, embrace the process, and let this cake become a cherished part of your dessert repertoire!

jhessica

Rhubarb Almond Cake: A Delicious Dessert Recipe Unveiled!

A delightful Rhubarb Almond Cake that combines the tartness of rhubarb with the nutty flavor of almonds, perfect for dessert lovers.
Prep Time 20 minutes
Cook Time 40 minutes
Total Time 1 hour
Servings: 8 servings
Course: Dessert
Cuisine: American
Calories: 210

Ingredients
  

  • 2 cups rhubarb chopped into 1-inch pieces
  • 1 ½ cups all-purpose flour
  • 1 cup granulated sugar
  • ½ cup unsalted butter softened
  • ½ cup almond flour
  • 2 large eggs
  • 1 teaspoon vanilla extract
  • 1 teaspoon baking powder
  • ½ teaspoon baking soda
  • ¼ teaspoon salt
  • ½ cup milk
  • Powdered sugar for dusting (optional)

Method
 

  1. Preheat the oven to 350°F (175°C). Grease and flour a 9-inch round cake pan or line it with parchment paper.
  2. In a medium bowl, combine the chopped rhubarb with 2 tablespoons of granulated sugar. Set aside to let it macerate for about 10 minutes.
  3. In a large mixing bowl, cream together the softened butter and remaining granulated sugar until light and fluffy.
  4. Add the eggs one at a time, mixing well after each addition. Stir in the vanilla extract.
  5. In another bowl, whisk together the all-purpose flour, almond flour, baking powder, baking soda, and salt.
  6. Gradually add the dry ingredients to the wet mixture, alternating with the milk. Mix until just combined.
  7. Fold in the macerated rhubarb gently into the batter.
  8. Pour the batter into the prepared cake pan and smooth the top.
  9. Bake for 35-40 minutes, or until a toothpick inserted into the center comes out clean.
  10. Allow the cake to cool in the pan for 10 minutes before transferring it to a wire rack to cool completely. Dust with powdered sugar before serving, if desired.

Nutrition

Serving: 1sliceCalories: 210kcalCarbohydrates: 28gProtein: 3gFat: 9gSaturated Fat: 5gPolyunsaturated Fat: 4gCholesterol: 50mgSodium: 150mgFiber: 1gSugar: 12g

Notes

  • For added flavor, consider mixing in a teaspoon of almond extract along with the vanilla.
  • You can substitute the rhubarb with fresh strawberries or blueberries for a different fruit flavor.

Tried this recipe?

Let us know how it was!

Spicy Salmon Bowls with Coconut Rice: A Tasty Delight!

Introduction to Spicy Salmon Bowls with Coconut Rice

There’s something magical about a meal that feels both comforting and exciting.

Spicy Salmon Bowls with Coconut Rice deliver just that.

This dish is perfect for those busy weeknights when you want to impress your loved ones without spending hours in the kitchen.

The creamy coconut rice pairs beautifully with the zesty salmon, creating a flavor explosion that will have everyone asking for seconds.

Whether you’re a seasoned cook or just starting out, this recipe is straightforward and satisfying.

Let’s dive into this culinary adventure that’s sure to become a family favorite!

Why You’ll Love This Spicy Salmon Bowls with Coconut Rice

These Spicy Salmon Bowls with Coconut Rice are a game-changer for your dinner routine.

They come together in just 40 minutes, making them perfect for busy evenings.

The combination of flavors is simply irresistible, with the creamy coconut rice balancing the spicy salmon beautifully.

Plus, this dish is not only delicious but also healthy, packed with protein and nutrients.

It’s a meal that satisfies both your taste buds and your body!

Ingredients for Spicy Salmon Bowls with Coconut Rice

Creating these Spicy Salmon Bowls with Coconut Rice is a breeze, thanks to a handful of simple ingredients.

Here’s what you’ll need:

  • Jasmine rice: This fragrant rice is the perfect base, soaking up the creamy coconut flavor.
  • Coconut milk: Adds richness and a tropical twist, making the rice irresistibly creamy.
  • Water: Essential for cooking the rice to fluffy perfection.
  • Salt: A pinch enhances all the flavors in the dish.
  • Salmon fillets: The star of the show! Rich in omega-3 fatty acids, they provide a healthy protein source.
  • Olive oil: Helps the sauce stick to the salmon and adds a touch of healthy fat.
  • Soy sauce: Brings a savory umami flavor that complements the salmon beautifully.
  • Sriracha: For that spicy kick! Adjust to your taste for a milder or hotter dish.
  • Honey: Balances the heat with a hint of sweetness.
  • Garlic powder: Adds depth and aroma without the fuss of fresh garlic.
  • Ginger powder: A warm spice that pairs perfectly with salmon.
  • Avocado: Creamy and nutritious, it adds a fresh element to the bowls.
  • Shredded carrots: For crunch and a pop of color.
  • Chopped cucumber: Refreshing and light, it balances the richness of the dish.
  • Green onions: A sprinkle of these adds a fresh, zesty finish.
  • Sesame seeds: For garnish, they add a nutty flavor and a touch of elegance.

Feel free to get creative! You can add chopped nuts for extra crunch or swap out the sriracha for a milder chili sauce if you prefer.

For exact measurements, check the bottom of the article where you can find everything available for printing.

How to Make Spicy Salmon Bowls with Coconut Rice

Creating these Spicy Salmon Bowls with Coconut Rice is a straightforward process that will have your kitchen smelling divine.

Let’s break it down step by step, ensuring you have all the tips you need for a successful meal.

Step 1: Prepare the Coconut Rice

Start by rinsing the jasmine rice under cold water.

This step is crucial; it removes excess starch and helps the rice cook up fluffy.

In a medium saucepan, combine the rinsed rice, coconut milk, water, and salt.

Bring this mixture to a boil over medium-high heat.

Once it’s bubbling, reduce the heat to low, cover, and let it simmer for about 15 minutes.

This is where the magic happens!

After the time is up, remove it from the heat but let it sit, covered, for another 5 minutes.

This resting period allows the rice to absorb any remaining liquid and become perfectly tender.

Fluff it with a fork before serving, and you’ll have a creamy, coconut-infused base for your bowls.

Step 2: Preheat the Oven and Prepare the Salmon

While the rice is cooking, preheat your oven to 400°F.

In a small bowl, whisk together the olive oil, soy sauce, sriracha, honey, garlic powder, and ginger powder.

This sauce is the heart of your dish, bringing all those spicy and savory flavors together.

Place the salmon fillets on a baking sheet lined with parchment paper.

Brush the sauce mixture generously over each fillet, ensuring they’re well-coated.

This will not only add flavor but also keep the salmon moist while baking.

Step 3: Bake the Salmon

Now it’s time to bake the salmon!

Slide the baking sheet into your preheated oven and let it cook for 12-15 minutes.

Keep an eye on it; you’ll know it’s done when the salmon flakes easily with a fork.

If you have a meat thermometer, aim for an internal temperature of 145°F for perfectly cooked salmon.

The aroma wafting through your kitchen will be irresistible!

Step 4: Assemble the Bowls

Once everything is cooked, it’s time to assemble your bowls.

Start by dividing the coconut rice among four bowls.

Top each bowl with a salmon fillet, then layer on the sliced avocado, shredded carrots, chopped cucumber, and green onions.

Feel free to get creative with the arrangement; a beautiful presentation makes the meal even more enjoyable.

Finally, sprinkle sesame seeds on top for that extra touch of flavor and elegance.

Serve immediately, and watch as everyone digs in with delight!

Tips for Success

  • Rinse the rice thoroughly to achieve that fluffy texture.
  • Adjust the sriracha to your spice preference; start with less if unsure.
  • Let the salmon rest for a minute after baking for juicier results.
  • Experiment with toppings like chopped nuts for added crunch.
  • Use a fork to fluff the rice gently; it keeps it light and airy.

Equipment Needed

  • Medium saucepan: Essential for cooking the rice; a pot with a lid works too.
  • Baking sheet: Use a lined sheet for easy cleanup; a casserole dish can substitute.
  • Whisk: Perfect for mixing the sauce; a fork can do the job in a pinch.
  • Meat thermometer: Handy for checking salmon doneness; a fork works if you don’t have one.

Variations

  • Spicy Tuna Bowls: Swap out salmon for fresh tuna for a different flavor profile.
  • Vegetarian Option: Replace salmon with marinated tofu or tempeh for a plant-based twist.
  • Quinoa Base: Use quinoa instead of jasmine rice for a protein-packed alternative.
  • Extra Veggies: Add steamed broccoli or snap peas for more color and nutrients.
  • Herb Infusion: Mix in fresh cilantro or basil for an aromatic touch.

Serving Suggestions

  • Side Salad: A light cucumber and tomato salad pairs perfectly with the bowls.
  • Drink Pairing: A crisp white wine or a refreshing iced tea complements the flavors.
  • Presentation: Serve in colorful bowls for a vibrant table setting.
  • Chili Flakes: Offer chili flakes on the side for those who love extra heat.

FAQs about Spicy Salmon Bowls with Coconut Rice

Can I use frozen salmon for this recipe?

Absolutely! Just make sure to thaw the salmon completely before cooking. This ensures even cooking and helps the flavors meld beautifully.

What can I substitute for coconut milk?

If you’re looking for a lighter option, you can use low-fat milk or almond milk. However, keep in mind that the flavor will change slightly, so adjust your seasonings accordingly.

How can I make this dish spicier?

To amp up the heat, add more sriracha to the sauce or sprinkle some red pepper flakes on top before serving. You can also include sliced jalapeños for an extra kick!

Can I prepare the rice in advance?

Yes! You can cook the coconut rice a day ahead. Just store it in the fridge and reheat it gently before serving. It’ll still taste delicious!

Is this recipe gluten-free?

Yes, these Spicy Salmon Bowls with Coconut Rice are gluten-free! Just ensure that your soy sauce is labeled gluten-free, or you can use tamari as a substitute.

Final Thoughts

Cooking these Spicy Salmon Bowls with Coconut Rice is more than just preparing a meal; it’s about creating a moment of joy.

The vibrant colors and enticing aromas fill your kitchen, making it a welcoming space for family and friends.

Each bite is a delightful blend of flavors, from the creamy coconut rice to the spicy salmon, leaving everyone satisfied and happy.

This dish is not only quick and easy but also a fantastic way to impress your loved ones.

So, roll up your sleeves, embrace the process, and enjoy the delicious rewards of your culinary adventure!

jhessica

Spicy Salmon Bowls with Coconut Rice: A Tasty Delight!

A delicious and flavorful recipe for Spicy Salmon Bowls with Coconut Rice, perfect for a satisfying meal.
Prep Time 10 minutes
Cook Time 30 minutes
Total Time 40 minutes
Servings: 4 servings
Course: Main Course
Cuisine: Asian
Calories: 550

Ingredients
  

  • 2 cups jasmine rice
  • 1 can 13.5 ounces coconut milk
  • 1 cup water
  • 1 teaspoon salt
  • 4 6-ounce salmon fillets
  • 2 tablespoons olive oil
  • 2 tablespoons soy sauce
  • 1 tablespoon sriracha adjust to taste
  • 1 tablespoon honey
  • 1 teaspoon garlic powder
  • 1 teaspoon ginger powder
  • 1 avocado sliced
  • 1 cup shredded carrots
  • 1 cup chopped cucumber
  • 2 green onions sliced
  • Sesame seeds for garnish

Method
 

  1. Rinse the jasmine rice under cold water until the water runs clear. In a medium saucepan, combine the rice, coconut milk, water, and salt. Bring to a boil over medium-high heat. Once boiling, reduce heat to low, cover, and simmer for 15 minutes or until the rice is tender and the liquid is absorbed. Remove from heat and let it sit, covered, for 5 minutes. Fluff with a fork before serving.
  2. While the rice is cooking, preheat the oven to 400°F. In a small bowl, whisk together the olive oil, soy sauce, sriracha, honey, garlic powder, and ginger powder. Place the salmon fillets on a baking sheet lined with parchment paper and brush the sauce mixture over the top of each fillet.
  3. Bake the salmon in the preheated oven for 12-15 minutes, or until the salmon is cooked through and flakes easily with a fork.
  4. To assemble the bowls, divide the coconut rice among four bowls. Top each bowl with a salmon fillet, sliced avocado, shredded carrots, chopped cucumber, and green onions. Sprinkle with sesame seeds for garnish.
  5. Serve immediately and enjoy your delicious spicy salmon bowls!

Nutrition

Serving: 1bowlCalories: 550kcalCarbohydrates: 45gProtein: 30gFat: 30gSaturated Fat: 8gPolyunsaturated Fat: 22gCholesterol: 70mgSodium: 800mgFiber: 3gSugar: 8g

Notes

  • For added crunch, include some chopped nuts like cashews or peanuts.
  • If you prefer a milder flavor, reduce the amount of sriracha or substitute it with a mild chili sauce.

Tried this recipe?

Let us know how it was!

Irish Potato Candy: Discover This Sweet Treat Recipe!

Introduction to Irish Potato Candy

Growing up, my kitchen was a treasure trove of sweet delights, but nothing quite matched the charm of Irish Potato Candy. This delightful treat, resembling tiny potatoes, is a nostalgic reminder of simpler times. It’s a no-bake recipe that’s perfect for busy days when you want to whip up something special without spending hours in the kitchen. With just a handful of ingredients, you can create a sweet treat that will impress your loved ones and satisfy your sweet tooth. Trust me, once you try this, it’ll become a go-to favorite!

Why You’ll Love This Irish Potato Candy

This Irish Potato Candy is a game-changer for anyone craving a quick and delicious dessert. It’s incredibly easy to make, requiring no baking and minimal cleanup. In just 15 minutes, you can create a sweet treat that’s both fun and satisfying. The combination of creamy peanut butter and shredded coconut delivers a delightful flavor that will have everyone coming back for more. Trust me, it’s a crowd-pleaser!

Ingredients for Irish Potato Candy

Gathering the right ingredients is the first step to creating this delightful Irish Potato Candy. Here’s what you’ll need:

  • Powdered Sugar: This sweet base gives the candy its sugary goodness and smooth texture.
  • Creamy Peanut Butter: The star of the show! It adds richness and a nutty flavor that pairs perfectly with the sweetness.
  • Unsalted Butter: Softened butter helps bind everything together, making the mixture creamy and easy to shape.
  • Vanilla Extract: A splash of vanilla enhances the overall flavor, adding warmth and depth.
  • Shredded Coconut: This ingredient gives the candy its unique texture and a hint of tropical sweetness.
  • Ground Cinnamon: Just a pinch adds a warm spice that complements the other flavors beautifully.
  • Cocoa Powder: Used for rolling, it gives the candies their signature “potato” look and a rich chocolatey taste.

For those looking to mix things up, consider substituting the shredded coconut with finely chopped nuts for an added crunch. If you want a different flavor profile, a teaspoon of almond extract can replace the vanilla. You can find the exact quantities for these ingredients at the bottom of the article, ready for printing!

How to Make Irish Potato Candy

Creating Irish Potato Candy is a delightful journey that’s as simple as it is rewarding. Follow these easy steps, and you’ll have a batch of these sweet treats ready in no time!

Step 1: Mix the Base

Start by grabbing a large mixing bowl. Combine the powdered sugar, creamy peanut butter, softened butter, and vanilla extract. Use a sturdy spatula or your hands to mix everything until it’s smooth and well-blended. This is where the magic begins, as the ingredients come together to form a creamy base that’s simply irresistible.

Step 2: Add Coconut and Cinnamon

Next, stir in the shredded coconut and ground cinnamon. Make sure everything is evenly distributed. The coconut adds a delightful texture, while the cinnamon brings a warm, comforting flavor. It’s like a cozy hug in candy form!

Step 3: Shape the Candies

Now comes the fun part! Use your hands to shape the mixture into small balls, about 1 inch in size. Don’t worry about making them perfect; the charm of Irish Potato Candy lies in their rustic appearance. Just like real potatoes, each one will have its own unique character!

Step 4: Coat with Cocoa Powder

Once you’ve shaped all the candies, it’s time to roll them in cocoa powder. This step is crucial for achieving that authentic potato look. Gently roll each ball until it’s completely coated. The cocoa not only adds to the visual appeal but also gives a rich chocolatey flavor that complements the sweetness.

Step 5: Chill and Serve

Finally, place the coated candies on a baking sheet lined with parchment paper. Pop them in the refrigerator for at least 30 minutes. This chilling time helps the candies firm up, making them easier to handle. Once they’re set, they’re ready to be enjoyed! Serve them at parties, or keep them all to yourself—no judgment here!

Tips for Success

  • Make sure your butter is softened for easy mixing.
  • Use a cookie scoop for uniform candy sizes.
  • Chill the mixture for a few minutes if it feels too sticky.
  • Experiment with different coatings like crushed nuts or sprinkles.
  • Store leftovers in an airtight container in the fridge for freshness.

Equipment Needed

  • Mixing Bowl: A large bowl for combining ingredients. A sturdy plastic or glass bowl works well.
  • Spatula: Use a spatula or your hands for mixing. A wooden spoon is a great alternative.
  • Baking Sheet: A standard baking sheet lined with parchment paper for chilling the candies.
  • Cookie Scoop: Optional, but helpful for shaping uniform balls. A tablespoon works too!

Variations of Irish Potato Candy

  • Nutty Delight: Substitute shredded coconut with finely chopped nuts like almonds or walnuts for a crunchy twist.
  • Chocolate Lovers: Mix in mini chocolate chips for an extra chocolatey flavor that will satisfy any sweet tooth.
  • Almond Joy: Replace vanilla extract with almond extract and add a sprinkle of chopped almonds for a delightful flavor reminiscent of the classic candy bar.
  • Vegan Option: Use coconut oil instead of butter and ensure your peanut butter is free from added sugars for a vegan-friendly treat.
  • Spiced Up: Experiment with different spices like nutmeg or cardamom to give your candies a unique flavor profile.

Serving Suggestions for Irish Potato Candy

  • Pair with a hot cup of coffee or tea for a delightful afternoon treat.
  • Serve on a decorative platter for parties, adding a touch of elegance.
  • Garnish with a sprinkle of shredded coconut for a tropical flair.
  • Include alongside fresh fruit for a balanced dessert spread.

FAQs about Irish Potato Candy

What is Irish Potato Candy?

Irish Potato Candy is a no-bake sweet treat that resembles small potatoes. Made with creamy peanut butter, shredded coconut, and cocoa powder, it’s a delightful dessert that’s easy to prepare and perfect for sharing.

Can I make Irish Potato Candy ahead of time?

Absolutely! These candies can be made a day or two in advance. Just store them in an airtight container in the refrigerator to keep them fresh and firm.

Is Irish Potato Candy suitable for vegetarians?

Yes, this recipe is vegetarian-friendly! It contains no meat or animal-derived ingredients, making it a great option for those following a vegetarian diet.

Can I customize the flavors of Irish Potato Candy?

Definitely! You can experiment with different extracts, like almond or coconut, and even add mix-ins like mini chocolate chips or nuts for a unique twist on this classic treat.

How should I store Irish Potato Candy?

Store your Irish Potato Candy in an airtight container in the refrigerator. They’ll stay fresh for up to a week, but I doubt they’ll last that long!

Final Thoughts

Making Irish Potato Candy is more than just whipping up a sweet treat; it’s about creating memories and sharing joy. The simplicity of this no-bake recipe allows anyone to dive into the world of candy-making without the fuss. Each bite is a delightful blend of flavors and textures, evoking warmth and nostalgia. Whether you’re enjoying them with family or surprising friends at a gathering, these little potato-shaped candies are sure to bring smiles. So, roll up your sleeves, gather your ingredients, and let the magic of Irish Potato Candy brighten your day!

jhessica

Irish Potato Candy: Discover This Sweet Treat Recipe!

Irish Potato Candy is a delightful sweet treat that resembles small potatoes, made with creamy peanut butter, shredded coconut, and cocoa powder.
Prep Time 15 minutes
Total Time 45 minutes
Servings: 12 servings
Course: Dessert
Cuisine: Irish
Calories: 150

Ingredients
  

  • 2 cups powdered sugar
  • 1 cup creamy peanut butter
  • 1/4 cup unsalted butter softened
  • 1 teaspoon vanilla extract
  • 1 cup shredded coconut
  • 1/2 teaspoon ground cinnamon
  • 1/2 cup cocoa powder for rolling

Method
 

  1. In a large mixing bowl, combine the powdered sugar, peanut butter, softened butter, and vanilla extract. Mix until well blended and smooth.
  2. Stir in the shredded coconut and ground cinnamon until evenly distributed.
  3. Using your hands, shape the mixture into small potato-shaped balls, about 1 inch in size.
  4. Roll each ball in cocoa powder to coat completely, giving them a realistic potato appearance.
  5. Place the coated candies on a baking sheet lined with parchment paper.
  6. Refrigerate for at least 30 minutes to firm up before serving.

Nutrition

Serving: 1candyCalories: 150kcalCarbohydrates: 12gProtein: 3gFat: 9gSaturated Fat: 3gPolyunsaturated Fat: 6gCholesterol: 5mgSodium: 50mgFiber: 1gSugar: 12g

Notes

  • For a different flavor, try adding a teaspoon of almond extract instead of vanilla.
  • You can substitute the shredded coconut with finely chopped nuts for added crunch.

Tried this recipe?

Let us know how it was!

Croque Madame with a Twist: A Delicious Gourmet Recipe!

Introduction to Croque Madame with a Twist

There’s something magical about a warm, cheesy sandwich that can brighten your day. The Croque Madame with a Twist takes the classic French dish and gives it a delightful upgrade, perfect for busy mornings or a cozy brunch with friends. Imagine sinking your teeth into layers of gluten-free bread, savory ham, and gooey Gruyère cheese, all topped with a creamy egg mixture. This recipe is not just a meal; it’s a moment of indulgence that you can whip up in no time. Whether you’re impressing loved ones or treating yourself, this dish is sure to satisfy.

Why You’ll Love This Croque Madame with a Twist

This Croque Madame with a Twist is a game-changer for your breakfast routine. It’s quick to prepare, taking just 25 minutes from start to finish. The combination of flavors is simply irresistible, with the creamy Gruyère and savory ham creating a taste explosion. Plus, it’s gluten-free, making it a fantastic option for those with dietary restrictions. You’ll find yourself craving this gourmet delight again and again!

Ingredients for Croque Madame with a Twist

Gathering the right ingredients is the first step to creating this delicious Croque Madame with a Twist. Here’s what you’ll need:

  • Gluten-free bread: The foundation of your sandwich. Choose a hearty loaf that holds up well to toasting.
  • Sliced ham: Adds a savory depth. Opt for high-quality ham for the best flavor.
  • Gruyère cheese: This nutty, creamy cheese melts beautifully, making it a perfect choice for this dish.
  • Dijon mustard: A tangy kick that elevates the flavors. Feel free to adjust the amount to your taste.
  • Unsalted butter: For cooking the sandwich to golden perfection. It adds richness without overpowering the other flavors.
  • Large egg: The star of the creamy topping. Fresh eggs will give you the best results.
  • Milk: Helps create a luscious egg mixture. You can use any milk you prefer, including dairy-free options.
  • Salt and pepper: Essential for seasoning. Adjust to your liking for the perfect balance.
  • Chopped fresh parsley (optional): A pop of color and freshness for garnish. It’s not just for looks; it adds a nice herbal note.

For those looking to mix things up, consider these substitutions:

  • Replace ham with sautéed mushrooms or spinach for a vegetarian option.
  • Add a slice of tomato or avocado inside the sandwich for extra flavor and nutrition.

Exact quantities for each ingredient can be found at the bottom of the article, ready for printing!

How to Make Croque Madame with a Twist

Creating this Croque Madame with a Twist is a straightforward process that will have you feeling like a gourmet chef in no time. Follow these simple steps, and you’ll be savoring every bite of this delicious dish.

Step 1: Preheat and Prepare

Start by preheating your oven to 400°F (200°C). This ensures your sandwich bakes evenly and gets that perfect golden crust. While the oven heats up, line a baking sheet with parchment paper. This will make cleanup a breeze and prevent sticking.

Step 2: Assemble the Sandwich

Grab your gluten-free bread and spread a generous layer of Dijon mustard on one side of each slice. This adds a zesty kick that complements the ham beautifully. Next, layer the sliced ham and half of the grated Gruyère cheese on one slice. Top it with the other slice, mustard side down, creating a delicious sandwich.

Step 3: Cook the Sandwich

In a skillet over medium heat, melt 1 tablespoon of unsalted butter. Once the butter is sizzling, carefully place your sandwich in the skillet. Cook it until golden brown on one side, about 3-4 minutes. Flip it gently and cook the other side until it’s equally golden and the cheese starts to melt. This step is crucial for that crispy texture!

Step 4: Prepare the Egg Mixture

While the sandwich is cooking, whisk together one large egg, 1/4 cup of milk, and a pinch of salt and pepper in a small bowl. This creamy mixture will soak into the sandwich, adding richness and flavor. Make sure it’s well combined for the best results.

Step 5: Bake the Sandwich

Once your sandwich is golden brown, transfer it to the prepared baking sheet. Pour the egg mixture over the sandwich, allowing it to soak in. Don’t be shy—let it soak! Sprinkle the remaining Gruyère cheese on top. Bake in the preheated oven for 10-12 minutes, or until the egg is set and the cheese is bubbly and golden.

Step 6: Serve and Enjoy

After baking, remove the sandwich from the oven and let it cool slightly. This will help the flavors meld together. If you like, garnish with chopped fresh parsley for a pop of color and freshness. Serve warm and enjoy every delicious bite of your Croque Madame with a Twist!

Tips for Success

  • Use a sturdy gluten-free bread to prevent sogginess.
  • Don’t rush the cooking process; golden brown is key for flavor.
  • Let the sandwich soak in the egg mixture for at least 5 minutes.
  • Experiment with different cheeses like cheddar or mozzarella for a unique twist.
  • For extra crunch, add a sprinkle of breadcrumbs on top before baking.

Equipment Needed

  • Skillet: A non-stick skillet works best, but any skillet will do.
  • Baking sheet: Use a regular baking sheet or a cast-iron skillet for a rustic touch.
  • Parchment paper: Optional, but it makes cleanup easier.
  • Whisk: A fork can also do the job for mixing the egg mixture.

Variations

  • Vegetarian Delight: Swap the ham for sautéed mushrooms, spinach, or roasted red peppers for a hearty vegetarian option.
  • Cheesy Spin: Experiment with different cheeses like sharp cheddar, creamy mozzarella, or tangy blue cheese for a unique flavor profile.
  • Herb Infusion: Add fresh herbs like thyme or basil to the egg mixture for an aromatic twist.
  • Spicy Kick: Incorporate a dash of hot sauce or sliced jalapeños for those who enjoy a bit of heat.
  • Breakfast Boost: Top with a fried or poached egg for an extra protein punch and a beautiful presentation.

Serving Suggestions

  • Fresh Salad: Pair your Croque Madame with a light arugula or mixed greens salad for a refreshing contrast.
  • Fruit Plate: Serve with a side of seasonal fruit for a sweet touch.
  • Coffee or Tea: Enjoy with a strong cup of coffee or herbal tea to complement the flavors.
  • Presentation: Serve on a rustic wooden board for a charming, café-style look.

FAQs about Croque Madame with a Twist

Can I make Croque Madame with a Twist ahead of time?

Absolutely! You can assemble the sandwich and prepare the egg mixture in advance. Just cover and refrigerate them separately. When you’re ready to eat, simply bake it as directed. This makes it a great option for busy mornings!

What can I substitute for Gruyère cheese?

If Gruyère isn’t available, you can use Swiss cheese or even sharp cheddar. Each cheese will bring its own unique flavor, so feel free to experiment!

Is this recipe suitable for meal prep?

Yes! This Croque Madame with a Twist is perfect for meal prep. You can make several sandwiches at once and store them in the fridge. Just reheat in the oven or microwave when you’re ready to enjoy.

Can I make this dish dairy-free?

Definitely! Use dairy-free cheese and a plant-based milk alternative. This way, you can still enjoy the delicious flavors without the dairy.

What sides pair well with Croque Madame with a Twist?

A light salad or a side of fresh fruit complements this dish beautifully. You could also serve it with a warm bowl of soup for a comforting meal.

Final Thoughts

Creating a Croque Madame with a Twist is more than just cooking; it’s about crafting a moment of joy. Each bite is a delightful blend of flavors that transports you to a cozy French café, even if you’re just in your kitchen. This recipe is perfect for those busy mornings or leisurely brunches, offering a gourmet experience without the fuss. Whether you’re sharing it with loved ones or savoring it solo, this dish brings warmth and satisfaction. So, roll up your sleeves, embrace the process, and enjoy the delicious rewards of your culinary adventure!

jhessica

Croque Madame with a Twist: A Delicious Gourmet Recipe!

A gourmet twist on the classic Croque Madame, featuring gluten-free bread, ham, and Gruyère cheese, topped with a creamy egg mixture and baked to perfection.
Prep Time 10 minutes
Cook Time 15 minutes
Total Time 25 minutes
Servings: 1 serving
Course: Breakfast
Cuisine: French
Calories: 450

Ingredients
  

  • 2 slices gluten-free bread
  • 2 ounces sliced ham
  • 1 ounce Gruyère cheese grated
  • 1 tablespoon Dijon mustard
  • 1 tablespoon unsalted butter
  • 1 large egg
  • 1/4 cup milk
  • Salt and pepper to taste
  • 1 tablespoon chopped fresh parsley optional, for garnish

Method
 

  1. Preheat your oven to 400°F (200°C). Line a baking sheet with parchment paper.
  2. Spread Dijon mustard on one side of each slice of gluten-free bread. Layer the ham and half of the Gruyère cheese on one slice, then top with the other slice, mustard side down.
  3. In a skillet over medium heat, melt 1 tablespoon of butter. Add the sandwich and cook until golden brown on one side, about 3-4 minutes. Carefully flip and cook the other side until golden brown and the cheese begins to melt, about another 3-4 minutes.
  4. Transfer the sandwich to the prepared baking sheet. In a small bowl, whisk together the egg, milk, salt, and pepper. Pour the egg mixture over the sandwich, allowing it to soak in.
  5. Sprinkle the remaining Gruyère cheese on top of the sandwich. Bake in the preheated oven for 10-12 minutes, or until the egg is set and the cheese is bubbly and golden.
  6. Remove from the oven and let cool slightly. Serve warm, garnished with chopped parsley if desired.

Nutrition

Serving: 1sandwichCalories: 450kcalCarbohydrates: 30gProtein: 25gFat: 25gSaturated Fat: 10gPolyunsaturated Fat: 15gCholesterol: 200mgSodium: 800mgFiber: 2gSugar: 2g

Notes

  • For a vegetarian option, replace the ham with sautéed mushrooms or spinach.
  • Add a slice of tomato or avocado inside the sandwich for extra flavor and nutrition.

Tried this recipe?

Let us know how it was!

Coconut Hibiscus Breeze: Refresh Your Summer Drinks Today!

Introduction to Coconut Hibiscus Breeze

Summer days can be sweltering, and nothing beats the heat quite like a refreshing drink. That’s where the Coconut Hibiscus Breeze comes in. This vibrant beverage is not just a thirst-quencher; it’s a tropical escape in a glass. With its delightful blend of coconut water and hibiscus tea, it’s perfect for those lazy afternoons or backyard barbecues. Whether you’re hosting friends or just treating yourself, this drink is a quick solution that impresses without the fuss. Let’s dive into this easy recipe that will have you sipping in style all summer long!

Why You’ll Love This Coconut Hibiscus Breeze

This Coconut Hibiscus Breeze is a game-changer for your summer drink lineup. It’s incredibly easy to whip up, taking just 10 minutes from start to finish. The combination of coconut water and hibiscus tea creates a refreshing taste that dances on your palate. Plus, it’s a guilt-free indulgence, low in calories and packed with flavor. Perfect for cooling down after a long day or impressing guests at your next gathering!

Ingredients for Coconut Hibiscus Breeze

Gathering the right ingredients is the first step to crafting your Coconut Hibiscus Breeze. Here’s what you’ll need:

  • Coconut Water: This hydrating base adds a subtle sweetness and tropical flair. Look for pure coconut water without added sugars for the best flavor.
  • Hibiscus Tea: Brewed from dried hibiscus flowers, this tea brings a tart, fruity flavor and a stunning ruby color. You can find it in most grocery stores or online.
  • Honey: A natural sweetener that balances the tartness of the hibiscus. Adjust the amount to your taste, or swap it out for agave syrup or stevia for a lower-calorie option.
  • Fresh Lime Juice: This adds a zesty kick that brightens the drink. Freshly squeezed is always best, but bottled lime juice works in a pinch.
  • Ice Cubes: Essential for serving, they keep your drink chilled and refreshing on hot days.
  • Lime Slices and Mint Leaves: These are optional garnishes that enhance the drink’s presentation and add a burst of freshness.

For exact measurements, check the bottom of the article where you can find everything listed for easy printing. Now that you have your ingredients ready, let’s move on to the fun part—making this delightful drink!

How to Make Coconut Hibiscus Breeze

Creating your Coconut Hibiscus Breeze is a breeze! Follow these simple steps, and you’ll have a refreshing drink ready in no time. Let’s get started!

Step 1: Brew the Hibiscus Tea

Begin by brewing the hibiscus tea. Boil 2 cups of water and add 2 tablespoons of dried hibiscus flowers. Let it steep for about 10 minutes. This allows the flavors to develop fully. Once it’s brewed, strain the tea to remove the flowers. Now, here’s the key: let the tea cool down completely. This step is crucial because mixing hot tea with coconut water can alter the drink’s refreshing vibe.

Step 2: Combine Ingredients

In a pitcher, combine the cooled hibiscus tea with 1 cup of coconut water. Add 1 tablespoon of honey and 1 tablespoon of fresh lime juice. Stir well until the honey dissolves completely. This mixture is where the magic happens! The tartness of the hibiscus balances beautifully with the sweetness of the coconut water and honey. Taste it and adjust the sweetness if needed. You want it just right!

Step 3: Serve Over Ice

Now, it’s time to serve! Fill your glasses with ice cubes. Pour the vibrant mixture over the ice, watching it cascade like a tropical waterfall. The ice will chill the drink instantly, making it even more refreshing. This is the moment you’ve been waiting for!

Step 4: Garnish and Enjoy

To elevate your Coconut Hibiscus Breeze, garnish each glass with a slice of lime and a few mint leaves. Not only does this add a pop of color, but it also enhances the aroma. Take a moment to appreciate your creation before diving in. Sip slowly and enjoy the tropical flavors dancing on your palate!

Tips for Success

  • Use fresh ingredients for the best flavor—especially the lime juice.
  • Adjust the sweetness to your liking; taste as you go!
  • Chill your glasses beforehand for an extra refreshing experience.
  • Experiment with different garnishes like basil or edible flowers for a unique twist.
  • Make a larger batch and store it in the fridge for quick access on hot days.

Equipment Needed

  • Teapot or Saucepan: For brewing hibiscus tea. A simple pot works just fine.
  • Pitcher: To mix your drink. Any large container will do.
  • Strainer: Essential for removing hibiscus flowers. A fine mesh sieve is perfect.
  • Glasses: For serving. Use your favorite tumblers or mason jars.
  • Spoon: For stirring. A regular kitchen spoon will suffice.

Variations of Coconut Hibiscus Breeze

  • Sparkling Coconut Hibiscus Breeze: Add a splash of sparkling water or club soda for a fizzy twist that elevates the drink.
  • Berry Infusion: Toss in some fresh berries like strawberries or blueberries for an extra burst of flavor and color.
  • Herbal Twist: Experiment with different herbs like basil or rosemary instead of mint for a unique aromatic experience.
  • Alcoholic Version: For a fun adult twist, add a shot of rum or vodka to create a tropical cocktail.
  • Chilled Hibiscus Popsicles: Pour the mixture into popsicle molds and freeze for a refreshing treat on hot days.

Serving Suggestions for Coconut Hibiscus Breeze

  • Pair with light appetizers like shrimp cocktail or fresh fruit skewers for a delightful summer spread.
  • Serve alongside grilled chicken or fish tacos for a tropical-themed meal.
  • For a festive touch, use mason jars for serving and add colorful straws.
  • Consider a platter of tropical fruits like pineapple and mango for a refreshing side.
  • Enjoy with a light salad topped with citrus vinaigrette for a balanced meal.

FAQs about Coconut Hibiscus Breeze

Can I make Coconut Hibiscus Breeze ahead of time?

Absolutely! You can prepare the mixture in advance and store it in the fridge. Just remember to add ice and garnish right before serving to keep it fresh and vibrant.

Is Coconut Hibiscus Breeze suitable for kids?

Yes! This drink is a fantastic option for kids. It’s naturally sweetened and packed with flavor, making it a fun and healthy alternative to sugary sodas.

Can I use dried hibiscus tea bags instead of loose flowers?

Definitely! If you have dried hibiscus tea bags, they work just as well. Follow the brewing instructions on the package for the best results.

How long can I store leftover Coconut Hibiscus Breeze?

If you have any leftovers, store them in the fridge for up to 2 days. Just give it a good stir before serving again, as the ingredients may settle.

What are some other ways to enjoy hibiscus tea?

Hibiscus tea is versatile! You can enjoy it hot, iced, or even as a base for smoothies. It also makes a great addition to cocktails or as a refreshing popsicle flavor!

Final Thoughts

The Coconut Hibiscus Breeze is more than just a drink; it’s a celebration of summer in every sip. This vibrant concoction brings together the tropical sweetness of coconut water and the tartness of hibiscus tea, creating a refreshing escape from the heat. Whether you’re lounging by the pool or hosting a backyard barbecue, this drink is sure to impress. Plus, it’s quick and easy to make, allowing you to spend more time enjoying the sunshine and less time in the kitchen. So, grab your ingredients and let the Coconut Hibiscus Breeze transport you to a tropical paradise!

jhessica

Coconut Hibiscus Breeze: Refresh Your Summer Drinks Today!

A refreshing summer drink combining coconut water and hibiscus tea, perfect for hot days.
Prep Time 10 minutes
Total Time 10 minutes
Servings: 4 servings
Course: Beverage
Cuisine: Tropical
Calories: 45

Ingredients
  

  • 1 cup coconut water
  • 1 cup hibiscus tea brewed and cooled
  • 1 tablespoon honey or to taste
  • 1 tablespoon fresh lime juice
  • Ice cubes
  • Lime slices and mint leaves for garnish

Method
 

  1. Brew hibiscus tea by steeping 2 tablespoons of dried hibiscus flowers in 2 cups of boiling water for about 10 minutes. Strain and let it cool.
  2. In a pitcher, combine the cooled hibiscus tea, coconut water, honey, and lime juice. Stir well until the honey is fully dissolved.
  3. Fill glasses with ice cubes and pour the mixture over the ice.
  4. Garnish each glass with a lime slice and a few mint leaves. Serve immediately.

Nutrition

Serving: 1servingCalories: 45kcalCarbohydrates: 10gProtein: 1gSugar: 9g

Notes

  • For a refreshing twist, add a splash of sparkling water before serving.
  • Substitute honey with agave syrup or stevia for a lower-calorie option.

Tried this recipe?

Let us know how it was!

Shakshouka Focaccia: Discover This Unique Recipe Now!

Introduction to Shakshouka Focaccia

There’s something magical about combining two beloved dishes into one, and that’s exactly what Shakshouka Focaccia does. This delightful creation marries the rich, spiced flavors of shakshouka with the soft, pillowy texture of focaccia. Whether you’re looking for a quick solution for a busy day or a dish to impress your loved ones, this recipe has you covered. It’s not just a meal; it’s an experience that brings warmth and comfort to your table. Trust me, once you try it, you’ll wonder how you ever lived without this unique twist!

Why You’ll Love This Shakshouka Focaccia

This Shakshouka Focaccia is a game-changer for your brunch game. It’s easy to whip up, making it perfect for those busy weekends when you want something special without the fuss. The combination of flavors is simply irresistible, with the warm spices and fresh ingredients dancing together in every bite. Plus, it’s a crowd-pleaser, so you can impress your friends and family without breaking a sweat!

Ingredients for Shakshouka Focaccia

Gathering the right ingredients is key to making a delicious Shakshouka Focaccia. Here’s what you’ll need:

  • All-purpose flour: The backbone of your focaccia, providing that perfect chewy texture.
  • Warm water: Activates the yeast, helping the dough rise beautifully.
  • Active dry yeast: This little powerhouse makes your dough rise and gives it a light, airy quality.
  • Sugar: Just a touch to feed the yeast and enhance the flavor.
  • Salt: Essential for flavor; it balances the sweetness and enhances the overall taste.
  • Olive oil: Adds richness to the dough and helps create that golden crust.
  • Paprika: A warm spice that brings depth and a hint of smokiness to the dish.
  • Ground cumin: Adds an earthy flavor, making the dish feel more authentic.
  • Large eggs: The star of the show, providing protein and a creamy texture when baked.
  • Diced tomatoes: Fresh or canned, they add moisture and a burst of flavor.
  • Bell pepper: Sweet and colorful, it adds crunch and a pop of freshness.
  • Onion: A classic aromatic that enhances the overall flavor profile.
  • Feta cheese: Crumbled on top for a tangy finish; you can substitute with goat cheese or skip it for a dairy-free option.
  • Fresh parsley: A bright garnish that adds a touch of color and freshness.
  • Salt and pepper: To taste, ensuring every bite is seasoned just right.

For those who like a kick, consider adding sliced jalapeños or red pepper flakes to the tomato mixture. You can find all the exact measurements at the bottom of the article, ready for printing!

How to Make Shakshouka Focaccia

Creating Shakshouka Focaccia is a delightful journey that combines the art of baking with the joy of cooking. Follow these simple steps, and you’ll have a stunning dish that’s sure to impress.

Step 1: Prepare the Yeast Mixture

Start by combining warm water, sugar, and active dry yeast in a small bowl. Let it sit for about 5-10 minutes until it becomes frothy. This step is crucial; it ensures your yeast is alive and ready to work its magic. The aroma of the yeast bubbling is a sign that you’re on the right track!

Step 2: Make the Dough

In a large mixing bowl, combine all-purpose flour and salt. Create a well in the center and pour in the yeast mixture along with olive oil. Mix everything together until a dough forms. It should be slightly sticky but manageable. If it’s too wet, sprinkle in a bit more flour.

Step 3: Knead and Rise

Transfer the dough to a floured surface and knead it for about 5-7 minutes. You want it to be smooth and elastic. Once done, place it in a greased bowl, cover it with a towel, and let it rise in a warm spot for about an hour. It should double in size, filling your kitchen with a lovely, yeasty scent.

Step 4: Preheat the Oven

While the dough is rising, preheat your oven to 400°F. This ensures that your focaccia will bake evenly and develop that golden crust we all love. The anticipation builds as the oven warms up, and you can almost taste the deliciousness to come!

Step 5: Shape the Focaccia

Once the dough has risen, punch it down gently to release the air. Spread it out on a greased baking sheet or a large cast-iron skillet. Use your fingers to create dimples all over the surface. These little pockets will hold the shakshouka topping beautifully.

Step 6: Prepare the Shakshouka Topping

In a skillet, heat a bit of olive oil and sauté the finely chopped onion and bell pepper until softened. Add the diced tomatoes, paprika, ground cumin, salt, and pepper. Cook for about 5 minutes until everything is heated through. The aroma will be intoxicating, making your mouth water!

Step 7: Assemble and Bake

Spoon the shakshouka mixture evenly over the focaccia dough, making small wells for the eggs. Crack the eggs into these wells, then sprinkle crumbled feta cheese on top. Drizzle with a little olive oil for that extra touch. Bake in the preheated oven for 20-25 minutes, or until the eggs are set to your liking and the edges of the focaccia are golden brown. The sight of this dish coming out of the oven is nothing short of spectacular!

Tips for Success

  • Use fresh yeast for the best rise; check the expiration date.
  • Don’t rush the rising time; a warm environment helps the dough develop flavor.
  • Experiment with toppings; add olives or spinach for extra flavor.
  • For a crispier crust, place a pan of water in the oven while baking.
  • Let the focaccia cool slightly before slicing for cleaner cuts.

Equipment Needed

  • Mixing bowl: A large bowl for combining ingredients; any bowl will do.
  • Baking sheet or cast-iron skillet: For baking; a pizza stone works too!
  • Measuring cups and spoons: Essential for accuracy; use a kitchen scale if preferred.
  • Wooden spoon or spatula: For mixing; a sturdy fork can work in a pinch.
  • Kitchen towel: To cover the dough while it rises; any clean cloth will suffice.

Variations

  • Spicy Shakshouka: Add sliced jalapeños or a sprinkle of red pepper flakes to the tomato mixture for an extra kick.
  • Herb-Infused Dough: Mix in fresh herbs like rosemary or thyme into the dough for added flavor.
  • Cheese Swap: Substitute feta with goat cheese or mozzarella for a different taste profile.
  • Vegetable Medley: Incorporate other veggies like zucchini, spinach, or mushrooms into the shakshouka topping.
  • Gluten-Free Option: Use a gluten-free flour blend to make the focaccia suitable for gluten-sensitive diets.

Serving Suggestions

  • Fresh Salad: Pair with a simple mixed greens salad drizzled with lemon vinaigrette for a refreshing contrast.
  • Yogurt Dip: Serve with a side of tangy yogurt or tzatziki for a creamy complement.
  • Herb Garnish: Sprinkle extra fresh parsley or cilantro on top for a vibrant finish.
  • Wine Pairing: Enjoy with a chilled white wine or a light beer to enhance the flavors.

FAQs about Shakshouka Focaccia

Can I make Shakshouka Focaccia ahead of time?

Absolutely! You can prepare the dough and toppings in advance. Just assemble everything and store it in the fridge. When you’re ready to bake, let it come to room temperature before popping it in the oven.

What can I substitute for eggs in this recipe?

If you’re looking for an egg alternative, consider using silken tofu or a flaxseed mixture. For each egg, mix 1 tablespoon of ground flaxseed with 2.5 tablespoons of water and let it sit until it thickens.

How do I store leftovers?

Leftover Shakshouka Focaccia can be stored in an airtight container in the fridge for up to three days. Reheat in the oven for a few minutes to restore its delicious texture.

Can I freeze Shakshouka Focaccia?

Yes, you can freeze it! Wrap individual slices tightly in plastic wrap and then place them in a freezer bag. They’ll keep well for up to three months. Just thaw and reheat when you’re ready to enjoy!

What are some good side dishes to serve with Shakshouka Focaccia?

Pair it with a fresh salad, roasted vegetables, or a light yogurt dip. These sides complement the rich flavors of the focaccia beautifully!

Final Thoughts

Shakshouka Focaccia is more than just a dish; it’s a celebration of flavors and cultures coming together. Each bite offers a delightful mix of spices, textures, and colors that can brighten any meal. Whether you’re sharing it with friends at brunch or enjoying a quiet dinner at home, this recipe brings warmth and joy to the table. Plus, the satisfaction of creating something so unique and delicious is truly rewarding. So roll up your sleeves, embrace the process, and let this Shakshouka Focaccia become a cherished part of your culinary repertoire!

jhessica

Shakshouka Focaccia: Discover This Unique Recipe Now!

Shakshouka Focaccia is a unique and flavorful dish that combines the classic Middle Eastern shakshouka with Italian focaccia bread, topped with eggs, tomatoes, and spices.
Prep Time 15 minutes
Cook Time 30 minutes
Total Time 1 hour 45 minutes
Servings: 4 servings
Course: Brunch
Cuisine: Mediterranean
Calories: 320

Ingredients
  

  • 2 cups all-purpose flour
  • 1 cup warm water about 110°F
  • 2 teaspoons active dry yeast
  • 1 teaspoon sugar
  • 1 teaspoon salt
  • 2 tablespoons olive oil plus extra for drizzling
  • 1 teaspoon paprika
  • 1 teaspoon ground cumin
  • 4 large eggs
  • 1 cup diced tomatoes canned or fresh
  • 1/2 cup bell pepper diced
  • 1/4 cup onion finely chopped
  • 1/4 cup crumbled feta cheese
  • Fresh parsley chopped (for garnish)
  • Salt and pepper to taste

Method
 

  1. In a small bowl, combine warm water, sugar, and yeast. Let it sit for about 5-10 minutes until frothy.
  2. In a large mixing bowl, combine flour and salt. Make a well in the center and add the yeast mixture and olive oil. Mix until a dough forms.
  3. Knead the dough on a floured surface for about 5-7 minutes until smooth and elastic. Place the dough in a greased bowl, cover with a towel, and let it rise in a warm place for 1 hour or until doubled in size.
  4. Preheat your oven to 400°F.
  5. Once the dough has risen, punch it down and spread it out on a greased baking sheet or a large cast-iron skillet. Use your fingers to create dimples in the dough.
  6. In a skillet, sauté the onion and bell pepper in a little olive oil until softened. Add the diced tomatoes, paprika, cumin, salt, and pepper. Cook for about 5 minutes until heated through.
  7. Spoon the tomato mixture evenly over the focaccia dough, making small wells for the eggs. Crack the eggs into the wells.
  8. Sprinkle crumbled feta cheese on top and drizzle with olive oil.
  9. Bake in the preheated oven for 20-25 minutes, or until the eggs are set to your liking and the edges of the focaccia are golden brown.
  10. Remove from the oven and let it cool slightly. Garnish with fresh parsley before serving.

Nutrition

Serving: 1sliceCalories: 320kcalCarbohydrates: 30gProtein: 12gFat: 18gSaturated Fat: 4gPolyunsaturated Fat: 14gCholesterol: 186mgSodium: 500mgFiber: 2gSugar: 3g

Notes

  • For a spicier version, add sliced jalapeños or red pepper flakes to the tomato mixture.
  • You can also substitute the feta with goat cheese or omit it for a dairy-free option.
  • For a heartier meal, serve with a side of mixed greens or a simple salad.

Tried this recipe?

Let us know how it was!

Stay Connected

Get recipes via email: