Get my cookbooks

Savory Satay Beef Noodle Soup: A Flavorful Delight!

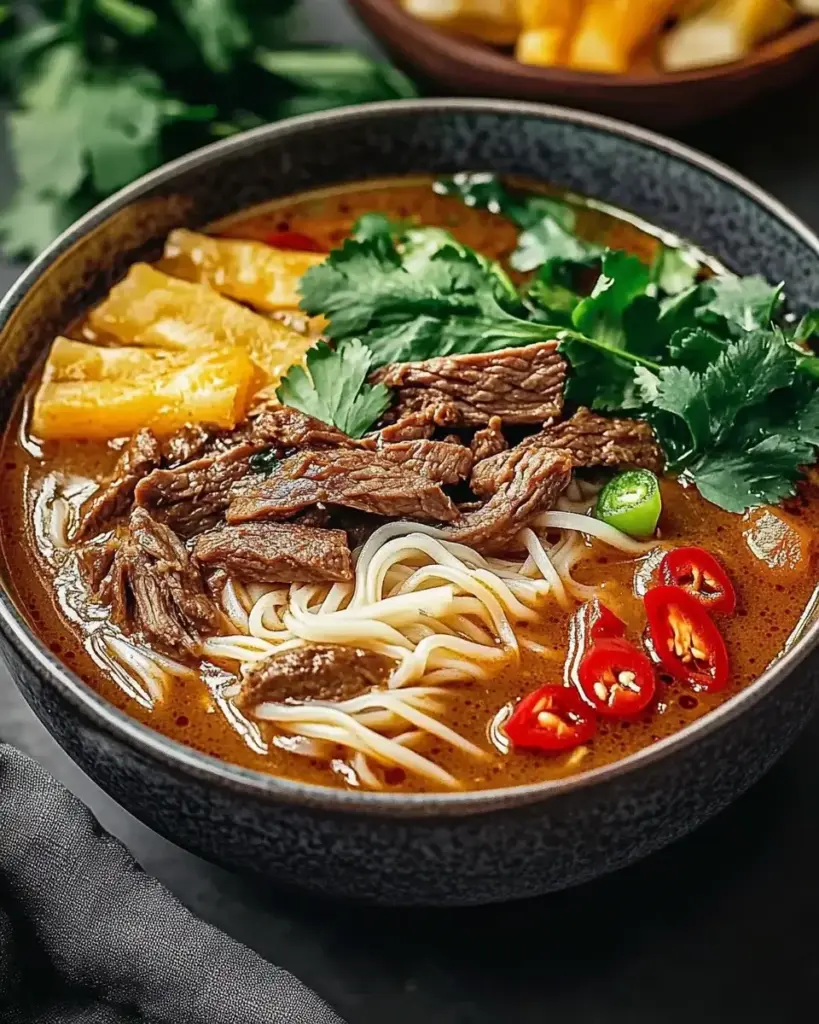
Introduction to Savory Satay Beef Noodle Soup

There’s something magical about a steaming bowl of soup that warms the soul, especially when it’s a Savory Satay Beef Noodle Soup. This dish is not just a meal; it’s a hug in a bowl. Whether you’re coming home after a long day or looking to impress friends at a casual gathering, this recipe is your go-to. It’s quick, easy, and packed with flavors that dance on your palate. Plus, the combination of tender beef, creamy coconut milk, and aromatic spices makes it a delightful experience for everyone at the table.

Why You’ll Love This Savory Satay Beef Noodle Soup

This Savory Satay Beef Noodle Soup is a game-changer for busy weeknights. It comes together in just 40 minutes, making it perfect for those evenings when time is tight. The rich, nutty flavors of the satay broth will have your taste buds singing. Plus, it’s a one-pot wonder, which means less cleanup and more time to enjoy with family or friends. Who wouldn’t love that?

Ingredients for Savory Satay Beef Noodle Soup

Gathering the right ingredients is the first step to creating your Savory Satay Beef Noodle Soup. Each component plays a vital role in building that rich, comforting flavor. Here’s what you’ll need:

  • Beef sirloin: Tender and flavorful, this cut is perfect for quick cooking.
  • Beef broth: The base of your soup, adding depth and richness.
  • Coconut milk: Creamy and sweet, it balances the savory elements beautifully.
  • Peanut butter: Adds a nutty flavor and thickens the broth for a satisfying texture.
  • Soy sauce: A staple in Asian cuisine, it brings umami and saltiness.
  • Fish sauce: Just a splash enhances the overall flavor profile with its unique depth.
  • Brown sugar: A touch of sweetness to round out the savory notes.
  • Red curry paste: This is where the magic happens, infusing the soup with aromatic spices.
  • Vegetable oil: For sautéing the aromatics, it helps to release their flavors.
  • Onion: Adds sweetness and depth when sautéed.
  • Garlic: A must-have for that aromatic kick.
  • Fresh ginger: Brightens the soup with its zesty flavor.
  • Rice noodles: These are the heart of the dish, soaking up all the delicious broth.
  • Bean sprouts: For crunch and freshness, they add a nice texture contrast.
  • Red bell pepper: Sweet and colorful, it enhances the visual appeal.
  • Green onions: A fresh garnish that adds a pop of color and flavor.
  • Fresh cilantro: Optional, but it brings a burst of freshness to each bowl.
  • Lime wedges: A squeeze of lime brightens the flavors and adds a zesty finish.

For those looking to mix things up, consider substituting beef with tofu for a vegetarian version. You can also use vegetable broth instead of beef broth. If you like it spicy, toss in some sliced jalapeños or a dash of sriracha. The exact quantities for each ingredient can be found at the bottom of the article, ready for printing!

How to Make Savory Satay Beef Noodle Soup

Now that you have all your ingredients ready, it’s time to dive into the cooking process. Making this Savory Satay Beef Noodle Soup is straightforward and rewarding. Follow these steps, and you’ll have a delicious meal in no time!

Step 1: Sauté Aromatics

Start by heating vegetable oil in a large pot over medium heat. Once the oil is shimmering, toss in the sliced onion, minced garlic, and fresh ginger. Sauté them for about 3-4 minutes until they soften and release their fragrant aroma. This step is crucial; it sets the flavor foundation for your soup.

Step 2: Brown the Beef

Next, add the thinly sliced beef sirloin to the pot. Cook it for about 3-5 minutes, stirring occasionally, until the beef is browned. Don’t overcrowd the pot; you want each piece to sear nicely. This browning adds depth to the Savory Satay Beef Noodle Soup.

Step 3: Create the Broth

Now it’s time to build that rich broth. Pour in the beef broth and coconut milk, then add the peanut butter, soy sauce, fish sauce, brown sugar, and red curry paste. Stir everything together and bring it to a gentle simmer. Let it bubble away for about 10 minutes, allowing the flavors to meld beautifully.

Step 4: Cook the Noodles

While the soup simmers, prepare the rice noodles according to the package instructions. Usually, this takes just a few minutes. Once cooked, drain them and set aside. These noodles will soak up all the delicious broth, making each bite a delight.

Step 5: Add Vegetables

After the broth has simmered, it’s time to add some color and crunch. Toss in the sliced red bell pepper and bean sprouts. Cook for an additional 3-5 minutes until the vegetables are tender but still vibrant. This step adds freshness to your Savory Satay Beef Noodle Soup.

Step 6: Serve the Soup

To serve, place a portion of the cooked rice noodles in a bowl. Ladle the hot soup over the noodles, ensuring each bowl gets a good mix of beef and veggies. Top with chopped green onions and fresh cilantro for that extra pop of flavor. Don’t forget to serve with lime wedges on the side for a zesty finish!

Tips for Success

  • Prep all ingredients before starting to cook. It makes the process smoother.
  • Don’t rush the sautéing; it builds essential flavors for your Savory Satay Beef Noodle Soup.
  • Adjust the spice level by adding more or less red curry paste to suit your taste.
  • For a creamier broth, use full-fat coconut milk.
  • Garnish generously with fresh herbs for a burst of flavor.

Equipment Needed

  • Large pot: A sturdy pot is essential for simmering the soup. A Dutch oven works great too.
  • Wooden spoon: Perfect for stirring and preventing the soup from sticking.
  • Measuring cups and spoons: For accurate ingredient measurements.
  • Colander: Useful for draining the cooked rice noodles.

Variations

  • Vegetarian Option: Swap the beef for tofu and use vegetable broth for a hearty vegetarian version.
  • Spicy Kick: Add sliced jalapeños or a dash of sriracha for an extra layer of heat.
  • Nut-Free: Replace peanut butter with sunflower seed butter or omit it entirely for a nut-free soup.
  • Low-Carb: Use zucchini noodles or shirataki noodles instead of rice noodles for a low-carb alternative.
  • Herb Variations: Experiment with different herbs like basil or mint for a unique flavor twist.

Serving Suggestions

  • Side Salad: A crisp cucumber and carrot salad pairs perfectly, adding freshness.
  • Drink Pairing: Enjoy with a cold Asian lager or a refreshing iced tea.
  • Presentation: Serve in deep bowls, garnished with extra cilantro and lime wedges for a vibrant look.

FAQs about Savory Satay Beef Noodle Soup

Can I make Savory Satay Beef Noodle Soup ahead of time?

Absolutely! This soup can be made ahead and stored in the fridge for up to three days. Just keep the noodles separate until you’re ready to serve to prevent them from getting mushy.

What can I substitute for beef in this recipe?

If you’re looking for a lighter option, try using chicken or tofu instead of beef. Both will absorb the delicious flavors of the satay broth beautifully.

Is this Savory Satay Beef Noodle Soup gluten-free?

Yes, this recipe is gluten-free! Just ensure you use gluten-free soy sauce and check the labels on your rice noodles.

How can I adjust the spice level?

To control the heat, start with a smaller amount of red curry paste and taste as you go. You can always add more if you like it spicier!

Can I freeze the leftovers?

Yes, you can freeze the soup, but it’s best to freeze the broth separately from the noodles. This way, you can enjoy it fresh later without compromising texture.

Final Thoughts

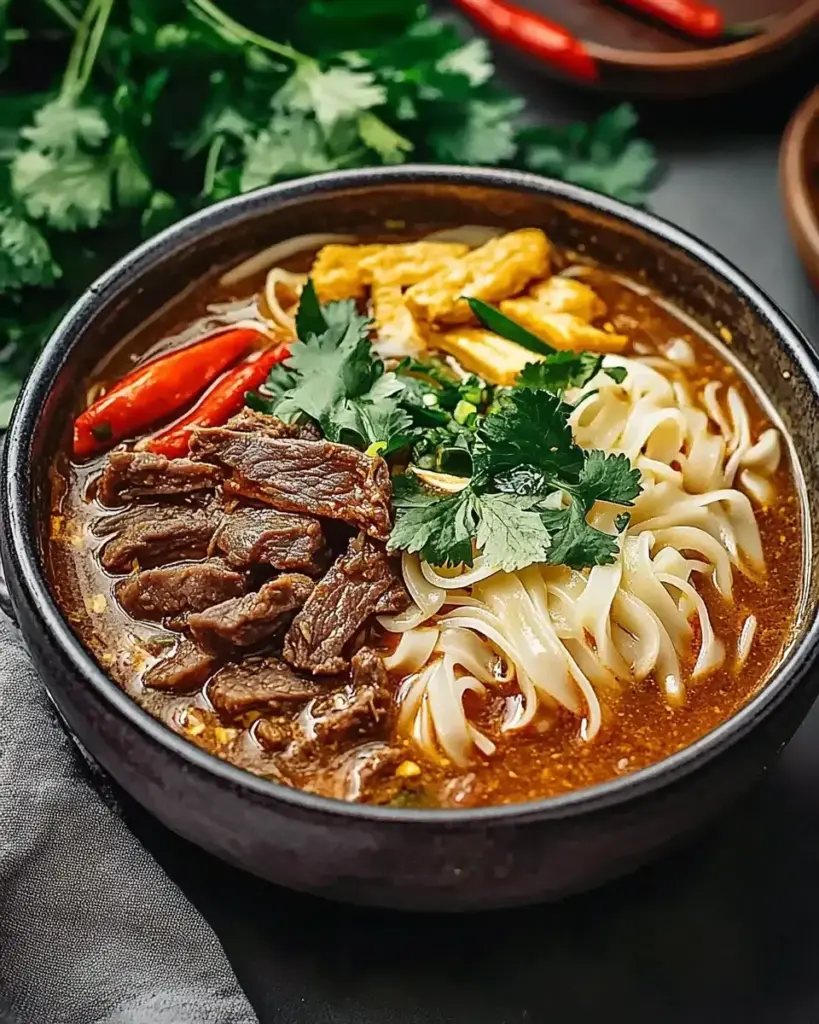
Cooking this Savory Satay Beef Noodle Soup is more than just preparing a meal; it’s about creating a moment of joy. The rich, aromatic broth fills your kitchen with warmth, inviting everyone to gather around the table. Each spoonful is a delightful blend of flavors that brings comfort and satisfaction. Whether you’re sharing it with family or enjoying a quiet night in, this soup has a way of making any day feel special. So, roll up your sleeves, embrace the process, and let this dish become a cherished part of your culinary repertoire. You won’t regret it!

jhessica

Savory Satay Beef Noodle Soup: A Flavorful Delight!

A flavorful and hearty soup featuring tender beef, rice noodles, and a rich satay broth.
Prep Time 15 minutes
Cook Time 25 minutes
Total Time 40 minutes
Servings: 4 servings
Course: Soup
Cuisine: Asian
Calories: 450

Ingredients
  

  • 1 pound beef sirloin thinly sliced
  • 4 cups beef broth
  • 1 cup coconut milk
  • 2 tablespoons peanut butter
  • 2 tablespoons soy sauce
  • 1 tablespoon fish sauce
  • 1 tablespoon brown sugar
  • 2 teaspoons red curry paste
  • 1 tablespoon vegetable oil
  • 1 onion thinly sliced
  • 3 cloves garlic minced
  • 1 tablespoon fresh ginger minced
  • 8 ounces rice noodles
  • 1 cup bean sprouts
  • 1 red bell pepper sliced
  • 2 green onions chopped
  • Fresh cilantro for garnish
  • Lime wedges for serving

Method
 

  1. In a large pot, heat vegetable oil over medium heat. Add the sliced onion, garlic, and ginger, cooking until softened, about 3-4 minutes.
  2. Stir in the beef slices and cook until browned, about 3-5 minutes.
  3. Add the beef broth, coconut milk, peanut butter, soy sauce, fish sauce, brown sugar, and red curry paste to the pot. Bring to a simmer.
  4. While the soup simmers, cook the rice noodles according to package instructions. Drain and set aside.
  5. After the soup has simmered for about 10 minutes, add the sliced red bell pepper and bean sprouts. Cook for an additional 3-5 minutes until the vegetables are tender.
  6. To serve, place a portion of cooked rice noodles in a bowl, ladle the hot soup over the noodles, and top with chopped green onions and fresh cilantro. Serve with lime wedges on the side.

Nutrition

Serving: 1bowlCalories: 450kcalCarbohydrates: 30gProtein: 30gFat: 25gSaturated Fat: 10gPolyunsaturated Fat: 15gCholesterol: 70mgSodium: 800mgFiber: 2gSugar: 6g

Notes

  • For a vegetarian version, substitute beef with tofu and use vegetable broth.
  • Add extra heat by including sliced jalapeños or a dash of sriracha to the soup.

Tried this recipe?

Let us know how it was!

Crispy Air Fryer Banana Chips are a must-try snack!

Introduction to Crispy Air Fryer Banana Chips

There’s something magical about a snack that’s both delicious and easy to whip up. Crispy Air Fryer Banana Chips are just that! They’re perfect for those busy days when you crave something crunchy yet healthy. I remember snacking on banana chips as a kid, and now I can recreate that joy in my own kitchen. With just a few simple ingredients, you can impress your family or treat yourself to a guilt-free indulgence. Let’s dive into this delightful recipe that’s sure to become a staple in your snack rotation!

Why You’ll Love This Crispy Air Fryer Banana Chips

These Crispy Air Fryer Banana Chips are a game-changer for snack time! They’re incredibly easy to make, taking just 25 minutes from start to finish. The air fryer gives them that perfect crunch without the guilt of deep frying. Plus, you can customize them with spices or sweeteners to suit your taste. Whether you’re watching the game or enjoying a quiet evening, these chips are the ideal companion!

Ingredients for Crispy Air Fryer Banana Chips

Gathering the right ingredients is the first step to creating these delightful Crispy Air Fryer Banana Chips. Here’s what you’ll need:

  • Ripe Bananas: Choose large, ripe bananas for the best flavor and texture. They should be firm but not overly soft.
  • Lemon Juice: A splash of lemon juice helps prevent the bananas from browning. It adds a subtle tang that enhances the flavor.
  • Cinnamon (optional): This spice adds warmth and sweetness. Feel free to sprinkle it on for an extra flavor boost.
  • Cooking Spray or Oil: A light coating of cooking spray or a small amount of oil is essential to prevent the banana slices from sticking to the air fryer basket.

For those looking to experiment, consider adding a sprinkle of sugar or coconut sugar for a sweeter treat. You can also try different spices like nutmeg or even a dash of vanilla extract for a unique twist. The exact quantities for these ingredients are available at the bottom of the article for easy printing!

How to Make Crispy Air Fryer Banana Chips

Making Crispy Air Fryer Banana Chips is a straightforward process that anyone can master. Follow these simple steps, and you’ll be snacking on delicious, crunchy chips in no time!

Step 1: Prepare the Bananas

Start by peeling the bananas. This is the easy part! Next, slice them into thin rounds, about 1/8 inch thick. The thickness is crucial; thinner slices will crisp up beautifully, while thicker ones may end up chewy. Aim for uniformity to ensure even cooking.

Step 2: Toss with Lemon Juice

In a bowl, toss the banana slices with lemon juice. This step is essential as it prevents the bananas from browning too quickly. If you’re feeling adventurous, sprinkle some cinnamon over the slices and toss them again. The cinnamon adds a delightful warmth that complements the bananas perfectly.

Step 3: Preheat the Air Fryer

Preheating your air fryer to 350°F is a must. This step ensures that the banana chips cook evenly and achieve that perfect crunch. A hot air fryer means less cooking time and better results!

Step 4: Prepare the Air Fryer Basket

Lightly spray the air fryer basket with cooking spray or brush it with a small amount of oil. This is crucial to prevent the banana slices from sticking. Nobody wants to deal with a sticky mess when they’re trying to enjoy a snack!

Step 5: Arrange Banana Slices

Now, it’s time to arrange the banana slices in the basket. Lay them out in a single layer, making sure they don’t overlap. This allows for optimal air circulation, which is key to achieving that crispy texture.

Step 6: Air Fry the Banana Chips

Air fry the banana slices for 10-15 minutes. Halfway through, give the basket a good shake to ensure even cooking. Keep an eye on them; they should turn golden and crispy. If you like them extra crunchy, feel free to add a minute or two!

Step 7: Cool and Enjoy

Once they’re done, remove the chips from the air fryer and let them cool completely on a wire rack. This cooling process is vital; the chips will become even crispier as they cool. Now, grab a handful and enjoy your homemade crispy snacks!

Tips for Success

  • Use ripe bananas for the best flavor and texture.
  • Slice the bananas evenly to ensure uniform cooking.
  • Don’t overcrowd the air fryer basket; it’s key for crispiness.
  • Experiment with spices like nutmeg or vanilla for unique flavors.
  • Store leftover chips in an airtight container to maintain crunch.

Equipment Needed

  • Air Fryer: The star of the show! Any model will do, but a basket-style air fryer works best for even cooking.
  • Cutting Board: A sturdy surface for slicing your bananas.
  • Sharp Knife: Essential for cutting the bananas into thin rounds.
  • Bowl: For tossing the banana slices with lemon juice and spices.
  • Wire Rack: Perfect for cooling the chips and enhancing their crispiness.

Variations

  • Sweet and Spicy: Add a pinch of cayenne pepper or chili powder for a kick that balances the sweetness of the bananas.
  • Chocolate Drizzle: Once cooled, drizzle melted dark chocolate over the chips for a decadent treat.
  • Nutty Banana Chips: Toss the banana slices with a bit of almond or peanut butter before air frying for a nutty flavor.
  • Maple Glaze: Brush the banana slices with a little maple syrup before air frying for a sweet, caramelized finish.
  • Herbed Chips: Experiment with savory herbs like rosemary or thyme for a unique twist on traditional banana chips.

Serving Suggestions

  • Pair your crispy banana chips with a refreshing yogurt dip for a delightful contrast.
  • Enjoy them alongside a cold glass of iced tea or lemonade for a perfect afternoon snack.
  • Serve on a colorful platter to impress guests at your next gathering.
  • Mix with nuts and dried fruits for a homemade trail mix.

FAQs about Crispy Air Fryer Banana Chips

Can I use green bananas for this recipe?
While ripe bananas are best for flavor and texture, you can use slightly green bananas. Just keep in mind they may not be as sweet and could require a longer cooking time.

How do I store leftover banana chips?
To keep your Crispy Air Fryer Banana Chips crunchy, store them in an airtight container at room temperature. They should stay fresh for about a week, but trust me, they won’t last that long!

Can I make these banana chips without an air fryer?
Absolutely! If you don’t have an air fryer, you can bake them in the oven at 350°F. Just spread the banana slices on a baking sheet and keep an eye on them, flipping halfway through.

What can I do with leftover banana chips?
Leftover banana chips can be crushed and used as a topping for yogurt, oatmeal, or even salads. They add a delightful crunch and a hint of sweetness!

Are these banana chips healthy?
Yes! Crispy Air Fryer Banana Chips are a healthier alternative to traditional snacks. They’re low in fat and packed with natural sugars, making them a guilt-free treat!

Final Thoughts

Creating Crispy Air Fryer Banana Chips is more than just a cooking task; it’s a delightful experience that brings back fond memories of childhood snacks. The joy of biting into a perfectly crunchy chip, knowing it’s made with simple, wholesome ingredients, is truly satisfying. Whether you’re enjoying them solo or sharing with friends, these chips are sure to spark smiles. Plus, the versatility of flavors means you can always try something new. So, roll up your sleeves, fire up that air fryer, and let the snacking adventure begin. You won’t regret it!

jhessica

Crispy Air Fryer Banana Chips are a must-try snack!

Crispy Air Fryer Banana Chips are a must-try snack that are easy to make and deliciously crunchy.
Prep Time 10 minutes
Cook Time 15 minutes
Total Time 25 minutes
Servings: 4 servings
Course: Snack
Cuisine: American
Calories: 120

Ingredients
  

  • 2 large ripe bananas
  • 1 tablespoon lemon juice
  • 1 teaspoon cinnamon optional
  • Cooking spray or a small amount of oil for greasing

Method
 

  1. Peel the bananas and slice them into thin rounds, about 1/8 inch thick.
  2. In a bowl, toss the banana slices with lemon juice to prevent browning. If desired, sprinkle cinnamon over the slices and toss to coat evenly.
  3. Preheat the air fryer to 350°F.
  4. Lightly spray the air fryer basket with cooking spray or brush with a small amount of oil to prevent sticking.
  5. Arrange the banana slices in a single layer in the air fryer basket, making sure they do not overlap.
  6. Air fry the banana slices for 10-15 minutes, shaking the basket halfway through to ensure even cooking. Check for crispness; they should be golden and crispy.
  7. Once done, remove the chips from the air fryer and let them cool completely on a wire rack. They will become crispier as they cool.

Nutrition

Serving: 1servingCalories: 120kcalCarbohydrates: 25gProtein: 1gSodium: 1mgFiber: 2gSugar: 10g

Notes

  • For a sweeter version, sprinkle a little sugar or coconut sugar on the banana slices before air frying.
  • Experiment with different spices like nutmeg or vanilla extract for a unique flavor twist.

Tried this recipe?

Let us know how it was!

Chocolate Tiramisu Delight: A Decadent Dessert Recipe

Introduction to Chocolate Tiramisu Delight

There’s something magical about dessert that brings people together. The rich, creamy layers of Chocolate Tiramisu Delight are a perfect example. This dessert combines the classic flavors of tiramisu with a luscious chocolate twist, making it a crowd-pleaser. Whether you’re hosting a dinner party or just want to treat yourself after a long day, this no-bake recipe is your go-to solution. It’s quick to prepare and even easier to enjoy. Trust me, your loved ones will be asking for seconds, and you’ll feel like a culinary hero in your own kitchen!

Why You’ll Love This Chocolate Tiramisu Delight

This Chocolate Tiramisu Delight is a dessert that checks all the boxes. It’s incredibly easy to whip up, taking just 20 minutes of your time. The no-bake nature means you can spend less time in the kitchen and more time enjoying life. Plus, the rich chocolate flavor combined with the classic tiramisu elements creates a taste sensation that’s hard to resist. It’s a guaranteed hit for any occasion!

Ingredients for Chocolate Tiramisu Delight

Gathering the right ingredients is the first step to creating your Chocolate Tiramisu Delight. Here’s what you’ll need:

  • Strong brewed coffee: This is the backbone of your dessert, providing that rich, bold flavor. Make sure it’s cooled before using.
  • Coffee liqueur (optional): For those who want to elevate the coffee flavor, a splash of liqueur adds depth and a hint of sweetness.
  • Mascarpone cheese: This creamy Italian cheese gives the dessert its signature smooth texture. It’s essential for that authentic tiramisu taste.
  • Heavy cream: Whipping this up adds lightness and volume to the mascarpone mixture, making it airy and delightful.
  • Granulated sugar: A touch of sweetness balances the bitterness of the coffee and cocoa, enhancing the overall flavor.
  • Vanilla extract: Just a teaspoon adds warmth and complexity to the mascarpone mixture, rounding out the flavors beautifully.
  • Ladyfinger cookies: These sponge-like cookies soak up the coffee mixture perfectly, creating layers of flavor and texture.
  • Unsweetened cocoa powder: Dusting this on top gives a rich chocolate finish and a slight bitterness that complements the sweetness.
  • Dark chocolate (for garnish): Grated dark chocolate adds a touch of elegance and an extra chocolatey kick to your dessert.

For exact measurements, check the bottom of the article where you can find everything listed for easy printing. Feel free to experiment with flavored coffee or different liqueurs to customize your Chocolate Tiramisu Delight!

How to Make Chocolate Tiramisu Delight

Creating your Chocolate Tiramisu Delight is a delightful journey. Follow these simple steps, and you’ll have a dessert that impresses everyone. Let’s dive in!

Step 1: Prepare the Coffee Mixture

Start by brewing a strong cup of coffee. Let it cool completely. If you’re feeling adventurous, add a splash of coffee liqueur to the cooled coffee. This optional step enhances the flavor, giving your dessert a little extra kick. Once combined, set the mixture aside while you prepare the next layer.

Step 2: Make the Mascarpone Mixture

In a large mixing bowl, combine the softened mascarpone cheese, heavy cream, granulated sugar, and vanilla extract. Using an electric mixer, beat the mixture until soft peaks form. This should take just a few minutes. The goal is a light, fluffy texture that will make your Chocolate Tiramisu Delight irresistible.

Step 3: Dip the Ladyfingers

Now, it’s time to dip the ladyfingers. Quickly immerse each one into the coffee mixture. Be careful not to soak them too long; you want them moist but not soggy. Lay the dipped ladyfingers in a single layer at the bottom of your dish. This creates a solid foundation for your dessert.

Step 4: Layer the Ingredients

Spread half of the mascarpone mixture over the layer of ladyfingers. Use a spatula to ensure an even layer. Then, repeat the process with another layer of dipped ladyfingers followed by the remaining mascarpone mixture. This layering technique is what gives your Chocolate Tiramisu Delight its signature look and taste.

Step 5: Chill the Dessert

Cover the dish with plastic wrap and refrigerate it for at least 4 hours. For the best results, let it chill overnight. This step is crucial as it allows the flavors to meld together beautifully, creating a rich and creamy dessert that’s worth the wait.

Step 6: Garnish and Serve

Before serving, dust the top of your Chocolate Tiramisu Delight with unsweetened cocoa powder. For an extra touch of elegance, sprinkle some grated dark chocolate on top. This final step not only enhances the presentation but also adds a delightful chocolatey finish that will have everyone coming back for more!

Tips for Success

  • Use freshly brewed coffee for the best flavor; it makes a noticeable difference.
  • Don’t soak the ladyfingers too long; a quick dip is all they need.
  • For a richer taste, let the dessert chill overnight.
  • Experiment with flavored liqueurs to customize your Chocolate Tiramisu Delight.
  • Always use room temperature mascarpone for easier mixing.

Equipment Needed

  • 9×9-inch dish: A square baking dish works perfectly. You can also use a similar-sized trifle bowl for a fun presentation.
  • Mixing bowls: Use a large bowl for the mascarpone mixture and a shallow dish for the coffee.
  • Electric mixer: A hand mixer is ideal, but a whisk will do if you’re feeling strong!
  • Spatula: A rubber spatula helps spread the mascarpone mixture evenly.

Variations

  • Mocha Twist: Add 1 tablespoon of cocoa powder to the mascarpone mixture for a richer chocolate flavor.
  • Fruit Infusion: Layer in fresh berries like raspberries or strawberries between the mascarpone layers for a fruity contrast.
  • Nutty Delight: Incorporate crushed hazelnuts or almonds into the mascarpone mixture for added crunch and flavor.
  • Gluten-Free Option: Substitute ladyfingers with gluten-free cookies or sponge cake to accommodate dietary needs.
  • Vegan Version: Use coconut cream instead of mascarpone and a plant-based whipped cream for a dairy-free treat.

Serving Suggestions

  • Pair your Chocolate Tiramisu Delight with a rich espresso or a creamy cappuccino for a delightful coffee experience.
  • Serve with fresh berries on the side for a pop of color and a refreshing contrast.
  • For an elegant touch, garnish each slice with a sprig of mint.

FAQs about Chocolate Tiramisu Delight

Can I make Chocolate Tiramisu Delight ahead of time?

Absolutely! In fact, making it a day in advance enhances the flavors. Just cover it well and refrigerate until you’re ready to serve.

What can I substitute for mascarpone cheese?

If you can’t find mascarpone, a mixture of cream cheese and heavy cream can work in a pinch. Just blend them until smooth for a similar texture.

Is it possible to make a non-alcoholic version?

Yes! Simply skip the coffee liqueur and use extra brewed coffee instead. Your Chocolate Tiramisu Delight will still be delicious!

How long does Chocolate Tiramisu Delight last in the fridge?

This dessert can last up to 3 days in the fridge, but it’s best enjoyed within the first couple of days for optimal freshness.

Can I freeze Chocolate Tiramisu Delight?

While it’s not recommended to freeze it, you can freeze individual slices. Just wrap them tightly and enjoy within a month for the best taste.

Final Thoughts

Creating this Chocolate Tiramisu Delight is more than just making a dessert; it’s about crafting a moment of joy. Each layer tells a story, from the rich coffee to the creamy mascarpone, inviting you to savor every bite. Whether you’re celebrating a special occasion or simply indulging after a long day, this dessert brings a touch of elegance to any table. Plus, the smiles on your loved ones’ faces as they dig in? That’s the real reward. So, roll up your sleeves and dive into this delightful recipe; you won’t regret it!

jhessica

Chocolate Tiramisu Delight: A Decadent Dessert Recipe

A rich and creamy dessert that combines the classic flavors of tiramisu with a chocolate twist.
Prep Time 20 minutes
Total Time 4 hours 20 minutes
Servings: 8 servings
Course: Dessert
Cuisine: Italian
Calories: 290

Ingredients
  

  • 2 cups strong brewed coffee cooled
  • 1/2 cup coffee liqueur optional
  • 8 ounces mascarpone cheese softened
  • 1 cup heavy cream
  • 1/2 cup granulated sugar
  • 1 teaspoon vanilla extract
  • 24 ladyfinger cookies
  • 1/4 cup unsweetened cocoa powder
  • 1 ounce dark chocolate grated (for garnish)

Method
 

  1. In a shallow dish, combine the cooled coffee and coffee liqueur (if using). Set aside.
  2. In a large mixing bowl, beat the mascarpone cheese, heavy cream, sugar, and vanilla extract together until soft peaks form.
  3. Quickly dip each ladyfinger into the coffee mixture, ensuring they are soaked but not soggy. Lay them in a single layer in a 9×9-inch dish.
  4. Spread half of the mascarpone mixture over the layer of ladyfingers.
  5. Repeat the process with another layer of dipped ladyfingers and the remaining mascarpone mixture.
  6. Cover the dish with plastic wrap and refrigerate for at least 4 hours, or overnight for best results.
  7. Before serving, dust the top with cocoa powder and sprinkle with grated dark chocolate.

Nutrition

Serving: 1sliceCalories: 290kcalCarbohydrates: 22gProtein: 4gFat: 20gSaturated Fat: 12gPolyunsaturated Fat: 8gCholesterol: 70mgSodium: 50mgFiber: 1gSugar: 14g

Notes

  • For a mocha flavor, add 1 tablespoon of cocoa powder to the mascarpone mixture.
  • Try using flavored coffee or different liqueurs, such as hazelnut or vanilla, to customize the taste.

Tried this recipe?

Let us know how it was!

BBQ Chicken Pasta Salad: A Must-Try Recipe Today!

Introduction to BBQ Chicken Pasta Salad

There’s something magical about a dish that brings together the smoky sweetness of BBQ and the comforting embrace of pasta. This BBQ Chicken Pasta Salad is just that—a delightful blend that’s perfect for any occasion. Whether you’re looking for a quick solution for a busy day or a dish to impress your loved ones at a summer gathering, this recipe has you covered. It’s easy to whip up, packed with flavor, and sure to satisfy even the pickiest eaters. Let’s dive into this culinary adventure that’s as fun to make as it is to eat!

Why You’ll Love This BBQ Chicken Pasta Salad

This BBQ Chicken Pasta Salad is a game-changer for busy weeknights or weekend get-togethers. It’s incredibly easy to make, taking just 15 minutes of prep time. The combination of tender chicken, vibrant veggies, and zesty dressing creates a flavor explosion that will have everyone coming back for seconds. Plus, it’s versatile enough to suit any palate, making it a crowd-pleaser that’s sure to impress!

Ingredients for BBQ Chicken Pasta Salad

Gathering the right ingredients is the first step to creating this delicious BBQ Chicken Pasta Salad. Here’s what you’ll need:

  • Cooked rotini pasta: This spiral-shaped pasta holds onto the dressing beautifully, making every bite flavorful.
  • Cooked, shredded chicken: You can use leftover rotisserie chicken or quickly boil some chicken breasts for a protein-packed addition.
  • Cherry tomatoes: These bite-sized gems add a burst of sweetness and color to the salad.
  • Corn: Whether canned or frozen, corn brings a delightful crunch and sweetness that complements the BBQ flavor.
  • Red bell pepper: Diced for a pop of color and a hint of sweetness, it’s a great way to sneak in some veggies.
  • Red onion: Finely chopped, it adds a sharp bite that balances the richness of the dressing.
  • BBQ sauce: The star of the show! Choose your favorite brand for that smoky, tangy flavor.
  • Ranch dressing: This creamy dressing adds a cool contrast to the BBQ sauce, making it irresistible.
  • Garlic powder: A sprinkle of this enhances the overall flavor without overpowering the dish.
  • Salt and pepper: Essential for seasoning, these staples help bring all the flavors together.
  • Fresh cilantro (optional): If you love a fresh herb kick, toss in some chopped cilantro for added brightness.

For those looking to mix things up, consider substituting the chicken with black beans or chickpeas for a vegetarian option. You can also add diced avocado or shredded cheese for extra creaminess and flavor. The exact quantities of these ingredients are listed at the bottom of the article for your convenience, ready for printing!

How to Make BBQ Chicken Pasta Salad

Step 1: Combine the Base Ingredients

Start by grabbing a large mixing bowl. In it, combine the cooked rotini pasta, shredded chicken, halved cherry tomatoes, corn, diced red bell pepper, and finely chopped red onion. The colors will pop, making it visually appealing. Gently mix everything together with a spatula or spoon. This step sets the foundation for your BBQ Chicken Pasta Salad, ensuring every bite is packed with flavor and texture. Trust me, the combination of these ingredients is a match made in culinary heaven!

Step 2: Prepare the Dressing

In a separate small bowl, whisk together the BBQ sauce, ranch dressing, garlic powder, salt, and pepper. This is where the magic happens! The BBQ sauce brings that smoky sweetness, while the ranch adds creaminess. Make sure to blend them well until the mixture is smooth and uniform. This dressing will tie all the flavors together, creating a deliciously tangy coating for your salad.

Step 3: Toss Everything Together

Now, it’s time to bring it all together! Pour the dressing over the pasta salad mixture. Using a large spoon, gently toss everything until the pasta and veggies are evenly coated. Be careful not to mash the ingredients; you want to keep that delightful texture. This step is crucial, as it ensures every bite is bursting with flavor. The BBQ Chicken Pasta Salad is starting to come to life!

Step 4: Chill the Salad

Cover the salad with plastic wrap or a lid and pop it in the refrigerator for at least 30 minutes. This chilling time allows the flavors to meld beautifully. Trust me, the wait is worth it! The longer it sits, the more delicious it becomes, as the ingredients soak up that tasty dressing.

Step 5: Serve and Enjoy

When you’re ready to serve, take the salad out of the fridge. You can enjoy it chilled or at room temperature, depending on your preference. Scoop it into bowls or onto plates, and watch as everyone digs in. This BBQ Chicken Pasta Salad is not just a dish; it’s a celebration of flavors!

Tips for Success

  • Use leftover chicken for a quick prep—rotisserie works wonders!
  • Don’t skip the chilling step; it enhances the flavors.
  • Feel free to customize with your favorite veggies or proteins.
  • For a creamier texture, add diced avocado or shredded cheese.
  • Adjust the BBQ sauce to your taste; some like it sweeter, others spicier!

Equipment Needed

  • Large mixing bowl: Essential for combining all your ingredients. A big pot can work in a pinch!
  • Small bowl: Perfect for whisking the dressing. A mason jar can double as a shaker.
  • Spatula or spoon: For mixing. A wooden spoon is a classic choice.
  • Plastic wrap or lid: To cover the salad while it chills. A plate can also do the trick!

Variations

  • Vegetarian Delight: Swap the chicken for black beans or chickpeas for a hearty, meat-free option.
  • Spicy Kick: Add diced jalapeños or a splash of hot sauce to the dressing for a fiery twist.
  • Cheesy Goodness: Mix in shredded cheese like cheddar or pepper jack for an extra creamy texture.
  • Grilled Flavor: Use grilled chicken for a smoky flavor that enhances the BBQ experience.
  • Seasonal Veggies: Incorporate seasonal vegetables like zucchini or asparagus for a fresh touch.

Serving Suggestions

  • Pair with crispy garlic bread for a satisfying meal.
  • Serve alongside a refreshing coleslaw to balance the flavors.
  • Complement with a chilled lemonade or iced tea for a perfect summer vibe.
  • Garnish with extra cilantro or a sprinkle of feta cheese for a pop of color.

FAQs about BBQ Chicken Pasta Salad

Can I make BBQ Chicken Pasta Salad ahead of time?

Absolutely! This salad is perfect for meal prep. You can make it a day in advance and store it in the fridge. Just remember to give it a good toss before serving to redistribute the dressing.

What can I substitute for the chicken?

If you’re looking for a vegetarian option, black beans or chickpeas work great. They add protein and texture without sacrificing flavor. You can also use tofu for a plant-based twist!

How long does BBQ Chicken Pasta Salad last in the fridge?

This salad can last up to 3 days in the fridge if stored in an airtight container. Just keep an eye on the freshness of the veggies, as they may start to wilt over time.

Can I use a different type of pasta?

Definitely! While rotini is fantastic for holding onto the dressing, you can use any pasta shape you prefer. Penne, fusilli, or even whole wheat pasta are great alternatives.

Is this BBQ Chicken Pasta Salad gluten-free?

Yes, as long as you use gluten-free pasta, this dish can easily fit into a gluten-free diet. Just check the labels on your BBQ sauce and ranch dressing to ensure they’re gluten-free as well.

Final Thoughts

Creating this BBQ Chicken Pasta Salad is more than just a cooking task; it’s an experience filled with joy and flavor. Each bite is a celebration of summer, family gatherings, and the simple pleasures of life. The vibrant colors and delicious aromas will draw everyone to the table, making it a perfect dish for any occasion. Whether you’re enjoying it on a sunny patio or at a cozy family dinner, this salad brings people together. So, roll up your sleeves, gather your ingredients, and let the magic of BBQ Chicken Pasta Salad brighten your day!

jhessica

BBQ Chicken Pasta Salad: A Must-Try Recipe Today!

A delicious and easy-to-make BBQ Chicken Pasta Salad that combines rotini pasta, shredded chicken, and fresh vegetables, all tossed in a flavorful BBQ and ranch dressing.
Prep Time 15 minutes
Total Time 45 minutes
Servings: 6 servings
Course: Salad
Cuisine: American
Calories: 290

Ingredients
  

  • 2 cups cooked rotini pasta
  • 1 cup cooked shredded chicken
  • 1 cup cherry tomatoes halved
  • 1 cup corn canned or frozen
  • 1/2 cup red bell pepper diced
  • 1/4 cup red onion finely chopped
  • 1/2 cup BBQ sauce
  • 1/4 cup ranch dressing
  • 1 teaspoon garlic powder
  • Salt and pepper to taste
  • 1/4 cup chopped fresh cilantro optional

Method
 

  1. In a large bowl, combine the cooked rotini pasta, shredded chicken, cherry tomatoes, corn, red bell pepper, and red onion.
  2. In a separate small bowl, whisk together the BBQ sauce, ranch dressing, garlic powder, salt, and pepper until well combined.
  3. Pour the dressing over the pasta salad mixture and toss gently until everything is evenly coated.
  4. If using, fold in the chopped cilantro for added flavor.
  5. Cover the salad and refrigerate for at least 30 minutes to allow the flavors to meld together.
  6. Serve chilled or at room temperature.

Nutrition

Serving: 1servingCalories: 290kcalCarbohydrates: 30gProtein: 18gFat: 10gSaturated Fat: 2gPolyunsaturated Fat: 8gCholesterol: 50mgSodium: 500mgFiber: 3gSugar: 3g

Notes

  • For a vegetarian option, substitute the chicken with black beans or chickpeas.
  • Add diced avocado or shredded cheese for extra creaminess and flavor.

Tried this recipe?

Let us know how it was!

Gochujang Beef Rice Bowls are a delicious weeknight meal!

Introduction to Gochujang Beef Rice Bowls

After a long day, the last thing I want is to spend hours in the kitchen. That’s where Gochujang Beef Rice Bowls come to the rescue! This dish is a delightful blend of savory ground beef, vibrant veggies, and a spicy gochujang sauce, all served over fluffy rice. It’s not just a meal; it’s a quick solution for busy weeknights or a way to impress your loved ones with minimal effort. Trust me, once you try this recipe, it’ll become a staple in your dinner rotation. Let’s dive into this delicious adventure!

Why You’ll Love This Gochujang Beef Rice Bowls

These Gochujang Beef Rice Bowls are a game-changer for your weeknight dinners. They come together in just 30 minutes, making them perfect for those hectic evenings. The combination of flavors is simply irresistible—spicy, savory, and oh-so-satisfying. Plus, you can customize them with your favorite veggies or proteins. It’s a dish that not only fills your belly but also warms your heart. What’s not to love?

Ingredients for Gochujang Beef Rice Bowls

Gathering the right ingredients is key to making these Gochujang Beef Rice Bowls a hit. Here’s what you’ll need:

  • Ground beef: The star of the dish, providing a rich, savory flavor. You can also use ground turkey or chicken for a leaner option.
  • Vegetable oil: This helps sauté the aromatics and beef. Feel free to swap it with olive oil or sesame oil for added flavor.
  • Onion: Diced onion adds sweetness and depth. Yellow or white onions work best.
  • Garlic: Minced garlic brings a punch of flavor. Fresh is always best, but jarred can work in a pinch.
  • Ginger: Fresh ginger adds a warm, zesty kick. If you don’t have fresh, ground ginger can be a substitute.
  • Gochujang: This Korean chili paste is the secret sauce! It’s spicy, sweet, and umami-rich. You can find it in most grocery stores or Asian markets.
  • Soy sauce: Adds saltiness and depth. For a gluten-free option, use tamari.
  • Brown sugar: Balances the heat from the gochujang. You can use honey or maple syrup as alternatives.
  • Sesame oil: A drizzle of this oil enhances the dish with a nutty flavor. It’s optional but highly recommended.
  • Cooked rice: The base of the bowl. White or brown rice works well, and you can even use quinoa for a twist.
  • Broccoli florets: Steamed broccoli adds color and nutrition. Feel free to swap with other veggies like bell peppers or snap peas.
  • Shredded carrots: These add crunch and sweetness. You can use pre-shredded carrots for convenience.
  • Green onions: Sliced green onions provide a fresh, crisp finish. Chives can be a good substitute.
  • Sesame seeds: For garnish, these add a nice touch of flavor and texture.

For exact measurements, check the bottom of the article where you can find a printable version of the recipe!

How to Make Gochujang Beef Rice Bowls

Creating these Gochujang Beef Rice Bowls is a breeze! Follow these simple steps, and you’ll have a delicious meal ready in no time. Let’s get cooking!

Step 1: Sauté the Aromatics

Start by heating the vegetable oil in a large skillet over medium heat. Once hot, toss in the diced onion. Sauté for about 3 minutes until the onion is softened and translucent. This step builds a flavorful base for your dish.

Step 2: Add Garlic and Ginger

Next, stir in the minced garlic and ginger. Cook for an additional minute until fragrant. The aroma will fill your kitchen, making it hard to resist diving in already!

Step 3: Cook the Ground Beef

Now, add the ground beef to the skillet. Break it apart with a spatula and cook until browned, about 5-7 minutes. Don’t forget to drain any excess fat to keep your dish light and tasty.

Step 4: Mix in the Sauce

Time to bring the flavor! Stir in the gochujang, soy sauce, brown sugar, and sesame oil. Let it simmer for 2-3 minutes. This is where the magic happens, as the ingredients meld together into a savory sauce.

Step 5: Steam the Vegetables

While the beef mixture simmers, steam the broccoli florets until tender, about 4-5 minutes. You want them bright green and slightly crisp for that perfect texture contrast.

Step 6: Assemble the Bowls

Now, it’s time to put it all together! Divide the cooked rice among four bowls. Top each bowl with the gochujang beef mixture, steamed broccoli, and a handful of shredded carrots. It’s a colorful feast!

Step 7: Garnish and Serve

Finally, garnish your bowls with sliced green onions and a sprinkle of sesame seeds. This adds a lovely crunch and a pop of flavor. Serve immediately and enjoy your homemade Gochujang Beef Rice Bowls!

Tips for Success

  • Prep your ingredients ahead of time to streamline the cooking process.
  • Don’t rush the sautéing; it builds flavor in your Gochujang Beef Rice Bowls.
  • Adjust the gochujang to your spice preference—start with less if you’re unsure!
  • Use leftover rice for a quicker meal; it reheats beautifully.
  • Experiment with different veggies to keep things fresh and exciting.

Equipment Needed

  • Large skillet: Essential for cooking the beef and veggies. A non-stick pan works well too.
  • Spatula: Perfect for breaking up the beef and stirring the mixture.
  • Steamer basket: For steaming broccoli; a microwave-safe bowl with a lid can work in a pinch.
  • Measuring spoons: Handy for accurate ingredient measurements.

Variations

  • Protein Swap: Use ground turkey, chicken, or even tofu for a vegetarian option. Each brings a unique flavor to the dish.
  • Spice Level: For a fiery kick, add extra gochujang or toss in some sliced jalapeños. Adjust to your heat preference!
  • Veggie Medley: Mix in bell peppers, snap peas, or zucchini for added color and nutrition. The more, the merrier!
  • Rice Alternatives: Try quinoa or cauliflower rice for a low-carb twist. Both options are delicious and filling.
  • Flavor Boost: Add a splash of rice vinegar or lime juice for a tangy finish that brightens the dish.

Serving Suggestions

  • Side Dishes: Pair your Gochujang Beef Rice Bowls with a simple cucumber salad for a refreshing crunch.
  • Drinks: Enjoy with a cold beer or a light, fruity iced tea to balance the spice.
  • Presentation: Serve in colorful bowls and add extra sesame seeds for a beautiful finish.

FAQs about Gochujang Beef Rice Bowls

Can I make Gochujang Beef Rice Bowls ahead of time?

Absolutely! You can prepare the beef mixture and steam the vegetables in advance. Just store them separately in the fridge. When you’re ready to eat, reheat everything and assemble your bowls. It’s a great way to save time on busy nights!

Is this recipe gluten-free?

Yes, Gochujang Beef Rice Bowls can be gluten-free! Just make sure to use gluten-free soy sauce or tamari. The rest of the ingredients are naturally gluten-free, so you can enjoy this dish without worry.

What can I substitute for gochujang?

If you can’t find gochujang, you can use a mix of miso paste and chili powder as a substitute. It won’t be exactly the same, but it will still give you a nice depth of flavor. Just adjust the quantities to your taste!

How spicy are these bowls?

The spice level of Gochujang Beef Rice Bowls can vary based on how much gochujang you use. It’s generally mild to medium, but you can always add more for a kick. If you’re sensitive to spice, start with a smaller amount and adjust as needed.

Can I use other proteins in this recipe?

Definitely! Ground turkey, chicken, or even tofu work well in this recipe. Each option brings its own unique flavor and texture, so feel free to experiment and find your favorite!

Final Thoughts

Cooking Gochujang Beef Rice Bowls is more than just preparing a meal; it’s about creating a moment of joy in your kitchen. The vibrant colors, enticing aromas, and bold flavors come together to make a dish that’s both comforting and exciting. Whether you’re sharing it with family or enjoying a solo dinner, each bite is a reminder of how simple ingredients can create something extraordinary. Plus, the ease of preparation means you can savor the experience without the stress. So, roll up your sleeves, embrace the spice, and let these bowls bring warmth to your table!

jhessica

Gochujang Beef Rice Bowls are a delicious weeknight meal!

Gochujang Beef Rice Bowls are a delicious weeknight meal featuring savory ground beef, steamed vegetables, and a spicy gochujang sauce served over rice.
Prep Time 10 minutes
Cook Time 20 minutes
Total Time 30 minutes
Servings: 4 servings
Course: Dinner
Cuisine: Korean
Calories: 450

Ingredients
  

  • 1 pound ground beef
  • 1 tablespoon vegetable oil
  • 1 small onion diced
  • 2 cloves garlic minced
  • 1 tablespoon fresh ginger minced
  • 3 tablespoons gochujang Korean chili paste
  • 2 tablespoons soy sauce
  • 1 tablespoon brown sugar
  • 1 teaspoon sesame oil
  • 4 cups cooked rice white or brown
  • 1 cup broccoli florets
  • 1 cup shredded carrots
  • 2 green onions sliced
  • Sesame seeds for garnish

Method
 

  1. In a large skillet, heat the vegetable oil over medium heat. Add the diced onion and sauté for about 3 minutes until softened.
  2. Stir in the minced garlic and ginger, cooking for an additional minute until fragrant.
  3. Add the ground beef to the skillet, breaking it apart with a spatula. Cook until browned and fully cooked, about 5-7 minutes. Drain any excess fat.
  4. Stir in the gochujang, soy sauce, brown sugar, and sesame oil. Mix well and let it simmer for about 2-3 minutes to combine the flavors.
  5. While the beef mixture simmers, steam the broccoli florets until tender, about 4-5 minutes.
  6. To assemble the bowls, divide the cooked rice among four bowls. Top with the gochujang beef mixture, steamed broccoli, and shredded carrots.
  7. Garnish with sliced green onions and sesame seeds before serving.

Nutrition

Serving: 1bowlCalories: 450kcalCarbohydrates: 45gProtein: 25gFat: 20gSaturated Fat: 7gPolyunsaturated Fat: 10gCholesterol: 70mgSodium: 800mgFiber: 3gSugar: 6g

Notes

  • For a spicier kick, add extra gochujang or a sprinkle of red pepper flakes to the beef mixture.
  • Substitute ground turkey or chicken for a leaner option, or use tofu for a vegetarian version.

Tried this recipe?

Let us know how it was!

Raspberry Pistachio Sourdough Bagels boost your brunch!

Introduction to Raspberry Pistachio Sourdough Bagels

There’s something magical about the aroma of freshly baked bread wafting through the kitchen.

When I first stumbled upon the idea of Raspberry Pistachio Sourdough Bagels, I knew I had to give it a try.

These bagels are not just a treat for the taste buds; they’re a delightful way to elevate your brunch game.

Imagine the tartness of ripe raspberries mingling with the crunch of pistachios, creating a flavor explosion that’s both comforting and exciting.

Whether you’re hosting friends or simply treating yourself, this recipe is a quick solution that will impress everyone at the table.

Why You’ll Love This Raspberry Pistachio Sourdough Bagels

These Raspberry Pistachio Sourdough Bagels are a game-changer for your brunch spread.

They’re surprisingly easy to make, even for those who might feel intimidated by baking.

The combination of flavors is simply irresistible, with the tart raspberries balancing perfectly against the nutty crunch of pistachios.

Plus, they’re a fantastic way to use that sourdough starter you’ve been nurturing.

Trust me, your taste buds will thank you!

Ingredients for Raspberry Pistachio Sourdough Bagels

Creating these delightful Raspberry Pistachio Sourdough Bagels starts with gathering the right ingredients.

Here’s what you’ll need:

  • All-purpose flour: This forms the base of your bagels, providing structure and chewiness.
  • Bread flour: Higher in protein, it gives the bagels that perfect chewy texture.
  • Active sourdough starter: The heart of this recipe, it adds flavor and helps the bagels rise beautifully.
  • Warm water: Essential for activating the yeast in your starter, it should be around 110°F for optimal results.
  • Sugar: Just a touch to enhance the flavor and help with browning during baking.
  • Salt: A crucial ingredient that balances flavors and strengthens the dough.
  • Fresh raspberries: These provide a burst of tartness and a lovely color to your bagels.
  • Shelled pistachios: Their crunch adds a delightful texture and nutty flavor that complements the raspberries.
  • Baking soda: Used in the boiling process, it helps create that classic bagel crust.
  • Egg: For the egg wash, giving your bagels a shiny, golden finish.

Feel free to get creative!

For a sweeter twist, consider adding a tablespoon of honey to the dough.

If raspberries aren’t your jam, blueberries or cranberries can easily step in for a different flavor profile.

You can find the exact measurements for each ingredient at the bottom of the article, ready for printing.

How to Make Raspberry Pistachio Sourdough Bagels

Step 1: Prepare the Dough

Start by gathering a large mixing bowl.

Combine the all-purpose flour, bread flour, sugar, and salt.

Mix these dry ingredients well to ensure even distribution.

Next, add your active sourdough starter and warm water to the bowl.

Stir everything together until a shaggy dough forms.

Don’t worry if it looks a bit messy; that’s perfectly normal!

This dough is the foundation of your Raspberry Pistachio Sourdough Bagels, so take your time to get it right.

Step 2: Knead the Dough

Now comes the fun part—kneading!

Transfer the shaggy dough onto a floured surface.

Knead it for about 8-10 minutes until it becomes smooth and elastic.

This step is crucial for developing gluten, which gives your bagels that chewy texture.

As you knead, gently fold in the mashed raspberries and chopped pistachios.

Make sure they’re evenly distributed throughout the dough.

The vibrant colors will make your bagels look as good as they taste!

Step 3: First Rise

Once your dough is kneaded, it’s time for the first rise.

Place the dough in a lightly greased bowl and cover it with a damp cloth.

Let it rise at room temperature for 4-6 hours, or until it doubles in size.

This step is essential for flavor development and texture.

The longer rise allows the sourdough to work its magic, creating a tangy flavor.

Keep an eye on it; you’ll know it’s ready when it’s puffed up and airy!

Step 4: Shape the Bagels

After the dough has risen, it’s time to shape your bagels.

Gently punch down the dough to release any air bubbles.

Divide it into 8 equal pieces, shaping each into a ball.

Then, poke a hole in the center of each ball to form the classic bagel shape.

Make sure the hole is big enough, as it will shrink during boiling and baking.

Place the shaped bagels on a parchment-lined baking sheet and let them rest for 30 minutes.

This resting period helps them relax before boiling.

Step 5: Boil the Bagels

Boiling is a key step in making bagels.

Preheat your oven to 425°F while you prepare a large pot of water.

Bring the water to a boil and add the baking soda.

This will help create that signature chewy crust.

Carefully drop each bagel into the boiling water, cooking for about 1 minute on each side.

Once boiled, return them to the baking sheet.

This step is what sets bagels apart from other baked goods, giving them that unique texture.

Step 6: Bake the Bagels

Now it’s time to bake!

Beat an egg and brush it over the top of each bagel for a shiny finish.

Place the bagels in your preheated oven and bake for 20-25 minutes.

You’re looking for a beautiful golden brown color.

The aroma will fill your kitchen, making it hard to resist.

Once baked, allow them to cool on a wire rack before serving.

These Raspberry Pistachio Sourdough Bagels are now ready to be enjoyed!

Tips for Success

  • Use a kitchen scale for precise measurements, especially for flour.
  • Ensure your sourdough starter is active and bubbly for the best rise.
  • Don’t skip the boiling step; it’s crucial for that classic bagel texture.
  • Experiment with different toppings like sesame seeds or everything bagel seasoning.
  • Store leftover bagels in an airtight container to keep them fresh.

Equipment Needed

  • Mixing bowl: A large bowl for combining ingredients; a sturdy pot can work in a pinch.
  • Floured surface: A clean countertop or cutting board for kneading; a silicone mat is a great alternative.
  • Parchment paper: For lining your baking sheet; aluminum foil can also do the trick.
  • Pot for boiling: A large pot is ideal; a deep skillet can suffice.
  • Wire rack: For cooling; a plate can work if you don’t have one.

Variations

  • Nut-Free Option: Omit the pistachios and replace them with sunflower seeds for a nut-free alternative.
  • Herb-Infused: Add fresh herbs like rosemary or thyme to the dough for a savory twist.
  • Cheesy Delight: Incorporate shredded cheese, such as cheddar or feta, for a rich, savory flavor.
  • Gluten-Free: Use a gluten-free flour blend to make these bagels suitable for gluten-sensitive diets.
  • Spiced Up: Add a pinch of cinnamon or cardamom to the dough for a warm, aromatic flavor.

Serving Suggestions

  • Pair your Raspberry Pistachio Sourdough Bagels with a dollop of cream cheese for a creamy contrast.
  • Serve alongside fresh fruit or a light salad for a balanced brunch.
  • Enjoy with a hot cup of coffee or a refreshing iced tea.
  • For a festive touch, sprinkle some extra pistachios on top before serving.

FAQs about Raspberry Pistachio Sourdough Bagels

Can I use frozen raspberries instead of fresh?

Absolutely! Frozen raspberries work well, but make sure to thaw and drain them first to avoid excess moisture in your dough. This way, your Raspberry Pistachio Sourdough Bagels will still have that delightful tartness without becoming soggy.

How do I store leftover bagels?

To keep your bagels fresh, store them in an airtight container at room temperature for up to two days. For longer storage, freeze them in a zip-top bag. Just pop them in the toaster when you’re ready to enjoy!

Can I make these bagels without a sourdough starter?

If you don’t have a sourdough starter, you can use instant yeast instead. Mix about 2 teaspoons of instant yeast with the dry ingredients and adjust the water accordingly. While the flavor will differ, you’ll still end up with delicious bagels!

What can I serve with Raspberry Pistachio Sourdough Bagels?

These bagels pair wonderfully with cream cheese, honey, or even a light fruit spread. For a savory option, try them with avocado or smoked salmon. The possibilities are endless!

How can I make these bagels vegan?

To make your Raspberry Pistachio Sourdough Bagels vegan, simply replace the egg wash with a mixture of plant-based milk and a bit of maple syrup. This will give your bagels a nice shine without using any animal products.

Final Thoughts

Baking Raspberry Pistachio Sourdough Bagels is more than just a culinary task; it’s an experience that fills your kitchen with warmth and joy.

The vibrant colors and delightful aromas create a sense of anticipation that’s hard to resist.

Each bite offers a perfect balance of tartness and crunch, making them a standout at any brunch table.

Whether you’re sharing them with friends or savoring them solo, these bagels bring a touch of creativity to your morning routine.

So roll up your sleeves, embrace the process, and enjoy the delicious rewards of your efforts!

jhessica

Raspberry Pistachio Sourdough Bagels boost your brunch!

Delicious Raspberry Pistachio Sourdough Bagels that are perfect for brunch, combining the tartness of raspberries with the crunch of pistachios.
Prep Time 30 minutes
Cook Time 25 minutes
Servings: 8 bagels
Course: Breakfast
Cuisine: American
Calories: 210

Ingredients
  

  • 2 cups all-purpose flour
  • 1 cup bread flour
  • 1 cup active sourdough starter fed and bubbly
  • 3/4 cup warm water about 110°F
  • 1 tablespoon sugar
  • 1 teaspoon salt
  • 1/2 cup fresh raspberries gently mashed
  • 1/2 cup shelled pistachios chopped
  • 1 tablespoon baking soda for boiling
  • 1 egg for egg wash

Method
 

  1. In a large mixing bowl, combine the all-purpose flour, bread flour, sugar, and salt. Mix well.
  2. Add the active sourdough starter and warm water to the dry ingredients. Stir until a shaggy dough forms.
  3. Knead the dough on a floured surface for about 8-10 minutes until smooth and elastic.
  4. Gently fold in the mashed raspberries and chopped pistachios until evenly distributed.
  5. Place the dough in a lightly greased bowl, cover with a damp cloth, and let it rise at room temperature for 4-6 hours, or until doubled in size.
  6. Once risen, punch down the dough and divide it into 8 equal pieces. Shape each piece into a ball and then poke a hole in the center to form a bagel shape.
  7. Place the shaped bagels on a parchment-lined baking sheet and let them rest for 30 minutes.
  8. Preheat your oven to 425°F. In a large pot, bring water to a boil and add the baking soda.
  9. Boil each bagel for about 1 minute on each side, then return them to the baking sheet.
  10. Beat the egg and brush it over the top of each bagel for a shiny finish.
  11. Bake in the preheated oven for 20-25 minutes or until golden brown.
  12. Allow to cool on a wire rack before serving.

Nutrition

Serving: 1bagelCalories: 210kcalCarbohydrates: 30gProtein: 6gFat: 5gSaturated Fat: 1gPolyunsaturated Fat: 4gCholesterol: 30mgSodium: 200mgFiber: 2gSugar: 1g

Notes

  • For a sweeter bagel, consider adding a tablespoon of honey to the dough.
  • You can also substitute the raspberries with blueberries or cranberries for a different flavor profile.

Tried this recipe?

Let us know how it was!

Boursin Stuffed Mushrooms: A Must-Try Appetizer Recipe!

Introduction to Boursin Stuffed Mushrooms

There’s something magical about the aroma of baked mushrooms wafting through the kitchen. Boursin Stuffed Mushrooms are not just an appetizer; they’re a delightful experience waiting to happen. Whether you’re hosting a gathering or simply craving a tasty snack, these little bites pack a punch of flavor and comfort. They’re quick to whip up, making them a perfect solution for busy days or last-minute get-togethers. Plus, who doesn’t love impressing friends and family with a dish that looks as good as it tastes? Let’s dive into this delicious recipe together!

Why You’ll Love This Boursin Stuffed Mushrooms

These Boursin Stuffed Mushrooms are a game-changer for any gathering. They’re incredibly easy to make, taking just 40 minutes from start to finish. The creamy, garlicky Boursin cheese melds perfectly with the earthy mushrooms, creating a flavor explosion in every bite. Plus, they’re vegetarian-friendly, making them a hit with everyone. Trust me, once you serve these, they’ll disappear faster than you can say “appetizer!”

Ingredients for Boursin Stuffed Mushrooms

Gathering the right ingredients is the first step to creating these mouthwatering Boursin Stuffed Mushrooms. Here’s what you’ll need:

  • Large cremini or button mushrooms: These are the stars of the show. Their meaty texture holds up beautifully when baked.
  • Boursin cheese (garlic & herb flavor): This creamy cheese adds a rich, garlicky flavor that elevates the dish. Feel free to experiment with other flavors!
  • Breadcrumbs: They provide a delightful crunch and help bind the filling together. Use plain or seasoned, depending on your preference.
  • Grated Parmesan cheese: This adds a salty, nutty flavor that complements the Boursin cheese perfectly.
  • Fresh parsley: A sprinkle of this herb brightens the dish and adds a pop of color.
  • Olive oil: A drizzle of olive oil keeps the filling moist and enhances the overall flavor.
  • Garlic powder: For an extra kick of flavor, this is a must-have in the mix.
  • Black pepper: A dash of this spice adds warmth and depth to the filling.
  • Salt: Just a pinch to enhance all the flavors.

For those looking to spice things up, consider adding a pinch of red pepper flakes to the cheese mixture. If you’re in a pinch, any flavored cream cheese can be a great substitute for Boursin. Remember, the exact quantities are listed at the bottom of the article for easy printing!

How to Make Boursin Stuffed Mushrooms

Creating Boursin Stuffed Mushrooms is a straightforward process that anyone can master. Follow these simple steps, and you’ll have a delicious appetizer ready in no time!

Step 1: Preheat the Oven

Start by preheating your oven to 375°F (190°C). Preheating is crucial because it ensures even cooking. You want those mushrooms to bake perfectly, so don’t skip this step!

Step 2: Prepare the Mushrooms

Next, clean your mushrooms with a damp paper towel. This removes any dirt without soaking them in water, which can make them soggy. Carefully remove the stems, creating a nice little cup for the filling. Set the caps aside and chop the stems finely; they can be added to the filling for extra flavor!

Step 3: Mix the Filling

In a mixing bowl, combine the Boursin cheese, breadcrumbs, grated Parmesan, chopped parsley, olive oil, garlic powder, black pepper, and salt. Mix until everything is well combined. The texture should be creamy yet slightly chunky, perfect for stuffing. Taste the mixture; it should be bursting with flavor!

Step 4: Stuff the Mushrooms

Now it’s time to fill those mushroom caps! Use a spoon to generously stuff each cap with the cheese mixture. Don’t be shy—fill them up! Just be careful not to overstuff, as the filling can spill out while baking. Aim for a nice mound on top.

Step 5: Bake the Mushrooms

Place the stuffed mushrooms on a baking sheet lined with parchment paper. Bake them in the preheated oven for 20-25 minutes. Keep an eye on them; they’re done when the mushrooms are tender and the tops are golden brown. The aroma will be irresistible!

Step 6: Cool and Serve

Once baked, remove the mushrooms from the oven and let them cool for a few minutes. This step is important; it allows the flavors to settle and makes them easier to handle. Serve warm, and watch them disappear!

Tips for Success

  • Use fresh mushrooms for the best flavor and texture.
  • Don’t skip the preheating step; it’s key for even baking.
  • Feel free to customize the filling with your favorite herbs or spices.
  • For a crispy topping, broil the mushrooms for the last 2-3 minutes.
  • Make ahead! Stuff the mushrooms and refrigerate until ready to bake.

Equipment Needed

  • Baking sheet: A standard sheet works, but a cast iron skillet adds a rustic touch.
  • Parchment paper: This keeps the mushrooms from sticking; aluminum foil is a good alternative.
  • Mixing bowl: Any bowl will do, but a large one makes mixing easier.
  • Spoon: Use a regular spoon or a small cookie scoop for stuffing.

Variations

  • Spicy Kick: Add a pinch of red pepper flakes or diced jalapeños to the filling for a zesty twist.
  • Meat Lover’s Delight: Mix in some cooked and crumbled sausage or bacon for a heartier version.
  • Vegan Option: Substitute Boursin with a vegan cream cheese and use nutritional yeast for a cheesy flavor.
  • Herb Infusion: Experiment with different herbs like thyme, rosemary, or chives for a unique flavor profile.
  • Cheesy Variations: Try different cheese blends, like feta or goat cheese, for a tangy twist.

Serving Suggestions for Boursin Stuffed Mushrooms

  • Pair with a crisp salad: A light arugula or mixed greens salad complements the richness of the mushrooms.
  • Serve with a dipping sauce: A tangy balsamic glaze or garlic aioli adds an extra layer of flavor.
  • Wine pairing: A chilled Sauvignon Blanc or a light Pinot Noir enhances the dish beautifully.
  • Presentation: Arrange on a rustic wooden board for a charming, inviting display.

FAQs about Boursin Stuffed Mushrooms

Can I make Boursin Stuffed Mushrooms ahead of time?

Absolutely! You can prepare the stuffed mushrooms in advance and refrigerate them until you’re ready to bake. Just pop them in the oven when your guests arrive for a fresh, warm appetizer.

What can I substitute for Boursin cheese?

If you can’t find Boursin, any flavored cream cheese works well. You can also try a mix of ricotta and herbs for a lighter option. The key is to maintain that creamy texture!

How do I store leftovers?

Store any leftover Boursin Stuffed Mushrooms in an airtight container in the fridge. They’ll last for about 2-3 days. Reheat them in the oven for the best results.

Can I freeze stuffed mushrooms?

Yes, you can freeze them! Just make sure to freeze them before baking. When you’re ready to enjoy, bake them straight from the freezer, adding a few extra minutes to the cooking time.

What can I serve with Boursin Stuffed Mushrooms?

These mushrooms pair wonderfully with a light salad, crusty bread, or a selection of dips. A glass of white wine or a refreshing cocktail also complements their rich flavors beautifully.

Final Thoughts

Creating Boursin Stuffed Mushrooms is more than just cooking; it’s about bringing people together. The joy of watching friends and family savor each bite is truly rewarding. These little gems are perfect for any occasion, from casual get-togethers to festive celebrations. They’re easy to make, yet they feel special, striking that perfect balance between comfort and elegance. So, whether you’re a seasoned chef or a kitchen novice, this recipe invites you to share delicious moments. Grab your ingredients, roll up your sleeves, and let the magic of Boursin Stuffed Mushrooms fill your home with warmth and flavor!

jhessica

Boursin Stuffed Mushrooms: A Must-Try Appetizer Recipe!

Boursin Stuffed Mushrooms are a delicious and easy-to-make appetizer, perfect for any gathering.
Prep Time 15 minutes
Cook Time 25 minutes
Total Time 40 minutes
Servings: 8 servings
Course: Appetizer
Cuisine: American
Calories: 150

Ingredients
  

  • 16 large cremini or button mushrooms stems removed
  • 8 ounces Boursin cheese garlic & herb flavor
  • 1/2 cup breadcrumbs
  • 1/4 cup grated Parmesan cheese
  • 2 tablespoons fresh parsley chopped
  • 1 tablespoon olive oil
  • 1 teaspoon garlic powder
  • 1/2 teaspoon black pepper
  • 1/4 teaspoon salt

Method
 

  1. Preheat the oven to 375°F (190°C).
  2. Clean the mushrooms with a damp paper towel and remove the stems.
  3. In a mixing bowl, combine the Boursin cheese, breadcrumbs, Parmesan cheese, parsley, olive oil, garlic powder, black pepper, and salt. Mix until well combined.
  4. Stuff each mushroom cap generously with the cheese mixture.
  5. Place the stuffed mushrooms on a baking sheet lined with parchment paper.
  6. Bake in the preheated oven for 20-25 minutes, or until the mushrooms are tender and the tops are golden brown.
  7. Remove from the oven and let cool for a few minutes before serving.

Nutrition

Serving: 1mushroomCalories: 150kcalCarbohydrates: 6gProtein: 5gFat: 12gSaturated Fat: 6gPolyunsaturated Fat: 4gCholesterol: 30mgSodium: 200mgFiber: 1gSugar: 1g

Notes

  • For a spicier kick, add a pinch of red pepper flakes to the cheese mixture.
  • You can substitute the Boursin cheese with any flavored cream cheese for a different taste.

Tried this recipe?

Let us know how it was!

Crispy Wheat Chicharrones: Discover This Tasty Snack!

Introduction to Crispy Wheat Chicharrones

There’s something magical about a crunchy snack that brings back memories of family gatherings and late-night munchies. Crispy Wheat Chicharrones are just that—a delightful treat that’s easy to whip up and perfect for sharing. Whether you’re looking for a quick solution for a busy day or a dish to impress your loved ones, these chicharrones fit the bill. With just a handful of ingredients, you can create a satisfying snack that pairs beautifully with your favorite dips or stands strong on its own. Let’s dive into this tasty adventure!

Why You’ll Love This Crispy Wheat Chicharrones

These Crispy Wheat Chicharrones are a game-changer for snack time. They’re incredibly easy to make, taking just about 50 minutes from start to finish. The taste? Absolutely irresistible! With a satisfying crunch and a hint of garlic, they’ll have you reaching for more. Plus, they’re versatile—perfect for dipping or enjoying solo. Whether it’s a casual movie night or a gathering with friends, these chicharrones will steal the show!

Ingredients for Crispy Wheat Chicharrones

Gathering the right ingredients is the first step to creating these delightful Crispy Wheat Chicharrones. Here’s what you’ll need:

  • Harina de trigo (wheat flour): The star of the show! This flour gives the chicharrones their structure and crunch.
  • Baking powder: A little leavening agent that helps the dough puff up during frying, creating that irresistible texture.
  • Salt: Essential for flavor, it enhances the overall taste of the chicharrones.
  • Garlic powder: Adds a savory kick that elevates the flavor profile. You can adjust the amount based on your preference.
  • Water: This binds the dry ingredients together, forming a smooth dough. Use it gradually to achieve the right consistency.
  • Vegetable oil: For frying, it’s crucial to use oil with a high smoke point. This ensures your chicharrones fry evenly and don’t absorb too much oil.

For those who like a bit of heat, consider adding cayenne pepper to the dough for a spicy twist. If you’re looking for alternatives, you can experiment with different flours, like whole wheat or gluten-free options, but keep in mind that the texture may vary. Exact measurements for these ingredients are available at the bottom of the article for easy printing!

How to Make Crispy Wheat Chicharrones

Step 1: Prepare the Dough

Start by mixing the dry ingredients in a large bowl. Combine the harina de trigo, baking powder, salt, and garlic powder. Stir them together until they’re well blended. Next, gradually add water to the mixture. This is where the magic happens! As you stir, the ingredients will come together to form a dough. Don’t rush this step; take your time to ensure everything is evenly mixed. The dough should be soft but not sticky, ready for the next stage of our chicharrones adventure!

Step 2: Knead and Rest

Now it’s time to knead the dough. Lightly flour your work surface and place the dough on it. Knead for about five minutes, pushing and folding until it’s smooth and elastic. This step is crucial; it develops the gluten, giving your chicharrones that perfect crunch. Once kneaded, cover the dough with a damp cloth. Let it rest for 30 minutes. This resting period allows the gluten to relax, making it easier to roll out later. Trust me, this little wait will pay off big time!

Step 3: Shape the Chicharrones

After the dough has rested, it’s time to shape those chicharrones! Start by dividing the dough into small balls, roughly the size of a golf ball. This will make it easier to roll them out. Take one ball and flatten it slightly before rolling it out into a thin circle, about 1/8 inch thick. Use a rolling pin for an even thickness. Repeat this process with the remaining dough balls. The thinner you roll them, the crispier they’ll be when fried. Get creative with your shapes if you like!

Step 4: Frying the Chicharrones

Heat about two inches of vegetable oil in a deep skillet over medium heat. You want the oil hot enough to fry but not smoking. To test, drop a small piece of dough into the oil; if it sizzles, you’re ready! Carefully add one or two dough circles at a time. Fry them for about 1-2 minutes on each side, or until they puff up and turn golden brown. Keep an eye on them; they can go from perfect to overdone quickly. The aroma will be irresistible!

Step 5: Drain and Serve

Once your chicharrones are golden and crispy, it’s time to drain them. Use a slotted spoon to remove them from the oil and place them on paper towels. This will absorb any excess oil, keeping them light and crunchy. Allow them to cool slightly before serving. Enjoy them plain or with your favorite salsa or guacamole. These Crispy Wheat Chicharrones are perfect for sharing, but I won’t judge if you keep them all to yourself!

Tips for Success

  • Make sure your oil is at the right temperature for frying; too hot can burn them, too cool can make them greasy.
  • Don’t overcrowd the pan; fry in batches to ensure even cooking.
  • Experiment with seasonings! Try adding spices like paprika or cumin for a unique twist.
  • Store any leftovers in an airtight container to keep them crispy.
  • Serve immediately for the best crunch, but they can be reheated in the oven if needed.

Equipment Needed

  • Mixing bowl: A large bowl for combining ingredients. Any bowl will do!
  • Rolling pin: For rolling out the dough. A wine bottle works in a pinch!
  • Deep skillet: Essential for frying. A heavy pot can also work.
  • Slotted spoon: Perfect for draining the chicharrones. A regular spoon can suffice, but it’s messier.
  • Paper towels: For draining excess oil. You can use a clean kitchen towel if needed.

Variations

  • Spicy Chicharrones: Add 1 teaspoon of cayenne pepper or chili powder to the dough for a fiery kick.
  • Herb-Infused: Mix in dried herbs like oregano or thyme for a fragrant twist.
  • Cheesy Delight: Incorporate grated cheese into the dough for a savory, cheesy flavor.
  • Sweet Version: Substitute garlic powder with cinnamon and sugar for a sweet snack option.
  • Gluten-Free: Use a gluten-free flour blend to make these chicharrones suitable for gluten-sensitive diets.

Serving Suggestions

  • Pair with fresh guacamole for a creamy contrast to the crunch.
  • Serve alongside a zesty salsa for a burst of flavor.
  • Enjoy with a cold beer or a refreshing margarita for a perfect snack combo.
  • Present on a colorful platter for a festive touch at gatherings.

FAQs about Crispy Wheat Chicharrones

Can I make Crispy Wheat Chicharrones ahead of time?
Absolutely! You can prepare the dough in advance and store it in the fridge for up to 24 hours. Just remember to let it come to room temperature before rolling it out and frying.

What can I serve with Crispy Wheat Chicharrones?
These chicharrones are fantastic with guacamole, salsa, or even a spicy cheese dip. They also pair well with a cold drink, like beer or a refreshing margarita, making them perfect for gatherings.

How do I store leftover chicharrones?
To keep them crispy, store any leftovers in an airtight container at room temperature. They can lose their crunch if stored in the fridge, so enjoy them fresh!

Can I use whole wheat flour instead of regular flour?
Yes, you can! Whole wheat flour will give your chicharrones a nuttier flavor and a slightly different texture. Just keep in mind they may not puff up as much as those made with regular flour.

What’s the best way to reheat leftover chicharrones?
If you have leftovers, the best way to reheat them is in the oven. Preheat your oven to 350°F (175°C) and bake them for about 5-10 minutes until they’re crispy again. Avoid the microwave, as it can make them chewy.

Final Thoughts

Creating Crispy Wheat Chicharrones is more than just making a snack; it’s about bringing joy to your kitchen and sharing delicious moments with friends and family. The satisfying crunch and savory flavor make them a hit at any gathering. Plus, the simplicity of the recipe means you can whip them up anytime the craving strikes. Whether you enjoy them plain or with a zesty dip, these chicharrones are sure to become a staple in your snack rotation. So, roll up your sleeves, gather your ingredients, and let the crispy magic unfold!

jhessica

Crispy Wheat Chicharrones: Discover This Tasty Snack!

Crispy Wheat Chicharrones are a delicious and crunchy snack made from wheat flour, perfect for dipping or enjoying on their own.
Prep Time 10 minutes
Cook Time 10 minutes
Total Time 50 minutes
Servings: 4 servings
Course: Snack
Cuisine: Mexican
Calories: 180

Ingredients
  

  • 2 cups harina de trigo wheat flour
  • 1 teaspoon baking powder
  • 1 teaspoon salt
  • 1 teaspoon garlic powder
  • 1 cup water
  • Vegetable oil for frying

Method
 

  1. In a mixing bowl, combine the wheat flour, baking powder, salt, and garlic powder. Mix well until evenly combined.
  2. Gradually add water, stirring until a dough forms.
  3. Knead the dough on a floured surface for about 5 minutes until smooth.
  4. Cover the dough with a damp cloth and let it rest for 30 minutes.
  5. After resting, divide the dough into small balls, about the size of a golf ball.
  6. Roll each ball into a thin circle, about 1/8 inch thick.
  7. Heat about 2 inches of vegetable oil in a deep skillet over medium heat.
  8. Once the oil is hot, carefully add one or two dough circles at a time.
  9. Fry until they puff up and turn golden brown, about 1-2 minutes per side.
  10. Remove the chicharrones from the oil and drain on paper towels.
  11. Allow to cool slightly before serving. Enjoy them plain or with your favorite salsa.

Nutrition

Serving: 1servingCalories: 180kcalCarbohydrates: 30gProtein: 4gFat: 7gSaturated Fat: 1gPolyunsaturated Fat: 6gSodium: 200mgFiber: 1g

Notes

  • For a spicy kick, add 1 teaspoon of cayenne pepper to the dough mixture.
  • Serve with guacamole or salsa for dipping to enhance the flavor.

Tried this recipe?

Let us know how it was!

Country-Style Beef Ribs: Easy Recipe for Tender Delights

Introduction to Country-Style Beef Ribs

There’s something undeniably comforting about a plate of country-style beef ribs. Growing up, my family would gather around the table, the aroma of slow-cooked meat wafting through the air, creating a sense of togetherness. This recipe is a quick solution for a busy day or a dish to impress your loved ones during a weekend barbecue. With just a handful of ingredients and a little patience, you can create tender, flavorful ribs that will have everyone asking for seconds. Let’s dive into this delicious journey together!

Why You’ll Love This Country-Style Beef Ribs

These country-style beef ribs are a game changer for any home cook. They’re incredibly easy to prepare, making them perfect for busy weeknights or lazy weekends. The slow baking process transforms tough meat into tender, juicy bites that practically fall off the bone. Plus, the rich, smoky flavor from the spices and barbecue sauce will have your taste buds dancing. Trust me, this dish is a crowd-pleaser!

Ingredients for Country-Style Beef Ribs

Gathering the right ingredients is the first step to creating mouthwatering country-style beef ribs. Here’s what you’ll need:

  • Country-style beef ribs: These are the star of the show, known for their rich flavor and tenderness when cooked properly.
  • Olive oil: A splash of this helps to sear the ribs, locking in moisture and flavor.
  • Salt: Essential for enhancing the natural flavors of the meat.
  • Black pepper: Adds a subtle kick that complements the other spices.
  • Garlic powder: A must-have for that savory depth; it’s like a flavor hug for your ribs.
  • Onion powder: This brings a sweet, aromatic quality that pairs beautifully with the beef.
  • Smoked paprika: Infuses a smoky essence, giving your ribs that barbecue flair.
  • Barbecue sauce: The sweet and tangy glaze that ties everything together, making each bite irresistible.
  • Beef broth: Adds moisture and richness, ensuring your ribs stay juicy throughout the cooking process.
  • Apple cider vinegar: A splash of acidity balances the flavors and tenderizes the meat.

For those looking to spice things up, consider adding cayenne pepper to the spice rub for an extra kick. You can find all the exact quantities for these ingredients at the bottom of the article, ready for printing. Happy cooking!

How to Make Country-Style Beef Ribs

Creating tender country-style beef ribs is a rewarding experience. Follow these simple steps, and you’ll be on your way to a delicious meal that will impress everyone at the table.

Step 1: Preheat the Oven

Start by preheating your oven to 300°F. This low and slow cooking method is crucial for breaking down the tough fibers in the meat. A properly preheated oven ensures even cooking, allowing the flavors to meld beautifully.

Step 2: Prepare the Spice Rub

In a large bowl, mix together salt, black pepper, garlic powder, onion powder, and smoked paprika. This spice rub is essential for seasoning the ribs. It not only enhances the flavor but also creates a delicious crust when seared. Don’t be shy—make sure to coat the ribs generously!

Step 3: Sear the Ribs

Heat olive oil in a large oven-safe skillet or Dutch oven over medium-high heat. Once hot, add the ribs and sear them for about 3-4 minutes on each side until they’re beautifully browned. This step is key; searing locks in moisture and adds a rich flavor that elevates your country-style beef ribs.

Step 4: Make the Sauce

After searing, remove the ribs and set them aside. In the same skillet, combine barbecue sauce, beef broth, and apple cider vinegar. Stir well to create a luscious sauce that will keep the ribs moist during baking. This sauce is the heart of the dish, bringing everything together with its sweet and tangy notes.

Step 5: Bake the Ribs

Return the ribs to the skillet, ensuring they’re well-coated in the sauce. Cover the skillet with a lid or aluminum foil, then transfer it to the preheated oven. Bake for 2.5 to 3 hours. This slow cooking process allows the meat to become tender and fall-off-the-bone delicious. Patience is key here!

Step 6: Rest and Serve

Once the ribs are done, remove them from the oven and let them rest for about 10 minutes. Resting is crucial; it allows the juices to redistribute throughout the meat, ensuring every bite is juicy and flavorful. Now, you’re ready to serve up these mouthwatering country-style beef ribs!

Tips for Success

  • Always let your ribs come to room temperature before cooking for even cooking.
  • Don’t skip the searing step; it adds depth to the flavor.
  • Use a meat thermometer to check for doneness; aim for 190°F for tender meat.
  • Feel free to experiment with different barbecue sauces for unique flavors.
  • Pair with sides like coleslaw or cornbread for a complete meal.

Equipment Needed

  • Oven-safe skillet or Dutch oven: Essential for searing and baking. A heavy-bottomed pot works too.
  • Mixing bowl: For combining your spice rub.
  • Meat thermometer: Helps ensure your ribs are perfectly cooked.
  • Aluminum foil: Useful for covering the skillet during baking.

Variations

  • Spicy Kick: Add 1 teaspoon of cayenne pepper to the spice rub for a fiery twist.
  • Herb Infusion: Mix in dried herbs like thyme or rosemary for an aromatic touch.
  • Honey Glaze: Substitute some barbecue sauce with honey for a sweet, sticky finish.
  • Smoky Flavor: Use liquid smoke in the sauce for an extra layer of barbecue flavor.
  • Low-Carb Option: Serve with cauliflower rice instead of traditional sides for a healthier meal.

Serving Suggestions

  • Coleslaw: A crunchy, tangy side that complements the richness of the ribs.
  • Cornbread: Sweet and buttery, it’s a classic pairing that never disappoints.
  • Pickles: Add a zesty crunch to balance the flavors.
  • Beer: A cold lager or amber ale enhances the barbecue experience.

FAQs about Country-Style Beef Ribs

What are country-style beef ribs?

Country-style beef ribs are cut from the chuck section of the cow, known for their rich flavor and tenderness. Unlike traditional ribs, they contain more meat and less bone, making them perfect for slow cooking and barbecuing.

How do I know when my country-style beef ribs are done?

The best way to check for doneness is to use a meat thermometer. Aim for an internal temperature of 190°F. At this point, the meat should be tender and easily pull away from the bone.

Can I cook country-style beef ribs in a slow cooker?

Absolutely! If you prefer a slow cooker, you can follow the same seasoning and sauce steps. Cook on low for 6-8 hours or until the meat is tender. This method is great for busy days!

What should I serve with country-style beef ribs?

These ribs pair wonderfully with classic sides like coleslaw, cornbread, or baked beans. A cold beer or a refreshing iced tea also complements the meal perfectly.

Can I freeze leftover country-style beef ribs?

Yes, you can freeze leftover ribs! Just let them cool completely, then store them in an airtight container or freezer bag. They’ll stay good for up to three months. Reheat in the oven for the best results.

Final Thoughts

Cooking country-style beef ribs is more than just preparing a meal; it’s about creating memories and sharing joy with those you love. The tender, flavorful bites that emerge from your oven will have everyone gathering around the table, eager for a taste. This recipe is a celebration of comfort food, perfect for any occasion, whether it’s a casual weeknight dinner or a festive barbecue. With each bite, you’ll savor the rich flavors and the satisfaction of having crafted something truly special. So roll up your sleeves, embrace the process, and enjoy the delicious rewards of your hard work!

jhessica

Country-Style Beef Ribs: Easy Recipe for Tender Delights

A simple and delicious recipe for tender country-style beef ribs, perfect for a barbecue meal.
Prep Time 15 minutes
Total Time 3 hours 15 minutes
Servings: 4 servings
Course: Main Dish
Cuisine: American
Calories: 450

Ingredients
  

  • 2 pounds country-style beef ribs
  • 1 tablespoon olive oil
  • 1 teaspoon salt
  • 1 teaspoon black pepper
  • 1 teaspoon garlic powder
  • 1 teaspoon onion powder
  • 1 teaspoon smoked paprika
  • 1 cup barbecue sauce
  • 1/2 cup beef broth
  • 1 tablespoon apple cider vinegar

Method
 

  1. Preheat your oven to 300°F.
  2. In a large bowl, mix together the salt, black pepper, garlic powder, onion powder, and smoked paprika. Rub this spice mixture all over the beef ribs.
  3. In a large oven-safe skillet or Dutch oven, heat the olive oil over medium-high heat. Sear the ribs on all sides until browned, about 3-4 minutes per side.
  4. Remove the ribs from the skillet and set aside. In the same skillet, add the barbecue sauce, beef broth, and apple cider vinegar. Stir to combine.
  5. Return the ribs to the skillet, making sure they are coated in the sauce. Cover the skillet with a lid or aluminum foil.
  6. Transfer the skillet to the preheated oven and bake for 2.5 to 3 hours, or until the ribs are tender and the meat easily pulls away from the bone.
  7. Remove the skillet from the oven and let the ribs rest for 10 minutes before serving.

Nutrition

Serving: 1servingCalories: 450kcalCarbohydrates: 8gProtein: 36gFat: 32gSaturated Fat: 10gPolyunsaturated Fat: 20gCholesterol: 100mgSodium: 800mgSugar: 8g

Notes

  • For a spicier kick, add 1 teaspoon of cayenne pepper to the spice rub.
  • Serve the ribs with coleslaw or cornbread for a classic barbecue meal.

Tried this recipe?

Let us know how it was!

Cuban White Bean Soup: Discover This Delicious Recipe!

Introduction to Cuban White Bean Soup

There’s something magical about a warm bowl of soup, especially when it’s a Cuban White Bean Soup. This dish wraps you in comfort, like a cozy blanket on a chilly evening. It’s not just a meal; it’s a hug in a bowl. Perfect for those busy days when you need a quick solution or a delightful dish to impress your loved ones. With its hearty flavors and vibrant ingredients, this soup is a celebration of Cuban cuisine that brings everyone together. Let’s dive into this delicious recipe that’s as easy to make as it is satisfying!

Why You’ll Love This Cuban White Bean Soup

This Cuban White Bean Soup is a game-changer for your weeknight dinners. It’s not only quick to whip up, taking just about 40 minutes, but it’s also packed with flavor. The combination of spices and fresh ingredients creates a taste explosion that will have your family asking for seconds. Plus, it’s vegan and healthy, making it a guilt-free indulgence. You’ll love how it warms your soul and fills your belly!

Ingredients for Cuban White Bean Soup

Gathering the right ingredients is the first step to creating a delicious Cuban White Bean Soup. Here’s what you’ll need:

  • Olive oil: This adds a rich flavor and helps sauté the vegetables to perfection.
  • Onion: A medium onion, diced, brings sweetness and depth to the soup.
  • Red bell pepper: Adds a pop of color and a hint of sweetness, balancing the savory elements.
  • Garlic: Minced garlic infuses the soup with aromatic goodness.
  • Ground cumin: This spice gives the soup its warm, earthy flavor.
  • Dried oregano: A classic herb that complements the other flavors beautifully.
  • Smoked paprika: Adds a subtle smokiness that elevates the dish.
  • Vegetable broth: The base of the soup, providing a savory foundation.
  • White beans: Canned white beans are a great source of protein and fiber, making the soup hearty.
  • Diced tomatoes: These add acidity and a touch of sweetness, enhancing the overall flavor.
  • Bay leaf: A single bay leaf infuses the soup with a subtle herbal note.
  • Salt and pepper: Essential for seasoning, bringing all the flavors together.
  • Cilantro: Fresh cilantro, chopped, is perfect for garnishing and adds a burst of freshness.
  • Lime: Lime wedges served on the side brighten the soup with a zesty kick.

For those looking to spice things up, consider adding a diced jalapeño or a pinch of red pepper flakes when cooking the onions. If you want to make the soup even heartier, toss in some cooked quinoa or brown rice before serving. You can find the exact quantities for each ingredient at the bottom of the article, ready for printing!

How to Make Cuban White Bean Soup

Now that you have all your ingredients ready, let’s get cooking! Making this Cuban White Bean Soup is straightforward and fun. Follow these simple steps, and you’ll have a delicious meal in no time.

Step 1: Sauté the Vegetables

Start by heating a tablespoon of olive oil in a large pot over medium heat. Once the oil is shimmering, toss in the diced onion and red bell pepper. Sauté them for about five minutes, stirring occasionally, until they’re softened and fragrant. This step lays the foundation for a flavorful soup!

Step 2: Add Aromatics

Next, stir in the minced garlic, ground cumin, dried oregano, and smoked paprika. Cook this aromatic mixture for an additional minute. You’ll know it’s ready when the kitchen fills with a warm, inviting scent. These spices are the heart of your Cuban White Bean Soup!

Step 3: Combine Ingredients

Now it’s time to bring everything together. Pour in the vegetable broth, then add the drained and rinsed white beans, undrained diced tomatoes, and the bay leaf. Give it a good stir and bring the mixture to a boil. This is where the magic begins, as all those flavors meld together!

Step 4: Simmer the Soup

Once boiling, reduce the heat to low and let the soup simmer for 20 to 25 minutes. This gentle cooking allows the flavors to deepen and develop. You can use this time to relax or prepare some sides to go with your soup!

Step 5: Final Seasoning

After simmering, carefully remove the bay leaf from the pot. Now, it’s time to season your soup with salt and pepper to taste. This final touch enhances all the flavors, making your Cuban White Bean Soup truly irresistible.

Step 6: Serve and Garnish

Serve your soup hot, garnished with fresh cilantro and lime wedges on the side. The cilantro adds a burst of freshness, while a squeeze of lime brightens the dish. Enjoy every spoonful of this hearty, comforting meal!

Tips for Success

  • Prep your ingredients ahead of time to streamline the cooking process.
  • Don’t skip the aromatics; they’re key to building flavor.
  • Adjust the seasoning gradually; taste as you go!
  • For a creamier texture, blend a portion of the soup before serving.
  • Store leftovers in an airtight container for up to three days.

Equipment Needed

  • Large pot: A sturdy pot is essential for simmering the soup. A Dutch oven works great too.
  • Wooden spoon: Perfect for stirring and mixing ingredients without scratching your pot.
  • Measuring cups and spoons: Handy for accurate ingredient measurements.
  • Cutting board and knife: Essential for chopping vegetables efficiently.

Variations

  • Spicy Kick: Add diced jalapeños or a pinch of red pepper flakes for a spicy twist.
  • Protein Boost: Stir in cooked quinoa, brown rice, or even shredded chicken for added heartiness.
  • Herb Infusion: Experiment with fresh herbs like thyme or parsley for a different flavor profile.
  • Vegetable Medley: Toss in additional veggies like spinach, kale, or zucchini for extra nutrition.
  • Coconut Cream: For a creamy texture, add a splash of coconut milk just before serving.

Serving Suggestions

  • Crusty Bread: Serve with a side of warm, crusty bread for dipping.
  • Salad: Pair with a light green salad dressed in vinaigrette for a refreshing contrast.
  • Wine: A chilled white wine complements the flavors beautifully.
  • Presentation: Serve in vibrant bowls to enhance the visual appeal.

FAQs about Cuban White Bean Soup

Can I make Cuban White Bean Soup ahead of time?

Absolutely! This soup actually tastes even better the next day as the flavors meld together. Just store it in an airtight container in the fridge for up to three days. Reheat on the stovetop or in the microwave before serving.

Is Cuban White Bean Soup gluten-free?

Yes, this recipe is naturally gluten-free! Just ensure that the vegetable broth you use is labeled gluten-free to keep it safe for those with gluten sensitivities.

Can I freeze the soup?

Definitely! Cuban White Bean Soup freezes well. Allow it to cool completely, then transfer it to freezer-safe containers. It can be stored for up to three months. Thaw in the fridge overnight before reheating.

What can I serve with Cuban White Bean Soup?

This soup pairs wonderfully with crusty bread, a fresh salad, or even some avocado slices. A chilled white wine can also enhance the meal experience!

How can I make this soup spicier?

If you like a bit of heat, add diced jalapeños or a pinch of red pepper flakes when sautéing the vegetables. You can also serve it with hot sauce on the side for those who want to spice it up even more!

Final Thoughts

Cooking this Cuban White Bean Soup is more than just preparing a meal; it’s about creating a moment of joy. The aroma wafting through your kitchen, the vibrant colors in your pot, and the warmth of each spoonful all come together to create a comforting experience. Whether you’re sharing it with family or enjoying a quiet night in, this soup brings a taste of Cuba right to your table. It’s a reminder that good food can nourish not just our bodies, but our souls too. So grab a bowl, savor the flavors, and enjoy every delightful bite!

jhessica

Cuban White Bean Soup: Discover This Delicious Recipe!

A hearty and flavorful Cuban White Bean Soup that is perfect for a comforting meal.
Prep Time 10 minutes
Cook Time 30 minutes
Total Time 40 minutes
Servings: 6 servings
Course: Soup
Cuisine: Cuban
Calories: 180

Ingredients
  

  • 1 tablespoon olive oil
  • 1 medium onion diced
  • 1 red bell pepper diced
  • 2 cloves garlic minced
  • 1 teaspoon ground cumin
  • 1 teaspoon dried oregano
  • 1/2 teaspoon smoked paprika
  • 4 cups vegetable broth
  • 2 15-ounce cans white beans, drained and rinsed
  • 1 14.5-ounce can diced tomatoes, undrained
  • 1 bay leaf
  • Salt and pepper to taste
  • 1/4 cup fresh cilantro chopped (for garnish)
  • 1 lime cut into wedges (for serving)

Method
 

  1. In a large pot, heat the olive oil over medium heat. Add the diced onion and red bell pepper, cooking until softened, about 5 minutes.
  2. Stir in the minced garlic, cumin, oregano, and smoked paprika. Cook for an additional minute until fragrant.
  3. Pour in the vegetable broth, then add the white beans, diced tomatoes, and bay leaf. Bring the mixture to a boil.
  4. Reduce the heat to low and let the soup simmer for 20-25 minutes, allowing the flavors to meld.
  5. Remove the bay leaf and season the soup with salt and pepper to taste.
  6. Serve hot, garnished with fresh cilantro and lime wedges on the side.

Nutrition

Serving: 1cupCalories: 180kcalCarbohydrates: 28gProtein: 9gFat: 3gSaturated Fat: 0.5gPolyunsaturated Fat: 2.5gSodium: 400mgFiber: 7gSugar: 2g

Notes

  • For added heat, include a diced jalapeño or a pinch of red pepper flakes when cooking the onions.
  • To make it heartier, add cooked quinoa or brown rice to the soup before serving.

Tried this recipe?

Let us know how it was!

Stay Connected

Get recipes via email: