Get my cookbooks

Sugar Cookie Cups with Cream Cheese Filling made easy!

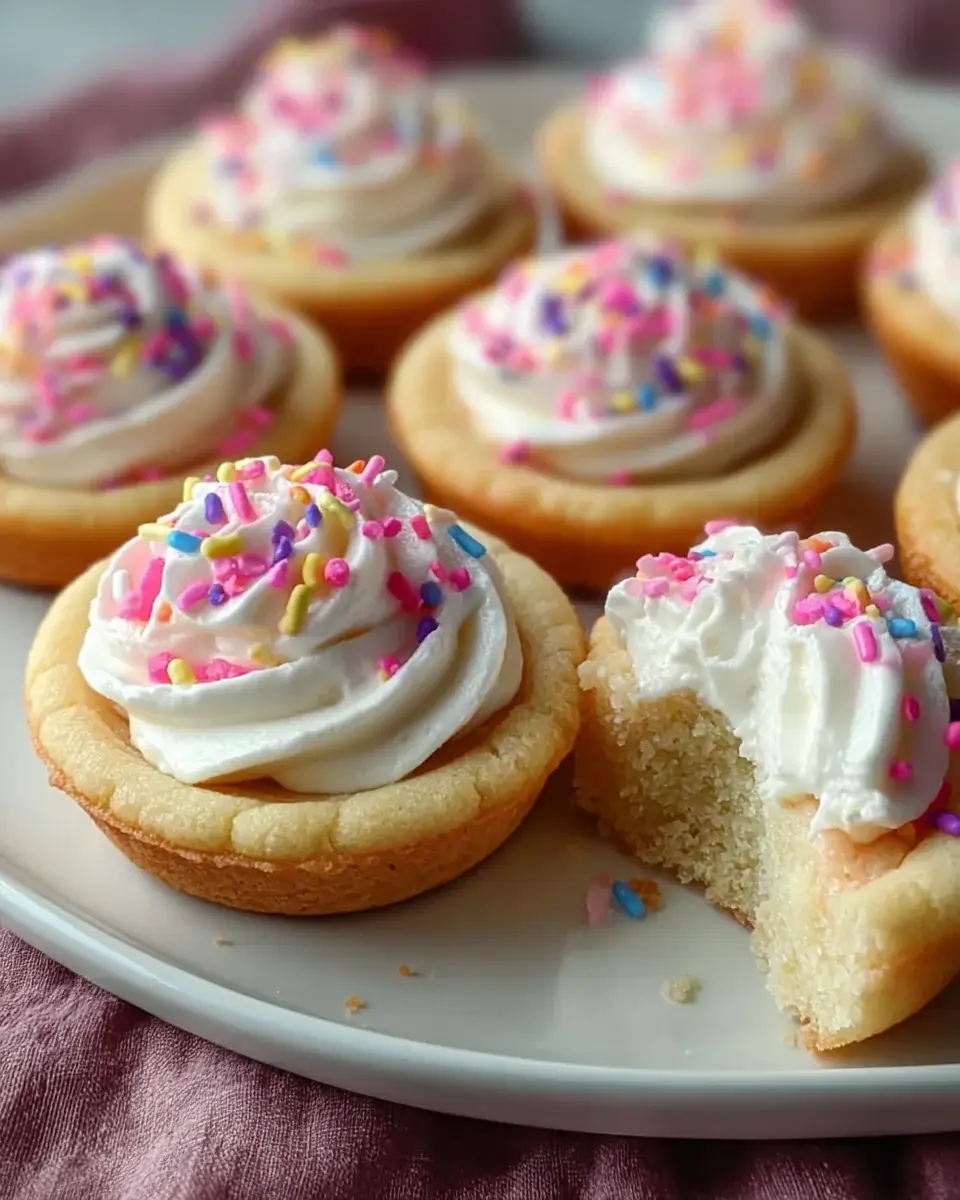
Introduction to Sugar Cookie Cups with Cream Cheese Filling

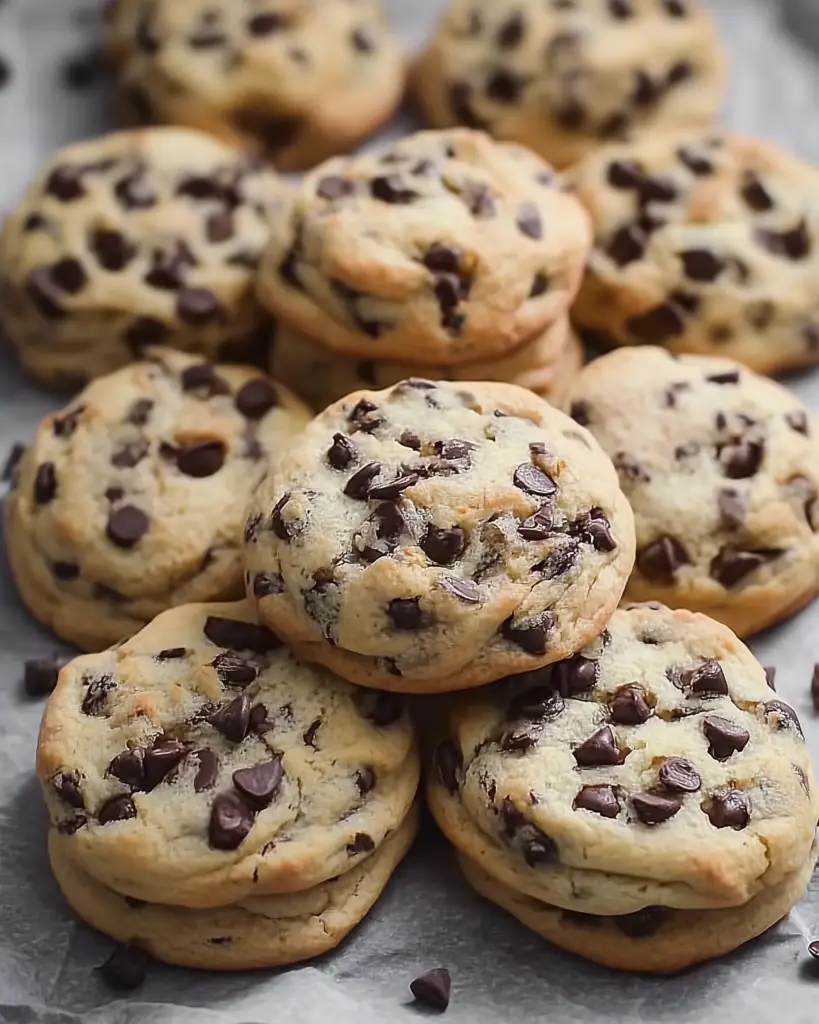
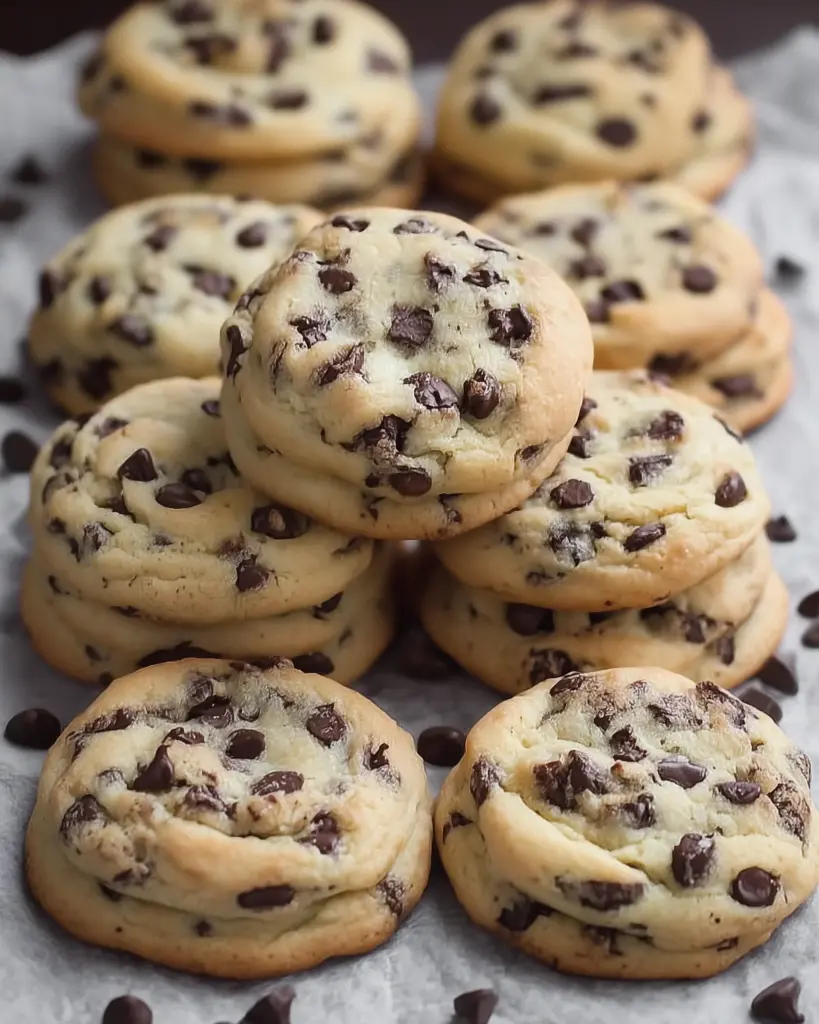
There’s something magical about the aroma of freshly baked cookies wafting through the house. It takes me back to my childhood, where every holiday meant a kitchen filled with laughter and sweet treats. Today, I’m excited to share a delightful recipe for Sugar Cookie Cups with Cream Cheese Filling. These little gems are not just a treat; they’re a quick solution for a busy day or a charming dessert to impress your loved ones. With their buttery cookie base and creamy filling, they’re sure to bring smiles all around. Let’s dive into this delicious adventure!

Why You’ll Love This Sugar Cookie Cups with Cream Cheese Filling

These Sugar Cookie Cups with Cream Cheese Filling are a game-changer in the dessert world. They’re incredibly easy to whip up, making them perfect for those last-minute gatherings or family cravings. The combination of a soft, buttery cookie and a rich, creamy filling is simply irresistible. Plus, they look impressive without requiring hours in the kitchen. Trust me, your taste buds will thank you for this delightful treat!

Ingredients for Sugar Cookie Cups with Cream Cheese Filling

Gathering the right ingredients is the first step to creating these delightful Sugar Cookie Cups with Cream Cheese Filling. Here’s what you’ll need:

  • Unsalted butter: This is the base of your cookie dough, providing richness and flavor. Make sure it’s softened for easy mixing.
  • Granulated sugar: Sweetness is key! This will help create that lovely, tender texture in your cookie cups.
  • Large egg: Eggs bind the ingredients together and add moisture, making your cookies soft and chewy.
  • Vanilla extract: A splash of vanilla enhances the flavor, giving your cookies that classic, comforting taste.
  • All-purpose flour: The backbone of your cookie dough, it provides structure. You can substitute with gluten-free flour if needed.
  • Baking powder: This leavening agent helps your cookie cups rise, creating a light and airy texture.
  • Salt: Just a pinch balances the sweetness and enhances the overall flavor.
  • Cream cheese: The star of the filling! It adds a creamy, tangy flavor that pairs perfectly with the sweet cookie base.
  • Powdered sugar: This sweetens the cream cheese filling and gives it a smooth texture.
  • Whipped topping: Lightens the filling, making it fluffy and delightful. You can use homemade whipped cream as an alternative.

For those looking to add a twist, consider mixing in a tablespoon of lemon juice or zest into the cream cheese filling for a refreshing zing. You can also top each filled cookie cup with fresh fruit or chocolate shavings for a decorative touch. Exact measurements for these ingredients can be found at the bottom of the article, ready for printing!

How to Make Sugar Cookie Cups with Cream Cheese Filling

Now that you have all your ingredients ready, let’s get to the fun part—making these delightful Sugar Cookie Cups with Cream Cheese Filling! Follow these simple steps, and you’ll have a batch of sweet treats in no time.

Step 1: Preheat the Oven

Start by preheating your oven to 350°F. This ensures it’s hot and ready for baking, giving your cookie cups that perfect golden edge.

Step 2: Cream the Butter and Sugar

In a large mixing bowl, cream together the softened butter and granulated sugar until light and fluffy. This step is crucial; it incorporates air into the mixture, making your cookie cups tender and delicious.

Step 3: Add Egg and Vanilla

Add the egg and vanilla extract, mixing until well combined. The egg adds moisture, while the vanilla brings that comforting aroma we all love.

Step 4: Combine Dry Ingredients

In another bowl, whisk together the flour, baking powder, and salt. This helps distribute the leavening agent evenly, ensuring your cookie cups rise beautifully.

Step 5: Mix Wet and Dry Ingredients

Gradually add the dry ingredients to the wet mixture, mixing until just combined. Be careful not to overmix; you want a soft dough that holds together without being tough.

Step 6: Prepare the Muffin Tin

Grease a muffin tin to prevent sticking. You can use cooking spray or butter—either works well to ensure your cookie cups pop out easily.

Step 7: Form the Cookie Cups

Scoop about 1 tablespoon of dough into each muffin cup, pressing it down to form a cup shape. Make sure the dough is evenly distributed for consistent baking.

Step 8: Bake the Cookie Cups

Bake for 10-12 minutes or until the edges are lightly golden. Keep an eye on them; ovens can vary, and you want to catch them at just the right moment!

Step 9: Cool the Cookie Cups

Remove from the oven and let cool for 5 minutes before transferring to a wire rack to cool completely. This helps them firm up and makes filling them easier.

Step 10: Prepare the Cream Cheese Filling

While the cookie cups are cooling, prepare the cream cheese filling by beating the softened cream cheese, powdered sugar, and vanilla extract until smooth. This creamy mixture is the heart of your dessert!

Step 11: Fold in Whipped Topping

Gently fold in the whipped topping until fully combined. This adds a lightness to the filling, making it fluffy and delightful.

Step 12: Fill the Cookie Cups

Once the cookie cups are completely cool, fill each cup with the cream cheese filling. Don’t be shy—load them up for a delicious bite!

Step 13: Chill Before Serving

Chill in the refrigerator for at least 30 minutes before serving to allow the filling to set. This step is key for that perfect creamy texture.

Tips for Success

  • Use room temperature ingredients for better mixing and texture.
  • Don’t overbake the cookie cups; they should be soft in the center.
  • Chill the cream cheese filling for a firmer texture before filling the cups.
  • Experiment with flavors by adding spices like cinnamon or nutmeg to the dough.
  • For a fun twist, try using different toppings like sprinkles or crushed cookies.

Equipment Needed

  • Muffin tin: Essential for shaping your cookie cups. A silicone mold can be a great alternative.
  • Mixing bowls: Use at least two—one for wet ingredients and one for dry.
  • Electric mixer: A hand mixer works well, but a whisk can do the job too.
  • Measuring cups and spoons: Accurate measurements are key for baking success.
  • Spatula: Perfect for folding in the whipped topping and transferring the filling.

Variations

  • For a citrus twist, add lemon or orange zest to the cream cheese filling for a refreshing flavor.
  • Swap out the whipped topping for homemade whipped cream for a richer taste.
  • Try using almond extract instead of vanilla for a unique flavor profile.
  • For a chocolate lover’s delight, mix in cocoa powder to the cookie dough for chocolate cookie cups.
  • Make them gluten-free by using a gluten-free all-purpose flour blend in the cookie dough.
  • Add crushed nuts or toffee bits to the cream cheese filling for added texture and flavor.

Serving Suggestions

  • Pair these cookie cups with a scoop of vanilla ice cream for a delightful dessert combo.
  • Serve alongside a hot cup of coffee or tea to balance the sweetness.
  • For a festive touch, garnish with fresh berries or a drizzle of chocolate sauce.
  • Present on a colorful platter for an eye-catching display at gatherings.

FAQs about Sugar Cookie Cups with Cream Cheese Filling

Can I make Sugar Cookie Cups with Cream Cheese Filling ahead of time?

Absolutely! You can prepare the cookie cups a day in advance and store them in an airtight container. Just fill them with the cream cheese filling on the day you plan to serve them for the best texture.

What can I use instead of cream cheese in the filling?

If you’re looking for a lighter option, you can use Greek yogurt or mascarpone cheese. Both will give you a creamy texture, but the flavor will vary slightly.

How do I store leftover Sugar Cookie Cups?

Store any leftovers in the refrigerator in an airtight container. They should stay fresh for about 3-4 days, but trust me, they won’t last that long!

Can I freeze Sugar Cookie Cups with Cream Cheese Filling?

Yes, you can freeze the cookie cups without the filling. Just bake and cool them, then freeze in a single layer. When you’re ready to enjoy, thaw and fill them with the cream cheese mixture.

What toppings can I add to my Sugar Cookie Cups?

Get creative! Fresh fruit, chocolate shavings, or a sprinkle of crushed nuts can elevate your cookie cups. You can also drizzle some caramel or chocolate sauce for an extra indulgent touch.

Final Thoughts

Creating these Sugar Cookie Cups with Cream Cheese Filling is more than just baking; it’s about crafting sweet memories. Each bite is a delightful blend of buttery goodness and creamy indulgence, perfect for any occasion. Whether you’re celebrating a special moment or simply treating yourself, these cookie cups bring joy to the table. They’re easy to make, fun to share, and sure to impress. So, roll up your sleeves, gather your loved ones, and dive into this delicious adventure. Trust me, the smiles you’ll see will be worth every moment spent in the kitchen!

jhessica

Sugar Cookie Cups with Cream Cheese Filling made easy!

Delicious sugar cookie cups filled with a creamy and smooth cream cheese filling, perfect for any occasion.
Prep Time 20 minutes
Cook Time 12 minutes
Total Time 1 hour
Servings: 12 servings
Course: Dessert
Cuisine: American
Calories: 180

Ingredients
  

  • 1 cup unsalted butter softened
  • 1 cup granulated sugar
  • 1 large egg
  • 1 teaspoon vanilla extract
  • 2 ½ cups all-purpose flour
  • 1 teaspoon baking powder
  • ½ teaspoon salt
  • 8 ounces cream cheese softened
  • ½ cup powdered sugar
  • 1 teaspoon vanilla extract
  • 1 cup whipped topping

Method
 

  1. Preheat the oven to 350°F.
  2. In a large mixing bowl, cream together the softened butter and granulated sugar until light and fluffy.
  3. Add the egg and vanilla extract, mixing until well combined.
  4. In another bowl, whisk together the flour, baking powder, and salt.
  5. Gradually add the dry ingredients to the wet mixture, mixing until just combined.
  6. Grease a muffin tin.
  7. Scoop about 1 tablespoon of dough into each muffin cup, pressing it down to form a cup shape.
  8. Bake for 10-12 minutes or until the edges are lightly golden.
  9. Remove from the oven and let cool for 5 minutes before transferring to a wire rack to cool completely.
  10. While the cookie cups are cooling, prepare the cream cheese filling by beating the softened cream cheese, powdered sugar, and vanilla extract until smooth.
  11. Gently fold in the whipped topping until fully combined.
  12. Once the cookie cups are completely cool, fill each cup with the cream cheese filling.
  13. Chill in the refrigerator for at least 30 minutes before serving to allow the filling to set.

Nutrition

Serving: 1cookie cupCalories: 180kcalCarbohydrates: 14gProtein: 2gFat: 10gSaturated Fat: 6gPolyunsaturated Fat: 4gCholesterol: 30mgSodium: 150mgSugar: 10g

Notes

  • For added flavor, consider mixing in a tablespoon of lemon juice or zest into the cream cheese filling.
  • You can also top each filled cookie cup with fresh fruit or chocolate shavings for a decorative touch.

Tried this recipe?

Let us know how it was!

Savory Bacon and Egg Galettes: A Delicious Recipe Idea

Introduction to Savory Bacon and Egg Galettes

There’s something magical about the aroma of bacon sizzling in the morning. It takes me back to lazy Sunday breakfasts at my grandparents’ house, where the kitchen was always filled with laughter and the promise of a delicious meal. If you’re looking for a quick solution for a busy day or a dish to impress your loved ones, Savory Bacon and Egg Galettes are the answer. These delightful galettes combine a flaky crust with rich, savory fillings that are sure to please everyone at the table. Let’s dive into this easy recipe that brings comfort and joy to any breakfast table!

Why You’ll Love This Savory Bacon and Egg Galettes

These Savory Bacon and Egg Galettes are a game-changer for breakfast lovers. They’re incredibly easy to whip up, making them perfect for busy mornings or leisurely weekends. The combination of crispy bacon, creamy eggs, and melted cheese wrapped in a flaky crust is simply irresistible. Plus, they’re versatile enough to customize with your favorite ingredients, ensuring every bite is packed with flavor. You’ll find yourself reaching for this recipe time and again!

Ingredients for Savory Bacon and Egg Galettes

Gathering the right ingredients is the first step to creating these mouthwatering Savory Bacon and Egg Galettes. Here’s what you’ll need:

  • All-purpose flour: The foundation of your flaky crust, providing the perfect texture.
  • Salt: Enhances the flavors of the other ingredients, making everything taste better.
  • Cold unsalted butter: Adds richness and flakiness to the dough; keep it cold for the best results.
  • Ice water: Helps bring the dough together without warming it up too much.
  • Cooked bacon: Crispy and savory, it’s the star of the show, adding a delightful crunch.
  • Large eggs: The heart of the filling, providing protein and a creamy texture when cooked.
  • Shredded cheese: Choose your favorite, like cheddar, for a melty, gooey goodness.
  • Fresh chives (optional): A pop of color and a mild onion flavor that brightens the dish.
  • Salt and pepper: Essential for seasoning, ensuring every bite is flavorful.

Feel free to get creative! You can swap the bacon for sautéed spinach or mushrooms for a vegetarian twist. Different cheeses like feta or mozzarella can also add unique flavors. For exact measurements, check the bottom of the article where you can find everything available for printing.

How to Make Savory Bacon and Egg Galettes

Creating these Savory Bacon and Egg Galettes is a straightforward process that anyone can master. Follow these simple steps, and you’ll have a delicious breakfast ready in no time!

Step 1: Prepare the Dough

Start by combining the all-purpose flour and salt in a mixing bowl. This is the base of your flaky crust. Next, add the cold, cubed butter. Use your fingers or a pastry cutter to mix until the mixture resembles coarse crumbs. This step is crucial; the cold butter creates those delightful flaky layers. Once mixed, gradually add ice water, one tablespoon at a time, until the dough comes together. Form it into a ball, wrap it in plastic wrap, and refrigerate for 30 minutes. Chilling the dough helps it firm up, making it easier to roll out later.

Step 2: Roll Out the Dough

After the dough has chilled, preheat your oven to 400°F. On a lightly floured surface, roll out the dough into a circle about 1/8 inch thick. Don’t worry about making it perfect; rustic is the name of the game here! Once rolled out, carefully transfer the dough to a lined baking sheet. This is where the magic happens, so make sure it’s positioned well.

Step 3: Assemble the Galette

Now comes the fun part! Sprinkle your shredded cheese evenly over the dough, leaving about a 1-inch border around the edges. Next, layer the chopped bacon over the cheese. The crispy bacon adds a savory crunch that pairs perfectly with the eggs. Carefully crack the eggs on top of the bacon, ensuring they stay within the border. Season everything with salt and pepper, and if you’re feeling fancy, sprinkle some fresh chives on top for an extra burst of flavor.

Step 4: Fold and Bake

It’s time to fold! Gently fold the edges of the dough over the filling, pleating as necessary to create that charming rustic look. Don’t stress about it being perfect; the beauty is in the imperfections. Once folded, pop the galette into the oven and bake for 25-30 minutes. You’re looking for a golden-brown crust and eggs set to your liking. The aroma will fill your kitchen, making it hard to wait!

Tips for Success

  • Keep your butter cold for a flakier crust; it makes all the difference.
  • Don’t skip the chilling step; it helps the dough relax and roll out easily.
  • Experiment with different cheeses for unique flavors; mozzarella or feta can be delightful.
  • Use a pizza cutter for easy slicing after baking.
  • Serve warm for the best taste; it’s a crowd-pleaser!

Equipment Needed

  • Mixing bowl: A standard bowl works, but a large one gives you more room to mix.
  • Pastry cutter or fork: Use a fork if you don’t have a pastry cutter to blend the butter.
  • Rolling pin: A wine bottle can serve as a great alternative!
  • Baking sheet: Any flat baking tray will do, just line it with parchment paper.
  • Plastic wrap: Use a resealable bag if you’re out of wrap for chilling the dough.

Variations of Savory Bacon and Egg Galettes

  • Vegetarian Delight: Swap the bacon for sautéed spinach, mushrooms, or roasted red peppers for a hearty, meat-free option.
  • Cheese Lovers: Experiment with different cheeses like goat cheese, feta, or pepper jack for a unique flavor twist.
  • Herb Infusion: Add fresh herbs like thyme, rosemary, or basil to the filling for an aromatic touch.
  • Spicy Kick: Incorporate diced jalapeños or a sprinkle of red pepper flakes for those who enjoy a bit of heat.
  • Breakfast Medley: Mix in diced bell peppers or onions for added texture and flavor.

Serving Suggestions for Savory Bacon and Egg Galettes

  • Fresh Salad: Pair with a light arugula or mixed greens salad for a refreshing contrast.
  • Fruit Platter: Serve with seasonal fruits like berries or sliced melons for a sweet touch.
  • Hot Sauce: A dash of your favorite hot sauce can elevate the flavors.
  • Coffee or Tea: Enjoy with a strong cup of coffee or herbal tea to complement the meal.

FAQs about Savory Bacon and Egg Galettes

Can I make Savory Bacon and Egg Galettes ahead of time?

Absolutely! You can prepare the dough and filling in advance. Just assemble the galettes and refrigerate them until you’re ready to bake. This makes for a quick breakfast option on busy mornings!

What can I substitute for bacon in this recipe?

If you’re looking for a vegetarian option, sautéed spinach, mushrooms, or even roasted red peppers work wonderfully. They add flavor and texture without the meat.

How do I store leftovers?

Store any leftover galettes in an airtight container in the fridge for up to three days. Reheat in the oven for a few minutes to restore that crispy crust.

Can I freeze Savory Bacon and Egg Galettes?

Yes! You can freeze them before baking. Just wrap them tightly in plastic wrap and foil. When you’re ready to enjoy, bake them straight from the freezer, adding a few extra minutes to the cooking time.

What type of cheese works best in this recipe?

Cheddar is a classic choice, but feel free to experiment! Mozzarella, feta, or pepper jack can add unique flavors and textures to your galettes.

Final Thoughts

Making Savory Bacon and Egg Galettes is more than just cooking; it’s about creating memories. The process is simple, yet the results are impressive, making it a perfect dish for any occasion. Whether you’re enjoying a quiet morning or hosting friends for brunch, these galettes bring warmth and satisfaction to the table. The combination of flaky crust, savory bacon, and creamy eggs is a delightful experience for the taste buds. So roll up your sleeves, gather your ingredients, and let the aroma of these galettes fill your kitchen. You’ll be glad you did!

jhessica

Savory Bacon and Egg Galettes: A Delicious Recipe Idea

Savory Bacon and Egg Galettes are a delicious and easy-to-make dish featuring a flaky crust filled with bacon, eggs, and cheese.
Prep Time 30 minutes
Cook Time 30 minutes
Total Time 1 hour
Servings: 4 servings
Course: Breakfast
Cuisine: American
Calories: 320

Ingredients
  

  • 1 cup all-purpose flour
  • 1/2 teaspoon salt
  • 1/4 cup cold unsalted butter cubed
  • 3 to 4 tablespoons ice water
  • 4 slices of cooked bacon chopped
  • 4 large eggs
  • 1/2 cup shredded cheese cheddar or your choice
  • 1 tablespoon fresh chives chopped (optional)
  • Salt and pepper to taste

Method
 

  1. In a mixing bowl, combine the flour and salt. Add the cold butter and mix until the mixture resembles coarse crumbs.
  2. Gradually add ice water, one tablespoon at a time, mixing until the dough comes together. Form the dough into a ball, wrap in plastic wrap, and refrigerate for 30 minutes.
  3. Preheat the oven to 400°F. Line a baking sheet with parchment paper.
  4. On a lightly floured surface, roll out the dough into a circle about 1/8 inch thick. Transfer to the prepared baking sheet.
  5. Sprinkle the cheese evenly over the dough, leaving a 1-inch border around the edges.
  6. Arrange the chopped bacon over the cheese. Carefully crack the eggs on top of the bacon, ensuring they stay within the border.
  7. Season with salt and pepper, and sprinkle with chives if using.
  8. Fold the edges of the dough over the filling, pleating as necessary to create a rustic look.
  9. Bake for 25-30 minutes, or until the crust is golden brown and the eggs are set to your liking.
  10. Let cool for a few minutes before slicing and serving.

Nutrition

Serving: 1galetteCalories: 320kcalCarbohydrates: 24gProtein: 14gFat: 20gSaturated Fat: 10gPolyunsaturated Fat: 8gCholesterol: 200mgSodium: 500mgFiber: 1gSugar: 1g

Notes

  • For a vegetarian option, substitute the bacon with sautéed spinach or mushrooms.
  • Experiment with different cheeses, such as feta or mozzarella, for varied flavors.

Tried this recipe?

Let us know how it was!

Cheesy Spinach and Artichoke Dip that Everyone Loves!

Introduction to Cheesy Spinach and Artichoke Dip

There’s something magical about gathering around a warm, cheesy spinach and artichoke dip.

It brings back memories of family parties, where laughter mingled with the aroma of baked goodness.

This dip is not just a recipe; it’s a crowd-pleaser that transforms any gathering into a celebration.

Whether you’re hosting friends for game night or just looking for a quick solution for a busy day, this dip is your go-to.

Creamy, cheesy, and packed with flavor, it’s a dish that impresses without demanding hours in the kitchen.

Why You’ll Love This Cheesy Spinach and Artichoke Dip

This cheesy spinach and artichoke dip is a game-changer for any occasion.

It’s incredibly easy to whip up, taking just 10 minutes of prep time.

The rich, creamy texture and savory flavors will have everyone coming back for more.

Plus, it’s a versatile dish that pairs perfectly with chips, veggies, or even crusty bread.

Trust me, this dip will become your new favorite party staple!

Ingredients for Cheesy Spinach and Artichoke Dip

Creating the perfect cheesy spinach and artichoke dip starts with gathering the right ingredients.

Here’s what you’ll need:

  • Cream Cheese: This is the base of our dip, providing that rich, creamy texture.
  • Sour Cream: Adds a tangy flavor and helps to keep the dip smooth and luscious.
  • Mayonnaise: For extra creaminess, mayonnaise brings a delightful richness to the mix.
  • Mozzarella Cheese: This melty cheese gives the dip its gooey goodness, making it irresistible.
  • Parmesan Cheese: A sprinkle of this sharp cheese enhances the flavor profile and adds a nice bite.
  • Artichoke Hearts: These tender morsels add a unique taste and texture, elevating the dip.
  • Fresh Spinach: Packed with nutrients, spinach adds color and a fresh flavor. You can also use frozen spinach if that’s what you have on hand.
  • Garlic: Minced garlic infuses the dip with a savory aroma and depth of flavor.
  • Onion Powder: This seasoning adds a subtle sweetness and enhances the overall taste.
  • Salt and Black Pepper: Essential for balancing flavors, these staples are a must for seasoning.
  • Red Pepper Flakes (optional): For those who like a little heat, these flakes add a spicy kick.

You can find the exact quantities for each ingredient at the bottom of the article, ready for printing.

Feel free to get creative! Substitute kale for spinach or add smoked paprika for a unique twist.

The possibilities are endless!

How to Make Cheesy Spinach and Artichoke Dip

Making cheesy spinach and artichoke dip is a breeze!

Follow these simple steps, and you’ll have a delicious dip ready in no time.

Let’s dive in!

Step 1: Preheat the Oven

Start by preheating your oven to 350°F (175°C).

This step is crucial because it ensures even cooking.

A hot oven helps the dip bubble and brown beautifully, creating that irresistible golden top.

Step 2: Mix the Base

In a large mixing bowl, combine the softened cream cheese, sour cream, and mayonnaise.

Use a hand mixer or a sturdy spatula to blend them until smooth.

This creamy base is the heart of your dip, so take your time to get it just right.

Step 3: Add the Cheeses and Veggies

Next, stir in the shredded mozzarella and grated Parmesan cheese.

Then, fold in the chopped artichoke hearts and fresh spinach.

Make sure everything is evenly mixed.

This combination of cheeses and veggies creates a delightful texture and flavor explosion.

Step 4: Season the Mixture

Now, it’s time to add the minced garlic, onion powder, salt, black pepper, and optional red pepper flakes.

These seasonings elevate the dip, giving it that extra kick.

Mix well to ensure every bite is packed with flavor.

Step 5: Transfer and Bake

Transfer the mixture into a baking dish, spreading it out evenly.

This helps it cook uniformly.

Bake in your preheated oven for 25-30 minutes.

You’ll know it’s ready when the dip is bubbly and golden on top.

Step 6: Cool and Serve

Once out of the oven, let the dip cool for a few minutes.

This waiting period is essential; it allows the flavors to settle and makes it easier to scoop.

Serve it warm with your favorite dippers, and watch it disappear!

Tips for Success

  • Soften the cream cheese for easier mixing; leave it out for about 30 minutes before starting.
  • For a creamier dip, consider using full-fat mayonnaise and sour cream.
  • Don’t skip the cooling step; it enhances the flavors and makes serving easier.
  • Experiment with different cheeses like cheddar for a unique twist.
  • Make it ahead of time and bake just before serving for convenience.

Equipment Needed

  • Mixing Bowl: A large bowl for combining ingredients. A sturdy pot can work in a pinch.
  • Hand Mixer or Spatula: For blending the dip smoothly. A whisk can also do the job.
  • Baking Dish: A 9×9 inch dish is ideal. Any oven-safe dish will suffice.
  • Measuring Cups: For accurate ingredient portions. Use a kitchen scale if you prefer weight measurements.

Variations of Cheesy Spinach and Artichoke Dip

  • Spicy Spinach and Artichoke Dip: Add diced jalapeños or a splash of hot sauce for an extra kick.
  • Buffalo Chicken Spinach Dip: Mix in shredded cooked chicken and buffalo sauce for a hearty twist.
  • Vegan Spinach and Artichoke Dip: Substitute cream cheese and sour cream with cashew cream and nutritional yeast for a dairy-free version.
  • Greek Spinach and Artichoke Dip: Incorporate feta cheese and black olives for a Mediterranean flair.
  • Herbed Spinach and Artichoke Dip: Add fresh herbs like dill or basil for a burst of freshness.

Serving Suggestions for Cheesy Spinach and Artichoke Dip

  • Tortilla Chips: Perfect for scooping up that creamy goodness.
  • Pita Bread: Warm, soft pita adds a delightful texture.
  • Fresh Veggies: Carrot sticks, celery, and bell peppers offer a crunchy contrast.
  • Wine Pairing: A chilled white wine complements the flavors beautifully.
  • Presentation: Serve in a rustic dish, garnished with fresh herbs for a pop of color.

FAQs about Cheesy Spinach and Artichoke Dip

Can I make Cheesy Spinach and Artichoke Dip ahead of time?

Absolutely! You can prepare the dip a day in advance. Just mix all the ingredients and store it in the fridge. When you’re ready to serve, pop it in the oven to bake. This makes it a perfect party dish!

What can I use instead of cream cheese?

If you’re looking for a lighter option, consider using Greek yogurt or a dairy-free cream cheese alternative. Both will still give you that creamy texture without sacrificing flavor.

How do I store leftovers?

Store any leftover dip in an airtight container in the fridge for up to three days. Reheat it in the oven or microwave before serving again. It’s just as delicious the next day!

Can I freeze Cheesy Spinach and Artichoke Dip?

Yes, you can freeze it! Just make sure to store it in a freezer-safe container. When you’re ready to enjoy it, thaw it in the fridge overnight and then bake as usual.

What are some good dippers for this dip?

Besides tortilla chips and pita bread, you can serve it with fresh veggies like cucumber slices, bell pepper strips, or even toasted baguette slices. The options are endless!

Final Thoughts

Every time I whip up this cheesy spinach and artichoke dip, it feels like a warm hug from the inside out.

The blend of creamy textures and savory flavors creates a comforting experience that brings people together.

Whether it’s game day, a family gathering, or just a cozy night in, this dip never fails to impress.

It’s more than just a recipe; it’s a way to share joy and laughter with loved ones.

So grab your ingredients, gather your friends, and let this cheesy delight be the star of your next gathering!

jhessica

Cheesy Spinach and Artichoke Dip that Everyone Loves!

A creamy and cheesy dip made with spinach and artichokes, perfect for parties and gatherings.
Prep Time 10 minutes
Cook Time 30 minutes
Total Time 40 minutes
Servings: 8 servings
Course: Appetizer
Cuisine: American
Calories: 250

Ingredients
  

  • 8 ounces cream cheese softened
  • 1 cup sour cream
  • 1 cup mayonnaise
  • 1 cup shredded mozzarella cheese
  • 1 cup grated Parmesan cheese
  • 1 can 14 ounces artichoke hearts, drained and chopped
  • 1 cup fresh spinach chopped (or 1/2 cup frozen spinach, thawed and drained)
  • 2 cloves garlic minced
  • 1 teaspoon onion powder
  • 1 teaspoon salt
  • 1/2 teaspoon black pepper
  • 1/4 teaspoon red pepper flakes optional

Method
 

  1. Preheat your oven to 350°F (175°C).
  2. In a large mixing bowl, combine the softened cream cheese, sour cream, and mayonnaise. Mix until smooth and well blended.
  3. Stir in the mozzarella cheese, Parmesan cheese, chopped artichoke hearts, and spinach.
  4. Add the minced garlic, onion powder, salt, black pepper, and red pepper flakes (if using). Mix until all ingredients are evenly incorporated.
  5. Transfer the mixture to a baking dish and spread it out evenly.
  6. Bake in the preheated oven for 25-30 minutes, or until the dip is bubbly and golden on top.
  7. Remove from the oven and let it cool for a few minutes before serving.

Nutrition

Serving: 1/2 cupCalories: 250kcalCarbohydrates: 6gProtein: 8gFat: 22gSaturated Fat: 10gPolyunsaturated Fat: 8gCholesterol: 60mgSodium: 600mgFiber: 1gSugar: 2g

Notes

  • For a smoky flavor, add 1/2 teaspoon of smoked paprika to the mixture before baking.
  • You can also substitute the spinach with kale for a different taste and texture.
  • Serve with tortilla chips, pita bread, or fresh vegetable sticks for dipping.

Tried this recipe?

Let us know how it was!

Fluffy Baked German Pancake: A Simple Delight Recipe

Introduction to Fluffy Baked German Pancake

There’s something magical about breakfast that brings back memories of lazy Sunday mornings. The aroma of something sweet wafting through the house, the sound of laughter, and the clinking of forks on plates. The Fluffy Baked German Pancake is a delightful way to recreate that magic. This recipe is not just easy; it’s a quick solution for busy weekdays or a special treat for family gatherings. With just a handful of ingredients, you can whip up a dish that puffs up beautifully in the oven, impressing everyone at the table. Let’s dive into this simple delight!

Why You’ll Love This Fluffy Baked German Pancake

This Fluffy Baked German Pancake is a game-changer for breakfast lovers. It’s incredibly easy to make, requiring minimal effort and time. In just 35 minutes, you can serve a dish that’s not only delicious but also visually stunning. The light, airy texture and buttery flavor will have everyone asking for seconds. Plus, it’s versatile enough to adapt to your taste, making it a perfect fit for any occasion!

Ingredients for Fluffy Baked German Pancake

Gathering the right ingredients is the first step to creating your Fluffy Baked German Pancake. Here’s what you’ll need:

  • Large eggs: These are the backbone of the pancake, providing structure and richness.
  • Milk: Whole milk works best for a creamy texture, but feel free to use any milk you have on hand.
  • All-purpose flour: This gives the pancake its body. You can substitute with whole wheat flour for a healthier twist.
  • Salt: Just a pinch enhances the flavors, balancing the sweetness.
  • Vanilla extract: A splash adds warmth and depth to the flavor profile.
  • Unsalted butter: This is melted in the baking dish, creating a deliciously crispy edge.
  • Powdered sugar: For dusting, it adds a touch of sweetness and a beautiful presentation.
  • Fresh lemon wedges: Optional, but they provide a zesty contrast that brightens the dish.

For those looking to mix things up, consider adding a dash of cinnamon for warmth or topping with fresh berries or sliced bananas for a fruity flair. Exact measurements are available at the bottom of the article for easy printing!

How to Make Fluffy Baked German Pancake

Creating a Fluffy Baked German Pancake is a breeze! Follow these simple steps, and you’ll have a delicious breakfast ready in no time. Let’s get started!

Step 1: Preheat the Oven

First things first, preheat your oven to 425°F (220°C). This high temperature is key to achieving that beautiful puff. While the oven heats up, place a 9×13-inch baking dish inside. This ensures the dish is hot when you pour in the batter, helping it rise perfectly.

Step 2: Prepare the Batter

In a mixing bowl, whisk together the eggs, milk, flour, salt, and vanilla extract. You want a smooth, well-combined batter. Don’t worry about overmixing; just blend until there are no lumps. This step is crucial for that light, airy texture we all love in a German pancake.

Step 3: Melt the Butter

Carefully remove the hot baking dish from the oven. Add the unsalted butter right into the dish. Watch it melt and coat the bottom. This melted butter creates a crispy edge that contrasts beautifully with the fluffy center. It’s a game-changer!

Step 4: Combine and Bake

Now, pour the batter into the melted butter in the baking dish. Spread it evenly, but don’t worry about perfection. Bake in the preheated oven for 20-25 minutes. Keep an eye on it; you want it puffed and golden brown. The sight of it rising is truly a treat!

Step 5: Serve and Enjoy

Once baked, remove the pancake from the oven and let it cool slightly. This helps it set. Slice it up, dust with powdered sugar, and serve with fresh lemon wedges if you like. The combination of flavors is simply delightful!

Tips for Success

  • Use room temperature eggs and milk for a smoother batter.
  • Don’t skip preheating the baking dish; it’s essential for puffiness.
  • Keep an eye on the pancake while baking; every oven is different.
  • For extra flavor, try adding a pinch of nutmeg or cinnamon to the batter.
  • Serve immediately for the best texture; it deflates as it cools.

Equipment Needed

  • 9×13-inch baking dish: Essential for the perfect puff. A cast-iron skillet works too!
  • Mixing bowl: Any large bowl will do for whisking the batter.
  • Whisk: A standard whisk is great, but a hand mixer can save time.
  • Measuring cups: For accurate ingredient portions, especially if you’re a stickler for precision.

Variations

  • Fruit-Infused: Add fresh berries, sliced bananas, or diced apples to the batter for a fruity twist.
  • Nutty Delight: Stir in chopped nuts like walnuts or pecans for added crunch and flavor.
  • Chocolate Chip: Fold in mini chocolate chips for a sweet treat that kids will love.
  • Savory Option: Incorporate cooked bacon or sautéed spinach and cheese for a savory breakfast version.
  • Gluten-Free: Substitute all-purpose flour with a gluten-free blend to accommodate dietary needs.

Serving Suggestions

  • Pair with crispy bacon or sausage for a hearty breakfast.
  • Serve alongside fresh fruit salad for a refreshing contrast.
  • Complement with a hot cup of coffee or a chilled glass of orange juice.
  • For a beautiful presentation, garnish with mint leaves or edible flowers.

FAQs about Fluffy Baked German Pancake

Can I make the batter ahead of time?
Absolutely! You can prepare the batter a few hours in advance. Just cover it and store it in the fridge. When you’re ready to bake, give it a quick whisk to recombine before pouring it into the hot butter.

Why did my pancake not puff up?
If your Fluffy Baked German Pancake didn’t puff, it could be due to a few reasons. Ensure your oven is fully preheated, and don’t skip heating the baking dish. Also, make sure your eggs are fresh and at room temperature for the best rise.

Can I use a different type of flour?
Yes, you can! While all-purpose flour is traditional, you can experiment with whole wheat or gluten-free flour. Just keep in mind that the texture may vary slightly.

How do I store leftovers?
If you have any leftovers, store them in an airtight container in the fridge for up to three days. Reheat in the oven or microwave before serving. It’s still delicious!

What toppings go well with this pancake?
The options are endless! You can top your Fluffy Baked German Pancake with fresh fruits, whipped cream, maple syrup, or even a sprinkle of cinnamon. Get creative!

Final Thoughts

Making a Fluffy Baked German Pancake is more than just cooking; it’s about creating moments. The joy of watching it puff up in the oven, the sweet aroma filling your kitchen, and the smiles around the breakfast table are priceless. This recipe is a canvas for your creativity, allowing you to experiment with flavors and toppings. Whether it’s a busy weekday or a leisurely weekend, this pancake brings warmth and comfort to any meal. So, gather your ingredients, invite your loved ones, and enjoy the delightful experience of sharing this simple yet impressive dish together

Mexican Street Corn Nachos: The Perfect Snack Recipe!

Introduction to Mexican Street Corn Nachos

There’s something magical about the combination of crispy tortilla chips and vibrant toppings that brings people together. Mexican Street Corn Nachos are not just a snack; they’re a celebration of flavor and fun. Whether you’re hosting a game night or just need a quick solution for a busy day, these nachos are your go-to. They’re easy to whip up, and the creamy lime mayonnaise adds a zesty twist that will impress your loved ones. Trust me, once you try this recipe, it’ll become a staple in your kitchen!

Why You’ll Love This Mexican Street Corn Nachos

These Mexican Street Corn Nachos are a game-changer for any snack lover. They come together in just 25 minutes, making them perfect for those busy weeknights or spontaneous gatherings. The blend of spices and creamy lime mayonnaise creates a flavor explosion that’s hard to resist. Plus, they’re customizable! You can easily tweak the toppings to suit your taste, ensuring everyone at the table leaves happy and satisfied.

Ingredients for Mexican Street Corn Nachos

Gathering the right ingredients is the first step to creating your delicious Mexican Street Corn Nachos. Here’s what you’ll need:

  • Tortilla Chips: The crunchy base of your nachos. Choose your favorite brand or make your own for an extra touch.
  • Corn Kernels: Fresh, frozen, or canned—each option brings a sweet, juicy burst to your dish.
  • Olive Oil: This helps sauté the corn, adding richness and flavor.
  • Chili Powder: A must for that smoky, spicy kick that elevates the nachos.
  • Garlic Powder: Adds depth and a savory note that complements the corn beautifully.
  • Cumin: This warm spice brings an earthy flavor, enhancing the overall taste.
  • Salt and Black Pepper: Essential for balancing flavors and bringing everything together.
  • Cotija Cheese: This crumbly cheese adds a salty, creamy element. If you can’t find it, feta or shredded cheddar work well too.
  • Mayonnaise: The base for your creamy lime drizzle, adding richness to the nachos.
  • Lime Juice: A splash of acidity that brightens the dish and cuts through the richness.
  • Fresh Cilantro: This herb adds a fresh, vibrant touch that enhances the overall flavor.
  • Diced Tomatoes: For a pop of color and freshness, these are a great addition.
  • Sliced Jalapeños: Optional, but they bring heat for those who like a spicy kick.
  • Avocado Slices: Also optional, but they add creaminess and a lovely texture.

For exact measurements, check the bottom of the article where you can find everything listed for easy printing. Now that you have your ingredients ready, let’s dive into the fun part—making these nachos!

How to Make Mexican Street Corn Nachos

Creating Mexican Street Corn Nachos is a straightforward process that’s as enjoyable as it is delicious. Follow these simple steps, and you’ll have a mouthwatering snack ready in no time!

Step 1: Preheat the Oven

Start by preheating your oven to 350°F (175°C). This step is crucial for even cooking. A hot oven ensures that your nachos bake perfectly, with crispy edges and melted cheese. Trust me, you don’t want to skip this part!

Step 2: Sauté the Corn

In a skillet over medium heat, add the olive oil and corn kernels. Sauté them for about 5 minutes until they’re slightly charred. This caramelization brings out the natural sweetness of the corn, adding depth to your nachos. You’ll know it’s ready when you see a bit of golden color on the kernels.

Step 3: Season the Corn

Now it’s time to amp up the flavor! Stir in the chili powder, garlic powder, cumin, salt, and black pepper. These spices work together to create a warm, smoky profile that enhances the corn’s sweetness. Cook for an additional 2 minutes, allowing the spices to bloom and infuse the corn with flavor.

Step 4: Prepare the Tortilla Chips

On a large baking sheet, spread the tortilla chips evenly. Make sure they’re not overlapping too much; you want every chip to get its fair share of toppings. Next, layer the sautéed corn mixture over the chips, followed by a generous sprinkle of cotija cheese. This layering ensures that every bite is packed with flavor!

Step 5: Bake the Nachos

Place the baking sheet in your preheated oven and bake for about 10 minutes. Keep an eye on them! You’re looking for the cheese to melt and the chips to become slightly crispy. The aroma wafting through your kitchen will be irresistible!

Step 6: Mix Lime Mayonnaise

While the nachos are baking, it’s time to whip up the creamy lime mayonnaise. In a small bowl, mix together the mayonnaise and lime juice. This zesty drizzle adds a refreshing contrast to the rich flavors of the nachos. It’s the secret weapon that takes your dish to the next level!

Step 7: Garnish and Serve

Once the nachos are out of the oven, drizzle the lime mayonnaise over the top. Then, garnish with chopped cilantro, diced tomatoes, and jalapeños if you’re feeling adventurous. For an extra touch of creaminess, add avocado slices. Serve immediately and watch everyone dig in!

Tips for Success

  • Use fresh corn for the best flavor, but frozen or canned works too.
  • Don’t overcrowd the baking sheet; give chips space for even crispiness.
  • Experiment with spices—add cayenne for heat or smoked paprika for depth.
  • Serve immediately for the best texture; nachos can get soggy if left too long.
  • Feel free to customize toppings based on your preferences!

Equipment Needed

  • Baking Sheet: A standard sheet works great, but a cast-iron skillet adds a fun twist.
  • Skillet: Any non-stick skillet will do for sautéing the corn.
  • Mixing Bowl: Use a small bowl for the lime mayonnaise; a jar works too!
  • Spatula: Handy for mixing and serving your nachos.

Variations

  • Spicy Street Corn Nachos: Add diced serrano peppers or a splash of your favorite hot sauce to the corn mixture for an extra kick.
  • Cheesy Nachos: Mix in shredded Monterey Jack or pepper jack cheese along with the cotija for a gooey, melty experience.
  • Vegan Option: Substitute mayonnaise with a vegan mayo and use nutritional yeast instead of cheese for a dairy-free version.
  • BBQ Chicken Nachos: Top with shredded BBQ chicken for a heartier snack that’s perfect for game day.
  • Southwestern Style: Add black beans and corn salsa for a more filling and colorful dish.

Serving Suggestions

  • Pair with a Cold Drink: Serve your nachos with a refreshing cerveza or a zesty margarita for the ultimate experience.
  • Side Dishes: Consider a side of guacamole or salsa for extra flavor and dipping fun.
  • Presentation: Use a colorful platter to showcase your nachos, garnished with lime wedges for a pop of color.

FAQs about Mexican Street Corn Nachos

Can I make Mexican Street Corn Nachos ahead of time?

While nachos are best enjoyed fresh, you can prepare the corn mixture in advance. Just store it in the fridge and assemble the nachos right before baking. This way, you’ll have a quick snack ready in no time!

What can I substitute for cotija cheese?

If you can’t find cotija cheese, feta or shredded cheddar are excellent alternatives. Each brings its own unique flavor, so feel free to experiment based on your taste preferences!

How can I make these nachos spicier?

For a spicy kick, add diced serrano peppers or a splash of your favorite hot sauce to the corn mixture. You can also sprinkle some cayenne pepper on top before serving for an extra heat boost!

Are Mexican Street Corn Nachos gluten-free?

Yes, as long as you use gluten-free tortilla chips, these nachos can be a delicious gluten-free snack. Always check the labels to ensure they meet your dietary needs.

Can I use different toppings for my nachos?

Absolutely! The beauty of nachos lies in their versatility. You can add black beans, diced bell peppers, or even grilled chicken for a heartier option. Customize them to suit your cravings!

Final Thoughts

Mexican Street Corn Nachos are more than just a snack; they’re a delightful experience that brings friends and family together. The combination of crispy chips, sweet corn, and zesty lime mayonnaise creates a flavor profile that dances on your palate. Whether you’re enjoying them during a game night or a casual get-together, these nachos are sure to impress. Plus, the ease of preparation means you can focus on what really matters—sharing good times with great people. So, roll up your sleeves, gather your ingredients, and let the nacho magic unfold in your kitchen!

jhessica

Mexican Street Corn Nachos: The Perfect Snack Recipe!

A delicious and easy-to-make snack featuring tortilla chips topped with sautéed corn, spices, and creamy lime mayonnaise.
Prep Time 10 minutes
Cook Time 15 minutes
Total Time 25 minutes
Servings: 4 servings
Course: Snack
Cuisine: Mexican
Calories: 320

Ingredients
  

  • 2 cups tortilla chips
  • 1 cup corn kernels fresh, frozen, or canned
  • 1 tablespoon olive oil
  • 1 teaspoon chili powder
  • 1 teaspoon garlic powder
  • 1/2 teaspoon cumin
  • 1/4 teaspoon salt
  • 1/4 teaspoon black pepper
  • 1/2 cup crumbled cotija cheese
  • 1/4 cup mayonnaise
  • 1 tablespoon lime juice
  • 1/4 cup chopped fresh cilantro
  • 1/4 cup diced tomatoes
  • 1/4 cup sliced jalapeños optional
  • Avocado slices for garnish optional

Method
 

  1. Preheat your oven to 350°F (175°C).
  2. In a skillet over medium heat, add the olive oil and corn kernels. Sauté for about 5 minutes until the corn is slightly charred.
  3. Stir in the chili powder, garlic powder, cumin, salt, and black pepper. Cook for an additional 2 minutes, then remove from heat.
  4. On a large baking sheet, spread the tortilla chips evenly. Top with the sautéed corn mixture and sprinkle the cotija cheese over the top.
  5. Bake in the preheated oven for 10 minutes, or until the cheese is melted and the chips are slightly crispy.
  6. While the nachos are baking, mix together the mayonnaise and lime juice in a small bowl.
  7. Once the nachos are done, remove them from the oven and drizzle the lime mayonnaise over the top.
  8. Garnish with chopped cilantro, diced tomatoes, and jalapeños if using. Add avocado slices for extra creaminess if desired.
  9. Serve immediately and enjoy your delicious Mexican street corn nachos!

Nutrition

Serving: 1/4 of the recipeCalories: 320kcalCarbohydrates: 30gProtein: 8gFat: 18gSaturated Fat: 5gPolyunsaturated Fat: 13gCholesterol: 15mgSodium: 500mgFiber: 3gSugar: 2g

Notes

  • For a spicier kick, add diced serrano peppers or a splash of hot sauce to the corn mixture.
  • Substitute the cotija cheese with feta cheese or shredded cheddar for a different flavor profile.

Tried this recipe?

Let us know how it was!

French Salted Butter Cookies: Discover the Secret Recipe!

Introduction to French Salted Butter Cookies

There’s something magical about the aroma of freshly baked cookies wafting through the house. French Salted Butter Cookies are a delightful treat that brings back memories of cozy afternoons spent in the kitchen. These cookies are not just delicious; they’re a quick solution for those busy days when you want to impress your loved ones without spending hours in the kitchen. With their buttery richness and a hint of salt, they strike the perfect balance between sweet and savory. Trust me, once you try these, they’ll become a staple in your baking repertoire!

Why You’ll Love This French Salted Butter Cookies

These French Salted Butter Cookies are a dream come true for any home cook. They’re incredibly easy to whip up, taking just 30 minutes from start to finish. The taste? Oh, it’s a delightful blend of buttery goodness with a touch of salt that elevates every bite. Whether you’re baking for a gathering or just treating yourself, these cookies are sure to impress without the fuss. You’ll find yourself making them again and again!

Ingredients for French Salted Butter Cookies

Gathering the right ingredients is the first step to creating these delightful French Salted Butter Cookies. Here’s what you’ll need:

  • All-purpose flour: The backbone of any cookie, it provides structure and texture.
  • Baking powder: This leavening agent helps the cookies rise, giving them a light and airy feel.
  • Sea salt: A pinch enhances the flavors, balancing the sweetness beautifully.
  • Unsalted butter: The star of the show! Softened butter adds richness and a melt-in-your-mouth quality.
  • Granulated sugar: This sweetener contributes to the cookie’s crisp edges and overall sweetness.
  • Light brown sugar: It adds moisture and a hint of caramel flavor, making the cookies even more delicious.
  • Pure vanilla extract: A splash of this aromatic ingredient elevates the flavor profile, making it irresistible.
  • Egg yolk: This adds richness and helps bind the ingredients together for a tender cookie.
  • Flaky sea salt: For sprinkling on top, it adds a delightful crunch and burst of flavor.

For those looking to experiment, consider using brown butter for a deeper flavor or adding chocolate chips or chopped nuts for extra texture. You can find all the exact measurements at the bottom of the article, ready for printing!

How to Make French Salted Butter Cookies

Now that you have your ingredients ready, let’s dive into the fun part: making these French Salted Butter Cookies! Follow these simple steps, and you’ll be on your way to cookie bliss.

Step 1: Preheat the Oven

Start by preheating your oven to 350°F (175°C). This step is crucial because it ensures even baking. While the oven warms up, line a baking sheet with parchment paper. This prevents the cookies from sticking and makes cleanup a breeze.

Step 2: Prepare the Dry Ingredients

In a medium bowl, whisk together the all-purpose flour, baking powder, and sea salt. This mix is the foundation of your cookies. Whisking helps to evenly distribute the baking powder and salt, ensuring every bite is perfectly balanced.

Step 3: Cream the Butter and Sugars

In a large mixing bowl, beat the softened unsalted butter, granulated sugar, and light brown sugar together until the mixture is light and fluffy. This usually takes about 2-3 minutes. The air you incorporate here is what gives your cookies that delightful texture!

Step 4: Add Vanilla and Egg Yolk

Next, add the pure vanilla extract and the egg yolk to the butter mixture. Mix until everything is well combined. The vanilla adds a warm, inviting flavor, while the egg yolk contributes richness, making your cookies even more delicious.

Step 5: Combine Wet and Dry Ingredients

Gradually add the dry ingredients to the wet mixture. Stir gently until just combined. Be careful not to overmix! Overmixing can lead to tough cookies, and we want them to be tender and melt-in-your-mouth.

Step 6: Shape the Cookies

Using a cookie scoop or a tablespoon, drop rounded balls of dough onto the prepared baking sheet, spacing them about 2 inches apart. Gently press each cookie ball down slightly with the palm of your hand. This helps them spread evenly while baking. Don’t forget to sprinkle a small pinch of flaky sea salt on top of each cookie for that perfect finishing touch!

Step 7: Bake the Cookies

Place the baking sheet in the preheated oven and bake for 12-15 minutes. Keep an eye on them! You want the edges to be lightly golden while the centers remain soft. This is the sweet spot for that perfect cookie texture.

Step 8: Cool and Enjoy

Once baked, remove the cookies from the oven and let them cool on the baking sheet for about 5 minutes. This allows them to set before transferring them to a wire rack to cool completely. Store any leftovers in an airtight container to keep them fresh and delicious!

Tips for Success

  • Use room temperature butter for easier creaming and a better texture.
  • Don’t skip the flaky sea salt on top; it enhances the flavor beautifully.
  • For uniform cookies, use a cookie scoop to measure the dough.
  • Experiment with chilling the dough for 30 minutes for thicker cookies.
  • Keep an eye on the baking time; ovens can vary!

Equipment Needed

  • Baking sheet: A standard sheet works, but a silicone mat can help with even baking.
  • Parchment paper: Great for easy cleanup; aluminum foil is a good alternative.
  • Mixing bowls: Use any size, but a large bowl is best for creaming.
  • Whisk: A hand whisk is perfect; an electric mixer speeds things up.
  • Cookie scoop: A tablespoon works if you don’t have one!

Variations

  • Brown Butter: For a nutty flavor, try browning the butter before adding it to the mix. It adds depth and richness.
  • Chocolate Chips: Fold in semi-sweet or dark chocolate chips for a delightful twist on the classic cookie.
  • Nuts: Add chopped walnuts or pecans for a crunchy texture that complements the buttery flavor.
  • Citrus Zest: Incorporate lemon or orange zest for a refreshing citrus note that brightens the cookies.
  • Gluten-Free Option: Substitute all-purpose flour with a gluten-free blend to make these cookies suitable for gluten-sensitive friends.

Serving Suggestions

  • Pair these cookies with a hot cup of coffee or tea for a delightful afternoon treat.
  • Serve alongside a scoop of vanilla ice cream for an indulgent dessert experience.
  • Present them on a rustic wooden platter for a charming touch.
  • For a festive flair, add a sprinkle of powdered sugar on top before serving.

FAQs about French Salted Butter Cookies

As you embark on your baking adventure with French Salted Butter Cookies, you might have a few questions. Here are some common queries that can help you along the way:

Can I use salted butter instead of unsalted butter?

Absolutely! If you prefer salted butter, just reduce the amount of sea salt in the recipe. This will help maintain the perfect balance of flavors in your cookies.

How do I store leftover cookies?

To keep your French Salted Butter Cookies fresh, store them in an airtight container at room temperature. They should stay delicious for up to a week!

Can I freeze the cookie dough?

Yes, you can! Shape the dough into balls and freeze them on a baking sheet. Once frozen, transfer them to a zip-top bag. When you’re ready to bake, just add a couple of extra minutes to the baking time.

What can I add to the dough for extra flavor?

Feel free to get creative! You can add chocolate chips, chopped nuts, or even a hint of citrus zest to enhance the flavor of your French Salted Butter Cookies.

Why are my cookies spreading too much?

If your cookies are spreading too much, it could be due to warm butter or not enough flour. Make sure your butter is softened but not melted, and consider chilling the dough for 30 minutes before baking.

Final Thoughts

Baking French Salted Butter Cookies is more than just a culinary task; it’s an experience that fills your home with warmth and joy. Each bite transports you to a quaint French café, where the simple pleasures of life are celebrated. The buttery richness paired with a hint of salt creates a delightful contrast that keeps you coming back for more. Whether you’re sharing them with friends or savoring them solo, these cookies bring a sense of comfort and satisfaction. So, roll up your sleeves, embrace the process, and let these cookies become a cherished part of your baking tradition!

jhessica

French Salted Butter Cookies: Discover the Secret Recipe!

Delicious and buttery French cookies with a hint of salt, perfect for any occasion.
Prep Time 15 minutes
Cook Time 15 minutes
Total Time 30 minutes
Servings: 24 cookies
Course: Dessert
Cuisine: French
Calories: 120

Ingredients
  

  • 2 cups all-purpose flour
  • 1/2 teaspoon baking powder
  • 1/2 teaspoon sea salt
  • 1 cup unsalted butter softened
  • 3/4 cup granulated sugar
  • 1/4 cup packed light brown sugar
  • 1 teaspoon pure vanilla extract
  • 1 large egg yolk
  • Flaky sea salt for sprinkling

Method
 

  1. Preheat your oven to 350°F (175°C) and line a baking sheet with parchment paper.
  2. In a medium bowl, whisk together the flour, baking powder, and sea salt. Set aside.
  3. In a large mixing bowl, beat the softened butter, granulated sugar, and brown sugar together until light and fluffy, about 2-3 minutes.
  4. Add the vanilla extract and egg yolk to the butter mixture, mixing until well combined.
  5. Gradually add the dry ingredients to the wet ingredients, mixing until just combined. Do not overmix.
  6. Using a cookie scoop or tablespoon, drop rounded balls of dough onto the prepared baking sheet, spacing them about 2 inches apart.
  7. Gently press each cookie ball down slightly with the palm of your hand, then sprinkle a small pinch of flaky sea salt on top of each cookie.
  8. Bake in the preheated oven for 12-15 minutes, or until the edges are lightly golden.
  9. Remove from the oven and let the cookies cool on the baking sheet for 5 minutes before transferring them to a wire rack to cool completely.

Nutrition

Serving: 1cookieCalories: 120kcalCarbohydrates: 10gProtein: 1gFat: 8gSaturated Fat: 5gPolyunsaturated Fat: 3gCholesterol: 20mgSodium: 50mgSugar: 6g

Notes

  • For a richer flavor, try using brown butter instead of regular butter.
  • You can also add chocolate chips or chopped nuts to the dough for added texture and flavor.

Tried this recipe?

Let us know how it was!

Giant Chocolate Chip Cookies: Bake Irresistible Treats Now!

Introduction to Giant Chocolate Chip Cookies

There’s something magical about the aroma of freshly baked cookies wafting through the house. Giant chocolate chip cookies, in particular, have a way of bringing back those warm childhood memories of baking with family. Whether you’re looking to impress friends or simply treat yourself after a long day, this recipe is your go-to solution. With just a few simple ingredients and minimal fuss, you can whip up these deliciously large and chewy cookies in no time. Trust me, once you take that first bite, you’ll understand why they’re a favorite for any occasion!

Why You’ll Love This Giant Chocolate Chip Cookies

These giant chocolate chip cookies are not just a treat; they’re a game changer. They come together quickly, making them perfect for busy weeknights or last-minute gatherings. The chewy texture and rich chocolate flavor will have everyone coming back for seconds. Plus, who can resist a cookie that’s bigger than your hand? It’s a simple recipe that delivers big on taste and satisfaction!

Ingredients for Giant Chocolate Chip Cookies

Gathering the right ingredients is the first step to cookie perfection. Here’s what you’ll need for these giant chocolate chip cookies:

  • All-purpose flour: The backbone of your cookies, providing structure and chewiness.
  • Baking soda: This little leavening agent helps your cookies rise and become fluffy.
  • Salt: A pinch enhances the sweetness and balances flavors.
  • Unsalted butter: Softened butter creates a rich, creamy base for your dough.
  • Granulated sugar: Adds sweetness and helps achieve that golden-brown color.
  • Brown sugar: Brings moisture and a hint of caramel flavor to your cookies.
  • Vanilla extract: A splash of this aromatic essence elevates the overall taste.
  • Large eggs: They bind everything together and add richness.
  • Semi-sweet chocolate chips: The star of the show! They melt beautifully and provide that classic chocolatey goodness.
  • Chopped nuts (optional): Walnuts or pecans add a delightful crunch, but feel free to skip them if you prefer a nut-free cookie.

For exact measurements, check the bottom of the article where you can find everything listed for easy printing. Happy baking!

How to Make Giant Chocolate Chip Cookies

Now that you have your ingredients ready, let’s dive into the fun part—making these giant chocolate chip cookies! Follow these simple steps, and you’ll be on your way to cookie bliss in no time.

Step 1: Preheat the Oven

First things first, preheat your oven to 350°F (175°C). This ensures your cookies bake evenly. While the oven warms up, line two baking sheets with parchment paper. This little trick prevents sticking and makes cleanup a breeze.

Step 2: Mix Dry Ingredients

In a medium bowl, whisk together the all-purpose flour, baking soda, and salt. This step is crucial as it evenly distributes the leavening agent and salt throughout the flour. Set this mixture aside for now; it’ll come into play shortly.

Step 3: Cream Butter and Sugars

In a large bowl, cream together the softened butter, granulated sugar, brown sugar, and vanilla extract. Use a hand mixer or a sturdy spatula to beat until the mixture is light and fluffy. This process incorporates air, giving your cookies that delightful texture.

Step 4: Add Eggs

Next, beat in the eggs one at a time. Make sure each egg is fully incorporated before adding the next. This helps create a smooth batter and ensures your cookies have the right consistency.

Step 5: Combine Dry and Wet Ingredients

Gradually mix in the dry ingredients until just combined. Be careful not to overmix; a few flour streaks are okay. Overmixing can lead to tough cookies, and we want them to be soft and chewy!

Step 6: Fold in Chocolate Chips and Nuts

Now, it’s time for the star of the show! Gently fold in the semi-sweet chocolate chips and chopped nuts (if you’re using them). This is where the magic happens, as those chocolate chips will melt into gooey goodness while baking.

Step 7: Scoop the Dough

Using a large cookie scoop or a 1/4 cup measuring cup, drop dough onto the prepared baking sheets. Make sure to space them about 3 inches apart. These cookies spread out as they bake, so give them room to grow!

Step 8: Bake

Pop the baking sheets into the oven and bake for 12-15 minutes. Keep an eye on them! You want the edges to be golden brown while the centers remain soft. This contrast is what makes these giant chocolate chip cookies so irresistible.

Step 9: Cool the Cookies

Once baked, remove the cookies from the oven and let them cool on the baking sheets for about 5 minutes. This allows them to set up a bit before transferring them to wire racks to cool completely. Trust me, the wait will be worth it!

Tips for Success

  • For extra chewiness, slightly underbake the cookies and let them sit on the baking sheet longer.
  • Use room temperature ingredients for better mixing and texture.
  • Chill the dough for 30 minutes before baking to enhance flavor and prevent spreading.
  • Experiment with different chocolate types for a unique twist.
  • Store cookies in an airtight container to keep them fresh and soft.

Equipment Needed

  • Baking sheets: Essential for baking; you can use any flat, oven-safe tray.
  • Parchment paper: Helps prevent sticking; aluminum foil works in a pinch.
  • Mixing bowls: A set of various sizes is handy; any large bowl will do.
  • Cookie scoop: For uniform cookies; a measuring cup can substitute.
  • Wire racks: Ideal for cooling; a plate can work if you don’t have them.

Variations

  • Dark Chocolate Delight: Swap semi-sweet chocolate chips for dark chocolate chips for a richer flavor.
  • Nutty Twist: Add chopped walnuts or pecans for an extra crunch and nutty flavor.
  • Oatmeal Chocolate Chip: Mix in 1 cup of rolled oats for a heartier texture and added fiber.
  • Gluten-Free Option: Substitute all-purpose flour with a gluten-free flour blend for a gluten-free treat.
  • Vegan Version: Use coconut oil instead of butter and flax eggs in place of regular eggs for a plant-based cookie.

Serving Suggestions

  • Pair these giant chocolate chip cookies with a tall glass of cold milk for the ultimate treat.
  • Serve warm with a scoop of vanilla ice cream on top for a delicious dessert sundae.
  • For a fun presentation, stack cookies on a decorative plate and sprinkle with sea salt.
  • Offer alongside a rich cup of coffee or hot chocolate for a cozy afternoon snack.

FAQs about Giant Chocolate Chip Cookies

Can I freeze giant chocolate chip cookies?

Absolutely! You can freeze the dough or the baked cookies. For dough, scoop it onto a baking sheet and freeze until solid, then transfer to a zip-top bag. Baked cookies can be stored in an airtight container for up to three months. Just thaw and enjoy!

What can I use instead of eggs in this recipe?

If you’re looking for an egg substitute, try using flax eggs. Mix 1 tablespoon of ground flaxseed with 2.5 tablespoons of water for each egg. Let it sit for a few minutes until it thickens. This works great in giant chocolate chip cookies!

How do I store leftover cookies?

To keep your giant chocolate chip cookies fresh, store them in an airtight container at room temperature. They’ll stay soft and chewy for several days. If you want to keep them longer, consider freezing them!

Can I use different types of chocolate chips?

Definitely! Feel free to mix it up. Dark chocolate, white chocolate, or even peanut butter chips can add a unique twist to your giant chocolate chip cookies. Get creative and find your favorite combination!

Why are my cookies flat?

If your cookies turn out flat, it could be due to melted butter or not enough flour. Make sure your butter is softened, not melted, and measure your flour accurately. A little extra flour can help achieve that perfect chewy texture!

Final Thoughts

Baking giant chocolate chip cookies is more than just a recipe; it’s an experience that brings joy to your kitchen and warmth to your heart. Each bite is a delightful reminder of simpler times, filled with laughter and love. Whether you’re sharing them with family or indulging solo, these cookies have a way of making any day feel special. The aroma, the gooey chocolate, and that perfect chewy texture create a moment of happiness. So, roll up your sleeves, embrace the mess, and let these giant cookies become a cherished part of your baking adventures!

jhessica

Giant Chocolate Chip Cookies: Bake Irresistible Treats Now!

Deliciously large and chewy chocolate chip cookies that are perfect for any occasion.
Prep Time 15 minutes
Cook Time 15 minutes
Total Time 30 minutes
Servings: 12 cookies
Course: Dessert
Cuisine: American
Calories: 320

Ingredients
  

  • 2 1/4 cups all-purpose flour
  • 1 teaspoon baking soda
  • 1/2 teaspoon salt
  • 1 cup unsalted butter softened
  • 3/4 cup granulated sugar
  • 3/4 cup packed brown sugar
  • 1 teaspoon vanilla extract
  • 2 large eggs
  • 2 cups semi-sweet chocolate chips
  • 1 cup chopped nuts optional

Method
 

  1. Preheat your oven to 350°F (175°C). Line two baking sheets with parchment paper.
  2. In a medium bowl, whisk together the flour, baking soda, and salt. Set aside.
  3. In a large bowl, cream together the softened butter, granulated sugar, brown sugar, and vanilla extract until light and fluffy.
  4. Beat in the eggs one at a time, ensuring each is fully incorporated before adding the next.
  5. Gradually mix in the dry ingredients until just combined. Avoid overmixing.
  6. Fold in the chocolate chips and nuts (if using).
  7. Using a large cookie scoop or 1/4 cup measuring cup, drop dough onto the prepared baking sheets, spacing them about 3 inches apart.
  8. Bake for 12-15 minutes, or until the edges are golden brown and the centers are still soft.
  9. Remove from the oven and let the cookies cool on the baking sheets for 5 minutes before transferring them to wire racks to cool completely.

Nutrition

Serving: 1cookieCalories: 320kcalCarbohydrates: 36gProtein: 3gFat: 17gSaturated Fat: 10gPolyunsaturated Fat: 7gCholesterol: 40mgSodium: 150mgFiber: 1gSugar: 20g

Notes

  • For a chewy texture, slightly underbake the cookies and let them sit on the baking sheet for a few extra minutes before transferring.
  • Experiment with different types of chocolate chips, such as dark chocolate or white chocolate, or add dried fruits for a unique twist.

Tried this recipe?

Let us know how it was!

Creamy Chicken Broccoli Pasta Salad is a must-try delight!

Introduction to Creamy Chicken Broccoli Pasta Salad

When I think of comfort food, my mind often drifts to a bowl of Creamy Chicken Broccoli Pasta Salad. This dish is more than just a meal; it’s a delightful blend of flavors and textures that brings back memories of family gatherings and sunny picnics.

Perfect for those busy weeknights or when you want to impress friends at a casual get-together, this pasta salad is a quick solution that doesn’t skimp on taste. With tender rotini, juicy chicken, and vibrant veggies, it’s a dish that satisfies both the stomach and the soul.

Why You’ll Love This Creamy Chicken Broccoli Pasta Salad

This Creamy Chicken Broccoli Pasta Salad is a game-changer for anyone juggling a busy schedule.

It comes together in just 25 minutes, making it a lifesaver for weeknight dinners.

The creamy dressing perfectly complements the tender chicken and fresh veggies, creating a flavor explosion in every bite.

Plus, it’s versatile enough to serve as a main dish or a side, ensuring it fits any occasion.

Ingredients for Creamy Chicken Broccoli Pasta Salad

Creating the perfect Creamy Chicken Broccoli Pasta Salad starts with gathering the right ingredients. Here’s what you’ll need:

  • Rotini pasta: This spiral-shaped pasta holds onto the creamy dressing beautifully, making every bite satisfying.
  • Cooked chicken: Shredded chicken adds protein and heartiness. You can use leftover rotisserie chicken for convenience.
  • Broccoli florets: Steamed broccoli not only brings a pop of color but also a nutritious crunch to the salad.
  • Cherry tomatoes: These sweet, juicy gems add freshness and a burst of flavor.
  • Red onion: Finely chopped, it provides a mild bite that complements the other ingredients.
  • Mayonnaise: This creamy base helps bind everything together, giving the salad its rich texture.
  • Plain Greek yogurt: A healthier alternative to sour cream, it adds creaminess and a slight tang.
  • Dijon mustard: Just a touch of this mustard elevates the flavor profile with its zesty kick.
  • Lemon juice: A splash of acidity brightens the dish and balances the creaminess.
  • Garlic powder: This adds a subtle depth of flavor without overpowering the other ingredients.
  • Salt and pepper: Essential for seasoning, these staples enhance all the flavors in the salad.
  • Shredded cheddar cheese (optional): For those who love cheese, this adds an extra layer of richness and flavor.

Feel free to get creative! You can toss in some chopped bell peppers or cucumbers for added crunch. If you’re looking for a different protein option, canned tuna or chickpeas work wonderfully as substitutes.

For exact measurements, check the bottom of the article where you can find everything available for printing.

How to Make Creamy Chicken Broccoli Pasta Salad

Making Creamy Chicken Broccoli Pasta Salad is a breeze.

With just a few simple steps, you’ll have a delicious dish ready to impress.

Let’s dive into the process!

Step 1: Cook the Pasta

Start by boiling a pot of salted water.

Add the rotini pasta and cook according to the package instructions until al dente.

Once done, drain the pasta and rinse it under cold water.

This stops the cooking process and helps cool it down for the salad.

Step 2: Combine the Ingredients

In a large mixing bowl, combine the cooled pasta, shredded chicken, steamed broccoli, halved cherry tomatoes, and chopped red onion.

Make sure everything is evenly distributed.

This is where the magic begins, as the colors and textures come together beautifully.

Step 3: Prepare the Dressing

In a separate bowl, whisk together the mayonnaise, Greek yogurt, Dijon mustard, lemon juice, garlic powder, salt, and pepper.

Mix until smooth and creamy.

This dressing is the heart of your salad, adding that rich flavor we all crave.

Step 4: Mix Everything Together

Pour the dressing over the pasta mixture.

Gently toss everything together until all the ingredients are well coated.

If you’re feeling cheesy, now’s the time to stir in the shredded cheddar cheese for an extra layer of flavor.

Step 5: Chill and Serve

Cover the bowl with plastic wrap and refrigerate for at least 30 minutes.

This allows the flavors to meld together, creating a more delicious dish.

Serve chilled or at room temperature, and watch your friends and family dig in!

Tips for Success

  • Always rinse the pasta with cold water to stop cooking and prevent clumping.
  • For a creamier texture, let the salad sit longer in the fridge before serving.
  • Adjust the seasoning to your taste; a pinch of cayenne can add a nice kick!
  • Use fresh ingredients for the best flavor and nutrition.
  • Feel free to customize with your favorite veggies or proteins.

Equipment Needed

  • Large pot: For boiling pasta. A deep skillet can work in a pinch.
  • Colander: To drain the pasta. A slotted spoon can also do the job.
  • Mixing bowls: One large for the salad and a smaller one for the dressing.
  • Whisk: For blending the dressing. A fork can suffice if you’re in a hurry.
  • Plastic wrap: To cover the salad while it chills. A lid works too!

Variations

  • Vegetarian Delight: Swap the chicken for chickpeas or black beans for a protein-packed vegetarian option.
  • Italian Twist: Add diced salami or pepperoni along with some Italian seasoning for a zesty flavor boost.
  • Spicy Kick: Incorporate diced jalapeños or a dash of hot sauce to give your salad a fiery edge.
  • Whole Grain Goodness: Use whole wheat rotini for a healthier, fiber-rich alternative.
  • Low-Fat Version: Substitute the mayonnaise with a low-fat version or use avocado for a creamy texture without the calories.

Serving Suggestions

  • Pair your Creamy Chicken Broccoli Pasta Salad with crusty garlic bread for a satisfying meal.
  • A light, crisp green salad complements the richness of the pasta salad beautifully.
  • Serve with a chilled glass of lemonade or iced tea for a refreshing touch.
  • For presentation, garnish with fresh herbs like parsley or basil for a pop of color.

FAQs about Creamy Chicken Broccoli Pasta Salad

Can I make this salad ahead of time?

Absolutely! In fact, making Creamy Chicken Broccoli Pasta Salad a day in advance allows the flavors to meld beautifully. Just store it in the fridge, and it’ll be ready to serve when you are.

What can I substitute for chicken?

If you’re looking for alternatives, canned tuna or chickpeas work great. Both options provide protein while keeping the salad delicious and satisfying.

How long does this salad last in the fridge?

This pasta salad can last up to three days in the fridge. Just make sure to keep it covered to maintain freshness.

Can I use a different type of pasta?

Definitely! While rotini is perfect for holding the creamy dressing, you can use any pasta shape you prefer, like penne or fusilli. Just adjust the cooking time as needed.

Is this salad suitable for meal prep?

<pYes, it’s a fantastic option for meal prep! Portion it out into containers for easy grab-and-go lunches throughout the week. Just remember to keep the dressing separate if you prefer a fresher taste.

Final Thoughts

Creating a bowl of Creamy Chicken Broccoli Pasta Salad is more than just cooking; it’s about bringing people together.

The vibrant colors and rich flavors make it a feast for the eyes and the palate.

Whether you’re enjoying it on a busy weeknight or serving it at a gathering, this dish is sure to impress.

It’s a recipe that invites creativity, allowing you to customize it to your taste.

So, roll up your sleeves, gather your ingredients, and let the joy of cooking fill your kitchen.

You’ll find that every bite is a celebration of flavor and togetherness.

jhessica

Creamy Chicken Broccoli Pasta Salad is a must-try delight!

Creamy Chicken Broccoli Pasta Salad is a must-try delight that combines tender rotini pasta, shredded chicken, and fresh vegetables in a creamy dressing.
Prep Time 15 minutes
Cook Time 10 minutes
Total Time 25 minutes
Servings: 4 servings
Course: Salad
Cuisine: American
Calories: 320

Ingredients
  

  • 2 cups rotini pasta
  • 1 cup cooked chicken shredded
  • 1 cup broccoli florets steamed
  • 1/2 cup cherry tomatoes halved
  • 1/4 cup red onion finely chopped
  • 1/2 cup mayonnaise
  • 1/4 cup plain Greek yogurt
  • 1 tablespoon Dijon mustard
  • 1 tablespoon lemon juice
  • 1 teaspoon garlic powder
  • Salt and pepper to taste
  • 1/4 cup shredded cheddar cheese optional

Method
 

  1. Cook the rotini pasta according to package instructions. Drain and rinse under cold water to cool.
  2. In a large bowl, combine the cooked pasta, shredded chicken, steamed broccoli, cherry tomatoes, and red onion.
  3. In a separate bowl, whisk together the mayonnaise, Greek yogurt, Dijon mustard, lemon juice, garlic powder, salt, and pepper until smooth.
  4. Pour the dressing over the pasta mixture and toss until everything is well coated.
  5. If desired, stir in the shredded cheddar cheese.
  6. Cover and refrigerate for at least 30 minutes to allow the flavors to meld. Serve chilled or at room temperature.

Nutrition

Serving: 1servingCalories: 320kcalCarbohydrates: 30gProtein: 22gFat: 15gSaturated Fat: 3gPolyunsaturated Fat: 10gCholesterol: 50mgSodium: 500mgFiber: 2gSugar: 3g

Notes

  • For added crunch, toss in some chopped bell peppers or cucumbers.
  • Substitute the chicken with canned tuna or chickpeas for a different protein option.

Tried this recipe?

Let us know how it was!

Fresh Vegetable Tortilla Roll-Ups are a crunchy delight!

Introduction to Fresh Vegetable Tortilla Roll-Ups

When I think of quick, satisfying snacks, Fresh Vegetable Tortilla Roll-Ups always come to mind.

These delightful bites are not just a treat for the taste buds; they’re a colorful way to sneak in some veggies.

Whether you’re hosting friends for game day or just need a light snack after a long day, these roll-ups are your go-to solution.

They’re easy to whip up, and the creamy spread paired with crisp vegetables creates a crunchy delight that everyone will love.

Let’s dive into this simple recipe that’s sure to impress your loved ones!

Why You’ll Love This Fresh Vegetable Tortilla Roll-Ups

Fresh Vegetable Tortilla Roll-Ups are a game-changer for busy days.

They come together in just 15 minutes, making them perfect for last-minute gatherings or a quick snack.

The vibrant colors and crunchy textures make them visually appealing, while the creamy spread adds a rich flavor that balances everything beautifully.

Plus, they’re versatile! You can customize them with your favorite veggies or dips, ensuring everyone leaves satisfied.

Ingredients for Fresh Vegetable Tortilla Roll-Ups

Creating these Fresh Vegetable Tortilla Roll-Ups is a breeze, especially with the right ingredients.

Here’s what you’ll need:

  • Flour tortillas: These serve as the base. Choose large ones for easy rolling.
  • Cream cheese: Softened for easy spreading, it adds a creamy texture. You can swap it for hummus for a dairy-free option.
  • Shredded carrots: They bring a sweet crunch and vibrant color.
  • Cucumber: Thinly sliced, it adds a refreshing crunch.
  • Bell pepper: Any color works! They add sweetness and a pop of color.
  • Red onion: Finely chopped, it gives a zesty kick.
  • Fresh spinach leaves: These add a nutritious boost and a lovely green hue.
  • Garlic powder: A sprinkle enhances the flavor without overpowering.
  • Salt and black pepper: Essential for seasoning, they elevate the overall taste.

Feel free to get creative!

You can add sliced jalapeños for heat or even swap in your favorite veggies.

For exact measurements, check the bottom of the article where you can find everything available for printing.

How to Make Fresh Vegetable Tortilla Roll-Ups

Making Fresh Vegetable Tortilla Roll-Ups is as easy as pie, or should I say, as easy as rolling a tortilla?

Let’s break it down step by step, ensuring you get the most out of this crunchy delight.

Step 1: Prepare the Tortillas

Lay the flour tortillas flat on a clean surface or cutting board.

Make sure they’re smooth and ready for action.

A little tip: If your tortillas are cold, give them a quick 10-second zap in the microwave.

This makes them more pliable and easier to roll.

Step 2: Mix the Cream Cheese Spread

In a medium bowl, mix the softened cream cheese, garlic powder, salt, and black pepper until well combined.

This creamy spread is the heart of your roll-ups.

Feel free to taste it! Adjust the seasoning if you like a little more kick.

Step 3: Spread the Cream Cheese Mixture

Spread an even layer of the cream cheese mixture over each tortilla, leaving a small border around the edges.

Don’t skimp on this step; it’s where the magic begins!

The creaminess will hold everything together and add a delightful flavor.

Step 4: Add the Fresh Vegetables

Evenly distribute the shredded carrots, cucumber slices, bell pepper slices, red onion, and spinach leaves over the cream cheese layer on each tortilla.

Layering is key here!

The more colorful your veggies, the more appealing your roll-ups will be.

Plus, it’s a great way to sneak in those nutrients.

Step 5: Roll the Tortillas

Starting from one end, carefully roll the tortilla tightly to enclose the filling.

Keep it snug but not too tight; you don’t want the filling to spill out.

Repeat with the second tortilla, and you’re almost there!

Step 6: Slice and Serve

Once rolled, use a sharp knife to slice each tortilla into 1-inch thick pinwheels.

Arrange the roll-ups on a serving platter and serve immediately.

If you have time, refrigerate for 30 minutes to firm up before serving.

This makes them even easier to handle and enhances the flavors.

Enjoy your Fresh Vegetable Tortilla Roll-Ups!

Tips for Success

  • Use room temperature cream cheese for easier spreading.
  • Experiment with different veggies like zucchini or radishes for variety.
  • For a crunchier texture, add some chopped nuts or seeds.
  • Wrap the roll-ups tightly in plastic wrap if you’re making them ahead of time.
  • Serve with a dipping sauce like ranch or salsa for extra flavor.

Equipment Needed

  • Cutting board: A clean surface for rolling and slicing.
  • Sharp knife: Essential for cutting the roll-ups into pinwheels.
  • Medium bowl: For mixing the cream cheese spread.
  • Spatula or knife: Useful for spreading the cream cheese evenly.

Variations

  • Spicy Kick: Add sliced jalapeños or a sprinkle of red pepper flakes to the cream cheese mixture for a fiery twist.
  • Herbed Cream Cheese: Mix in fresh herbs like dill or chives into the cream cheese for an aromatic flavor boost.
  • Hummus Swap: Replace cream cheese with hummus for a dairy-free option that’s equally delicious.
  • Protein Boost: Include sliced turkey or chicken for a heartier roll-up that packs more protein.
  • Fruit Addition: Add thin slices of apple or pear for a sweet contrast to the savory veggies.

Serving Suggestions

  • Pair with a zesty salsa or creamy ranch dressing for dipping.
  • Serve alongside a fresh garden salad for a complete meal.
  • Offer a selection of beverages like iced tea or sparkling water to refresh.
  • Garnish with fresh herbs for an elegant touch on the platter.

FAQs about Fresh Vegetable Tortilla Roll-Ups

Can I make Fresh Vegetable Tortilla Roll-Ups ahead of time?

Absolutely! You can prepare these roll-ups a few hours in advance. Just wrap them tightly in plastic wrap and refrigerate. This helps the flavors meld together beautifully.

What can I substitute for cream cheese?

If you’re looking for a dairy-free option, hummus works wonderfully! It adds a different flavor profile while keeping the roll-ups creamy and delicious.

How do I store leftover roll-ups?

Store any leftovers in an airtight container in the fridge. They should stay fresh for up to two days, but trust me, they’re usually gone long before then!

Can I use whole wheat tortillas instead?

Definitely! Whole wheat tortillas are a great alternative. They add a nutty flavor and extra fiber, making your Fresh Vegetable Tortilla Roll-Ups even healthier.

What other vegetables can I add?

The sky’s the limit! Try adding sliced bell peppers, zucchini, or even roasted red peppers for a twist. Get creative with your favorite veggies!

Final Thoughts

Fresh Vegetable Tortilla Roll-Ups are more than just a snack; they’re a celebration of color, flavor, and creativity.

Each bite is a crunchy delight that brings a smile, whether you’re enjoying them solo or sharing with friends.

The joy of rolling up fresh veggies in a creamy spread is a simple pleasure that brightens any day.

Plus, they’re adaptable, making them perfect for any occasion.

So, gather your ingredients, unleash your inner chef, and let these roll-ups bring a burst of freshness to your table.

You won’t just be serving food; you’ll be sharing happiness!

jhessica

Fresh Vegetable Tortilla Roll-Ups are a crunchy delight!

Fresh Vegetable Tortilla Roll-Ups are a crunchy delight filled with fresh vegetables and a creamy spread, perfect for a light snack or appetizer.
Prep Time 15 minutes
Total Time 15 minutes
Servings: 4 servings
Course: Appetizer
Cuisine: American
Calories: 150

Ingredients
  

  • 2 large flour tortillas
  • 1 cup cream cheese softened
  • 1/2 cup shredded carrots
  • 1/2 cup cucumber thinly sliced
  • 1/2 cup bell pepper thinly sliced (any color)
  • 1/4 cup red onion finely chopped
  • 1/4 cup fresh spinach leaves
  • 1/4 teaspoon garlic powder
  • 1/4 teaspoon salt
  • 1/4 teaspoon black pepper

Method
 

  1. Lay the flour tortillas flat on a clean surface or cutting board.
  2. In a medium bowl, mix the softened cream cheese, garlic powder, salt, and black pepper until well combined.
  3. Spread an even layer of the cream cheese mixture over each tortilla, leaving a small border around the edges.
  4. Evenly distribute the shredded carrots, cucumber slices, bell pepper slices, red onion, and spinach leaves over the cream cheese layer on each tortilla.
  5. Starting from one end, carefully roll the tortilla tightly to enclose the filling. Repeat with the second tortilla.
  6. Once rolled, use a sharp knife to slice each tortilla into 1-inch thick pinwheels.
  7. Arrange the roll-ups on a serving platter and serve immediately, or refrigerate for 30 minutes to firm up before serving.

Nutrition

Serving: 1roll-upCalories: 150kcalCarbohydrates: 15gProtein: 4gFat: 9gSaturated Fat: 4gPolyunsaturated Fat: 5gCholesterol: 20mgSodium: 200mgFiber: 2gSugar: 2g

Notes

  • For a spicy kick, add sliced jalapeños or a sprinkle of red pepper flakes to the cream cheese mixture.
  • You can also substitute the cream cheese with hummus for a dairy-free option.

Tried this recipe?

Let us know how it was!

Cruffin Delight: Discover the Ultimate Recipe Now!

Introduction to Cruffin Delight

There’s something magical about the aroma of freshly baked goods wafting through the kitchen. It takes me back to my childhood, where weekends meant warm pastries and family gatherings. Today, I’m excited to share my take on a delightful treat that combines the best of both worlds: the Cruffin Delight. This recipe is perfect for those busy mornings when you need a quick breakfast or a sweet indulgence to impress your loved ones. With its flaky layers and sweet cinnamon goodness, these cruffins are sure to become a favorite in your home. Let’s dive in!

Why You’ll Love This Cruffin Delight

What’s not to love about a treat that’s both easy to make and utterly delicious? The Cruffin Delight is a game-changer for busy mornings or lazy weekends. It combines the flaky, buttery goodness of croissants with the comforting shape of muffins. Plus, you can whip these up in under two hours, making them a perfect choice for a last-minute brunch or a sweet surprise for your family. Trust me, they’ll be asking for seconds!

Ingredients for Cruffin Delight

Gathering the right ingredients is the first step to creating your Cruffin Delight. Here’s what you’ll need:

  • All-purpose flour: The backbone of your dough, providing structure and texture.
  • Granulated sugar: Adds sweetness and helps with browning during baking.
  • Instant yeast: This little powerhouse helps your dough rise quickly, giving those flaky layers.
  • Salt: Enhances flavor and balances the sweetness of the sugar.
  • Whole milk: Warmed to help activate the yeast, it adds richness to the dough.
  • Unsalted butter: Melted for the dough and softened for spreading, it brings that buttery goodness.
  • Large egg: Acts as a binder, giving the dough its structure and a lovely golden color.
  • Vanilla extract: A splash of this adds a warm, inviting flavor to your cruffins.
  • Cinnamon sugar: A delightful mix of sugar and cinnamon that brings warmth and sweetness to each bite.
  • Powdered sugar: Optional for dusting, it adds a touch of elegance to your finished cruffins.

For those looking to mix things up, consider adding mini chocolate chips to the cinnamon sugar for a sweet twist. If savory is more your style, swap the cinnamon sugar for garlic powder and grated cheese. The possibilities are endless!

Exact measurements for these ingredients can be found at the bottom of the article, ready for printing. Happy baking!

How to Make Cruffin Delight

Now that you have your ingredients ready, it’s time to roll up your sleeves and dive into the fun part: making your Cruffin Delight. Follow these simple steps, and you’ll be on your way to creating a batch of flaky, sweet goodness that will have everyone coming back for more.

Step 1: Prepare the Dough

Start by mixing your dry ingredients. In a large bowl, combine the all-purpose flour, granulated sugar, instant yeast, and salt. Give it a good stir to ensure everything is evenly distributed. In a separate bowl, whisk together the warmed whole milk, melted unsalted butter, large egg, and vanilla extract until smooth. This mixture is crucial; it brings moisture and flavor to your dough.

Now, pour the wet ingredients into the dry mix. Stir until a dough begins to form. Here’s where the magic happens: knead the dough on a floured surface for about five minutes. This step is vital for developing gluten, which gives your cruffins that perfect texture. You want it smooth and elastic, not sticky.

Step 2: Let the Dough Rise

Once your dough is kneaded, it’s time for a little patience. Place the dough in a greased bowl and cover it with a clean kitchen towel. Let it rise in a warm spot for about an hour, or until it doubles in size. This rising process is essential; it creates those lovely air pockets that make your cruffins light and fluffy. If your kitchen is cool, consider placing the bowl in a slightly warm oven (turned off, of course) to help it along.

Step 3: Shape the Cruffins

After the dough has risen, it’s time to shape your cruffins. Roll it out on a floured surface into a rectangle about 1/4 inch thick. Spread the softened butter evenly over the surface, then sprinkle the cinnamon sugar mixture generously on top. This is where the flavor really comes alive!

Now, starting from one long edge, roll the dough tightly into a log. The tighter you roll, the more layers you’ll get in your cruffins. Once rolled, cut the log into 12 equal pieces. Place each piece upright in a greased muffin tin, allowing them to rise for another 30 minutes. This second rise is crucial for achieving that perfect puffiness.

Step 4: Bake the Cruffins

Preheat your oven to 375°F (190°C) while your cruffins are rising. Once they’ve puffed up nicely, pop them in the oven and bake for 15-20 minutes. Keep an eye on them; you want them golden brown and smelling heavenly. To check for doneness, gently tap the top of a cruffin; it should sound hollow. Let them cool slightly before dusting with powdered sugar for that extra touch of sweetness.

Tips for Success

  • Use room temperature ingredients for better mixing and texture.
  • Don’t rush the rising time; it’s key for fluffy cruffins.
  • Experiment with fillings like chocolate chips or fruit preserves for a twist.
  • Keep your work surface floured to prevent sticking while rolling.
  • For a golden finish, brush the tops with melted butter before baking.

Equipment Needed

  • Mixing bowls: A large bowl for mixing dough and a smaller one for wet ingredients.
  • Rolling pin: If you don’t have one, a wine bottle works in a pinch!
  • Muffin tin: Essential for shaping your cruffins; silicone molds are a great alternative.
  • Whisk: For blending wet ingredients; a fork can do the job too.
  • Kitchen towel: To cover the dough while it rises; any clean cloth will suffice.

Variations of Cruffin Delight

  • Chocolate Chip Cruffins: Add mini chocolate chips to the cinnamon sugar mixture for a sweet, gooey surprise.
  • Savory Garlic and Cheese Cruffins: Replace the cinnamon sugar with garlic powder and grated cheese for a deliciously savory twist.
  • Fruit-Filled Cruffins: Incorporate fresh berries or fruit preserves in the center before rolling for a fruity burst.
  • Nutty Cruffins: Mix in chopped nuts like pecans or walnuts with the cinnamon sugar for added crunch and flavor.
  • Gluten-Free Cruffins: Substitute all-purpose flour with a gluten-free blend to accommodate dietary needs.

Serving Suggestions for Cruffin Delight

  • Pair your cruffins with a hot cup of coffee or a refreshing glass of orange juice.
  • Serve with a side of fresh fruit for a balanced breakfast.
  • For a brunch spread, arrange cruffins on a decorative platter with a dusting of powdered sugar.
  • Drizzle with honey or maple syrup for an extra touch of sweetness.

FAQs about Cruffin Delight

What is a cruffin?

A cruffin is a delightful hybrid of a croissant and a muffin. It features the flaky layers of a croissant, shaped like a muffin, making it a perfect treat for breakfast or dessert.

Can I make cruffins ahead of time?

Absolutely! You can prepare the dough in advance and refrigerate it overnight. Just let it come to room temperature before shaping and baking for the best results.

How do I store leftover cruffins?

Store your Cruffin Delight in an airtight container at room temperature for up to two days. For longer storage, consider freezing them and reheating in the oven.

Can I customize the filling?

Yes! Feel free to get creative. You can add chocolate chips, fruit preserves, or even savory ingredients like cheese and herbs to suit your taste.

What’s the best way to enjoy cruffins?

Enjoy your cruffins warm, dusted with powdered sugar, or drizzled with honey. Pair them with coffee or tea for a delightful treat any time of day!

Final Thoughts

Creating the Cruffin Delight is more than just baking; it’s an experience filled with warmth and joy. The process of mixing, rolling, and watching those delightful pastries rise brings back memories of family gatherings and shared laughter. Each bite is a reminder of the simple pleasures in life, combining flaky layers with sweet cinnamon goodness. Whether you’re enjoying them on a busy morning or serving them at a brunch, these cruffins are sure to bring smiles to your table. So roll up your sleeves, embrace the joy of baking, and let the deliciousness unfold!

jhessica

Cruffin Delight: Discover the Ultimate Recipe Now!

A delightful recipe for Cruffins, a hybrid of croissants and muffins, perfect for breakfast or a sweet treat.
Prep Time 20 minutes
Cook Time 20 minutes
Total Time 1 hour 40 minutes
Servings: 12 servings
Course: Dessert
Cuisine: American
Calories: 210

Ingredients
  

  • 2 cups all-purpose flour
  • 1/4 cup granulated sugar
  • 1 teaspoon instant yeast
  • 1/2 teaspoon salt
  • 1/2 cup whole milk warmed
  • 1/4 cup unsalted butter melted
  • 1 large egg
  • 1 teaspoon vanilla extract
  • 1/2 cup unsalted butter softened (for spreading)
  • 1/2 cup cinnamon sugar 1/2 cup granulated sugar mixed with 2 tablespoons ground cinnamon
  • Powdered sugar for dusting, optional

Method
 

  1. In a large mixing bowl, combine the flour, granulated sugar, instant yeast, and salt. Mix well.
  2. In a separate bowl, whisk together the warmed milk, melted butter, egg, and vanilla extract until smooth.
  3. Pour the wet ingredients into the dry ingredients and mix until a dough forms. Knead the dough on a floured surface for about 5 minutes until smooth and elastic.
  4. Place the dough in a greased bowl, cover with a clean kitchen towel, and let it rise in a warm place for about 1 hour or until doubled in size.
  5. Preheat your oven to 375°F (190°C) and grease a muffin tin.
  6. Once the dough has risen, roll it out on a floured surface into a rectangle about 1/4 inch thick. Spread the softened butter evenly over the dough, then sprinkle the cinnamon sugar mixture on top.
  7. Starting from one long edge, roll the dough tightly into a log. Cut the log into 12 equal pieces.
  8. Place each piece upright in the greased muffin tin, allowing them to rise for another 30 minutes.
  9. Bake in the preheated oven for 15-20 minutes or until golden brown. Let cool slightly before dusting with powdered sugar, if desired.

Nutrition

Serving: 1cruffinCalories: 210kcalCarbohydrates: 25gProtein: 3gFat: 10gSaturated Fat: 6gPolyunsaturated Fat: 4gCholesterol: 30mgSodium: 150mgFiber: 1gSugar: 10g

Notes

  • For a chocolate twist, add mini chocolate chips to the cinnamon sugar mixture.
  • To make a savory version, replace the cinnamon sugar with garlic powder and grated cheese before rolling up the dough.

Tried this recipe?

Let us know how it was!

Stay Connected

Get recipes via email: