Get my cookbooks

Garlic Butter Ritz Bites: A Simple, Irresistible Treat

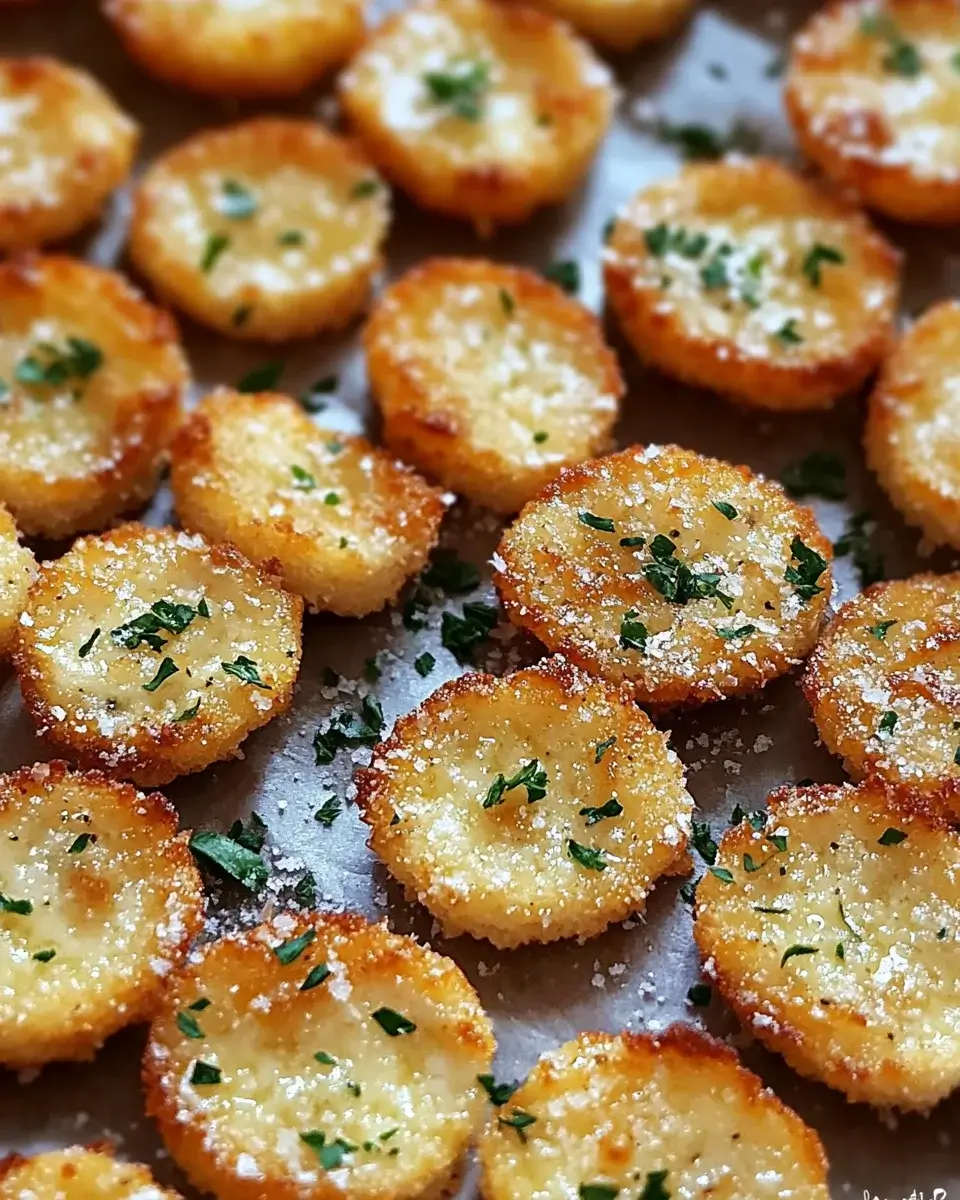
Introduction to Garlic Butter Ritz Bites

There’s something magical about the aroma of garlic wafting through the kitchen.

It takes me back to family gatherings, where the simplest snacks often stole the show.

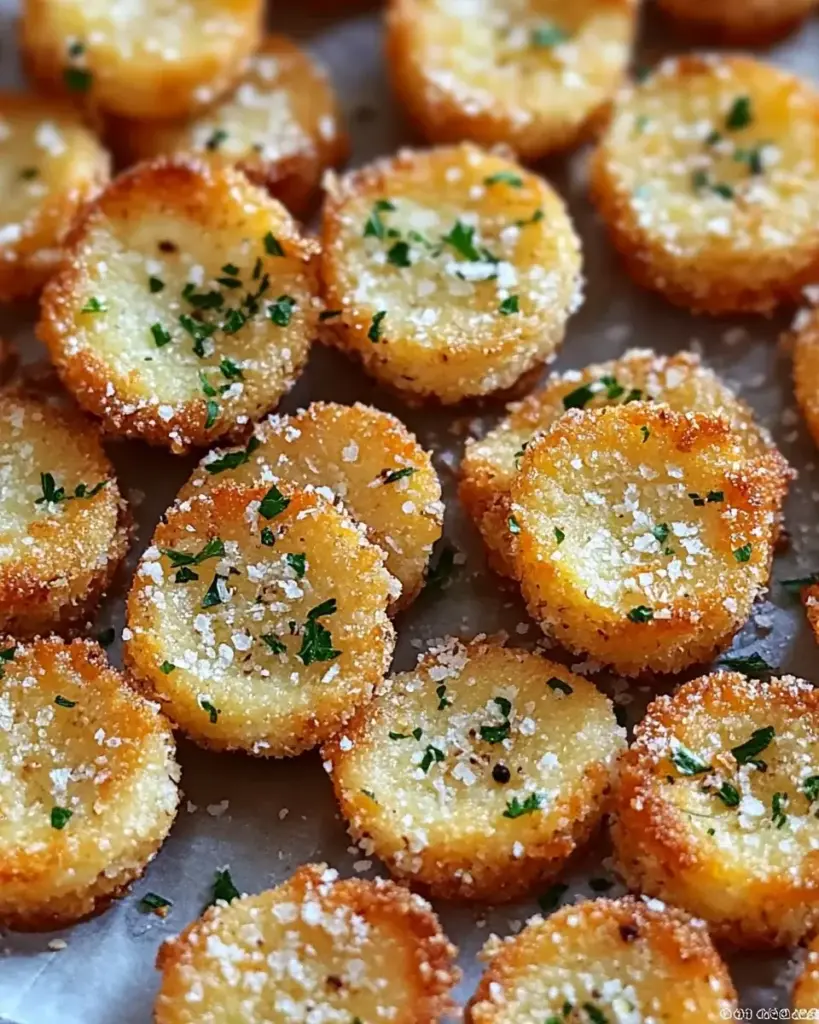
Garlic Butter Ritz Bites are just that—an easy, irresistible treat that can elevate any occasion.

Whether you’re looking for a quick solution after a long day or a dish to impress your friends during game night, these bites are your answer.

With just a handful of ingredients, you can whip up a snack that’s bursting with flavor and sure to please everyone.

Why You’ll Love This Garlic Butter Ritz Bites

These Garlic Butter Ritz Bites are a game-changer for any home cook.

They come together in just 22 minutes, making them perfect for those busy evenings.

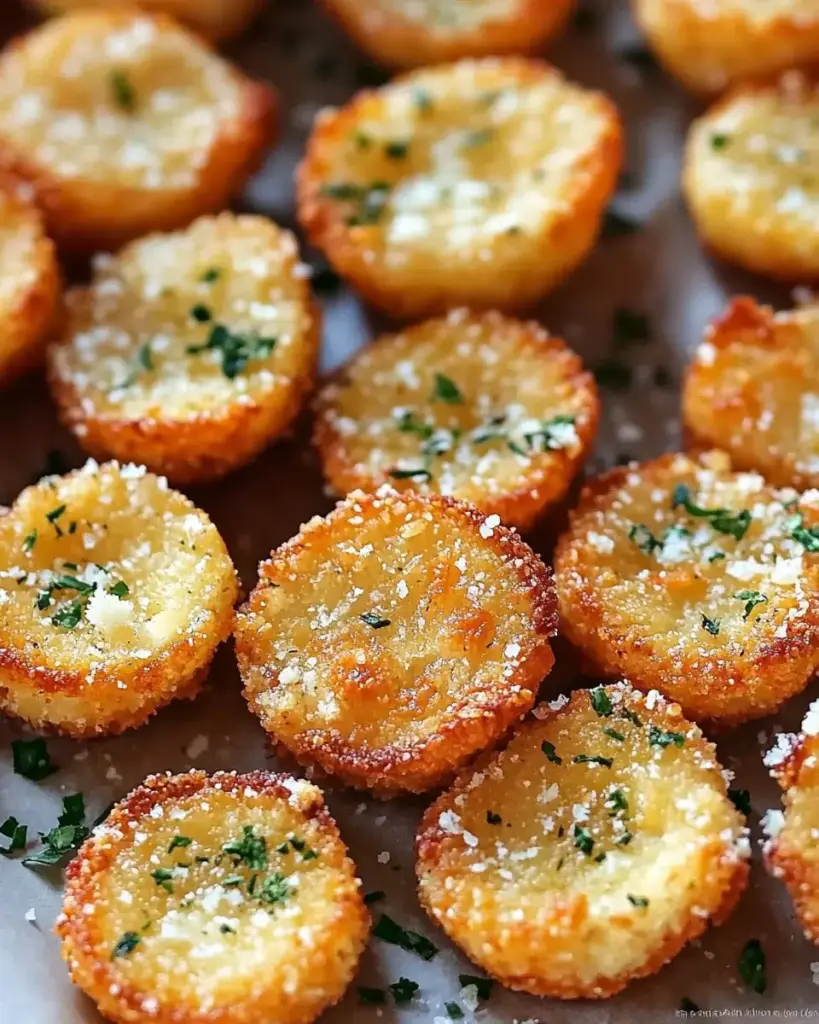
The buttery, garlicky goodness paired with the crunch of Ritz crackers creates a flavor explosion that’s hard to resist.

Plus, they’re versatile enough to serve at parties or enjoy as a late-night snack.

Once you try them, you’ll wonder how you ever lived without this simple treat!

Ingredients for Garlic Butter Ritz Bites

Creating these Garlic Butter Ritz Bites is a breeze, thanks to a handful of simple ingredients.

Here’s what you’ll need:

  • Ritz crackers: The star of the show! Their buttery flavor and crisp texture make them the perfect base for this snack.
  • Unsalted butter: Adds richness and helps the garlic flavor shine. Using unsalted allows you to control the saltiness.
  • Garlic: Freshly minced garlic is a must for that aromatic punch. It’s what makes these bites truly irresistible.
  • Parmesan cheese: This brings a savory depth to the bites. Grated Parmesan melts beautifully and adds a delightful umami flavor.
  • Fresh parsley: A pop of color and freshness! You can use dried parsley if fresh isn’t available, but fresh is always best.
  • Salt: Just a pinch enhances all the flavors. It’s essential for balancing the richness of the butter and cheese.
  • Black pepper: A dash of black pepper adds a subtle kick. It’s a simple way to elevate the flavor profile.
  • Red pepper flakes (optional): If you like a bit of heat, sprinkle some in! It’s a great way to customize the bites to your taste.

For exact measurements, check the bottom of the article where you can find everything listed for easy printing.

With these ingredients on hand, you’re just a few steps away from a delicious snack that’s sure to impress!

How to Make Garlic Butter Ritz Bites

Making Garlic Butter Ritz Bites is as easy as pie.

With just a few simple steps, you’ll have a delicious snack ready to go.

Let’s dive into the process!

Step 1: Preheat the Oven

Start by preheating your oven to 350°F.

This ensures that your Garlic Butter Ritz Bites bake evenly and come out perfectly crispy.

While the oven warms up, you can gather your ingredients and get ready for the next steps.

Step 2: Prepare the Garlic Butter Mixture

In a mixing bowl, combine the melted butter, minced garlic, grated Parmesan cheese, chopped parsley, salt, black pepper, and red pepper flakes if you’re feeling adventurous.

Mix everything together until it’s well combined.

The aroma of garlic will start to fill your kitchen, and trust me, it’s a good sign!

Step 3: Arrange the Crackers

Next, take your Ritz crackers and arrange them in a single layer on a baking sheet.

Make sure they’re not overlapping; you want each cracker to get its fair share of that delicious garlic butter mixture.

This step is crucial for achieving that perfect crunch!

Step 4: Drizzle the Mixture

Using a spoon, generously drizzle the garlic butter mixture over each cracker.

Don’t be shy—make sure each cracker gets a good coating.

This is where the magic happens, as the butter seeps into the crackers, making them irresistible.

Step 5: Bake to Perfection

Pop the baking sheet into your preheated oven and bake for 10-12 minutes.

Keep an eye on them; you want the edges to turn golden and crispy.

The smell will be heavenly, and you might find it hard to wait!

Step 6: Cool and Serve

Once they’re done baking, remove the Garlic Butter Ritz Bites from the oven.

Let them cool for a few minutes before serving.

This will help them firm up a bit, making them even more enjoyable to munch on.

Now, gather your friends or family, and watch these bites disappear in no time!

Tips for Success

  • Use fresh garlic for the best flavor; it makes a world of difference.
  • Don’t skip the cooling step; it helps the bites hold their shape.
  • Experiment with different cheeses like mozzarella for a cheesy twist.
  • For extra crunch, try broiling them for the last minute of baking.
  • Store leftovers in an airtight container to keep them fresh.

Equipment Needed

  • Baking sheet: A standard baking sheet works perfectly. If you don’t have one, a large oven-safe dish will do.
  • Mixing bowl: Any bowl will suffice, but a medium-sized one makes mixing easier.
  • Spoon: Use a regular spoon for drizzling, or a basting brush for even coverage.

Variations of Garlic Butter Ritz Bites

  • Cheesy Garlic Bites: Add shredded mozzarella or cheddar cheese on top of the crackers before baking for a gooey, cheesy twist.
  • Herb-Infused: Swap out parsley for fresh basil or thyme to give your bites a different herbal flavor.
  • Spicy Kick: Mix in some diced jalapeños or a dash of hot sauce to the garlic butter for an extra kick.
  • Sweet and Savory: Drizzle a bit of honey over the baked bites for a delightful sweet contrast to the savory garlic.
  • Gluten-Free Option: Use gluten-free crackers to make this snack suitable for those with gluten sensitivities.

Serving Suggestions for Garlic Butter Ritz Bites

  • Pair with Dips: Serve alongside marinara or ranch dressing for a delightful dipping experience.
  • Complement with Drinks: Enjoy with a cold beer or a crisp white wine to enhance the flavors.
  • Presentation: Arrange on a colorful platter with fresh herbs for a visually appealing display.

FAQs about Garlic Butter Ritz Bites

Can I make Garlic Butter Ritz Bites ahead of time?

Absolutely! You can prepare the garlic butter mixture and arrange the crackers on the baking sheet ahead of time. Just cover them and store in the fridge. When you’re ready to serve, simply bake them as directed.

What can I substitute for Parmesan cheese?

If you don’t have Parmesan on hand, you can use Pecorino Romano or even a sprinkle of nutritional yeast for a dairy-free option. Both will add a nice savory flavor!

How do I store leftovers?

Store any leftover Garlic Butter Ritz Bites in an airtight container at room temperature. They’re best enjoyed fresh, but they can last for a couple of days. Just reheat them in the oven for a few minutes to regain that crunch!

Can I use a different type of cracker?

Definitely! While Ritz crackers are perfect for this recipe, feel free to experiment with other types like buttery club crackers or even whole grain options for a healthier twist.

Are Garlic Butter Ritz Bites suitable for vegetarians?

Yes! This recipe is vegetarian-friendly, making it a great snack option for everyone. Just be sure to check your cracker ingredients if you’re serving strict vegetarians.

Final Thoughts

Creating Garlic Butter Ritz Bites is more than just whipping up a snack; it’s about bringing people together.

The joy of sharing these crispy, buttery bites with friends or family is unmatched.

Each bite is a burst of flavor, a reminder of simple pleasures in life.

Whether it’s game night or a cozy evening at home, these treats are sure to spark smiles and compliments.

So, roll up your sleeves, embrace the garlic goodness, and enjoy the delightful experience of making and sharing these irresistible bites.

Trust me, they’ll become a staple in your kitchen!

jhessica

Garlic Butter Ritz Bites: A Simple, Irresistible Treat

Garlic Butter Ritz Bites are a simple and irresistible treat, perfect for snacking or entertaining.
Prep Time 10 minutes
Cook Time 12 minutes
Total Time 22 minutes
Servings: 4 -6 servings
Course: Appetizer
Cuisine: American
Calories: 150

Ingredients
  

  • 1 cup Ritz crackers
  • 1/2 cup unsalted butter melted
  • 4 cloves garlic minced
  • 1/4 cup grated Parmesan cheese
  • 1 tablespoon fresh parsley chopped (or 1 teaspoon dried parsley)
  • 1/2 teaspoon salt
  • 1/4 teaspoon black pepper
  • 1/4 teaspoon red pepper flakes optional

Method
 

  1. Preheat your oven to 350°F.
  2. In a mixing bowl, combine the melted butter, minced garlic, Parmesan cheese, parsley, salt, black pepper, and red pepper flakes (if using). Mix well until all ingredients are combined.
  3. Arrange the Ritz crackers in a single layer on a baking sheet.
  4. Using a spoon, generously drizzle the garlic butter mixture over each cracker.
  5. Bake in the preheated oven for 10-12 minutes, or until the edges of the crackers are golden and crispy.
  6. Remove from the oven and let cool for a few minutes before serving.

Nutrition

Serving: 1servingCalories: 150kcalCarbohydrates: 10gProtein: 2gFat: 12gSaturated Fat: 7gPolyunsaturated Fat: 3gCholesterol: 30mgSodium: 200mg

Notes

  • For a twist, try adding shredded mozzarella cheese on top of the crackers before baking for a cheesy garlic bread flavor.
  • Alternatively, you can substitute the parsley with fresh basil for a different herbaceous note.

Tried this recipe?

Let us know how it was!

Spicy Thai Pasta Salad: Discover the Flavor Explosion!

Introduction to Spicy Thai Pasta Salad

When I think of summer gatherings, my mind drifts to vibrant dishes that bring people together. One of my favorites is Spicy Thai Pasta Salad. It’s a dish that’s not only bursting with flavor but also incredibly easy to whip up.

Whether you’re looking for a quick solution for a busy day or a dish to impress your loved ones at a barbecue, this salad fits the bill perfectly. The combination of fresh veggies and creamy peanut dressing creates a delightful explosion of taste. Trust me, once you try it, you’ll be hooked!

Why You’ll Love This Spicy Thai Pasta Salad

This Spicy Thai Pasta Salad is a game-changer for busy weeknights or casual get-togethers.

It comes together in under an hour, making it a breeze to prepare.

The vibrant flavors and crunchy textures will have everyone coming back for seconds.

Plus, it’s versatile! You can easily customize it to suit your taste or dietary needs.

Once you try it, you’ll wonder how you ever lived without this refreshing dish!

Ingredients for Spicy Thai Pasta Salad

Creating a delicious Spicy Thai Pasta Salad starts with gathering the right ingredients. Here’s what you’ll need:

  • Rotini pasta: This spiral-shaped pasta holds onto the dressing beautifully, making every bite flavorful.
  • Red bell pepper: Adds a sweet crunch and vibrant color to the salad.
  • Cucumber: Refreshing and hydrating, it balances the spice with its coolness.
  • Shredded carrots: These bring a natural sweetness and a pop of color.
  • Green onions: They add a mild onion flavor and a nice crunch.
  • Fresh cilantro: This herb gives a burst of freshness that complements the other ingredients.
  • Chopped peanuts: For that satisfying crunch and nutty flavor, they’re a must!
  • Peanut butter: The star of the creamy dressing, it adds richness and depth.
  • Soy sauce: This brings umami and saltiness, enhancing the overall flavor.
  • Rice vinegar: A tangy touch that brightens the dish.
  • Honey: It balances the flavors with a hint of sweetness.
  • Sesame oil: Adds a nutty aroma and flavor that ties everything together.
  • Sriracha: For those who love heat, adjust this to your spice preference.
  • Minced garlic: A little goes a long way in adding depth to the dressing.
  • Water: Use this to thin the dressing if it’s too thick.

Feel free to get creative! You can add cooked shrimp or grilled chicken for extra protein. If you’re looking for a vegetarian option, simply swap honey for maple syrup.

For exact measurements, check the bottom of the article where you can find everything available for printing.

How to Make Spicy Thai Pasta Salad

Making Spicy Thai Pasta Salad is a straightforward process that anyone can master.

Follow these simple steps, and you’ll have a delicious dish ready in no time!

Step 1: Cook the Pasta

Start by boiling a pot of water.

Add a pinch of salt to enhance the flavor.

Once the water is bubbling, toss in the rotini pasta.

Cook it according to the package instructions until it’s al dente.

This usually takes about 8 to 10 minutes.

When it’s done, drain the pasta and rinse it under cold water.

This stops the cooking process and cools it down for the salad.

Step 2: Prepare the Vegetables

While the pasta is cooking, grab your fresh veggies.

Dice the red bell pepper and cucumber into bite-sized pieces.

Shred the carrots if you haven’t already.

Slice the green onions and chop the cilantro.

These colorful ingredients will add crunch and freshness to your salad.

Set them aside in a large mixing bowl.

Step 3: Make the Dressing

In a separate bowl, it’s time to whip up the creamy peanut dressing.

Start with the peanut butter, then add soy sauce, rice vinegar, honey, and sesame oil.

Don’t forget the minced garlic and sriracha for that spicy kick!

Whisk everything together until it’s smooth and well combined.

If the dressing feels too thick, add a tablespoon of water at a time until it reaches your desired consistency.

Step 4: Combine Ingredients

Now, it’s time to bring everything together.

Pour the cooled pasta into the bowl with the veggies.

Drizzle the dressing over the top.

Toss everything gently but thoroughly, ensuring every piece is coated in that delicious sauce.

The colors and textures should come together beautifully.

Step 5: Chill and Serve

Cover the bowl with plastic wrap or a lid.

Refrigerate the salad for at least 30 minutes.

This allows the flavors to meld and intensify.

When you’re ready to serve, give it a quick toss.

You can enjoy it chilled or at room temperature.

Either way, it’s a refreshing dish that’s sure to impress!

Tips for Success

  • Always rinse the pasta under cold water to stop cooking and keep it firm.
  • Adjust the sriracha to your spice level; start with a little and add more if needed.
  • Let the salad chill for at least 30 minutes to enhance the flavors.
  • For a creamier dressing, add a bit more peanut butter.
  • Use fresh ingredients for the best taste and texture.

Equipment Needed

  • Large pot: For boiling pasta; a deep skillet works too.
  • Colander: To drain the pasta; a slotted spoon can be a quick alternative.
  • Mixing bowls: Use two bowls for mixing pasta and dressing; any large bowl will do.
  • Whisk: For blending the dressing; a fork can work in a pinch.

Variations

  • Protein Boost: Add cooked shrimp, grilled chicken, or tofu for a heartier meal.
  • Veggie Power: Toss in additional vegetables like snap peas, broccoli, or edamame for extra crunch and nutrition.
  • Spicy Twist: Incorporate diced jalapeños or a splash of chili oil for an extra kick.
  • Nut-Free Option: Substitute sunflower seed butter for peanut butter and omit peanuts for a nut-free version.
  • Gluten-Free: Use gluten-free pasta to make this dish suitable for gluten-sensitive diets.

Serving Suggestions

  • Pair with Grilled Meats: This salad complements grilled chicken or shrimp beautifully.
  • Refreshing Drinks: Serve with iced tea or a light beer for a perfect summer vibe.
  • Presentation: Garnish with extra cilantro and peanuts for a pop of color.
  • Make it a Meal: Add a side of spring rolls for a complete Thai-inspired feast.

FAQs about Spicy Thai Pasta Salad

Can I make Spicy Thai Pasta Salad ahead of time?

Absolutely! This salad tastes even better after sitting in the fridge for a few hours or overnight. Just give it a good toss before serving to refresh the flavors.

How can I adjust the spice level?

If you prefer a milder salad, start with a small amount of sriracha and gradually add more until it reaches your desired heat. You can also omit it entirely for a non-spicy version.

What can I substitute for peanut butter?

If you have a nut allergy or want a different flavor, try sunflower seed butter or tahini. Both will give you a creamy texture without the nuts.

Is this salad suitable for meal prep?

<pDefinitely! It holds up well in the fridge for several days. Just keep the dressing separate until you’re ready to eat to maintain the salad’s freshness.

Can I add protein to this salad?

<pYes! Cooked shrimp, grilled chicken, or even tofu can be great additions. They’ll make the salad more filling and satisfying.

Final Thoughts

Creating this Spicy Thai Pasta Salad is more than just a cooking task; it’s an experience that brings joy to your kitchen.

The vibrant colors and bold flavors transform a simple meal into a celebration.

Whether you’re serving it at a summer barbecue or enjoying it as a quick lunch, each bite is a reminder of the joy of cooking.

This dish is not just about nourishment; it’s about sharing moments with family and friends.

So, roll up your sleeves, dive into this recipe, and let the flavors take you on a delightful culinary adventure!

jhessica

Spicy Thai Pasta Salad: Discover the Flavor Explosion!

A refreshing and flavorful Spicy Thai Pasta Salad that combines vibrant vegetables with a creamy peanut dressing.
Prep Time 15 minutes
Cook Time 10 minutes
Total Time 55 minutes
Servings: 6 servings
Course: Salad
Cuisine: Thai
Calories: 280

Ingredients
  

  • 8 ounces of rotini pasta
  • 1 cup of red bell pepper diced
  • 1 cup of cucumber diced
  • 1 cup of shredded carrots
  • 1/2 cup of green onions sliced
  • 1/4 cup of fresh cilantro chopped
  • 1/4 cup of peanuts chopped
  • 1/4 cup of peanut butter
  • 2 tablespoons of soy sauce
  • 2 tablespoons of rice vinegar
  • 1 tablespoon of honey
  • 1 tablespoon of sesame oil
  • 1 teaspoon of sriracha adjust to taste
  • 1 clove of garlic minced
  • 1 tablespoon of water to thin if necessary

Method
 

  1. Cook the rotini pasta according to package instructions until al dente. Drain and rinse under cold water to cool.
  2. In a large bowl, combine the cooled pasta, red bell pepper, cucumber, carrots, green onions, cilantro, and peanuts.
  3. In a separate bowl, whisk together the peanut butter, soy sauce, rice vinegar, honey, sesame oil, sriracha, and minced garlic until smooth. If the dressing is too thick, add water a little at a time until you reach your desired consistency.
  4. Pour the dressing over the pasta salad and toss well to combine.
  5. Cover and refrigerate for at least 30 minutes to allow the flavors to meld. Serve chilled or at room temperature.

Nutrition

Serving: 1servingCalories: 280kcalCarbohydrates: 30gProtein: 9gFat: 12gSaturated Fat: 2gPolyunsaturated Fat: 8gSodium: 400mgFiber: 3gSugar: 6g

Notes

  • For added protein, consider adding cooked shrimp or grilled chicken.
  • To make it vegetarian, substitute honey with maple syrup for a vegan option.

Tried this recipe?

Let us know how it was!

Butter Pecan Bliss Cake: A Delightful Recipe to Try!

Introduction to Butter Pecan Bliss Cake

There’s something magical about the aroma of a freshly baked cake wafting through the house. The Butter Pecan Bliss Cake is a delightful treat that brings back memories of family gatherings and cozy afternoons. This cake is not just a dessert; it’s a warm hug on a plate. Perfect for impressing your loved ones or simply indulging yourself after a long day, it combines the rich flavors of butter, brown sugar, and toasted pecans. Whether you’re a seasoned baker or just starting out, this recipe is a quick solution that guarantees smiles all around.

Why You’ll Love This Butter Pecan Bliss Cake

This Butter Pecan Bliss Cake is a game-changer for dessert lovers. It’s incredibly easy to whip up, making it perfect for busy weeknights or last-minute gatherings. The combination of buttery richness and nutty pecans creates a flavor explosion that’s hard to resist. Plus, it’s versatile enough to serve at any occasion, from casual family dinners to festive celebrations. Trust me, once you try it, you’ll be hooked!

Ingredients for Butter Pecan Bliss Cake

Gathering the right ingredients is the first step to creating your Butter Pecan Bliss Cake. Here’s what you’ll need:

  • All-purpose flour: The backbone of your cake, providing structure and texture.
  • Granulated sugar: Sweetens the cake and helps create that lovely golden crust.
  • Unsalted butter: Adds richness and moisture; make sure it’s softened for easy mixing.
  • Brown sugar: Brings a deep, caramel-like flavor that pairs beautifully with the pecans.
  • Eggs: Essential for binding the ingredients together and adding moisture.
  • Vanilla extract: A must-have for that warm, comforting flavor that enhances the cake.
  • Baking powder: Helps the cake rise, giving it a light and fluffy texture.
  • Baking soda: Works with the acidic buttermilk to create a tender crumb.
  • Salt: Balances the sweetness and enhances all the flavors.
  • Chopped pecans: Toasted for extra crunch and nutty flavor; they’re the star of this cake!
  • Buttermilk: Adds moisture and a slight tang, making the cake incredibly tender.

For those looking to switch things up, consider adding almond extract for a richer flavor or substituting half of the all-purpose flour with whole wheat flour for a nuttier taste. You can find the exact measurements for these ingredients at the bottom of the article, ready for printing!

How to Make Butter Pecan Bliss Cake

Now that you have your ingredients ready, let’s dive into the fun part: making the Butter Pecan Bliss Cake! Follow these simple steps, and you’ll have a delicious dessert that will impress everyone.

Step 1: Preheat and Prepare

First things first, preheat your oven to 350°F (175°C). This ensures your cake bakes evenly. While the oven warms up, grease and flour two 9-inch round cake pans. This will help your cakes slide out easily once they’re baked.

Step 2: Cream the Butter and Sugars

In a large mixing bowl, combine the softened unsalted butter, granulated sugar, and brown sugar. Using an electric mixer, beat them together until the mixture is light and fluffy—about 3 to 4 minutes. This step is crucial; it incorporates air into the batter, giving your cake that delightful texture.

Step 3: Add Eggs and Vanilla

Next, add the eggs one at a time, mixing well after each addition. This helps to create a smooth batter. Then, stir in the vanilla extract. The aroma of vanilla will fill your kitchen, making it feel like a warm hug!

Step 4: Combine Dry Ingredients

In a separate bowl, whisk together the all-purpose flour, baking powder, baking soda, and salt. This step ensures that your leavening agents are evenly distributed, which is key for a perfectly risen cake.

Step 5: Mix Wet and Dry Ingredients

Now, it’s time to combine everything! Gradually add the dry ingredients to the butter mixture, alternating with the buttermilk. Start and end with the flour mixture. Mix until just combined; overmixing can lead to a dense cake, and we want it light and fluffy!

Step 6: Fold in Pecans

Gently fold in the toasted pecans. This adds a delightful crunch and nutty flavor to your Butter Pecan Bliss Cake. Be careful not to overmix; you want those pecans to stay intact!

Step 7: Bake the Cakes

Divide the batter evenly between the prepared cake pans. Bake in your preheated oven for 25 to 30 minutes. To check for doneness, insert a toothpick into the center of the cakes. If it comes out clean, they’re ready!

Step 8: Cool and Serve

Once baked, allow the cakes to cool in the pans for about 10 minutes. Then, transfer them to a wire rack to cool completely. You can serve the cake plain or dust it with powdered sugar for a touch of elegance. Enjoy every bite of your Butter Pecan Bliss Cake!

Tips for Success

  • Always use room temperature ingredients for better mixing and texture.
  • Toast your pecans just before adding them for maximum flavor.
  • Don’t skip the cooling step; it helps the cake set properly.
  • For a moist cake, avoid overbaking; check for doneness a few minutes early.
  • Experiment with toppings like whipped cream or caramel sauce for extra indulgence!

Equipment Needed

  • Mixing bowls: A set of various sizes is ideal; you can use any large bowl if needed.
  • Electric mixer: A hand mixer works great, but a stand mixer can save time.
  • Measuring cups and spoons: Essential for accuracy; you can use a kitchen scale as an alternative.
  • Cake pans: Two 9-inch round pans are perfect; you can use one pan and bake in batches.
  • Wire rack: For cooling; a plate can work in a pinch.

Variations

  • Chocolate Chip Butter Pecan Bliss Cake: Add a cup of semi-sweet chocolate chips for a delightful twist.
  • Gluten-Free Option: Substitute all-purpose flour with a gluten-free blend for a cake everyone can enjoy.
  • Maple Pecan Bliss Cake: Replace brown sugar with maple syrup for a unique flavor profile.
  • Spiced Version: Add a teaspoon of cinnamon or nutmeg for a warm, spiced flavor that’s perfect for fall.
  • Vegan Adaptation: Use flax eggs and a plant-based butter substitute to make this cake vegan-friendly.

Serving Suggestions

  • Pair with Coffee: A slice of Butter Pecan Bliss Cake goes perfectly with a hot cup of coffee or espresso.
  • Ice Cream Delight: Serve with a scoop of vanilla or caramel ice cream for an indulgent treat.
  • Fresh Berries: Add a side of fresh berries for a pop of color and a refreshing contrast.
  • Presentation: Dust with powdered sugar or drizzle with caramel sauce for an elegant touch.

FAQs about Butter Pecan Bliss Cake

Can I make Butter Pecan Bliss Cake ahead of time?

Absolutely! This cake stores well. You can bake it a day in advance and keep it covered at room temperature. Just add any toppings right before serving for the best presentation.

What can I substitute for buttermilk?

If you don’t have buttermilk on hand, you can easily make a substitute. Mix one cup of milk with a tablespoon of vinegar or lemon juice. Let it sit for about 5 minutes, and you’re good to go!

How do I store leftover Butter Pecan Bliss Cake?

Store any leftovers in an airtight container at room temperature for up to three days. If you want to keep it longer, refrigerate it for up to a week. Just remember to bring it back to room temperature before serving!

Can I freeze Butter Pecan Bliss Cake?

Yes, you can freeze this cake! Wrap it tightly in plastic wrap and then in aluminum foil. It can last in the freezer for up to three months. Thaw it in the fridge overnight before serving.

What’s the best way to serve Butter Pecan Bliss Cake?

This cake shines on its own, but you can elevate it with a dusting of powdered sugar, a drizzle of caramel sauce, or a scoop of ice cream. Pair it with coffee for a delightful dessert experience!

Final Thoughts

Creating the Butter Pecan Bliss Cake is more than just baking; it’s about crafting memories and sharing joy. Each slice is a celebration of rich flavors and comforting textures that can brighten any day. Whether you’re enjoying it with family or impressing friends at a gathering, this cake brings people together. The aroma that fills your kitchen is just the beginning. As you savor each bite, you’ll find yourself transported to those cherished moments of laughter and love. So, roll up your sleeves and dive into this delightful recipe—it’s sure to become a beloved favorite in your home!

jhessica

Butter Pecan Bliss Cake: A Delightful Recipe to Try!

A delightful Butter Pecan Bliss Cake that combines the rich flavors of butter, brown sugar, and toasted pecans for a delicious dessert.
Prep Time 20 minutes
Cook Time 30 minutes
Total Time 50 minutes
Servings: 12 servings
Course: Dessert
Cuisine: American
Calories: 400

Ingredients
  

  • 2 cups all-purpose flour
  • 1 ½ cups granulated sugar
  • 1 cup unsalted butter softened
  • 1 cup packed brown sugar
  • 4 large eggs
  • 1 teaspoon vanilla extract
  • 1 teaspoon baking powder
  • 1 teaspoon baking soda
  • ½ teaspoon salt
  • 1 cup chopped pecans toasted
  • 1 cup buttermilk

Method
 

  1. Preheat the oven to 350°F (175°C). Grease and flour two 9-inch round cake pans.
  2. In a large mixing bowl, cream together the softened butter, granulated sugar, and brown sugar until light and fluffy (about 3-4 minutes).
  3. Add the eggs one at a time, mixing well after each addition, then stir in the vanilla extract.
  4. In a separate bowl, whisk together the flour, baking powder, baking soda, and salt.
  5. Gradually add the dry ingredients to the butter mixture, alternating with the buttermilk, beginning and ending with the flour mixture. Mix until just combined.
  6. Fold in the toasted pecans gently.
  7. Divide the batter evenly between the prepared cake pans.
  8. Bake in the preheated oven for 25-30 minutes, or until a toothpick inserted in the center comes out clean.
  9. Allow the cakes to cool in the pans for 10 minutes before transferring them to a wire rack to cool completely.
  10. Serve the cake plain or with a dusting of powdered sugar.

Nutrition

Serving: 1sliceCalories: 400kcalCarbohydrates: 45gProtein: 5gFat: 20gSaturated Fat: 10gPolyunsaturated Fat: 8gCholesterol: 100mgSodium: 200mgFiber: 1gSugar: 30g

Notes

  • For a richer flavor, consider adding ½ teaspoon of almond extract along with the vanilla.
  • You can substitute half of the all-purpose flour with whole wheat flour for a nuttier taste and added nutrition.

Tried this recipe?

Let us know how it was!

Boat Dip with Rotel and Ranch: A Flavorful Delight!

Introduction to Boat Dip with Rotel and Ranch

There’s something magical about gathering around a table with friends, sharing stories, and indulging in delicious food. One dish that never fails to impress is Boat Dip with Rotel and Ranch. This creamy, flavorful dip is a crowd-pleaser, perfect for game days, parties, or just a cozy night in. With minimal prep time, it’s a quick solution for busy days when you want to whip up something special without the fuss. Trust me, once you serve this dip, your friends will be asking for the recipe—and you’ll be happy to share!

Why You’ll Love This Boat Dip with Rotel and Ranch

This Boat Dip with Rotel and Ranch is a game-changer for any gathering. It’s incredibly easy to make, taking just minutes to prepare. The combination of creamy textures and zesty flavors creates a taste explosion that keeps everyone coming back for more. Plus, it’s versatile enough to suit any occasion, whether it’s a backyard barbecue or a cozy movie night. You’ll love how quickly it disappears!

Ingredients for Boat Dip with Rotel and Ranch

Gathering the right ingredients is the first step to creating this delightful Boat Dip with Rotel and Ranch. Here’s what you’ll need:

  • Cream Cheese: This is the base of our dip, providing a rich and creamy texture.
  • Sour Cream: Adds a tangy flavor that balances the richness of the cream cheese.
  • Shredded Cheddar Cheese: For that classic cheesy goodness, it melts beautifully into the dip.
  • Diced Tomatoes with Green Chilies (like Rotel): These bring a zesty kick and a pop of color to the mix.
  • Ranch Dressing Mix: This is where the flavor magic happens, infusing the dip with savory herbs and spices.
  • Bacon: Cooked and crumbled, it adds a smoky crunch that elevates the dip to another level.
  • Chopped Green Onions (optional): For a fresh, crunchy element, these can be folded in for extra flavor.
  • Tortilla Chips or Crackers: Perfect for dipping, they provide the ideal vehicle for this creamy delight.

Feel free to get creative! You can swap the bacon for cooked sausage or leave it out for a vegetarian option. If you like it spicy, consider using hot Rotel or adding diced jalapeños. For exact measurements, check the bottom of the article where you can find everything available for printing.

How to Make Boat Dip with Rotel and Ranch

Creating this Boat Dip with Rotel and Ranch is as easy as pie. Follow these simple steps, and you’ll have a delicious dip ready in no time. Let’s dive in!

Step 1: Mix Cream Cheese and Sour Cream

Start by taking your softened cream cheese and sour cream. In a large mixing bowl, combine them. Use a hand mixer or a spatula to blend until the mixture is smooth and creamy. This is the foundation of your dip, so make sure there are no lumps. The creaminess will set the stage for all those fantastic flavors to come!

Step 2: Add Remaining Ingredients

Now it’s time to amp up the flavor! Add the shredded cheddar cheese, drained diced tomatoes with green chilies (your Rotel), ranch dressing mix, and crumbled bacon to the bowl. Stir everything together until well combined. The colors and textures will start to come together beautifully. This is where the magic happens, and your taste buds will thank you!

Step 3: Fold in Optional Ingredients

If you’re feeling adventurous, fold in the chopped green onions at this stage. They add a fresh crunch and a burst of flavor that complements the dip perfectly. If you prefer a more straightforward approach, feel free to skip this step. Either way, your dip will be a hit!

Step 4: Chill the Dip

Once everything is mixed, transfer the dip to a serving bowl. Now, here’s a crucial step: refrigerate it for at least 30 minutes. Chilling allows the flavors to meld together, creating a more robust taste. Trust me, the wait will be worth it!

Step 5: Serve and Enjoy

Finally, it’s time to dig in! Serve your Boat Dip with Rotel and Ranch chilled, alongside tortilla chips or crackers. The creamy dip paired with the crunch of the chips is a match made in heaven. Watch as your friends and family devour it in no time!

Tips for Success

  • Make sure your cream cheese is softened for easy mixing.
  • For a smoother dip, blend the ingredients longer until creamy.
  • Chill the dip longer than 30 minutes if you can; it enhances the flavors.
  • Experiment with different cheeses for a unique twist.
  • Keep extra chips or crackers on hand; this dip disappears fast!

Equipment Needed

  • Mixing Bowl: A large bowl for combining ingredients. A sturdy pot can work in a pinch.
  • Hand Mixer or Spatula: For blending the dip smoothly. A whisk can also do the job.
  • Serving Bowl: To present your dip. Any attractive bowl will do!
  • Refrigerator: Essential for chilling the dip before serving.

Variations of Boat Dip with Rotel and Ranch

  • Spicy Kick: Use hot Rotel or add diced jalapeños for an extra layer of heat.
  • Cheesy Delight: Mix in different cheeses like pepper jack or mozzarella for a unique flavor profile.
  • Vegetarian Option: Omit the bacon and add black beans or corn for a hearty, meat-free dip.
  • Herb Infusion: Incorporate fresh herbs like cilantro or parsley for a fresh twist.
  • Smoky Flavor: Use smoked paprika or chipotle powder to give the dip a smoky depth.

Serving Suggestions for Boat Dip with Rotel and Ranch

  • Pair with crispy tortilla chips for the perfect crunch.
  • Serve alongside fresh vegetable sticks like carrots and celery for a healthier option.
  • Complement with a refreshing drink, like iced tea or a light beer.
  • Present in a colorful bowl, garnished with extra green onions for flair.

FAQs about Boat Dip with Rotel and Ranch

Can I make Boat Dip with Rotel and Ranch ahead of time?

Absolutely! In fact, making it a day in advance can enhance the flavors even more. Just store it in the refrigerator and give it a good stir before serving.

What can I use instead of cream cheese?

If you’re looking for a lighter option, you can substitute cream cheese with Greek yogurt or a dairy-free cream cheese alternative. Just keep in mind that the texture and flavor may vary slightly.

How can I make this dip spicier?

For a spicy twist, use hot Rotel instead of the regular version. You can also add diced jalapeños or a dash of hot sauce to kick up the heat!

Is Boat Dip with Rotel and Ranch suitable for vegetarians?

Yes, it can be! Simply omit the bacon and consider adding black beans or corn for a hearty vegetarian option. The dip will still be delicious!

What should I serve with Boat Dip?

Tortilla chips are a classic choice, but you can also serve it with crackers, fresh veggies, or even pita bread. Get creative with your dippers!

Final Thoughts

Creating Boat Dip with Rotel and Ranch is more than just whipping up a snack; it’s about bringing people together. The creamy texture and zesty flavors make it a hit at any gathering, sparking laughter and conversation. I love how this dip can transform an ordinary evening into a memorable occasion. Whether you’re hosting a game night or enjoying a quiet evening with family, this dip is sure to delight. So, grab your ingredients, gather your loved ones, and dive into this delicious experience. Trust me, it’s a recipe that will become a staple in your home!

jhessica

Boat Dip with Rotel and Ranch: A Flavorful Delight!

A creamy and flavorful dip made with cream cheese, sour cream, cheddar cheese, and Rotel, perfect for parties and gatherings.
Prep Time 10 minutes
Total Time 40 minutes
Servings: 8 servings
Course: Appetizer
Cuisine: American
Calories: 210

Ingredients
  

  • 8 ounces cream cheese softened
  • 1 cup sour cream
  • 1 cup shredded cheddar cheese
  • 1 can 10 ounces diced tomatoes with green chilies (like Rotel), drained
  • 1 packet 1 ounce ranch dressing mix
  • 1 cup cooked and crumbled bacon about 6 slices
  • 1/4 cup chopped green onions optional
  • Tortilla chips or crackers for serving

Method
 

  1. In a large mixing bowl, combine the softened cream cheese and sour cream. Use a hand mixer or a spatula to blend until smooth and creamy.
  2. Add the shredded cheddar cheese, drained diced tomatoes, ranch dressing mix, and crumbled bacon to the bowl. Stir until all ingredients are well combined.
  3. If desired, fold in the chopped green onions for added flavor and crunch.
  4. Transfer the dip to a serving bowl and refrigerate for at least 30 minutes to allow the flavors to meld.
  5. Serve chilled with tortilla chips or crackers for dipping.

Nutrition

Serving: 1/8 of the dipCalories: 210kcalCarbohydrates: 3gProtein: 6gFat: 18gSaturated Fat: 10gPolyunsaturated Fat: 8gCholesterol: 40mgSodium: 500mgSugar: 2g

Notes

  • For a spicier dip, use hot Rotel or add diced jalapeños.
  • Substitute the bacon with cooked and crumbled sausage or omit it for a vegetarian option.

Tried this recipe?

Let us know how it was!

Almond Flour Banana Bread: A Delicious Health Boost!

Introduction to Almond Flour Banana Bread

There’s something magical about the aroma of freshly baked banana bread wafting through the house. It takes me back to my childhood, where my mom would whip up a loaf every Sunday. Now, as a passionate home cook, I’ve discovered a delightful twist: Almond Flour Banana Bread. This recipe is not just a treat; it’s a nutritious option that fits perfectly into a busy lifestyle. Whether you need a quick breakfast or a snack to impress your friends, this banana bread is your go-to solution. Trust me, once you try it, you’ll be hooked!

Why You’ll Love This Almond Flour Banana Bread

This Almond Flour Banana Bread is a game-changer in the kitchen. It’s incredibly easy to whip up, taking just over an hour from start to finish. The taste? Absolutely divine! With its moist texture and rich flavor, it’s a crowd-pleaser. Plus, it’s gluten-free, making it a fantastic option for those with dietary restrictions. You’ll love how it satisfies your sweet tooth while still being a healthier choice!

Ingredients for Almond Flour Banana Bread

Gathering the right ingredients is the first step to creating your Almond Flour Banana Bread masterpiece. Here’s what you’ll need:

  • Ripe Bananas: The star of the show! Choose bananas that are overripe for maximum sweetness and moisture.
  • Large Eggs: These help bind the ingredients together and add richness to the bread.
  • Honey or Maple Syrup: A natural sweetener that enhances flavor. You can swap it for agave syrup if you prefer.
  • Melted Coconut Oil or Unsalted Butter: Adds moisture and a subtle flavor. Coconut oil is a great dairy-free option.
  • Vanilla Extract: A splash of this elevates the taste, making your bread smell heavenly.
  • Baking Soda: This is your leavening agent, ensuring the bread rises beautifully.
  • Salt: Just a pinch enhances all the flavors in your bread.
  • Almond Flour: The key ingredient that makes this bread gluten-free and adds a nutty flavor.
  • Ground Cinnamon (optional): A warm spice that complements the bananas perfectly. Feel free to add nutmeg for an extra kick!
  • Chopped Walnuts or Chocolate Chips (optional): These add texture and flavor. Choose walnuts for a healthy crunch or chocolate chips for a sweet surprise.

For exact measurements, check the bottom of the article where you can find everything listed for easy printing. Happy baking!

How to Make Almond Flour Banana Bread

Step 1: Preheat and Prepare

Start by preheating your oven to 350°F (175°C). While it warms up, grab a 9×5-inch loaf pan. Grease it lightly with coconut oil or butter, or line it with parchment paper for easy removal later. This step sets the stage for your delicious Almond Flour Banana Bread!

Step 2: Mix Wet Ingredients

In a large mixing bowl, combine the mashed bananas, large eggs, honey (or maple syrup), melted coconut oil (or butter), and vanilla extract. Use a fork or whisk to mix everything until it’s smooth and well blended. This mixture is the heart of your banana bread!

Step 3: Add Dry Ingredients

Now, it’s time to incorporate the dry ingredients. Add the baking soda, salt, and ground cinnamon (if you’re using it) to the wet mixture. Stir gently until everything is well combined. This step ensures your bread rises perfectly and has a lovely flavor!

Step 4: Combine with Almond Flour

Gradually add the almond flour to the mixture, stirring until just combined. Be careful not to overmix; a few lumps are okay! If you want to add some texture, fold in the chopped walnuts or chocolate chips at this stage. Your batter is almost ready!

Step 5: Bake the Bread

Pour the batter into your prepared loaf pan, smoothing the top with a spatula. Place it in the preheated oven and bake for 45-55 minutes. Keep an eye on it! You’ll know it’s done when a toothpick inserted in the center comes out clean. The aroma will be irresistible!

Step 6: Cool and Serve

Once baked, remove the bread from the oven and let it cool in the pan for about 10 minutes. Then, transfer it to a wire rack to cool completely. This cooling time helps the flavors settle, making each slice even more delicious. Enjoy your homemade Almond Flour Banana Bread!

Tips for Success

  • Use very ripe bananas for the best flavor and moisture.
  • Don’t overmix the batter; a few lumps are perfectly fine.
  • For a sweeter bread, increase the honey or maple syrup slightly.
  • Let the bread cool completely before slicing for cleaner cuts.
  • Store leftovers in an airtight container to keep it fresh longer.

Equipment Needed

  • 9×5-inch Loaf Pan: Essential for baking. If you don’t have one, a round cake pan works too.
  • Mixing Bowls: A large bowl for mixing ingredients. Any size will do, but a sturdy one is best.
  • Whisk or Fork: For blending wet ingredients. A hand mixer can speed things up.
  • Spatula: Perfect for pouring and smoothing the batter.
  • Wire Rack: Ideal for cooling the bread. A plate can work in a pinch.

Variations

  • Nutty Delight: Add a mix of chopped pecans and almonds for an extra crunch and flavor.
  • Chocolate Lovers: Swap in dark chocolate chips instead of walnuts for a rich, indulgent treat.
  • Fruit Fusion: Incorporate dried fruits like cranberries or raisins for a sweet and chewy texture.
  • Spiced Up: Experiment with spices like nutmeg or ginger for a warm, cozy flavor profile.
  • Vegan Option: Replace eggs with flax eggs (1 tablespoon ground flaxseed mixed with 2.5 tablespoons water) for a plant-based version.

Serving Suggestions

  • Spread it: Slather a slice with almond butter or cream cheese for a delicious twist.
  • Pair it: Enjoy with a hot cup of coffee or a refreshing herbal tea.
  • Top it: Add fresh berries or a drizzle of honey for an extra touch of sweetness.
  • Presentation: Serve on a rustic wooden board for a charming display.

FAQs about Almond Flour Banana Bread

Can I use regular flour instead of almond flour?
While you can substitute regular flour, it will change the texture and make the bread gluten-containing. Almond flour gives a moist, nutty flavor that’s hard to replicate.

How do I store leftover Almond Flour Banana Bread?
To keep your banana bread fresh, store it in an airtight container at room temperature for up to three days. For longer storage, wrap it tightly and freeze for up to three months.

Can I make this recipe without eggs?
Absolutely! You can replace each egg with a flax egg (1 tablespoon ground flaxseed mixed with 2.5 tablespoons water) for a vegan-friendly option. It works beautifully in this Almond Flour Banana Bread.

What can I add for extra flavor?
Feel free to mix in spices like nutmeg or ginger, or add nuts and dried fruits. Chocolate chips are also a fantastic addition for a sweet twist!

Is this banana bread suitable for meal prep?
Yes! This Almond Flour Banana Bread is perfect for meal prep. Bake a loaf at the beginning of the week, and you’ll have a nutritious snack or breakfast ready to go!

Final Thoughts

Baking Almond Flour Banana Bread is more than just a recipe; it’s an experience that fills your home with warmth and nostalgia. Each slice is a delightful blend of flavors and textures, perfect for any time of day. Whether you’re enjoying it with a cup of coffee or sharing it with loved ones, this bread brings joy to the table. Plus, knowing it’s a healthier option makes every bite even sweeter. So, roll up your sleeves, embrace the process, and let this delicious banana bread become a cherished part of your culinary adventures!

jhessica

Almond Flour Banana Bread: A Delicious Health Boost!

A delicious and healthy banana bread made with almond flour, perfect for a nutritious snack or breakfast.
Prep Time 10 minutes
Cook Time 55 minutes
Total Time 1 hour 5 minutes
Servings: 8 servings
Course: Baking
Cuisine: American
Calories: 180

Ingredients
  

  • 3 ripe bananas mashed
  • 2 large eggs
  • 1/4 cup honey or maple syrup
  • 1/4 cup melted coconut oil or unsalted butter
  • 1 teaspoon vanilla extract
  • 1 teaspoon baking soda
  • 1/2 teaspoon salt
  • 1 1/2 cups almond flour
  • 1/2 teaspoon ground cinnamon optional
  • 1/2 cup chopped walnuts or chocolate chips optional

Method
 

  1. Preheat your oven to 350°F (175°C) and grease a 9×5-inch loaf pan or line it with parchment paper.
  2. In a large mixing bowl, combine the mashed bananas, eggs, honey (or maple syrup), melted coconut oil (or butter), and vanilla extract. Mix until well combined.
  3. Add the baking soda, salt, and ground cinnamon (if using) to the banana mixture and stir until incorporated.
  4. Gradually add the almond flour to the mixture, stirring until just combined. If desired, fold in the chopped walnuts or chocolate chips.
  5. Pour the batter into the prepared loaf pan and smooth the top with a spatula.
  6. Bake in the preheated oven for 45-55 minutes, or until a toothpick inserted into the center comes out clean.
  7. Allow the bread to cool in the pan for about 10 minutes before transferring it to a wire rack to cool completely.

Nutrition

Serving: 1sliceCalories: 180kcalCarbohydrates: 18gProtein: 4gFat: 10gSaturated Fat: 5gPolyunsaturated Fat: 5gCholesterol: 70mgSodium: 200mgFiber: 2gSugar: 8g

Notes

  • For added flavor, try mixing in 1/2 teaspoon of nutmeg or a handful of dried fruit such as raisins or cranberries.
  • If you prefer a sweeter bread, increase the honey or maple syrup to 1/3 cup.

Tried this recipe?

Let us know how it was!

Moist Cinnamon Streusel Coffee Cake: Your New Favorite Recipe!

Introduction to Moist Cinnamon Streusel Coffee Cake

There’s something magical about the aroma of freshly baked goods wafting through the house.

When I think of comfort, my mind drifts to a slice of Moist Cinnamon Streusel Coffee Cake.

This delightful treat is not just a cake; it’s a warm hug on a plate.

Perfect for breakfast or an afternoon snack, it’s a quick solution for busy mornings or a sweet way to impress your loved ones.

With its tender crumb and sweet cinnamon topping, this cake is bound to become a staple in your kitchen.

Let’s dive into this delicious recipe together!

Why You’ll Love This Moist Cinnamon Streusel Coffee Cake

This Moist Cinnamon Streusel Coffee Cake is a game-changer for any home cook.

It’s incredibly easy to whip up, making it perfect for those hectic mornings or last-minute gatherings.

The rich, buttery flavor combined with the sweet cinnamon streusel topping creates a taste sensation that’s hard to resist.

Plus, it’s versatile enough to serve at breakfast, brunch, or as a delightful dessert.

Trust me, once you try it, you’ll be hooked!

Ingredients for Moist Cinnamon Streusel Coffee Cake

To create this delightful Moist Cinnamon Streusel Coffee Cake, you’ll need a handful of simple ingredients that come together beautifully.

Here’s what you’ll gather:

  • All-purpose flour: The backbone of the cake, providing structure and a tender crumb.
  • Granulated sugar: Sweetens the cake and helps achieve that lovely golden color.
  • Unsalted butter: Adds richness and moisture; make sure it’s softened for easy mixing.
  • Sour cream: This secret ingredient keeps the cake moist and adds a slight tang.
  • Large eggs: They bind everything together and contribute to the cake’s fluffiness.
  • Vanilla extract: A splash of this enhances the overall flavor, making it irresistible.
  • Baking powder: This leavening agent helps the cake rise to perfection.
  • Baking soda: Works in tandem with the baking powder for a light texture.
  • Salt: Just a pinch enhances the sweetness and balances flavors.
  • Brown sugar: For the streusel topping, it adds a deep, caramel-like sweetness.
  • Ground cinnamon: The star of the show in the streusel, bringing warmth and spice.
  • Optional ingredients: Consider adding chopped nuts or chocolate chips for extra flavor and texture.

For exact measurements, check the bottom of the article where you can find everything listed for easy printing.

How to Make Moist Cinnamon Streusel Coffee Cake

Step 1: Preheat and Prepare

Preheat your oven to 350°F (175°C).

While it warms up, grab a 9×13-inch baking pan and grease it with butter or cooking spray.

Then, dust it lightly with flour to ensure your cake doesn’t stick.

This simple step sets the stage for a perfect bake.

Trust me, you want that cake to slide out easily when it’s done!

Step 2: Cream Butter and Sugar

In a large mixing bowl, combine the softened butter and granulated sugar.

Using a hand mixer or stand mixer, beat them together until the mixture is light and fluffy.

This process usually takes about 3-5 minutes.

The air you incorporate here is crucial for a tender, moist cake.

So, don’t rush it—let that mixer do its magic!

Step 3: Add Eggs and Sour Cream

Now, it’s time to add the eggs.

Incorporate them one at a time, mixing well after each addition.

This helps create a smooth batter.

Next, mix in the sour cream and vanilla extract until everything is well combined.

The sour cream is your secret weapon for moisture, so don’t skip it!

Step 4: Combine Dry Ingredients

In a separate bowl, whisk together the all-purpose flour, baking powder, baking soda, and salt.

This step ensures that your leavening agents are evenly distributed throughout the flour.

It’s a small but important detail that contributes to the cake’s rise.

Once mixed, set this bowl aside for the next step.

Step 5: Mix Wet and Dry Ingredients

Gradually add the dry ingredients to the wet mixture.

Mix gently until just combined; be careful not to overmix.

A few lumps are perfectly fine!

Overmixing can lead to a dense cake, and we want it light and fluffy.

So, fold it in with love!

Step 6: Prepare the Streusel Topping

In another bowl, combine the brown sugar, flour, and ground cinnamon for the streusel topping.

Stir in the melted butter until the mixture resembles coarse crumbs.

This topping is what makes the cake special, adding that sweet, crunchy layer.

Set it aside while you layer the batter.

Step 7: Layer the Batter and Topping

Pour half of the batter into your prepared baking pan, spreading it evenly.

Next, sprinkle half of the streusel topping over the batter.

Repeat this process with the remaining batter and streusel.

This layering creates a delightful texture and flavor in every bite.

It’s like a surprise in every slice!

Step 8: Bake the Cake

Place the pan in your preheated oven and bake for 35-40 minutes.

To check for doneness, insert a toothpick into the center.

If it comes out clean, your cake is ready!

The aroma wafting through your kitchen will be irresistible, so be prepared for some eager taste testers.

Step 9: Cool and Serve

Once baked, allow the cake to cool in the pan for about 10 minutes.

Then, carefully transfer it to a wire rack to cool completely.

This step is crucial for the texture; it helps the cake set perfectly.

Slice it up and serve it warm or at room temperature.

Enjoy every delicious bite of your Moist Cinnamon Streusel Coffee Cake!

Tips for Success

  • Use room temperature ingredients for better mixing and a smoother batter.
  • Don’t skip the cooling step; it helps the cake maintain its structure.
  • For a richer flavor, try using brown sugar in the cake batter.
  • Keep an eye on the baking time; ovens can vary, so check early.
  • Store leftovers in an airtight container to keep it moist and fresh.

Equipment Needed

  • 9×13-inch baking pan: A standard size for this recipe; you can use a similar-sized dish if needed.
  • Mixing bowls: A couple of medium-sized bowls will do the trick.
  • Hand mixer or stand mixer: For creaming butter and sugar; a whisk works too, but it’ll take longer.
  • Measuring cups and spoons: Essential for accuracy in baking.
  • Spatula: Perfect for folding and spreading the batter evenly.

Variations

  • Nutty Delight: Add 1/2 cup of chopped walnuts or pecans to the batter for a crunchy texture.
  • Chocolate Lovers: Mix in 1/2 cup of chocolate chips for a sweet twist that pairs beautifully with cinnamon.
  • Fruit Fusion: Incorporate 1 cup of fresh blueberries or diced apples into the batter for a fruity burst.
  • Gluten-Free Option: Substitute all-purpose flour with a gluten-free blend to accommodate dietary needs.
  • Vegan Version: Replace eggs with flax eggs and use plant-based yogurt instead of sour cream for a vegan-friendly treat.

Serving Suggestions

  • Fresh Fruit: Serve with a side of sliced strawberries or a fruit salad for a refreshing contrast.
  • Coffee or Tea: Pair with a hot cup of coffee or your favorite tea to enhance the flavors.
  • Presentation: Dust with powdered sugar before serving for an elegant touch.
  • Whipped Cream: A dollop of whipped cream adds a creamy richness that complements the cake.

FAQs about Moist Cinnamon Streusel Coffee Cake

Can I make this cake ahead of time?

Absolutely! This Moist Cinnamon Streusel Coffee Cake keeps well for a few days. Just store it in an airtight container at room temperature. You can also freeze it for up to three months. Just make sure to wrap it tightly!

What can I substitute for sour cream?

If you don’t have sour cream on hand, Greek yogurt works beautifully as a substitute. It will keep your cake just as moist and add a nice tangy flavor.

How do I know when the cake is done baking?

The best way to check for doneness is to insert a toothpick into the center of the cake. If it comes out clean or with a few moist crumbs, your cake is ready to come out of the oven!

Can I add nuts to the streusel topping?

Definitely! Chopped nuts like walnuts or pecans can add a delightful crunch to the streusel topping. Just mix them in with the other streusel ingredients for added texture and flavor.

Is this cake suitable for special diets?

This Moist Cinnamon Streusel Coffee Cake can be adapted for various dietary needs. You can make it gluten-free by using a gluten-free flour blend or vegan by substituting eggs and sour cream with plant-based alternatives. Enjoy it your way!

Final Thoughts

Baking this Moist Cinnamon Streusel Coffee Cake is more than just following a recipe; it’s about creating memories.

The warm, inviting aroma fills your kitchen, wrapping you in a comforting embrace.

Each slice offers a delightful balance of sweetness and spice, perfect for sharing with family or enjoying solo with a cup of coffee.

Whether it’s a busy morning or a cozy afternoon, this cake is your go-to treat.

So, roll up your sleeves, gather your ingredients, and let the magic unfold.

Trust me, this cake will quickly become a cherished favorite in your home!

jhessica

Moist Cinnamon Streusel Coffee Cake: Your New Favorite Recipe!

A deliciously moist coffee cake topped with a sweet cinnamon streusel, perfect for breakfast or a snack.
Prep Time 15 minutes
Cook Time 40 minutes
Total Time 55 minutes
Servings: 12 servings
Course: Dessert
Cuisine: American
Calories: 250

Ingredients
  

  • 2 cups all-purpose flour
  • 1 cup granulated sugar
  • 1/2 cup unsalted butter softened
  • 1 cup sour cream
  • 2 large eggs
  • 1 teaspoon vanilla extract
  • 1 teaspoon baking powder
  • 1/2 teaspoon baking soda
  • 1/2 teaspoon salt
For the streusel topping:
  • 1/2 cup brown sugar packed
  • 1/2 cup all-purpose flour
  • 1 teaspoon ground cinnamon
  • 1/4 cup unsalted butter melted

Method
 

  1. Preheat your oven to 350°F (175°C). Grease and flour a 9×13-inch baking pan.
  2. In a large mixing bowl, cream together the softened butter and granulated sugar until light and fluffy.
  3. Add the eggs, one at a time, mixing well after each addition.
  4. Stir in the sour cream and vanilla extract until combined.
  5. In a separate bowl, whisk together the flour, baking powder, baking soda, and salt.
  6. Gradually add the dry ingredients to the wet mixture, mixing until just combined. Do not overmix.
  7. In another bowl, prepare the streusel topping by combining the brown sugar, flour, and cinnamon. Stir in the melted butter until the mixture resembles coarse crumbs.
  8. Pour half of the batter into the prepared baking pan and spread evenly. Sprinkle half of the streusel topping over the batter.
  9. Pour the remaining batter on top and finish with the rest of the streusel.
  10. Bake in the preheated oven for 35-40 minutes, or until a toothpick inserted in the center comes out clean.
  11. Allow the cake to cool in the pan for about 10 minutes before transferring it to a wire rack to cool completely.

Nutrition

Serving: 1sliceCalories: 250kcalCarbohydrates: 30gProtein: 3gFat: 12gSaturated Fat: 7gPolyunsaturated Fat: 5gCholesterol: 40mgSodium: 200mgFiber: 1gSugar: 15g

Notes

  • This recipe serves 12.
  • For a lighter version, substitute Greek yogurt for sour cream.
  • Consider mixing in 1/2 cup of chopped nuts or chocolate chips into the batter for added flavor.

Tried this recipe?

Let us know how it was!

Easter Whoopie Pies are the perfect festive treat!

Introduction to Easter Whoopie Pies

Spring is in the air, and with it comes the joy of Easter celebrations! What better way to embrace the season than with delightful Easter Whoopie Pies? These sweet treats are not just a feast for the eyes; they’re a quick solution for busy days filled with family gatherings and egg hunts. I remember making these with my kids, their laughter filling the kitchen as we smeared frosting and created our own little masterpieces. Whether you’re looking to impress loved ones or simply indulge your sweet tooth, these whoopie pies are the perfect festive treat!

Why You’ll Love This Easter Whoopie Pies

Easter Whoopie Pies are a delightful blend of ease and flavor. They come together quickly, making them perfect for last-minute dessert needs. The rich chocolatey goodness paired with creamy filling is a taste sensation that will have everyone coming back for seconds. Plus, they’re fun to make! Gather the family, and let the creativity flow as you decorate these festive treats. Who wouldn’t love a sweet bite of nostalgia?

Ingredients for Easter Whoopie Pies

Gathering the right ingredients is the first step to creating these delightful Easter Whoopie Pies. Here’s what you’ll need:

  • All-purpose flour: This is the backbone of your whoopie pies, providing structure and texture.
  • Baking powder and baking soda: These leavening agents help your pies rise, giving them that perfect fluffy texture.
  • Salt: Just a pinch enhances the flavors and balances the sweetness.
  • Cocoa powder: The star of the show! It adds rich chocolate flavor, making these pies irresistible.
  • Granulated sugar: Sweetens the batter, creating a delightful contrast with the filling.
  • Brown sugar: Adds moisture and a hint of caramel flavor, making the pies even more delicious.
  • Unsalted butter: Softened butter creates a creamy texture and rich taste in the batter.
  • Eggs: They bind everything together and add moisture, ensuring a tender crumb.
  • Vanilla extract: A splash of vanilla elevates the flavor profile, making each bite more aromatic.
  • Whole milk: This adds moisture and richness to the batter, keeping it soft and tender.
  • Powdered sugar (for filling): This sweetens the filling and gives it that smooth, creamy texture.
  • Unsalted butter (for filling): Softened butter makes the filling rich and spreadable.
  • Vanilla extract (for filling): Just like in the batter, it enhances the flavor of the filling.
  • Milk (for filling): A little milk helps achieve the perfect consistency for spreading.

For those looking to get creative, consider adding a few drops of food coloring to the filling for a festive touch. You can also swap out the cocoa powder for a flavored cake mix, like red velvet or lemon, for a fun twist. Exact measurements for these ingredients can be found at the bottom of the article, ready for printing!

How to Make Easter Whoopie Pies

Creating these Easter Whoopie Pies is a delightful journey that fills your kitchen with sweet aromas. Follow these simple steps, and you’ll have a batch of festive treats ready to impress!

Step 1: Preheat and Prepare

Start by preheating your oven to 350°F. This is crucial for achieving that perfect bake. While the oven warms up, line two baking sheets with parchment paper. This will prevent sticking and make cleanup a breeze.

Step 2: Mix Dry Ingredients

In a medium bowl, whisk together the all-purpose flour, baking powder, baking soda, salt, and cocoa powder. This step ensures that the leavening agents are evenly distributed, which is key for fluffy whoopie pies.

Step 3: Cream Butter and Sugars

In a large bowl, beat together the granulated sugar, brown sugar, and softened butter until the mixture is light and fluffy. This usually takes about 3-4 minutes. This creamy base is what makes your whoopie pies rich and delicious.

Step 4: Add Eggs and Vanilla

Next, add the eggs one at a time, mixing well after each addition. Then, stir in the vanilla extract. This not only adds moisture but also infuses your batter with a lovely aroma that will have everyone eager to taste.

Step 5: Combine Wet and Dry Ingredients

Gradually add the dry ingredients to the wet mixture, alternating with the whole milk. Start and end with the dry ingredients. This method helps maintain a smooth batter, ensuring your whoopie pies turn out perfectly.

Step 6: Shape the Batter

Using a spoon or cookie scoop, drop rounded tablespoons of batter onto the prepared baking sheets. Make sure to space them about 2 inches apart. This allows for even baking and prevents them from merging into one giant cookie!

Step 7: Bake

Bake the whoopie pies for 10-12 minutes, or until the tops spring back when lightly pressed. This is the moment of truth! You want them to be perfectly cooked, so keep an eye on them.

Step 8: Cool and Prepare Filling

Once baked, allow the whoopie pies to cool on the baking sheets for 5 minutes. Then, transfer them to wire racks to cool completely. While they cool, prepare the filling by beating together the powdered sugar, softened butter, vanilla extract, and milk until smooth and creamy.

Step 9: Assemble the Whoopie Pies

Finally, it’s time to assemble! Spread a generous amount of filling on the flat side of one cake and top it with another cake, flat side down. This creates that delightful sandwich effect that makes whoopie pies so special. Repeat with the remaining cakes and filling, and enjoy your festive treats!

Tips for Success

  • Make sure your butter is softened for easy mixing; it should be slightly warm to the touch.
  • Use a cookie scoop for uniform batter portions, ensuring even baking.
  • Don’t overmix the batter; mix until just combined for the best texture.
  • Let the whoopie pies cool completely before adding the filling to prevent melting.
  • Experiment with flavors by adding extracts like almond or mint to the filling.

Equipment Needed

  • Baking sheets: If you don’t have parchment paper, greasing the sheets works too.
  • Mixing bowls: A large bowl for the batter and a medium bowl for dry ingredients.
  • Whisk: A fork can work in a pinch for mixing dry ingredients.
  • Cookie scoop: A tablespoon works just fine for portioning the batter.
  • Wire racks: If you lack these, a plate can serve for cooling the pies.

Variations of Easter Whoopie Pies

  • Red Velvet Whoopie Pies: Swap the cocoa powder for red velvet cake mix for a vibrant twist that’s perfect for Easter.
  • Lemon Whoopie Pies: Use lemon cake mix instead of chocolate and add lemon zest to the filling for a refreshing citrus flavor.
  • Peanut Butter Filling: Replace the vanilla filling with a creamy peanut butter filling for a nutty, indulgent treat.
  • Gluten-Free Option: Substitute all-purpose flour with a gluten-free flour blend to accommodate dietary needs.
  • Mini Whoopie Pies: Use a teaspoon to drop smaller amounts of batter for bite-sized versions that are perfect for sharing.

Serving Suggestions for Easter Whoopie Pies

  • Pair with a scoop of vanilla ice cream for an indulgent dessert experience.
  • Serve alongside fresh fruit, like strawberries or raspberries, for a refreshing contrast.
  • Drizzle with chocolate or caramel sauce for an extra touch of sweetness.
  • Present on a colorful platter to enhance the festive vibe.
  • Enjoy with a cup of coffee or tea for a delightful afternoon treat.

FAQs about Easter Whoopie Pies

As you embark on your journey to create these delightful Easter Whoopie Pies, you might have a few questions. Here are some common queries that can help you along the way:

Can I make the whoopie pies ahead of time?

Absolutely! You can bake the cakes a day in advance. Just store them in an airtight container. Assemble them with the filling on the day you plan to serve for the best texture.

How do I store leftover whoopie pies?

Store any leftovers in an airtight container at room temperature for up to three days. If you want to keep them longer, refrigerate them for up to a week.

Can I freeze Easter Whoopie Pies?

Yes! Freeze the assembled whoopie pies in a single layer on a baking sheet. Once frozen, transfer them to a freezer-safe container. They can last up to three months in the freezer.

What can I use instead of cocoa powder?

If you want a different flavor, try using a flavored cake mix, like vanilla or lemon. This gives you a unique twist on the classic whoopie pie!

How can I make the filling more festive?

For a fun touch, add a few drops of food coloring to the filling. You can also mix in sprinkles or flavored extracts to elevate the taste and appearance!

Final Thoughts

Creating Easter Whoopie Pies is more than just baking; it’s about making memories. The laughter of family, the sweet aroma wafting through the kitchen, and the joy of sharing these delightful treats bring a sense of warmth to any gathering. Each bite is a reminder of the simple pleasures in life, making them perfect for celebrating the season. Whether you’re enjoying them with loved ones or savoring a quiet moment with a cup of coffee, these whoopie pies are sure to bring smiles. So roll up your sleeves, get baking, and let the festivities begin!

jhessica

Easter Whoopie Pies are the perfect festive treat!

Easter Whoopie Pies are the perfect festive treat!
Prep Time 20 minutes
Cook Time 12 minutes
Total Time 32 minutes
Servings: 12 servings
Course: Dessert
Cuisine: American
Calories: 210

Ingredients
  

  • 2 cups all-purpose flour
  • 1 teaspoon baking powder
  • 1 teaspoon baking soda
  • ½ teaspoon salt
  • ½ cup unsweetened cocoa powder
  • 1 cup granulated sugar
  • ½ cup packed brown sugar
  • ½ cup unsalted butter softened
  • 2 large eggs
  • 1 teaspoon vanilla extract
  • 1 cup whole milk
  • 1 cup unsweetened powdered sugar for filling
  • ½ cup unsalted butter softened (for filling)
  • 1 teaspoon vanilla extract for filling
  • 2 tablespoons milk for filling

Method
 

  1. Preheat your oven to 350°F. Line two baking sheets with parchment paper.
  2. In a medium bowl, whisk together the flour, baking powder, baking soda, salt, and cocoa powder. Set aside.
  3. In a large bowl, beat together the granulated sugar, brown sugar, and softened butter until light and fluffy, about 3-4 minutes.
  4. Add the eggs one at a time, mixing well after each addition, then stir in the vanilla extract.
  5. Gradually add the dry ingredients to the wet mixture, alternating with the milk, starting and ending with the dry ingredients. Mix until just combined.
  6. Drop rounded tablespoons of batter onto the prepared baking sheets, spacing them about 2 inches apart.
  7. Bake for 10-12 minutes, or until the tops spring back when lightly pressed. Allow to cool on the baking sheets for 5 minutes before transferring to wire racks to cool completely.
  8. For the filling, beat together the powdered sugar, softened butter, vanilla extract, and milk until smooth and creamy.
  9. Once the whoopie pie cakes are completely cool, spread a generous amount of filling on the flat side of one cake and top with another cake, flat side down. Repeat with remaining cakes and filling.

Nutrition

Serving: 1pieCalories: 210kcalCarbohydrates: 28gProtein: 2gFat: 10gSaturated Fat: 6gPolyunsaturated Fat: 4gCholesterol: 30mgSodium: 150mgFiber: 1gSugar: 14g

Notes

  • For a fun twist, try adding a few drops of food coloring to the filling for a festive look.
  • You can also substitute the cocoa powder with a flavored cake mix for different whoopie pie variations, such as red velvet or lemon.

Tried this recipe?

Let us know how it was!

Bang Bang Shrimp Tacos: Discover Your New Favorite Recipe!

Introduction to Bang Bang Shrimp Tacos

There’s something magical about a dish that brings people together, and Bang Bang Shrimp Tacos do just that.

Whether it’s a busy weeknight or a casual weekend gathering, these tacos are a quick solution that never disappoints.

Imagine crispy shrimp tossed in a spicy sauce, all wrapped up in warm tortillas.

It’s a flavor explosion that’s sure to impress your loved ones.

With just a handful of ingredients and minimal prep time, you’ll find yourself reaching for this recipe again and again.

Let’s dive into the deliciousness that awaits!

Why You’ll Love This Bang Bang Shrimp Tacos

These Bang Bang Shrimp Tacos are a game-changer for any home cook.

They come together in just 25 minutes, making them perfect for those hectic evenings.

The crispy shrimp, combined with a creamy, spicy sauce, creates a flavor profile that dances on your taste buds.

Plus, they’re customizable!

You can add your favorite toppings or adjust the spice level to suit your palate.

It’s a dish that’s as fun to make as it is to eat!

Ingredients for Bang Bang Shrimp Tacos

Creating Bang Bang Shrimp Tacos is a breeze with these simple ingredients.

Here’s what you’ll need to whip up this delightful dish:

  • Shrimp: Large, peeled, and deveined shrimp are the star of the show. They cook quickly and soak up flavors beautifully.
  • Garlic Powder: This adds a savory depth to the shrimp, enhancing their natural flavor.
  • Paprika: A touch of paprika brings warmth and a hint of smokiness to the dish.
  • Salt and Black Pepper: Essential for seasoning, these staples elevate the overall taste.
  • Mayonnaise: This creamy base helps create the luscious bang bang sauce that ties everything together.
  • Sweet Chili Sauce: A sweet and tangy addition that balances the heat from the sriracha.
  • Sriracha: Adjust this spicy sauce to your liking for that extra kick!
  • Tortillas: Small corn or flour tortillas are perfect for wrapping up the shrimp and toppings.
  • Shredded Cabbage: Adds crunch and freshness, making each bite delightful.
  • Diced Tomatoes: These juicy morsels provide a burst of flavor and color.
  • Chopped Green Onions: A sprinkle of these adds a fresh, oniony bite.
  • Lime Wedges: A squeeze of lime brightens the flavors and adds a zesty finish.

Feel free to get creative!

You can swap in grilled shrimp for a healthier option or toss in sliced avocado or mango for a fresh twist.

For exact measurements, check the bottom of the article where you can find everything available for printing.

How to Make Bang Bang Shrimp Tacos

Making Bang Bang Shrimp Tacos is a straightforward process that’s as enjoyable as it is delicious.

Follow these simple steps, and you’ll have a plateful of mouthwatering tacos ready in no time!

Step 1: Prepare the Shrimp

Start by rinsing the shrimp under cold water.

Pat them dry with a paper towel to remove excess moisture.

In a medium bowl, toss the shrimp with garlic powder, paprika, salt, and black pepper.

Make sure each shrimp is evenly coated with the spices.

This seasoning is key to enhancing the shrimp’s natural flavor.

Step 2: Cook the Shrimp

Heat a large skillet over medium-high heat and add a tablespoon of oil.

Once the oil is shimmering, carefully add the seasoned shrimp to the pan.

Cook them for about 2-3 minutes on each side until they turn pink and crispy.

Don’t overcrowd the pan; you want them to fry evenly.

Once done, remove the shrimp from heat and set them aside.

Step 3: Make the Bang Bang Sauce

In a separate bowl, whisk together mayonnaise, sweet chili sauce, and sriracha.

Mix until smooth and creamy.

Taste the sauce and adjust the sriracha to your preferred spice level.

This sauce is what makes the Bang Bang Shrimp Tacos truly special, so don’t skip this step!

Step 4: Warm the Tortillas

To warm the tortillas, you can use a dry skillet over medium heat or pop them in the microwave for a few seconds.

Warming them makes them pliable and enhances their flavor.

If using a skillet, heat each tortilla for about 30 seconds on each side.

This little step ensures your tacos have the perfect texture.

Step 5: Assemble the Tacos

Now comes the fun part!

Take a warm tortilla and place a few crispy shrimp in the center.

Top with shredded cabbage, diced tomatoes, and a generous drizzle of the bang bang sauce.

Sprinkle with chopped green onions for that fresh crunch.

Layering is key for both flavor and presentation!

Step 6: Serve and Enjoy

Serve your Bang Bang Shrimp Tacos immediately with lime wedges on the side.

A squeeze of lime adds a zesty brightness that elevates the dish.

Gather your friends or family around the table, and enjoy these flavorful tacos fresh.

Trust me, they won’t last long!

Tips for Success

  • Don’t skip drying the shrimp; it helps them get crispy when cooked.
  • Adjust the spice level of the bang bang sauce to suit your taste.
  • For extra crunch, let the shrimp rest on a paper towel after cooking.
  • Experiment with toppings like avocado or cilantro for added flavor.
  • Make extra sauce; it’s great for dipping or drizzling on other dishes!

Equipment Needed

  • Large Skillet: A non-stick skillet works best, but any heavy-bottomed pan will do.
  • Medium Bowl: For mixing the shrimp and spices; a mixing bowl is perfect.
  • Whisk: Essential for blending the bang bang sauce; a fork can work in a pinch.
  • Spatula: Use this for flipping the shrimp and serving the tacos.

Variations

  • Grilled Bang Bang Shrimp: For a healthier twist, grill the shrimp instead of pan-frying. This adds a smoky flavor and reduces oil.
  • Vegetarian Option: Substitute shrimp with crispy tofu or grilled vegetables for a delicious plant-based version.
  • Spicy Mango Salsa: Top your tacos with a fresh mango salsa for a sweet and spicy kick. Just mix diced mango, red onion, jalapeño, and cilantro.
  • Gluten-Free: Use corn tortillas to make this dish gluten-free without sacrificing flavor.
  • Extra Crunch: Add crushed tortilla chips or fried onions on top for an added crunch in every bite.

Serving Suggestions

  • Side Salad: Pair your tacos with a refreshing side salad, like a simple cucumber and tomato salad.
  • Cold Beverages: Enjoy with a cold beer or a zesty margarita to complement the flavors.
  • Presentation: Serve on a colorful platter with lime wedges and extra sauce for dipping.

FAQs about Bang Bang Shrimp Tacos

Can I make Bang Bang Shrimp Tacos ahead of time?

While the shrimp are best enjoyed fresh, you can prepare the bang bang sauce and chop your toppings in advance. Just store them separately in the fridge until you’re ready to assemble your tacos.

What can I substitute for shrimp in this recipe?

If shrimp isn’t your thing, try using crispy tofu or grilled chicken. Both options will still deliver a delicious flavor when paired with the bang bang sauce.

How spicy are Bang Bang Shrimp Tacos?

The spice level can be adjusted based on your preference. Start with a small amount of sriracha in the sauce and add more if you like it hotter. The sweet chili sauce helps balance the heat!

Can I use flour tortillas instead of corn?

Absolutely! Flour tortillas work just as well and can add a different texture to your tacos. Choose whichever you prefer for your Bang Bang Shrimp Tacos.

How do I store leftovers?

Store any leftover shrimp and toppings in airtight containers in the fridge. The shrimp can be reheated, but the tortillas are best fresh. Consider making a taco salad with the leftovers for a tasty twist!

Final Thoughts

Bang Bang Shrimp Tacos are more than just a meal; they’re an experience that brings joy to the table.

Each bite is a delightful combination of crispy shrimp, creamy sauce, and fresh toppings, creating a symphony of flavors.

Whether you’re cooking for family or hosting friends, these tacos are sure to impress.

They’re quick to prepare, making them perfect for any occasion.

So, roll up your sleeves, gather your ingredients, and dive into this culinary adventure.

Trust me, once you try these tacos, they’ll become a staple in your kitchen!

jhessica

Bang Bang Shrimp Tacos: Discover Your New Favorite Recipe!

Bang Bang Shrimp Tacos are a delicious and easy-to-make dish featuring crispy shrimp tossed in a spicy sauce, served in warm tortillas with fresh toppings.
Prep Time 15 minutes
Cook Time 10 minutes
Total Time 25 minutes
Servings: 4 servings
Course: Main Dish
Cuisine: Mexican
Calories: 320

Ingredients
  

  • 1 pound large shrimp peeled and deveined
  • 1 teaspoon garlic powder
  • 1 teaspoon paprika
  • 1/2 teaspoon salt
  • 1/4 teaspoon black pepper
  • 1/2 cup mayonnaise
  • 1/4 cup sweet chili sauce
  • 1 tablespoon sriracha adjust to taste
  • 8 small corn or flour tortillas
  • 1 cup shredded cabbage
  • 1/2 cup diced tomatoes
  • 1/4 cup chopped green onions
  • Lime wedges for serving

Method
 

  1. In a medium bowl, toss the shrimp with garlic powder, paprika, salt, and black pepper until evenly coated.
  2. Heat a large skillet over medium-high heat and add a tablespoon of oil. Once hot, add the seasoned shrimp and cook for 2-3 minutes on each side until pink and cooked through. Remove from heat.
  3. In a separate bowl, whisk together the mayonnaise, sweet chili sauce, and sriracha until smooth. Adjust the sriracha to your preferred spice level.
  4. Warm the tortillas in a dry skillet or microwave until pliable.
  5. To assemble, place a few shrimp on each tortilla, top with shredded cabbage, diced tomatoes, and a drizzle of the bang bang sauce. Sprinkle with chopped green onions.
  6. Serve immediately with lime wedges on the side for squeezing over the tacos.

Nutrition

Serving: 1tacoCalories: 320kcalCarbohydrates: 20gProtein: 25gFat: 15gSaturated Fat: 2gPolyunsaturated Fat: 10gCholesterol: 150mgSodium: 800mgFiber: 2gSugar: 5g

Notes

  • For a healthier option, grill the shrimp instead of pan-frying.
  • Add sliced avocado or mango for a fresh twist and extra flavor.

Tried this recipe?

Let us know how it was!

Honey Pineapple Glazed Salmon: A Flavorful Delight!

Introduction to Honey Pineapple Glazed Salmon

There’s something magical about a dish that combines sweet and savory, and that’s exactly what you get with Honey Pineapple Glazed Salmon.

This recipe is a lifesaver for those busy weeknights when you want to whip up something delicious without spending hours in the kitchen.

With just a handful of ingredients, you can create a meal that not only tastes incredible but also impresses your loved ones.

Whether you’re a seasoned cook or just starting out, this dish is sure to become a favorite in your home.

Let’s dive into this flavorful delight!

Why You’ll Love This Honey Pineapple Glazed Salmon

This Honey Pineapple Glazed Salmon is a game-changer for your dinner routine.

It’s quick to prepare, taking just 30 minutes from start to finish, making it perfect for those hectic evenings.

The combination of honey and pineapple creates a mouthwatering glaze that elevates the salmon to new heights.

Plus, it’s a healthy option packed with protein, ensuring you can indulge without the guilt.

What’s not to love?

Ingredients for Honey Pineapple Glazed Salmon

Creating this Honey Pineapple Glazed Salmon is a breeze, thanks to its simple yet flavorful ingredients.

Here’s what you’ll need:

  • Salmon fillets: Fresh salmon is the star of this dish, providing a rich source of protein and healthy fats.
  • Honey: This natural sweetener adds a delightful sweetness that balances the savory elements.
  • Pineapple juice: It brings a tropical twist, enhancing the glaze with its fruity acidity.
  • Soy sauce: A splash of this adds depth and umami, making the flavors pop.
  • Minced garlic: Garlic infuses the dish with a warm, aromatic essence that complements the salmon beautifully.
  • Ground ginger: This spice adds a hint of warmth and a touch of zing to the glaze.
  • Black pepper: A dash of pepper enhances the overall flavor profile, giving it a subtle kick.
  • Olive oil: Used for cooking, it helps achieve that perfect sear while keeping the salmon moist.
  • Fresh parsley: This is for garnish, adding a pop of color and freshness to your plate.

Feel free to get creative!

For a spicier kick, consider adding a pinch of red pepper flakes to the marinade.

If you’re looking for alternatives, chicken breasts or tofu can be substituted for the salmon, making this dish versatile for different dietary preferences.

Exact measurements for these ingredients can be found at the bottom of the article, ready for printing!

How to Make Honey Pineapple Glazed Salmon

Making Honey Pineapple Glazed Salmon is a straightforward process that yields delicious results.

Follow these simple steps to create a meal that will have everyone asking for seconds.

Step 1: Preheat Your Grill or Oven

Start by preheating your grill or oven to 375°F.

This step is crucial because it ensures even cooking and helps achieve that perfect sear on the salmon.

If you’re using a grill, oil the grates to prevent sticking.

A little preparation goes a long way in making your cooking experience smoother.

Step 2: Prepare the Marinade

In a small bowl, whisk together honey, pineapple juice, soy sauce, minced garlic, ground ginger, and black pepper.

Mixing these ingredients creates a flavorful glaze that will enhance the salmon.

Marinating is essential; it allows the salmon to absorb all those delicious flavors, making each bite a taste sensation.

Step 3: Marinate the Salmon

Place the salmon fillets in a shallow dish and pour half of the honey-pineapple mixture over them.

Let the salmon marinate for about 15-20 minutes.

This step is where the magic happens!

The longer you marinate, the more intense the flavor will be.

Just remember to reserve the other half of the glaze for later.

Step 4: Cook the Salmon

Now it’s time to cook!

If you’re pan-searing, heat olive oil in a skillet over medium heat.

Remove the salmon from the marinade and place it skin-side down in the skillet.

Cook for about 4-5 minutes until it’s golden brown.

Carefully flip the fillets and brush the reserved honey-pineapple mixture on top.

Cook for another 4-5 minutes until the salmon flakes easily with a fork.

For grilling, place the marinated salmon directly on the grill grates.

Cook for about 6-8 minutes per side, brushing with the reserved glaze halfway through.

Whichever method you choose, the result will be a beautifully glazed salmon.

Step 5: Garnish and Serve

Once cooked, remove the salmon from heat and let it rest for a couple of minutes.

This resting time allows the juices to redistribute, keeping the salmon moist.

Garnish with chopped fresh parsley for a pop of color and freshness.

Serve it up and watch your loved ones enjoy every bite!

Tips for Success

  • Always use fresh salmon for the best flavor and texture.
  • Don’t skip the marinating step; it’s key to infusing flavor.
  • Keep an eye on the cooking time to avoid overcooking.
  • Experiment with the glaze by adding your favorite spices.
  • Let the salmon rest before serving for juicier results.

Equipment Needed

  • Grill or Oven: Either works well; choose based on your preference.
  • Skillet: A non-stick skillet is great for pan-searing.
  • Whisk: Essential for mixing the marinade.
  • Shallow Dish: For marinating the salmon.
  • Spatula: To flip the salmon without breaking it.

Variations

  • Spicy Kick: Add a teaspoon of sriracha or a pinch of red pepper flakes to the marinade for a fiery twist.
  • Herb-Infused: Incorporate fresh herbs like dill or cilantro into the glaze for an aromatic touch.
  • Fruit Fusion: Swap pineapple juice with orange or mango juice for a different fruity flavor profile.
  • Gluten-Free Option: Use tamari instead of soy sauce to keep it gluten-free while maintaining that umami flavor.
  • Vegetarian Delight: Substitute salmon with firm tofu, marinating and cooking it the same way for a plant-based option.

Serving Suggestions

  • Pair with Rice: Serve the salmon over a bed of fluffy jasmine or brown rice to soak up the glaze.
  • Fresh Salad: A crisp green salad with a light vinaigrette complements the richness of the salmon.
  • Drink Pairing: Enjoy with a chilled white wine or a refreshing iced tea.
  • Presentation: Serve on a colorful plate, garnished with lemon wedges and extra parsley for a vibrant look.

FAQs about Honey Pineapple Glazed Salmon

Can I use frozen salmon for this recipe?

Absolutely! Just make sure to thaw the salmon completely before marinating. Frozen salmon can still be delicious when cooked properly.

What can I substitute for honey in the glaze?

If you’re looking for a different sweetener, maple syrup or agave nectar works well. They’ll give a unique twist to the glaze while keeping it sweet.

How do I know when the salmon is cooked through?

The salmon is done when it flakes easily with a fork and has an internal temperature of 145°F. A little patience goes a long way here!

Can I make the glaze ahead of time?

Yes! You can prepare the honey-pineapple glaze a day in advance. Just store it in the fridge until you’re ready to use it.

Is this dish suitable for meal prep?

Definitely! Honey Pineapple Glazed Salmon holds up well in the fridge. Just reheat gently to maintain its flavor and texture.

Final Thoughts

Cooking Honey Pineapple Glazed Salmon is more than just preparing a meal; it’s about creating a moment.

The sweet and tangy glaze transforms a simple salmon fillet into a culinary masterpiece that delights the senses.

Each bite is a reminder of the joy that comes from sharing good food with family and friends.

Whether it’s a weeknight dinner or a special occasion, this dish brings warmth and happiness to the table.

So, roll up your sleeves, embrace the flavors, and enjoy the satisfaction of serving a dish that’s as delightful to make as it is to eat!

jhessica

Honey Pineapple Glazed Salmon: A Flavorful Delight!

A delicious and flavorful salmon dish glazed with honey and pineapple, perfect for a healthy meal.
Prep Time 20 minutes
Cook Time 10 minutes
Total Time 30 minutes
Servings: 2 servings
Course: Main Course
Cuisine: American
Calories: 320

Ingredients
  

  • 2 6-ounce salmon fillets
  • 1/4 cup honey
  • 1/4 cup pineapple juice
  • 1 tablespoon soy sauce
  • 1 teaspoon minced garlic
  • 1/2 teaspoon ground ginger
  • 1/4 teaspoon black pepper
  • 1 tablespoon olive oil
  • 1 tablespoon chopped fresh parsley for garnish

Method
 

  1. Preheat your grill or oven to 375°F. If using a grill, make sure to oil the grates to prevent sticking.
  2. In a small bowl, whisk together honey, pineapple juice, soy sauce, minced garlic, ground ginger, and black pepper until well combined.
  3. Place the salmon fillets in a shallow dish and pour half of the honey-pineapple mixture over them, reserving the other half for later. Let the salmon marinate for about 15-20 minutes.
  4. Heat olive oil in a skillet over medium heat. Remove the salmon from the marinade and place it skin-side down in the skillet. Cook for about 4-5 minutes.
  5. Carefully flip the salmon fillets and brush the reserved honey-pineapple mixture on top. Cook for an additional 4-5 minutes, or until the salmon is cooked through and flakes easily with a fork.
  6. If using a grill, place the marinated salmon fillets directly on the grill grates and cook for about 6-8 minutes per side, brushing with the reserved glaze halfway through.
  7. Remove the salmon from heat and let it rest for a couple of minutes. Garnish with chopped parsley before serving.

Nutrition

Serving: 1filletCalories: 320kcalCarbohydrates: 20gProtein: 30gFat: 15gSaturated Fat: 2gPolyunsaturated Fat: 13gCholesterol: 70mgSodium: 300mgSugar: 24g

Notes

  • For a spicier kick, add a pinch of red pepper flakes to the marinade.
  • Substitute the salmon with chicken breasts or tofu for a different protein option.

Tried this recipe?

Let us know how it was!

Spicy Dumpling Soup: A Quick and Flavorful Recipe!

Introduction to Spicy Dumpling Soup

There’s something magical about a warm bowl of soup, especially when it’s a Spicy Dumpling Soup.

This dish is like a cozy hug on a chilly evening, perfect for those busy days when you need a quick solution.

With tender dumplings swimming in a savory broth, it’s a meal that impresses without the fuss.

Whether you’re cooking for yourself or sharing with loved ones, this recipe brings comfort and flavor to the table.

Let’s dive into this delightful dish that’s sure to become a favorite in your kitchen!

Why You’ll Love This Spicy Dumpling Soup

This Spicy Dumpling Soup is a game-changer for busy weeknights.

It’s quick to whip up, taking just 30 minutes from start to finish.

The flavors are bold yet comforting, making it a crowd-pleaser for everyone at the table.

Plus, it’s versatile! You can easily customize it to suit your taste or dietary needs.

With minimal cleanup and maximum satisfaction, this soup is a win-win for any home cook!

Ingredients for Spicy Dumpling Soup

Creating a delicious Spicy Dumpling Soup starts with gathering the right ingredients.

Here’s what you’ll need:

  • Vegetable oil: This is your base for sautéing, adding a rich flavor to the aromatics.
  • Onion: Diced onion brings sweetness and depth to the broth, making it more savory.
  • Garlic: Minced garlic adds a punch of flavor that elevates the entire dish.
  • Fresh ginger: A touch of ginger gives a warm, spicy kick that complements the dumplings.
  • Chicken broth: This forms the heart of your soup, providing a rich, savory base.
  • Water: Balances the broth, ensuring it’s not too salty or concentrated.
  • Soy sauce: Adds umami and saltiness, enhancing the overall flavor profile.
  • Sriracha: This spicy sauce is key for that kick! Adjust it to your heat preference.
  • Frozen dumplings: Convenient and delicious, these can be chicken or vegetable, depending on your choice.
  • Baby spinach: Fresh greens add color and nutrition, wilting perfectly into the soup.
  • Green onions: Sliced green onions are a fresh garnish that adds a nice crunch.
  • Sesame oil: A drizzle at the end gives a nutty flavor that ties everything together.
  • Salt and pepper: Essential for seasoning, ensuring your soup is just right.

Feel free to get creative!

For extra heat, consider adding sliced jalapeños or more sriracha.

If you’re looking for a vegetarian option, swap the dumplings for tofu or make your own dumplings from scratch.

You can find the exact quantities for each ingredient at the bottom of the article, ready for printing!

How to Make Spicy Dumpling Soup

Making Spicy Dumpling Soup is a breeze!

Follow these simple steps, and you’ll have a delicious meal ready in no time.

Let’s get cooking!

Step 1: Sauté the Aromatics

Start by heating the vegetable oil in a large pot over medium heat.

Once hot, toss in the diced onion and sauté for about five minutes until it turns translucent.

The aroma will fill your kitchen, making your mouth water!

Next, add the minced garlic and ginger, cooking for another minute or two.

This step is crucial; it builds the flavor base for your soup.

Step 2: Prepare the Broth

Now it’s time to create that savory broth.

Pour in the chicken broth and water, then add the soy sauce and sriracha.

Bring the mixture to a boil, letting those flavors meld together.

The sriracha will start to give off a delightful heat, so adjust it to your liking.

This broth is the heart of your Spicy Dumpling Soup!

Step 3: Cook the Dumplings

Once your broth is boiling, carefully add the frozen dumplings.

Stir gently to ensure they don’t stick together.

Reduce the heat to a simmer and let them cook for about 8 to 10 minutes.

You’ll know they’re done when they’re heated through and floating to the top.

This is where the magic happens, as the dumplings soak up all that delicious broth!

Step 4: Add Greens and Season

With the dumplings cooked, it’s time to add some freshness.

Stir in the baby spinach and let it wilt for about two minutes.

This not only adds color but also boosts the nutrition of your soup.

Finally, drizzle in the sesame oil and season with salt and pepper to taste.

Give it a good stir, and your Spicy Dumpling Soup is ready to serve!

Tips for Success

  • Always taste your broth before adding salt; the soy sauce can be salty enough.
  • For a richer flavor, let the soup simmer a bit longer after adding the dumplings.
  • Use fresh ingredients whenever possible for the best taste.
  • Don’t overcrowd the pot; cook in batches if necessary to ensure even heating.
  • Garnish with extra green onions for a fresh crunch!

Equipment Needed

  • Large pot: A sturdy pot is essential for making the soup. A Dutch oven works great too.
  • Wooden spoon: Perfect for stirring without scratching your pot.
  • Measuring cups: Handy for measuring broth and water accurately.
  • Knife and cutting board: Essential for chopping your aromatics.

Variations of Spicy Dumpling Soup

  • Vegetarian Delight: Swap out the chicken broth for vegetable broth and use tofu or vegetable dumplings for a meat-free option.
  • Seafood Twist: Add shrimp or fish dumplings for a seafood version that brings a fresh ocean flavor to the soup.
  • Extra Veggies: Toss in additional vegetables like bell peppers, carrots, or mushrooms for added nutrition and texture.
  • Spicy Lovers: Amp up the heat by adding sliced jalapeños or a dash of chili oil for a fiery kick.
  • Herb Infusion: Experiment with fresh herbs like cilantro or basil to enhance the flavor profile and add freshness.

Serving Suggestions for Spicy Dumpling Soup

  • Side Salad: Pair with a light cucumber salad for a refreshing contrast.
  • Rice: Serve over steamed jasmine rice to soak up the flavorful broth.
  • Drink: Enjoy with a cold beer or a crisp white wine to balance the spice.
  • Presentation: Garnish with extra green onions and a sprinkle of sesame seeds for a beautiful finish.

FAQs about Spicy Dumpling Soup

Can I use homemade dumplings in this Spicy Dumpling Soup?

Absolutely! Homemade dumplings can elevate your soup to a whole new level. Just ensure they are cooked through before serving.

How can I make this soup spicier?

If you’re a heat enthusiast, consider adding more sriracha or some sliced jalapeños. You can also drizzle in chili oil for an extra kick!

Can I freeze Spicy Dumpling Soup?

Yes, you can freeze the soup! Just make sure to leave out the spinach until you reheat it. This keeps the greens fresh and vibrant.

What can I serve with Spicy Dumpling Soup?

This soup pairs wonderfully with a light salad or steamed rice. A cold beer or crisp white wine also complements the flavors beautifully.

Is this soup suitable for meal prep?

Definitely! Spicy Dumpling Soup is perfect for meal prep. Just store it in airtight containers, and it will stay fresh in the fridge for up to three days.

Final Thoughts

Cooking this Spicy Dumpling Soup is more than just preparing a meal; it’s about creating a moment of warmth and comfort.

Each spoonful is a delightful blend of flavors that warms the soul, making it perfect for any occasion.

Whether you’re enjoying it solo or sharing it with family, this soup brings people together.

It’s quick, easy, and packed with goodness, making it a staple in my kitchen.

So, grab your ingredients and let the aroma fill your home.

You’ll soon discover that this soup is not just a dish; it’s an experience worth savoring!

jhessica

Spicy Dumpling Soup: A Quick and Flavorful Recipe!

A quick and flavorful Spicy Dumpling Soup that combines savory broth with tender dumplings and fresh vegetables.
Prep Time 10 minutes
Cook Time 20 minutes
Total Time 30 minutes
Servings: 4 servings
Course: Soup
Cuisine: Asian
Calories: 280

Ingredients
  

  • 2 tablespoons vegetable oil
  • 1 medium onion diced
  • 3 cloves garlic minced
  • 1 tablespoon fresh ginger minced
  • 4 cups chicken broth
  • 1 cup water
  • 2 tablespoons soy sauce
  • 1 tablespoon sriracha adjust to taste
  • 1 package 12 ounces frozen dumplings (chicken or vegetable)
  • 1 cup baby spinach
  • 2 green onions sliced
  • 1 tablespoon sesame oil
  • Salt and pepper to taste

Method
 

  1. In a large pot, heat the vegetable oil over medium heat. Add the diced onion and sauté for about 5 minutes until translucent.
  2. Stir in the minced garlic and ginger, cooking for an additional 1-2 minutes until fragrant.
  3. Pour in the chicken broth and water, then add the soy sauce and sriracha. Bring the mixture to a boil.
  4. Once boiling, carefully add the frozen dumplings to the pot. Reduce the heat to a simmer and cook for 8-10 minutes, or until the dumplings are heated through.
  5. Add the baby spinach and cook for another 2 minutes until wilted.
  6. Stir in the sesame oil and season with salt and pepper to taste.
  7. Serve hot, garnished with sliced green onions.

Nutrition

Serving: 1bowlCalories: 280kcalCarbohydrates: 30gProtein: 10gFat: 12gSaturated Fat: 2gPolyunsaturated Fat: 10gCholesterol: 30mgSodium: 800mgFiber: 2gSugar: 2g

Notes

  • For extra heat, add sliced jalapeños or more sriracha.
  • Substitute the dumplings with homemade ones or use tofu for a vegetarian option.

Tried this recipe?

Let us know how it was!

Stay Connected

Get recipes via email: