Get my cookbooks

French Salted Butter Cookies: Discover the Secret Recipe!

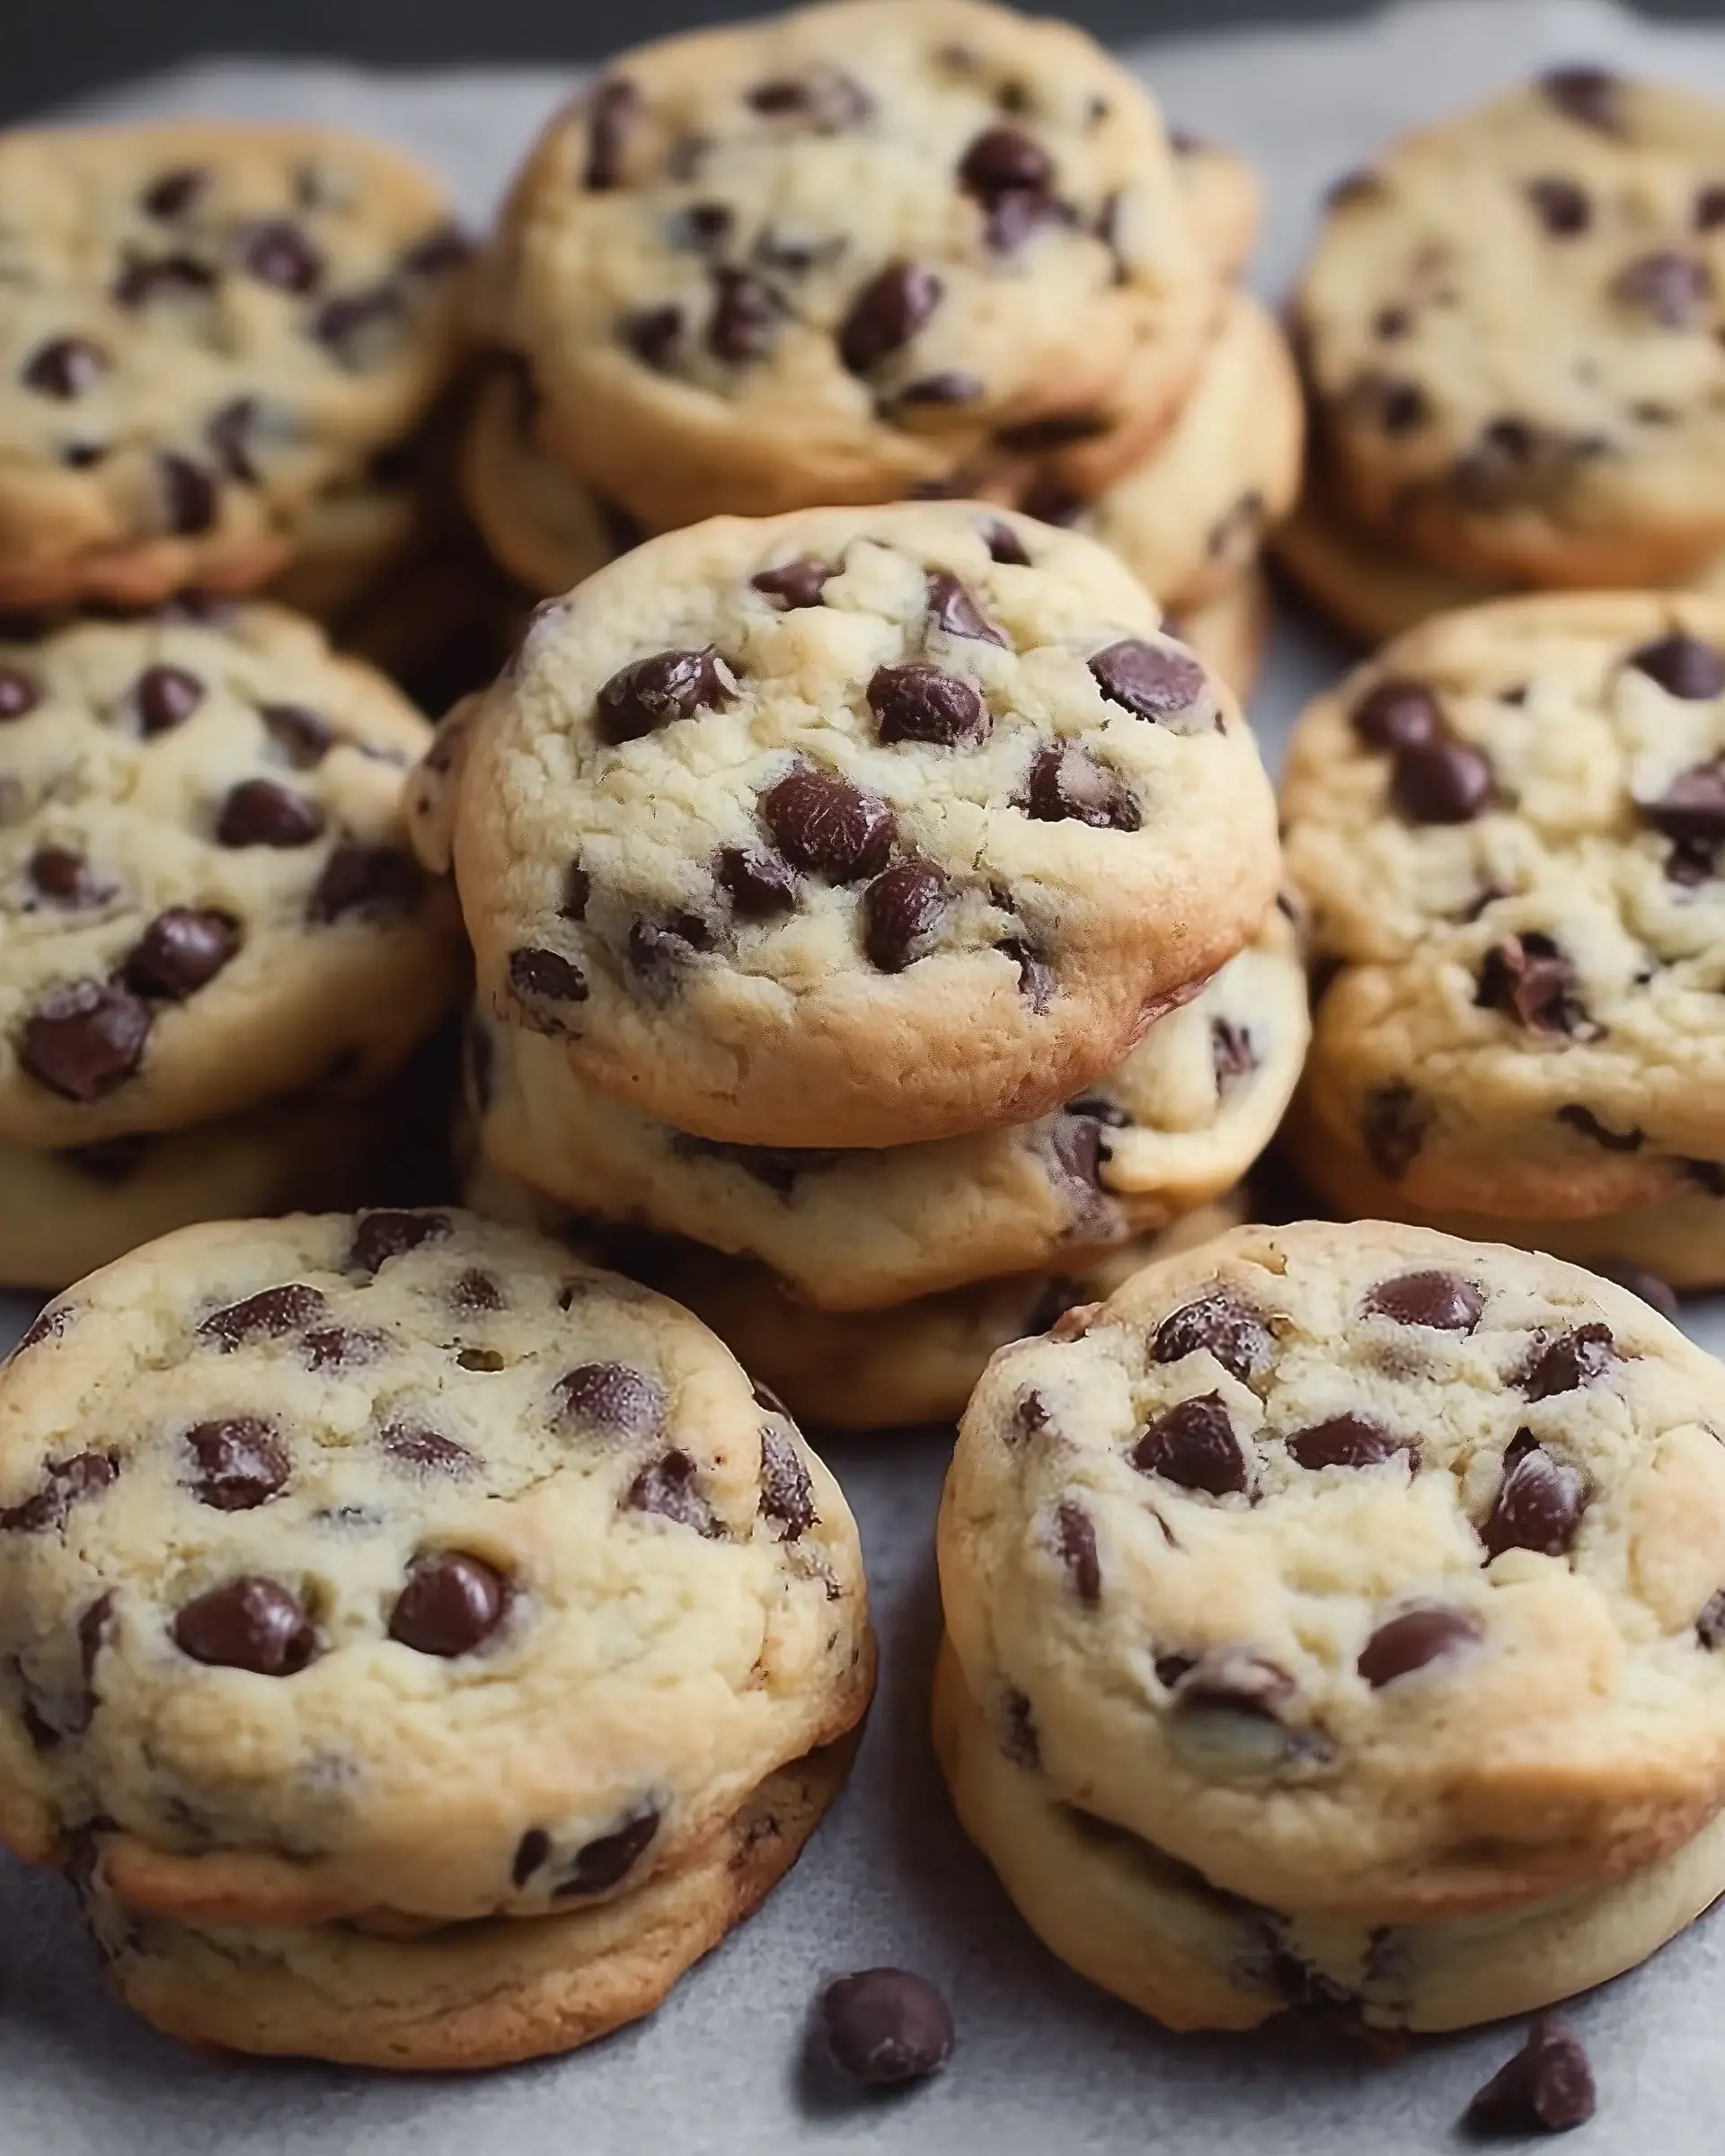
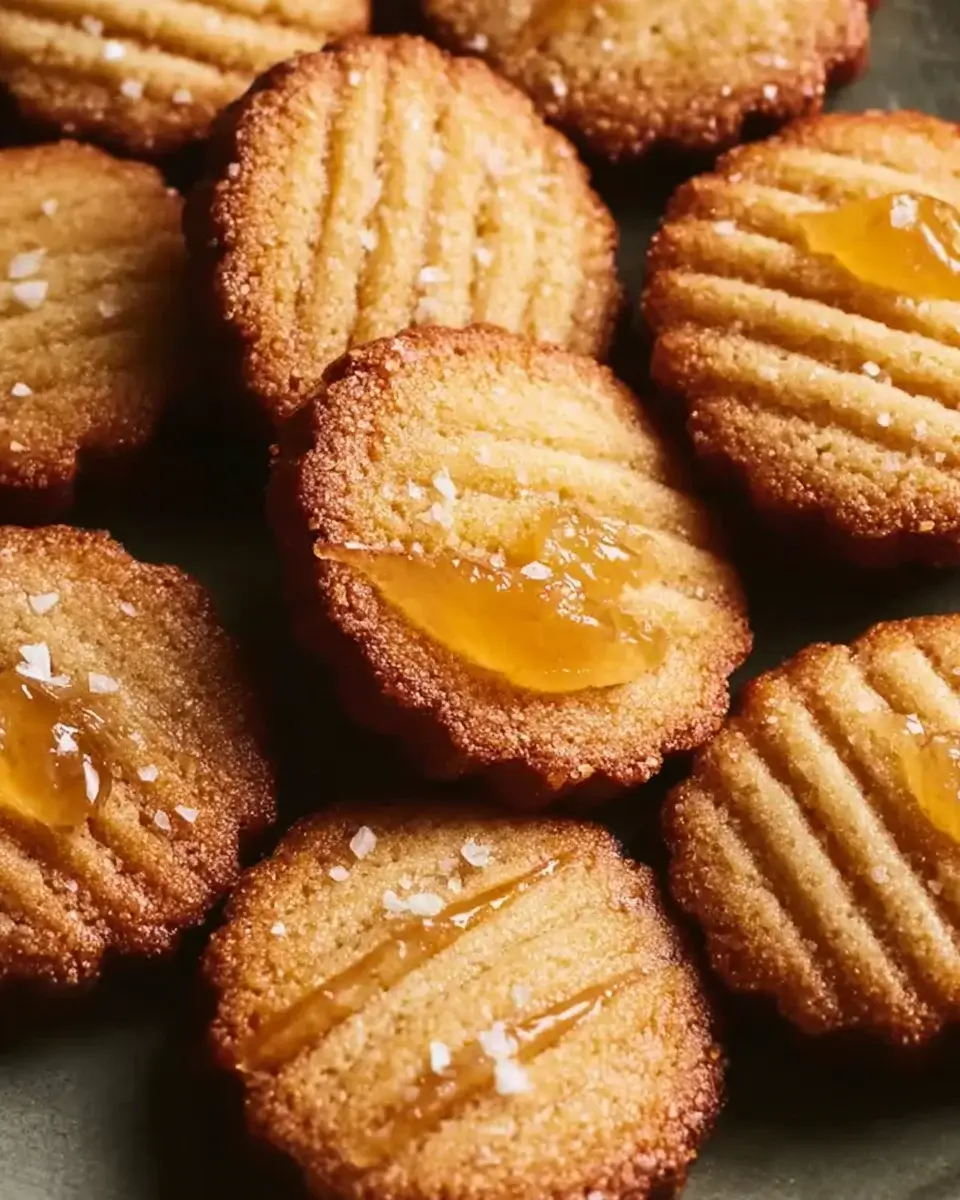
Introduction to French Salted Butter Cookies

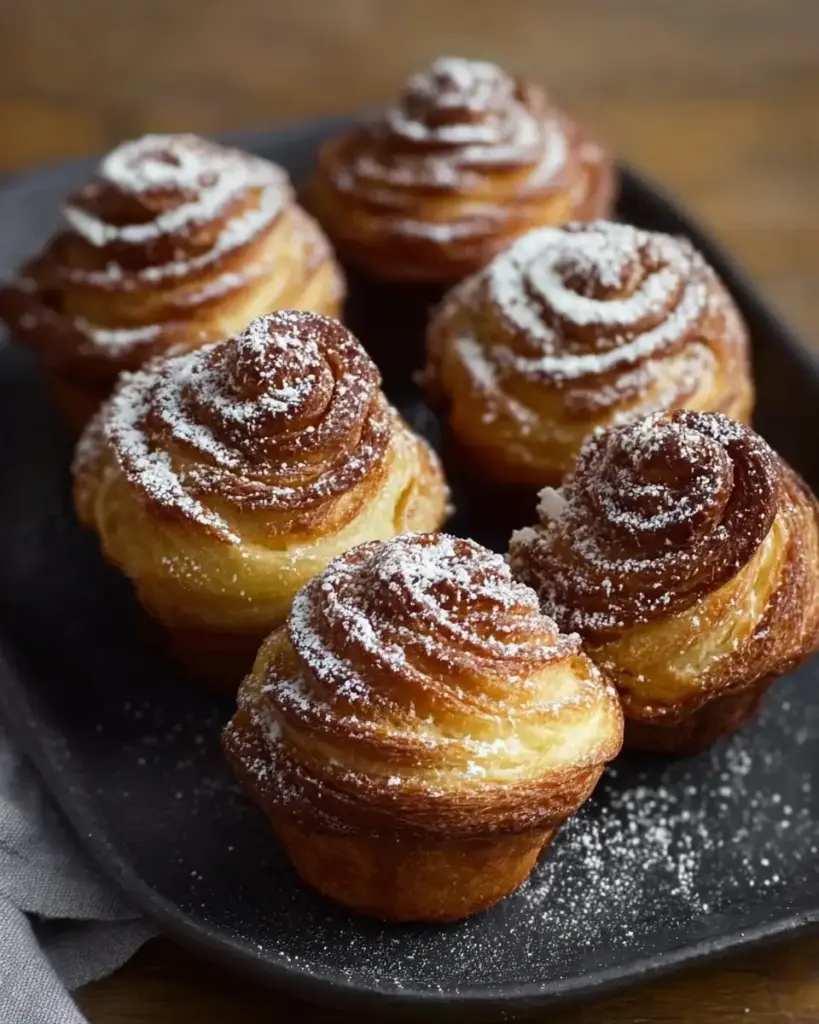
There’s something magical about the aroma of freshly baked cookies wafting through the house. French Salted Butter Cookies are a delightful treat that brings back memories of cozy afternoons spent in the kitchen. These cookies are not just delicious; they’re a quick solution for those busy days when you want to impress your loved ones without spending hours in the kitchen. With their buttery richness and a hint of salt, they strike the perfect balance between sweet and savory. Trust me, once you try these, they’ll become a staple in your baking repertoire!

Why You’ll Love This French Salted Butter Cookies

These French Salted Butter Cookies are a dream come true for any home cook. They’re incredibly easy to whip up, taking just 30 minutes from start to finish. The taste? Oh, it’s a delightful blend of buttery goodness with a touch of salt that elevates every bite. Whether you’re baking for a gathering or just treating yourself, these cookies are sure to impress without the fuss. You’ll find yourself making them again and again!

Ingredients for French Salted Butter Cookies

Gathering the right ingredients is the first step to creating these delightful French Salted Butter Cookies. Here’s what you’ll need:

  • All-purpose flour: The backbone of any cookie, it provides structure and texture.
  • Baking powder: This leavening agent helps the cookies rise, giving them a light and airy feel.
  • Sea salt: A pinch enhances the flavors, balancing the sweetness beautifully.
  • Unsalted butter: The star of the show! Softened butter adds richness and a melt-in-your-mouth quality.
  • Granulated sugar: This sweetener contributes to the cookie’s crisp edges and overall sweetness.
  • Light brown sugar: It adds moisture and a hint of caramel flavor, making the cookies even more delicious.
  • Pure vanilla extract: A splash of this aromatic ingredient elevates the flavor profile, making it irresistible.
  • Egg yolk: This adds richness and helps bind the ingredients together for a tender cookie.
  • Flaky sea salt: For sprinkling on top, it adds a delightful crunch and burst of flavor.

For those looking to experiment, consider using brown butter for a deeper flavor or adding chocolate chips or chopped nuts for extra texture. You can find all the exact measurements at the bottom of the article, ready for printing!

How to Make French Salted Butter Cookies

Now that you have your ingredients ready, let’s dive into the fun part: making these French Salted Butter Cookies! Follow these simple steps, and you’ll be on your way to cookie bliss.

Step 1: Preheat the Oven

Start by preheating your oven to 350°F (175°C). This step is crucial because it ensures even baking. While the oven warms up, line a baking sheet with parchment paper. This prevents the cookies from sticking and makes cleanup a breeze.

Step 2: Prepare the Dry Ingredients

In a medium bowl, whisk together the all-purpose flour, baking powder, and sea salt. This mix is the foundation of your cookies. Whisking helps to evenly distribute the baking powder and salt, ensuring every bite is perfectly balanced.

Step 3: Cream the Butter and Sugars

In a large mixing bowl, beat the softened unsalted butter, granulated sugar, and light brown sugar together until the mixture is light and fluffy. This usually takes about 2-3 minutes. The air you incorporate here is what gives your cookies that delightful texture!

Step 4: Add Vanilla and Egg Yolk

Next, add the pure vanilla extract and the egg yolk to the butter mixture. Mix until everything is well combined. The vanilla adds a warm, inviting flavor, while the egg yolk contributes richness, making your cookies even more delicious.

Step 5: Combine Wet and Dry Ingredients

Gradually add the dry ingredients to the wet mixture. Stir gently until just combined. Be careful not to overmix! Overmixing can lead to tough cookies, and we want them to be tender and melt-in-your-mouth.

Step 6: Shape the Cookies

Using a cookie scoop or a tablespoon, drop rounded balls of dough onto the prepared baking sheet, spacing them about 2 inches apart. Gently press each cookie ball down slightly with the palm of your hand. This helps them spread evenly while baking. Don’t forget to sprinkle a small pinch of flaky sea salt on top of each cookie for that perfect finishing touch!

Step 7: Bake the Cookies

Place the baking sheet in the preheated oven and bake for 12-15 minutes. Keep an eye on them! You want the edges to be lightly golden while the centers remain soft. This is the sweet spot for that perfect cookie texture.

Step 8: Cool and Enjoy

Once baked, remove the cookies from the oven and let them cool on the baking sheet for about 5 minutes. This allows them to set before transferring them to a wire rack to cool completely. Store any leftovers in an airtight container to keep them fresh and delicious!

Tips for Success

  • Use room temperature butter for easier creaming and a better texture.
  • Don’t skip the flaky sea salt on top; it enhances the flavor beautifully.
  • For uniform cookies, use a cookie scoop to measure the dough.
  • Experiment with chilling the dough for 30 minutes for thicker cookies.
  • Keep an eye on the baking time; ovens can vary!

Equipment Needed

  • Baking sheet: A standard sheet works, but a silicone mat can help with even baking.
  • Parchment paper: Great for easy cleanup; aluminum foil is a good alternative.
  • Mixing bowls: Use any size, but a large bowl is best for creaming.
  • Whisk: A hand whisk is perfect; an electric mixer speeds things up.
  • Cookie scoop: A tablespoon works if you don’t have one!

Variations

  • Brown Butter: For a nutty flavor, try browning the butter before adding it to the mix. It adds depth and richness.
  • Chocolate Chips: Fold in semi-sweet or dark chocolate chips for a delightful twist on the classic cookie.
  • Nuts: Add chopped walnuts or pecans for a crunchy texture that complements the buttery flavor.
  • Citrus Zest: Incorporate lemon or orange zest for a refreshing citrus note that brightens the cookies.
  • Gluten-Free Option: Substitute all-purpose flour with a gluten-free blend to make these cookies suitable for gluten-sensitive friends.

Serving Suggestions

  • Pair these cookies with a hot cup of coffee or tea for a delightful afternoon treat.
  • Serve alongside a scoop of vanilla ice cream for an indulgent dessert experience.
  • Present them on a rustic wooden platter for a charming touch.
  • For a festive flair, add a sprinkle of powdered sugar on top before serving.

FAQs about French Salted Butter Cookies

As you embark on your baking adventure with French Salted Butter Cookies, you might have a few questions. Here are some common queries that can help you along the way:

Can I use salted butter instead of unsalted butter?

Absolutely! If you prefer salted butter, just reduce the amount of sea salt in the recipe. This will help maintain the perfect balance of flavors in your cookies.

How do I store leftover cookies?

To keep your French Salted Butter Cookies fresh, store them in an airtight container at room temperature. They should stay delicious for up to a week!

Can I freeze the cookie dough?

Yes, you can! Shape the dough into balls and freeze them on a baking sheet. Once frozen, transfer them to a zip-top bag. When you’re ready to bake, just add a couple of extra minutes to the baking time.

What can I add to the dough for extra flavor?

Feel free to get creative! You can add chocolate chips, chopped nuts, or even a hint of citrus zest to enhance the flavor of your French Salted Butter Cookies.

Why are my cookies spreading too much?

If your cookies are spreading too much, it could be due to warm butter or not enough flour. Make sure your butter is softened but not melted, and consider chilling the dough for 30 minutes before baking.

Final Thoughts

Baking French Salted Butter Cookies is more than just a culinary task; it’s an experience that fills your home with warmth and joy. Each bite transports you to a quaint French café, where the simple pleasures of life are celebrated. The buttery richness paired with a hint of salt creates a delightful contrast that keeps you coming back for more. Whether you’re sharing them with friends or savoring them solo, these cookies bring a sense of comfort and satisfaction. So, roll up your sleeves, embrace the process, and let these cookies become a cherished part of your baking tradition!

jhessica

French Salted Butter Cookies: Discover the Secret Recipe!

Delicious and buttery French cookies with a hint of salt, perfect for any occasion.
Prep Time 15 minutes
Cook Time 15 minutes
Total Time 30 minutes
Servings: 24 cookies
Course: Dessert
Cuisine: French
Calories: 120

Ingredients
  

  • 2 cups all-purpose flour
  • 1/2 teaspoon baking powder
  • 1/2 teaspoon sea salt
  • 1 cup unsalted butter softened
  • 3/4 cup granulated sugar
  • 1/4 cup packed light brown sugar
  • 1 teaspoon pure vanilla extract
  • 1 large egg yolk
  • Flaky sea salt for sprinkling

Method
 

  1. Preheat your oven to 350°F (175°C) and line a baking sheet with parchment paper.
  2. In a medium bowl, whisk together the flour, baking powder, and sea salt. Set aside.
  3. In a large mixing bowl, beat the softened butter, granulated sugar, and brown sugar together until light and fluffy, about 2-3 minutes.
  4. Add the vanilla extract and egg yolk to the butter mixture, mixing until well combined.
  5. Gradually add the dry ingredients to the wet ingredients, mixing until just combined. Do not overmix.
  6. Using a cookie scoop or tablespoon, drop rounded balls of dough onto the prepared baking sheet, spacing them about 2 inches apart.
  7. Gently press each cookie ball down slightly with the palm of your hand, then sprinkle a small pinch of flaky sea salt on top of each cookie.
  8. Bake in the preheated oven for 12-15 minutes, or until the edges are lightly golden.
  9. Remove from the oven and let the cookies cool on the baking sheet for 5 minutes before transferring them to a wire rack to cool completely.

Nutrition

Serving: 1cookieCalories: 120kcalCarbohydrates: 10gProtein: 1gFat: 8gSaturated Fat: 5gPolyunsaturated Fat: 3gCholesterol: 20mgSodium: 50mgSugar: 6g

Notes

  • For a richer flavor, try using brown butter instead of regular butter.
  • You can also add chocolate chips or chopped nuts to the dough for added texture and flavor.

Tried this recipe?

Let us know how it was!

Giant Chocolate Chip Cookies: Bake Irresistible Treats Now!

Introduction to Giant Chocolate Chip Cookies

There’s something magical about the aroma of freshly baked cookies wafting through the house. Giant chocolate chip cookies, in particular, have a way of bringing back those warm childhood memories of baking with family. Whether you’re looking to impress friends or simply treat yourself after a long day, this recipe is your go-to solution. With just a few simple ingredients and minimal fuss, you can whip up these deliciously large and chewy cookies in no time. Trust me, once you take that first bite, you’ll understand why they’re a favorite for any occasion!

Why You’ll Love This Giant Chocolate Chip Cookies

These giant chocolate chip cookies are not just a treat; they’re a game changer. They come together quickly, making them perfect for busy weeknights or last-minute gatherings. The chewy texture and rich chocolate flavor will have everyone coming back for seconds. Plus, who can resist a cookie that’s bigger than your hand? It’s a simple recipe that delivers big on taste and satisfaction!

Ingredients for Giant Chocolate Chip Cookies

Gathering the right ingredients is the first step to cookie perfection. Here’s what you’ll need for these giant chocolate chip cookies:

  • All-purpose flour: The backbone of your cookies, providing structure and chewiness.
  • Baking soda: This little leavening agent helps your cookies rise and become fluffy.
  • Salt: A pinch enhances the sweetness and balances flavors.
  • Unsalted butter: Softened butter creates a rich, creamy base for your dough.
  • Granulated sugar: Adds sweetness and helps achieve that golden-brown color.
  • Brown sugar: Brings moisture and a hint of caramel flavor to your cookies.
  • Vanilla extract: A splash of this aromatic essence elevates the overall taste.
  • Large eggs: They bind everything together and add richness.
  • Semi-sweet chocolate chips: The star of the show! They melt beautifully and provide that classic chocolatey goodness.
  • Chopped nuts (optional): Walnuts or pecans add a delightful crunch, but feel free to skip them if you prefer a nut-free cookie.

For exact measurements, check the bottom of the article where you can find everything listed for easy printing. Happy baking!

How to Make Giant Chocolate Chip Cookies

Now that you have your ingredients ready, let’s dive into the fun part—making these giant chocolate chip cookies! Follow these simple steps, and you’ll be on your way to cookie bliss in no time.

Step 1: Preheat the Oven

First things first, preheat your oven to 350°F (175°C). This ensures your cookies bake evenly. While the oven warms up, line two baking sheets with parchment paper. This little trick prevents sticking and makes cleanup a breeze.

Step 2: Mix Dry Ingredients

In a medium bowl, whisk together the all-purpose flour, baking soda, and salt. This step is crucial as it evenly distributes the leavening agent and salt throughout the flour. Set this mixture aside for now; it’ll come into play shortly.

Step 3: Cream Butter and Sugars

In a large bowl, cream together the softened butter, granulated sugar, brown sugar, and vanilla extract. Use a hand mixer or a sturdy spatula to beat until the mixture is light and fluffy. This process incorporates air, giving your cookies that delightful texture.

Step 4: Add Eggs

Next, beat in the eggs one at a time. Make sure each egg is fully incorporated before adding the next. This helps create a smooth batter and ensures your cookies have the right consistency.

Step 5: Combine Dry and Wet Ingredients

Gradually mix in the dry ingredients until just combined. Be careful not to overmix; a few flour streaks are okay. Overmixing can lead to tough cookies, and we want them to be soft and chewy!

Step 6: Fold in Chocolate Chips and Nuts

Now, it’s time for the star of the show! Gently fold in the semi-sweet chocolate chips and chopped nuts (if you’re using them). This is where the magic happens, as those chocolate chips will melt into gooey goodness while baking.

Step 7: Scoop the Dough

Using a large cookie scoop or a 1/4 cup measuring cup, drop dough onto the prepared baking sheets. Make sure to space them about 3 inches apart. These cookies spread out as they bake, so give them room to grow!

Step 8: Bake

Pop the baking sheets into the oven and bake for 12-15 minutes. Keep an eye on them! You want the edges to be golden brown while the centers remain soft. This contrast is what makes these giant chocolate chip cookies so irresistible.

Step 9: Cool the Cookies

Once baked, remove the cookies from the oven and let them cool on the baking sheets for about 5 minutes. This allows them to set up a bit before transferring them to wire racks to cool completely. Trust me, the wait will be worth it!

Tips for Success

  • For extra chewiness, slightly underbake the cookies and let them sit on the baking sheet longer.
  • Use room temperature ingredients for better mixing and texture.
  • Chill the dough for 30 minutes before baking to enhance flavor and prevent spreading.
  • Experiment with different chocolate types for a unique twist.
  • Store cookies in an airtight container to keep them fresh and soft.

Equipment Needed

  • Baking sheets: Essential for baking; you can use any flat, oven-safe tray.
  • Parchment paper: Helps prevent sticking; aluminum foil works in a pinch.
  • Mixing bowls: A set of various sizes is handy; any large bowl will do.
  • Cookie scoop: For uniform cookies; a measuring cup can substitute.
  • Wire racks: Ideal for cooling; a plate can work if you don’t have them.

Variations

  • Dark Chocolate Delight: Swap semi-sweet chocolate chips for dark chocolate chips for a richer flavor.
  • Nutty Twist: Add chopped walnuts or pecans for an extra crunch and nutty flavor.
  • Oatmeal Chocolate Chip: Mix in 1 cup of rolled oats for a heartier texture and added fiber.
  • Gluten-Free Option: Substitute all-purpose flour with a gluten-free flour blend for a gluten-free treat.
  • Vegan Version: Use coconut oil instead of butter and flax eggs in place of regular eggs for a plant-based cookie.

Serving Suggestions

  • Pair these giant chocolate chip cookies with a tall glass of cold milk for the ultimate treat.
  • Serve warm with a scoop of vanilla ice cream on top for a delicious dessert sundae.
  • For a fun presentation, stack cookies on a decorative plate and sprinkle with sea salt.
  • Offer alongside a rich cup of coffee or hot chocolate for a cozy afternoon snack.

FAQs about Giant Chocolate Chip Cookies

Can I freeze giant chocolate chip cookies?

Absolutely! You can freeze the dough or the baked cookies. For dough, scoop it onto a baking sheet and freeze until solid, then transfer to a zip-top bag. Baked cookies can be stored in an airtight container for up to three months. Just thaw and enjoy!

What can I use instead of eggs in this recipe?

If you’re looking for an egg substitute, try using flax eggs. Mix 1 tablespoon of ground flaxseed with 2.5 tablespoons of water for each egg. Let it sit for a few minutes until it thickens. This works great in giant chocolate chip cookies!

How do I store leftover cookies?

To keep your giant chocolate chip cookies fresh, store them in an airtight container at room temperature. They’ll stay soft and chewy for several days. If you want to keep them longer, consider freezing them!

Can I use different types of chocolate chips?

Definitely! Feel free to mix it up. Dark chocolate, white chocolate, or even peanut butter chips can add a unique twist to your giant chocolate chip cookies. Get creative and find your favorite combination!

Why are my cookies flat?

If your cookies turn out flat, it could be due to melted butter or not enough flour. Make sure your butter is softened, not melted, and measure your flour accurately. A little extra flour can help achieve that perfect chewy texture!

Final Thoughts

Baking giant chocolate chip cookies is more than just a recipe; it’s an experience that brings joy to your kitchen and warmth to your heart. Each bite is a delightful reminder of simpler times, filled with laughter and love. Whether you’re sharing them with family or indulging solo, these cookies have a way of making any day feel special. The aroma, the gooey chocolate, and that perfect chewy texture create a moment of happiness. So, roll up your sleeves, embrace the mess, and let these giant cookies become a cherished part of your baking adventures!

jhessica

Giant Chocolate Chip Cookies: Bake Irresistible Treats Now!

Deliciously large and chewy chocolate chip cookies that are perfect for any occasion.
Prep Time 15 minutes
Cook Time 15 minutes
Total Time 30 minutes
Servings: 12 cookies
Course: Dessert
Cuisine: American
Calories: 320

Ingredients
  

  • 2 1/4 cups all-purpose flour
  • 1 teaspoon baking soda
  • 1/2 teaspoon salt
  • 1 cup unsalted butter softened
  • 3/4 cup granulated sugar
  • 3/4 cup packed brown sugar
  • 1 teaspoon vanilla extract
  • 2 large eggs
  • 2 cups semi-sweet chocolate chips
  • 1 cup chopped nuts optional

Method
 

  1. Preheat your oven to 350°F (175°C). Line two baking sheets with parchment paper.
  2. In a medium bowl, whisk together the flour, baking soda, and salt. Set aside.
  3. In a large bowl, cream together the softened butter, granulated sugar, brown sugar, and vanilla extract until light and fluffy.
  4. Beat in the eggs one at a time, ensuring each is fully incorporated before adding the next.
  5. Gradually mix in the dry ingredients until just combined. Avoid overmixing.
  6. Fold in the chocolate chips and nuts (if using).
  7. Using a large cookie scoop or 1/4 cup measuring cup, drop dough onto the prepared baking sheets, spacing them about 3 inches apart.
  8. Bake for 12-15 minutes, or until the edges are golden brown and the centers are still soft.
  9. Remove from the oven and let the cookies cool on the baking sheets for 5 minutes before transferring them to wire racks to cool completely.

Nutrition

Serving: 1cookieCalories: 320kcalCarbohydrates: 36gProtein: 3gFat: 17gSaturated Fat: 10gPolyunsaturated Fat: 7gCholesterol: 40mgSodium: 150mgFiber: 1gSugar: 20g

Notes

  • For a chewy texture, slightly underbake the cookies and let them sit on the baking sheet for a few extra minutes before transferring.
  • Experiment with different types of chocolate chips, such as dark chocolate or white chocolate, or add dried fruits for a unique twist.

Tried this recipe?

Let us know how it was!

Creamy Chicken Broccoli Pasta Salad is a must-try delight!

Introduction to Creamy Chicken Broccoli Pasta Salad

When I think of comfort food, my mind often drifts to a bowl of Creamy Chicken Broccoli Pasta Salad. This dish is more than just a meal; it’s a delightful blend of flavors and textures that brings back memories of family gatherings and sunny picnics.

Perfect for those busy weeknights or when you want to impress friends at a casual get-together, this pasta salad is a quick solution that doesn’t skimp on taste. With tender rotini, juicy chicken, and vibrant veggies, it’s a dish that satisfies both the stomach and the soul.

Why You’ll Love This Creamy Chicken Broccoli Pasta Salad

This Creamy Chicken Broccoli Pasta Salad is a game-changer for anyone juggling a busy schedule.

It comes together in just 25 minutes, making it a lifesaver for weeknight dinners.

The creamy dressing perfectly complements the tender chicken and fresh veggies, creating a flavor explosion in every bite.

Plus, it’s versatile enough to serve as a main dish or a side, ensuring it fits any occasion.

Ingredients for Creamy Chicken Broccoli Pasta Salad

Creating the perfect Creamy Chicken Broccoli Pasta Salad starts with gathering the right ingredients. Here’s what you’ll need:

  • Rotini pasta: This spiral-shaped pasta holds onto the creamy dressing beautifully, making every bite satisfying.
  • Cooked chicken: Shredded chicken adds protein and heartiness. You can use leftover rotisserie chicken for convenience.
  • Broccoli florets: Steamed broccoli not only brings a pop of color but also a nutritious crunch to the salad.
  • Cherry tomatoes: These sweet, juicy gems add freshness and a burst of flavor.
  • Red onion: Finely chopped, it provides a mild bite that complements the other ingredients.
  • Mayonnaise: This creamy base helps bind everything together, giving the salad its rich texture.
  • Plain Greek yogurt: A healthier alternative to sour cream, it adds creaminess and a slight tang.
  • Dijon mustard: Just a touch of this mustard elevates the flavor profile with its zesty kick.
  • Lemon juice: A splash of acidity brightens the dish and balances the creaminess.
  • Garlic powder: This adds a subtle depth of flavor without overpowering the other ingredients.
  • Salt and pepper: Essential for seasoning, these staples enhance all the flavors in the salad.
  • Shredded cheddar cheese (optional): For those who love cheese, this adds an extra layer of richness and flavor.

Feel free to get creative! You can toss in some chopped bell peppers or cucumbers for added crunch. If you’re looking for a different protein option, canned tuna or chickpeas work wonderfully as substitutes.

For exact measurements, check the bottom of the article where you can find everything available for printing.

How to Make Creamy Chicken Broccoli Pasta Salad

Making Creamy Chicken Broccoli Pasta Salad is a breeze.

With just a few simple steps, you’ll have a delicious dish ready to impress.

Let’s dive into the process!

Step 1: Cook the Pasta

Start by boiling a pot of salted water.

Add the rotini pasta and cook according to the package instructions until al dente.

Once done, drain the pasta and rinse it under cold water.

This stops the cooking process and helps cool it down for the salad.

Step 2: Combine the Ingredients

In a large mixing bowl, combine the cooled pasta, shredded chicken, steamed broccoli, halved cherry tomatoes, and chopped red onion.

Make sure everything is evenly distributed.

This is where the magic begins, as the colors and textures come together beautifully.

Step 3: Prepare the Dressing

In a separate bowl, whisk together the mayonnaise, Greek yogurt, Dijon mustard, lemon juice, garlic powder, salt, and pepper.

Mix until smooth and creamy.

This dressing is the heart of your salad, adding that rich flavor we all crave.

Step 4: Mix Everything Together

Pour the dressing over the pasta mixture.

Gently toss everything together until all the ingredients are well coated.

If you’re feeling cheesy, now’s the time to stir in the shredded cheddar cheese for an extra layer of flavor.

Step 5: Chill and Serve

Cover the bowl with plastic wrap and refrigerate for at least 30 minutes.

This allows the flavors to meld together, creating a more delicious dish.

Serve chilled or at room temperature, and watch your friends and family dig in!

Tips for Success

  • Always rinse the pasta with cold water to stop cooking and prevent clumping.
  • For a creamier texture, let the salad sit longer in the fridge before serving.
  • Adjust the seasoning to your taste; a pinch of cayenne can add a nice kick!
  • Use fresh ingredients for the best flavor and nutrition.
  • Feel free to customize with your favorite veggies or proteins.

Equipment Needed

  • Large pot: For boiling pasta. A deep skillet can work in a pinch.
  • Colander: To drain the pasta. A slotted spoon can also do the job.
  • Mixing bowls: One large for the salad and a smaller one for the dressing.
  • Whisk: For blending the dressing. A fork can suffice if you’re in a hurry.
  • Plastic wrap: To cover the salad while it chills. A lid works too!

Variations

  • Vegetarian Delight: Swap the chicken for chickpeas or black beans for a protein-packed vegetarian option.
  • Italian Twist: Add diced salami or pepperoni along with some Italian seasoning for a zesty flavor boost.
  • Spicy Kick: Incorporate diced jalapeños or a dash of hot sauce to give your salad a fiery edge.
  • Whole Grain Goodness: Use whole wheat rotini for a healthier, fiber-rich alternative.
  • Low-Fat Version: Substitute the mayonnaise with a low-fat version or use avocado for a creamy texture without the calories.

Serving Suggestions

  • Pair your Creamy Chicken Broccoli Pasta Salad with crusty garlic bread for a satisfying meal.
  • A light, crisp green salad complements the richness of the pasta salad beautifully.
  • Serve with a chilled glass of lemonade or iced tea for a refreshing touch.
  • For presentation, garnish with fresh herbs like parsley or basil for a pop of color.

FAQs about Creamy Chicken Broccoli Pasta Salad

Can I make this salad ahead of time?

Absolutely! In fact, making Creamy Chicken Broccoli Pasta Salad a day in advance allows the flavors to meld beautifully. Just store it in the fridge, and it’ll be ready to serve when you are.

What can I substitute for chicken?

If you’re looking for alternatives, canned tuna or chickpeas work great. Both options provide protein while keeping the salad delicious and satisfying.

How long does this salad last in the fridge?

This pasta salad can last up to three days in the fridge. Just make sure to keep it covered to maintain freshness.

Can I use a different type of pasta?

Definitely! While rotini is perfect for holding the creamy dressing, you can use any pasta shape you prefer, like penne or fusilli. Just adjust the cooking time as needed.

Is this salad suitable for meal prep?

<pYes, it’s a fantastic option for meal prep! Portion it out into containers for easy grab-and-go lunches throughout the week. Just remember to keep the dressing separate if you prefer a fresher taste.

Final Thoughts

Creating a bowl of Creamy Chicken Broccoli Pasta Salad is more than just cooking; it’s about bringing people together.

The vibrant colors and rich flavors make it a feast for the eyes and the palate.

Whether you’re enjoying it on a busy weeknight or serving it at a gathering, this dish is sure to impress.

It’s a recipe that invites creativity, allowing you to customize it to your taste.

So, roll up your sleeves, gather your ingredients, and let the joy of cooking fill your kitchen.

You’ll find that every bite is a celebration of flavor and togetherness.

jhessica

Creamy Chicken Broccoli Pasta Salad is a must-try delight!

Creamy Chicken Broccoli Pasta Salad is a must-try delight that combines tender rotini pasta, shredded chicken, and fresh vegetables in a creamy dressing.
Prep Time 15 minutes
Cook Time 10 minutes
Total Time 25 minutes
Servings: 4 servings
Course: Salad
Cuisine: American
Calories: 320

Ingredients
  

  • 2 cups rotini pasta
  • 1 cup cooked chicken shredded
  • 1 cup broccoli florets steamed
  • 1/2 cup cherry tomatoes halved
  • 1/4 cup red onion finely chopped
  • 1/2 cup mayonnaise
  • 1/4 cup plain Greek yogurt
  • 1 tablespoon Dijon mustard
  • 1 tablespoon lemon juice
  • 1 teaspoon garlic powder
  • Salt and pepper to taste
  • 1/4 cup shredded cheddar cheese optional

Method
 

  1. Cook the rotini pasta according to package instructions. Drain and rinse under cold water to cool.
  2. In a large bowl, combine the cooked pasta, shredded chicken, steamed broccoli, cherry tomatoes, and red onion.
  3. In a separate bowl, whisk together the mayonnaise, Greek yogurt, Dijon mustard, lemon juice, garlic powder, salt, and pepper until smooth.
  4. Pour the dressing over the pasta mixture and toss until everything is well coated.
  5. If desired, stir in the shredded cheddar cheese.
  6. Cover and refrigerate for at least 30 minutes to allow the flavors to meld. Serve chilled or at room temperature.

Nutrition

Serving: 1servingCalories: 320kcalCarbohydrates: 30gProtein: 22gFat: 15gSaturated Fat: 3gPolyunsaturated Fat: 10gCholesterol: 50mgSodium: 500mgFiber: 2gSugar: 3g

Notes

  • For added crunch, toss in some chopped bell peppers or cucumbers.
  • Substitute the chicken with canned tuna or chickpeas for a different protein option.

Tried this recipe?

Let us know how it was!

Fresh Vegetable Tortilla Roll-Ups are a crunchy delight!

Introduction to Fresh Vegetable Tortilla Roll-Ups

When I think of quick, satisfying snacks, Fresh Vegetable Tortilla Roll-Ups always come to mind.

These delightful bites are not just a treat for the taste buds; they’re a colorful way to sneak in some veggies.

Whether you’re hosting friends for game day or just need a light snack after a long day, these roll-ups are your go-to solution.

They’re easy to whip up, and the creamy spread paired with crisp vegetables creates a crunchy delight that everyone will love.

Let’s dive into this simple recipe that’s sure to impress your loved ones!

Why You’ll Love This Fresh Vegetable Tortilla Roll-Ups

Fresh Vegetable Tortilla Roll-Ups are a game-changer for busy days.

They come together in just 15 minutes, making them perfect for last-minute gatherings or a quick snack.

The vibrant colors and crunchy textures make them visually appealing, while the creamy spread adds a rich flavor that balances everything beautifully.

Plus, they’re versatile! You can customize them with your favorite veggies or dips, ensuring everyone leaves satisfied.

Ingredients for Fresh Vegetable Tortilla Roll-Ups

Creating these Fresh Vegetable Tortilla Roll-Ups is a breeze, especially with the right ingredients.

Here’s what you’ll need:

  • Flour tortillas: These serve as the base. Choose large ones for easy rolling.
  • Cream cheese: Softened for easy spreading, it adds a creamy texture. You can swap it for hummus for a dairy-free option.
  • Shredded carrots: They bring a sweet crunch and vibrant color.
  • Cucumber: Thinly sliced, it adds a refreshing crunch.
  • Bell pepper: Any color works! They add sweetness and a pop of color.
  • Red onion: Finely chopped, it gives a zesty kick.
  • Fresh spinach leaves: These add a nutritious boost and a lovely green hue.
  • Garlic powder: A sprinkle enhances the flavor without overpowering.
  • Salt and black pepper: Essential for seasoning, they elevate the overall taste.

Feel free to get creative!

You can add sliced jalapeños for heat or even swap in your favorite veggies.

For exact measurements, check the bottom of the article where you can find everything available for printing.

How to Make Fresh Vegetable Tortilla Roll-Ups

Making Fresh Vegetable Tortilla Roll-Ups is as easy as pie, or should I say, as easy as rolling a tortilla?

Let’s break it down step by step, ensuring you get the most out of this crunchy delight.

Step 1: Prepare the Tortillas

Lay the flour tortillas flat on a clean surface or cutting board.

Make sure they’re smooth and ready for action.

A little tip: If your tortillas are cold, give them a quick 10-second zap in the microwave.

This makes them more pliable and easier to roll.

Step 2: Mix the Cream Cheese Spread

In a medium bowl, mix the softened cream cheese, garlic powder, salt, and black pepper until well combined.

This creamy spread is the heart of your roll-ups.

Feel free to taste it! Adjust the seasoning if you like a little more kick.

Step 3: Spread the Cream Cheese Mixture

Spread an even layer of the cream cheese mixture over each tortilla, leaving a small border around the edges.

Don’t skimp on this step; it’s where the magic begins!

The creaminess will hold everything together and add a delightful flavor.

Step 4: Add the Fresh Vegetables

Evenly distribute the shredded carrots, cucumber slices, bell pepper slices, red onion, and spinach leaves over the cream cheese layer on each tortilla.

Layering is key here!

The more colorful your veggies, the more appealing your roll-ups will be.

Plus, it’s a great way to sneak in those nutrients.

Step 5: Roll the Tortillas

Starting from one end, carefully roll the tortilla tightly to enclose the filling.

Keep it snug but not too tight; you don’t want the filling to spill out.

Repeat with the second tortilla, and you’re almost there!

Step 6: Slice and Serve

Once rolled, use a sharp knife to slice each tortilla into 1-inch thick pinwheels.

Arrange the roll-ups on a serving platter and serve immediately.

If you have time, refrigerate for 30 minutes to firm up before serving.

This makes them even easier to handle and enhances the flavors.

Enjoy your Fresh Vegetable Tortilla Roll-Ups!

Tips for Success

  • Use room temperature cream cheese for easier spreading.
  • Experiment with different veggies like zucchini or radishes for variety.
  • For a crunchier texture, add some chopped nuts or seeds.
  • Wrap the roll-ups tightly in plastic wrap if you’re making them ahead of time.
  • Serve with a dipping sauce like ranch or salsa for extra flavor.

Equipment Needed

  • Cutting board: A clean surface for rolling and slicing.
  • Sharp knife: Essential for cutting the roll-ups into pinwheels.
  • Medium bowl: For mixing the cream cheese spread.
  • Spatula or knife: Useful for spreading the cream cheese evenly.

Variations

  • Spicy Kick: Add sliced jalapeños or a sprinkle of red pepper flakes to the cream cheese mixture for a fiery twist.
  • Herbed Cream Cheese: Mix in fresh herbs like dill or chives into the cream cheese for an aromatic flavor boost.
  • Hummus Swap: Replace cream cheese with hummus for a dairy-free option that’s equally delicious.
  • Protein Boost: Include sliced turkey or chicken for a heartier roll-up that packs more protein.
  • Fruit Addition: Add thin slices of apple or pear for a sweet contrast to the savory veggies.

Serving Suggestions

  • Pair with a zesty salsa or creamy ranch dressing for dipping.
  • Serve alongside a fresh garden salad for a complete meal.
  • Offer a selection of beverages like iced tea or sparkling water to refresh.
  • Garnish with fresh herbs for an elegant touch on the platter.

FAQs about Fresh Vegetable Tortilla Roll-Ups

Can I make Fresh Vegetable Tortilla Roll-Ups ahead of time?

Absolutely! You can prepare these roll-ups a few hours in advance. Just wrap them tightly in plastic wrap and refrigerate. This helps the flavors meld together beautifully.

What can I substitute for cream cheese?

If you’re looking for a dairy-free option, hummus works wonderfully! It adds a different flavor profile while keeping the roll-ups creamy and delicious.

How do I store leftover roll-ups?

Store any leftovers in an airtight container in the fridge. They should stay fresh for up to two days, but trust me, they’re usually gone long before then!

Can I use whole wheat tortillas instead?

Definitely! Whole wheat tortillas are a great alternative. They add a nutty flavor and extra fiber, making your Fresh Vegetable Tortilla Roll-Ups even healthier.

What other vegetables can I add?

The sky’s the limit! Try adding sliced bell peppers, zucchini, or even roasted red peppers for a twist. Get creative with your favorite veggies!

Final Thoughts

Fresh Vegetable Tortilla Roll-Ups are more than just a snack; they’re a celebration of color, flavor, and creativity.

Each bite is a crunchy delight that brings a smile, whether you’re enjoying them solo or sharing with friends.

The joy of rolling up fresh veggies in a creamy spread is a simple pleasure that brightens any day.

Plus, they’re adaptable, making them perfect for any occasion.

So, gather your ingredients, unleash your inner chef, and let these roll-ups bring a burst of freshness to your table.

You won’t just be serving food; you’ll be sharing happiness!

jhessica

Fresh Vegetable Tortilla Roll-Ups are a crunchy delight!

Fresh Vegetable Tortilla Roll-Ups are a crunchy delight filled with fresh vegetables and a creamy spread, perfect for a light snack or appetizer.
Prep Time 15 minutes
Total Time 15 minutes
Servings: 4 servings
Course: Appetizer
Cuisine: American
Calories: 150

Ingredients
  

  • 2 large flour tortillas
  • 1 cup cream cheese softened
  • 1/2 cup shredded carrots
  • 1/2 cup cucumber thinly sliced
  • 1/2 cup bell pepper thinly sliced (any color)
  • 1/4 cup red onion finely chopped
  • 1/4 cup fresh spinach leaves
  • 1/4 teaspoon garlic powder
  • 1/4 teaspoon salt
  • 1/4 teaspoon black pepper

Method
 

  1. Lay the flour tortillas flat on a clean surface or cutting board.
  2. In a medium bowl, mix the softened cream cheese, garlic powder, salt, and black pepper until well combined.
  3. Spread an even layer of the cream cheese mixture over each tortilla, leaving a small border around the edges.
  4. Evenly distribute the shredded carrots, cucumber slices, bell pepper slices, red onion, and spinach leaves over the cream cheese layer on each tortilla.
  5. Starting from one end, carefully roll the tortilla tightly to enclose the filling. Repeat with the second tortilla.
  6. Once rolled, use a sharp knife to slice each tortilla into 1-inch thick pinwheels.
  7. Arrange the roll-ups on a serving platter and serve immediately, or refrigerate for 30 minutes to firm up before serving.

Nutrition

Serving: 1roll-upCalories: 150kcalCarbohydrates: 15gProtein: 4gFat: 9gSaturated Fat: 4gPolyunsaturated Fat: 5gCholesterol: 20mgSodium: 200mgFiber: 2gSugar: 2g

Notes

  • For a spicy kick, add sliced jalapeños or a sprinkle of red pepper flakes to the cream cheese mixture.
  • You can also substitute the cream cheese with hummus for a dairy-free option.

Tried this recipe?

Let us know how it was!

Cruffin Delight: Discover the Ultimate Recipe Now!

Introduction to Cruffin Delight

There’s something magical about the aroma of freshly baked goods wafting through the kitchen. It takes me back to my childhood, where weekends meant warm pastries and family gatherings. Today, I’m excited to share my take on a delightful treat that combines the best of both worlds: the Cruffin Delight. This recipe is perfect for those busy mornings when you need a quick breakfast or a sweet indulgence to impress your loved ones. With its flaky layers and sweet cinnamon goodness, these cruffins are sure to become a favorite in your home. Let’s dive in!

Why You’ll Love This Cruffin Delight

What’s not to love about a treat that’s both easy to make and utterly delicious? The Cruffin Delight is a game-changer for busy mornings or lazy weekends. It combines the flaky, buttery goodness of croissants with the comforting shape of muffins. Plus, you can whip these up in under two hours, making them a perfect choice for a last-minute brunch or a sweet surprise for your family. Trust me, they’ll be asking for seconds!

Ingredients for Cruffin Delight

Gathering the right ingredients is the first step to creating your Cruffin Delight. Here’s what you’ll need:

  • All-purpose flour: The backbone of your dough, providing structure and texture.
  • Granulated sugar: Adds sweetness and helps with browning during baking.
  • Instant yeast: This little powerhouse helps your dough rise quickly, giving those flaky layers.
  • Salt: Enhances flavor and balances the sweetness of the sugar.
  • Whole milk: Warmed to help activate the yeast, it adds richness to the dough.
  • Unsalted butter: Melted for the dough and softened for spreading, it brings that buttery goodness.
  • Large egg: Acts as a binder, giving the dough its structure and a lovely golden color.
  • Vanilla extract: A splash of this adds a warm, inviting flavor to your cruffins.
  • Cinnamon sugar: A delightful mix of sugar and cinnamon that brings warmth and sweetness to each bite.
  • Powdered sugar: Optional for dusting, it adds a touch of elegance to your finished cruffins.

For those looking to mix things up, consider adding mini chocolate chips to the cinnamon sugar for a sweet twist. If savory is more your style, swap the cinnamon sugar for garlic powder and grated cheese. The possibilities are endless!

Exact measurements for these ingredients can be found at the bottom of the article, ready for printing. Happy baking!

How to Make Cruffin Delight

Now that you have your ingredients ready, it’s time to roll up your sleeves and dive into the fun part: making your Cruffin Delight. Follow these simple steps, and you’ll be on your way to creating a batch of flaky, sweet goodness that will have everyone coming back for more.

Step 1: Prepare the Dough

Start by mixing your dry ingredients. In a large bowl, combine the all-purpose flour, granulated sugar, instant yeast, and salt. Give it a good stir to ensure everything is evenly distributed. In a separate bowl, whisk together the warmed whole milk, melted unsalted butter, large egg, and vanilla extract until smooth. This mixture is crucial; it brings moisture and flavor to your dough.

Now, pour the wet ingredients into the dry mix. Stir until a dough begins to form. Here’s where the magic happens: knead the dough on a floured surface for about five minutes. This step is vital for developing gluten, which gives your cruffins that perfect texture. You want it smooth and elastic, not sticky.

Step 2: Let the Dough Rise

Once your dough is kneaded, it’s time for a little patience. Place the dough in a greased bowl and cover it with a clean kitchen towel. Let it rise in a warm spot for about an hour, or until it doubles in size. This rising process is essential; it creates those lovely air pockets that make your cruffins light and fluffy. If your kitchen is cool, consider placing the bowl in a slightly warm oven (turned off, of course) to help it along.

Step 3: Shape the Cruffins

After the dough has risen, it’s time to shape your cruffins. Roll it out on a floured surface into a rectangle about 1/4 inch thick. Spread the softened butter evenly over the surface, then sprinkle the cinnamon sugar mixture generously on top. This is where the flavor really comes alive!

Now, starting from one long edge, roll the dough tightly into a log. The tighter you roll, the more layers you’ll get in your cruffins. Once rolled, cut the log into 12 equal pieces. Place each piece upright in a greased muffin tin, allowing them to rise for another 30 minutes. This second rise is crucial for achieving that perfect puffiness.

Step 4: Bake the Cruffins

Preheat your oven to 375°F (190°C) while your cruffins are rising. Once they’ve puffed up nicely, pop them in the oven and bake for 15-20 minutes. Keep an eye on them; you want them golden brown and smelling heavenly. To check for doneness, gently tap the top of a cruffin; it should sound hollow. Let them cool slightly before dusting with powdered sugar for that extra touch of sweetness.

Tips for Success

  • Use room temperature ingredients for better mixing and texture.
  • Don’t rush the rising time; it’s key for fluffy cruffins.
  • Experiment with fillings like chocolate chips or fruit preserves for a twist.
  • Keep your work surface floured to prevent sticking while rolling.
  • For a golden finish, brush the tops with melted butter before baking.

Equipment Needed

  • Mixing bowls: A large bowl for mixing dough and a smaller one for wet ingredients.
  • Rolling pin: If you don’t have one, a wine bottle works in a pinch!
  • Muffin tin: Essential for shaping your cruffins; silicone molds are a great alternative.
  • Whisk: For blending wet ingredients; a fork can do the job too.
  • Kitchen towel: To cover the dough while it rises; any clean cloth will suffice.

Variations of Cruffin Delight

  • Chocolate Chip Cruffins: Add mini chocolate chips to the cinnamon sugar mixture for a sweet, gooey surprise.
  • Savory Garlic and Cheese Cruffins: Replace the cinnamon sugar with garlic powder and grated cheese for a deliciously savory twist.
  • Fruit-Filled Cruffins: Incorporate fresh berries or fruit preserves in the center before rolling for a fruity burst.
  • Nutty Cruffins: Mix in chopped nuts like pecans or walnuts with the cinnamon sugar for added crunch and flavor.
  • Gluten-Free Cruffins: Substitute all-purpose flour with a gluten-free blend to accommodate dietary needs.

Serving Suggestions for Cruffin Delight

  • Pair your cruffins with a hot cup of coffee or a refreshing glass of orange juice.
  • Serve with a side of fresh fruit for a balanced breakfast.
  • For a brunch spread, arrange cruffins on a decorative platter with a dusting of powdered sugar.
  • Drizzle with honey or maple syrup for an extra touch of sweetness.

FAQs about Cruffin Delight

What is a cruffin?

A cruffin is a delightful hybrid of a croissant and a muffin. It features the flaky layers of a croissant, shaped like a muffin, making it a perfect treat for breakfast or dessert.

Can I make cruffins ahead of time?

Absolutely! You can prepare the dough in advance and refrigerate it overnight. Just let it come to room temperature before shaping and baking for the best results.

How do I store leftover cruffins?

Store your Cruffin Delight in an airtight container at room temperature for up to two days. For longer storage, consider freezing them and reheating in the oven.

Can I customize the filling?

Yes! Feel free to get creative. You can add chocolate chips, fruit preserves, or even savory ingredients like cheese and herbs to suit your taste.

What’s the best way to enjoy cruffins?

Enjoy your cruffins warm, dusted with powdered sugar, or drizzled with honey. Pair them with coffee or tea for a delightful treat any time of day!

Final Thoughts

Creating the Cruffin Delight is more than just baking; it’s an experience filled with warmth and joy. The process of mixing, rolling, and watching those delightful pastries rise brings back memories of family gatherings and shared laughter. Each bite is a reminder of the simple pleasures in life, combining flaky layers with sweet cinnamon goodness. Whether you’re enjoying them on a busy morning or serving them at a brunch, these cruffins are sure to bring smiles to your table. So roll up your sleeves, embrace the joy of baking, and let the deliciousness unfold!

jhessica

Cruffin Delight: Discover the Ultimate Recipe Now!

A delightful recipe for Cruffins, a hybrid of croissants and muffins, perfect for breakfast or a sweet treat.
Prep Time 20 minutes
Cook Time 20 minutes
Total Time 1 hour 40 minutes
Servings: 12 servings
Course: Dessert
Cuisine: American
Calories: 210

Ingredients
  

  • 2 cups all-purpose flour
  • 1/4 cup granulated sugar
  • 1 teaspoon instant yeast
  • 1/2 teaspoon salt
  • 1/2 cup whole milk warmed
  • 1/4 cup unsalted butter melted
  • 1 large egg
  • 1 teaspoon vanilla extract
  • 1/2 cup unsalted butter softened (for spreading)
  • 1/2 cup cinnamon sugar 1/2 cup granulated sugar mixed with 2 tablespoons ground cinnamon
  • Powdered sugar for dusting, optional

Method
 

  1. In a large mixing bowl, combine the flour, granulated sugar, instant yeast, and salt. Mix well.
  2. In a separate bowl, whisk together the warmed milk, melted butter, egg, and vanilla extract until smooth.
  3. Pour the wet ingredients into the dry ingredients and mix until a dough forms. Knead the dough on a floured surface for about 5 minutes until smooth and elastic.
  4. Place the dough in a greased bowl, cover with a clean kitchen towel, and let it rise in a warm place for about 1 hour or until doubled in size.
  5. Preheat your oven to 375°F (190°C) and grease a muffin tin.
  6. Once the dough has risen, roll it out on a floured surface into a rectangle about 1/4 inch thick. Spread the softened butter evenly over the dough, then sprinkle the cinnamon sugar mixture on top.
  7. Starting from one long edge, roll the dough tightly into a log. Cut the log into 12 equal pieces.
  8. Place each piece upright in the greased muffin tin, allowing them to rise for another 30 minutes.
  9. Bake in the preheated oven for 15-20 minutes or until golden brown. Let cool slightly before dusting with powdered sugar, if desired.

Nutrition

Serving: 1cruffinCalories: 210kcalCarbohydrates: 25gProtein: 3gFat: 10gSaturated Fat: 6gPolyunsaturated Fat: 4gCholesterol: 30mgSodium: 150mgFiber: 1gSugar: 10g

Notes

  • For a chocolate twist, add mini chocolate chips to the cinnamon sugar mixture.
  • To make a savory version, replace the cinnamon sugar with garlic powder and grated cheese before rolling up the dough.

Tried this recipe?

Let us know how it was!

Cheesy BBQ Smoked Meatloaf: A Flavorful Comfort Dish

Introduction to Cheesy BBQ Smoked Meatloaf

There’s something undeniably comforting about a hearty meatloaf, especially when it’s infused with smoky flavors and gooey cheese. My journey with Cheesy BBQ Smoked Meatloaf began on a chilly evening, craving a dish that would warm both my heart and my home. This recipe is perfect for those busy weeknights when you want to impress your loved ones without spending hours in the kitchen. With just a few simple ingredients and a smoker, you can create a flavorful masterpiece that will have everyone asking for seconds. Trust me, this dish is a game-changer!

Why You’ll Love This Cheesy BBQ Smoked Meatloaf

This Cheesy BBQ Smoked Meatloaf is a true crowd-pleaser. It combines the rich flavors of beef and pork with the irresistible allure of melted cheese and tangy barbecue sauce. Not only is it easy to prepare, but it also cooks slowly in the smoker, allowing the flavors to meld beautifully. Plus, it’s a fantastic way to bring the family together around the dinner table, making it a perfect choice for any occasion.

Ingredients for Cheesy BBQ Smoked Meatloaf

Gathering the right ingredients is the first step to creating a delicious Cheesy BBQ Smoked Meatloaf. Here’s what you’ll need:

  • Ground beef: This is the heart of your meatloaf, providing rich flavor and texture.
  • Ground pork: Adds moisture and a hint of sweetness, balancing the beef perfectly.
  • Breadcrumbs: These help bind the meatloaf together, ensuring it holds its shape while cooking.
  • Shredded cheddar cheese: Melts beautifully, adding a creamy, cheesy goodness that elevates the dish.
  • Diced onion: Brings a savory depth of flavor, enhancing the overall taste.
  • Diced bell pepper: Adds a pop of color and a slight sweetness, making each bite more enjoyable.
  • Large eggs: Acts as a binder, helping to hold everything together.
  • Barbecue sauce: A key ingredient for that smoky, tangy flavor; you’ll also use it for topping.
  • Worcestershire sauce: Adds a complex umami flavor that deepens the taste profile.
  • Garlic powder: A must-have for that aromatic kick.
  • Onion powder: Enhances the onion flavor without the texture of fresh onions.
  • Salt and black pepper: Essential seasonings that bring all the flavors together.
  • Smoked paprika: Infuses a subtle smokiness, complementing the smoking process.

For those looking to spice things up, consider adding cayenne pepper for a kick. If you prefer a different cheese, pepper jack can provide a delightful twist. You can find the exact quantities for each ingredient at the bottom of the article, ready for printing!

How to Make Cheesy BBQ Smoked Meatloaf

Creating the perfect Cheesy BBQ Smoked Meatloaf is a rewarding experience. Follow these simple steps to ensure your meatloaf turns out flavorful and juicy. Let’s dive in!

Step 1: Preheat the Smoker

Preheating your smoker is crucial for achieving that smoky flavor. Set your smoker to 250°F. This low and slow method allows the meatloaf to cook evenly, ensuring every bite is tender and infused with flavor. Trust me, this step is non-negotiable!

Step 2: Prepare the Meat Mixture

In a large bowl, combine the ground beef, ground pork, breadcrumbs, cheddar cheese, diced onion, diced bell pepper, eggs, barbecue sauce, Worcestershire sauce, garlic powder, onion powder, salt, black pepper, and smoked paprika. Mix gently until everything is just combined. Overmixing can lead to a dense meatloaf, and nobody wants that!

Step 3: Shape the Meatloaf

Now it’s time to shape your meatloaf. Transfer the mixture onto a piece of parchment paper. Form it into a loaf shape, about 2 inches thick. This thickness helps it cook evenly. Make sure the ends are sealed to keep all that cheesy goodness inside!

Step 4: Smoke the Meatloaf

Place the shaped meatloaf in the smoker. Close the lid and let it smoke for about 2 to 2.5 hours. Use a meat thermometer to monitor the internal temperature. You’re aiming for 160°F. This ensures it’s cooked through while remaining juicy and flavorful.

Step 5: Add BBQ Sauce

During the last 30 minutes of cooking, brush additional barbecue sauce on top of the meatloaf. This adds a sticky, sweet glaze that enhances the flavor. It’s the finishing touch that takes your Cheesy BBQ Smoked Meatloaf to the next level!

Step 6: Rest and Slice

Once your meatloaf reaches the desired temperature, remove it from the smoker. Let it rest for about 10 minutes before slicing. This resting period allows the juices to redistribute, ensuring each slice is moist and delicious. Patience pays off here!

Tips for Success

  • Use a meat thermometer to ensure perfect doneness; it’s your best friend in the kitchen.
  • Let the meatloaf rest before slicing to keep it juicy and flavorful.
  • Experiment with different cheeses for unique flavor profiles.
  • Don’t skip the parchment paper; it makes transferring the meatloaf easier.
  • For extra flavor, consider adding chopped herbs like parsley or thyme.

Equipment Needed

  • Smoker: A dedicated smoker works best, but a charcoal or gas grill can also do the job.
  • Meat thermometer: Essential for checking doneness; a simple instant-read thermometer will suffice.
  • Parchment paper: Helps with shaping and transferring the meatloaf easily.
  • Mixing bowl: A large bowl for combining ingredients.

Variations of Cheesy BBQ Smoked Meatloaf

  • Spicy Kick: Add 1/2 teaspoon of cayenne pepper or diced jalapeños for a fiery twist.
  • Cheese Swap: Try pepper jack or gouda instead of cheddar for a different flavor profile.
  • Vegetarian Option: Substitute ground beef and pork with a mix of lentils, mushrooms, and quinoa for a hearty meatless version.
  • BBQ Sauce Variations: Experiment with different barbecue sauces, like honey mustard or chipotle, for unique flavors.
  • Herb Infusion: Incorporate fresh herbs like basil or cilantro for a fresh, aromatic touch.

Serving Suggestions for Cheesy BBQ Smoked Meatloaf

  • Classic Sides: Serve with creamy mashed potatoes or buttery corn on the cob for a comforting meal.
  • Fresh Salad: A crisp garden salad adds a refreshing contrast to the rich meatloaf.
  • Drink Pairing: Enjoy with a cold beer or a glass of sweet iced tea.
  • Presentation: Garnish with fresh parsley for a pop of color and serve on a rustic wooden board.

FAQs about Cheesy BBQ Smoked Meatloaf

Can I use only ground beef for this recipe?

Absolutely! While the combination of ground beef and pork adds depth, you can use just ground beef if that’s what you have on hand. Just remember, it might be a bit less moist.

How do I know when the meatloaf is done?

The best way to check is by using a meat thermometer. You want the internal temperature to reach 160°F. This ensures your Cheesy BBQ Smoked Meatloaf is safe to eat and perfectly cooked.

Can I make this meatloaf ahead of time?

Yes! You can prepare the meat mixture a day in advance and store it in the fridge. Just shape it into a loaf when you’re ready to smoke it. This makes for a quick dinner solution!

What can I serve with Cheesy BBQ Smoked Meatloaf?

This dish pairs wonderfully with classic sides like mashed potatoes, coleslaw, or a fresh garden salad. You can also enjoy it with a side of baked beans for a true barbecue experience.

Can I freeze leftovers?

Definitely! Wrap the leftover meatloaf tightly in plastic wrap and then in aluminum foil. It can be frozen for up to three months. Just thaw and reheat when you’re ready to enjoy it again!

Final Thoughts

Cooking this Cheesy BBQ Smoked Meatloaf is more than just preparing a meal; it’s about creating memories. The aroma wafting through your kitchen as it smokes is enough to make anyone’s mouth water. Each slice reveals a delightful blend of flavors, with the cheese melting into the savory meat. It’s a dish that brings family and friends together, sparking laughter and conversation around the table. Whether it’s a casual weeknight dinner or a weekend gathering, this meatloaf is sure to impress. So fire up that smoker and enjoy the joy this recipe brings to your home!

jhessica

Cheesy BBQ Smoked Meatloaf: A Flavorful Comfort Dish

A flavorful and comforting dish that combines ground beef and pork with cheese and barbecue sauce, smoked to perfection.
Prep Time 15 minutes
Total Time 2 hours 45 minutes
Servings: 6 servings
Course: Main Dish
Cuisine: American
Calories: 350

Ingredients
  

  • 1 pound ground beef
  • 1 pound ground pork
  • 1 cup breadcrumbs
  • 1/2 cup shredded cheddar cheese
  • 1/2 cup diced onion
  • 1/2 cup diced bell pepper
  • 2 large eggs
  • 1/4 cup barbecue sauce plus extra for topping
  • 1 tablespoon Worcestershire sauce
  • 1 teaspoon garlic powder
  • 1 teaspoon onion powder
  • 1 teaspoon salt
  • 1/2 teaspoon black pepper
  • 1/2 teaspoon smoked paprika

Method
 

  1. Preheat your smoker to 250°F.
  2. In a large bowl, combine the ground beef, ground pork, breadcrumbs, cheddar cheese, onion, bell pepper, eggs, barbecue sauce, Worcestershire sauce, garlic powder, onion powder, salt, black pepper, and smoked paprika.
  3. Mix until well combined, but do not overmix.
  4. Shape the mixture into a loaf and place it on a piece of parchment paper.
  5. Transfer the meatloaf to the smoker and cook for about 2 to 2.5 hours, or until the internal temperature reaches 160°F.
  6. During the last 30 minutes of cooking, brush additional barbecue sauce on top of the meatloaf for added flavor.
  7. Once cooked, remove from the smoker and let it rest for 10 minutes before slicing.

Nutrition

Serving: 1sliceCalories: 350kcalCarbohydrates: 10gProtein: 25gFat: 22gSaturated Fat: 10gPolyunsaturated Fat: 8gCholesterol: 100mgSodium: 600mgFiber: 1gSugar: 3g

Notes

  • For a spicier kick, add 1/2 teaspoon of cayenne pepper to the meat mixture.
  • You can substitute the cheddar cheese with pepper jack cheese for a different flavor profile.

Tried this recipe?

Let us know how it was!

Garlic Butter Shrimp and Rice: Easy Recipe to Try!

Introduction to Garlic Butter Shrimp and Rice

There’s something magical about a dish that comes together in a flash, especially after a long day. Garlic Butter Shrimp and Rice is just that—a delightful meal that’s both quick and satisfying. I remember the first time I made this dish; the aroma of garlic sizzling in butter filled my kitchen, instantly lifting my spirits. This recipe is perfect for busy weeknights or when you want to impress someone special without spending hours in the kitchen. With just a handful of ingredients, you can create a comforting, flavorful meal that everyone will love.

Why You’ll Love This Garlic Butter Shrimp and Rice

This Garlic Butter Shrimp and Rice recipe is a game-changer for anyone who craves a delicious meal without the fuss. It’s incredibly easy to whip up, taking just 30 minutes from start to finish. The rich, buttery flavor combined with the succulent shrimp and fluffy rice creates a dish that’s not only satisfying but also impressive. Perfect for a weeknight dinner or a casual gathering, it’s sure to become a favorite in your kitchen.

Ingredients for Garlic Butter Shrimp and Rice

Gathering the right ingredients is the first step to culinary success. For this Garlic Butter Shrimp and Rice, you’ll need:

  • Shrimp: Large, peeled, and deveined shrimp are ideal. They cook quickly and soak up all that delicious garlic butter.
  • Jasmine Rice: This fragrant rice adds a lovely texture and aroma. You can substitute it with basmati or long-grain rice if needed.
  • Chicken Broth: Using broth instead of water infuses the rice with flavor. Vegetable broth works well for a lighter option.
  • Unsalted Butter: The star of the show! It creates a rich sauce that coats the shrimp beautifully. Feel free to use olive oil for a healthier twist.
  • Garlic: Freshly minced garlic is a must for that aromatic punch. Garlic powder can be used in a pinch, but fresh is best.
  • Paprika: This spice adds a subtle smokiness and a pop of color. You can swap it for cayenne if you like a bit of heat.
  • Salt and Black Pepper: Essential for seasoning. Adjust to your taste preferences.
  • Fresh Parsley: Chopped parsley adds a fresh, vibrant touch. You can also use cilantro for a different flavor profile.
  • Lemon: A squeeze of lemon juice brightens the dish and balances the richness of the butter.

For those looking to mix things up, consider adding a pinch of red pepper flakes for heat or swapping shrimp for chicken or tofu for a different protein option. The exact quantities for each ingredient are listed at the bottom of the article, ready for you to print and take to the kitchen!

How to Make Garlic Butter Shrimp and Rice

Now that you have your ingredients ready, let’s dive into the cooking process. This Garlic Butter Shrimp and Rice recipe is straightforward, making it perfect for both novice cooks and seasoned chefs. Follow these simple steps, and you’ll have a delicious meal on the table in no time!

Step 1: Prepare the Rice

Start by bringing the chicken broth to a boil in a medium saucepan. The broth is key; it adds depth to the rice. Once boiling, add the jasmine rice, then reduce the heat to low. Cover the pot and let it simmer for about 15 minutes. This is when the magic happens—the rice absorbs all that flavorful broth. After 15 minutes, remove it from heat and let it sit, covered, for another 5 minutes. This resting time makes the rice fluffy and perfect.

Step 2: Sauté the Garlic

While the rice is cooking, grab a large skillet and heat 2 tablespoons of unsalted butter over medium heat. Once the butter is melted and bubbly, toss in the minced garlic. Sauté it for about a minute, just until it becomes fragrant. Be careful not to burn it; burnt garlic can turn bitter and ruin the dish. The aroma will fill your kitchen, making your mouth water!

Step 3: Cook the Shrimp

Next, add the peeled and deveined shrimp to the skillet. Season them with paprika, salt, and black pepper. Cook the shrimp for about 2-3 minutes on each side. You’ll know they’re done when they turn pink and opaque. This is the moment to stir in the remaining 2 tablespoons of butter and the fresh lemon juice. Mix everything well, ensuring the shrimp are coated in that luscious garlic butter sauce.

Step 4: Combine and Serve

Now it’s time to bring it all together! Fluff the cooked rice with a fork and divide it among your serving plates. Top each plate with the garlic butter shrimp, making sure to drizzle some of that buttery sauce over the rice. Finally, sprinkle with fresh parsley for a pop of color and flavor. Your Garlic Butter Shrimp and Rice is ready to impress!

Tips for Success

  • Always use fresh garlic for the best flavor; it makes a world of difference.
  • Don’t overcrowd the skillet when cooking shrimp; this ensures even cooking.
  • Let the rice rest after cooking; it helps achieve that perfect fluffy texture.
  • Adjust seasoning to your taste; everyone’s palate is different!
  • For a quick cleanup, line your baking sheets with parchment paper.

Equipment Needed

  • Medium Saucepan: Essential for cooking the rice. A pot with a lid works too.
  • Large Skillet: Needed for sautéing the garlic and shrimp. A non-stick pan is ideal.
  • Measuring Cups and Spoons: For accurate ingredient measurements. You can use any standard kitchen measuring tools.
  • Fork: Perfect for fluffing the rice. A spoon can work in a pinch.

Variations

  • Spicy Garlic Butter Shrimp: Add a pinch of red pepper flakes or diced jalapeños for a fiery kick.
  • Vegetable Medley: Toss in some bell peppers, snap peas, or broccoli for added color and nutrition.
  • Herb-Infused Rice: Mix in fresh herbs like basil or thyme into the rice for an aromatic twist.
  • Low-Carb Option: Substitute rice with cauliflower rice for a lighter, low-carb meal.
  • Asian-Inspired: Use soy sauce and sesame oil instead of butter for a different flavor profile.

Serving Suggestions

  • Side Salad: A crisp green salad with a light vinaigrette complements the richness of the dish.
  • Garlic Bread: Serve with warm garlic bread to soak up the delicious sauce.
  • Wine Pairing: A chilled white wine, like Sauvignon Blanc, enhances the flavors beautifully.
  • Presentation: Serve in shallow bowls for an elegant touch, garnished with lemon wedges.

FAQs about Garlic Butter Shrimp and Rice

Can I use frozen shrimp for this recipe?

Absolutely! Frozen shrimp work just fine. Just make sure to thaw them completely before cooking. This will help them cook evenly and absorb all that delicious garlic butter flavor.

What can I substitute for jasmine rice?

If jasmine rice isn’t available, you can easily swap it for basmati or long-grain rice. Both options will still give you a lovely texture and taste in your Garlic Butter Shrimp and Rice.

How can I make this dish spicier?

For a spicy kick, add a pinch of red pepper flakes or diced jalapeños when cooking the shrimp. This will elevate the flavor and give your dish a nice heat!

Can I make this recipe ahead of time?

While it’s best enjoyed fresh, you can prepare the rice and shrimp separately ahead of time. Just reheat them together before serving for a quick meal.

Is Garlic Butter Shrimp and Rice gluten-free?

Yes! This dish is naturally gluten-free, making it a great option for those with dietary restrictions. Just double-check your broth to ensure it’s gluten-free as well.

Final Thoughts

Cooking Garlic Butter Shrimp and Rice is more than just preparing a meal; it’s about creating a moment of joy in your kitchen. The rich aroma of garlic and butter wafting through the air brings back memories of family dinners and laughter. This dish is a reminder that you don’t need to spend hours to create something special. With its vibrant flavors and comforting textures, it’s perfect for any occasion. Whether you’re impressing guests or enjoying a cozy night in, this recipe is sure to become a beloved staple in your culinary repertoire.

jhessica

Garlic Butter Shrimp and Rice: Easy Recipe to Try!

A delicious and easy recipe for Garlic Butter Shrimp and Rice, perfect for a quick weeknight dinner.
Prep Time 10 minutes
Cook Time 20 minutes
Total Time 30 minutes
Servings: 4 servings
Course: Main Course
Cuisine: American
Calories: 350

Ingredients
  

  • 1 pound large shrimp peeled and deveined
  • 1 cup jasmine rice
  • 2 cups chicken broth
  • 4 tablespoons unsalted butter
  • 4 cloves garlic minced
  • 1 teaspoon paprika
  • 1 teaspoon salt
  • ½ teaspoon black pepper
  • 2 tablespoons fresh parsley chopped
  • 1 lemon juiced

Method
 

  1. In a medium saucepan, bring the chicken broth to a boil.
  2. Add the jasmine rice, reduce the heat to low, cover, and simmer for about 15 minutes or until the rice is tender and the liquid is absorbed.
  3. Remove from heat and let it sit covered for 5 minutes.
  4. While the rice is cooking, heat 2 tablespoons of butter in a large skillet over medium heat.
  5. Add the minced garlic and sauté for about 1 minute until fragrant, being careful not to burn it.
  6. Add the shrimp to the skillet, season with paprika, salt, and black pepper.
  7. Cook for about 2-3 minutes on each side until the shrimp are pink and opaque.
  8. Stir in the remaining 2 tablespoons of butter and the lemon juice, mixing well to coat the shrimp.
  9. Remove from heat.
  10. Fluff the cooked rice with a fork and divide it among serving plates.
  11. Top each serving with the garlic butter shrimp and sprinkle with fresh parsley.

Nutrition

Serving: 1servingCalories: 350kcalCarbohydrates: 40gProtein: 25gFat: 12gSaturated Fat: 7gPolyunsaturated Fat: 3gCholesterol: 200mgSodium: 800mgFiber: 1gSugar: 1g

Notes

  • For a spicy kick, add a pinch of red pepper flakes when cooking the shrimp.
  • You can substitute the shrimp with chicken or tofu for a different protein option.

Tried this recipe?

Let us know how it was!

Smoky Salmon Cream Cheese Dip: A Delicious Treat!

Introduction to Smoky Salmon Cream Cheese Dip

There’s something magical about a dip that brings people together.

The *Smoky Salmon Cream Cheese Dip* is just that—a creamy, flavorful delight that’s perfect for any gathering or a cozy night in.

I remember the first time I made this dip for a game night with friends. The way they devoured it, paired with crunchy crackers and fresh veggies, was a sight to behold.

This recipe is not only quick to whip up, but it also impresses with its rich flavors.

Whether you’re hosting a party or just need a snack, this dip is your go-to solution.

Why You’ll Love This Smoky Salmon Cream Cheese Dip

This *Smoky Salmon Cream Cheese Dip* is a game-changer for any occasion.

It’s incredibly easy to make, taking just 10 minutes of your time.

The rich, smoky flavor of the salmon combined with the creamy texture of the cheese creates a taste sensation that’s hard to resist.

Plus, it’s a crowd-pleaser, making it perfect for parties or casual get-togethers.

You’ll find yourself making it again and again!

Ingredients for Smoky Salmon Cream Cheese Dip

Creating the *Smoky Salmon Cream Cheese Dip* is a breeze, thanks to its simple yet flavorful ingredients.

Here’s what you’ll need:

  • Cream Cheese: The base of our dip, it adds a rich, creamy texture that balances the smokiness of the salmon.
  • Smoked Salmon: This is the star of the show! Its deep, smoky flavor elevates the dip and gives it that gourmet touch.
  • Sour Cream: Adds a tangy creaminess that complements the other ingredients beautifully.
  • Fresh Dill: This herb brings a refreshing note. If fresh isn’t available, dried dill works just fine.
  • Lemon Juice: A splash of acidity brightens the flavors and cuts through the richness.
  • Worcestershire Sauce: Just a dash adds depth and umami, enhancing the overall flavor profile.
  • Garlic Powder: For a hint of savory goodness, garlic powder is a must. It’s easy to mix in and packs a punch.
  • Salt and Pepper: Essential for seasoning, these will help bring all the flavors together.
  • Capers (optional): If you’re feeling adventurous, chopped capers add a briny kick that pairs wonderfully with the salmon.
  • Vegetable Sticks, Crackers, or Bagel Chips: These are perfect for serving and dipping, providing a satisfying crunch.

For exact measurements, check the bottom of the article where you can find everything listed for easy printing.

With these ingredients, you’re well on your way to creating a dip that will have everyone coming back for more!

How to Make Smoky Salmon Cream Cheese Dip

Making the *Smoky Salmon Cream Cheese Dip* is as easy as pie.

With just a few simple steps, you’ll have a delicious dip ready to impress your friends and family.

Let’s dive into the process!

Step 1: Prepare the Base

Start by taking your softened cream cheese and placing it in a mixing bowl.

Add the sour cream and lemon juice.

Using a hand mixer or a sturdy spatula, blend these ingredients until they’re smooth and creamy.

This base is the heart of your dip, so make sure it’s well combined.

The creaminess will set the stage for the smoky flavors to come.

Step 2: Mix in the Salmon and Seasonings

Next, it’s time to introduce the star of the show: the smoked salmon.

Chop it into bite-sized pieces and fold it into your creamy mixture.

Then, sprinkle in the fresh dill, Worcestershire sauce, and garlic powder.

If you’re using capers, now’s the moment to add them too.

Gently stir everything together until well combined.

The colors and aromas will start to come alive!

Step 3: Adjust the Flavor

Now, it’s time to taste your creation.

Add salt and pepper to your liking.

If you want a little extra kick, consider a dash of hot sauce or cayenne pepper.

This step is crucial; it’s where you can make the dip truly yours.

Feel free to adjust the flavors until it sings!

Step 4: Chill and Serve

Transfer your dip to a serving bowl and cover it with plastic wrap.

Chill it in the refrigerator for at least 30 minutes.

This allows the flavors to meld beautifully.

When you’re ready to serve, pair it with vegetable sticks, crackers, or bagel chips.

Watch as everyone dives in, eager for a taste of your delicious *Smoky Salmon Cream Cheese Dip*!

Tips for Success

  • Make sure your cream cheese is softened for easy mixing; leave it out for about 30 minutes before starting.
  • For a smoother dip, use a hand mixer instead of a spatula.
  • Let the dip chill longer than 30 minutes if you can; it enhances the flavors even more.
  • Experiment with different herbs like chives or parsley for a unique twist.
  • Always taste and adjust seasoning before serving; it makes a world of difference!

Equipment Needed

  • Mixing Bowl: A medium-sized bowl works best. If you don’t have one, any large container will do.
  • Hand Mixer or Spatula: A hand mixer makes it easier, but a sturdy spatula will get the job done.
  • Measuring Cups: Essential for accuracy. If you’re in a pinch, use a regular cup for rough estimates.
  • Serving Bowl: Any attractive bowl will showcase your dip beautifully.

Variations

  • Spicy Twist: Add a dash of sriracha or a pinch of cayenne pepper for a spicy kick that elevates the flavor.
  • Herb Infusion: Swap out dill for fresh chives or parsley for a different herbal note that brightens the dip.
  • Smoked Trout: For a change of pace, use smoked trout instead of salmon for a unique flavor profile.
  • Vegan Option: Substitute cream cheese with a plant-based alternative and use smoked tofu for a delicious vegan dip.
  • Cheesy Delight: Mix in some shredded cheddar or crumbled feta for an extra cheesy experience.

Serving Suggestions

  • Pair the dip with crunchy vegetable sticks like carrots, celery, or bell peppers for a fresh contrast.
  • Serve alongside an assortment of crackers or bagel chips for a satisfying crunch.
  • For drinks, consider a crisp white wine or a light beer to complement the flavors.
  • Garnish with extra dill or capers for a beautiful presentation that impresses your guests.

FAQs about Smoky Salmon Cream Cheese Dip

Can I make Smoky Salmon Cream Cheese Dip ahead of time?

Absolutely! This dip can be made a day in advance. Just store it in the refrigerator, covered, to let the flavors meld beautifully. It’s a great time-saver for parties!

What can I substitute for smoked salmon?

If you don’t have smoked salmon on hand, canned tuna is a fantastic alternative. It will give you a different flavor profile but still create a delicious dip.

How long does the dip last in the fridge?

Your *Smoky Salmon Cream Cheese Dip* will stay fresh for about 3 days in the fridge. Just make sure it’s stored in an airtight container to maintain its flavor.

Can I freeze this dip?

While it’s best enjoyed fresh, you can freeze the dip for up to a month. Just thaw it in the fridge overnight before serving, and give it a good stir to bring back the creaminess.

What should I serve with the dip?

Pair it with crunchy vegetable sticks, crackers, or bagel chips. These options provide a satisfying crunch that complements the creamy dip perfectly!

Final Thoughts

Creating the *Smoky Salmon Cream Cheese Dip* is more than just whipping up a snack; it’s about sharing joy and flavor with those you care about.

Each bite is a delightful blend of creamy, smoky goodness that sparks conversations and laughter.

Whether it’s a casual gathering or a special occasion, this dip has a way of making moments memorable.

I love how it brings people together, encouraging everyone to dip in and enjoy.

So, roll up your sleeves, gather your ingredients, and let this dip be the star of your next get-together!

jhessica

Smoky Salmon Cream Cheese Dip: A Delicious Treat!

A creamy and flavorful dip made with smoked salmon and cream cheese, perfect for parties or as a snack.
Prep Time 10 minutes
Total Time 40 minutes
Servings: 6 servings
Course: Appetizer
Cuisine: American
Calories: 150

Ingredients
  

  • 8 ounces cream cheese softened
  • 4 ounces smoked salmon chopped
  • 2 tablespoons sour cream
  • 2 tablespoons fresh dill chopped (or 1 tablespoon dried dill)
  • 1 tablespoon lemon juice
  • 1 teaspoon Worcestershire sauce
  • 1 teaspoon garlic powder
  • Salt and pepper to taste
  • 1 tablespoon capers drained and chopped (optional)
  • Vegetable sticks crackers, or bagel chips for serving

Method
 

  1. In a mixing bowl, combine the softened cream cheese, sour cream, and lemon juice. Mix until smooth and creamy.
  2. Add the chopped smoked salmon, dill, Worcestershire sauce, garlic powder, and capers (if using) to the bowl. Stir until all ingredients are well incorporated.
  3. Season with salt and pepper to taste. Adjust seasoning as needed.
  4. Transfer the dip to a serving bowl and cover with plastic wrap. Chill in the refrigerator for at least 30 minutes to allow the flavors to meld.
  5. Serve with vegetable sticks, crackers, or bagel chips.

Nutrition

Serving: 1/6 of the dipCalories: 150kcalCarbohydrates: 3gProtein: 8gFat: 12gSaturated Fat: 6gPolyunsaturated Fat: 4gCholesterol: 30mgSodium: 300mgSugar: 1g

Notes

  • For a spicier kick, add a dash of hot sauce or a pinch of cayenne pepper to the mix.
  • You can also substitute the smoked salmon with canned tuna for a different flavor profile.

Tried this recipe?

Let us know how it was!

Spicy Bayou Deviled Eggs: A Flavorful Recipe Guide

Introduction to Spicy Bayou Deviled Eggs

Deviled eggs have always held a special place in my heart, evoking memories of family gatherings and summer picnics. Now, when I whip up a batch of Spicy Bayou Deviled Eggs, it’s like bringing a little piece of the South to my kitchen. This recipe is not just about flavor; it’s a quick solution for those busy days when you want to impress your loved ones without spending hours in the kitchen. With a delightful kick and creamy texture, these deviled eggs are sure to be a hit at any gathering, making them a must-try for every home cook.

Why You’ll Love This Spicy Bayou Deviled Eggs

These Spicy Bayou Deviled Eggs are a game-changer for any occasion. They’re incredibly easy to make, taking just 27 minutes from start to finish. The combination of creamy yolks and zesty Cajun seasoning creates a flavor explosion that will have your guests coming back for more. Plus, they’re gluten-free, making them a perfect appetizer for everyone. Trust me, once you try them, you’ll be hooked!

Ingredients for Spicy Bayou Deviled Eggs

Gathering the right ingredients is key to making these Spicy Bayou Deviled Eggs shine. Here’s what you’ll need:

  • Large eggs: The star of the show! Fresh eggs yield the best flavor and texture.
  • Mayonnaise: This adds creaminess and richness to the filling. You can use regular or light, depending on your preference.
  • Dijon mustard: A touch of tanginess that elevates the flavor profile. It’s a must for that classic deviled egg taste.
  • Hot sauce: Adjust this to your heat tolerance. It brings the spicy kick that makes these eggs special.
  • Cajun seasoning: This blend of spices adds depth and a Southern flair. Feel free to experiment with your favorite brand.
  • Green onions: Finely chopped, they add a fresh crunch and a pop of color to the filling.
  • Salt and pepper: Essential for seasoning. Don’t skip these; they enhance all the flavors.
  • Paprika: A sprinkle on top not only adds color but also a hint of smokiness. You can use smoked paprika for an extra layer of flavor.

For those looking to mix things up, consider substituting the Cajun seasoning with Old Bay seasoning for a different twist. All ingredient quantities are listed at the bottom of the article for easy reference and printing.

How to Make Spicy Bayou Deviled Eggs

Creating Spicy Bayou Deviled Eggs is a straightforward process that anyone can master. Follow these simple steps, and you’ll have a delicious appetizer ready in no time. Let’s dive in!

Step 1: Boil the Eggs

Start by placing the large eggs in a saucepan. Cover them with cold water, ensuring the water is about an inch above the eggs. Bring the water to a boil over medium-high heat. Once it reaches a rolling boil, cover the pot and remove it from the heat. Let the eggs sit for 12 minutes. This method ensures perfectly cooked yolks without that greenish ring around them.

Step 2: Cool the Eggs

After the timer goes off, it’s time to cool those eggs down. Transfer them to an ice bath—just a bowl filled with ice and water. This step is crucial. It stops the cooking process and makes peeling the eggs a breeze. Let them chill for about 5 minutes. Trust me, your fingers will thank you later!

Step 3: Prepare the Filling

Once the eggs are cool, gently tap them on a hard surface to crack the shell. Peel the eggs under running water for easier removal. Slice each egg in half lengthwise and carefully scoop out the yolks into a mixing bowl. Mash the yolks with a fork until they’re crumbly. Then, add the mayonnaise, Dijon mustard, hot sauce, Cajun seasoning, green onions, salt, and pepper. Mix everything until it’s smooth and creamy. Taste and adjust the seasoning if needed; this is your moment to shine!

Step 4: Fill the Egg Whites

Now comes the fun part—filling the egg whites! You can either spoon the yolk mixture back into the egg halves or use a piping bag for a fancier look. If you’re using a bag, cut a small hole in one corner and pipe the filling in. Aim for a nice swirl on top; it adds a touch of elegance. Don’t worry if it’s not perfect; it’s all about the taste!

Step 5: Garnish and Serve

To finish off your Spicy Bayou Deviled Eggs, sprinkle a little paprika on top for color and a hint of smokiness. You can also add a few extra green onions for a pop of freshness. Arrange them on a platter, and they’re ready to impress! Serve them chilled, and watch as they disappear at your next gathering.

Tips for Success

  • Use fresh eggs for the best flavor and easier peeling.
  • Adjust the hot sauce to your preferred spice level; taste as you go!
  • For a creamier filling, let the mayonnaise sit at room temperature before mixing.
  • Experiment with different garnishes like chives or crispy bacon bits for added flair.
  • Make these deviled eggs a day ahead; they taste even better after chilling overnight!

Equipment Needed

  • Medium saucepan: For boiling the eggs. A large pot works too.
  • Mixing bowl: To combine the yolk filling. Any bowl will do.
  • Fork: For mashing the yolks. A potato masher can work in a pinch.
  • Ice bath container: A large bowl or sink filled with ice water.
  • Piping bag or spoon: For filling the egg whites. A zip-top bag can substitute.

Variations

  • Smoky Bayou Deviled Eggs: Add a dash of smoked paprika to the yolk mixture for a deeper flavor.
  • Spicy Sriracha Deviled Eggs: Swap the hot sauce for Sriracha for a different kind of heat and a hint of sweetness.
  • Avocado Deviled Eggs: Replace half of the mayonnaise with mashed avocado for a creamy, healthier twist.
  • Herbed Deviled Eggs: Mix in fresh herbs like dill or cilantro for a refreshing flavor boost.
  • Vegan Deviled Eggs: Use silken tofu blended with mustard and spices as a substitute for the yolk mixture.

Serving Suggestions

  • Pair your Spicy Bayou Deviled Eggs with a crisp green salad for a refreshing contrast.
  • Serve alongside a zesty cocktail, like a Bloody Mary, to complement the flavors.
  • For presentation, arrange the eggs on a colorful platter with fresh herbs for a pop of color.
  • Consider offering a variety of hot sauces on the side for guests to customize their spice level.

FAQs about Spicy Bayou Deviled Eggs

Can I make Spicy Bayou Deviled Eggs ahead of time?

Absolutely! These deviled eggs can be made a day in advance. Just store them in the refrigerator, covered, and they’ll taste even better after chilling overnight. Just remember to garnish them right before serving for that fresh look!

What can I substitute for Cajun seasoning?

If Cajun seasoning isn’t your thing, you can easily swap it out for Old Bay seasoning. It offers a different flavor profile while still keeping that Southern charm. You can also create your own blend with paprika, garlic powder, and a pinch of cayenne.

How do I prevent the eggs from cracking while boiling?

To avoid cracked eggs, make sure to start with cold water and bring it to a boil gradually. Adding a splash of vinegar to the water can also help seal any cracks that might form during cooking.

Can I use a different type of mustard?

Definitely! While Dijon mustard adds a nice tang, you can use yellow mustard for a milder flavor or even spicy brown mustard for an extra kick. It’s all about your personal taste!

How do I store leftover Spicy Bayou Deviled Eggs?

Store any leftovers in an airtight container in the refrigerator. They’re best enjoyed within 2-3 days, but I doubt they’ll last that long with how delicious they are!

Final Thoughts

Making Spicy Bayou Deviled Eggs is more than just a cooking task; it’s an experience filled with flavor and nostalgia. Each bite transports me back to those lively family gatherings, where laughter and good food were the stars of the show. The joy of sharing these zesty, creamy delights with friends and family is unmatched. Whether it’s a casual get-together or a festive celebration, these deviled eggs are sure to steal the spotlight. So, roll up your sleeves, embrace the spice, and let these little bites of happiness bring warmth and flavor to your table!

jhessica

Spicy Bayou Deviled Eggs: A Flavorful Recipe Guide

A flavorful recipe for Spicy Bayou Deviled Eggs, perfect for gatherings and parties.
Prep Time 15 minutes
Cook Time 12 minutes
Total Time 27 minutes
Servings: 6 servings
Course: Appetizer
Cuisine: Southern
Calories: 120

Ingredients
  

  • 6 large eggs
  • 3 tablespoons mayonnaise
  • 1 teaspoon Dijon mustard
  • 1 teaspoon hot sauce adjust to taste
  • 1 teaspoon Cajun seasoning
  • 1 tablespoon finely chopped green onions
  • Salt and pepper to taste
  • Paprika for garnish

Method
 

  1. Place the eggs in a saucepan and cover them with cold water. Bring to a boil over medium-high heat. Once boiling, cover the pot, remove it from heat, and let it sit for 12 minutes.
  2. After 12 minutes, transfer the eggs to an ice bath to cool for about 5 minutes. This will make peeling easier.
  3. Once cooled, peel the eggs and slice them in half lengthwise. Remove the yolks and place them in a mixing bowl.
  4. Mash the yolks with a fork and add the mayonnaise, Dijon mustard, hot sauce, Cajun seasoning, green onions, salt, and pepper. Mix until smooth and creamy.
  5. Spoon or pipe the yolk mixture back into the egg whites.
  6. Sprinkle with paprika for garnish and serve chilled.

Nutrition

Serving: 1egg halfCalories: 120kcalCarbohydrates: 1gProtein: 6gFat: 10gSaturated Fat: 2gPolyunsaturated Fat: 8gCholesterol: 186mgSodium: 150mg

Notes

  • For a smoky flavor, add a dash of smoked paprika to the yolk mixture.
  • Substitute the Cajun seasoning with Old Bay seasoning for a different flavor profile.

Tried this recipe?

Let us know how it was!

Crack Corn Salad: A Tasty Recipe You Must Try!

Introduction to Crack Corn Salad

There’s something magical about summer gatherings, where laughter fills the air and delicious food brings everyone together. One dish that never fails to impress is Crack Corn Salad. This vibrant salad combines sweet corn with fresh veggies, creating a refreshing side that’s perfect for any occasion. Whether you’re hosting a backyard barbecue or just looking for a quick solution for a busy day, this salad is your go-to. It’s easy to whip up, and trust me, your friends and family will be asking for seconds!

Why You’ll Love This Crack Corn Salad

This Crack Corn Salad is a game-changer for busy cooks. It comes together in just 15 minutes, making it a breeze for any gathering. The combination of sweet corn and crisp veggies creates a burst of flavor that’s hard to resist. Plus, it’s versatile! You can serve it as a side dish or a light meal. Trust me, once you try it, you’ll want to make it a staple in your kitchen.

Ingredients for Crack Corn Salad

Gathering the right ingredients is the first step to creating this delightful Crack Corn Salad. Here’s what you’ll need:

  • Frozen sweet corn: The star of the show! Thaw it for a burst of sweetness.
  • Cherry tomatoes: Their juicy pop adds color and freshness.
  • Diced cucumber: Crisp and refreshing, it balances the sweetness of the corn.
  • Red onion: A touch of sharpness that enhances the overall flavor.
  • Mayonnaise: This creamy base brings everything together.
  • Sour cream: Adds tanginess and richness to the dressing.
  • Apple cider vinegar: A splash of acidity that brightens the salad.
  • Garlic powder: For a hint of savory depth.
  • Onion powder: Enhances the onion flavor without overpowering.
  • Salt and black pepper: Essential seasonings to elevate the taste.
  • Crumble bacon (optional): For those who love a smoky crunch.
  • Shredded cheddar cheese (optional): Adds a creamy, cheesy element.
  • Fresh cilantro or parsley: A sprinkle for garnish that adds a pop of color and freshness.

Feel free to get creative! You can substitute Greek yogurt for sour cream for a healthier twist or even add diced jalapeños for a spicy kick. For exact measurements, check the bottom of the article where you can find everything available for printing.

How to Make Crack Corn Salad

Creating this Crack Corn Salad is as easy as pie. Follow these simple steps, and you’ll have a delicious dish ready in no time. Let’s dive in!

Step 1: Combine the Vegetables

Start by grabbing a large mixing bowl. Toss in the thawed sweet corn, halved cherry tomatoes, diced cucumber, and finely chopped red onion. Stir gently until everything is well mixed. The colors alone will make your mouth water!

Step 2: Prepare the Dressing

In a separate bowl, whisk together the mayonnaise, sour cream, apple cider vinegar, garlic powder, onion powder, salt, and black pepper. Keep whisking until the mixture is smooth and creamy. This dressing is the secret sauce that ties all the flavors together!

Step 3: Mix Everything Together

Pour the dressing over the vegetable mixture. Stir carefully to ensure every piece is coated. This is where the magic happens! The creamy dressing clings to the veggies, making each bite a flavor explosion.

Step 4: Add Optional Ingredients

If you’re feeling adventurous, fold in the crumbled bacon and shredded cheddar cheese. These additions bring a delightful crunch and richness to the salad. But hey, if you prefer to keep it lighter, feel free to skip them!

Step 5: Chill and Serve

Cover the salad and pop it in the fridge for at least 30 minutes. This chilling time allows the flavors to meld beautifully. When you’re ready to serve, give it a good stir and garnish with fresh cilantro or parsley. Your Crack Corn Salad is now ready to impress!

Tips for Success

  • Use fresh ingredients for the best flavor. Fresh veggies make a noticeable difference!
  • Let the salad chill longer if you can. The flavors deepen and become more vibrant.
  • Adjust the seasoning to your taste. Don’t be afraid to add more salt or pepper!
  • For a creamier texture, add more mayonnaise or sour cream.
  • Experiment with herbs like dill or basil for a unique twist.

Equipment Needed

  • Large mixing bowl: Essential for combining all your ingredients. A sturdy pot can work in a pinch.
  • Whisk: Perfect for mixing the dressing. A fork can do the job if you don’t have one.
  • Measuring cups: For precise ingredient amounts. Use a regular cup if you’re in a hurry.
  • Cutting board and knife: Necessary for chopping veggies. A sturdy plate can substitute in a bind.

Variations

  • Spicy Twist: Add diced jalapeños or a splash of hot sauce to the dressing for a kick that’ll wake up your taste buds.
  • Healthier Option: Swap out the mayonnaise and sour cream for Greek yogurt. It’s lighter but still creamy!
  • Vegan Delight: Use a dairy-free mayonnaise and skip the bacon for a plant-based version that everyone can enjoy.
  • Herb Infusion: Experiment with fresh herbs like dill, basil, or chives to elevate the flavor profile.
  • Fruit Addition: Toss in diced avocado or even some sweet pineapple for a tropical twist that complements the corn.

Serving Suggestions

  • Pair with Grilled Meats: This salad complements grilled chicken, steak, or fish beautifully.
  • Perfect Picnic Dish: Serve it at picnics alongside sandwiches or wraps for a refreshing side.
  • Chill in Style: Present in a clear bowl to showcase the vibrant colors.
  • Drink Pairing: Enjoy with a cold beer or a refreshing lemonade for a summer vibe.

FAQs about Crack Corn Salad

Got questions about this delightful Crack Corn Salad? You’re not alone! Here are some common queries that might pop up as you whip up this tasty dish.

Can I make Crack Corn Salad ahead of time?

Absolutely! In fact, making it a few hours in advance allows the flavors to meld beautifully. Just keep it covered in the fridge until you’re ready to serve.

Is Crack Corn Salad suitable for vegetarians?

Yes! This salad is vegetarian-friendly, especially if you skip the optional bacon. It’s a great way to enjoy fresh veggies and sweet corn.

How long does Crack Corn Salad last in the fridge?

Stored in an airtight container, it can last up to 3 days. Just give it a good stir before serving again, as the dressing may separate.

Can I customize the ingredients?

Definitely! Feel free to add or substitute ingredients based on your preferences. Try adding diced bell peppers or even some black beans for extra flavor and texture.

What can I serve with Crack Corn Salad?

This salad pairs wonderfully with grilled meats, sandwiches, or even as a light lunch on its own. It’s versatile enough to complement any meal!

Final Thoughts

Crack Corn Salad is more than just a dish; it’s a celebration of flavors and memories. Each bite transports you to sunny days filled with laughter and good company. The vibrant colors and fresh ingredients make it a feast for the eyes as much as the palate. Whether you’re serving it at a family gathering or enjoying it on a quiet evening, this salad brings joy and satisfaction. It’s easy to make, delicious, and adaptable to your taste. So, roll up your sleeves and dive into this delightful recipe. Your taste buds will thank you!

jhessica

Crack Corn Salad: A Tasty Recipe You Must Try!

A delicious and refreshing Crack Corn Salad that combines sweet corn, fresh vegetables, and a creamy dressing, perfect for any gathering.
Prep Time 15 minutes
Total Time 45 minutes
Servings: 6 servings
Course: Salad
Cuisine: American
Calories: 210

Ingredients
  

  • 2 cups frozen sweet corn thawed
  • 1 cup cherry tomatoes halved
  • 1 cup diced cucumber
  • 1/2 cup red onion finely chopped
  • 1/2 cup mayonnaise
  • 1/4 cup sour cream
  • 1 tablespoon apple cider vinegar
  • 1 teaspoon garlic powder
  • 1 teaspoon onion powder
  • 1/2 teaspoon salt
  • 1/4 teaspoon black pepper
  • 1/4 cup crumbled bacon optional
  • 1/4 cup shredded cheddar cheese optional
  • 1/4 cup chopped fresh cilantro or parsley for garnish

Method
 

  1. In a large mixing bowl, combine the thawed corn, cherry tomatoes, cucumber, and red onion. Stir until well mixed.
  2. In a separate bowl, whisk together the mayonnaise, sour cream, apple cider vinegar, garlic powder, onion powder, salt, and black pepper until smooth.
  3. Pour the dressing over the corn mixture and stir until everything is evenly coated.
  4. If using, gently fold in the crumbled bacon and shredded cheddar cheese.
  5. Cover the salad and refrigerate for at least 30 minutes to allow the flavors to meld.
  6. Before serving, give the salad a good stir and garnish with chopped cilantro or parsley.

Nutrition

Serving: 1servingCalories: 210kcalCarbohydrates: 10gProtein: 4gFat: 18gSaturated Fat: 3gPolyunsaturated Fat: 15gCholesterol: 10mgSodium: 300mgFiber: 2gSugar: 3g

Notes

  • For a spicy kick, add diced jalapeños or a dash of hot sauce to the dressing.
  • Substitute Greek yogurt for sour cream for a healthier option, or use a dairy-free alternative for a vegan version.

Tried this recipe?

Let us know how it was!

Stay Connected

Get recipes via email: