Get my cookbooks

Coconut Curry Shrimp: A Flavorful Journey You’ll Love!

Introduction to Coconut Curry Shrimp

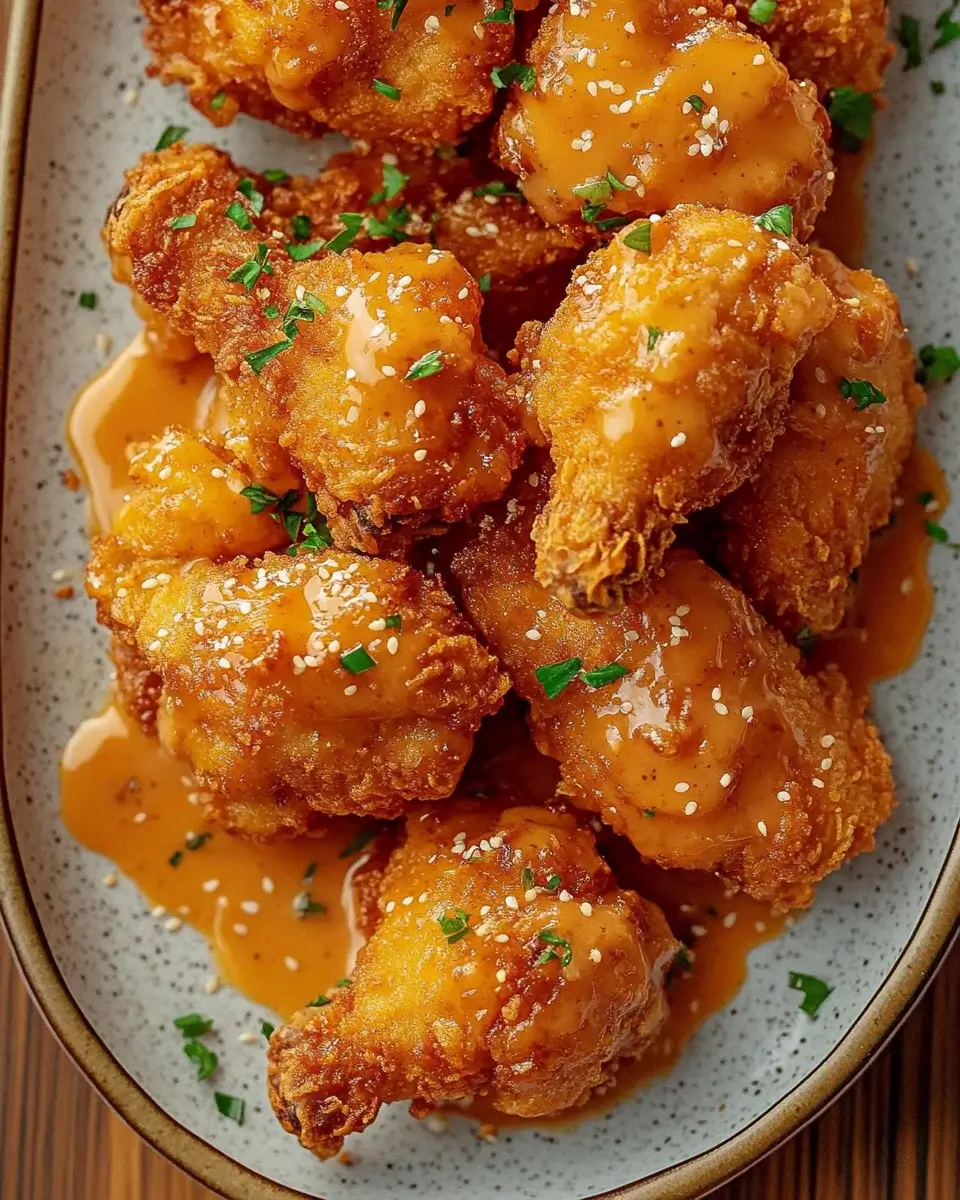
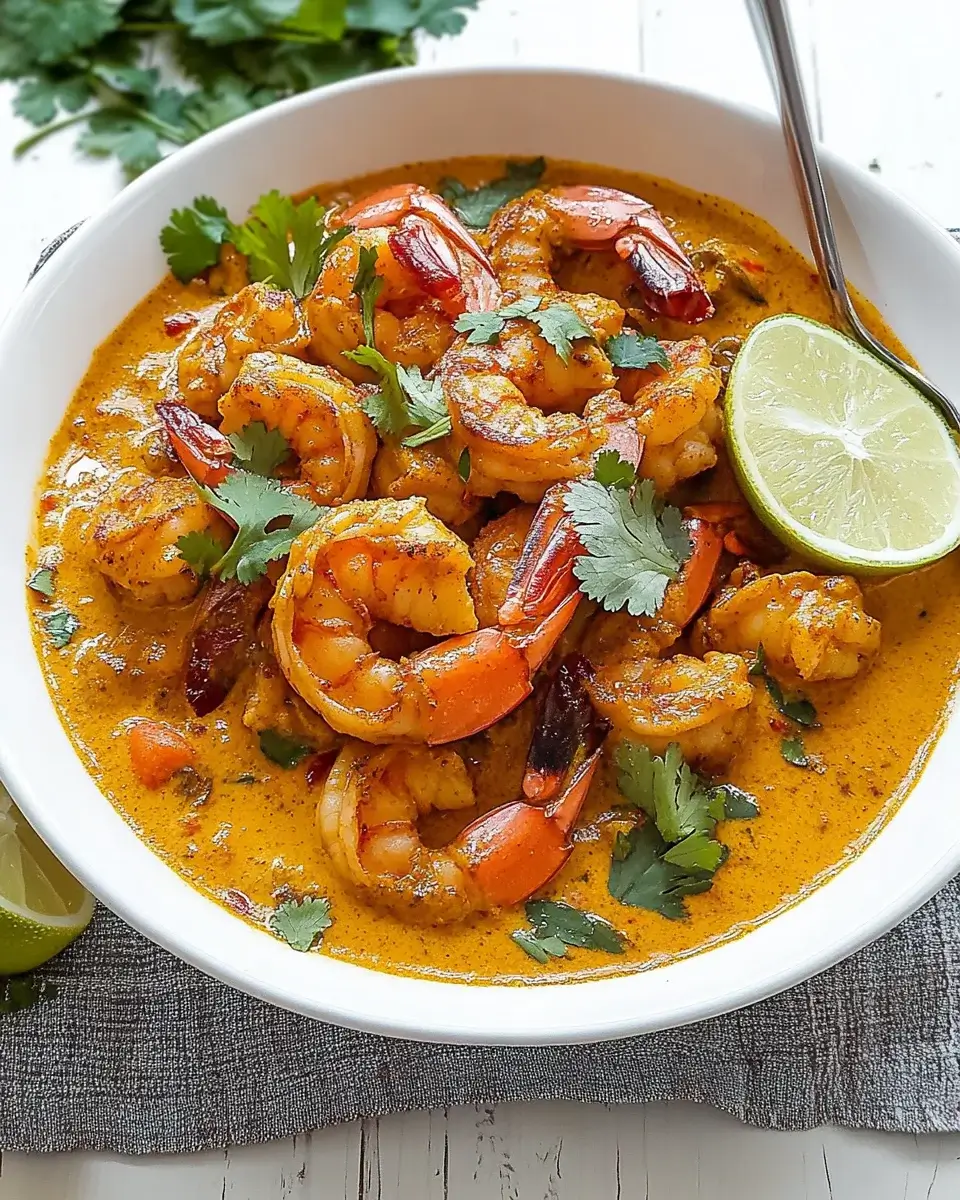
There’s something magical about the aroma of coconut curry shrimp wafting through the kitchen. It takes me back to family gatherings where laughter mingled with the scent of spices. This dish is not just a meal; it’s a warm hug on a plate. Perfect for those busy weeknights or when you want to impress your loved ones, coconut curry shrimp is quick and easy to whip up. With just a handful of ingredients, you can create a flavorful experience that transports you straight to a tropical paradise. Trust me, your taste buds will thank you!

Why You’ll Love This Coconut Curry Shrimp

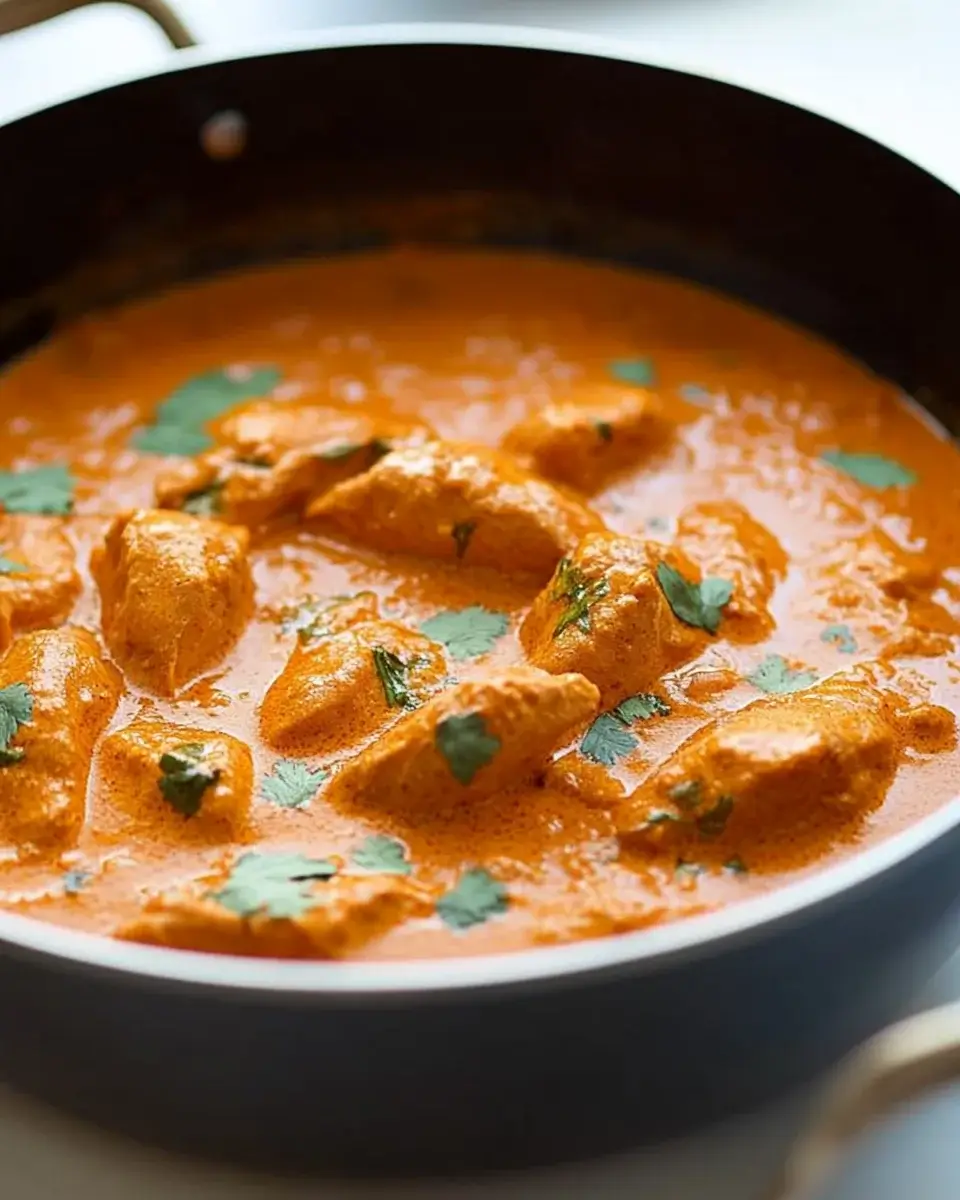
This coconut curry shrimp recipe is a game-changer for anyone who craves bold flavors without spending hours in the kitchen. It’s quick, taking just 25 minutes from start to finish, making it perfect for busy evenings. The creamy coconut milk and zesty lime create a delightful balance, while the shrimp cooks to tender perfection. Plus, it’s a one-pan wonder, which means less cleanup and more time to enjoy your meal!

Ingredients for Coconut Curry Shrimp

Gathering the right ingredients is the first step to creating your coconut curry shrimp masterpiece. Here’s what you’ll need:

  • Shrimp: Large, peeled, and deveined shrimp are the stars of this dish. They cook quickly and soak up all the delicious flavors.
  • Olive Oil: A splash of olive oil helps sauté the aromatics and adds a touch of richness.
  • Onion: Diced onion brings sweetness and depth to the curry, making it more flavorful.
  • Garlic: Minced garlic adds a punch of flavor that complements the shrimp beautifully.
  • Fresh Ginger: Grated ginger gives a warm, spicy kick that elevates the dish.
  • Red Curry Paste: This is where the magic happens! It’s packed with spices and adds that signature curry flavor.
  • Coconut Milk: Creamy coconut milk creates a luscious sauce that ties everything together. It’s the heart of the dish.
  • Soy Sauce: A splash of soy sauce adds umami and balances the sweetness of the coconut milk.
  • Lime Juice: Fresh lime juice brightens the dish and adds a zesty finish.
  • Bell Peppers: Any color will do! They add crunch and a pop of color to your curry.
  • Snap Peas: These tender-crisp veggies add a fresh, sweet bite that contrasts nicely with the shrimp.
  • Salt and Pepper: Essential for seasoning, adjust to your taste.
  • Fresh Cilantro: A sprinkle of cilantro at the end adds freshness and a burst of flavor.
  • Cooked Rice: Serve your coconut curry shrimp over rice to soak up all that delicious sauce.

For those looking to spice things up, consider adding sliced jalapeños or a dash of sriracha. If shrimp isn’t your thing, chicken or tofu can be great substitutes. You can find the exact quantities for each ingredient at the bottom of the article, ready for printing!

How to Make Coconut Curry Shrimp

Now that you have all your ingredients ready, let’s dive into the cooking process. Making coconut curry shrimp is straightforward and fun. Follow these simple steps, and you’ll have a delicious meal in no time!

Step 1: Heat the Olive Oil

Start by heating a tablespoon of olive oil in a large skillet over medium heat. The oil should shimmer but not smoke. This is where the magic begins!

Step 2: Sauté the Onion

Add the diced onion to the skillet. Sauté for about 3-4 minutes until it becomes soft and translucent. This step builds the foundation of flavor for your coconut curry shrimp.

Step 3: Add Garlic and Ginger

Next, stir in the minced garlic and grated ginger. Cook for an additional minute until fragrant. The aroma will be irresistible, and your kitchen will start to feel like a cozy Thai restaurant!

Step 4: Incorporate Red Curry Paste

Now, it’s time to add the red curry paste. Stir it into the onion mixture, ensuring it’s well combined. This paste is packed with spices and will give your dish that signature curry flavor.

Step 5: Pour in Coconut Milk

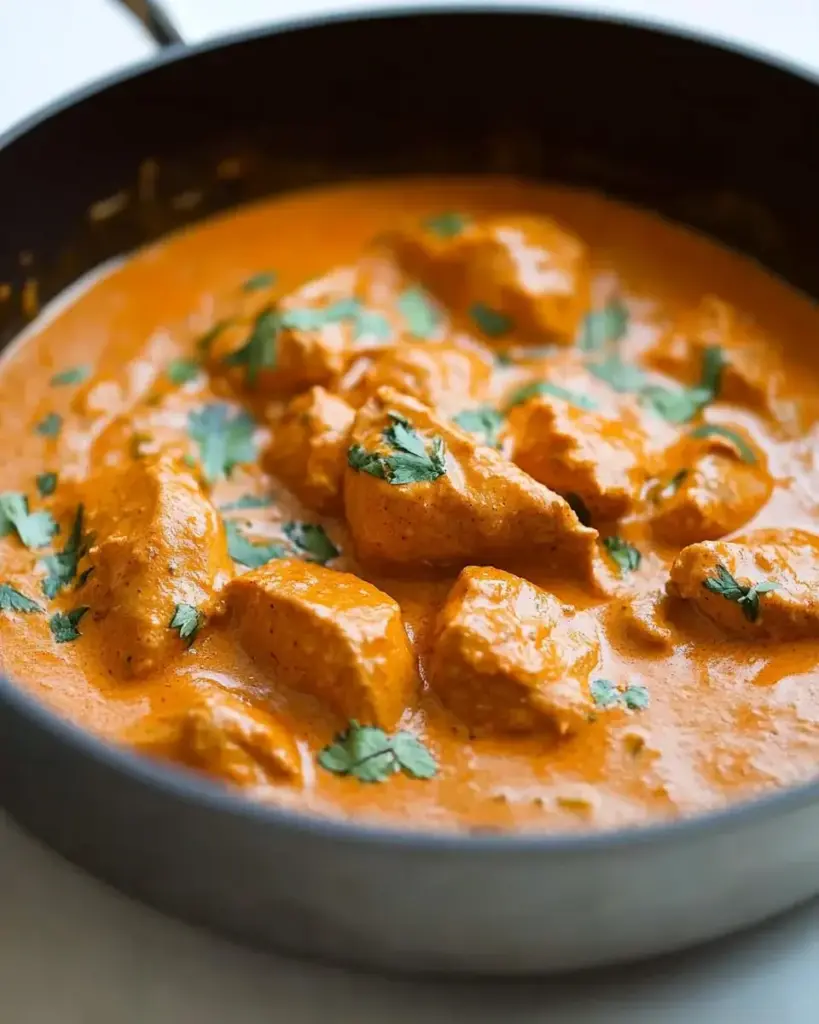
Pour in the can of coconut milk, soy sauce, and lime juice. Stir everything together until well mixed. Bring the mixture to a gentle simmer. The creamy coconut milk will create a luscious sauce that envelops the shrimp.

Step 6: Add Shrimp and Vegetables

Now, toss in the shrimp, bell peppers, and snap peas. Cook for about 5-7 minutes, or until the shrimp turn pink and are cooked through. The vegetables should be tender-crisp, adding a nice texture to your dish.

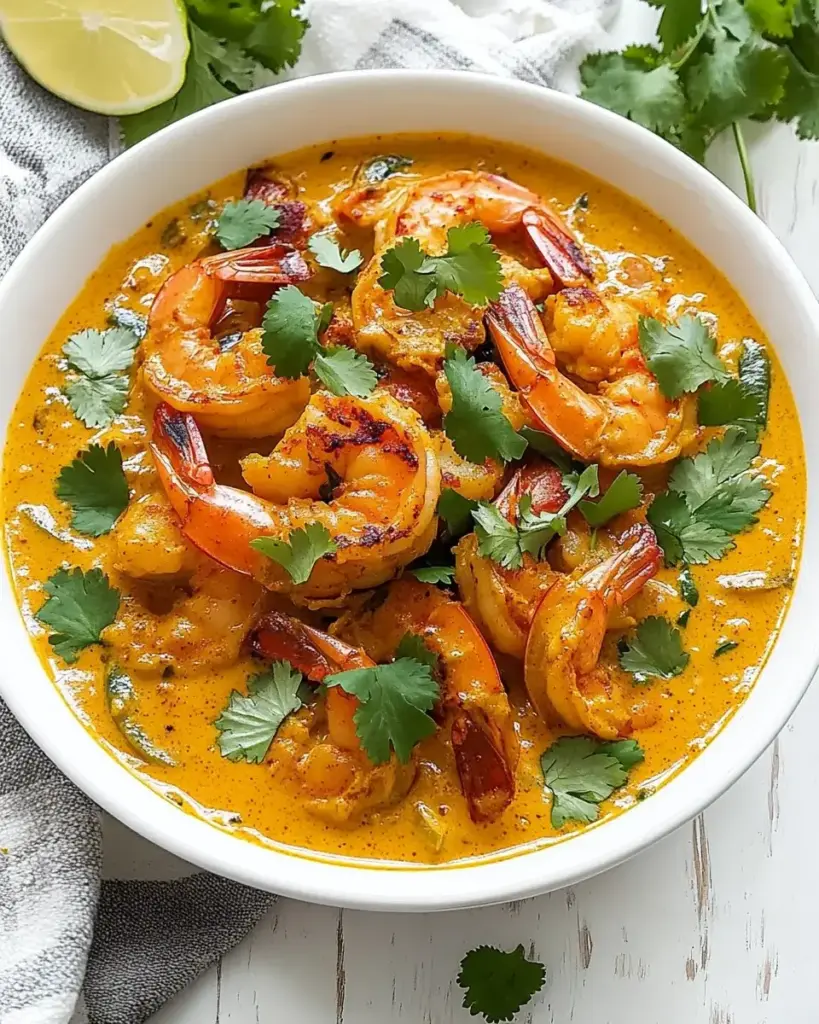
Step 7: Season and Garnish

Season your coconut curry shrimp with salt and pepper to taste. Remove the skillet from heat and garnish with fresh cilantro. This final touch adds a burst of freshness that elevates the dish.

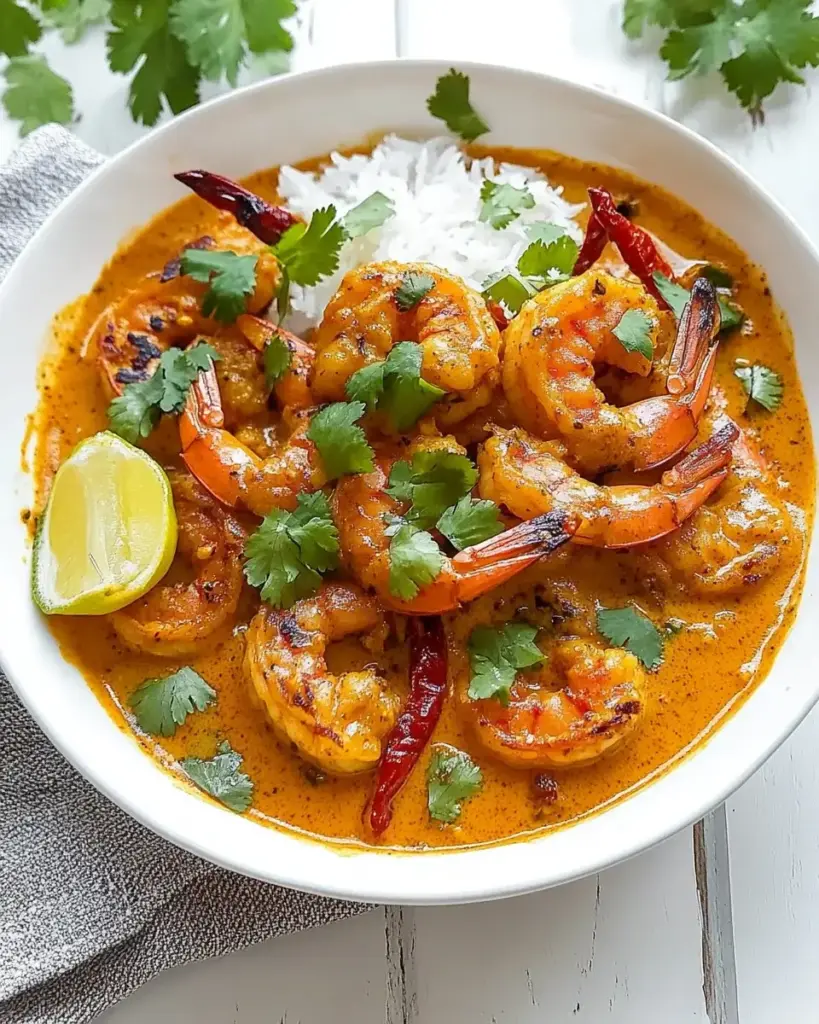
Step 8: Serve Over Rice

Serve your coconut curry shrimp over a bed of cooked rice. The rice will soak up all that delicious sauce, making every bite a flavor explosion. Enjoy your culinary creation!

Tips for Success

  • Prep all your ingredients before you start cooking. It makes the process smoother and more enjoyable.
  • Don’t overcook the shrimp; they should be just pink and tender. Overcooked shrimp can become rubbery.
  • Feel free to adjust the spice level by adding more or less red curry paste.
  • For a creamier sauce, let the coconut milk simmer a bit longer.
  • Garnish with lime wedges for an extra zesty kick!

Equipment Needed

  • Large Skillet: A non-stick skillet works best, but any large pan will do.
  • Wooden Spoon: Perfect for stirring and mixing your ingredients without scratching your pan.
  • Measuring Cups and Spoons: Essential for accurate ingredient measurements.
  • Cutting Board and Knife: For chopping veggies and prepping your shrimp.

Variations

  • Vegetable Delight: Swap shrimp for a mix of your favorite vegetables like zucchini, carrots, and mushrooms for a hearty vegetarian option.
  • Spicy Twist: Add sliced jalapeños or a spoonful of sriracha to the curry for an extra kick that spice lovers will adore.
  • Protein Swap: Use chicken or tofu instead of shrimp for a different protein source that still absorbs all those delicious flavors.
  • Herb Infusion: Experiment with fresh herbs like basil or mint for a unique twist that brightens the dish.
  • Coconut Curry Soup: Add more coconut milk and broth to turn this dish into a comforting soup, perfect for chilly evenings.

Serving Suggestions

  • Rice: Serve your coconut curry shrimp over fluffy jasmine or basmati rice to soak up the delicious sauce.
  • Side Salad: A light cucumber and tomato salad adds a refreshing crunch to balance the richness of the curry.
  • Drink Pairing: Enjoy with a cold Thai beer or a crisp white wine like Sauvignon Blanc.
  • Presentation: Garnish with lime wedges and extra cilantro for a vibrant, inviting look.

FAQs about Coconut Curry Shrimp

Can I use frozen shrimp for this recipe?

Absolutely! Just make sure to thaw them completely before cooking. Frozen shrimp can be a convenient option, and they’ll still soak up all the delicious flavors of the coconut curry.

What can I substitute for coconut milk?

If you’re looking for a lighter option, you can use low-fat coconut milk or even almond milk. Just keep in mind that the flavor will change slightly, but it will still be tasty!

How do I store leftovers?

Store any leftovers in an airtight container in the fridge for up to 3 days. Reheat gently on the stove or in the microwave, adding a splash of water or coconut milk to keep it creamy.

Can I make this dish ahead of time?

While it’s best enjoyed fresh, you can prep the ingredients ahead of time. Just cook it right before serving for the best flavor and texture.

Is this coconut curry shrimp recipe gluten-free?

Yes! This recipe is naturally gluten-free, especially if you use gluten-free soy sauce. It’s a great option for those with dietary restrictions.

Final Thoughts

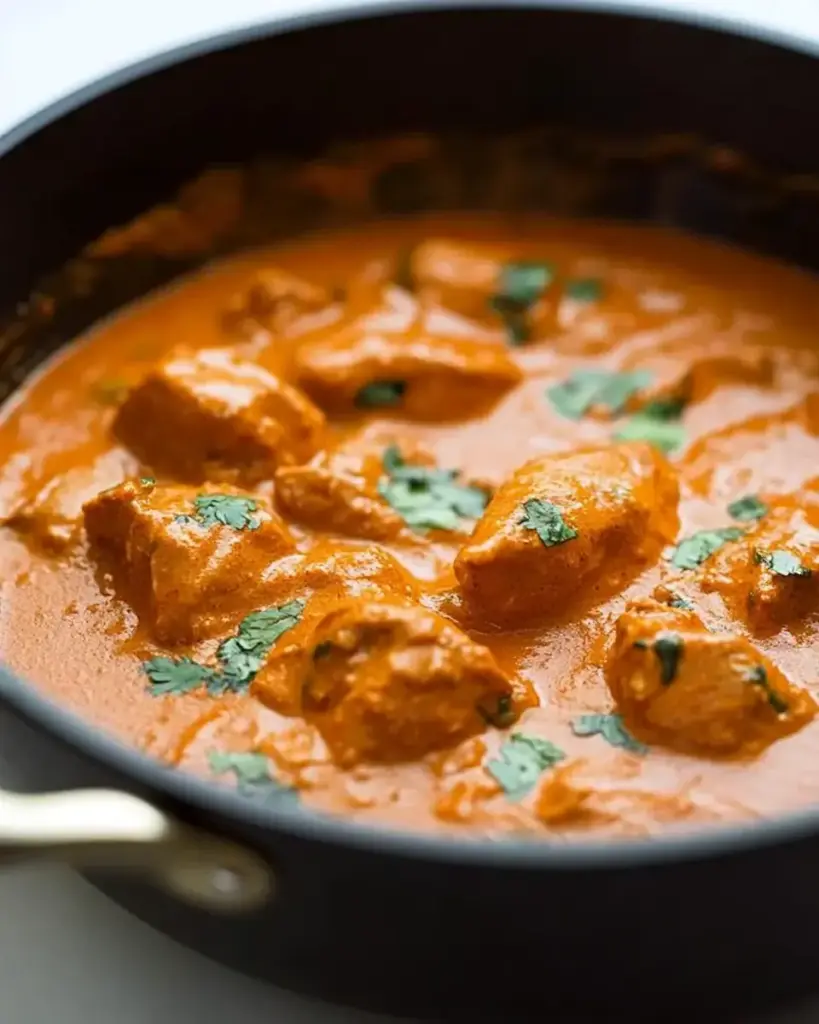
Cooking coconut curry shrimp is more than just preparing a meal; it’s about creating a moment of joy. The vibrant colors, enticing aromas, and rich flavors come together to make every bite a celebration. Whether you’re sharing it with family or enjoying a quiet dinner alone, this dish brings a taste of adventure to your table. Plus, the ease of preparation means you can focus on what truly matters—savoring the experience. So, roll up your sleeves, embrace the process, and let this coconut curry shrimp dish transport you to a tropical paradise right in your kitchen!

jhessica

Coconut Curry Shrimp: A Flavorful Journey You’ll Love!

A delicious and flavorful coconut curry shrimp dish that is easy to prepare and perfect for any occasion.
Prep Time 10 minutes
Cook Time 15 minutes
Total Time 25 minutes
Servings: 4 servings
Course: Main Course
Cuisine: Thai
Calories: 320

Ingredients
  

  • 1 pound large shrimp peeled and deveined
  • 1 tablespoon olive oil
  • 1 small onion diced
  • 2 cloves garlic minced
  • 1 tablespoon fresh ginger grated
  • 1 tablespoon red curry paste
  • 1 can 13.5 ounces coconut milk
  • 1 tablespoon soy sauce
  • 1 tablespoon lime juice
  • 1 cup bell peppers sliced (any color)
  • 1 cup snap peas
  • Salt and pepper to taste
  • Fresh cilantro for garnish
  • Cooked rice for serving

Method
 

  1. Heat the olive oil in a large skillet over medium heat.
  2. Add the diced onion and sauté for about 3-4 minutes until softened.
  3. Stir in the minced garlic and grated ginger, cooking for an additional minute until fragrant.
  4. Add the red curry paste to the skillet, stirring to combine with the onion mixture.
  5. Pour in the coconut milk, soy sauce, and lime juice, stirring well to incorporate. Bring the mixture to a gentle simmer.
  6. Add the shrimp, bell peppers, and snap peas to the skillet.
  7. Cook for about 5-7 minutes, or until the shrimp are pink and cooked through, and the vegetables are tender-crisp.
  8. Season with salt and pepper to taste.
  9. Remove from heat and garnish with fresh cilantro.
  10. Serve the coconut curry shrimp over cooked rice.

Nutrition

Serving: 1servingCalories: 320kcalCarbohydrates: 10gProtein: 25gFat: 20gSaturated Fat: 10gPolyunsaturated Fat: 8gCholesterol: 150mgSodium: 600mgFiber: 2gSugar: 3g

Notes

  • For a spicier kick, add sliced jalapeños or a dash of sriracha to the curry.
  • You can also substitute the shrimp with chicken or tofu for a different protein option.

Tried this recipe?

Let us know how it was!

Fried Strawberry Cheesecake Sandwiches are a must-try!

Introduction to Fried Strawberry Cheesecake Sandwiches

There’s something magical about the combination of strawberries and cheesecake, isn’t there? When I first stumbled upon the idea of Fried Strawberry Cheesecake Sandwiches, I knew I had to give it a try. This delightful dessert is not just a treat for the taste buds; it’s a quick solution for those busy days when you want to impress your loved ones without spending hours in the kitchen. With a crispy exterior and a creamy, fruity filling, these sandwiches are sure to become a favorite in your home. Let’s dive into this delicious adventure!

Why You’ll Love This Fried Strawberry Cheesecake Sandwiches

These Fried Strawberry Cheesecake Sandwiches are a game-changer for dessert lovers. They’re incredibly easy to whip up, making them perfect for a last-minute treat. The crispy, golden crust gives way to a creamy, sweet filling that bursts with fresh strawberry flavor. Plus, they’re a hit at gatherings, impressing friends and family alike. Who wouldn’t love a dessert that’s both indulgent and quick to prepare?

Ingredients for Fried Strawberry Cheesecake Sandwiches

Gathering the right ingredients is the first step to creating these mouthwatering Fried Strawberry Cheesecake Sandwiches. Here’s what you’ll need:

  • Fresh strawberries: The star of the show! Sweet and juicy, they add a burst of flavor.
  • Granulated sugar: This helps to macerate the strawberries, enhancing their natural sweetness.
  • Vanilla extract: A splash of this aromatic essence elevates the flavor profile.
  • Cream cheese: The creamy base for our filling, it provides that rich cheesecake taste.
  • Powdered sugar: This sweetens the cream cheese and gives it a smooth texture.
  • Lemon juice: A hint of acidity balances the sweetness and brightens the flavors.
  • White bread: Soft and fluffy, it forms the perfect sandwich base.
  • Crushed graham crackers: These add a delightful crunch and a nod to traditional cheesecake crust.
  • All-purpose flour: Essential for the coating, it helps create that crispy exterior.
  • Baking powder: This gives the coating a little lift, making it light and airy.
  • Salt: Just a pinch enhances all the flavors in the dish.
  • Egg: This binds the coating together and helps it adhere to the sandwiches.
  • Milk: It adds moisture to the egg mixture, ensuring a smooth coating.
  • Vegetable oil: For frying, it creates that golden, crispy finish.
  • Powdered sugar (for dusting): A final touch that makes these sandwiches look as good as they taste.

Feel free to get creative! You can swap out strawberries for other fruits like blueberries or raspberries for a seasonal twist. For a chocolatey indulgence, consider adding a layer of chocolate spread between the cream cheese and strawberries. Exact measurements for these ingredients can be found at the bottom of the article, ready for printing!

How to Make Fried Strawberry Cheesecake Sandwiches

Step 1: Prepare the Strawberries

Start by hulling and slicing your fresh strawberries. In a medium bowl, combine the strawberries with granulated sugar and vanilla extract. Toss them gently to coat. This process, known as macerating, allows the strawberries to release their juices and become even sweeter. Let them sit for about 15 minutes. The result? A deliciously syrupy mixture that will elevate your sandwiches!

Step 2: Make the Cream Cheese Filling

In another bowl, take your softened cream cheese and add powdered sugar and lemon juice. Using a hand mixer or a whisk, blend these ingredients until smooth and creamy. The lemon juice adds a refreshing zing, balancing the sweetness of the sugar. This filling is the heart of your Fried Strawberry Cheesecake Sandwiches, so make sure it’s well mixed!

Step 3: Assemble the Sandwiches

Now it’s time to bring everything together! Spread a generous layer of the cream cheese mixture on four slices of white bread. Next, spoon a portion of the macerated strawberries on top of the cream cheese. Finally, place another slice of bread on top to create a sandwich. Press down gently to ensure everything sticks together. Your sandwiches are now ready for their crispy transformation!

Step 4: Prepare the Coating

In a shallow dish, mix together the crushed graham crackers, all-purpose flour, baking powder, and salt. This combination will give your sandwiches that signature crunch. In a separate bowl, whisk together the egg and milk until well combined. This egg mixture will help the graham cracker coating adhere perfectly to your sandwiches. Get ready for some frying magic!

Step 5: Fry the Sandwiches

Heat about 2 inches of vegetable oil in a deep skillet or pot over medium heat until it reaches 350°F. Carefully dip each sandwich into the egg mixture, allowing any excess to drip off. Then, coat it in the graham cracker mixture, pressing gently to ensure it sticks. Fry the sandwiches in batches for about 2-3 minutes per side, or until they turn golden brown. Remove them and let them drain on paper towels.

Step 6: Serve and Enjoy

Once your Fried Strawberry Cheesecake Sandwiches are golden and crispy, dust them with powdered sugar for that perfect finishing touch. Serve them warm, and watch as everyone dives in for a taste of this delightful dessert!

Tips for Success

  • Make sure your oil is hot enough before frying; a drop of batter should sizzle immediately.
  • Don’t overcrowd the pan; fry in batches to ensure even cooking.
  • Let the sandwiches cool slightly before dusting with powdered sugar for a better presentation.
  • Use day-old bread for a sturdier sandwich that holds up during frying.
  • Experiment with different fruits or add chocolate for a unique twist!

Equipment Needed

  • Deep skillet or pot: A heavy-bottomed pan works well if you don’t have a deep fryer.
  • Mixing bowls: Use any size you have on hand for mixing ingredients.
  • Whisk or hand mixer: A whisk is perfect for mixing the cream cheese filling.
  • Slotted spoon: Ideal for removing the sandwiches from hot oil.
  • Paper towels: Essential for draining excess oil after frying.

Variations

  • Berry Medley: Swap out strawberries for a mix of berries like blueberries, raspberries, or blackberries for a colorful twist.
  • Chocolate Delight: Spread a layer of chocolate hazelnut spread between the cream cheese and strawberries for a rich, indulgent flavor.
  • Nutty Crunch: Add chopped nuts like almonds or pecans to the graham cracker coating for an extra crunch.
  • Gluten-Free Option: Use gluten-free bread and substitute the all-purpose flour with a gluten-free flour blend.
  • Vegan Version: Replace cream cheese with a vegan alternative and use plant-based milk and egg substitutes for frying.

Serving Suggestions

  • Pair with a scoop of vanilla ice cream for a delightful contrast in temperature and texture.
  • Serve alongside fresh whipped cream for an extra touch of indulgence.
  • Complement with a drizzle of chocolate or caramel sauce for added sweetness.
  • Enjoy with a cup of coffee or tea to balance the richness.
  • Garnish with mint leaves for a pop of color and freshness.

FAQs about Fried Strawberry Cheesecake Sandwiches

Can I make Fried Strawberry Cheesecake Sandwiches ahead of time?

Absolutely! You can prepare the cream cheese filling and macerate the strawberries in advance. Just assemble the sandwiches right before frying for the best texture. This way, you can enjoy a quick dessert without the last-minute rush!

What can I use instead of cream cheese?

If you’re looking for a lighter option, consider using Greek yogurt or a vegan cream cheese alternative. Both will provide a creamy texture while adding their unique flavors to the sandwiches.

How do I store leftovers?

Store any leftover Fried Strawberry Cheesecake Sandwiches in an airtight container in the fridge for up to two days. Reheat them in an oven or air fryer to regain that crispy texture before serving.

Can I freeze these sandwiches?

Yes, you can freeze the assembled sandwiches before frying. Just wrap them tightly in plastic wrap and store them in a freezer-safe bag. When you’re ready to enjoy, thaw them in the fridge and fry as usual!

What other fruits can I use in this recipe?

Feel free to get creative! Blueberries, raspberries, or even sliced peaches can be delicious alternatives. Each fruit brings its own unique flavor, making this dessert versatile and fun!

Final Thoughts

Fried Strawberry Cheesecake Sandwiches are more than just a dessert; they’re a celebration of flavors and memories. Each bite transports you back to carefree summer days, where sweetness and joy intertwine. The crispy exterior gives way to a creamy, fruity filling that delights the senses. Whether you’re sharing them with family or indulging solo, these sandwiches bring a sense of warmth and happiness to any occasion. So, roll up your sleeves and dive into this delightful recipe. Trust me, once you try them, you’ll be hooked on this sweet adventure!

jhessica

Fried Strawberry Cheesecake Sandwiches are a must-try!

Fried Strawberry Cheesecake Sandwiches are a delicious dessert that combines the flavors of strawberries and cheesecake, all encased in a crispy fried bread.
Prep Time 30 minutes
Cook Time 10 minutes
Total Time 40 minutes
Servings: 4 servings
Course: Dessert
Cuisine: American
Calories: 450

Ingredients
  

  • 2 cups fresh strawberries hulled and sliced
  • 2 tablespoons granulated sugar
  • 1 teaspoon vanilla extract
  • 8 ounces cream cheese softened
  • 1/2 cup powdered sugar
  • 1 teaspoon lemon juice
  • 8 slices of white bread
  • 1 cup crushed graham crackers
  • 1 cup all-purpose flour
  • 1 teaspoon baking powder
  • 1/2 teaspoon salt
  • 1 large egg
  • 1 cup milk
  • Vegetable oil for frying
  • Powdered sugar for dusting

Method
 

  1. In a medium bowl, combine the sliced strawberries, granulated sugar, and vanilla extract. Toss to coat and set aside to macerate for about 15 minutes.
  2. In another bowl, beat together the softened cream cheese, powdered sugar, and lemon juice until smooth and creamy.
  3. Spread a generous layer of the cream cheese mixture on four slices of bread. Top each with a portion of the macerated strawberries and then place another slice of bread on top to create a sandwich.
  4. In a shallow dish, combine the crushed graham crackers, flour, baking powder, and salt.
  5. In a separate bowl, whisk together the egg and milk until well combined.
  6. Heat about 2 inches of vegetable oil in a deep skillet or pot over medium heat until it reaches 350°F.
  7. Dip each sandwich into the egg mixture, allowing any excess to drip off, then coat it in the graham cracker mixture, pressing gently to adhere.
  8. Carefully place the coated sandwiches into the hot oil, frying in batches for about 2-3 minutes per side or until golden brown. Remove and drain on paper towels.
  9. Dust the fried sandwiches with powdered sugar before serving.

Nutrition

Serving: 1sandwichCalories: 450kcalCarbohydrates: 40gProtein: 8gFat: 25gSaturated Fat: 10gPolyunsaturated Fat: 15gCholesterol: 70mgSodium: 300mgFiber: 2gSugar: 20g

Notes

  • For a chocolate twist, add a layer of chocolate spread between the cream cheese and strawberries.
  • Experiment with different fruits like blueberries or raspberries for a seasonal variation.

Tried this recipe?

Let us know how it was!

Bang Bang Chicken: Discover the Ultimate Recipe Now!

Introduction to Bang Bang Chicken

There’s something magical about a dish that combines crispy, spicy, and creamy all in one bite. Bang Bang Chicken is just that—a delightful explosion of flavors that can turn any ordinary meal into a culinary adventure. Whether you’re looking to impress your friends at a game night or simply want a quick solution for a busy weeknight dinner, this recipe has got you covered. With just a handful of ingredients and a straightforward process, you’ll find yourself whipping up this crowd-pleaser in no time. Trust me, your taste buds will thank you!

Why You’ll Love This Bang Bang Chicken

This Bang Bang Chicken recipe is a game-changer for anyone who craves bold flavors without spending hours in the kitchen. It’s quick to prepare, taking just 45 minutes from start to finish, making it perfect for busy weeknights. The crispy texture paired with a creamy, spicy sauce creates a taste sensation that will have everyone coming back for seconds. Plus, it’s a dish that’s sure to impress, whether it’s a casual dinner or a special occasion!

Ingredients for Bang Bang Chicken

Gathering the right ingredients is the first step to creating your Bang Bang Chicken masterpiece. Here’s what you’ll need:

  • Boneless, skinless chicken thighs: These are juicy and tender, perfect for absorbing flavors. You can also use chicken breasts for a leaner option.
  • All-purpose flour: This helps create a crispy coating. It’s the base for your dry mix.
  • Salt: A must-have for enhancing the flavors of the chicken.
  • Black pepper: Adds a subtle kick to the dish.
  • Garlic powder: This brings a savory depth that pairs beautifully with the chicken.
  • Paprika: Not only does it add color, but it also contributes a mild sweetness.
  • Large eggs: These act as a binding agent, helping the breadcrumbs stick to the chicken.
  • Panko breadcrumbs: For that extra crunch! They’re lighter and crispier than regular breadcrumbs.
  • Mayonnaise: This creamy base makes the sauce rich and smooth.
  • Sweet chili sauce: Adds a delightful sweetness and a hint of heat.
  • Sriracha: Adjust this to your spice preference; it brings the heat!
  • Lime juice: A splash of acidity to balance the richness of the sauce.
  • Chopped green onions: For garnish, they add a fresh, vibrant touch.

For exact measurements, check the bottom of the article where you can find everything available for printing. Happy cooking!

How to Make Bang Bang Chicken

Step 1: Preheat and Prepare

Start by preheating your oven to 400°F (200°C). This ensures your Bang Bang Chicken will cook evenly and get that perfect golden brown color. While the oven heats up, line a baking sheet with parchment paper. This not only makes cleanup a breeze but also prevents the chicken from sticking. Trust me, you’ll appreciate this little step later!

Step 2: Mix the Dry Ingredients

In a shallow bowl, combine the all-purpose flour, salt, black pepper, garlic powder, and paprika. This dry mix is crucial for creating that crispy coating. Make sure to whisk it well so that all the spices are evenly distributed. A well-mixed dry blend means every bite of your Bang Bang Chicken will be packed with flavor!

Step 3: Prepare the Egg Wash

In a separate bowl, whisk the large eggs until they’re well beaten. This egg wash acts as the glue that holds the panko breadcrumbs to the chicken. It’s a simple step, but it’s essential for achieving that crunchy texture we all love in crispy chicken recipes.

Step 4: Coat the Chicken

Now comes the fun part! Take each chicken thigh and first coat it in the flour mixture, shaking off any excess. Next, dip it into the beaten eggs, ensuring it’s fully covered. Finally, roll it in the panko breadcrumbs, pressing gently to make sure they stick. This three-step coating process is what gives your Bang Bang Chicken that irresistible crunch. Repeat this for all the chicken thighs, and get ready for some serious flavor!

Step 5: Bake the Chicken

Place the breaded chicken thighs on your prepared baking sheet, making sure they’re spaced out. Bake them in the preheated oven for 25-30 minutes. You’re looking for a golden brown color and an internal temperature of 165°F. This baking method keeps the chicken juicy while giving it that satisfying crunch. Keep an eye on them; you want them crispy, not burnt!

Step 6: Make the Sauce

While the chicken is baking, it’s time to whip up the creamy sauce. In a bowl, mix together the mayonnaise, sweet chili sauce, sriracha, and lime juice. Stir until everything is well combined. This sauce is the perfect balance of creamy and spicy, and it complements the crispy chicken beautifully. Adjust the sriracha to your taste for that extra kick!

Step 7: Serve and Garnish

Once the chicken is done baking, let it cool for a few minutes. You can drizzle the sauce over the chicken or serve it on the side for dipping. Garnish with chopped green onions for a fresh touch. This not only adds color but also a burst of flavor. Your Bang Bang Chicken is now ready to impress!

Tips for Success

  • For extra crunch, consider frying the chicken instead of baking.
  • Let the chicken rest for a few minutes after baking to keep it juicy.
  • Use a meat thermometer to ensure the chicken reaches 165°F for safety.
  • Feel free to adjust the spice level in the sauce to suit your taste.
  • Prep your ingredients ahead of time to streamline the cooking process.

Equipment Needed

  • Baking sheet: A standard baking sheet works well, but a wire rack can help with even cooking.
  • Parchment paper: This makes cleanup easy; aluminum foil is a good alternative.
  • Shallow bowls: Use these for mixing dry ingredients and egg wash; any bowl will do.
  • Whisk: Essential for mixing; a fork can work in a pinch.
  • Meat thermometer: To check chicken doneness; a simple knife can also help cut into the meat.

Variations

  • Spicy Bang Bang Chicken: Add more sriracha or a dash of cayenne pepper to the sauce for an extra kick.
  • Gluten-Free Option: Use gluten-free breadcrumbs and flour to make this dish suitable for gluten-sensitive diets.
  • Vegetarian Version: Substitute chicken with firm tofu or cauliflower florets for a delicious plant-based alternative.
  • Asian-Inspired Twist: Incorporate sesame oil into the sauce for a nutty flavor that complements the dish beautifully.
  • Herb-Infused Chicken: Marinate the chicken thighs in a mixture of soy sauce, ginger, and garlic before coating for added depth of flavor.

Serving Suggestions

  • Serve with steamed rice: A fluffy bed of rice complements the spicy chicken perfectly.
  • Pair with a crisp salad: A fresh green salad adds a refreshing crunch.
  • Enjoy with cold beverages: Iced tea or a light beer balances the heat.
  • Presentation tip: Arrange the chicken on a platter and drizzle with sauce for a stunning display.

FAQs about Bang Bang Chicken

As you dive into the world of Bang Bang Chicken, you might have a few questions. Here are some common queries that can help you navigate this delicious dish:

Can I use chicken breasts instead of thighs?

Absolutely! While chicken thighs provide juiciness, chicken breasts can be a leaner option. Just be mindful of the cooking time, as breasts may cook faster.

How can I make Bang Bang Chicken less spicy?

If you prefer a milder flavor, simply reduce the amount of sriracha in the sauce. You can also skip it altogether and add a bit more sweet chili sauce for sweetness.

Can I prepare the sauce in advance?

Yes! The sauce can be made ahead of time and stored in the refrigerator. Just give it a good stir before serving to ensure it’s creamy and well-mixed.

What can I serve with Bang Bang Chicken?

This dish pairs wonderfully with steamed rice, a fresh salad, or even crispy fries. The creamy sauce also makes a great dip for veggies!

Is Bang Bang Chicken gluten-free?

To make this dish gluten-free, simply substitute the all-purpose flour and panko breadcrumbs with gluten-free alternatives. It’s just as delicious!

Final Thoughts

Creating Bang Bang Chicken is more than just cooking; it’s about bringing joy to your table. The crispy texture, combined with that creamy, spicy sauce, makes every bite a celebration of flavors. Whether you’re sharing it with family or enjoying it solo, this dish has a way of making any meal feel special. Plus, the ease of preparation means you can focus on what really matters—enjoying good food and great company. So, roll up your sleeves, dive into this recipe, and let the deliciousness unfold. Your taste buds are in for a treat!

jhessica

Bang Bang Chicken: Discover the Ultimate Recipe Now!

Bang Bang Chicken is a deliciously crispy and spicy dish made with breaded chicken thighs, served with a creamy and tangy sauce.
Prep Time 15 minutes
Cook Time 30 minutes
Total Time 45 minutes
Servings: 4 servings
Course: Main Course
Cuisine: Asian
Calories: 450

Ingredients
  

  • 2 pounds boneless skinless chicken thighs
  • 1 cup all-purpose flour
  • 1 teaspoon salt
  • 1 teaspoon black pepper
  • 1 teaspoon garlic powder
  • 1 teaspoon paprika
  • 2 large eggs
  • 1 cup panko breadcrumbs
  • 1 cup mayonnaise
  • 1/4 cup sweet chili sauce
  • 1 tablespoon sriracha adjust to taste
  • 1 tablespoon lime juice
  • 1 tablespoon chopped green onions for garnish

Method
 

  1. Preheat your oven to 400°F (200°C) and line a baking sheet with parchment paper.
  2. In a shallow bowl, mix together the flour, salt, black pepper, garlic powder, and paprika.
  3. In another bowl, whisk the eggs until well beaten.
  4. In a third bowl, place the panko breadcrumbs.
  5. Take each chicken thigh and coat it in the flour mixture, shaking off any excess. Dip it into the beaten eggs, then coat it with panko breadcrumbs, pressing gently to adhere.
  6. Place the breaded chicken thighs on the prepared baking sheet. Bake for 25-30 minutes, or until golden brown and cooked through (internal temperature should reach 165°F).
  7. While the chicken is baking, prepare the sauce by mixing together the mayonnaise, sweet chili sauce, sriracha, and lime juice in a bowl.
  8. Once the chicken is done, remove it from the oven and let it cool for a few minutes. Drizzle the sauce over the chicken or serve it on the side for dipping.
  9. Garnish with chopped green onions before serving.

Nutrition

Serving: 1servingCalories: 450kcalCarbohydrates: 12gProtein: 30gFat: 30gSaturated Fat: 5gPolyunsaturated Fat: 20gCholesterol: 200mgSodium: 800mgFiber: 1gSugar: 4g

Notes

  • For extra crunch, try frying the chicken in hot oil instead of baking.
  • You can also substitute the chicken thighs with chicken breasts for a leaner option.
  • Adjust the level of sriracha in the sauce to suit your spice preference.

Tried this recipe?

Let us know how it was!

Cheeseburger Sliders: Easy Recipe for Delicious Bites!

Introduction to Cheeseburger Sliders

There’s something undeniably comforting about cheeseburger sliders. They remind me of backyard barbecues and family gatherings, where laughter mingles with the aroma of sizzling beef. These little bites pack a punch of flavor and are perfect for any occasion, whether it’s game day or a casual weeknight dinner. If you’re looking for a quick solution to satisfy hungry mouths or a dish to impress your loved ones, this cheeseburger sliders recipe is just what you need. Easy to make and even easier to devour, these sliders will quickly become a favorite in your home.

Why You’ll Love This Cheeseburger Sliders

Cheeseburger sliders are the ultimate crowd-pleaser. They come together in just 40 minutes, making them a fantastic option for busy weeknights or spontaneous gatherings. The combination of juicy beef and melted cheese nestled in soft buns is simply irresistible. Plus, you can customize them to suit everyone’s taste, ensuring that even the pickiest eaters will be satisfied. Trust me, these sliders will have everyone coming back for seconds!

Ingredients for Cheeseburger Sliders

Gathering the right ingredients is key to making delicious cheeseburger sliders. Here’s what you’ll need:

  • Ground beef: An 80/20 blend is perfect for juicy sliders. You can also use ground turkey for a leaner option.
  • Garlic powder: This adds a savory depth to the beef. Fresh garlic works too, but be careful not to overpower the mix.
  • Onion powder: A must-have for that classic cheeseburger flavor. It blends seamlessly into the meat.
  • Salt: Essential for enhancing all the flavors. Don’t skip it!
  • Black pepper: A pinch adds a subtle kick. Adjust to your taste.
  • Worcestershire sauce: This brings a rich umami flavor. It’s a secret weapon in many burger recipes.
  • Slider buns: Soft and fluffy, they cradle the beef perfectly. You can use whole wheat or gluten-free buns if needed.
  • Cheddar cheese: Halved slices melt beautifully over the beef. Feel free to swap for pepper jack or Swiss for a twist.
  • Shredded lettuce: Adds a fresh crunch. You can also use spinach or arugula for a different texture.
  • Diced tomatoes: Juicy and vibrant, they brighten up each bite. Cherry tomatoes work well too.
  • Sliced pickles: A tangy addition that complements the richness of the beef. Dill pickles are a classic choice.
  • Ketchup and mustard: The classic condiments that everyone loves. You can also offer BBQ sauce for a smoky flavor.

For exact measurements, check the bottom of the article where you can find everything available for printing. Happy cooking!

How to Make Cheeseburger Sliders

Making cheeseburger sliders is a breeze! Follow these simple steps, and you’ll have a delicious dish ready in no time. Let’s dive in!

Step 1: Preheat the Oven

First things first, preheat your oven to 350°F. This ensures that your sliders bake evenly and come out perfectly golden. While the oven heats up, you can get everything else ready.

Step 2: Prepare the Beef Mixture

In a large bowl, combine the ground beef, garlic powder, onion powder, salt, black pepper, and Worcestershire sauce. Mix gently until just combined. Overmixing can lead to tough sliders, and nobody wants that! The blend of spices will give your cheeseburger sliders a flavor boost.

Step 3: Bake the Beef

Next, press the beef mixture into a greased 9×13-inch baking dish. Spread it evenly to ensure all sliders cook uniformly. Bake in the preheated oven for 20-25 minutes, or until the beef is cooked through. Once done, remove it from the oven and drain any excess fat. This step is crucial for keeping your sliders from becoming soggy.

Step 4: Assemble the Sliders

Now, slice the slider buns in half horizontally. Place the bottom halves in the baking dish. Layer the cooked beef evenly over the buns, then top with the halved cheese slices. The cheese will melt beautifully, creating that gooey cheeseburger experience we all crave. Finally, place the top halves of the buns on the cheese.

Step 5: Final Bake

Return the assembled sliders to the oven and bake for an additional 5-7 minutes. This will melt the cheese and toast the buns just right. Once they’re golden and bubbly, remove them from the oven and let cool for a few minutes. Cut the sliders into individual portions and top with your favorite toppings like lettuce, tomatoes, pickles, ketchup, and mustard. Enjoy your cheeseburger sliders!

Tips for Success

  • Use a meat thermometer to ensure the beef reaches 160°F for safety.
  • Don’t overmix the beef; it keeps the sliders tender.
  • Let the sliders cool for a few minutes before cutting to avoid squishing.
  • Experiment with toppings—try avocado or jalapeños for a twist!
  • Make ahead and freeze unbaked sliders for a quick meal later.

Equipment Needed

  • Baking dish: A 9×13-inch dish works best, but any similar-sized dish will do.
  • Mixing bowl: A large bowl for combining ingredients; a stand mixer can be used if you prefer.
  • Meat thermometer: Optional, but great for checking beef doneness.
  • Knife: For slicing buns and toppings.
  • Spatula: Handy for spreading the beef mixture evenly.

Variations

  • Spicy Sliders: Add diced jalapeños to the beef mixture for a fiery kick. Top with spicy mustard for extra heat.
  • Cheesy Delight: Swap cheddar for pepper jack or blue cheese for a bold flavor twist.
  • Veggie Sliders: Use black beans or lentils instead of beef for a hearty vegetarian option. Add diced bell peppers for crunch.
  • BBQ Sliders: Mix in your favorite BBQ sauce with the beef for a smoky, sweet flavor. Top with coleslaw for added texture.
  • Breakfast Sliders: Replace beef with breakfast sausage and add a fried egg on top for a morning treat.

Serving Suggestions

  • Classic Sides: Serve with crispy fries or onion rings for that perfect diner experience.
  • Fresh Salads: A light coleslaw or garden salad balances the richness of the sliders.
  • Drinks: Pair with cold beers or homemade lemonade for a refreshing touch.
  • Presentation: Arrange sliders on a wooden board for a rustic, inviting look.

FAQs about Cheeseburger Sliders

Can I make cheeseburger sliders ahead of time?

Absolutely! You can prepare the beef mixture and assemble the sliders in advance. Just cover them and store them in the fridge. When you’re ready to serve, pop them in the oven to bake. This makes them a fantastic option for parties or busy weeknights.

What can I use instead of ground beef?

If you’re looking for alternatives, ground turkey or chicken works well for a leaner option. You can also try black beans or lentils for a vegetarian twist. Just remember to adjust the seasonings to keep the flavor profile delicious!

How do I store leftover sliders?

Leftover cheeseburger sliders can be stored in an airtight container in the fridge for up to three days. Reheat them in the oven or microwave before serving. They make for a quick snack or lunch!

Can I freeze cheeseburger sliders?

Yes, you can freeze unbaked sliders! Just assemble them, wrap tightly, and store in the freezer. When you’re ready to enjoy, bake them straight from the freezer, adding a few extra minutes to the cooking time.

What toppings do you recommend for cheeseburger sliders?

The classic toppings like lettuce, tomatoes, and pickles are always a hit. You can also get creative with avocado, jalapeños, or even a fried egg for a breakfast twist. The options are endless!

Final Thoughts

Cheeseburger sliders are more than just a meal; they’re a celebration of flavors and memories. Each bite transports me back to those carefree summer days, where good food and great company were all that mattered. This recipe is a simple way to bring joy to your table, whether it’s a casual family dinner or a lively gathering with friends. The ease of preparation means you can focus on what truly matters—enjoying the moment. So, roll up your sleeves, gather your loved ones, and dive into these delicious sliders. Trust me, they’ll become a cherished favorite in no time!

jhessica

Cheeseburger Sliders: Easy Recipe for Delicious Bites!

A simple and delicious recipe for cheeseburger sliders that are perfect for parties or family gatherings.
Prep Time 10 minutes
Cook Time 30 minutes
Total Time 40 minutes
Servings: 12 sliders
Course: Appetizer
Cuisine: American
Calories: 250

Ingredients
  

  • 1 pound ground beef 80/20 blend
  • 1 teaspoon garlic powder
  • 1 teaspoon onion powder
  • 1 teaspoon salt
  • 1/2 teaspoon black pepper
  • 1 tablespoon Worcestershire sauce
  • 12 slider buns
  • 6 slices cheddar cheese halved
  • 1 cup shredded lettuce
  • 1 cup diced tomatoes
  • 1/2 cup pickles sliced
  • Ketchup and mustard for serving

Method
 

  1. Preheat your oven to 350°F.
  2. In a large bowl, combine the ground beef, garlic powder, onion powder, salt, black pepper, and Worcestershire sauce. Mix until just combined.
  3. Press the beef mixture into a greased 9×13-inch baking dish, spreading it evenly.
  4. Bake in the preheated oven for 20-25 minutes, or until the beef is cooked through. Remove from the oven and drain any excess fat.
  5. Slice the slider buns in half horizontally.
  6. Place the bottom halves of the buns in the baking dish. Layer the cooked beef evenly over the buns, then top with the halved cheese slices.
  7. Place the top halves of the buns on the cheese.
  8. Return the sliders to the oven and bake for an additional 5-7 minutes, or until the cheese is melted and the buns are slightly toasted.
  9. Remove from the oven and let cool for a few minutes.
  10. Cut the sliders into individual portions and top with shredded lettuce, diced tomatoes, pickles, ketchup, and mustard as desired.

Nutrition

Serving: 1sliderCalories: 250kcalCarbohydrates: 15gProtein: 15gFat: 15gSaturated Fat: 6gPolyunsaturated Fat: 9gCholesterol: 50mgSodium: 500mgFiber: 1gSugar: 2g

Notes

  • For a spicy kick, add diced jalapeños to the beef mixture or top the sliders with spicy mustard.
  • You can substitute the cheddar cheese with your favorite cheese, such as pepper jack or Swiss, for a different flavor profile.

Tried this recipe?

Let us know how it was!

Savory Turkey and Egg Breakfast Casserole is a Delight!

Introduction to Savory Turkey and Egg Breakfast Casserole

There’s something special about a warm, hearty breakfast that sets the tone for the day. The Savory Turkey and Egg Breakfast Casserole is just that—a delightful dish that combines flavor and nutrition in one easy-to-make recipe. Whether you’re rushing out the door or enjoying a leisurely weekend brunch, this casserole is a quick solution that satisfies. It’s perfect for impressing family or friends, and it’s a fantastic way to use up leftover turkey. Trust me, once you try it, you’ll want to make it a regular part of your breakfast rotation!

Why You’ll Love This Savory Turkey and Egg Breakfast Casserole

This Savory Turkey and Egg Breakfast Casserole is a game-changer for busy mornings. It’s incredibly easy to whip up, taking just 15 minutes of prep time. The combination of turkey, eggs, and veggies creates a deliciously satisfying meal that keeps you full for hours. Plus, it’s versatile—perfect for breakfast, brunch, or even a quick dinner. You’ll love how it brings everyone together around the table, making mornings feel special.

Ingredients for Savory Turkey and Egg Breakfast Casserole

Gathering the right ingredients is the first step to creating this delicious Savory Turkey and Egg Breakfast Casserole. Here’s what you’ll need:

  • Large eggs: The star of the dish, providing protein and a fluffy texture.
  • Milk: Adds creaminess and helps bind the ingredients together.
  • Salt: Enhances the flavors of the dish.
  • Black pepper: A dash of spice to wake up your taste buds.
  • Garlic powder: For that savory depth of flavor.
  • Onion powder: Complements the garlic and adds a subtle sweetness.
  • Cooked turkey: Shredded or diced, it’s a great way to use leftovers while adding lean protein.
  • Frozen spinach: Packed with nutrients, it adds color and a healthy twist. Just make sure to thaw and drain it well.
  • Shredded cheddar cheese: Melts beautifully on top, adding richness and flavor.
  • Diced bell pepper: Adds crunch and a pop of color.
  • Diced onion: For a sweet and savory base flavor.
  • Olive oil: Used for sautéing the veggies, it adds healthy fats.

Feel free to get creative! You can swap turkey for cooked sausage or ham for a different flavor profile. If you’re looking for a lighter version, consider using egg whites and low-fat cheese. For those who like a kick, diced jalapeños or a splash of hot sauce can spice things up. The exact quantities for each ingredient are listed at the bottom of the article, ready for printing!

How to Make Savory Turkey and Egg Breakfast Casserole

Step 1: Preheat and Prepare

Start by preheating your oven to 350°F (175°C). While it warms up, grab a 9×13-inch baking dish and grease it with cooking spray or a drizzle of olive oil. This will ensure your casserole comes out easily and doesn’t stick. A little prep goes a long way!

Step 2: Whisk the Egg Mixture

In a large mixing bowl, crack open those eight large eggs and pour in a cup of milk. Add in the salt, black pepper, garlic powder, and onion powder. Whisk everything together until it’s well combined. This egg mixture is the heart of your Savory Turkey and Egg Breakfast Casserole!

Step 3: Sauté the Vegetables

Heat a tablespoon of olive oil in a skillet over medium heat. Toss in the diced bell pepper and onion, sautéing them for about five minutes. You want them softened and fragrant. This step adds a wonderful depth of flavor to your casserole, making it even more delicious!

Step 4: Combine Turkey and Spinach

Next, add your cooked turkey and thawed spinach to the skillet. Stir everything together, letting it cook for an additional 2-3 minutes. This ensures the turkey is heated through and the spinach is well mixed in. It’s a colorful, nutritious blend that’s hard to resist!

Step 5: Assemble the Casserole

Pour the turkey and vegetable mixture into your prepared baking dish, spreading it out evenly. Then, gently pour the egg mixture over the top, making sure everything is coated. This layering is key to achieving that perfect bite of flavor in every slice!

Step 6: Add Cheese and Bake

Finally, sprinkle a generous amount of shredded cheddar cheese on top of the casserole. Pop it into the preheated oven and bake for 30-35 minutes. You’ll know it’s done when the eggs are set and the top is lightly golden. The aroma will have everyone eagerly waiting!

Tips for Success

  • Make sure to thoroughly drain the spinach to avoid a soggy casserole.
  • For extra flavor, consider adding fresh herbs like parsley or chives.
  • Let the casserole cool for a few minutes before slicing; this helps it hold its shape.
  • Feel free to prep the ingredients the night before for a quicker morning assembly.
  • Experiment with different cheeses for a unique twist!

Equipment Needed

  • Baking dish: A 9×13-inch dish is ideal, but any similar-sized dish will work.
  • Mixing bowl: A large bowl for whisking the egg mixture; a smaller bowl can suffice.
  • Skillet: A non-stick skillet is great for sautéing, but any skillet will do.
  • Whisk: Essential for mixing; a fork can work in a pinch.
  • Spatula: Useful for spreading and serving the casserole.

Variations

  • Spicy Kick: Add diced jalapeños or a splash of hot sauce to the egg mixture for a fiery twist.
  • Meat Swap: Substitute turkey with cooked sausage or ham for a different flavor profile.
  • Veggie Delight: Incorporate other vegetables like zucchini, mushrooms, or tomatoes for added nutrition and flavor.
  • Cheese Choices: Experiment with different cheeses such as feta, pepper jack, or mozzarella for a unique taste.
  • Low-Carb Option: Replace the milk with unsweetened almond milk and use cauliflower rice instead of turkey for a lighter, low-carb version.

Serving Suggestions

  • Pair your Savory Turkey and Egg Breakfast Casserole with fresh fruit for a refreshing contrast.
  • A side of crispy hash browns adds a delightful crunch.
  • Serve with a dollop of salsa or avocado for extra flavor.
  • Complement with a hot cup of coffee or a refreshing juice.
  • Garnish with fresh herbs like parsley or chives for a pop of color.

FAQs about Savory Turkey and Egg Breakfast Casserole

Can I make this casserole ahead of time?
Absolutely! You can prepare the casserole the night before and store it in the fridge. Just pop it in the oven in the morning for a quick breakfast. This Savory Turkey and Egg Breakfast Casserole is perfect for meal prep!

How do I store leftovers?
Store any leftovers in an airtight container in the fridge for up to 3 days. Reheat individual slices in the microwave or oven until warmed through. This dish holds up well, making it a great option for meal planning.

Can I freeze the casserole?
Yes, you can freeze the Savory Turkey and Egg Breakfast Casserole! Just make sure to let it cool completely before wrapping it tightly in plastic wrap and aluminum foil. It can be frozen for up to 2 months. Thaw in the fridge overnight before reheating.

What can I substitute for turkey?
If turkey isn’t your thing, feel free to swap it out for cooked sausage, ham, or even crumbled bacon. Each option brings its own unique flavor to the casserole, making it versatile for any taste preference.

Is this casserole suitable for a low-carb diet?
Yes! To make a low-carb version, you can replace the turkey with cauliflower rice and use unsweetened almond milk instead of regular milk. This way, you can enjoy a delicious breakfast without the extra carbs!

Final Thoughts

Cooking the Savory Turkey and Egg Breakfast Casserole is more than just preparing a meal; it’s about creating moments. The aroma wafting through your kitchen, the laughter shared around the table, and the satisfaction of a hearty breakfast all come together in this dish. It’s a recipe that invites creativity, allowing you to customize it to your taste. Whether it’s a busy weekday or a relaxed weekend brunch, this casserole brings joy and nourishment. I hope it becomes a cherished part of your breakfast routine, just as it has in mine. Enjoy every delicious bite!

jhessica

Savory Turkey and Egg Breakfast Casserole is a Delight!

Savory Turkey and Egg Breakfast Casserole is a delicious and nutritious dish perfect for breakfast or brunch.
Prep Time 15 minutes
Cook Time 35 minutes
Total Time 50 minutes
Servings: 6 servings
Course: Breakfast
Cuisine: American
Calories: 230

Ingredients
  

  • 8 large eggs
  • 1 cup milk
  • 1 teaspoon salt
  • 1/2 teaspoon black pepper
  • 1/2 teaspoon garlic powder
  • 1/2 teaspoon onion powder
  • 1 cup cooked turkey shredded or diced
  • 1 cup frozen spinach thawed and drained
  • 1 cup shredded cheddar cheese
  • 1/2 cup diced bell pepper
  • 1/2 cup diced onion
  • 1 tablespoon olive oil

Method
 

  1. Preheat your oven to 350°F (175°C). Grease a 9×13-inch baking dish with cooking spray or olive oil.
  2. In a large mixing bowl, whisk together the eggs, milk, salt, pepper, garlic powder, and onion powder until well combined.
  3. In a skillet, heat the olive oil over medium heat. Add the diced bell pepper and onion, and sauté for about 5 minutes, or until softened.
  4. Add the cooked turkey and spinach to the skillet, stirring to combine. Cook for an additional 2-3 minutes until heated through.
  5. Pour the turkey and vegetable mixture into the prepared baking dish, spreading it evenly.
  6. Pour the egg mixture over the turkey and vegetables, ensuring everything is evenly coated.
  7. Sprinkle the shredded cheddar cheese on top.
  8. Bake in the preheated oven for 30-35 minutes, or until the eggs are set and the top is lightly golden.
  9. Let the casserole cool for about 5 minutes before slicing and serving.

Nutrition

Serving: 1sliceCalories: 230kcalCarbohydrates: 4gProtein: 22gFat: 14gSaturated Fat: 5gPolyunsaturated Fat: 9gCholesterol: 300mgSodium: 500mgFiber: 1gSugar: 2g

Notes

  • For a spicier kick, add diced jalapeños or a dash of hot sauce to the egg mixture.
  • You can also substitute the turkey with cooked sausage or ham for a different flavor profile.
  • For a lighter version, use egg whites instead of whole eggs and low-fat cheese.

Tried this recipe?

Let us know how it was!

Butter Chicken: Discover the Secret to Perfect Flavor!

Introduction to Butter Chicken

There’s something magical about the aroma of Butter Chicken wafting through the kitchen. It takes me back to family gatherings, where laughter mingled with the rich scent of spices. This dish is more than just a meal; it’s a warm hug on a plate. Perfect for a quick weeknight dinner or an impressive dish for guests, Butter Chicken is a crowd-pleaser that never disappoints. With its creamy tomato sauce and tender chicken, it’s a delightful way to bring a taste of India into your home. Trust me, once you try it, you’ll be hooked!

Why You’ll Love This Butter Chicken

This Butter Chicken recipe is a game-changer for busy weeknights. It’s quick to prepare, taking just about an hour and a half from start to finish. The flavors are rich and comforting, making it a dish that pleases even the pickiest eaters. Plus, it’s versatile! Serve it over rice, with naan, or even on its own. You’ll find yourself craving this creamy delight again and again!

Ingredients for Butter Chicken

Gathering the right ingredients is the first step to creating a mouthwatering Butter Chicken. Here’s what you’ll need:

  • Boneless, skinless chicken thighs: These are juicy and tender, perfect for soaking up all the flavors.
  • Plain yogurt: This helps to marinate the chicken, making it tender and adding a tangy flavor.
  • Lemon juice: A splash of acidity brightens the dish and balances the richness.
  • Ground cumin: This spice adds a warm, earthy flavor that’s essential in Indian cuisine.
  • Ground coriander: It brings a citrusy note that complements the other spices beautifully.
  • Turmeric: Known for its vibrant color and health benefits, it adds a subtle warmth.
  • Garam masala: A blend of spices that gives Butter Chicken its signature flavor profile.
  • Paprika: This adds a mild sweetness and a lovely red hue to the sauce.
  • Salt and black pepper: Essential for seasoning and enhancing all the flavors.
  • Unsalted butter: The star of the show, it creates a rich, creamy sauce.
  • Onion: Finely chopped, it forms the base of the sauce, adding sweetness when sautéed.
  • Garlic and ginger: These aromatics bring depth and a fragrant kick to the dish.
  • Tomato sauce: The heart of the sauce, providing a rich, tangy base.
  • Heavy cream: This is what makes the sauce luxuriously creamy and indulgent.
  • Fresh cilantro: A garnish that adds a pop of color and freshness to the final dish.

For those looking to spice things up, consider adding red pepper flakes or a chopped jalapeño for heat. If you want a lighter version, swap half of the heavy cream with coconut milk. You can find the exact quantities for each ingredient at the bottom of the article, ready for printing!

How to Make Butter Chicken

Now that you have all your ingredients ready, let’s dive into the cooking process. Making Butter Chicken is a delightful journey, and I promise it’s easier than you might think. Follow these steps, and you’ll have a restaurant-quality dish right at home!

Step 1: Marinate the Chicken

Start by marinating the chicken. In a large bowl, combine the yogurt, lemon juice, cumin, coriander, turmeric, garam masala, paprika, salt, and black pepper. This mixture is the magic potion that infuses the chicken with flavor. Add the chicken pieces, ensuring they’re well-coated. Cover the bowl and let it marinate for at least an hour, or overnight if you can. The longer, the better! This step is crucial for tender, flavorful chicken.

Step 2: Sauté the Aromatics

Next, it’s time to sauté the aromatics. In a large skillet or pot, melt the unsalted butter over medium heat. Once it’s bubbling, toss in the finely chopped onion. Sauté until it’s soft and translucent, about 5-7 minutes. This is where the magic begins! Then, add the minced garlic and ginger, cooking for another 1-2 minutes. The aroma will be heavenly, and trust me, your kitchen will feel like a cozy Indian restaurant.

Step 3: Cook the Chicken

Now, it’s time to add the marinated chicken to the skillet. Cook it until it’s browned on all sides, about 5-7 minutes. Don’t rush this step! Browning the chicken adds depth to the flavor. You want those beautiful golden bits to form at the bottom of the pan. They’ll contribute to the sauce later, making it even more delicious.

Step 4: Add Tomato Sauce

Once the chicken is nicely browned, pour in the tomato sauce. Stir everything together, making sure the chicken is well-coated. Bring the mixture to a simmer, then reduce the heat to low. Cover the skillet and let it cook for about 20 minutes. This simmering time is essential; it allows the flavors to meld beautifully, creating that rich, comforting sauce we all love.

Step 5: Stir in the Cream

Finally, it’s time for the grand finale! Stir in the heavy cream and let it simmer uncovered for another 10 minutes. This is where the magic happens, transforming your dish into a creamy delight. The sauce should thicken slightly, becoming luxuriously smooth. Taste and adjust the seasoning if needed. Now, you’re ready to serve this incredible Butter Chicken!

Tips for Success

  • Marinate the chicken overnight for maximum flavor and tenderness.
  • Use fresh spices for a more vibrant taste; they make a big difference!
  • Don’t rush the sautéing process; it builds the foundation of flavor.
  • Adjust the cream to your preference; less for a lighter dish, more for indulgence.
  • Garnish with cilantro just before serving for a fresh touch.

Equipment Needed

  • Large bowl: For marinating the chicken. A mixing bowl works too.
  • Skillet or pot: Essential for cooking. A Dutch oven is a great alternative.
  • Measuring cups and spoons: For accurate ingredient measurements.
  • Wooden spoon: Perfect for stirring and scraping up those flavorful bits.
  • Knife and cutting board: For chopping onions, garlic, and ginger.

Variations of Butter Chicken

  • Spicy Butter Chicken: Add red pepper flakes or a chopped jalapeño during cooking for an extra kick.
  • Vegetarian Version: Substitute chicken with paneer or chickpeas for a delicious meat-free option.
  • Coconut Butter Chicken: Replace half of the heavy cream with coconut milk for a tropical twist.
  • Butter Chicken Tacos: Use the Butter Chicken filling in soft tortillas, topped with fresh cilantro and lime.
  • Butter Chicken Pizza: Spread the sauce over pizza dough, add cheese, and bake for a fusion delight.

Serving Suggestions for Butter Chicken

  • Serve over basmati rice: The fluffy rice soaks up the creamy sauce beautifully.
  • Pair with naan: Soft, warm naan is perfect for scooping up every last bit.
  • Garnish with cilantro: A sprinkle adds freshness and color.
  • Enjoy with a cold beer: A light lager complements the spices well.

FAQs about Butter Chicken

What is Butter Chicken?

Butter Chicken is a rich and creamy Indian dish made with marinated chicken cooked in a spiced tomato sauce. It’s known for its comforting flavors and is a favorite in Indian cuisine.

Can I make Butter Chicken ahead of time?

Absolutely! You can prepare the Butter Chicken a day in advance. Just reheat it gently on the stove before serving. The flavors will deepen overnight, making it even more delicious!

Is Butter Chicken spicy?

Butter Chicken is generally mild, but you can adjust the spice level to your liking. Add red pepper flakes or jalapeños for a kick, or keep it mild for a family-friendly dish.

What can I serve with Butter Chicken?

This dish pairs wonderfully with basmati rice or warm naan. You can also serve it with a side of cucumber raita to balance the spices.

Can I make Butter Chicken dairy-free?

Yes! To make a dairy-free version, substitute the heavy cream with coconut milk. It adds a lovely flavor while keeping the dish creamy.

Final Thoughts

Cooking Butter Chicken is more than just preparing a meal; it’s an experience that brings joy and warmth to your kitchen. The rich, creamy sauce envelops tender chicken, creating a dish that feels like a celebration. Each bite transports you to a bustling Indian market, filled with vibrant spices and aromas. Whether you’re sharing it with family or enjoying a quiet night in, this recipe is sure to impress. So roll up your sleeves, embrace the process, and let the flavors unfold. Trust me, once you serve this Butter Chicken, it will become a cherished favorite in your home!

jhessica

Butter Chicken: Discover the Secret to Perfect Flavor!

A rich and creamy Indian dish made with marinated chicken cooked in a spiced tomato sauce.
Prep Time 1 hour
Cook Time 40 minutes
Total Time 1 hour 40 minutes
Servings: 6 servings
Course: Main Course
Cuisine: Indian
Calories: 450

Ingredients
  

  • 2 pounds boneless skinless chicken thighs, cut into bite-sized pieces
  • 1 cup plain yogurt
  • 2 tablespoons lemon juice
  • 2 teaspoons ground cumin
  • 2 teaspoons ground coriander
  • 1 teaspoon turmeric
  • 1 teaspoon garam masala
  • 1 teaspoon paprika
  • 1 teaspoon salt
  • 1/2 teaspoon black pepper
  • 4 tablespoons unsalted butter
  • 1 medium onion finely chopped
  • 4 cloves garlic minced
  • 1 tablespoon fresh ginger minced
  • 1 can 15 ounces tomato sauce
  • 1 cup heavy cream
  • Fresh cilantro for garnish

Method
 

  1. In a large bowl, combine the yogurt, lemon juice, cumin, coriander, turmeric, garam masala, paprika, salt, and black pepper. Add the chicken pieces, mix well to coat, and marinate for at least 1 hour, or overnight in the refrigerator for best flavor.
  2. In a large skillet or pot, melt the butter over medium heat. Add the chopped onion and sauté until soft and translucent, about 5-7 minutes.
  3. Stir in the minced garlic and ginger, cooking for an additional 1-2 minutes until fragrant.
  4. Add the marinated chicken to the skillet, cooking until the chicken is browned on all sides, about 5-7 minutes.
  5. Pour in the tomato sauce, stirring to combine. Bring to a simmer, then reduce the heat to low. Cover and cook for 20 minutes, allowing the flavors to meld.
  6. Stir in the heavy cream and simmer for another 10 minutes, uncovered, until the sauce thickens slightly.
  7. Serve hot, garnished with fresh cilantro, over rice or with naan bread.

Nutrition

Serving: 1servingCalories: 450kcalCarbohydrates: 8gProtein: 30gFat: 30gSaturated Fat: 18gPolyunsaturated Fat: 8gCholesterol: 120mgSodium: 800mgFiber: 1gSugar: 5g

Notes

  • For a spicier version, add 1-2 teaspoons of red pepper flakes or a chopped jalapeño during cooking.
  • To make it lighter, substitute half of the heavy cream with coconut milk for a dairy-free option.

Tried this recipe?

Let us know how it was!

Tex-Mex Tater Tot Casserole: A Flavorful Family Favorite!

Introduction to Tex-Mex Tater Tot Casserole

There’s something magical about a dish that brings everyone together, and the Tex-Mex Tater Tot Casserole does just that. I remember the first time I made it; my kitchen filled with the savory aroma of seasoned beef and melting cheese. It felt like a warm hug on a busy weeknight. This casserole is not just a meal; it’s a quick solution for those hectic days when you want to impress your loved ones without spending hours in the kitchen. With its hearty ingredients and crispy tater tots, it’s bound to become a family favorite!

Why You’ll Love This Tex-Mex Tater Tot Casserole

This Tex-Mex Tater Tot Casserole is a game-changer for busy nights. It’s incredibly easy to whip up, requiring minimal prep time. The combination of flavors is a fiesta for your taste buds, with the savory beef and zesty spices dancing together. Plus, it’s a one-pot wonder, meaning less cleanup for you. Whether you’re feeding a crowd or just your family, this dish is sure to please everyone at the table!

Ingredients for Tex-Mex Tater Tot Casserole

Gathering the right ingredients is the first step to creating this delicious Tex-Mex Tater Tot Casserole. Here’s what you’ll need:

  • Ground beef: The star of the show, providing a hearty base. You can swap it for ground turkey or chicken for a lighter option.
  • Onion: Diced onion adds sweetness and depth to the dish. Yellow or white onions work best.
  • Bell pepper: A pop of color and crunch. Feel free to use any color you like—red, green, or yellow.
  • Garlic: Minced garlic brings a fragrant kick. Fresh is best, but jarred works in a pinch.
  • Black beans: These add protein and fiber, making the casserole more filling. Canned beans are convenient; just rinse them well.
  • Corn: Sweet corn adds a delightful burst of flavor. Canned or frozen both work beautifully.
  • Diced tomatoes with green chilies: This adds a zesty kick and moisture. Look for a can with mild or spicy chilies, depending on your heat preference.
  • Taco seasoning: A blend of spices that brings the Tex-Mex flair. You can use store-bought or make your own for a personal touch.
  • Cheddar cheese: Shredded cheese on top creates a gooey, melty finish. Feel free to mix in Monterey Jack for extra flavor.
  • Sour cream: This adds creaminess and balances the spices. You can substitute Greek yogurt for a healthier option.
  • Tater tots: The crispy topping that makes this casserole a hit! Frozen tater tots are perfect for convenience.
  • Salt and pepper: Essential for seasoning. Adjust to your taste.
  • Fresh cilantro: A garnish that adds freshness and color. If you’re not a fan, green onions work too!

For exact measurements, check the bottom of the article where you can find everything available for printing.

How to Make Tex-Mex Tater Tot Casserole

Creating this Tex-Mex Tater Tot Casserole is a breeze! Follow these simple steps, and you’ll have a delicious meal ready to impress your family. Let’s dive in!

Step 1: Brown the Ground Beef

Start by heating a large skillet over medium heat. Add the ground beef and cook until it’s browned, breaking it apart with a spatula. This should take about 5 to 7 minutes. Drain any excess fat to keep the casserole from being greasy. The beef is the heart of this dish, so make sure it’s cooked well!

Step 2: Sauté the Vegetables

Next, toss in the diced onion, bell pepper, and minced garlic. Sauté them for about 5 minutes until they soften and become fragrant. This step adds a wonderful depth of flavor to your casserole. The colors alone will make your kitchen feel vibrant!

Step 3: Combine Ingredients

Now, stir in the black beans, corn, diced tomatoes with green chilies, and taco seasoning. Mix everything well and let it simmer for about 5 minutes. This allows the flavors to meld beautifully. Don’t forget to season with salt and pepper to taste. Your taste buds will thank you!

Step 4: Layer the Casserole

In a large bowl, combine the beef mixture with the sour cream and half of the shredded cheddar cheese. Mix until everything is well incorporated. Spray the inside of your slow cooker with cooking spray. Layer half of the frozen tater tots on the bottom, then pour the beef mixture over them. Top it off with the remaining tater tots and sprinkle the rest of the cheddar cheese on top. It’s a sight to behold!

Step 5: Cook in the Slow Cooker

Cover the slow cooker and set it to cook on low for 4 to 6 hours or on high for 2 to 3 hours. The goal is to heat the tater tots through and melt the cheese. The longer you let it cook on low, the more the flavors will develop. Just resist the urge to peek too often!

Step 6: Garnish and Serve

Once it’s cooked, remove the lid and let the aroma fill your kitchen. Garnish with freshly chopped cilantro before serving. This adds a pop of color and freshness. Serve it hot, and watch your family dig in with smiles on their faces!

Tips for Success

  • Prep your ingredients ahead of time to save on cooking time.
  • Don’t skip draining the beef; it keeps the casserole from being greasy.
  • Feel free to customize the spice level with jalapeños or hot sauce.
  • For a crispy topping, add a few extra tater tots on top before serving.
  • Let leftovers cool completely before storing them in an airtight container.

Equipment Needed

  • Large skillet: Essential for browning the beef. A non-stick pan works well too.
  • Slow cooker: The star of the show! If you don’t have one, an oven-safe dish can work.
  • Spatula: Perfect for mixing and serving.
  • Measuring cups: Handy for portioning ingredients.

Variations

  • Vegetarian Option: Swap the ground beef for a mix of sautéed mushrooms, zucchini, and bell peppers for a hearty vegetarian version.
  • Spicy Kick: Add diced jalapeños or a splash of hot sauce to the beef mixture for an extra layer of heat.
  • Cheesy Delight: Mix in different cheeses like pepper jack or queso blanco for a unique flavor twist.
  • Gluten-Free: Ensure all ingredients, especially the taco seasoning, are gluten-free to keep this dish suitable for gluten-sensitive diners.
  • Southwestern Flair: Incorporate corn salsa or roasted corn for a smoky, sweet flavor that enhances the Tex-Mex vibe.

Serving Suggestions

  • Fresh Salad: Pair with a crisp green salad topped with avocado and lime dressing for a refreshing contrast.
  • Chips and Salsa: Serve with tortilla chips and your favorite salsa for a fun appetizer.
  • Cold Beverages: Enjoy with a cold beer or a zesty margarita to enhance the Tex-Mex experience.
  • Presentation: Serve in colorful bowls and garnish with extra cilantro for a vibrant look.

FAQs about Tex-Mex Tater Tot Casserole

Can I make Tex-Mex Tater Tot Casserole ahead of time?

Absolutely! You can prepare the beef mixture and layer it with tater tots in the slow cooker. Just cover and refrigerate it overnight. When you’re ready to cook, simply set the slow cooker to your desired time.

What can I substitute for ground beef in this recipe?

If you’re looking for a lighter option, ground turkey or chicken works well. For a vegetarian twist, try using a mix of beans, lentils, or sautéed vegetables instead.

How do I store leftovers of Tex-Mex Tater Tot Casserole?

Let the casserole cool completely, then transfer it to an airtight container. It can be stored in the fridge for up to 3 days. Reheat in the microwave or oven until warmed through.

Can I freeze Tex-Mex Tater Tot Casserole?

Yes, this casserole freezes beautifully! Just make sure to let it cool completely before transferring it to a freezer-safe container. It can be frozen for up to 3 months. Thaw in the fridge before reheating.

What sides pair well with Tex-Mex Tater Tot Casserole?

For a complete meal, serve it with a fresh salad, tortilla chips with salsa, or even some guacamole. A cold drink like a margarita or beer complements the flavors perfectly!

Final Thoughts

Cooking the Tex-Mex Tater Tot Casserole is more than just preparing a meal; it’s about creating memories. The joy of gathering around the table, sharing laughter, and savoring each bite is what makes this dish special. It’s a comforting reminder of home, where flavors meld together to create something truly delightful. Whether it’s a busy weeknight or a weekend gathering, this casserole brings everyone together. So, roll up your sleeves, embrace the mess, and enjoy the deliciousness that unfolds. Trust me, your family will be asking for seconds!

jhessica

Tex-Mex Tater Tot Casserole: A Flavorful Family Favorite!

A flavorful and hearty Tex-Mex Tater Tot Casserole that combines ground beef, beans, corn, and cheese, topped with crispy tater tots.
Prep Time 15 minutes
Total Time 4 hours 15 minutes
Servings: 6 servings
Course: Casserole
Cuisine: Tex-Mex
Calories: 450

Ingredients
  

  • 2 pounds ground beef
  • 1 medium onion diced
  • 1 bell pepper diced
  • 2 cloves garlic minced
  • 1 can 15 ounces black beans, drained and rinsed
  • 1 can 15 ounces corn, drained
  • 1 can 10 ounces diced tomatoes with green chilies
  • 1 packet 1 ounce taco seasoning
  • 1 cup shredded cheddar cheese
  • 1 cup sour cream
  • 1 bag 32 ounces frozen tater tots
  • Salt and pepper to taste
  • Fresh cilantro chopped (for garnish)

Method
 

  1. In a large skillet over medium heat, cook the ground beef until browned. Drain excess fat.
  2. Add the diced onion, bell pepper, and minced garlic to the skillet. Cook until the vegetables are softened, about 5 minutes.
  3. Stir in the black beans, corn, diced tomatoes, and taco seasoning. Mix well and let simmer for 5 minutes. Season with salt and pepper to taste.
  4. In a large bowl, combine the beef mixture with the sour cream and half of the shredded cheddar cheese. Mix until well combined.
  5. Spray the inside of a slow cooker with cooking spray. Layer half of the tater tots on the bottom of the slow cooker.
  6. Pour the beef mixture over the tater tots, spreading it evenly. Top with the remaining tater tots and sprinkle the rest of the cheddar cheese on top.
  7. Cover and cook on low for 4 to 6 hours or on high for 2 to 3 hours, until the tater tots are heated through and the cheese is melted.
  8. Once cooked, garnish with chopped cilantro before serving.

Nutrition

Serving: 1servingCalories: 450kcalCarbohydrates: 30gProtein: 25gFat: 25gSaturated Fat: 10gPolyunsaturated Fat: 15gCholesterol: 80mgSodium: 800mgFiber: 5gSugar: 3g

Notes

  • For a spicier version, add diced jalapeños to the beef mixture or use spicy taco seasoning.
  • You can also substitute ground turkey or chicken for a lighter option.

Tried this recipe?

Let us know how it was!

Banana Raspberry Muffins: Indulge in a Healthy Treat!

Introduction to Banana Raspberry Muffins

There’s something magical about the aroma of freshly baked Banana Raspberry Muffins wafting through the kitchen. It takes me back to lazy Sunday mornings, where the world outside felt still, and the only thing that mattered was a warm muffin and a cup of coffee. These muffins are not just a treat; they’re a quick solution for busy days or a delightful snack to impress your loved ones. With their perfect balance of sweetness and tartness, they make breakfast feel special, even on the most hectic mornings. Trust me, you’ll want to keep this recipe close!

Why You’ll Love This Banana Raspberry Muffins

These Banana Raspberry Muffins are a game-changer for anyone juggling a busy schedule. They come together in just 30 minutes, making them perfect for a quick breakfast or an afternoon snack. The combination of ripe bananas and fresh raspberries creates a flavor explosion that’s both satisfying and guilt-free. Plus, they’re versatile enough to please even the pickiest eaters in your family. Who wouldn’t love a muffin that’s both delicious and healthy?

Ingredients for Banana Raspberry Muffins

Gathering the right ingredients is the first step to creating these delightful Banana Raspberry Muffins. Here’s what you’ll need:

  • Ripe Bananas: The star of the show! They add natural sweetness and moisture.
  • Fresh Raspberries: These little gems bring a burst of tartness. Frozen raspberries work too; just thaw them first.
  • Vegetable Oil: This keeps the muffins tender and moist. You can substitute with melted coconut oil for a tropical twist.
  • Granulated Sugar: A touch of sweetness to balance the flavors. Feel free to use brown sugar for a deeper flavor.
  • Large Egg: It binds everything together and adds richness. For a vegan option, try a flax egg.
  • Vanilla Extract: A splash of this enhances the overall flavor profile, making it more aromatic.
  • Baking Soda: This is your leavening agent, helping the muffins rise beautifully.
  • Salt: Just a pinch to enhance the sweetness and balance the flavors.
  • All-Purpose Flour: The base of your muffins. You can swap half for whole wheat flour for added nutrition.

For those who like to experiment, consider adding a dash of cinnamon or nutmeg to the dry ingredients for an extra layer of flavor. The exact quantities for each ingredient are listed at the bottom of the article, ready for you to print and take to the kitchen!

How to Make Banana Raspberry Muffins

Creating these Banana Raspberry Muffins is a breeze! Follow these simple steps, and you’ll have a batch of delicious muffins ready in no time. Let’s get started!

Step 1: Preheat the Oven

First things first, preheat your oven to 350°F (175°C). This ensures your muffins bake evenly. While the oven warms up, prepare your muffin tin by lining it with paper liners or giving it a light grease. This will help your muffins pop out easily once they’re baked.

Step 2: Mix Wet Ingredients

In a large bowl, combine the mashed bananas, vegetable oil, sugar, egg, and vanilla extract. Use a fork or whisk to mix everything until it’s well combined. The bananas should be smooth, and the mixture should look creamy. This is where the magic begins!

Step 3: Combine Dry Ingredients

In a separate bowl, whisk together the baking soda, salt, and flour. This step is crucial because it helps distribute the baking soda evenly, ensuring your muffins rise perfectly. Make sure there are no lumps in the flour; a smooth mix is key!

Step 4: Combine Mixtures

Now, gradually add the dry ingredients to the banana mixture. Stir gently until just combined. Be careful not to overmix; a few lumps are perfectly fine. Overmixing can lead to dense muffins, and we want them light and fluffy!

Step 5: Fold in Raspberries

Next, it’s time to fold in the raspberries. Gently add them to the batter, being careful not to break them apart. This will keep those beautiful bursts of flavor intact. Trust me, you want those juicy pockets of raspberry goodness in every bite!

Step 6: Fill Muffin Cups

Divide the batter evenly among the muffin cups, filling each about 2/3 full. This gives them room to rise without overflowing. If you have a cookie scoop, it’s perfect for this job—quick and mess-free!

Step 7: Bake

Pop the muffin tin into the preheated oven and bake for 18-20 minutes. Keep an eye on them! You’ll know they’re done when a toothpick inserted into the center comes out clean. The tops should be golden brown and slightly domed.

Step 8: Cool

Once baked, allow the muffins to cool in the pan for about 5 minutes. This makes them easier to remove. After that, transfer them to a wire rack to cool completely. The aroma will be irresistible, so try to resist the urge to dive in right away!

Tips for Success

  • Use overripe bananas for maximum sweetness and moisture.
  • Don’t overmix the batter; it’s okay if it’s a bit lumpy.
  • Gently fold in the raspberries to keep them intact.
  • Check muffins a minute or two early to avoid overbaking.
  • Let them cool completely for the best texture before storing.

Equipment Needed

  • Muffin Tin: A standard 12-cup muffin tin works best. If you don’t have one, use a cupcake pan.
  • Mixing Bowls: A large bowl for wet ingredients and a medium bowl for dry ingredients.
  • Whisk: Perfect for mixing; a fork can work in a pinch.
  • Measuring Cups and Spoons: Essential for accuracy; you can use a kitchen scale if you prefer.
  • Rubber Spatula: Great for folding in ingredients and scraping the bowl clean.

Variations

  • Nutty Delight: Add 1/2 cup of chopped walnuts or pecans for a crunchy texture and added nutrition.
  • Chocolate Lovers: Mix in 1/2 cup of chocolate chips for a sweet twist that pairs beautifully with the fruit.
  • Gluten-Free Option: Substitute all-purpose flour with a gluten-free flour blend for a gluten-free treat.
  • Vegan Version: Replace the egg with a flax egg (1 tablespoon ground flaxseed mixed with 2.5 tablespoons water) for a plant-based option.
  • Berry Medley: Swap raspberries for blueberries or strawberries, or mix them for a colorful muffin experience.

Serving Suggestions

  • Pair your Banana Raspberry Muffins with a dollop of Greek yogurt for a creamy contrast.
  • Enjoy them alongside a steaming cup of coffee or a refreshing herbal tea.
  • For a fun presentation, dust the muffins with powdered sugar before serving.
  • Serve warm for the best flavor experience!

FAQs about Banana Raspberry Muffins

Got questions about these delightful Banana Raspberry Muffins? You’re not alone! Here are some common queries that might pop up as you whip up this tasty treat.

Can I use frozen raspberries in this recipe?

Absolutely! Frozen raspberries work just as well as fresh ones. Just make sure to thaw them first and gently fold them into the batter to avoid breaking them apart.

How do I store leftover muffins?

To keep your muffins fresh, store them in an airtight container at room temperature for up to three days. For longer storage, you can freeze them for up to three months. Just thaw them at room temperature when you’re ready to enjoy!

Can I make these muffins gluten-free?

Yes! Simply substitute the all-purpose flour with a gluten-free flour blend. This way, you can enjoy the same delicious flavor without the gluten.

What can I add for extra flavor?

For a little extra kick, consider adding a teaspoon of cinnamon or nutmeg to the dry ingredients. It adds a warm, cozy flavor that pairs beautifully with the bananas and raspberries.

How can I make these muffins healthier?

You can easily make these muffins healthier by substituting half of the all-purpose flour with whole wheat flour. You can also reduce the sugar slightly or use a natural sweetener like honey or maple syrup.

Final Thoughts

There’s a certain joy that comes from baking Banana Raspberry Muffins. The process is simple, yet the results are nothing short of delightful. Each bite offers a perfect blend of sweetness and tartness, making them a treat for any time of day. Whether you’re enjoying them fresh out of the oven or as a quick snack later, these muffins bring warmth and comfort to your kitchen. Plus, they’re a fantastic way to use up those overripe bananas! So, roll up your sleeves, gather your ingredients, and let the aroma of these muffins fill your home with happiness.

jhessica

Banana Raspberry Muffins: Indulge in a Healthy Treat!

Delicious and healthy Banana Raspberry Muffins that are perfect for breakfast or a snack.
Prep Time 10 minutes
Cook Time 20 minutes
Total Time 30 minutes
Servings: 12 muffins
Course: Baked Goods
Cuisine: American
Calories: 150

Ingredients
  

  • 2 ripe bananas mashed
  • 1 cup fresh raspberries or frozen, thawed
  • 1/3 cup vegetable oil
  • 1/2 cup granulated sugar
  • 1 large egg
  • 1 teaspoon vanilla extract
  • 1 teaspoon baking soda
  • 1/2 teaspoon salt
  • 1 1/2 cups all-purpose flour

Method
 

  1. Preheat the oven to 350°F (175°C) and line a muffin tin with paper liners or grease it lightly.
  2. In a large bowl, combine the mashed bananas, vegetable oil, sugar, egg, and vanilla extract. Mix until well combined.
  3. In a separate bowl, whisk together the baking soda, salt, and flour.
  4. Gradually add the dry ingredients to the banana mixture, stirring until just combined. Do not overmix.
  5. Gently fold in the raspberries, being careful not to break them apart.
  6. Divide the batter evenly among the muffin cups, filling each about 2/3 full.
  7. Bake for 18-20 minutes or until a toothpick inserted into the center comes out clean.
  8. Allow the muffins to cool in the pan for 5 minutes before transferring them to a wire rack to cool completely.

Nutrition

Serving: 1muffinCalories: 150kcalCarbohydrates: 25gProtein: 2gFat: 6gSaturated Fat: 0.5gPolyunsaturated Fat: 5.5gCholesterol: 20mgSodium: 150mgFiber: 1gSugar: 10g

Notes

  • For added flavor, consider mixing in 1/2 teaspoon of cinnamon or nutmeg to the dry ingredients.
  • Substitute half of the all-purpose flour with whole wheat flour for a healthier option.

Tried this recipe?

Let us know how it was!

Hearty Vegetable Beef Soup is a perfect meal idea!

Introduction to Hearty Vegetable Beef Soup

There’s something magical about a steaming bowl of Hearty Vegetable Beef Soup on a chilly evening. It’s like a warm hug from the inside out, perfect for those busy days when you need comfort food that doesn’t skimp on nutrition. I remember my grandmother making this soup, filling the house with rich aromas that made everyone gather around the table. This recipe is not just a meal; it’s a way to impress your loved ones while keeping things simple. With tender beef and vibrant veggies, it’s a dish that brings everyone together, making it a must-try for your next dinner.

Why You’ll Love This Hearty Vegetable Beef Soup

This Hearty Vegetable Beef Soup is a game-changer for your dinner routine. It’s not just easy to make; it’s also packed with flavor and nutrition. In about two hours, you’ll have a comforting meal that warms the soul. Plus, it’s versatile! You can customize it to suit your taste or dietary needs. Whether you’re feeding a family or just yourself, this soup is sure to satisfy and impress.

Ingredients for Hearty Vegetable Beef Soup

Gathering the right ingredients is the first step to creating a delicious Hearty Vegetable Beef Soup. Here’s what you’ll need:

  • Olive oil: This is your base for sautéing, adding a rich flavor to the beef and vegetables.
  • Beef stew meat: Tender cuts like chuck work best, providing that hearty texture we crave.
  • Onion: A staple in many dishes, it adds sweetness and depth to the soup.
  • Garlic: Minced garlic brings a punch of flavor that elevates the entire dish.
  • Carrots: These add natural sweetness and a pop of color, making the soup visually appealing.
  • Celery: It contributes a nice crunch and enhances the overall flavor profile.
  • Potato: Diced potatoes add heartiness and help thicken the soup as it cooks.
  • Diced tomatoes: Canned tomatoes provide acidity and richness, balancing the flavors beautifully.
  • Beef broth: This is the soul of the soup, infusing it with savory goodness.
  • Green beans: Fresh or frozen, they add a delightful texture and vibrant color.
  • Dried thyme and oregano: These herbs bring warmth and earthiness, enhancing the soup’s aroma.
  • Salt and pepper: Essential for seasoning, they help bring all the flavors together.
  • Fresh spinach (optional): Stir in at the end for a nutritional boost and a splash of green.

For those looking to spice things up, consider adding a pinch of red pepper flakes or a diced jalapeño. If you prefer a lighter version, ground turkey or chicken can be substituted for the beef. You’ll find the exact quantities for each ingredient at the bottom of the article, ready for printing!

How to Make Hearty Vegetable Beef Soup

Creating a delicious Hearty Vegetable Beef Soup is easier than you might think. Follow these simple steps, and you’ll have a comforting meal that warms the heart and fills the belly.

Step 1: Brown the Beef

Start by heating the olive oil in a large pot over medium-high heat. Once the oil shimmers, add the beef stew meat. Brown the meat on all sides, which should take about 5-7 minutes. This step is crucial; it develops a rich flavor that forms the base of your soup. Don’t rush it—let that beef get a nice sear!

Step 2: Sauté the Aromatics

Next, toss in the chopped onion and minced garlic. Cook them until the onion turns translucent, about 3-4 minutes. This step is where the magic happens! The aroma of sautéing onion and garlic fills your kitchen, enhancing the soup’s flavor and making it feel like home.

Step 3: Add the Vegetables

Now it’s time to add the sliced carrots, celery, and diced potato. Stir them in and let them cook for another 5 minutes. These veggies not only add heartiness but also bring a variety of textures and flavors to the soup. Plus, they make it visually appealing with their vibrant colors!

Step 4: Combine Ingredients

Pour in the can of diced tomatoes along with their juice, followed by the beef broth. Add the green beans, dried thyme, oregano, salt, and pepper. This step is essential for the overall taste of your Hearty Vegetable Beef Soup. The combination of tomatoes and broth creates a rich, savory base that ties everything together.

Step 5: Simmer to Perfection

Bring the mixture to a boil, then reduce the heat to low. Cover the pot and let it simmer for 1.5 to 2 hours. This slow cooking allows the beef to become tender and the flavors to meld beautifully. Keep an eye on it; you want that beef to be fork-tender, not mushy!

Step 6: Final Touches

If you’re using fresh spinach, stir it in during the last 5 minutes of cooking. This adds a nutritional boost and a lovely splash of green. Before serving, taste your soup and adjust the seasoning if needed. A little extra salt or pepper can make all the difference!

Tips for Success

  • Prep your ingredients ahead of time to streamline the cooking process.
  • Don’t skip browning the beef; it adds depth to the flavor.
  • Feel free to experiment with seasonal vegetables for variety.
  • Let the soup cool completely before storing leftovers in the fridge.
  • Reheat gently on the stove to maintain the soup’s texture.

Equipment Needed

  • Large pot: A Dutch oven works great, but any heavy-bottomed pot will do.
  • Wooden spoon: Perfect for stirring and scraping up those flavorful bits.
  • Cutting board: Essential for chopping your veggies and meat.
  • Sharp knife: A good chef’s knife makes prep a breeze.

Variations of Hearty Vegetable Beef Soup

  • Spicy Kick: Add diced jalapeños or a pinch of cayenne pepper for a fiery twist.
  • Herb-Infused: Experiment with fresh herbs like rosemary or parsley for a fragrant boost.
  • Vegetarian Option: Swap the beef for lentils or chickpeas, and use vegetable broth for a hearty meatless version.
  • Asian Flair: Incorporate soy sauce and ginger, and add bok choy for a unique flavor profile.
  • Slow Cooker Adaptation: Brown the beef and then transfer everything to a slow cooker for an easy, hands-off approach.

Serving Suggestions for Hearty Vegetable Beef Soup

  • Crusty Bread: Serve with a warm, crusty baguette or sourdough for dipping.
  • Salad: Pair with a fresh green salad for a balanced meal.
  • Wine: A glass of red wine complements the rich flavors beautifully.
  • Garnish: Top with fresh parsley or grated Parmesan for an elegant touch.

FAQs about Hearty Vegetable Beef Soup

Can I make Hearty Vegetable Beef Soup in a slow cooker?

Absolutely! Brown the beef first, then transfer everything to a slow cooker. Cook on low for 6-8 hours or high for 3-4 hours. This method allows the flavors to develop beautifully.

What can I substitute for beef stew meat?

If you want a lighter option, ground turkey or chicken works well. For a vegetarian twist, try lentils or chickpeas instead. Just remember to adjust cooking times accordingly!

How do I store leftovers of Hearty Vegetable Beef Soup?

Let the soup cool completely before transferring it to an airtight container. It can be stored in the fridge for up to 3 days or frozen for up to 3 months. Just reheat gently on the stove!

Can I add more vegetables to the soup?

Definitely! Feel free to toss in seasonal veggies like zucchini, bell peppers, or even corn. The more, the merrier when it comes to flavor and nutrition!

Is this soup gluten-free?

Yes, as long as you use gluten-free beef broth and check your canned tomatoes for any additives. This Hearty Vegetable Beef Soup can easily fit into a gluten-free diet!

Final Thoughts

Cooking this Hearty Vegetable Beef Soup is more than just preparing a meal; it’s about creating memories. The aroma wafting through your kitchen will draw family and friends together, sparking conversations and laughter. Each spoonful is a reminder of warmth and comfort, perfect for any occasion. Whether you’re enjoying it on a quiet evening or serving it at a gathering, this soup brings joy to the table. It’s a dish that nourishes not just the body but the soul, making it a cherished recipe in your culinary repertoire. Dive in and savor every moment!

jhessica

Hearty Vegetable Beef Soup is a perfect meal idea!

Hearty Vegetable Beef Soup is a perfect meal idea packed with nutritious vegetables and tender beef, ideal for a comforting dinner.
Prep Time 15 minutes
Cook Time 2 hours
Total Time 2 hours 15 minutes
Servings: 6 servings
Course: Soup
Cuisine: American
Calories: 250

Ingredients
  

  • 2 tablespoons olive oil
  • 1 pound beef stew meat cut into 1-inch cubes
  • 1 medium onion chopped
  • 2 cloves garlic minced
  • 3 medium carrots sliced
  • 2 stalks celery sliced
  • 1 medium potato diced
  • 1 can 14.5 ounces diced tomatoes, undrained
  • 4 cups beef broth
  • 1 cup green beans trimmed and cut into 1-inch pieces
  • 1 teaspoon dried thyme
  • 1 teaspoon dried oregano
  • Salt and pepper to taste
  • 2 cups fresh spinach optional

Method
 

  1. In a large pot, heat the olive oil over medium-high heat. Add the beef stew meat and brown on all sides, about 5-7 minutes.
  2. Add the chopped onion and minced garlic to the pot, cooking until the onion is translucent, about 3-4 minutes.
  3. Stir in the carrots, celery, and potato, cooking for another 5 minutes.
  4. Pour in the diced tomatoes with their juice and the beef broth. Add the green beans, thyme, oregano, salt, and pepper.
  5. Bring the mixture to a boil, then reduce the heat to low. Cover and simmer for 1.5 to 2 hours, or until the beef is tender.
  6. If using, stir in the fresh spinach during the last 5 minutes of cooking.
  7. Taste and adjust seasoning if necessary before serving.

Nutrition

Serving: 1cupCalories: 250kcalCarbohydrates: 15gProtein: 22gFat: 10gSaturated Fat: 3gPolyunsaturated Fat: 7gCholesterol: 60mgSodium: 600mgFiber: 3gSugar: 4g

Notes

  • For a spicier kick, add a pinch of red pepper flakes or a diced jalapeño during the cooking process.
  • Substitute the beef with ground turkey or chicken for a lighter version of the soup.

Tried this recipe?

Let us know how it was!

Turkey Taco Soup: A Deliciously Easy Recipe to Try!

Introduction to Turkey Taco Soup

There’s something magical about a warm bowl of soup on a chilly evening. Turkey Taco Soup is not just a meal; it’s a cozy hug in a bowl. This recipe is perfect for those busy days when you want something hearty yet quick to whip up. With just a handful of ingredients, you can create a dish that impresses your loved ones and satisfies your cravings. Plus, it’s a healthy option that doesn’t skimp on flavor. Trust me, once you try this Turkey Taco Soup, it’ll become a staple in your kitchen!

Why You’ll Love This Turkey Taco Soup

This Turkey Taco Soup is a game-changer for anyone juggling a busy lifestyle. It’s incredibly easy to make, taking just about 40 minutes from start to finish. The flavors are bold and satisfying, making it a hit with the whole family. Plus, it’s packed with protein and fiber, so you can enjoy a hearty meal without the guilt. Trust me, this soup will quickly become your go-to comfort food!

Ingredients for Turkey Taco Soup

Gathering the right ingredients is the first step to creating a delicious Turkey Taco Soup. Here’s what you’ll need:

  • Ground turkey: A lean protein that keeps the soup light yet filling. You can swap it for ground beef or chicken if you prefer.
  • Onion: Diced onion adds a sweet and savory base to the soup, enhancing the overall flavor.
  • Garlic: Minced garlic brings a fragrant kick that elevates the taste. Fresh is best, but jarred works in a pinch.
  • Bell pepper: Any color will do! It adds crunch and sweetness, making the soup visually appealing.
  • Black beans: These provide a hearty texture and are packed with protein and fiber. Rinse them well to remove excess sodium.
  • Corn: Sweet corn adds a pop of color and sweetness, balancing the spices beautifully.
  • Diced tomatoes: Canned tomatoes with juice create a rich broth. They’re a must for that comforting tomato flavor.
  • Tomato sauce: This thickens the soup and adds depth. You can use homemade if you have it on hand!
  • Chicken broth: A flavorful base that ties all the ingredients together. Low-sodium options are great for controlling salt levels.
  • Taco seasoning: This is where the magic happens! It infuses the soup with classic taco flavors. Feel free to adjust the amount to your taste.
  • Cumin: A warm spice that adds an earthy note, enhancing the overall flavor profile.
  • Salt and pepper: Essential for seasoning. Always taste as you go to get it just right.
  • Olive oil: Used for sautéing the veggies, it adds a nice richness to the soup.
  • Optional toppings: Shredded cheese, sour cream, avocado, cilantro, and tortilla chips can take your soup to the next level. Get creative!

For exact measurements, check the bottom of the article where you can find everything listed for easy printing.

How to Make Turkey Taco Soup

Now that you have all your ingredients ready, let’s dive into making this delicious Turkey Taco Soup. Follow these simple steps, and you’ll have a hearty meal in no time!

Step 1: Sauté the Vegetables

Start by heating a tablespoon of olive oil in a large pot over medium heat. Once the oil is shimmering, toss in the diced onion and bell pepper. Sauté them for about 5 minutes until they soften and become fragrant. This step builds a flavorful base for your soup.

Step 2: Add Garlic

Next, it’s time to add the minced garlic. Stir it in and let it cook for about a minute. Garlic is essential here; it adds a wonderful aroma and depth to the soup. Just be careful not to let it burn, as that can turn the flavor bitter.

Step 3: Brown the Turkey

Now, add the ground turkey to the pot. Use a wooden spoon to break it apart as it cooks. You want to brown it for about 6-8 minutes until it’s no longer pink. If there’s excess fat, drain it off. This step is crucial for achieving that savory flavor in your Turkey Taco Soup.

Step 4: Combine Ingredients

Once the turkey is browned, it’s time to bring everything together. Stir in the black beans, corn, diced tomatoes (with their juice), tomato sauce, chicken broth, taco seasoning, cumin, salt, and pepper. Mix it all well, ensuring every ingredient is coated in those delicious spices.

Step 5: Simmer the Soup

Bring the mixture to a boil, then reduce the heat to low. Let it simmer for 20-25 minutes, stirring occasionally. This allows the flavors to meld beautifully. If you prefer a thicker soup, let it simmer a bit longer. The aroma will fill your kitchen, making it hard to resist!

Step 6: Adjust Seasoning

After simmering, take a moment to taste your soup. This is your chance to adjust the seasoning. Add more salt, pepper, or even a dash of hot sauce if you like it spicy. Personalizing the flavor is part of the fun!

Step 7: Serve and Garnish

Finally, ladle the hot soup into bowls and get creative with your toppings. Shredded cheese, a dollop of sour cream, fresh avocado, cilantro, or crunchy tortilla chips can elevate your Turkey Taco Soup to new heights. Serve it hot and enjoy every comforting spoonful!

Tips for Success

  • Prep your ingredients ahead of time to streamline the cooking process.
  • Don’t skip the simmering step; it’s key for flavor development.
  • Feel free to customize the spice level by adding jalapeños or hot sauce.
  • For a creamier texture, stir in a splash of cream or Greek yogurt before serving.
  • Store leftovers in an airtight container for up to three days for easy meals.

Equipment Needed

  • Large pot: A sturdy pot is essential for simmering the soup. A Dutch oven works great too!
  • Wooden spoon: Perfect for stirring and breaking up the turkey.
  • Cutting board and knife: For chopping your veggies efficiently.
  • Measuring cups: Handy for portioning out ingredients, though you can eyeball it!

Variations

  • Spicy Turkey Taco Soup: Add diced jalapeños or a splash of hot sauce for an extra kick.
  • Vegetarian Option: Substitute ground turkey with lentils or a mix of your favorite vegetables for a hearty meatless version.
  • Low-Carb Version: Replace corn with zucchini or cauliflower to keep the carbs in check while still enjoying the flavors.
  • Southwestern Twist: Incorporate diced sweet potatoes or butternut squash for a touch of sweetness and added nutrition.
  • Cheesy Delight: Stir in some cream cheese or shredded cheese while simmering for a creamy texture.

Serving Suggestions

  • Crusty Bread: Serve with a side of warm, crusty bread for dipping.
  • Salad: A fresh green salad pairs perfectly to balance the flavors.
  • Drinks: Enjoy with a cold beer or a refreshing iced tea.
  • Presentation: Garnish with lime wedges for a pop of color and zest.

FAQs about Turkey Taco Soup

Can I make Turkey Taco Soup in a slow cooker?

Absolutely! Just brown the turkey and sauté the veggies first, then transfer everything to your slow cooker. Cook on low for 6-8 hours or high for 3-4 hours. It’s a great way to let the flavors develop while you go about your day!

How can I store leftovers of Turkey Taco Soup?

Store any leftovers in an airtight container in the fridge for up to three days. You can also freeze it for up to three months. Just make sure to let it cool completely before freezing!

Can I use other types of meat in this soup?

Definitely! Ground beef or chicken can be used instead of turkey. Each will bring its own unique flavor to the Turkey Taco Soup, so feel free to experiment!

Is this soup suitable for meal prep?

Yes! Turkey Taco Soup is perfect for meal prep. Make a big batch and portion it out for easy lunches or dinners throughout the week. Just reheat and enjoy!

What can I serve with Turkey Taco Soup?

This soup pairs wonderfully with crusty bread, a fresh salad, or even some tortilla chips for dipping. You can also top it with your favorite garnishes for added flavor!

Final Thoughts

Cooking Turkey Taco Soup is more than just preparing a meal; it’s about creating a moment of warmth and comfort. The rich flavors and hearty ingredients come together to form a dish that feels like home. Whether you’re enjoying it on a quiet night or sharing it with friends, this soup brings people together. Plus, it’s a breeze to make, allowing you to focus on what really matters—good company and great conversation. So, grab your ingredients and let the aroma fill your kitchen. You’re in for a delightful experience that will leave everyone asking for seconds!

jhessica

Turkey Taco Soup: A Deliciously Easy Recipe to Try!

A deliciously easy Turkey Taco Soup recipe that is perfect for a cozy meal.
Prep Time 10 minutes
Cook Time 30 minutes
Total Time 40 minutes
Servings: 6 servings
Course: Soup
Cuisine: Mexican
Calories: 220

Ingredients
  

  • 1 pound ground turkey
  • 1 medium onion diced
  • 2 cloves garlic minced
  • 1 bell pepper diced (any color)
  • 1 can 15 ounces black beans, drained and rinsed
  • 1 can 15 ounces corn, drained
  • 1 can 15 ounces diced tomatoes (with juice)
  • 1 can 8 ounces tomato sauce
  • 2 cups chicken broth
  • 2 tablespoons taco seasoning
  • 1 teaspoon cumin
  • Salt and pepper to taste
  • 1 tablespoon olive oil
  • Optional toppings: shredded cheese sour cream, avocado, cilantro, tortilla chips

Method
 

  1. In a large pot, heat the olive oil over medium heat. Add the diced onion and bell pepper, sautéing for about 5 minutes until softened.
  2. Stir in the minced garlic and cook for an additional minute.
  3. Add the ground turkey to the pot, breaking it apart with a spoon. Cook until browned and no longer pink, about 6-8 minutes. Drain any excess fat if necessary.
  4. Stir in the black beans, corn, diced tomatoes, tomato sauce, chicken broth, taco seasoning, cumin, salt, and pepper.
  5. Bring the mixture to a boil, then reduce the heat and let it simmer for 20-25 minutes, stirring occasionally.
  6. Taste and adjust seasoning if needed. If you prefer a thicker soup, let it simmer longer.
  7. Serve hot, garnished with your choice of toppings.

Nutrition

Serving: 1cupCalories: 220kcalCarbohydrates: 20gProtein: 24gFat: 7gSaturated Fat: 1gPolyunsaturated Fat: 6gCholesterol: 70mgSodium: 500mgFiber: 5gSugar: 3g

Notes

  • For a spicier kick, add diced jalapeños or a dash of hot sauce while cooking.
  • You can also substitute ground turkey with ground beef or chicken for a different flavor.

Tried this recipe?

Let us know how it was!

Stay Connected

Get recipes via email: